Leaderboard
-
grannyknot
Free Member8Points5,158Posts -
inline6
 Subscriber
 7Points1,282Posts
 -
.JPG.cfcada9cf1c1b502df3f5f2f2ca3ff36.JPG)
SteveJ
Free Member7Points9,646Posts -
AK260
Free Member6Points999Posts


Popular Content
Showing content with the highest reputation on 01/10/2024 in all areas
-
4 pointsThanks fella. If any consolation, I still have tonnes of underseal liberally sprayed by the PO to scrape off one day. The good news is, what I’ve peeled off has solid metal beneath it! Which is rare for UK cars - as they normally use it to conceal rust before selling 😉 also the trouble with a clean underbelly is that any puddle becomes scary while driving - all you’re thinking of is what’s that doing to my lovely clean underside! 😛4 points
-
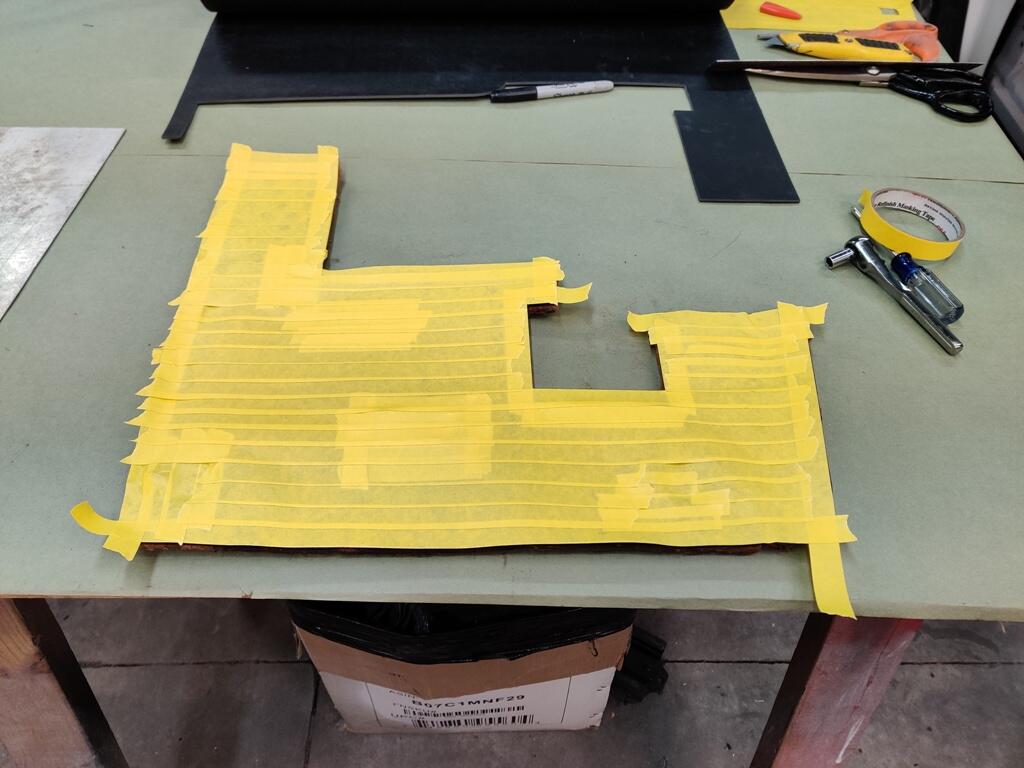
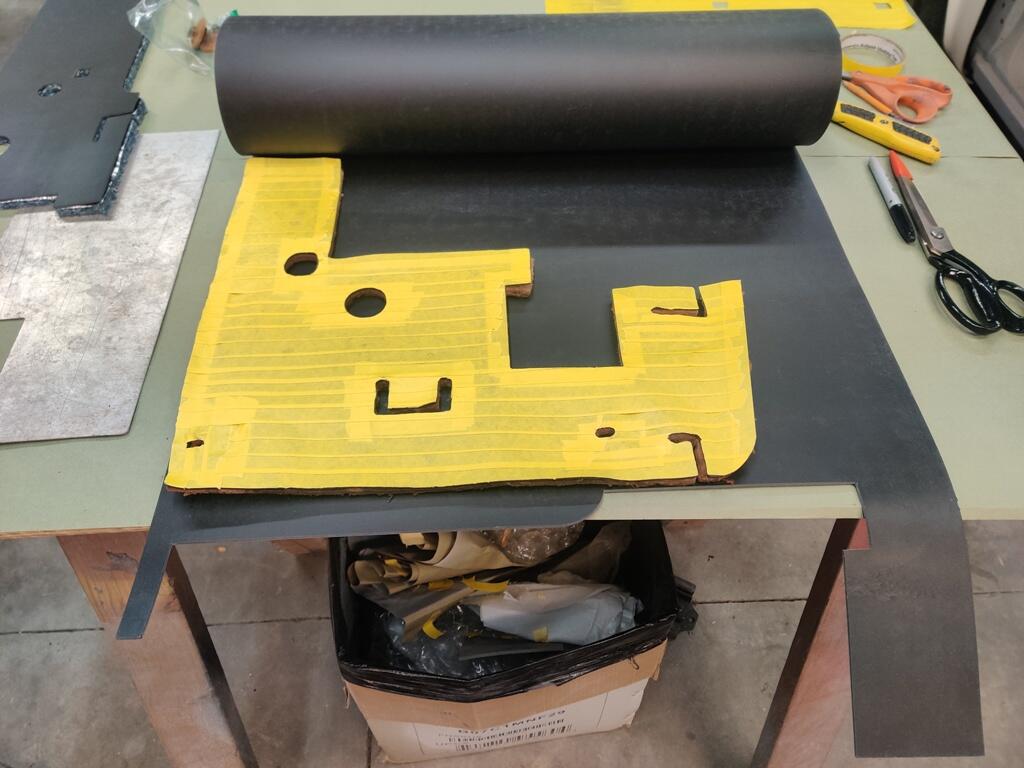
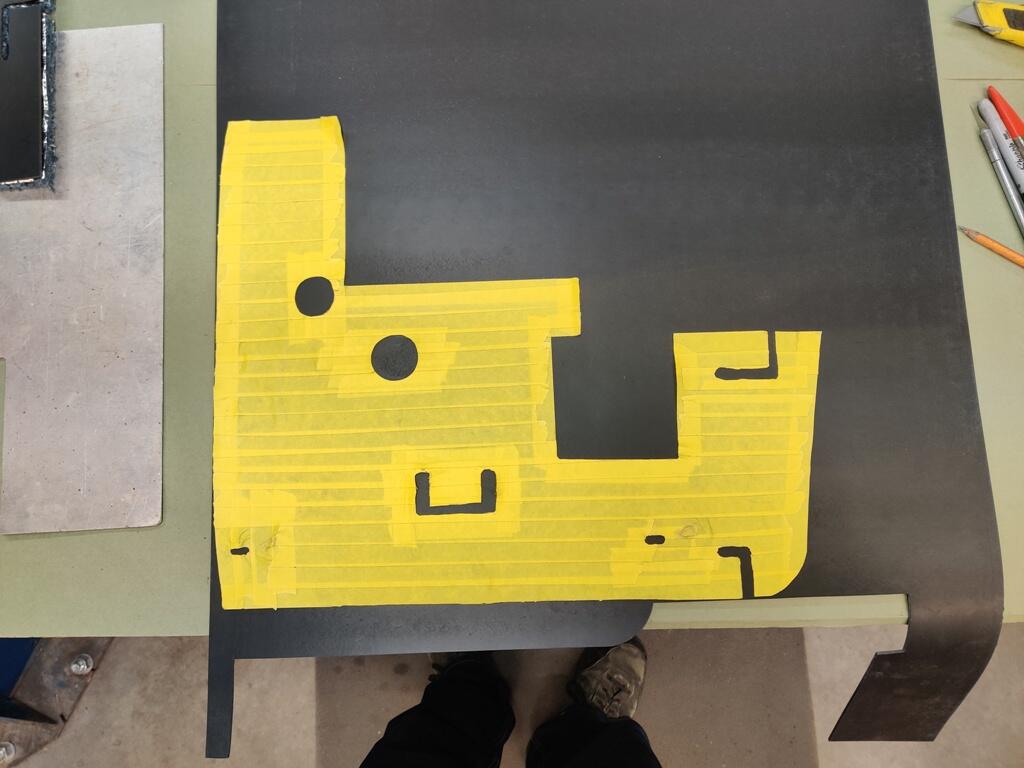
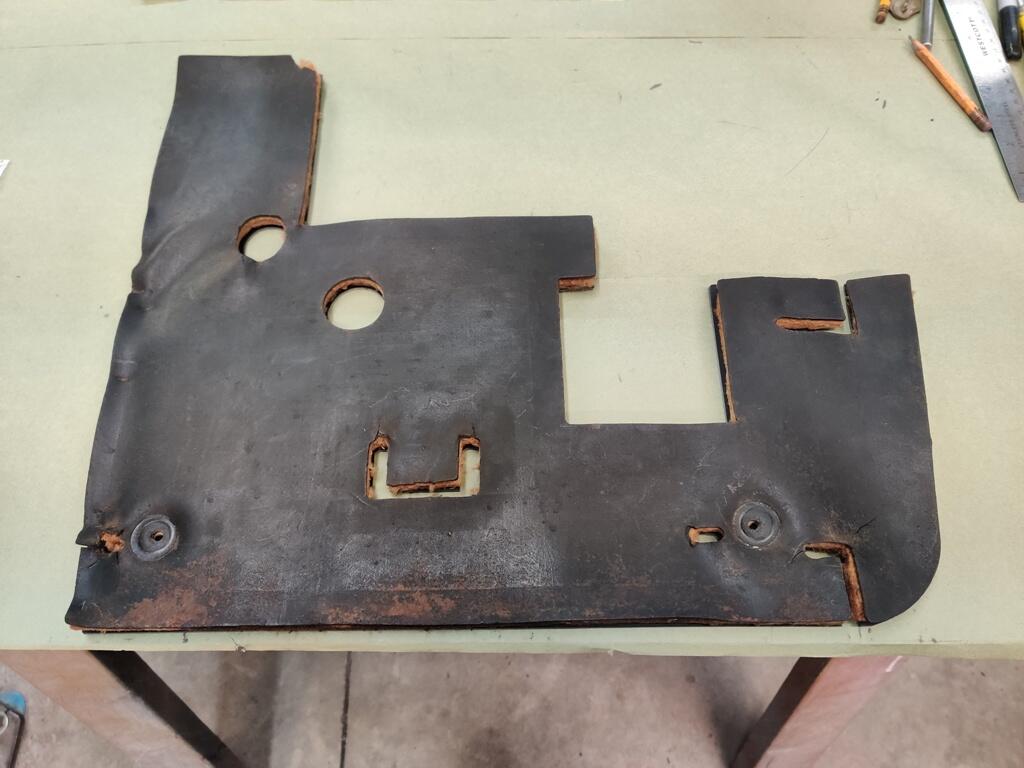
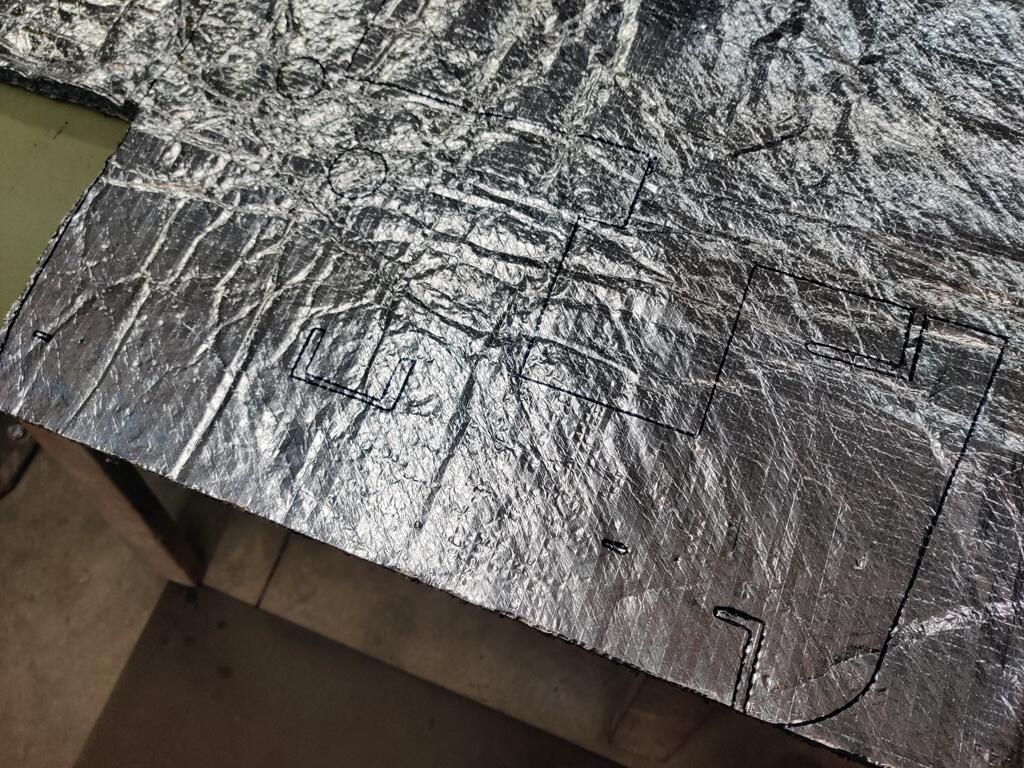
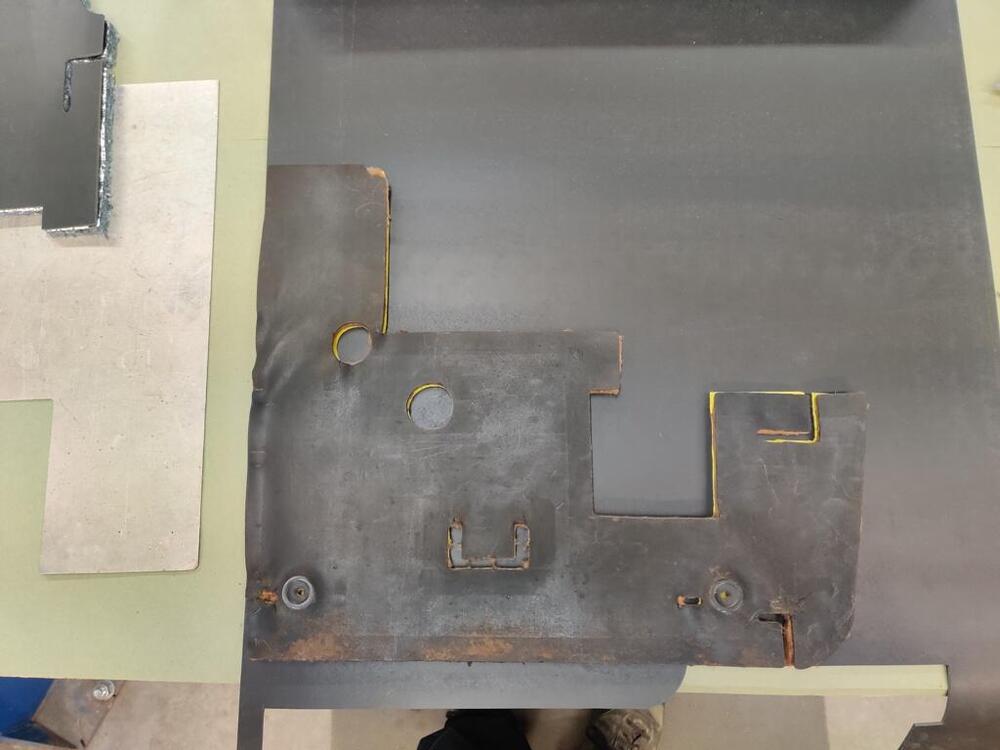
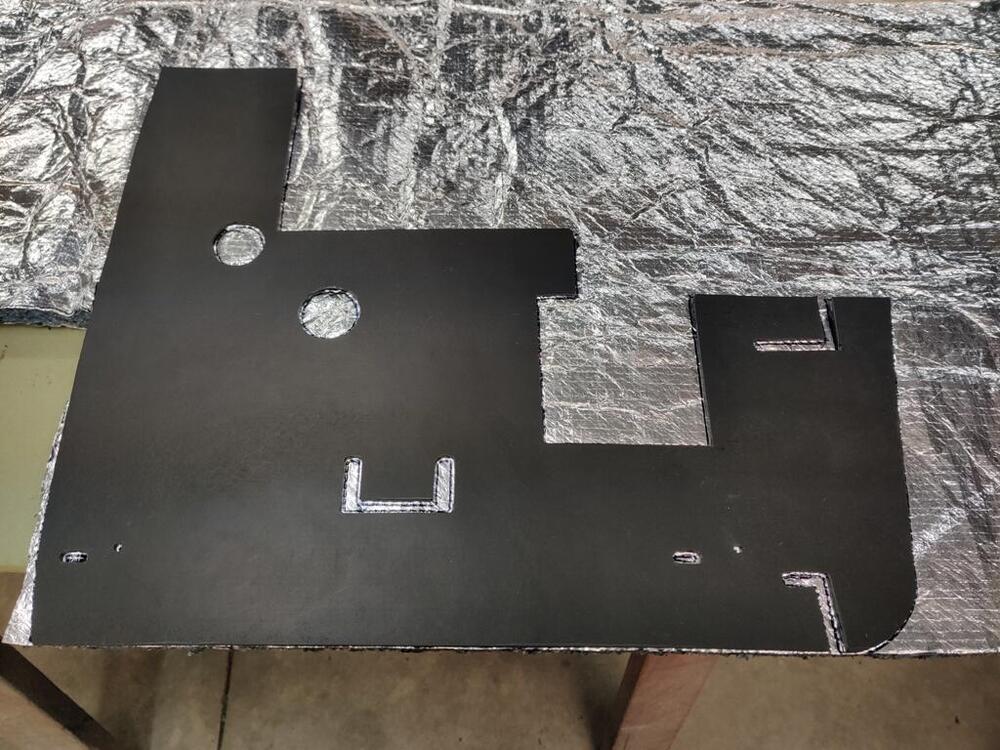
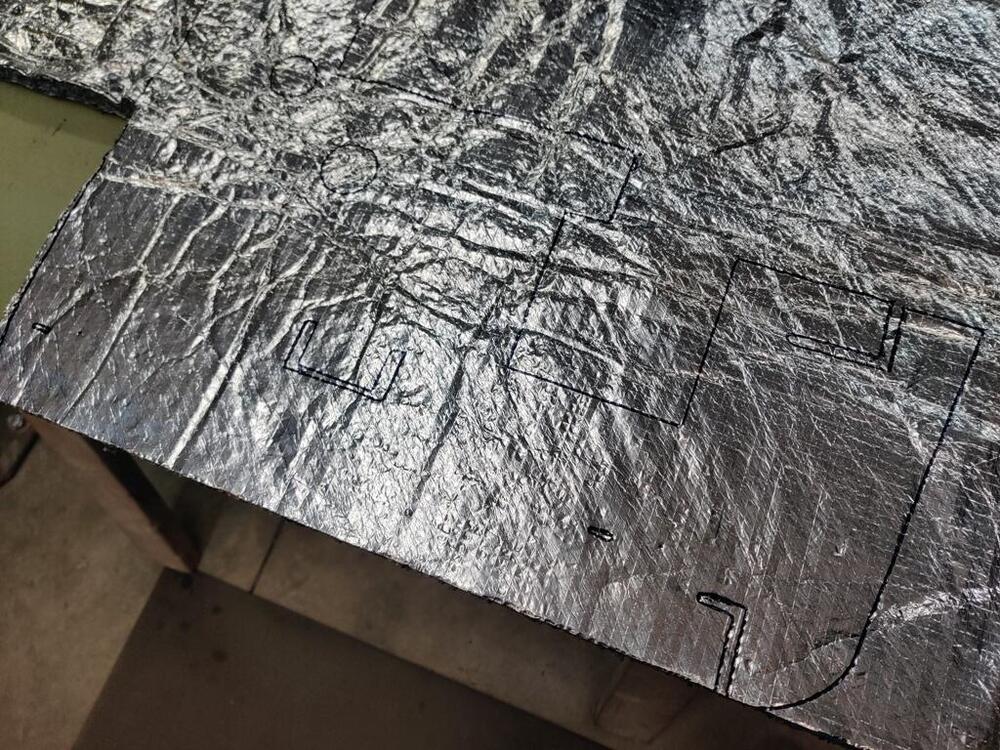
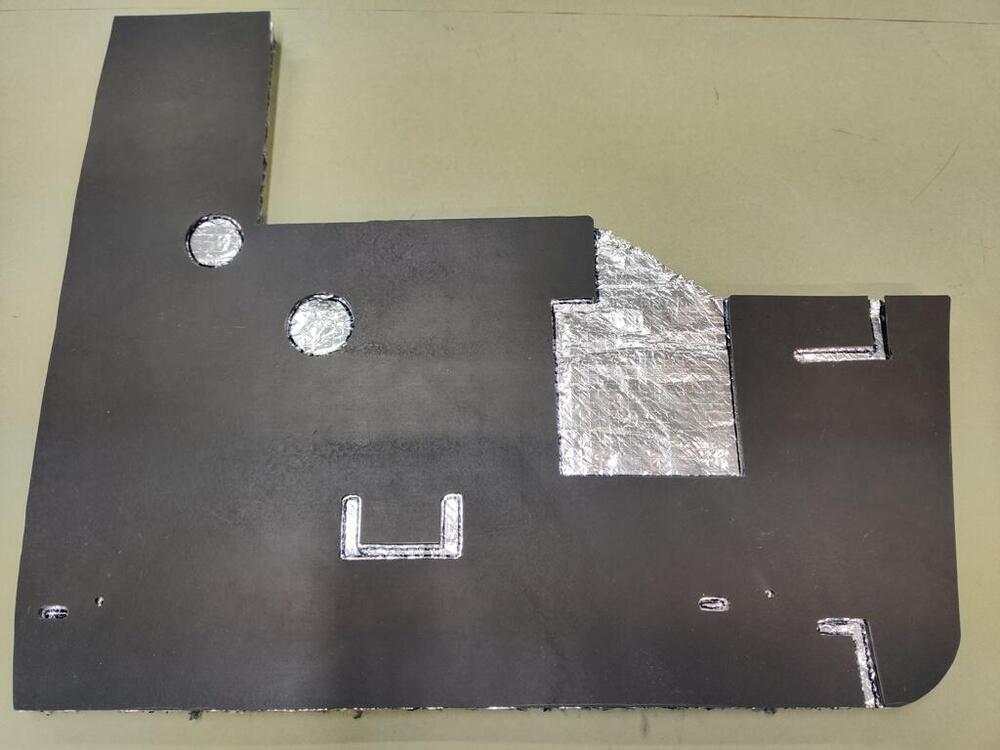
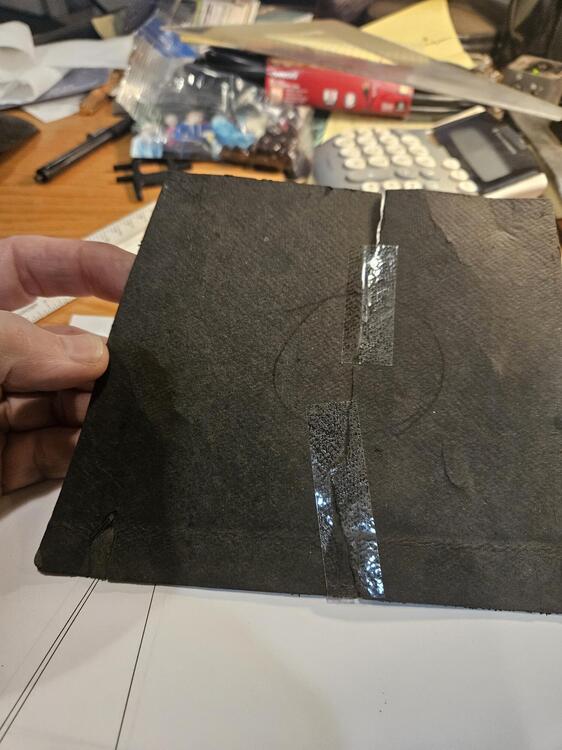
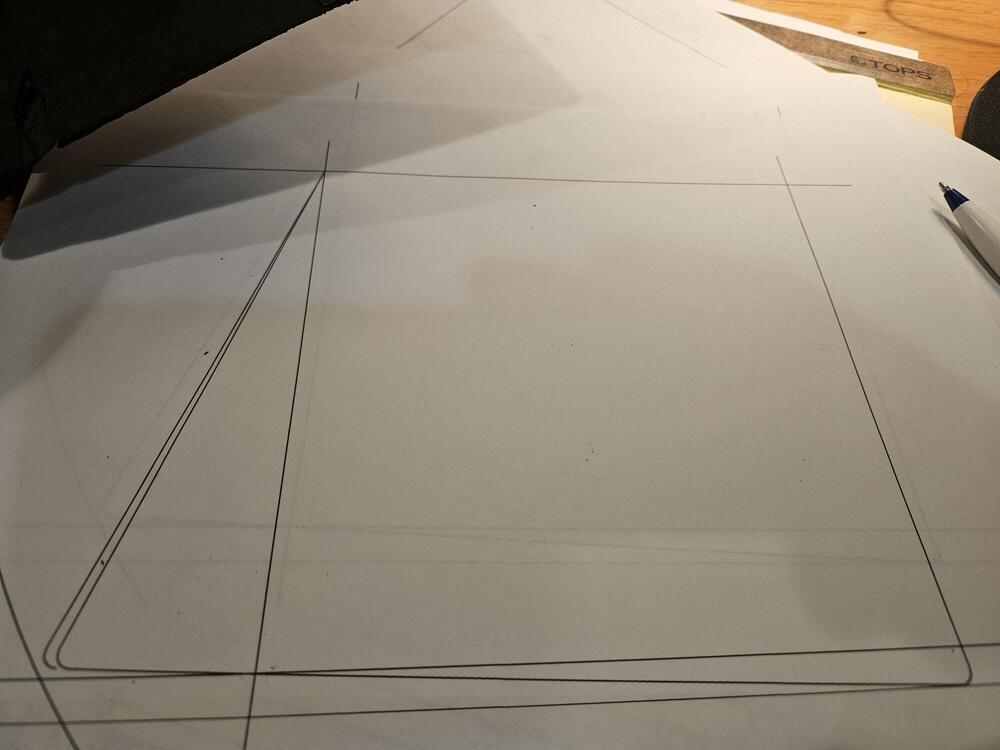
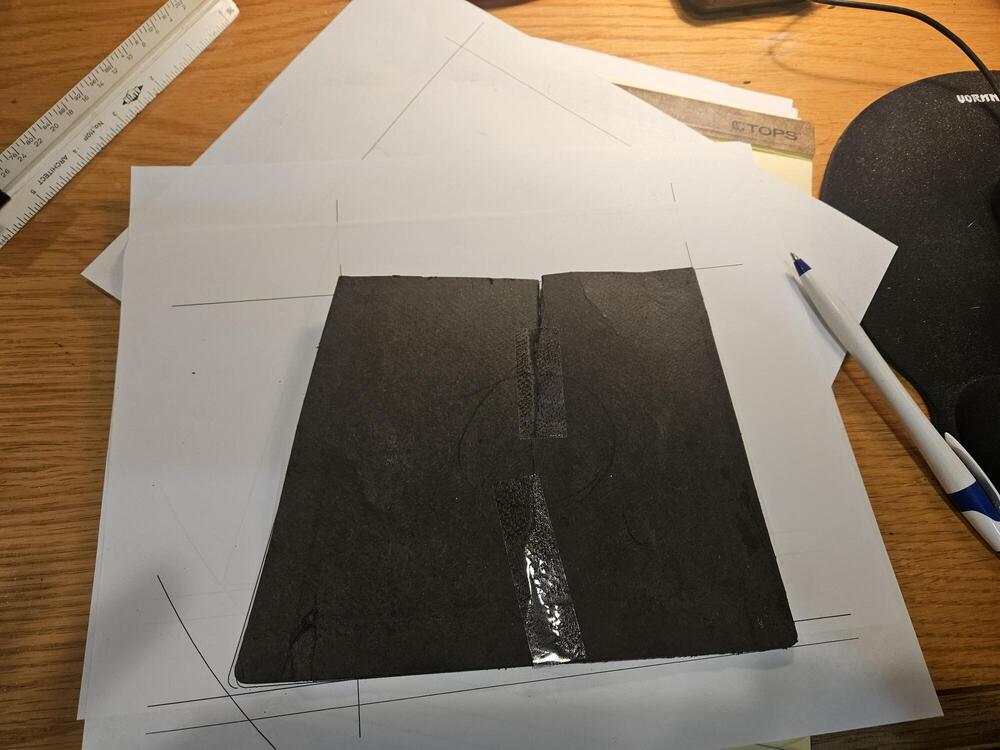
I was able to make more progress tonight on the firewall pads, this time moving to the left side pad. Covered in tape, then the cut outs, and the old on top of the tape pattern: The tape pattern on the butyl rubber sheet, the butyl rubber sheet after cutting out under the old pad, and the old pad placed above the new rubber cut out: The new rubber cut out on top of the new insulation, the outline in black marker on the insulation, the partially cut insulation under the new rubber cut out: The work to do this is somewhat tedious, but the results are pretty good. I decided to quit for the night rather than finish cutting the insulation for this pad.


 4 points
 -
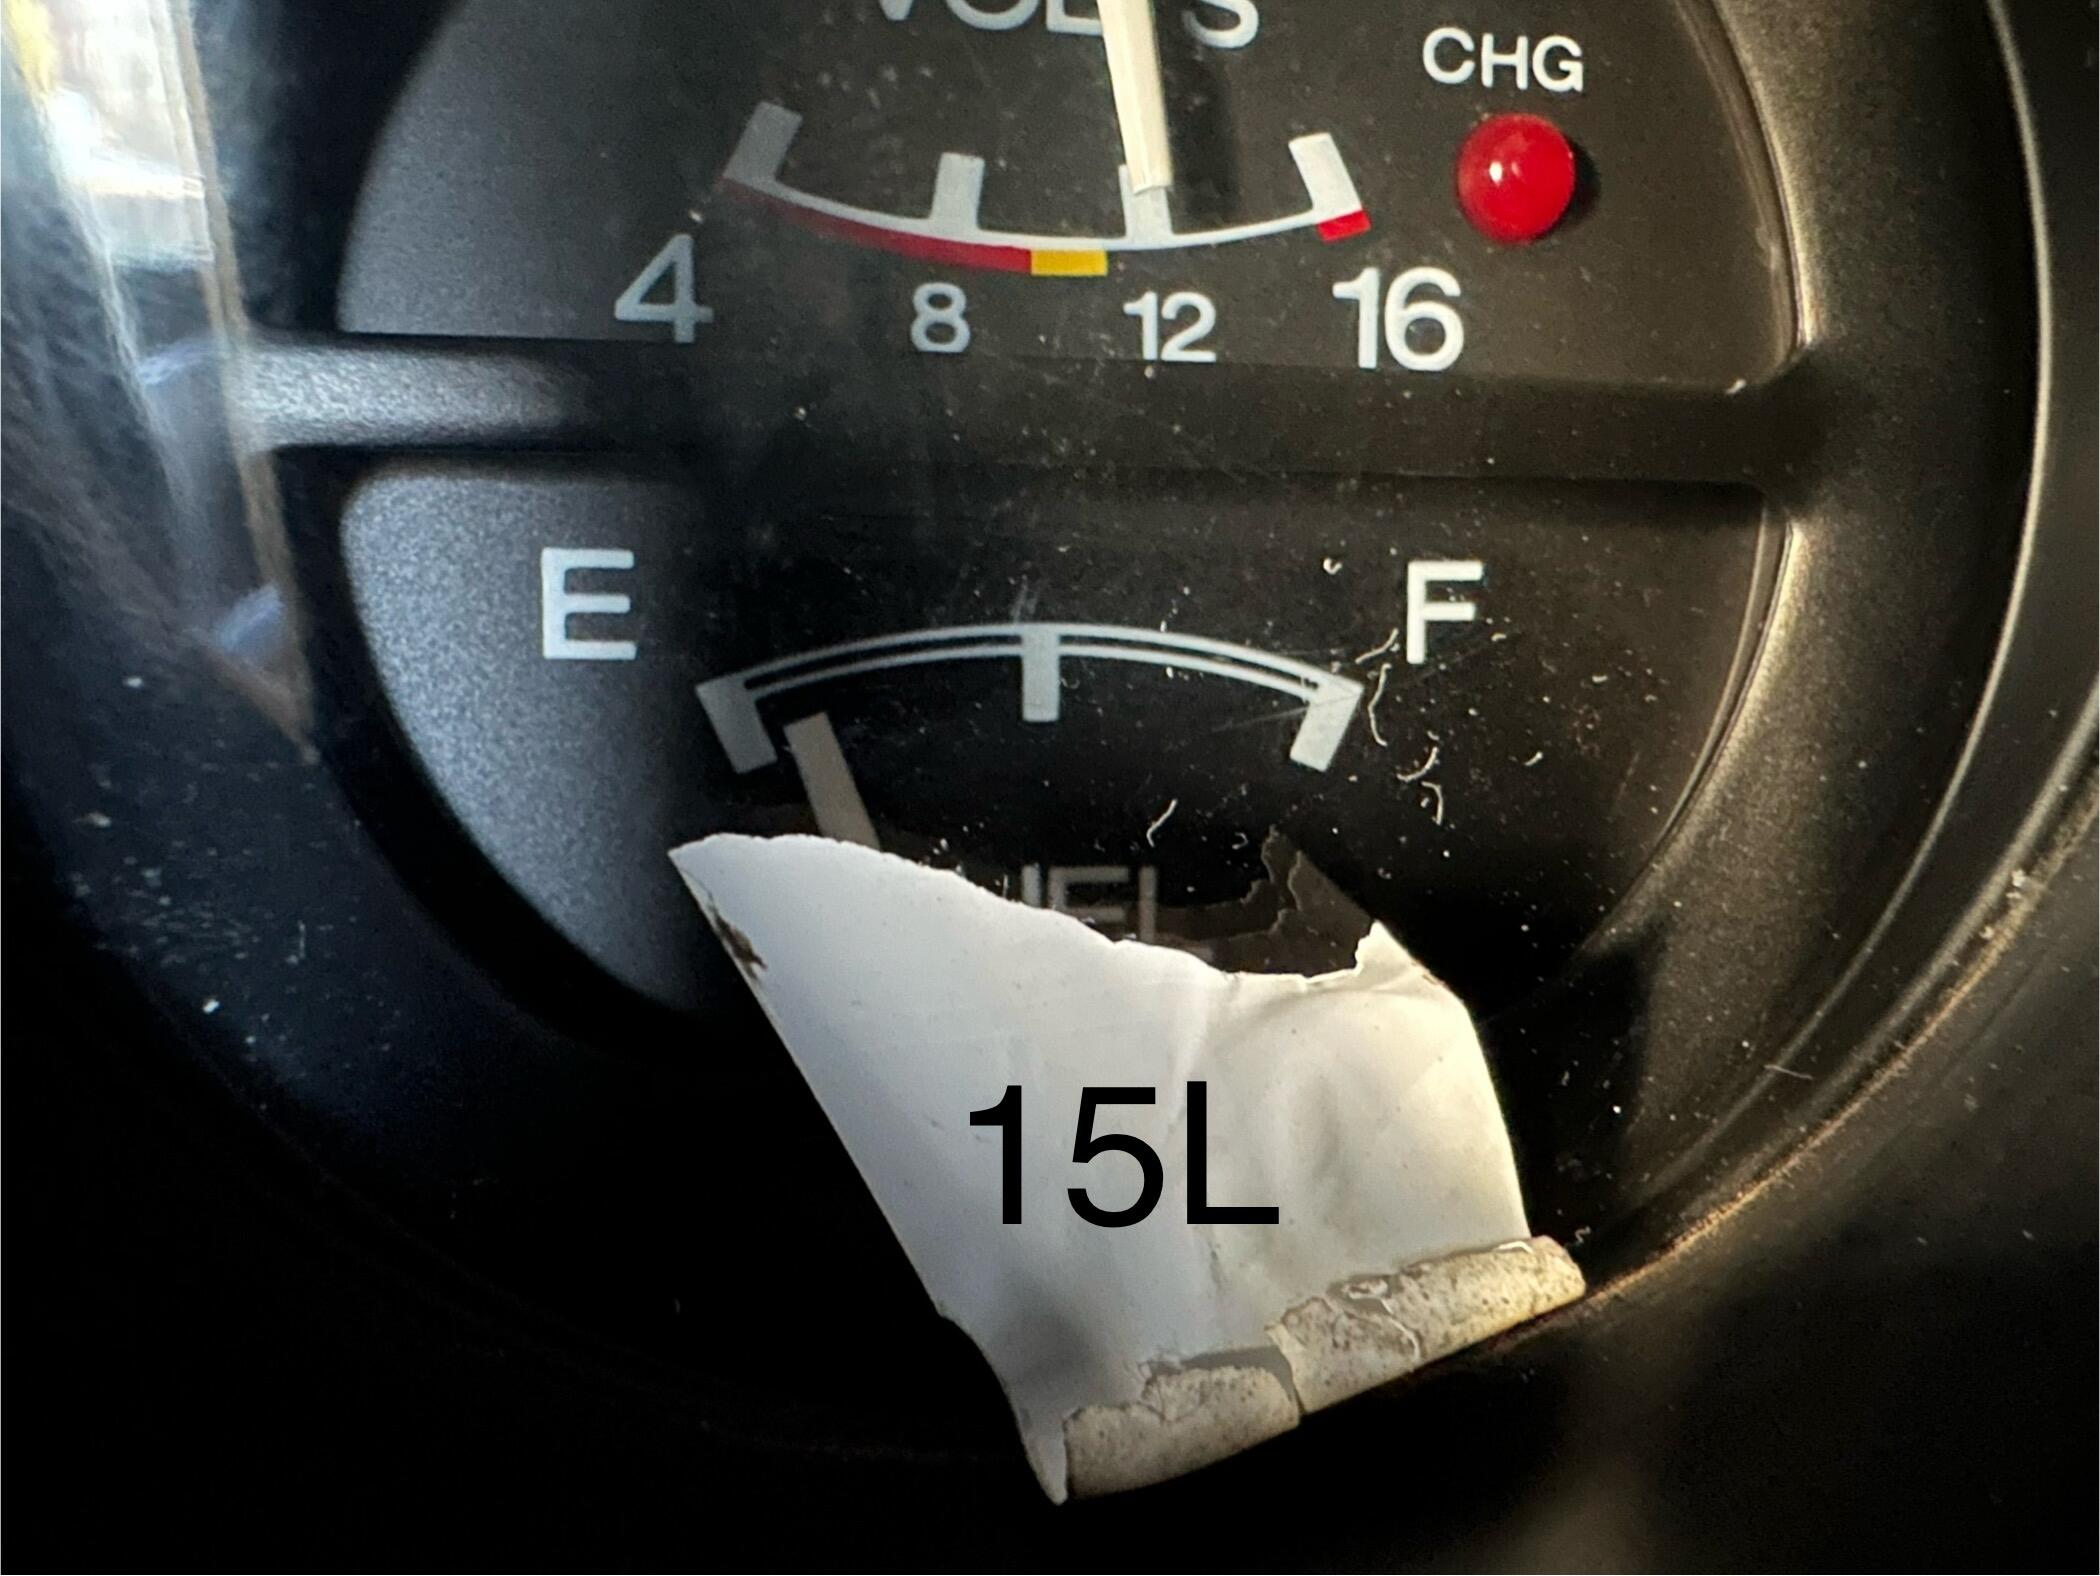
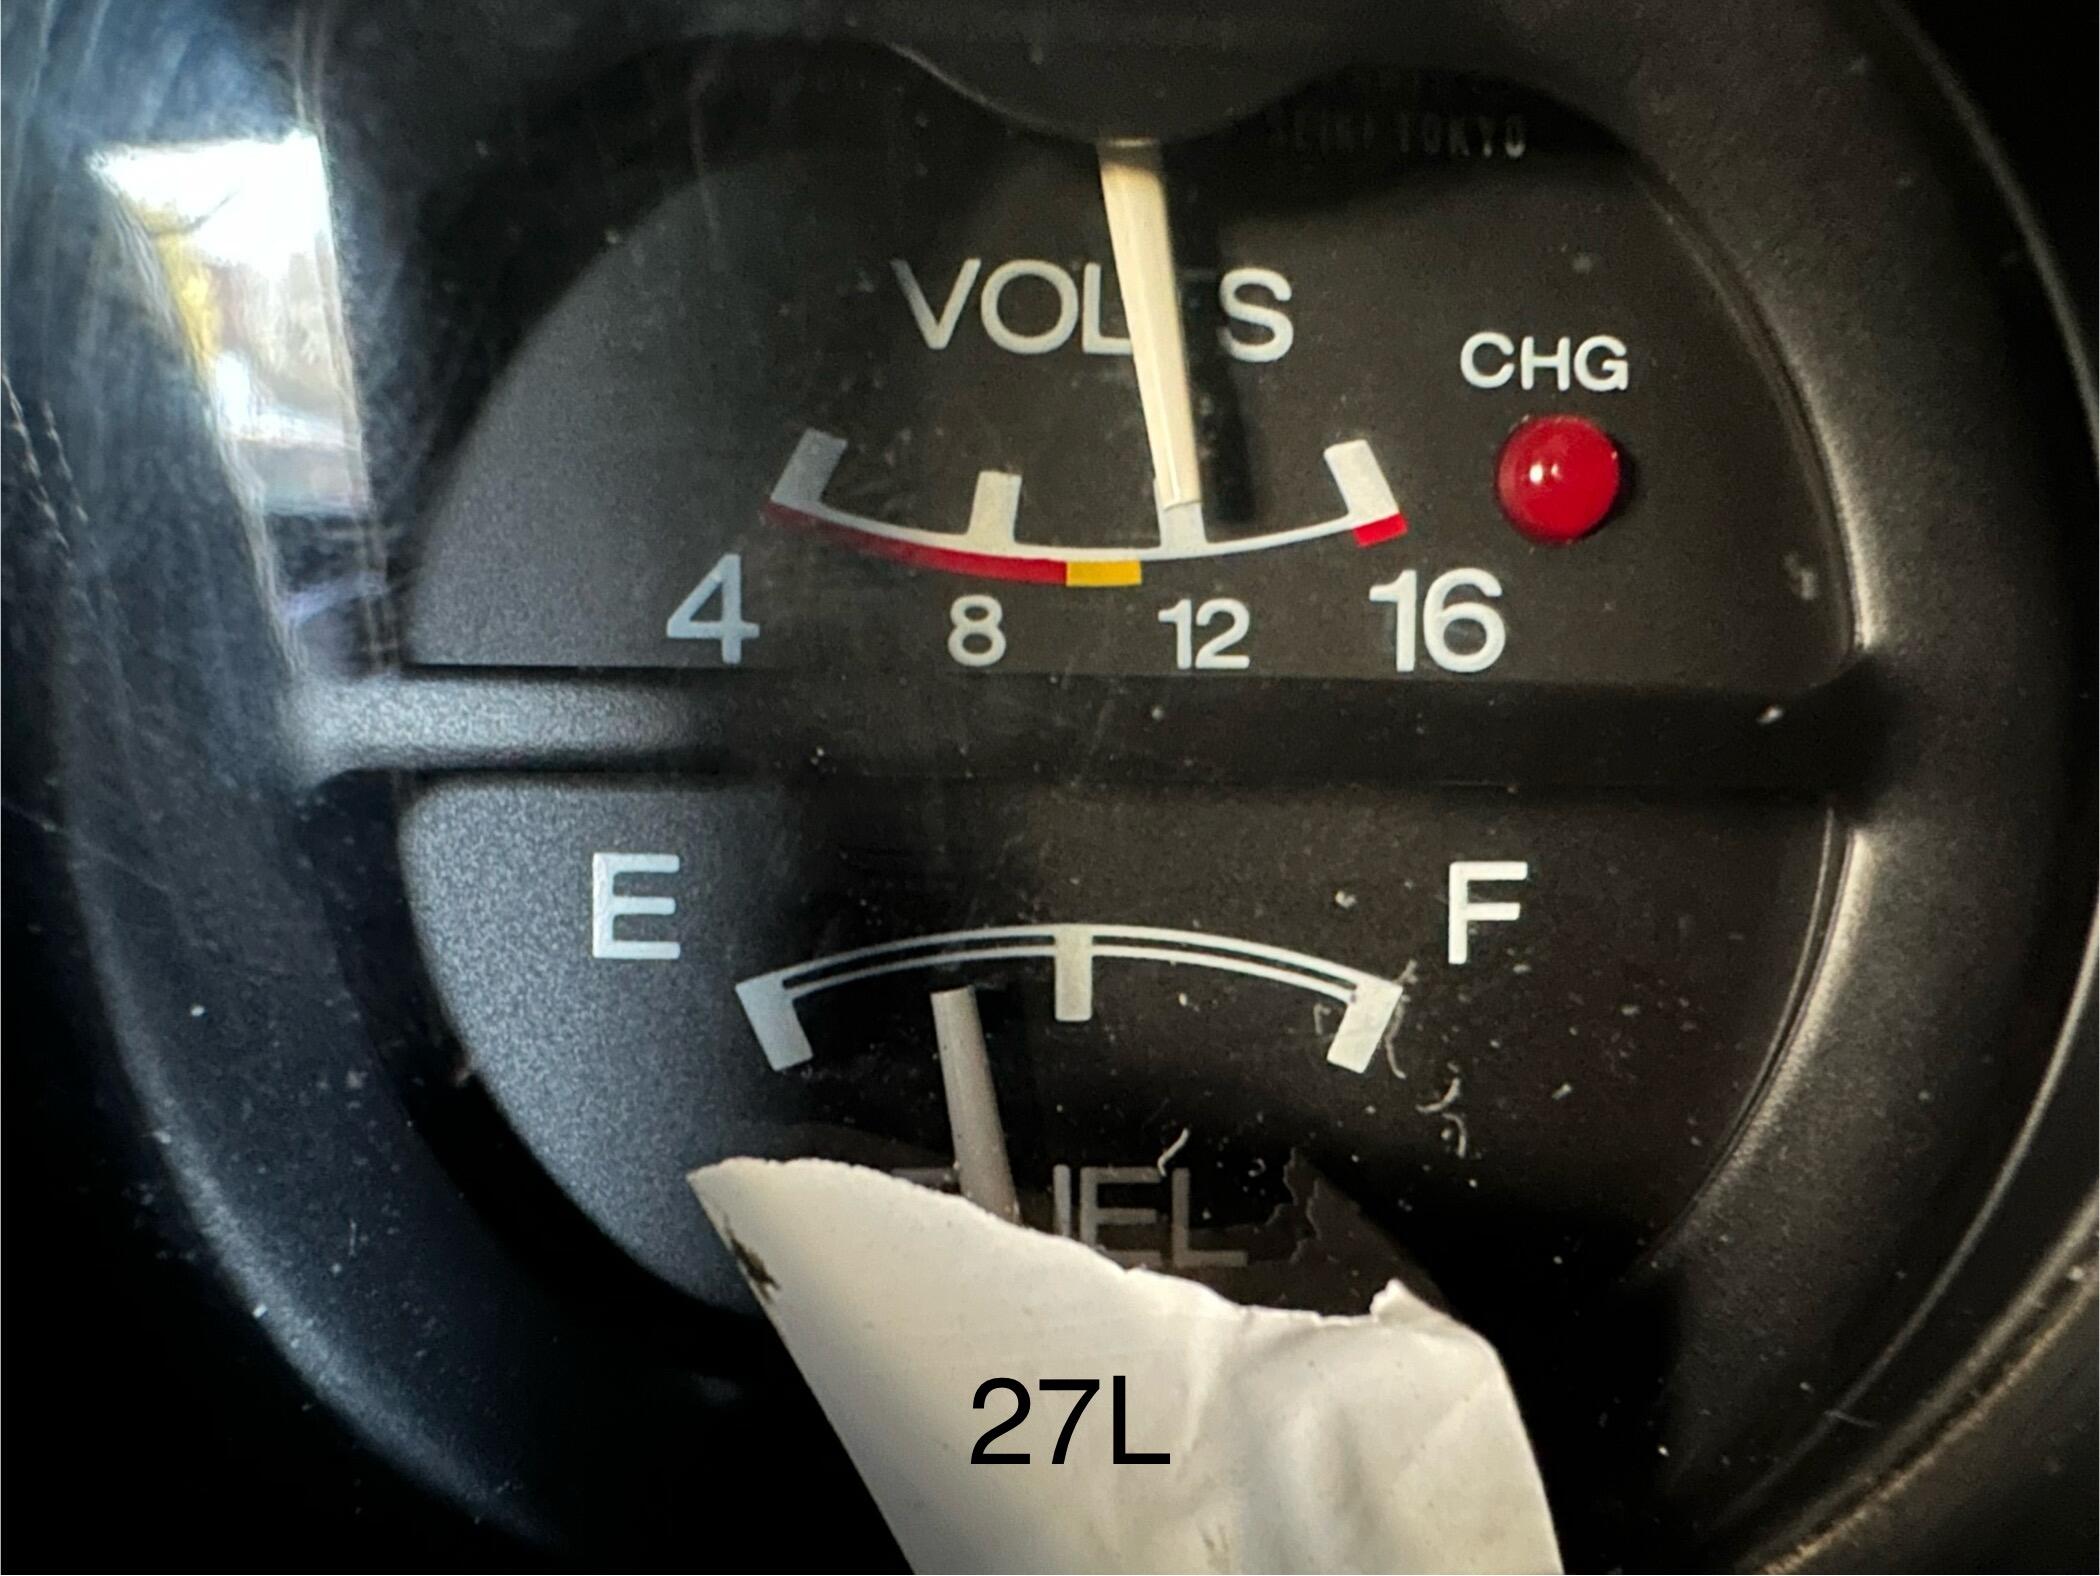
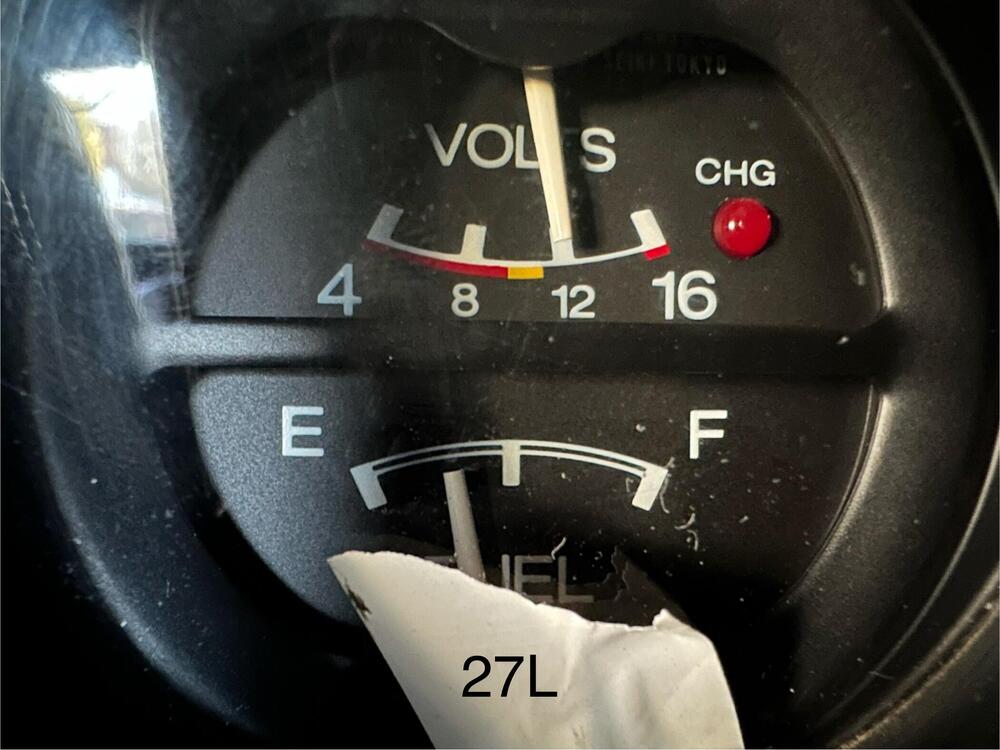
I'm not sure what year your Z is. Up through 76, I believe the specs are 60 L for fuel (15.85 US Gallons) for the North American model. I would assume a 77 or 78 260Z (if they exist in the UK) would have the larger tank like North America. The problem is that I don't think the sender does anything to account for the shape of the tank. I'm not sure if the adjustment screws would help, either. The top 2/3 has only about 1/2 the width of the bottom third. To simplify things due to the fact that I have a simple mind, we can model the tank somewhat like this: So the darker grey top half is about equal in volume to the light grey bottom half. Since the tank is 60 L, that means each portion is 30 L. That means 15L would be 1/6 of the way to the top of the tank, and 27 L would come up to a little under 1/3 way. It looks like the gauge readings are somewhat consistent with that.
 3 points
 -
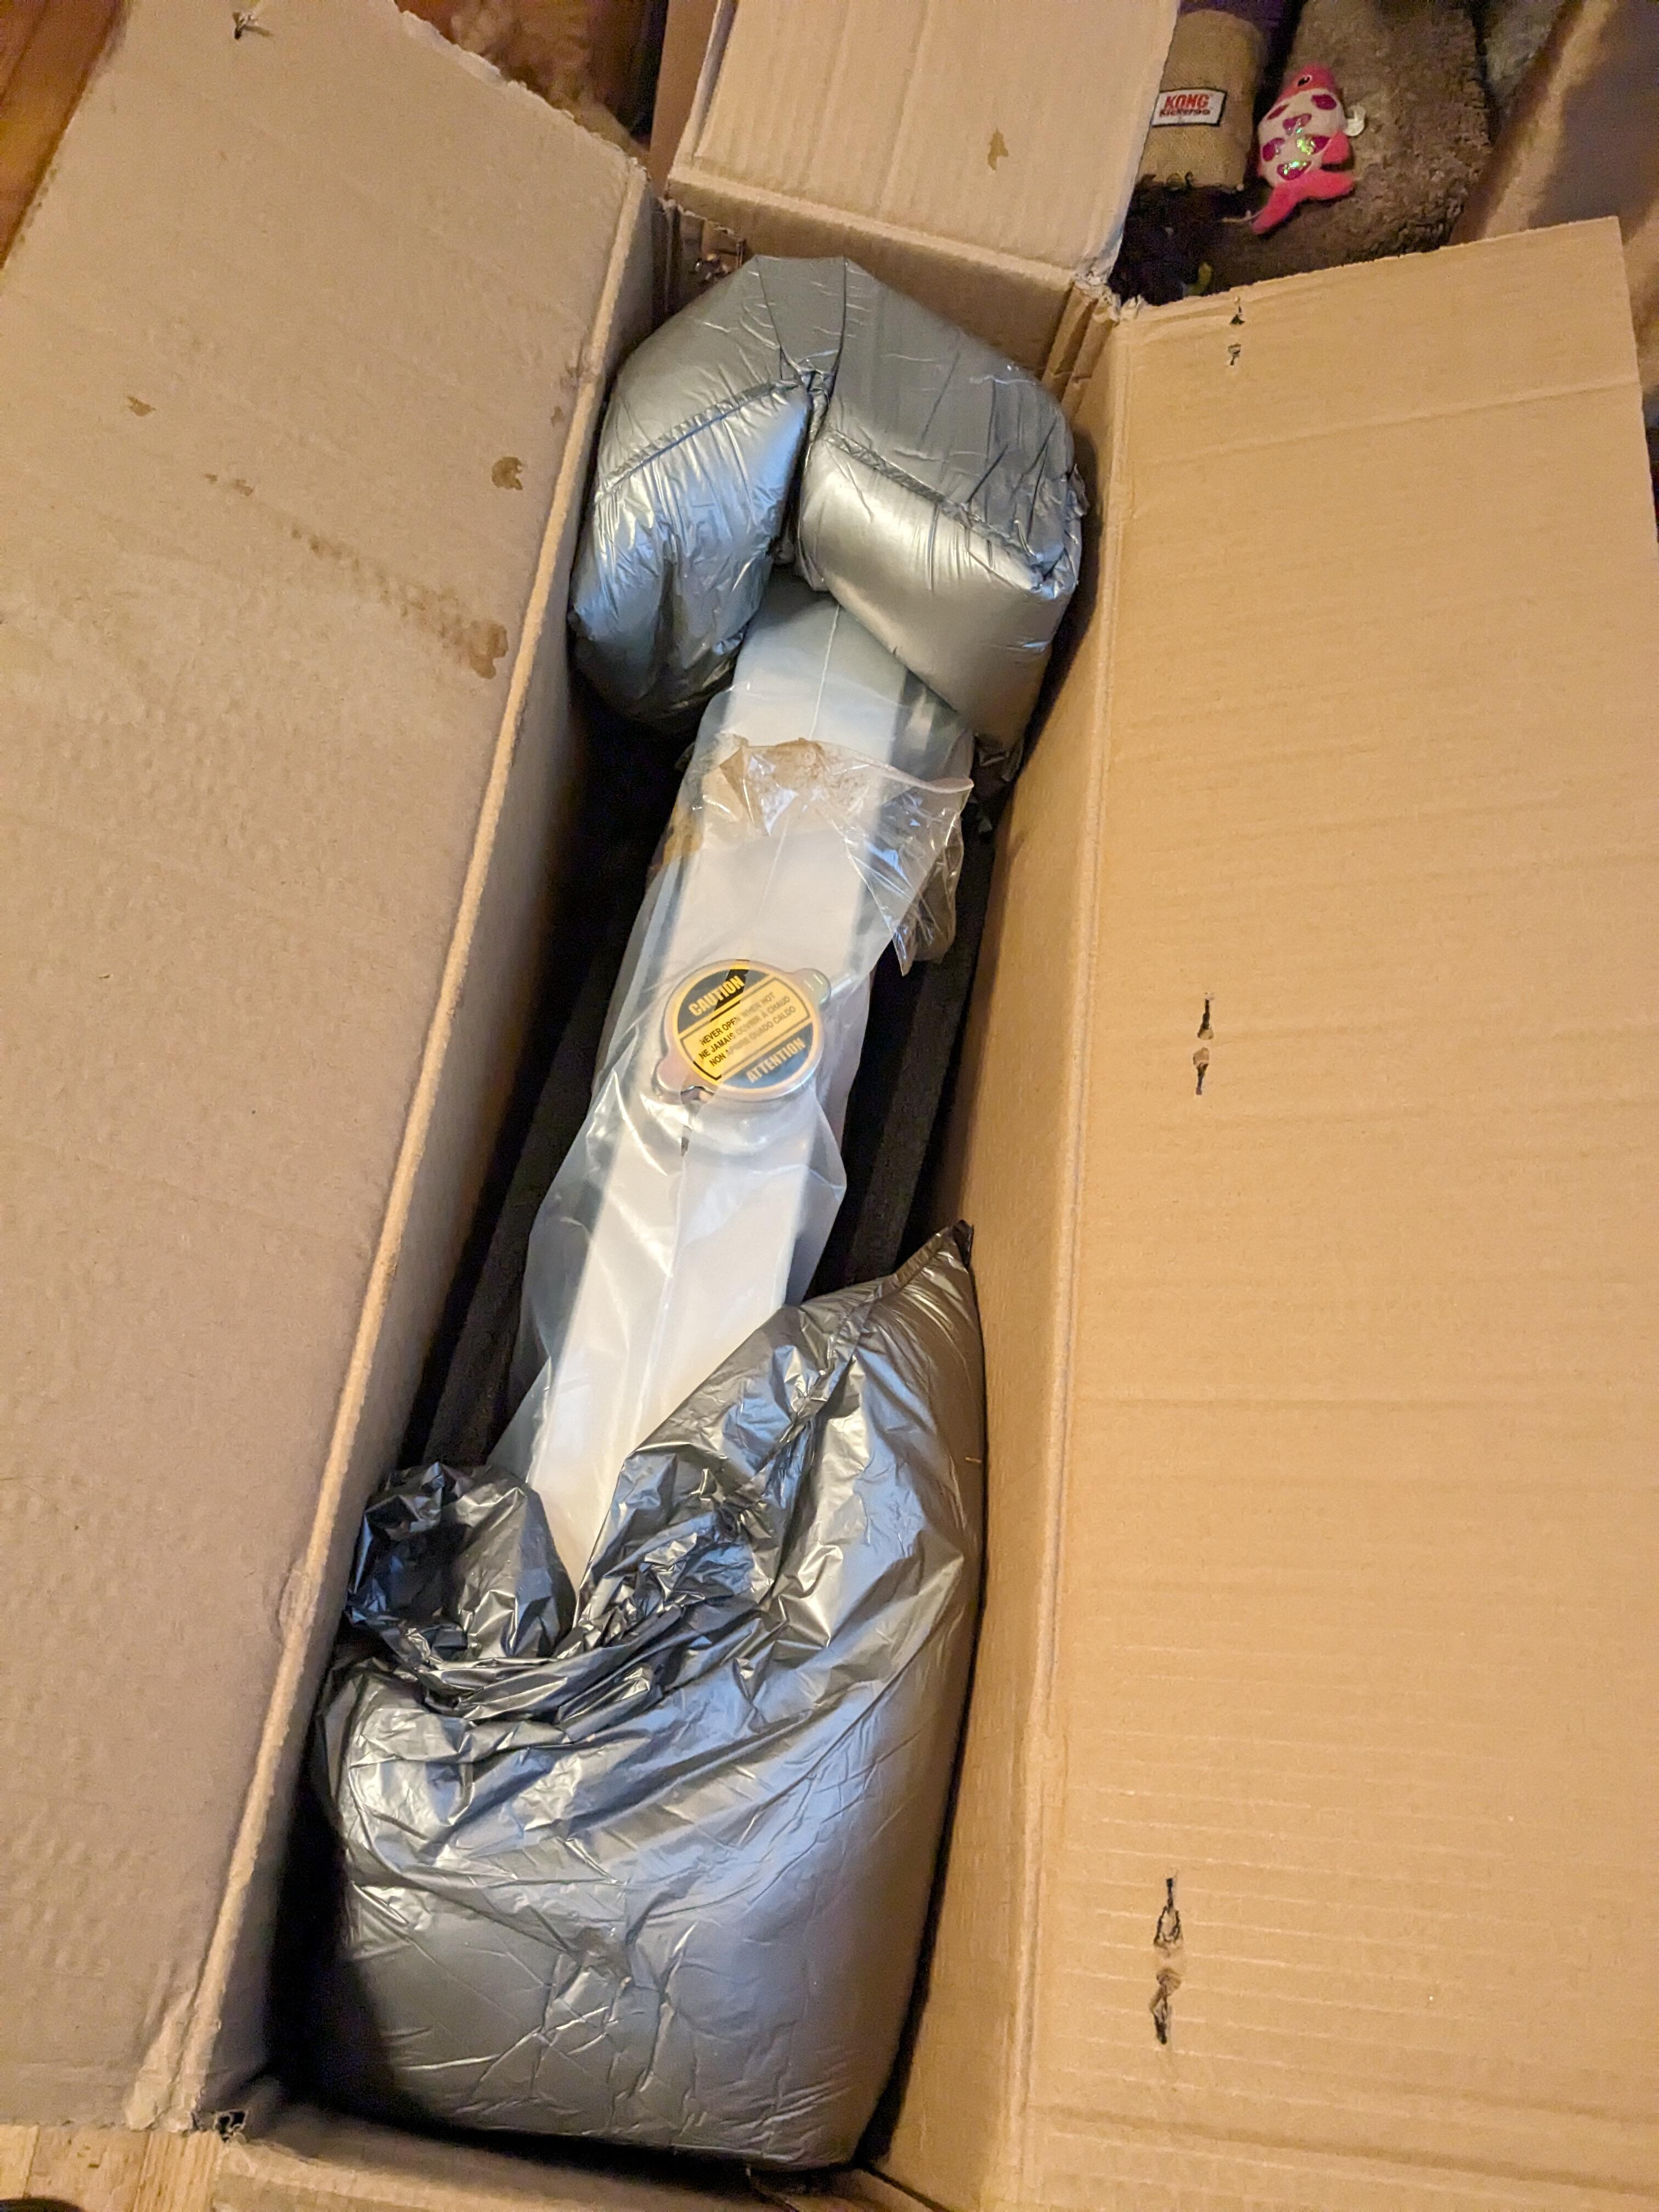
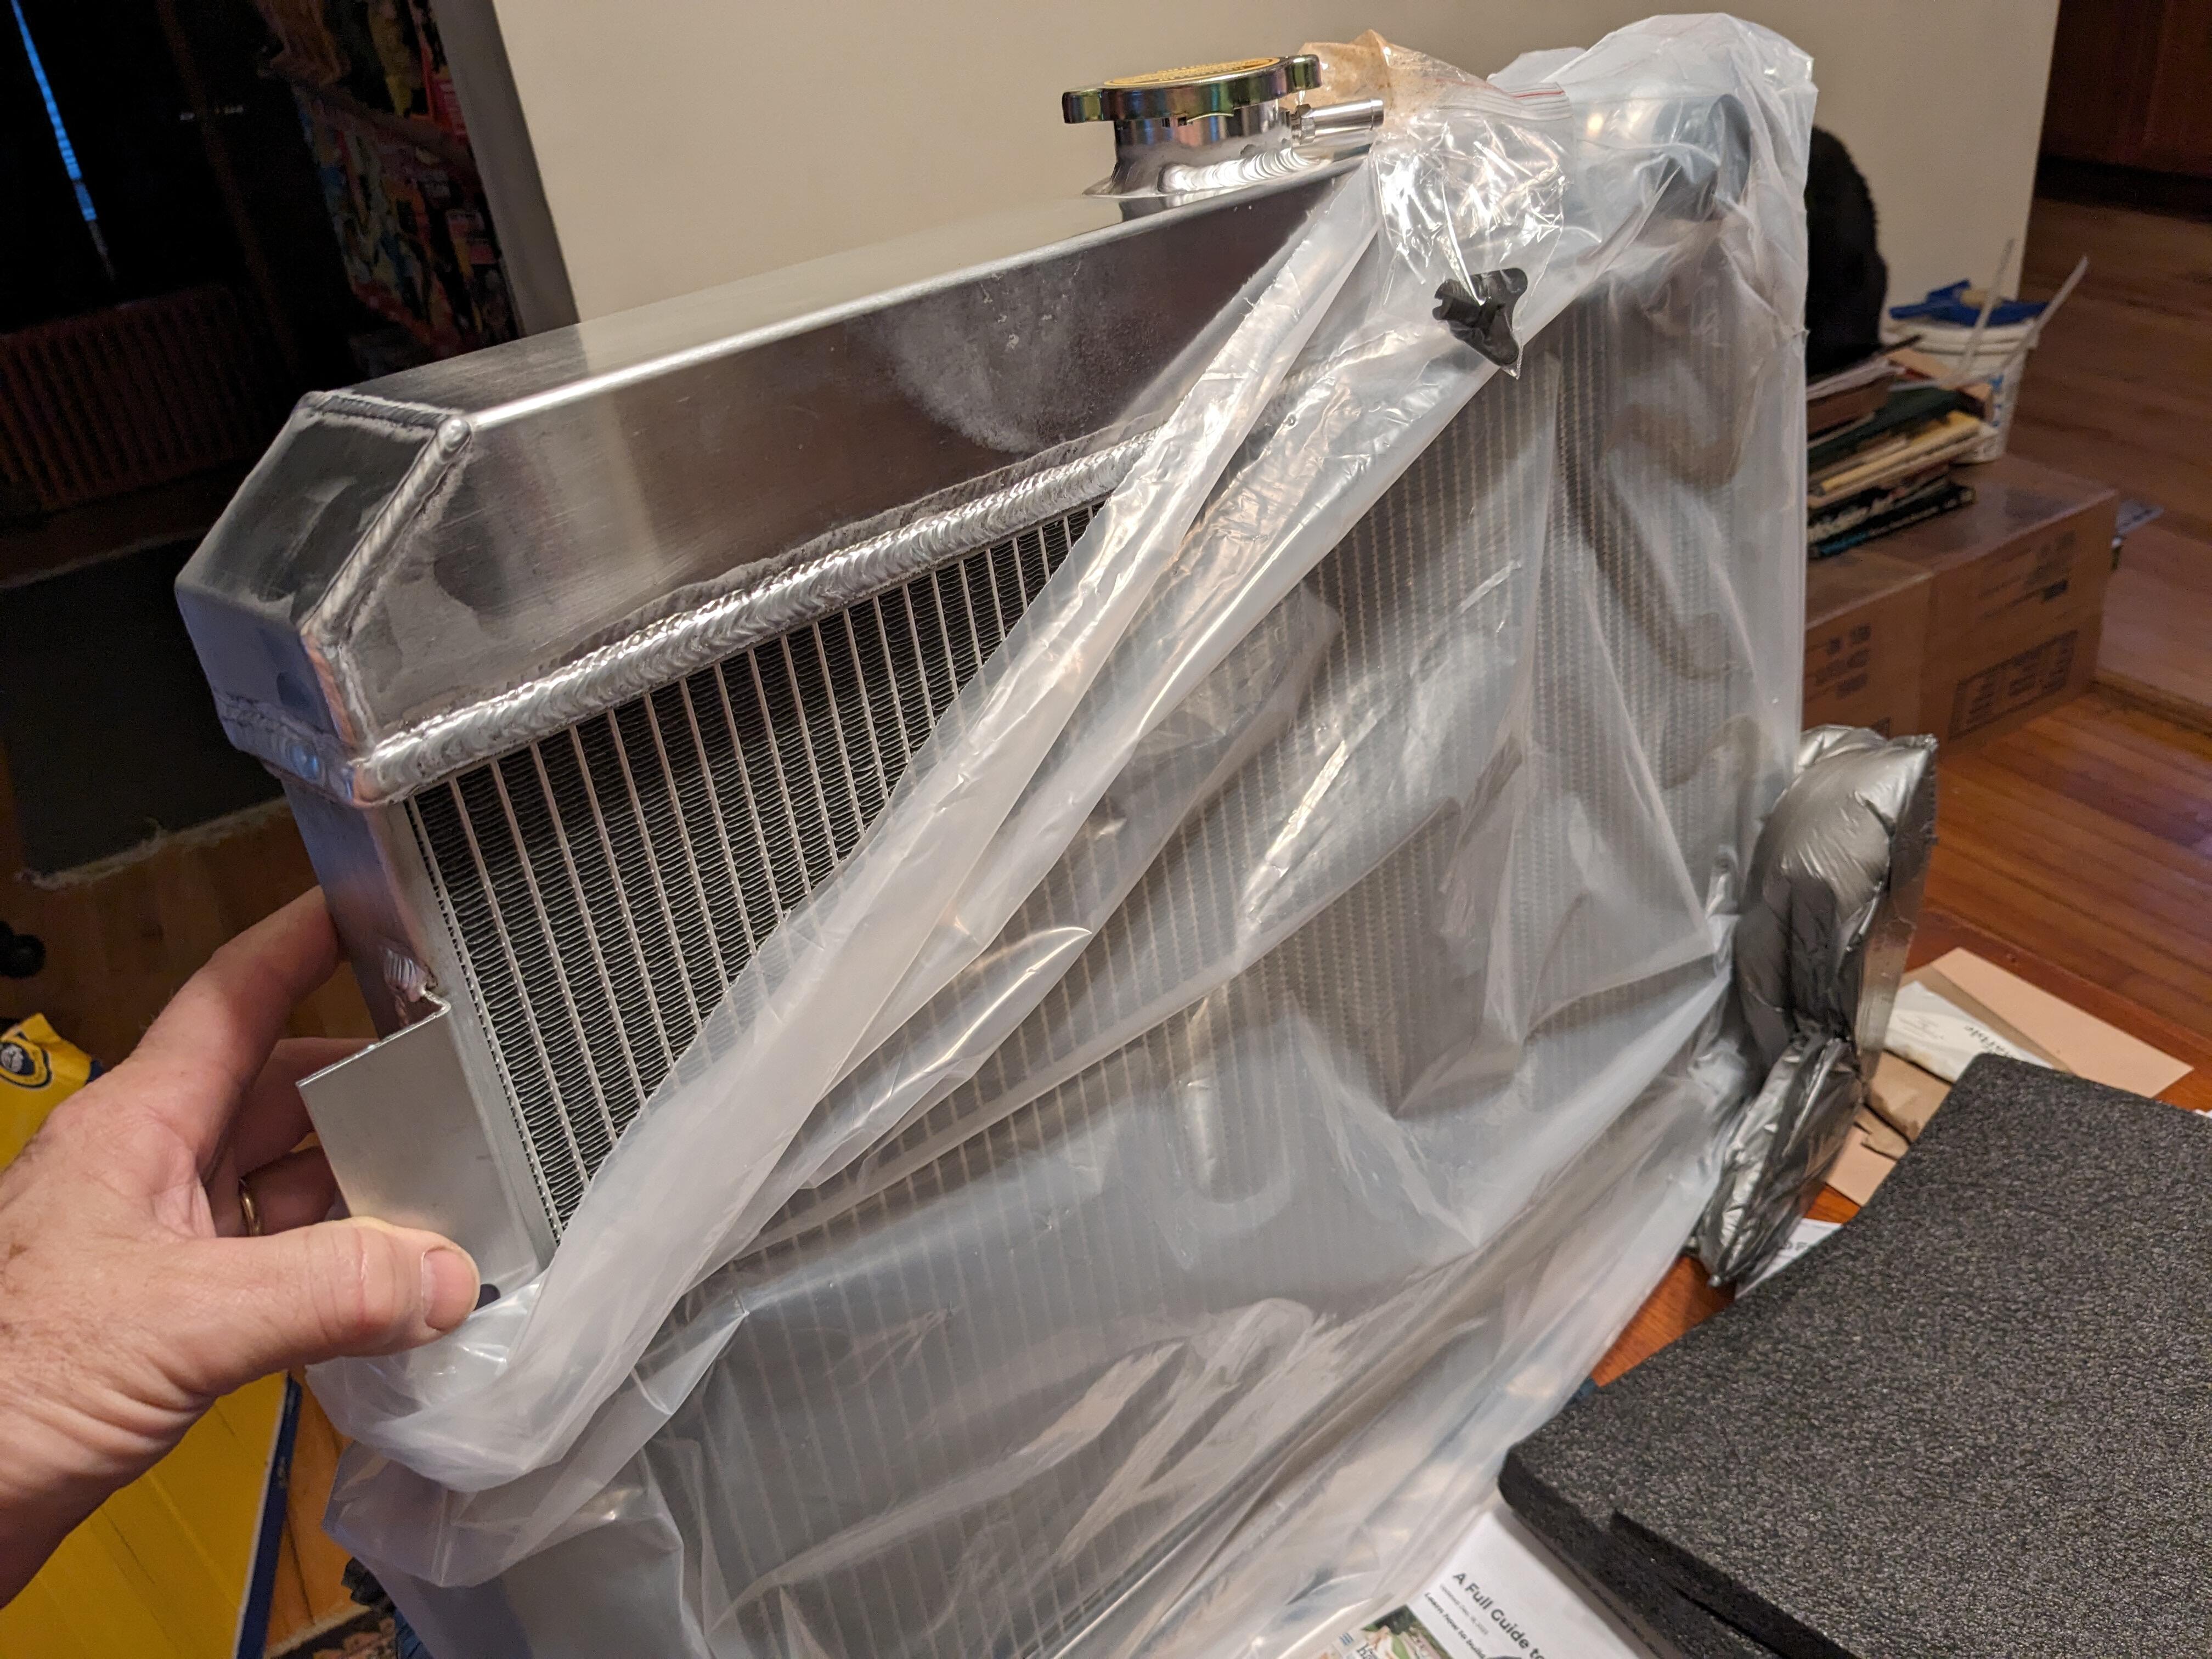
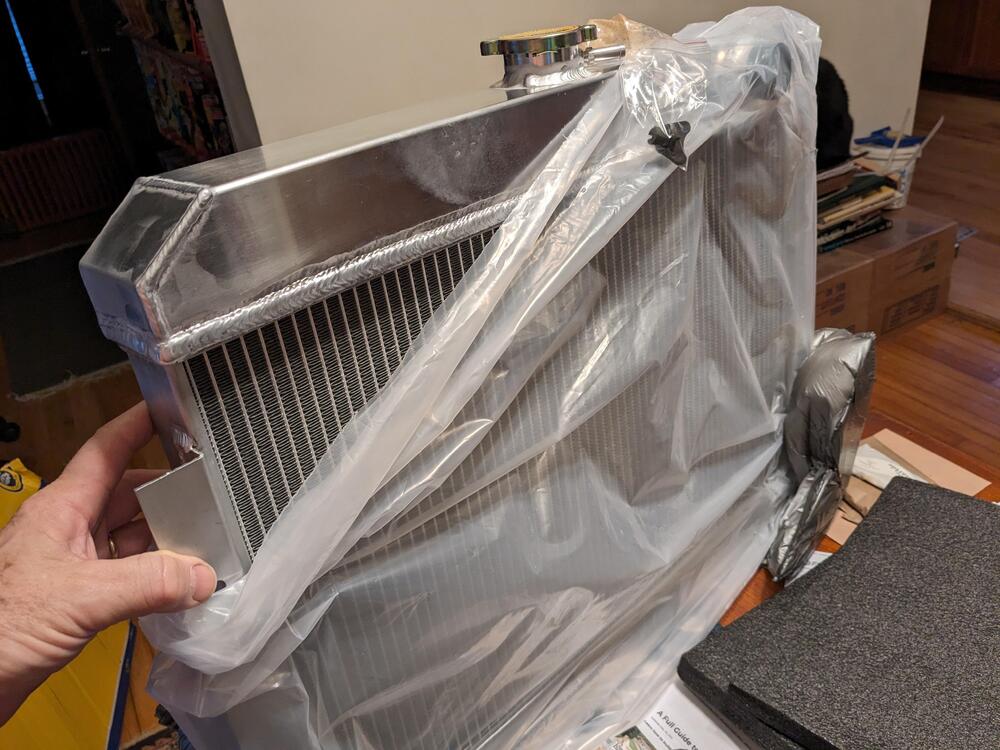
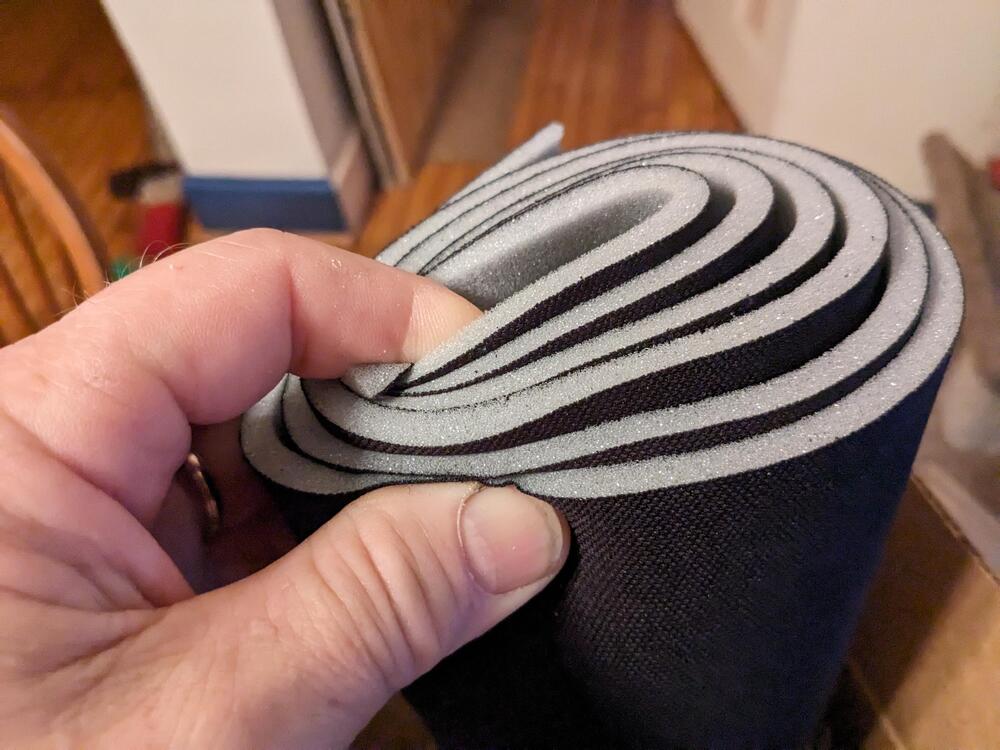
Rad for the VQ conversion came - very well packaged & looks great, especially for the price. Application is mid 80's Jeep CJ series. Have to cut off the mount flanges & reweld. Easier than cutting off the necks on a Datsun specific fitment, and half the price ($130 shipped) for the 3 row that I bought Also picked up some more 1/4" foam backer for when I remove the hatch / strut tower vinyl to do the permanent seat belt mounts Used a similar product covered with vinyl for the rear strut brace


 3 points
 -
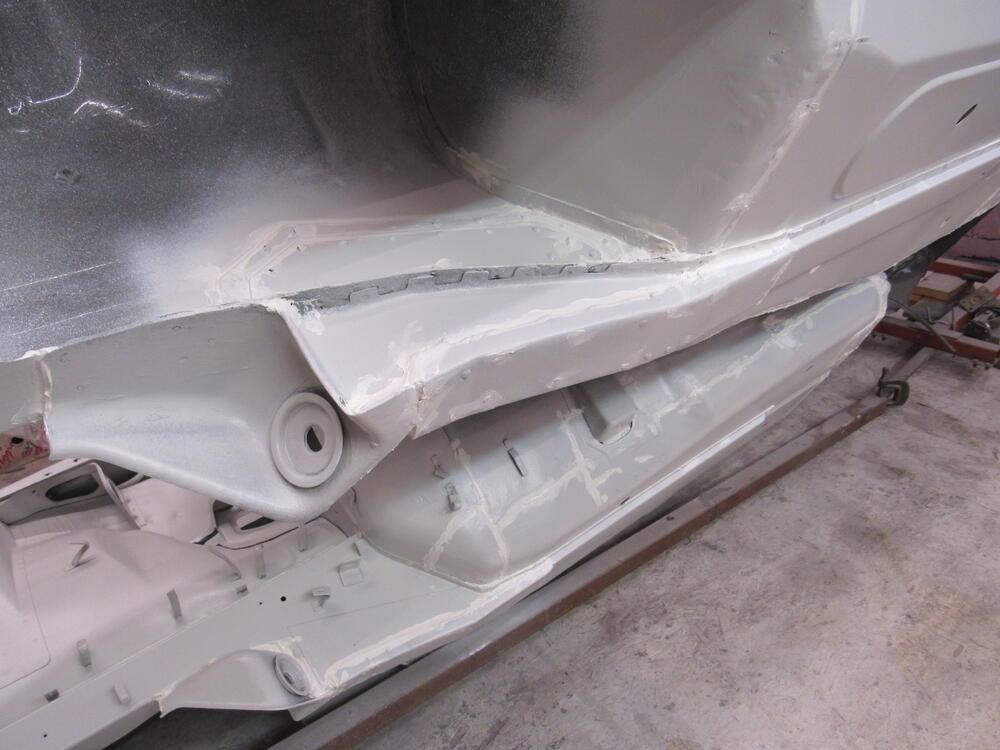
3 pointsThe primer wasn't cured fully this morning, too cool in the garage so I spent the day seam sealing inside and out.


 3 points
 -
2 pointsI'll try to remember to reach out to a Z person in that area to see if he has heard from them.2 points
-
Interesting. While I have a wipe pattern from assembly with all new bearings, I do not have one from before I disassembled the differential. In all probability, it had never been apart before, so the wipe pattern before disassembly should have been "close" to correct. I do recall (and posted somewhere earlier) that I measured the back lash before I took it apart and it was well within spec. So, I guess I will hope that centering the contact pattern will put it back close to where it was and minimize noise for the reason you point out. Well... Unfortunately, my history of experiences of having others do car related work for me have more often turned out to be disappointments than good experiences. Another way of saying that is: the majority of the time I hand stuff off to someone else to do, it doesn't get done well enough. Now, I am freely admitting that I am a perfectionist. And that is probably more than half of the problem. However, it can be very hit and miss with having someone else do this (as well as other) types of automotive work. If there is a place that is highly recommended by people with personal experience with the work, I will gladly and seriously consider it. I just assume that either: most differential rebuilders (who are still around) won't touch this, or I'd be better off not playing Russian roulette with the places that pop up with an internet search. Then, there is the weight of the thing... shipping both ways, etc., but that is a secondary set of issues.2 points
-
2 pointsYou can start it in the garage, try not to let it sit at idle for too long, vary the revs up and down but don't go over 3,000 until it is run in. If you can keep it running for a good half hour until the engine has reached full temp. Those are just the rules I follow when starting a freshly rebuilt engine.2 points
-
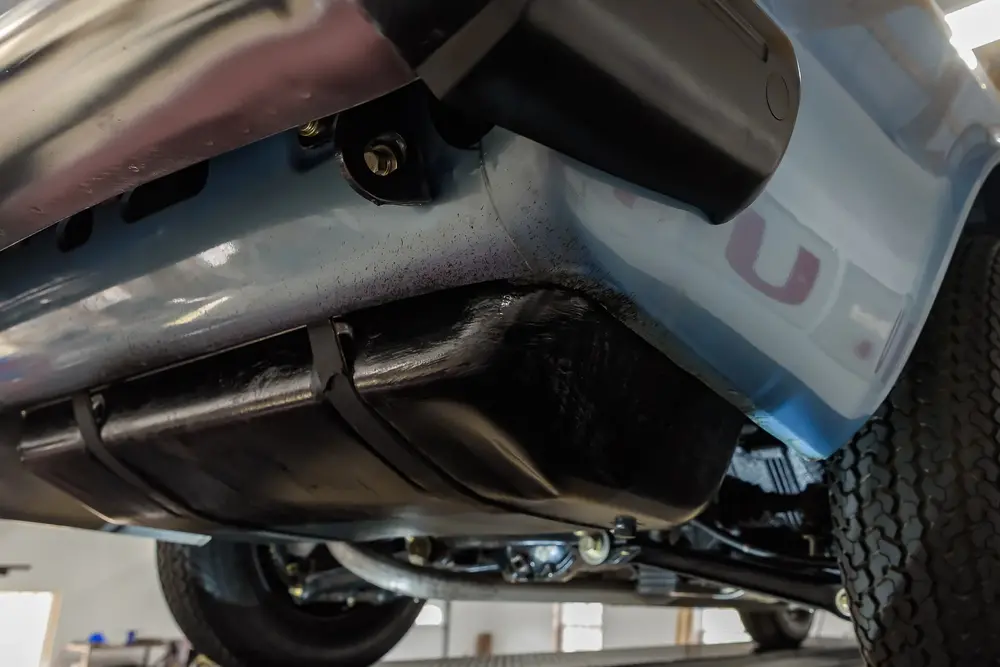
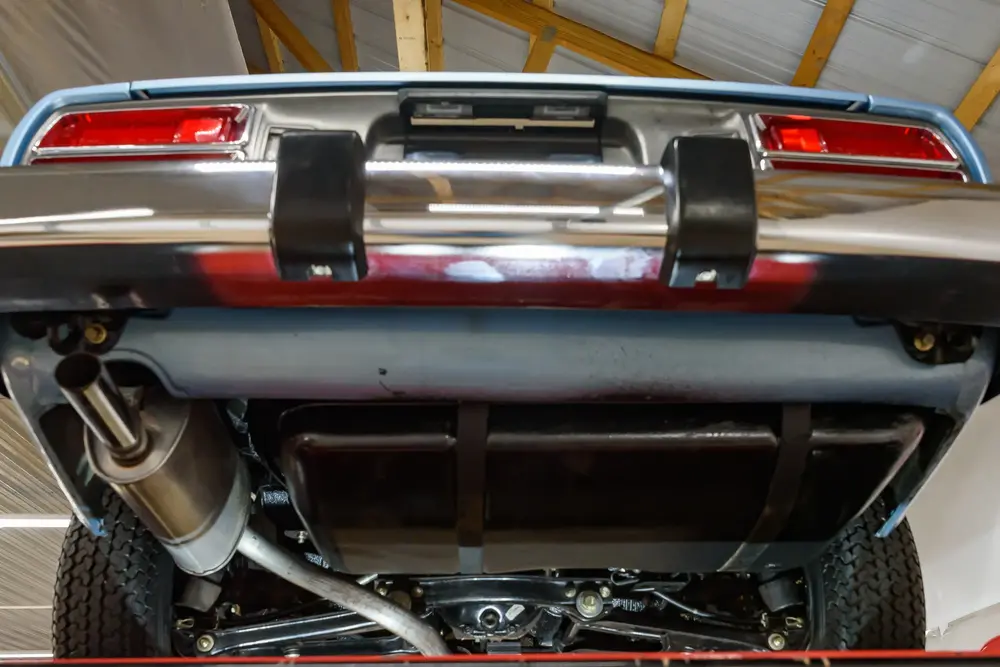
2 pointsHere are some photos of the rear bumper area from BaT of the 355 original miles 280Z that sold for $140,000. https://bringatrailer.com/listing/1976-datsun-280z-39/

 2 points
 -
2 pointsOK, here's another update. I started sorting these against the hoses I am going to start with and see a gap in the size range forcing me to buy an additional item from Amazon for the radiator hoses. https://www.amazon.com/gp/product/B0CJR8W51N/ref=ppx_od_dt_b_asin_title_s00?ie=UTF8&th=1 and also keep one of the previous ebay kits i started this thread with to cover some of the pcv hoses This may be useful for someone. I matched up these sizes to the hose kits I recently purchased from resurrected classics Coolant (12) 18-22mm (2) 25-29mm PCV (3) 18-22mm (1) 25-32mm Brake Booster (4) 13-16mm Smog (2) 25-29mm (2) 18-22mm (6) 23-29mm Radiator (4) 38-44mm The leftovers from these three kits will also be used for all the remaining vapor and fuel hoses as needed. I'm sure I have all remaining size ranges covered except maybe float bowl if memory serves. Once I get around to doing that work I'll try to remember to come back here and complete a full list for the entire engine bay.
 2 points
 -
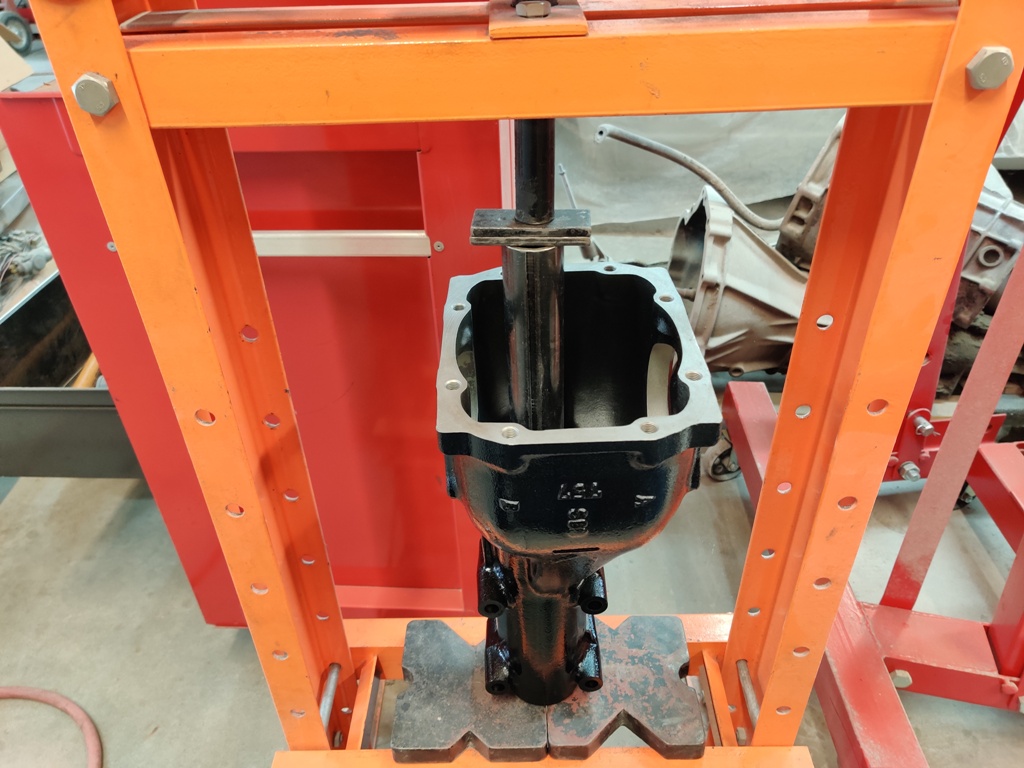
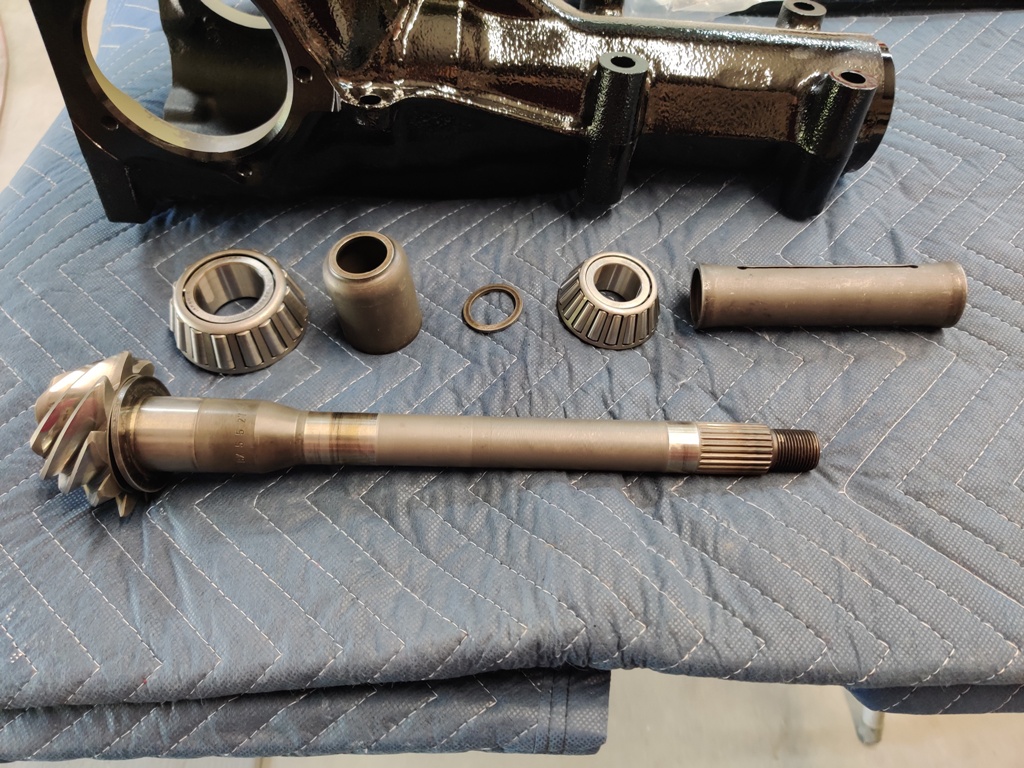
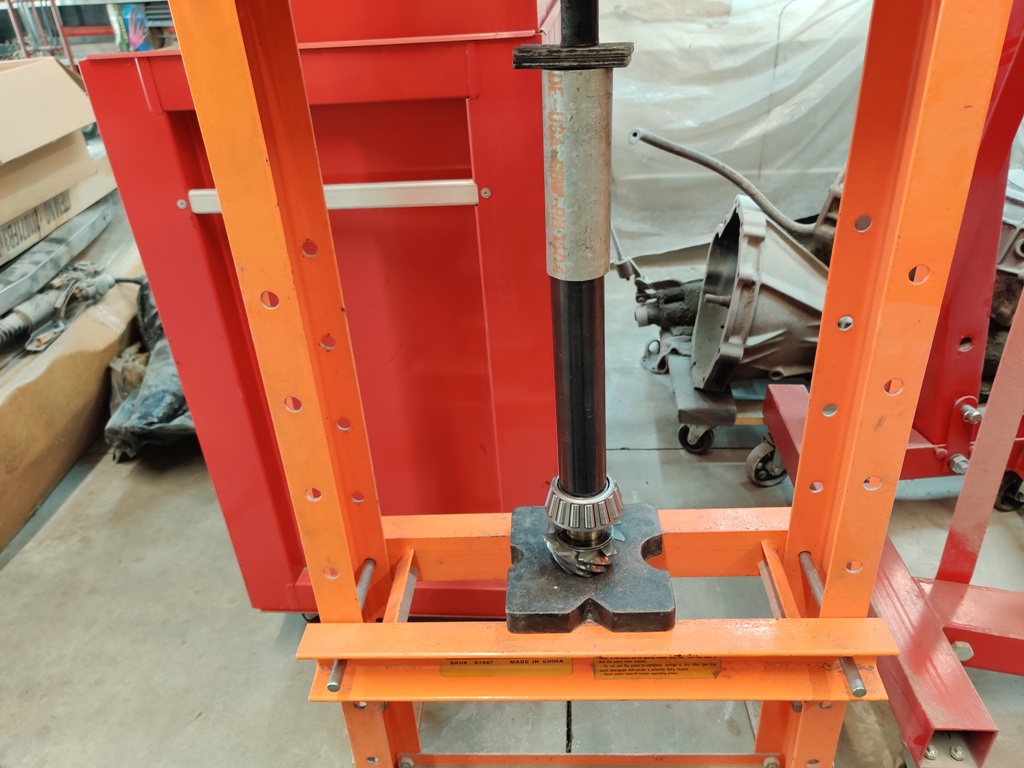
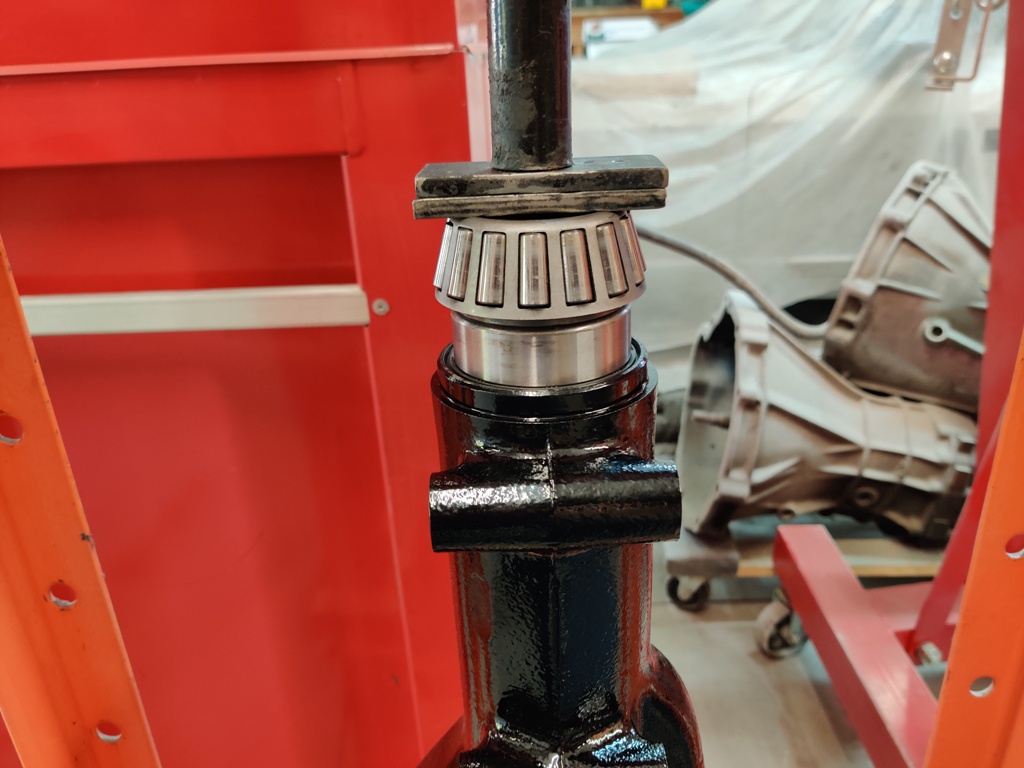
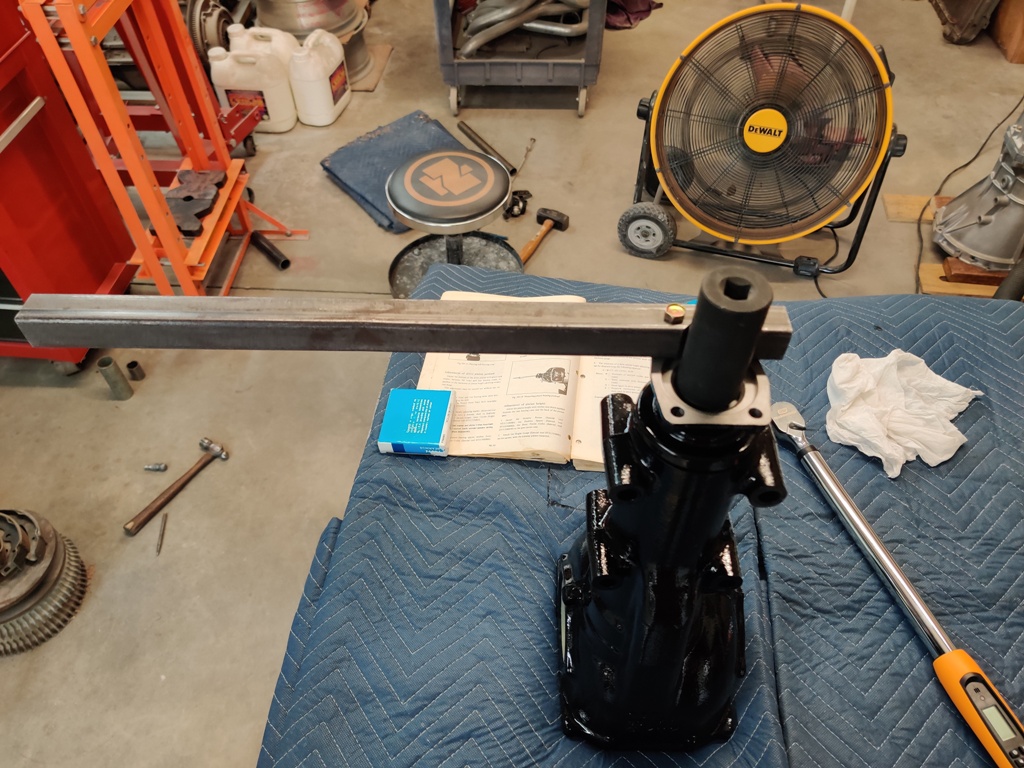
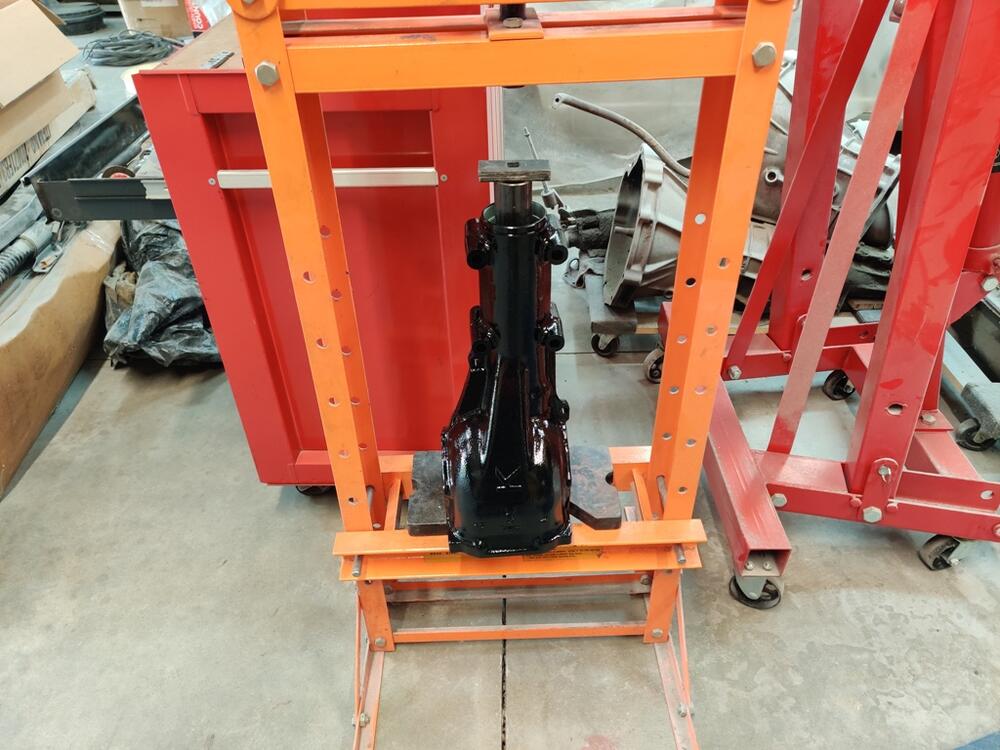
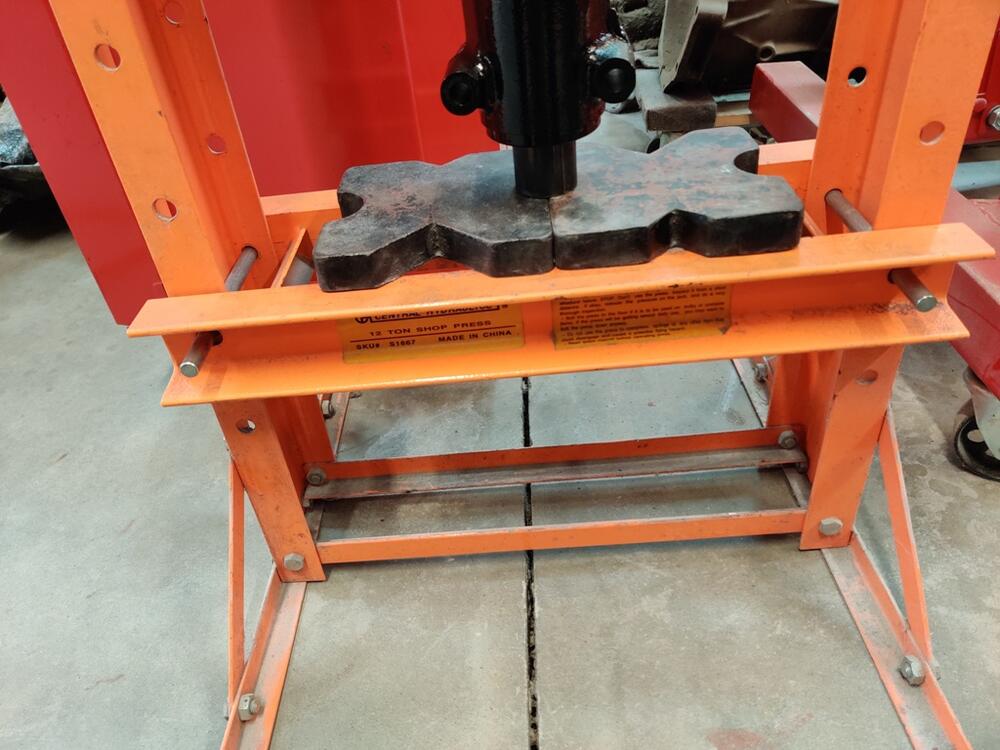
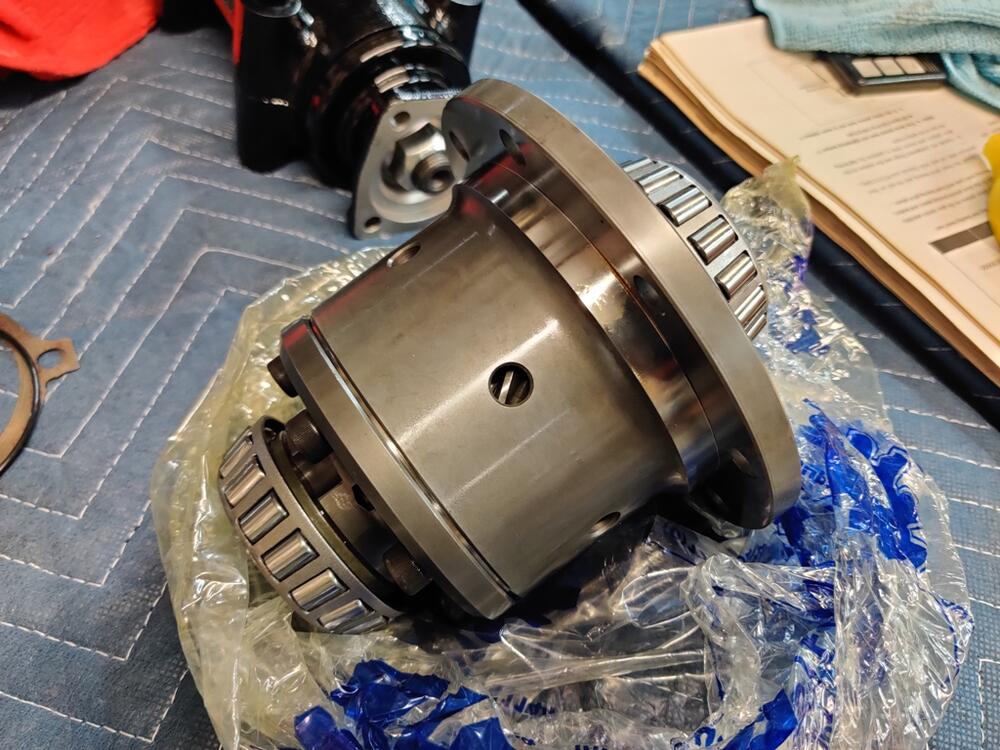
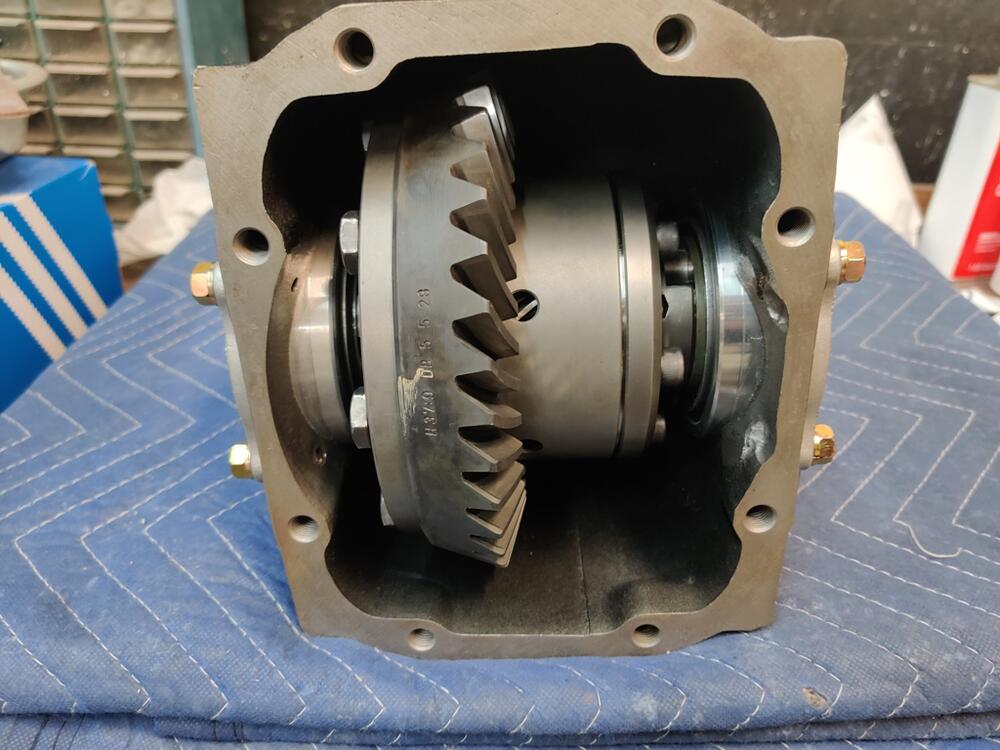
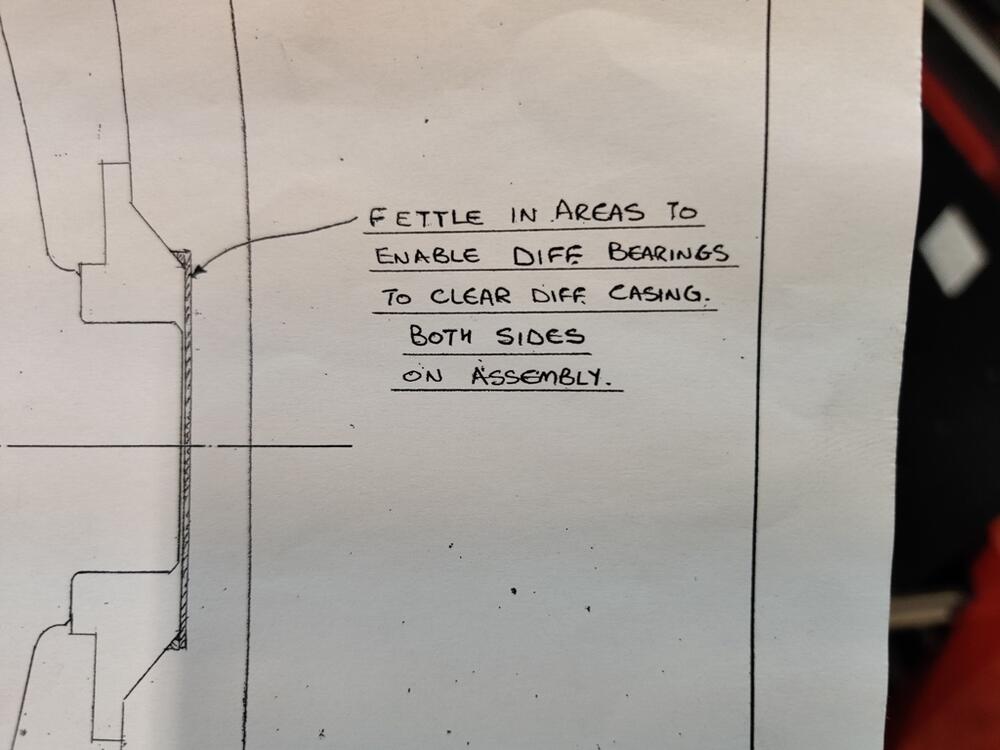
I have been rebuilding my differential for the last couple of evenings. It is a "K" R180 from the front of a Nissan 4X4 truck. From running it in my 240z, I know it was in good condition before disassembly. And, when I took it apart, I checked backlash and it was within spec. So, I don't believe it ever had been apart before. I purchased a Quaife LSD for it. I also purchased all new bearings and seals. For the differential case and the drive pinion shaft, I was very careful to install races and the tapered bearings, fully seating them in their correct positions. I also was sure to use the spacers and shims that were removed back in their original locations. Using old bearing as an installation tool for the front pinion bearing. Using a homemade tool to hold the pinion from turning while setting the torque to 135 ft-lbs (factory manual specifies 122.9 -144.6 ft-lbs_ To get the Quaife in the case, it was required to "Fettle": It took a lot of fettling, but I very carefully ground only where needed until the carrier just fit. In fact, I had to leave one of the main gear bolts off until the carrier was partly in the case, and then torque that last bolt through the side axle opening. This fettling was an unpleasant surprise that added 4 hours of time to grind on the case. I had to be extremely careful with packing the case cavity and other preparation to keep the metal shavings from the carrier and from installed pinion shaft (and bearings). At this point, and here is where I stopped, I have installed the side retainers, left and right, with their respective shims in their original positions, with the 5 bolts on each just snugged down, not torqued. Now, I could use some guidance. What I have not done that I may need to: I didn't measure the amount of turning force on the pinion shaft. I don't have a suitable tool to measure that. I see that this is supposed to be done without the pinion seal installed. I have already installed that. There is preload on the pinion bearings - I can tell by rotating the shaft by hand. I just don't know how much. I did not remove the fresh paint (and primer) from the sides of the case where the side retainers seat. I am wondering if those thousandths of an inch matter. Given the side retainer shims originally used are quite thin, paint in this location may be an issue? I didn't measure the amount of main gear backlash with a dial gauge yet. I just moved the main gear by hand back and forth. Doing so, the amount of movement is noticeable. I'd guess .015" to .020". I do have a dial gauge and magnetic base and plan to measure the back lash when I pick back up on this. I was hoping, perhaps naively, that I would be able to use the existing pinion and side retainer shims even with replacing the stock carrier with the Quaife LSD unit, but it looks like I have more work ahead of me. The factory shop manual is difficult to understand, and I don't have the factory tools being referenced. Anyone have any guidance on how to proceed? I am thinking about buying the tool to check pinion turning force. I am thinking to not removing the pinion seal, because I would likely destroy it in the process, but instead just factor in 1-2 additional inch-lbs into the reading I measure from having that in place. So, if I measure 2 inch-lbs more than the factory upper limit, I'd call that good, for example. I am also thinking about removing the paint from under the side retainers and reinstalling them with fasteners torqued to spec to check the main gear lash measurement. From there, I may need to order various side shims and attempt to get back lash correct? Then check the gear mesh pattern to see if everything is set up the way it should be?


 1 point
 -
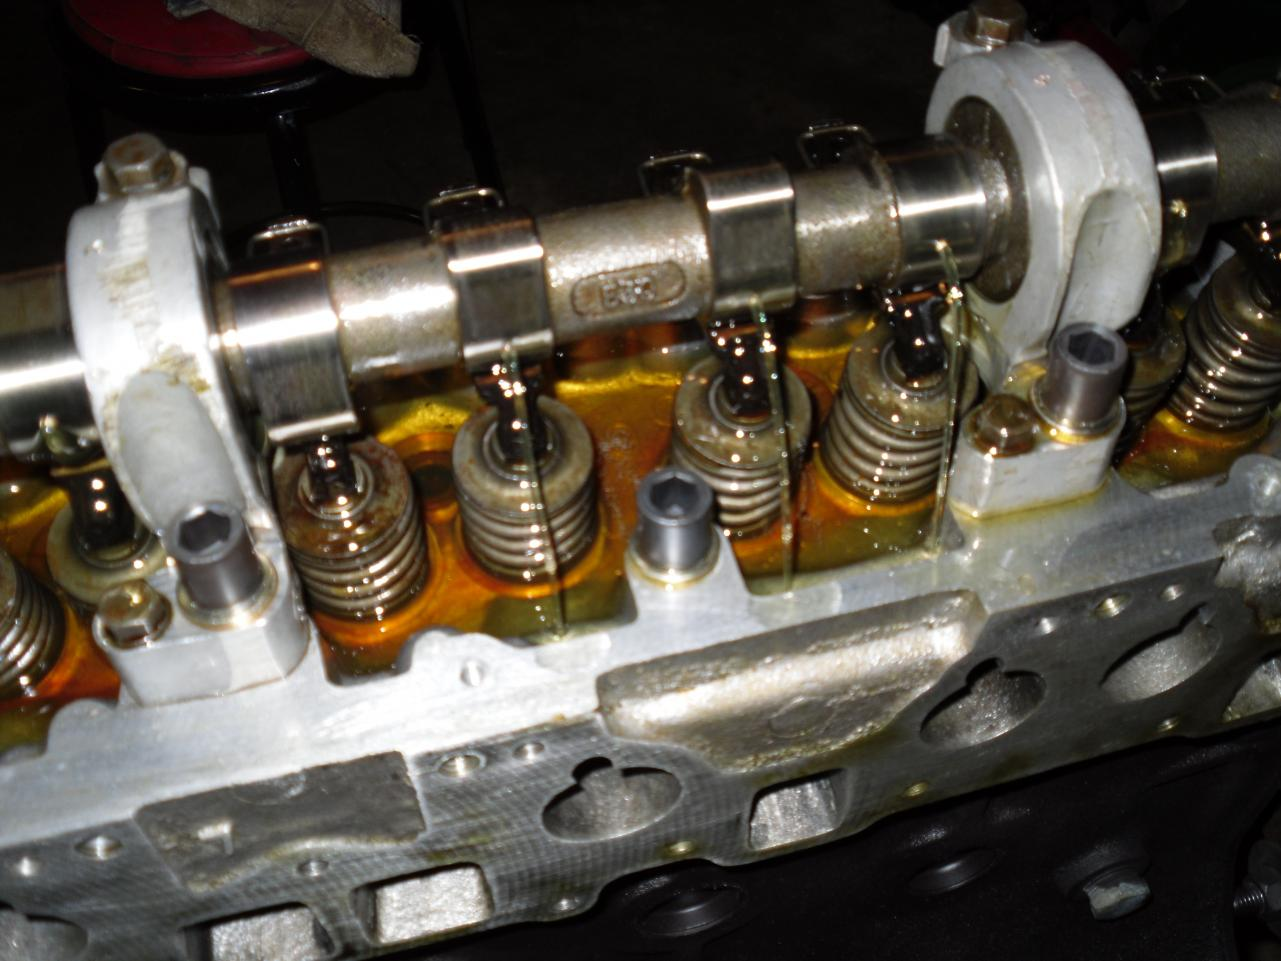
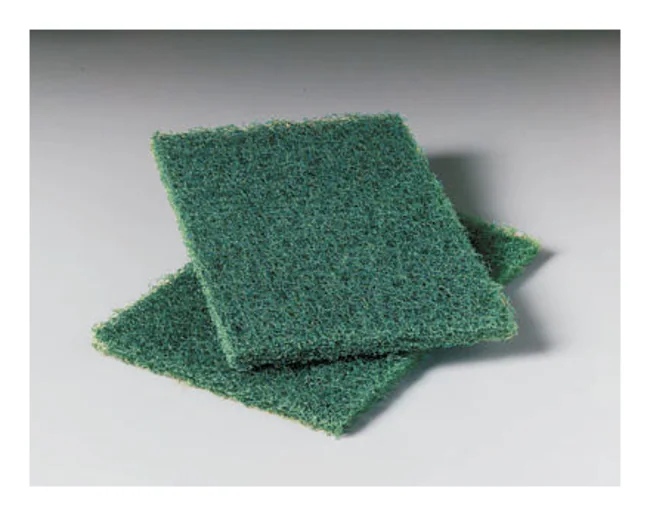
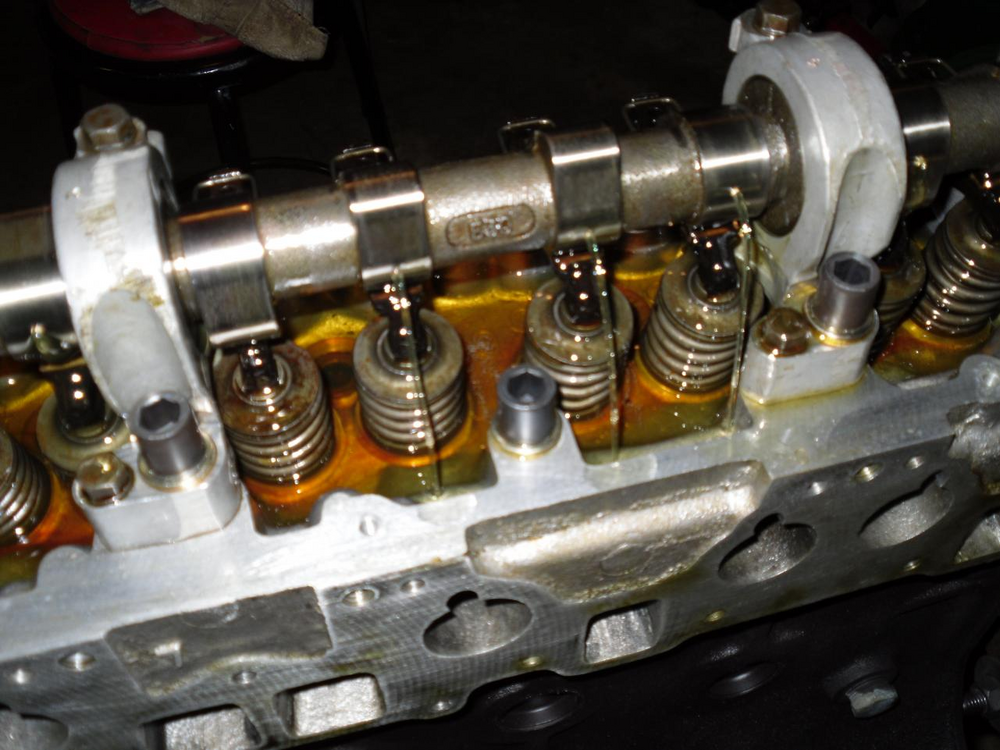
1 pointLooks like mine. I think you are okay if your fingernail doesn't catch on the marks/lines. If you are going to clean the lobes I would suggest a green Scotch-Brite pad instead of steel wool. Steel wool will kind of disintegrate after use and leave steel wool fibers. Then you need Woolite.
 1 point
 -
1 point
-
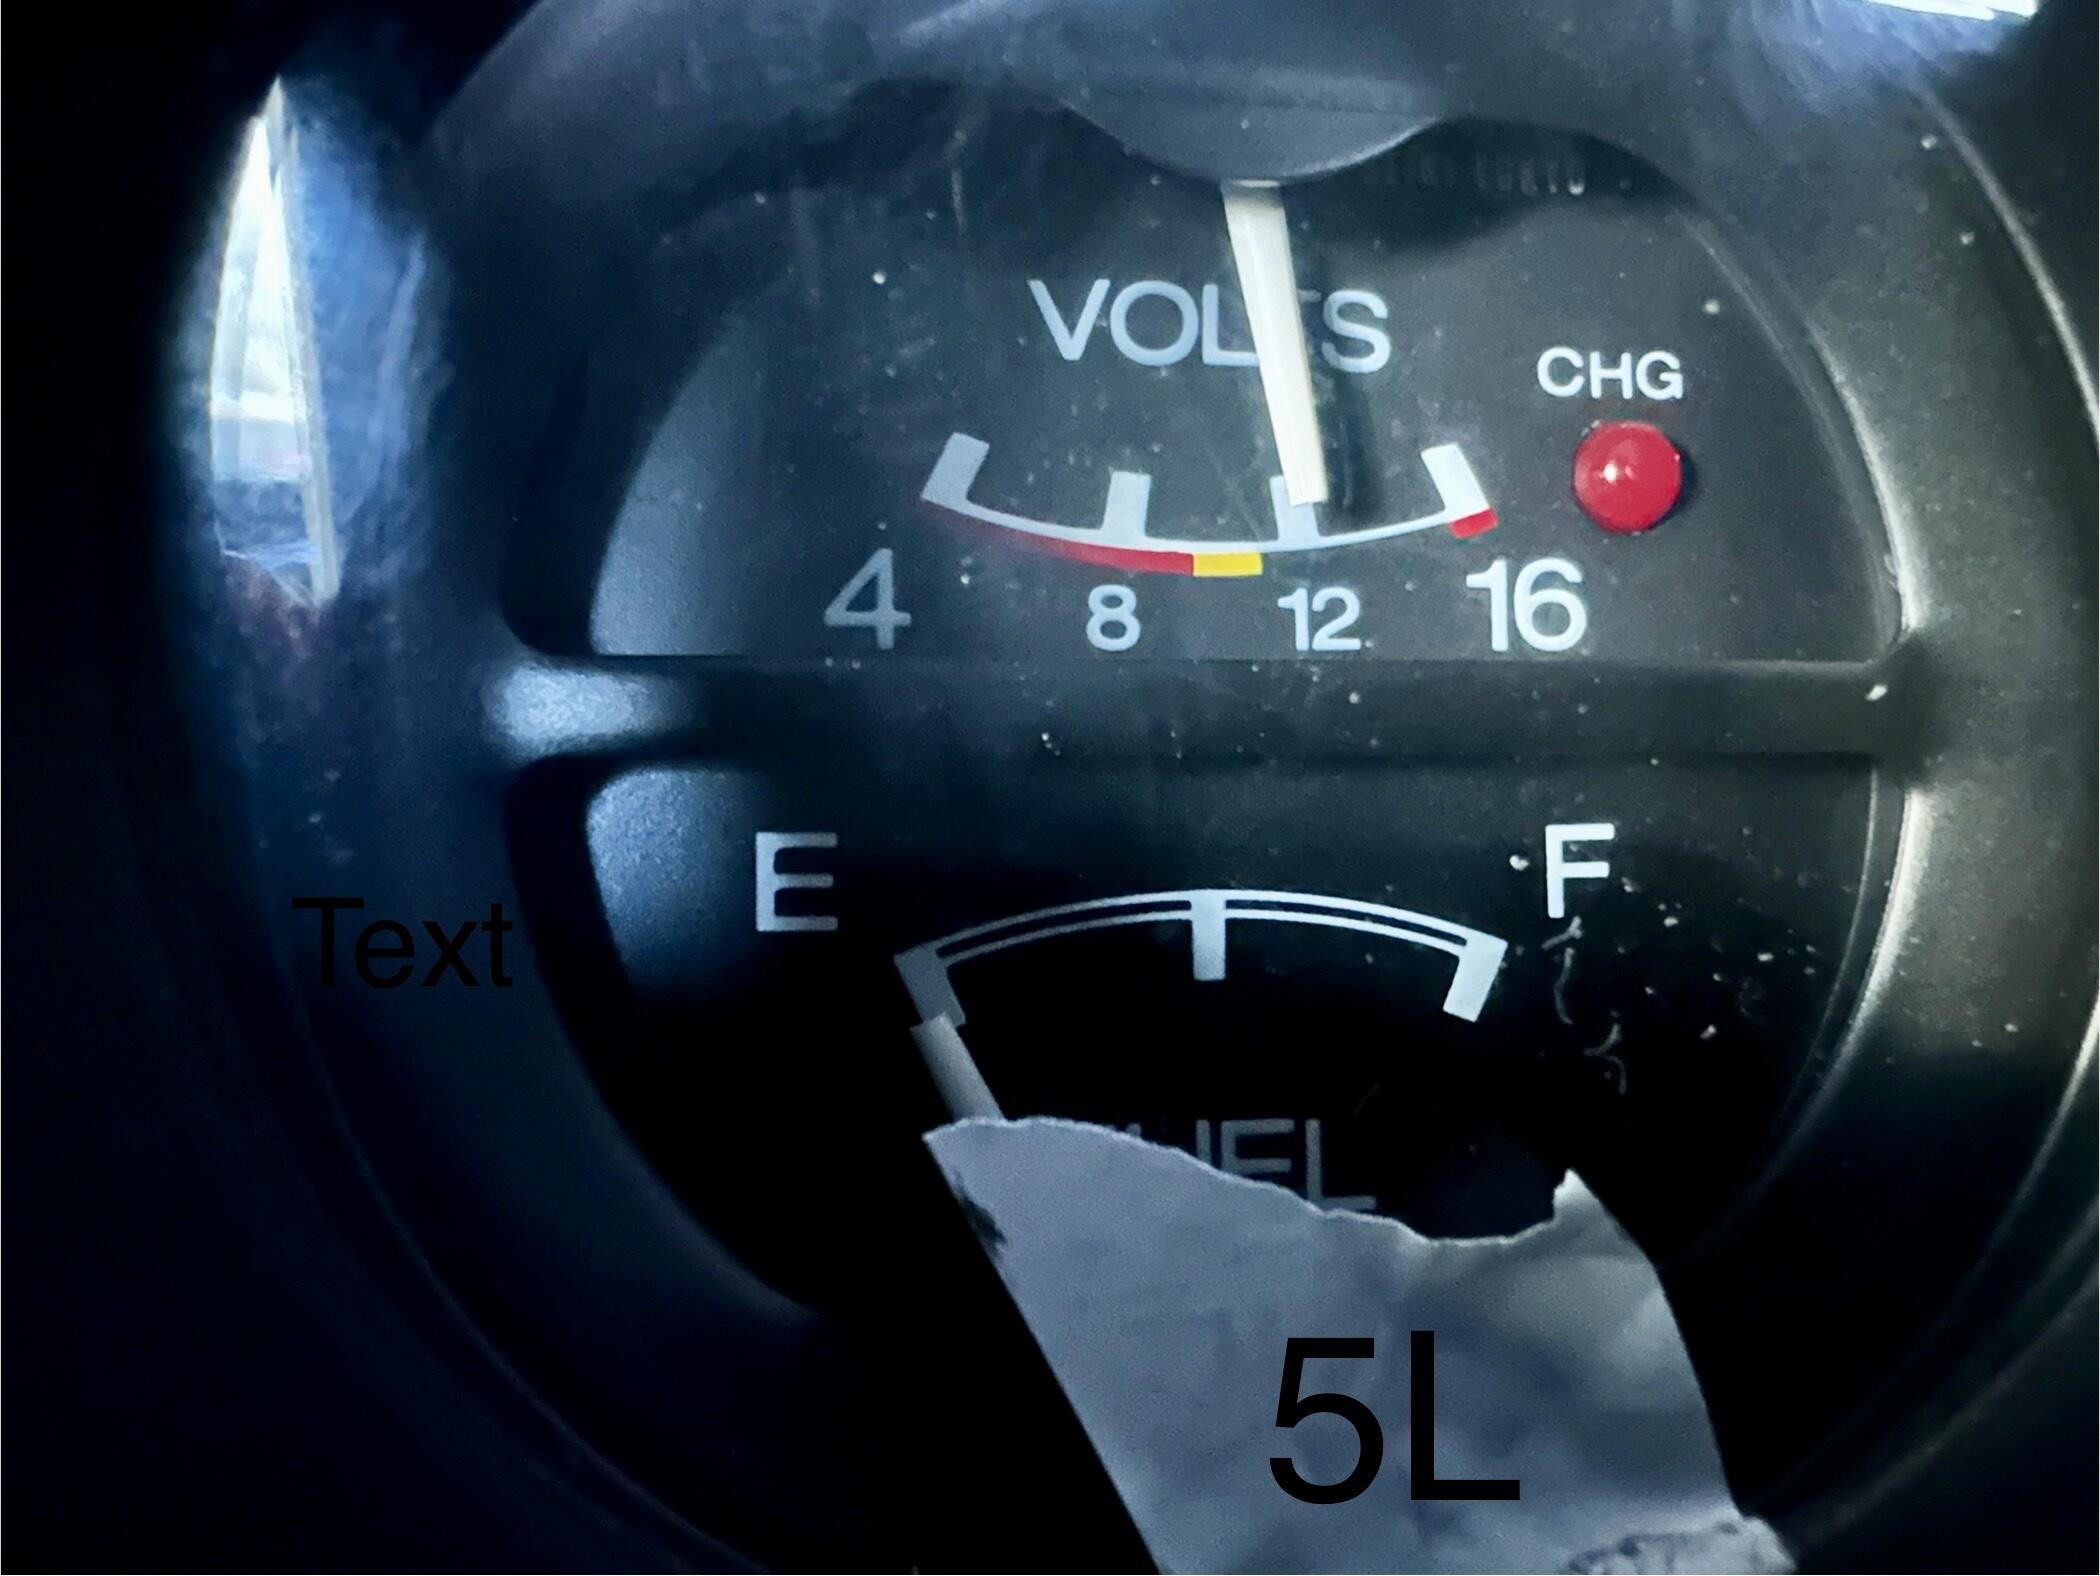
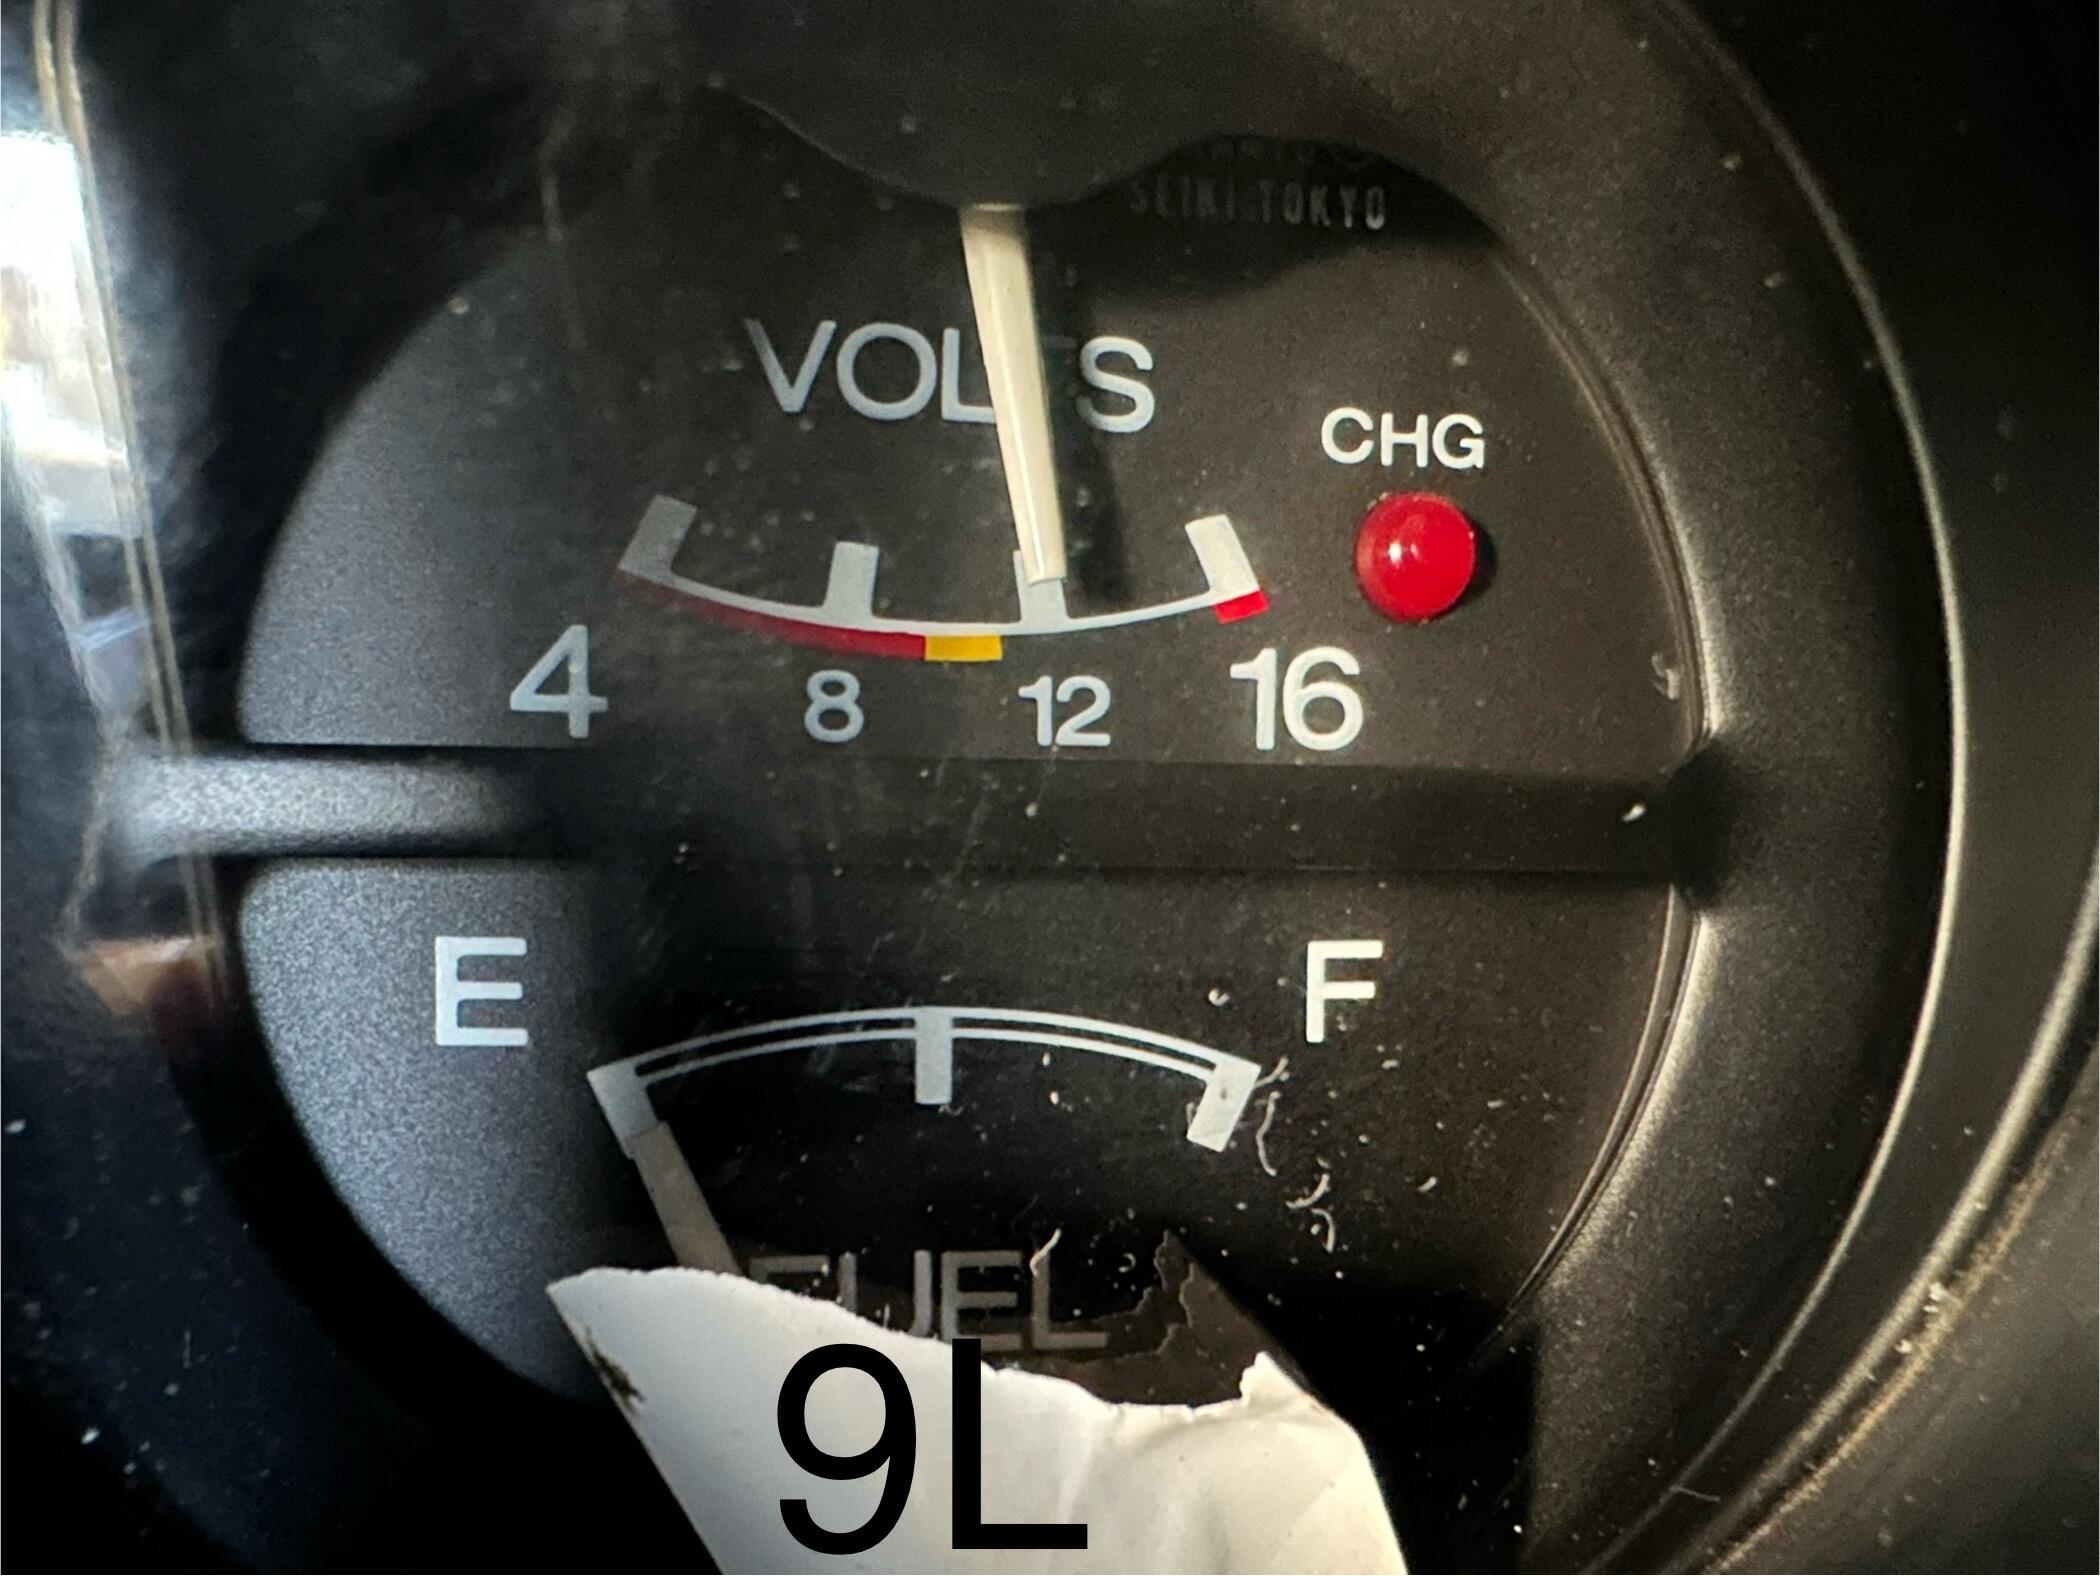
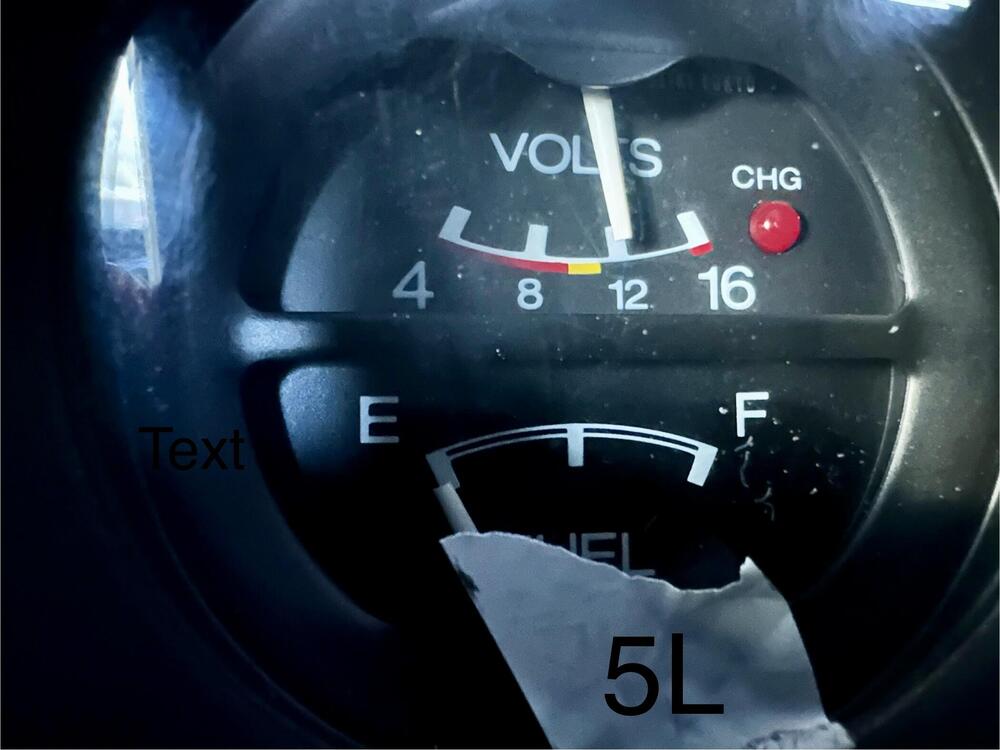
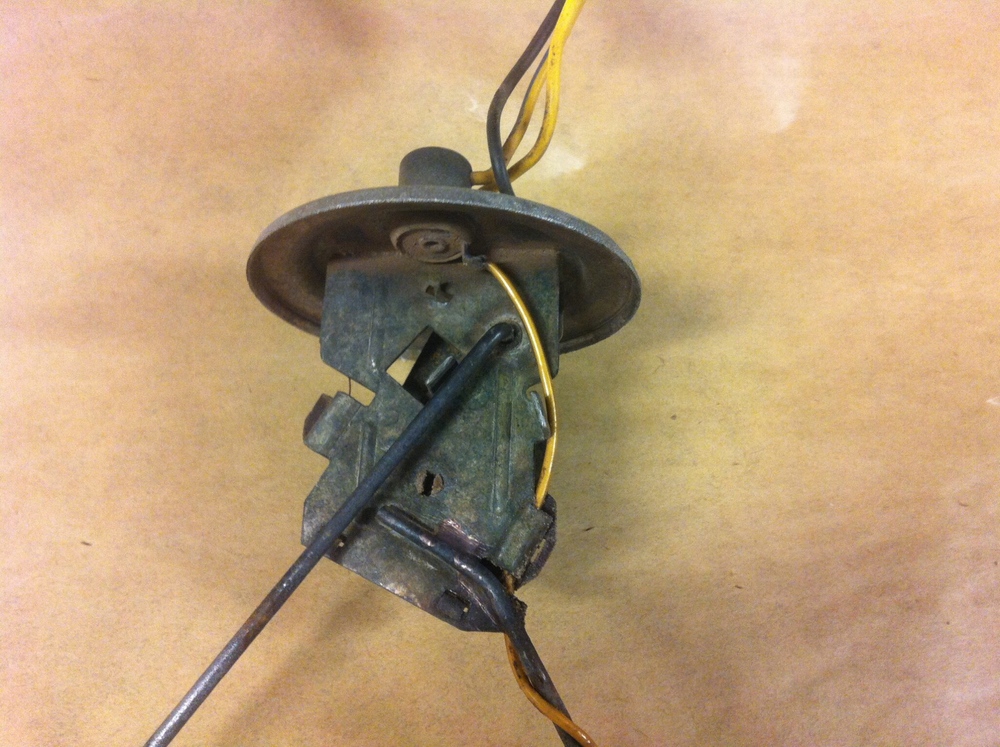
To keep adding to this excellent thread… I was playing under the car today and stink of fuel! problem: The gauge drops to below half within say 50 miles of filling up, then stays close to E forever, until all of a sudden it’s below it and you’re driving around with your sphincter pulsating, wondering if you will run out before the petrol station arrives. So I started by draining the tank completely and adjusted the sender bend for fully empty to not be way below the mark but “just” below. Then filled up and observed the needle in 5L increments. 9L is c. 2 imperial gallons (5.54L / gal). Knowing my typical 15-17mpg average (with a heavy right foot), that gives me a safety margin when on E, but an uncomfortable one that I won’t be visiting unless it’s an emergency - as it would suck all the potential crud at the bottom of the tank. The edge of the white tape aligns with needle position at totally empty. I really wanted to know the 15L position as that is roughly 1/4 of a tank and I tend to fill up before that. But I now know where a true 1/4 tank is. Finally at 27L with all the fuel I had to hand - I believe a full tank for a European 260z is 65L (tested by shoe horning 63litres at the pump) so another 5L and it’ll be roughly at half a tank. This is progress as I will now trust the gauge more. With another 5litres, the needle will be pretty close to half. But I suspect it will be shy of it. I managed to semi-slice a decent chunk of flesh off my finger using a wheel chock, but currently held on with tissue and electric tape - I’ll spare you the graphic photos! That ended play for today and I’m currently waiting for my wife to get home so that I may go to A&E to have it checked out! So I didn’t get to go buy that extra 5L in the can to try (maybe I’ll get it on the way back from hospital 😛 )! I will report back when at 32 litres. What I’m wondering though is, has anyone used the trim adjustments on the back of the fuel gauge to fine tune rather than constantly pulling and guess bending the sender arm?


 1 point
 -
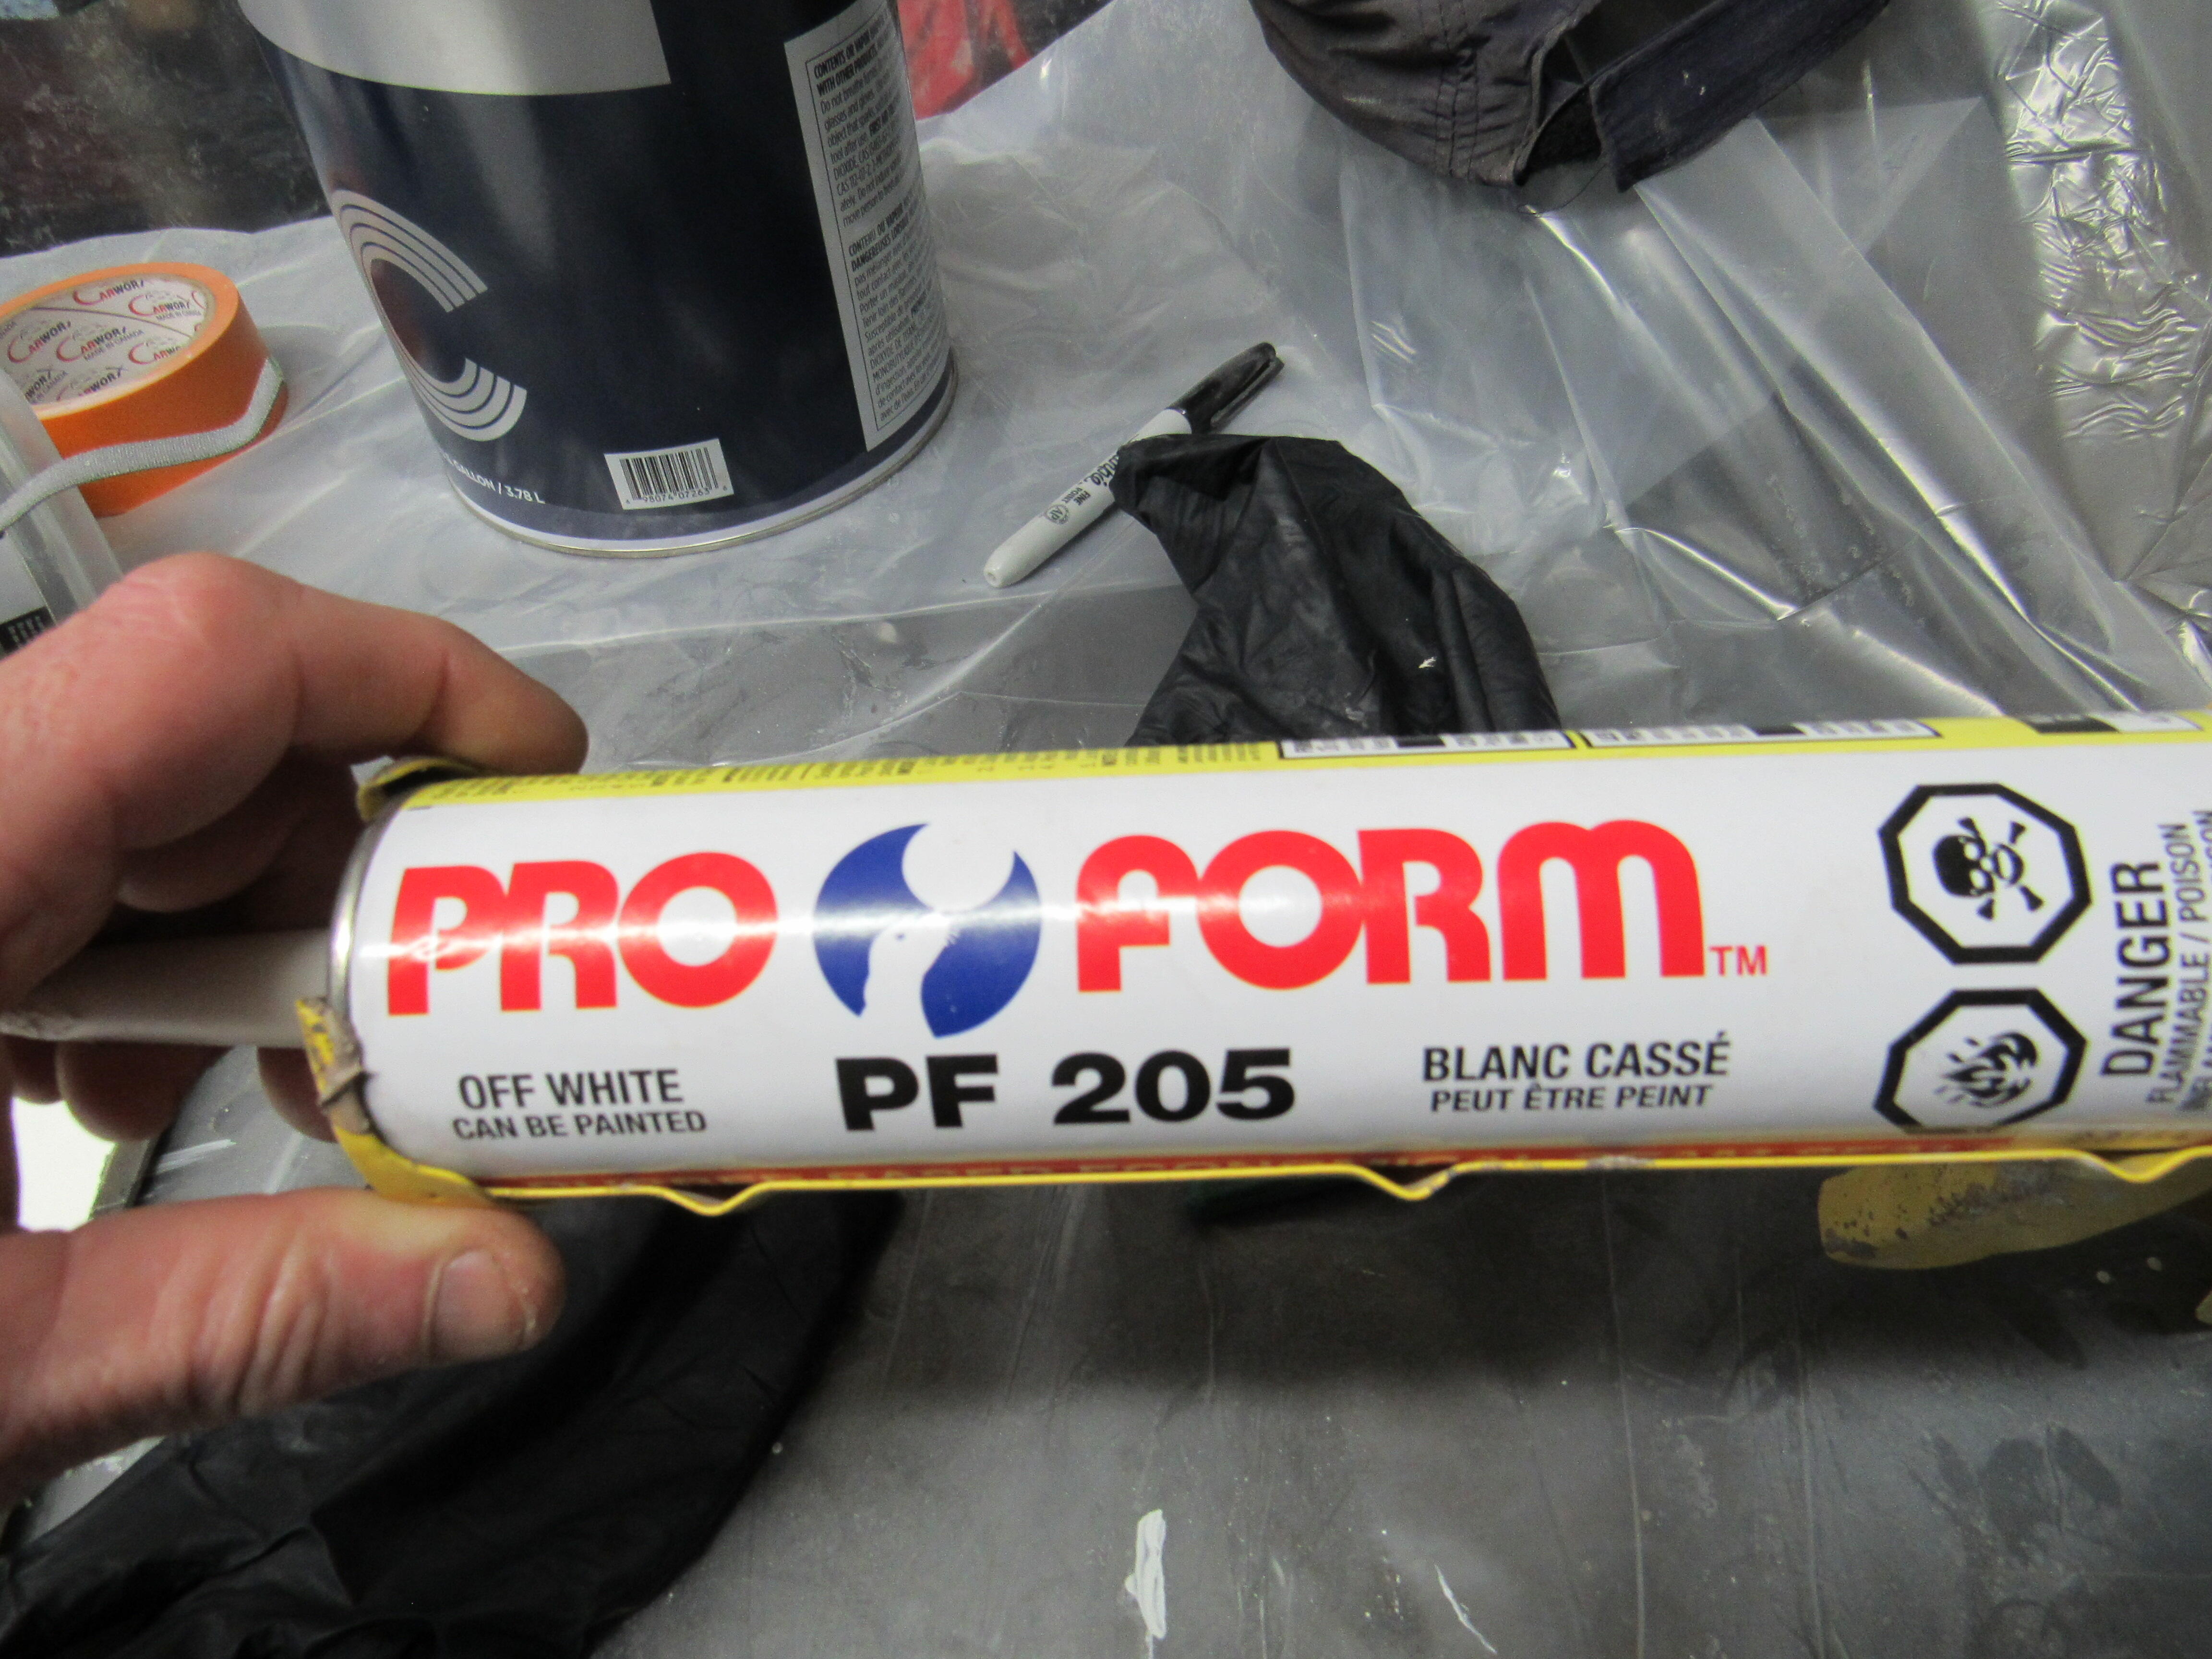
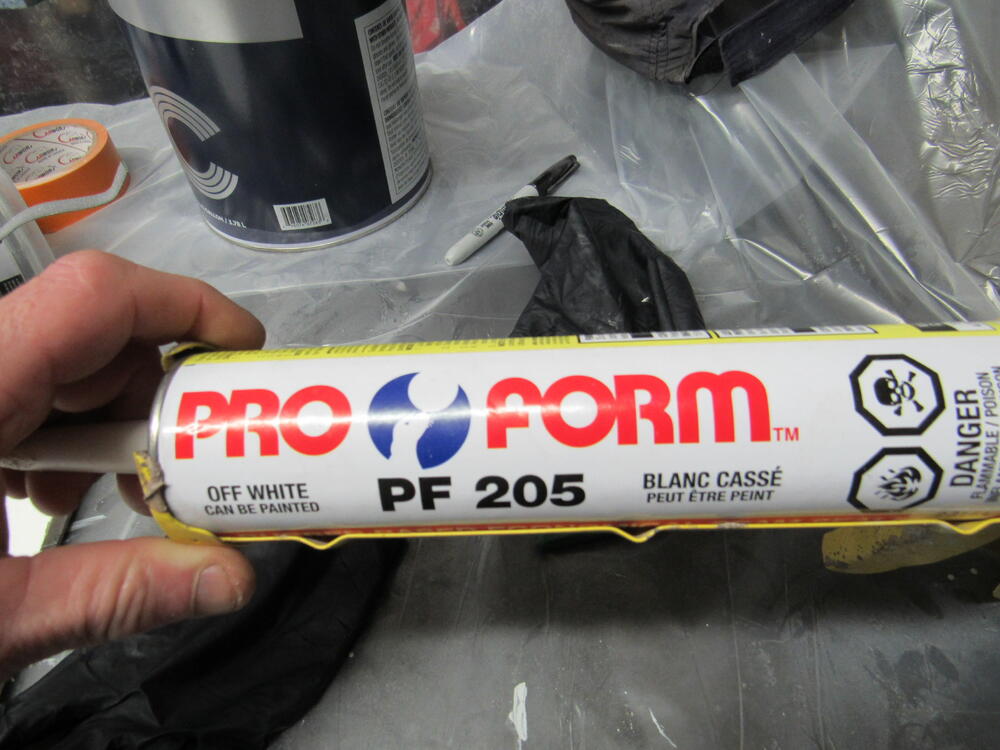
1 pointI've been using this stuff for many years, never had a problem. Stays semi soft, paint and undercoat stick to it well. There are some pretty fancy/expensive seam sealers these days and I can see using them on new cars that will be driven daily in all kinds of weather. With the way these cars will be driven, wash water and occasional rain is all they will encounter so a simple automotive caulking is all that is required IMHO. Just a word of caution, these products are a lot more toxic than you would think, if applying in an enclosed space a good respirator with cartridges for organic compounds is needed.
 1 point
 -
1 pointA "duh statement" but don't forget a hose pipe in the radiator with the drain valve open. Tom monroe's book.1 point
-
1 point
-
Like a Friend once said: Yes, if you want it to be done right, you'll have to do it yourself! About the shims i would buy some small ones (Thin) .. you can easely make 10 thicknesses with 4 different shims! (In fact 15..) (Last year i bought a diff and it's completely apart with new bearings and shim's so i watch and try to learn something here! Normally i don't take apart gearboxes or diffs..)1 point
-
1 pointTurn it over without the ignition on.. until you have oil on the cam. (You can also take some oil out the engine and put it all over the cam.. but that's more work) then.. what Grannyknot said. 👍1 point
-
1 point
-
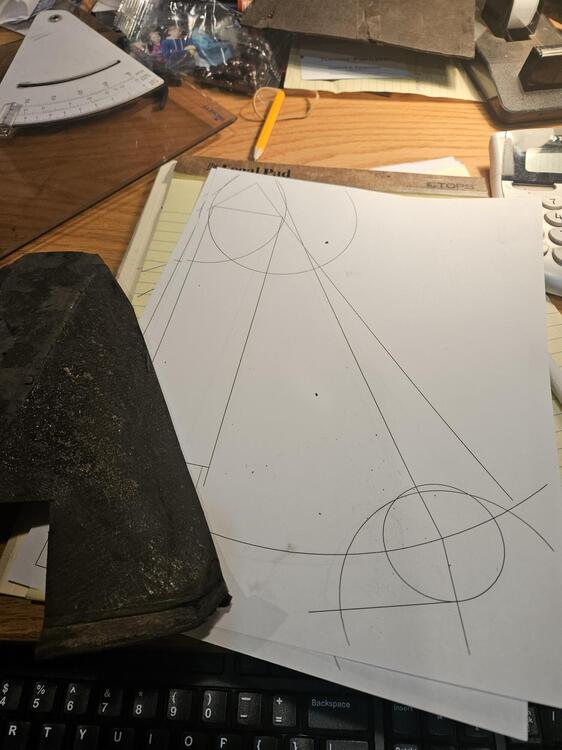
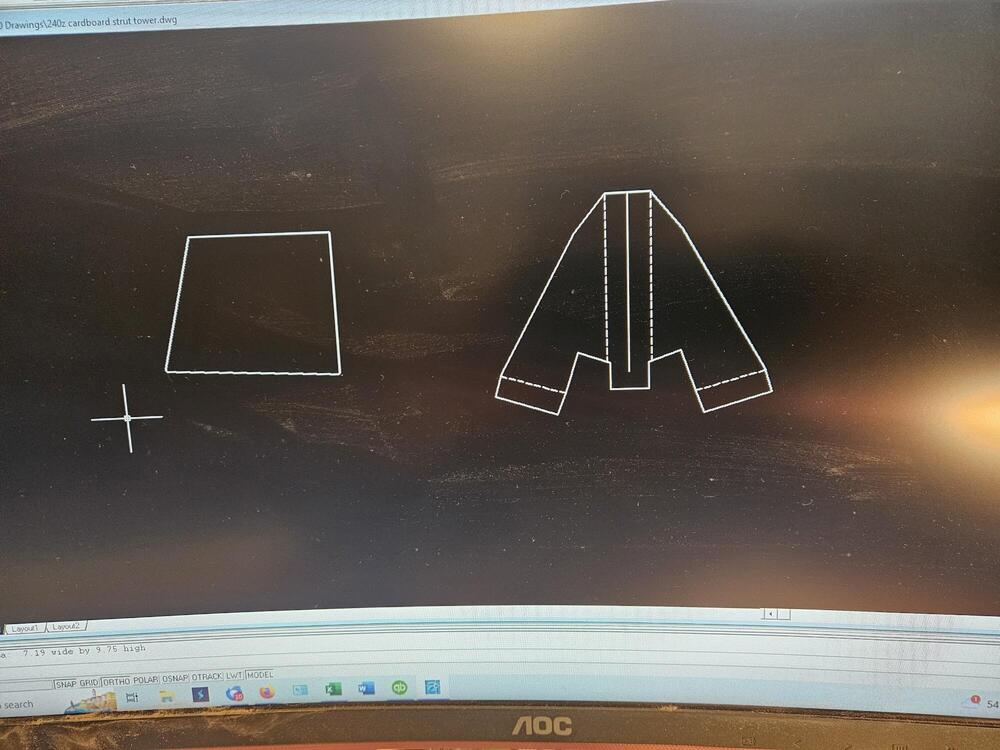
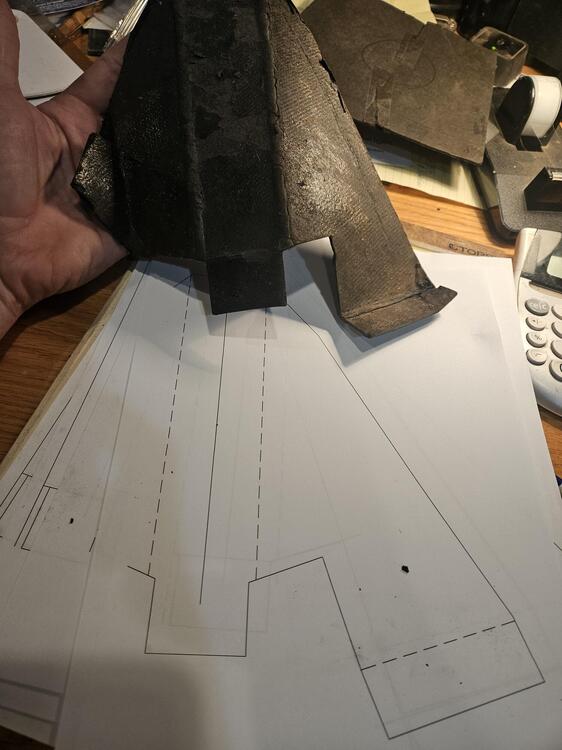
1 pointDuplicating the cardboard at the rear strut towers Posted into the resource section
 1 point
 -
1 pointSteve types faster than me so this is another option... I would think you could pull the coil wire off, remove the spark plugs and get someone to crank it over while you observe the cam's oiling??? I used a drill on low speed with a rod down the distributor's hole when I put an N42 head that was converted over to a oilier cam on my 2.8 motor after a rebuild while it was on an engine stand.
 1 point
 -
1 pointActually, if you take the car out of gear (assuming it's a manual), connect a remote starter with decent sized wires (not the cheap Harbor Freight version) to the solenoid. (Here's an example of one:https://www.amazon.com/INNOVA-3630-Remote-Starter-Switch/dp/B000EVU8MK.) Take off the valve cover and crank the engine with the remote starter while looking to see if the oil is coming out of the holes. If there isn't enough oil coming through, you'll be able to tell by the grooves in the cam lobes. 😬1 point
-
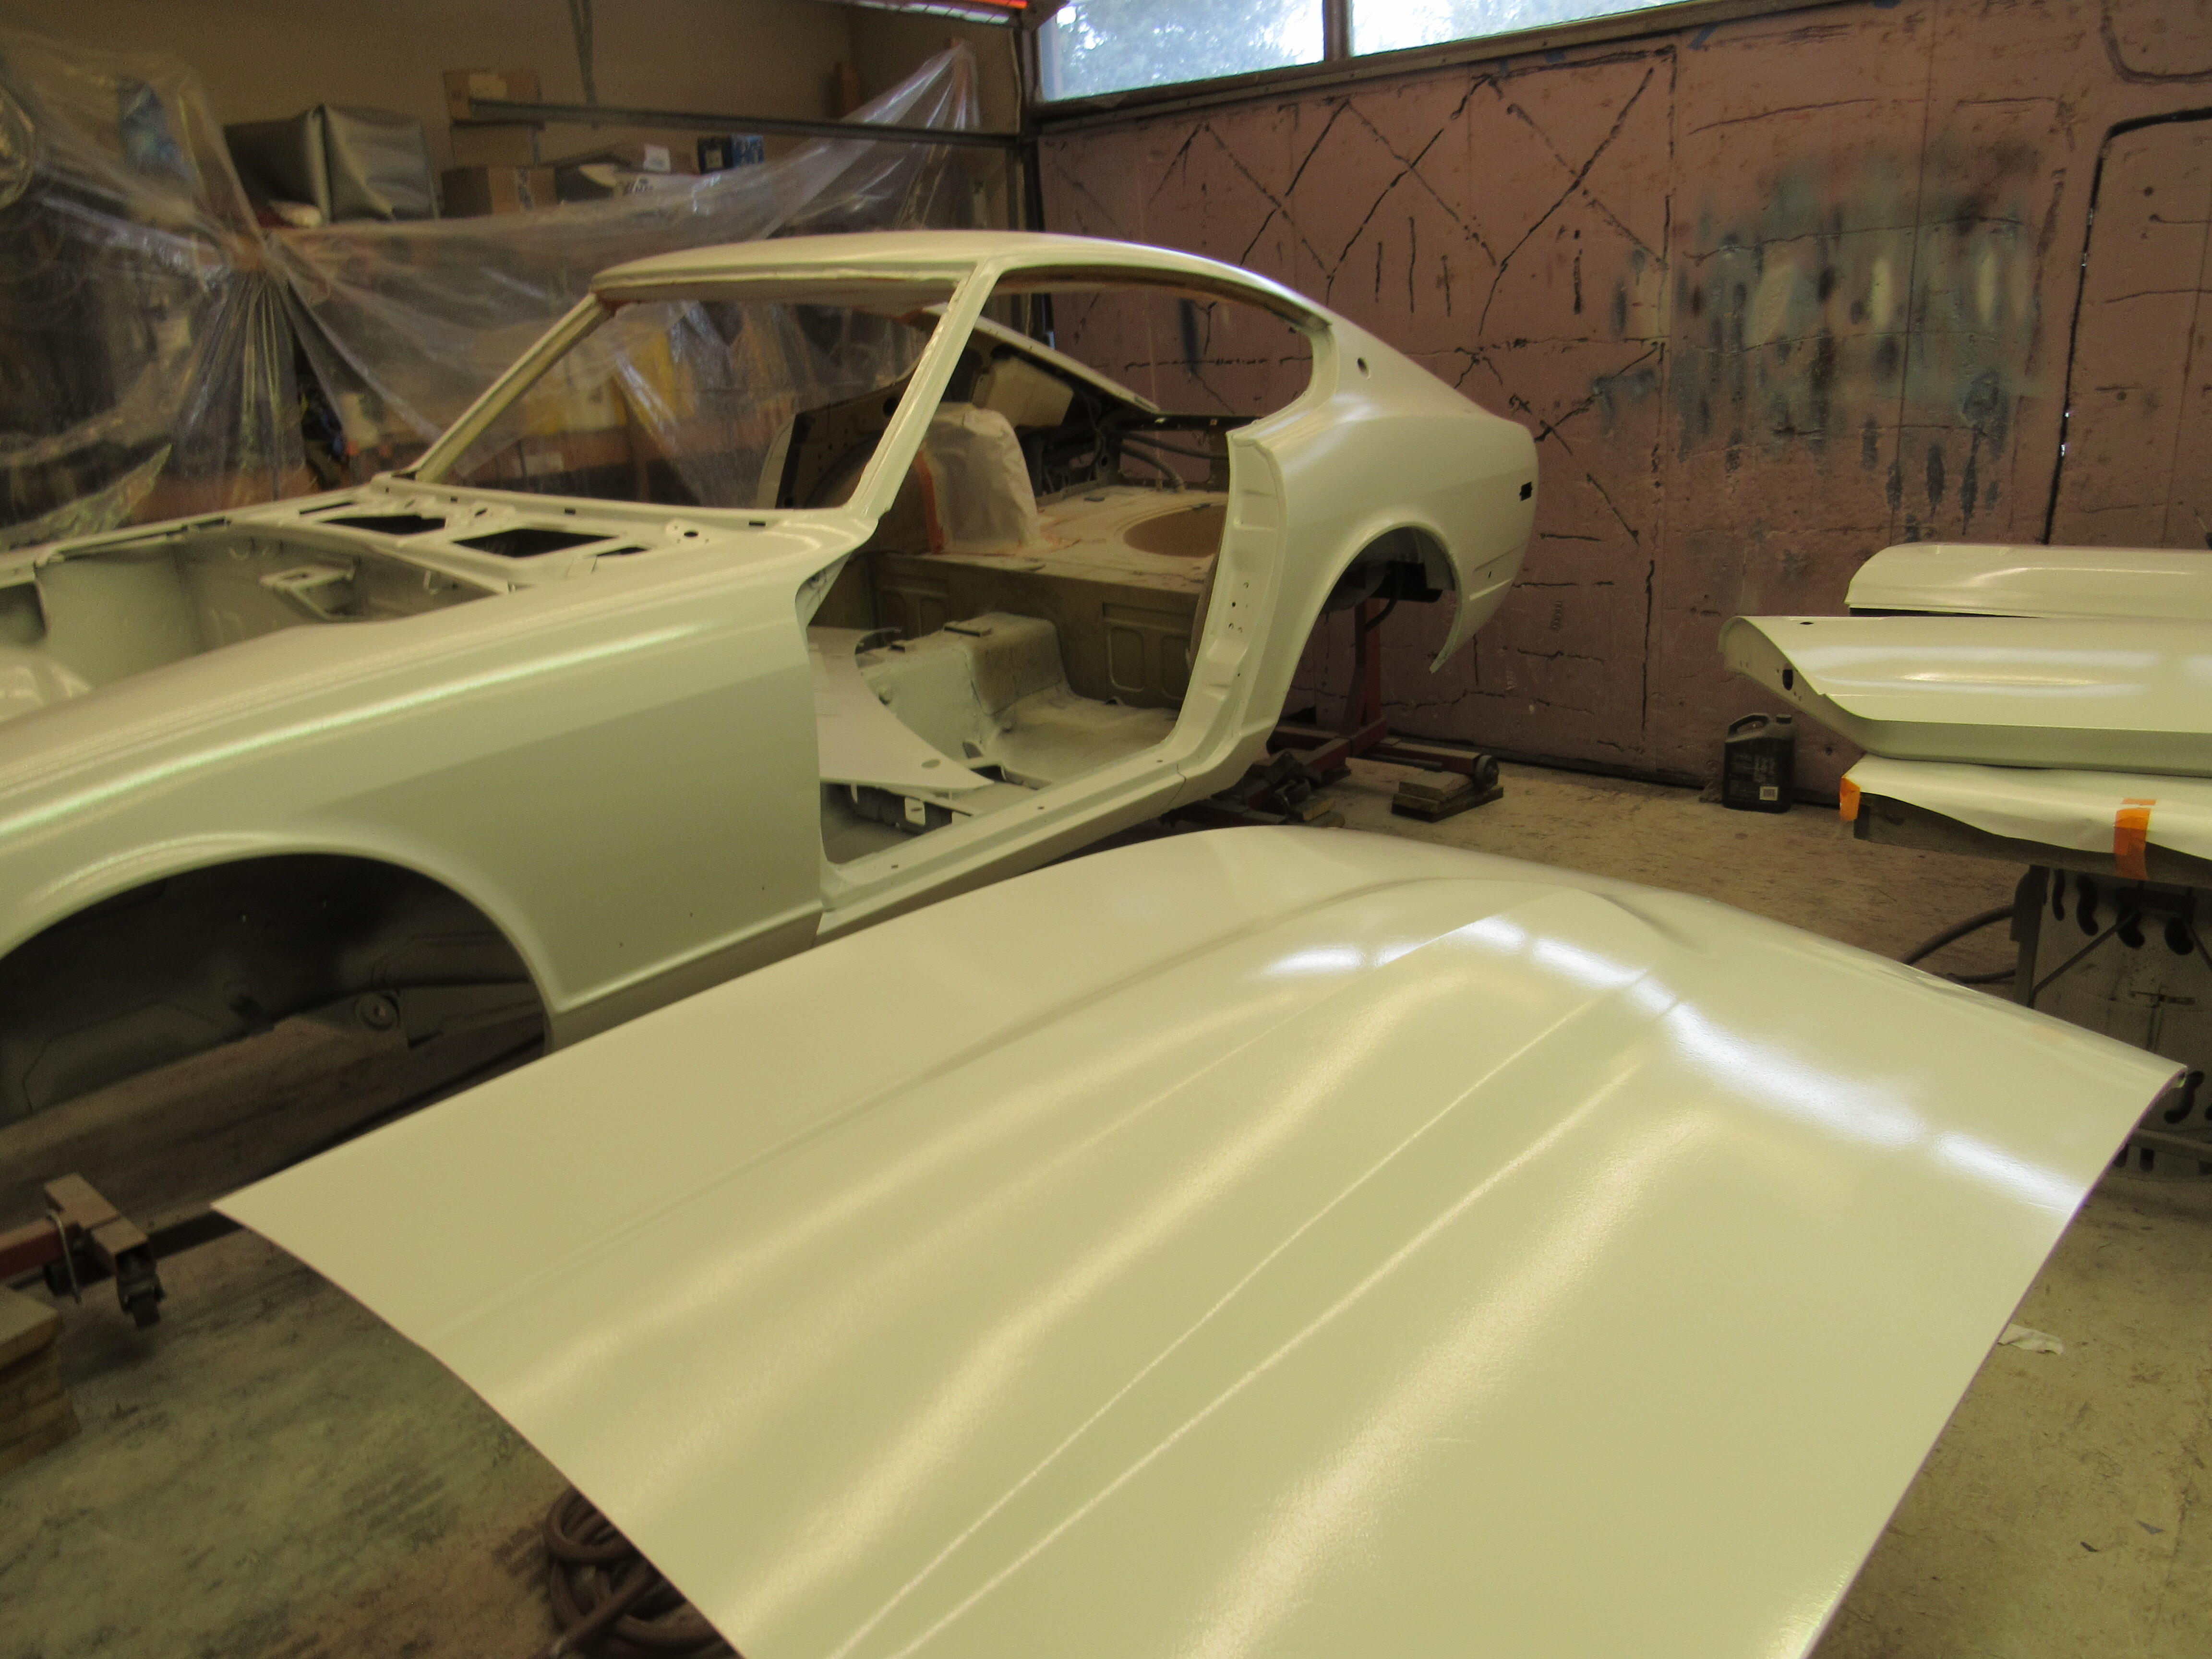
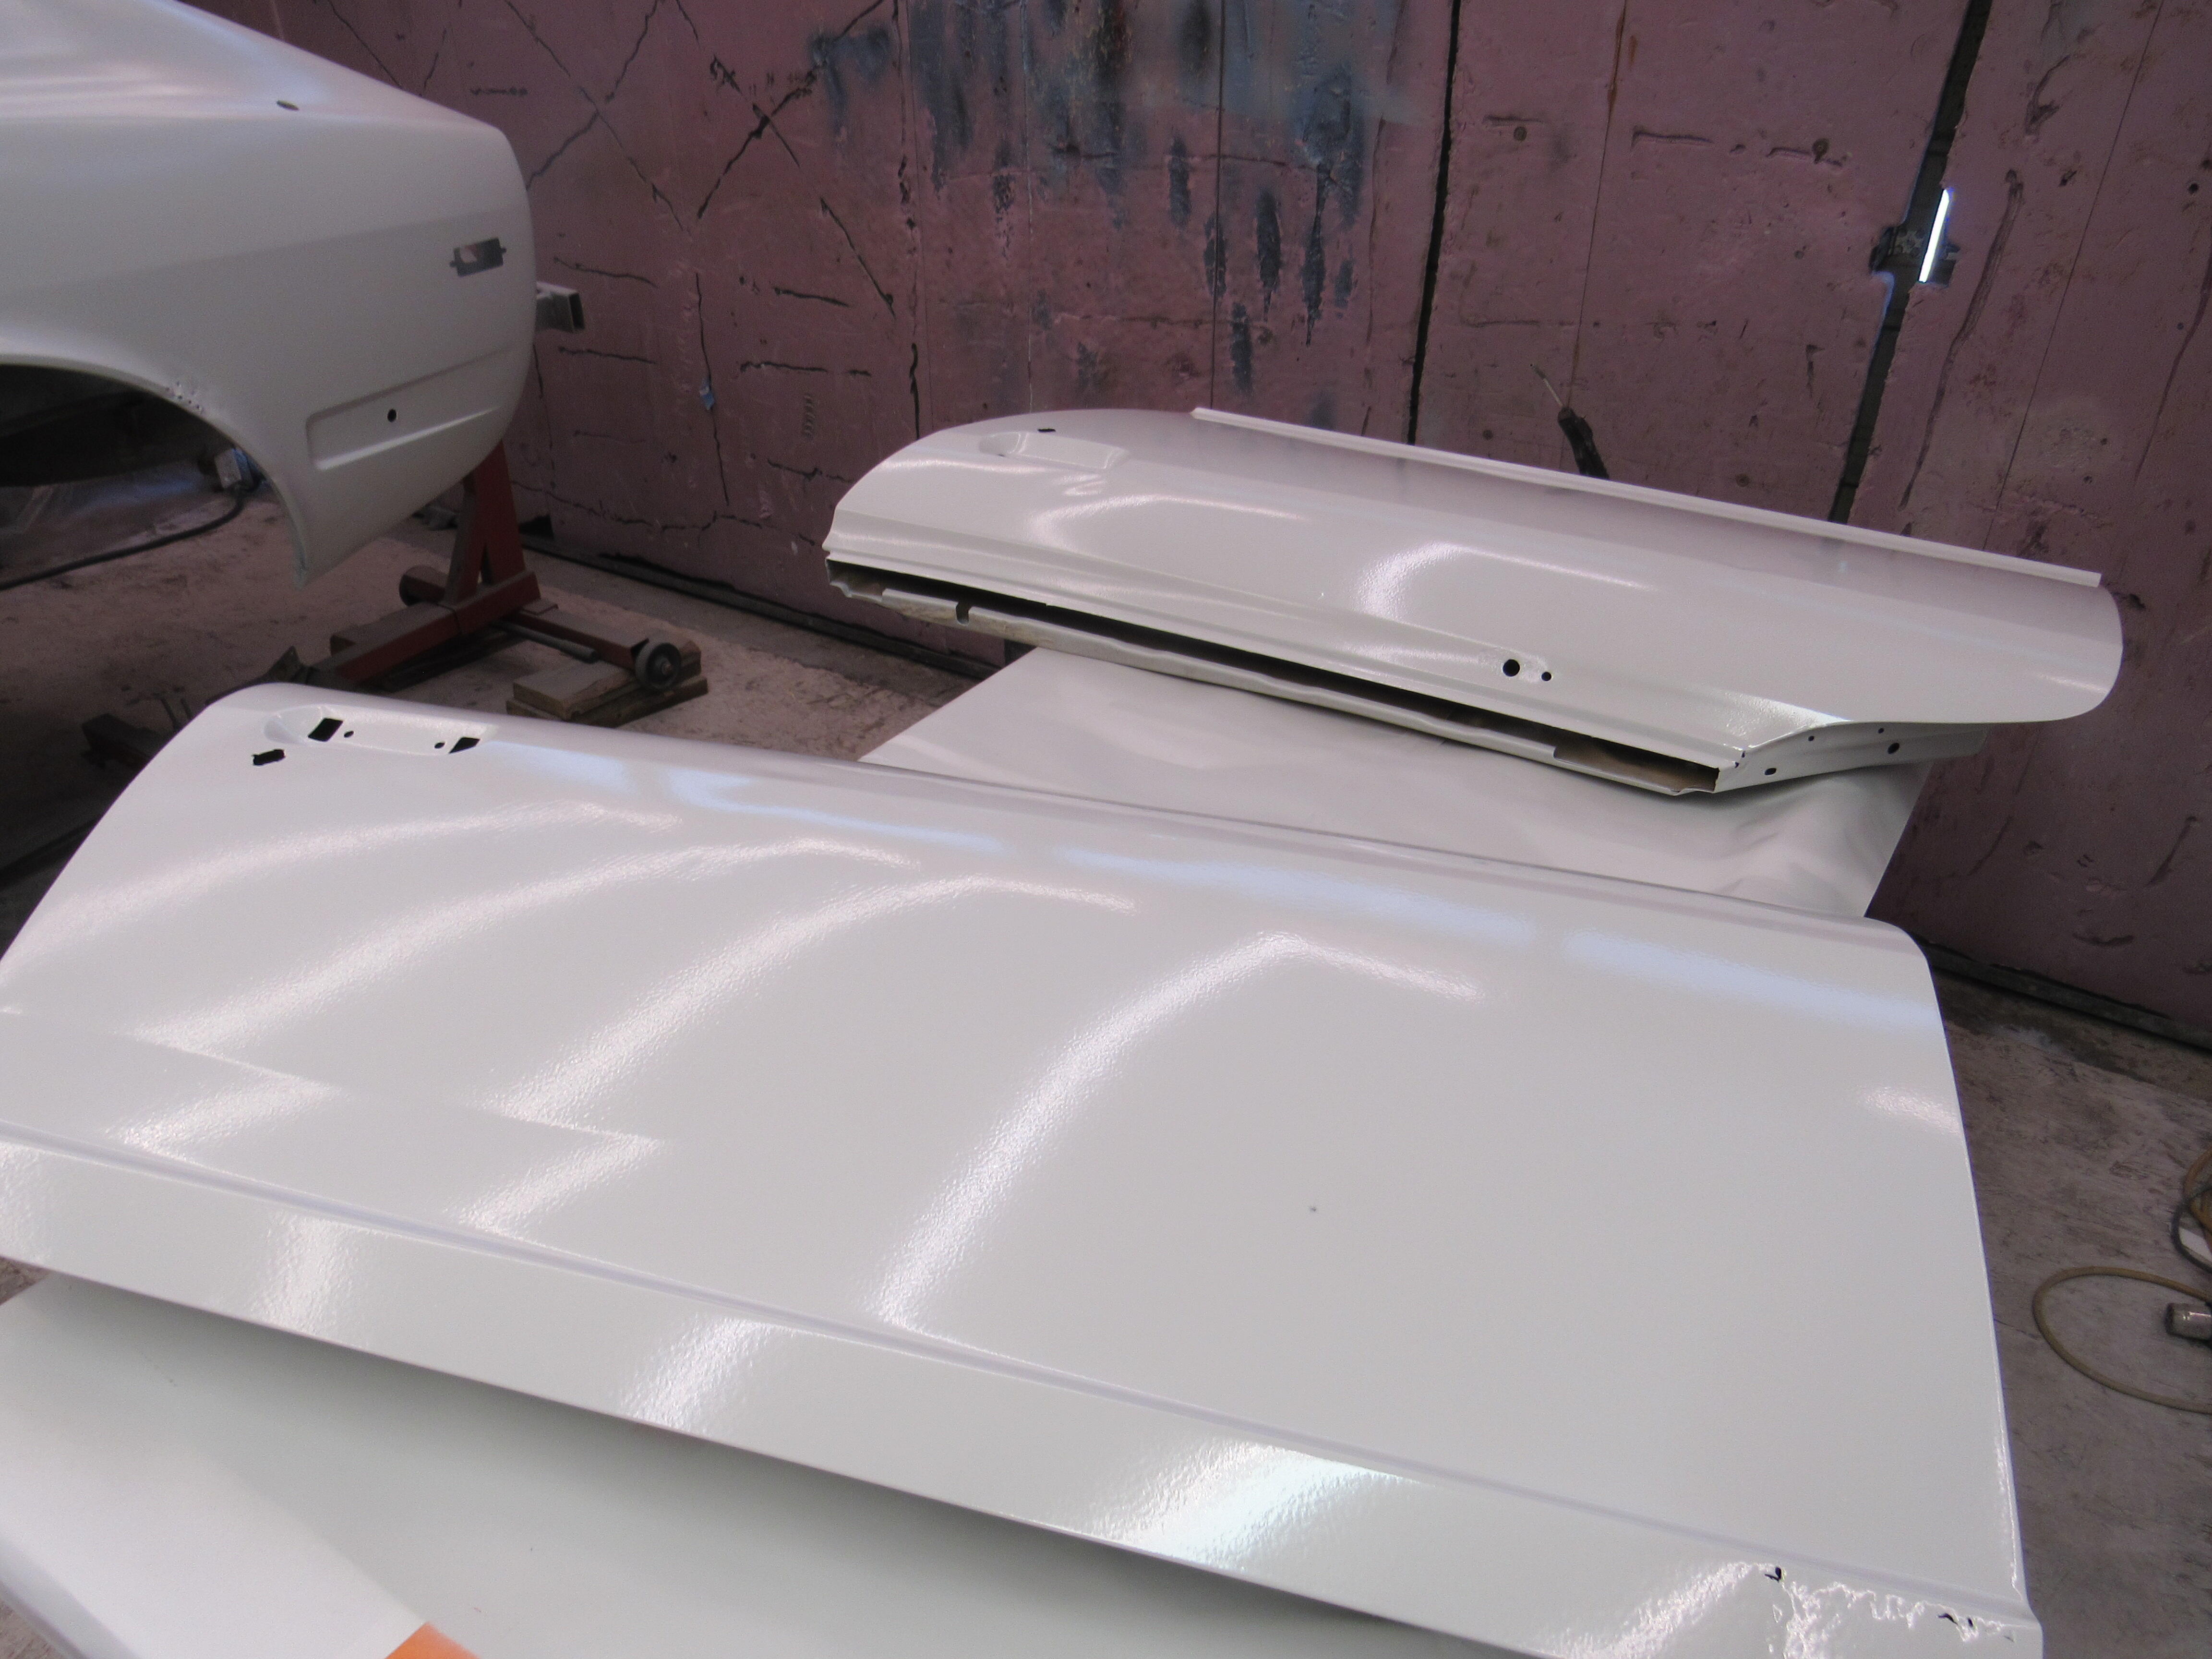
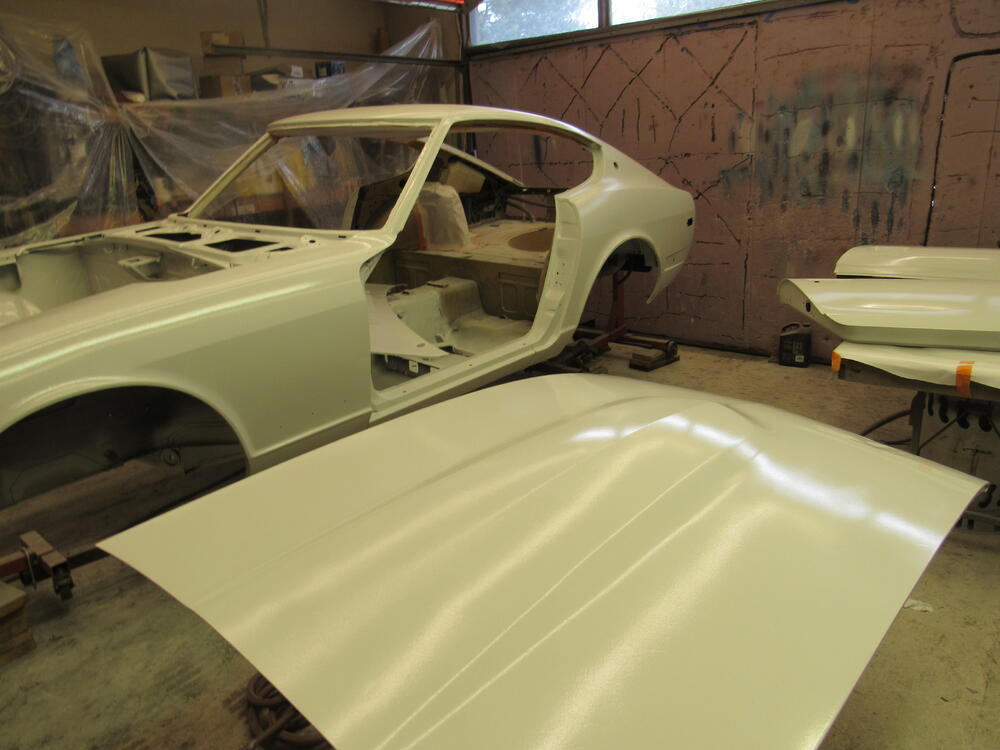
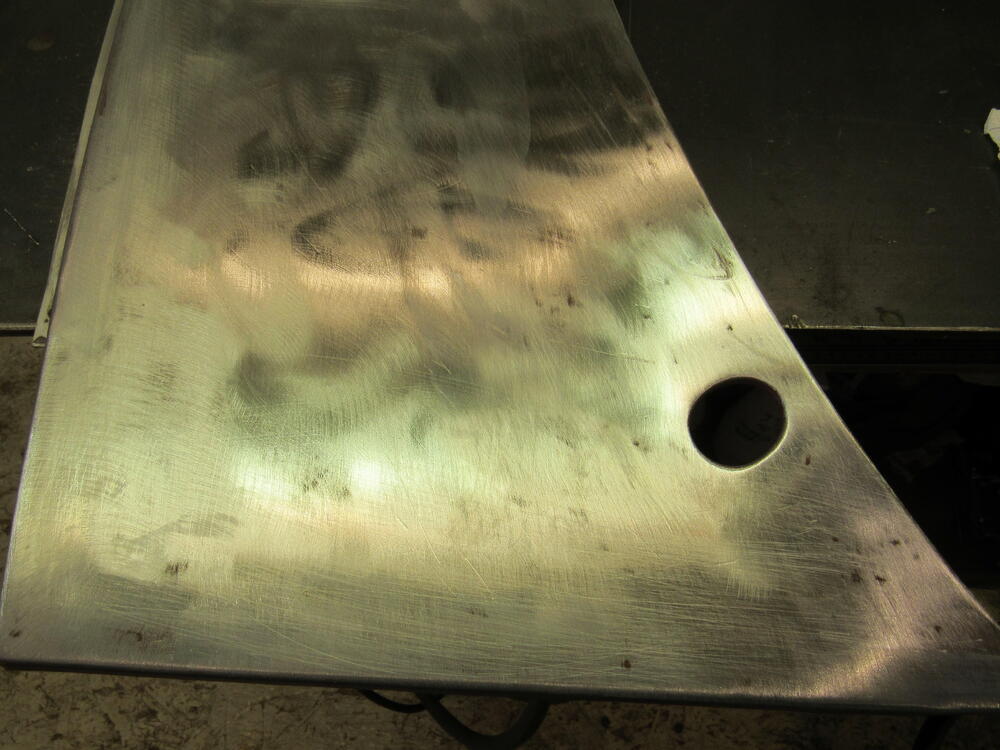
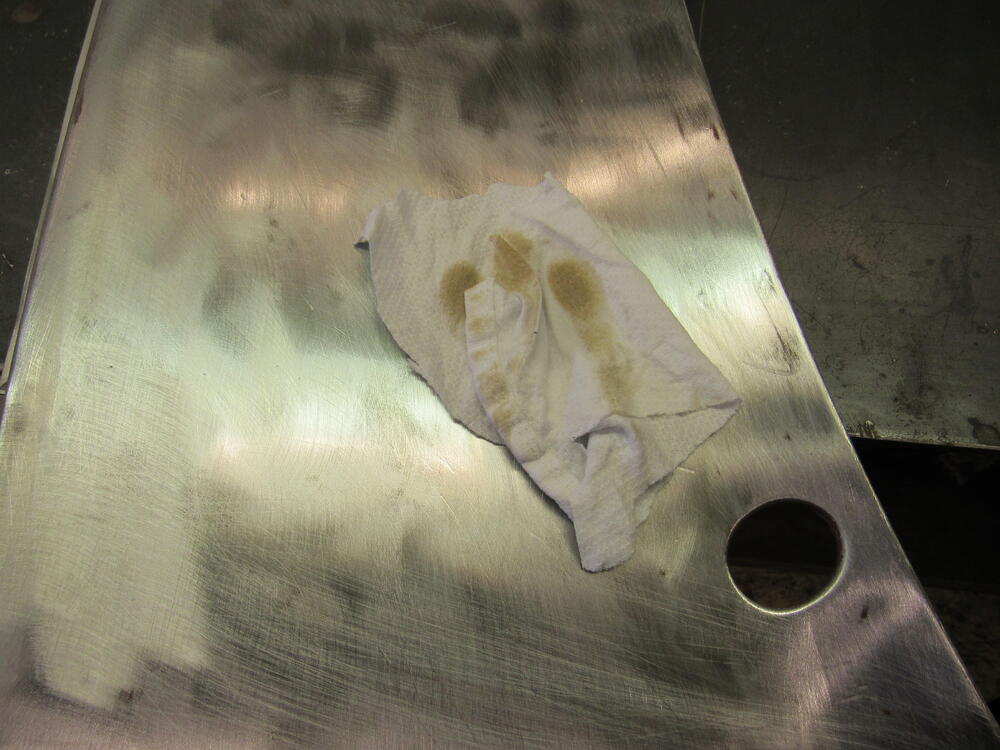
1 pointI got 2 coats of epoxy primer on everything this morning, a good feeling having all that bare metal sealed up. I got the shop temp up 28 degrees C using both the infra red heaters and the big propane burner, and that was the perfect temperature to wake up all the mosquitoes that were hiding. Lots of bugs to sand out of the primer now. I rigged up a new exhaust fan so no more mist in the air, so effective that by the last shoot I decided it was safe enough to have the over head infra red propane heater on. No boom. I have mentioned this before on other builds but it still surprises me, this panel was freshly sanded, washed with a fine steel brush and Acetone, wiped clean with Acetone until a white cloth came away clean, then repeated with Methyl hydrate until the white cloth came away clean. Then I washed it again with an industrial Lye cleaner and look at all the dirt that was still on the metal.


 1 point
 -
1 pointI used them in lock down to clamp onto the fuel tank - they are great quality!1 point
-
Hmmm. I'd be reluctant to use that Amazon shim material in this application. I think I'd want a hardened washer in that application. How high do you torque the nut on the end of the pinion gear? I'm worried that you would ooze a low carbon shim at high torque. Is the original spacer shim hardened? Does a file cut it easy, or just skate off the surface? But you could certainly use that shim material as proof of concept. You could cut that thin stuff (.003) with scissors for the OD. Easy peasy. The ID you might be able to hack out with a razor knife. I'm thinking that the profile doesn't have to be perfect, just fit over the pinion even if the ID is a little rough. Cut the shim, put it together and check the backlash. That will at least confirm for sure what thickness shim you really need.1 point
-
I think you have done a remarkable job so far. I wish I had the expertise or could point you to someone that who does. Best of luck. There is an answer out there.1 point
-
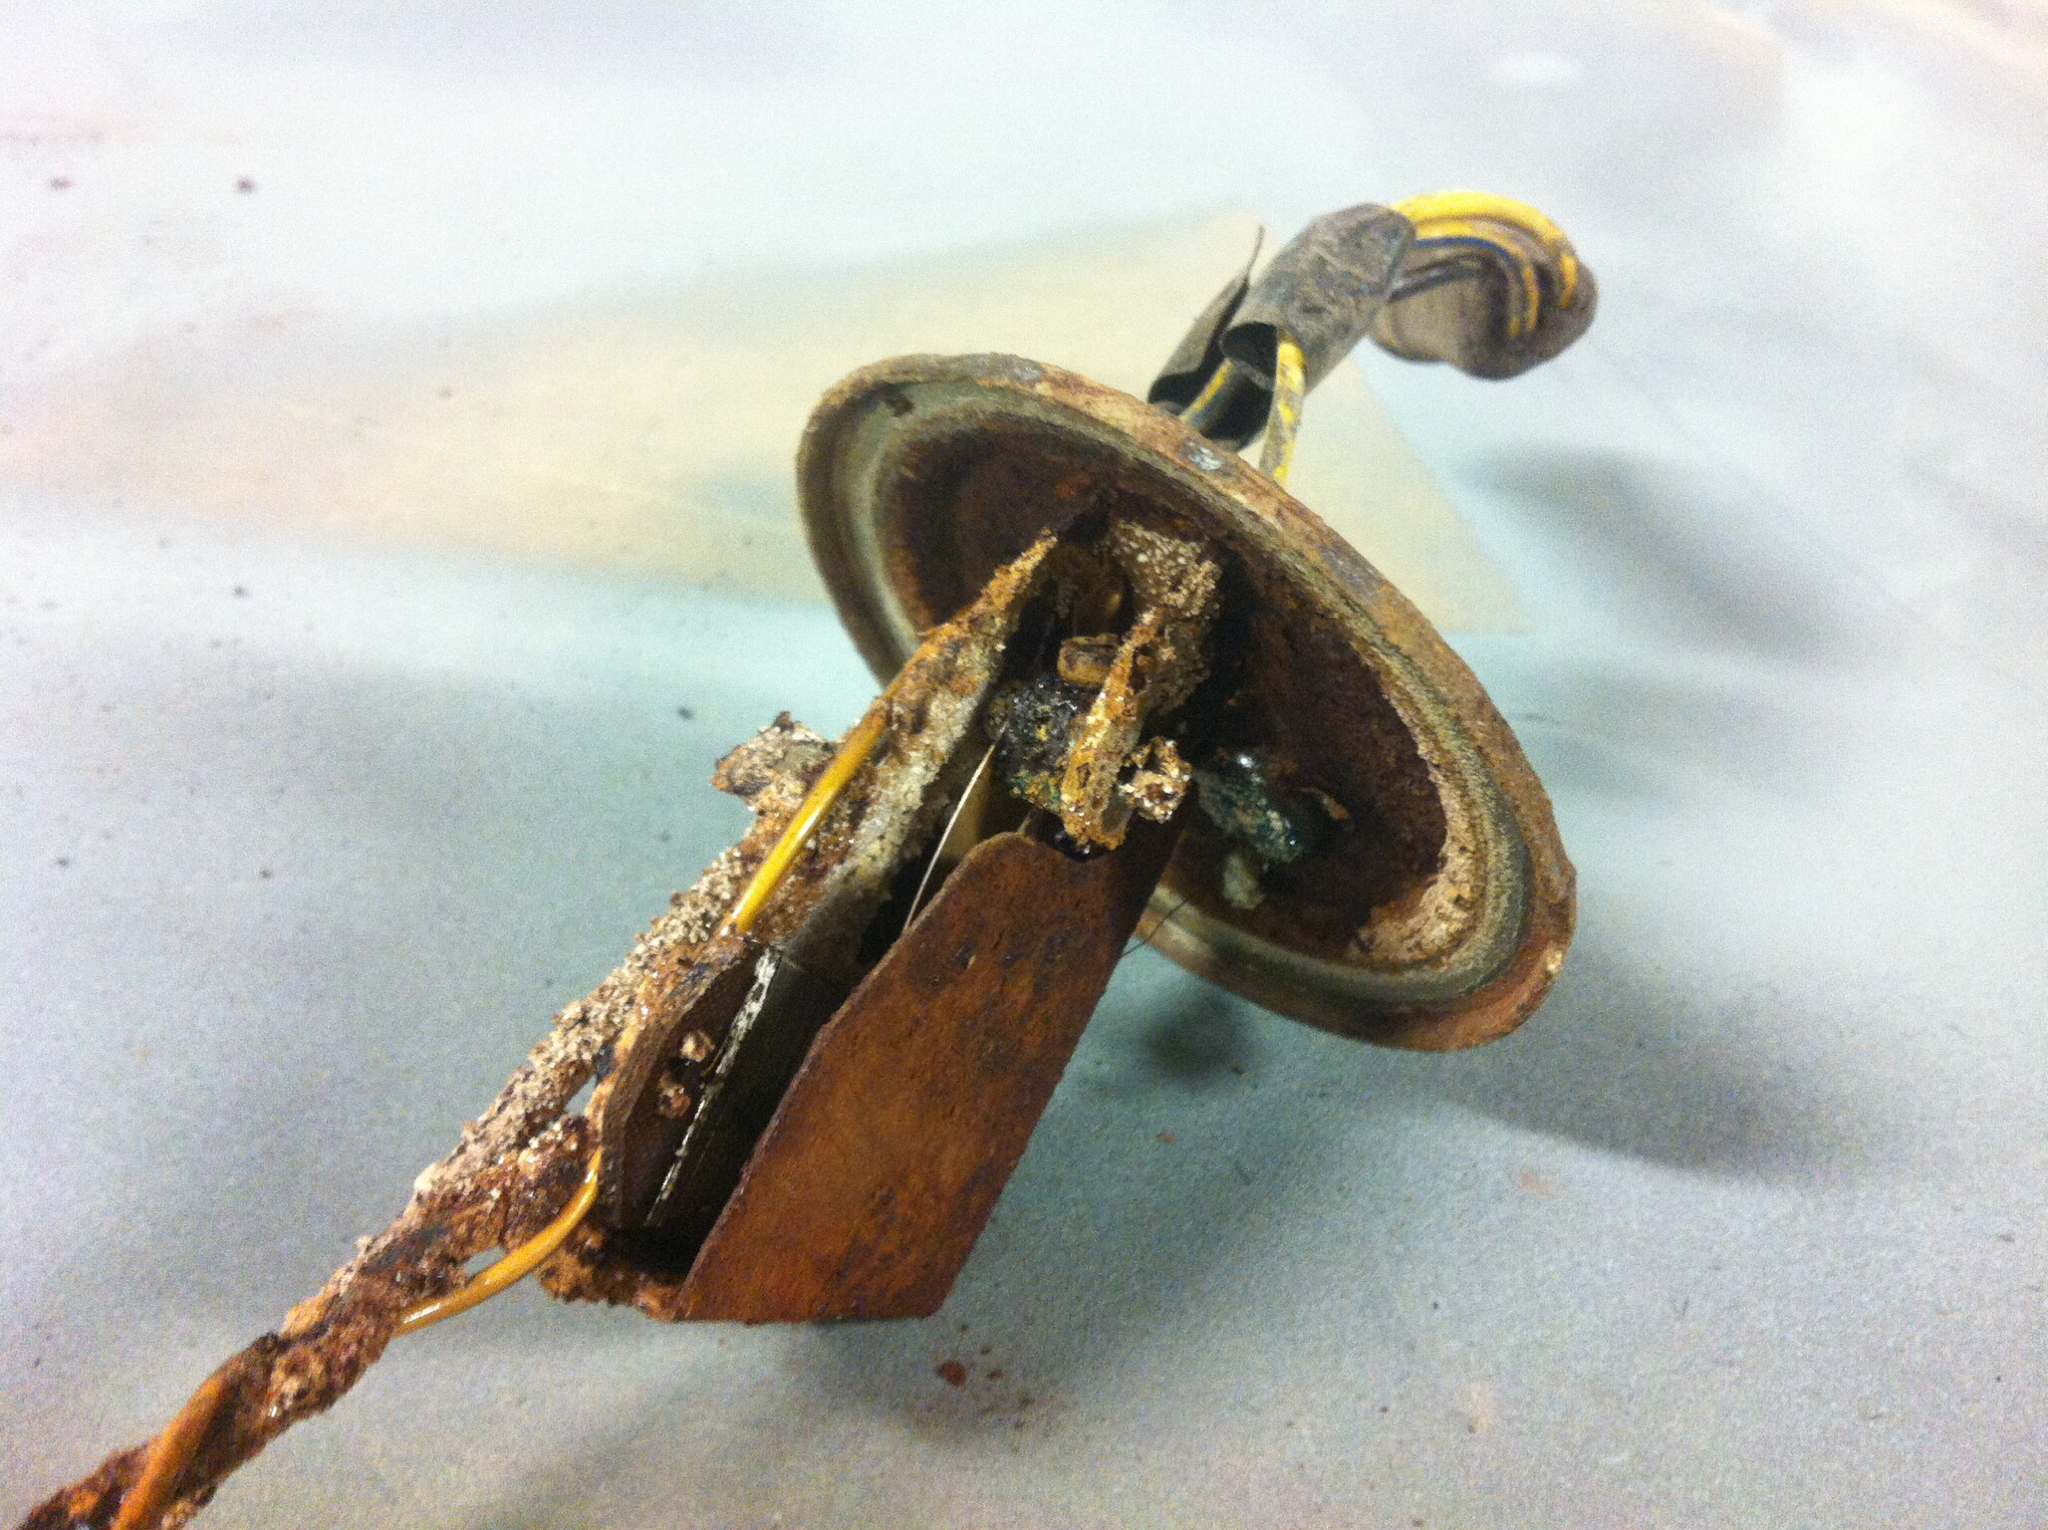
Before and after soaking in CLR. I will check the adjustment screw but I was getting a pretty good reading on the ohmmeter when I cleaned it last fall.

 1 point
 -
0 pointsAnd what about @Zup? Anybody heard a peep. Hey FrogSquisher. You still read the forum??0 points
-
0 points