


Leaderboard
-
grannyknot
Free Member6Points5,158Posts -
MH77280Z
Free Member5Points469Posts -
Patcon
 Subscriber
 4Points11,142Posts
 -
inline6
Subscriber4Points1,282Posts


Popular Content
Showing content with the highest reputation on 10/15/2023 in all areas
-
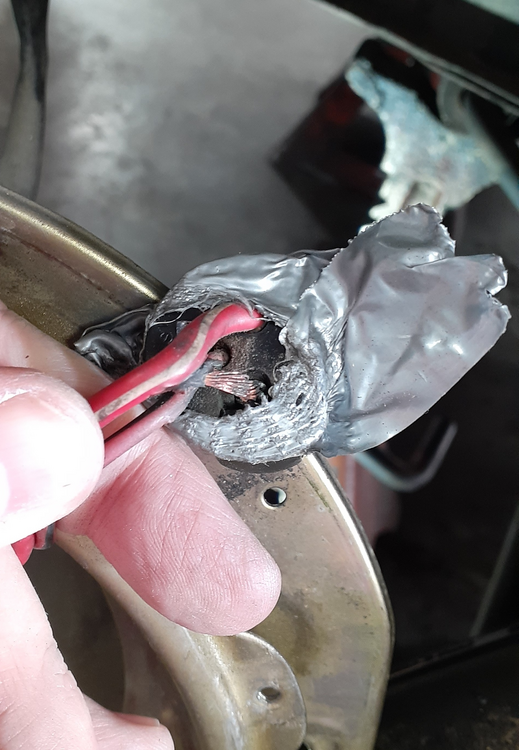
A friend was working on a customer's 78, and there was an issue with the headlights. I took a quick look at it a couple of weeks ago when my friend was hosting a party (It was a great way to decrease the amount I had to socialize.), and it seemed like corrosion in the fusible link may have been the cause. The fusible links were pretty nasty. My friend put in a Maxi Fuse holder, but the problem remained. I went out to take another look today. I saw voltage on both sides of the right fuse when I pulled the ground on the circuit. However, the was no voltage on the downstream side when I had the ground plugged in. I cleaned the fuse holders with a wire wheel, but no change. Neither headlight would light, either. I swapped the fuse for the right headlight with another that was in the fuse box, but that fuse wasn't in great shape. I got another 10A fuse from my friend, and a little while later, I detected that it had blown. Getting nowhere fast in my diagnostics, I talked with @Captain Obvious, but I couldn't provide enough information for a true ah-ha moment. He did make a good suggestion to start using a test light instead of a meter because we both knew I had to get around an impedance issue if it existed. I decided to focus on the left headlight next. I disconnected the headlight and rigged up a jumper between the engine harness connector and the headlight connector. I rigged up another jumper that I could connect to ground. I still couldn't get the left headlight to light up with the new ground. I checked things with the test light. I could get the positive side of the wiring to light up the test light, but the ground leg would not cause the test light to light up. (Hold on to this.) At that point, my friend and I broke for lunch, and I discussed the next steps with him. We agreed that pulling off the headlights would be the course of action because I narrowed down the problem to that part of the circuit. He got the front end on jackstands, and I got the left headlight out. This is what I found. Yikes! Someone thought duct tape would make good insulation. You can see how hot and melty it got. That is the positive wire with all of the missing insulation. Unfortunately I didn't have my headlight connectors with me to replace the bad terminal. At least I found the impedance issue with the left headlight. I'm surprised it didn't pop the fuse. I went over to the other side and pulled the right headlight. I found someone had overfilled it because all of the excess water came out. Okay, so the outer sheath had cracked and without inner liners, water got trapped inside the sheath. I cleaned it up and wrapped it with electrical tape. I decided to put in a 15A fuse since my friend had those on hand and test just the right headlight with the left disconnected. Sure enough, it lit up nicely. I'm not sure what caused the 10A fuses to pop, but I'm going to install a 10A fuse when I go back next week. With the right side operating, I connected the left headlight bulb (H4 housings with halogen bulbs) to the socket and turned on the headlights. The right still came on fine, and the left was dim. I'm thinking the left side was probably getting its power from the right side fuse backfeeding it. Next week I'll return to my friend's place to fix the wiring on the left headlight bucket, and he can have the owner pick up the car. Lessons learned: Follow my own advice and ALWAYS remove the fuse to test it. I was fooling myself early on when I didn't test the fuse for continuity. I know that the headlights can back feed. With a car that you're not familiar with, you don't know what someone might have crossed wiring-wise. (Finding a wire nut in the engine bay is also a BAD SIGN.) Have plenty of the right size fuses on hand when doing the testing. A fuse kit will become a regular part of my road kit for house calls. I keep them in my Z cars, but it wouldn't hurt to have a third for my tool kit. Drill down to the component level to verify diagnostics when you don't have a smoking gun. I spent more time at the entire circuit level than I should have.
 4 points
 -
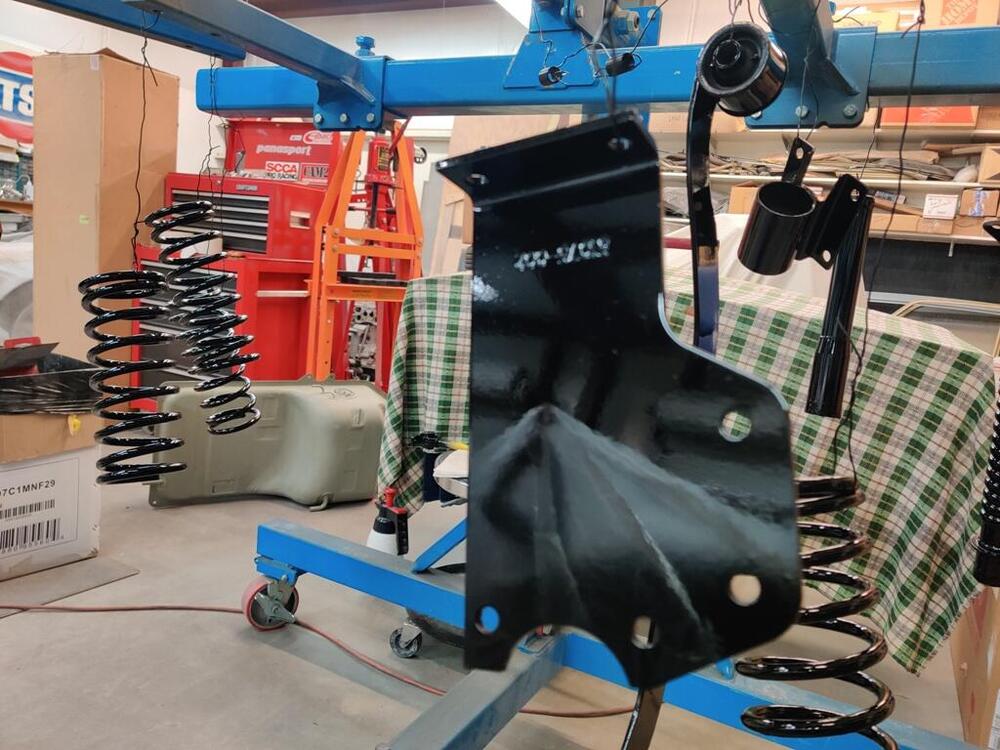
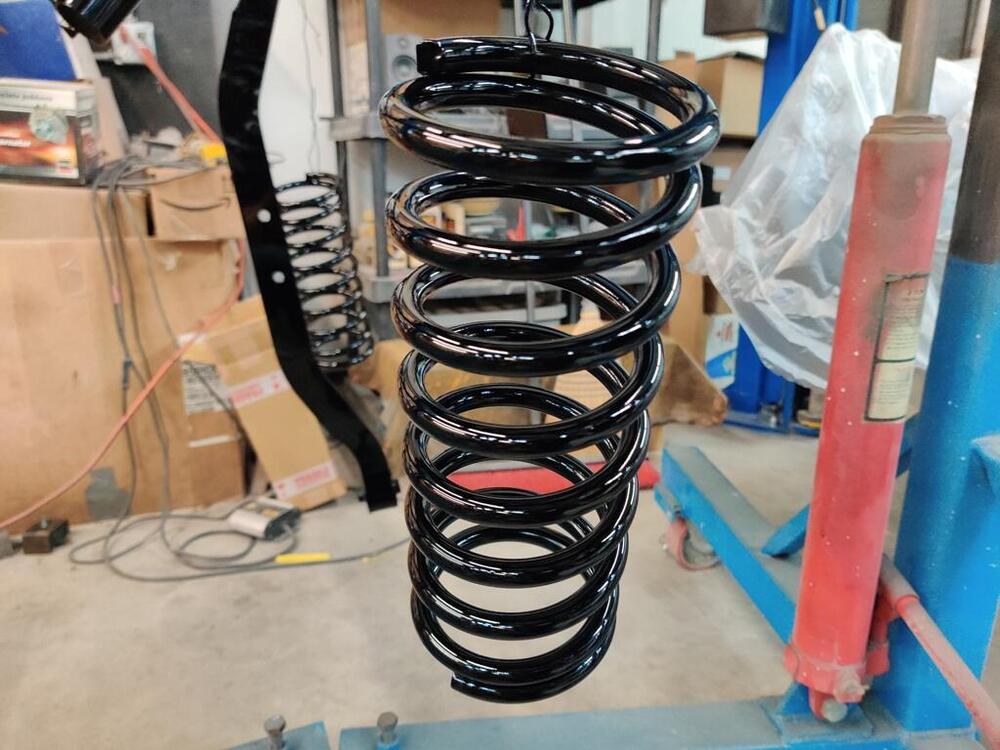
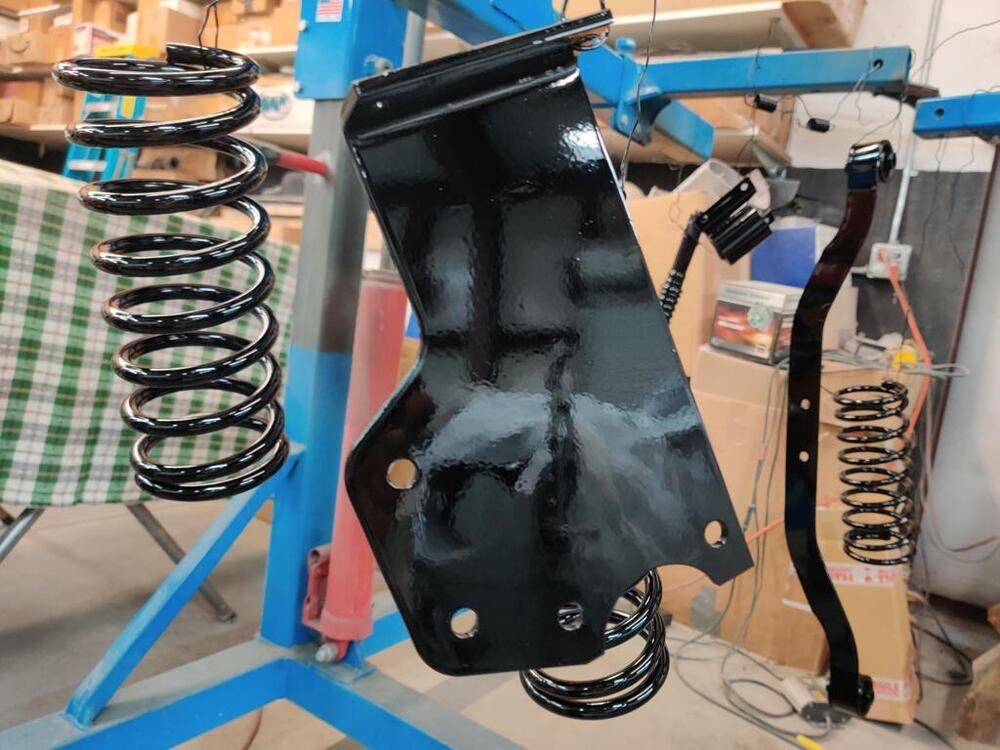
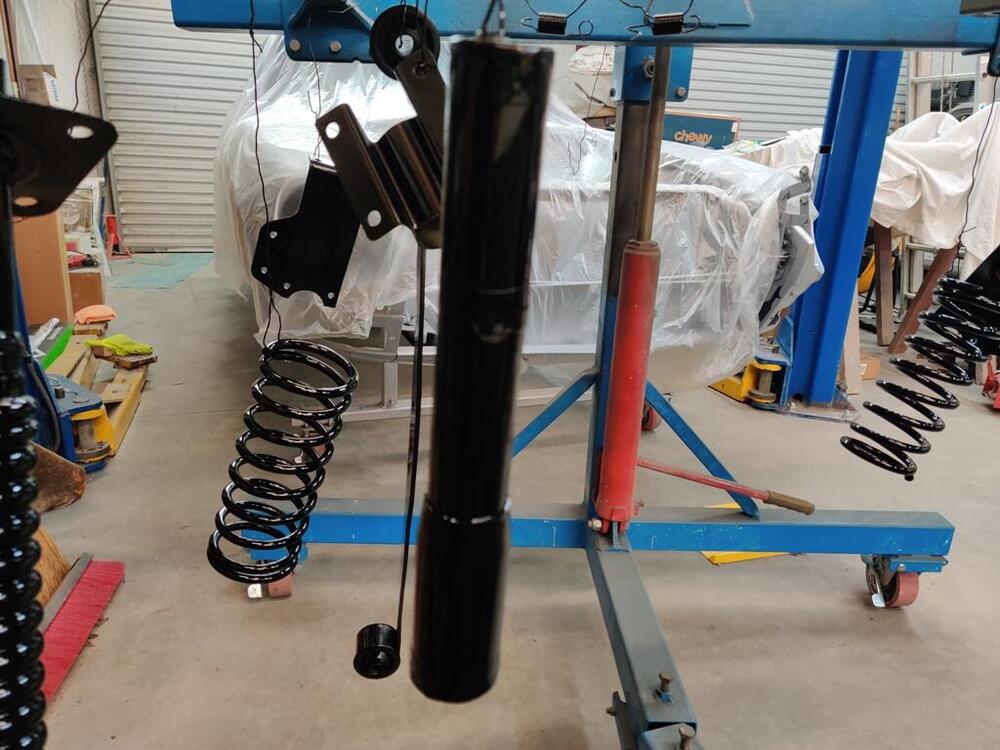
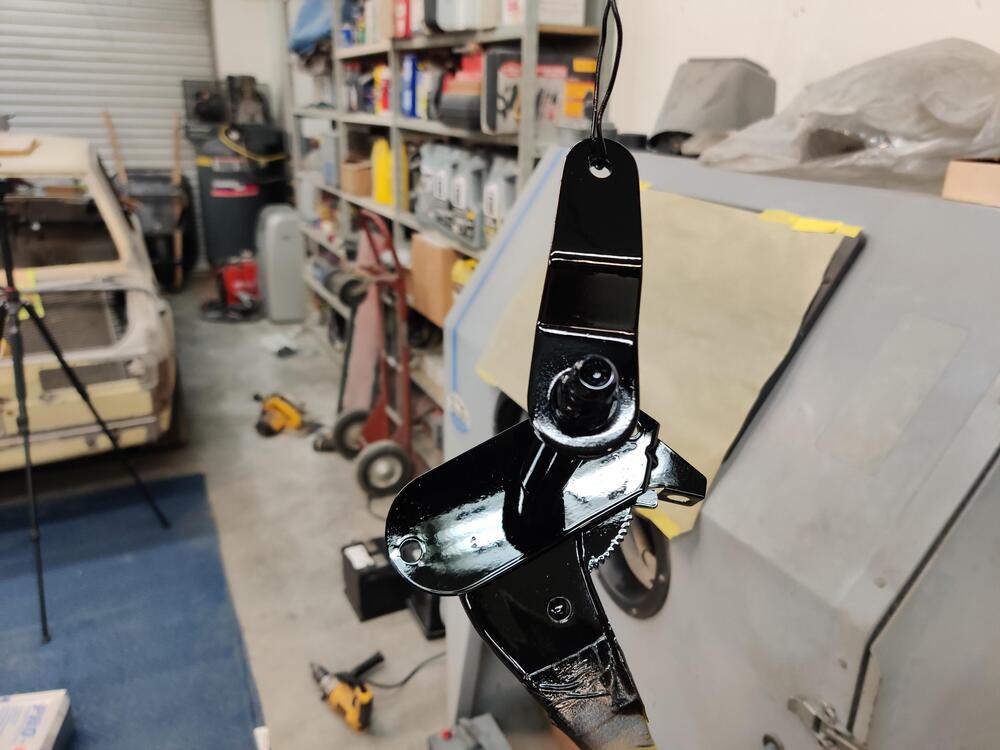
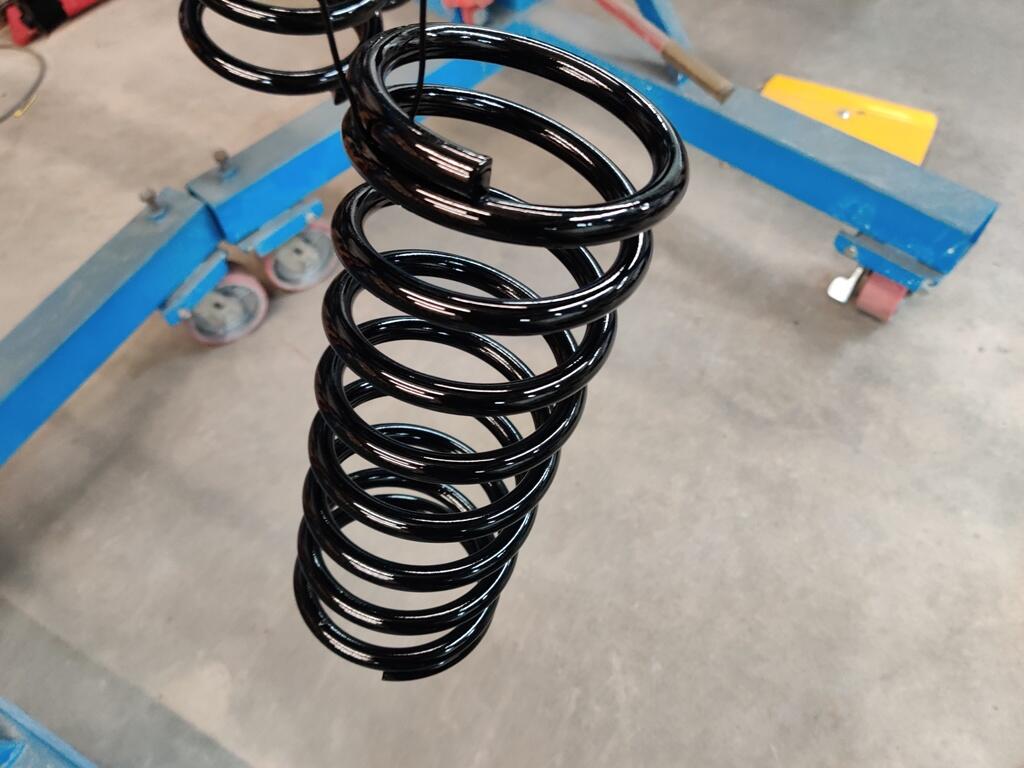
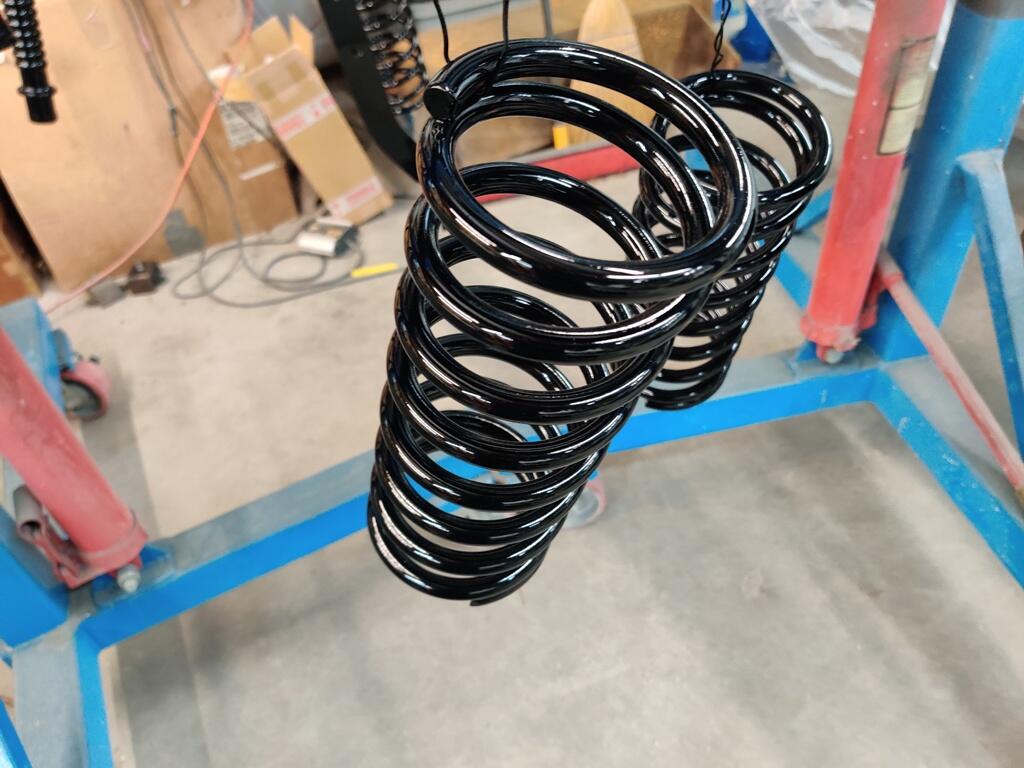
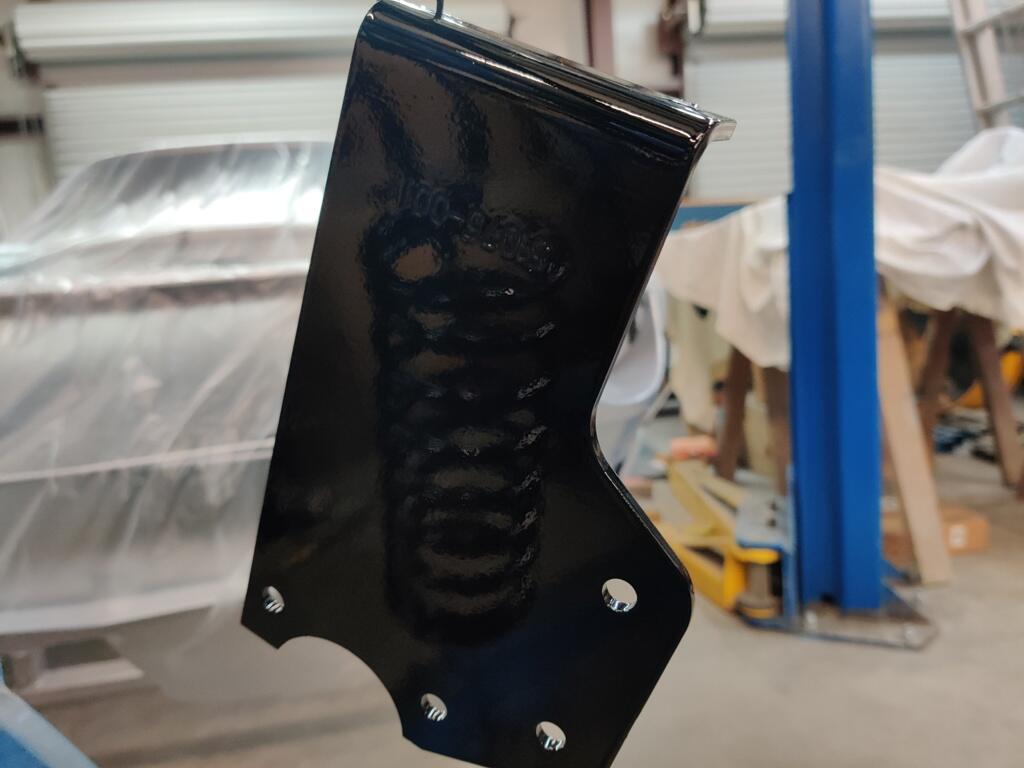
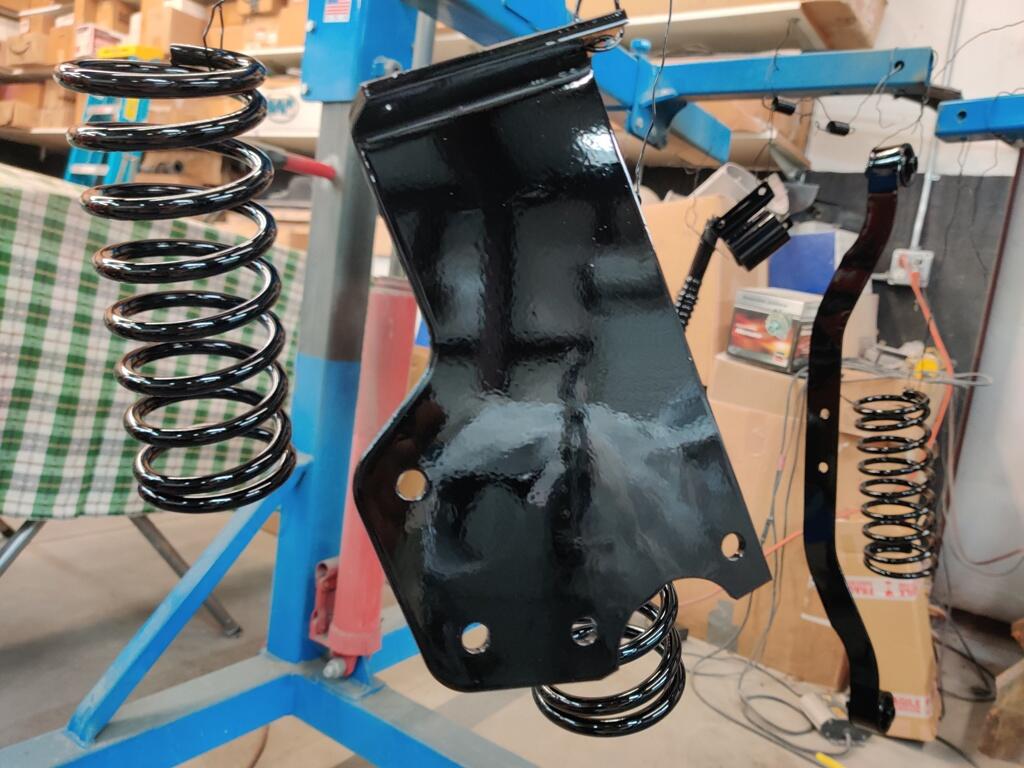
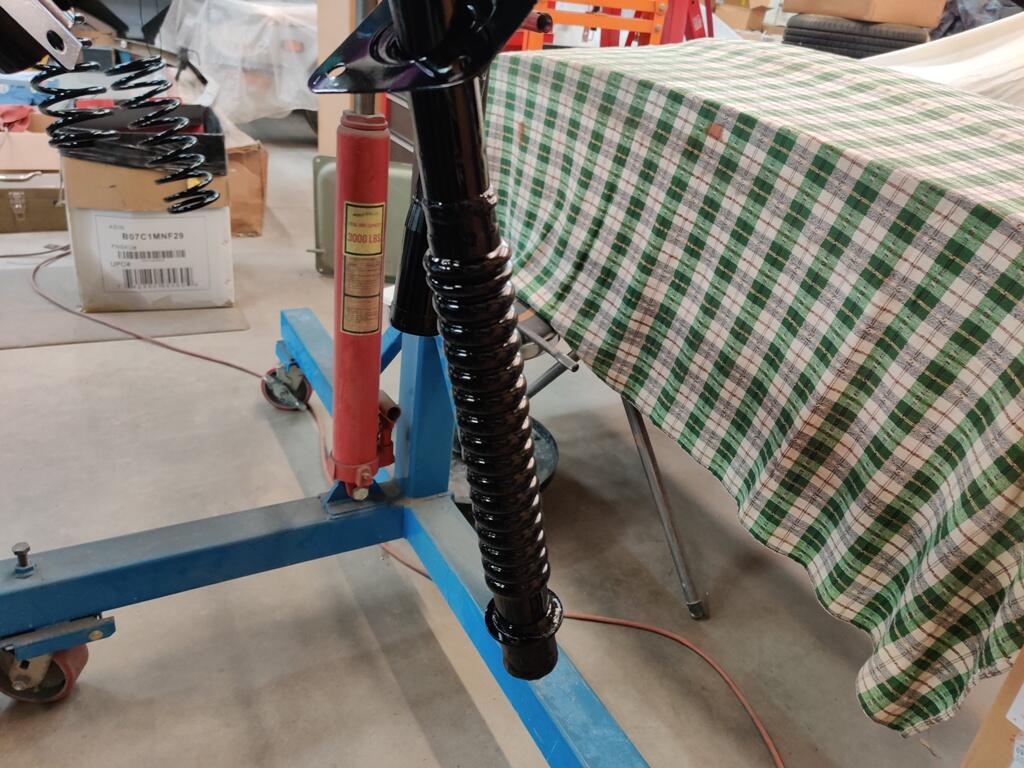
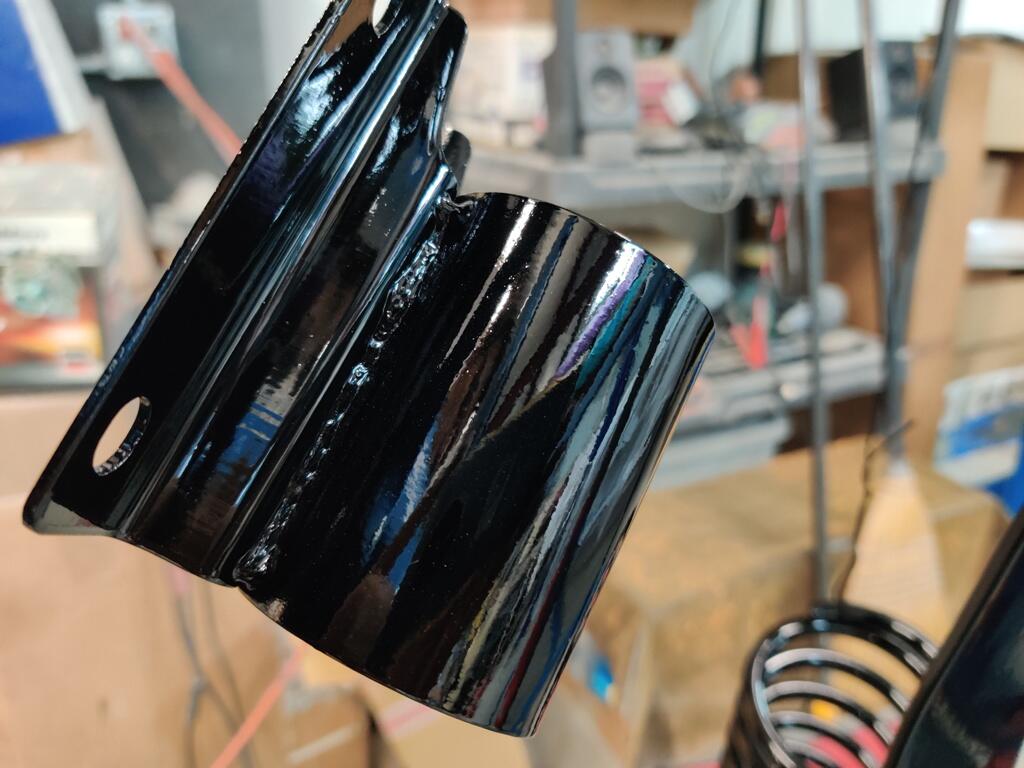
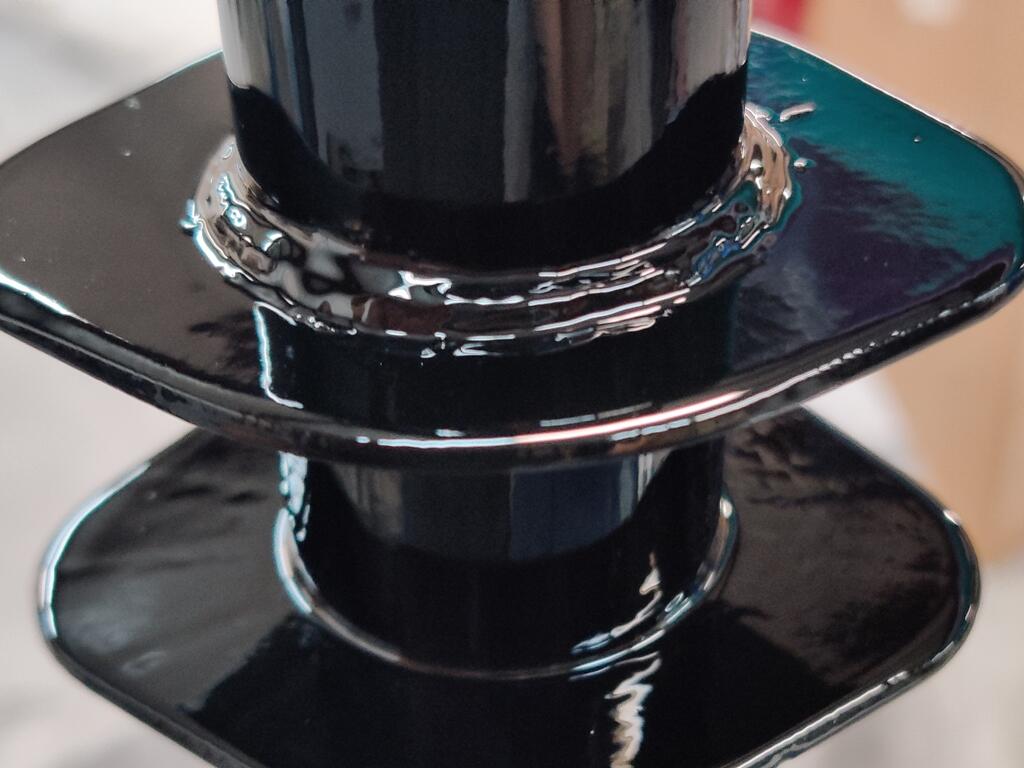
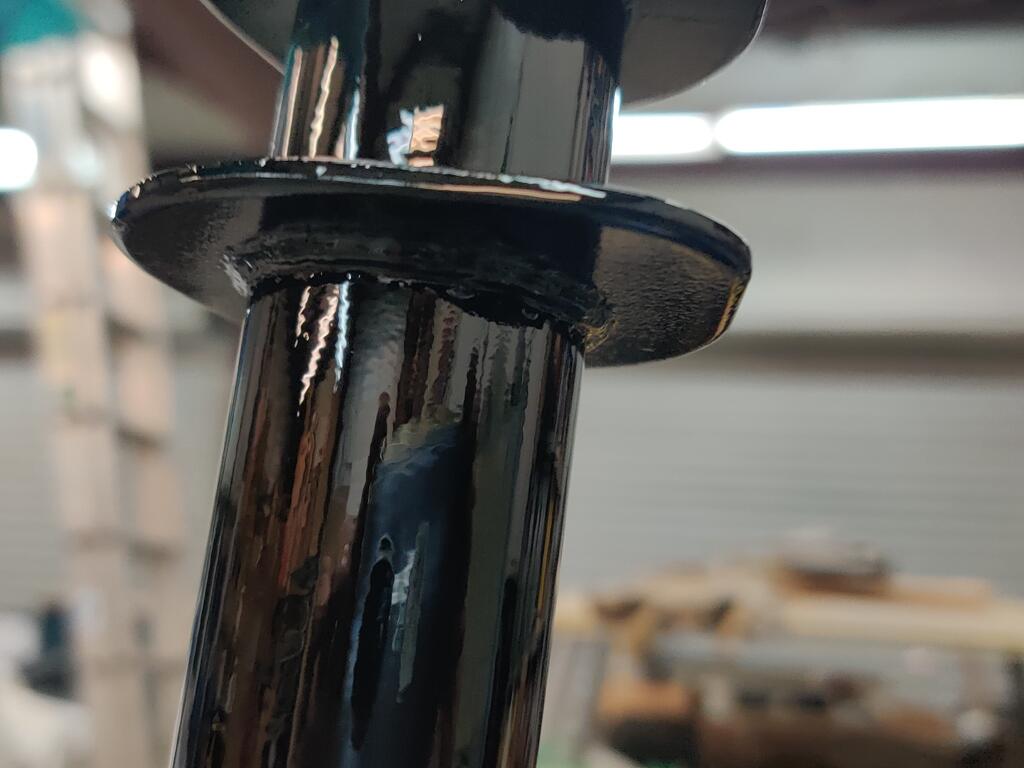
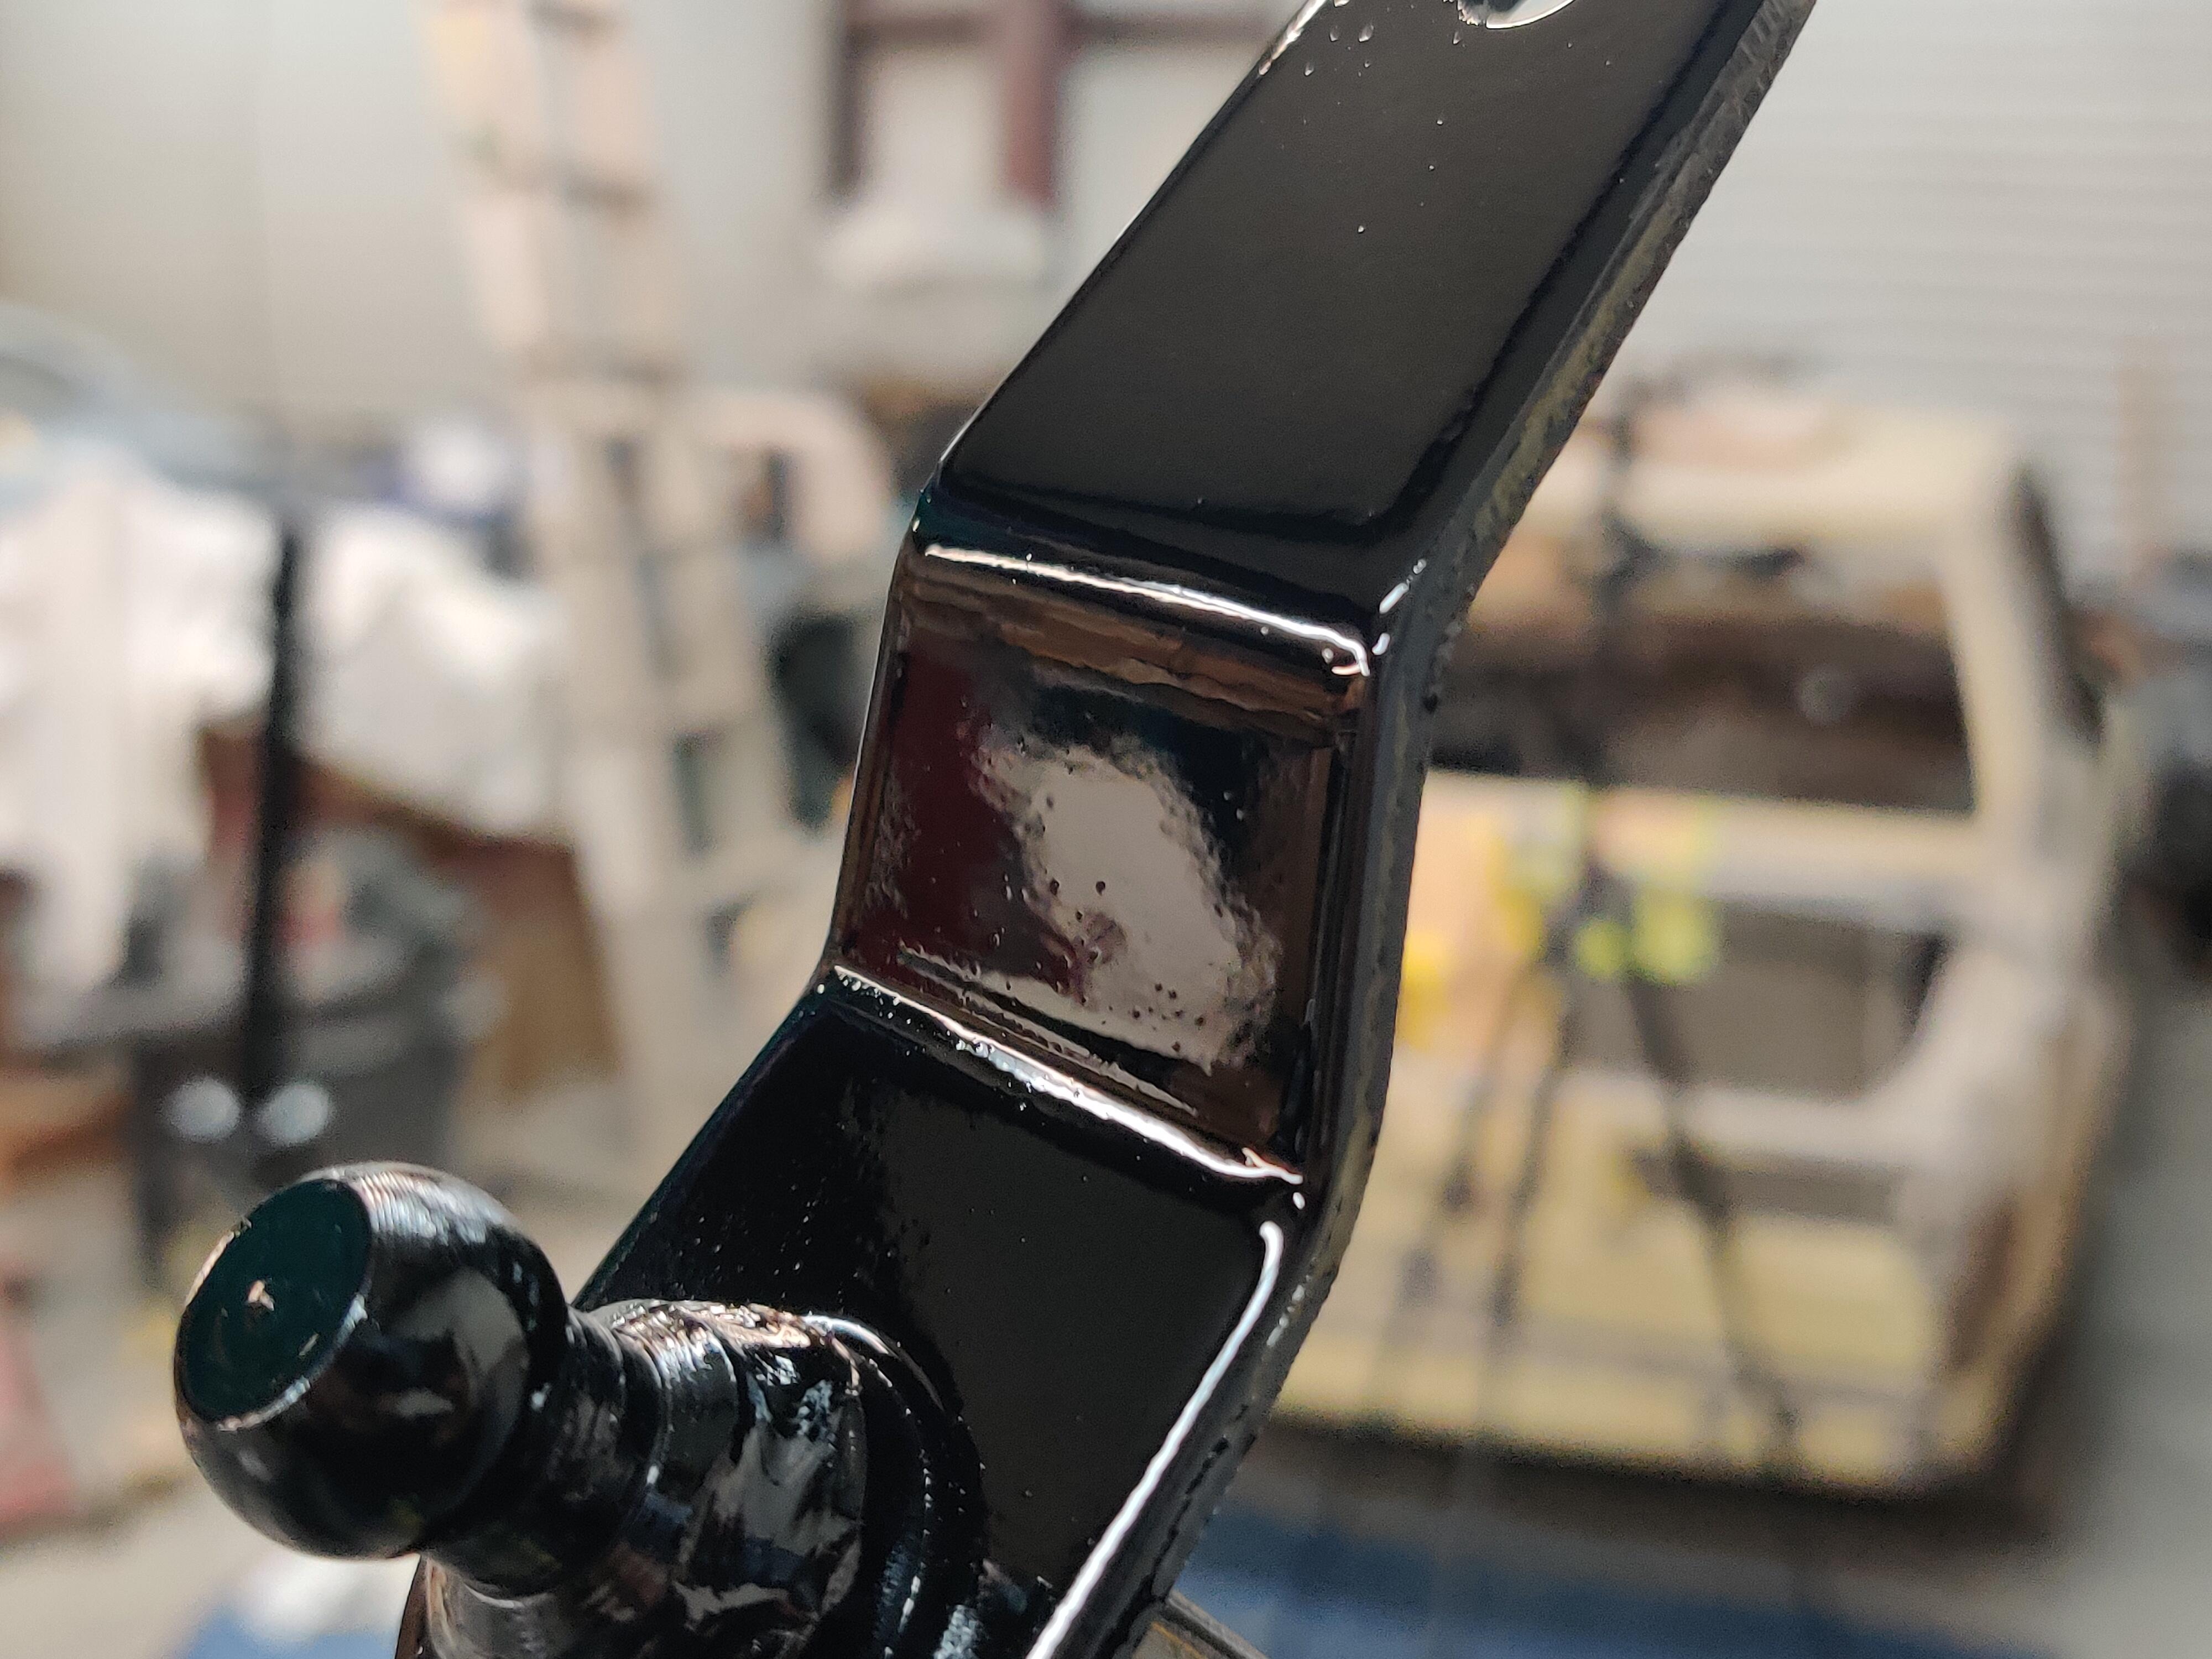
Another batch of parts are now gloss black: The difference between one and two coats is substantial. One coat just isn't sufficient. I didn't quite mix enough paint, so I had a couple of thin areas on a couple parts. I let them dry for an hour or so while I ate dinner and then mixed up some more and reshot the steering rack, transmission mount and the hand brake handle assembly. These Suspension Techniques springs come in a blue powder coat. I scuffed them with red and then green Scotch Brite pads before shooting them with black. Also, while I painted the original suspension "vertical hangers" black already, they will not be installed. Instead, I will be using these which came with the Suspension Techniques rear anti-roll bar kit. These were black powder coated, and I did the same scuffing before painting them with this gloss black. I continue to use 10% (by weight) of flattening agent with each batch of black that I mix up. I will let these dry overnight and tomorrow, hope to get the engine and transmission together and installed in the car.


 4 points
 -
3 pointsFinal update: We fogged the car like in that video again last weekend and confirmed sealing the taillight gaskets with Seal 'N Peel (one bead between the gasket and the light housing and a second between the gasket and body) worked perfectly - no smoke escapes there anymore. That said it didn't 100% fix the issue meaning there were leaks else where which we found due to a shotty weld job done by the PO when replacing the hatch base which must have been rusty. Fogging: - I saw this originally on another thread which I cant find but besides what we did (throwing the fog machine in the car and shutting the door) there's actually a better way to do it. - Once the car is fully pressurized with the fog machine, the smoke will escape from the paths of least resistance, which isn't the tiny pinholes in the back. The trick is to have someone hold the smoke machine behind the car and move it around while you turn on a shop vac and let it sit in the hatch area creating a vacuum (just like how the car works while driving). You will see where the smoke is sneaking in then just wipe some seal 'n peel or whatever sealant you have left and its game over. You'd be surprised where smoke sneaks in, for example, smoke was sneaking in AROUND one of the rivets I found. This is definitely worth your time to do at least in my opinion.3 points
-
I'd start by cleaning it up, remove anything that's loose, and then go at it with a wire brush on an angle grinder. Once that's done poke around any suspicious areas with an ice pick. That will tell you which areas are thin.3 points
-
Mmmmm, that's not looking so good, you can see on both the P/S and D/S the floor pan has collapsed into the the rail running underneath. The only way to be sure is get a putty knife and start chipping out all of the tar mat, once you've removed that you will be able to see the extent of the damage. Chances are you will have to replace the floor pans and rails but being a 2+2 is going to add some complexity to the job. It doesn't look like https://kfvintagejdm.com/product-category/datsun-280z/ make a 2+2 floor pan but you might get away with the standard 280 pans with an custom extension welded in. https://kfvintagejdm.com/shop/datsun-280z/complete-floor-pans-datsun-280z/ Body shops make their money by getting a damaged car in and out as fast as possible, modern uni body cars with rust take a lot of work to repair properly and so they avoid them, the Z series from 69-78 were some of the first uni body cars and they are much simpler and easier to repair than a modern car. If you aren't going to do the work yourself you will need to hunt for a shop that is experienced repairing older classic cars, a standard collision shop shouldn't be your first choice.3 points
-
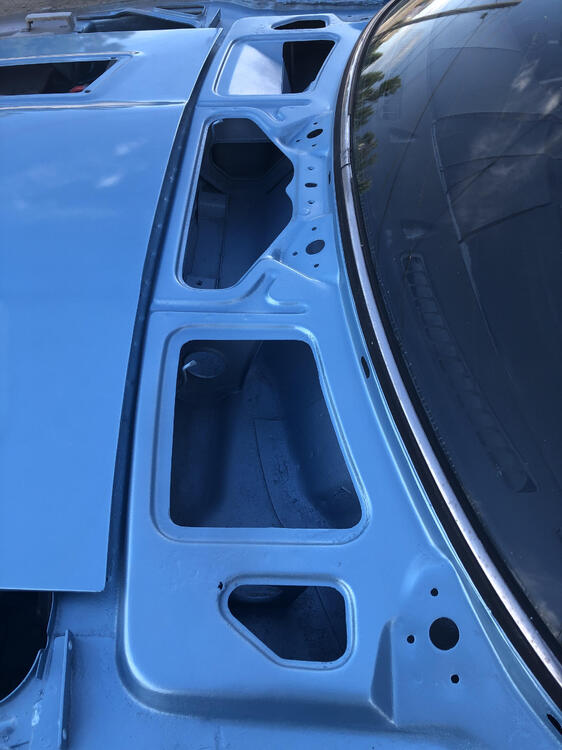
3 pointsBack to factory original ... light blue metallic. Next new steering and suspension and i will be back on the road. Engine runs great. Need to put back body panels next few weeks.
 3 points
 -
2 points
-
2 pointsYes, came out pretty nice. The Rust Kutter was great plus i did plenty of sanding but the paint looks solid. I dont drive in rain or wet anyway so should be good.
 2 points
 -
2 pointsThe last thing I’m going to do is destroy a 1970 z. I won’t do anything to the car that can’t be backed out. It will be a little better every time I touch it, well maybe not, but it will be preserved. Sent from my iPhone using Tapatalk2 points
-
swflaz i highly recommend any one of the dry ice methods of removing tar based sound deadening. you can google many videos on youtube. Some use the alcohol method others just drop the ice straight on if its small enough pellets. What happens is the dry ice quick flash freezes the tar and its so brittle it come up in sheets. the ice sublimates (straight to gas) so its no mess really just a little wipe down. Beats the hell out of scraping with a screw driver or any of the heat it up methods and all that sticky mess. one of dozens if not hundreds of examples2 points
-
Yes, it is very possible to only use a portion of the new panel, quite often the entire panel doesn't need to be replaced and doing so just brings you a lot more work and expense. Someone on your other thread mentioned using dry ice to help remove the tar mat, it does work well but so does a sharpened putty knife. Looking forward to your pics.1 point
-
Seam sealer sticks to almost anything! You can wipe up excess with lacquer thinner Silicone will seal and bonds pretty good but isn't paintable Silicone can be wiped up with denatured alcohol1 point
-
I agree, this is not a 3 digit problem. Mark makes a good point trying to find the extent of the damage. Your repair estimates will be more accurate the more you uncover. And yes you could section the pan and only replace the areas that need it. Flat metal is not ideal because it can oil can. The stamped sections of the floor pan help add strength1 point
-
I replied in your other thread1 point
-
I would recommend going to some of the automotive paint supply stores in your area (finish masters?). Ask them for some names of shops that do classic car work. Dont do it in front of other customers! Collision shops don't like working on classic cars. You need to find a restoration shop. The guys who sell the paint will know who's in your area. Go to more than one paint supply house. Their customers tend to shop at only one shop. So it's sort of Balkanized. Once you find a restoration shop they may not be interested or have a long backlog, ask them who they would recommend. It's gonna require some networking. I would drive the car. The car will still maintain its shape even with no floor pan. I wouldn't thrash on the car though...1 point
-
1 point
-
1 pointFastwoman, Sarah, was the best. She was unbelievably helpful with me and my '77. We all miss her. She was a Volvo lover too then went head first into the efi 280 like you. Once we got them right the fun went away. I can't remember what she bought but I bought two 240s. I kept the best one now I'm bored again.1 point
-
Back to the duct work. Had to do this before the steering wheel & glovebox got back in. This is the diagram I found for the AC ducts Driver's side doesn't match the vent I bought listed as being the driver's side, and no way the one I bought will work on the DS. The one I bought listed as pass side is correct for the DS - I found two captive nuts set into the over steering column section of the dash frame. The duct is significantly shorter than the illustration, which threw me off while I was trying to figure out where either vent could fit. pass side ducts. I will have to mod the glovebox, as the AC duct sits into the glovebox area, due to the offset of the non-factory evaporator box width Trying to fit the vertical port on the right - just not going to work so I need to locate another horizontal vent bracket the the vent is supposed to attach to found a pic online of what the right side bracket for the vent should look like1 point
-
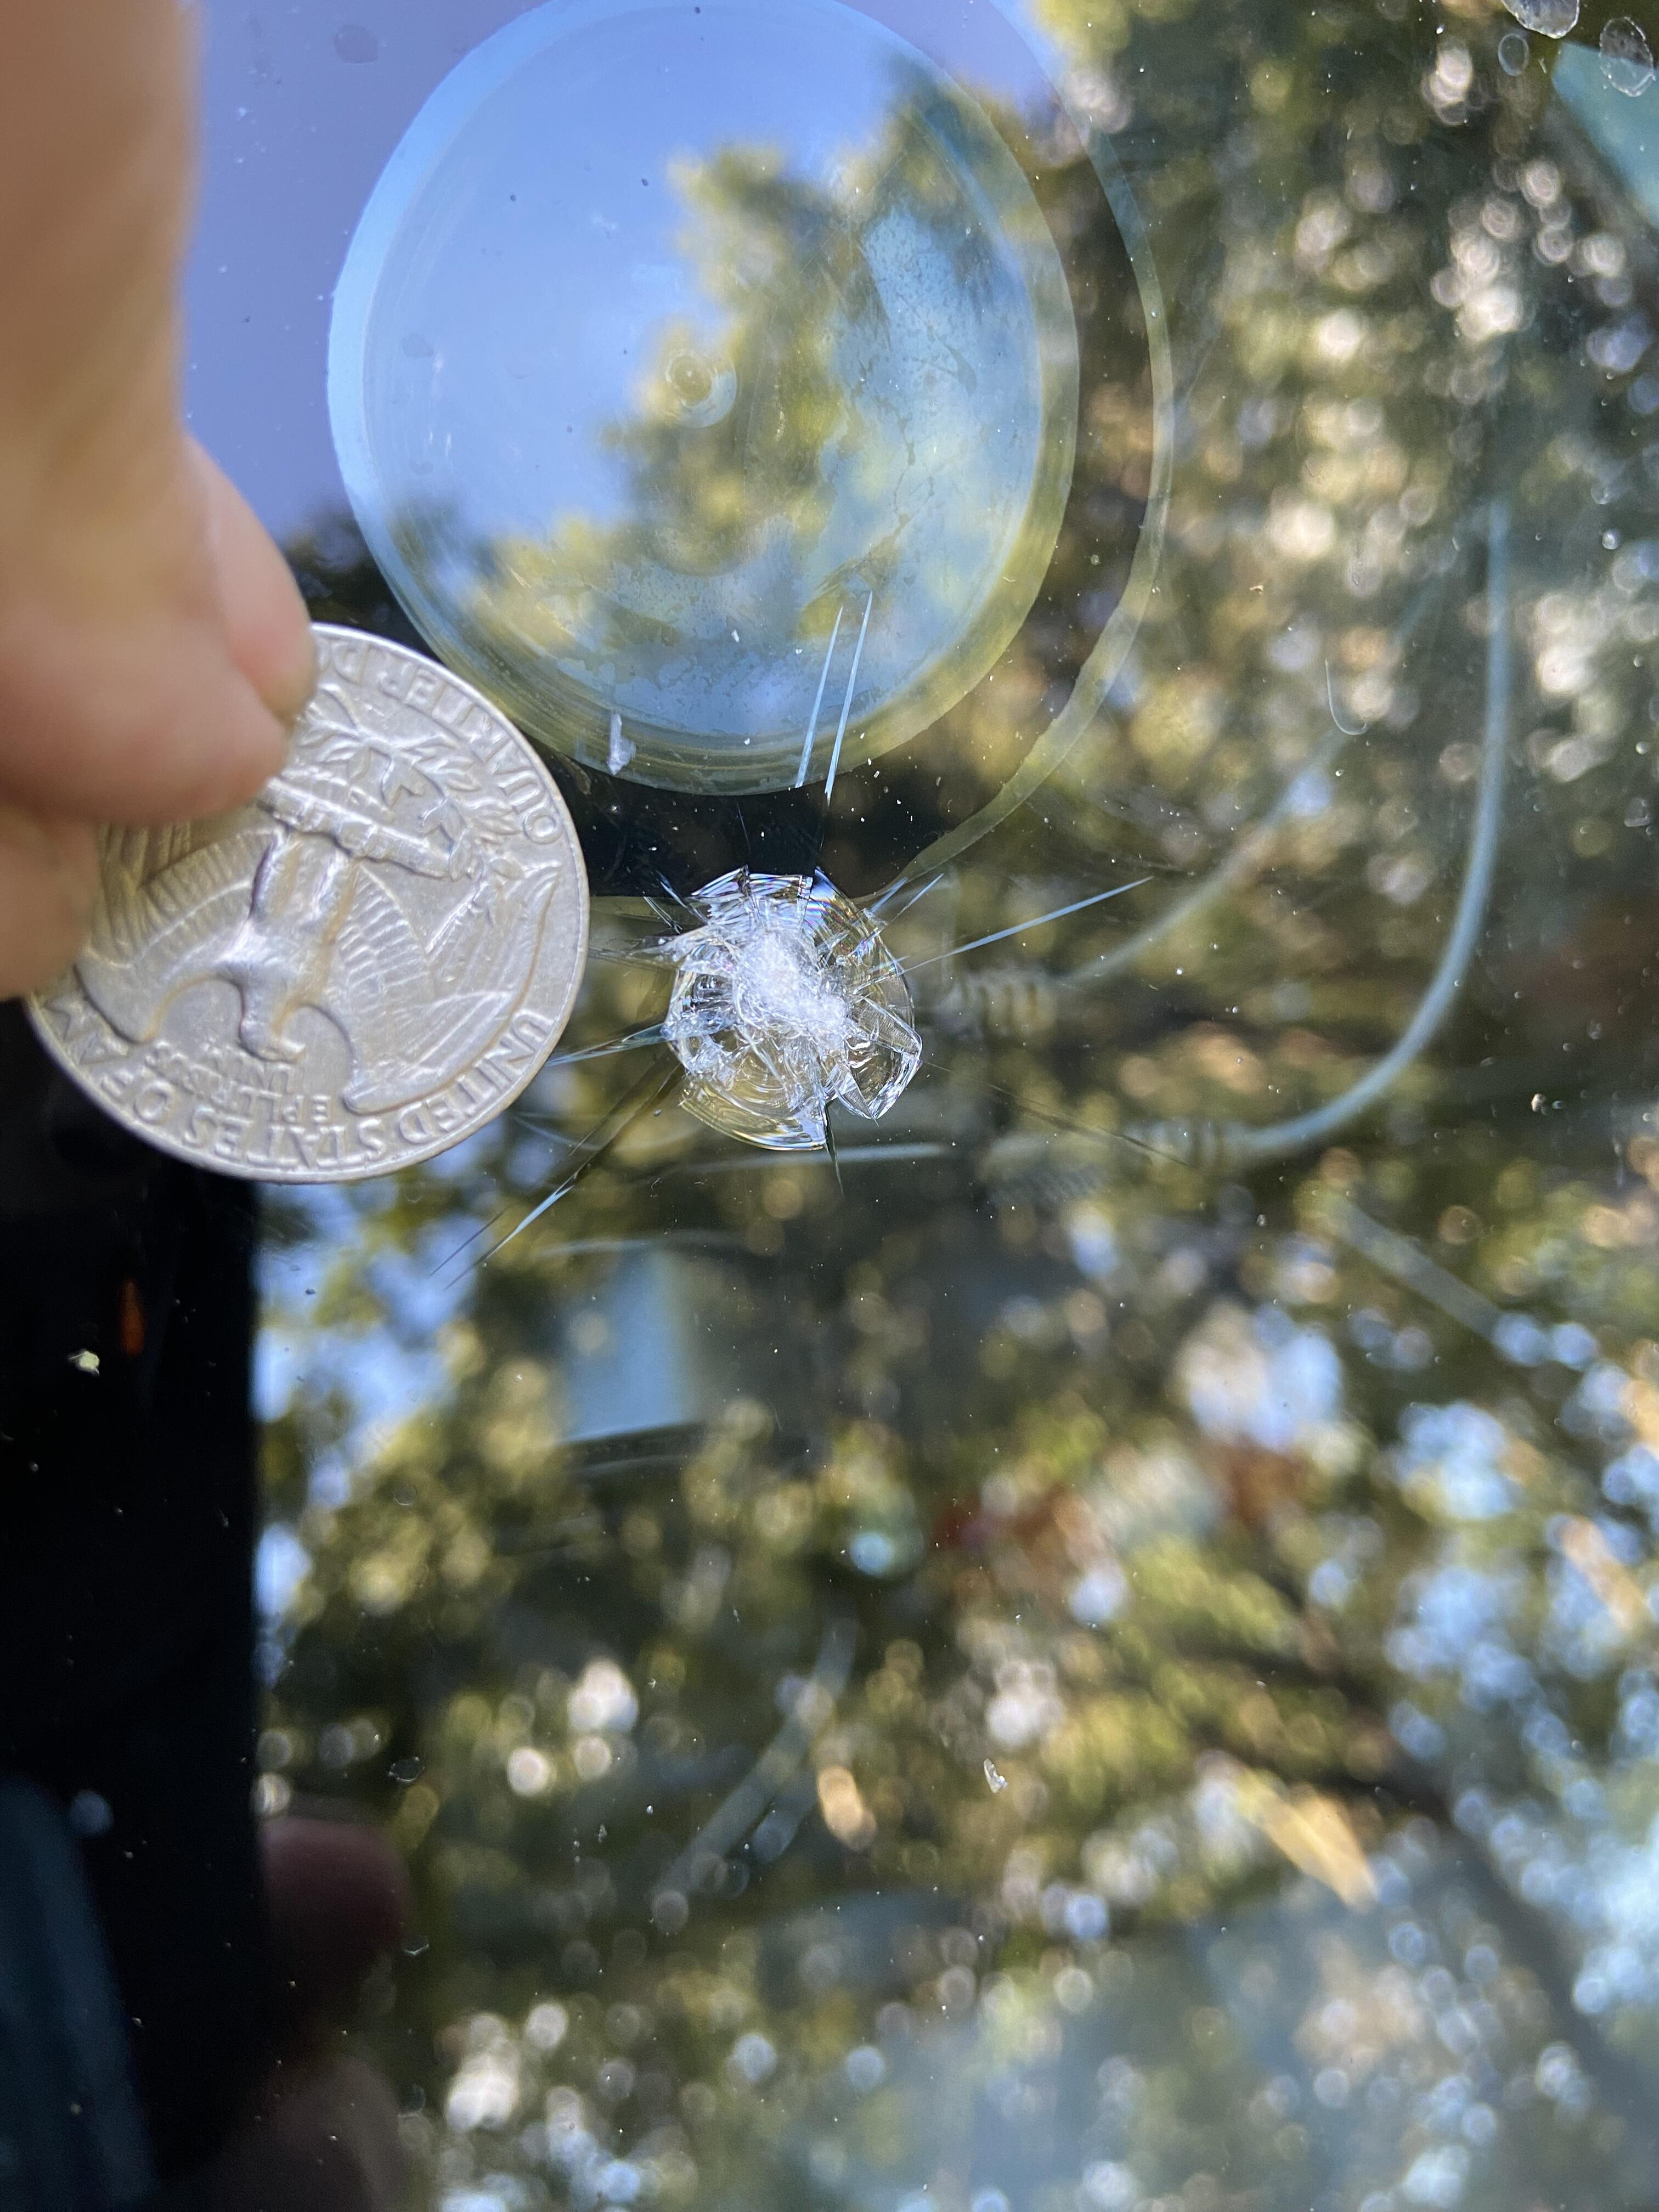
I've been very busy with work and have been quiet on this forum for while now, but I still read the posts and still glean important knowledge and laughs from all of you. To my pleasure my Z has run great over the past year without any issues, and as of late, been driving it about 3 to four days a week. It's turned out to be a good solid car. Today, while driving home, I caught nice rock on the windshield from oncoming traffic. I saw it coming and could do nothing.🥴 I'm hoping it's repairable so I'm taking it to a windshield repair place ASAP so it won't spread.
 1 point
 -
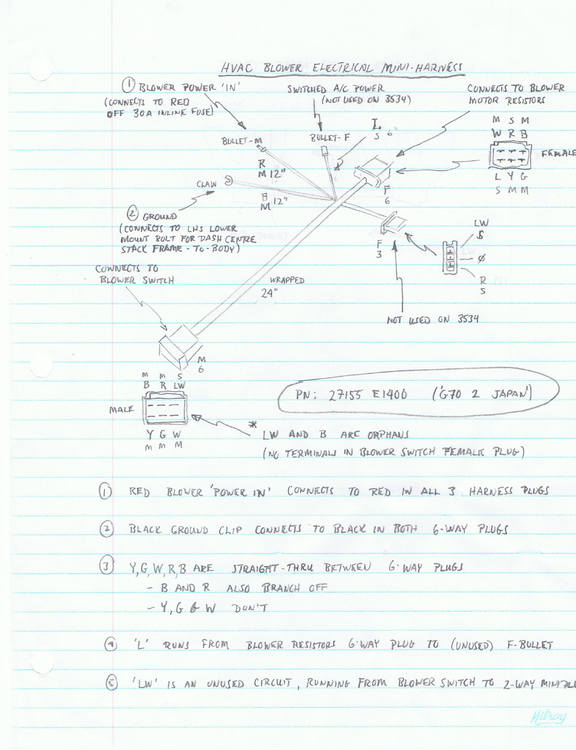
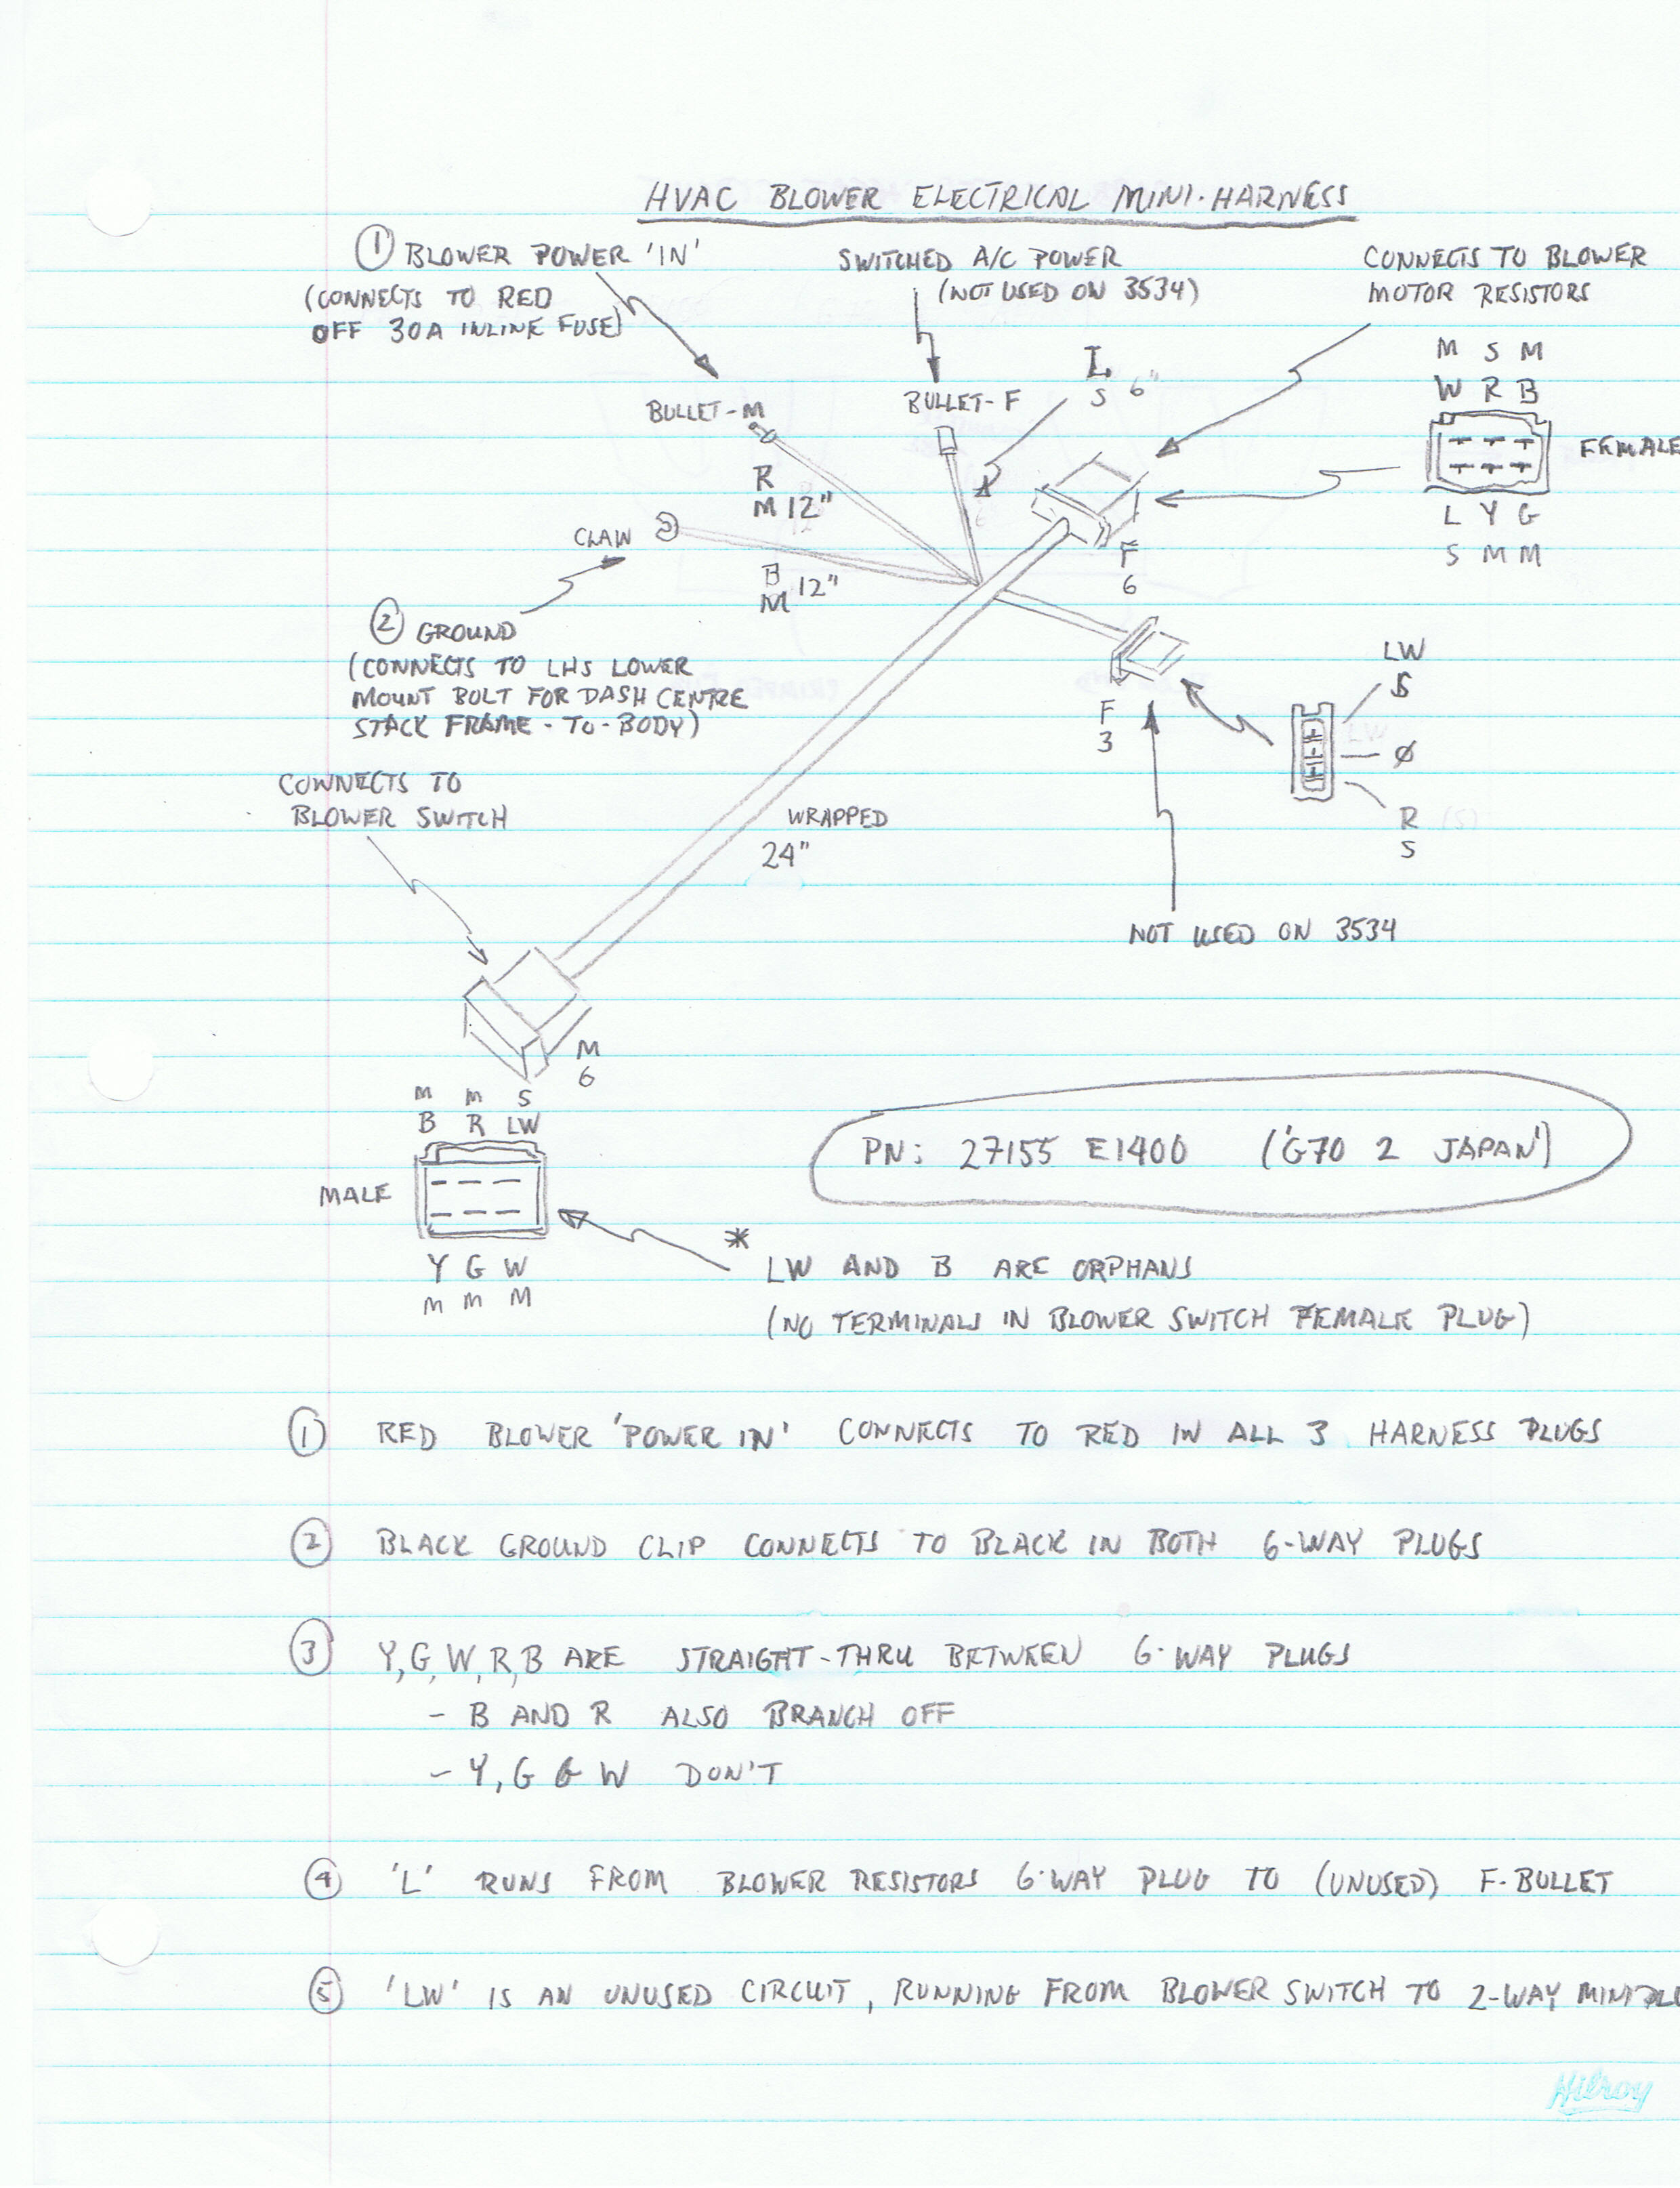
1 pointThe elusive HVAC mini-harness is lurking in the bottom right corner of Fig. 1.2 in the FSM Supplement that CO has posted. It also appears in the bottom right corner of Figure VI-1 at the end of the FSM Supplement, complete with some labeling and a legend with some wire color coding to (sort of) tell you where some of its connections connect to. The blue wire is, according to the legend, there to provide a power signal to the A/C system... which was, of course, available only as a dealer-installed option, meaning that for many Z's the blue wire never ended up being connected to anything over the life of the car. When it came from the factory, the blue wire ended in a female 'bullet' connector. I've scanned the notes I made for the HVAC mini-harness and they appear below... (note: everything you see in my notes is specific to a 1970 Z with manual trans):
.thumb.jpg.65ad2d812299c8f3b47c81ea70cad6f1.jpg) 1 point
1 point


.jpg.ea68db7982521082c66f98df5f3b9454.jpg)