Leaderboard
-
Captain Obvious
Free Member8Points10,081Posts -
73str86
Free Member6Points362Posts -

CanTechZ
Free Member3Points1,311Posts -

SpeedRoo
Free Member2Points359Posts


Popular Content
Showing content with the highest reputation on 07/11/2023 in Posts
-
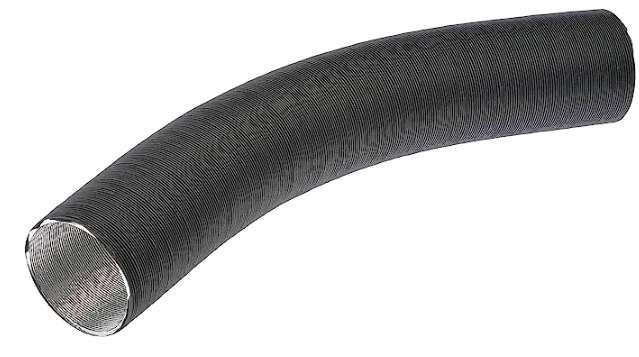
2 pointsOK thanks guys. So cooler air = better performance, just like cold water makes better coffee 😉 I was just curious that the manifold pipe being left wide open wasn't a "good thing", no issues just leaving it like that? We don't cap it or anything? And for looks if I do decide to place it on and off at times, is that dryer vent looking hose from Z Car really accurate? I can't imagine they used that way back when, looks so out of place with everything else. I was going to get this from Dorman to at least have it match some of the hoses aesthetically. Only $10 or so currently on Amazon https://www.amazon.com/Dorman-HELP-96034-Preheater-Hose/dp/B000C5I7VC/ref=asc_df_B000C5I7VC/?tag=hyprod-20&linkCode=df0&hvadid=241973068692&hvpos=&hvnetw=g&hvrand=17963068419572466911&hvpone=&hvptwo=&hvqmt=&hvdev=c&hvdvcmdl=&hvlocint=&hvlocphy=9032516&hvtargid=pla-570818045410&psc=1
 2 points
 -
Great work @73str86 Always good to see a 240Z resurrected rather than broken up. Keep up the good work.2 points
-
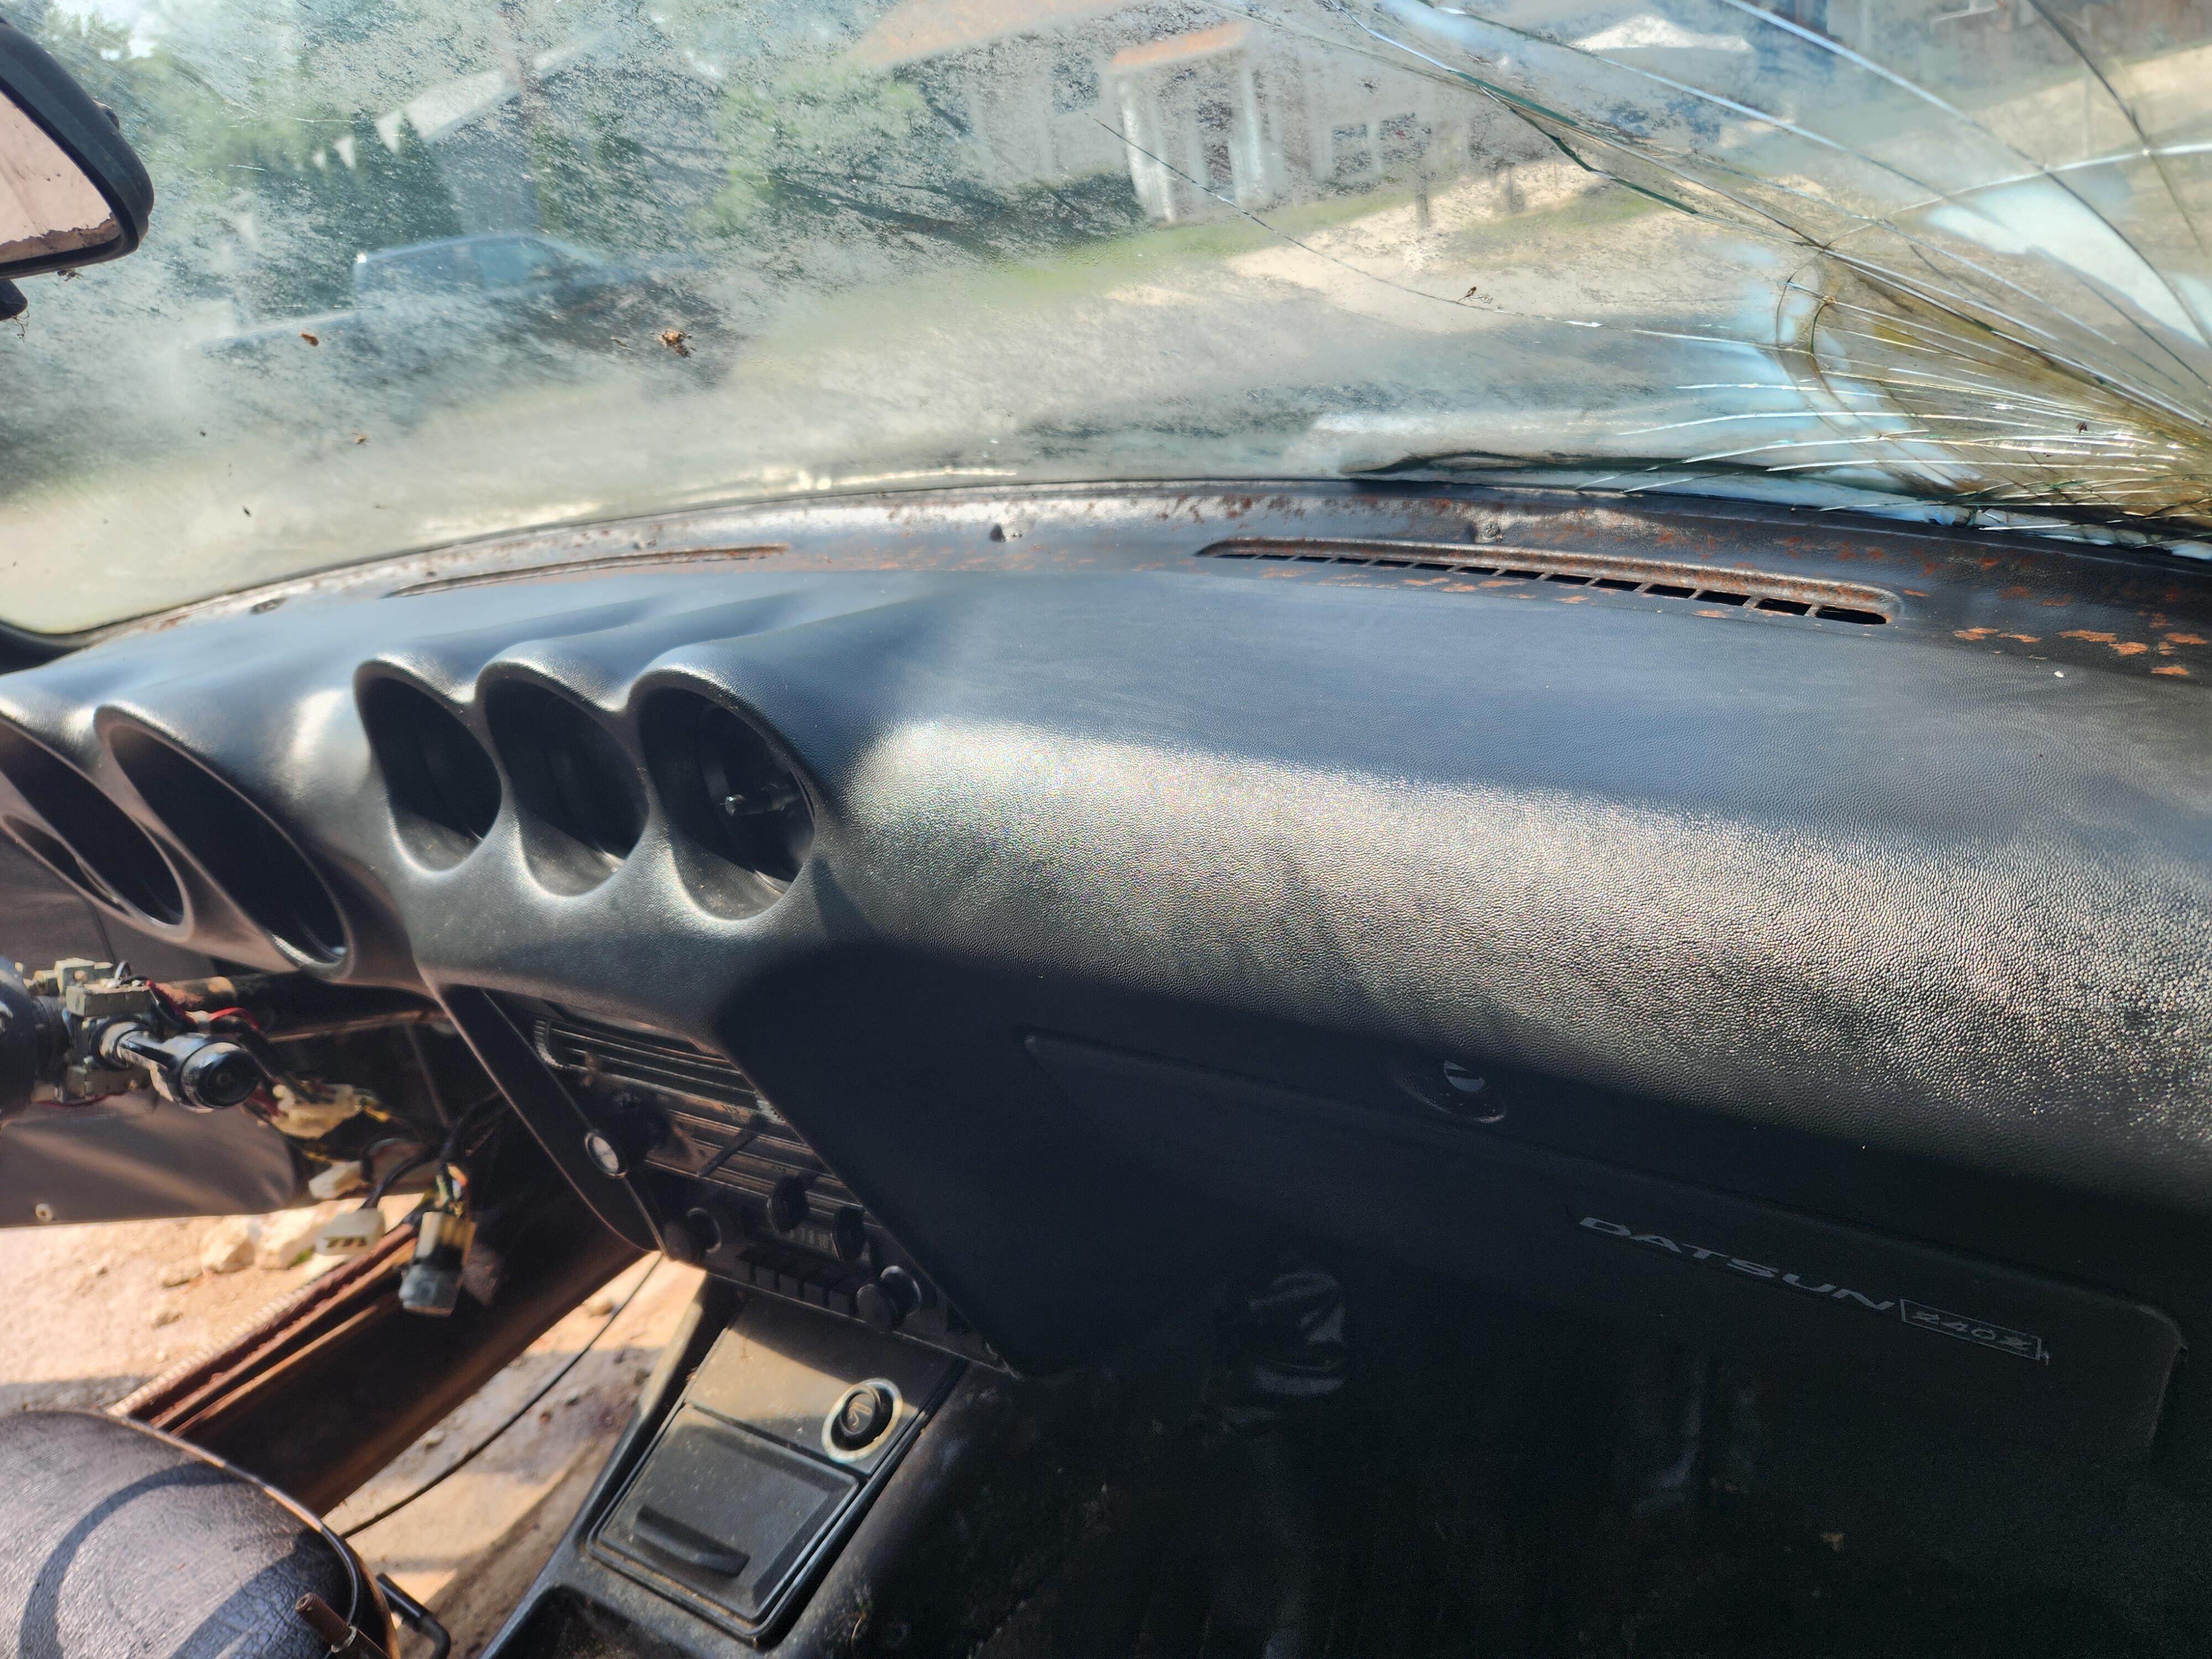
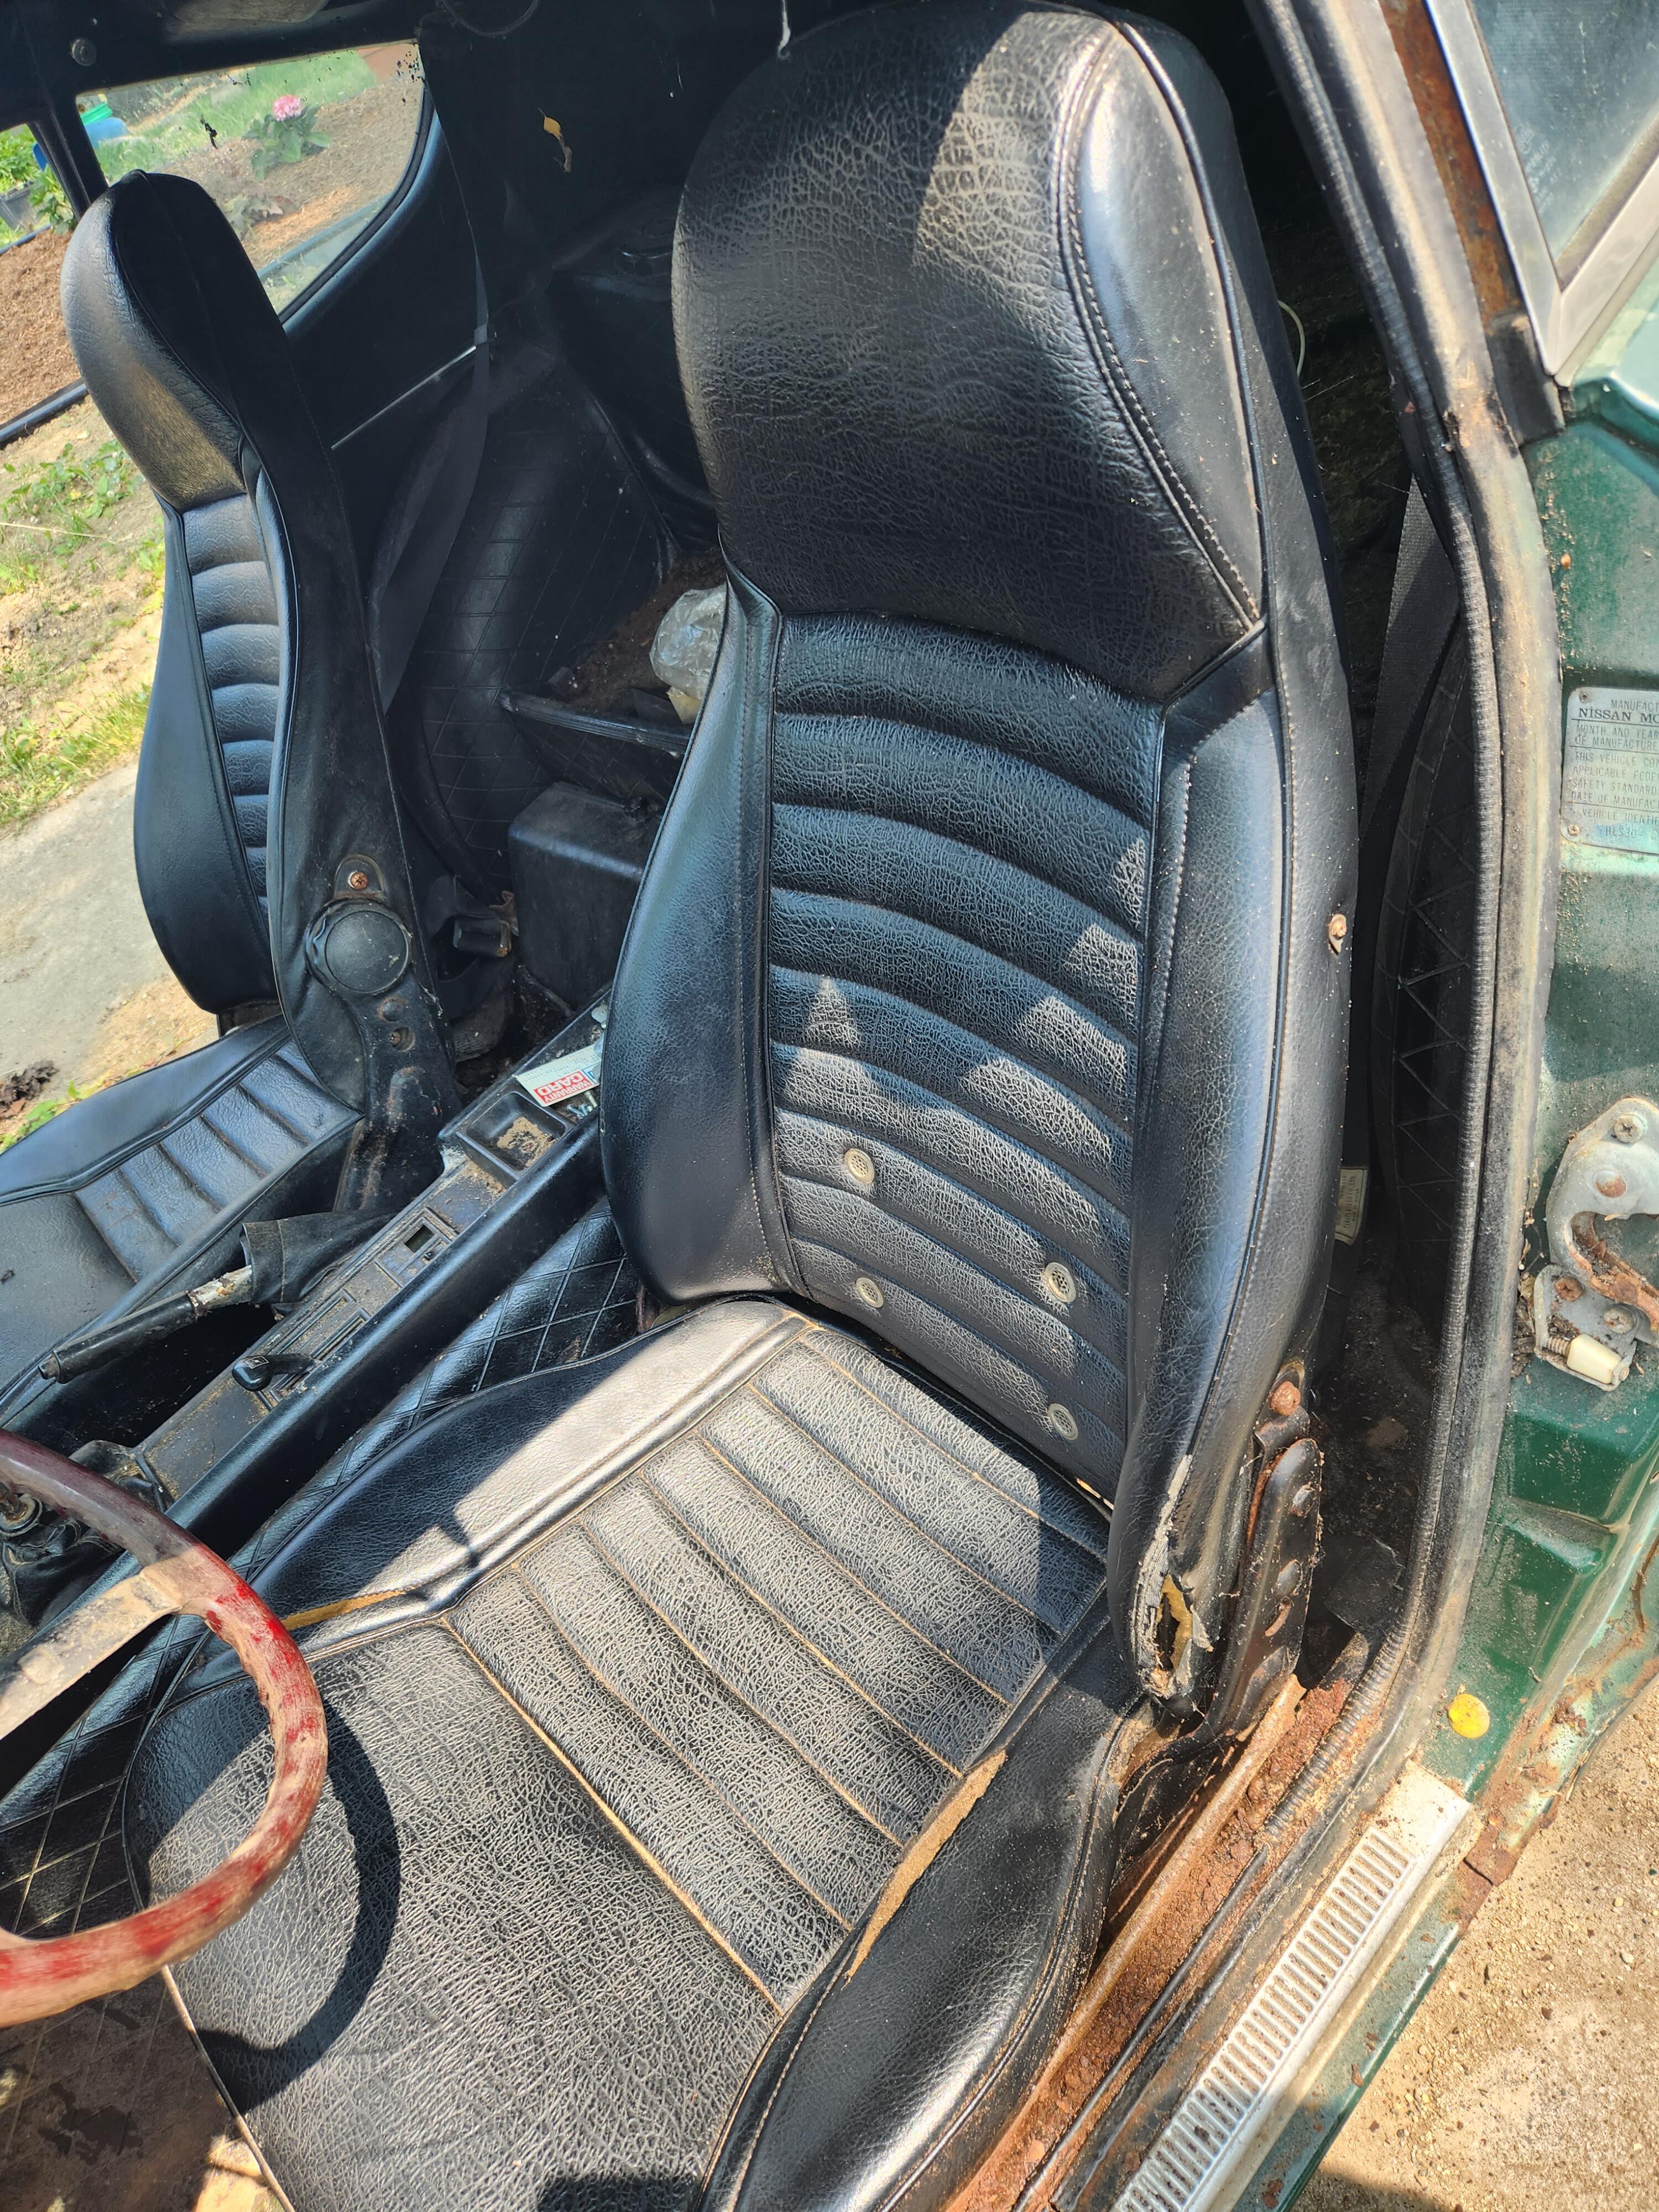
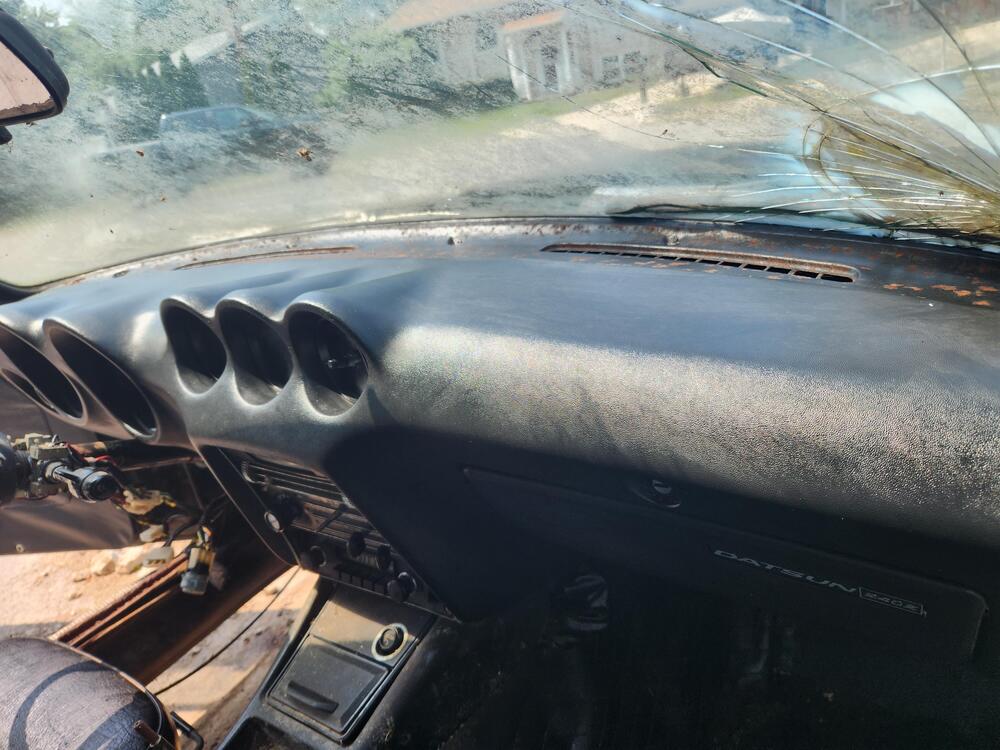
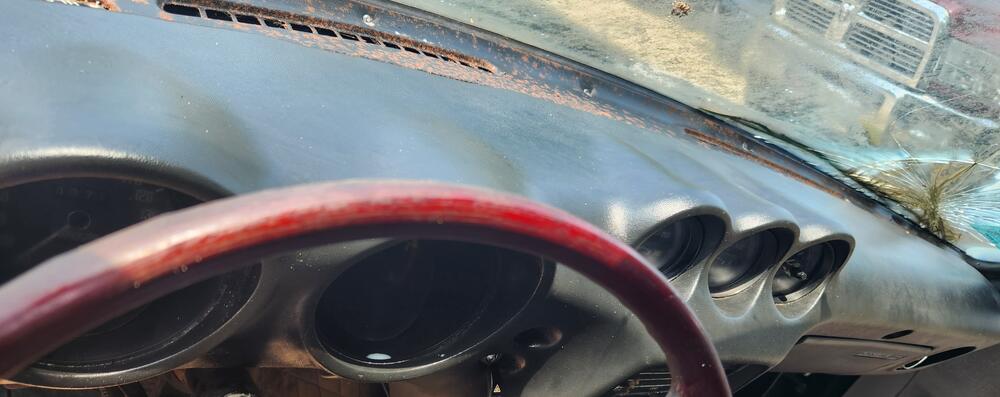
She might be rusty. She might need a new windshield. But she's got a crack free dash!
 2 points
 -
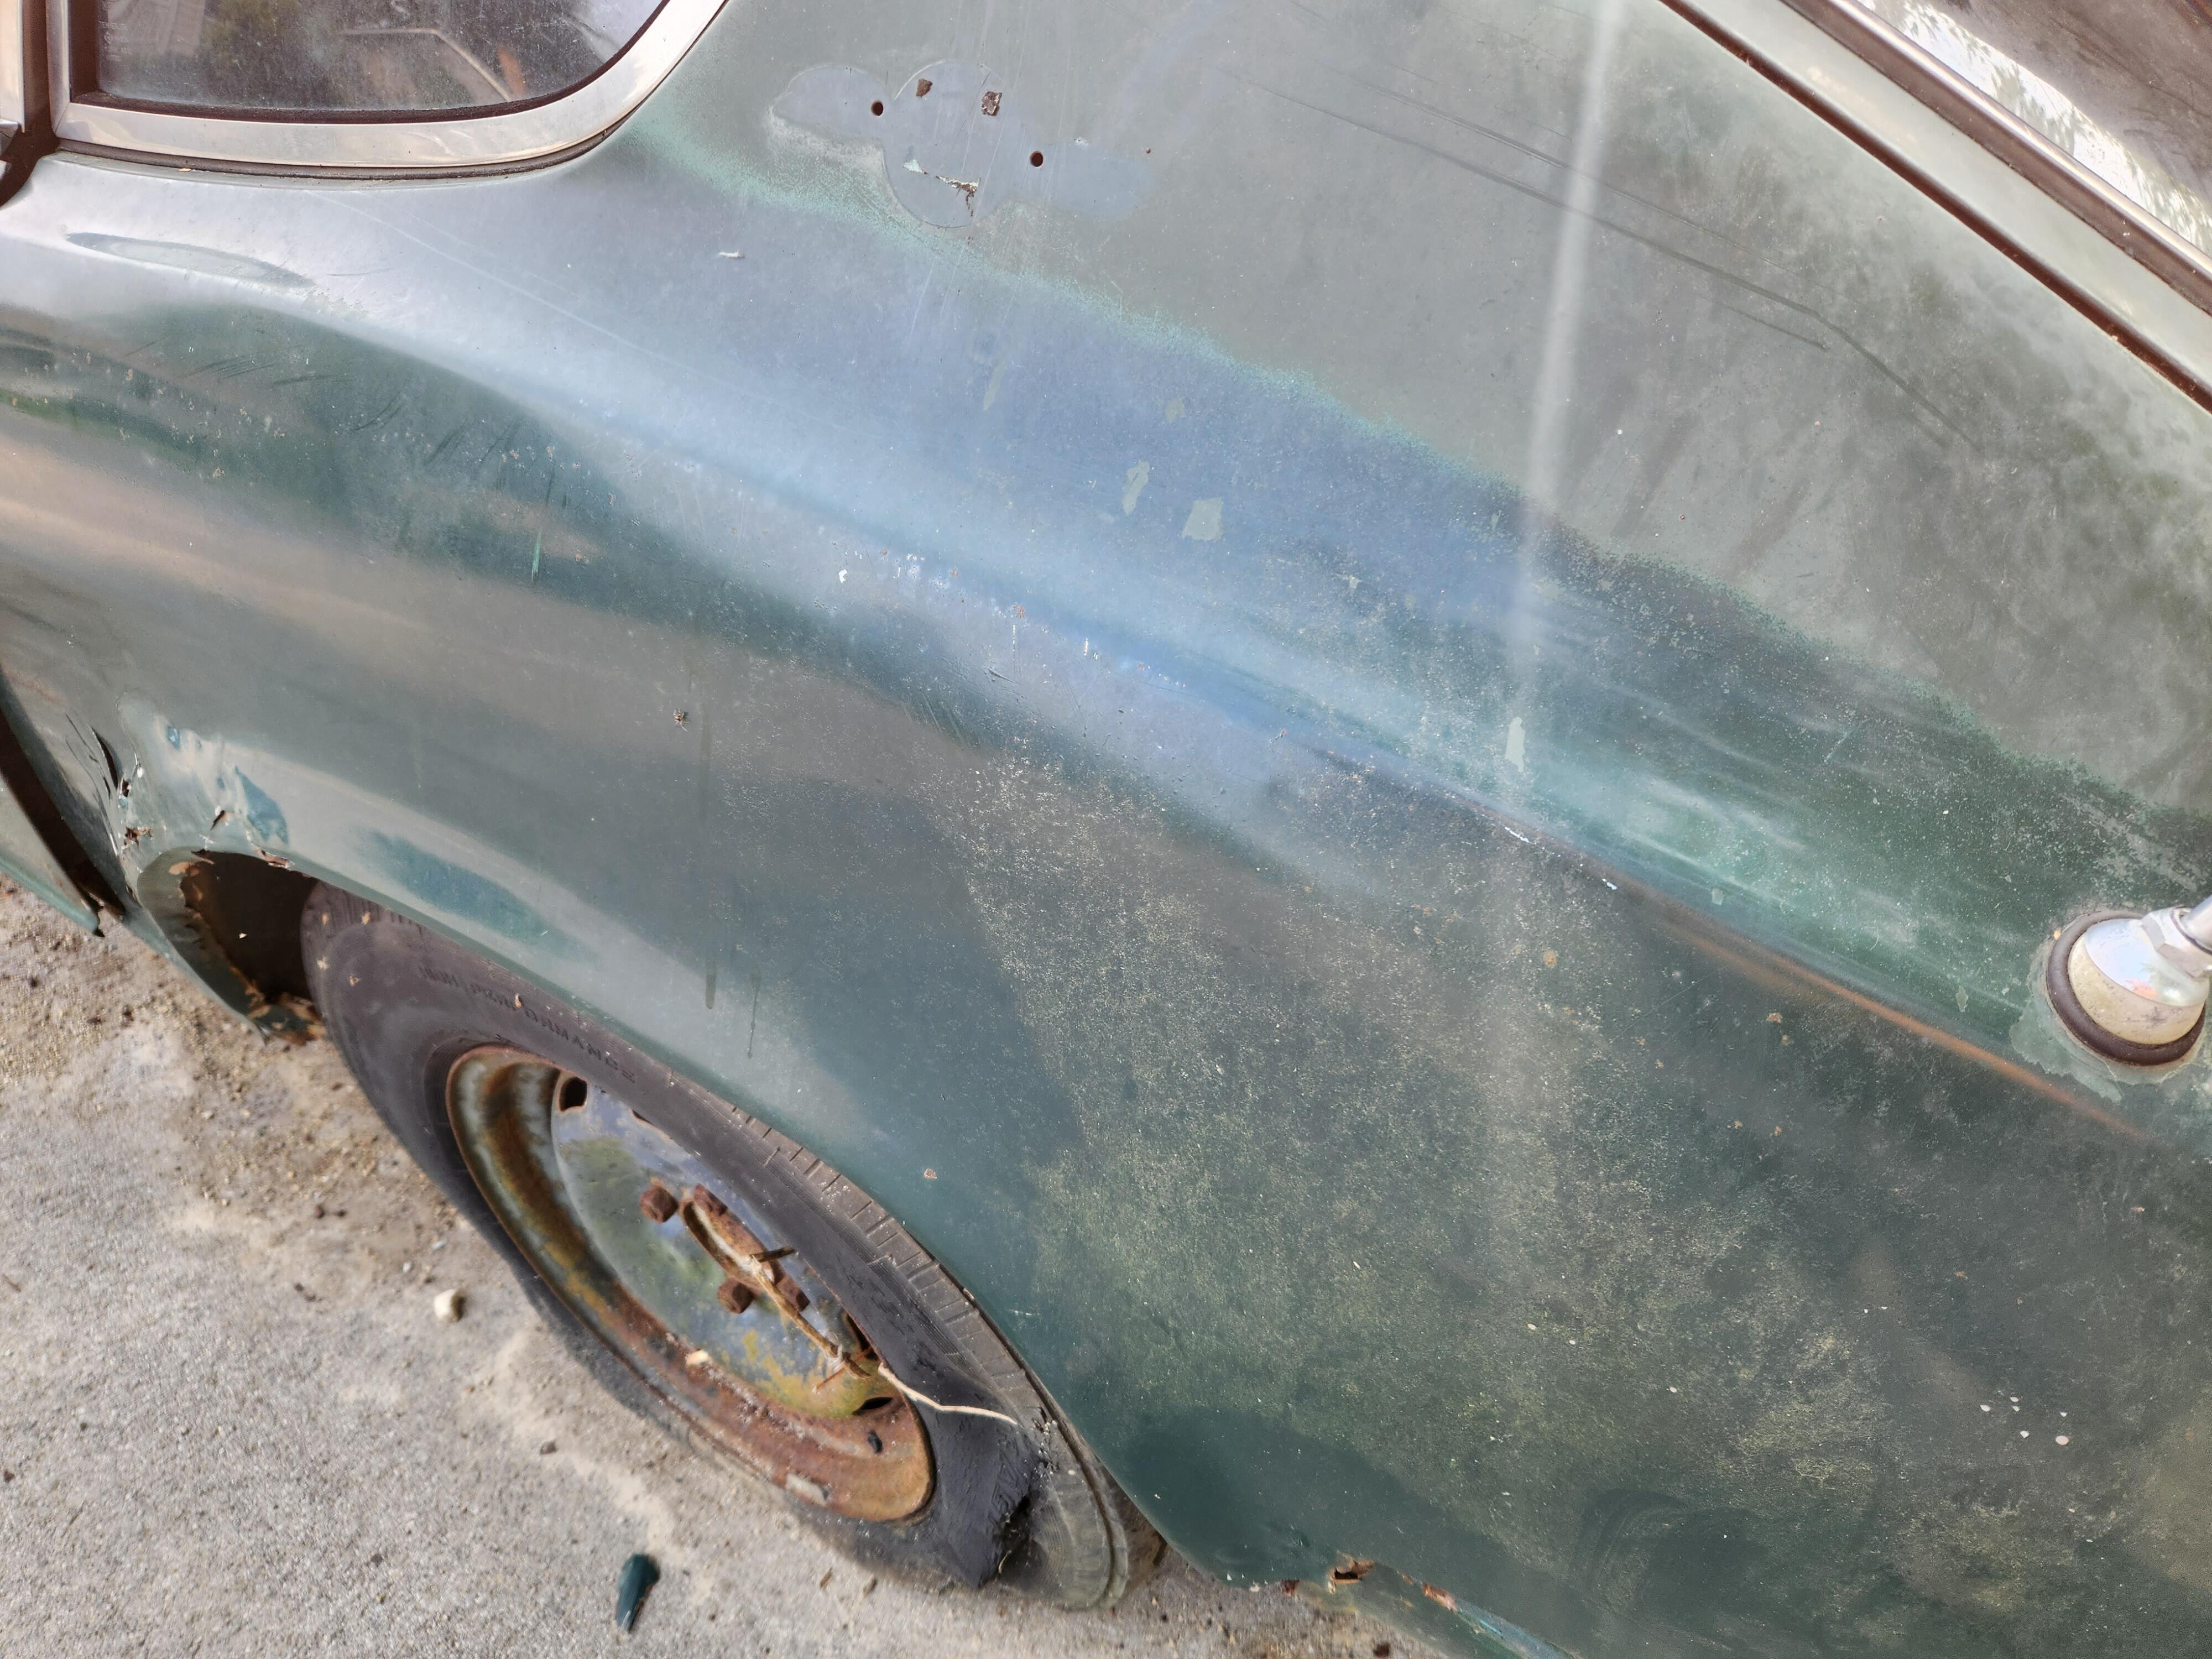
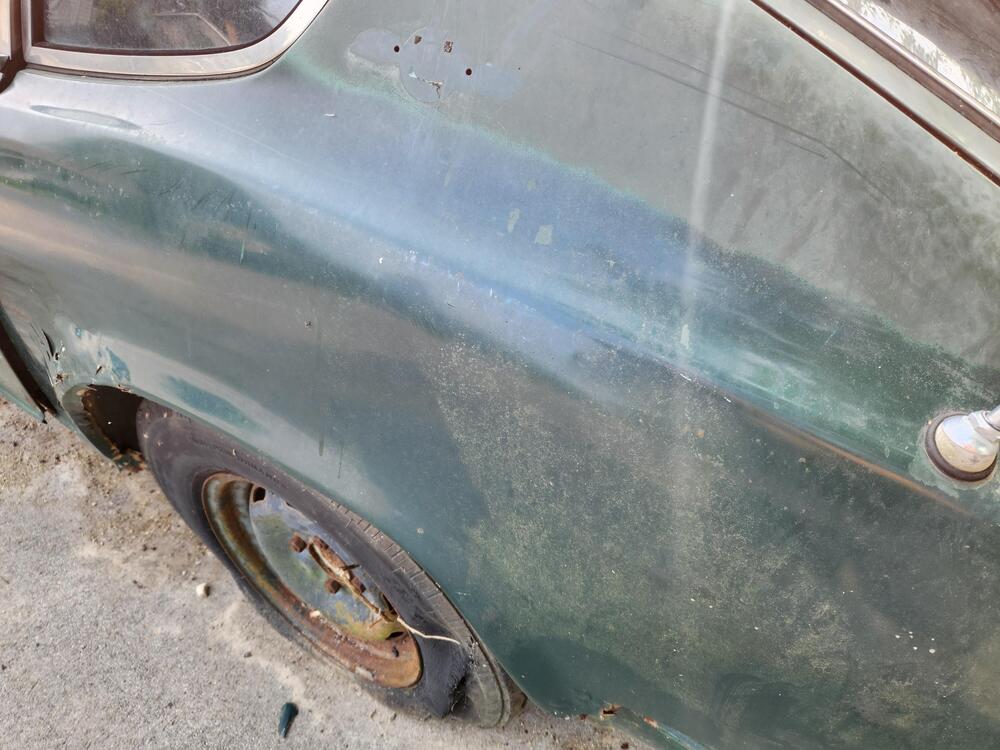
Some updates: I used a little compound on driver's rear quarter with decent results.

 2 points
 -
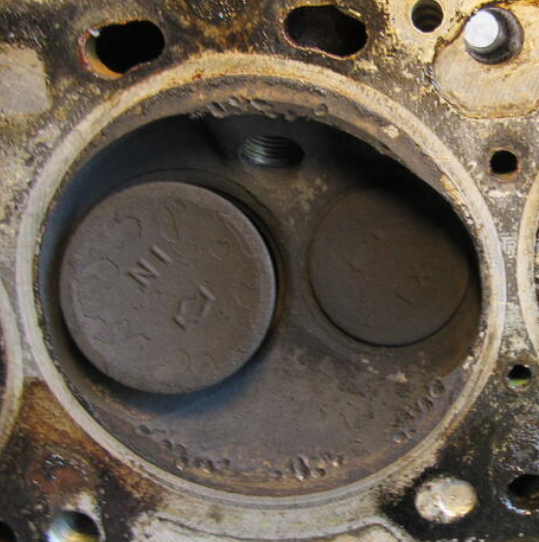
2 pointsHaha!! I know it's a longshot, but the insides of the cylinders really don't look that bad. In order to leak that much past the exhaust valves, I would have expected everything to look worse. Longshot, but here's hoping it's something simple like a valve lash issue!2 points
-
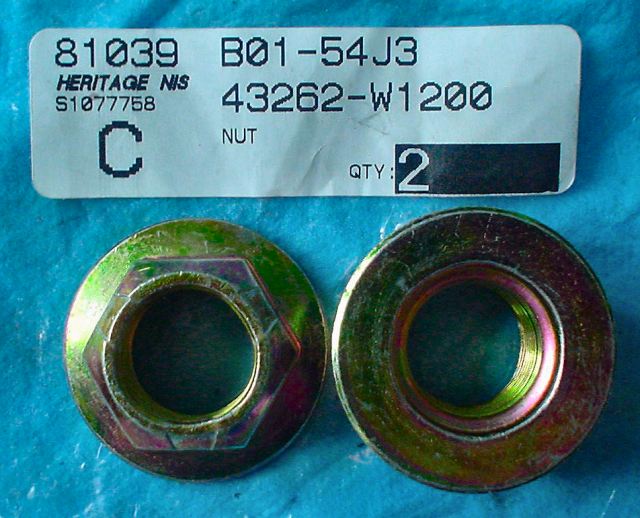
I'm not sure I would trust loctite there, even the red stuff. If that nut comes loose, you could lose a wheel. Highly unlikely, but just not sure I would trust a loctite bond and ONLY a loctite bond. So I've done rear wheel bearings a couple times and I've switched over to the newer style of deformed thread nuts they used on the 280ZX cars. I'm not sure how the thickness of the newer ones compares to the older ones, but if it's thin enough and the deformed threads are down far enough, they could be a simple solution. The newer nut looks like this. Photo credit @ Blue:
 2 points
 -
2 pointsThey fit just fine. Fuel profile is different (no surprise), but mechanically they mount identically.2 points
-
2 points
-
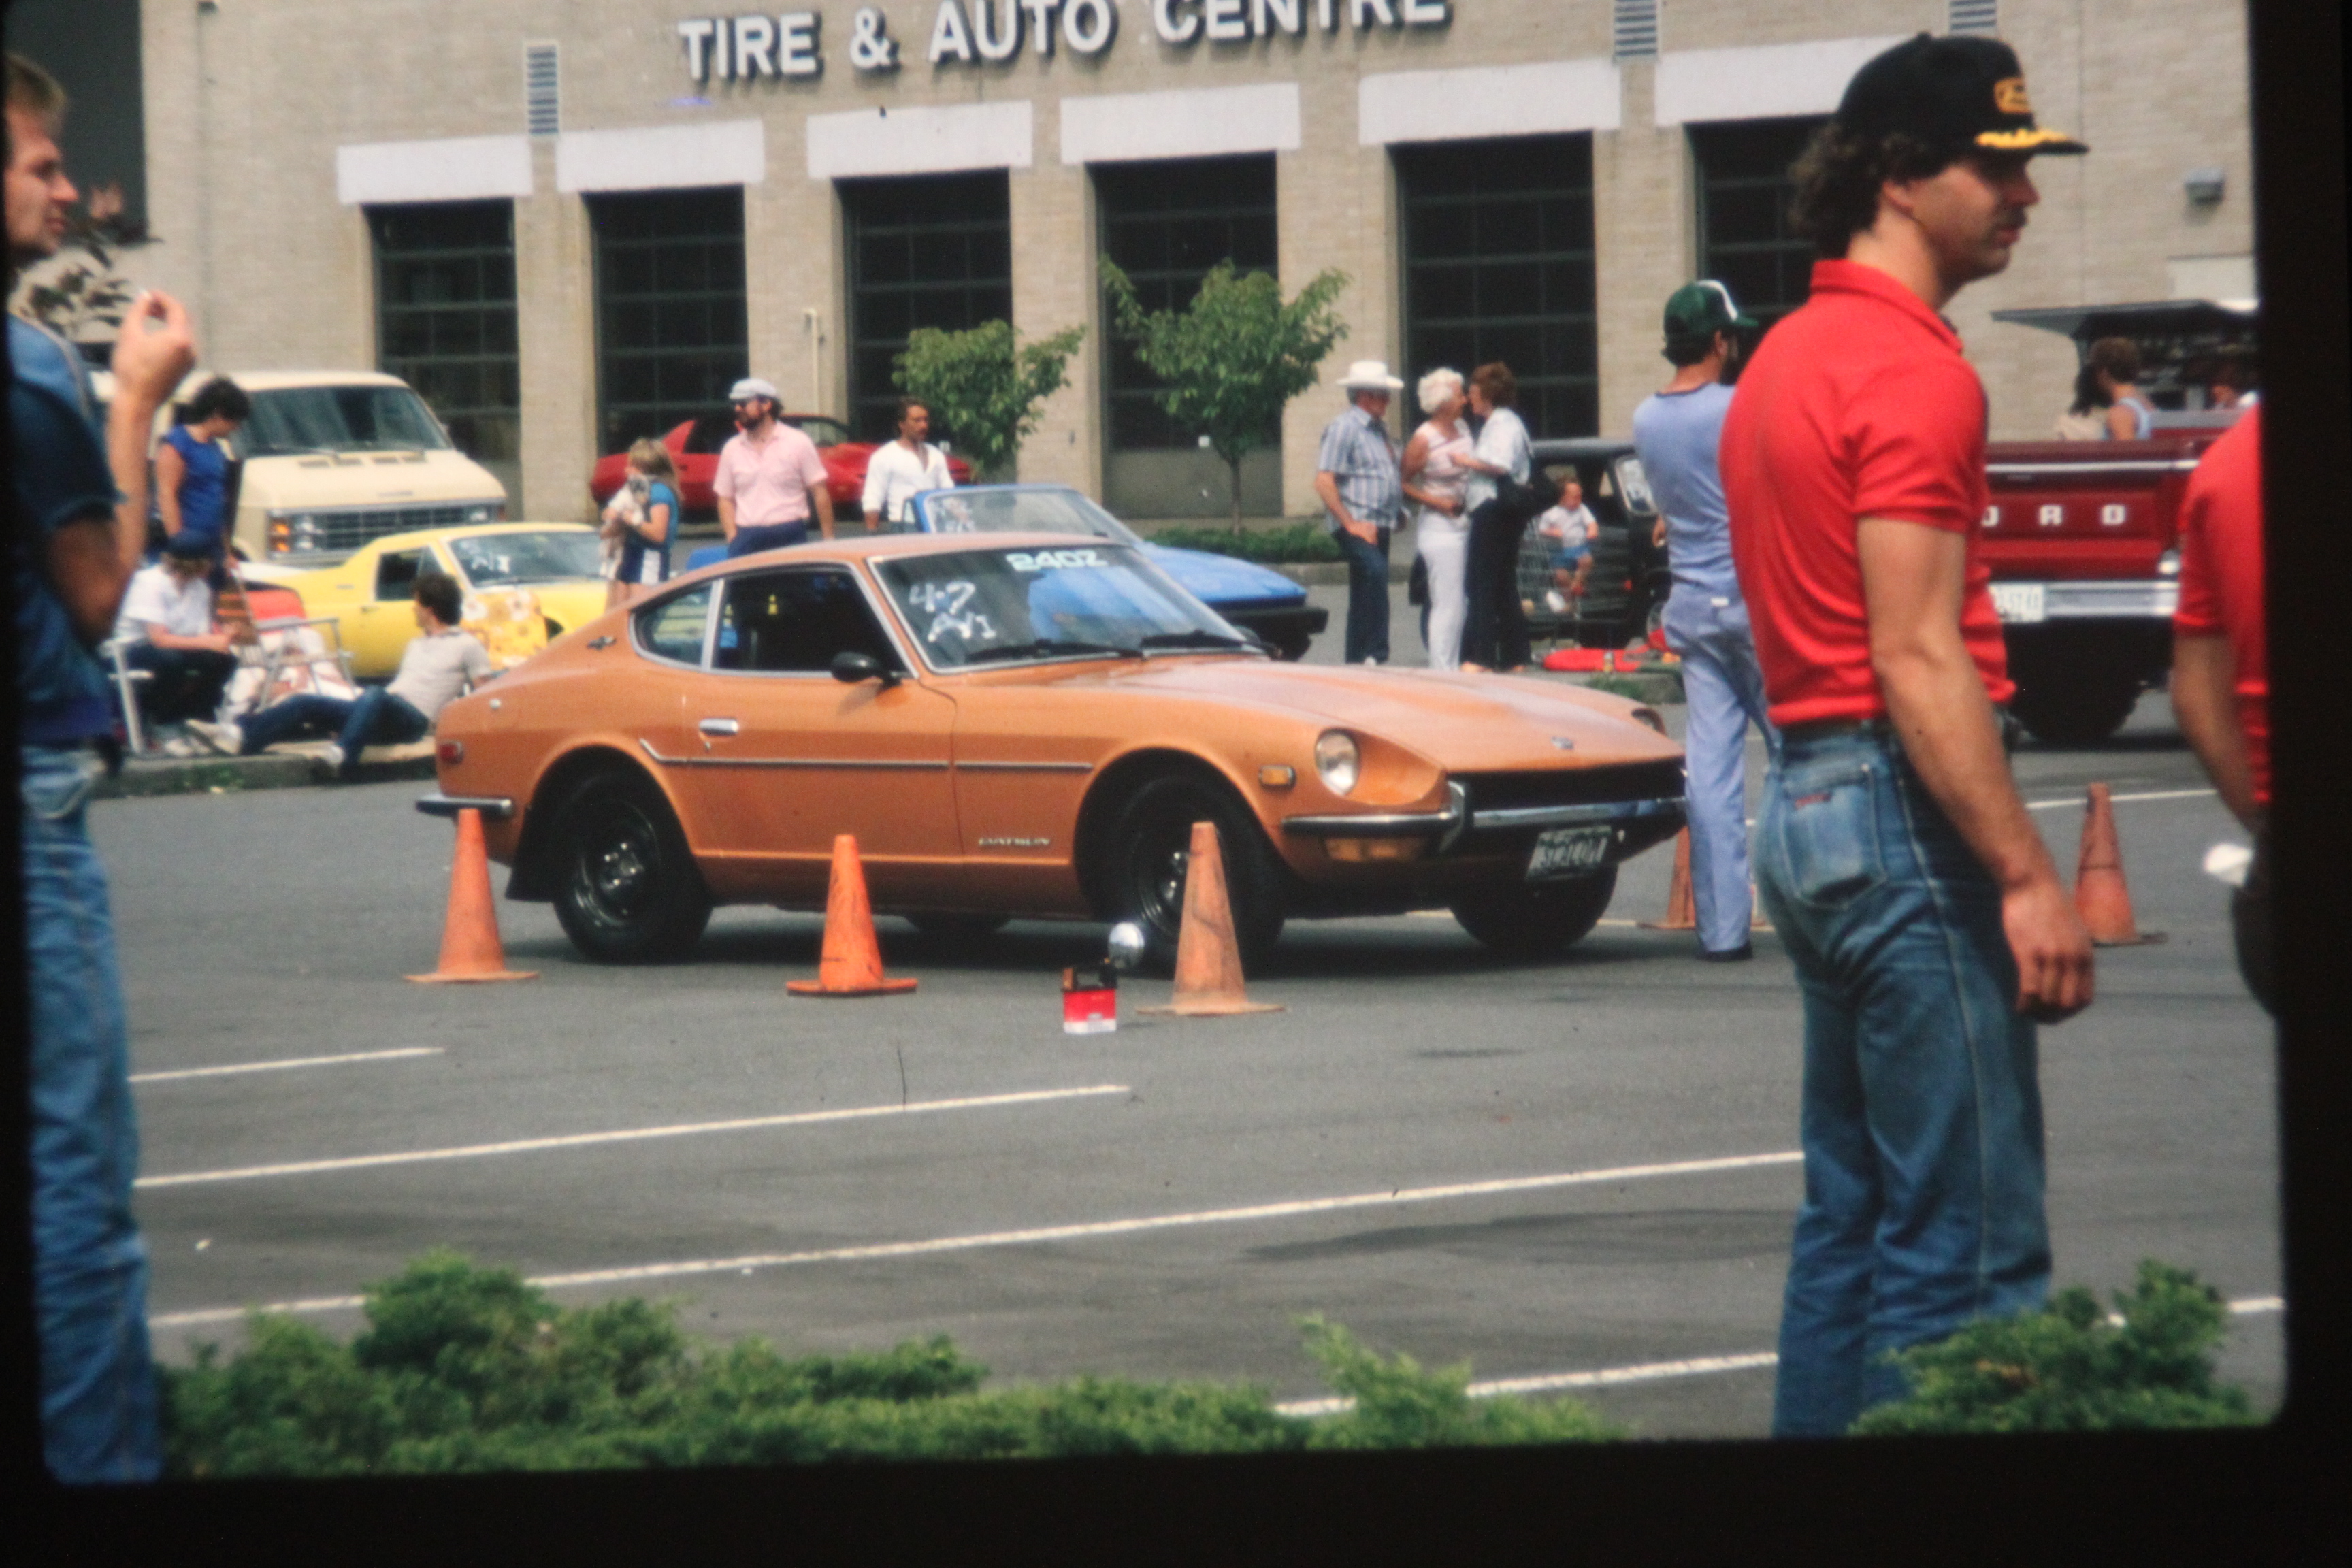
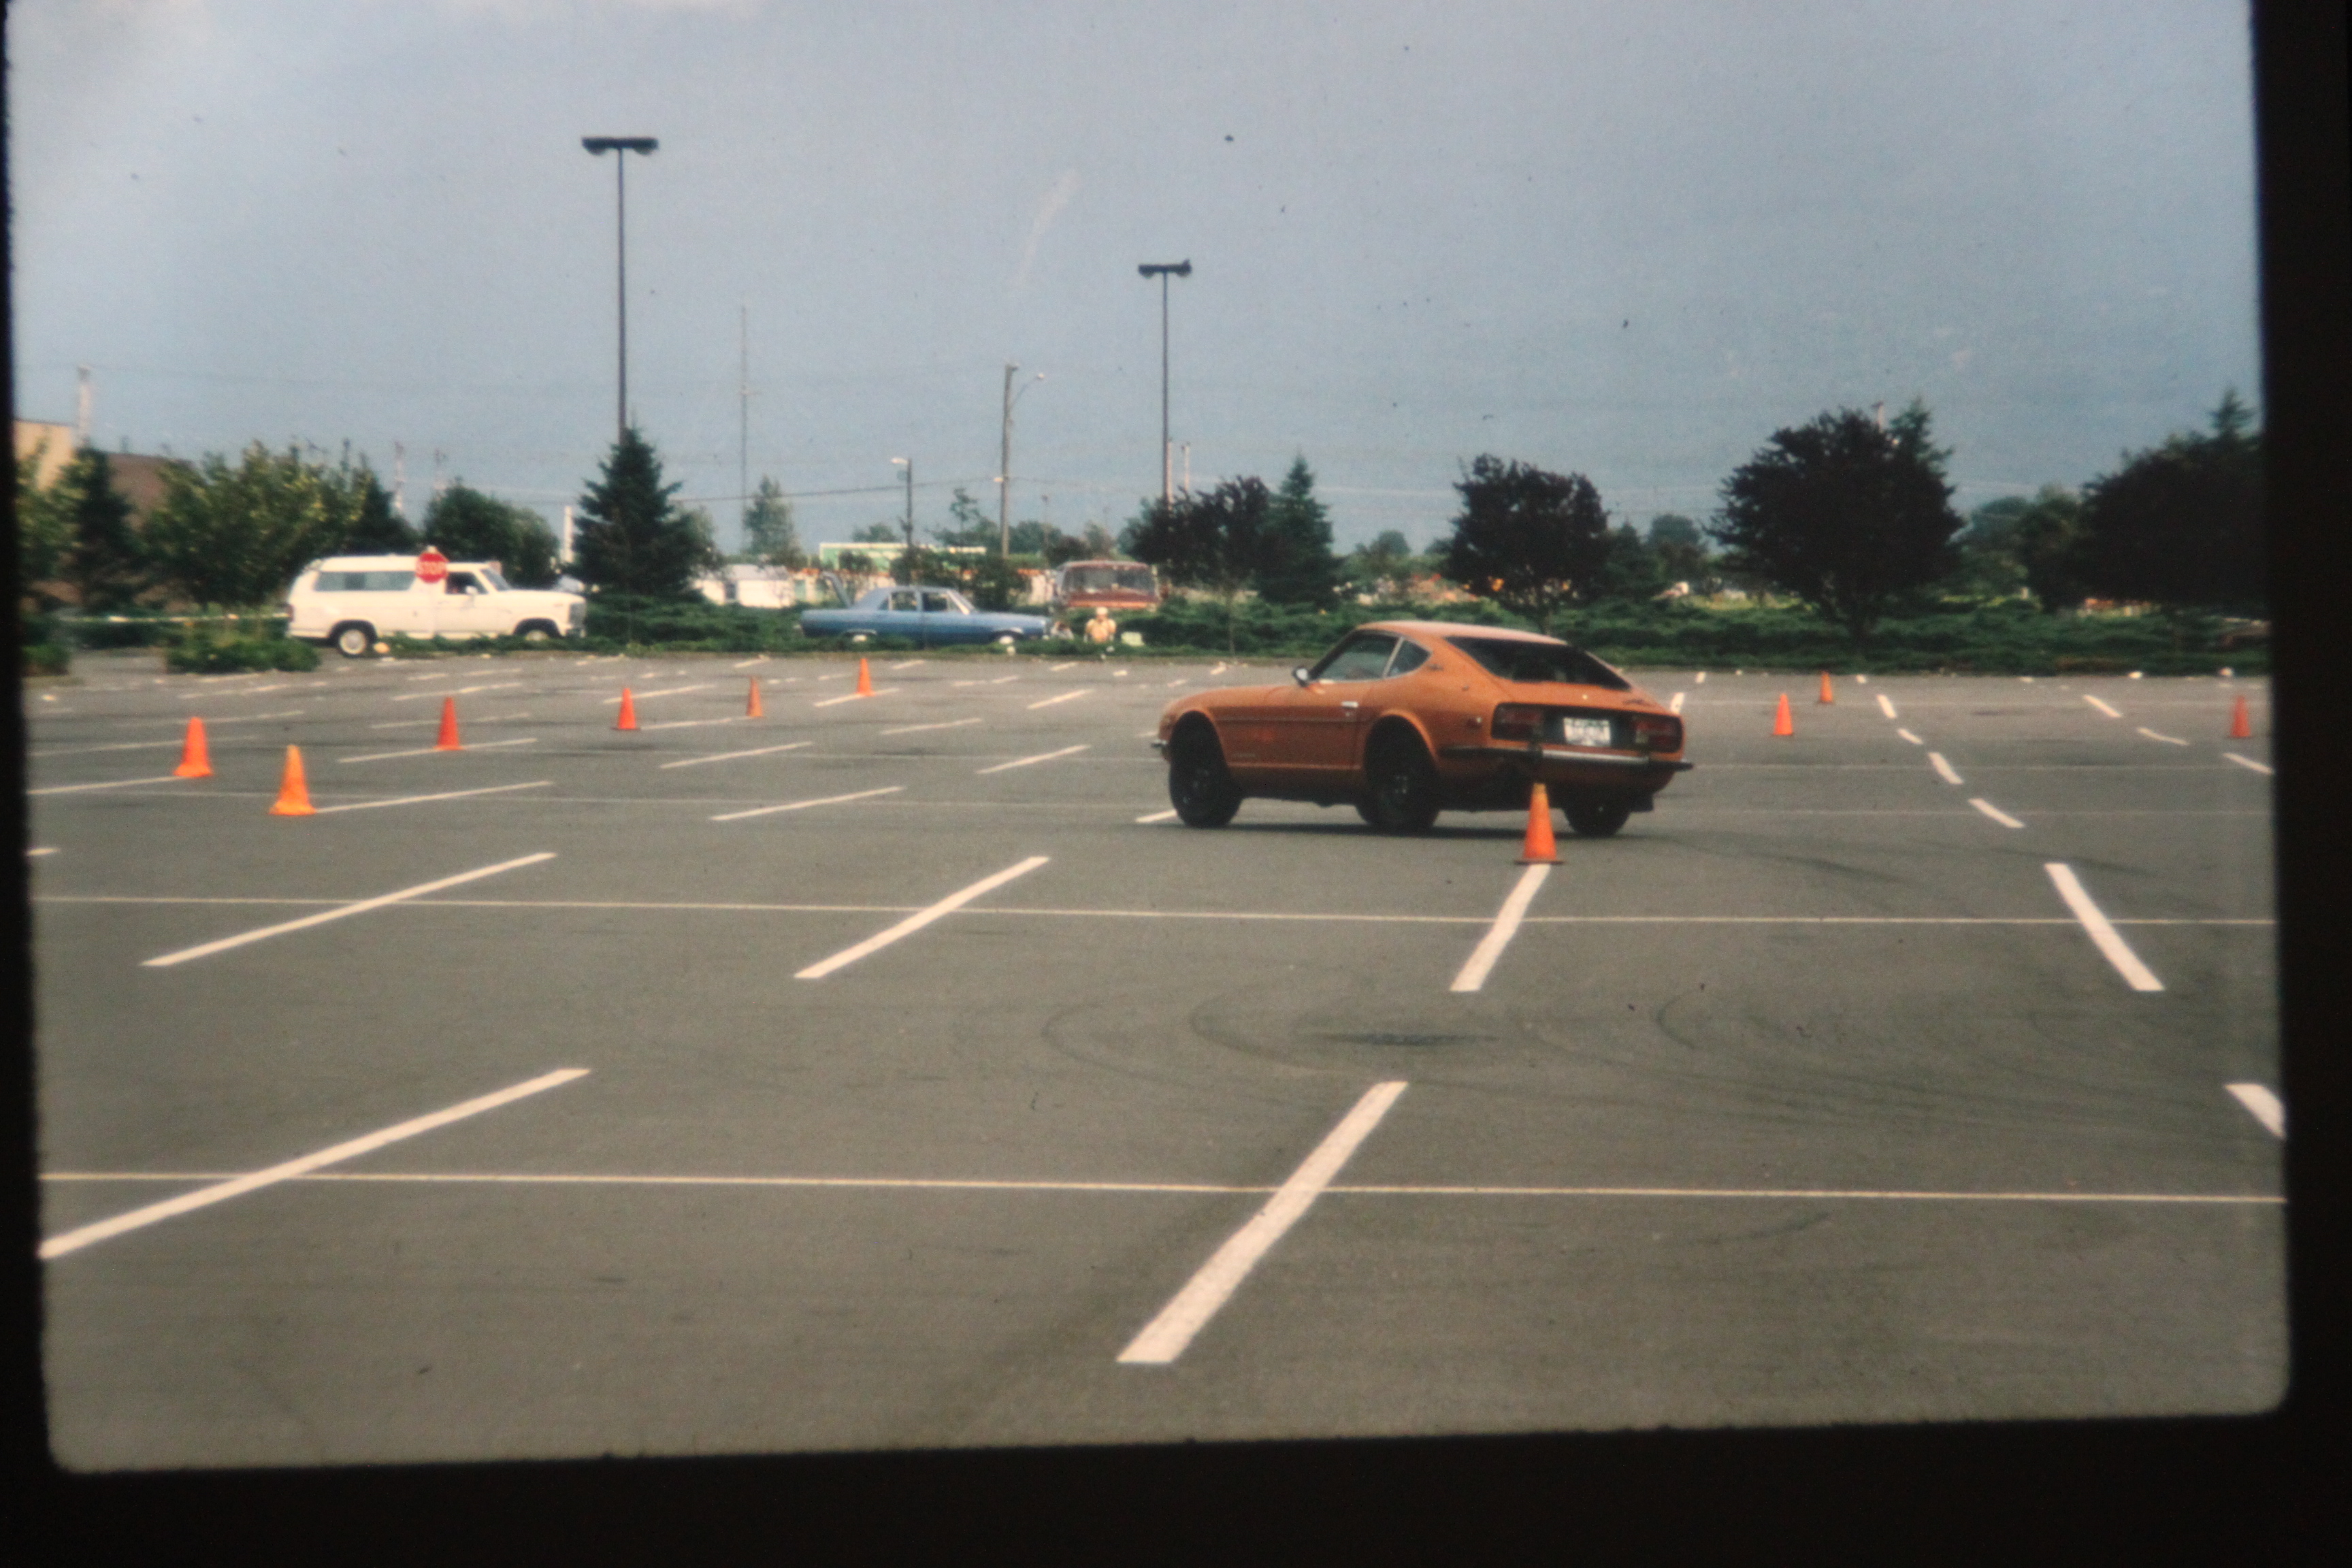
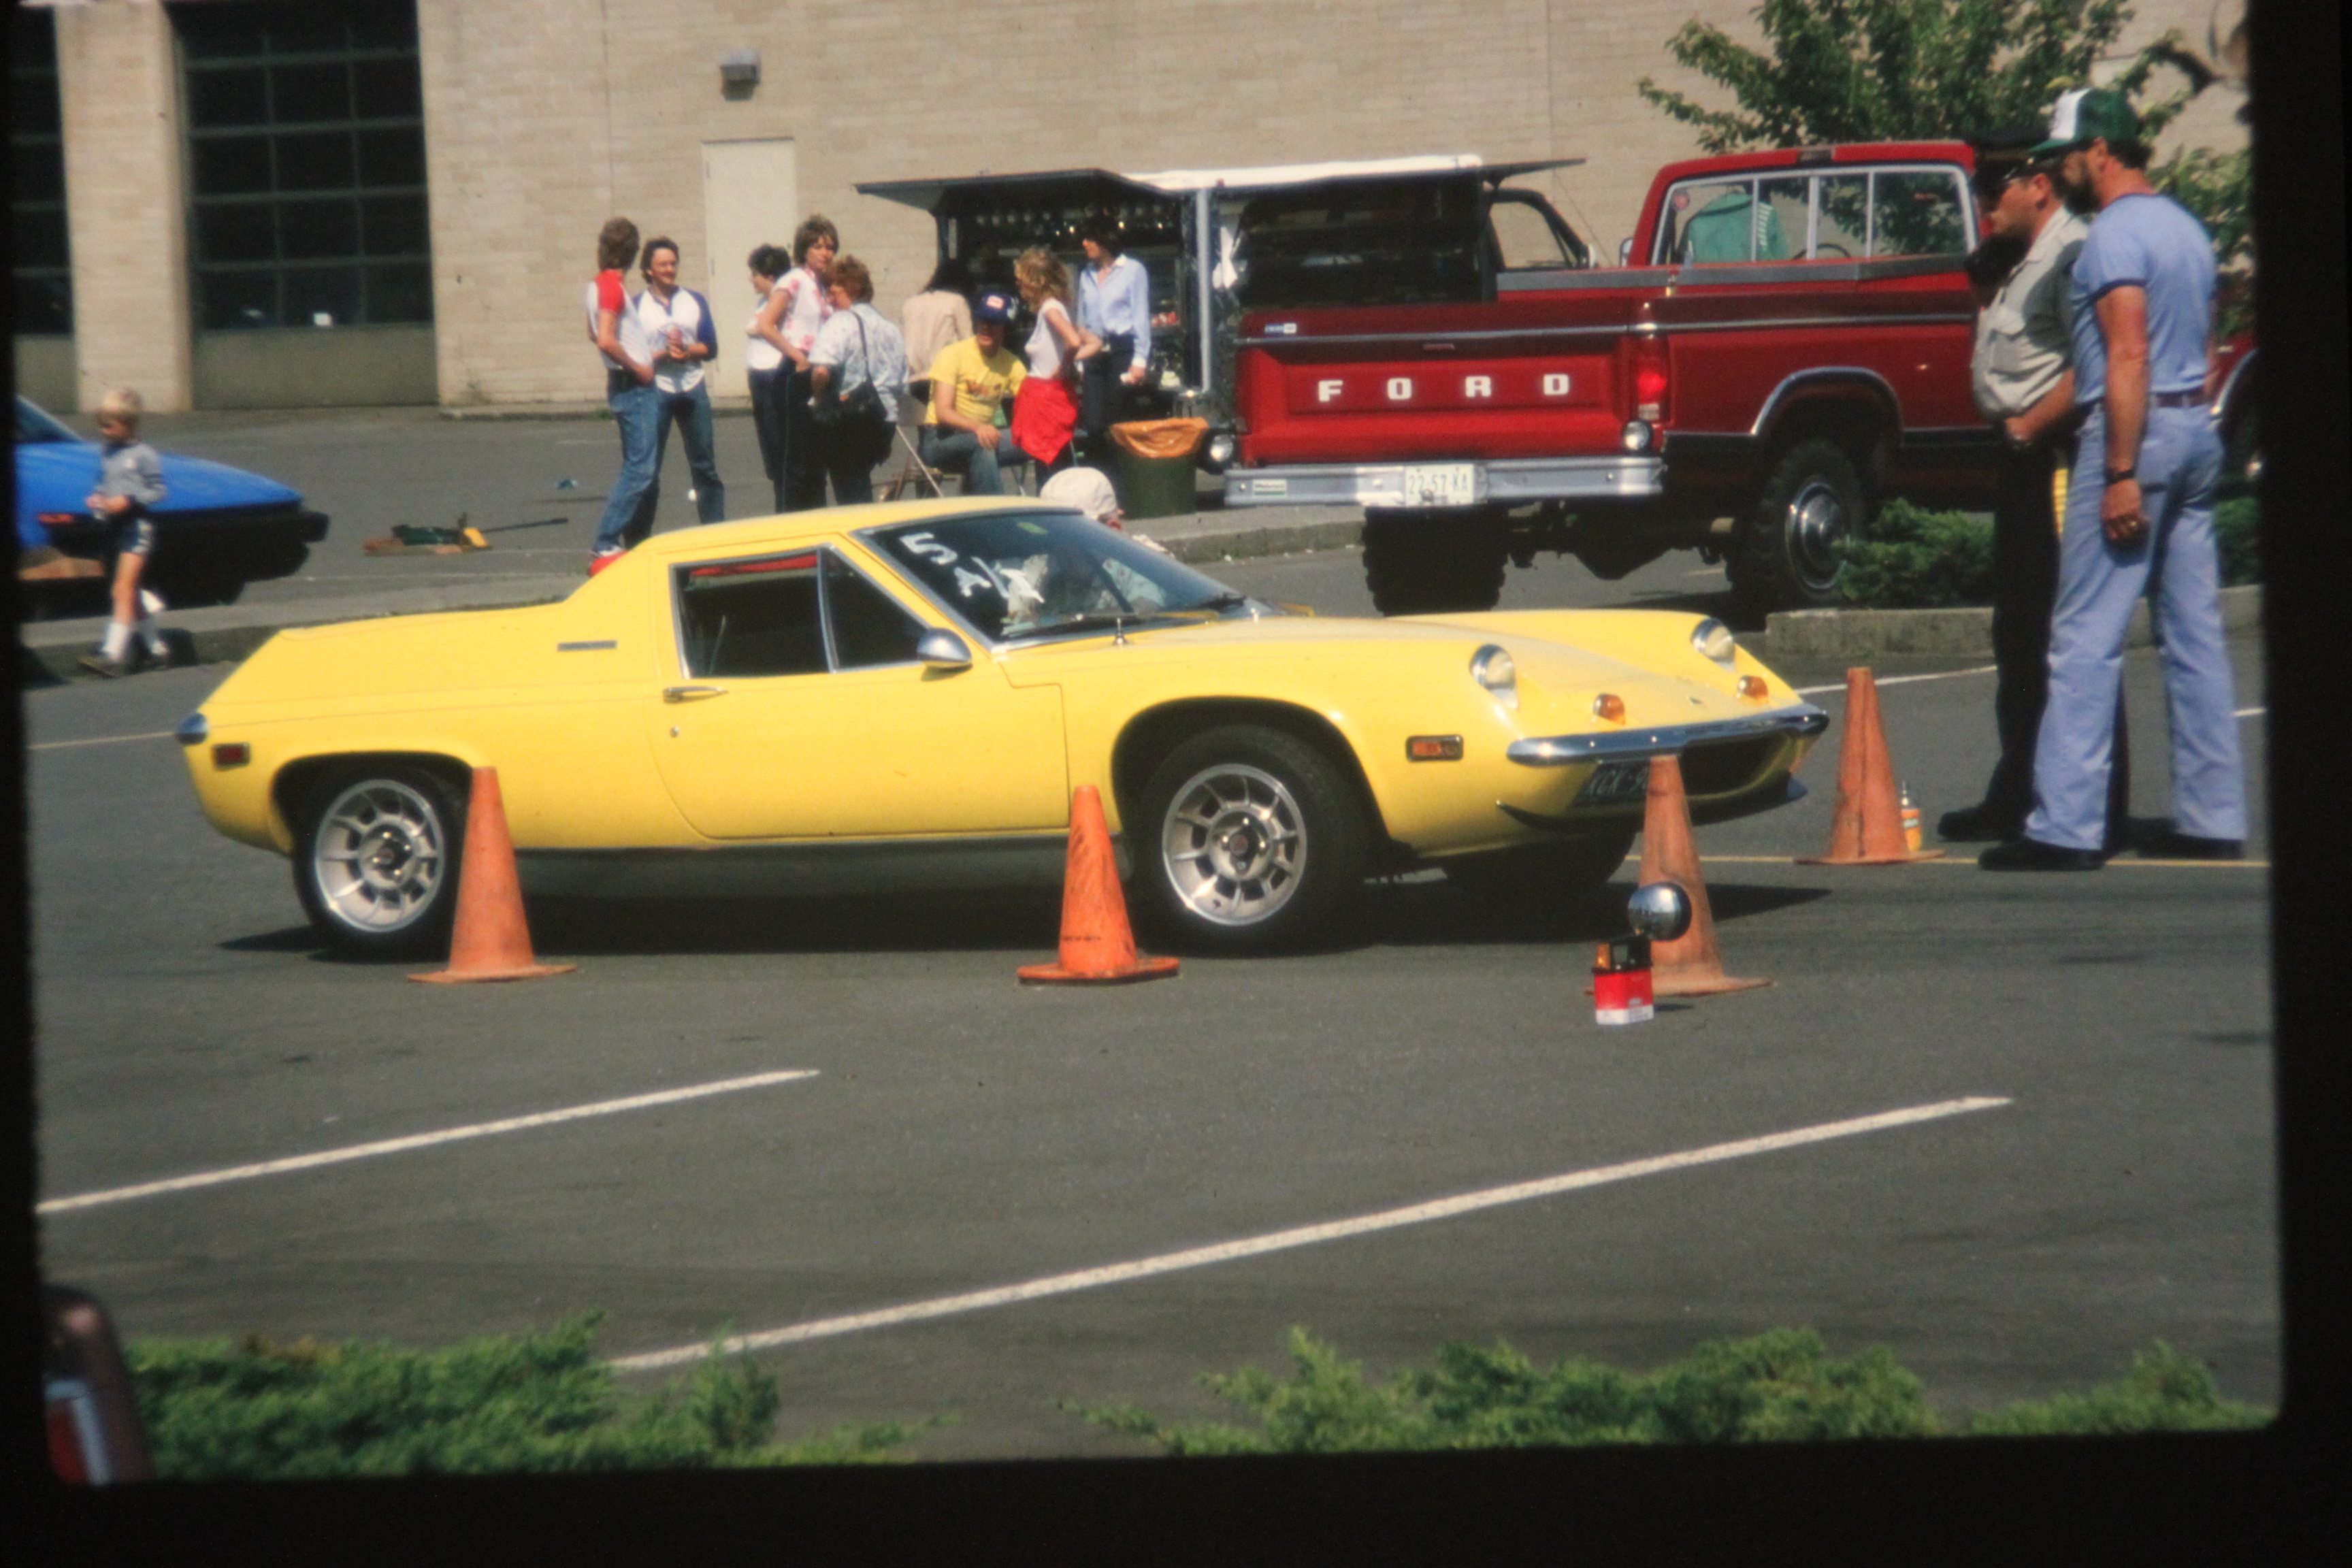
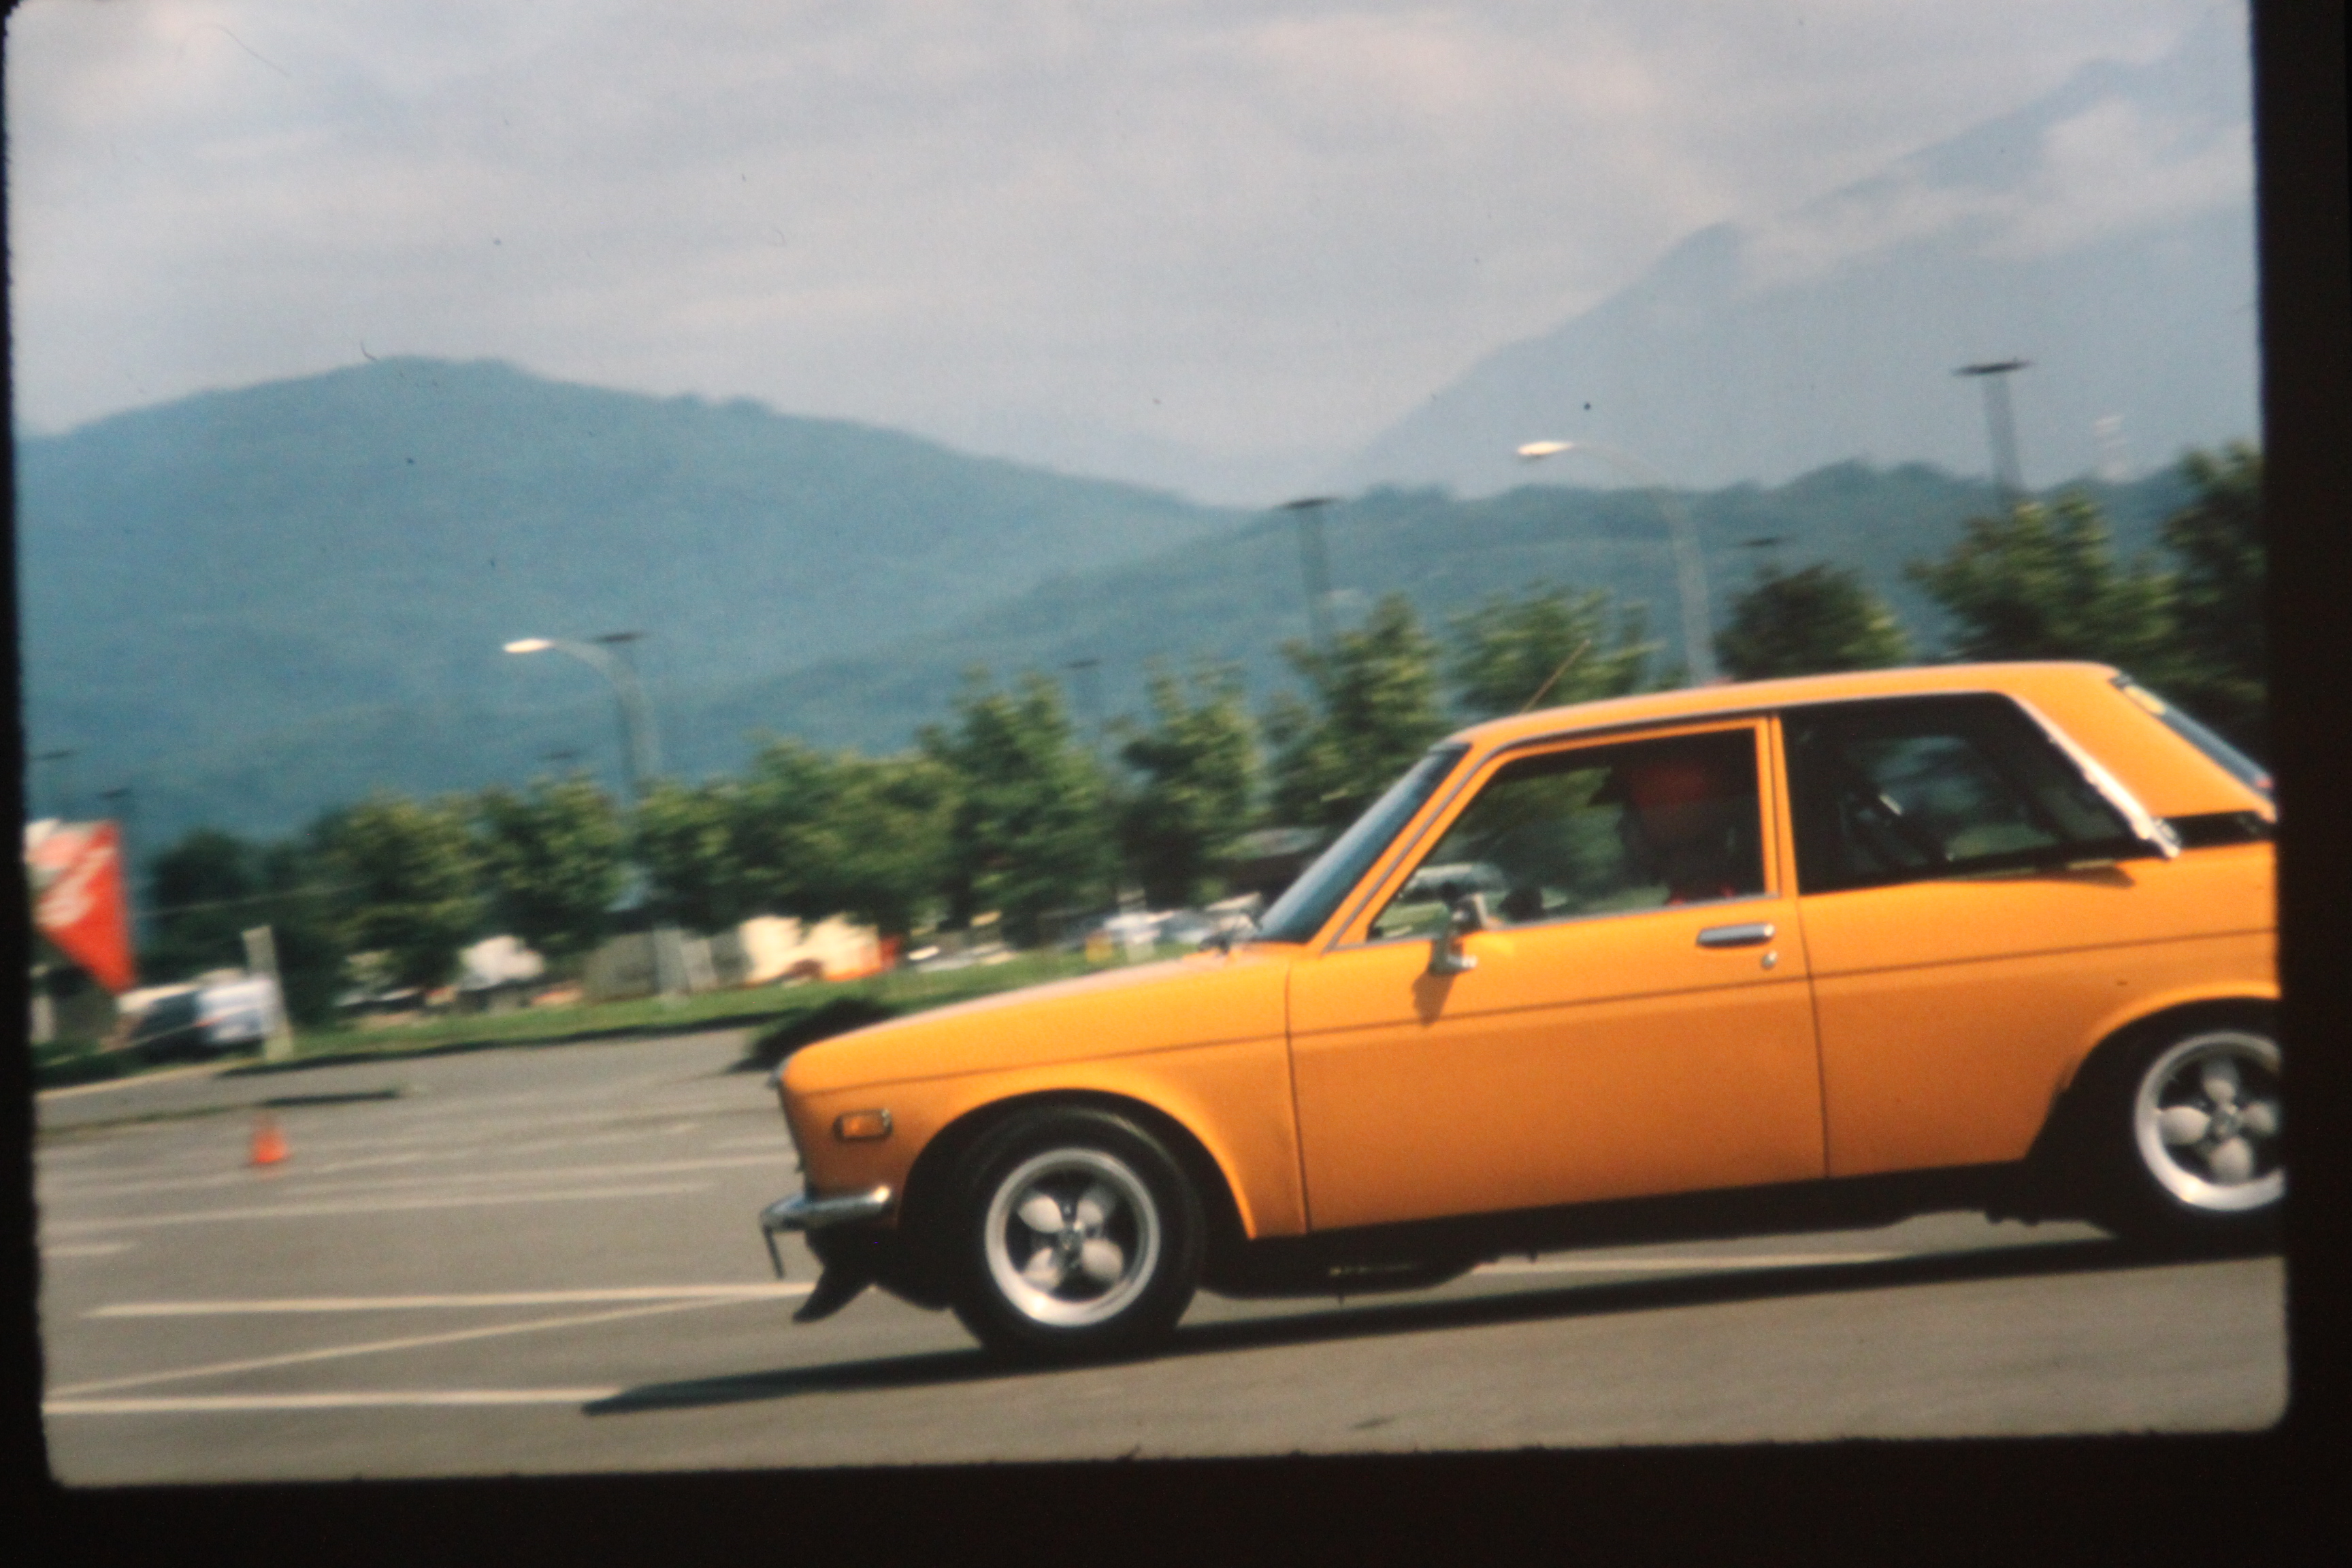
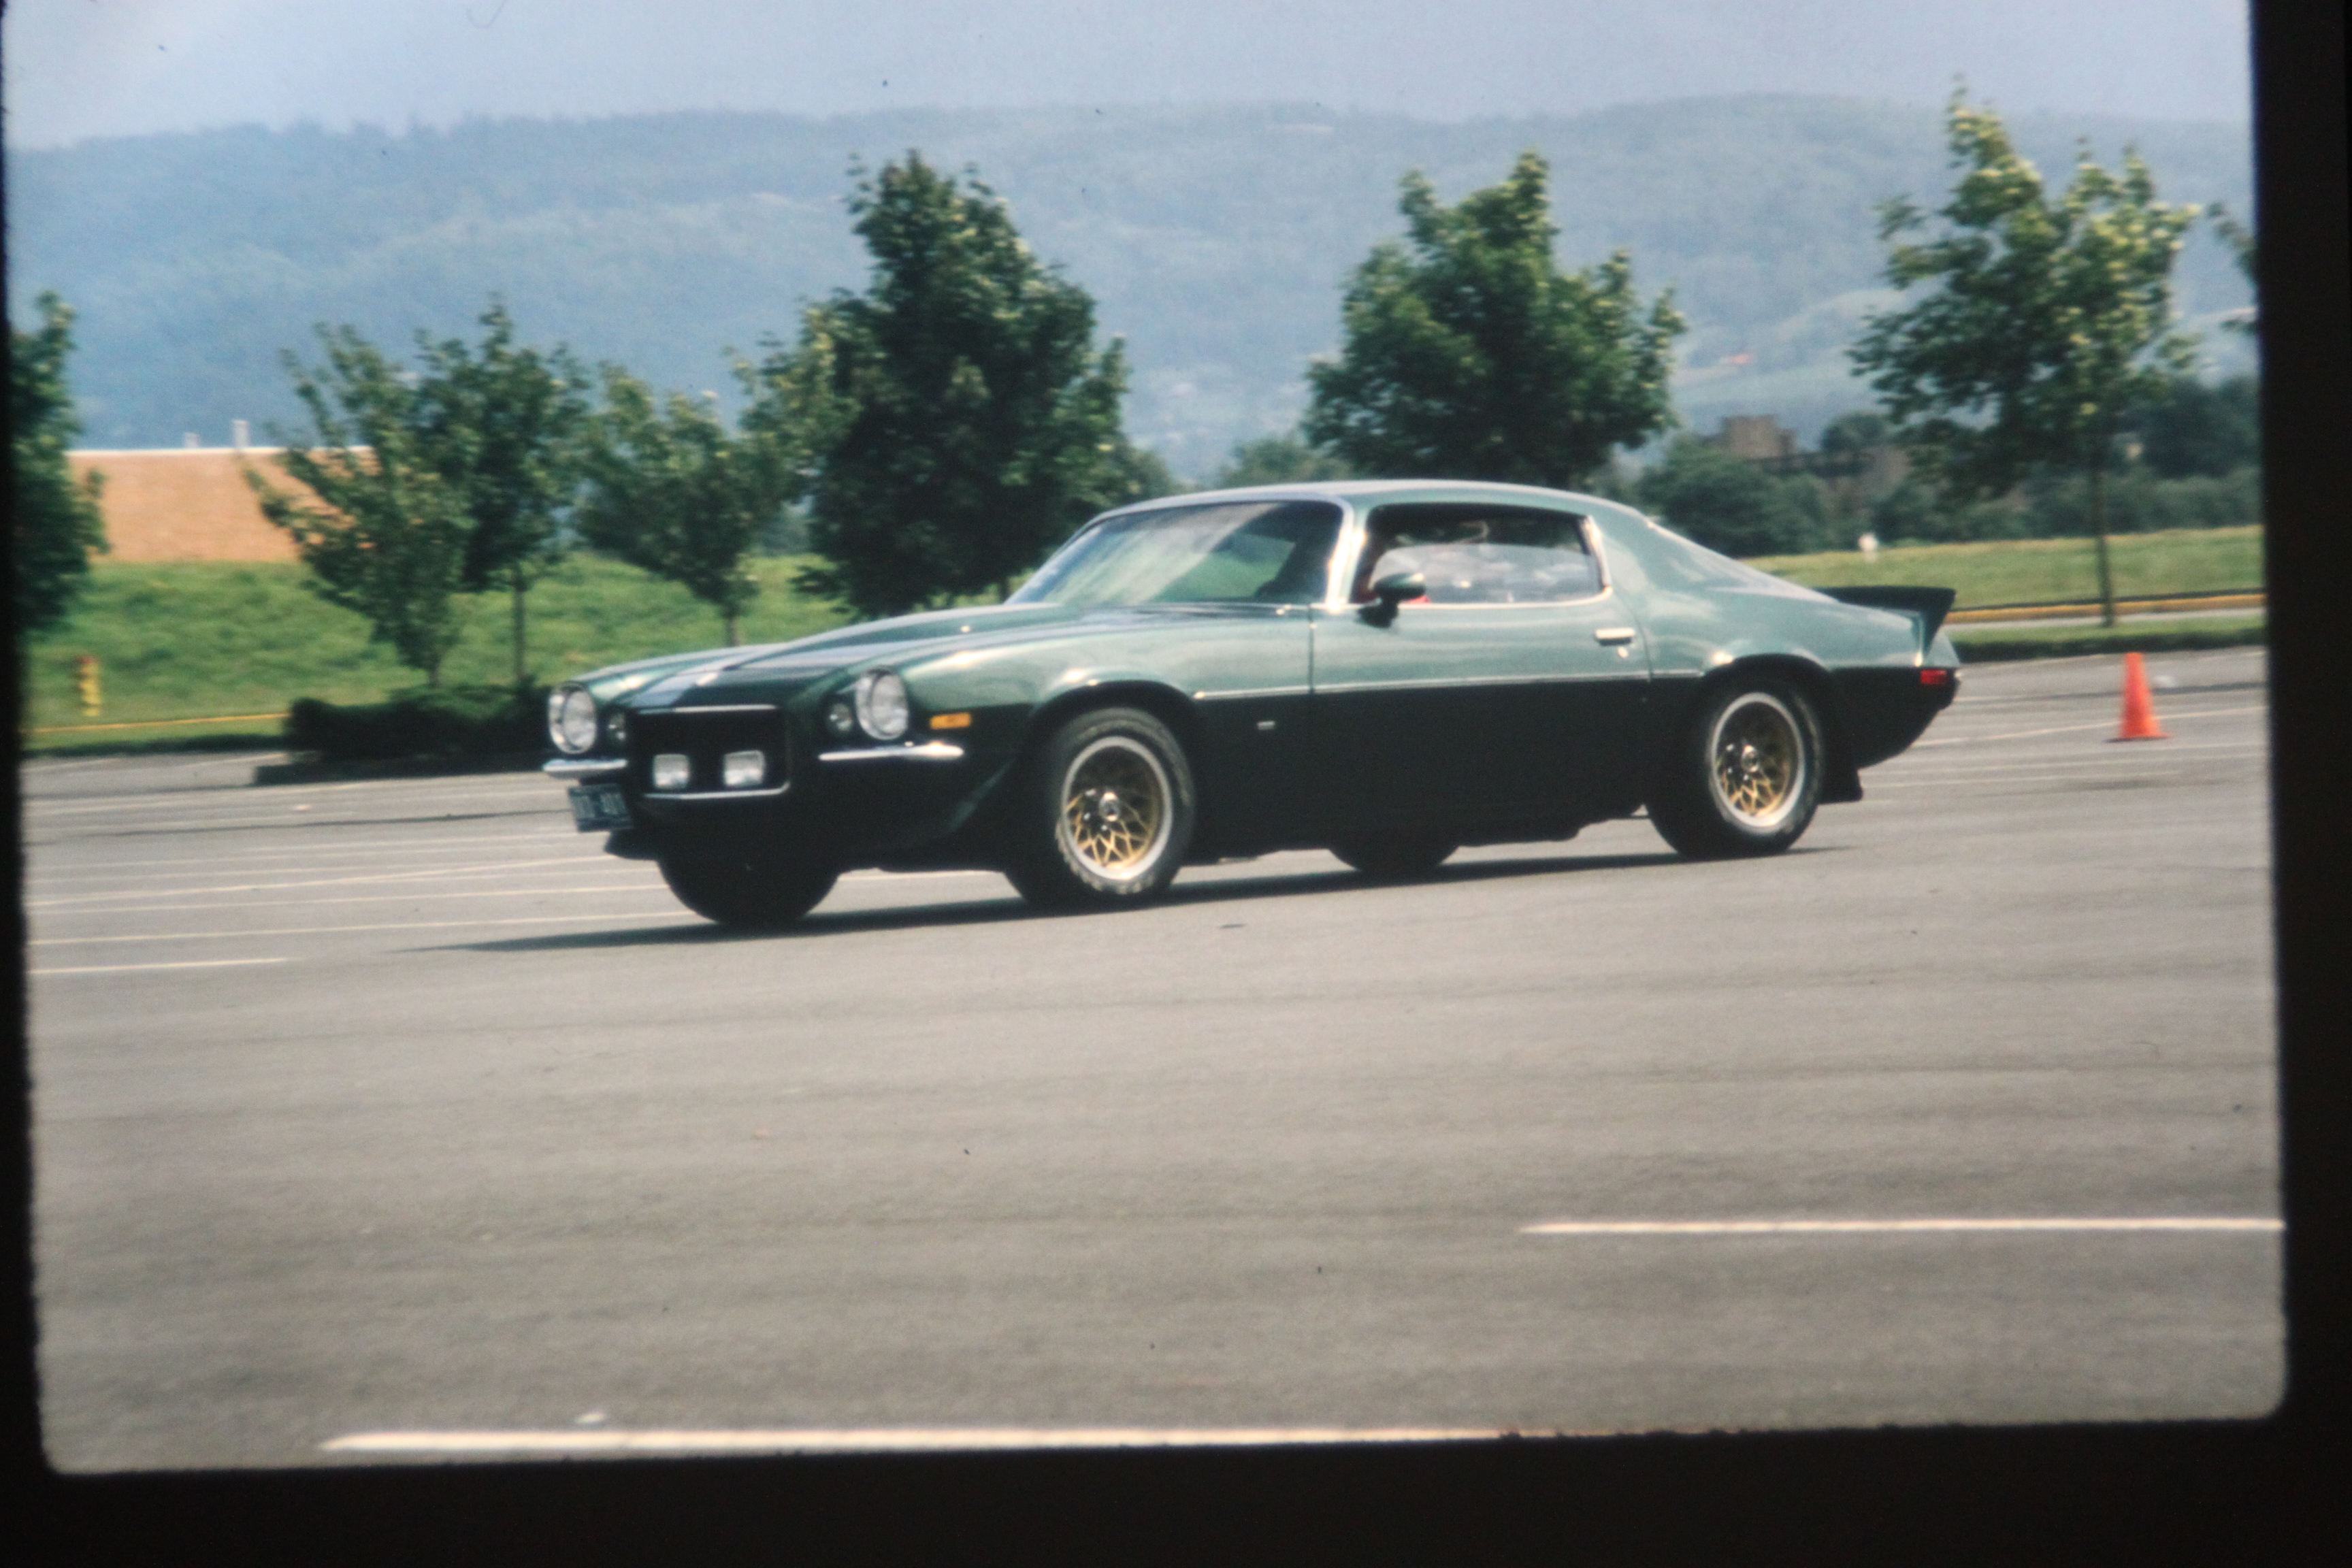
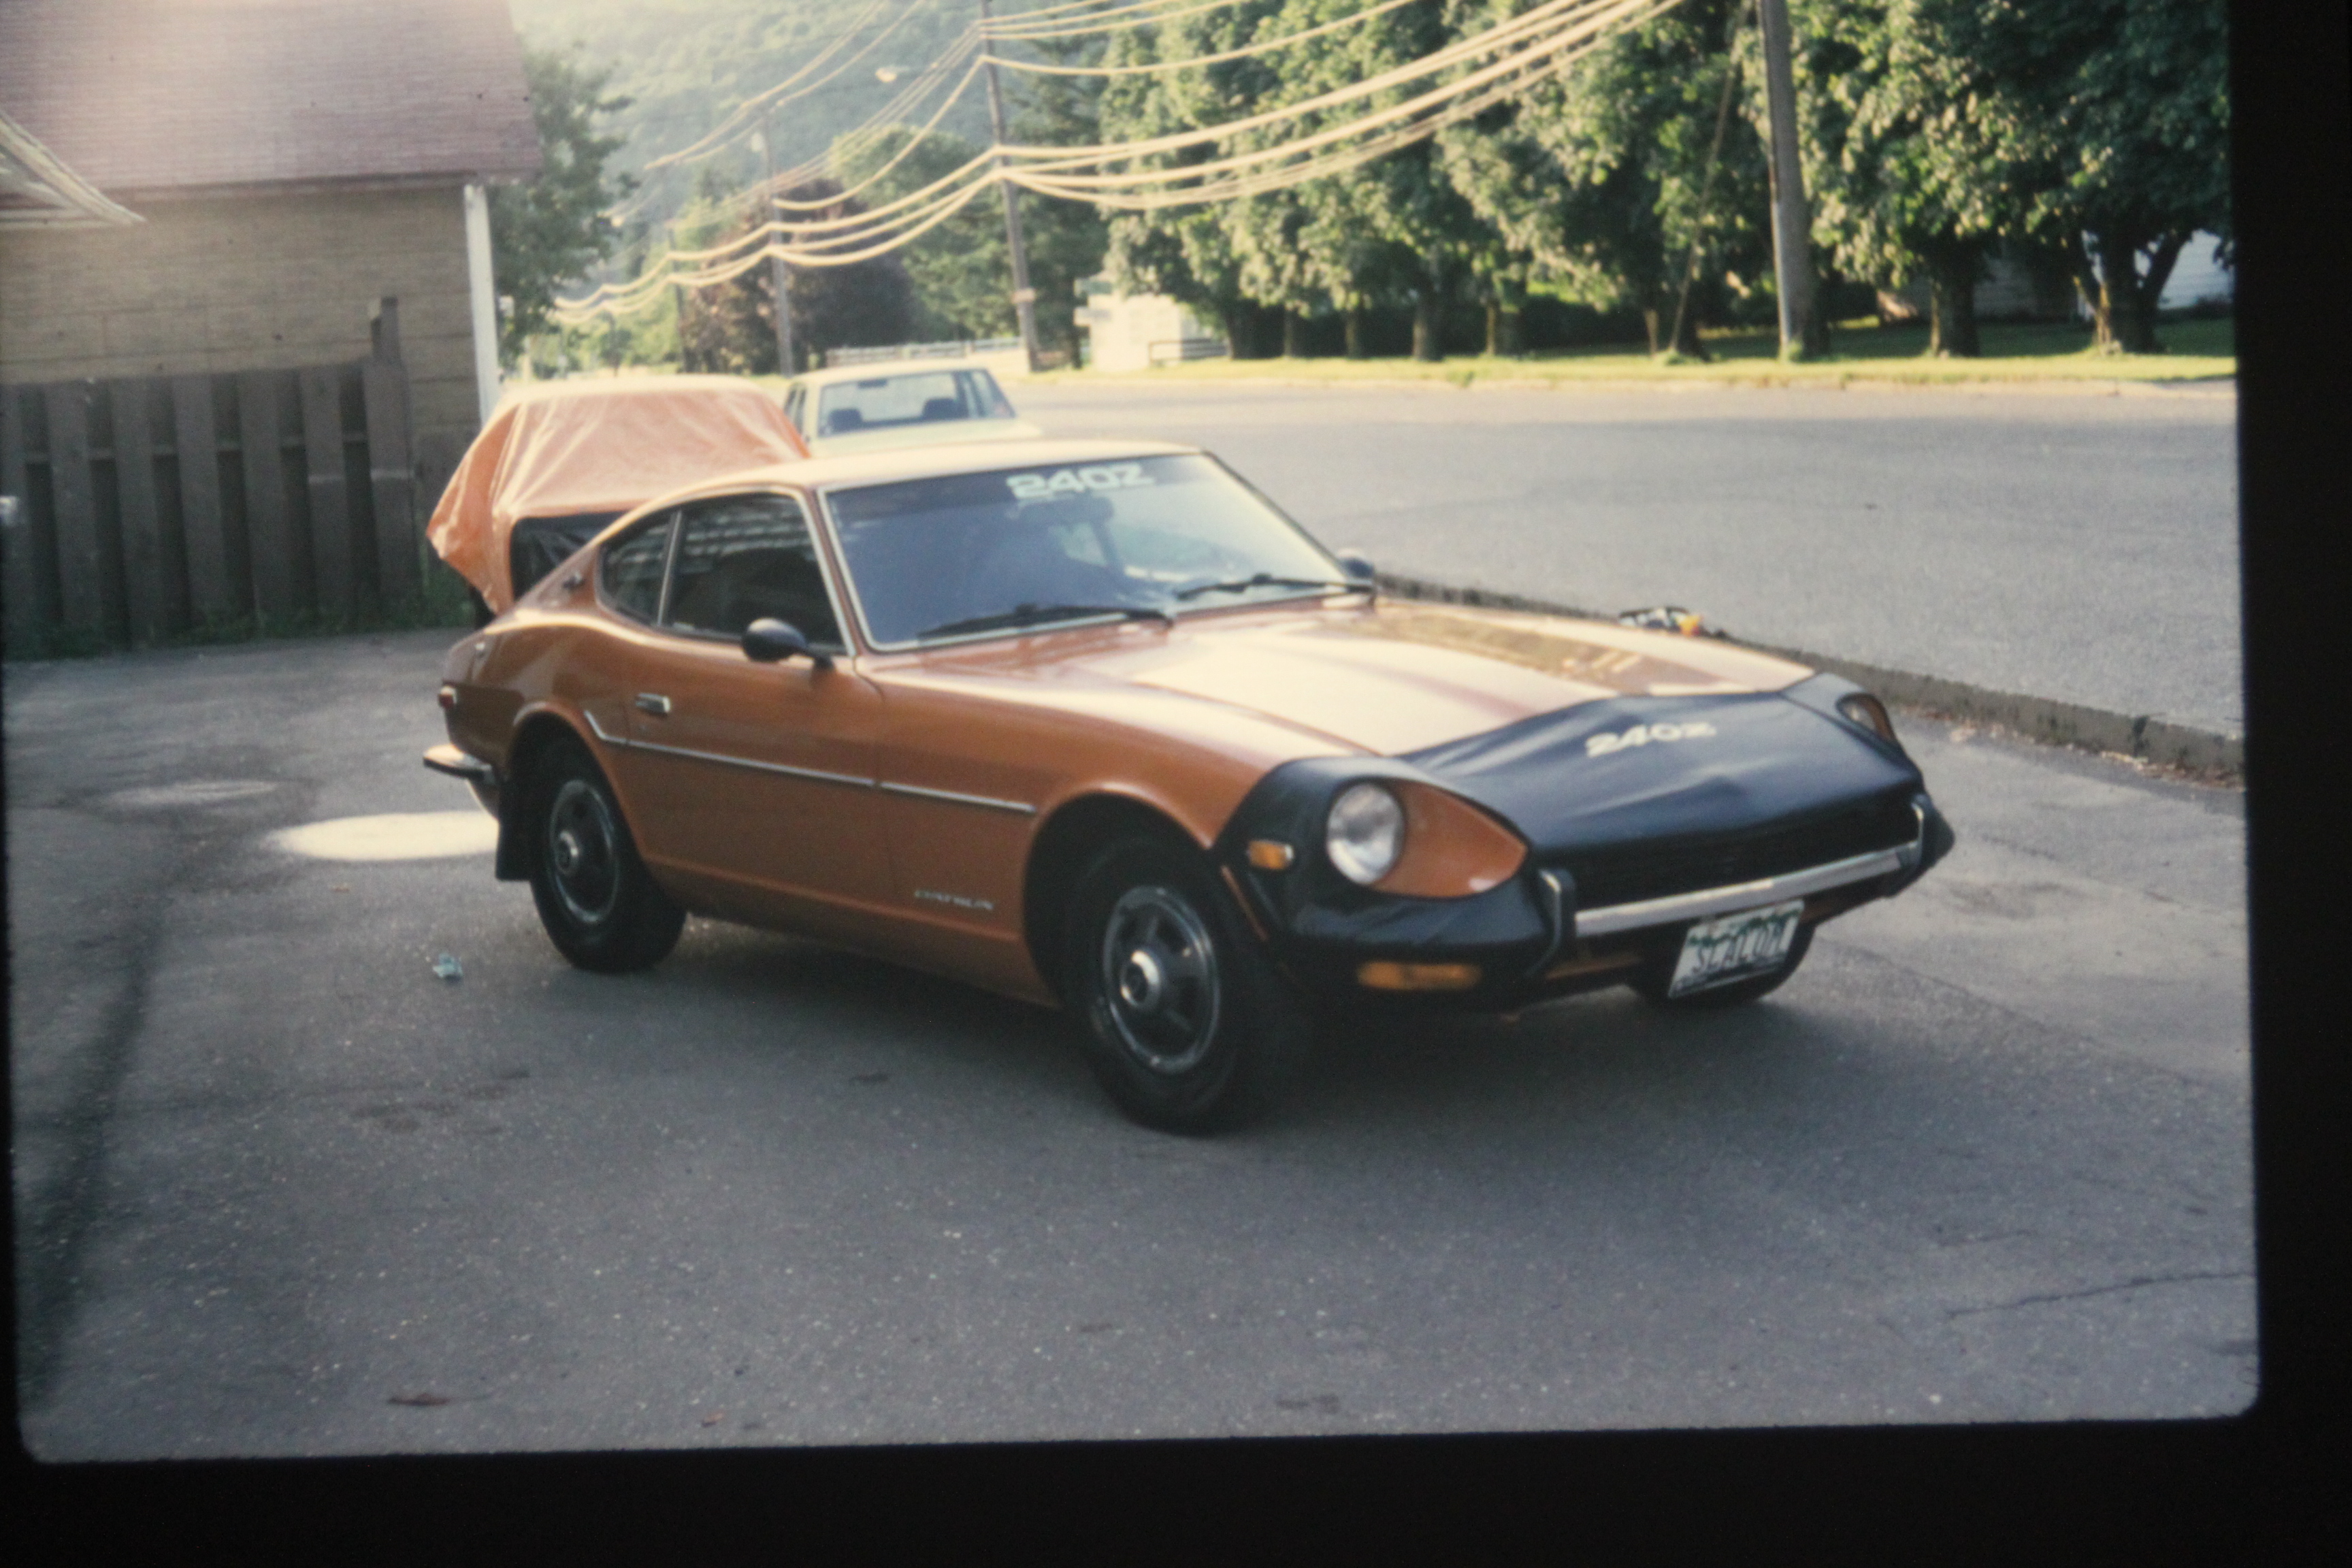
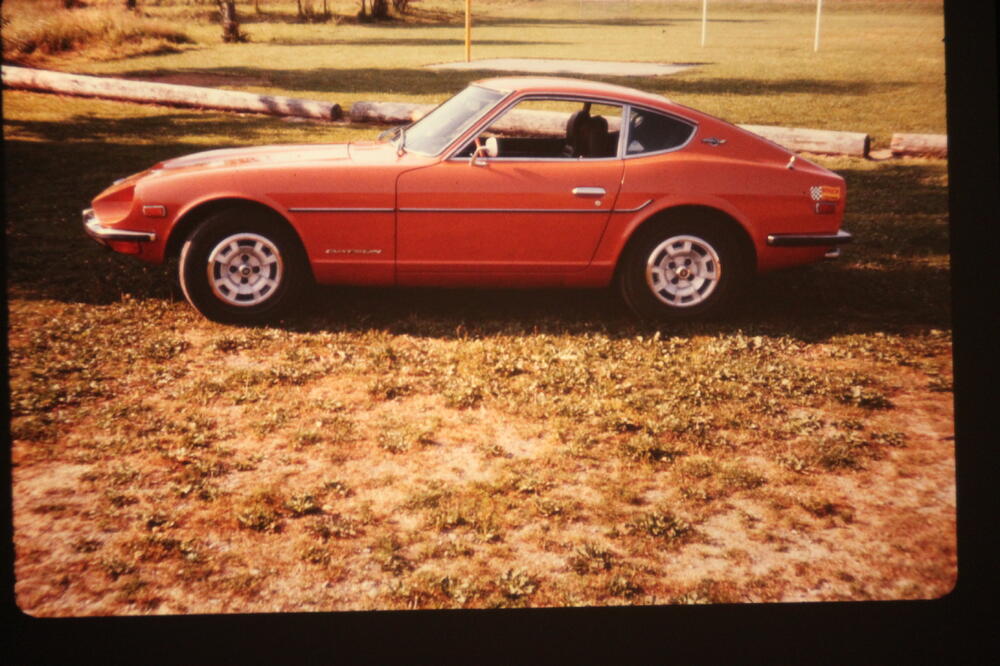
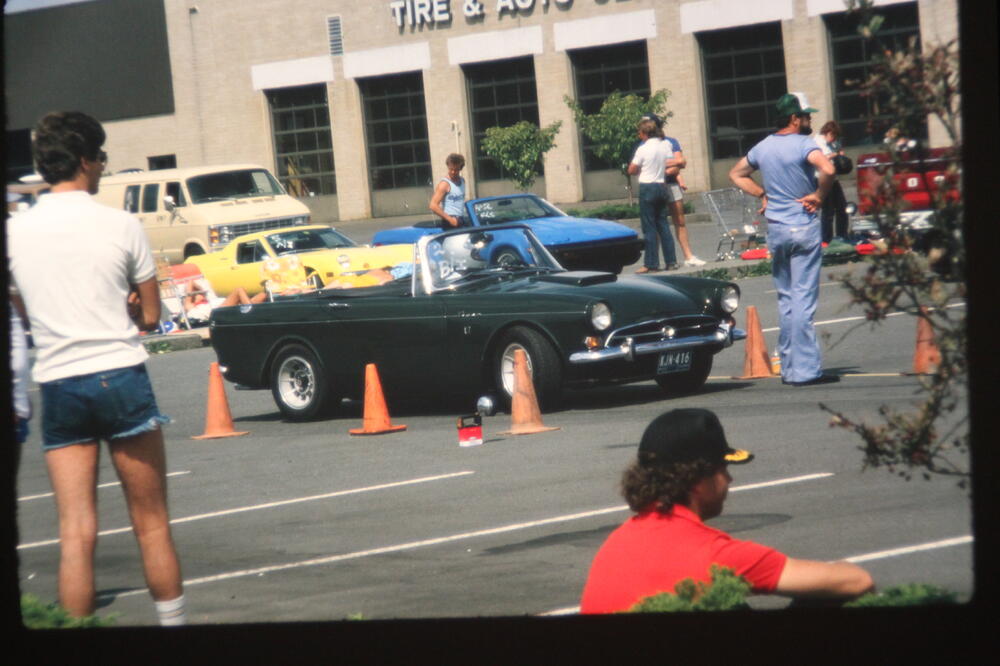
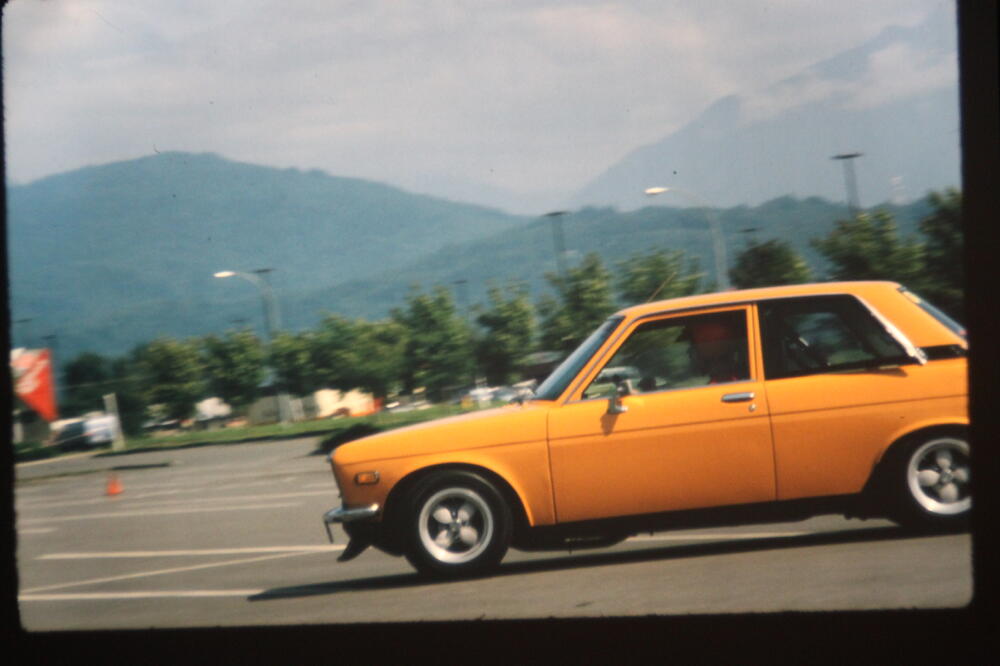
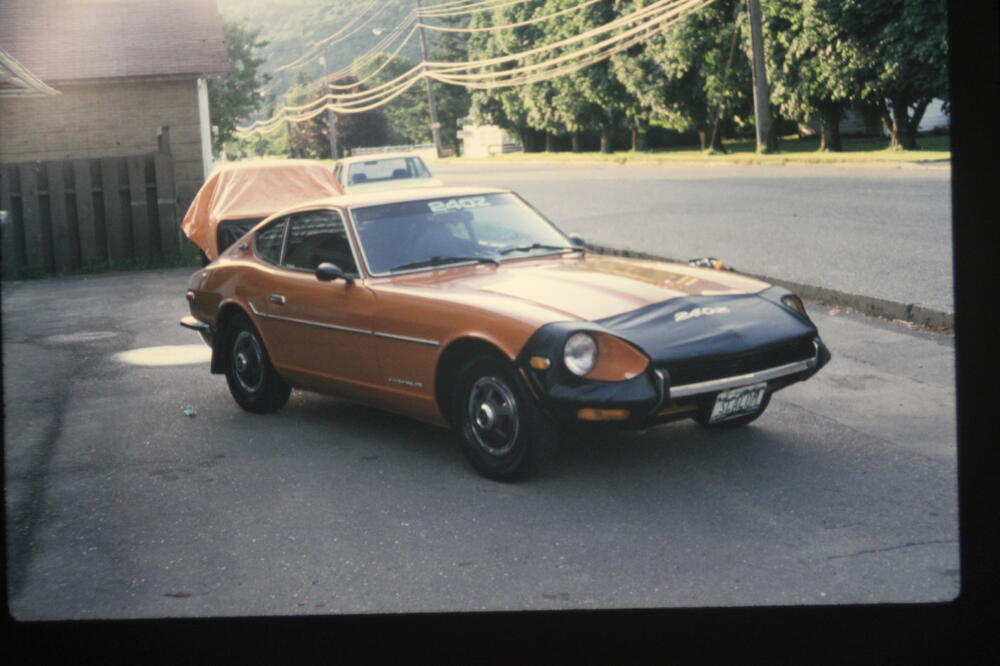
1 pointWell it's been over a year since my last post. During this time we did a major reno on our house so the car project was on the back burner, all good. I just had a chat with my body guy and looks like he will be able to get me scheduled in the fall so I'm looking forward to that. In the meantime I started sorting thru some old pictures and slides that I am scanning to do a photo timeline of my history with the car since 1978. Hard for me to believe that it has been 45 years. Here is a preview of some early pictures (scans of slides). July, 1978 as it was when I purchased it well used. Lol A few slalom pics, early eighties. Sears parking lot, before Sunday shopping was a thing. Lol Same slalom event, there was a good selection of cars, Here's one from 1984? shortly after I finished the first restoration. If you look close there are two of my 510's in the background.


 1 point
 -
1 point
-
Correct, the high/low beam switch on the turn signal stalk.1 point
-
It's from the factory. If you crimp it properly, it can last for over 50 years. 😉1 point
-
1 pointI just downloaded these. They aught to be a great help. Thanks for investing the time! C1 point
-
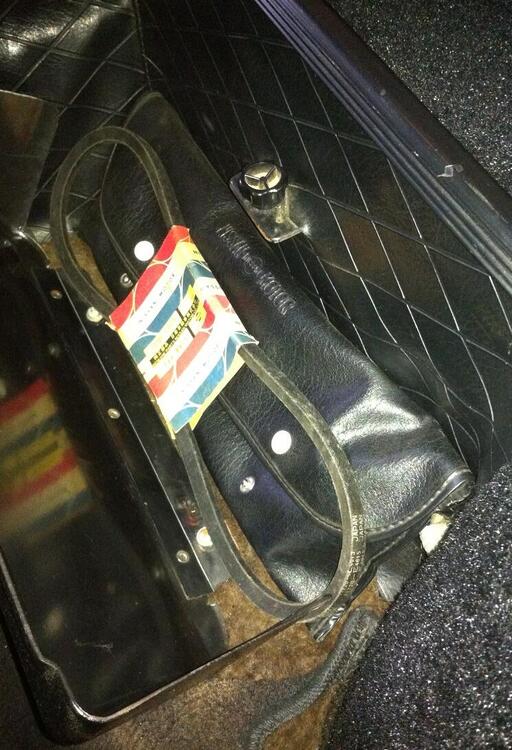
I did a double take when I saw this pic, I've always kept a spare belt in the same spot in my 7/70, #6521, owned since 1978. Here's a pic of mine from about 10 years ago....
 1 point
 -
1 pointSorry, no video on or off track. I do have some in car video on VHS from the time I borrowed a camcorder and taped a couple races, but it needs to be digitized, and who knows if the recordings are still good after all this time. Notice the exhaust comes out the side. With it following the stock route, the heat was burning my right foot. I tried heat shields, header wrap, and still the heat would blister the side of my right foot. Since the rules allowed any exhaust system using the stock manifold, provided the exit was aft of the steering wheel hub, and the sound levels were met, I built a custom side outlet setup. I made a flange for the manifold attachment with 3/8” steel plate, and if memory serves, the pipes were 1-3/4”, then 3” going into the LoBak muffler (the LoBak was a circle track racing piece that isn’t filled with glass fiber, but has a spiral strip of steel wrapped around a 3/4” tube, the outer portion of the auger welded to the inside of the shell), with a 3” turndown. It was very quiet, never going over 65 to 70 db on the track sound meter (measured at 50 feet from the track).1 point
-
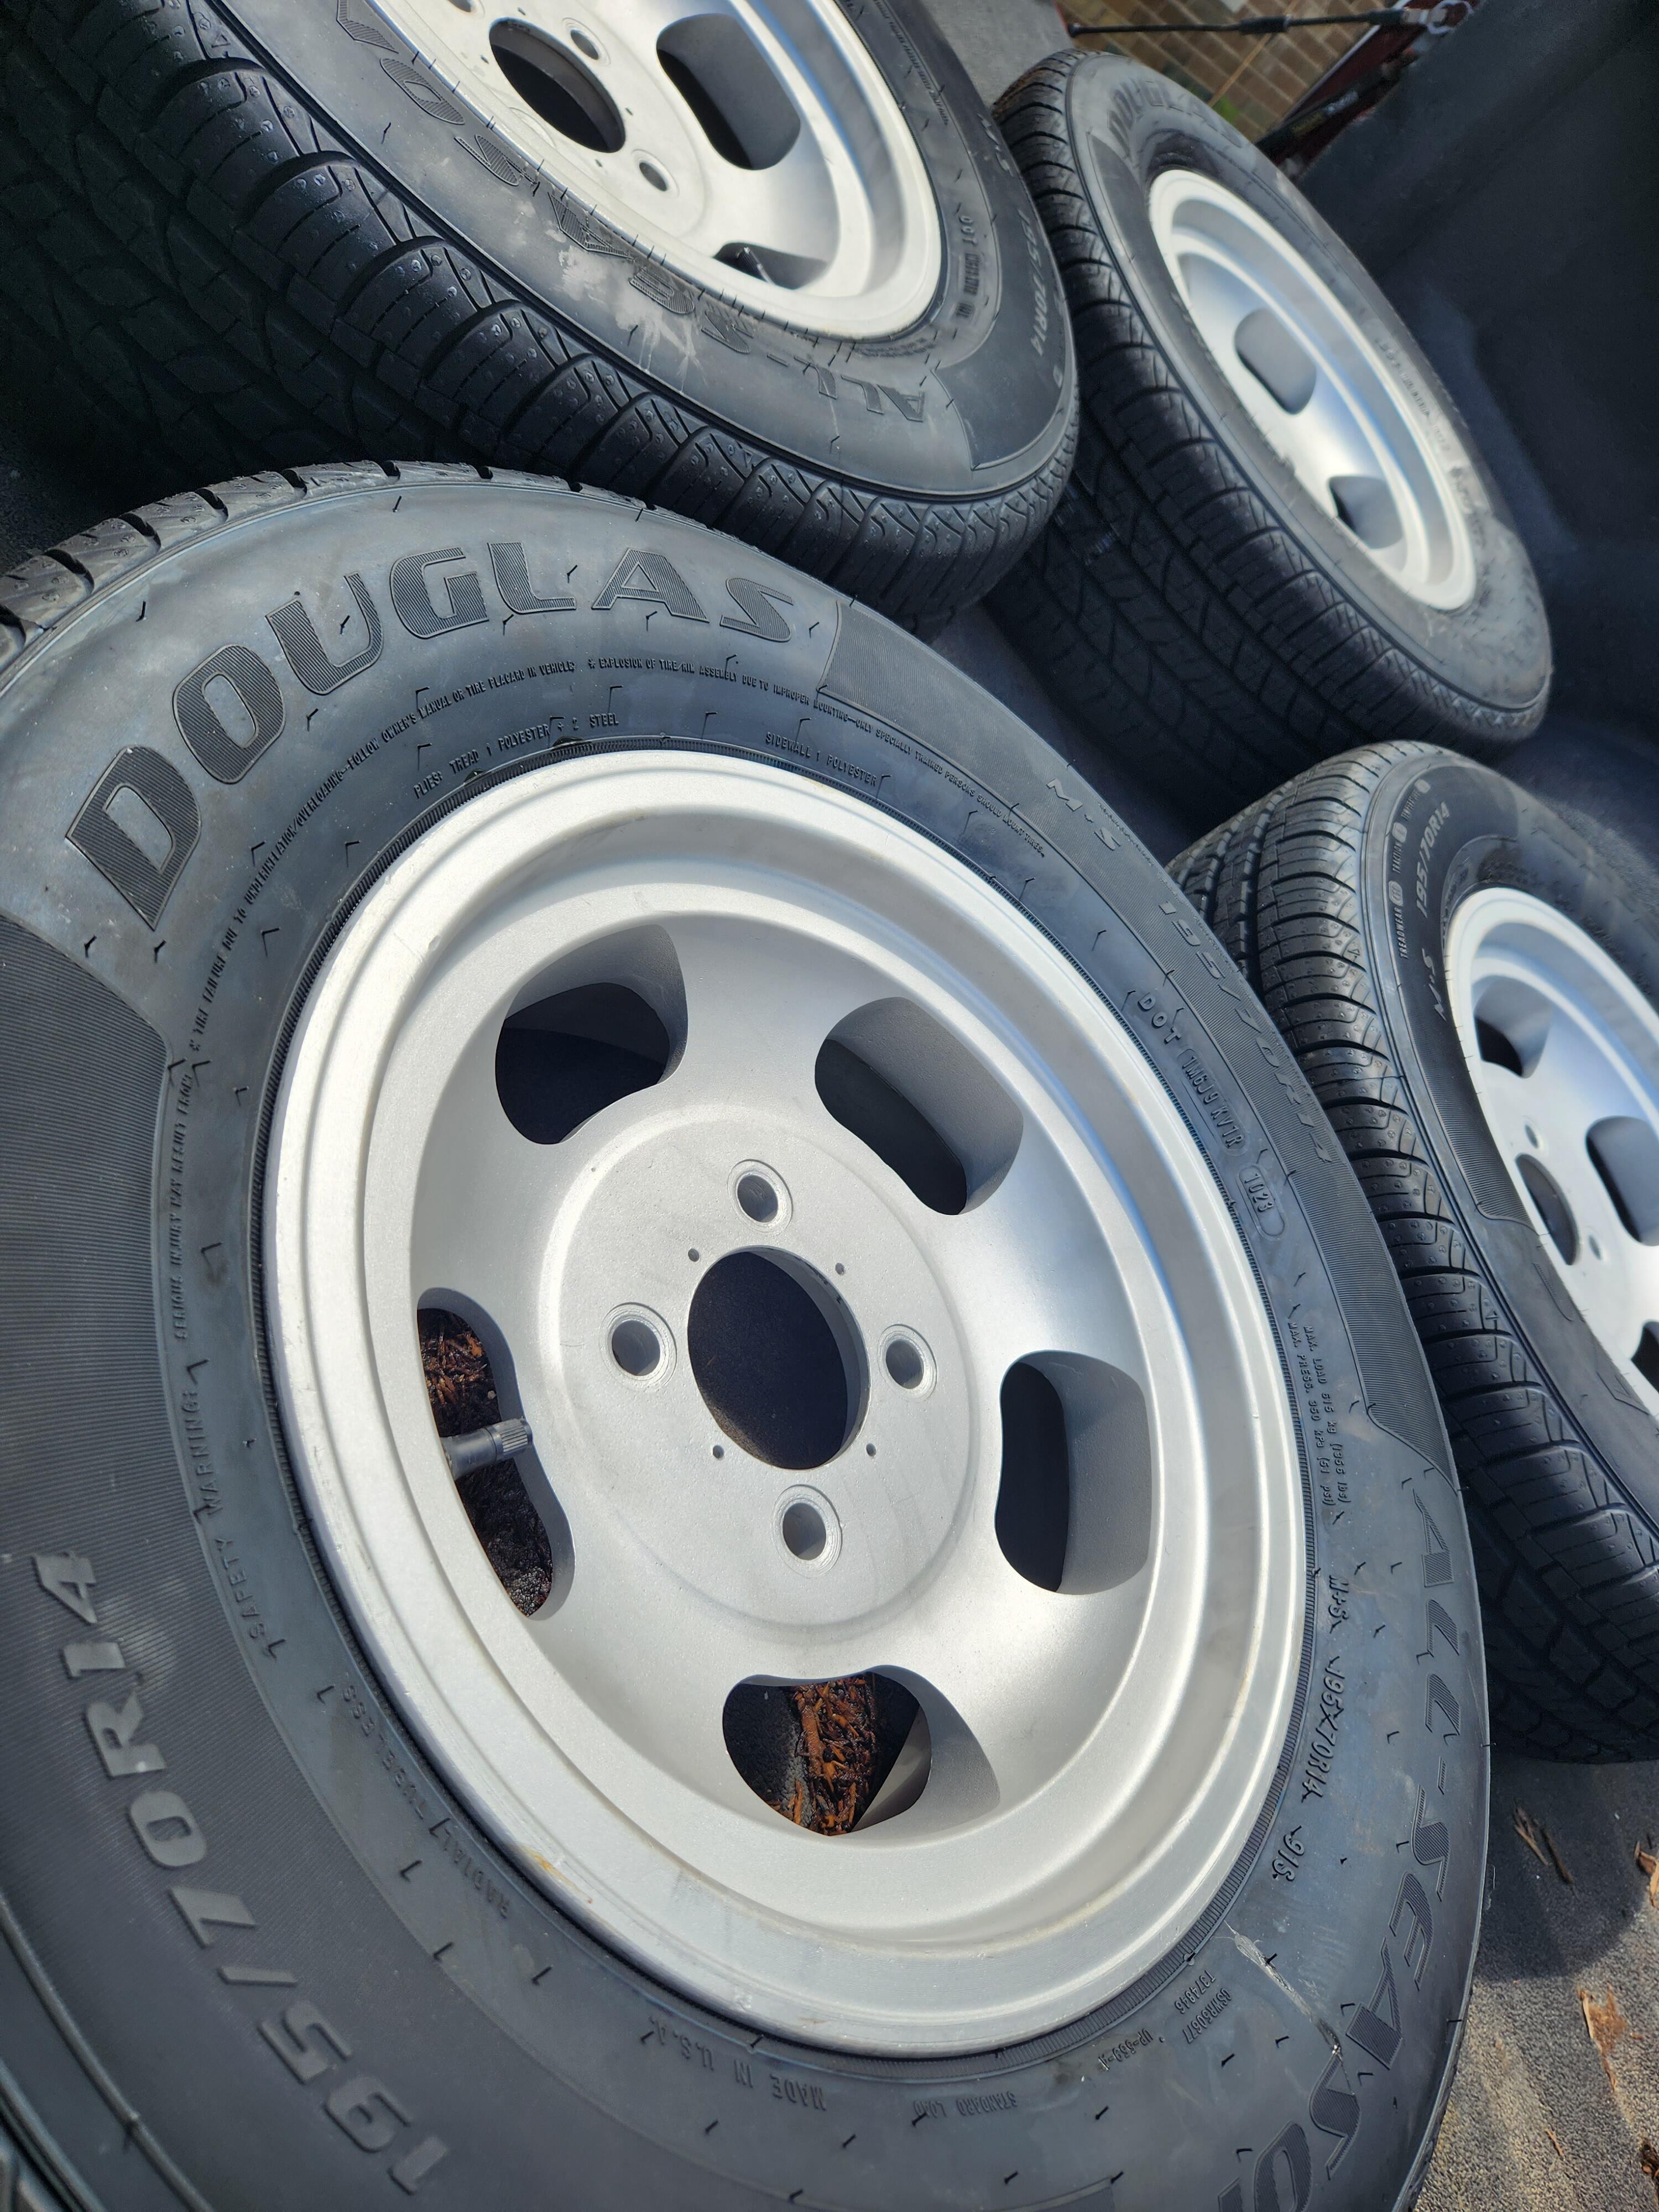
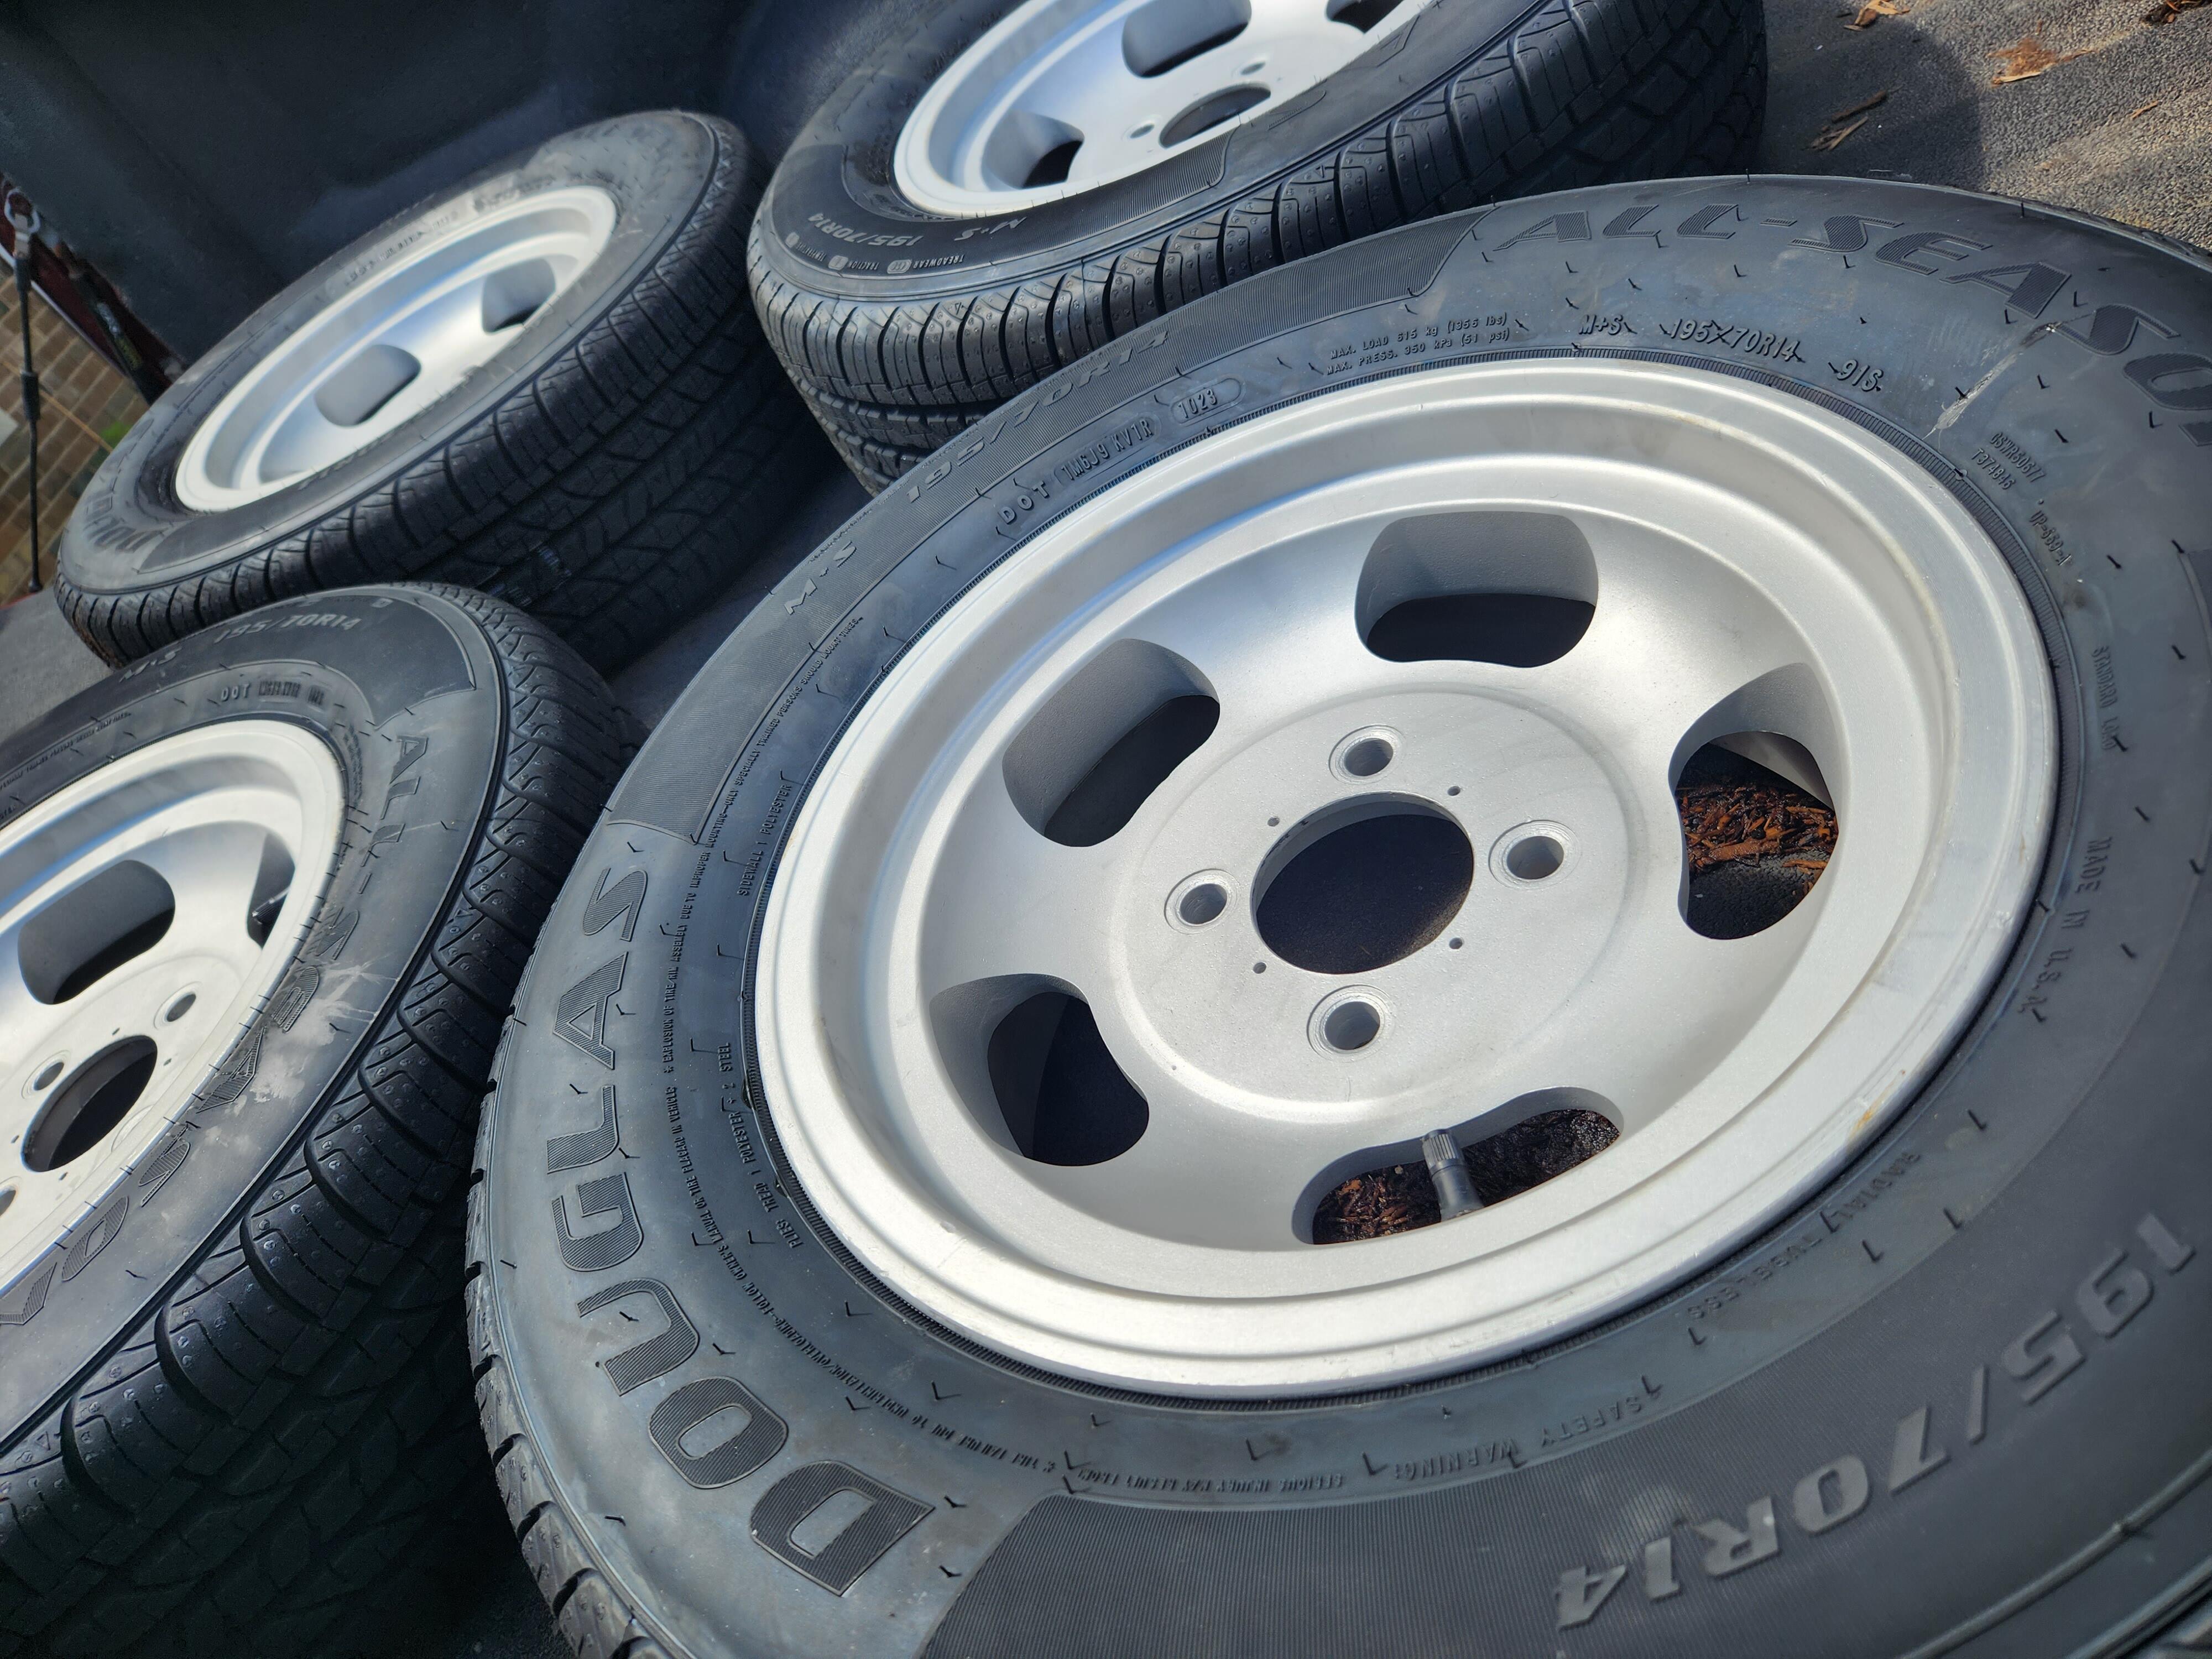
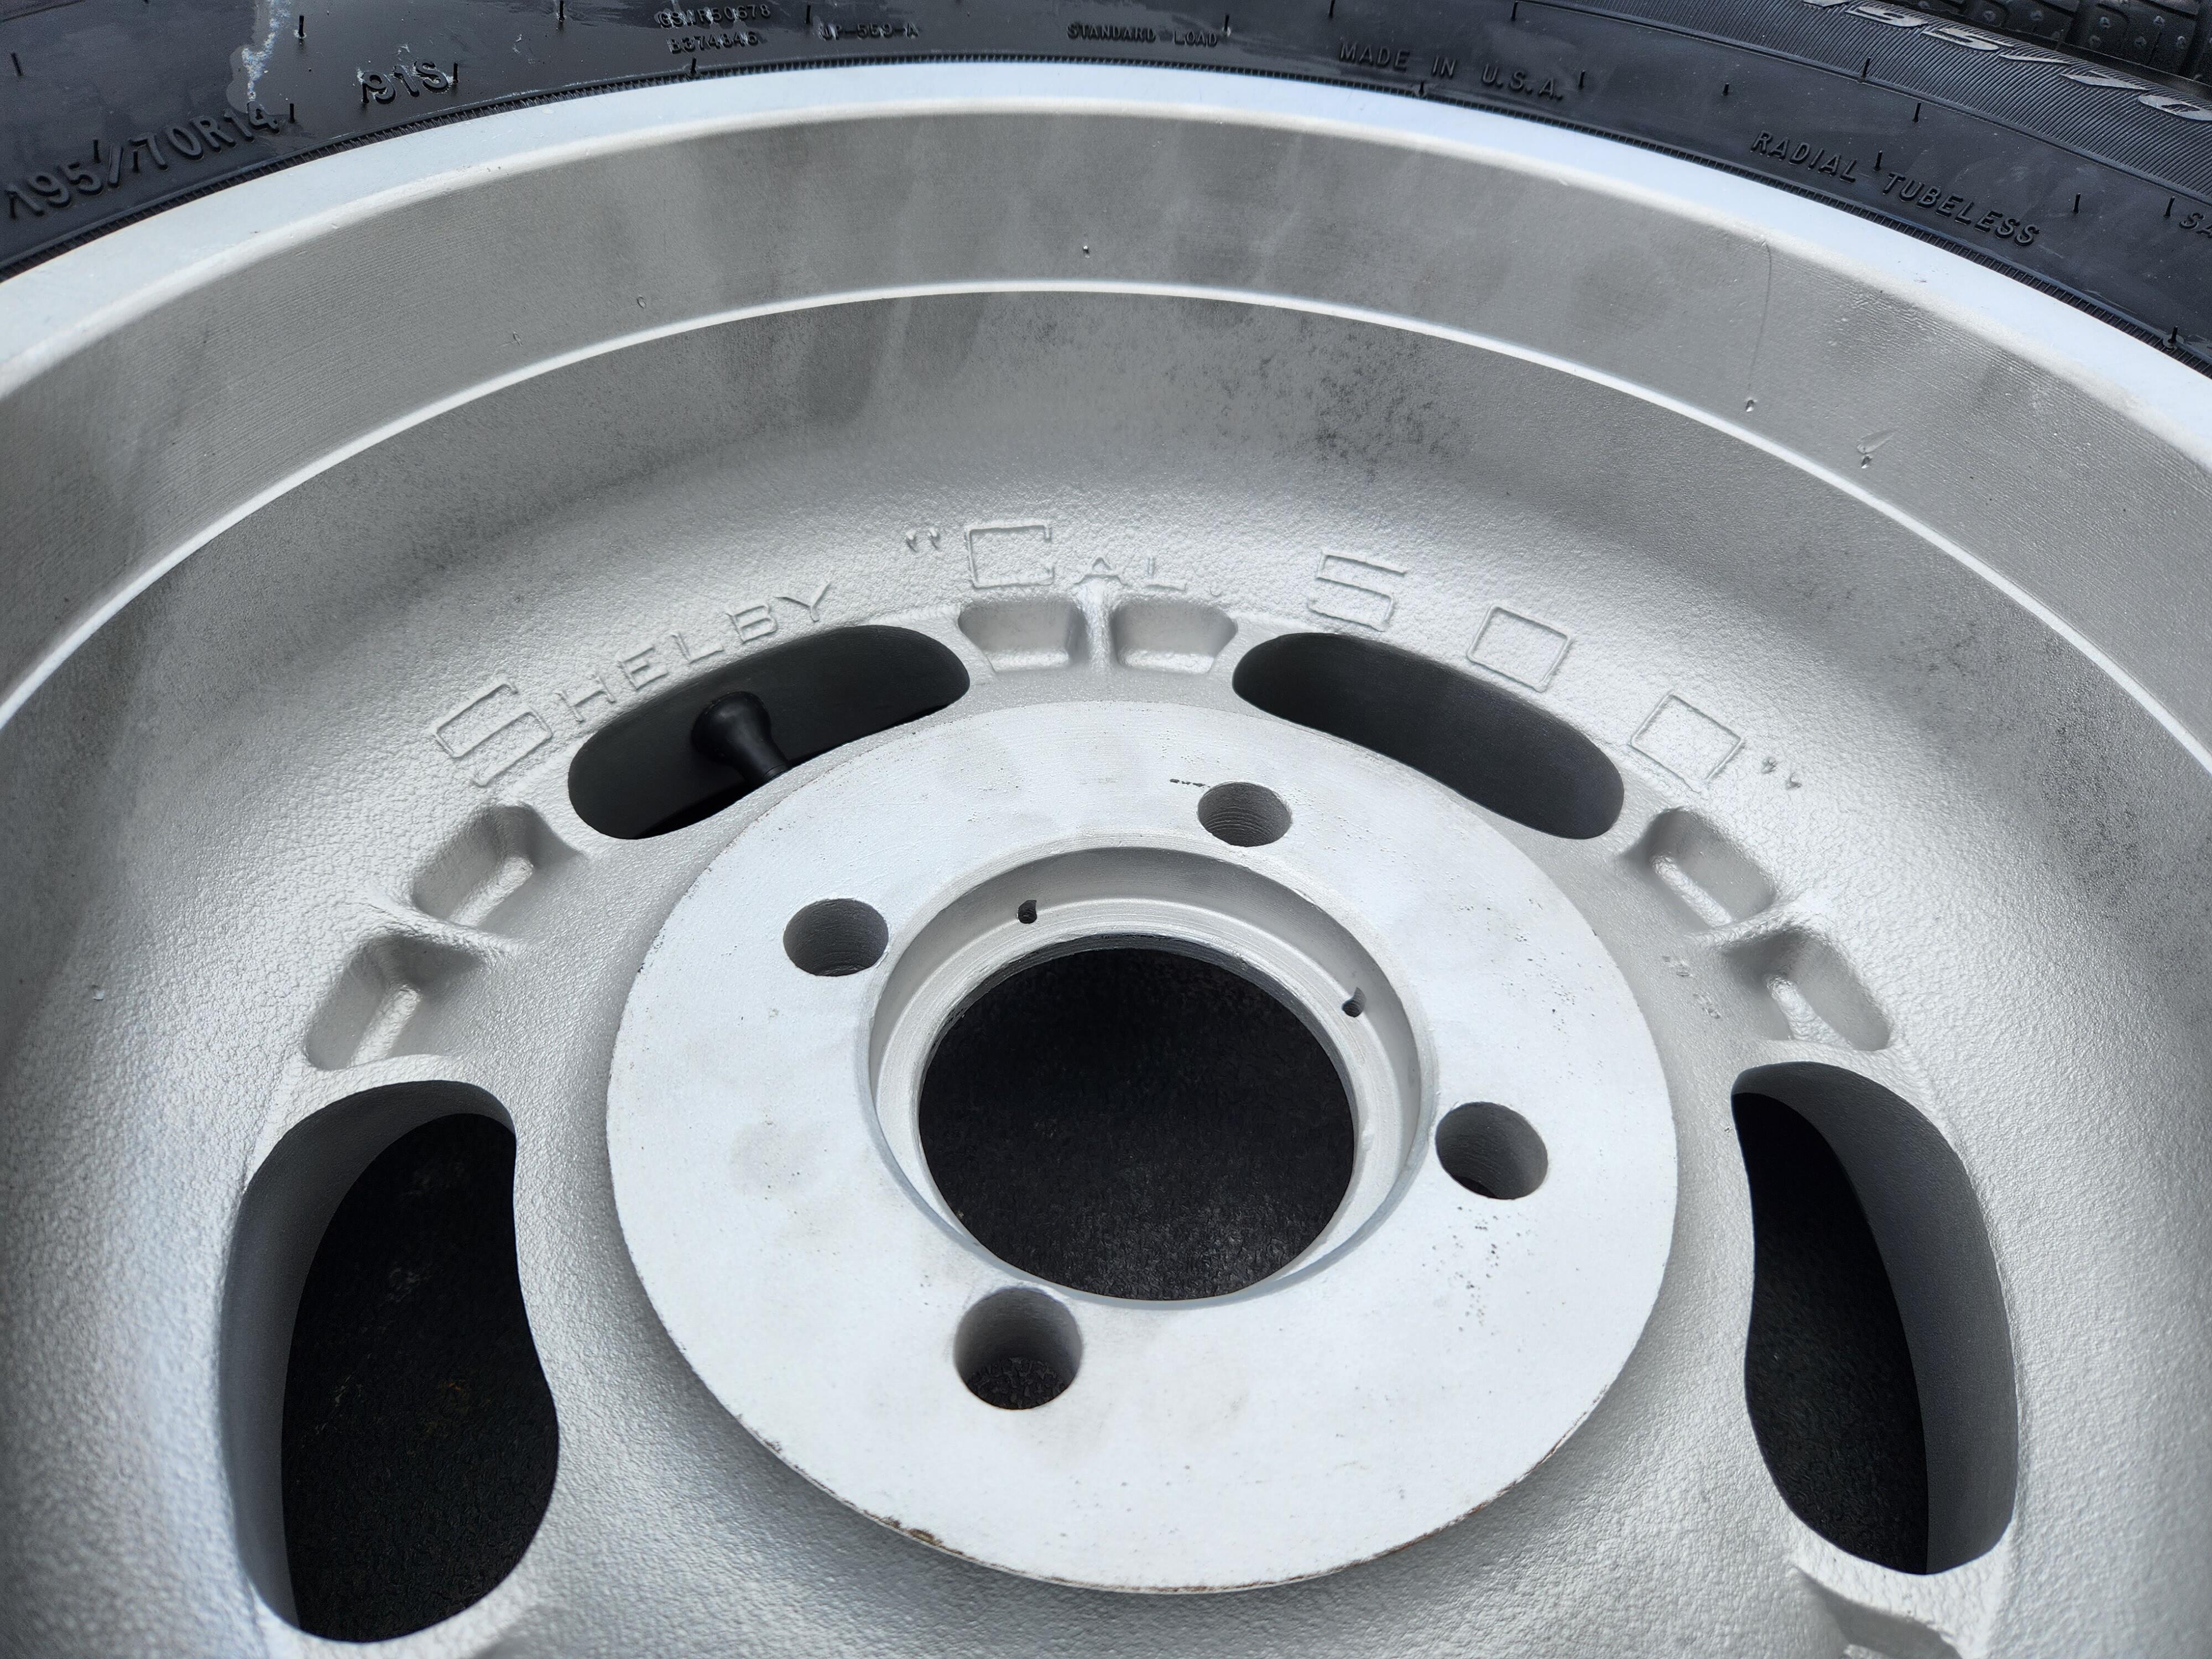
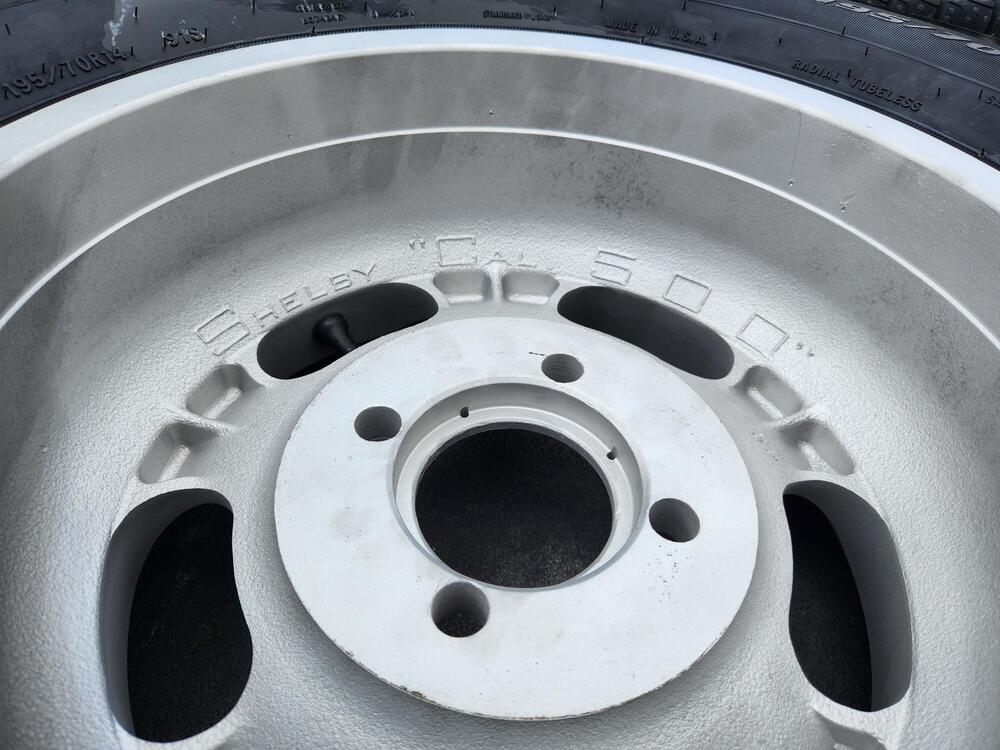
Some fresh bead blasted Shelby Cal 500 slotted mags with new 195/70/14 all seasons.


 1 point
 -
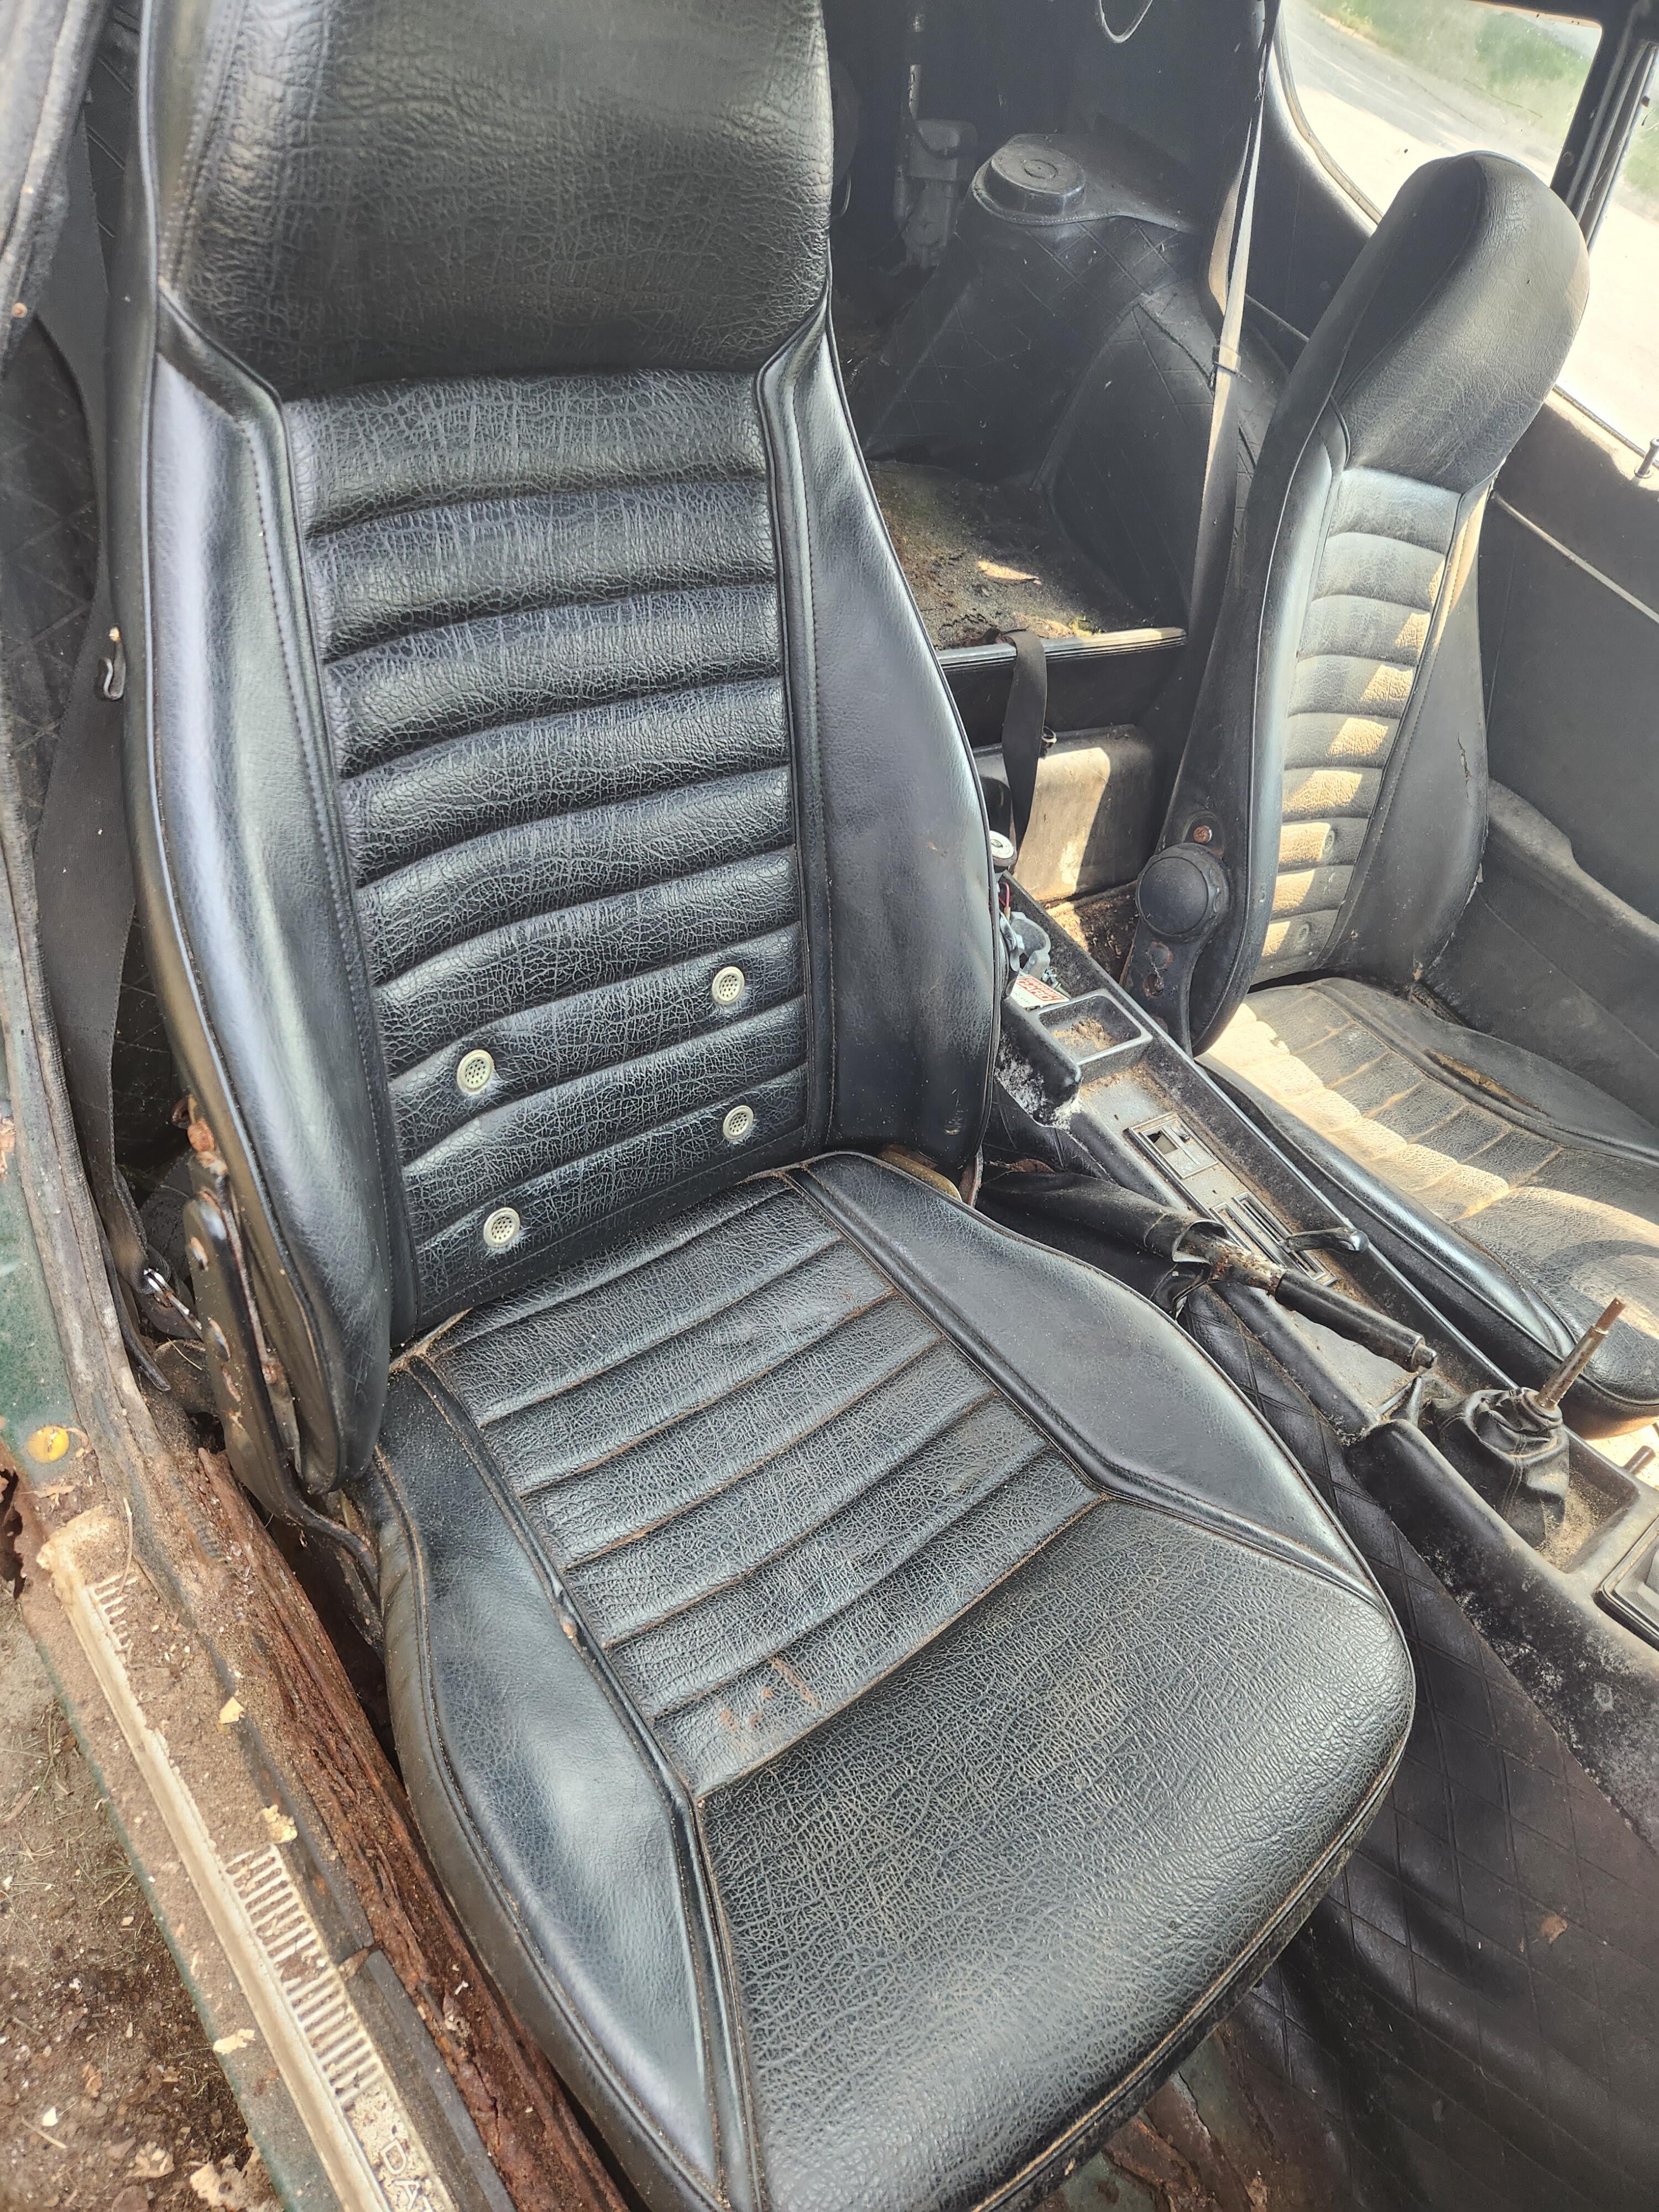
OEM fan belt found in storage compartment behind driver's seat. Seats cleaned up pretty well.


 1 point
 -
1 pointI’m with granny - unless you want the stock look, I don’t think it’s function is really worth it. Before I went with a different air box and full cold air intake, I had a plastic intake pipe going from the exhaust part of the box to the rad panel, bringing in cold air from the front of the car - I figured every little helps.1 point
-
1 point
-
1 pointEven with the Summer/Winter lever turned to Summer, the hot air from the exhaust manifold will be heating up the airbox, best to leave the hose off but have it on hand for the next guy.1 point
-
Here's a variation, maybe even the inspiration for (or vice-versa), of the Silvermine adapter flange. It doesn't have the 4 mm problem. Lots of other good details in the thread too. And he was selling them. Doesn't look like he's visited Hybridz since late May though. https://forums.hybridz.org/topic/128943-z31t-axle-swap-can-fit/#comment-1204163 https://forums.hybridz.org/topic/128951-fs-z31t-axle-adapter-flanges-for-s30-r200-slim-design/#comments1 point
-
1 pointThose dimples around the edge here could be detonation damage or foreign object. The damage looks the same, but it's only at the edges in your case where the detonations would be. Not a big deal, just an observation. What's the top of that piston look like?
 1 point
 -
Well it's holiday season. First i was away for two weeks enjoying the sea, now my bodyshop us running on low flame, so the recent progress is a bit slow. Also because they have to finish another nice project for another customer first. Here's what happened in the last few weeks. The inner wheel tub has been repaired on the inside and outside visible part, as well as LH inside trunk area which my previos bodyshop messed up a bit. The rusty swiss-cheese bit which you still see is the part from the rear quarter, which will be replaceed completely with the NOS piece in my posession soon. The main task is to rework the KFV side sills before putting them into the car. Generally their part is as close to OEM specs as it gets and fit really excellent, but these are somehow quite off in all directions. We made several templates to compare them to the OEM ones and nothing fits. so my bodyshop has to rework them. I'm a bit surprized as their stuff usually is really ace, but these not, on both sides. I tried to reach out to them with many pictures and measurements but haven't got any feedback, sadly. So the only thing we can do is rework them. Any bodyshop will anyway tell you that usually not a single replacement panel is a straight-on swap, so it's not a big deal, but some extra hours. And he had to go to a different shop which has a longer metal-scissor long enough to gut this pieces: On the already finished part, their in-house paintshop had the finished area sanded down and primered so it doesn't start to rust in the summer heat. That's it for now. I expect a pallette of goodies from Japan here mid-august and i have put an eye on a nice collection of parts, but negotiation will surely take a bit of time. wish me luck. And i hop in the coming weeks the bodyshop speeds up things a bit, when the yellow VW Bus in the background is completed (only small damage repair).1 point
-
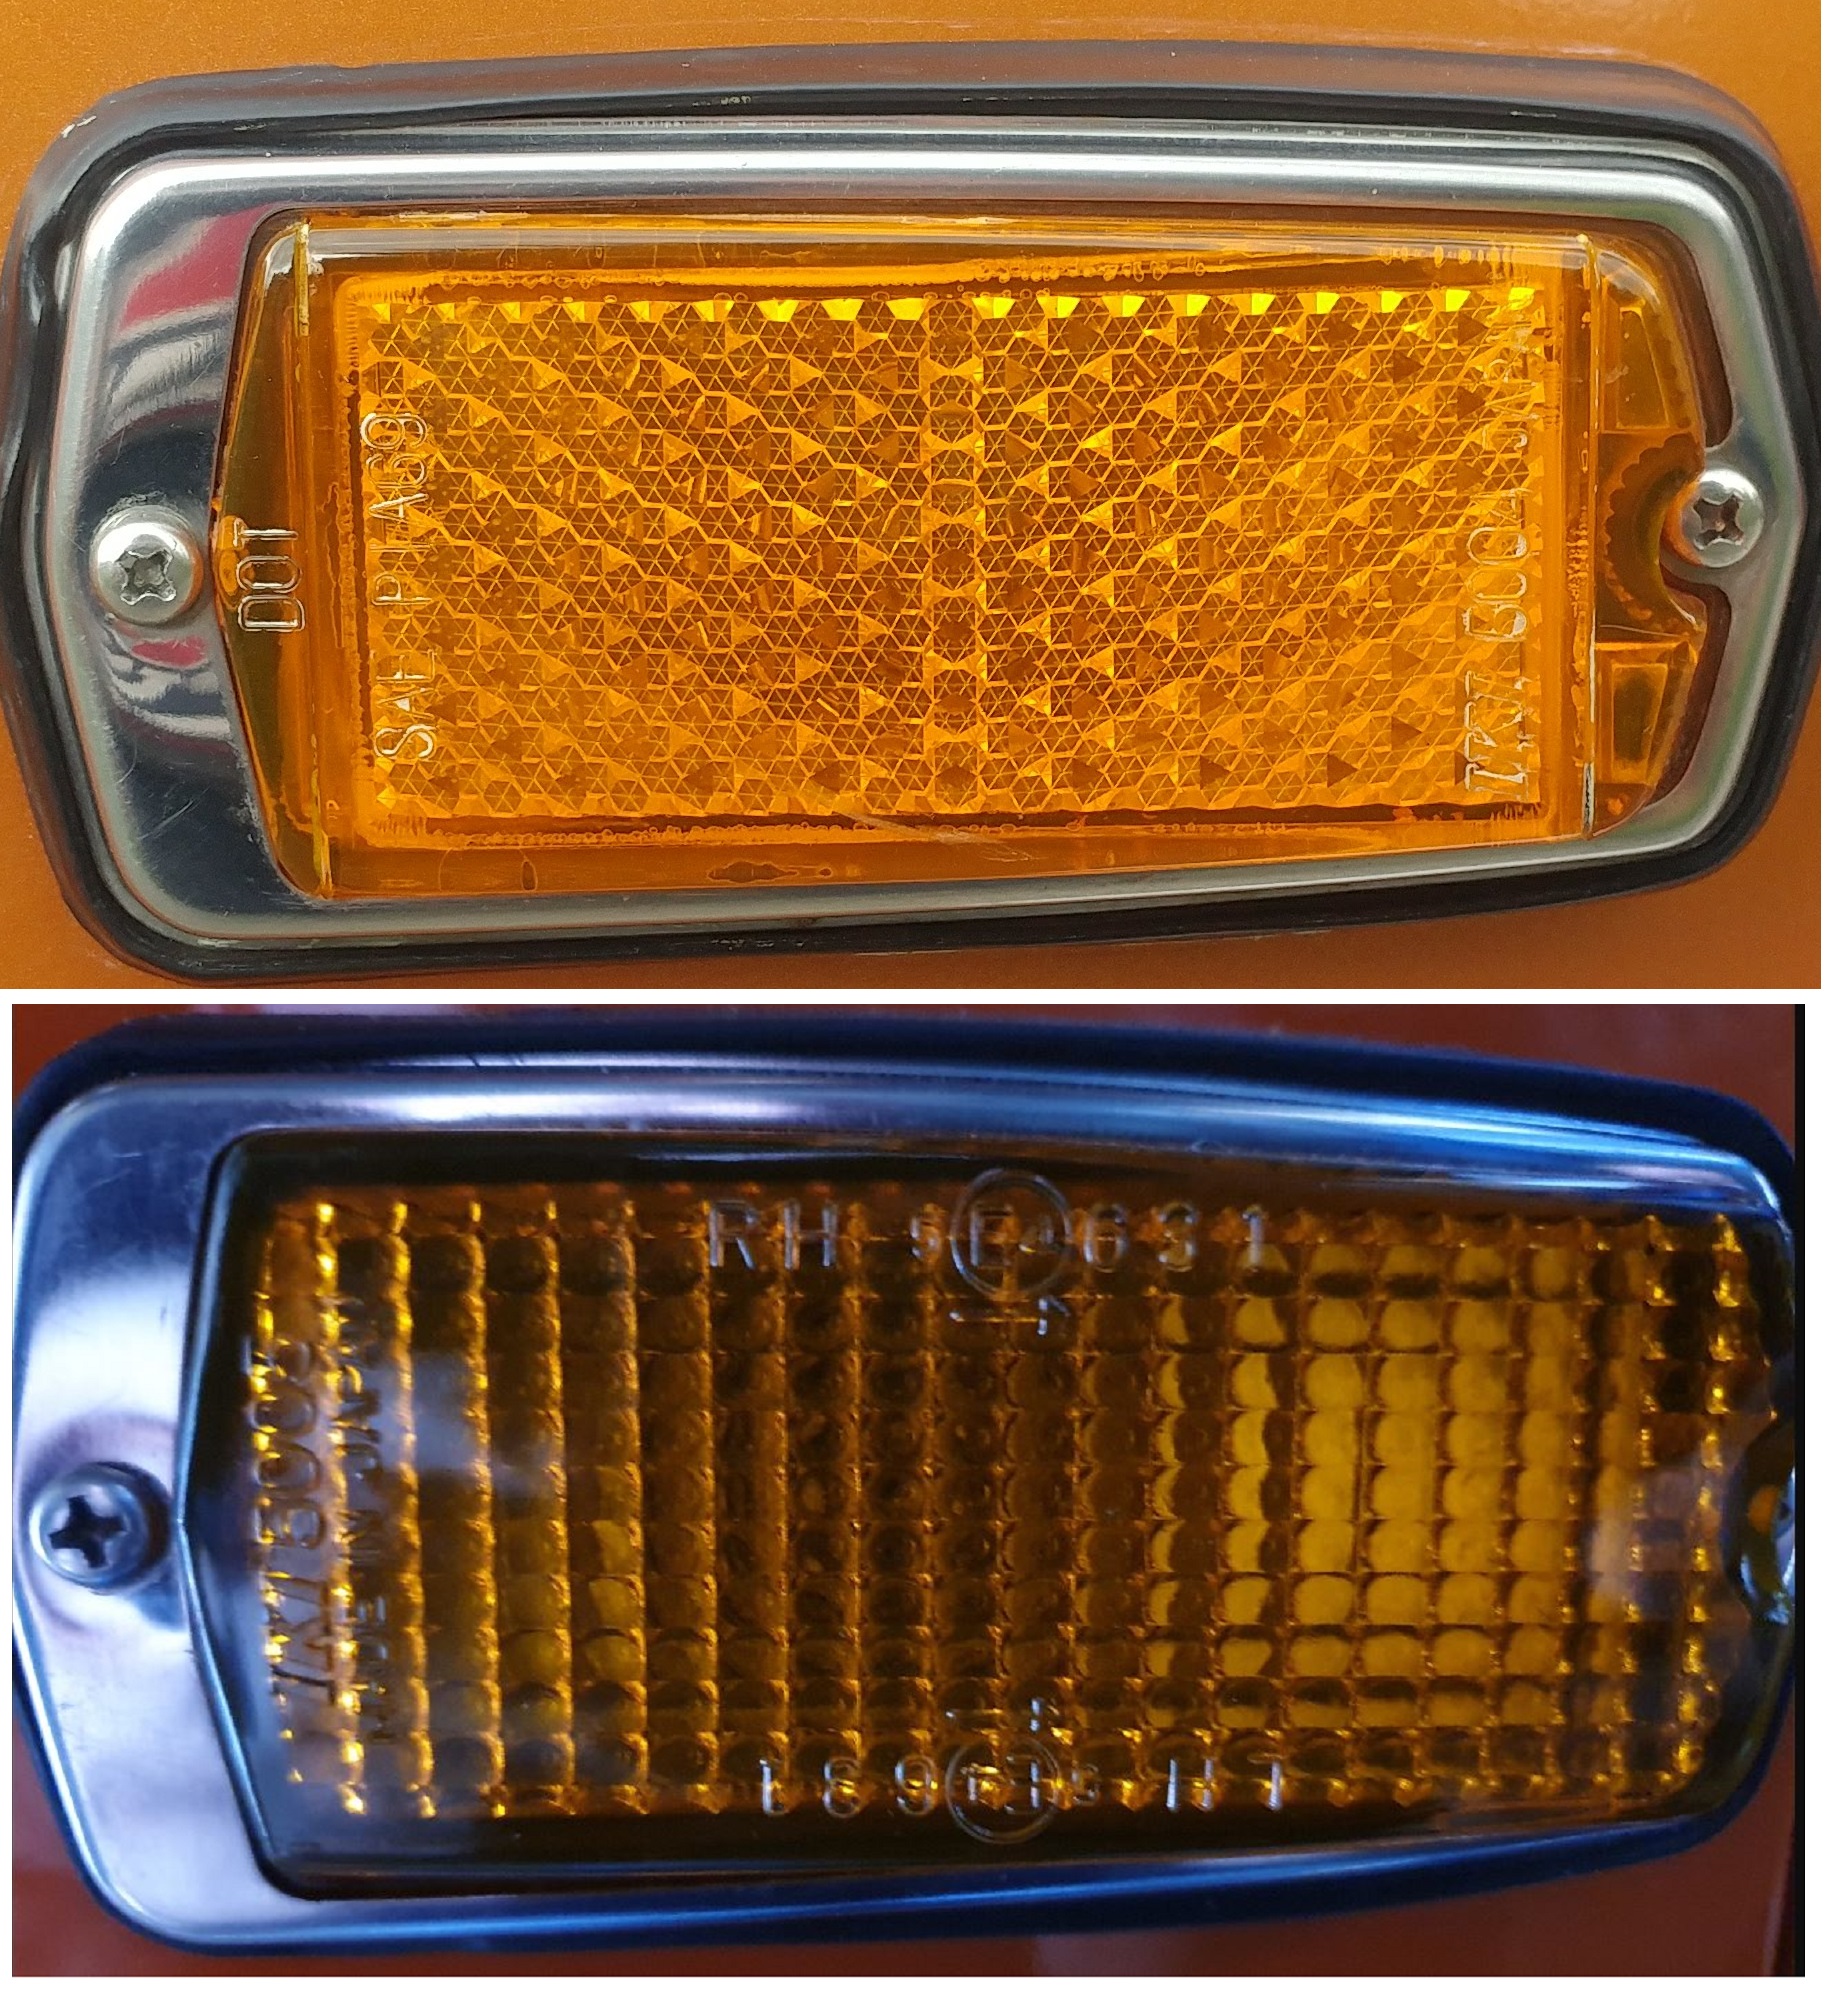
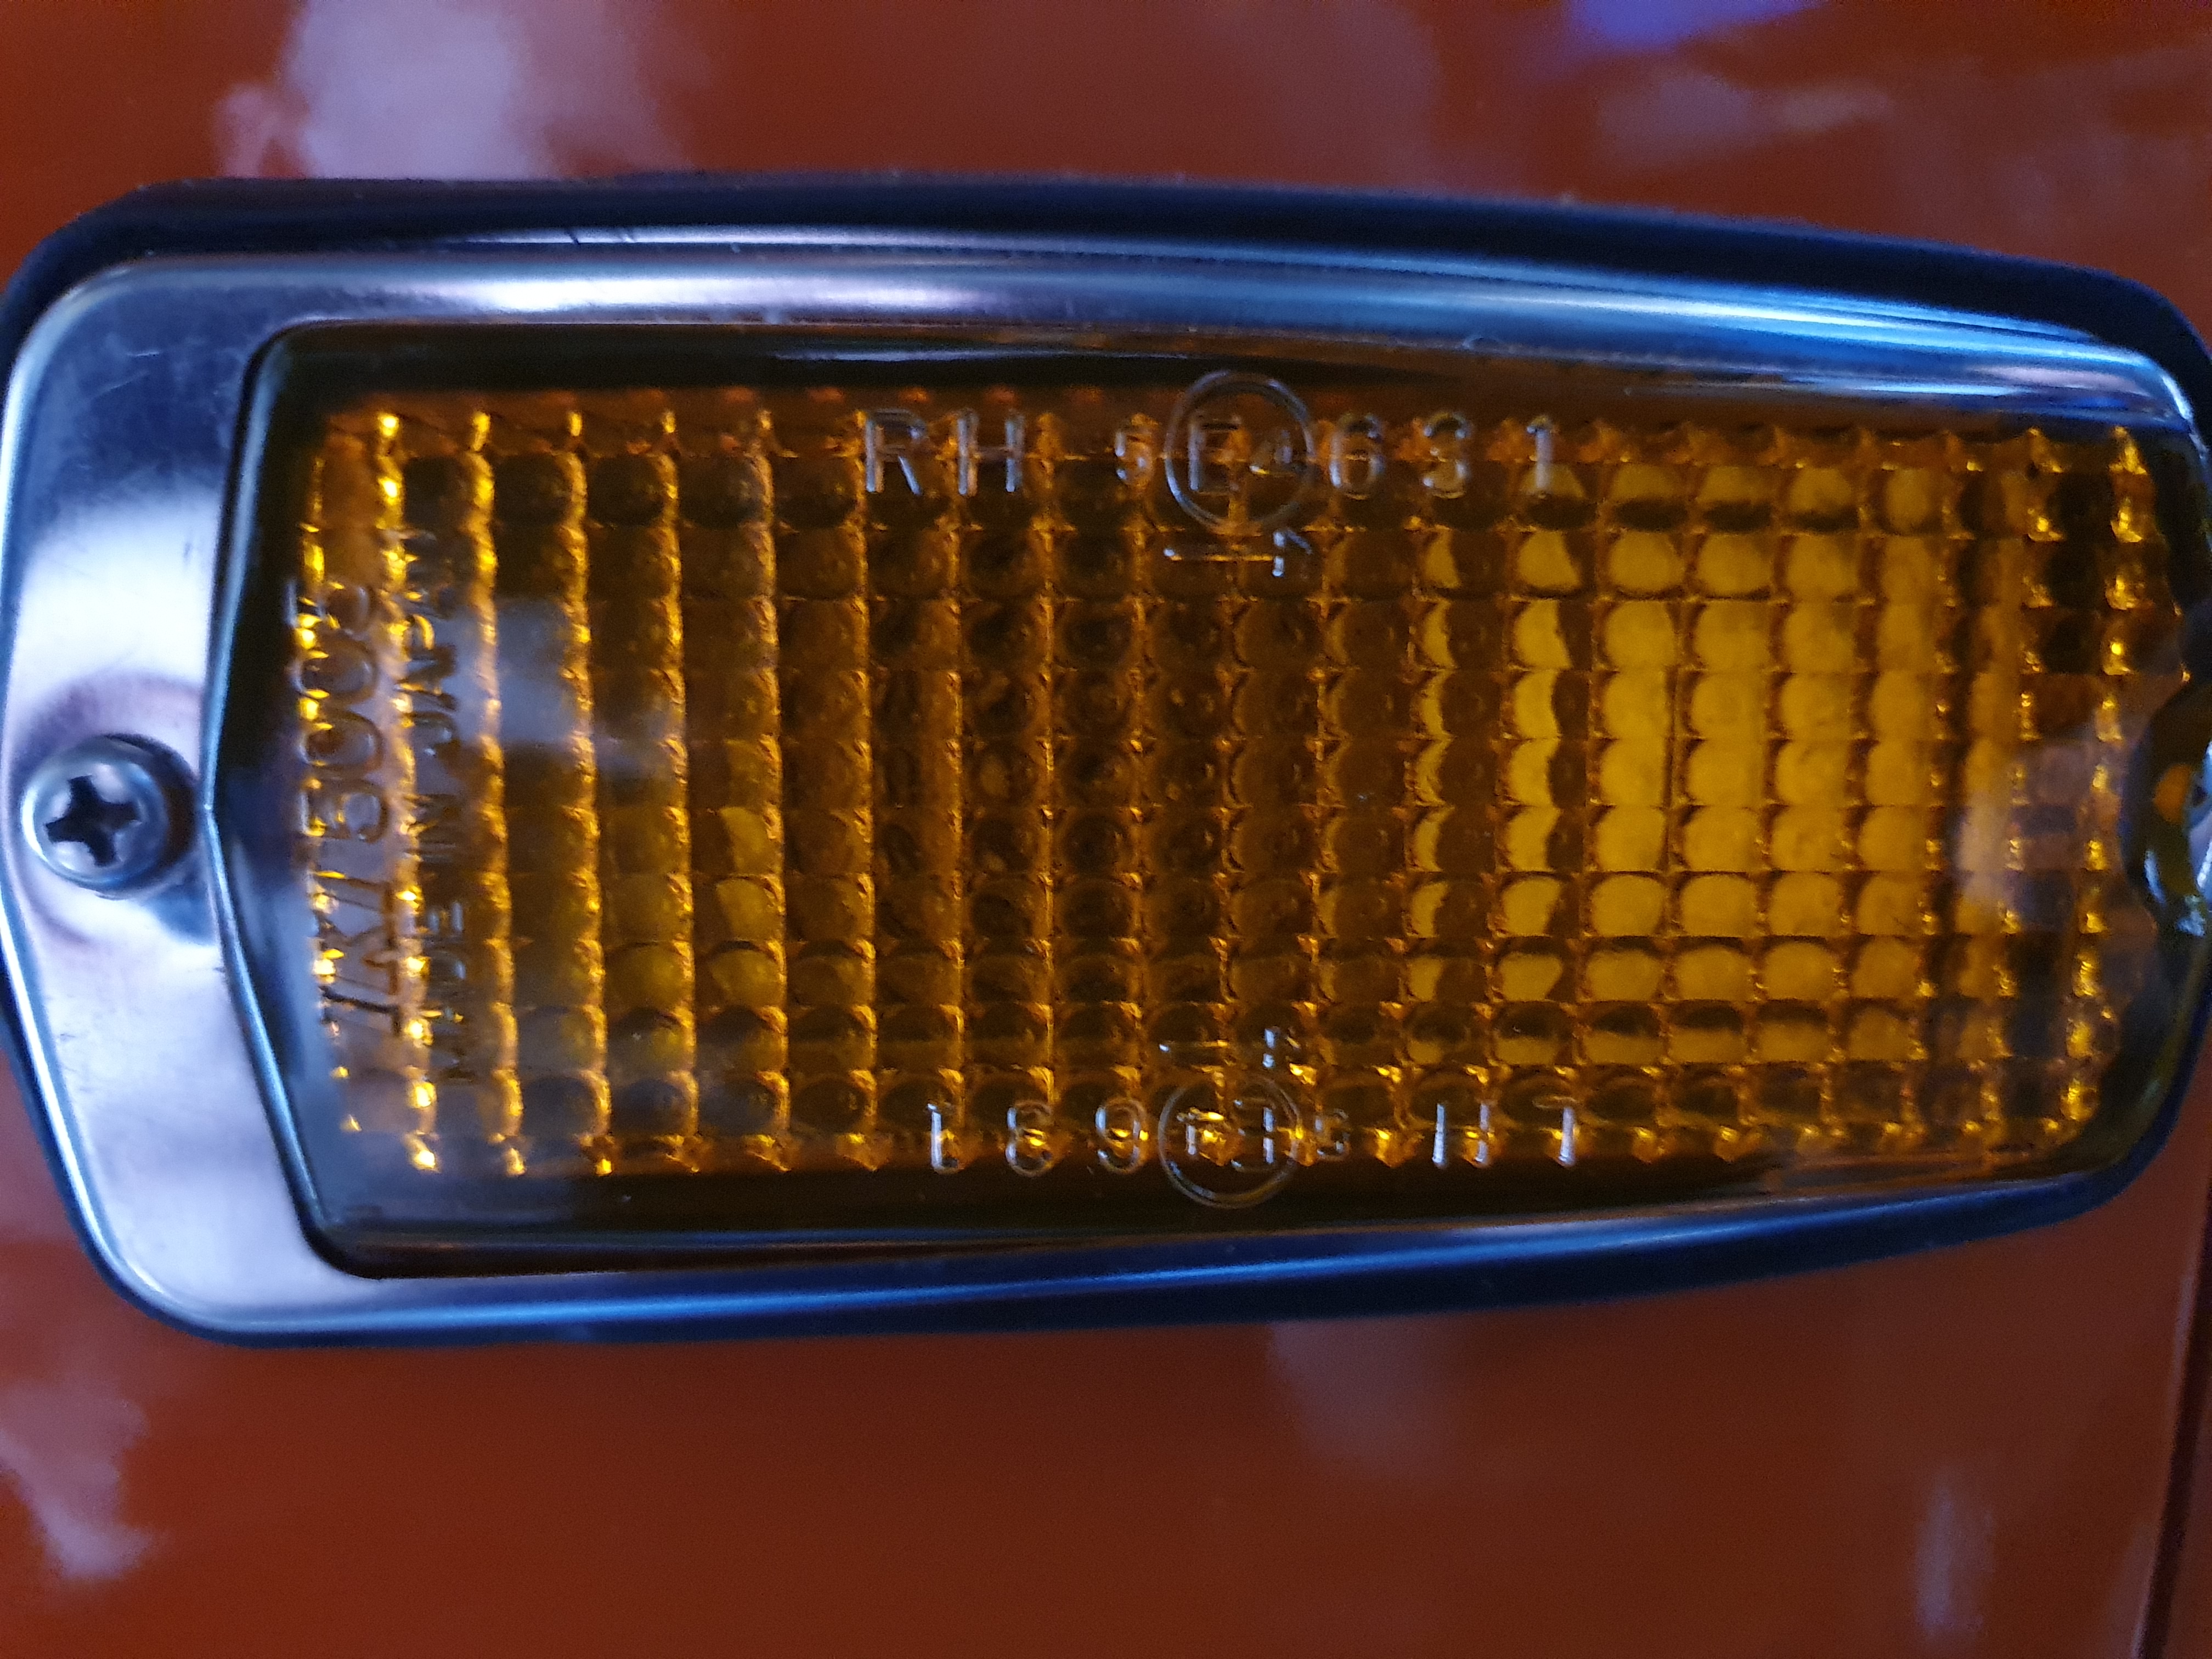
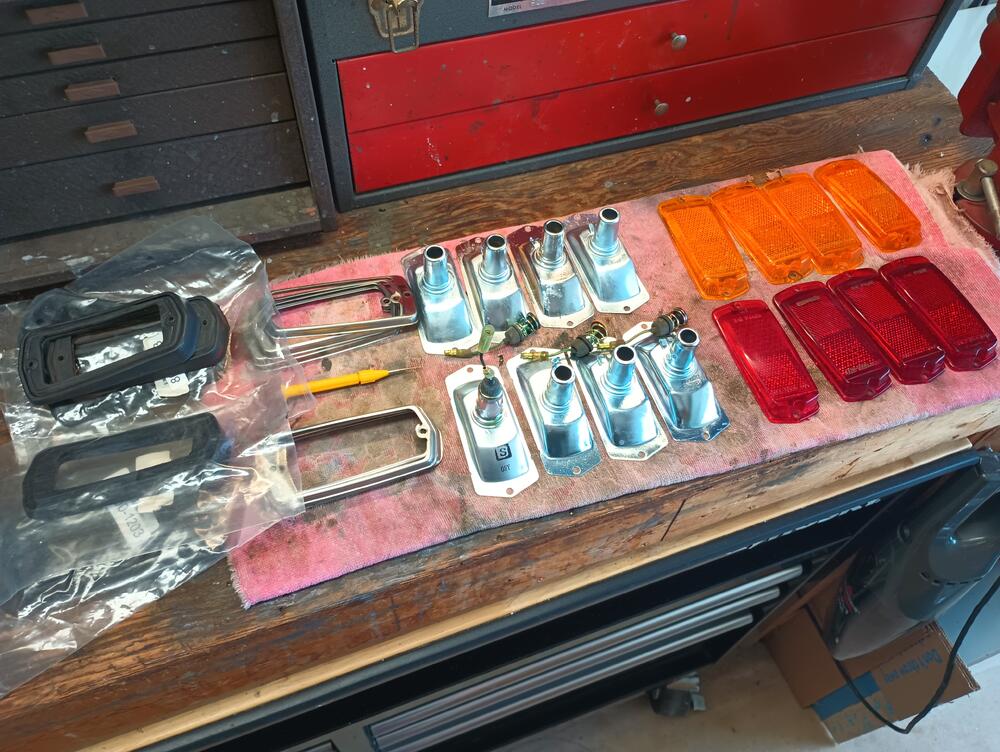
1 point@HS30-Hand @jfa.series1thanks for sharing this interesting info about the side marker lights. I had a quick look at the pictures I have of my 7/70 (originally delivered to Canada) and they have the IKI 5004 DOT lenses, as Jim found. It also is interesting that the IKI 5004 lenses have a different pattern for the reflective feature. IKI 5004 has a pattern that is prismatic and IKI 5005 seems to be more like a pattern of circular, possibly parabolic shapes.
 1 point
 -
1 pointVery interesting. I suspect the lens you pictured is unique to the Euro export vehicles. It looks like the IKI # is 5005, all of the lenses I've worked with are IKI 5004 as are the lamp bodies. Our North American versions also specify SAE PIA69 at the other end, and some but not all have DOT just above the SAE. Ours have no other lettering on the lens surface. The orientation of the raised IKI 5004 is opposite of yours. The RH / LH designations are found on the underside of the rubber adapter. I am just getting underway on assembling some sets of refurbed markers.
 1 point
 -
1 pointAlso, Nissan very kindly supplied us with orientation clues on the lens itself. If the lamp unit is mounted correctly, the arrow will point to the front of the car and the 'RH' or 'LH' script will be legible and not upside down. RH and LH of these cars is as viewed from the driver's seat. Simple.
 1 point
 -
1 pointRacer, do you have a video of you at the track? I would love to hear the engine.1 point
-
1 pointIt's a later mis-transcription of 'Rim'. 1970 C-187 Japanese market factory parts manual gives: 26182-E4100 RIM-side flasher lamp.1 point
-
1 point🙊 I had a questionmark behind it! I personal don't think they are anchors.. (worthless) .. These flatheads are just much more complicated to tune right! Also they are more sensitive to wear i think.. Never tuned one as i'm not a carb specialist.. a HJG46W (roundtop) is a simple carburator that even a twat like me can get running very well ( 🙊 ) hihi.. Years ago i bought a complete L24 with everything on it (also gearbox euro 5 speed!) and it had flattops.. 1 carb was seriously damaged so i took the needles from them and saved them.. hence the question.. It's common that the american guys talk about SU carbs on our z cars, i stopped to correct them on that years ago .. THEY ARE NOT SU.. THEY ARE HITACHI CARBS! 🙈🤣 There are A LOT of small differences between the SU and Hitachi carbs.. (It's like a improved version of the SU.)1 point
-
1 pointI filled the back ones and just put stickers over the front ones. I also removed all the wires that weren't needed.1 point
-
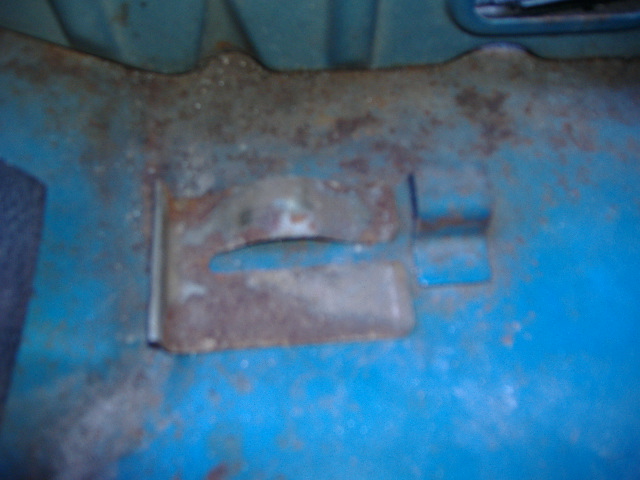
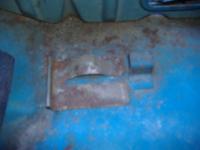
My 7/70, 10/70, and 2/73 build date cars have the L shaped metal clips on the front floorpans just in front of the seat mounting brackets to hold the Metal Carpet CLIPS that I mentioned to Arne and that BonziLon provided pictures of. These protrude up through serged cutouts in the carpets and the clips installed under the L shaped floorpan clips to hold the carpet and keep it from sliding. The firewall end of the front carpet was fastened by 2 female snap halves clinched onto the carpet and 2 corresponding male snap halve studs that were mounted on the firewall insulator near the juncture of the firewall/floorpan. Both the early cars had unsplit rear deck carpet (storage covers behind the seats----not pockets in the deck) with factory installed screw positions for the cargo straps in the rear deck metal. serged cutouts for this end, and notches cut and serged for the straps as shown by westpak at the rearmost end. The 2/73, of course, had the split for access to the storage bins, cut outs in the carpet that were unserged (the metal end screwed directly to the deck), and the notches at the rear for the cargo straps which were serged. The carpet pieces that went behind the front seats have a seam where it was cut and then resewn to make it conform to the rise in the floorpan as it meets the rear deck forward wall (riser). AZ-240---I can't say that what I have is original to either of the early Series1 cars when it comes to the pieces around the storage bins. I do have some pieces that go there, but they may have come from later series 240's. Surely someone out there has an early car that has the real deal from which patterns could be made. Surging shouldn't be a big deal if the upholsterer has the proper machine. It's just a side to side stitch, but it does have to be closely spaced to look original. Sorry I can't provide pictures of all of this, as my camera isn't very good and most of the carpet is at my storage building across town. I'm not buying any carpet until this is resolved. My next move is to get in touch with Bryan (LBO370) and see if he is equipped and willing to take the project on. Thanks to all for the contributions to this thread as it may have stirred the interest for us to get the "right stuff" once and for ever! Jim D. "Zup"1 point
-
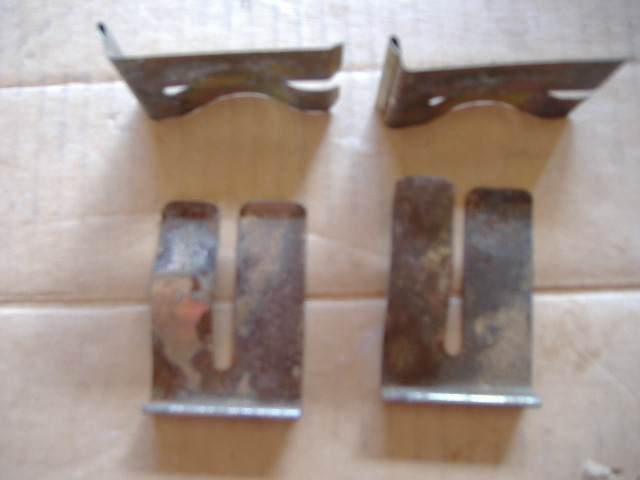
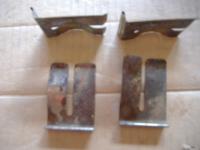
Here are 2 photos of the clips in question. My camera seems to be myopic today but you can see what they look like. They fit under the tab welded to the floor. They are 2 5/8" long by 1 7/8" wide and the lift is about 1/4" and were clad plate but a little rusty now. If they were bunnies I'd have them make some sets for you guys. Bonzi Lon
 1 point