Leaderboard
-

siteunseen
Free Member5Points15,115Posts -
.JPG.cfcada9cf1c1b502df3f5f2f2ca3ff36.JPG)
SteveJ
Free Member5Points9,646Posts -
emccallum
 Subscriber
 4Points428Posts
 -
Patcon
Subscriber4Points11,142Posts


Popular Content
Showing content with the highest reputation on 02/05/2023 in all areas
-
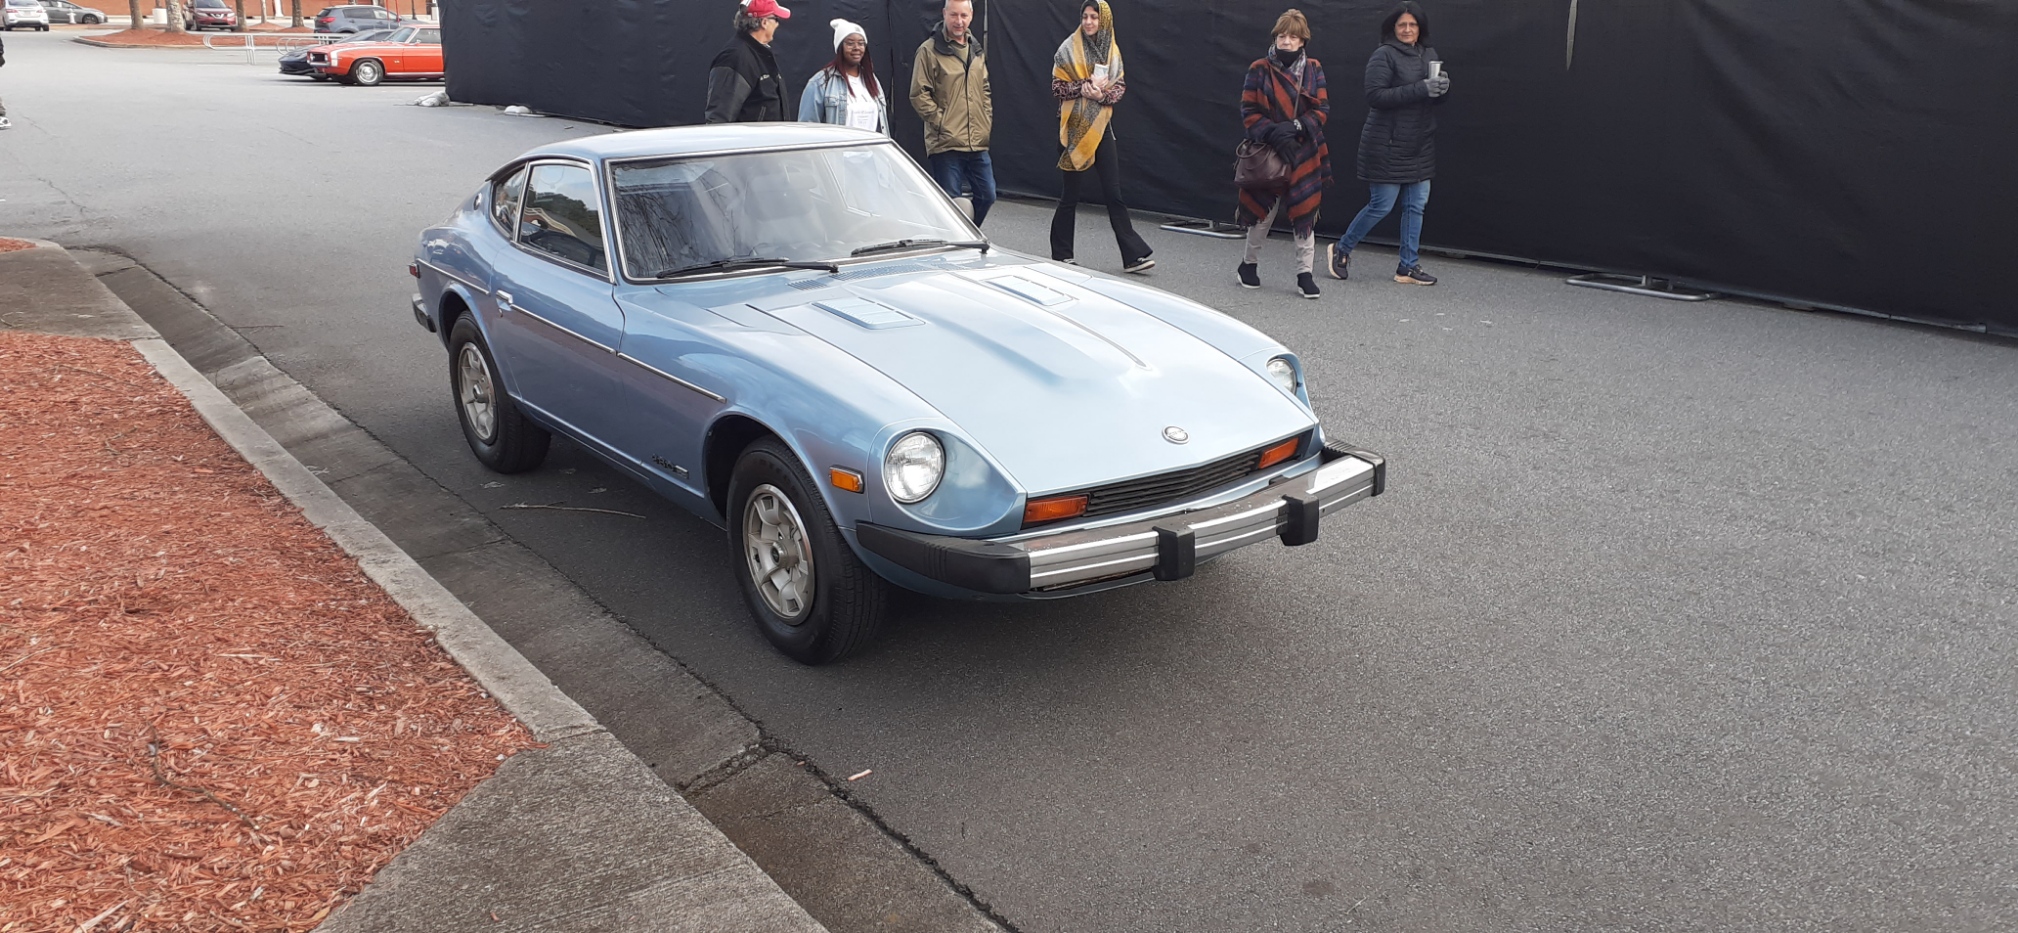
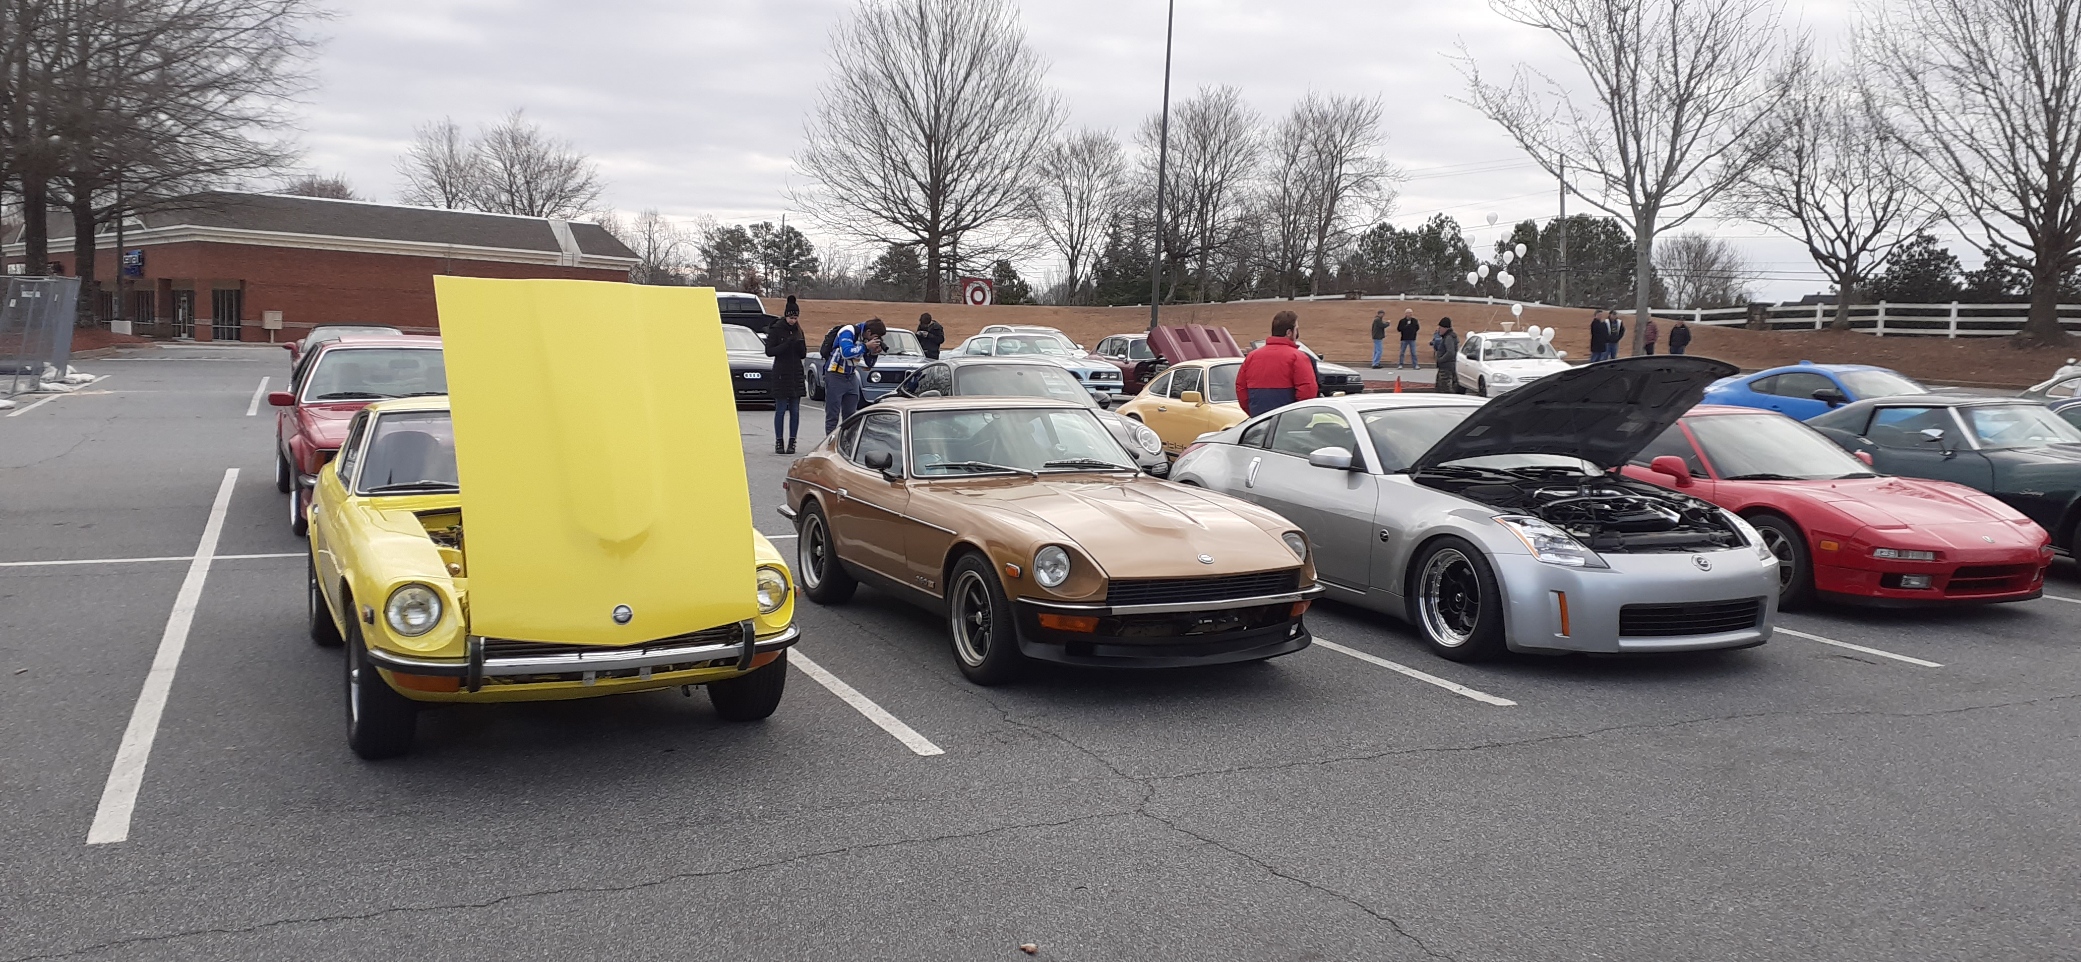
Another weekend, another car meet. There another couple of Z33s that showed up, but they were shy. The silver 260Z had the rare, but coveted, Golden Retriever option.


 3 points
 -
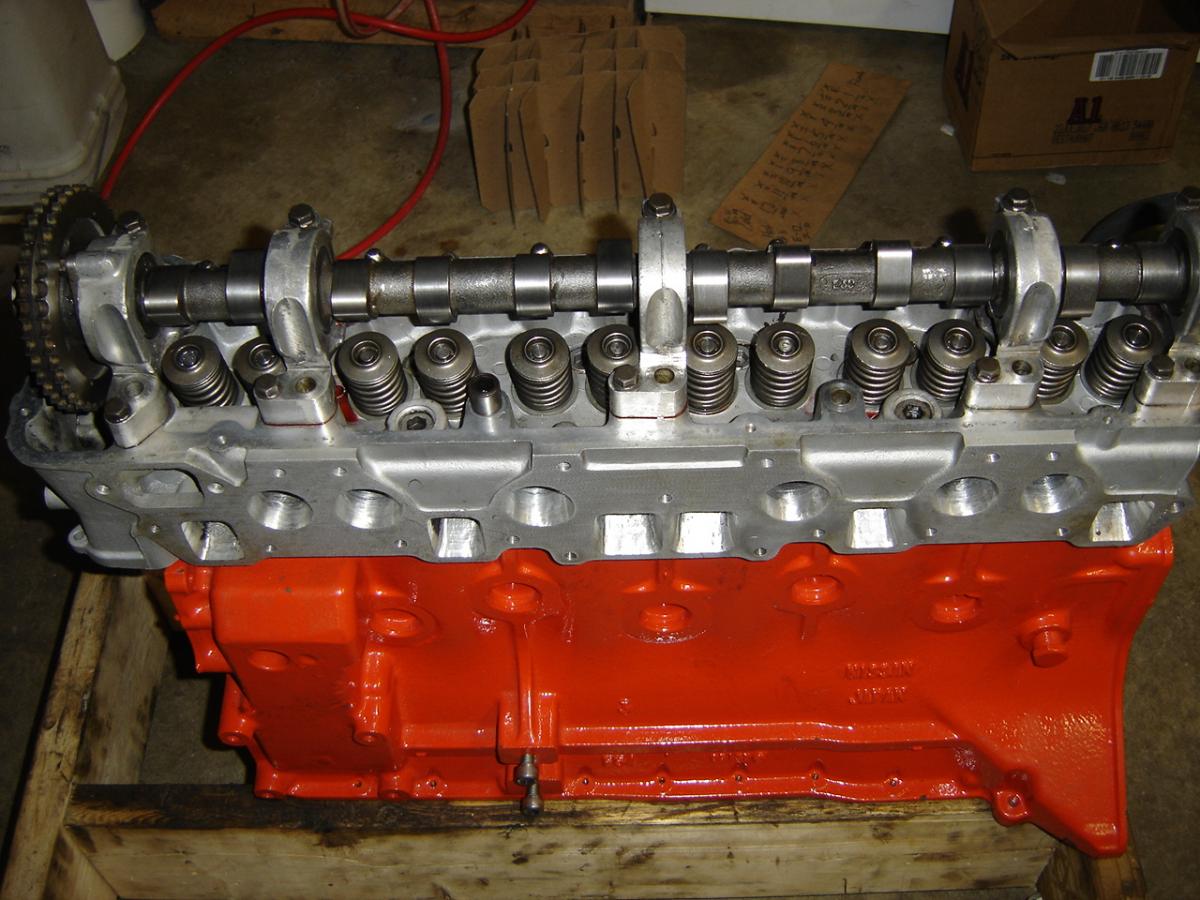
3 pointsHe's going to send it back on the wooden crates he makes I would bet unless you want your metal crate back. I've made a couple of those crates and put steel casters on them to roll the blocks around while rebuilding. It's nice to be able to sit down and work on the motors. @Diseazd has a wall lined with original motors stored on them. Here's a L2.8 block on one I've used to hold the cylinder head down while I did some work on it.
 3 points
 -
2 pointsAlso the newer filters that I hate, aren't quart size so they throw off the standard 5 qts. that we all know. I use these...
 2 points
 -
The VIN stamped on the Firewall was HLS30 14160 - The first series of chassis serial numbers ran up at least HLS30 20533. The second series of chassis serial numbers (aka Series II) started at HLS30 21001.2 points
-
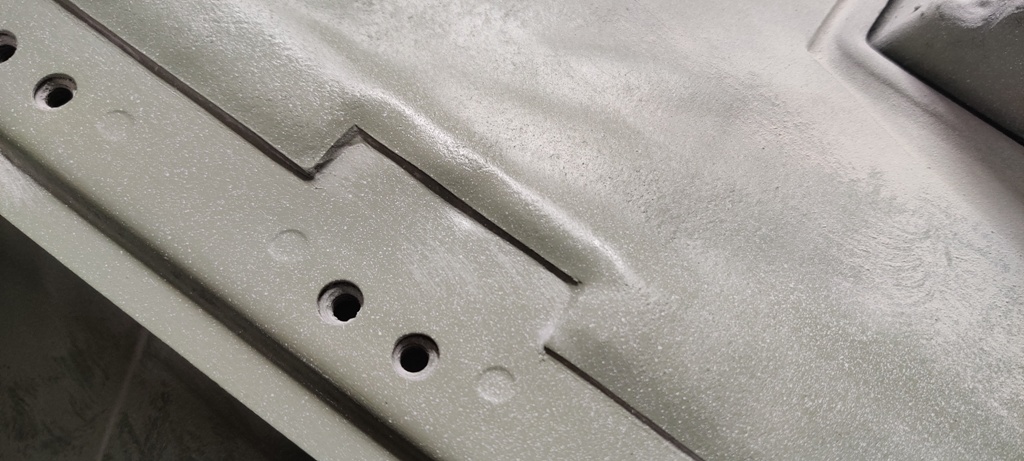
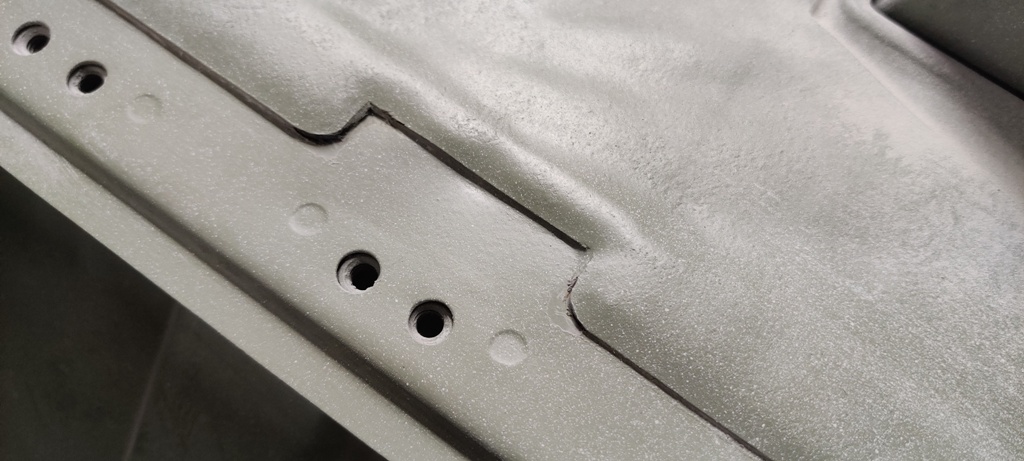
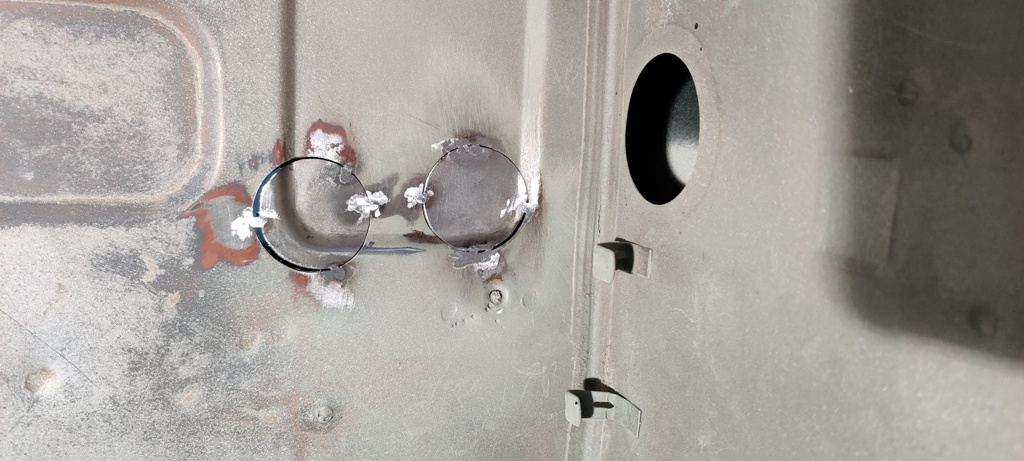
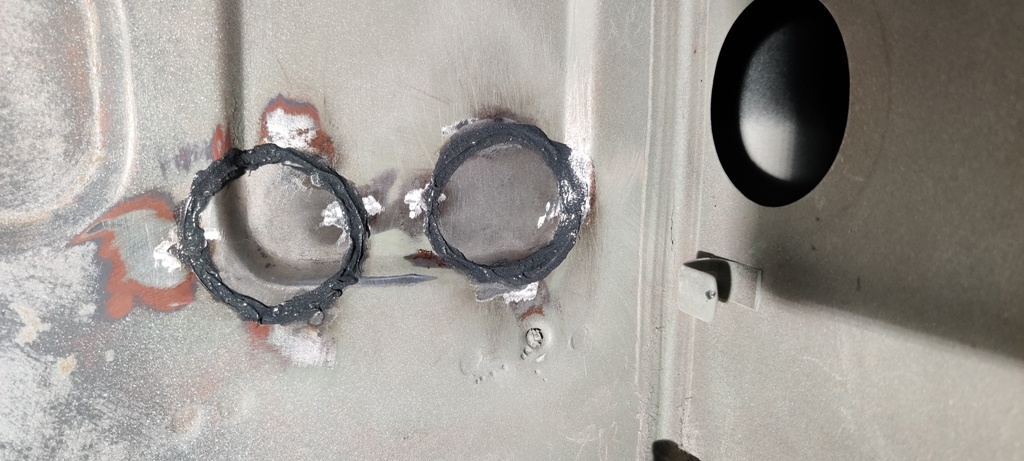
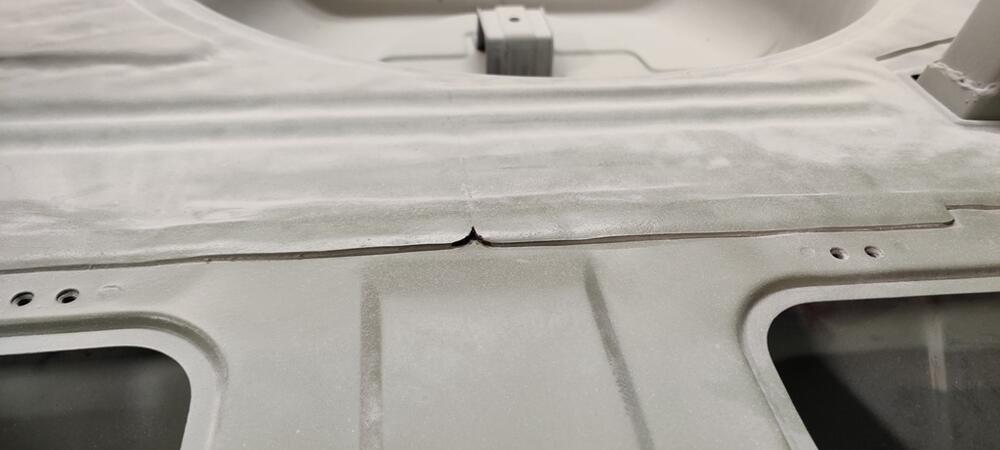
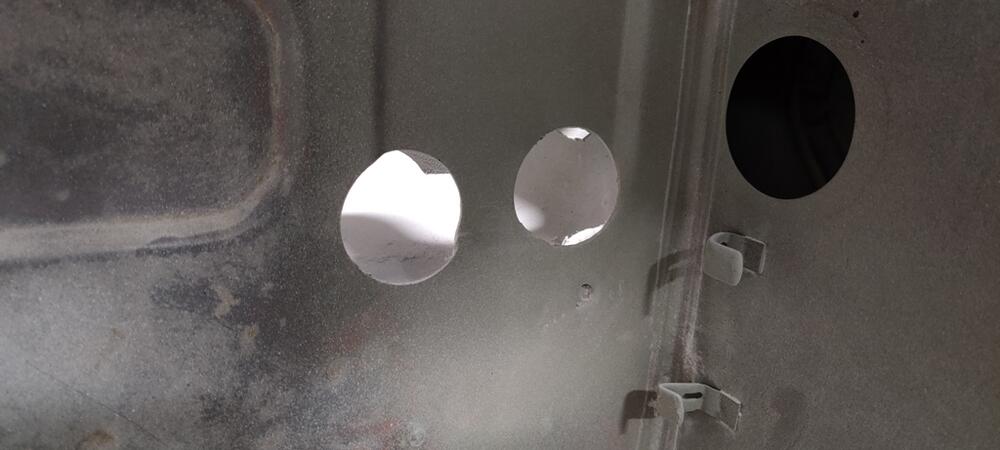
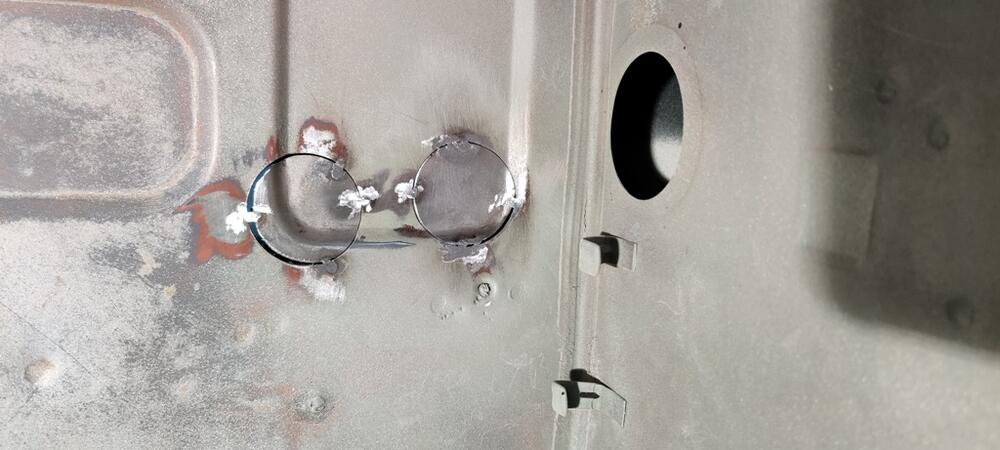
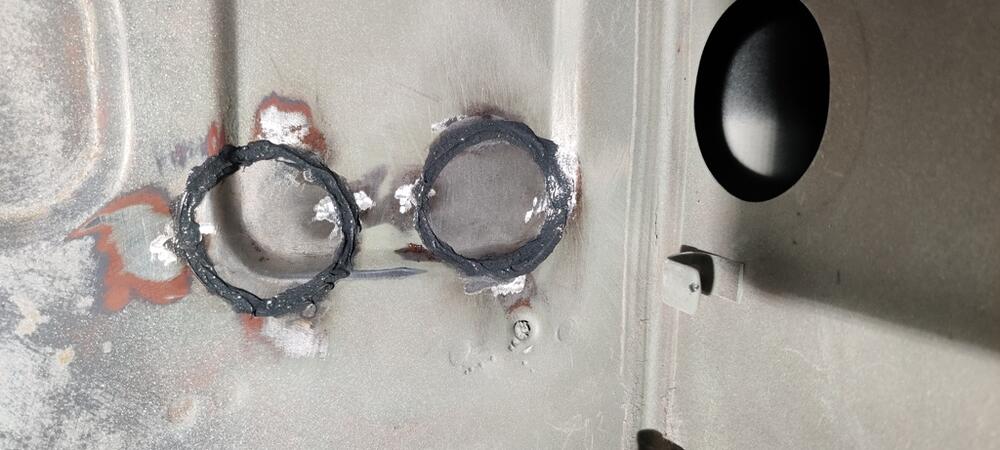
I have been motivated to put in more hours last weekend and this weekend. My deadline for finishing the body work is the night of Feb 12 when I go to bed. Little things here and there are getting addressed along with final wet sanding. One of the things I noticed a while back is that the sound deadening mats are supposed to have rounded corners at the luggage strap bolt down location and at the mid point. Took care of that: Another thing I have been needing to do is make some block off plates for the holes that were cut in the firewall for the dealer installed AC. I made some plates and tack welded them in, then sealed with seam sealer. This way, if I decide to add AC later, it will be pretty easy to knock these plates out. Tomorrow, I will be shooting the entire exterior with a couple more coats of primer. Sanding from this point forward will be 600 grit or finer.
 2 points
 -
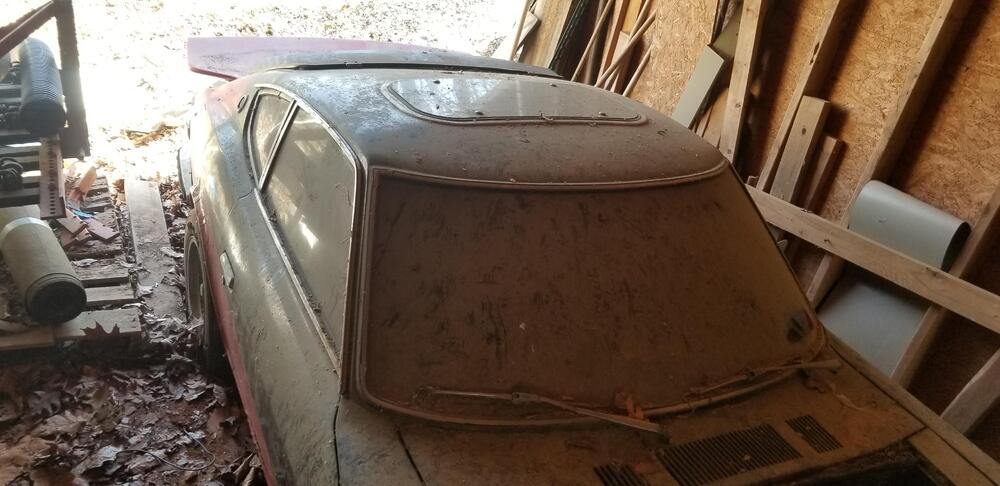
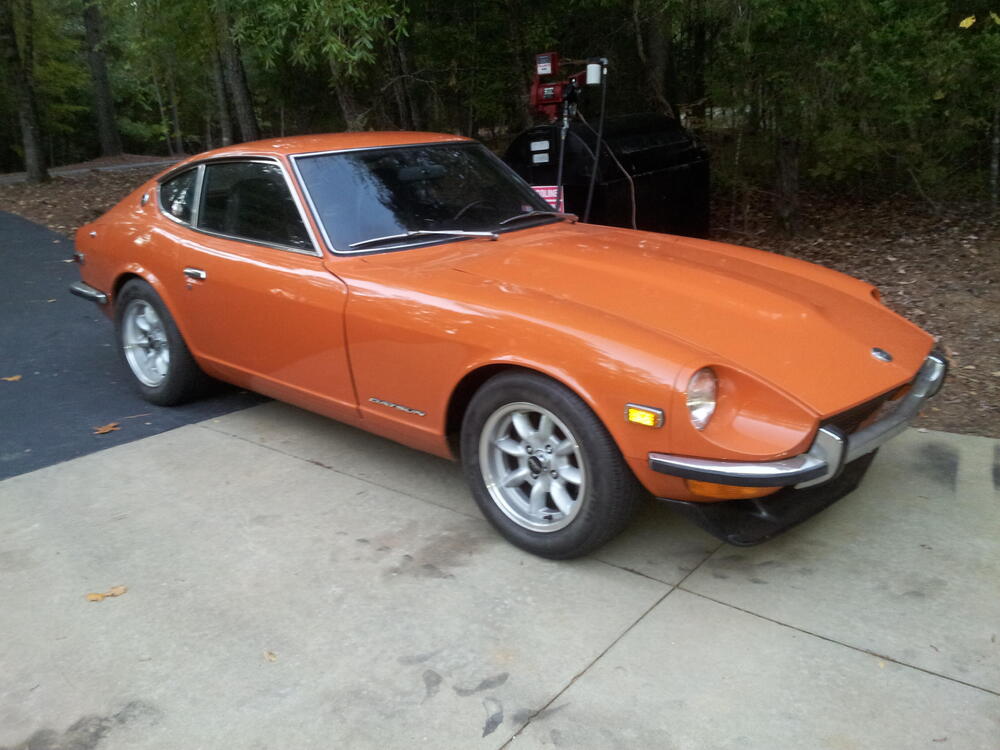
1 pointI joined this group in 2000 and sold my last 240 in 2014. I saved some old parts for some crazy reason. I really thought with the recent increase in Z values that I would never get back into them. So, I moved on to restoring and playing with some other cars. A couple of weeks ago I got an email from an old college friend. We both had 240's in college. He swapped to a vw after his second year in college. He told me that he had parked his 240 in a shed at his parents house in 1986 and never touched it again. He said his parents were moving to an assisted living facility and the car had to go. He lives across the country and doesn't have time to deal with it, and thought I may be interested. I initially said no, but I would go take a look as it was less than an hour from me, and I could help him sell it. Long story short we made a deal on it and I am back in the z scene. The car is a 72, but was modified with a rear wing and front spoiler and a sunroof! The good, is that it is very solid, has the original motor and straight panels. Bumpers are straight and in good shape. Interior is rough. My plans are a complete restoration to the original metallic brown. I remembered I had an old parts car that I let a friend have. Thinking I could use it for a donor roof, I went to check it out. Guess what.....It has a sunroof too! How could I get this unlucky? Why didn't I remember that? It did have a few other bits that I will need. So, I will be searching for a donor roof. I will post up some more pictures when I go get the car and get it home. Looking forward to catching up with the z community. It was my first online car group. I remember when we had a list serv system where we got emails back in the 90's. Here is how she has been sitting since 1986.
 1 point
 -
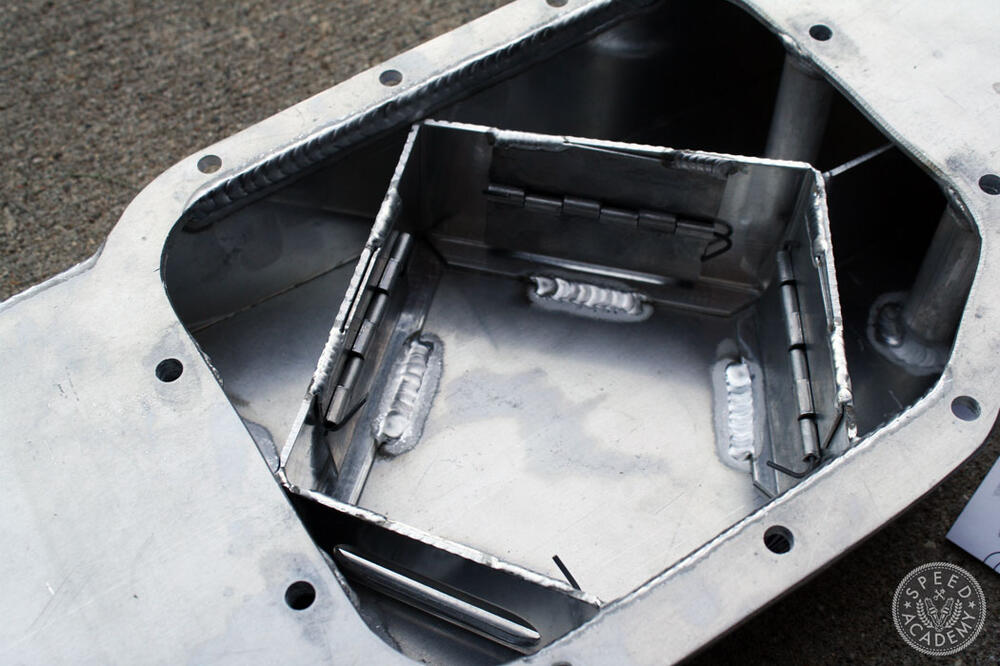
1 pointSorry, I missed that. The plugs are tapered pipe thread. They would either be tight, or they would work their way out. The resulting leak would not have been characteristic of OK oil pressure at idle that falls off as the engine speed increases. More likely that there would have been little to no oil pressure, and the bearings would have been wiped out very quickly. I suppose it could be calculated. We would know the size of the hole. The output volume of the oil pump can be calculated, indeed the engineering team that designed it had to do so to ensure it would adequately lubricate the engine. Never assume. No. The dipstick is meant to show how much oil is in the oil pan. Yes, the level relative to the bottom of the crankshaft is important, as you wouldn’t want the crankshaft turning in the oil. Every effort is made to keep oil from the sump from coming in contact with the rotating assembly after it comes out of the bearing journals. It is called windage. It is important to know that there is adequate oil capacity to keeping the oil pickup submerged in oil. The basic design for road going engines is a compromise between cost and complexity. For racing engines elaborate compartments with trap doors, and a close fitting tray to “scrape” the oil (it doesn’t actually touch the crank, but fits very closely) from the rotating assembly for wet sumps, or, for dry sump systems, a tray, with a shallow oil pan and several fittings connected to a multi stage scavenging pump that removes every last drop of oil as soon as it falls into the pan. A trap door setup: A windage setup for L series engines: A dry sump pan:

 1 point
 -
1 pointI did the modern thing and googled “Engine Shipping Crate”. Quite enlightening what’s out there. Plastic two piece clam shell boxes are very popular. Shippers also love pallets. Few pieces of wood under strategic places to support it upright, basic tie down ratchet straps to lock down to the pallet slats. No need to “enclose it in a box”1 point
-
1 pointI think you're starting with the right idea. Insure it at a high level and it should get well taken care of1 point
-
1 pointPer the factory service manual, initial ignition timing and engine rpm is 17 degrees before top dead center at 550 rpm for non emissions engines, 5 degrees before top dead center at 750 rpm for emissions engines. Does your engine have an air pump? I’ve stated previously the rule of thumb for minimum oil pressure. Once more: Ten pounds of oil pressure for every 1000 rpm of engine speed. At 1000 rpm, 10 lbs. At 2000 rpm, 20 lbs. At 3000 rpm, 30 lbs. See the pattern here? Again, this is the minimum pressure required. 60 lbs at 3000 rpm is plenty. You made a huge mess when running the engine with the cam cover removed. Oil can, and will, go everywhere. You will likely have oil burning off of the exhaust system for a while. We’ve covered this already. Crankcase capacity is 5 quarts including the oil filter. Put 5 quarts of oil in an empty crankcase, start the engine and run for a minute or two, sun it do2n and while waiting for the oil to return to the crankcase, inspect for leaks, especially at the oil filter and drain plug, as you just had them off. After the engine has sat without running for a few minutes, check the level. If it isn’t at the “full” mark, it doesn’t matter. You know you just put enough oil in it. Make a note of the position of 5he oil level, relative to the high and low marks on the dipstick (by the way, this will work with your old dipstick, you didn’t need to buy a new one). Since you know the distance between the high and low marks on the dipstick, and you now know the actual full position, it should be easy to interpolate where “add” should be.1 point
-
I have something on the rivets. I will try to look tomorrow1 point
-
1 point
-
1 pointI would much prefer my dash gauge being wrong and having 38 psi at idle and more revving than what you had before. Now you have a gauge issue but not a mechanical engine issue! I would consider that progress!1 point
-
1 pointThat's good progress. I'm not surprised you had two dash pieces when I saw that crack... Dogs are the best!1 point
-
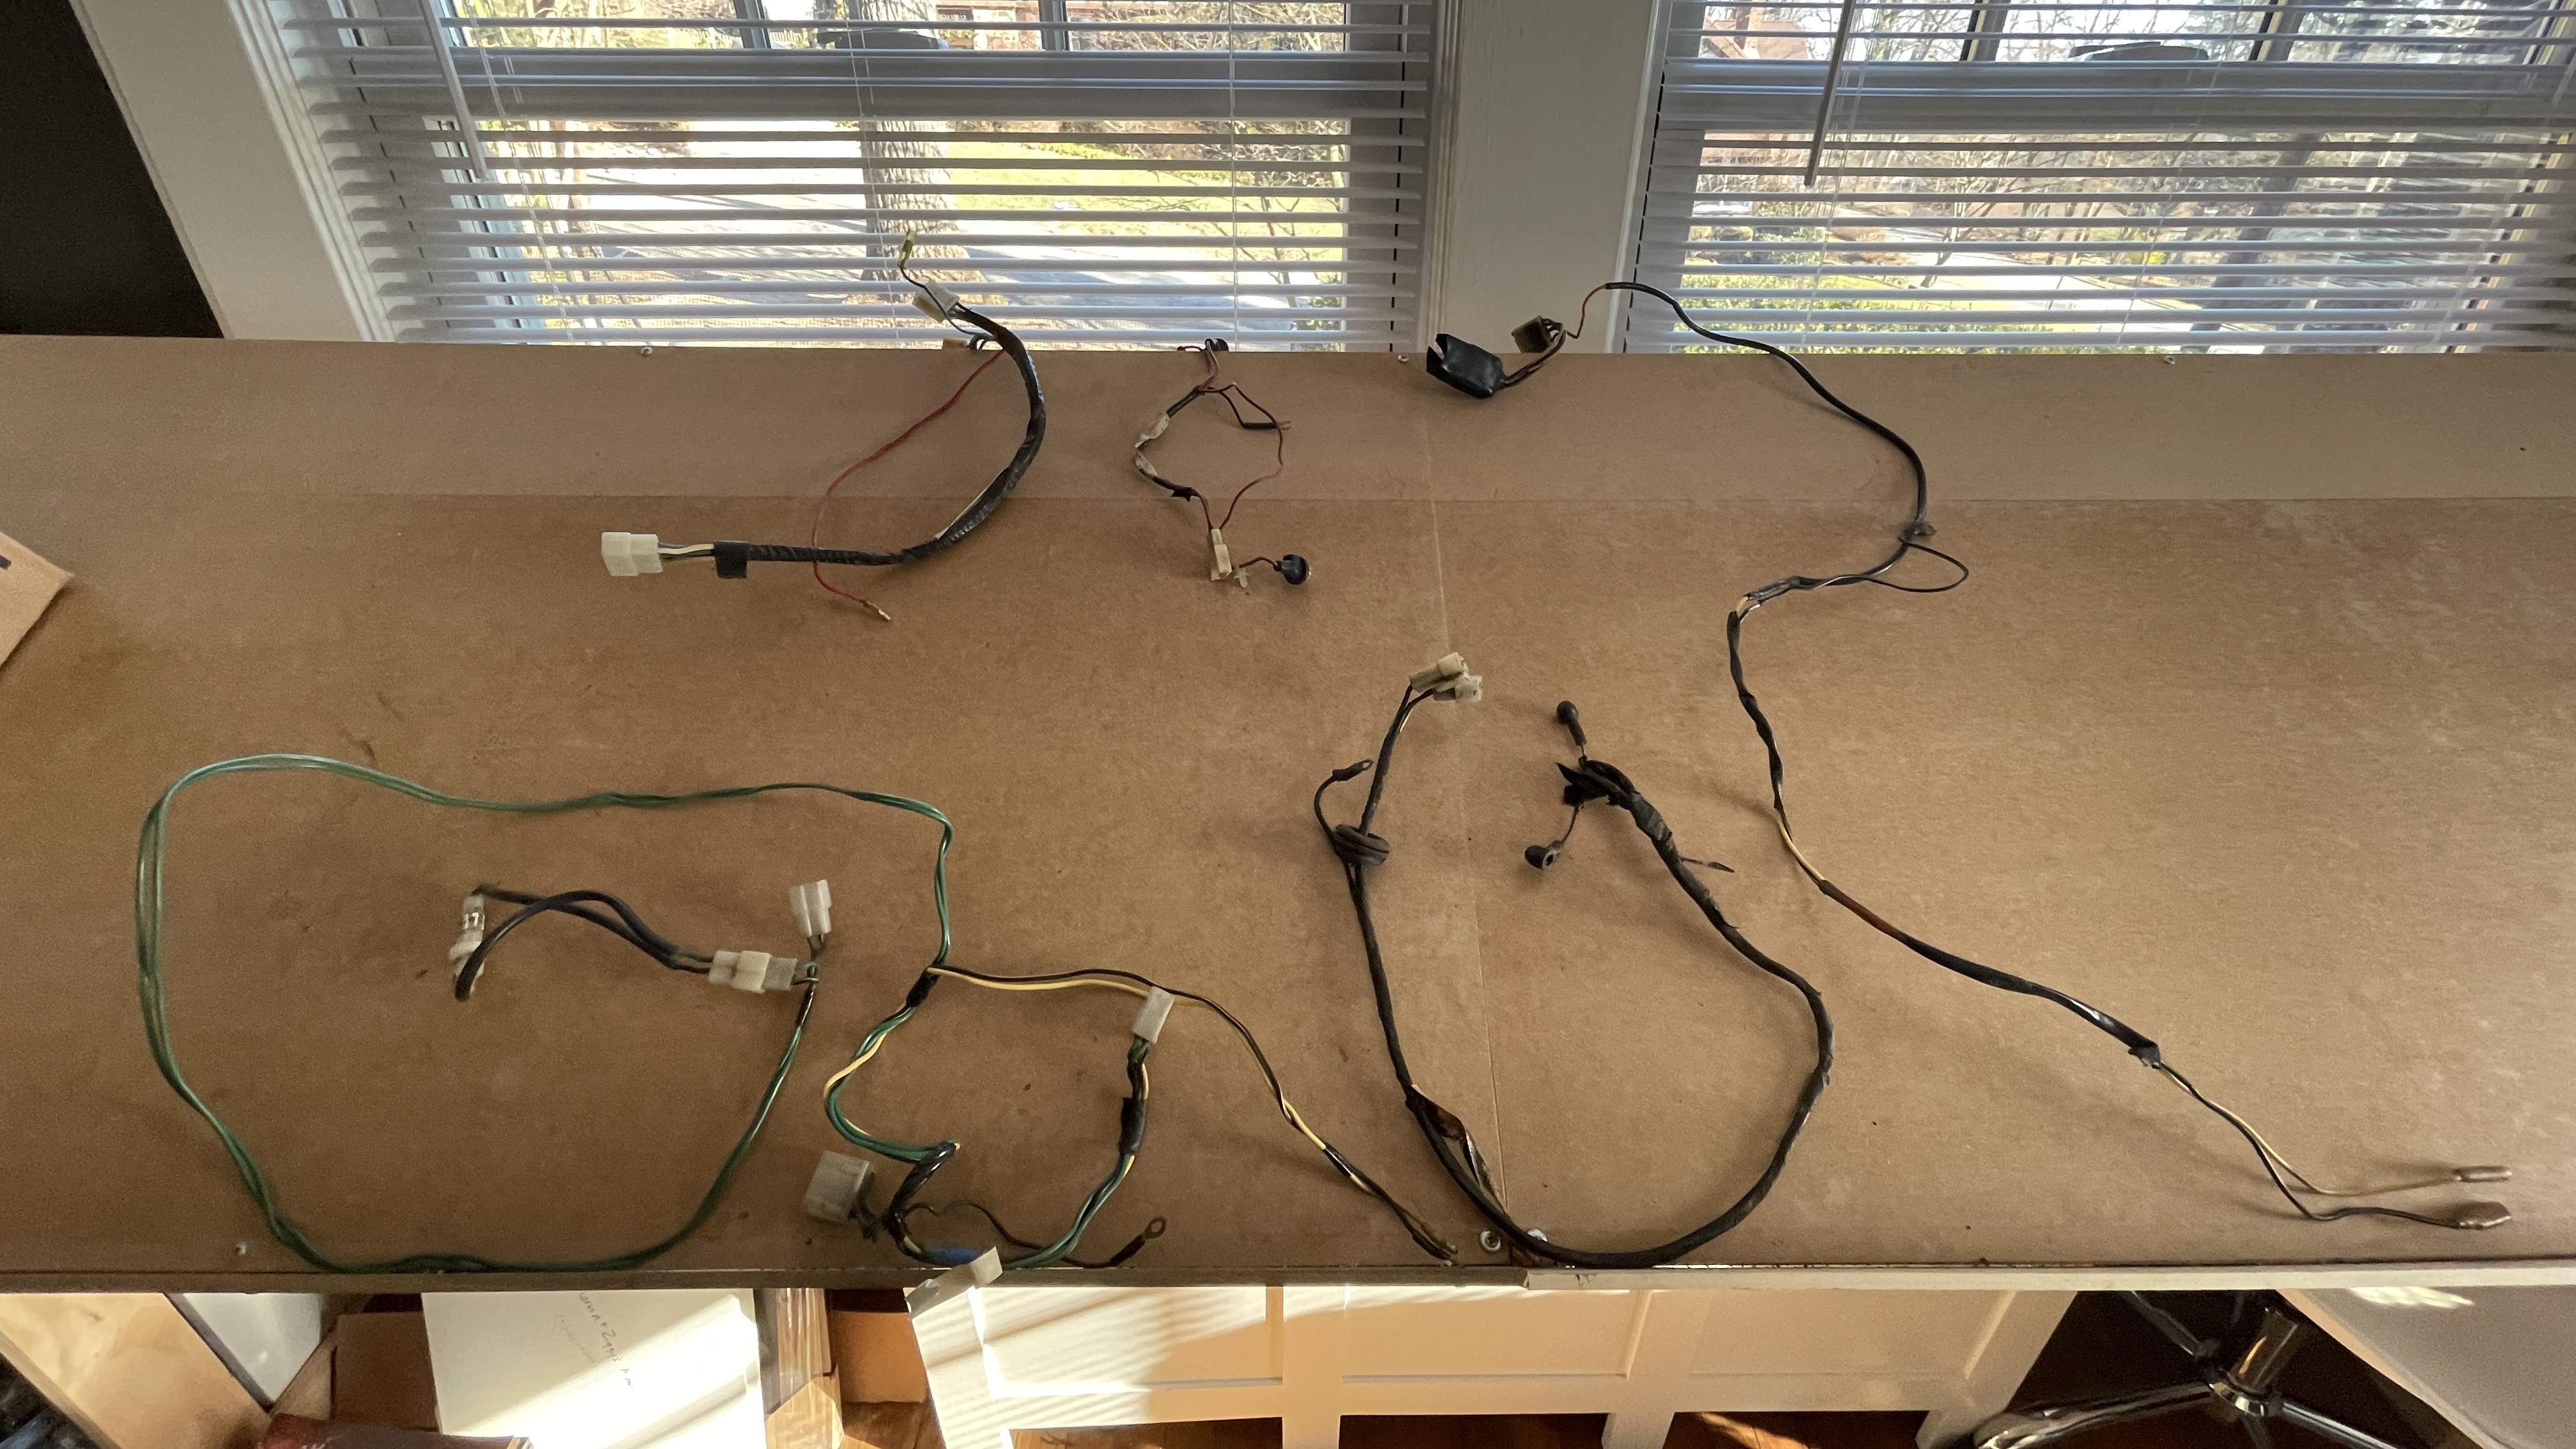
I unearthed another box of wiring harnesses I had buried in my basement which has shed light on some things above, specifically the Fuel Pump Relay and how that fits into the rest of things. This thread started by @conedodger prompted me to look for the harnesses that were added in late 1973 shown in the illustration below supplied by @Carl Beck: So here's what I found: Clockwise from far right, they are… Fuel Pump Harness A (PN 24032-N3300) Electric Fuel Pump & Fuel Sender Unit Harness (PN 24815 E8200) Fuel Pump Harness B (PN 24034 N3300) Fan Blower Switch Harness (PN 27155 E4400) Climate Control Face Harness (PN 24026 N3300) So it looks like the one thing I am missing is Relay A (PN 25235 P0100) from the illustration @Carl Beck provided, which I have seen labeled as a heater relay or an Auto Choke Relay, but seems NLA like all the others. Should be fun trying to scrounge this, but first I need to add these 5 harnesses to my diagram and spreadsheets.
 1 point
 -
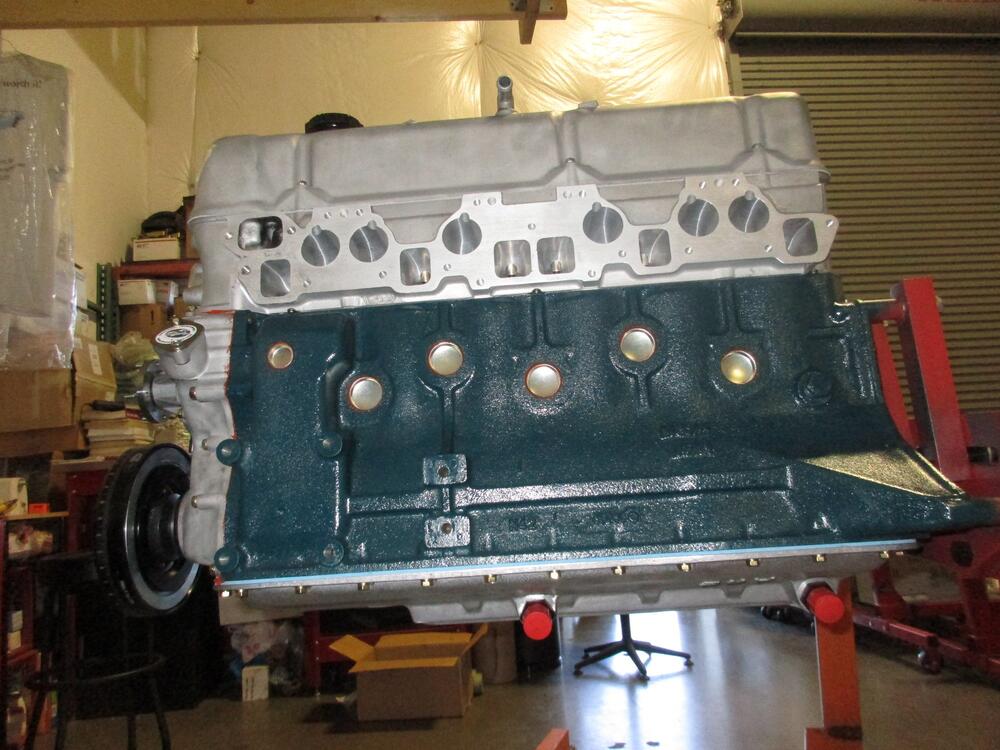
Did someone say V-3 kit - final installment So, for the next two plus years we tried very hard, at least I did, to make those 73, 74 & 74.5 Z cars run properly. I paid careful attention to each and every service bulletin ignoring those that didn't make sense and trying those that I thought had a shot. I found that as time passed less and less of the affected cars ended up at the dealer. Where did they go? Fast forward to my post dealer days. I was getting a fair number of mostly second owners who weren't aware of the faulty induction system but knew something just wasn't right and wanted very dearly to make the damn thing run properly. Of course the fix was to backdate the induction system, the entire system. Everything from the cylinder head out. This operation turned the undriveable into pleasurable. Most of these second owner cars had low mileage, often less than 15k. It seems that most of these cars were parked by the original owners after their patience ran out. In about the year 2000 I did the backdate to a 73 with only 8K miles. Uemura-san's book drew a detailed picture of the extensive real-world testing that was done before the 240 was introduced to the US market. It's clear to me that Nissan did ZERO real world testing before introducing the 73 240 to US market. What a colossal foul-up! Interesting postscript - 10-15% of the cars in these model years, according to the original owners, ran just fine! In my view these chaps weren't being completely honest or they only used their Zs in the cooler months. Some time in the future I'll go into the other 74 & 74.5 big problem - loose crankshaft pulley bolts, oh yea! Cheers
 1 point
 -
Probably just me, but when I see the 240 dash, I see this:
 1 point
 -
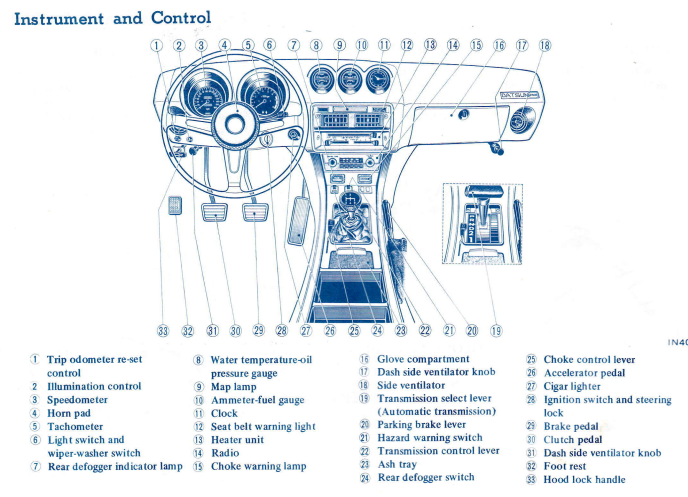
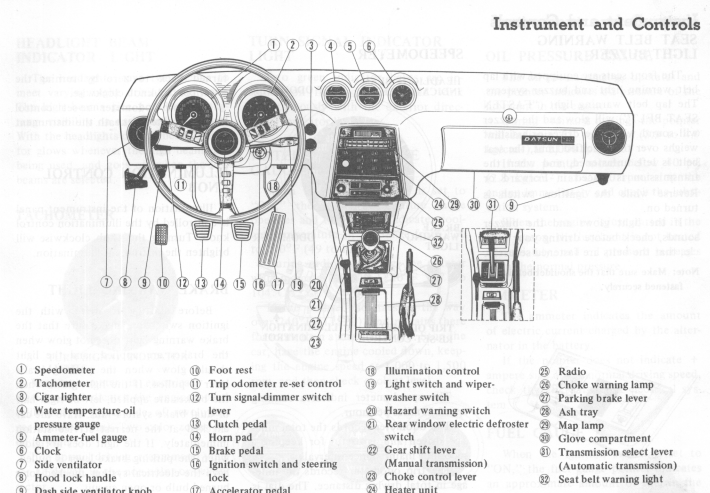
I'm not sure what you mean by the ignition hole. The ignition switch on my 240Z and 260Z are on the steering column. Differences: The 260Z dash does not go down as far as the 240Z dash. The 240Z dash has cutouts for the cigarette lighter and hazard switch. For the 260Z, the switch moved down to the center console. Note the hazard switch hole for the 240Z has variations, too. The shape of the ventilation controls area is different. The gauge lights dimmer and trip reset are on the front of the dash on a 260Z. There is a cutout for the glove box lock on the 240Z. The lock is integrated into the door on the 260Z. There are some contour differences, too. 240Z 260Z
 1 point
 -
1 pointRacer X, Forgot to mention that there are NO jeweled movements in these clocks. There are brass bushings on the ends of the shafts.1 point
-
1 pointYes, I do repair these clocks and also convert them to quartz units. Take a look at my web site. zclocks.com1 point
-
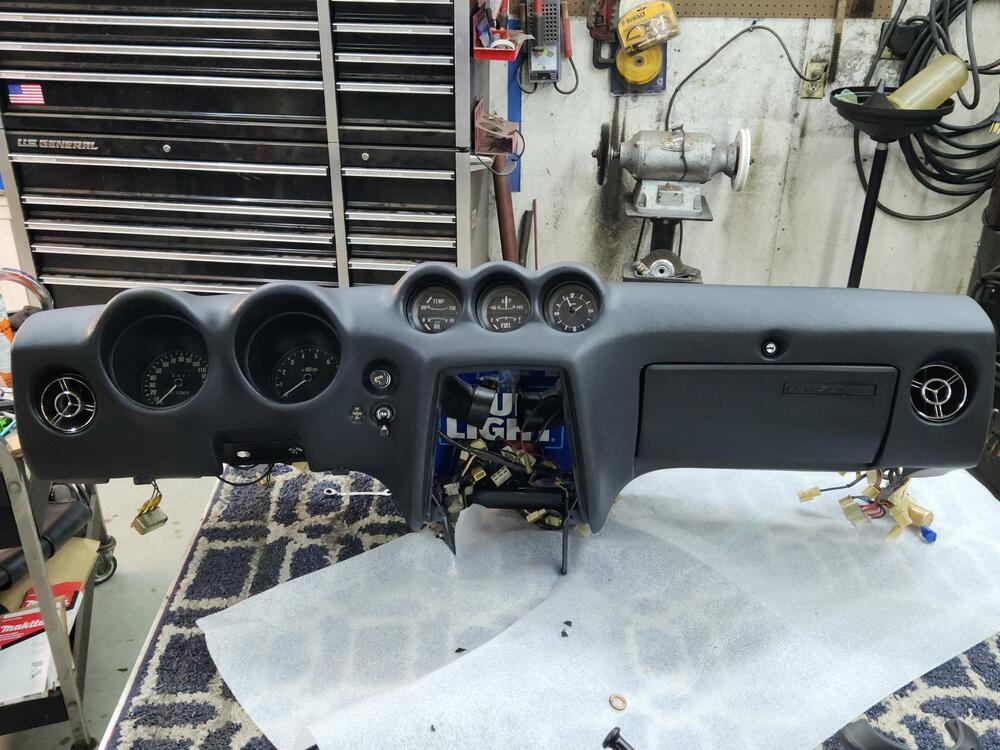
1 pointRACEWR X, I really dont know.....they are pretty small. I went in heavy and soaked it down with brake parts cleaner. Blew it dry , put a tiny drop of very light oil on each staff bearing. iIt seems to be running well. I let it run all day, and it kept good time. Put it all back together. I got my dash back from just dashes. Pretty pleased with the job they did. I put it all together today. I replaced all the lights with LED's. Only three of the original bulbs were working. Cant say enough about the importance of taking a ton of pictures during disassembly. That really helps.
 1 point
 -
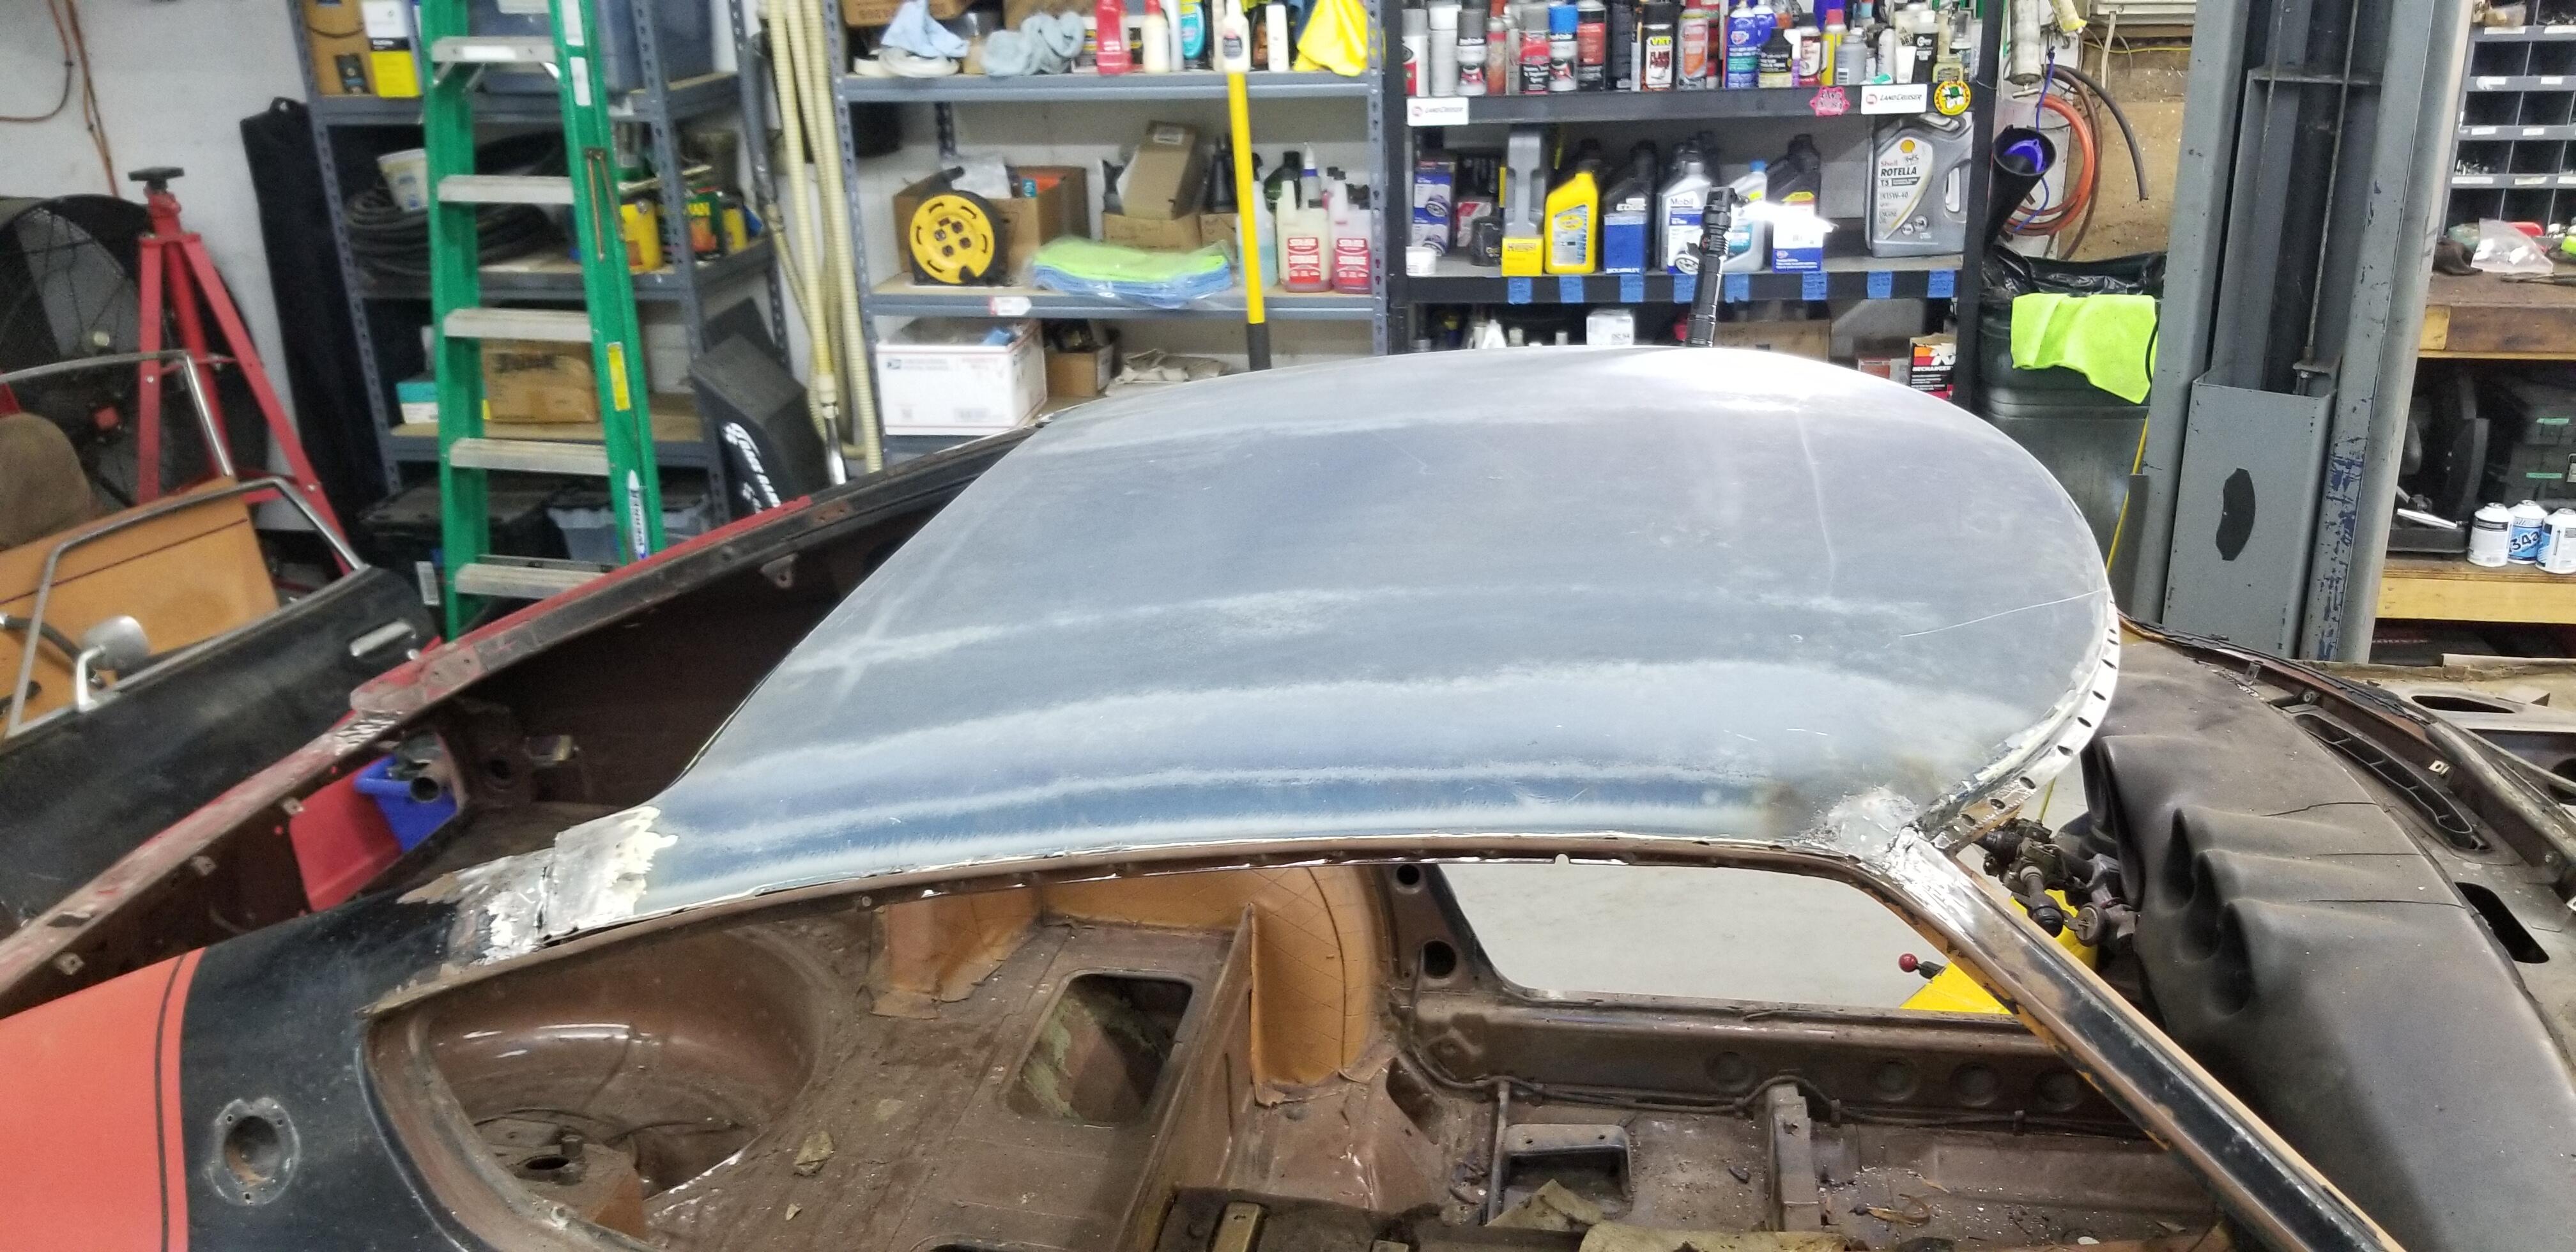
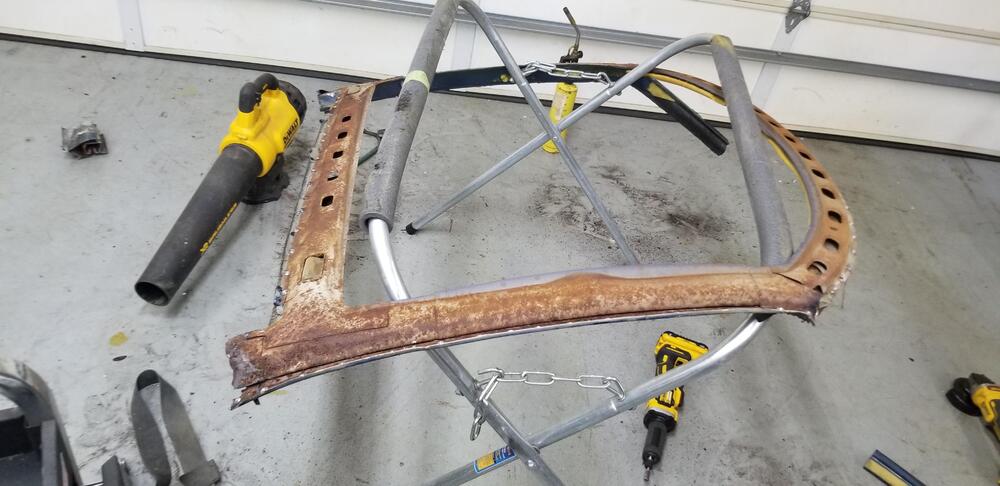
1 pointI picked up a roof down in Ga at Resurrected classics. Very nice guys there. I ended up picking up several other things that I needed. They make some nice products. It was great seeing the younger generation passionate about old z's. Happy to support them. Cutting the roof skins off wasnt quite as easy as I had read it was. Each corner was welded and soldered in place. It took me a while to figure out the best approach. I got some spot weld drill bits and a seam buster. Pretty pleased with it so far and it looks like it will go back together ok. This is going to be a long project! I dropped of the motor at the machine shop today. Some pictures of the new roof test fit:

 1 point
 -
1 pointThanks for the replies and the welcome backs! ! At this point, I am open to all ideas concerning the roof, as I have a lot of work to do before I get to that point! I have restored a number of cars since I refreshed my last z back in the 90's. It turned out nice, but looking back, it would have been better if I had taken it completely apart. One of the biggest improvements since the 90's is the cell phone camera. Lots and lots of pictures at your fingertips! My old z right before she was shipped to Canada...
 1 point