Leaderboard
.JPG.cfcada9cf1c1b502df3f5f2f2ca3ff36.JPG)


Popular Content
Showing content with the highest reputation on 08/15/2022 in all areas
-
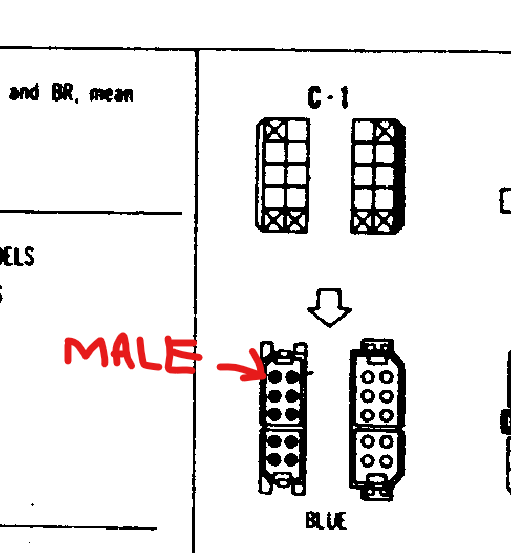
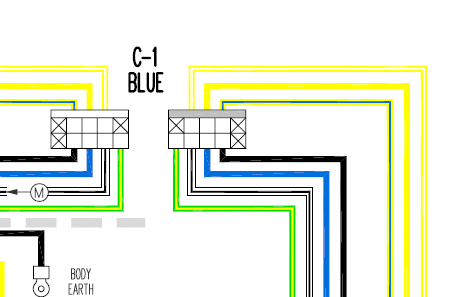
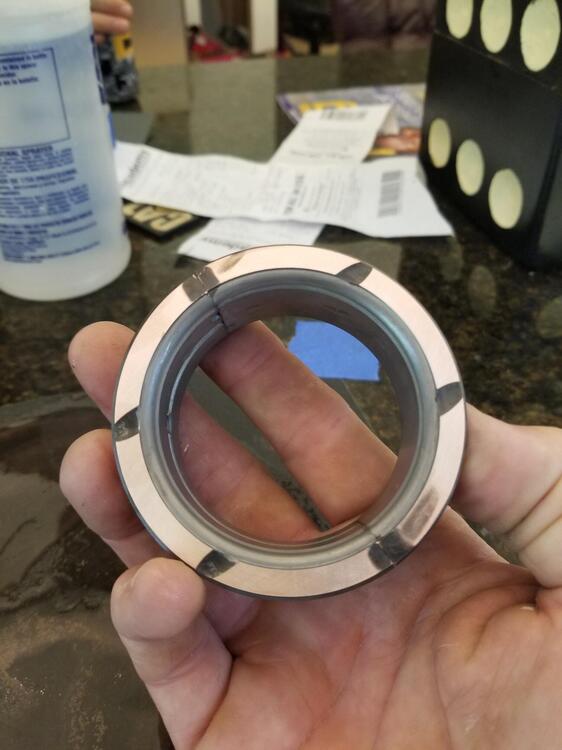
3 points@Terrapin Zis correct. Those connectors are also color coded. C1 is blue as indicated on the wiring diagram. Another convention, knowing which side has the male pins: So in the wiring diagram: The male pins should be on the engine harness side, and the female pins should be on the body harness. If you see how the connector is shown in the wiring diagram, there are no wires going to where the Xs are.
 3 points
 -
2 pointsI'm going to guess that the water pump is not pumping or is pumping at a low rate. Maybe there's a blockage. The hot coolant is just moving slowly by the sender right after it picks up the extra heat from the "load test". In the garage with no load, the extra RPM move the coolant just a little bit faster pulling cooled coolant through from the radiator. The gauge needle behavior looked normal, plus it started from the correct spot for an idling warmed up engine. The proposal of a bad sender really just means that it's correct at about 180, but shoots up ~10 degrees / real degree after 180. It might be scary to do but if you load tested at higher RPM you might get a different result. Keep the revs up to keep the coolant moving. Just trying to fit the puzzle pieces together. When you dump the flushing chemicals you might remove the top radiator hose and see what kind of flow you have. Don't drain it, use the engine and water pump to push it out. Another data point...2 points
-
2 pointsRacer X No, inspected the back of caliper, no anti rattle springs in place. Just the rod retainer spring (on back side of caliper) connecting and holding the pad rods. missing the spring pushing down on the backing plate. Found the springs replacements on-line, they actually call them "anti rattle springs". Toyota requires one per caliper (bottom of each caliper), couple of YouTube video's suggesting to add an additional spring on the top as well. Ordered 4. Thank you for the info.2 points
-
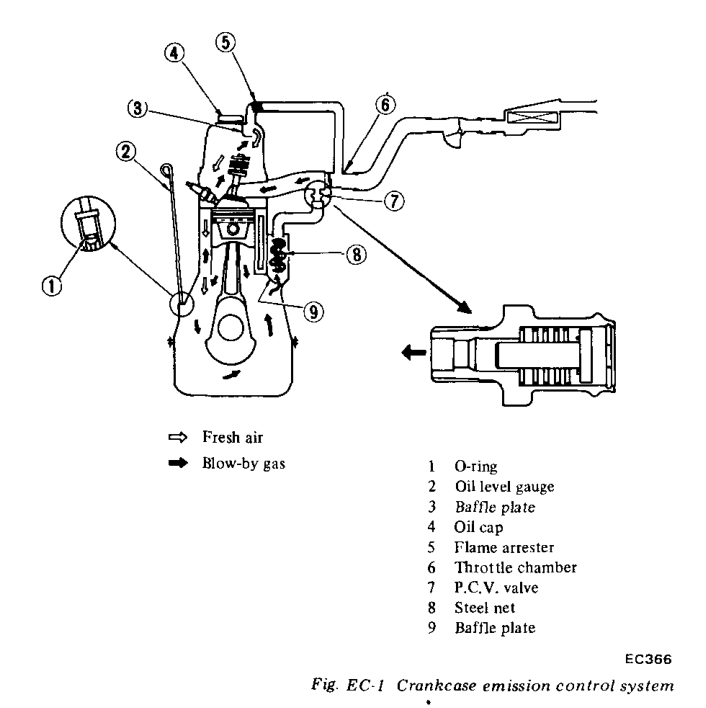
2 pointsDouble check that the PCV valve isn't stuck open and letting in excessive air.2 points
-
1 point
-
1 pointThis is the most likely cause of the noise. The system is not "intact". During normal operation of an engine with normal blowby there won't be very much flow through the valve. Just enough to clear out the gases.
 1 point
 -
1 pointWell this may all be for naught... I got a head start based on the pics from that Dime Quarterly thread I started looking for info on the IC chip - AN603. Based on the logo, it looks like a Matsushita (now part of Panasonic) part, but I couldn't dig up any info about it at all. So if I can't find anything about what's going on inside that chip, I might not be able to do much with it. I mean, I can certainly do a macro level reverse engineering and infer what's going on inside that chip, but that may be about it. And if it looks like there's something wrong inside the chip, I certainly won't be able to get a replacement except from another old donor part. I wonder if they used that same chip in the current sense Z tachs... Those are at least easier to find at this point. Anyway, regardless, I'll do what I can.1 point
-
1 pointIn my understanding of these diagrams, the upper C1 shows the x'ed out ones have no wires in this positions. The lower C1 is what the plug actually looks like. SteveJ will know for sure about this. 🙂1 point
-
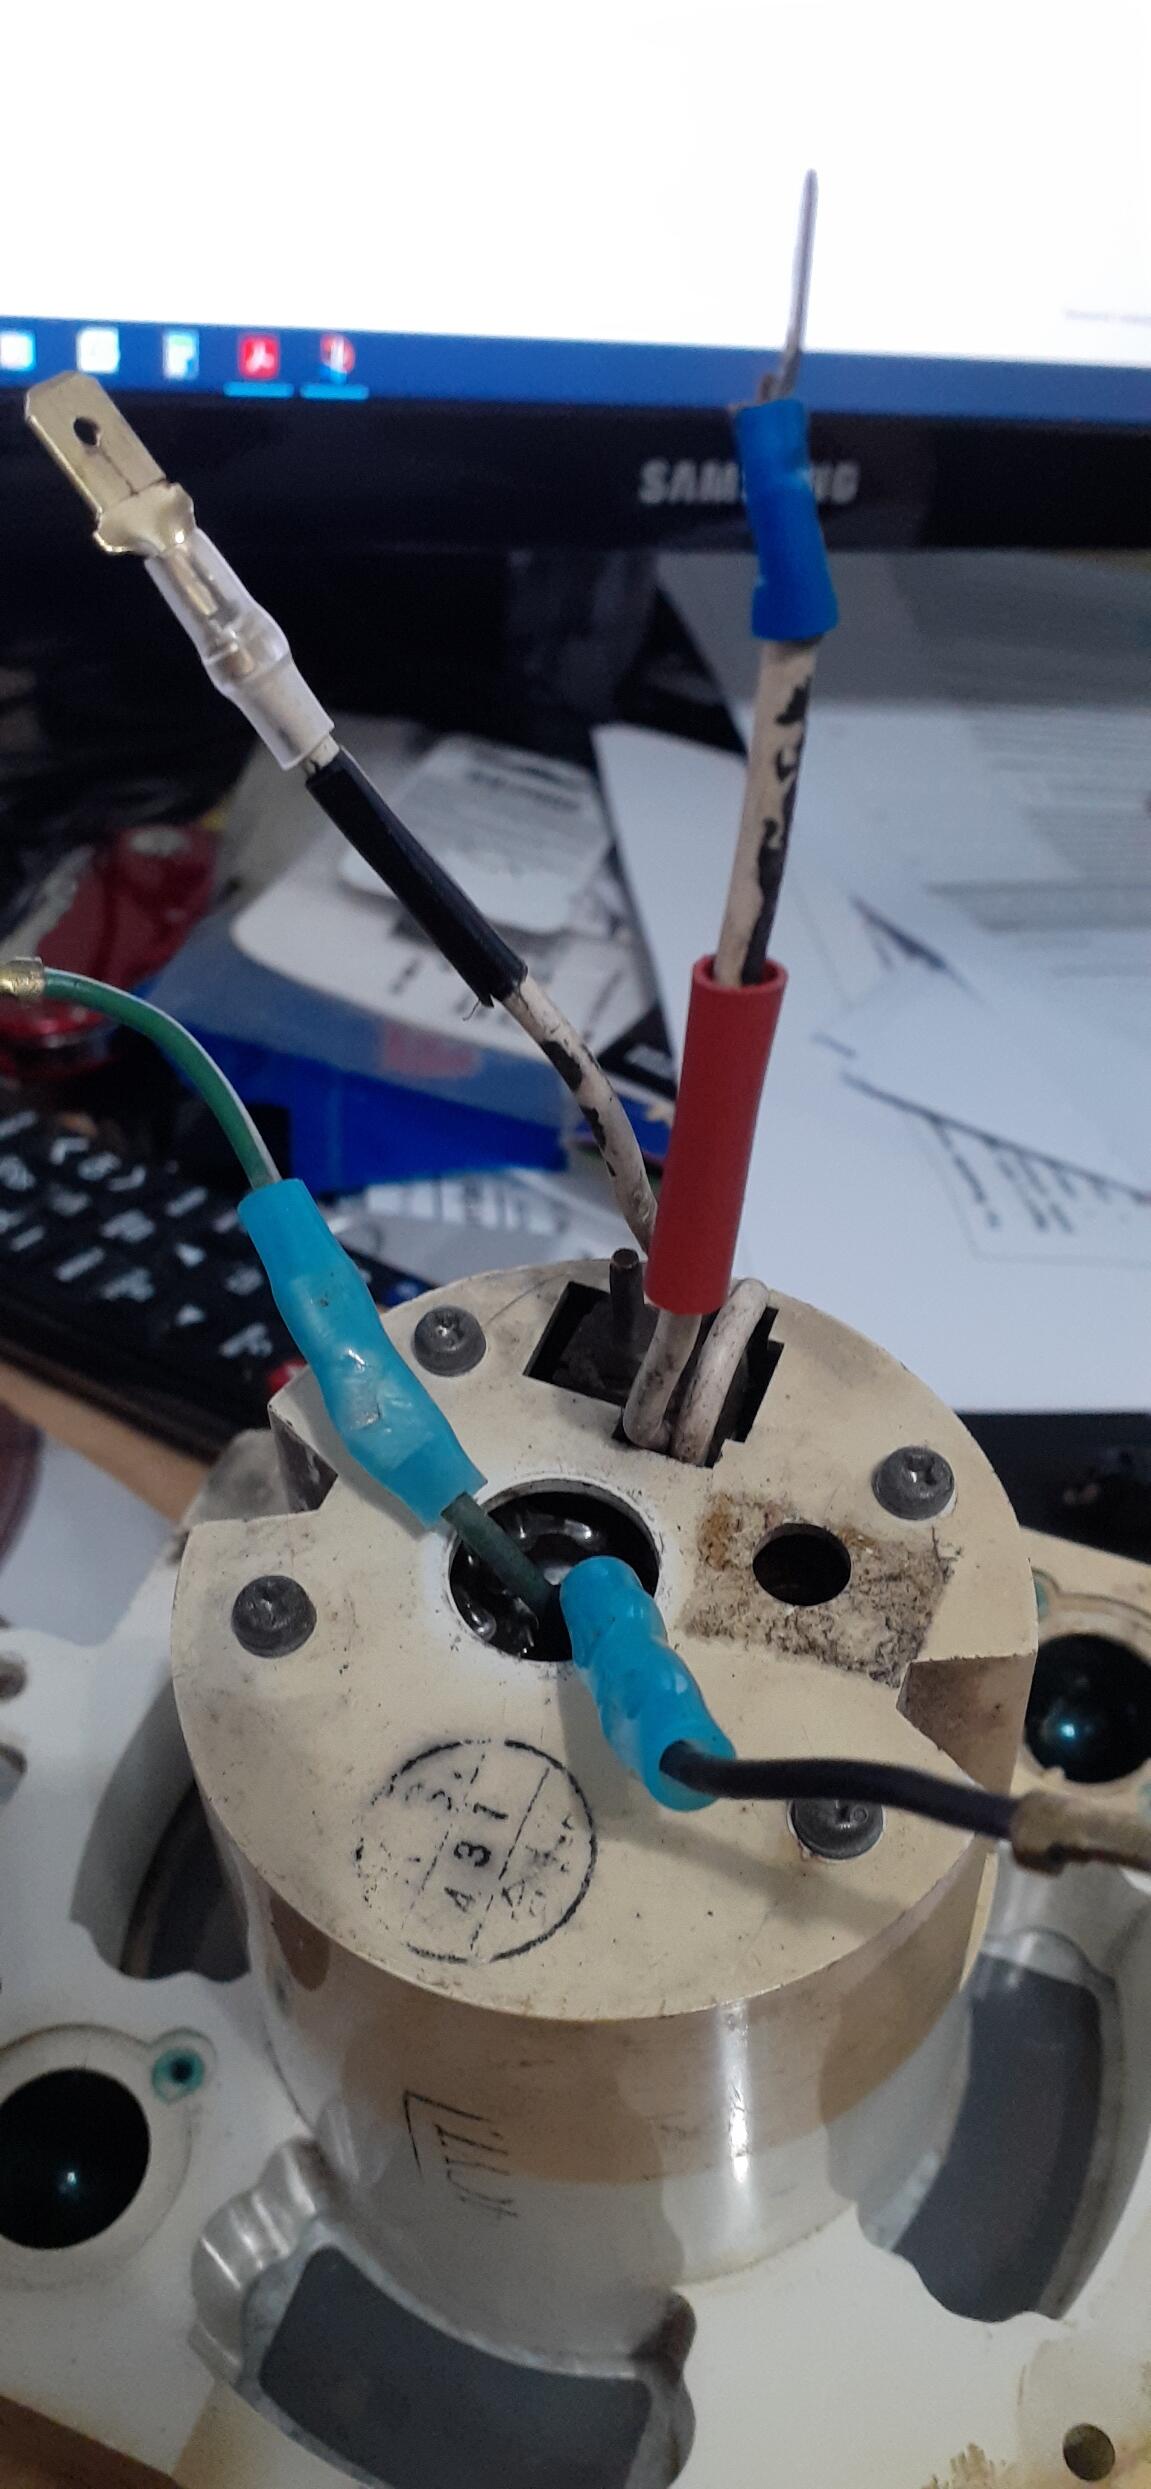
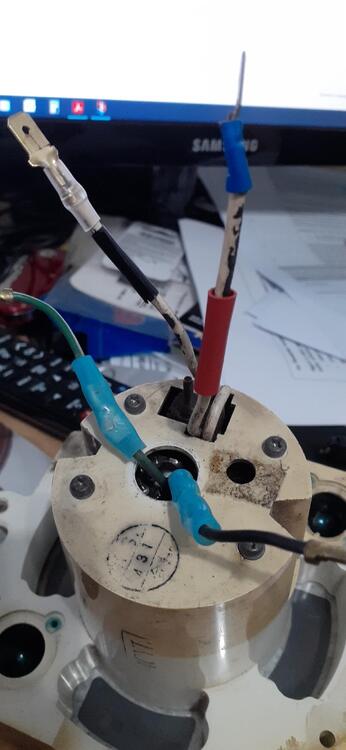
1 pointNot surprisingly, there was no change. But I did take the time to mark the polarity on the tachometer wires to make it easier to identify which wire goes where in the future. I couldn't find my red electrical tape (that had been sitting in the same place in the garage for about 10 years until I reorganized last year), but I did find some red heat shrink that fit over the spade connector. At least I had fun testing. I'm interested in Bruce's analysis. I could do a visual on the discrete components, but I think Bruce has better skills in that realm.
 1 point
 -
1 pointI put the Toyota 4 piston calipers with the 300ZX vented rotors on my race Z . It's a pretty noisy environment, so I wouldn't know if they were rattling or not. There is a stainles steel spring that should be nstalled. Each end is tucked under the pins that hold the pads in place, and at a couple places inbetween the spring pushes down on the backing plates of the pads. Do you have those in place?1 point
-
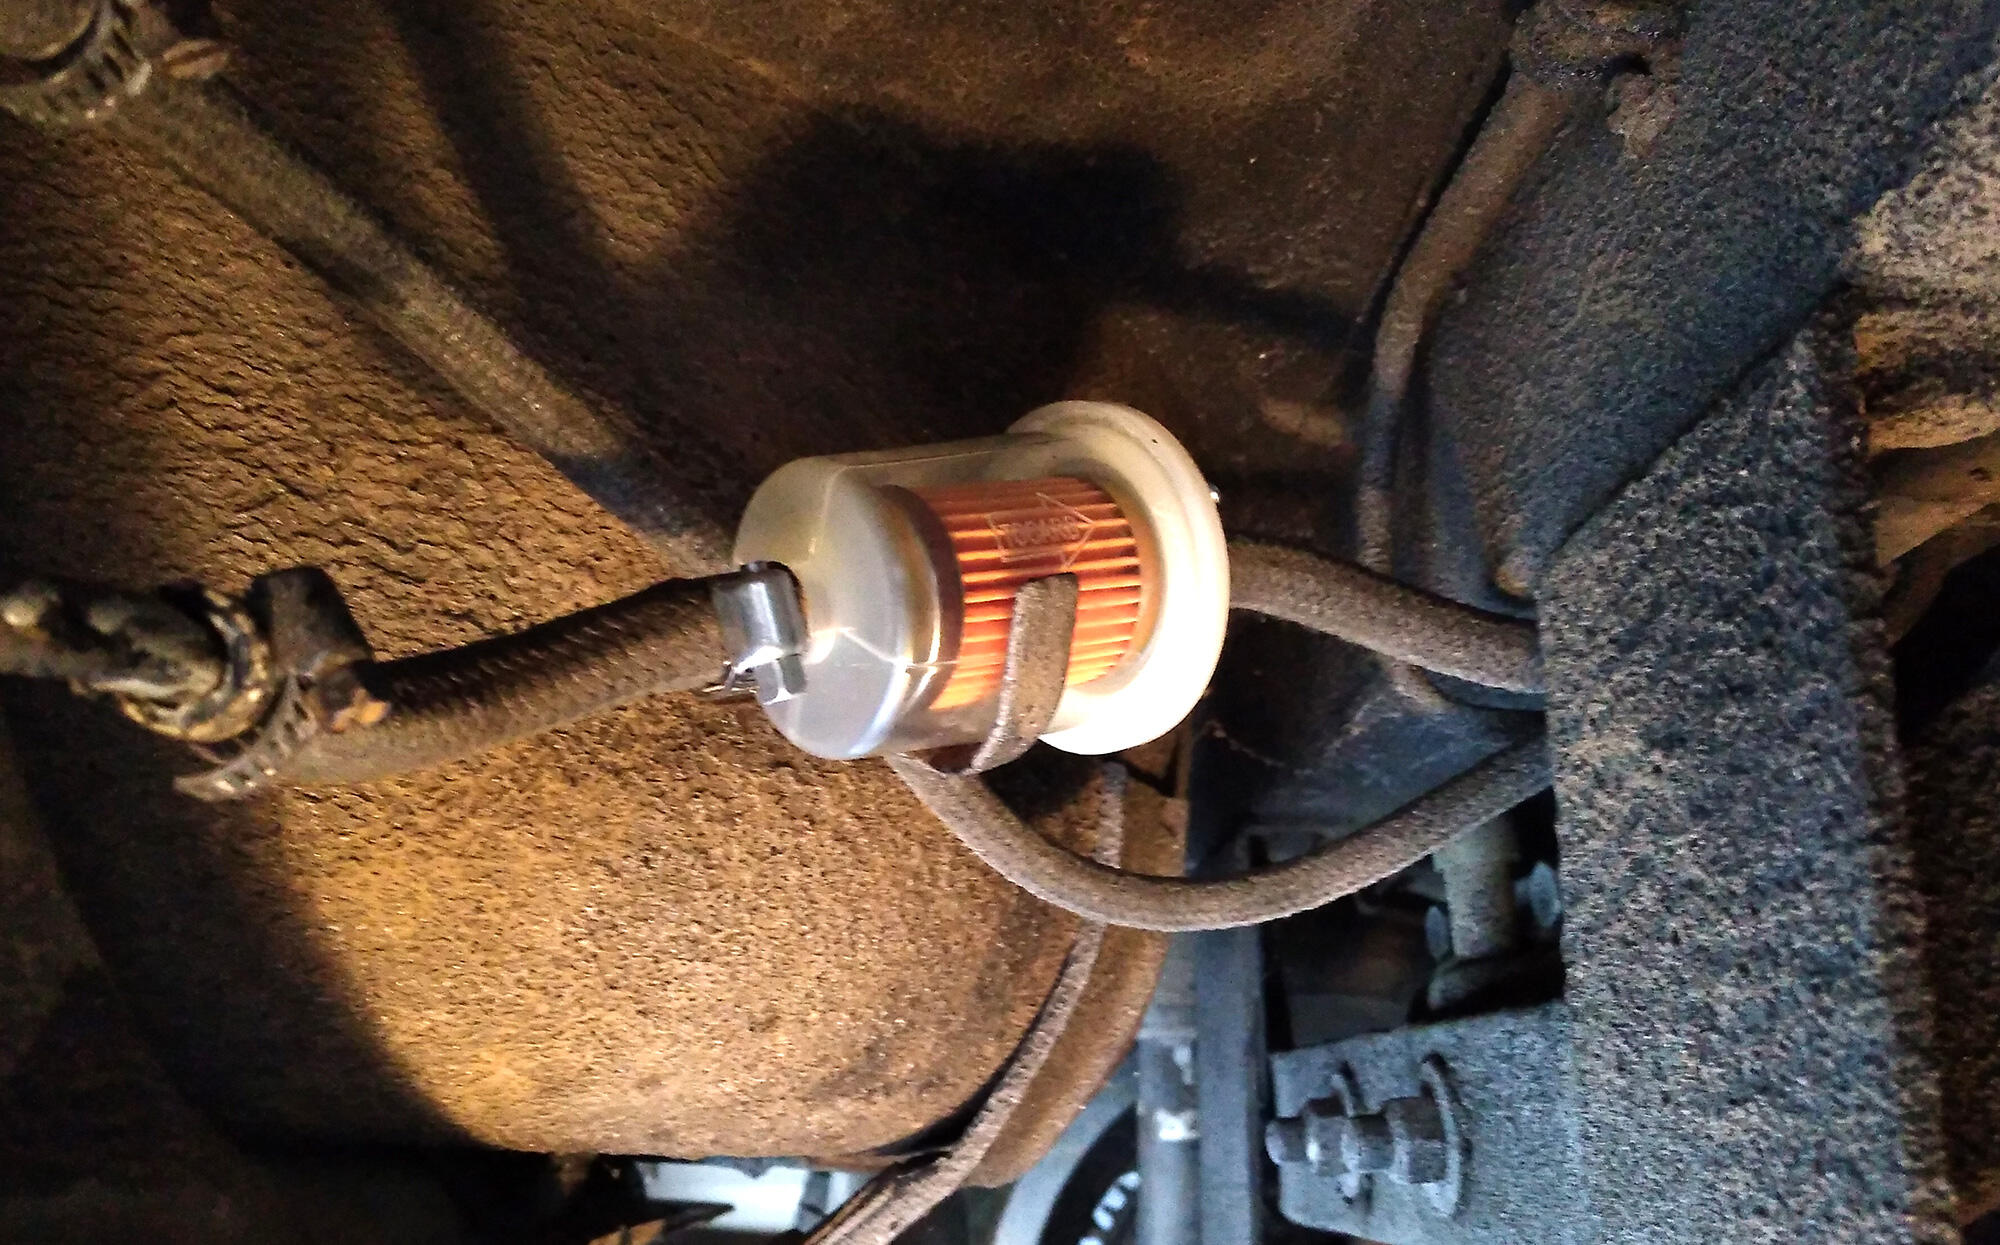
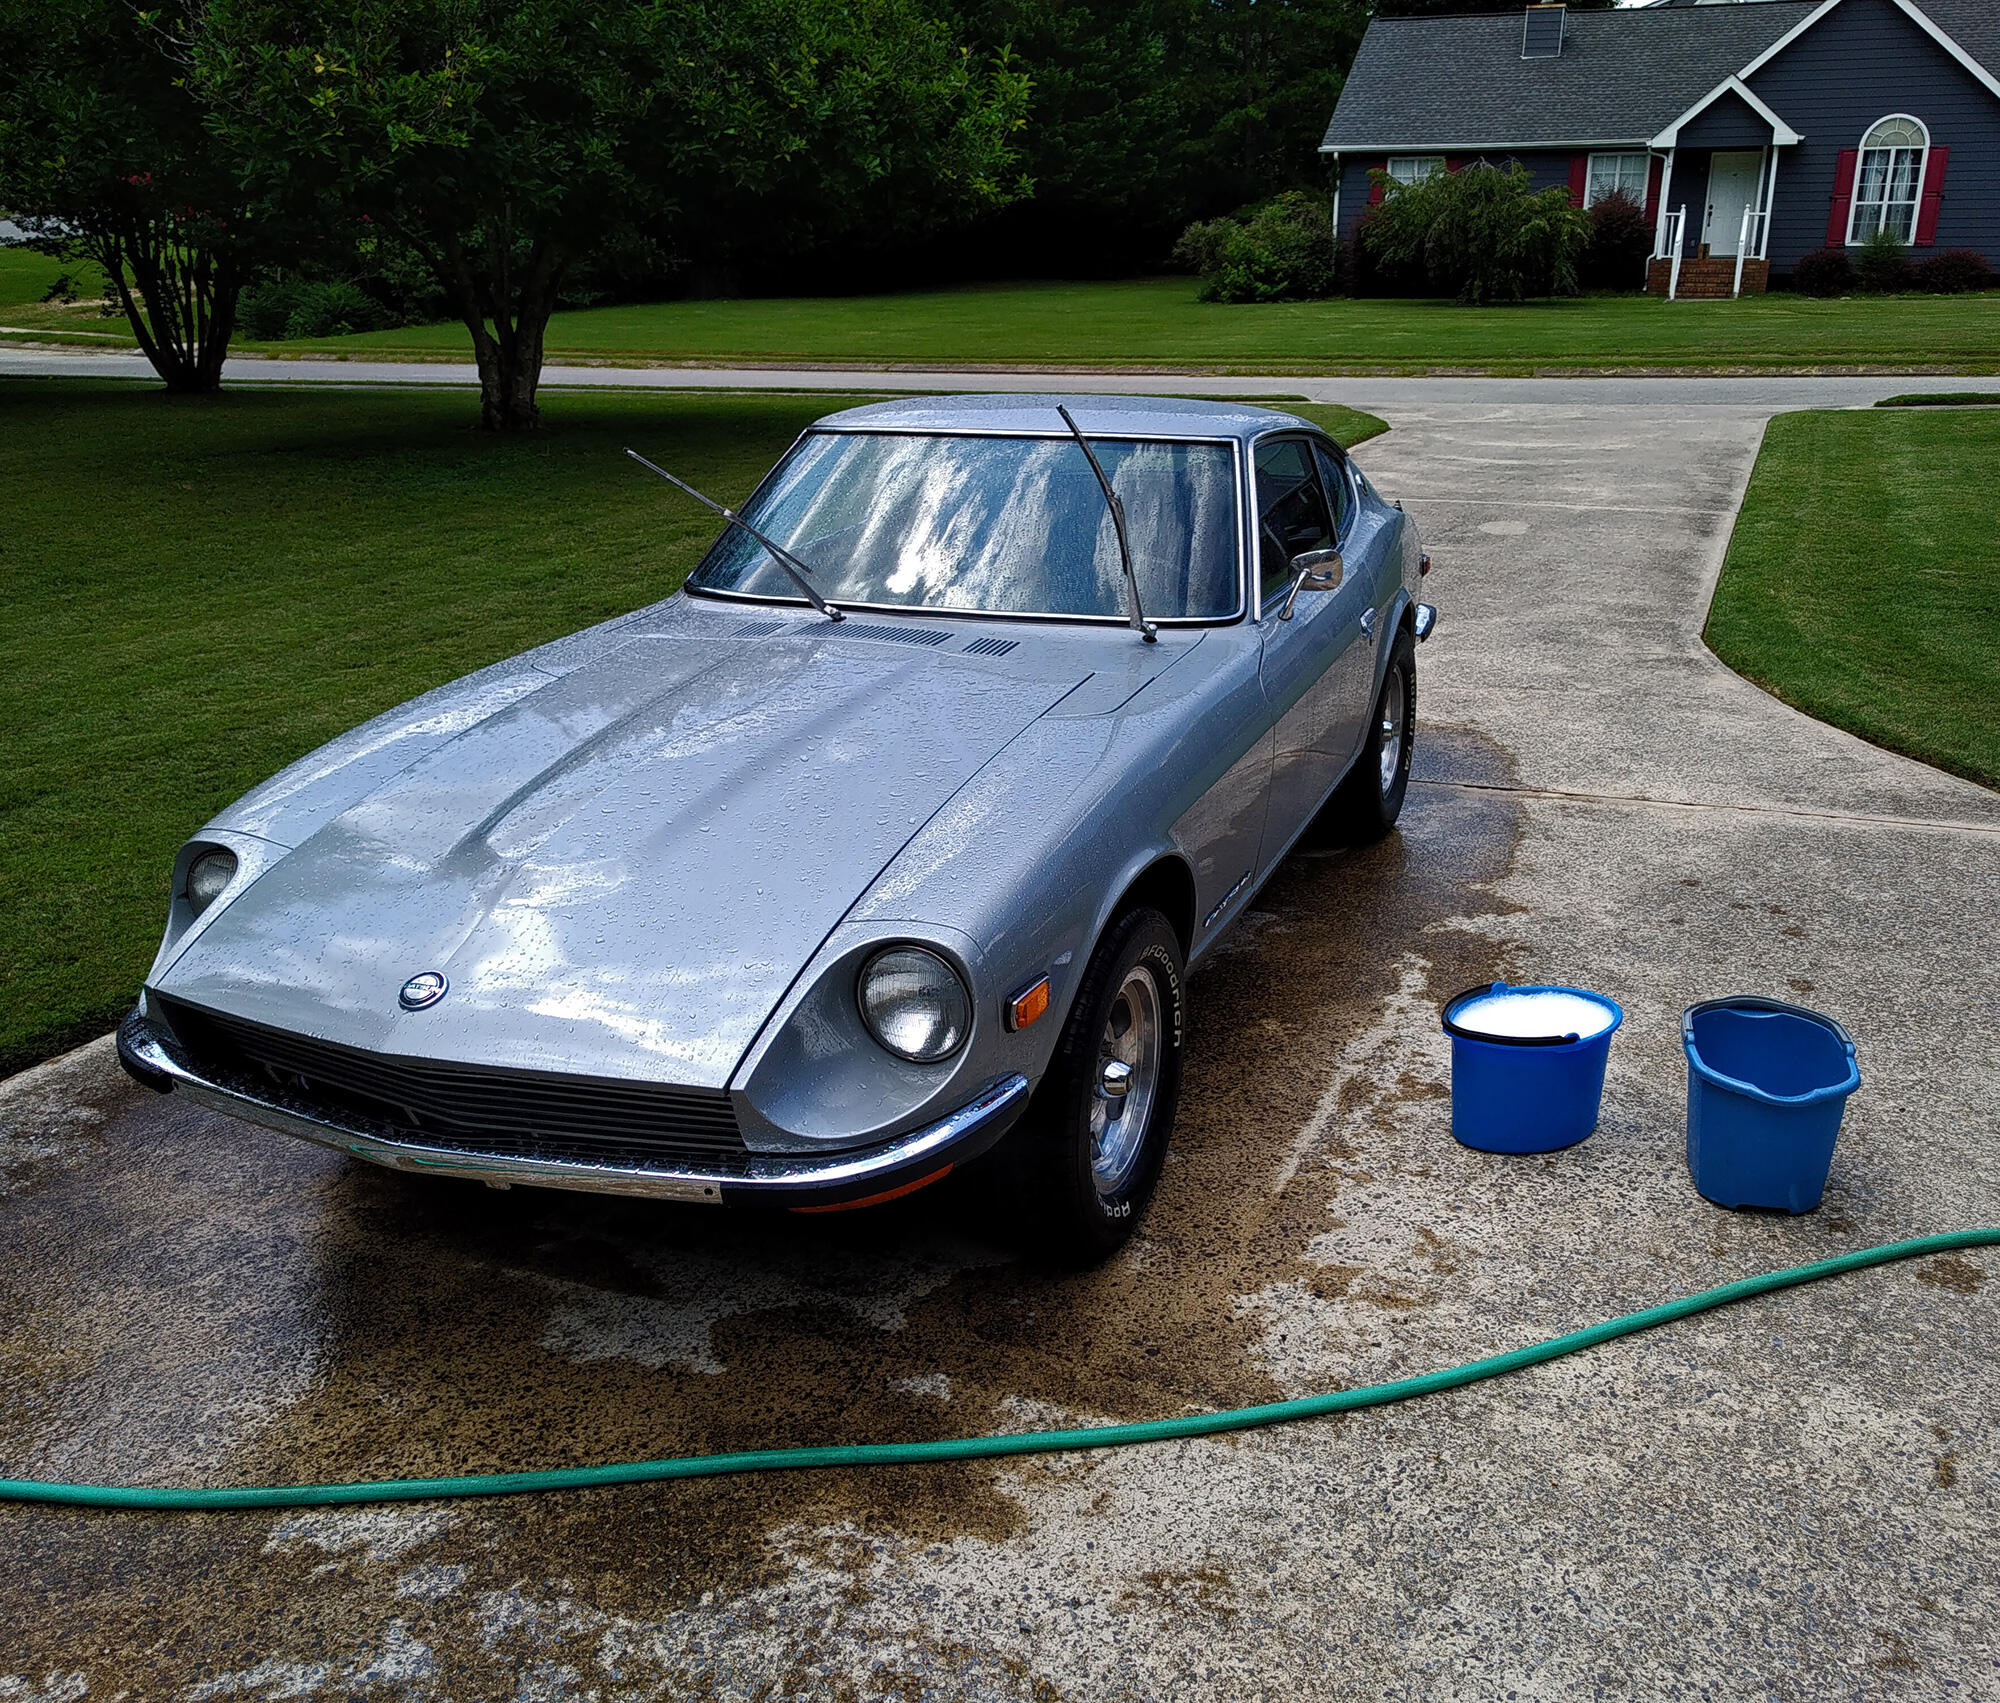
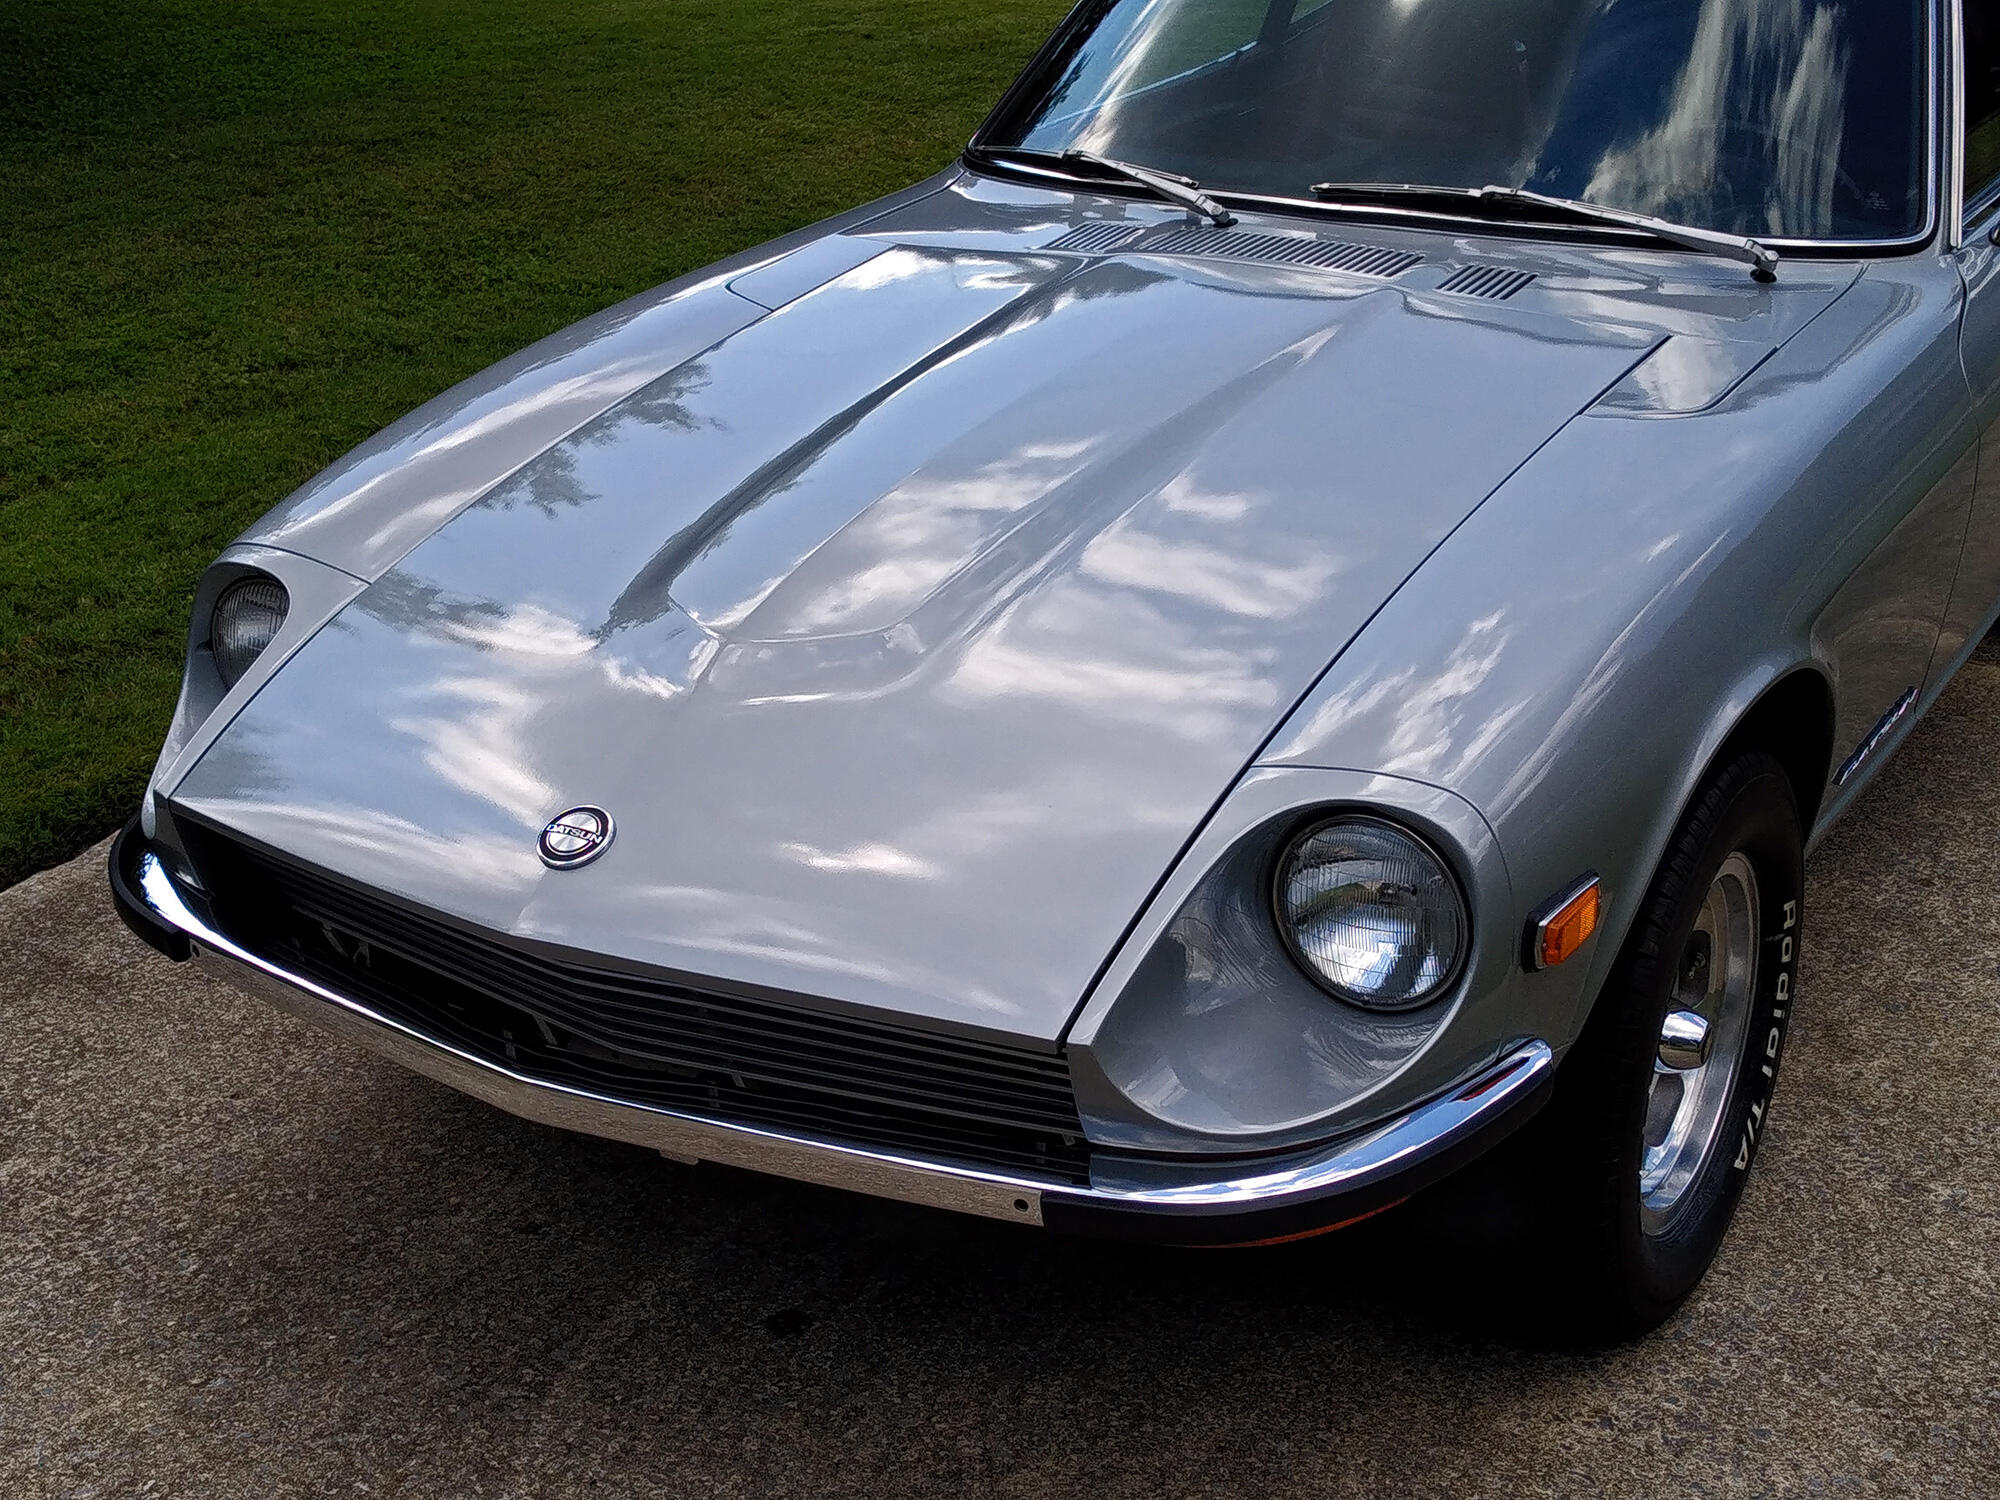
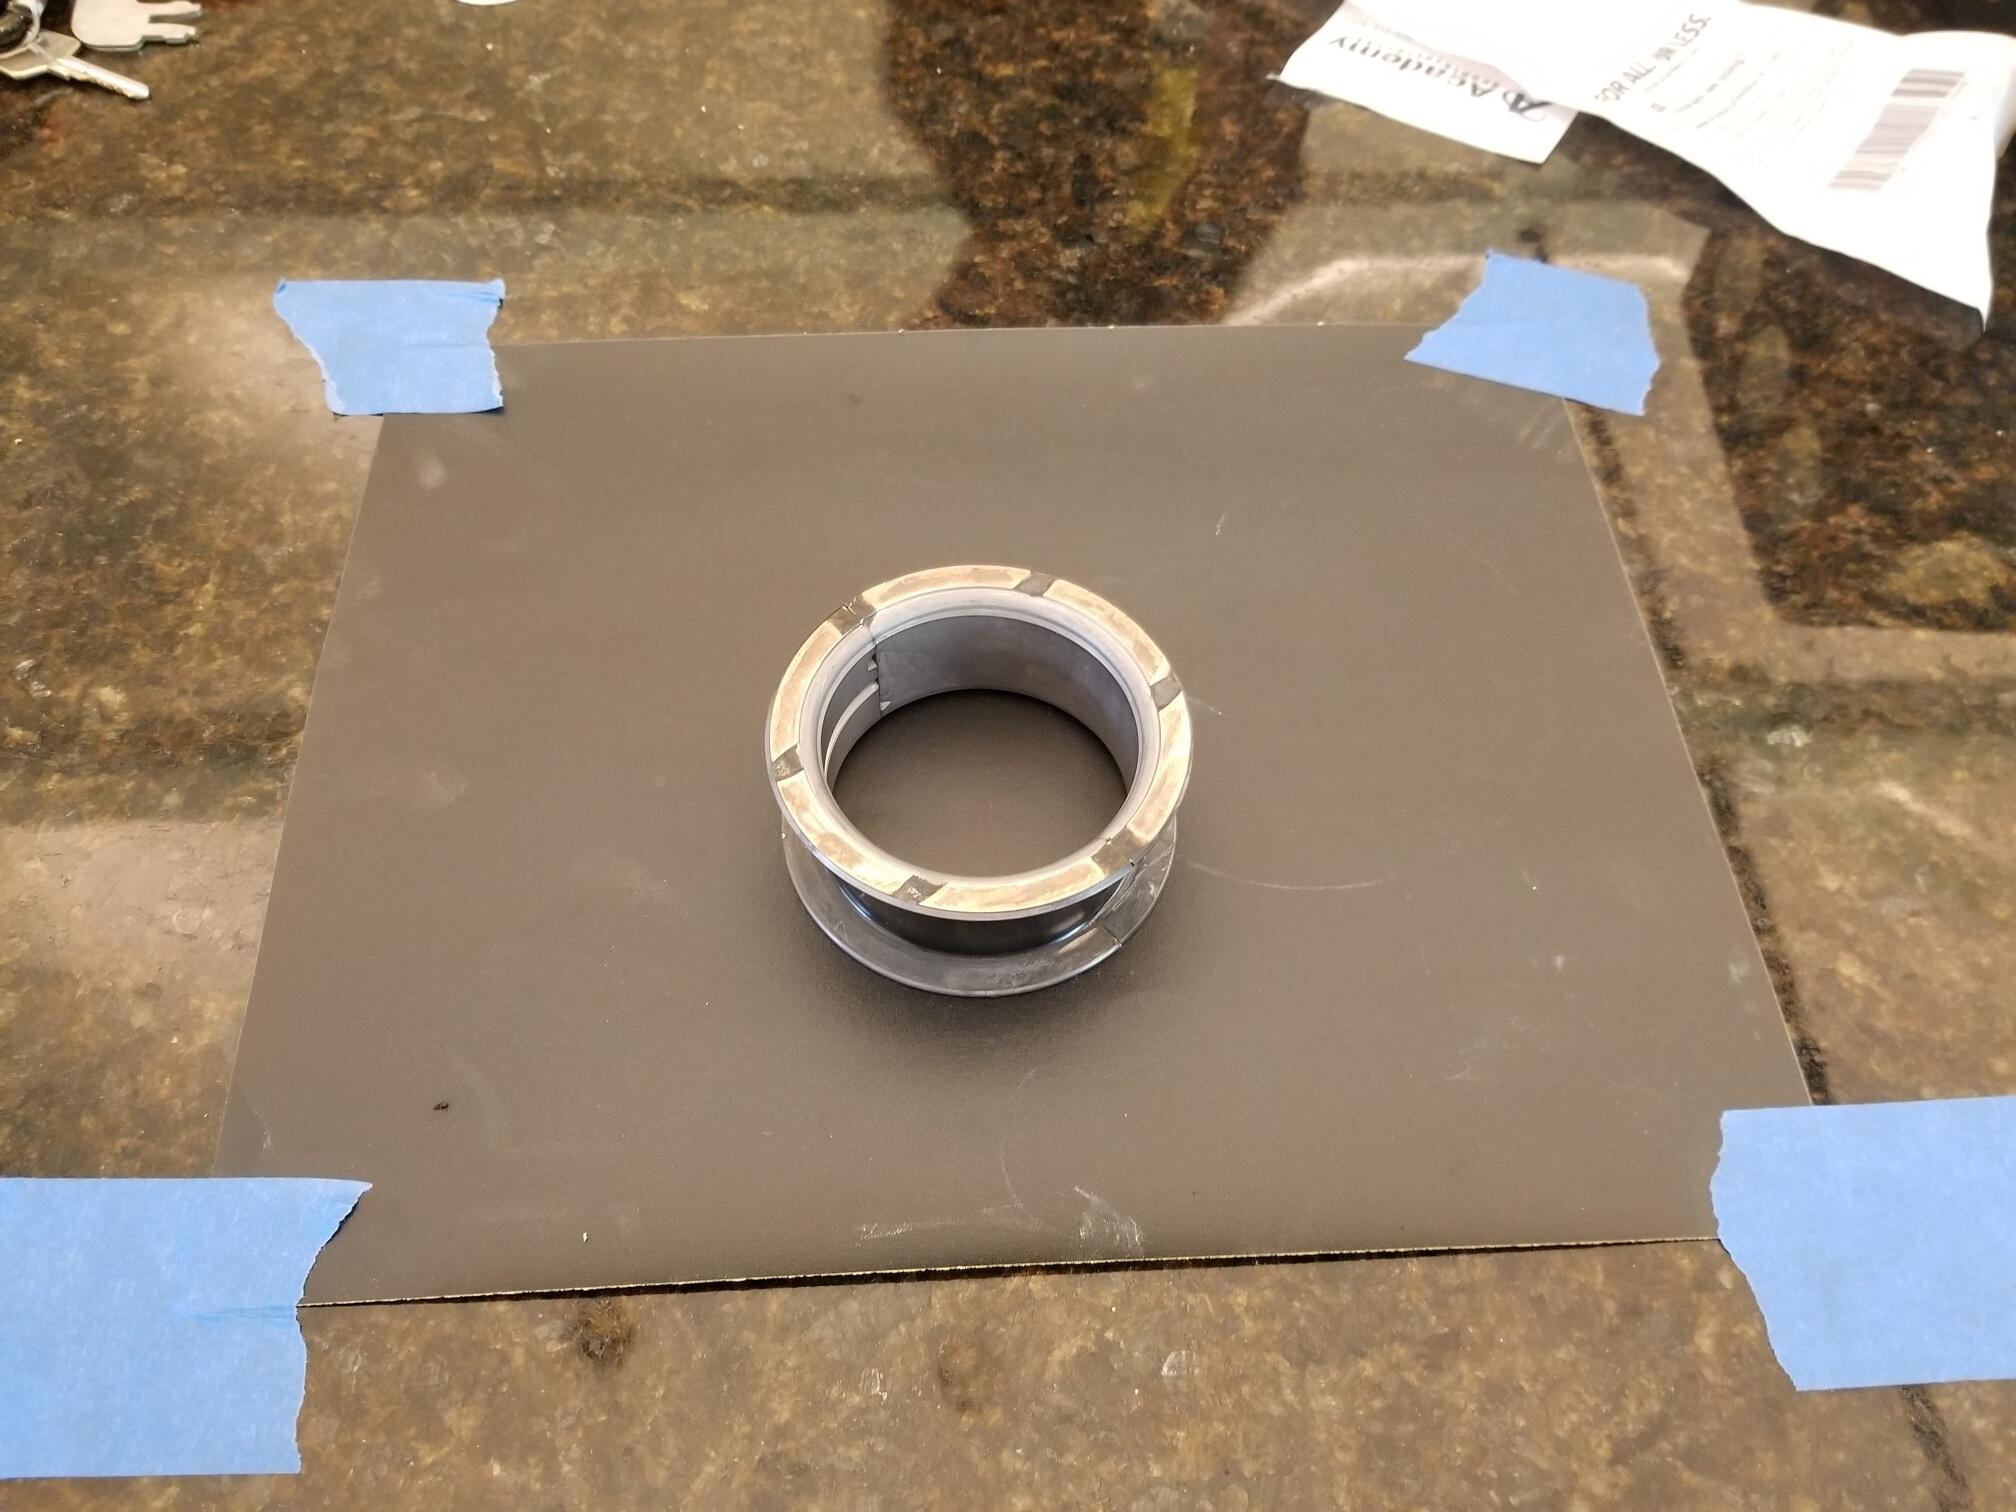
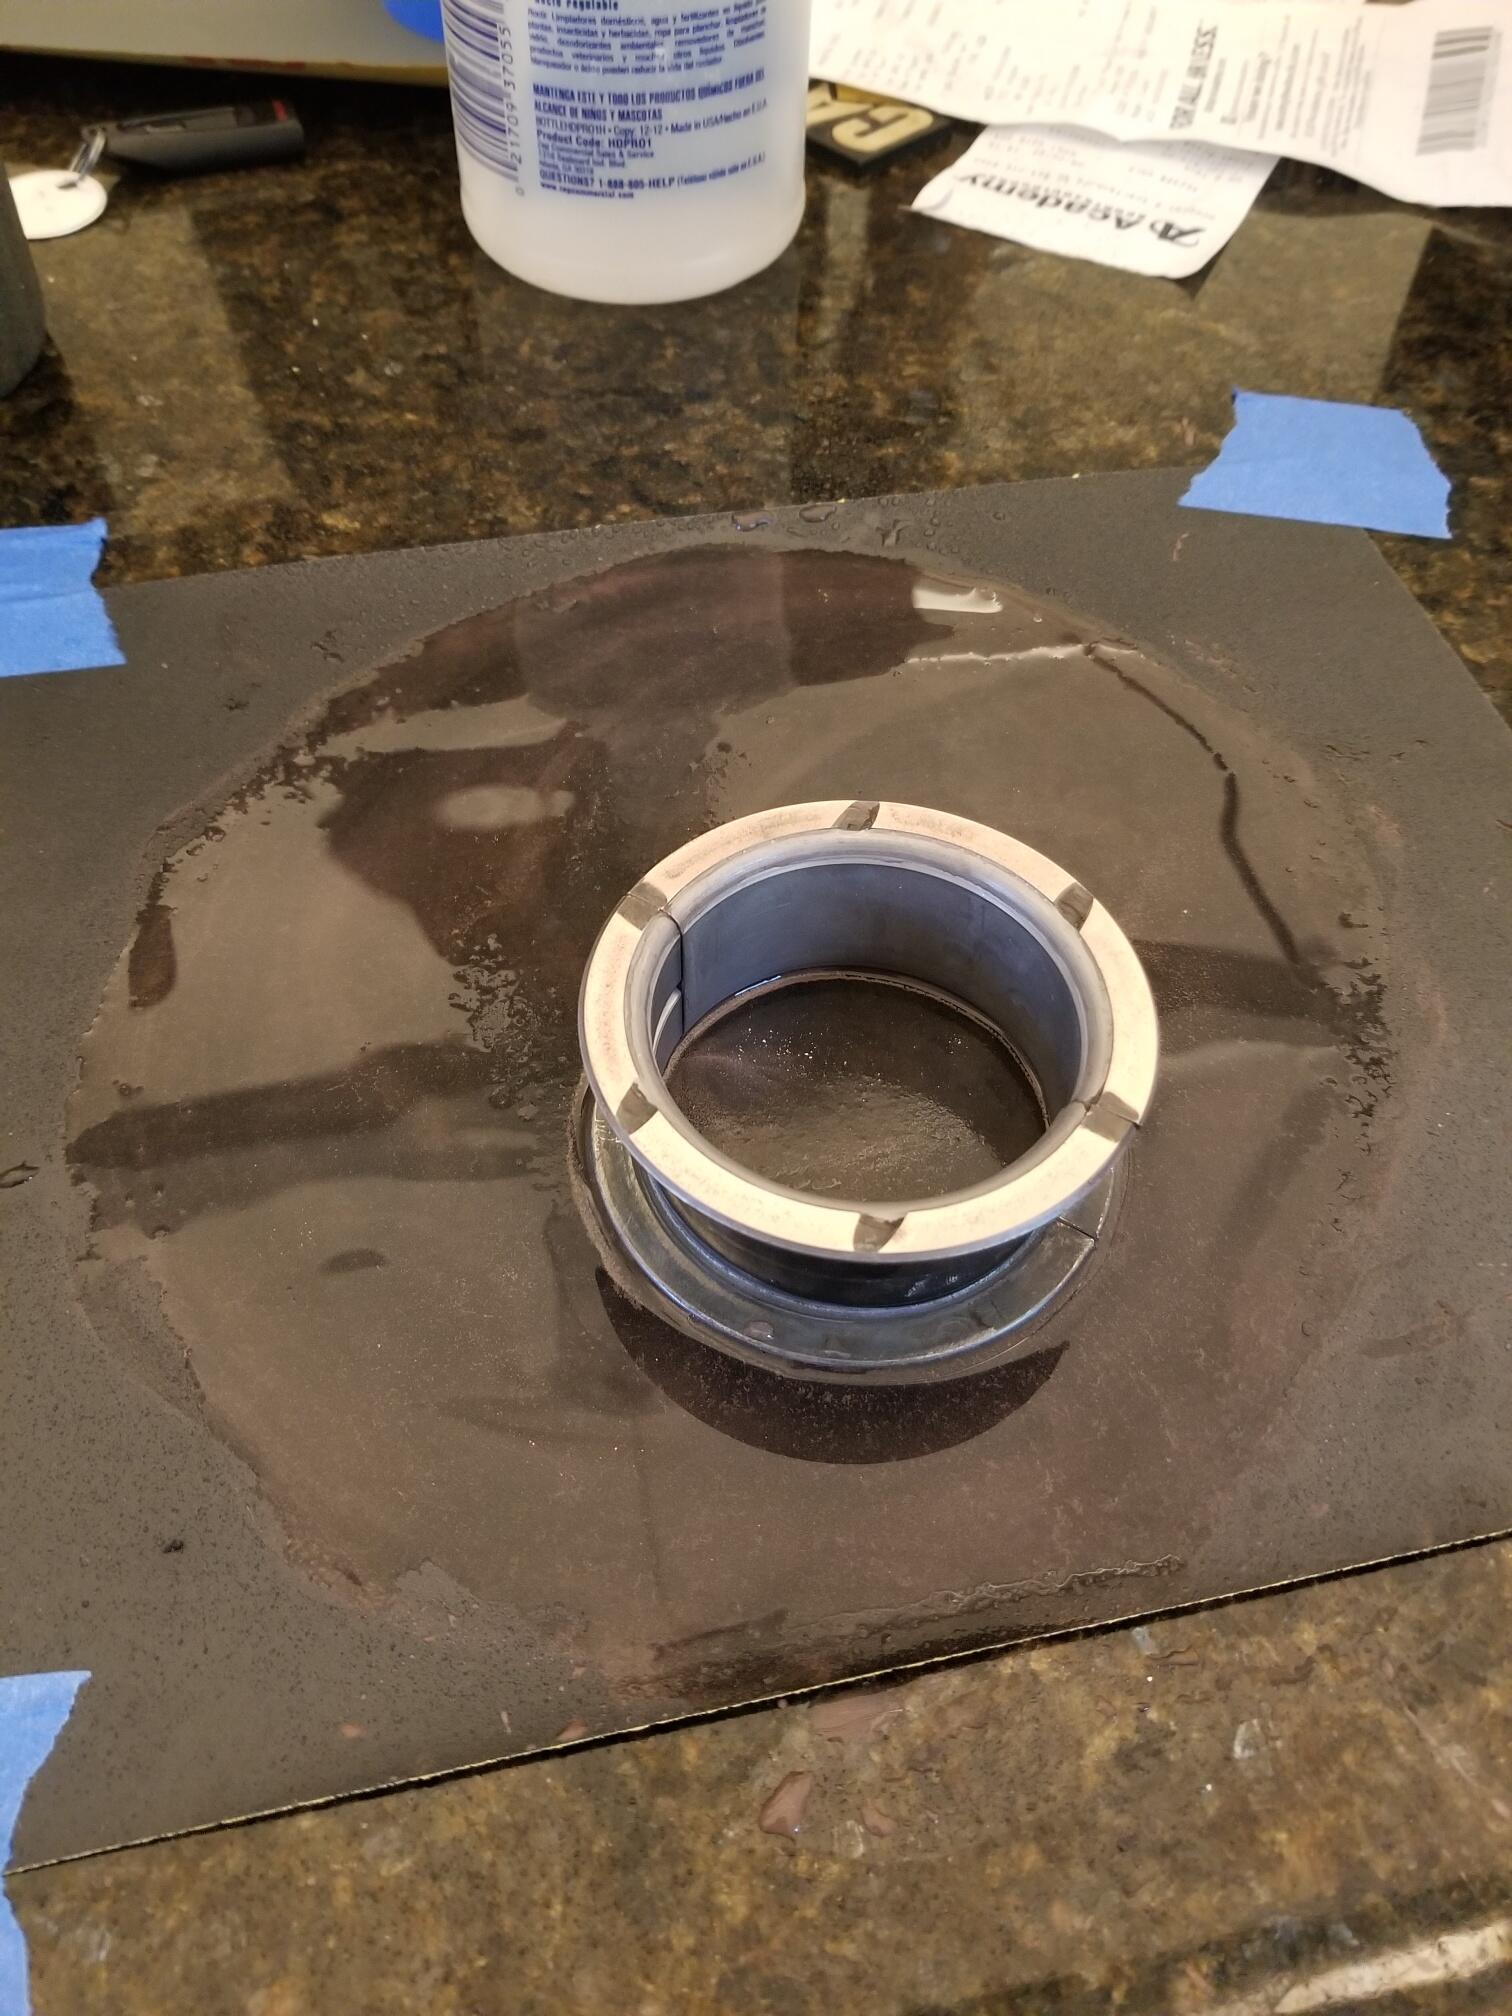
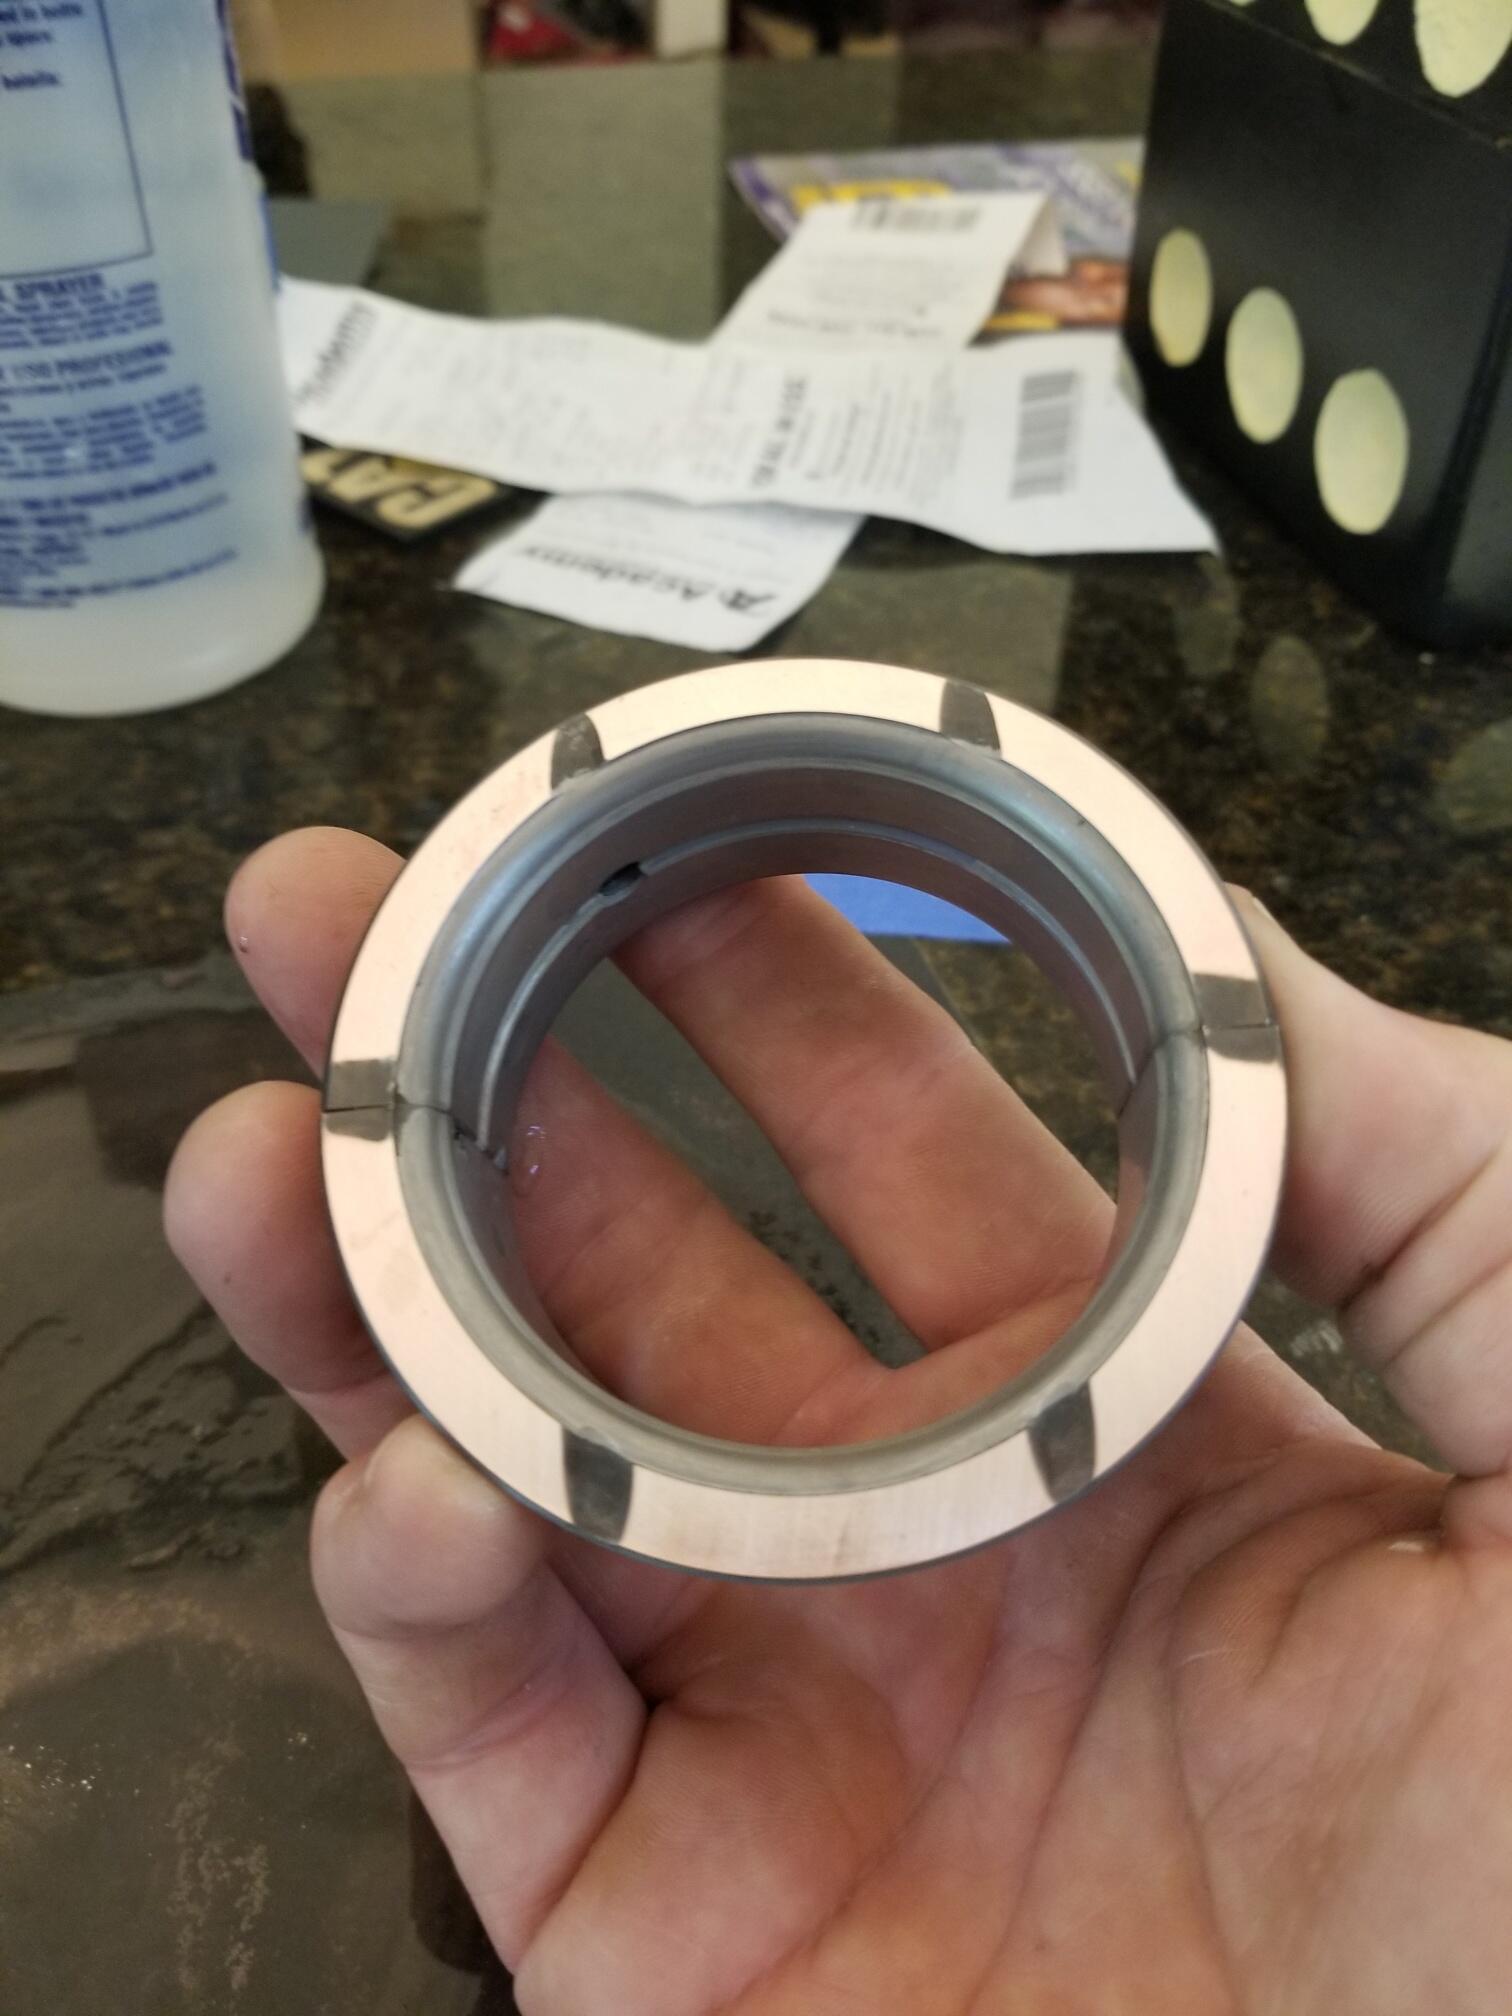
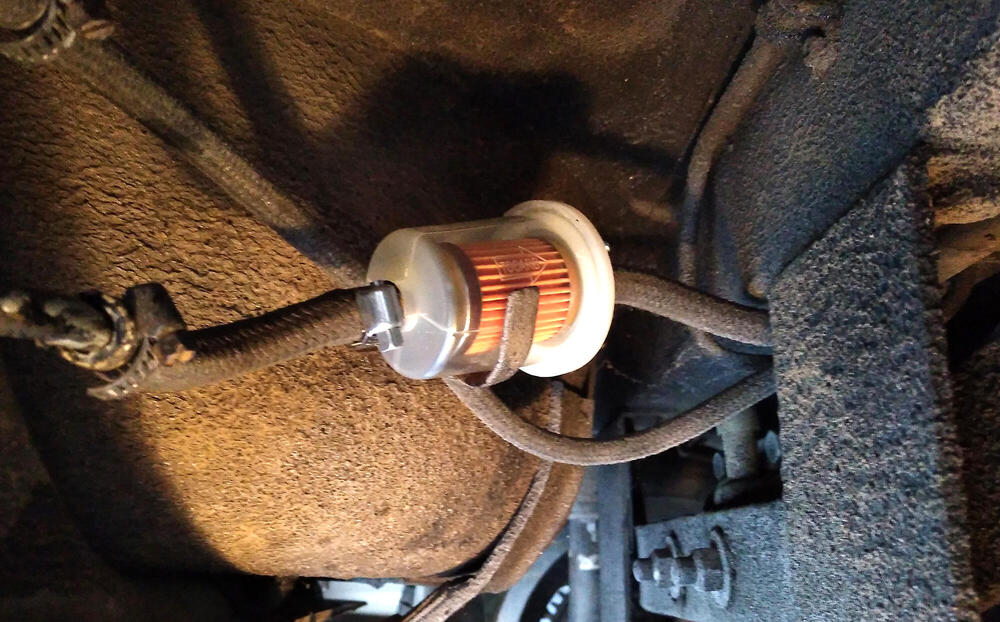
So I think I may have it sorted out. Don't want to speak too soon though... I installed an extra fuel filter inline next to the tank. I also installed a new primary fuel filter and the new fuel sender unit, o-ring and lock ring. I had to re-solder one of the connectors and use the heat gun on the rubber boots to get them soft enough to push over the terminals. I also blew out all the fuel lines with my air compressor turned down to 40-50 psi or so. Started the car after a bit of cranking to fill the filters, and it seemed to run...OK. Still missing and hunting somewhat, but I got it into a state where I could drive it around the neighborhood. After some more tinkering, it was alright, but then it died again the way it did last week. I coasted into the driveway and pulled the top off the rear carb fuel bowl: Dry as a bone. 😡 Really frustrating, but then I noticed that I forgot to put a hose clamp on the fuel pump inlet line. Also, it was kind of loose. I wonder if the fuel pump had been sucking air, creating a kind of vapor lock condition in the fuel lines? Regardless, I put a clamp on it, and the car seemed to run a lot better. I was able to drive it down the road a little ways and it didn't threaten to die at any time. I didn't want to get greedy so I came home and decided to wash it. It's the first bath it's had in almost 20 years. The paint cleaned up really well and looks fantastic; the painters did a great job with it. There are a couple of tiny water leaks but nothing major. I don't plan to drive it in the rain anyway. Current engine bay status: Yes, that's blue painter's tape protecting the left shock tower from getting scratched by the air filter wingnut.


 1 point
 -
No doubt that's what was involved in making it, but both Izumi and Nissan called them 'Wood Rim Steering Wheels' so I think it fair to follow suit. So, high-pressure moulded, heat-cured, oriented strand wood fibre (quite a mouthful), but certainly 'wood'.1 point
-
How about calling it an oriented strand steering wheel. OSSW or just OSW.1 point
-
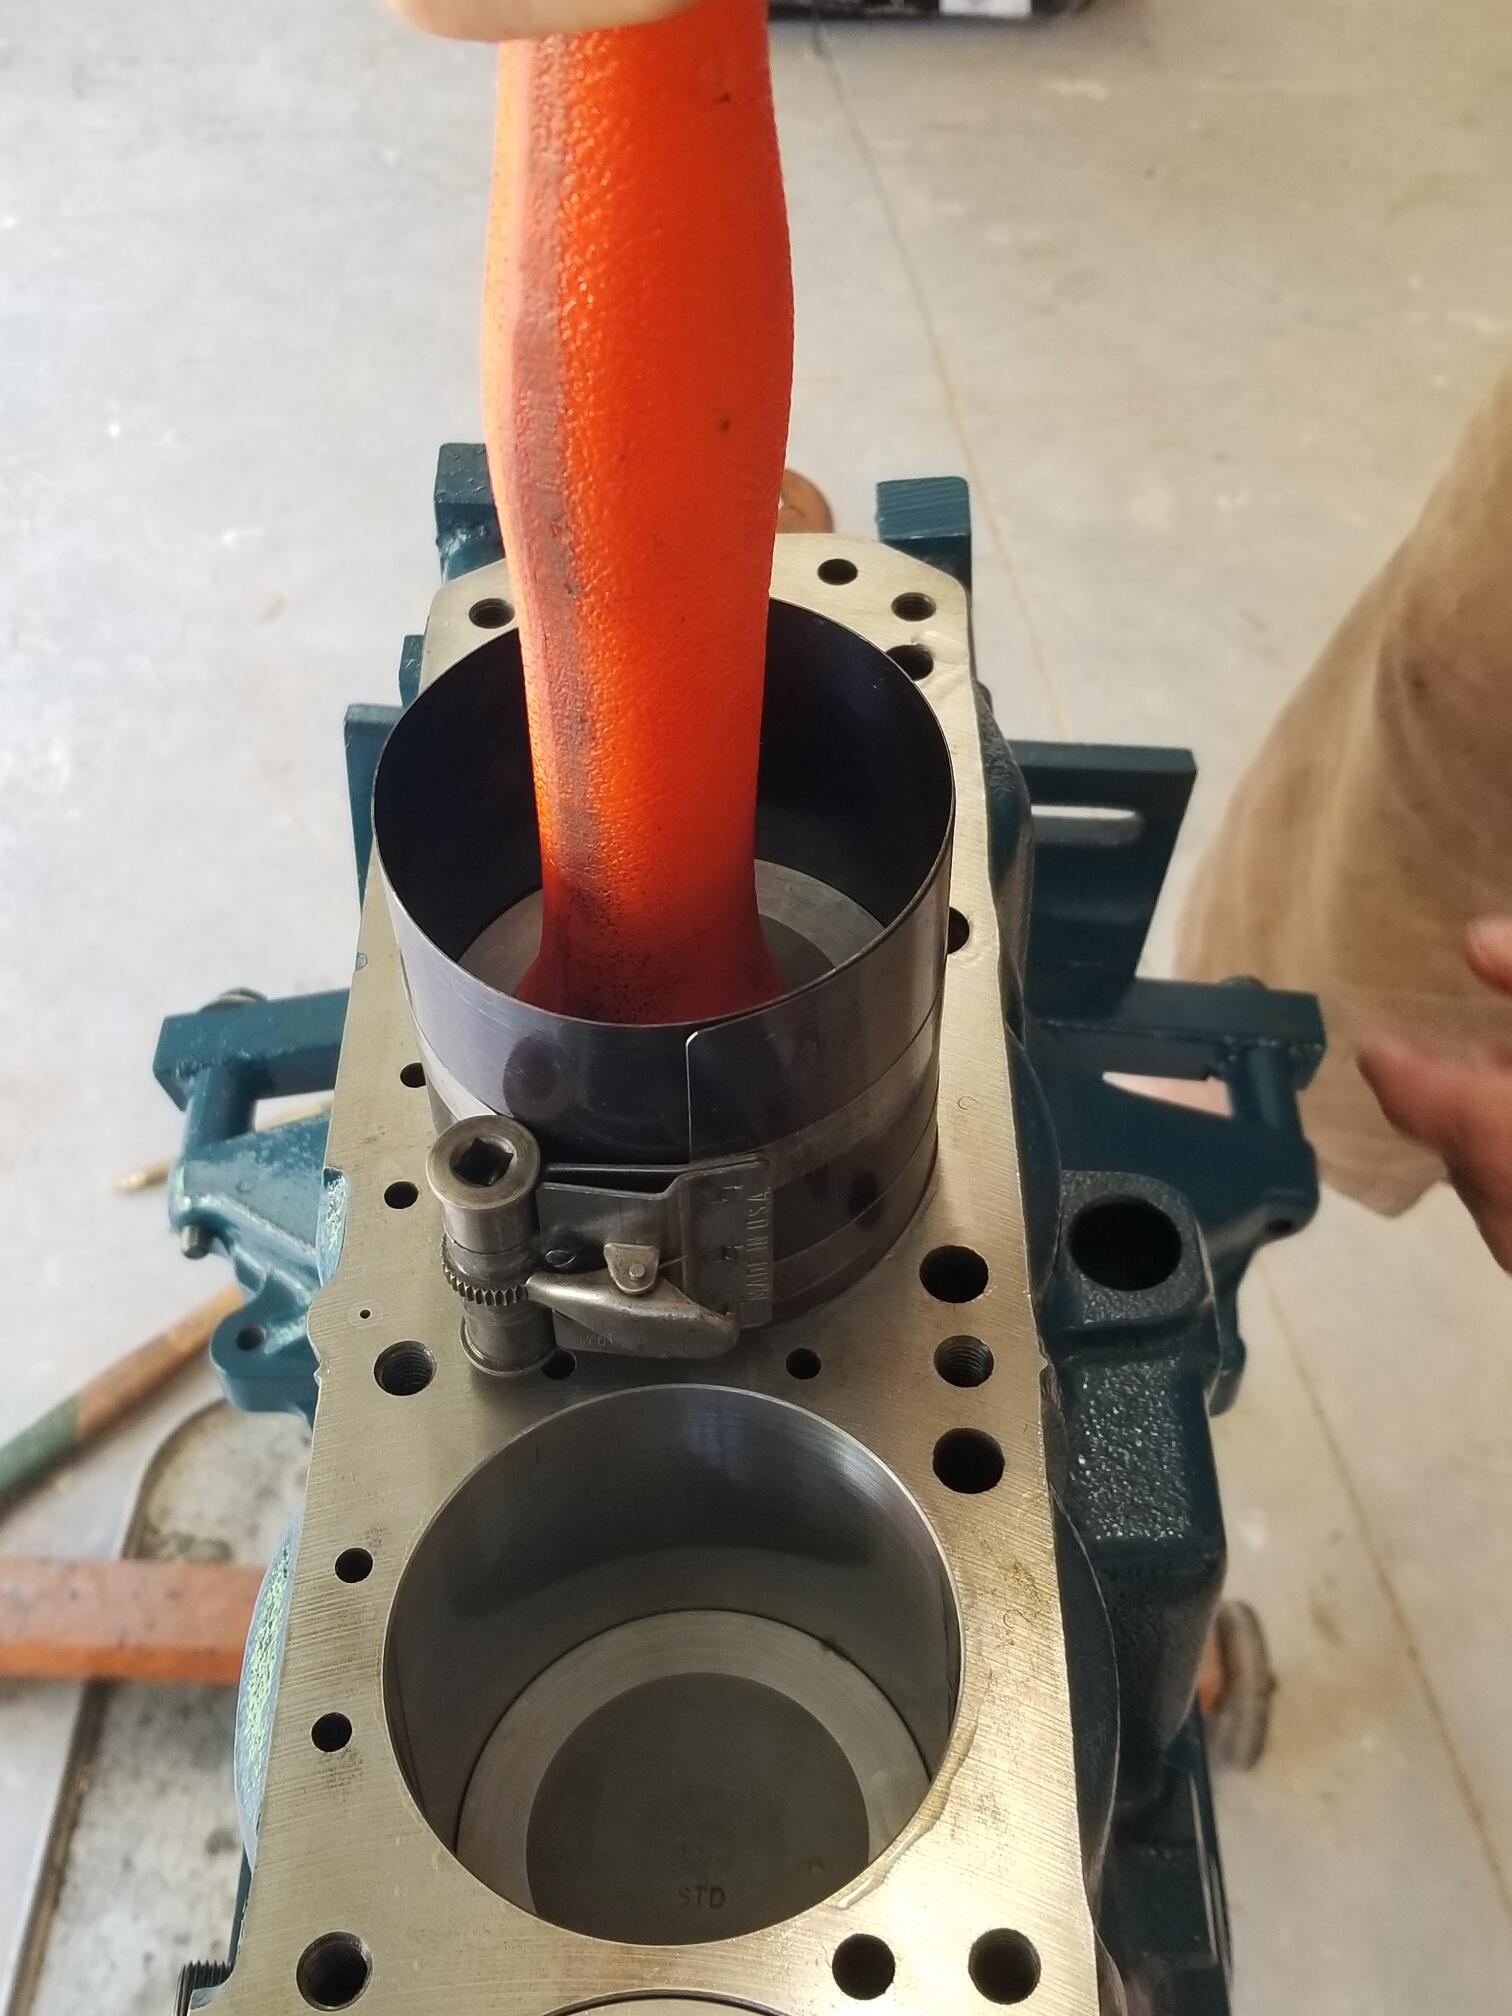
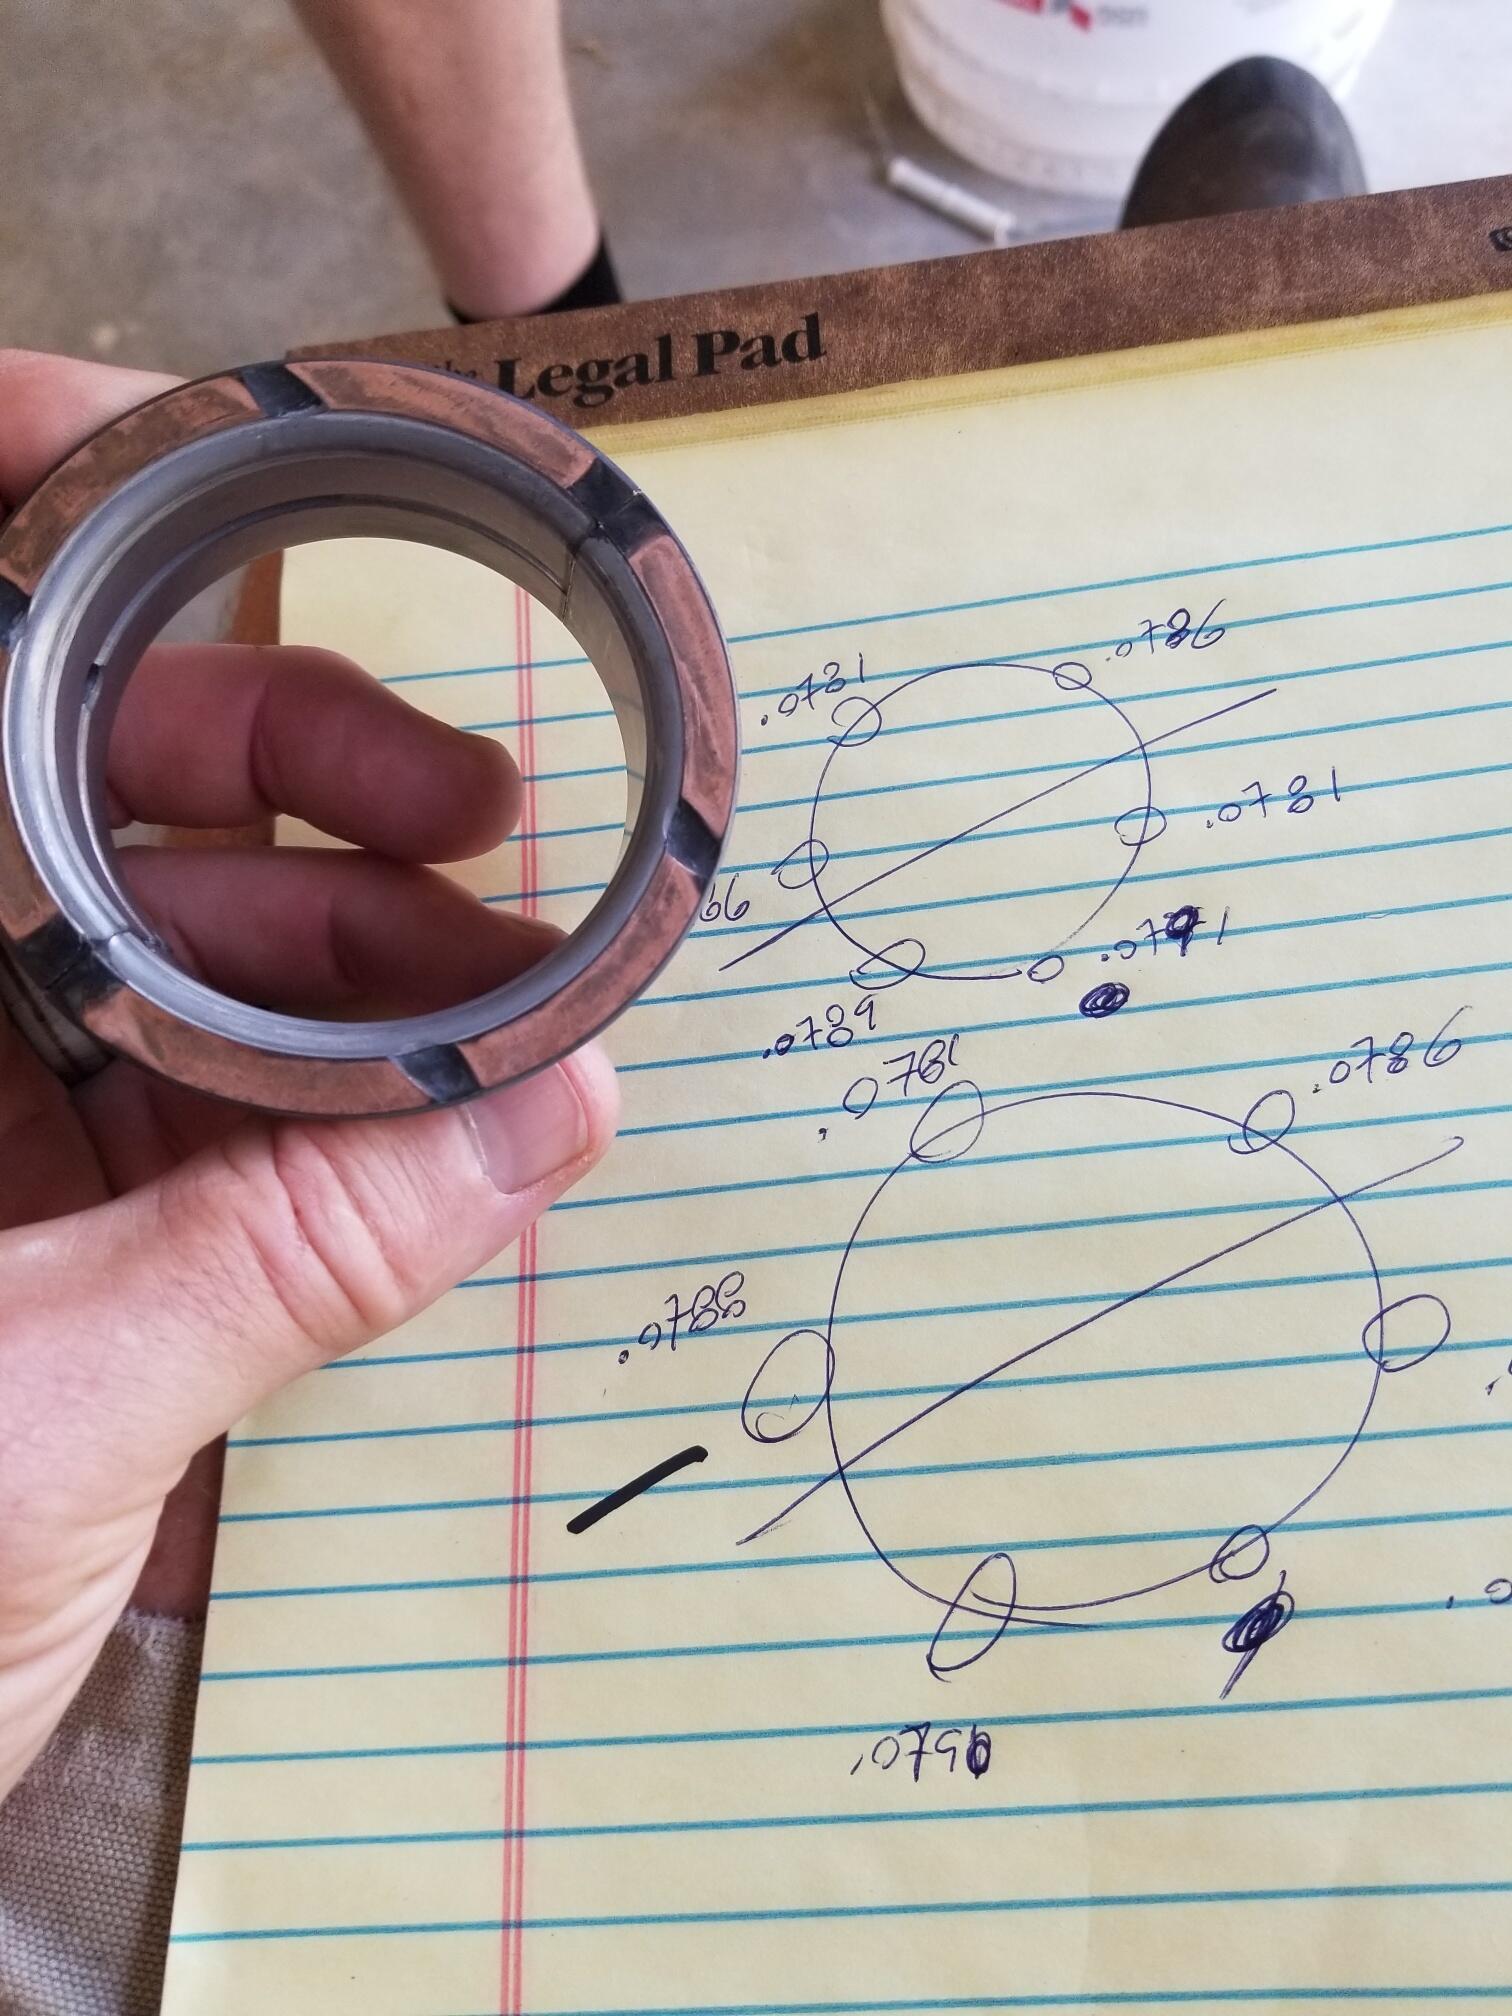
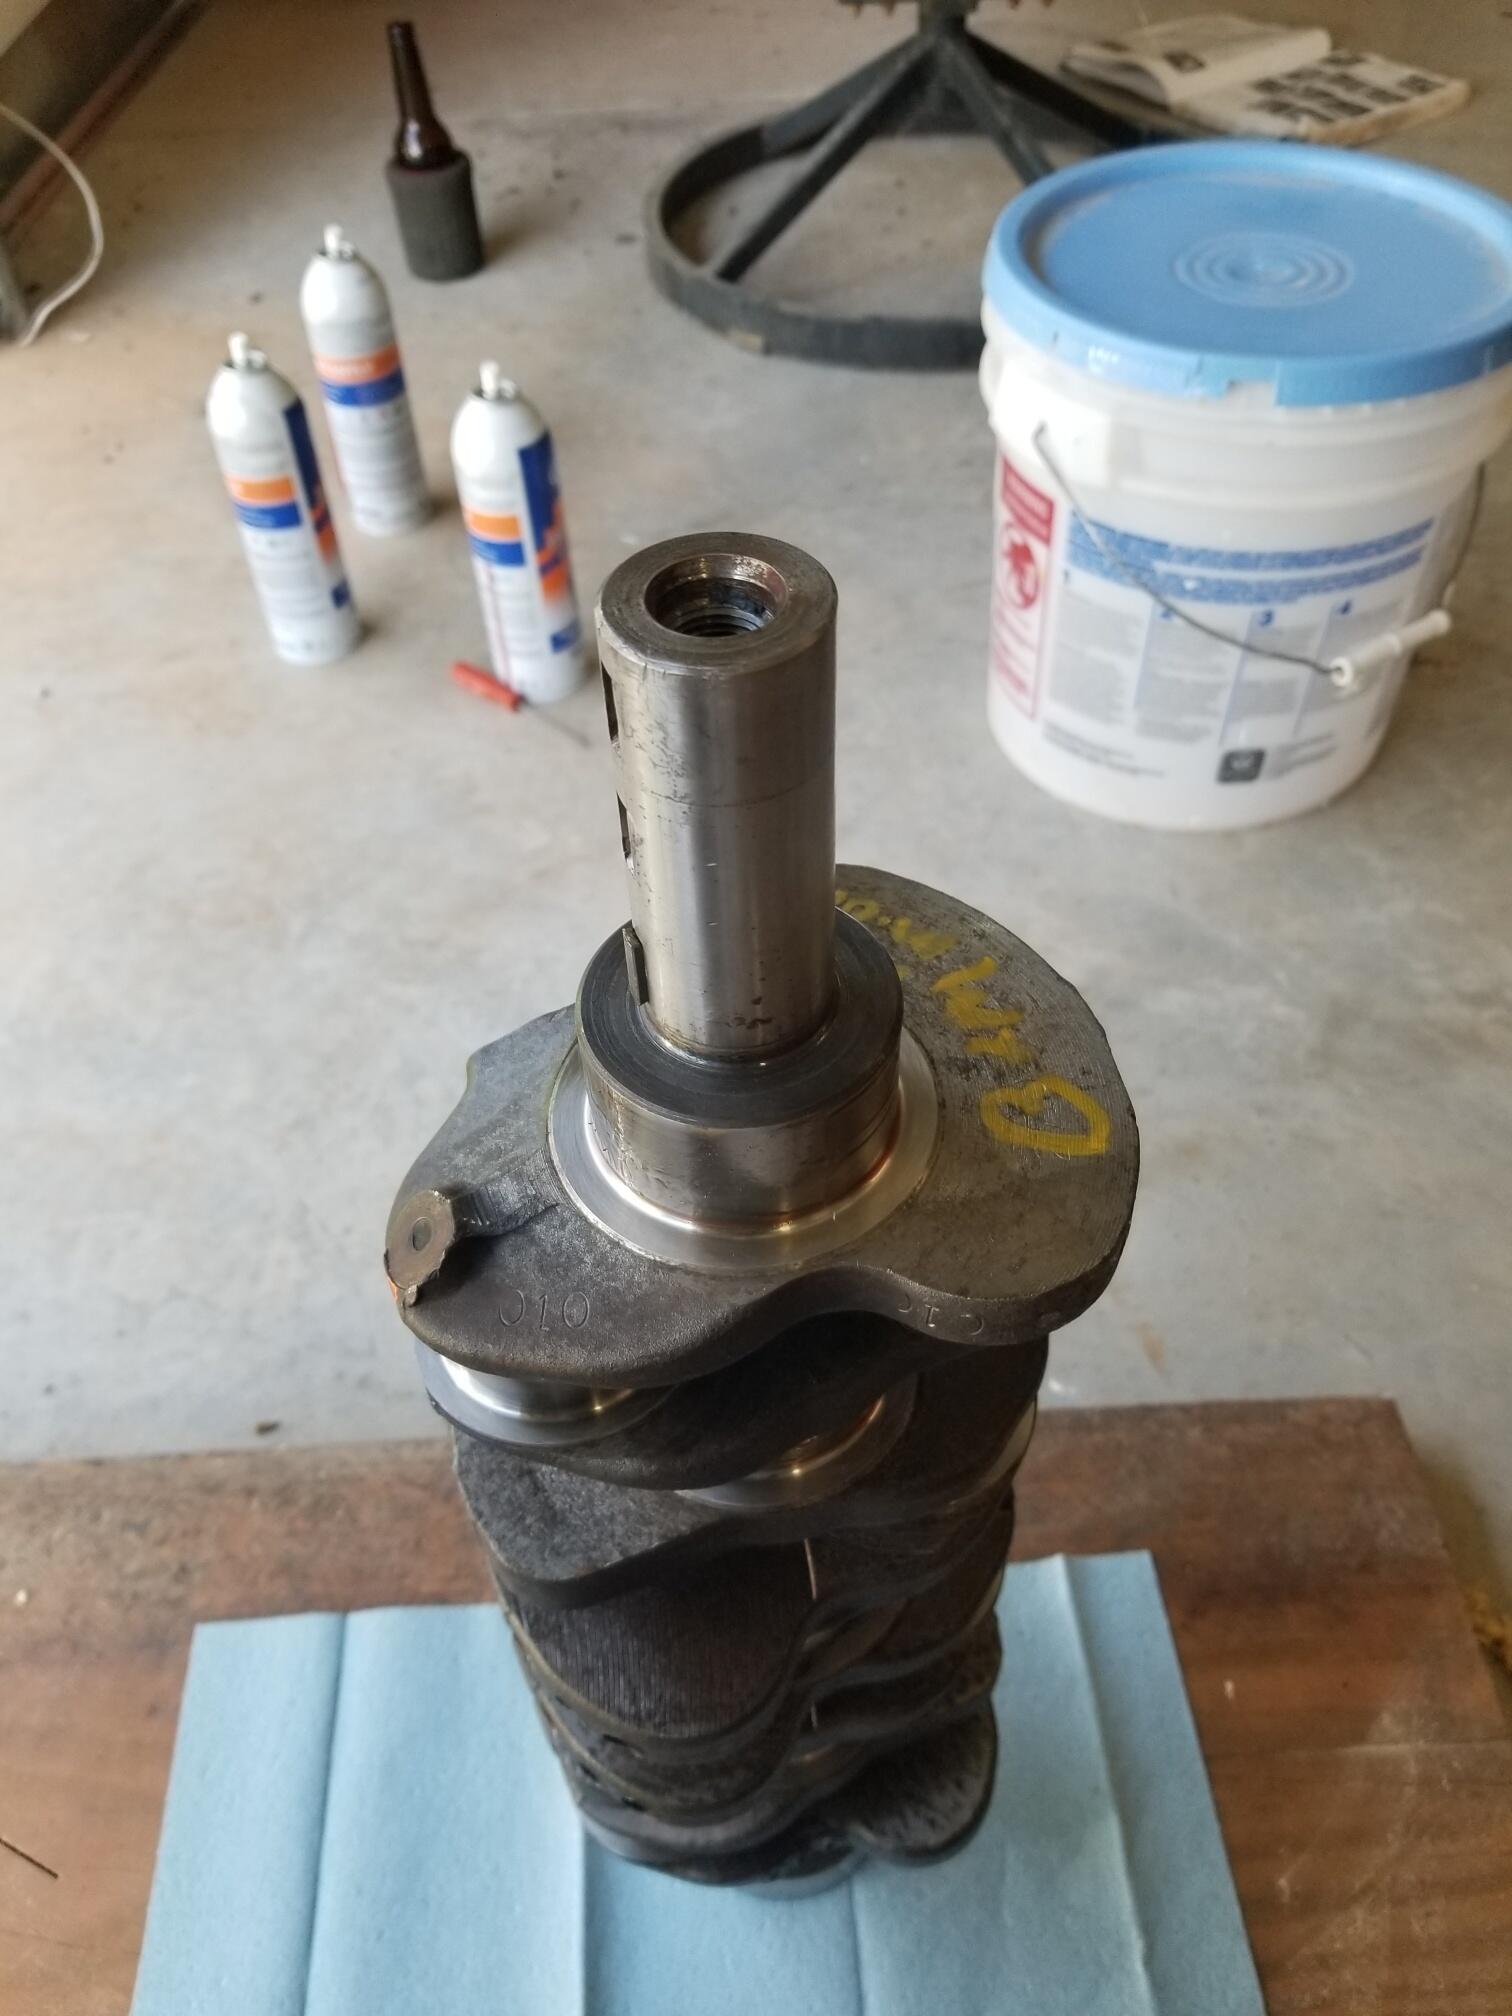
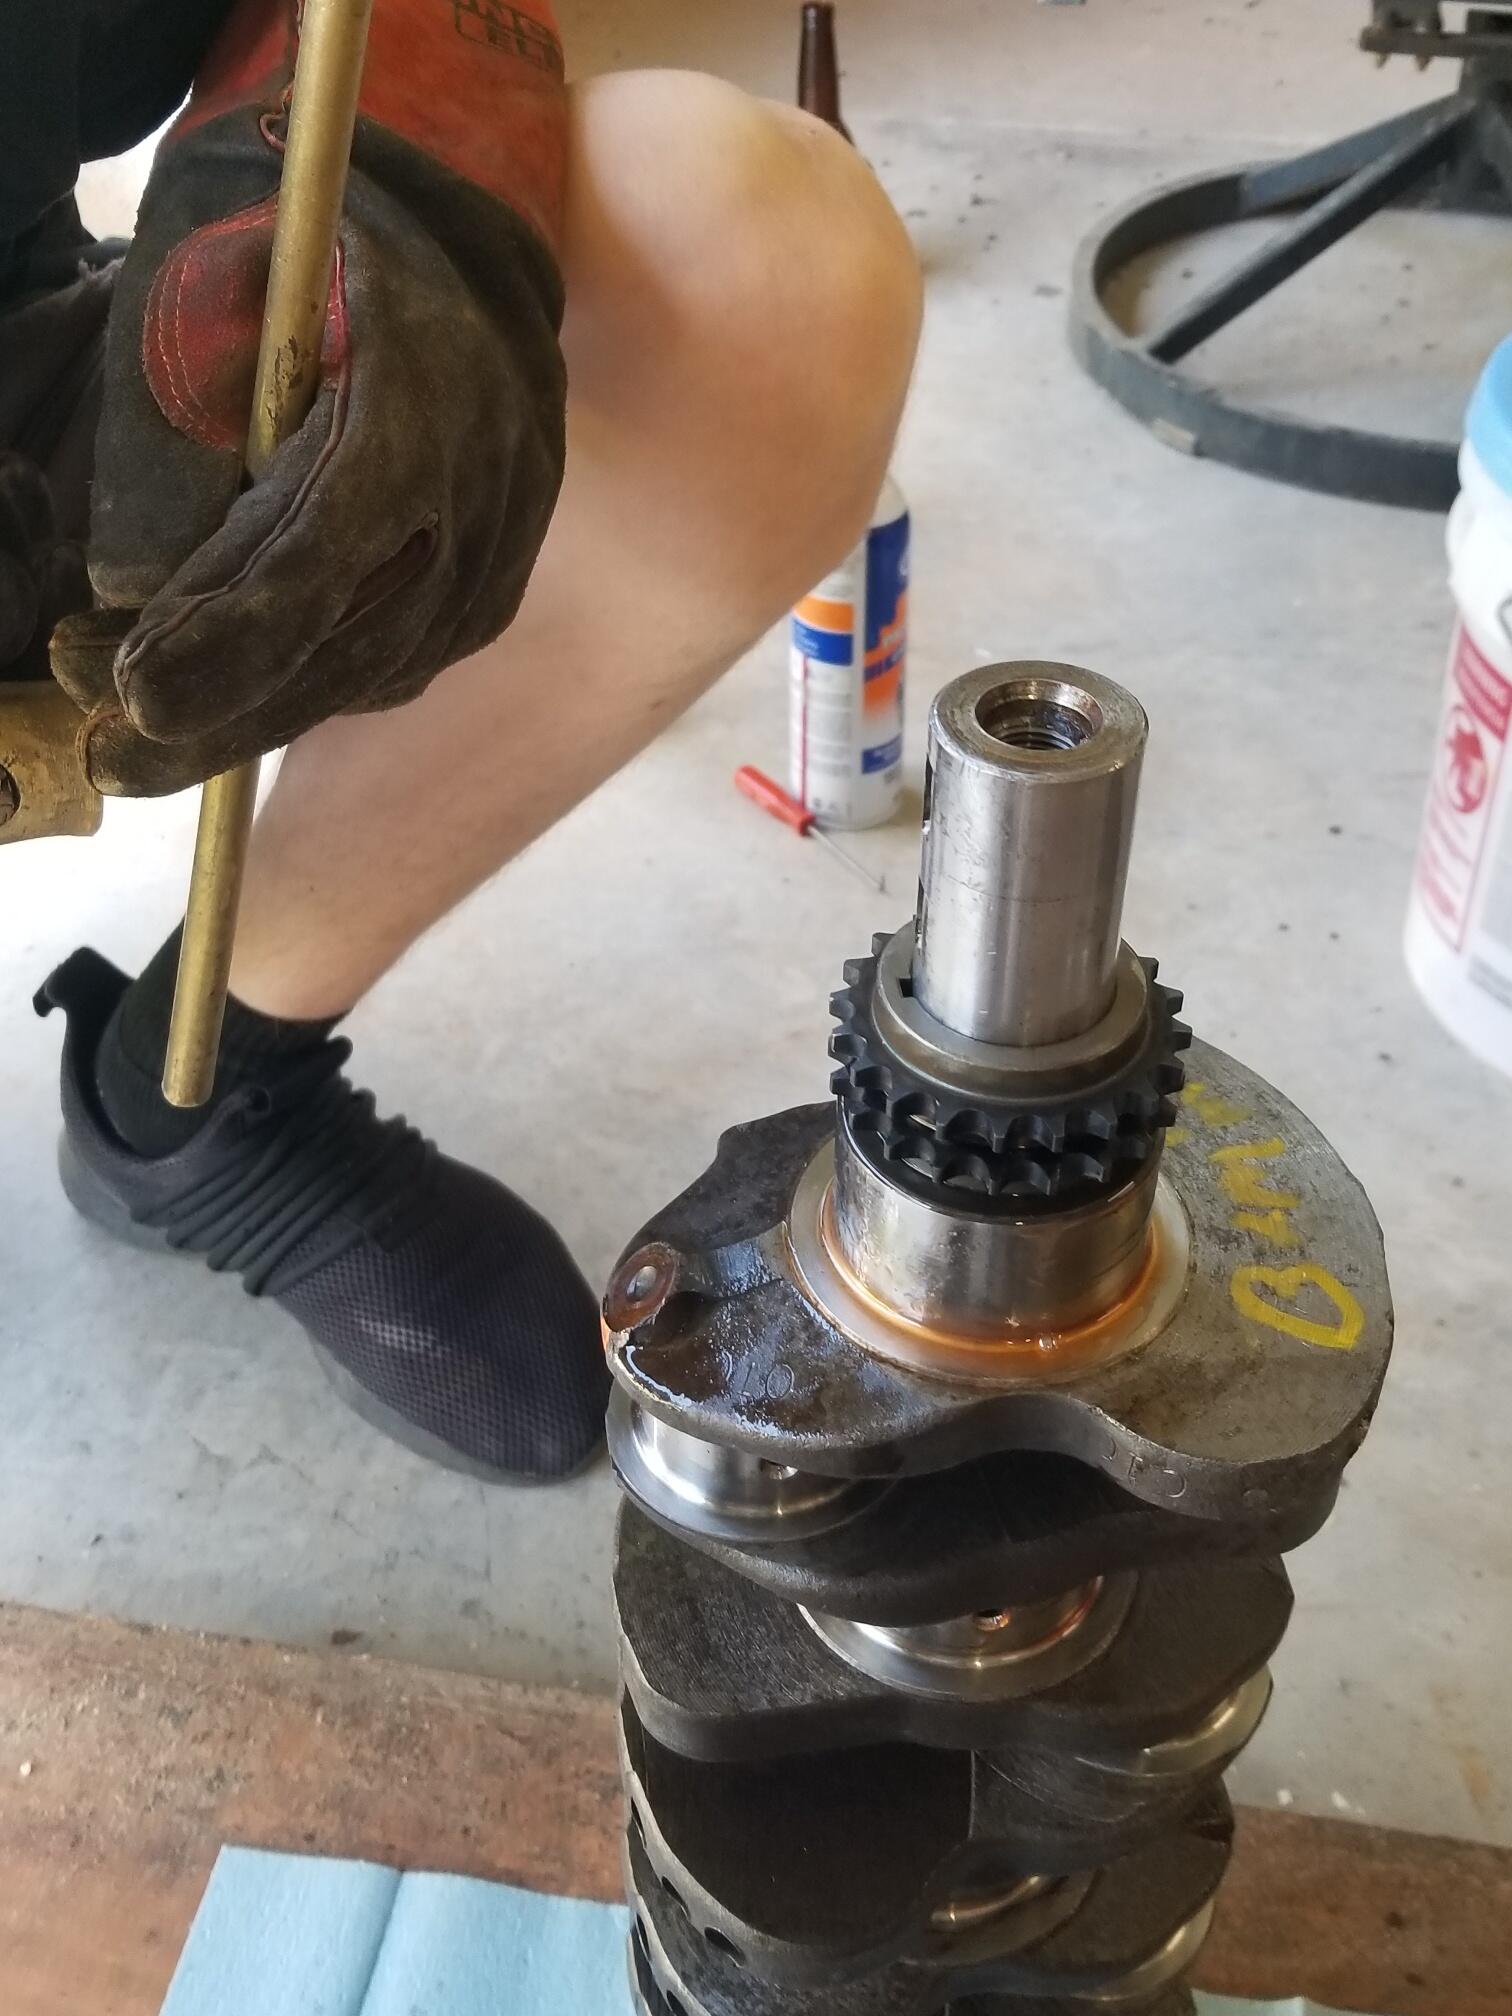
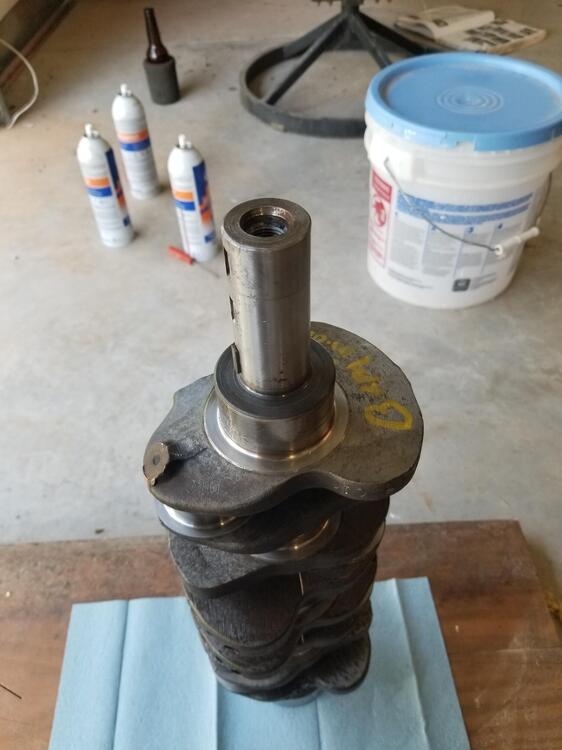
1 pointSo we worked on the motor some more today. We started by checking end play float. We could force 2 thousandths of play be we really had more like 1-1 1/2. So we pulled the crank back out and we checked the thrust bearing thicknesses. I logged all of those down. Then we did some calculating and decided we wanted to add 1 1/2 thousands. So we removed half of that from each side of the bearing plus a little. Tom Monroe calls for using 320 grit paper but I used 600 wet. 320 seemed way too course. You need to be able to keep track of which side is which. I made a sharpie mark on one side and the oil hole gives a reference point to work from. Each pad is treated as a measured location. We set the shells against each other and wrapped with a couple of turns of electrical tape. We used the granite counter as a flattening plate but a piece of glass would work good too. I made circular motions when sanding and counted revolutions. I did 10 to the side and then mic'd. Then 10 more. It took about 30 to the side to take off 0.00075". After we reassembled we had 2 thousands that would indicate with no pressure applied. We could force it up near 3 thousands. While we had the crank out we heated the timing gear in the oven and installed it on the crank. Then we put rings on the pistons and installed them. The pistons are 7 thousands proud at TDC. Off my rough calculations we will be about 10.35:1 compression. So we may have to keep the timing down until we upgrade the head and cam. Now we need to get the timing cover cleaned and then work on the rest of it. I couldn't really turn the crank by hand before without the pistons, just the crank. I can now turn the whole assembly, pistons and all by hand. It's tough but doable


 1 point
 -
1 pointPlease don't read this wrong. It is your car and you can do whatever you want to make yourself happy. IMO, that is a very nice, solid, unmolested example. Even with a "modified" driveline the car will not be very fast compared with a modern car. Why not go through the car and keep it all original? I have done the L28 with e31 head , turbos, and other variations in the past. Sure, it was fun, but I didnt really find them to be that much more fun than a stock 240. I just have an appreciation of the survivors, I guess because I am becoming one myself!1 point
-
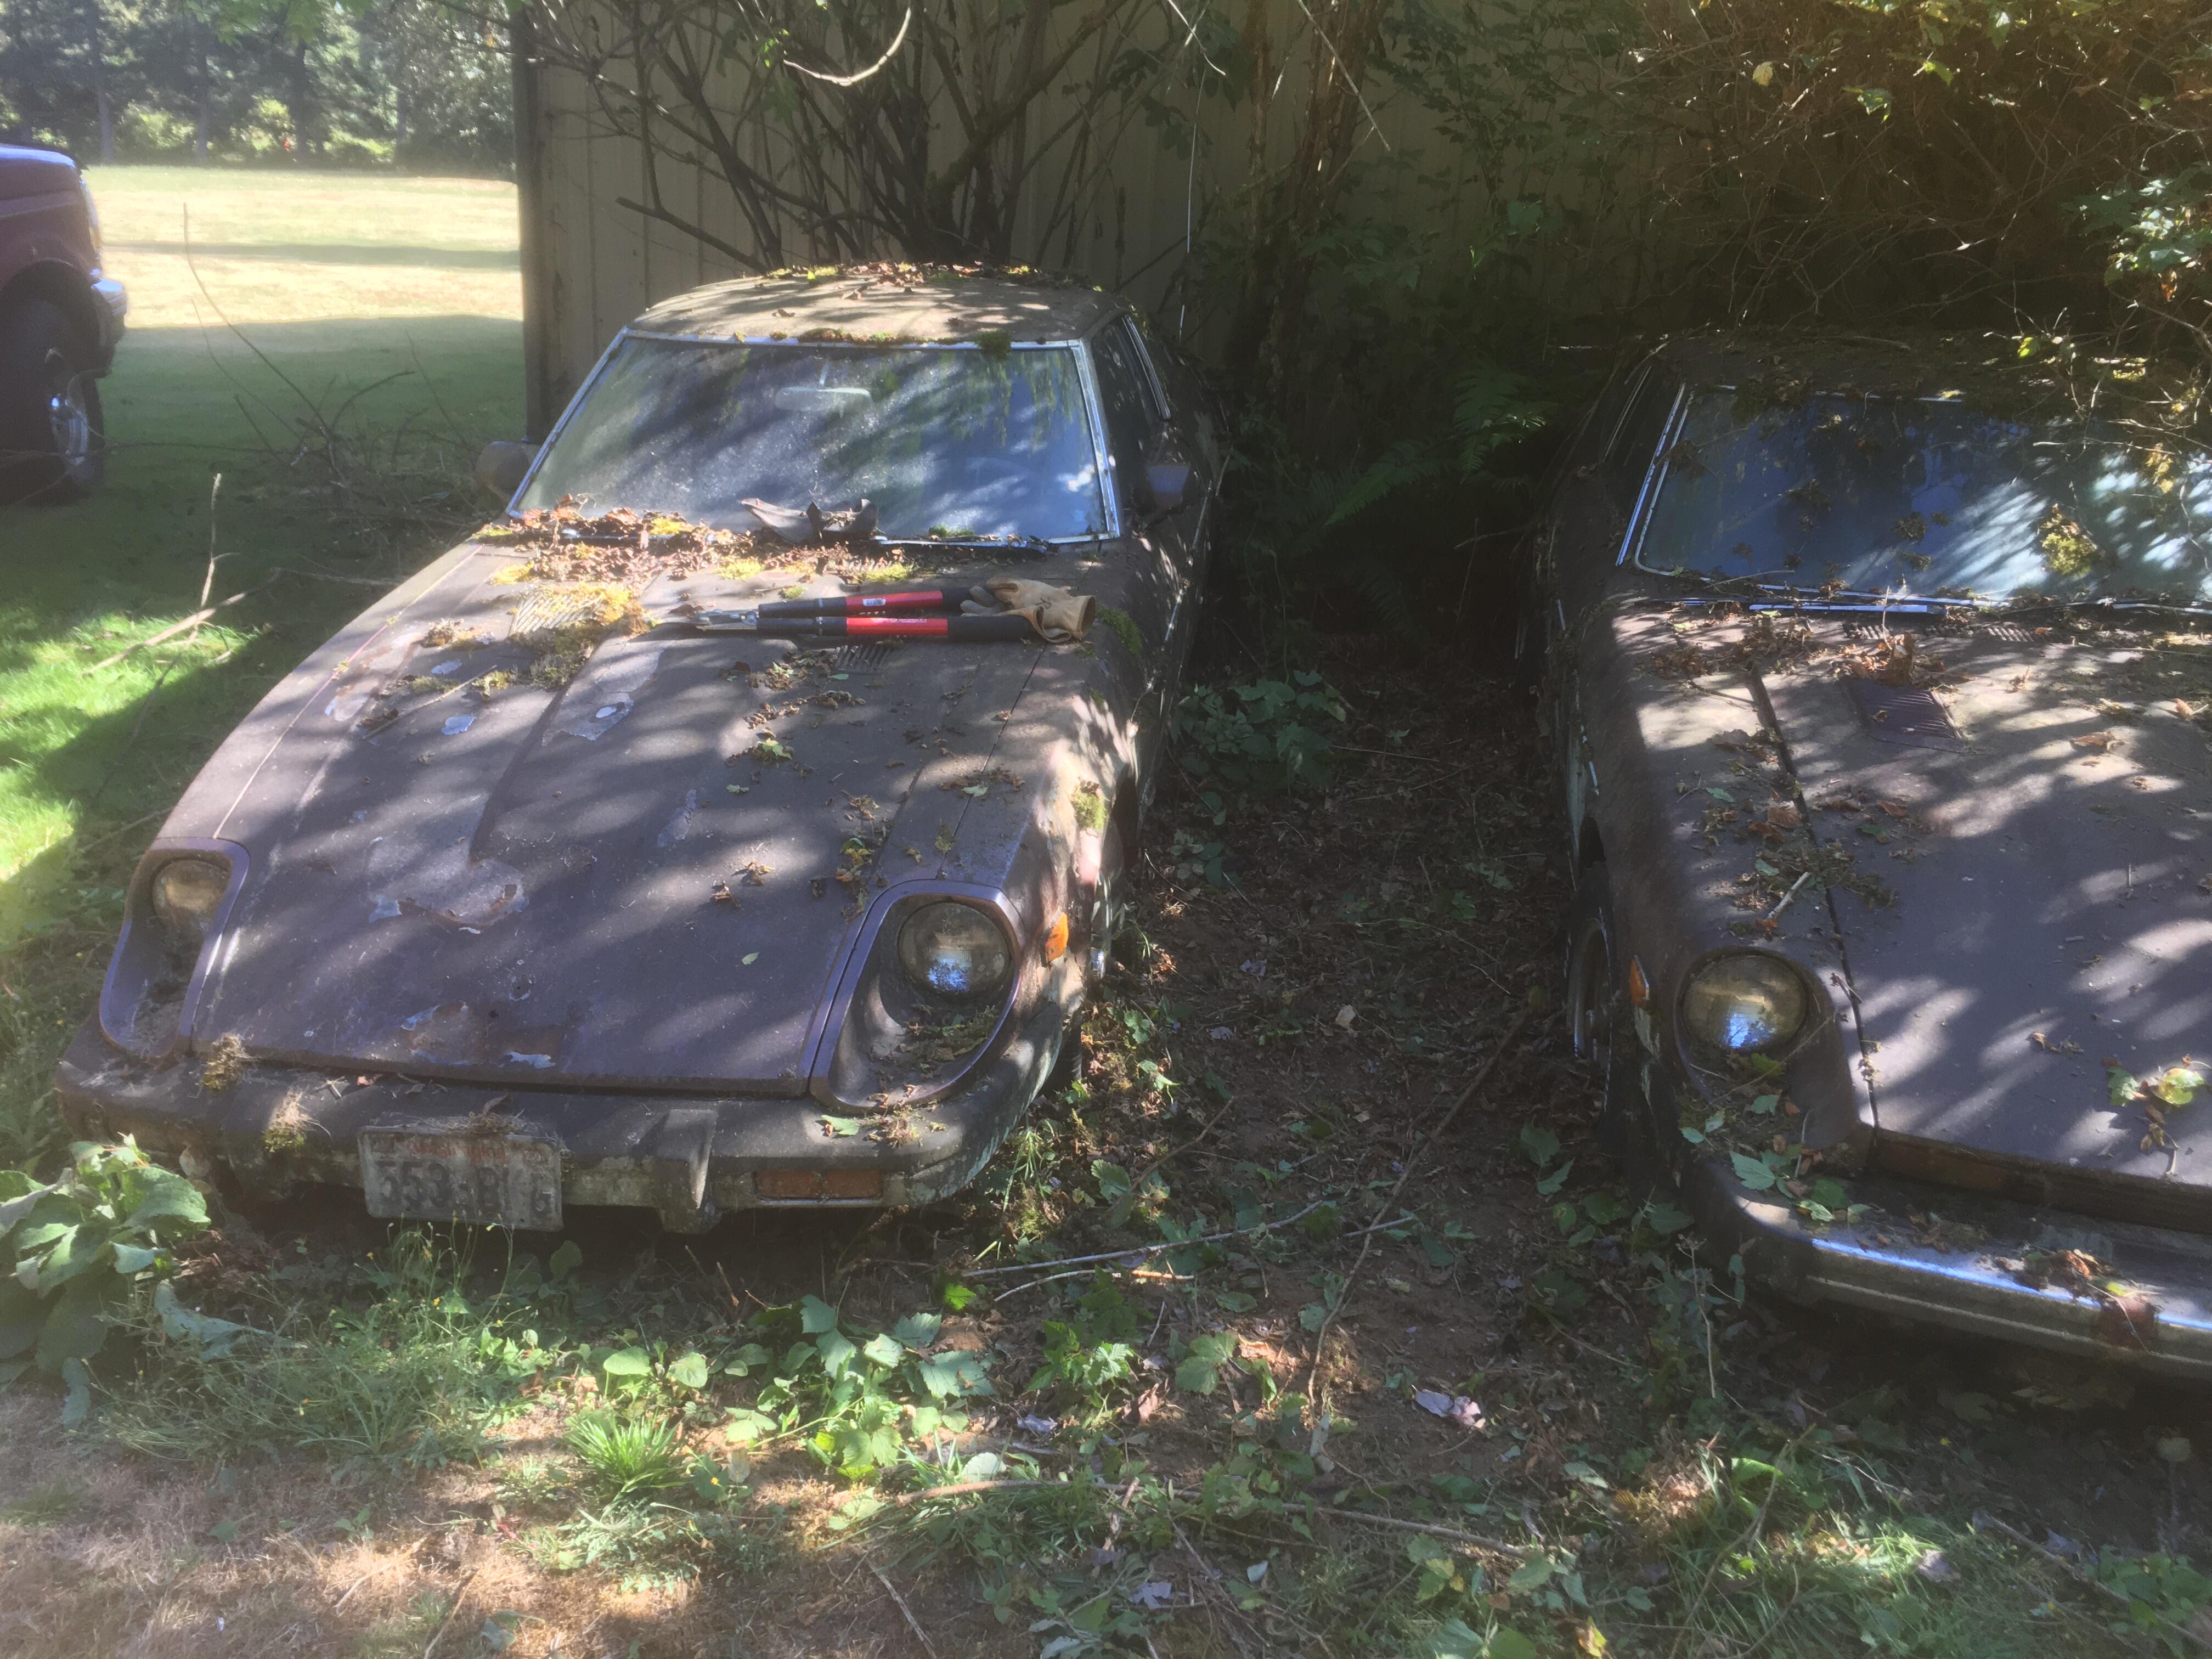
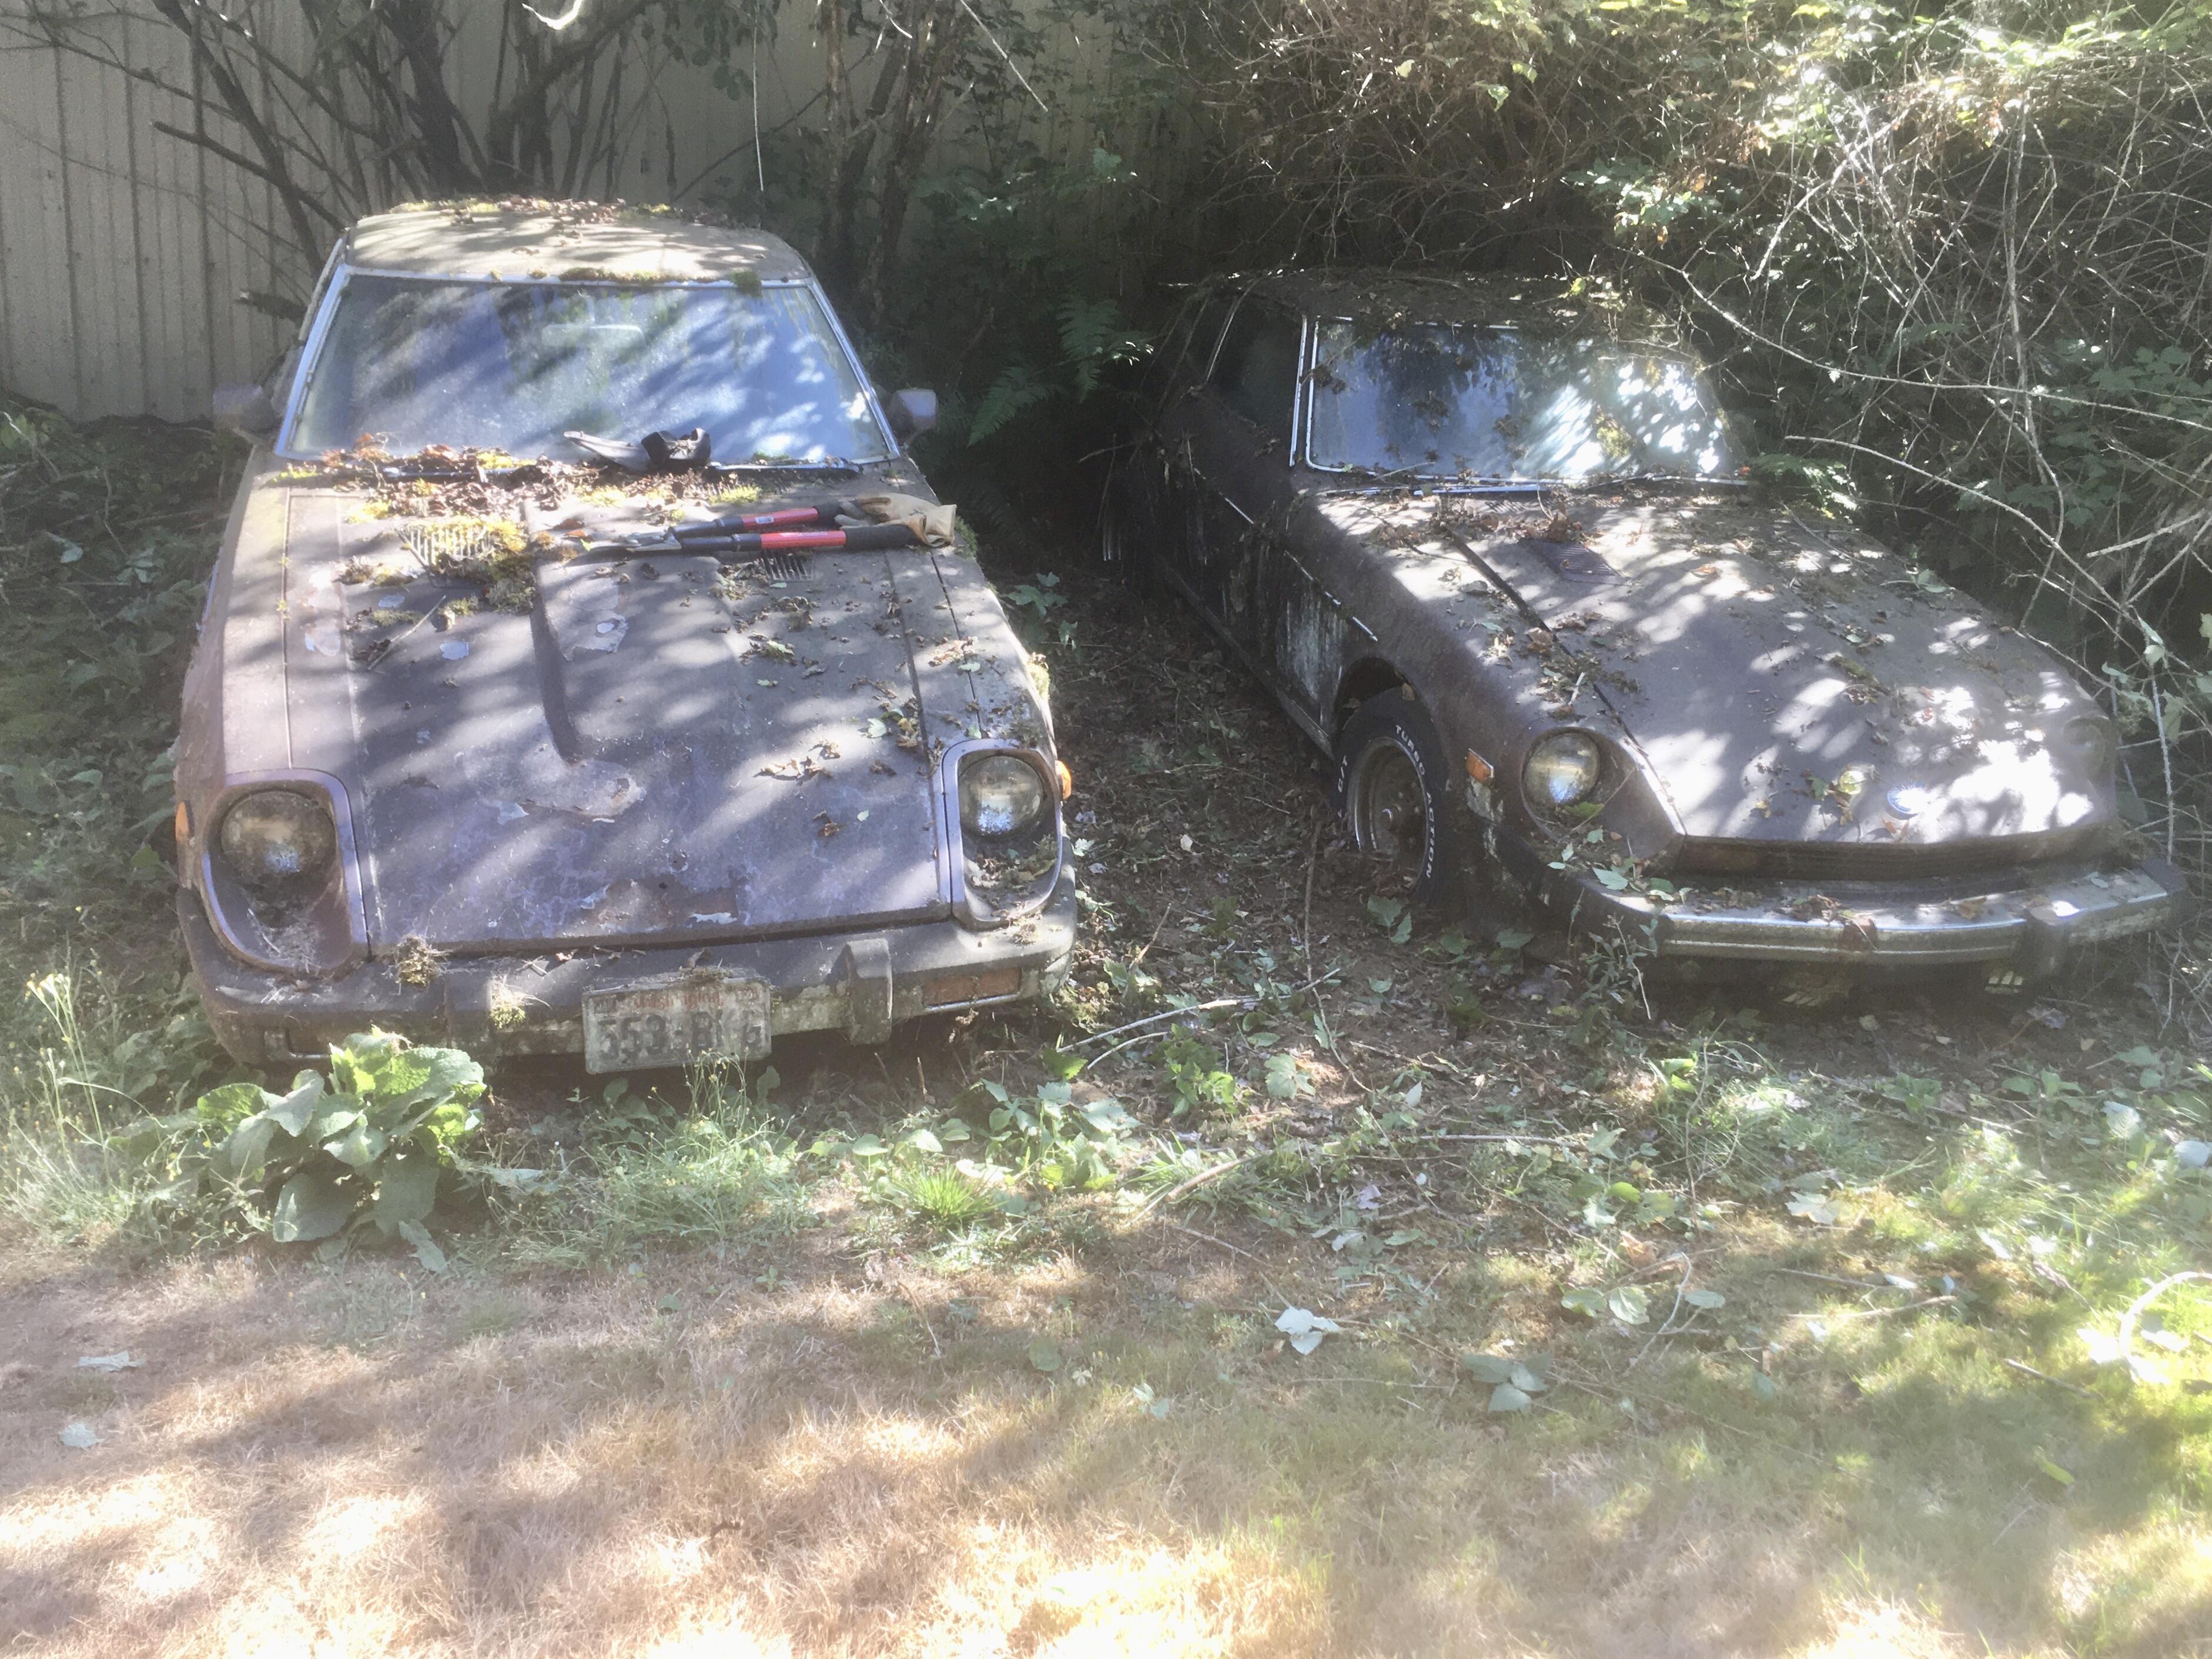
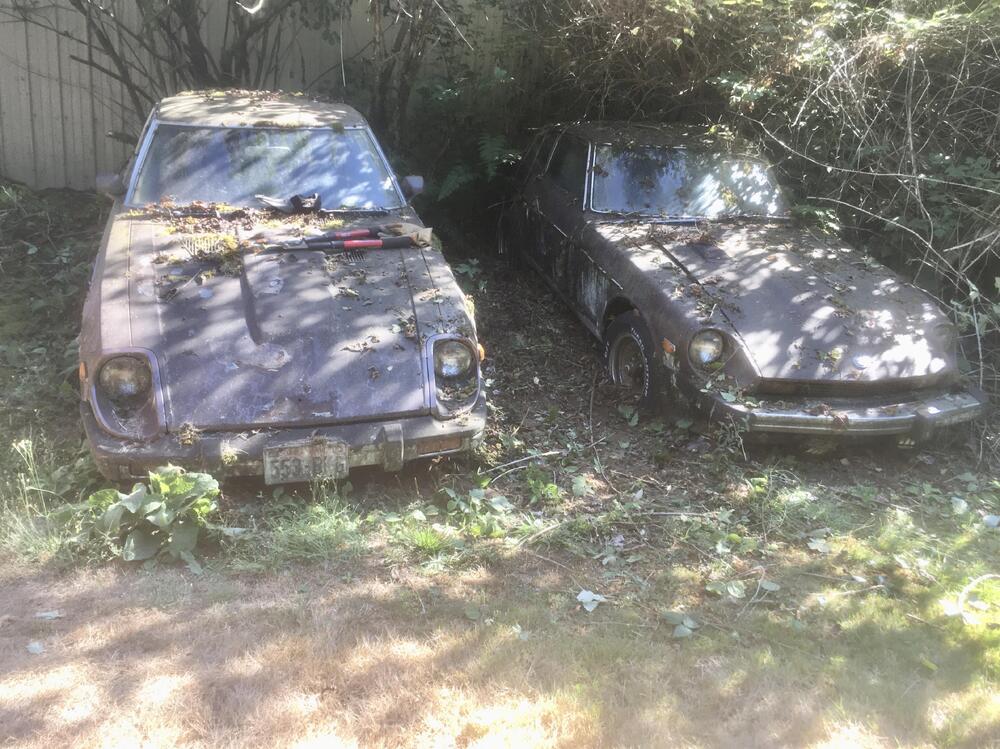
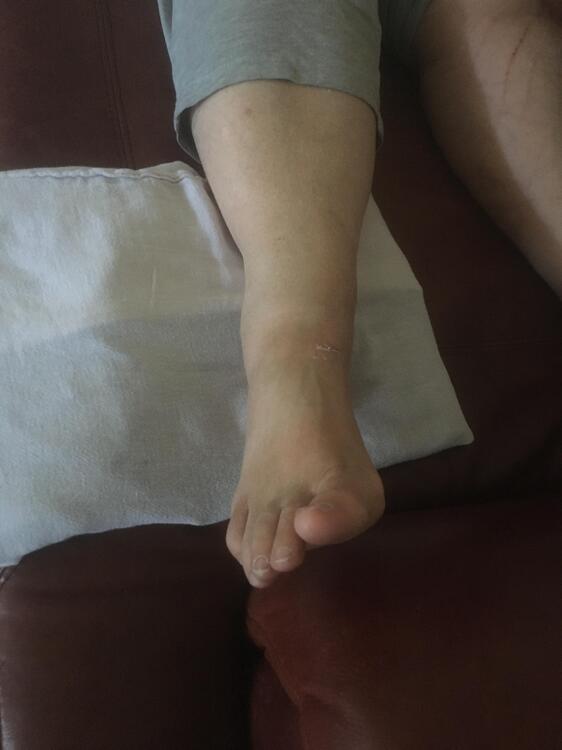
Started clearing brush yesterday. Got the ZX free, and half of one of the 280Zs exposed. Six more to go. I stopped to take a break, texted Mrs. Racer some progress pictures, then went into the shop to take a break. Had a race on the TV. A few minutes passed, and I heard what sounded like someone in distress. Turns out Mrs. Racer was coming out to see the progress, slipped and fell on the back porch steps, and broker her lower leg/ankle. I had to call the aid car, they hauled her to hospital, and we were up all night. Now I am missing work to get her into see an orthopedic surgeon. Good times, eh?


 0 points