Leaderboard
-
BoldUlysses
Free Member8Points344Posts -

siteunseen
Free Member6Points15,115Posts -

CW240Z72
Free Member6Points229Posts -
Captain Obvious
Free Member3Points10,081Posts


Popular Content
Showing content with the highest reputation on 09/02/2021 in all areas
-
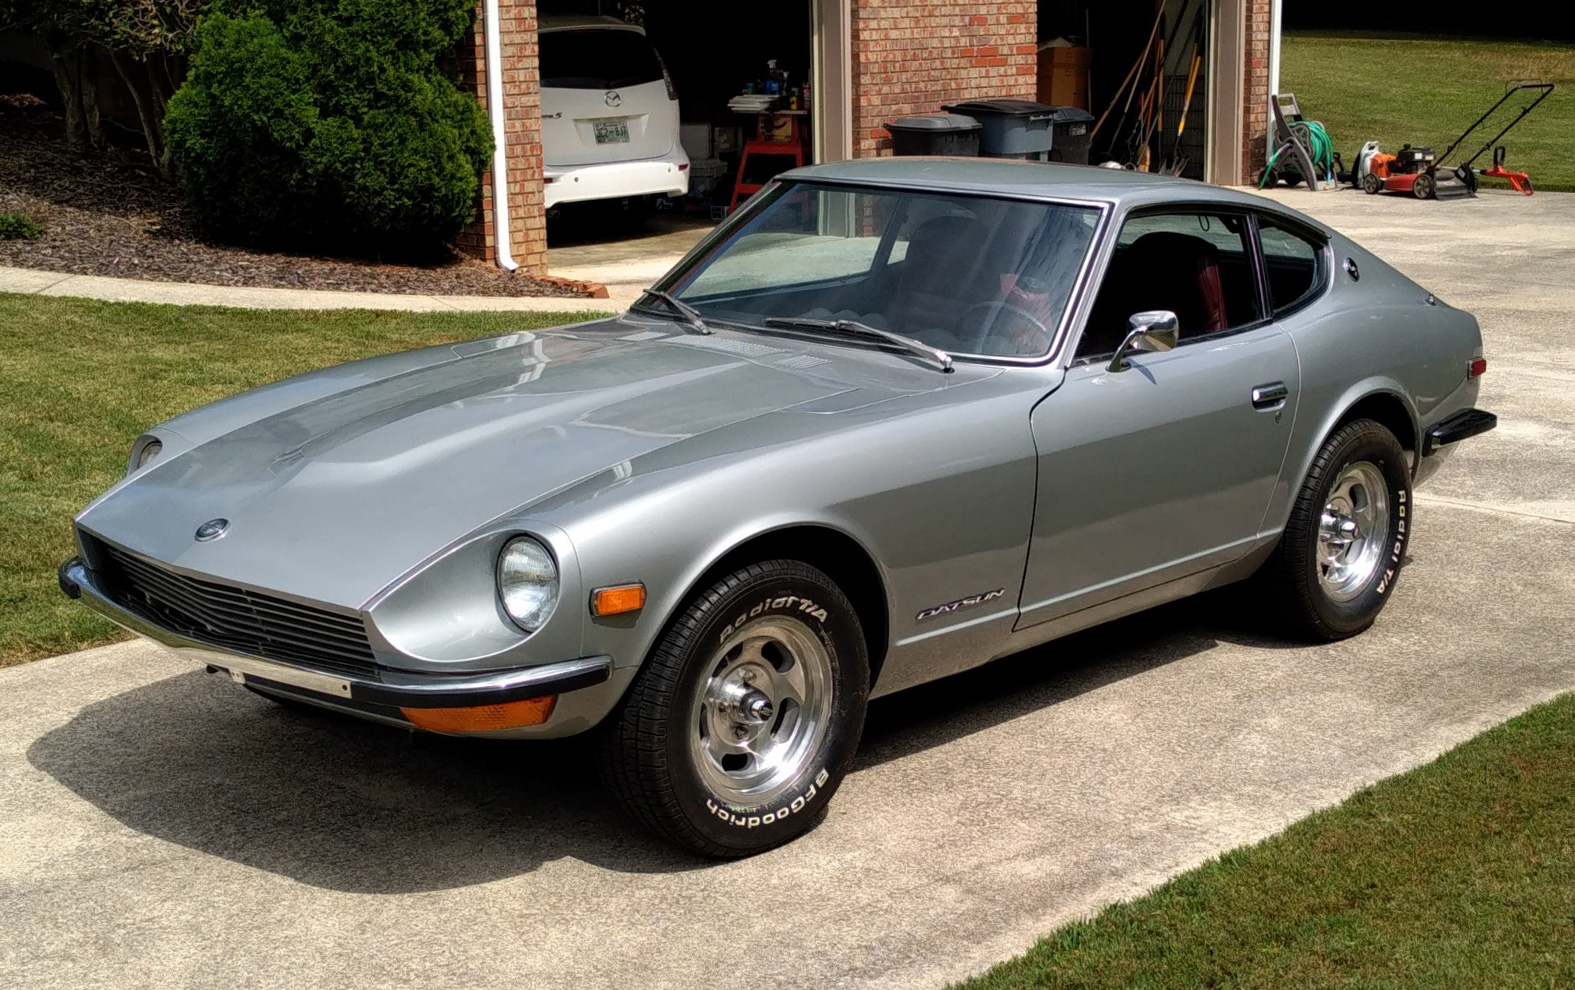
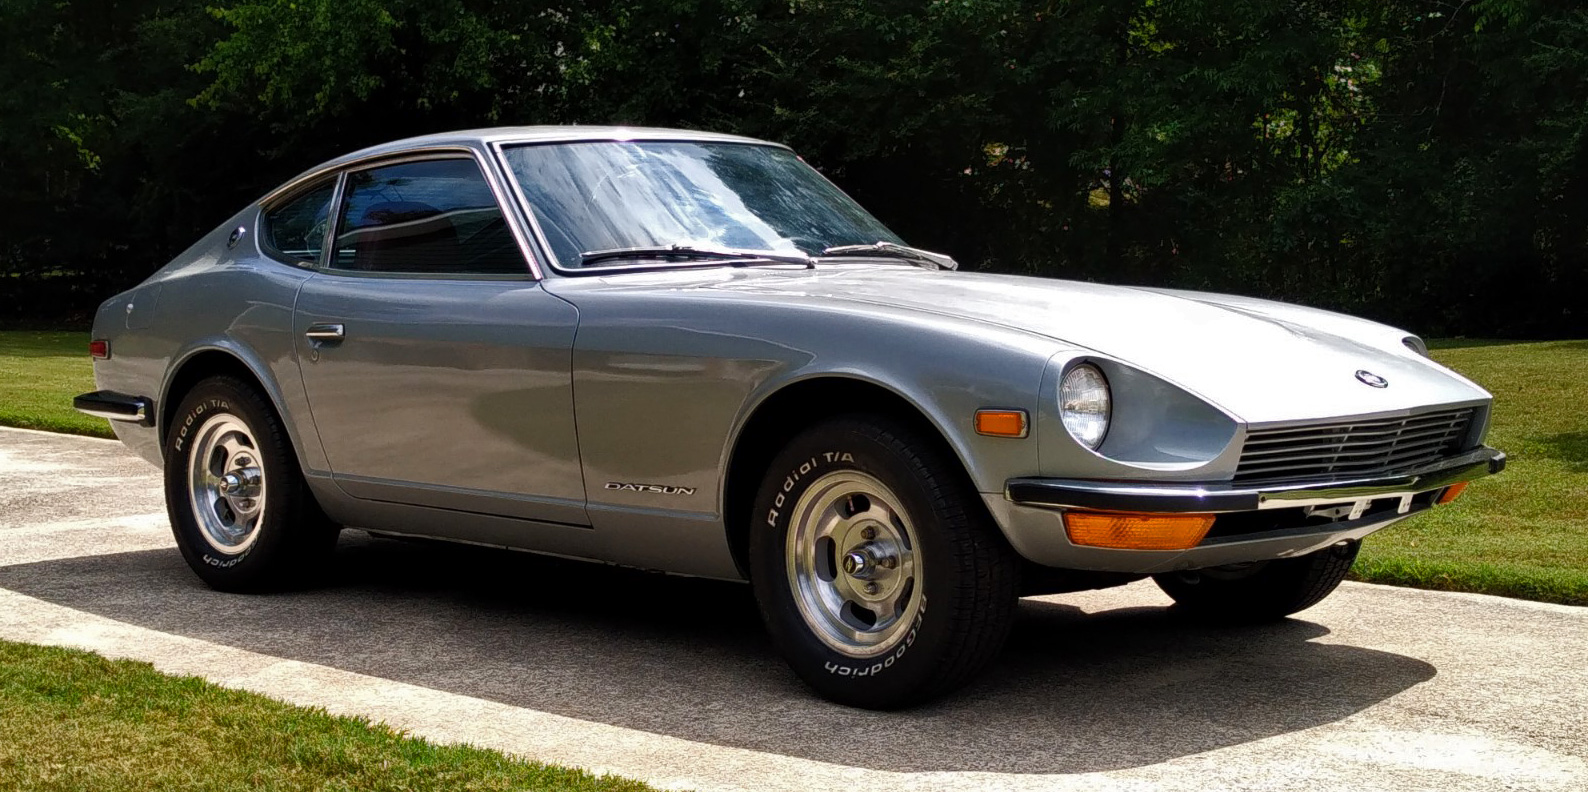
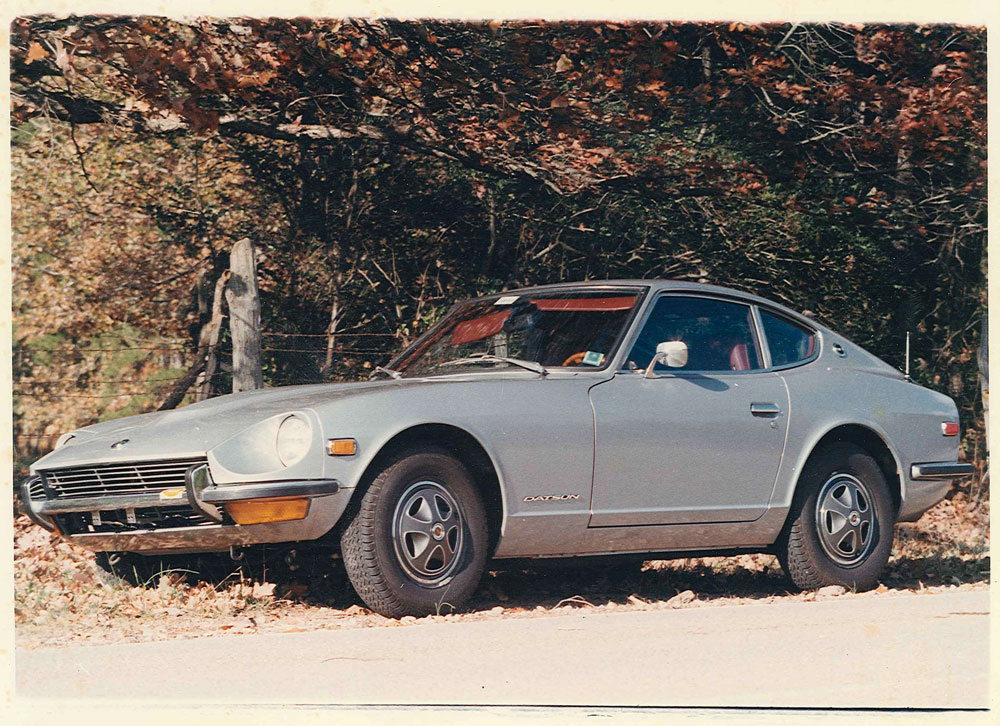
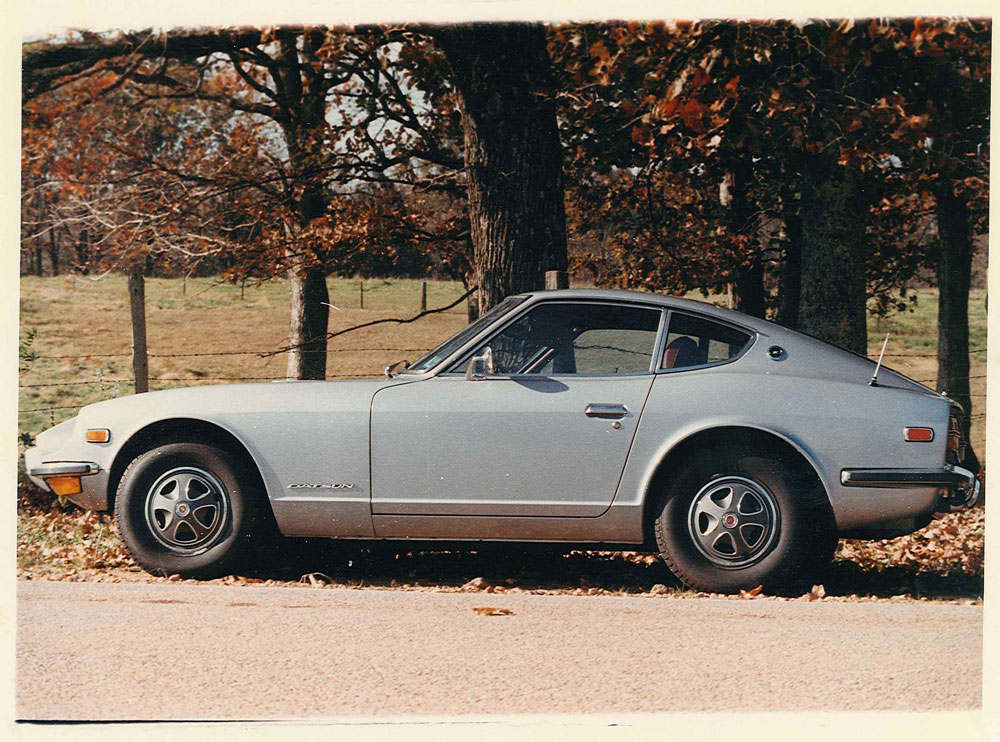
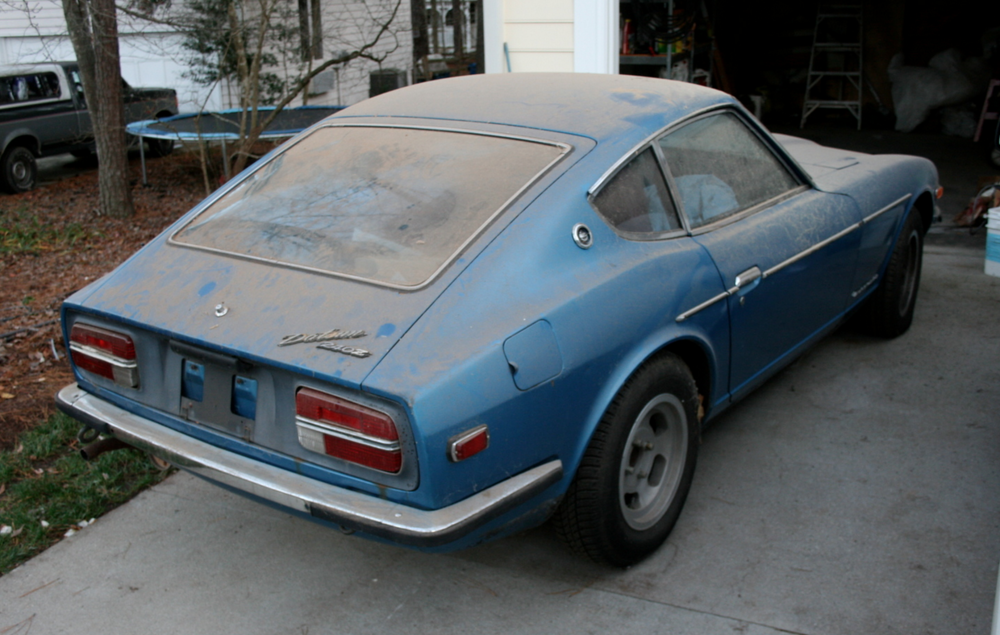
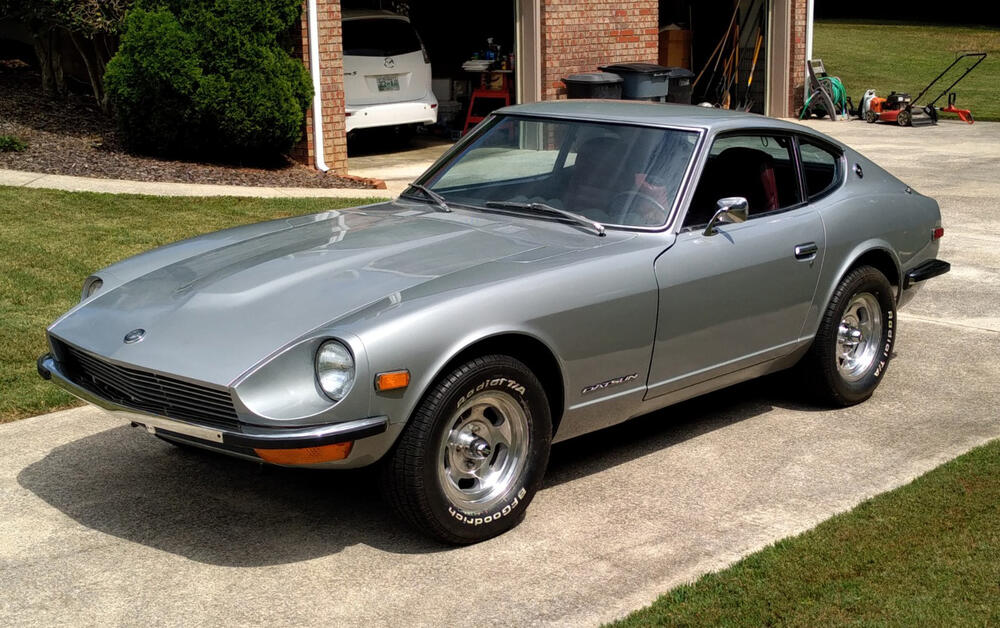
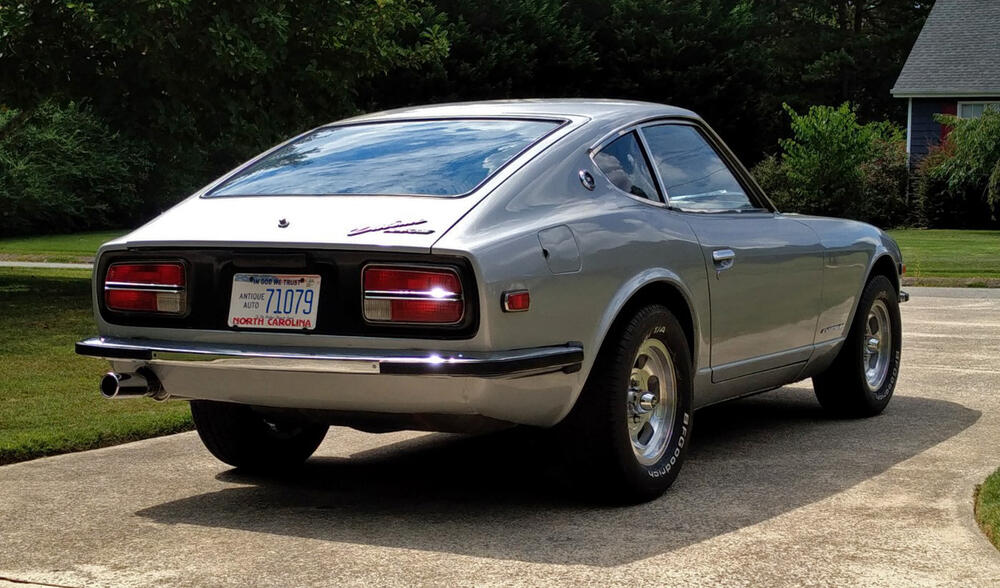
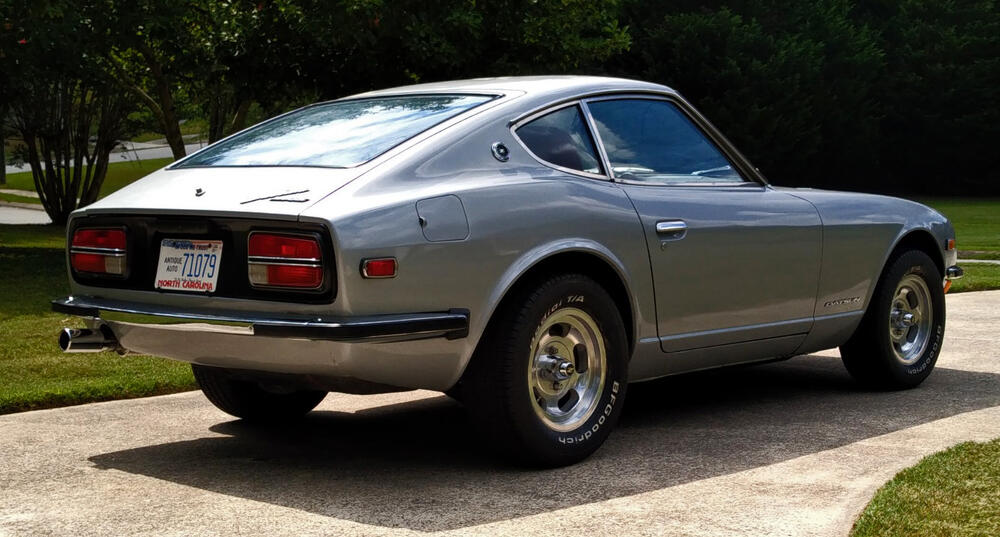
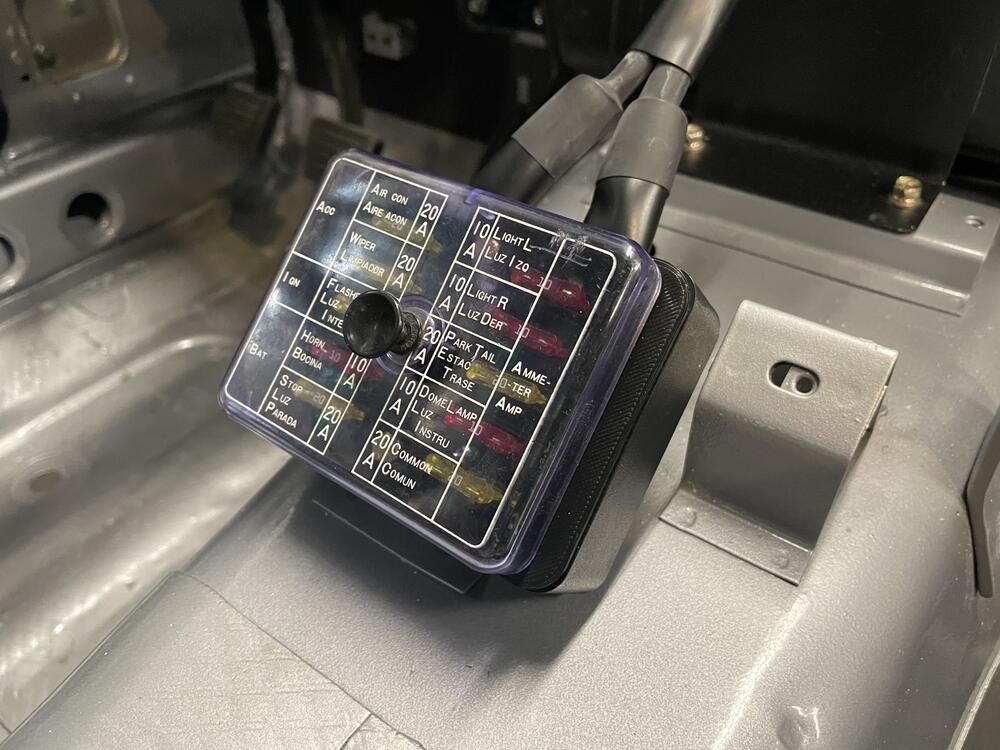
Hi guys. I figured I should start a build thread in here. The actual restoration is very close to being complete, but this seems like a good place to document a few things and perhaps ask little questions so I don't clutter up the main subforums with little inquiries when I can't find the answer. Anyway, this is about 93069, which my dad bought new in October of 1972 from Cardinal Motors in Jacksonville, NC. He was 21 years old at the time and just starting his senior year at NC State. The car's block number is 118555 and it has a built date of 07/72 (right around the brake system crossover). Original color: 901 Silver over red vinyl, dealer-installed factory air. Here are a couple of pictures my dad took in November of 1972, one month after he bought it: My dad had it repainted blue in the late '70s. My mom has always liked blue cars, so it's possible she had a hand in choosing the color. It seems rub strips were installed at that time also. I obviously remember the car all growing up. It was my dad's daily driver, and my brothers and I crammed into the back of it on more than one occasion, legs dangling behind the front seats, lying on our backs in under the hatch glass, watching the trees flick by overhead. Very unsafe, but it was a different time. The car deteriorated over the years. Battery acid ate a hole in the inner fender well and firewall, water seeped down and rusted out the passenger side floor pan. Rust started to pop up other places also, like the rocker panels and the trunk sill. My dad had the engine rebuilt in the '90s, and the carbs refurbished by the original owner of ZTherapy around the same time. I still have his "Just SU Carbs" and "240Z Tuneup" videos on VHS. Pretty nice viewing. I've always been into cars, but was never wild about the Z, which always felt weird because everyone I talked to said it was an incredibly cool car. Maybe familiarity just breeds contempt (or indifference in this case)? Who knows. Regardless, I got into wrenching about 20 years ago and have had a long succession of project cars (FB RX-7s, mk3 Supra, Type 85 Audi, various BMWs, etc), but found it hard to muster the motivation to start restoring the Z. Finally, about 10 years ago, I was at a point in my life where I had a place of my own with a 2-car garage and wanted to start bringing the Z back into focus. This was its state then: Pretty much a "barn find" in my parents' own garage. Dusty, rusty, mismatched tires, etc. I had chucked the bumper overriders years ago and managed to talk my dad into buying a set of slotted mags since he kept losing hubcaps. It hadn't run in 6+ years at that point. Back in 2005, I was driving it and the battery wasn't properly secured. It slipped off the its pedestal and impacted the oil filter, creating a nice gash (and minor fire, which I beat out). I was young and stupid and continued driving, trying to make it to the nearest auto parts store for a filter in spite of the fact that I likely had marginal oil pressure. The moment the engine started acting funny I parked it and walked the remaining 1/2 mile to CarQuest for an oil filter. I put it on and drove it home, but was scared that I had permanently damaged something, so I just let it sit. Fast forward to 2011, Stage 1 of the restoration was determining if it would run properly or if the engine needed a rebuild. I replaced all the consumables on the engine, had the carbs rebuilt (again) by ZTherapy and drained and resealed the fuel tank. Got everything hooked back up and after a few hiccups...it started and ran just fine. That was a relief. Stage 2 had to wait a few more years. I moved for work about 6 hours further away from my parents (they had been 1.5 hours away before), and took the Z with me. In early 2014, I partially disassembled the car, removing the engine and some other key bits. The next spurt of motivation came in 2016, when I finally got my garage organized and finished stripping the car down. In 2017, my dad came with a trailer and took the car back to his house to have the body restored. He took it to a local body shop to have the rust repaired and the car repainted its original 901 Silver. The body shop did an OK job. I wish I had been local in order to supervise the work more closely, since they cut a few corners, especially in the engine bay. Long story short, the car returned back to me for reassembly on Labor Day 2019. I was initially pretty intimidated by the task at hand, but started chipping away at it and it started coming together. I finally got it started again a little over a year ago so it could move under its own power to our new (local) home. Since then, reassembly has continued in fits and starts, but this is where it stands now: Still quite a lot to do, especially as regards the interior, but I've been pleased with the progress so far. Thanks for reading and stay tuned. -Matt


 8 points
 -
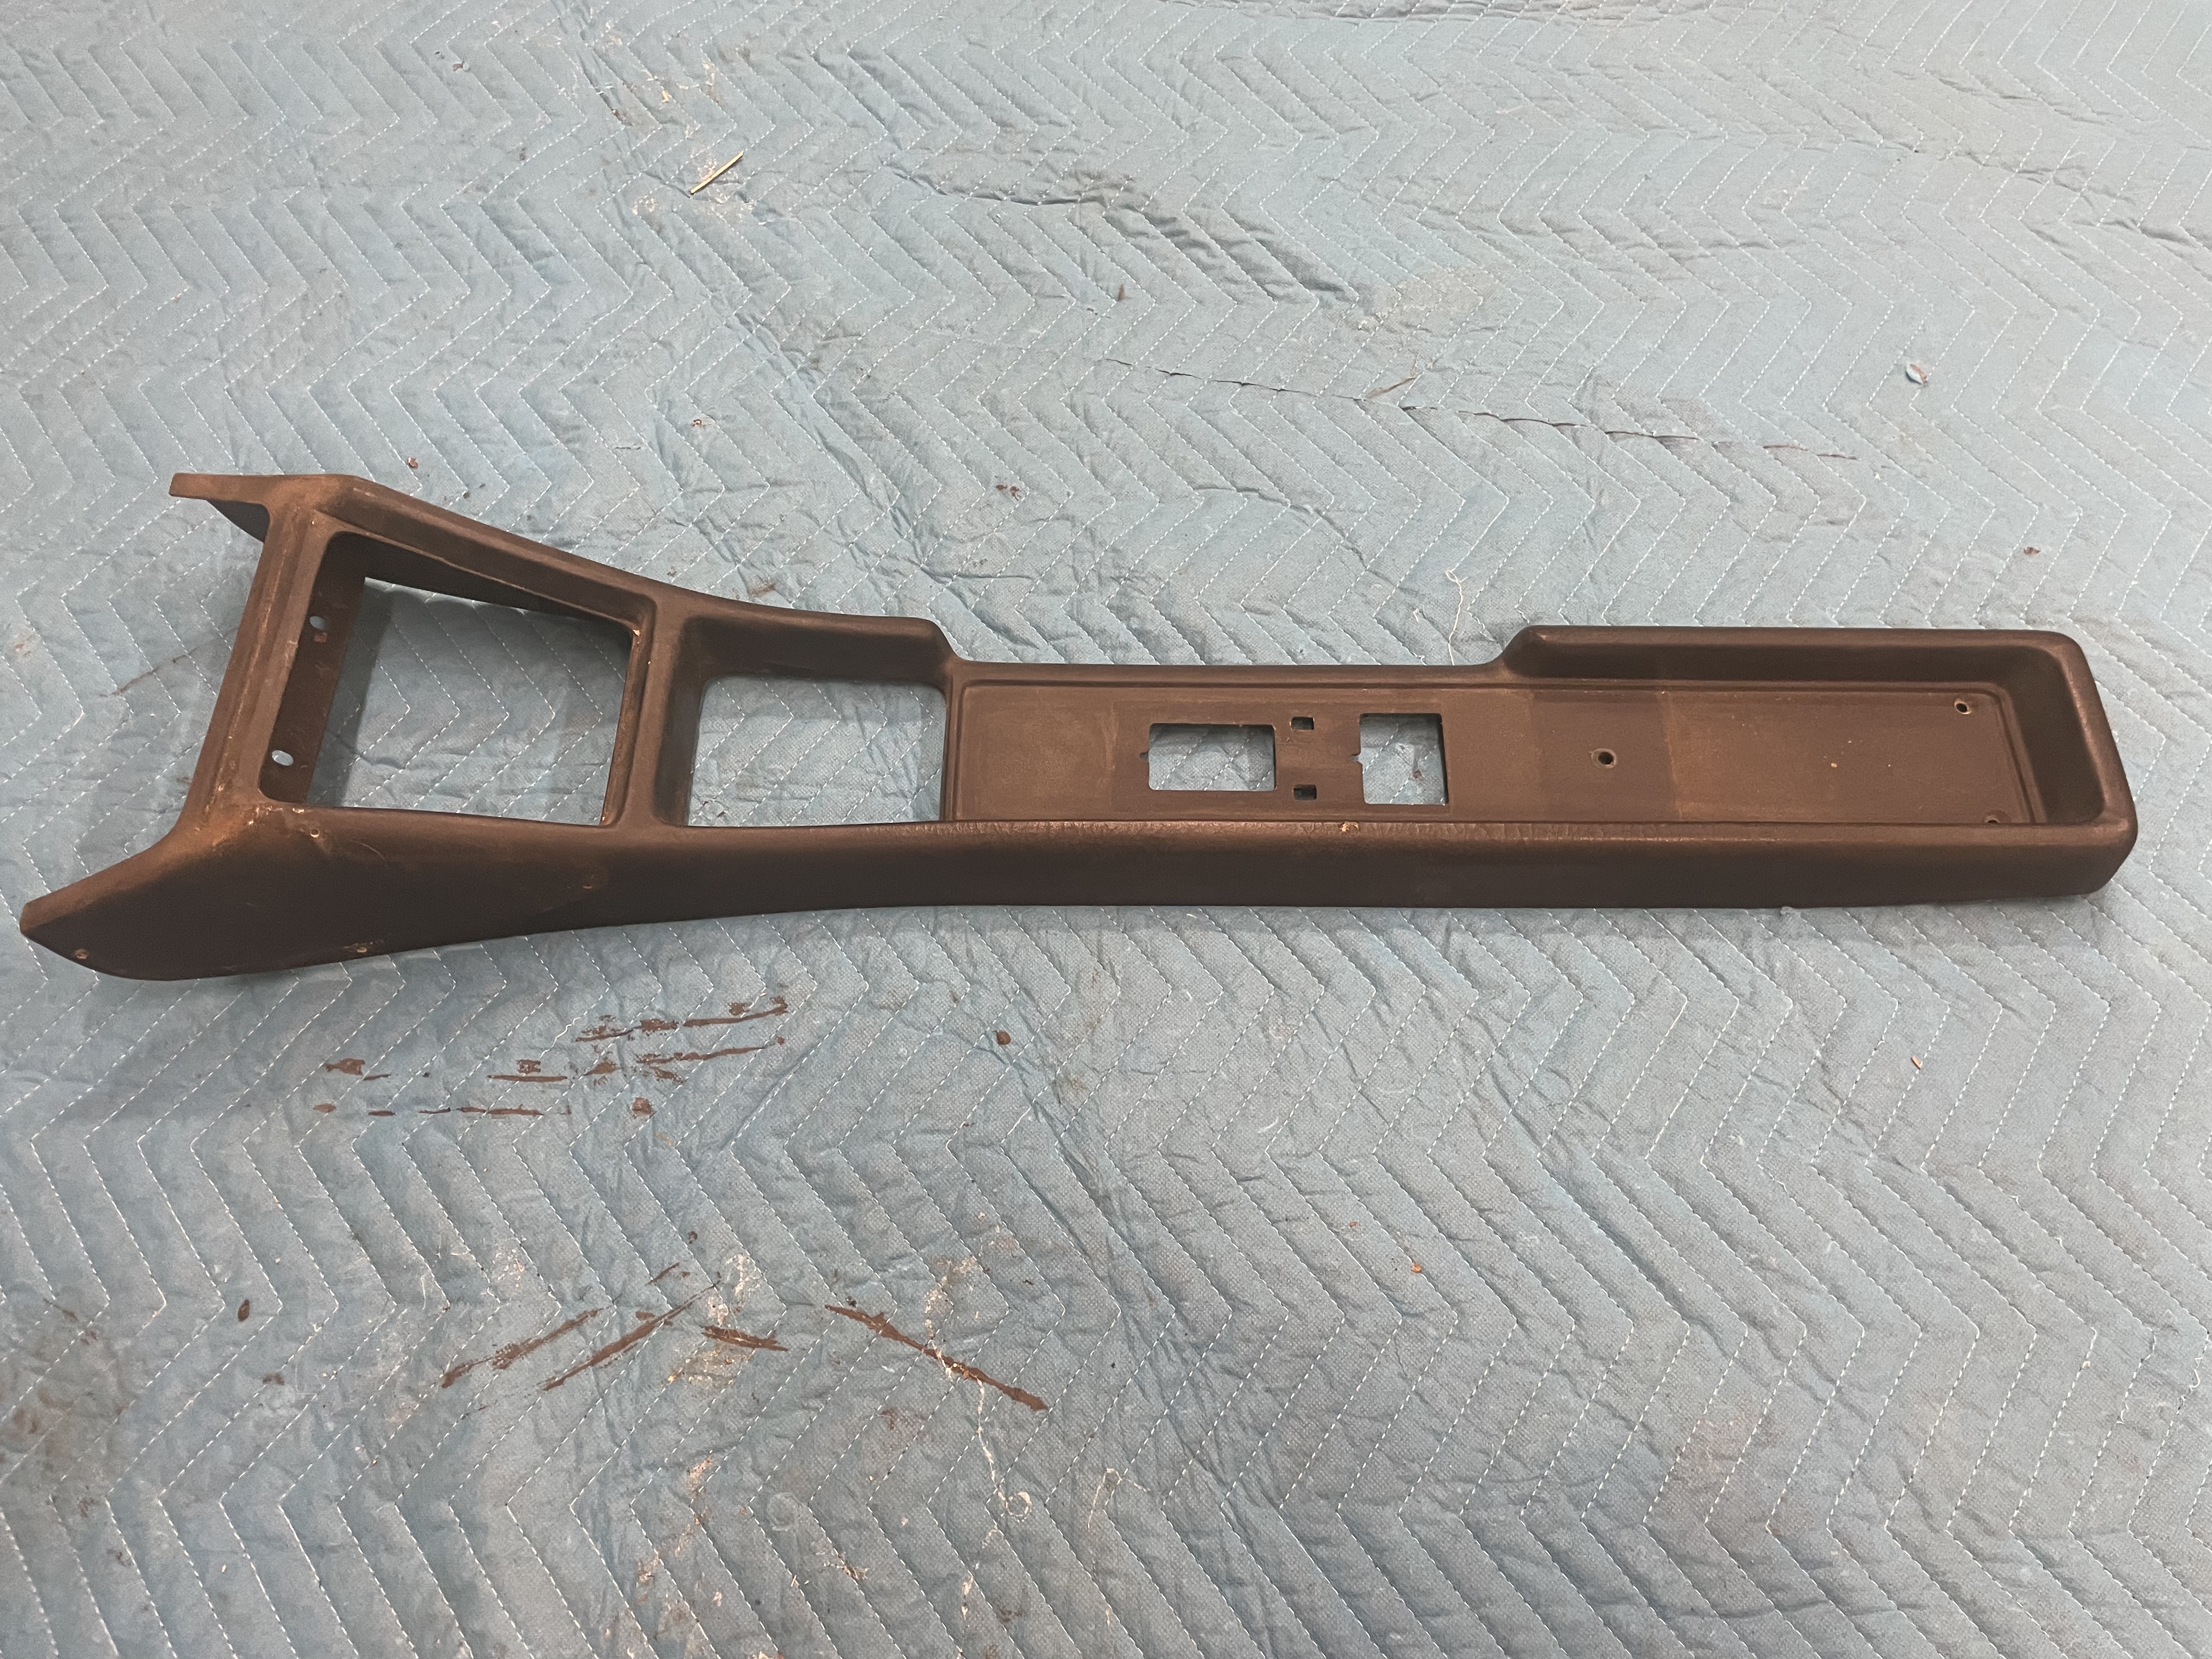
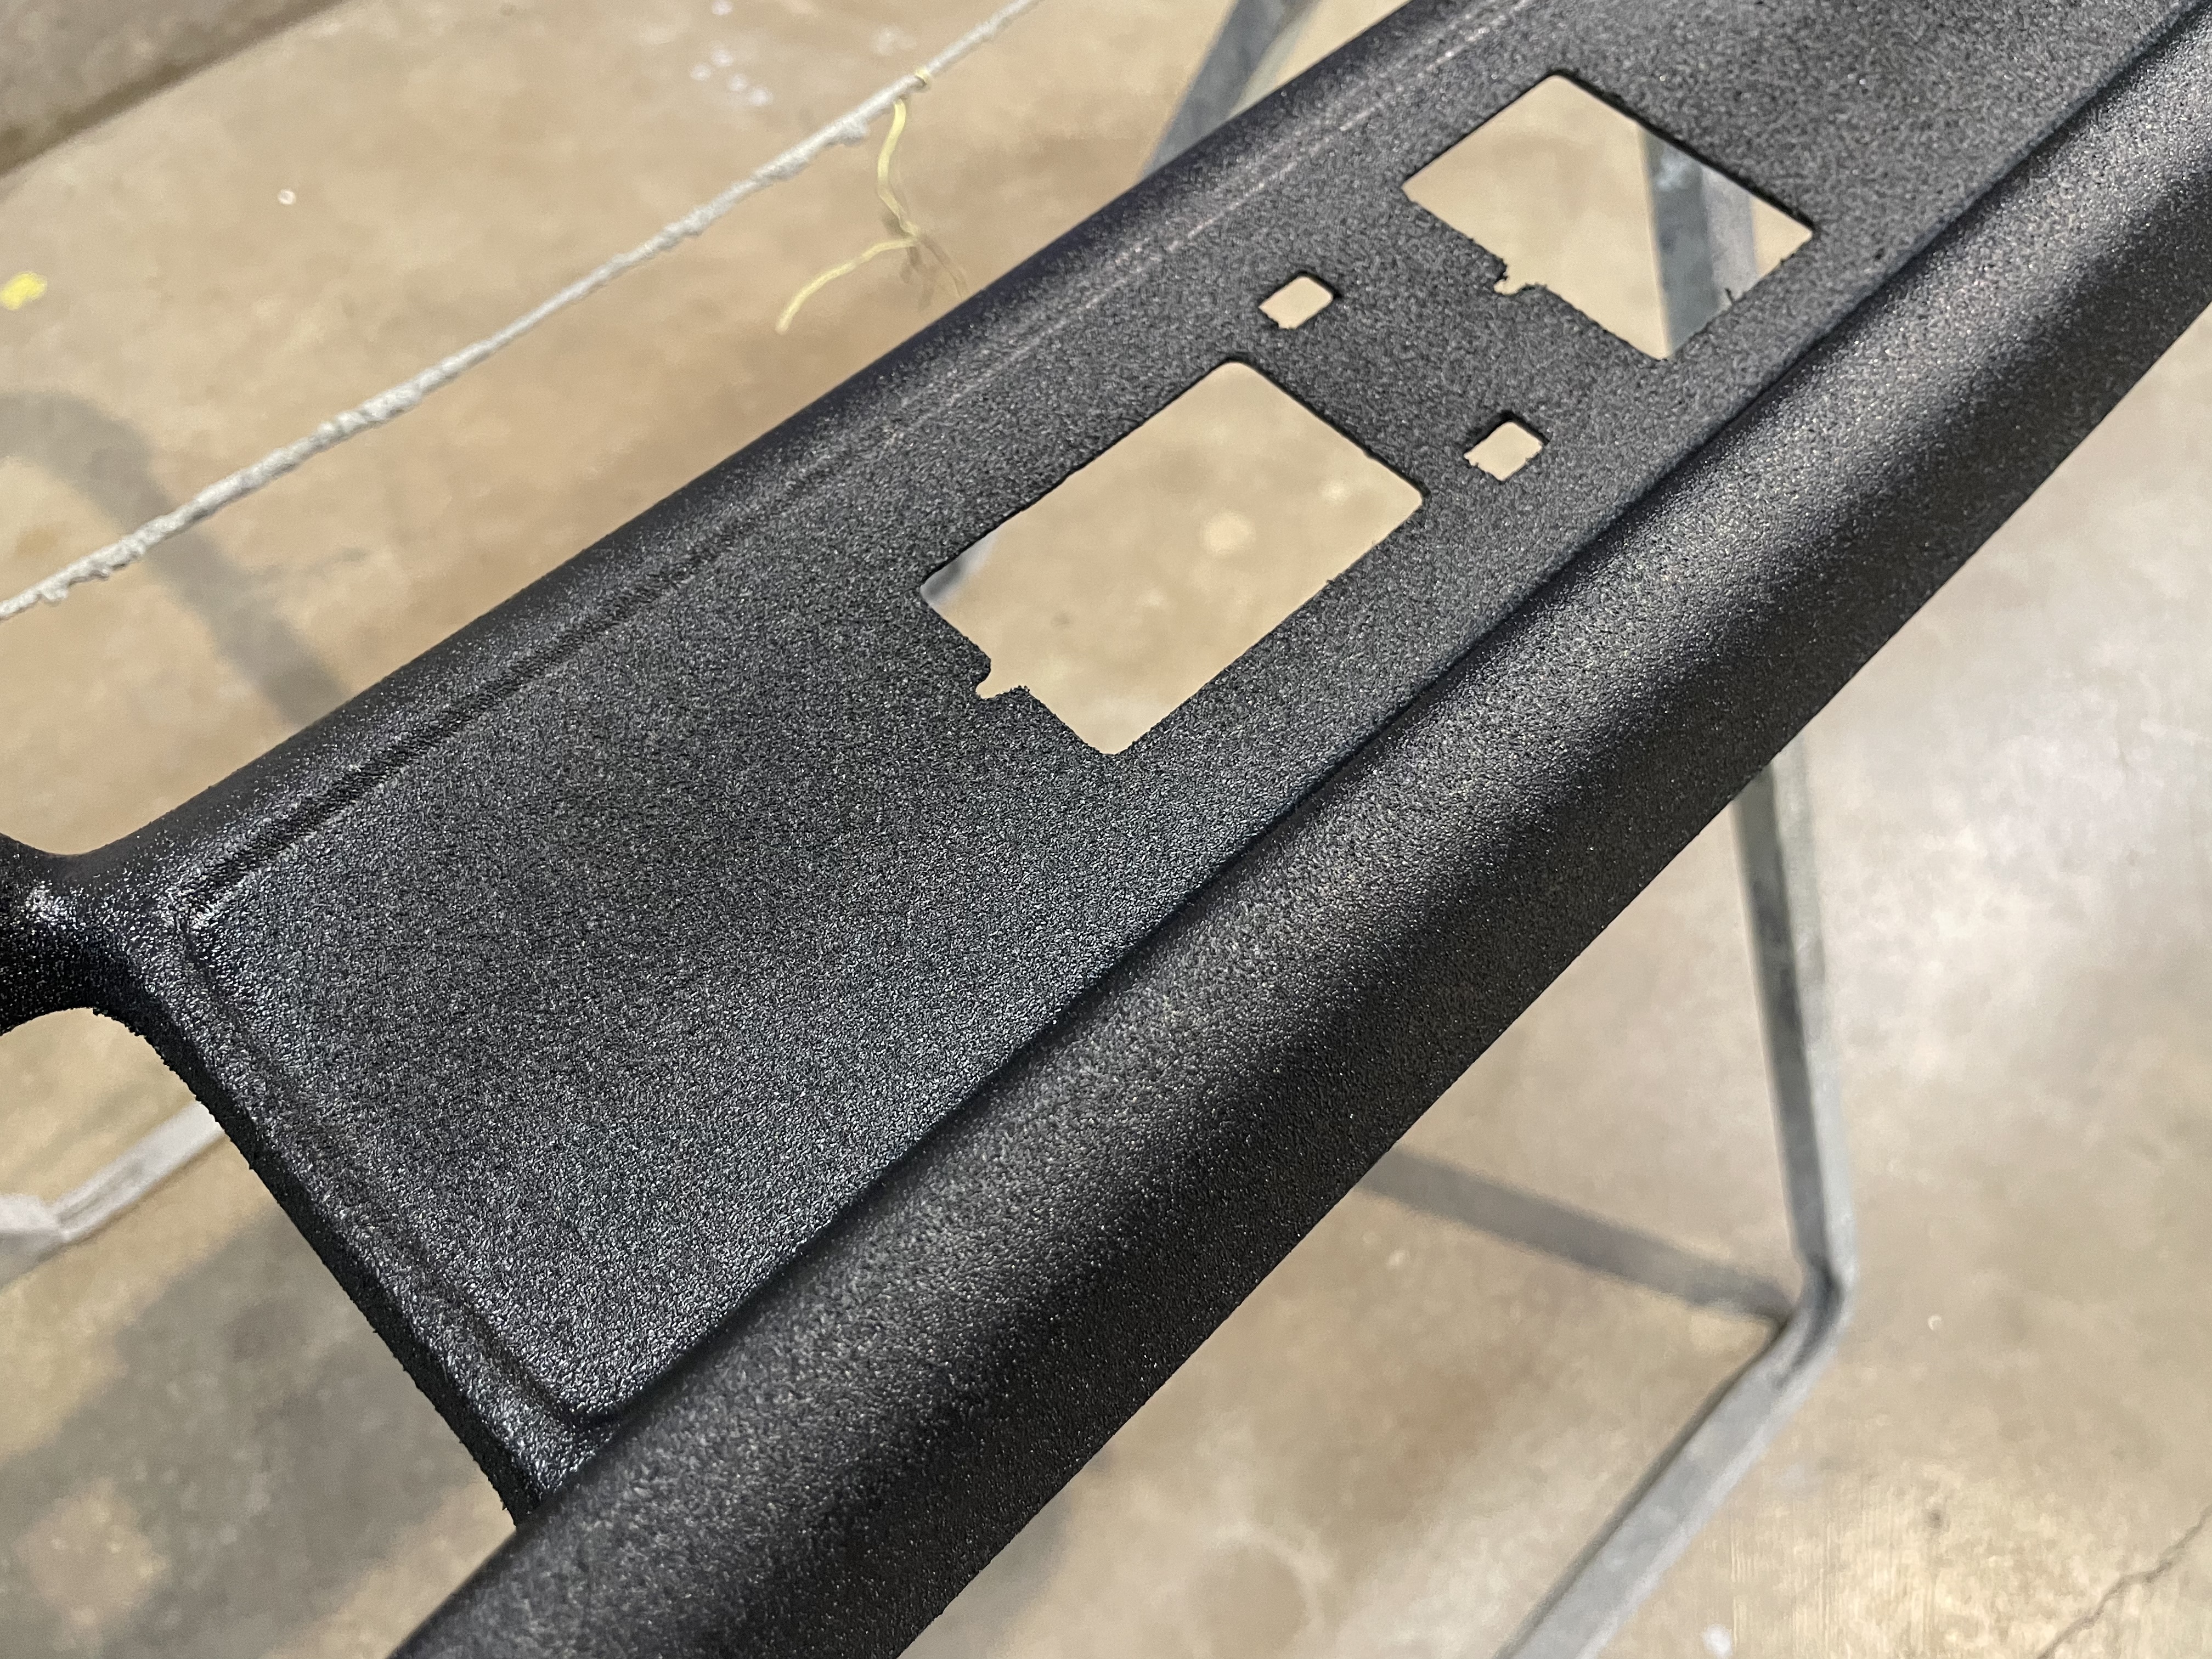
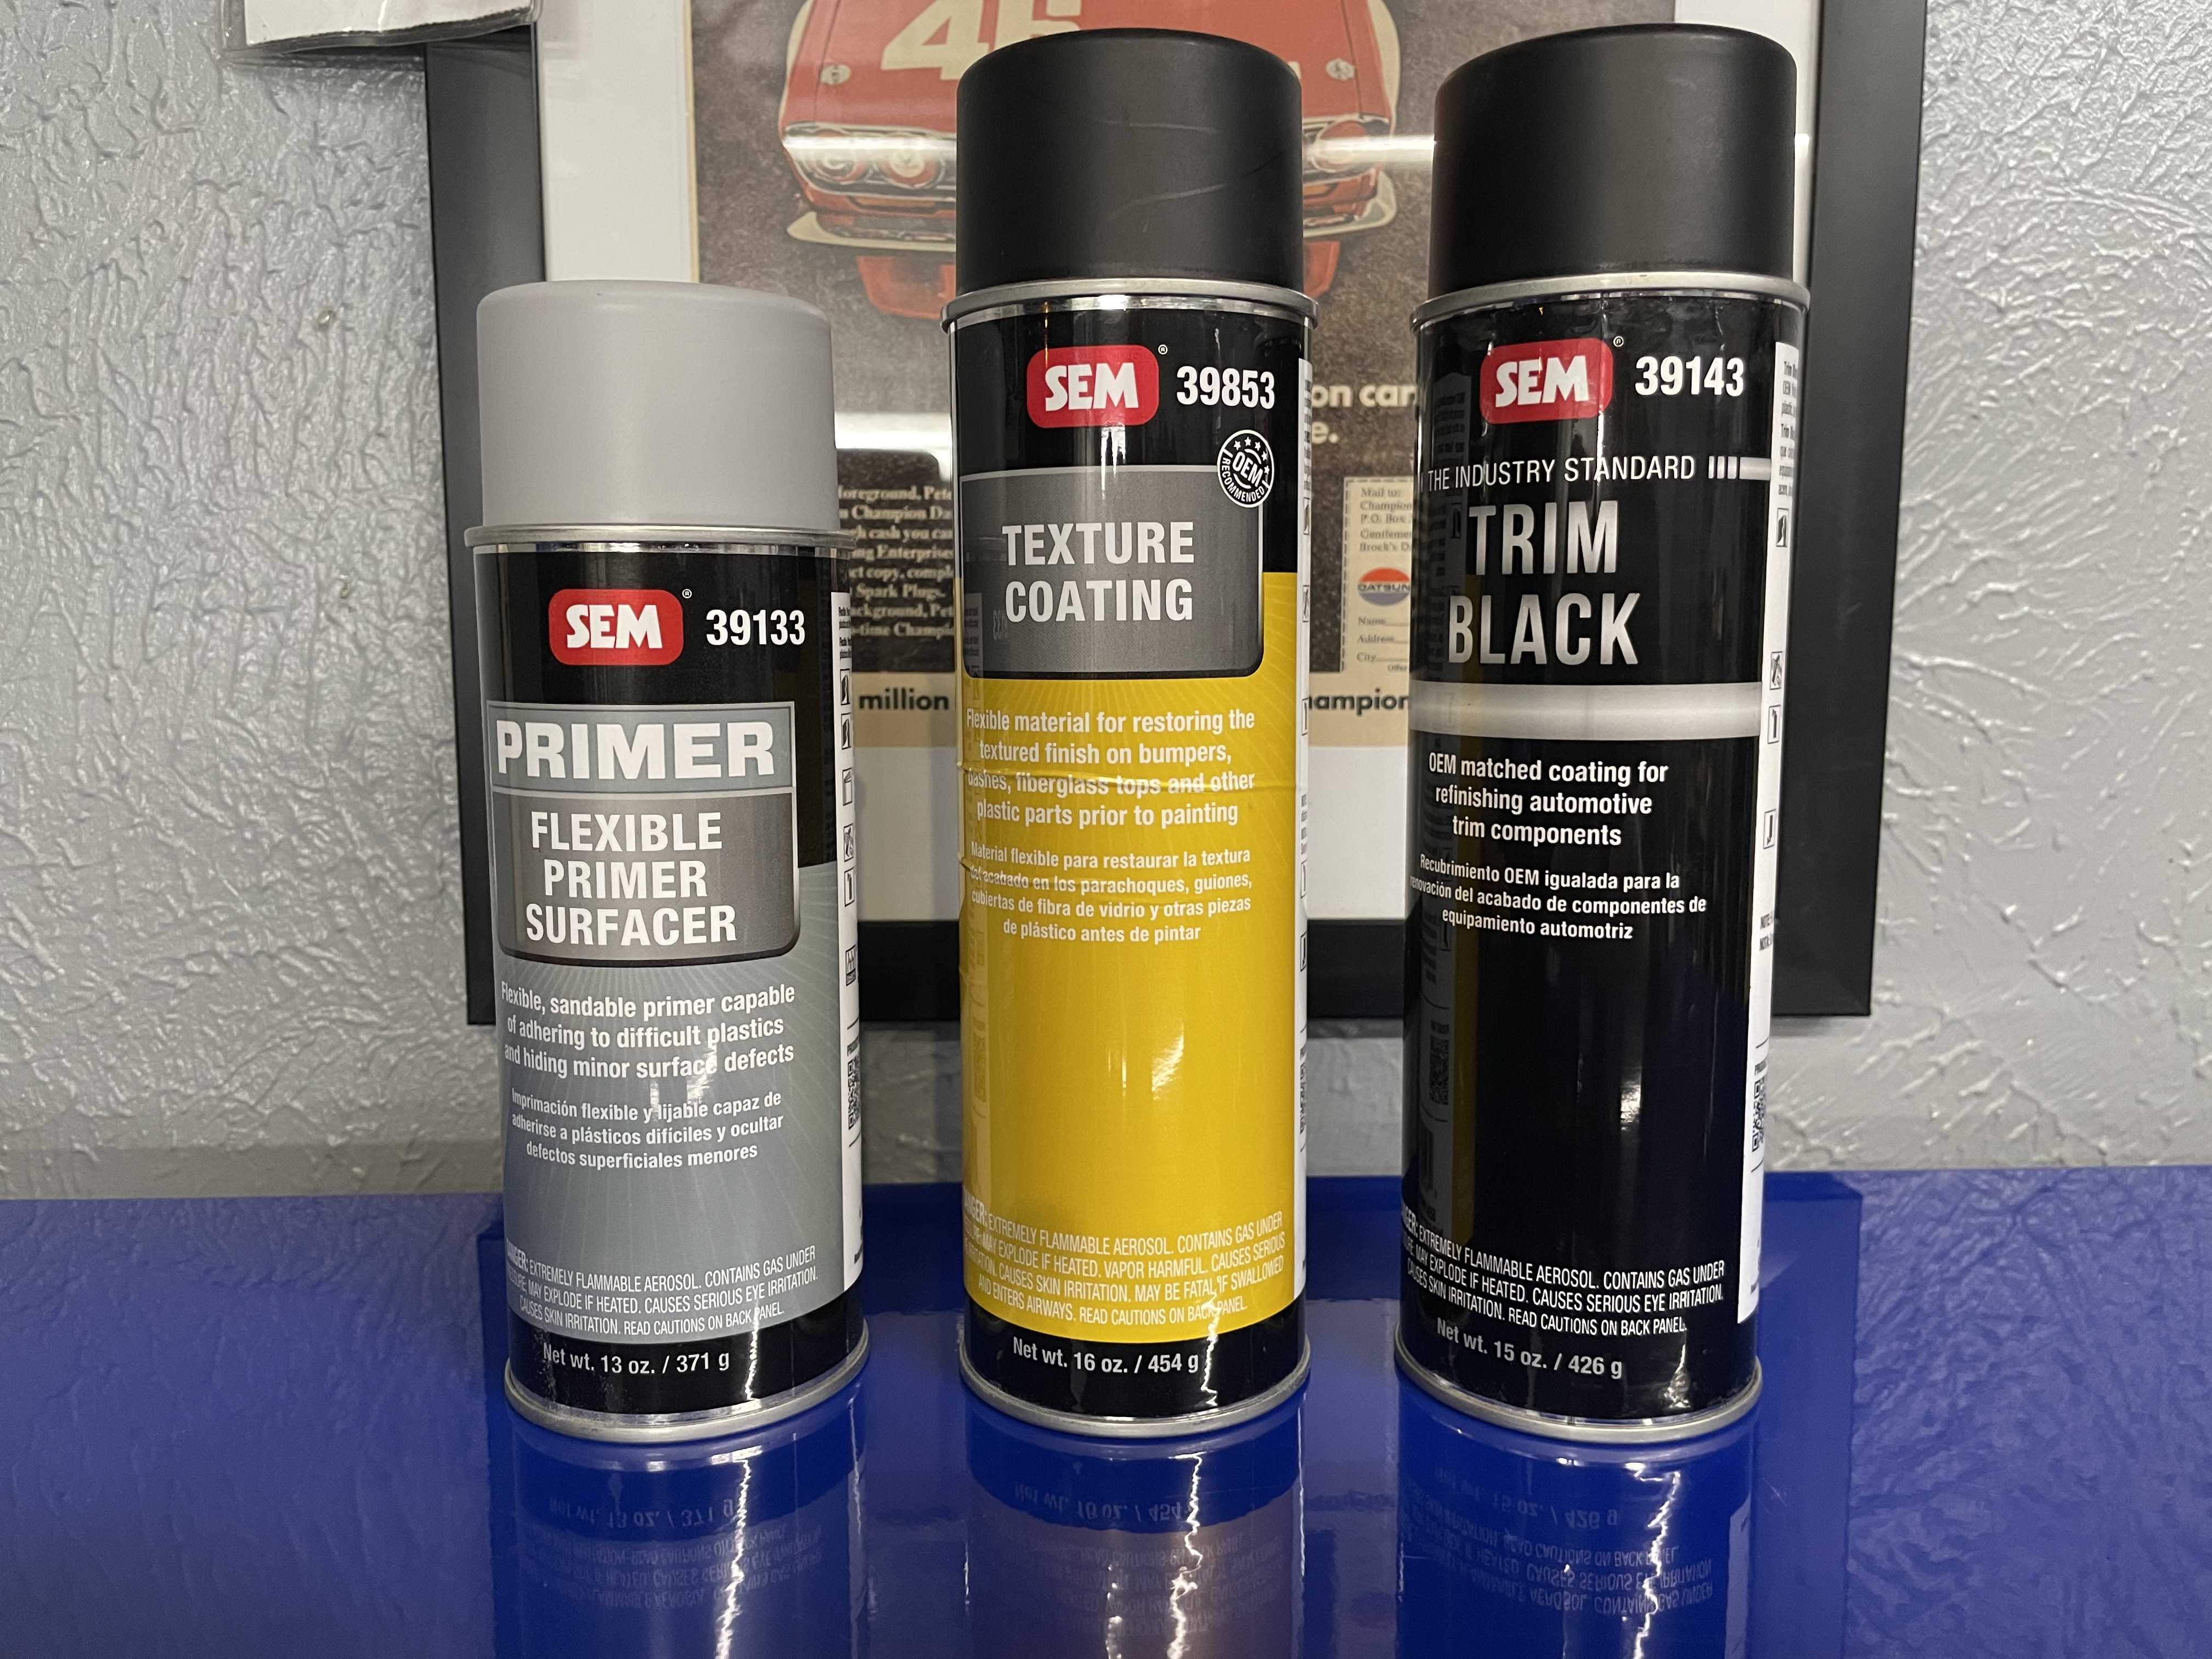
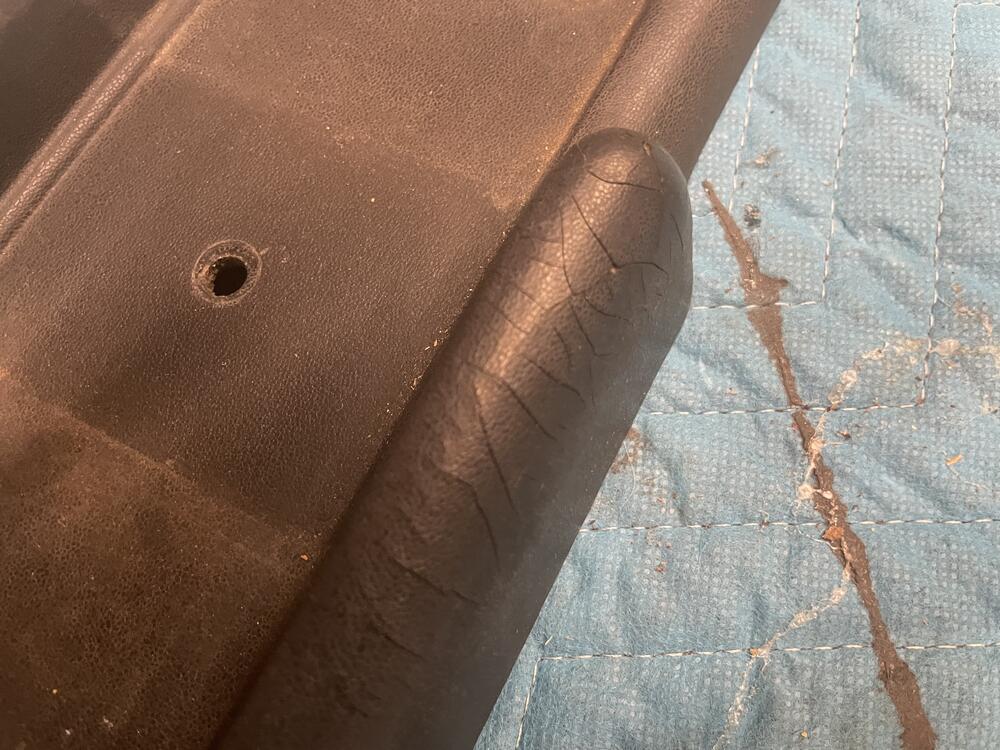
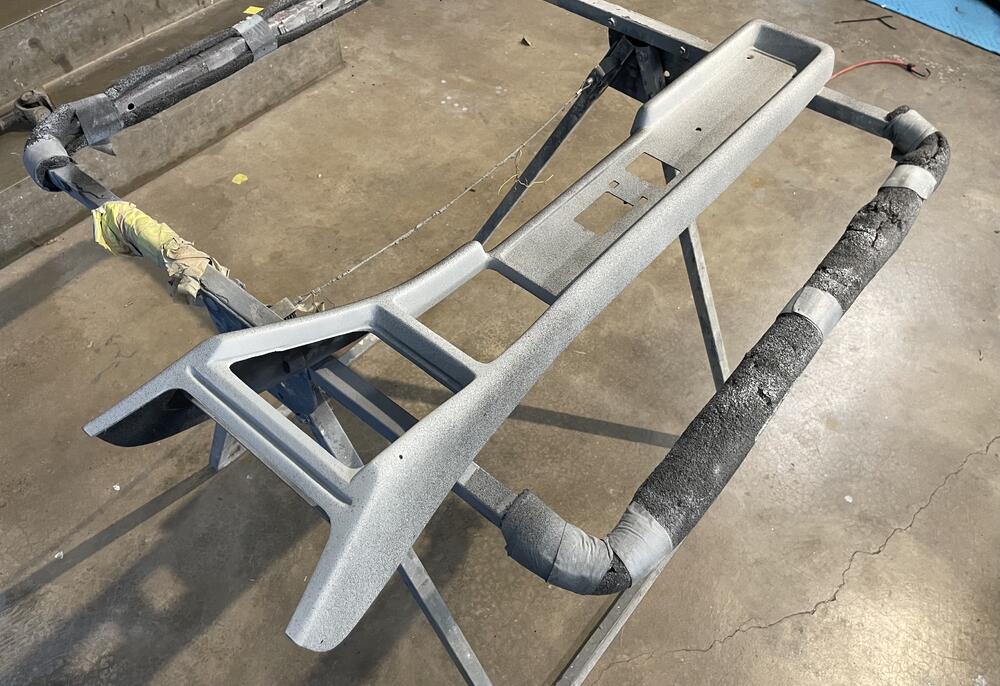
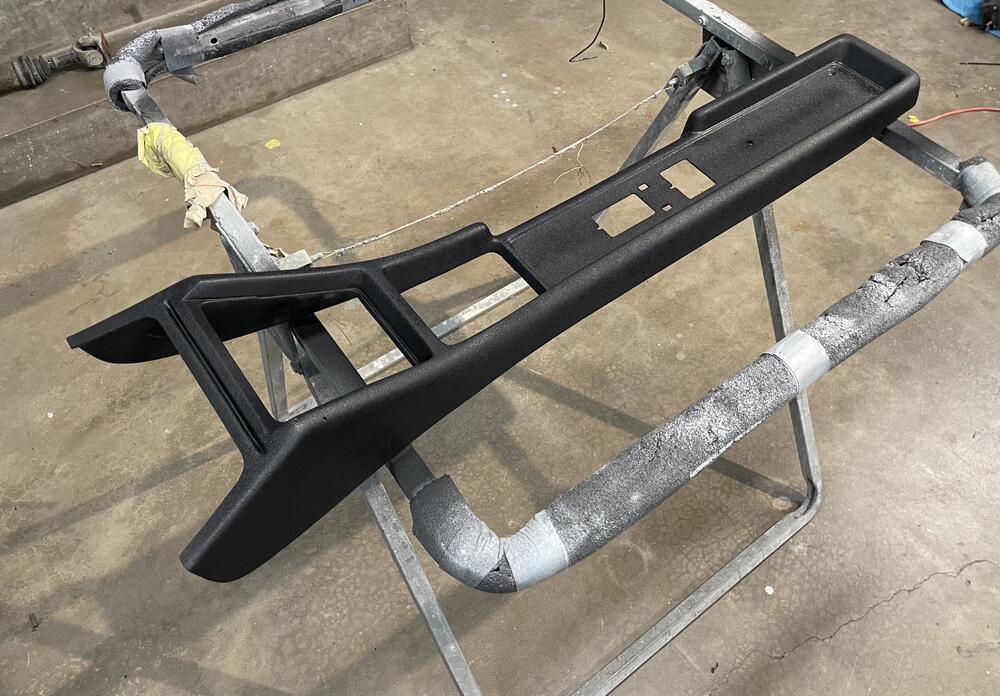
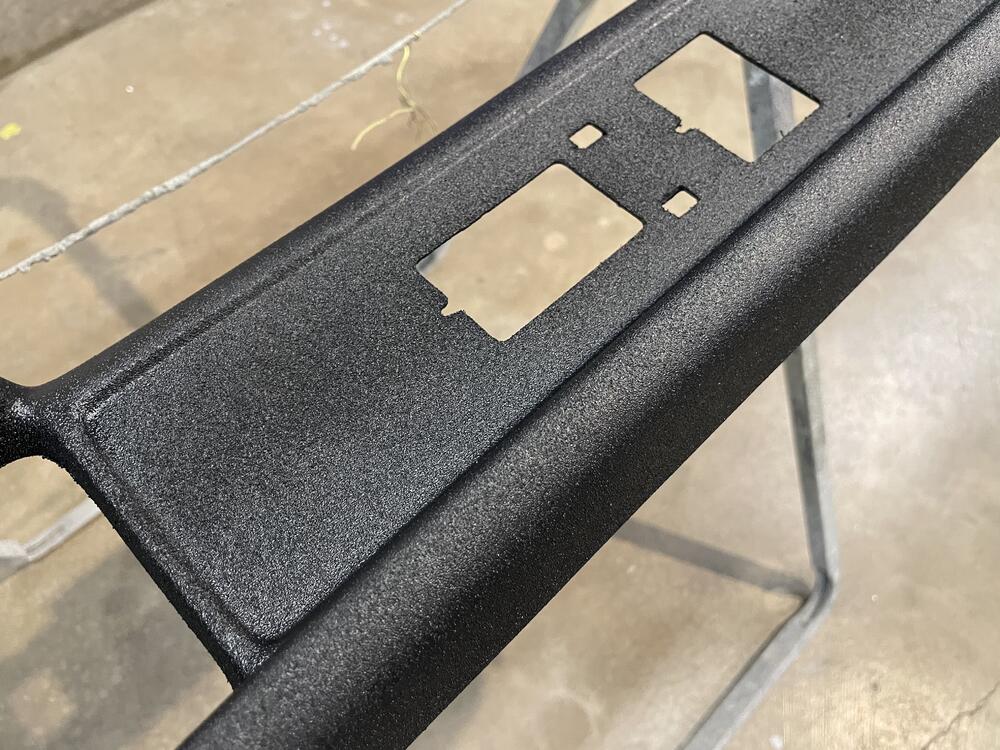
4 pointsThe original console was structurally in good shape, but sun baked causing the textured finished to crack. Since there aren’t many of these floating around I decided to restore it. I first sanded down the textured finish where it was damaged and used body filler to fill in the deeper hairline cracks. This was then top coated with a quality high build primer, and then sanded down to perfect the surface. SEM sells a great interior/exterior textured coating. Very lightly applying it, a thin texture was sprayed where the original had been removed. Finally it was top coated with a trim paint from SEM. Very happy with the results. If you look at the closeup finished photo, the flat area of the console behind the shifter opening received no textured finish and was left untouched apart from the primer and top coat. It now blends seamlessly with the new texture on the sidewalls of the console. Last photo is of the SEM products used to do this. Give it a go before buying a repop!

 4 points
 -
4 pointsTake the thicker gasket off when you go to the high lift cam. To be completely honest a good friend on here, who's dissappeared for some reason, told me to do it and run 93 gas and not to worry. He must have done it or wouldn't advise me to. That kind of guy, no guessing. @240260280 where are you? We (me) miss your knowledgeable comments. To hell with the negative people.4 points
-
2 pointsI haven't dusted off my compression ratio calculator for a few months, but if you want me to double check the numbers, just say the word. Just remember that I'm just a guy with a keyboard and an internet connection.2 points
-
2 pointsYour social studies teacher told you. He must've had aids and drank from the fountain.2 points
-
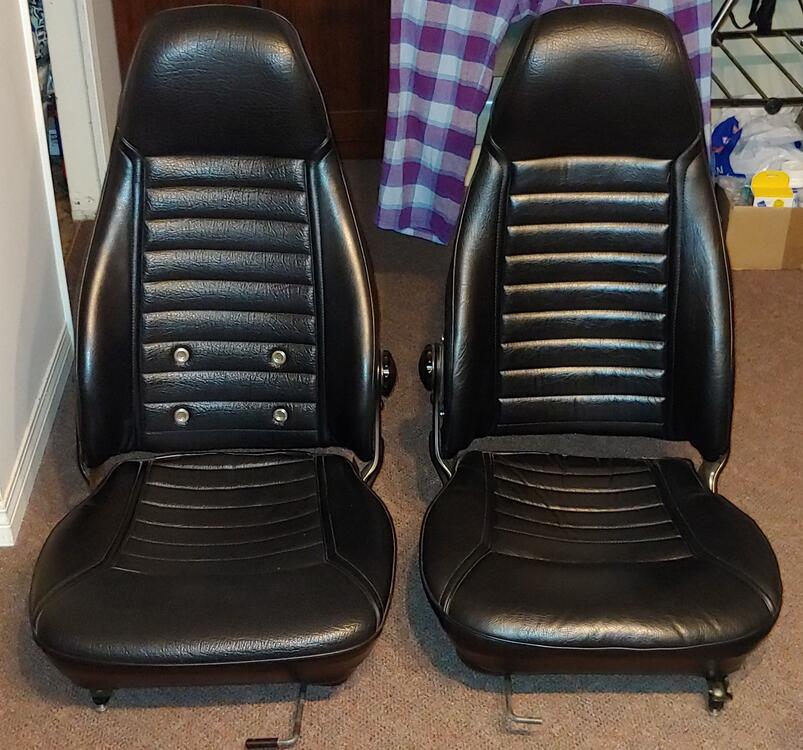
1 pointI don't agree about the gap between the seat back and seat cushion not being there. The amount of gap definitely depends on the seat angle and the angle you are looking from. Here is a picture of the original seats from my 7/70 car #6521. the LH seat has been redone but the RH seat is completely original. In the picture the seat back on the LH seat is set more forward making the gap larger from this viewing angle.
 1 point
 -
1 pointI’m already in way over my head! Help is always appreciated. Don’t worry if you’re a member of the forum and I have your number don’t be surprised by a call for assistance. Today’s accomplishments: -Tension Rods installed -Sway bar installed -Cleaned up and put POR-15 under clutch master area of body that had surface rust (will paint 110 Red tomorrow) . Need to do that under battery but that’s harder because the tray is welded in. No holes here or flaking just metal just stripped off paint with rust. Need a plan here. - cleaned and painted the brake booster will install post paint under clutch master area. Time to work on house projects so I get some credit when my wife get home.1 point
-
1 pointAgreed……A higher duration camshaft is supposed to help with detonation. The Isky Stage III regrinds work for me…..zero detonation, but all my heads are shaved P79’s. Like Zed Head says…..back the timing off till you get your performance camshaft, then come back to us and we’ll walk you through that installation. But, by all means, install the flat tops.1 point
-
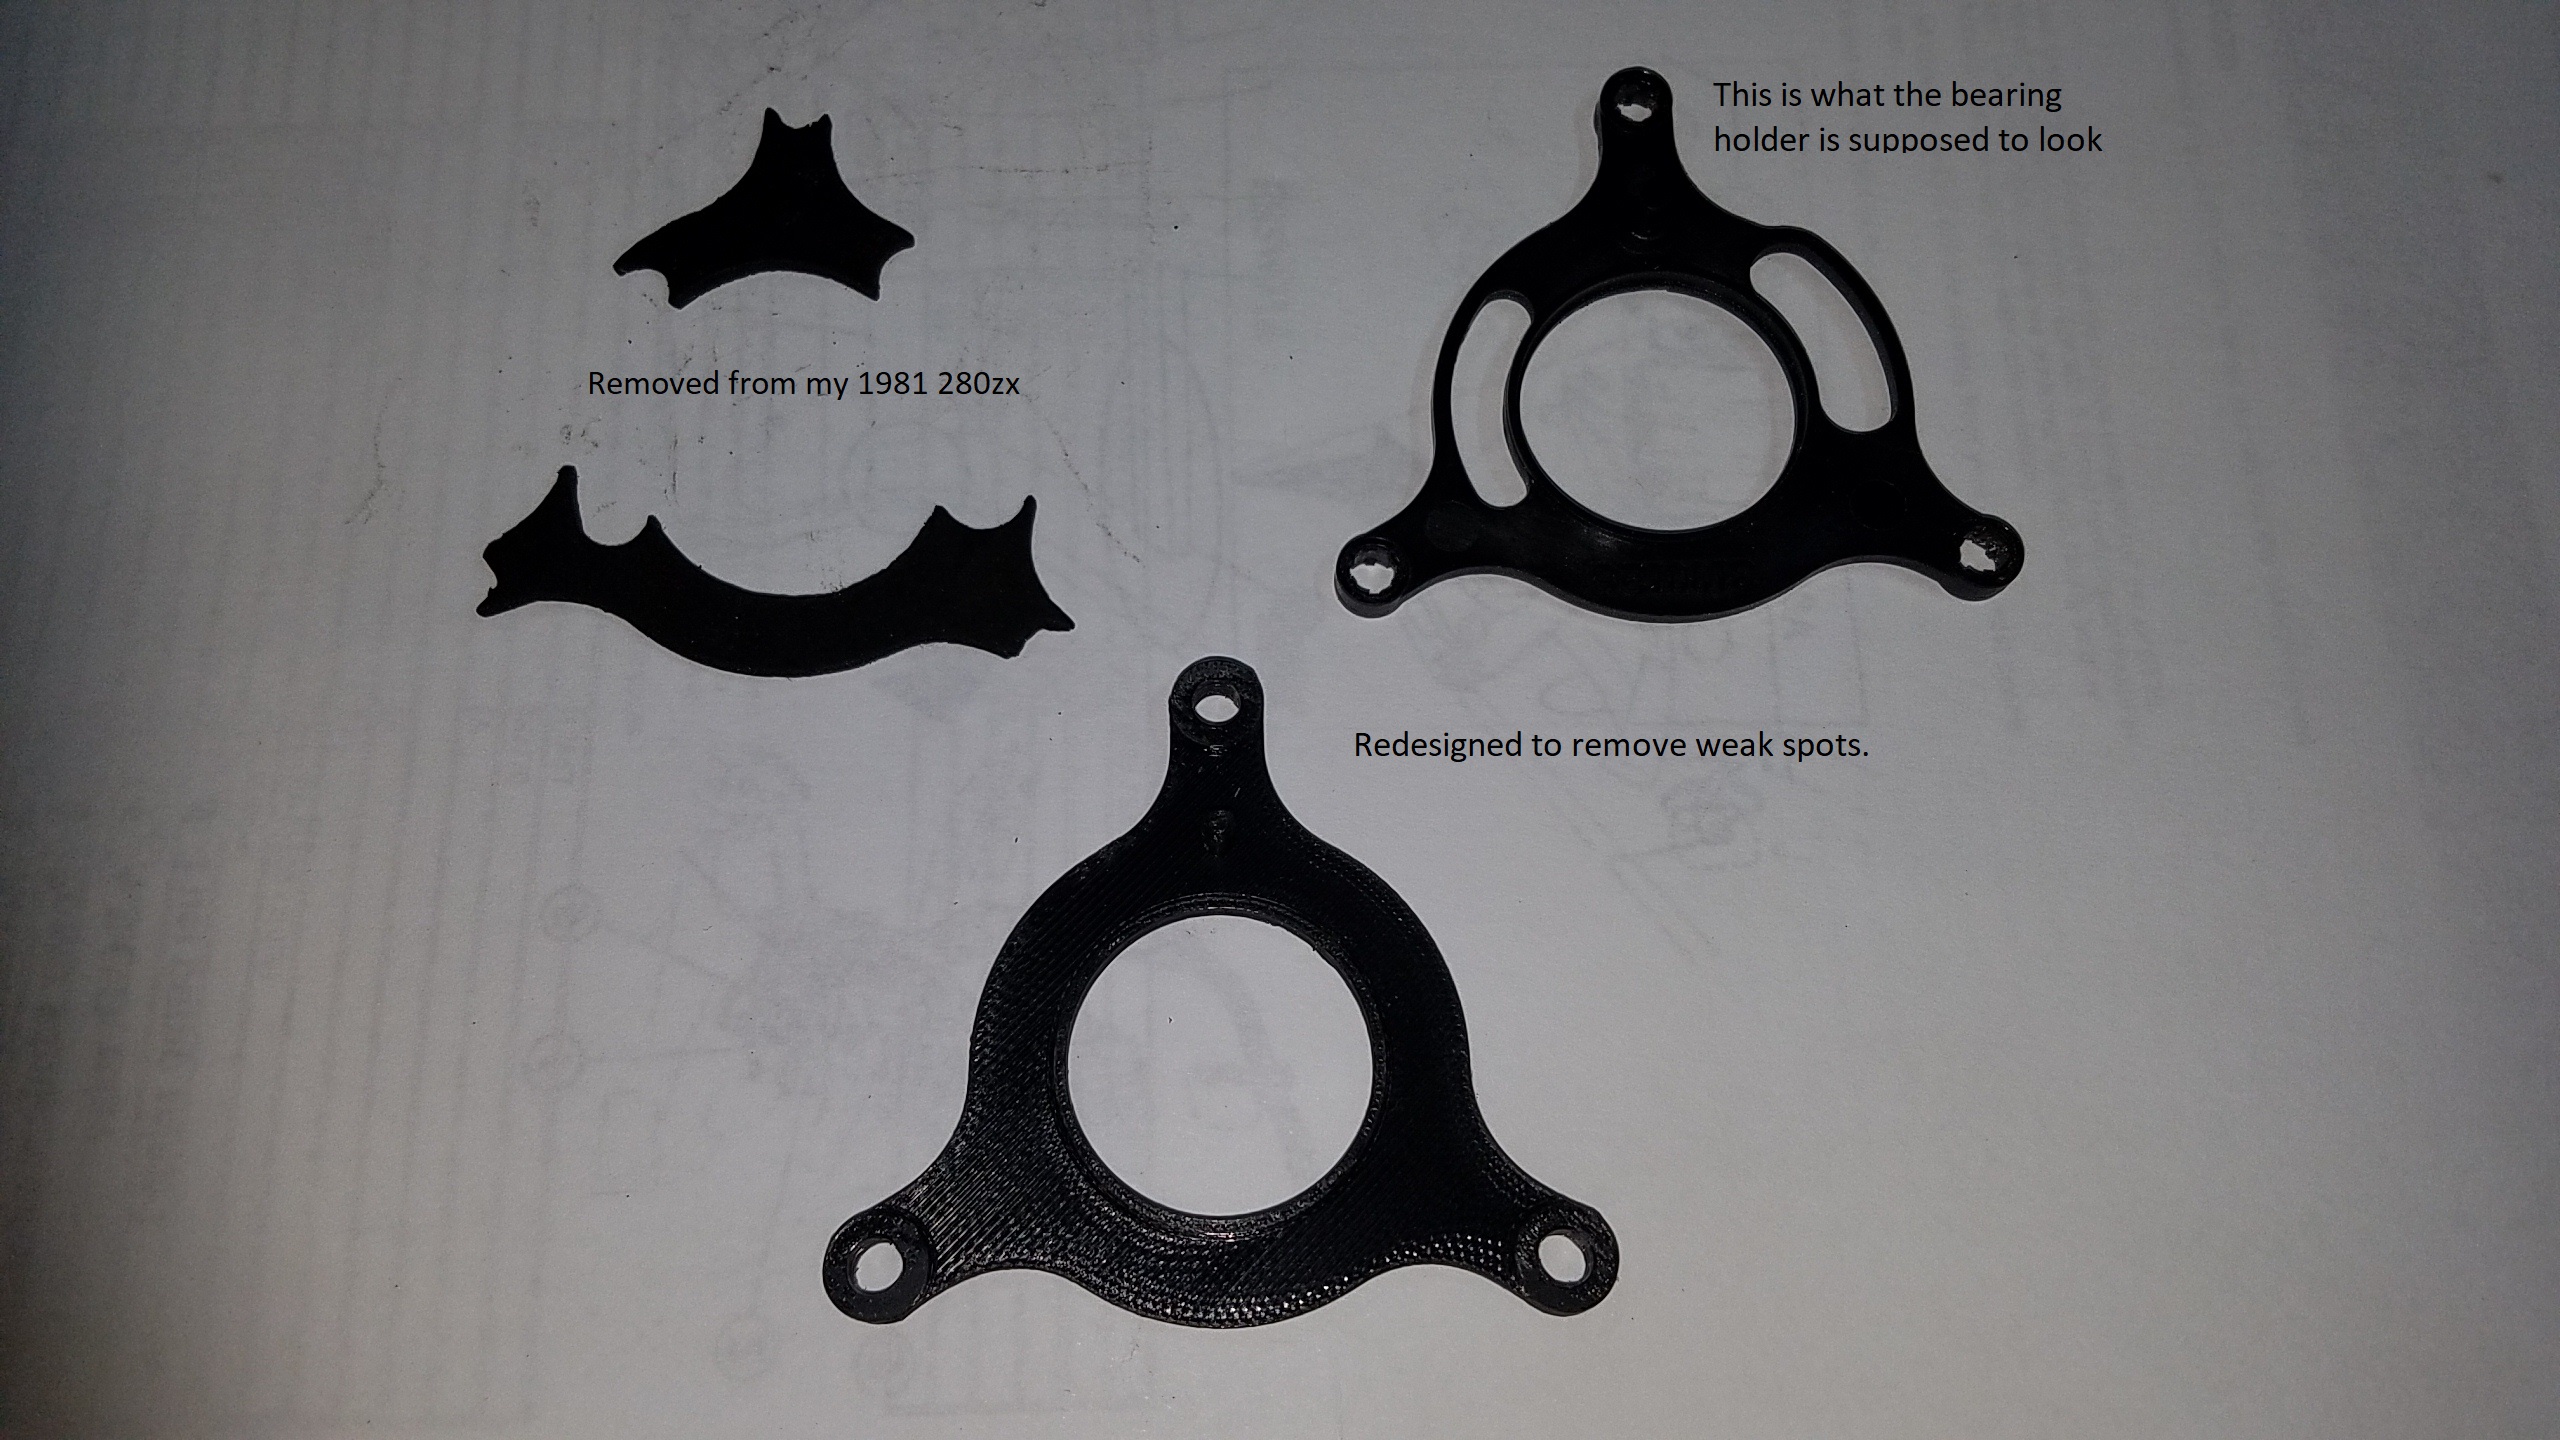
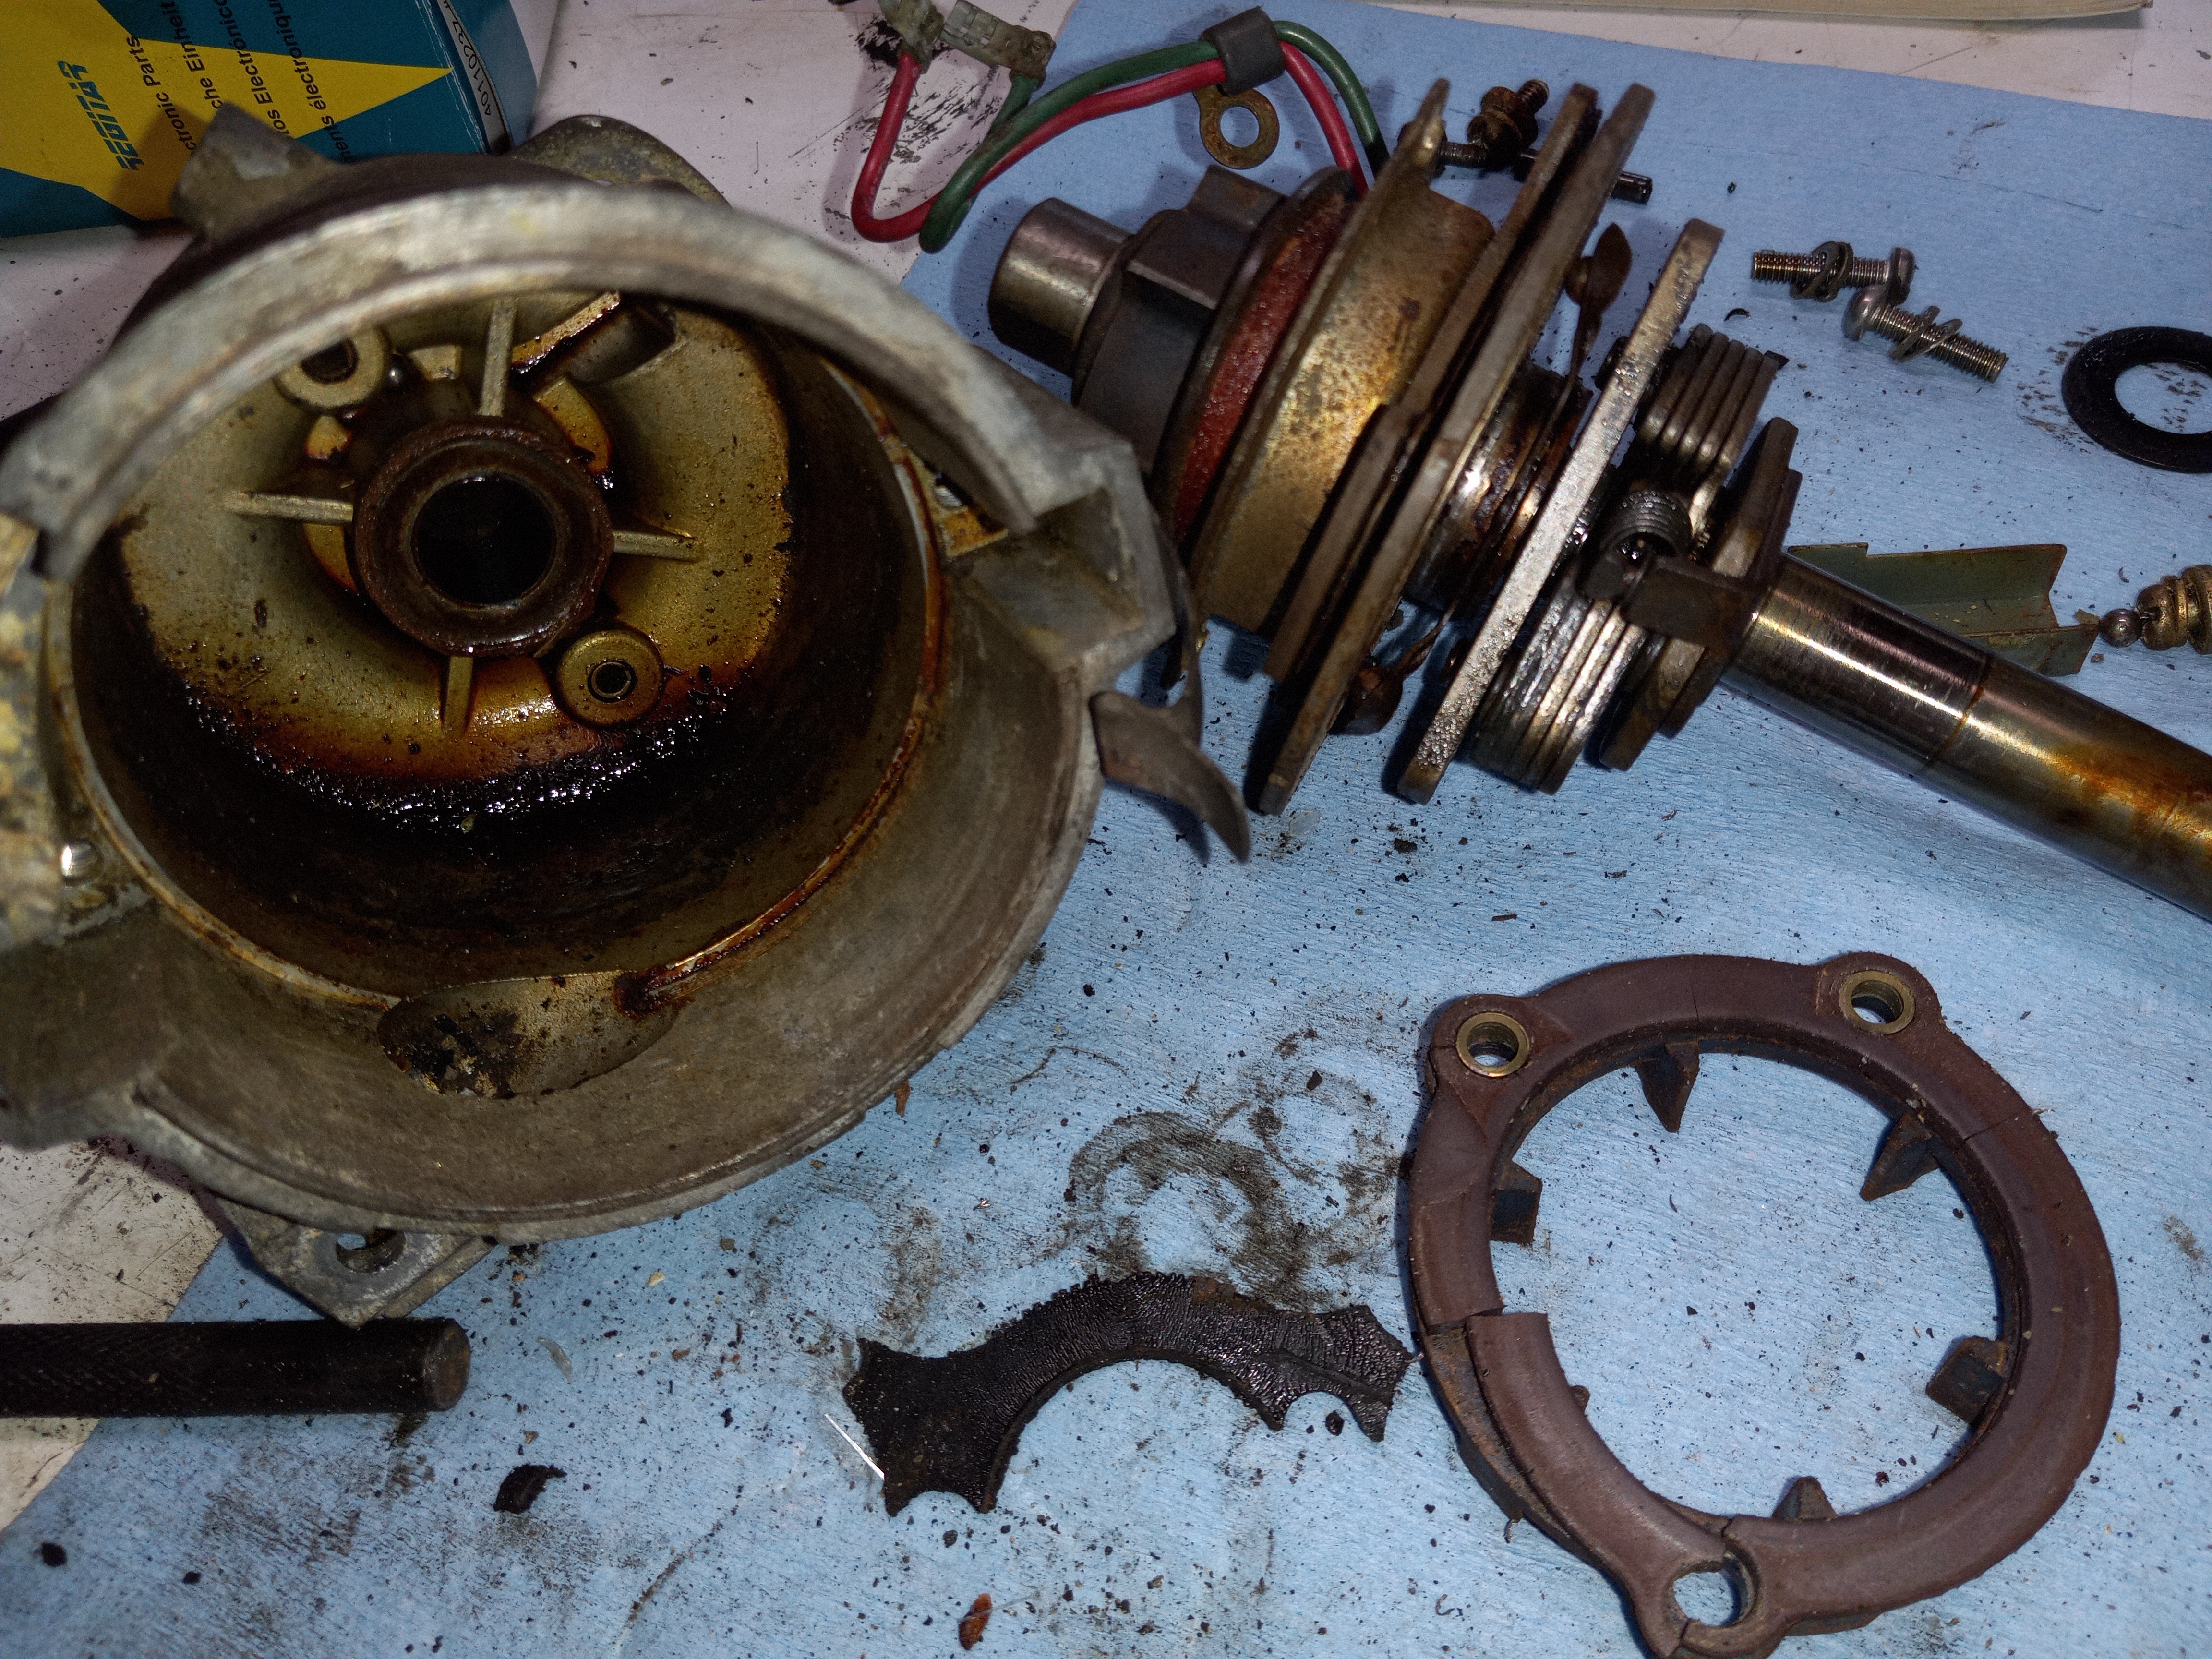
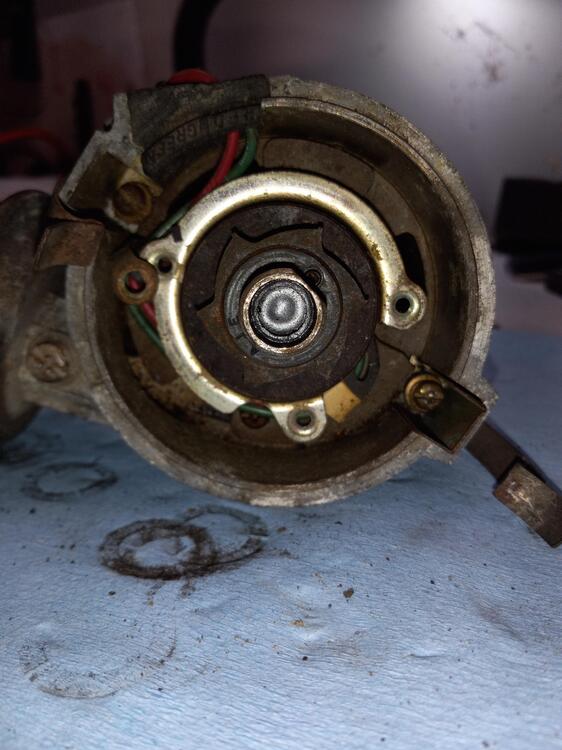
Greeting all. I joined this forum but have not spent much time on it. I have re-designed the plastic bearing retainer that is broken in your distributor. I sell them for 2.00. Here is a picture of my broken retainer, an origional and my re-designed retainer. I removed all the week spots and beefed up the holes where the ball bearing sit. This will fit any 4 or 6 cylinder matchbox distributor. HAS TO BE A MATCHBOX DISTRIBUTOR. I have these posted on another Z site or if you search 280zx distributor repair kit you will find my story. Good luck.
 1 point
 -
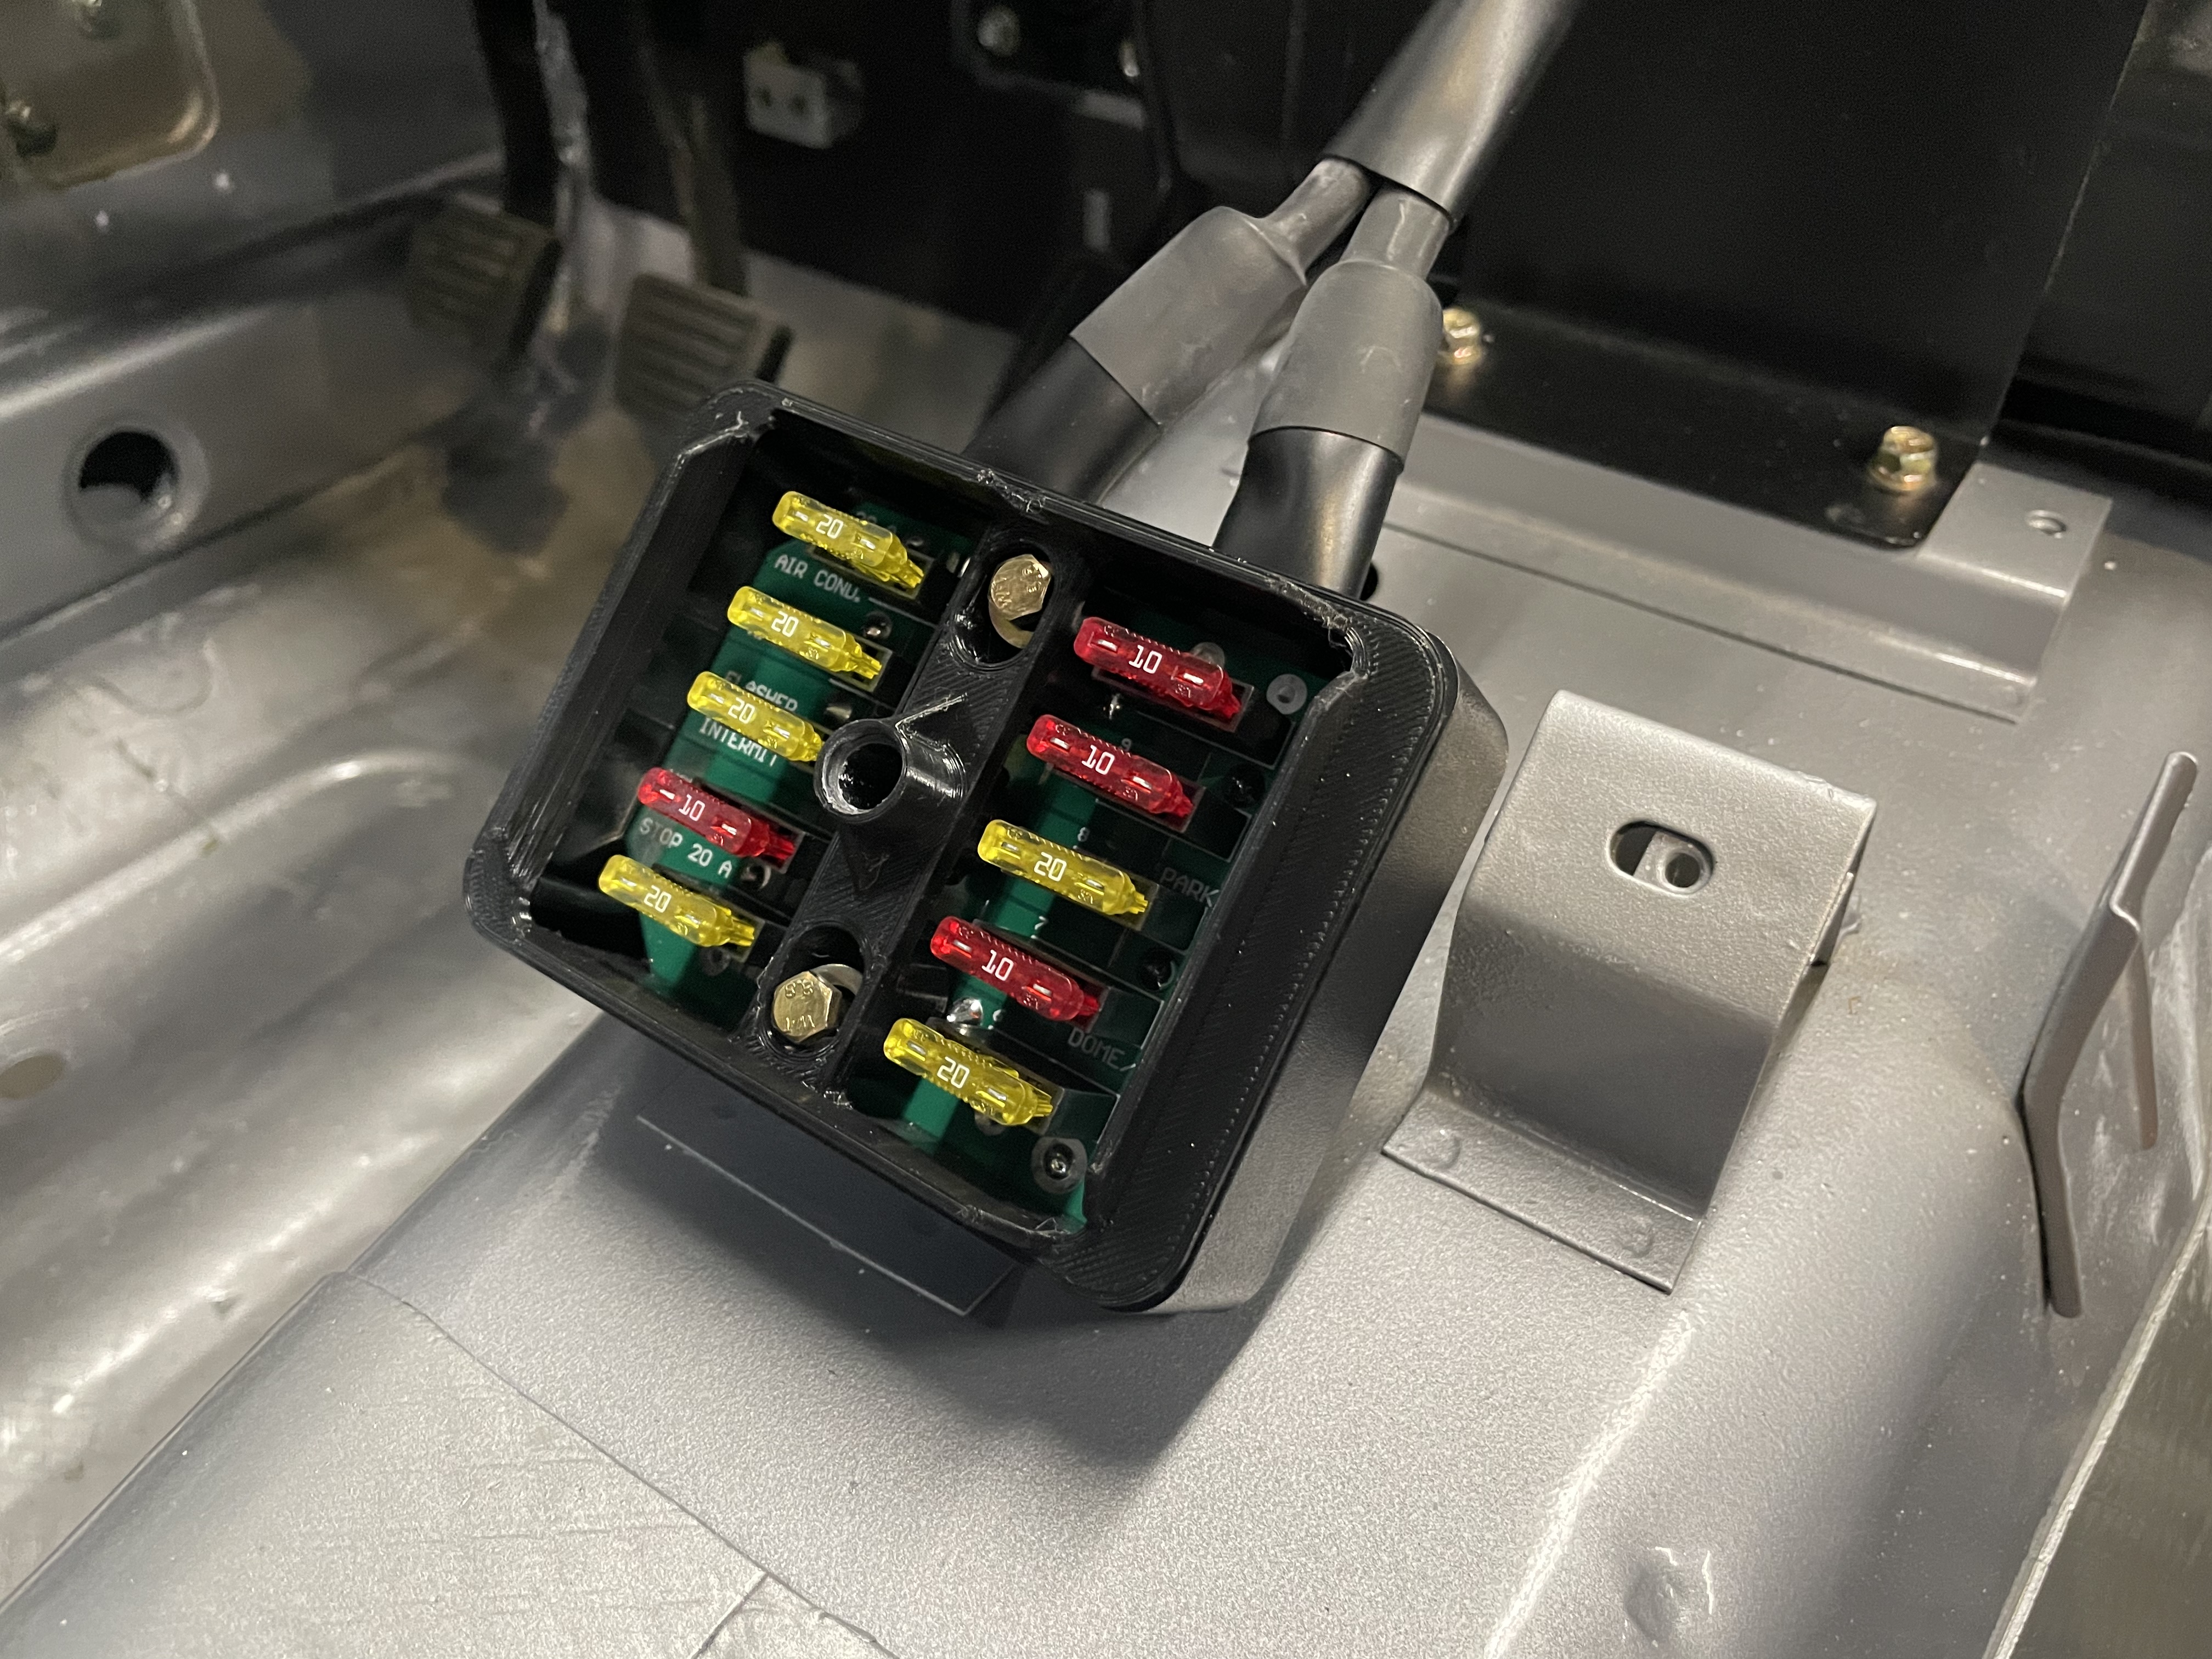
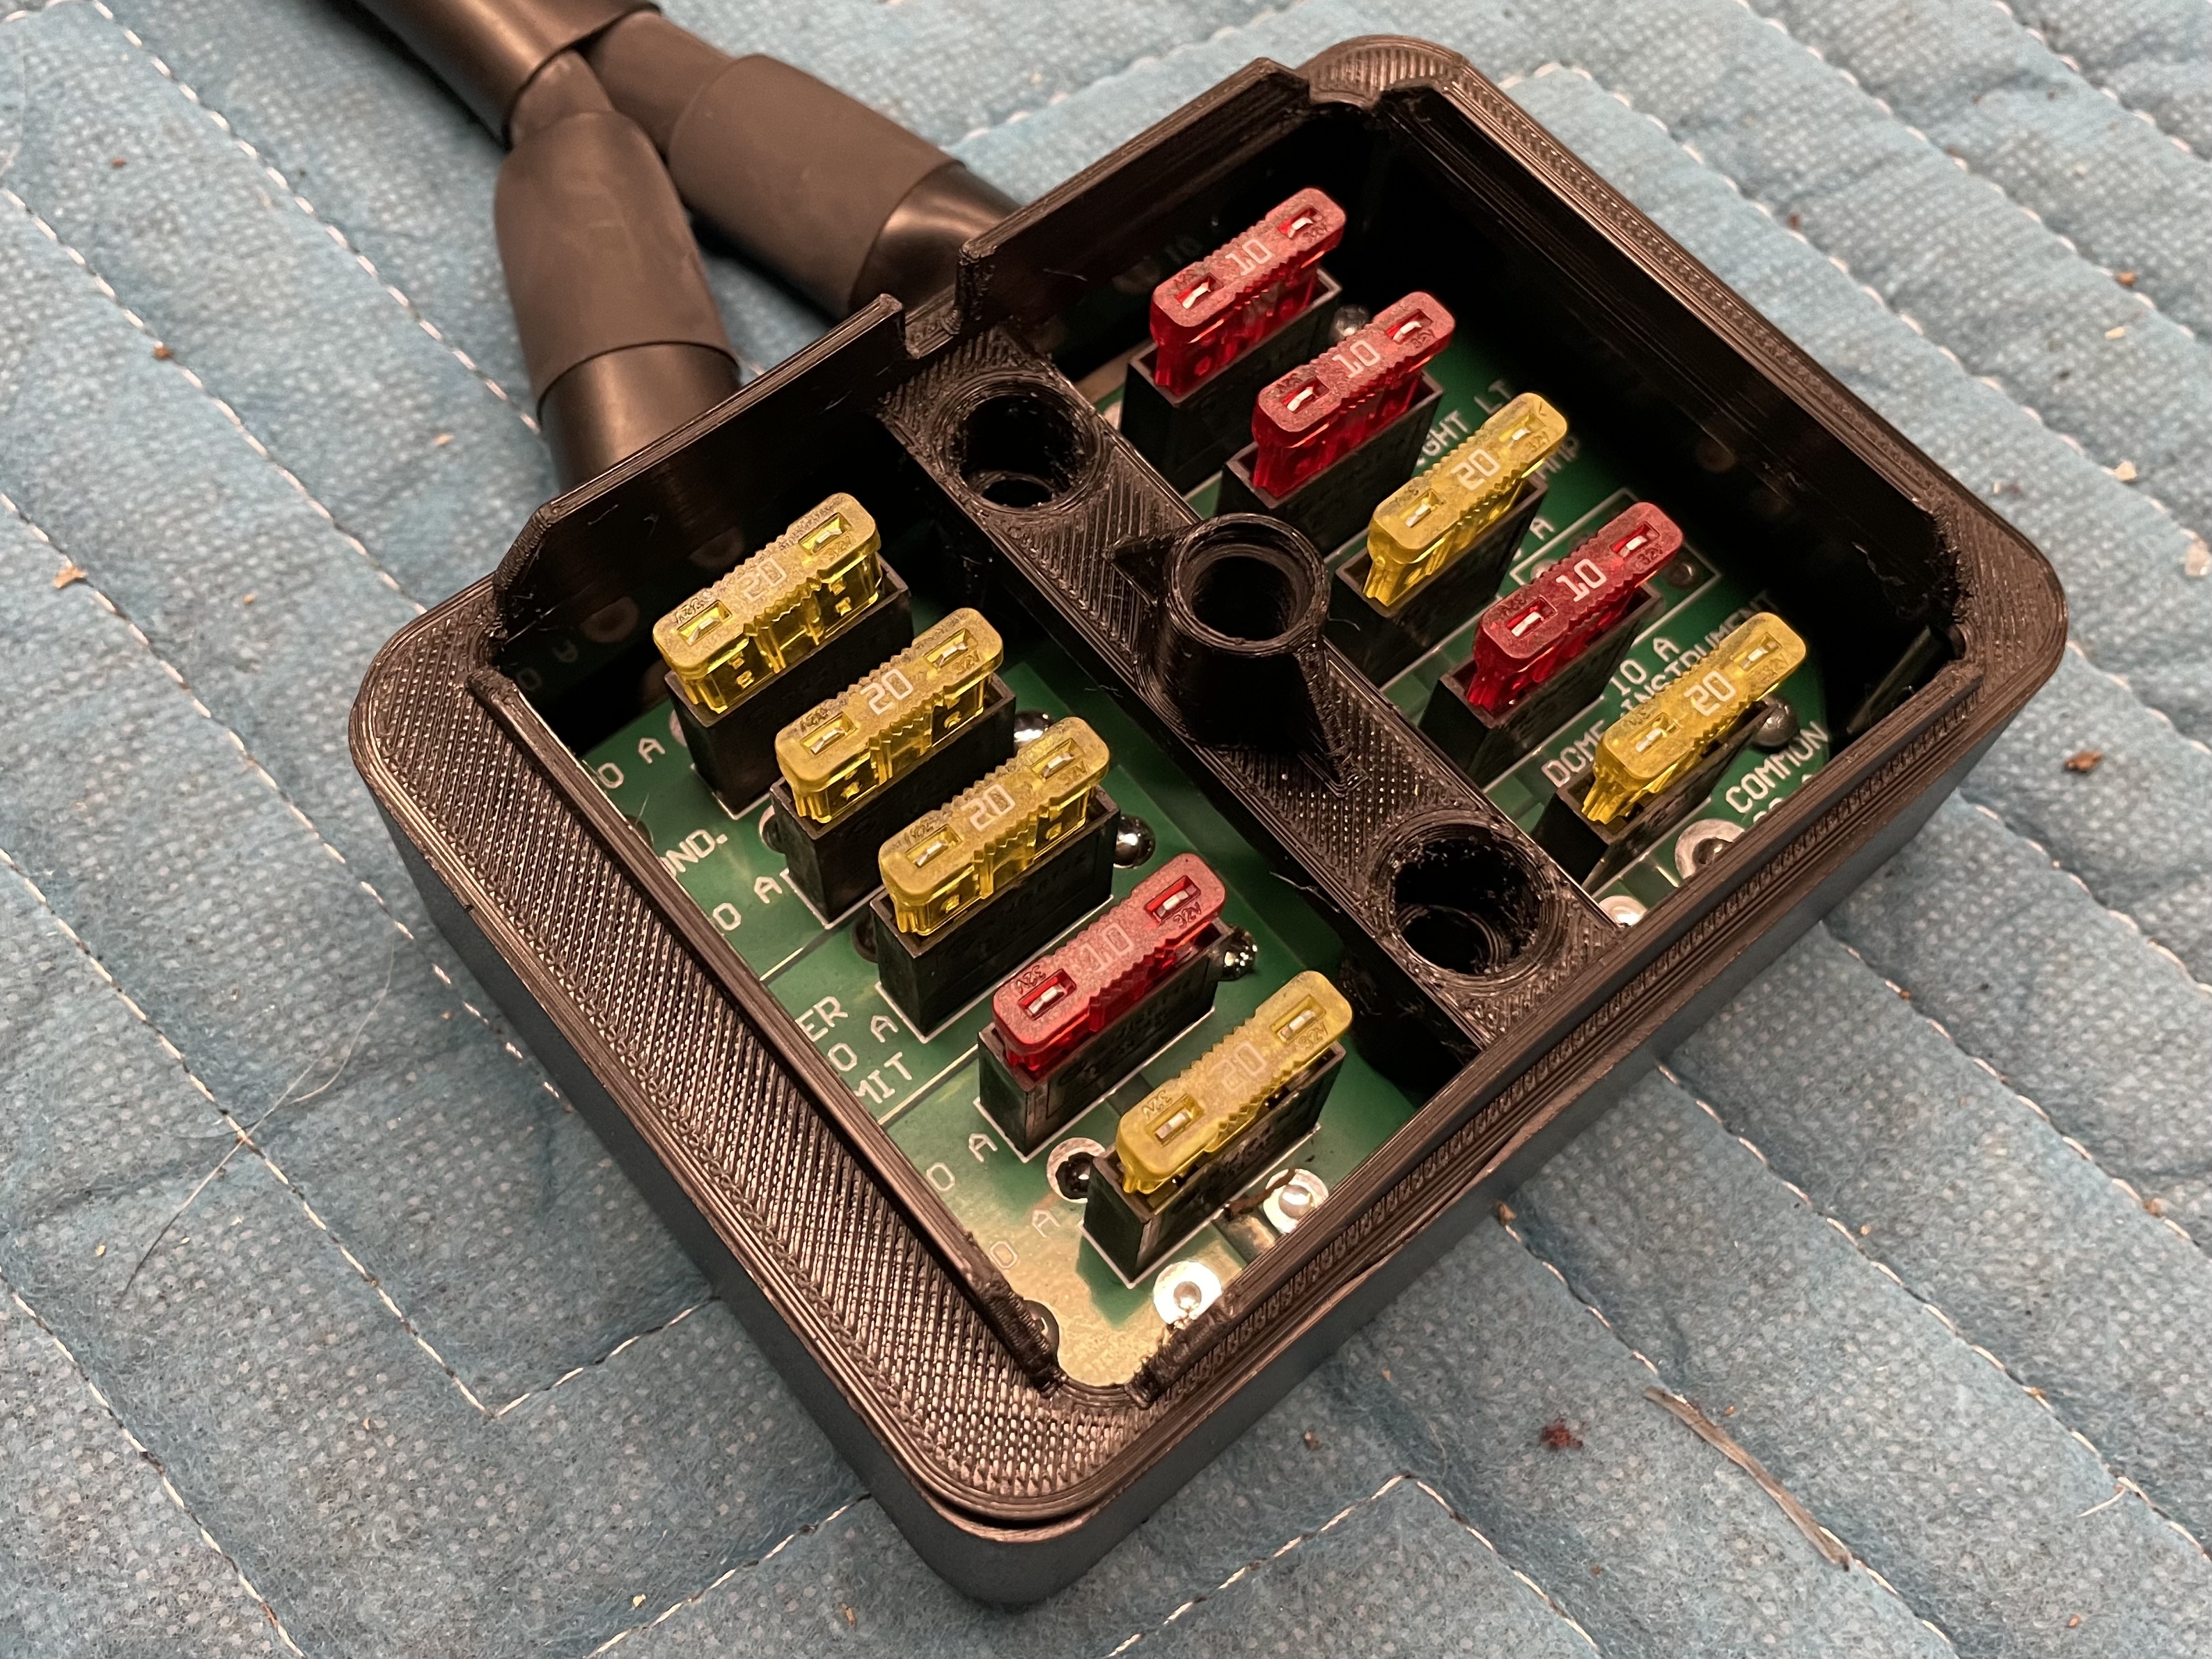
1 pointSecond print complete with a few minor tweaks. I’m very happy with the fit. Just need to make sure it’ll clear the ash tray

 1 point
 -
1 pointLOL. Well I hope I didn't come off as pushy, but I think it's the right thing to do. Haha! As for that big arse vacuum bottle... I didn't like it either, so I modified all my climate control stuff (except the cable driven heater core valve) over to little electrical servo motors. I think I posted some pics of that somewhere sometime. If you can't find anything, let me know and I'll see what I can dig up.1 point
-
1 pointI was about to complain that doing a head gasket would need me to retime the engine and all that jazz. But I just realized the cam gear comes off regardless!1 point
-
Not truly fair, apples to oranges. Now if you compare a Z4 coupe then the answer is probably yes. Plus you dont need to adjust the jets at the continental divide, pull the choke or huff exhaust fumes. But I still like my 240s1 point
-
1 point
-
1 pointI have never had Rebello not answer the phone. I suppose the Z Car Garage is another engine builder in NorCal and they have never failed to answer either.1 point
-
1 pointThat conversation has been going on for decades. I think that regional fuel quality might play a part as well as altitude and temperature, plus timing and other tuning factors. You won't really know until you try it, basically. I'd just make sure you're conservative on your ignition timing, including the fine details like the rate of centrifugal advance and vacuum advance. There are many variations in timing curves out there in the world of Z distributors.1 point
-
1 pointFirst print complete. A little tweaking on the hole spacing and it should be good. I need to double check that the overall height isn’t an issue for the console.

 1 point
 -
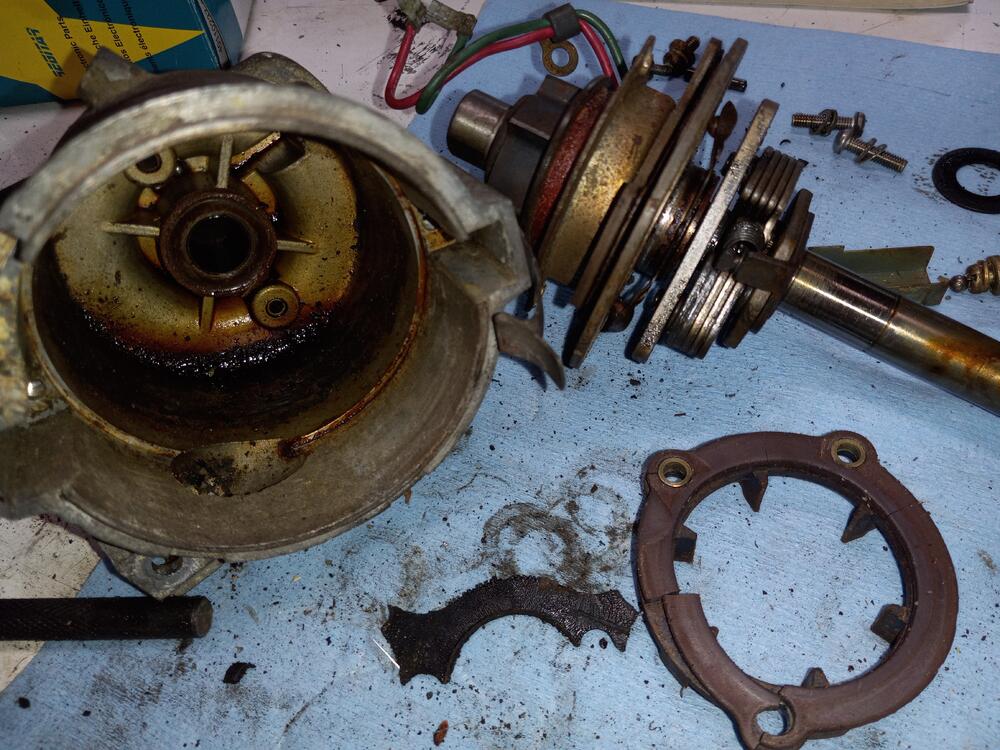
Thanks for the information Zed, Here is where i am today , I pulled the Dizzy and looked it over I figure welp at the very least I need to get the moister and dirt out of there. Below are the pictures of what it looked like , as I started to dissemble it I noticed it had been messed with the screws were rounded and the bottom pin was burred. After taking everything apart and cleaning all the parts put in the new ignition module i purchased in anticipation of this issue , I resembled it to see if it helped , or at the very least to send out to get rebuilt. when I put it back in the car voila I GOT SPARK! I have fuel pressure ....... but its still not running . a little fuel in the intake manifold and hot dog shes running . so now i have to chase down the fuel issue. side note the dizzy did have a broke magnet and it will need to be replaced the little bearings also were cruddy, once i get her up and running again I would take her on any long trips with out fixing those parts better. Again thanks for all the input guys .
 1 point
 -
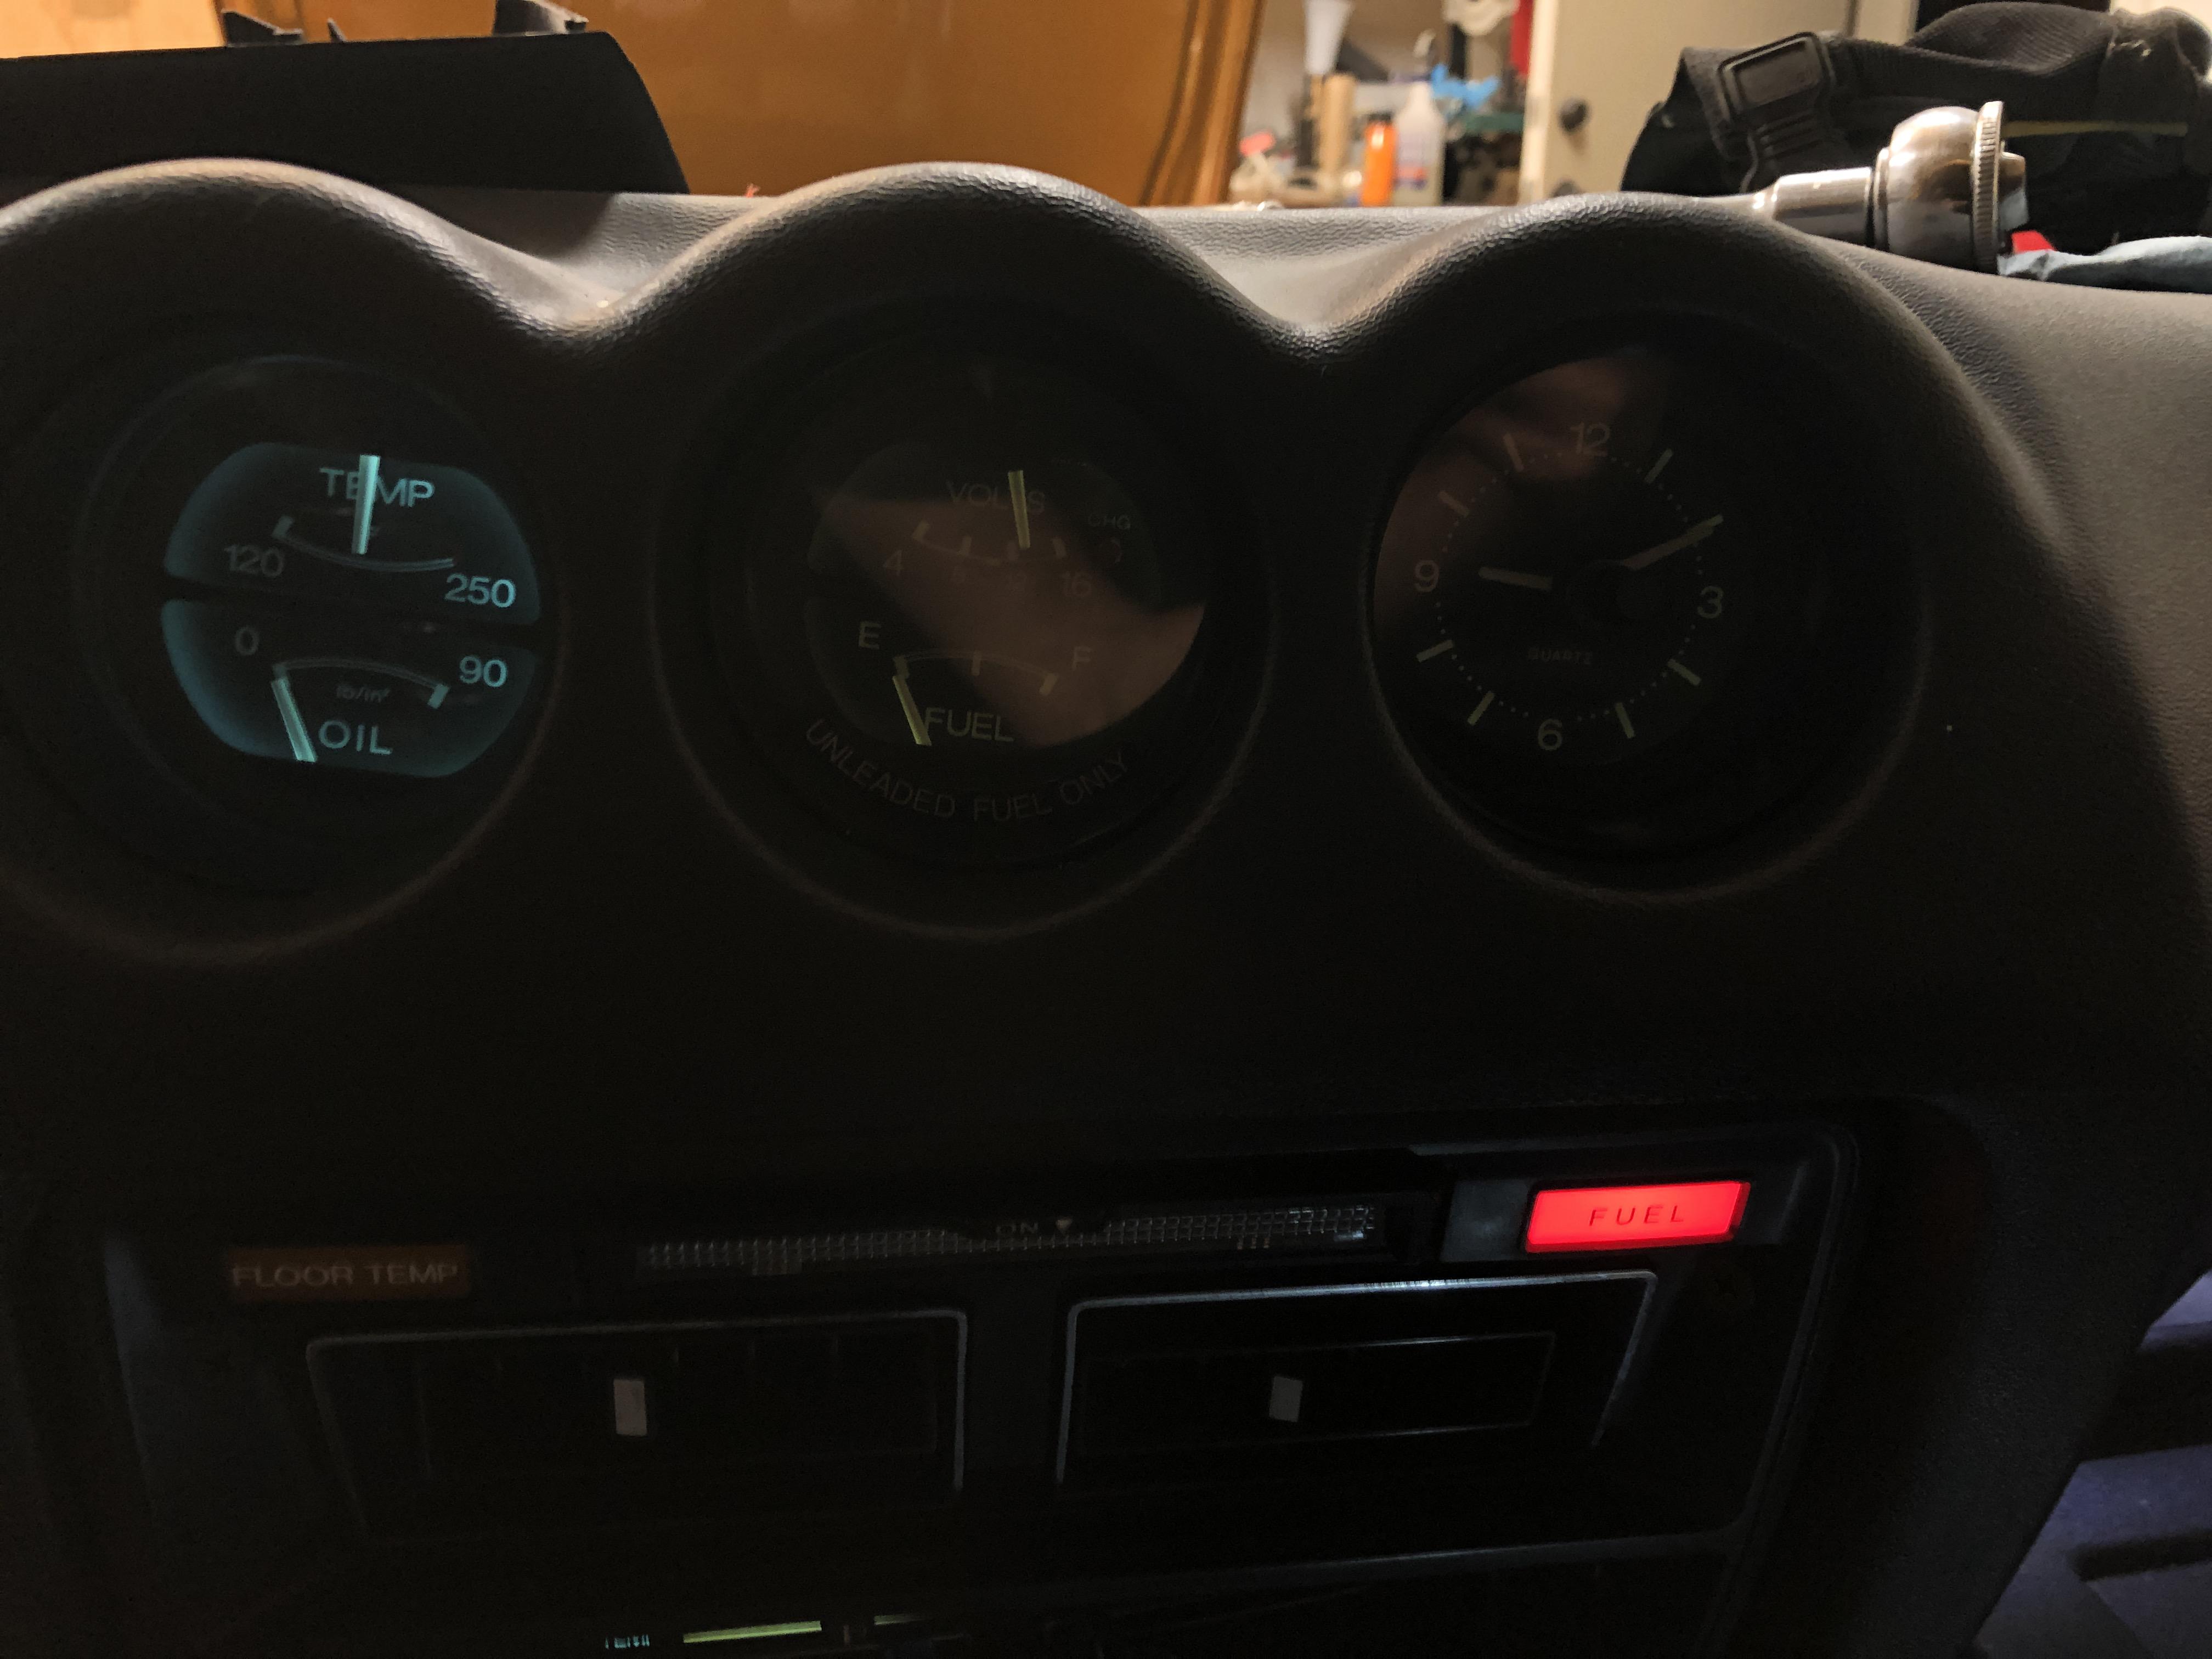
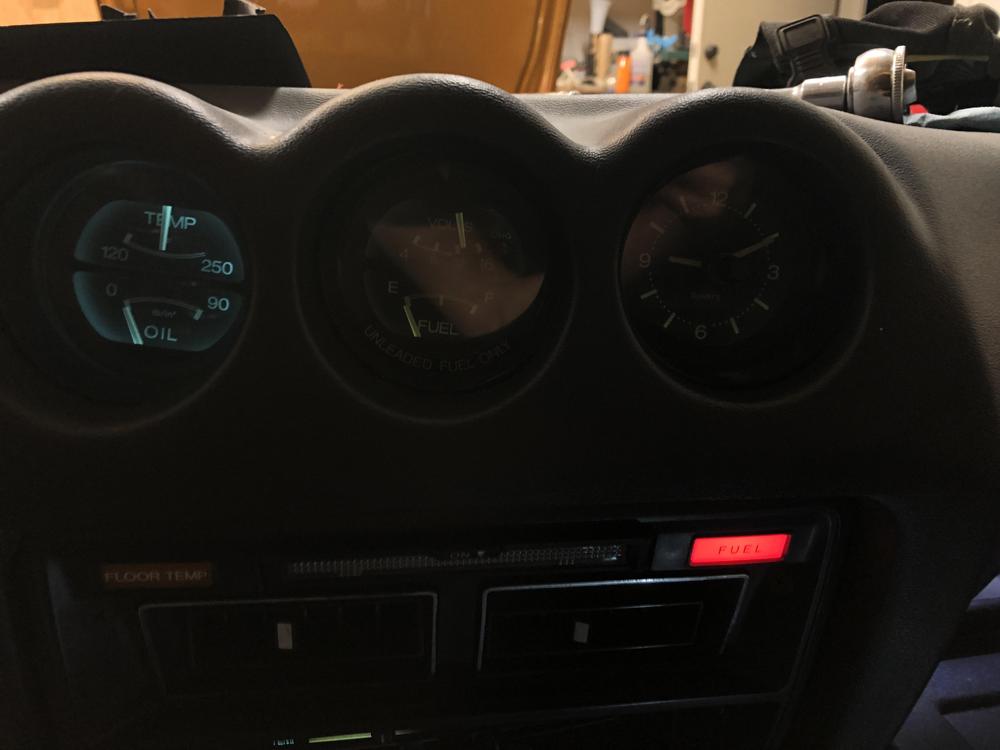
Thought to share the fuel light on when fuel is near empty. It works beautifully. I’ve been chasing the running rich/powder/sooty on first 3 cylinder and kept an eye on th fuel light to see if it works inside the fuel tank. As the gauge dropped a bit to the left of near empty, light gradually brighten. So cool. Rushed to gas station to get another 2 gallons and fuel light is off. So nice when things work the way you expected. Wonder how many gallons/mileages when the light is on? reminded me of a scene of Kramer and Jerry in one of the episodes where they test drive a car. It keeps running and running for hours even though the warning light is on. ? Only if it was true in real life !!
 1 point