Leaderboard
-
zKars
 Subscriber
 6Points3,770Posts
 -
davewormald
Free Member2Points128Posts -
rturbo 930
Free Member2Points355Posts -
Mark Maras
Free Member2Points3,719Posts


Popular Content
Showing content with the highest reputation on 05/24/2021 in all areas
-
Entire thread is tongue in cheek I assure you. I cannot always be counted on to do the right thing, but in this case, I know what to do. And in this case it involves charging my customer a nice markup for new bolts.3 points
-
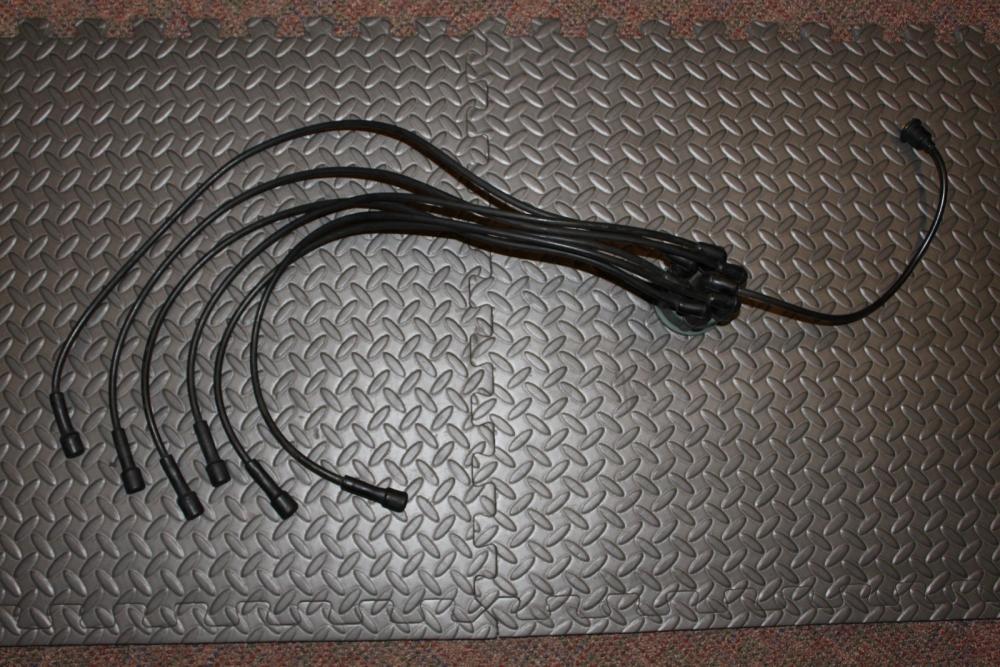
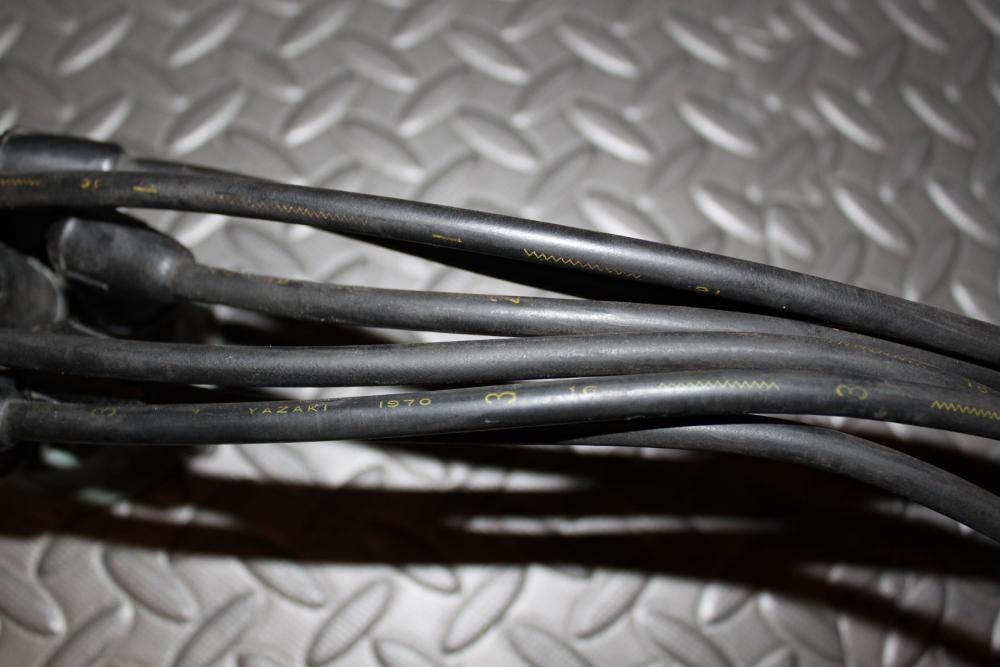
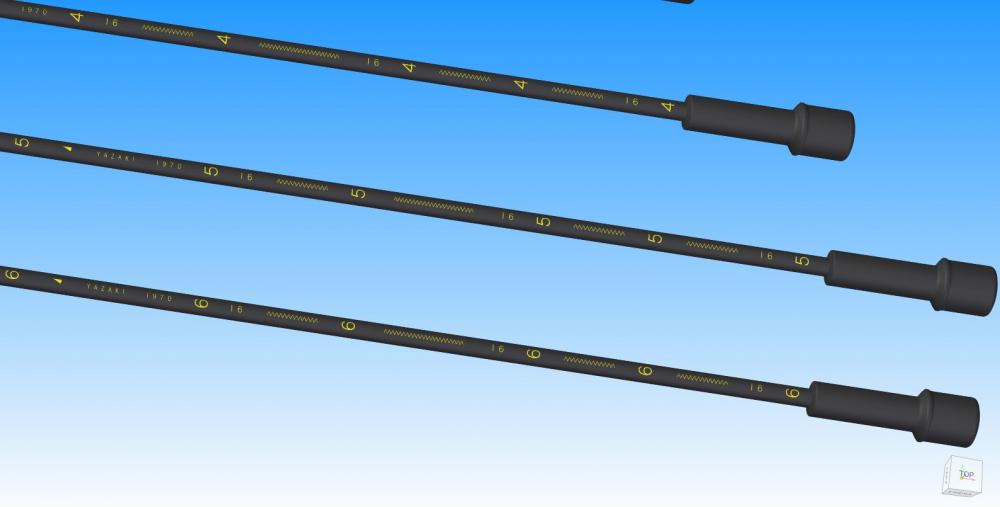
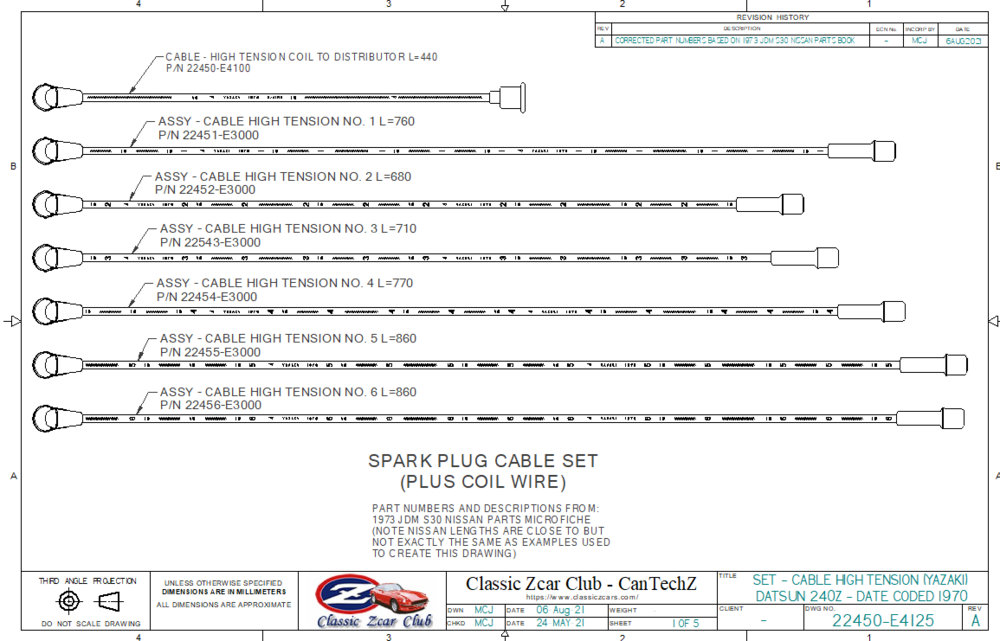
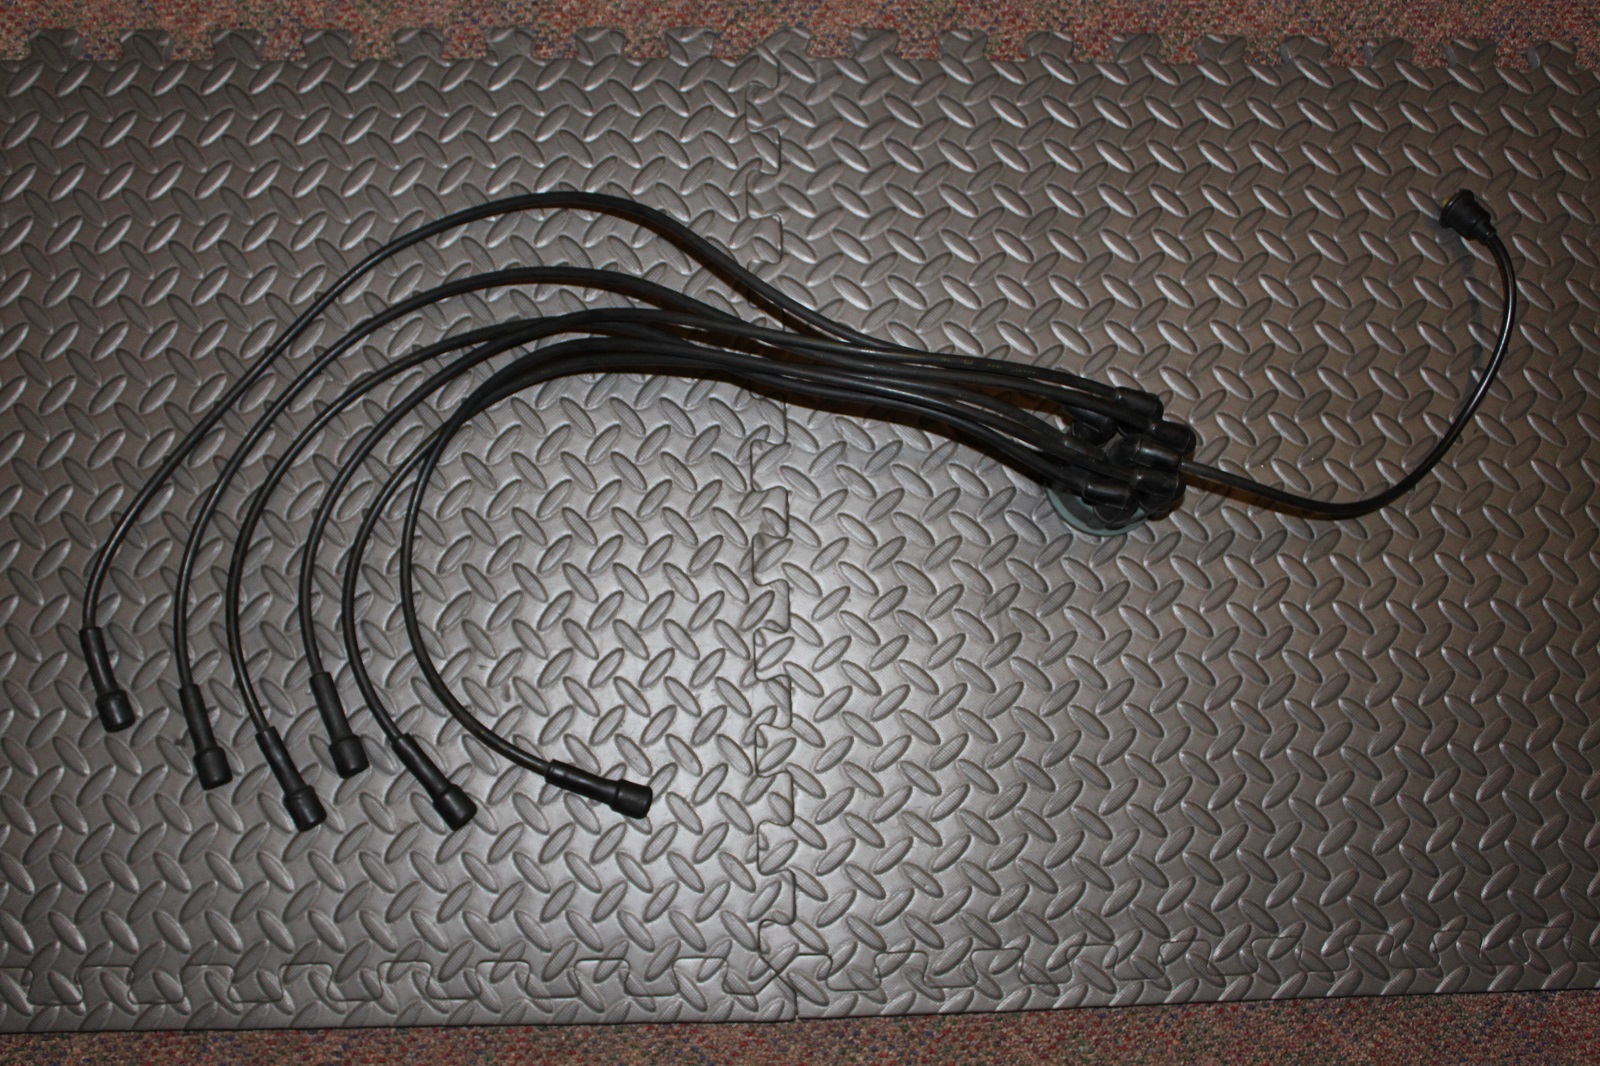
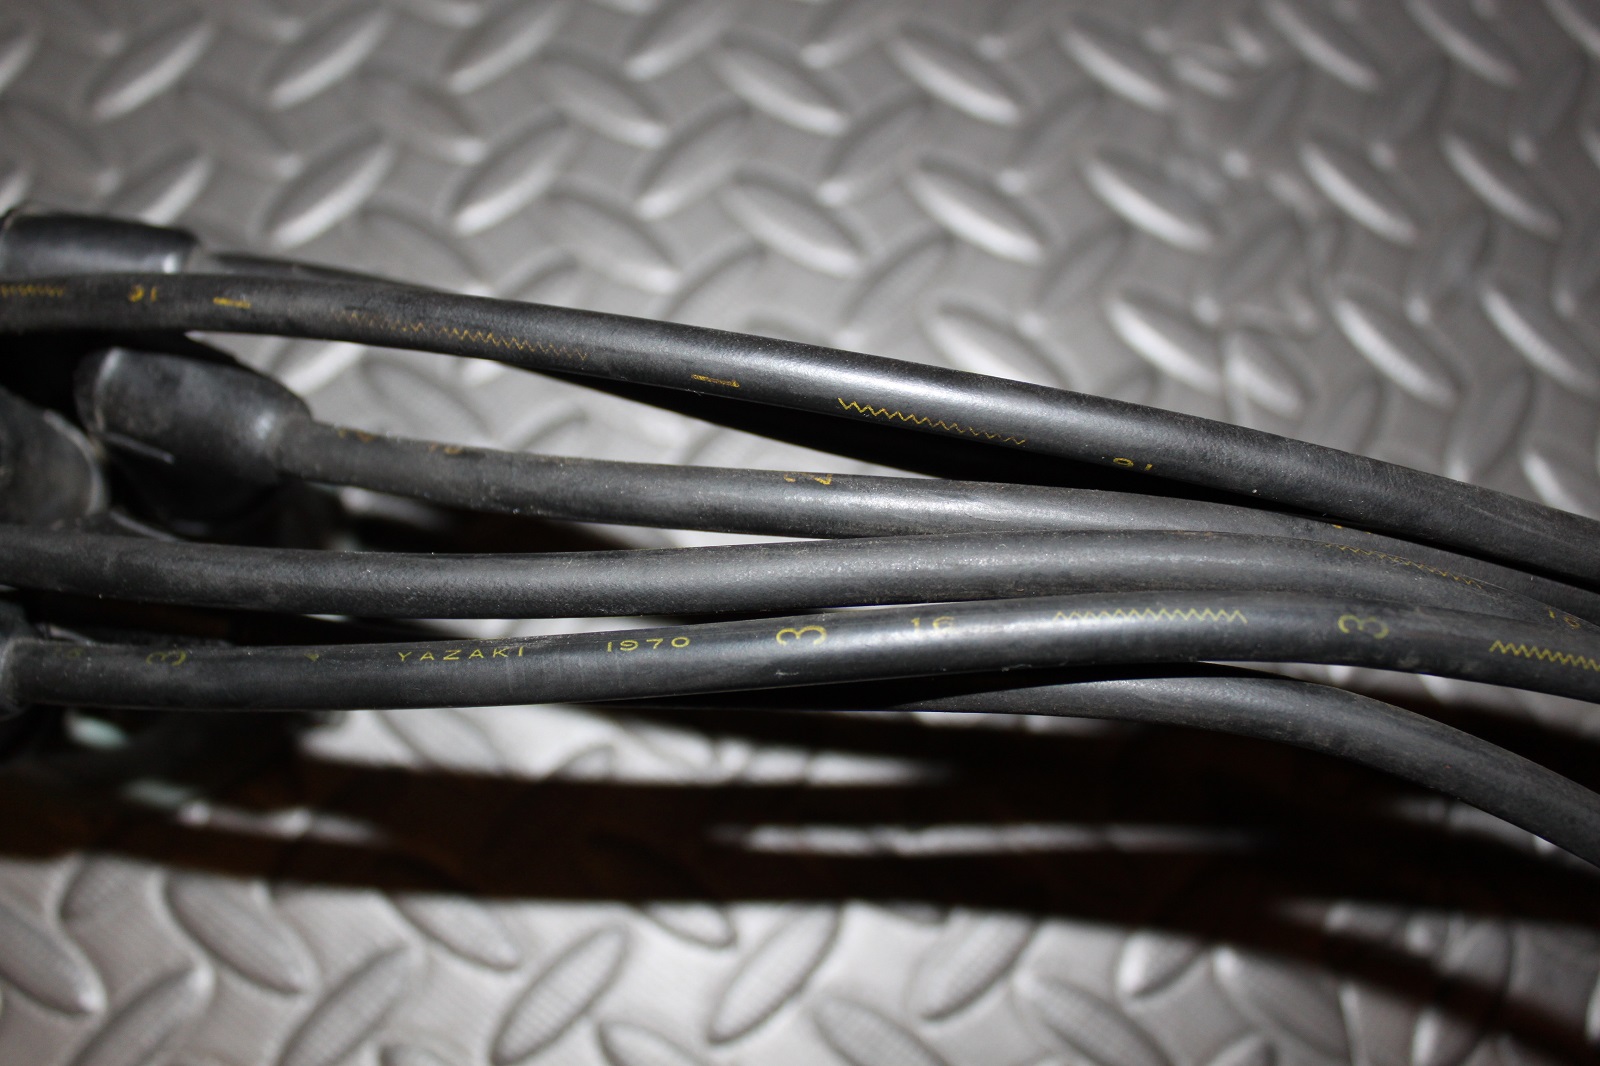
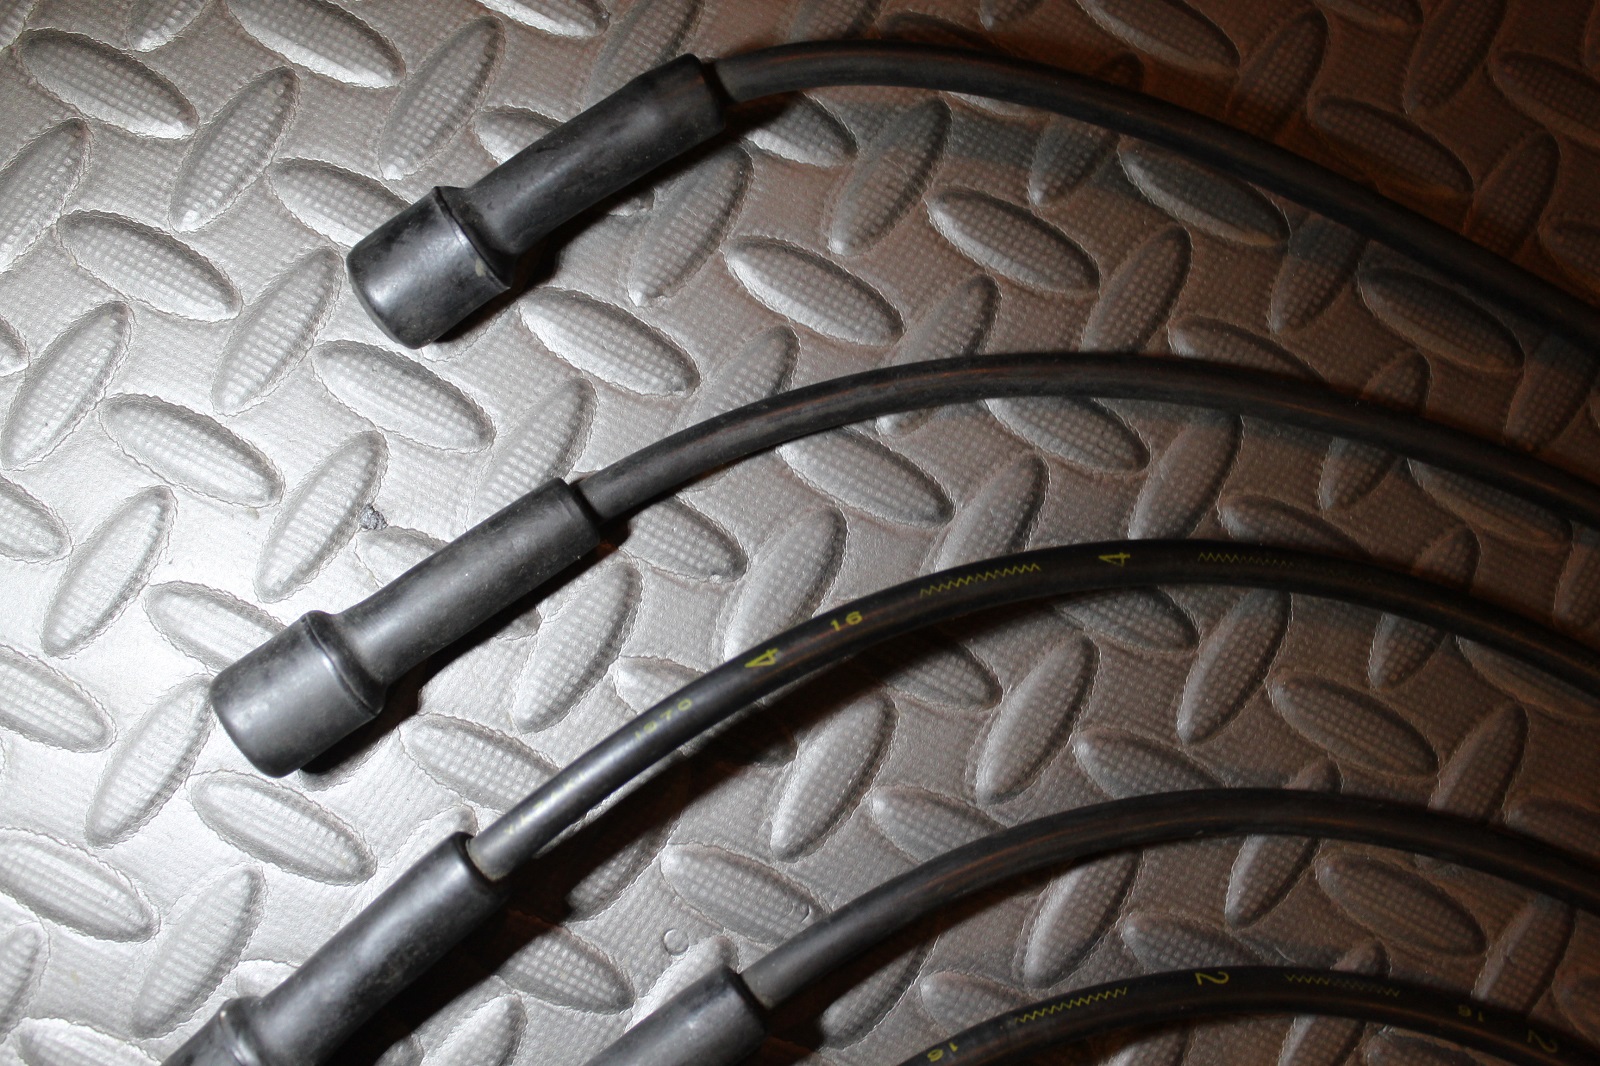
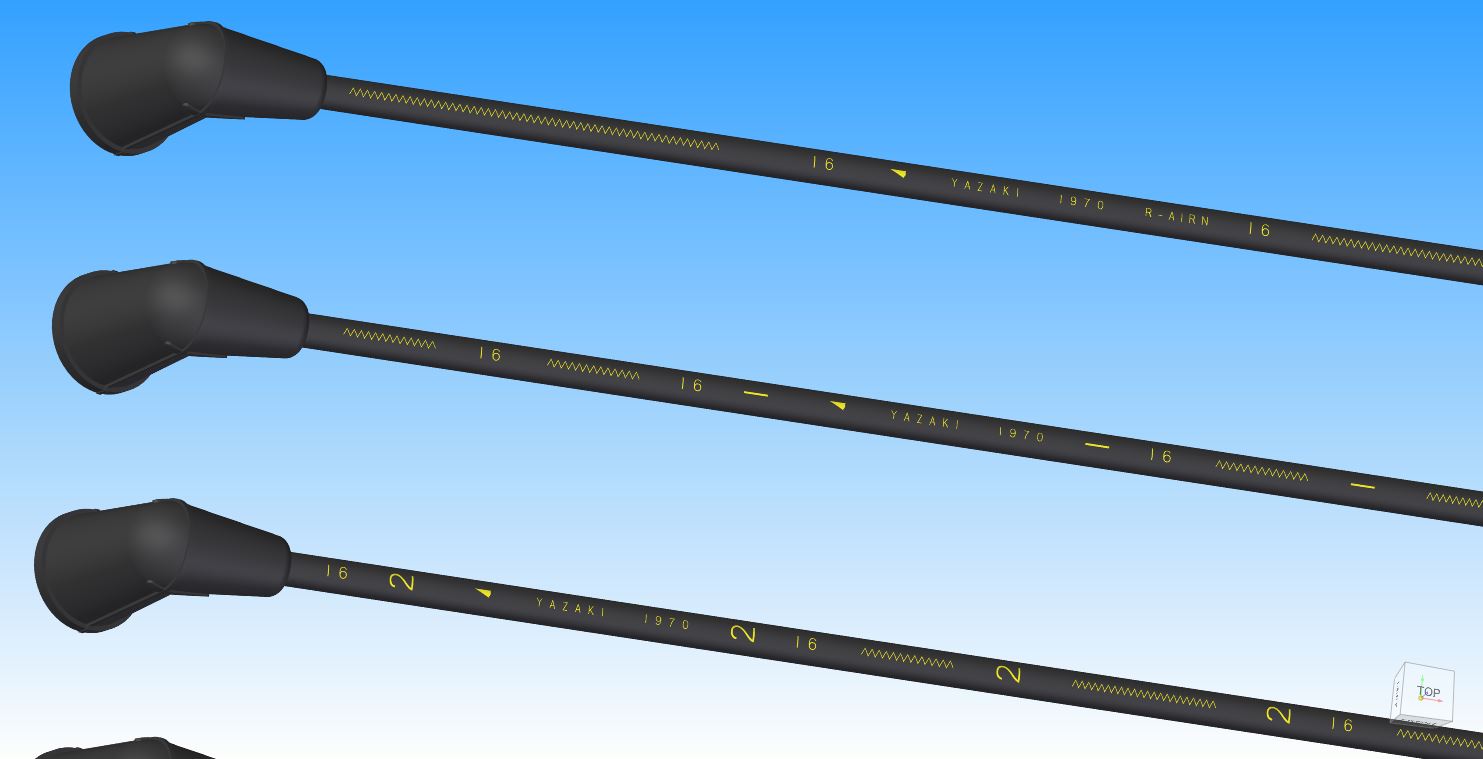
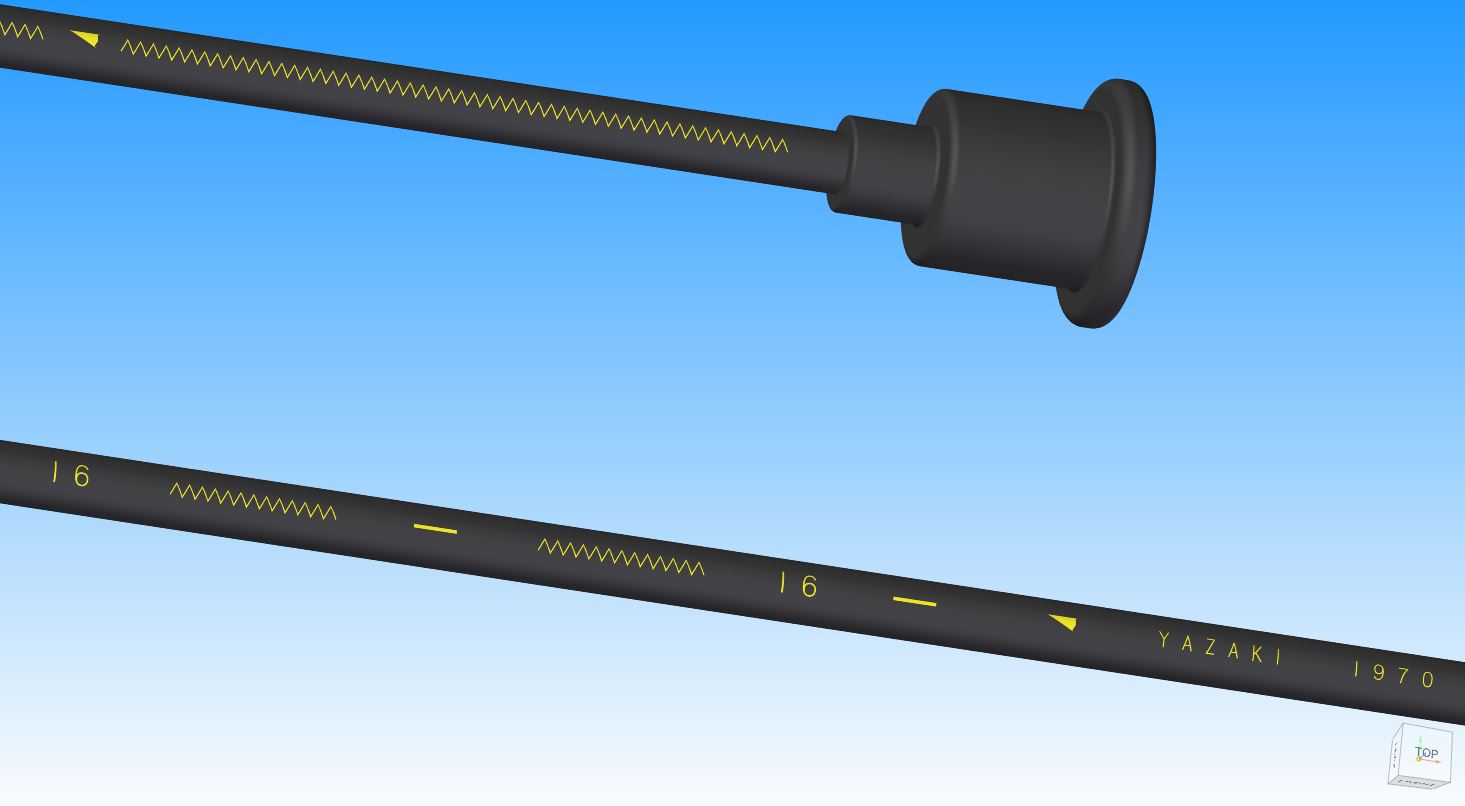
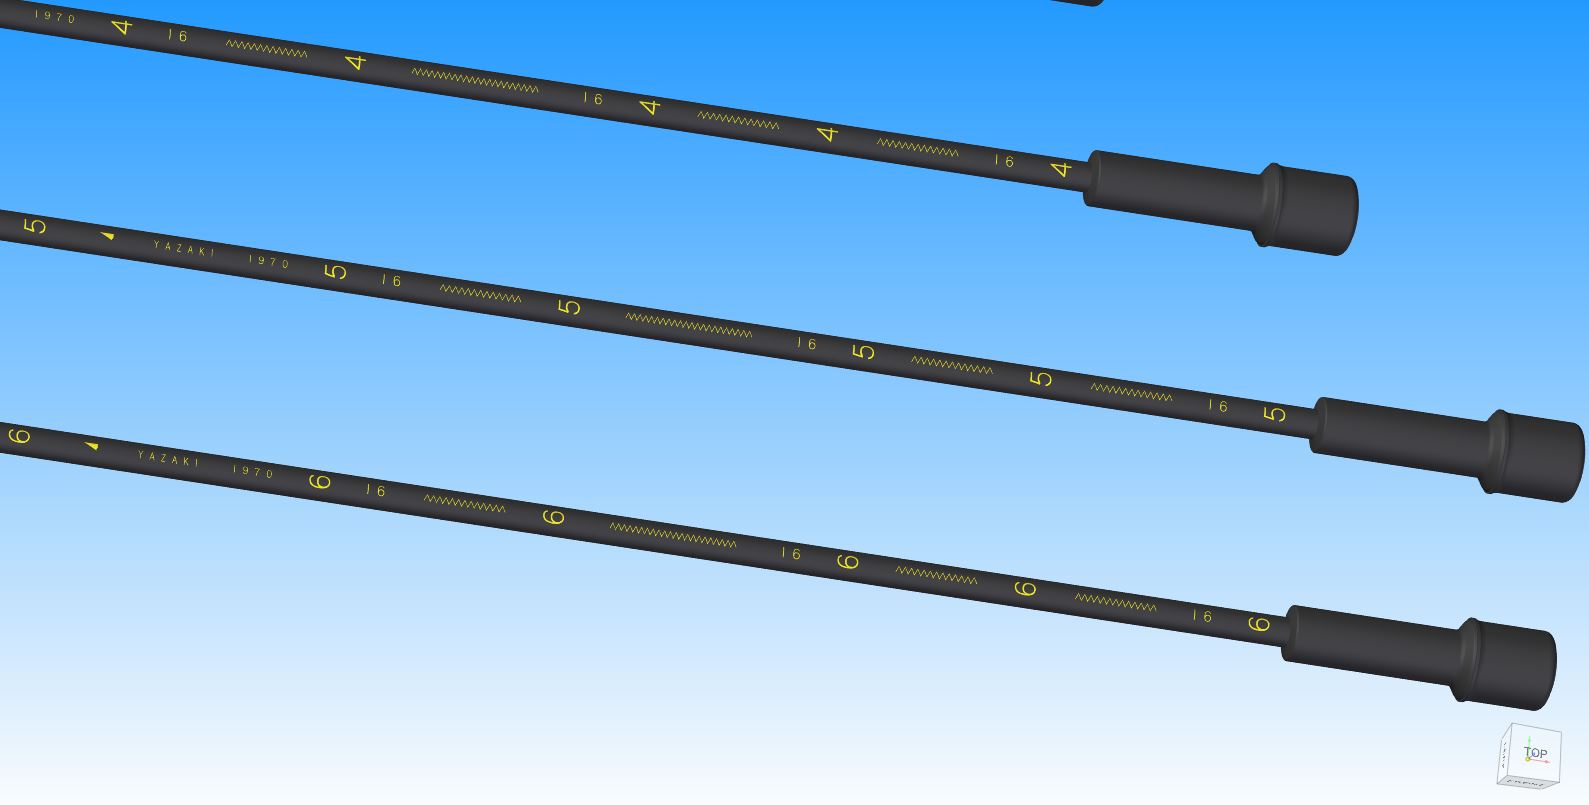
I am lucky to have the original date coded Yazaki plug and coil leads on my 1970 240Z. So I've started this topic to discuss the details of these on S30 cars, I don't want to limit this to only early cars, as I'm interested in hearing about their evolution over the years. Edit, 6AUG2021, Replaced image and pdf drawing to reflect correct part numbers I have taken detailed measurements to create 3D cad models and a drawing complete with markings. To start here are a few pictures of mine, they are not pristine but the date code and markings can be seen. Here are a few images of the 3D cad model, created with Solid Edge version 2020: The descriptions and part numbers are from the 1973 JDM S30 Nissan parts microfiche. Interestingly the lengths quoted in the parts book are close but not exactly the same as my examples. The small triangle ahead of Yazaki, is actually their corporate symbol, I did my best to represent it as close to the original as I could. The text font I used was the closet I could find on my cad program, again close but not exact. https://www.yazaki-group.com/75th_en/history/mark/ I'm also attaching a drawing of these in pdf format. @Mike, I hope you don't mind that I poached the club logo and used it. Any comments are welcome and appreciated. Here's a preview of sheet 1 of the drawing: 22450-E4125(A) Yazaki Ignition Lead Set 1970 240Z.pdf


.thumb.JPG.2b7fd3a8c06f5fbca4900c35d1d84246.JPG)
 2 points
 -
2 pointsI would never put a solid diff mount on a street car. It would help if you told us why you can't use the OEM mount and what your car's setup is. A popular option is the Ron Tyler diff mount, a version of which can be found for sale here: https://www.technoversions.com/DiffMount.html2 points
-
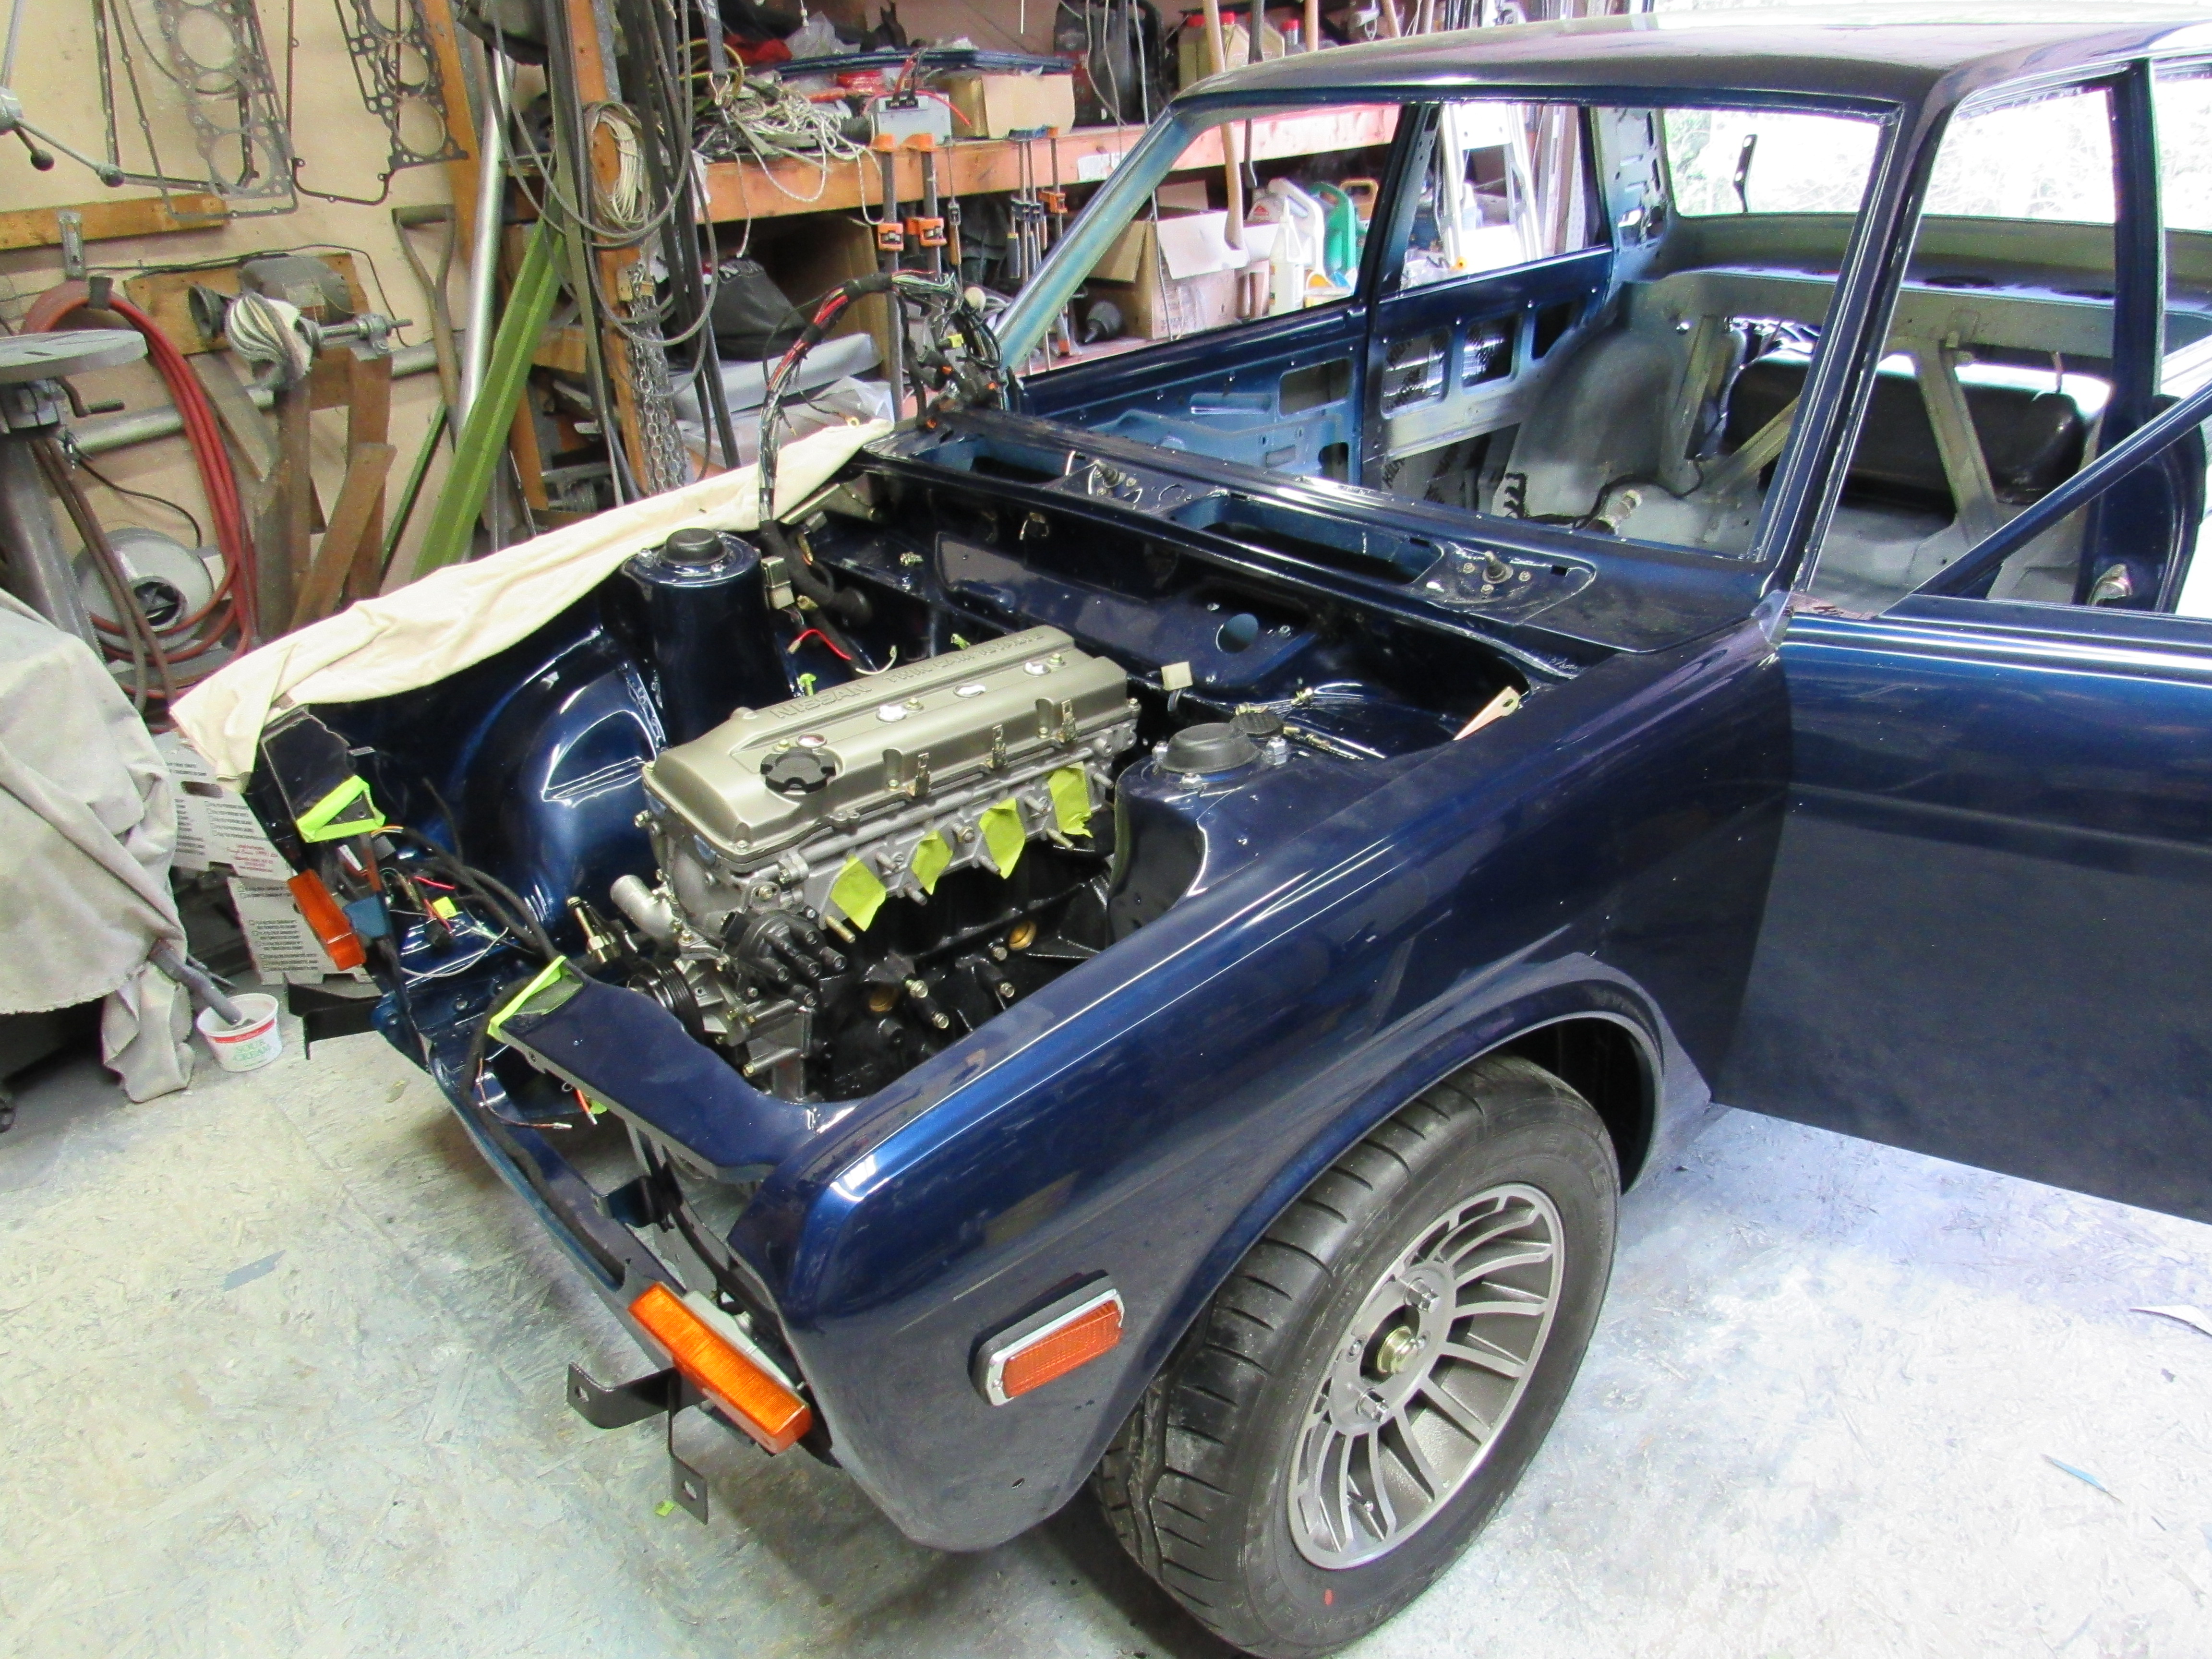
Lots of progress this weekend. First off I'm told the best replacement filler neck is from Gates Auto part #24717. This Sunday I put the fuel pick up line into a can of clean gas and put the fuel line from just before the filter into another empty can. Then I turned the ignition to on which started the fuel pump, and pushed all of the old gas out of the line. Then at the back of the car I put the return fuel line in a empty can and started the car. It idled pretty good for a car that hasn't run in 10-20 years. The motor sounded a little ticky for me but I don't know what it's suppose to sound like.
 2 points
 -
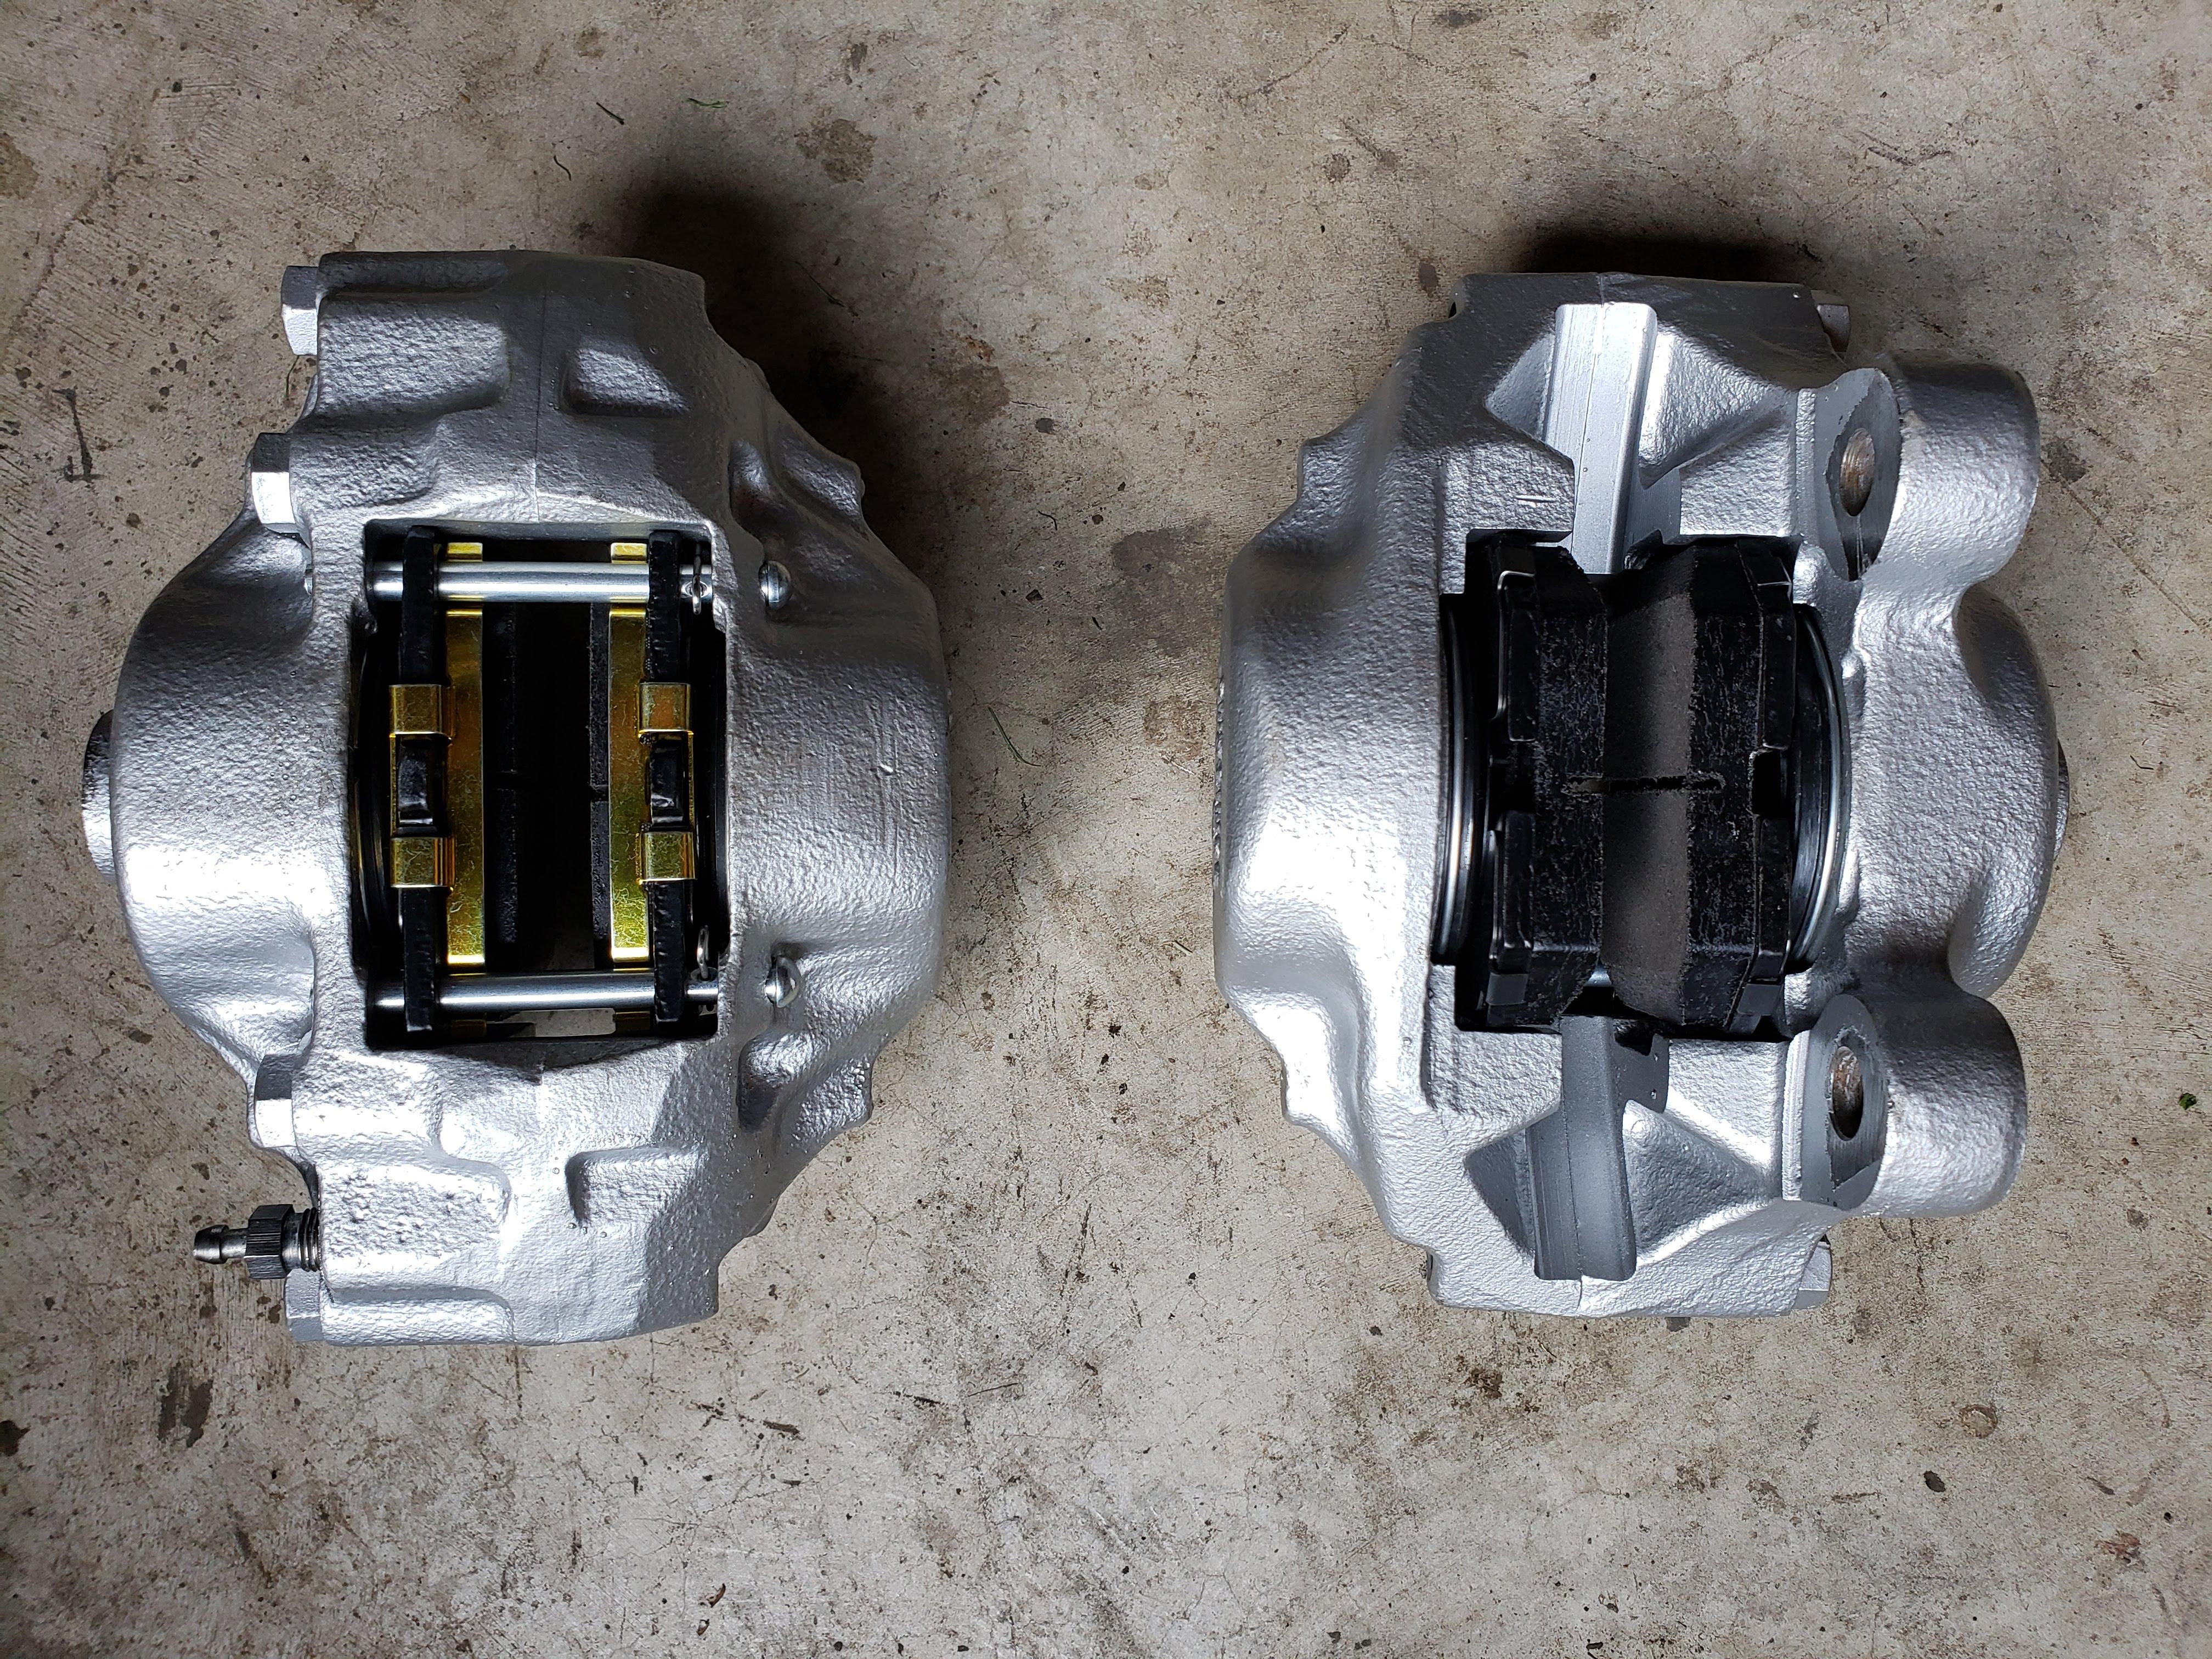
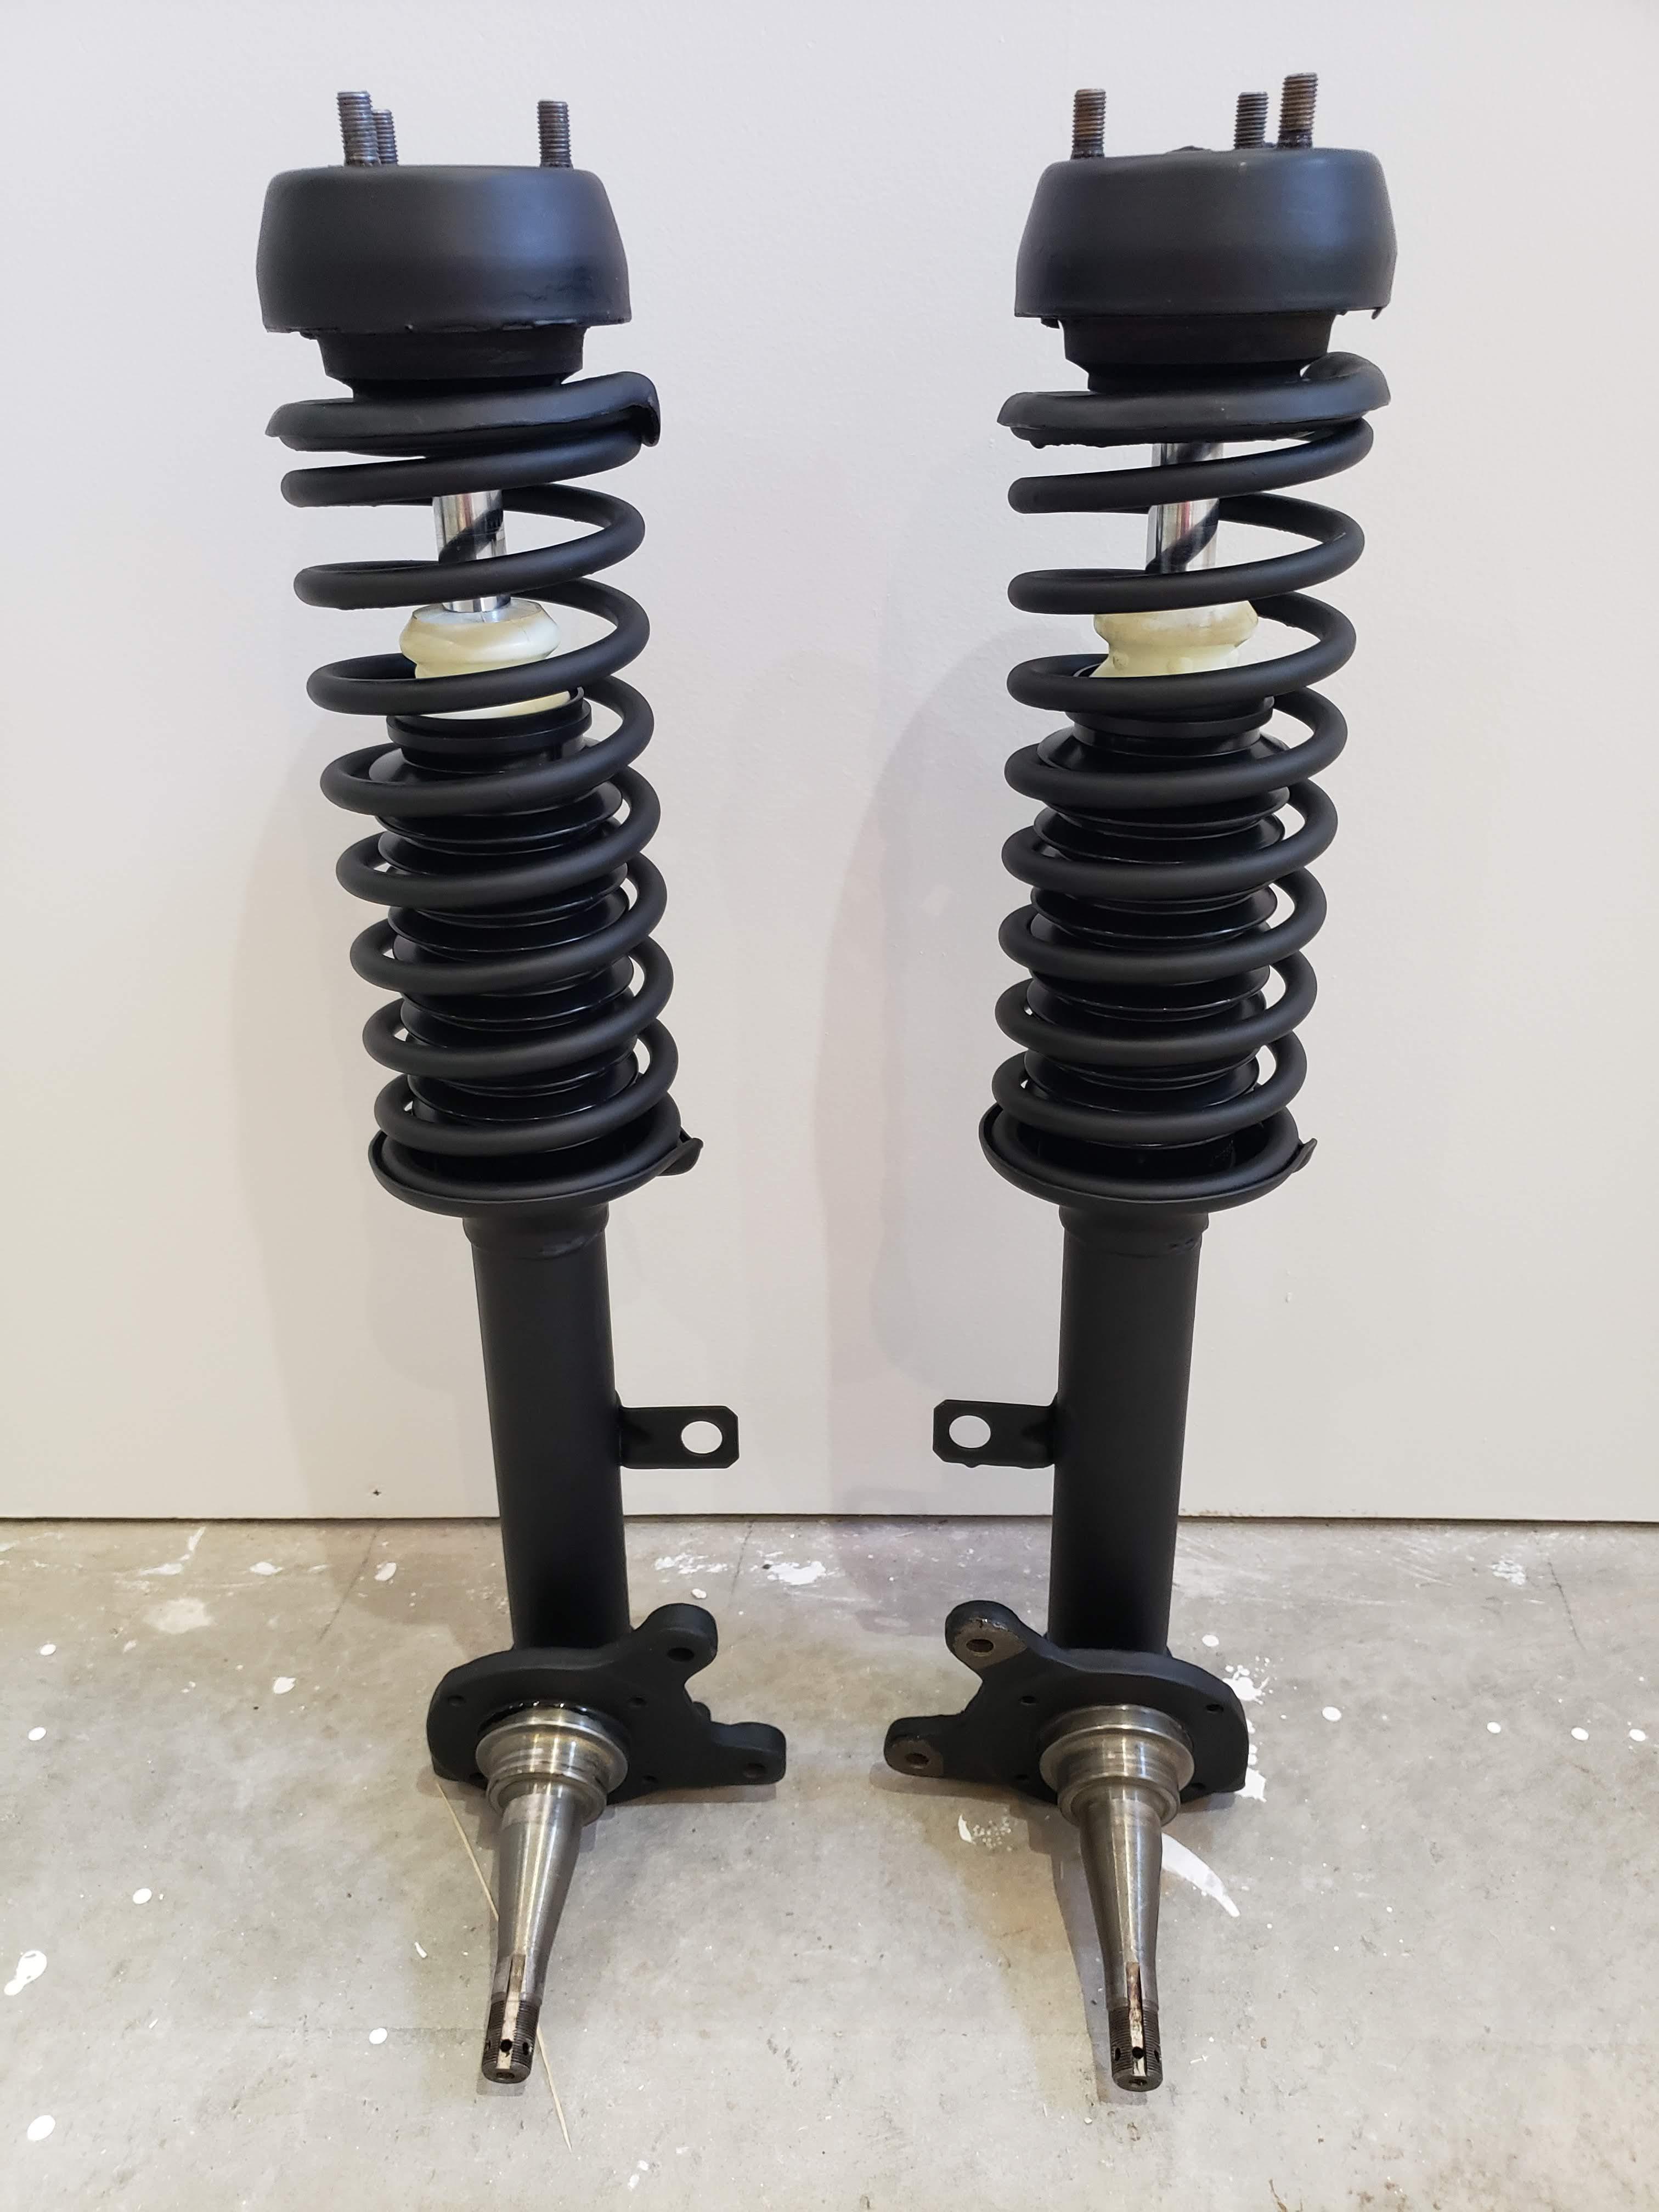
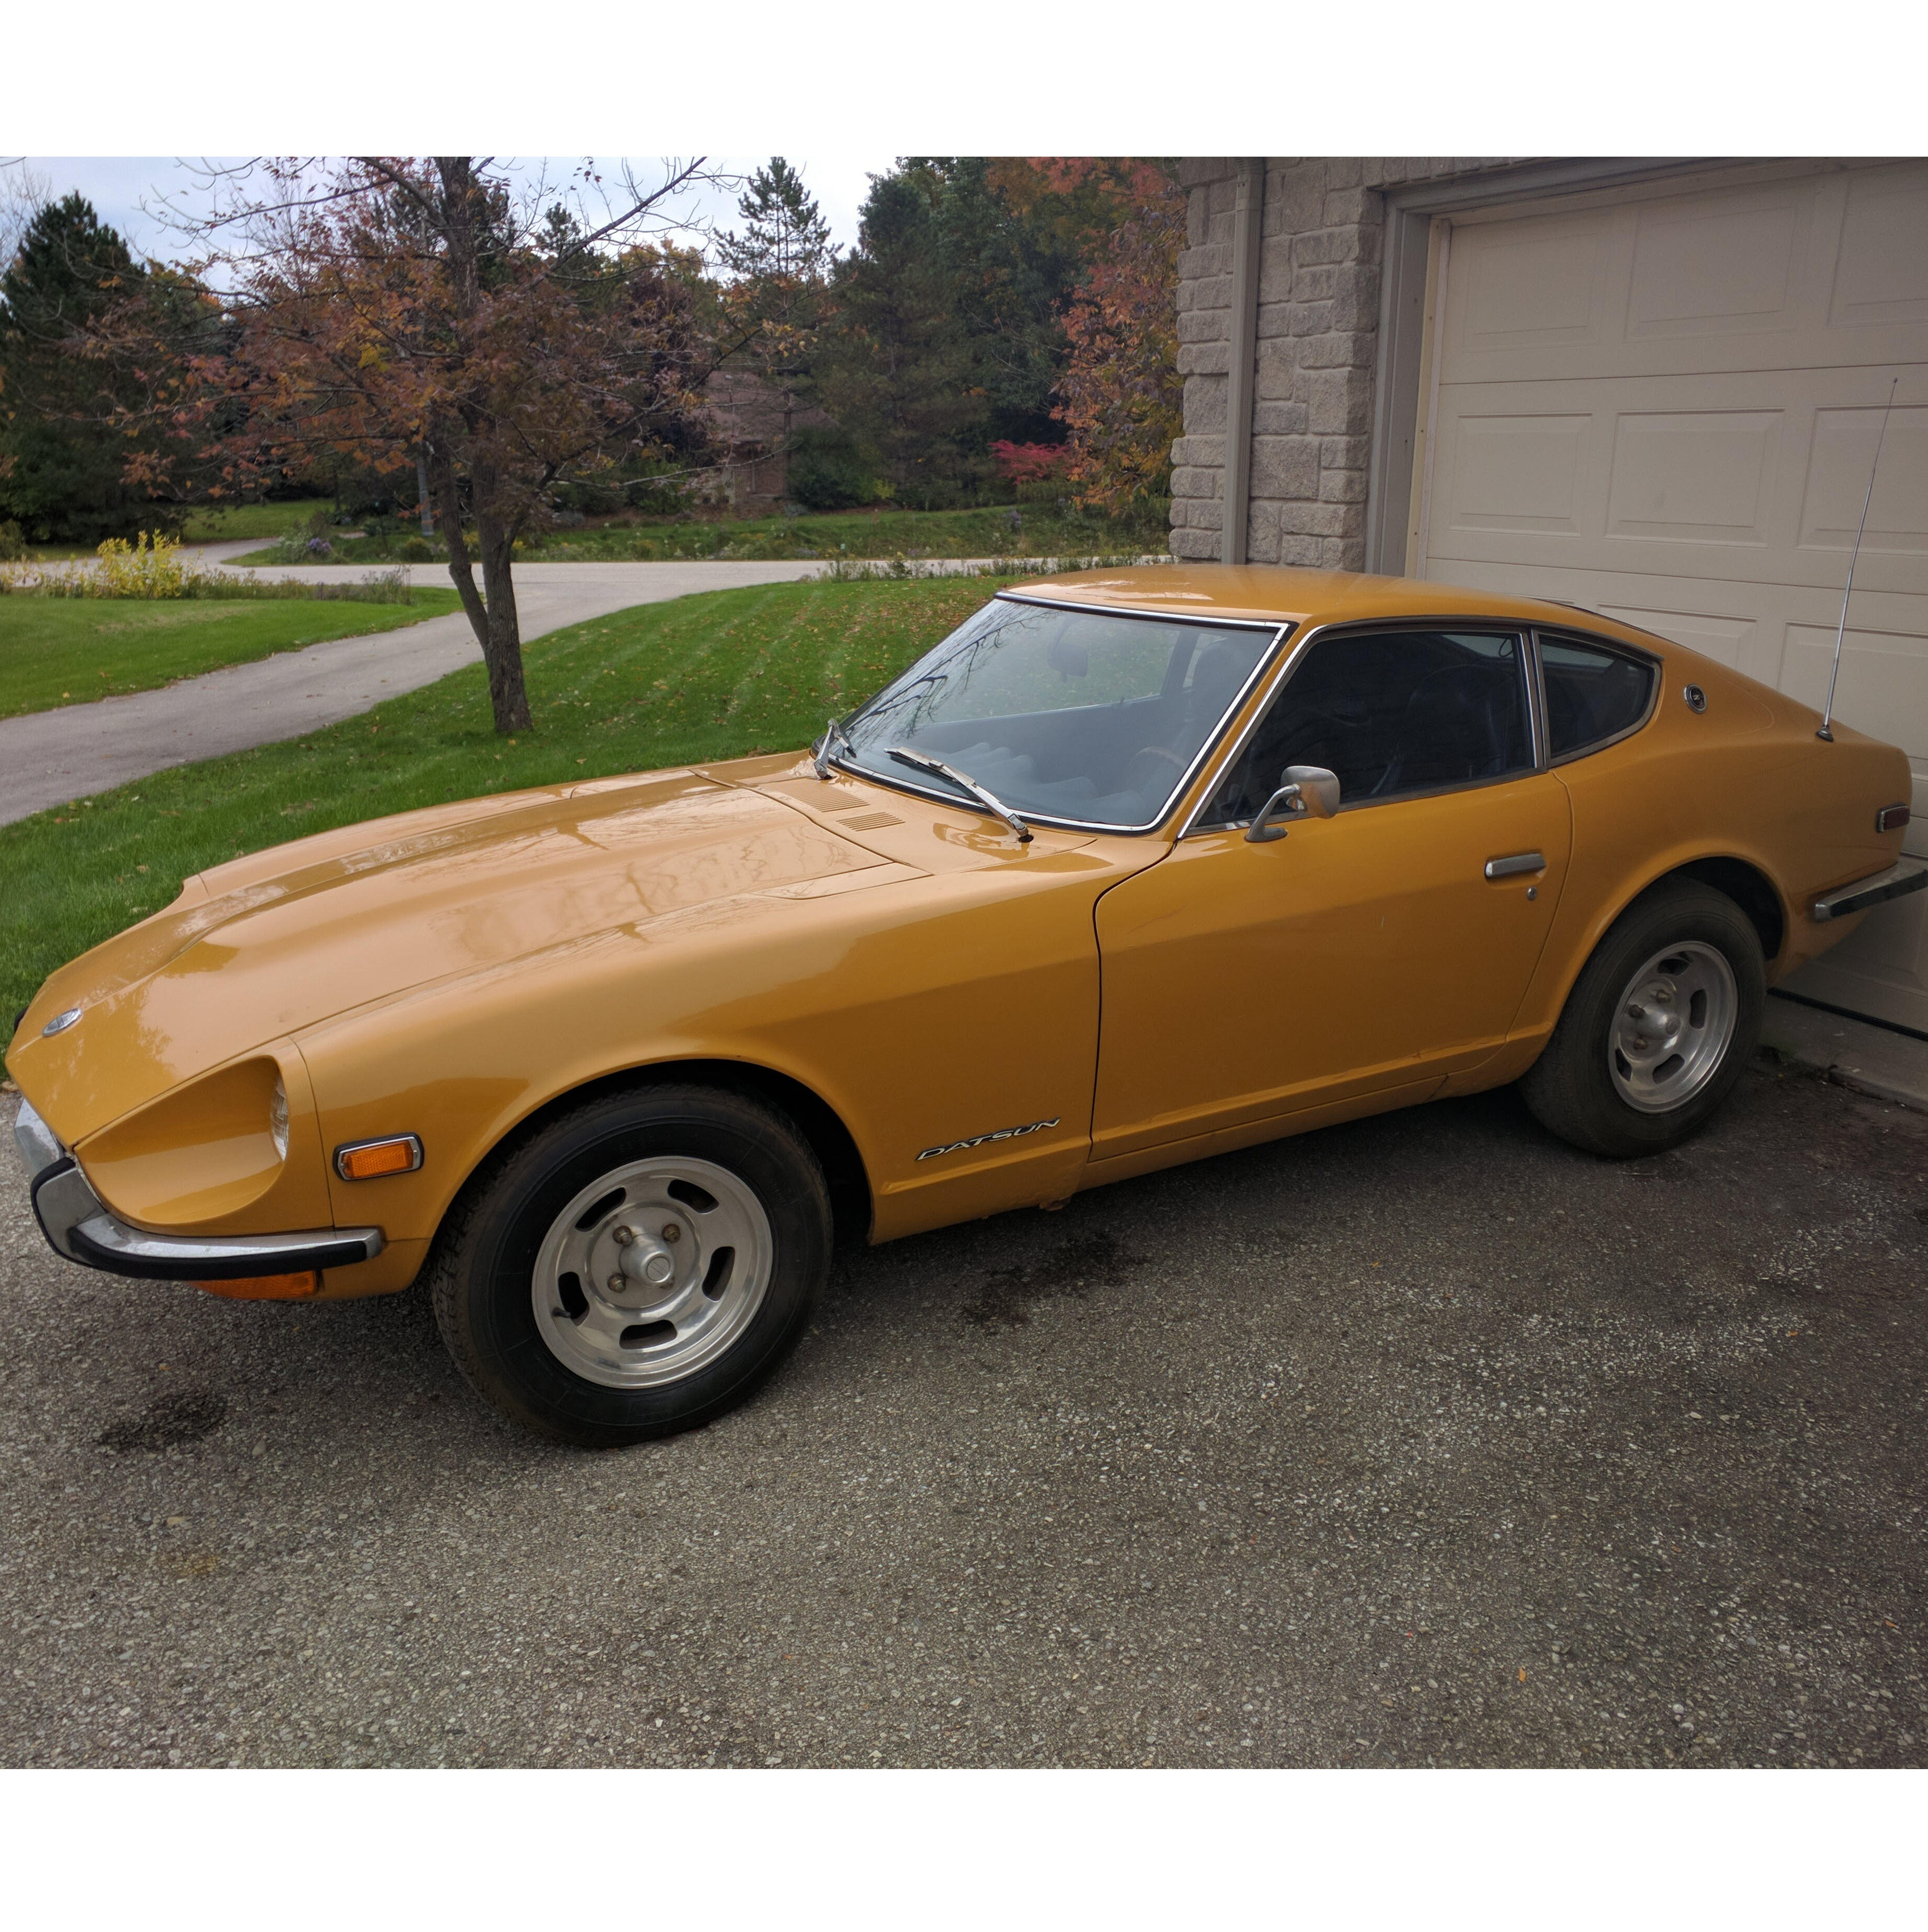
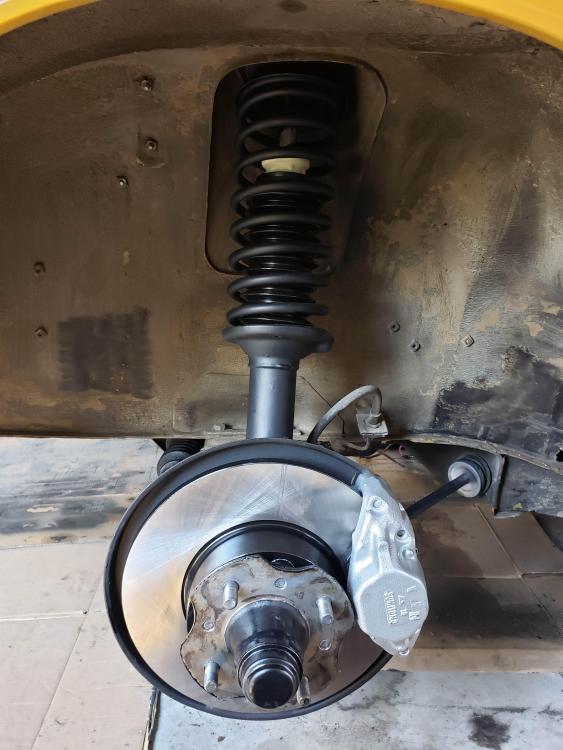
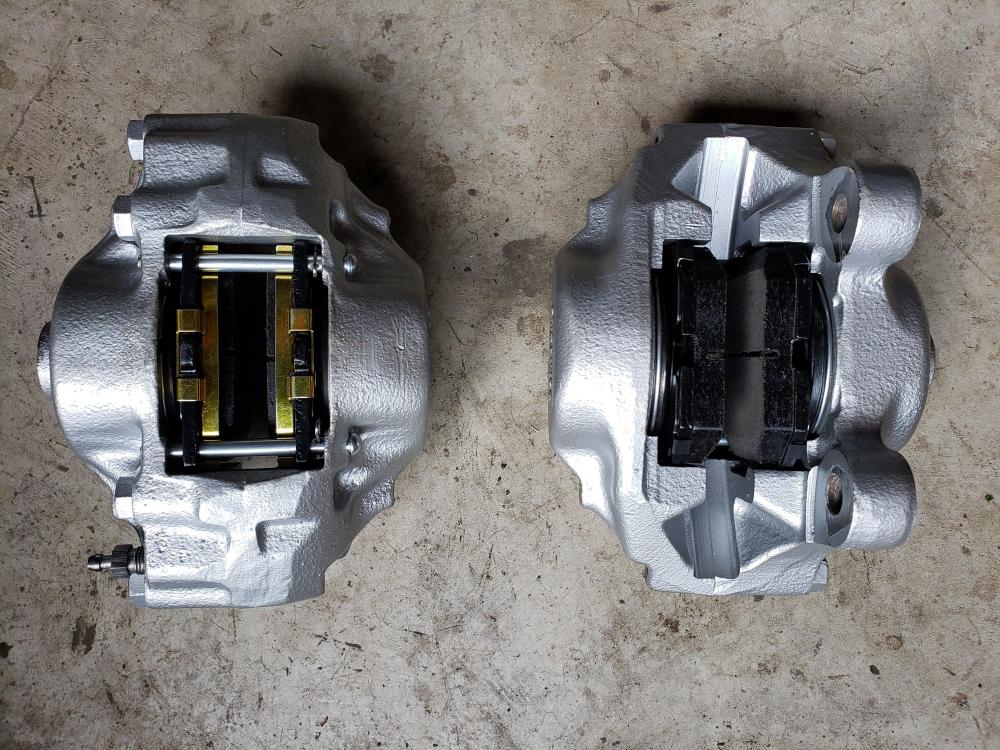
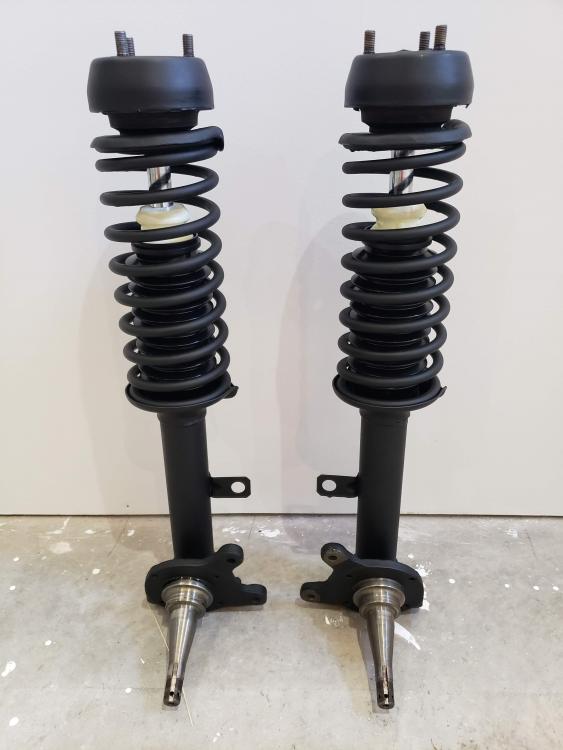
2 pointsI did eventually get all this done, I just neglected to update the thread. I've attached a few pictures: I really only reinstalled the suspension so I could get the car outside to start to clean up of the wheel wells. You can see some signs of initial experimentation that proved it wasn't a good job for the garage. There seems to be a solid, stubborn layer of dirt over undercoating, over paint, over primer. I believe (aside from the dirt), it's original (factory primer and paint, and dealer undercoating). It's going to be quite a job to clean it all up, but there's a real mix of conditions. In some areas, all layers are intact and solid. In others, I can see paint and in a few areas there's rust. The small reinforcement panel above the point where the TC rod connects to the frame has rotted through on both sides (you can just see the left edge of the hole I knocked through it in the first picture). I've hammered away elsewhere and haven't found any other soft spots in the wheel wells, but I think it makes sense to remove everything and re-coat the whole thing. I took the passenger fender off and things aren't too bad there. No paint or undercoat (and not a lot of dirt). There's rust mostly on the horizontal surfaces under the top of the fender. It isn't so bad cleaning these parts up. There's another rotted bit at the lower front of the outer rocker panel where I see the cowl drain conveniently dumps water. I'm not a welder, so I'll have to have these repaired by someone who knows what they're doing. On the positive side, the car started up instantly after the winter. It's running very rich, but that's for another day. It's fine for moving it in and out of the garage, although the clutch engages very high, so I'll probably have to have a look at that. It seems to disengage at a reasonable point, which seems like a weird combo to me. Like I said at the beginning of this thread, this will likely be a multi-year project!
 2 points
 -
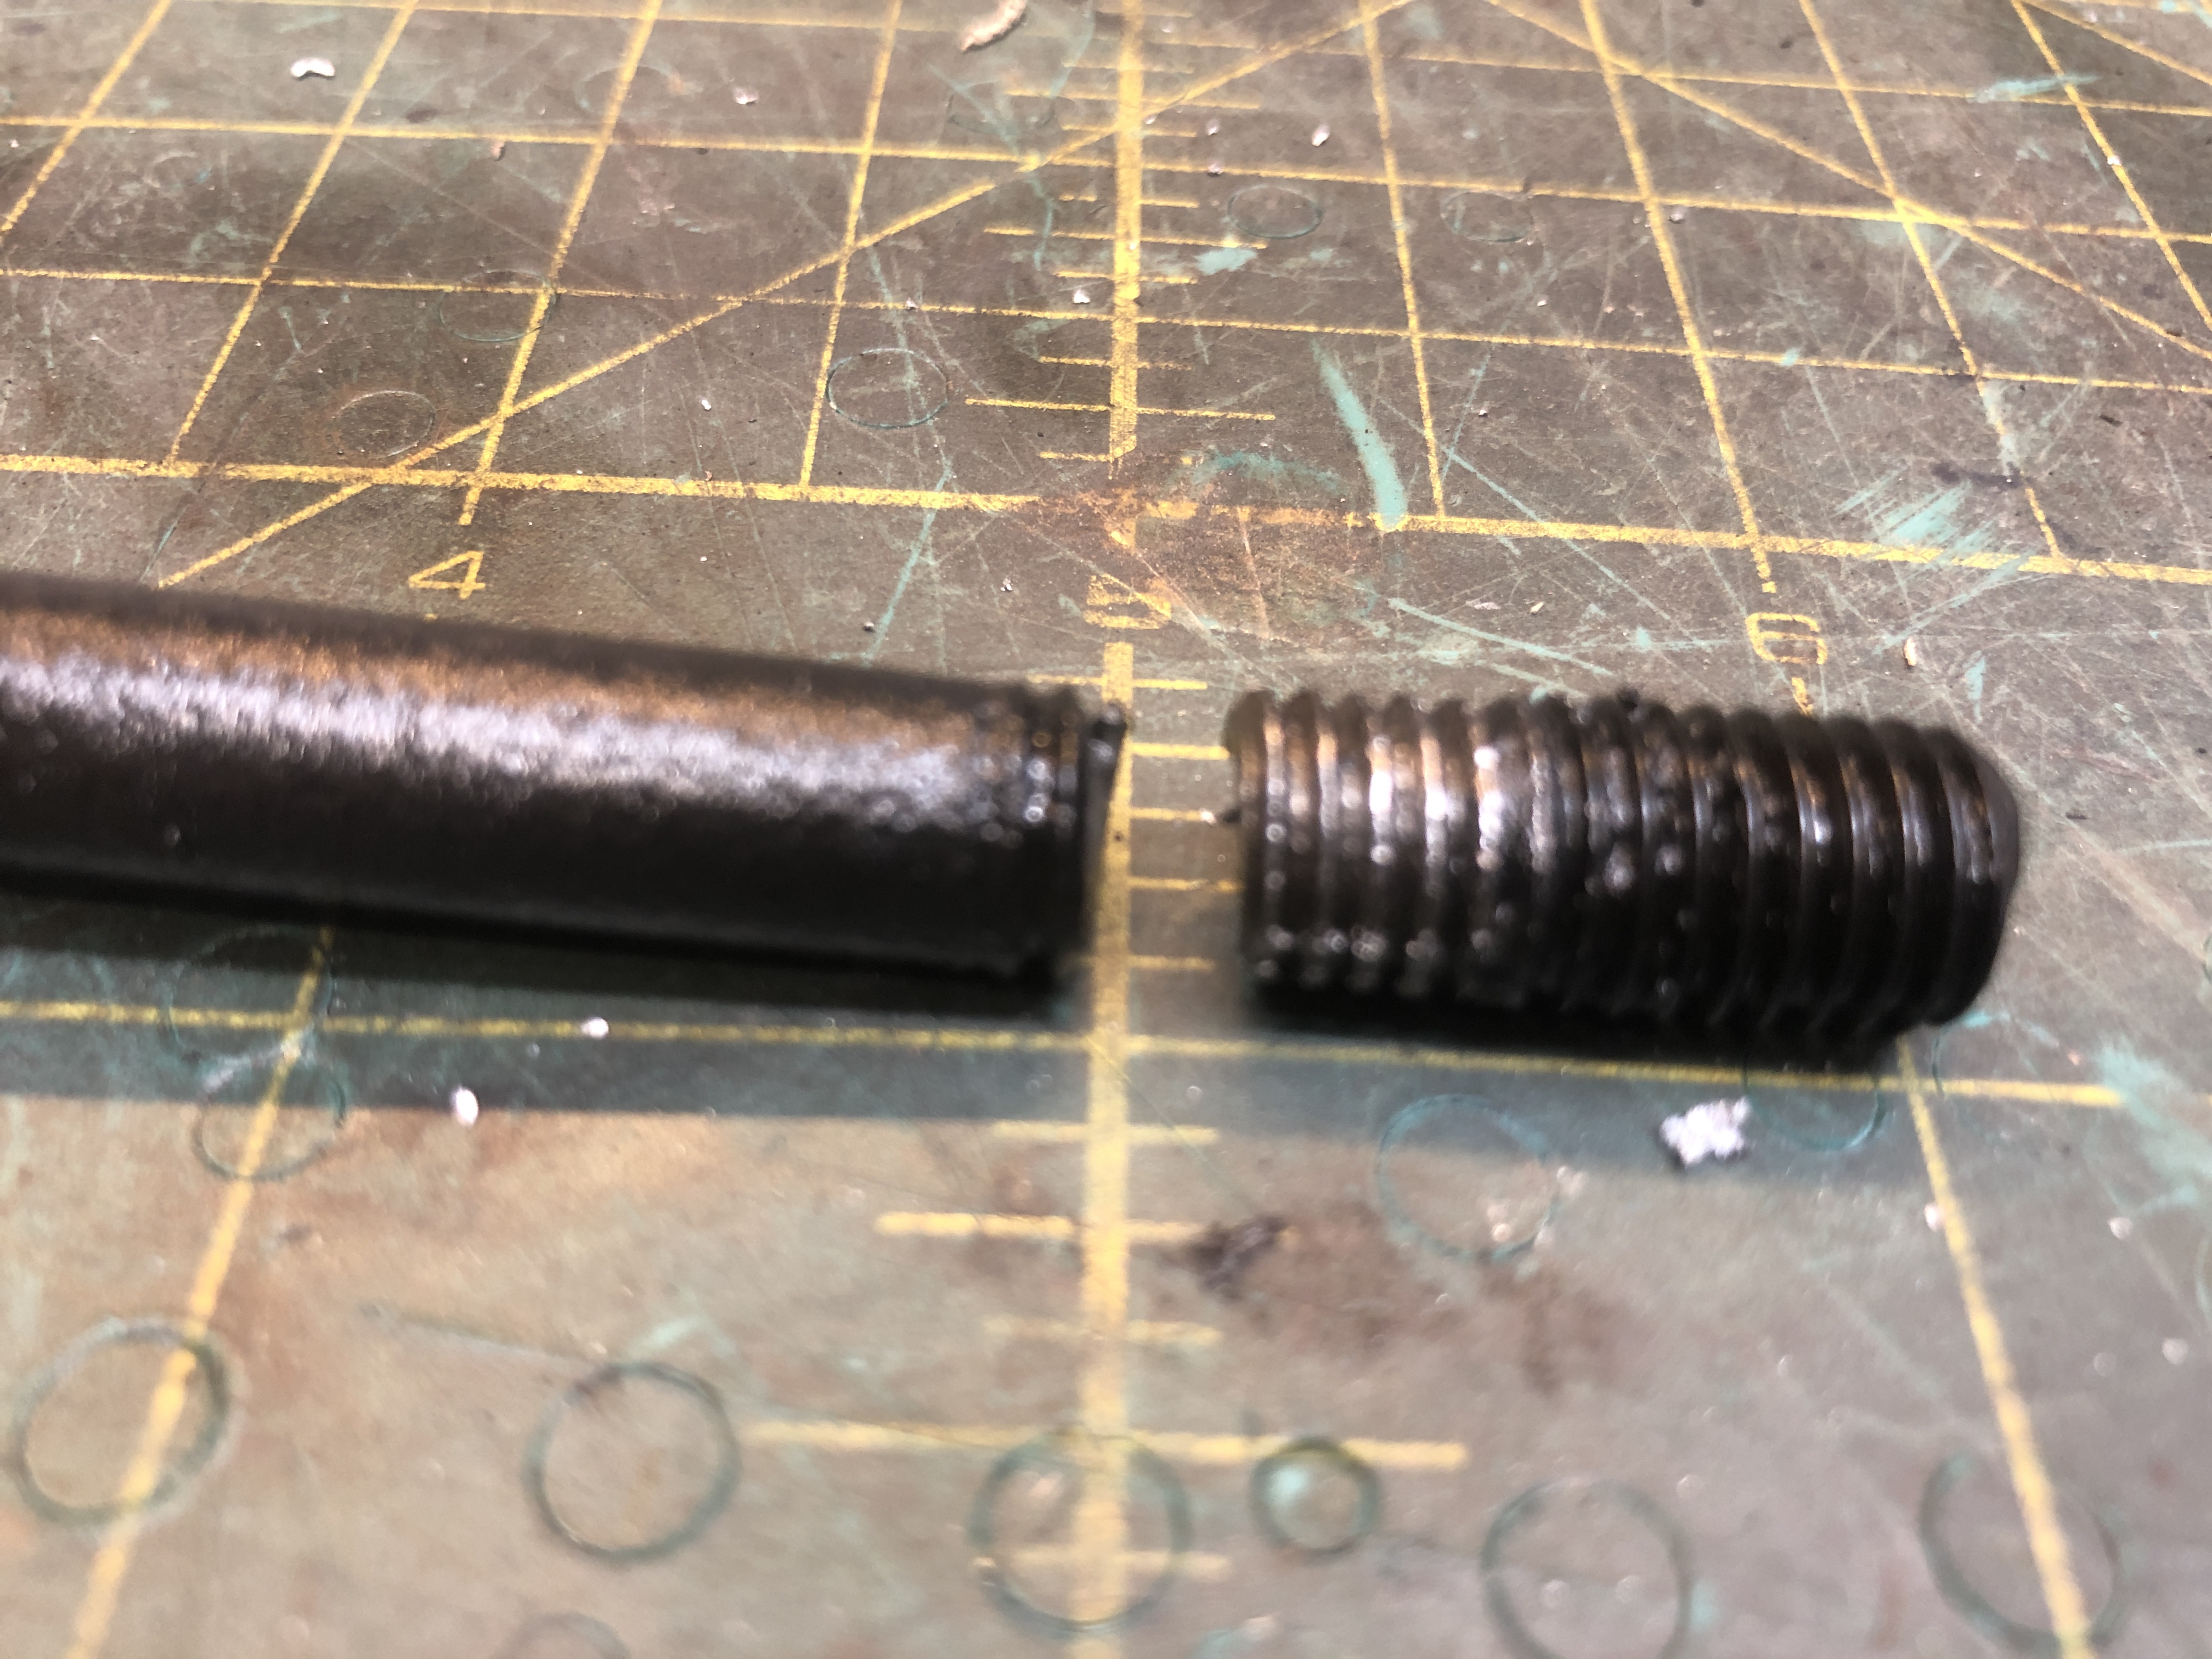
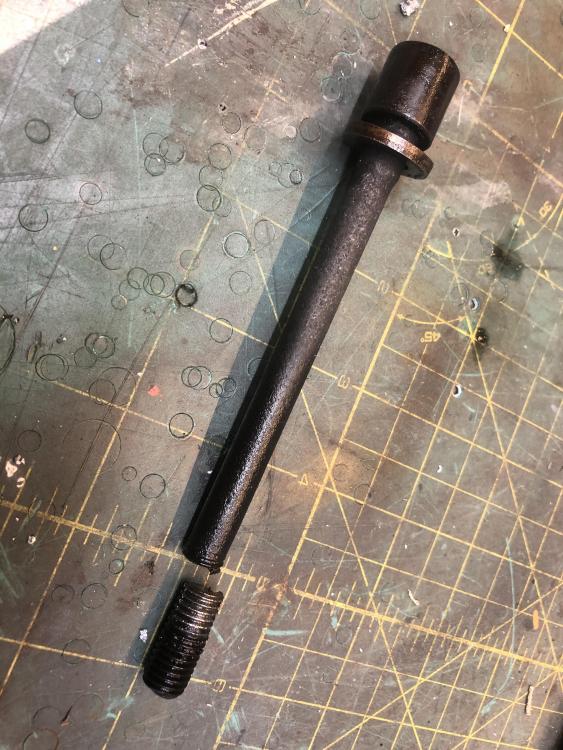
And today, the final stage of my birthday present, I was able to put a vise grip on the stub and easily break it free then unthread it by hand. Yahoo! It never goes this smooth.... What do you think? Buy new head bolts or just re-use the old ones?
 2 points
 -
I chased a resonance problem years ago. I started by replacing all the u-joints. No luck. The half shafts didn't spin fast enough to produce my vibration. I had the drive shaft balance checked and they found it was slightly bent. They re-tubed the drive shaft and the vibration disappeared.2 points
-
1 pointRadiator was rusty thats why I upgraded and did a coolant change. I will most likely do another coolant flush just to assure no rusty coolant left. Thank you for the part number, Nissan dealer was a little confused. Sent from my iPhone using Tapatalk1 point
-
1 pointThat was quick! IMO, You'll need a new hose but I think you'll find that the real problem is that fitting. Once you remove the hose from it, you'll find it corroded mostly away.1 point
-
1 pointTake a paper towel, fold in half, then half again and then place it like a hammock under that fitting and heater hose you have circled in the picture above. Bring it up tight to the bottom of the fitting and hold it for a bit. Then take it off and see if there's any moisture on the paper towel. No? Do much the same on the side of the block under that fitting. Use dry towels each time, continue until you find a damp spot.1 point
-
Stellar job Mike, incredible attention to detail. Perfect basis to recreate the plug wires over the winter. Roo1 point
-
I’m totally doing this! New bolts are a fortune! Thanks!1 point
-
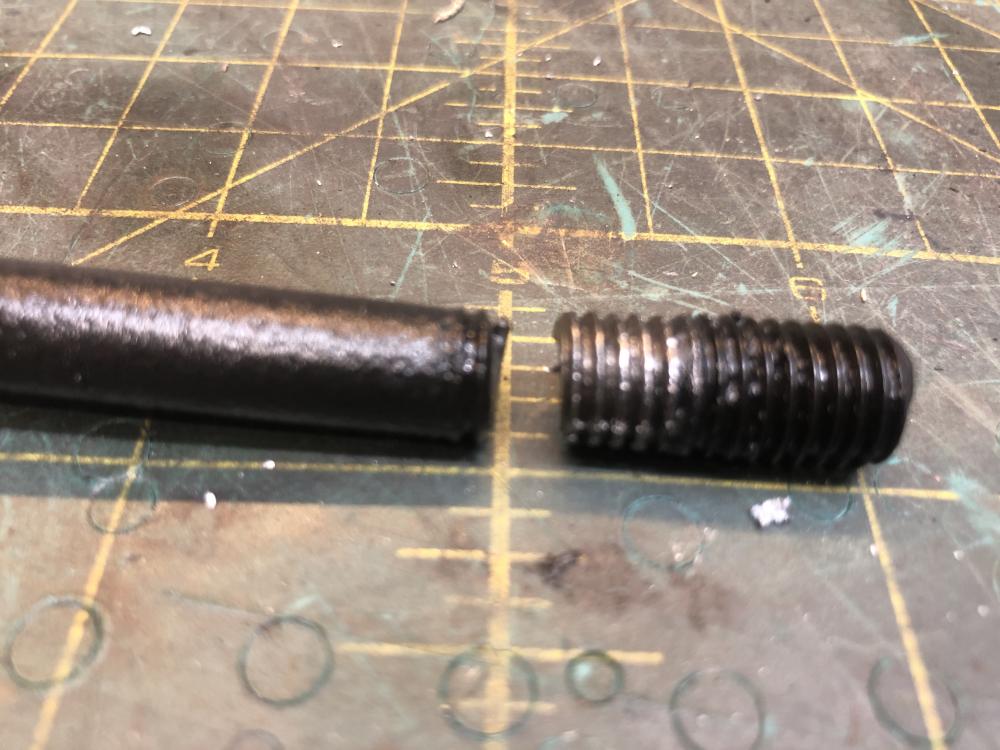
There's no way I would reuse that bolt. I would chuck up the remains of the bolt in the lathe and drill a hole in the end. Do the same thing to the threaded stump, and then turn a metal dowel pin to fit the holes. Press the dowel pin into place to align the two while you run a small weld bead around where it broke. If your welding skills are good, they say "the weld is stronger than the base metal".1 point
-
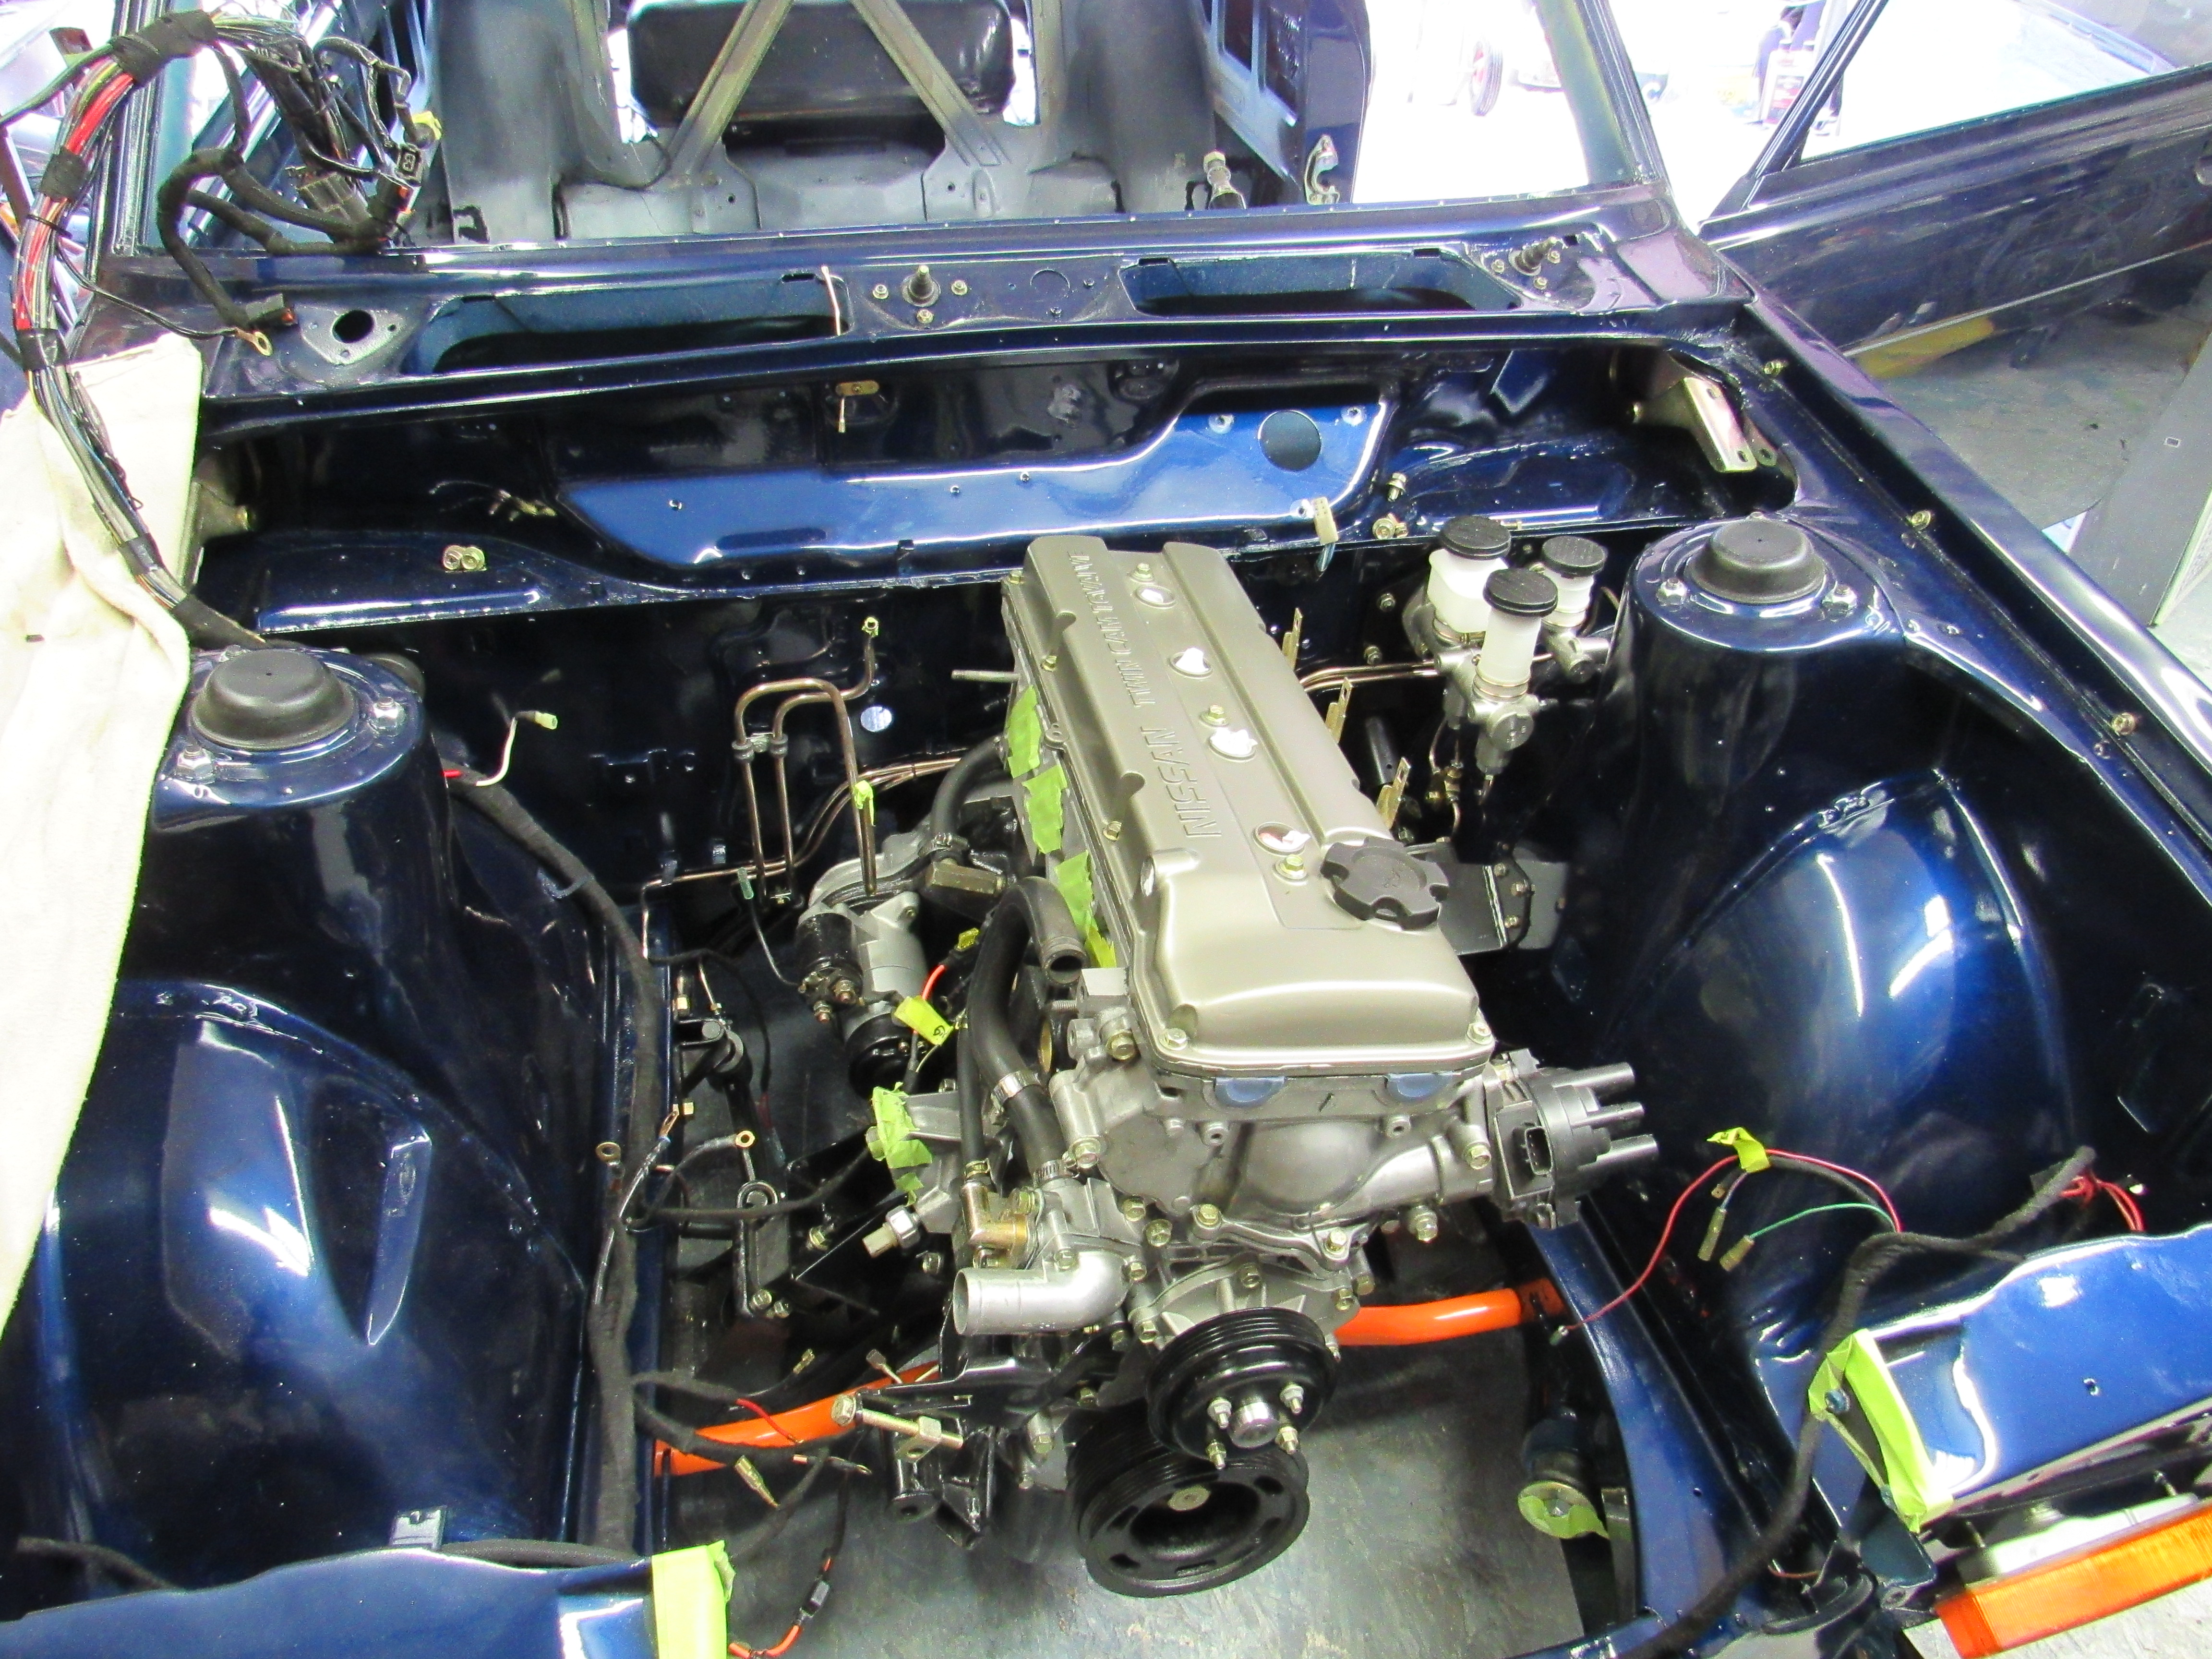
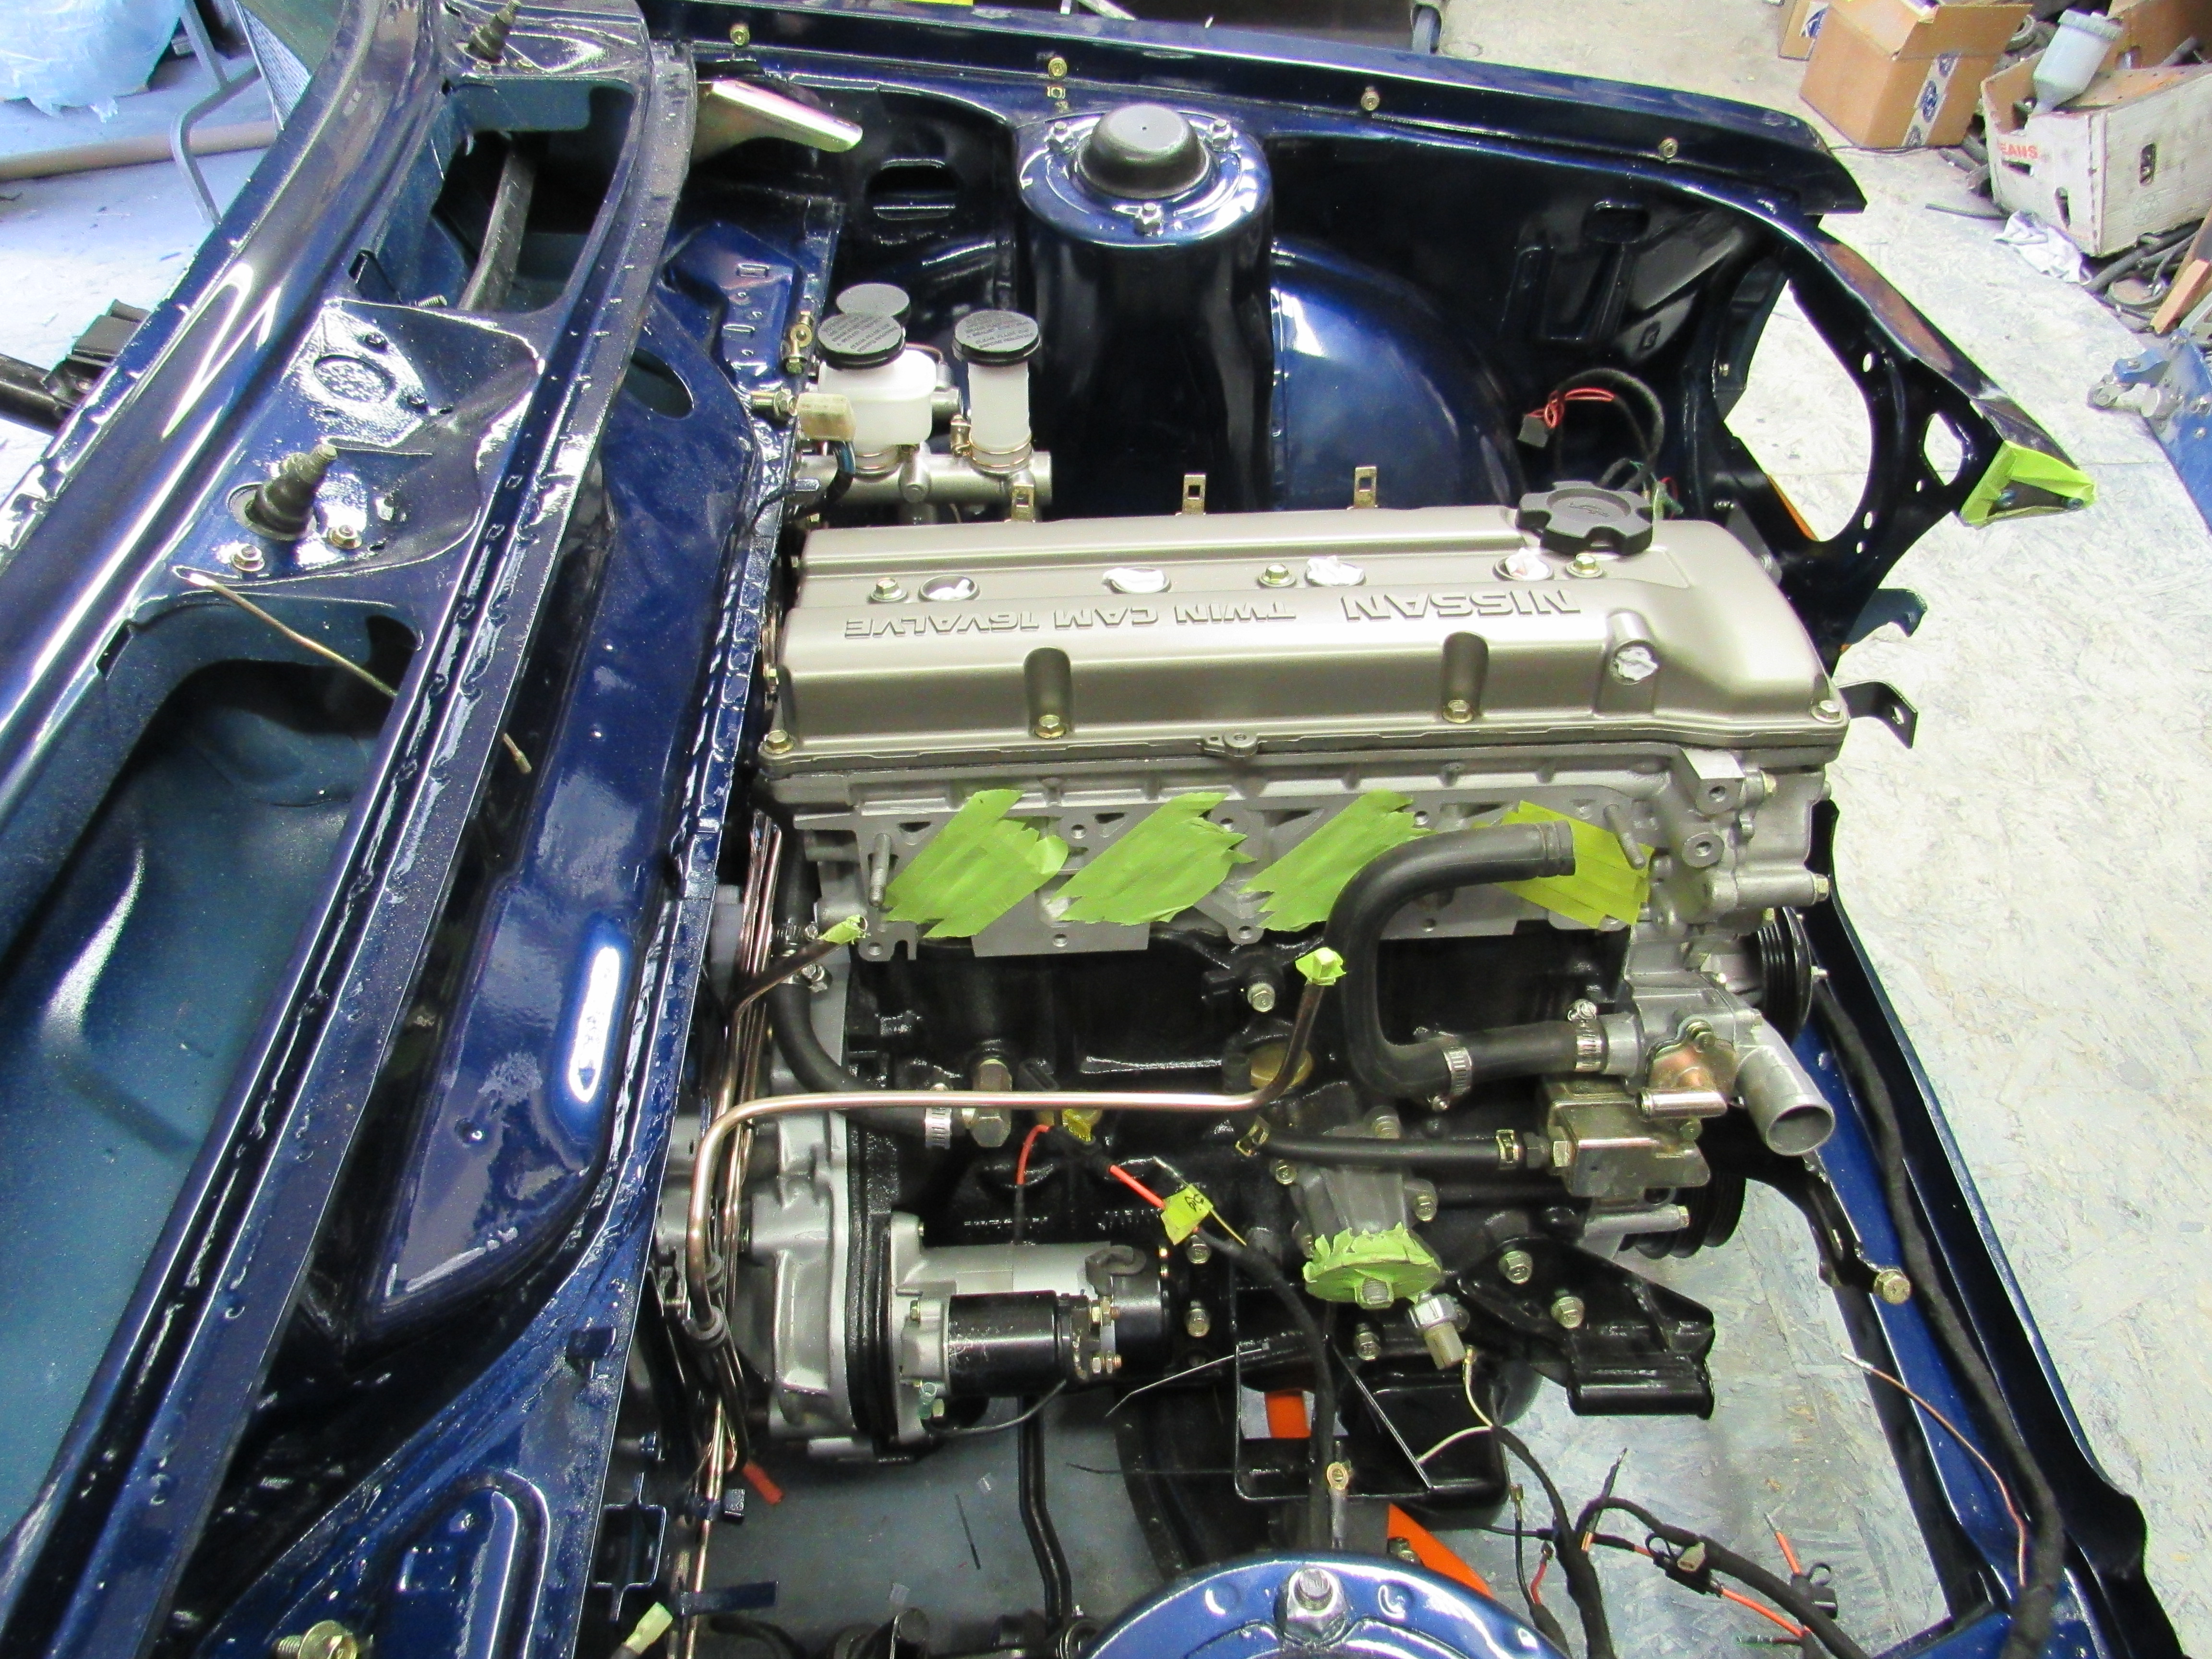
1 pointBig milestone for me today! My first engine removal. Took about 2 hours solo. Zero issues along the way which was awesome. No seized bolts, no rounded bolts, nothing broke! I ended up using two water pump bolts for the front as I didnt have a short enough bolt for the head bolt holes. I cant wait to start cleaning this up and refreshing. Check out the spider nest in the bell housing 😨
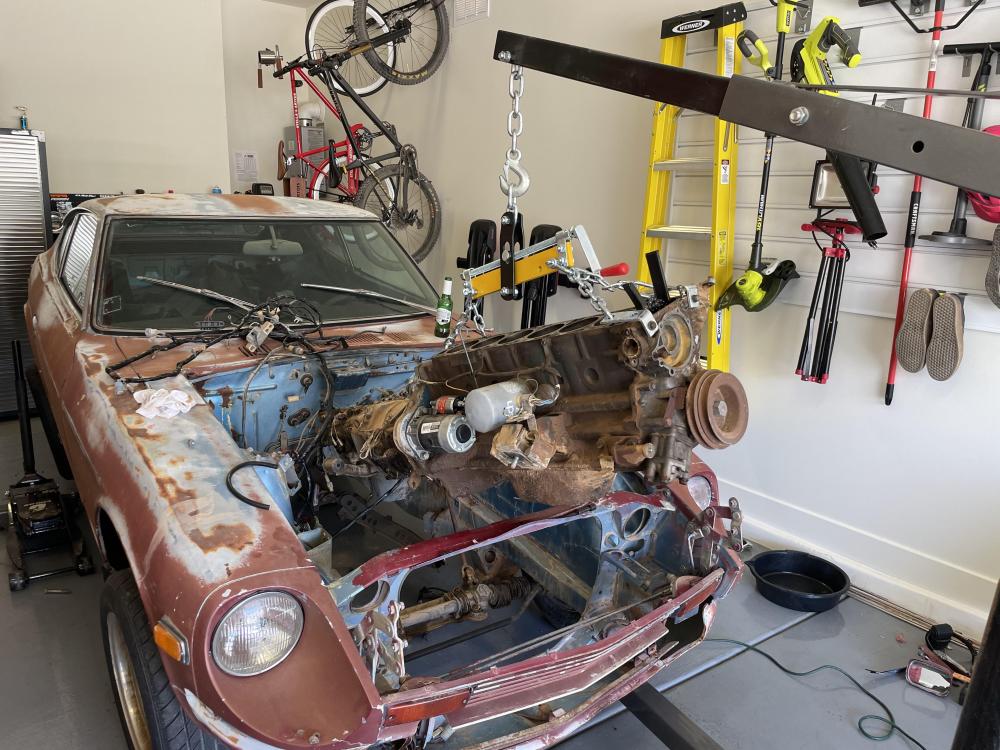
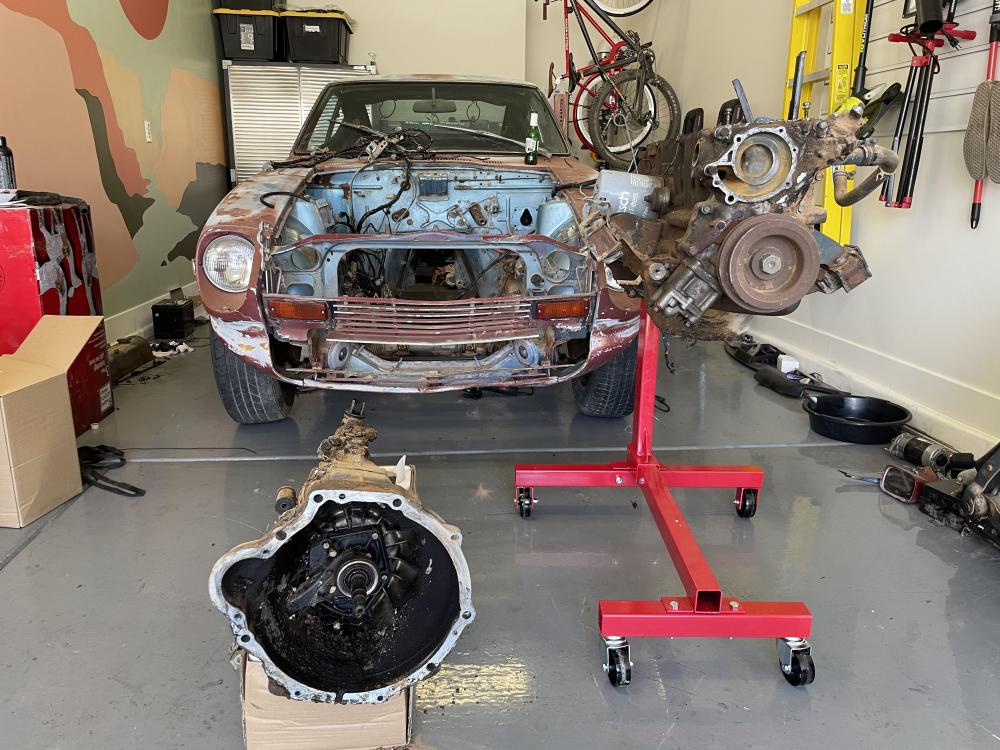
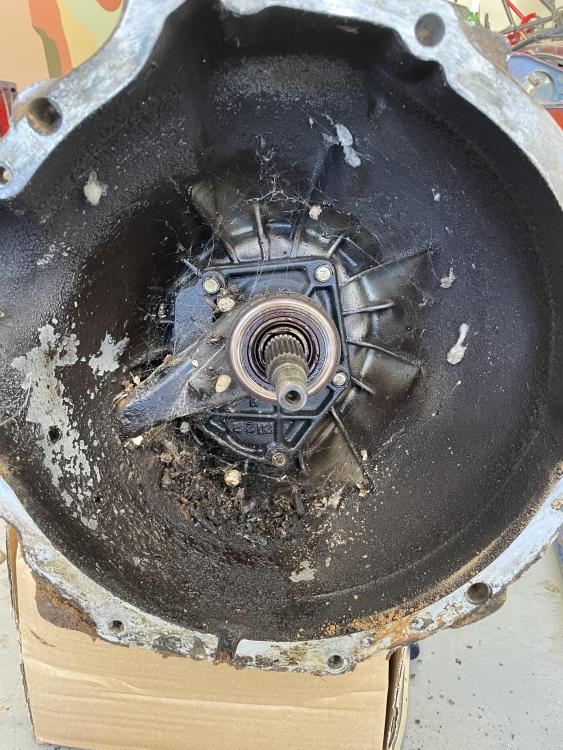 1 point
 -
1 point100% in the injectors. I rewired mine 10 years ago and asked an expert the same question. I have no idea if I swapped sides when I re-did the harness (new pins & connectors and put em together) but she's been running perfectly for a decade. And also 100% on keeping a stock cam. This FI is "dumb" in that it's not adjustable and built and designed to work within a small set of parameters. If you want to swap in a hotter can, you need to switch to a modern FI, which can self adjust on the fly, or Carbs.1 point
-
You need to put that next inspection on your calendar 1/1/2099!1 point
-
1 point

.JPG.6654356d42e0cf66fb1a33e18c19adf1.JPG)