Leaderboard
-
madkaw
Free Member6Points4,370Posts -
HS30-H
Free Member3Points5,509Posts -
bartsscooterservice
Free Member2Points1,900Posts -
duffymahoney
Free Member2Points961Posts


Popular Content
Showing content with the highest reputation on 09/25/2020 in all areas
-
5 pointsWell I can’t keep up with what I post anymore . The 3.2 is now running with the MN47 head again . Since the last post I had put miles on the p90 while I was fixing a 71 for a customer . Meanwhile the MN head got new Manely valves and bronze guides . I swapped it back I’m with the proper head gasket thickness and should be back to 10.5:1 . Cylinder pressure is around 220 with compression tester . Pistons were pretty much broke in , so just a tune and start flogging . I managed a quick 0-60 time of 4.77 seconds . This is a beast motor . It’s amazing how hard it pulls even in 4h gear . Dyno appointment is in November - everyone is booked up until then . 8B4867CC-29D6-428F-A1D7-5F72482973E3.MP45 points
-
@gnosez and I have corresponded about this bodyshell. As far as I'm concerned, everything rings true.3 points
-
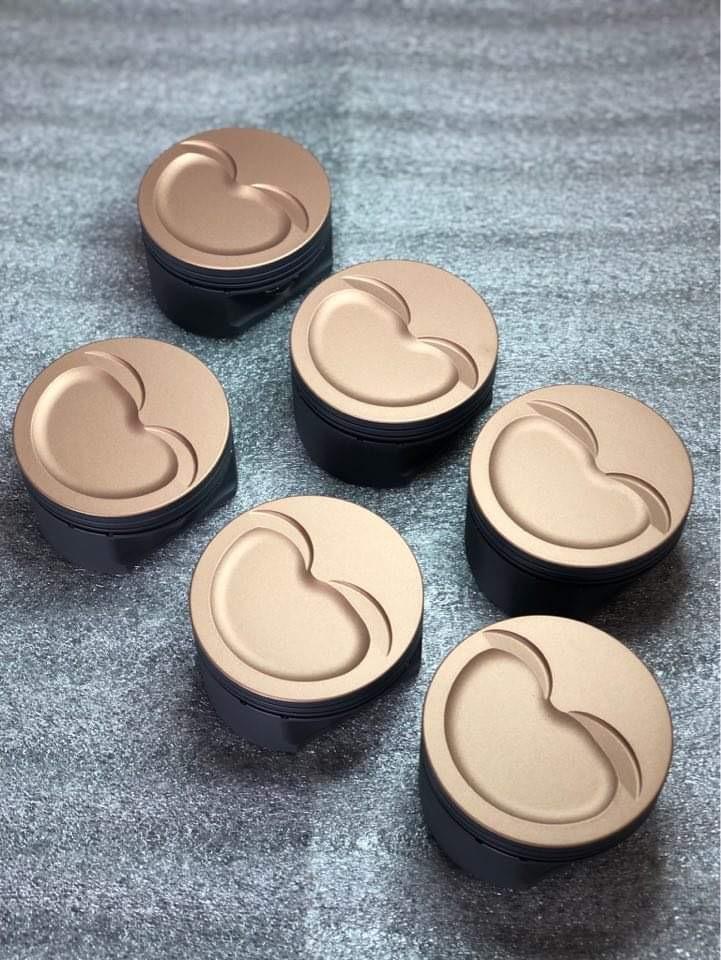
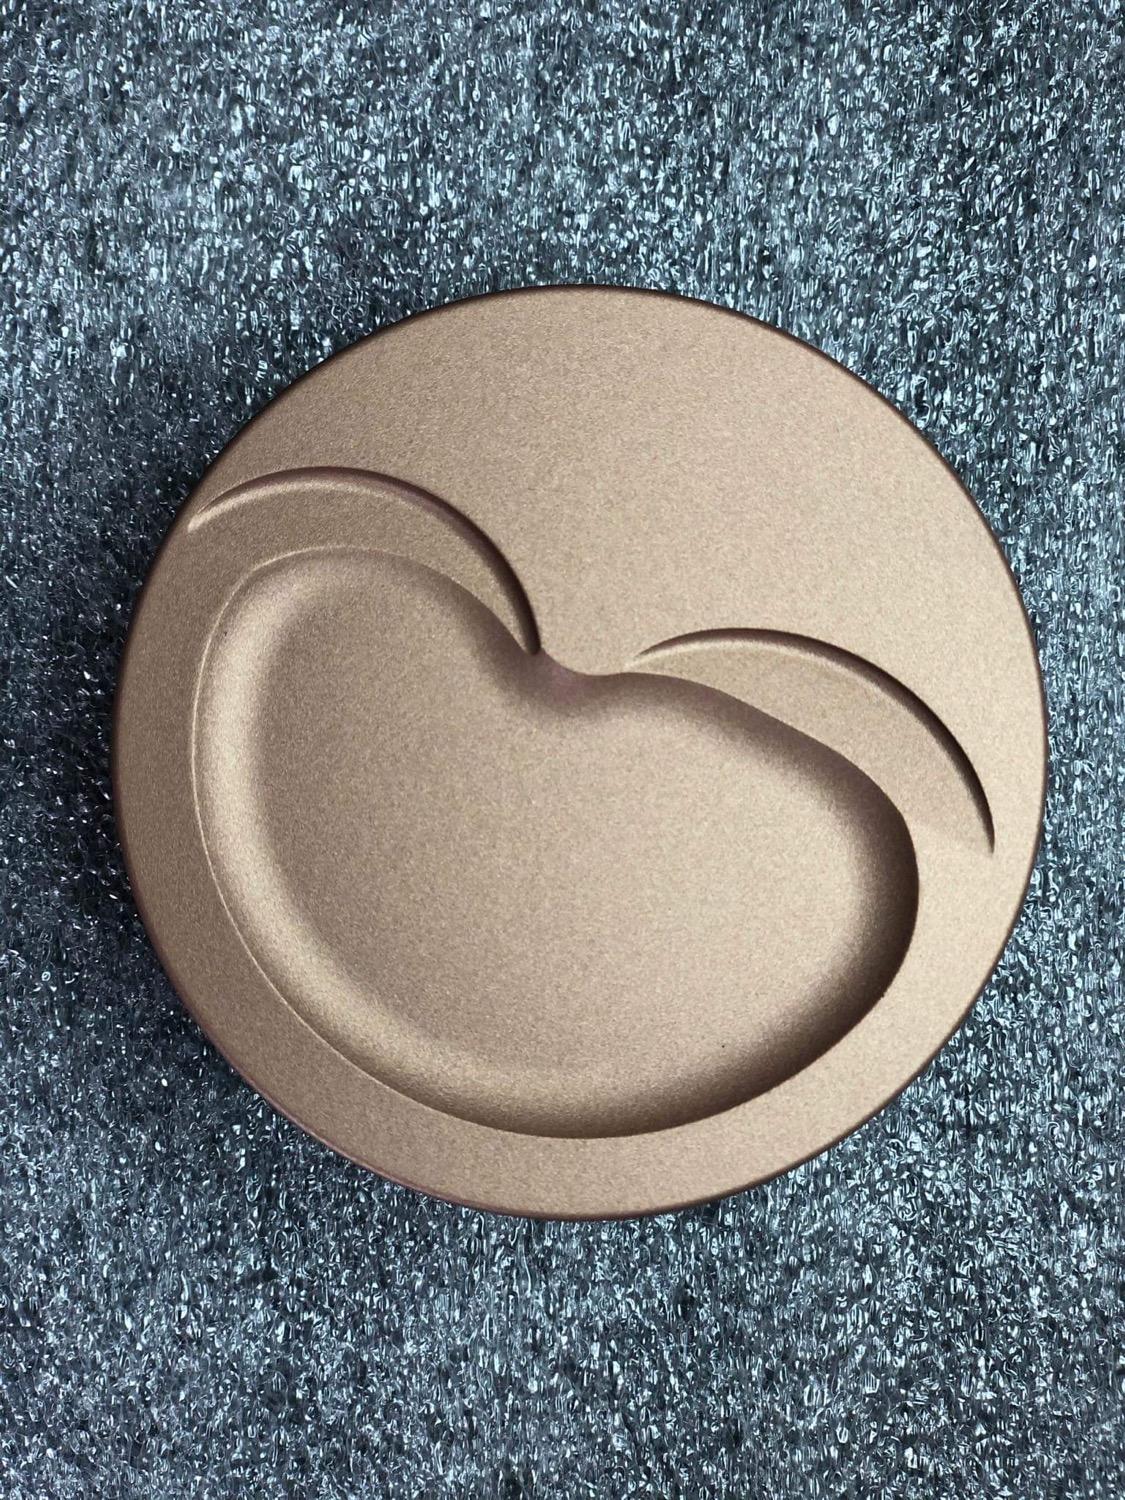
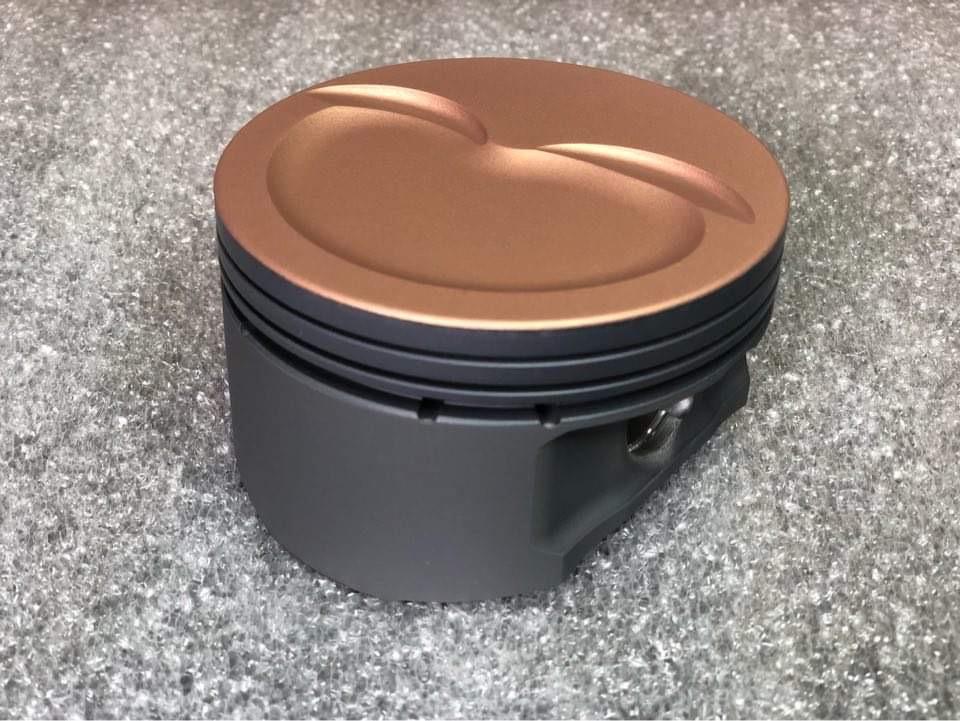
2 pointsSome L series piston porn for your Thursday viewing pleasure. Originally the ceramic coating had some issues. I reached out to the company eagle suggested and they fixed them for me. Much better coating job. Contact IA coatings: https://www.facebook.com/iacoatings/

 2 points
 -
1 point
-
1 pointI've seen one of those. Seems like it uses an air compressor but I don't remember. A mechanic friend had one at his shop. Reverse fluid filling. Here's one I found on the www.com. https://www.autoanything.com/brakes/77A5485A3714372.aspx?kc=GOOGADW&DZID=PLA_g_1776970776_66506501262_5485-3714372_c&utm_source=g&utm_medium=cpc&utm_campaign=1776970776&utm_content=66506501262&utm_product=5485-3714372&gclid=EAIaIQobChMI_Lya1eqE7AIVF47ICh3xxAzOEAQYBSABEgKa_vD_BwE1 point
-
1 pointPs. One of my neighbours has a machine that feeds the brake fluid in from the callipers!!!! Now that’s a cool way to chase the air back to the M/C! [emoji106]1 point
-
1 point
-
1 pointThat's a clever trick, I'll have to remember that one. The mount looks like it will work perfectly. Sure, it's called the R/T mount, https://www.technoversions.com/DiffMountHome.html? But if you want to remain original all you have to do is eliminate the space between the top of the diff housing and the bottom of the arrestor strap. The last time I did it I used two layers of some old rubber conveyor belt I had on hand, it is only about a 1/2" gap so when you raise the diff into place the arrestor strap is snug against the spacer and there is no room for the diff to jump up and make that clunk.1 point
-
@gnosez (Bad Dog) knows Bob Sharpe and maybe able to dig deeper to find the path & pedigree. Bad Dog mentioned that Bob Sharpe liked the 260z the best of the NA trio so this is a nice find wrt racing.1 point
-
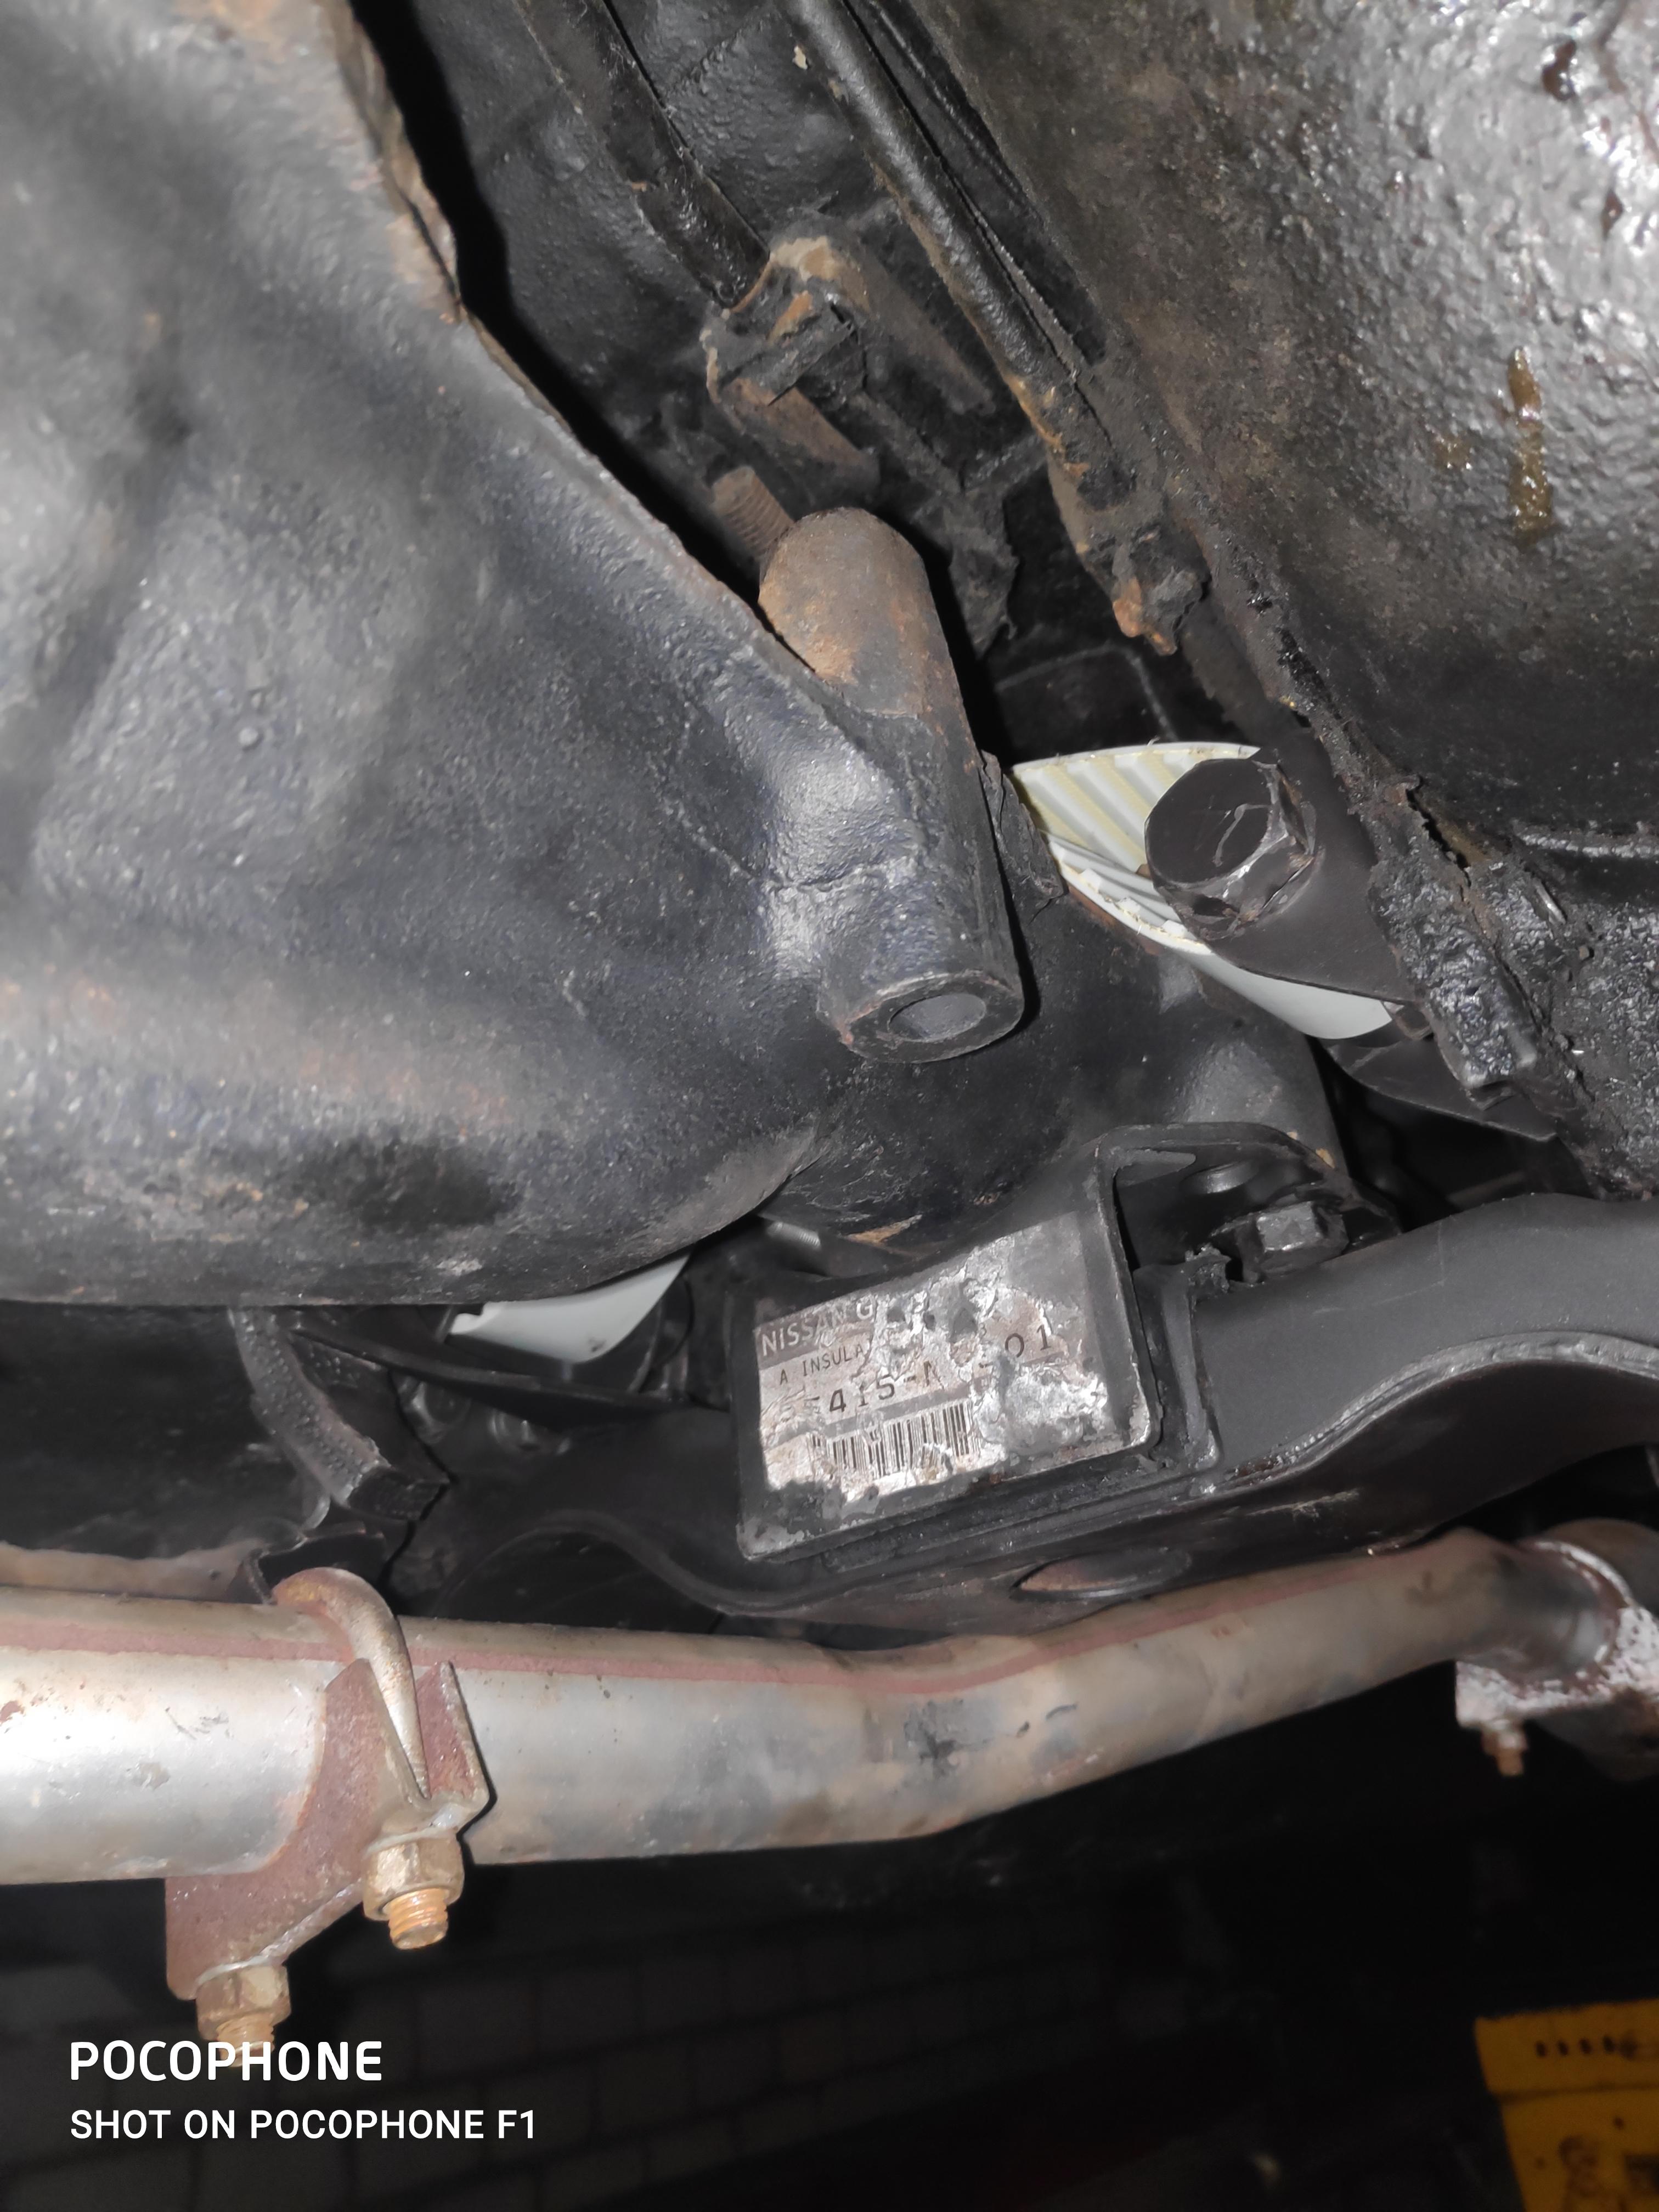
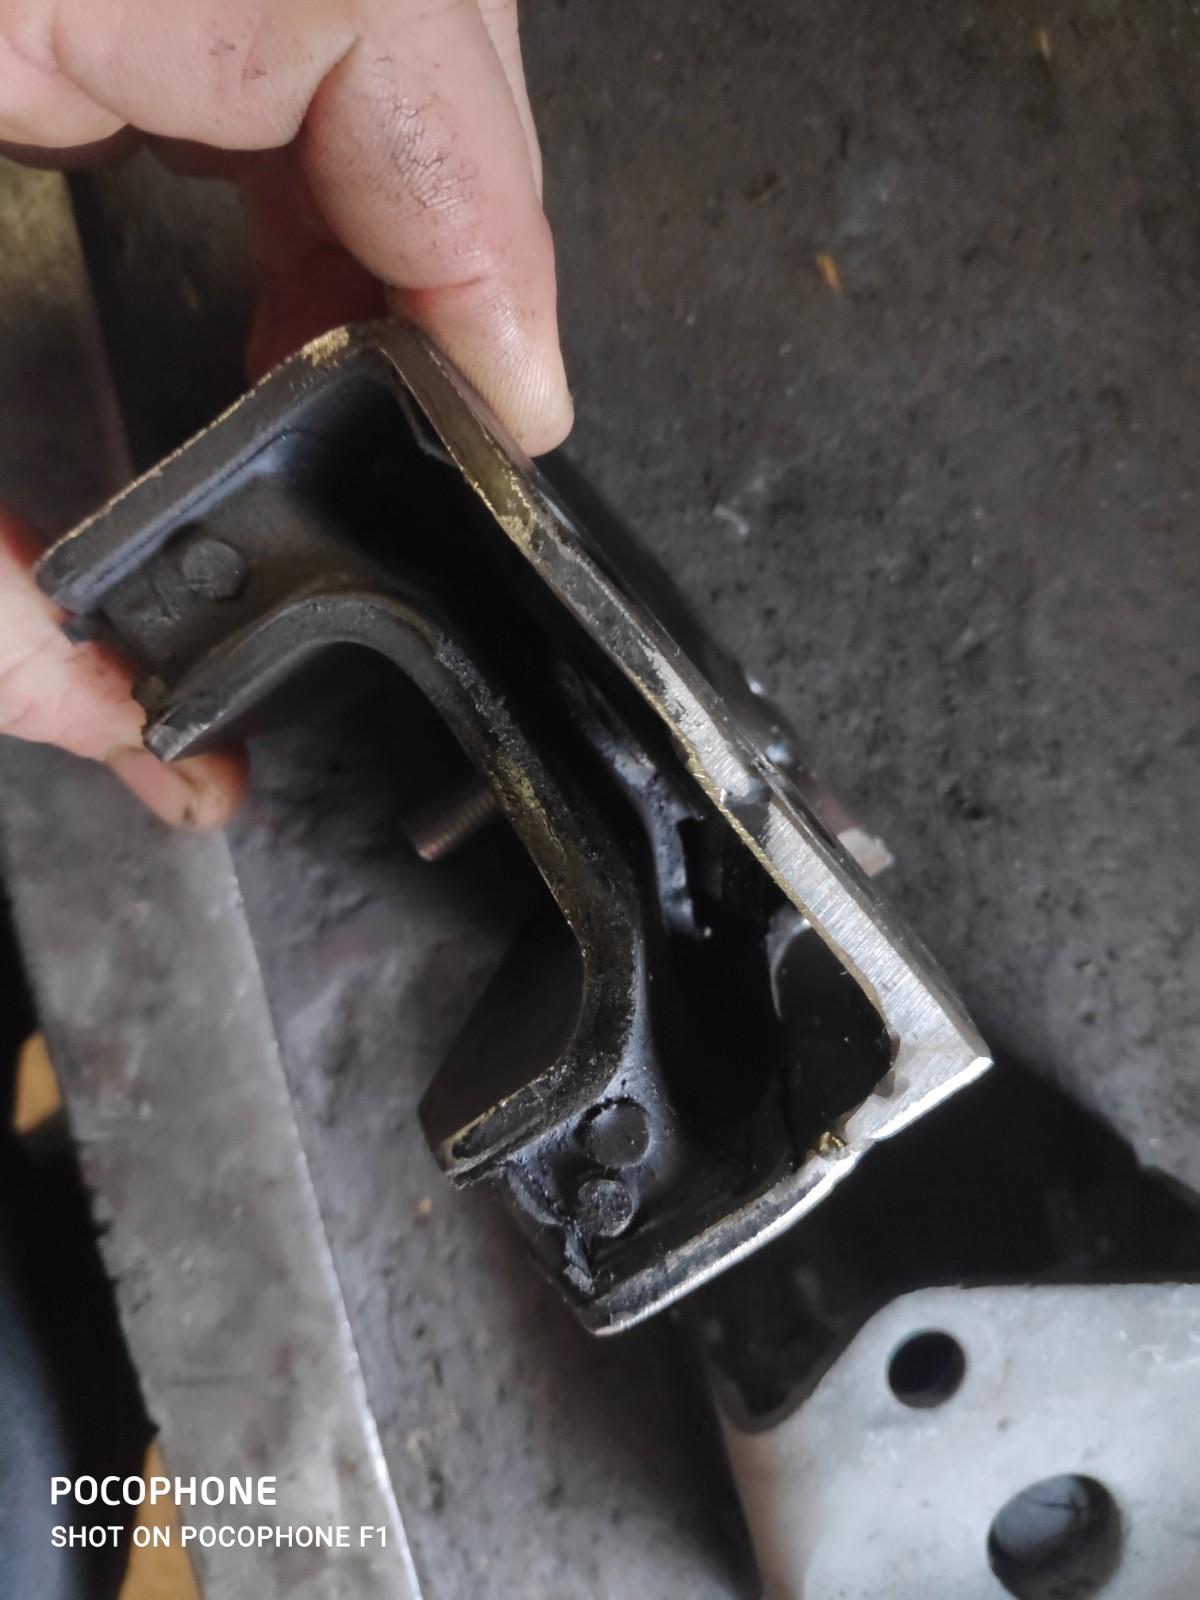
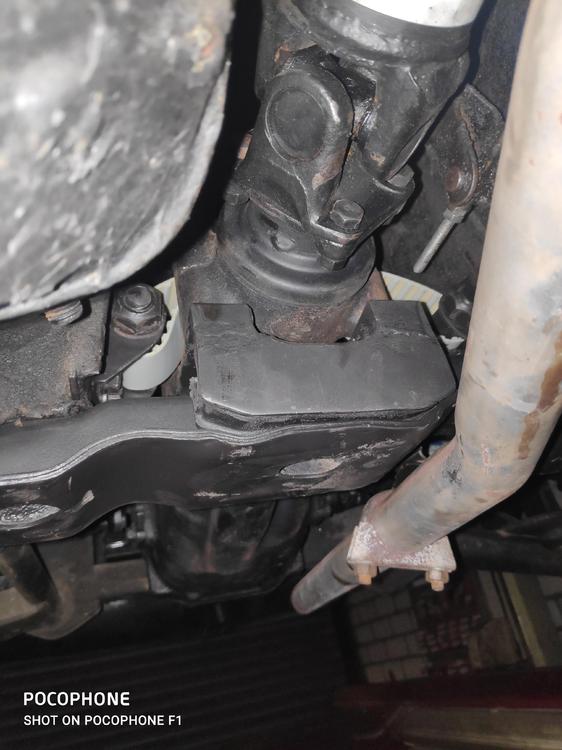
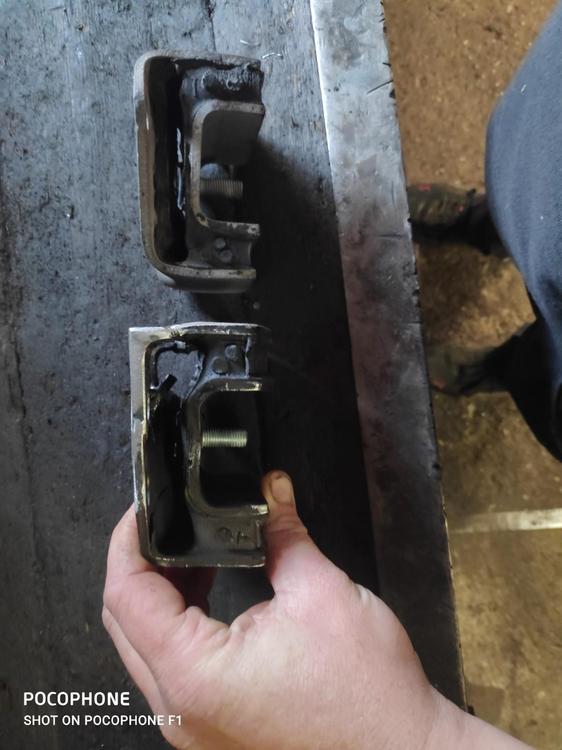
1 pointIt's in, I did have to shave some more metal of the inside to fit the bolts through and the nut on top like the manual shows. So it's possible to make the 72 mount to fit like the early one..

 1 point
 -
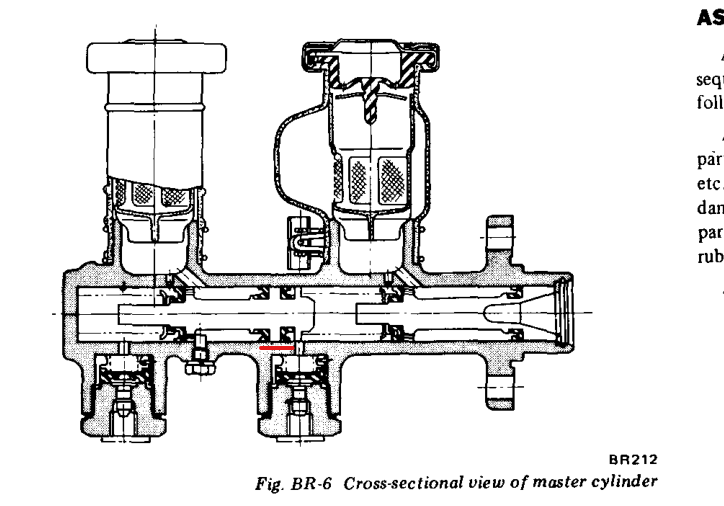
1 pointThere are four seals in the MC. Two to pressurize the front and back systems, one to keep them separated, and one to hold all of the fluid in the cylinder. Seems like your separator seal is not separating. Not sure of the actual dynamics but that seems reasonable, to me. Looking at the drawing it seems that fluid is pumping back and forth to various places with each pedal press. In your case it might be that the port to the front reservoir is clogged and fluid is getting forced past the separator seal (had to take a guess). Short would be - your MC is bad. Best guess. I found that some of the hydraulic parts I bought at the parts store had machining grit in the bores. Best to take them apart and clean them before installing.
 1 point
 -
1 pointWell Mr.Dat: Thanks for the link; no love, but BINGO just the same. I now know that it is the Standard Motor vac module that Cardone always shows with their unobtanium distributor bodies. It was this very issue that prompted me to call the folks at Cardone the other day, seeking some way to obtain one of those obviously new units, so prominently displayed in all their cut fotos. This event was also illuminating, if you count "in a disappointing light". A two parter, it began with the "Tech" staff, that collectively claimed that Cardone "made" the piece, and no, it was not available to the public under any circumstances, presumably because of Proprietary interests. I was subsequently transferred to the "R and R" Dept., and a conversation that revealed that Cardone don't make no stinkin' VA modules, but he could/would not reveal their origins. He asserted that all the work is done in Mexico and the Home Office wasn't really interested in where they got the parts, and besides, the Contractor wasn't inclined to offer the information anyway. He volunteered that he believed that these days, they're using "pre-owned" stock for this purpose. Given what I know now about the Standard product, I have no reason to doubt him. Finally, as reason would suggest, that "send us your dist. and we will re-build it for you" stuff is, in fact, the Old Switcheroo turn-around, so there is little incentive to provide something you would like to keep. No wonder one occasionally gets a disclaimer about the "fit and finish" of the "rebuilt" product from a responsible dealer. I know it was naive to think anything else was the case, but desperation led me to try a bank shot: I'd pay full price if they would leave the dist. alone and just attach a module. Of course, I was rebuffed, tho he did opine that if I really wanted to get my own dist. back it would "probably cost 2 or 3 times the normal charge and there would be no predicting the turn-around time". Sigh. I wonder if there is a toll-free to someone interesting at Standard Motors....1 point
-
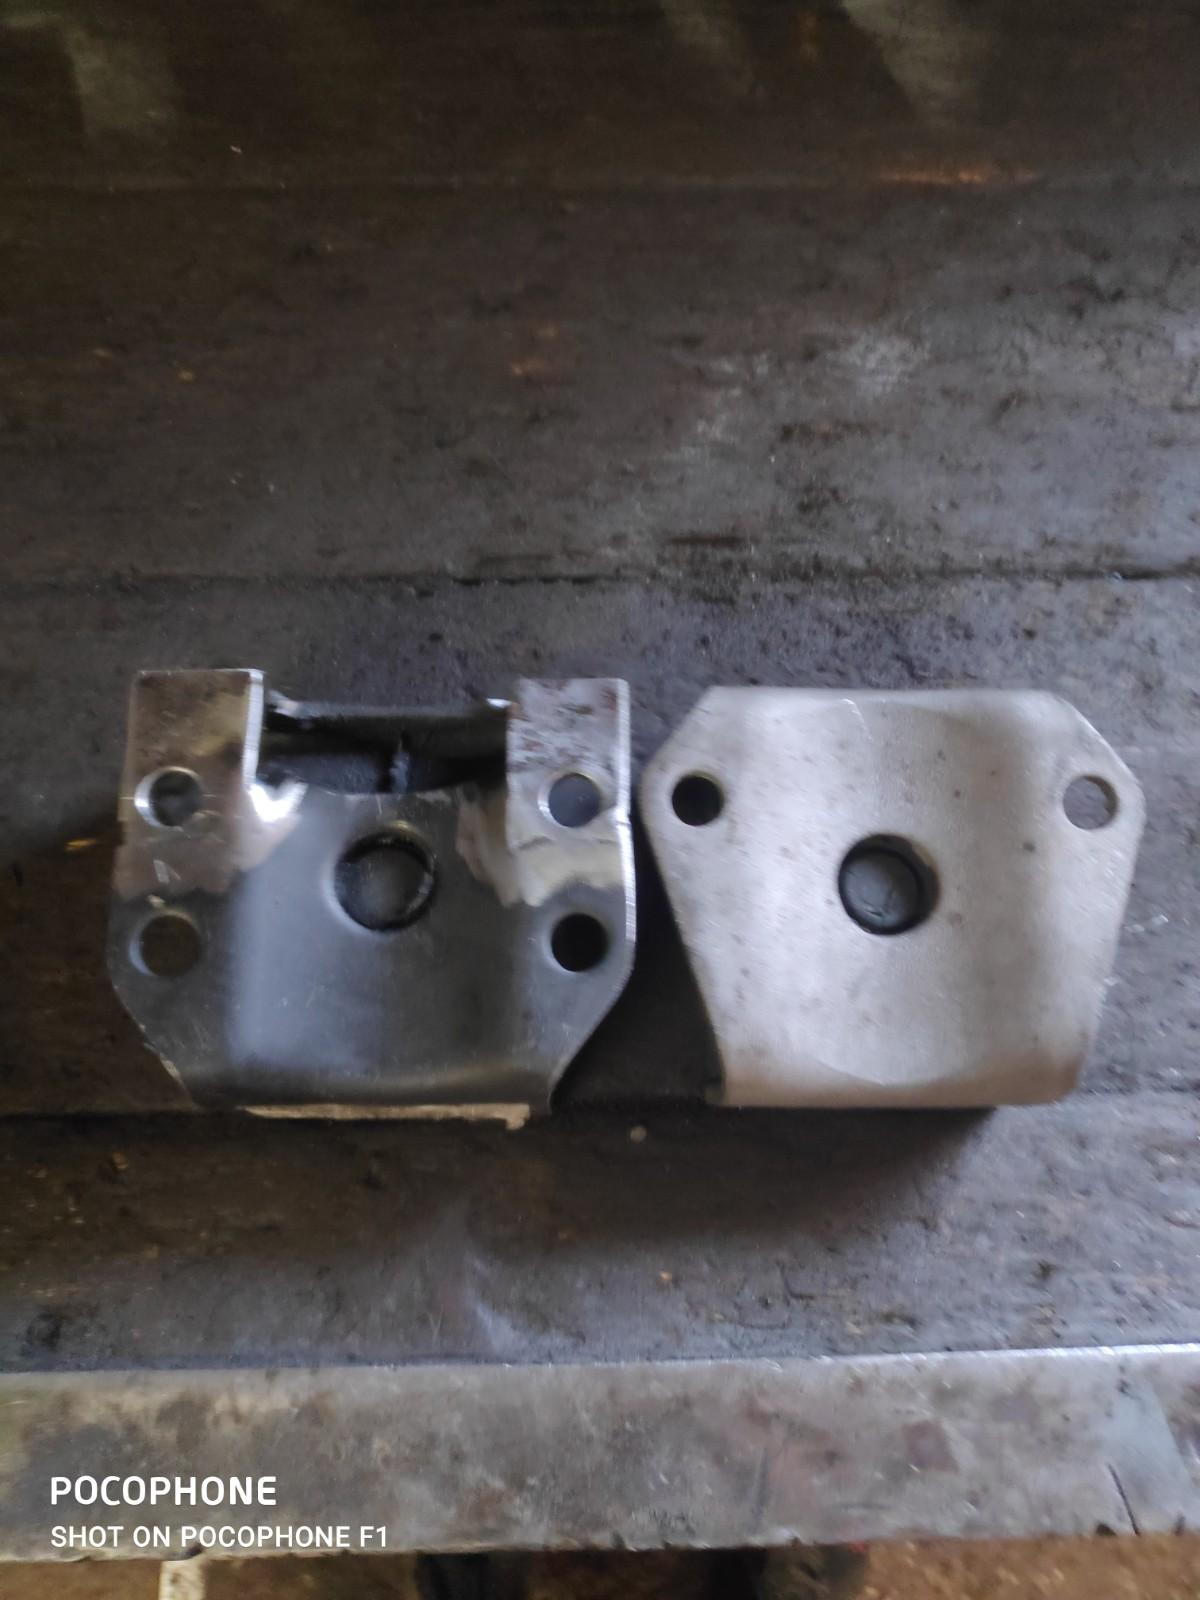
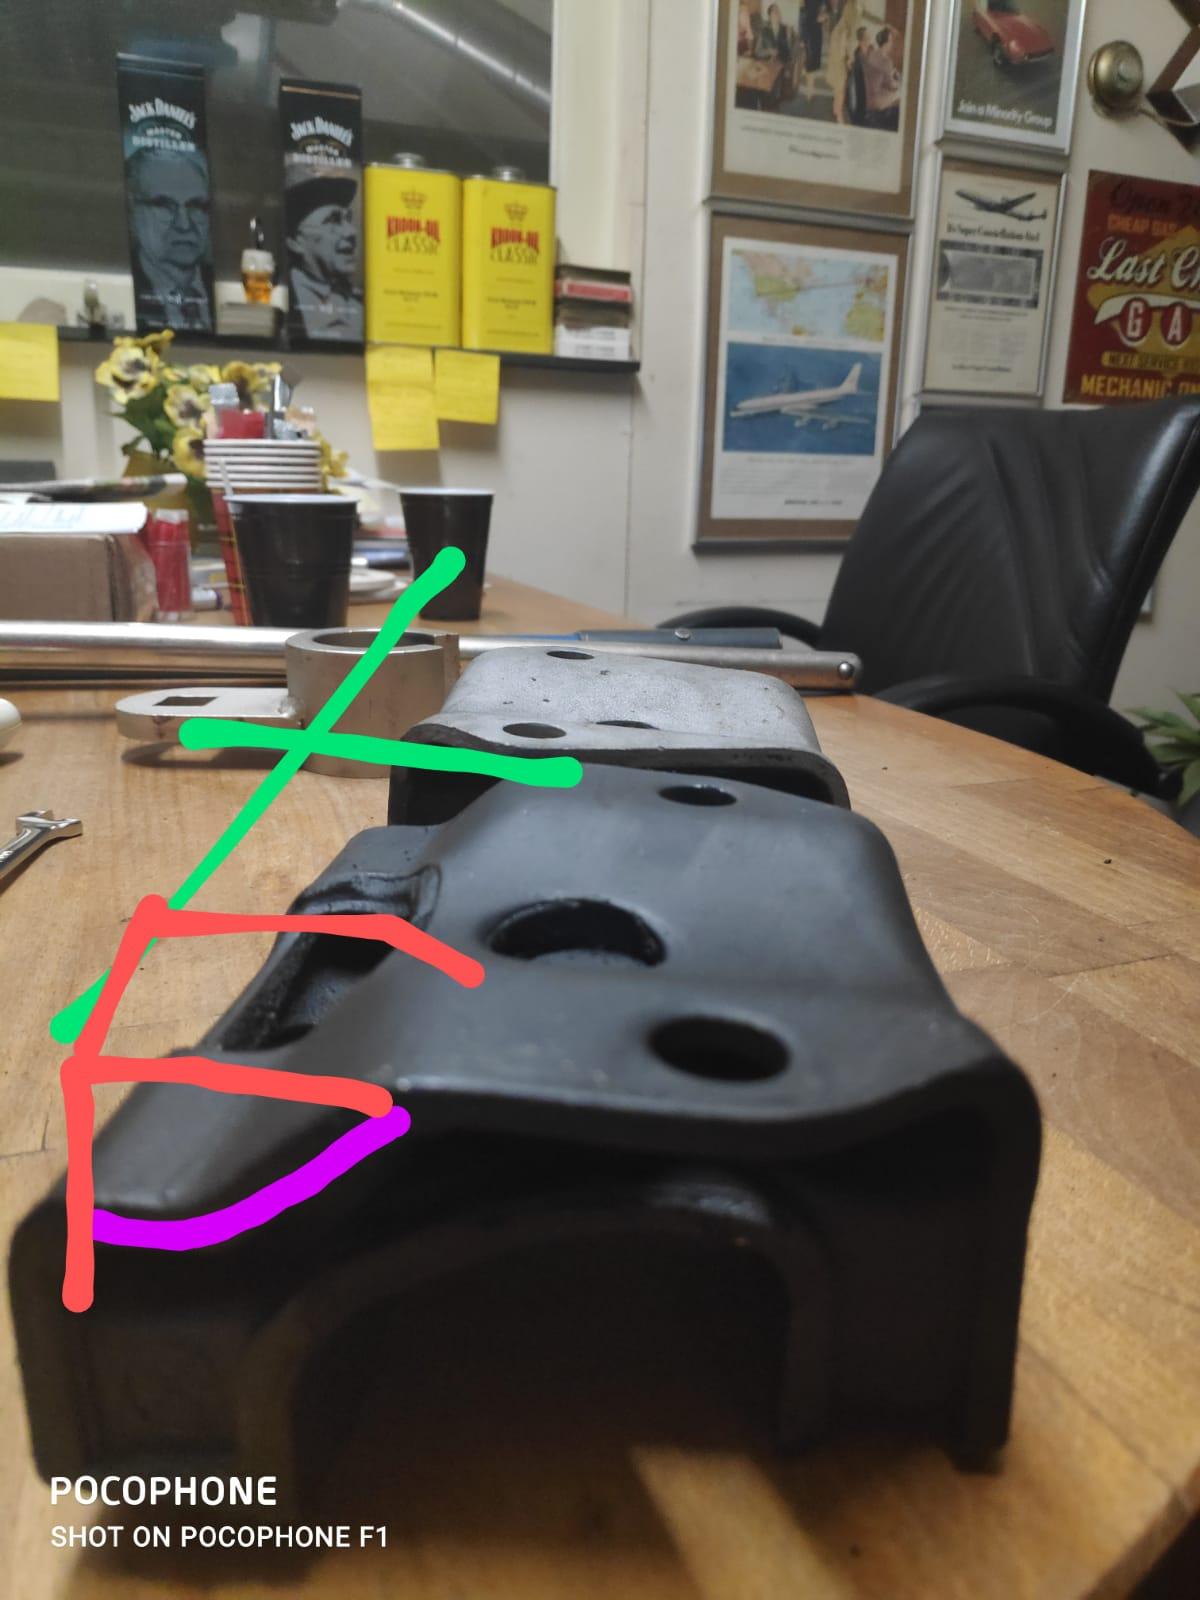
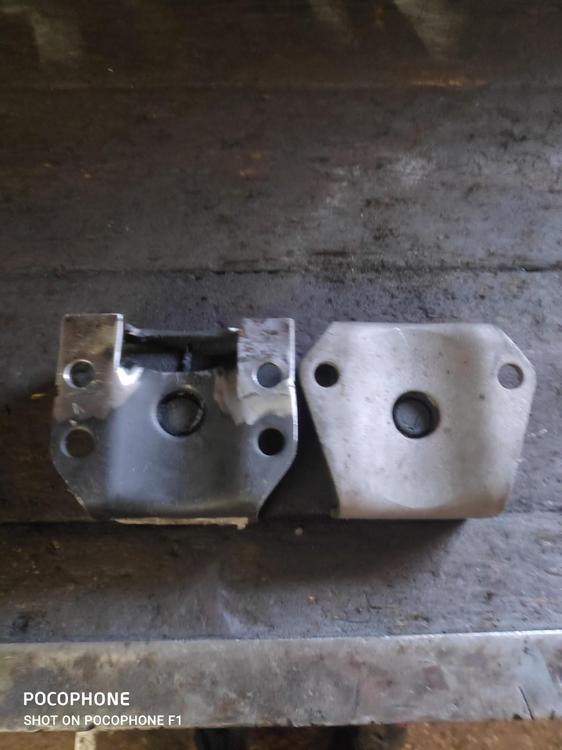
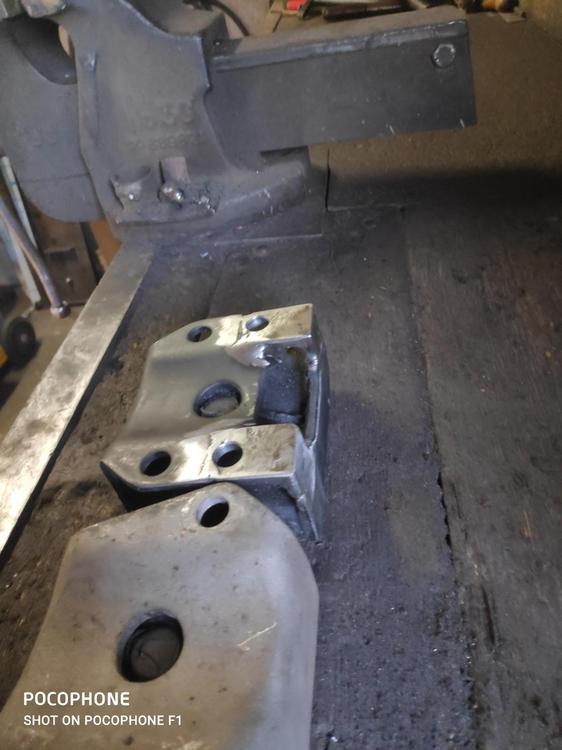
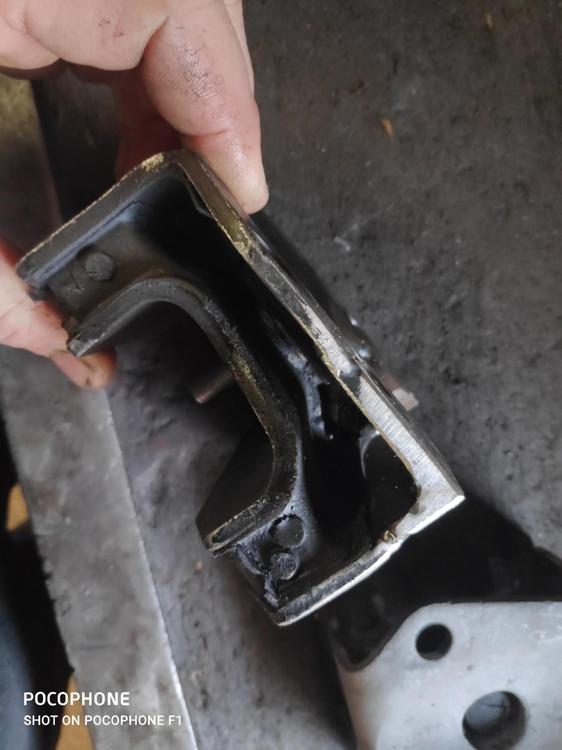
1 pointWe did some brainstorming, including heaving the early one remolded, but that would be way to expensive, they will only do it from at least a 1000 pieces. So I decided to modify the later one, back to the early one. I think it worked out. I will test it to make sure, just waiting for the strap to come in first. I cut the purple, and added to red, so the " slope " is the same, and the holes are on the same spot as the early one. With the purple cut out, you can now put the M12 nut under there. I could not just simply twist the mount 180 because that would change the angle.. so this was the only way. Welded the mount with the rubber part of it submerged in some water, so it wouldn't melt..
 1 point
 -
1 pointYeah, that's from the time I was being pursued down the freeway by a dozen LAPD, the sparks were flying but that old 510 out maneuvered them all. By the time it was over it looked like the end of The Blues Brothers.
 1 point
 -
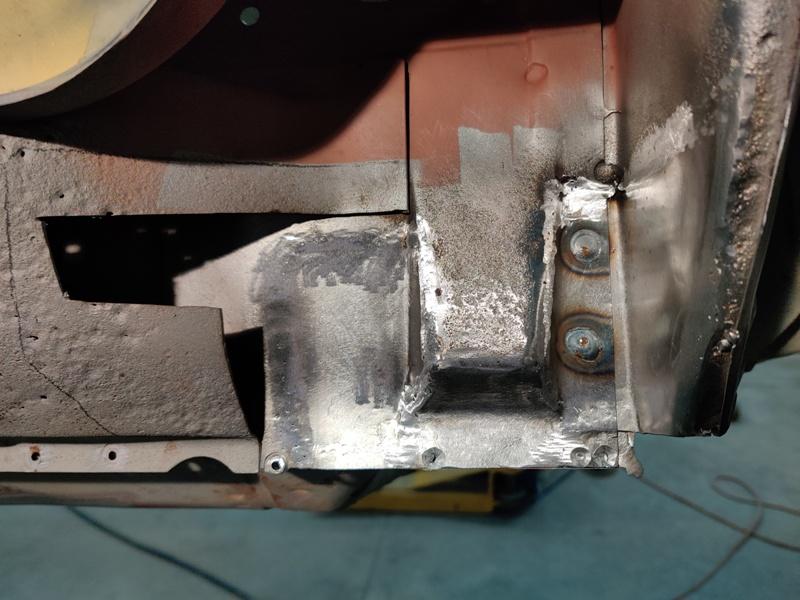
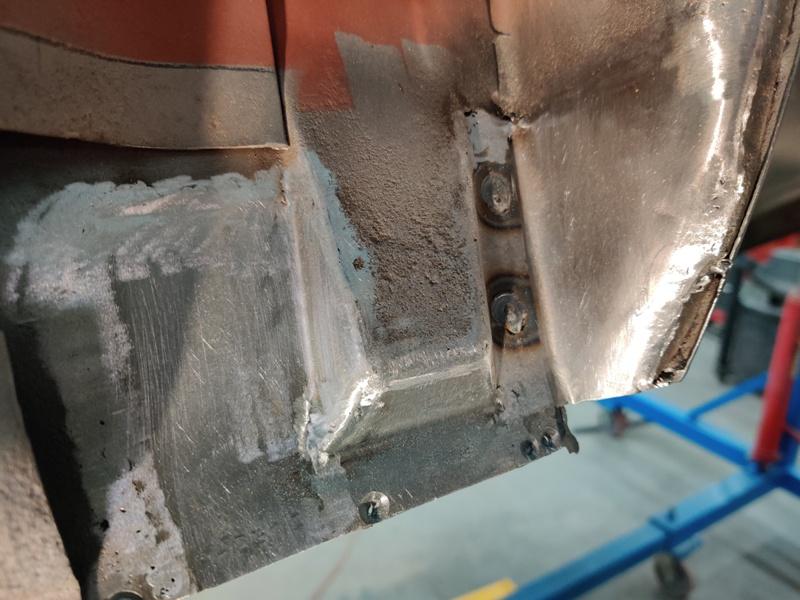
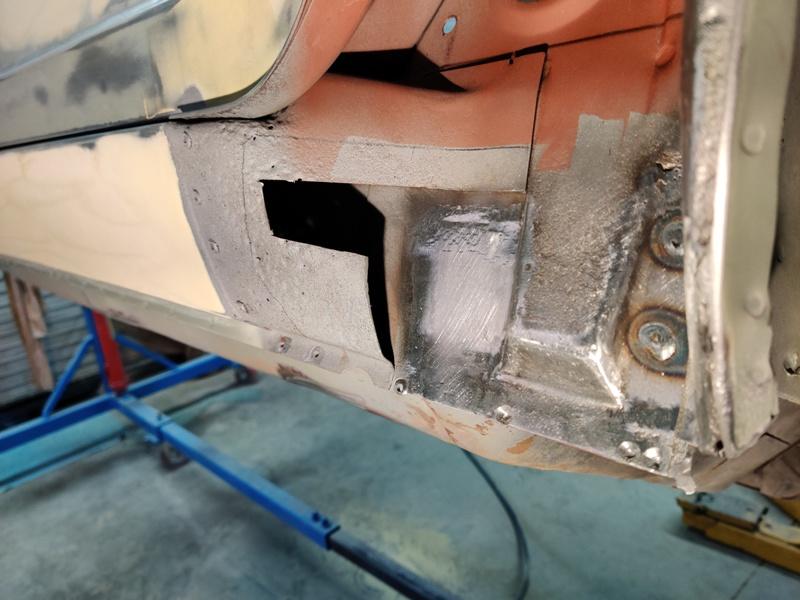
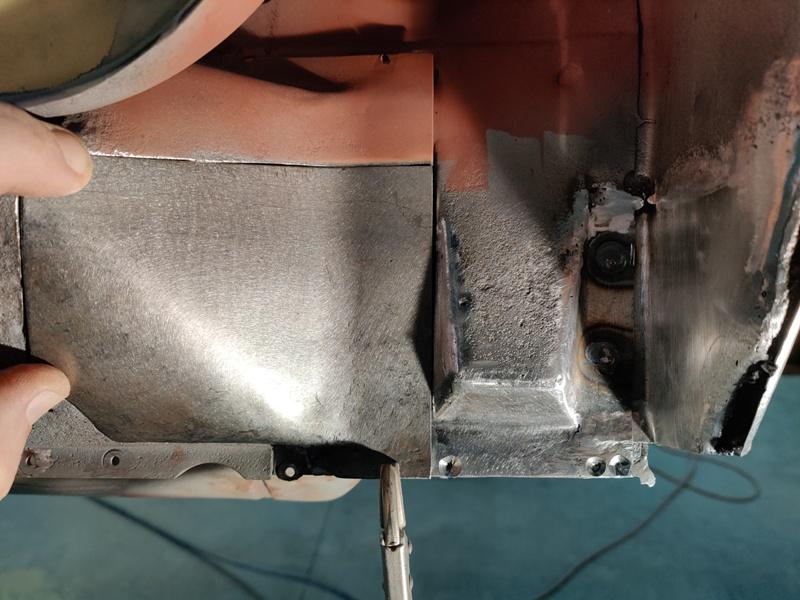
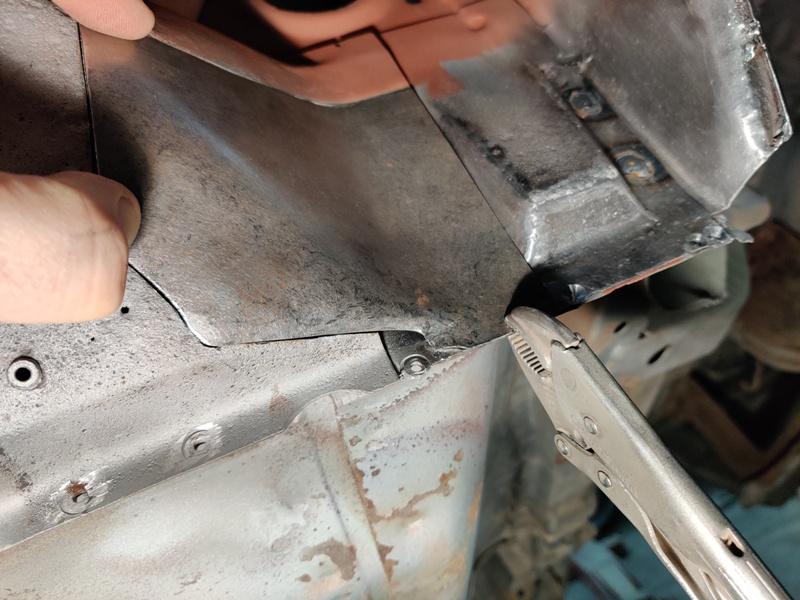
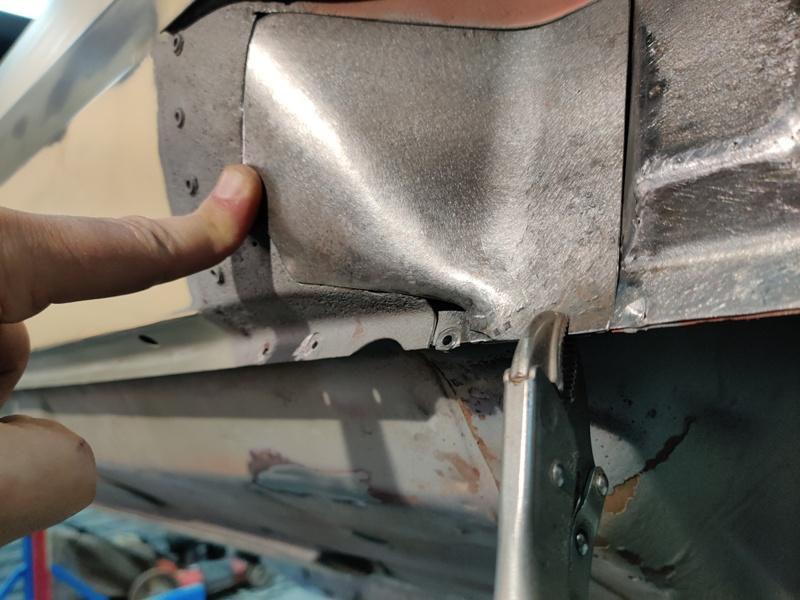
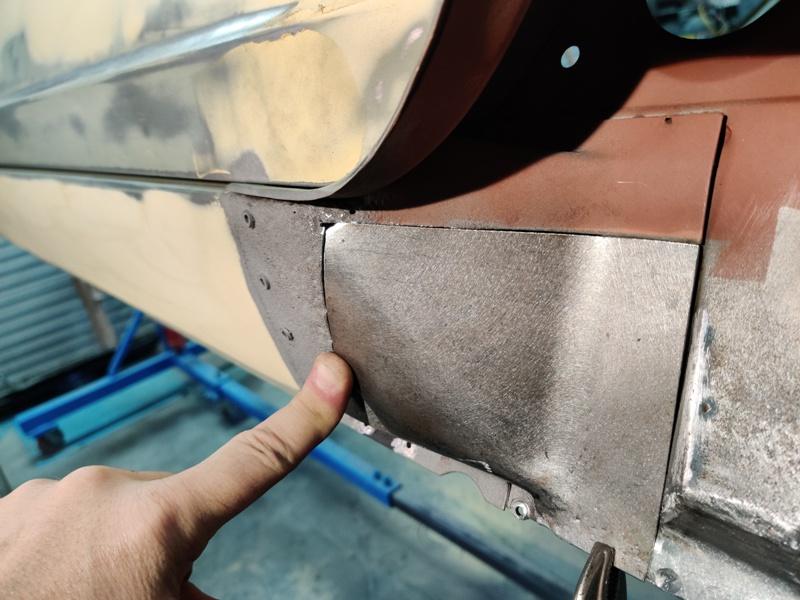
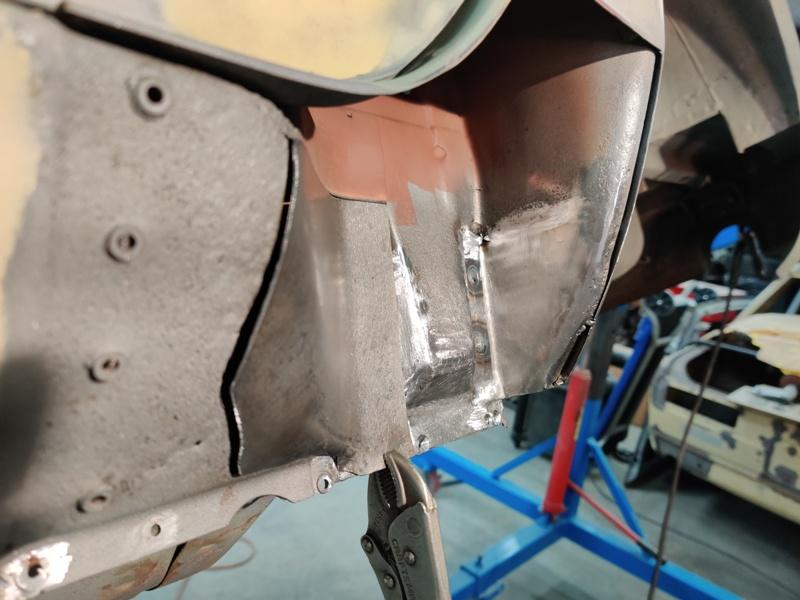
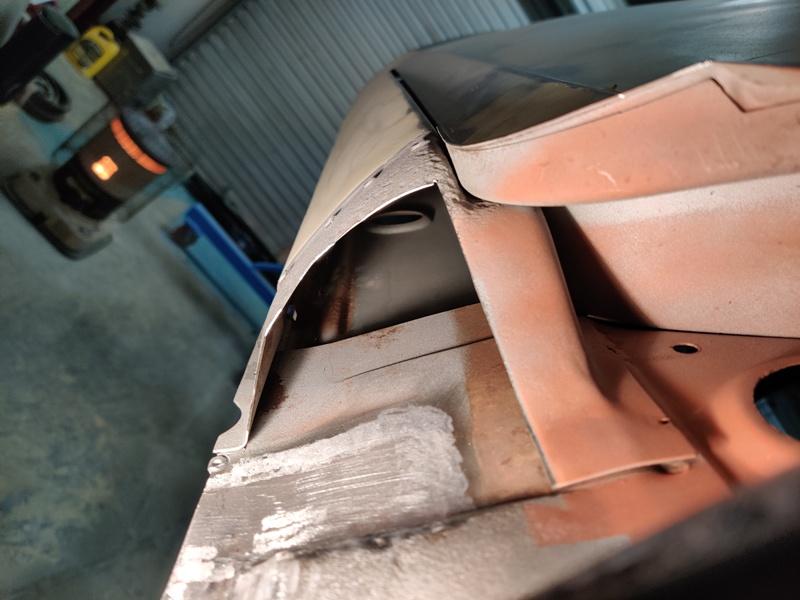
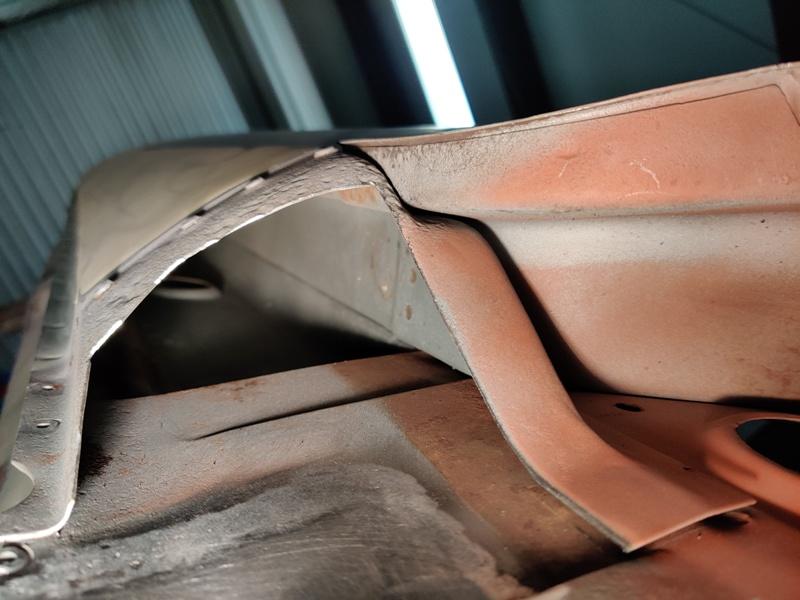
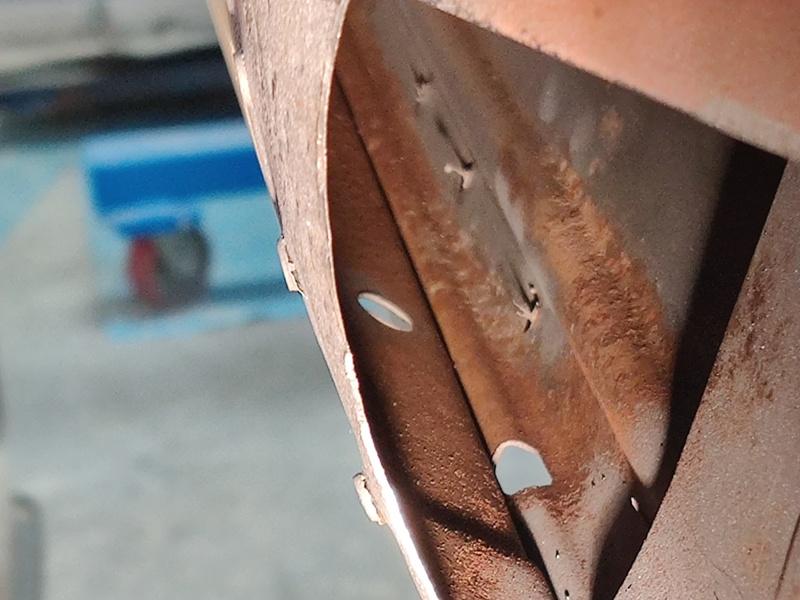
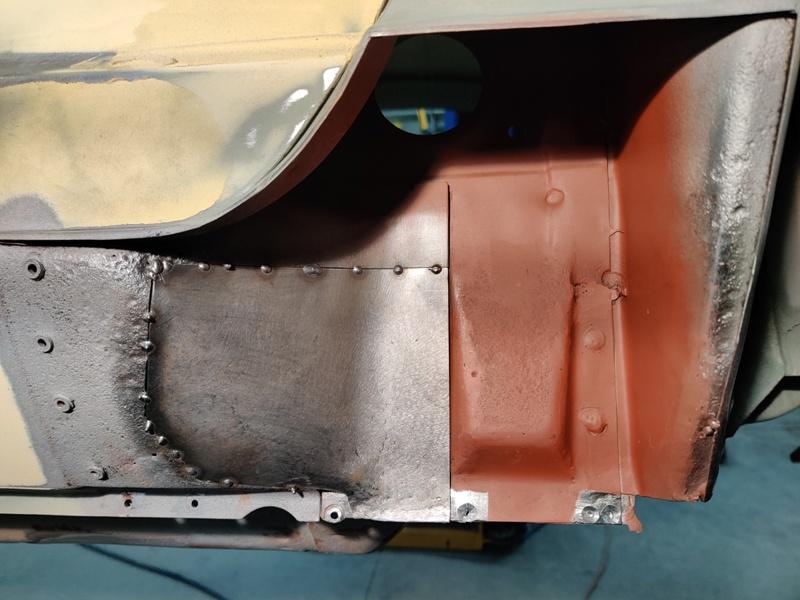
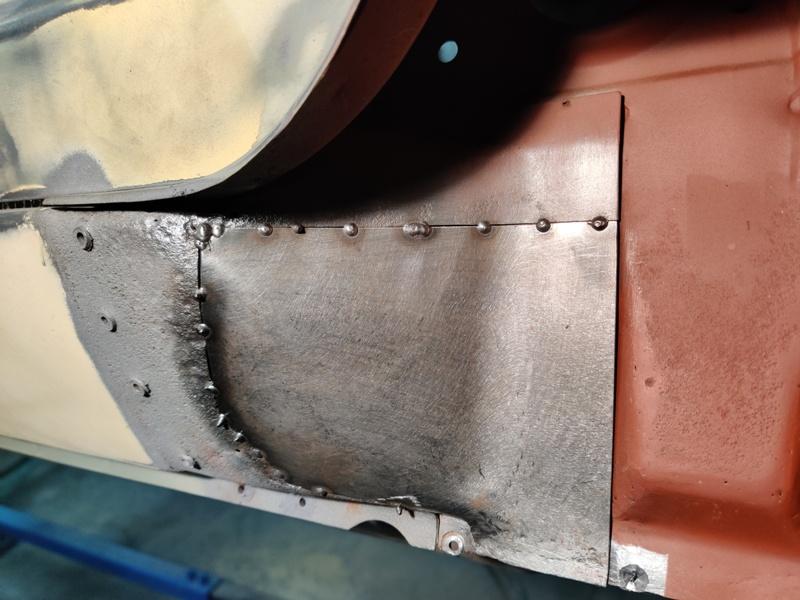
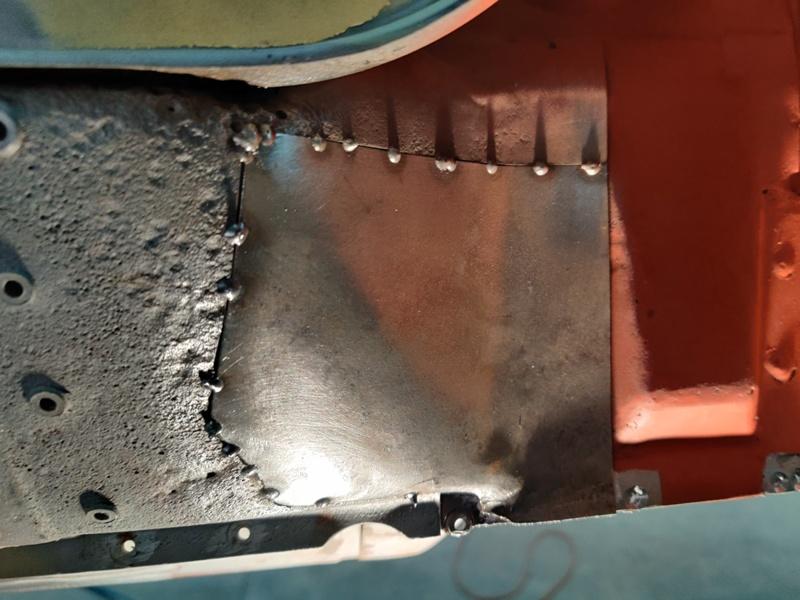
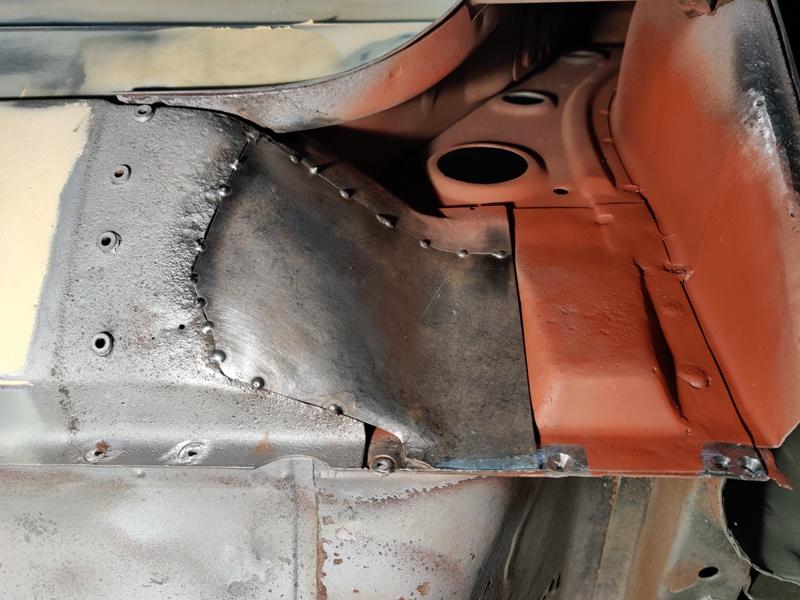
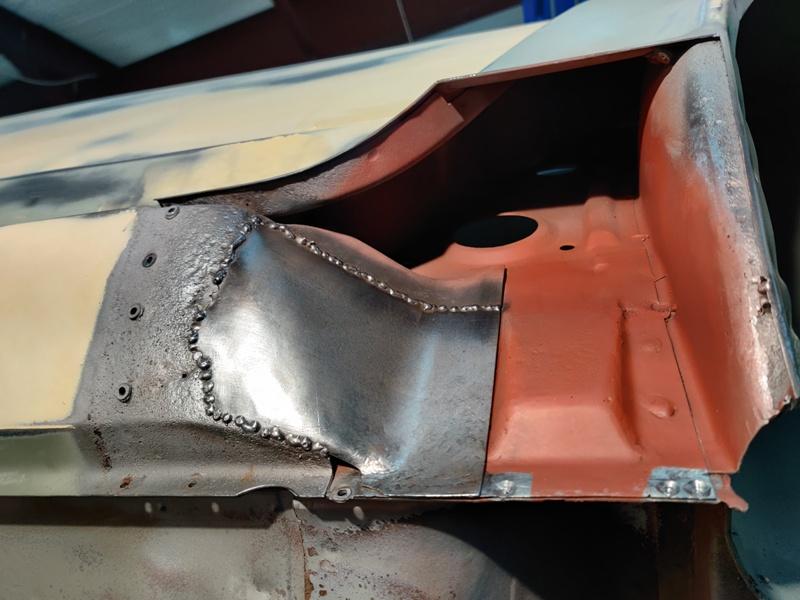
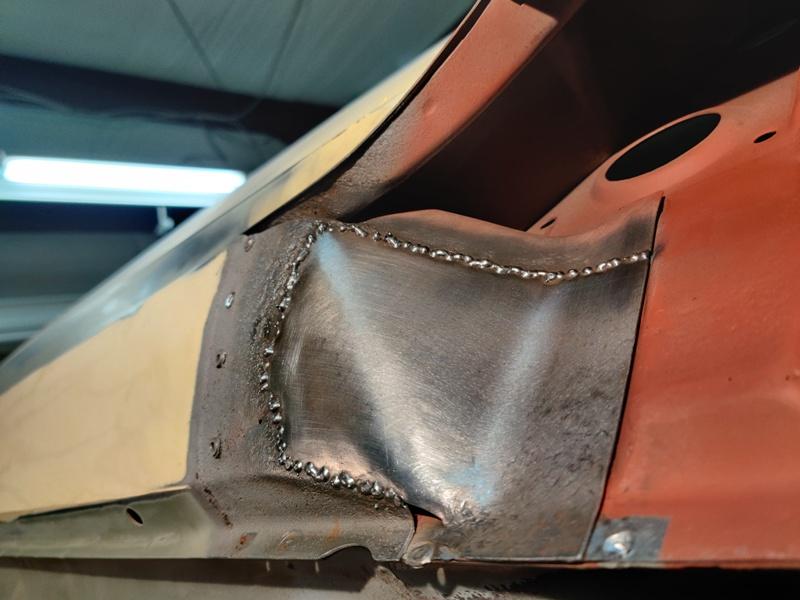
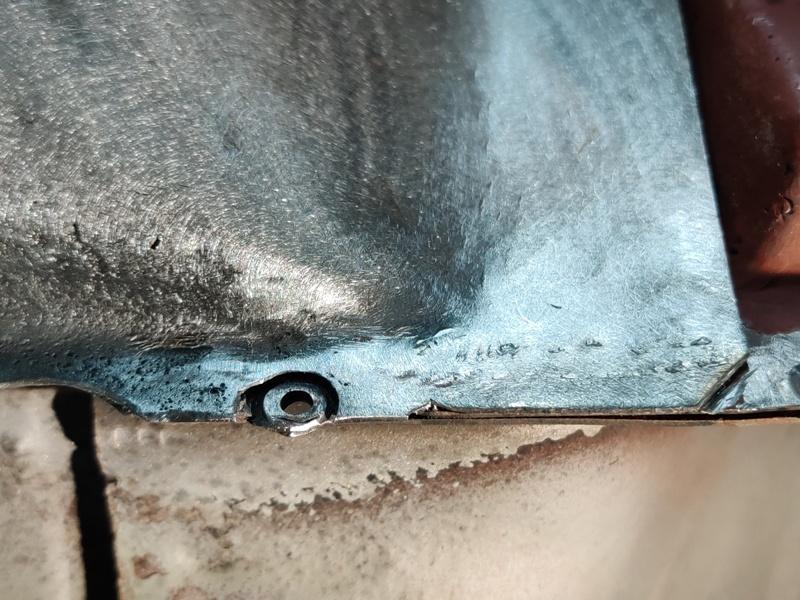
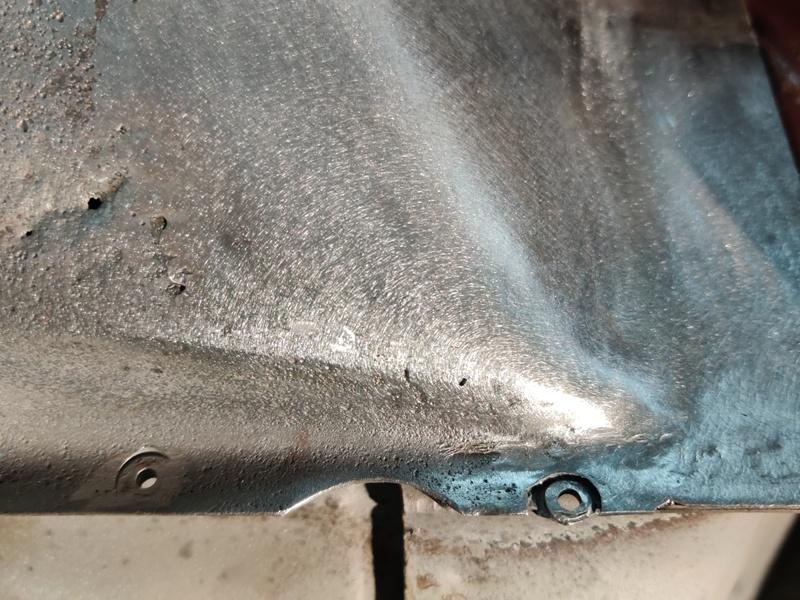
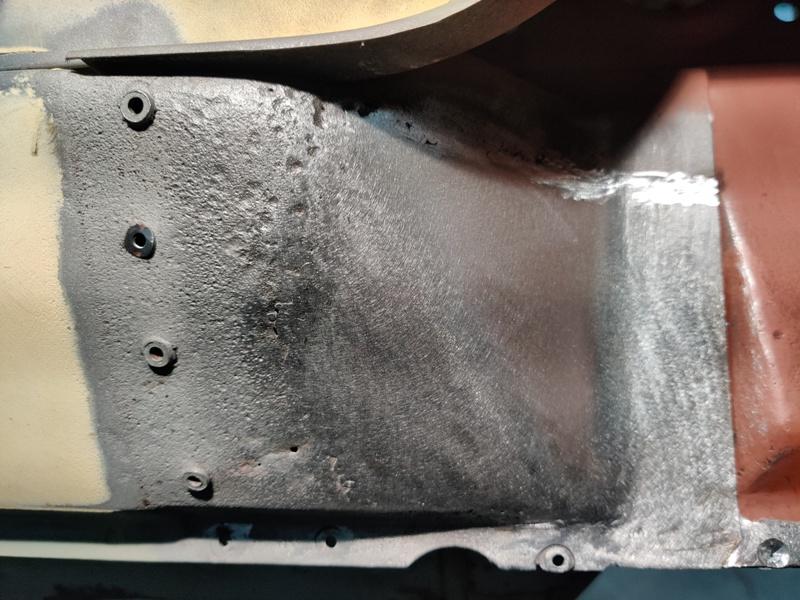
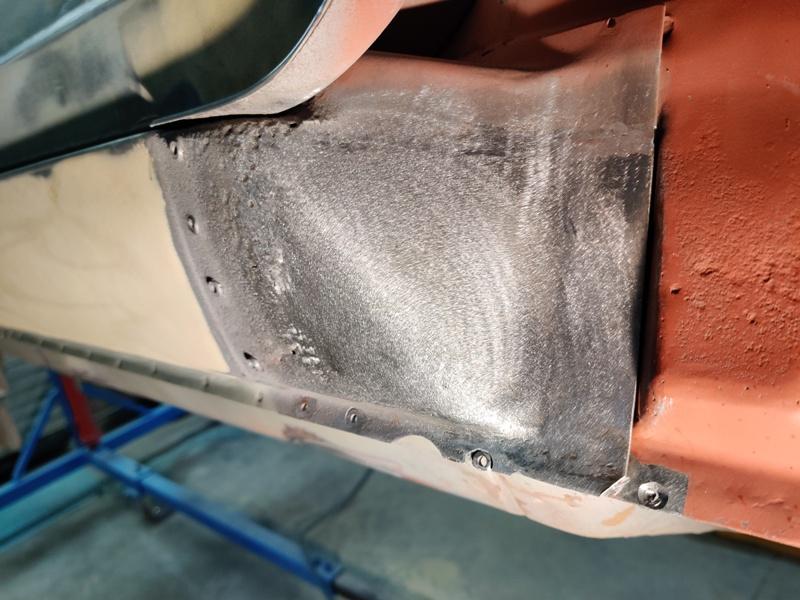
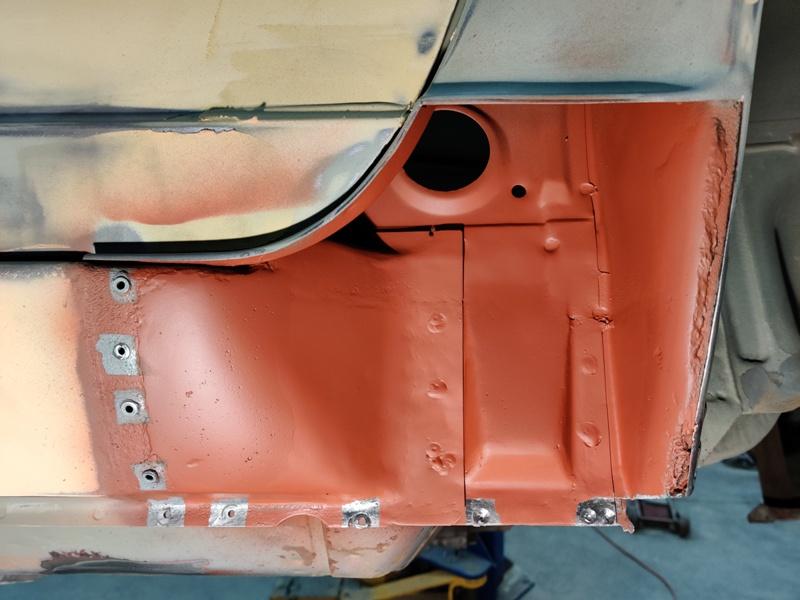
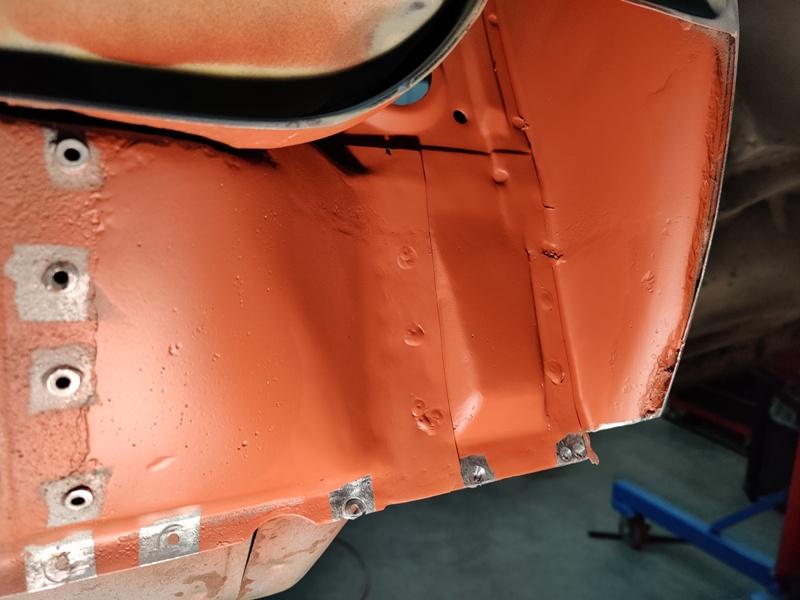
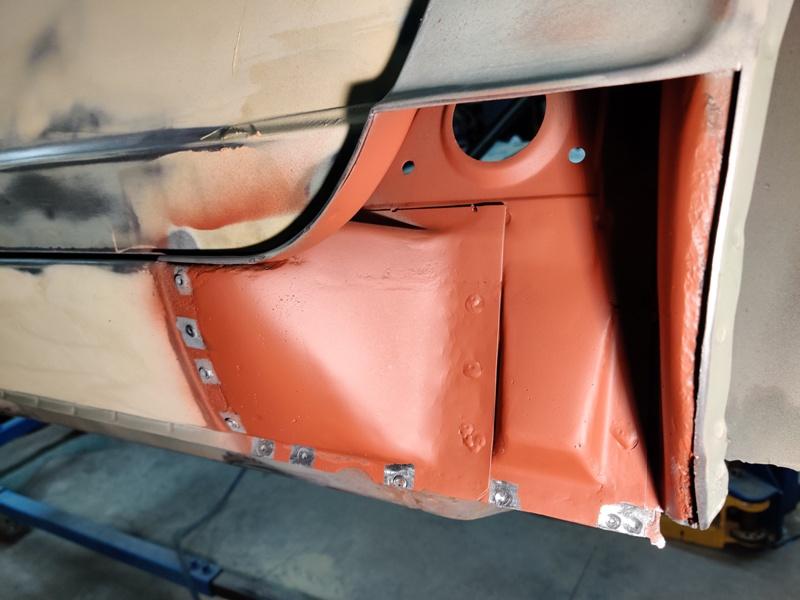
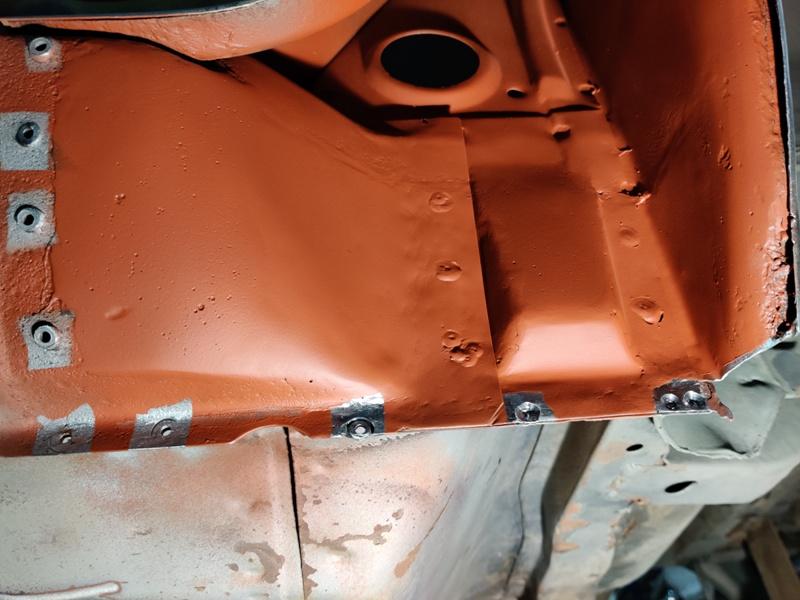
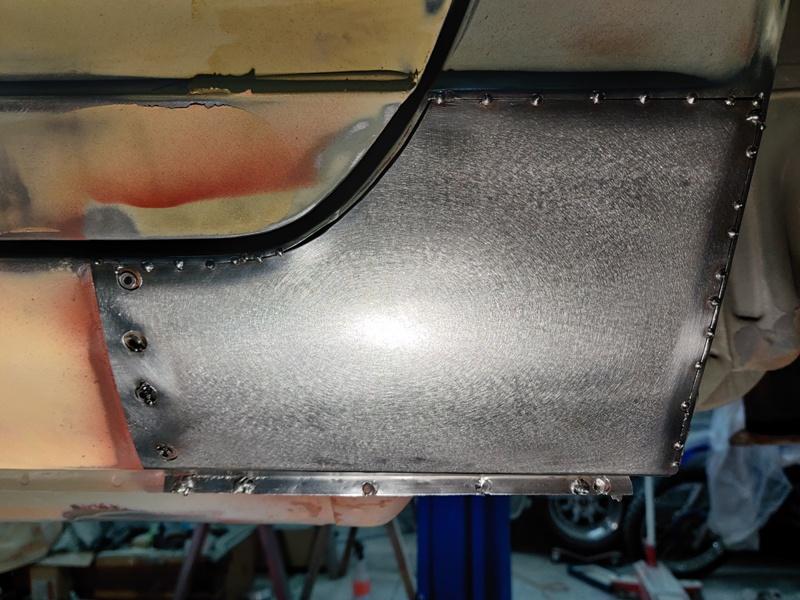
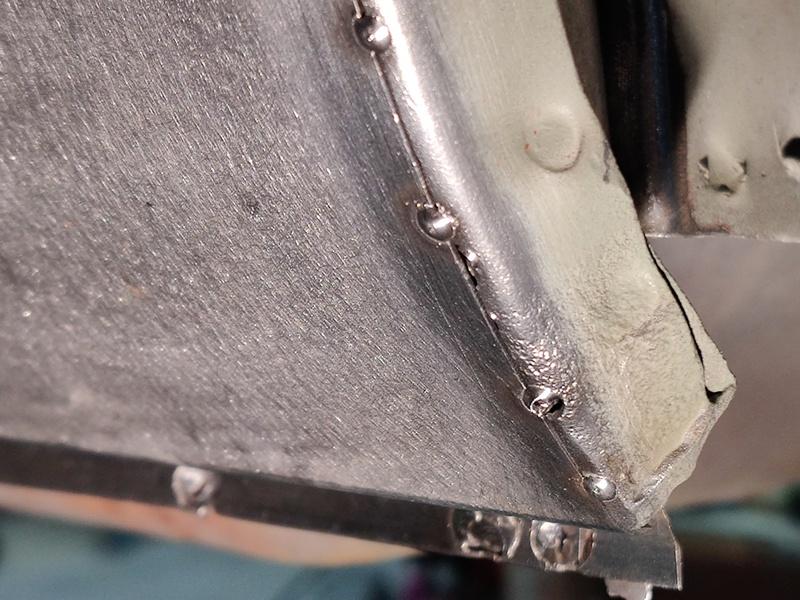
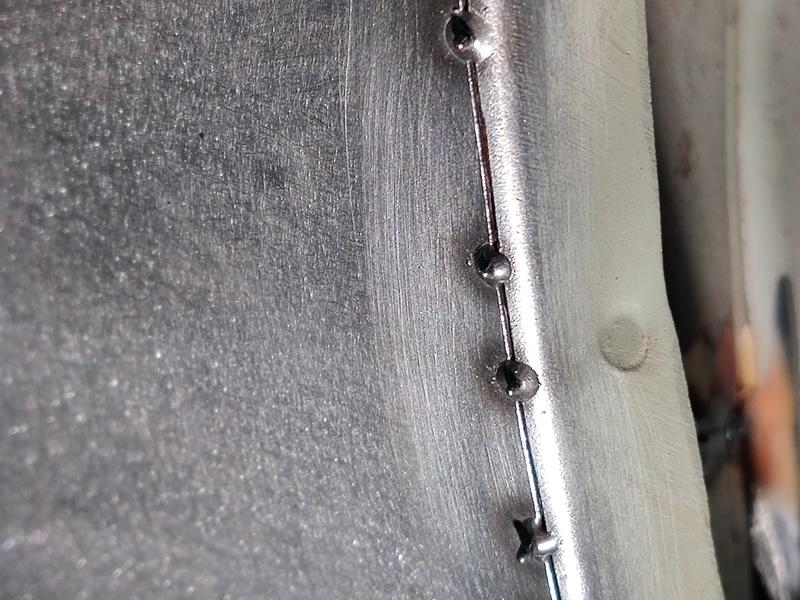
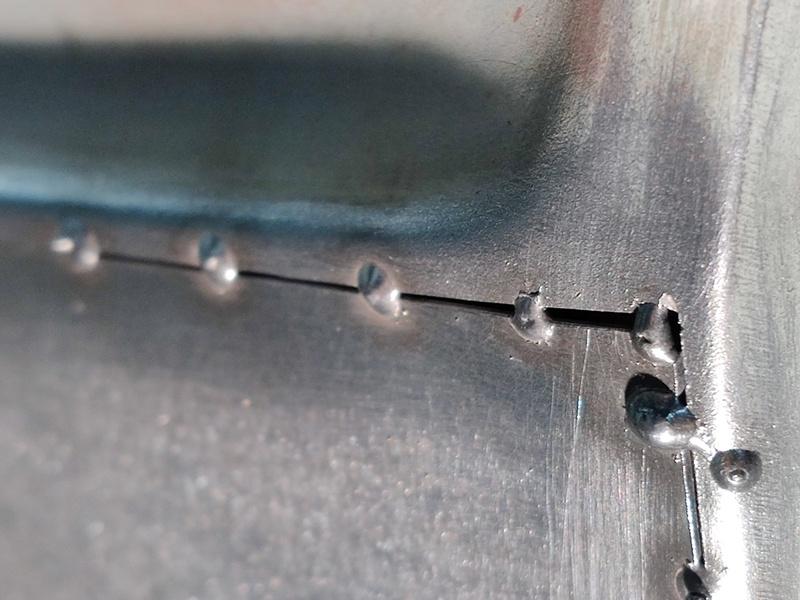
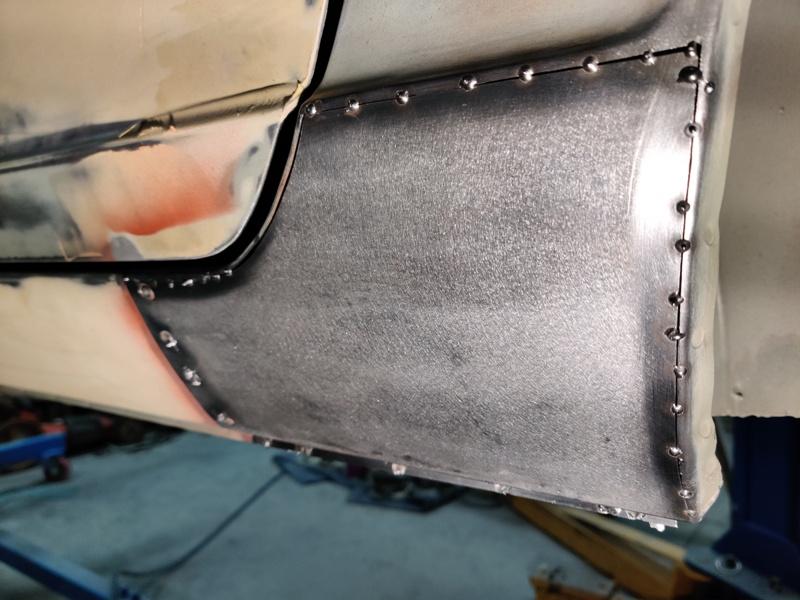
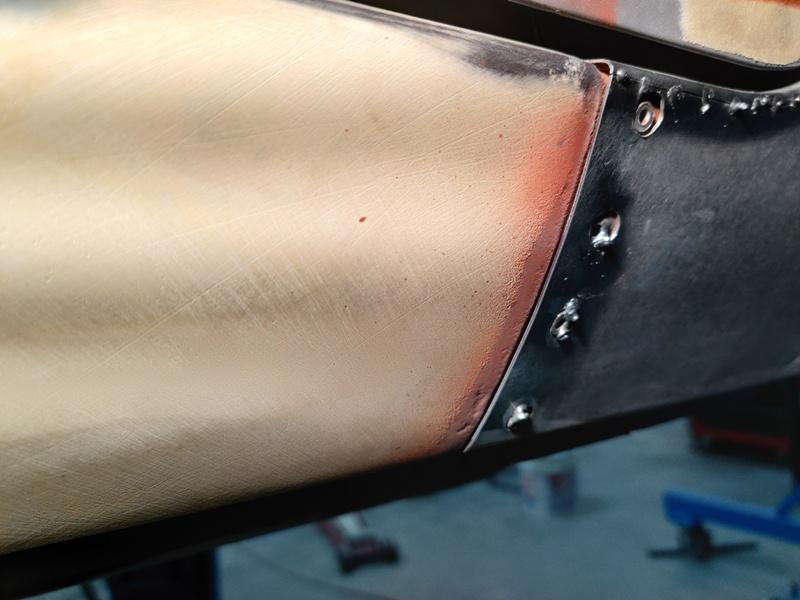
I made some good progress yesterday. As always, clicking on the image will give you a larger picture. Rosette welds on inner panel and finish grinding on wheel house repair area, marking out where to cut on the rocker curved surface: Trimming replacement rocker piece to fit (no overlapping joints): Fit is decent. After removal of the area being replaced, I took some pics showing the inside of the rocker: Inside the rocker looks very good. Starting to tack the new panel in: Several angles: Continuing to weld all the way around: Just a small spot that needed to be closed: Grind down welds - finish work: More rosette welds where needed. Additionally, I used a small amount of fiberglass body filler in a few strategic areas. Fiberglass body filler is 100% waterproof. And I learned recently that it is a good idea to use it on certain weld seams like these to fill tiny holes that are present after welding and grinding down. Additionally, I wanted to fill the pitting and couple of holes in the rocker panel in the area that I did not replace. Finish repair of inner panels in red oxide primer. Final fitting of outer replacement panel. Taking time here to get the fit dead on is really important. The finished result after grinding down the welds will come out much better if old to new panel alignment is 100% level and weld gaps are present but don't exceed 1 mm. New to old panel fit is good. The gap got wider than optimum in a couple of areas (middle photo): Front edge fit. Door gap in corner corrected for better gap consistency: There isn't much more welding and finish grinding to do here to complete this part of the project. Body work elsewhere on the panels is probably about 75% at a guess. I am going to be spraying the whole thing and all loose panels in epoxy primer one more time, then the high build primer, and started guide coat sanding.


 1 point