Leaderboard
-
zKars
 Subscriber
 5Points3,770Posts
 -
Captain Obvious
Free Member3Points10,081Posts -
jfa.series1
Subscriber3Points2,734Posts -
.JPG.cfcada9cf1c1b502df3f5f2f2ca3ff36.JPG)
SteveJ
Free Member2Points9,646Posts


Popular Content
Showing content with the highest reputation on 09/17/2020 in all areas
-
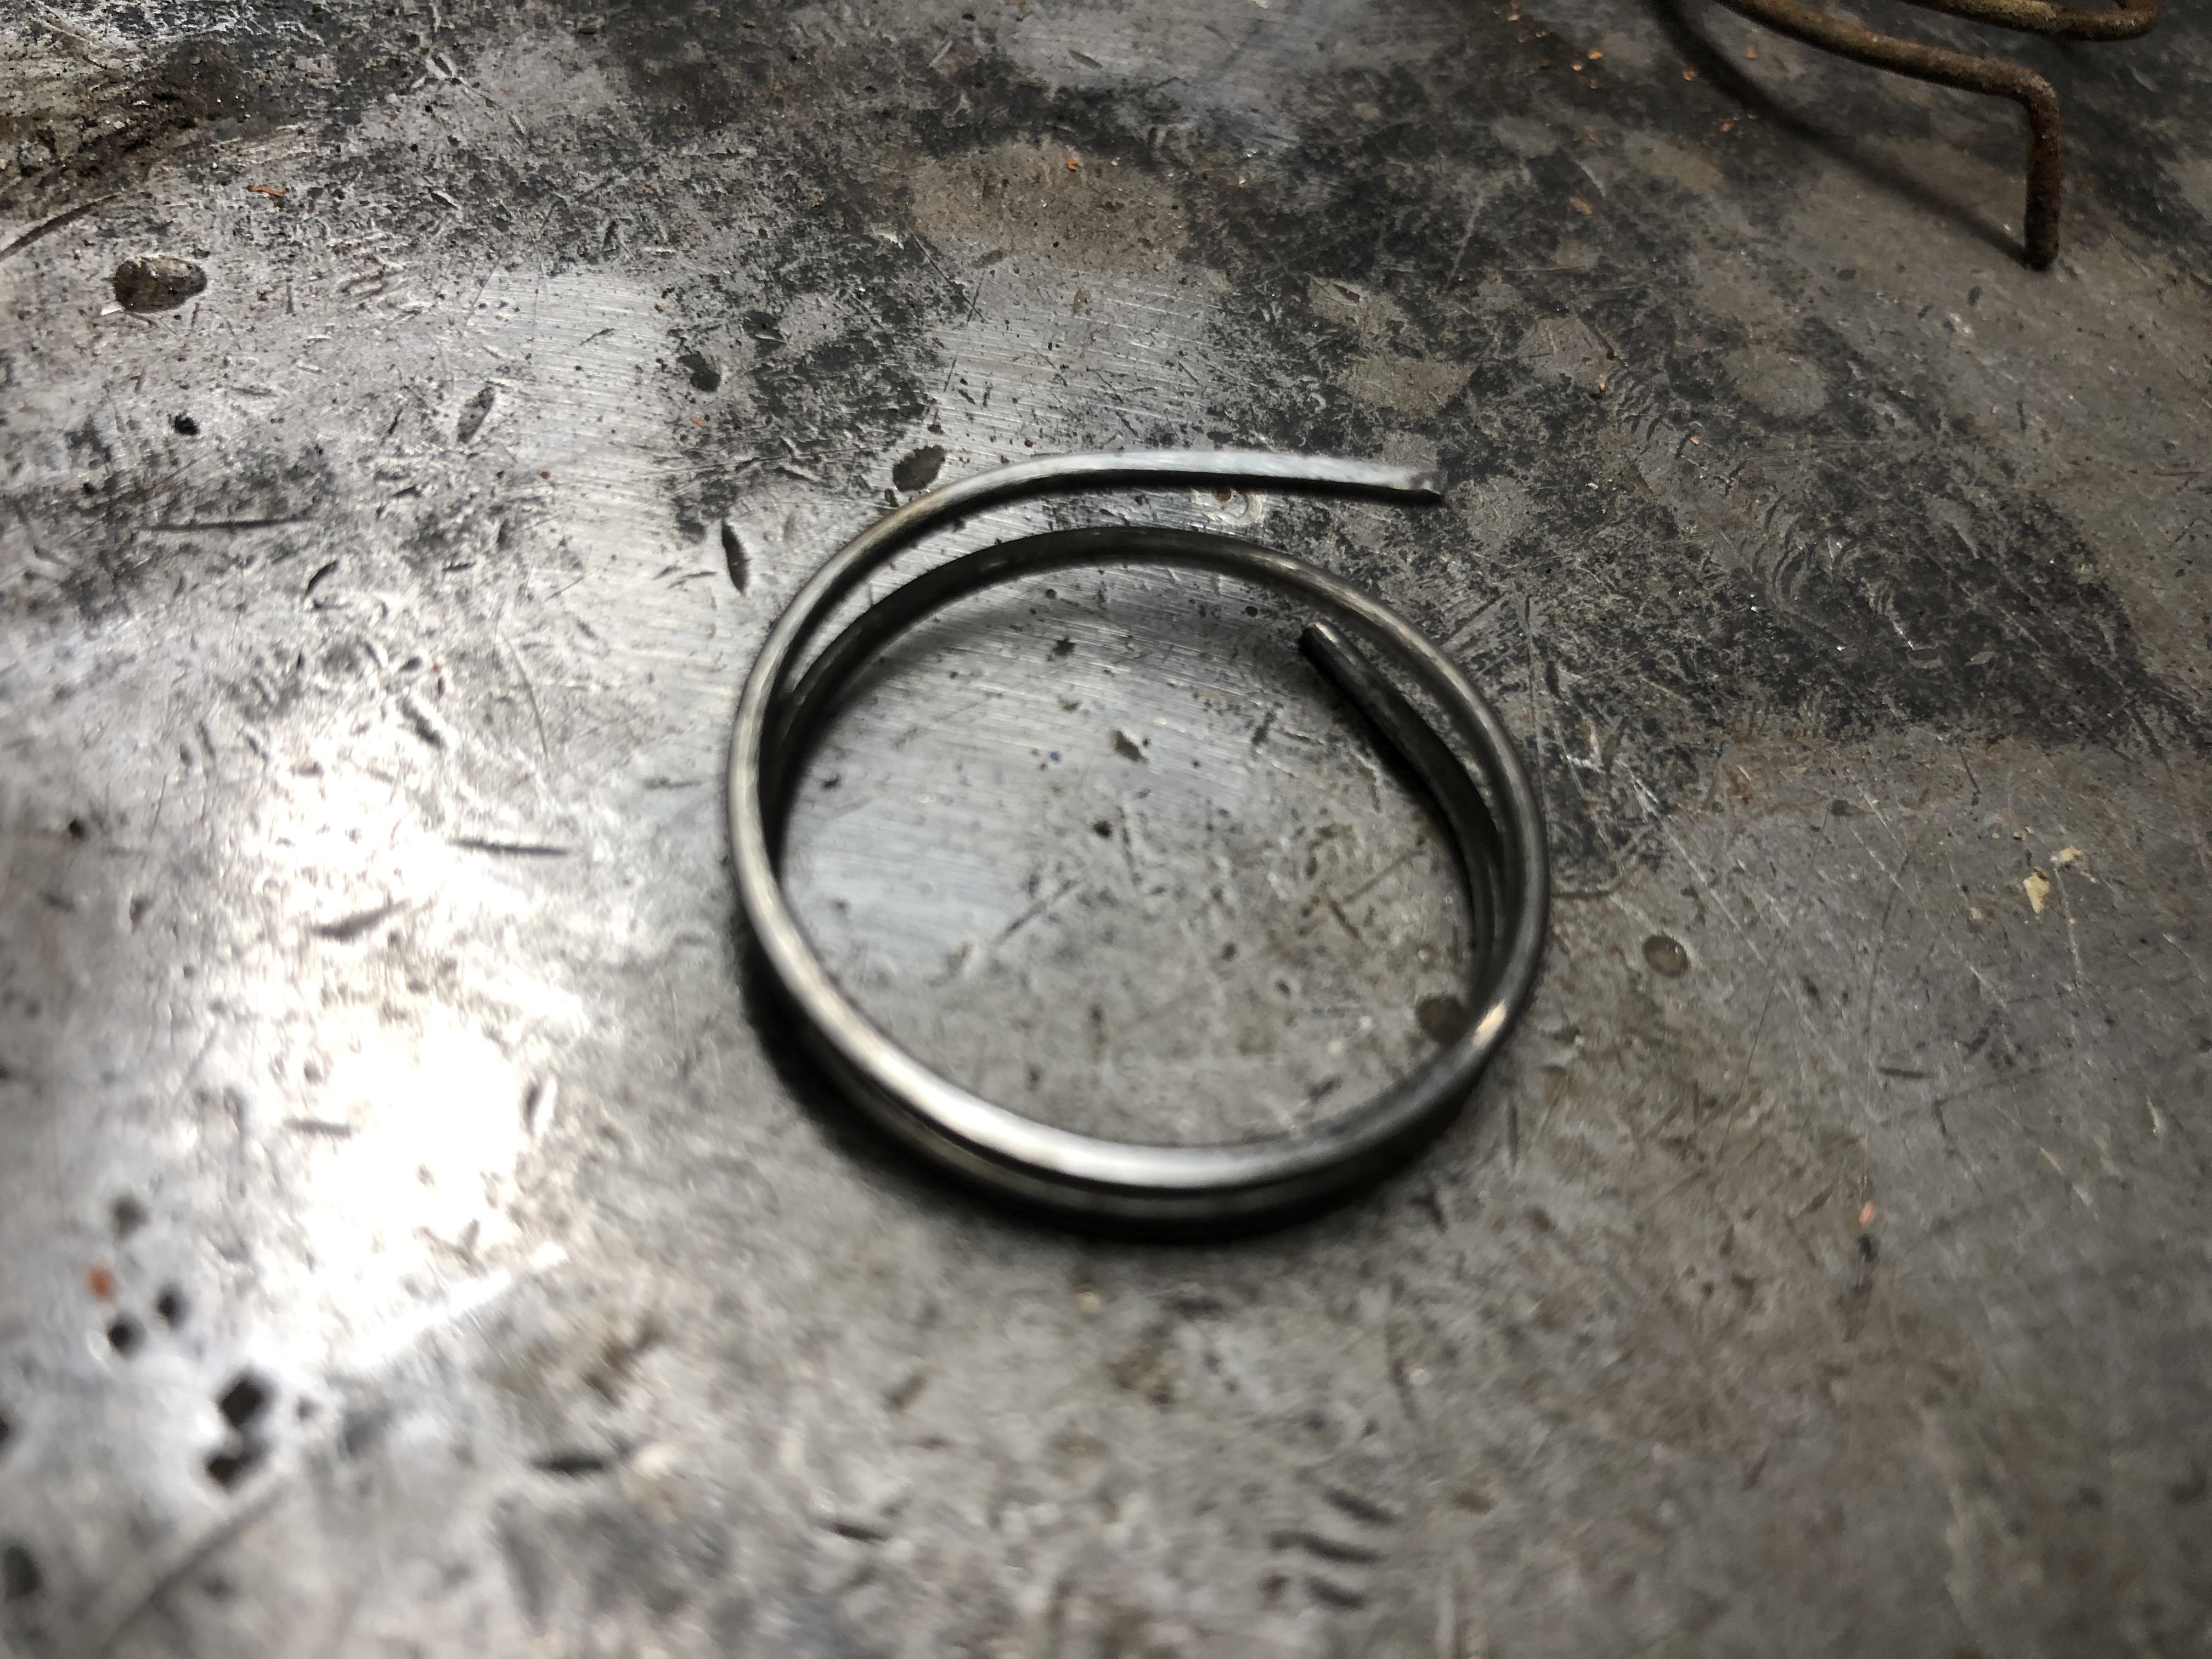
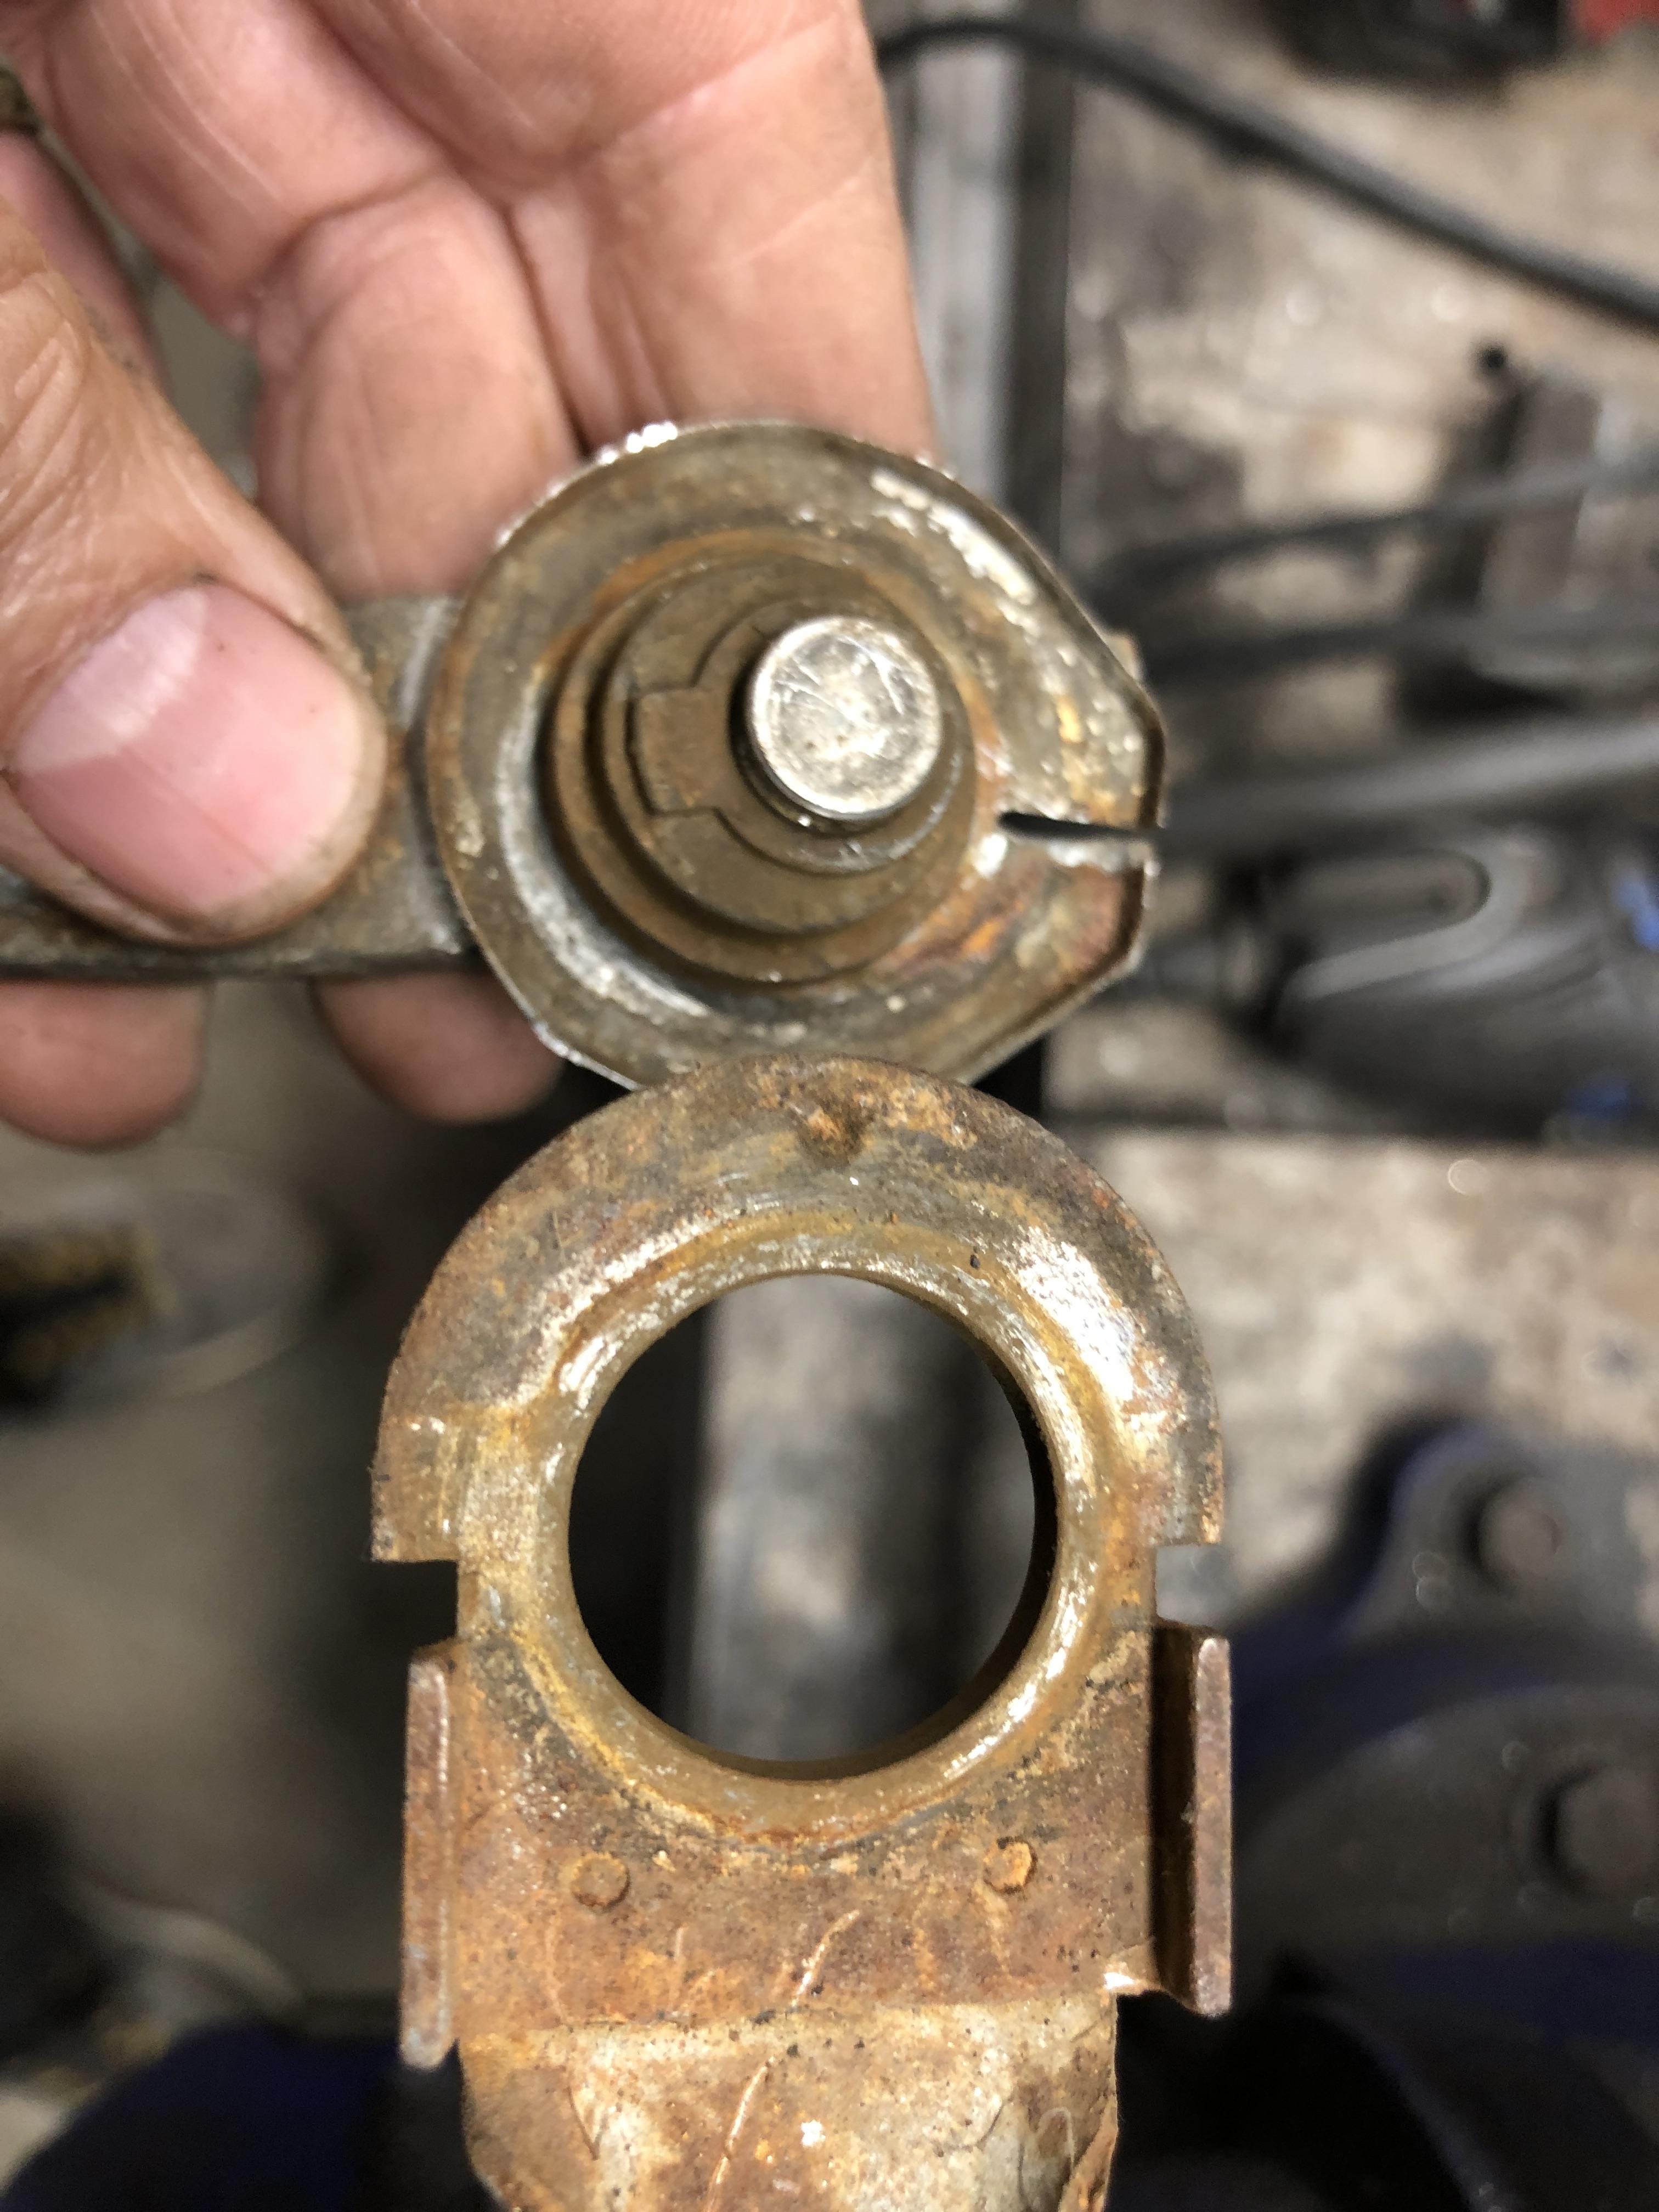
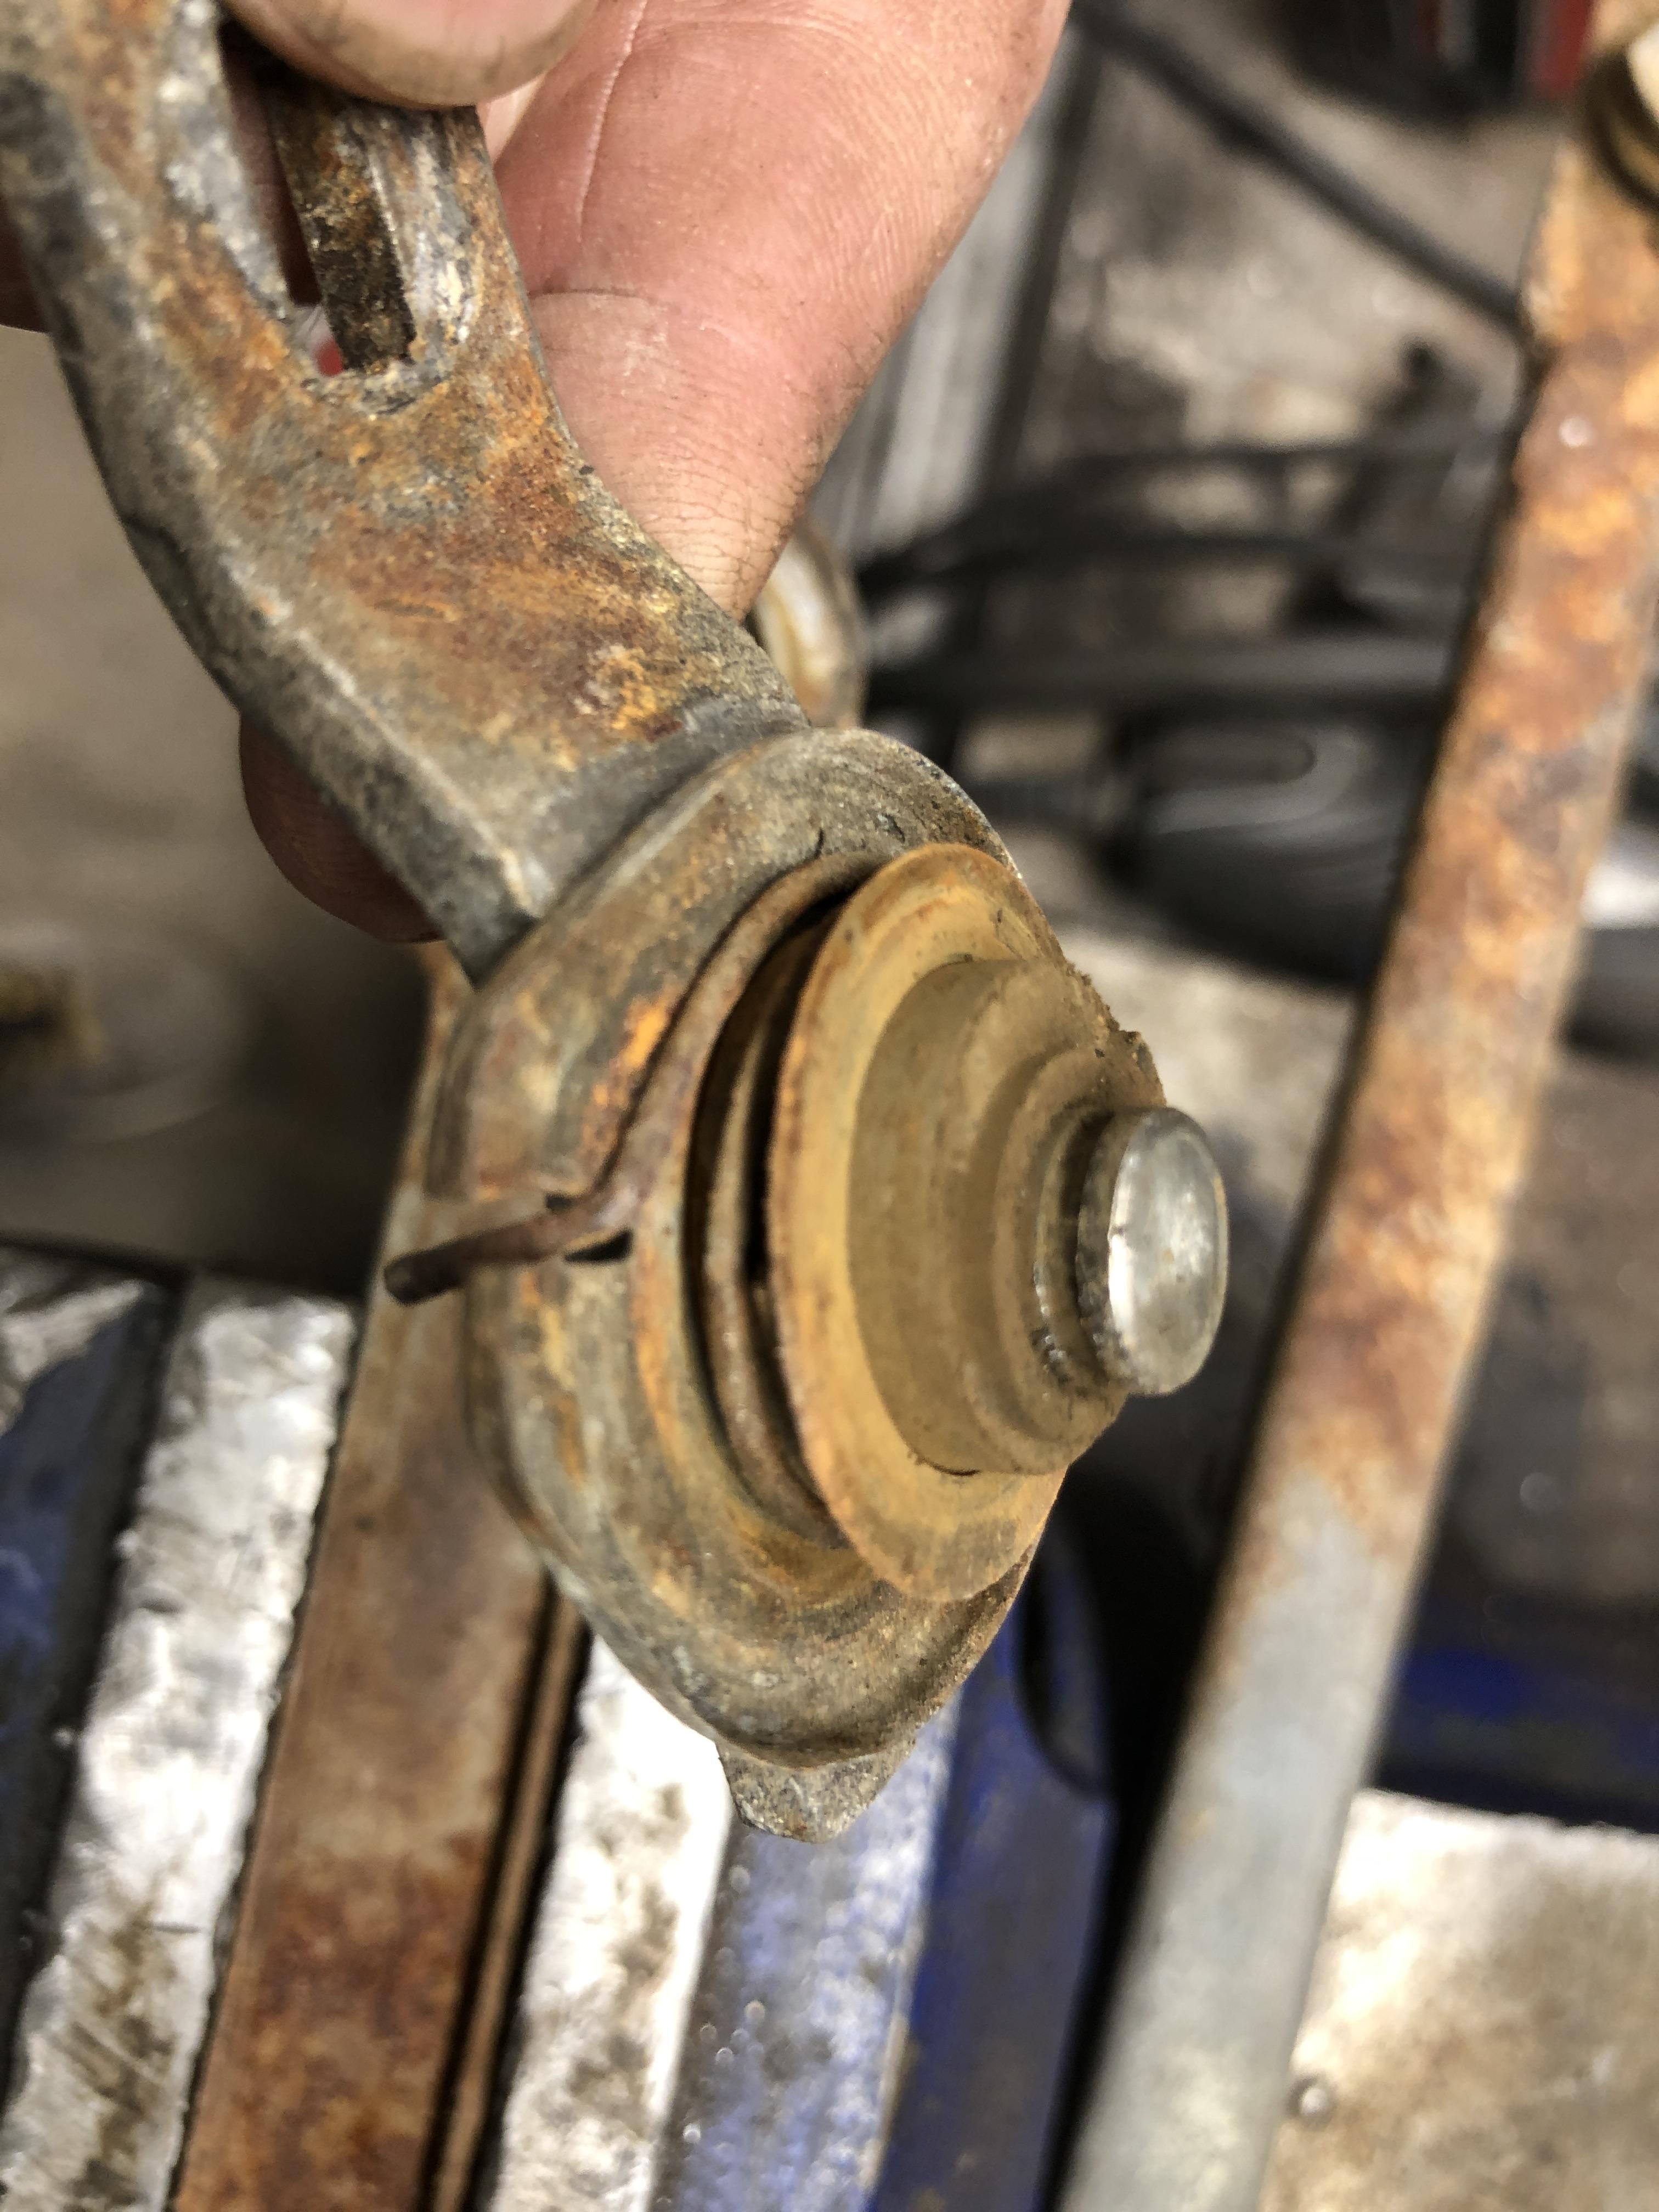
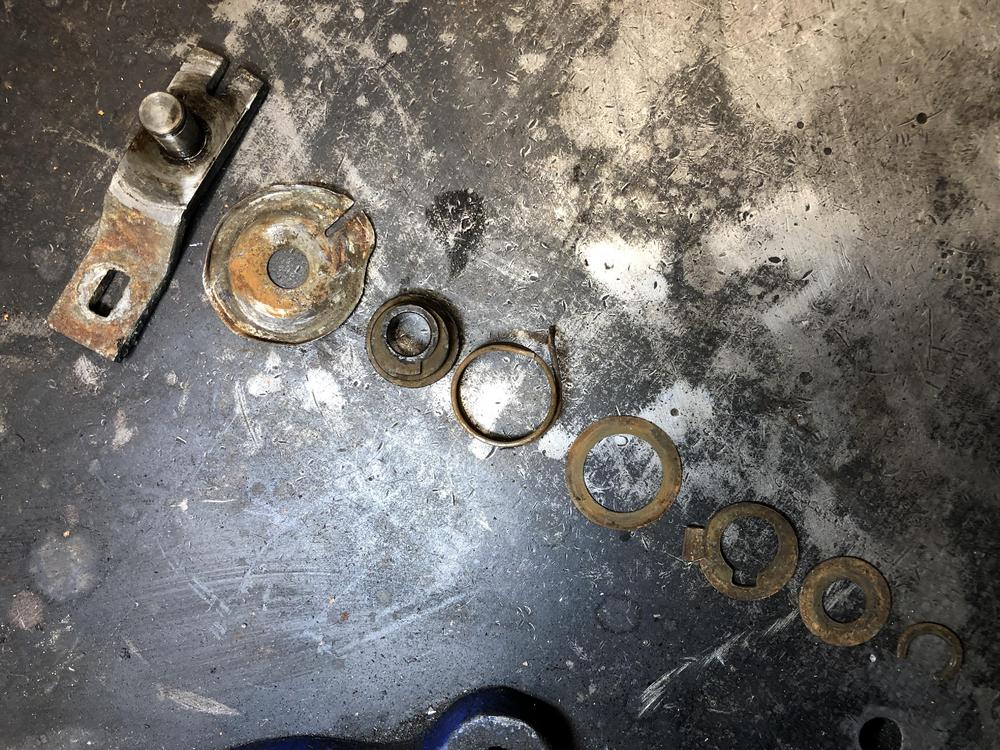
3 pointsAs I am today rebuilding another wiper linkage, I thought I would contribute some more detailed pictures of the fancy wiper park components for future posterity. Out of, ahem, "several" available wiper linkages, I have only a single one that has an unbroken spring. Thought I would include detailed pictures of it in hopes of some day creating new ones, as well as to show the assembly order and position of all the components Here is the little spring with oft-broken off hook engaged where it belongs Complete and broken example for comparison of where the break happens and how long the bent tang is Clever photography (ie move it around until you can see it), shows the shiny spots and wear on the bottom of the spring. All the bits and pieces in order from top to bottom. Top is defined as having the end with the (poor excuse for a ) snap ring/C-clip pointing up when you're taking it apart. I have used a real compatible sized E clip to replace that obnoxious soft C clip thing. This gives you a visual idea of how the eccentric cam part fits with the hole in the arm, effectively changing the arm length as the cam rotates. Another shot showing how the spring and the "millennium falcon" part with the slot are arranged in the assembly. Clearly this proves the designer of said space ship in the movie was a Datsun owner.


 3 points
 -
2 points
-
1 pointSounds like it's running on 5 and the dead/bad cylinder has a stuck valve or something. Or it's running on 5 and it's running lean, and the weak cylinder doesn't have enough to keep firing, just an occasional kickback. What happens if you increase injector open duration to make sure you have enough fuel? These engines love their rich mixtures you know. That video was about perfect. It played, it was small (quick download) and it showed some stuff.1 point
-
1 pointGlad you enjoyed today’s little treasure. Now off to google “How to make small coil springs by hand”1 point
-
1 point
-
1 pointYea, I saw that. It will need a lot of work but could be worth between $70k and $90k. It's an auto trans which may pull its value down. But honestly, a low VIN car that is properly restored (not 100% perfect but pretty close) should be in the $100k and up range. I wouldn't let my cars go for less. You'll probably have that much in it when you're finished, so I see the $12k price way high as a starting point. Wishful thinking on the seller's part. That car will need everything; like my 27th.1 point
-
1 pointSite, I was thinking of you earlier today when I saw the map. Hold on tight and be ready to get to higher ground!!1 point
-
1 pointWelp here we go in my part of this. Winds are high and gusting, rain for 24hr supposedly. Only wish I could send some @Mark Maras and @Zed Head way.
 1 point
 -
1 point
-
1 point
-
1 pointOverall the lines are very clean and Nissan certainly avoided the Supra's wretched excess of bulges, bends, and faux scoops and vents. If Nissan really wants to pay homage to the S30 line, the gaping maw of a grill has to go - it needs to be a substantially broader and flatter rectangle. To me the hood screams Chevy Camaro, nothing elegant about it. Expand the headlights to more resemble the sugar scoops (yes, keep then covered). Open up the quarter lights by eliminating the sharp break upwards and continuing the door line (ala S30). The rear end is a bit soft on the lines, could use a more crisp definition. Overall, too much 370Z carryover.1 point
-
1 pointI would get some Kroil like Yarb recommended then try what captain obvious recommended. Personally Ive had more luck welding a nut onto the stud and using a impact to taking them out. The heat helps it break out. I also have this metric stud removal tool that I've used ..... but sometimes i just look for excuses to get the welder out.1 point
-
1 pointWait! Don't cut the stub off! First thing to try would be penetrating oil, some heat, and grabbing that stub with a pair of pliers. If you cut it off, you'll lose that opportunity. Wiggle it back and forth. If you can get it to move at all, you're pretty much home free. And you've got another advantage in that it's not a blind hole. You have access to both side. Is there any bolt length sticking out the other side? And what is the base piece made out of? Is it steel or aluminum?1 point
-
1 point
-
1 pointI might have said something unkind about Rotaries at one point. But I don’t see how that’s relevant.... [emoji13]1 point
-
I suspect it's just designed too close to the hairy edge of working (or not working). The one or two prototypes probably worked great on the bench, but now that there are more of them out in the field, the parts tolerances variability and operating environment are having unforeseen results. Not that I've ever had that happen to me or anything........1 point
-
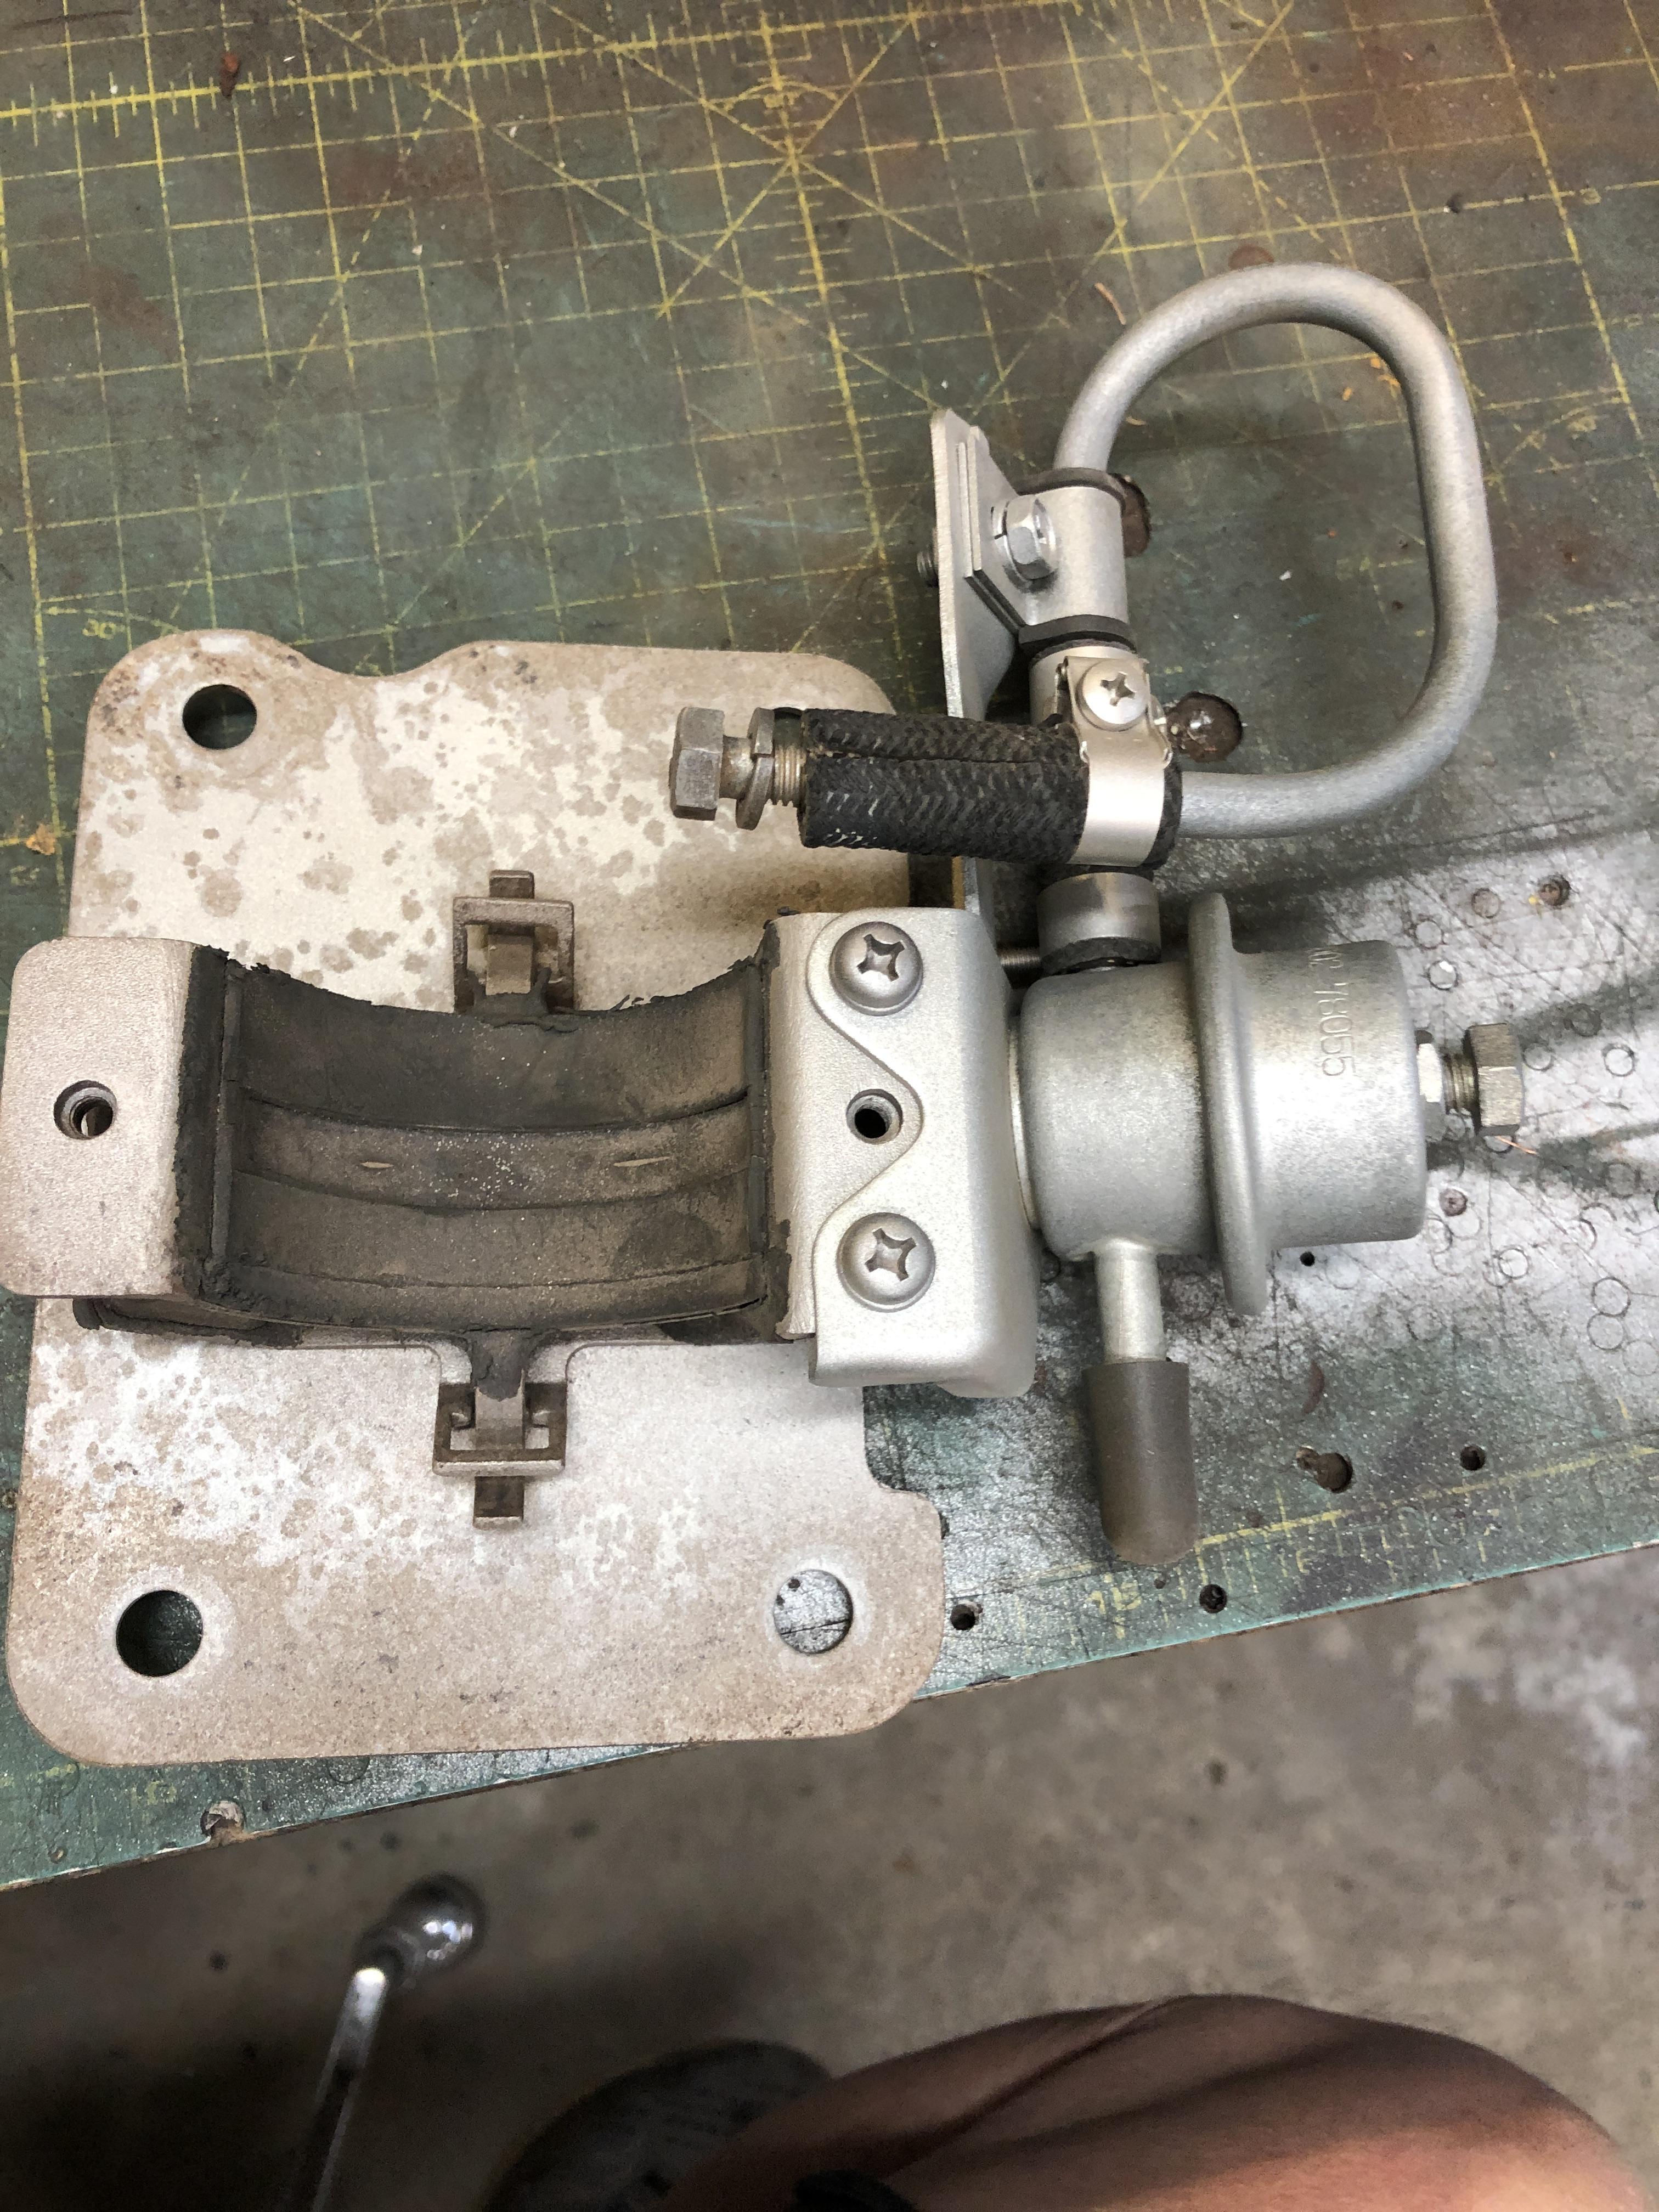
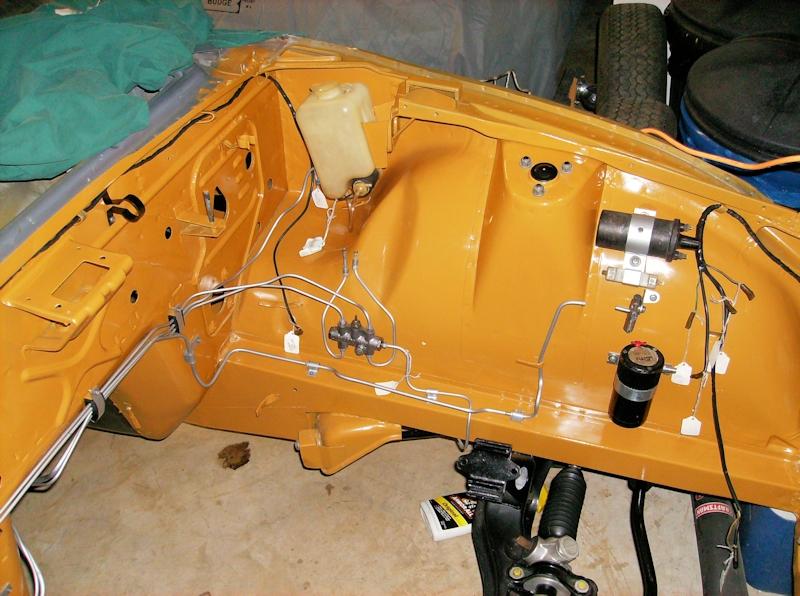
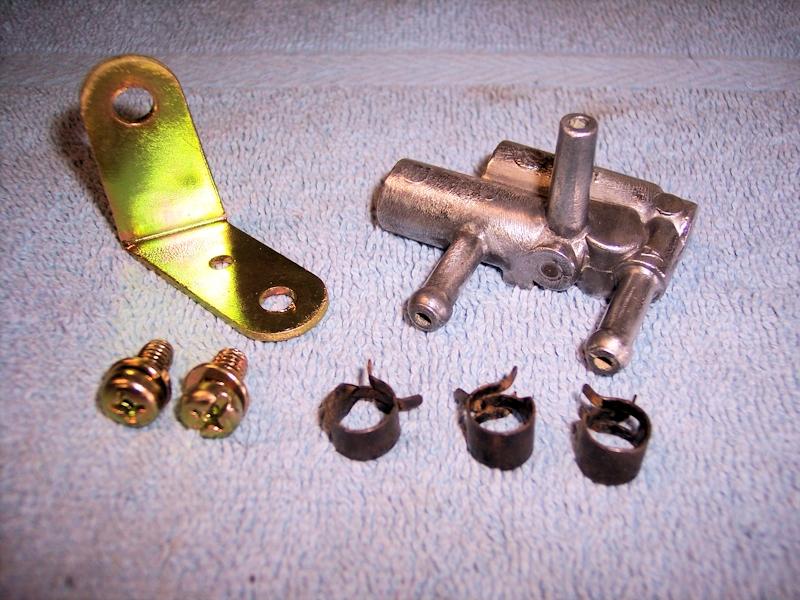
1 pointMatt, I think this should meet your need. The vapor line gets connected to the vapor valve with a short length of hose, not yet installed in this pic. The vapor valve is just below the ballast resistor. FYI - the not-stock item below the vapor valve is a compressor for air horns. Let me know if any questions. Jim
 1 point
 -
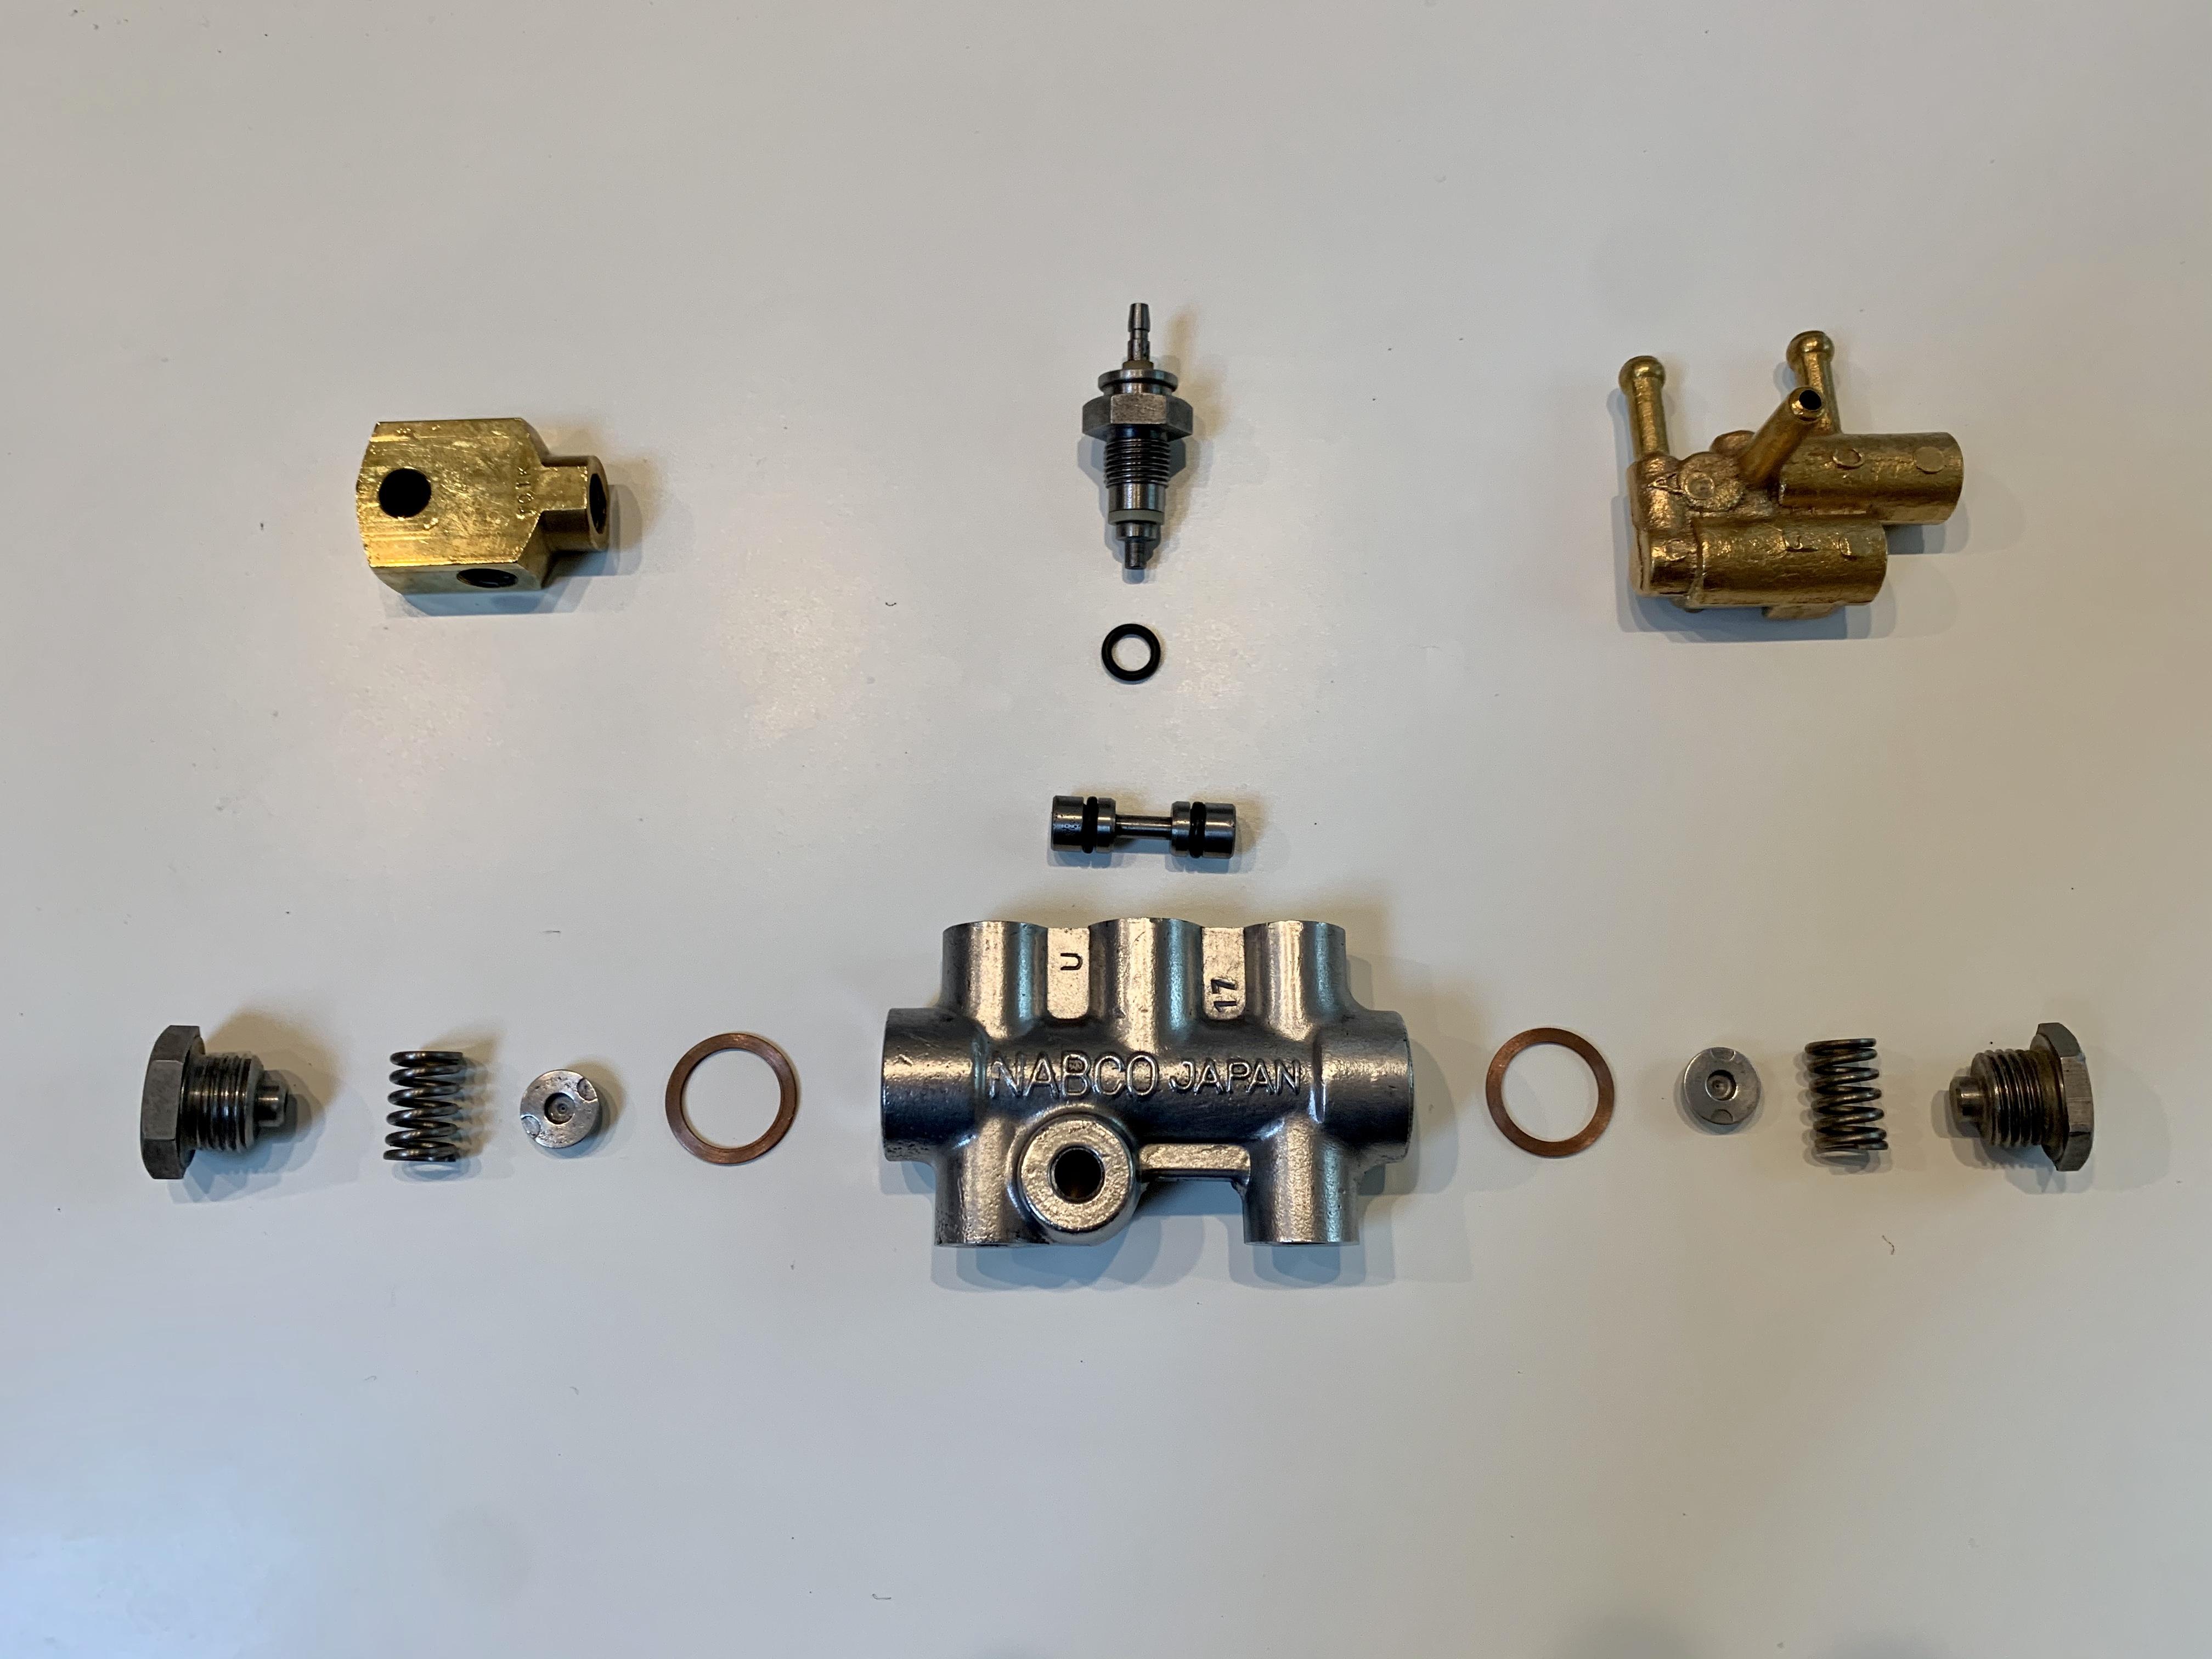
1 pointMatt - here's a pic of the flow guide valve, slightly diferent versions on each year but essentially the same. It mounts to the inner fender wall beneath the ballast resistor. Check this diagram for the hose routing - one line from the small tube on the crankcase breather pipe, one short hose from the tank vapor line in your pic, one line to the back of the air filter to feed the vapors into the carbs. The valve is #57. http://www.carpartsmanual.com/datsun/Z-1969-1978/engine-240z-260z/emission-control-device
 1 point
 -
0 pointsDang it. Someone wiped out at track day. I thought it was Greg IRA from a distance. The driver is okay.0 points
-
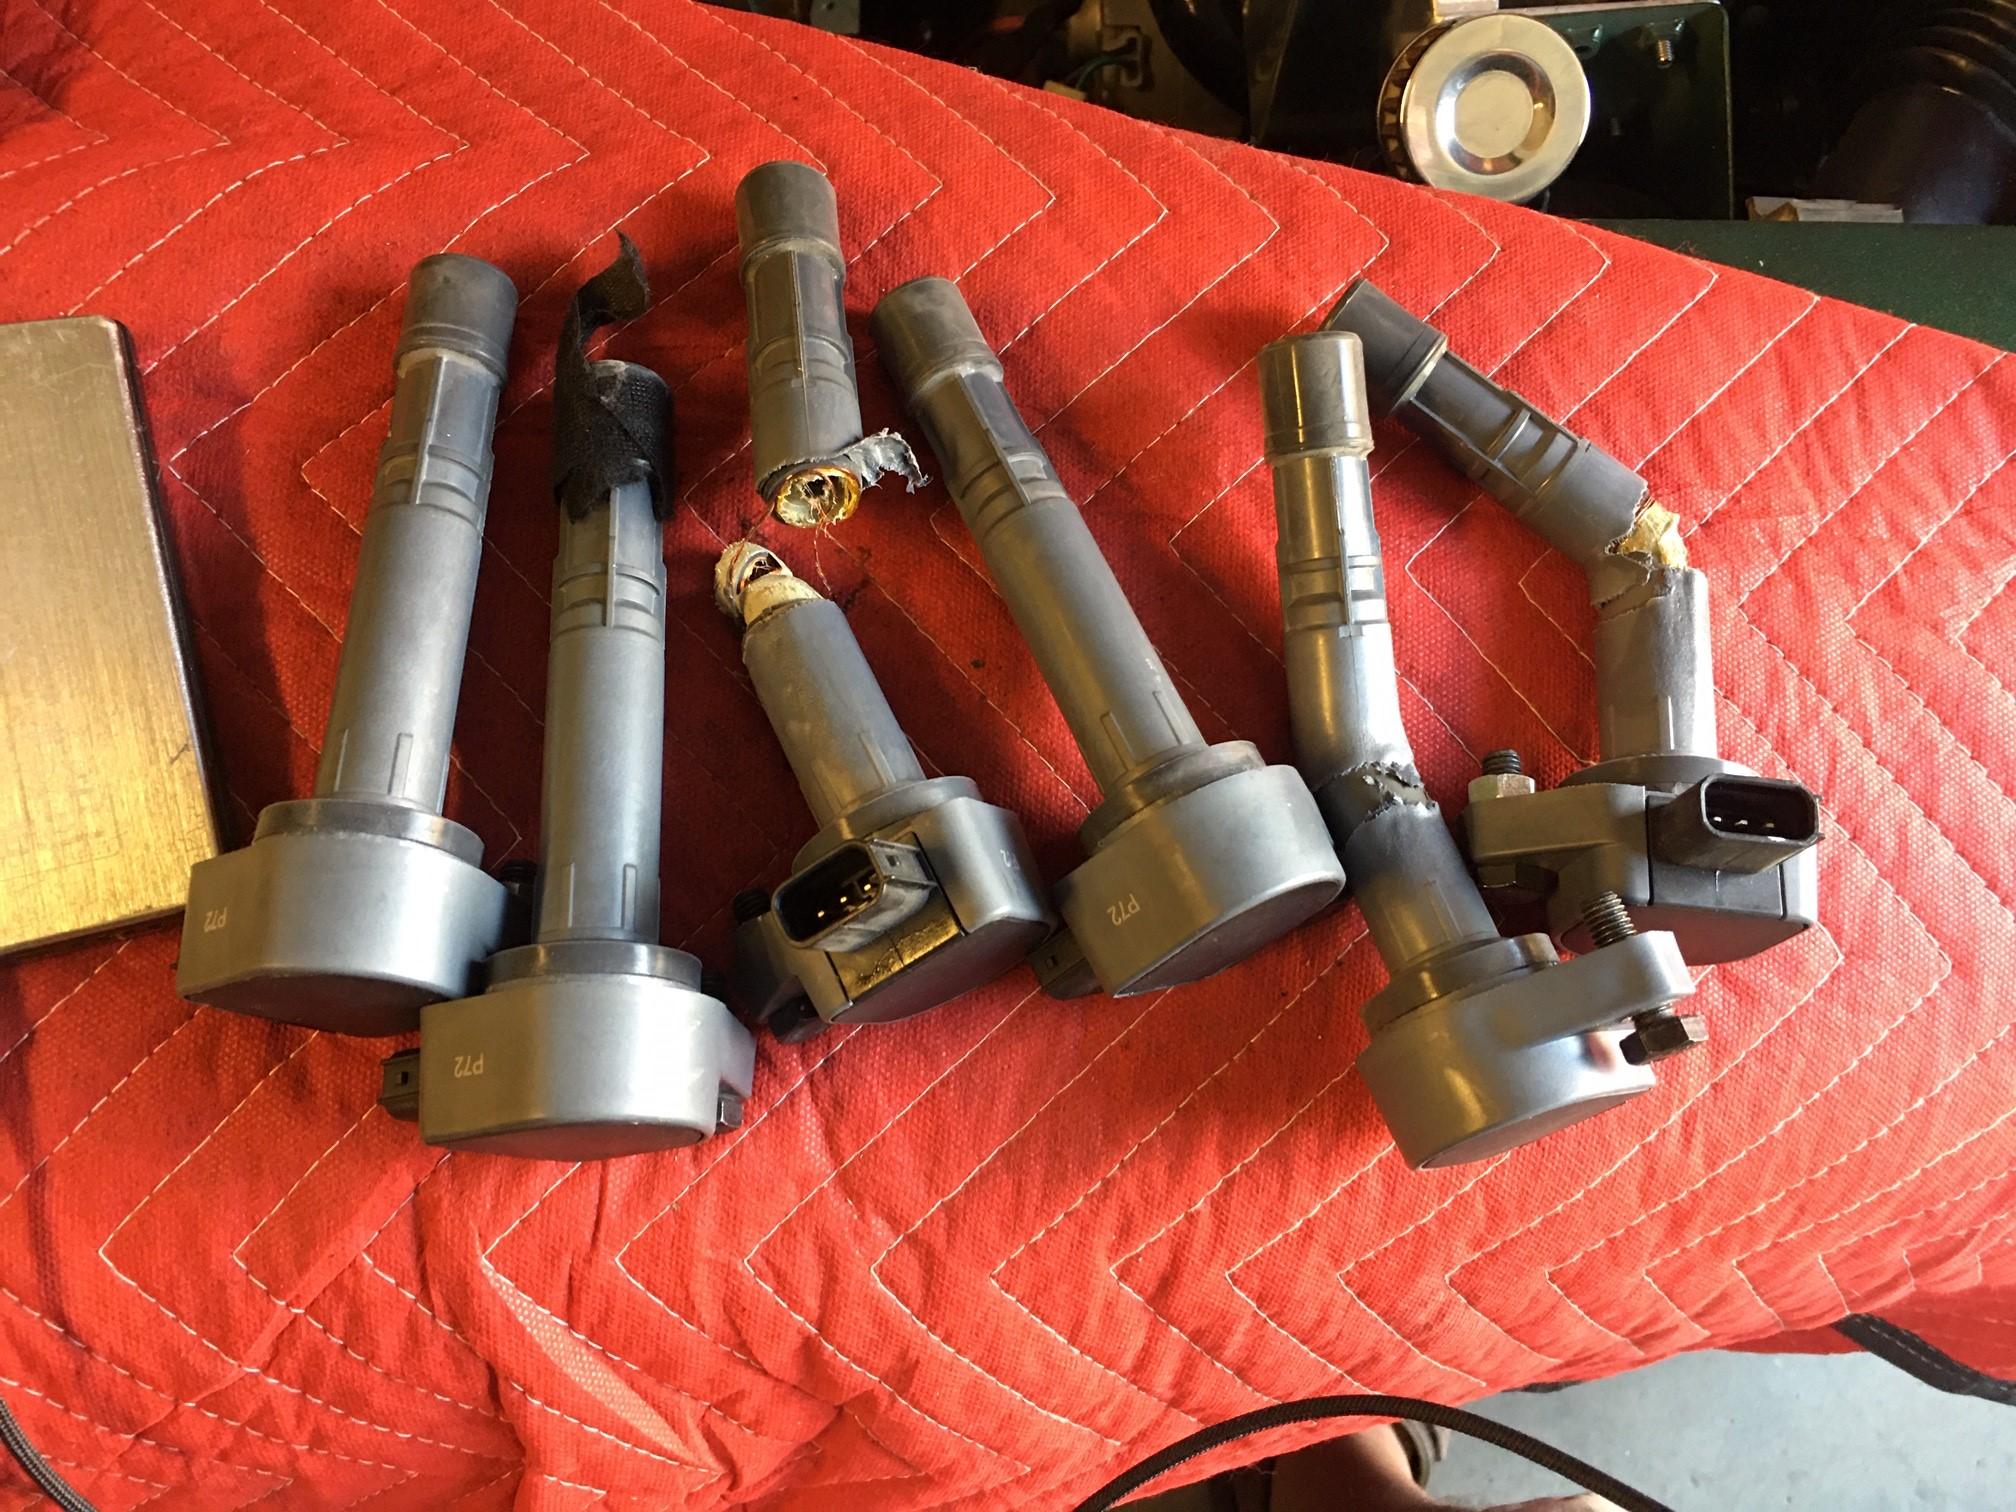
0 pointsWell after another remote tuning sesion, I am not much further ahead. The CAS seemed to be syncing but was still not providing a consistent signal for the Haltech. We tried a few different settings including batch fire injection and wasted spark. That's where things got interesting... the COPs melted in seconds of loading the tune, even before starting the engine. ☹️ Basically as soon as we rebooted the ECU (as you have to after every ECU software change). I don't think it was the tune as much as a glitch in the Haltech that caused the COPs to latch power. Only three melted. I believe it was cylinders 2, 4 & 6, but I might be wrong. I should have written that down before pulling them. I am waiting for the arrival of some new COP's to reset the software and try again. I also moved the Home signal from one reluctor to the other (B pin to C pin) on the OneSix CAS to see if that helps signal fidelity. Tim (from OneSix) apparently recommends that we use Signal Ground from the Haltech versus Home and Trigger ground in the wiring, so that was done as well. I opened the valve cover and inspected the cam to see if any of the keepers/lash pads had slid off, causing valve issues but alas, they were fine. So no easy "aha!" moment to be found there. I ordered a NOID light test kit as well, so I will confirm the injectors are firing as they are supposed to. I confirmed all the injectors a re working properly with a 9v battery test. Clicking away happily. The Individual spark was confirmed prior to the meltdown. Hoping to have some good results soon with the new COPs. If not, I think I will have to consider trashing this CAS and rebuilding the engine setup to run a crank trigger. Not what I wanted to do....
 0 points