


Leaderboard
-
240dkw
Free Member7Points711Posts -

Zed Head
Free Member6Points19,238Posts -
Namerow
Free Member3Points1,553Posts -
Marty Rogan
Free Member2Points1,617Posts


Popular Content
Showing content with the highest reputation on 08/25/2020 in all areas
-
3 points
-
2 points
-
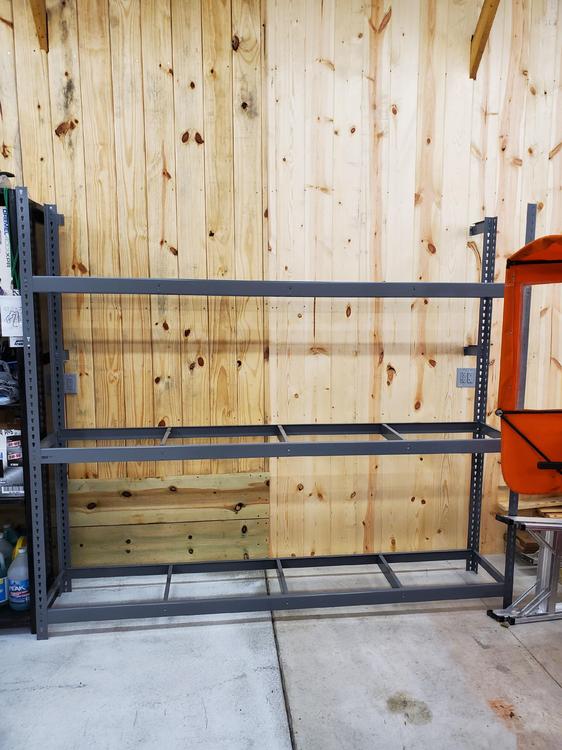
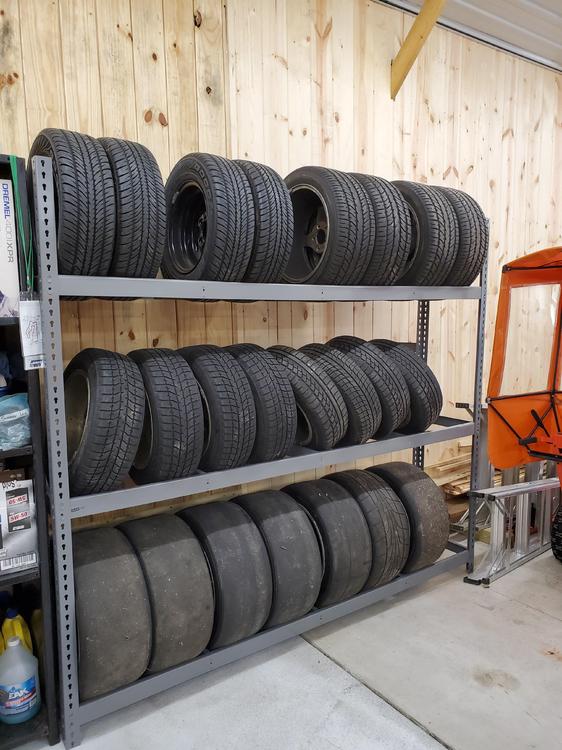
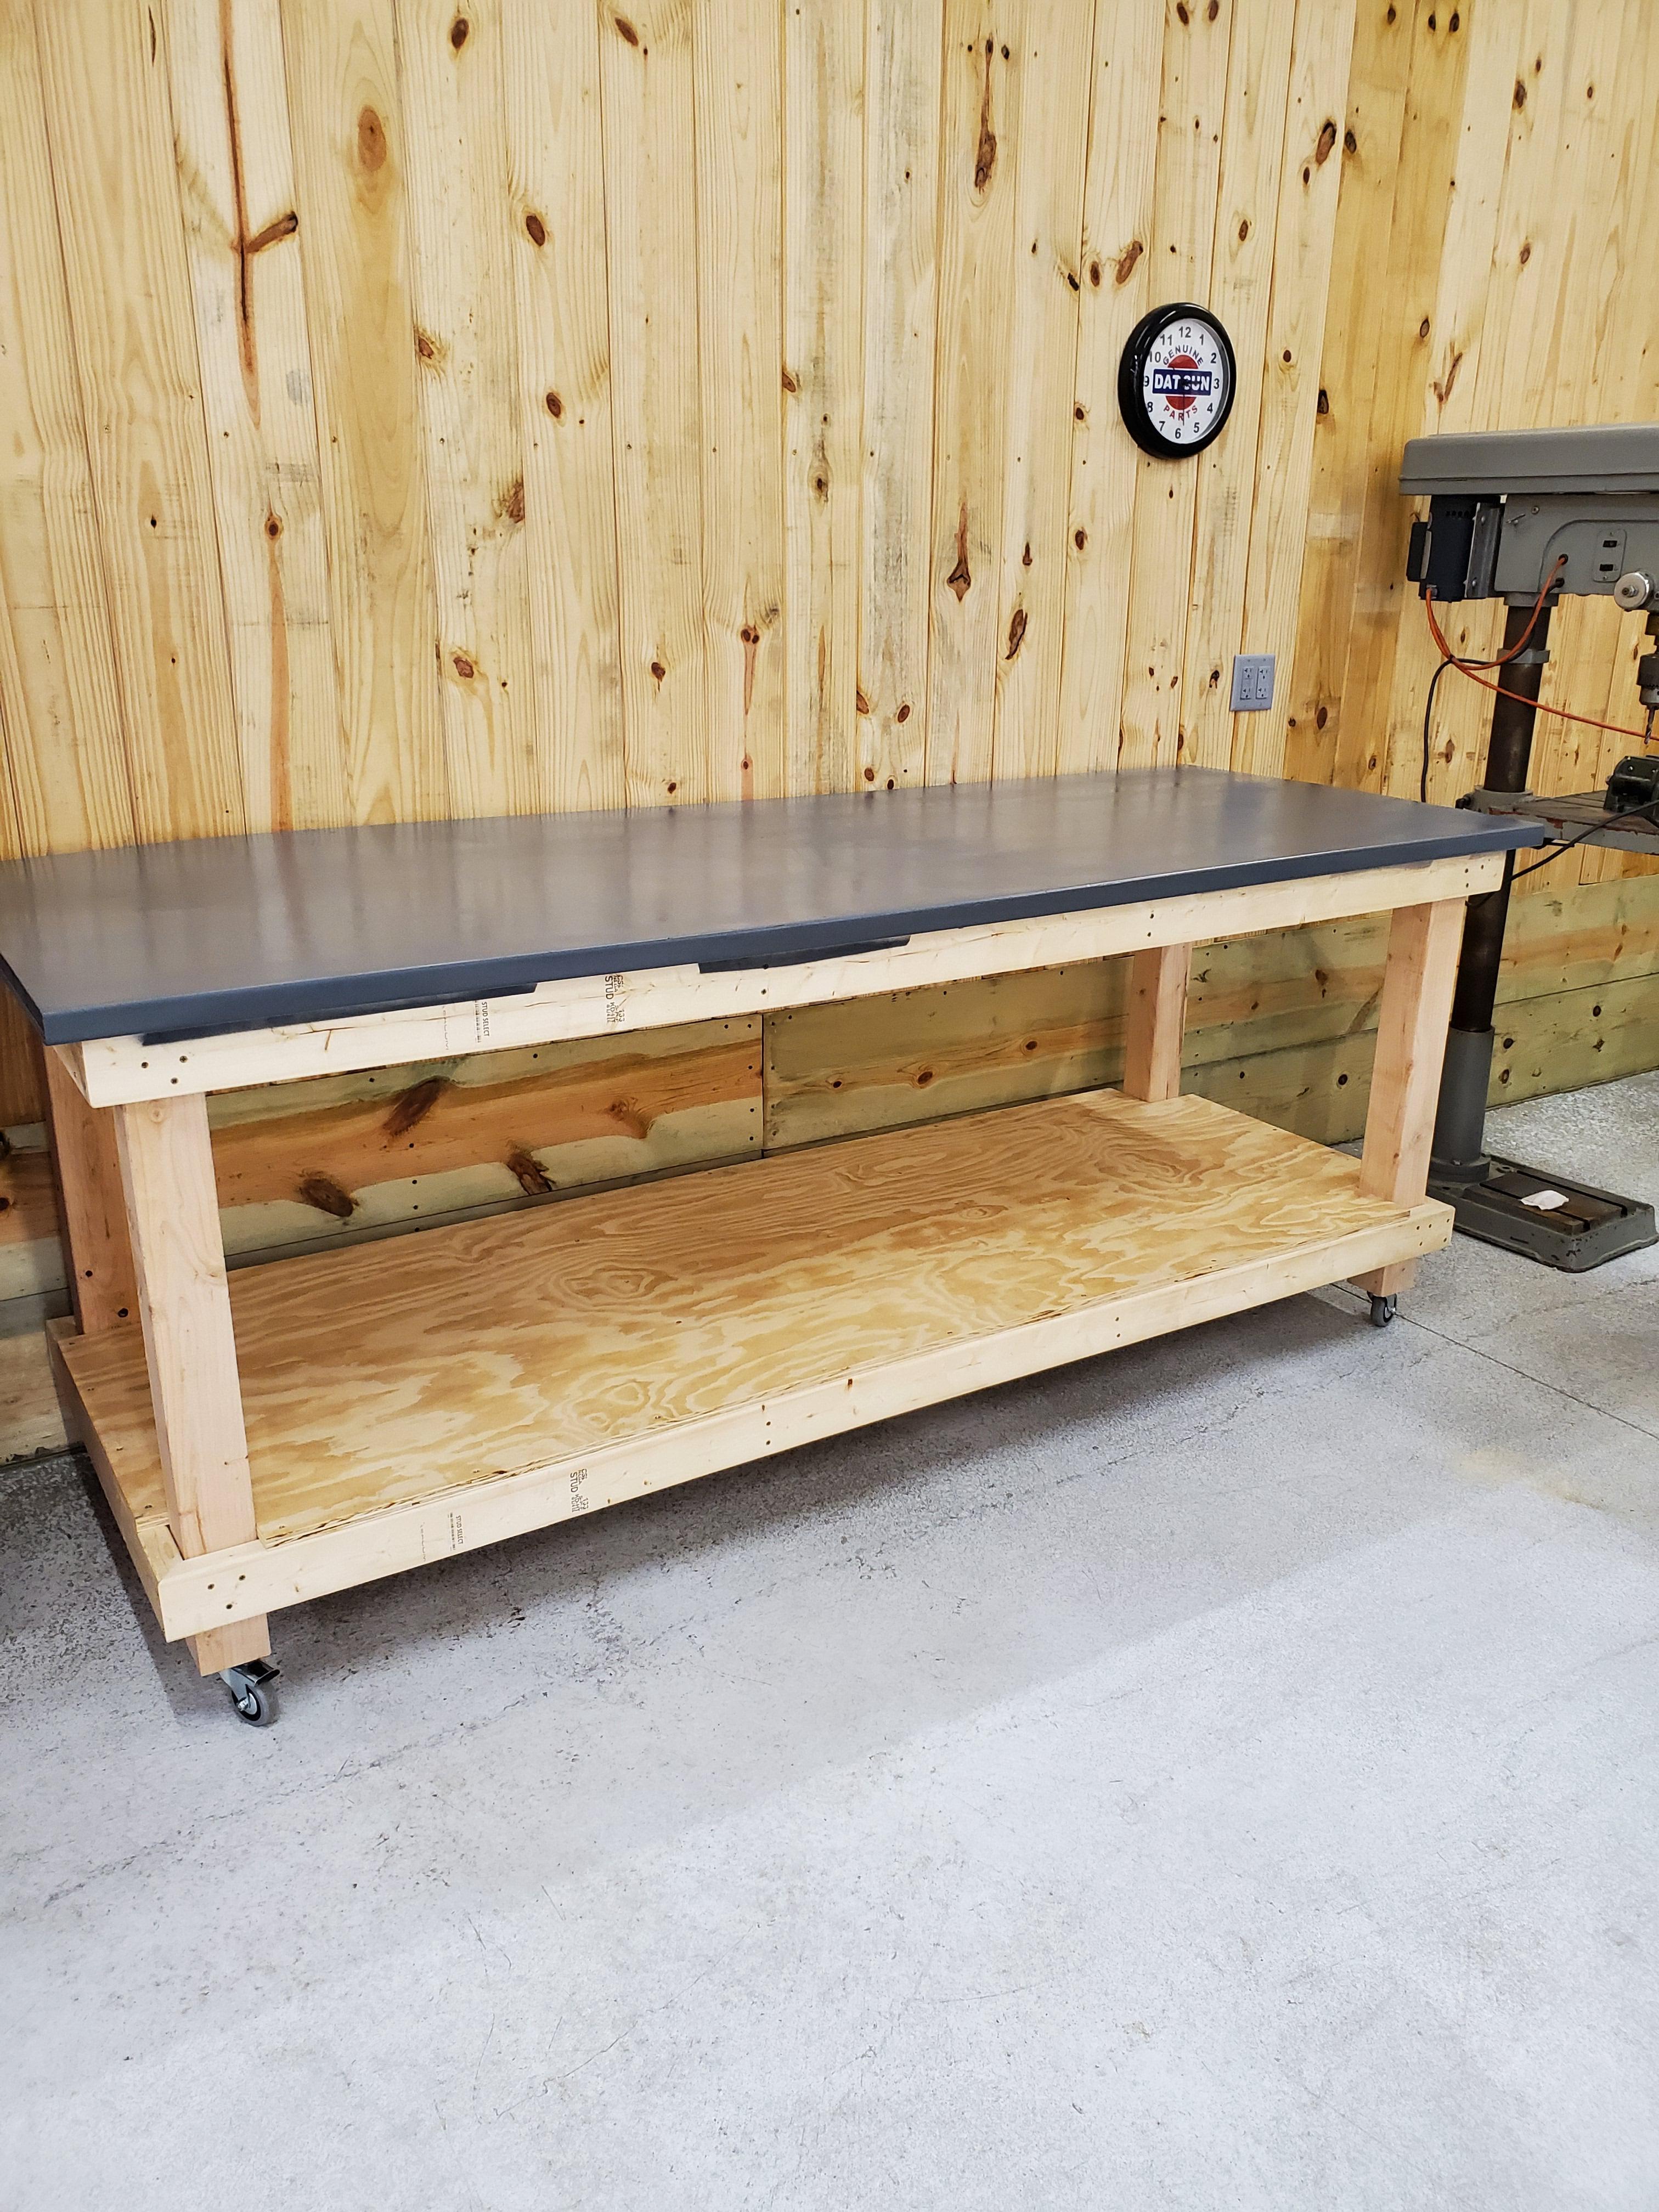
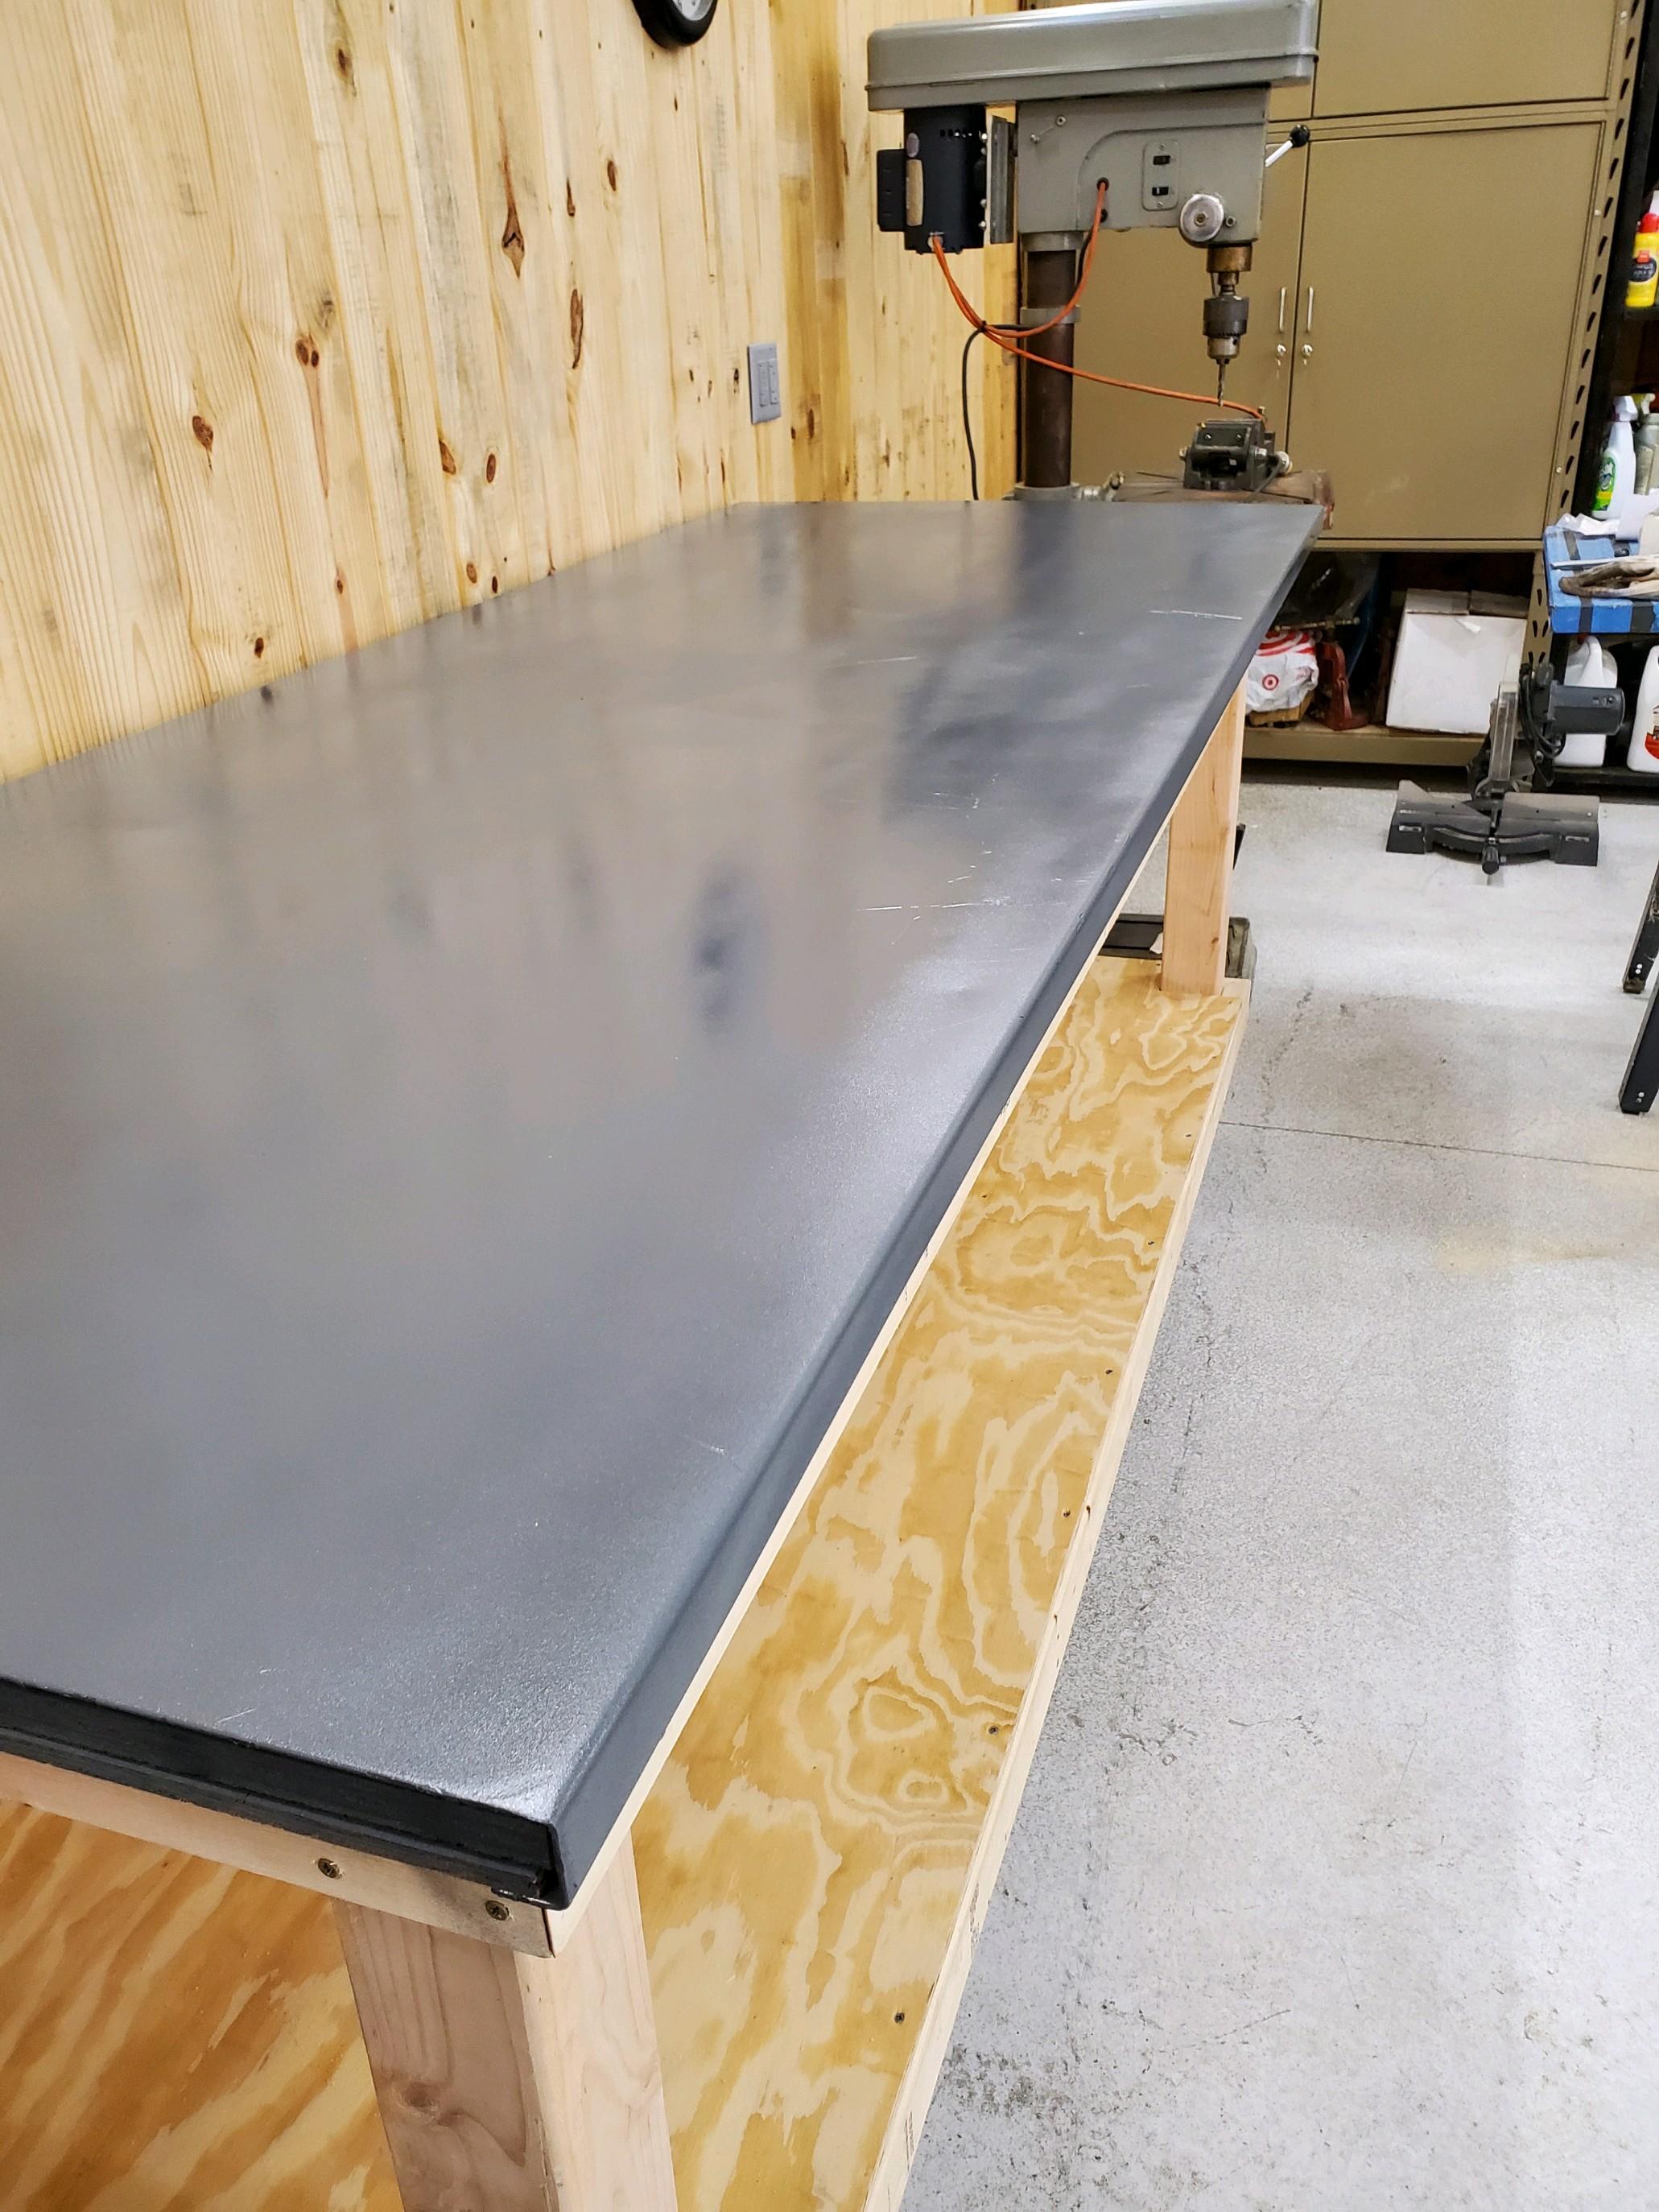
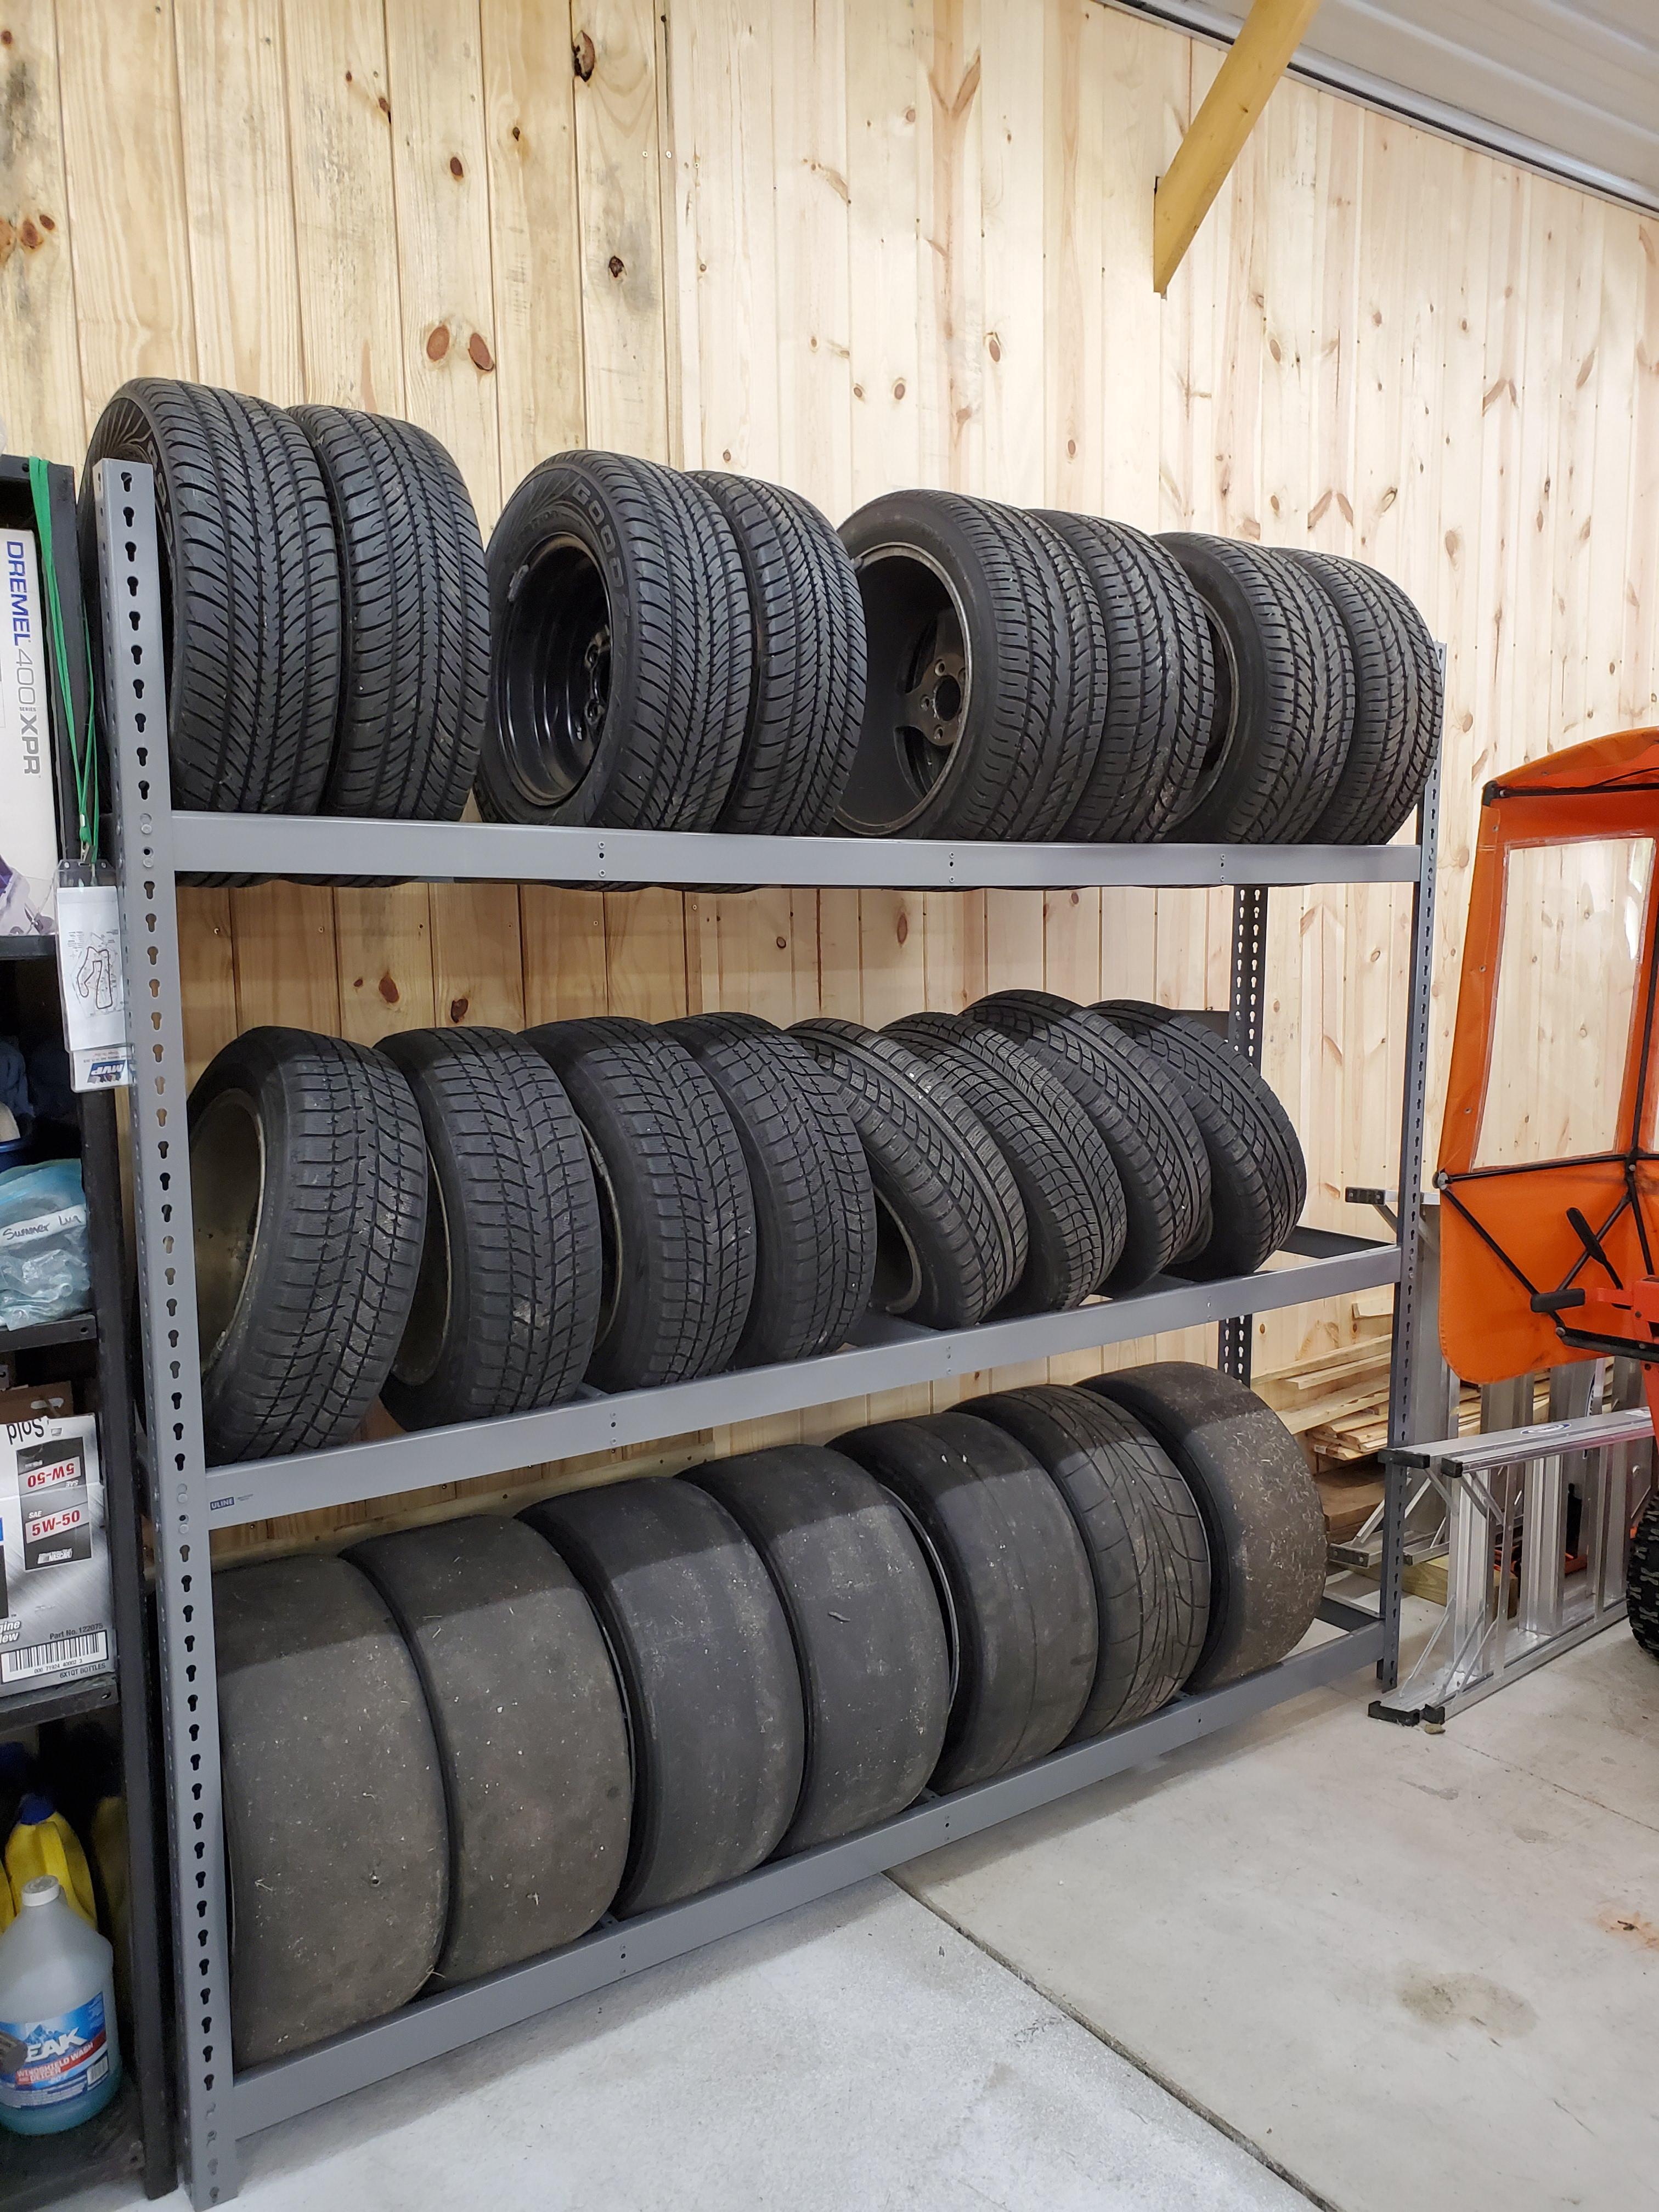
2 points2 points2 pointsWell, I retired last month, so I finally had some time to build a work bench. I found a decent steel top, that was 8' x 3", which I ended up getting for free. Used 4"x4"'s for the uprights and 2"x4"s to tie it all together. Used 3/4" plywood for the shelf. I made the bench extra high so that I don't have to bend over to work on stuff. Also put it on casters so that I could keep flexibility in the shop configuration. I also picked up a really nice tire rack, so I don't have stacks of tires all over the place anymore. I will be getting the heater put in in the next few weeks. The lift is planned for the spring. That will about take care of building the shop. Now I need to find a new car project to work on!!!


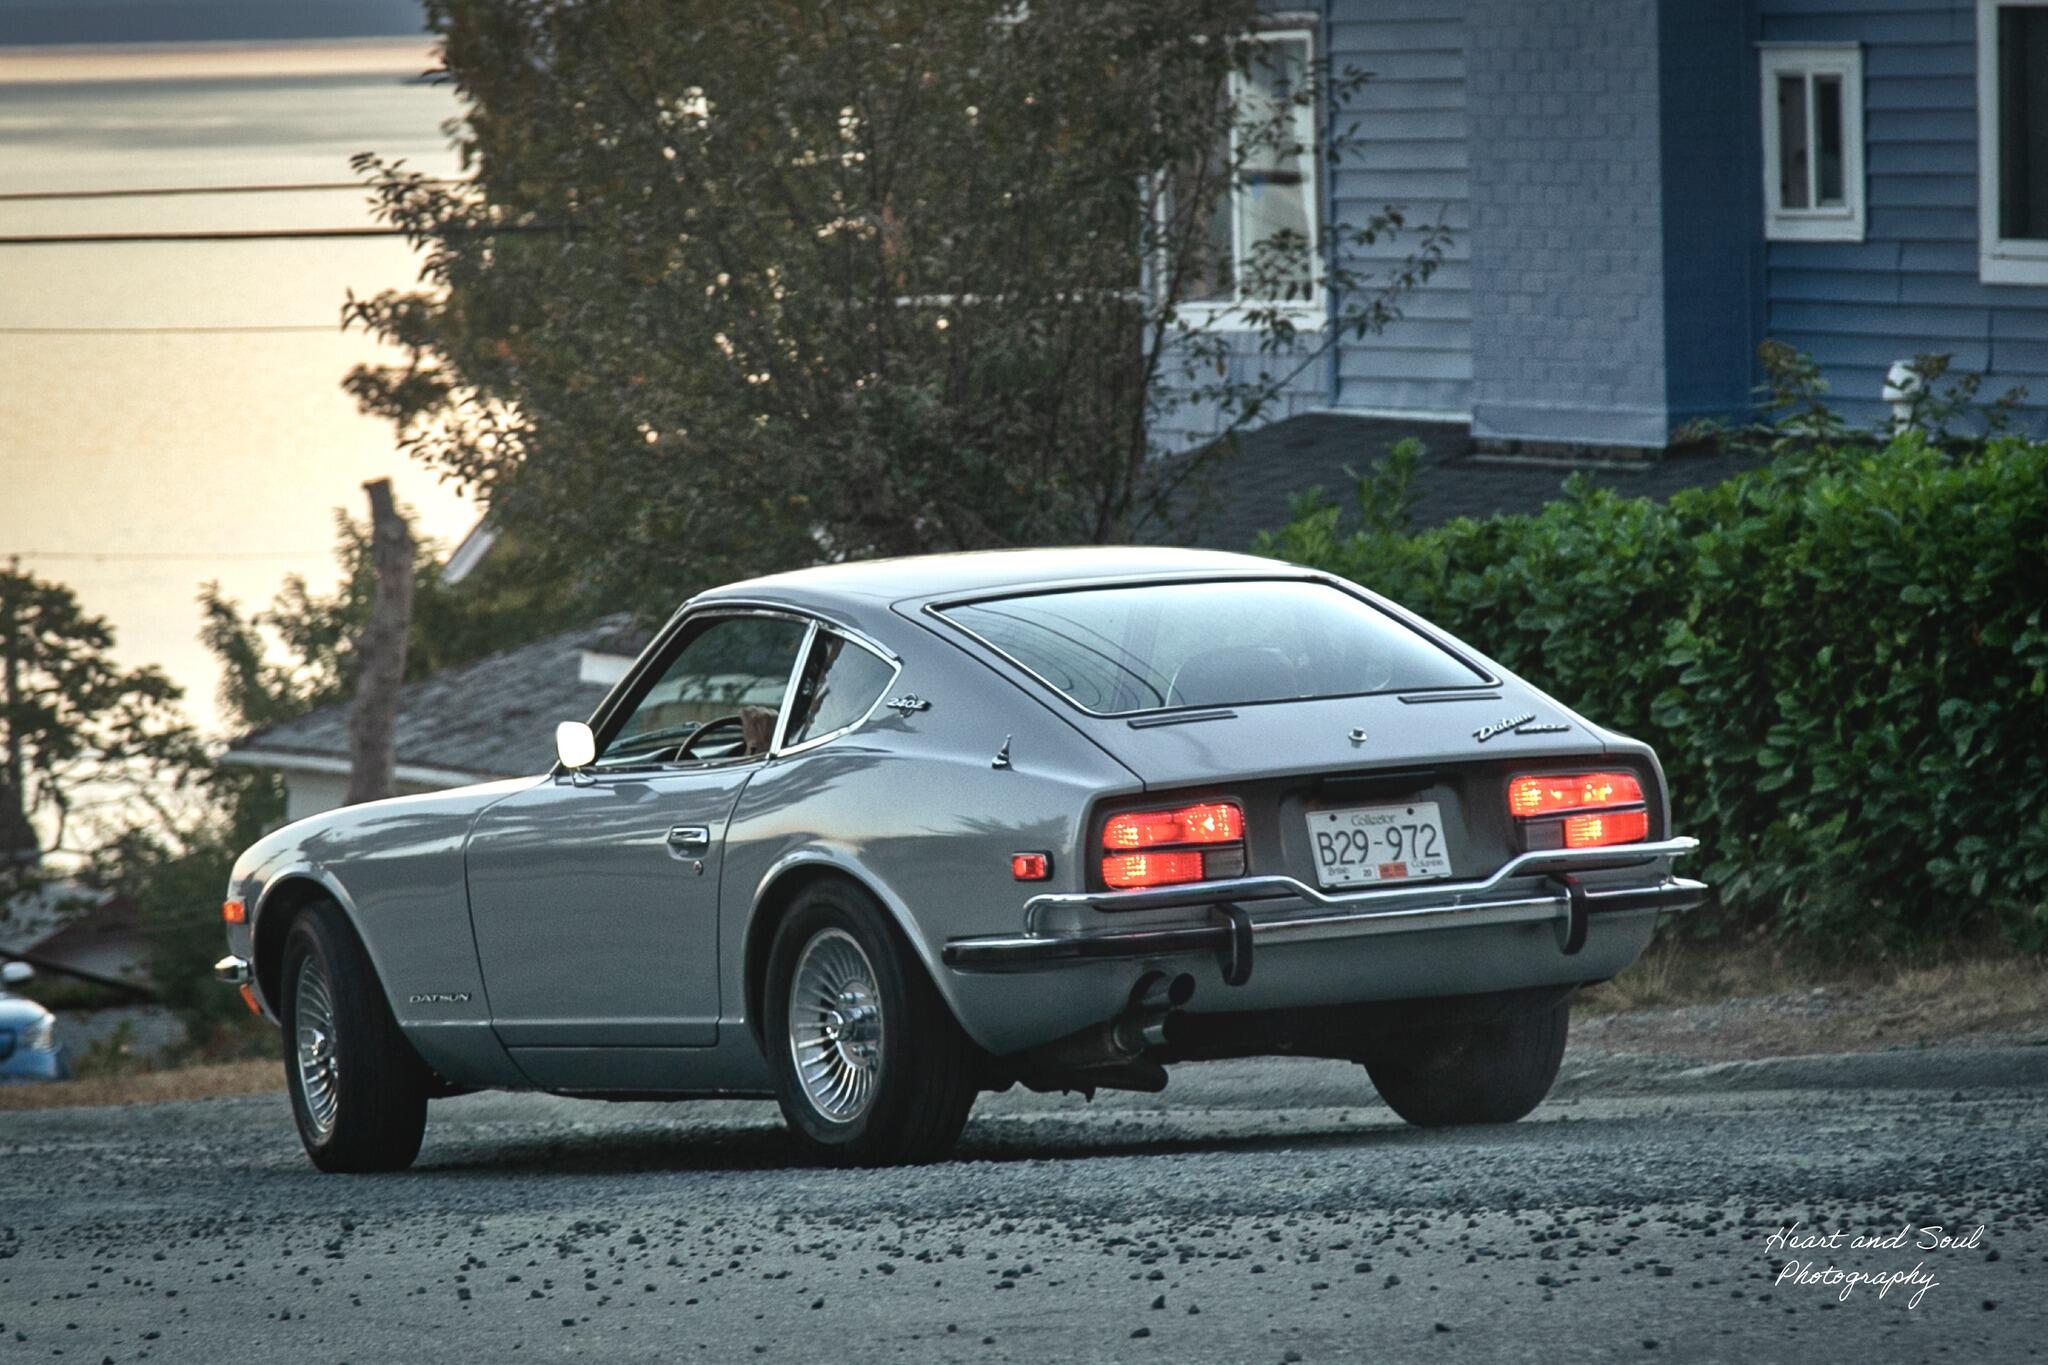
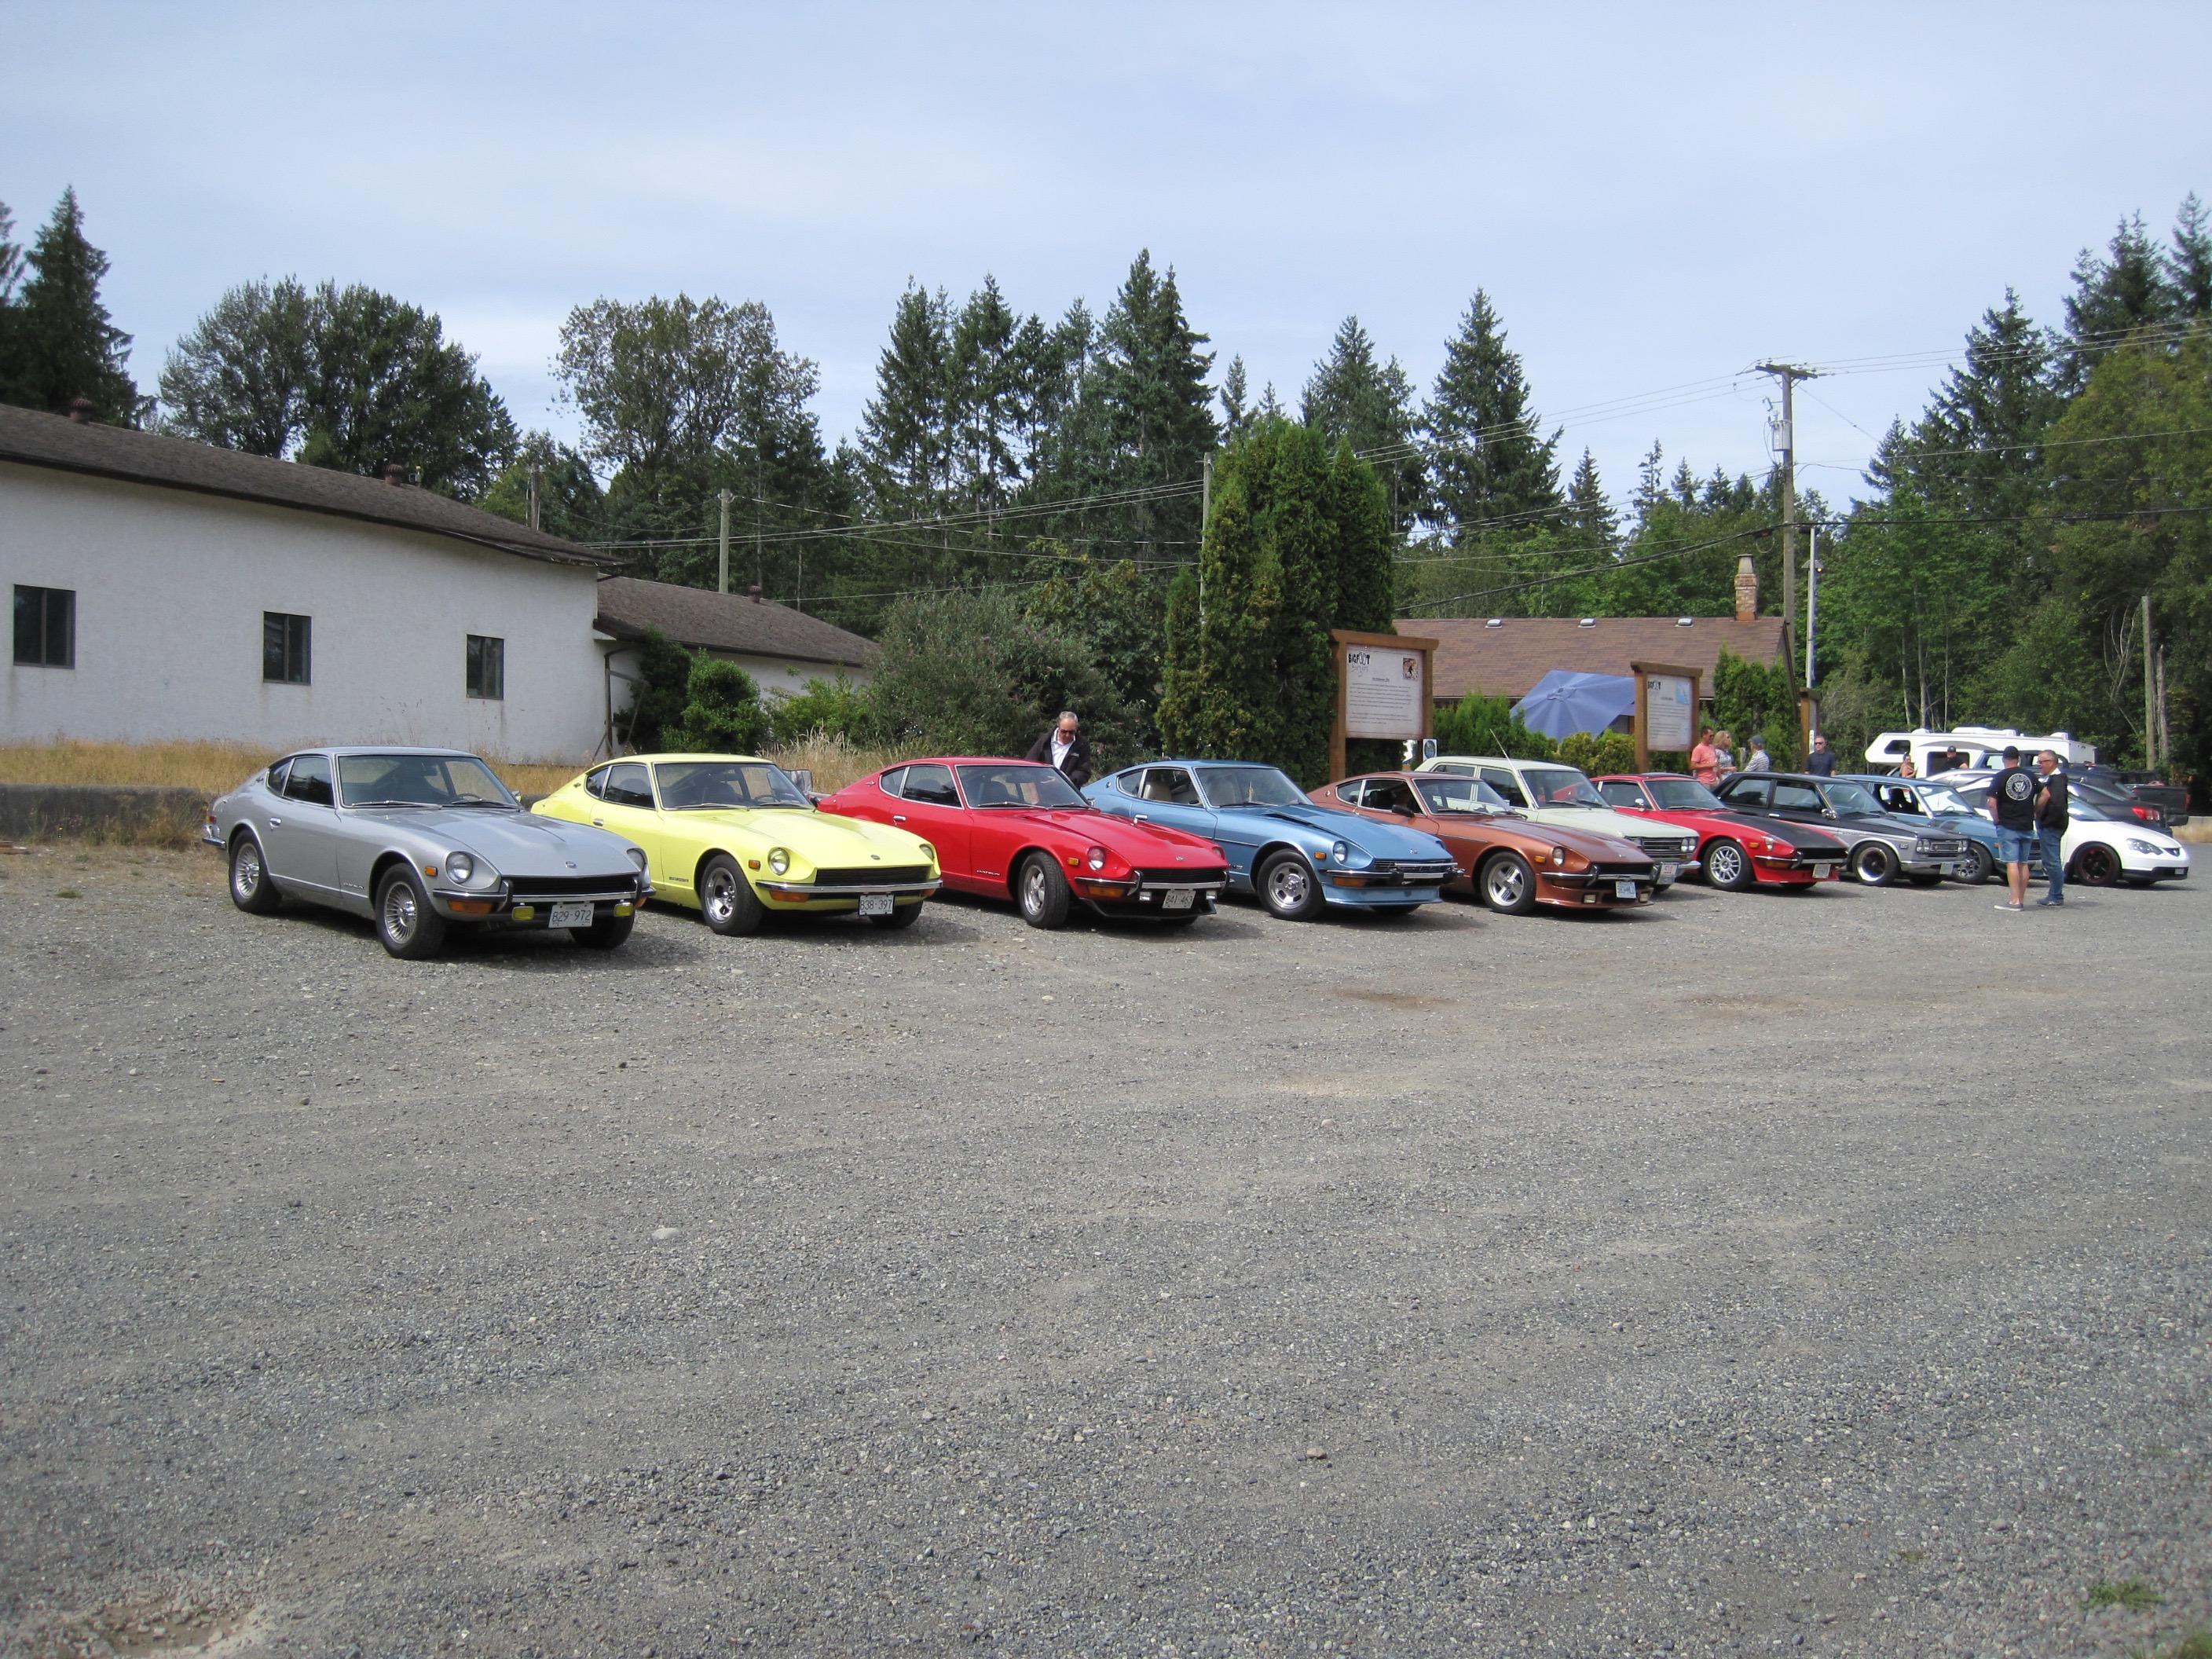
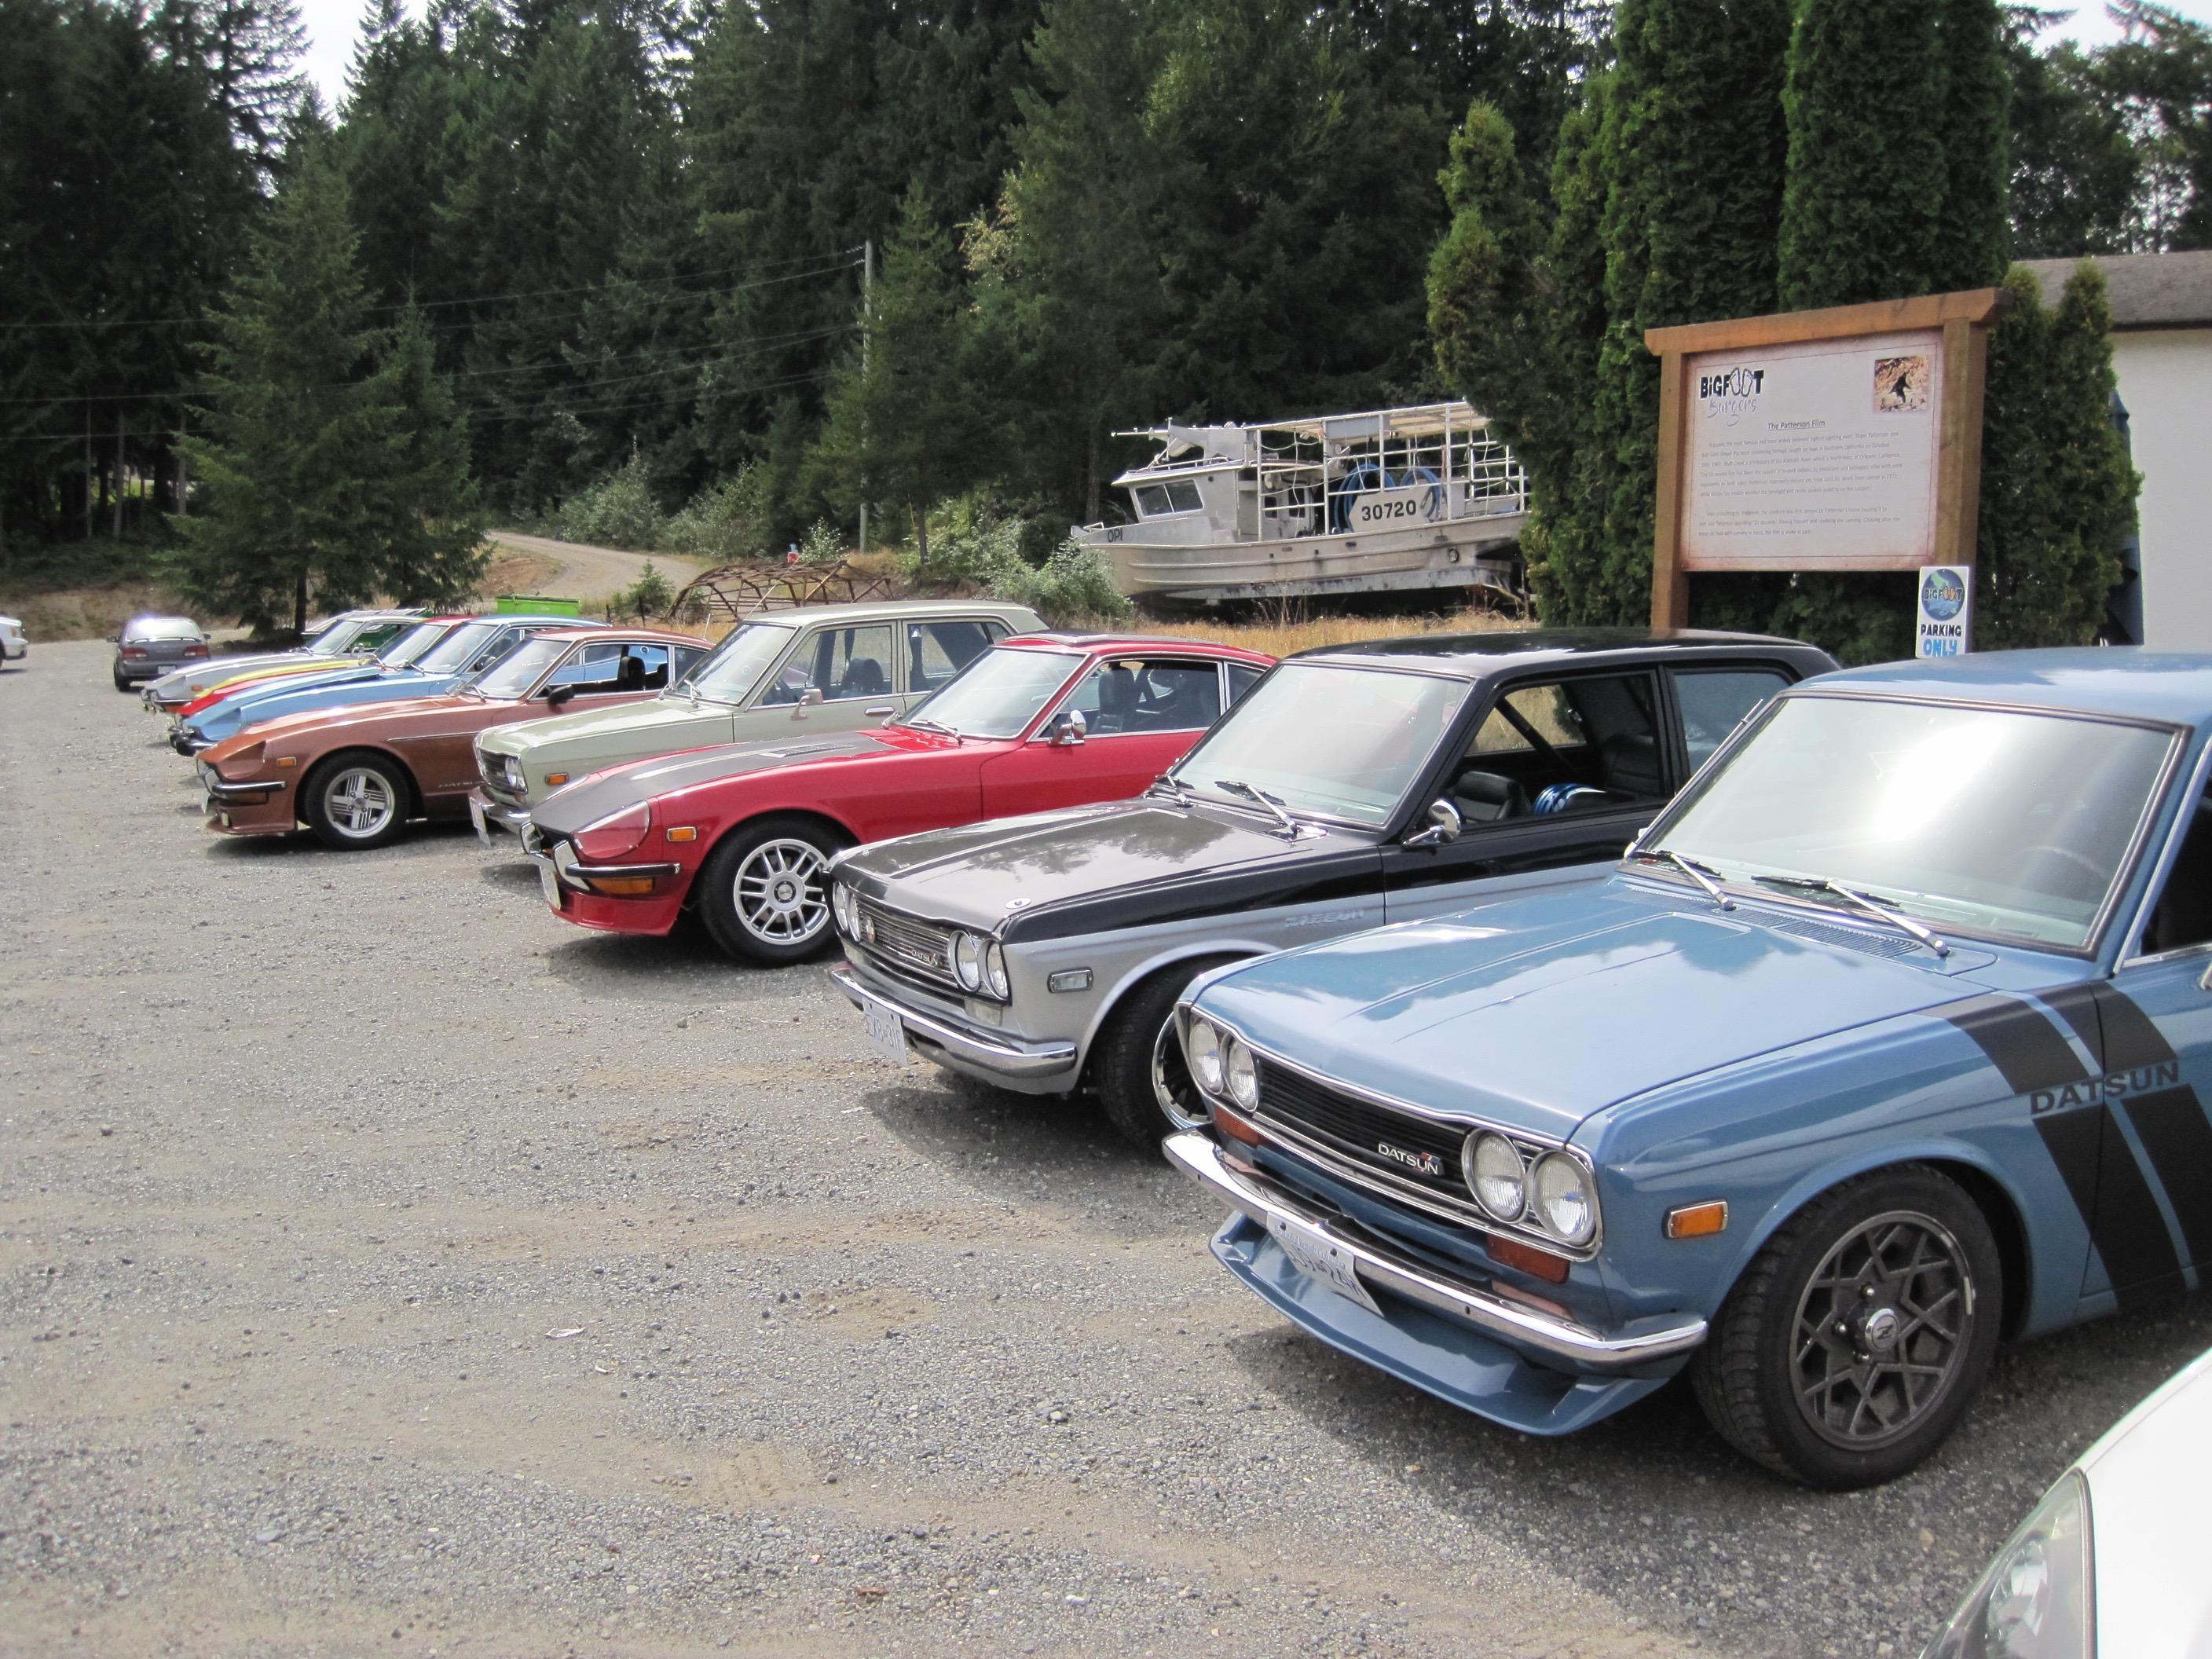
 2 points2 pointsI'll third the MSA 6-1 ceramic coated headed, they really did a nice job with it. I'm looking into buying a muffler from Sean. His whole system looks really nice. https://www.datsun-zstory.com/2 pointsWent over to Vancouver Island on Sunday and spent the day on a cruise with a bunch of Datsun folks, it was a enjoyable drive. Everyone did the social distancing thing. @zKars I think you would know most if not all of these cars and their owners.
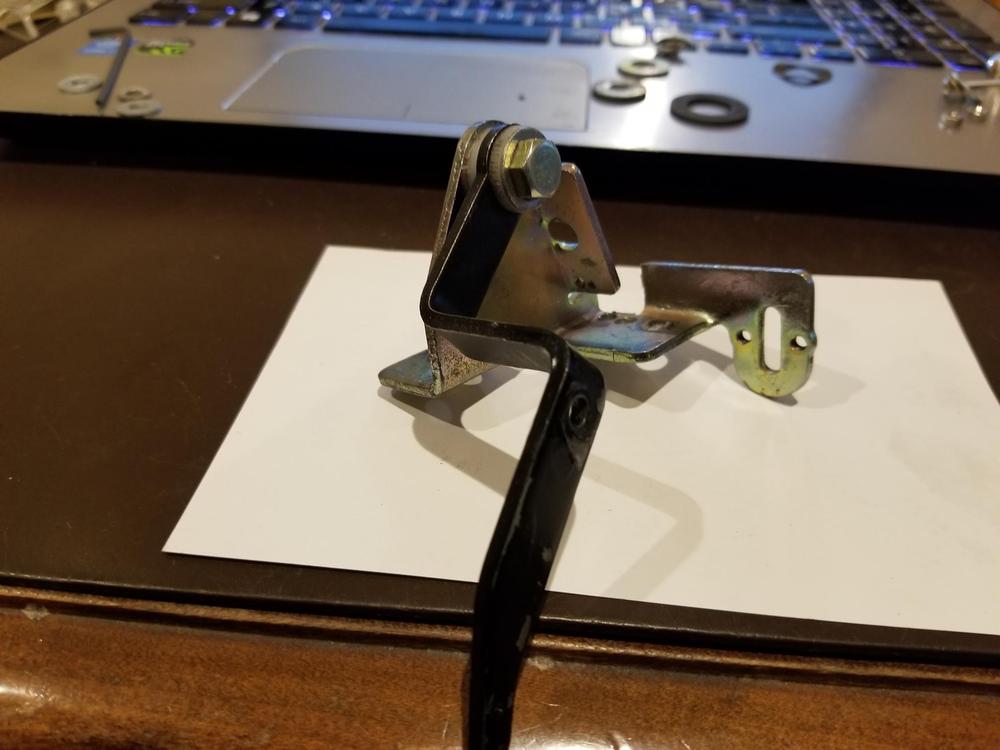
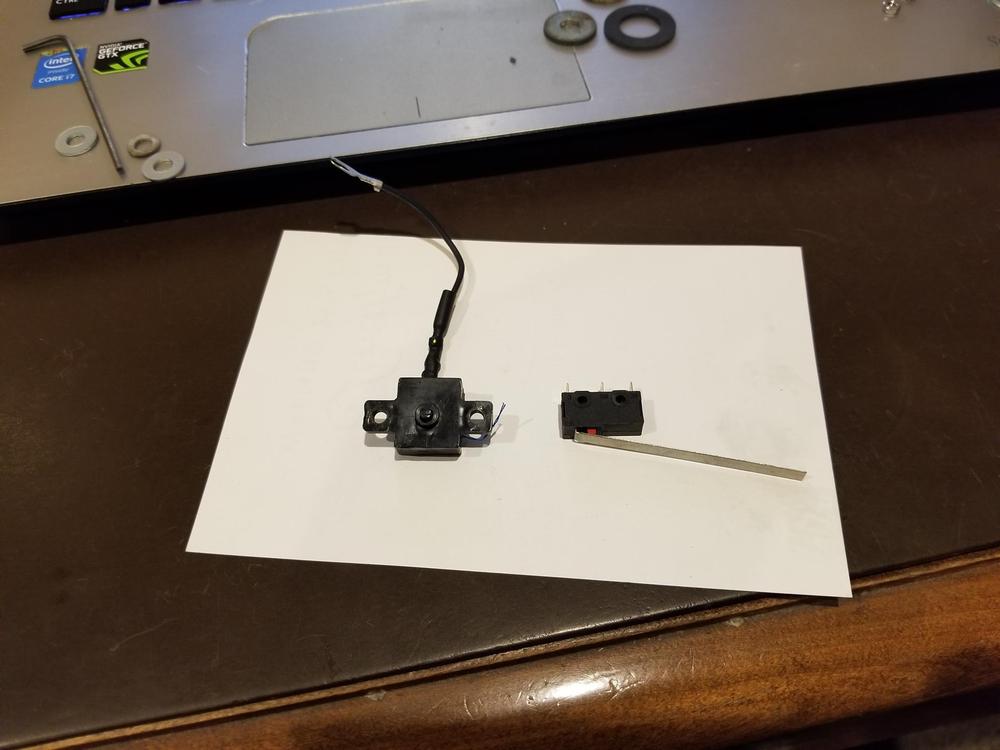
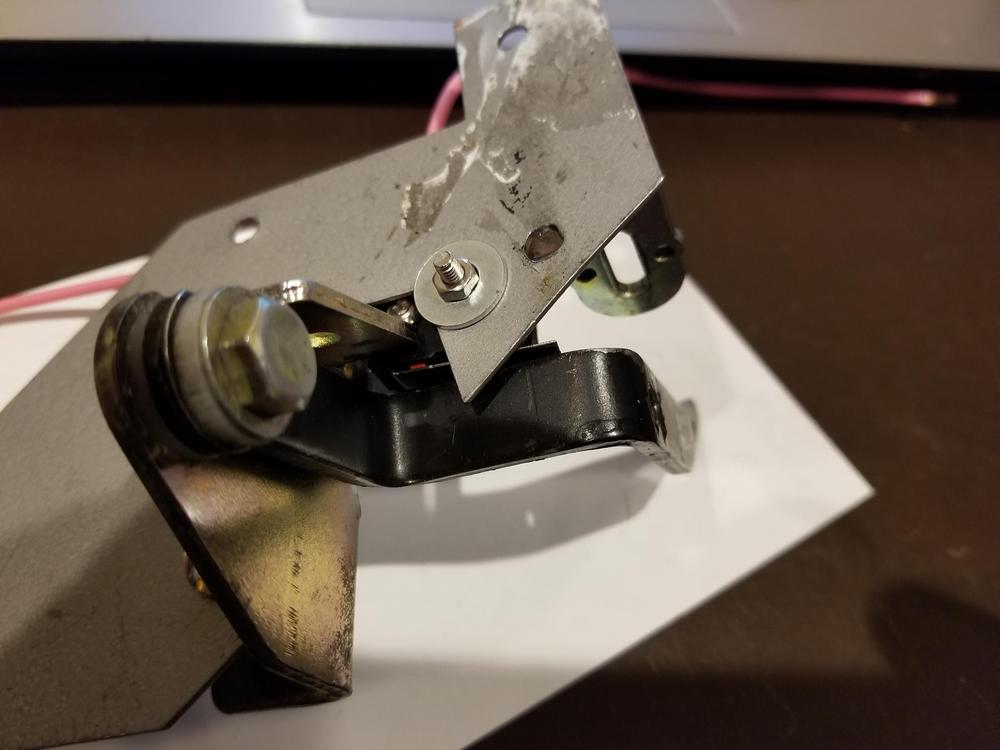
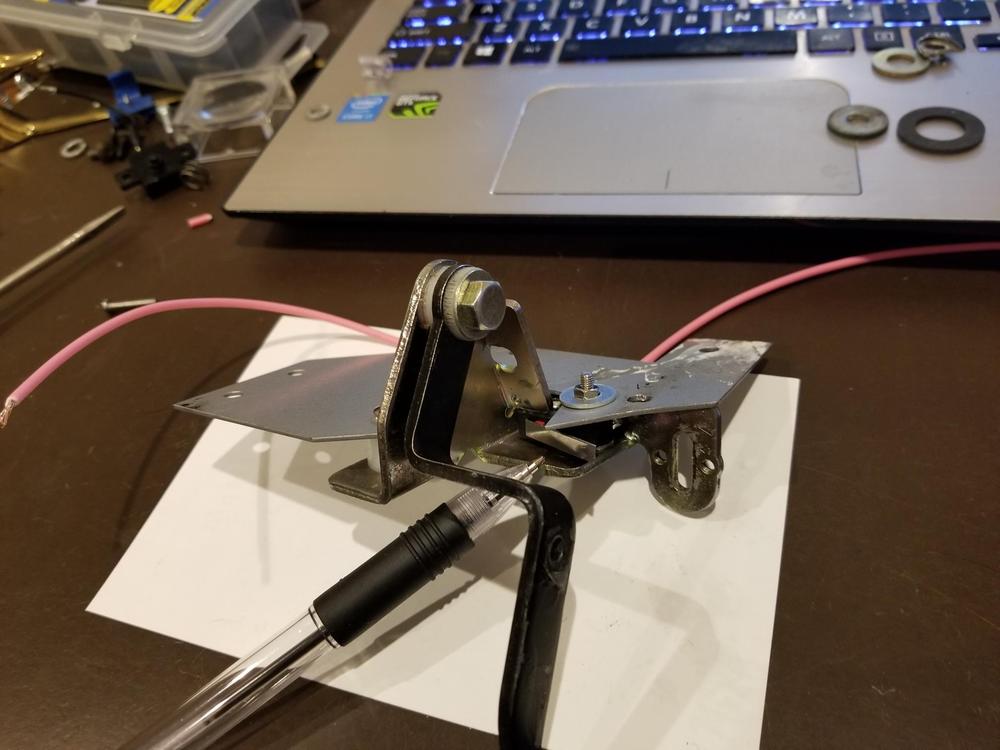
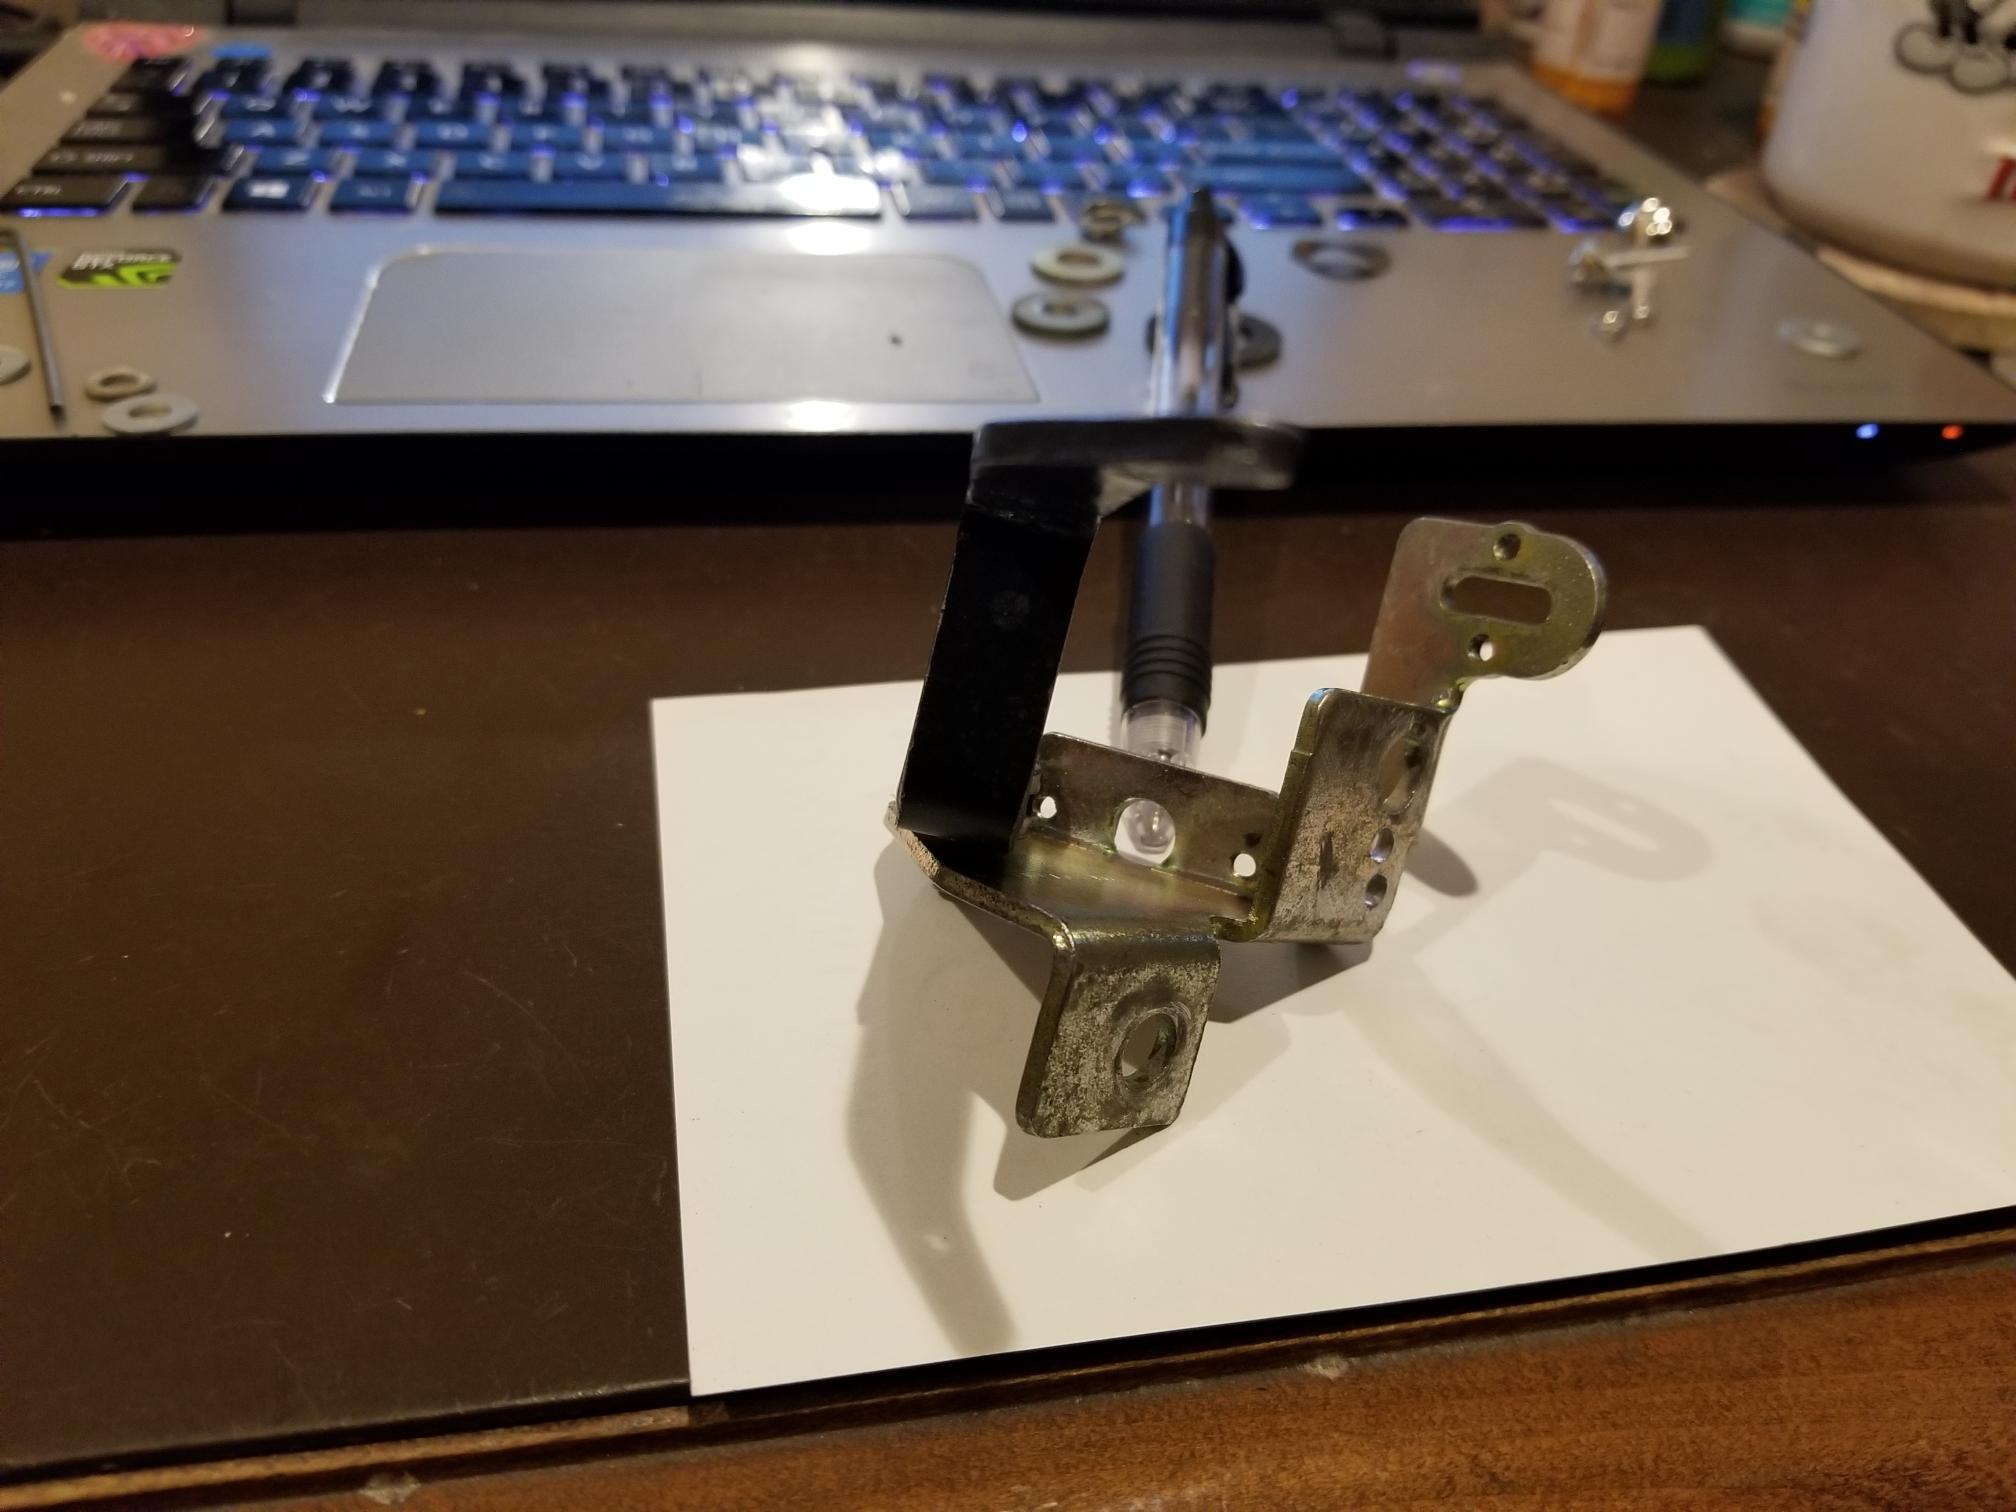
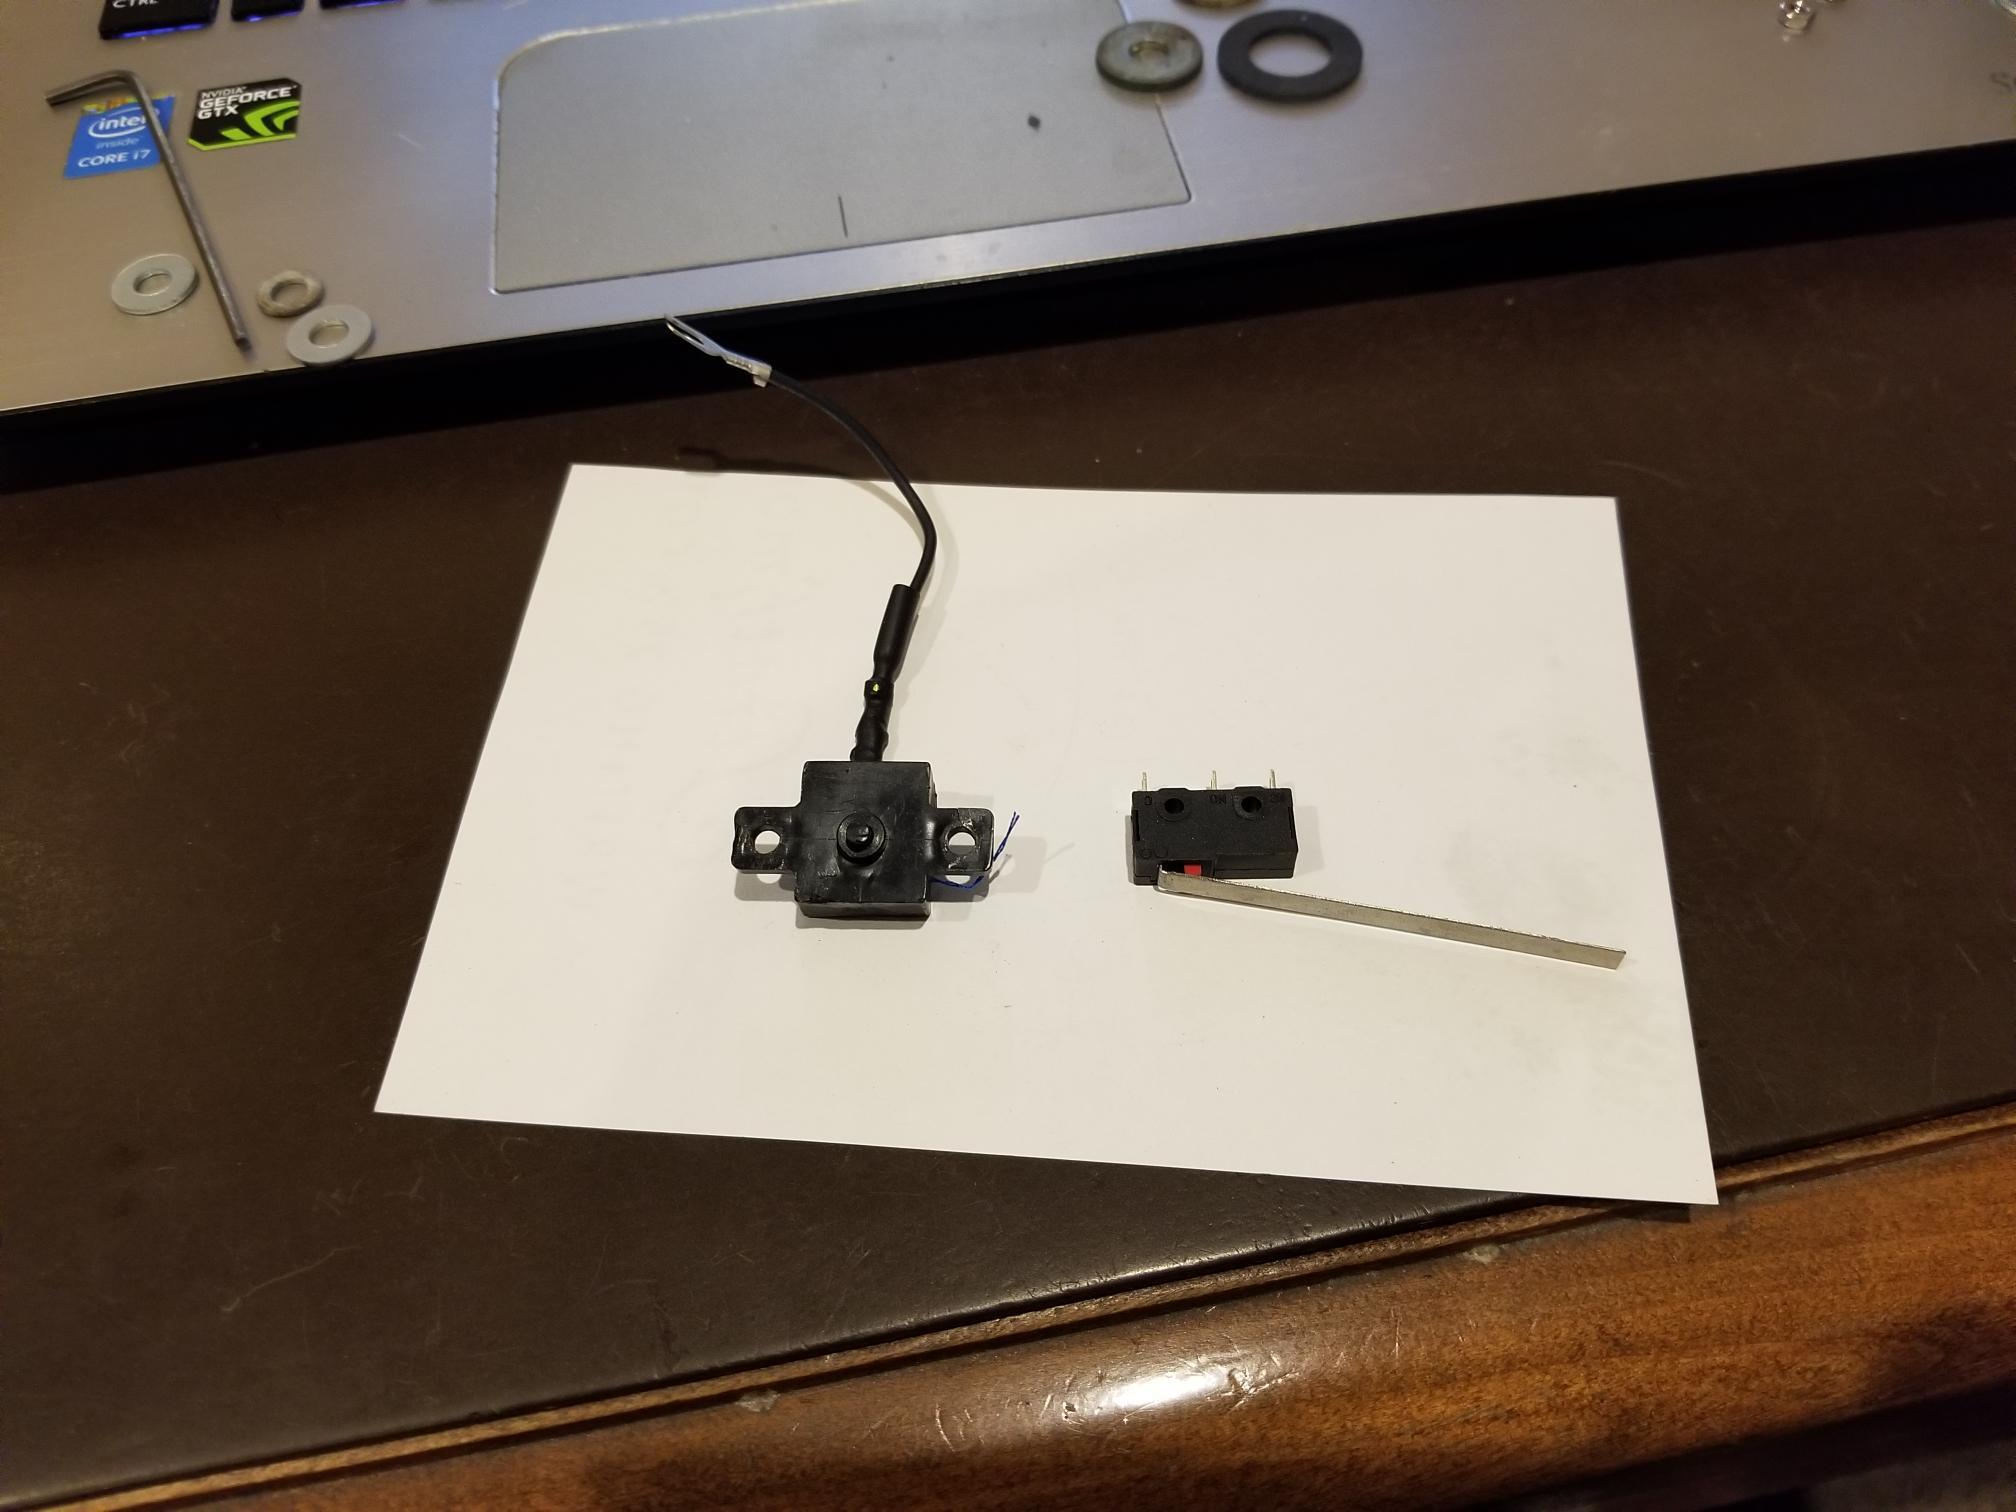
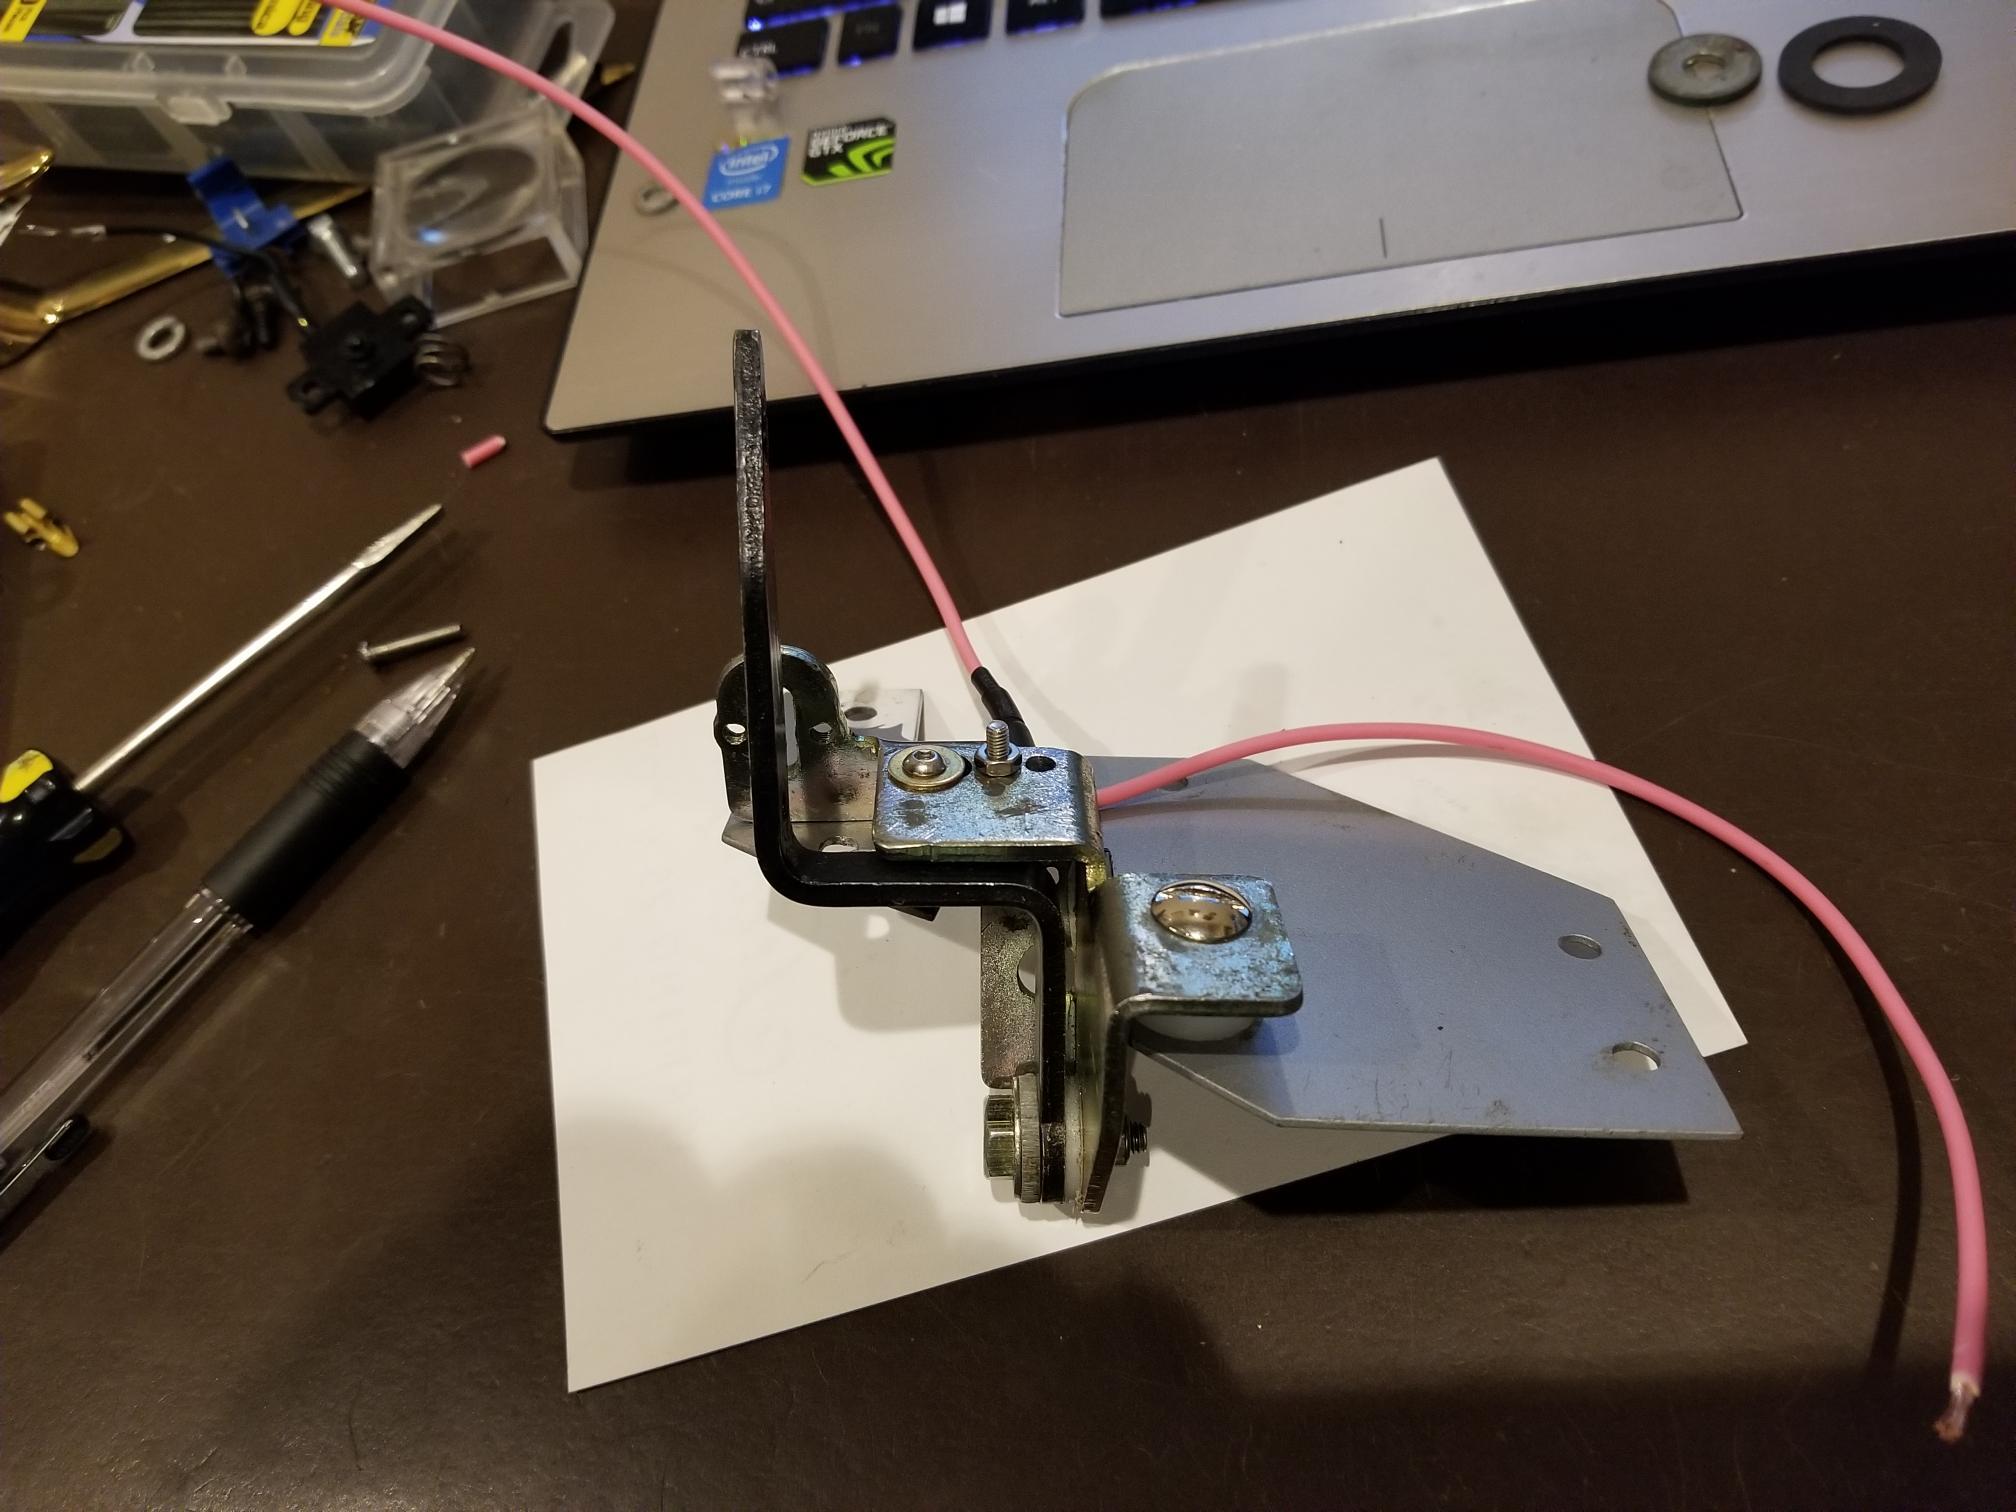
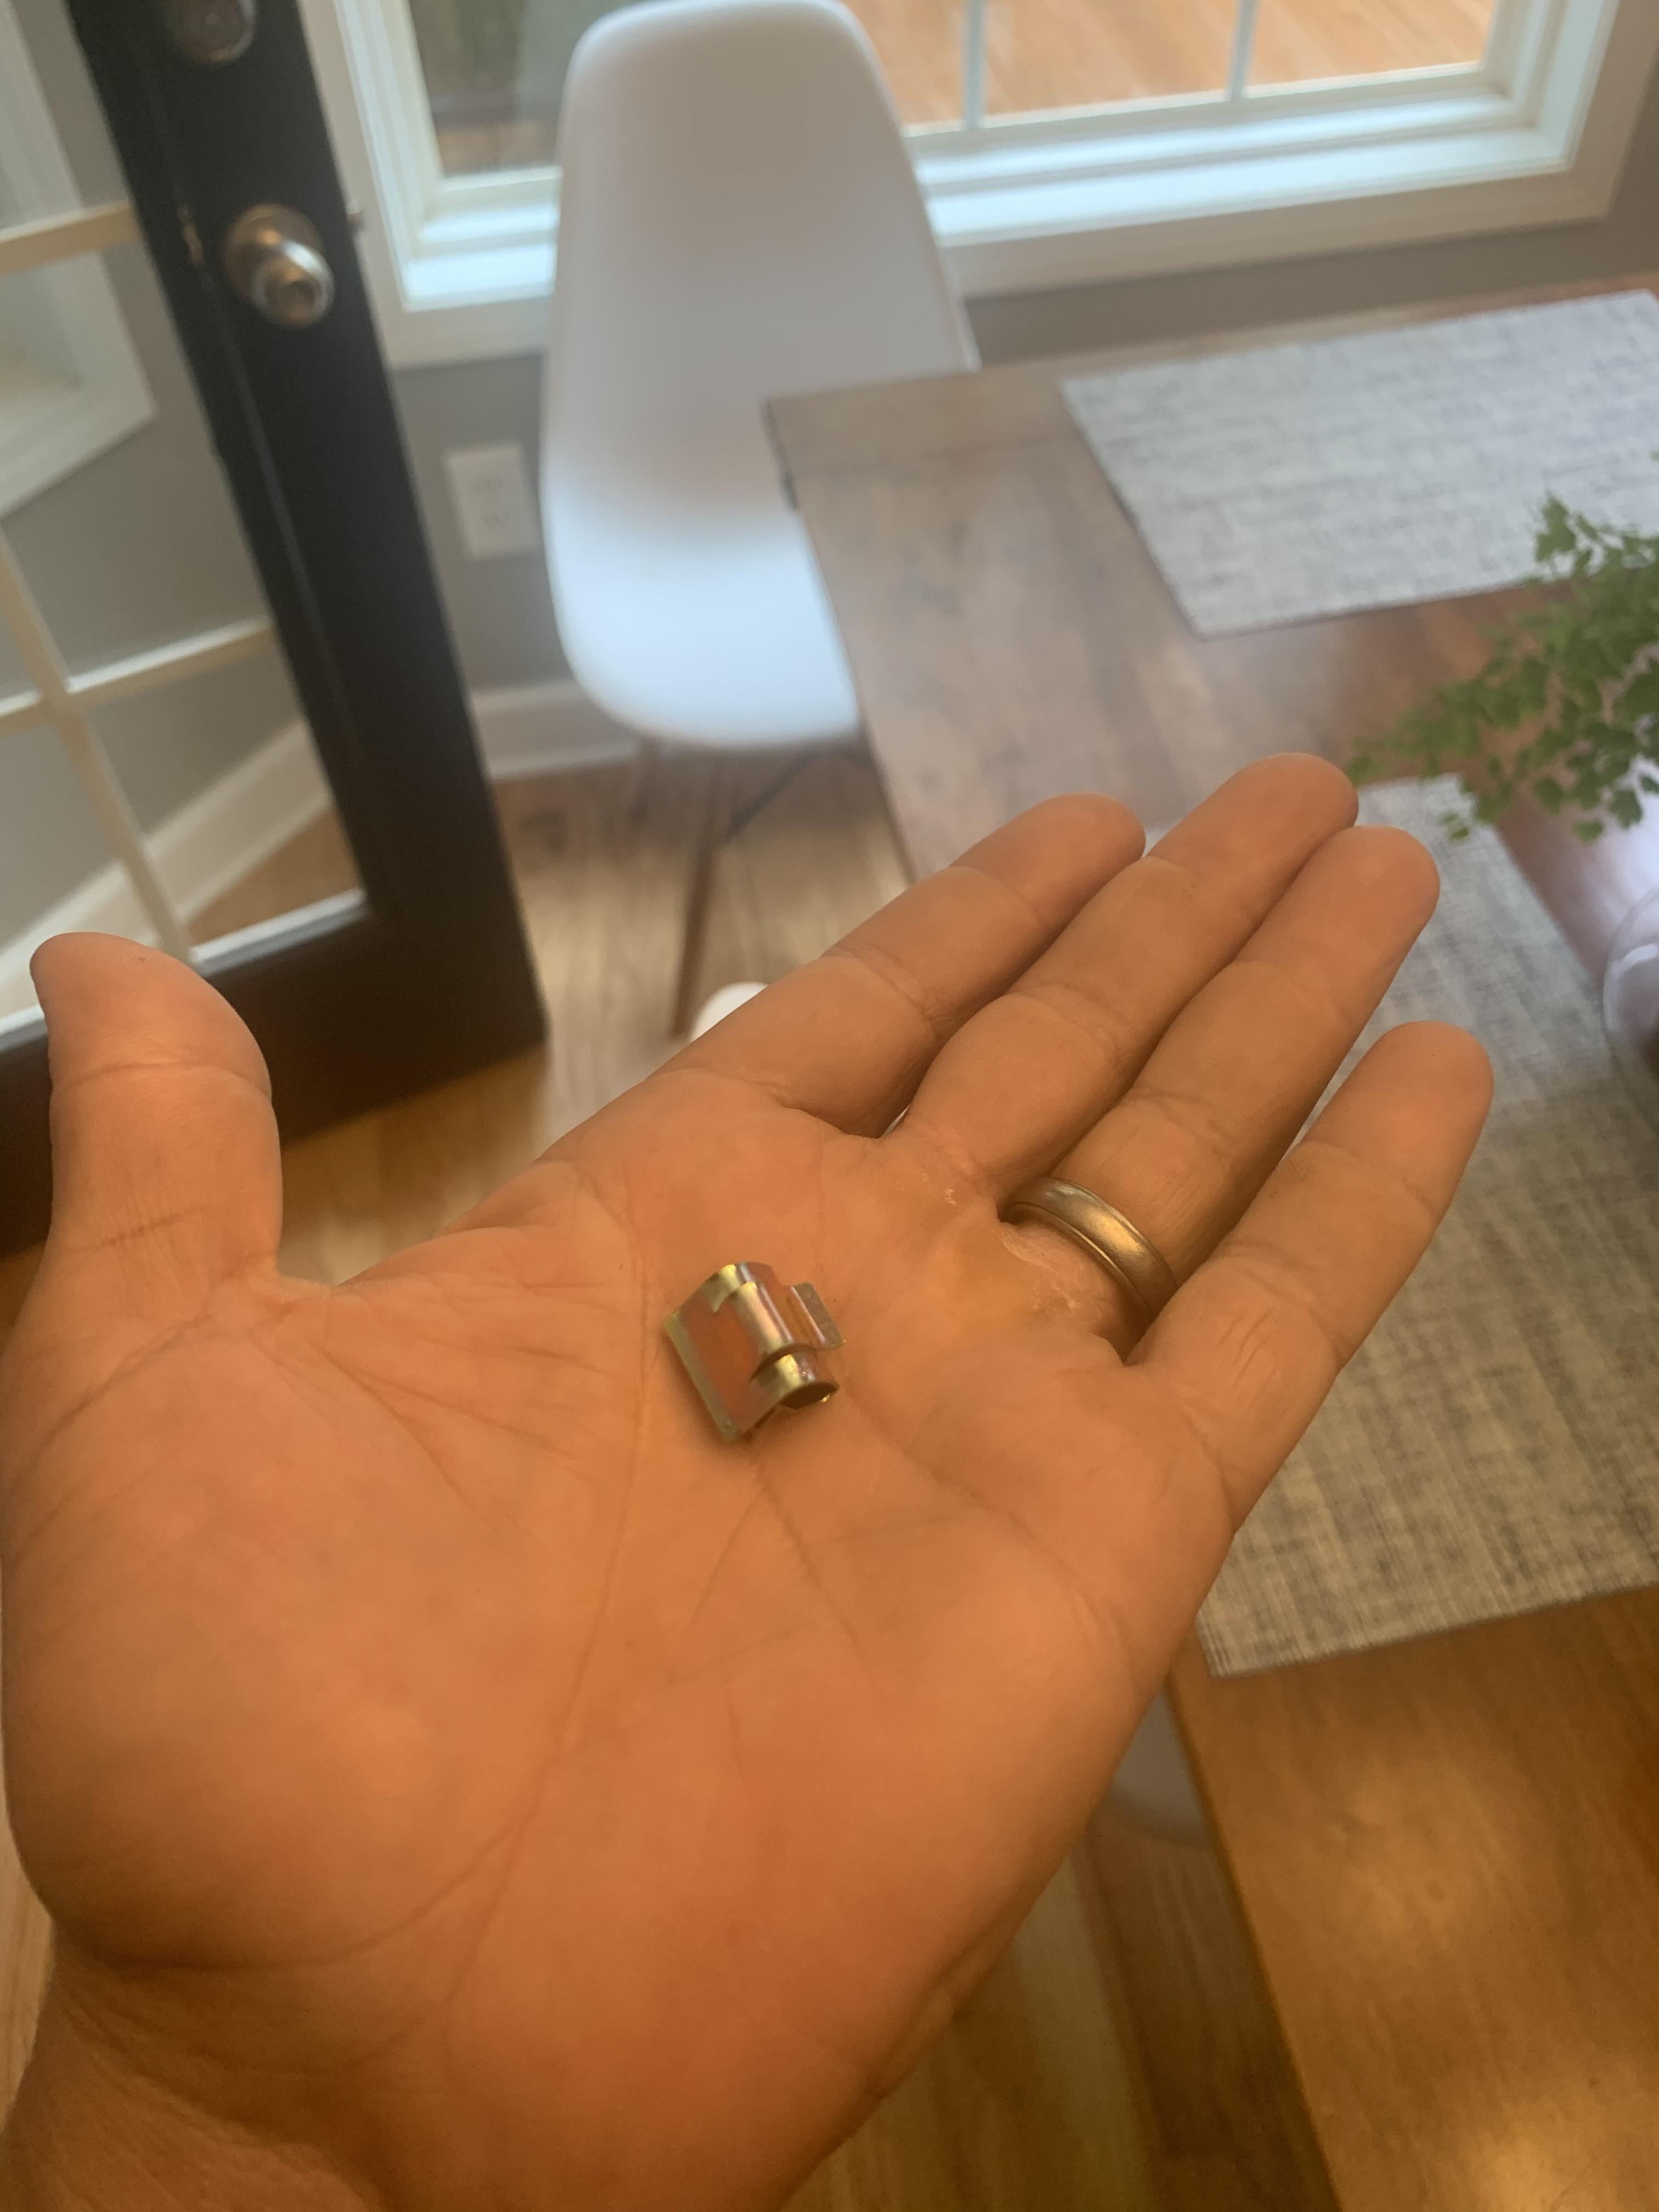
 2 points2 pointsReminds me that one of the foremost names in headers back in the day was 'Hooker'.2 points1 point1 pointI recently acquired a 1970 240Z #00664. The car is all original condition with a documented 74k on odometer. The car has sat for 20 years and unfortunately the frame rail is rusted through(Assuming from the battery tray) I am looking for some advice on how to handle the frame rail. Should I find a donor car and cut the rail out and weld the new one in or should I look at some aftermarket frame rail replacements? I would like to keep this car as a survivor car(Still has the green distributor cap) but looking for advice on the right route to take.1 point1 pointpreface: I am working on the restoration of a 73 240z. A mentor of mine used to say “The enemy of good is better”. I adopted this saying but often times I unfortunately ignore it. Our car “the bucket” has what I believe is its original center console. It has a single slot on the driver’s side for the choke control. At some time in the past the original choke control arm and bracket were replaced with a generic pull out handle and cable mounted where the cigarette lighter would normally be located. It worked well enough with the previous owner’s conversion to a Holey 4 barrel. I returned the car to a dual SU setup. The choke reminder lamp was also replaced with a blank piece of plastic. I could have used the generic control for the SU setup, but “the enemy of good is better”. I looked at the Console and I looked at the empty slot for the choke control and once again I ignored my training – “the enemy of good is better”. I located a choke control arm, original cable, and a choke indicator lamp. I purchased a bracket to mount them on the transmission tunnel so that the 40+ year old plastic console would not be stressed by the mechanical action of the choke control. I wired in the lamp taking a silly shortcut using power from the rear defroster switch. I believe the switch plastic failed and that set up a nasty sequence of events. Ultimately a short melted the plastic choke control switch before it could be protected by blowing a fuse. The hatch defrost circuit has a 20 amp fuse. It blew but too late to protect the mini switch. I know better but I made a number of silly mistakes that I am not proud of but my errors led me to a fix that I thought might help you. choke control switch alternative: if your choke control switch is not working and you need to replace it this might help. Above is the original choke control switch. Normally it has 2 leads, but one was weak and it broke, which probably helped to create the short that melted it. It mounts to the control arm bracket with two screws thru the holes on either side of the switch. Above is the control arm bracket. The pen is pointing to the hole where the switch button protrudes when mounted. The threaded holes on either side are to mount the switch. I could not locate an original plastic switch. I decided to use a limit switch and bought the following on Amazon. MXRS SPDT 1NO 1NC 5.5cm Hinge Lever Momentary Push Button Micro Limit Switch AC 5A 125V 250V 3 Pins 12 Pcs. Hard to believe but 12 switches cost less than $7.00. Above is the original switch on the left and the switch that I bought on the right. The nice thing about this switch is that there are three pins which allow you to alter its definition. Depending on which pins are used the switch can be either normally open or normally closed. The issue for me was a mechanical one – mounting the switch. Naturally it does not mate to the control arm bracket in the same fashion as the original. There are two holes that go thru the body of the new switch. So the mounting orientation is off by 90 degrees and the red button is not long enough to protrude through the bracket like the original switch. I wanted to make as few changes as possible to the control arm bracket. Only one additional hole was necessary. I also cut part of the bracket to provide more clearance for the pin that returns to the indicator lamp . Above is the control arm bracket with the new switch mounted to it. The pen points to the lever (shortened) of the limit switch. If you look closely you see the red button that it contacts when the control arm (black handle) contacts the switch lever. The bracket is upside down in the picture. The control arm is in the activated position, equivalent to applying the choke for starting, pulling the cables, the indicator lamp would be lit. In order to mount the new switch I had to enlarge the mounting holes in the switch body. I enlarged them to accommodate #4 metric screws. There is at least enough room for this, just go slowly. The new switch is actually mounted to the horizontal plate that I bought separately to eliminate the need to attach the control arm bracket to the bottom of the center console. There are a lot of benefits to mounting it to the transmission tunnel. It is a real pain to remove/install the center console with the control arm mounted to it. The 40+ year old plastic is brittle and a common complaint Is that the control arm cable binds and the stress breaks the plastic center console. Above is a picture of the choke control in the inactive position, cables released. You can see the red button and the switch lever. They are depressed so continuity is broken and the indicator lamp is off. in the image above is the control arm and bracket. It is upright, the front of the car is in the direction of the keyboard. The arm is forward, the choke is off, the indicator lamp is extinguished. above is the control arm and bracket. Just in front of the original switch mount is where I removed a small part of the bracket for extra clearance for the pin the extends out of the new switch back. If you have any questions feel free to ask away.
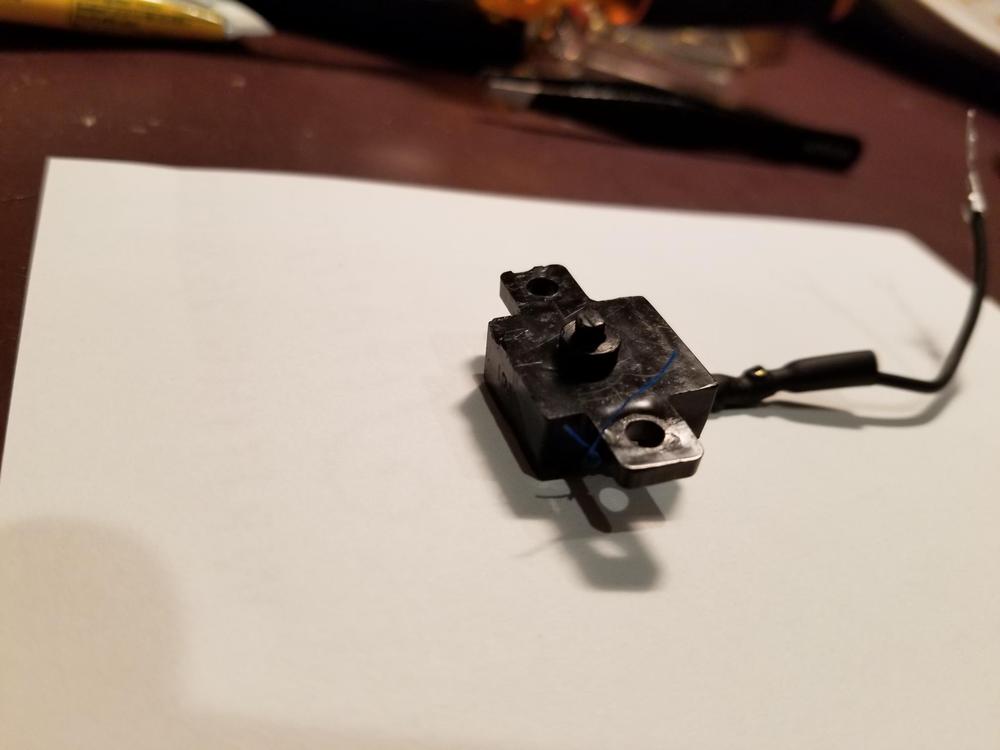


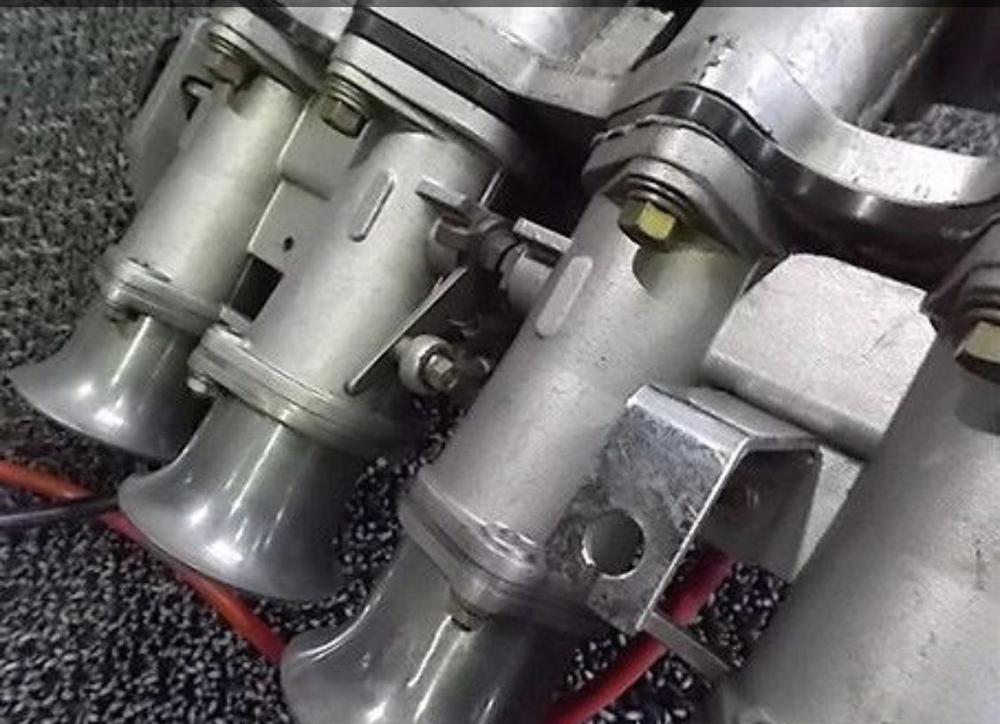
 1 point1 pointThe ZX's have a different type of suspension on the back. Where exactly did you install the bushings? And what type of tire and rim are you using? Tire sidewalls are a significant part of the suspension. Low profile tires probably make more noise. I used to notice a big change in the Portland area roads when I went from the old high aggregate concrete to the newer asphalt. The rocky concrete was super noisy.1 point1 point1 pointWell I’m probably a idiot. But I decided to swap my Jenvey throttles bodies out for something a little more vintage/ classic. These are late 70s early 80s SK throttle bodies. They are 47mm that taper to 45. I picked them up off yahoo japan. They have a nice vac balance port on them. I bought two sets off a single seller. Now time to fabricate a single piece fuel rail and find a tps sensor that works. They should match my SK intake nicely. The old SK stuff is so nicely cast. I’m excited!
 1 pointThanks everyone to share the advice/wisdom. If it runs, let it runs like an energizer bunny. On and on. let's see any other issue popup. regards1 point1 pointSo many variables to a clean burn with EFI. If it runs good let it go, and go and go.1 point1 point1 point1 pointThere's that red paint fade we just talked about. That rust looks like it came from battery acid/salts drippage. Very localized. I've seen people just patch holes like that. A good fabricator could do a nice job on it. Survivor sounds like a cool idea. Have you spun the engine yet? 20 years is a long time. If you do some prep work before starting it you might save yourself some problems and end up with a better-running engine. Take your time.1 point1 pointWasn't Heddman another? Hedmann? Hedman. Hedman Hedders. Knew there was something odd about it. https://www.hedman.com/headers
 1 pointI have been using the Kia weatherstripping on both doors and the hatch for 5 years now and have no issues with noise and/or fumes. The doors close with a nice quiet click.1 point1 point1 pointMake sure that it has a thick flange that matches the intake manifold flange thickness. That seems to a major oversight among many manufacturers. A thin flange that requires special clamping yokes. From what I've read if you haven't done any porting work on the head, headers will have little effect on power. The power bottlenecks are elsewhere. They will increase the noise level though, so the perception of power will be greater. No offense intended. Some people go back to exhaust manifolds from headers just because of the extra noise. Not kidding. Something to consider.1 point


Important Information
By using this site, you agree to our Privacy Policy and Guidelines. We have placed cookies on your device to help make this website better. You can adjust your cookie settings, otherwise we'll assume you're okay to continue.