Leaderboard


Popular Content
Showing content with the highest reputation on 05/18/2018 in all areas
-
That's an interesting thread. It's weird how people always want to talk about things "in private" when in the open is best for everyone involved. Which is the purpose of these kinds of forums. The covering up alone is enough to make you want to avoid. Don't see the value in going private once the dirt is out there. I read the whole thread and it still doesn't look good for Pierre Z. Who knows what really happened? There was a guy on another thread who told me that he didn't post on the open forum, about somebody who seemed to be taking people's money but not producing the product he said he would, because he wanted to get his money back. The guy could pay him off to keep quiet. And it worked, he got his money refunded and/or parts returned and never told anyone. It was one of Senza Pari's customers. Not a fan of private communications about that sort of thing.2 points
-
2 pointsFixed!! I pushed 2 quarts of brake fluid though the right and a lot of bubbles came from drivers rear. Thanks to everyone for the help and support. I appreciate you guys.2 points
-
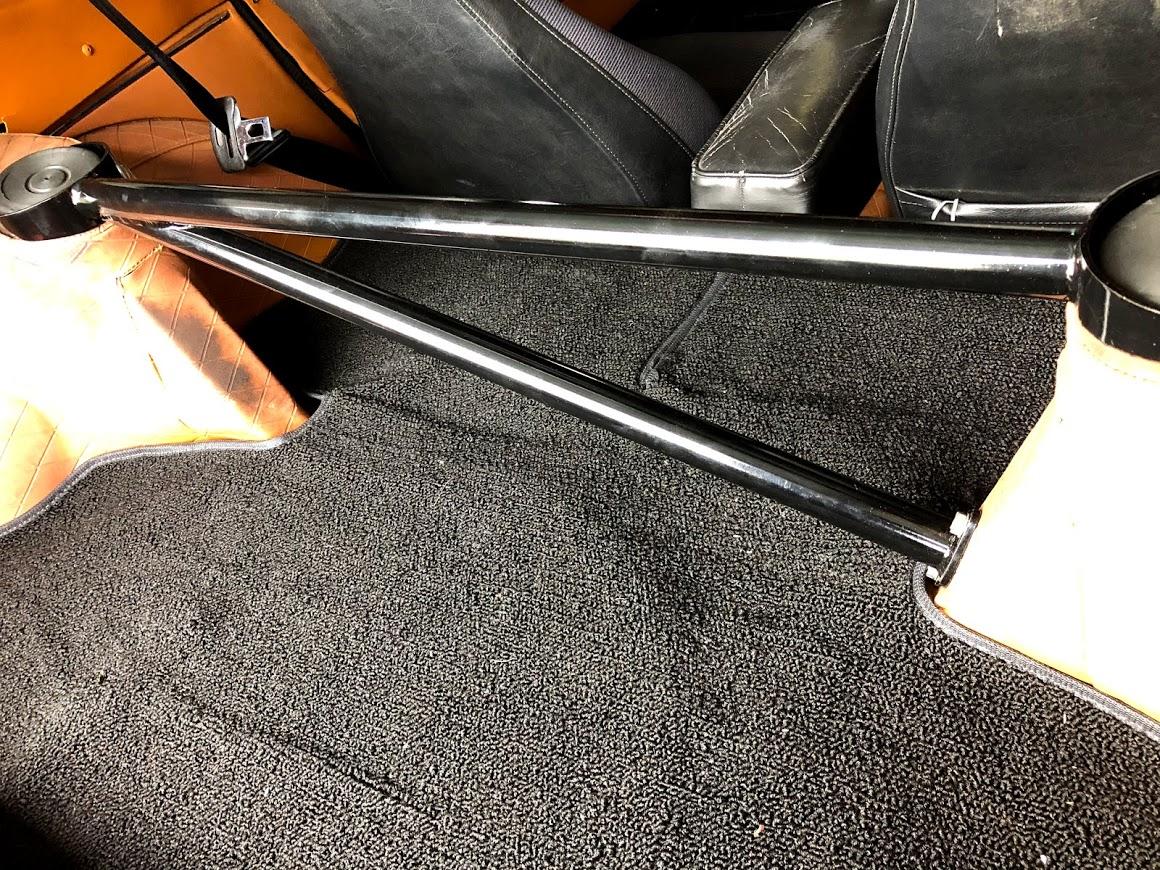
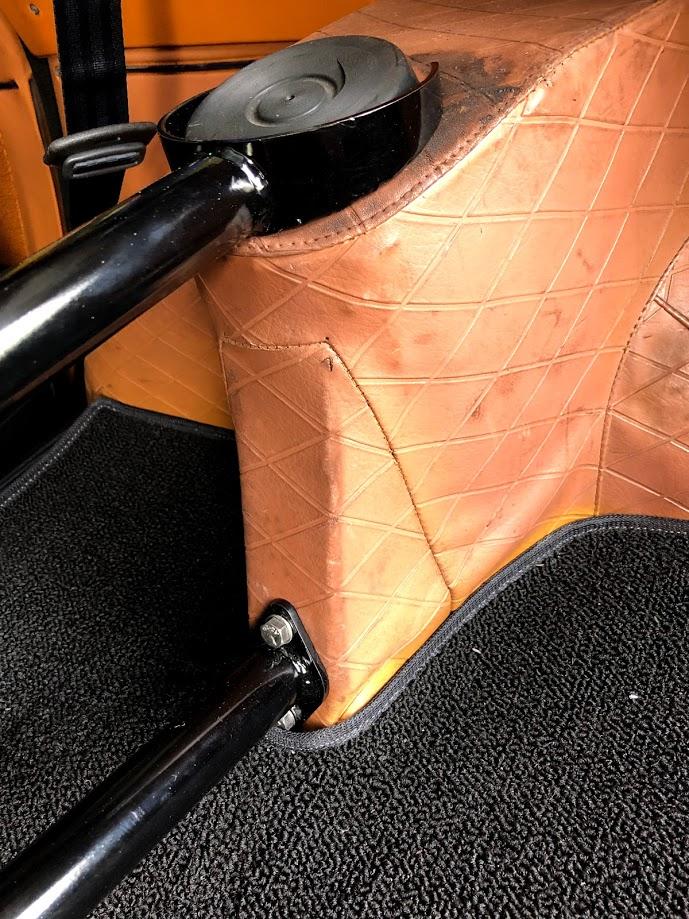
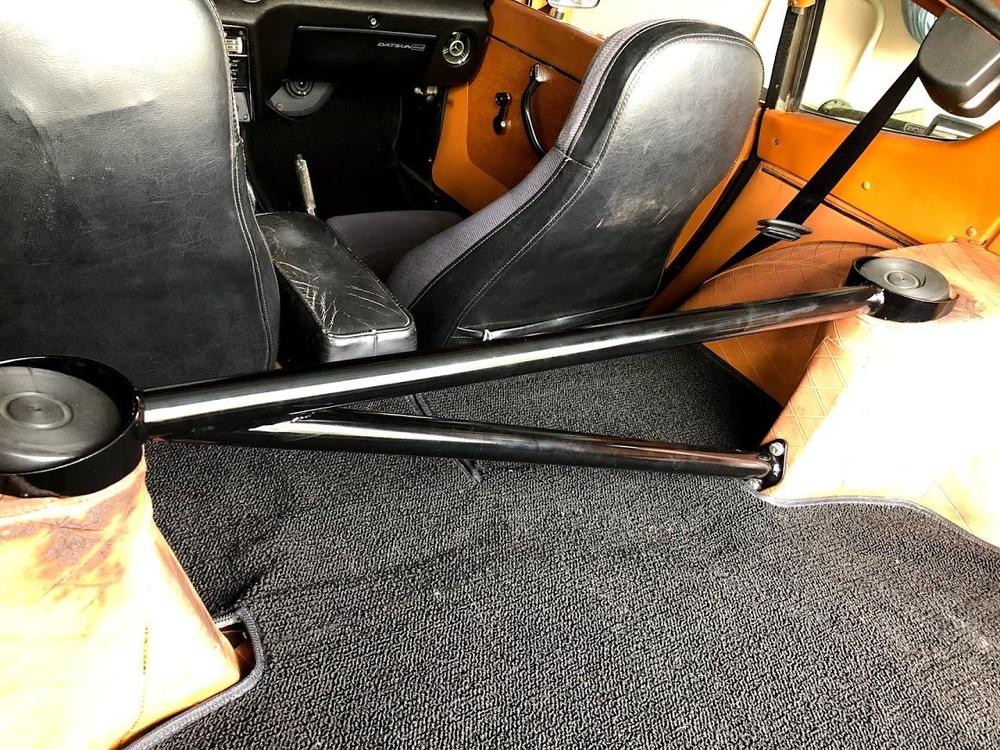
Big shout out to Z Car Depot and their rear strut tower brace. Purchased one and installed in minutes. I like that I can still use the factory covers and that it is so beefy. Highly recommended, very good quality welds. https://zcardepot.com/rear-strut-tower-brace-bar-240z-260z

 1 point
 -
https://www.olx.pt/anuncio/pecas-datsun-240z-travagem-IDz8bHP.html#af6aa94a5e 240z NOS all brake rubbers and rebuilds for master, wheel cylinders, and vacuum booster. Even has the bleeders and caps.1 point
-
ZCCOR#109......I was at Road Atlanta also in 1970.....we looked over the fence at the top of the Esses. Probably one of the most exciting times of my life when I saw the Datsuns screaming through the Esses after the parade lap. I too went out and purchased my first (1970) Z after I saw John blow away the competition. John should get a commission for every Nissan I’ve bought since......and it’s been a lot! BTW....I was also at this year’s Mitty. Regards Guy
 1 point
 -
1 pointSomeone can correct me if I'm wrong, but I don't think engine bay heat makes your plugs turn black. The plug color is a byproduct of internal combustion. Cooler air to the engine is always a plus, but I don't believe your approach is good. I live in the desert where the air temp hits 120º and the stock air intake/preheat works nicely just as the Nissan engineers designed it to work almost 50 years ago. As previously mentioned, stick with the current advice and don't start looking for other variables to fiddle with until carb adjustment is resolved. Dennis1 point
-
1 pointYou do not have to shim the head if you are changing the timing chain: 1. You can move the chain a link and use the 3 optional cam positions to align the timing mark on the cam sprocket where you want it. (The crank sprocket will be at TDC). 2. Once aligned you then adjust the slack side guide to take up all the slack so that the tensioner is pressed all the way in. Some top bolt holes on the slack side guide need a bit of reaming to move clockwise to take up the slack.1 point
-
1 pointI took one of those apart from a 78 parts car. Can't remember the details exactly but a very thin pick might have been involved. I think that I circled the locking mechanism in this picture. It's not what you'd expect. You need four thin jamming devices for each operation, if I recall.
 1 point
 -
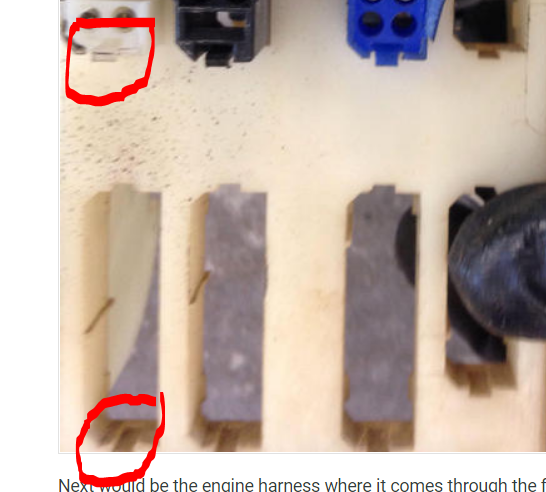
1 pointWoof. Putting someone else's hacked harness back together. That is really a no fun position to be in. So those cut wires up in the engine compartment I believe go to a couple automatic transmission specific devices. I believe the B/R and the B are supposed to go to the "downshift solenoid", and I believe the others (W/B and G) are supposed to go to the "inhibitor switch". Neither of those devices exist on the manual trans cars. As for how to get that blue connector out of the white plastic housing.... Boy, are those things a biatch. I've taken a couple of those out, and it's a real PITA. There are little plastic tabs on the white housing that clip the connector shells into place. Four (at least) on each connector shell. You can see them on the empty holes. Thin tools inserted from the front to push the tabs out of the way enough to force the connector shell backwards out of the white plastic holder. PITA. If you've got access to a parts car, I would say to just take a hacksaw to the old one to get all the connectors out, and then use a drill to eviscerate the connector shells on the other one to salvage the housing at the expense of the connectors. PITA. I somehow managed to get a couple of mine out, and once they were out, I filed all the tabs down some so I could get them out again easier in the future if necessary. I'm hoping it's never necessary. I rebuild my engine bay harness, and in theory, I should never have to do that again.1 point
-
1 pointYou'll need a pin removal (extractor) tool. However, I don't know which one you need for the round connectors. Edit: This one gives you options: https://www.amazon.com/Lisle-56500-Terminal-Tool/dp/B0009OR906 2d Edit: Just search for pin removal tool at Amazon under automotive. There are a lot of choices like this (https://www.amazon.com/ILamourCar【11PCS】Auto-Terminal-Electrical-Connector-Extractor/dp/B07B2P7D7L) and this (https://www.amazon.com/dp/B075KLM6R9/ref=sxbs_sxwds-stvpv2_1?pf_rd_m=ATVPDKIKX0DER&pf_rd_p=2708083022714283574)1 point
-
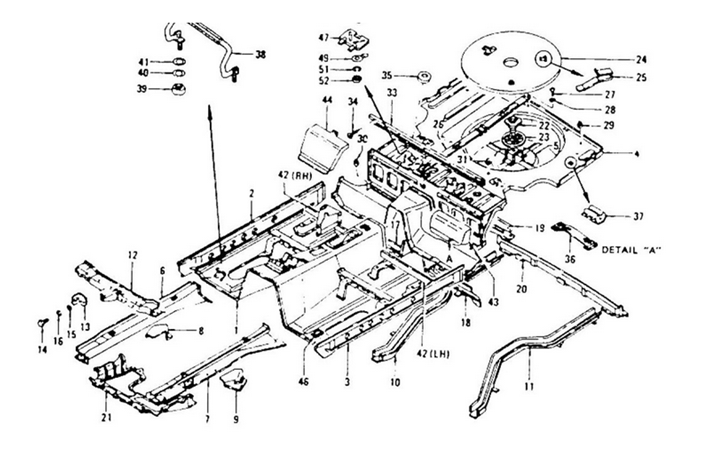
1 pointFurther to Grannyknot's comment, I suppose you could be tricked by certain diagrams into thinking there's a separate frame... ... but there really isn't. It's just a collection of panels, ribs and rails, all spot-welded together.
 1 point
 -
1 pointLooks like they are around $300 used and up to $800 new after a google search. Good luck with your sale.1 point
-
1 pointWhat do you mean? I'm not really sure exactly what you're asking, but I think you kind of answered your own question there - the S30 is a unibody. No frame.1 point
-
1 pointDupont, PPG, whomever, your local auto body paint supplier should be able to dig up the formula if you give them the year and paint code.1 point
-
1 pointI've read where people get the right color from a PPG supplier. http://zhome.com/History/ZColorGallary/index.html1 point
-
Really? I'll have to take a closer look when I take out the complete assembly this weekend. Thanks for the info.1 point
-
A few years ago, I was in the middle of restoring the heater/blower system for my 70. All of the foam gaskets were shot, so I made tracings and used them to fabricate replacements from foam sheet. My approach involved making paper cut-outs that I could glue to the foam sheet and then use as a guide for cutting out the shapes and punching the holes. I didn't want to risk malking a mistake with my original tracings, so I scanned them into .pdf files and then used those to print out the pieces that I eventually glued to the foam. I ended up with a library of .pdf files for all of the system's gaskets. I posted these as part of a how-to article, but another member recently contacted me to say that they won't download any more. For that reason, I'm re-posting them here. Hope they can help someone else with their restoration. They should come out of your printer in 1:1 scale. For most of these gaskets, I recommend that you use the 1mm-thick closed-cell neoprene foam sheets that you can buy at crafts stores like Michaels. These sheets already have adhesive on one side, so they're very easy to use. You'll probably need at least a dozen sheets (maybe more). You'll need something thicker and softer to make the pads for the big airflow control flaps. I recommend 1/4"-thick open-cell foam. They need to be covered with thin, soft vinyl sheet. The foam that lines the plenum box for the centre air outlet grill is intended to reduce airflow noise. It needs to be made from open-cell foam (1/8"-thick). 240Z 1970-71 Series 1 - HVAC Foam Gasket Templates.zip1 point