Leaderboard
-
S30Driver
Free Member4Points1,580Posts -
Namerow
Free Member3Points1,551Posts -
Captain Obvious
Free Member3Points10,081Posts -

dutchzcarguy
Free Member3Points2,676Posts


Popular Content
Showing content with the highest reputation on 12/11/2017 in all areas
-
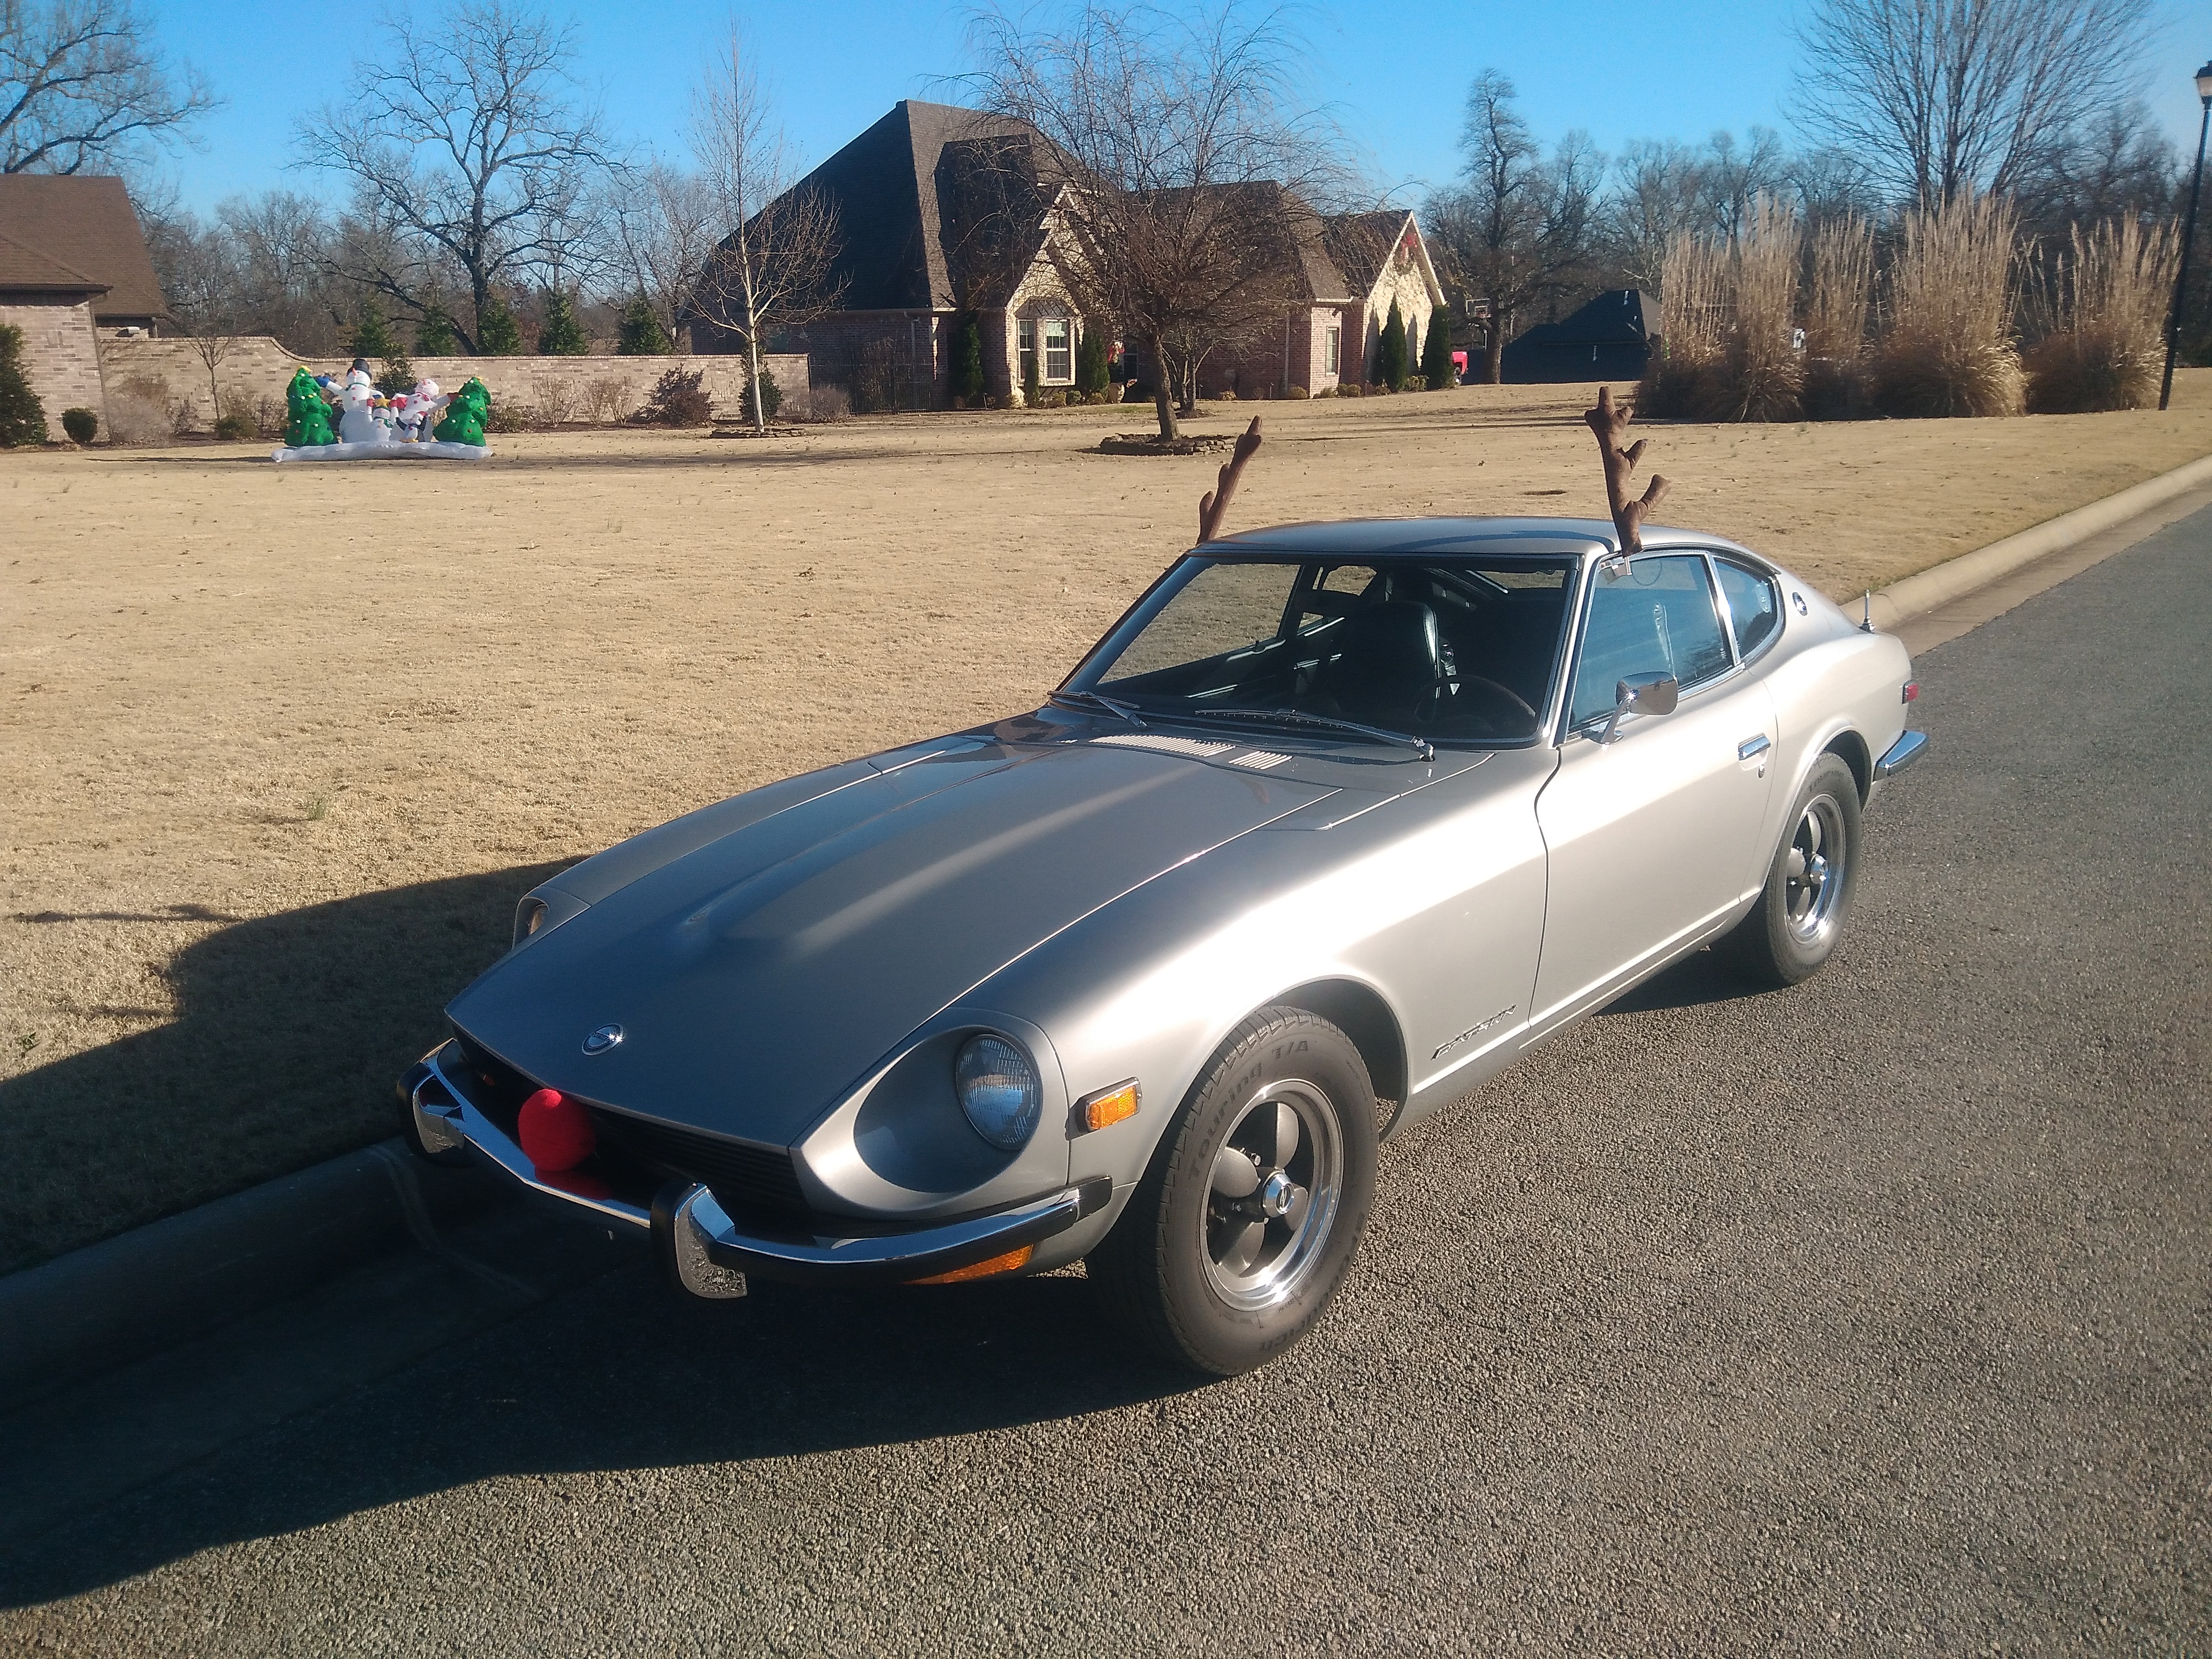
We had our club Christmas party on Saturday at Scott's house. Great food and a very nice time. Zup found his Nismo Christmas Z car accessories in time for the event ....
 4 points
 -
No, I'm thinking it takes him a really long time to do the crossword puzzle...2 points
-
Methinks he's a hoarder with a house full of Z car parts!!! Duh. And cats.2 points
-
1 pointThis is a RARE ACCOUNT of a very non-typical find. This owner scored big time, by finding what sounds like a well taken care of car and a more than helpful seller. A RARE occurence when buying any kind of car. You can find a car in any type of condition imaginable to answer you question bluntly. MY ADVICE, 1st SET A PRICE CEILING and remember the ceiling is the buyers, not the sellers. 2nd BY ALL MEANS DO NOT BUY A CAR SIGHT UNSEEN, you will rue that decision. 3rd call around the country to some Z specialist that actually do modifications and repair. They normally have a car or two around that is complete and they would be wiling to part with. I found #6333 in Redondo Beach Ca in a Z mechanics lot on a mechanics lien. So don't rule out any avenues. I wouldn't plan on a short, easy search though. Perservere and good luck in your search.1 point
-
I used the classic tube ss brake lines. They fit very well. I had to convince the front passenger one a little but nothing serious. Stainless is harder to bend. As far as cracking - I've never heard that one. A quick (and lazy) trip to google produced this quote, "...so that as a general rule ferritic and martensitic types cannot be expected to be as fatigue resistant as the austenitic stainless steels..." meaning carbon steel lines are more likely to fatigue and crack than stainless.1 point
-
1 pointYou ask "What should you be concerned about in finding a decent car? First and foremost, see the car personally. The cost of a drive, or a quick flight will be peanuts compared to what you could lose by buying a car with hidden defects. I have the scar tissue to prove it. Long-distance, I bought an e-bay car from the rust belt. "Rust-free" said the ad. The photos didn't show any rust, but it's amazing what fiberglass, paint, and spray-on undercoat can hide. The second car, I found in the sun belt. It was for sale in an auto-repair shop. Apparently the car's owner had died, and the shop was selling to cover their bill. When I got there, the fellow asked me what I wanted to see, to which I replied "everything." After looking around for a few minutes and finding nothing that troubled me, I asked if I could see the underside. He put the car on the hoist, handed me a trouble light and said "take your time." I did, and I bought. Airfare, car rental and one night in a hotel, I probably spent $700-800, which is a minute fraction of what major repairs, particularly body rust, can cost. Hope you find what you're looking for! ps, I second Wheee!s recommendation with respect to zKar's Z for sale. Lovely customized / hot-rodded restoration. The guy who's selling it really knows his Z-car stuff.1 point
-
1 pointI've been using ITM on my race engines for a few years and have no complaints. Chuck1 point
-
1 pointReminds me about a question from a (very untechnical) director from the firm i ones worked for... i showed him a set of ratchet ring spanners.. he askt me if that black inner ring was plastic..... (Pfffff.....) I told him YES, and... i have another set of these because these are for undo-ing a nut.. the other set i need to put them back on! (what an %$#^%$)1 point
-
When i had my first 280zx back in 1991 i already knew that there was a "Mercedes like" engine in it.. some sayd: they took away the starr and wrote NISSAN on it haha... But i think it's like with the SU / Hitachi (roundtop) carbs... they looked at a very good design and made e'm better and call it theire own... good work!1 point
-
I don't think it was copying but it is irrefutable, from the above components and configuration, that the Nissan/Prince L engine has its roots clearly in the Mercedes M-180 engine from 1951. Gents and Gals, we have a next generation "Vintage-Mercedes-Based" engine in our Z's.1 point
-
And in europe they had the flattops till 1978, i even know a late sold 78 that is registered in the Netherlands as a 1979 model and has those flattops.. When the engine is cold they are very crappy but after a warm up the engine runs better.. but still a set of roundtops could make it run a lot better.. cold and warm..1 point
-
1 point
-
1 pointThis is a great sentiment, and one that I share as well. I've gotten so much help and support from the people here. Thank you all so much!1 point
-
May 2013 newspaper, are you a hoarder with a house full of cats?1 point
-
I ordered a 1973 harness that’s in great shape from eBay. I’m going to work on getting the suspension sorted first as it will likely be less frustrating and more fulfilling.1 point
-
1 pointWhen you set out to find a replacement spring, note that the same spring is used for LHS and RHS door. Once you have the spring, it may not be obvious which way is 'right side up' when you go to install it on its shaft. The correct installation for both the LHS and RHS regulator is to have the hook on the free end of the spring oriented so that it bears against the bottom of the engagement tab on the main plate.1 point
-
1 pointSearch this site for Grannyknot's write-up on refurbishing. These lift mechanisms are called 'regulators', so first go to GK's postings and then search on that word. The hard-plastic idler wheels can be replaced (with units from a cabinet drawer 'slide', IIRC). However, the mounting shaft takes a lot of load, so you'll need to either work towards a light interference fit (maybe assisted by some Loctite 'stud mount' anaerobic) or tack the end with a MIG weld. As for the spring: After the regulator is un-wound to the point where the gear rack comes loose from the pinion gear, the spring doesn't really have that much tension on it. Once the gear rack comes free of the pinion gear, the remaining spring tension will go to zero after the lever arm has rotated about another 30 degrees or so. At that point, you can just pluck the spring out of the slot in the centre shaft. When you're re-assembling, it's pretty easy to load the lever by hand so that the gear rack comes in contact with the pinion gear. At that point, you can just start turning the window crank handle to feed the gear rack back into full engagement. That said, it won't be easy finding a replacement spring all on its own. If anyone has a spare, they're probably not going to want to sell you just the spring.1 point
-
1 pointIf you're looking for a tastefully and meticulously built restomod 240, talk to @zKars about his beauty. Excellent value in a driveable solid car. Not a "survivor" but a better than original daily driver that looks and runs great. ...and Safari Gold is the colour you're referring to I believe.
 1 point
 -
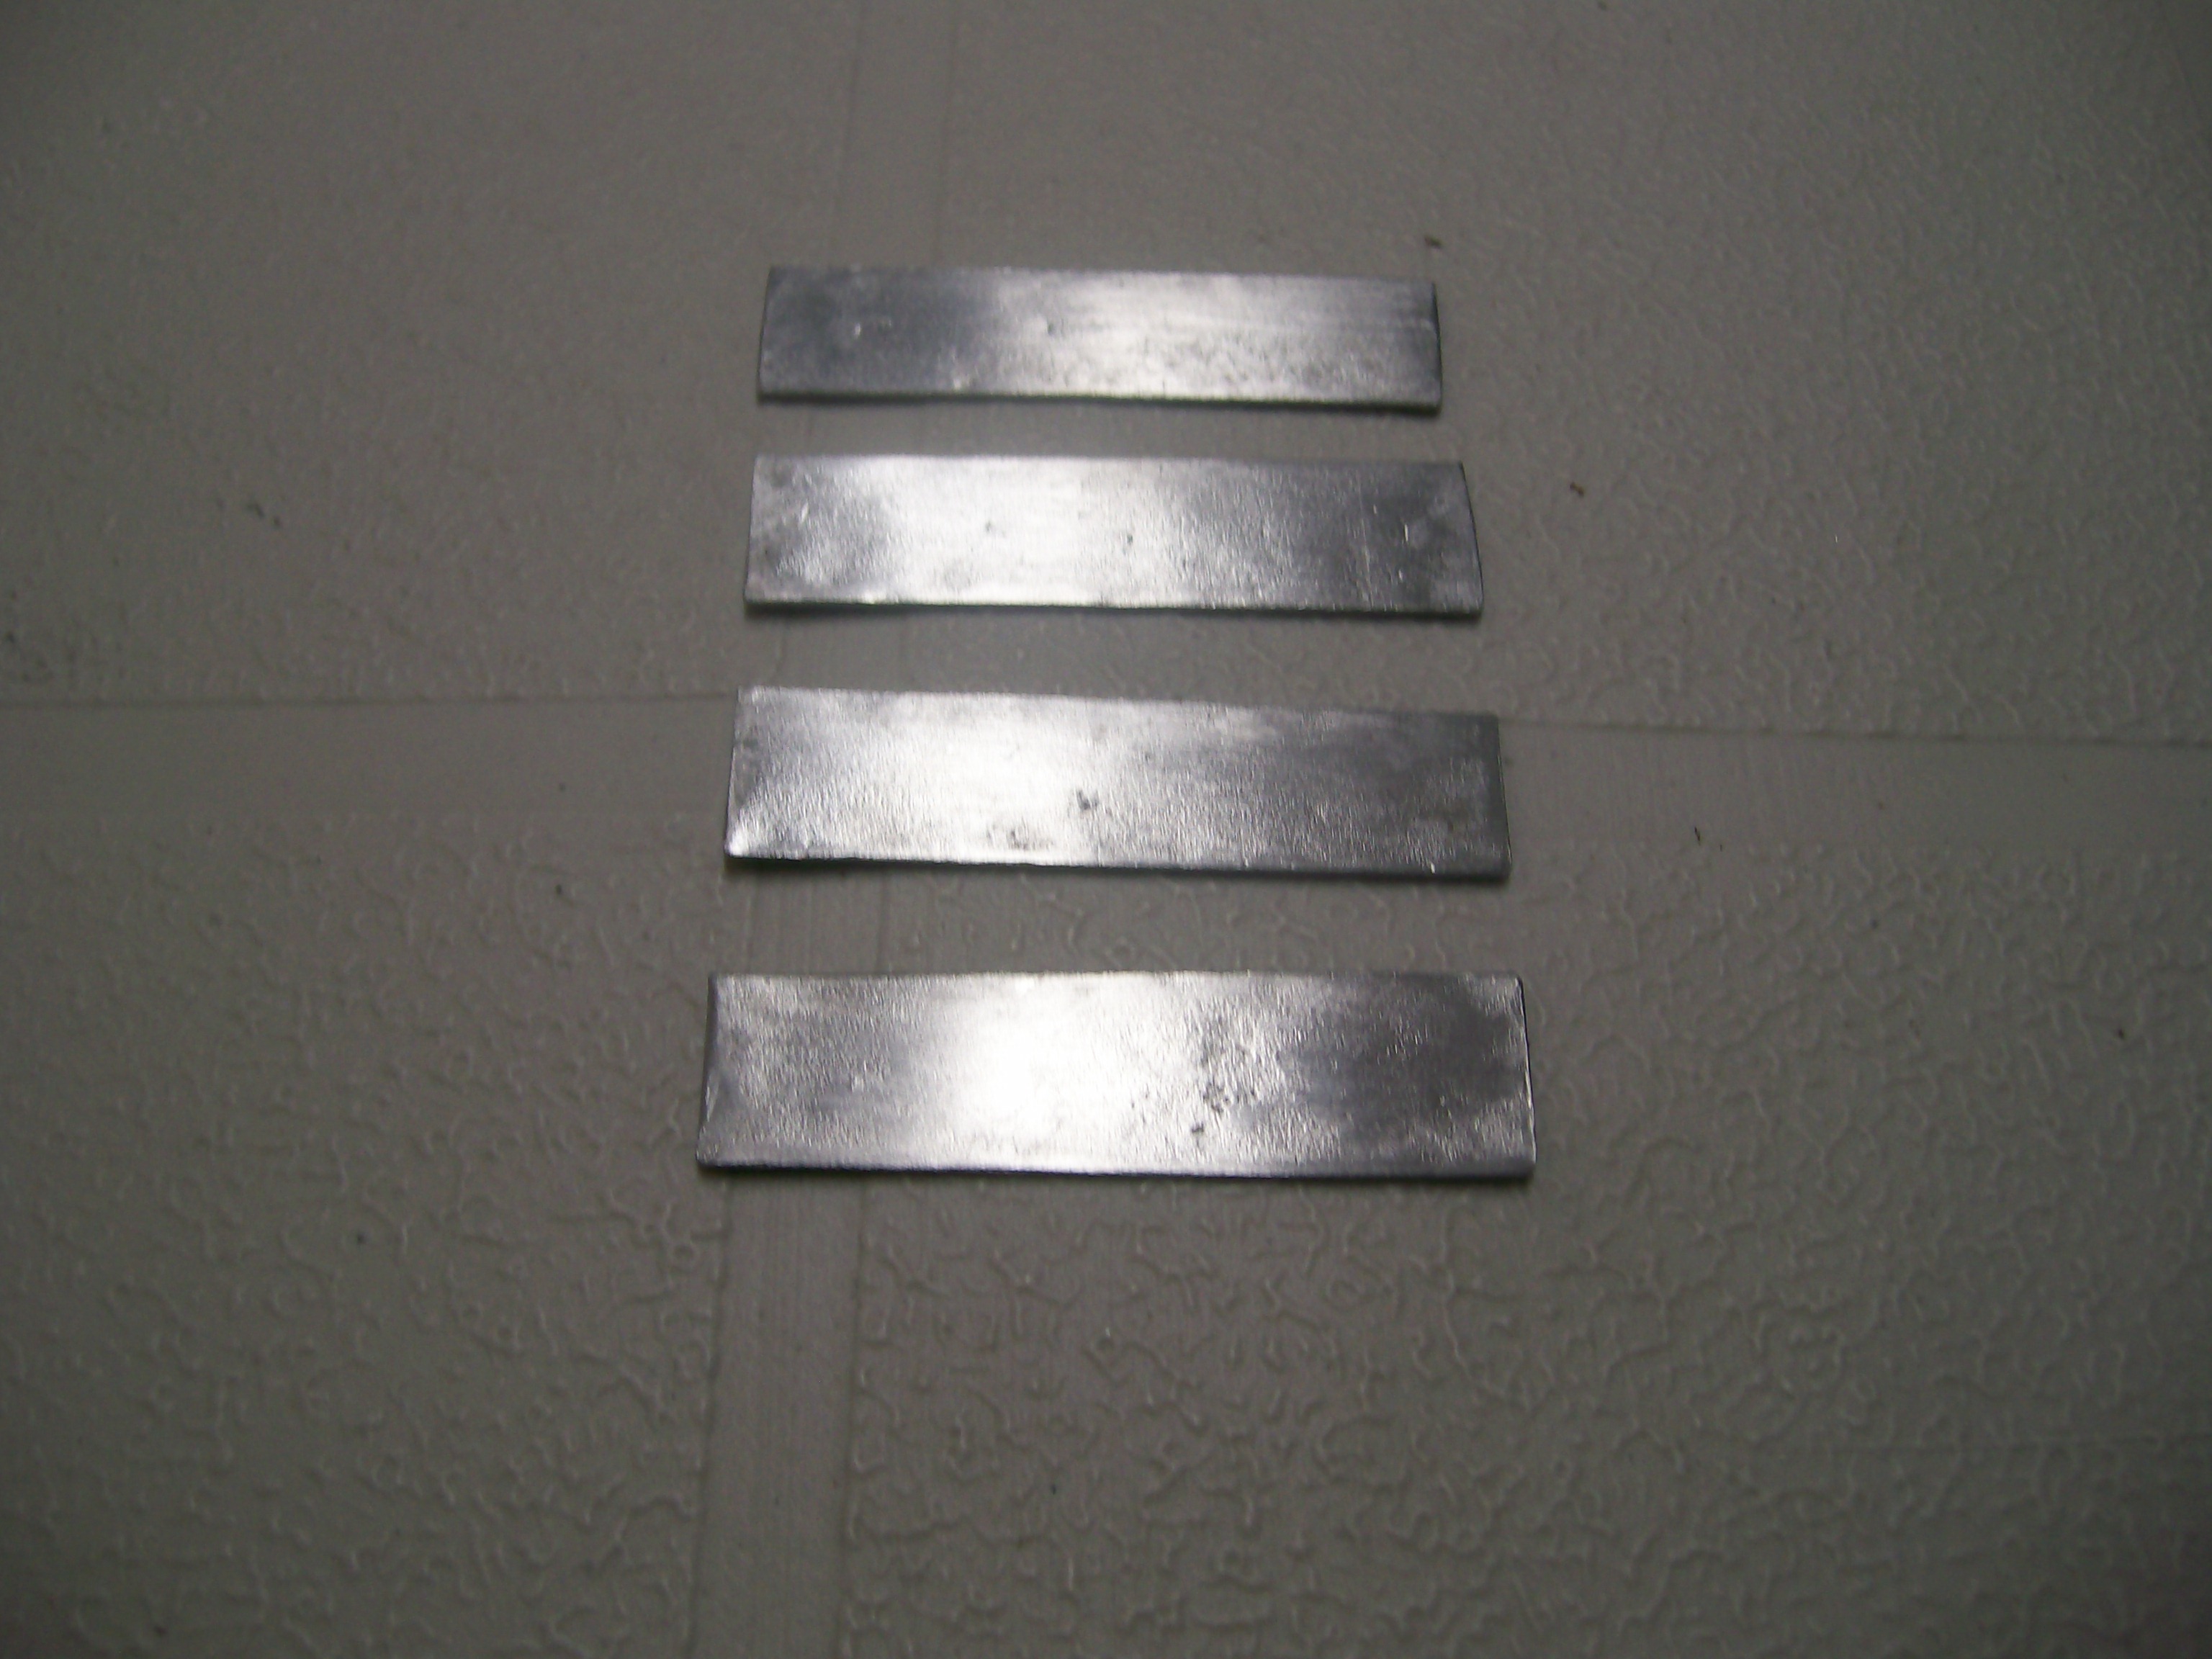
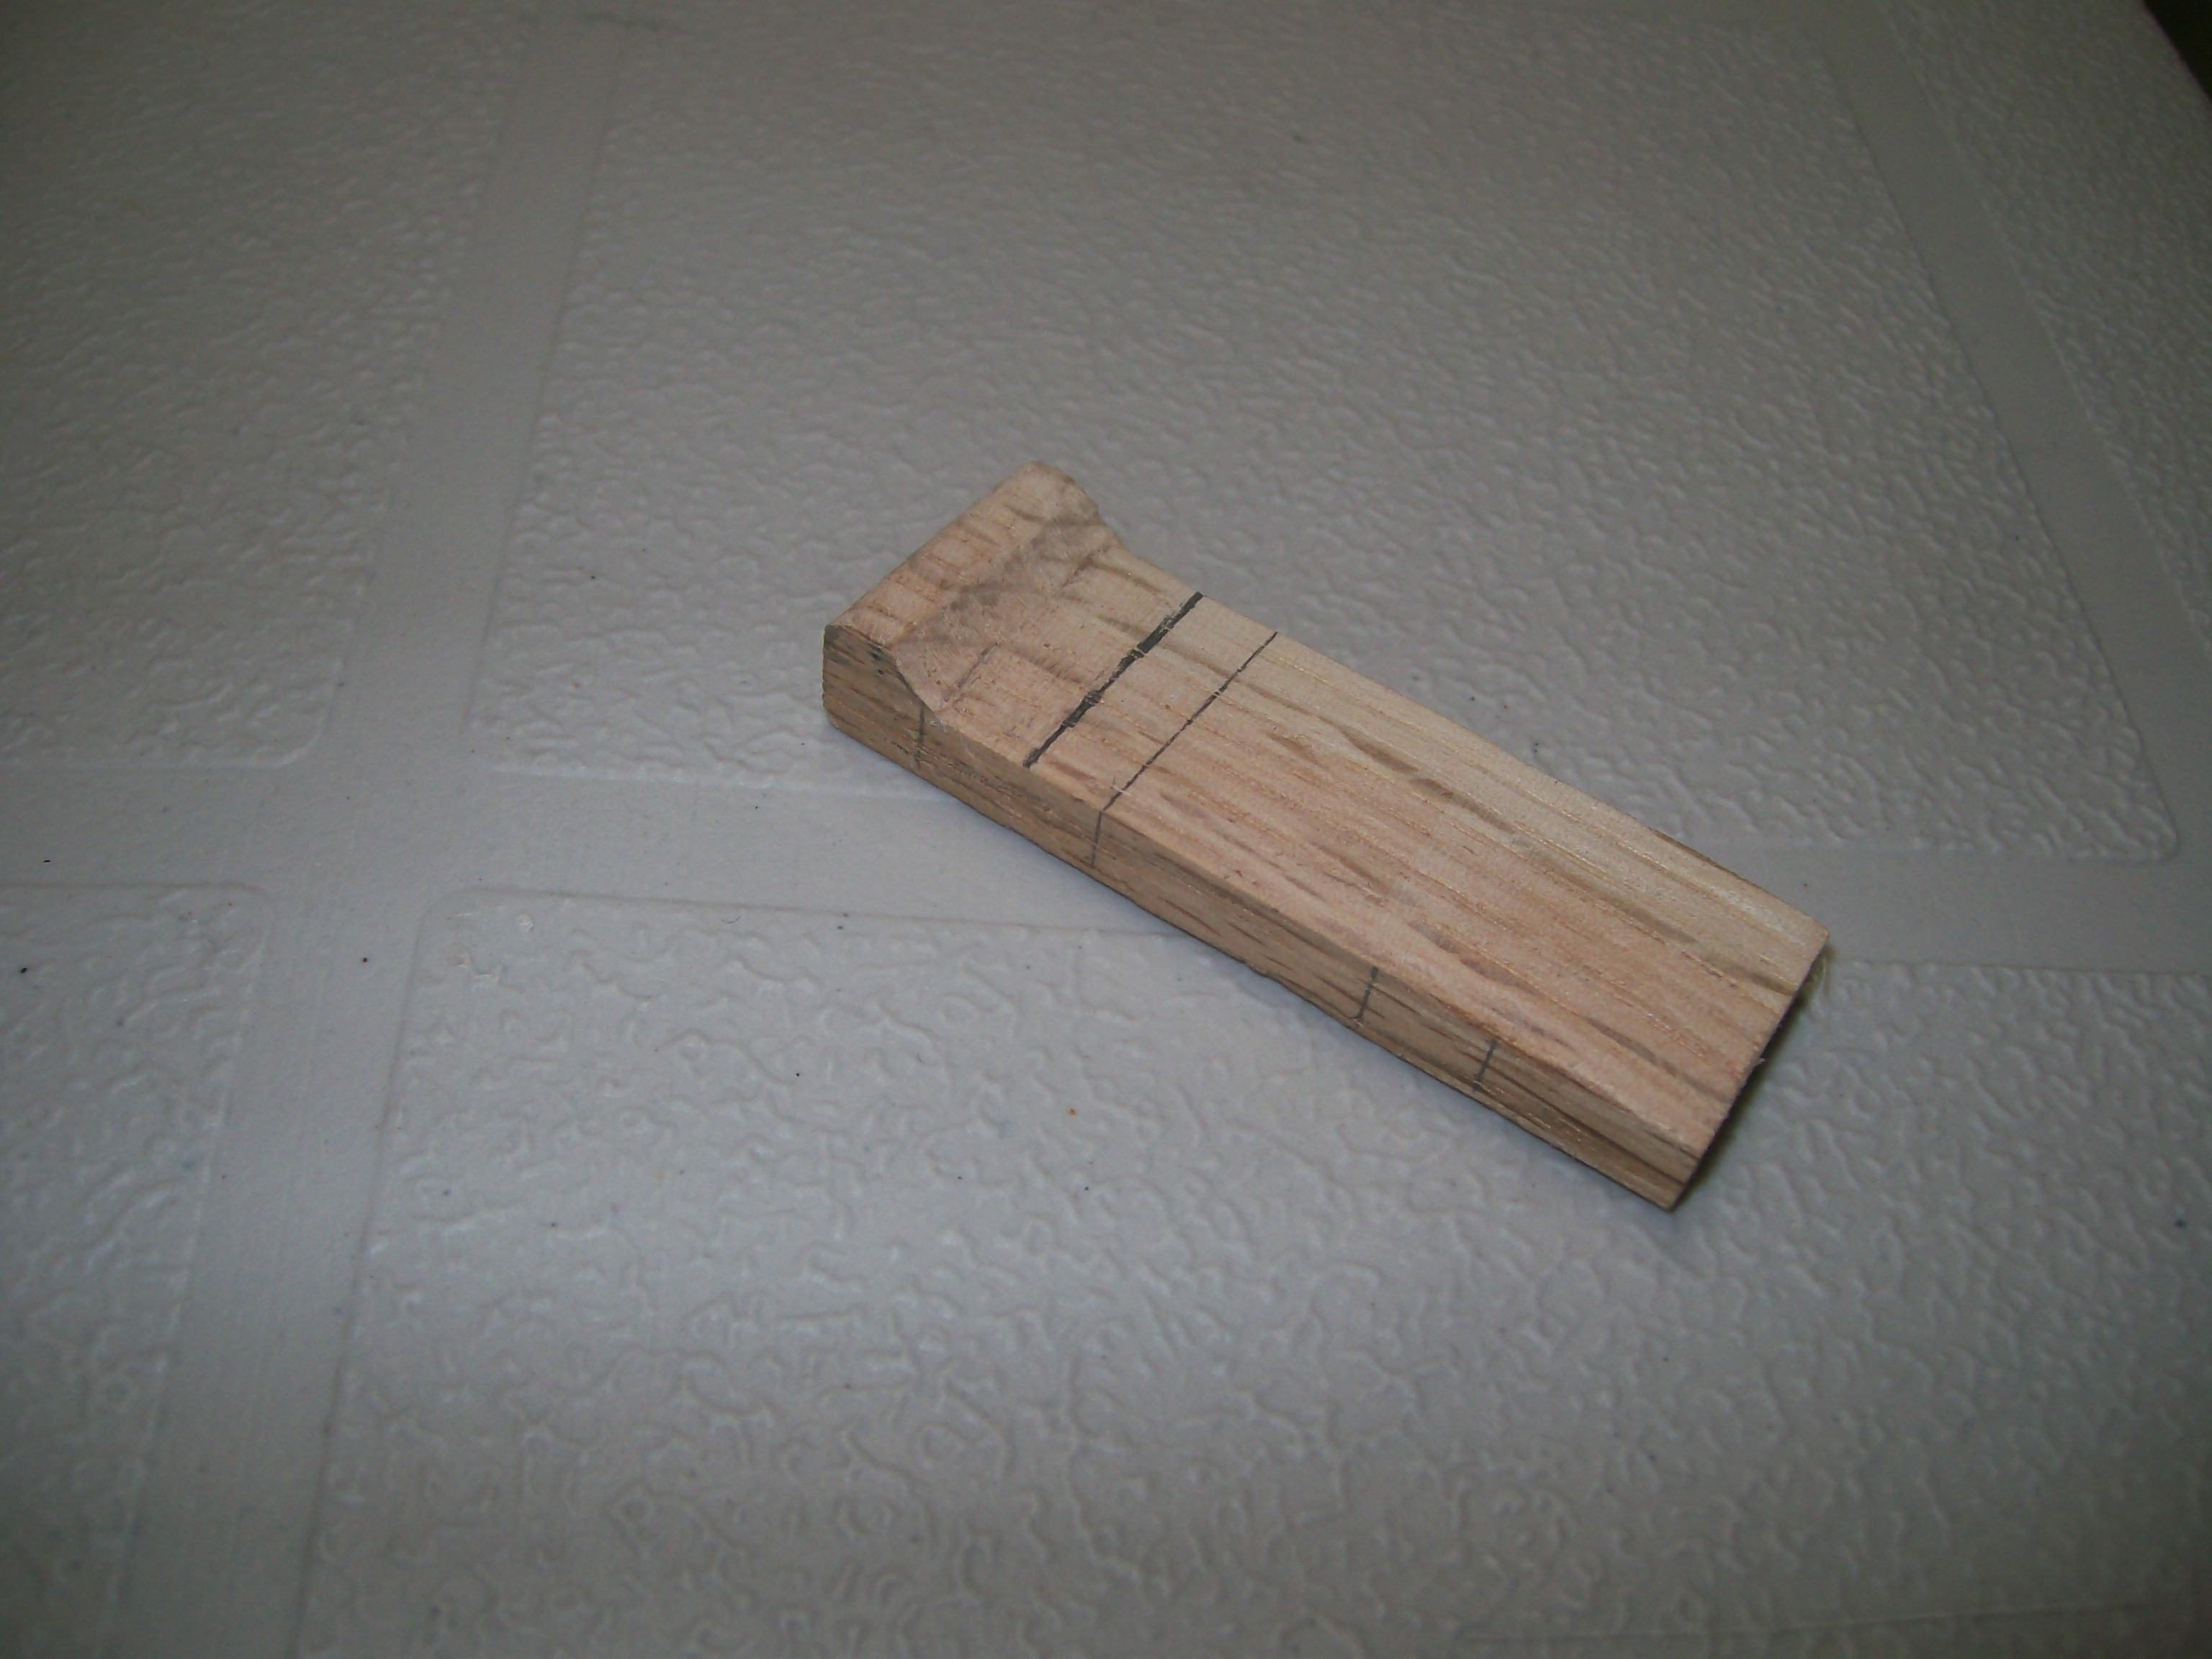
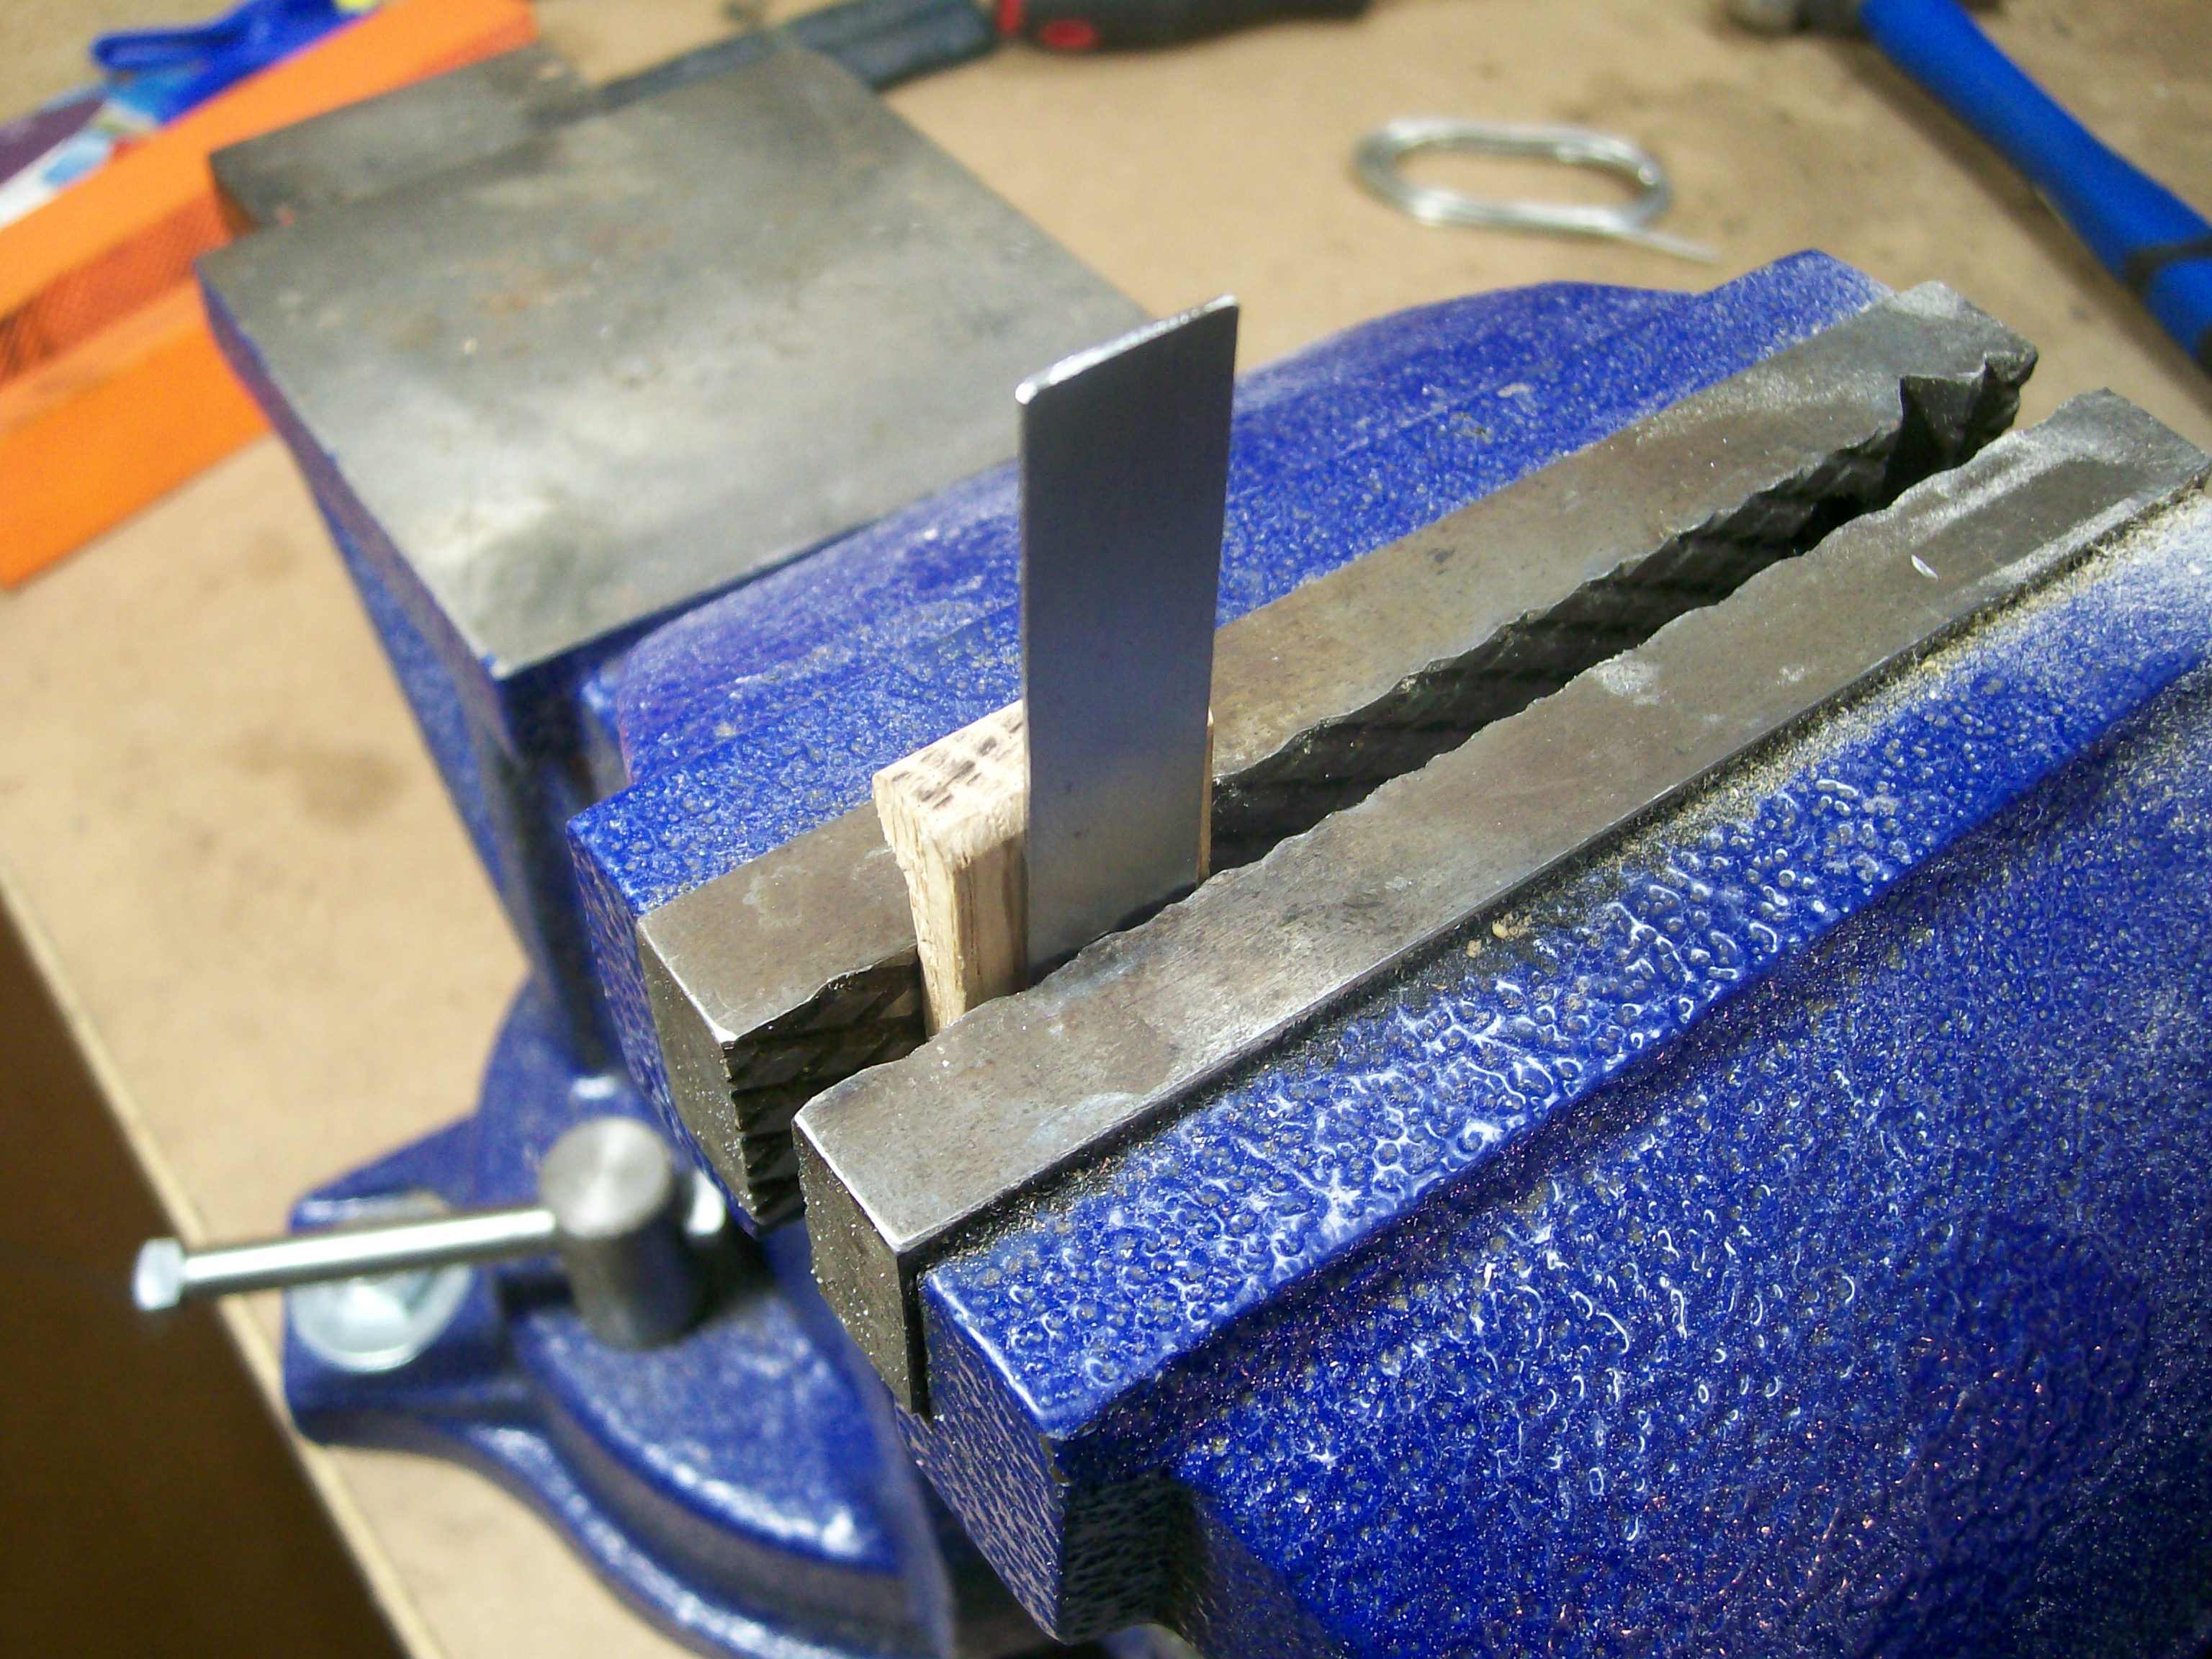
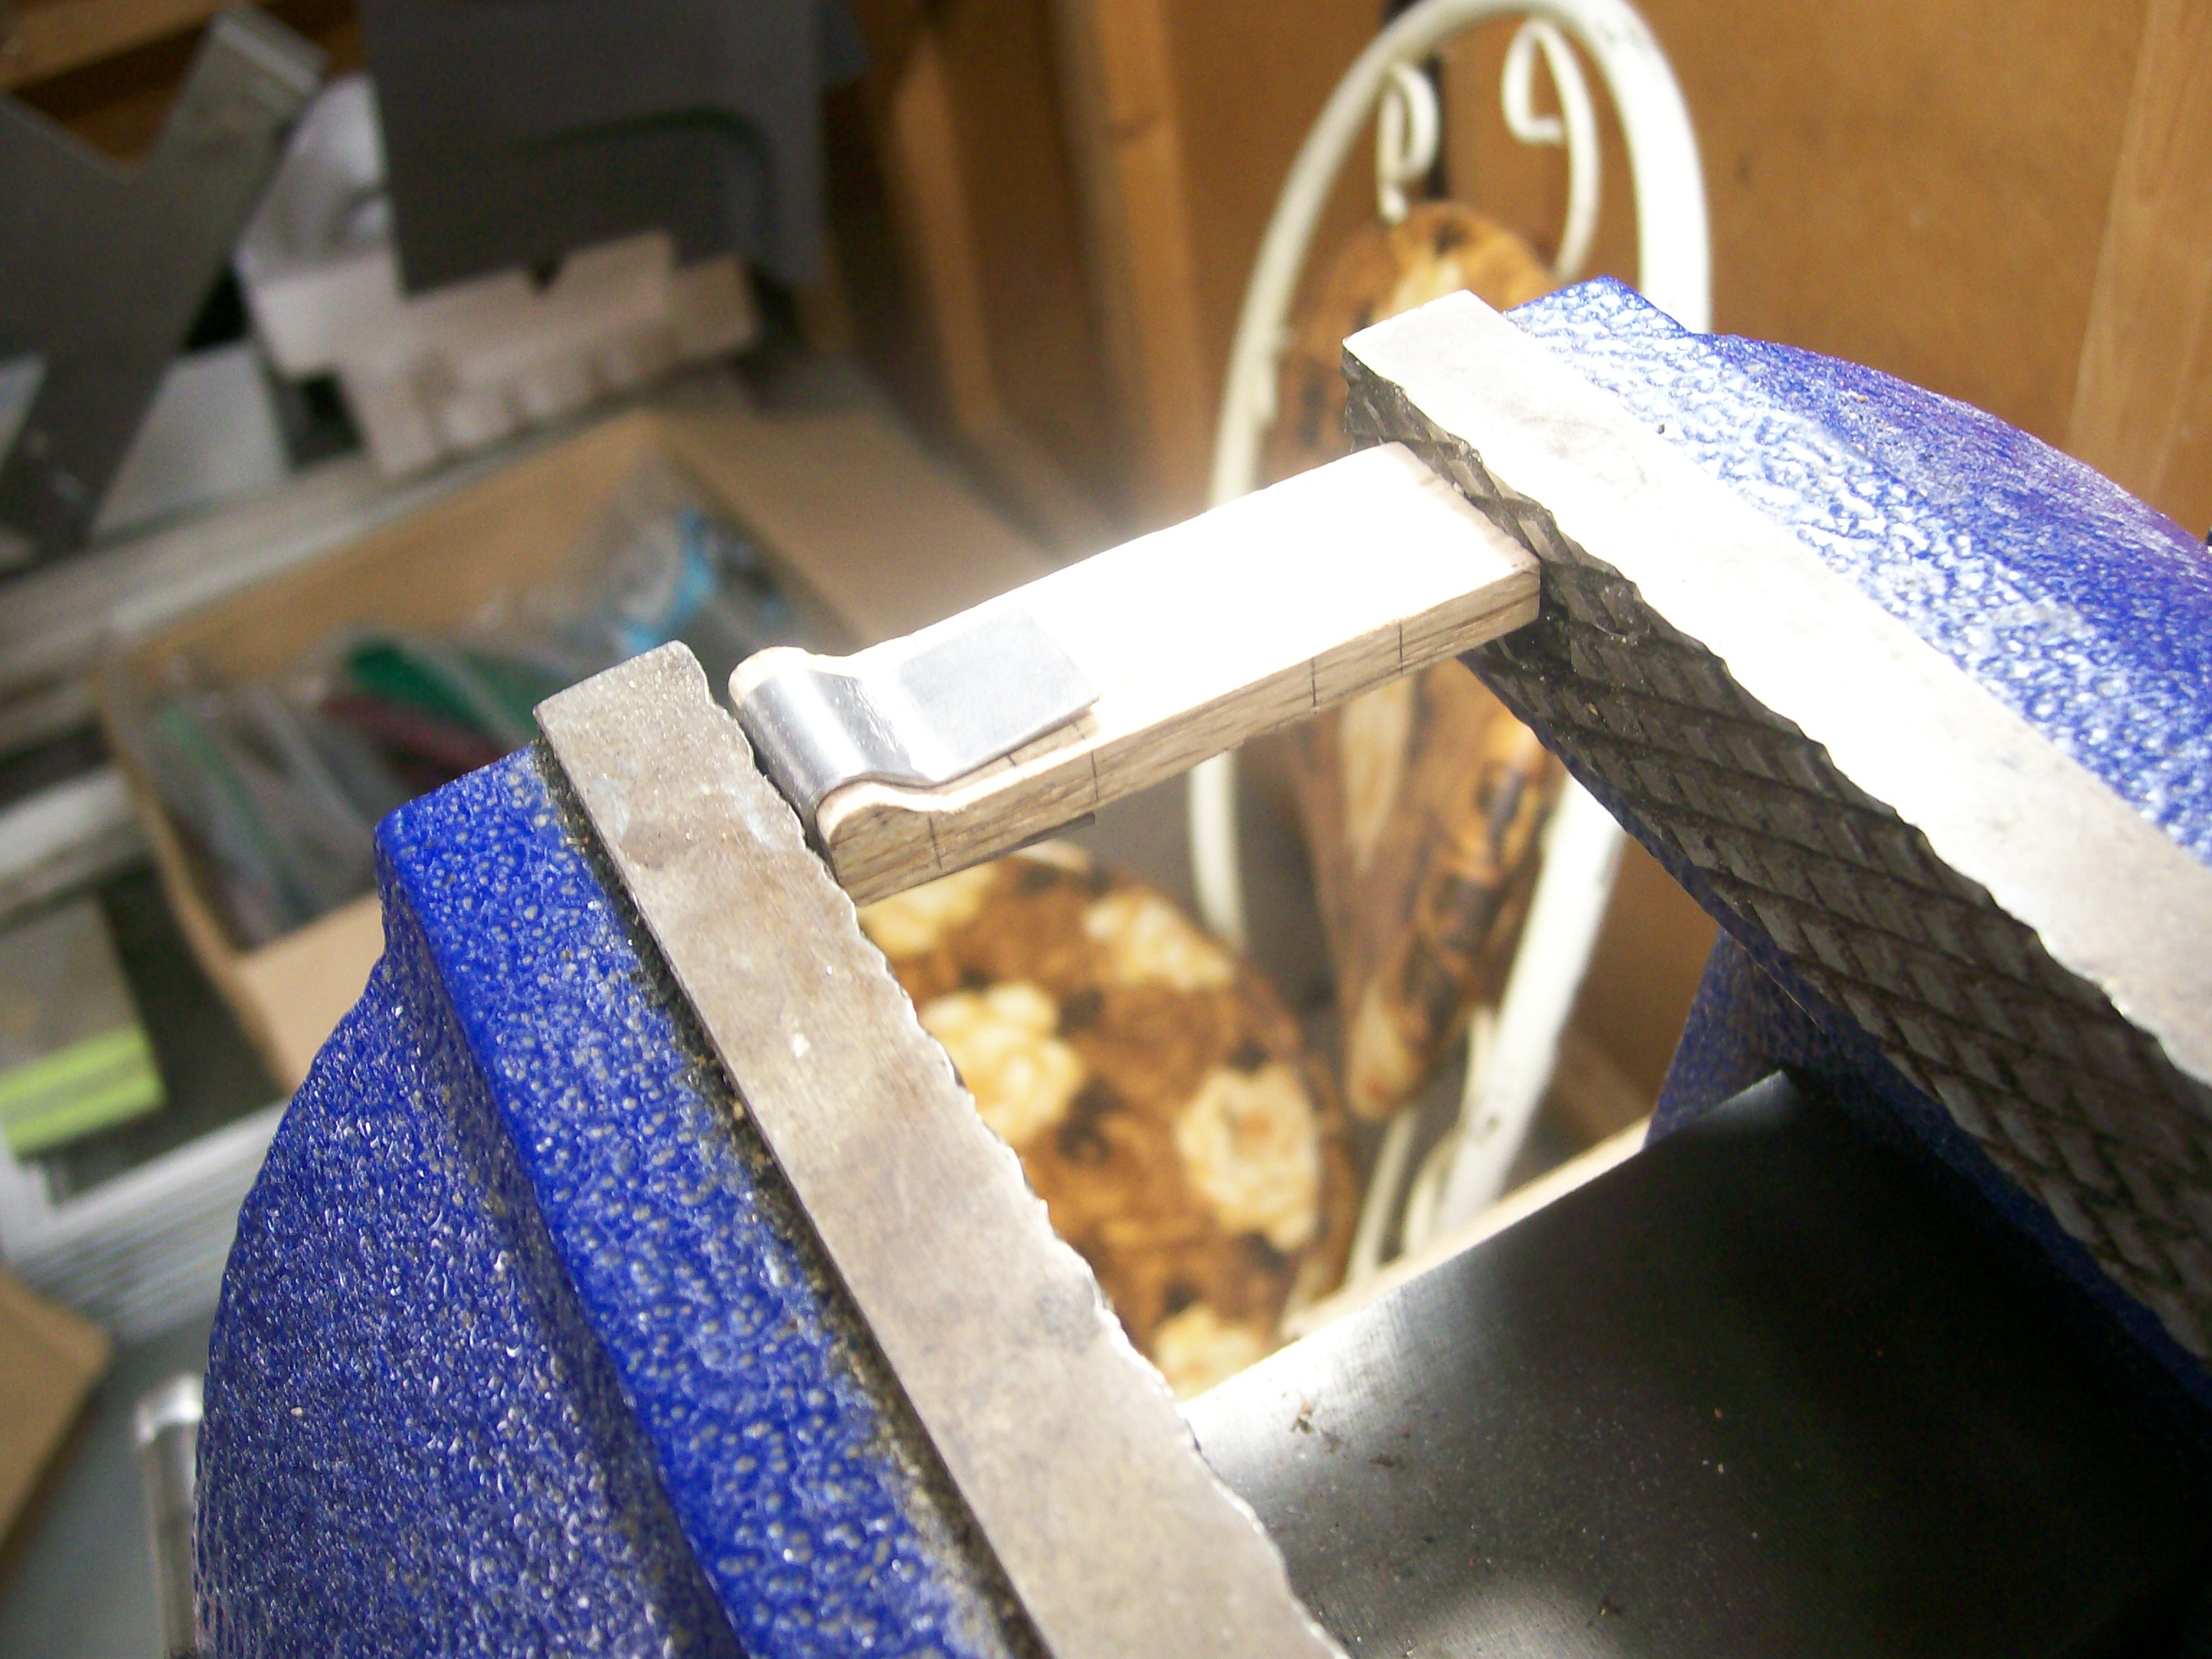
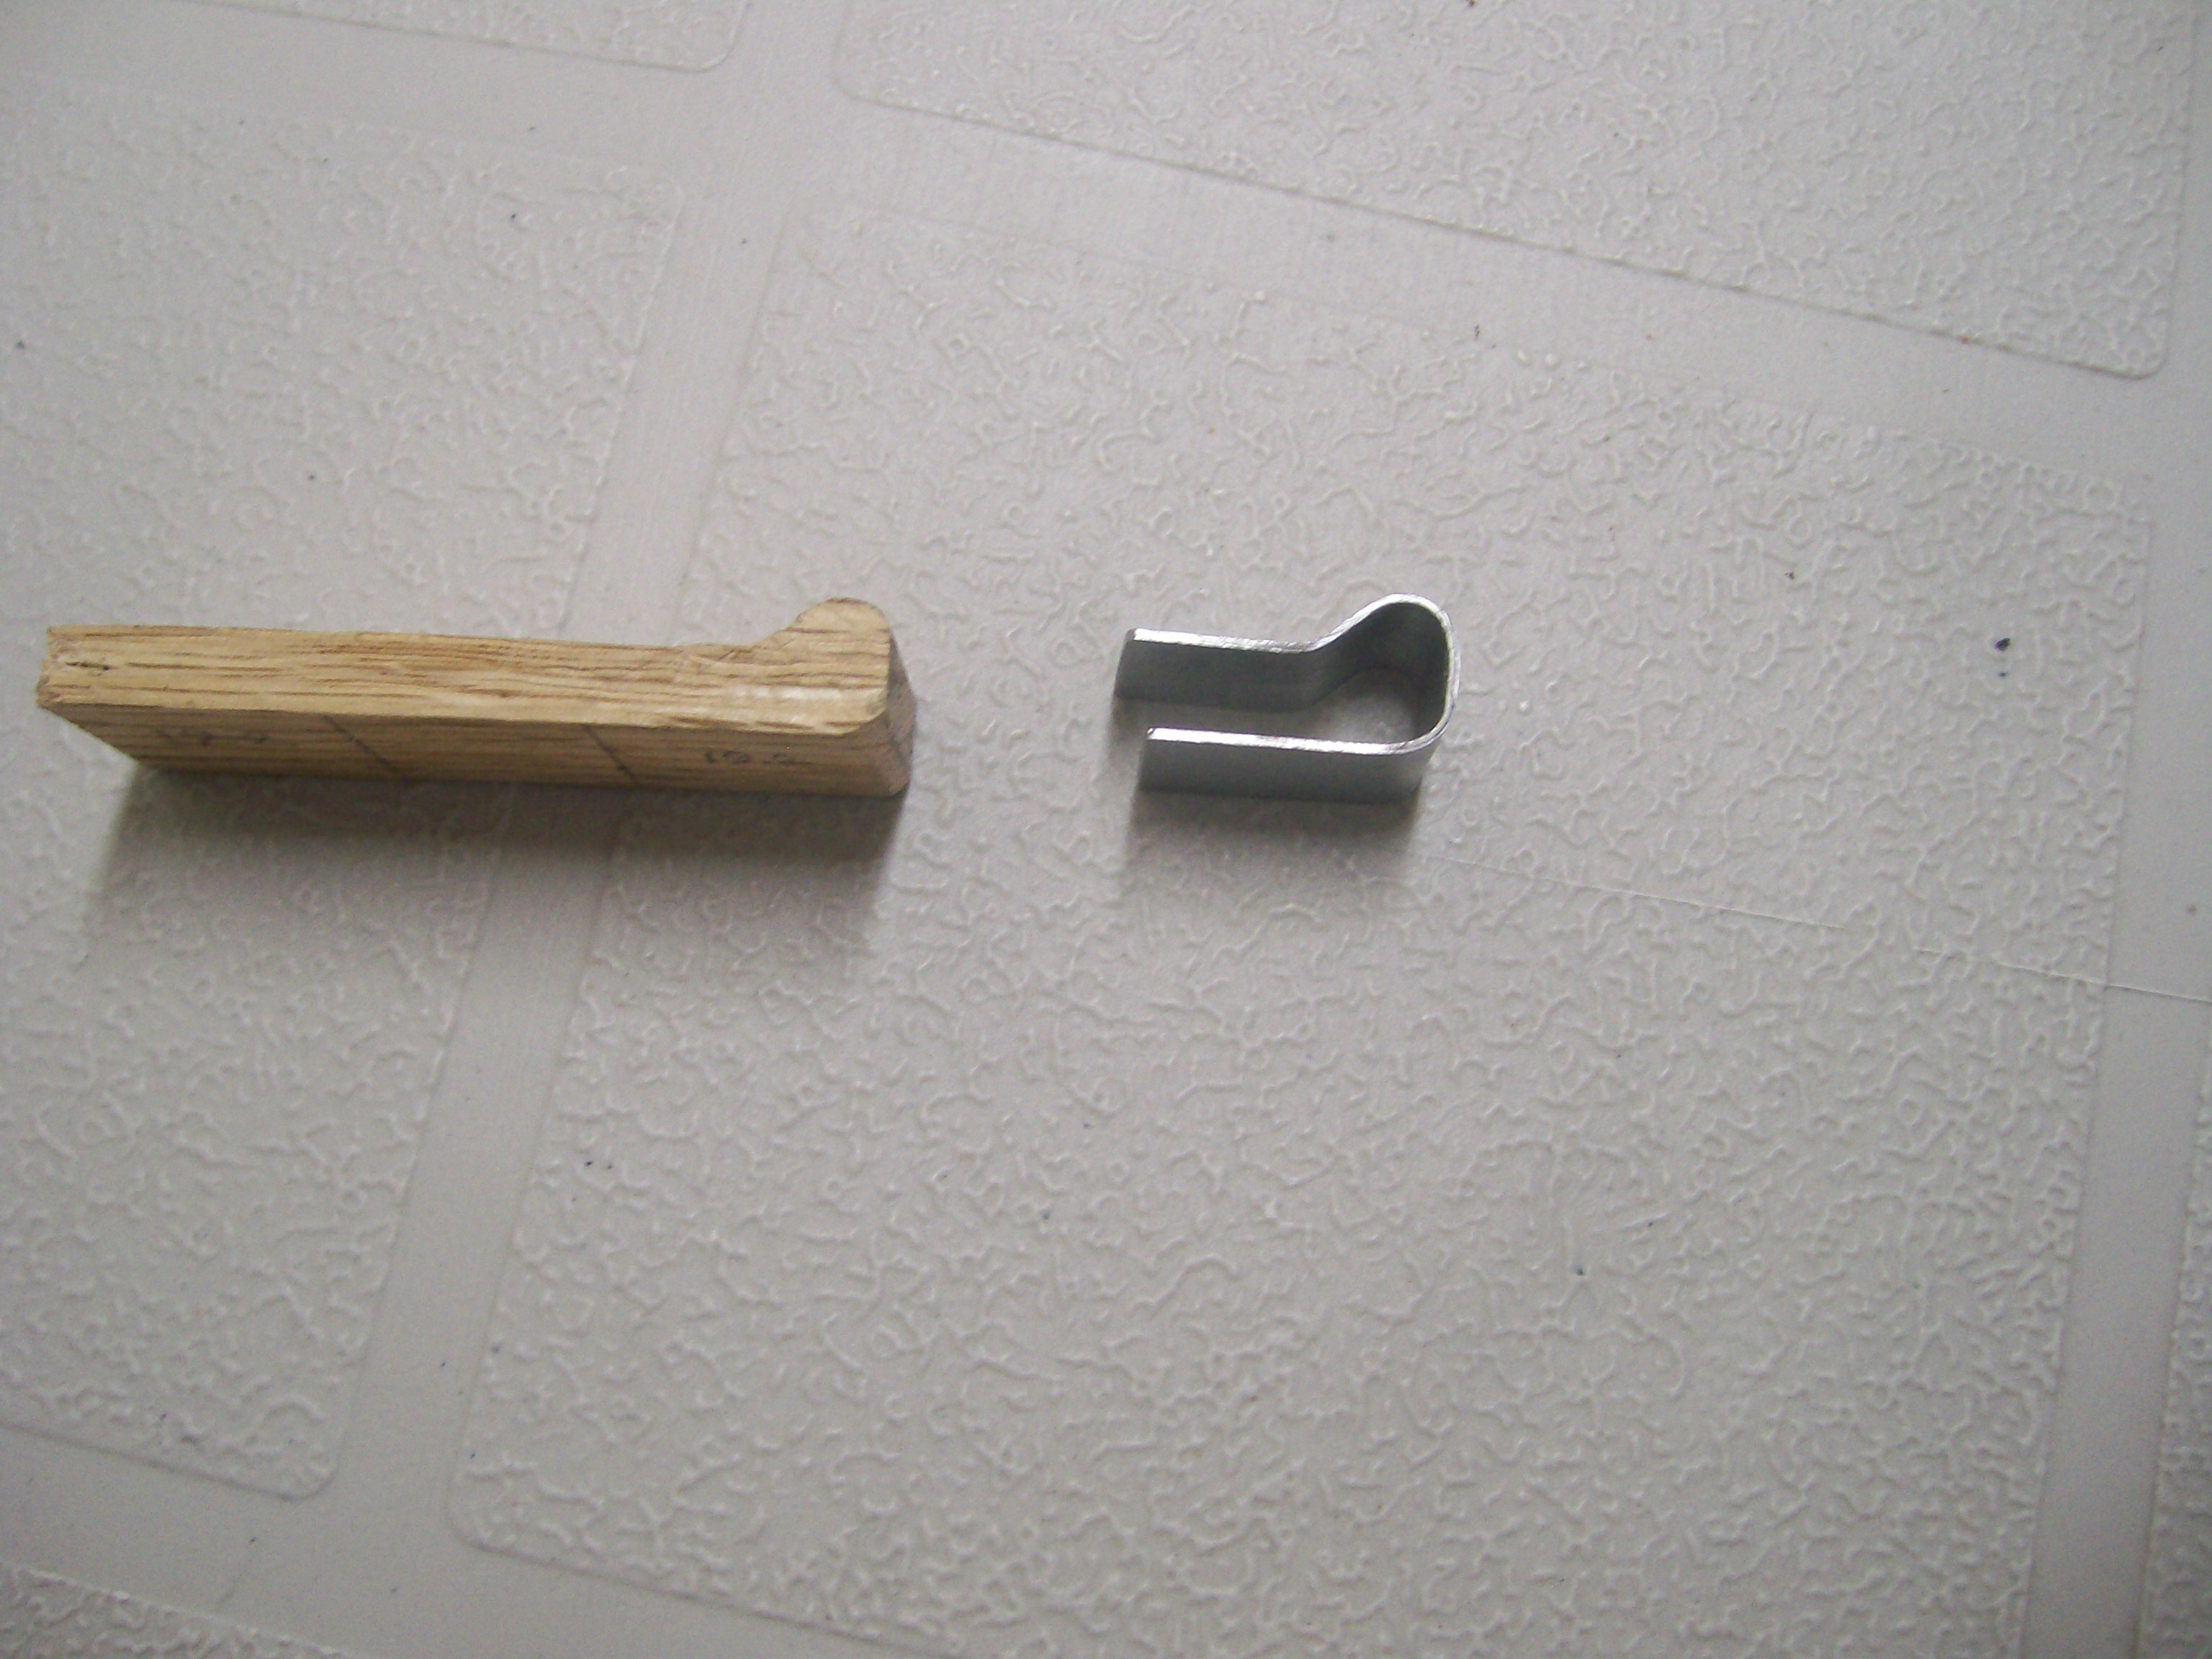
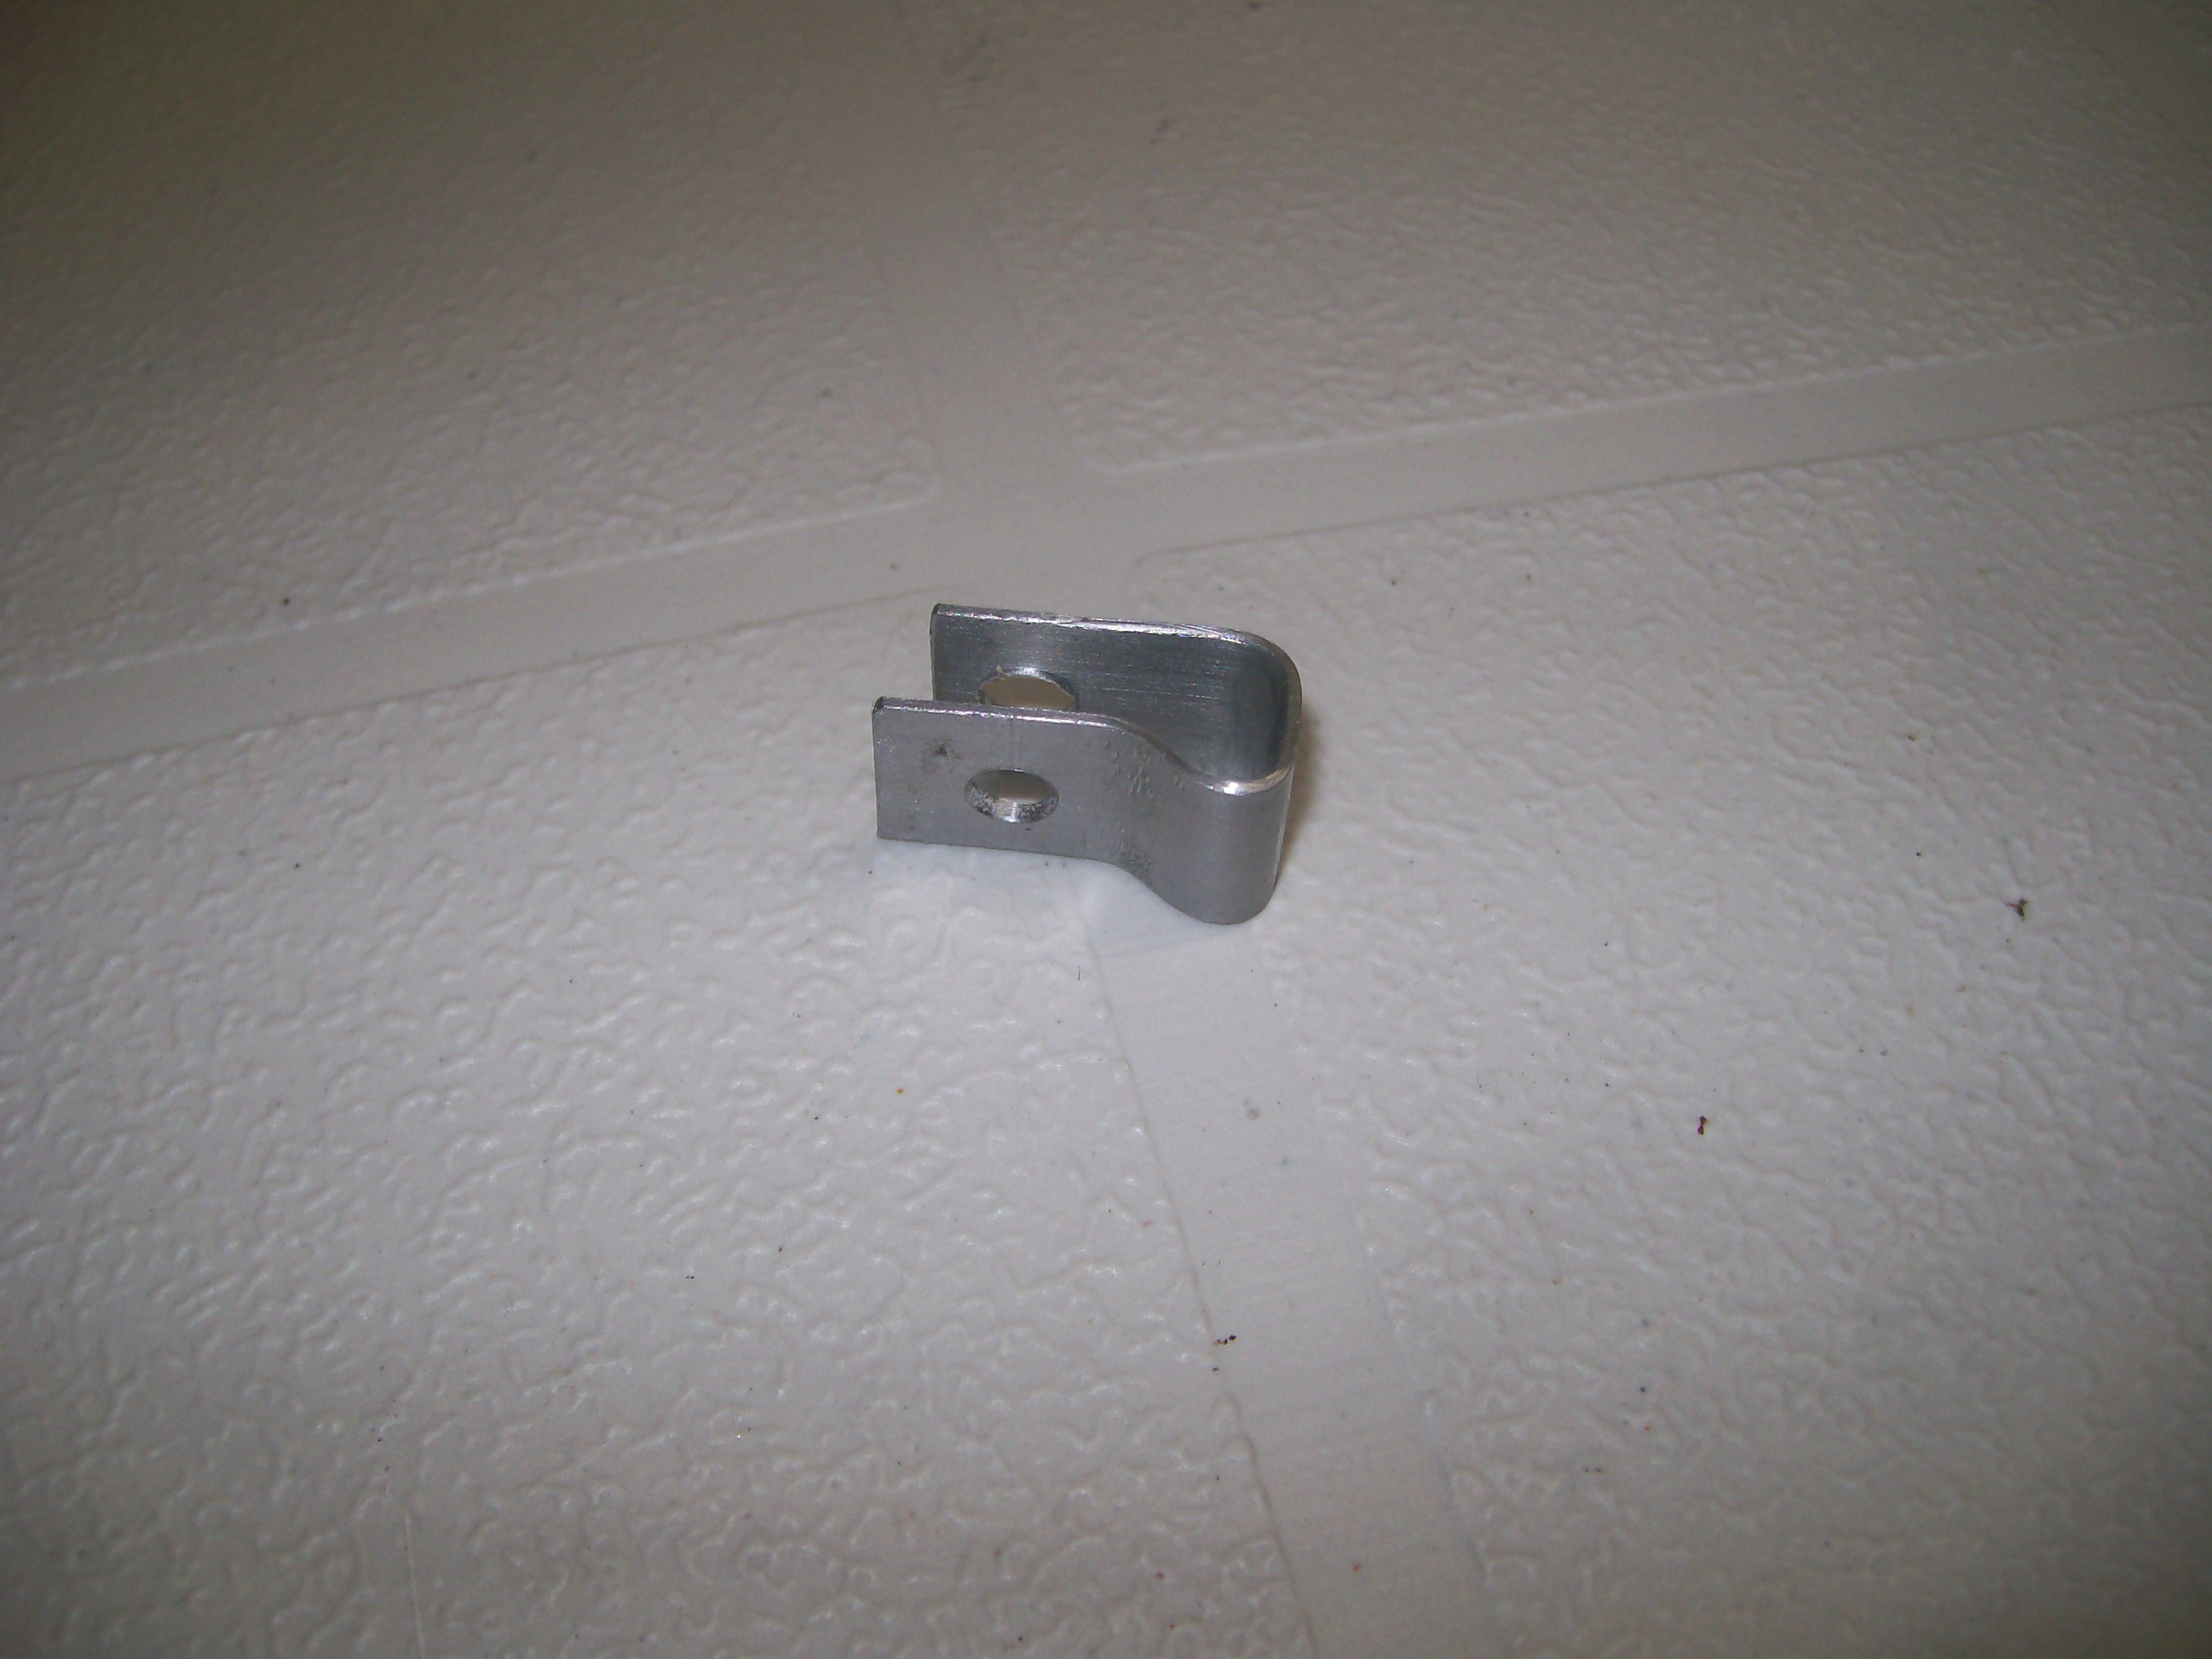
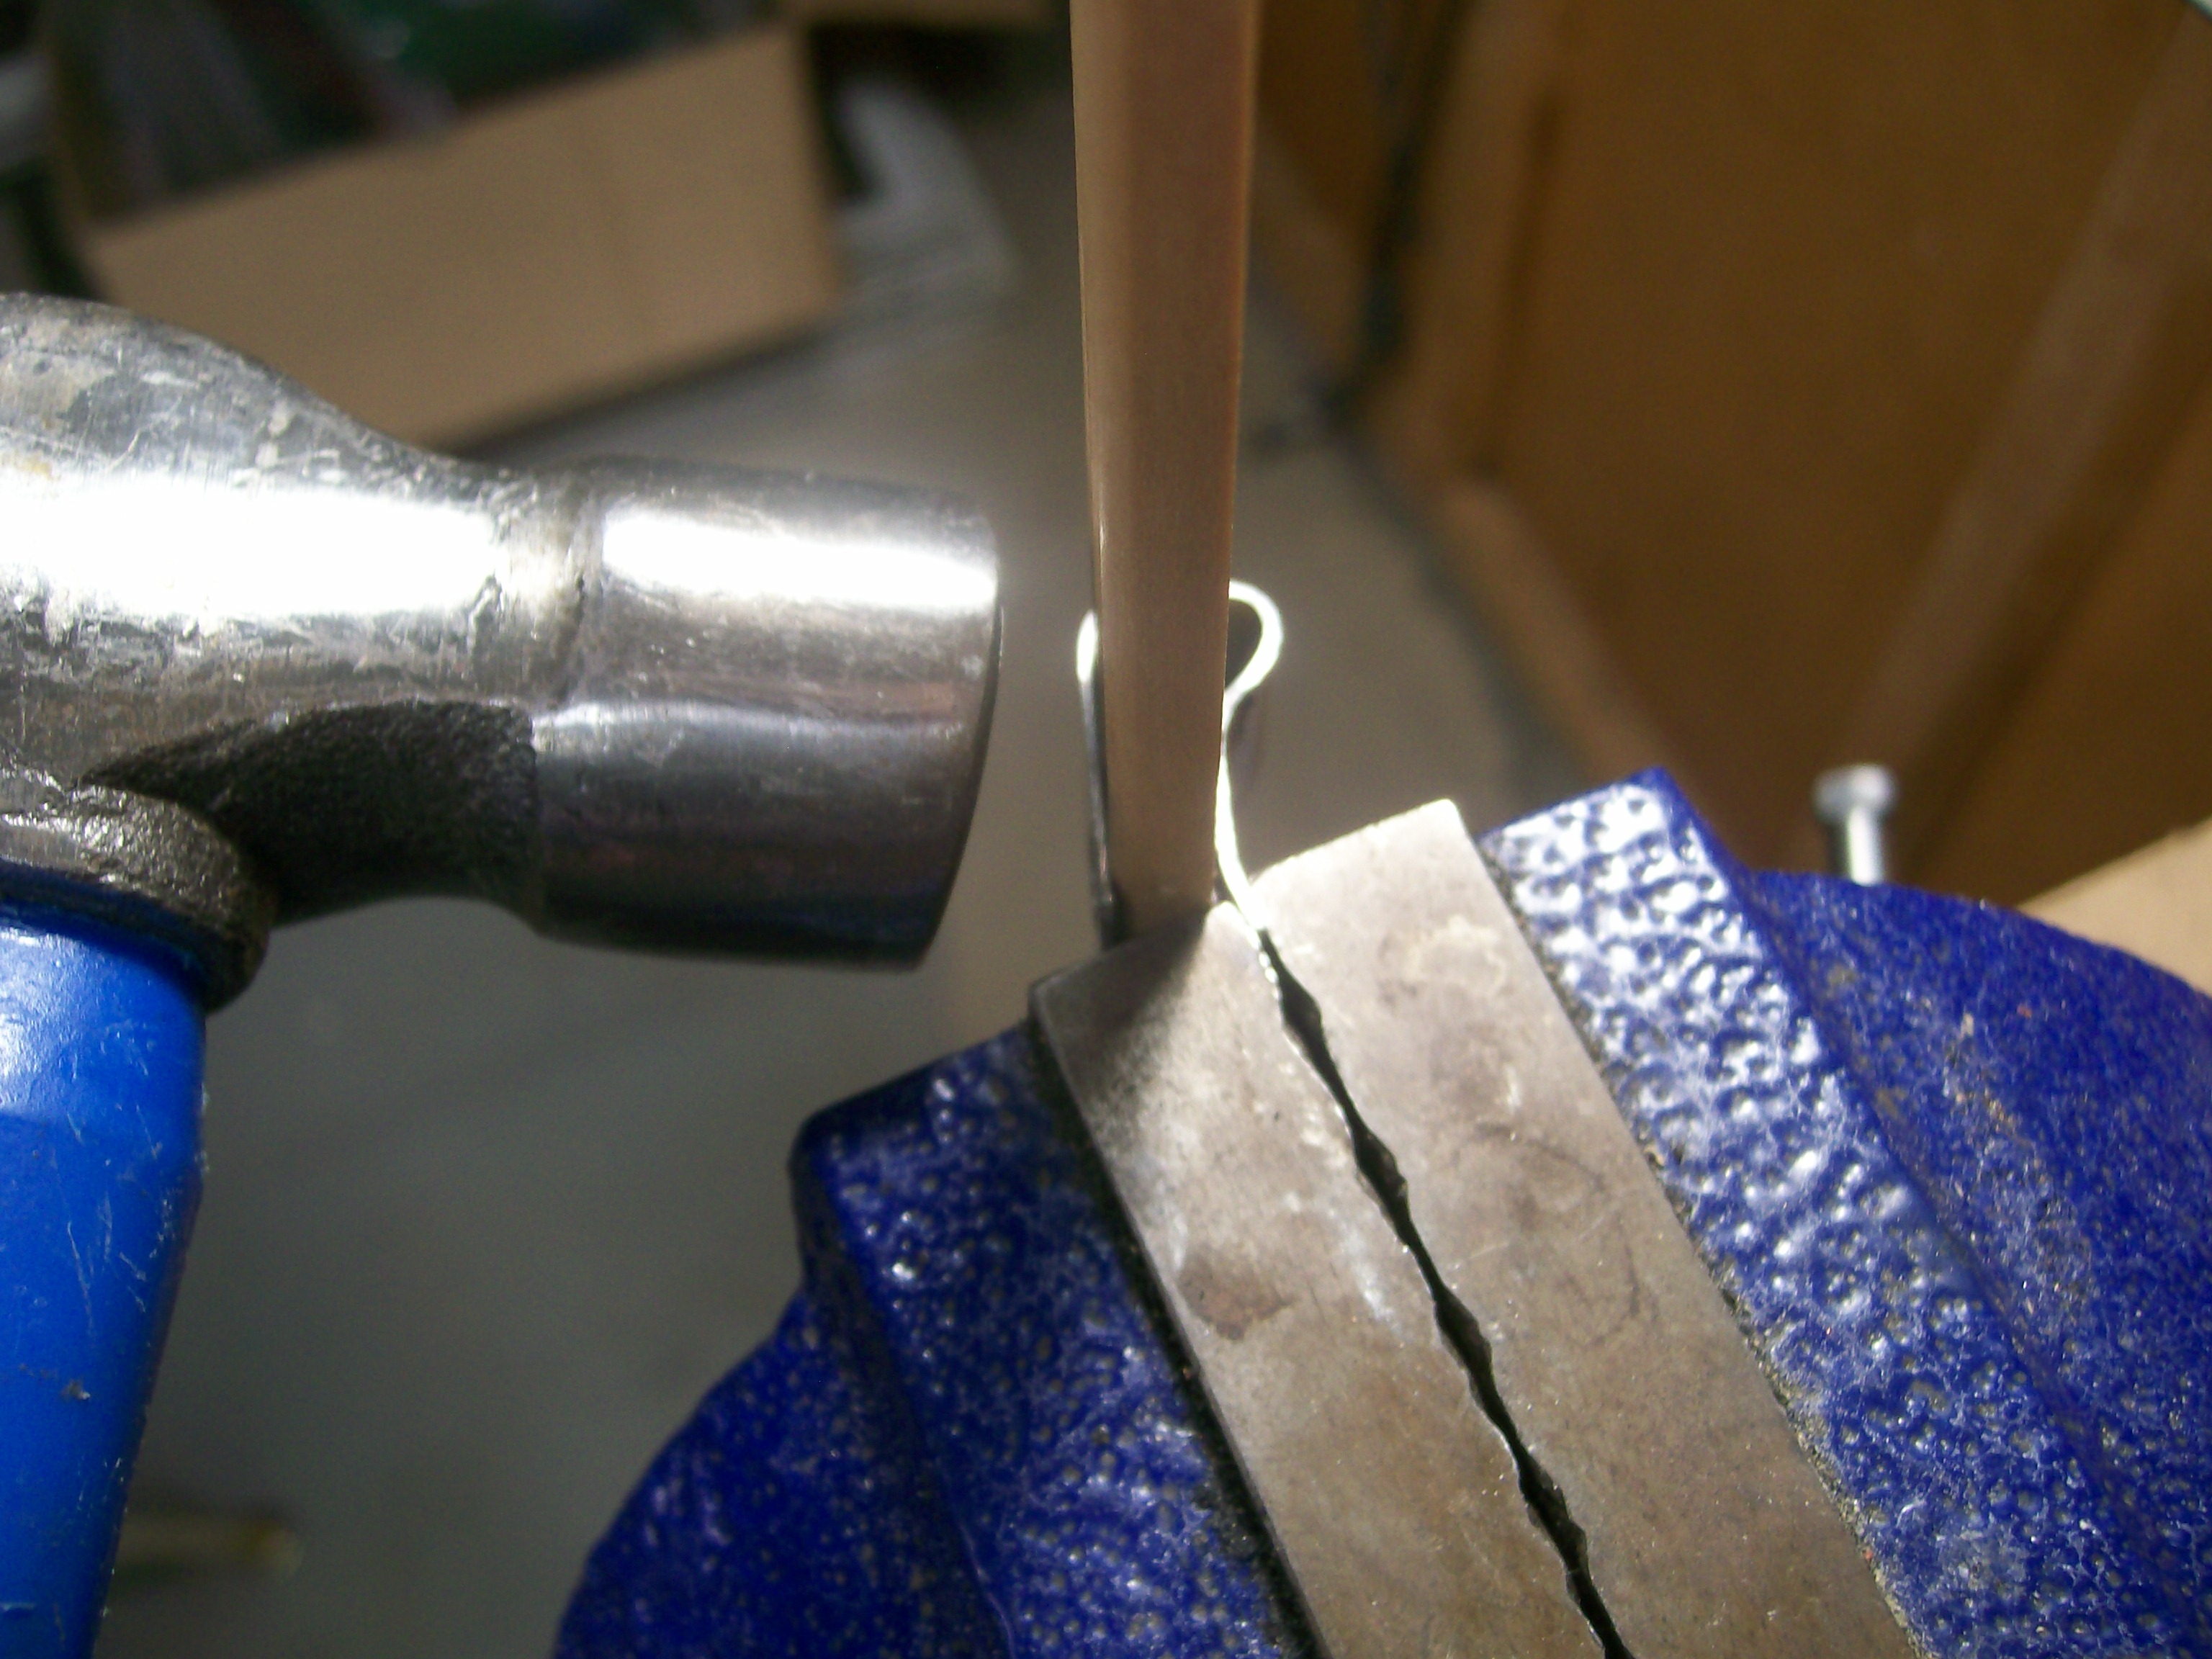
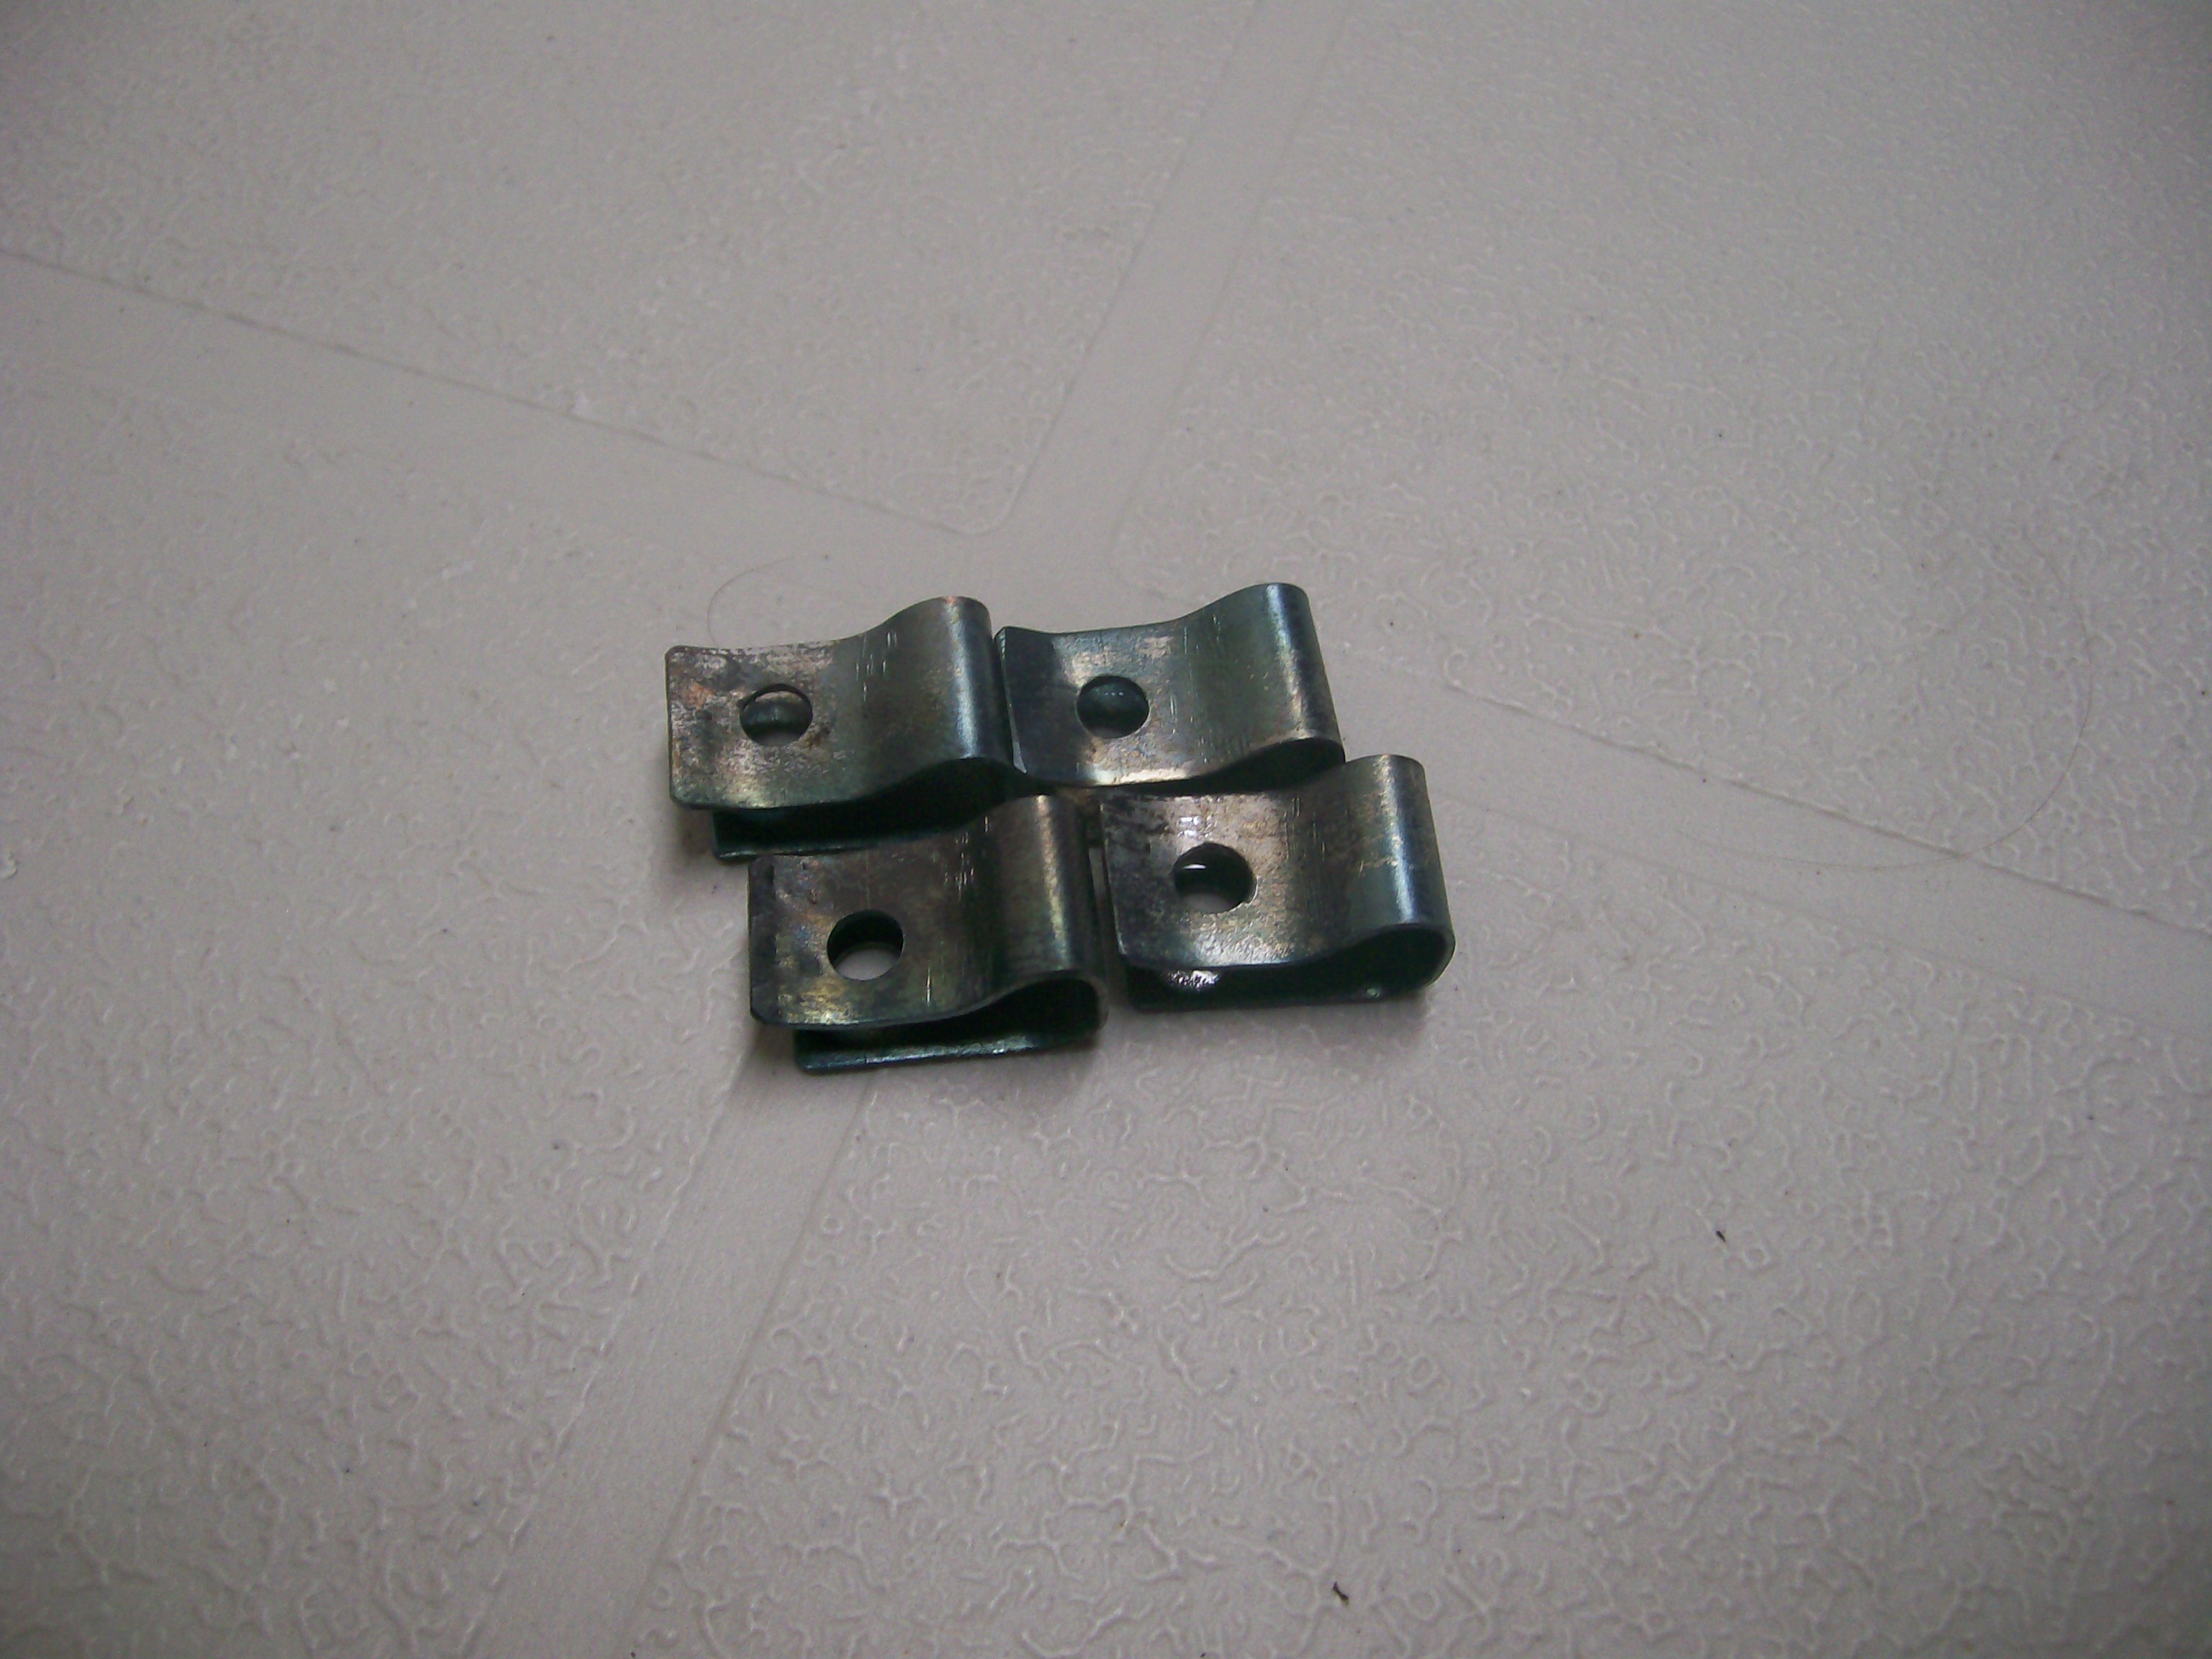
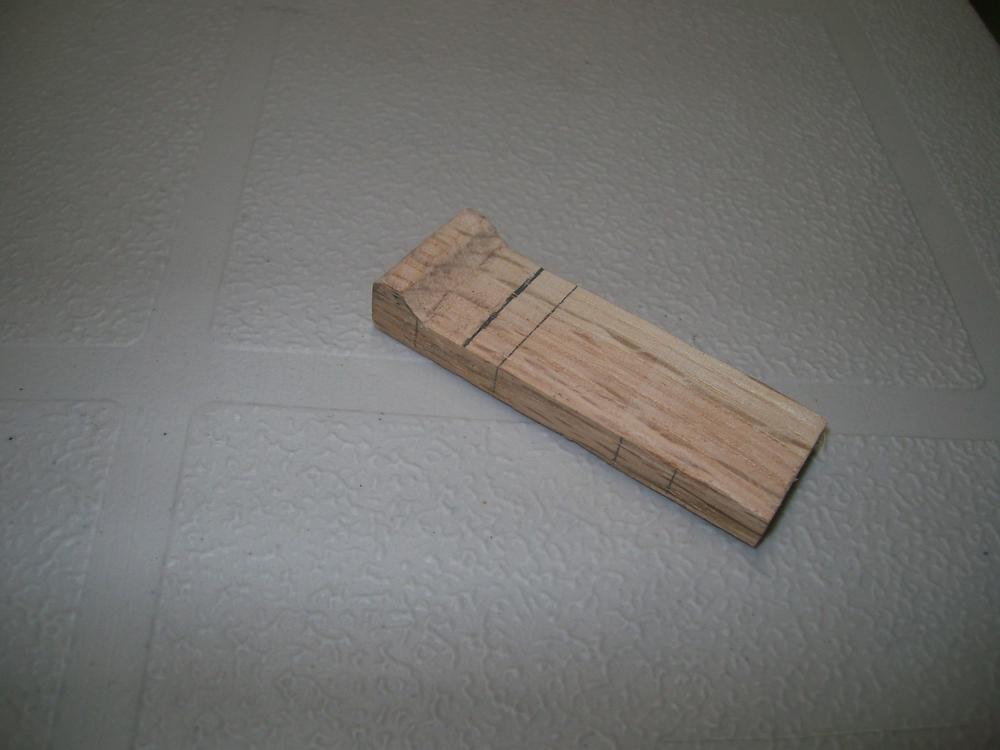
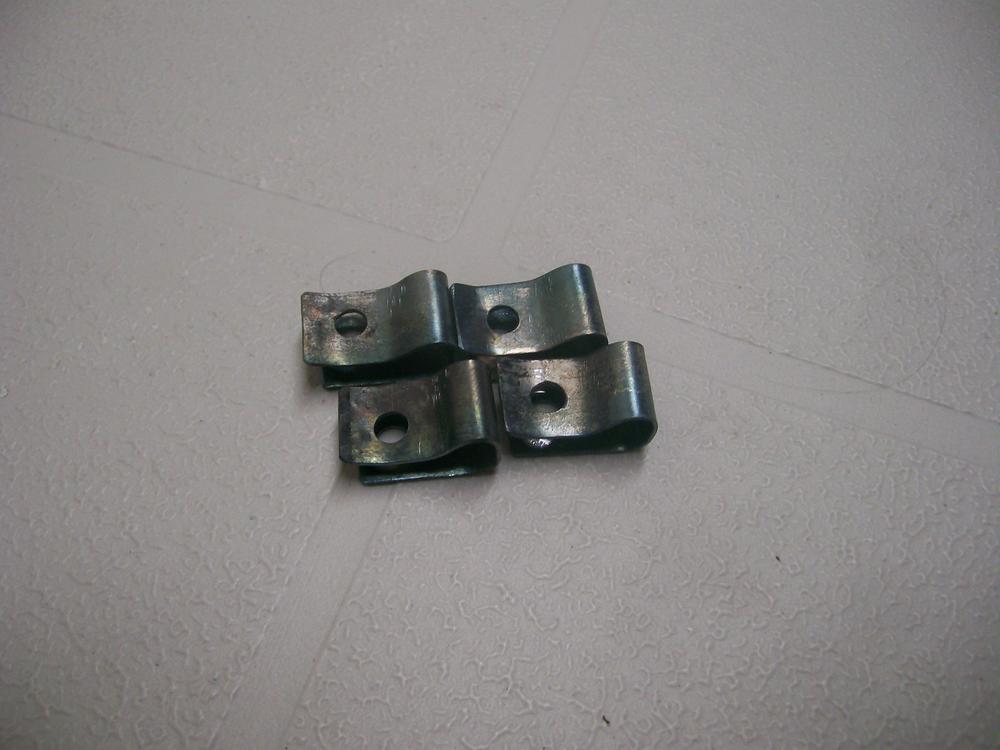
Now that Hardway has sold off his inventory and doesn't look like he's planning to commission a second run, I feel I can share my D-I-Y strategy with those of you who still need these pieces. The clips aren't terribly difficult to fabricate from sheet stock and they don't have to be made from spring steel (that comes afterwards). Here's how I made mine: 1. Using tin snips, cut 4 metal strips from 0.022" sheet (or close to that). After cutting, flatten the strips on a hard surface with an autobody hammer. Then de-burr all the cut edges with a file. x After cutting, flatten the strips on a hard surface with an autobody hammer. Then de-burr all the cut edges with a file. This had yet to be done for the pieces in the photo. 2. Fabricate a forming buck from a small piece of hardwood (softwood won't do). You'll need the buck to form the 'bump' in the closed end. The 'bump' shape is mandatory -- it provides clearance for the stamped flange that runs around the periphery of the vent opening in the hatch outer sheet metal). I used a power sander and a Dremel sanding drum to make my buck. When you're happy with the shape, mark the side edge for the location of the centreline of the hole that you'll need to drill in the clip after you've bent it to shape. x 3. Mount your buck in a bench vise, along with one of the metal strips. The vise jaws should clamp on one end of the metal strip and the buck simultaneously (keeps the metal strip in position during the bending process). x 4. Now shape each strip using, as appropriate, either hand pressure or your autobody hammer (use the flat part of the hammer for the outside bends and the 'pick' end for the inside bend). x x 5. Mark and centre-punch the hole center before you remove the finished clip from from the buck. Then, using another strip of wood of appropriate thickness as a backing/spacer piece, slide the shaped clip over the wood and then clamp in some fashion to prepare for drilling the hole. Because the hole has to pass through both the upper and lower leg of the clip, you'll need both the spacer piece and a backing board. It's preferable, but not mandatory, to use a drill press here. De-burr both drilled holes afterwards... 6 6. To finish up, give the clips a bit of 'spring tempering' by heating them up with a torch (get them just to start of glowing red) and then dunking them in cold water (sorry, no photo for this step) 7. Here's my end result... The total project probably took me 3 or 4 hours to complete (making the buck is finicky). Materials costs were ~ zero. Best part: The clips worked perfectly during the installation of my vent pieces.


 1 point
 -
I've been painting interior walls all day. No opportunity to get my nut off but the days not over yet.0 points