Leaderboard


 Subscriber
Popular Content
Showing content with the highest reputation on 05/10/2017 in all areas
-
3 pointsThey are asymmetric, as they have to fit to a subtly double curved surface. I have a couple here on my desk and the rear surface (where it meets the body of the car) is slightly curved, and more so in one quarter. The emblems are market 'L' and 'R' on the reverse, with an arrow indicating 'up'. You can't fit an 'L' marked emblem to the 'R' side of the body (and vice versa) without ending up with a gap...3 points
-
2 pointsThat image comes from the February 1970 issue of "Car Graphic" magazine, a Japanese publication, page 58 of an extensive article on the design and prototype development of the S30. We have seen many images scanned from that article. The picture is attributed to the development stage of July / August, 1969 (prototype P6 and P7).2 points
-
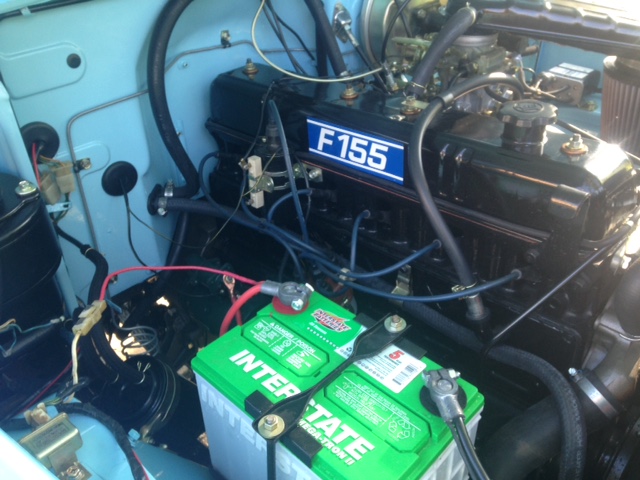
Well I've had various parts arrive over the past couple of weeks with some last minute necessary tweets before my upcoming trip to BD engineering next Tuesday for tuning. Firstly I've got to give a big shout out to UK forum member who kindly donated me a heat shield in order that I could fit some proper throttle springs rather than the completely bodged setup that was in place from the previous owners! In my haste I sent this off to the local powder coaters to be finished in a rush to have it fitted, stupidly having not tired to trial fit it So it turns out when I came to fitting that there are not in fact two different heat shields over the generations but three different ones, with the second and third looking very similar with subtle differences as pictured below :eek: Unfortunately to my disappointment it therefore wouldn't fit, while the purists will cringe and wanto to look out of the way at this point however out came the dremel to remedy the fitment issues so that following some tinkering it now sits perfectly in place (albeit I need to touch up a couple of areas and its not quite the same shape). Finally the car now has proper throttle springs fitted giving the pedal a much more progressive feel and the rather shambolic bit of wire has been well and truly removed from the subframe! IMG_1458 by Mark Woodrow, on Flickr After powder coating and before some modification IMG_1428 by Mark Woodrow, on Flickr With that now fitted and fully functional it was time for some new new spark plugs and HT leads to change out some of the more unknown components as part of the service. Spark plugs looked well in need of a change and I now have peace of mind knowing the current state of the usual consumable items. Big thanks to Mike F (UK parts supplier) on that front. On the subject of HT leads we decided to splash out and rather than modify a new set or buy some off the shelf items we purchased some from Datsun Spirit. In place of the traditional layout over the top of the head they are now neatly routed around it giving a much cleaner appearance. There's still a myriad of cables and pipework in the engine bay to confront however its at least a start. I think its fair to say the results speak for themselves, and should put us in good stead given the unknown age of most of the original components. IMG_1437 by Mark Woodrow, on Flickr IMG_1453 by Mark Woodrow, on Flickr IMG_1456 by Mark Woodrow, on Flickr Some other small details have been altered that make a big difference imo with the replacement of the worn out foot rest, and the replacement of the OEM door lock pulls. One was broken on purchase and was letting down the overall aesthetic, I'm sure again it will be to the purists disgust however we've gone with some nicely detailed Z finished replacements to modernise and detail the car further. I'm really pleased overall and think the finish speaks for itself IMG_1438 by Mark Woodrow, on Flickr IMG_1440 by Mark Woodrow, on Flickr IMG_1443 by Mark Woodrow, on Flickr IMG_1445 by Mark Woodrow, on Flickr That's all for now, however I'm hoping that the car will be running spot on for the upcoming Donnington Historic following its trip to BD engineering on Tuesday. Hopefully there will be some dyno print outs to follow in due course. Will be interesting to see what figures its producing come the hour.2 points
-
2 pointsIt's a photo scan I posted here on the 18th of December 2009. I can't help but point out that the answer to your question is easily answered in the thread in which the image was originally posted, but somehow I doubt that's where you found it - right? It's a photo of a prototype. I think Carl Beck would like to believe that it refers to 4 cylinder engine capacity (2400cc='240', 1600cc='160) but this prototype is well past the stage where the planning for a 4cyl S30-series Z was dropped. '160' refers to the rated PS of the S20 engine (160ps), so it's a dropped prototype emblem for what became the '432'. Font type and paint scheme matches too. It's likely that the '160' idea was dropped when the '240' moniker was adopted for the L24-engined Export market cars, as the higher CC-based number would make it look like the L24 was more powerful than the S20. There's a subtext in that the '160' moniker was quite possibly the inspiration for the '240' moniker, unless people are happy to believe it was picked out of thin air...?2 points
-
Just an update. Ran wire for the electric pump into the cockpit and dived into the area behind the radio to repair the defroster circuitry. After figuring our where to tap the power, I located the switch on the bottom of the steering column plastic finisher. Plugged the battery back in and the pump ran as expected, but when I went to start the engine, the starter circuit was dead. Finally traced the problem back to the neutral/park switch wiring (AT). While running the wire for the pump, I must have loosened a bullet joint. With the old style soft plastic tubing over the joint, nothing was apparent until I tugged on it. So back to testing the pump. Earlier in the day I ran the pump until I heard the change in pitch as the fuel manifold pressurized and then another 5-10 seconds. So several hours later when I got the engine to turn over, it started in the first second of cranking with no choke applied! Looks like I got a winner. Thinking back to how long it takes to pressurize the manifold, I wonder if the check valves in the engine driven pump may be allowing fuel to slowly drain back into the tank leaving air/vapor in the fuel manifold. An empty manifold could be a partial cause in the delay to re-fill the float bowls after sitting for several days. In any case, the electric pump seems to be doing the trick.2 points
-
2 pointsOh I'm glad you got her rolling. If this happened last week I'd have been there to lend a hand. I just started Dorm renovations at CSUCI last Monday. Unfortunately I'm not available until the 1st of September. I'll be working six days a week 12 plus hrs a day. At least you can get her moved now. If you haven't got her running by the time I'm done with the university then I'll be available to help. But I'll bet she'll be running before then. Sure wish I could be there now.2 points
-
2 pointsHello everyone. New owner of the #187 here. I don't have to tell you that I haven't received the car, but when I do, I'll go through it and document in detail with pictures so I can pick your collective brains on the best approach to refreshing/restoring this gal. I am a collector, so #187 will be with me for a long time to come. I am not new to owning s30. She will join her 5 siblings: 2 - 1970 Series 1, 1971, and 2-1972. She is a true survivor with some battle scars. However, I've seen worse, much worse.2 points
-
1 pointI'm going to make sure the home I put him in when the time comes has a female staff. Should cover it. Hopefully he won't notice when I steel all his tools.1 point
-
1 pointYayyy! Site, your idea with the WD-40 worked perfectly on the jammed seat belt. Only took about 2 minutes total, and no grease on the seat belt. I had to go buy a can, and corrected the seat belt in the parking lot. Now the seat belt just zooms out and in. You guys are sooo smart. I am having a ball with RedBird out running flying trucks, that I swear they hit the gas when they see me pulling out! Today one did that trick roaring at me, and I just floored RB. We were to 55 in nothing flat, and he was shrinking back in my dust!!! I'd imagine he never expected that. My sweet RB took it in stride, no changes, no huffing or puffing from her. I had that door to door grin again. Actually, it made my day. Snicker!!! Well that darned AC still is not putting out cool. It never did do a super job. I guess I'll just have to contact Sam who installed it to see what he will do. That is if he has recovered and is still working. He mentioned quitting, the abuse folks do to him has really annoyed him. Some people really try to take advantage when they can. "That's all folks..." Jai1 point
-
1 point
-
1 pointYou seem to be trying to do a switcheroo here. As was pointed out in post #4 of this thread, I first posted a scan of the same image on this forum back in 2003 but - as far as I am aware - I have not claimed that I was "first" to post it, even if I was. That's in your (Zed) head, I believe. The image that's in the first post of this thread has my initials - ART - and a date code on it, and I believe I first posted it on the Japanese Nostalgic Cars forum thread that the 'Kyusha Kai' blog post (as linked by siteunseen in post #5 of this thread), and was part of a discussion which hopefully debunked a silly theory - as alluded to in the Kyusha Kai blog post. The initialling and date coding is something that I do occasionally with the intention of giving some traceability for an image I have posted, as I am concerned that images get taken out of context by being right-clicked-and-saved and then posted elsewhere. The context in question being the reason that they were posted in the first place, and it's often to illustrate a point or detail that is relevant to the topic of discussion. We do it all the time on classiczcars.com. Lifting an image from one of those threads/discussions and pasting it elsewhere - and in the process dropping all the information that went with it - seems like a backward step to me. I don't know the solution, but a bit of common sense would not go amiss. This is the reason for my hackles being raised somewhat when member 'Blue' here on classiczcars started a process of "vacuuming" images from archived classiczcars threads and posting them elsewhere on classiczcars devoid of any link to their original context. I just don't get it. Yes, the image came originally from the 70-2 issue of Car Graphic magazine (as 26th-Z pointed out in post #8 of this thread...) but it is actually a copyright-free Nissan Press Department photo, which is where Car Graphic magazine got it from. If you want an example of 'Fair Use' of such photos I invite you to take a peek at zhome.com, which uses many photos from the same Nissan Press Dept. sequence as used in that 70-2 Car Graphic article. We still have not been told where the original poster sourced the image he was asking about, but the fact that it carries my watermark narrows things down a little I think? I don't think you're going to get very far with your finger-pointing regarding me "lifting words" from the Car Graphic article. The original is - of course - in Japanese.1 point
-
1 pointYou really aren't getting it, are you? You're telling me I've broken the context chain but then link to a thread containing the image where I gave the context by explaining what was depicted in the photo I had posted... If you don't see the difference between that and the first post in this thread then I don't know how to help you.1 point
-
1 pointLook at the post above yours. You are - of course - missing the whole point. It's the lifting of images LOSING ORIGINAL CONTEXT that's the problem. If they stay with their explanations, or at least a link to the source, then it's all fine and dandy.1 point
-
1 pointThree cheers for siteunseen, then. He's clearly our last best hope. Next time I need an explanation for an image I've uploaded I'll cut out the middleman and go straight to him.1 point
-
1 pointThanks. This one - http://backissues.com/issue/Sports-Car-Graphic-February-1970 siteunseen had the best and most direct and informative answer, I think. And he didn't even add a comment.1 point
-
1 pointAnd the article makes it clear that the '160' emblem related specifically to the 432, and not anything else, so I don't know where any confusion or counter theories come from? Original picture caption also points out that the pictured emblems were hand-made aluminium and paper mock-ups, and that the size, style and location of emblems had to accommodate the requirements of panel production, as stamped holes needed to be in a one-size-fits-all configuration.1 point
-
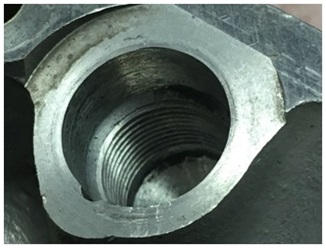
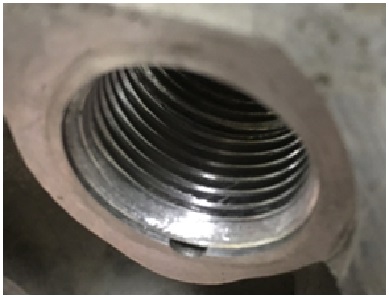
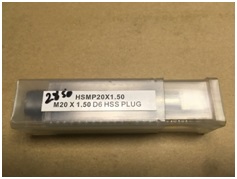
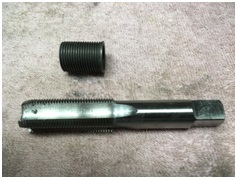
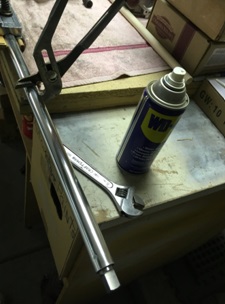
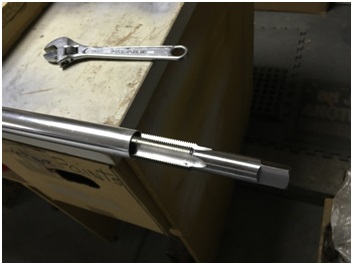
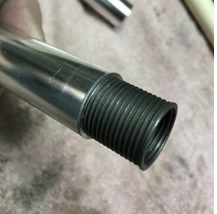
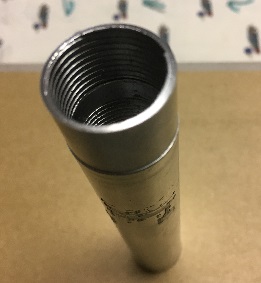
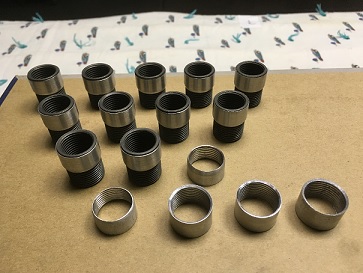
1 pointMaking Time-sert Sleeves for a P90a - to P90 Rocker Arm Pivot Post Conversion: First, I bought an M22x1.5 tap and a length of 7/8” aluminum tube from the hardware store. An 8-foot length of tubing cost us $32 and the tap cost $28 - much less than labor and materials to have a machine shop make the sleeves. The tap matches the external threads on the Time-sert and the inside diameter of the tube is large enough to accept the tap without drilling it out. The tap won’t cut the full thread depth because the tube’s wall thickness is just slightly too thin; however, that is okay because it makes tapping the tube easier. The reason we need the sleeve is to fill the void between the time-sert and the pivot post well. Sealant and epoxy will make the installation firm so we only need the finished sleeve to thread easily onto the time-sert and fit closely against the pivot post well. “Soft-jaws,’’ used to hold hydraulic fittings, held the aluminum tube in the vise but the tube still slipped when we ran the tap in. Wrapping the tube in 80-grit abrasive cloth provided a better grip but we still had to take small bites with the tap – maybe two or three turns – before backing the tap out to clean things. Cutting oil is an absolute must. Eventually, the tap cuts enough treads to make four or five threaded sleeves, then we cut 6” off the threaded end of the tube and started over. At least three 6"-lengths of tubing are needed for twelve sleeves, and each must be turned to an outside diameter of at least 0.550-inch. Below you can see the diference in diameters, between a partially finished sleeve and the original diameter of the tubing. Its not much. Without a lathe, we used a drill press and homemade spindle setup to do this. I cut the hexagonal head off of an M10x1.75 bolt I found at Ace hardware, cleaned up a damaged lower part of an adjustable pivot, and sacrificed a Time-sert to install over the pivot threads. This made up the drive spindle that fit into my drill press, but we still needed a way to hold and center the opposite end of the tube. I used hard maple to make a tight-fitting plug, fit into the opposite end of the tube. This gave me something relatively soft to bear against a live center (You can find a live center at a wood worker’s supply store; they are used in wood lathes to turn dowels and spindles.) Then, I chucked the live-center vertically into my drill vice and bolted the vice to the drill press to keep the whole setup in line and rigid. With the live-center mounted, and the vice bolted to the frame of the drill press, I could turn down the spinning tube with a coarse file and various grits of sand paper. I took measurments often and when the diameter was right, I cut the tube in pieces approximating the sleeve length. There is a bevel in the P90a pivot post well, near the top of the threads; to match this, each sleeve is given a bevel on its lower outside diameter so it dropps into the pivot post well as far as possible. Also, the inside diameter of the top end was chamfered to let the time-sert thread as far into the sleeve as it could. Total time to make 12 sleeves was 16-hours. Not bad. We will make the installation tool from an M22x1.5 bolt. I'll show that later, when I post the sleeve installation. Hope this helps. Cheers.


 1 point
 -
1 point
-
1 point
-
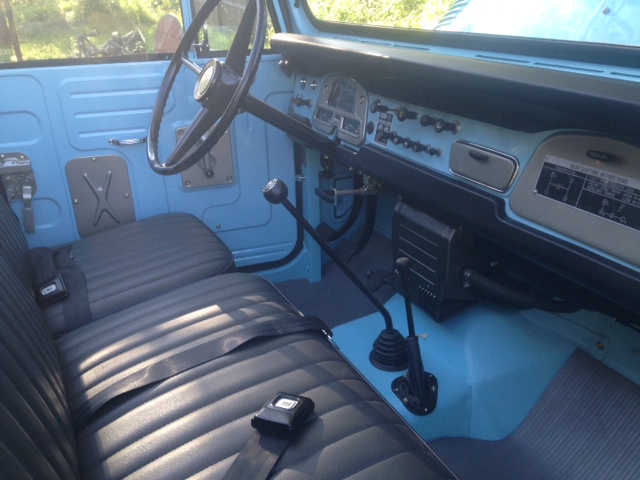
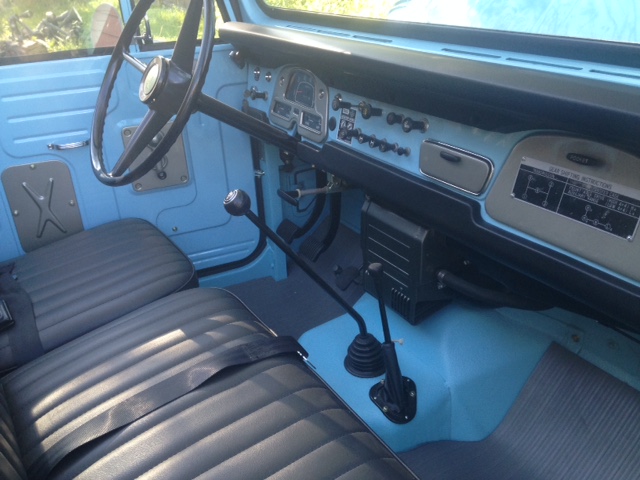
Well in other news I had a very productive weekend with some servicing and general maintenance which in some cases was well overdue. First issue to confront was ground clearance to get enough access to the car, having no access to a ramp or pit and having owned a couple of cars that are too low for ramps I’ve never bothered until now (Off to Halfords, local UK car parts supplier). With the front of the car now up on newly purchased ramps at the front we jacked up the rear off the diff and had axel stands placed under the rear sills to give 5 strong points to hold the car up. Access sorted and onto the essentials. After various debate over coolant we ended up with some standard IAT blue anti freeze from Eurocarparts on reccomendation. In light of the unknown mix from the heater matrix refurb with the rad requiring a topup it seemed prudent to flush and clean the system so that the mix was consistent. We drained the system on both the rad and engine block (which needed the asistance of a pry bar to release the engine block drain bolt) before fully flushing the system and refilling with a 50/50 mix. Onto fresh oil and after some recent advice we’ve also gone with Millers 20w-50 Semi Synthetic oil for the engine and chucked a new OEM Nissan oil filter on before refilling the system for good measure given its age was unknown. Next onto the carbs and air filters, being K&N’s it was all straightforward to strip down and fully clean (persil washing powder in warm water works wonders) before re-oiling. While at it, it also seemed prudent to strip the carbs down for a clean and to change out the oil. This was an interesting expirience having never touched carbs before and this being my first car with them, 10 minutes of Youtube viewing later and off I went. Not knowing the usual state of wear I’ve no idea what I should have expected however it seemed well worth doing. Both were covered in gunk which got sorted out with some carb cleaner (thanks halfords), all cleaned up I decided to give the dome tops some tlc given their dull apearance. Now I’m hardly into bling however out came the power drill and polishing wheels. Whilst not perfect they now look a darn sight nicer and have a nice patina to them so as to not look off the shelf new. Here’s where the plain sailing gave way to a shocking discovery particularly in light of recent conversations of fuel overflows. Whilst removing the coolant drain plug from the engine block previously I came into contact with the fuel line running below the carb, next thing I know fuel was ******* all over my hands while I tried to stop it. Having clamped off the fuel supply we went about removing the culprit fuel hose. On removal it suddenly became clear what’s horrors lurked beneath, the rubber hose (which was completely unfit for its purpose and too small) had gone completely rigid from the fuel and age cuasing it to split from the pressure of the clamps holiding it in place. It was quite clear that for the last few months we’ve been driving around with a ticking time bomb waiting to go off which could have potentially covered burning hot headers/manifold in fuel which would have been an engine fire and game over. Back off to Halfords again and some new replacement fuel hose sourced and we were back to refit and crack on with (had to return on Sunday to get a bigger hose to accommodate the fact the perished pipe was too small and had been bodged). With safety in mind we decided to replace both as a precaution. It turns out that the other hose with in a similar state and well past its sell by date, albeit wasn’t hanging on by a thread in quite the same way. Crisis averted we put the carbs back together and whilst reassembling the K&N’s noted that someone had previously drilled a hole in the back of both which was the perfect size for more fuel hose, fuel overflows now routed more safely in the air filters and fully reassembled another job was tackled. New dizzy cap and rotor arm also fitted as part of the ignition system refresh. Spark plugs are currently awaiting the arrival of our new HT leads for the US which will hopefully refresh the whole ignition system and tidy up some of the some of cables currently all over the engine bay. A few more bits and pieces also coming from the states to make some improvements which I’ll update later. After a few attempts to start up and having resolved a few random bits she fired back up, but was running a bit rough and even more in need of a tune up than before. Out of time for the day that problem was left for Sunday to deal with following a run down to the SE with the MR2OC in my MR2 Turbo to strech our legs in the early hours of Sunday before a full english. Having revisited Youtube again my attempts at tryinng to tune up the car ended in disaster, despite my efforts the car was running terribly struggling to idle before being brought back to a more respectable level albeit in need of some professional attention. Accepting I was way out of my depth I left the car until later that evening well aware that I was planning on sending the car off the BD engineering (rolling road tuning company in Kent) to be properly tuned and inspected in the coming weeks before its next major journey. To my surpise late on Sunday evening having told my dad about my completely failed attmepts to tune the car we went to return the car to the lock up where it is stored, at which point to my complete surpise it seemed to be running relativly smoothly and was a completely unrecognisable car from the state I had left it in earlier! God knows if everything had just settled down after everything that had been altered or I genuinely by fluke managed to improve our situation by the time I left it is a mystery to me. Either way I’m going to try and book the car in for some professional help on the Tuesday after the Easter bank holiday before I head up to the Highlands on a driving holiday in the MR2 and in preperation for the run up to the Donnington Historic. There will be more to follow as things continue to develop however here are some pics as that’s the bit your all really interested in! All the bits ready for servicing IMG_1240 by Mark Woodrow, on Flickr Starting point for the day IMG_1242 by Mark Woodrow, on Flickr Dirty looking carbs IMG_1244 by Mark Woodrow, on Flickr Clean up has begun FullSizeRender by Mark Woodrow, on Flickr Some TLC underway IMG_1254 by Mark Woodrow, on Flickr Comparison after some clean up! IMG_1255 by Mark Woodrow, on Flickr Tired looking fuel line IMG_1316 by Mark Woodrow, on Flickr All freshened up IMG_1308 by Mark Woodrow, on Flickr Period correct nos Hella 4004 GT mirrors which we picked up a while back, the drivers side will work perfectly however I've currently not worked out whether the passenger side will ever be able to be made functional IMG_1306 by Mark Woodrow, on Flickr1 point
-
Well its been a while, I've been updating my thread on ZClub but had forgotten to get back on here to keep you guys posted as well. Apologies, here we go anyway this is a highlights catch up. Well its update time again and the car after an extended period of 6 weeks in the garage is back on the road! After some useful advise on here and doing some research, reading online and in a few manuals/guides I got for Christmas we tried to reverse flush tthe heater matrix system having decided that our problem was likely a blockage in the heater core. Having stripped the pipework off the matrix and hooked up the garden hose there was barely a dribble of coolant flowing out despite the pressure. With it confirmed the matrix was in need of re-coring. Having met a UK Z owner on at Goodwood in December and got a recommendation to give it to Guildford radiators they agreed to take a look at it, about 3.5 hours work to get the whole unit out of the car with the dashboard in place and I dropped it in before Christmas. As promised it got looked at straight away in the new year..Once the unit finally got cracked open it was apparent that the whole core was corroded in place and to extract the core they had to attach some hoops to it so that it could be hammered out of the box. With that out it was clear the unit hadn't been touched since it left the factory 46 years ago and was well overdue some attention. The original was measured up to make sure a new unit would drop straight in and the box shot blasted to be repainted due to the surface corrosion. Having had the unit picked up for me a few weeks ago the exterior all looked great with fresh paint however having cracked it open to satisfy my curiosity I soon found that the inside had not been touched other than the new core. As is all too common these days it seems that there are plenty of people who remain satisfied with only doing half a job. Not satisfied between me and my dad we treated the surface rust and painted the inside with hammerite rust killing paint for good measure tiding it up before sealing the unit up for installation. Having previously looked at the state of the original control valve it was clear that it was well overdue retirement so a nos one had been sourced and sent from the states. All back together we were ready to tackle the job come this weekend just gone. As always the time required was underestimated with it taking more hours than I care to mention squeezing the unit back in and remembering the order that everything went back in. First job was hoovering out as much dirt and **** possible, it was was scary how much had accumulated hidden behind the dash. Next the passenger seat came out owing to a small coolant leak which gave a good opportunity to inspect the full extent of the floor. Via some minor surface rust that was all treated the original floor looked really solid I'm pleased to say with only the newly welded in chassis/floor rail being obvious. So several hours of lying upside down in the foot well bolt and re-connecting everything up and we were good to go, fortunately having labeled up all the wiring that job was relatively straight forward with a few connectors needing to be cleaned along the way. Its fair to say it wasn't the easiest job with lots of cursing and swearing along the way. Per some advise we did consider removing the dashboard however we were concerned as to what may be disturbed in the process and decided to let any potential future gremlins lie in peace just in case. Firing her up for the first time in six weeks was a great relief, even more so when several minutes later heat started flooding out into the car! Mission a success and having grabbed dinner an hour or so late and it was time for a quick burn out to admire our handy work. Safe to say the car is certainly toasty and it won't be cold anymore in winter, really impressed with how effective a relatively primitive system really is. Certainly some smart cookies at Nissan there. For those that are curious to re-core the matrix was £180 inc VAT (The joys of living in Surrey hey) That all done and another journey under its belt and it was time for a quick blast down to Basingstoke to see the same UK Z owner that I met at Goodwood again as he was dropping out his L26 and 5 speed gearbox from his UK 260Z +2. Given long term we want to drop in a 5 speed it made sense to pick one up nice and early while the opportunity was there so it seemed a no brainer being fairly local. I was kindly offered the opportunity to drive the car to see what the box was like as syncro on 2nd is pretty much gone however we weren't too fussed as we want to fully rebuild it before it gets dropped into the 240 as we don't want to have to touch it again if we can help it. All being well it will be out in the next week or so and we'll collect it so that it can be parked in the garage until it works its way up the jobs list. Despite the poor conditions it was entertaining to get behind the wheel of a RHD car for a change and make a mess of remembering that all of the controls are in reverse. The stand out difference though was how much more composed the car was even on its aged stock suspension. I was aware there was meant to be a difference between US and UK spec however I was amazed how much more refined it was to drive. It has certainly reinforced my view that our boat like suspension needs to be swapped asap so that I can get some refinement and control to start doing some spirited driving. It does make me wonder why they had such stark differences between the markets others then I can only guess cost (I also don't know whether the setup changed further from 240z's to 260z's either). UK market cars certainly got the nicer setup! Despite the greasy conditions it was great fund being back in the Z and blasting down some country back roads enjoying some slippy roundabouts as well on the way home The Hella 4004 GT mirrors arrived the other day and look great however it looks like there will only be visibility on the drivers side so back to the drawing board again. I imagine they will be back on ebay again shortly, which is a shame as they are really nice nos items. Its looking like ironically we're going to end up with some Vitaloni Californian Mirrors as I've seen various cars fitted with these and I like the look and I believe are actually functional which is the end goal here. Still to be decided though. I'm also considering removing the bumper overrides to go for a cleaner JDM look, does anyone know where I can acquire the blanking bolts to this end? Anyway time for some pictures! Presents from Christmas As it was following removal The mess inside Inside treated and painted Shiny new control valve vs old Outside - ready for installation1 point
-
1 pointCool Cliff. We only have a certain amount of time to get it all done too. Makes for a busy few months for sure. Papabear, just keep us posted on any progress. I'll do what I can get up there in the near future.1 point
-
1 pointAndrew, I am in the process of a full restoration. For the electrical, I found Dave Irwin in Washington State. https://www.datsun-240z-upgrades.net/ He may not be able to remove the dash, but he is an absolute Datsun Electrical Wizard. I ended up sending him my dash harness, engine harness, and body harness and he went through and tested each connection and replaced the ones that needed to be replaced. He refurbished the gauges including upgarding to LED back lights. He refurbished the turn signal/head light assembly, converting all the side markers to LED and other things. He was great to work with and responsive to requests and had great suggestions. He even converted a hazard switch to an A/C switch so that I could put that in the open spot on the dash next to the hazard switch. He really was great and his prices were very fair, possibly undercharging what he is worth. I cannot recommend him high enough!! Good luck, Jon
 1 point
 -
Lol, you all seem trust worthy. I think I found the issue. The car had an aftermarket alarm and there is a mess under the steering column. There is an aftermarket installed relay that when unplugged the starter won't crank and I can replicate the issue or keep it running by wiggling the wires that go to the relay. I'll get the fsm and fix the mess the previous owner left behind. Thank you all for the help. I'll post back once I fix the wires and confirm the fix.1 point
-
1 pointSeems to be the ticket. So, classiczcars.com gets its own window from now on.1 point
-
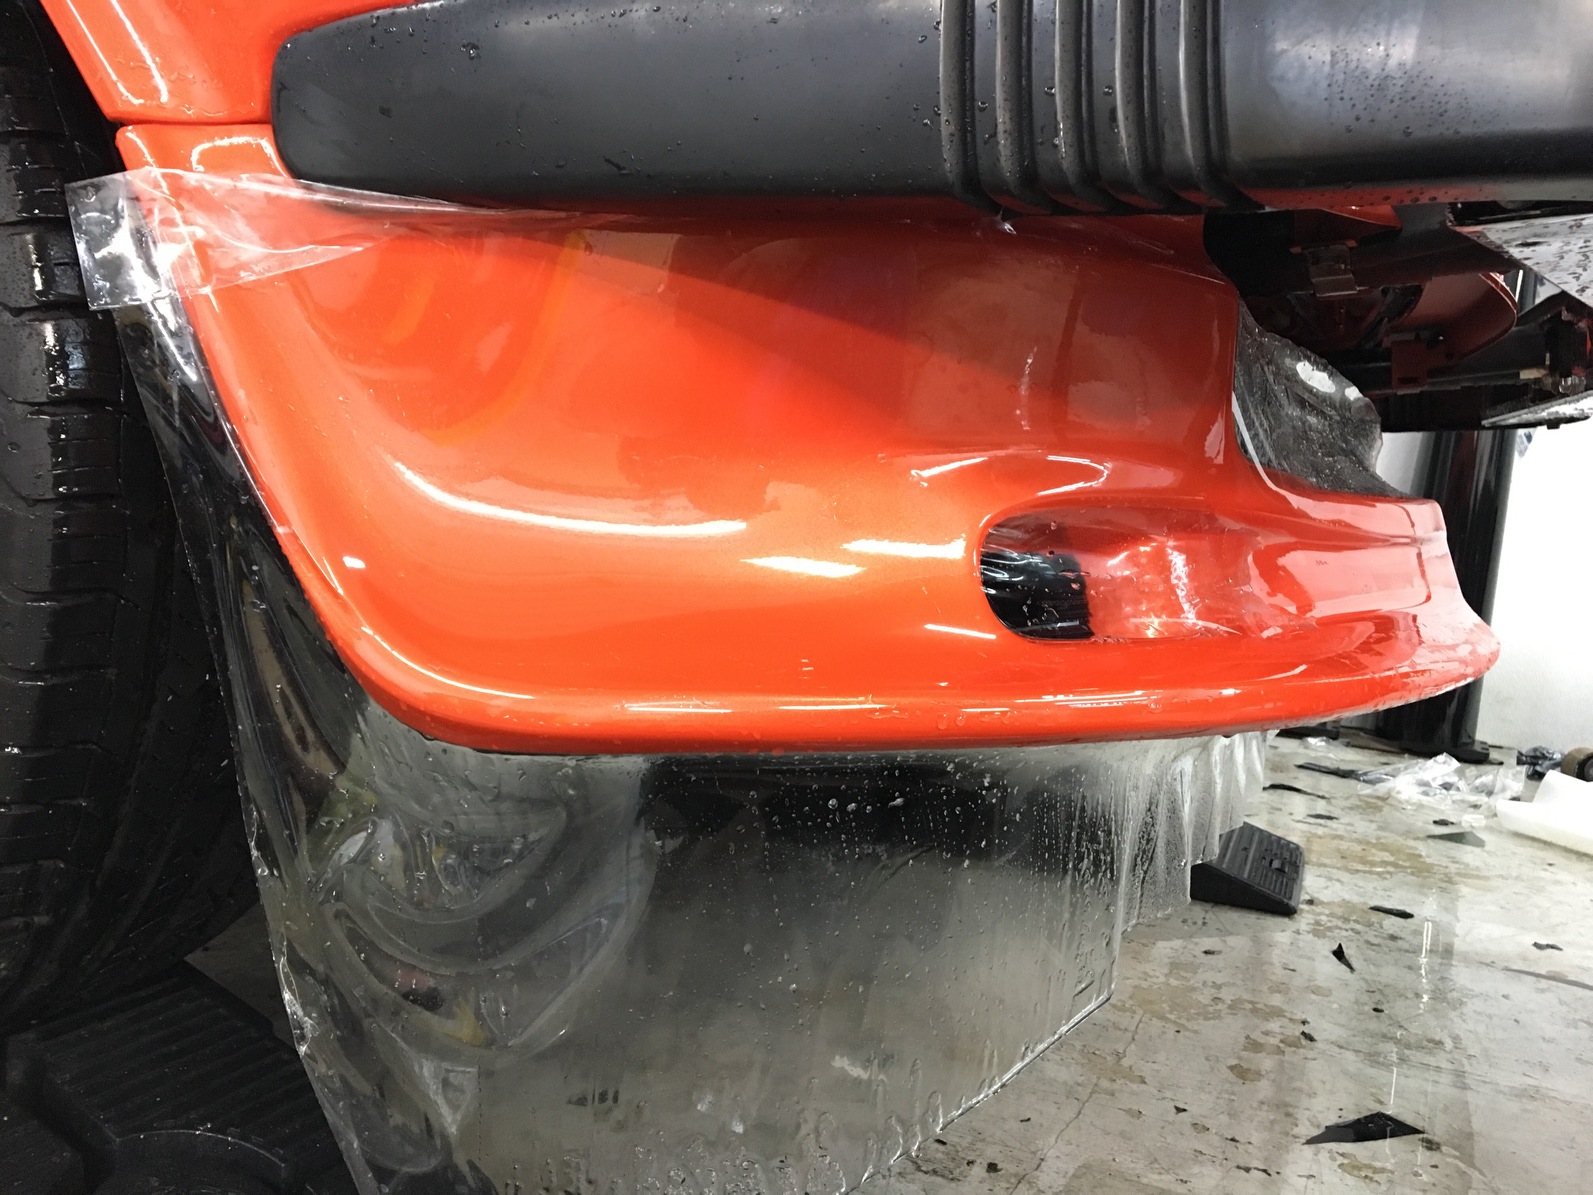
1 pointI applied clear film protection on it nonetheless since it's so exposed to rock chips.

 1 point
 -
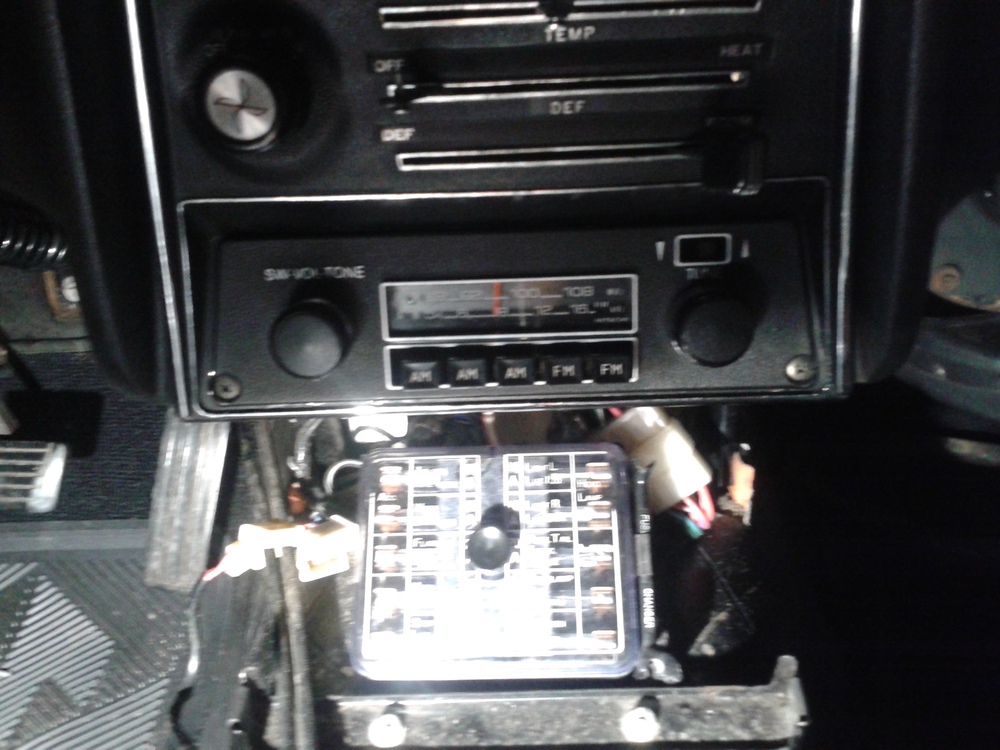
Finally! It's in and makes a little static noise when I push the power knob, green light and illumination lights work. That was tough for me, I'm the bull in a china shop so not breaking any plastic was a miracle. Thanks again to Dr Dave Morales for putting me on the right path. Until his post I was going at it blind. Here's a crappy picture from a crap phone. Console will have to wait until tomorrow, it's 3 hours past Miller Time.
 1 point
 -
1 pointI agree wholeheartedly. The Alamo is smaller than my detached garage. The River Walk is however spectacular! Restaurants making guacamole table side. You will remember that guacamole your whole life. Alamo? Roughly the size of a two car garage. My shop/garage? 2000sf!
 1 point
 -
I am getting ready to adjust the valves prior to putting the refreshed valve cover on. I did take the time to wash the Z's garage mate the 72 FJ40 (restoration coming to completion).

 1 point
 -
1 pointSo glad Greg came over in all this rain! THANKS GREG!!! Have to run a few days to make sure all is OK before returning the alternator. That's easy! Will have to check the A/C the way Charles has suggested, but it will be 10 days or so before that can happen. Bit of rotten news. Gmail decided to not sync my email, and they have no "customer care" to talk to. No choices anywhere near what my problem is in their "prepared help by text". But I finally sent an email stating the problem, and they will get back to me in 3-5 days. Nice eh? Anyway, no email coming or going, so don't send me any more love notes for a while!!! Hahaha.....1 point
-
I want to close this thread and end it, as they are installed and running. My review is complete as they are just a joy to own and drive. I can finally rev my car up without any issues whatsoever. The Weber carb is a joy to tune and drive with every thing having immediate and measurable results! I want to start a new thread on tuning, and tracking the results of changes.1 point
-
Is that a defect blue, or is just an inherent Weber 'thing' I will keep an eye on it.1 point
-
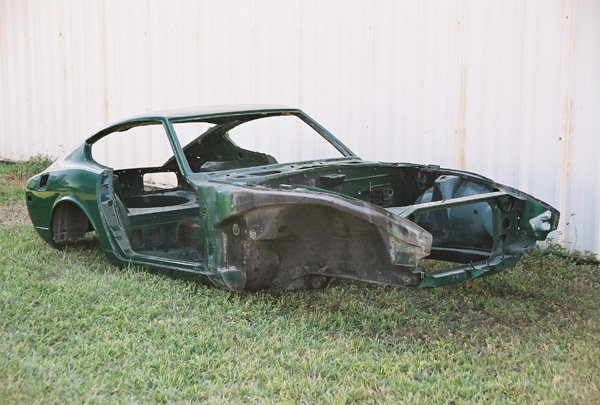
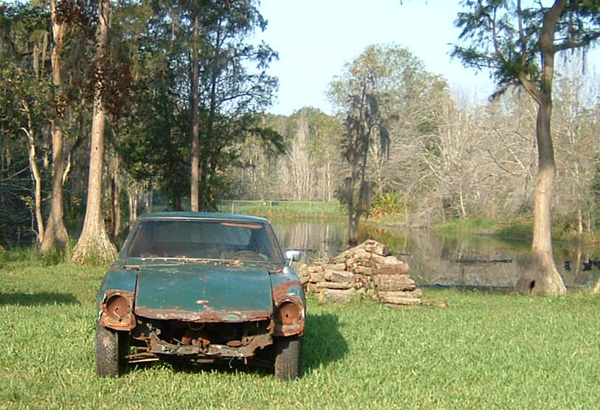
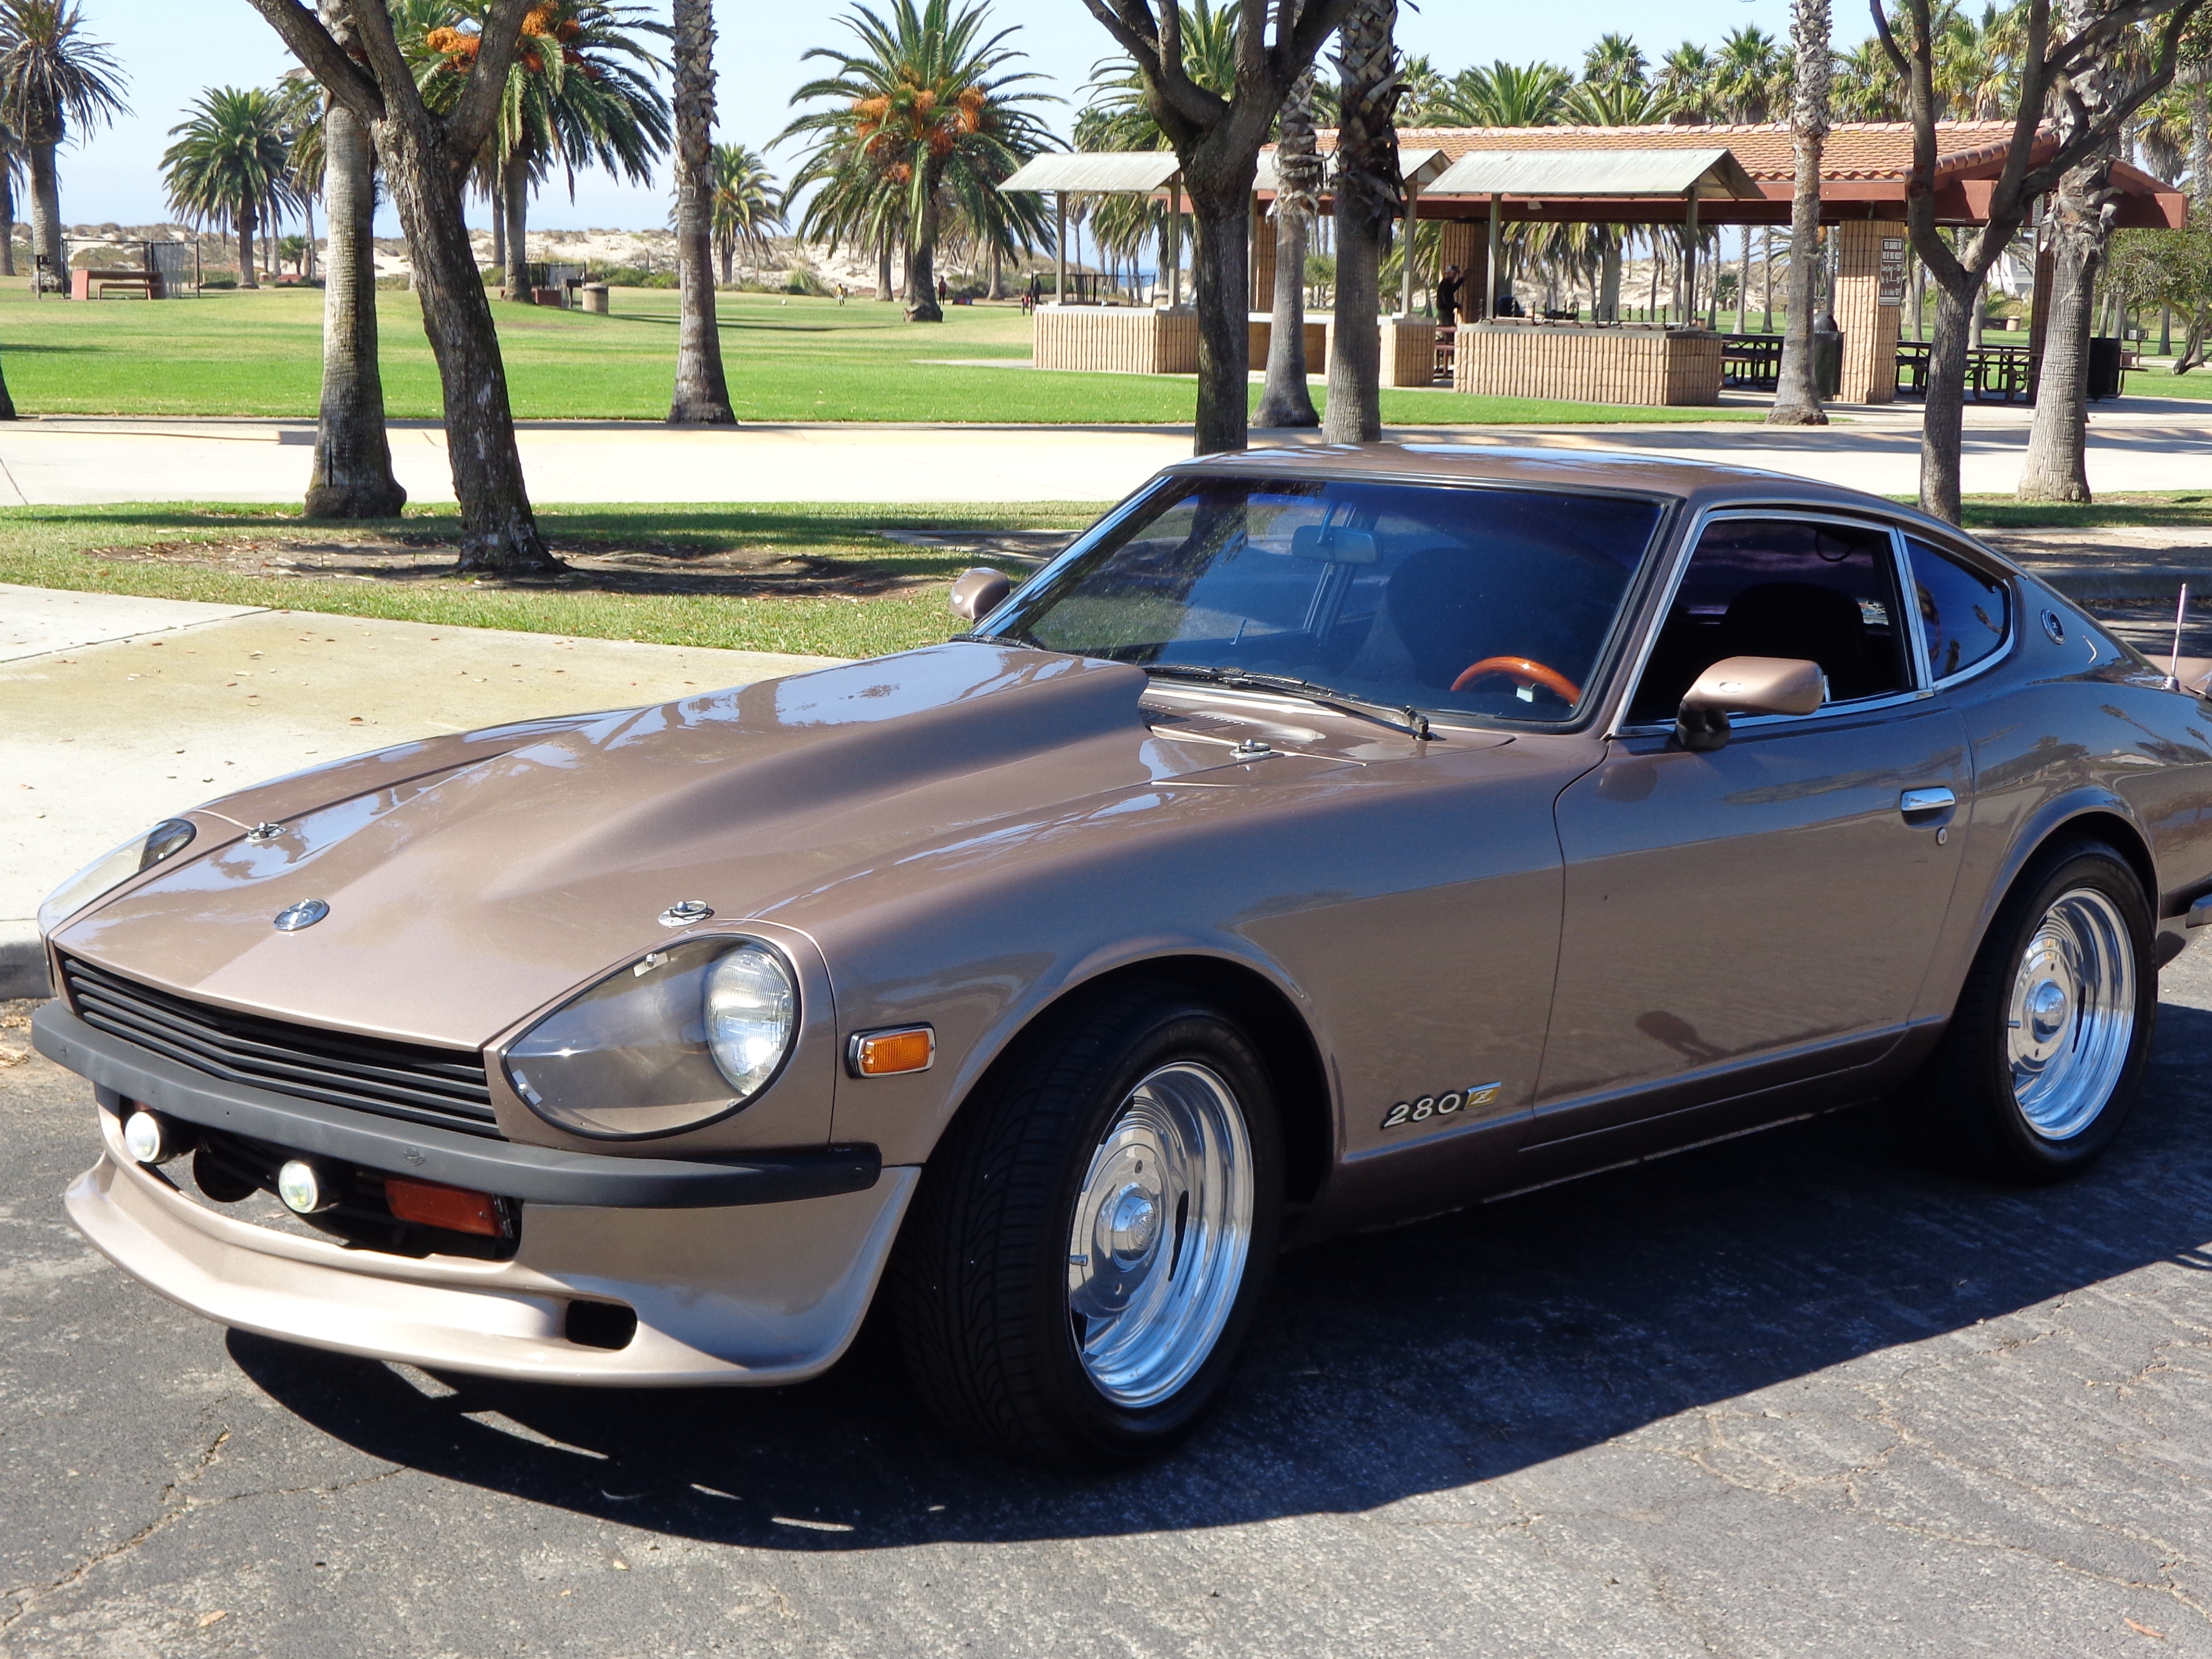
1 pointYep! 26th has been with me for twenty years and is currently completely apart and her body shell is being dipped / derusted. I found 27th on eBay last summer and she is rusting comfortably in storage while I restore 26th. They are both racing green with butterscotch interiors. Both will eventually be restored to "pretty damned original" condition. 26th is scheduled to be enhanced with Nissan / Datsun optional and period correct parts. 27th will go dead stock. 26th went to the dipping "spa" last November and she is still there. She was supposed to be done in March but there has been a hurricane-or-two delay and I expect her back 100% rust free / bare metal very soon.
 1 point