Leaderboard
-

siteunseen
Free Member5Points15,115Posts -
Hardway
Free Member3Points1,332Posts -
.JPG.cfcada9cf1c1b502df3f5f2f2ca3ff36.JPG)
SteveJ
Free Member2Points9,646Posts -
rcb280z
 Subscriber
 2Points2,392Posts


Popular Content
Showing content with the highest reputation on 03/09/2017 in all areas
-
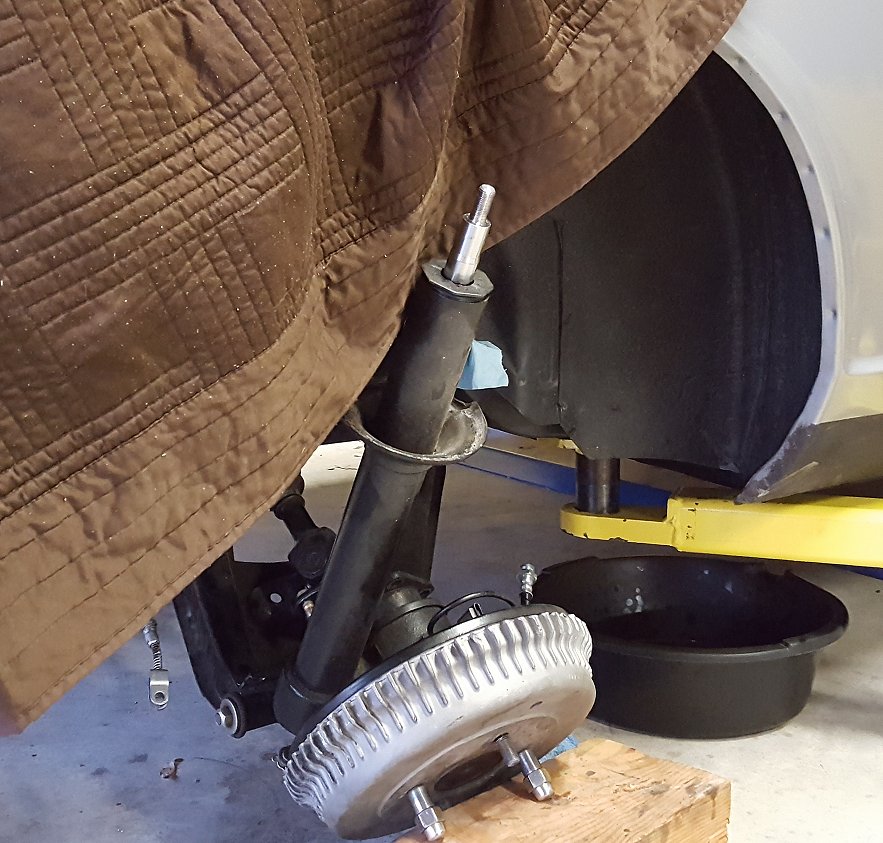
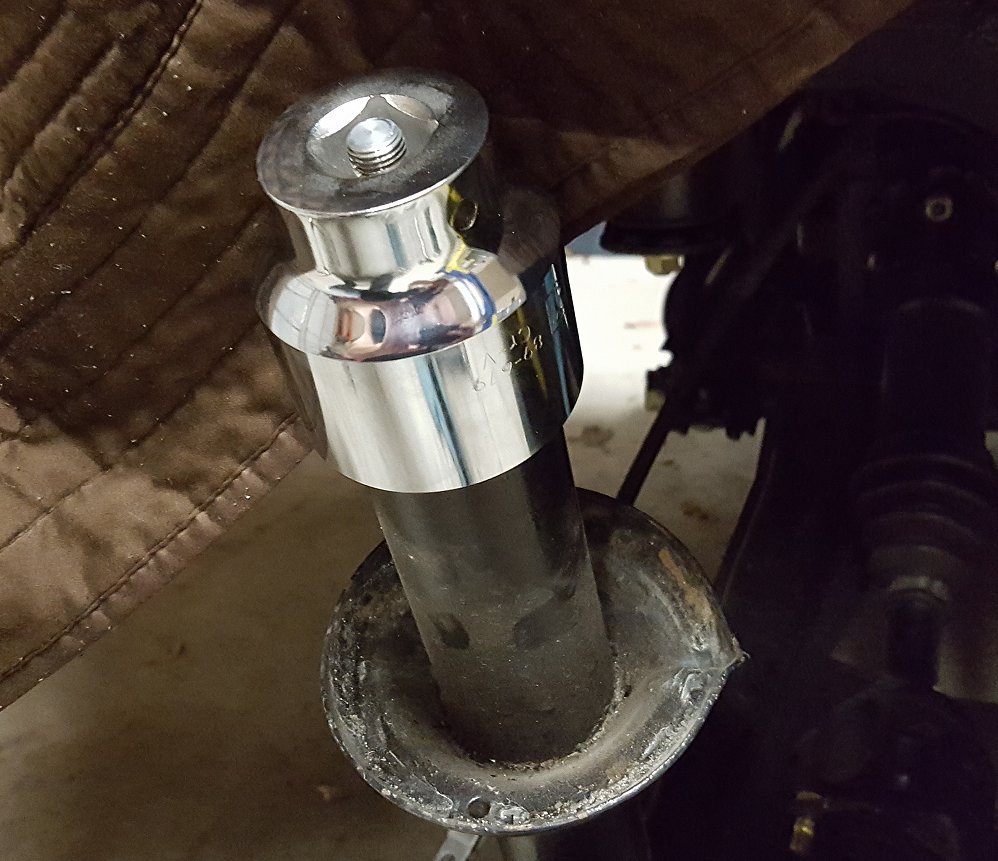
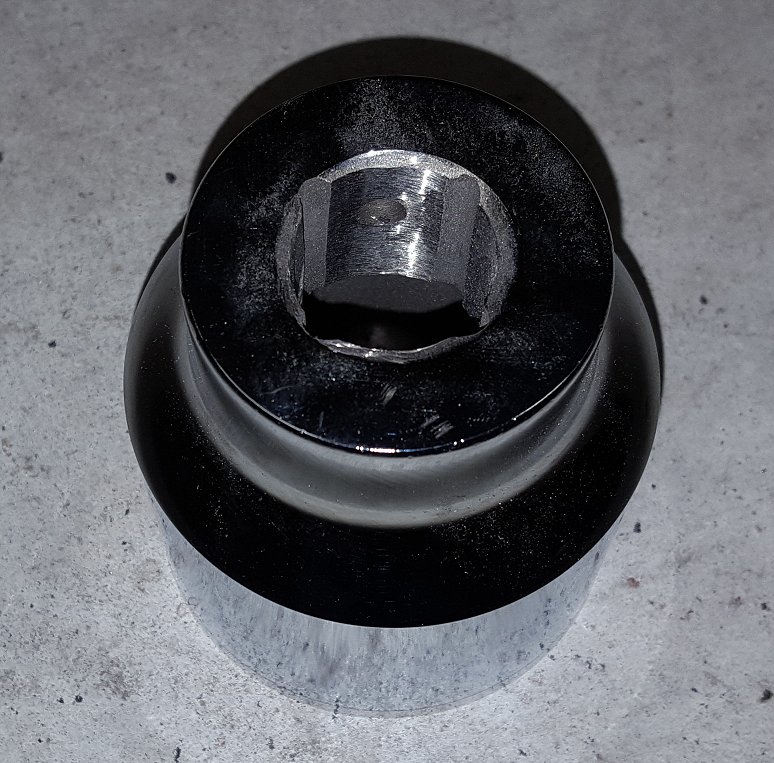
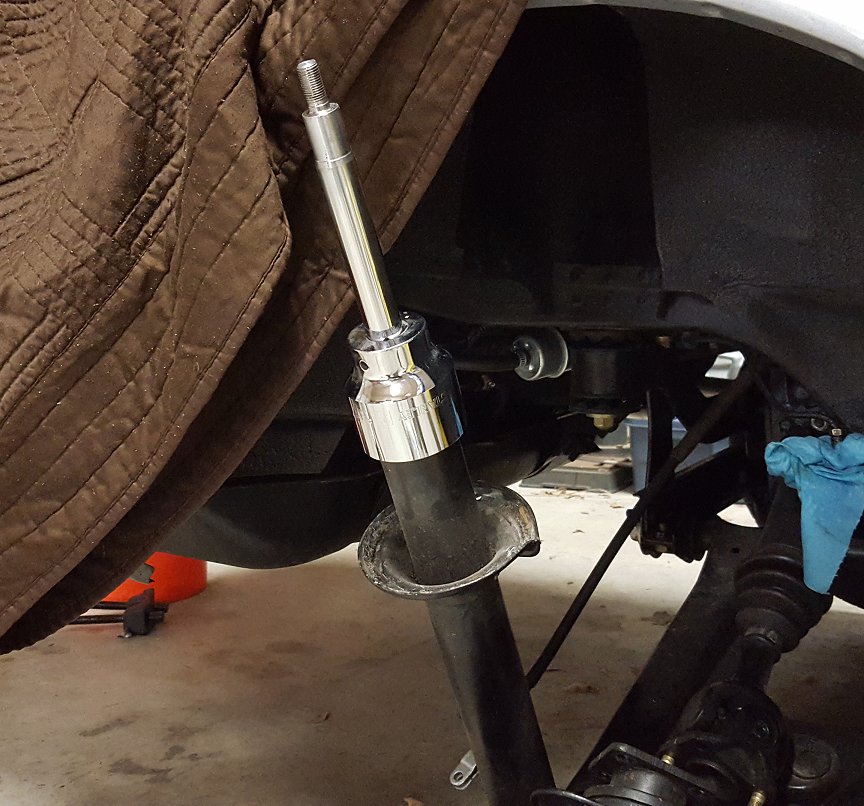
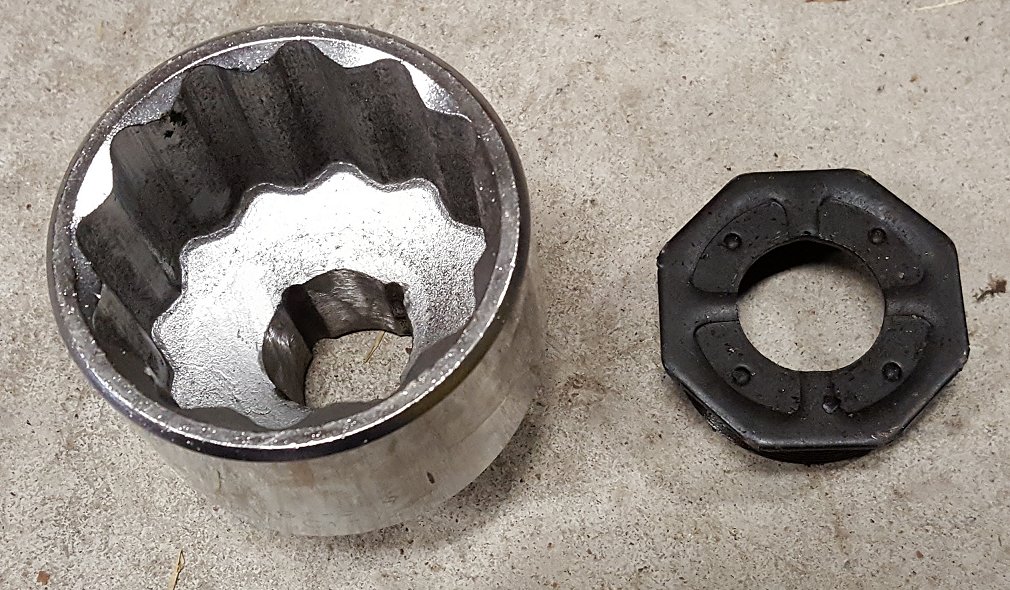
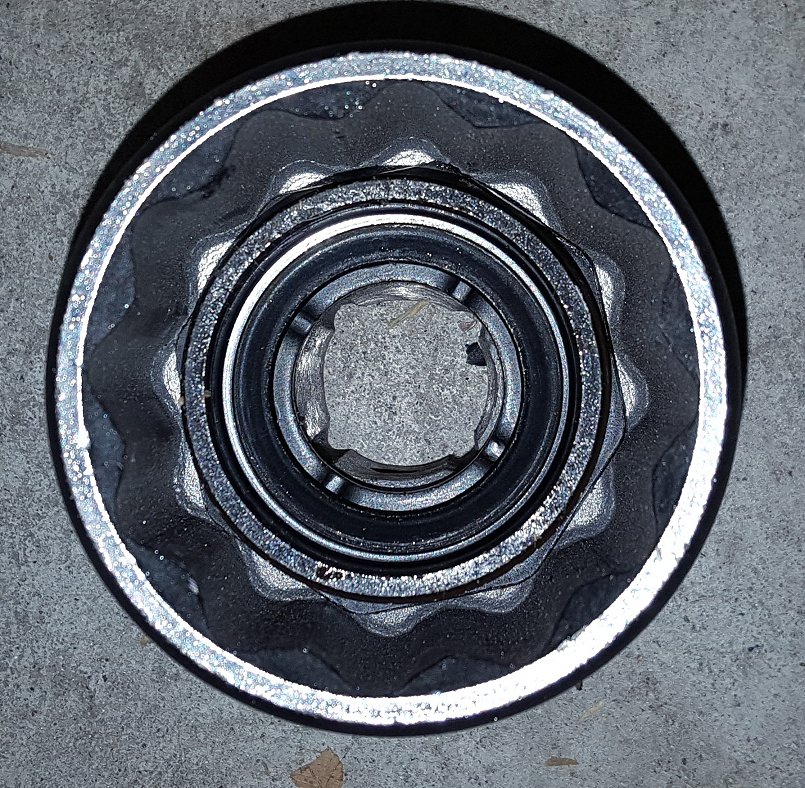
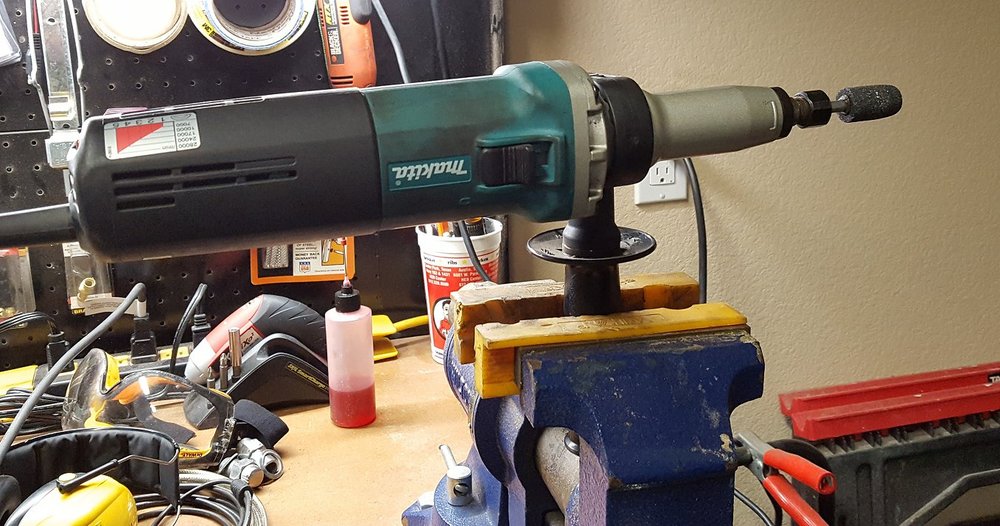
3 pointsThe need to extract my rear strut inserts had me facing the same challenge as many other owners needing to replace the struts on their classic Z, removing the dreaded gland nuts. More often than not they are seized on due to years of use. Worse, it seems to be the best method for getting them off by using two opposing pipe wrenches can also be the most damaging. I went through this same exercise with my 1972 lime green 240z several years ago and vowed this time would be different. I remember seeing an workshop manual showing how these were installed at the factory using a special made socket and wrench. I searched for a long time to find an 8-point socket of any kind that was 51mm or 2 inches in diameter. I was hoping to find an axle socket but after many days and nights of Googling and searching I came up empty handed. So I purchased a 12 point 2" socket made by Stanley on eBay for $21.50 shipped. I verified it fit as I could easily push down on the strut piston. The 3/4" drive opening was already close to being big enough. After about 30 minutes of enlarging the hole using my "worth its weight in gold" Makita rotary tool, it would now slip over the piston. Next was to grind some flats on the socket so I could use a pipe wrench to turn it. Threw it on and with one good turn, the glad nut was loose! Once I off I verified there was no damage to the strut tube or the gland nut itself. You can see in the last picture with the gland nut in the socket that the corners are not exactly aligned in to the socket. I am a little lucky as the entire suspension on my car was rebuilt in the past few years. Why the strut insert has already failed on stock springs is another story. If your gland nut is really stuck there is a decent chance the socket would slip. Going down one size may help with this. Anyway, that was my solution, it worked, and thought I would share.


 3 points
 -
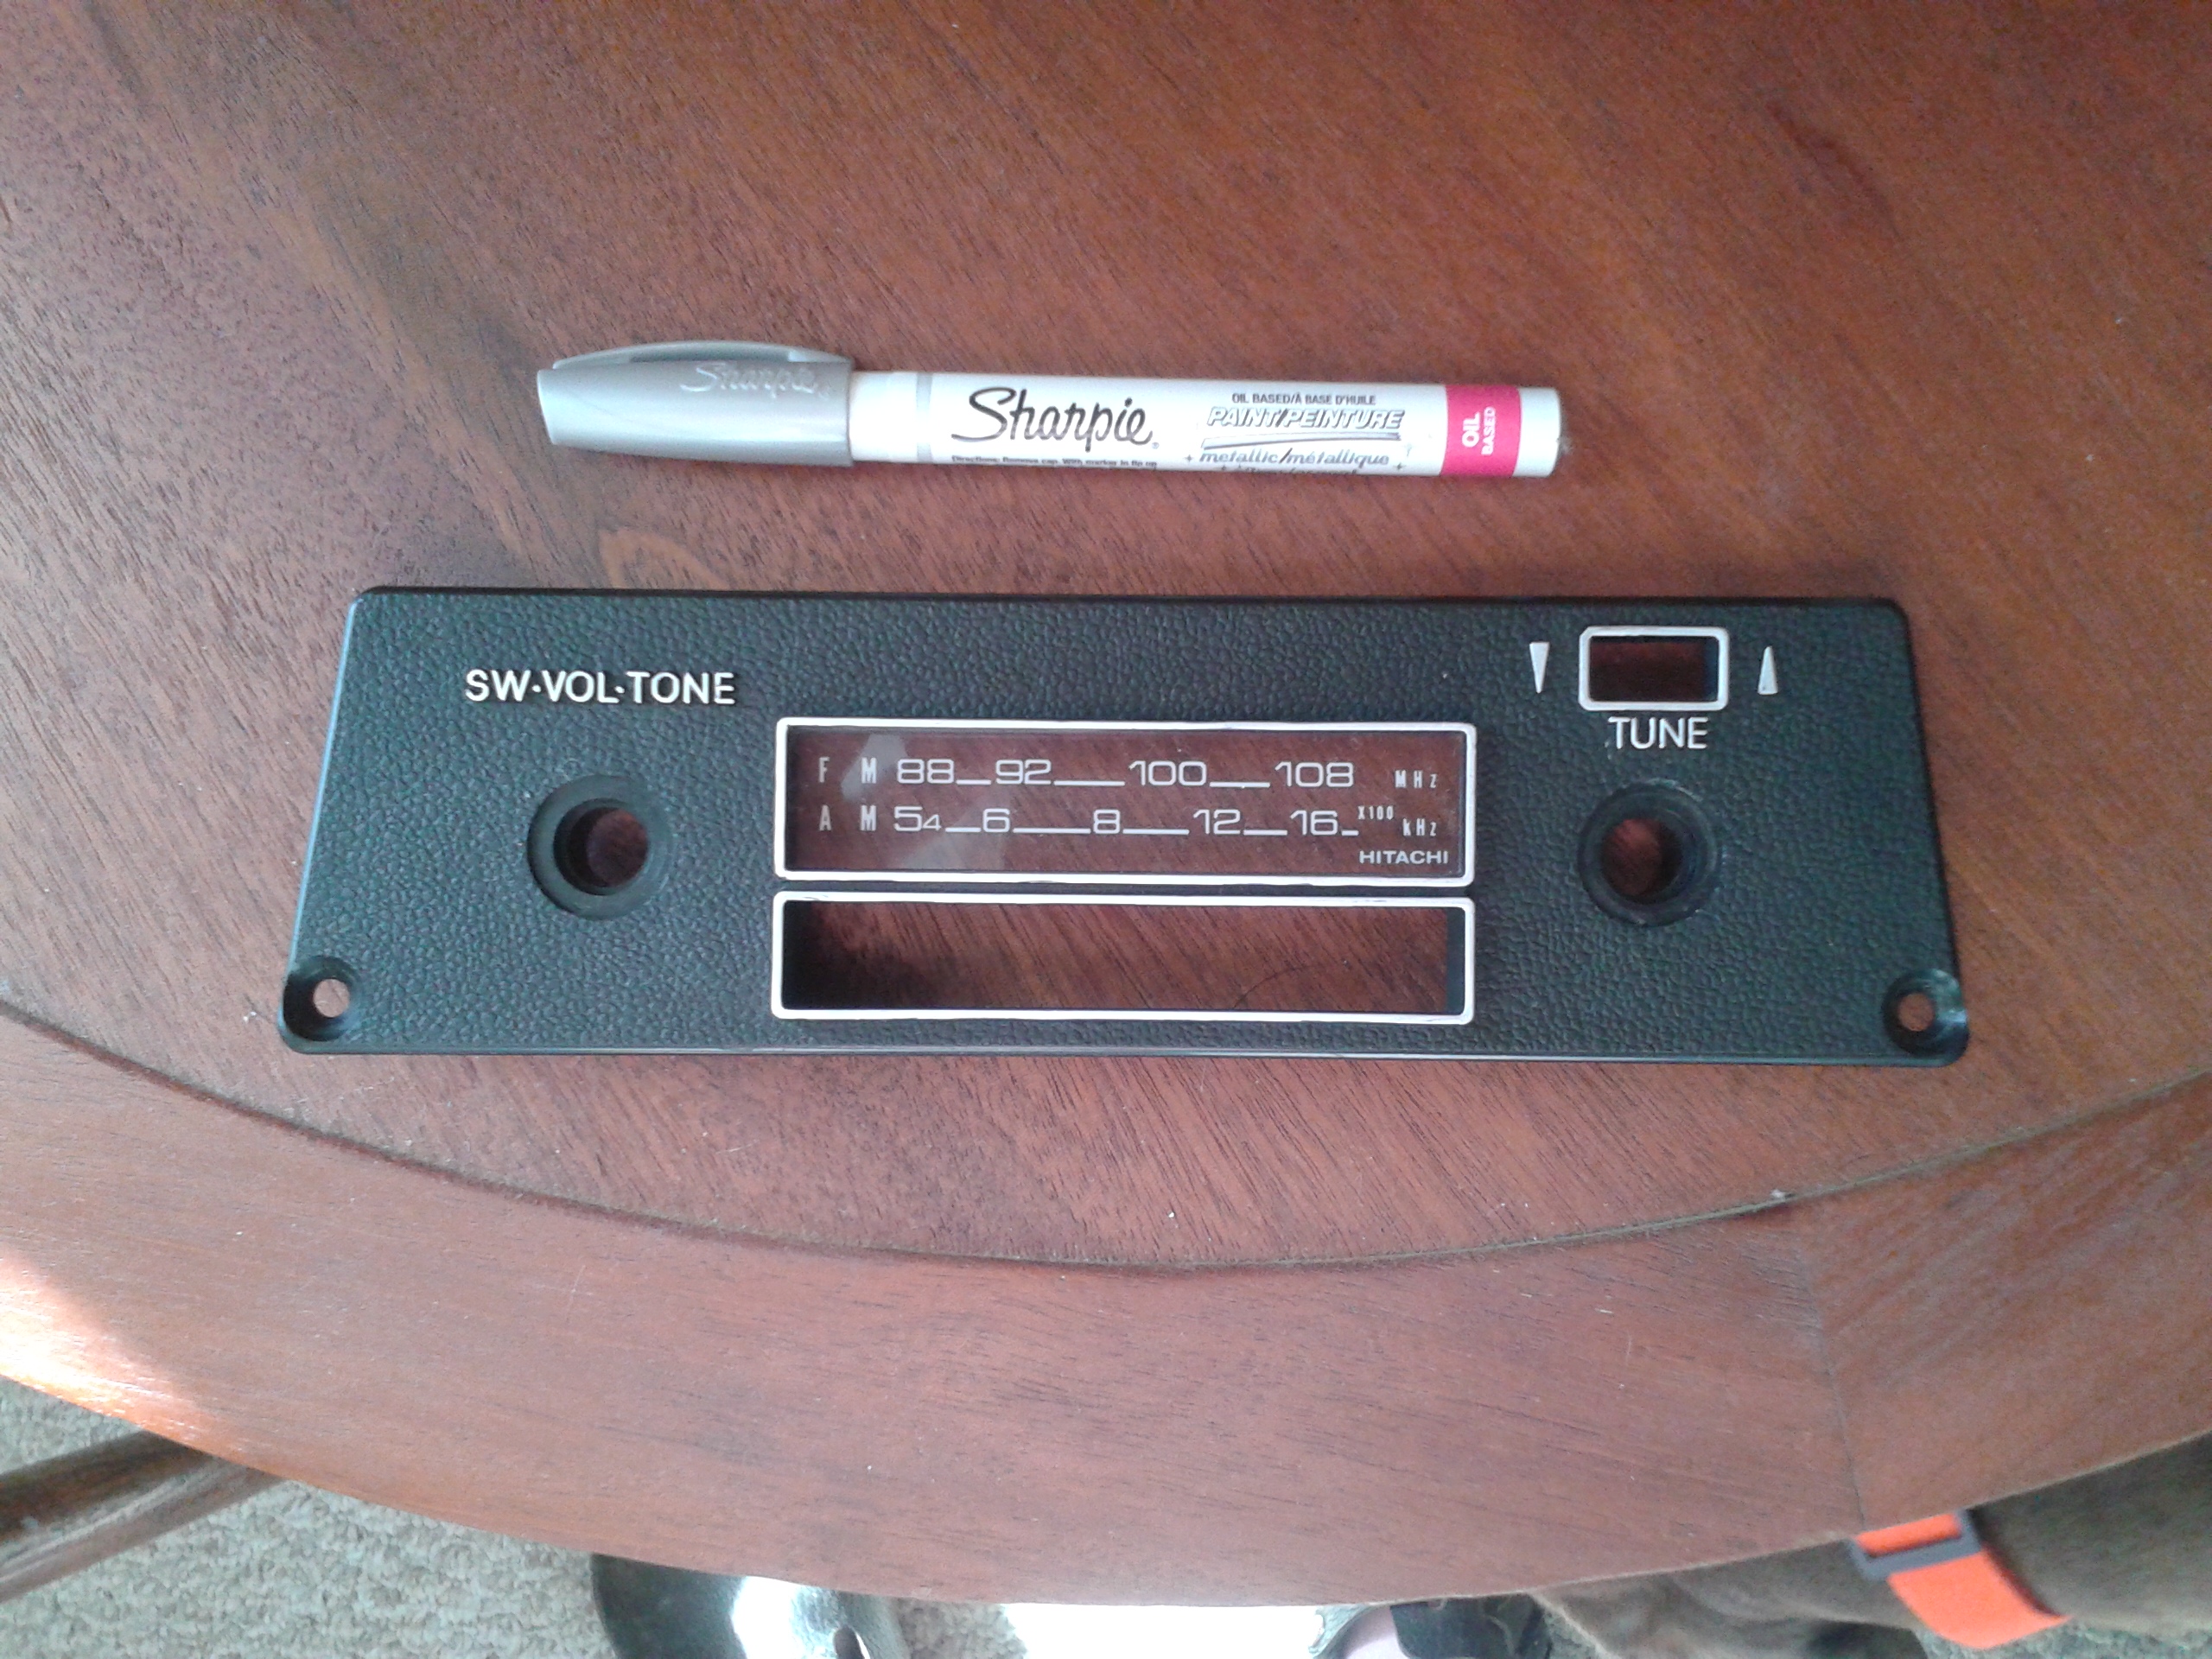
A silver Sharpie paint pen on the radio's face plate works great. Thanks again @psdenno
 2 points
 -
2 pointsI know there are several people here from the Bay Area. I was at Travis AFB in the mid 90s. That's where I bought my first Z.2 points
-
Ok, so now I must confess, and I do this with great humility that I discovered the problem while sitting next to the car with the tires off making measurements and thinking what did I do wrong. Before I tell you please understand I have only owned the car for a few months and had no knowledge of how it was set up. So, I am sitting just staring into the distance as one will when tired of trying to solve a problem when my gaze falls upon the tires. Yes, the tires, they are different sizes!!! One is 185 (obviously ment for the front) and one is 205 (back). I'm sure I had the 205 on the front when I went for my test drive and thus, wheel rub. In my defense they are black wall tires and so it is not that obvious but non the less I ask that you not laugh directly in my presence...Oh, and don't let this stop you from helping me in the future.... Sent from my SAMSUNG-SM-G900A using Classic Zcar Club mobile1 point
-
One way to get a faster response from stop is to let the engine rev to yellow line BEFORE transmitting it's power to the rest of the drive train.1 point
-
Hopefully you can find a nice replacement faceplate. You have a lot of hard work completed on your dash area. A nice faceplate would be icing on the cake.1 point
-
That's one of the correction I need to make Already have a similar pen but thanks for the info the other corrections are cleaning fan controller from paint find a way to rewrite the FM/AM on push buttons find a way to print on the plastic clear face the FM/AM sequences cause during the cleaning few erased or just find another in good condition to buy (anyone??? )1 point
-
Jeff, If you haven't already, try Auveco. https://www.auveco.com/ I have found numerous parts there for my Z that I could not find anywhere else and their catalog is extensive. They even have an entire section dedicated to metric. This is where I was able to locate the plastic door panel clips that hold the door panel to the door itself. Not an exact match to the originals but they worked perfectly. They might just have what you are looking for. Hope that helps. Mike.1 point
-
1 point
-
From all his past post he wants someone to say YES or NO. So can you or anybody else tell him YES or NO? So, if a simple Yes or No is all that's needed......... YES! Totally safe. The car won't catch fire, drive into a ditch, or tip over because the choke is open. However, for 46 years, I've judged when to back off on the choke by performance feel, not by looking at the temperature gauge or the clock. That's been my experience in starting and driving in ambient temperatures ranging from minus 20 degrees to 120 degrees F. Real seat of the pants driving just like knowing when to shift by sound and feel rather than looking at the tach. The Z is a car for all seasons. Dennis1 point
-
That's excellent John. So glad you got it worked out. Let me know if you need any help on the brakes or random tools...1 point
-
1 pointFunny, so be careful when you go to take off now. You will propel a lot easier and faster now. ZOOOM ZOOOM!1 point
-
1 pointSupercalafragalisticexpealodosis..... Guess what? ANOTHER member has shared $ with me, to be applied to the clutch installation! Oh my goodness, the folks on this list are the MOST WONDERFUL GIVING people on the net. I am so happy to belong to such a special group. Thank you, thank you, thank you, thank you, thank you my friend!!! Jai1 point
-
1 pointHi Jai, I'm really surprised you got this from a worn out clutch. Specifically the "very quick starting". Hope you have no more problems with her. Good luck and keep us informed.1 point
-
1 pointI have a quite a few from my rebuild in a folder. Manifold gasket, rear main seal, intake washers, oil pan gasket, and more I'm sure from Nissan. Bearings, rings, oil pump, timing kit and a bunch of other stuff from rockauto.com. Water pump, clutch kit and fluids from amazon.com. The 2.8 motor I have was a lot easier to get parts for. 2.4 was more difficult in my opinion. First thing to buy is How to Rebuild Your Nissan L Motor by Tom Monroe. amazon.com, $20. I'll dig through that file and see what I have. I don't know if there's a check list, I've not seen one. Zcardepot.com has a complete bolt kit that I used instead of cleaning and reusing the old ones. That was nice. He may have a rebuild kit too? zcarsource.com has one I think, MSA may also. Most folks do a rebuild thread on here, read a couple of those for paint and other tips. The motor mounts from Nissan are high dollar but are right. Aftermarket ones need a little adjusting but will work and way cheaper. We'll be here for help.1 point
-
1 pointNow that'll be stuck in my head until dementia sets in. NEE-SUN Surface rust, " merely a flesh wound".1 point
-
I vote air box ! Sent from my iPhone using Classic Zcar Club mobile1 point
-
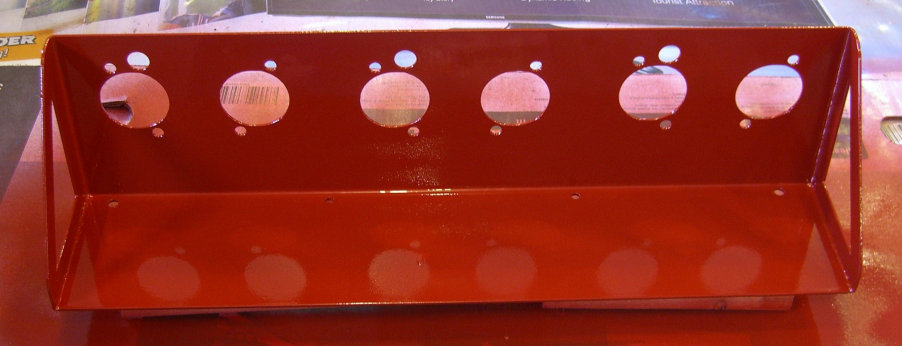
Rossiz, thanks for your update. I've been working on this since the posts began (well, mostly thinking). And, I've come up with some ideas to try. Overall, though, my thinking has landed on the following (supported by your own dyno runs): 1) Longer (i.e. stock) air horns/velocity stacks are best...both for resonance, runner length, and air conditioning (streamlining, compression, air speed, etc.). This was confirmed by a few folks I know at Redline, Top Performance, etc. and others who like to ponder fluid dynamics. So, decision 1: keep the 2.5" horns. 2) More air is better. I looked into the generic air filters which are 3.25" deep and the K&N ones which can be 3.75" but both sit really close to the air horn (.5" or .75"). This seems to suggest that there would still be a restriction, especially at max RPM) made worse by the environment inside the air filter as valves open and close. As the opening of the air horns is 2.5", I'd like the same space between the end of the air horn and the filter surface. In plumbing, that's how you'd do it, yes? It's true that air "turns" more quickly than water as it's lighter, but it's the same idea. Decision 2: more space is needed. 3) The turbulence thing you talked about is definitely an issue, as well as filtration, so in addition to lots of air, I need to make lots of it available, protect it from the heat coming up from the header, turbulence, and keep it relatively cool. I have a heat shield over the manifold already, but decision 3: add some kind of heat shielding. I've attached my latest heat shield and have a plan to build a bracket to stack two air filters on top of one another which will give the horns the 2.5" of space I think they need. I've got the heat shield finished I CNC-ed from aluminum (see photo) and added heat protective shielding on the bottom. I will work on the brackets next. More when I'm finished!
 1 point