Leaderboard
-
Zedyone_kenobi
Free Member4Points3,440Posts -
bartsscooterservice
Free Member2Points1,900Posts -
grannyknot
Free Member2Points5,158Posts -
HS30-H
Free Member2Points5,509Posts


Popular Content
Showing content with the highest reputation on 06/02/2016 in Posts
-
Well the point is that you can buy a Z that has already had a bare metal restoration (or close to it) for less than 30 probably. In essence you are buying 40k dollars in work and parts for 25k dollars. These cars are not like 911's (yet) and you rarely get more from them than you put in. So buy one that 95% there and does not NEED a bare metal restoration, then you can spend time and money just maintaining it and modifying it the way you want to (wheels, triples, decals, seats, etc)2 points
-
Sorry, I may have skimmed over that. Okay, not doing the work all yourself will make things more expensive, and this leads me to the most important thing. Buy the BEST Z you can, even if it eats up ALL your budget. You can make more money. Buy a car that is just about 'done'. It will still be VERY much a project I promise you.2 points
-
2 points"Appraised" by whom? I can only conclude that this person did not know what they were looking at. As stated above, I have a lower chassis numbered Fairlady Z-L myself and it was made in the second half of 1970. Nissan Shatai's production records and the records of the Japanese motor vehicle licensing agency contradict the claim that your car was built in 1969. If you look closely at all the manufacturing date codes and quality control stamps on the componentry of the car they will show a majority of June/July/August/September 1970 dates. And here's no "numbers matching" in the accepted sense for these cars, as the chassis tags on Japanese market cars did not record the original engine number in the way that north American market cars did. Sorry, but it's a 1970 car. You'll put yourself in a stronger position regarding the sale if you embrace that fact. Good luck. Alan T.2 points
-
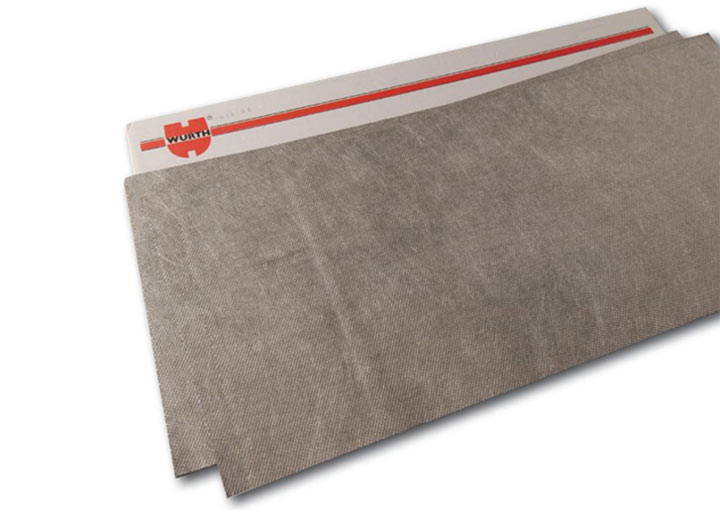
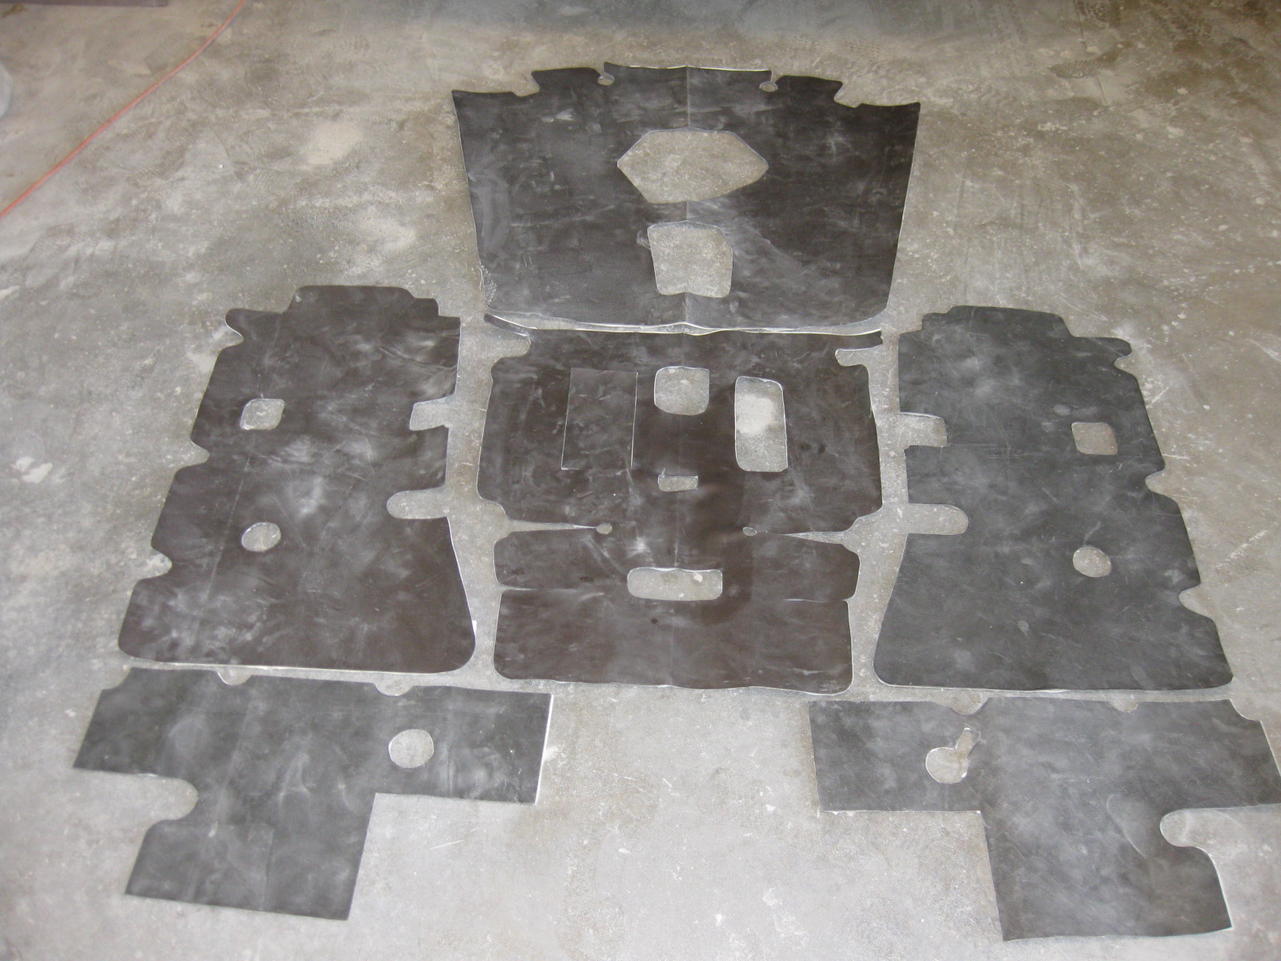
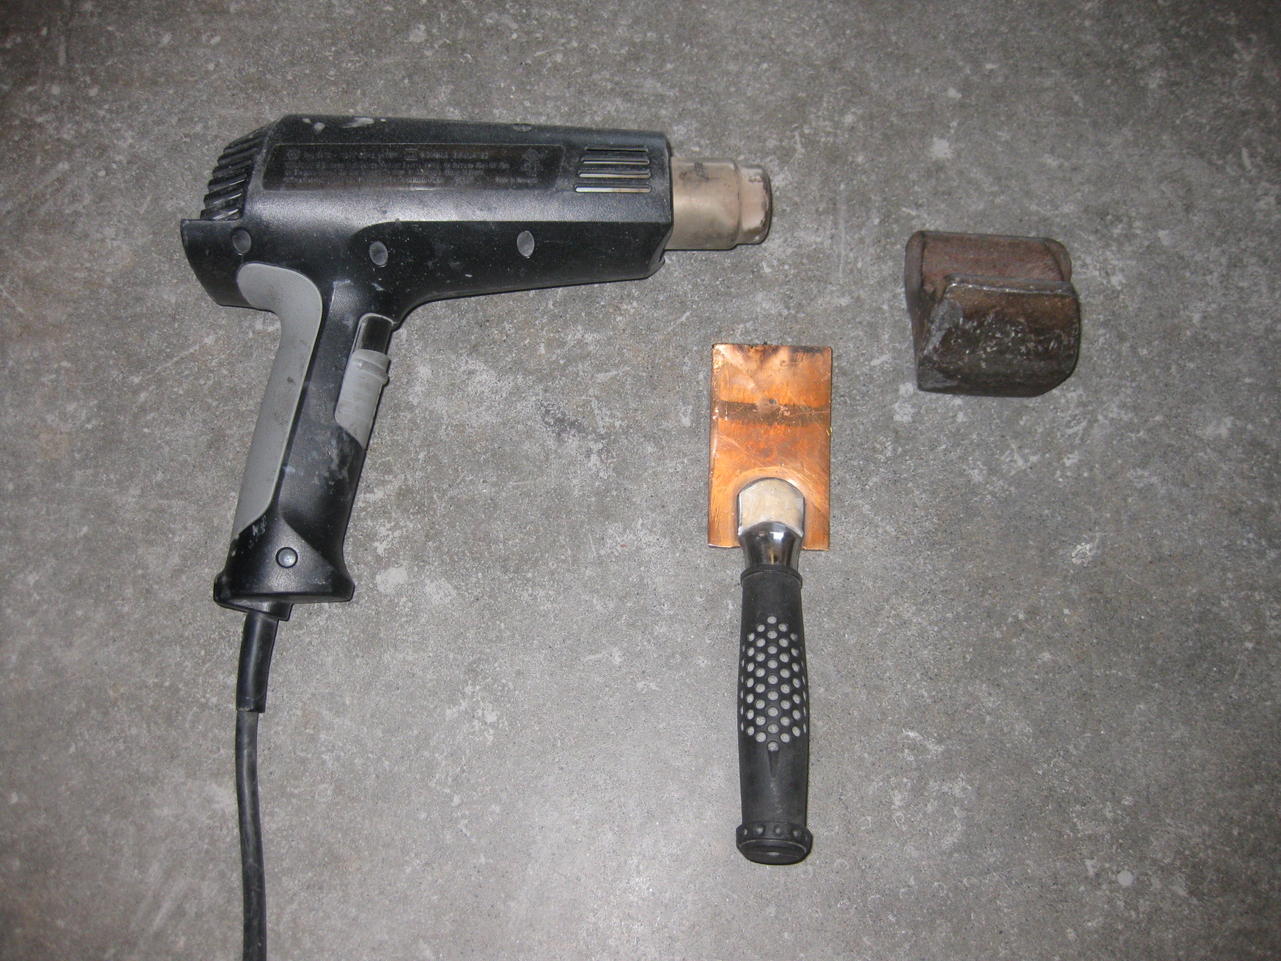
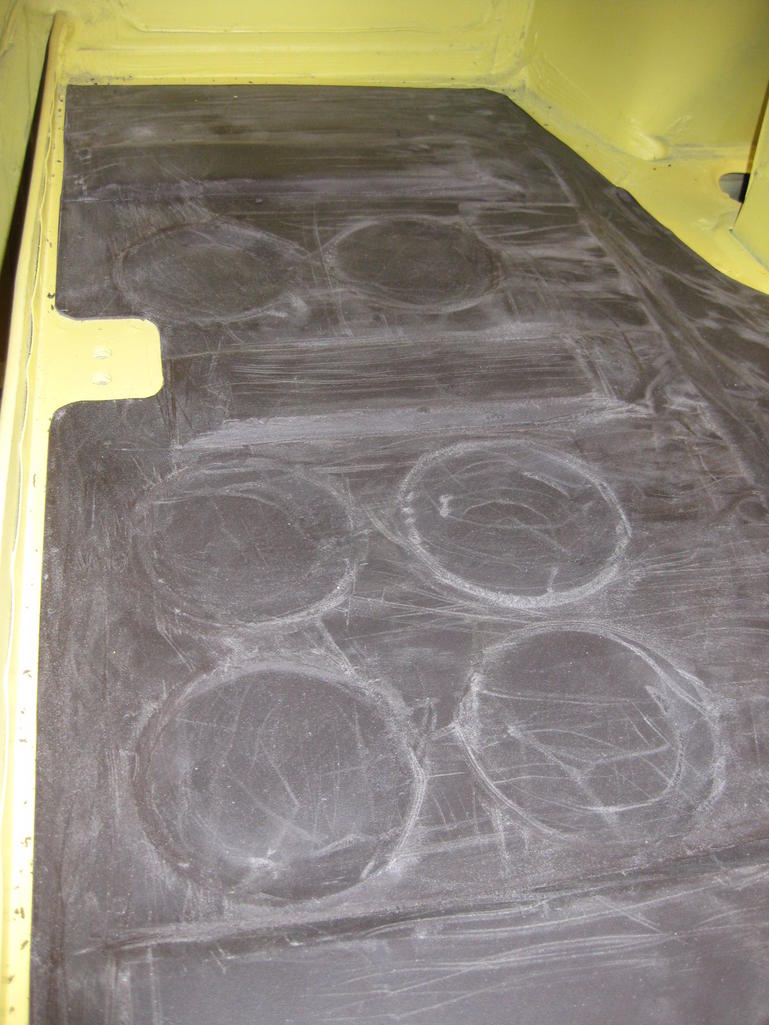
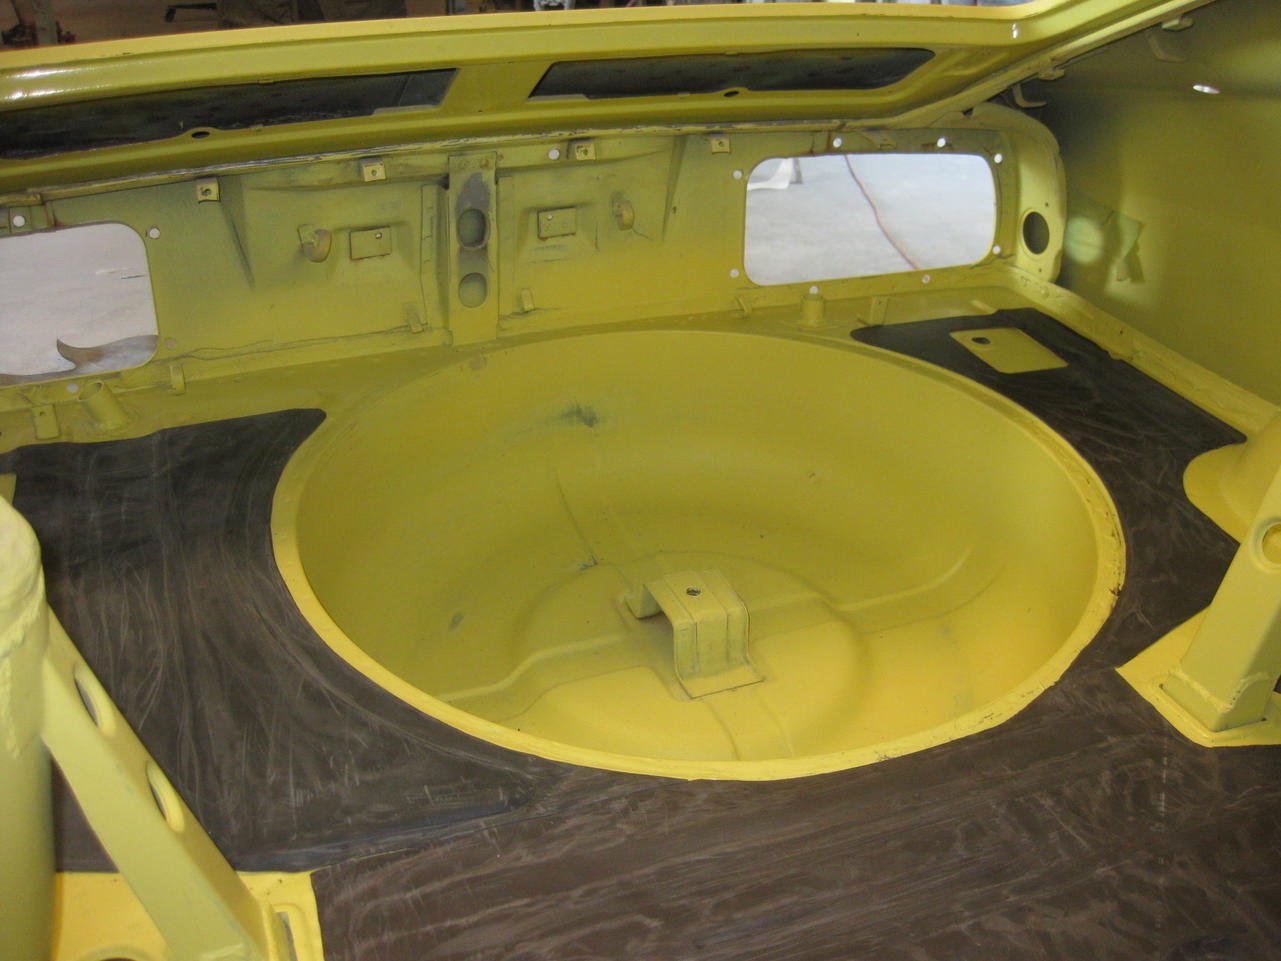
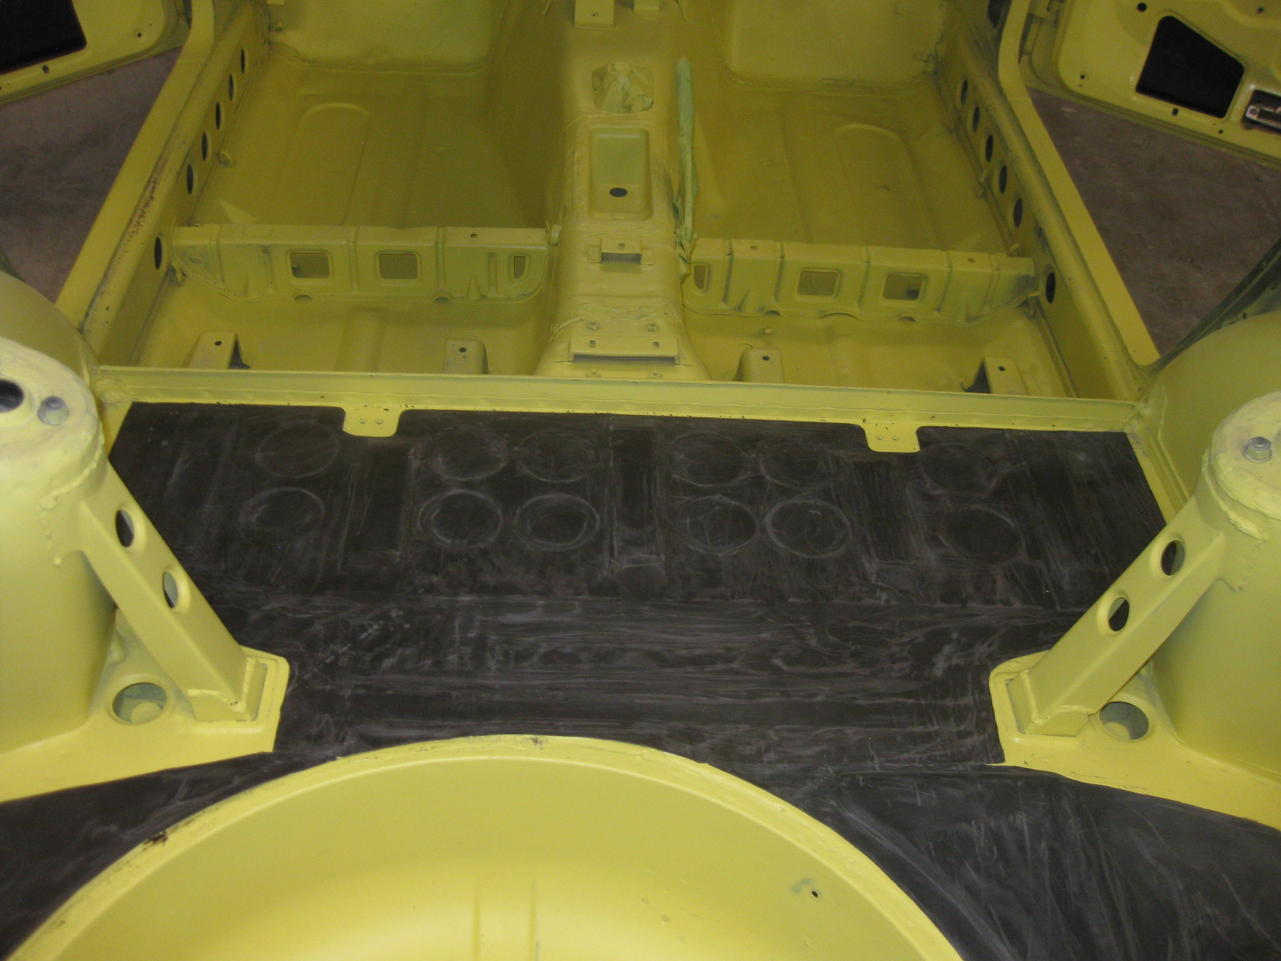
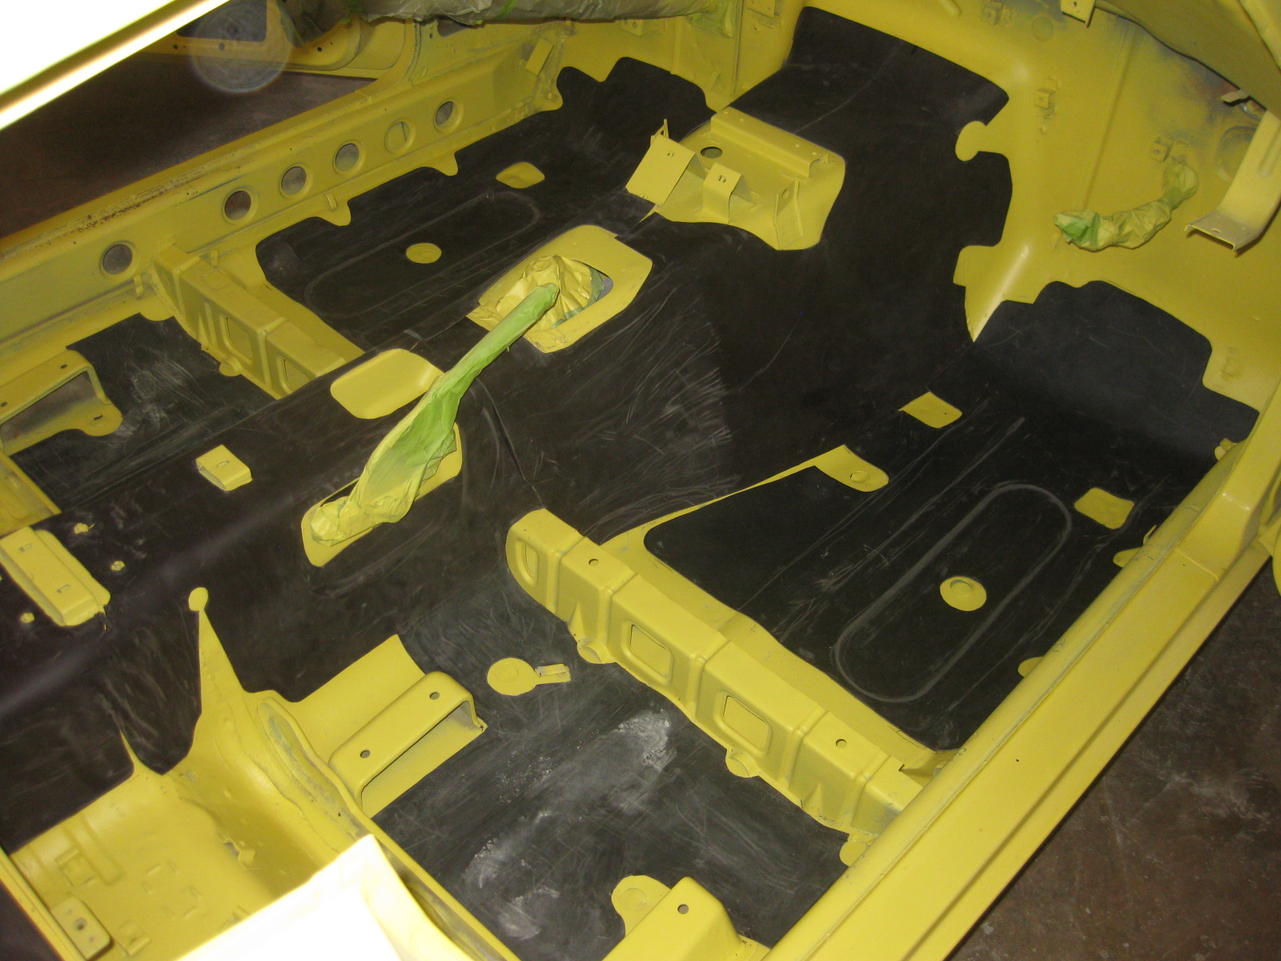
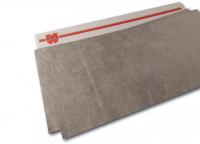
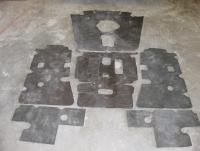
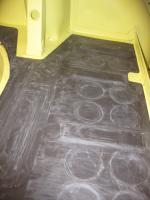
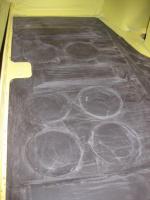
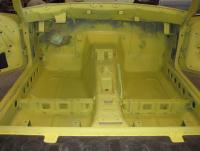
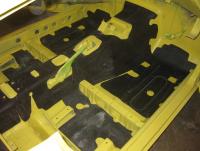
1 pointAfter 8 years of fits and starts restoring "Buttercup", a 7/70 build date 240Z (#7032) it has come down to the interior, which was completely stripped and the old tar mat removed. While "Murdermat", "Fatmat", and the like are what are commonly used as upgrade/replacement--- I wanted the original deal--- as close to the factory fitment as possible. After lots of net searching I finally found what I thought would be as near the original asphaltic mat as I was apt to find. I bought the mat from AutoAtlanta FOR PORSCHE: WU890100, WU8 901 00 - READY TO SHIP - (WURTH FLOOR PAN TAR SOUND DEADENING INSULATING KIT) , a purveyor of restoration parts for Porsche autos: I used a roll of rosin paper to trace the original floor mat outlines---- from the interior of another '70 240Z I had purchased as a parts car---- and cut out the patterns , traced it again and cut the new mat out with scissors. Here's how that looks: Next I proceeded to install the mat using a heat gun and a couple of hand tools to shape the mat to the sheet metal contours of the floor pans, transmission tunnel and rear hatch floor: The mat has an adhesive and a release paper and when heated can be formed easily to the contours of the metal. It took several hours to create the patterns and do the install. I deviated from installing the mat on bare metal by painting all of the interior first, but the mat will be painted the body color as was done originally with a complete re-spray of the interior . All in all I am satisfied with the product and offer this to assist to anyone wanting to do the same in the restoration of their Z. Paint should follow in the next few days and I will post up a few photos when that has been completed. Jim D. "Zup"


 1 point
 -
Since there has always seemed to be a lot of threads with people in need of help with their 280z EFI systems, I have come up with an idea that might get those people in need of help on the right track and give them a little basic knowledge about how the fi's on these cars work! This in return would give us a break on not having to explain everything and how the efi system work so often as they could refer back to the sticky post for those types of questions. Not only this, but they could refer back that post for example and they will know what the parts are called so there wouldn't be anymore of the "black part on the top left", but the actual name and part so we would know exactly what their talking about the first time. I'm not however implying that this post would be all the answers to all their techincal questions, that's not the point of it. The point is to give them a basic understanding of how the Bosch efi system works on these cars and what the parts are called before they ask their question. That's why the sticky post would be called "Please read before you post your efi question" at the top of the help and fi sections of the forum. Basically this might include a link to the atlantic Z car page and a link to the the efi bible. Better yet, a diagram that shows the names of all the parts on the fi system that could be posted right into the post so it's easier to refer to for part names without clicking the links. I would do this from my book, but my scannor I can't seem to get my scanner to work. Before I posted this, I pm'd Stephen (sblake01) as he is our big fi guy here on the board and he thought that is was a good idea so I forwarded the message to Mike who in return liked the idea. There are down sides to everything, and like Stephen mentioned, different model years differ and sometimes these cars get tampered with by previous owners. This is why it would be great if all you efi guys could chip in and post links, diagrams information, common problems (all efi related) or whatever you feel is necessary to be included in this post. Please keep it as simple as possible. Since a lot of us own different years of 280Z's, you might have some stuff to chip in on here as you're familiar with that particular year of car. Hopefully you see what I'm getting at. I will wait maybe a week or so and this will go you all a good chance to post what you want into the post. Once this is done, I will copy and paste everything into one post and send it to Mike who in return be the one to make the sticky post. Like I said my scanner is not working at this time to post that diagram of the efi names and pictures of each part, but will keep working on it. Here are the links to the EFI bible and the Atlantic Z car page. I will start off: Electronic Fuel pump- Pumps fuel from the tank to the engine Fuel Damper- Acts as "muffler- that is, it keeps pressure surges from making noises which could be heard by the driver Fuel Filter- Filters out particles in the fuel before reaching the inectors Fuel injector- Spray fuel into the combustion chamber Dropping Resistor- Causes a voltage drop so that the injector operates on less battery voltage and also protects the injector from voltage surges coming from the alternator from the effects of other parts in the electrical system. Electronic Control Unit (ECU)- Controls the injectors by turning their ground on and off. Governs how much fuel is injected by holding the injectors open for longer or shorter periods of time. Fuel Pressure Regulator (FPR)- Keep the pressure in the fuel system to a constant 36 psi. Air Flow Meter (AFM)- Measures the amount of air coming into the intake mainifold. The more air passing through, the farther the flap inside will be pushed open. Idle speed screw- Use it to adjust the idle speed Throttle Position Switch(TPS)- Contains a set of contacts inside that tell the ecu if the engine is either idling or declerating. Water Temperature Sensor- Allows the ecu to richen the mixture until the engine arrives at opperating temperature. Air Temperature Sensor- Measures the temperature of the air coming in from the air cleaner. Cold Start Valve- A seventh injector to add additional fuel on a cold start up. Only gets current when the starter is cranking. Thermotime Switch- Opperates according to both temperature and time. (Hopefully somebody can come up with a better definition than that). Air regulator- Allows the engine to be at a fast idle to aid in warm up. http://www.atlanticz.ca/zclub/techtips/EFI&fuel.htm http://www.atlanticz.ca/zclub/techti...ectionbook.pdf http://www.atlanticz.ca/zclub/techti...e_Bulletin.pdf Please chip in what you would like to see in this post!1 point
-
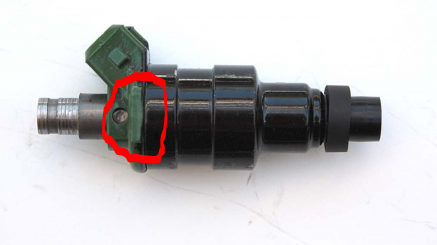
1 pointOP.. you are over thinking this. Your definitive test was the screwdriver test where the #5 injector made no noise or tap when engine was running. That's a done deal right there. Injector is defective. Replace it. Period. Edit: Check electrical connector with a NOID lite of course. But you already swapped injectors and problem injector moved cylinders, so that eliminates an electrical harness problem The screwdriver or stethoscope method is a very good test that is often forgotten about. It will immediately show up a bad injector, whether through electrical fault or a mechanical fault. Injectors can test fine electrically, but mechanical faults, such as sticking, will not show up with electrical tests.1 point
-
1 pointI've had the thought that the extra resistance is more for the ECU circuitry than the injectors. The injector solenoids are covered in fuel. 2.5 ohms gives 4.8 amps at 12 volts. A few clicks using a 12 volt battery doesn't seem too damaging. I've done it with some and they seemed fine afterward. No smoke. Aren't the resistors 6 ohms? 12 / (6+2.5) = 1.4 vs. 9/2.5 = 3.6 at the asymptote. So, maybe not enough current to open up a gummy or rusted injector. You might just let some fuel blow through the "bad" injector to see if it will clear up. Nissan used tan and light green for it's NA injectors, and purplish brown for turbo. Black is aftermarket. The codes will be hard to see, molded or stamped in to the plastic plug portion. FJ707, A11...., 280 150... are examples.
 1 point
 -
1 pointRemember the 2013 effort by the Bonk Brothers to give John Morton another try to win the SCCA Group E race? Well, the #48 car is for sale:1 point
-
1 pointI think you need a new or used but good injector. They don't work on the full 12 volt so.. never put 12 v on them directly.. it will break them! They are working with serial resistors see your manual.. I believe only the choke injector is 12 volt directly.. Also a good injectorcleaner can't hurt. When you put all 6 injectors in cans and you crank the engine you will see that every injector delivers a different amount of fuel.. after cleaner it that wil be better.. Succes.. Mart1 point
-
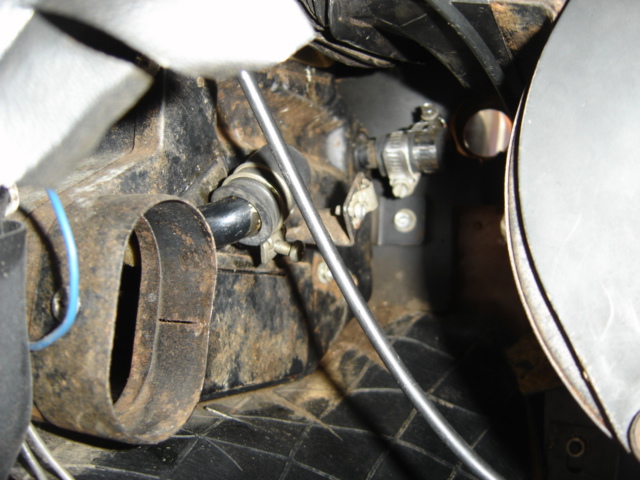
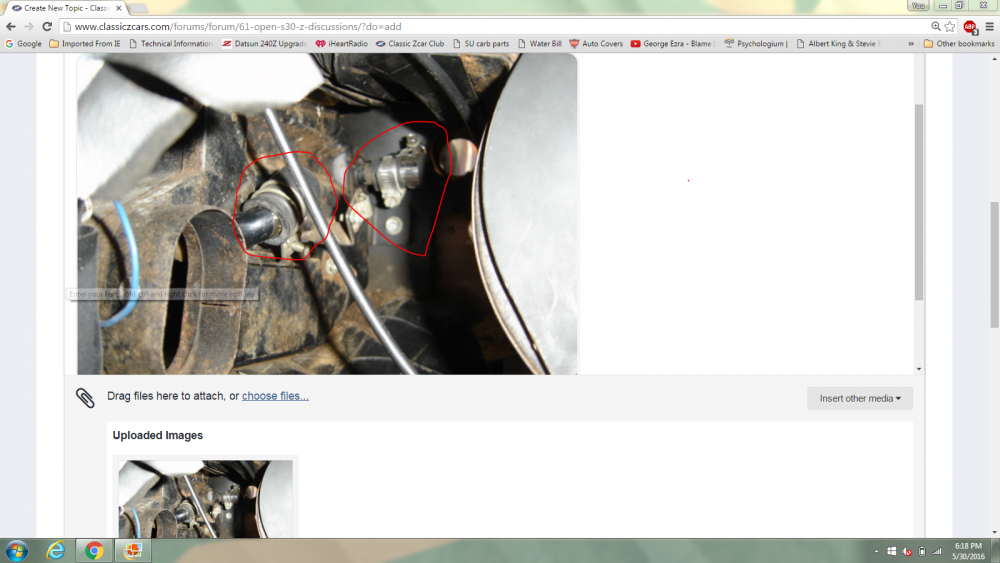
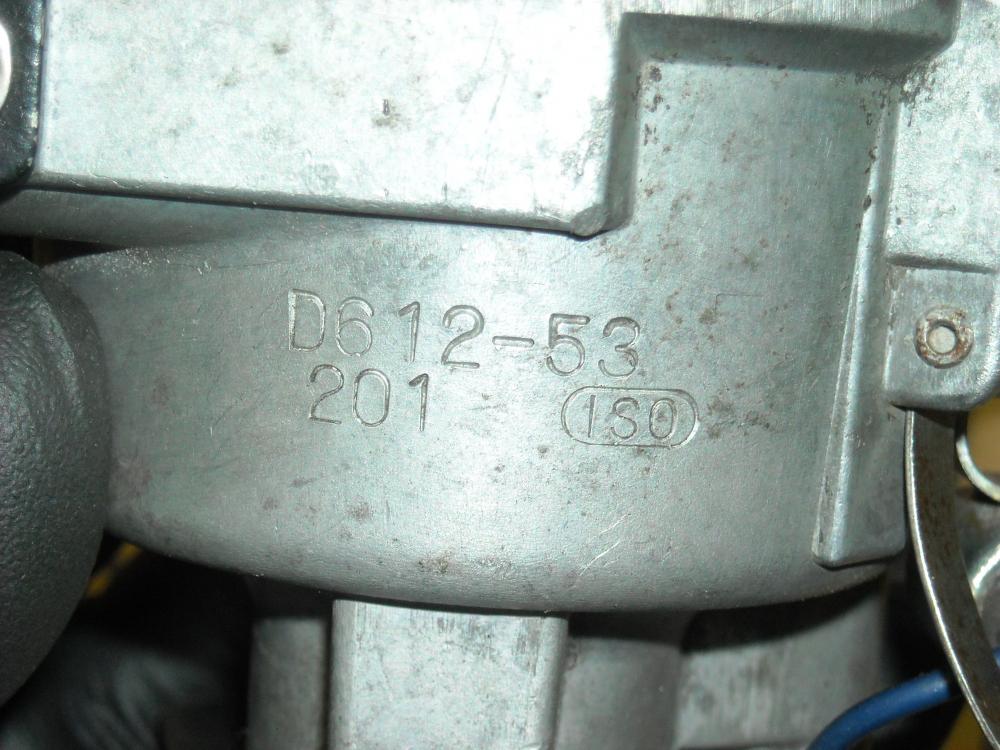
1 pointWhat about the outside of the car makes you say it looks like a "Series II body with a series I hatch"? It looks like a 1970 S30 to me. I can't read Japanese, but based on the second photo the OP attached it looks like the VIN is S30-03814, which would make it a 1970 model year, but too late to be a 1969 production car I think. I'm sure Alan T could confirm if he see this thread. There are three Showa dates shown in that same photo, the first is 45-10-23, which is Oct 23, 1970. I am wondering if that was the date it was purchased by the original owner? Looks like a solid early car.1 point
-
1 pointMade the trip to LNA Enterprises today.....Sam's getting the number 46 car ready for VIR this October.1 point
-
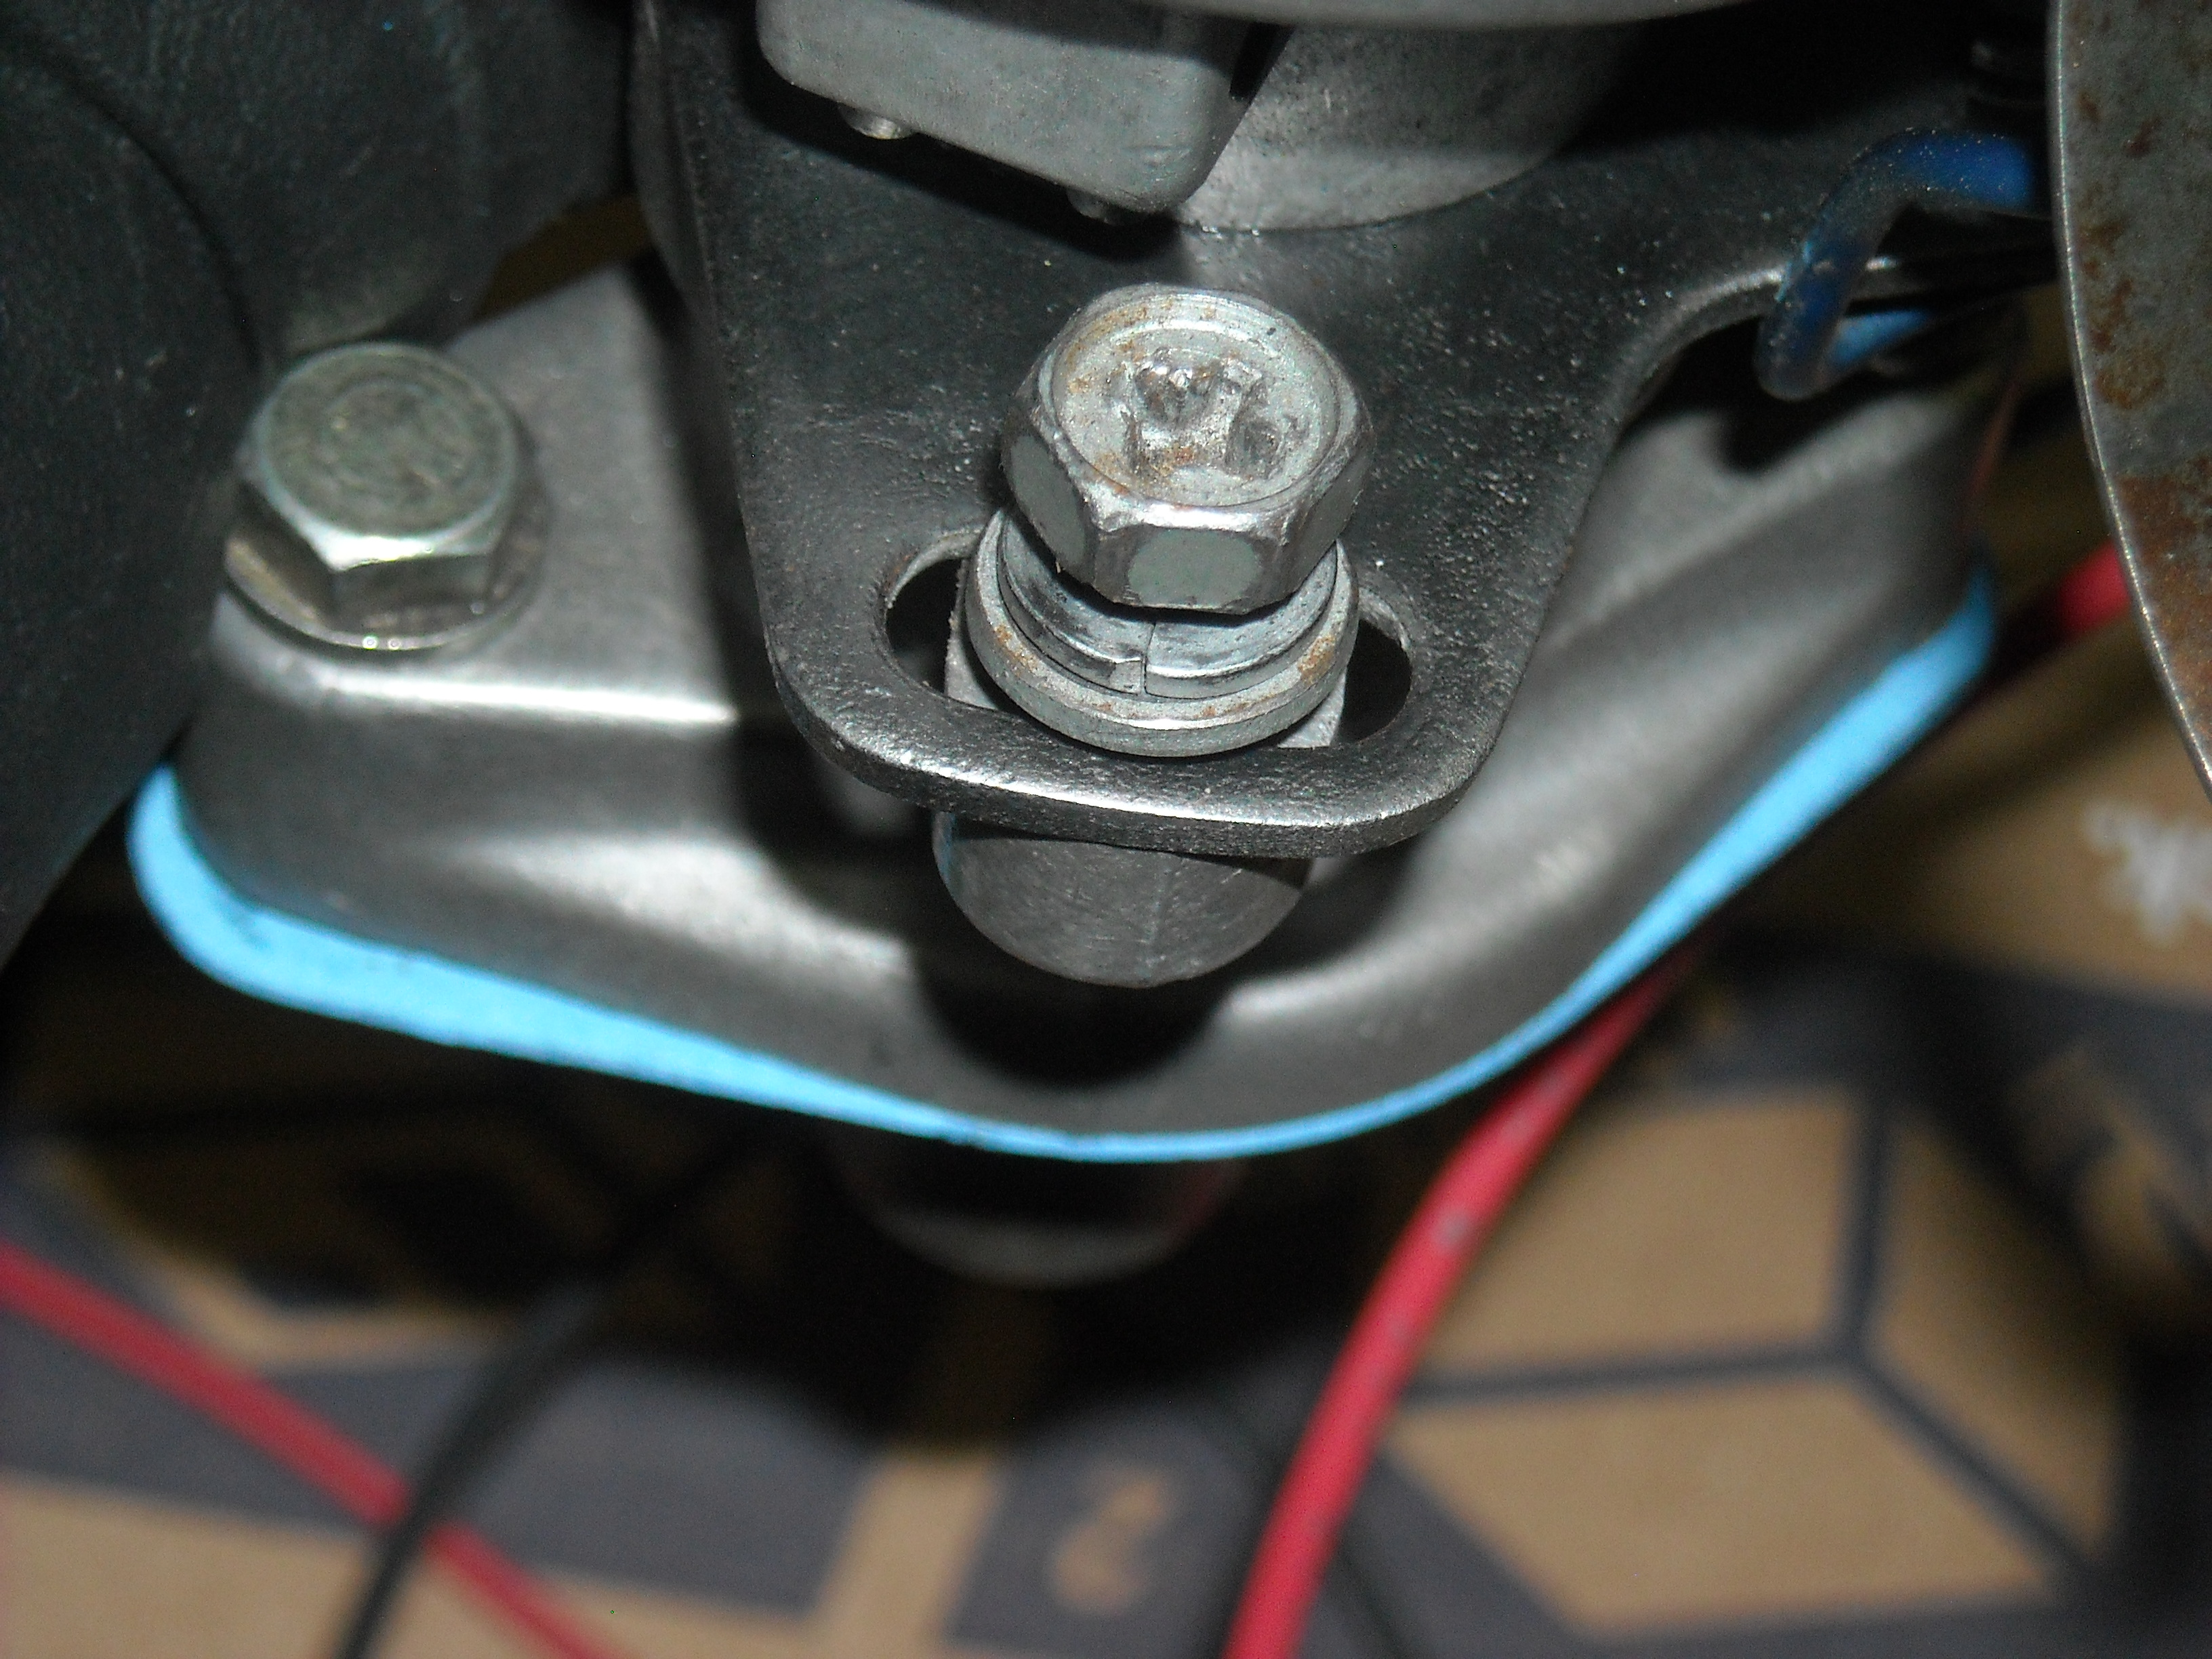
1 pointSomebody was talking about coolant gushing out of the hose in their engine bay, can't remember the thread. Here's what you do with some rubber, chair leg stoppers would be the best, I think Mr Jim Arnett showed me that on a plug for the air filter. I used pieces of hose before I read his suggestion. Passenger's footwell on the left or the right side of the transmission hump.
 1 point
 -
1 point
-
1 pointThat made ME nervous just watching but the drivers seemed very alert. Thanks for posting that, it's the closest I'll ever be to Japan. Do not touch! My Dad had something similar on an old beater VW bug when I was a kid, "Mafia Staff Car, keepa you hands off"1 point
-
1 pointJust got back from Japan and finished uploading this video of a ride in Kats' 432. The condition of this car is amazing and its good to see it being driven and enjoyed. The guy in that black ferrari was really gawking at the 432. I can only imagine what it must have been like to be a cop back in 1970 chasing down speeders in one of these beasts. Thanks Kats for graciously sharing your cars and your knowledge of these cars over the years. Youtube video1 point
-
1 point
-
1 point
-
1 pointI have the tan panel type, Kats. Some time ago, I bought a black colored panel and it has the vent like your blue panel. Strange?1 point
-
1 pointKats, my 03/70 240Z that I just sold had a black interior and the hatch panel vent was identical to your blue panel. Chris1 point
-
I got it on last night, the slightly enlarged 3/8 fit on the tank well, did not require any herculean efforts to get on. Of course doing this at night without getting the jacks out, turned out to be a less than ideal setup (full tank of gas of course). Garage still smell of fumes, but its done so one more check on the to do list. I did notice a lot of air trapped in the filter, I guess all I have to do is tilt it pump side up to purge the air that is trapped.1 point
-
more than likely the belts are rotten and it wont work. but, there is hope! http://www.vintage-electronics.com/ http://www.marrscommunications.com/pioneer-cassette-belts and help http://www.tapeheads.net/forums.php?s=c764cb5f815e0f881d768b44fcf41de91 point
-
1 pointIt may have leaked a little into #1. When that happens it'll steam clean the head and piston. Chuck1 point
-
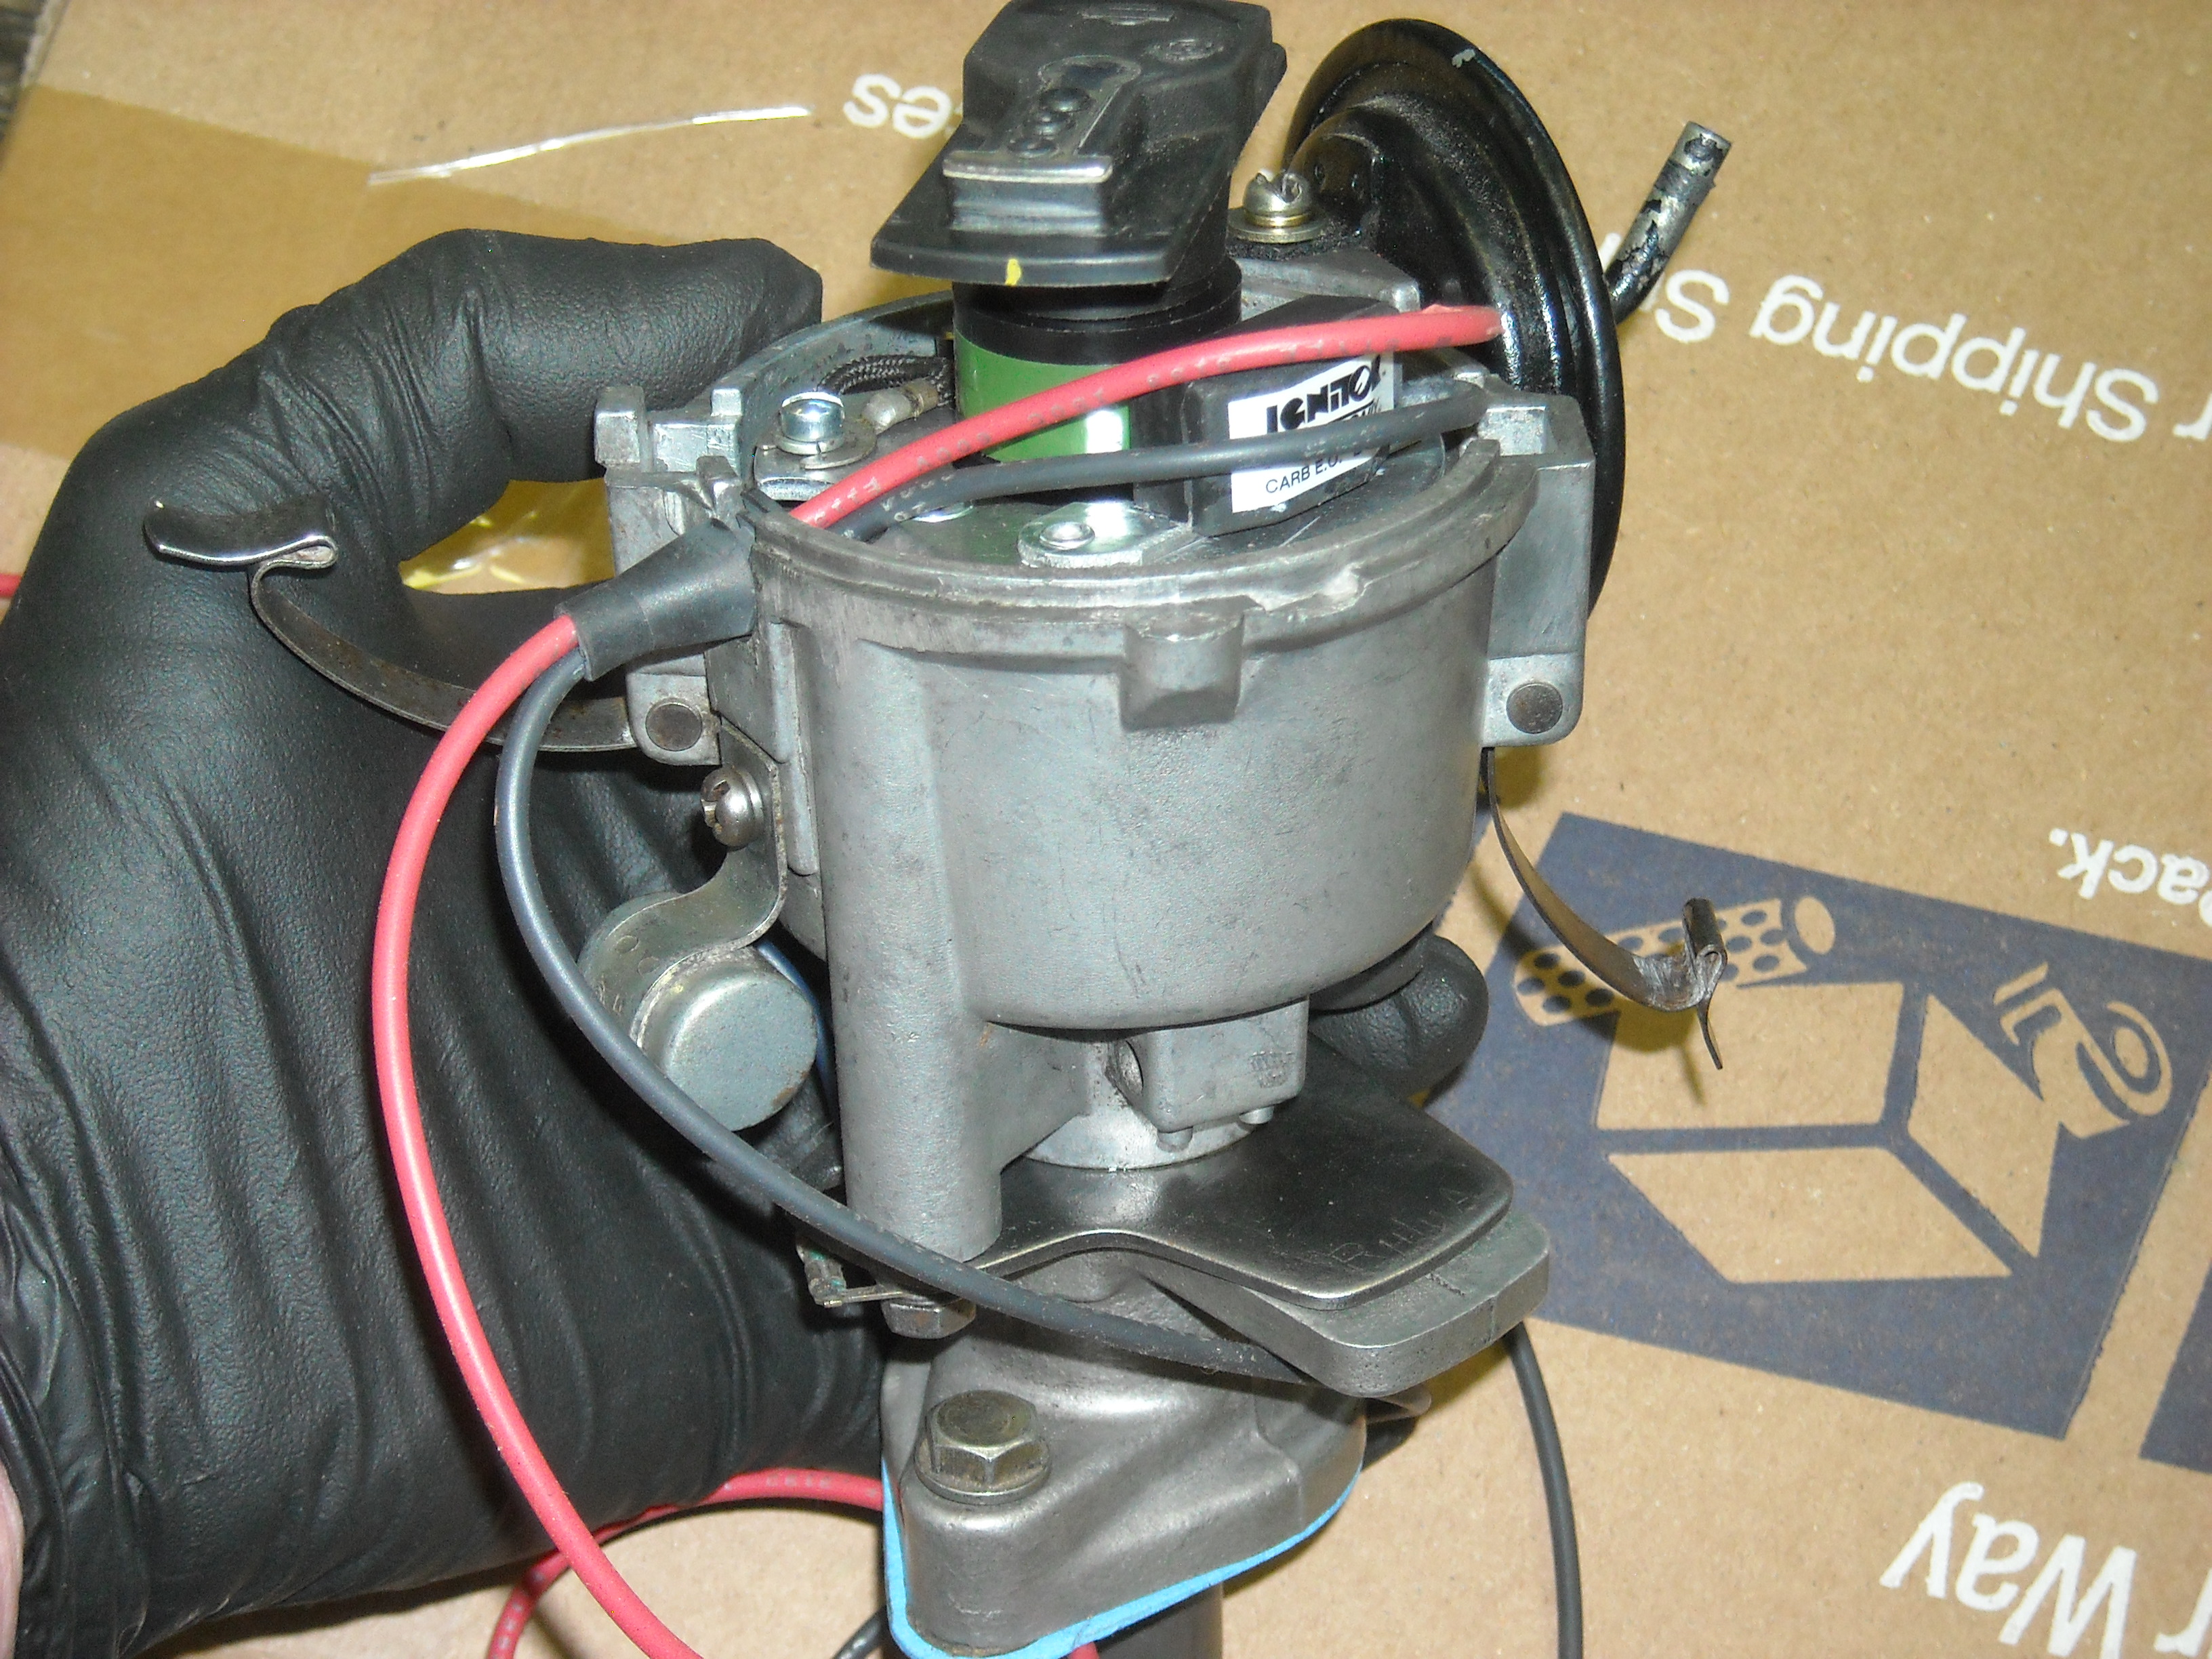
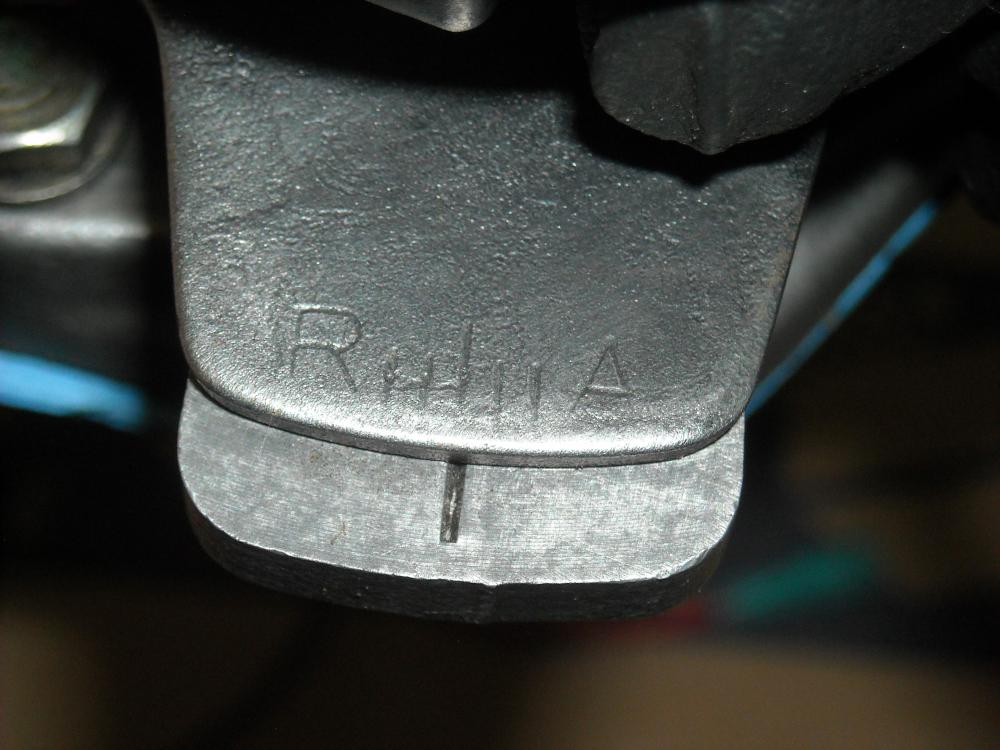
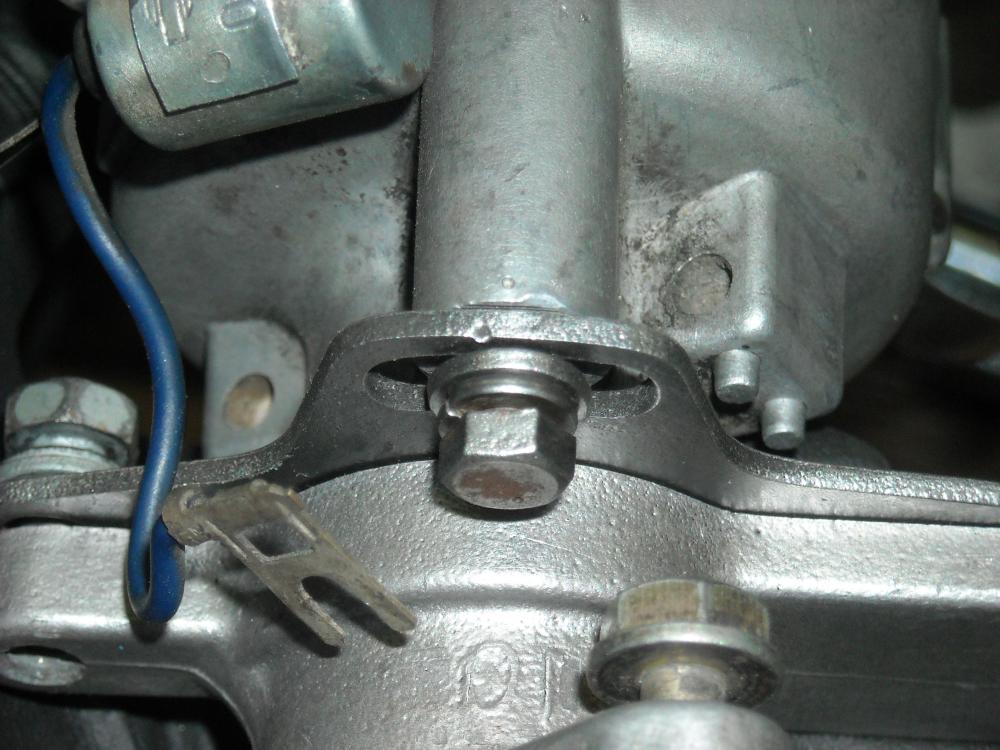
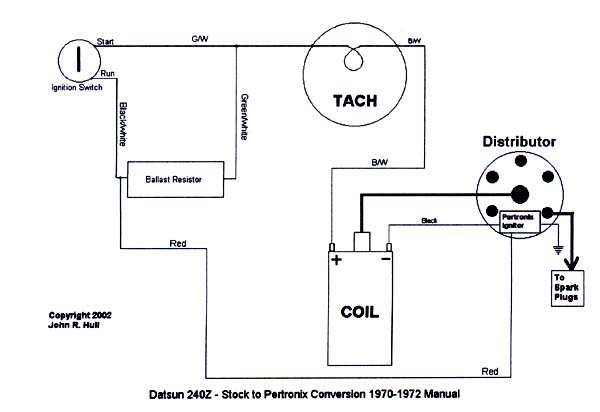
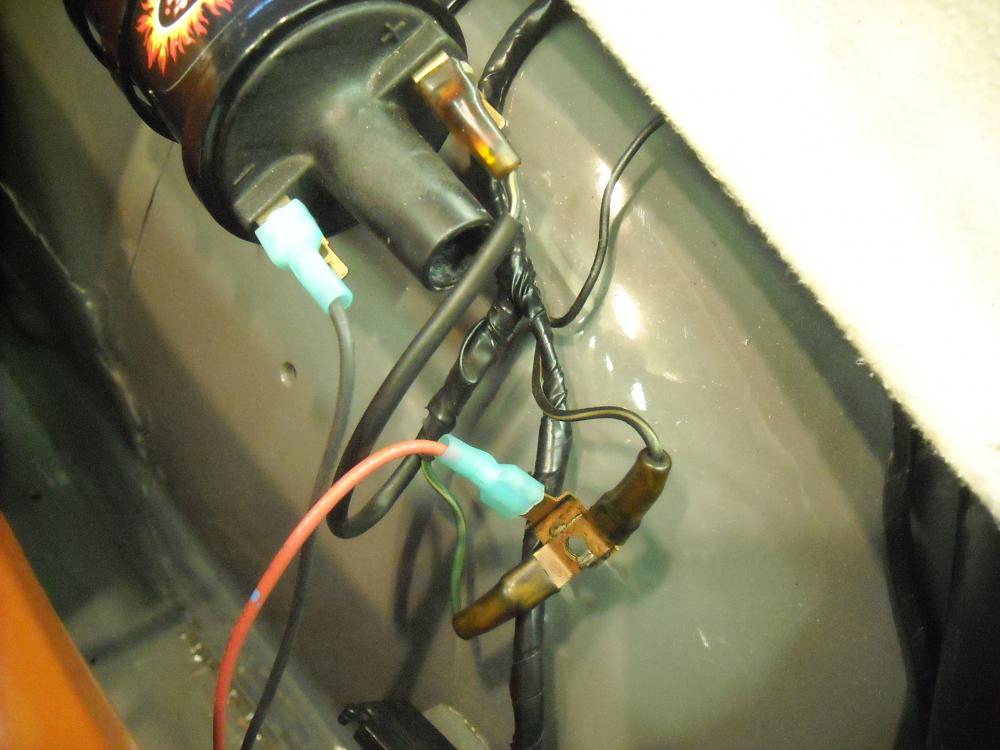
4 yrs ago I pulled the original 2.4l engine, filled it with oil and tucked into the corner of the shop thinking it would never be started again. Well, it's back in it's numbers matching car and I'm getting close to start up and I thought I would check with you guys on a few things before I start cranking. The compression was good when I put it away so last fall I got it on the engine stand, cleaned and painted it, all new seals and gaskets, the head was skimmed. So everything is pretty and lubed, the SU's were rebuilt by ZTherapy, a new Pertronix unit was installed in the original distributor that I gave a bit of an overhaul to, all hoses are new and tight. The engine is at TDC. The coil is a 3 ohm so the ballast resister has been bypassed The dizzy has 2 adjustments, one for the advance/retard, and the 2nd adjustment I'm not sure where it should be before locking it down? Also, Pertronix says put the black lead on the neg side of the coil and the red lead on the pos side but I found this diagram on Zhome.com. so I made up this connector to join the short Blk/w lead, Grn/w lead and the pertronix red lead. Any advice would be appreciated


 1 point
 -
1 pointIt's an RPM controlled "fuel cut". Take a look at page EF-12 of the 76 FSM. It describes the operation there. Basically, if you take your foot completely off the gas when the RPM's are around 3200, the ECM stops injecting fuel. Once the car slows down to the point where the RPM's drop below about 2800, the ECM starts injecting fuel again. That's the "smoothing out" you feel.1 point