
Everything posted by Captain Obvious
-
Hi Kats, Thank you for the sketch and video showing the taper collar spinning independently of the rest of the nut. And your English is not the problem. The problem is me overstepping my understanding and making assumptions about how something is put together without ever examining one in person. Thank you for your patience. I do not believe the retaining feature that holds the collar in place is a separate piece. I still believe there are just to pieces to the assembly. I do not see any seam where the face of the shoulder meets the shank. Looking at the picture you posted here, that face appears to be integral with the center portion of the nut: With that in mind, I suspect they forged the metal outward slightly to deform the shank a small amount and therefore retain the collar. They may have machined a thin section of material to ease this process. There appears as if there could be a jagged burr edge of extruded material visible on the silver plated nut on the right. I do not see the same burr on the yellow plated nut on the right, but it could just be better processing on that part. It would only take a small amount of material interference to prevent that collar from slipping off. In application, all the force would be in the direction to press the collar towards the hex portion and away from the retaining feature. It seems the retaining feature really only needs to be strong enough to keep the collars from falling off during shipping and handling, and while rattling around in a toolbox. Some other less likely ideas... 1) They undercut the shank a tiny amount and heated the collar (and maybe chilled the nut) and then slipped the two parts together while they were at very different temperatures. Once at the same temperature, the parts would be held together. 2) One other wild idea is that there are retaining pins inside the nut body that were forced outward before the threading operation. Would you like for me to make one or two to test some of the ideas above?
-
Thanks for the pics and info guys. I've (thankfully) not yet had to mess with that part of the car and I appreciate the education. I haven't studied the design at all, but the general concept for all the rubber bushings on the car is that there is no direct metal to metal contact between the two things being connected together. The center metal cylinder would be tightly pinched between the metal of the washers, but the rubber would isolate the outer portion of the bushing.
-
I think the longer it goes without them changing back, the less likely it is that they ever will. Honestly, I think if they were going back, it would have happened by now. I wonder if they are publically traded, and what the last two months of stock value look like...
-
Well I wouldn't be so quick to condemn the motor without a couple diagnostic tests first, especially in the middle of the driving season. Compression test would be high on my list. I'm still hoping it's not something serious. I don't know how long it takes to burn through a piston, but I would hope you would have heard some pinging in order for that to happen.
-
Either of those washer designs will work just fine on the inboard side of the spring. They just cheaped out and used the same one for front and back locations. If you're going for 100% originality, then have at it, but if you're just looking for functionality, you can use the quarter-turn locking washers on both sides of the springs. As long as they are large enough not to slip through the holes in the brake shoes (which I assume is the case), then it should be just fine.
-
Holed pistons are one of the possible outcomes of running very lean. You weren't getting like 35 mpg for the past couple weeks or anything, where you? (Just kidding... Here's to hoping it's something simple and not serious!!!)
-
Haha! Yeah, I guess that's true. I can think of several beers that are worth less than ten cents to me. For some beers, the can would be worth more to me empty than full!
-
So let me poke around this a little more. When you noticed a difference between the two, and "fixed" it by putting less oil in one of them... I'm assuming you were putting less oil in the one that was harder to lift, right? And by doing that, the two of them were closer to the same. If that's the case, then I claim that the one that was harder to lift was the one that was actually working CORRECTLY, and the check valve on the other one was screwed up. So by starving the good one for oil to make them equal, your broke BOTH of them. In theory, the check valve damper should still work even if the caps are a little loose, but they should be snug. They are, however, sensitive to alignment, and that was the problem I was having. I think one of my stalks was tilted to the side a little. Not enough to prevent the whole thing from fitting down into the carb, but enough that it was preventing the damper from working. That should be identifiable by swapping the two dampers between the two carbs. A check valve issue should follow the stalk. About oil level: You can fill the tubes all the way to the top. Worst thing that will happen is that a little oil will spill over the edge and run down into the carb for the engine to burn. In short, you cant really use too much. It will find it's own level if you put in more than necessary. About how fast it goes down: There was some discussion a long time ago about such things, and my answer is that it should never go down. Although there are documented cases where some people are positive they need to refill theirs every now and then, I'm not sure why. But with that in mind, you should check it every now and then. Monthly maybe?
-
Well I'm probably going to be manning the hydraulic press tomorrow, but not for a Z application. I'm elbow deep on wheel bearings for the family Truckster. But while I'm messing around in the drawer where I have all my short leftover drops, drifts, and scraps and stuff, I'll look to see if I can jar brain cells about exactly what I used. You know you can press them in or out from either side, right. What about flipping it over and changing direction? I'm sure you knew that, but that's my name...
-
Tapered? You got a pic? My PO put poly in there and I haven't done anything about it yet, so I've never seen it disassembled.
-
Wait, so that collar actually spins free from the shank? It's not pressed on tight? That's more difficult. Nice feature though!
-
Don't you think FULL beer cans would be worth more to me than empty ones????
-
Glad to help. Only reason I even thought of it was because I had removed the same brace not long ago. I took the cheaters way out and put blocks under the tires to keep the suspension loaded while I had the back end up high enough to get under there.
-
Jason, he had posted a pic from the other end earlier in the thread. You can clearly see the joint line between the two parts of the assy in that other pic as well:
-
Haha! I understand completely! It's working so much better than it used to that it's changed position on the priority list. Glad you've made such an improvement!
-
You need a tube of the proper diameter to use as an anvil. I don't remember if I had to make something, or if I already had something laying around. Just like you did for the fronts, only the dimensions are a little more critical.
-
Glad you got rid of the clunk!! Just one comment/question. The rubber portion of those inboard control arm bushings are clamped into place by the brace you removed. With the brace removed, the rubber can rotate. Point is... If you had the wheels hanging when you took that brace off and put it back on, I believe there's a risk that those inner bushings rotated changed position. Did you do the final tightening of the hardware with the car on the ground (or the wheels suitably loaded)?
-
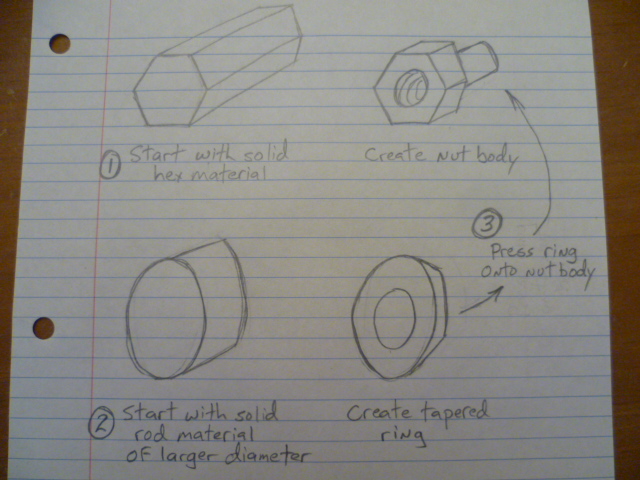
Kats, Here's a crude sketch of how I believe they made those lug nuts: They could have made the entire nut from one piece, but they would have needed to start with the lager rod and they would have needed to create the hex portion in a different operation. Making hex shapes on a lathe is a more difficult thing to do, so if you start with hex shaped material, then everything is simple lathe work. If you have to actually cut the hex shape, you need a more complicated machine. You may even have to transfer the parts to a different machine completely in order to cut the hex. Starting with hex shaped material allows them to do everything on simple lathes and also reduces the amount of total material they have to remove in order to create the final part. One other advantage to using two parts is that it allows them to use different materials for the two portions. I don't know if they did something like that, but for example, it could have allowed them to do something like use a hardened seat on the tapered locating washer while still having a more ductile unhardened threaded portion.
-
That schematic has Lucas written all over it.
-
Yeah, that's just not cool. Funny, but not cool!
-
I copied the bushing info over from the other thread. Thanks for the links and info. I'm sure there's something that would work. We just have to find it!! That first bushing from RIdetech looked interesting until I saw the ID. It won't fit over the bolt sticking down.
-
Here's a dimensioned sketch of the OEM bushing. For those of you who don't want to deal with my chicken scratch, the bottom line is: OD ~ 1.977 OAL of bushing outer wall ~ 1.575 after installation (1.985 reference before installation) length of center bolt cylinder ~ 2.565 ID of bolt hole through ~ .677 (clearance hole for 17mm dia bolt shank) Note that the 40mm after install dimension should be on the inside edges of the bent over flanges instead the outside as it's drawn. I'm no draftsman.
-
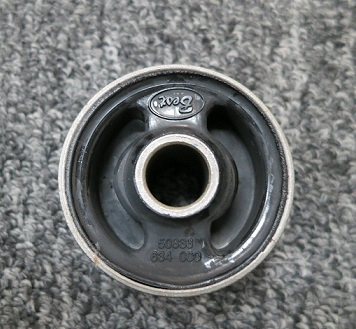
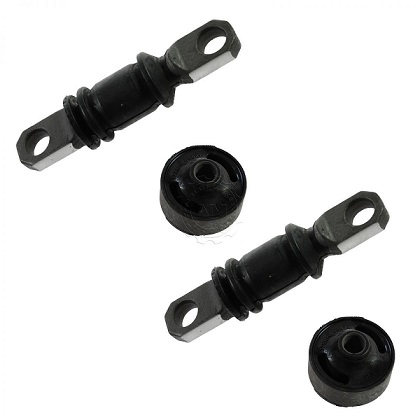
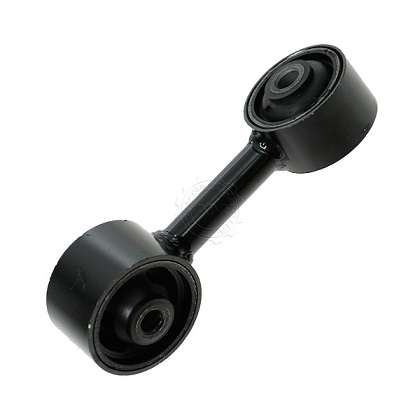
As a back burner project under @Patcon's guidance, I've been looking into this off and on for a while. The most promising bushings I've seen are things like engine torque strut mounts. The upper bar they strap on transverse mounted engines to keep the top of the engine from wretching around as the engine works. if you can't find something that has the exact same size as the original bushing, I muse that you could use something that is a little smaller than the stock bushing, and press it into a thin wall cylinder of appropriate ID and OD. Make the length of the cylinder long enough that there's extra material to swage over the mustache bar. Here's some pics of common cheap bushings that are probably large enough to consider. I bet with a caliper at a junkyard you ought to be able to turn up something .100 or so smaller than the original. There's got to be something out there. Little smaller OD than stock. Same or larger bolt through the middle. Length shouldn't matter so much. Here's some possible candidates. Next time I'm headed to the yard, I'm going to take my caliper: 73-79 Civic Camry: Excel: Paseo:
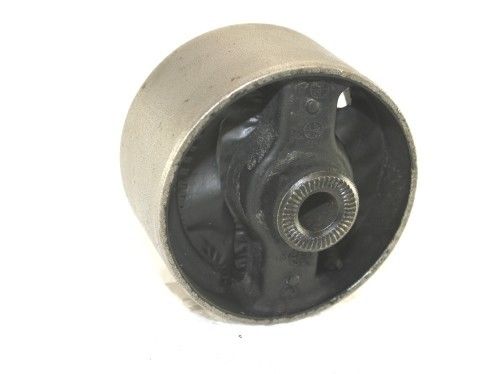
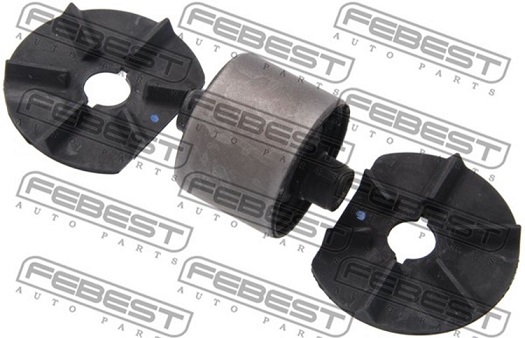
-
Do you still have your old springs? Maybe just throw them in there to see what happens? Also, if you're interested, I can walk you through how to measure the spring constant so you can compare the two.
-
Forgot something... About the rust (or lack of it), with a press fit of that caliber, it's pretty much gas tight. No oxygen, no rust.