


cgsheen1
Community Member
-
Joined
-
Last visited
Everything posted by cgsheen1
-
+1 for transmission bearing noise.
-
So I should probably sell the original steelies with the original tires and the original Z hubcaps from Bob's '75 "museum car" completely separately from the car itself. Oh, and the original spare...
-
Have you given thought to installing the mechanical pump without the spacer - just to see if that makes a difference?
-
Arizonan's really have a thing for cloth seats (and white cars) - if not cloth, it's gotta be leather. (Just sit on vinyl through an Arizona summer.) Even if you have the coldest A/C in the state you're still sweat-stuck to the vinyl if you're in the car for more than two minutes. I'm sure that some of the dealers here had an ongoing relationship with an upholstery shop to re-do the seats in these cars as soon as they came in. Otherwise they would have never sold a Z in the summertime.
-
JavelinZ has a late 280 with southwestern pattern cloth seats that appear to have been dealer installed. His is 110 and the seats are Red/Orange Arizona looking. Guess it fits. My sons '76 also had cloth with a Tan/Gold weave pattern - it was originally 304 Gold Metallic. Both Arizona cars (where NO ONE likes to sit on black vinyl that's been sitting in the Arizona sun!).
-
Wow, my first thought was "why the hell is he putting jack stands UNDER THE FRAME RAILS?"...
-
During the 46 years the 260's have been on the planet, most have undergone changes. When I got mine nearly 12 years ago, I pulled all the locks and had my locksmith key them all the same. The code is on the passenger door lock. But, the suggestion above would be the easiest. Me, I prefer one key.
-
The Precision door weather strip is crap! Not only did I install it on my 260Z, but have installed it on several other customer Z's because they bought the whole Precision kit. I finally got SO sick of mine, I pulled it off and used side-bulb welt (which is marvelous in comparison). But we still have access to Bob's 1975 280Z "museum car" and the original weather-strip is phenomenal.
-
What about door cards for any and all years. I'm talking about someone molding the MDF, fiberboard, pressed board - or whatever it's called - into the correct shape and with the proper cutouts. It would be nice to get proper vinyl also but I'd settle for new cards.
-
Bob's 1975 "museum car" has one and I thought it was added for an aftermarket alarm. Thinking about it, there is no other evidence of an alarm system. Looks just like the picture above and it's in the same spot. Guess I ought to check and see if it lights the dome lamp.
-
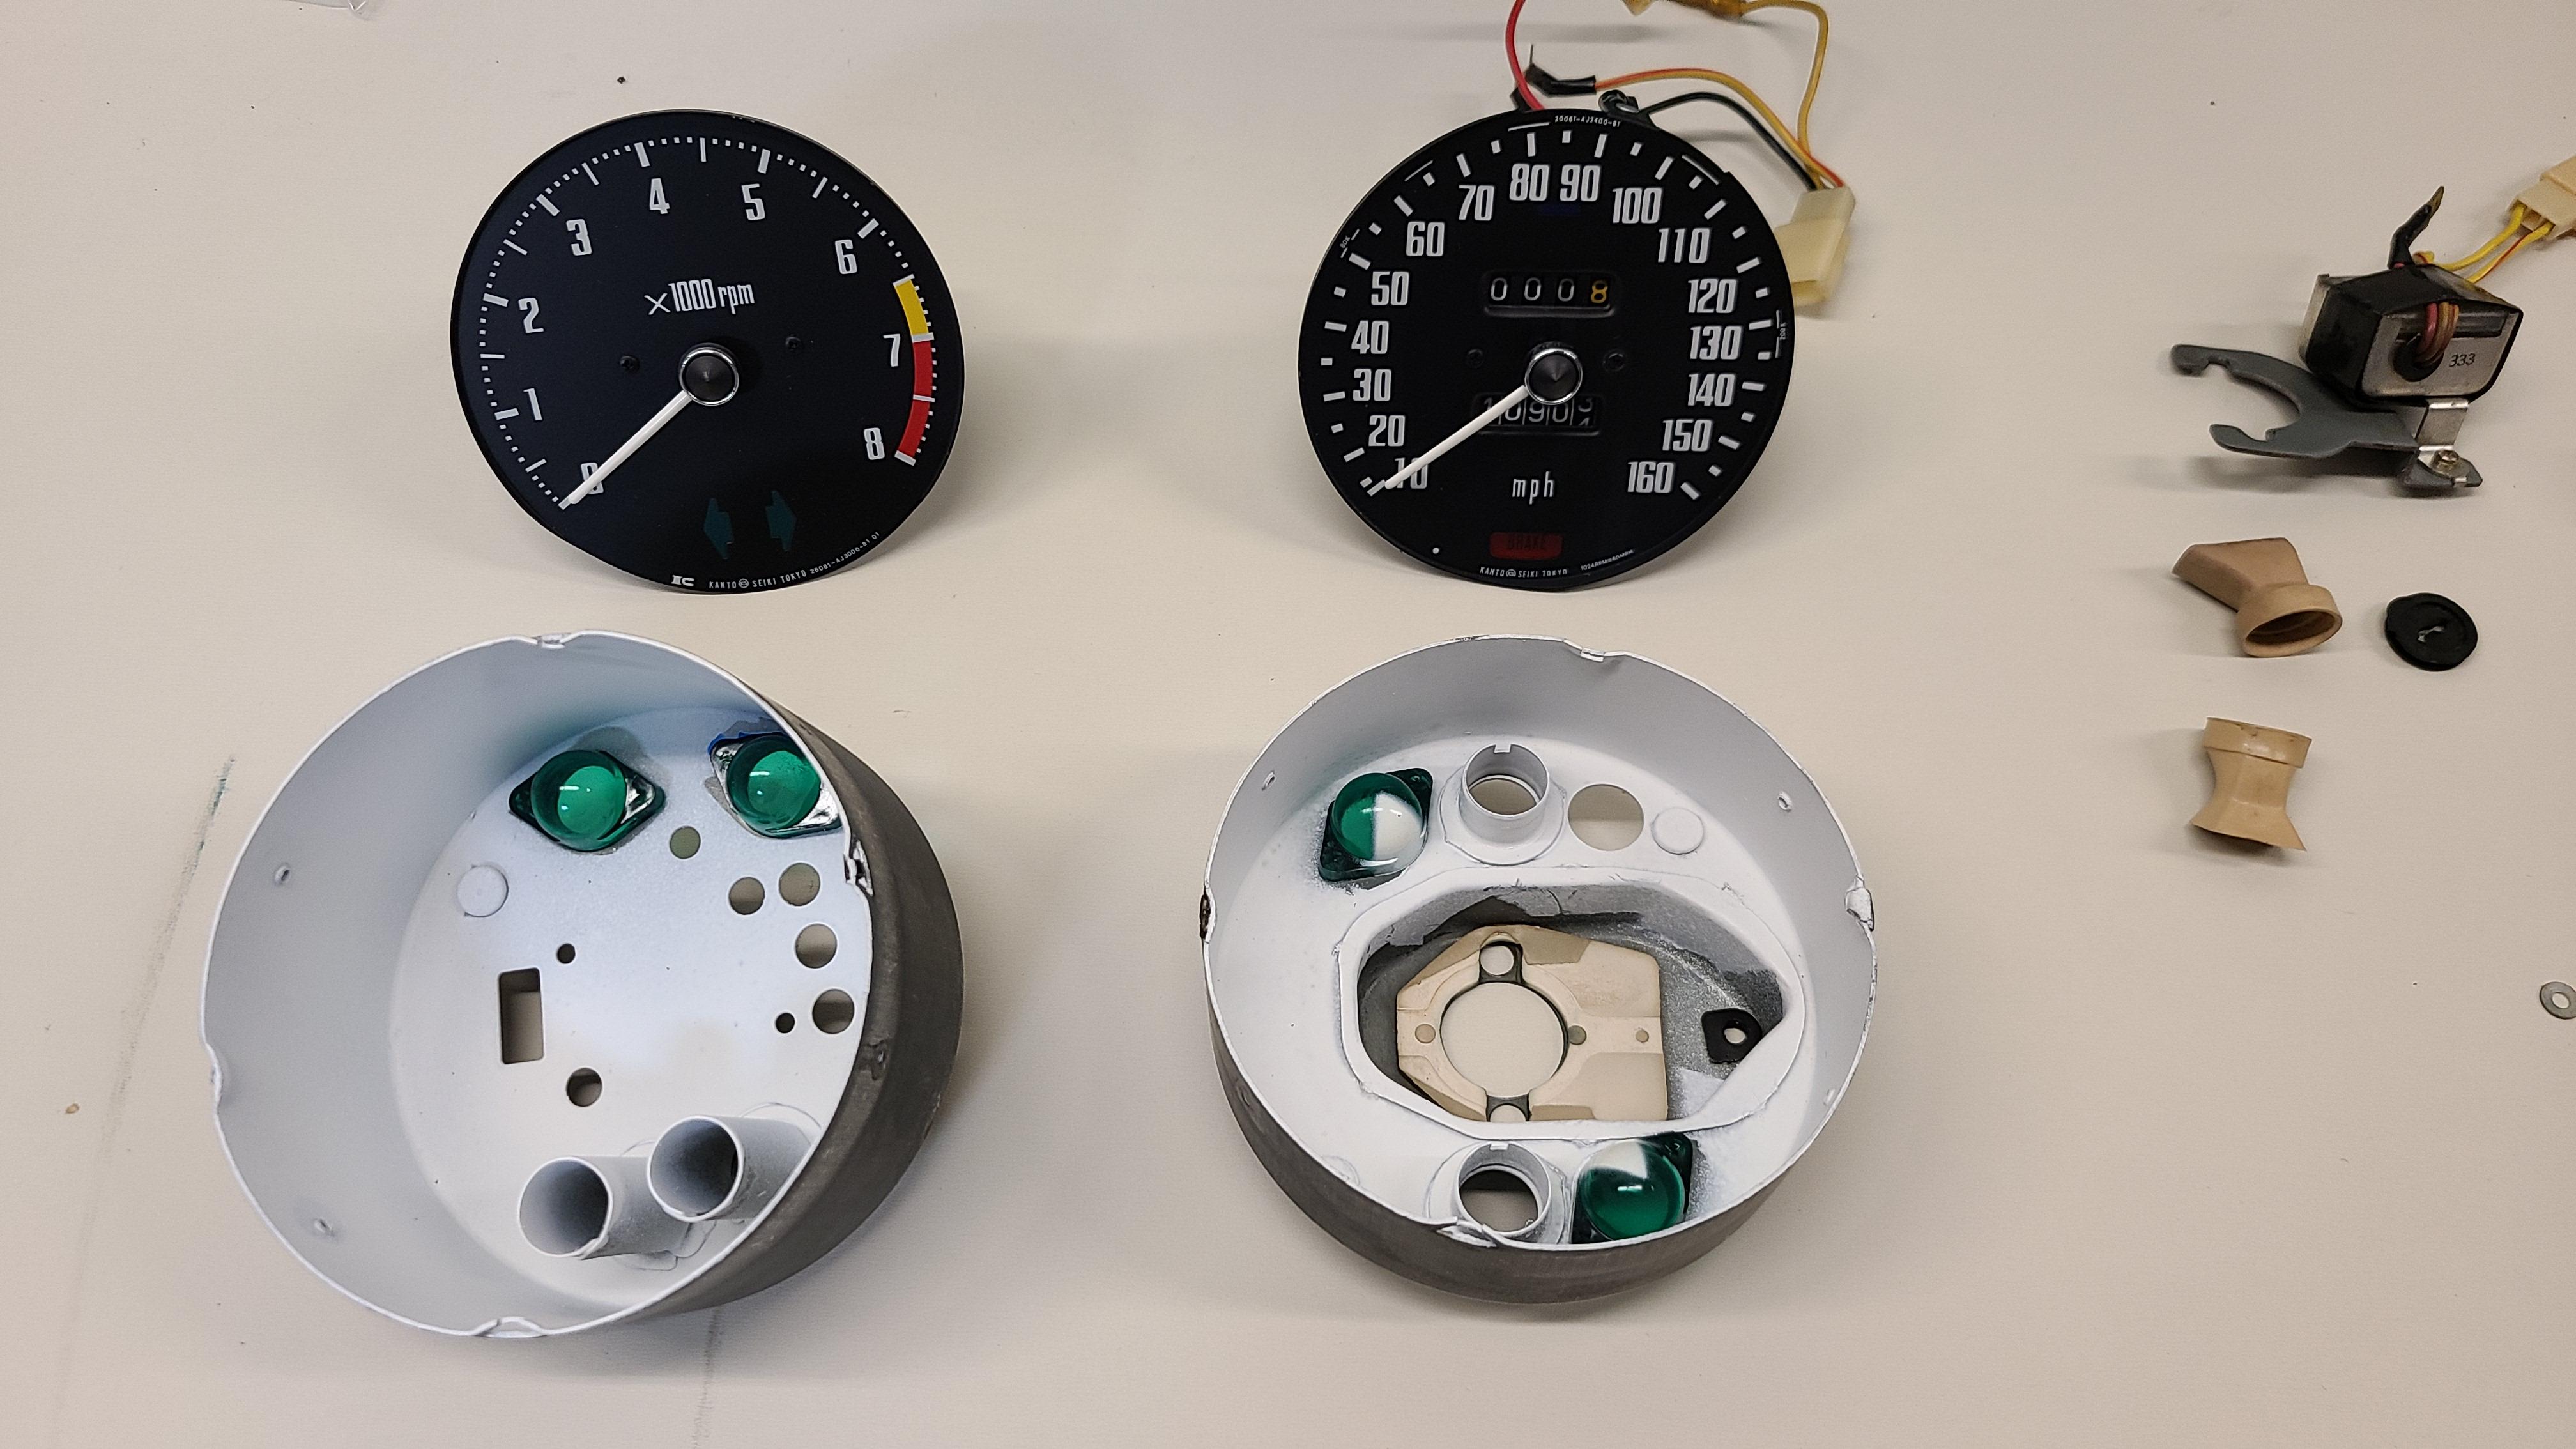
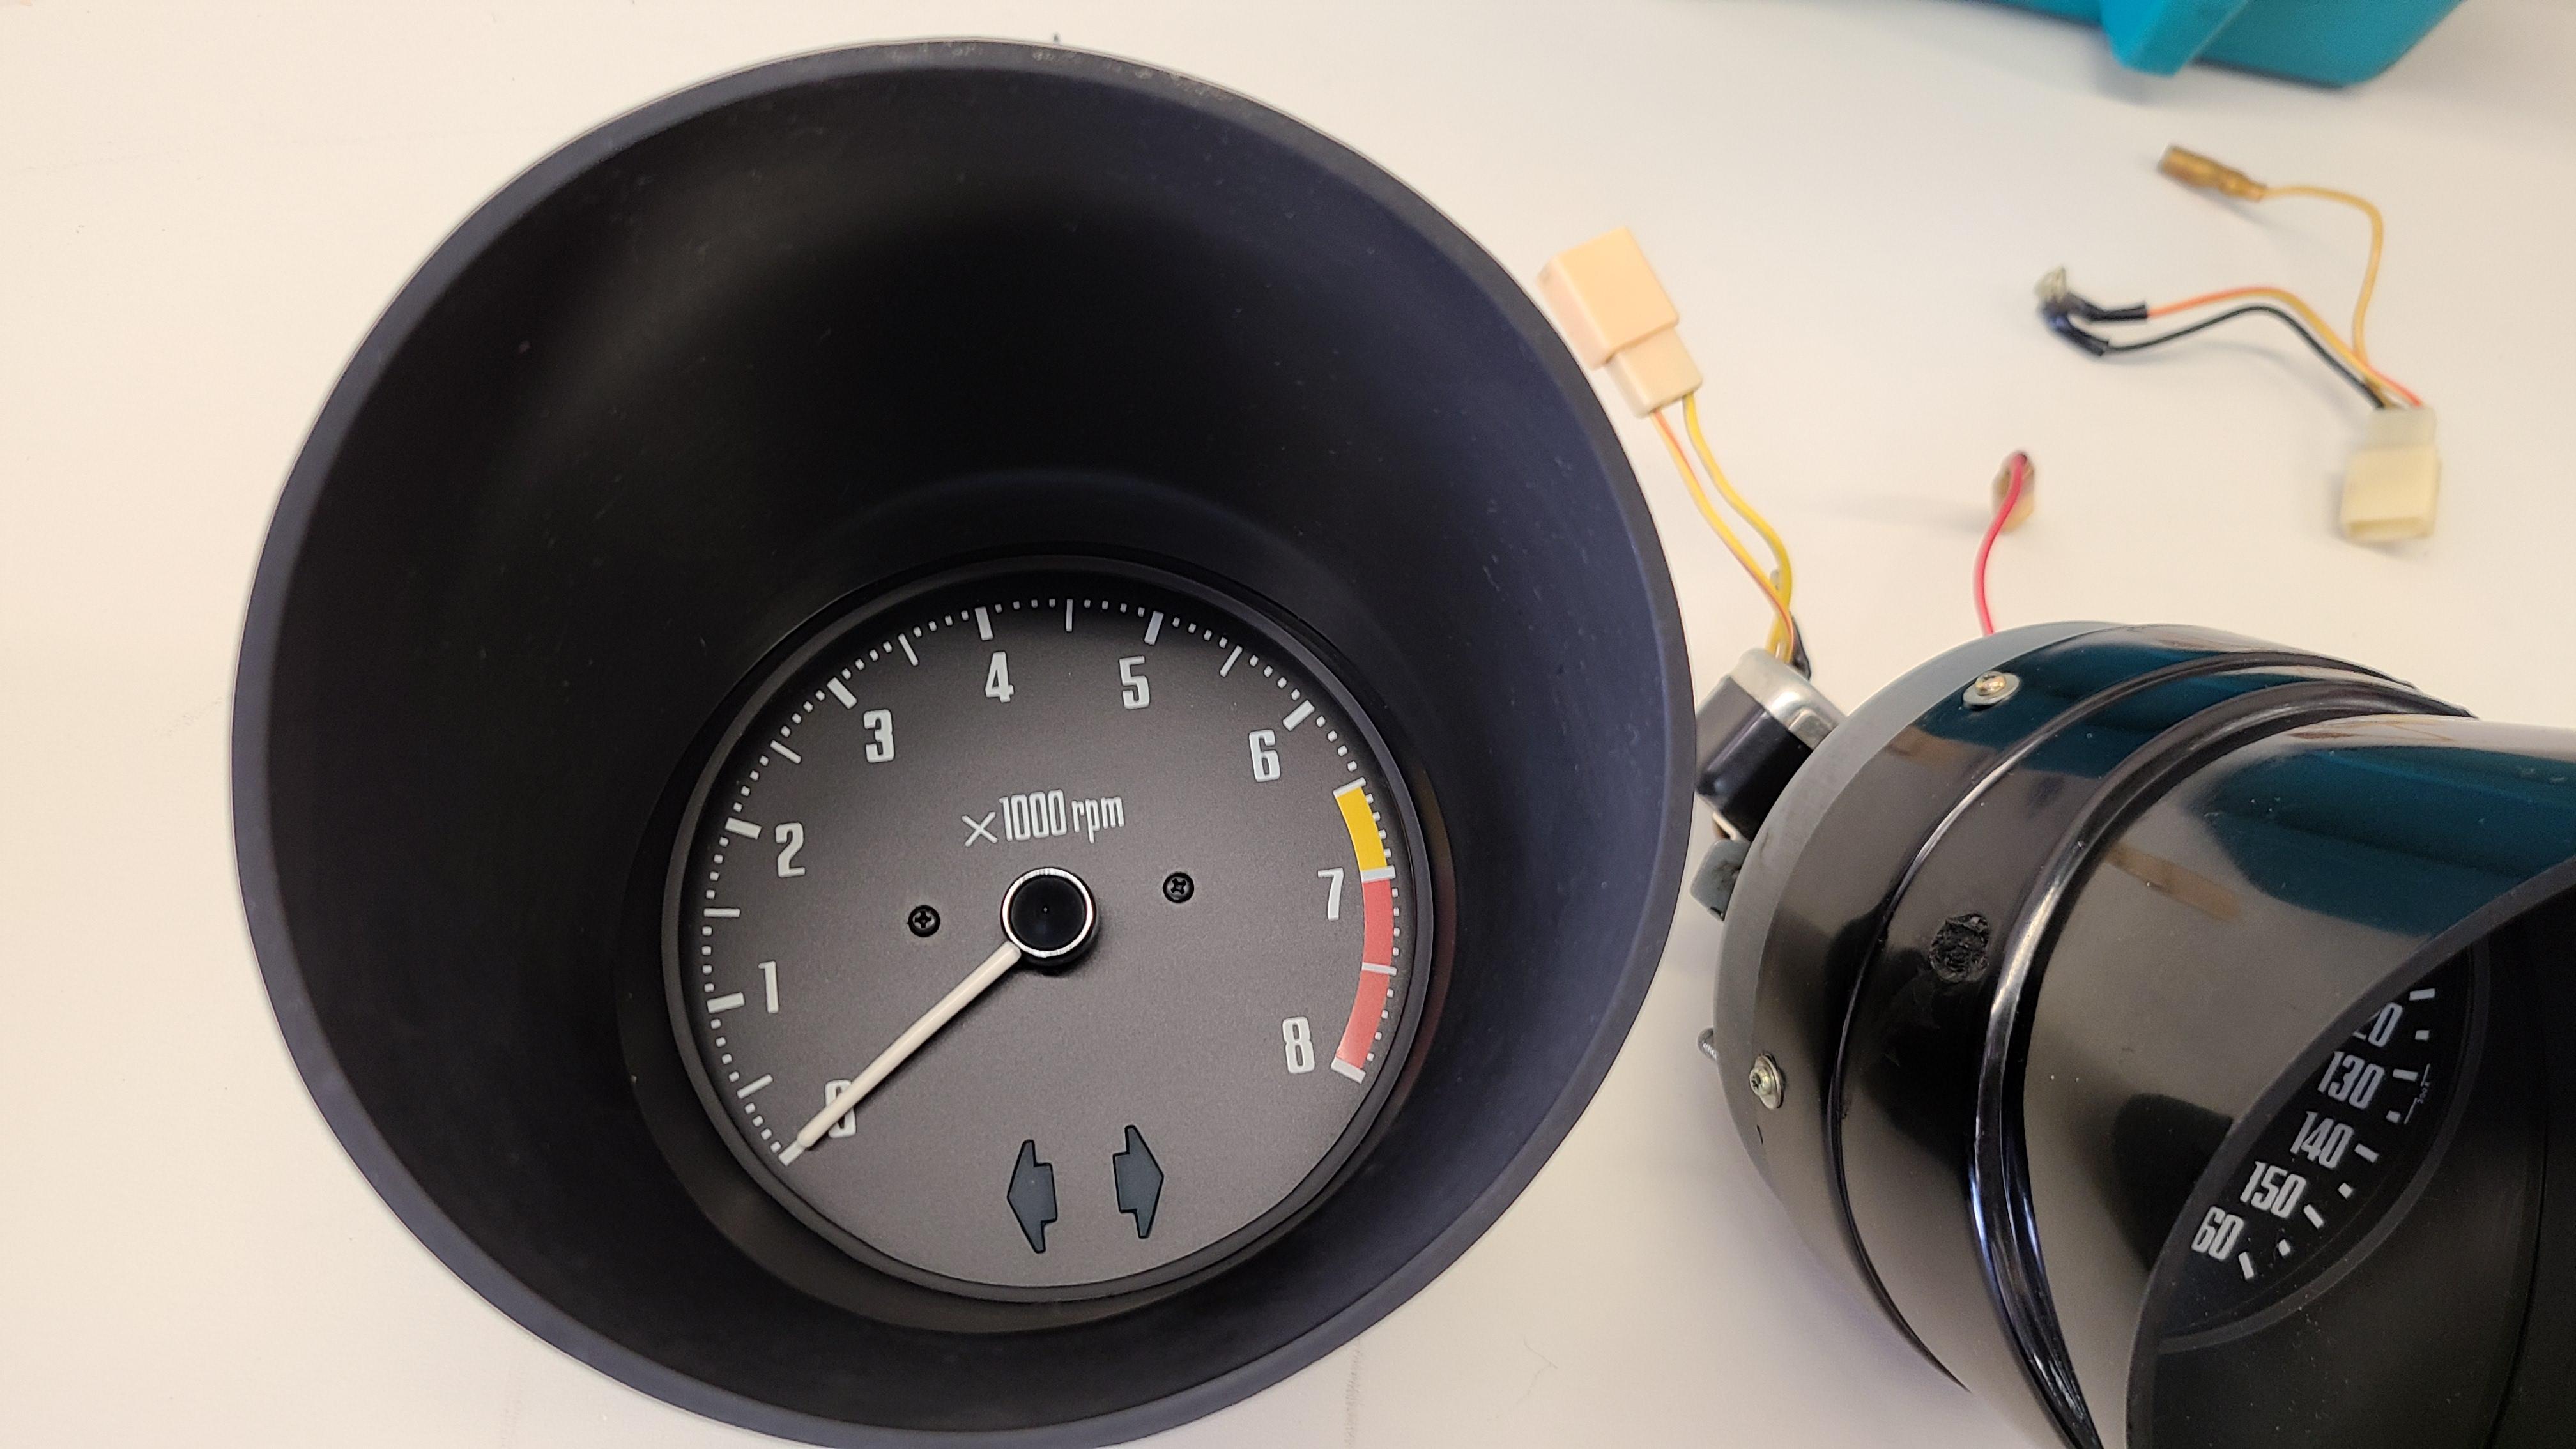
How thick is your spacer? Did you use the spacer with your previous wheels? The lower valence has some adjustment. Have you tried loosening that side to see if it will move forward? (We see quite a few Z's with this issue when owners are changing wheels and tires... I had this issue when I first mounted my sons Rota Grids on Goldie. -> airdam)You won't find those on an early, but my 260Z has those outlets. (had. I have them but they're not currently installed) and my son's '76 280Z has them. Both are factory A/C cars. I don't think those are installed on Bob's '75 280Z museum car. It doesn't have factory A/C.I'm a Journeyman Plumber (former life). We had to stop using, 'um, gender specific language, when referring to various plumbing parts due to the always offended. Certainly couldn't refer to the "toilet fill valve" as a "ballcock" like they did for generations. No more Galvanized Steel Nipple, or Male Adapter, well, you get the picture. The part you reference above plumbers now have to refer to as a Stop, Shut-off, or Valve.I'd like to see that in person one day. Did you open up your gauges at all? Pepper and I are just going through some gauges - cleaning, re-spraying the white inside and the black if necessary, and polishing up the scratched lenses.When you use paint stripper, don't scrape - use a brush with firm plastic bristles. Yup, it's messy.I installed "bulbs" of this type in a customers 240Z years ago. They were WHITE though - that LED brassy white. Super bright - and they happened to work well with his rheostat. Brightened up his instruments double or more. I've not used a colored LED though.To me, the dash install is so much simpler with the windshield out. And. we've installed a dozen windshields with the dash in place (dash in place - not the finisher). In the beginning, we were using a small cord and it really is much like grannyknot described but I find the lower corners much easier than the upper ("sharper") corners. Once we changed procedure to larger diameter wet cloth as the pull string (1/8" or so cotton cord) it became a non-issue. Decreased the time and effort ten-fold (that's probably an exaggeration - but it's a heck-of-a-lot easier...) Q, go ahead and install your dash and invite me up when you're ready for glass!Picture of yours please. There is a difference between the Factory A/C and Non-A/C models. But, it's not cables (well, I guess it IS cables... read on). The A/C models have vacuum bottles, vacuum solenoids, and vacuum actuators under the dash (a vacuum actuator on the right side of the blower housing for the mode door - where the non-A/C has one cable on the right side of the blower housing to operate the mode door.) I've not seen two cables on the right side of the blower housing - only one for the mode door and one to the left of the blower housing for the heater valve. (I have the '75 "museum 280Z" in the shop - it's non-factory A/C. I'll look at it's blower box.)It would help if the end of yours was rounded a bit like the cable in the lower picture. It would slip in the back of the speedo easier if it were. It's tough getting the proper alignment under the dash with all the crap you have to fight back there. That's likely most of your problem. If your Tach were out It would be much easier, but I'd probably follow the advice given above - remove the other end from the transmission, pull the cable back a bit, hook it up under the dash, and then push the cable (while turning it) back up into the speedo from the transmission end. Reconnect to the trans and you're set.Bought one of these for my 260Z several years ago direct from Nissan. These replacement consoles are beefier than the originals - in the center section that really counts. I've enjoyed mine, I'm sure you will too! Nissan part #96911-N4725, right?The 280ZX HVAC was a total redesign so I doubt it. I do know that the blower motor and fan spin the opposite direction of the S30. (But that may be help rather than hindrance in your situation... )CO, you just made my head hurt...


Important Information
By using this site, you agree to our Privacy Policy and Guidelines. We have placed cookies on your device to help make this website better. You can adjust your cookie settings, otherwise we'll assume you're okay to continue.