cgsheen1
Community Member
-
Joined
-
Last visited
Everything posted by cgsheen1
-
50 years. Stock electrical connectors and wire. But, most likely, that shouldn't make the gauge not work at all - skew the reading maybe. Their are adjusters (trim pots) on the back of the gauge to set and/or correct needle travel. To me it sounds like your problem is in the wiring. Are you sure the sender has a good ground connection? The "signal" the yellow wiring is sending the gauge is a variable resistance from the fuel level sender and it's ground connection. It actually heats up a bimetal strip in the gauge that causes the needle to move. If you ground the yellow wire and the gauge needle goes to full, the problem is probably not in the gauge (if the gauge and it's trim pots have not been modified). What I initially meant was: 50+ years and stock wiring means increased resistance in wiring and connectors. The gauge displays electrical resistance - so adding more resistance skews the reading (needle position). But doesn't normally kill the reading altogether - unless the Ohm value (resistance) provided is out of the range that the gauge will display .
-
The window regulators are different between the two models. I also seem to remember that there's some difference in the length and/or position of a channel that the rollers of the regulator sit in. I made an early regulator work in my 260Z drivers door but it required some sheet metal modification and a change of channel (else the roller would fall out of the channel on one extreme of the up/down movement). That was years ago and I don't exactly remember all that I had to do. Eventually I went back to actual 260/280 window and regulator hardware - just know there is a difference between the 240 and the 260/280 when it comes to window and door hardware...
-
Well, here is the AI generated answer: "When swapping a 280Z L28E intake manifold for one used with twin SU carburetors, such as the 240Z manifold, the correct intake/exhaust manifold gasket to use is the one designed for the carbureted 240Z/260Z models from 1970–1974. This is because the 280Z L28E manifold is designed for fuel injection and features notches for injectors, while the SU carburetor setup requires a gasket without these notches to prevent air leaks. Using an EFI-specific gasket with a carbureted manifold can result in air leaks and poor engine performance, as the gasket's sealing surface does not align properly with the carburetor ports. The 240Z/260Z gasket matches the round intake ports and square exhaust ports typical of carbureted setups and is recommended for compatibility and sealing integrity. Additionally, if headers are used, stepped washers may be necessary to ensure even clamping force between the manifold and cylinder head, especially when the flange thicknesses differ." I would have said use the gasket that matches the head (and thus the injector notches) but I don't have a 240Z intake to test that on... Or a 240Z gasket to check on an L28E head.
-
The fuel pump doesn't prime in the early EFI. I don't think that came until the ECCS system of the 280ZX Turbo. In the 280Z the AFM has a switch that "senses" air flow and enables the fuel pump - no air flow, no pump, so the engine has to be making vacuum and sucking air through the AFM. Safely First.
-
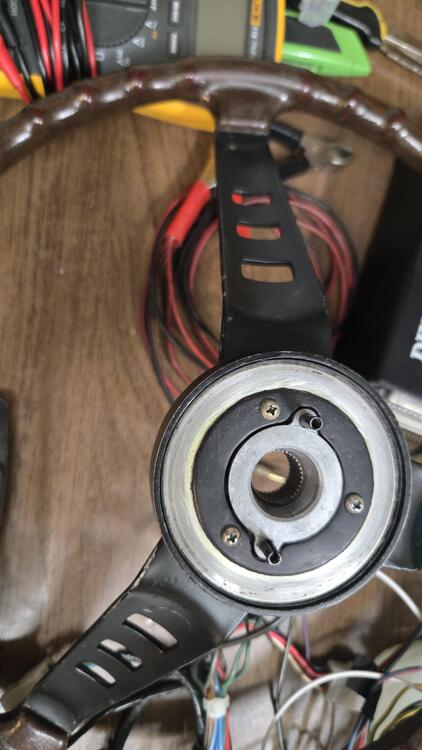
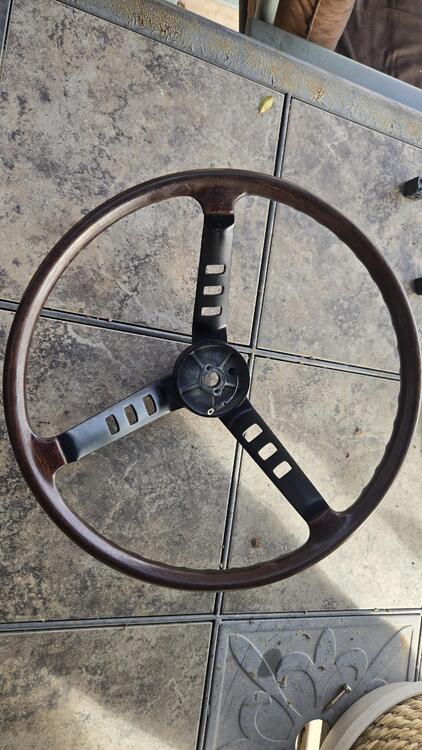
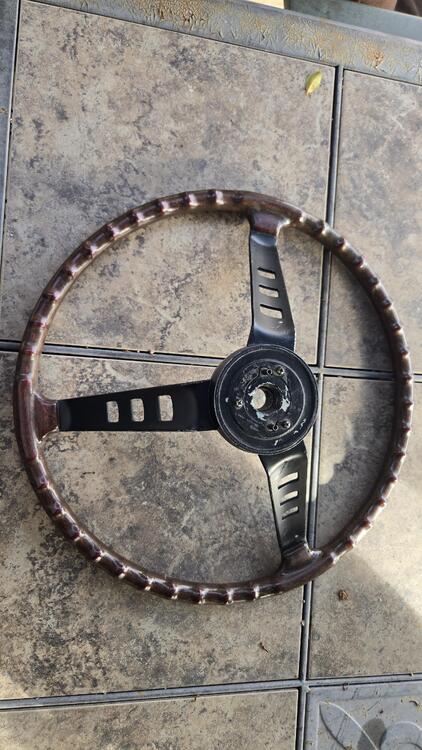
I actually dug this wheel out to measure it for a leather wrap kit. Has anyone leather wrapped their early steering wheel with a DIY stitch kit? What did you use?
-
That's a little better.
-
240Z alternator? External voltage regulator? The earlies don't use a shunt (like the 260-280) to the ammeter. So power to/from the battery goes directly through the ammeter (via large wire). The ammeter measures current flow, not voltage - even though it's important to have a proper and stable voltage from the alternator and regulator. What could be causing disruption or variation of current flow? Does it stay in the positive, or is it swinging from positive to negative current flow? The battery discharges at start cranking and then is recharged by a properly working alternator. This recharge should show on the ammeter as a significant flow in the positive direction at first, but taper off as the battery is charged, ending with the ammeter showing a slightly positive value for the rest of the drive (or engine operation). The ammeter should also show changes in electrical use - like lighting, headlights, A/C compressor, electric fan, and etc. being turned on and off as more (or less) current is being drawn during their use. (Ya, I blabbed on for all those youngsters who didn't grow up with an ammeter...)
-
He said: "Will you trade me? I refurbished my steering wheel and now the horn doesn't work..."
-
I didn't do mine in a kit, but the Toyota 4-piston caliper upgrade using the 300ZX vented rotor is a nice, easy upgrade from the stock caliper and rotor. Upgraded friction front and rear makes it even better. There are literally hundreds of posts about this particular upgrade (for more than a decade) and the kit shown above looks to have all the needed parts. The early hub on 240's and my early 260Z needs a thicker spacer than does the late 260 and 280Z's to center the rotor in the caliper properly. The upgrade also works well with the stock master cylinder. Many people also upgrade to a 15/16" 280ZX master cylinder... I use the stock 7/8" in my 260, my son uses the ZX master in his (also Turbo-swapped) 280Z.
-
From the 1972 FSM. I Believe this is the first mention in an FSM of coolant to the intake manifold and/or carburetor. I also believe this explains the purpose well. I don't see anything about cold or warm weather START in relation to carburetor temperature control - and why would there be when coolant is likely to be ambient temp when first cranking the engine. I also don't know if its required to circulate coolant between the water pump to the thermostat housing if you're not going to utilize the "try to keep the carbs a semi-consistent temperature" feature. That plumbing seems to be absent in the earlier year versions. That plumbing and the "Temperature control of SU-type carburetor by engine coolant" paragraphs seem to be absent from the 1970 FSM and the 1971 Supplement. The companion "Datsun L20A, L24 Series Engine Factory Service Manual" does not contain this information either.

-
When I finally read this I was immediately - NO - what are they thinking?? Didn't they learn from the last Zcon they held in Phoenix - IN THE HEAT OF SUMMER?? So I had to go to the website. Thankfully they did learn a bit. September 21-26. That's a little smarter. Most people don't realize this but the heat holds on a bit longer than you'd expect generally. It takes a major climate event (RAIN) to break the back of the heat. Water - it's so underrated. So even at the end of September it can be warm here - but it's usually not in the above 100's - only the (above) 90's... You'll still be using A/C in the car. Beautiful weather doesn't normally happen until October and November. Right now is perfect for an Idaho raised boy and most Arizonans are cold and in jackets or sweats if they're not in the sun. Mexicans are in Parkas... When you get to Phoenix hit me up. I may be in Snowflake but I'll head down to the valley for the event. Chuck (rarely Charles, Never Charlie...)
-
Had a Champion, worked a bit better than stock I think but found a much better solution with a 240Z KOYO radiator. Been using the KOYO with my intercooled, turbo-swapped, (early) 260Z with factory A/C, here in PHOENIX, Arizona (not name dropping, just emphasizing the HEAT factor...) for a few years. In my estimation it's much better than the Champion I had - or Mishimoto radiators I've seen in some Z's here in Phoenix...
-
Grab a torch - propane will do - and melt the body lead out of that section. That'll give you a better idea of how that sheet metal is shaped and spot welded together. There will be body lead in various places all up and down that pillar. The lead will probably have saved the sheet metal up near the window flange - and may give you a good clean section to weld to at that end.
-
But if you look at the diagram, the G/W gets Battery Voltage in the START position of the IGN Switch. (The circuit provides a bypass of the Ballast Resistor when cranking the engine for start - once started the juice goes through the Ballast Resistor for normal running operation) SO - don't leave the G/W dangling where it could cause a short... could have done that in one post - but I'm old...
-
Very good idea with one caveat - the stock wiring is "50 how many" years old and could be pretty oxidized (engine bay). My OCD would be "new gauge... OLD wire? Naw...". Your mileage may vary.
-
(this is for anyone else interested in a little information about some specifics that you raise:) 1. NONE of the above are "Coil - ". (Stock config = Coil "-" is connected to the points output of the distributor. So, new wire from the Coil "-" to your new gauge...(it will be a 2nd wire connection as the Coil "-" needs a "signal to fire" from points or an electronic ignition unit as well - your new gauge is just tapping into that signal)) 2. You don't necessarily need to jumper any of the wires in that connector, but you need to understand the coil wiring to decide whether to JUMP or just ABANDON the G/W and B/W in the connector pictured above. The stock circuit goes like this: IGN SWITCH -> B/W -> Ballast Resistor -> G/W -> Tach connector -> Loop on back of Tach -> Tach connector -> B/W -> Coil "+". The coil gets power at IGN ON through this and the Tach "senses" the flow of electricity to the coil. If you're replacing the stock Tach, the re-route of the B/W back to the Tach is not necessary - the B/W and G/W to that connector can simply be ignored (abandoned). SO - the B/W that goes to the Ballast can be connected to the Coil "+" - either through the Ballast (by removing the G/W and running a short wire from there to the Coil "+") OR bypassing the Ballast and connecting the "ballast's" B/W directly to the Coil "+" instead - IF you no longer need a Ballast Resistor in the circuit. note: I think it's better to abandon and get all that extra wire (and added resistance) OUT of the power circuit to the coil... BTW, the other two wires in that connector: Black - is a Battery Ground. R/L is gauge lighting - it's listed in the wiring schematic as "IL". So Black is the power ground for the Tach - the Tach gets power (battery voltage) from a Green in another connector.
-
Awesome.
-
Or a new flare on that tube and maybe a new flare nut. I'd venture a guess that it didn't go 6 years without any leak at all - probably just one that was slight and unnoticed... (just like many plumbing leaks)
-
It's quite amazing the problems in the plumbing world that arose with the change of season. Especially when the atmosphere went from warm to cold...
-
Automotive upholster... I think the best tool for cutting foam is a hotwire cutter but that isn't for the faint of heart.
-
The FSM describes how to adjust the horn sound and its actually very simple (screw on the back with a locking nut). Not saying they'll sound like a Jag, but altering the way they sound is possible. I believe each horn is set to a different tone.
-
There is a point where the adjusters will cease to tighten. If they're working properly, they shouldn't be the cause of a sticky drum removal. There are other factors that could be the cause. IRL the drum shoe friction material isnt that thick and they don't see that much use so there really isn't that much re-adjustment needed over time. I daily drive my 260 and have changed shoes once in 14 years. After you have them set properly you won't notice much if any park brake handle lock position change.
-
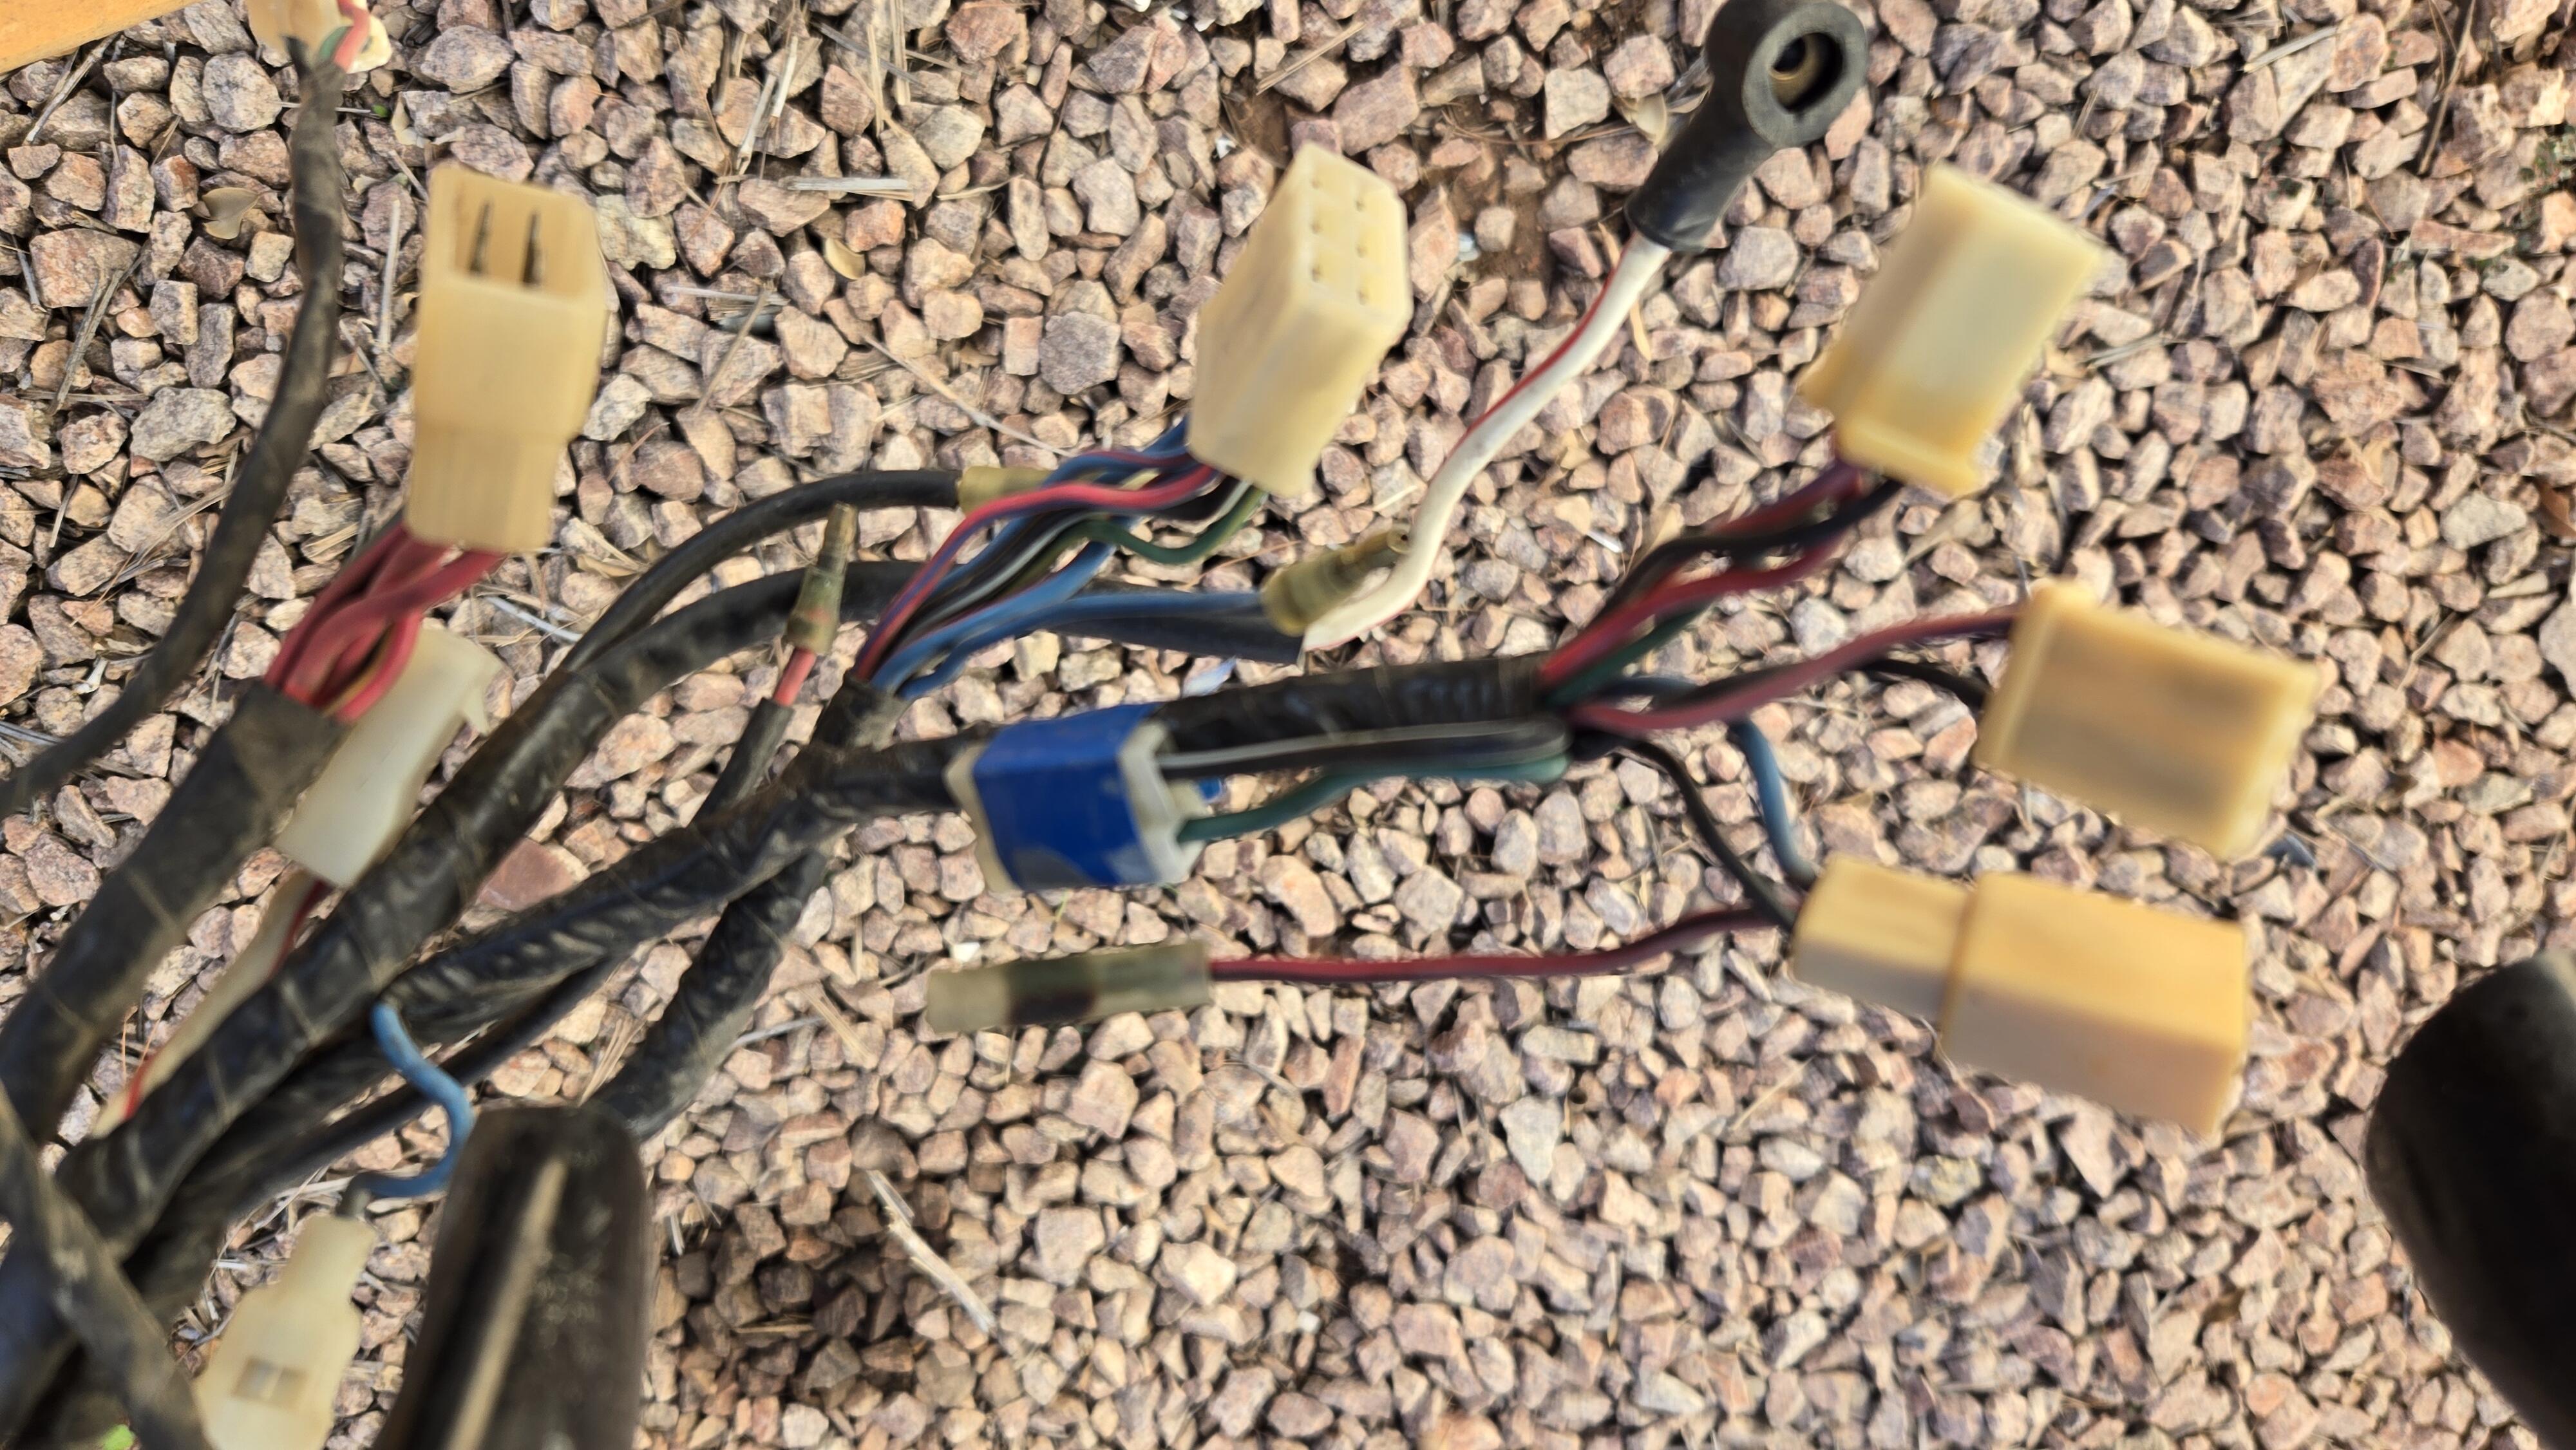
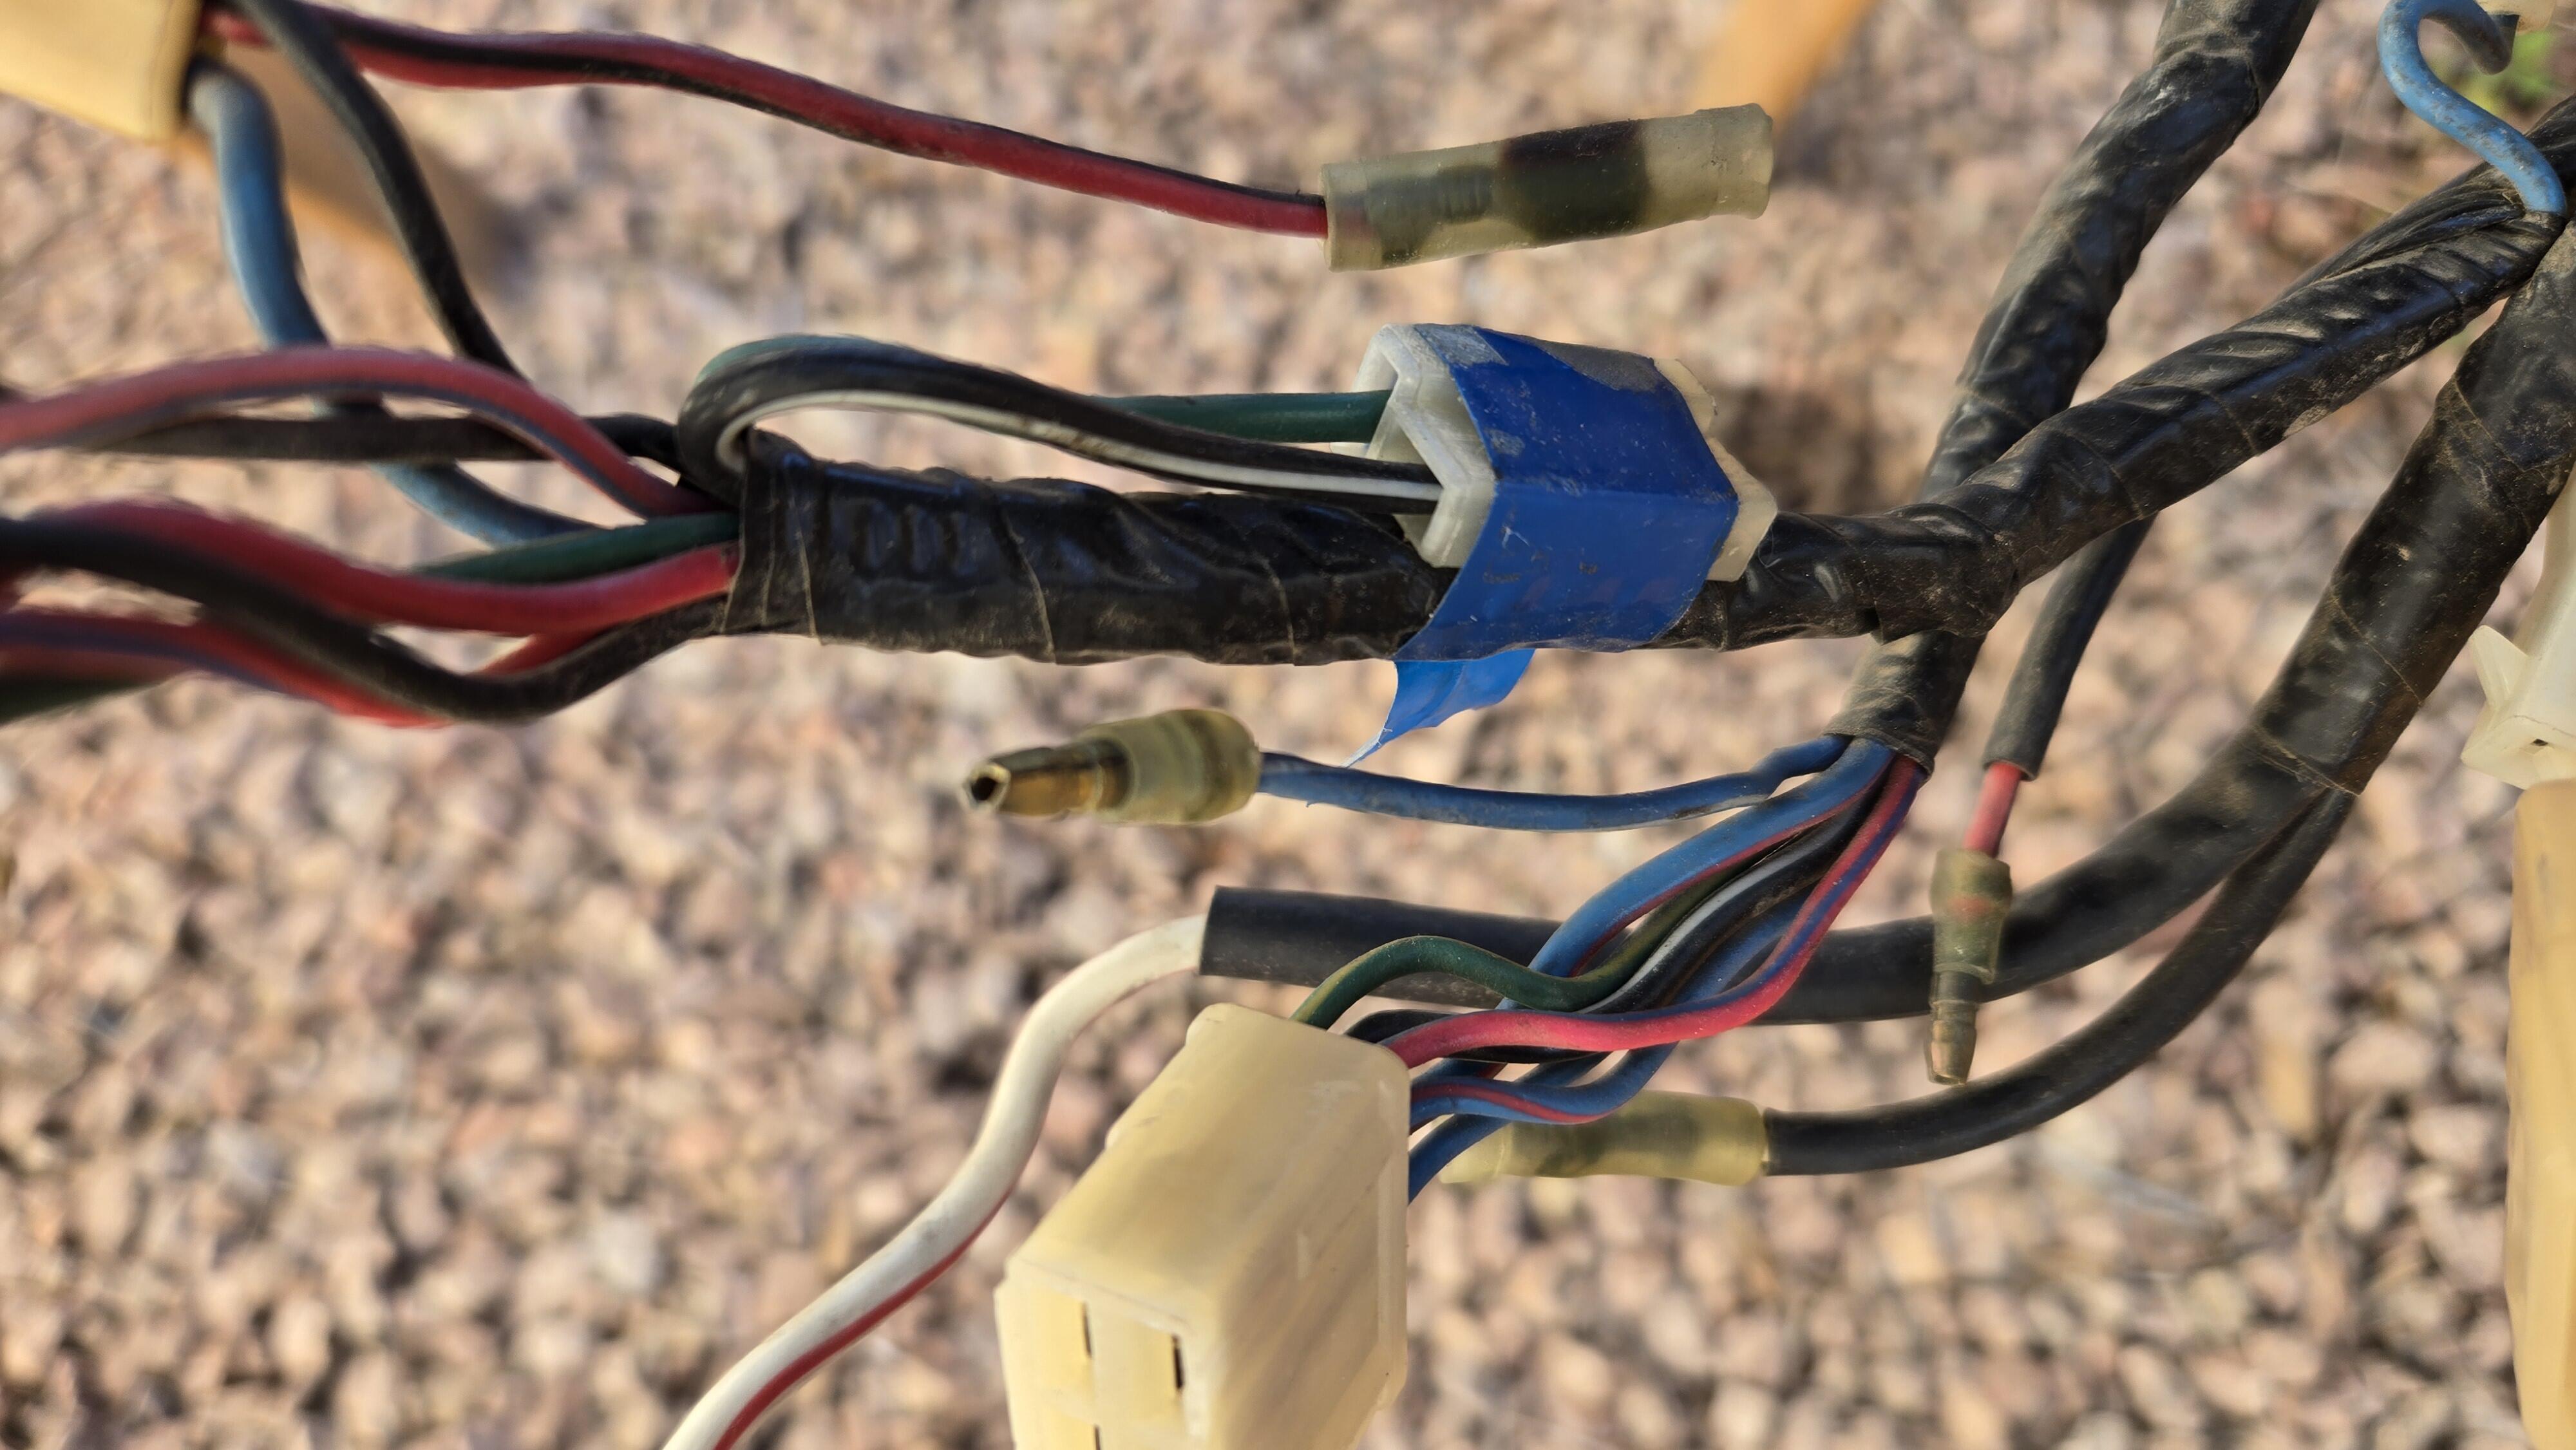
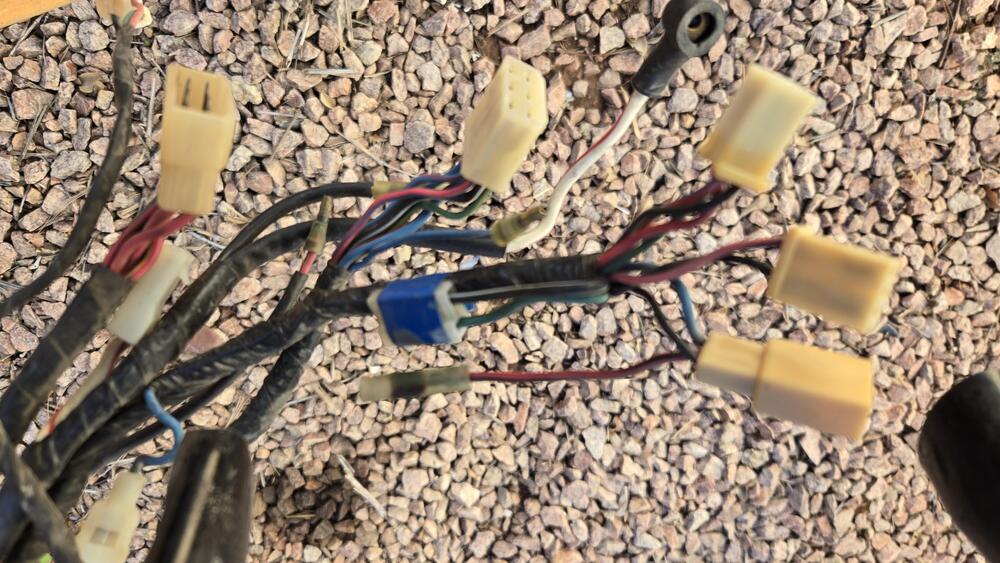
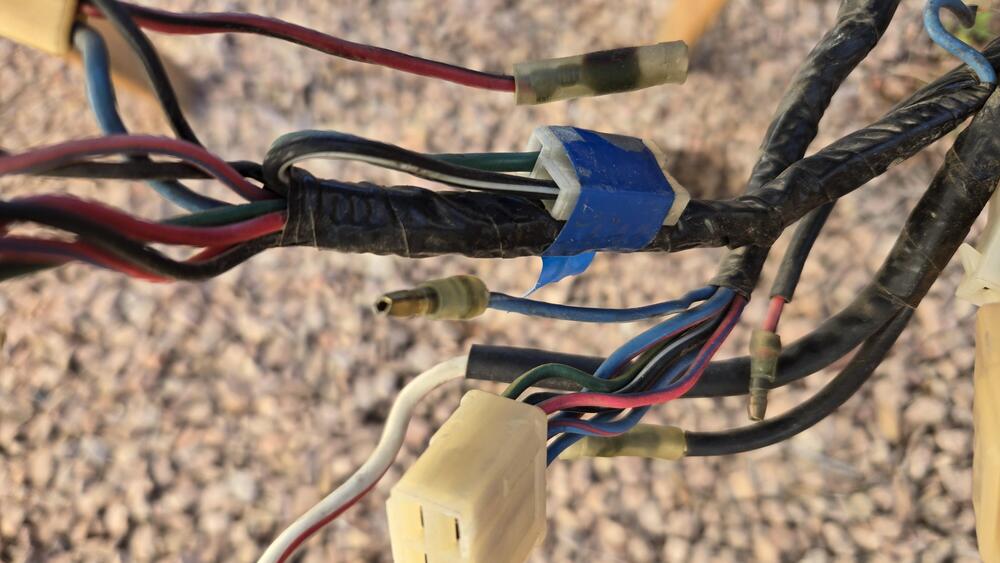
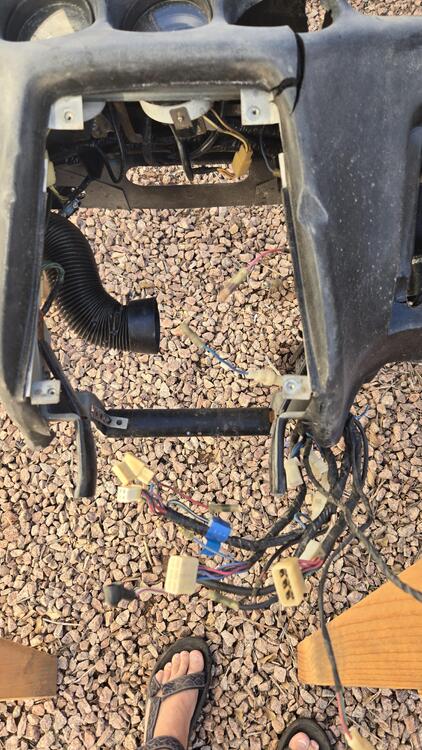
Sorry, this 240Z dash is not in the car but here are pictures of the dash wiring and the unused connector that could deliver power back to a fuel pump. The wiring comes down the right side of the heater slider assembly with all the wiring to the fuse box and center console connections.
-
🤣 OMG... I used to do that... Thank goodness I haven't seen a phone cord in decades!
-
The cup or the embossed piece holds the spring and the small hole keeps the pin centered. I'm sure you've seen a spring that has slipped to one side - now you have spring steel that is potentially causing wear on the pin and backing plate due to it's abnormal position.