Leaderboard

.thumb.jpg.75165ae25cbc256d967cf4697fa089e3.jpg)


Popular Content
Showing content with the highest reputation on 05/18/2025 in all areas
-
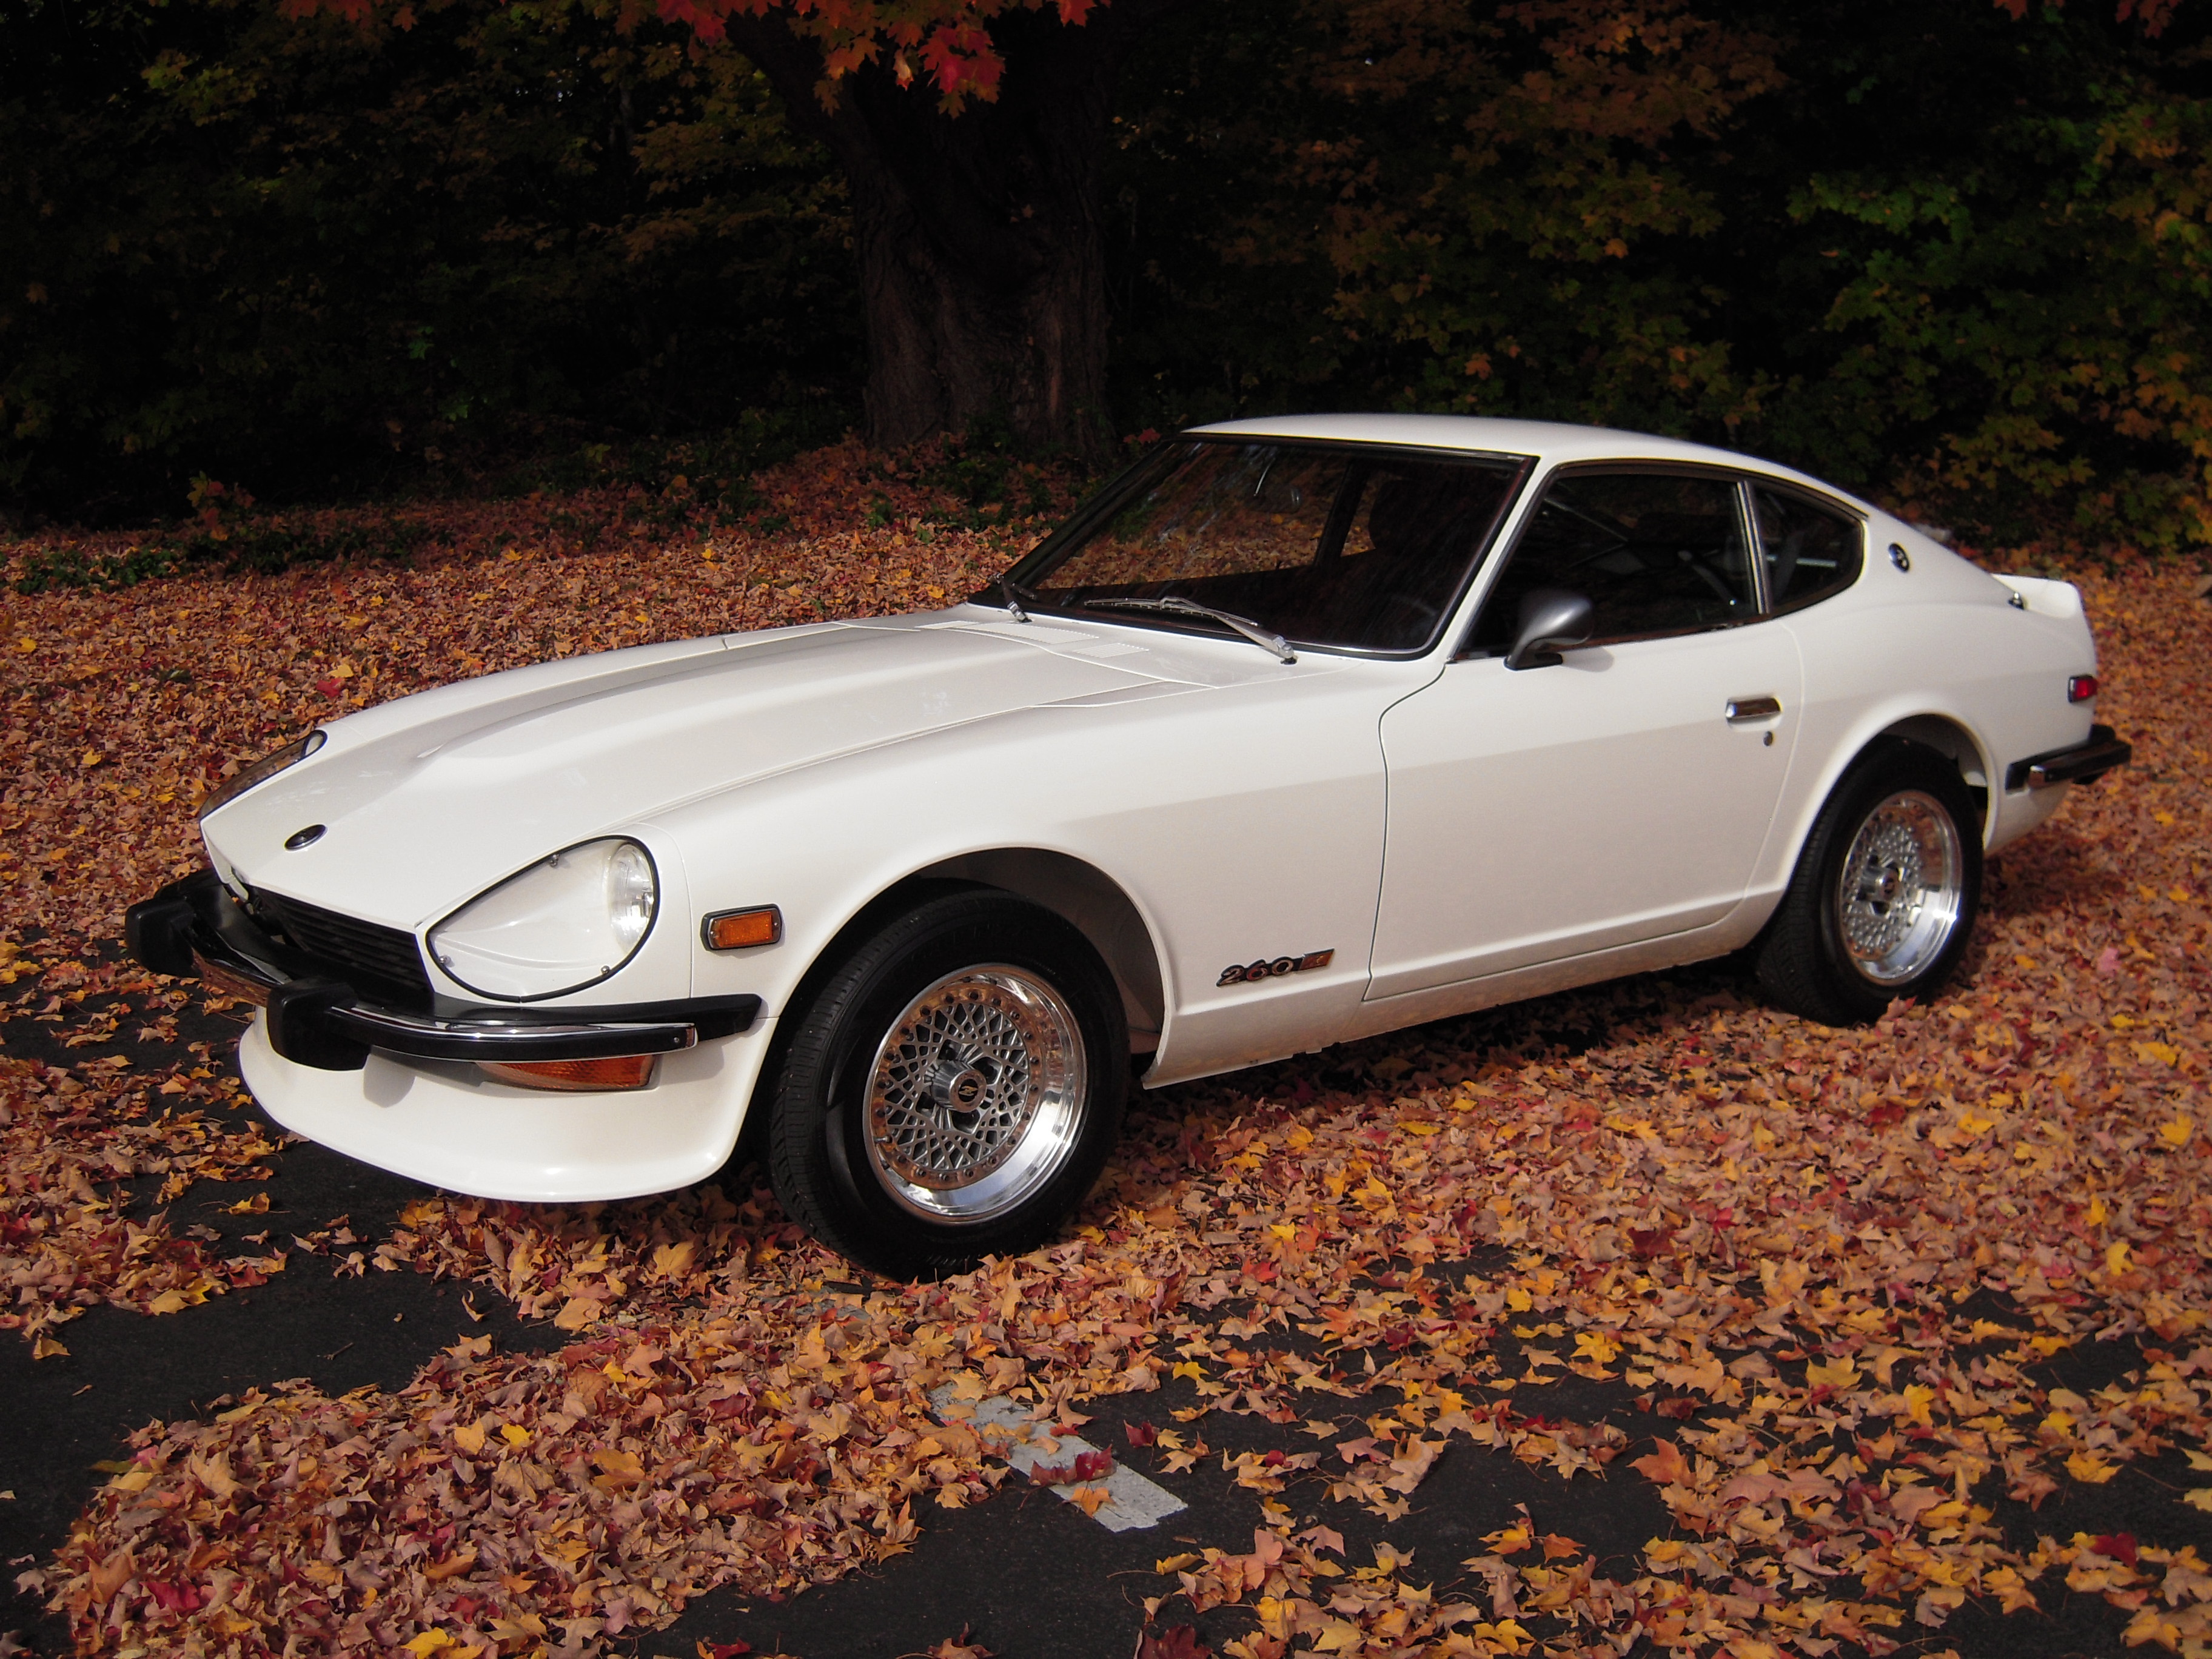
2 pointsI sold my restored 260Z about 3 years ago. It was a labor of love. But I still like front engine sports cars. A Z replacement entered my garage this month. Enjoy your Z's. Dave

.thumb.jpg.f4fd85811bc7a047b77ca92dcb925fc3.jpg)
.thumb.jpg.8d14b8b7e15f256a8b4a2dc627ce97bd.jpg)
.thumb.jpg.fce7bcceac74c5ce6e4e25738a8f1386.jpg) 2 points
2 points -
2 pointsHey, I just wanted to follow up in case anyone was wondering—turns out it was the ECU/computer after all. Swapped it out all those years ago, and everything has been running perfectly. Appreciate your advice to test instead of just guessing. Helped me narrow it down and get it fixed a lot quicker. Thanks for the help!2 points
-
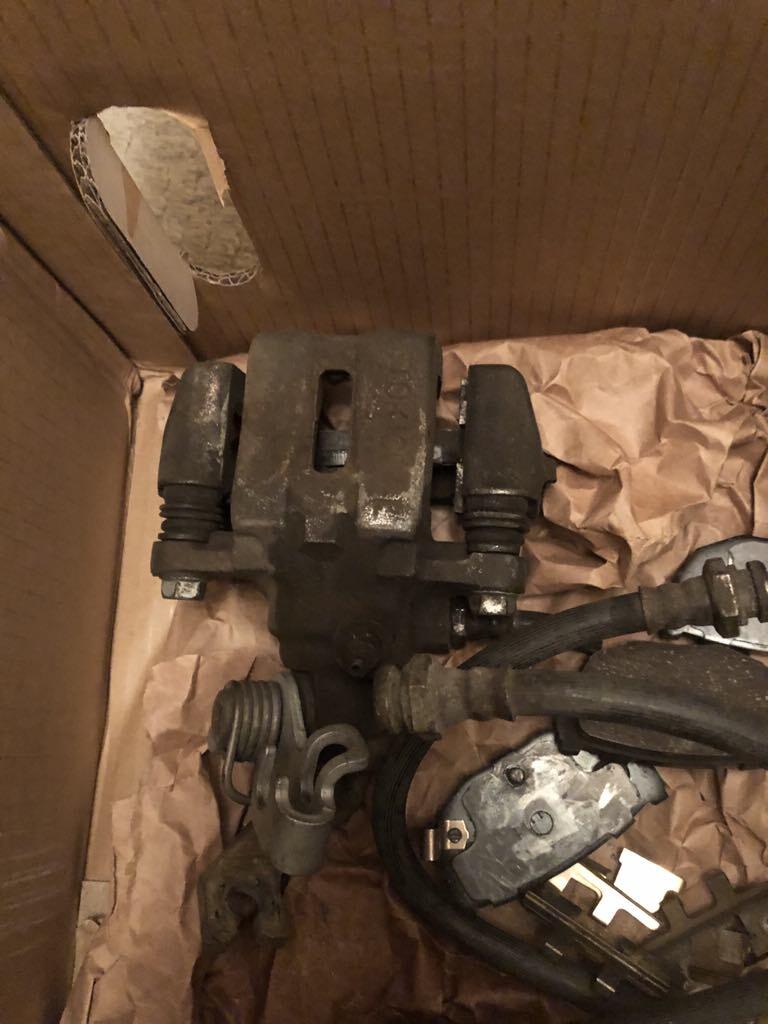
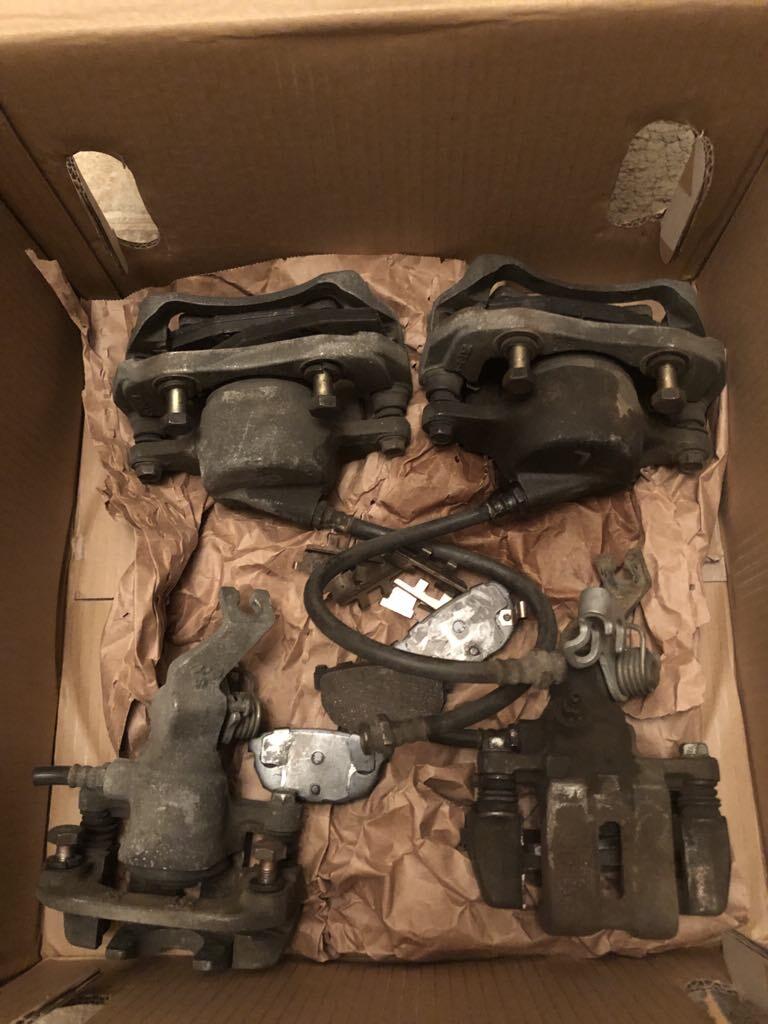
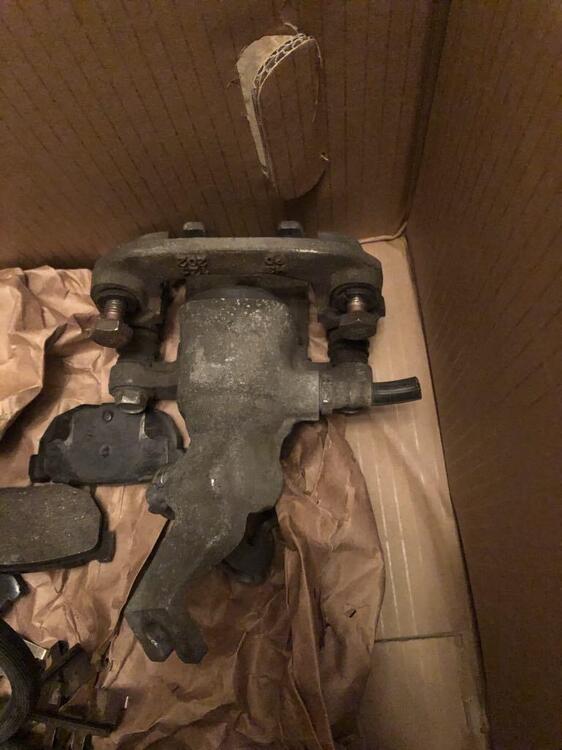
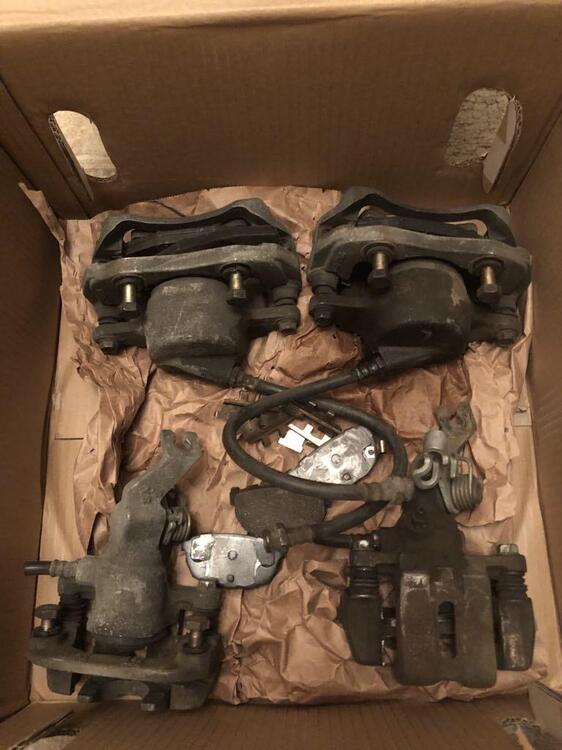
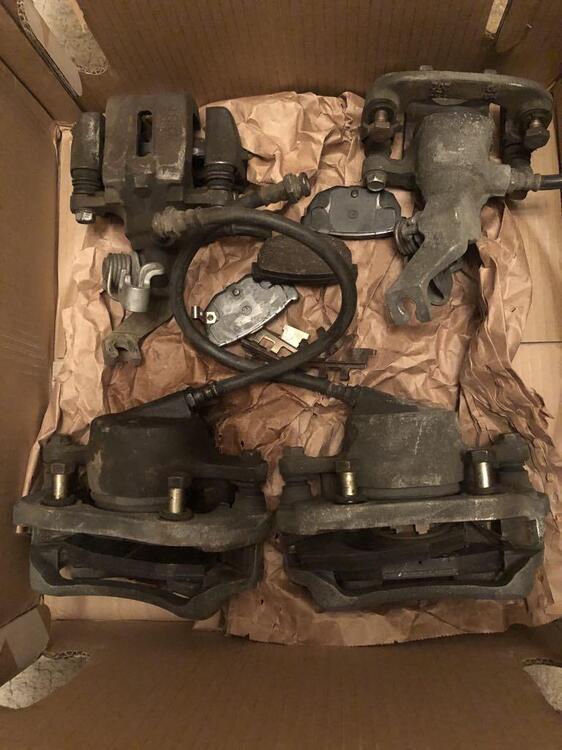
Free -- you cover the cost of shipping and PayPal fee. Complete set of front and rear calipers for a 280ZX (S130). What you see is what you get...some mounting hardware, some (worn) pads, no rotors or soft lines. Year unknown, working condition unknown. Snagged these a couple years ago on FB Marketplace "just in case I might need them". Turns out I don't. Unless you have a preferred shipper that you can send me an account number/prepaid shipping label/etc; I will ship these flat rate USPS. I can fit everything into a single Large flat-rate box, but it's a heavy sucker. Safer approach might be two Medium flat-rate boxes. Thanks for looking.


 1 point
 -
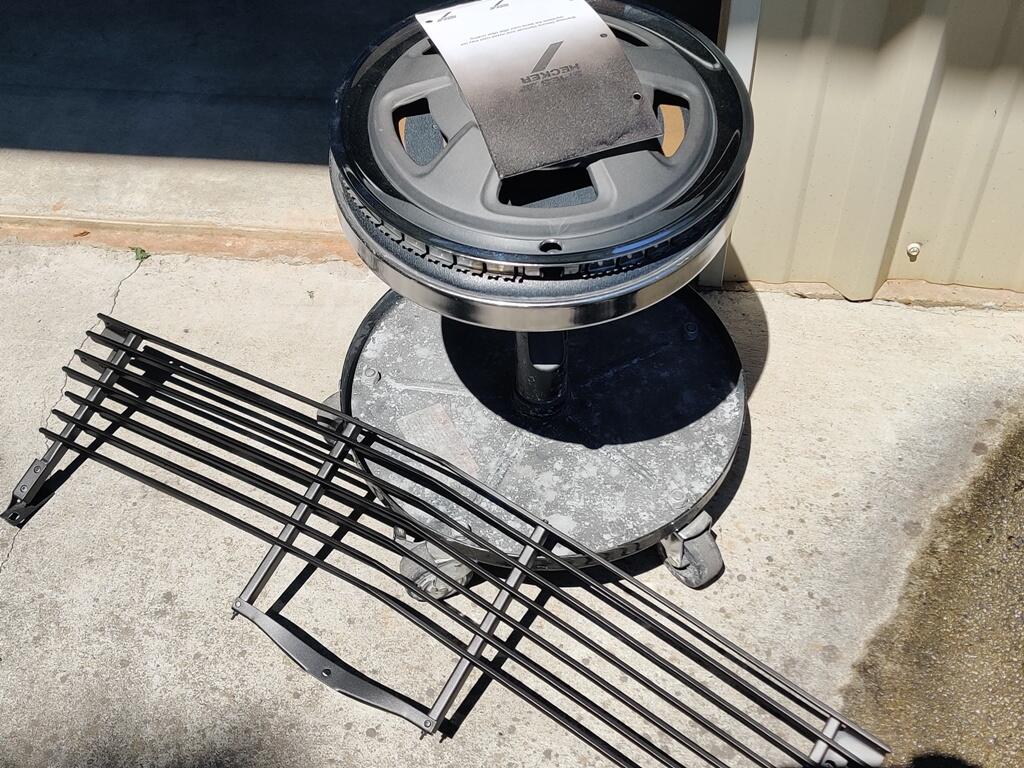
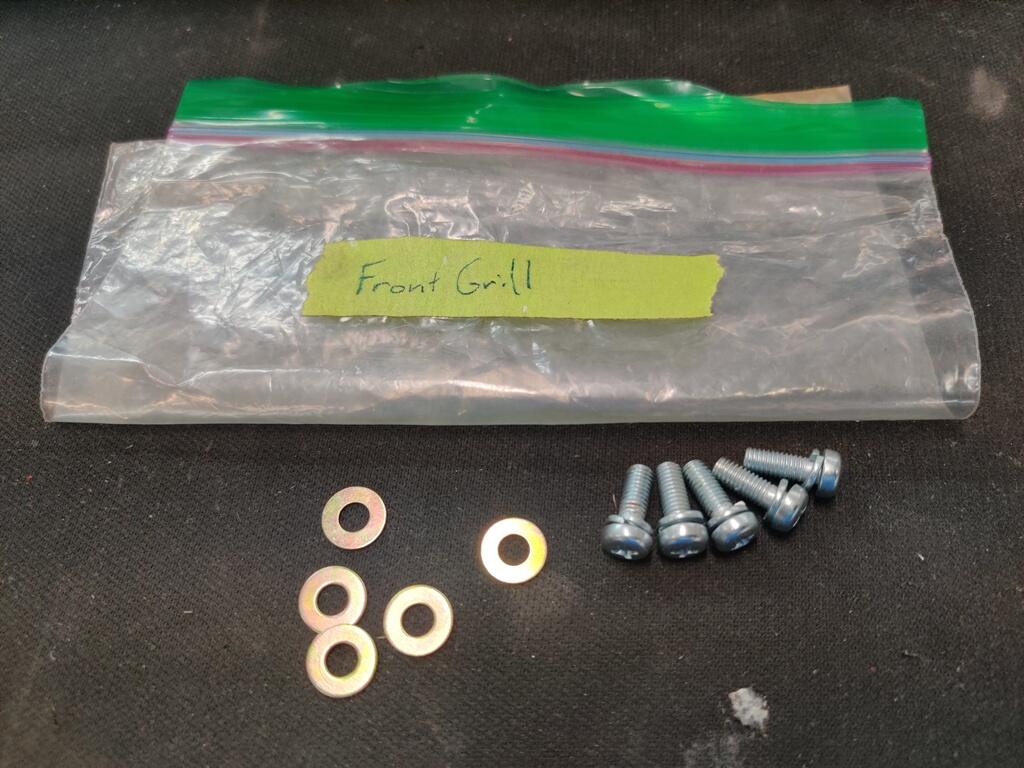
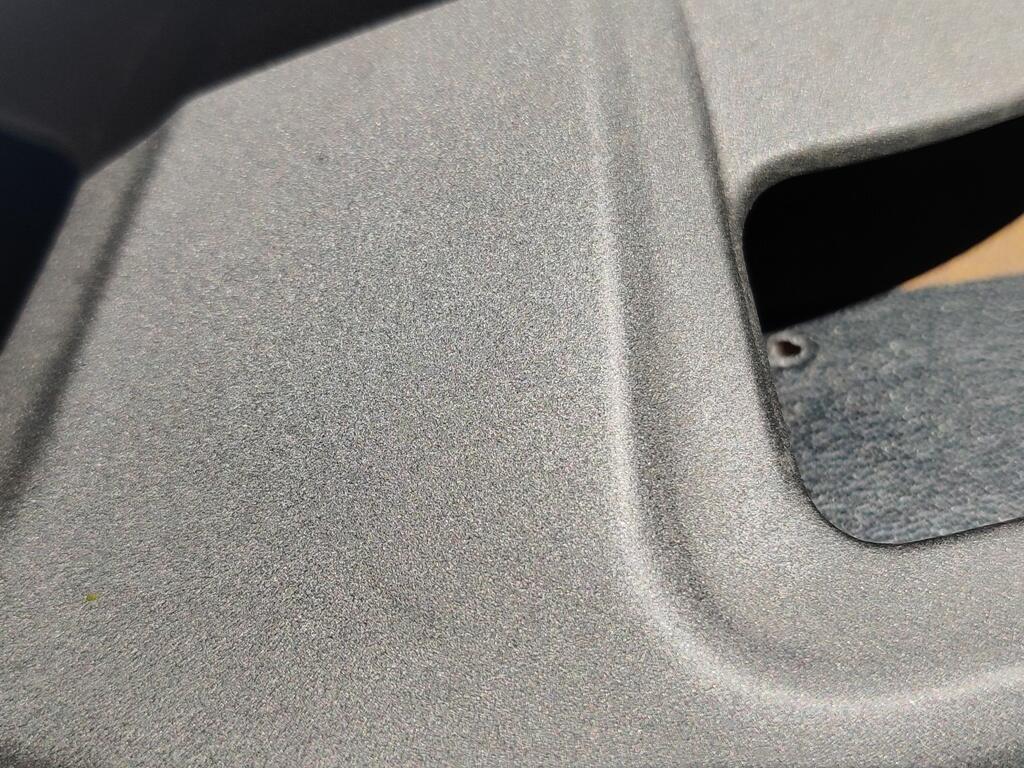
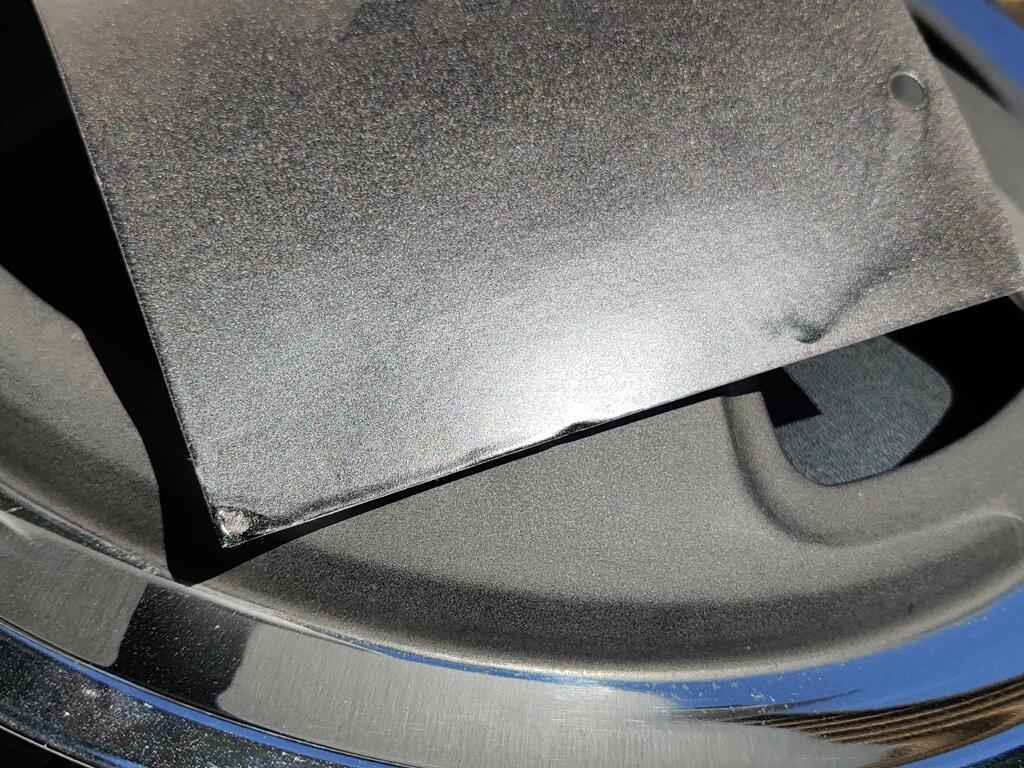
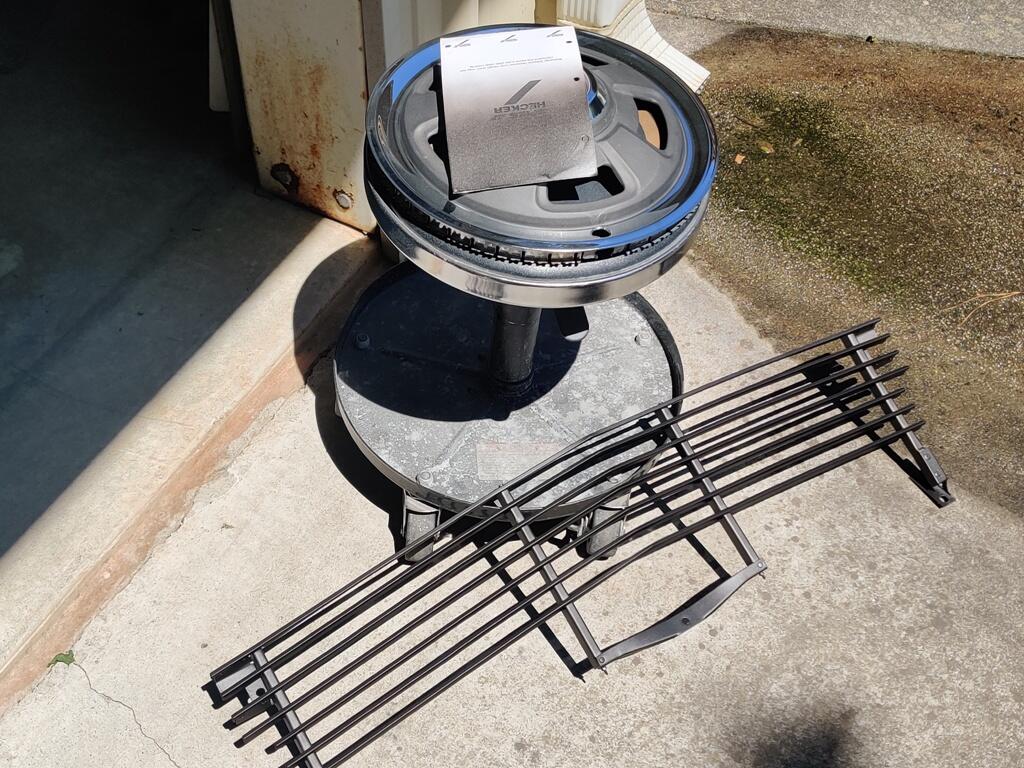
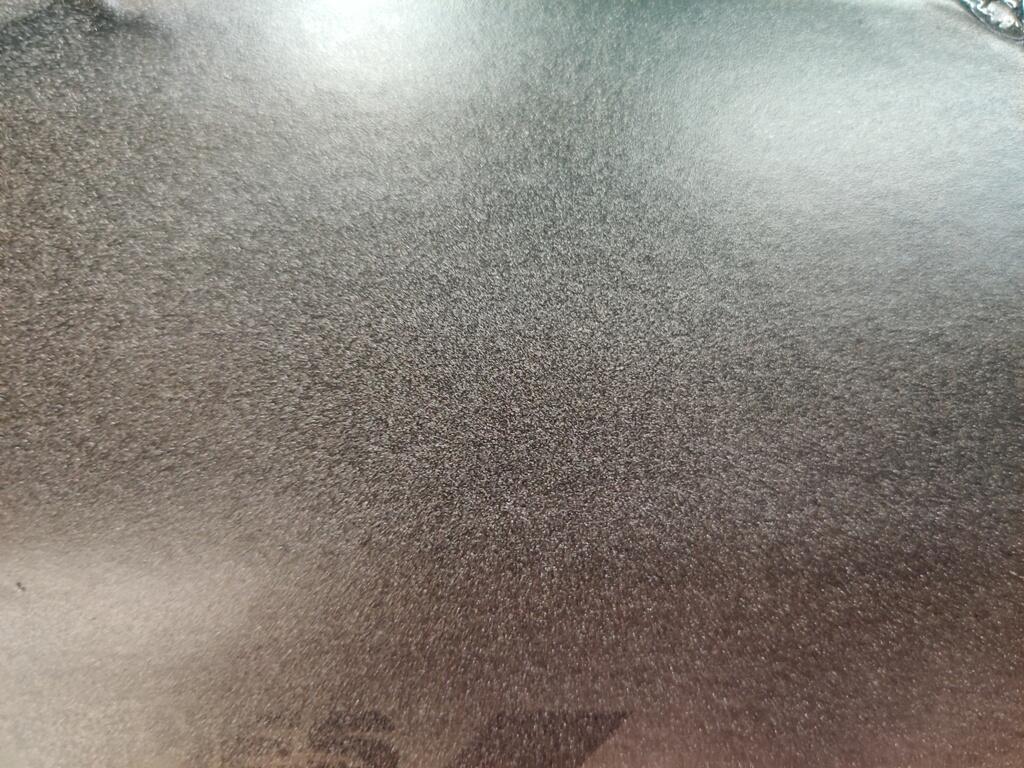
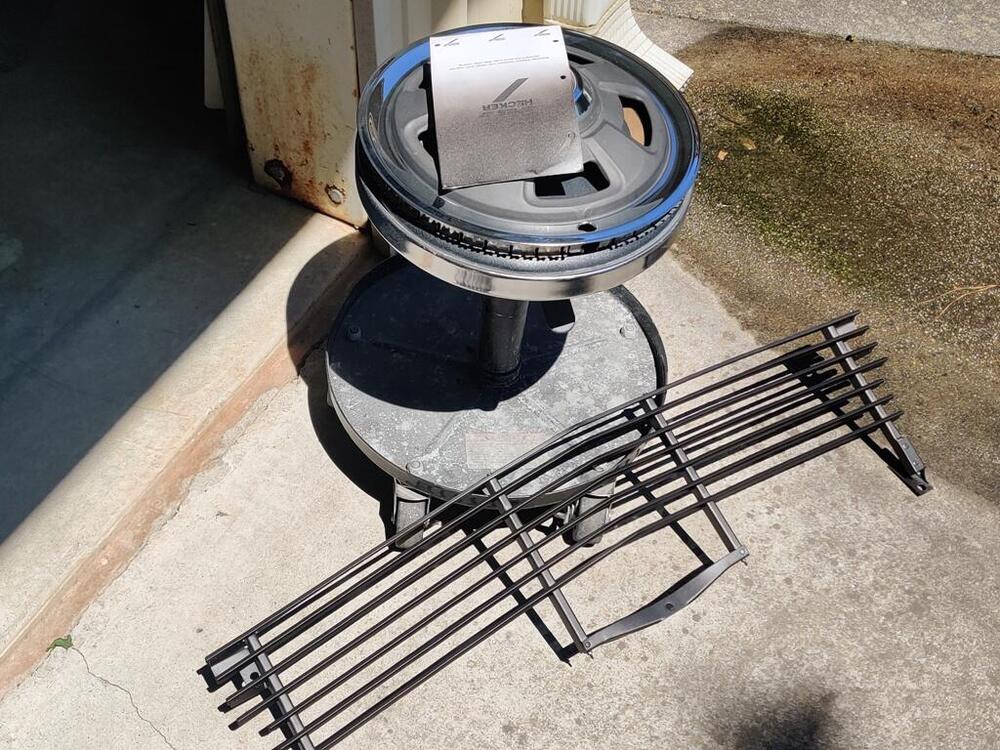
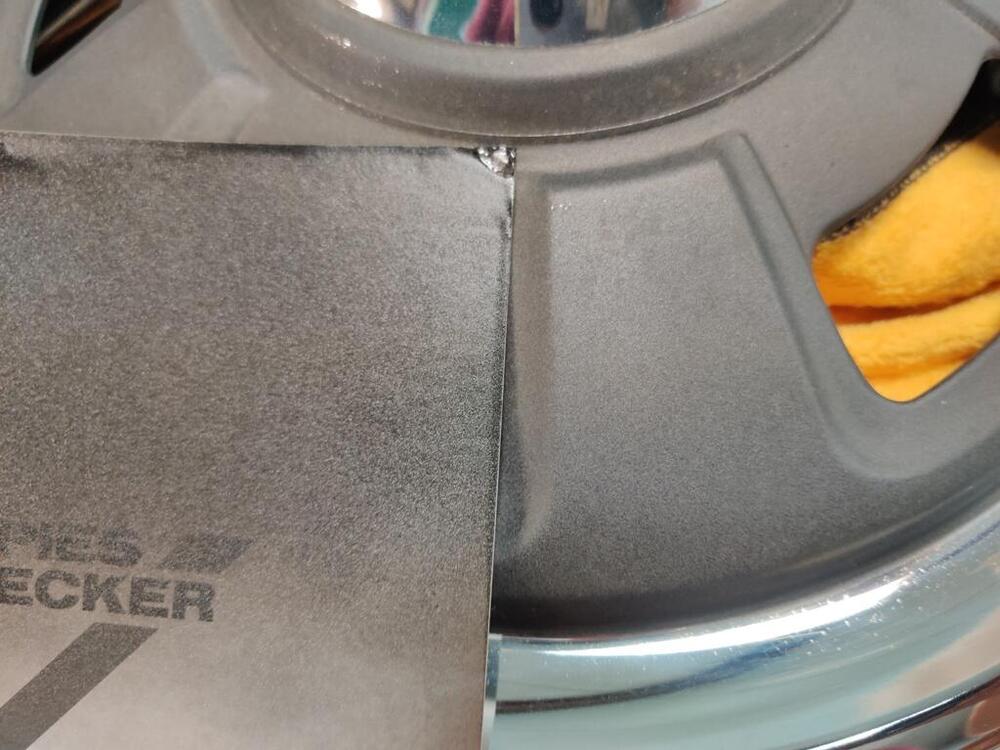
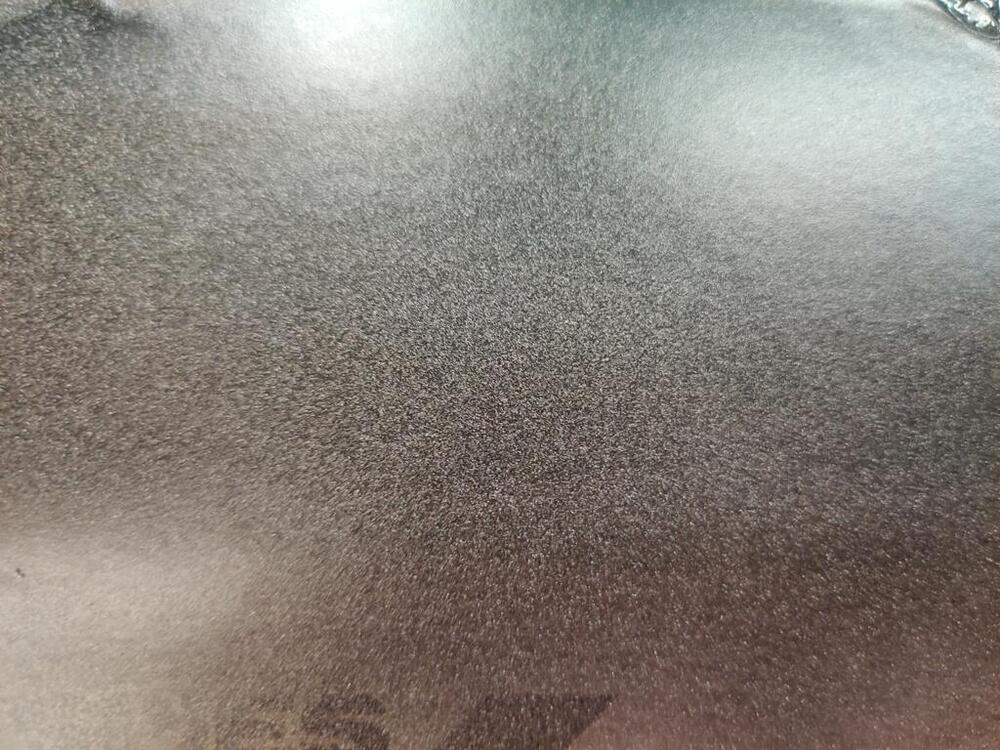
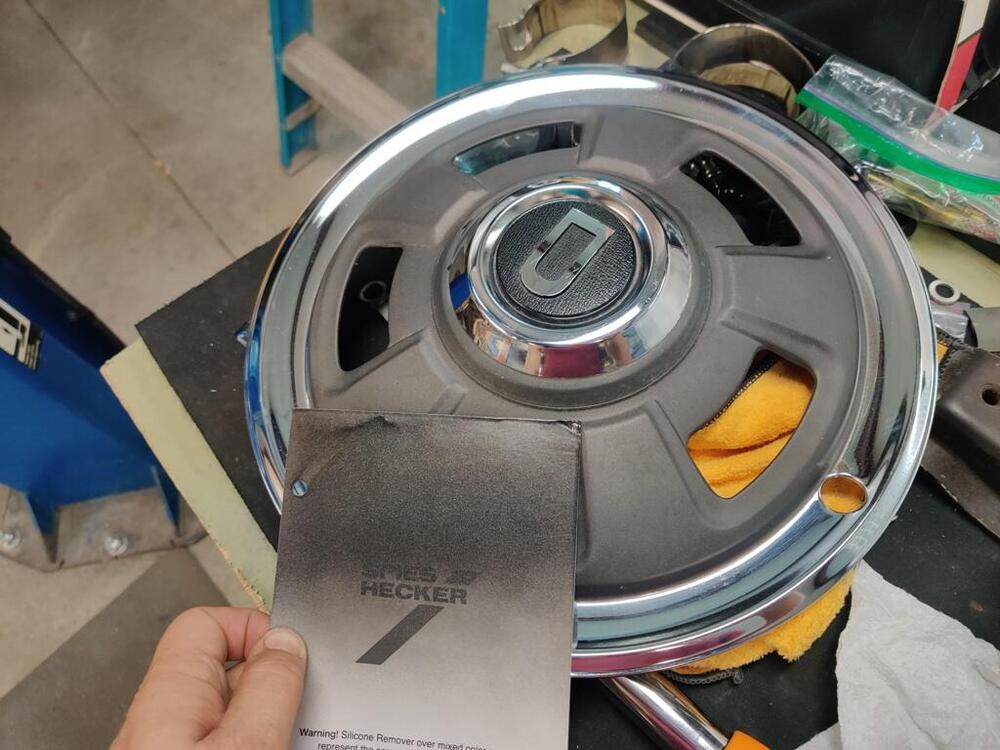
I installed the front grill today. As you can see, the paint is a little darker than the original, but I am not interested in painting it for a third time, especially since I have a wrist cast for the next six weeks. Interestingly, when in the sunlight, the original paint does appear to be metallic. The metallic particles seem smaller, less noticeable, but they do reflect. This is not easy to capture in a photo (second pic here): Original grill hardware:


 1 point
 -
1 pointThanks guys. I really don't want to get rid of her but life is getting expensive. I have a kiddo who will be going to college in 3 years and I'm in a house with a very small garage. One day I'll have a big garage or shop again and I'm sure that's the point I'll regret letting her go.1 point
-
jup, i got a clip on the chokecables feb 1971 (USA) car.. my '72 car had one too. that was a (Dutch) euro version.1 point
-
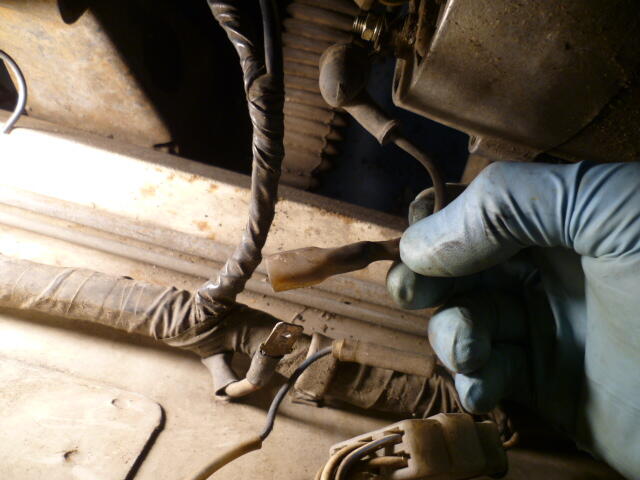
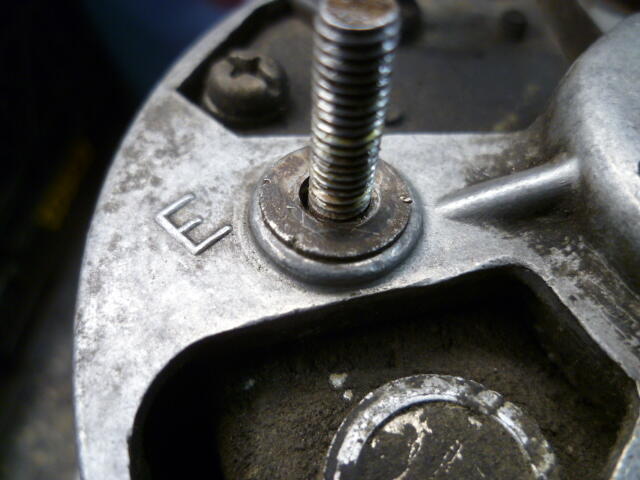
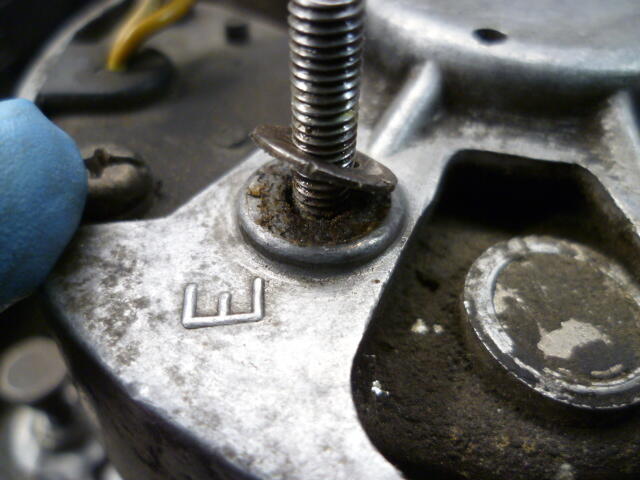
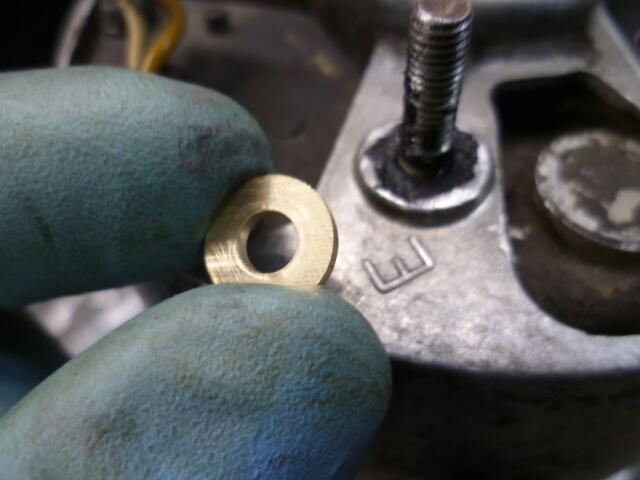
Yes, the early cars had a fusible between the alternator and the harness. (It's on the wiring diagram I've posted up on the site 😄) : Your spade connector looks a little black and crispy. It's a high amperage connection, so it's super important that it is a good connection. Clean and tight! I also found corrosion underneath the washer on the ground "E" connection that resulted in about a half volt drop when I turned the headlights on. Doing the calculation, it came out to about 50 milliOhms of resistance, but 50 mOhms drops a half a volt at ten amps!! So... Clean and tight!! I can walk you through how I found that questionable connection if you want, but I doubt I would need to do that. Here's my washer with hidden corrosion underneath: I didn't want to put a steel washer back in there, so I made a new washer out of brass: \
 1 point
 -
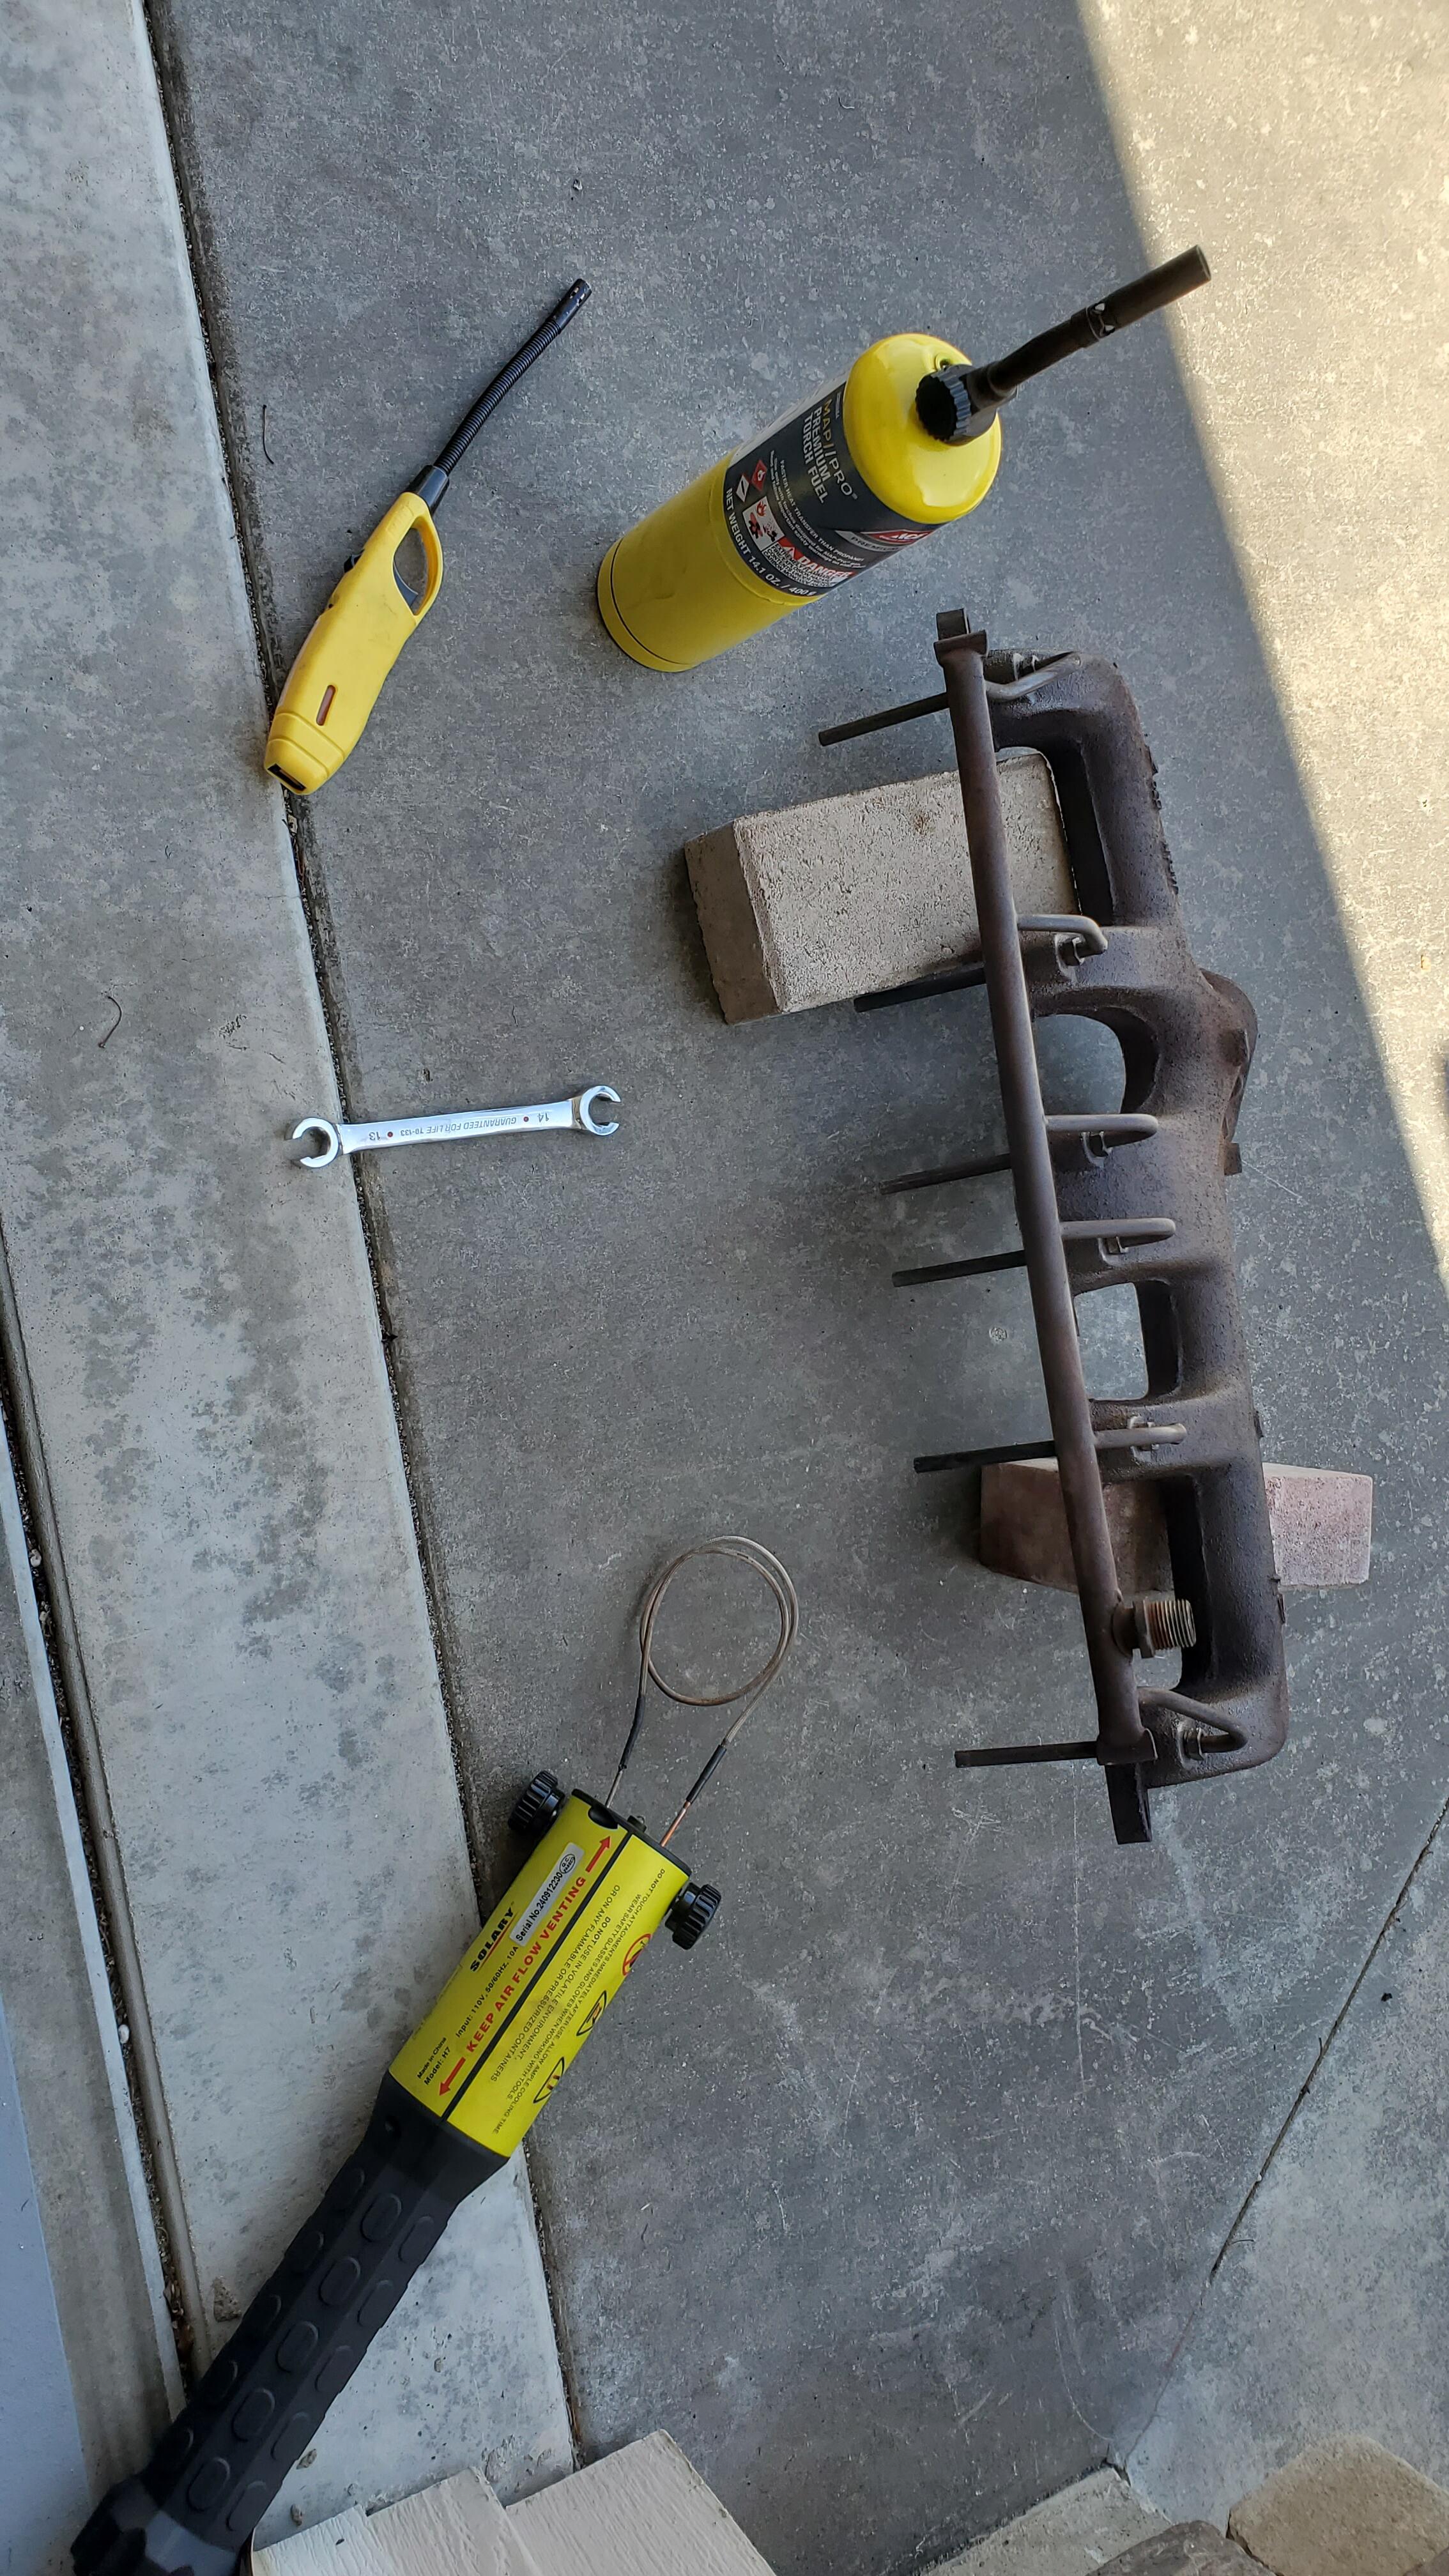
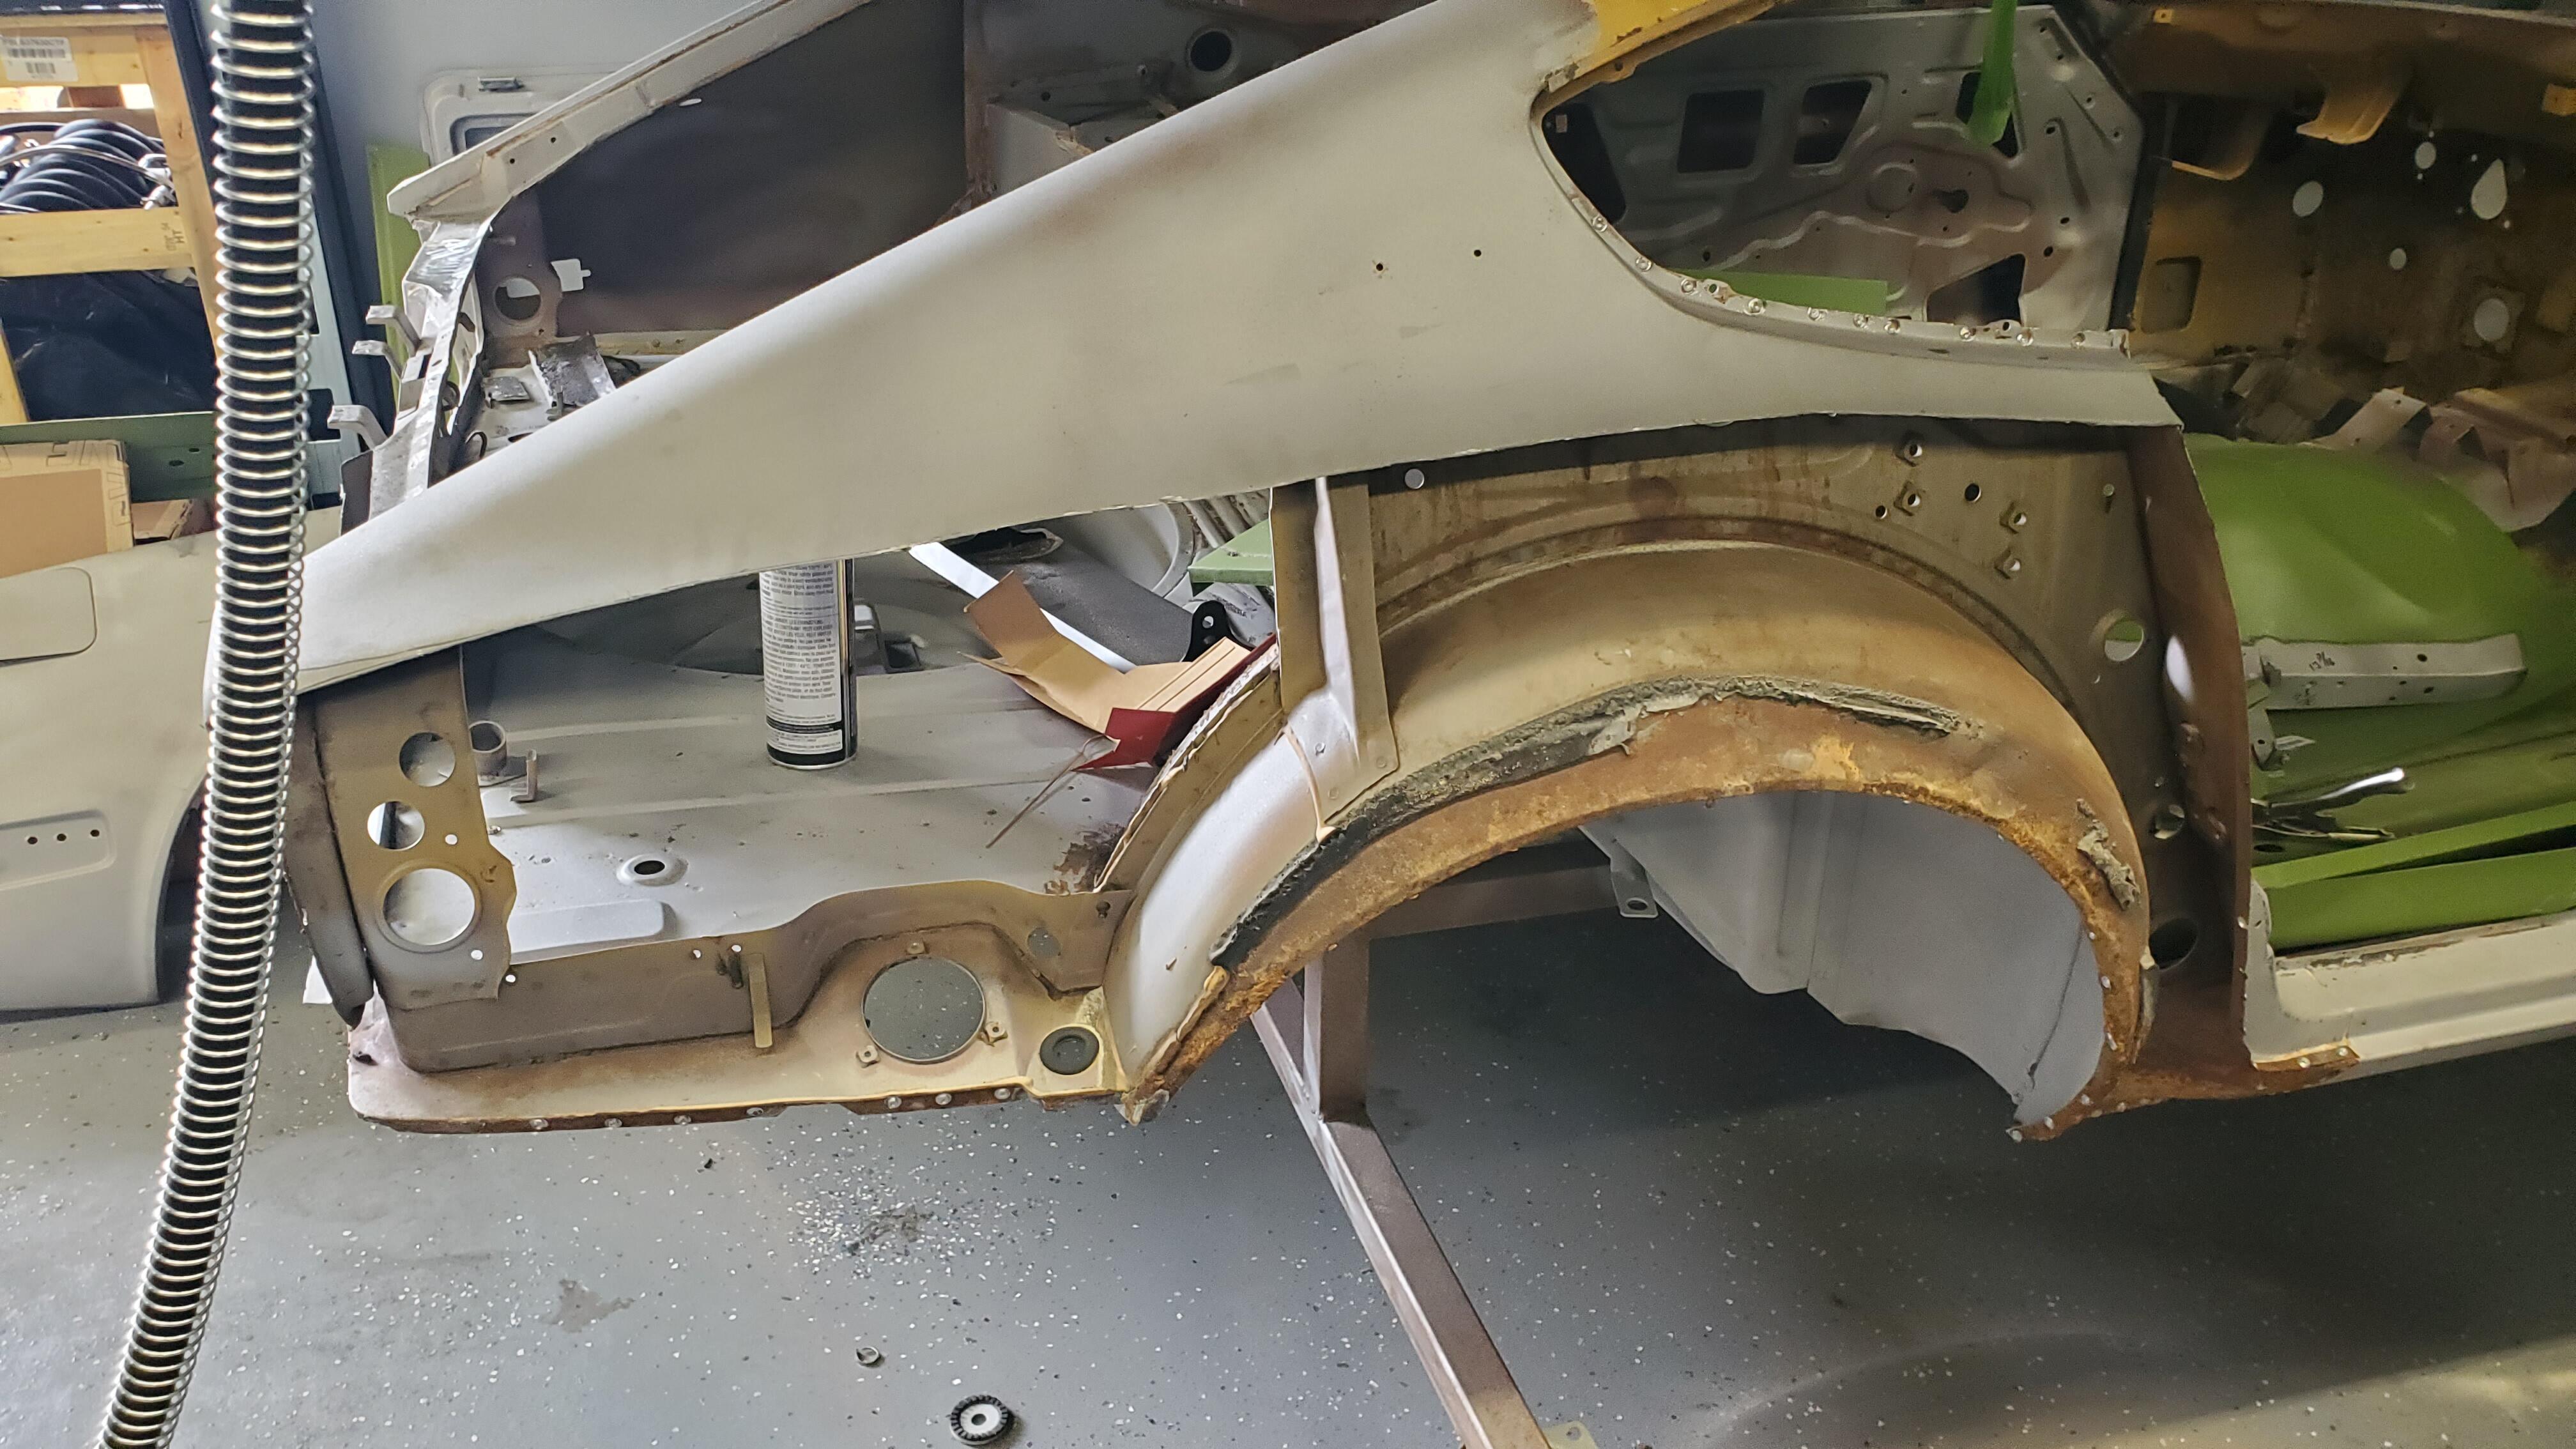
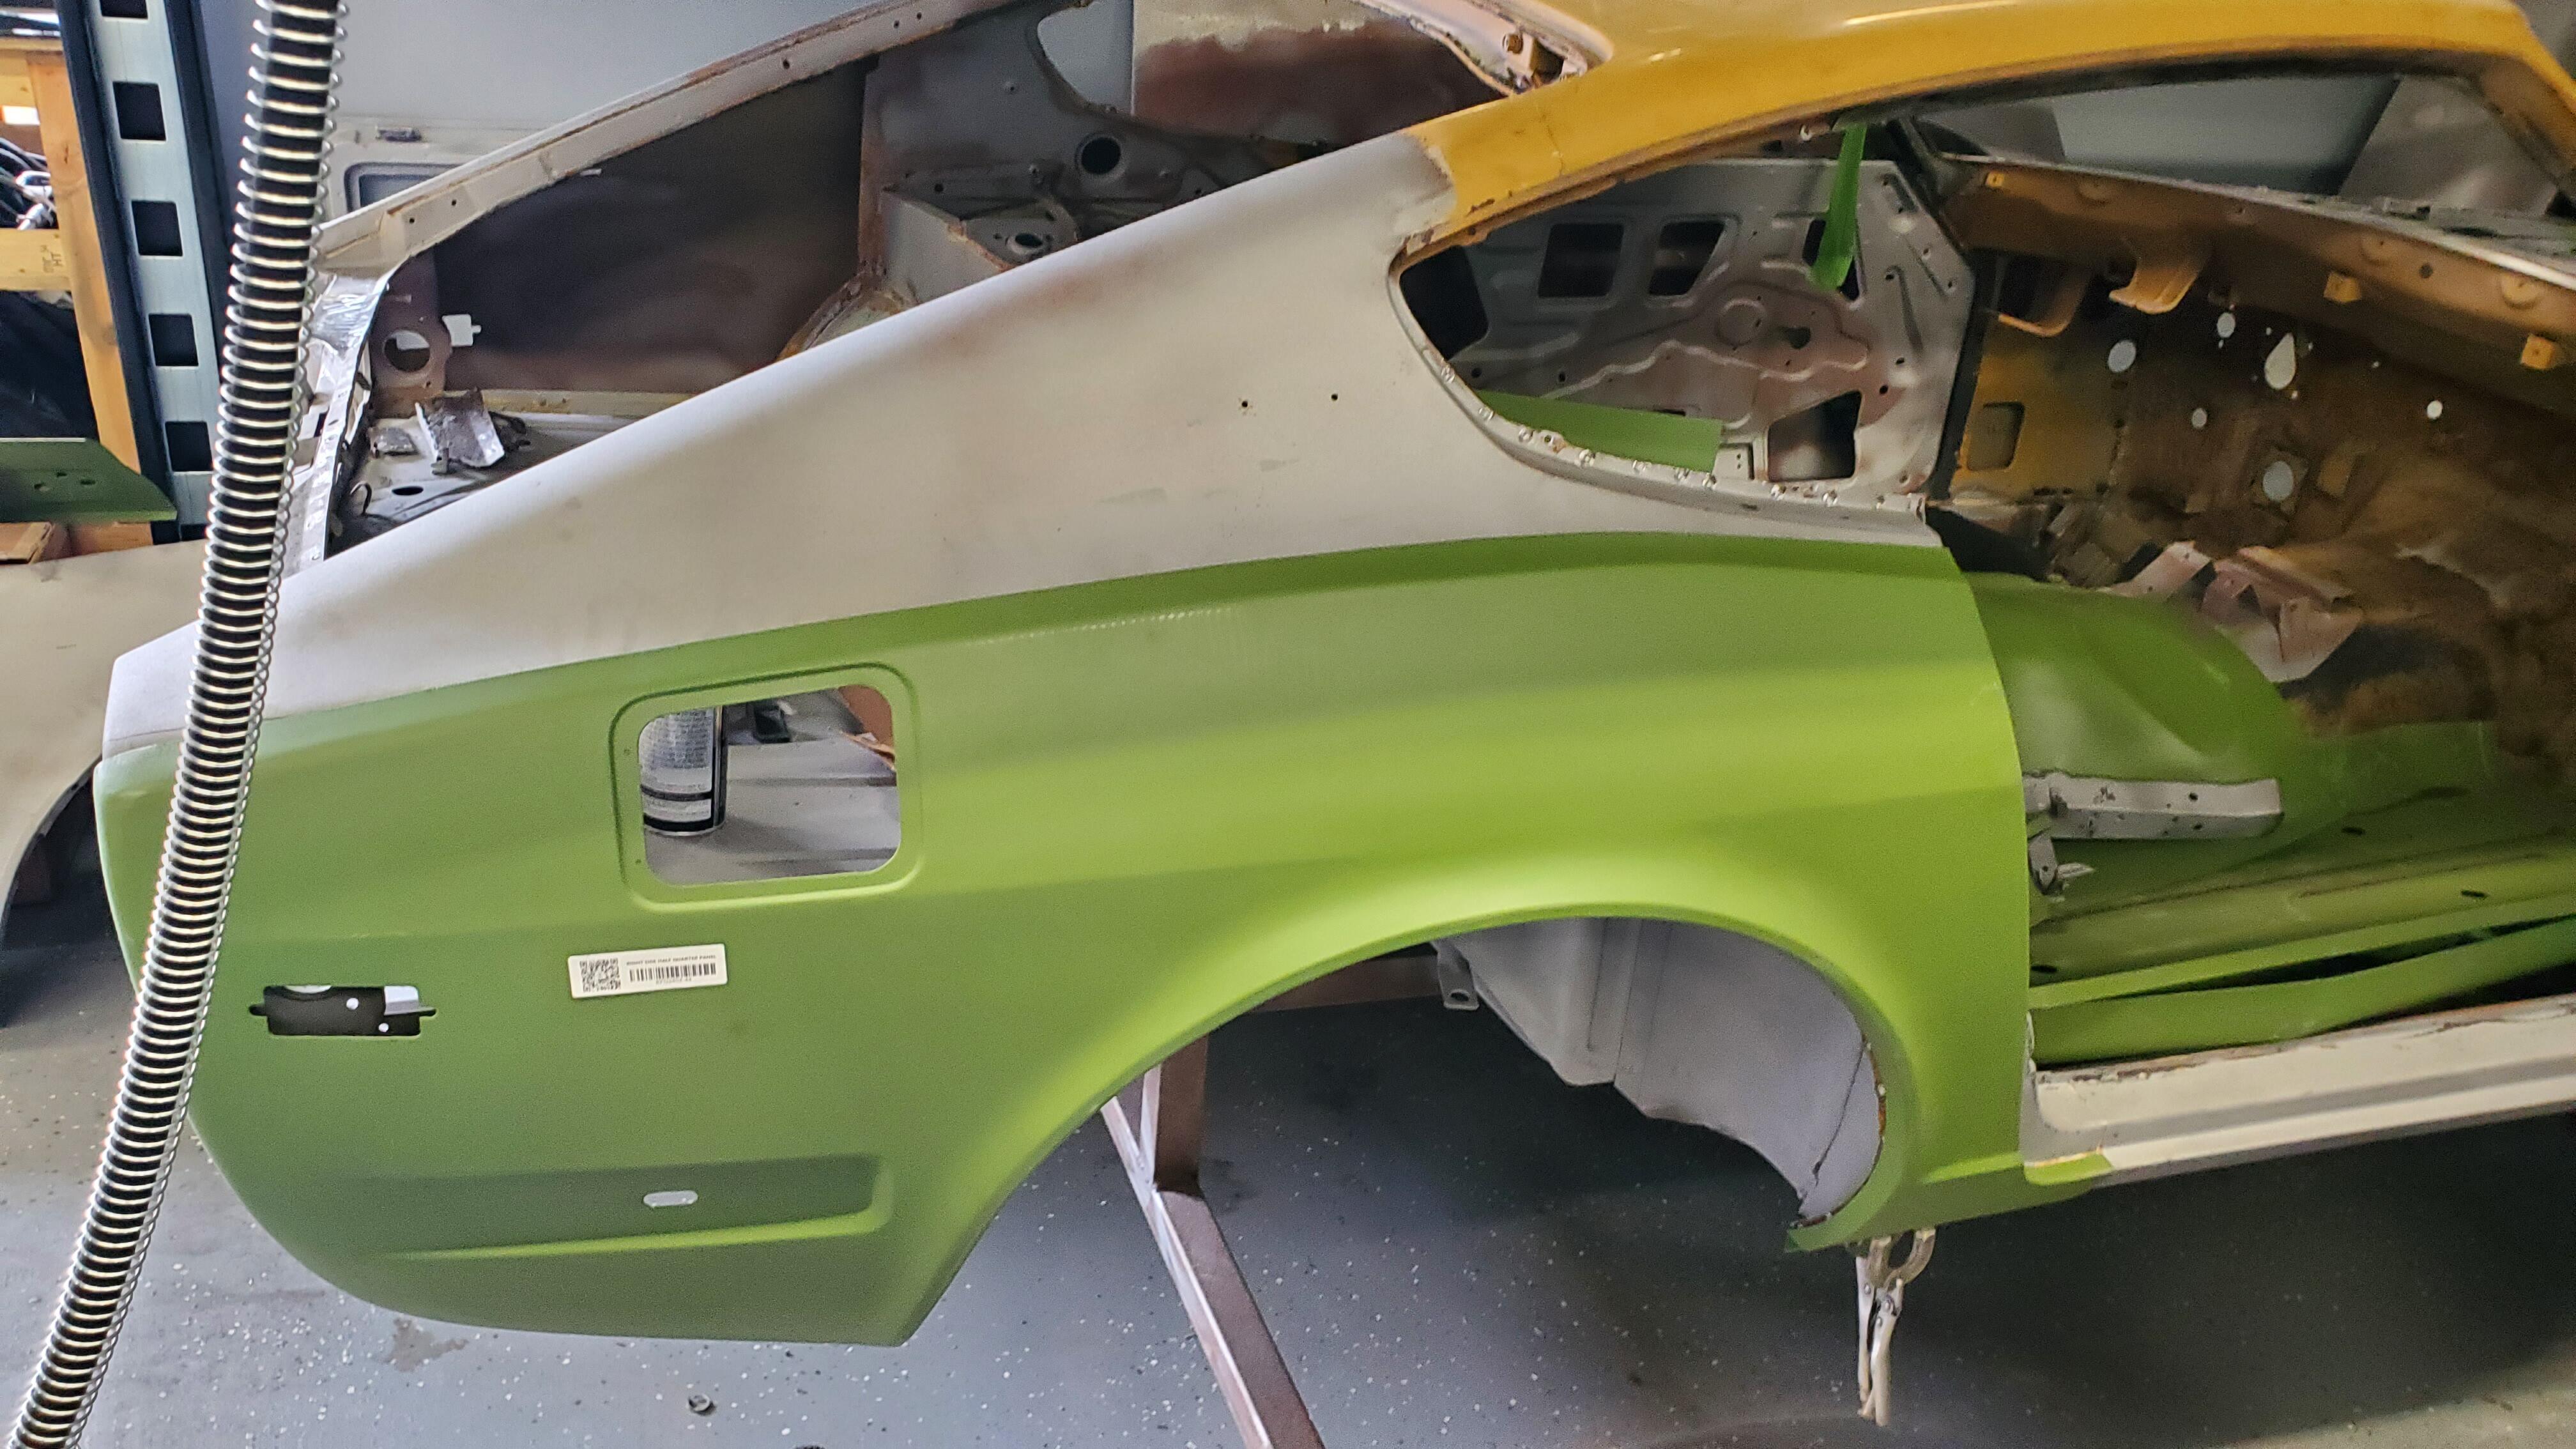
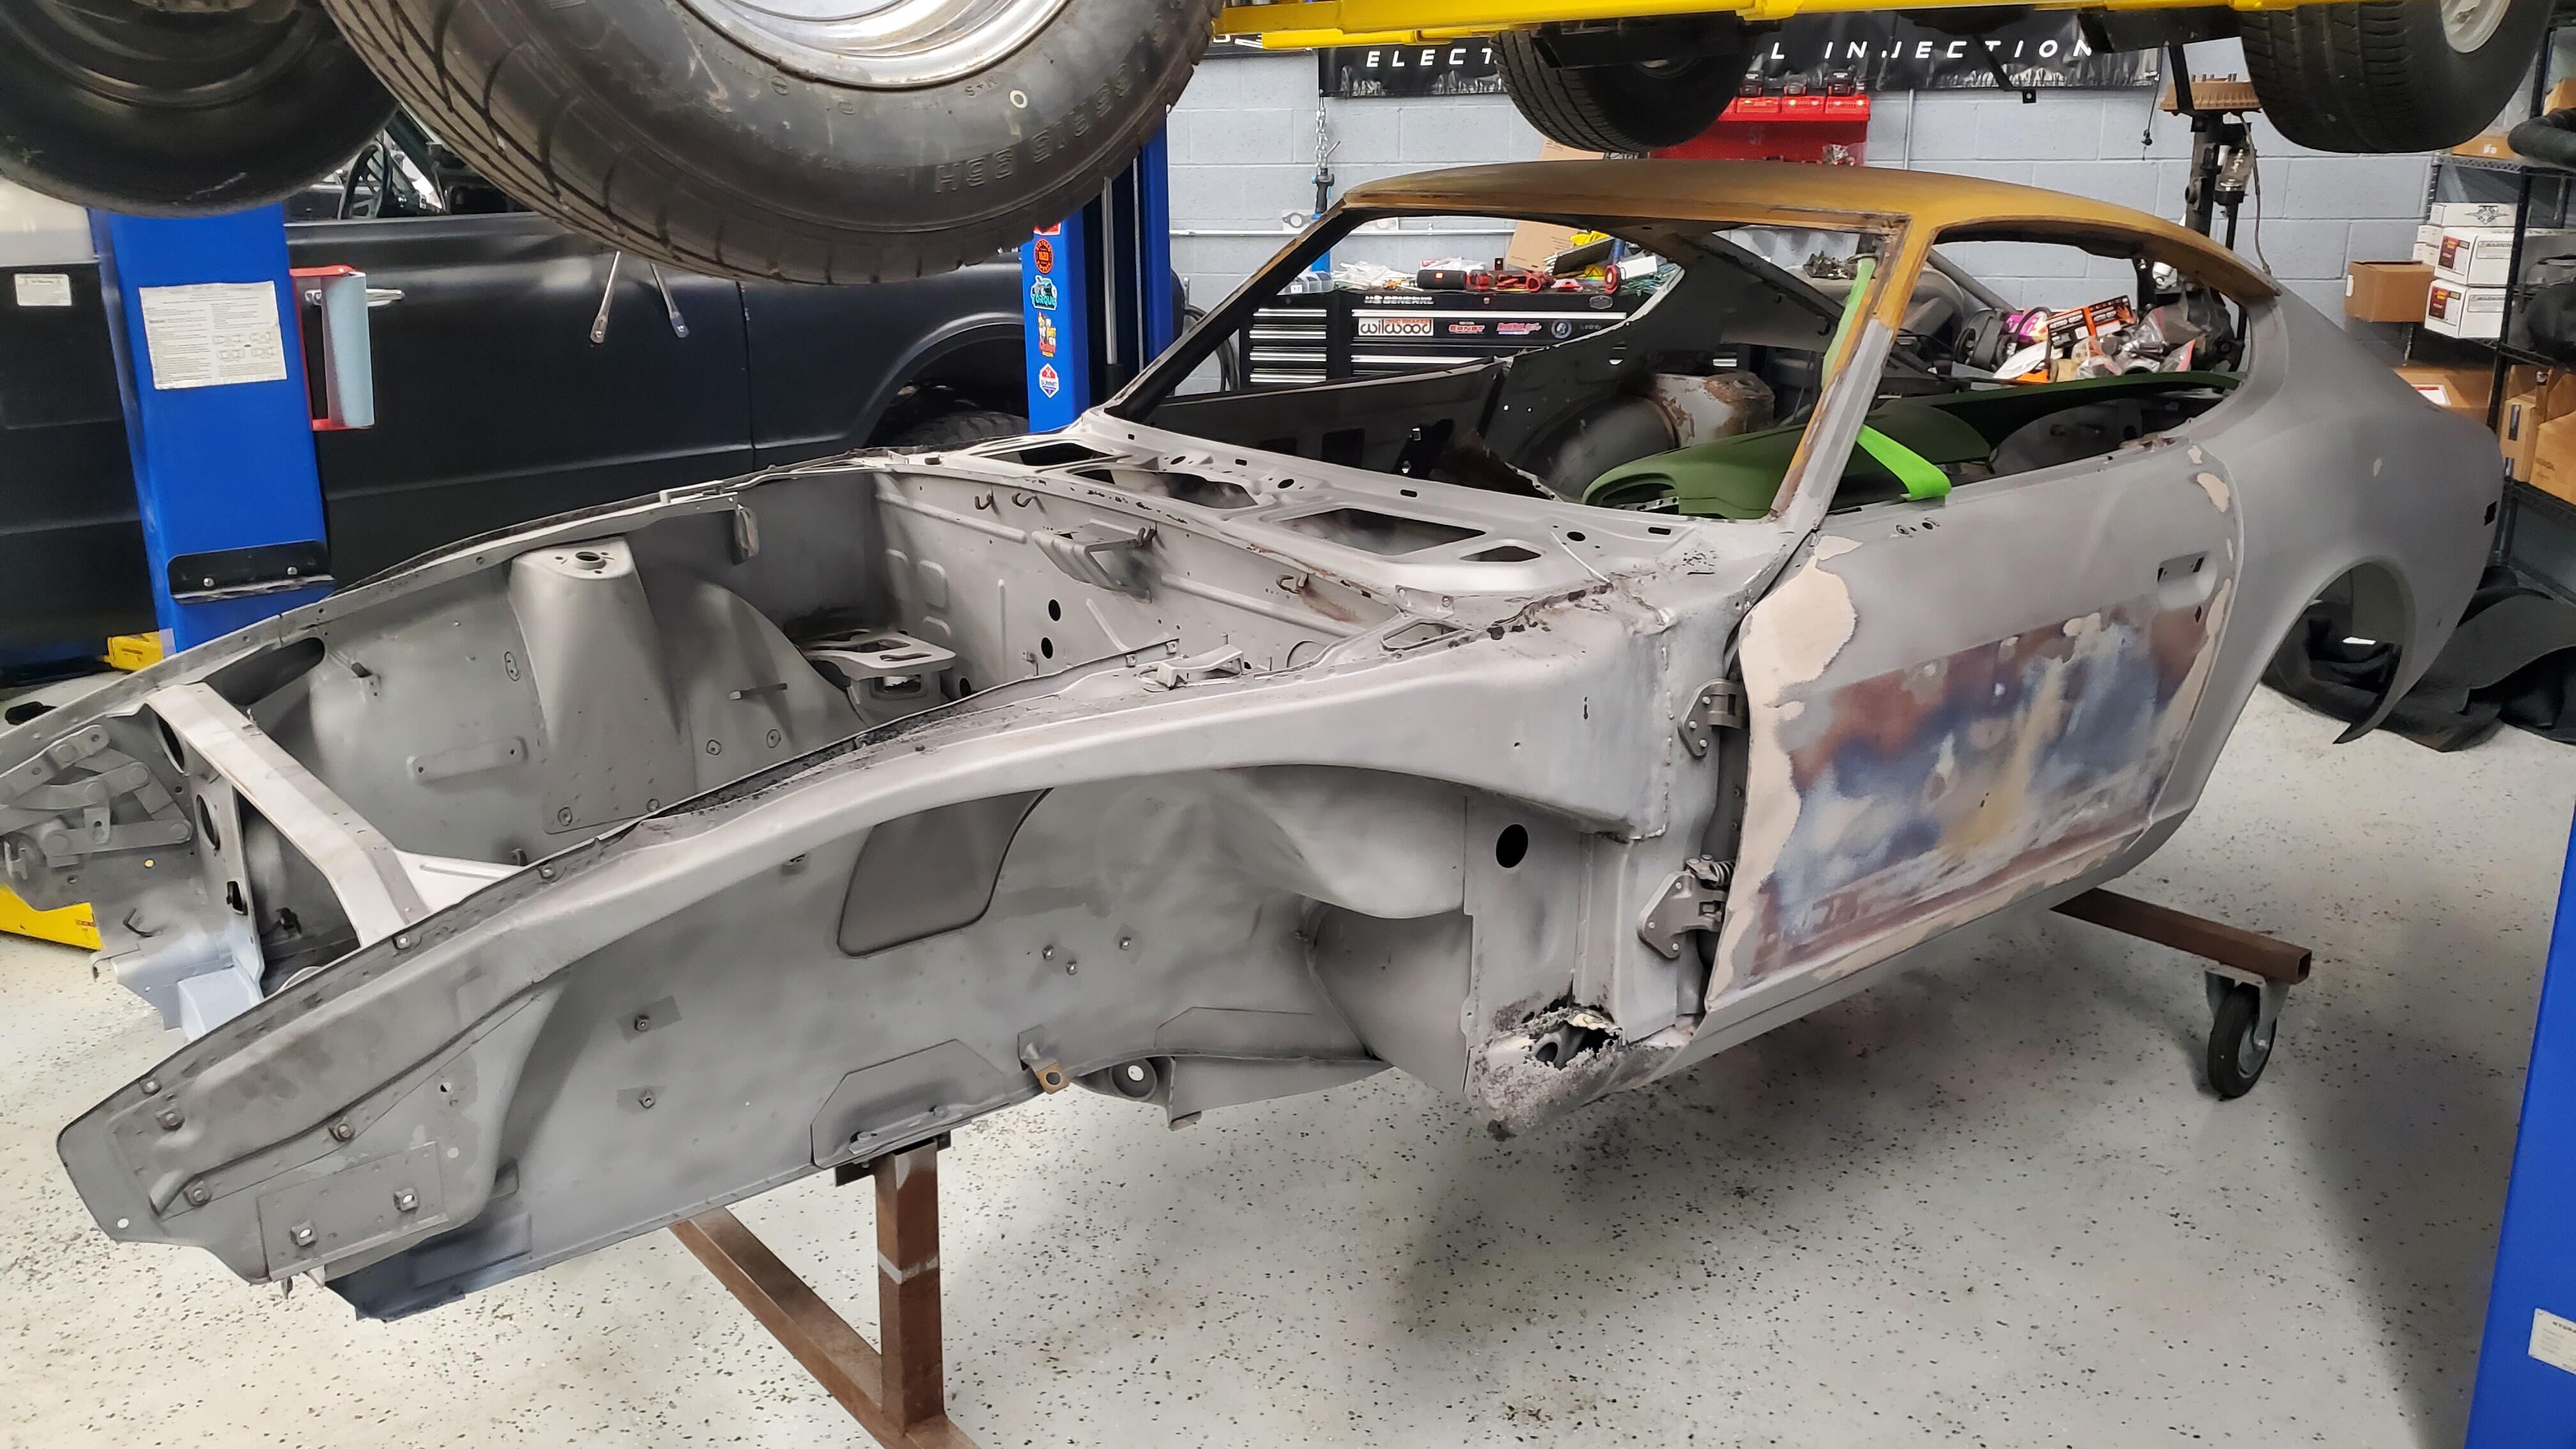
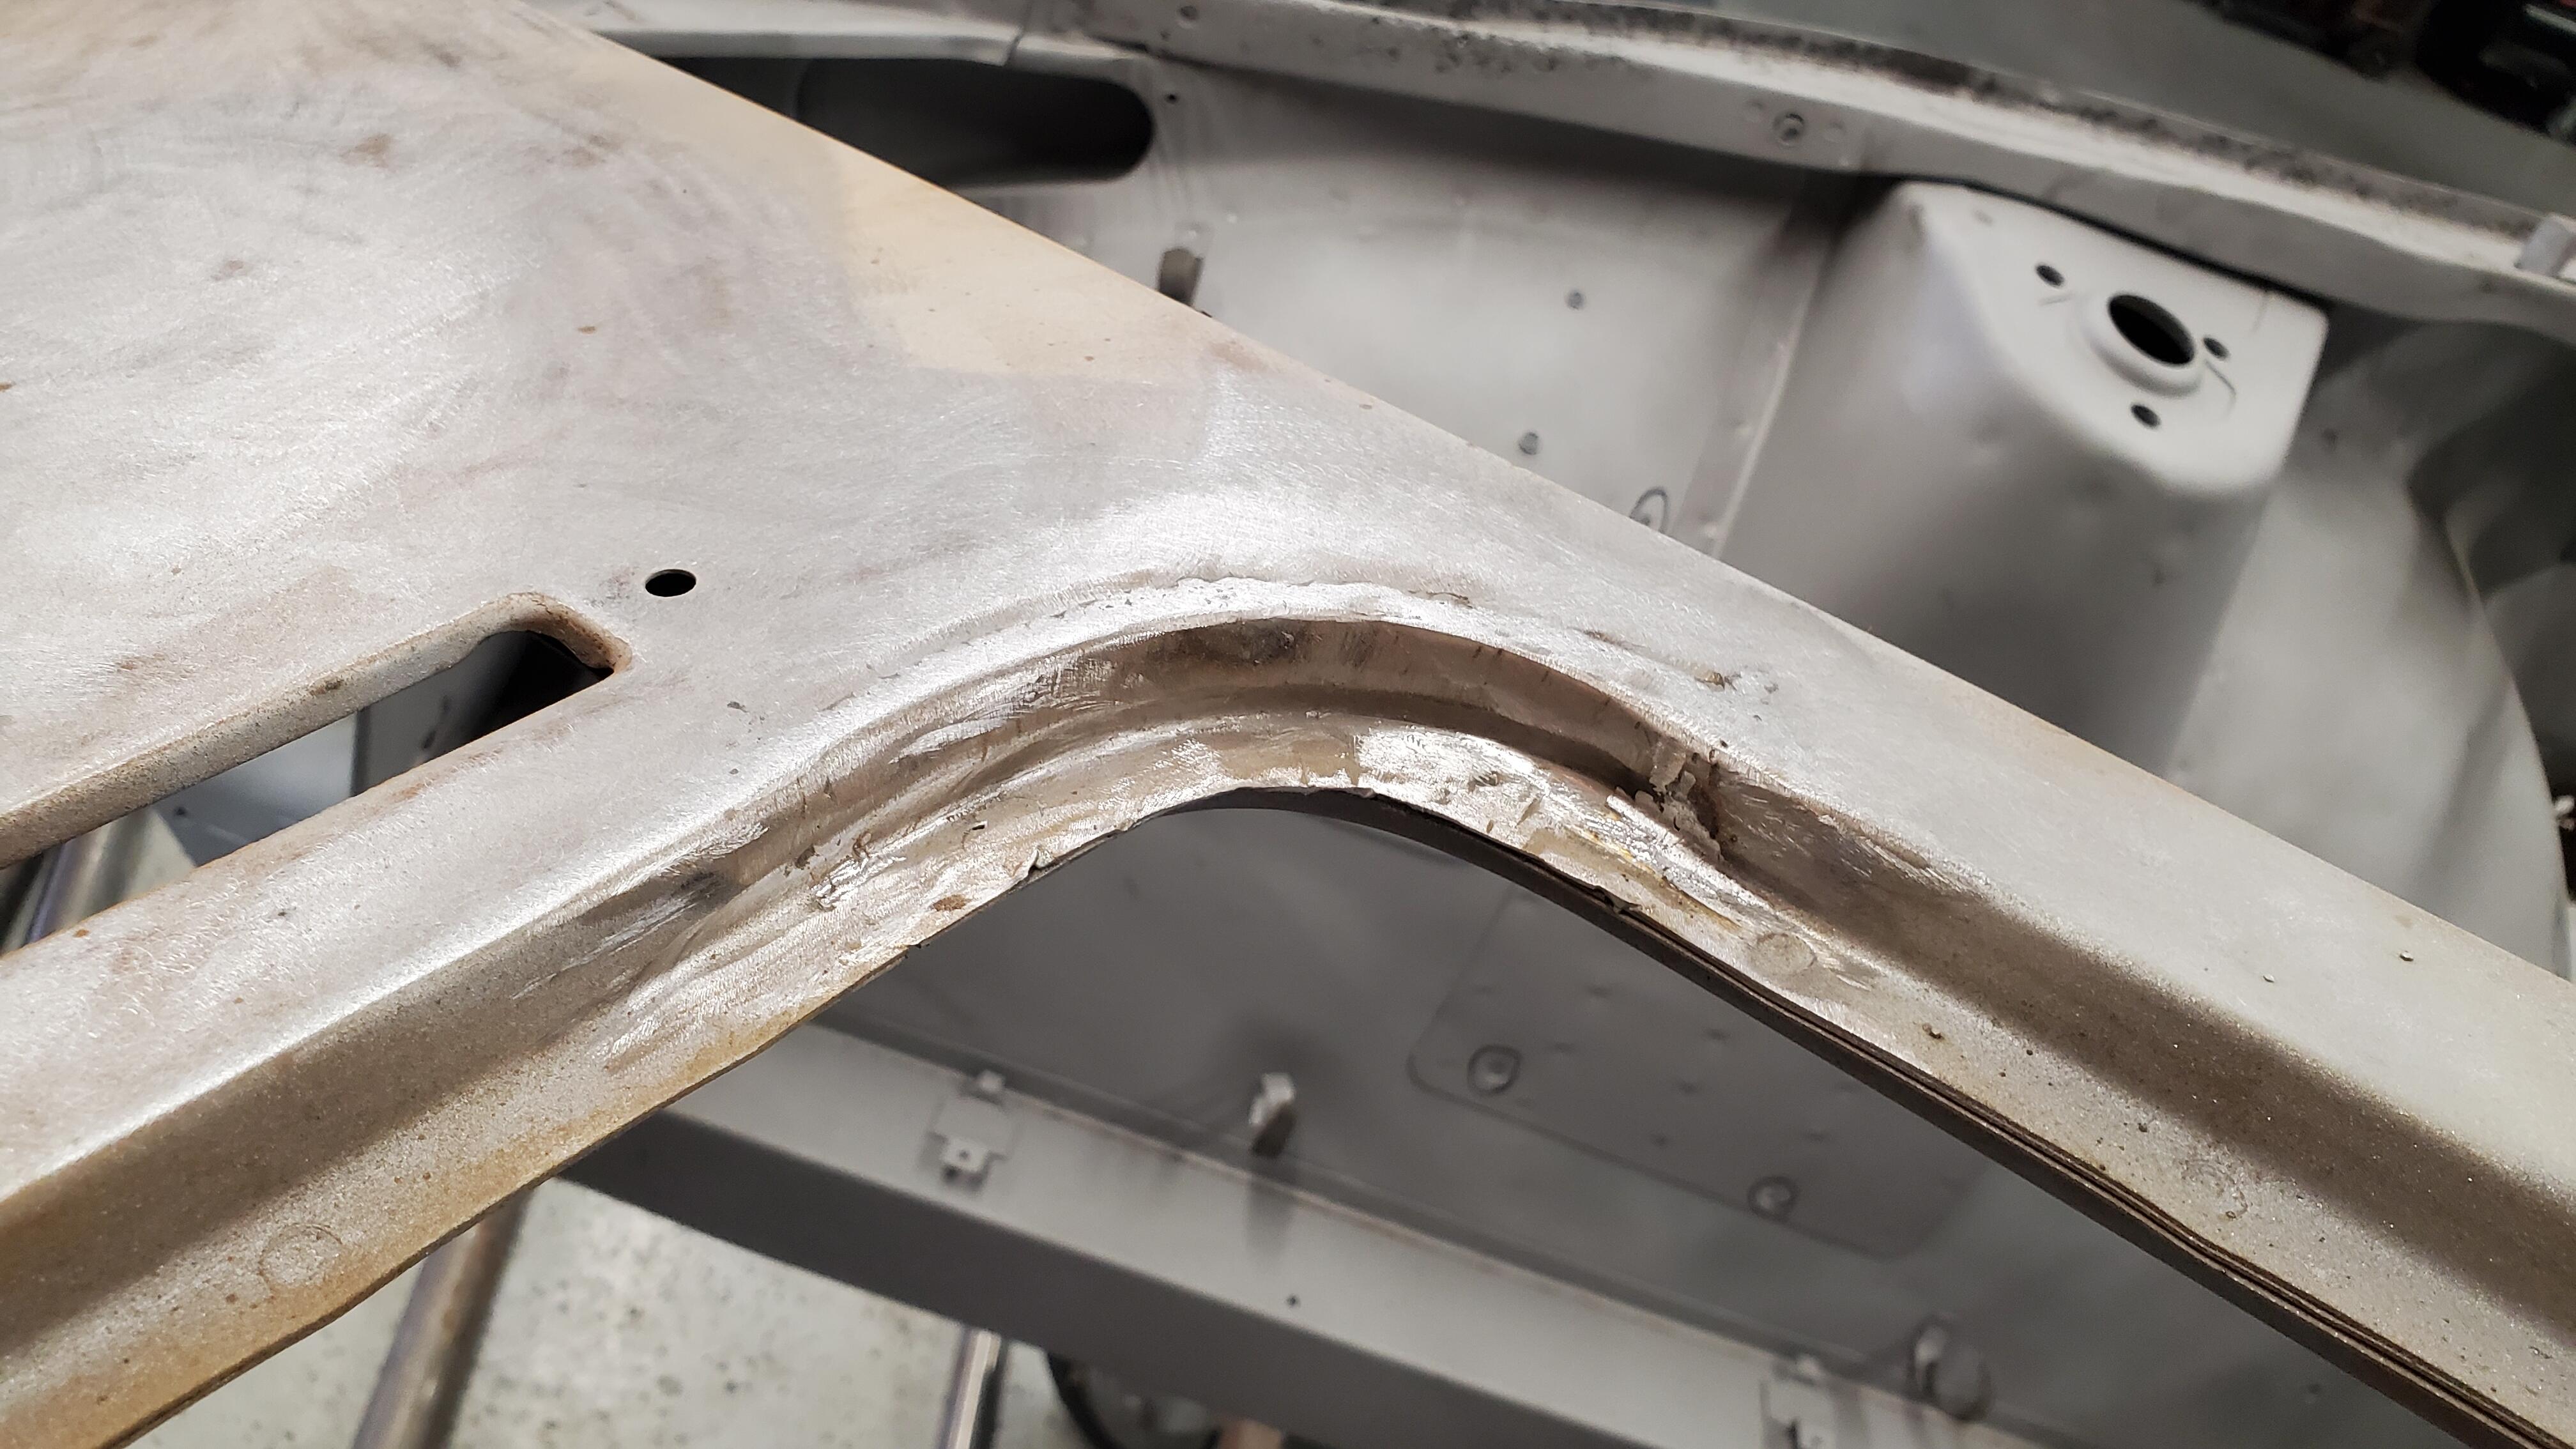
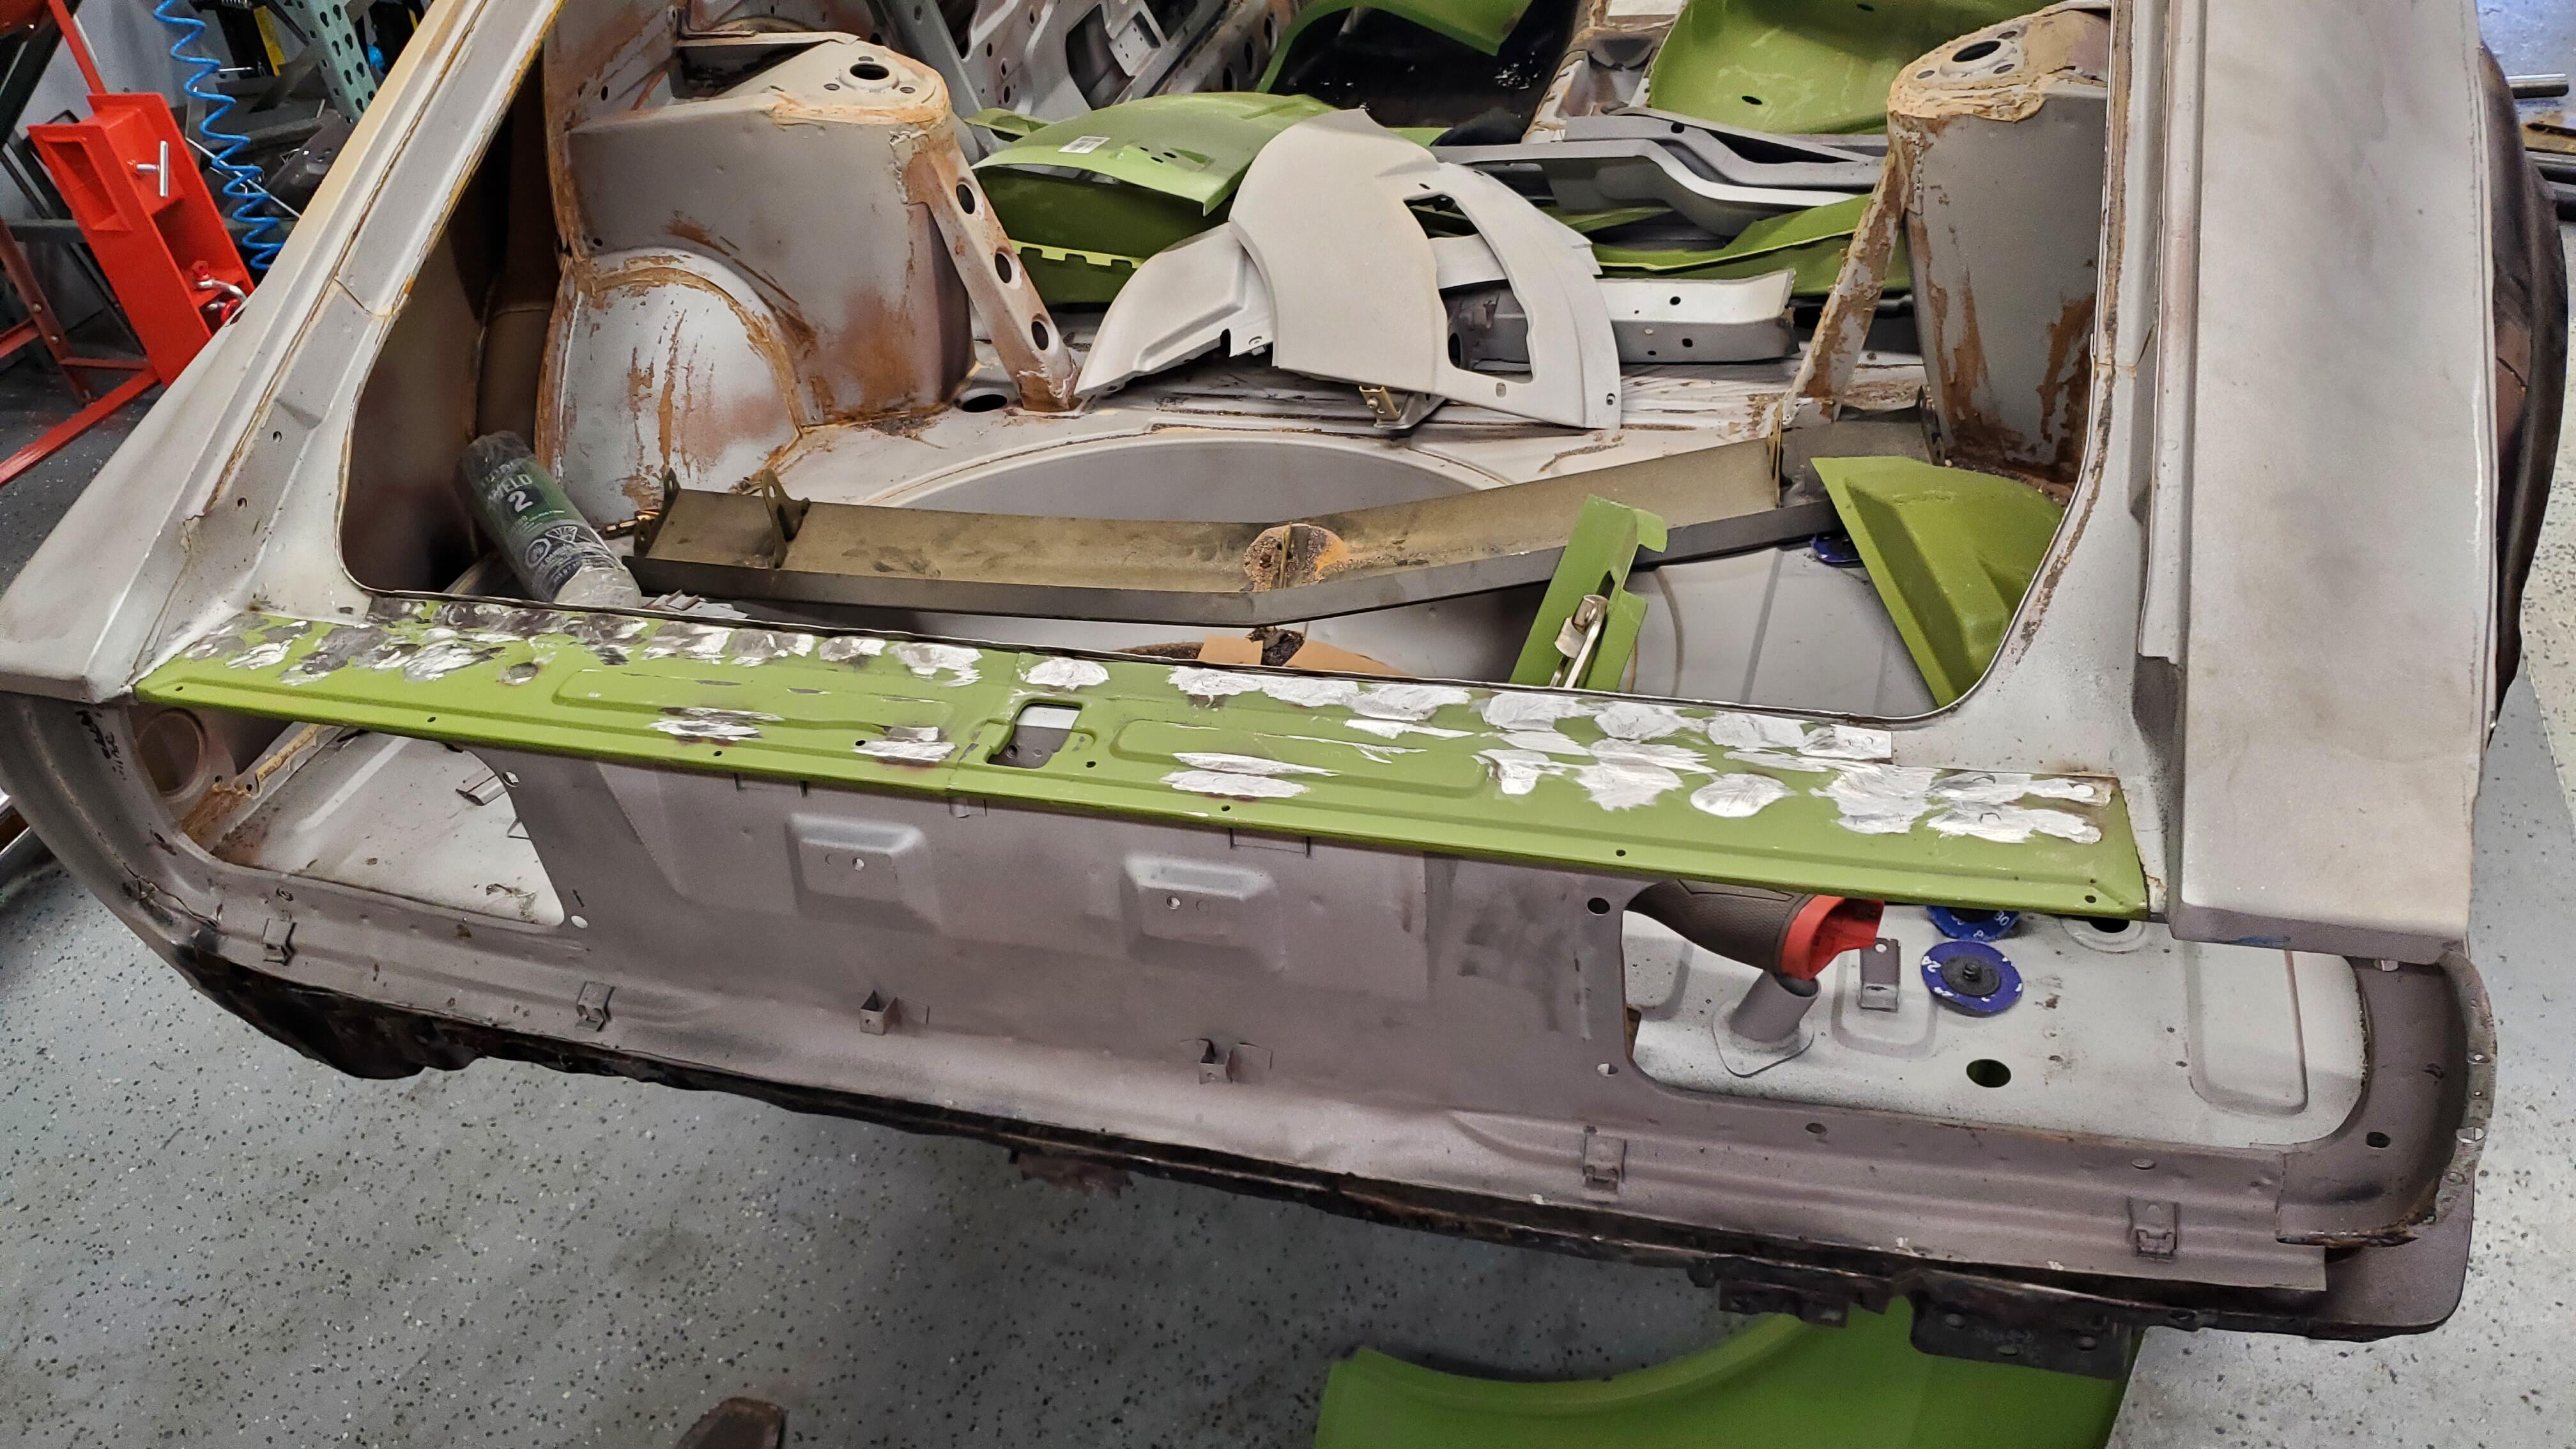
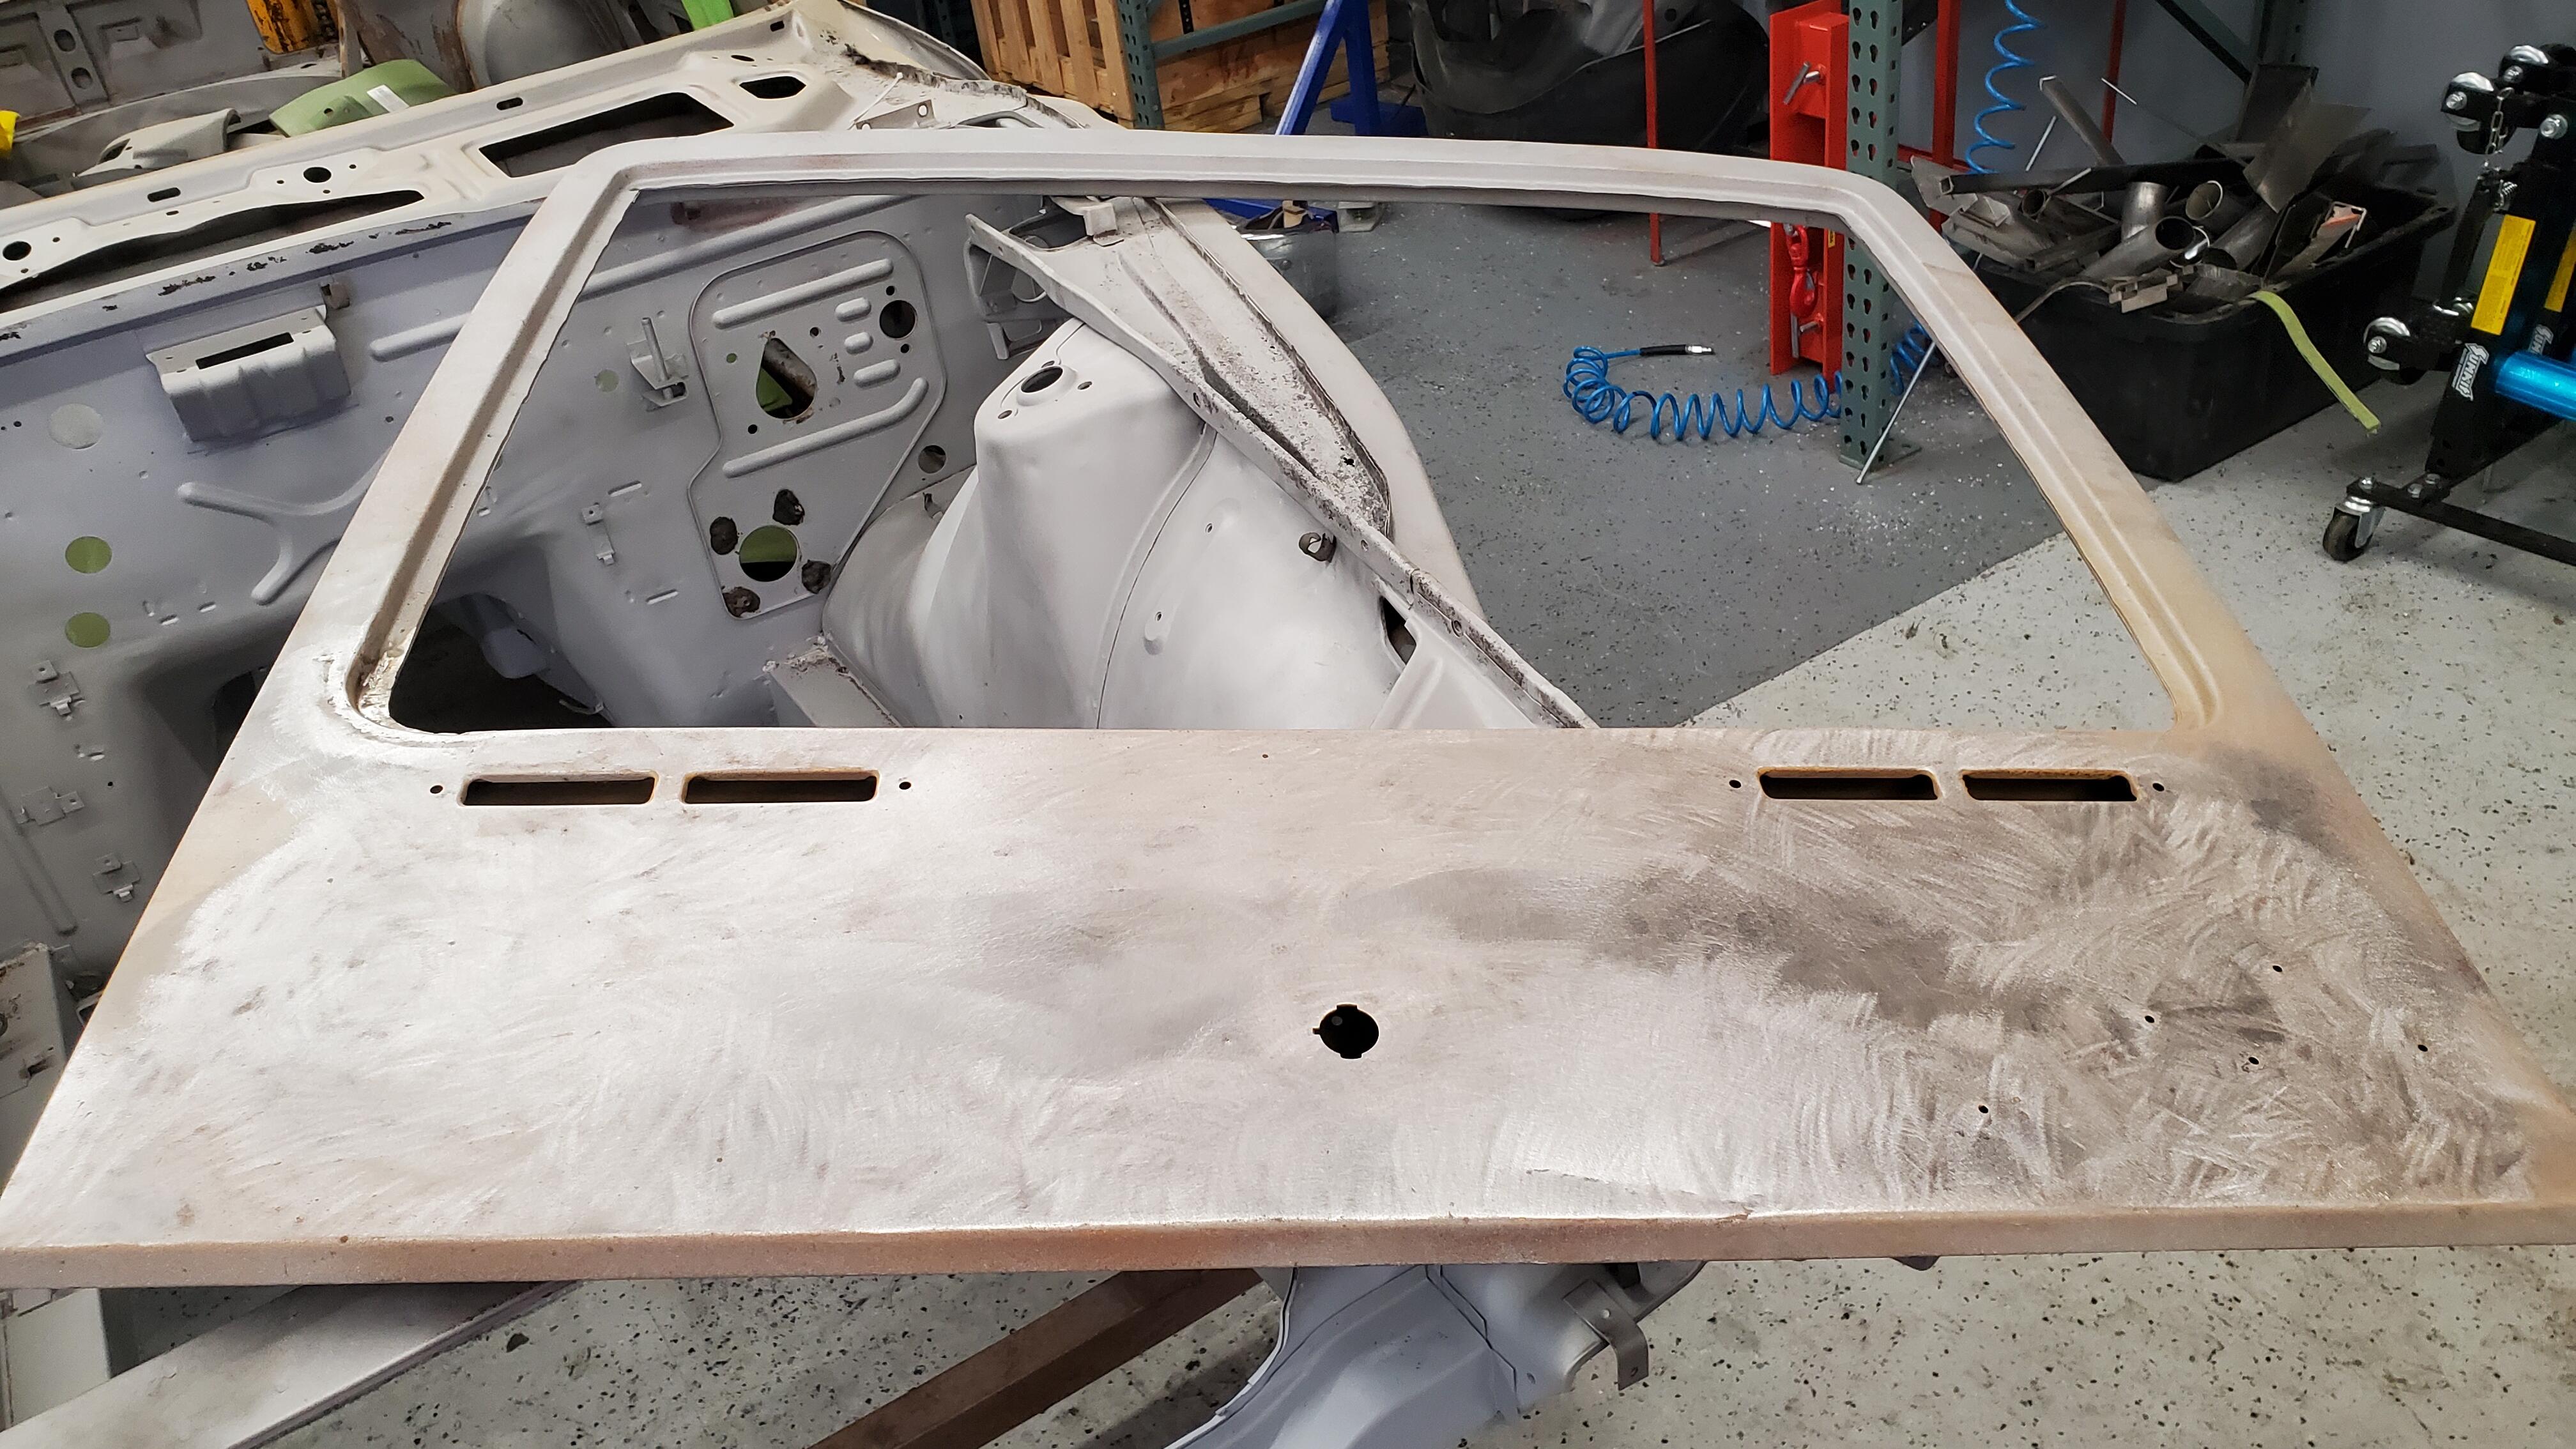
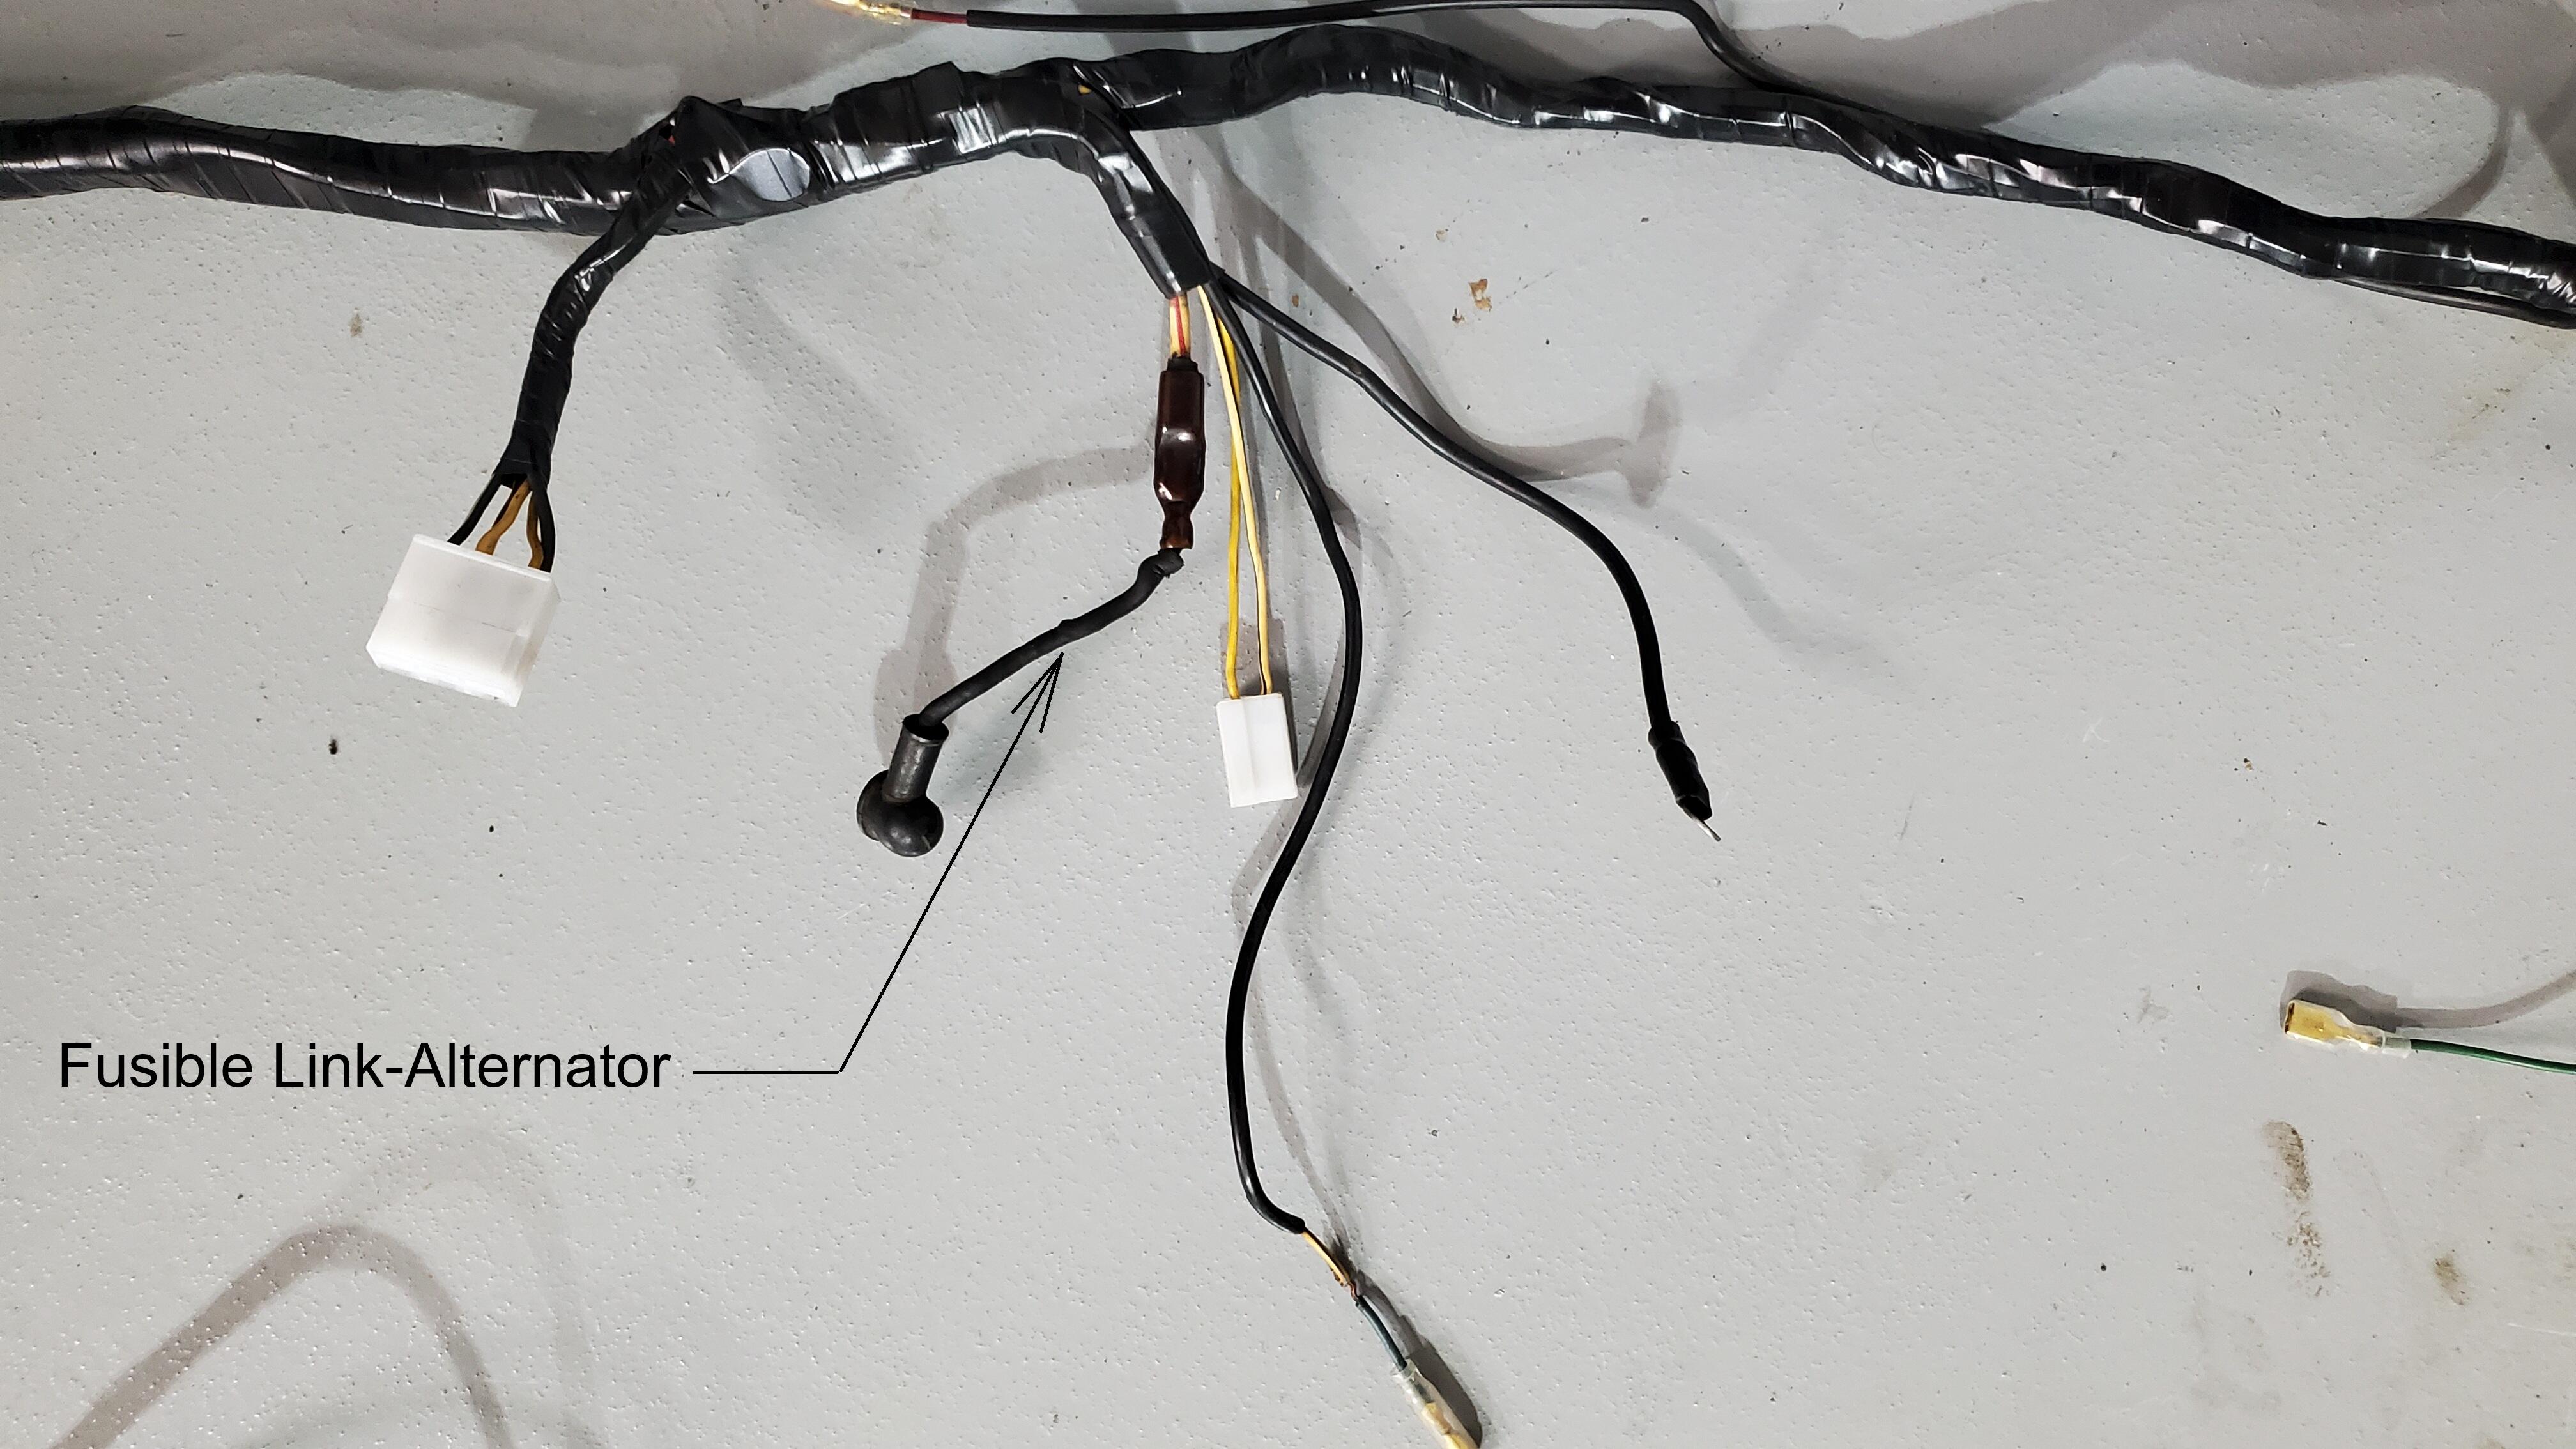
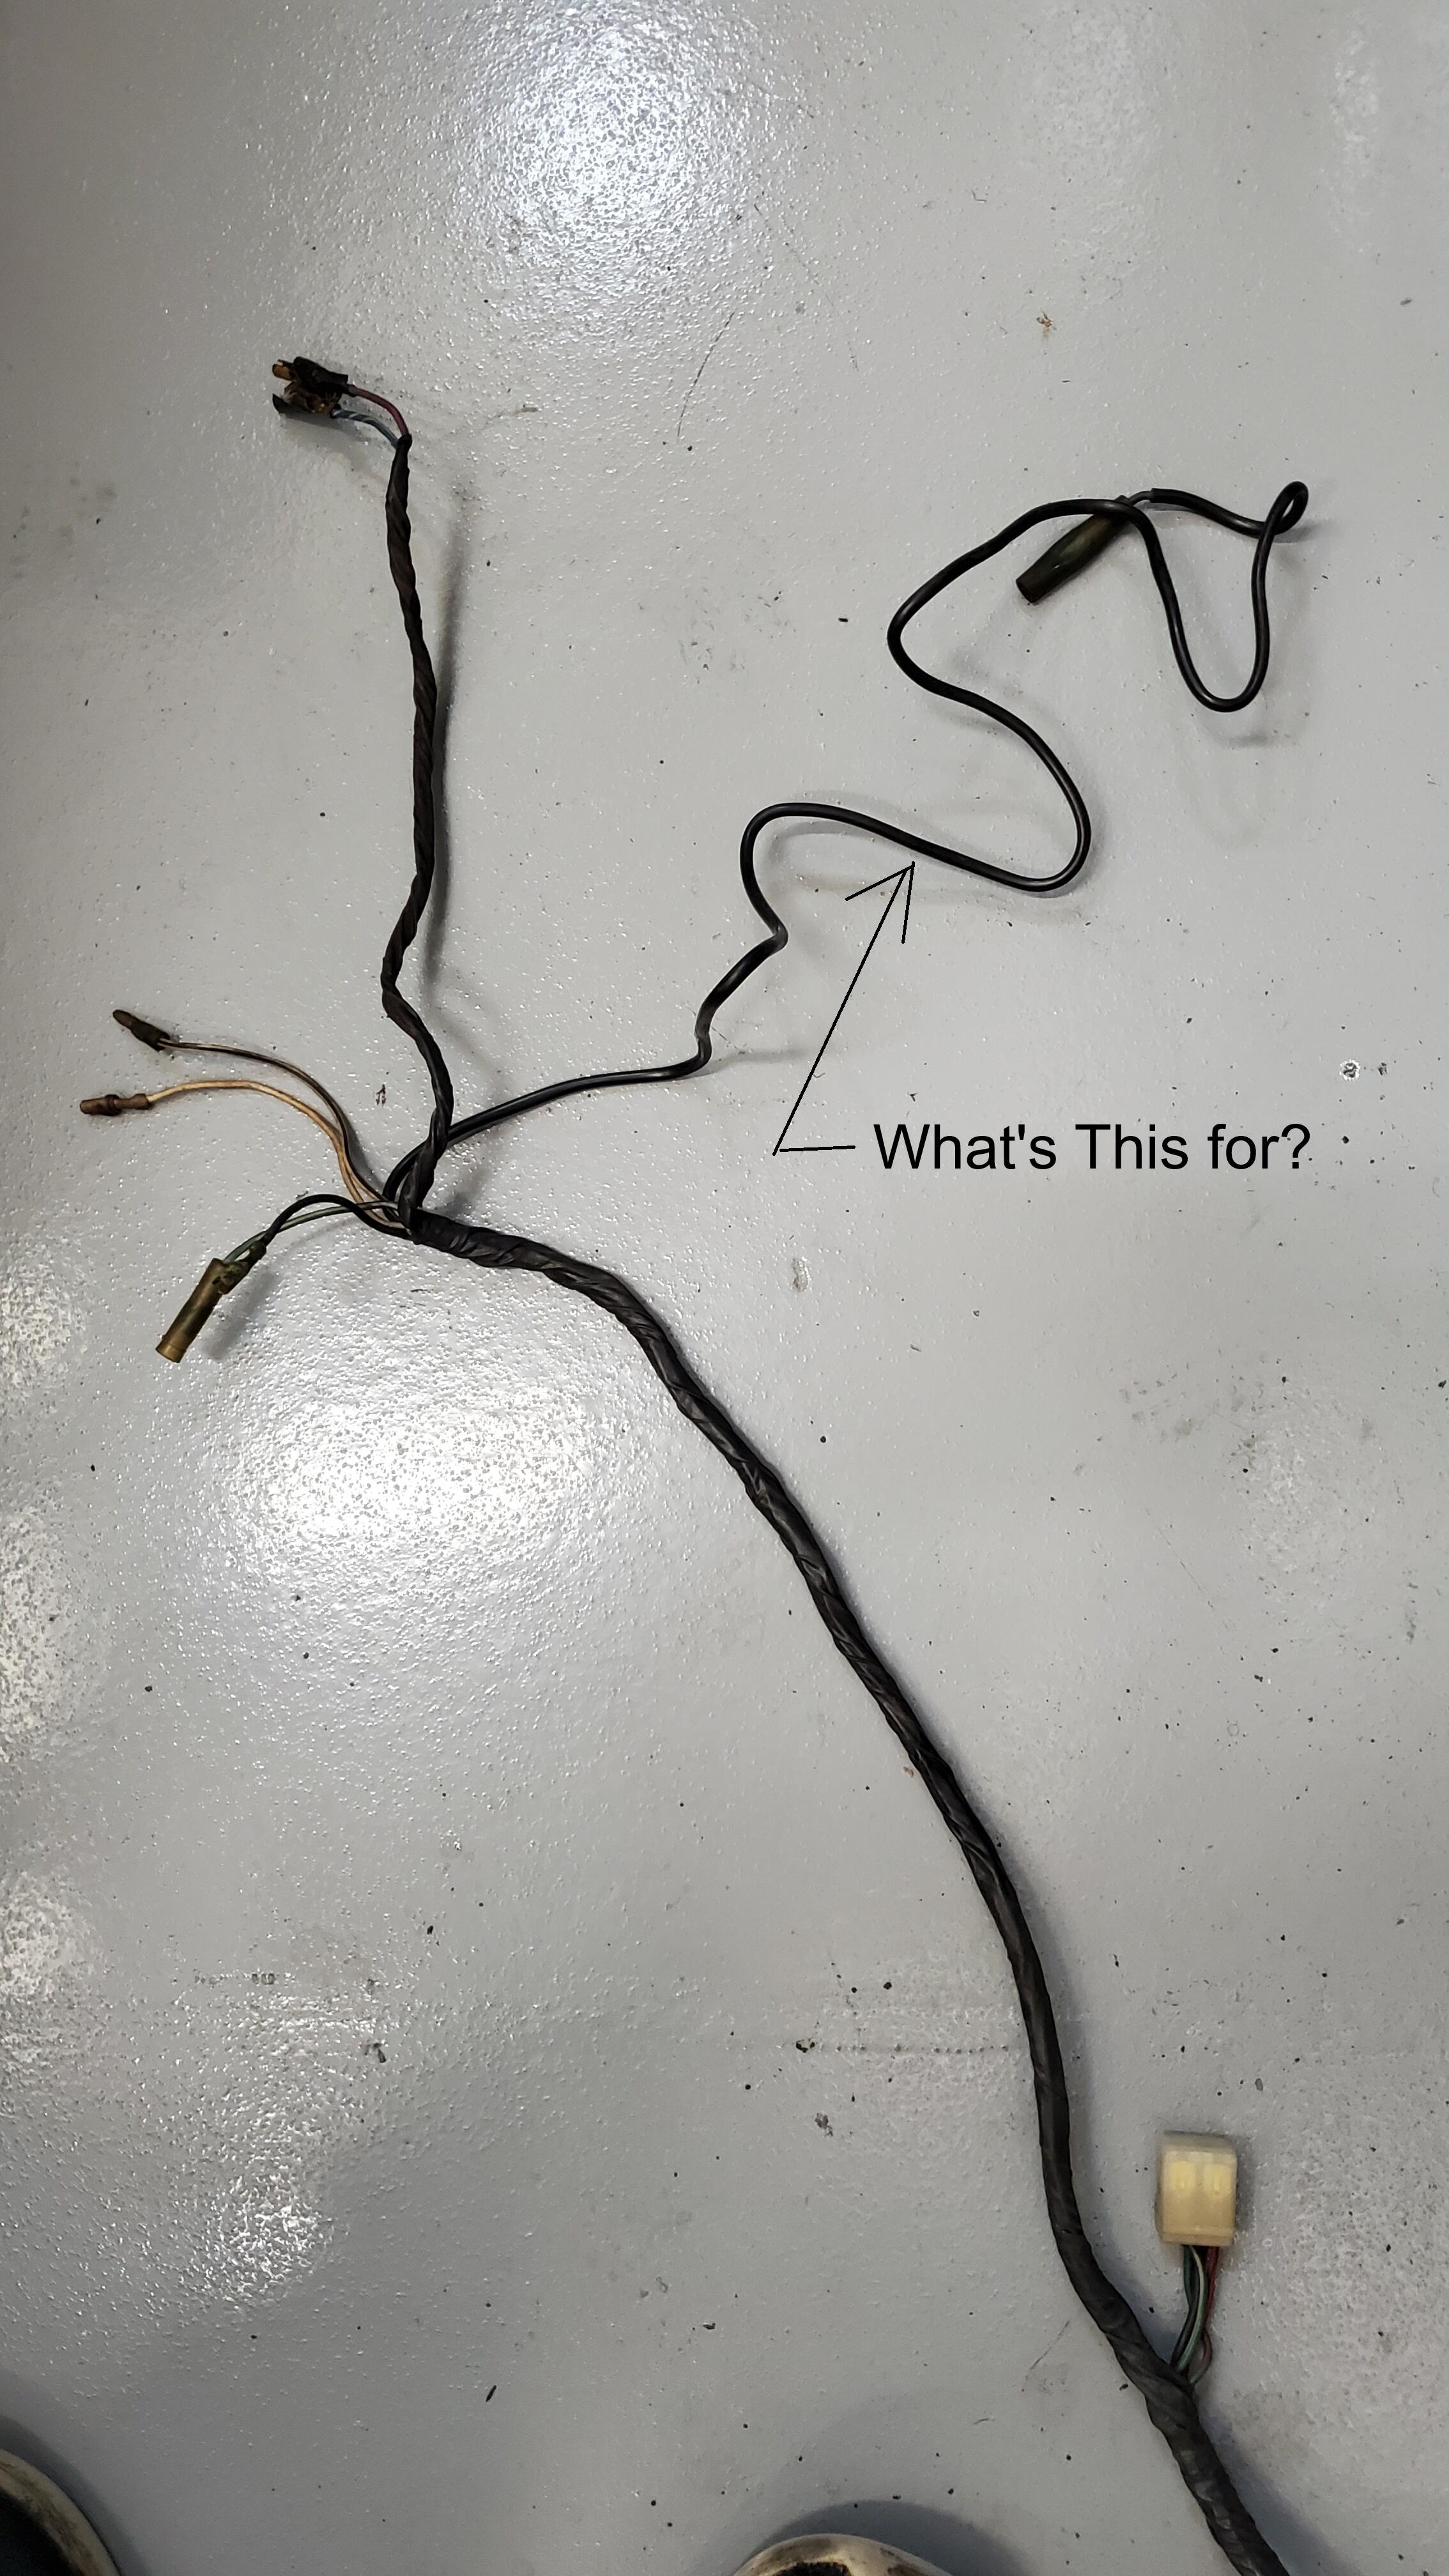
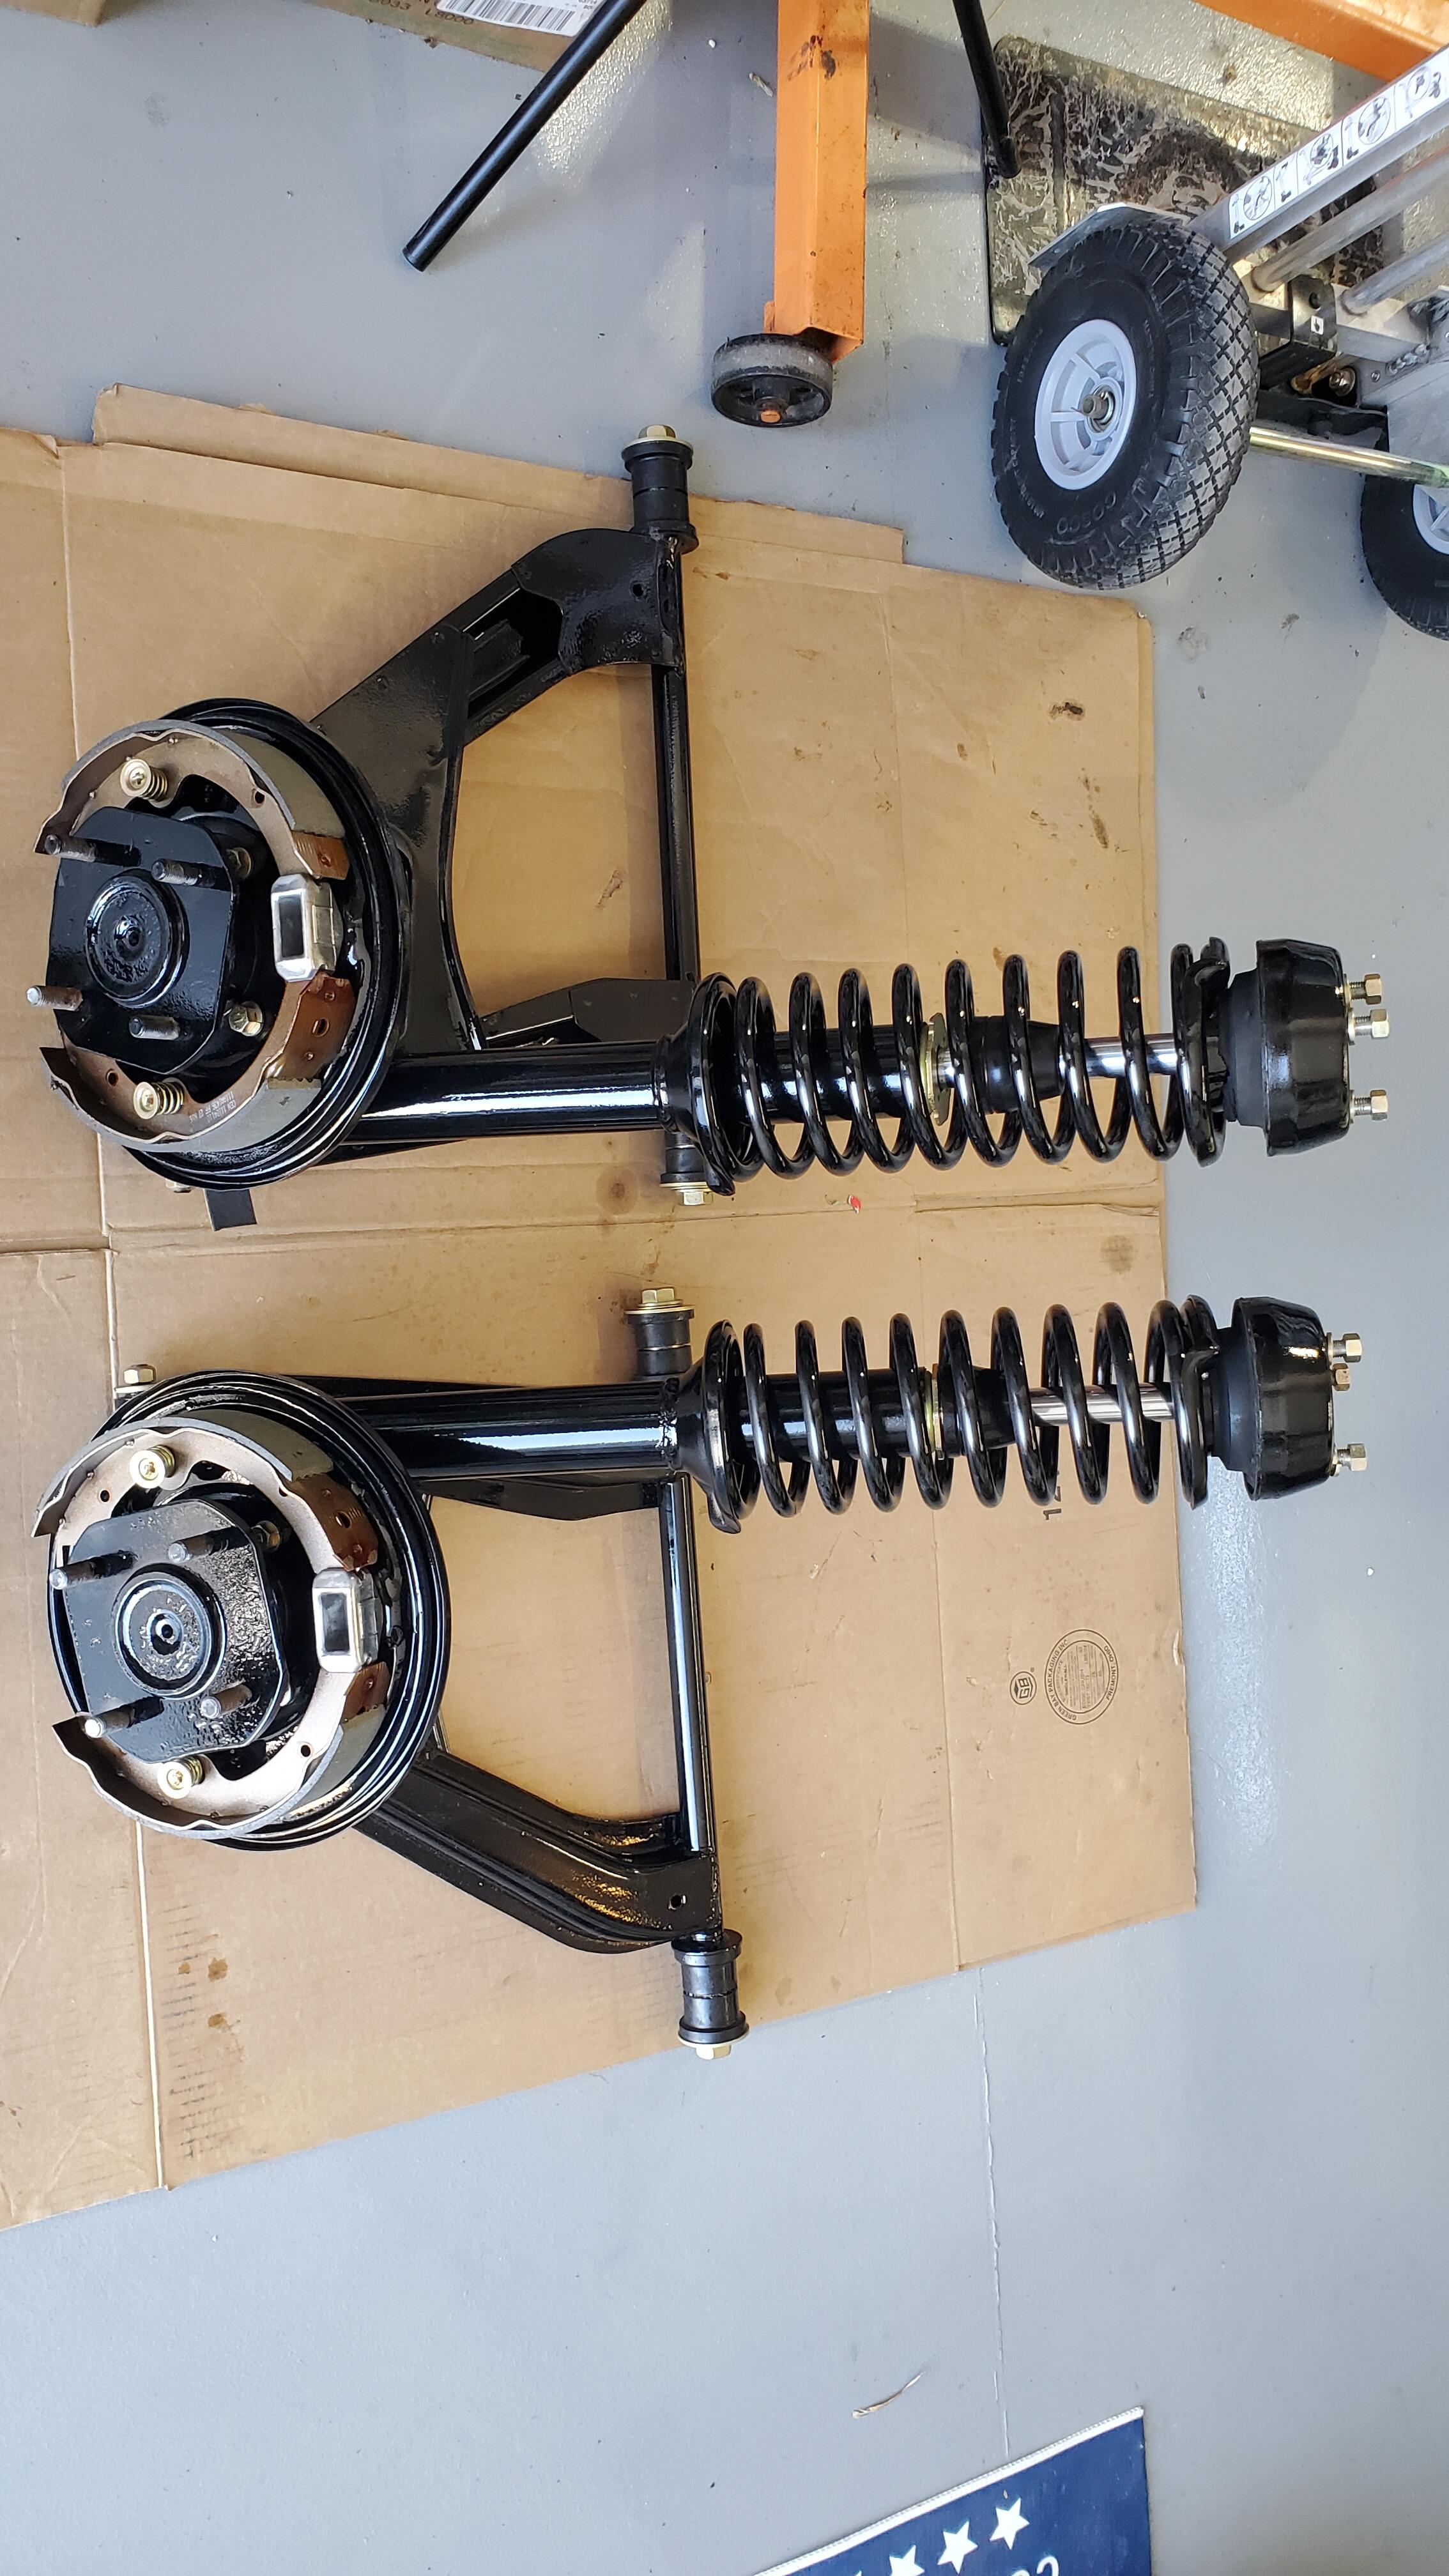
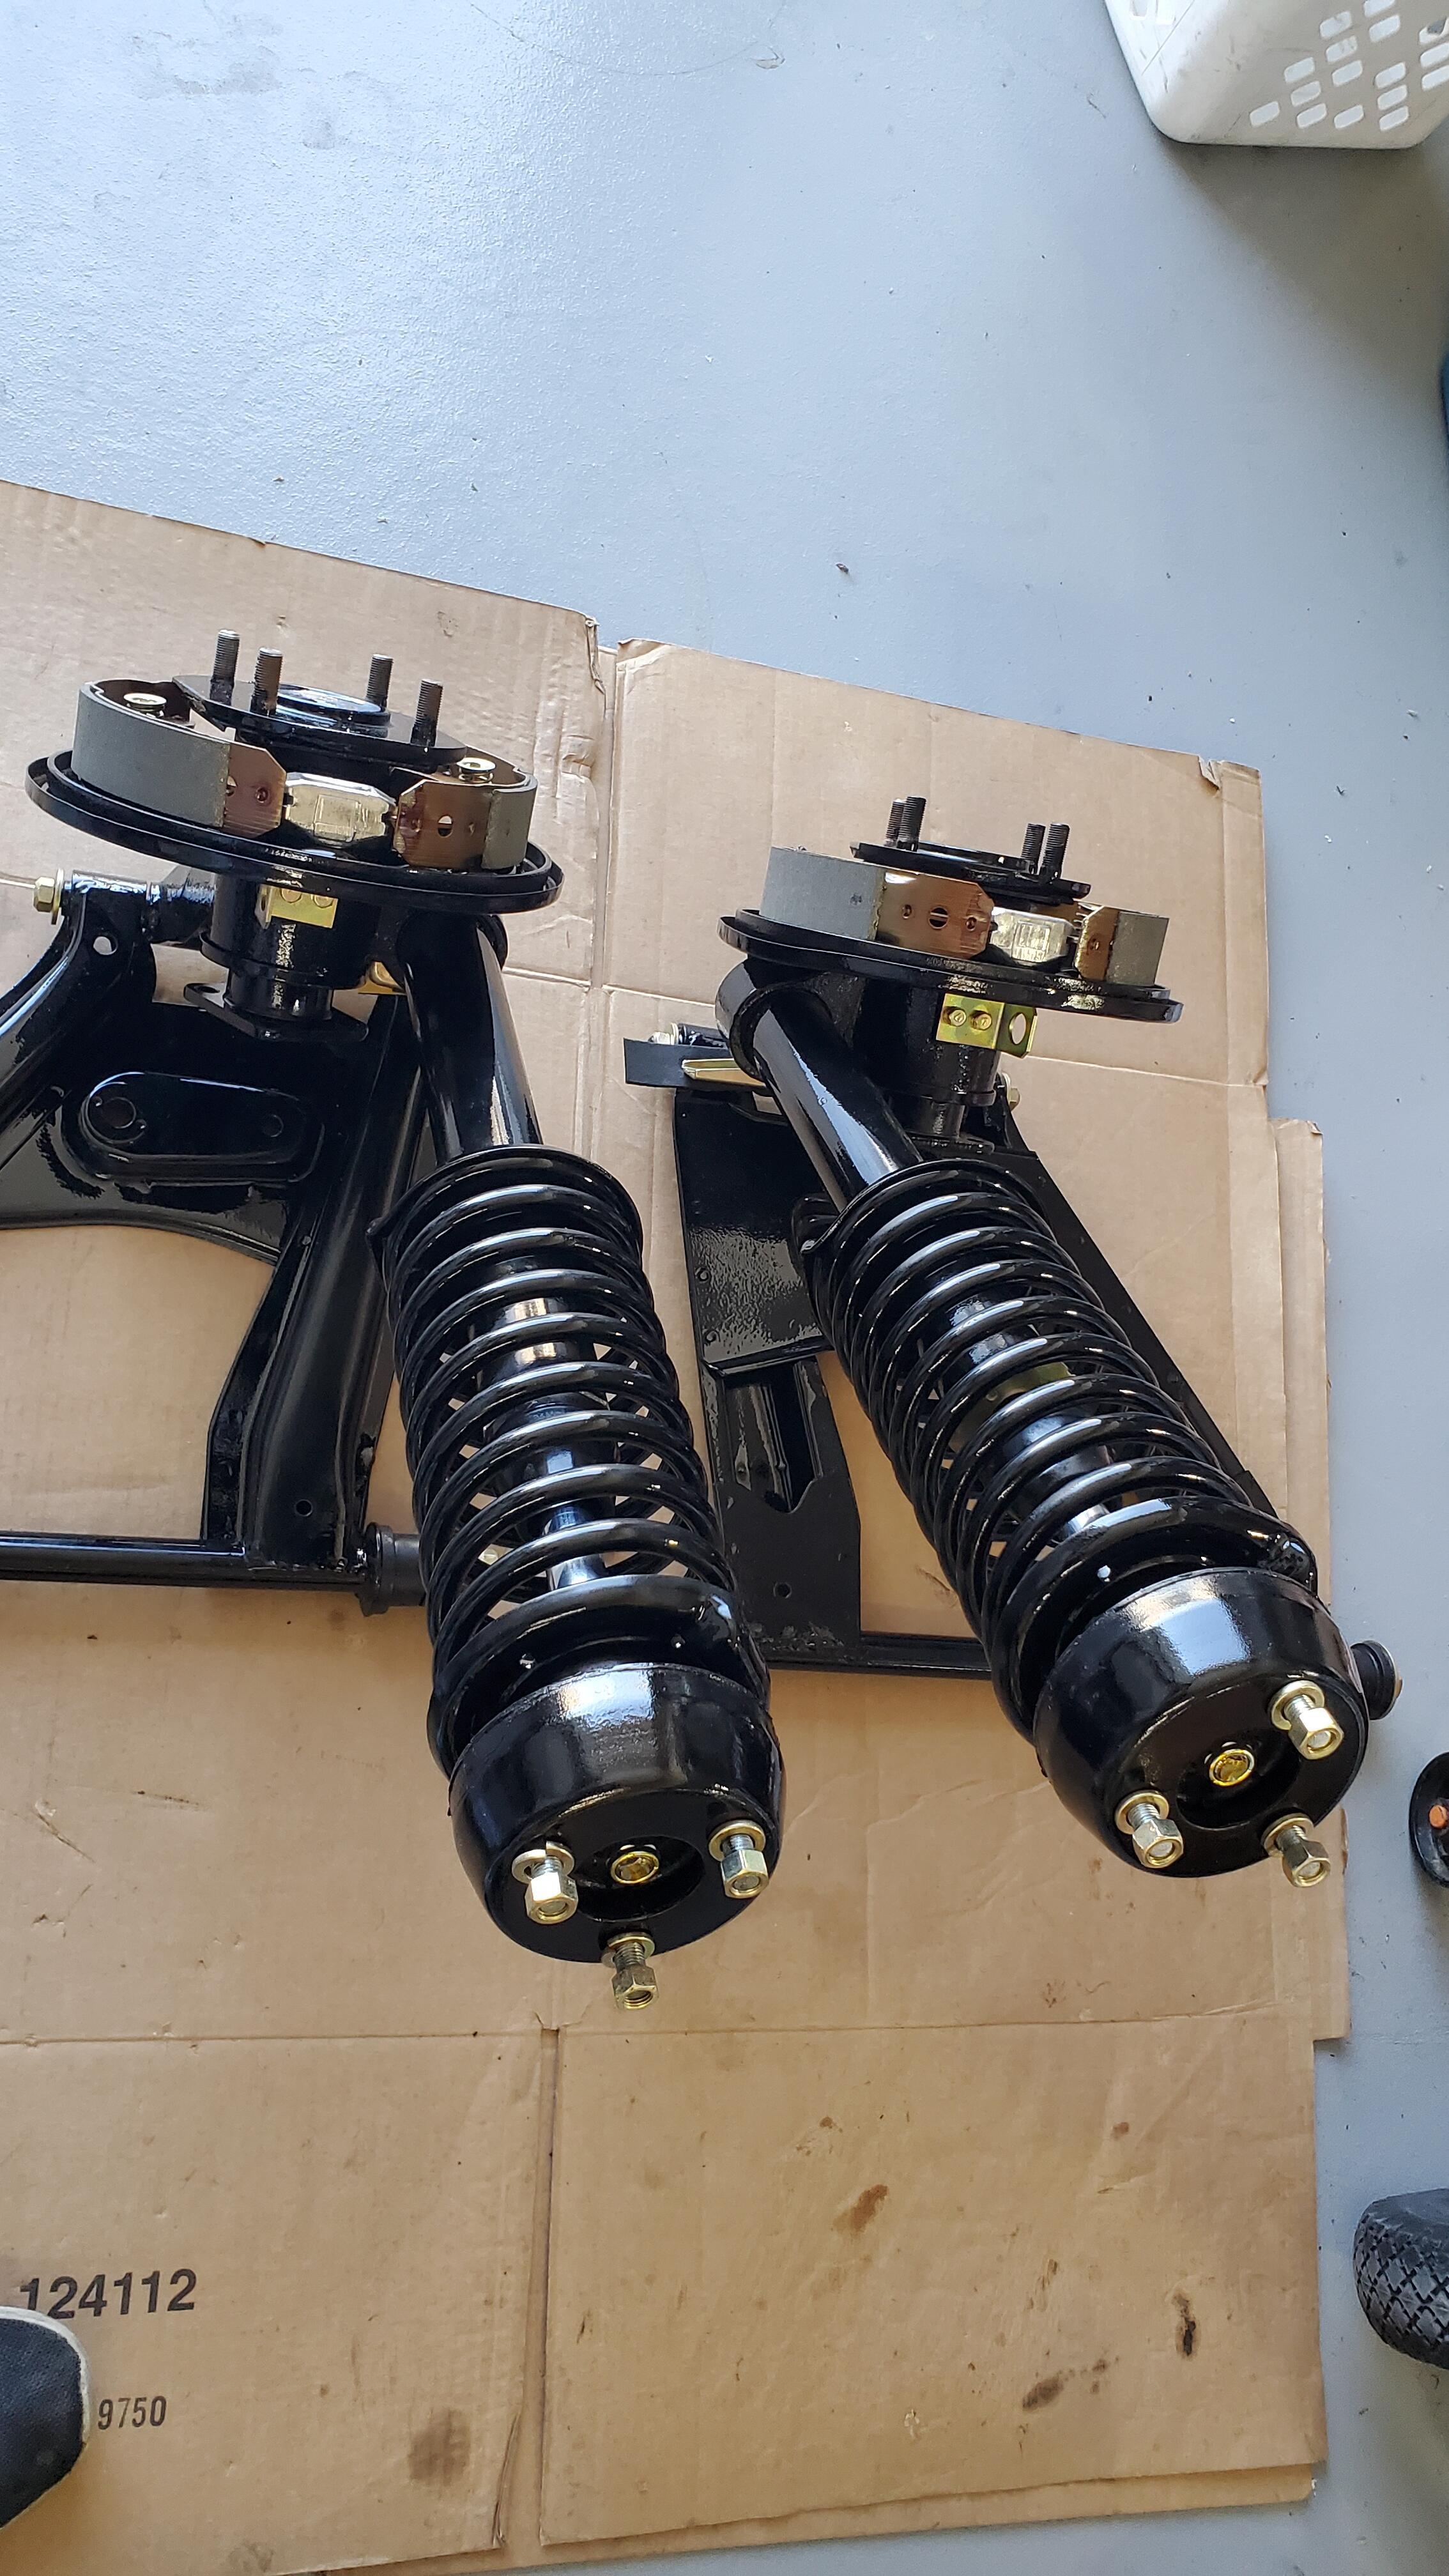
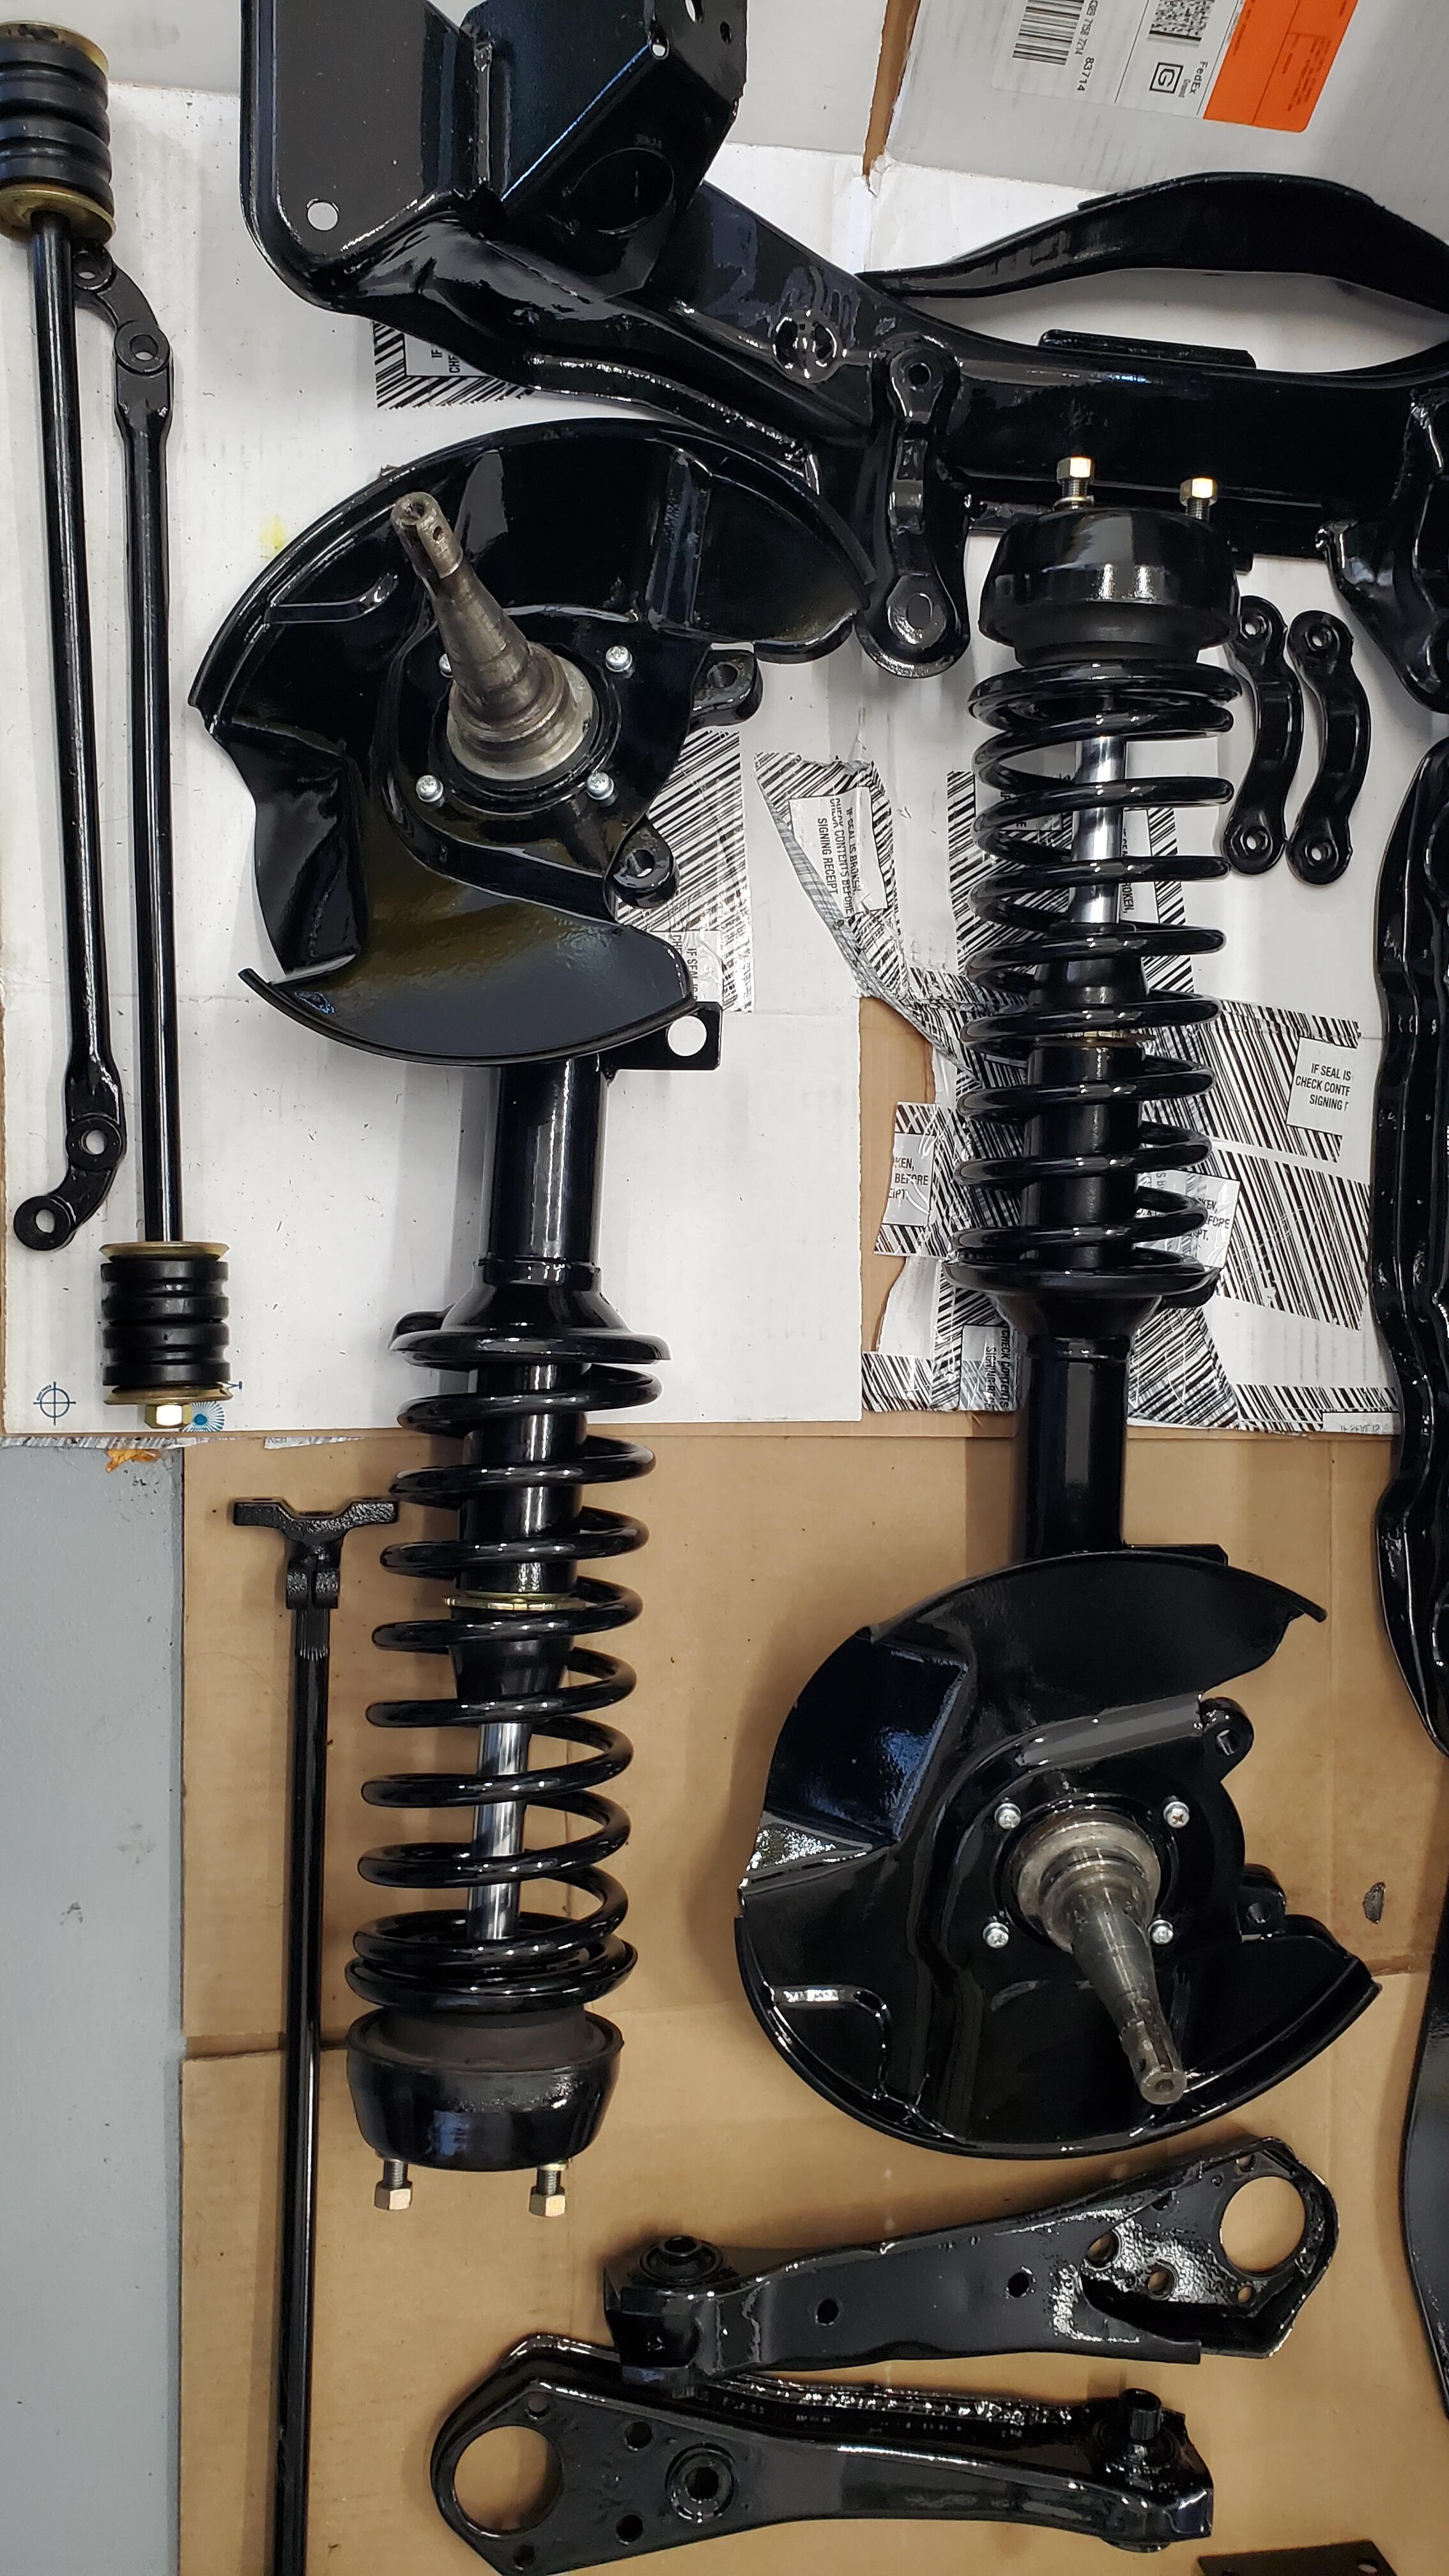
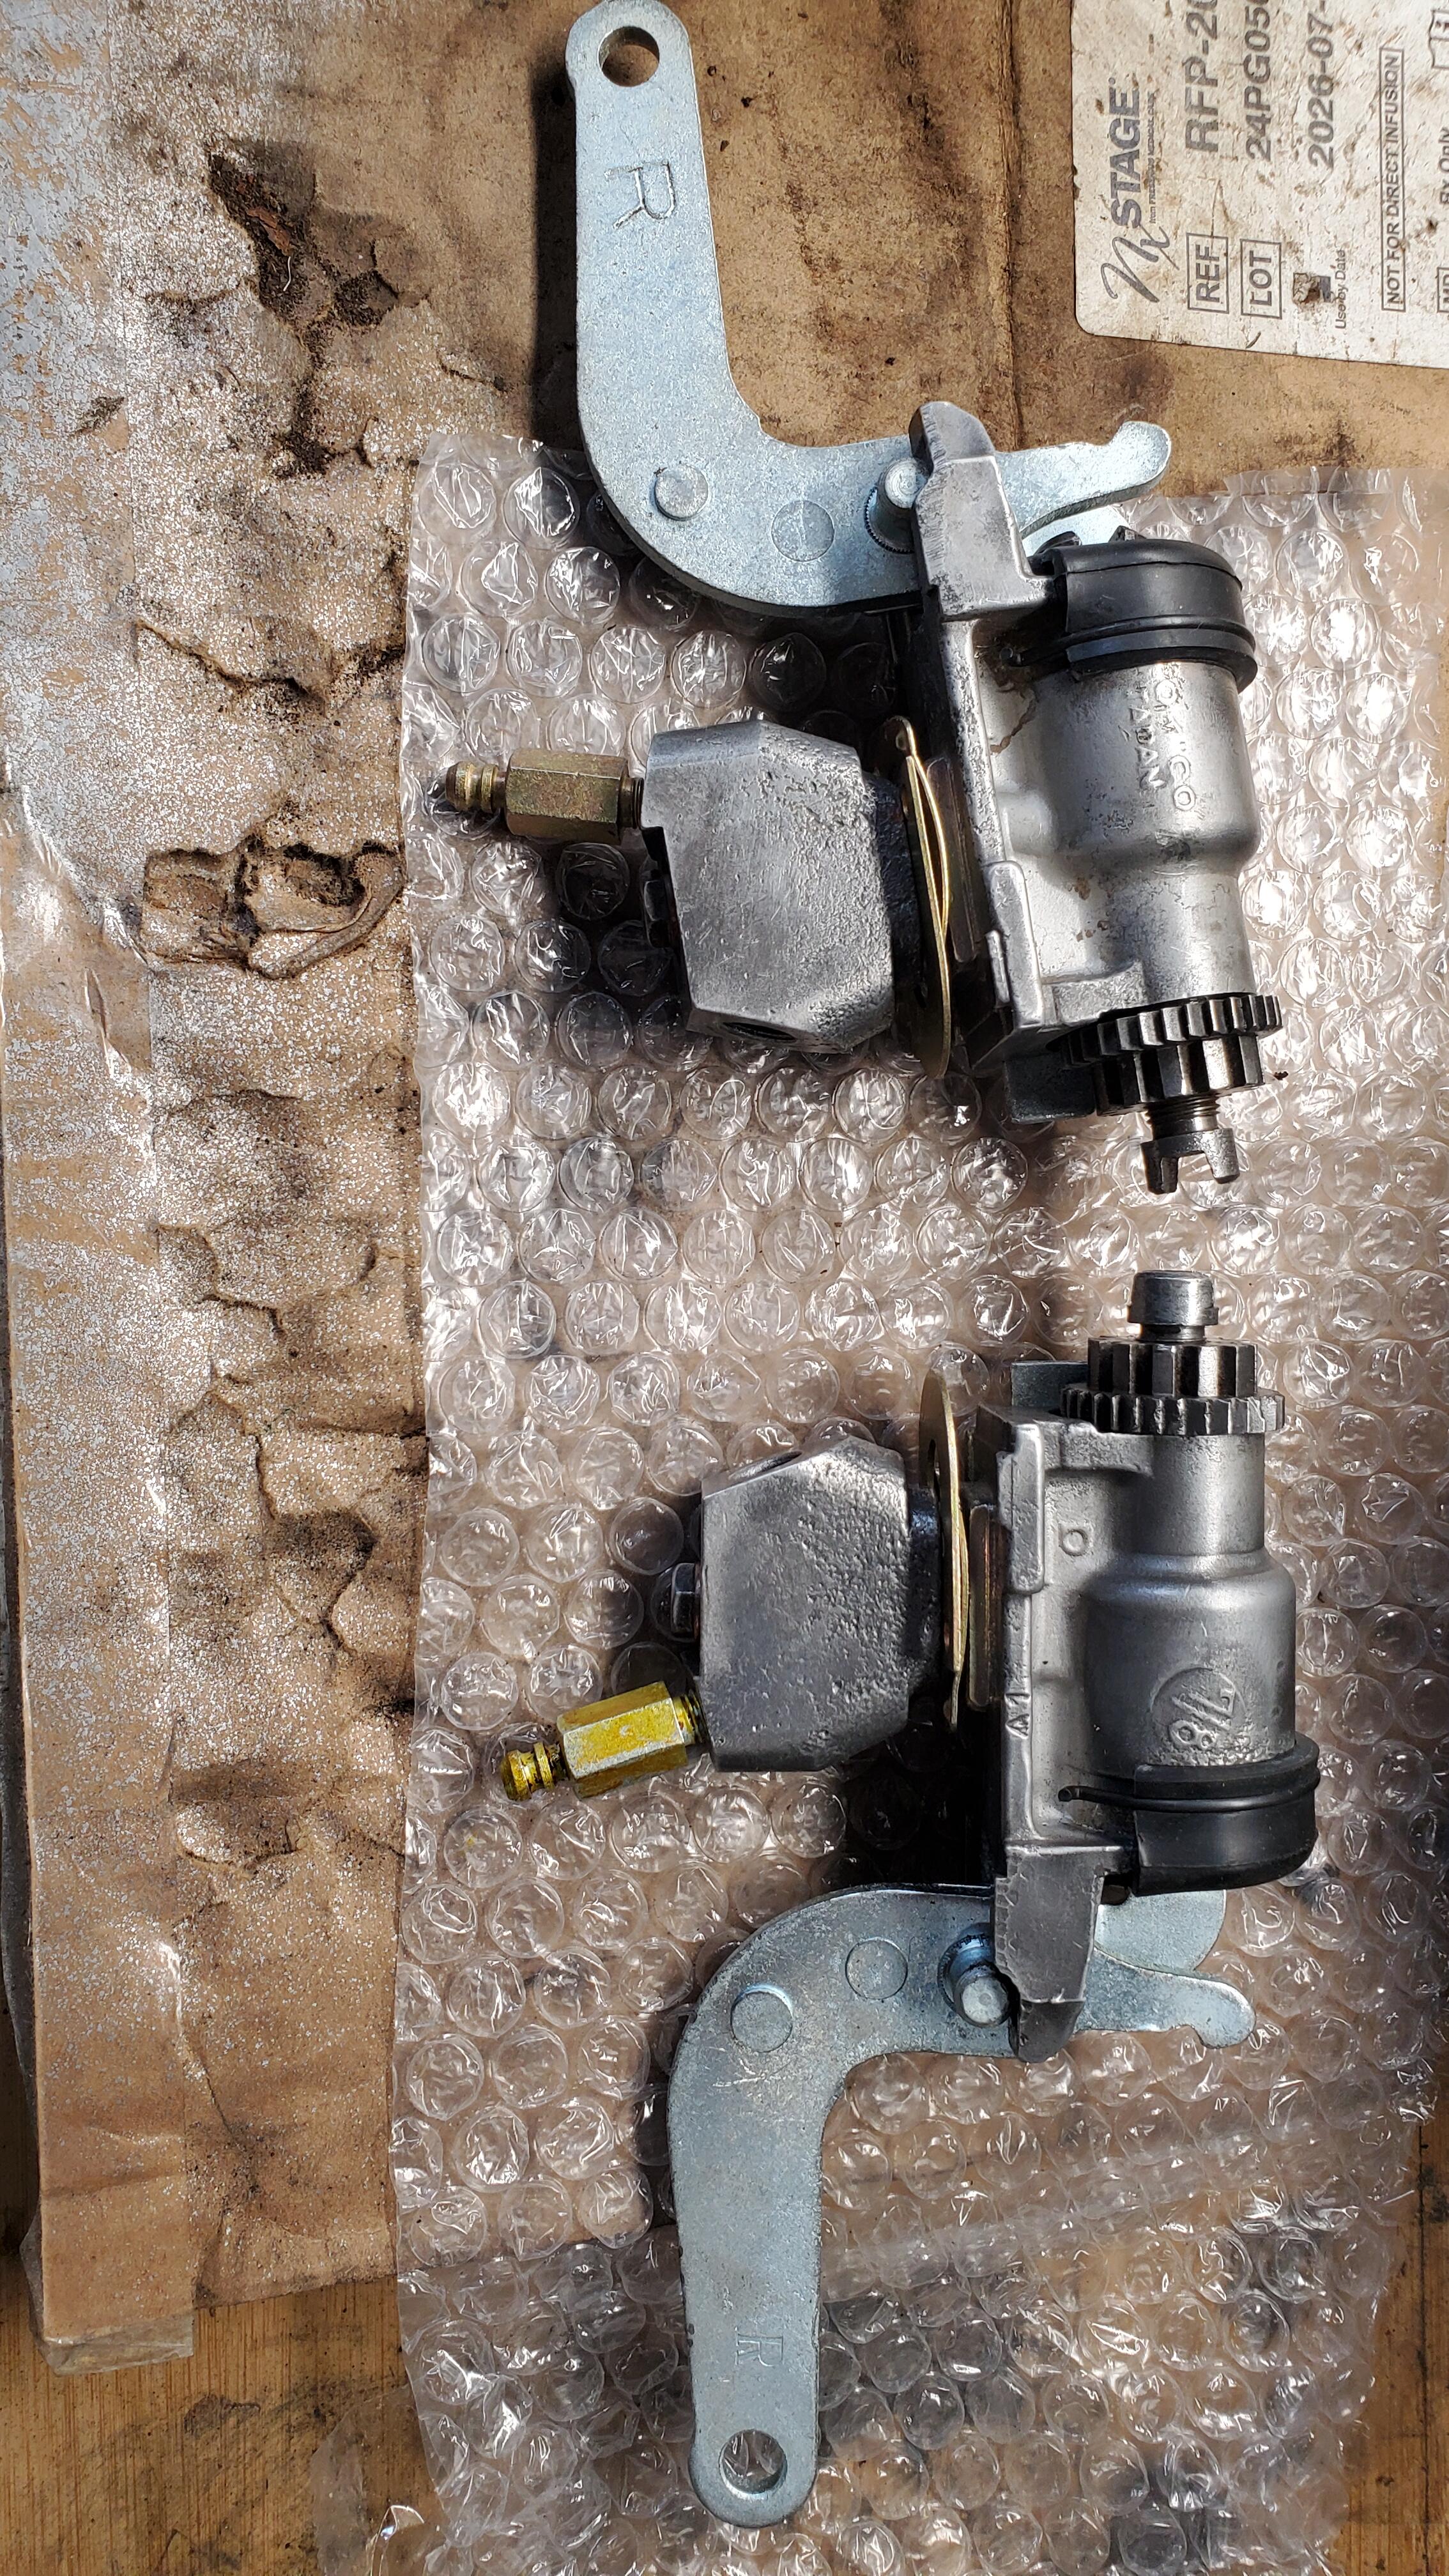
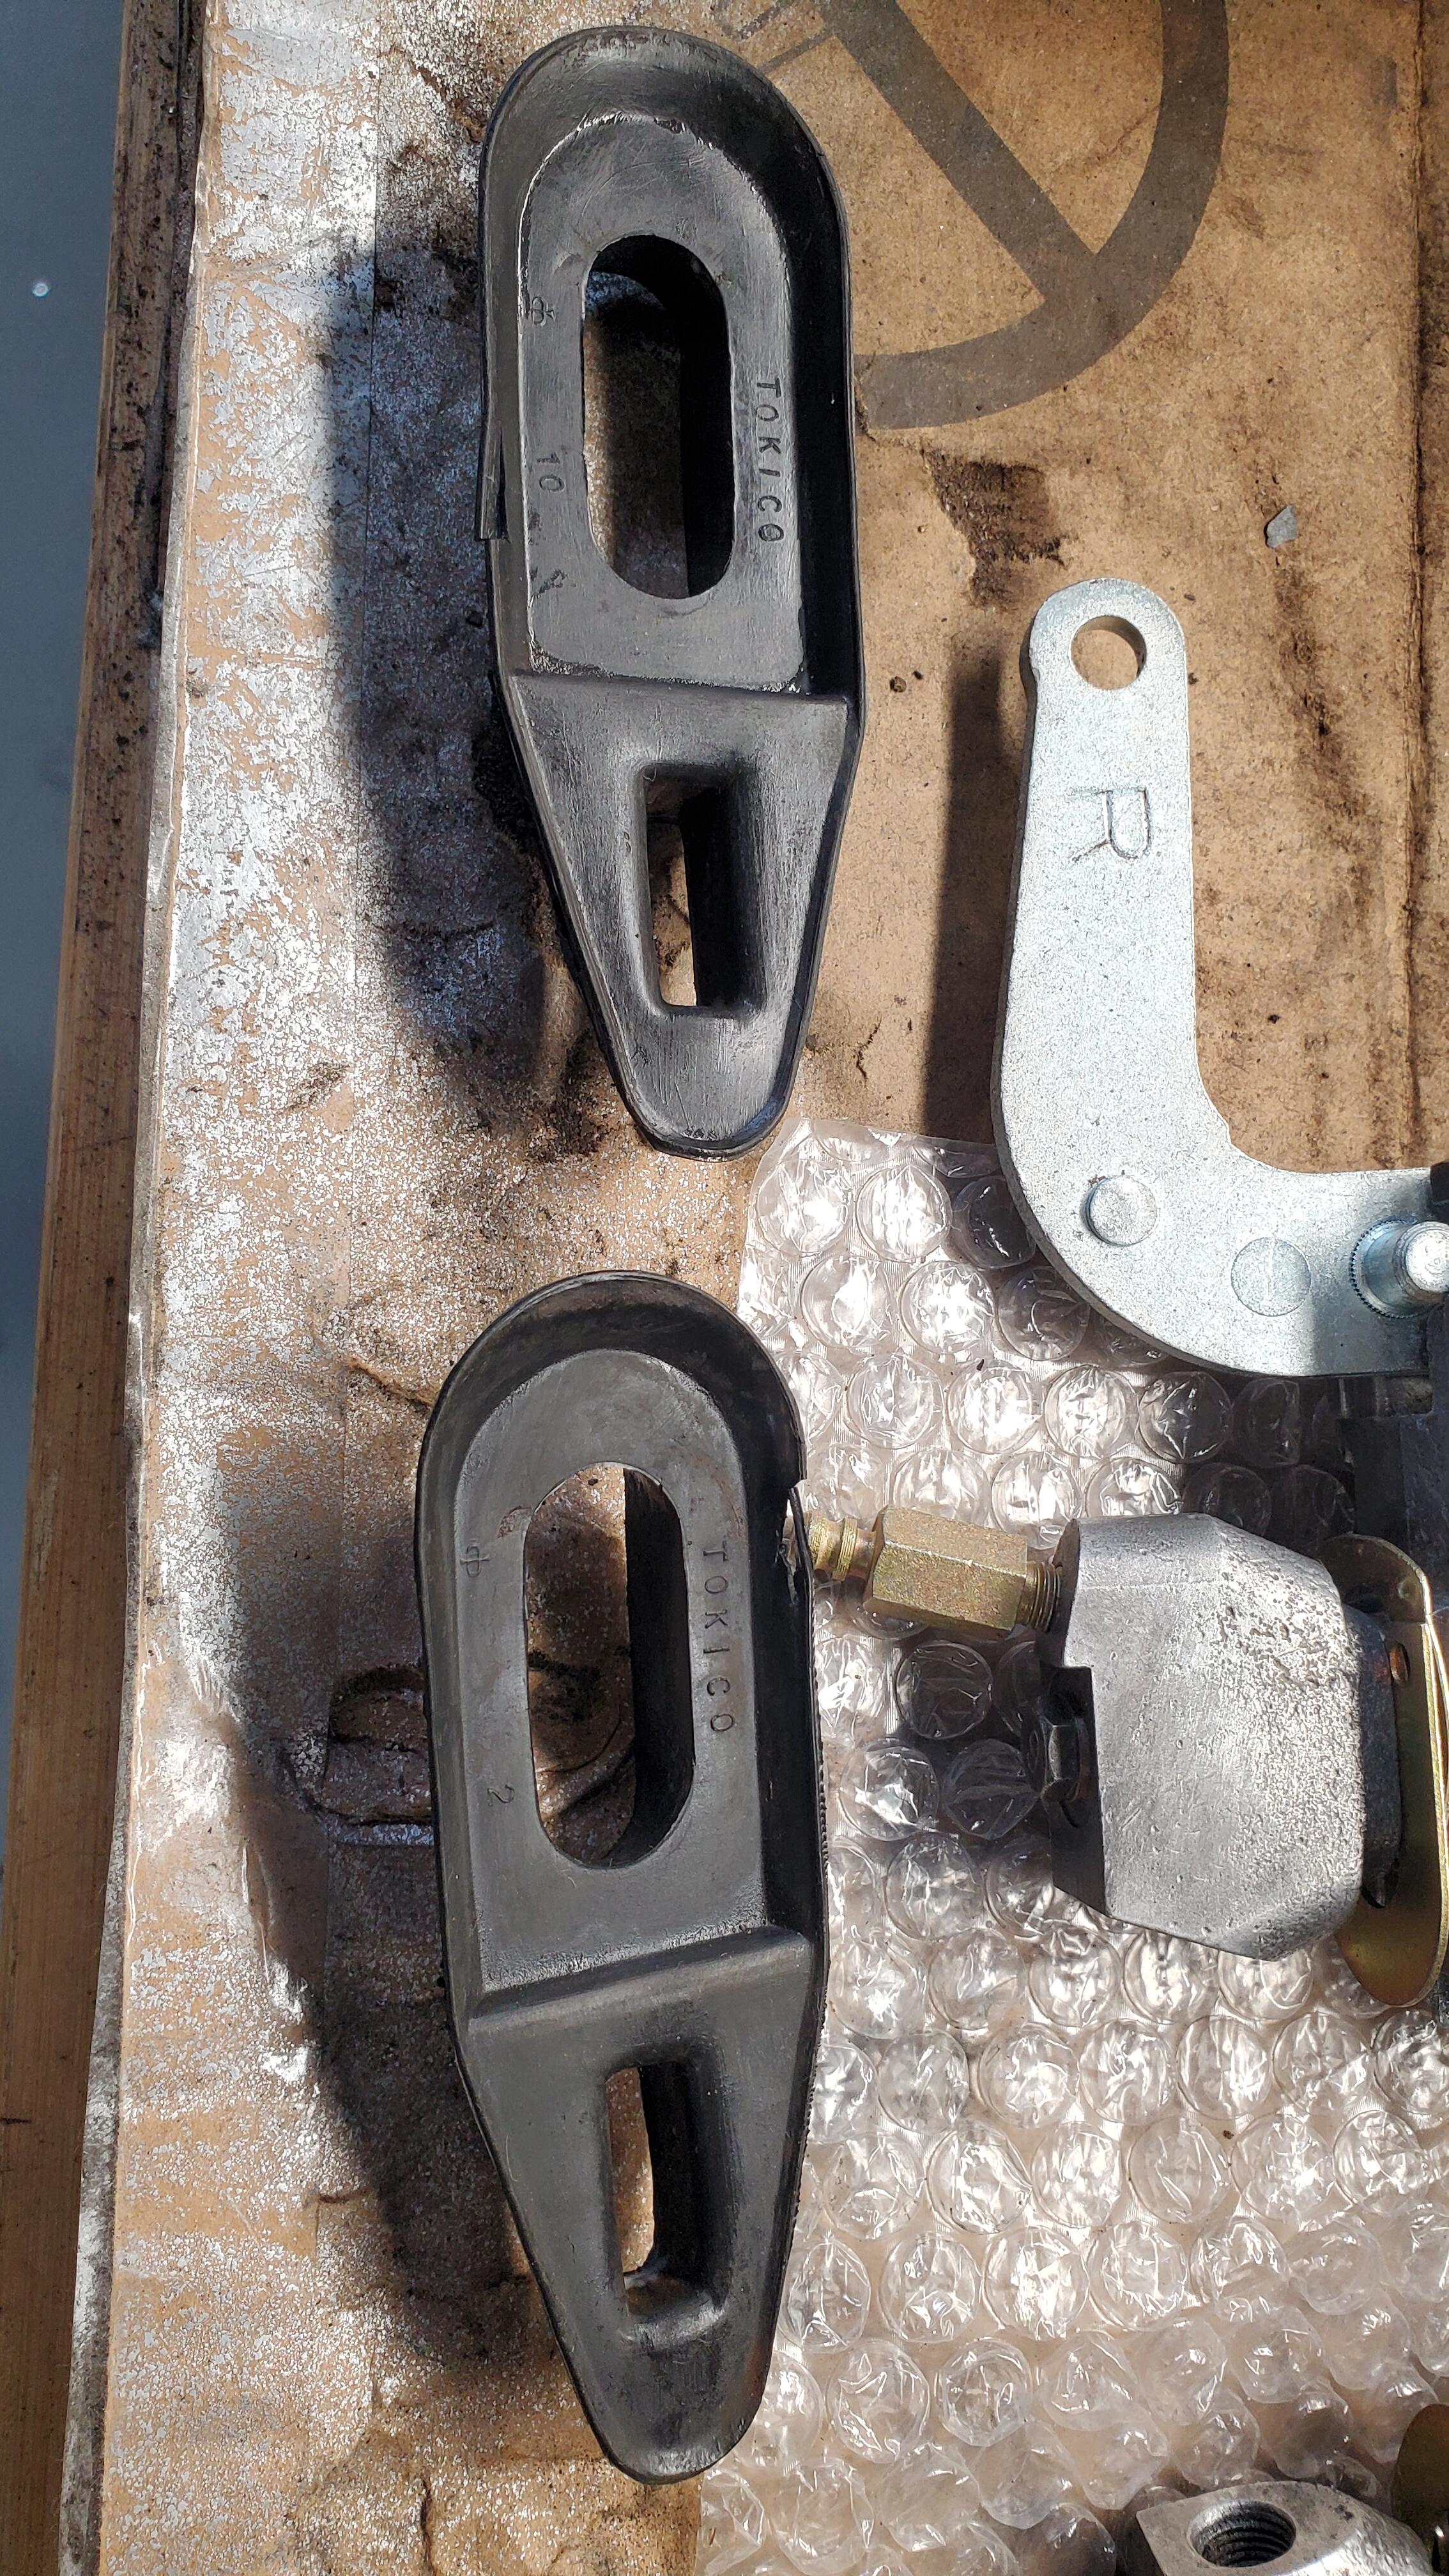
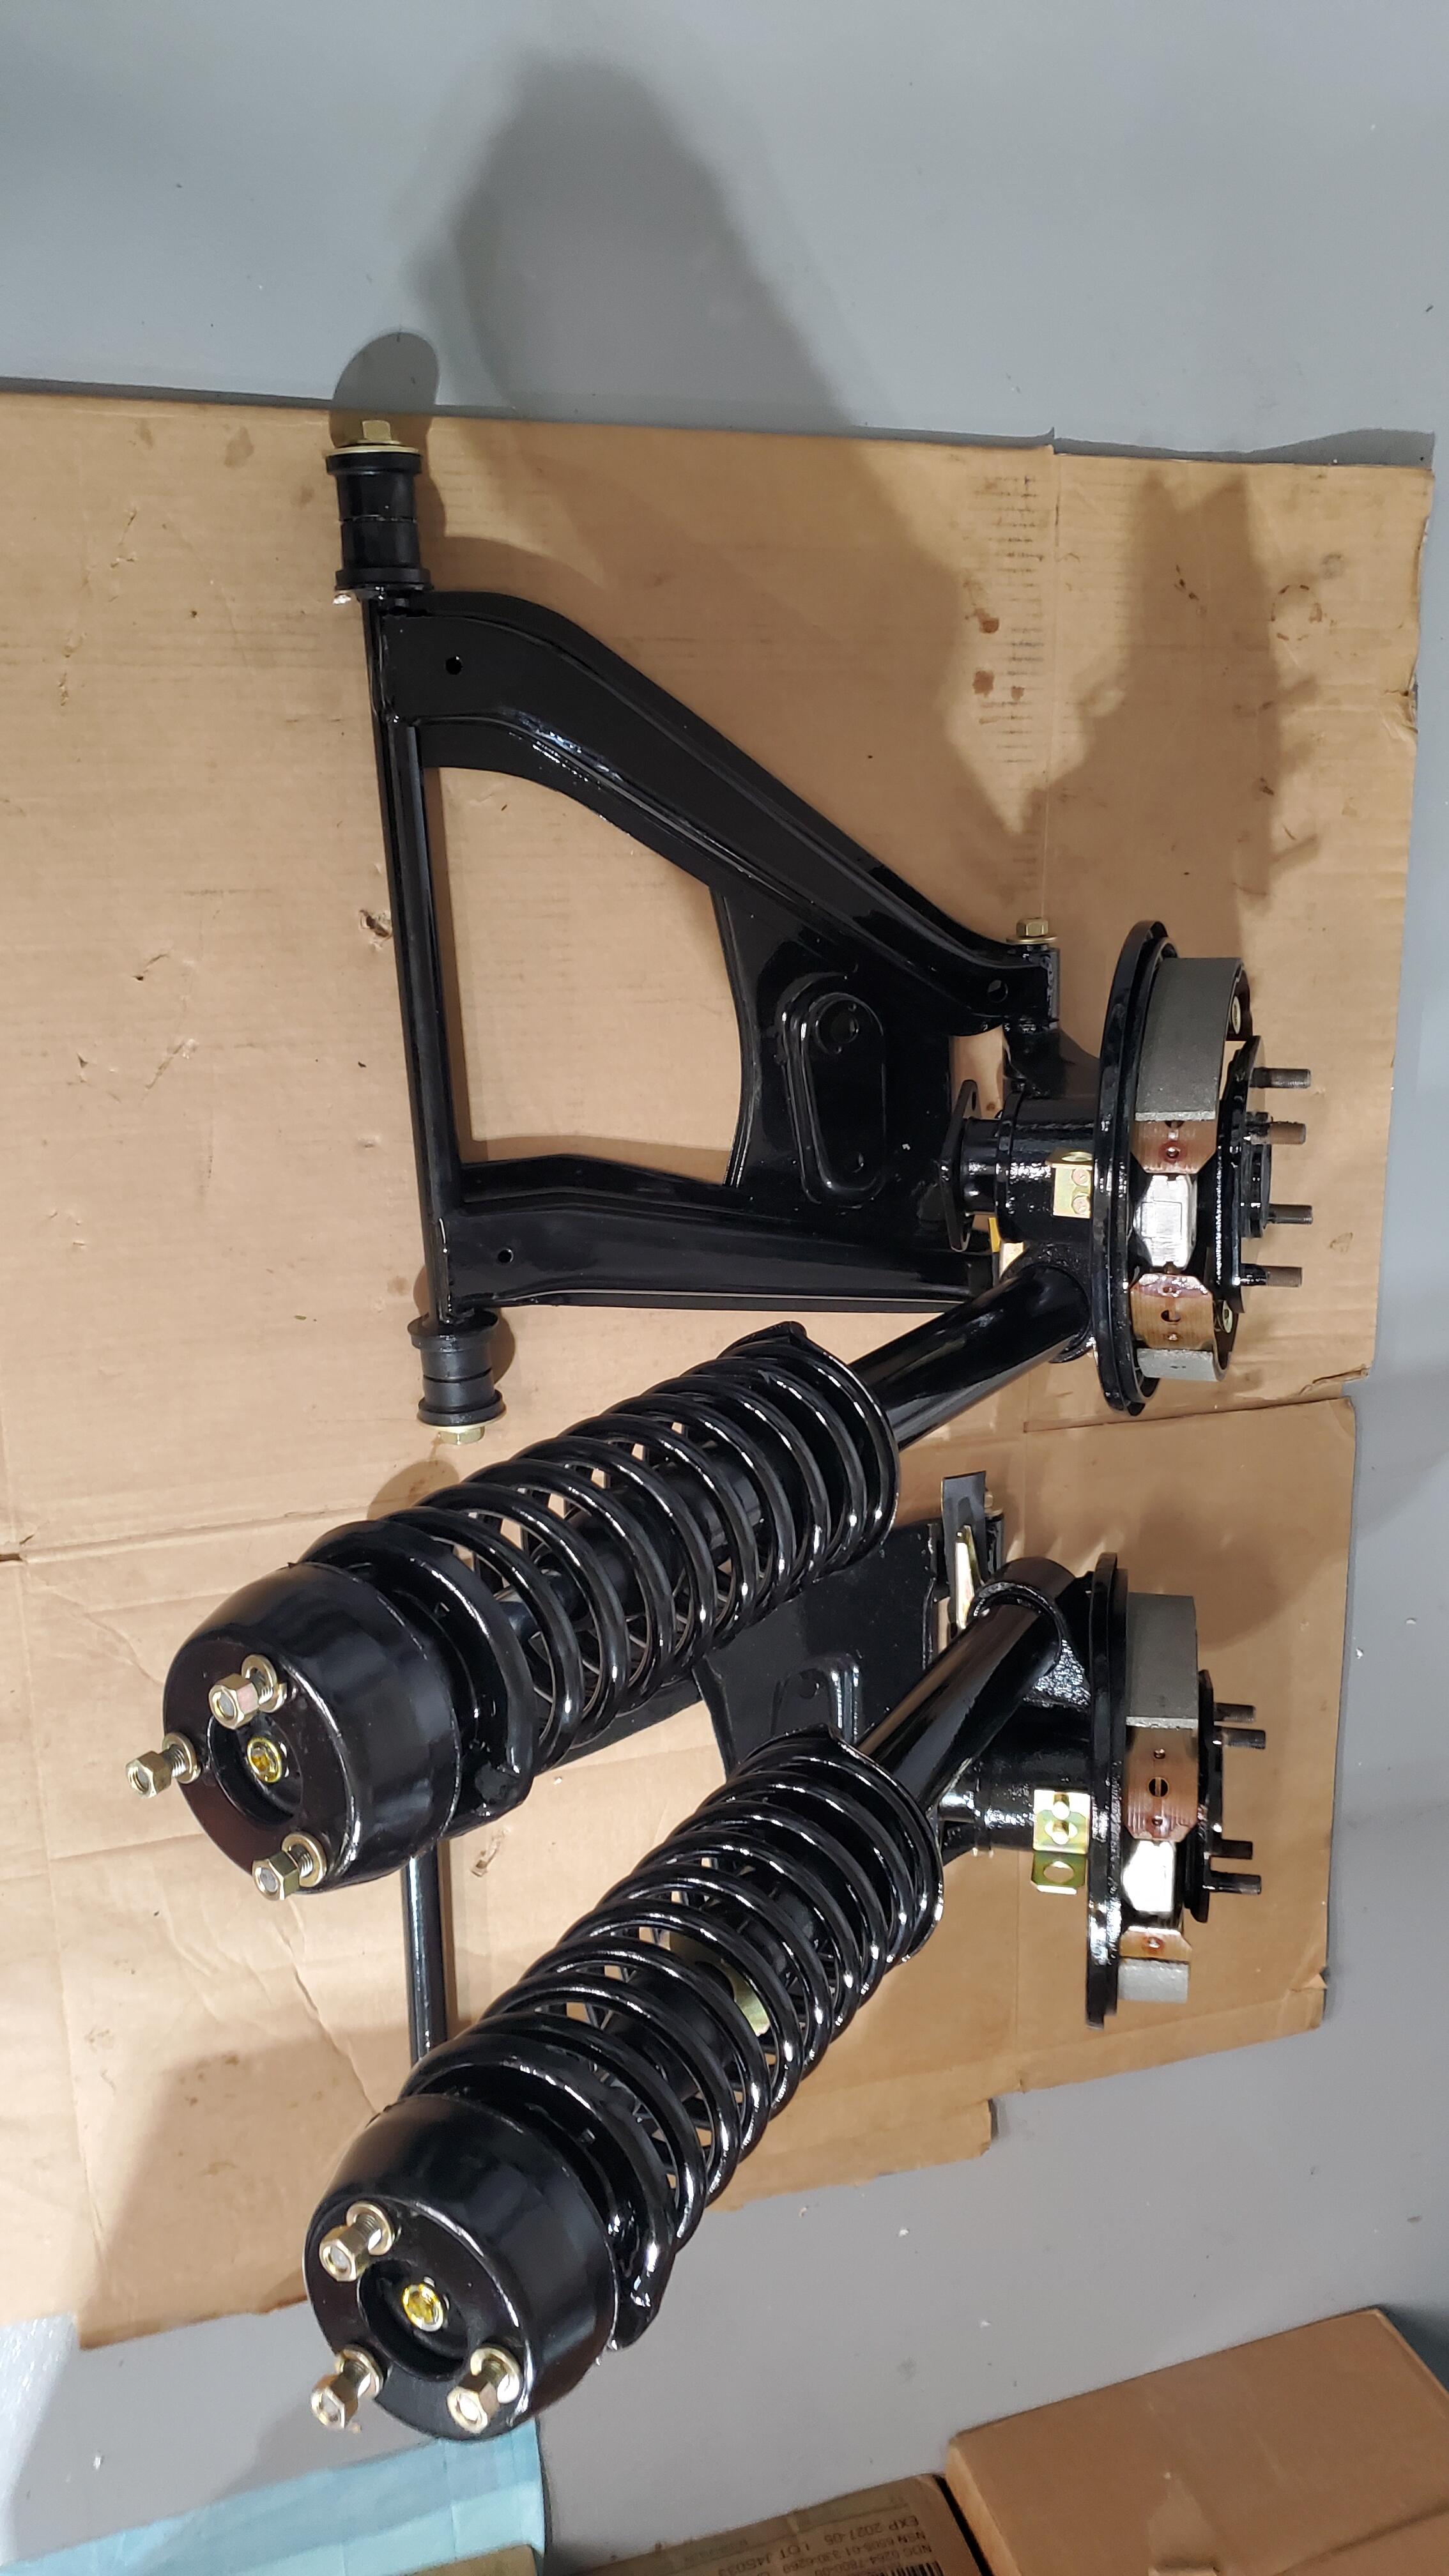
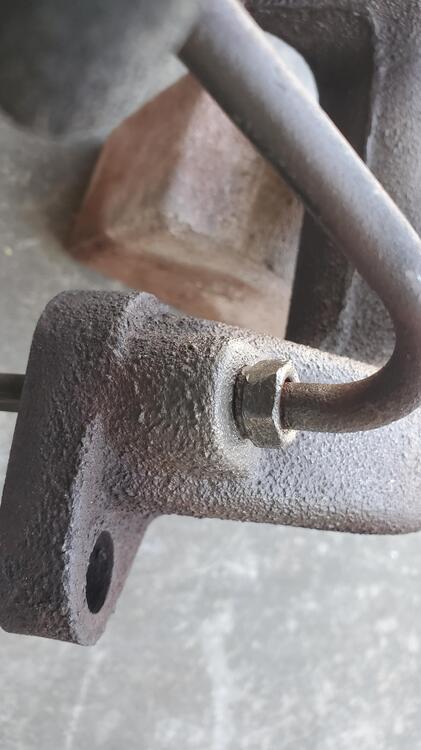
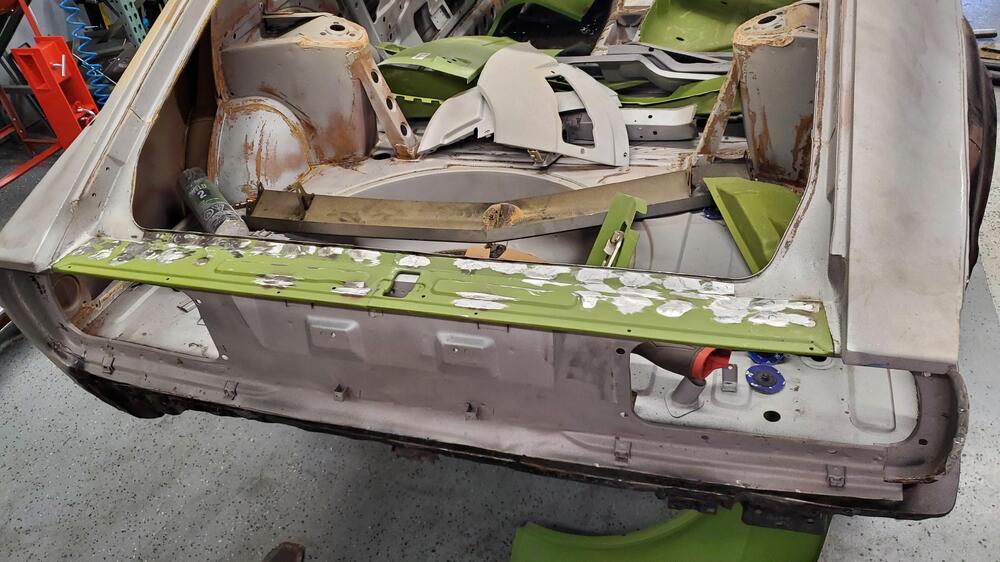
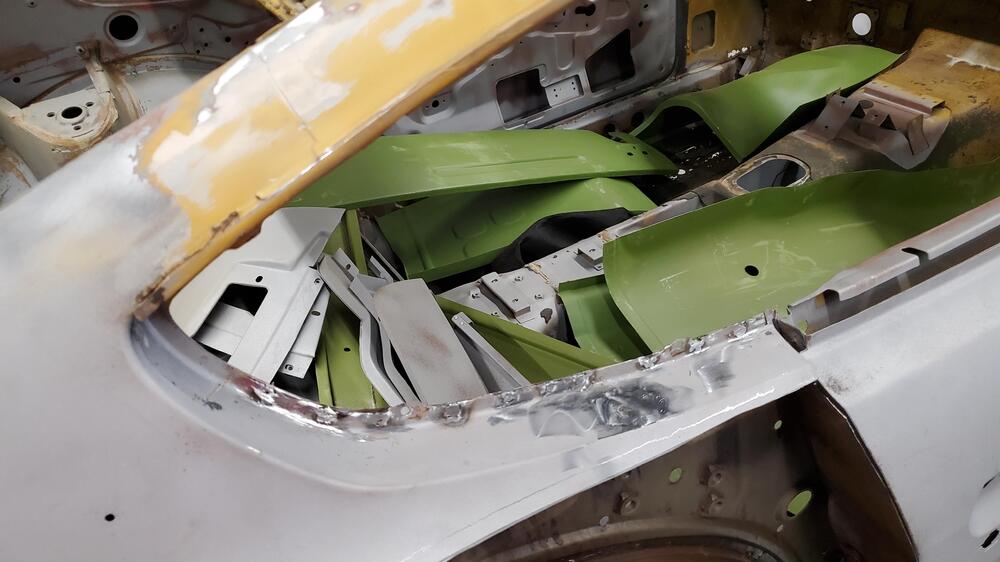
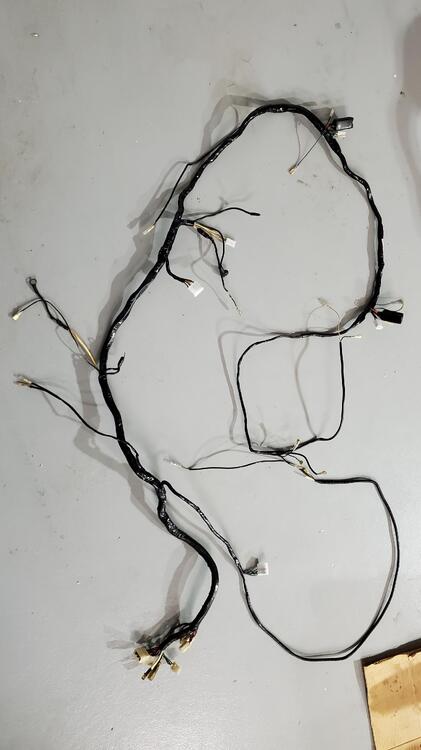
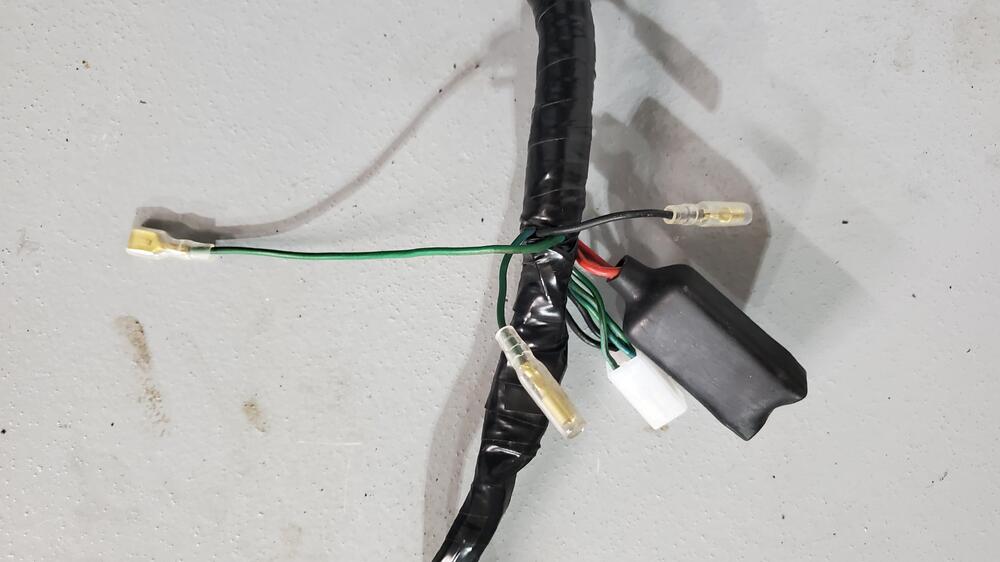
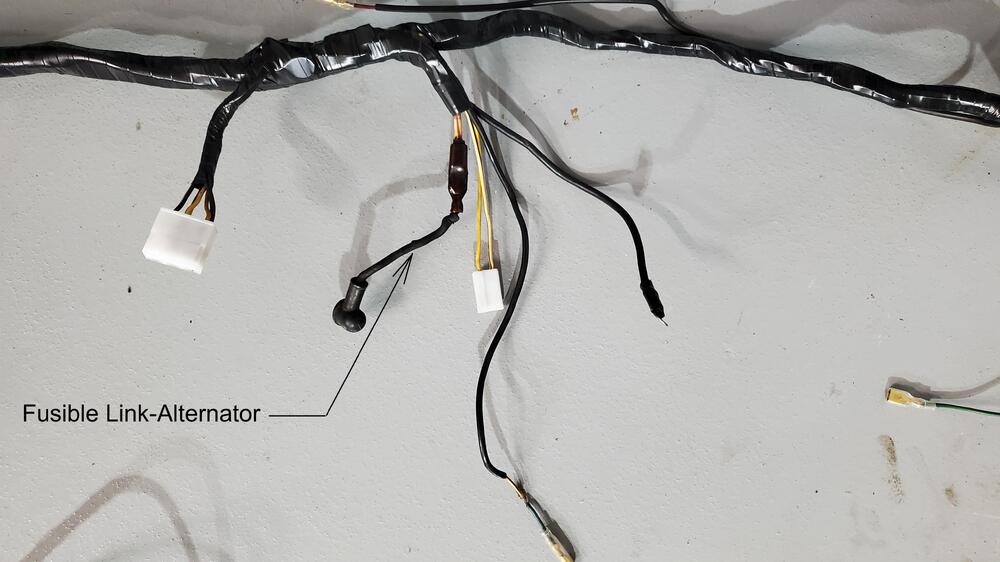
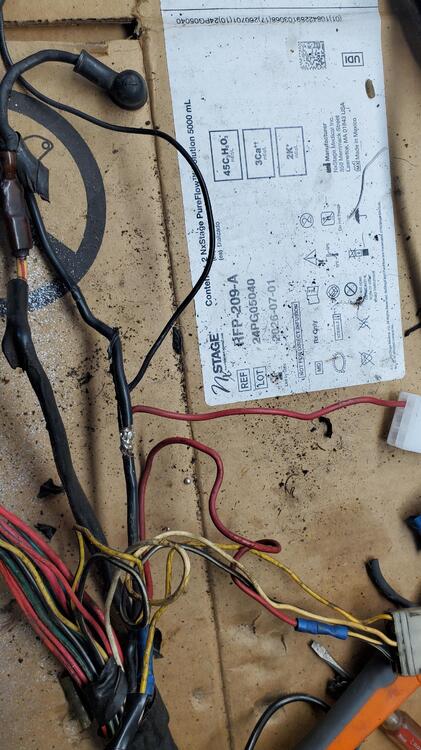
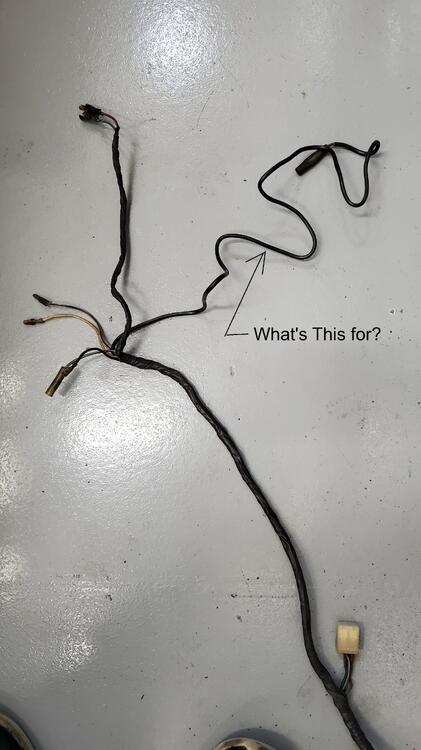
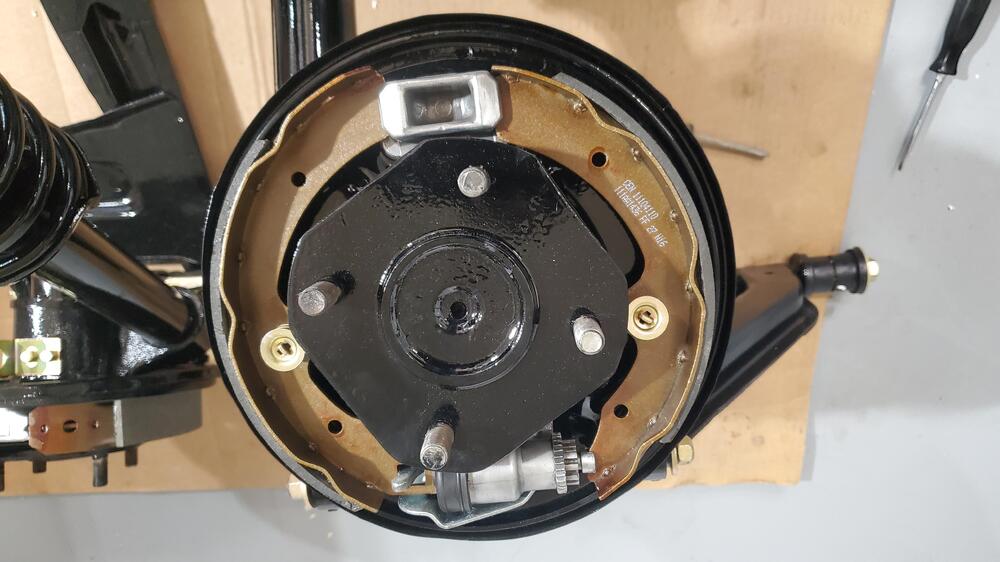
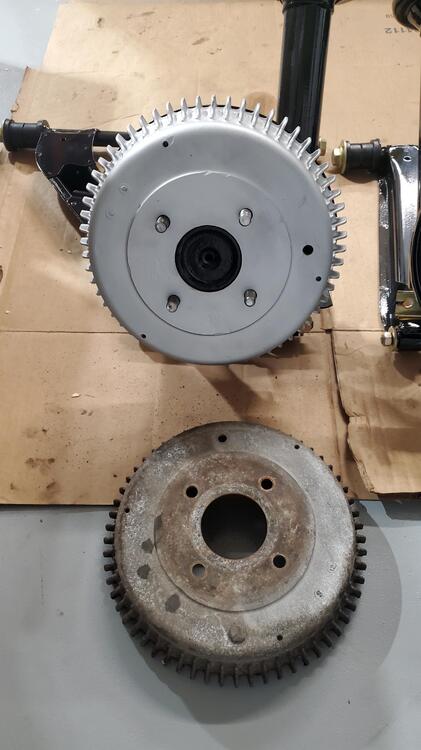
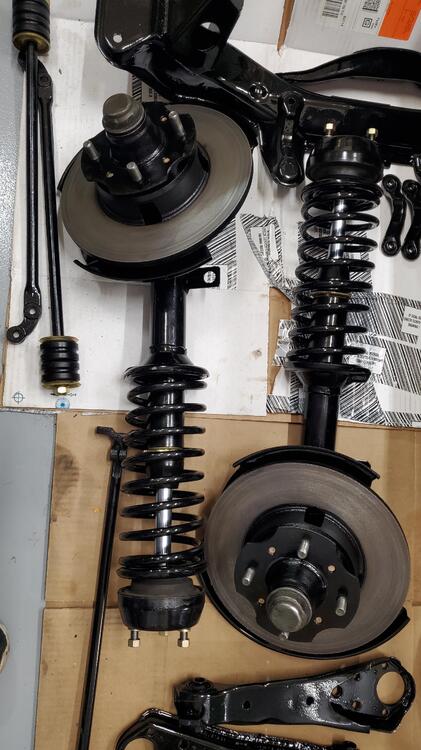
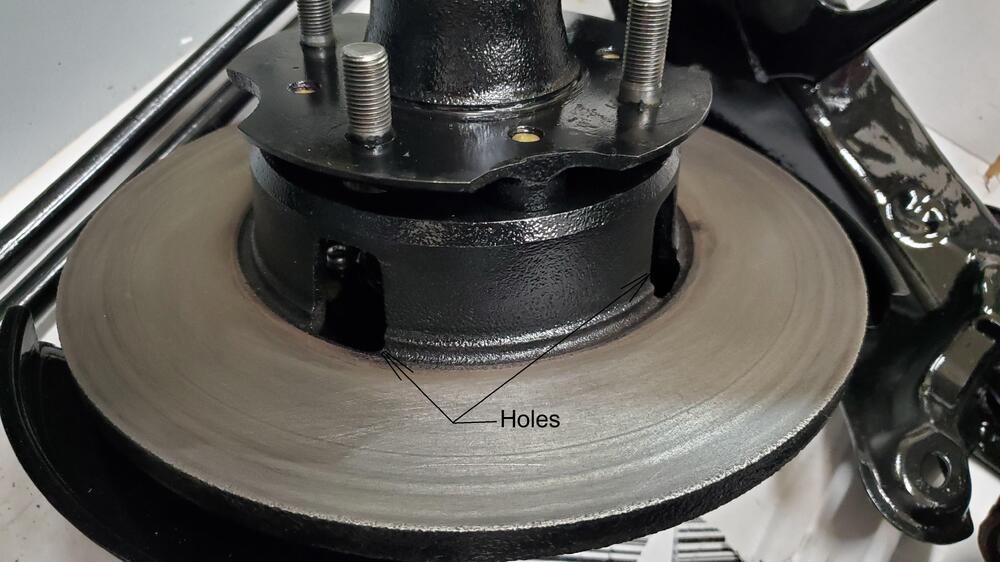
Finally, another update. We last left off with my attempt to remove the Air Galley from the Exhaust Manifold. This is still very much a challenge and I am continuing to work on this. I did get one fitting out, but the others are very stubborn. I continue to soak them in PB Blaster almost everyday, but have not used the Electromagnetic heater for the last couple weeks. The fumes are pretty bad from the heating process so I have backed off on that, even while doing that outdoors. Will probably go back to the heating process in a week or so and see if I can make some progress. There really is no rush on this, so I will hit it at a more convenient time. The body work is moving along, slowly as always. Pictures below show the latest updates from the body shop. I am almost finished with the engine electrical harness and have finished the rear harness. The engine electrical harness had a couple of interesting items. First is a Fusible link that goes to the Alternator. I have not seen that before, but apparently it is a thing on the very early cars. Also, on the alternator charge/regulator cable, it look like there was some outside work done. There was a red wire connected to the main black ground wire. That's a little scary. I checked my Z charge cable wiring and noticed my wire was black, so I am guessing that whoever did the work didn't have the correct gauge black wire, so they used red instead. Anyway, I replaced the red wire with the correct color black wire just to get everything back to normal. Pics are below. On the rear harness there is a wire at the end of the harness near where the speaker and antenna control wires are. Haven't seen that before. Not sure what it would operate. See pic below. I got the shocks and springs installed on the struts. Also cleaned and lubed the front strut bearings prior to re-assembly. I re-furbed the rear brake cylinders and assembled those onto their respective backing plates. Also noticed the both emergency brake arms had an 'R' on them, odd. Cleaned up the drums also. I cleaned and installed the front discs and noticed slots/holes in the rim of the disc. First time I have seen that. Again, probably unique to the early cars. 20250404_153515.mp4


 1 point
 -
I put the progress dealing with the prop shaft and transmission and differential angles in another forum thread. While I was repainting the driveshaft, I also painted the front grill. The front grill, rear tail light trim panels and the hub caps all share the same paint. I bought the paint for these near the beginning of my restoration. If I recall correctly, I told the paint supply place the info for the color that is in the How to Restore your Z Car book. I painted the grill, but the color was too light - it was too grey, at least comparing to my original, not repainted hubcap. I got some crap in it too. So, repainting was necessary. This time, I took a guess, and added 10% of black paint (by weight) to make it darker. I think it came out a bit too dark, but I like it a lot more than what it was. I think I will experiment a bit more with it, adding maybe 5% of black and seeing how that looks. Then, I will repaint the tail light trim panels and possibly the hub caps as well.
 1 point
 -
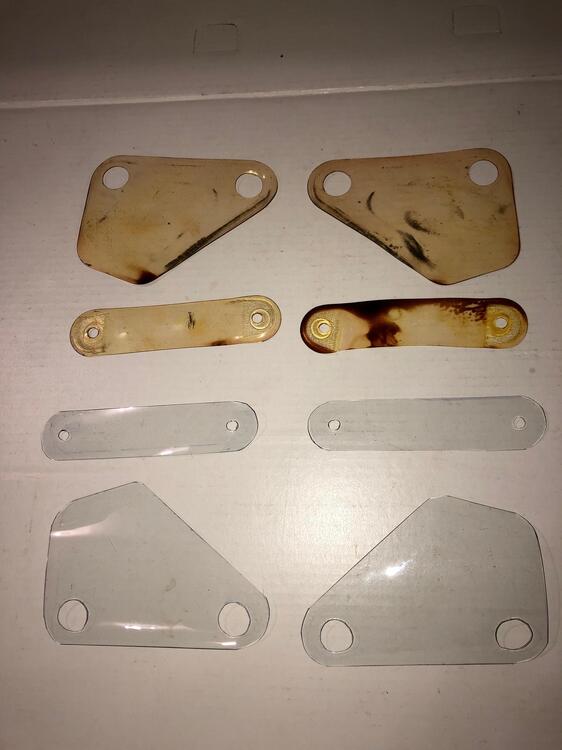
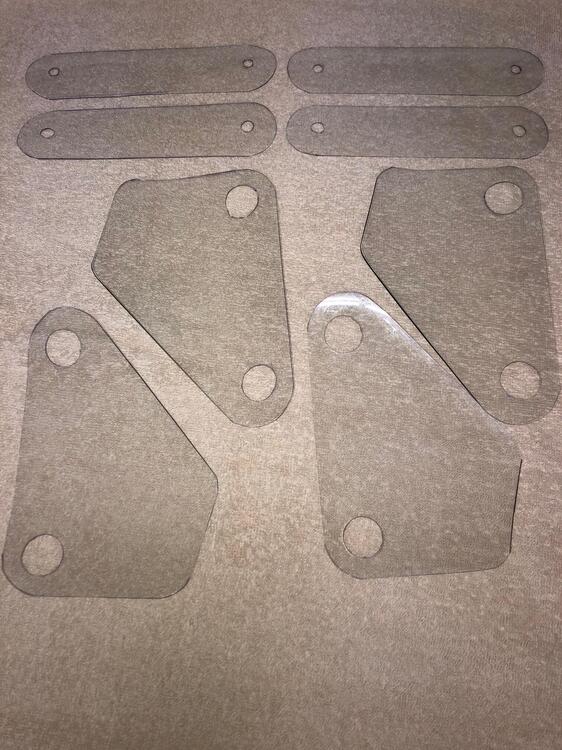
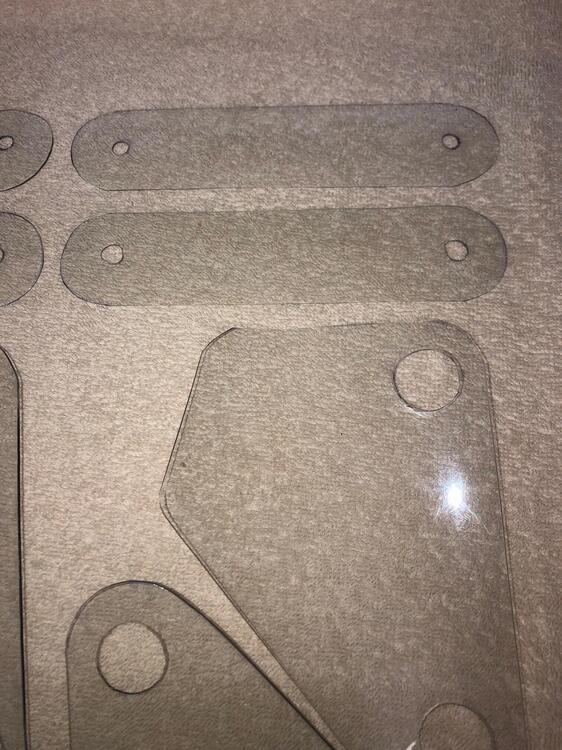
Since these clear vinyl seat protectors are no longer available from Nissan, nor are reproductions available from existing fabricators, I sourced a large quantity of clear vinyl material to fabricate reproductions. These are for the 1969-1971 seats that do not have the recline mechanism. Set of eight (8) as shown in photo, (plus close-up photo) Material is same gauge/thickness as original Photos show: Set of four (4) original, aged and yellowed clear vinyl seat protectors and set of four (4) reproduction clear vinyl seat protectors. Set of eight (8) reproduction clear vinyl seat protectors - what you would receive upon ordering. The pricing is $48.00 shipped to a CONUS address. Shipping will be insured with tracking. If you are interested in a set, please PM me your full name, mailing address and Paypal address. I will then send you an invoice. Note, these are time consuming to produce. Therefore, I will only send the invoice when the set is available for shipment, production timefame as noted below Thanks, Keith Note: The last time I offered these was Summer 2022. So if you plan on needing a set before Fall 2025 please order now. Orders accepted in the first available production time frame ------------------------------------------------------------------------------ Maximum sets available with 1 week production time frame - 4 sets to be produced Reserved: 1 set - Rick R (shipped) 1 set - Joel L (shipped) 1 set - Bob D (invoiced) 1 set - John R (invoiced)
 1 point
 -
1 point
-
1 pointMaybe drill them and expoxy small sections of thin all thread? Then bolt them to the hubcaps1 point
-
Yes, a great read and many thanks to @JDMjunkies.ch for putting that together. Great job, as always, to Kats and Alan.1 point
-
1 pointWe have never broken one during removal or install. We were very nervous about removing and reinstalling the windshield with the crack so we were super careful (and had a fair amount of experience on our side at that point.) In the beginning, we were super careful because we weren't sure we could find a replacement. Then we had some solid experience, and had developed a removal method once we found that we could source replacements. I have broken a windshield out of the car... On our shop move a few years ago, I didn't pack one well enough... And, who says it doesn't get cold in Arizona? Why I've seen temps in the mid-to-upper 30's!! - well, until the sun comes up... (and I'm wearing a light jacket while these Arizonan's are bundled up in ski parkas - I grew up in Idaho and waited for the school bus in -30 temps.) Okay, I'll admit that we don't trust any modern windshield installers. They glue windshields in. That's pretty much all they know. A gasketed windshield installed over a flange is foreign to them. So, here's how we don't crack windshields: A. Use a utility knife (Xacto knife, single edge razor blade) to slice away the thin rubber that holds the trim on. Remove the stainless steel trim. 2. Utility knife - slice the exterior gasket carefully in the flat that was covered by the trim. You're looking for the edge of the glass. Once you find it, cut around it - all the way - enough that you can remove all the rubber from the outside face of the glass. 2b. You can do the above by yourself, but what follows really needs an assistant. Or two. c. Carefully push the glass out from inside the car. Lift just a little bit all along the perimeter until you're sure that all edges of the glass are unattached and it can be removed without interference. D. Remove the rest of the original gasket from the flange and clean the flange completely. REMOVE the dash finisher (the black crescent moon shape metal piece). 5. Get the new or exisiting windshield on a stand and install the new gasket on the glass. Be sure the glass is fully in the channel all around. Lube helps - very soapy water. 6. Install the stainless steel trim - not the corners, just the long pieces. Ya, do it now - it's MUCH easier than after the windshield is in place. The back side of the trim IS SHARP. It'll slice the rubber if you're not careful. You can file or sand the sharp edges if you're OCD (or even if you're not...) You have to raise the rubber flap up and over the edge of the trim. Lube helps - we use Meguiar's Hyper Dressing - and a smooth skinny tool: Awl, pick, screwdriver, smooth without sharp anything that will cut the thin flaps that hold the trim. g. Install a long cord in the gasket groove - thicker is better - like the olde tyme clothes line cord, cotton is better, but I have 3/8" polyester that works. WET the cord FIRST - yup, soak it in water. Add a little dish soap if you want, we need lubrication. The cord needs to pass each other at the meeting point by 10-12 inches. We like the meeting point at the top of the glass in the middle and the ends need to hang out fairly far - you need to get a good grip on either one - perhaps wrapping it around your hand. H. Lube up the windshield flange metal with some dish soap and water or Hyper Dressing. i. Two people - set the windshield - with the gasket snug all around - into the flange. Cord ends should be inside the car. Make sure it's centered all around. ii. One person is going to pull the cords inside to pull the rubber gasket into the interior of the car, sealing it to the interior side of the flange. At the top and on the pillars it'll be set over the vinyl. The other person is going to be on the outside holding the glass in place while the cord is being pulled. That person will use both hands as often as possible, palms down, fingers splayed on the glass. Their job is two-fold: 1. As the cord is pulled, the glass will want to move opposite of the pull (starts at the top, it'll want to move down, when the pull is on a side, it'll want to push to the other side. Exterior person needs to keep the edges of the glass/gasket from moving out of the hole the windshield sits in. 2. When the cord is pulled the glass needs to sink into the frame when the rubber is pulled into the interior. So, a certain amount of exterior pressure can be needed to keep the glass settling inward as the cord pull progresses. J. With the person with hands on the glass externally, the person inside starts to pull the cord. The cord hanging on the right side will be pulled to the left, and vice versa. Pull one cord only. Pull it at a 90 degree angle to the glass. Pull carefully and slowly if necessary. Don't pull so fast that the person on the exterior can't manage keeping the glass in place or help you get the glass to sink into the hole. I'll be easy until you get to the top corner(s). Stop at the corner and pull the gasket up on the inside and get it set into the flange as much as possible. The gasket needs to be pulled outward (like lifting it the same direction as the outside edge of the glass) getting it to set firmly in the flange. That helps the glass pull inward as well. At the corner, go very slowly and swing the cord in a circle as you're carefully pulling corner gasket rubber. Sounds stupid, but it works and doesn't cut the gasket. Once past, make sure your helper keeps the glass from moving out of the hole on the opposite side. Before getting to the bottom corner, pull the gasket into the flange - do it as you go and it'll help. Now pull across the bottom - it'll want to make the glass pop out of the side that's not pulled yet. All this time your helper needs to be getting the windshield to push inward as you're pulling cord and setting gasket into flange. If you have two helpers, it makes it very easy. Keep going around the entire windshield and do the second top corner same as the first. Pressure on the outside. Finish up by pressing firmly down on the outside, and pulling the gasket firmly into the flange on the inside. k. if it doesn't set right - have no fear - just remove it and start again. Pull the gasket rubber on the inside down on one corner and push that corner out carefully - continue around the whole windshield, take a deep breath, lube it up, try again. (But... It's a LOT easier if you're patient and get it right the first time...) L. Push the gasket out as far as you can - especially at the top corners. Install the trim corners and gap cover pieces. The stainless steel trim is not just for looks - it helps maintain the gasket in it's proper place and will help stop the gasket from pulling away from the top corners. Don't use it at you own peril... Note: I do not use any adhesive or gasket seal. These gaskets were designed to seal around the glass and flange without it. Now, I'm fully aware that that isn't always true. BUT, Arizona (no rain) and Z owners here wouldn't (don't) drive their Z's in the rain even if there was. Okay, they still wash their cars, but heat and NO humidity dries things FAST here. YOU can decide for yourself if you want to use such a thing - Nissan did - in spots - on the later models. I still don't. And: Patience is the key to Joy... Fortune cookie...1 point

.jpg.05526356ecbaf6357513558e5317a1f5.jpg)
.jpg.a8eee412972902e3770b2ac39f29196a.jpg)
.jpg.652ce9a7dfc56a0adb3f3bca59bea5ff.jpg)