Leaderboard
-
conedodger
Free Member15Points12,513Posts -
Patcon
 Subscriber
 14Points11,142Posts
 -
Richie G
Free Member9Points254Posts -

DC871F
Free Member5Points676Posts


Popular Content
Showing content with the highest reputation on 06/23/2024 in Posts
-
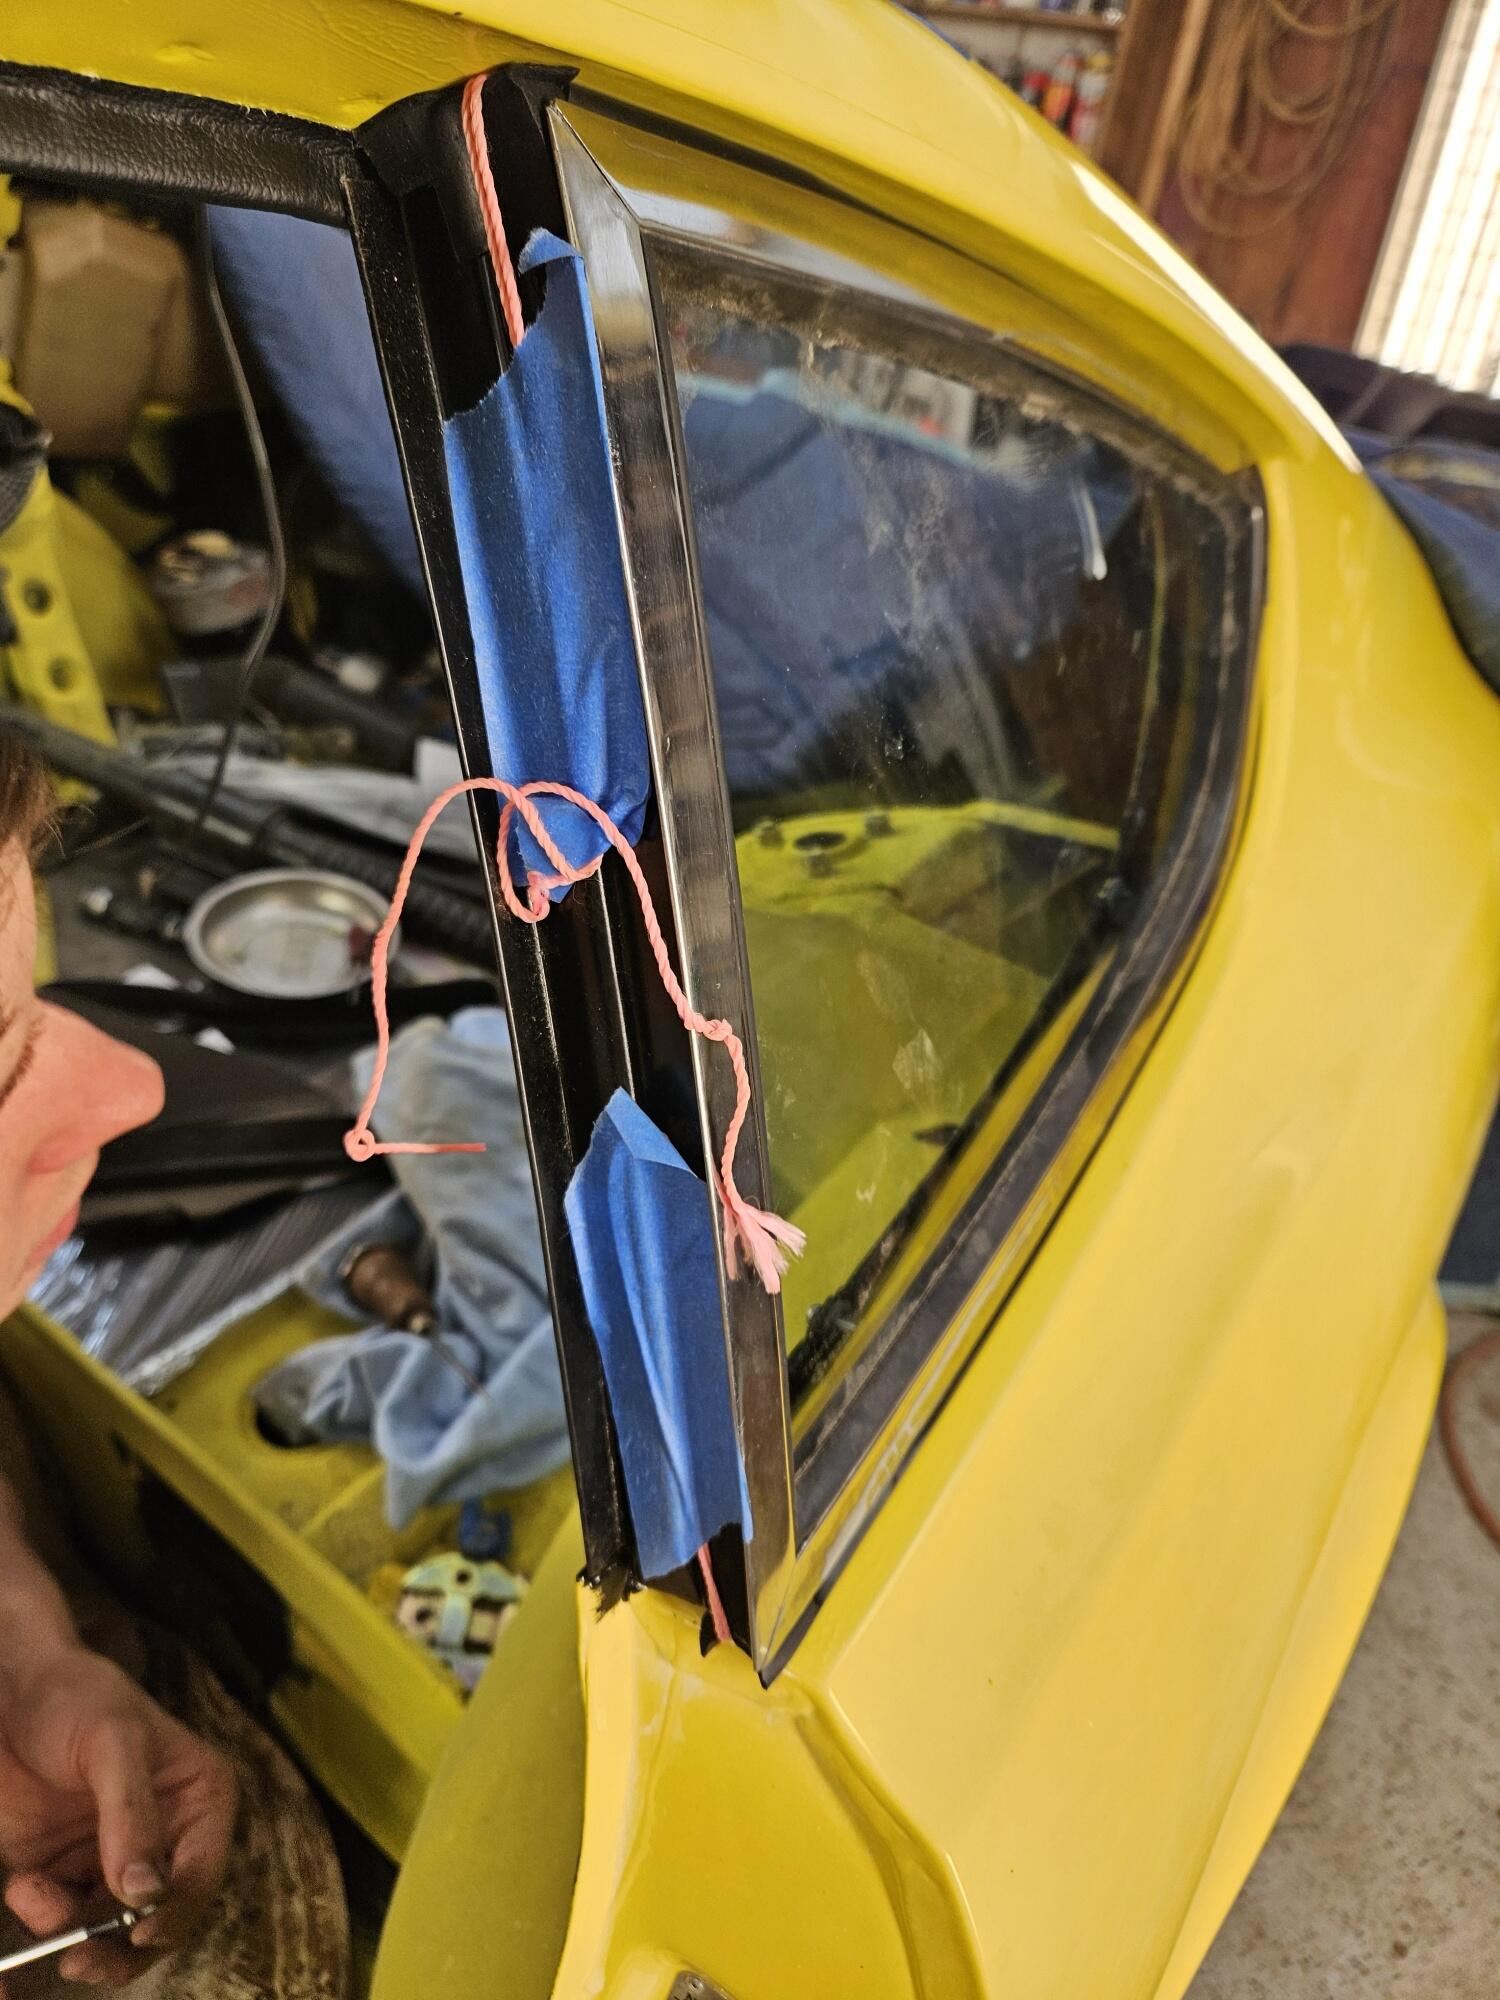
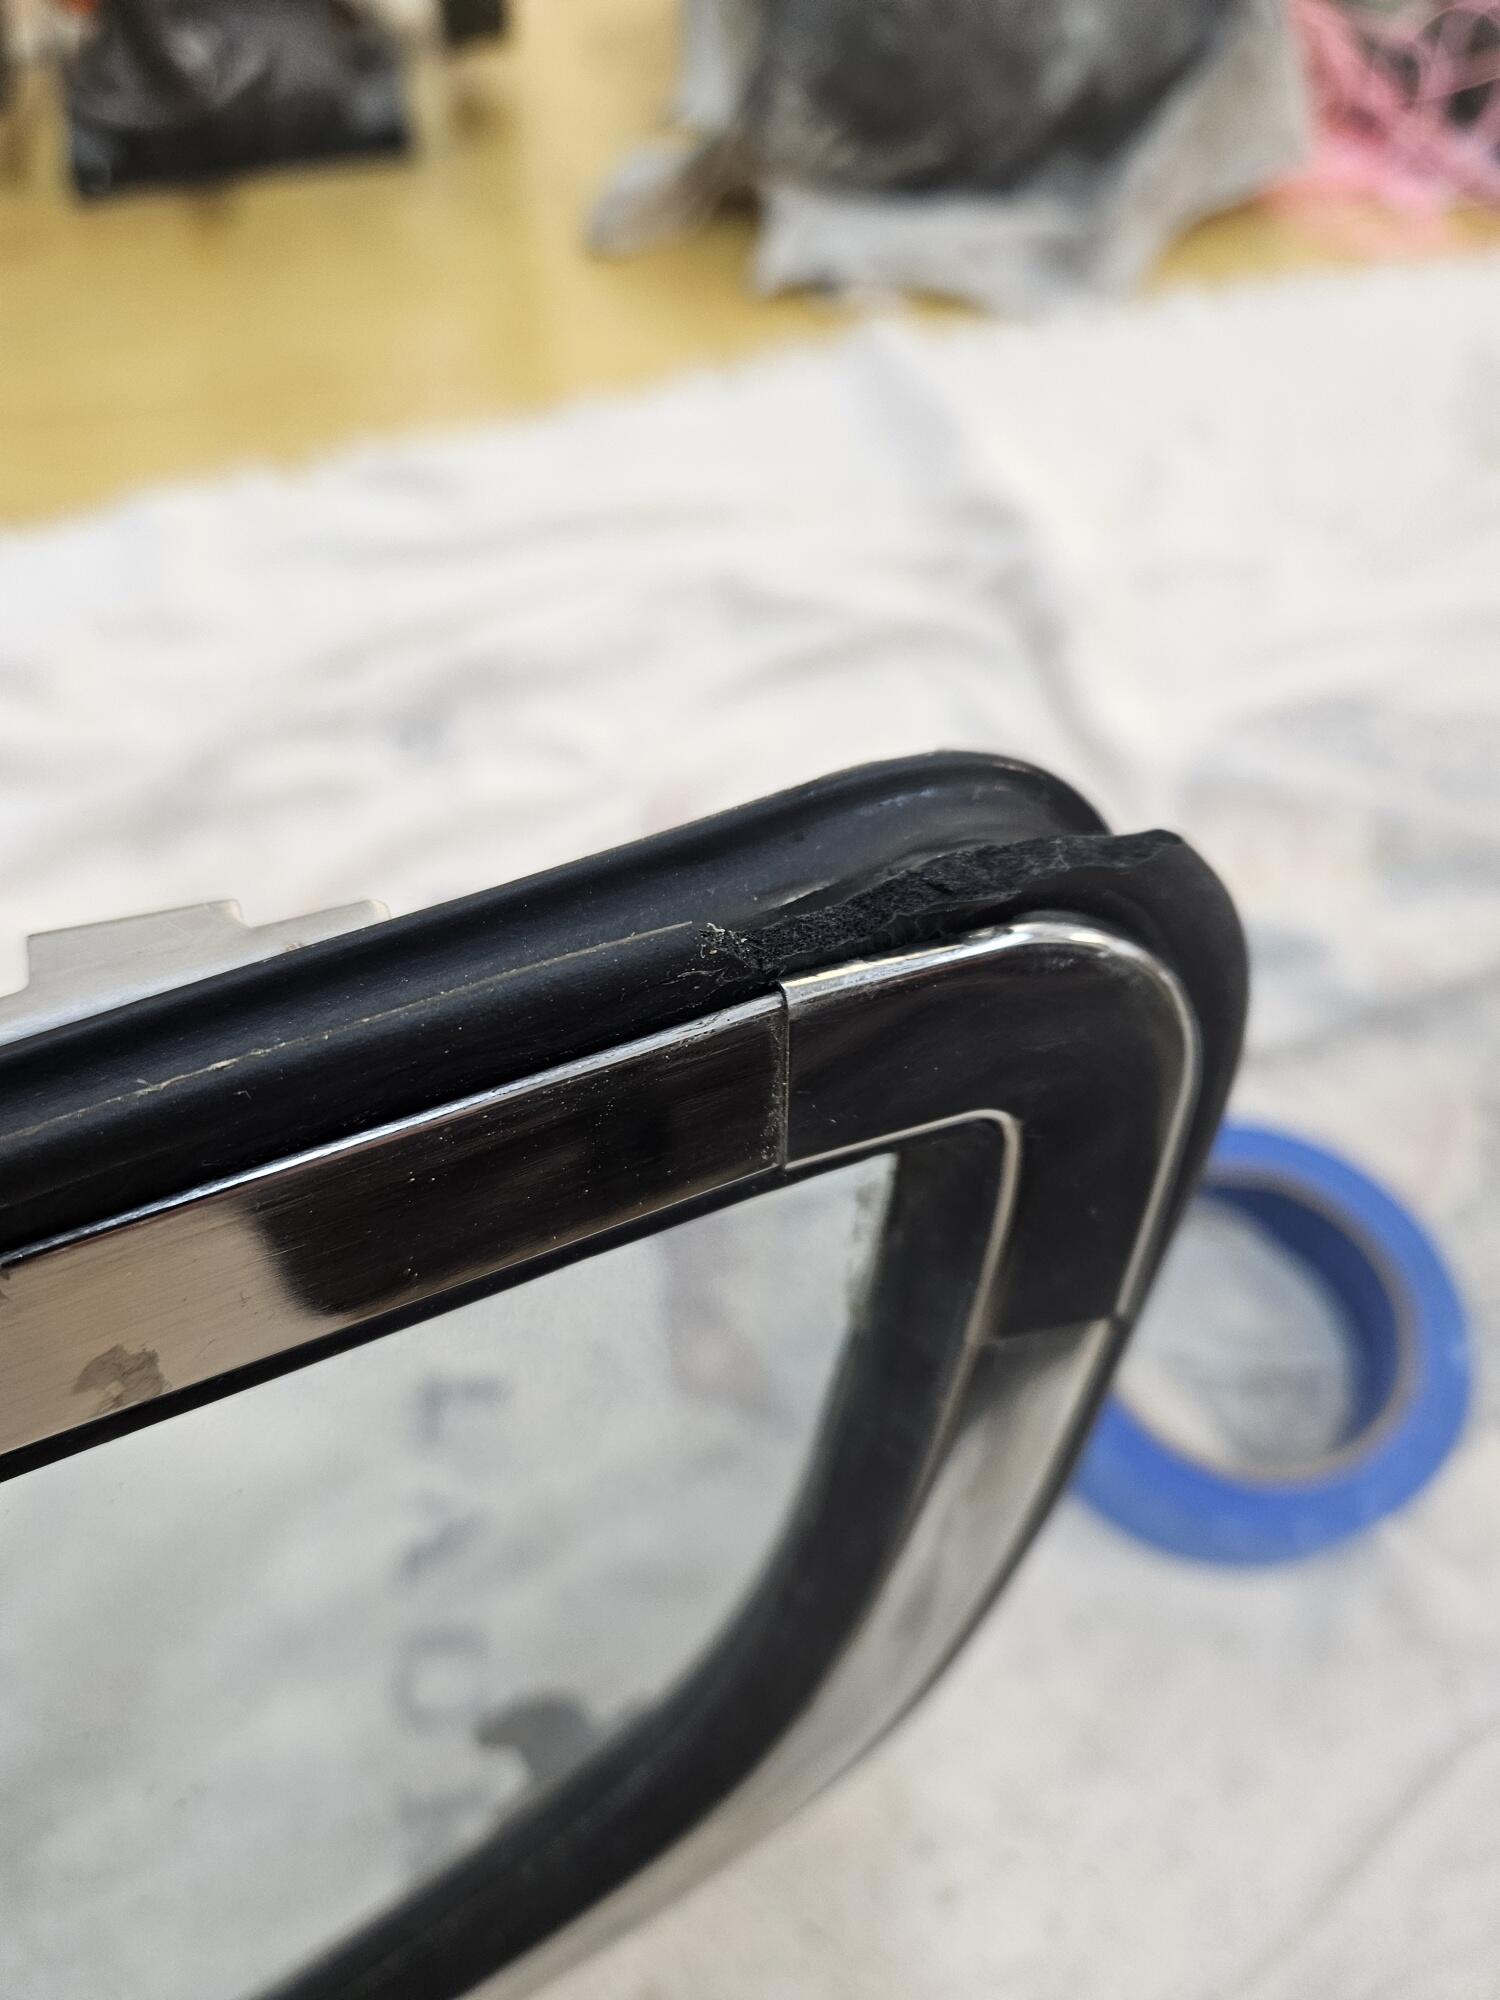
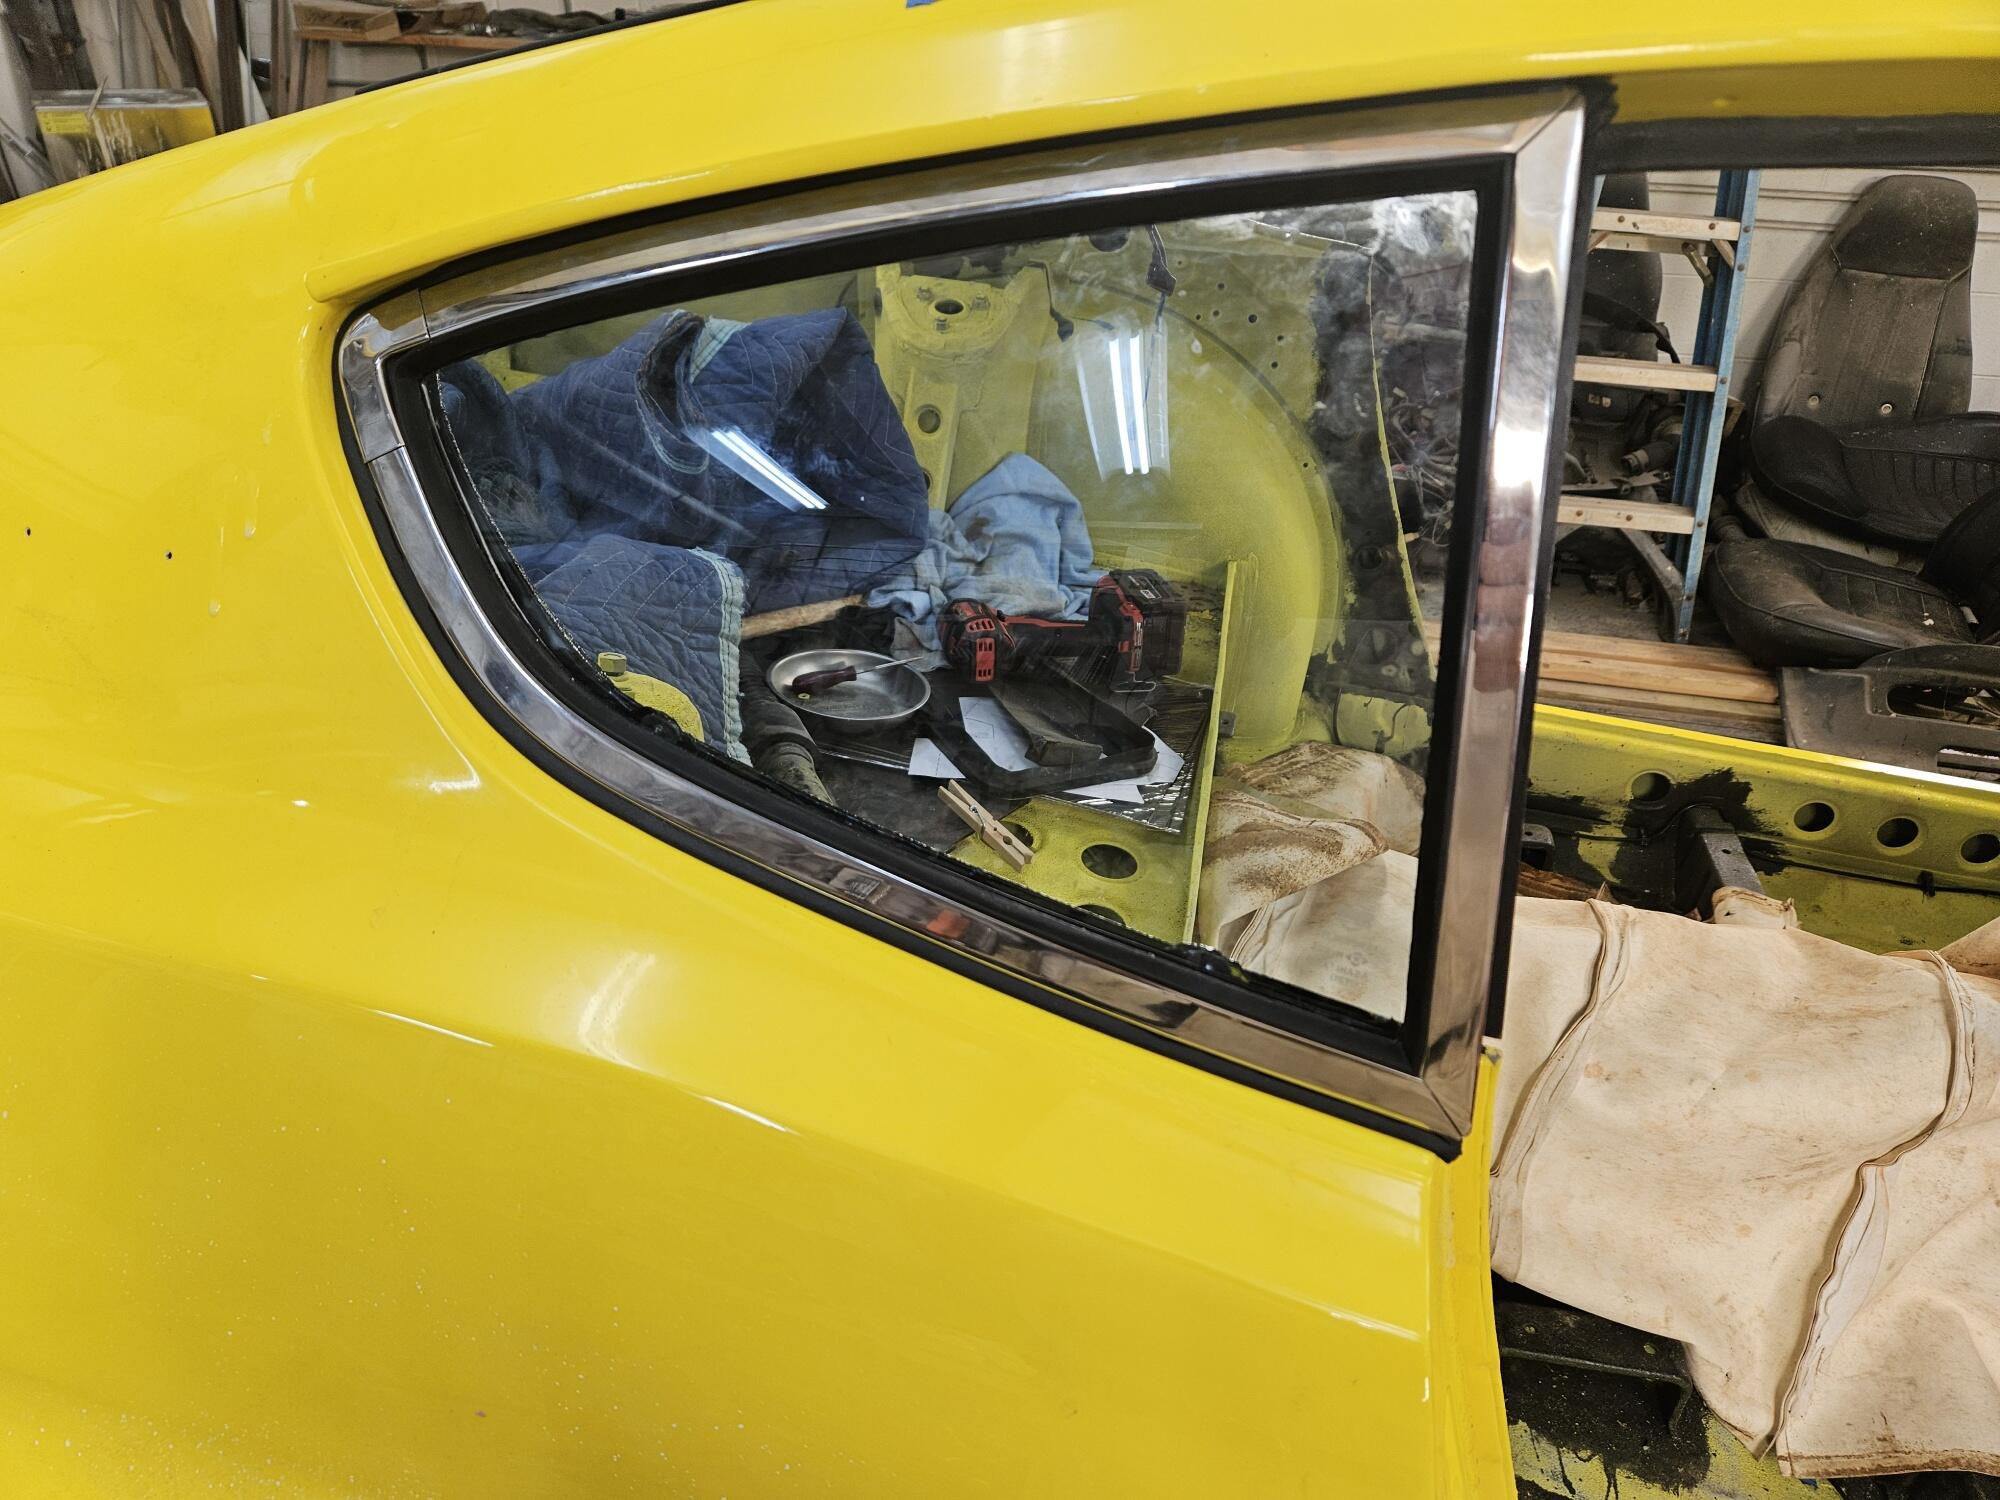
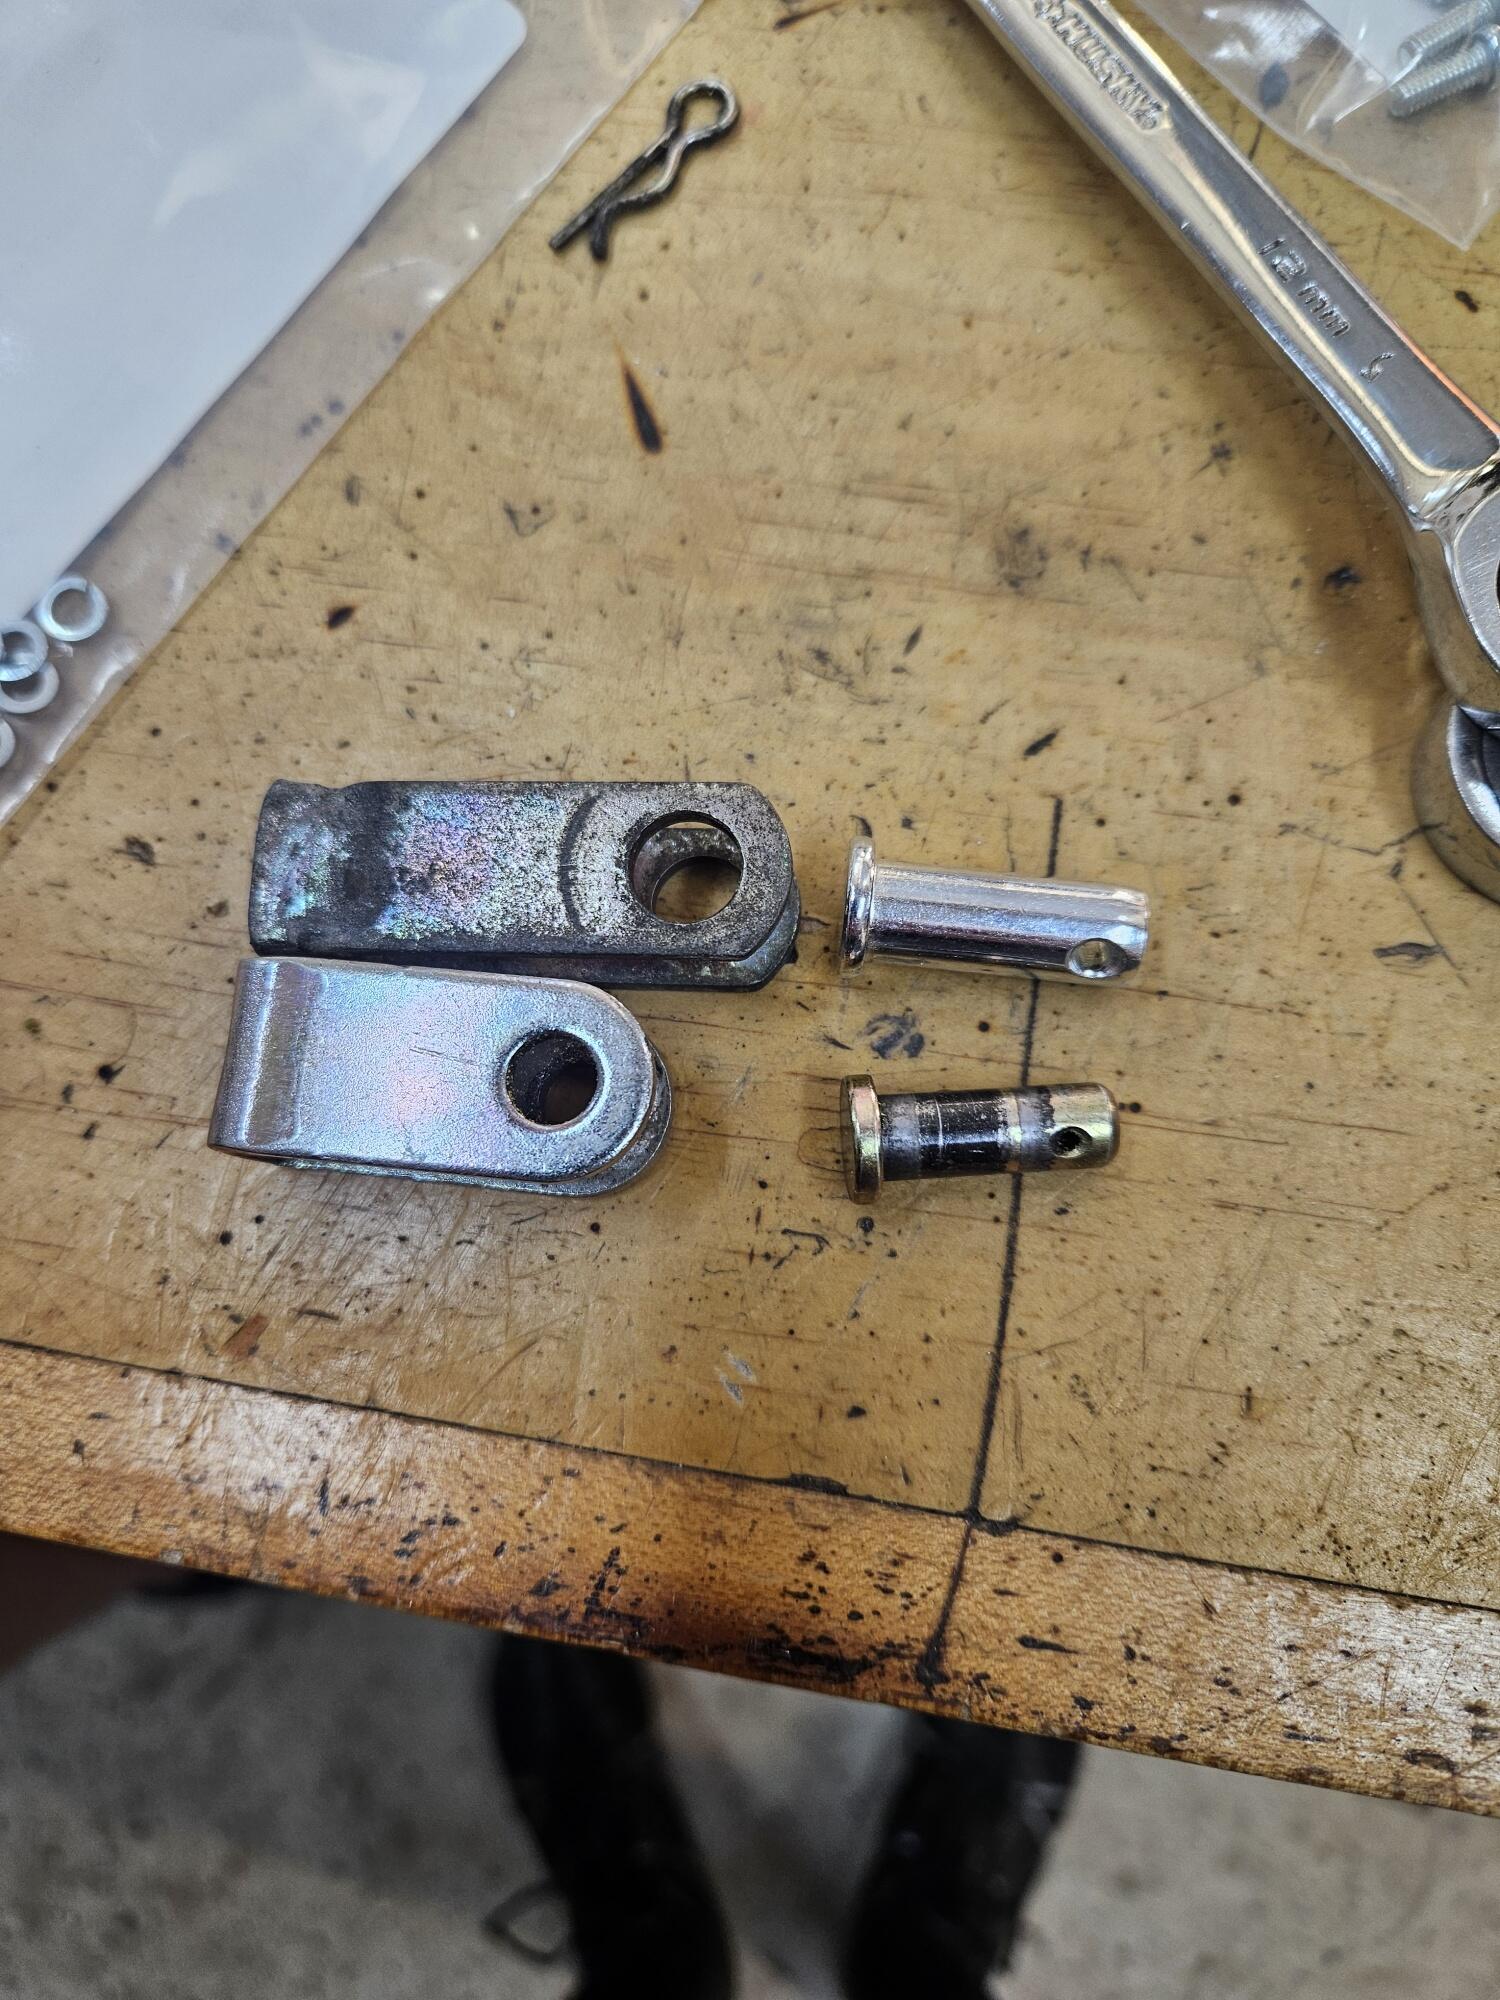
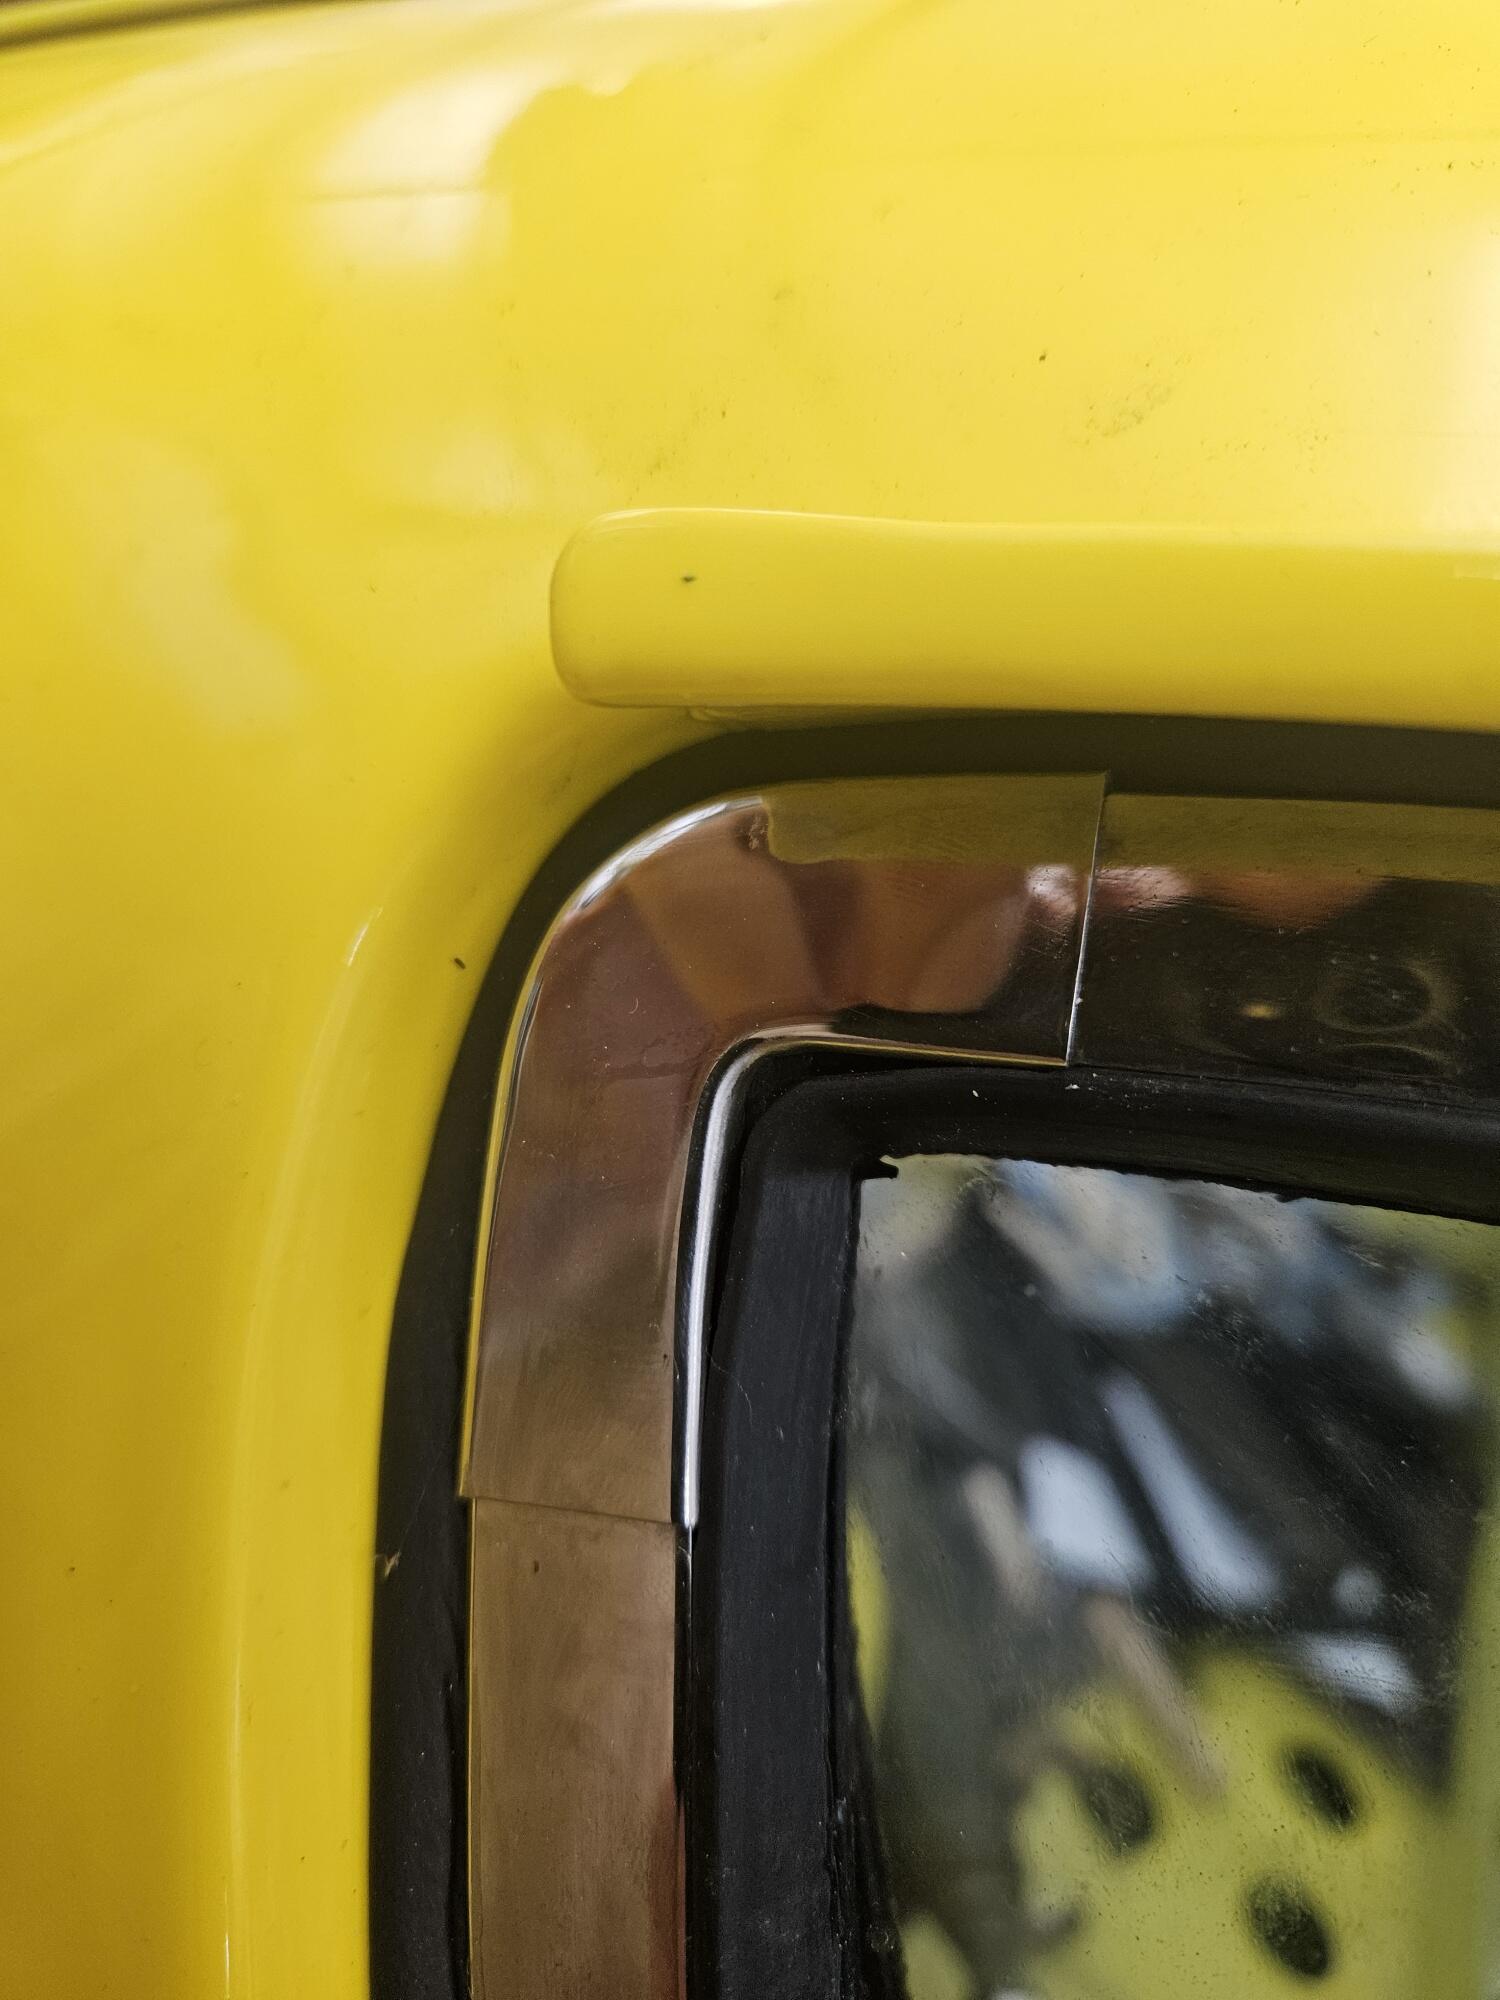
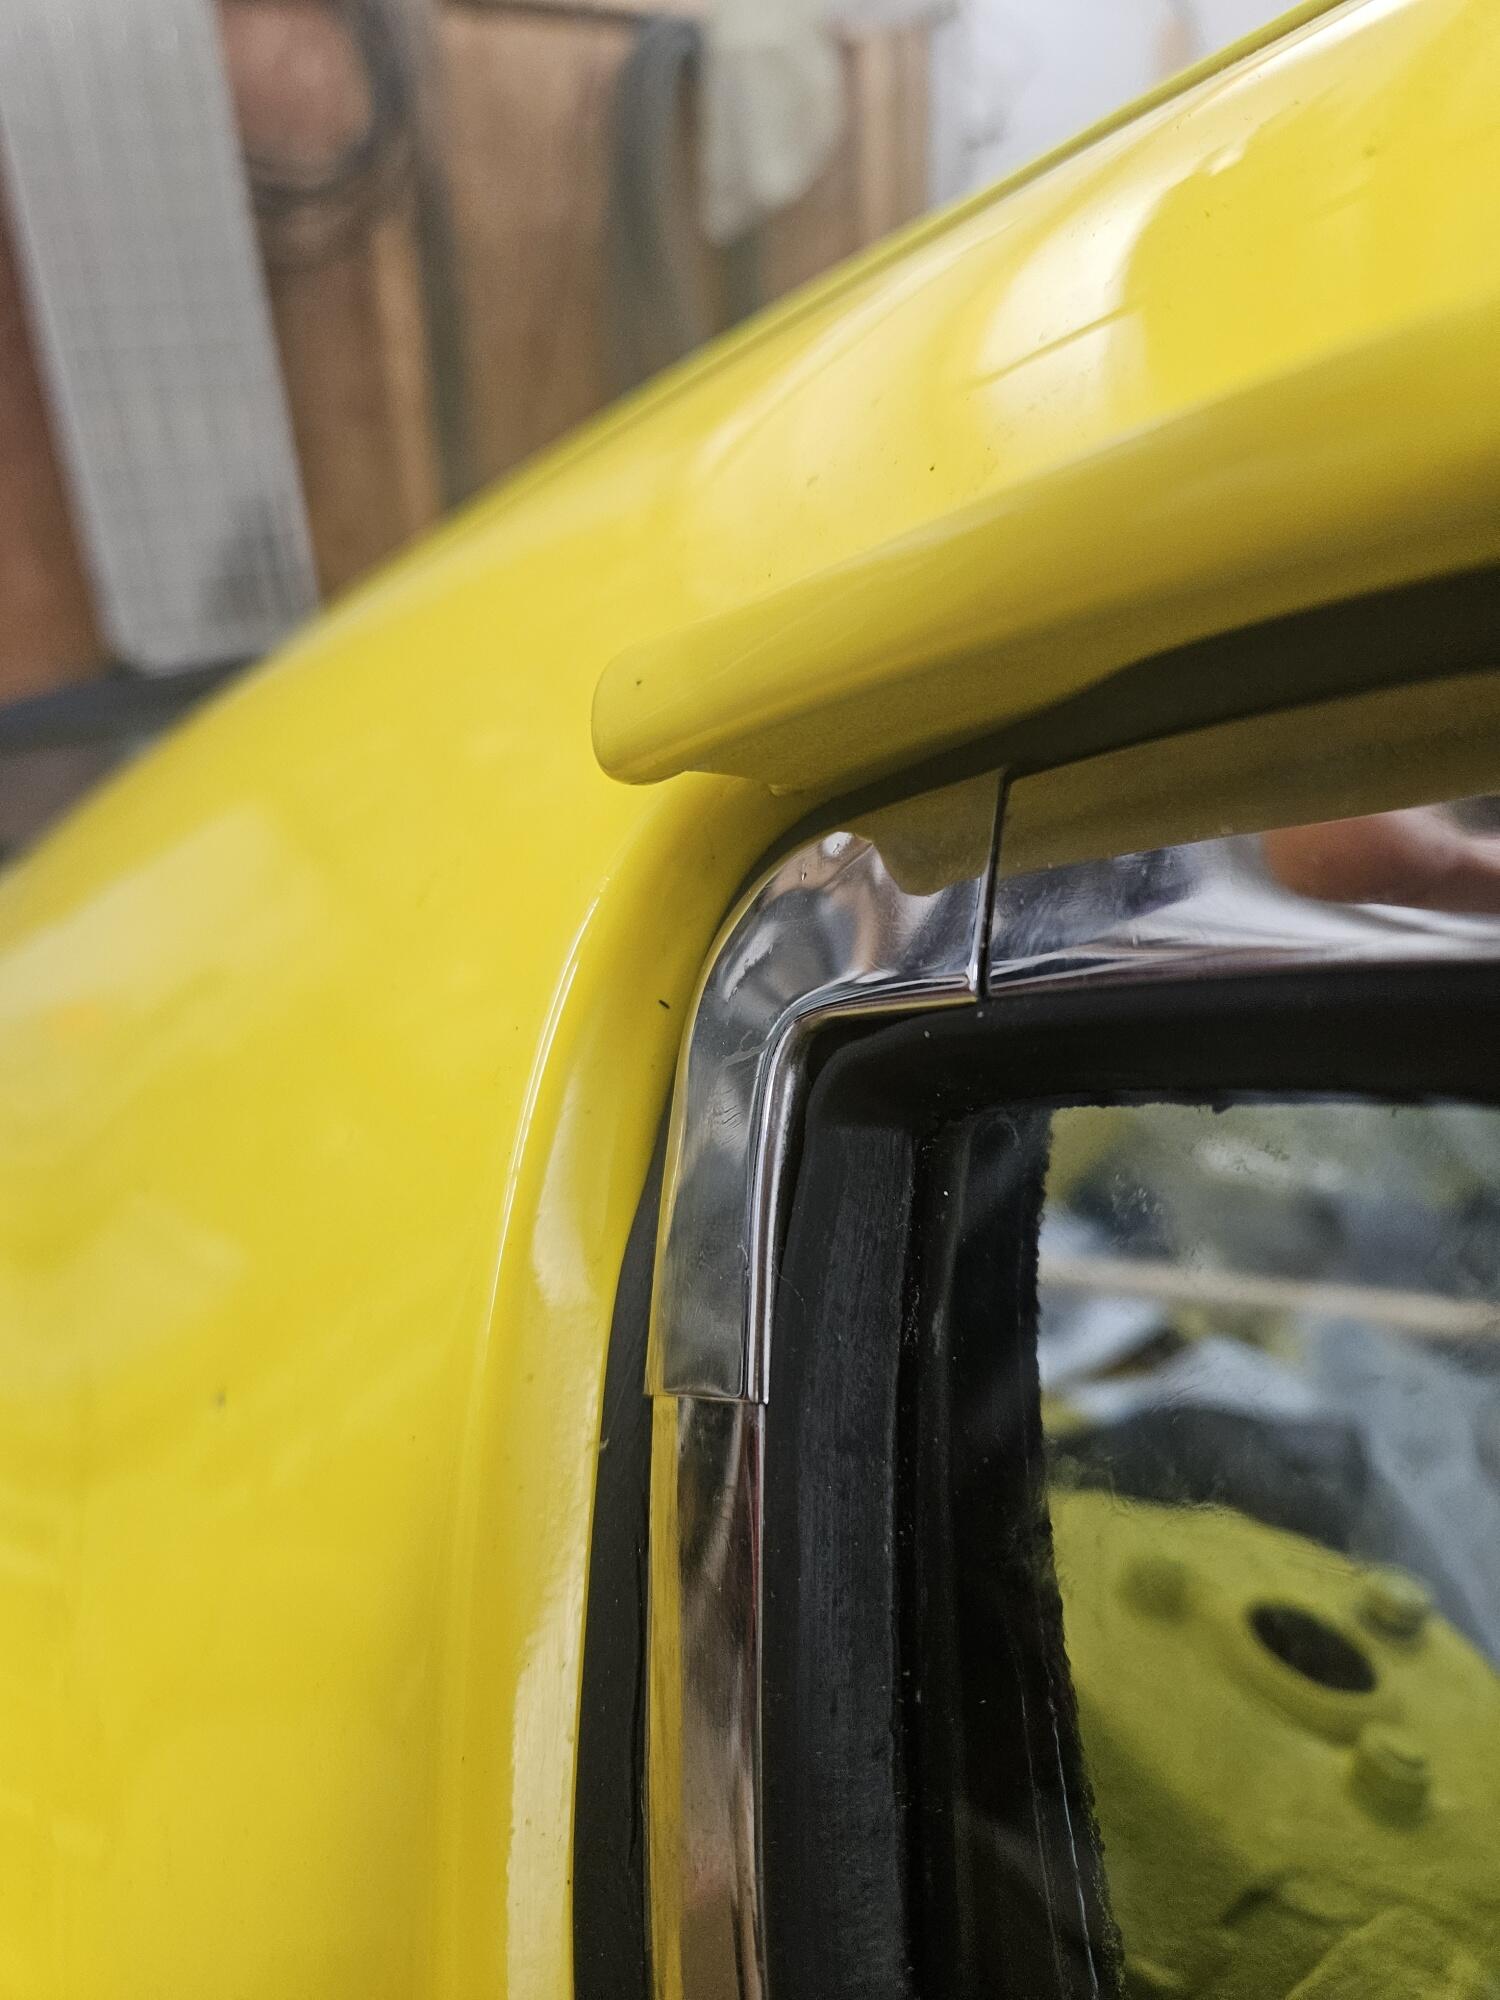
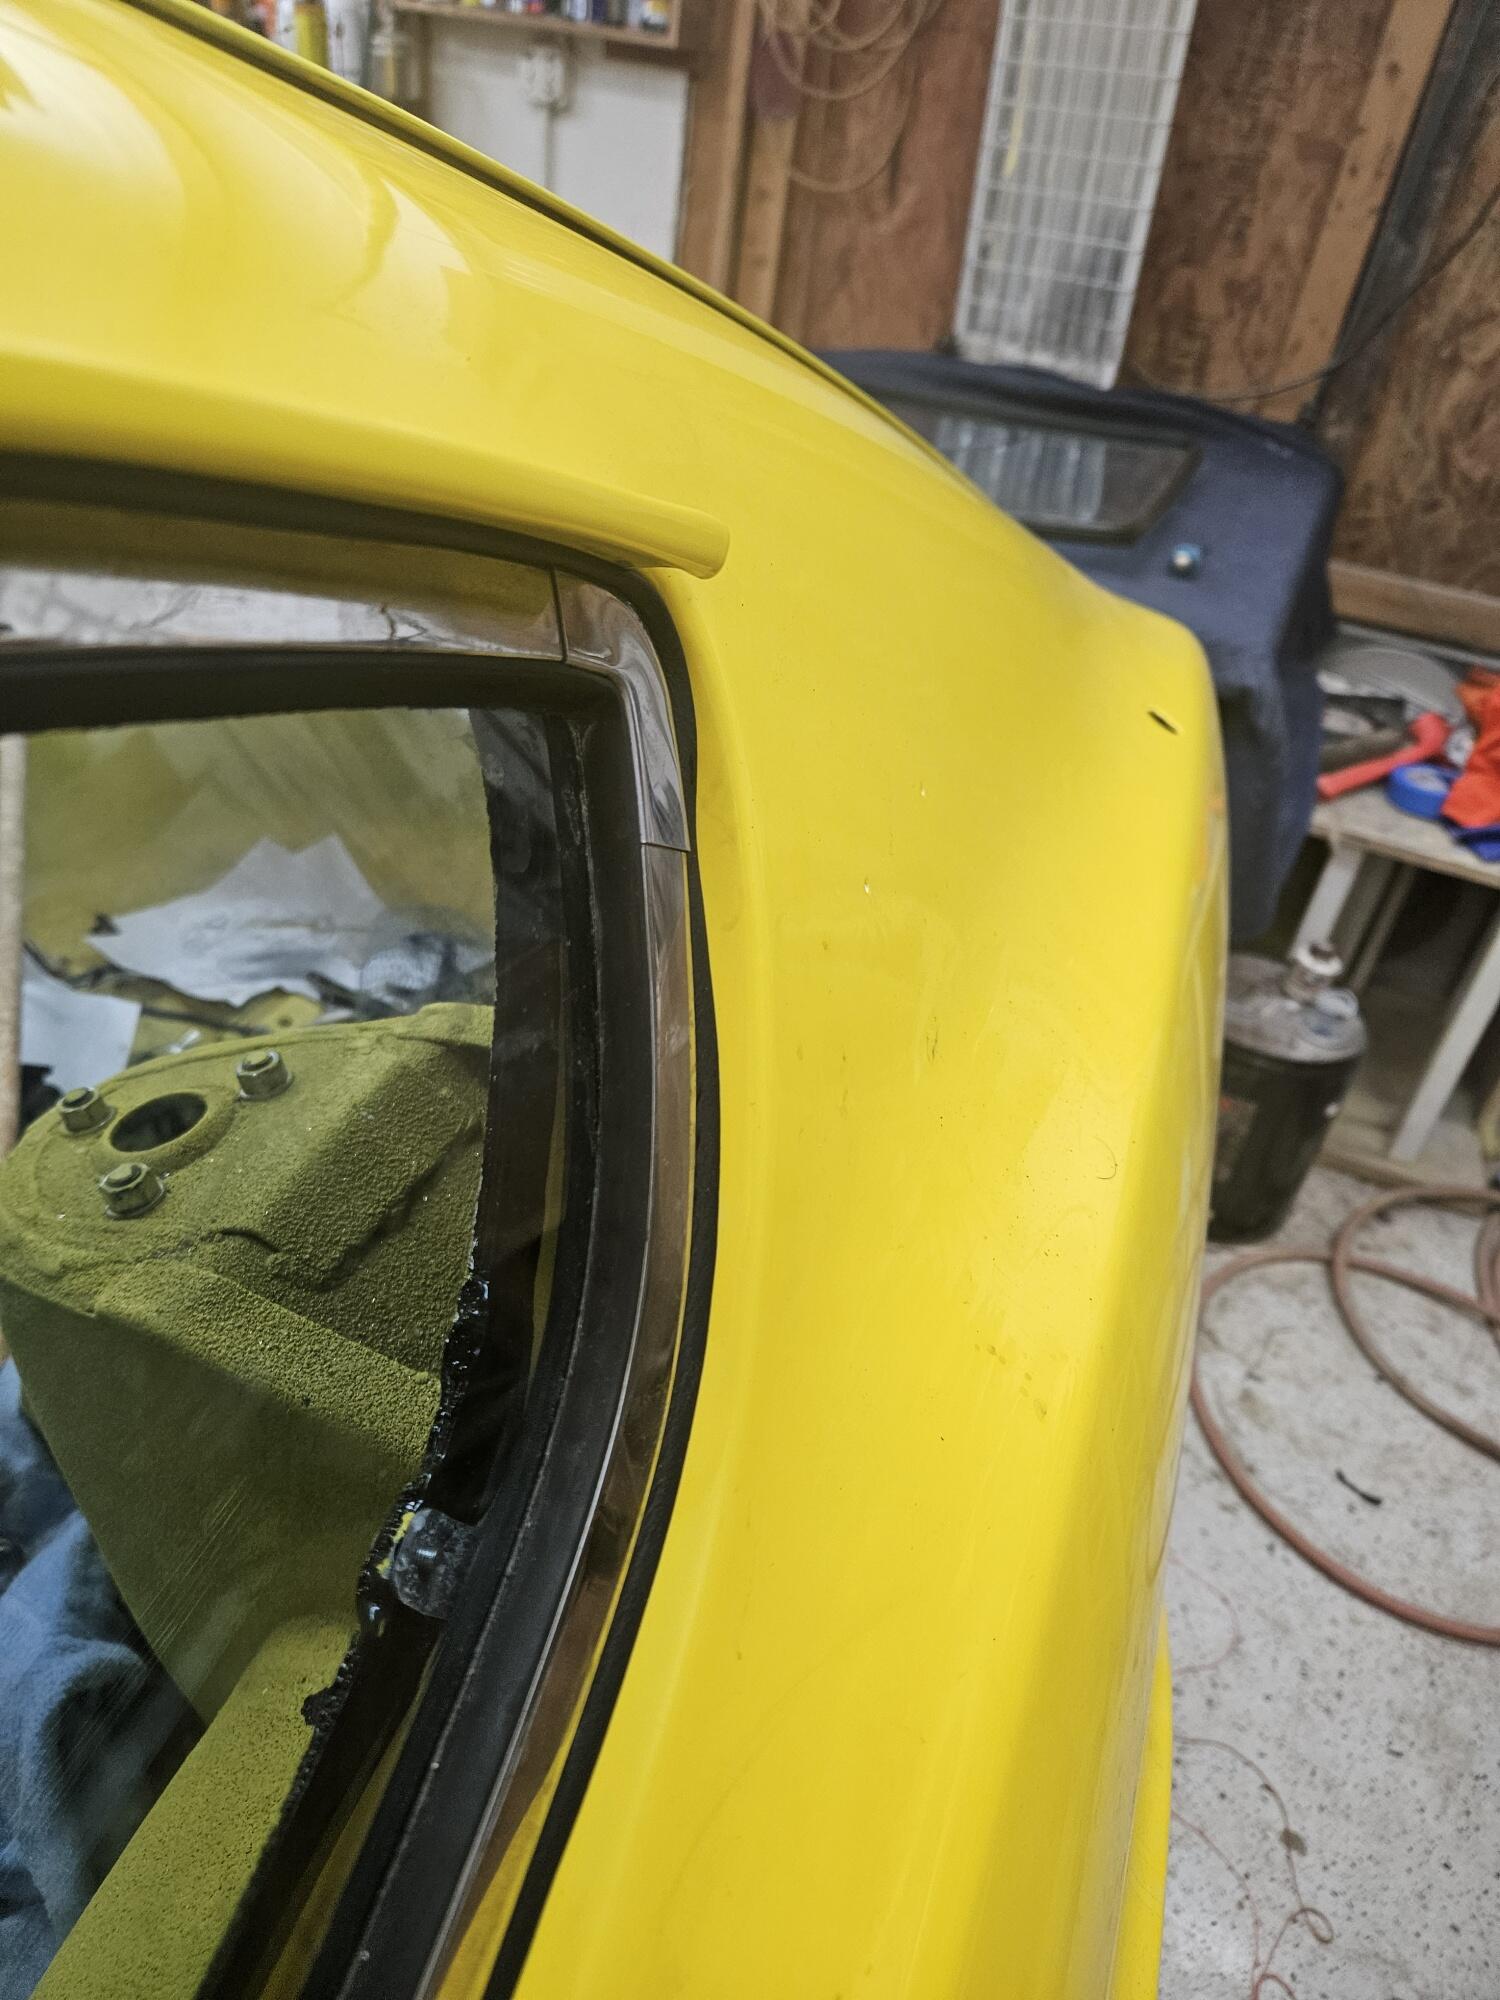
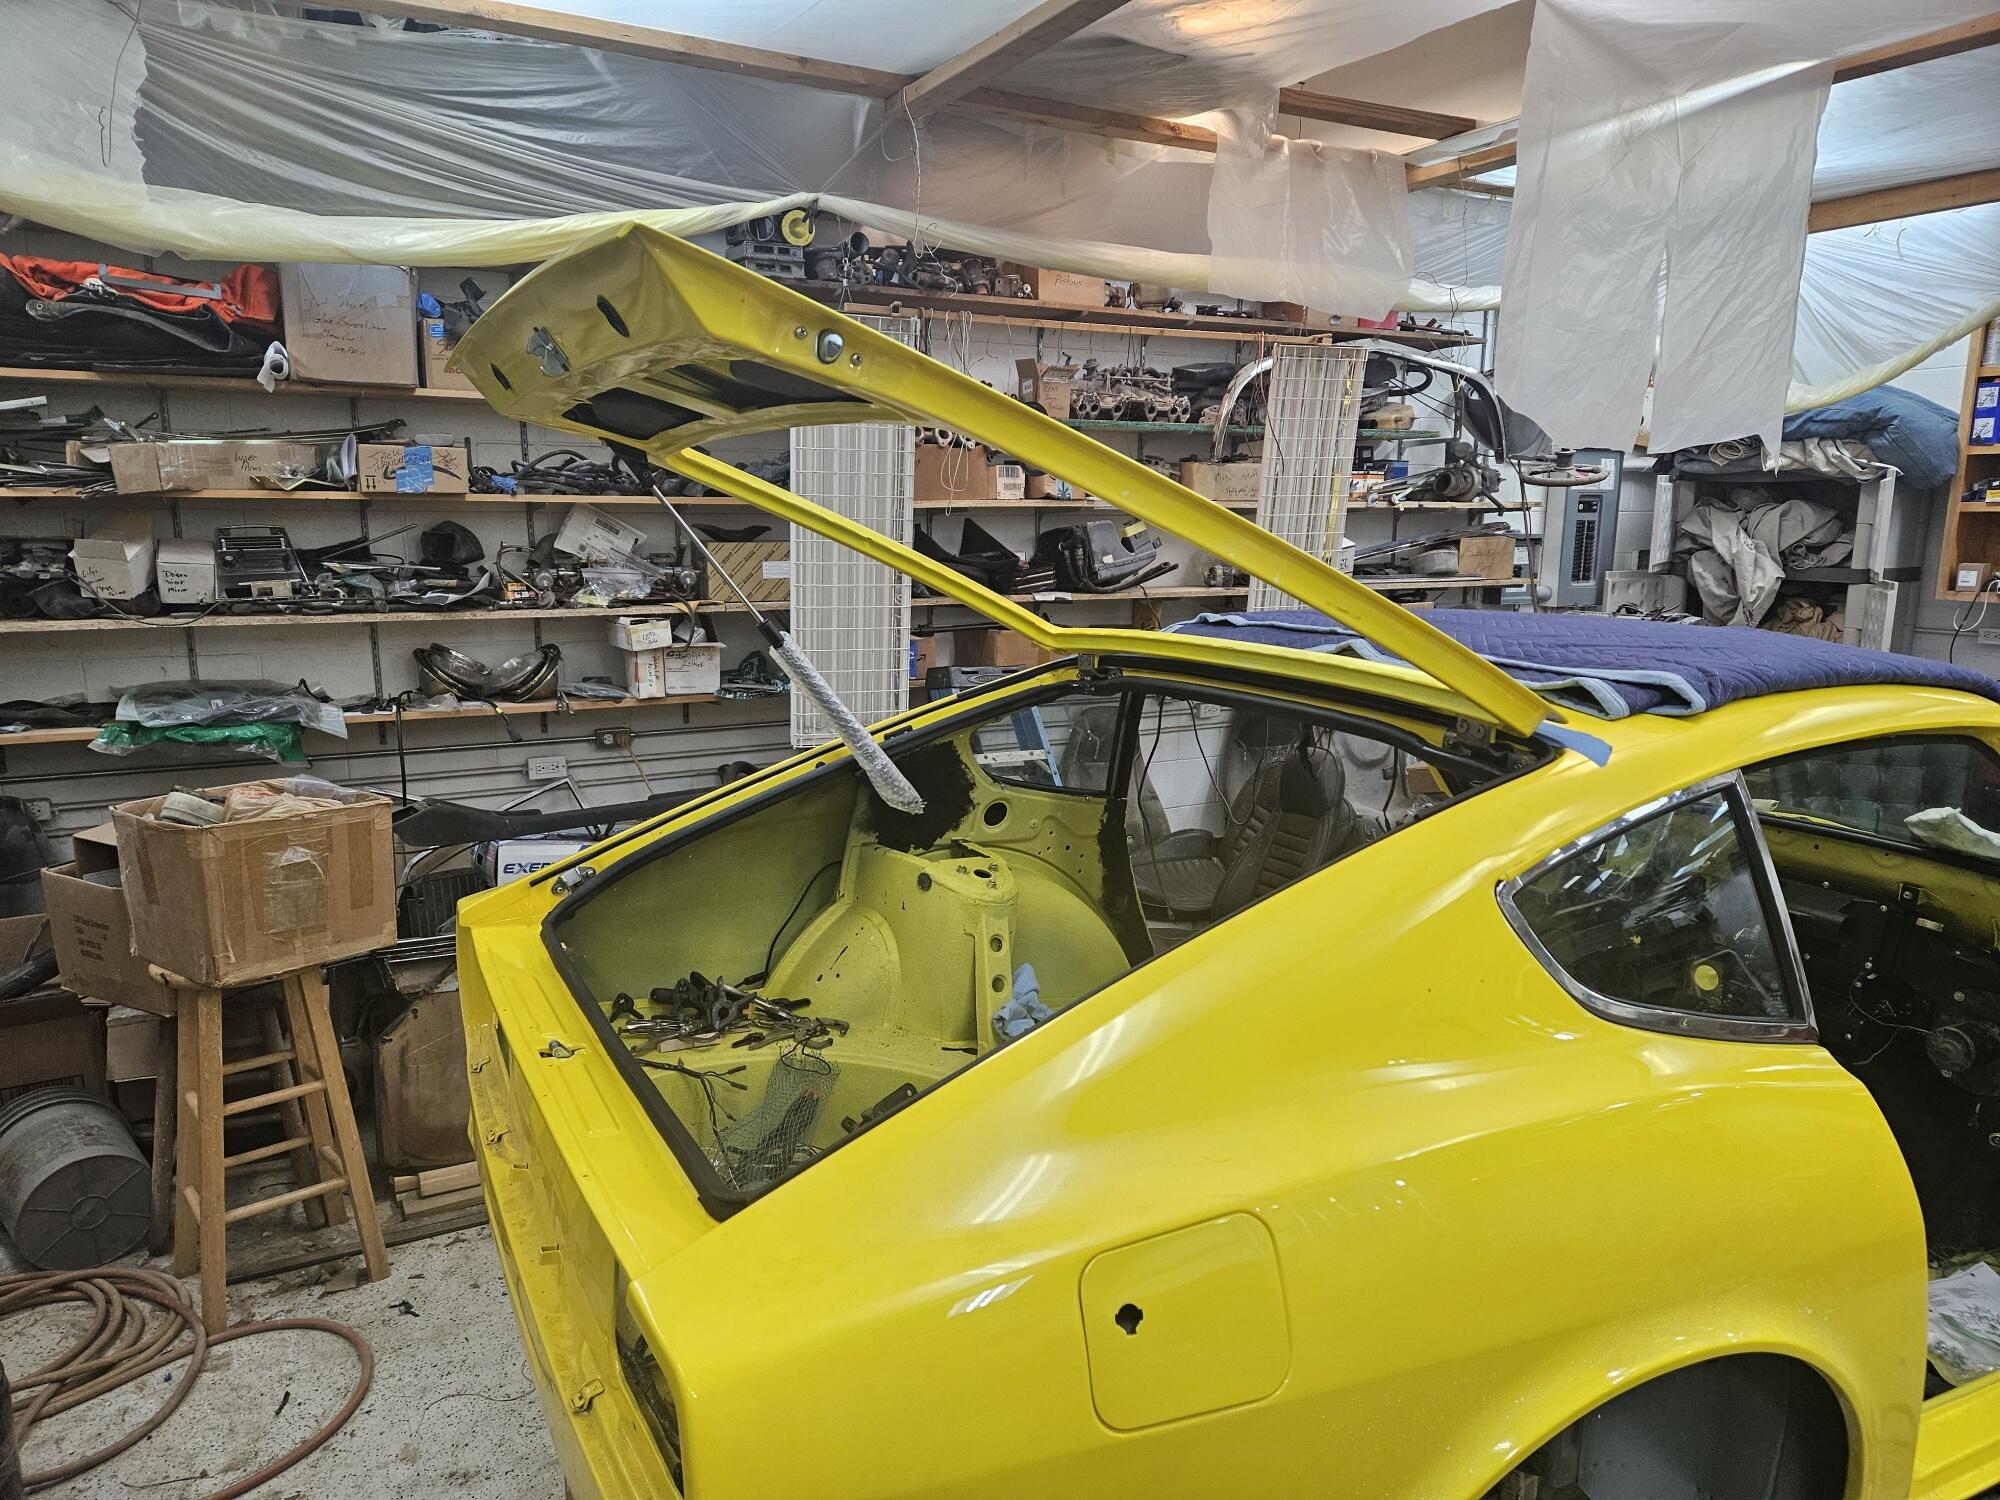
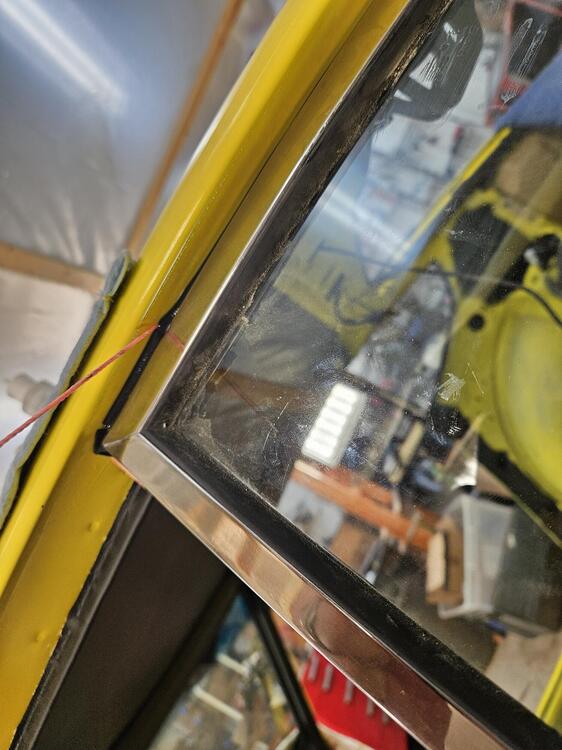
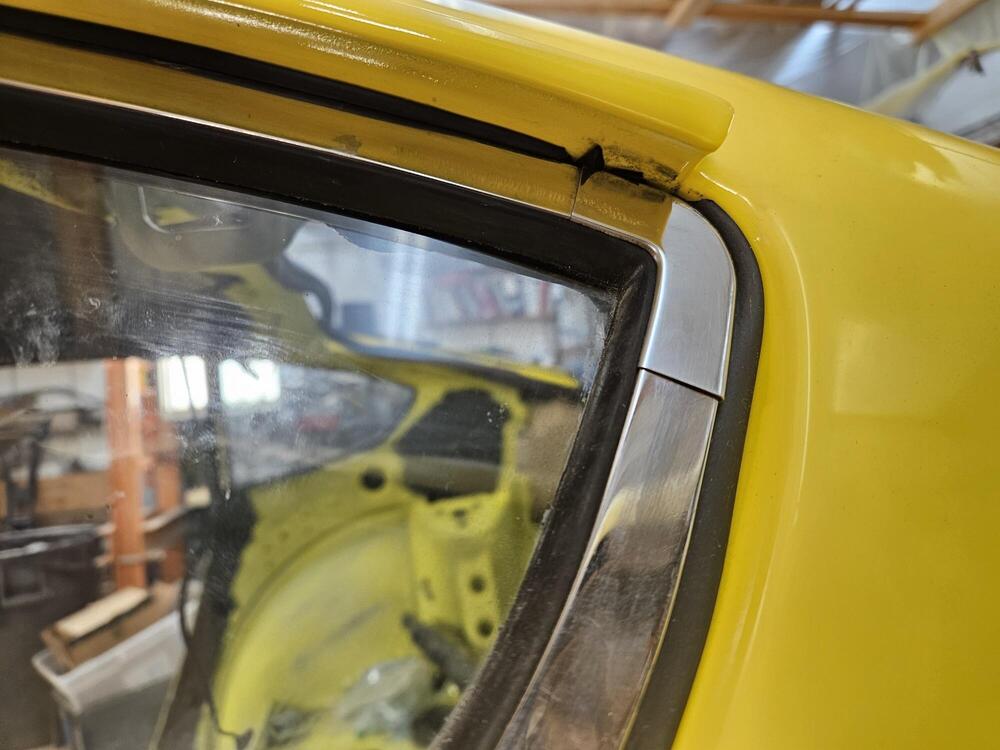
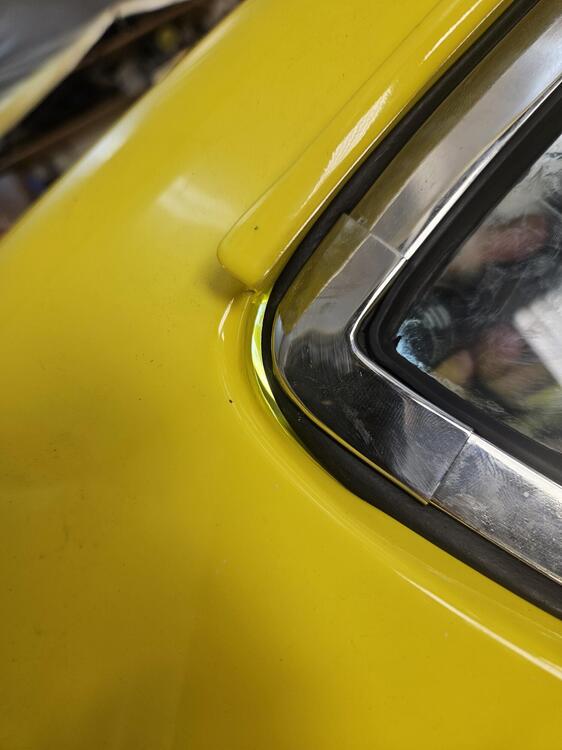
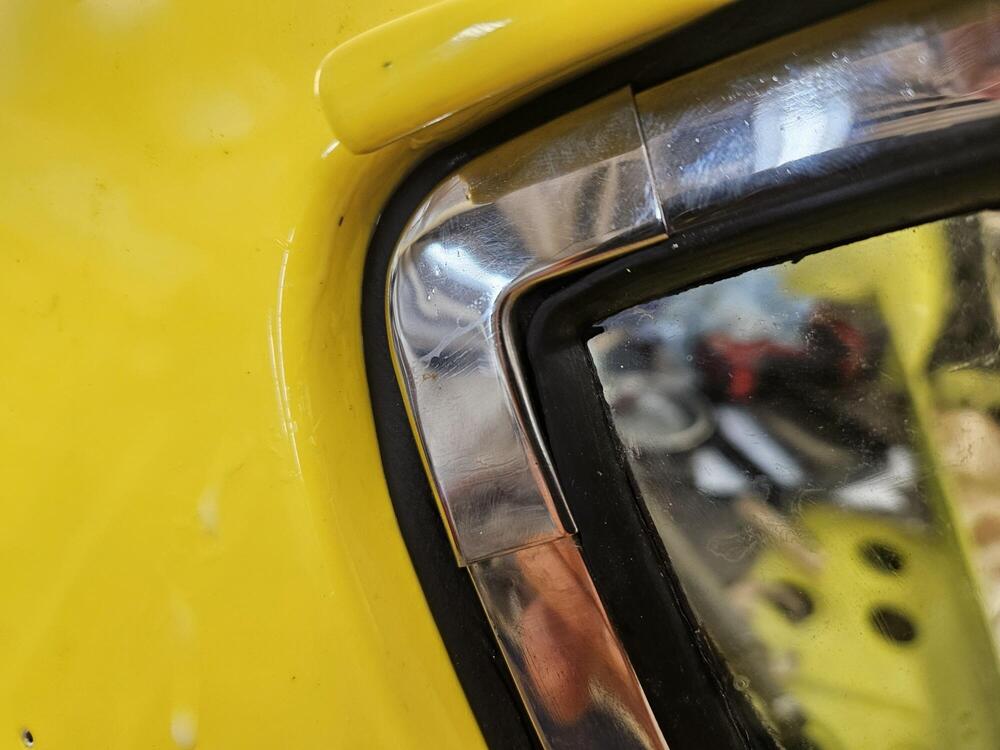
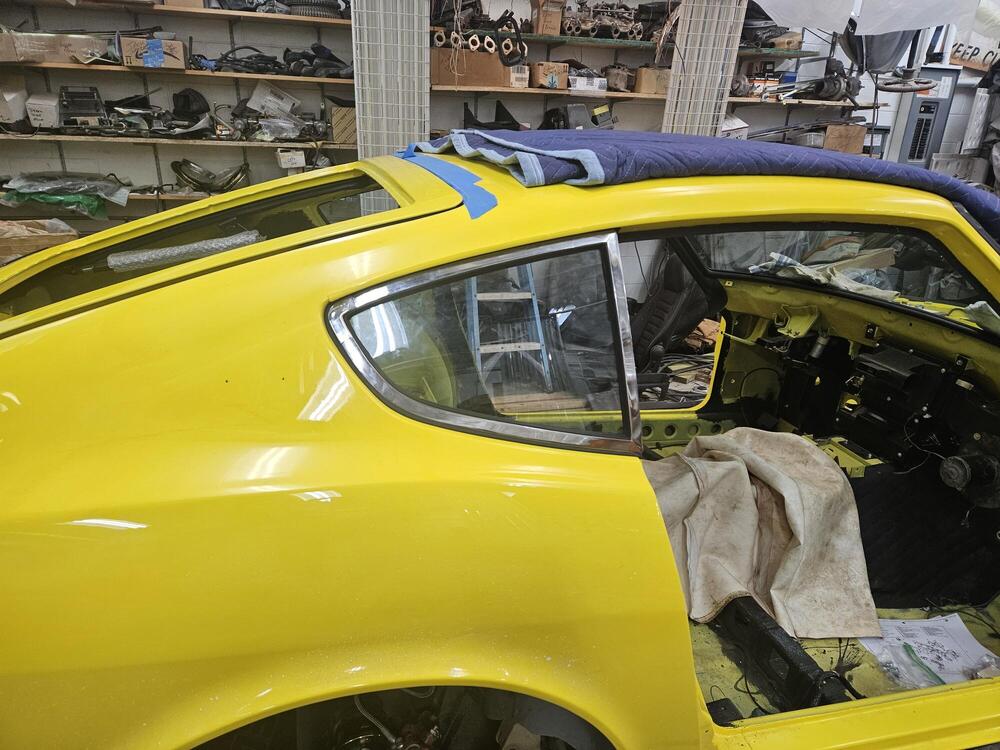
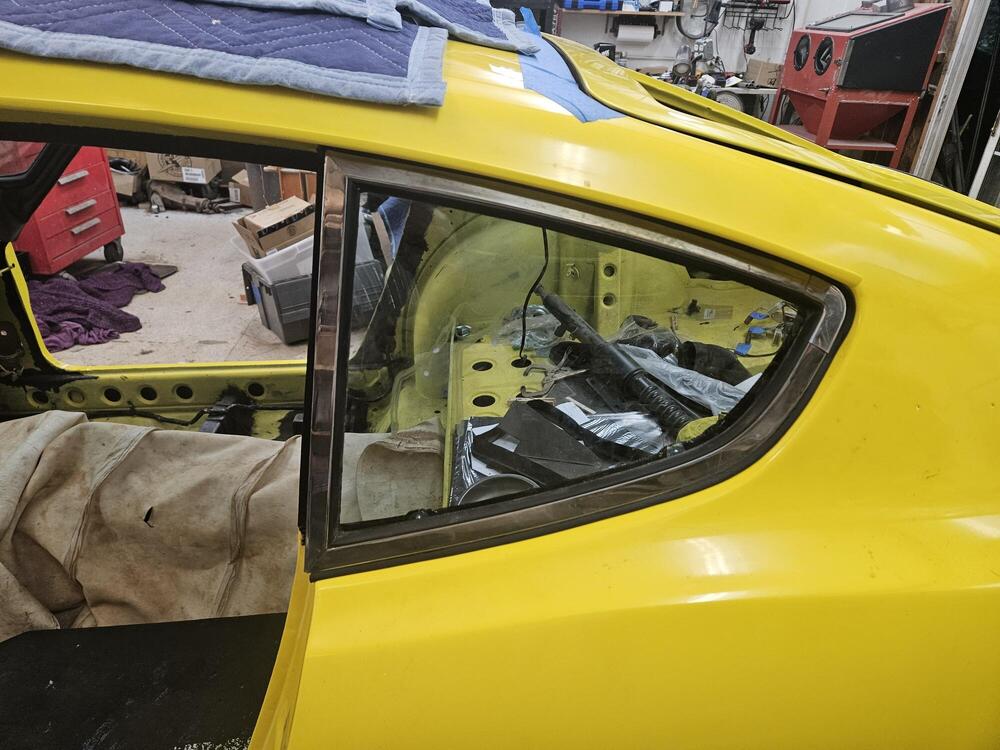
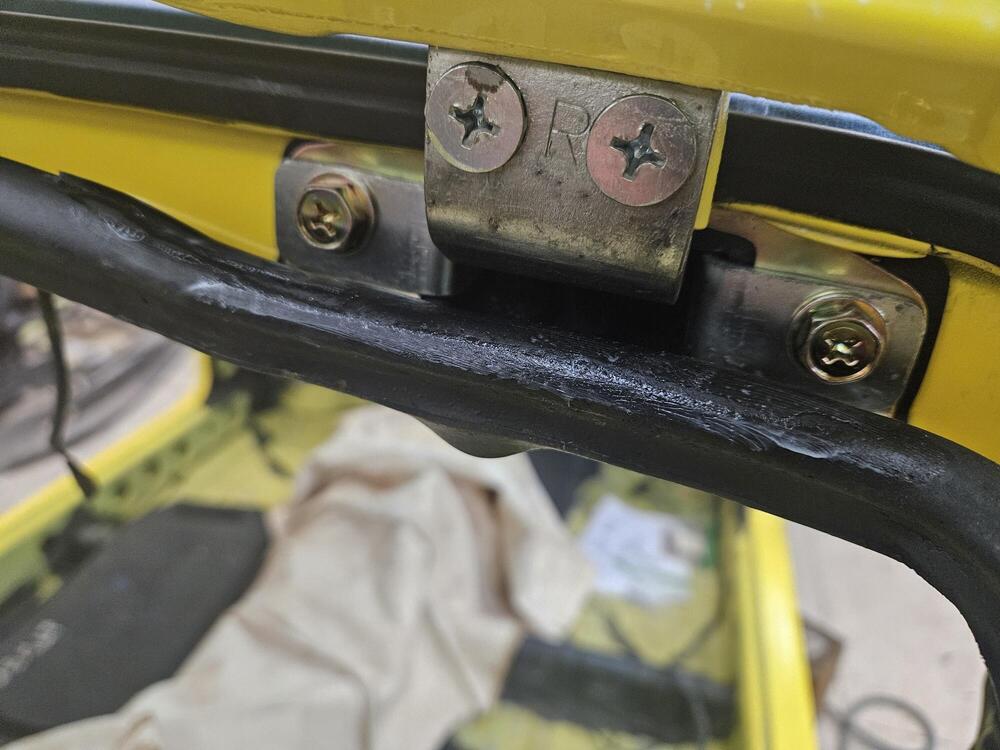
8 pointsCody worked on the brake booster some. I found a longer clevis. It also has a larger diameter pin which fits better in the pedal This brought the pedal height up and against the brake switch We messed with quarter windows last weekend. It was frustrating. Probably one of the tougher jobs to do, especially by yourself and get them right. We did get them installed last weekend. I wrapped a string around them to make it easier to get the lip turned out properly. But at the back of the drivers side window, it got really tight to the body and the seal ripped instead of turning out. On the passenger side, I wrapped the seal too tight to the glass and it didn't seal at the back corner of the glass Fortunately for some odd reason I had an extra set of quarter window seals. So this week in the evenings I redid the quarter window seals. We put them back in yesterday They both pretty much seal but they're still not quite right. The passenger side gap closed up but the seal turns in a little at the back becuase it doesn't have enough pressure on it to make it flair evenly. The drivers side does the same thing but in a different location. I visited Inline6 this week and saw his immaculate car. He said he used a slice of a bondo spreader to work the lips out from the inside of the car. It is flexible to put it down between the glass frame and the body to push from the inside. Tips for quarter windows. Grannyknots pick idea works really good to help manipulate the frames. Also just get the screws all started then work on getting the lips all turned out. The windows will still move a little until they're all the way tightened down. Also if the doors are off you can use the door jamb up by the door hinges to help push with your foot to get enough force to push the window back in place I finished the inner weatherstrip on the hatch yesterday and got the hatch back on. It sits a good bit proud of the body because it's so new. Hopefully it will relax over time I also used some silicone grease on the weatherstrip at the hood hinges to keep the hinge screws from nipping the weatherstrip. Seems to be working


 8 points
 -
My two cents as a relative newbie to all this. i have a 6/71 build HLS3036219 and am not the original owner so i don't know what was original or not. By date and VIN it should be a pure series 2. the PO did a terrible job of restoring and took so many shortcuts its shameful. trying my best to correct all that I can. As i'm doing this I realize that the most important thing is to make your car what you want with it. I had to address seat mechanism issues and took the ebay route. Well what I did was get a 72 pair of seats which isn't correct for the car but its correct for me since I like the idea of the better reclining function. I also had to replace the fan, the original metal one was a mess well I decided to get the 72 plastic one to save wear and tear on the water pump, and the list could go on. So enjoy your cars, build and tinker to suit your needs. We wont be here forever so enjoy it.5 points
-
I own a 1/71 car "Series 1", and I had someone approach the car and start pointing at all the incorrect things on my car. The fun part is , my car is all original and unrestored. I just said thank you.5 points
-
I don't find the Series 1 / 2 terminology offensive. I look at it as a general description that gives some idea of the traits the car could have. It's not normally used as a hard and fast rule or an absolute. I find the terminology very helpful and always have. If I want exactness I use production dates but it's very rare I care that much.4 points
-
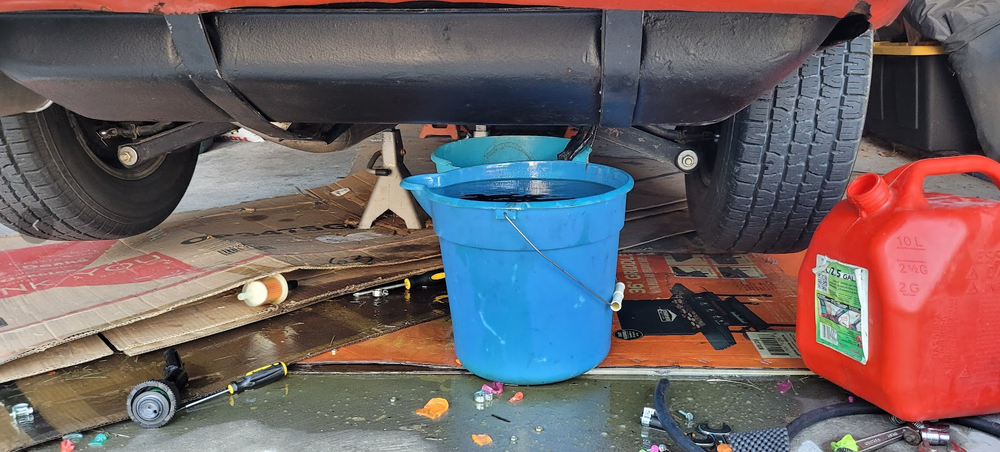
So, today was a comedy of errors. I removed the pre-filter and tried to prime the new fuel pump again. No fuel flow came out of the discharge. Just for shits and grins, I decided to reinstall the old pump to make sure that I wasn't screwing something up. The old pump re-primed without issue and within a few seconds. It seems likely that I was sent a defective fuel pump. Around this time, my wife wants to go out to dinner, so I set the old pump on the ledge of the bucket I was using to catch the fuel from my disconnection and reconnection activities and go to wash up so that I can go to dinner with my wife and kids without reeking of gasoline. We get to dinner, and my son says he feels dehydrated and not well. Just as we are about to get seated, he gets as pale as a ghost, and my wife, with her mother's ESP/intuition/sixth sense, ushers him out the door, where he proceeds to vomit at the entrance of the restaurant. Needless to say, we came home. Upon opening the garage door, we discover this: The fuel pump had fallen off the bucket ledge (probably when we closed the garage door or sometime there about), into the bucket, and proceeded to drain my tank into the bucket and then slightly overfilling on to the garage floor and scrap cardboard that I was using for minor fluid spills. I think I can safely rule out that there is any issue within the tank. 🤞 To top it all off, when we went inside, our dog was excited and choking on something she decided to chew on while we were out. She cleared it and was okay after a few scary seconds. This is certainly a night I won't forget anytime soon! 🤣 After spending the better part of the evening cleaning up the garage and trying to get rid of the gasoline odors, I came to the realization that I really want a lift and I am back in the market for a fuel pump.
 3 points
 -
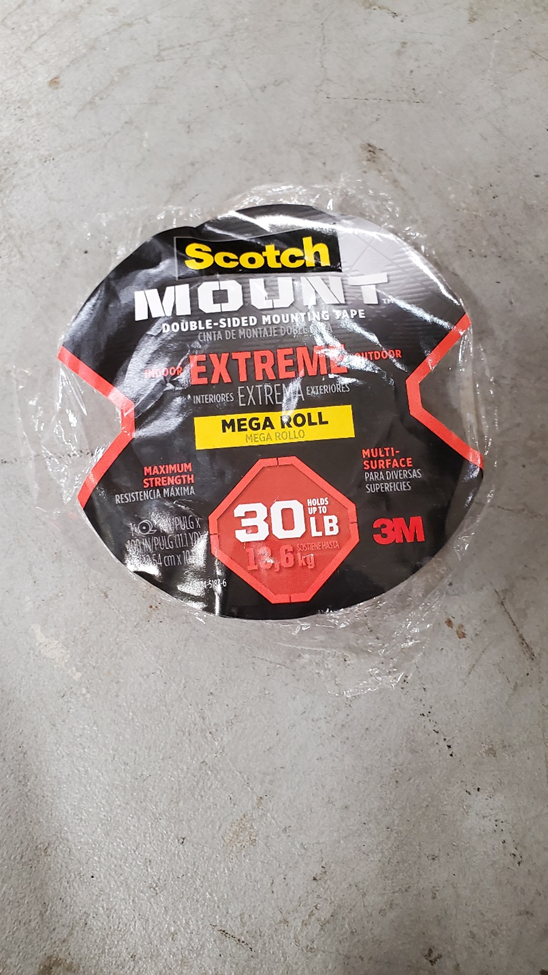
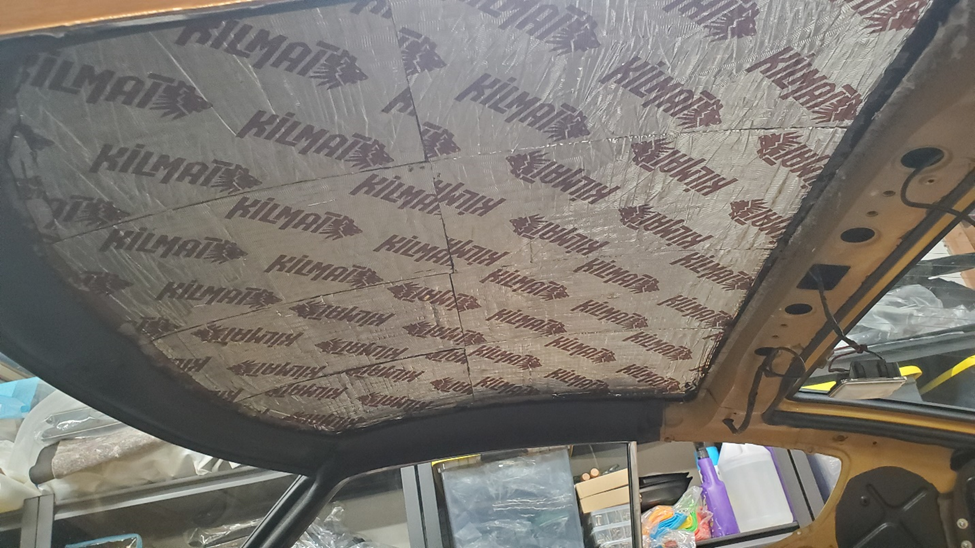
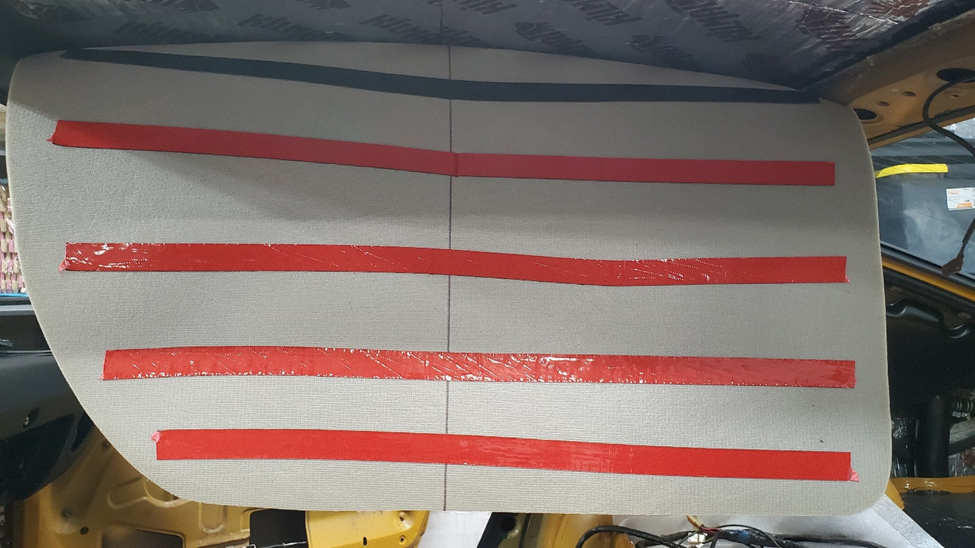
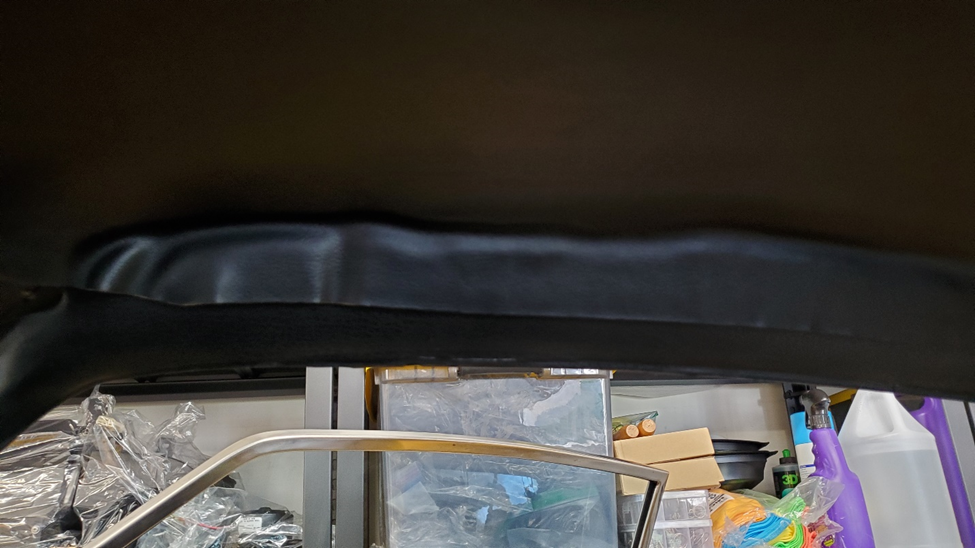
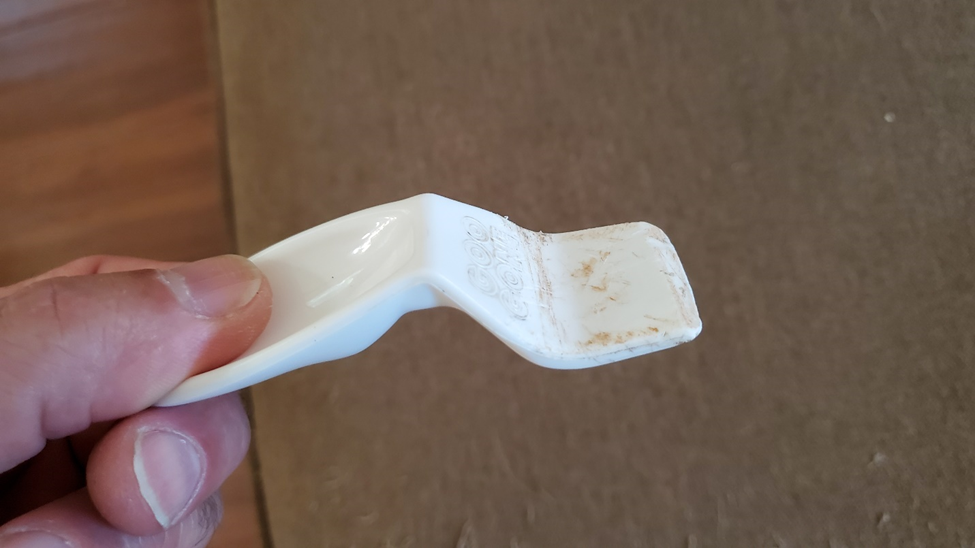
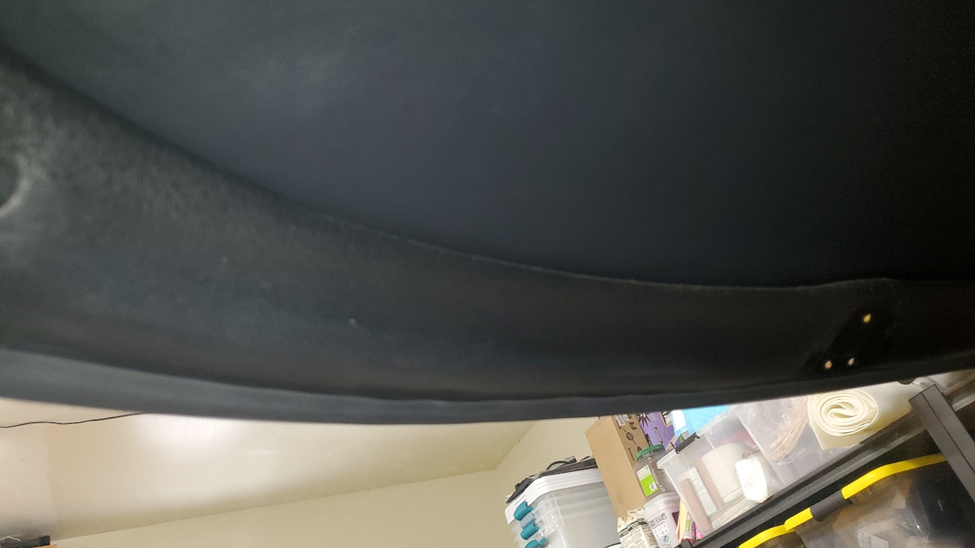
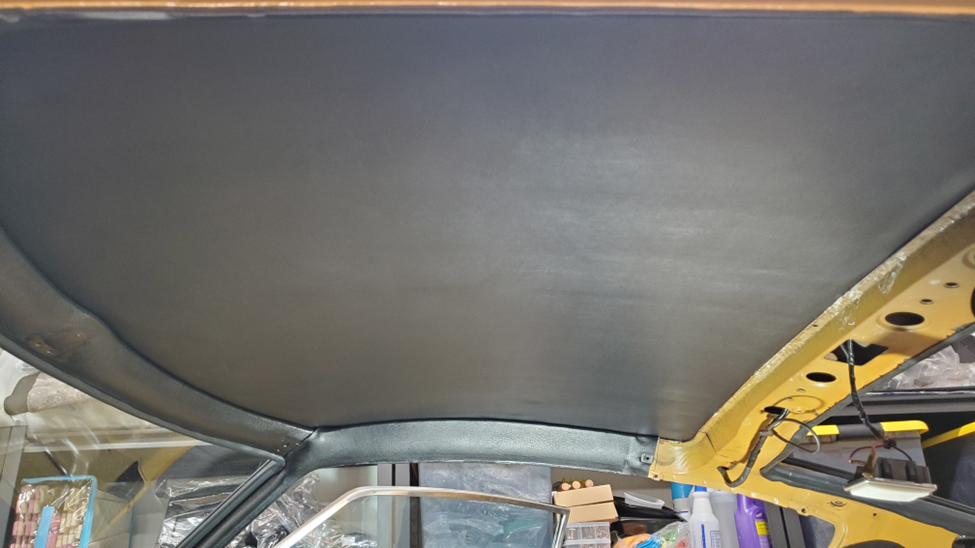
Things are coming together quicker than expected and I got to the headliner today. I had purchased one from the z store almost two years ago but was severely delayed with the project. It came with the typical spray on glue but before IO went to tackle this i had a moment of hesitation. I still have the dash in the car and the thought of over spray and drippings of that glue (its 104 today in Roseville) really had me pause. I was thinking about the recent dynaliner experience with the peel off backing and thought why not do the same for the headliner. So I went to the home depot near me and after looking around decided on this since it was the stickiest, had a high temp resistance, and was relatively thin compared to others of the same strength a single roll ended up covering the entire liner in strips from front to back about 3 in apart. I made sure not to get too close to the ends on all 4 sides since I knew I had to tuck under the edges. TIP - Make sure to draw center lines in both directions and place some painters tape on the vinyl side to match so you can see the tape when attempting to stick to the ceiling. This allows for easy orientation with the center of the mirror mount and the lamp light cutout. I started with by doing the soundproof (highly recommend, the roof now is like a modern car After laying out the tape on the back of the pad I used the same 1 inch roller that I pressed down the soundproof to really press down the tape onto the back of the liner. I made sure it wouldn’t peel up without some real tugging. Once I was happy I pulled the red backing from the center line only and attached it to the roof right down the center line using the painters tape as guides I then worked on the passenger side first removing all red backing and carefully working from center towards door fram pressing the liner up onto the ceiling. Was very happy with how smooth and easy it was and did the driver to match. When I was done I had about 2 inch of material exposed on the doors frames and an inch or so on front and back. TIP – DO NOT BE TEMPTED TO TRIM, it will all fit with gentle tucking The front is the most visible so I decided to start dead center with a tool for scraping glue from windows I was surprised how easily it tucked under the front and went from center to edge in both directions in maybe 45 secs I then went down each side to the turn at the back and finally across the back. Finished product looks factory new! Time will tell if I took an easy way out and this droops from heat or deterioration of the pad but I feel it was the right thing to do considering my circumstances and doing the least amount of harm to the dash 😊 Total install was less than 20 mins, way faster and less messy than spray or roll on adhesive in my opinion.

 3 points
 -
2 pointsThat's going to be a great looking car when you get it done and out on the street. Keep up the good work.2 points
-
Update on the wonder U-joint tool. Today I went to use it to do a Z driveshaft u-joint for the first time and much to my dismay, it is too big! By this I mean the U shape receiver area that you place over the end of the yoke (where the cups sit) slips right past the yoke. Barely. Useless… Dang. Unless you have a welder I just ran a couple of beads along the lip to make it smaller, and it worked just fine. Now I haven’t tried it on the half shafts to see if I made it too small now, if I did, I suppose I’ll have to get another 10105. Oh well
 2 points
 -
1 pointThat is a problem with restoring a car. It may look great to others, but you know every flaw and its hard to unsee them! There arent a lot of people out there that can completely tear down and rebuild an entire car. Dont sweat the small stuff it looks great and you will have more fun with it out of the shop than collecting dust worried about a mismatching body panel!! At least thats what I told myself 🙂1 point
-
Good bellwether of a softening market. 75K was the highest bid it got at a Mecum auction last month as well.
 1 point
 -
I truly do respect your knowledge on these and have found you be to a wealth of information over the past MANY years. Could you please share your thoughts on why several of the cars built after the body changes such as the pillar vents and tool storage would have still had some of the early componentry such as steering wheel, ashtray/center console, valve cover, and other items commonly associated with the earlier production cars? I genuinely would like to learn the reason if not what I described above (which I have picked up over the years from many sources, and seems to make sense); I was not there so I only know what I have learned on these forums and other internet sites over the years. This is the approach I was taking above, specifically with the pillar vents and the tool storage. These are things that clearly signify a change.1 point
-
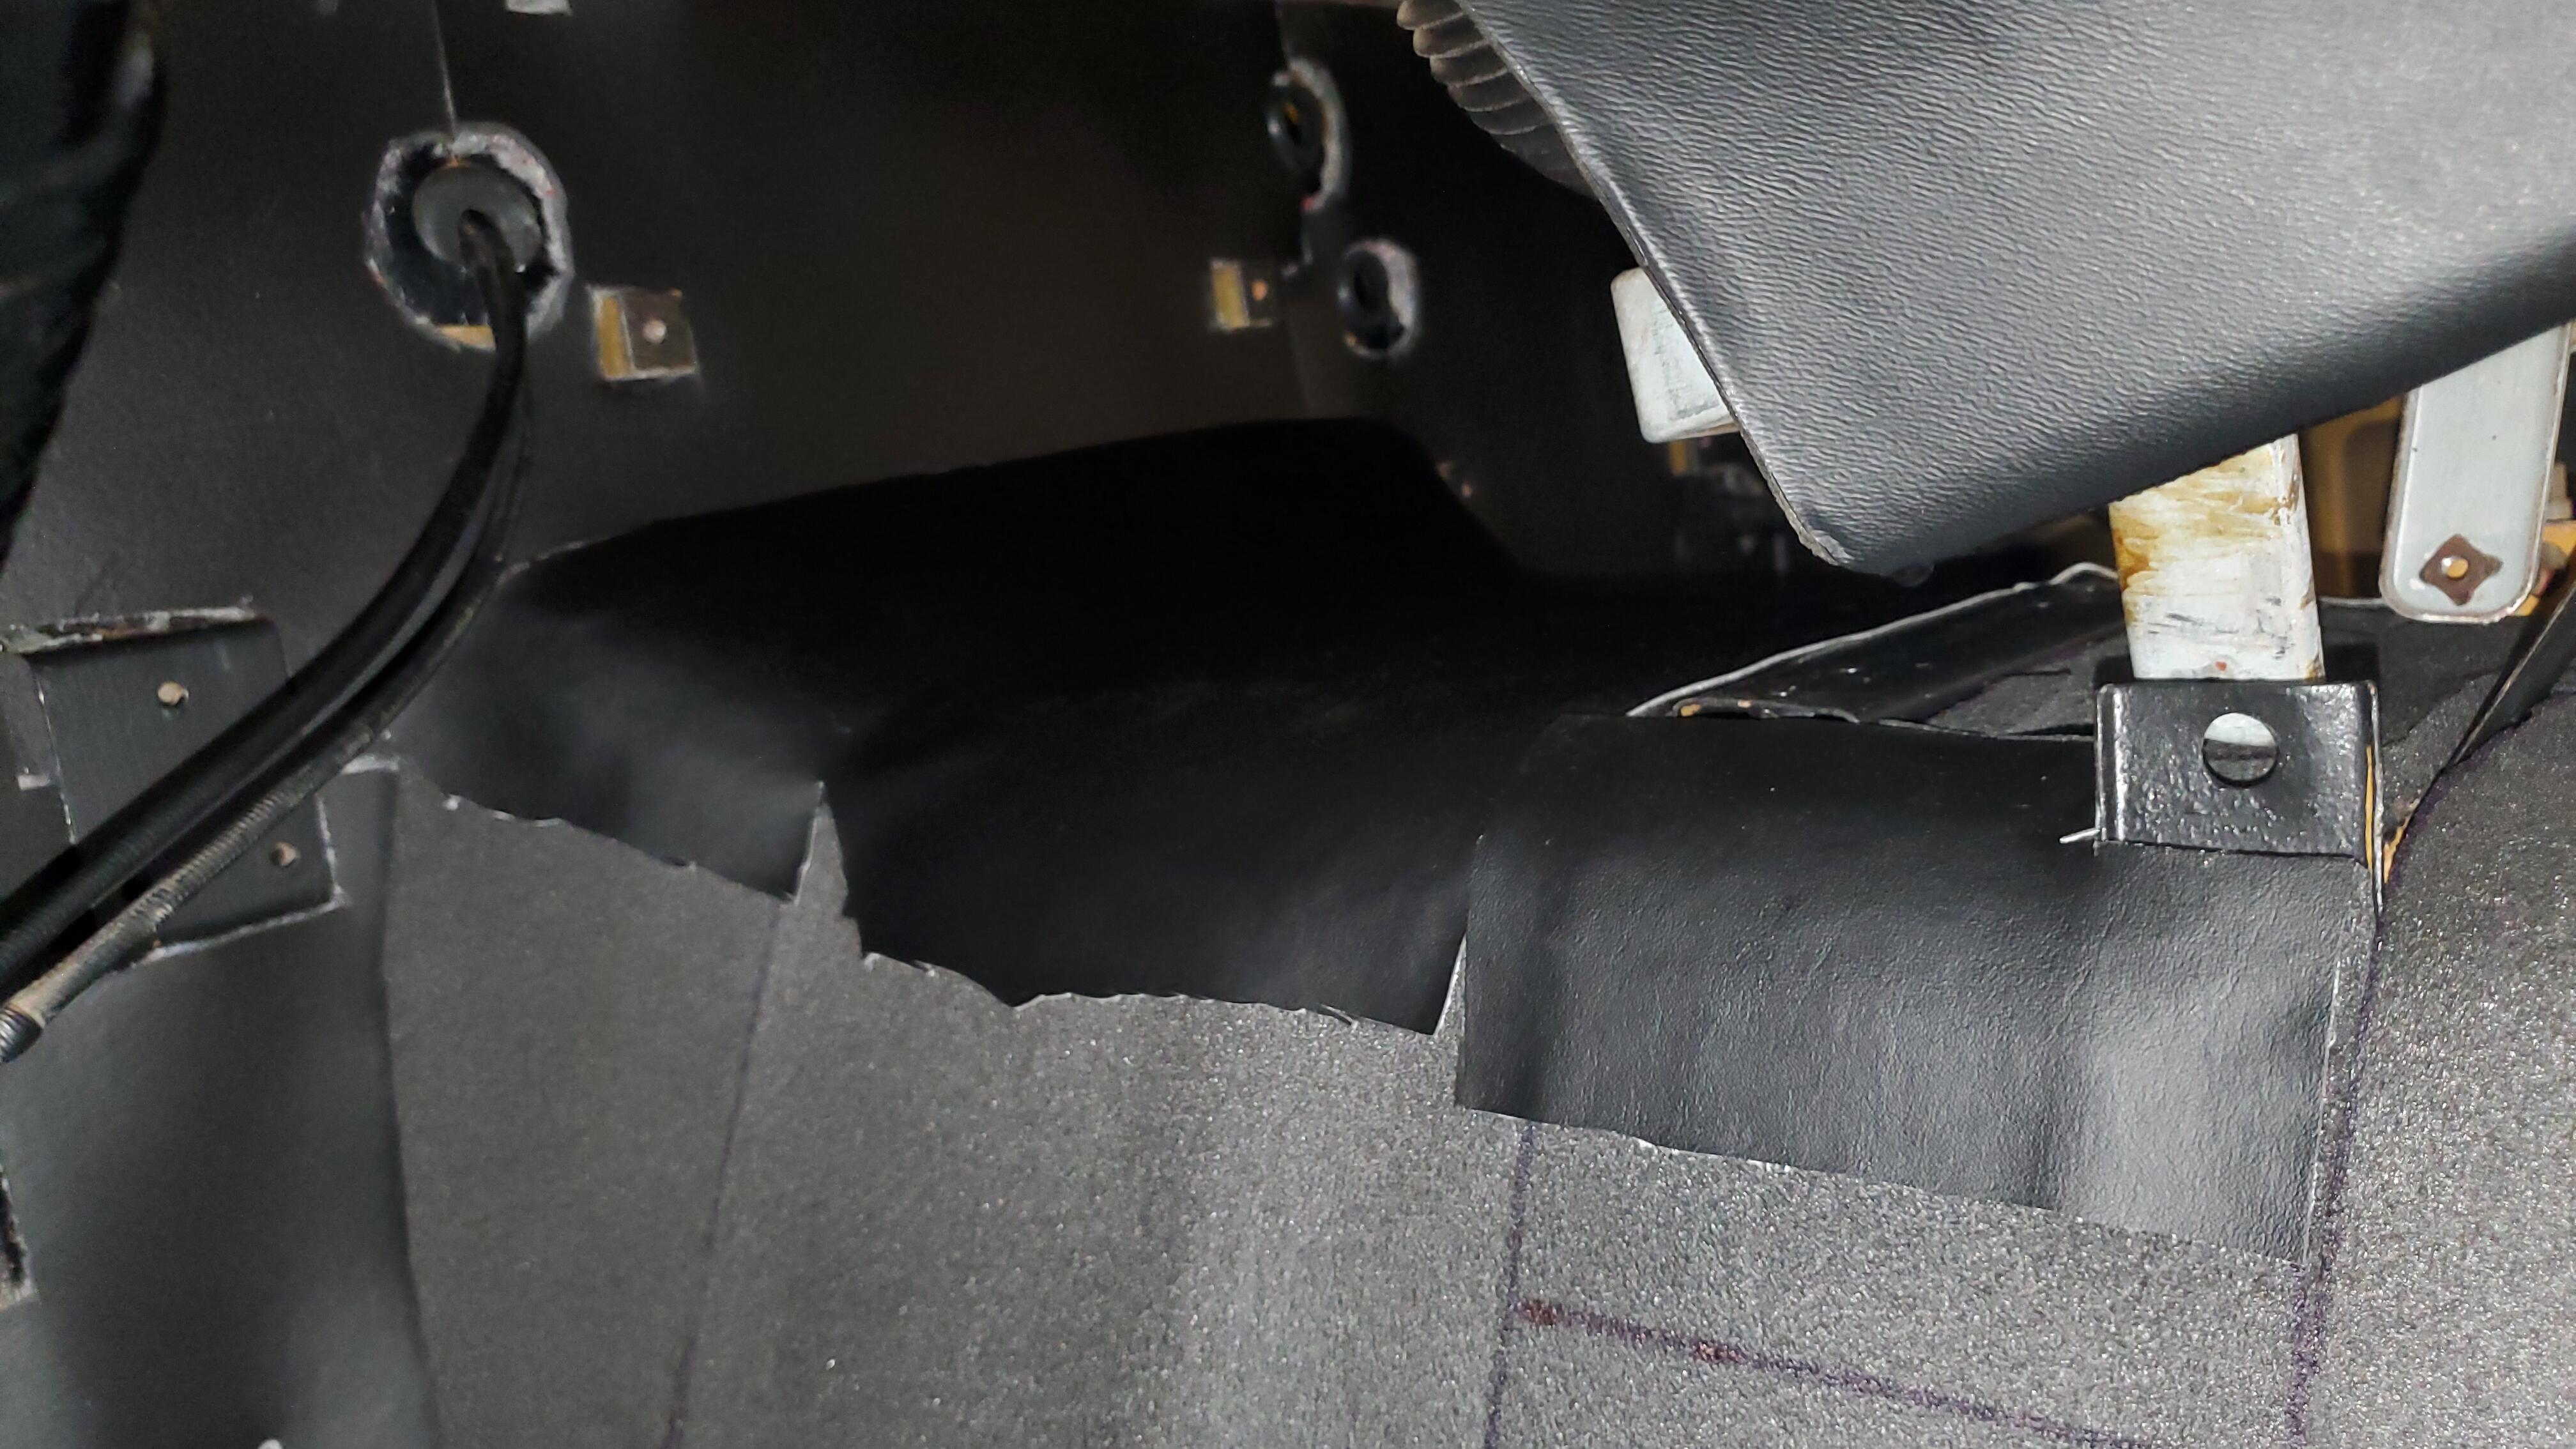
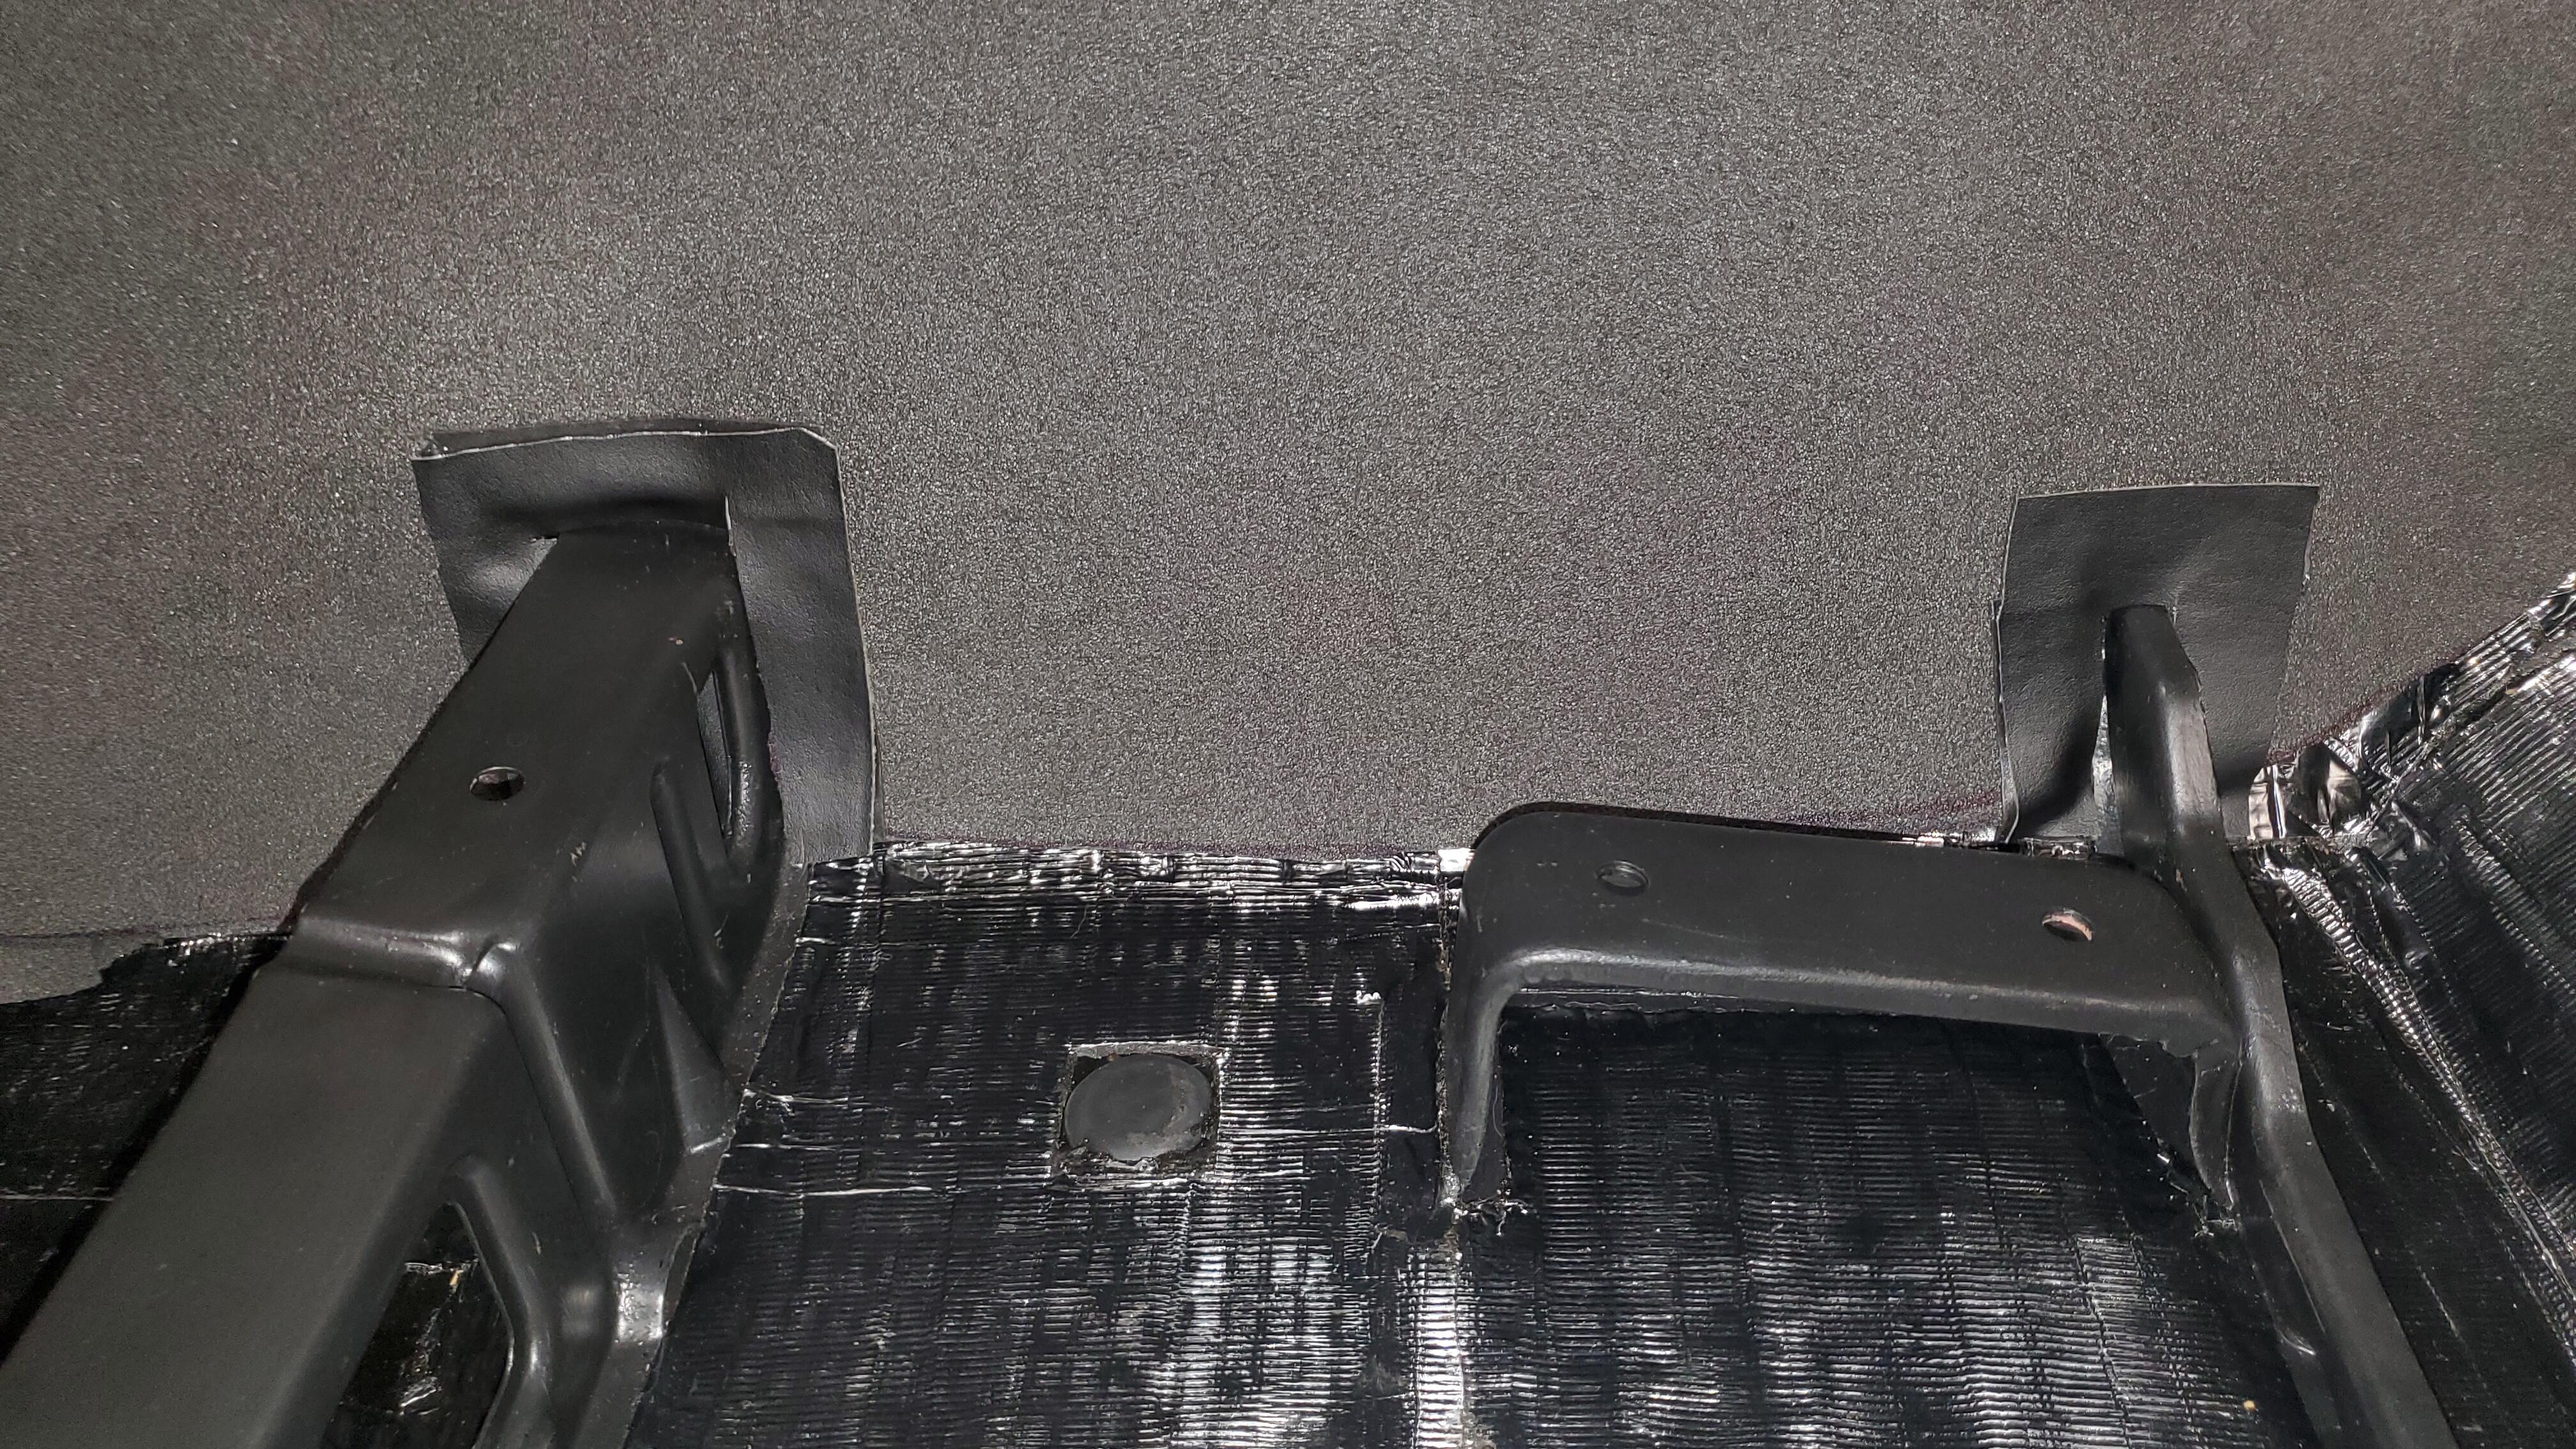
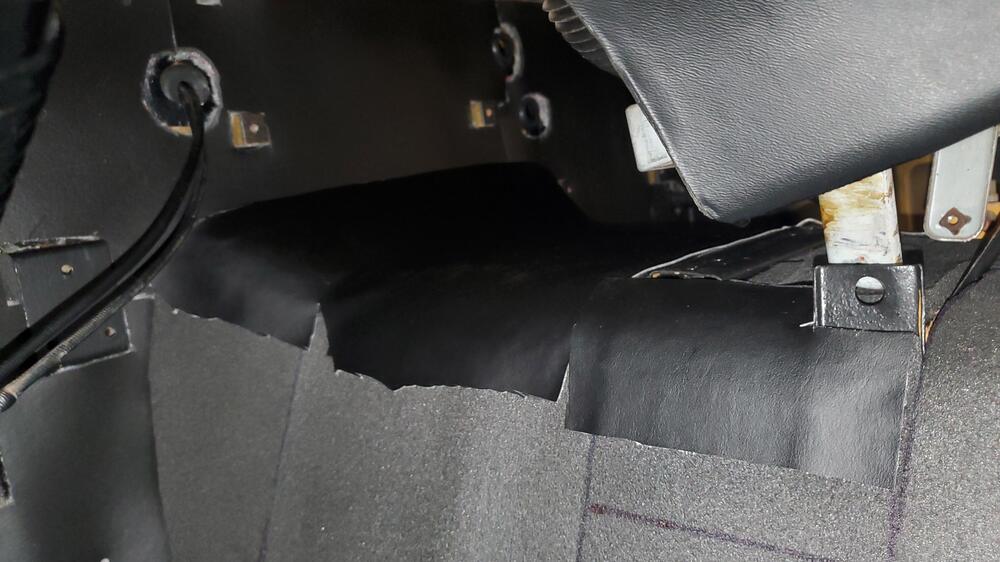
Update. I've started dry fitting the vinyl and noticed that the traditional cutouts for the seat rails and the typical pattern of slices near the firewall as it curves would expose some of the padding I just laid down. Didn't like that so took some of the old headliner I just replaced (so glad I kept the skin) and placed pieces to hide the grey padding once the vinyl is done. i used the same scotch tape from the headliner experiment and it works great. I'm using these pieces as a test run to see if this tape can be used for the actual vinyl itself rather than messy glue (just like i did the headliner). Here I did the entire under heater core box, looks great and the rails
 1 point
 -
There are many things in life that are not used in the way they were intended or good ways. That doesn't make the thing the problem but instead the application. Like many of these things, we here or most people anywhere can't stop the misuse of these things. The best we can do is use these things including the Series 1/2 designation in a responsible way and move forward.1 point
-
To flog the dead horse, the problem is it's often used as an absolute. Then all sorts of contortions are required to make it fit when an example car pops up. That's why I laughed..1 point
-
Hahaha... Oh dear. I'm sure Carl can explain series 1 and 2.1 point
-
Sounds like it's running out of fuel in the float chambers? Try sticking a little hose down the over flow bung on the lids. The little small red ones off WD-40 work good at pushing down the floats. They should push down and bounce right back up if there's fuel after you run it.1 point
-
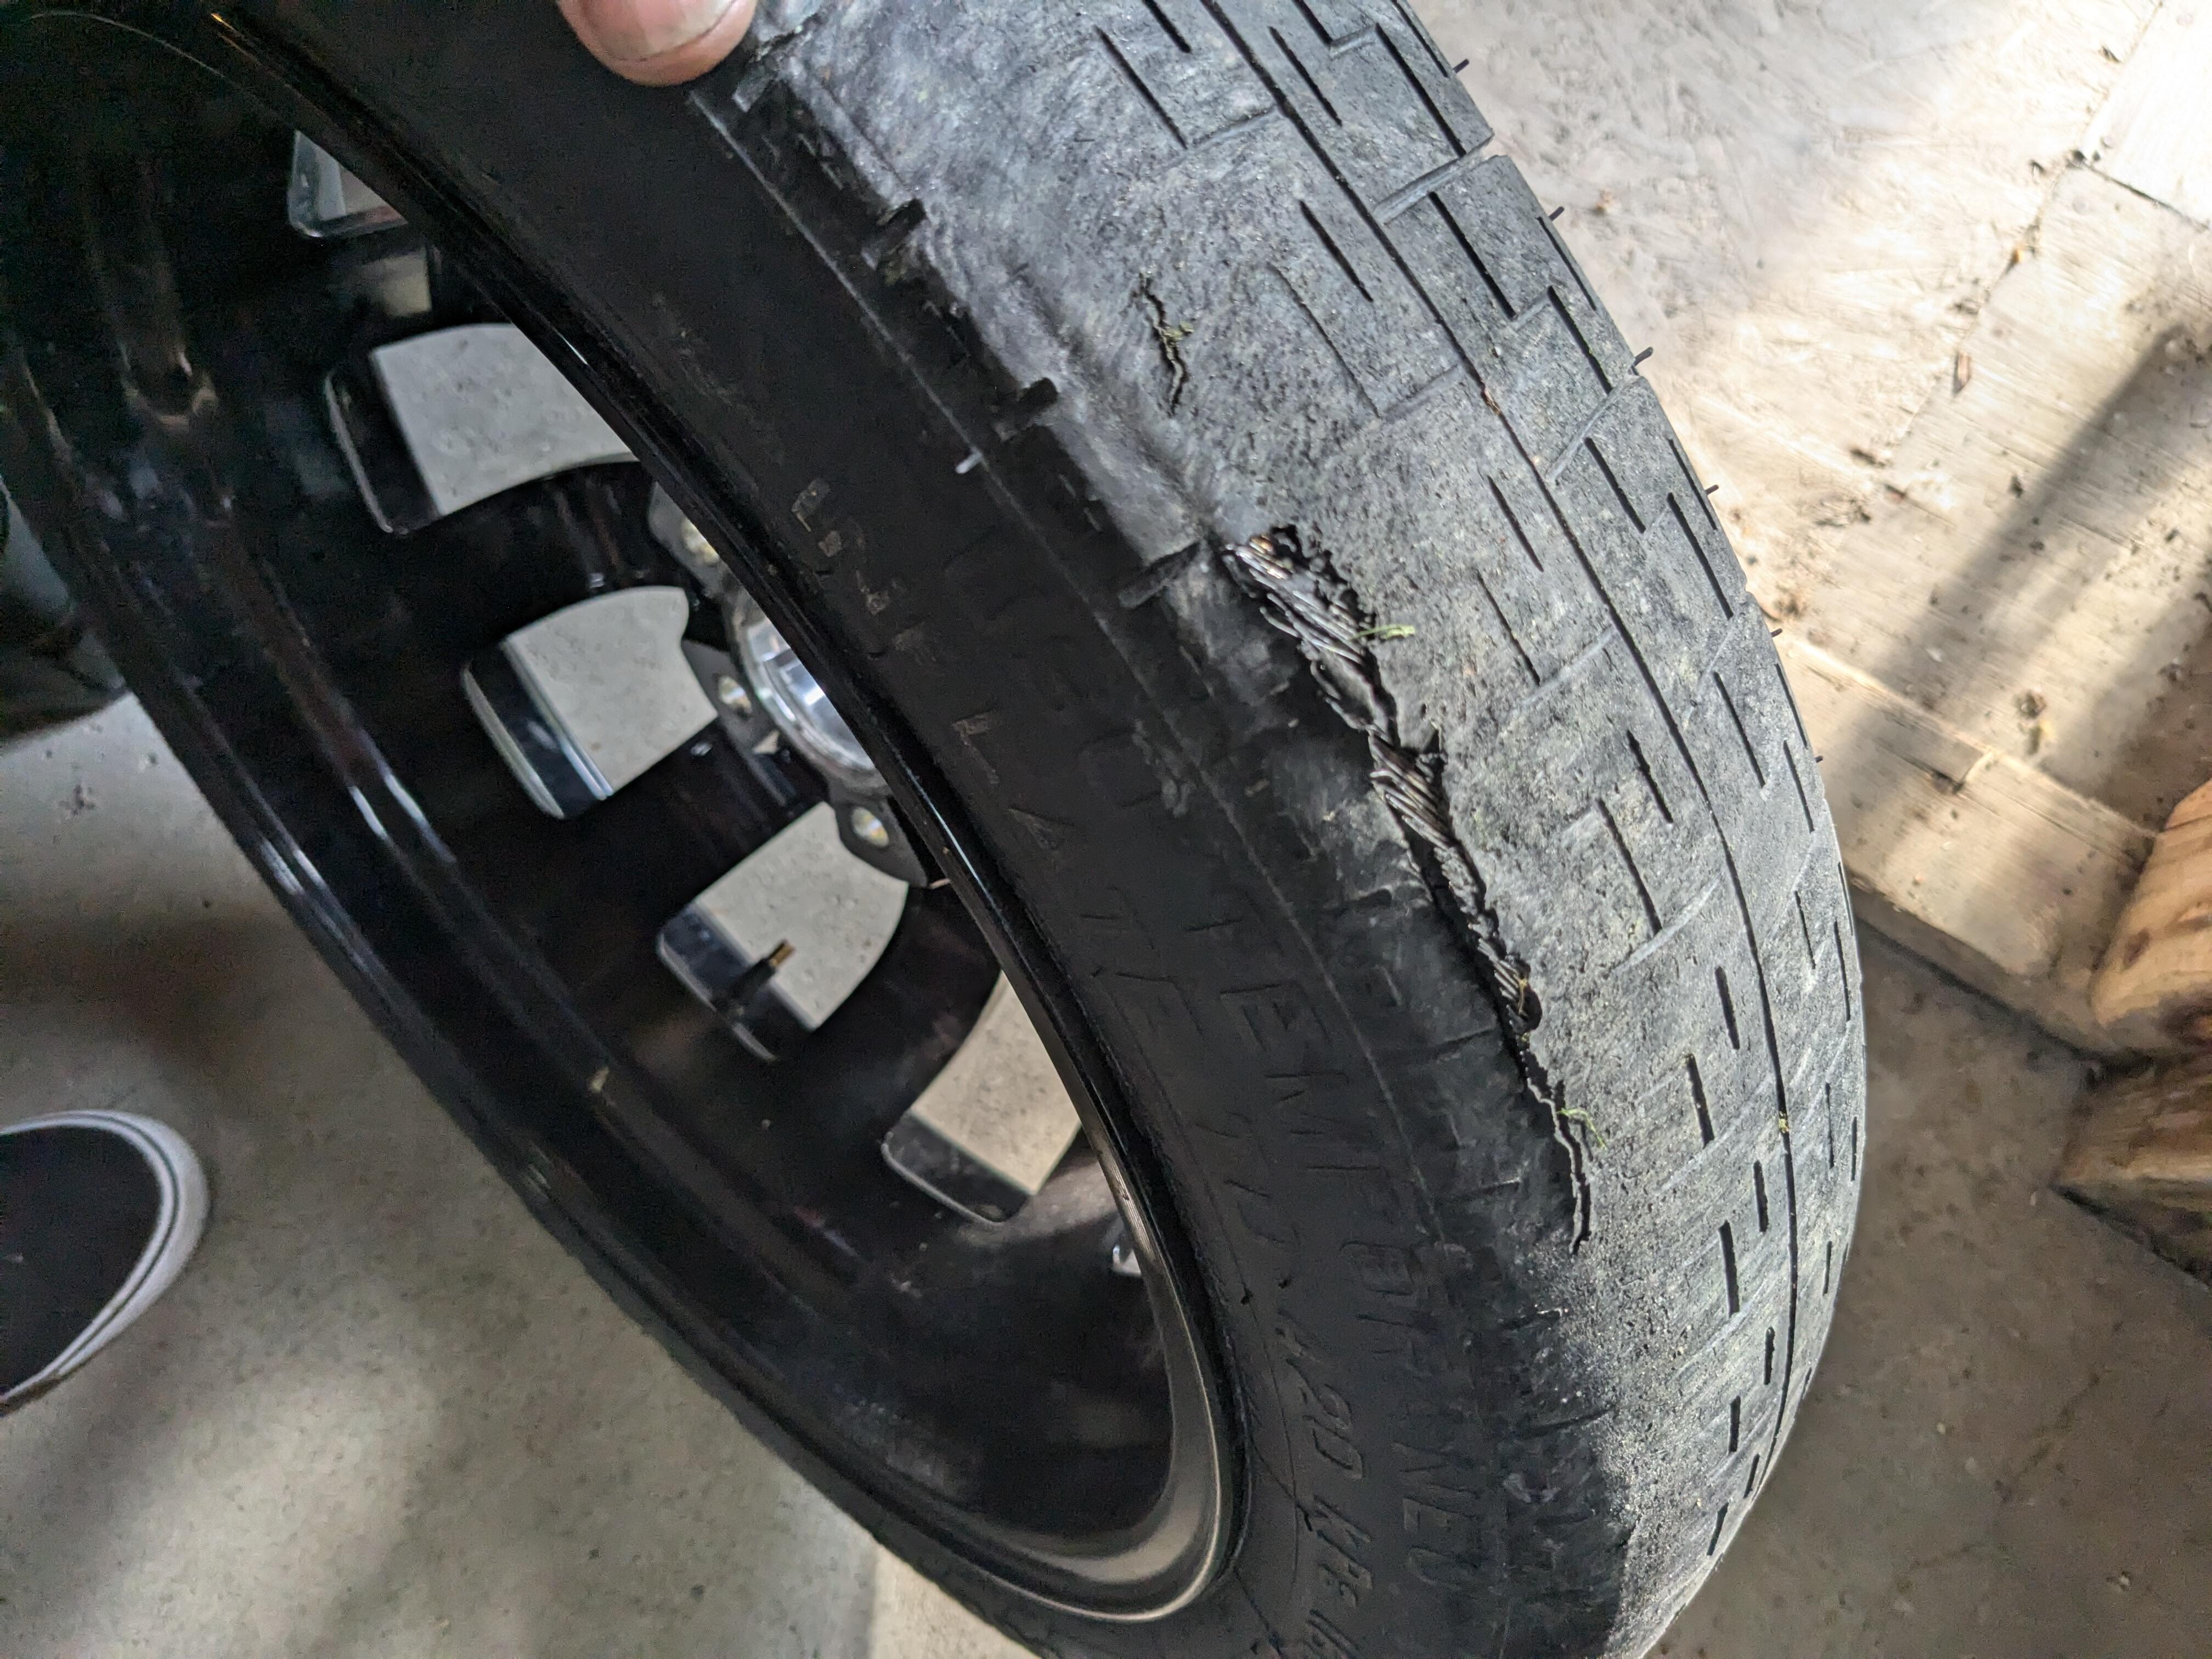
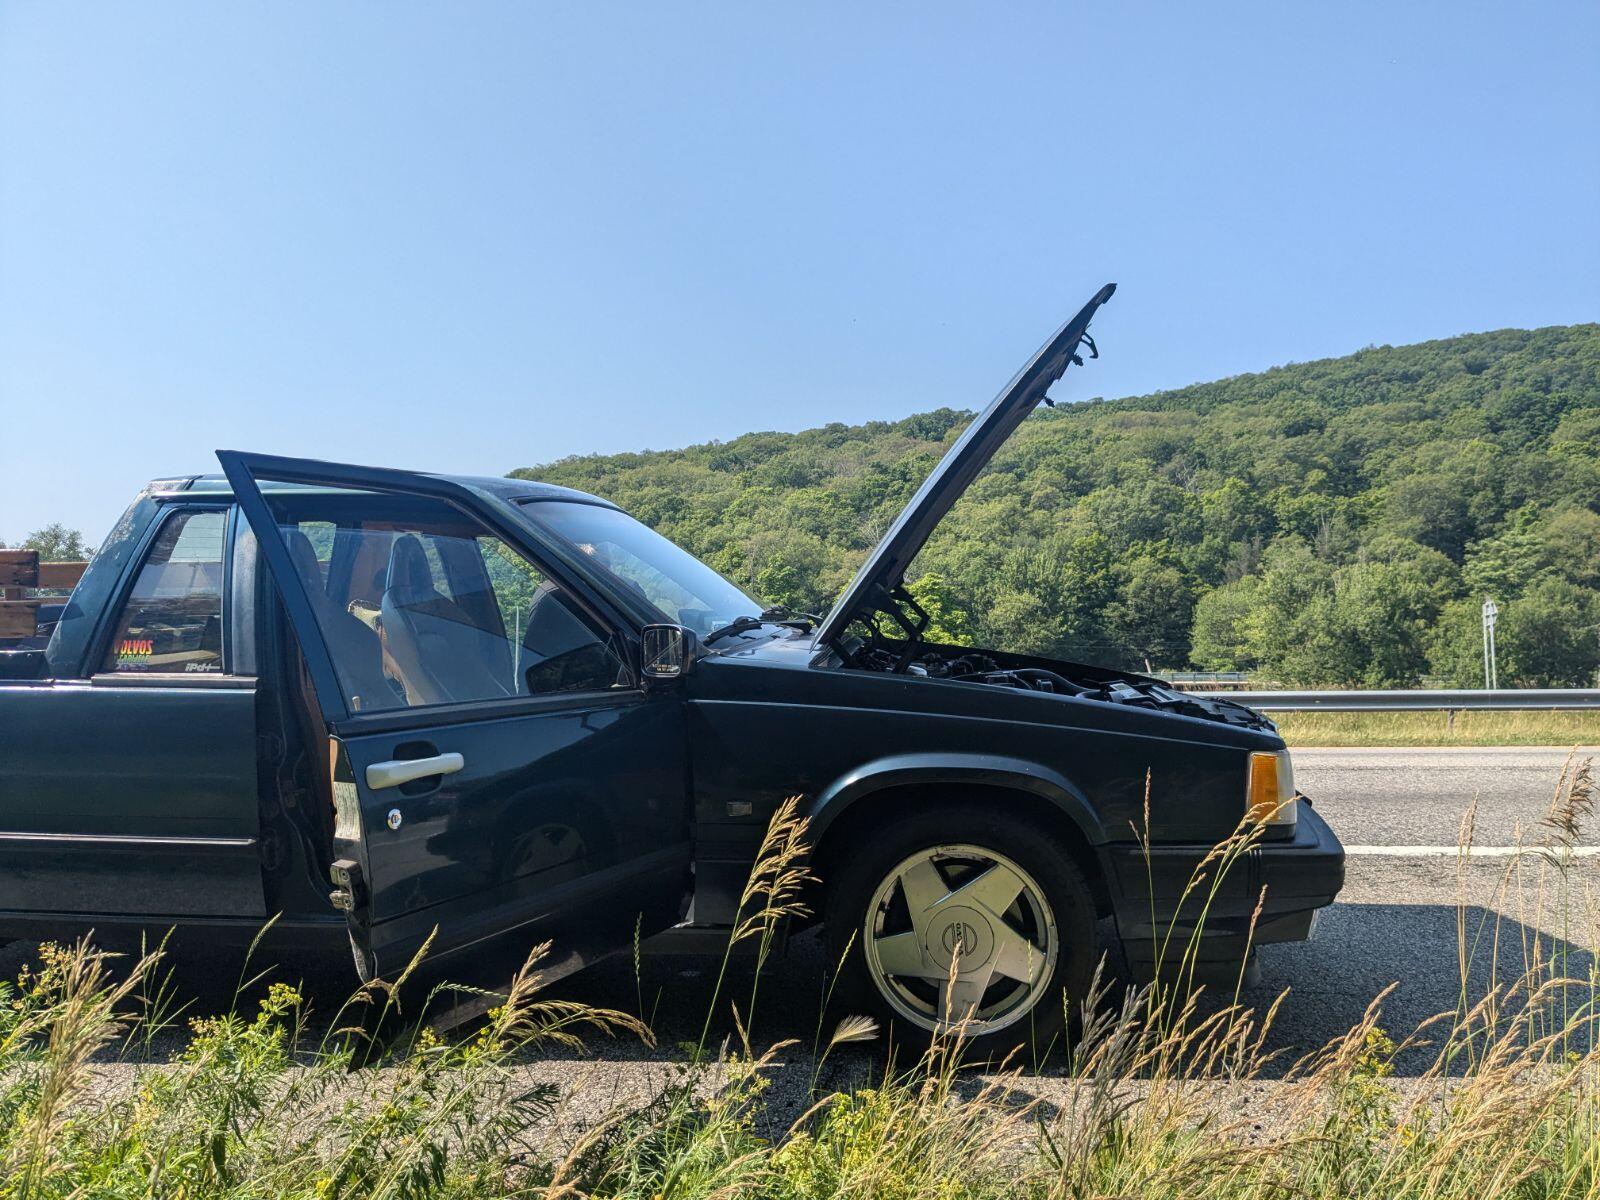
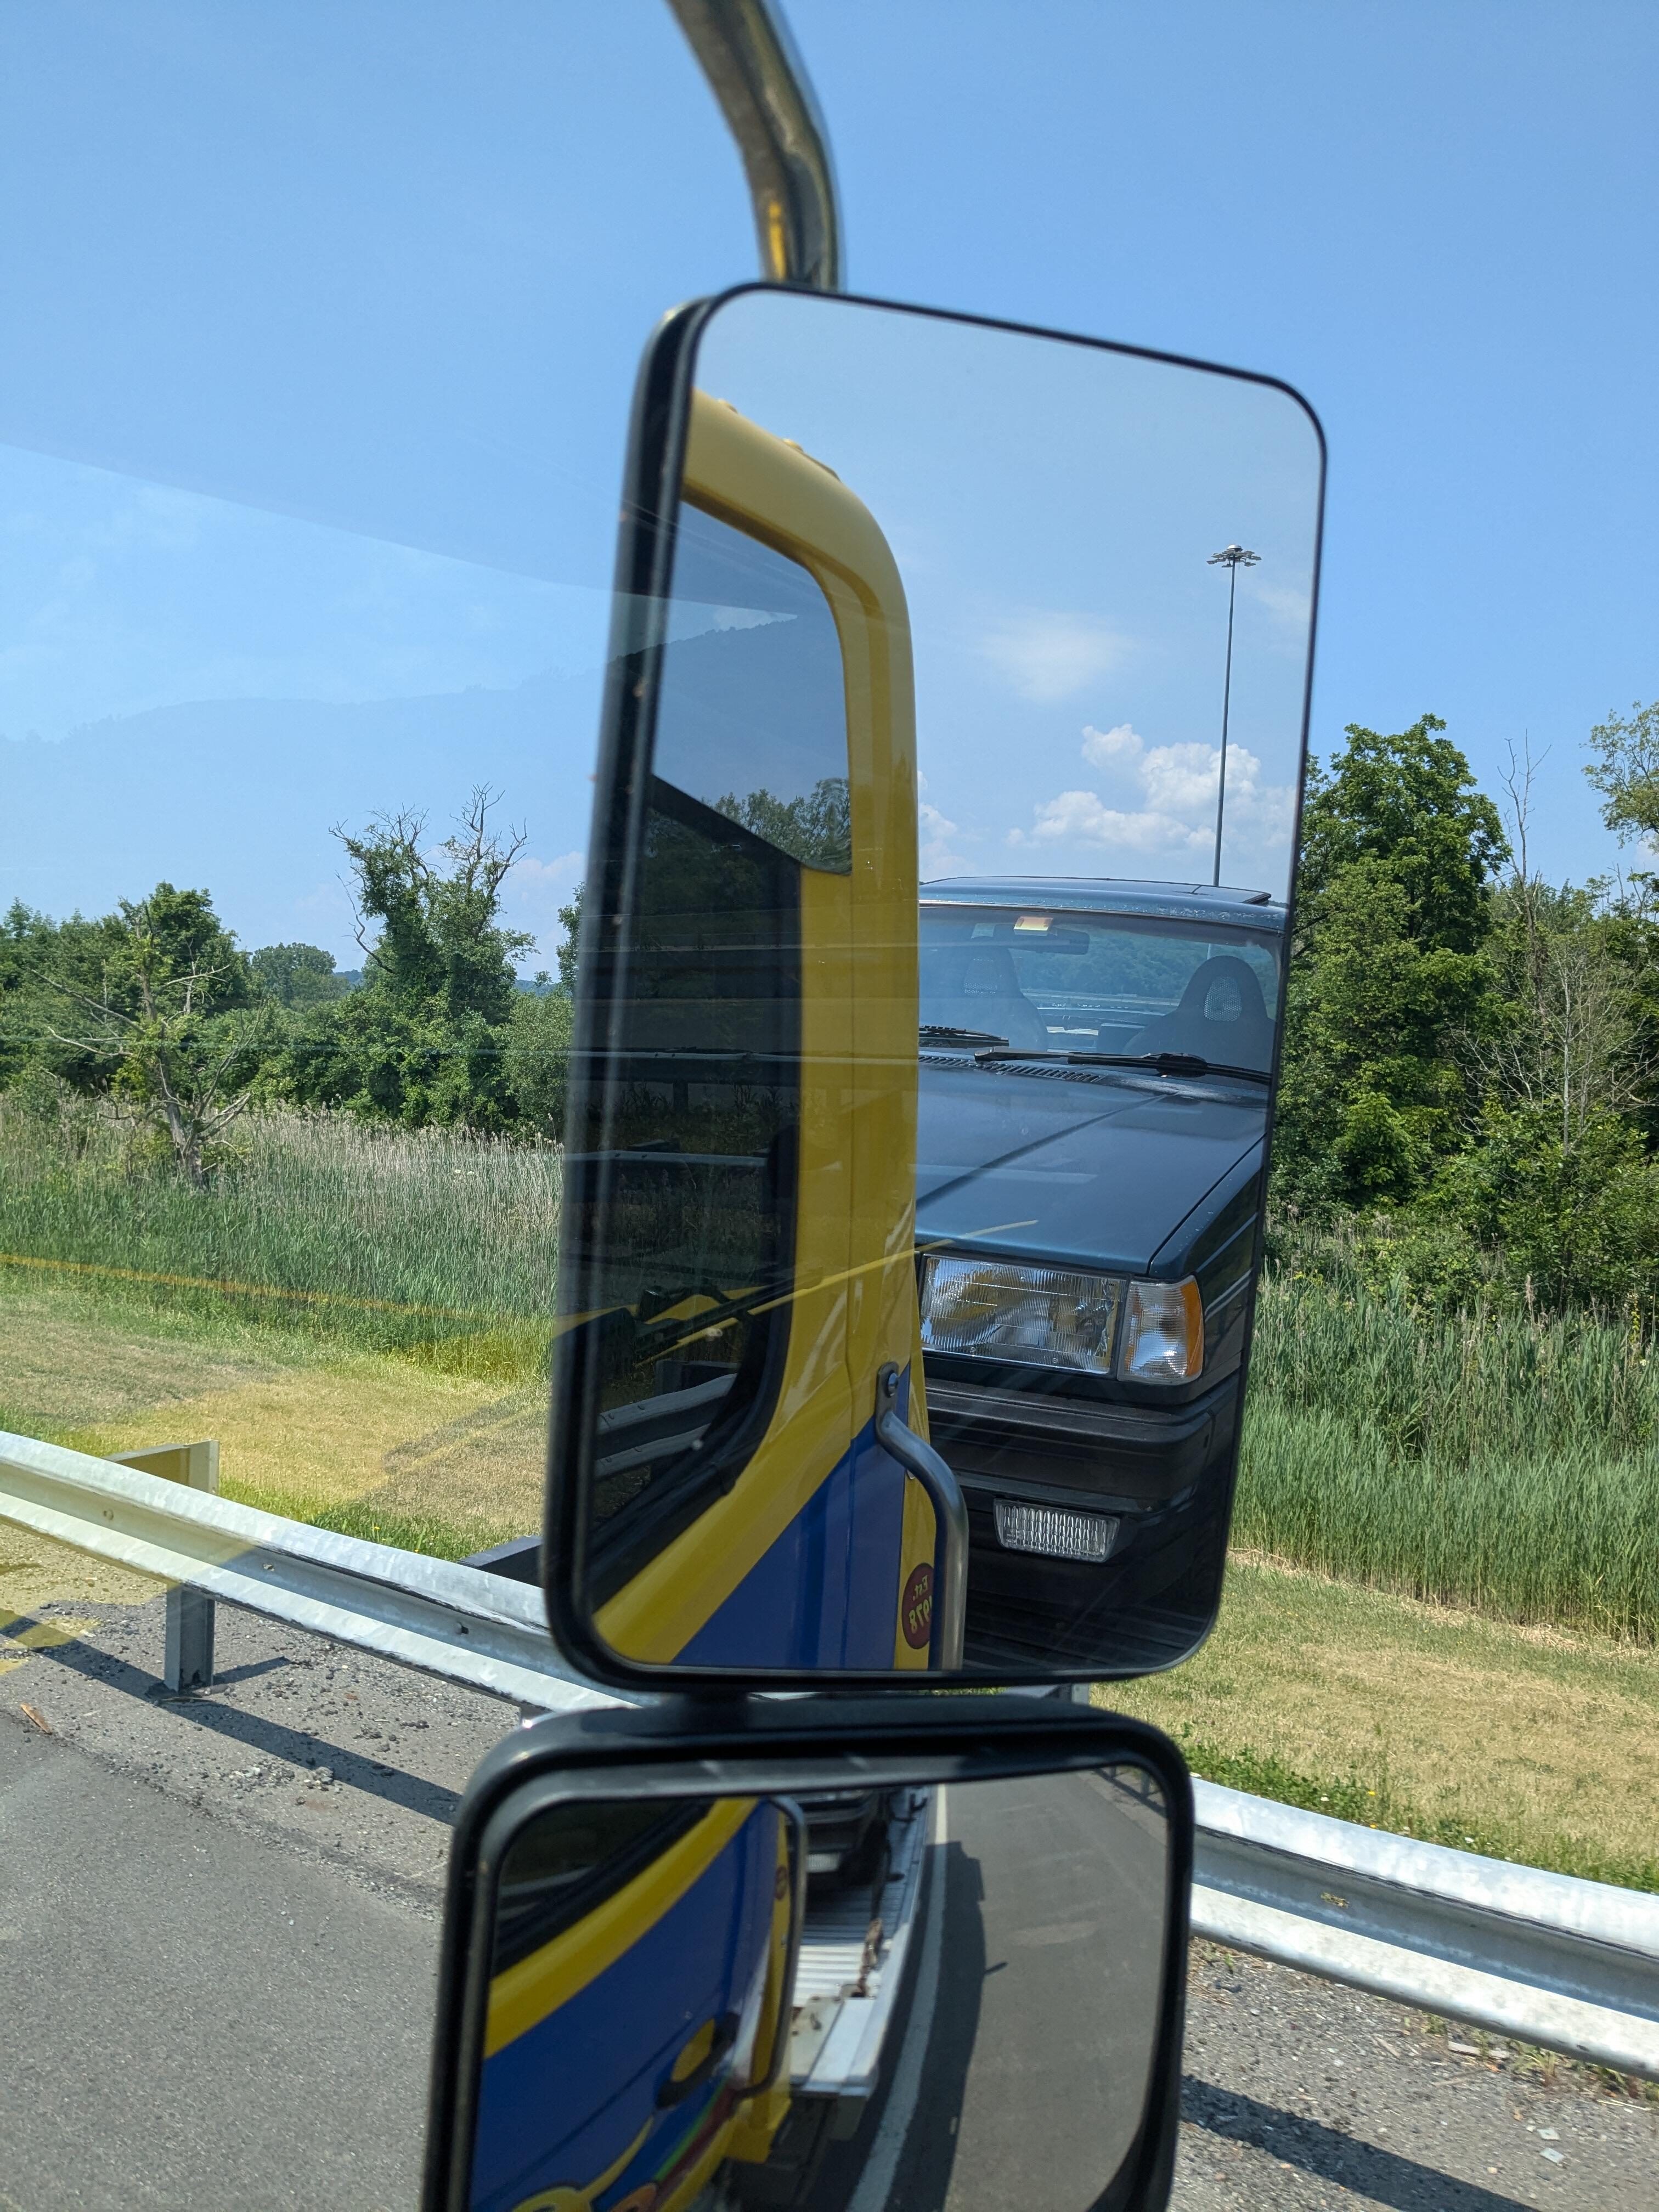
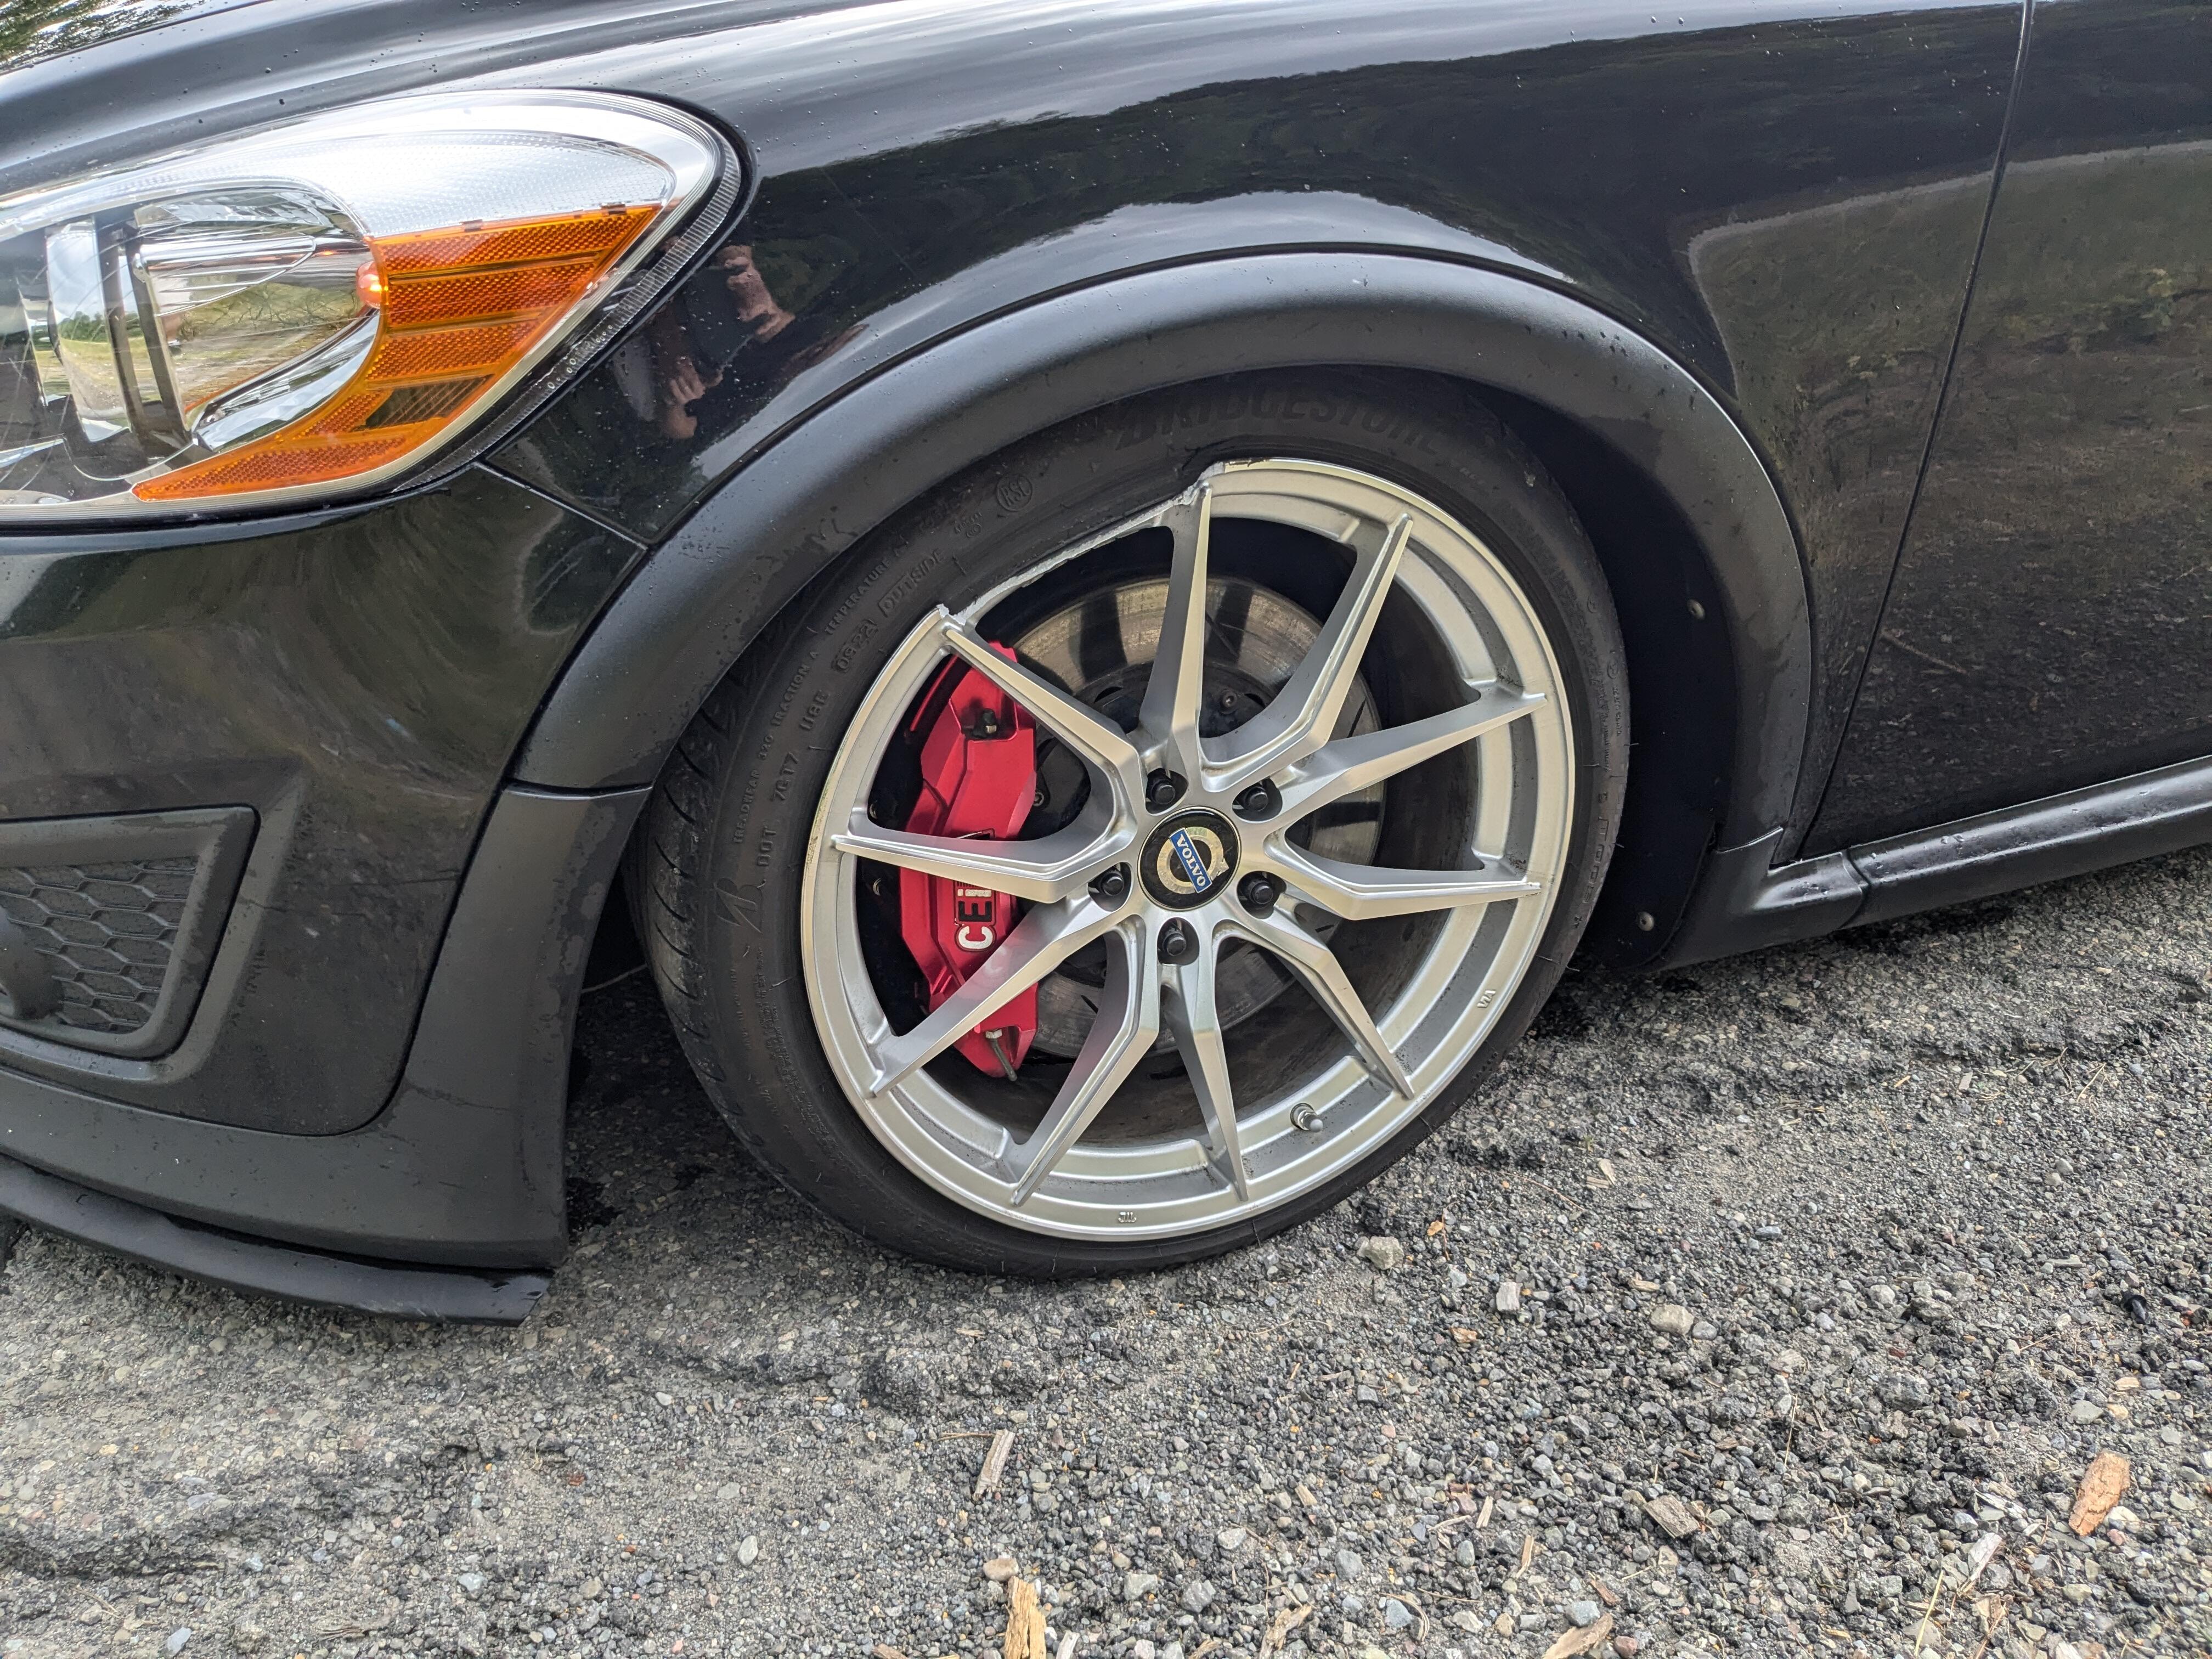
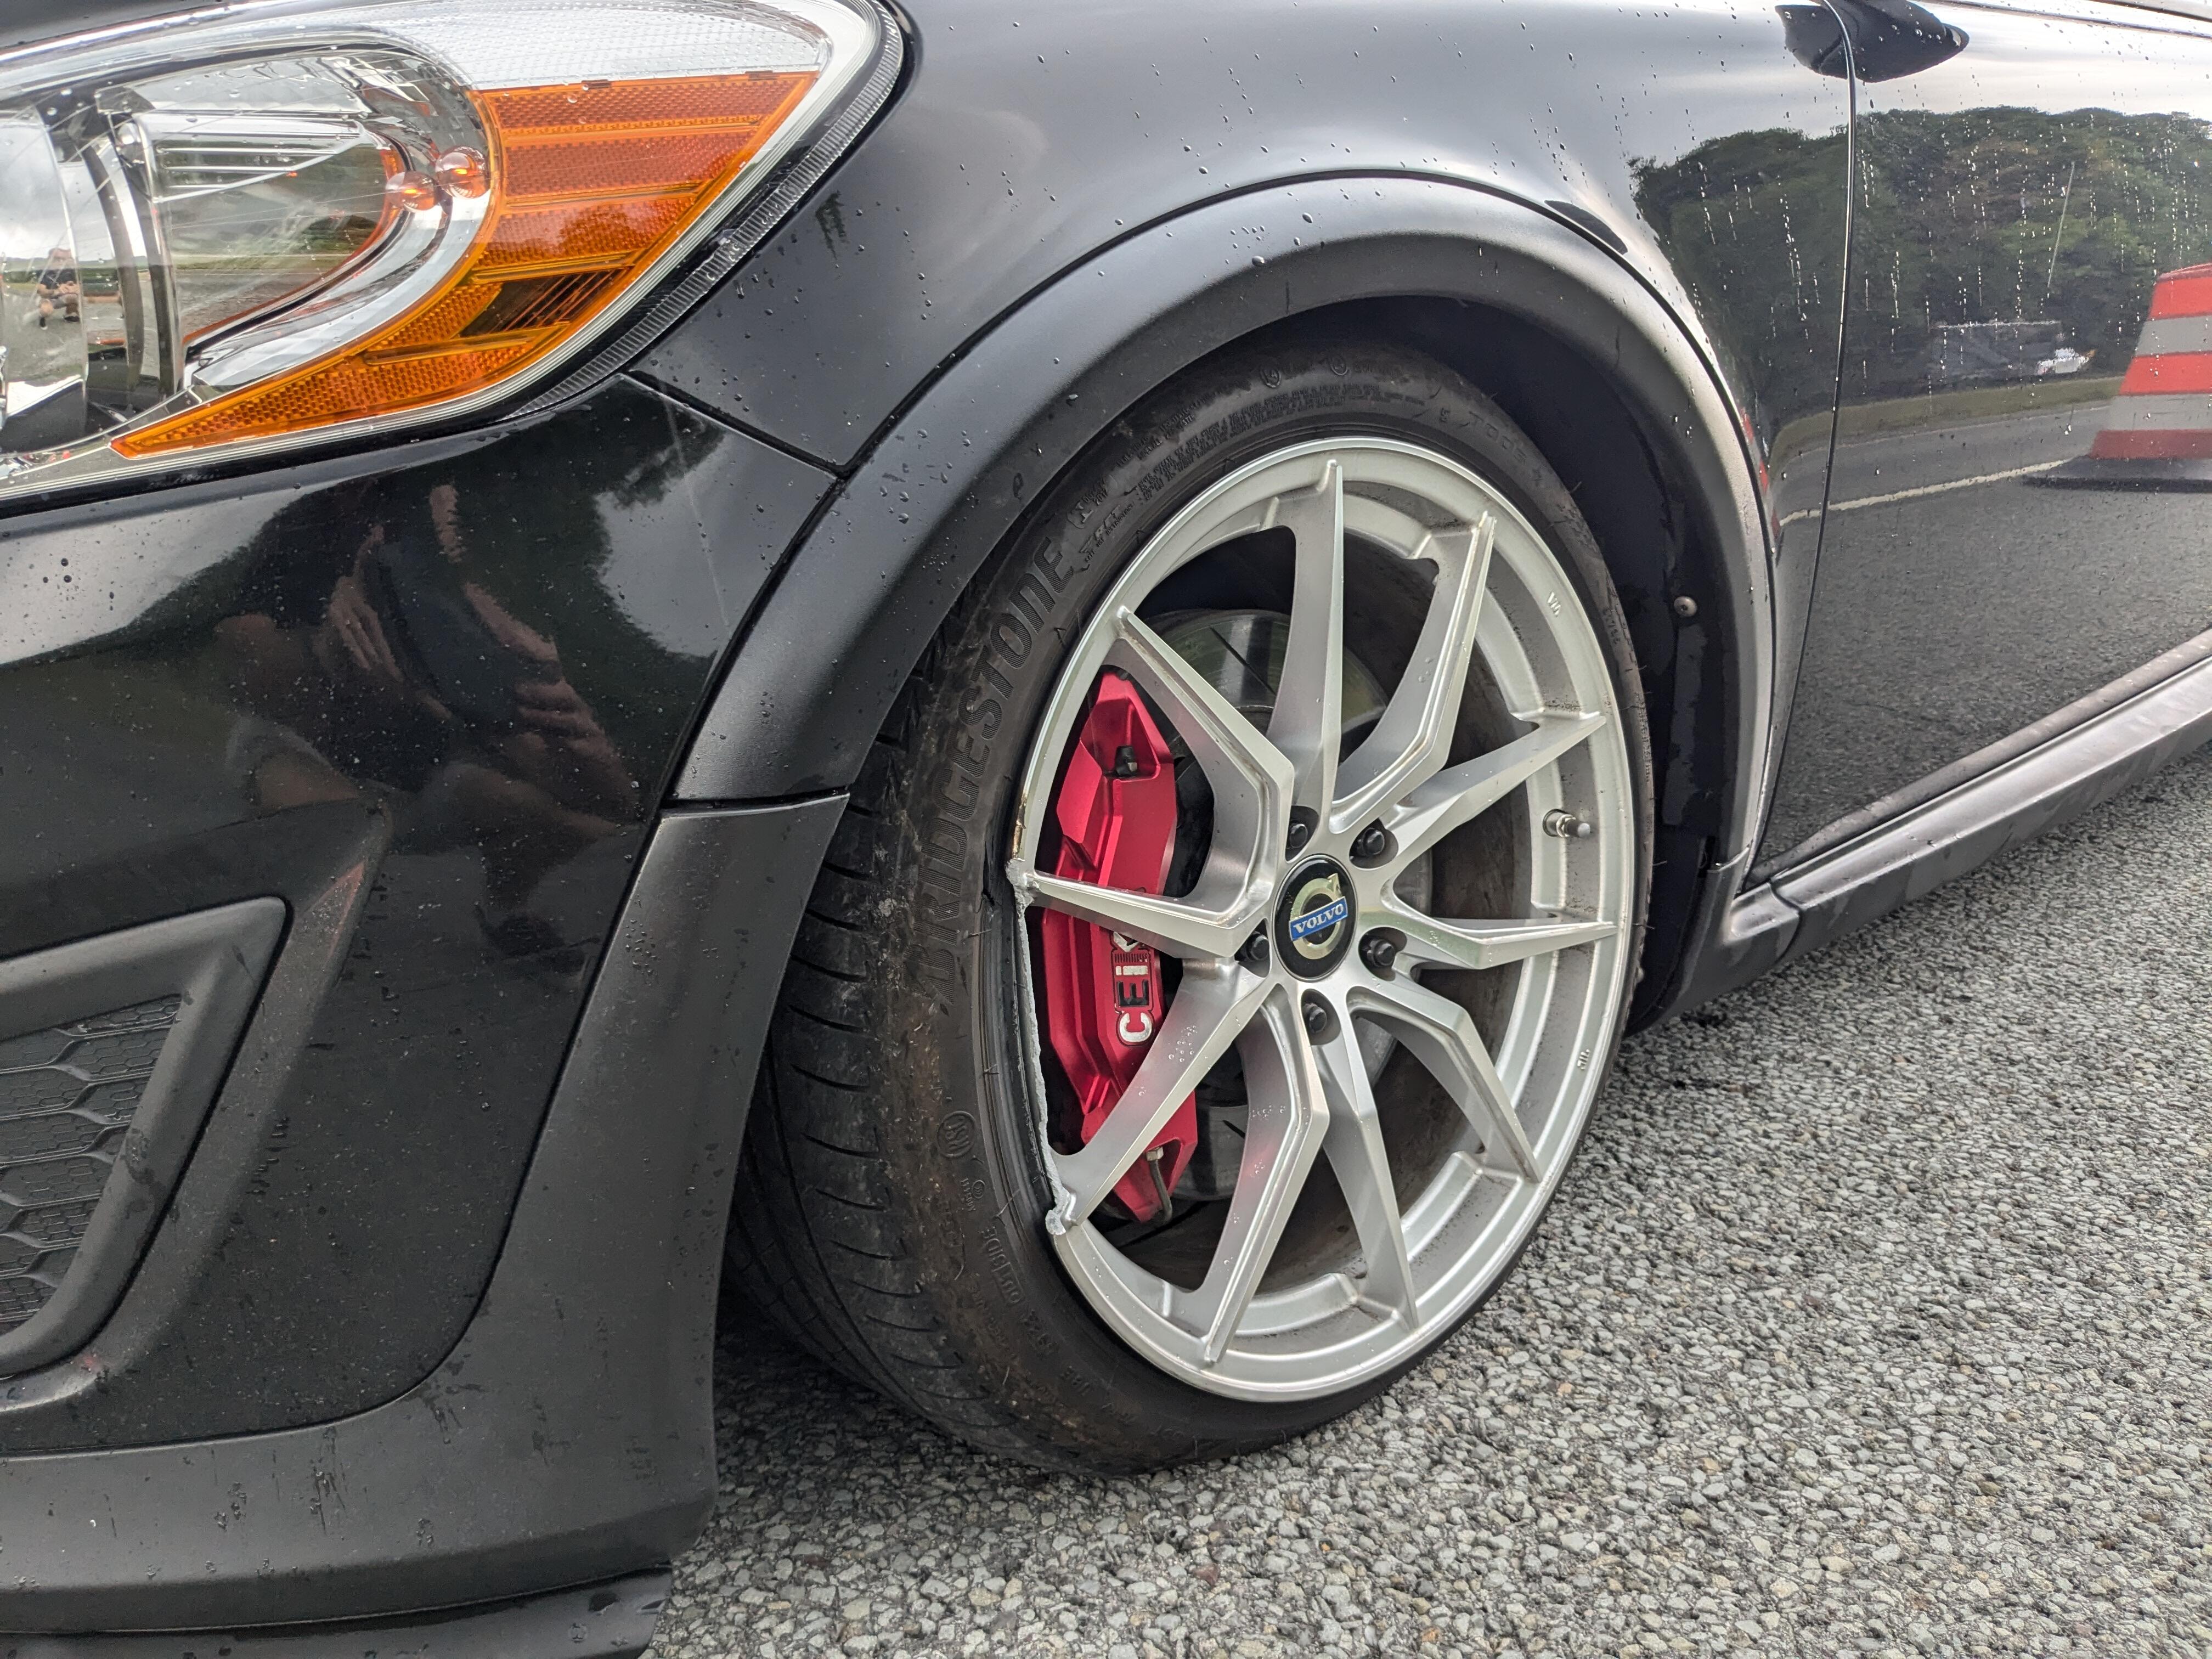
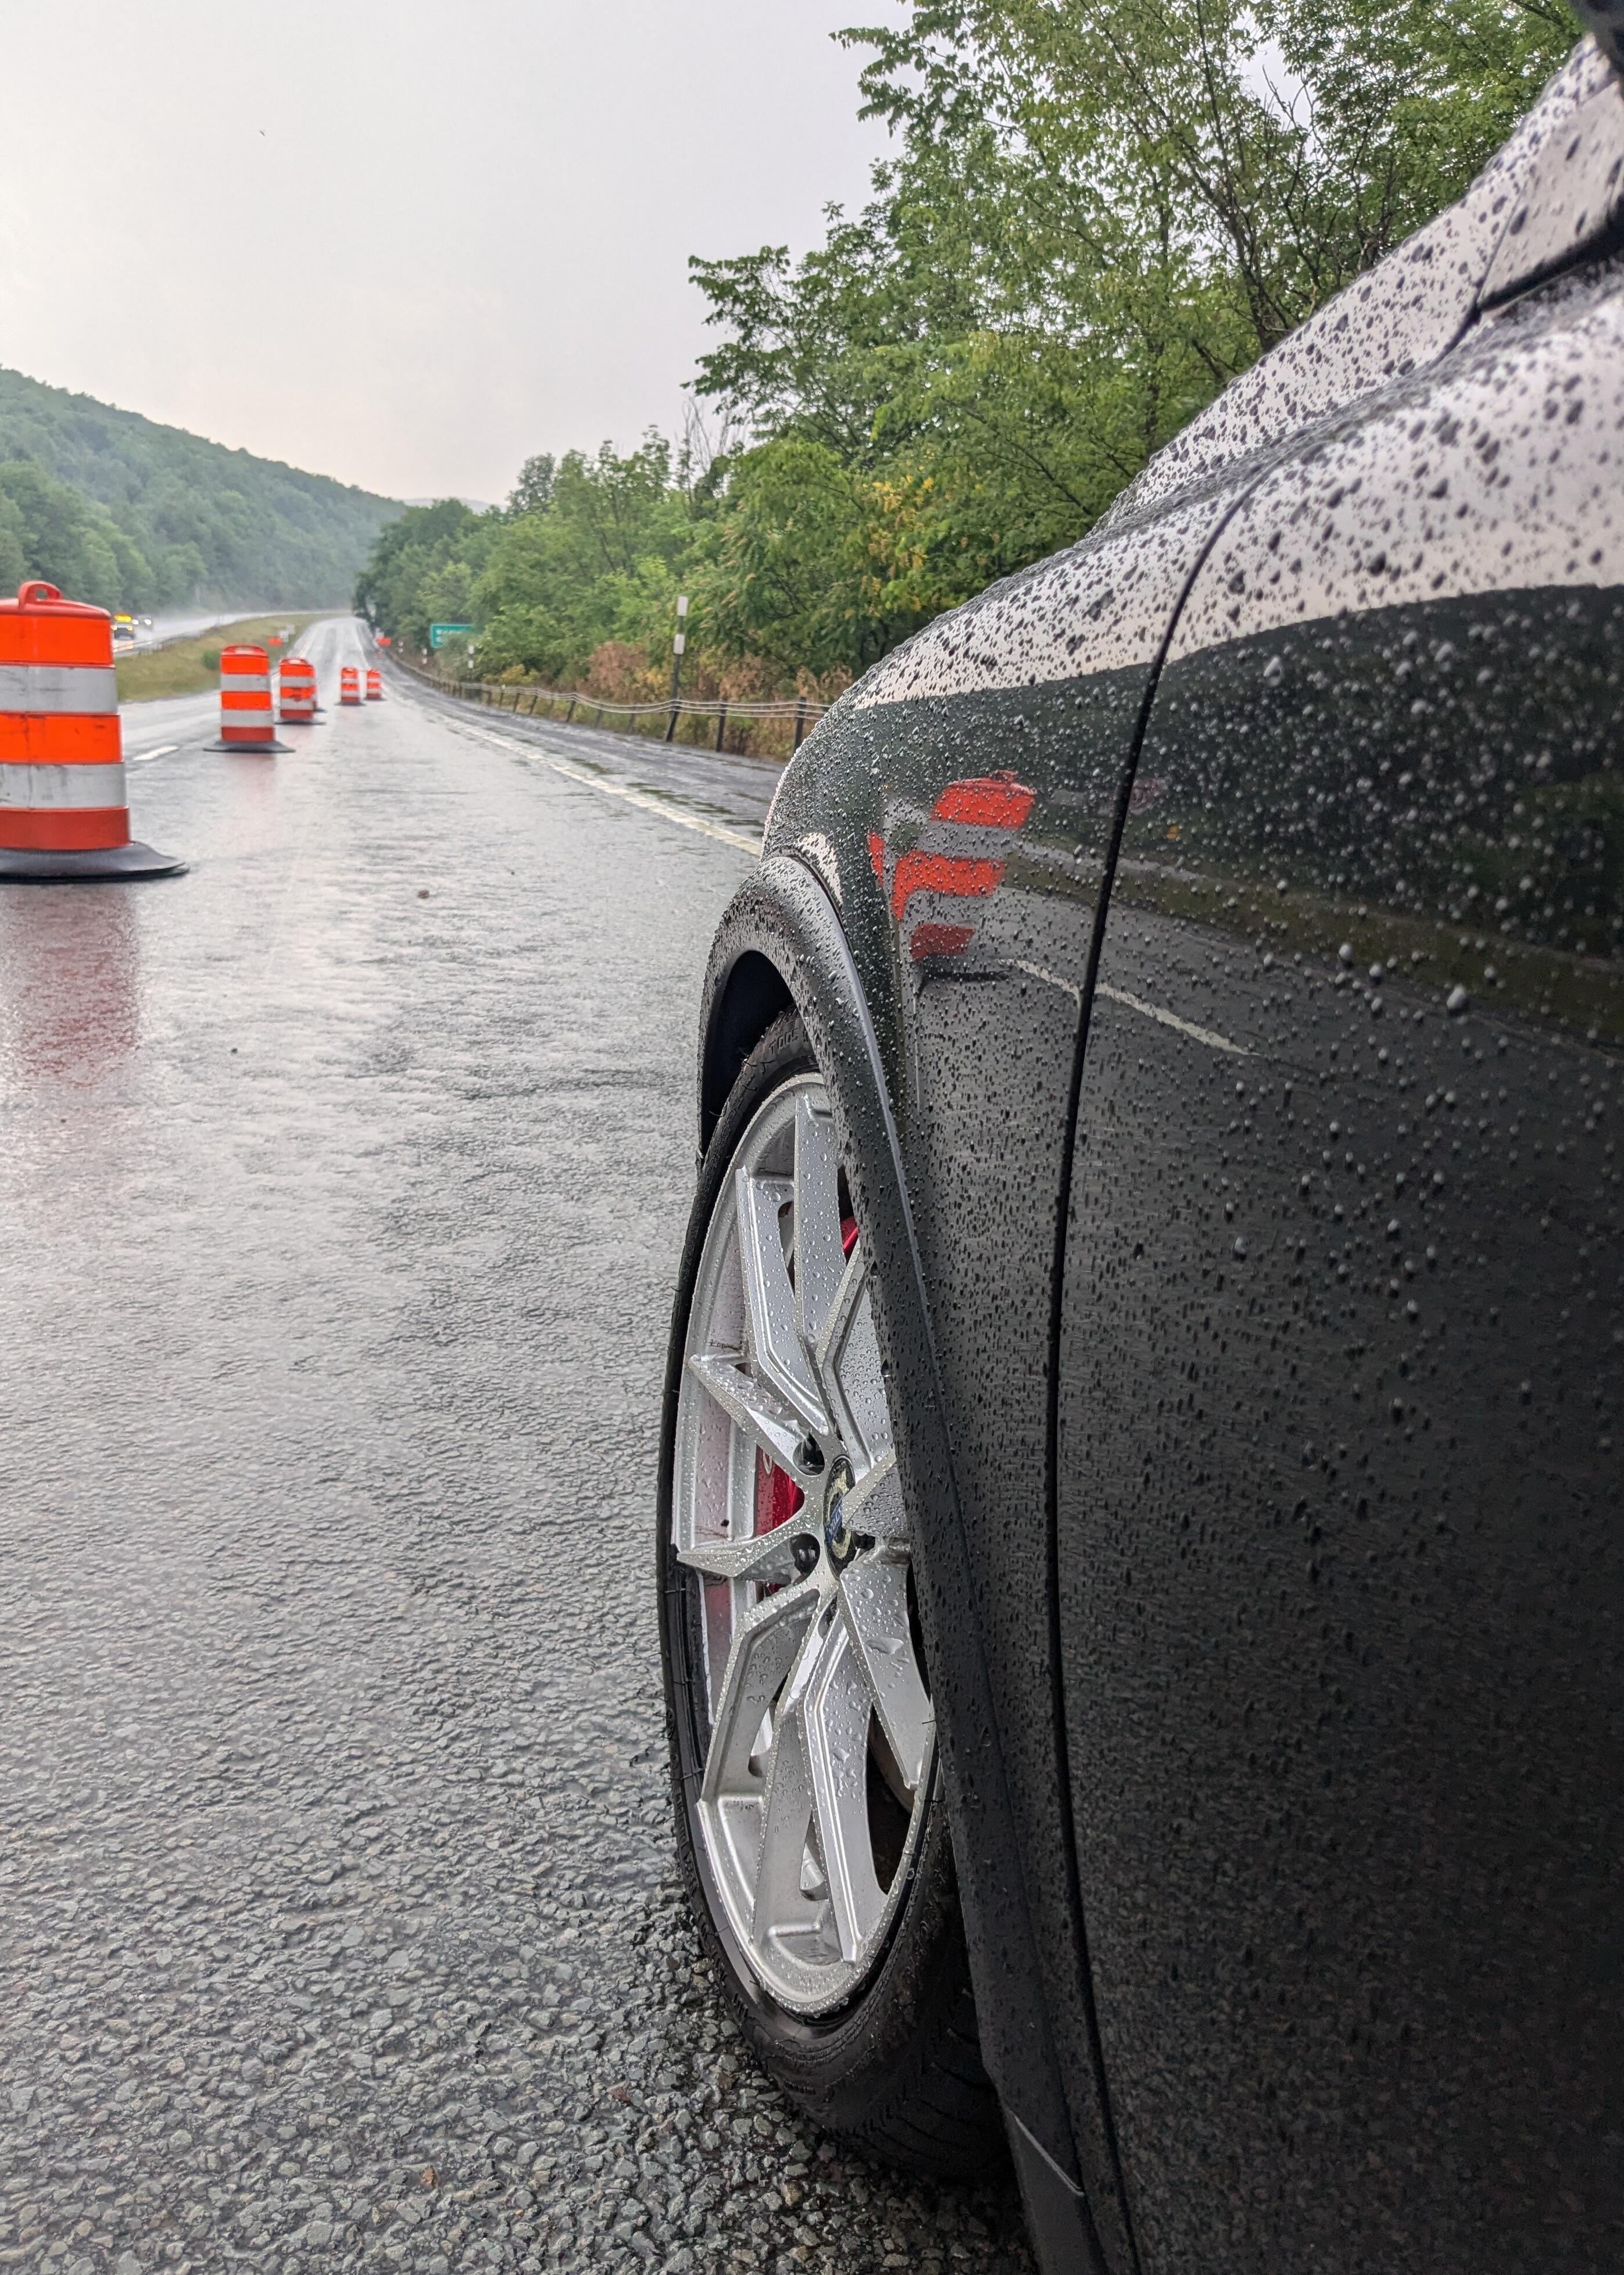
Space saver after 100 miles with extreme camber Bent tube removed Have to keep it 45 or lower to avoid drivability / handling concerns. Made it back to Deposit, NY where the accident happened. took me over 2 hours to go the 90 miles. The remaining 140miles will take about 3 hours, on a replacement same spec space saver (mid 00's Volvo S60Rs came with big brakes - so they provided a space saver with a deep offset, works for my setup.


 1 point
 -
Might help to describe the engine. Carbs, igntion, etc. You've probably mentioned it in the past but searching past posts is work. You could also put some stuff in your Signature. Guessing that the filters are off? (You can see white smoke.) Both carbs puff or just one? One second is not much. Neither is two. One one thousand, two one thousand. Are you sure it's not running longer? How can you see several "few revolutions" in one or two seconds? One more nit-pick - if it's puffing out of a carb or carbs, is that "running smoothly? Hard to grasp what you're describing. Might be a sticking intake valve causing the puffing. You might be able to discern between ignition and fuel with starting fluid on the restart problem.1 point
-
Presumably it will be explained away with the usual goalpost moving and assigned some fraction between 1 and 2 ('Series 1.25'/'Series 1.5'/'Series 1.75'). Solito Negotium. I'm sorry but all this 'using up of stock parts until depleted' narrative is a combination of supposition, underestimation of Nissan as a company and lack of knowledge about what was actually going on. It implies that Nissan's component manufacturing - both in-house and with sub-contractors - was somehow disconnected with the sections of the company engaged in planning model updates and supersessions of said components. The idea that Nissan would find themselves with crates full of suddenly obsolescent parts which somehow needed to be "used up" before the introduction of their successors is for the birds. This is Cargo Cult-level nonsense. Jungle tribes trying to make sense of refrigerators dropping out of the sky. Much like the retrospectively-applied vernacular 'Series' appellations, indeed. Pundits need to do better. Have to laugh at the list of de-merits for this car cited as reasons why it won't be bid as high as last time. Those 'faults' (hey, it's had a life, who knew?) were on the car last time it was bid sky high too. The car hasn't changed, the zeitgeist has.1 point
-
I made a loop out of a piece of fuel hose to get my pump to fit. It gives flexibility of orientation without kinks. The pump will probably work fine but might be noisy. Looks like it might be over-spec. for your needs although the specs shown are in an odd format. Apparently it's a knockoff of the Airtex E8228. The Airtex E8312 used to be the pump for the 280Z EFI. But it's all weird now, hard to tell what's what. It should spin up and pump fuel though. Good luck. https://www.autobestusa.com/universal_pumps.html1 point
-
Here we go again, "series 1 series 2" . What is the production date? I promise this will be my last comment on this subject.1 point
-
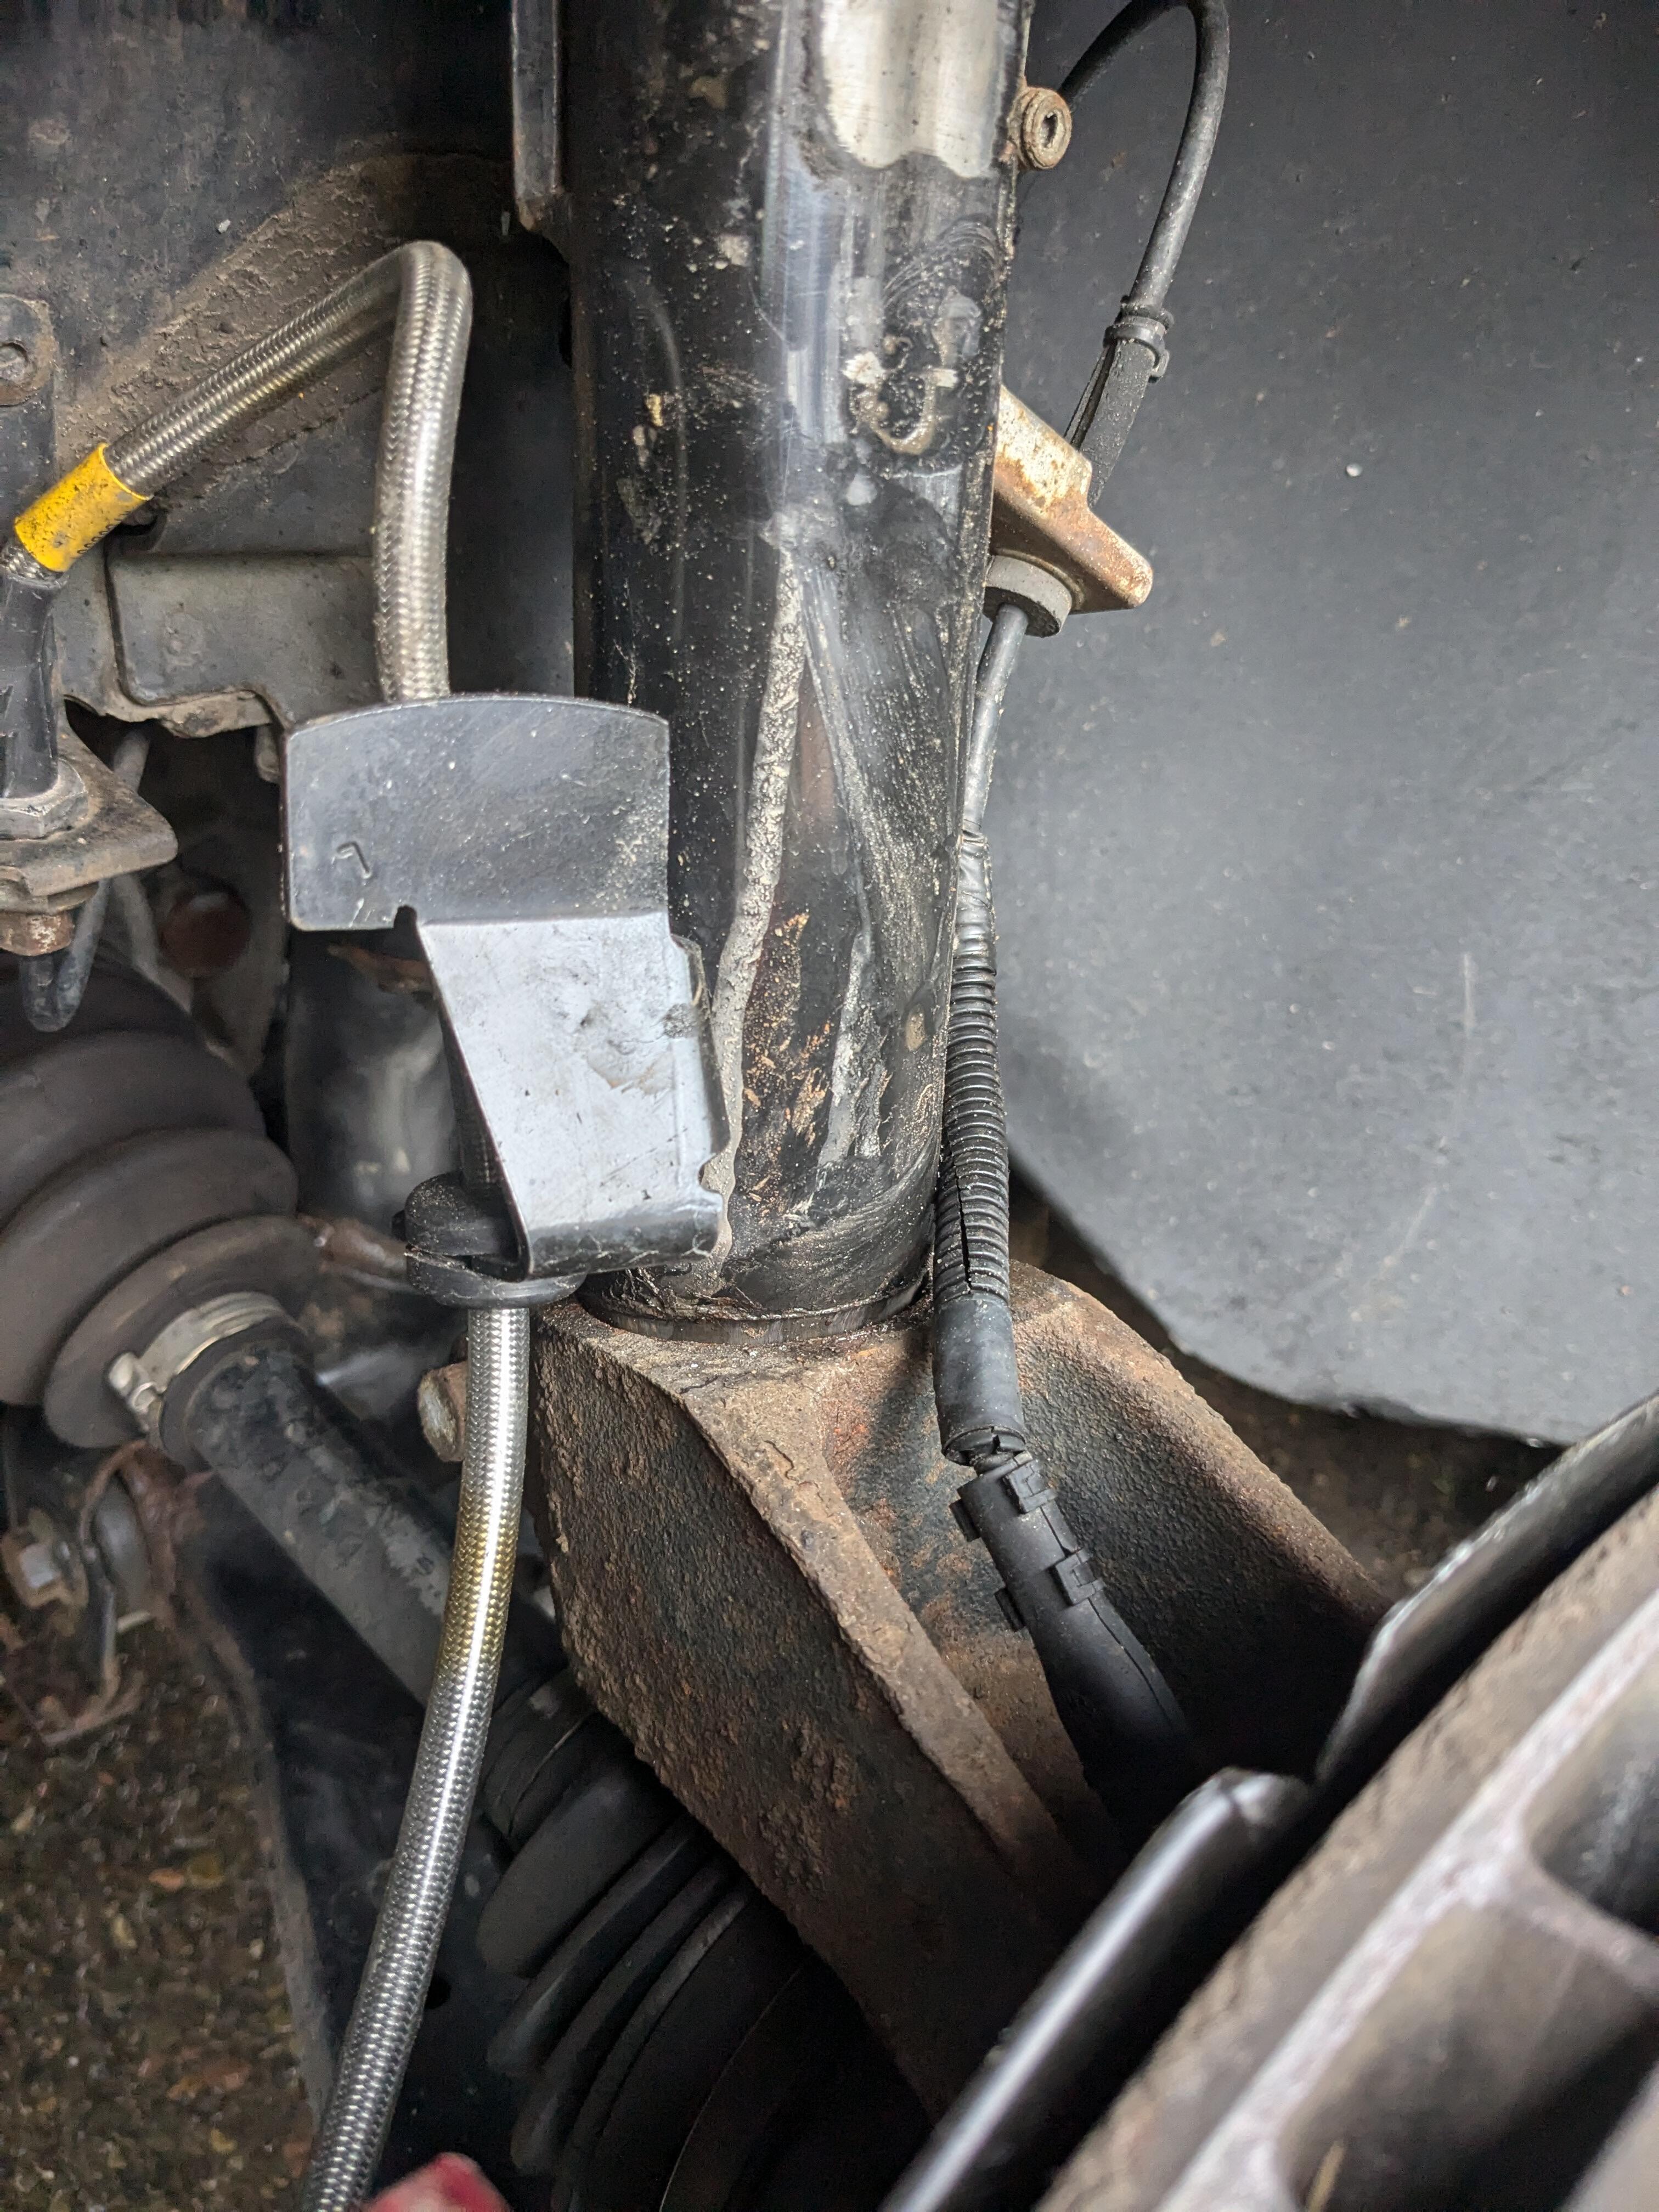
Hell of a day today. Left home with the Mrs. at 9am to head upstate for the annual Volvo car meet. We got about 30miles north & then the pickup died. I tried to fix it, but there was no spark & I had no parts to fix it on the spot. SO, we got towed back home around noon. I still wanted to get up to Ithaca for the meet, so repacked the C30 & left on my own, the Mrs. had had it. I got about 2 hours or so into the drive & then this happened Single lane traffic through a construction zone, basically we were all on the shoulder. Section of roadway heaved, broke the Tesla in front of me, I moved over as far as I could without hitting the concrete divide, and got the broken wheel & a bent strut tube Just a little extra camber I put the space saver on it & drove the remaining 90 miles at 40-45mph. That was excruciating, but at least I made it, and ppl up here were able to source a strut tube, so I can change that tomorrow, if all goes well. I'll have to drive downstate on the space saver, which won't be fun, but at least I won't need to be towed all the way home.


 1 point
 -
I don't think it's getting anywhere near $100k this time. Liquidity has been sucked out of markets and all classic car prices are down. I wouldn't be listing without a reserve in this market.1 point
-
1 pointDown under we called that outback engineering, love that you got it to run!1 point
-
1 pointSo I wanted to be sure the motor was still viable. So I hooked it up to a battery sitting on a trailer and spun it over with a remote starter switch. It spun freely with no plugs in it. So then I wanted to try to fire it over. It didn't have any carbs or exhaust on it. I messed with it for a while. Tried three different coils and two distributors called SteveJ to make sure I knew what I was doing. I then put the matchbox dizzy back in and got it to run on ether. I have a set of Ztherpay carbs that are evidently from 2011 that still look surprisingly good. They were on this engine and I will clean them up and reuse them for now 20231007_172650_447749883773934.mp4 It lives!!!1 point