Richie G
Supporting Member
-
Joined
-
Last visited
Everything posted by Richie G
-
I actually got it done with just stands in the back but im not a big guy so wiggling here and there made it work.
-
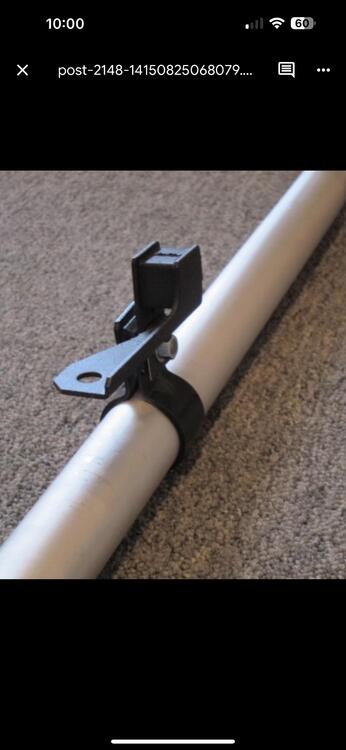
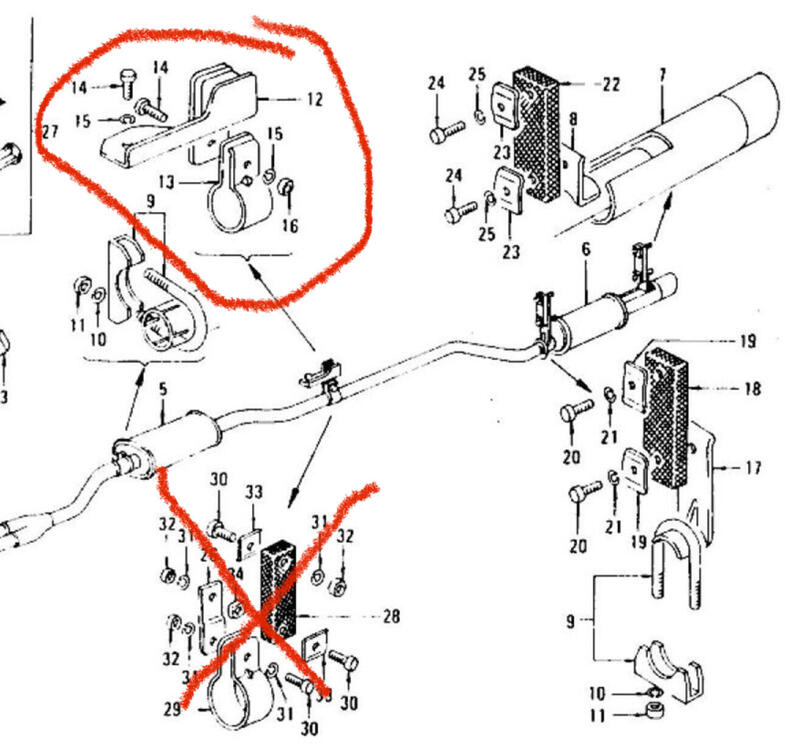
And once again same experience with Max. We went back and forth about instruction and how helpful they would be. Don't get me wrong, he was extremely easy to work with and very customer oriented but what I got was old pics from a rusted out car lol:

-
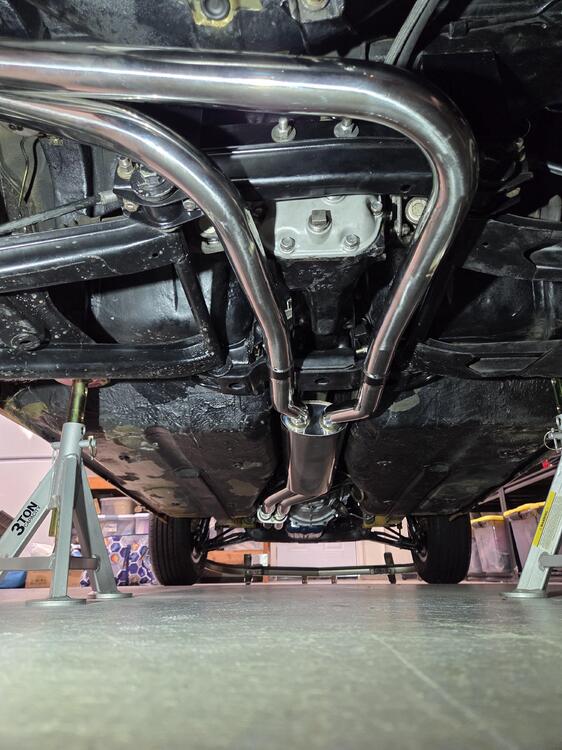
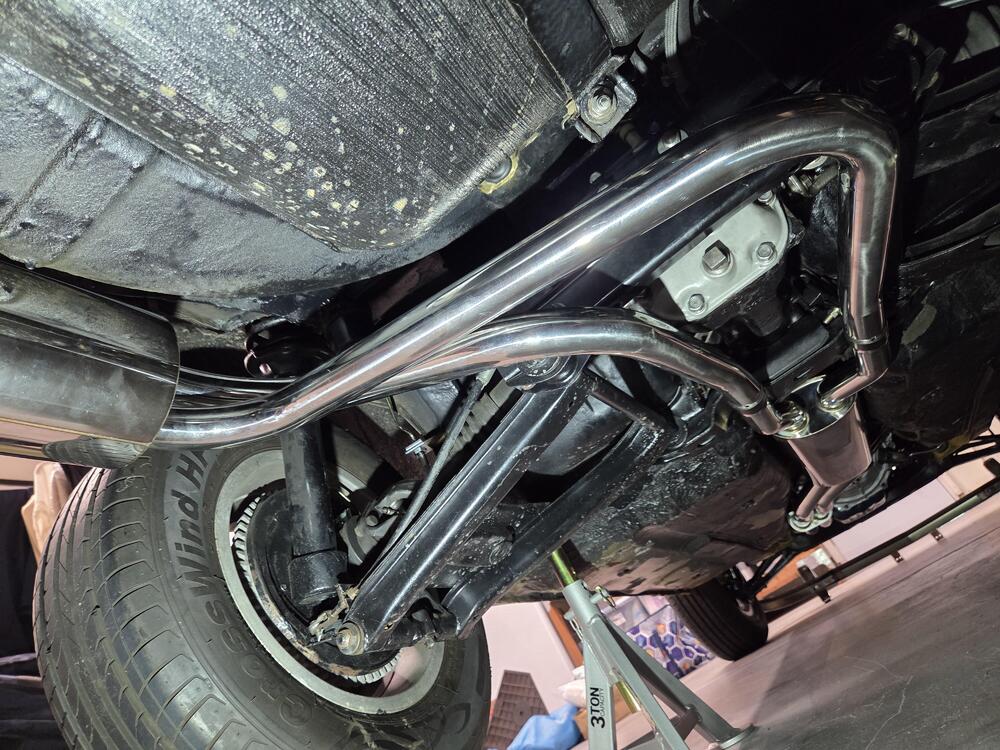
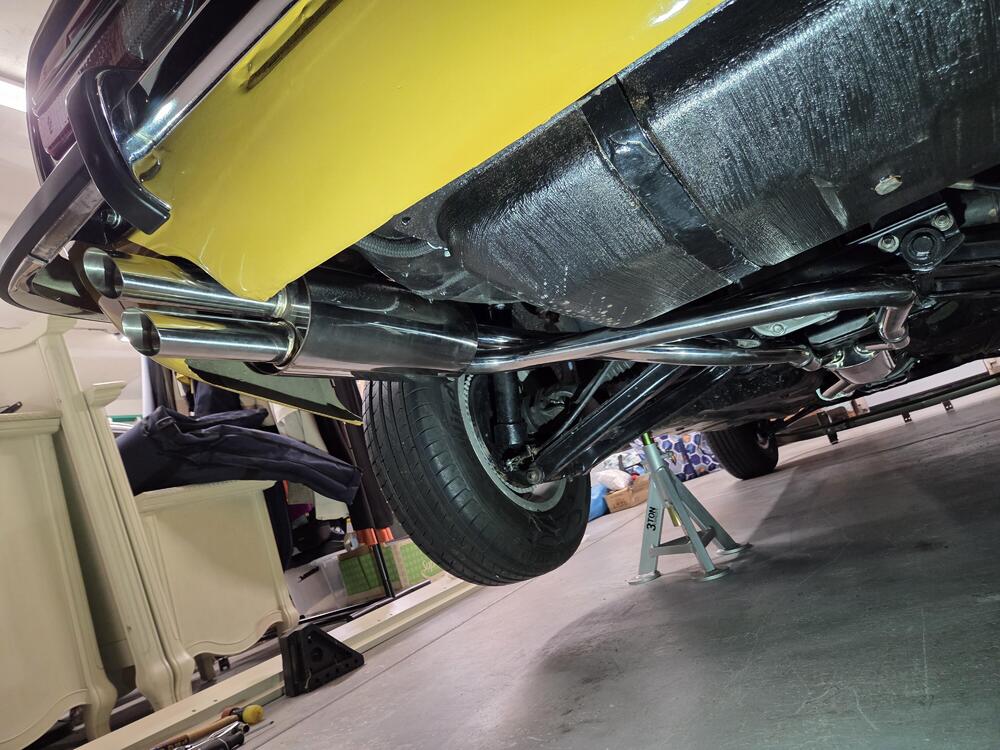
For whatever reason, when I hung the muffler from the original factory mounts, I was actually about two inches short of meeting those pipes together properly. What I would call the female side that was notched, actually had exposed opening, where you could see the edge of the Midpipe, so I had to seat the muffler section deeper. And then use some additional rubber mounts to build up where the hangars were for the muffler. Now I have to be honest, I don't know if the previous owner rewielded those brackets for the muffler hanger in the wrong position or not. Maybe that's what started all my problems in the first place. I'm happy with how it's all set up right now. But once I get a full road test, I'll make any adjustments as necessary.
-
That's great. So it seems you did have the exact same experience as me. I had told max, about four inches of extra length would be best based on what I observed. I also took some measurements and gave him some advice around bolt selection up above the diff so that you could actually install the hangers without having to drop it. I found M10 1.25 16 mm short bolts that were the perfect size to get the brackets on without removing the cross member.
-
WOW! awesome job, looks amazing.
-
Thanks, I fully restored the interior and the engine bay but still need to do the undercarriage stuff. Its far from perfect but I'm really proud of all the work I did as a DIY kind of guy. I'm still learning so much about the car and this place and others like it is the reason why. Thanks to all that have helped me on the way. SN 486 that's amazing, I'd love to get something that low and do it proper now that I've been through this one. I'm pretty good at the assembly side of things but wouldn't have the skills to do a bare metal ground up restoration not yet anyways :-)
-
lol. Its funny you say that, as part of my brake work i've spilled a little and you're right it sure works well lol.
-
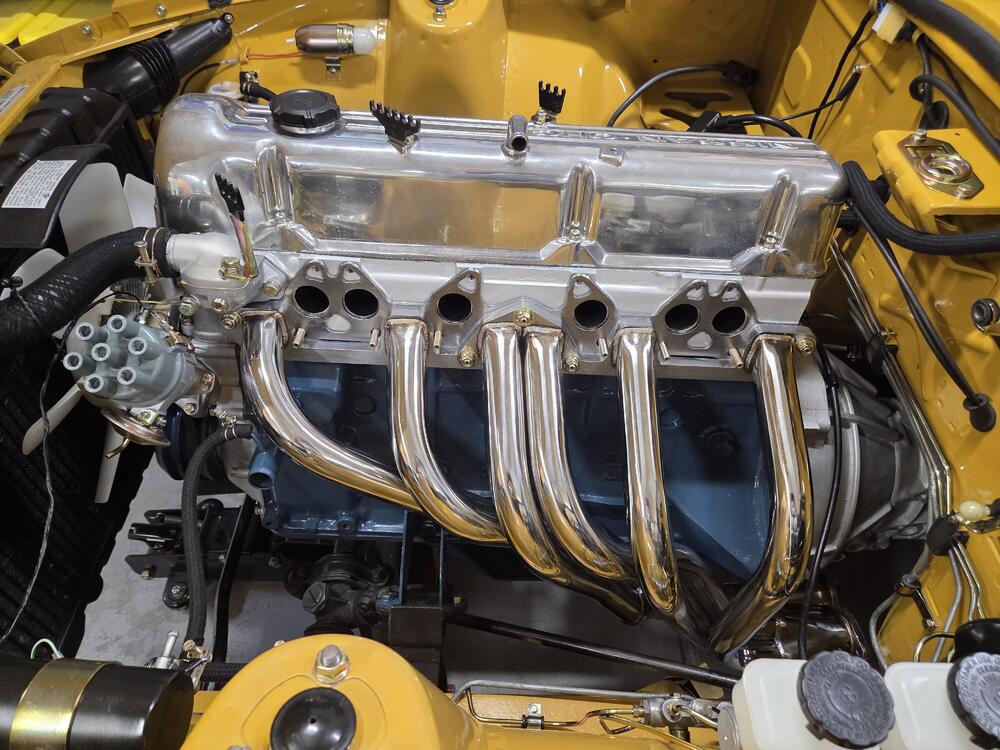
Not sure I ever posted the finished product. Completely spaced on that. I'm still working on finishing a few other things so haven't gotten to really fire it up yet. Carbs need rework and the brakes are all being redone before I can really test it out. I do have to say other than the fitment issue with the sections mating properly the rest was a snap for someone like me, the hangers and everything worked great. I may choose to get that section reworked at some point with some type of extension or cut and weld if need be but I'll cross that when i need to.
-
not really no. Basically they said you don't have to fully seat the pipes to make a good seal. I was like that sounds a little sketchy. Best of luck to you, let me know how it goes. Maybe my setup was weird due to PO mucking something up but I have a stock engine and it all seemed to line up pretty well so i didn't expect any surprises until i had one lol. Maybe I would have been ok with the tips where they were but it just felt like the age old exhaust into the cabin was something to deal with or an issue with exhaust up under the cowl all the time in traffic.
-
@L24ITS Wondering if you may run into the issue I had with mine. For me, once assembled I found that the mid pipe to tail pipe section could benefit from a longer tail pipe to allow for a deeper insertion of the mid pipes to the tail pipes to properly seat those together. My exhaust tip was barely out of the cowl so I had to compromise a little bit and slide the tail pipe section back towards the rear which then exposed a little bit of a leak which i had to seal with some exhaust tape around the section where they join together by the hangers.
-
I did not but they are not acting on the jet it's fully seated all the way to top even before I started leaning it out by raising the mixture screw. I'll try that though this weekend.
-
Thanks Yarb. I don't but that gives me a direction to pursue. I'm sure there's something around or someone I could ship to if there's nothing off the shelf.
-
I started putting all the brake lines back together and found a few leaks and was wondering if anyone knew of an option to use some type of flex braided hose in place of the hard lines for the small sections with the 90 degree turns? I'm talking about the two for the master cylinder to differential valve and especially the stupid S one in the back between splitter and proportioning valve. I've searched all over and the closest thing is a couple of trailer ones but they are all the wrong thread at 3/8 rather than m10. I guess a caliper hose could work but one end isn't the male inverted flare we need so some type of adapter?
-
Here's an update and maybe some help needed. I got myself a timing light with digital readout and advance setting. First thing I did was confirm where I was at idle with engine warmed up and it was way too advanced from what i can tell, maybe 30 degrees with mechanical advance removed and the vacuum port plugged. So i dialed it back down to get around 17 at 800 and it felt pretty smooth . I felt pretty good in that i could do this myself and a small win in that the dash tach matched the digital readout lol. So i proceeded to pull the 2 sparkplug and use the colortune method of checking mixture. As I suspected, the plug was black when i pulled it and this was only after running it about an hr earlier in the week in the garage after cleaning all the plugs. I inserted the colortune and it was yellow orange confirming the rich mixture. Heres where things got interesting. I started dialing the jet up to lean it out and the flame was losing its yellow flavor returning to a duller orange but it never got bunson blue from what i could tell even with the jet all the way seated at the top. And this happened to both 2 and 4 cylinders. the rear carb seemed to get closer in color but never quite there yet. Heres a video of #2 after fully seated jet 20260816_112443.mp4 and heres a video of #4 also fully seated 20260816_113113.mp4 The engine seems pretty stable and smooth and the exhaust now seems cleaner and throatier but i think there may be some more tweaking to do to get this just right. If someone can weigh in on these questions to help me with next steps that would be appreciated: Am i interpreting the color right? do these still look slightly rich? It seems odd to me that the jets are fully seated and the color is still slightly on the rich side assuming i am interpreting that correctly. I have SM needles in there BTW, could they be seated too high and need to be lowered to lean it out? Also there is no spillage from the float bowl and i believe levels should be correct based on seating the floats. Does the #2 cylinder video indicate a misfire? It doesnt seem as consistent as the #4. Coincidentally, if i do the piston pin lift test when i lift the front piston the idle will bump and lower to about where it was which i think is what we want. If i do the same to the rear carb the engine starts hesitating but never fully stalls. Does that confirm something up with the front carb matching the potential misfire in #2? I do have equal airflow at idle when checking with flow meter. Thanks for any advice on next steps, I'm really trying to learn how to do all of this and i think i have the basics and am making progress. You all are the reason why.
-
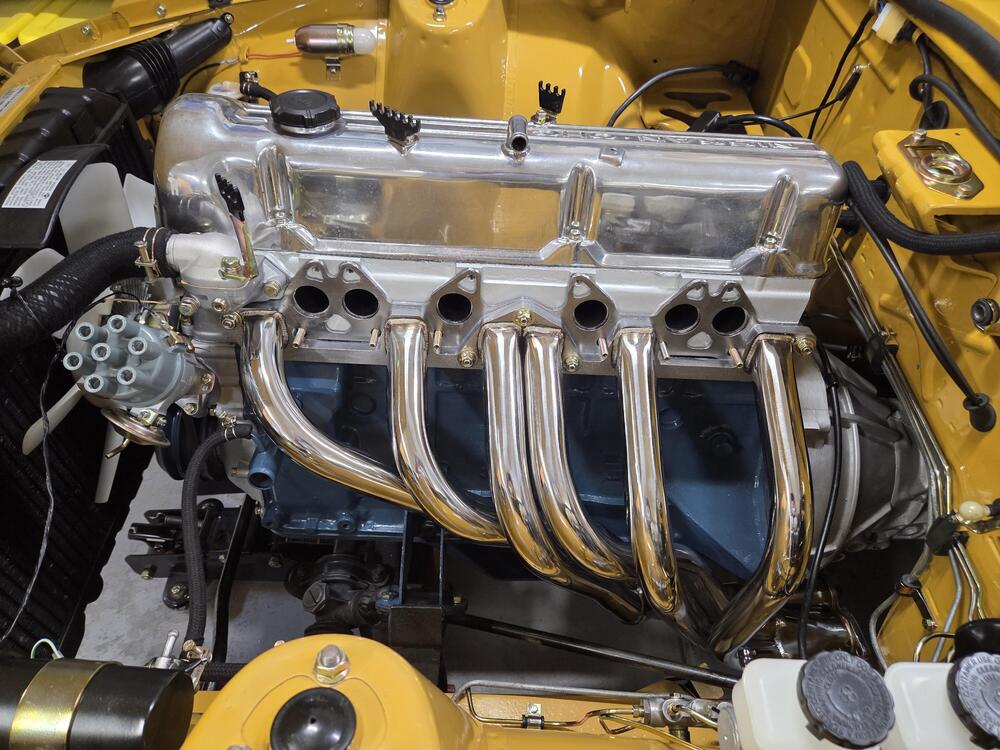
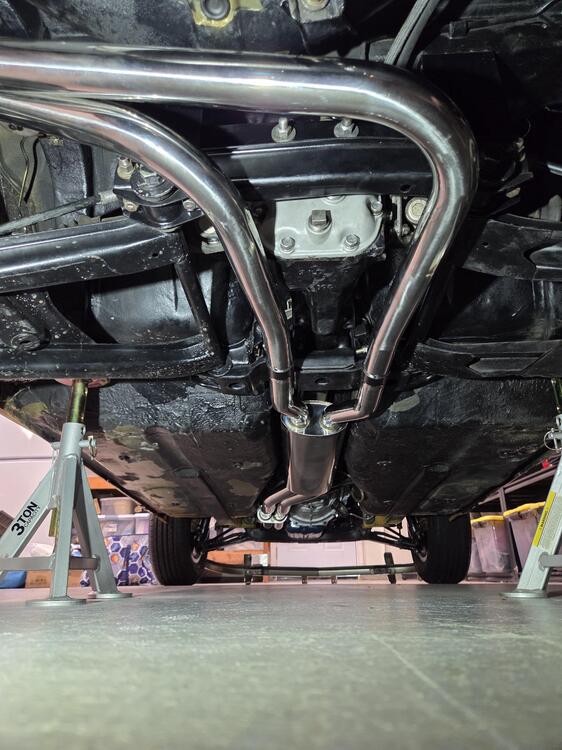
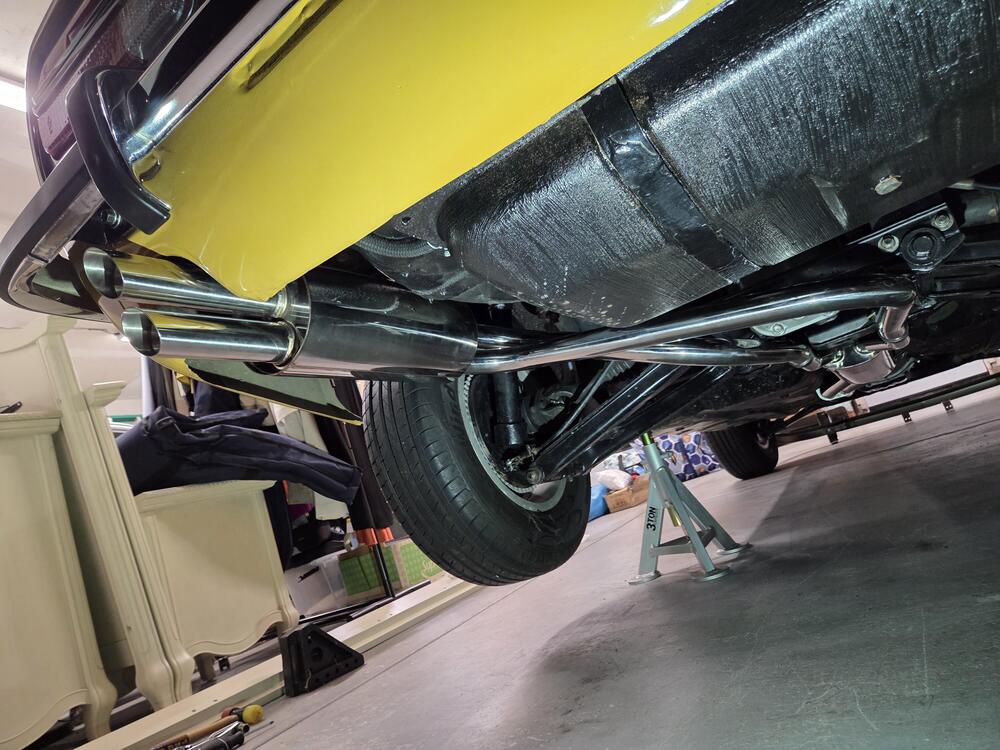
Actually I went with the full system from resurrected, headers to tips. It was extremely easy for someone like me, no need to weld anything custom, fit all the factory hangers, came with everything. I had purchased them during last black Friday sale at a deep discount. https://resurrectedclassics.com/collections/engine/products/stainless-steel-dual-exhaust-system-s30z-240z-260z-280z-datsun-1970-1978-polished
-
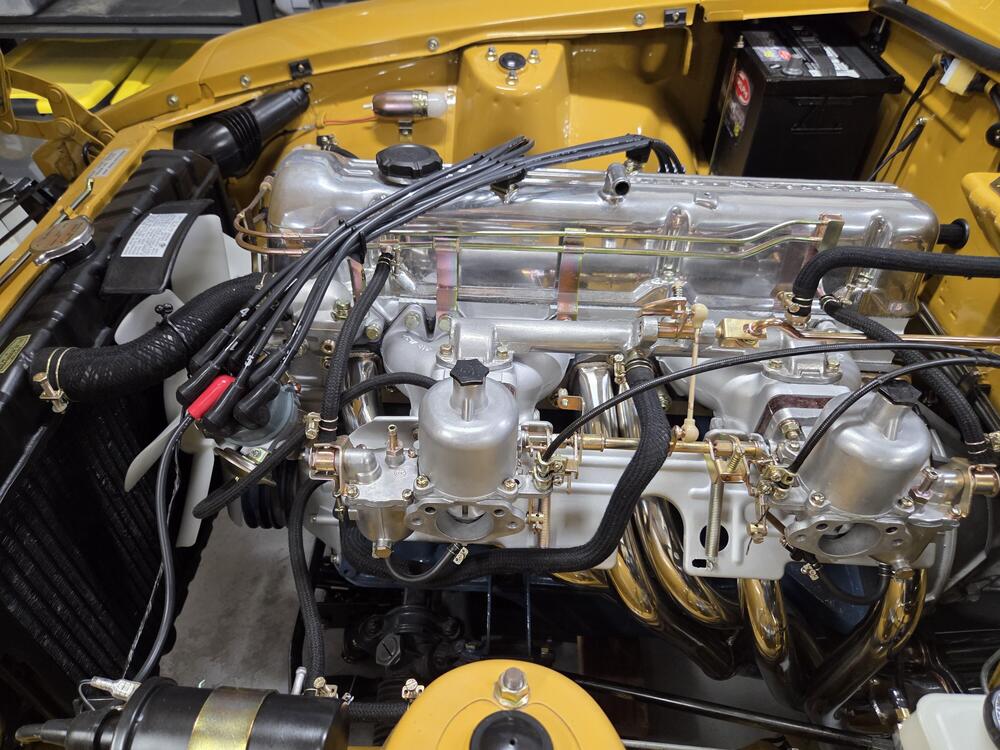
Thanks. I've been working so hard taking it all apart, replating, cleaning, reinstalling it all. Hopefully it runs or i have to trailer it to the show lol. Better pic attached.
-
Thanks all. Well, I think I made some progress here by tweaking as needed until its running smooth. Both carbs are air balanced where it sits and it starts immediately with a single flip of the key when engine is cold so that's good I would think lol. I have yet to play with any fine tuning of mixture and probably need to check timing again to be sure its all still where it should be. My only rpm gauge at the moment is the dash and not exactly sure how accurate that could be. I have a timing light with rpm meter on its way to dial it in and then move to mixture. I really appreciate all the help and guidance. Maybe someone with good ears can check out how this sounds in this small video? I can't tell a ping from a knock lol :-) This is taken at what the gauge in the dash says is ~1k with the temp almost at normal operating. 20260811_173616.mp4
-
Thanks for the thread post, will get to it in a moment, but this looks like the adjustment screw for the smog apparatus not the throttle one if I'm not mistaken. This particular screw doesn't matter in my setup as I pulled all the smog stuff.
-
I was thinking about that, just didn't have something in the moment. I'm going to poke around a little, maybe even a mirror like on a dental tool type situation.
-
As part of my engine bay rebuild, I tore apart everything to get it properly plated. That included the carbs and all associated linkages. I'm at the point I'm putting it back together and ready to balance and set fuel mixture from scratch. I've read a bunch of the articles around the necessary steps but one step has me wondering if there is alternate information out there I missed that may help me. From what I gather, there are a few "pre-start" steps to put the carbs in so you get close enough to get a smooth first start. Loosen the center linkage nuts, back off the fast idle screw, back off the rear carb balance screw, seat the jets to top then back off 2 turns, and back off the throttle screws to initial contact then turn down 1.5 turns. I have no smog setup so the other balance screw does nothing. That last one is where the question comes in. With all the linkages in the way and my old eyes its really hard to see when the throttle screw is making initial contact with the linkage. I've tried getting stubby fingers up in there to feel the screw head, I've tried to hold the linkage to feel the initial resistance when the screw touched, etc. So my question is, is there a way to seat the throttle screw all the way down and back it off a certain number of turns like we do the jets rather than this method? It would be so much easier to just screw it all the way in and back it out a certain amount than trying to determine initial contact when you cant see anything. I'm not yet good enough to tune by ear so these type of "mechanical' tips seem to work best for me. In fact I stumbled onto that colortune set of instructions for fuel mixture and if it works as advertised its perfect for someone like me. "Seeing" the ignition seems a lot easier than trying to listen to it for someone like me without the experience of the gang here. I've ordered a set that will hopefully arrive this week.
-
I had a similar problem after rebuilding / replating everything. I couldn't get the clunk when doing the drop test on the pistons. Had to back off the jet nozzle nut to reseat the jets and viola lots of clunk in both pistons.
-
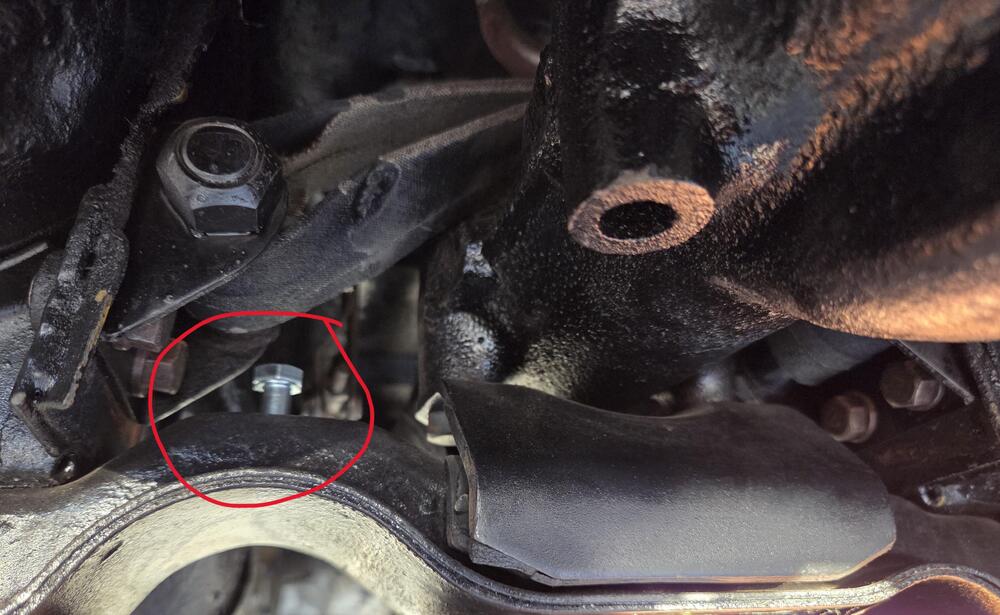
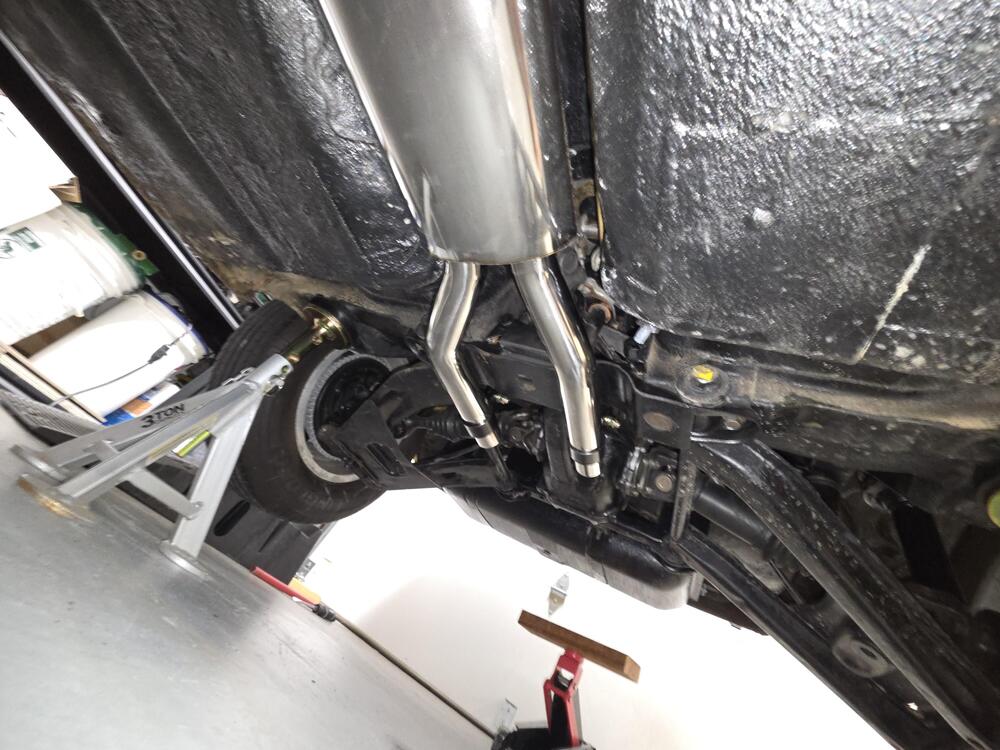
Finishing this thread up. Figured it all out and maybe this helps the next DIY guy. I found M10 1.25 16 mm short bolts that were the perfect size to get the brackets on without removing the cross member. Took some patience to make the turns ever so small at a time, but eventually worked well. Thanks for all you do everyone. .
-
LOL!!! Actually I think its an M10 1.25 from doing some research. The problem was I'm trying to take a shortcut and do this without removing the crossmember or anything else needed. My M10 was too long (that's what she said) so it wouldn't catch the threads as the cap was hitting the side of the member mount. Waiting for a shorter one to try again in hopes I can wiggle this in without too much extra work.
-
Thanks @Yarb. Went with this one which allows me to try various ones right in the member. https://a.co/d/0alQcI7M
-
This is probably an odd question, but does anyone know what the right bolt is for the two captive nuts on the top of the crossmember (71)? I bought the exhaust from resurrected classics and it came with mounting brackets and hangers that use the nuts on either side of the crossmember for the midpipe to dual exhaust connection. I've been under there a bit tonight and my neck and back are killing me. I've tried all the bolts they sent and none of them are right. I think what they gave me are m8 1.0 and they just drop to the bottom seemingly too "skinny" for the opening. I tried what i think was an m10 from my bag of tricks and it seemed too big. I need that goldilocks bolt I guess 😄