Leaderboard
-
Terrapin Z
 Subscriber
 9Points1,333Posts
 -
conedodger
Free Member5Points12,513Posts -
duffymahoney
Free Member4Points961Posts -
grannyknot
Free Member4Points5,158Posts


Popular Content
Showing content with the highest reputation on 05/04/2024 in Posts
-
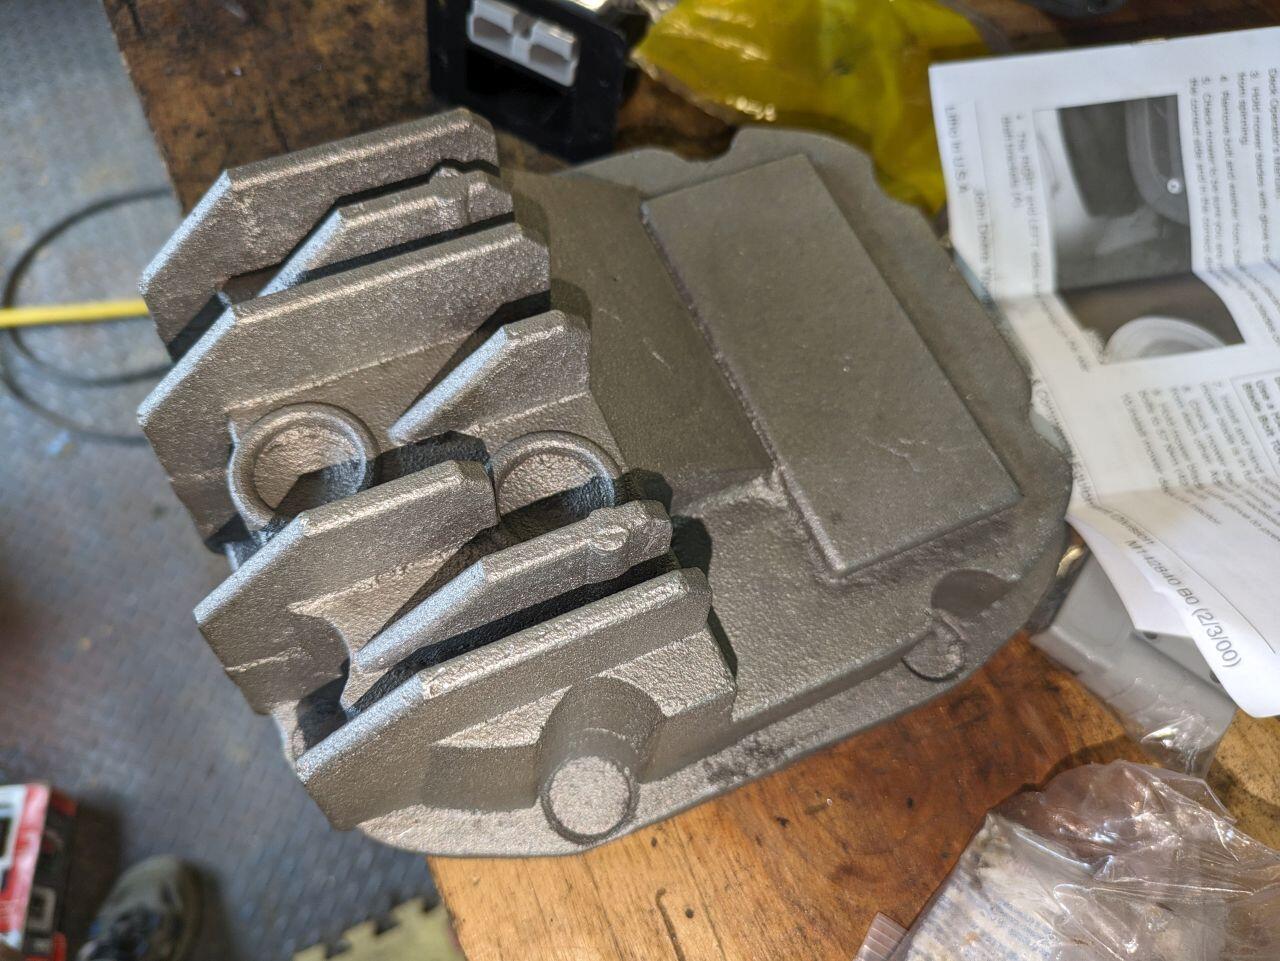
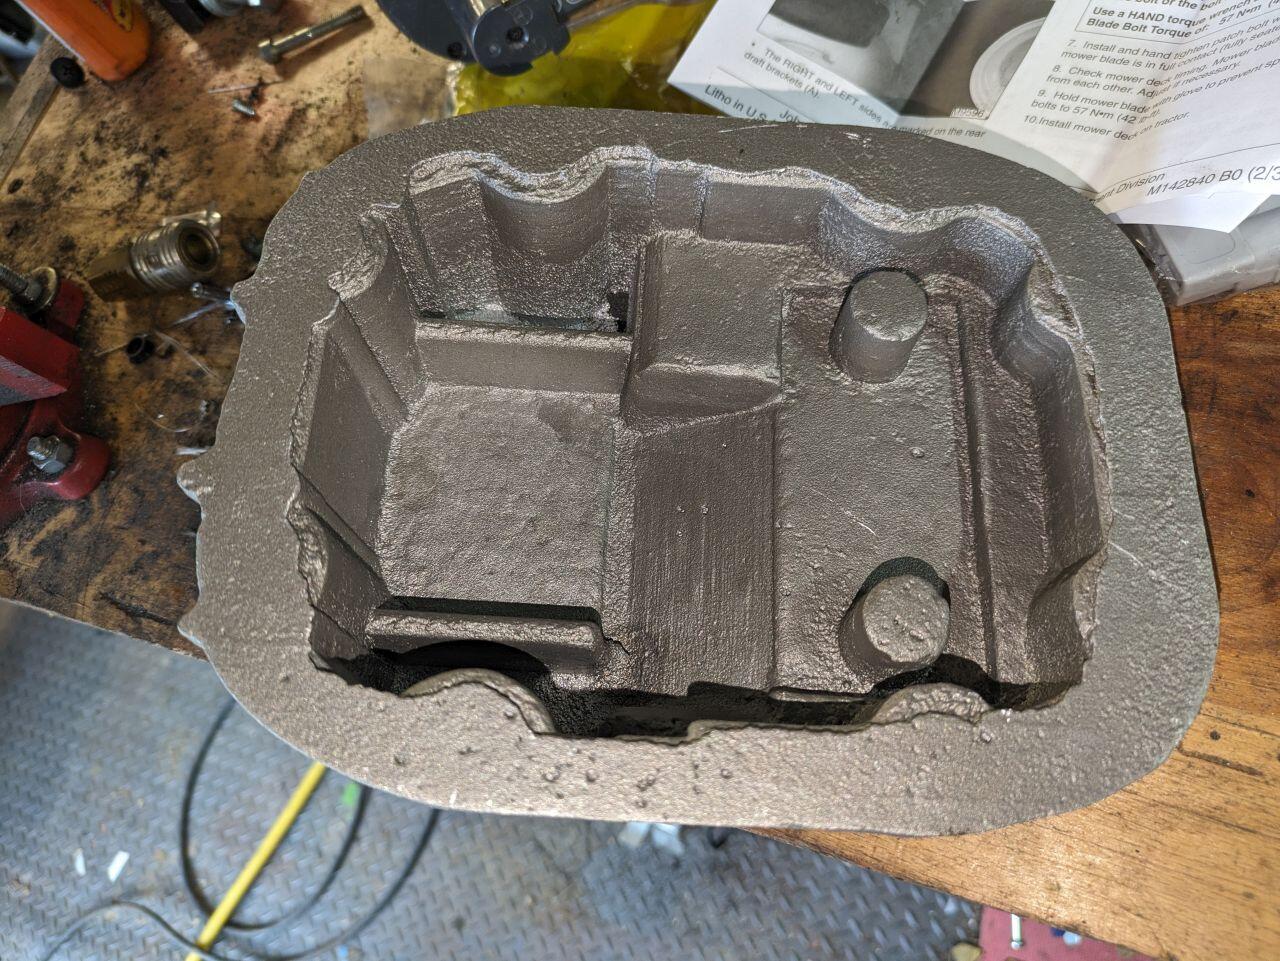
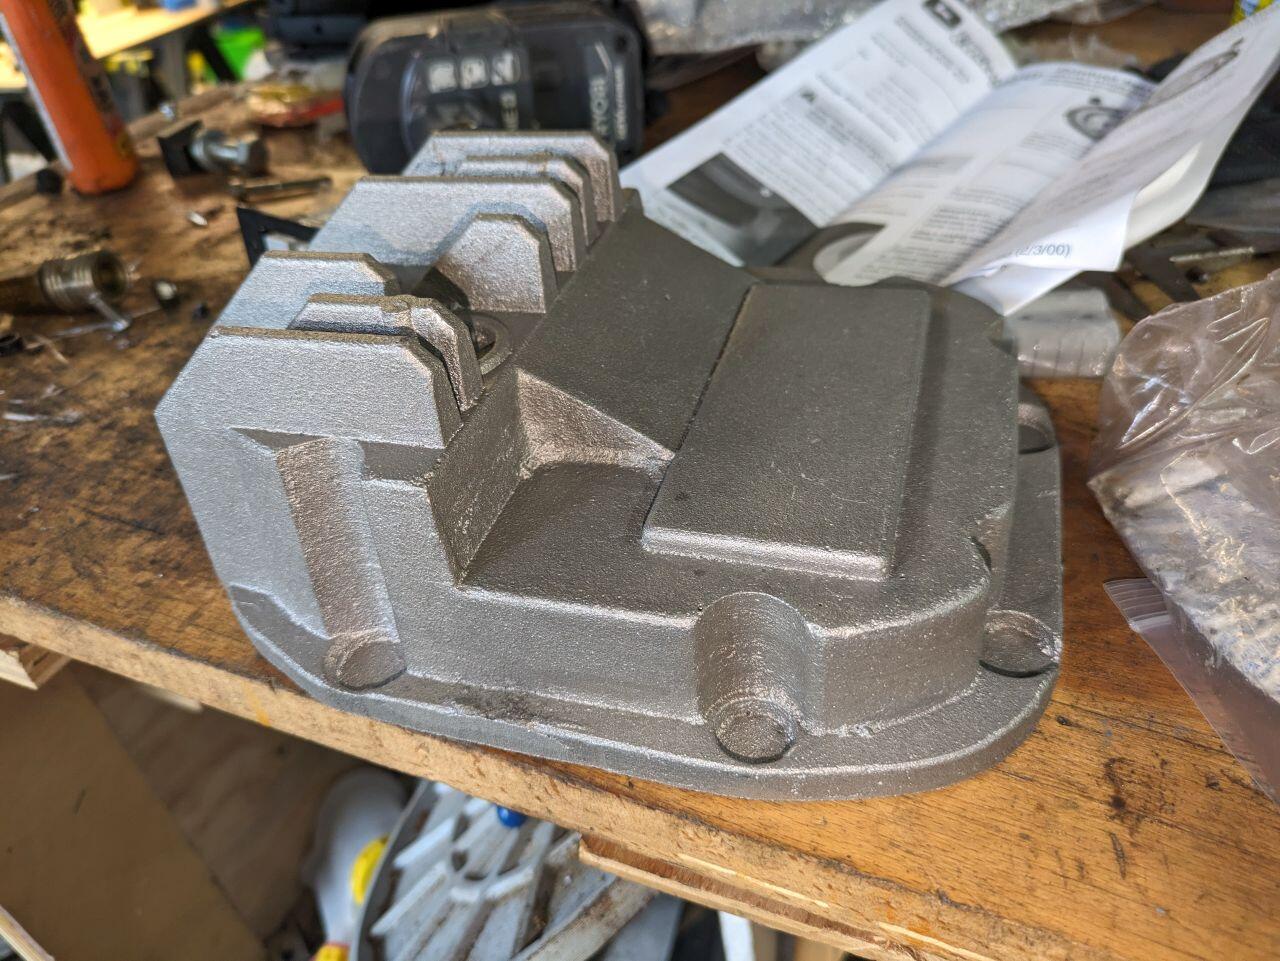
4 pointsI was just installing the differential with the original cover when the post man pulled up with a package. It came to a little more than expected at around $60 plus $23 S&H, and will need a lot of post-casting cleanup but for a first custom made part, I'm more than satisfied.


 4 points
 -
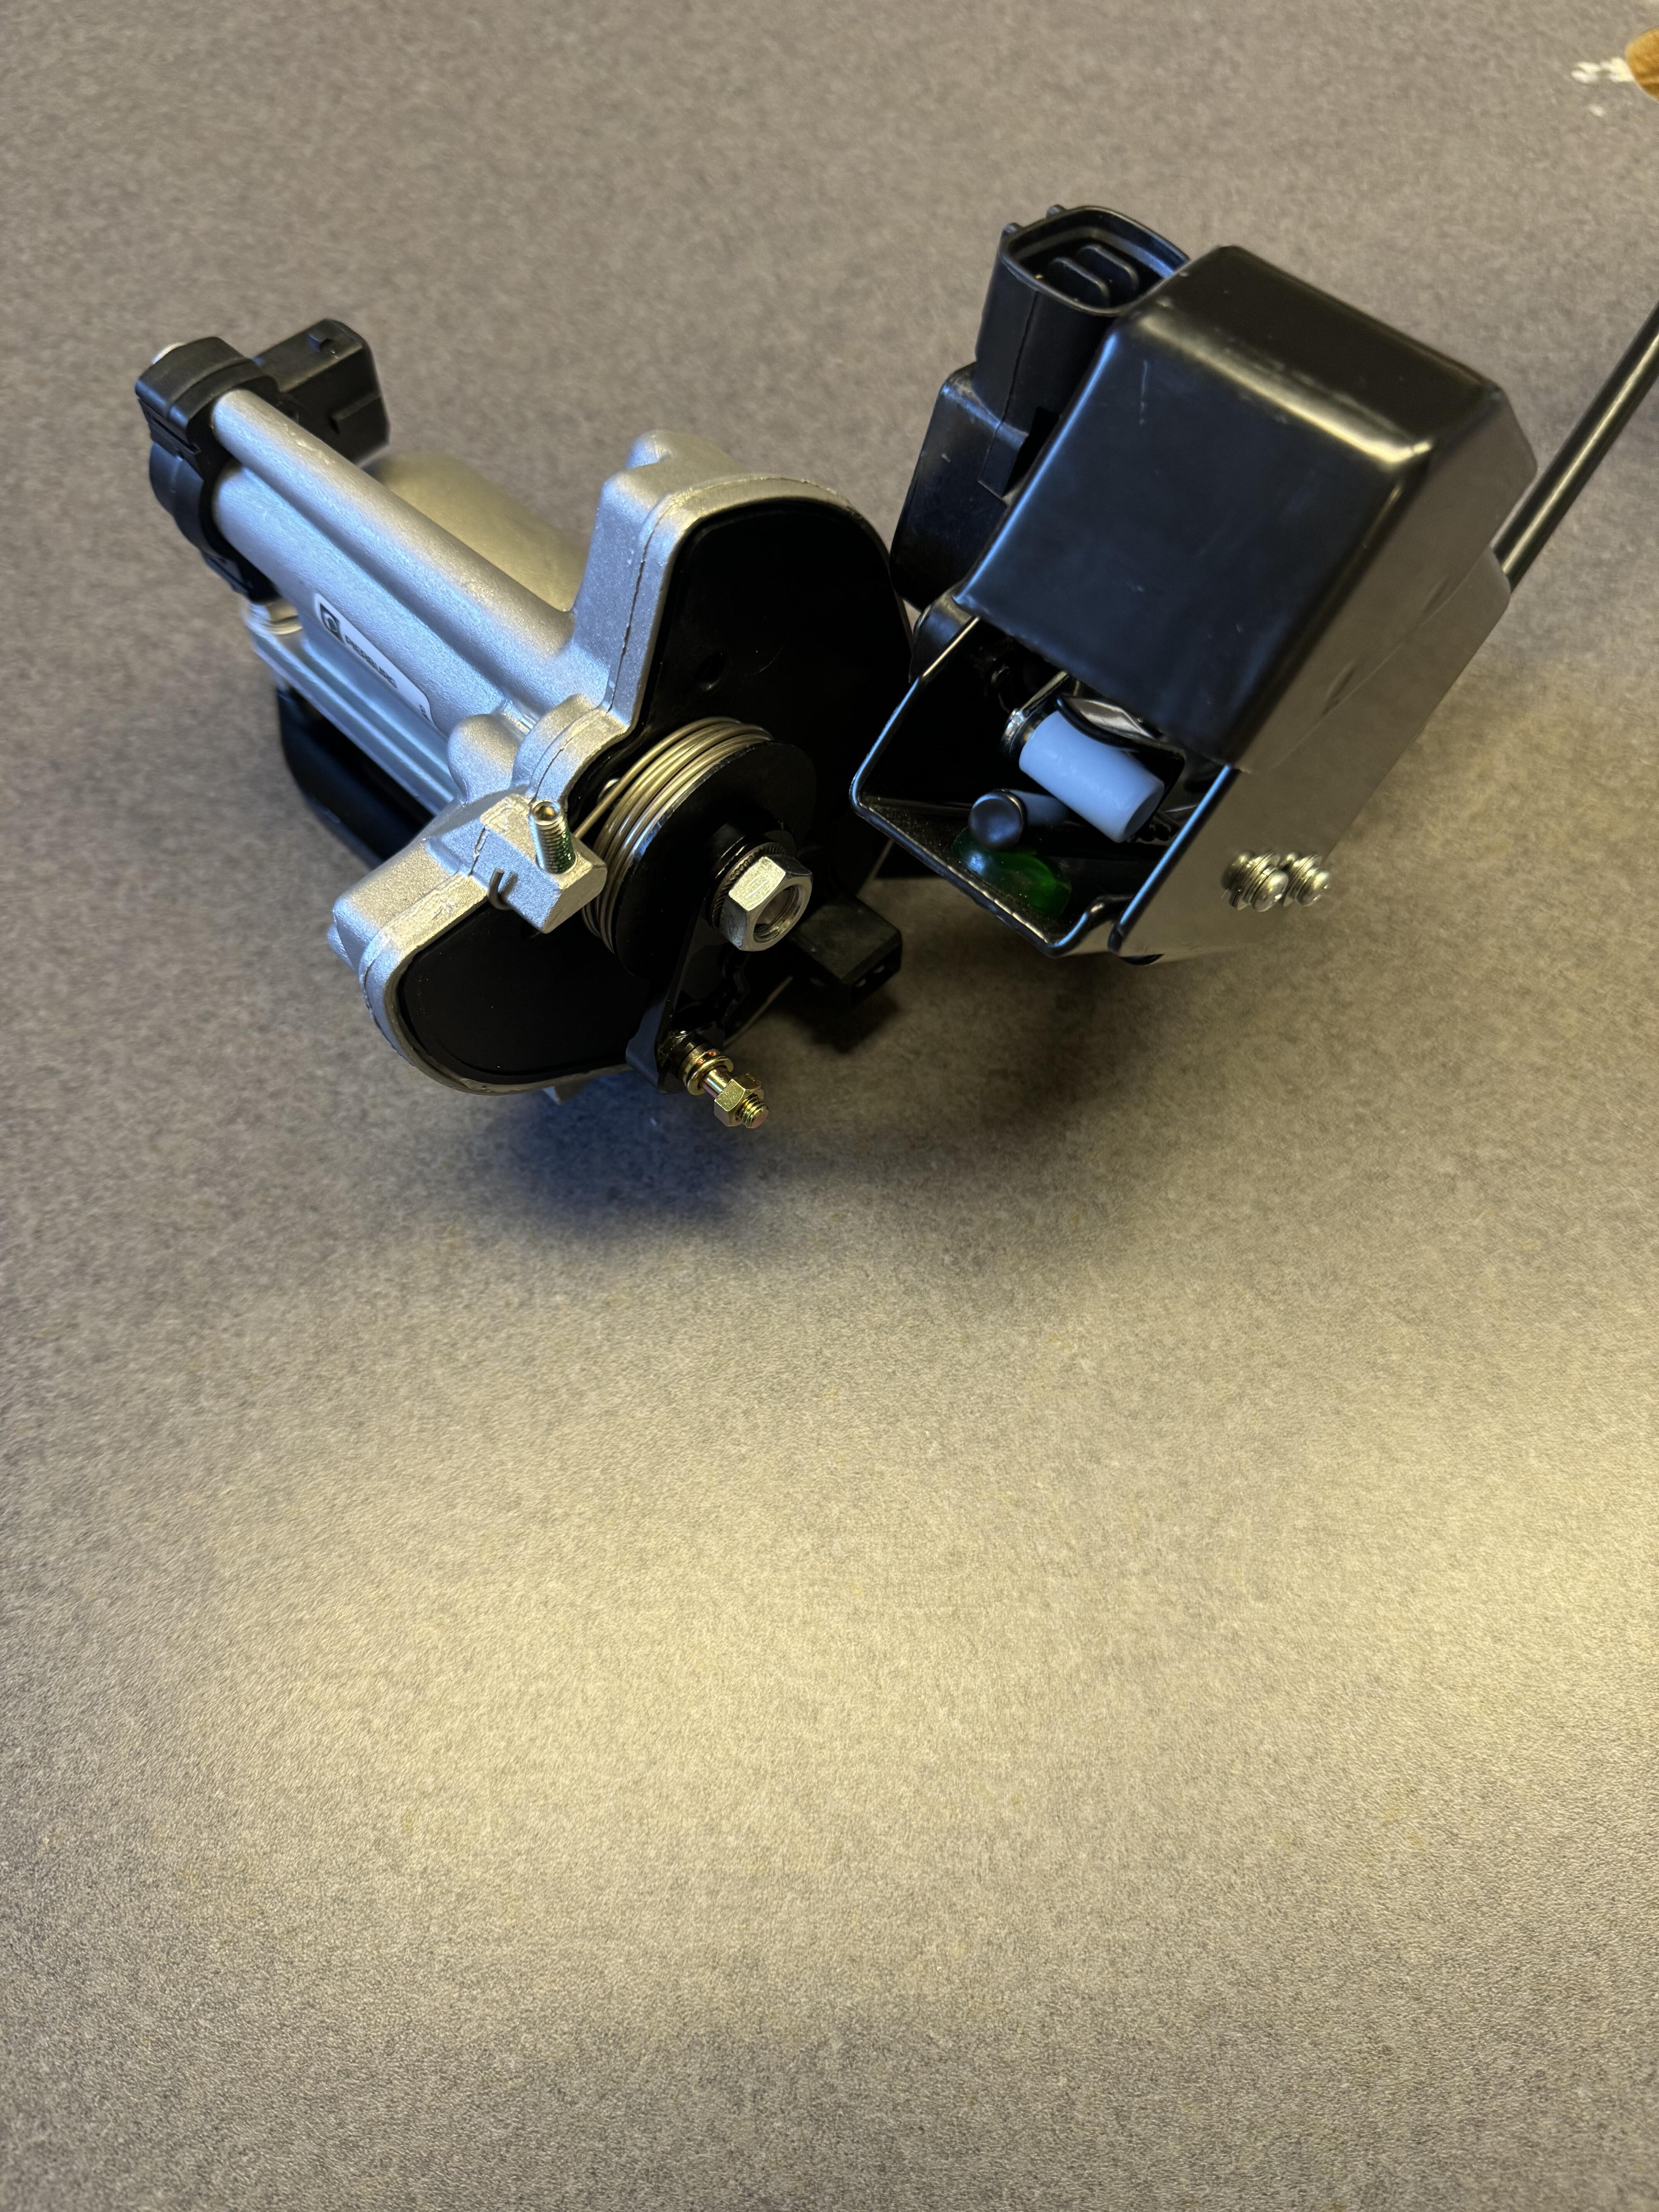
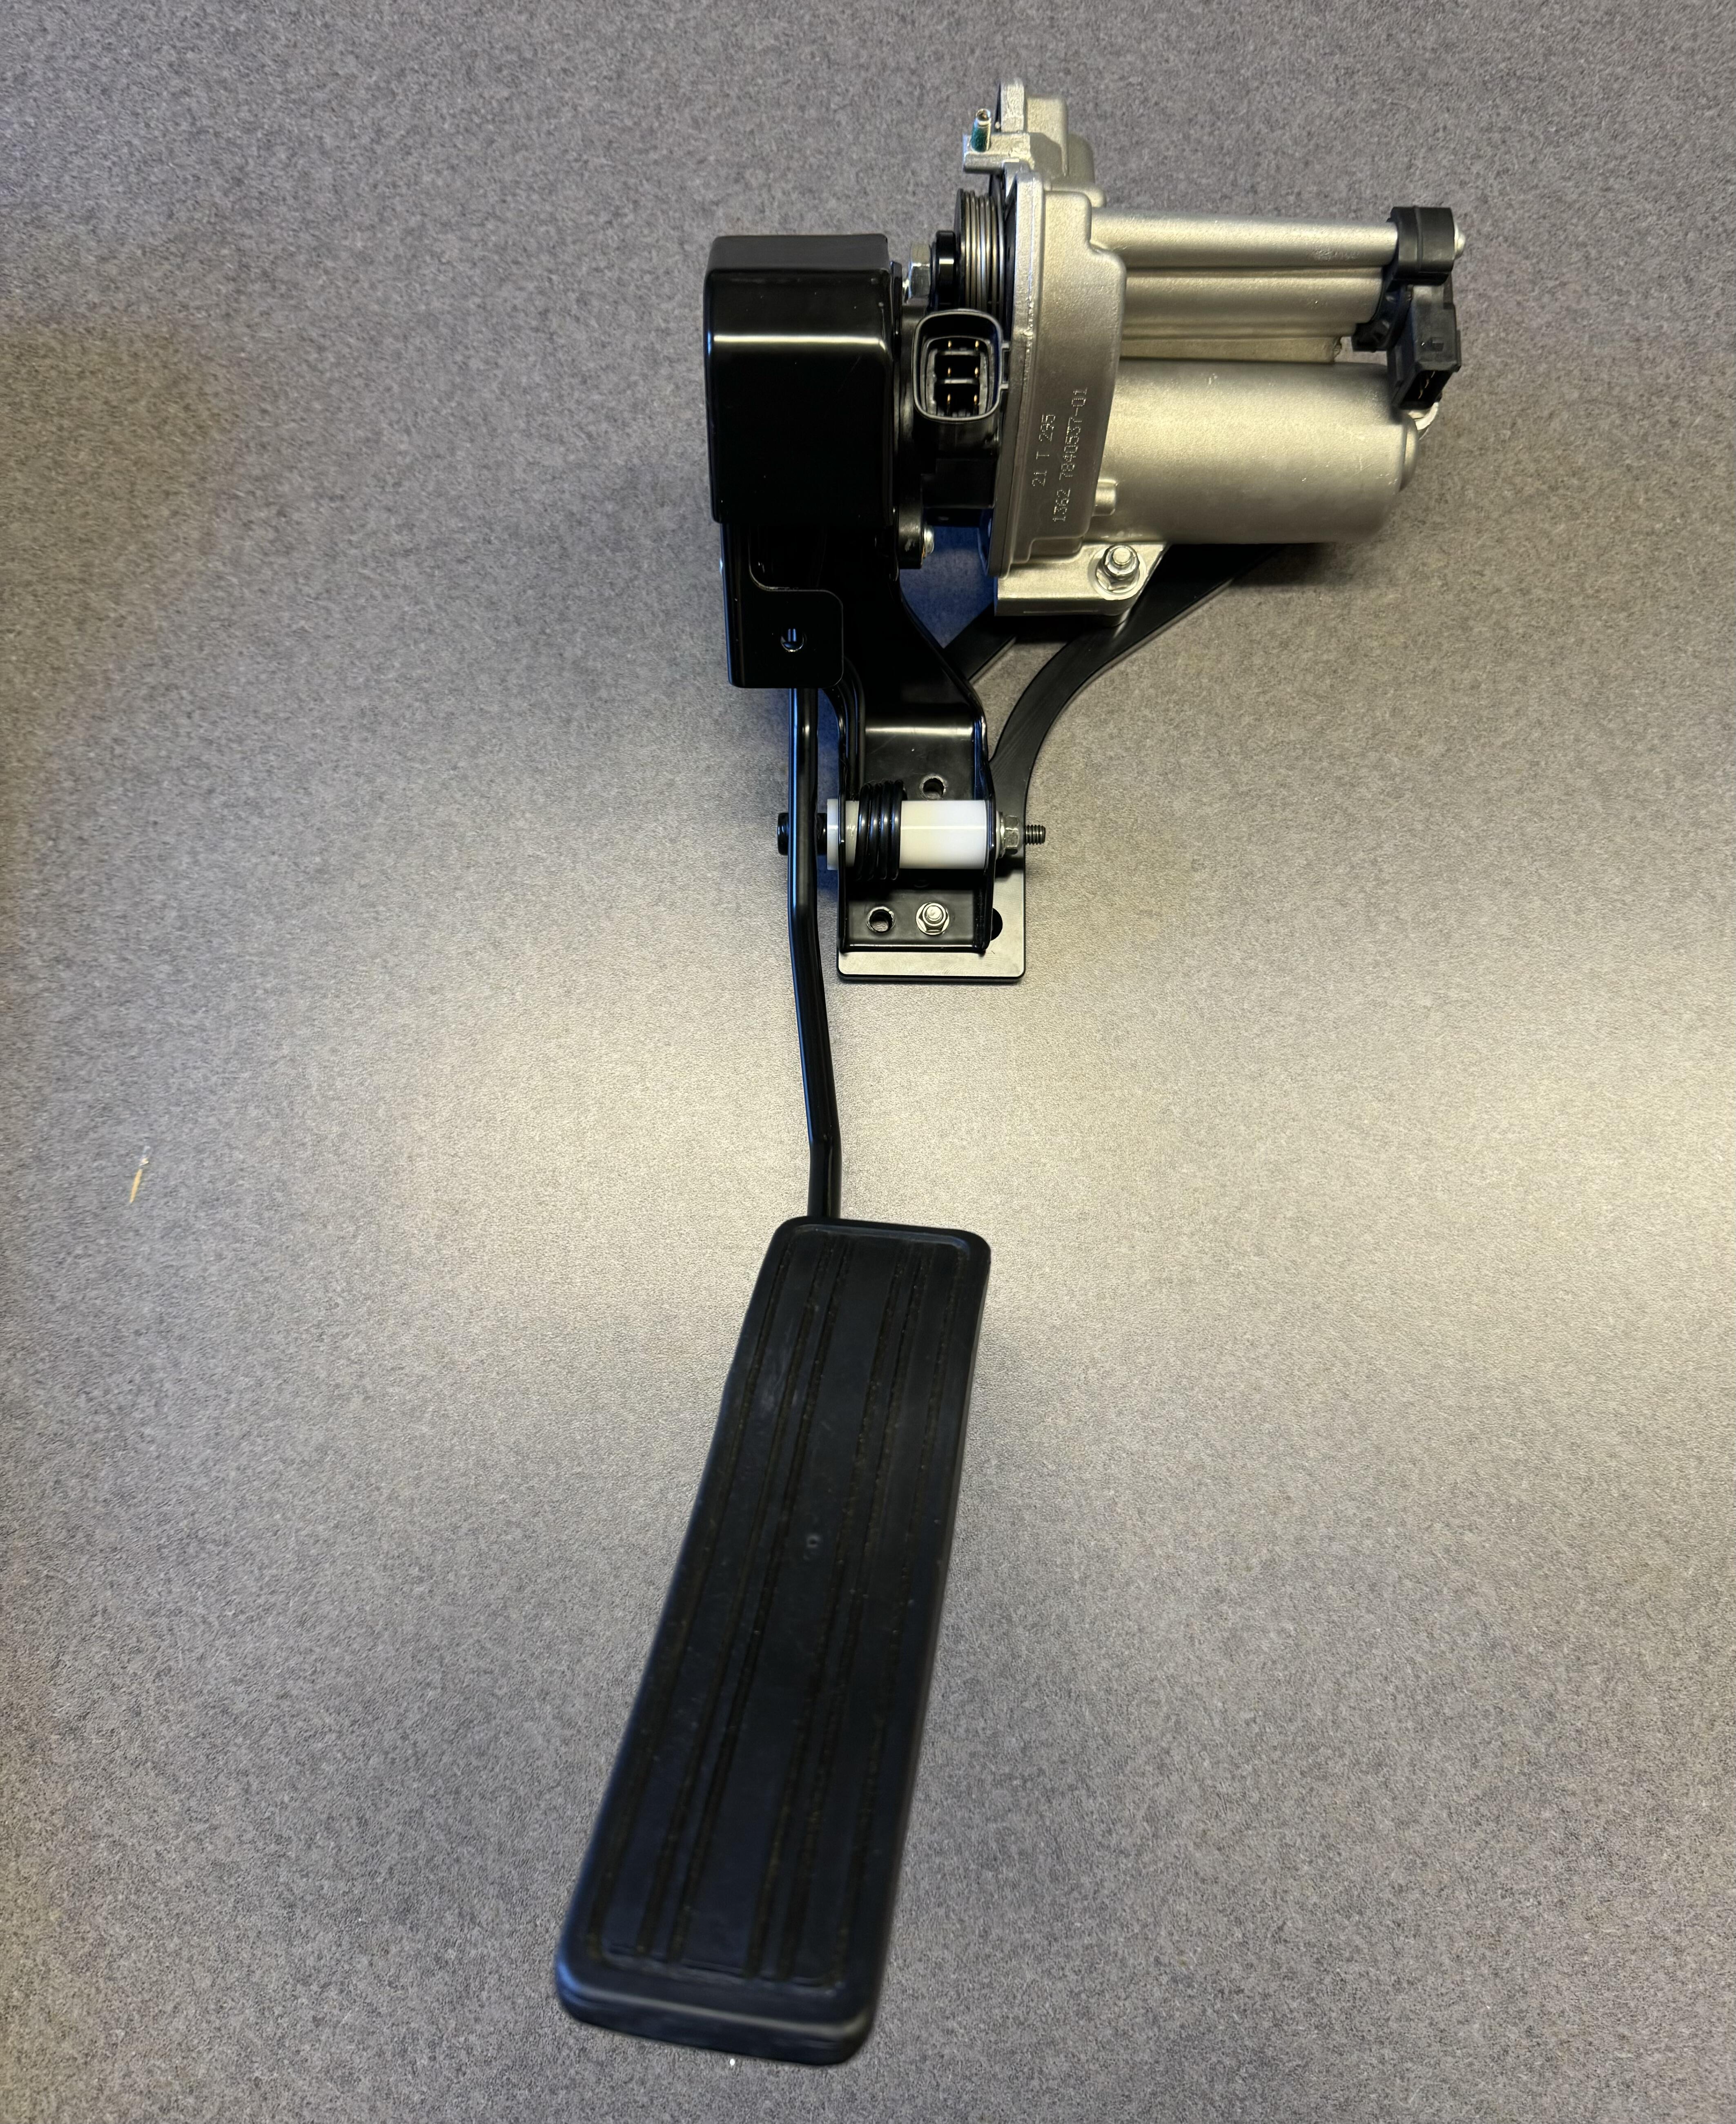
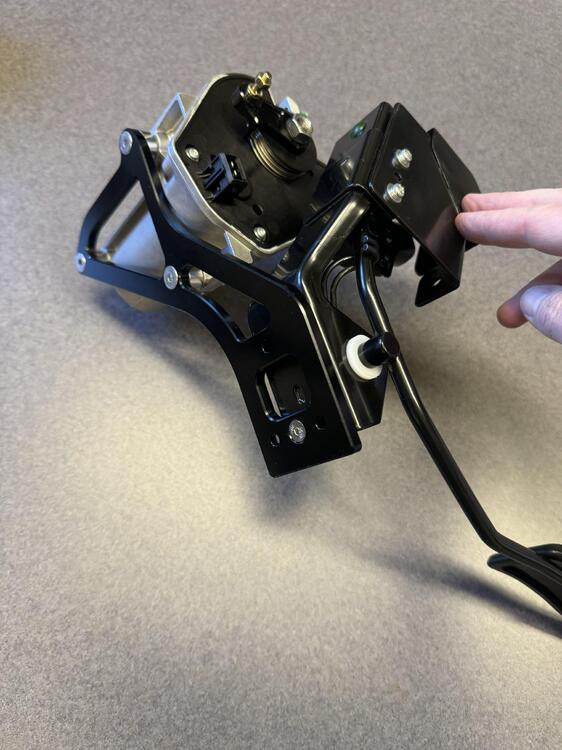
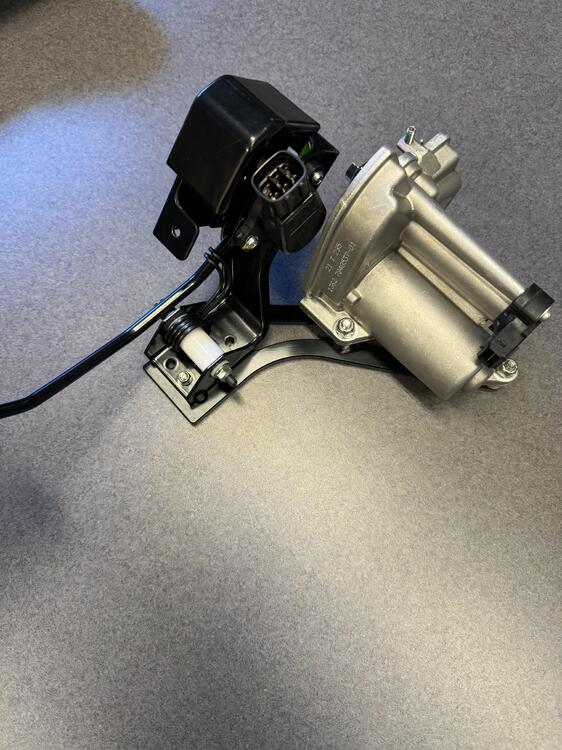
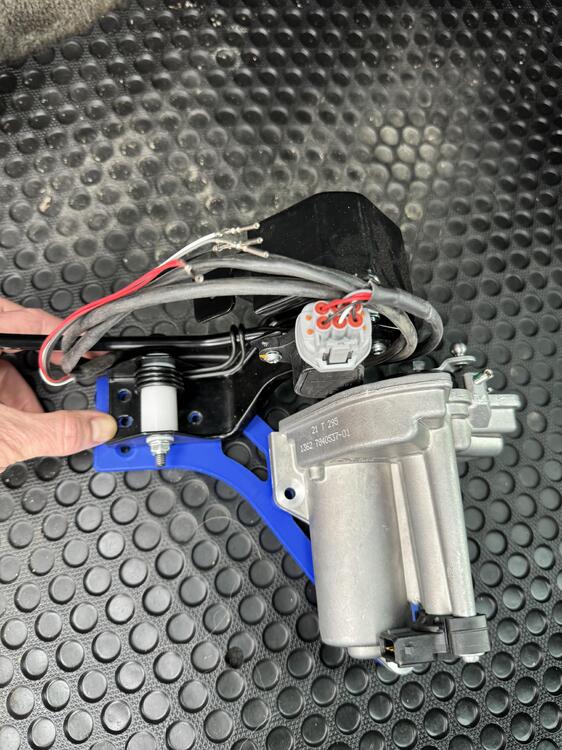
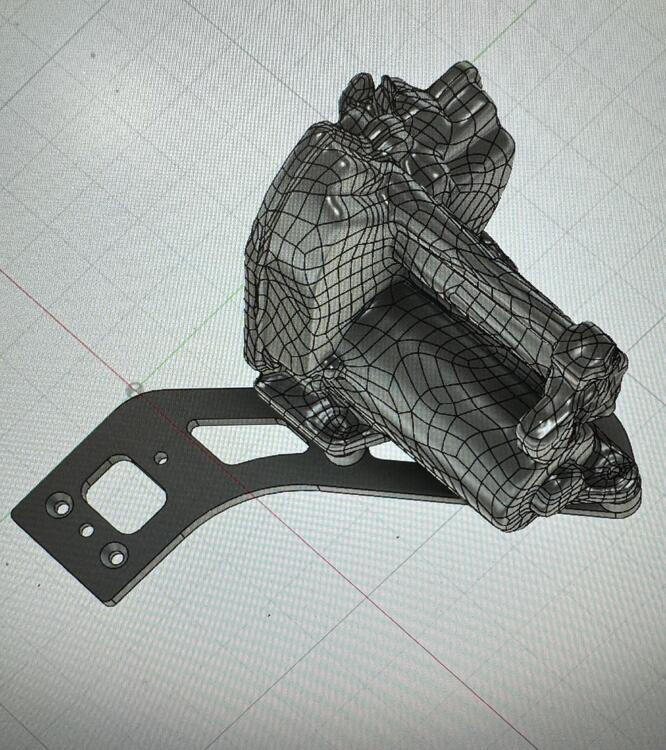
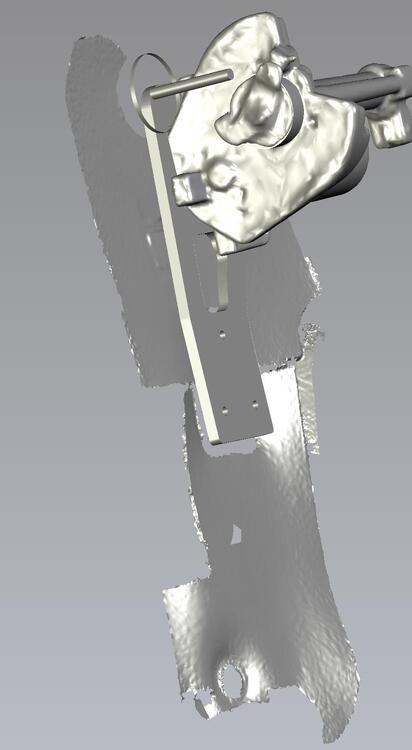
4 pointsSomething fun I have been working on! I really want drive by wire on my 240z. But figuring out a location for the actuator has been tough to say the least. I don’t want it hanging over the intake. This is a 100% bolt in adapter featuring a BMW 6 cylinder actuator and a 350z pedal. This will attach to stock linkage and drive my ITBs. Hopefully it works! The pivot arcs a far bit, so that might not work and the pedal mount might flex too much? Time will tell. This would allow me modern cold starts, any sort of progressive pedal movement I could want. Full idle control, traction control, valet mode, cruise control and way easier tuning. We 3D scanned the pedal area and the actuator to mock it all up in CAD! All of this is 5axis cut out of 6061.


 4 points
 -
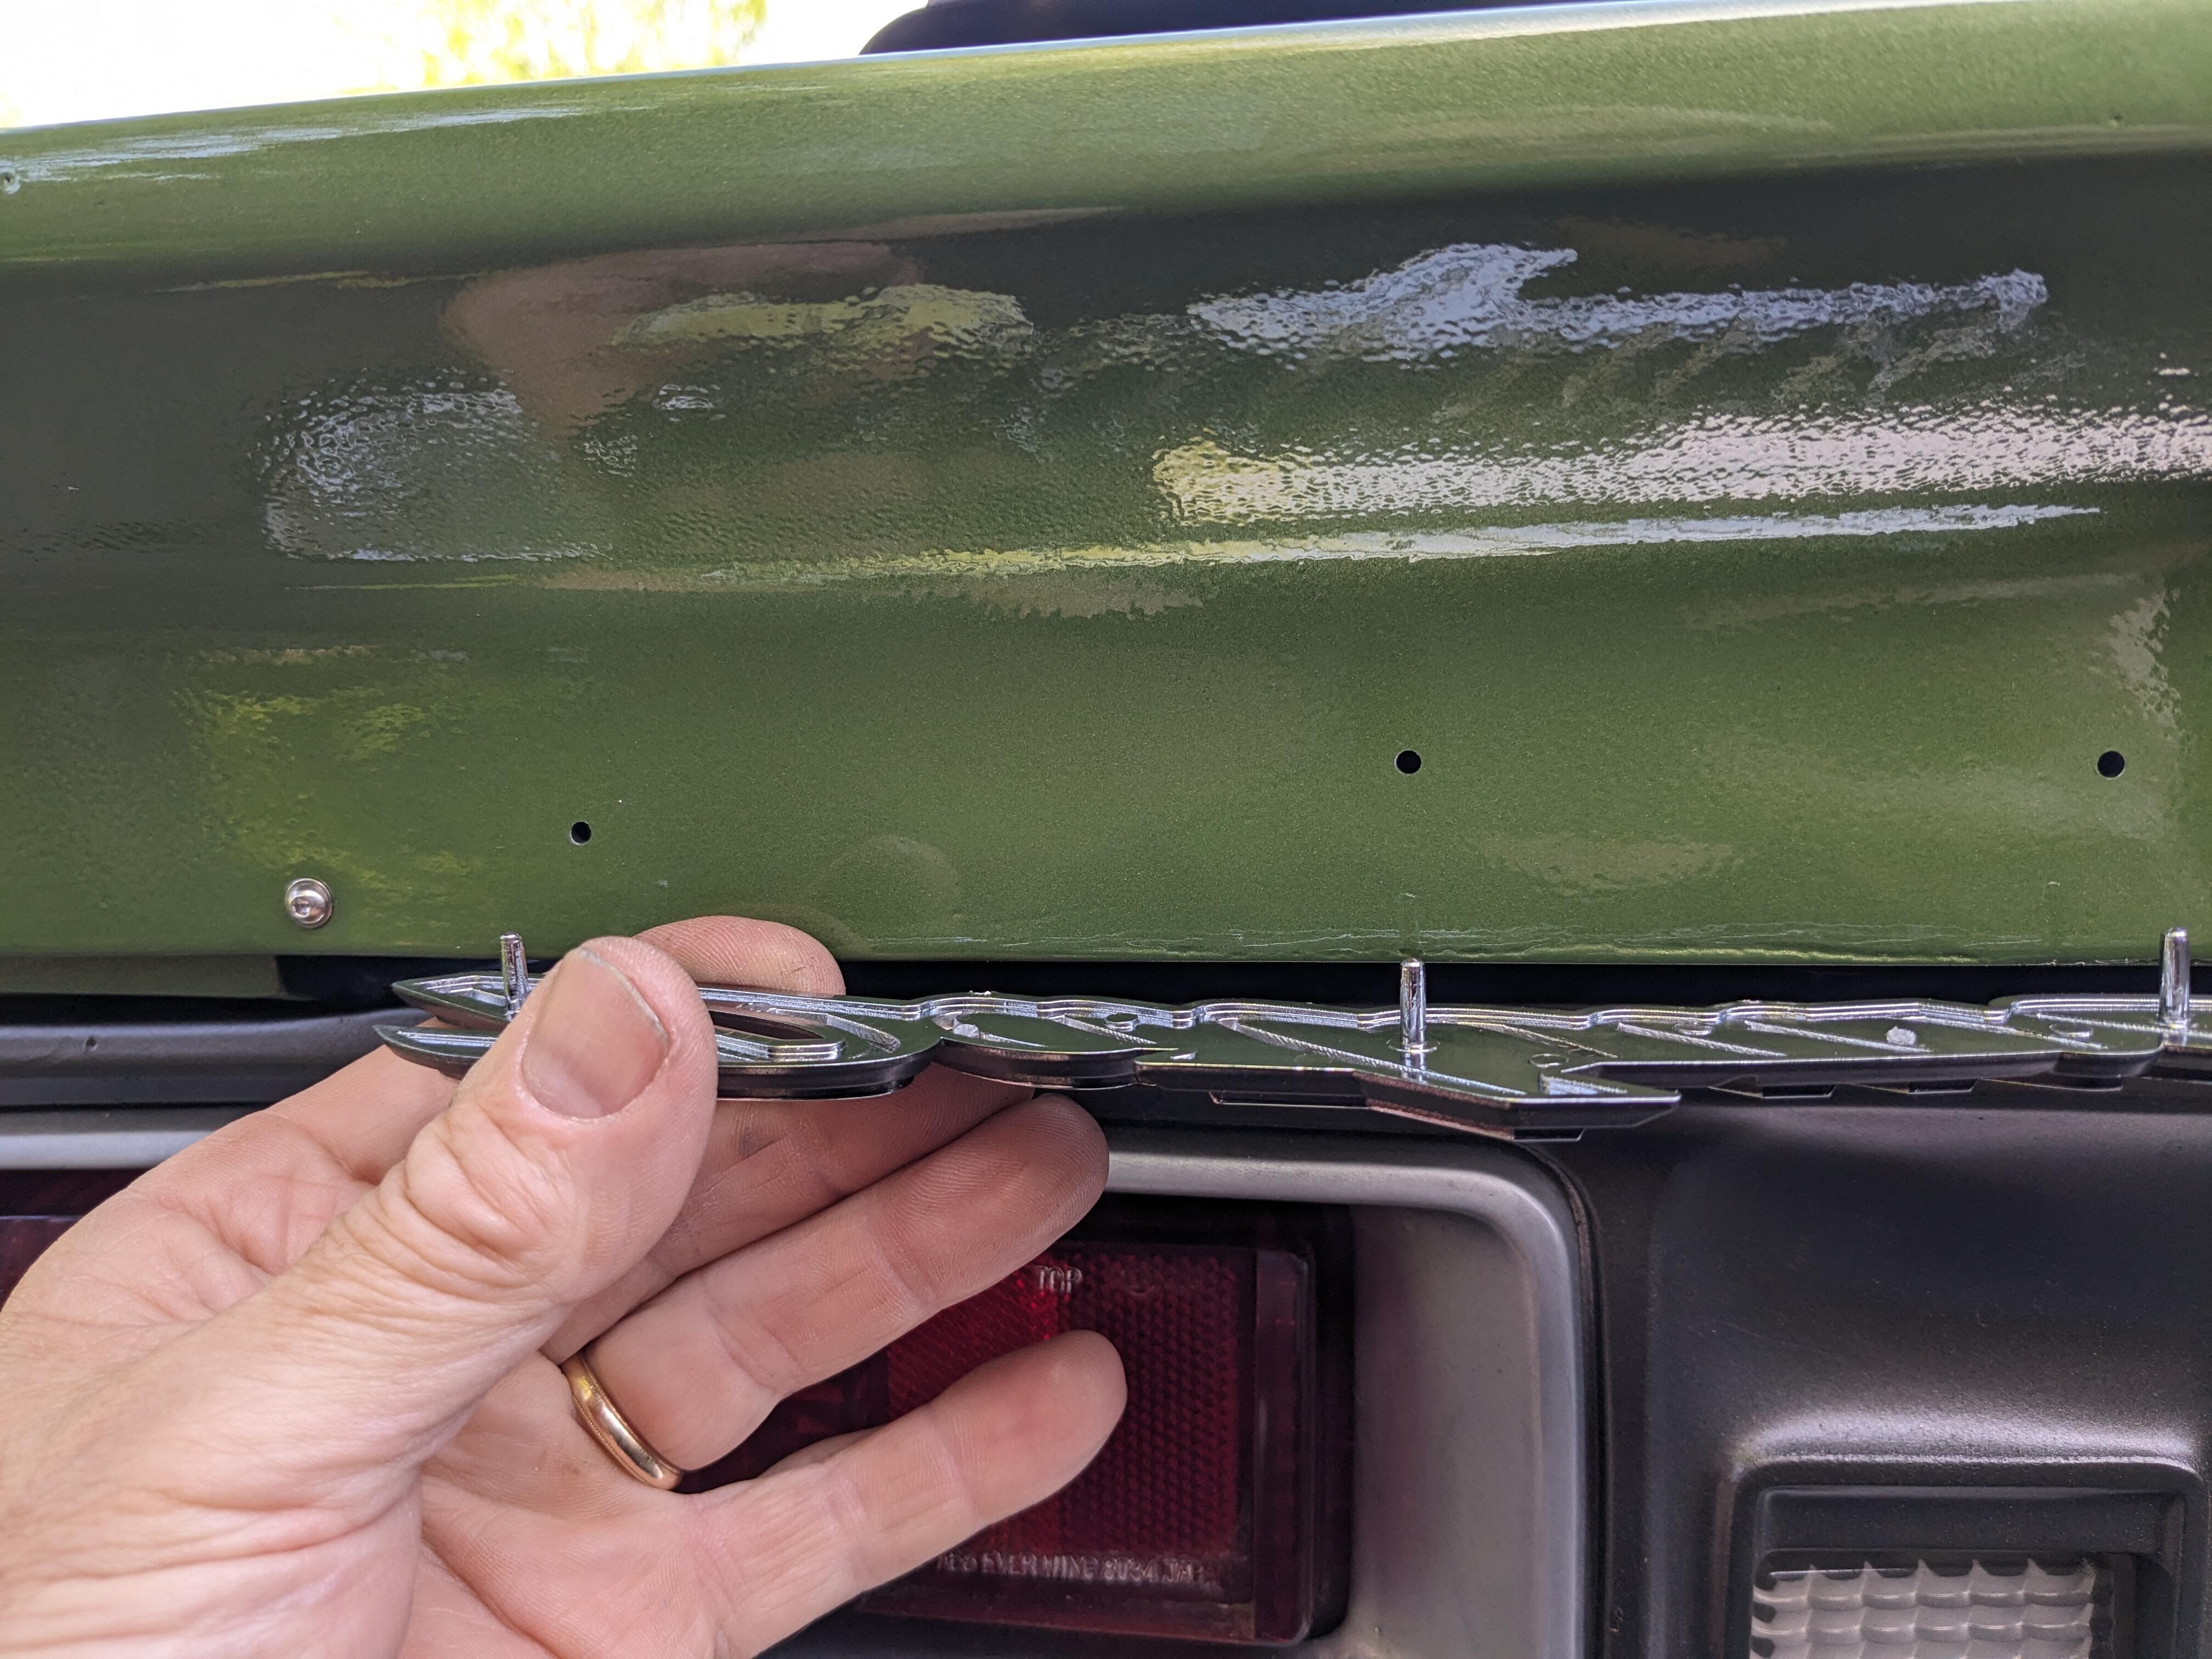
Hello Steve - I have them - they come with the new emblems - the spoiler is thicker than sheet metal, so I don't k now if the clips will lock into place. I didn't want to risk drilling what would then be an oversize hole in the spoiler & have the clip not work as intended.3 points
-
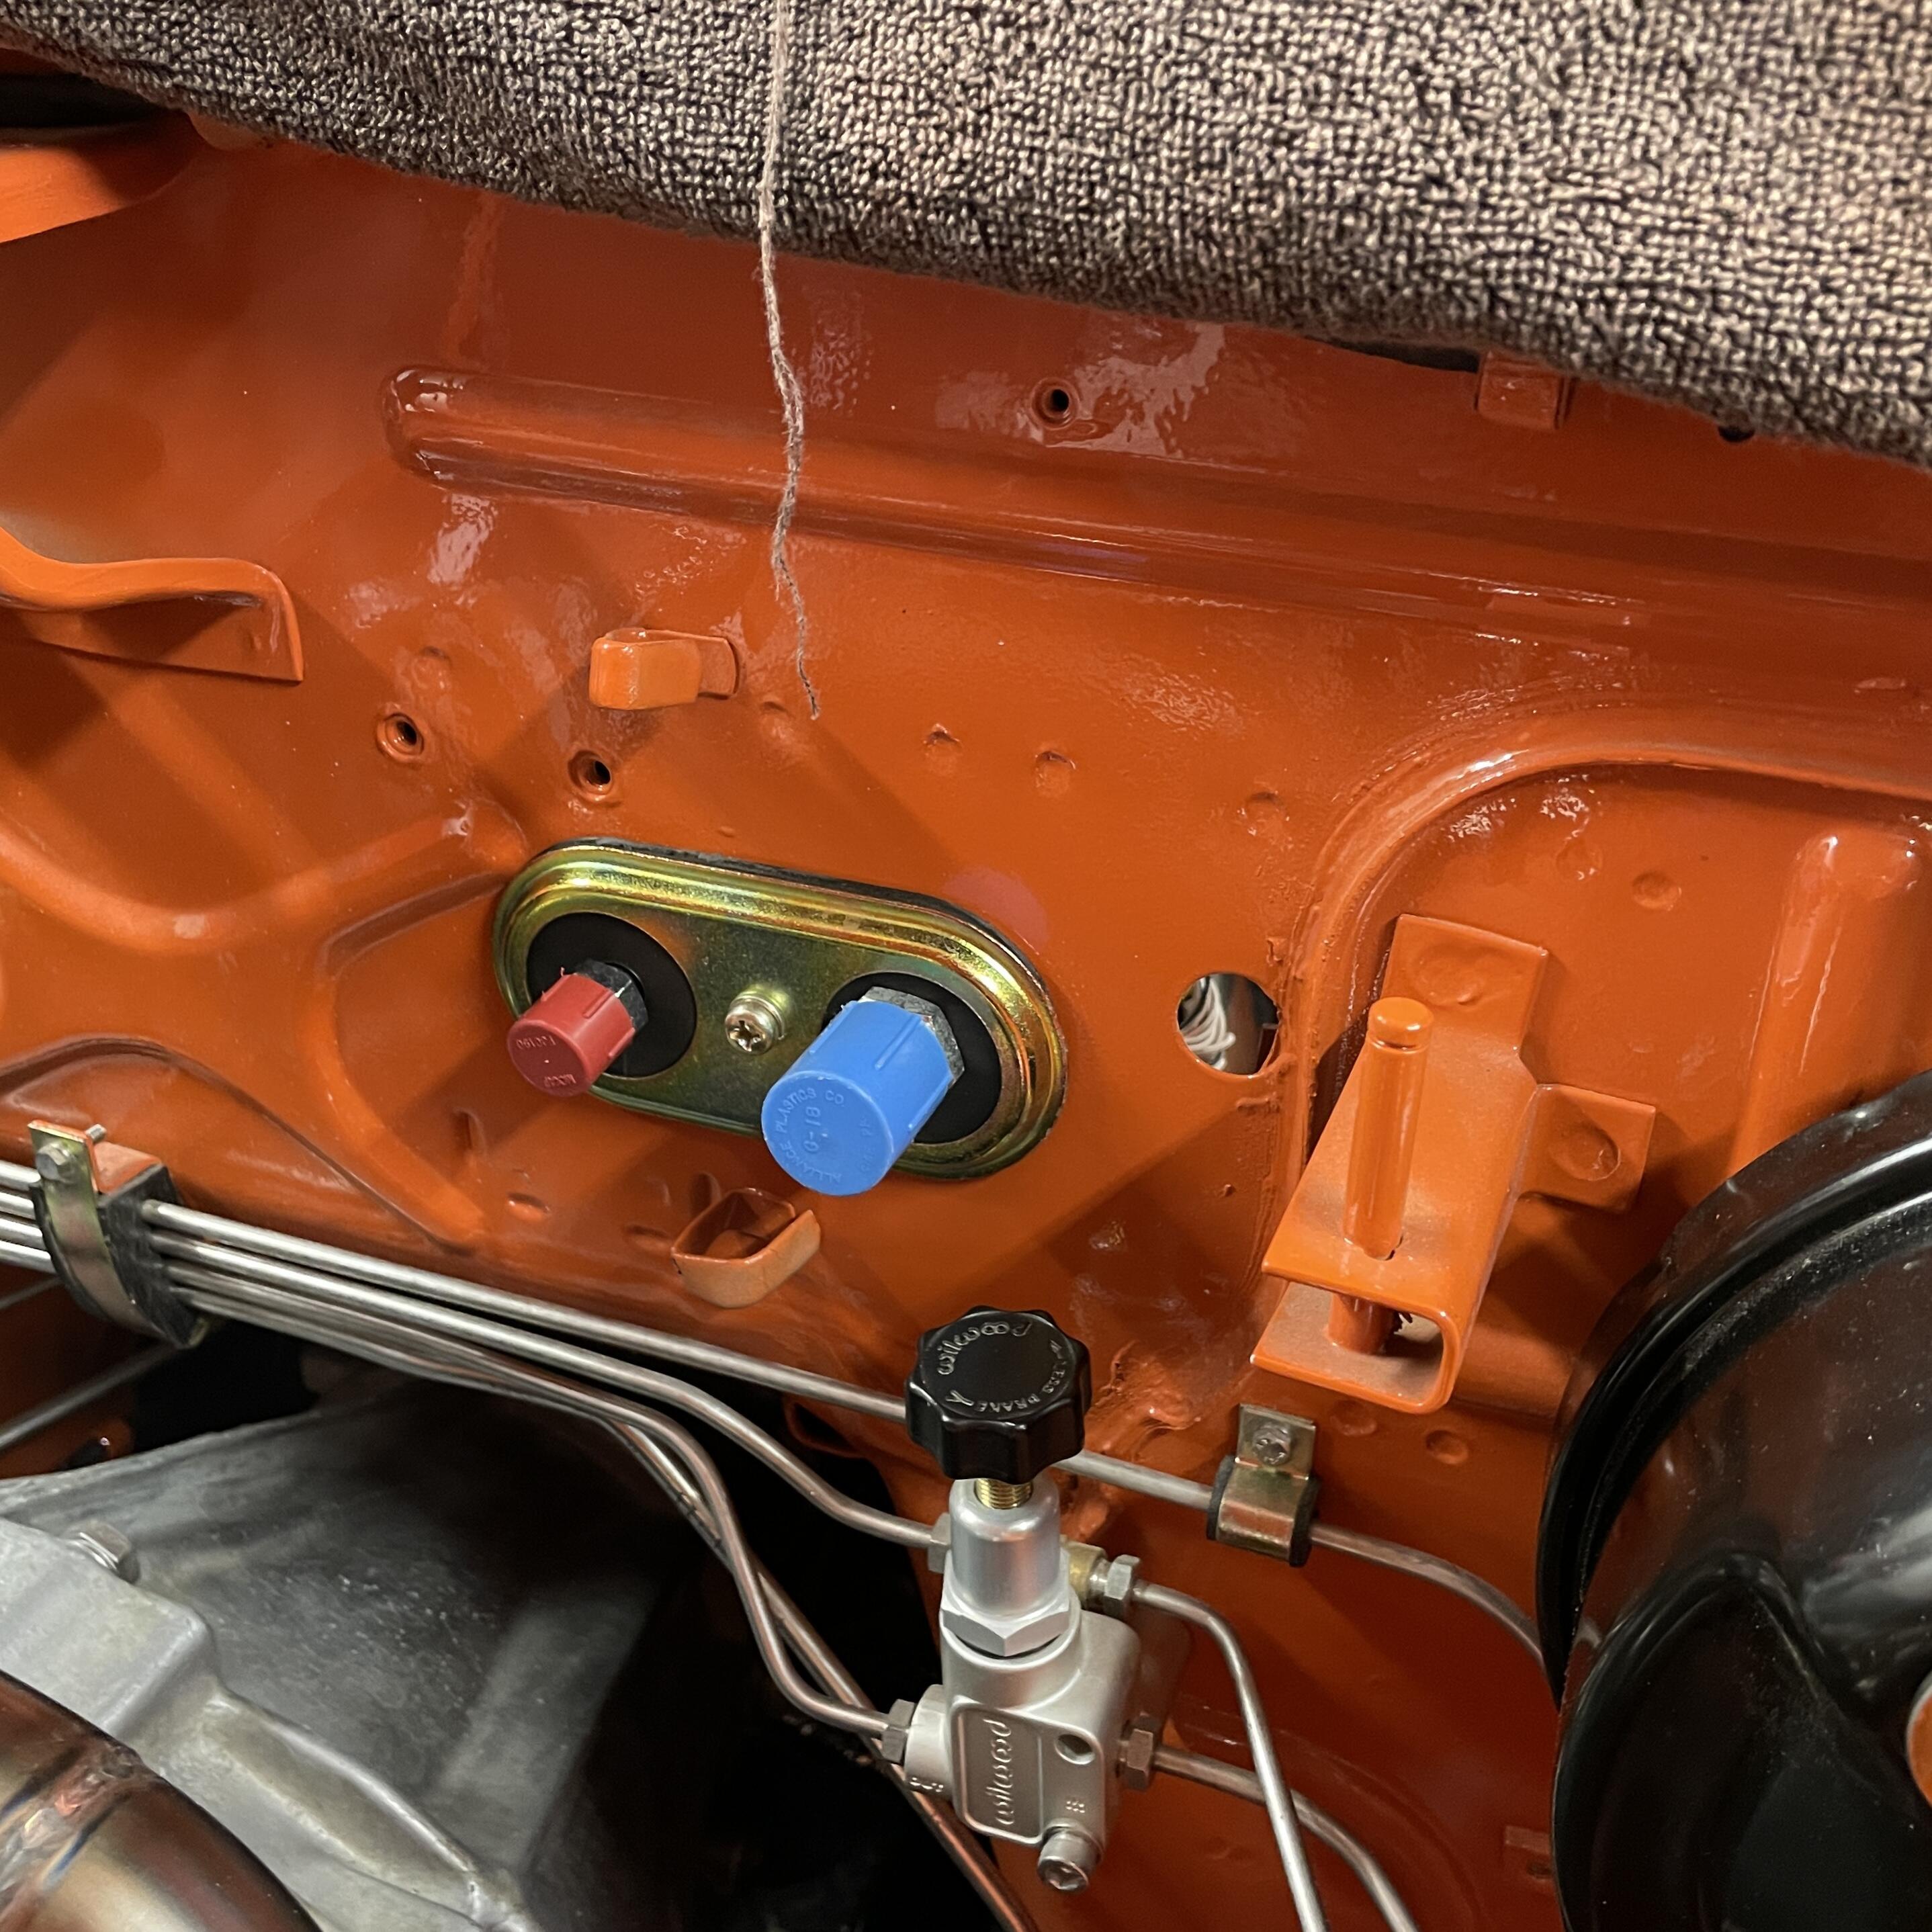
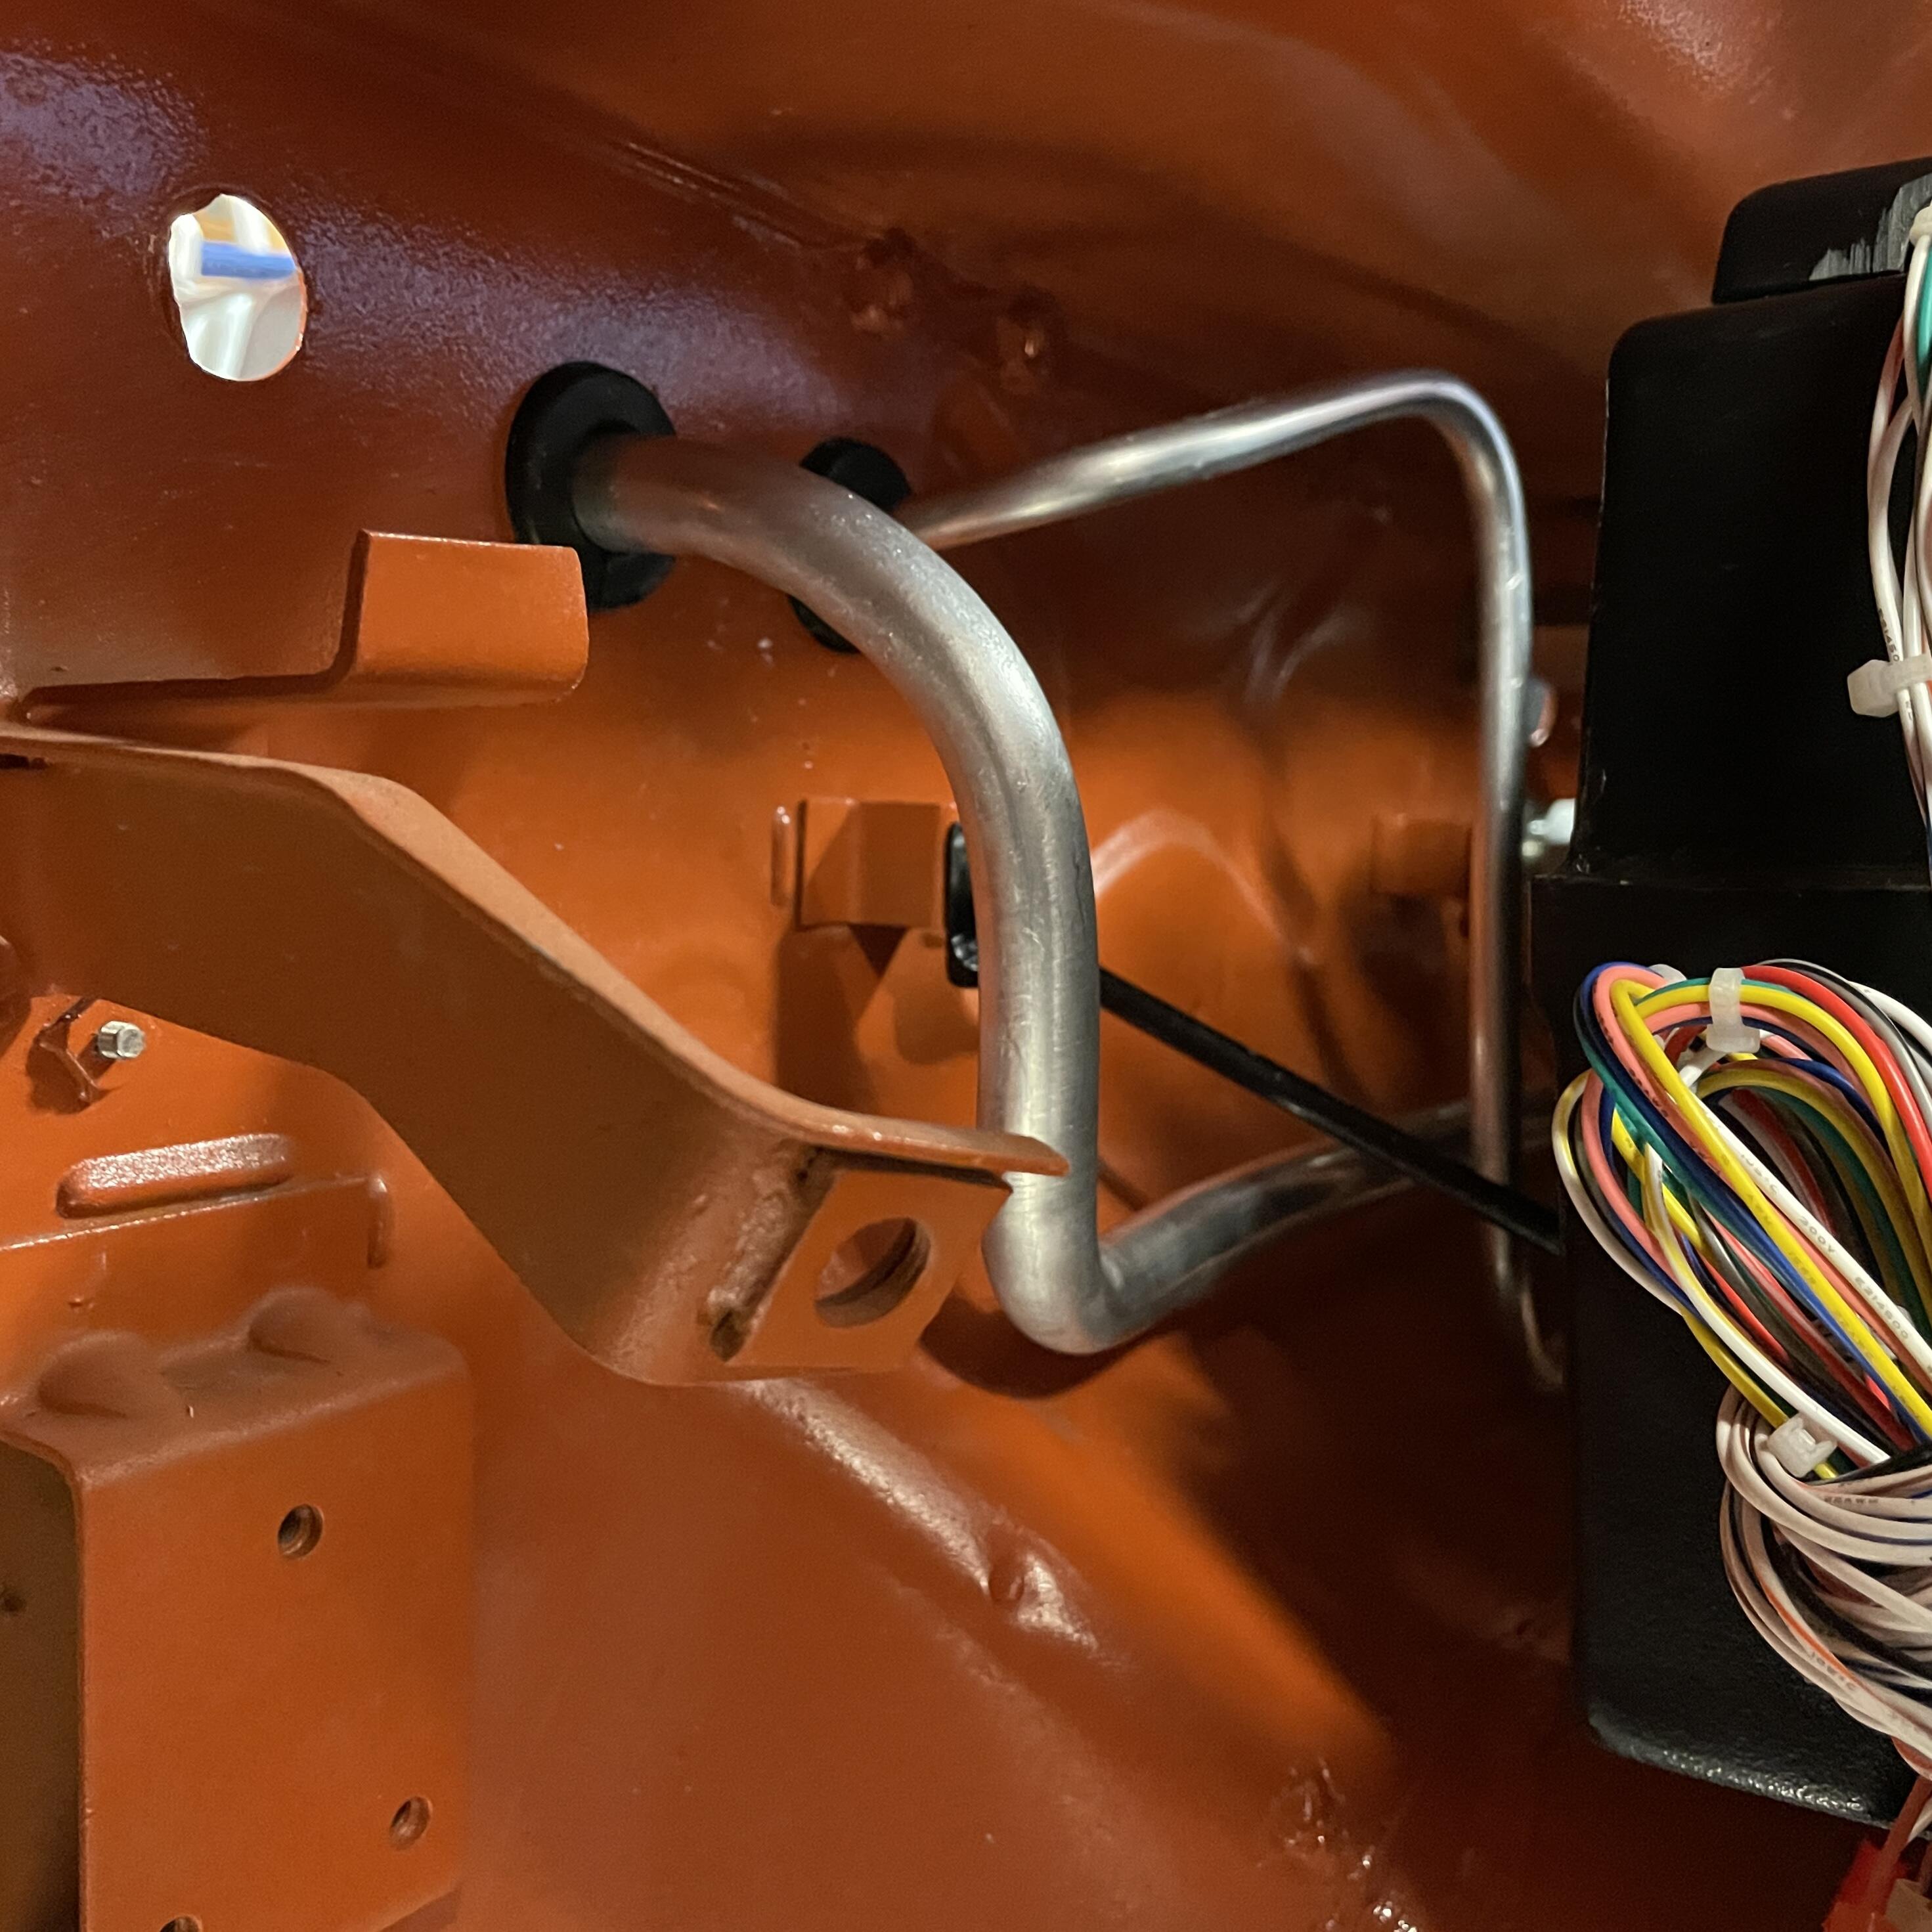
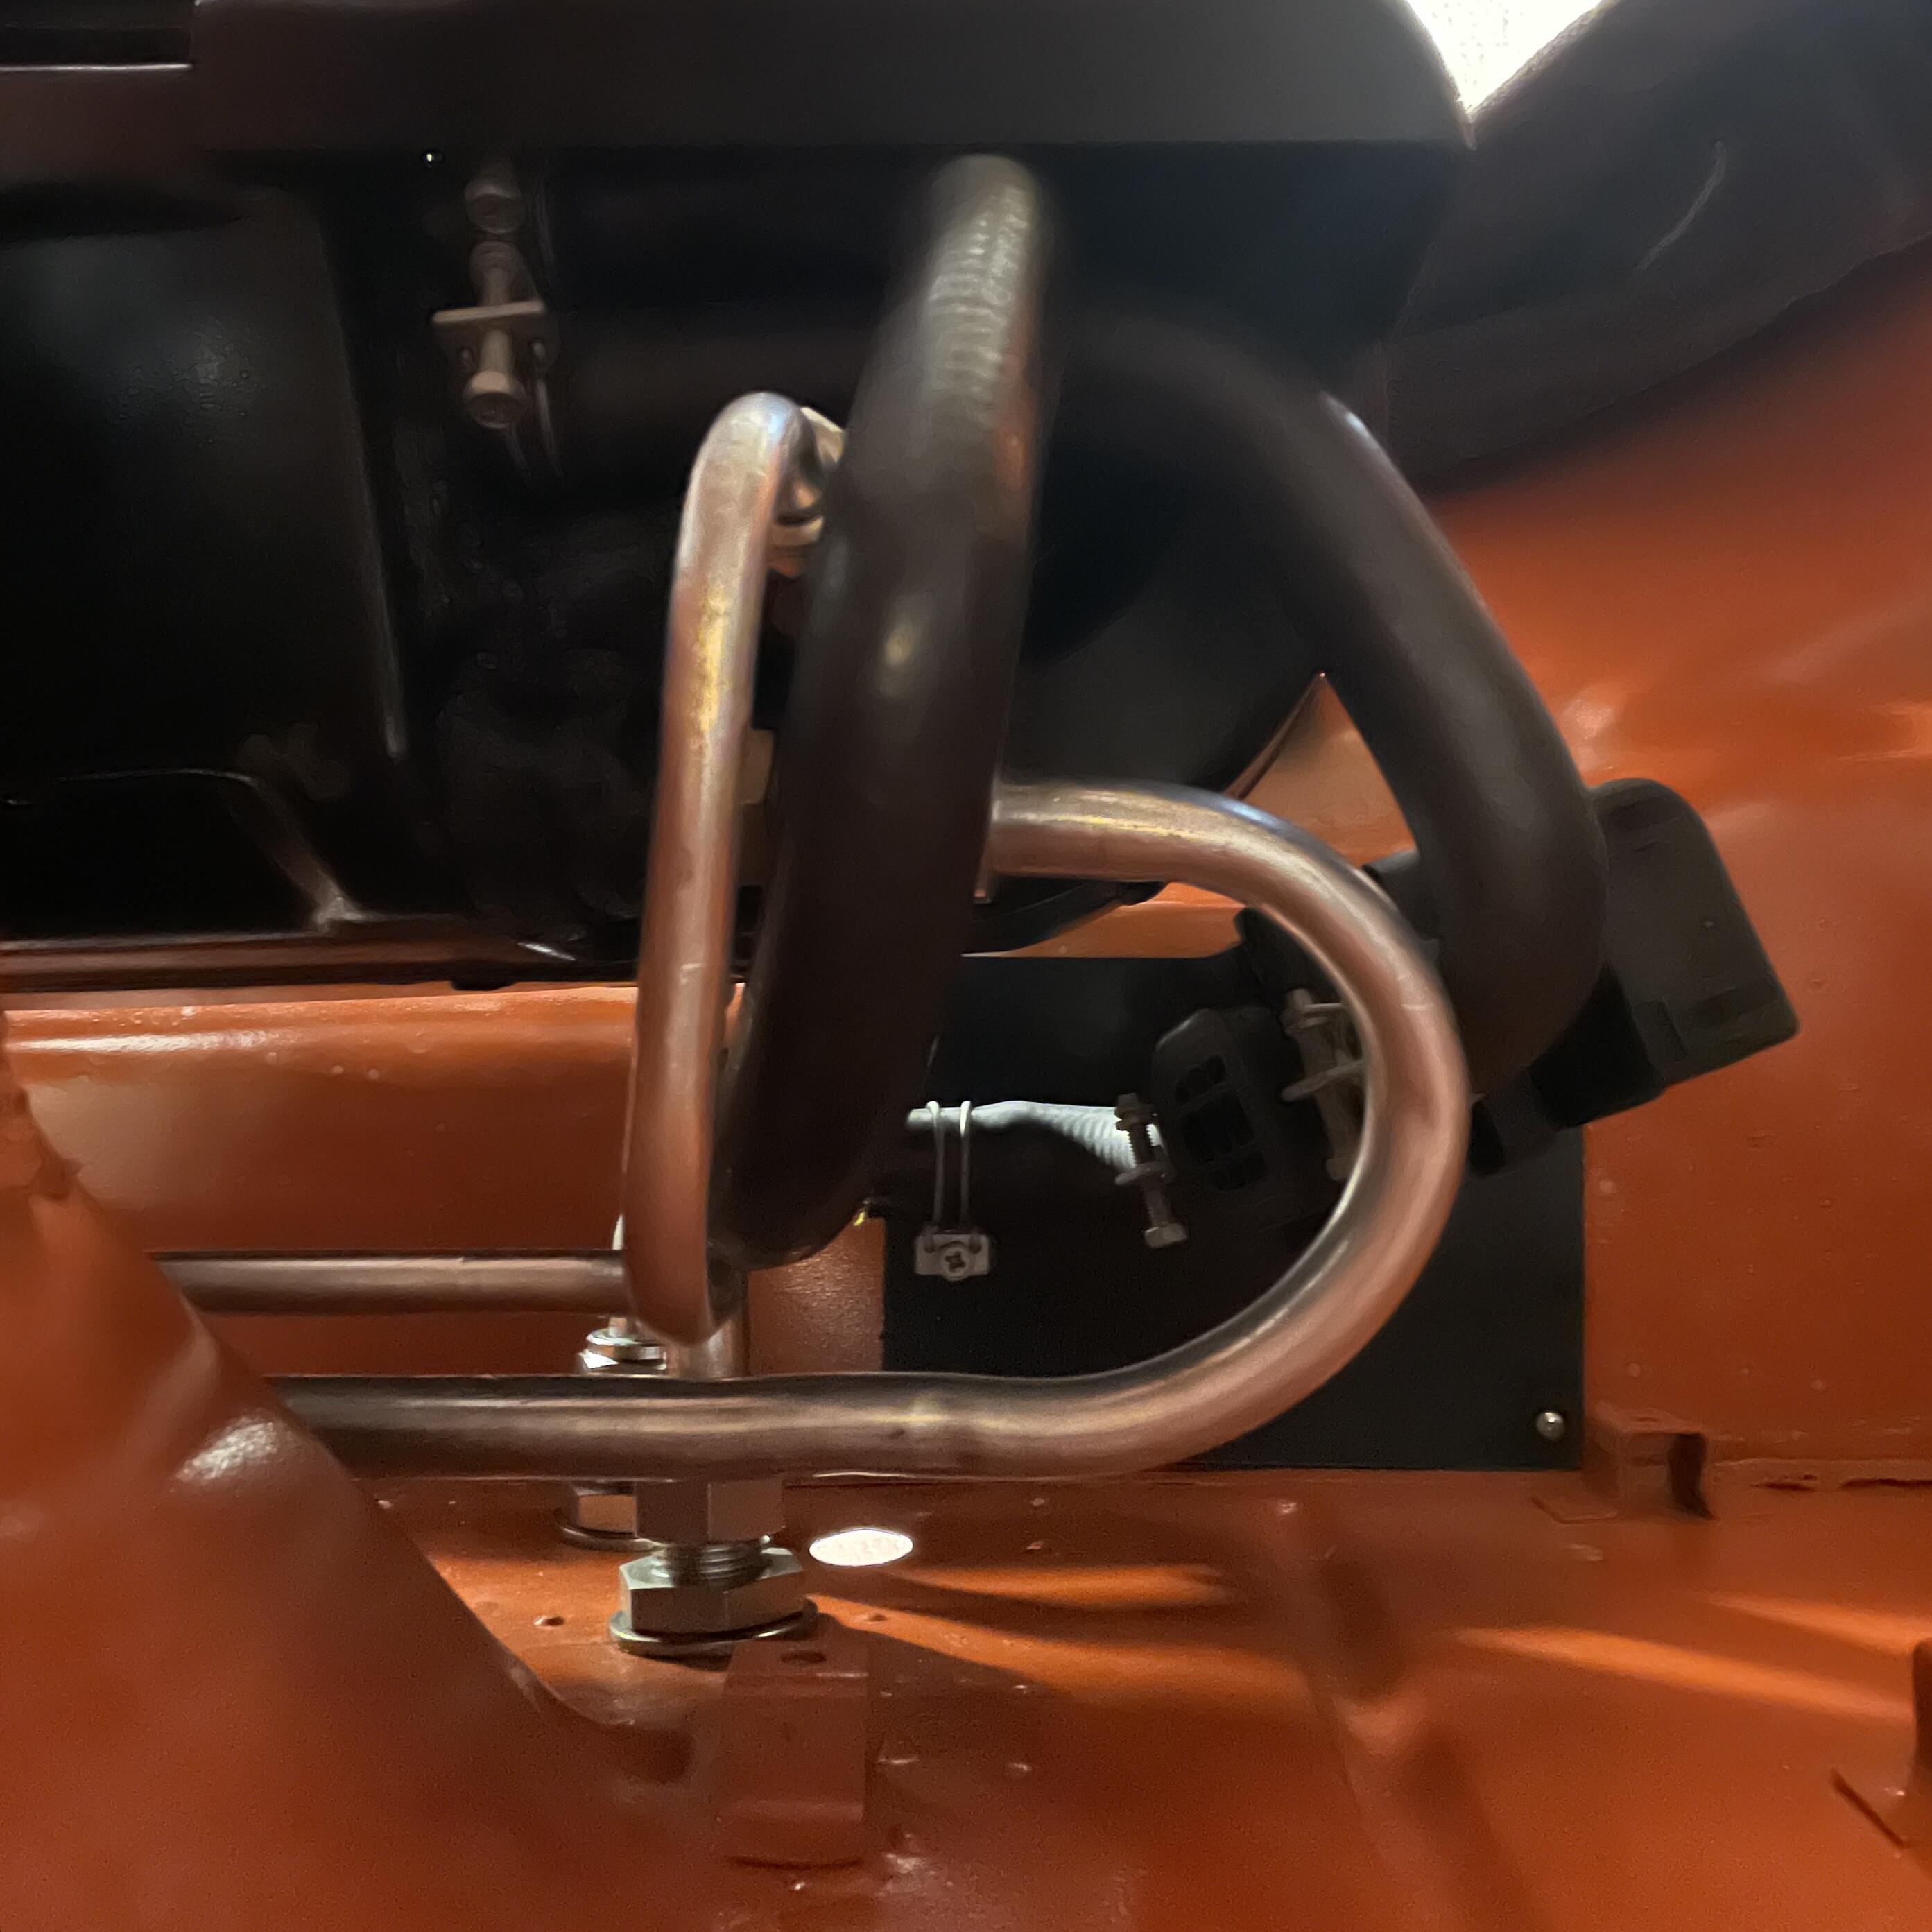
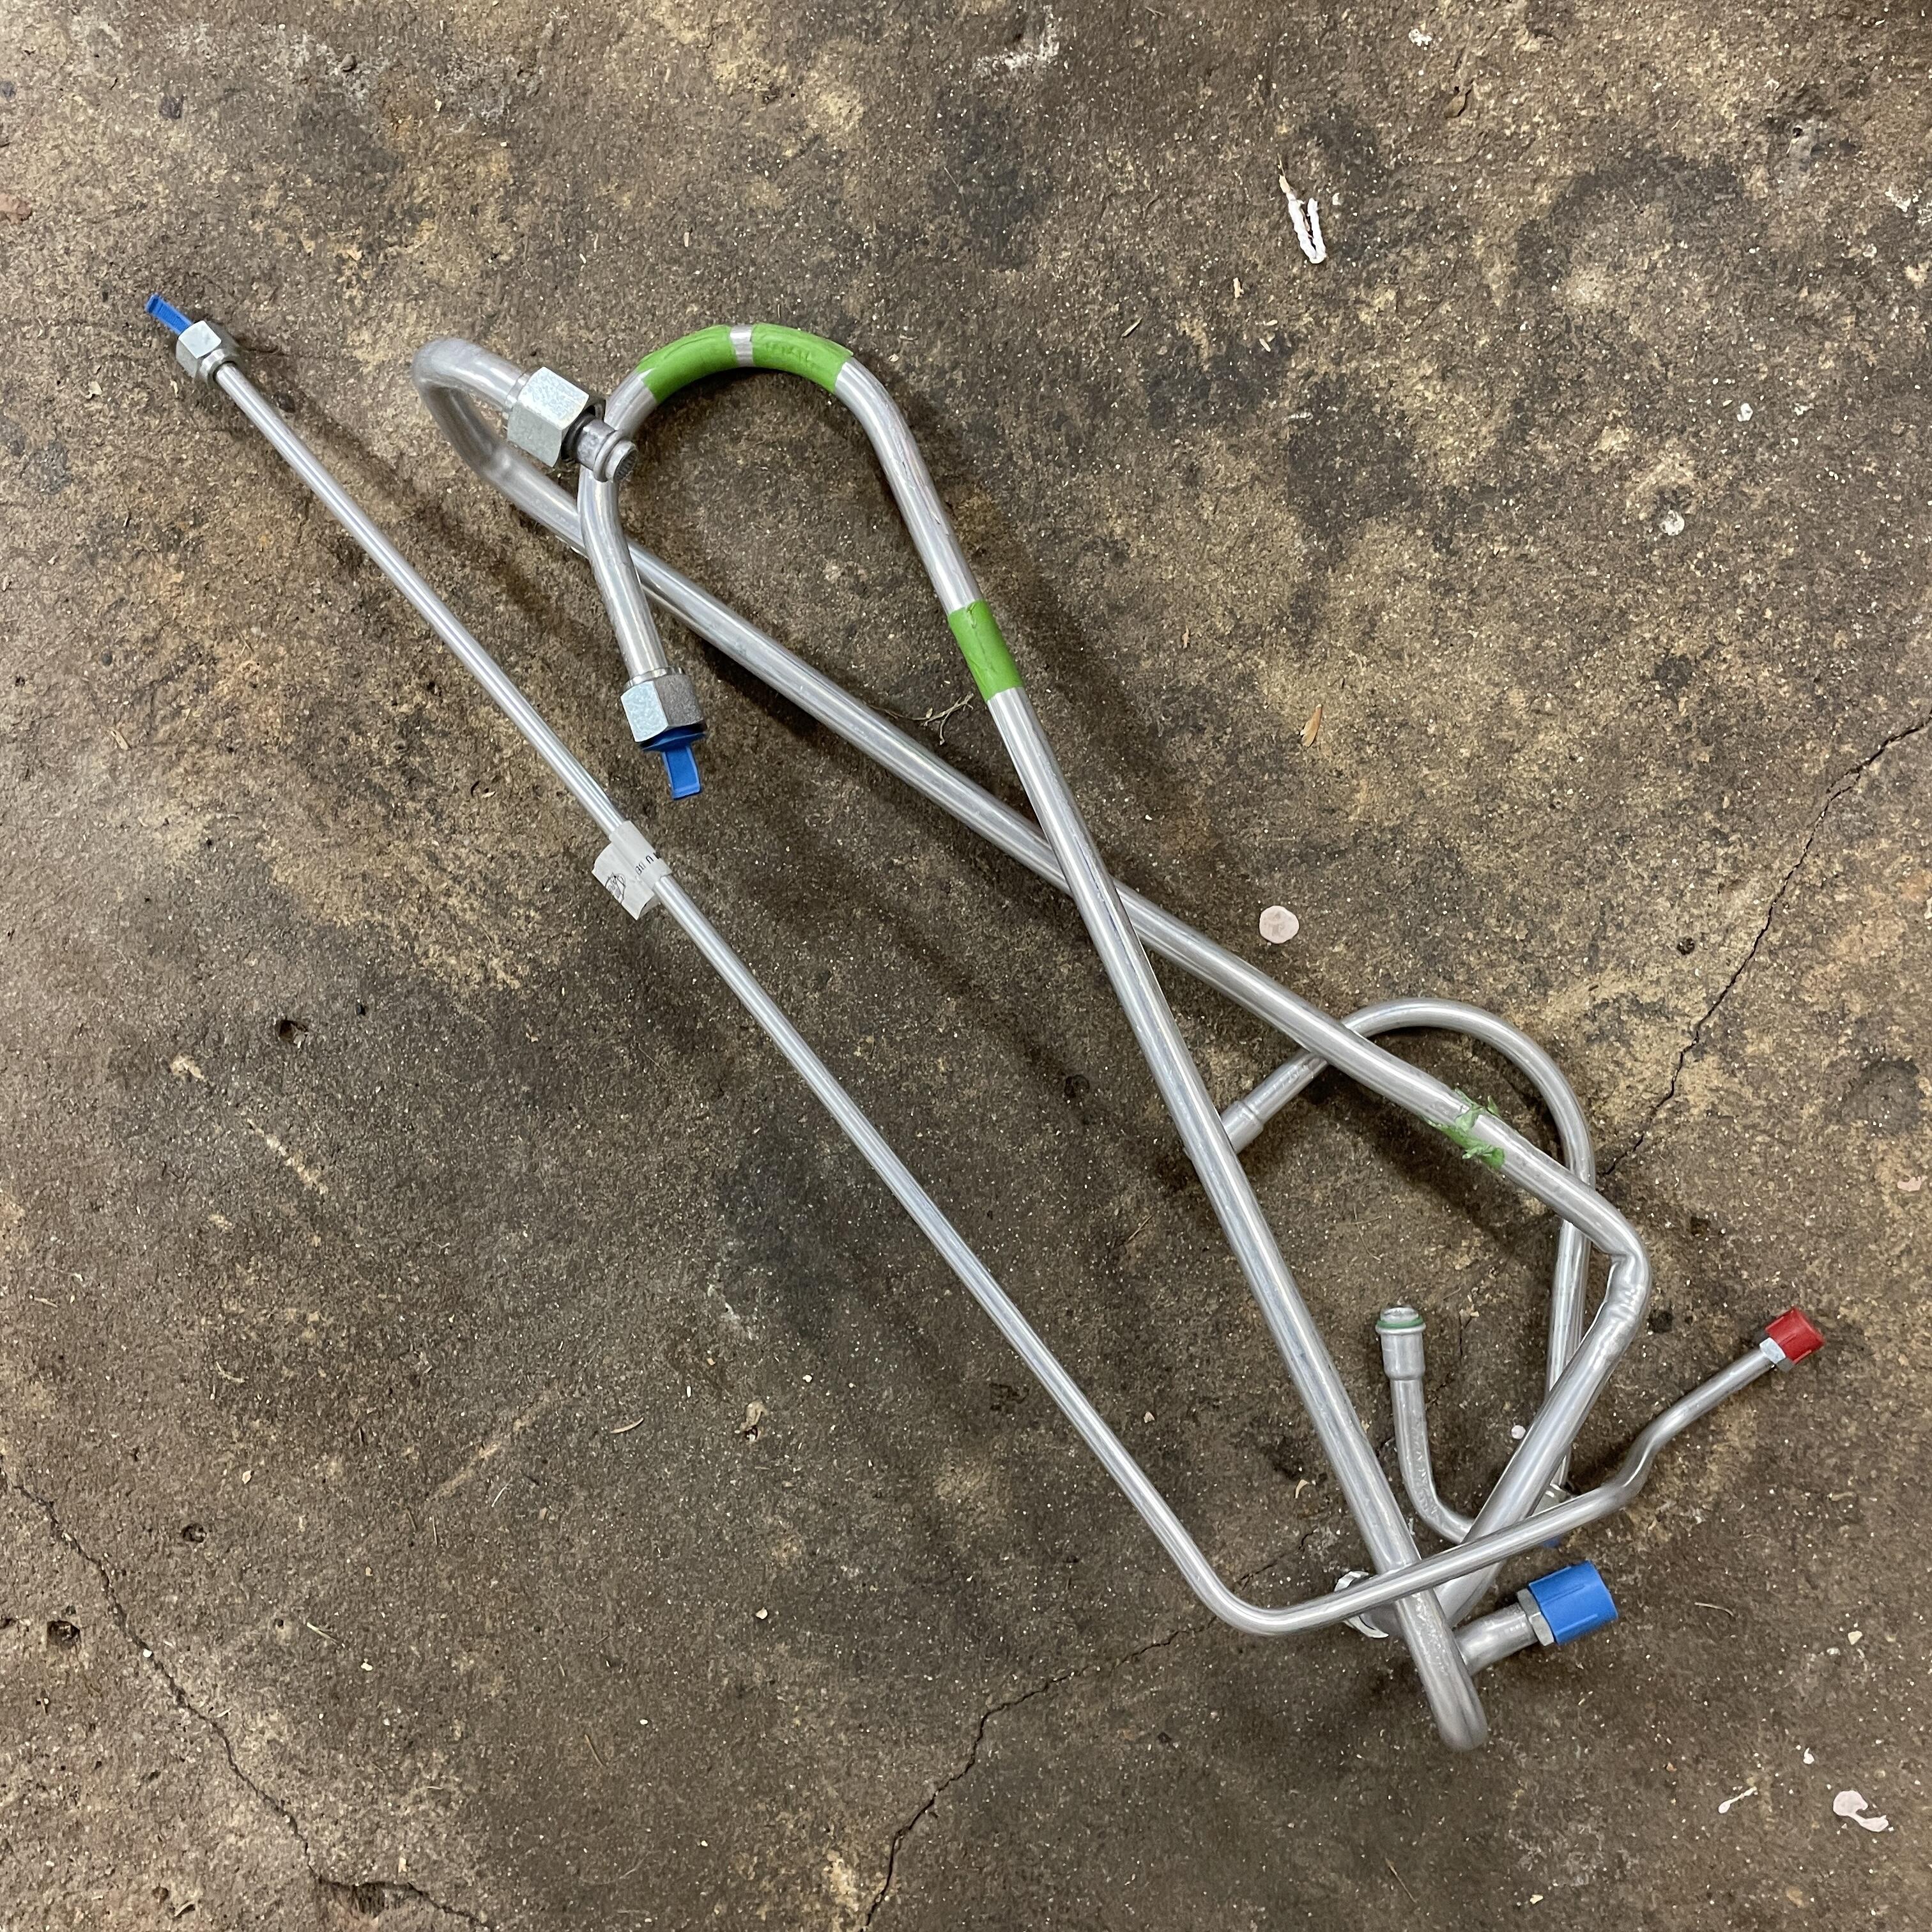
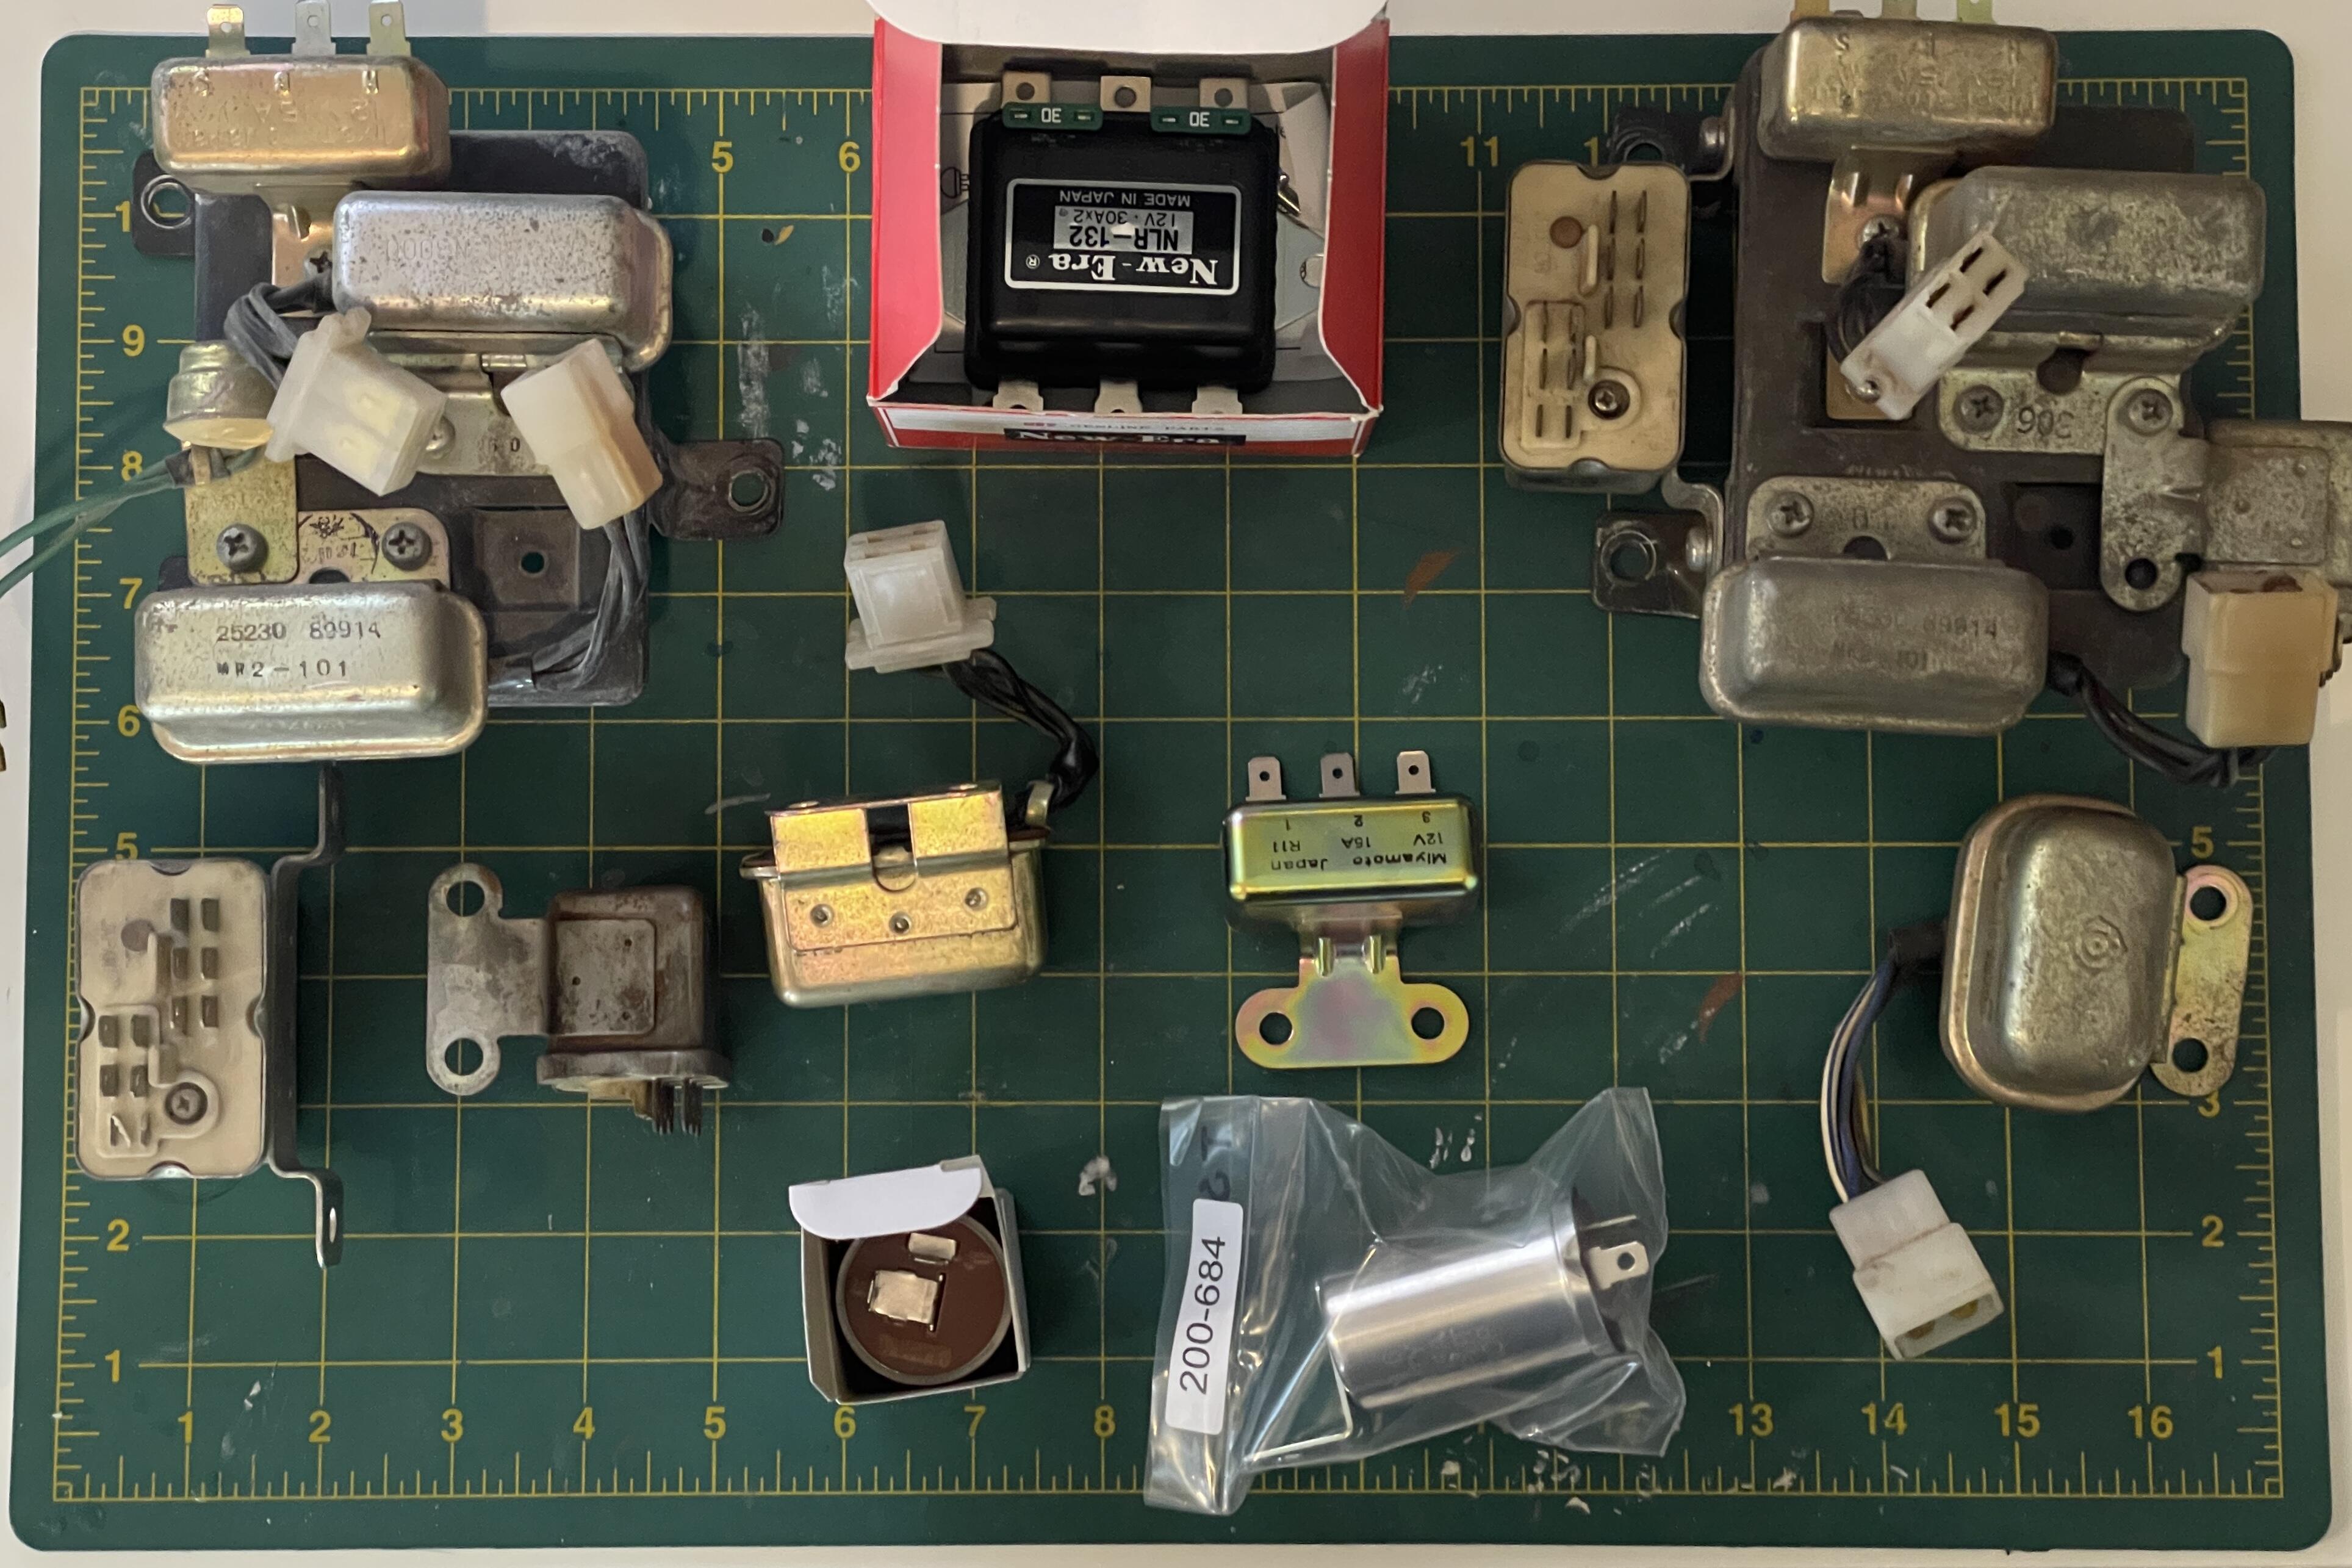
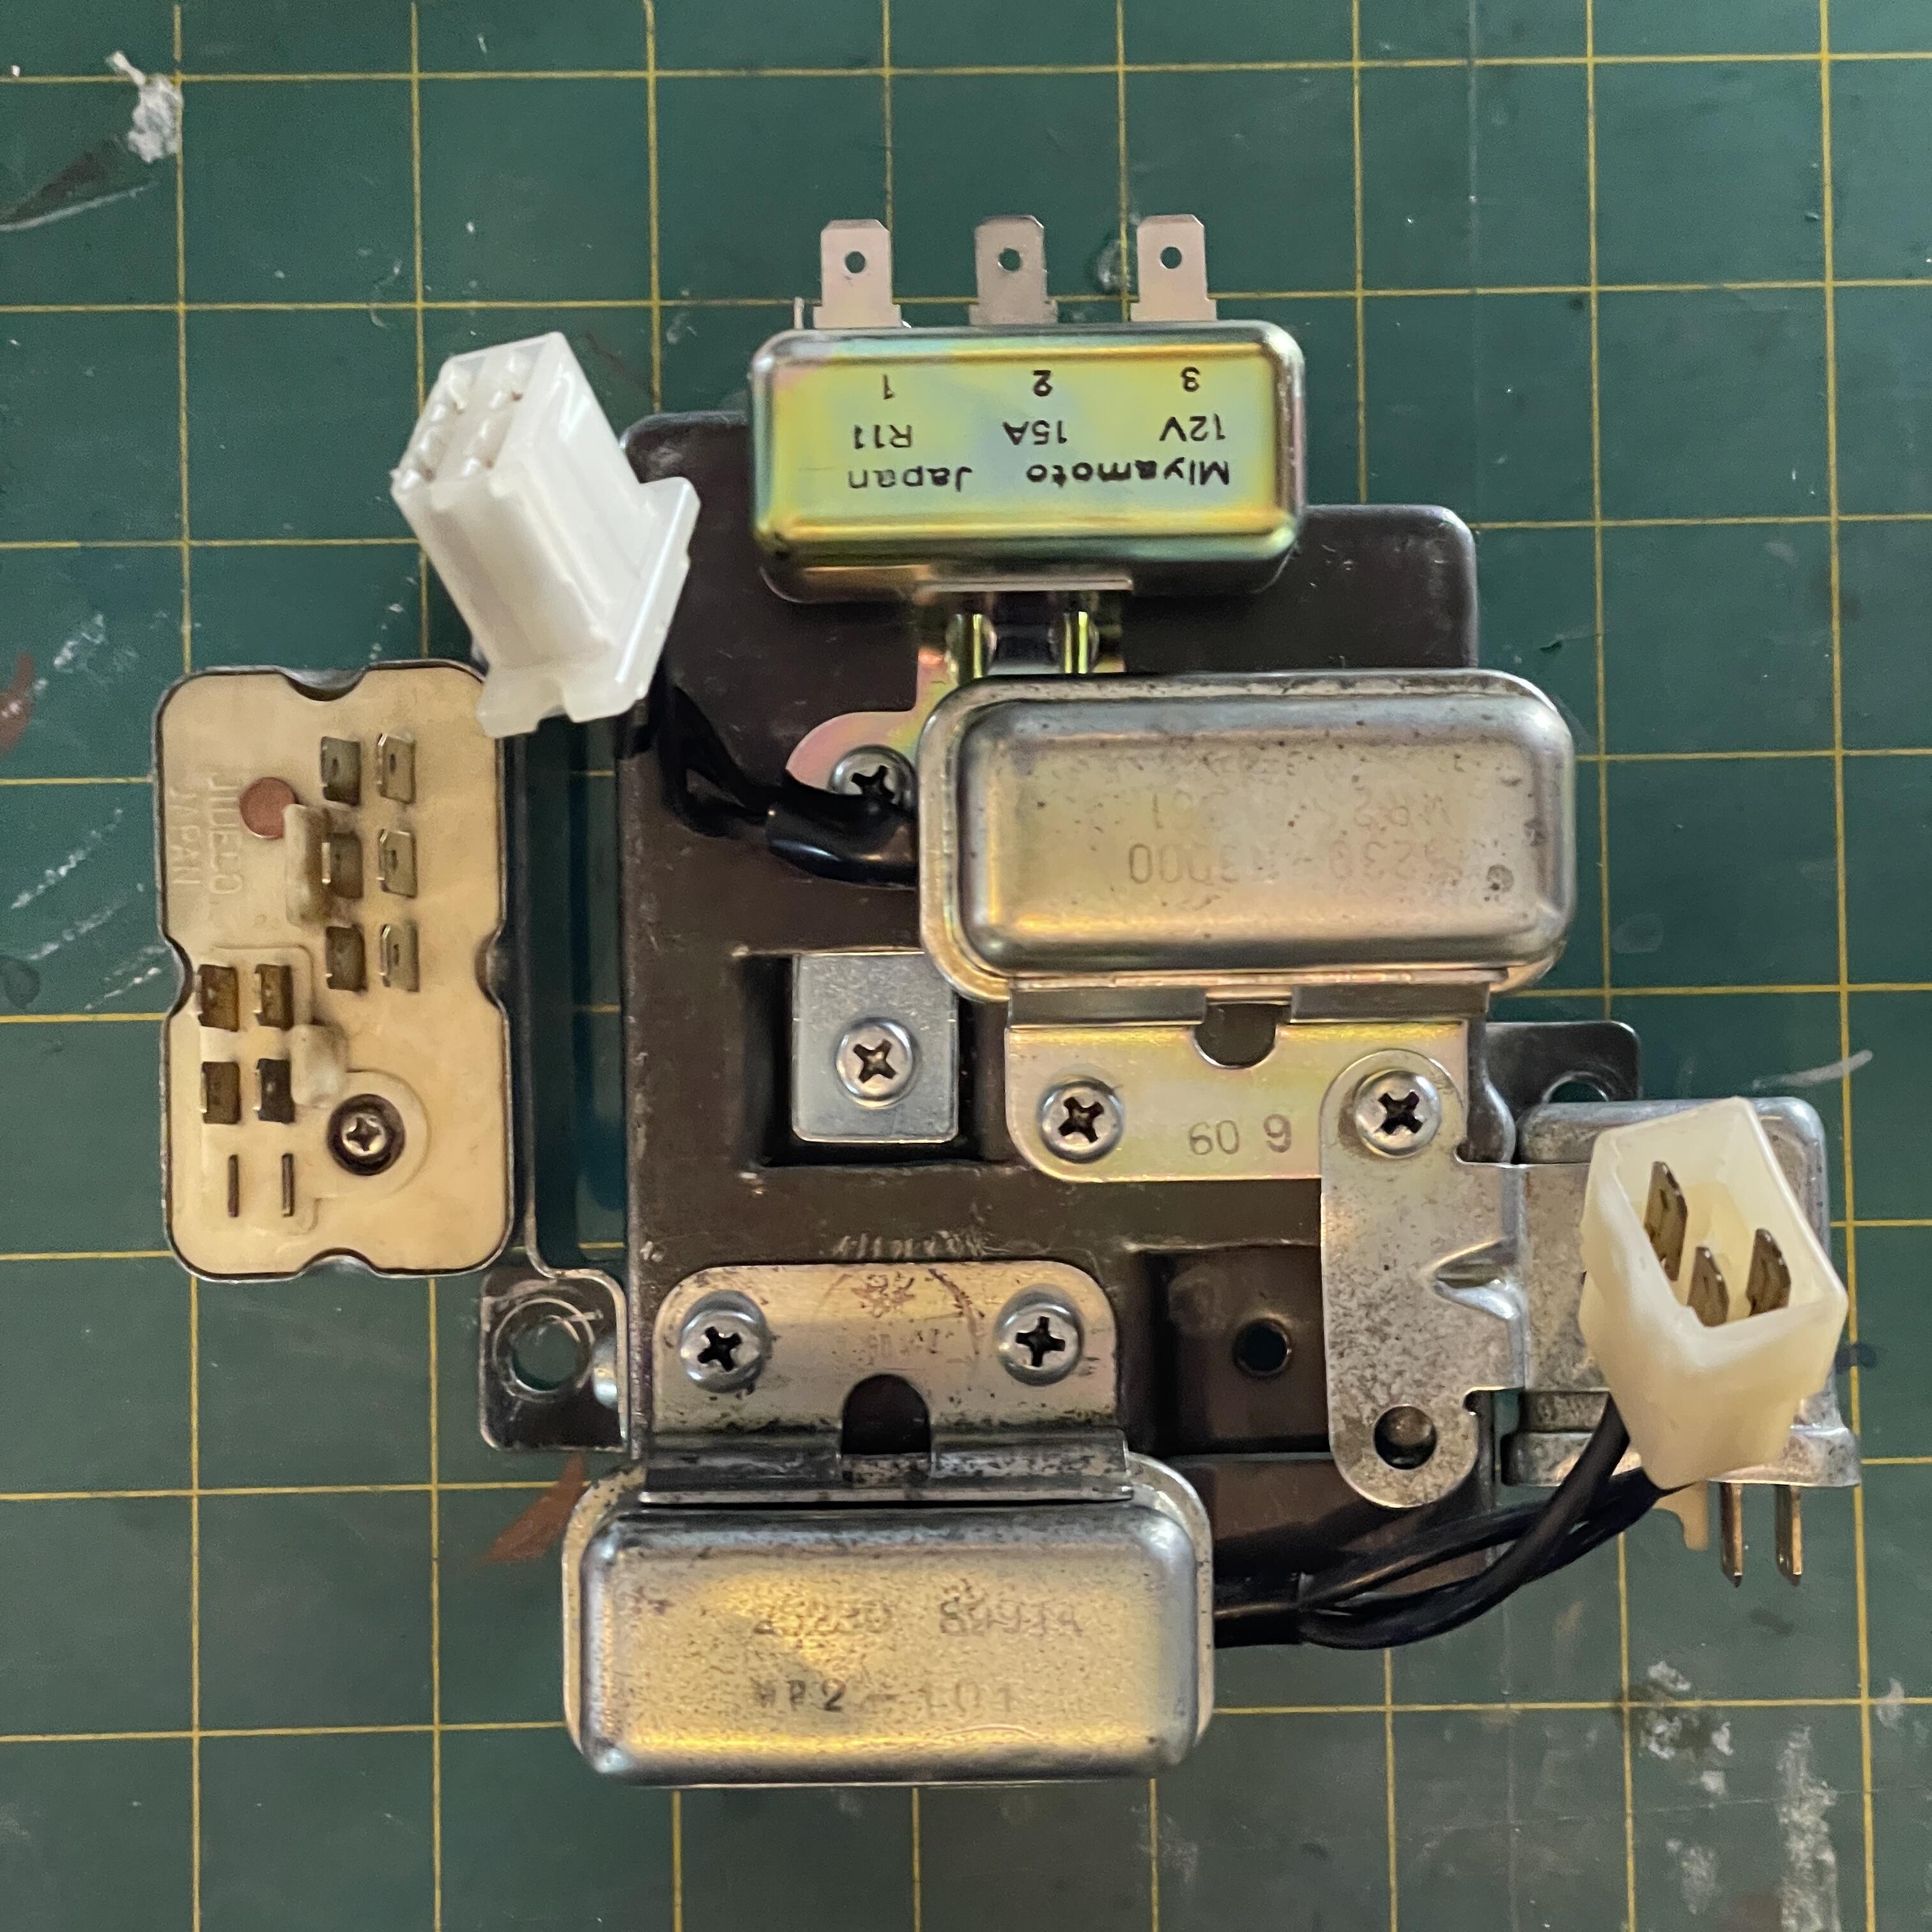
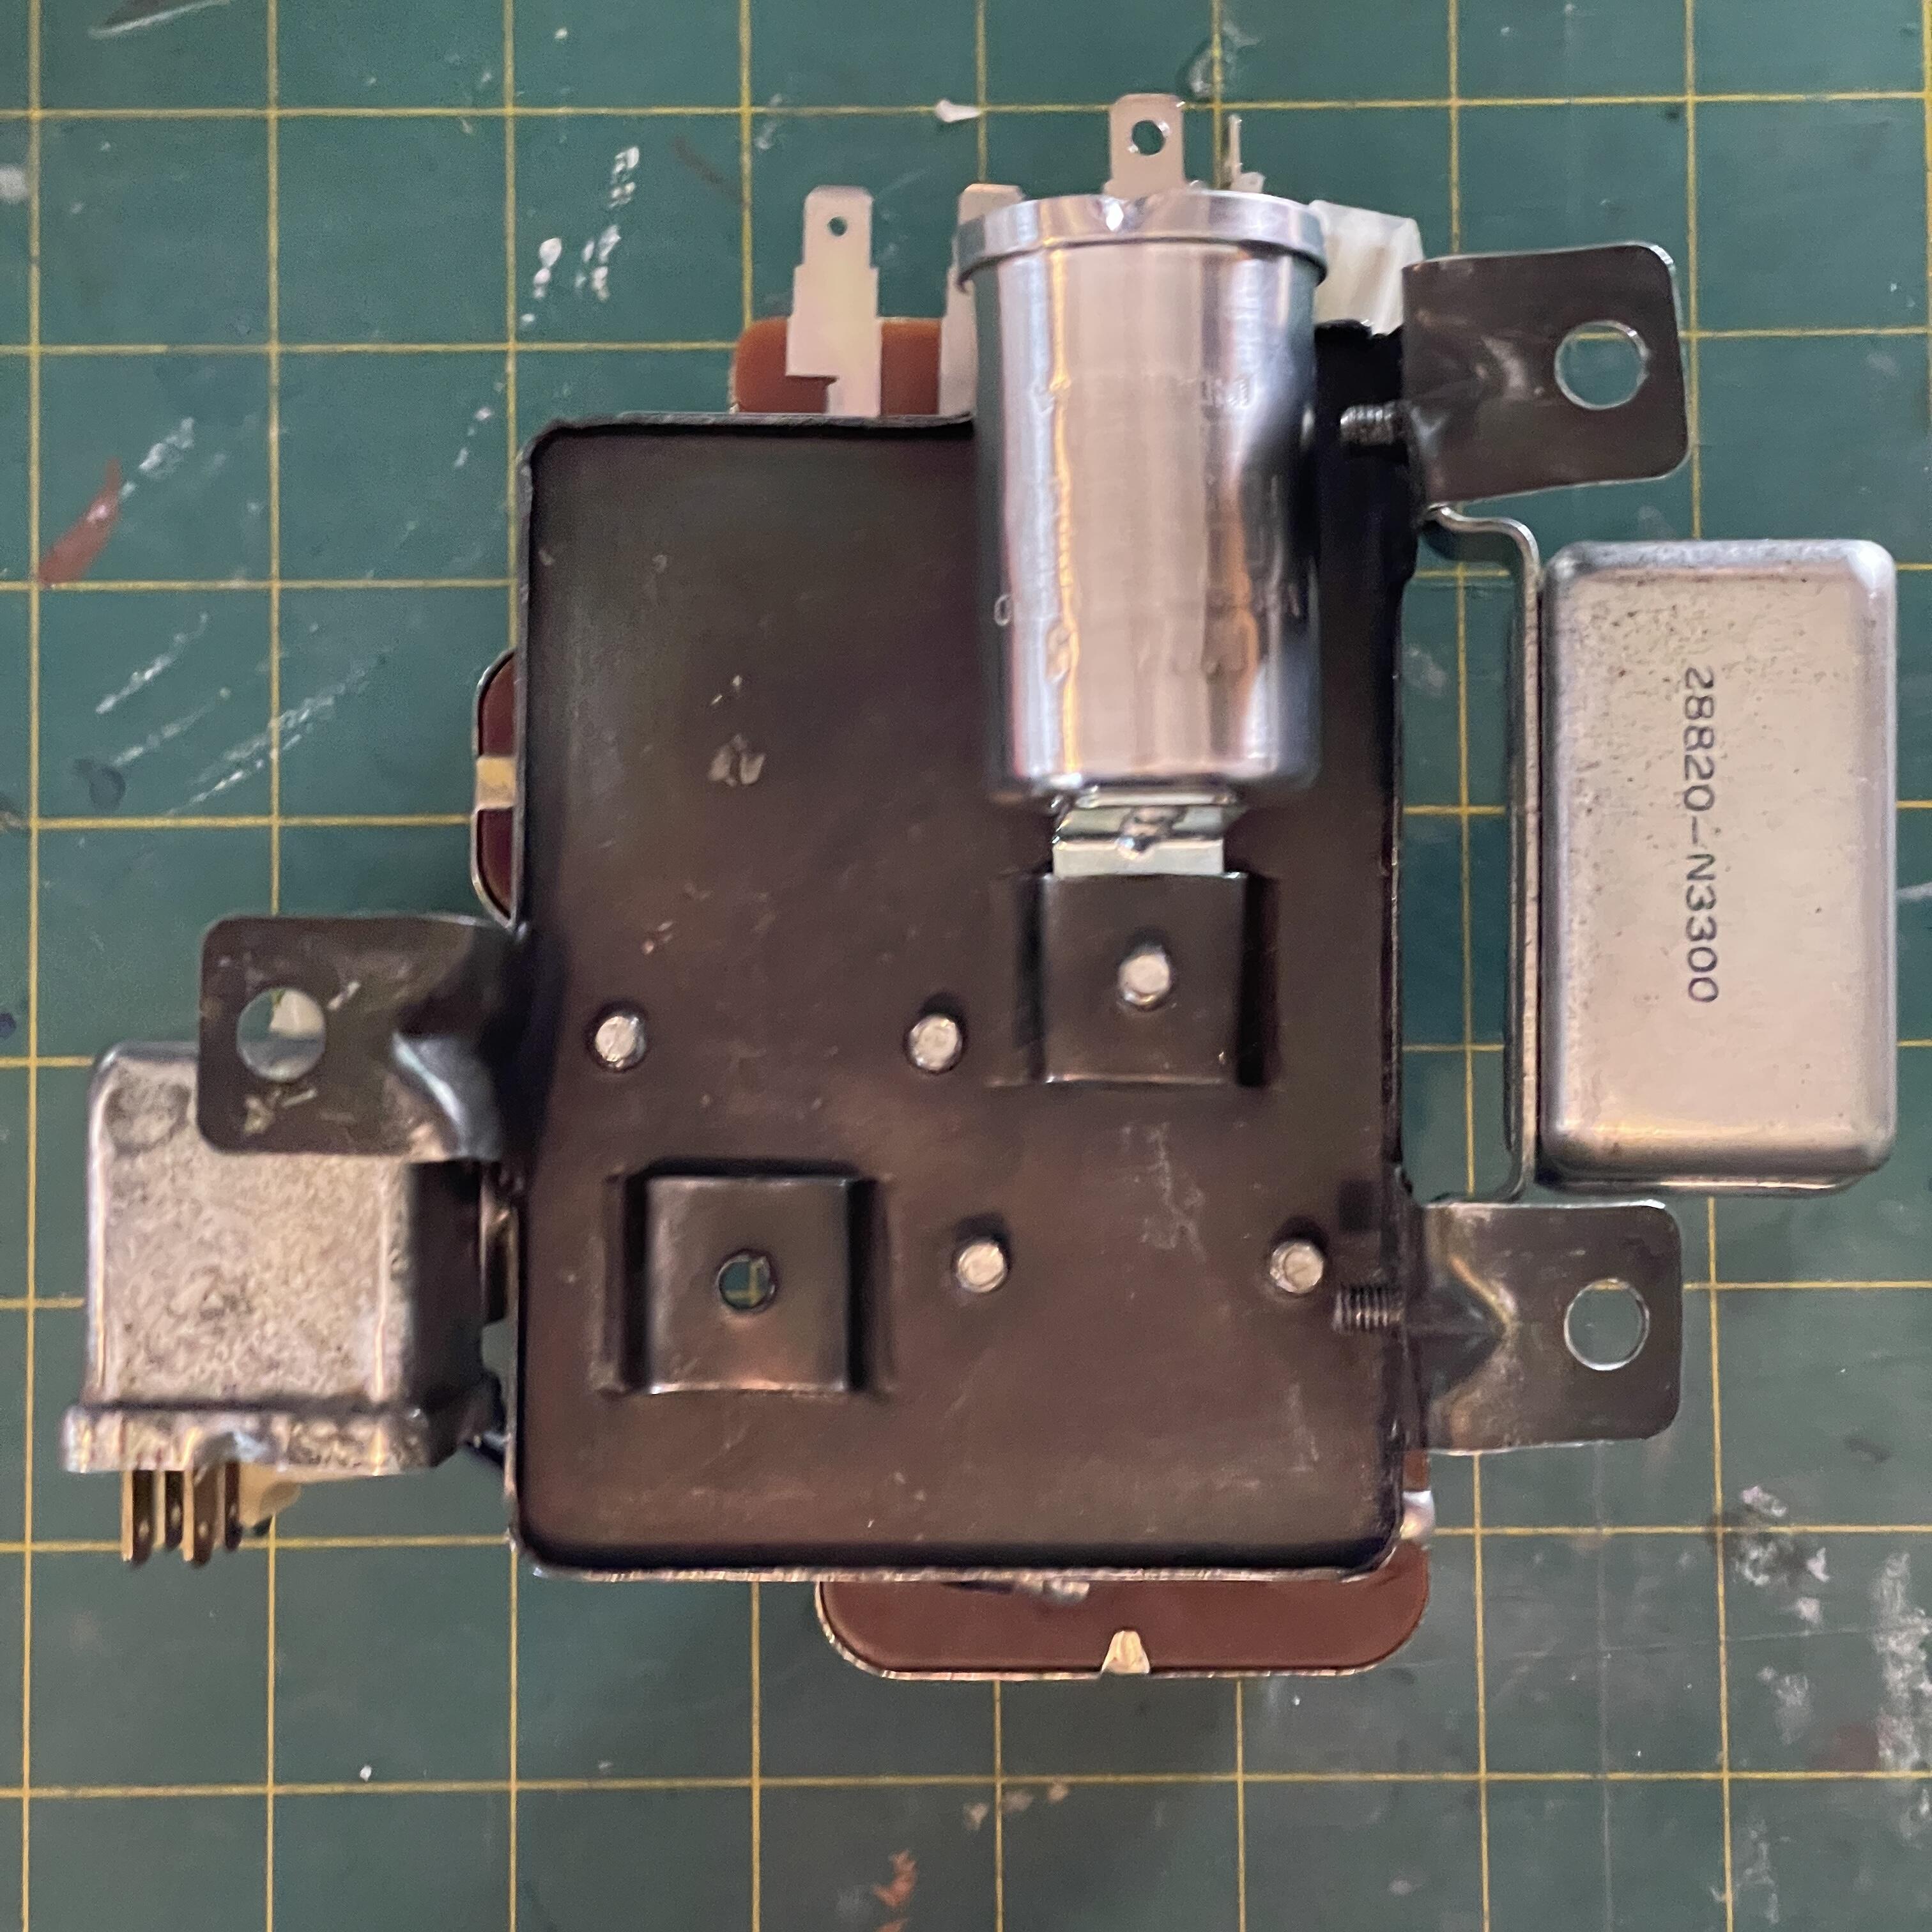
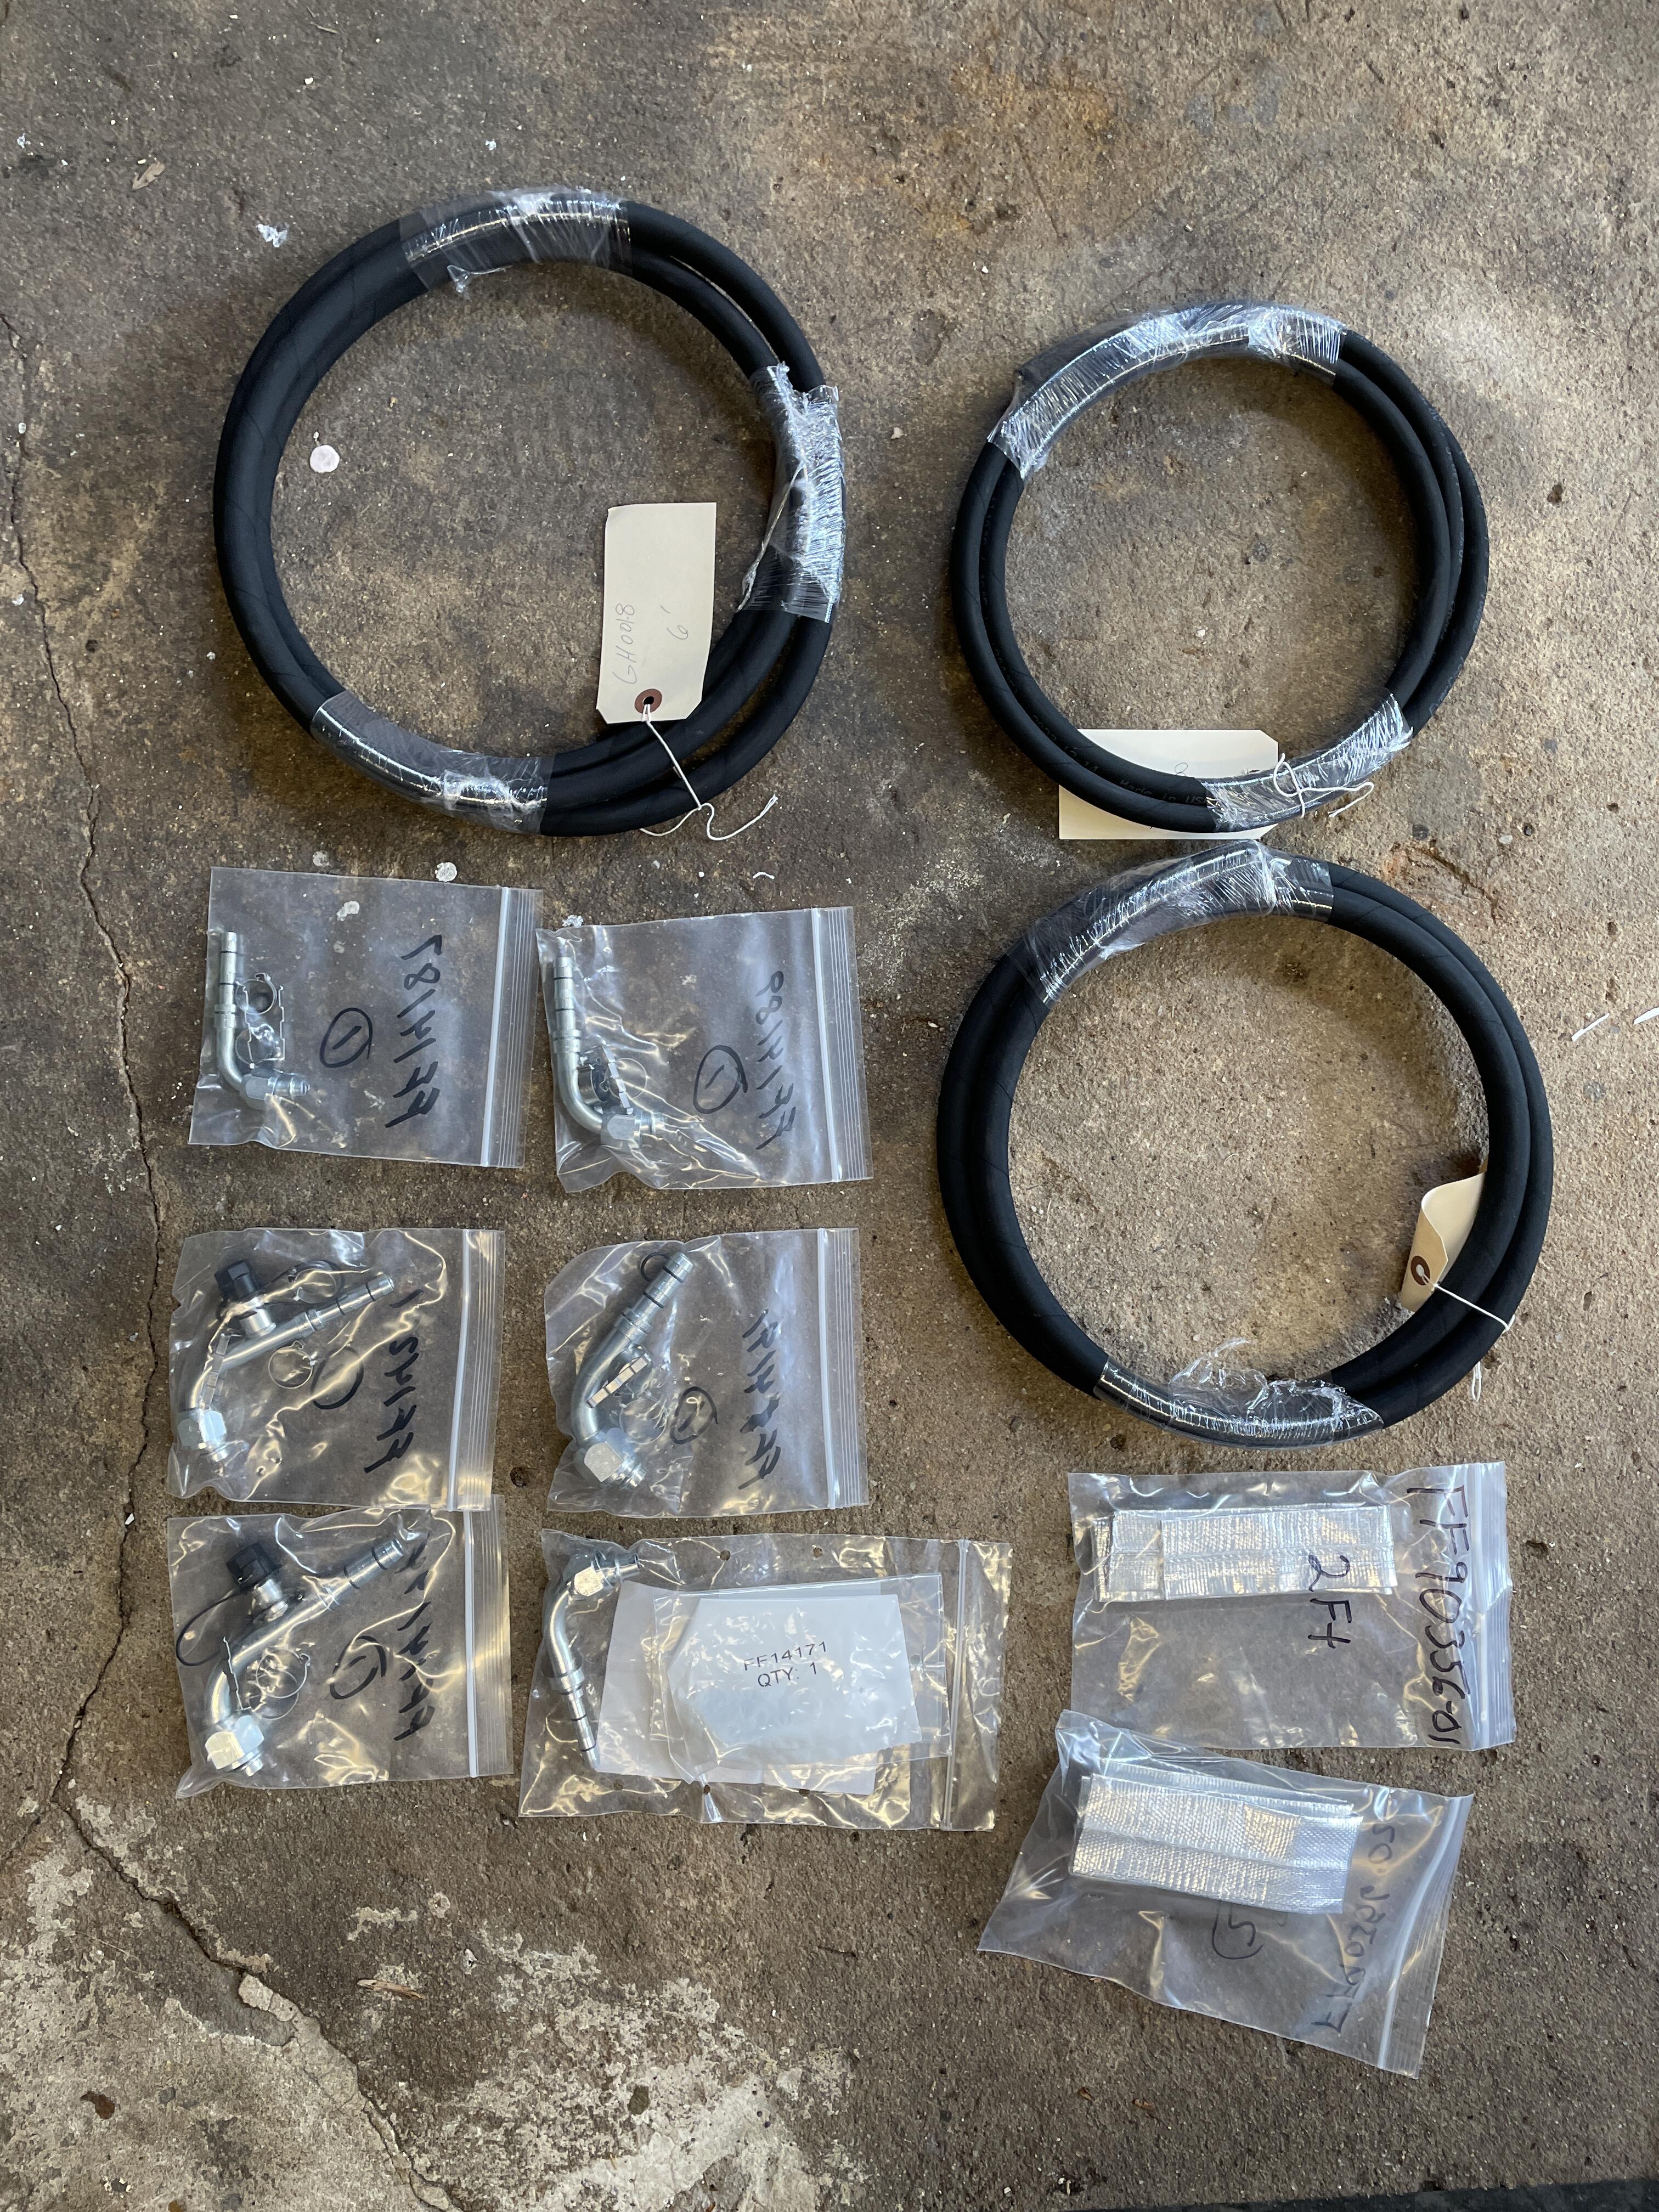
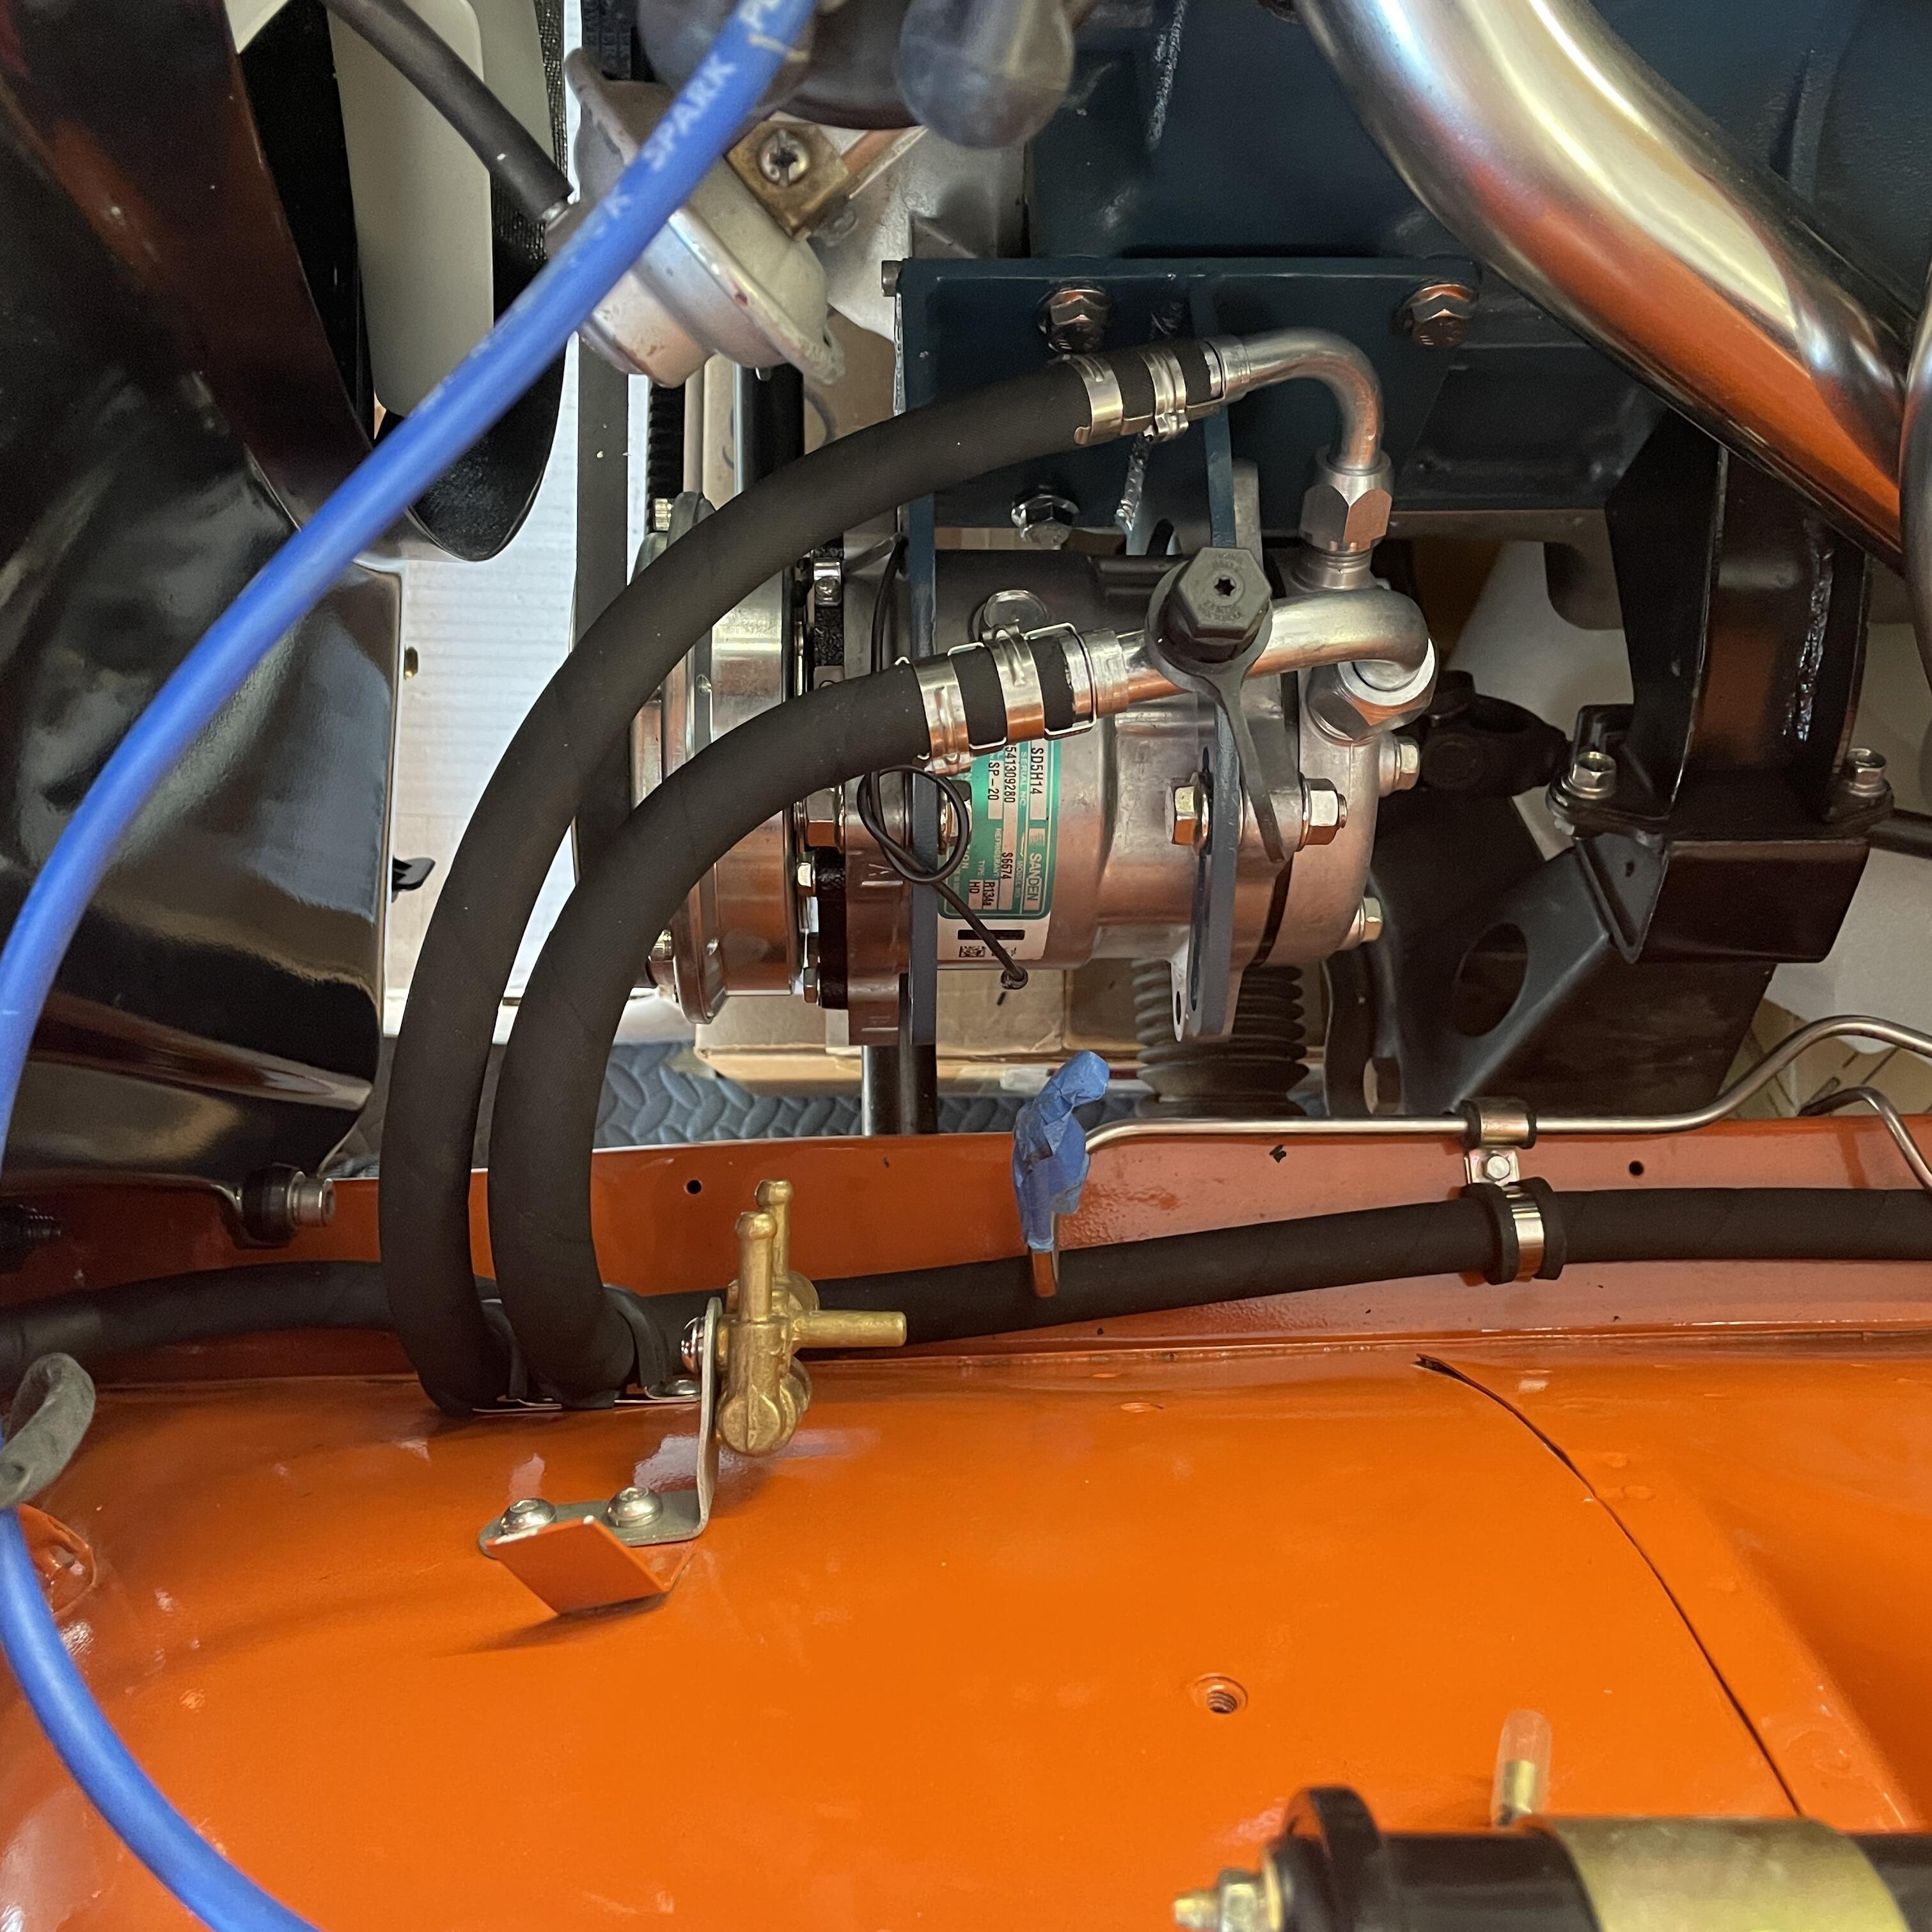
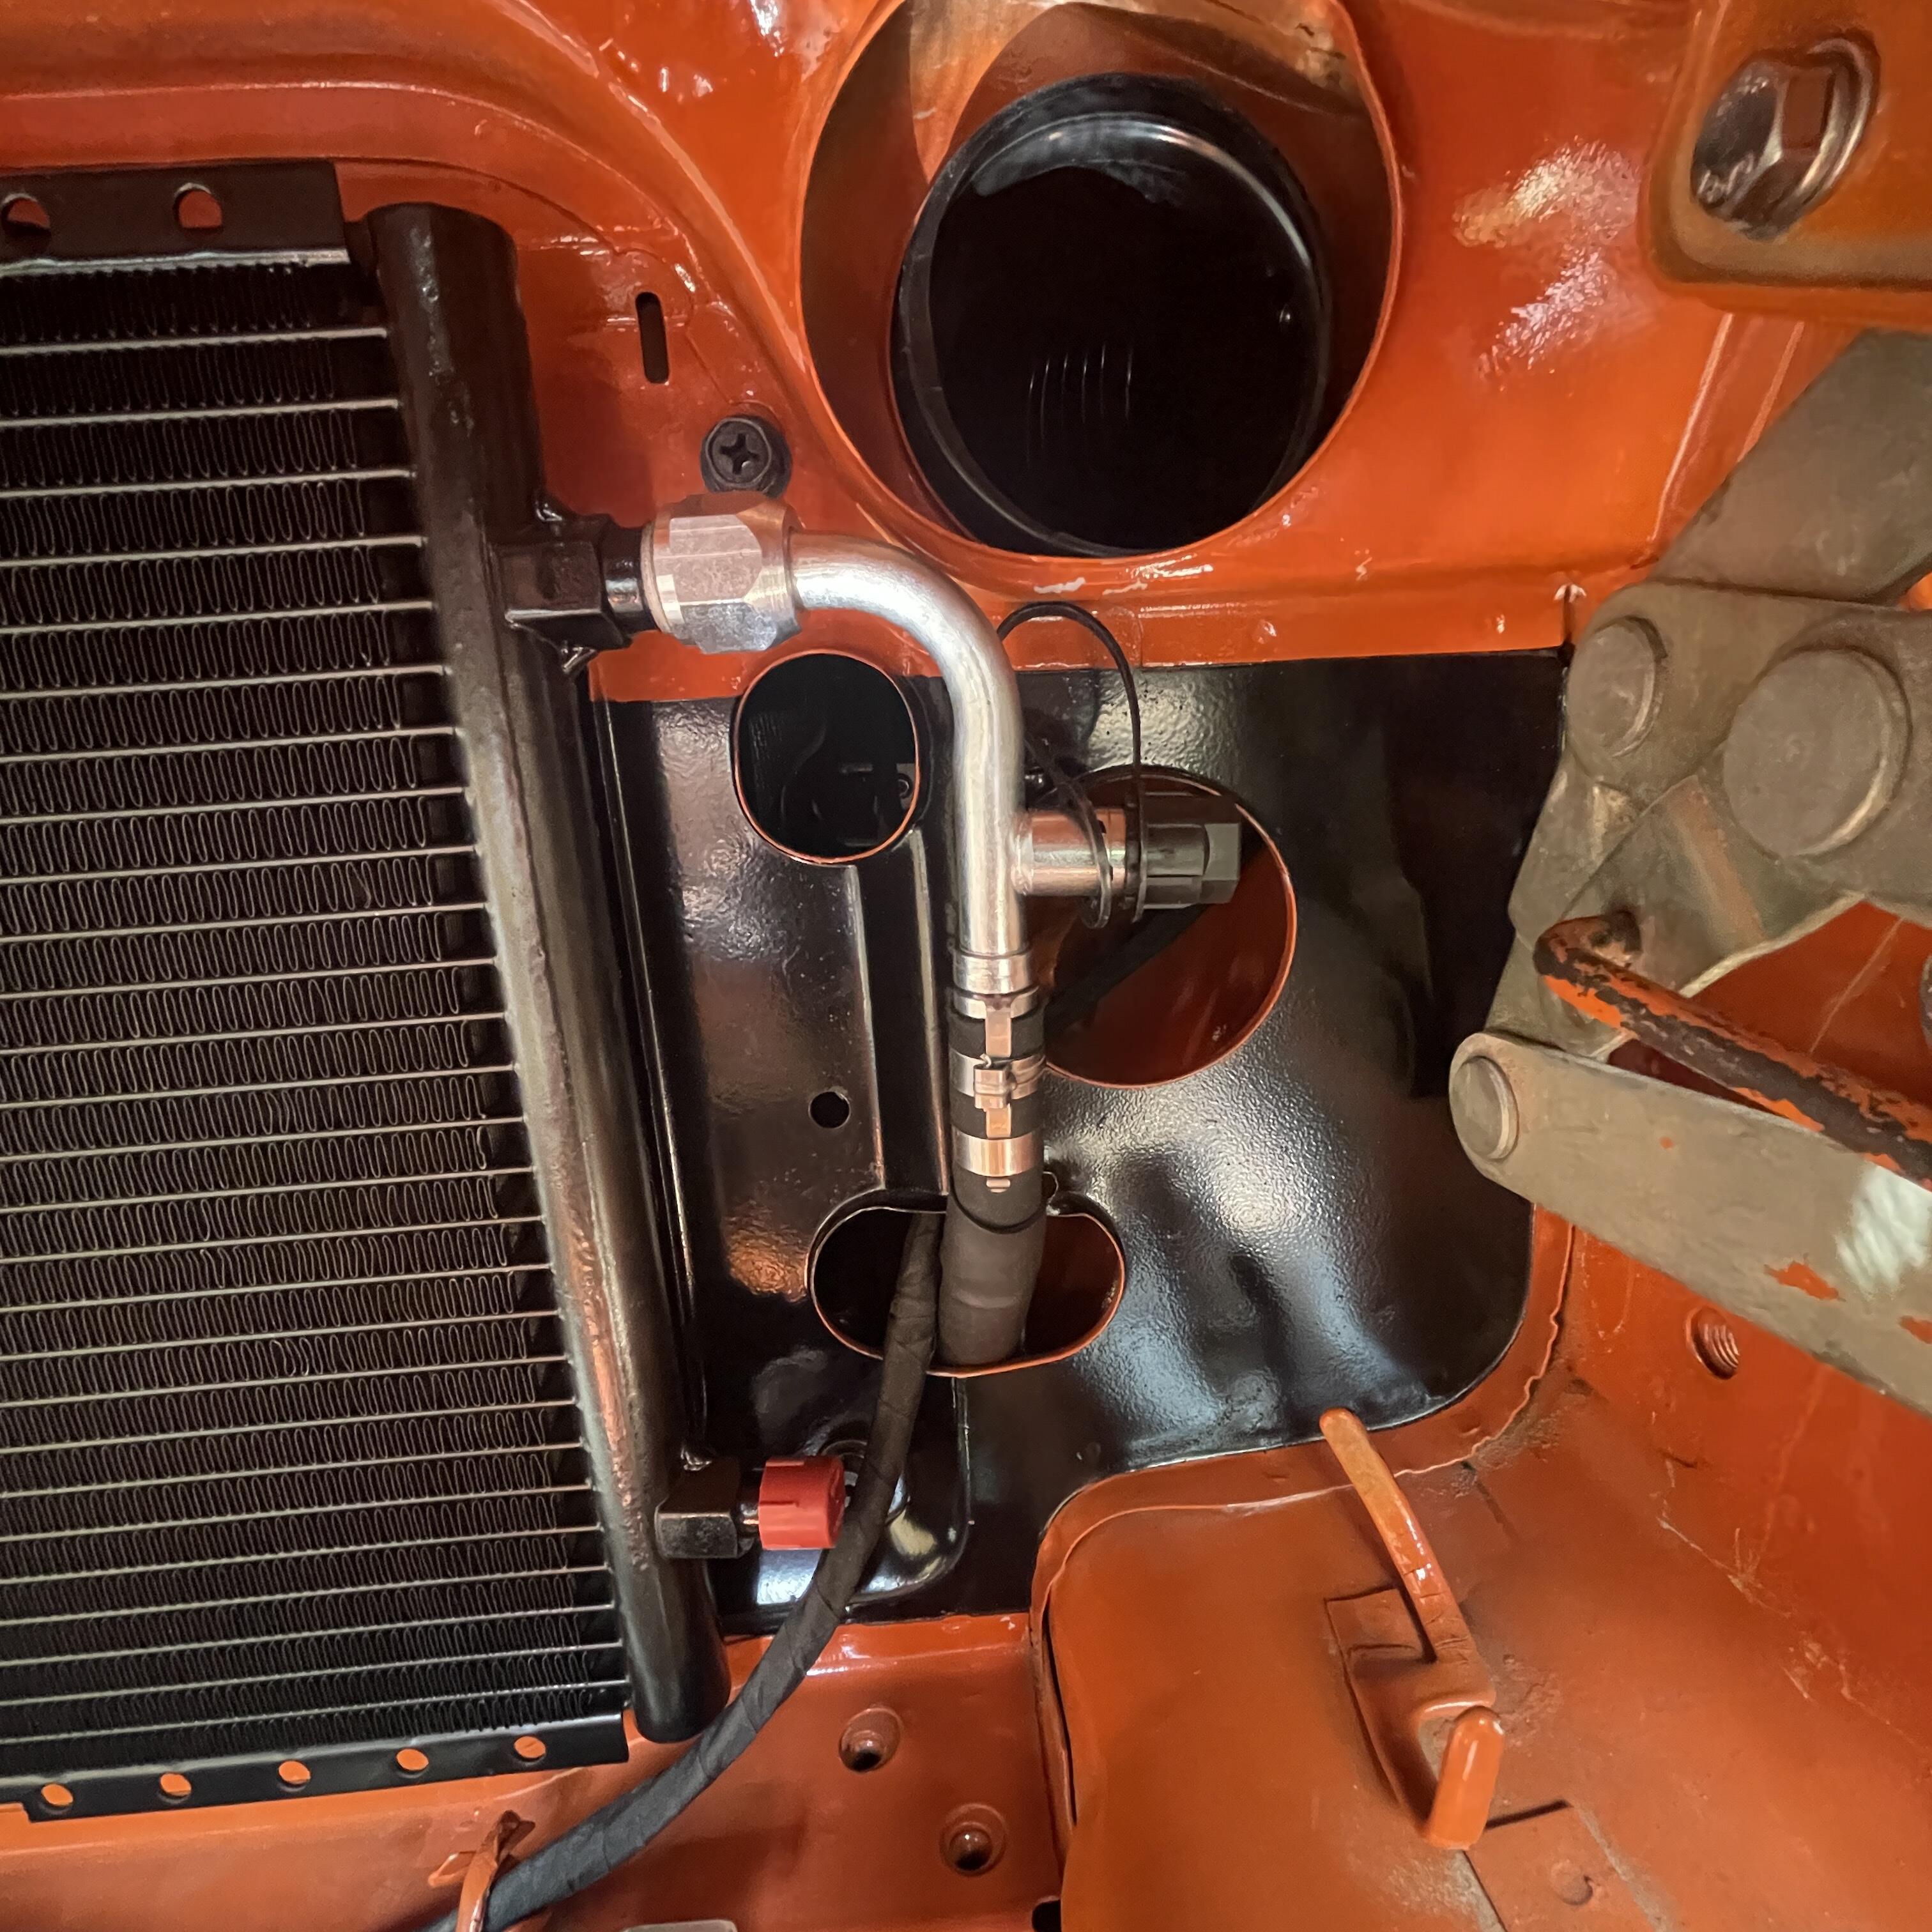
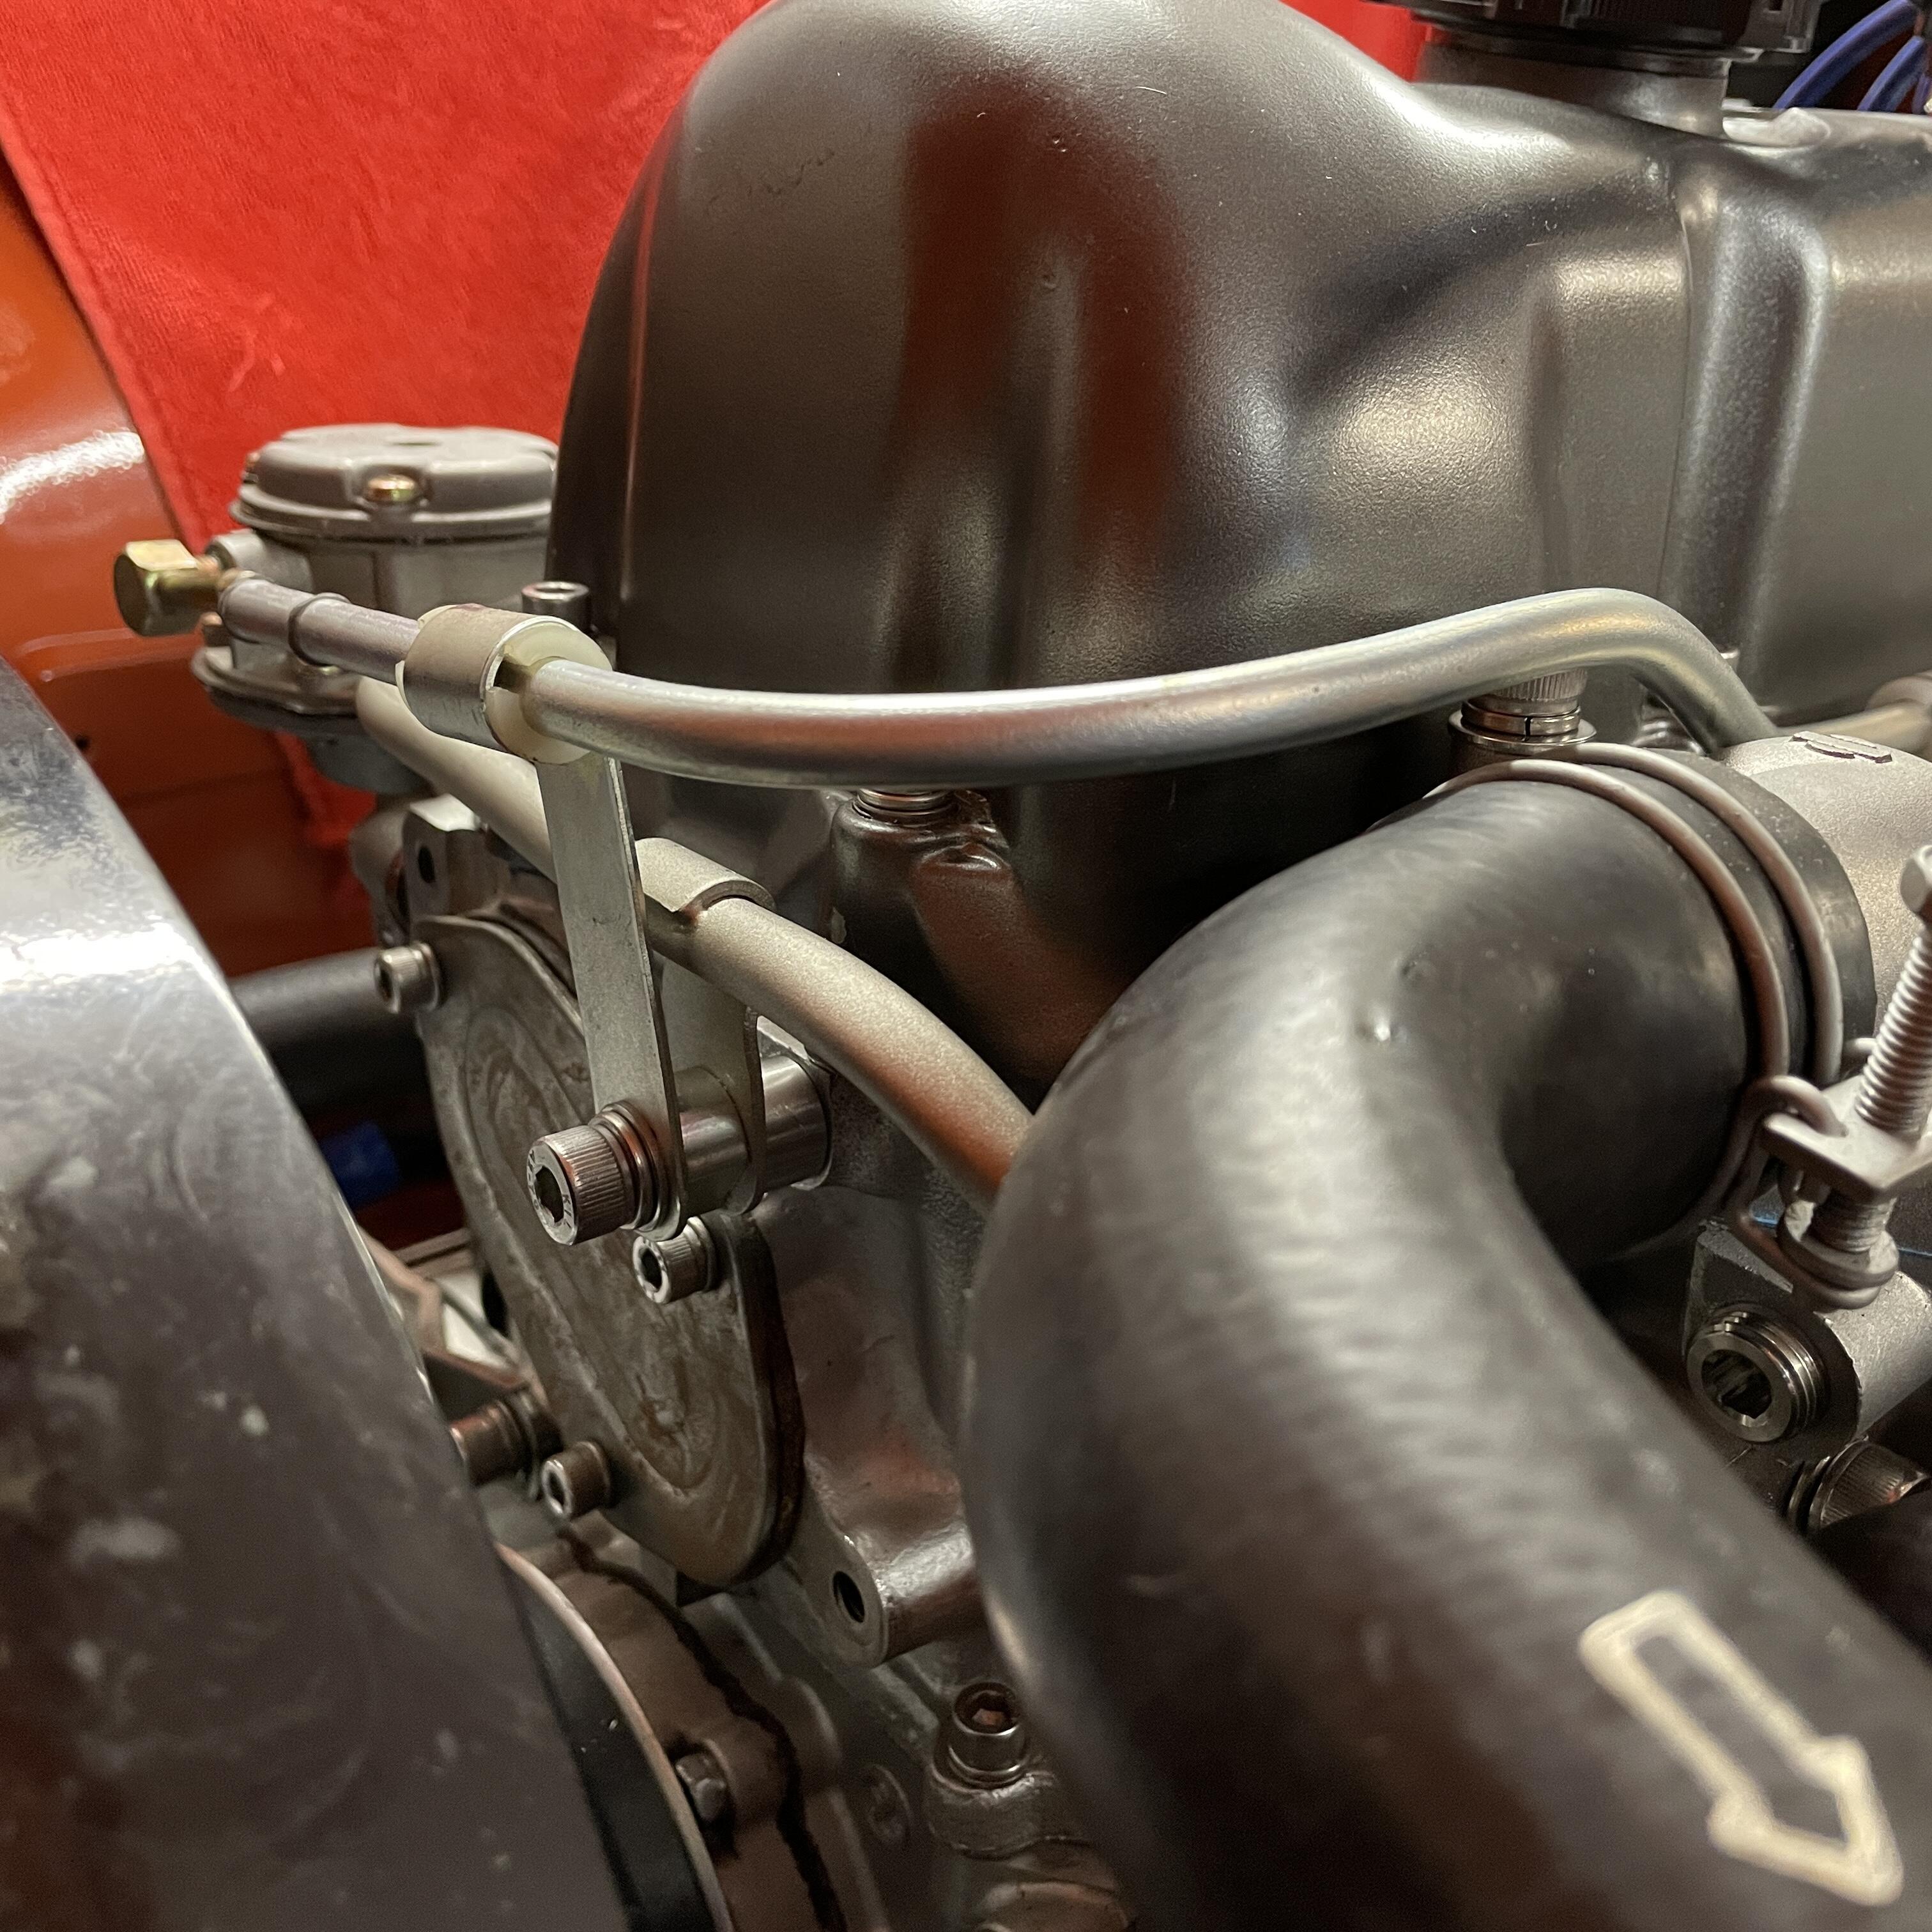
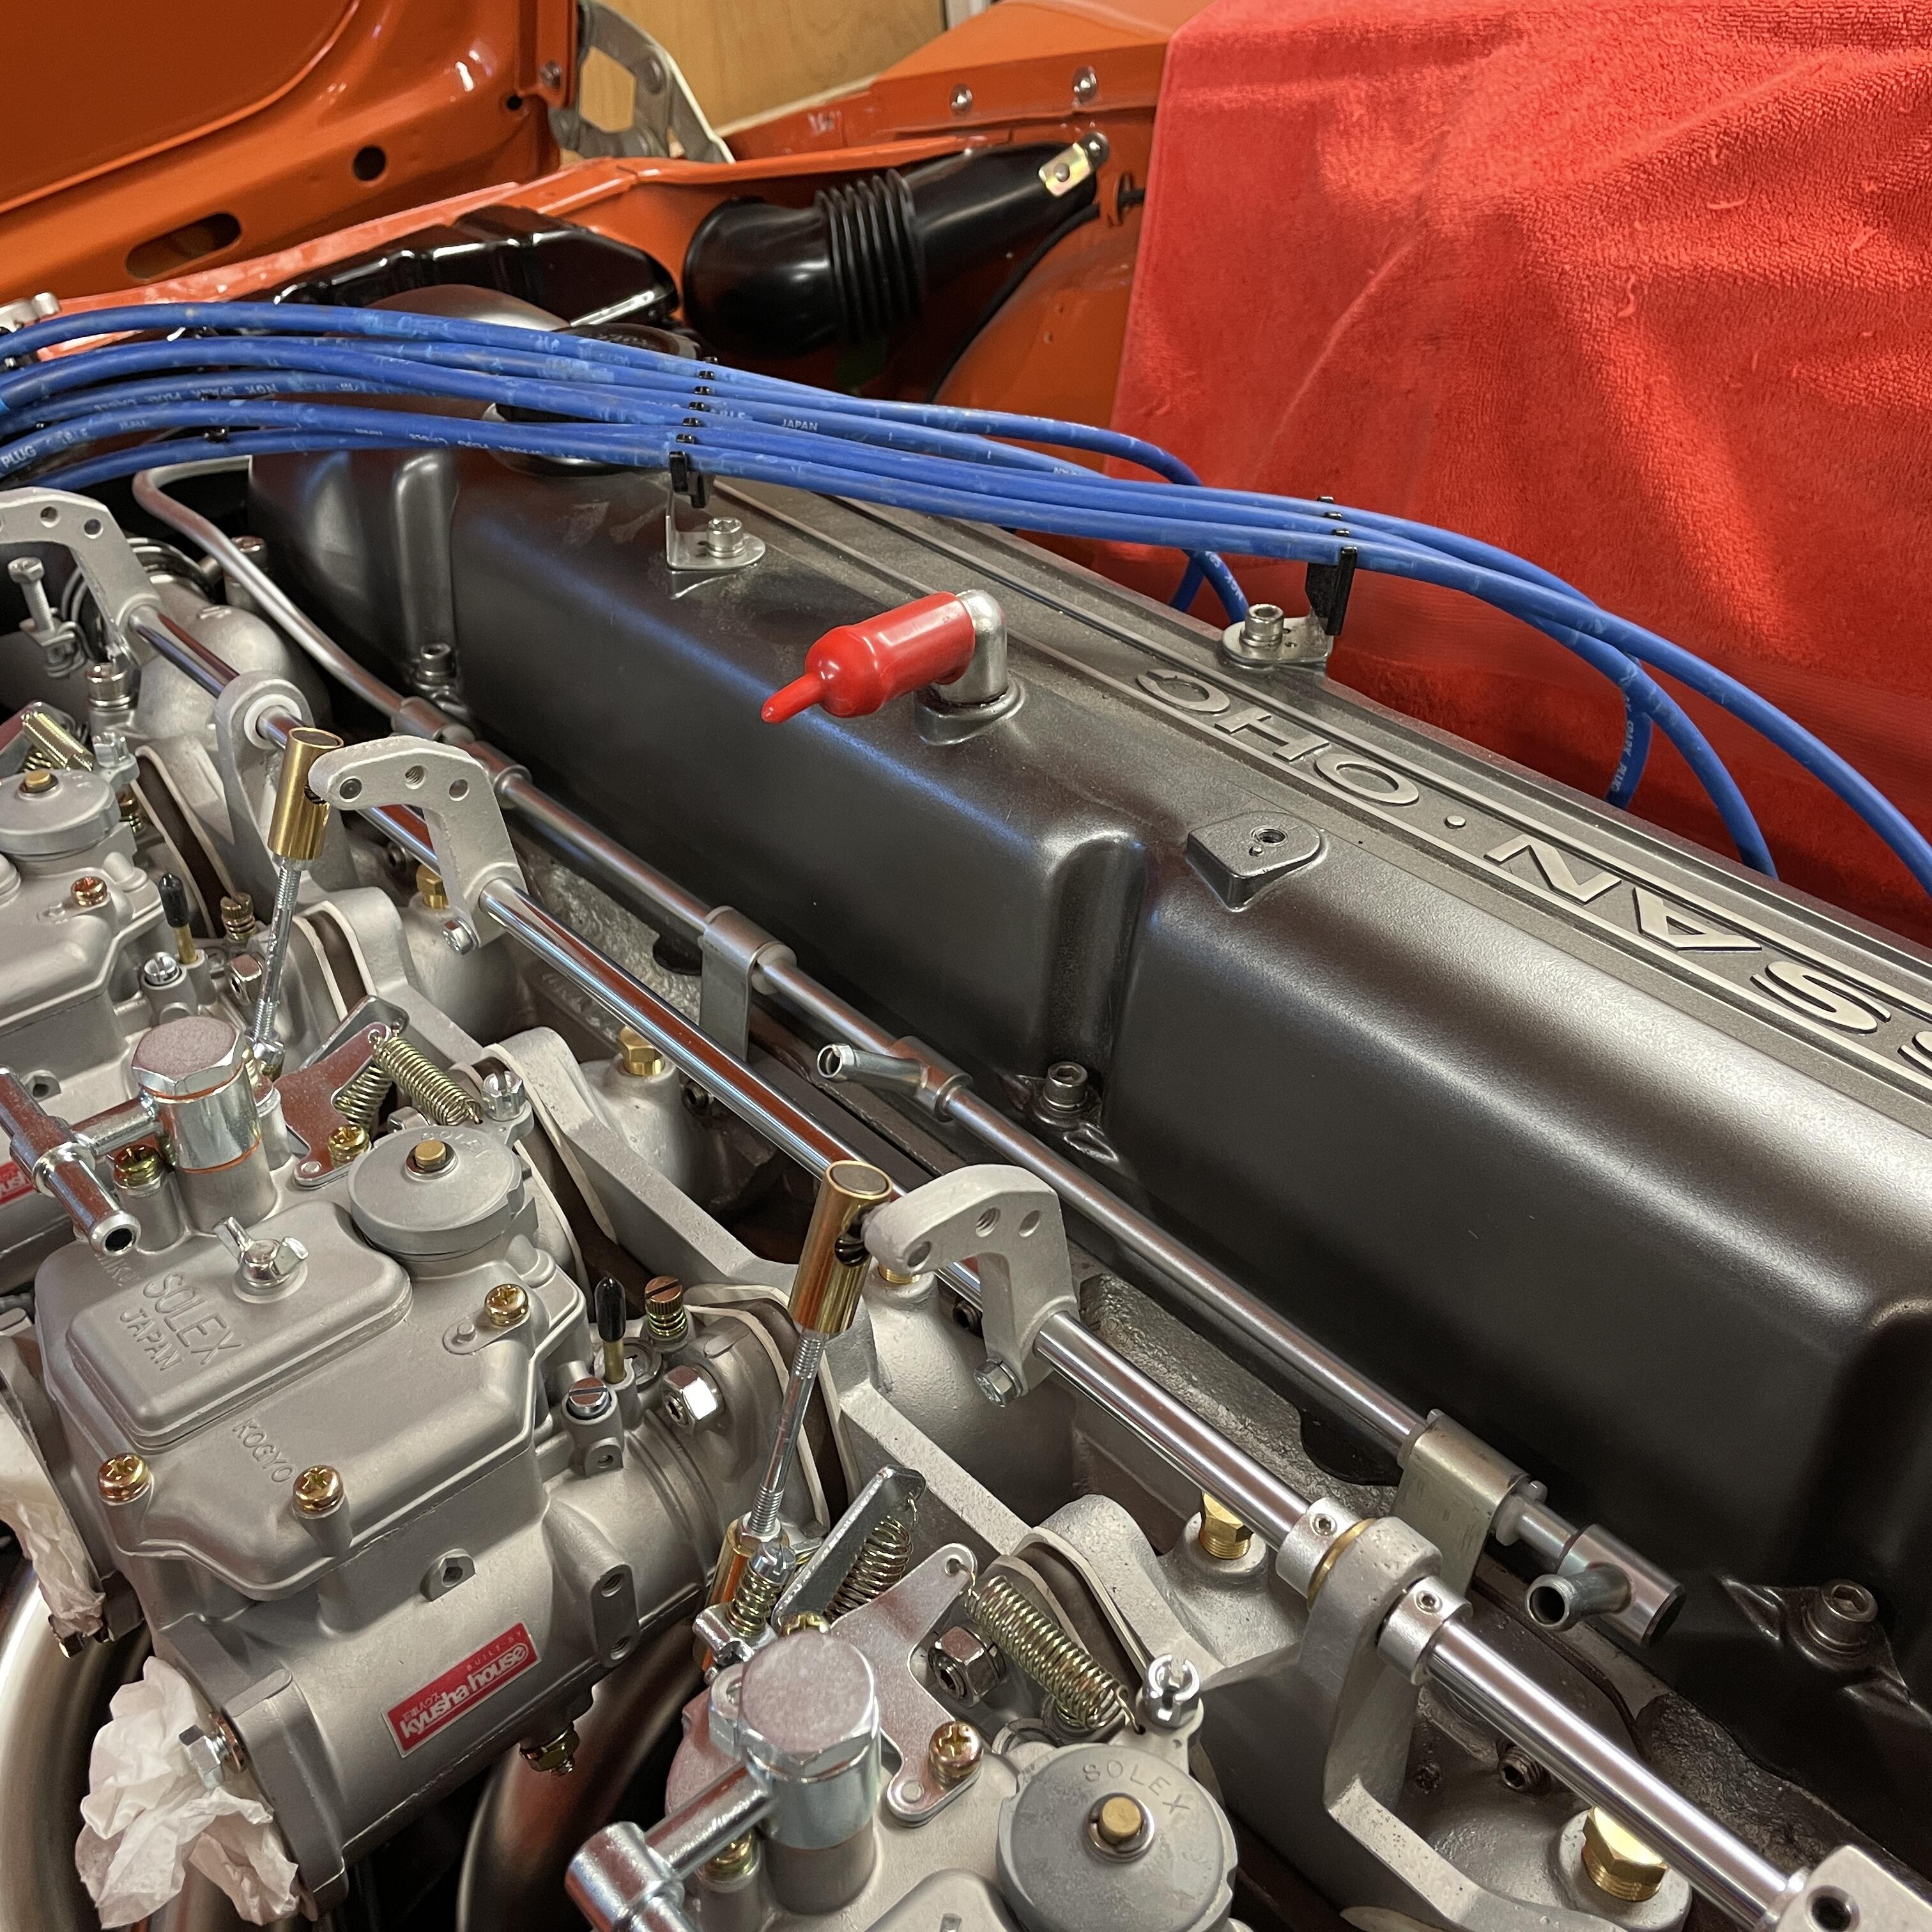
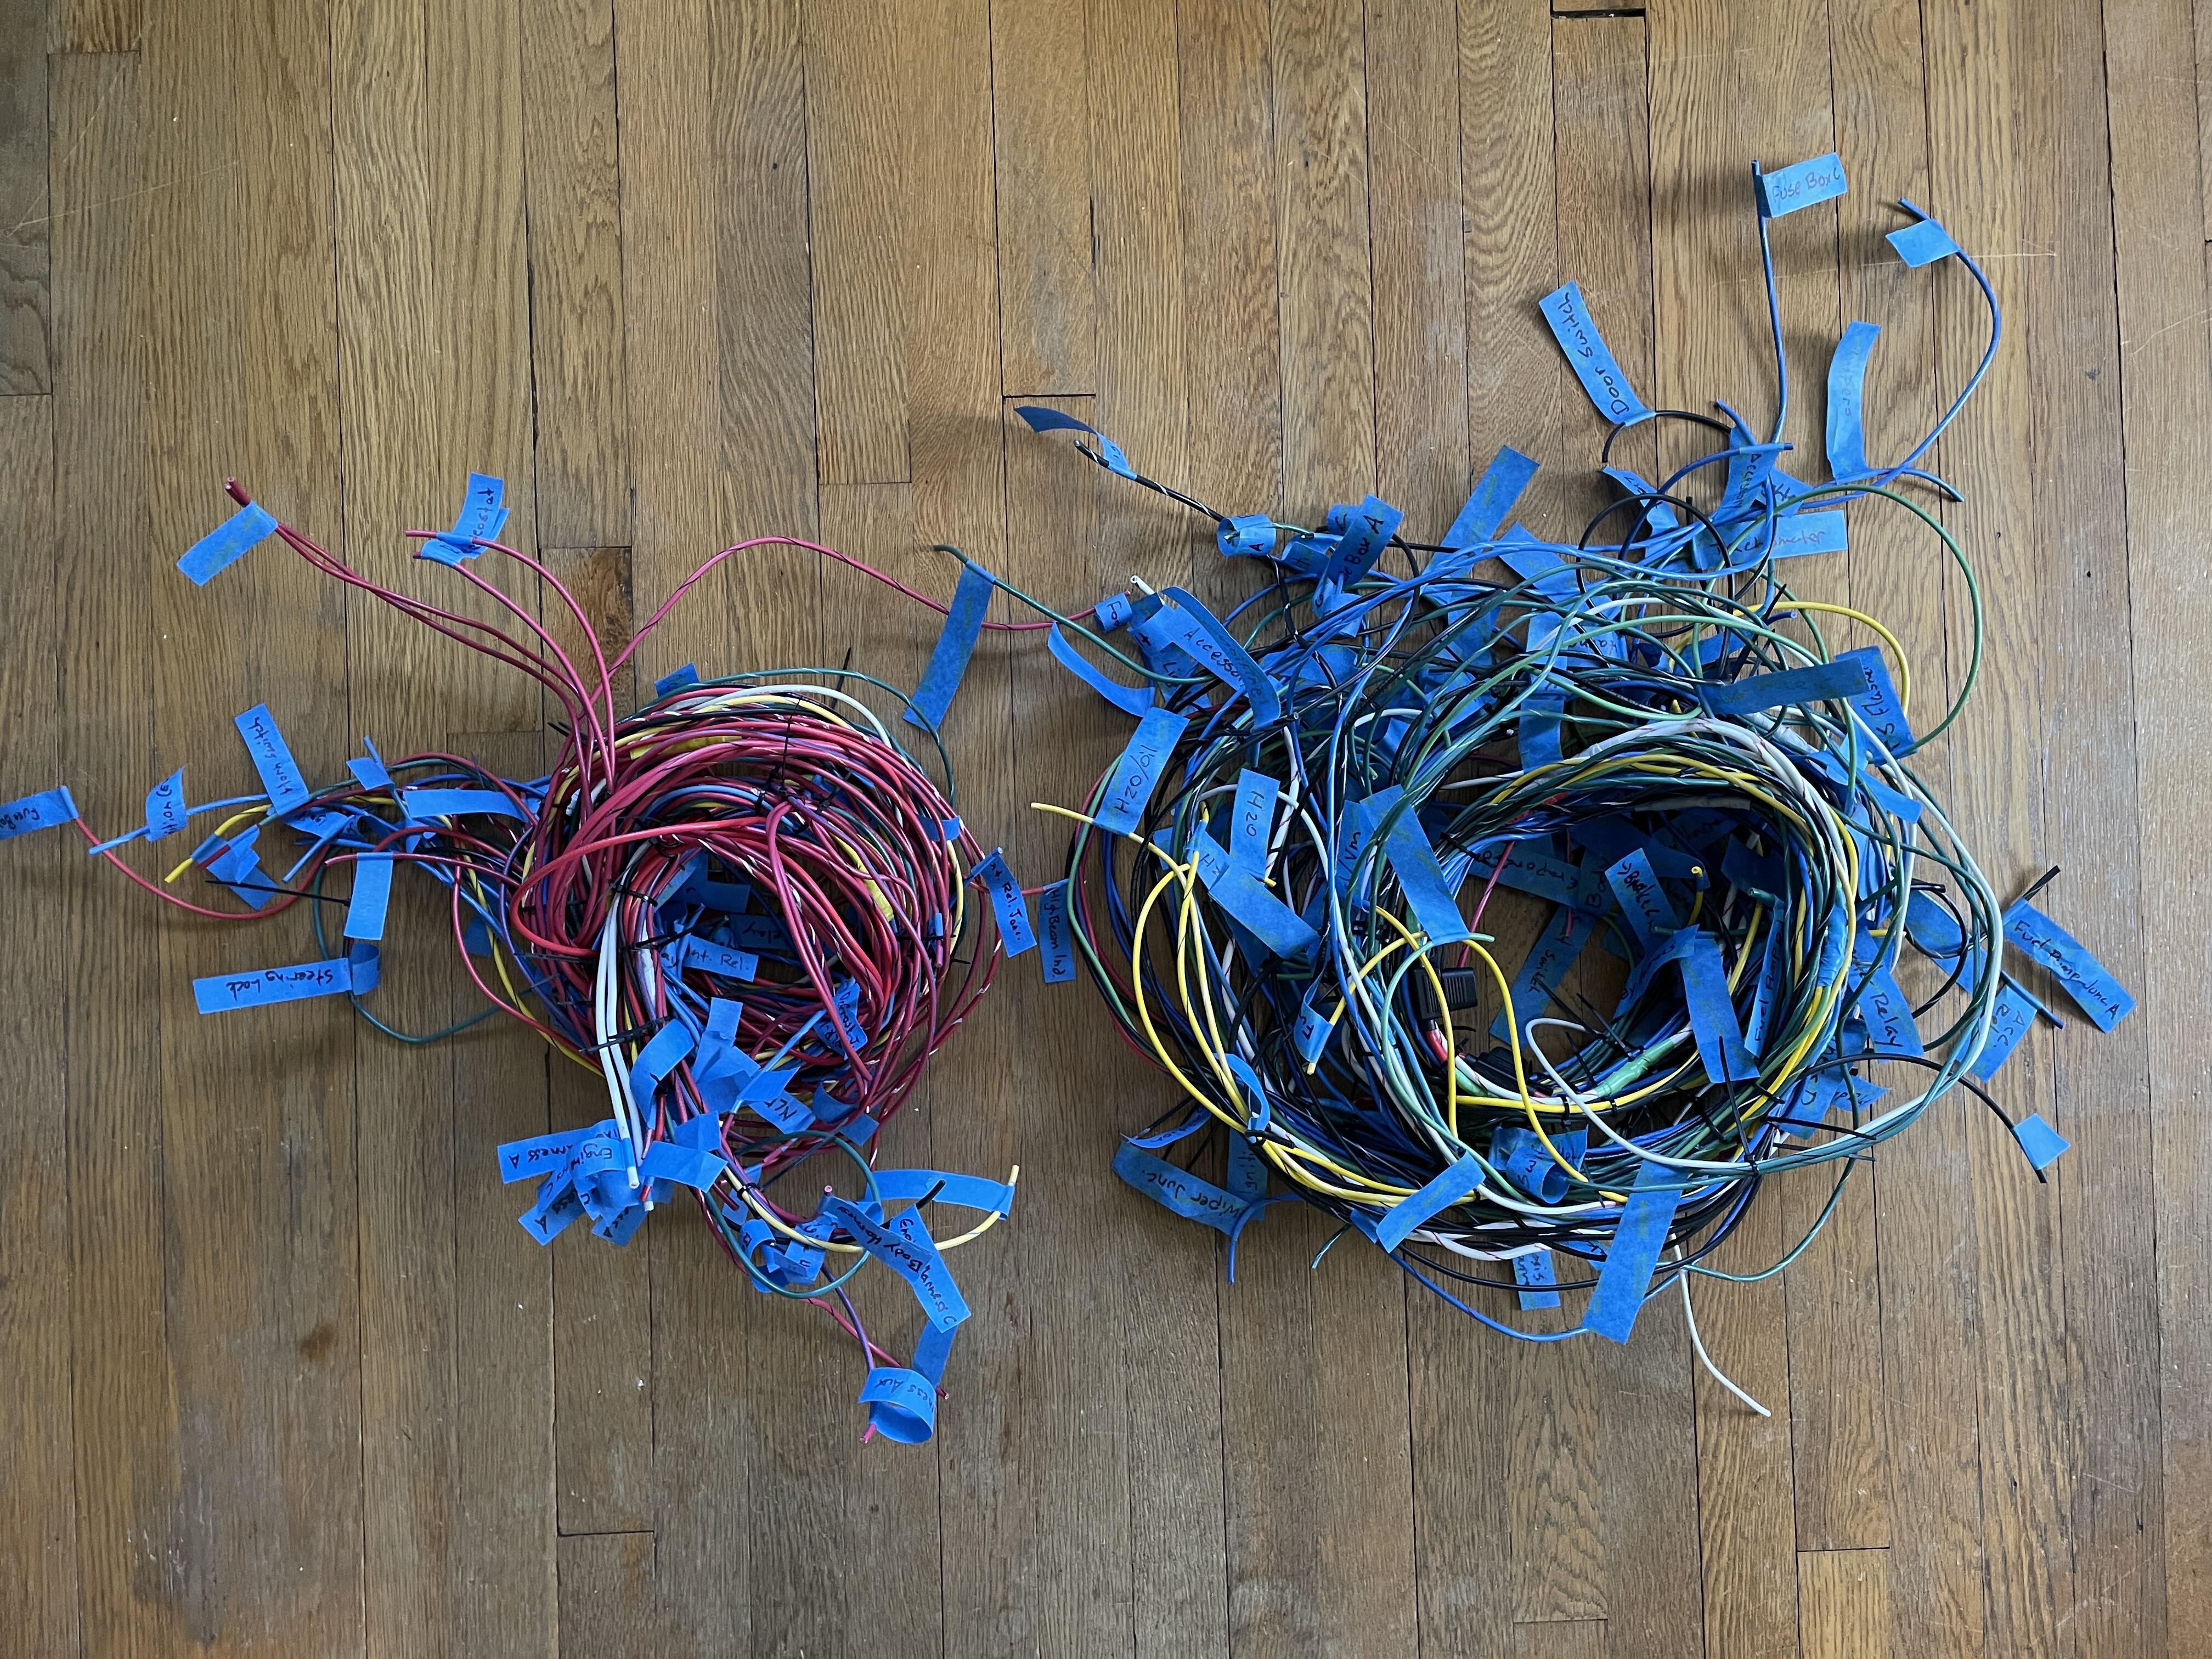
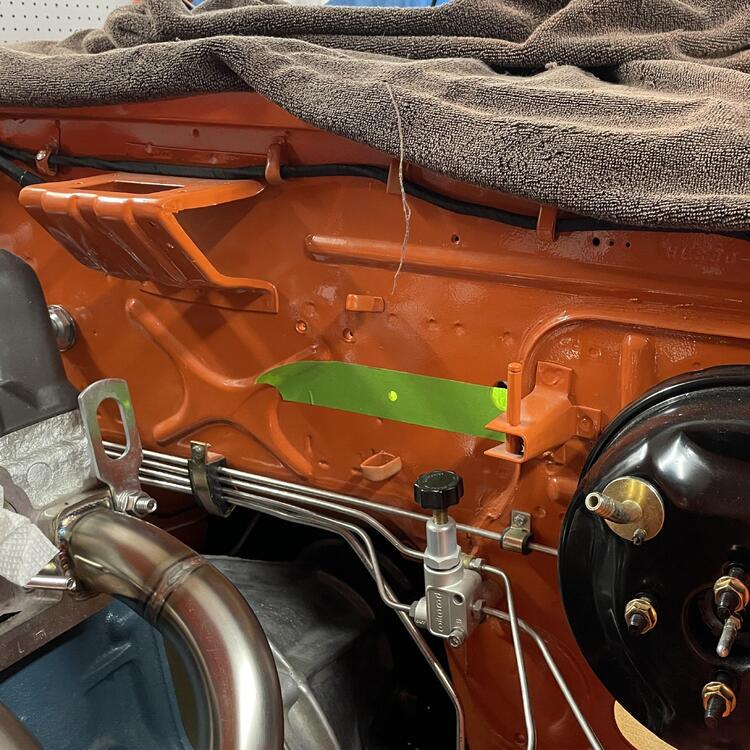
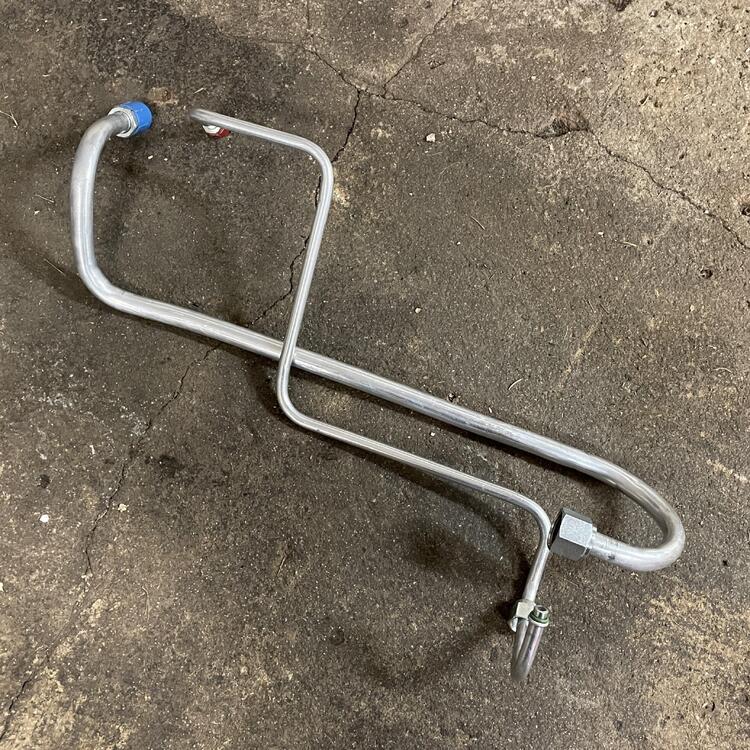
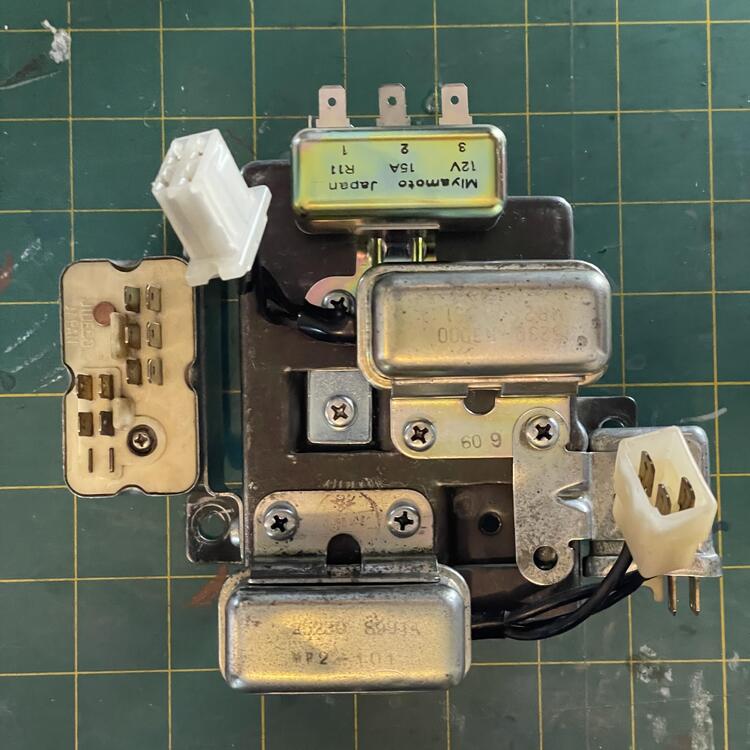
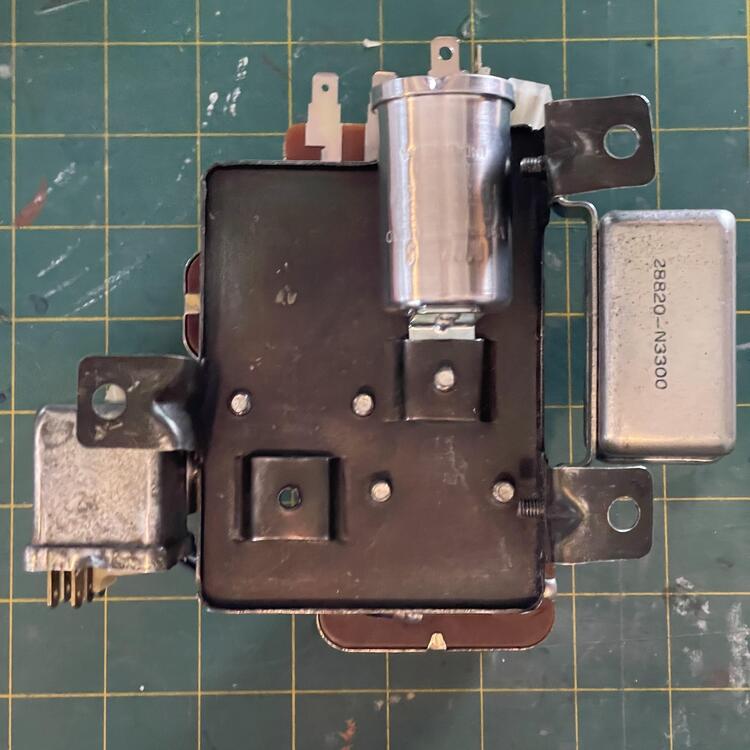
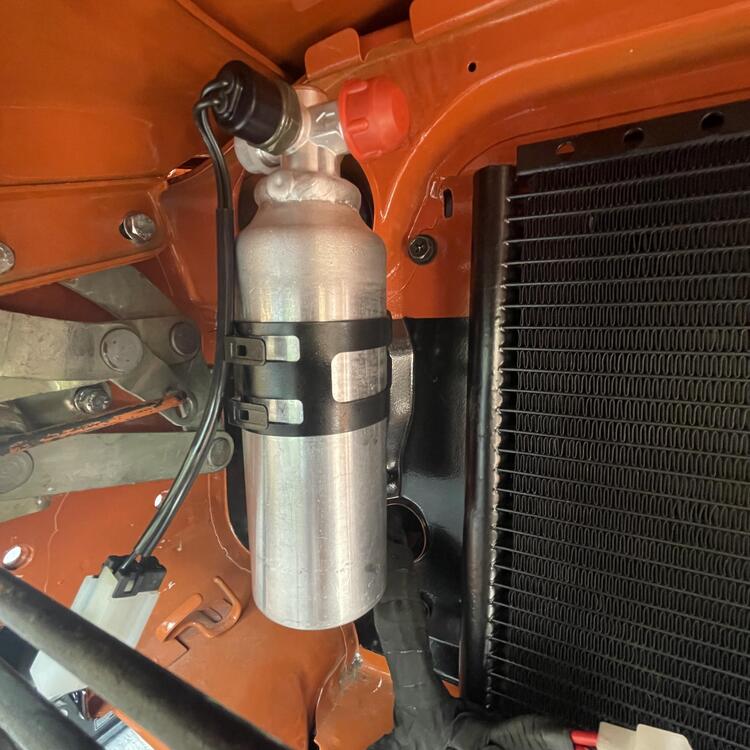
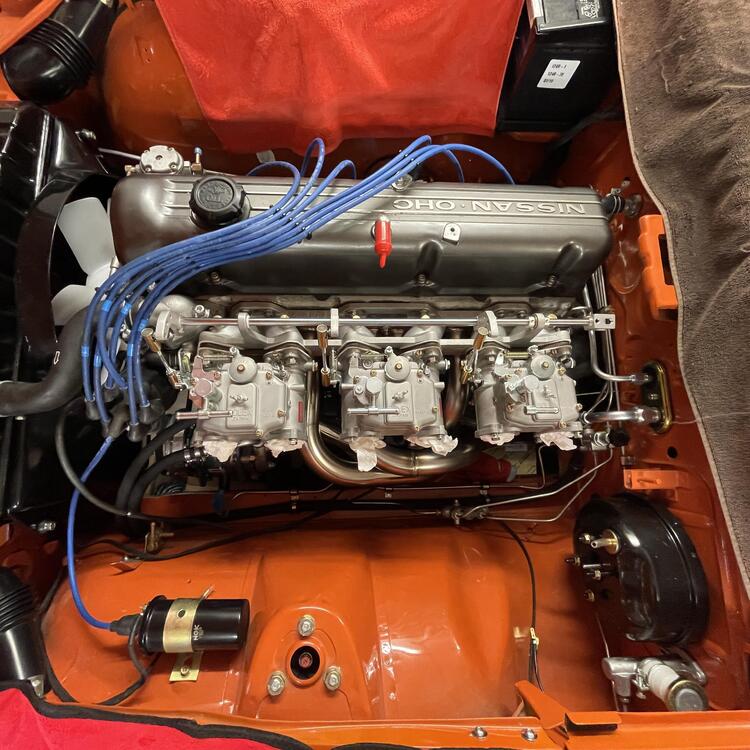
2 pointsOkay. Time for an update. I’ve done a bunch of random stuff, mostly on the dash wiring, but here and there with other stuff… First, I e been working on the AC lines. I went around and around in this one, looking into making stainless line, then buying the Godzilla kit, and then buying Vintage Air hard lines. I ended up settling on a mix of hardlines and Aeroquip E-Z Clip hoses. ”Prototypes (i.e. failed attempts): AC hard lines for inside the cabin are in, but ugly. This one was a pain. I went through several pieces until I got the lengths and bends right, and even these aren’t wonderful, so I’ll redo them one more time. I opted for Vintage Air U-Bend-Em aluminum hard lines because stainless was going to be far too expensive and the hose options I investigated didn’t quite cut it. These fit okay, but you can see the -06 line is too long and I had to cram it in. I got another so I could make them fit better. It’s important because right now they are pulling on the lines they connect to in the engine bay. The firewall insulator is OEM from eBay. It’s in pretty good shape considering its age. • • • I’ve also been scrounging up my relays, which I talk about in my wiring thread. The fun one to find was the seatbelt warning buzzer and the three wire door switch, but I was able to find them after a lot of direct messaging. I’m not 100% certain all of these relays are good (still testing), but I cleaned up the best looking pieces from my pile and assembled them a few weeks ago. • • • The wires for the dash harnesses are all cut, spliced, and zip tied, so the next step is test fitting them in the dashboard and marking where they will get cut for the terminals. I won’t be wrapping these until I know everything works, so that’s a ways off. They look like a mess here, but they’re simpler than they could have been. They’re pretty heavily modified, with the stereo and antenna deleted and add provisions for various new components like footwell lights and USB-C plugs. All of the splicing and positioning has been checked and verified against the diagram I made as well as the original harnesses. The wire is heavier gauge and marine insulation (yes, overkill). Will it fit? We will find out. Why? Burnt wires, the PO used a harness for an automatic in a manual car, I wanted to incorporate the fuel harnesses into the dash harness, and to make it fresh. That right there is over a year in the making. Glad it’s over. • • • Now on to the engine bay. Carb-side AC lines are done! The hose for the other side is in the mail, so I’ll knock that out soon. You can see the prototype of the hard line in the photo above. There are two problems with it: the max length is 72 inches, which is about two inches too short to get a nice clean routing, and about six inches too short to tuck it away and make it discreet; and the end is just slightly wrong for the R32 Skyline AC drier/receiver in the last photo in this sequence. I like that drier too much to switch it out and I’m uneasy about modifying the end of the line and potentially not getting a tight seal, so hoses it is! The hose for the E-Z Clip system bends tighter than regular AC hose, but it doesn’t bend quite as tightly as I had hoped (it’s rated at a 2” radius for the -08 hose) so it gets weird in a couple of places, and I’m still unsure if these Danfoss E-Z Clip fittings are going to be air tight. We will find out when I try to charge the system. You can barely make out where I sleeved the hose at points where it might rub on something. I used three layers of heavy duty shrink wrap for this and I think it looks almost like it’s supposed to be there. All I need to do with these, though, is add a hose separator that is the right size to keep that -08 hose from flexing too much. I have two of them in the mail to me now. • • • I installed the fuel rail for the triples the other day. This was surprisingly involved. I thought I would just slap it on and call it done, but there were several barriers; nothing crazy, but time consuming and requiring thinking it through. I had intended to use the empty M10x1.0 holes that are next to the M8 manifold mounting holes, but the rail brackets aren’t drilled for that, and the manifold nuts are too close. I tried a bunch of different workarounds but in the end it was easier to use the manifold studs as the mounting points. To do that I had to use longer studs, which meant grinding some relief into the manifold. I REALLY didn’t want to do that, but I caved and broke out the Dremel tool. Was I paranoid I was going to pierce the runners? 100% But I didn’t. I switched to hand files after a while just to make sure I wasn’t going through it too fast. All those years of model making have paid off in writes on this car. So once that was done I put the thing together and realized these rails are meant to go with electric fuel pumps. I have a NOS mechanical pump on this car and I worked too damned hard to find it to go dumping it for this, so the rail got a trim and beads rolled on the end. Looks like it’s supposed to be like that now. After that I just had to tweak the bends to make sure it cleared everything and it’s good to go. Now to figure out the fuel hoses and find a fuel filter bracket. • • • So the big question now is… HOW TO ROUTE THE FUEL LINES? I would like to use the return line, so I would need to send the fuel back to the other side somehow. Right now I am leaning toward installing my Mikuni cooling bodies and running a line across the front of the engine under the coolant line, but I’m trying to think of something more elegant.


 2 points
 -
2 points
-
Your shop is doing beautiful work, very interested to see how they're going to re establish the bodyline on the door, not the easiest piece to work with.2 points
-
Those who follow my Instagram already might have noted that the 240Z ist back at my home. The bodyshop have speed up things to "finish" phase 1 of the bodywork. As far as my limited knowledge goes, i have to say they did an excellent job. They spent quite some time getting everything right, finding the required information and aligning with me, whenever needed. Here are some random photos of the process, which i haven't shown you yet: Floorpan replacement passenger side (2nd time, after the first bodyshop messed it up and with the new KFV panels): Done, with footrest installed: Roof installed and dents removed: New fuel lid flap surrounding area (the old lid would not line up with the body, since the previous bodyshop messed something up): US rear side marker holes closed for correct euro-spec look: One of the many random small areas which they had to fix.. Lower door area got a rust repair: Overall all these small little areas took up 600 hours of work. The project is far beyond reasonable, but i still like the idea to properly safe and restore a "rare" euro spec car back to former glory. This is the current state at the Bodyshop: you can see the side bodyline is still missing in the fender and door (previous owner thought it was nice to "clean" it. But Front end body assembled: Yesterday i got it delivered back in a nice closed trailer: Now it's finally back in my workshop Just in case you wonder: These are all (except the rear end and Passenger side front end) Parts that got replaced on the car. So it's safe to say that aroun 50% of the body has been replaced within the last 5 years. But that was worth it. Now the body is almost back to factory spec. May task is now to install all the rubbers, bumpers, spacers, hinges, remaining panels etc, to bring it back to the bodyshop to have the panel gaps adjusted, the side bodyline hammered back in and maybe fix some areas which don't fit. I'll do a walkaround of the car in the coming days and post it here. and i've already started installing some items. so expect some updates soon.2 points
-
2 pointsIt sure sounds like you are close on this issue, I live up in the Chehalis area and have some time tomorrow to come down and see if I can help. No guarantees but maybe a second set of eyes on the issues could help. I can bring my test tools and some spare parts to swap and test. If you have time and would like the help PM me with the address and info.2 points
-
2 pointsI don't remember the model. It was probably built in the 40s. It didn't roll, it went down an embankment backward, bucket up, dug in, and flipped on its backside, like an upside-down turtle, which explains my fear of the nose lifting on my Z. Turn one at Portland International Raceway. 120+, the steering is best described as turning the wheel and wondering how long it will take to turn. That was fun learning to steer with the throttle.2 points
-
2 pointsSuccess...! (I hope) I was curious as to the wiring of the connectors associated with the wiper motor. I referenced the ABATE wiring diagram (excellent) and found a discrepancy in the configuration of the wires in the 6 wire connector that the wiper motor plugs into. Wish I had started there, but I could not be a happier guy right now...! Two wires were swapped...The Blue (L) wire and the Blue with Red Stripe (L/R). The intermittent relay still sounds like it is clicking on and off no matter which setting the switch is on, but I am elated that I can actually turn the wipers OFF...! I appreciate everyone's comments and suggestions. Persistance and beer work wonders...!2 points
-
At least we have it sorted out. It was $2.05 for the bushing at the Nissan dealer I use.2 points
-
It looks like they cut close to where they have the black marker line above the previous welded seam, I can't say for sure what technique they used but it is common to fit the new pan as close as possible to the original metal as below, then with a thin cutoff disc cut through both layers of metal at the same time. That results in a seam that is matched above and below.
 1 point
 -
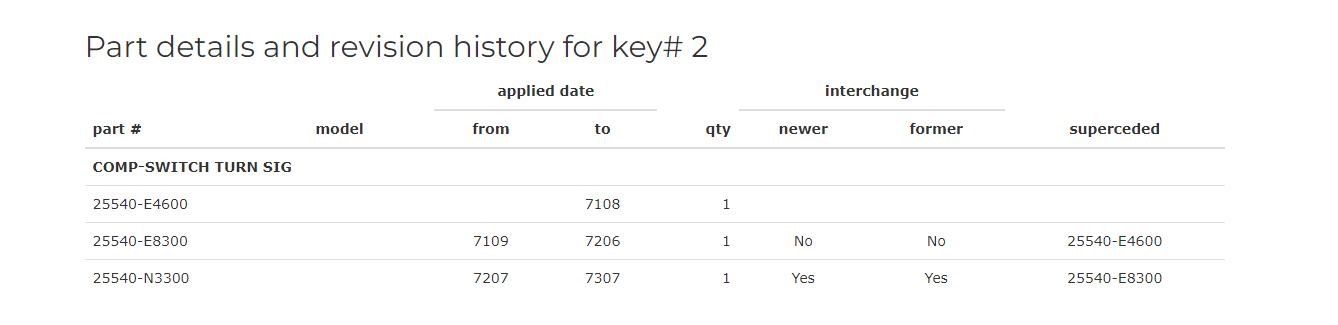
1 pointI have also noticed that issue on the on-line version, not all part numbers are shown for a particular date range. It is misleading, however if you click on one of the part numbers you do seem to get the correct list with proper date ranges, for the most part. The thing that bothers me the most is the truncated descriptions. I have the CD version of the 1970 - 1978 parts book that was sold by Courtesy Nissan years ago and I prefer to use it. Here is what you see when you click on 22540-N3300 under item #2
 1 point
 -
1 pointCPM shows all the same part number for the clip 240-280 Part number 96809-19700 = discontinued I have some used ones, but the ZCD one should work fine too.1 point
-
1 pointI was very impressed with that same throttle by wire system BMW used on the S54 M engine, I had to reluctantly install it when I couldn't find anyway to delete it from the programming. I couldn't believe the pedal feel would be as good as mechanical linkage but was pleased to be proved wrong.1 point
-
1 pointI had the same issue. I think the rear hatch retainer clip is unique to the hatch lock and is a bit bigger. i ended up ordering this clip and taking a dremel tool and widening the gap to make it fit the lock. Its a bit on the small side, but it did work. Crown Automotive-2583377 Lock... https://www.amazon.com/dp/B077Z8NKQ6?ref=ppx_pop_mob_ap_share1 point
-
1 pointEverything in this thread has been about that. The spark at the points is what causes the spark from the coil.1 point
-
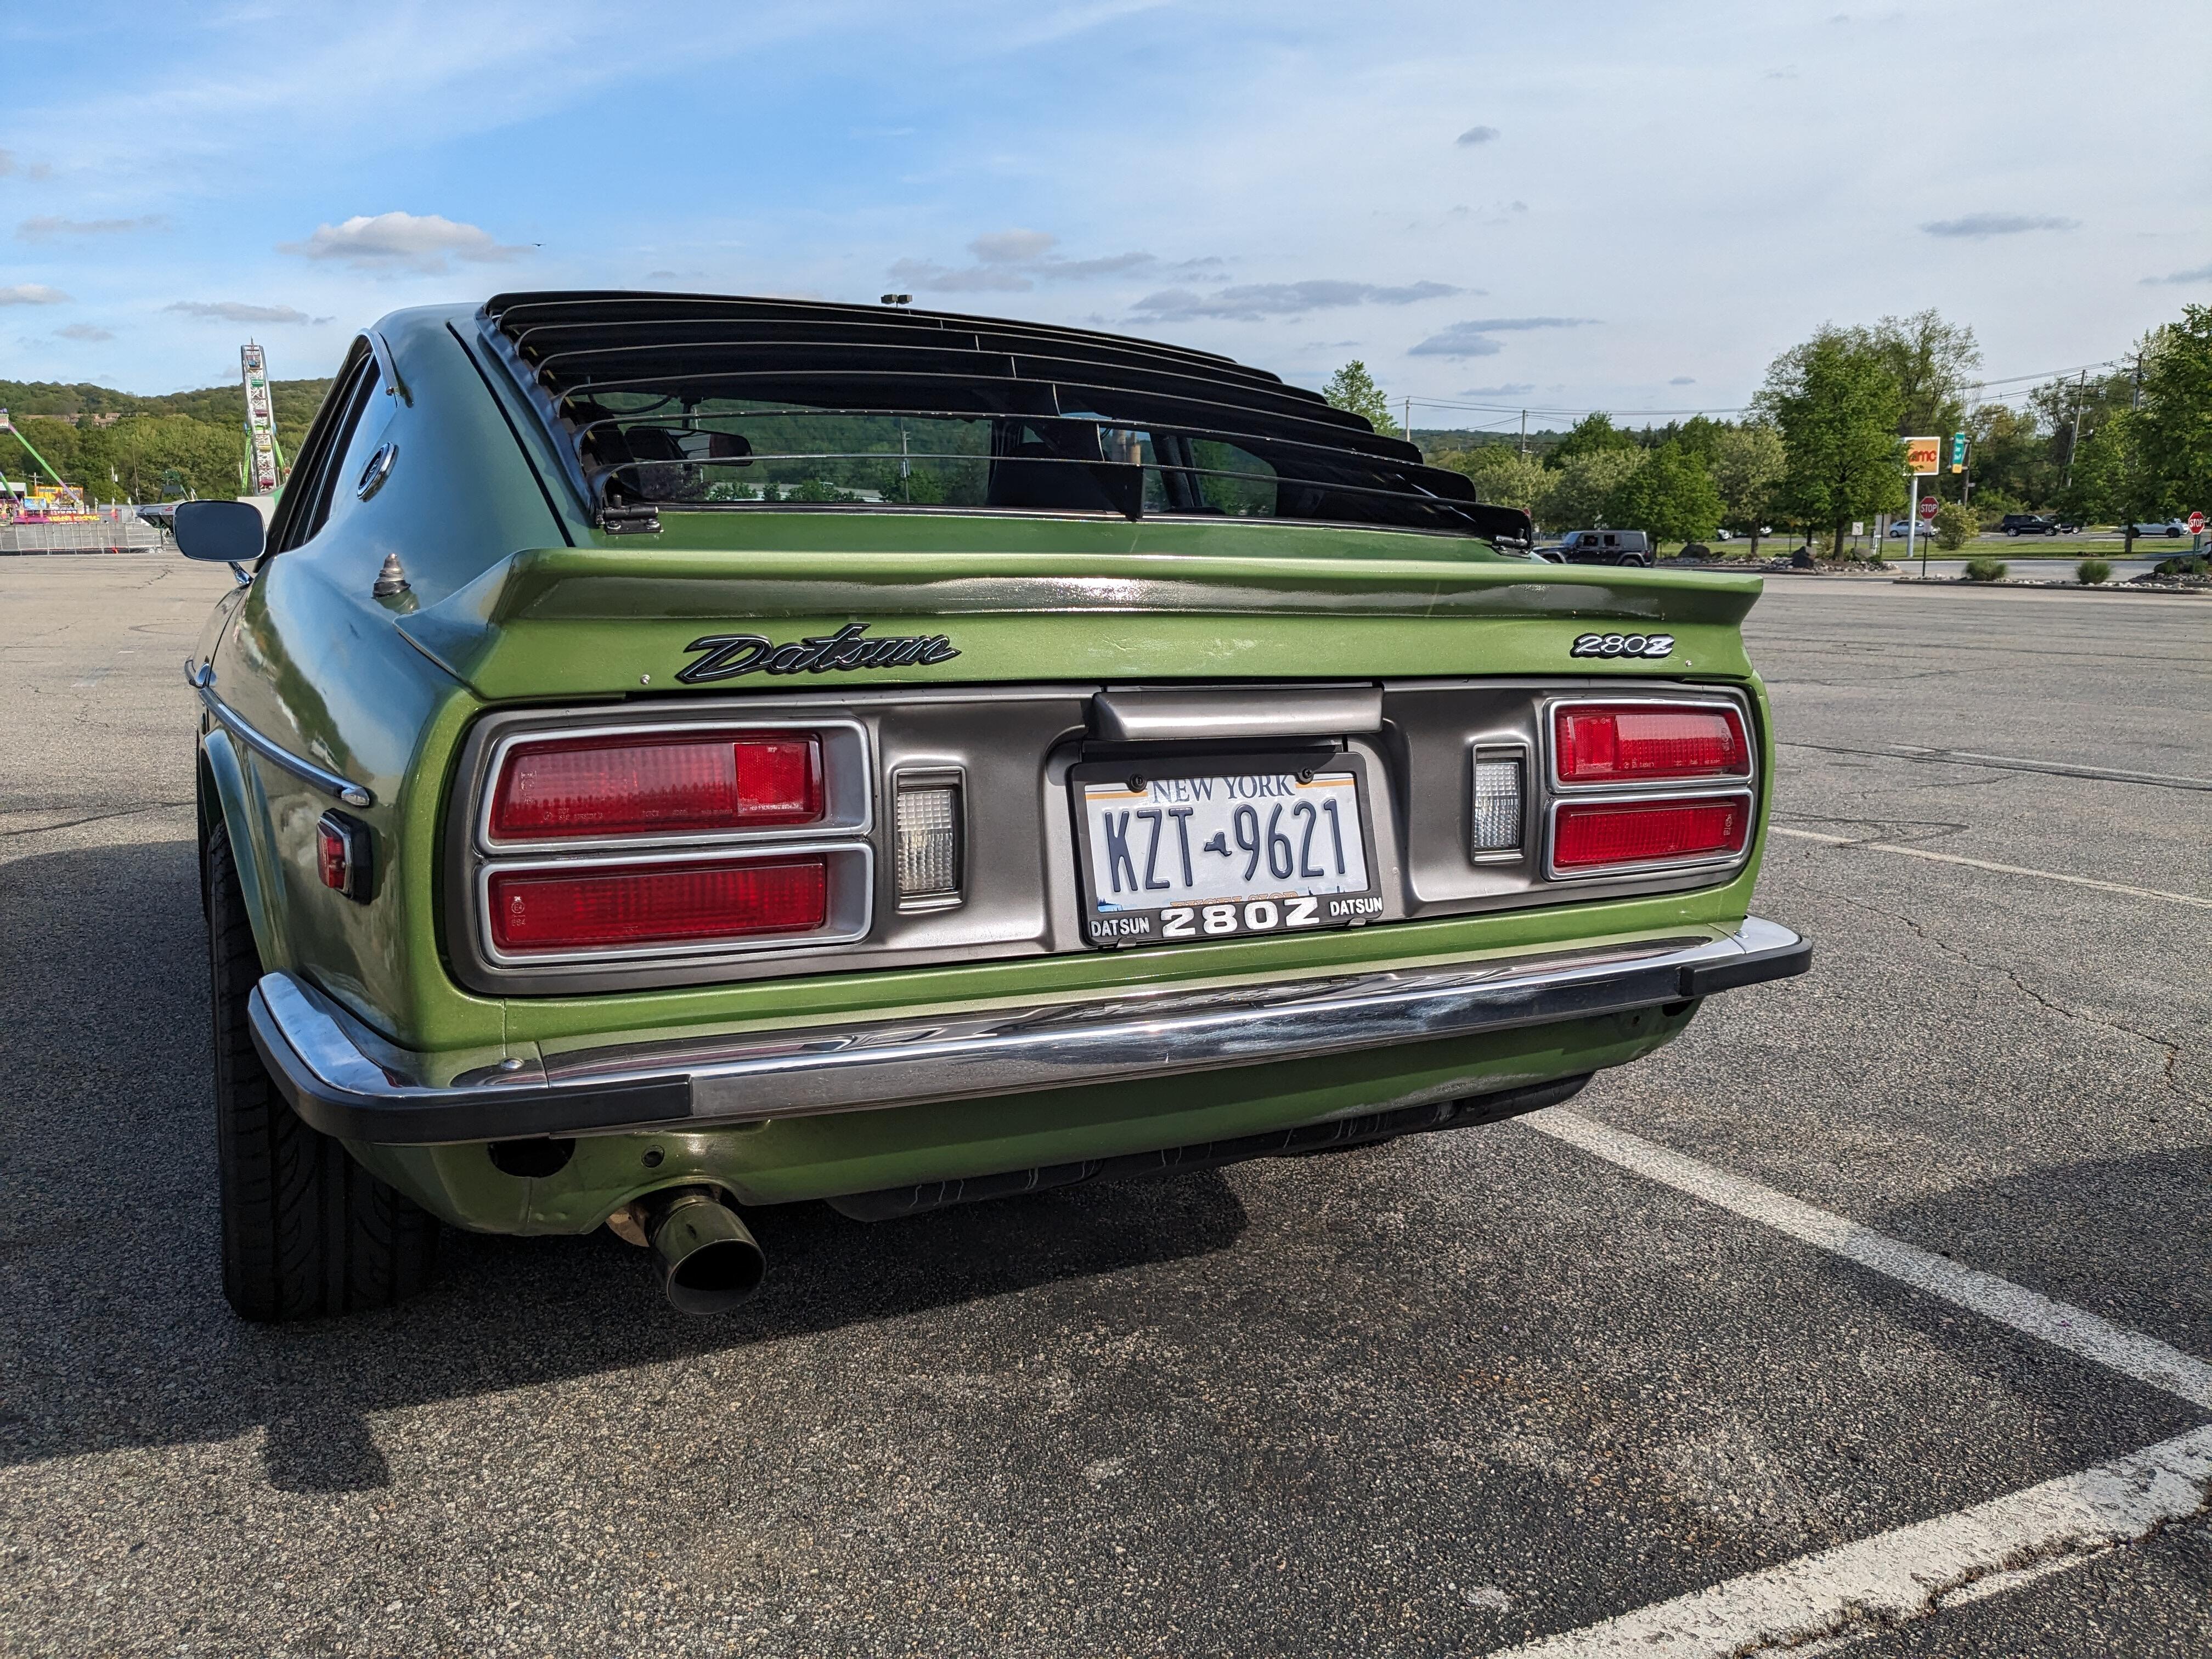
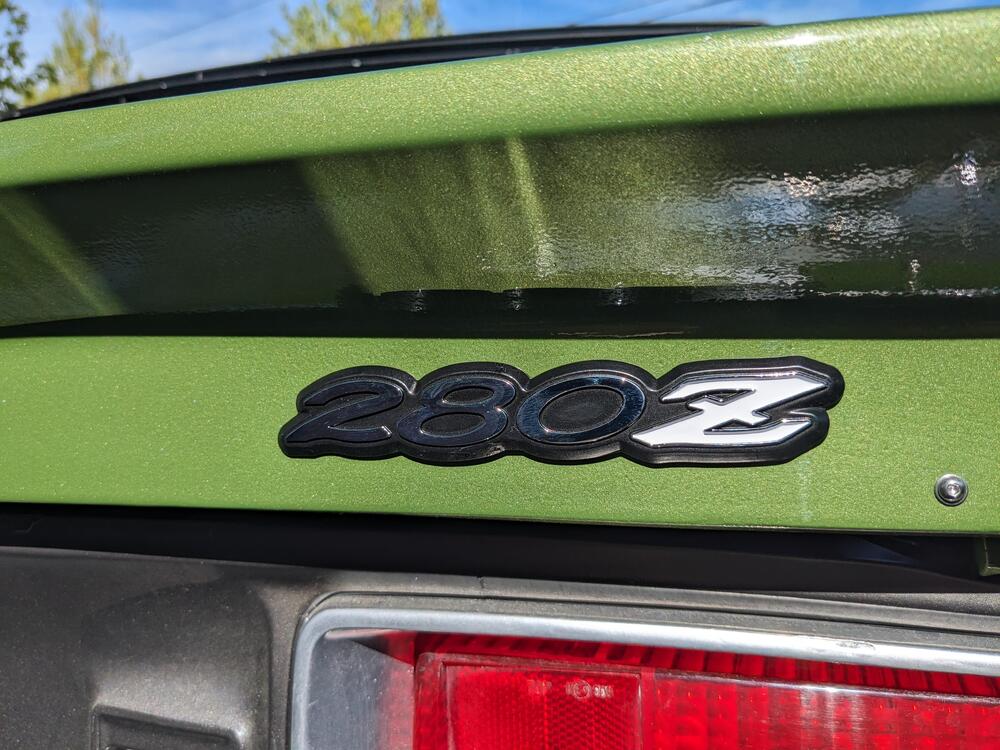
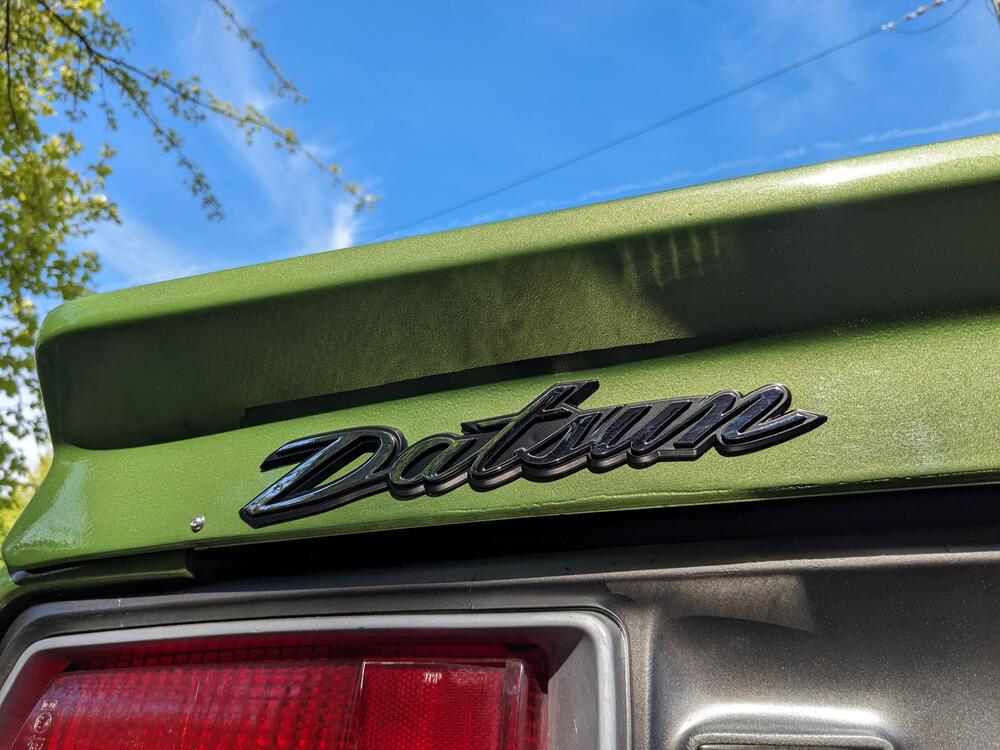
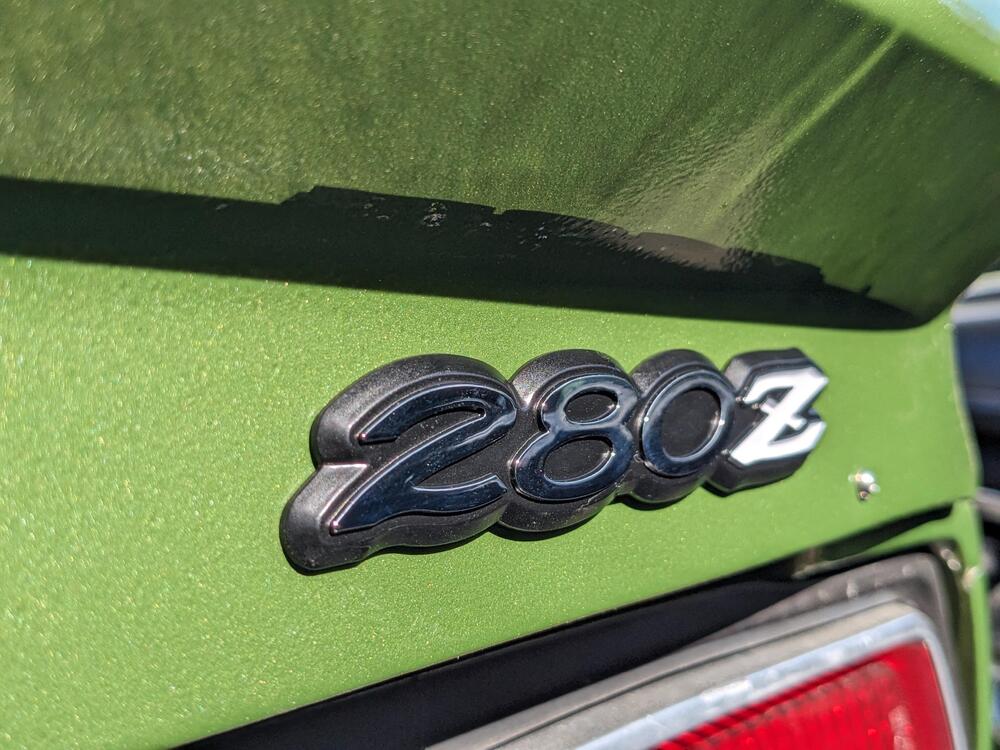
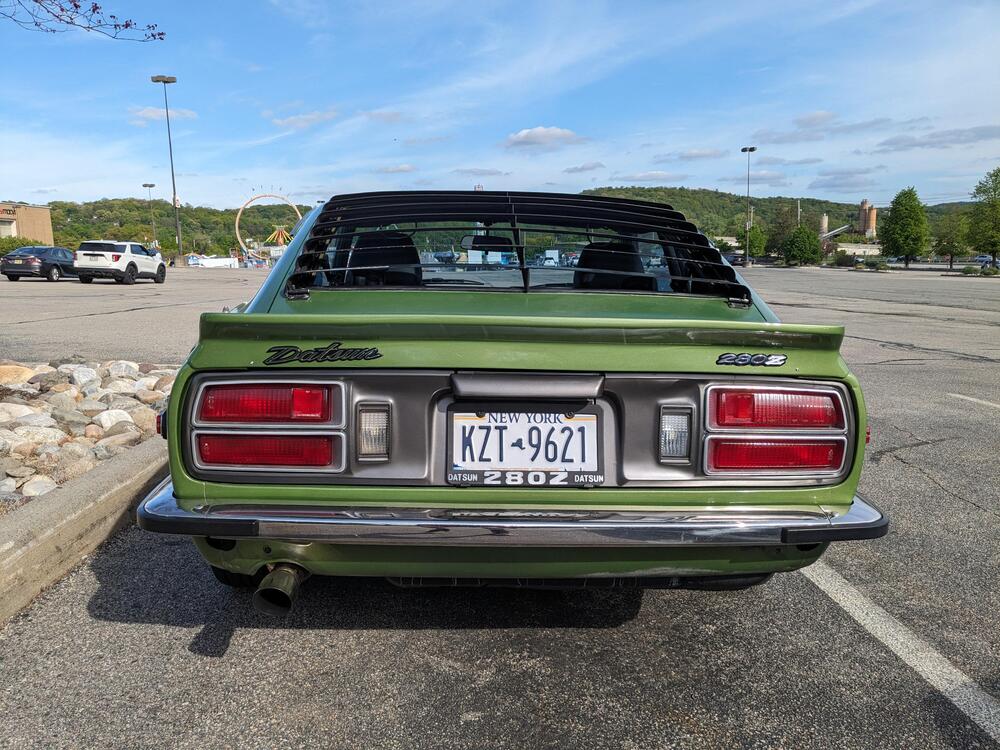
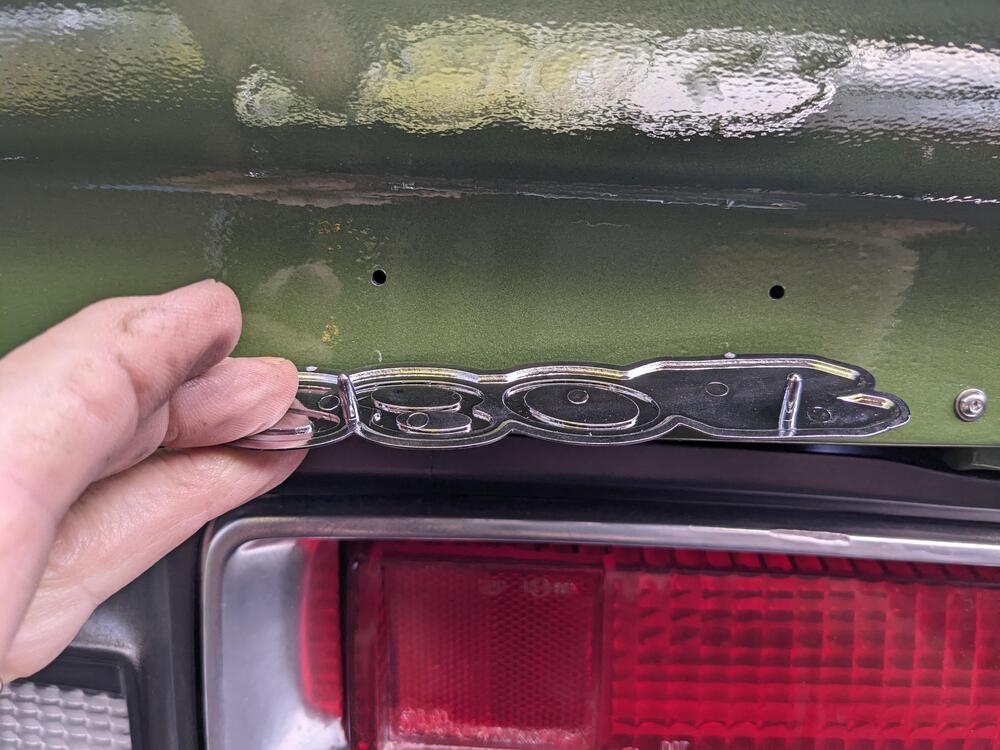
Got the new Datsun & 280Z emblems today (from resurrected classics). I contemplate the location of the Datsun emblem a bit, since on the hatch, it is set on a diagonal - it's obviously not really intended to be set in a horizontal spot. I ended up angling it very slightly to mimic the hatch fitting 280Z set horizontally, 15mm up from bottom edge I just drilled the spoiler slightly under the pin size, so it's a press fit


 1 point
 -
1 pointWell BC is out of range for me. There is a great group of Z peeps in the BC Z car club. Perhaps search them out. My thoughts were that I don't see a chassis ground off your battery. Negative should go to that bolt in the firewall behind the battery. Cleaned up of course. Also can you confirm the loss of ground when opening the points? a lot of time the wire is not in the isolator connector and is grounded out there. Third is the coil wire metal clip getting all the way down to the metal in the distributor. Sometimes the cap keeps it up too high to make contact. These have been basic common problems I see in this type of set up. The vid you posted is what we all expect to find in an old barn find car. A simple clean up and it works just fine. Points are very basic and have been around for a long time. Electronic ignition from this era was far worse to get working. IMHO. You can gap point with a matchbook and a nail file1 point
-
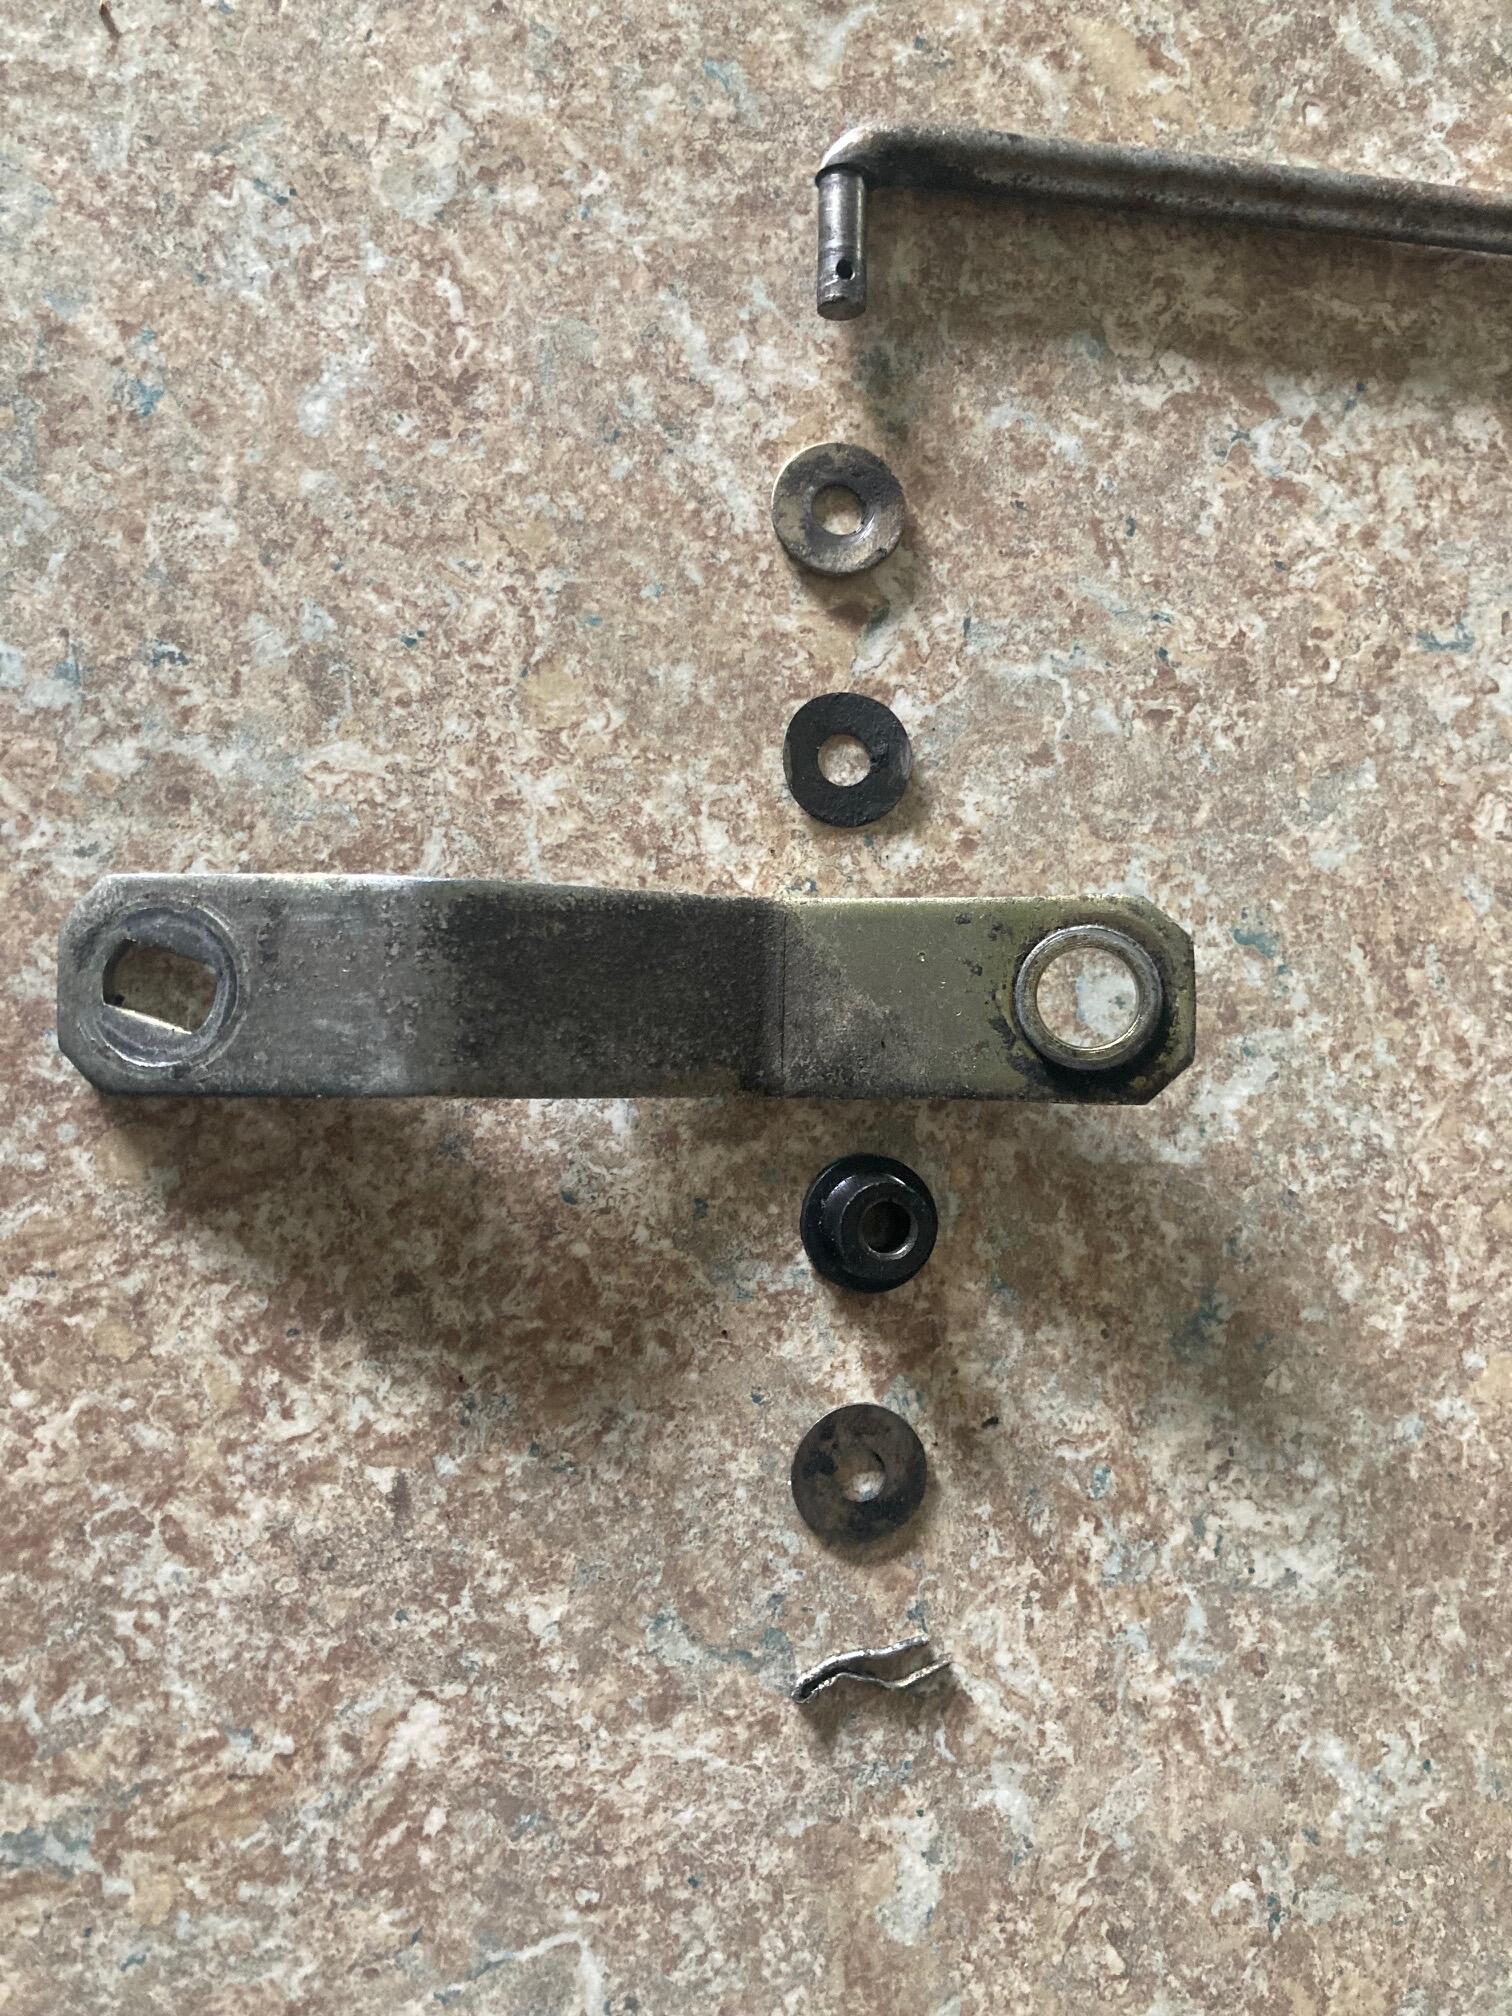
OR I might be on the wrong piece, the shift selector has a bushing. As shown in my picture. The bushing is still available from Nissan # 34552-89900
 1 point
 -
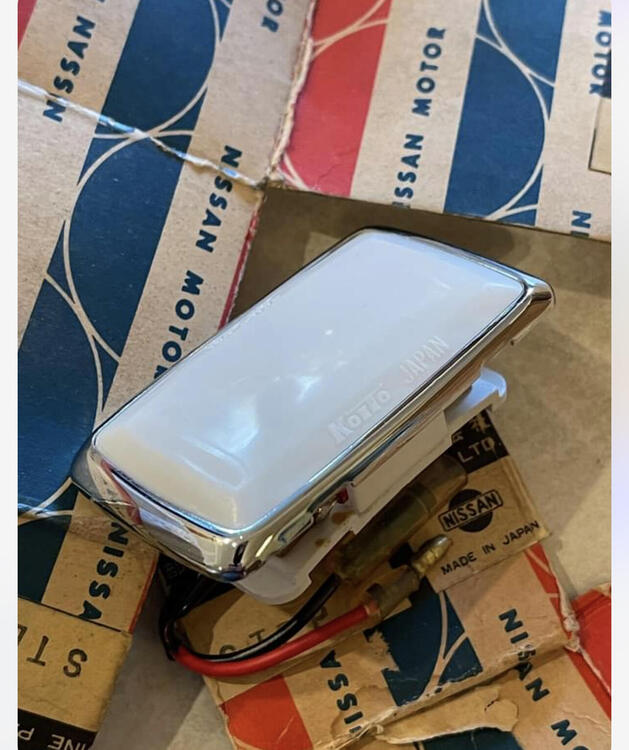
I hear they are a few door lights floating around…. I know Kats has a set as well….
 1 point
 -
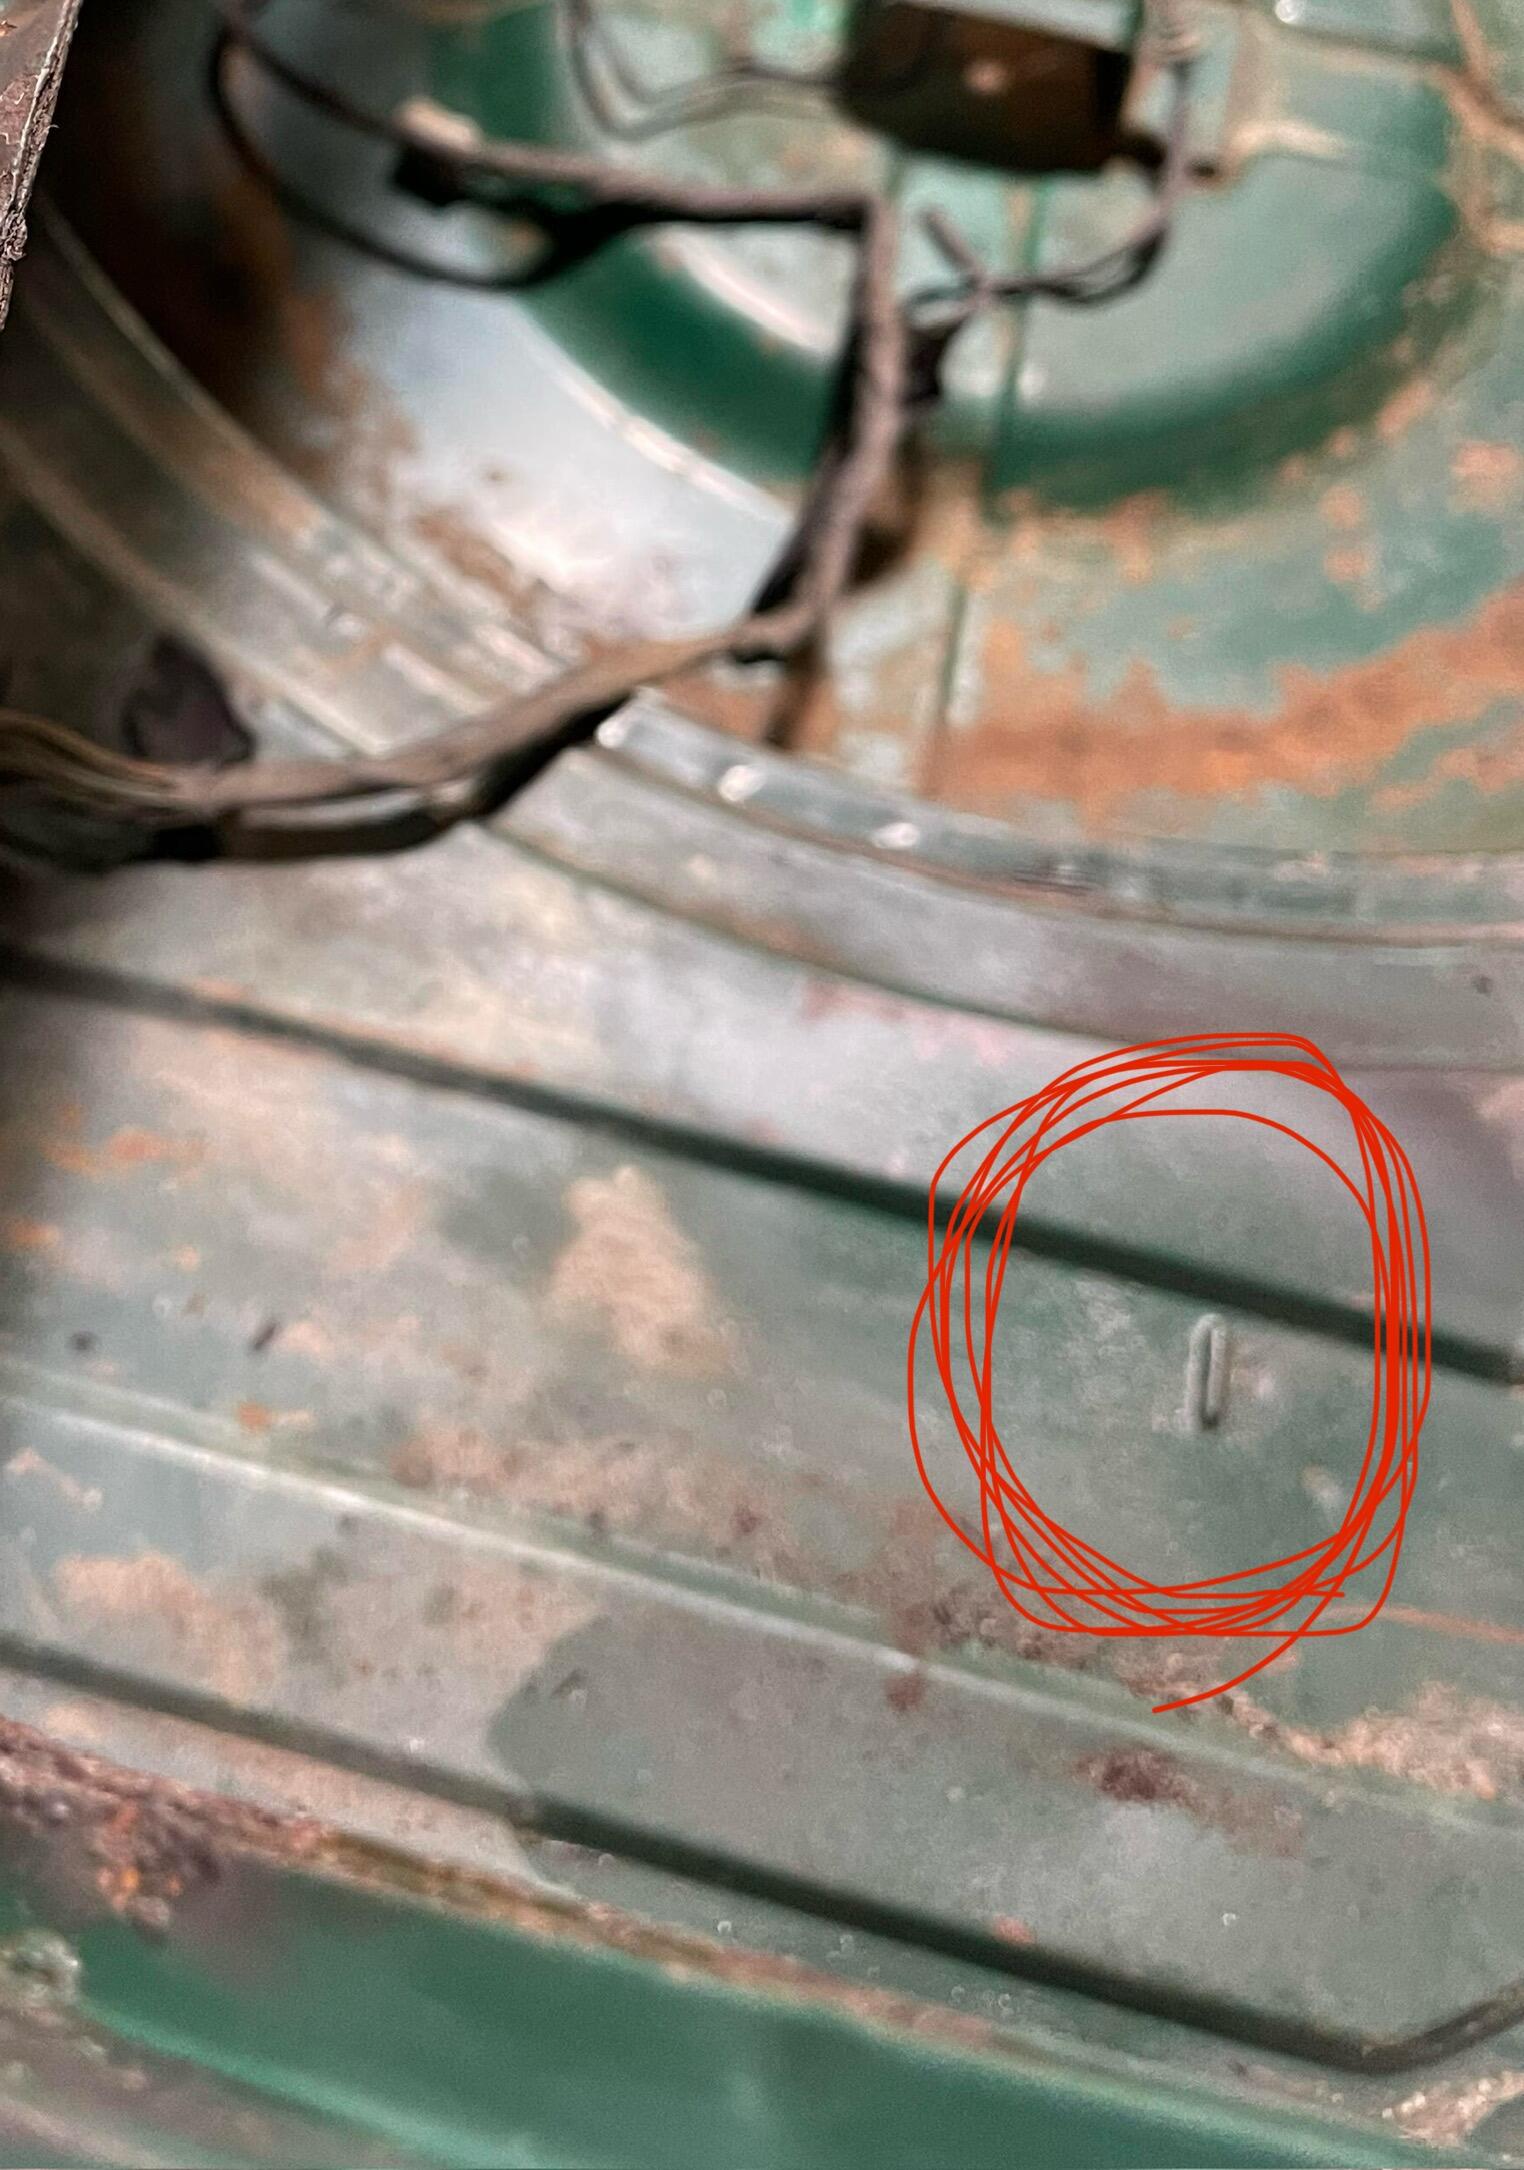
26th has two of those dents on the passenger (right) side of the spare tire well. November car. I'll post a picture soon when I look at 27th.1 point
-
I'm going to speculate that these little 'dents' were used as master positioning markers. If so, were they created to guide the panel-stamping/forming process? Or, instead, were they used to guide and/or check the positioning of the stampings in their jig prior to welding? The latter seems more likely. One wonders, then, what prompted the change in orientation of the dent in the rear floor deck stamping after less than 100 units had been assembled. Perhaps the performance of the assembly jig in its original design iteration wasn't delivering adequate results, making this small-but-important change necessary before the production process ramped up to full speed.1 point
-
It takes a commitment to cut into a door panel for the Install1 point
-
Wow!! I really like your green 1969 240Z. Thanks for sharing a lot of pictures. A tiny dent caught my eyes, which is on the rear deck floor, near the frame rib. The dent was pushed upward from underneath of the floor, that is a good sign of the super early cars. I don’t know why, the later dent was pushed down from above the floor. This is true for all the other dents in the rear deck floor and maybe for the firewall. I have been talking about this with an enthusiast Chris in Netherlands. He has been doing extensive work for his a lot of 1969 240Z. This leads me my curiosity about “which model is earlier than others in 1969.” I am not talking about the Nissan official report of the first 14 cars strats from S30-00001. I am talking about cars like made in October, November, December. HLS30-00051, HS30-00051, PS30-00051, S30-00051. I guess they would be like this (starting with the earliest) S30-00051, HLS30-00051, PS30-00051,HS30-00051. We don’t argue about HS30-00051 is a 1970 made. But other three are fun to discuss. (I know most of the people are not interested in talking about S30 and PS30) Anyway, PS30-00051 was not made in October like S30-00051 and HLS30-00051. I don’t know why, looks like Z432 was taking a rest for a while in October then re- engaged in the assembly line in November or even December. We can tell it by the dents on the floor. Even PS30-00028 is not made so early. I would say not in October. According to the data from NIPPON JIDOUSYA KOGYO KAI, 72cars were made as Z432(including Z432-R) in 1969. Most of them would have been made in November or December. Do you remember Nissan Shatai reduced production of export models (DATSUN 240Z) in December? I would guess it could be because of the test reports from the team ‘test ride in US & CANADA’. They reported steering kick back and rear axle vibrations. Nissan Shatai would have decided to make more PS30 cars in December instead of export models. Kats
 1 point