


Leaderboard
-

siteunseen
Free Member5Points15,115Posts -
Captain Obvious
Free Member5Points10,081Posts -
davewormald
Free Member4Points128Posts -
conedodger
Free Member3Points12,513Posts


Popular Content
Showing content with the highest reputation on 04/25/2024 in all areas
-
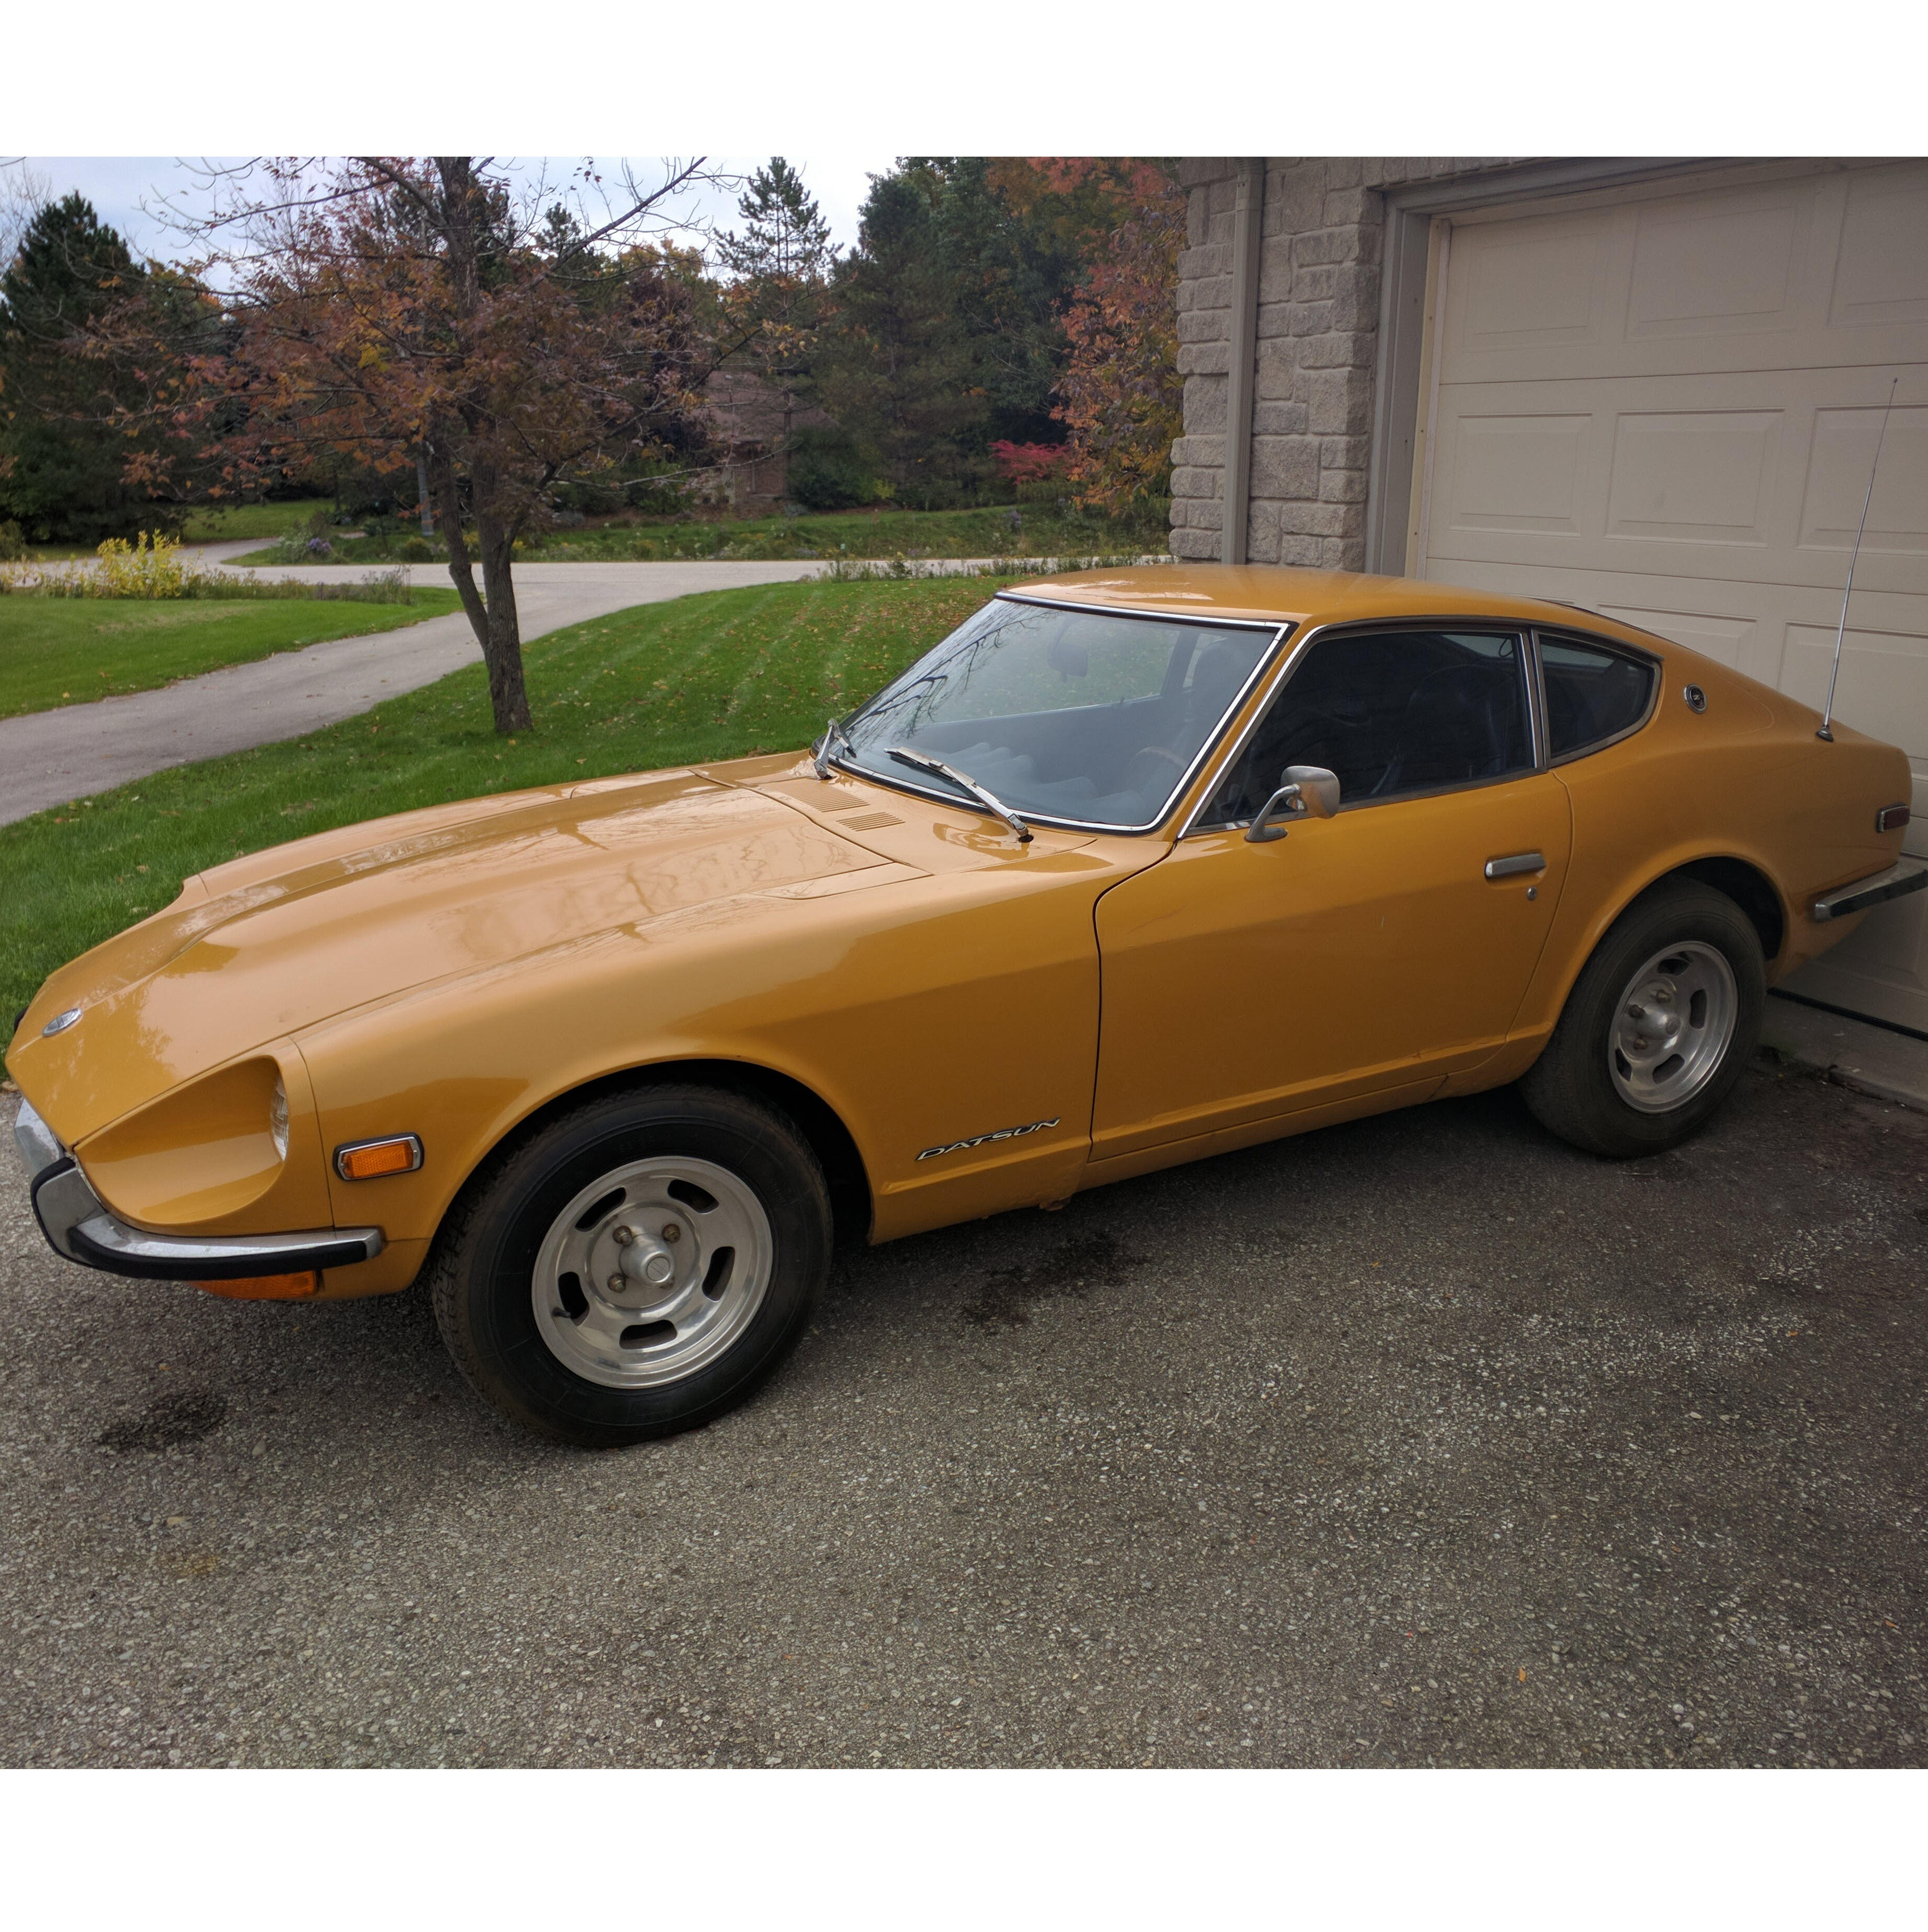
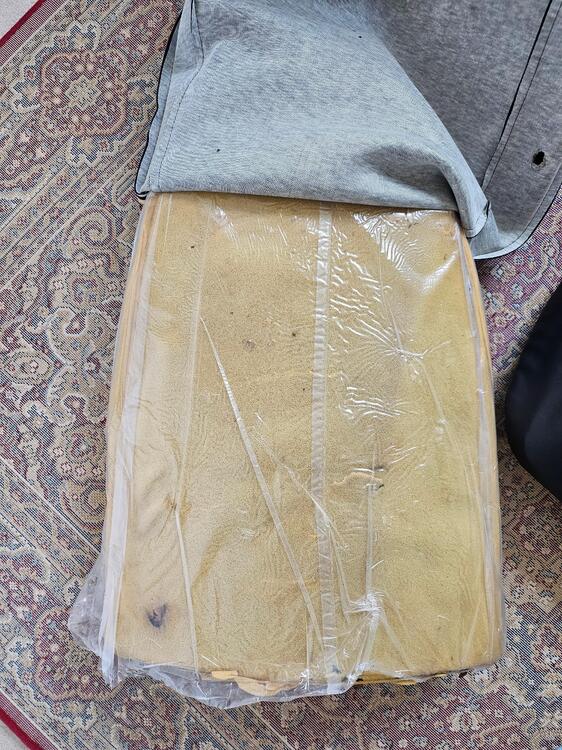
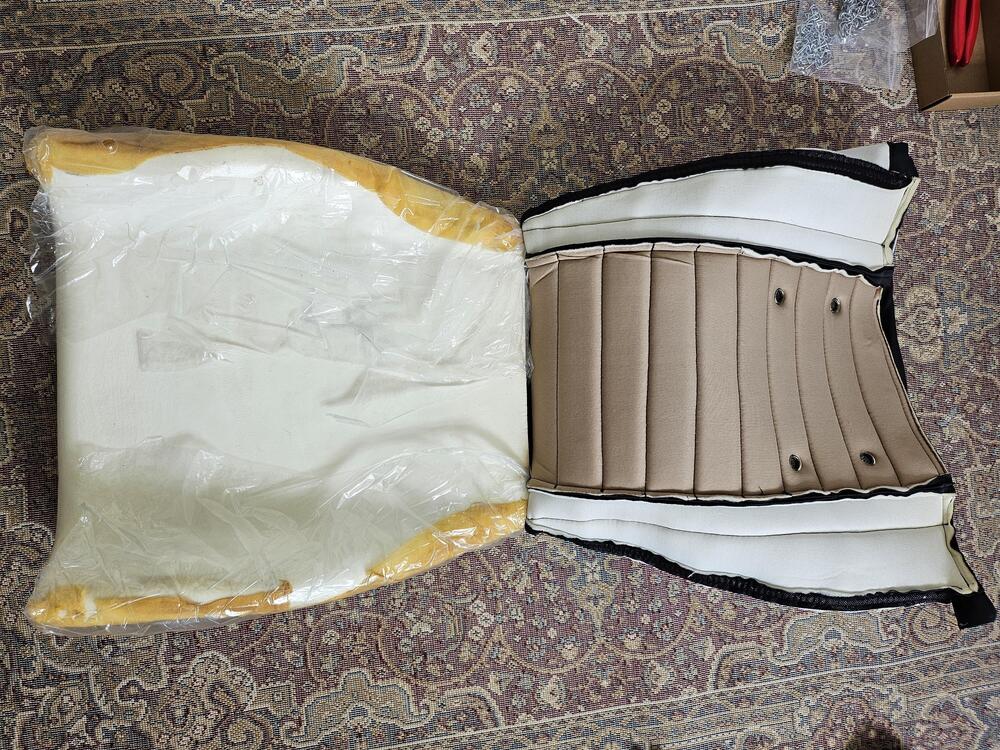
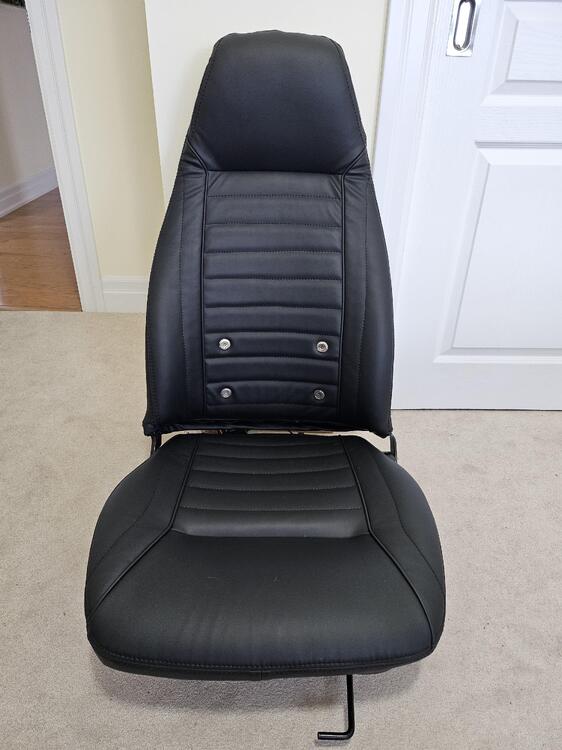
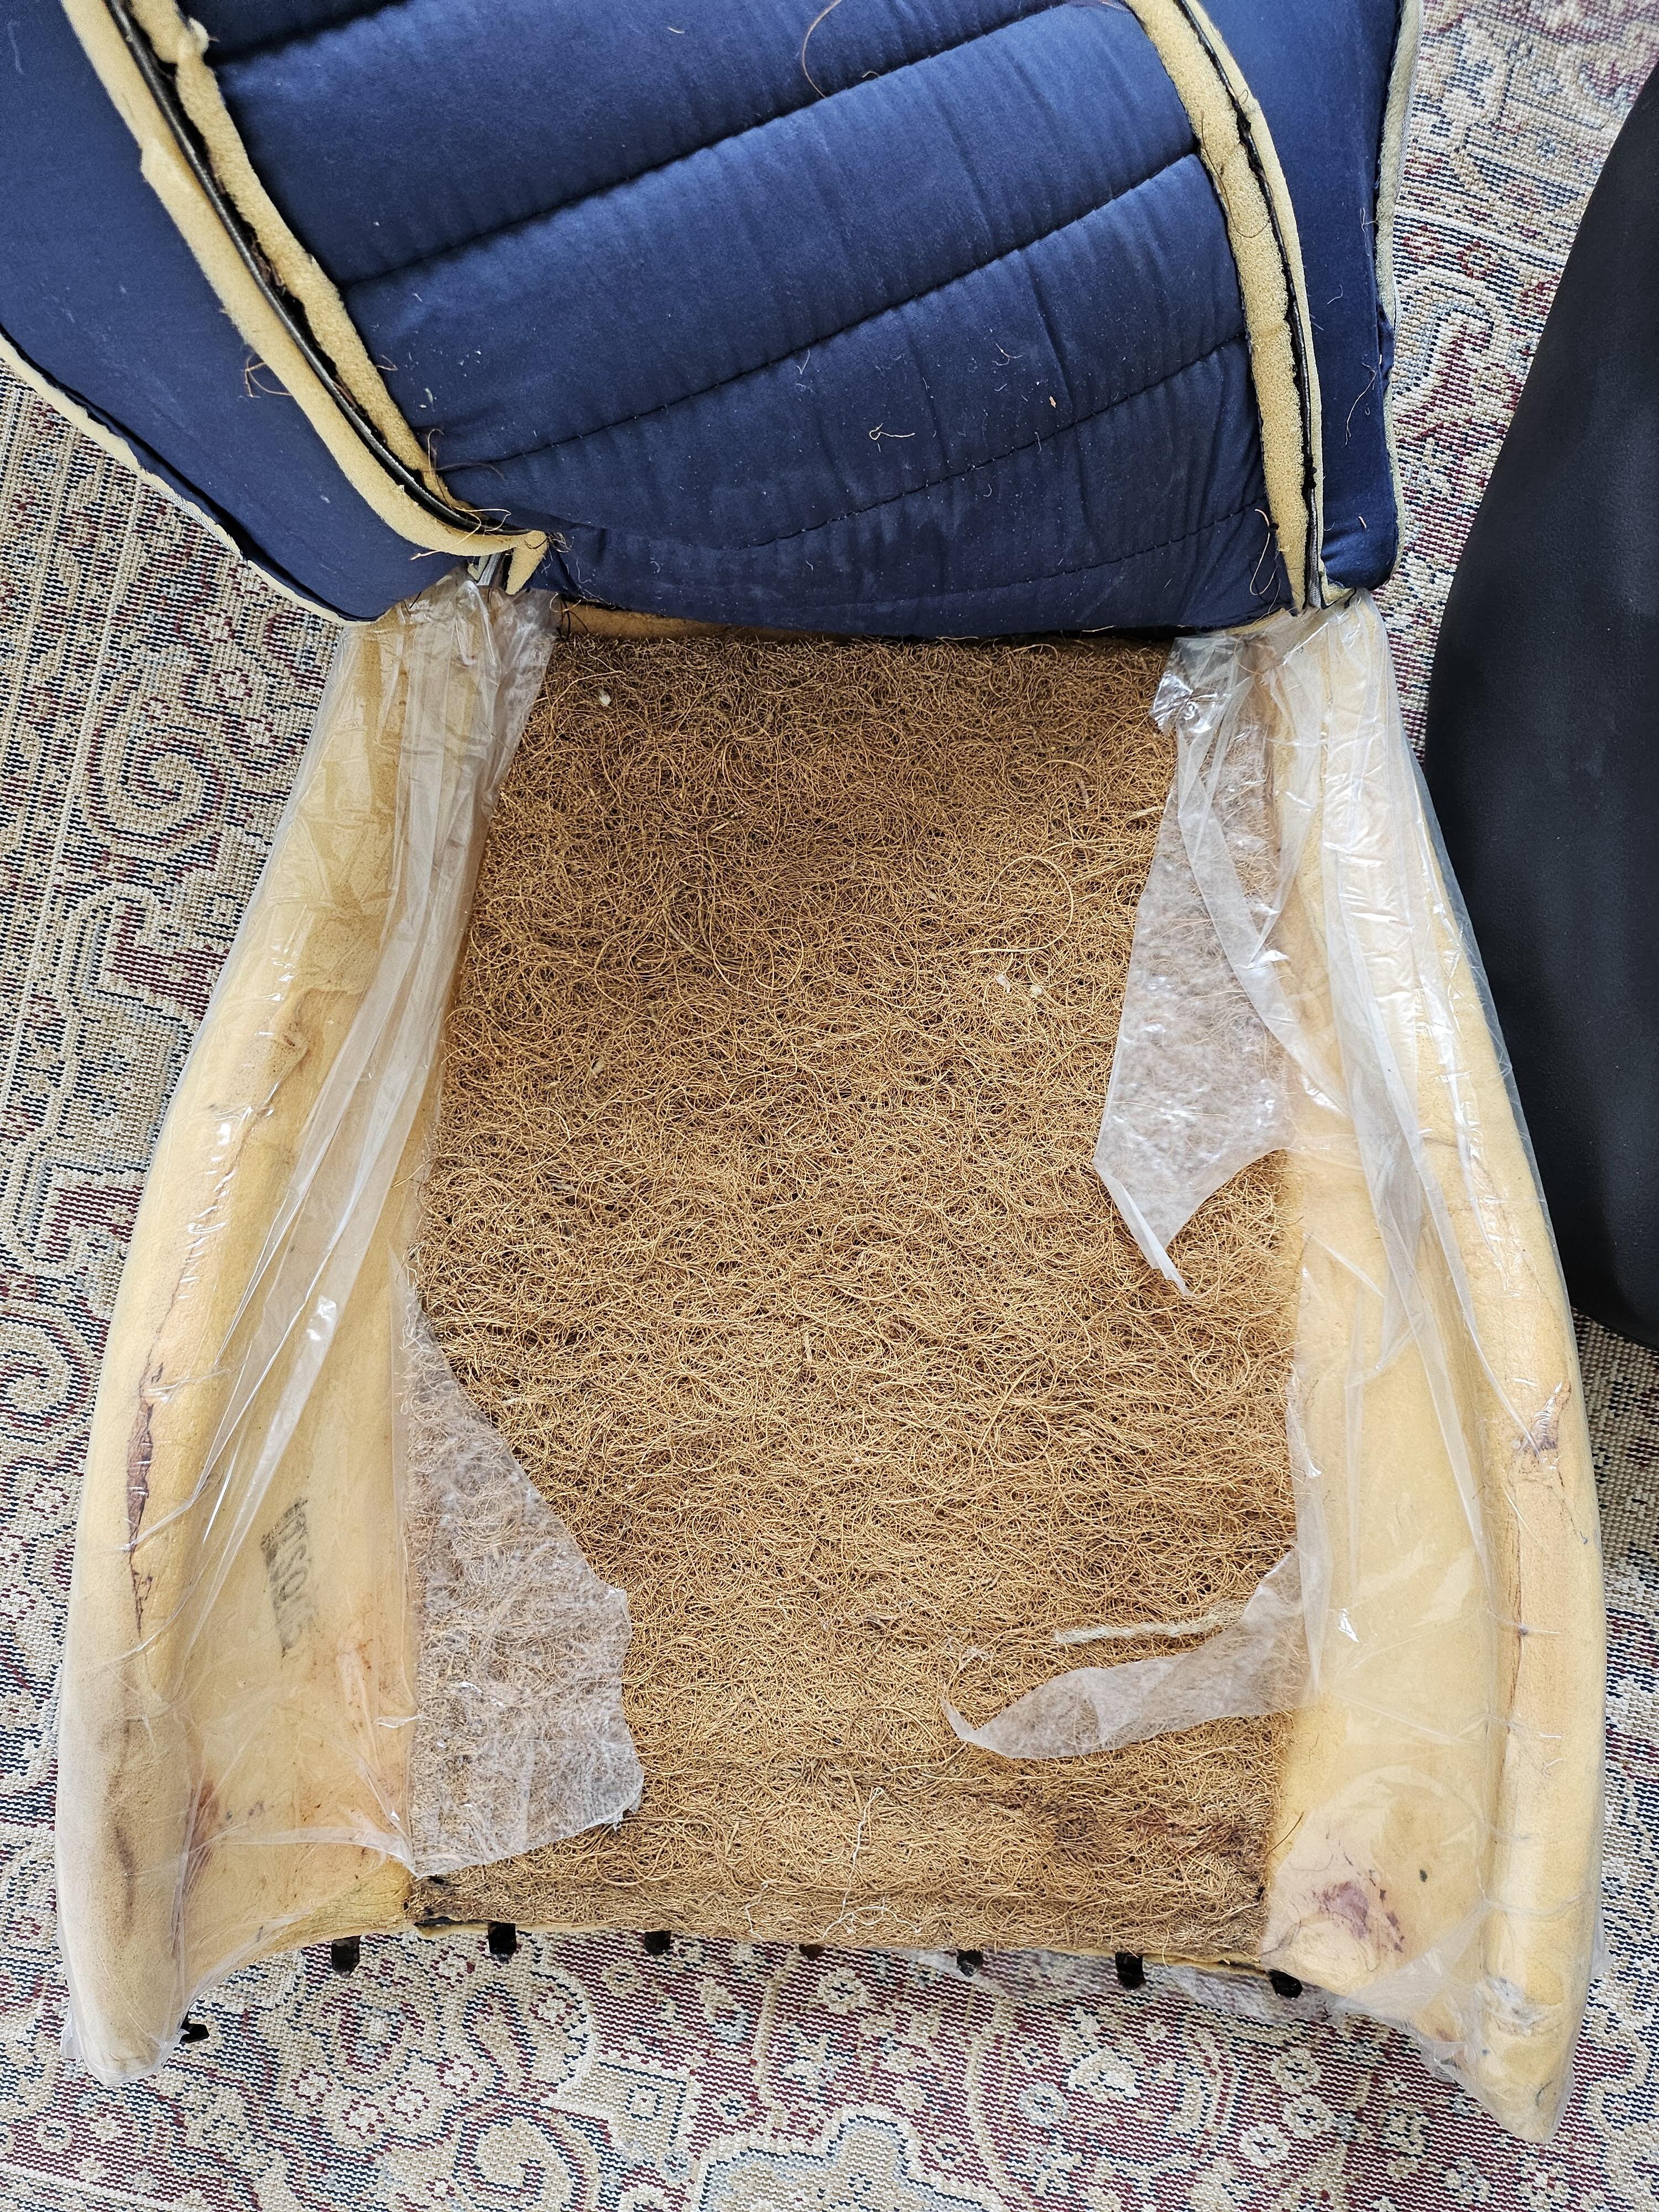
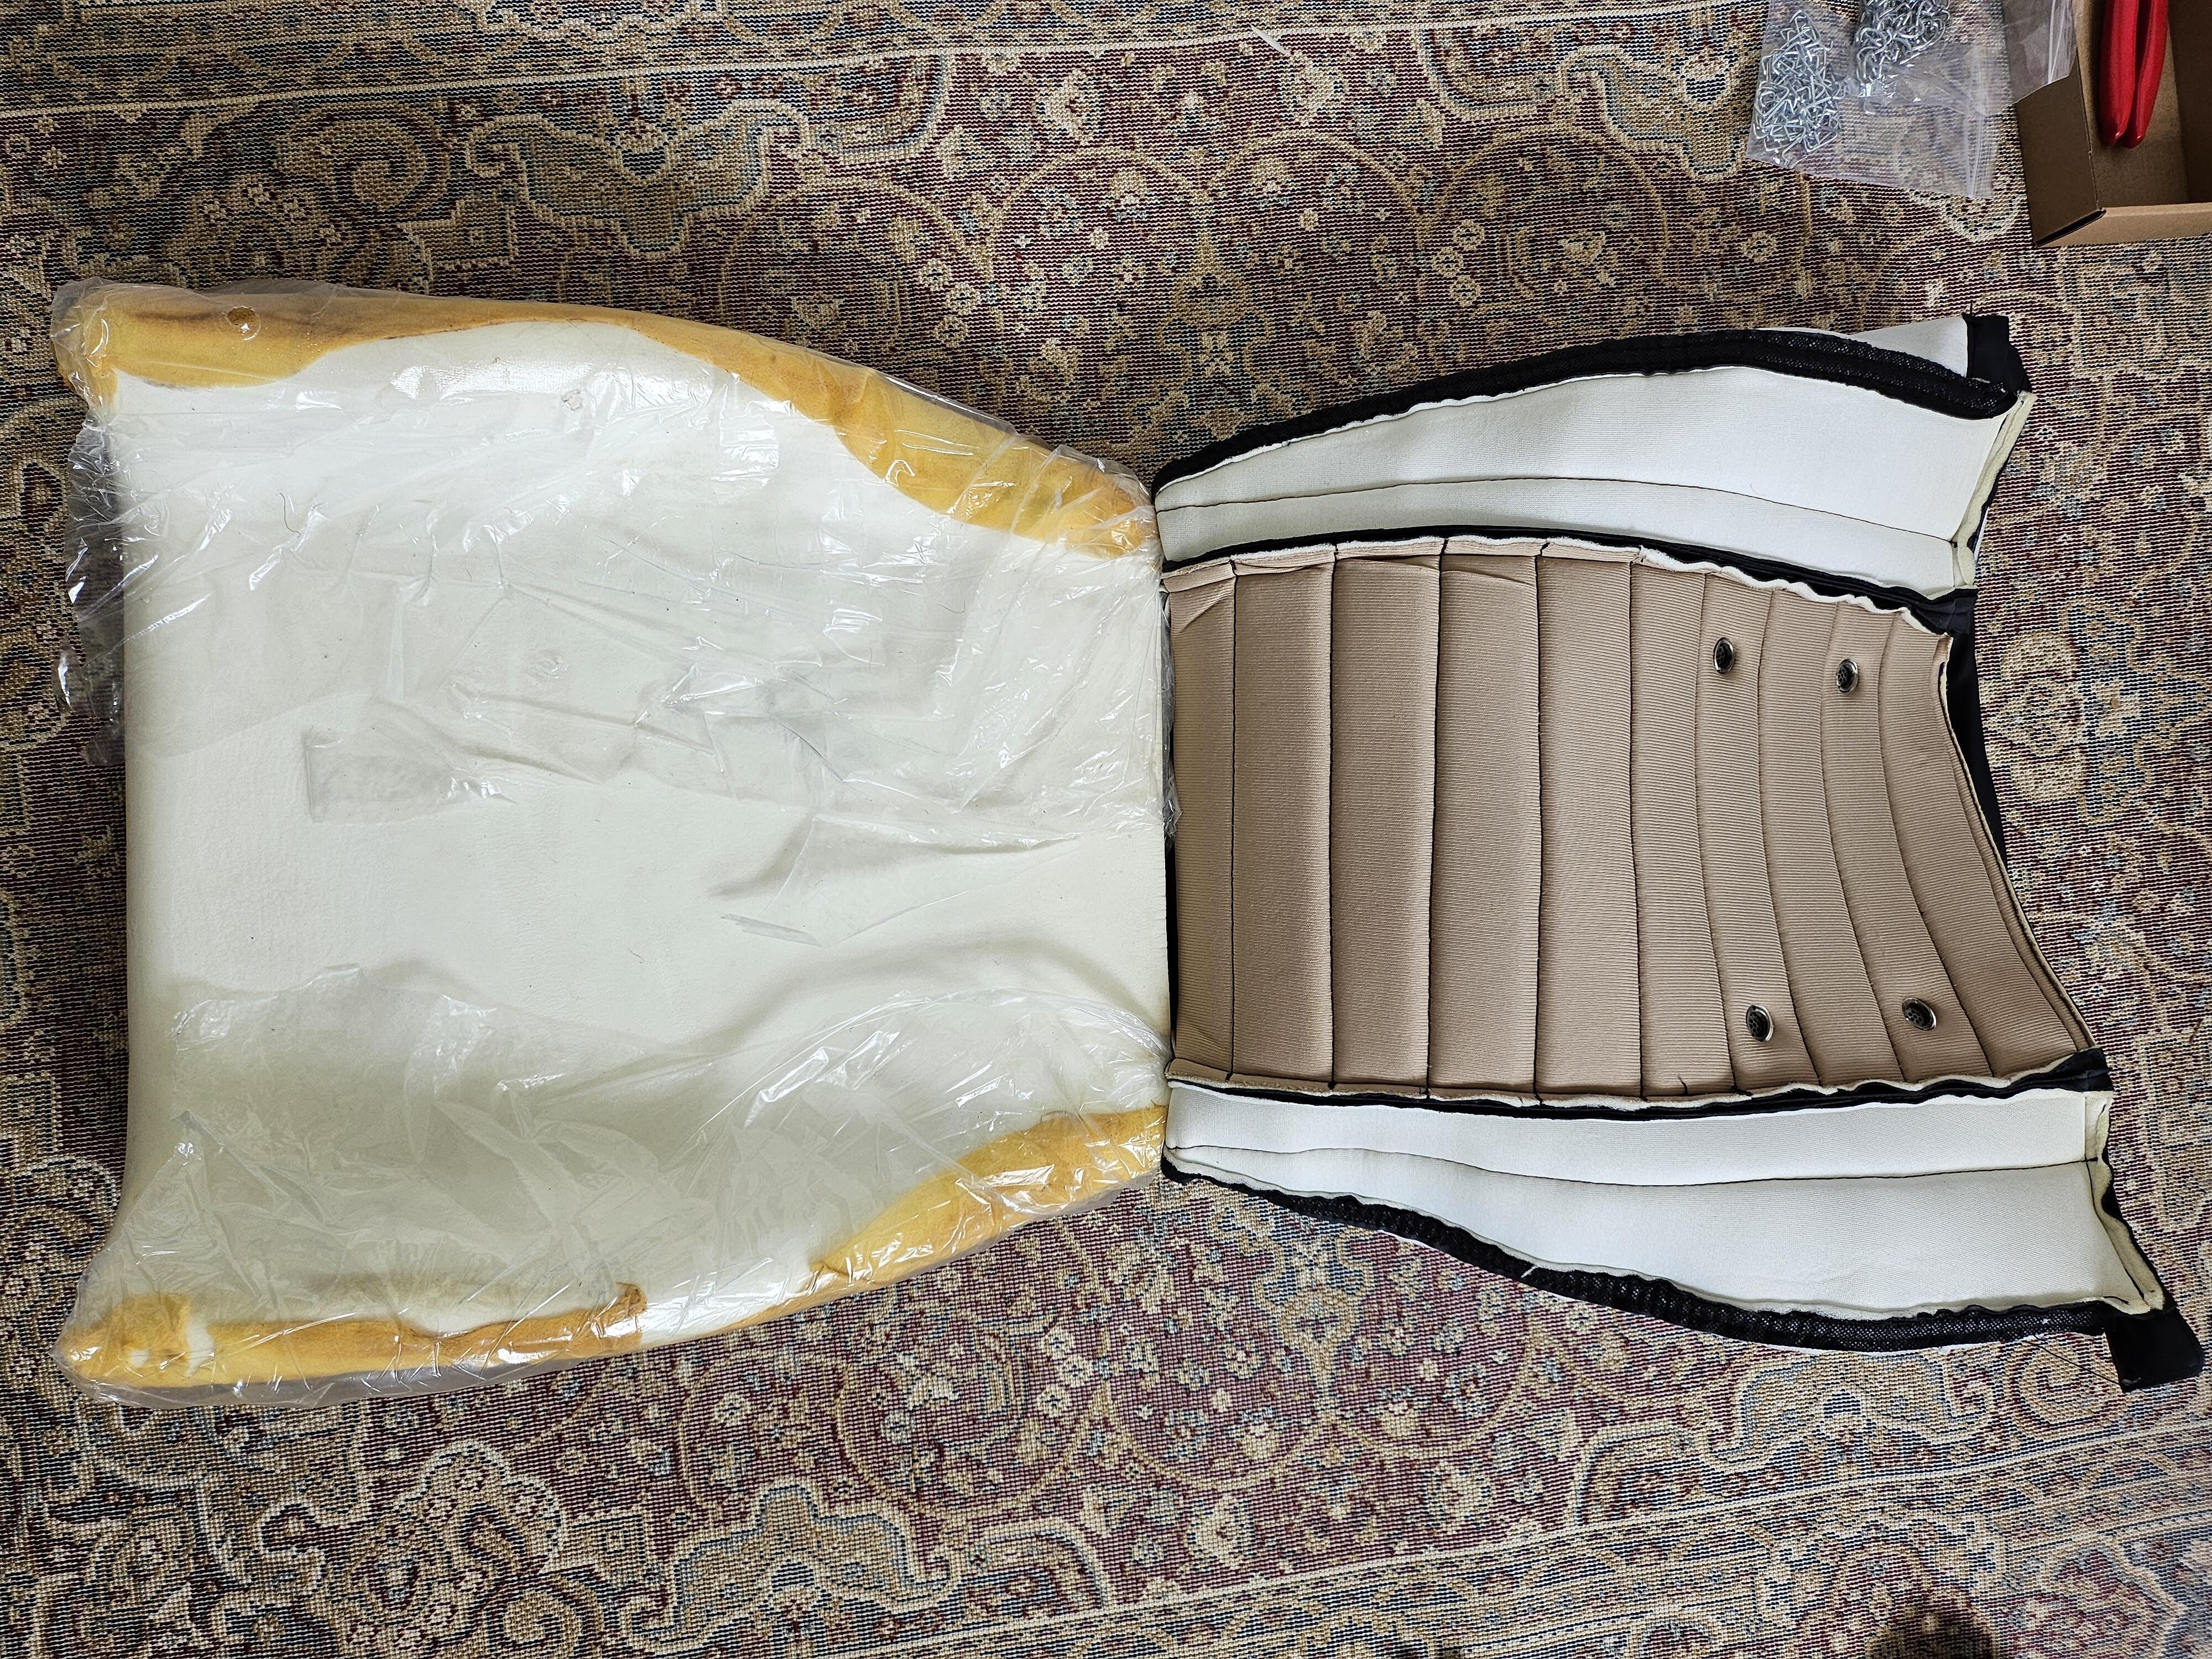
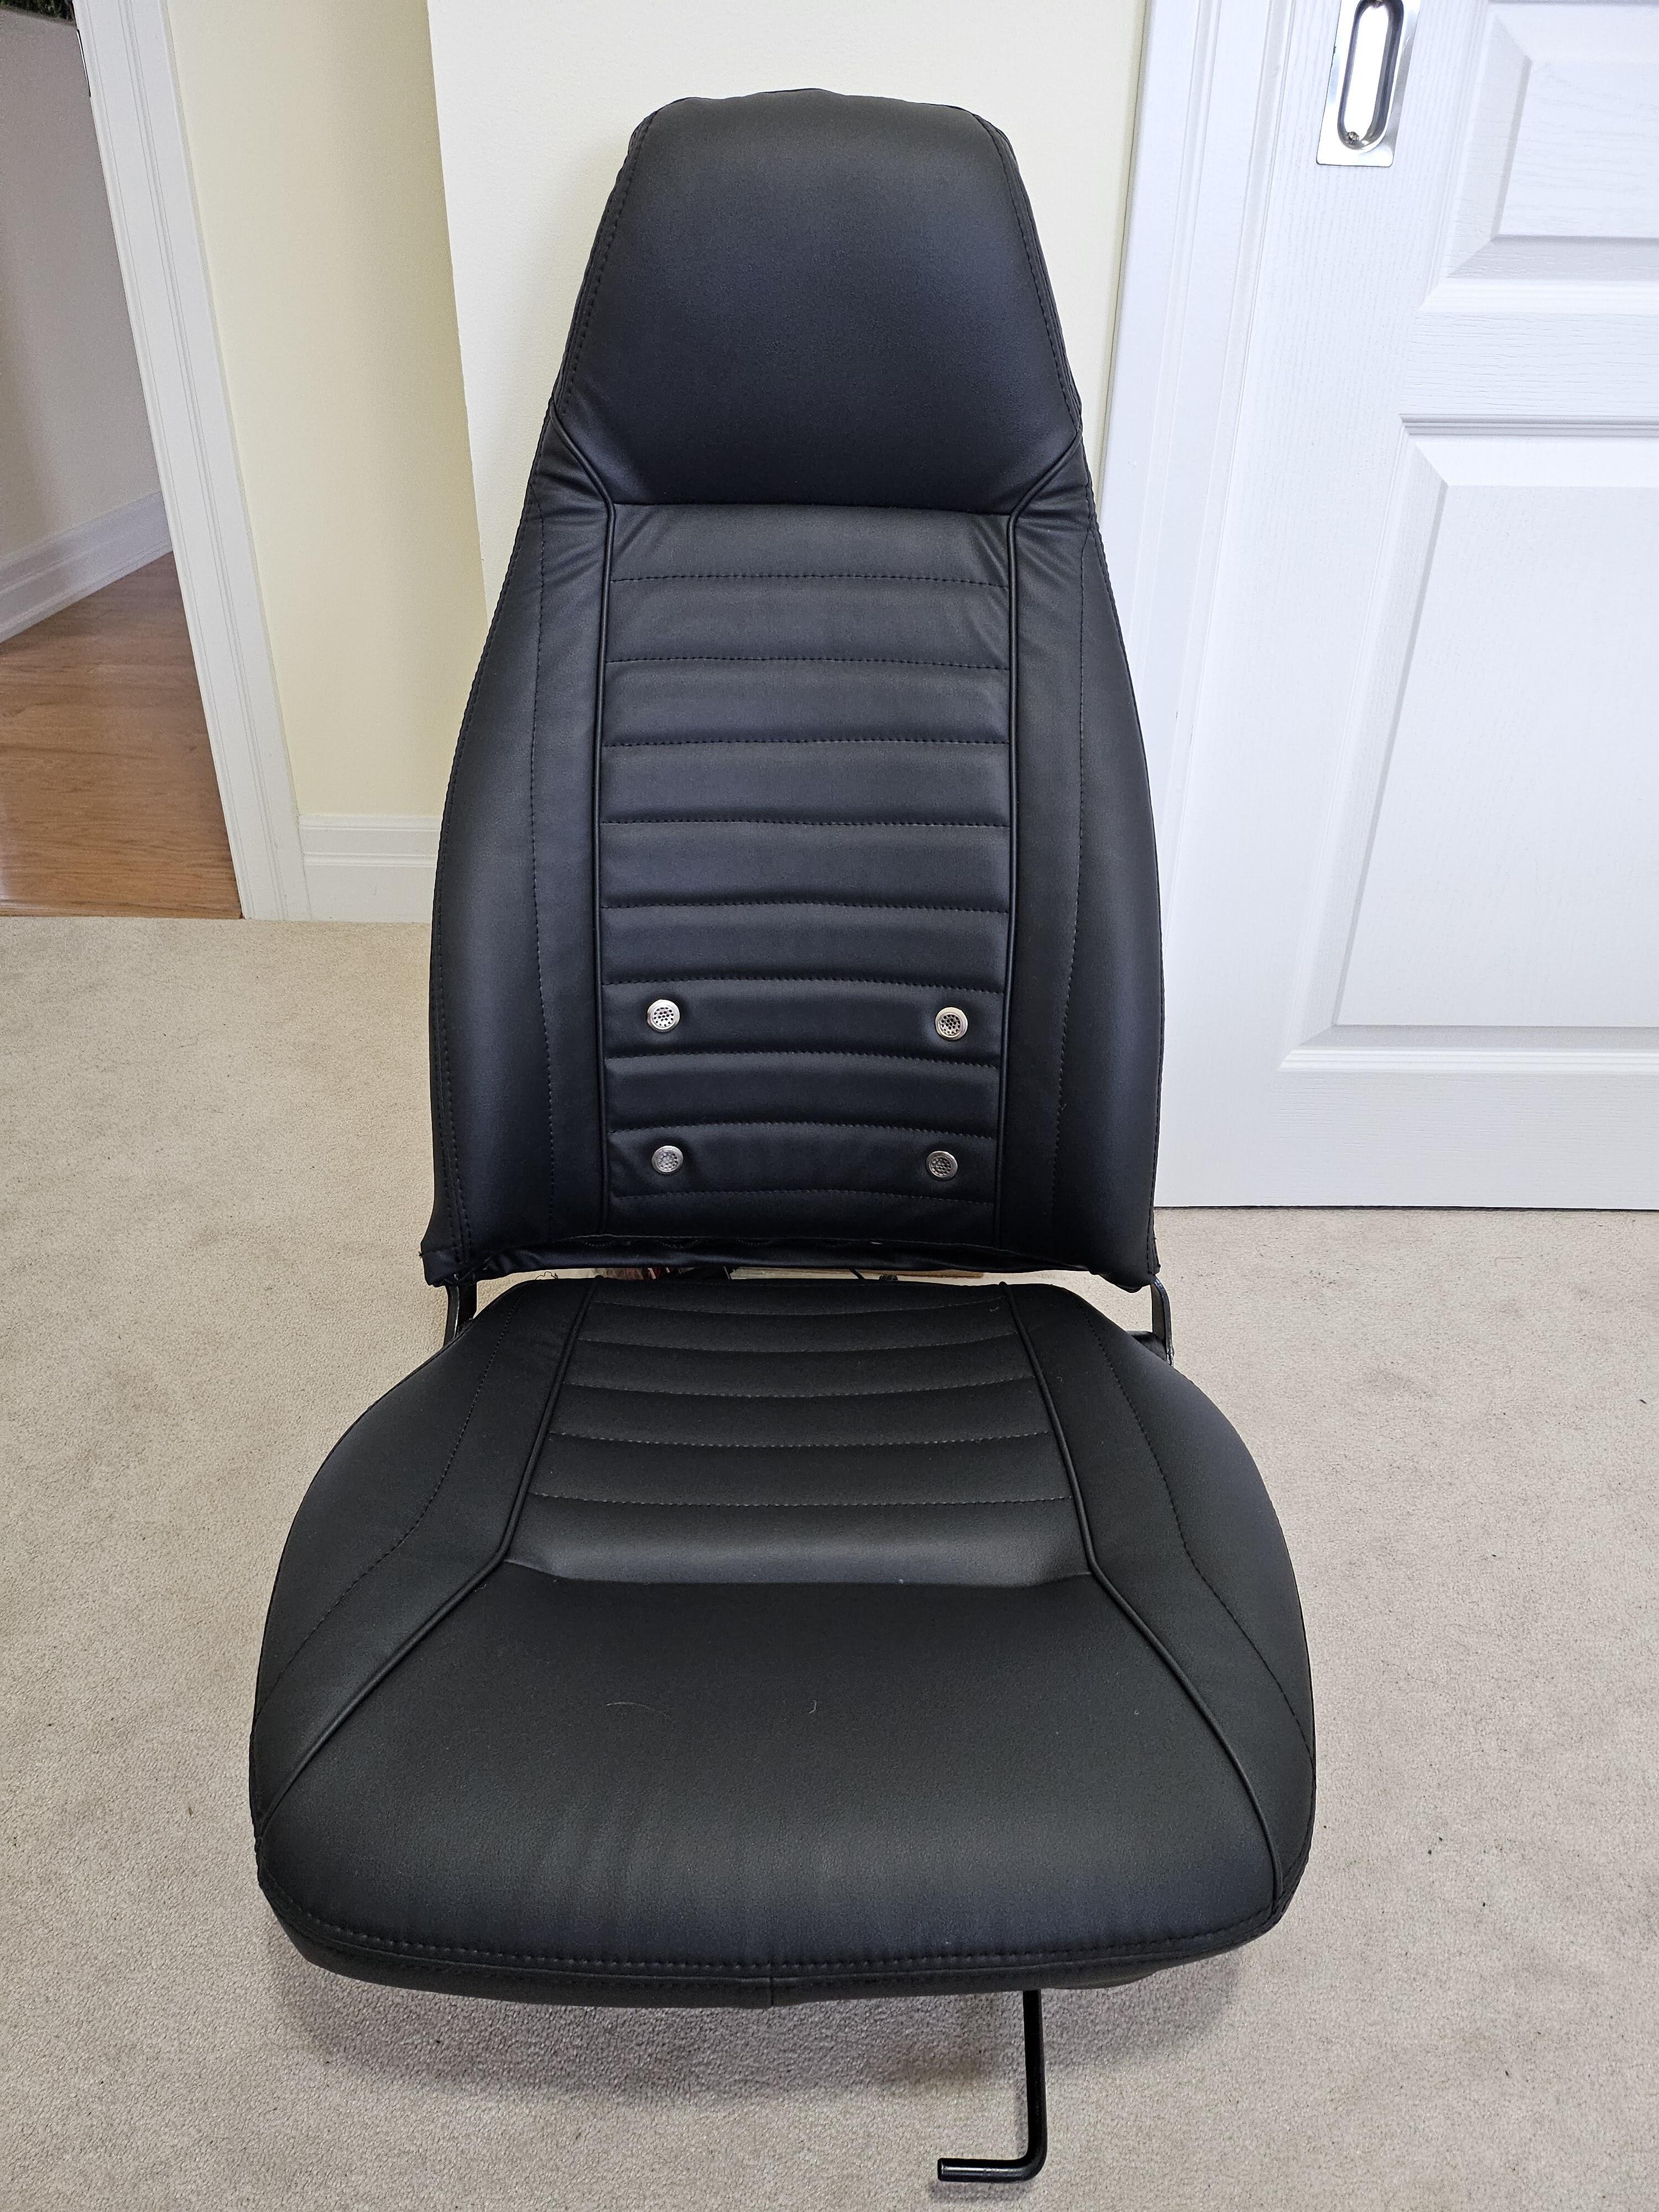
I just re-covered my passenger seat with the Interior Innovations cover that I bought from @KenFirch a while back. I purchased the replacement foam from Interior Innovations as well. I wasn't really looking forward to the job. It sounded like it was a bit of a pain, but it went very well and didn't take me more than a couple of hours. I thought I'd add a couple of things to this thread that might help people doing it in the future. My car is a 1971 240 (the one @grannyknot has been working on in a current build thread), but the seats seem to be from a 280Z. They have the metal "springs" in the seat bottom rather than the webbing. They've been recovered previously (the covers were obviously not original), but the foams seemed to be original. A couple of things made the job easier, as described here. There was a thin sheet of plastic covering the foam of the seat back. It seemed to be professionally made to fit the seat, but I don't know whether it was something that came from the factory. It was a little worse for wear, but I was able to reuse it. I was also able to leave the very thin layer of foam on the metal seat back. It was wrapped around and over the edges of the foam on the front of the seat back, but I was able to peel it off. I first glued the edges of the new foam to the metal seat back. I used Lepage Multi-Purpose Spray Adhesive and it held very well through the rest of the work. The plastic on the top of the seat back made it easy to slip the top of the new cover over the seat back down to the point where I needed to hog ring it to the metal back. Once I'd done that (more on that in a minute), I was able to very easily roll the rest of the cover down over the rest of the back. When using the tangs to secure the front and back of the cover to the bottom of the seat back, it was easy to pull the material down far enough. This was probably because it could slide easily on the plastic sheet. I was able to hog ring the cover to the metal back through the slot without too much trouble. I first used plastic cable ties to pull the wire on the metal seat back and the wire in the seat cover insert together, then used the hog ring pliers I bought to add the hog rings. I was going to cut the cable ties off afterwards, but decided to simply trim them instead. I can't see them doing any harm, and they're providing extra holding power. When I did the seat bottom, I first used the tangs to pull the cover down tight on the foam and metal seat base. Once I'd done that, it made the job of attaching the hog rings much easier because the foam was quite compressed. I used the cable ties again, which made it very easy to attach the hog rings. I do kind of wonder whether you could do this job with the cable ties and not bother with hog rings at all. Maybe they'd wear through over time. So I would suggest using a plastic wrap over the seat back, attaching the seat bottom cover using the tangs before doing the hog rings, and using cable ties to pull parts together when installing the hog rings. I'll be doing the driver's seat over the next few days, so I'll get a chance to do this again. Hopefully it will go as well as this one did.

 4 points
 -
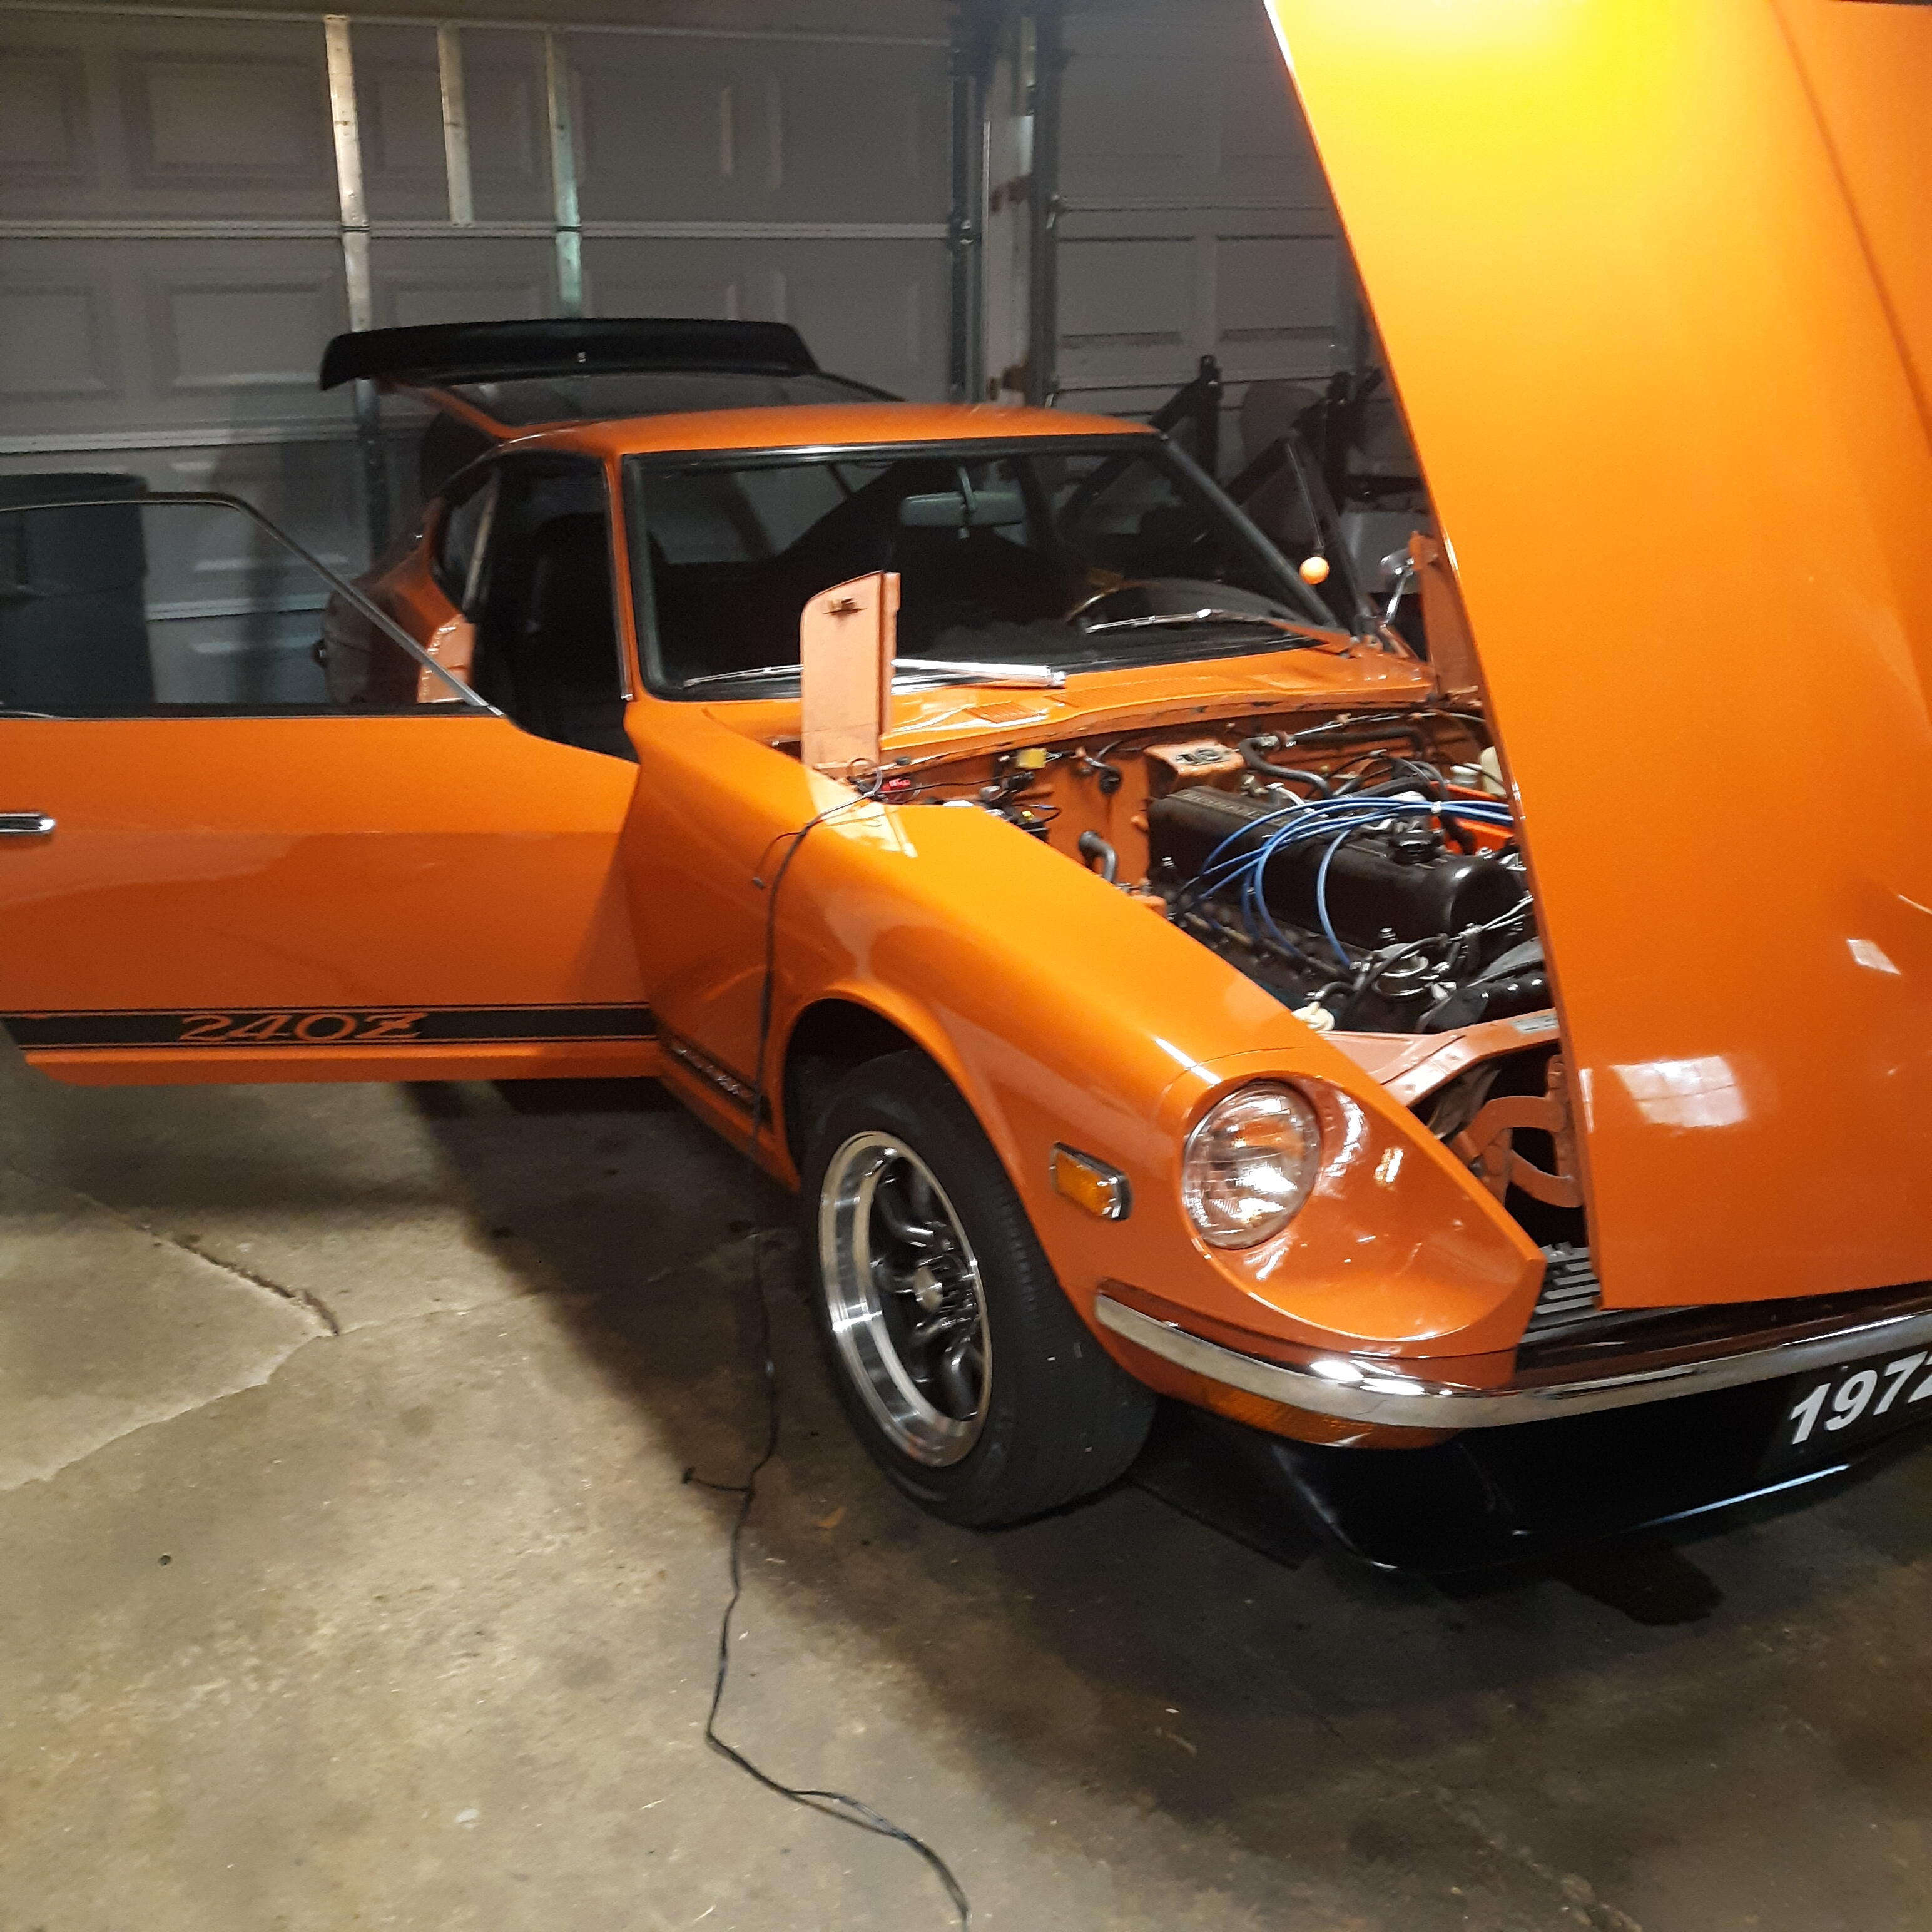
Watered Rodger, the 240. He has a new friend, Archie. Can't wait to shake brakes with one another.
 3 points
 -
Wait... I know. You're HOT, right??!3 points
-
I've used a insulation piercing volt meter many times without removing the part I was testing voltage on. It has a needle like end you push through the outer insulation to the copper wire for testing. I can't say how many times I've pricked my fingers to accidentally test MY voltage.2 points
-
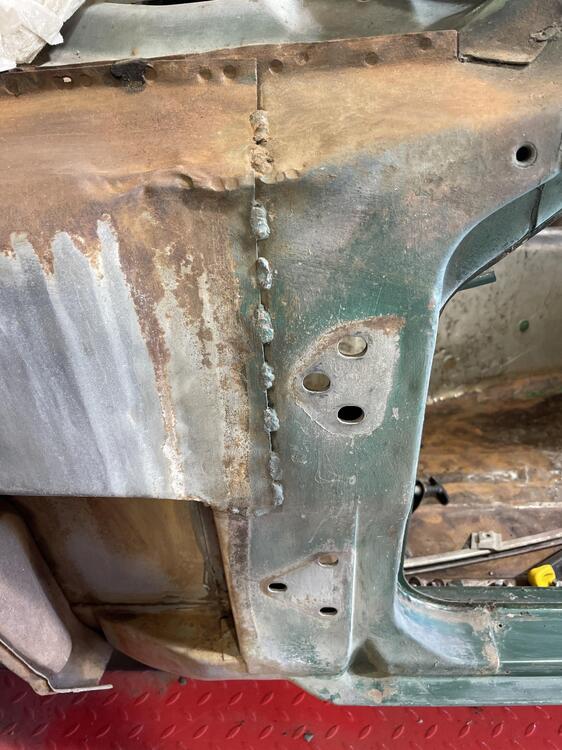
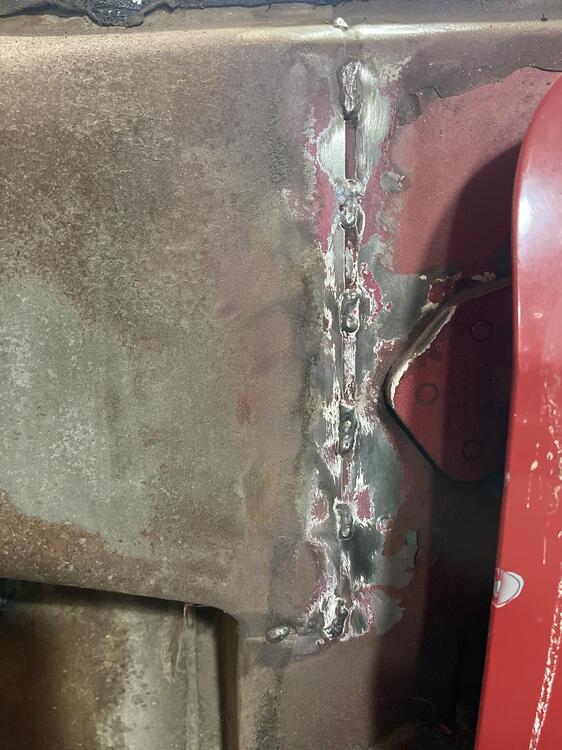
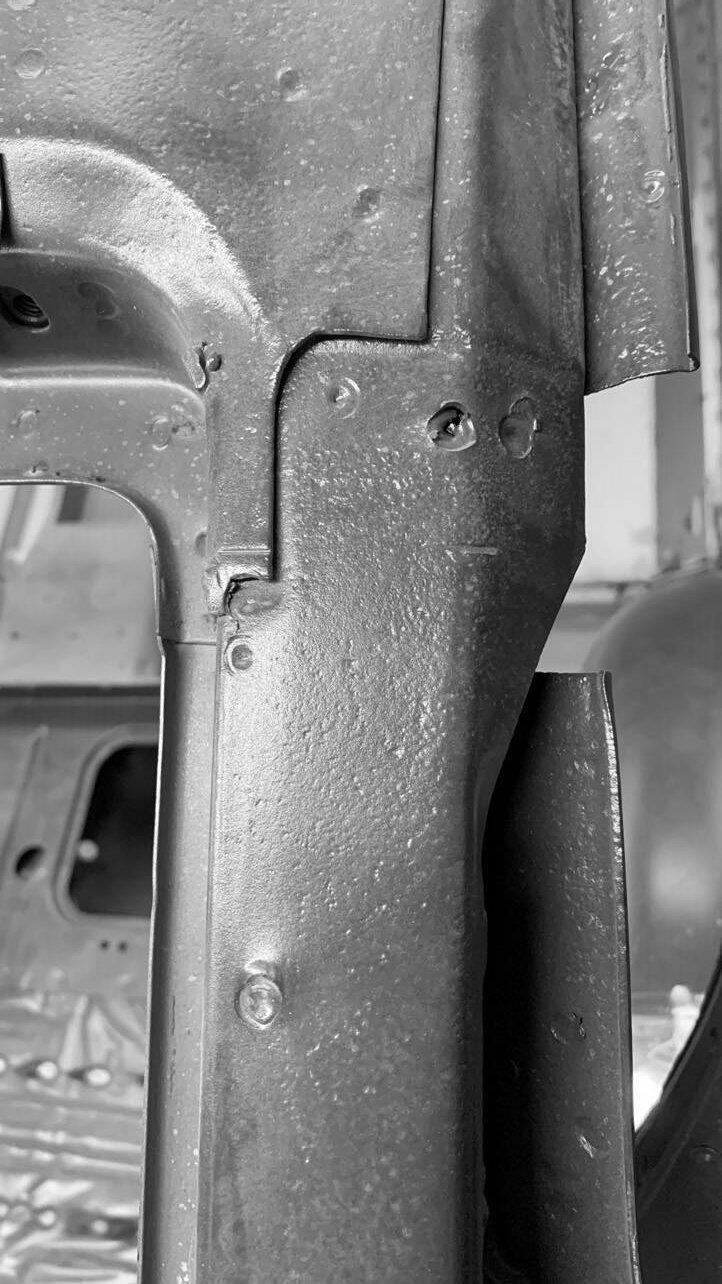
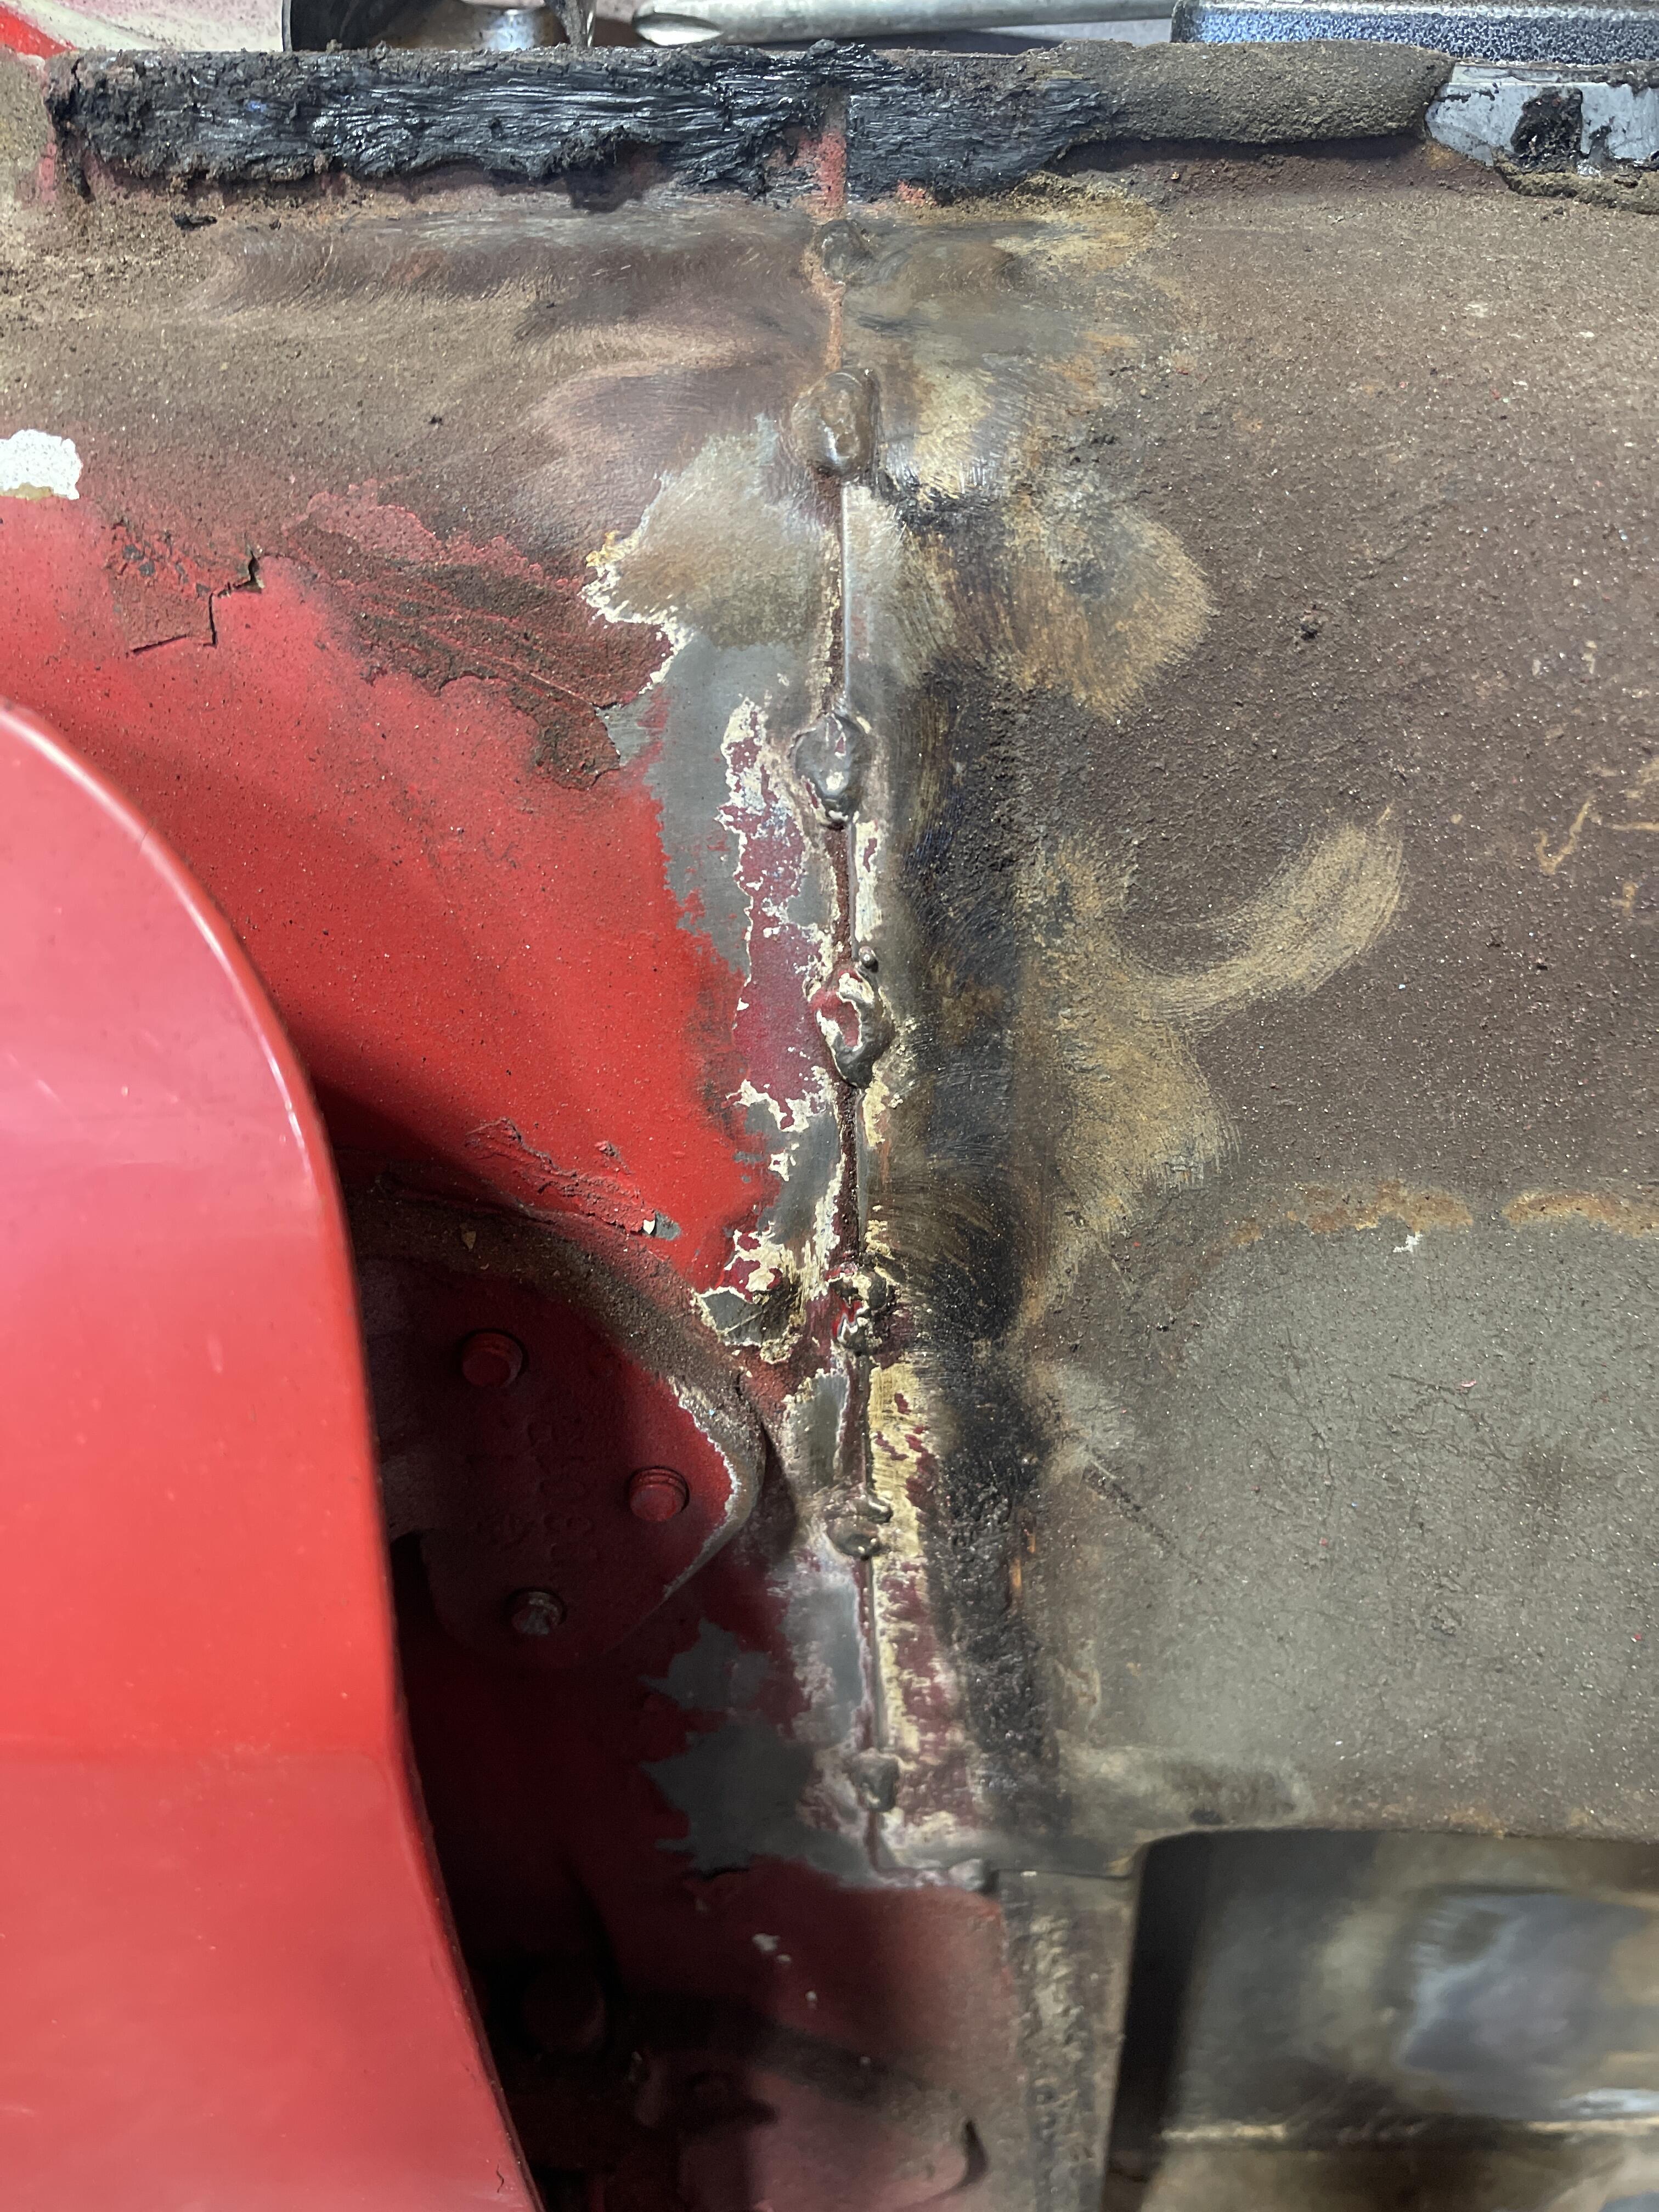
...and here's a right-hand rear quarter roof/quarter joint with rear quarter panel removed (spotwelds drilled out), blasted and etch-primed: It's a complicated joint - the meeting point of roof outer panel, roof rear crossmember/hatch hinge mount/roof longitudinal rail/rear quarter. Perhaps not surprising that it required lead-loading.
 2 points
 -
It follows from Mr. Matsuo's comments. p.s. It shouldn't be overlooked that many of the things you see on a car are there for ease and speed of production. Not performance. p.s. 2 - those welds look terrible. I wonder if they got better along the way to the 280Z bodies. It would be interesting to see some later welds. .1 point
-
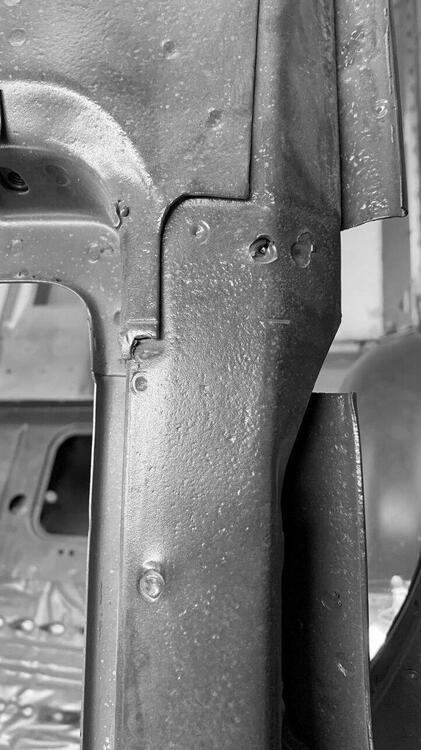
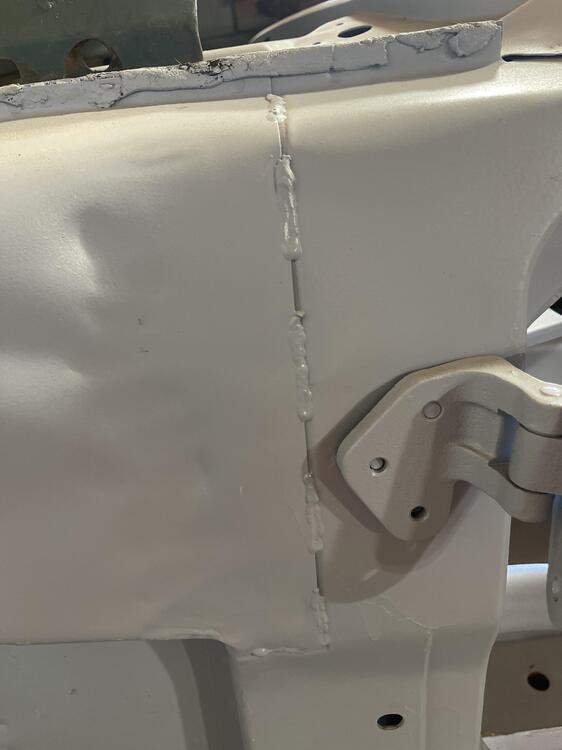
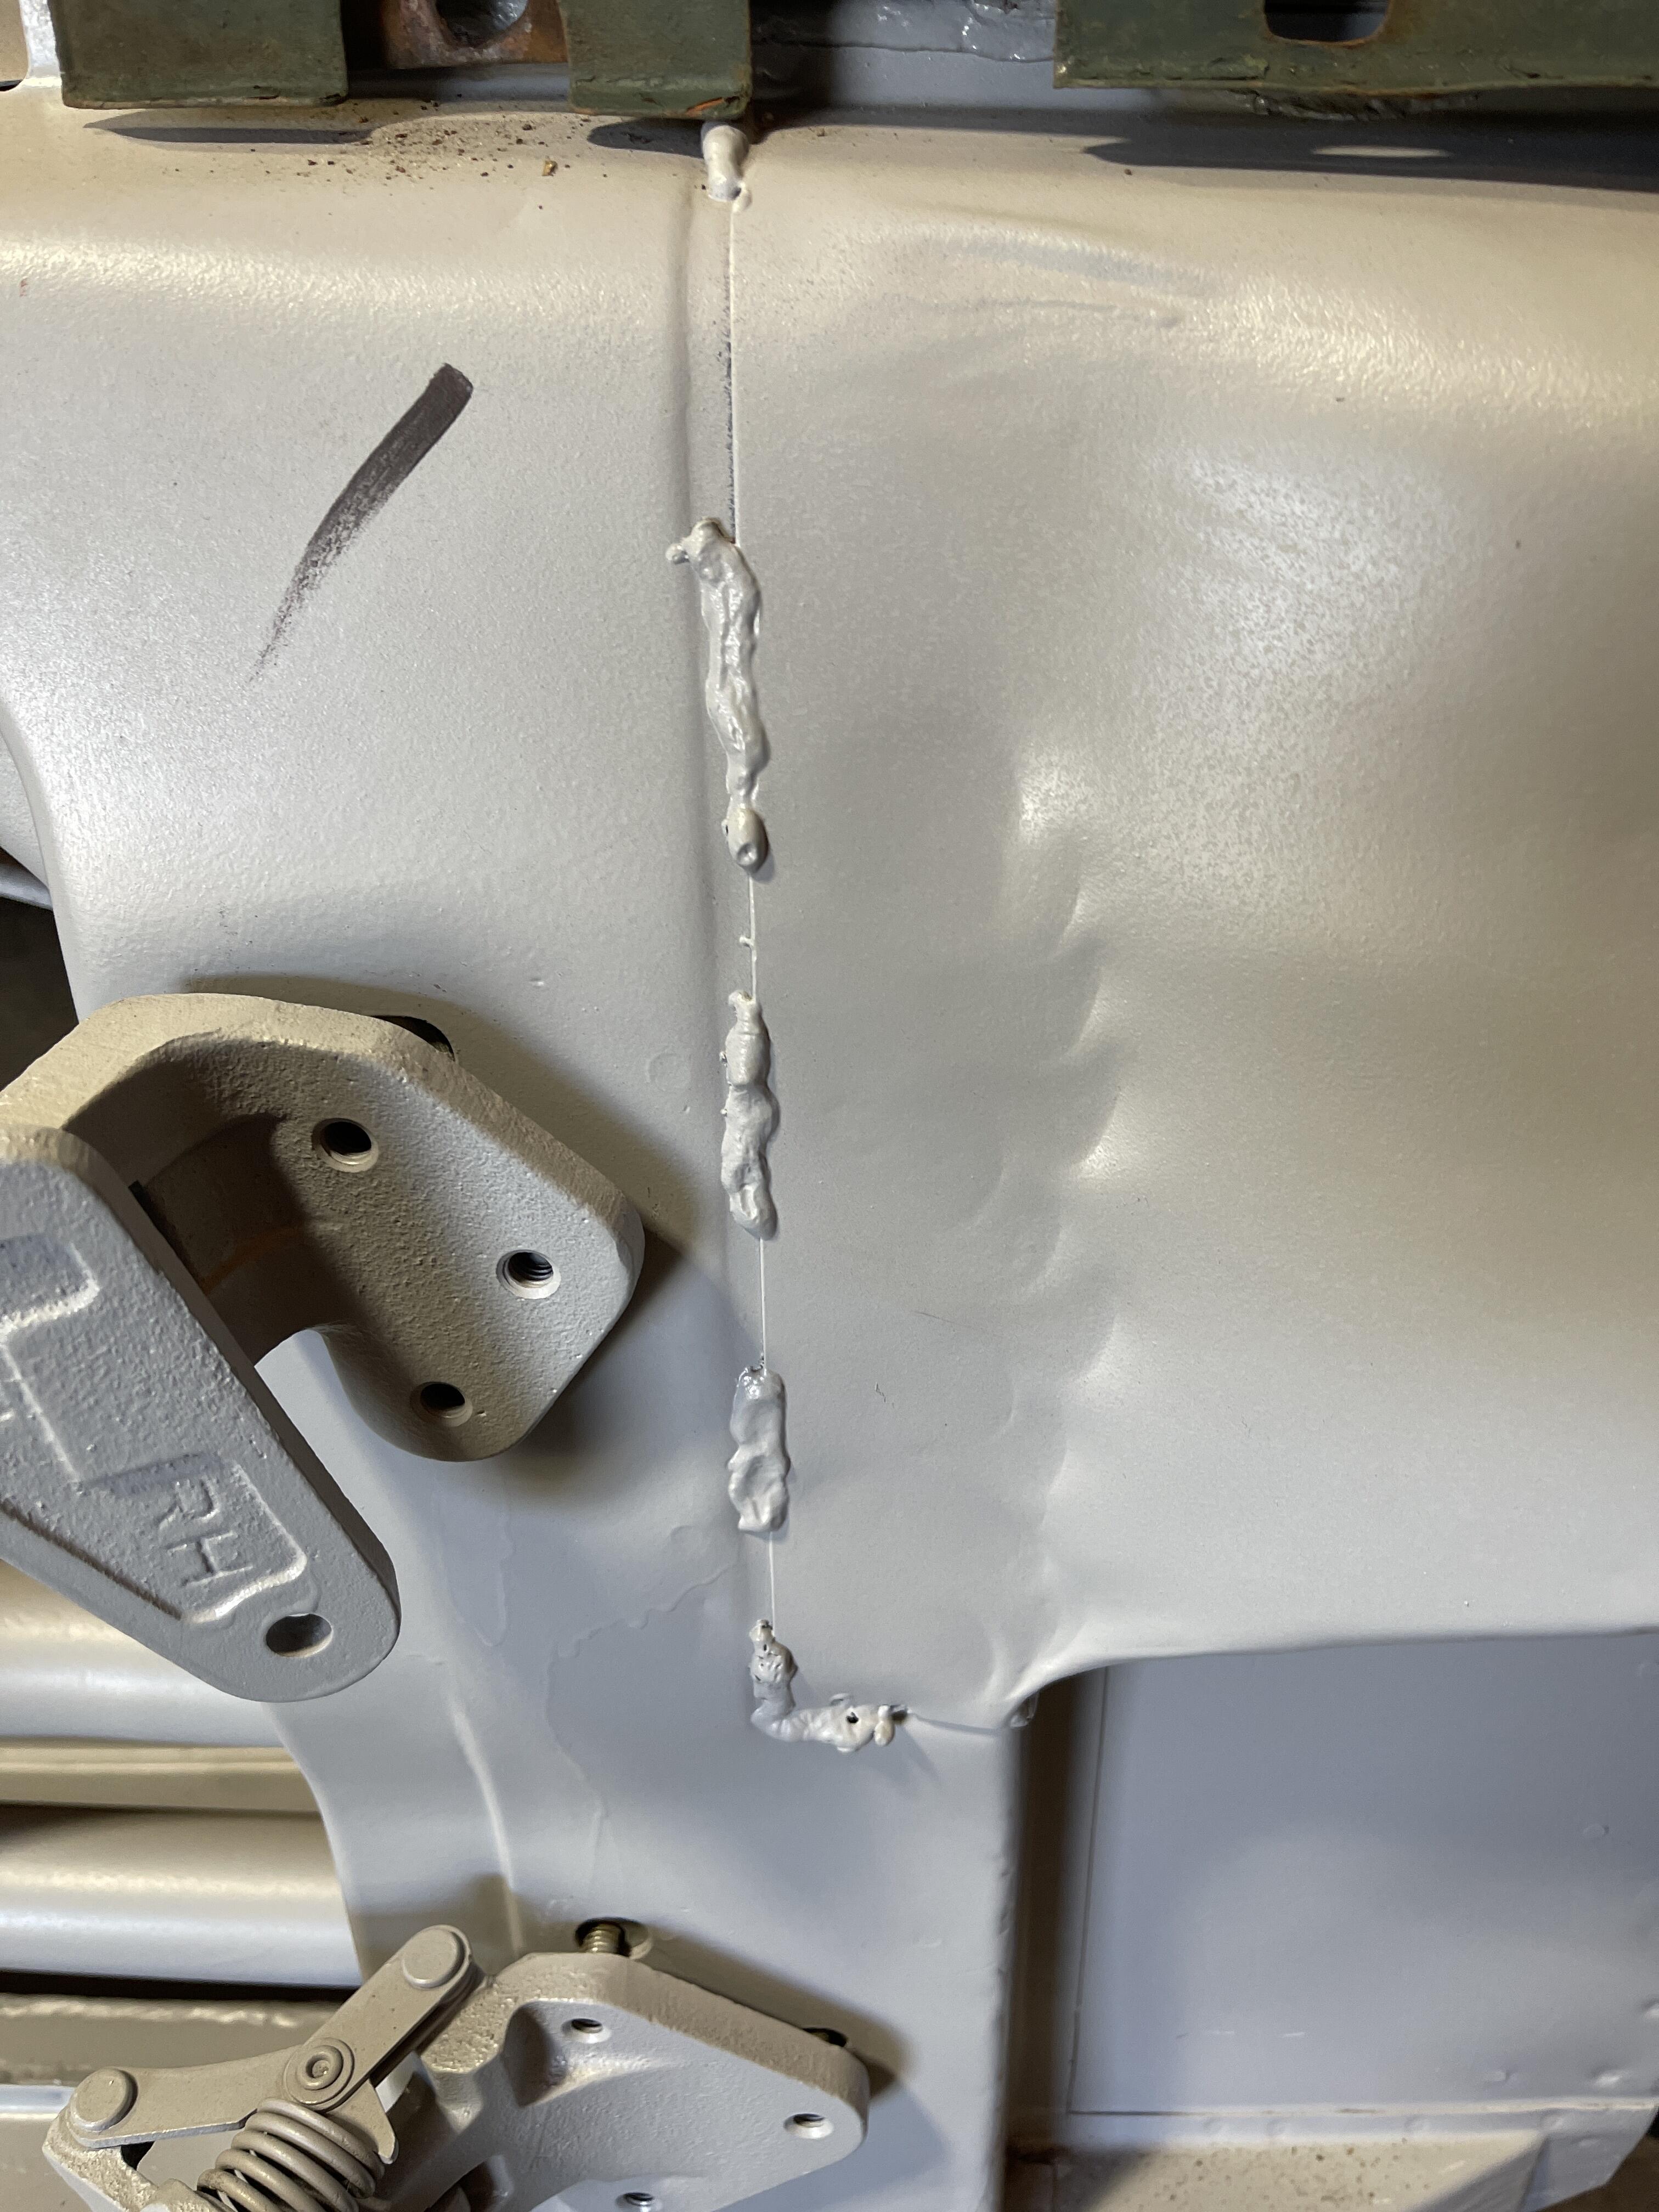
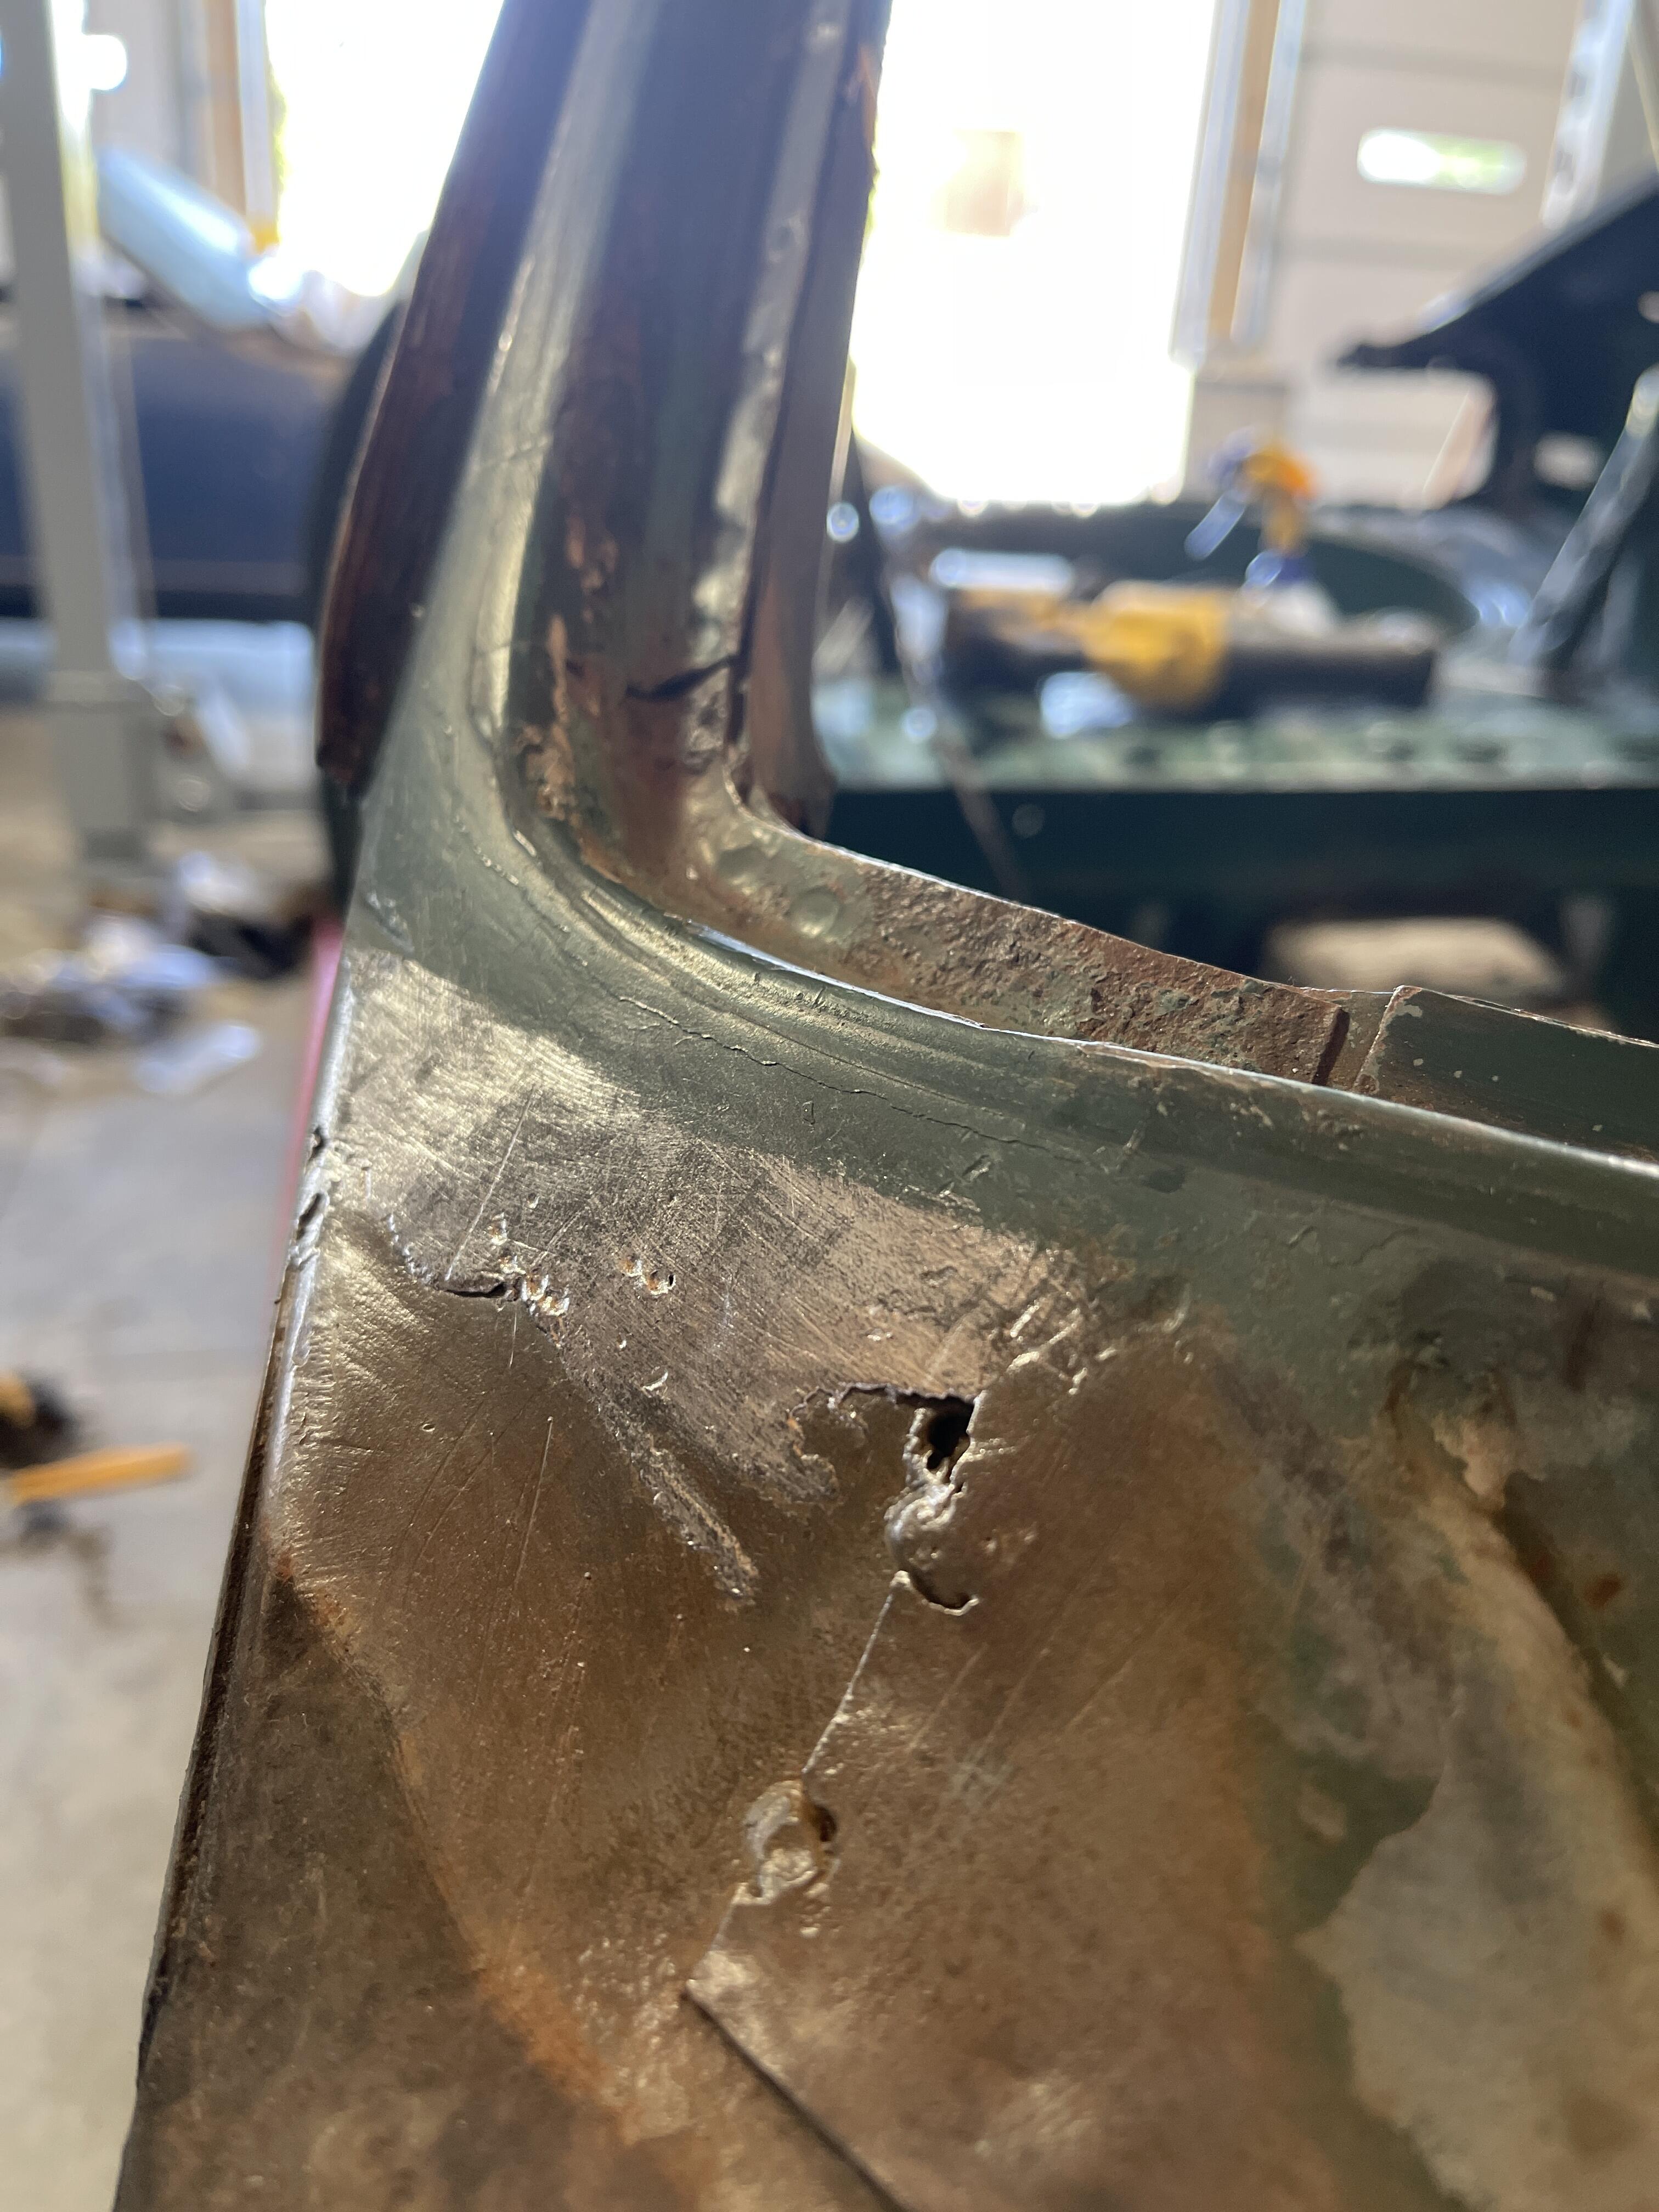
Since the screen pillars ('A') and rear quarter/roof joint ('C') are both finished with lead-loading, any hypothesis of them being "designed to flex" (I would say more likely 'expected to flex'...) would have to apply to both, no? I'm struggling to think of any other cosmetically-observable area on the bodyshells of these cars which is similarly 'filled' before paint. Nissan Shatai didn't bother to pretty up the joint between the rear quarter panels and the lower rear apron (spotwelds nicely visible and always a pleasure to see...) and I can't think of any other points on the body where - all opening panels closed - filling/joint disguising before paint was necessary. If I'm right, those lead-loaded joints are the only cosmetically-enhanced/filled-before-paint joints on the whole car. The 'designed to flex' thing seems like an answer looking for a question.1 point
-
Having to shout squirrel every 30 minutes or so, when distracted by items not noticed before, or perceived body and fender support changes in production methods like this welded joint between ….some changes through the years…. Hls30-00051 first pair welding exhibits “Green car” Hls30-00740….”blue car” Hls30-03496…. “Primer” Hs30- 10324…..”red” quite a difference in weld patterns.

 1 point
 -
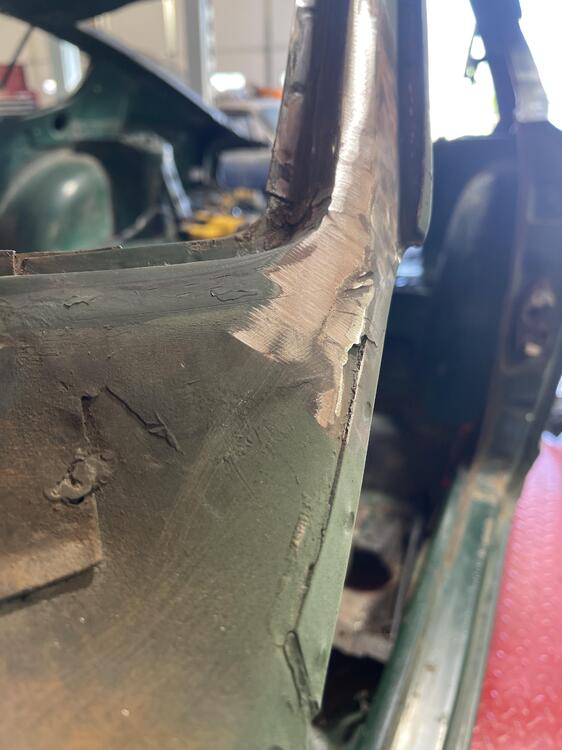
Thank you Allen… windshields pillars are looking good, thankfully… dip,or blast will tell the tale.

 1 point
 -
1 pointGotcha. And a couple comments about that spot / glazing putty: It's solvent based and because of that, it shrinks a lot as the solvent evaporates. Thin coats only to build up a deeper wound. Also it will likely etch into the PVC that the center console is made out of. That PVC is low on the chemical resistance chart. And lastly, be aware that filler has no mechanical strength on it's own. Think of it as "spraying a whole bunch of coats of sandable primer". (If that makes sense. ) I've found that JB weld sands OK with the correct low load paper.1 point
-
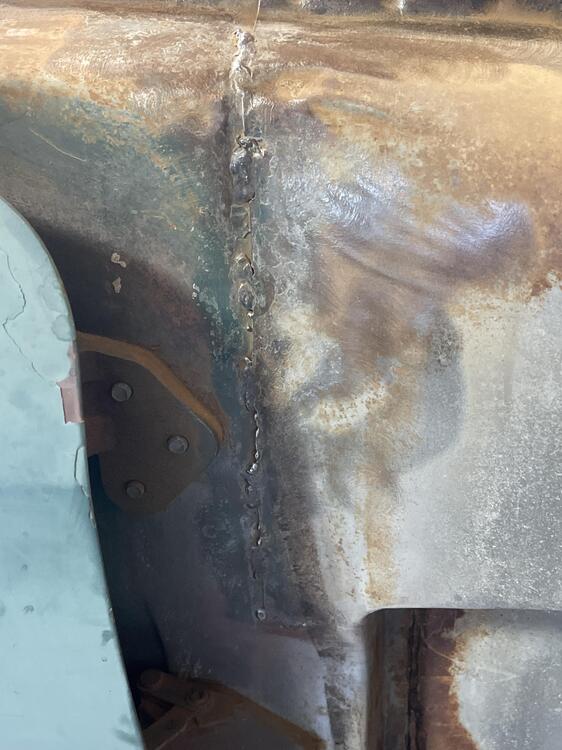
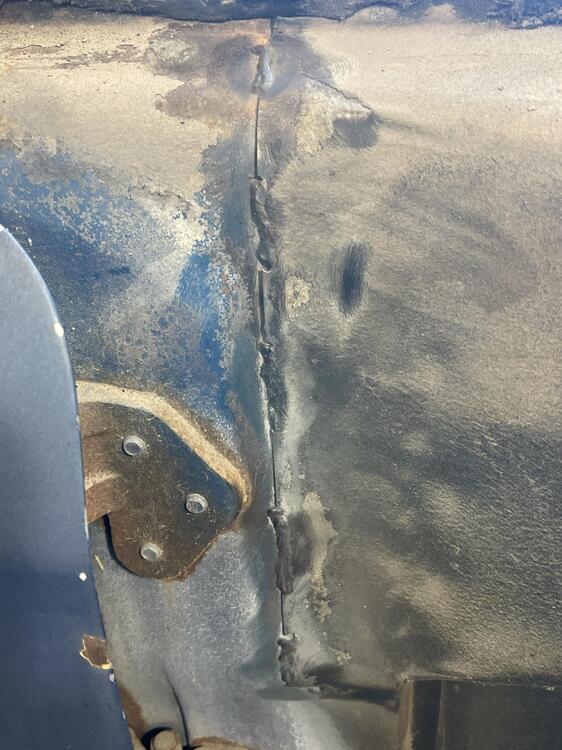
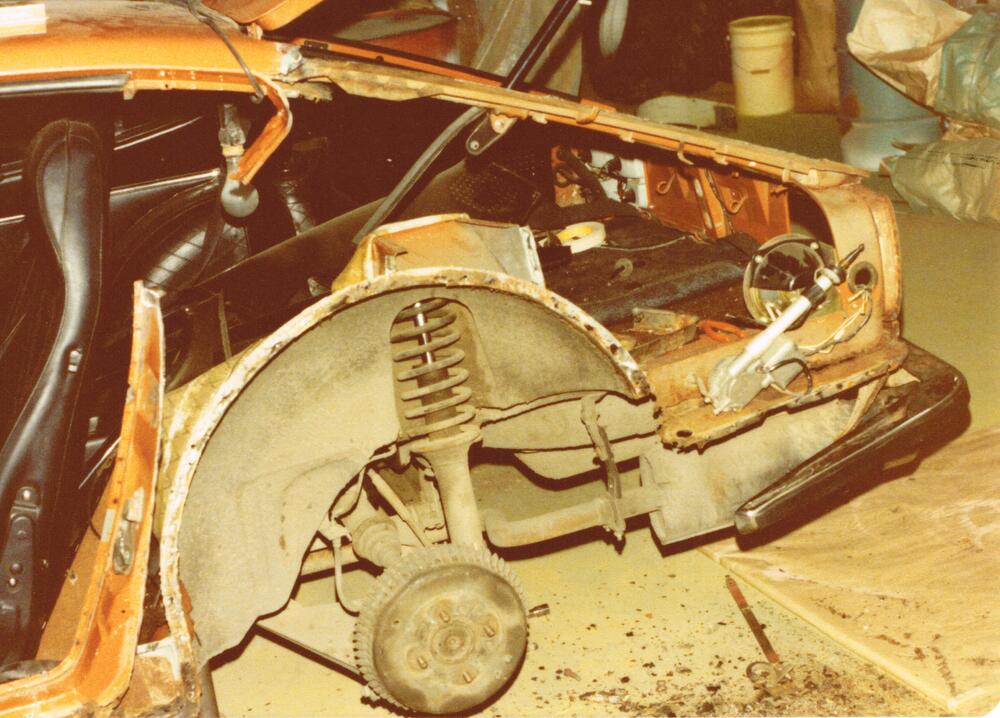
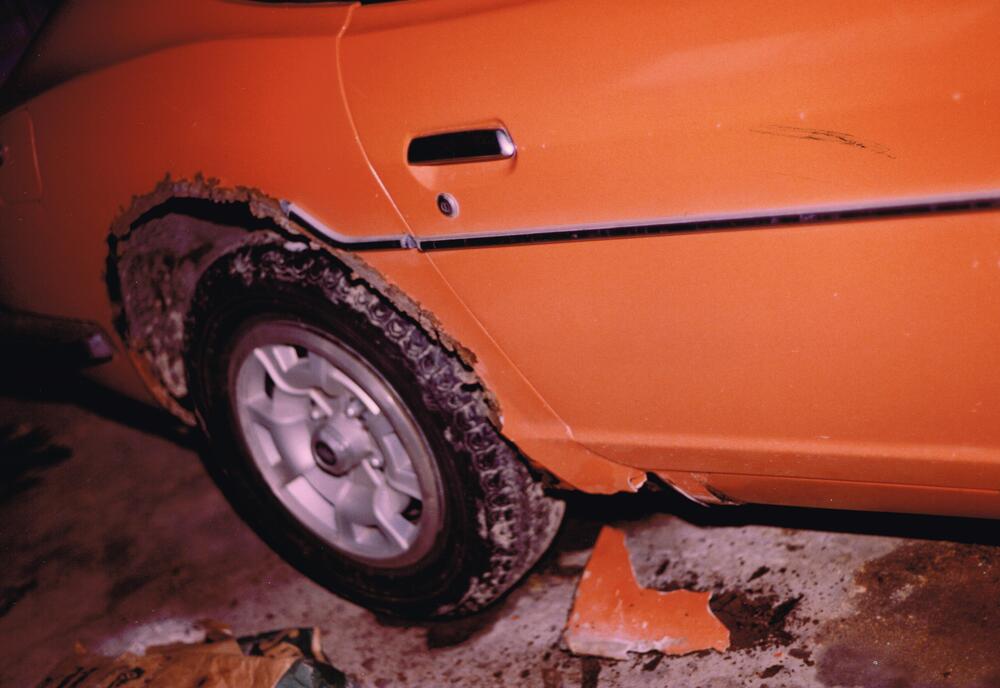
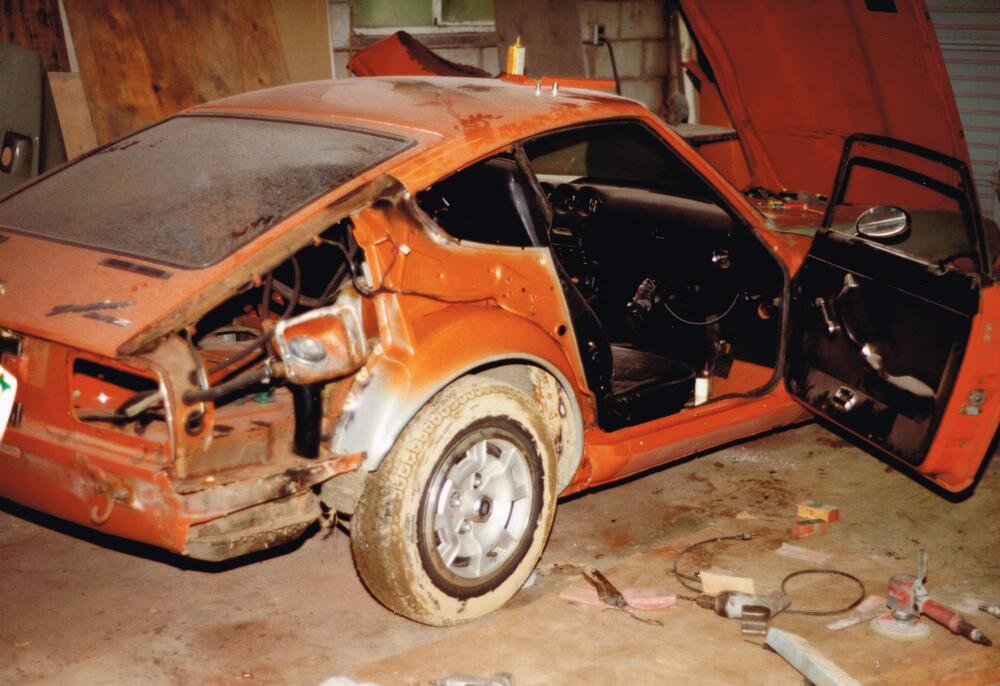
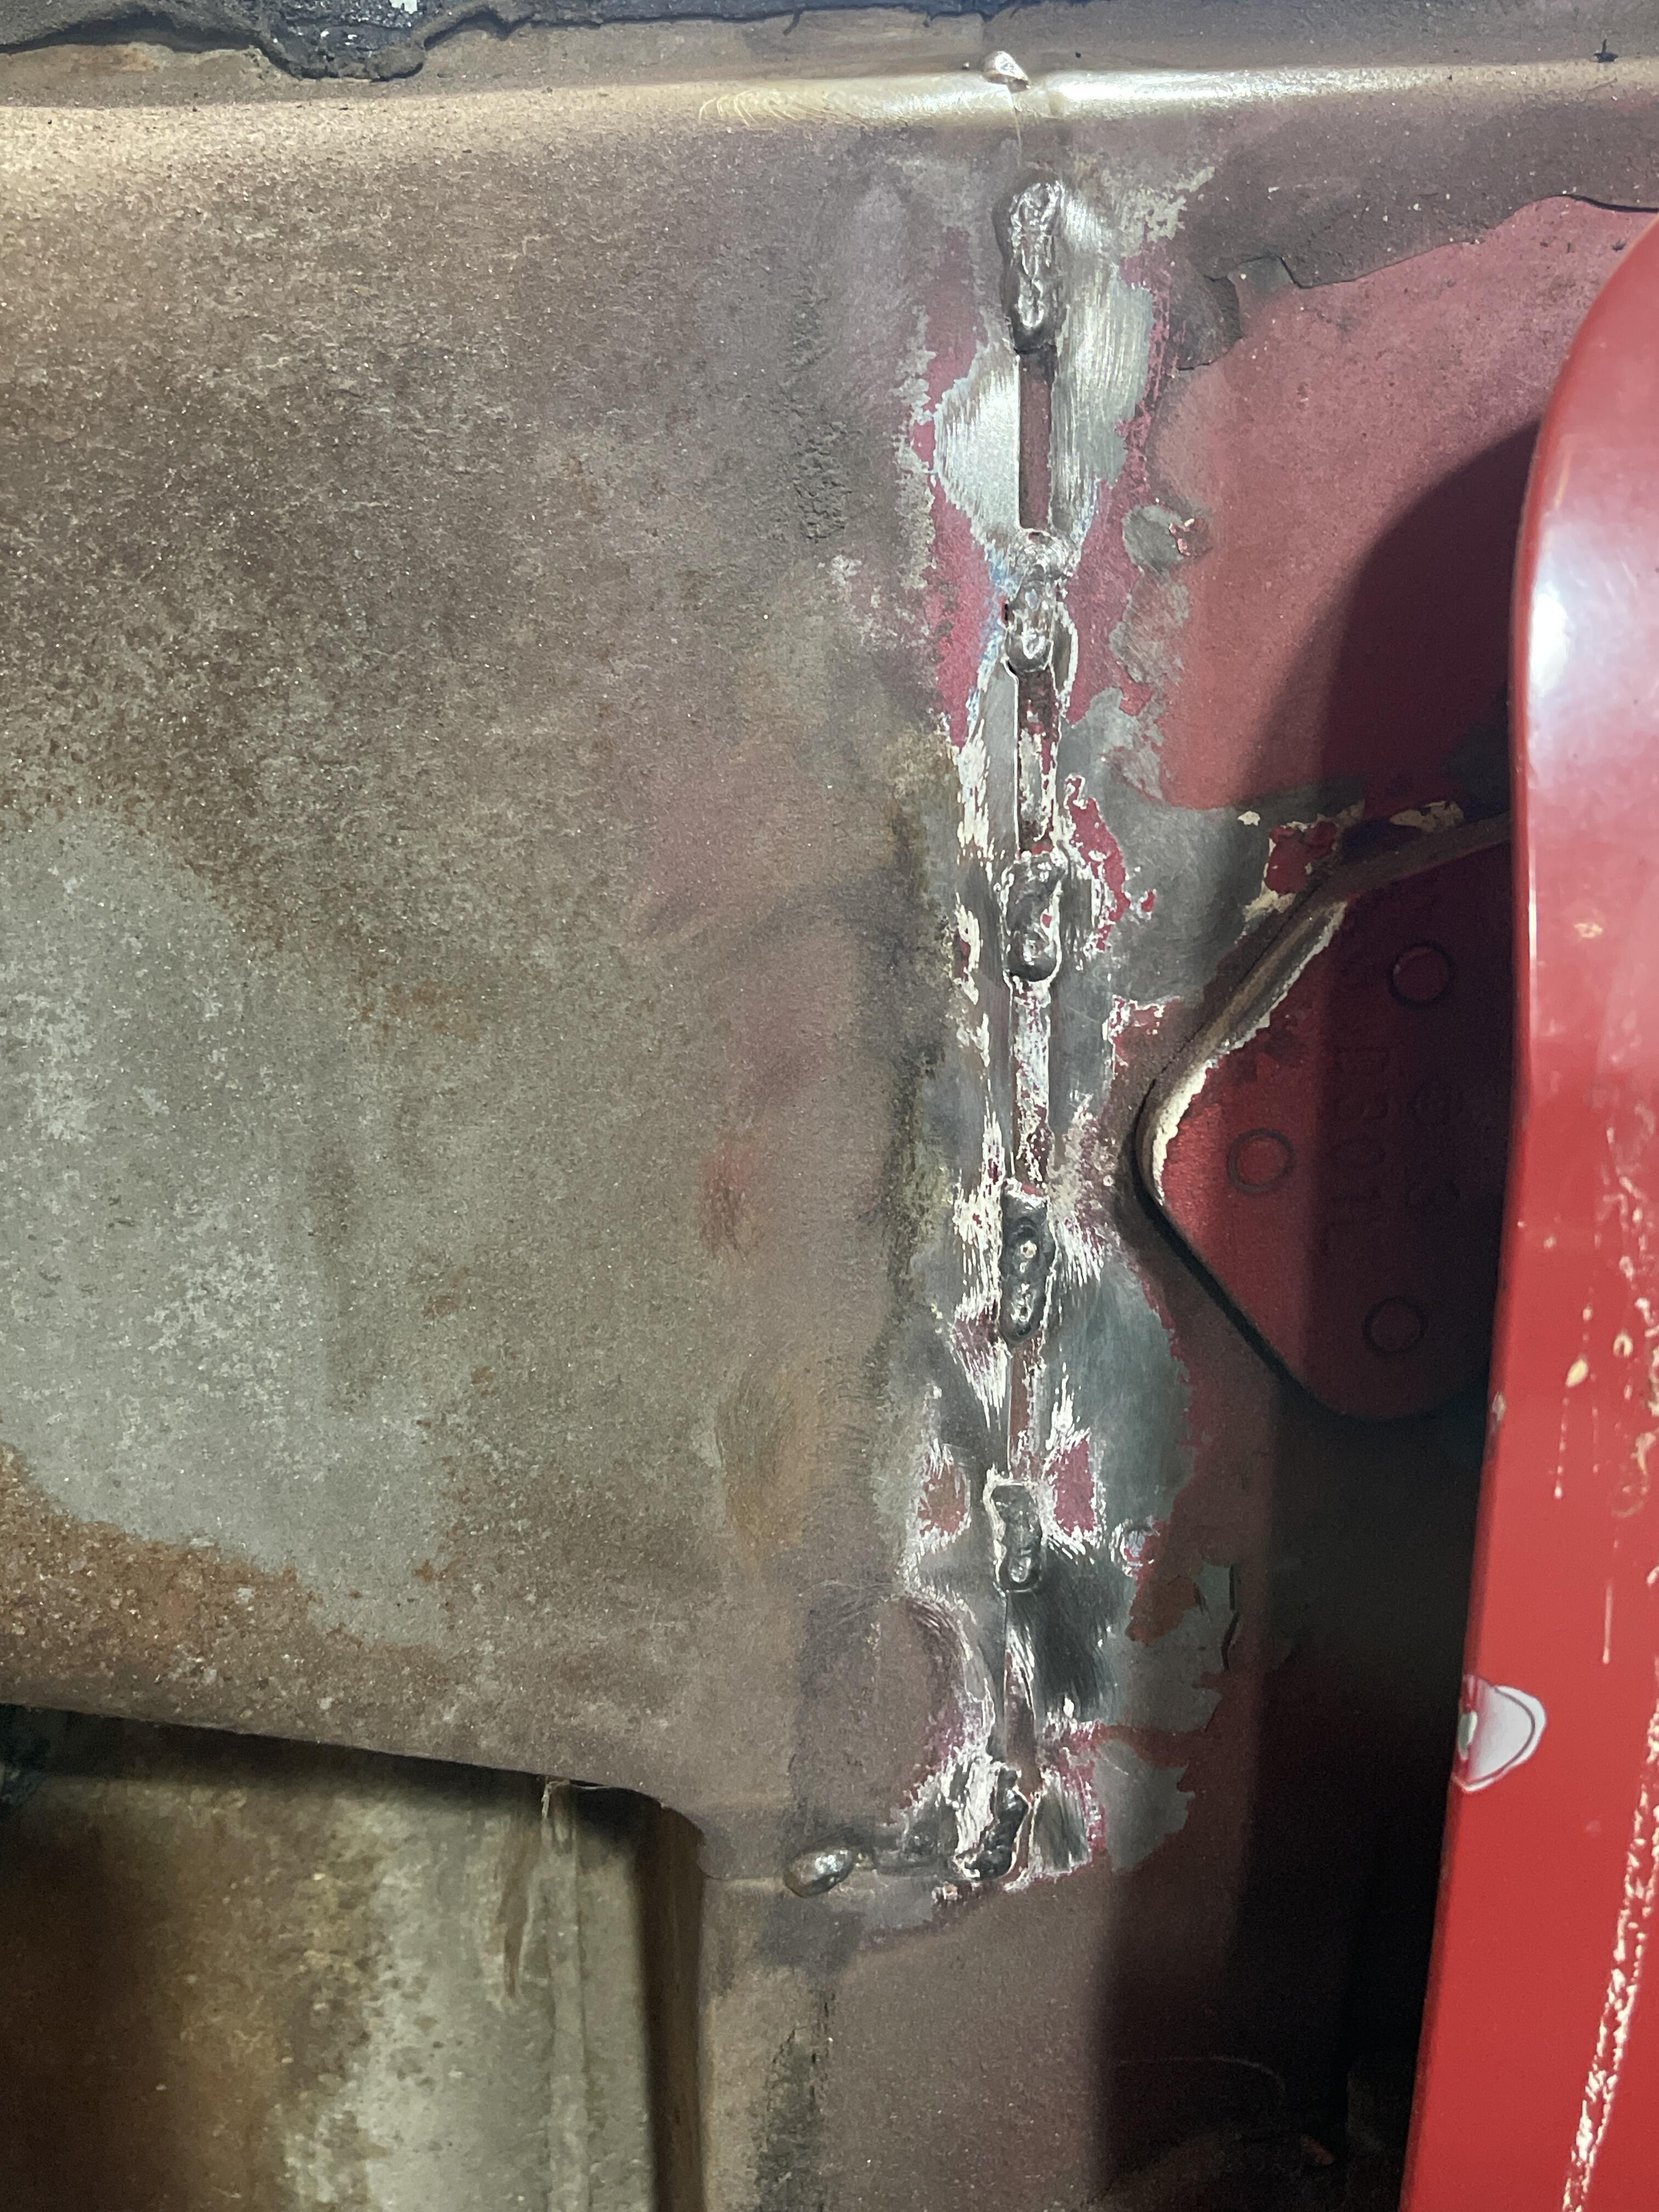
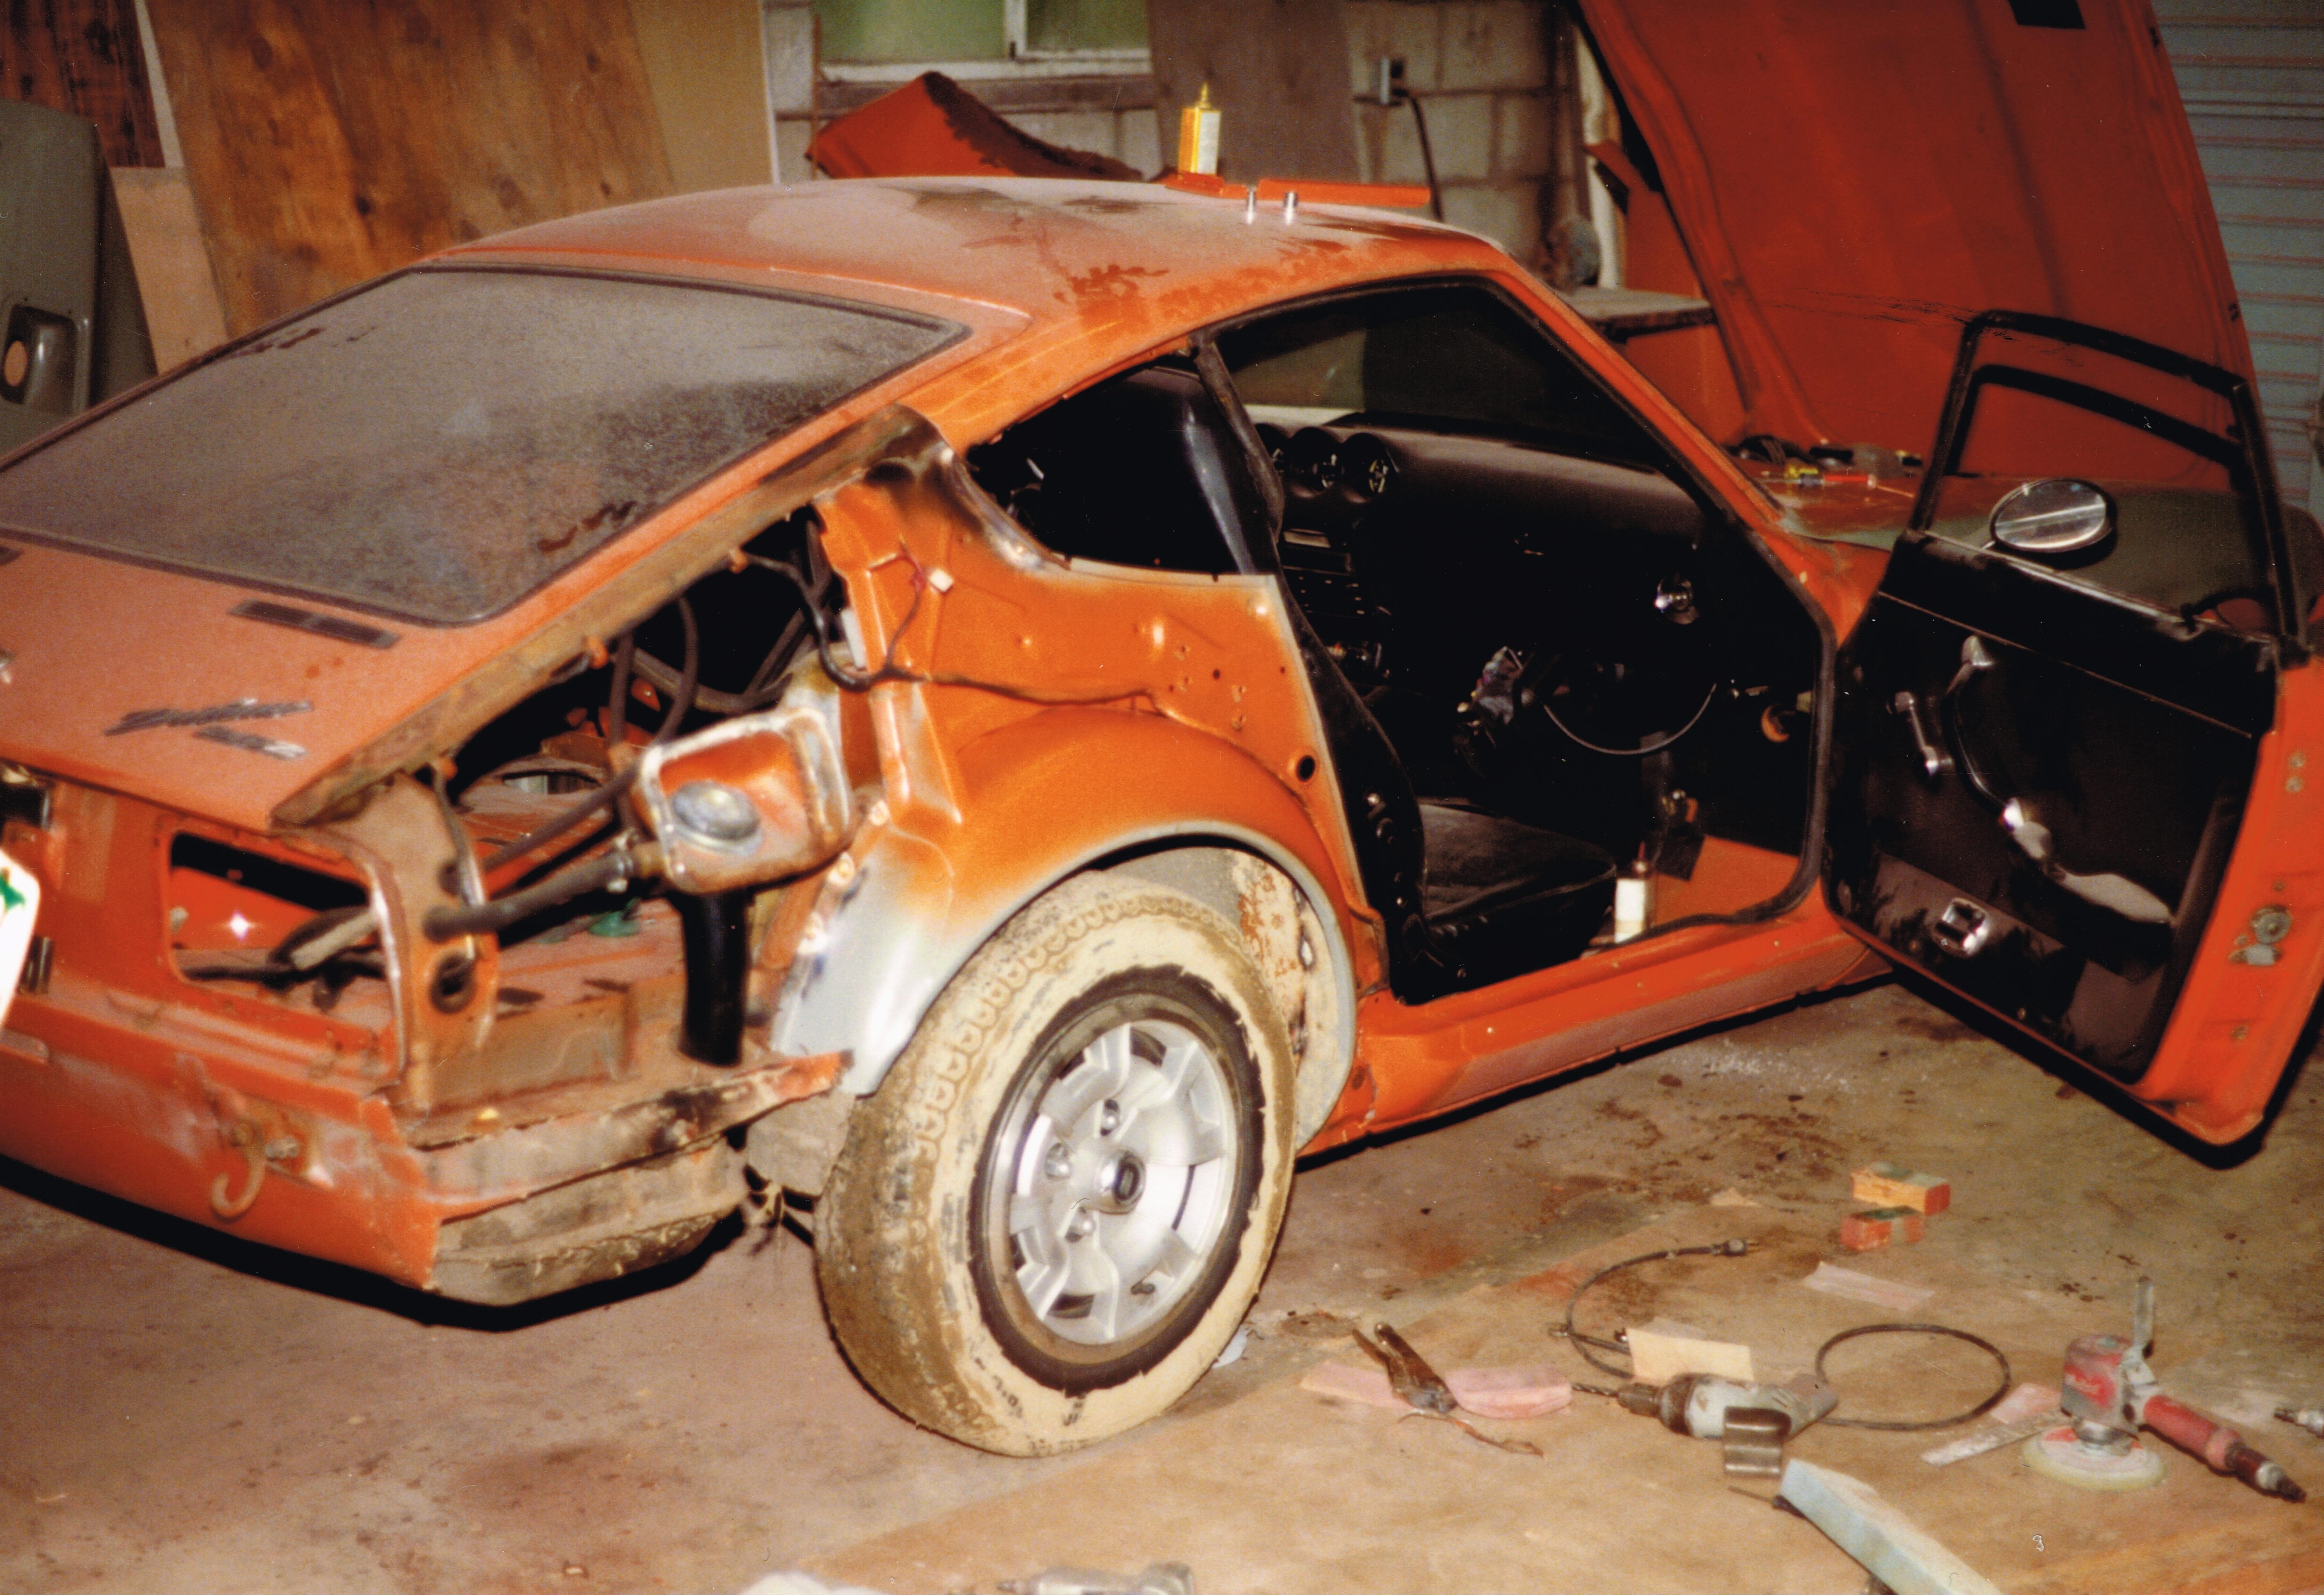
1 pointHere are a few pics from the early eighties when I had my rear quarters replaced. Sorry that they don't show more detail. The left side was actually done about a year before the right, as someone lightly backed into me and due to the existing shoddy bondo repair, a pile of rusty bits was left on the ground similar to the second pic, during the more complete resto. At the time of the incident I didn't have the funds to do the full resto. The left side was cut back to the factory joint but on the right side it is cut further down, I'm not sure why? Or if it was cut more later in the repair process? Anyways you can see a little of the detail. I wish I had taken more closeup pictures back then.
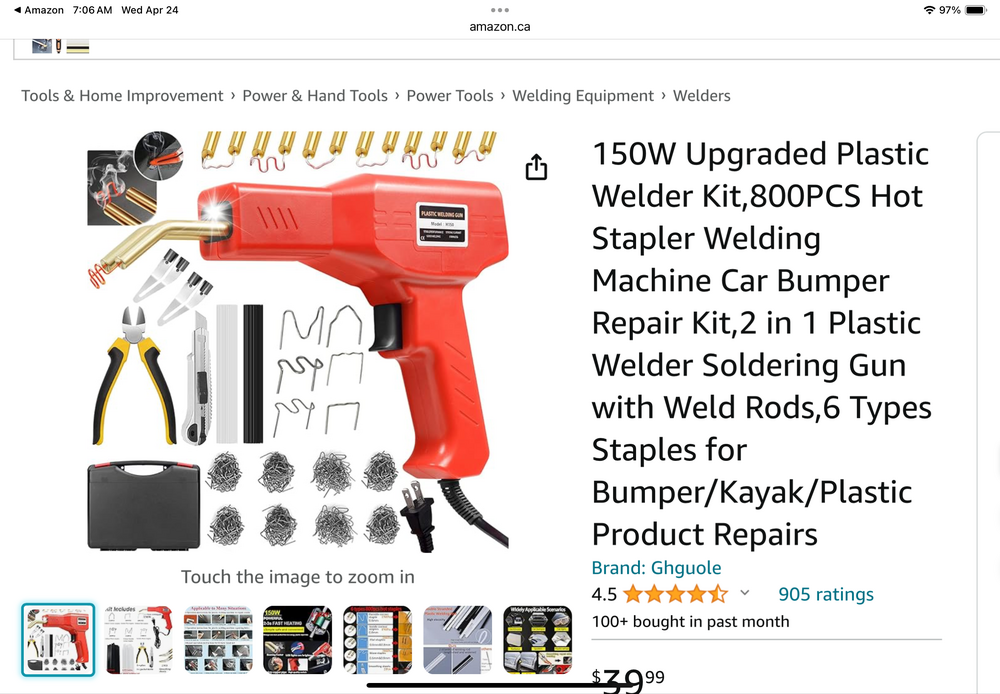
 1 point1 pointPlastic repair is one of those things I’ve been experimenting with frequently in the last year or so. The usual, interior plastic panels, consoles yes, broken eye glass frames, toy repair, you name it. These are my favorite findings and tools 1. Plastic welding. Basically a wide flat soldering iron with filler “wire” of various plastic species. Melt the substrate, add filler, smear it all over. 2. Wire staples in various shapes, that you heat up and press across a crack that melt then harden into the plastic thickness, binding the two sides together. 3. Build up missing areas with UV cure epoxy resin. This is my new favorite. Also makes a good glue for plastics. Used to buy in small expensive gluing kits (Goggle Bondic) but now UV cure resins are everywhere in the hobby world and are cheap.
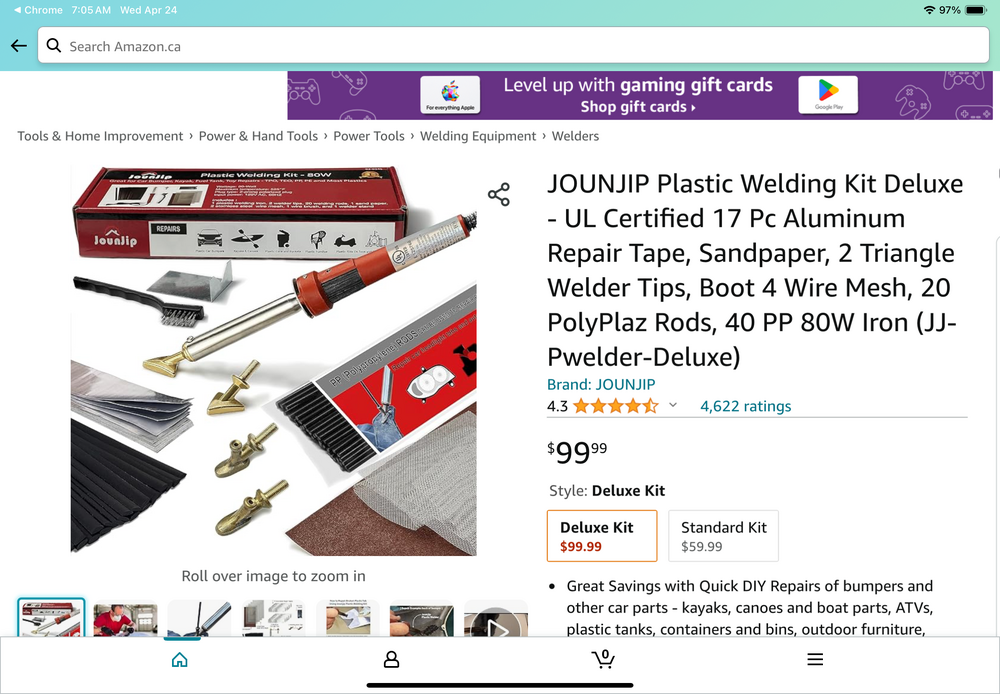
 1 pointThanks bluez. So it definitely looks like between 7/70 and 12/70 they changed the markings from stamped-in to cast-in. Haha!! Another detail to look for on the early cars for authenticity. Stock class judges be aware! "It's got an early style M/C." "Yeah, but it's not an early early style."1 pointGlad you found it! You may want to consider going with a LED compatible flashers (blinker and hazard). When I put my car back together the running light fuse was getting really hot. I swapped all the bulbs and flashers to LED and it made a huge difference. Several threads on this. I think I bought everything from Amazon.1 pointI'd test it before prying those tabs back and opening it up. I broke a tab on mine.1 point


Important Information
By using this site, you agree to our Privacy Policy and Guidelines. We have placed cookies on your device to help make this website better. You can adjust your cookie settings, otherwise we'll assume you're okay to continue.