Leaderboard
-
dspillman
 Subscriber
 7Points445Posts
 -
grannyknot
Free Member5Points5,158Posts -

CanTechZ
Free Member5Points1,311Posts -
Terrapin Z
Subscriber4Points1,333Posts


Popular Content
Showing content with the highest reputation on 04/16/2024 in all areas
-
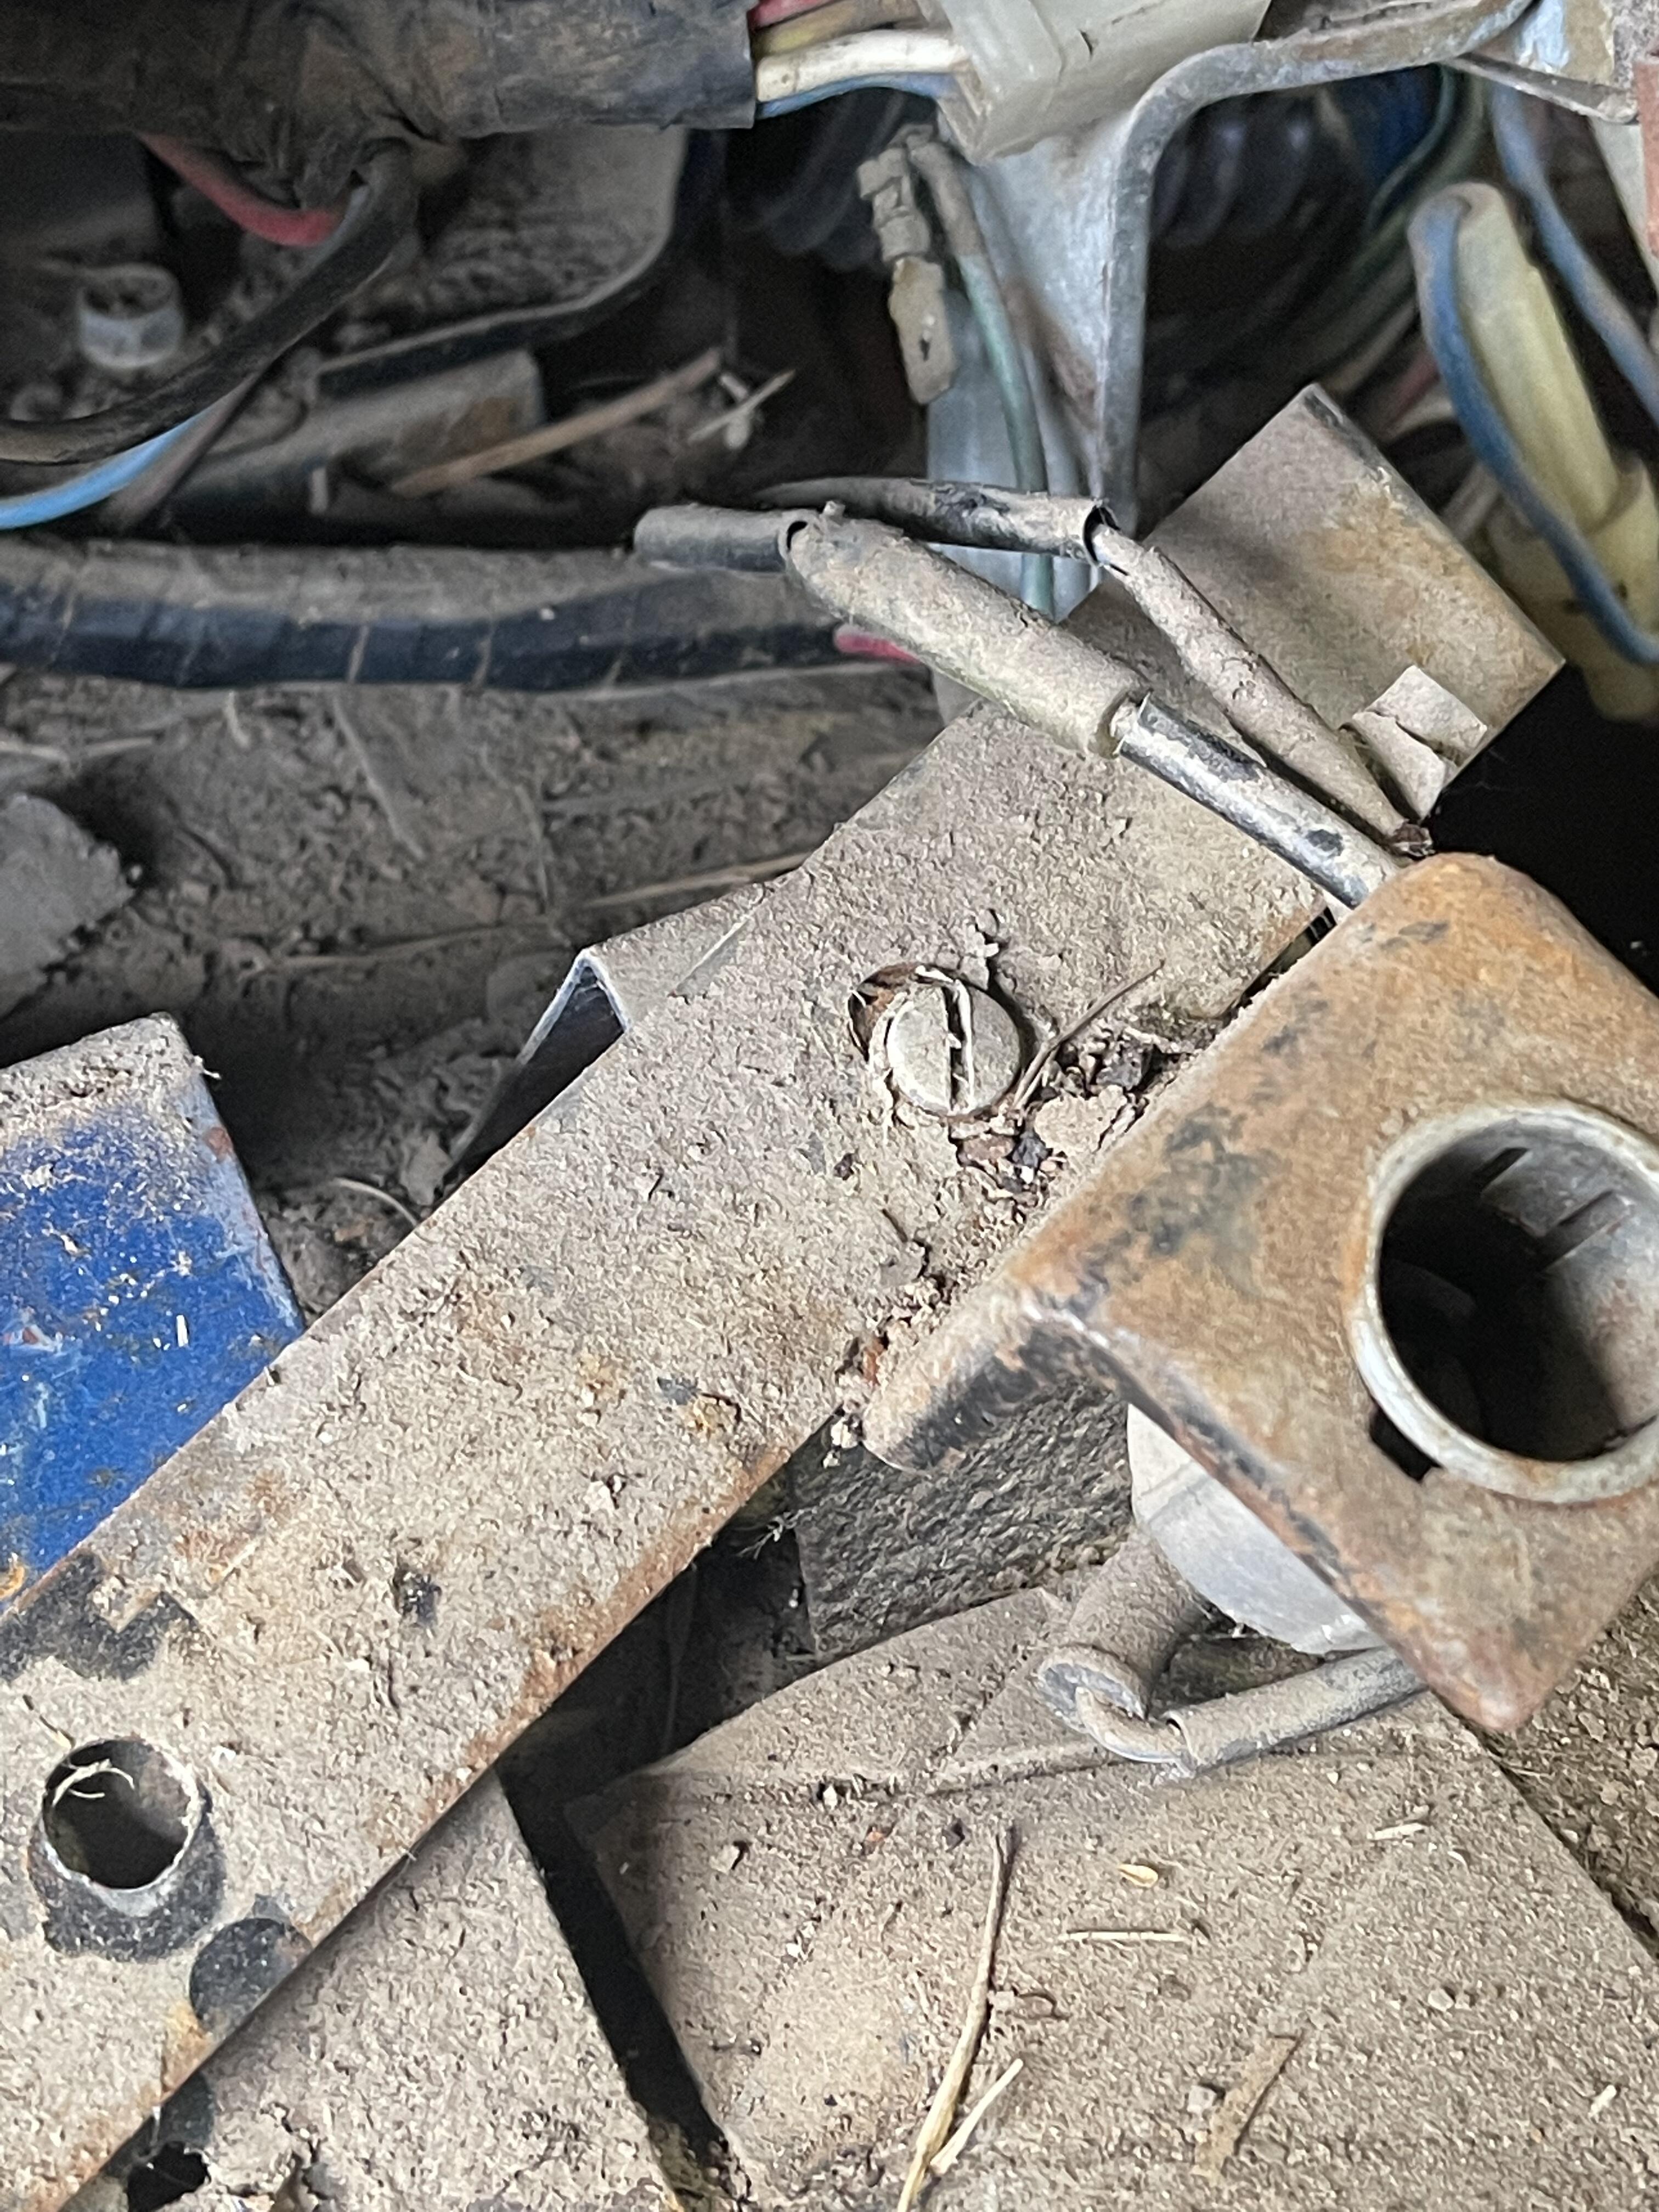
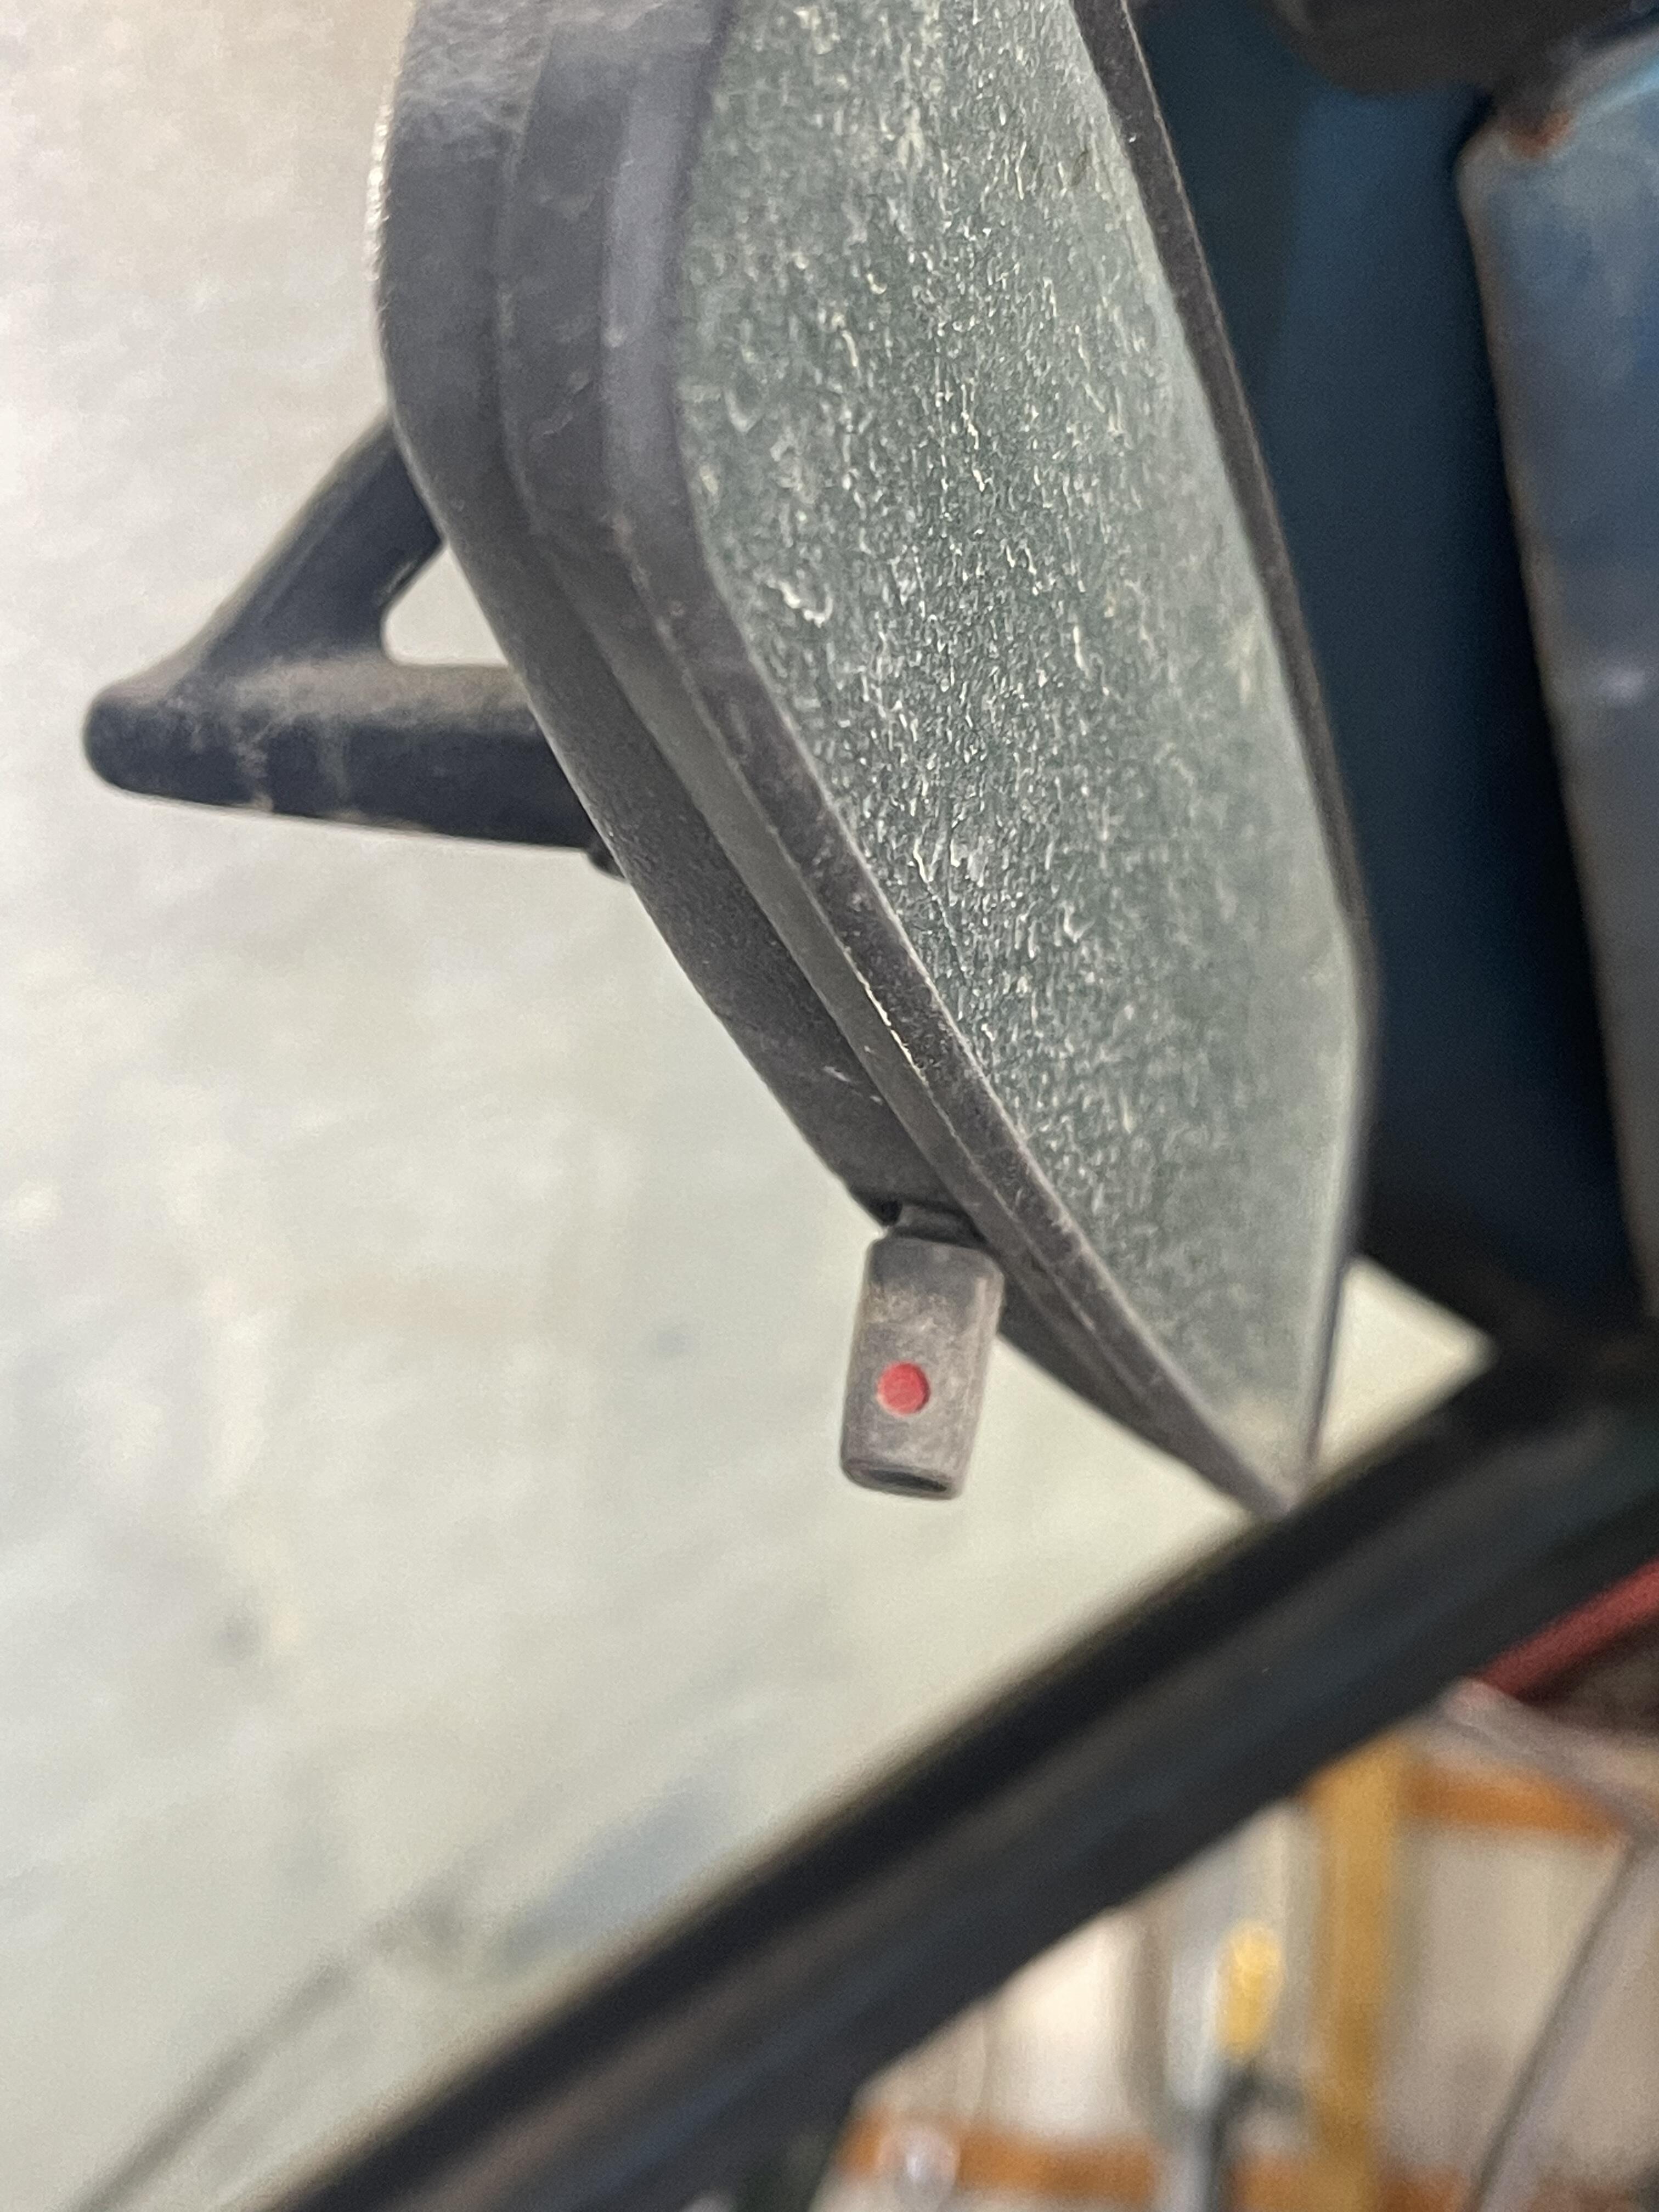
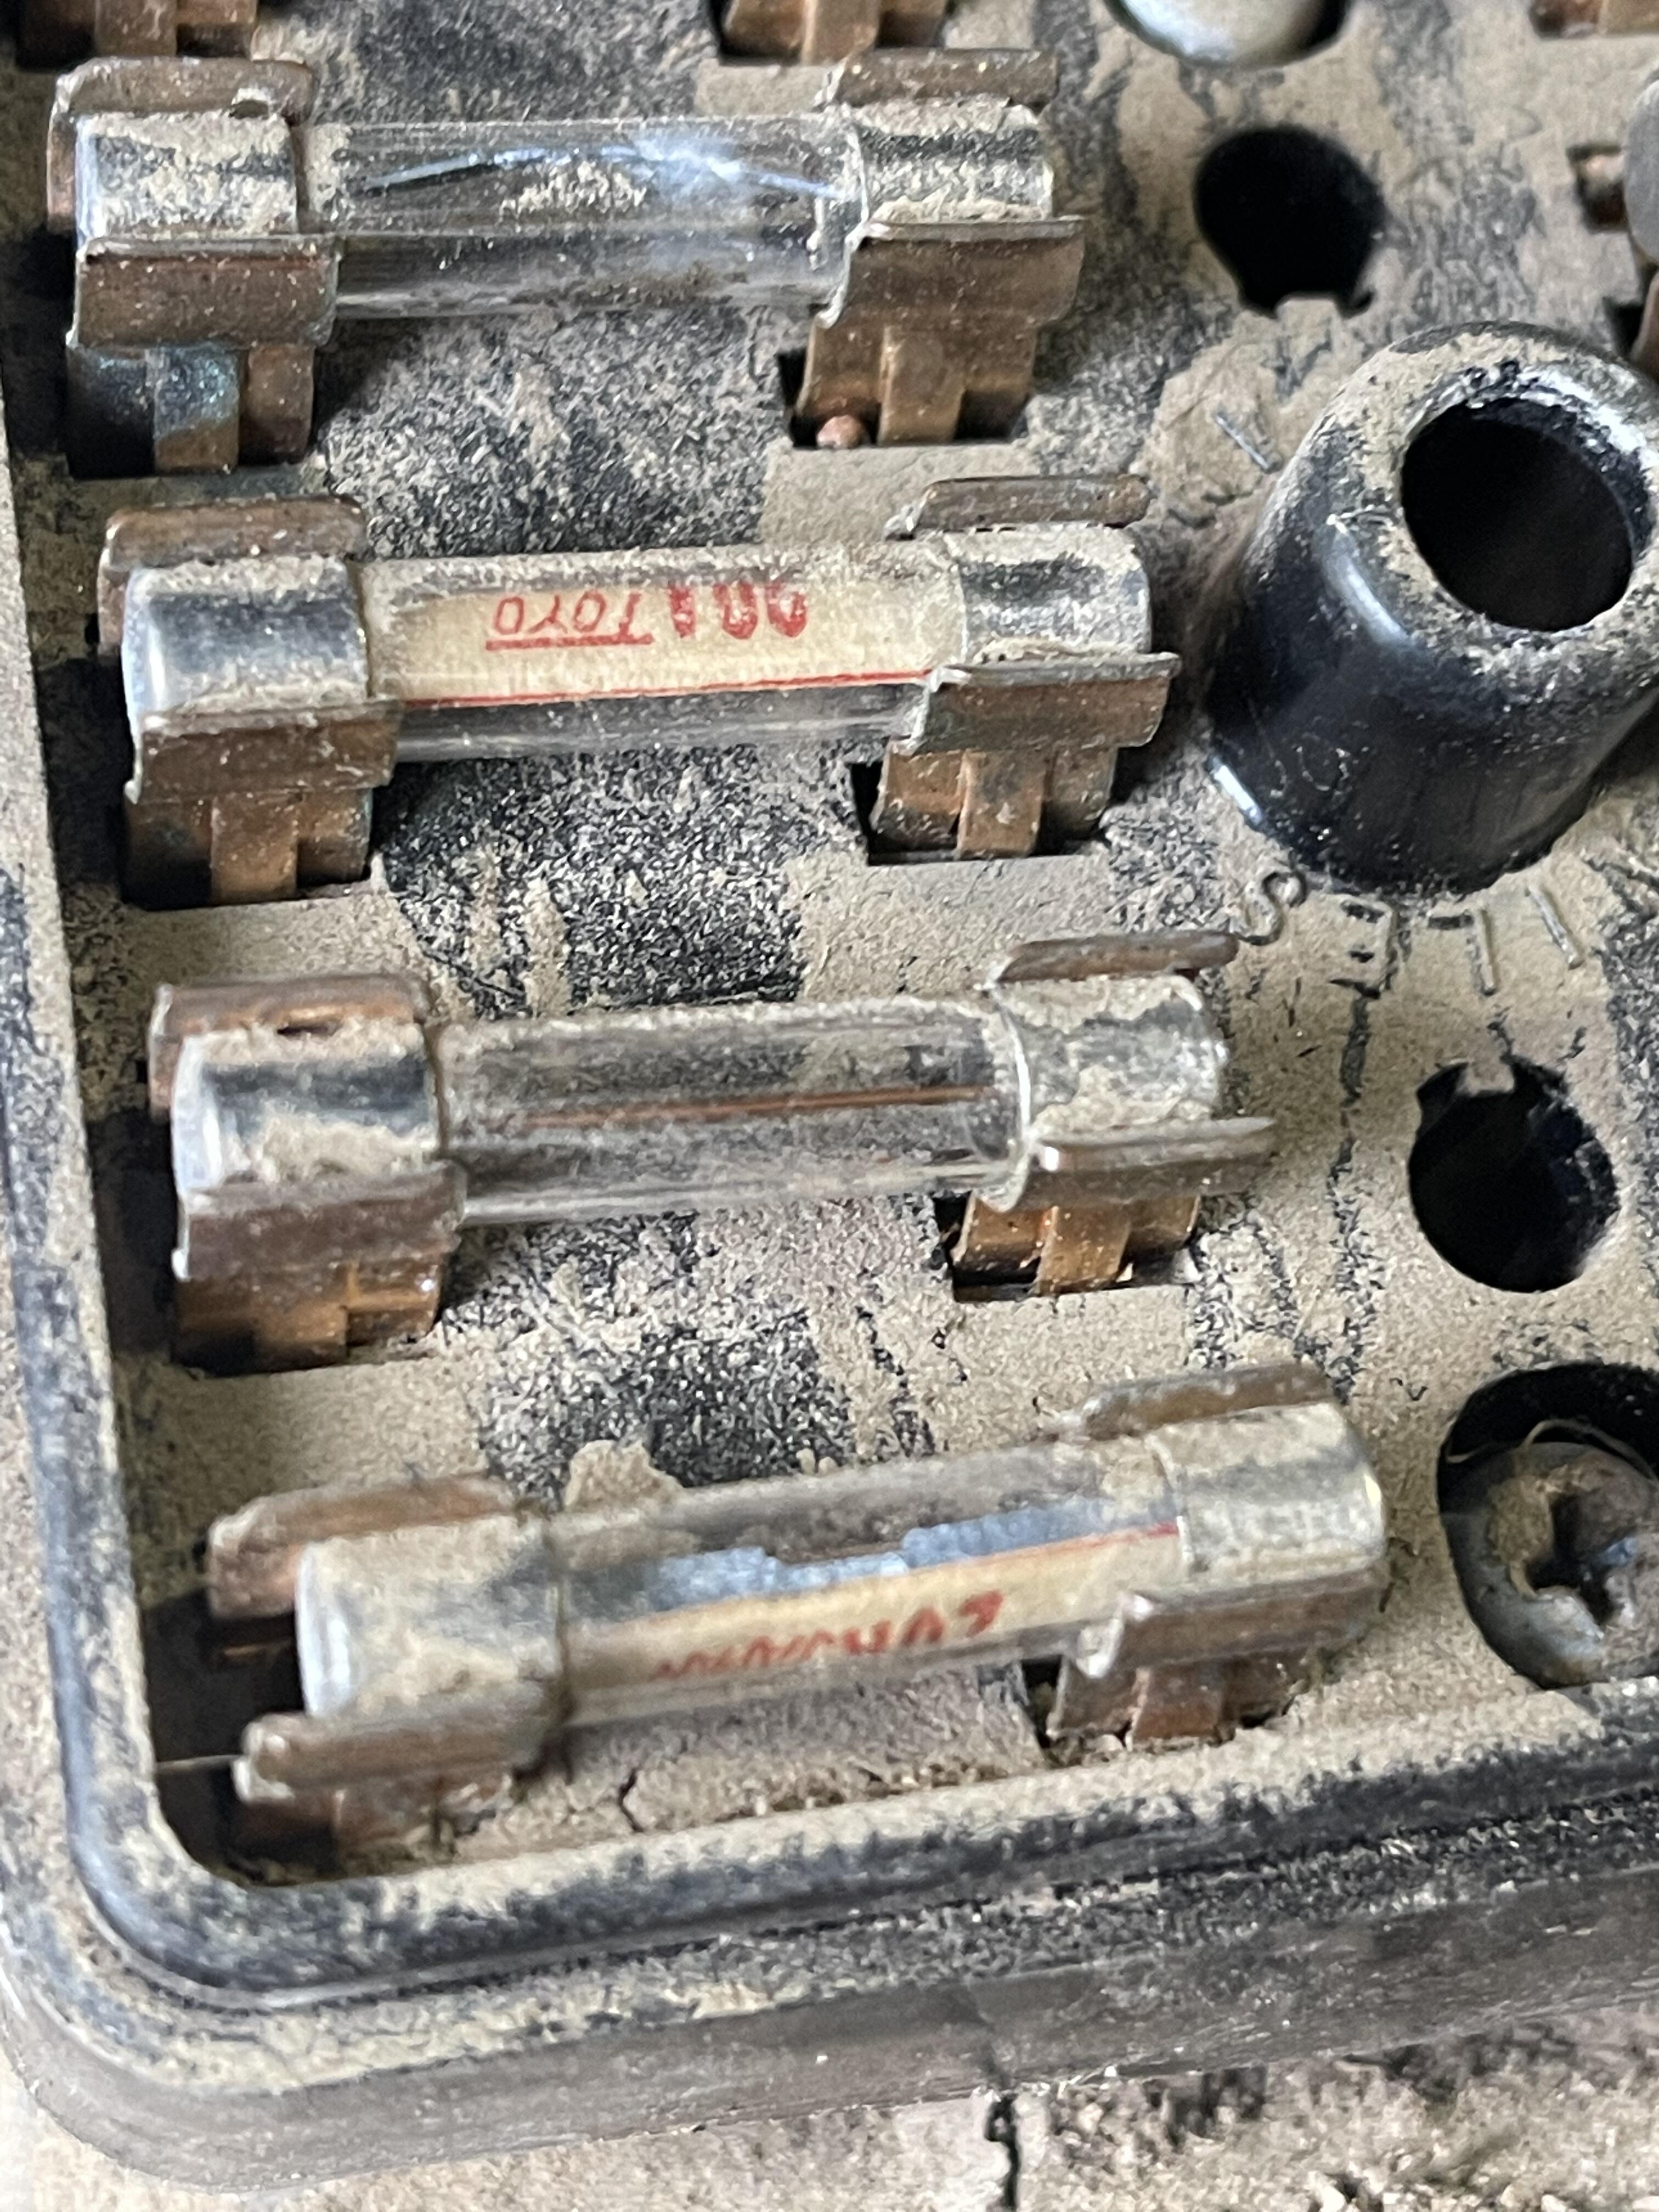
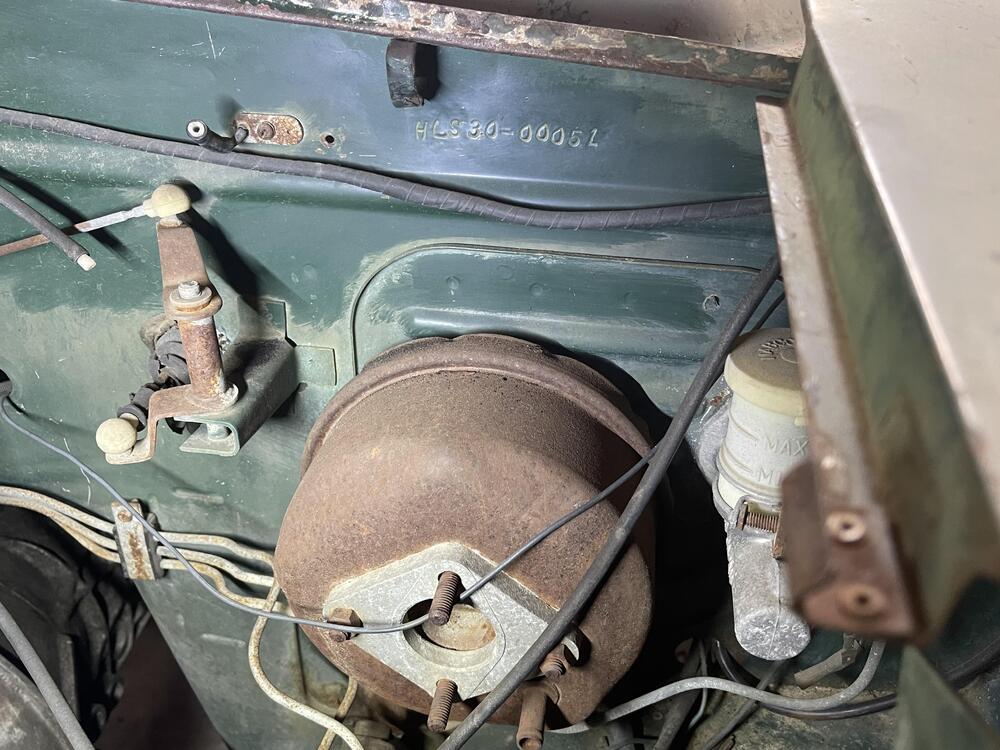
Better picture of firewall vin stamp, proper inspection lid, and a small example of needed parts…… But my “part doner car” 740 is showing great potential. Red dot mirror, radio, console, perfect fuse box,and ashtray dash wiring harness!!!. Much needed parts for 51


 5 points
 -
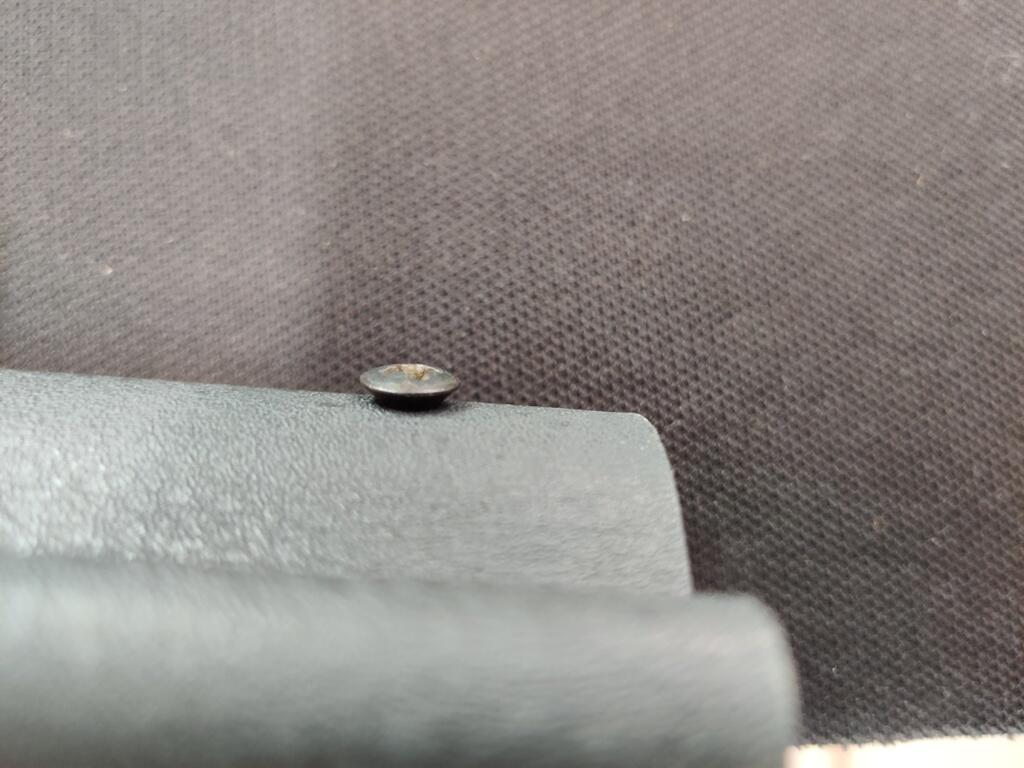
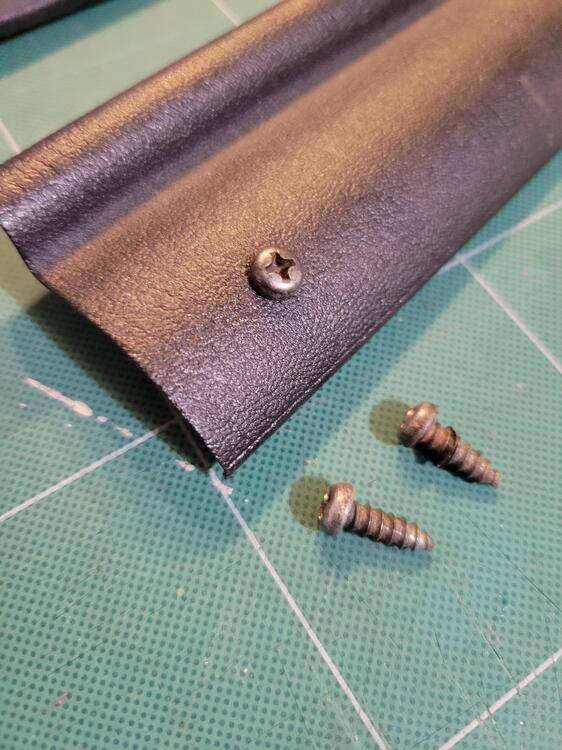
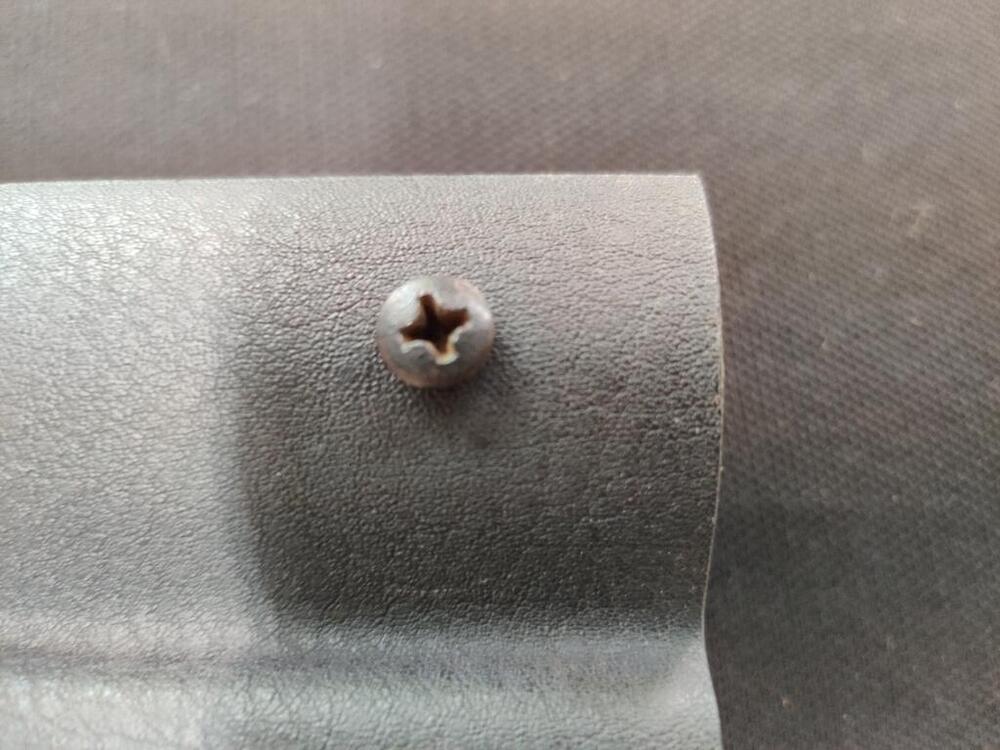
Here's a picture of the screws that held down those strips on my '70. They are round head type 4mm thread OD x 12 mm long. There appear to maybe have had blackened heads, some evidence on a few of mine.
 3 points
 -
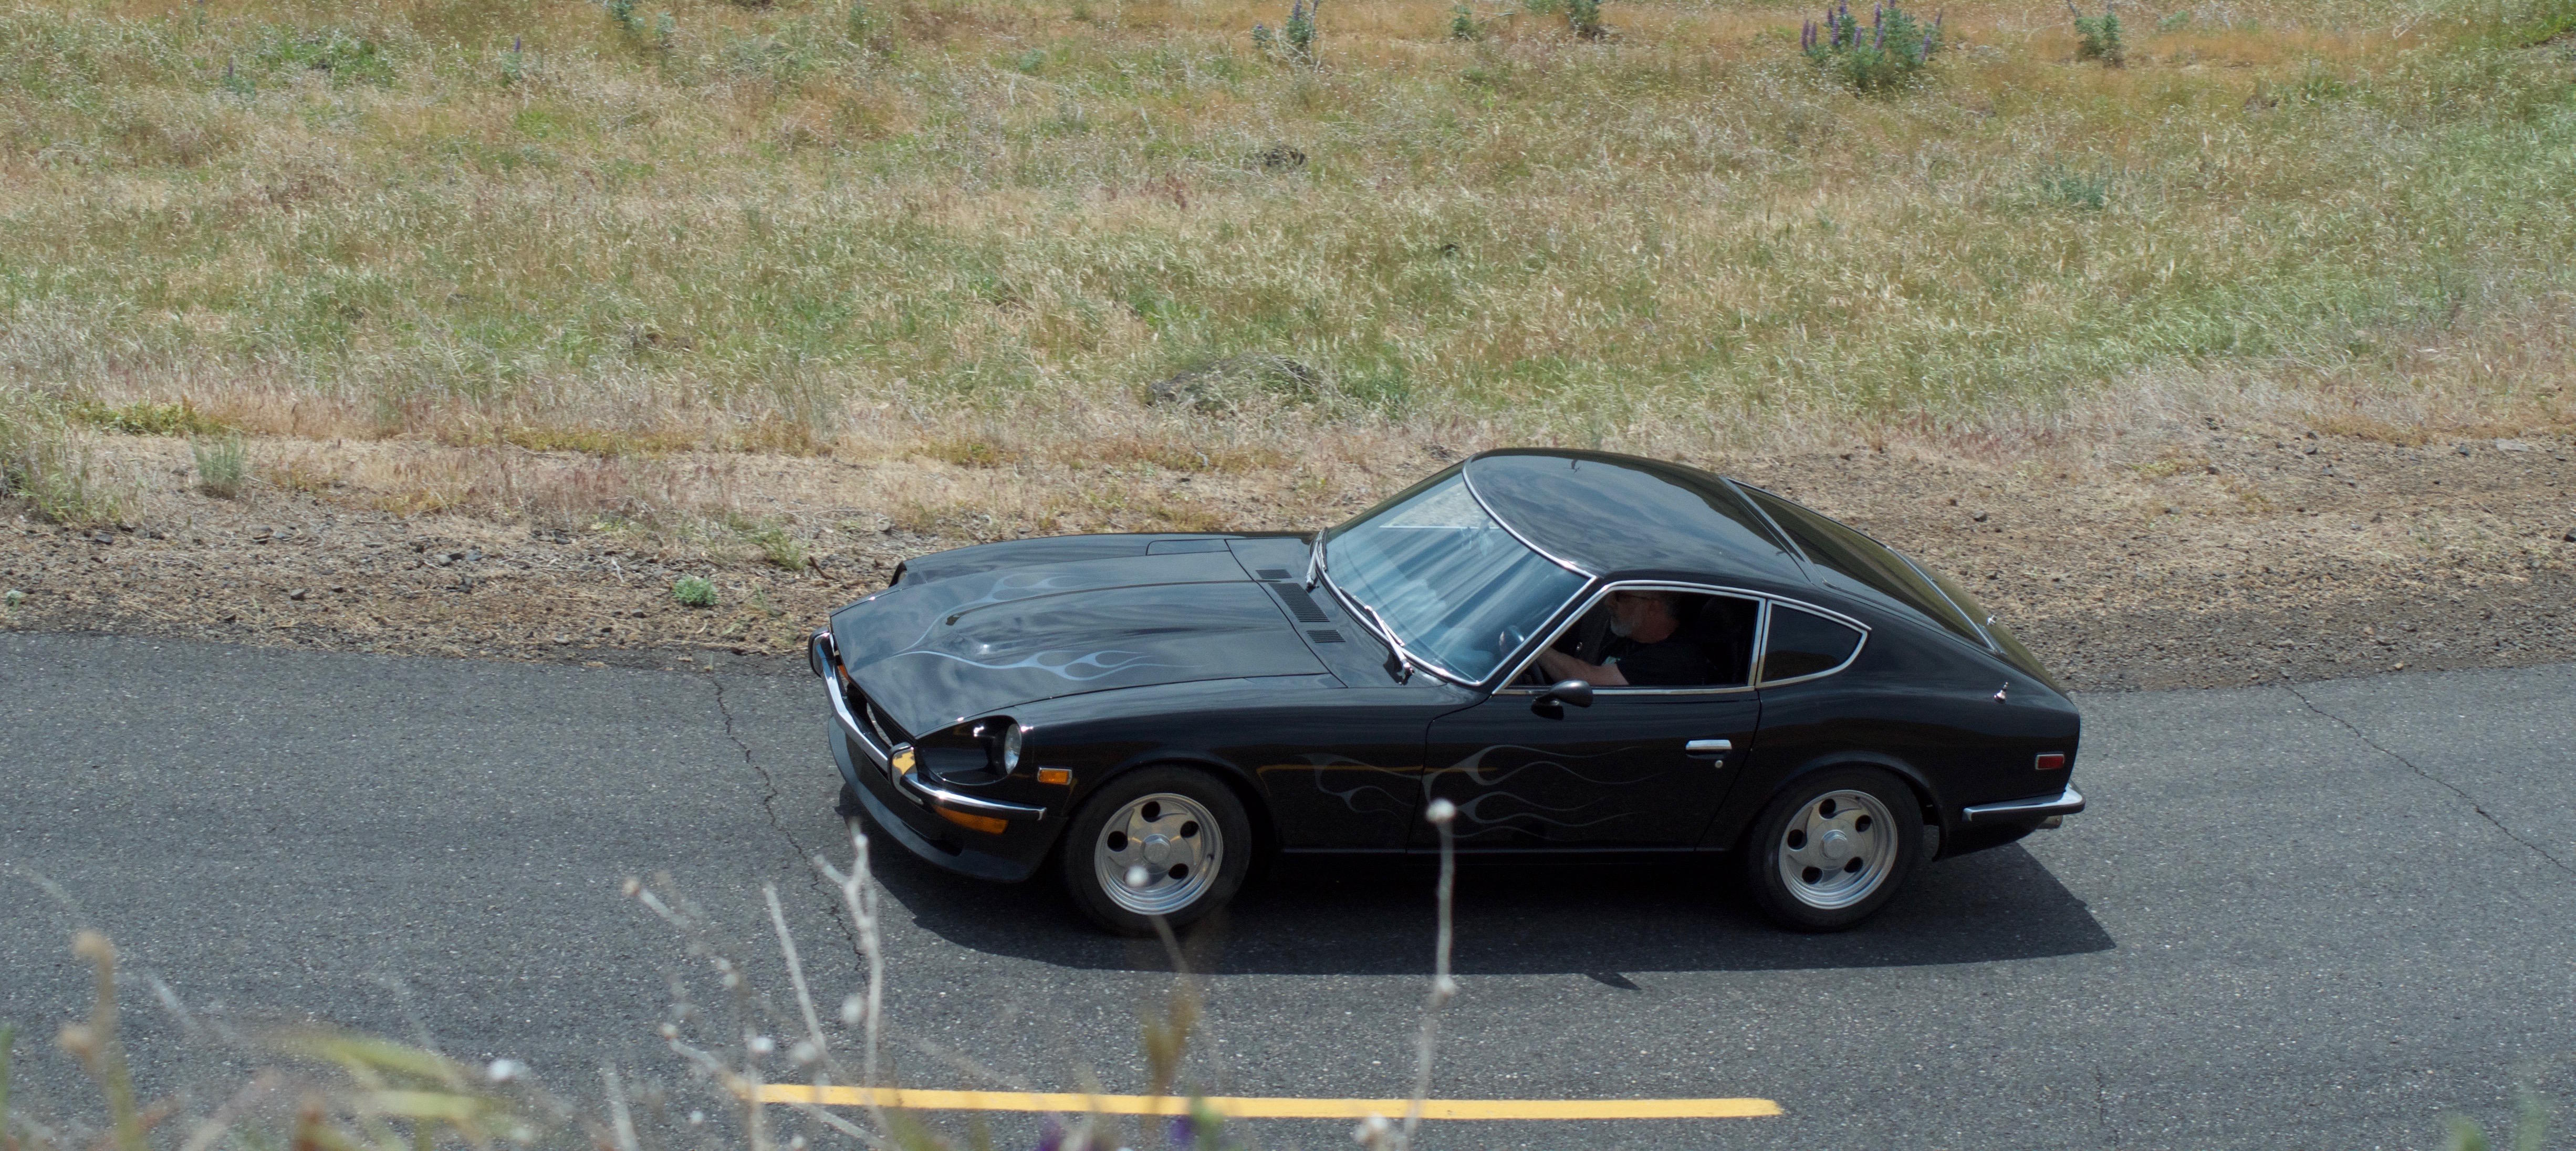
3 pointsJust thought I would share this picture as I came off a hill early in the morning on the way to a club (ZCCW) drive. That's Mount Rainier looking from Cooks Hill in Chehalis WA. All in all it was a fun 300 mile drive this day.
 3 points
 -
dspillman, you post anyway you want, it's a real treat to to see photos from such an early car, bring'em on.2 points
-
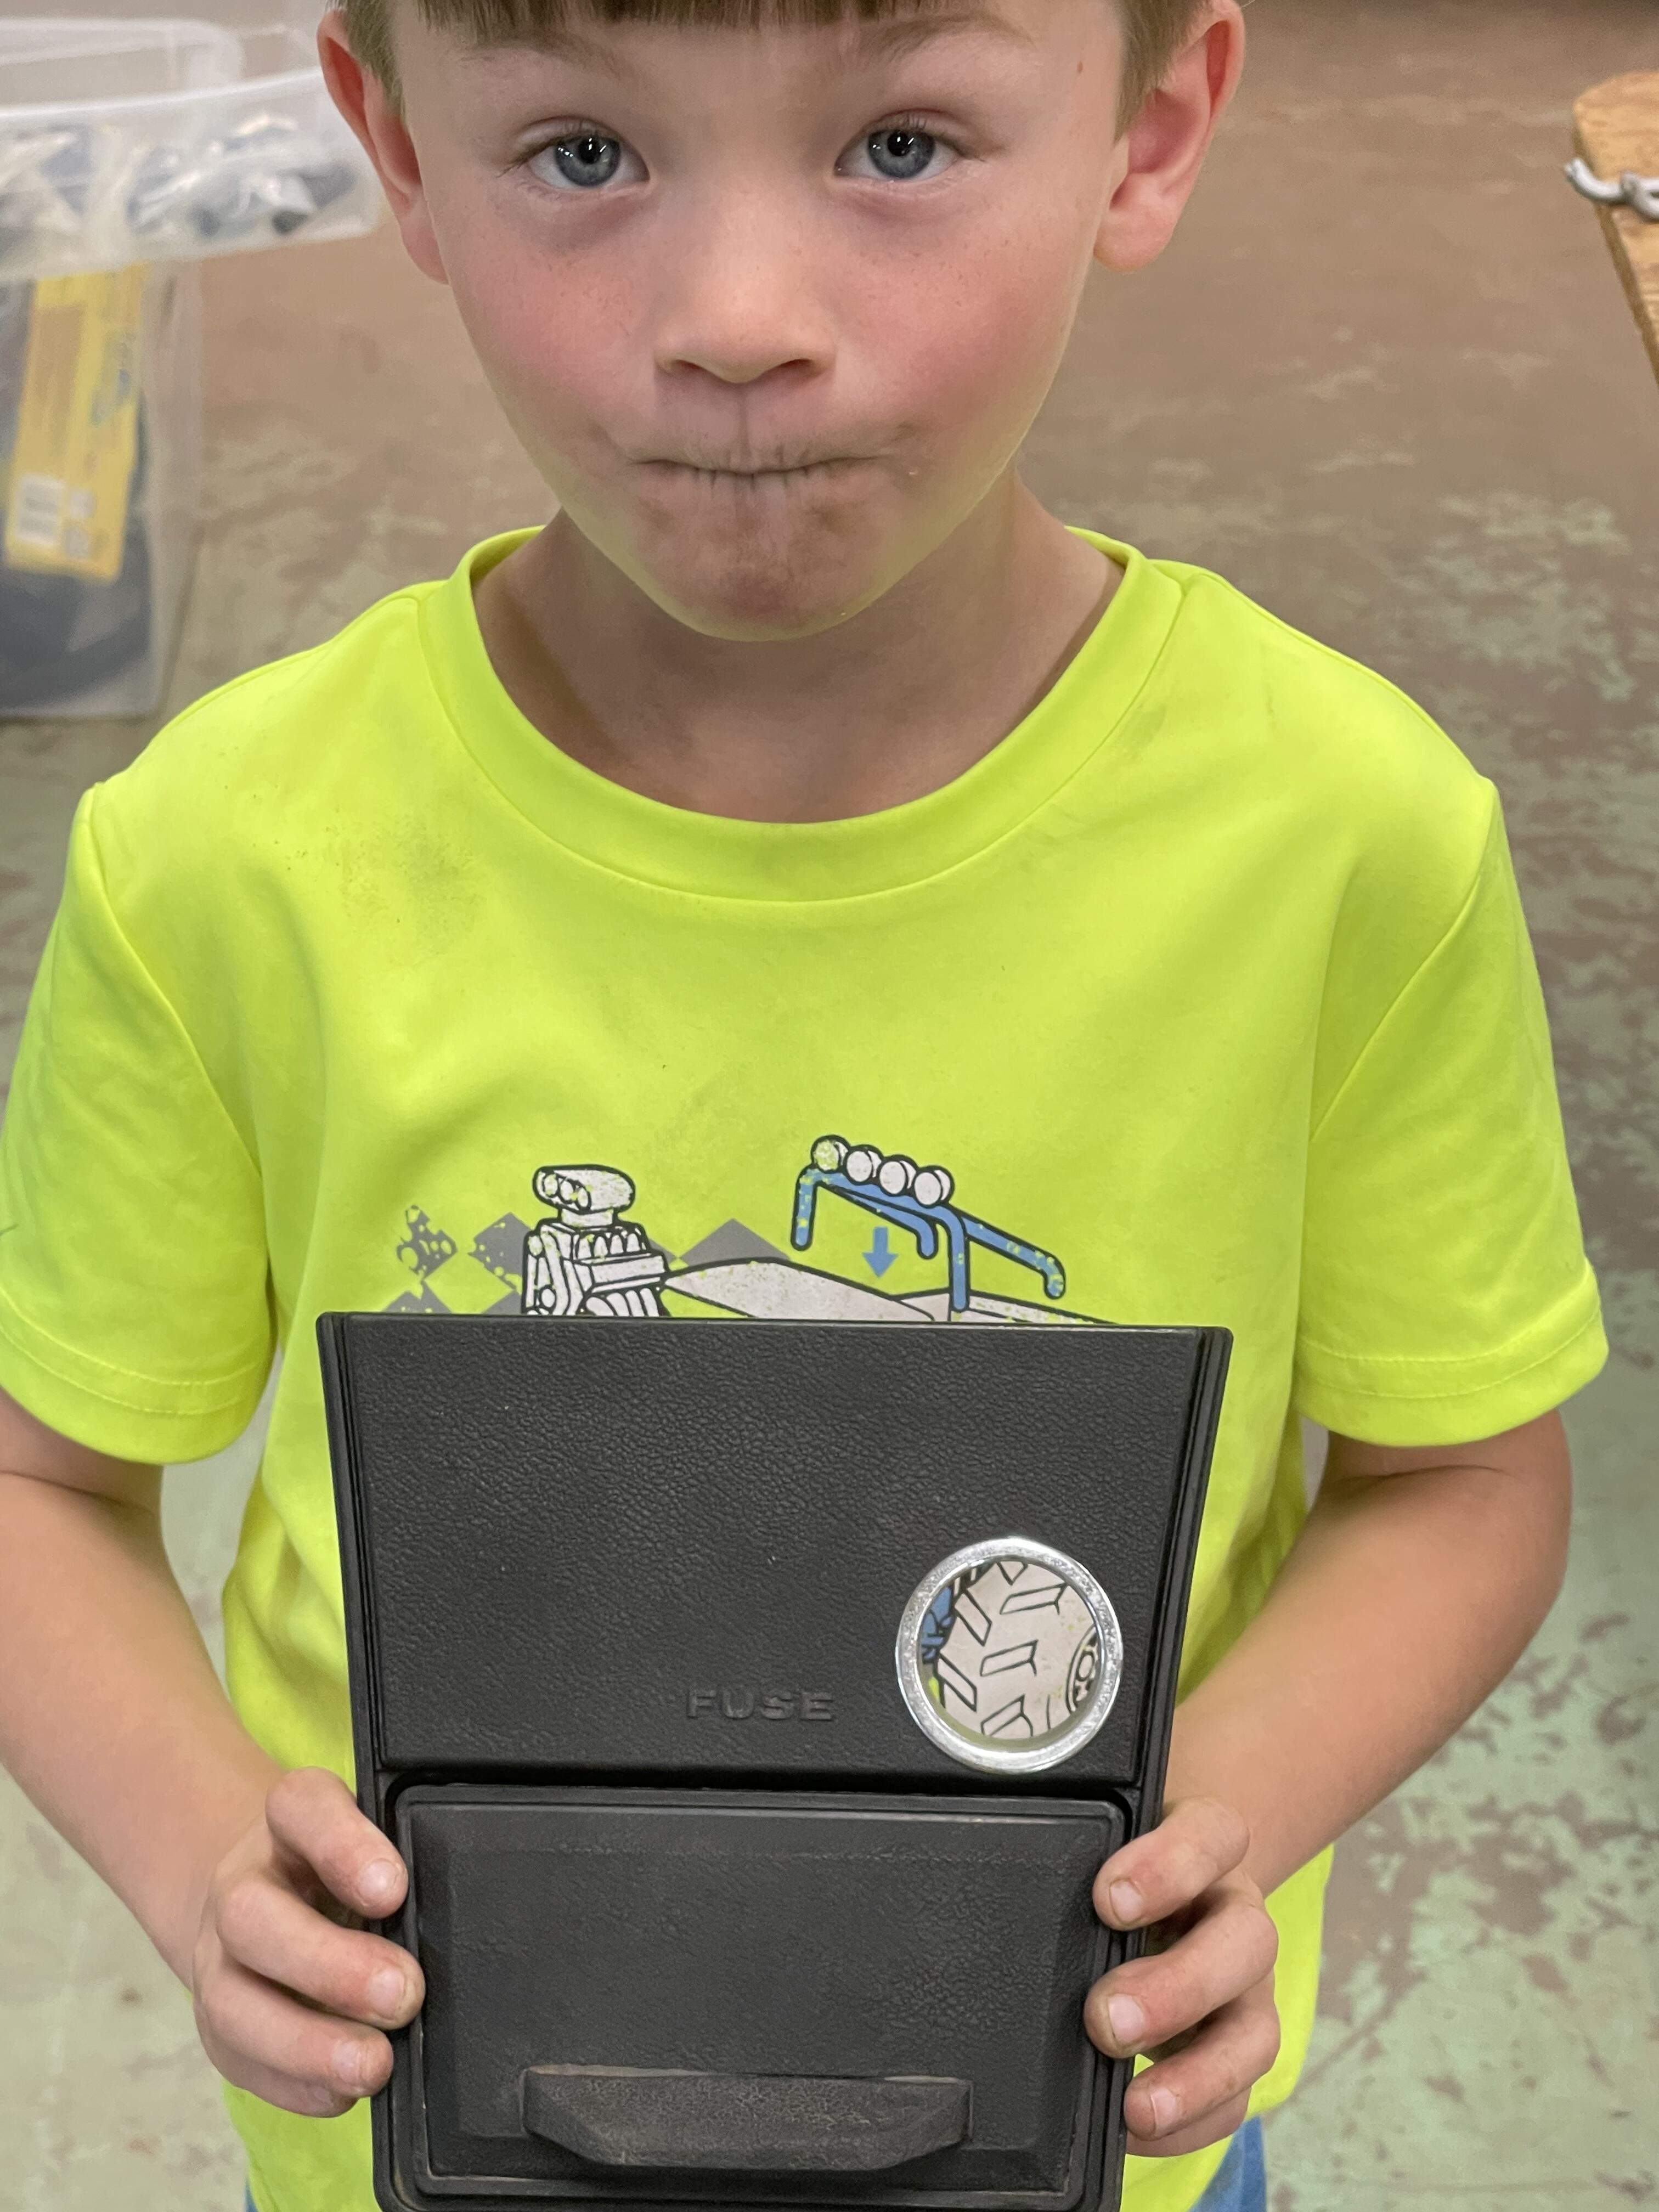
It is difficult to determine true intentions of comments, sarcasm, etc…. This is exact reason I’m posting here on this site to avoid some of the peanut gallery…. It’s all good here, bring it on …. I hadn’t noticed the lines on my grandsons lips…. Way more dust in the air then I intended.2 points
-
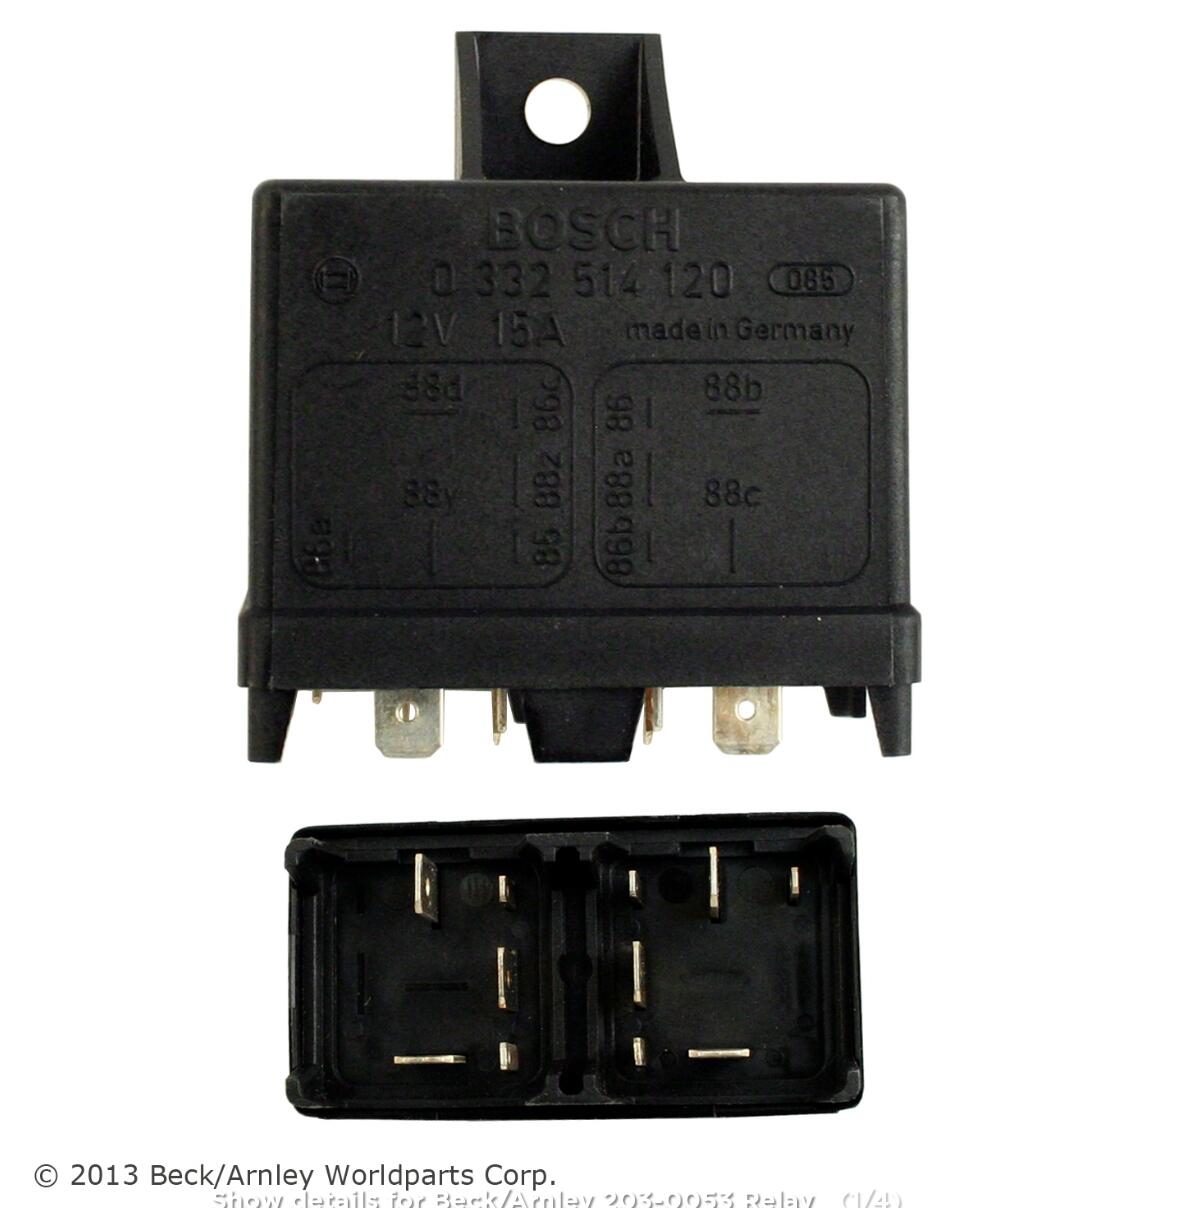
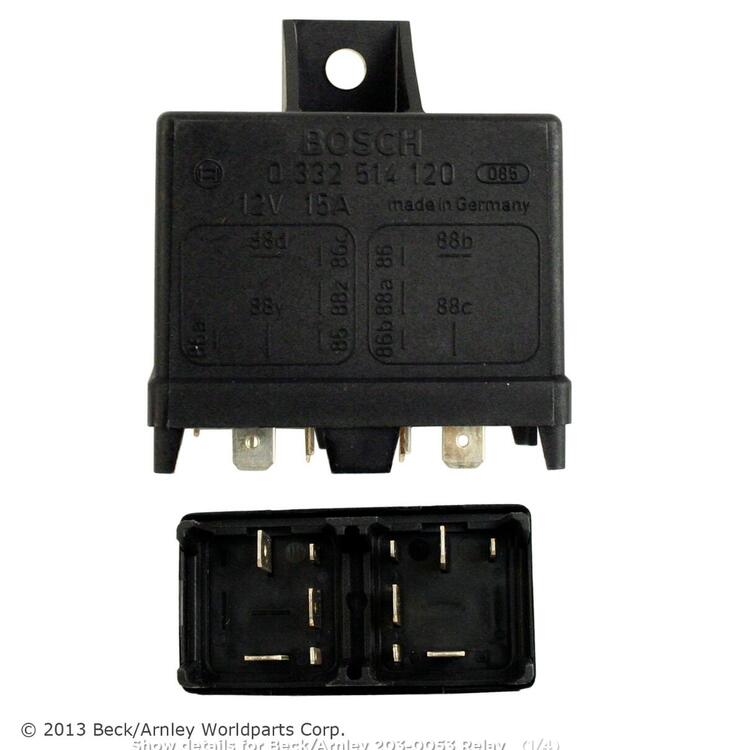
Congrats on the quick fix. You are lucky to have a Bosch 0 322 514 127 Fiat relay handy. These dual units are getting harder to find since Bosch stopped making them around 2020. Something I found years ago. If you are looking for a Bosch 0 322 514 120, try Beck Arnley 203-0053. It's a Bosch relay, but they just took it out of the Bosch box and put in a Beck Arnley box. It is also hard to find, but the more options increase your chances of finding one.
 2 points
 -
I've been driving the Z to work pretty regularly (as long as no rain is forecast), and the car has not missed a beat since replacing the original relay. Many thanks again to Zed Head for his input - it would have been a bitch to find otherwise.2 points
-
I did a test fit but will probably go a different direction. It’s well made and would be great except that it gets too close to my headers. After discussing it with them they told me it’s designed to work around the stock exhaust manifold, which doesn’t get as close. I think it’s a good option for anyone with that setup and will probably be selling the kit I have. It’s been too long to return it.2 points
-
2 pointsThanks, @Patcon, @HS30-H, @bartsscooterservice for your your kind words of support. Just taking one day at a time. With the exceptional support of my son and some of our very close friends, it's slowly getting a little easier. I will continue living for the moment as Deb always had. You just never know what life will throw at you tomorrow. I'm very thankful for the 44 years she gave me.2 points
-
Thanks for the notification. It sounds like HH is looking for a generic replacement spring. I may still have some stock ones but they would of course be used.1 point
-
The pictures are great. I know someone that bought a '70 that's enjoying you thread. I know I am.1 point
-
The brace for the rear seat mounts.1 point
-
1 pointYou won't find a drop in condenser or drier. I haven't try to purchase either, so I cannot give you guidance. R12 is difficult to obtain since it was phased out over 30 years ago. It's probably smarter just to go with an R134a system while you're at it. Unfortunately I don't know a way to test the expansion valve in the existing evaporator. The expansion valve is another component that can fail and has no ready replacement.1 point
-
Those fuses look pretty cool. You should save them as antique curiosities. Never even knew about "red dot mirrors". Are they a "Series 1" thing? 😈 Who stitched the boy's mouth shut?1 point
-
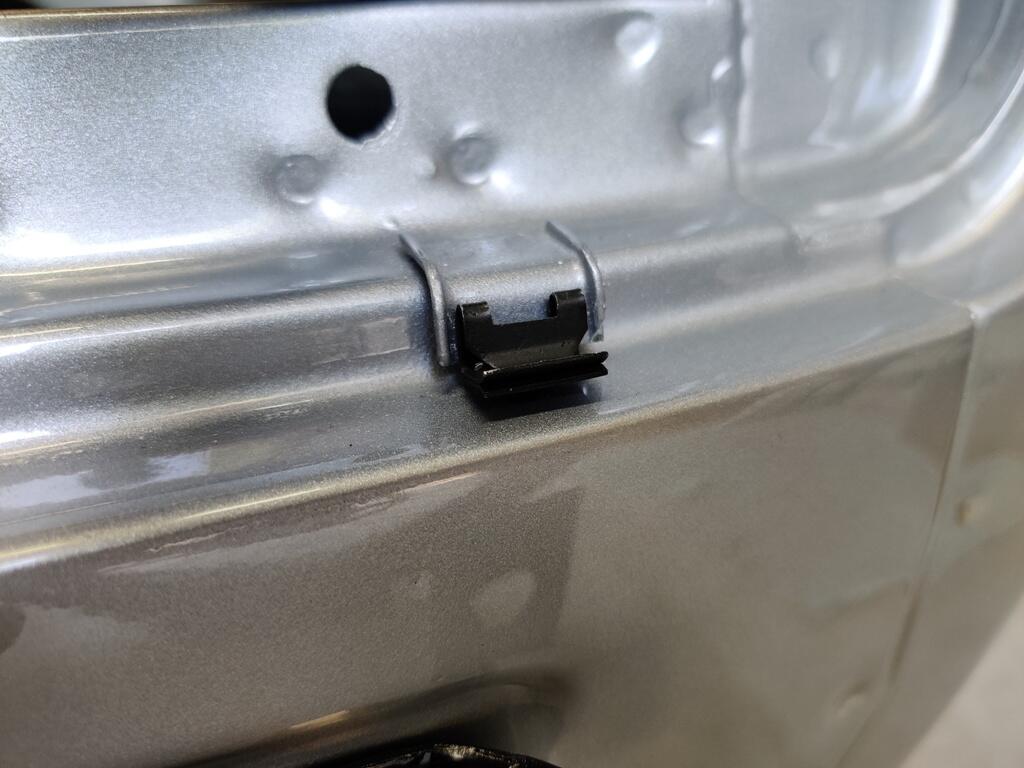
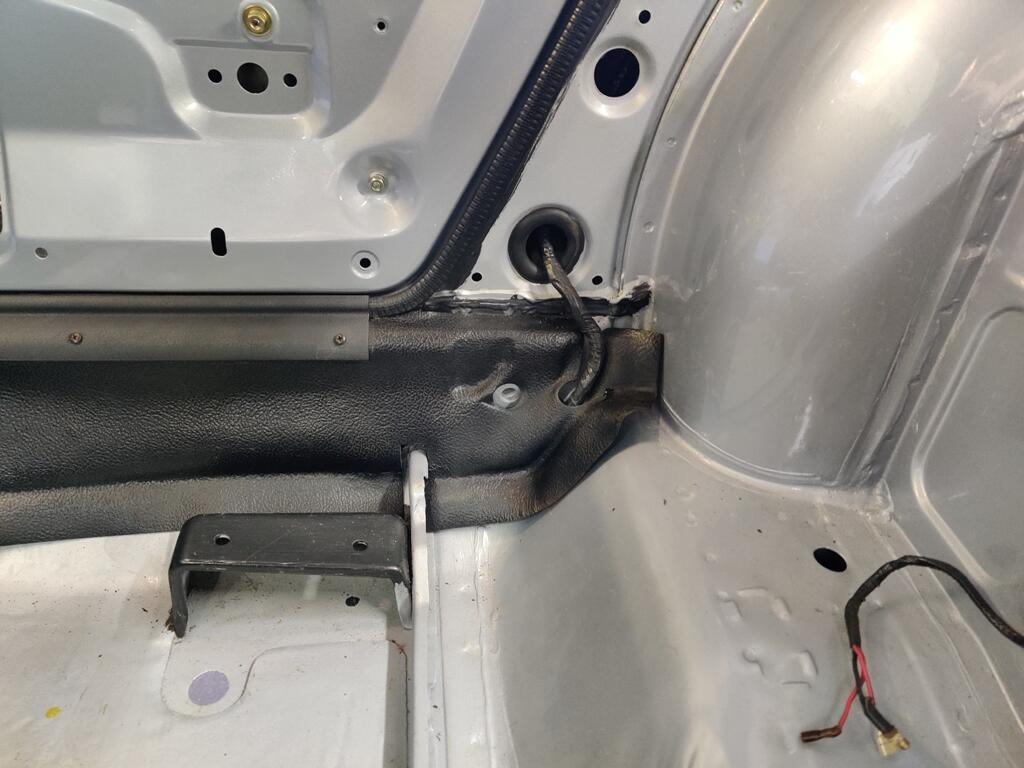
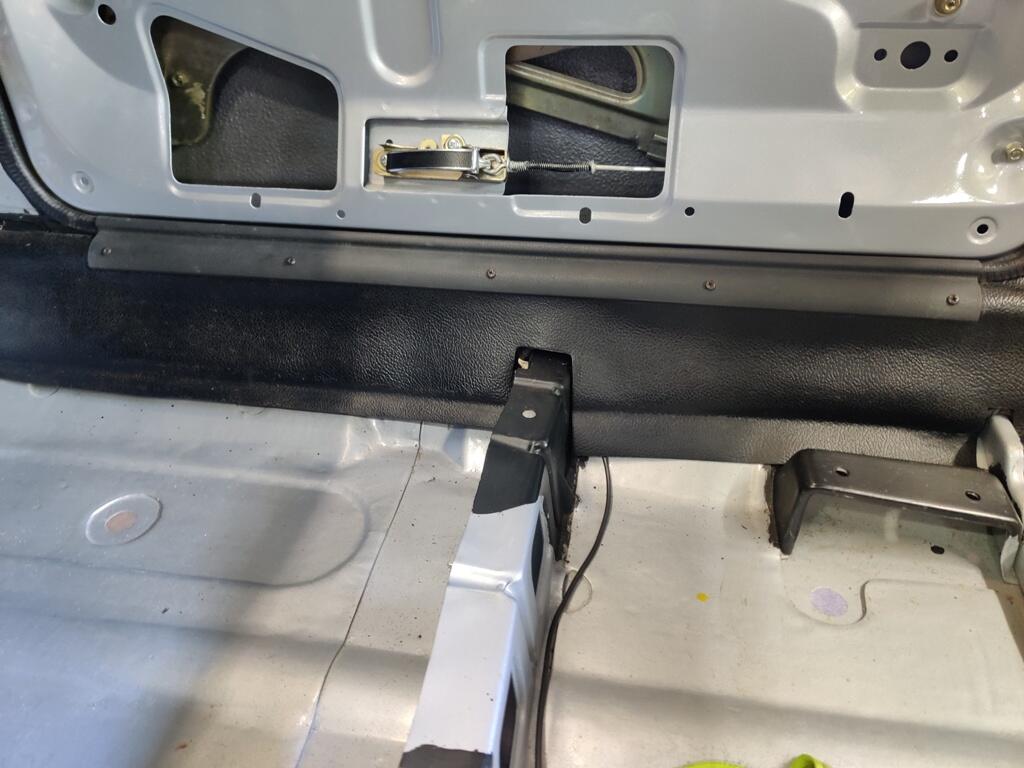
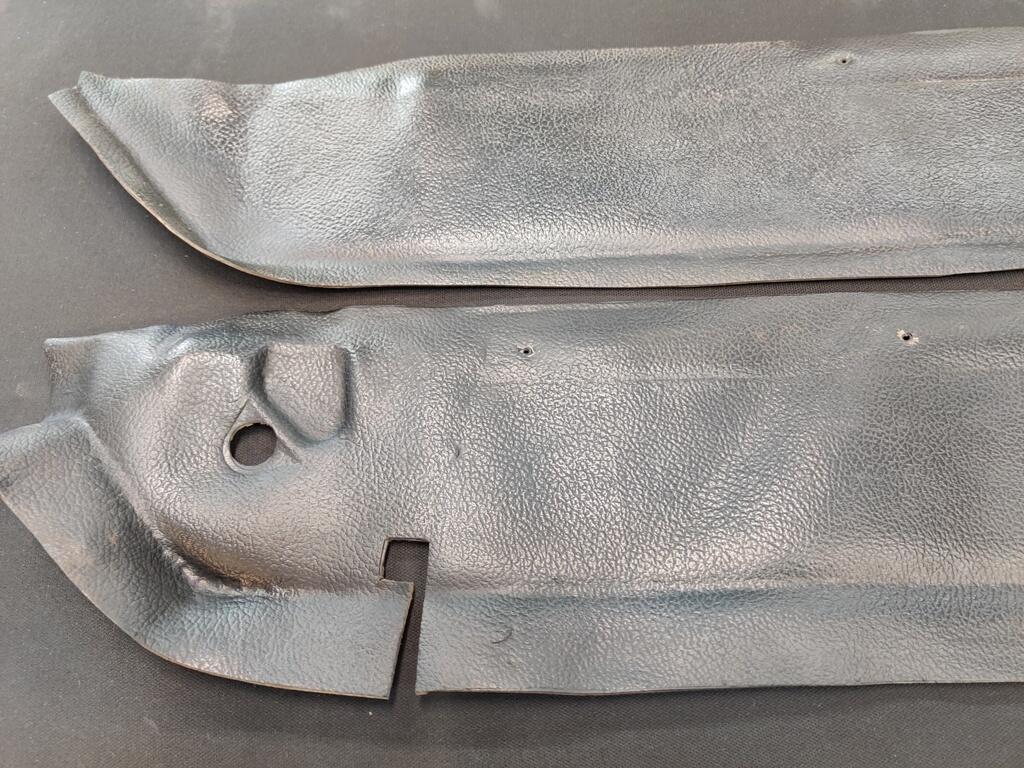
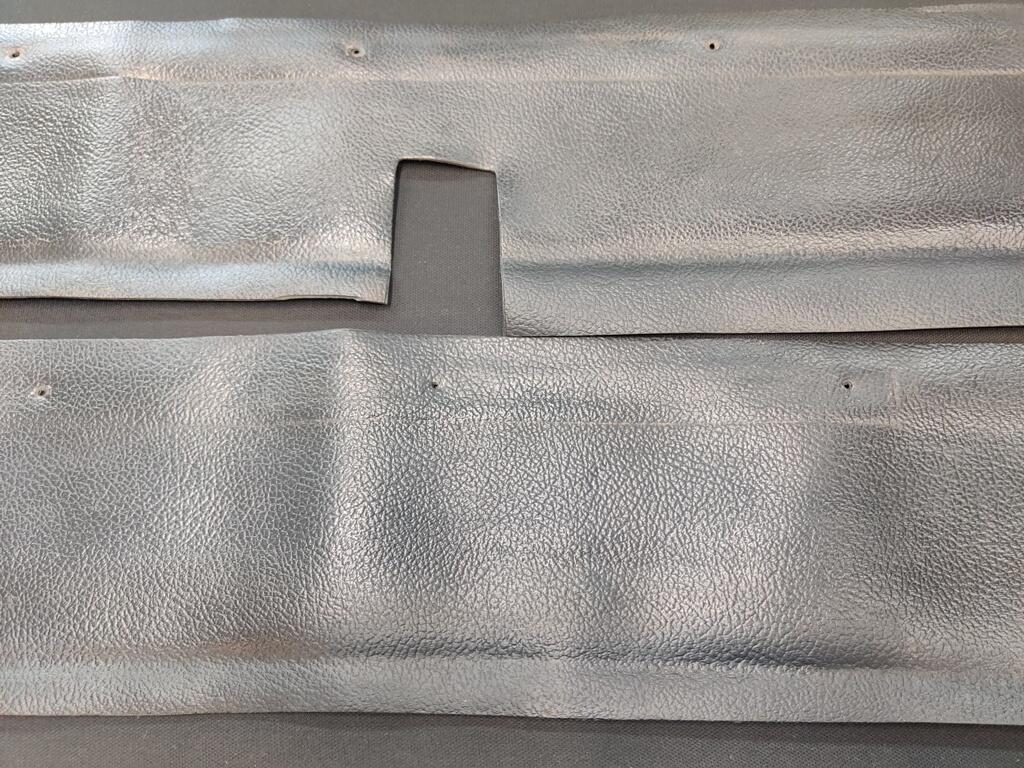
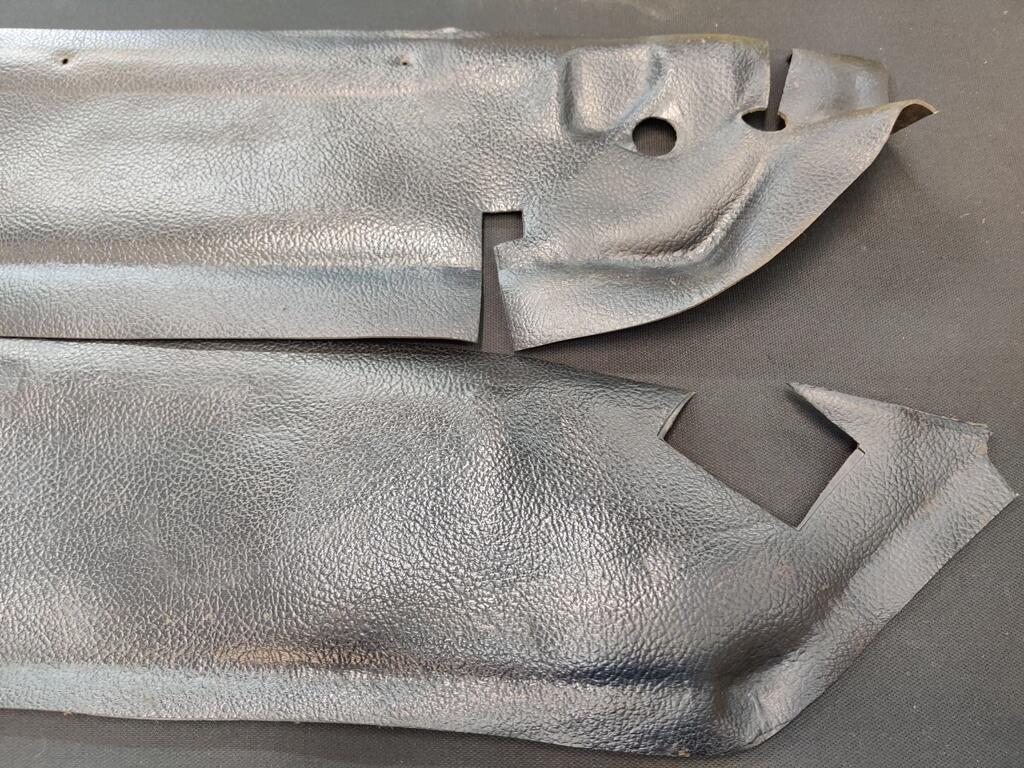
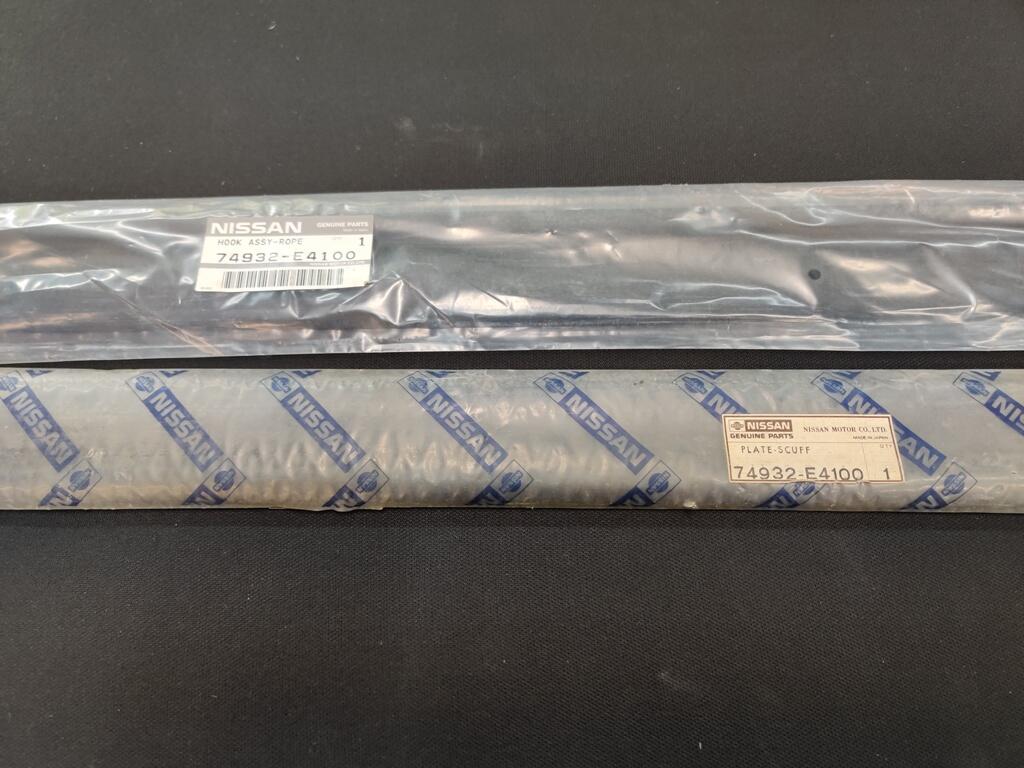
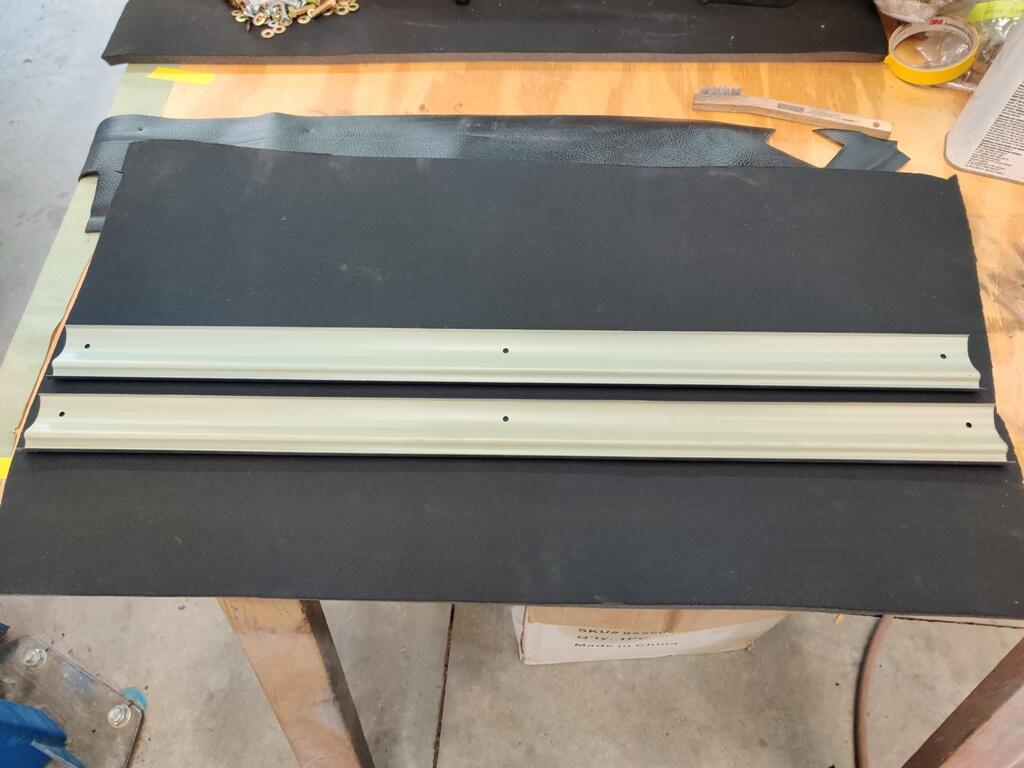
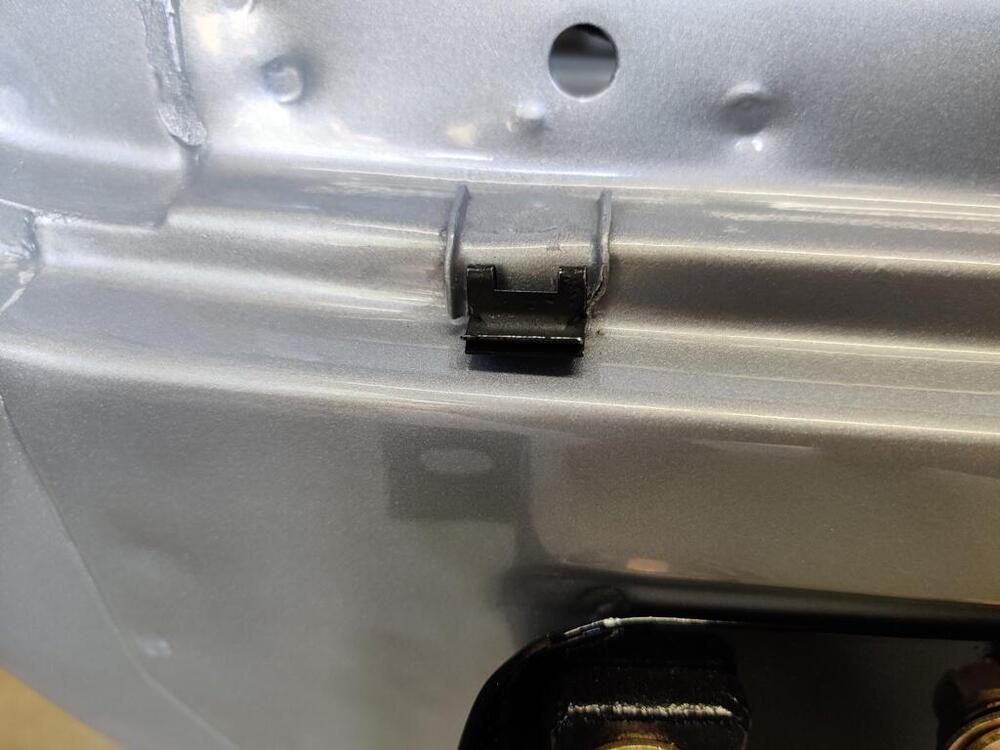
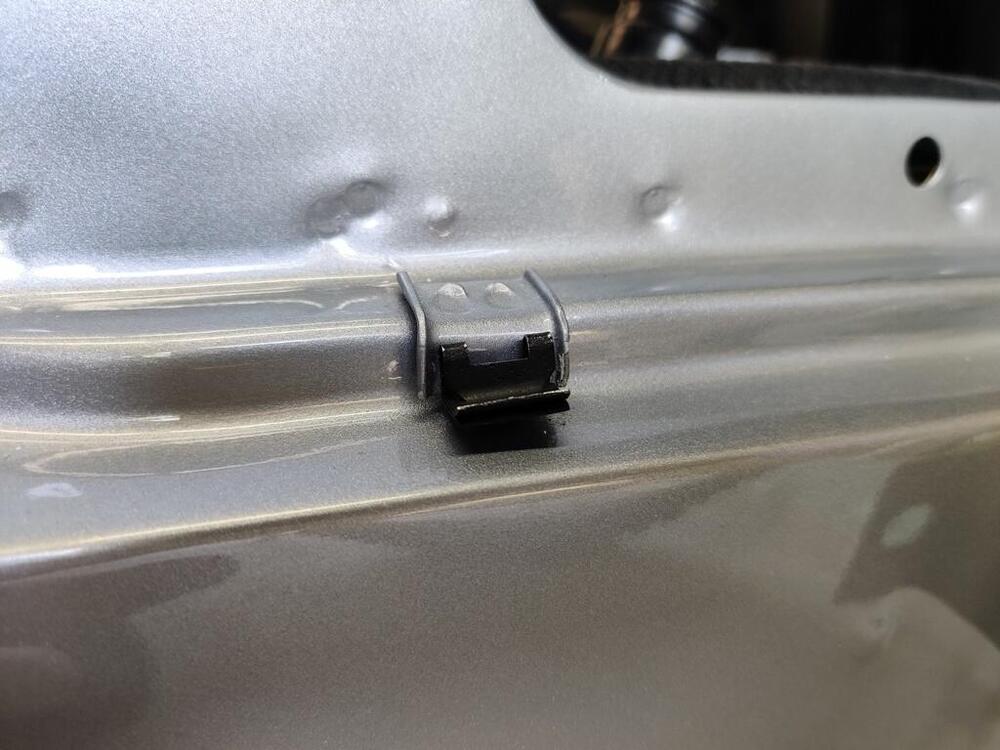
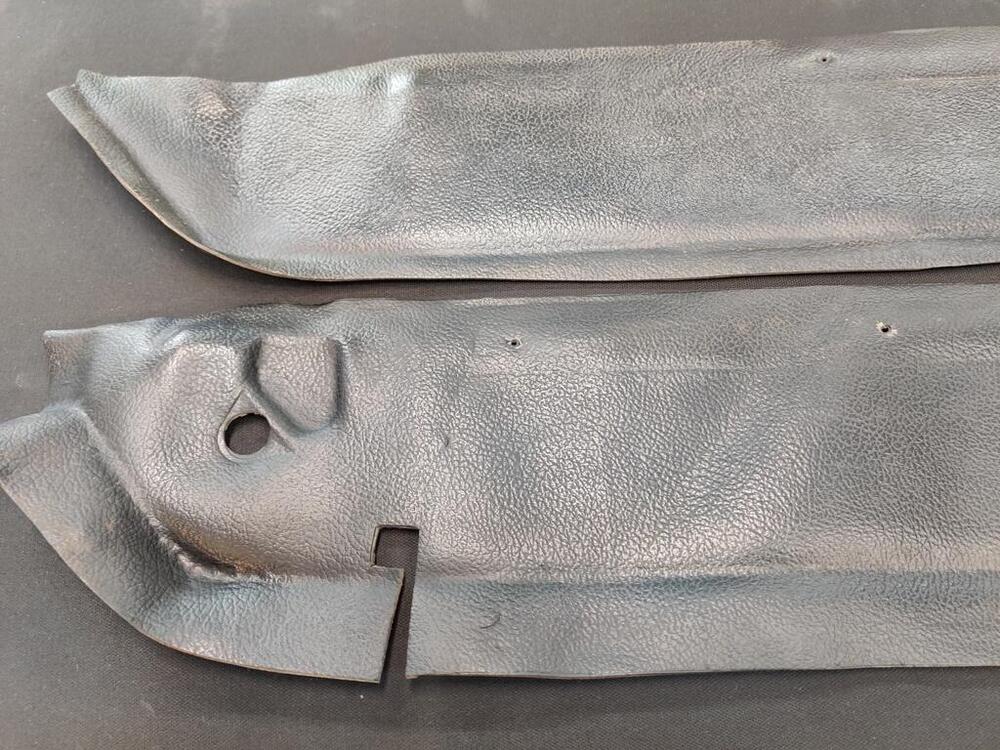
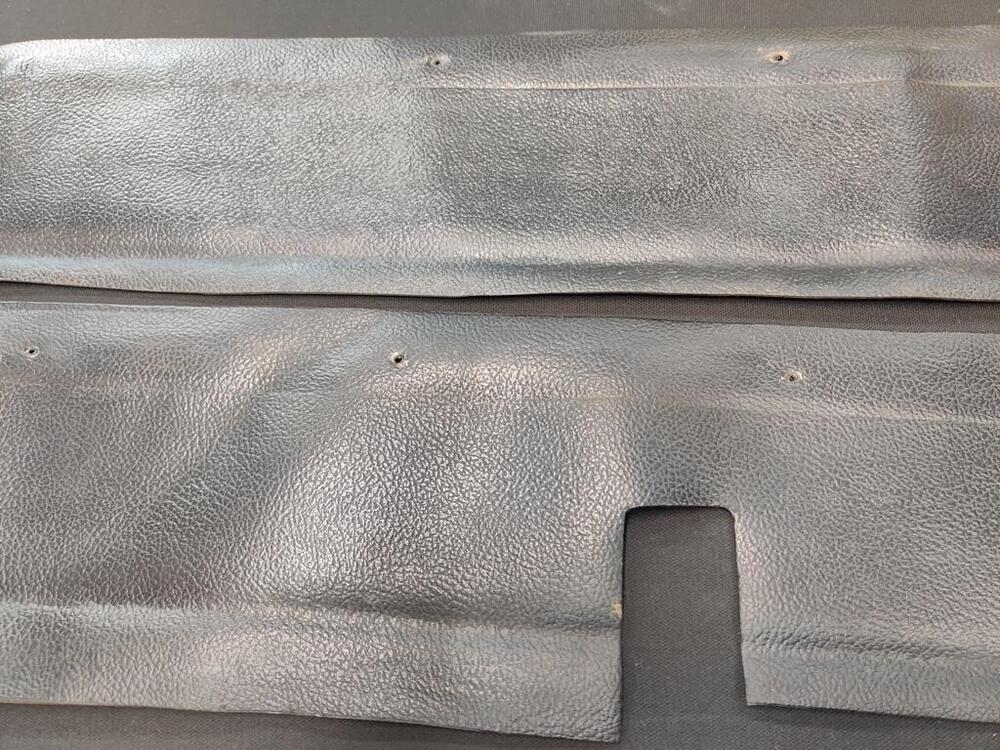
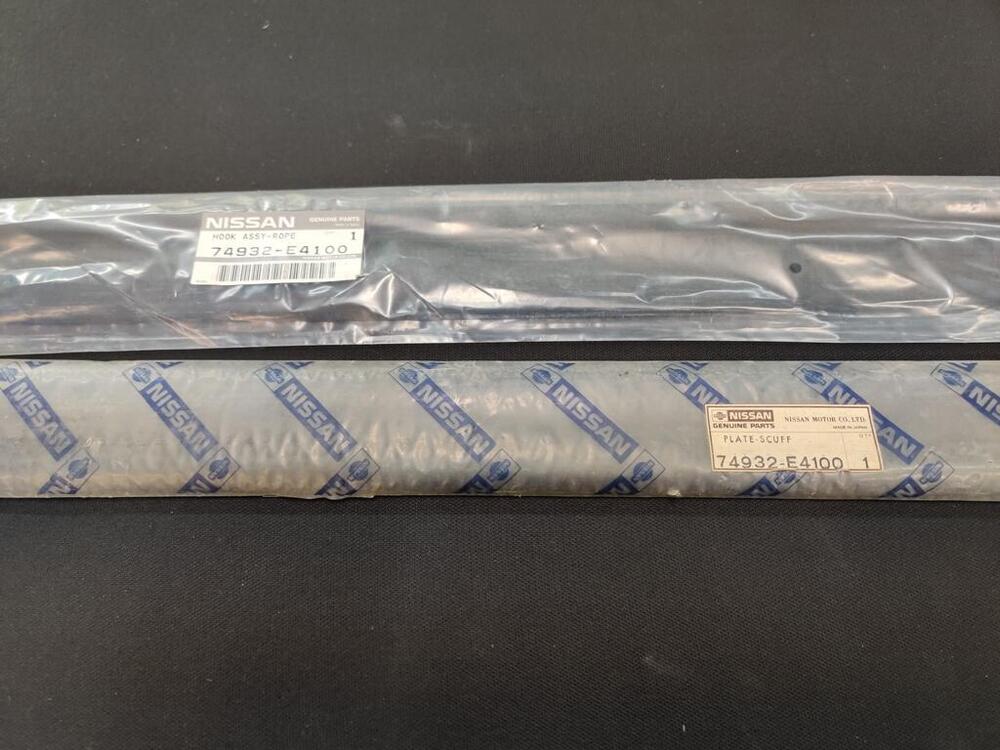
Nice! I think aftermarket support for these cars is at its zenith. My clips were nearly rust free, so I glass bead blasted them and had them re-plated in black. Once I got the first one on, the next three went a lot easier, but key was sliding them on from the edge that was not as tall. A bit of damage to the edge occurred on a couple of them. If I were to do it again, I'd grind down the height of the lip on the part that is spot welded to the body - just the bottom 1/8 of an inch and just to make it half the existing amount of edge height. Doing that would be sufficient to make slipping the clip on from the slide easy. I spent a lot of time with adhesive remover and a wire brush getting these vinyl trim pieces cleaned up. A few pics of the install of the right side vinyl covering on the rocker: The right side is only partially installed. I put contact adhesive along most of the top of the rocker panel (for about an inch wide inside the weld flange). Then I stretched the vinyl lengthwise as needed to get the 5 screw holes to align with the holes in the vinyl. I installed the new threshold as well. I have to add some more contact cement on the front and back portions. The NOS thresholds had 3 holes instead of five. I added two more to match what the car came with. I do not know which hardware was used to hold these thresholds in place. I found only 6 of these screws in my miscellaneous hardware. Are these correct? The taper head makes me think not.


 1 point
 -
I rembered what you MUST be good at, in my mind anyway, Tetris. You have that way of thinking. "It'll fit, I know it will". Proof is in the pictures.1 point
-
Today marks a bit of a milestone: the 240Z frame / Body / Shell is more or less completed. The rollbar and all the accessories (optional passenger foot bar, etc.) are fitted. And all the panels are installed: The car got new floorpanes, new front inner fenders, rear quarters, rear inner and outer wheel wells, new frame rails, new inner and outer side steps, new roof, a complete new rear-end, new seat-rail mounts, and much more. Many small areas like alle the little brackets got fixed and rectified. I think i can say the car is as rust-free as possible. In the next few photos, you can find some details of how the rollcage was installed, as some were intersted how i installed it. I hope i got it right and close to the factory setup. Welds from the bottom side: Bolts from the other side (inside the inner rear wheel well): So now? They'll deliver the car back to my own workshop, so i can install all the locks, spacers, rubber-dampers, trim, etc. before it goes back for final gap-adjustment and to get the sideline into the doors, etc. Once the car is back in my place, i'll take a closer look at it and share the photos with you. On the first glimpse i'm very happy with their work. but there are still some areas to fine-tune and i'm sure we forgot some small things which i will figure out once the car is back in my place. Meanwhile the next project is already waiting at their shop. A one of four known-to-still-exist Bentley Airline. Something in a slightly different category with wood frame and all.1 point