


Leaderboard

 Subscriber


Popular Content
Showing content with the highest reputation on 02/02/2024 in all areas
-
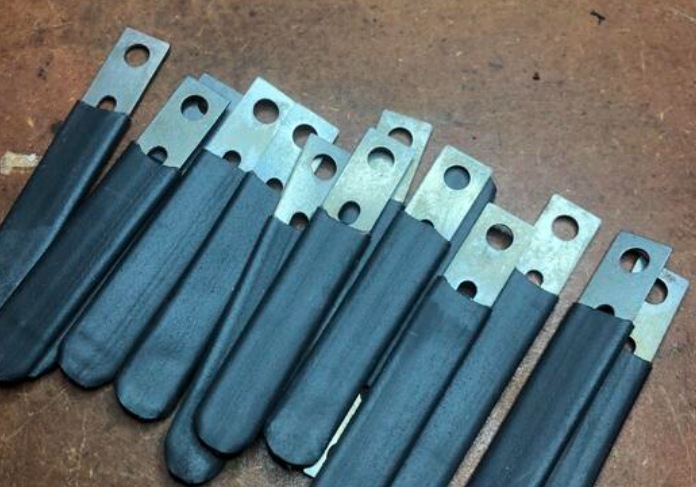
4 pointsThe tab thickness is .7 mm or .028"? What is the thickness of the panel? You are getting nearly zero penetration into the panel to which you are attaching the tabs? What is your wire speed? Is the panel prepped to bare metal where you are attempting to attach the tabs? Are you starting in the center of the hole, on the panel, or at the edge of the hole in the tab? Do the former, not the latter. Trigger, and then stay in the center of the hole in the tab - on the panel only, as if just trying to put a blob of weld on the panel portion. As that builds, you can move out out of the center of the hole and "pick up" the edge of the tab. When you do, the tab metal will melt (quickly) and pull the "blob" you started in the middle of the hole - the molten metal of what you started on the panel and the molten metal of the tab will join. Following this technique will maximize time on the thicker panel portion, and should help with penetration on that panel. Another idea: How big is the diameter of the hole in the tabs? If I still couldn't get good penetration to the panel with the above technique, I'd consider making the hole in the tab larger and repeating the technique above. Looking at your pic, the holes can be enlarged without making the edges too thin. You need to get the panel hot enough first, then slide to the tab which will melt much quicker by comparison. A larger hole in the tab will allow you to buy time "pre-heating" the panel, which equates to better penetration.
 4 points
 -
2 pointsI drew these in autocad. I printed them to pdf but they aren't to scale. They really need to be plotted to pdf to scale but I either can't or don't know how to do that. One DWG has a grid that makes it easier to adjust the pattern if necessary. One is without the grid for making pdfs 1971 240z jute patterns wo grid.dwg 1971 240z jute patterns.dwg 1971 jute floor mat.pdf 1971 jute tunnel pt1.pdf 1971 jute tunnel pt2.pdf2 points
-
Not a problem. We do have a lot of work to do. FYI- the Nissan folks are subsidizing a promotion for the entire month of Feb: "From 2/1/2024 through 2/29/2024, we’re offering Nissan owners 15% off select genuine Nissan parts and accessories* & free shipping on orders over $75 with the code FREESHIP.** "2 points
-
If you move the sub woofer under the driver seat you can feel the music even if you cannot hear it over the exhaust.2 points
-
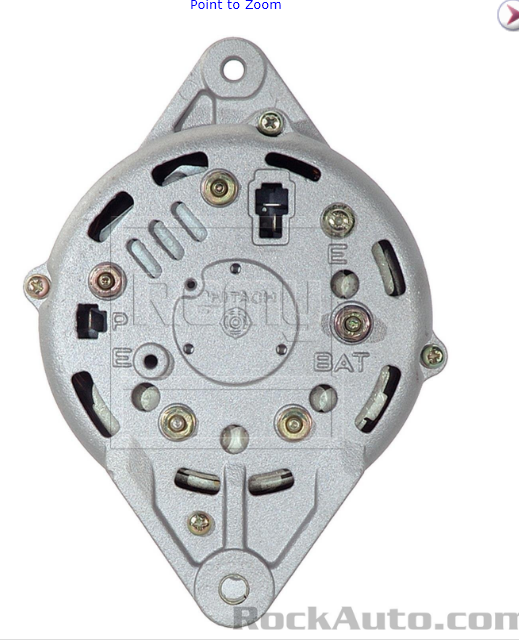
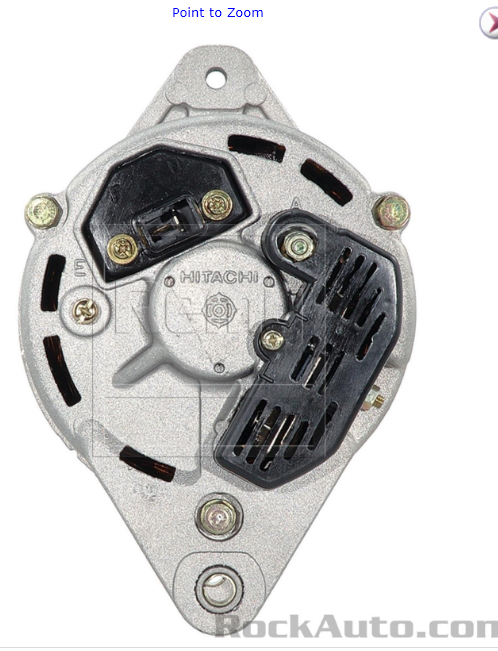
Looks like it does. Looks like a ZX alternator. The P terminal is a sign, plus the missing plastic vents on the back. ZX - internal https://www.rockauto.com/en/moreinfo.php?pk=37579&cc=1209293&pt=2412&jsn=389 1976 280Z - external https://www.rockauto.com/en/moreinfo.php?pk=37404&cc=1209226&pt=2412&jsn=448
 2 points
 -
1 pointThe regulator is bypassing the fuel back to the tank. The motor doesn’t control the pressure so to speak. There’s multiple parameters regarding fuel pressure.1 point
-
1 pointThree sheet set of full scale on a 36" wide x 48" paper size. 240Z_71-JutePatterns.pdf1 point
-
That is not a diode. It is a capacitor referred to as a condenser. That is on internally and externally regulated alternators. It was incorporated to reduce electrical noise for the radio. If you have an older stereo, keep it. If you have a newer stereo, you may not need it.1 point
-
I get mostly engine/exhaust sound and mine sounds like a burbly V8 due to the performance cam installed in the 80s I might actually try grabbing some 6x9's and see if I can put them behind the panels and see if that sounds good enough, and if I want something better I can at least swap them over to a custom box at the back. I think 6.5s might be too big and not sure if 5.25s would be a bit small.1 point
-
1 pointIMO Install a fuel pressure gauge between the filter and metal fuel line. You can monitor pressure at any given time to give you clues moving forward.1 point
-
1 point
-
1 pointcoincidentally I just got off the phone with oreillys to confirm they had a fuel pressure test kit - will get back to you with an answer on that tonight1 point
-
Well there you go I didn't scroll down at all, as it is with most FB ad's I see. There was a picture of the "trunk" but no door in there.1 point
-
1 pointThis shipment was from Z Car Depot. We have shipments of goodies coming from all over the place at the moment, including Rock Auto. Sent from my SM-S901W using Tapatalk1 point
-
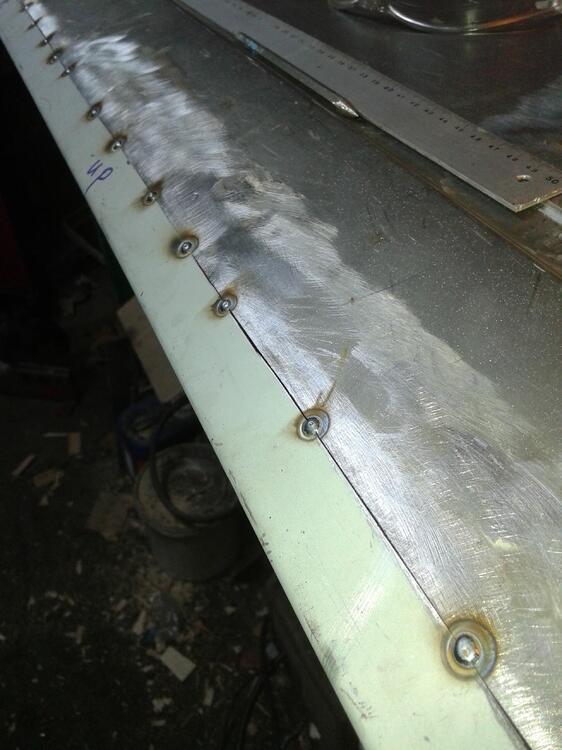
1 pointHi, If you don't have enough penatration you need to go from step 2 to step3 but weld just for 1 second at the time.. lay small welds after each other. Normally when you weld thick steel you can weld for say a minute, but thin steel you have to make small short welds.. Also, welding is putting a current through your cables and the steel your welding.. You have to keep in mind that if you have the earth clamp further from your welding work, that welding current also has to travel further and that extra resistance also reduces the welding current, so the shorter you are on your weld with the earth clamp, the higher the current will be. .. by placing it as far away as possible you create a kind of step 2.5 on your welding machine. Just be sure that your clamp is making good contact to your chassis. Make small welds and as far as possible from each other, especially when doing something like this door i repaired.. one weld left one to the right then one in the middle.. let it cool down, and weld one left one right, let it cool down and lay some weld between.. cooling down can be done with a damp cloth. (Not to wet. but not to dry 😉 ) To be a good welder takes years, it's a matter of trail and error! Once you understand how it works you get better and better in it!
 1 point


