


Leaderboard
-
Patcon
 Subscriber
 21Points11,142Posts
 -
Yarb
Subscriber4Points1,935Posts -
Zpenman
Free Member3Points97Posts -
grannyknot
Free Member3Points5,158Posts


Popular Content
Showing content with the highest reputation on 01/28/2024 in all areas
-
9 points
-
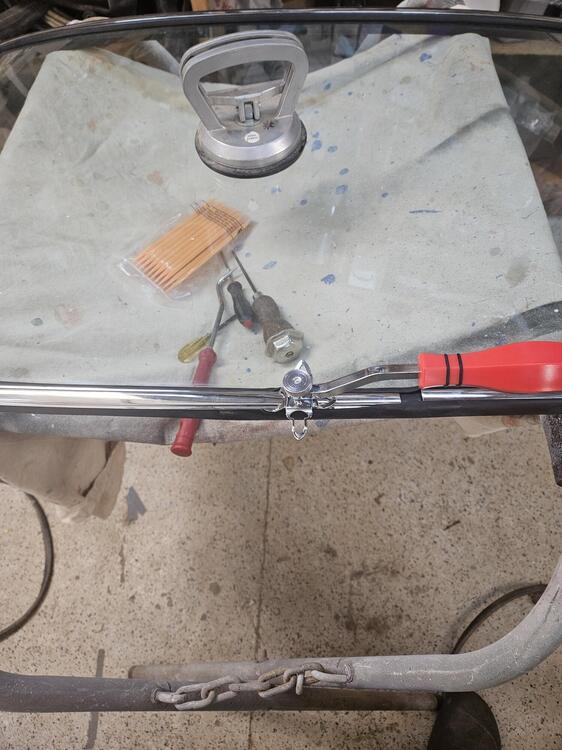
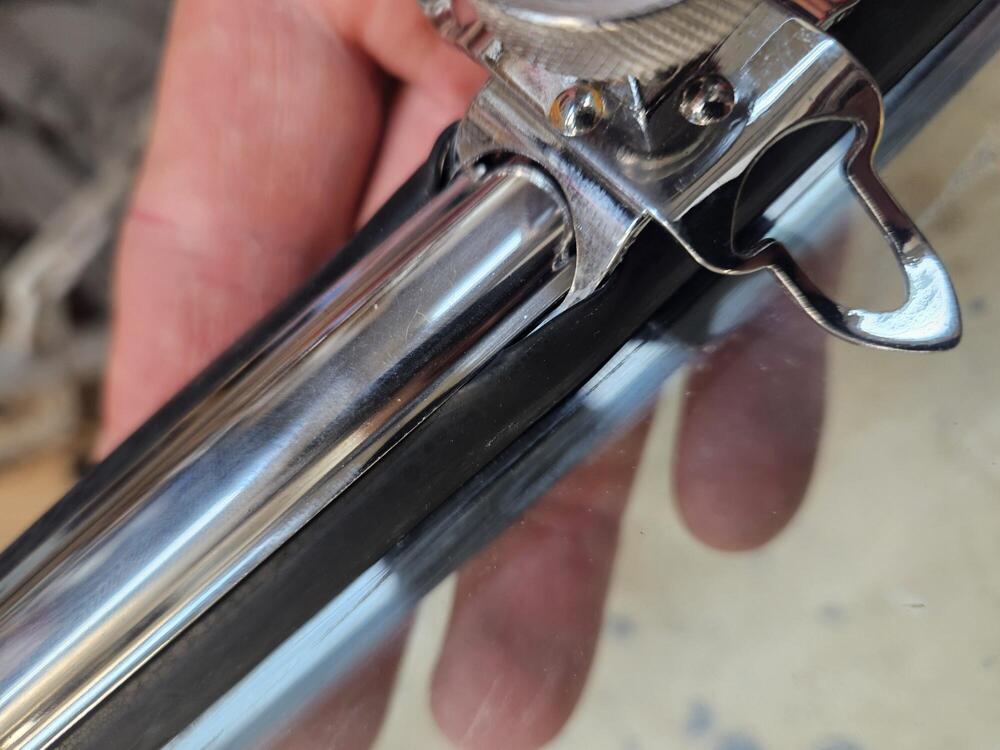
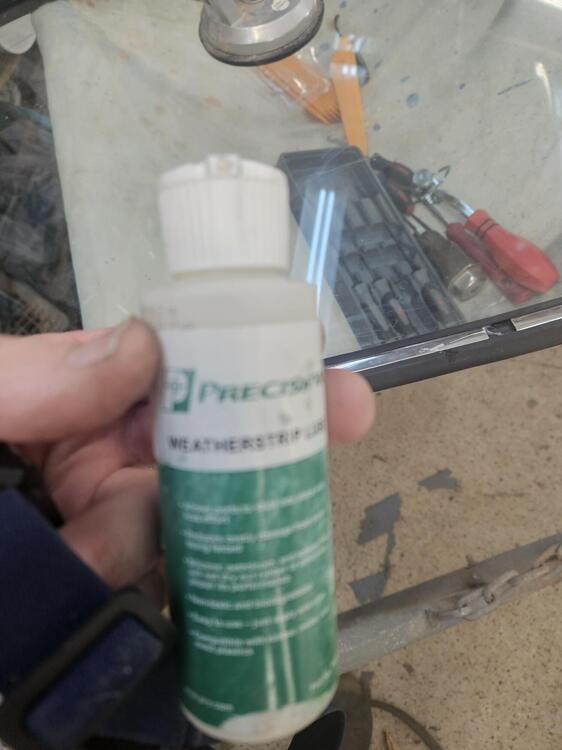
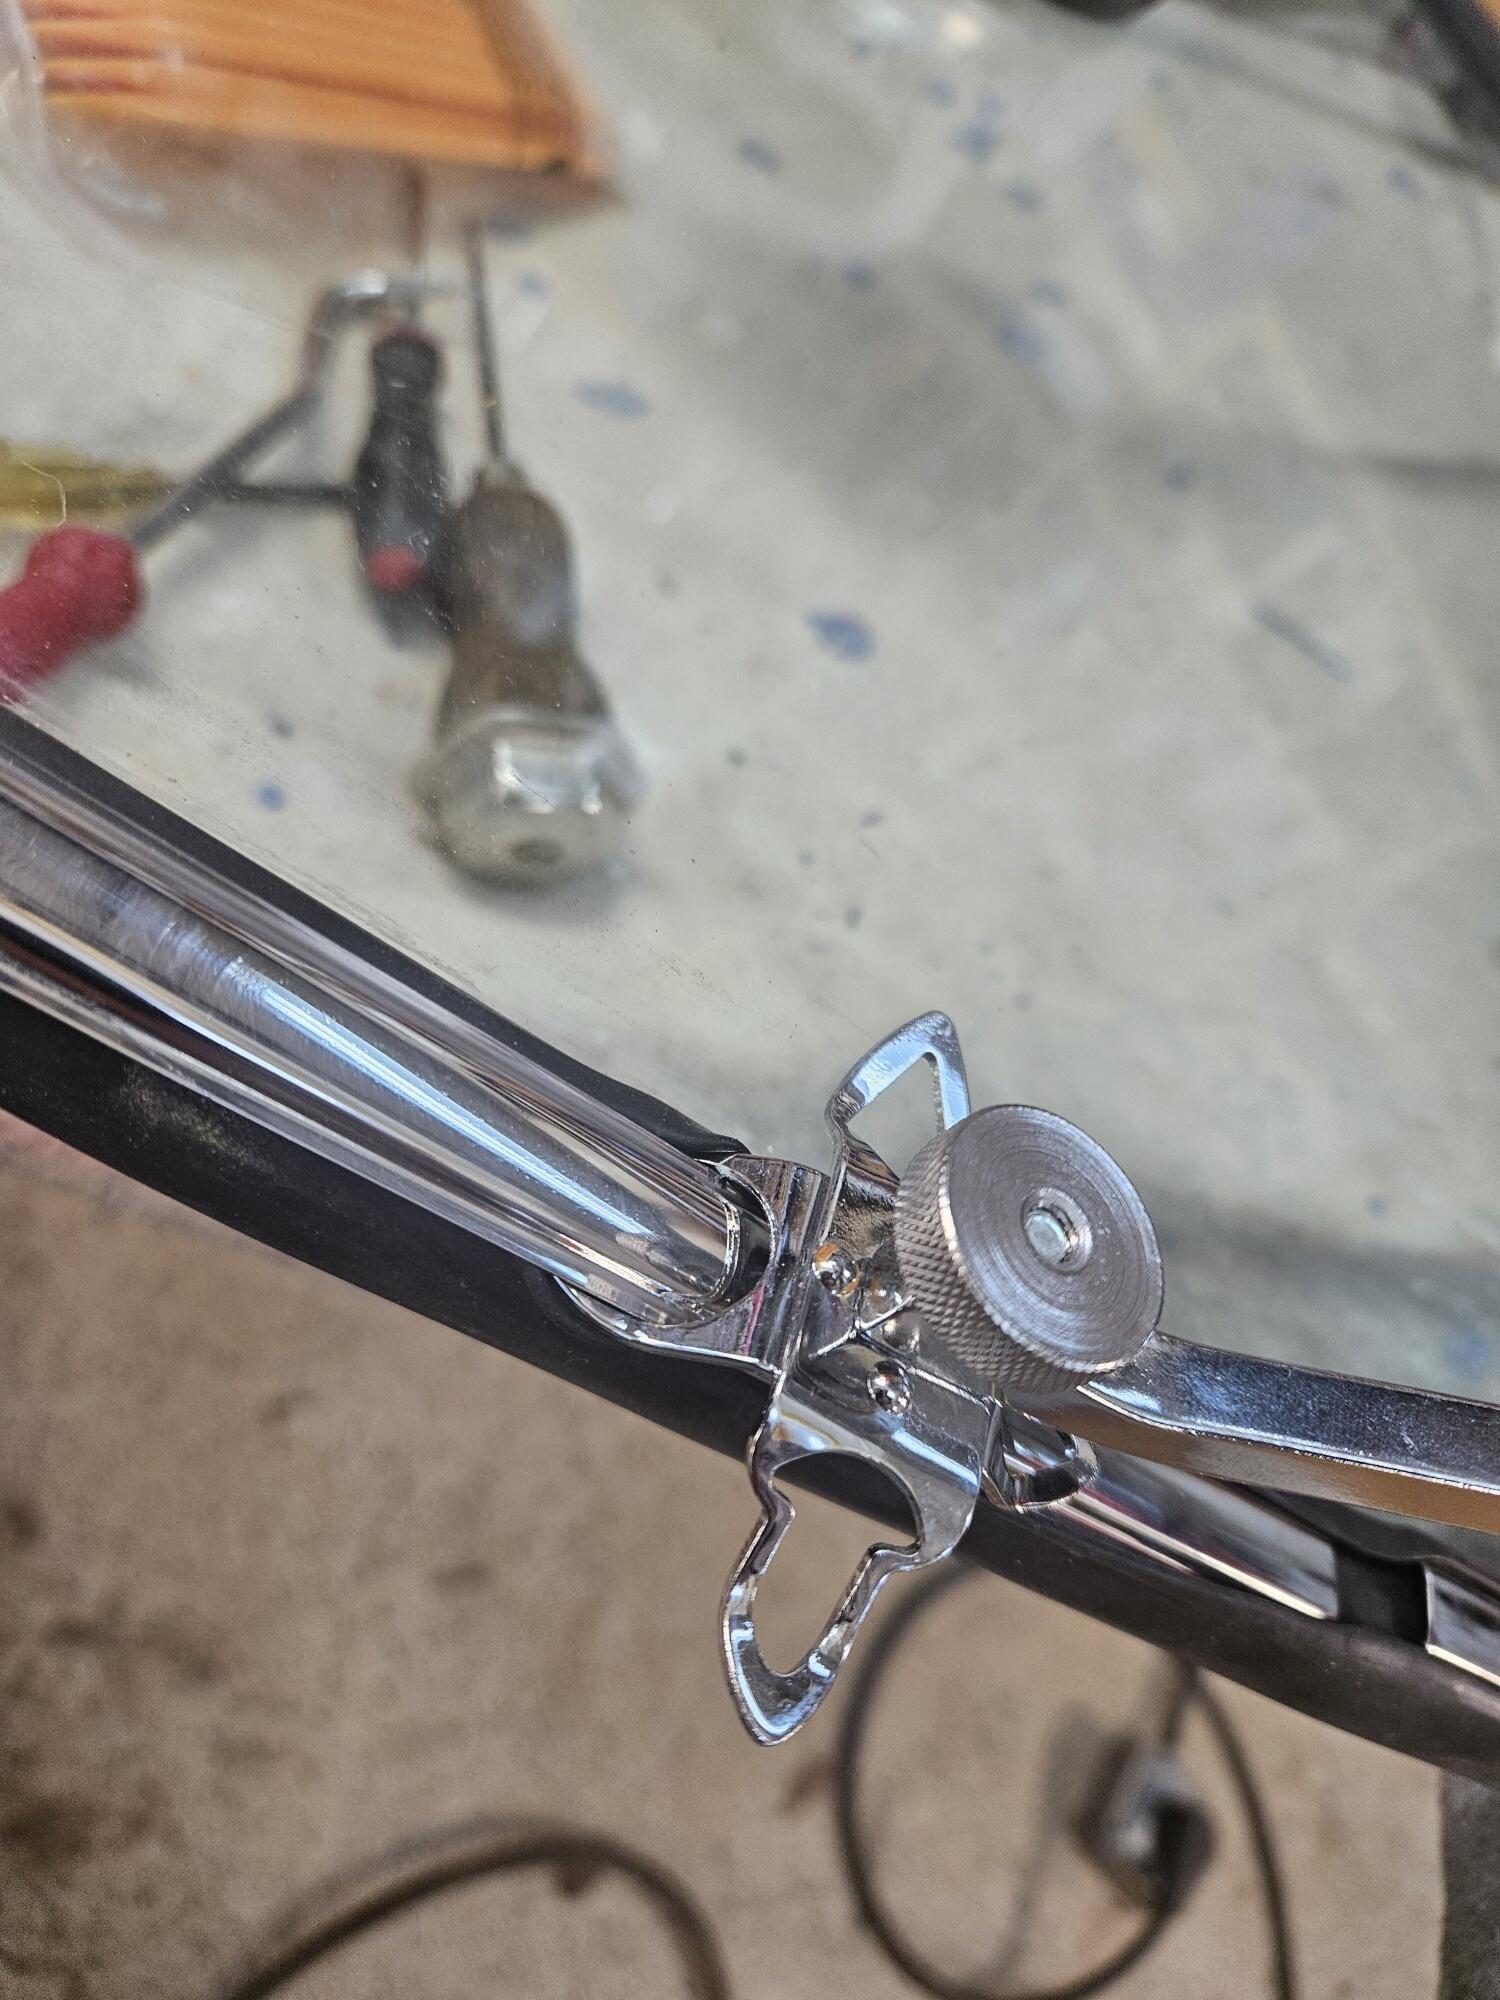
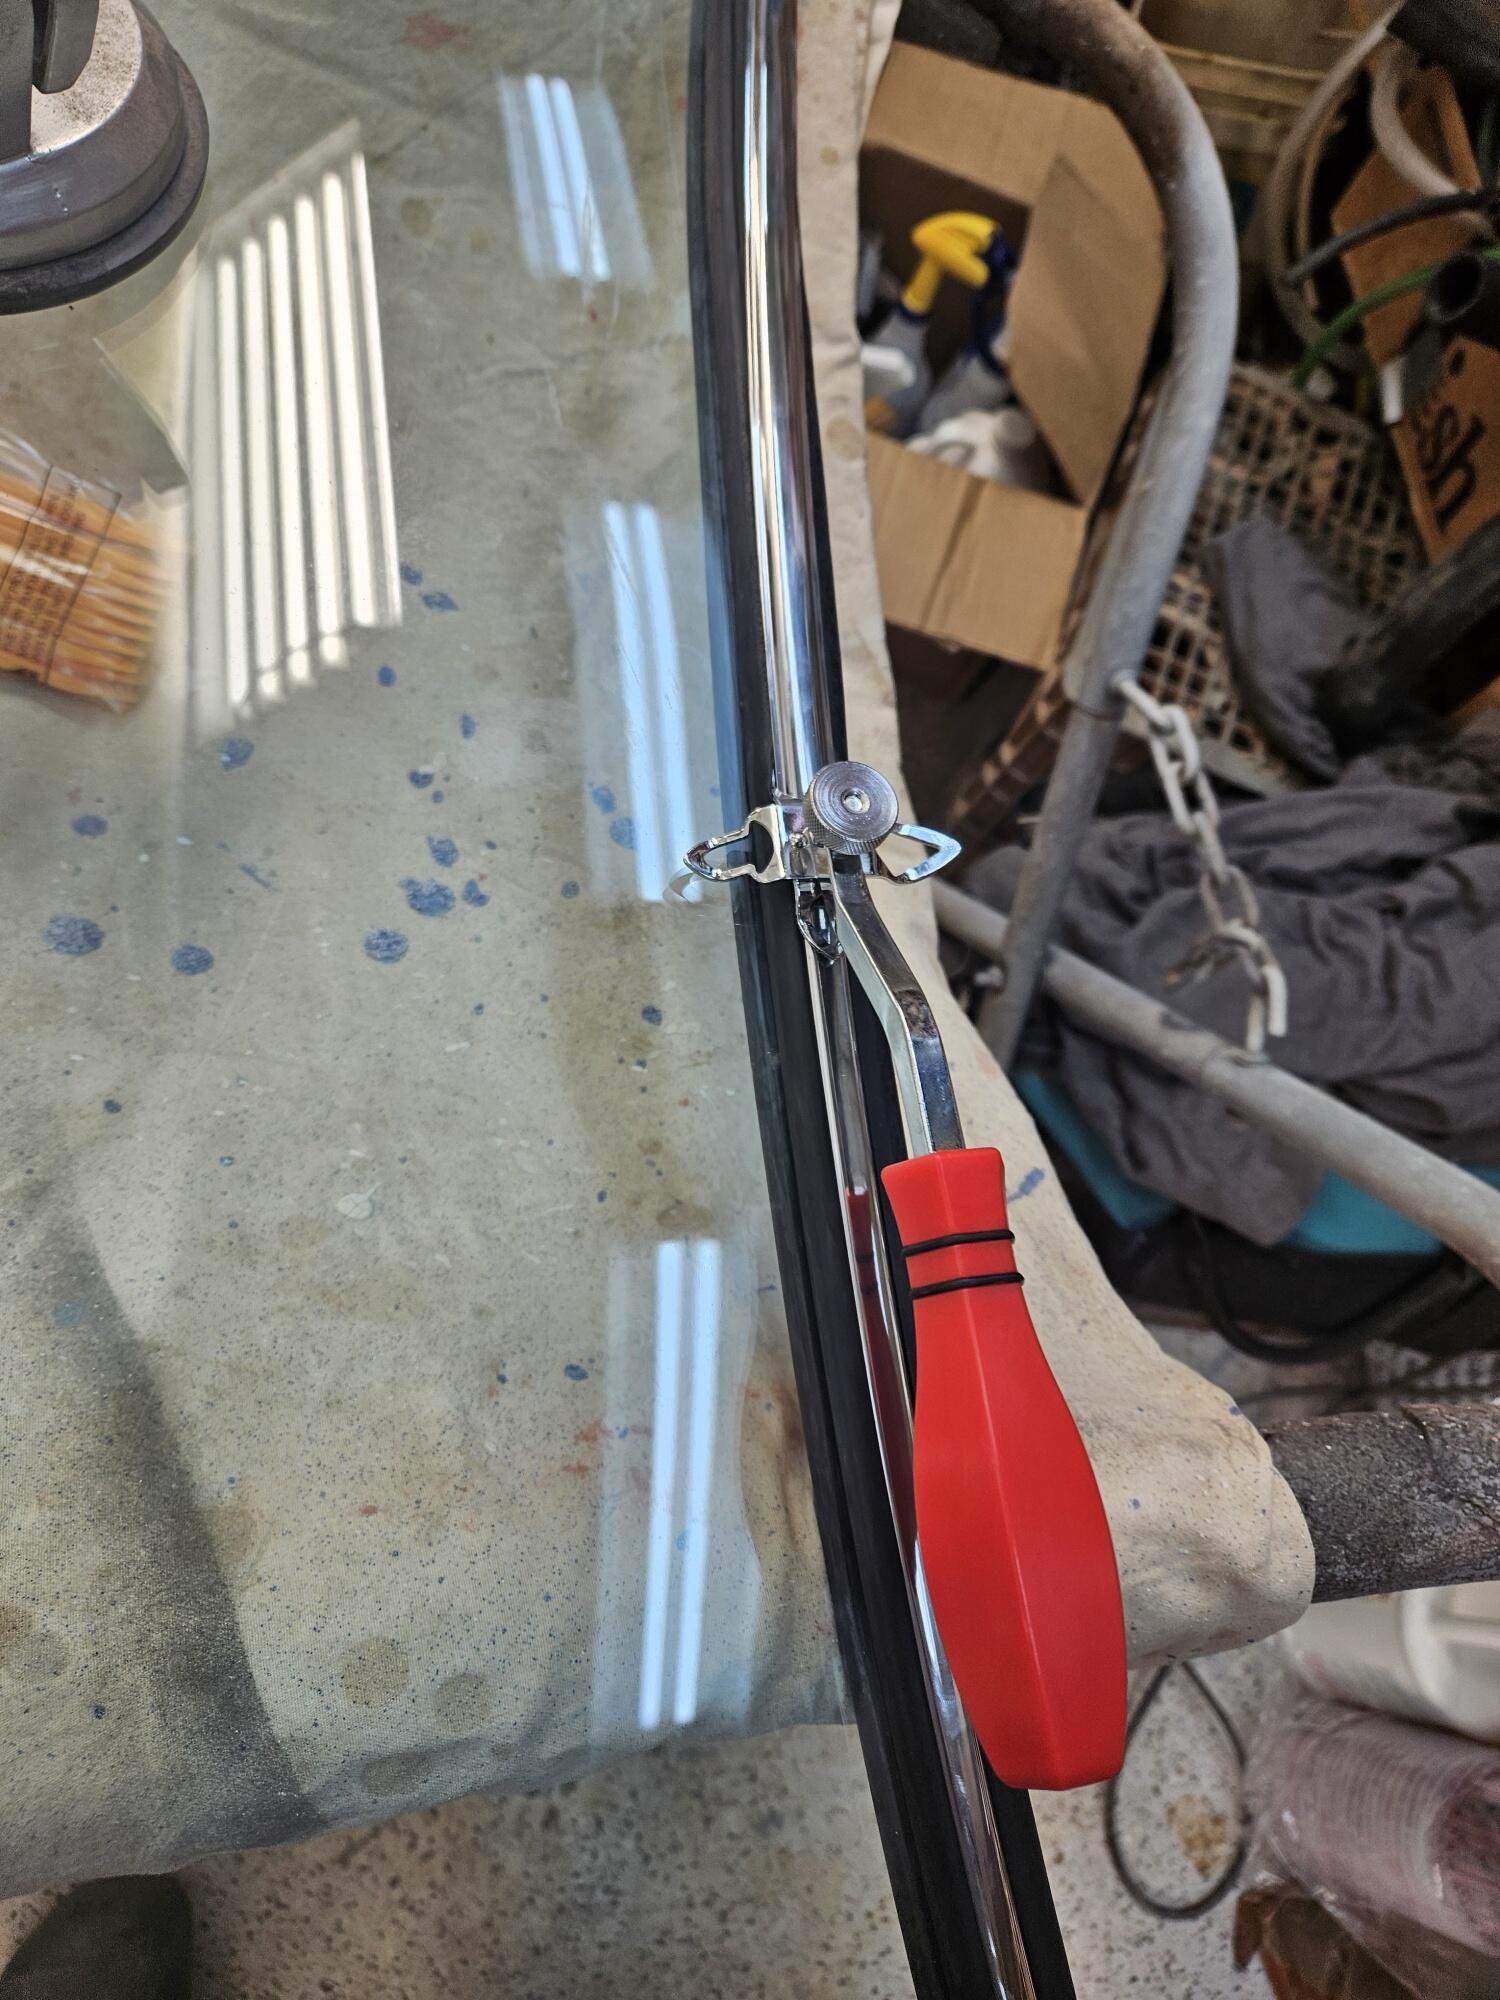
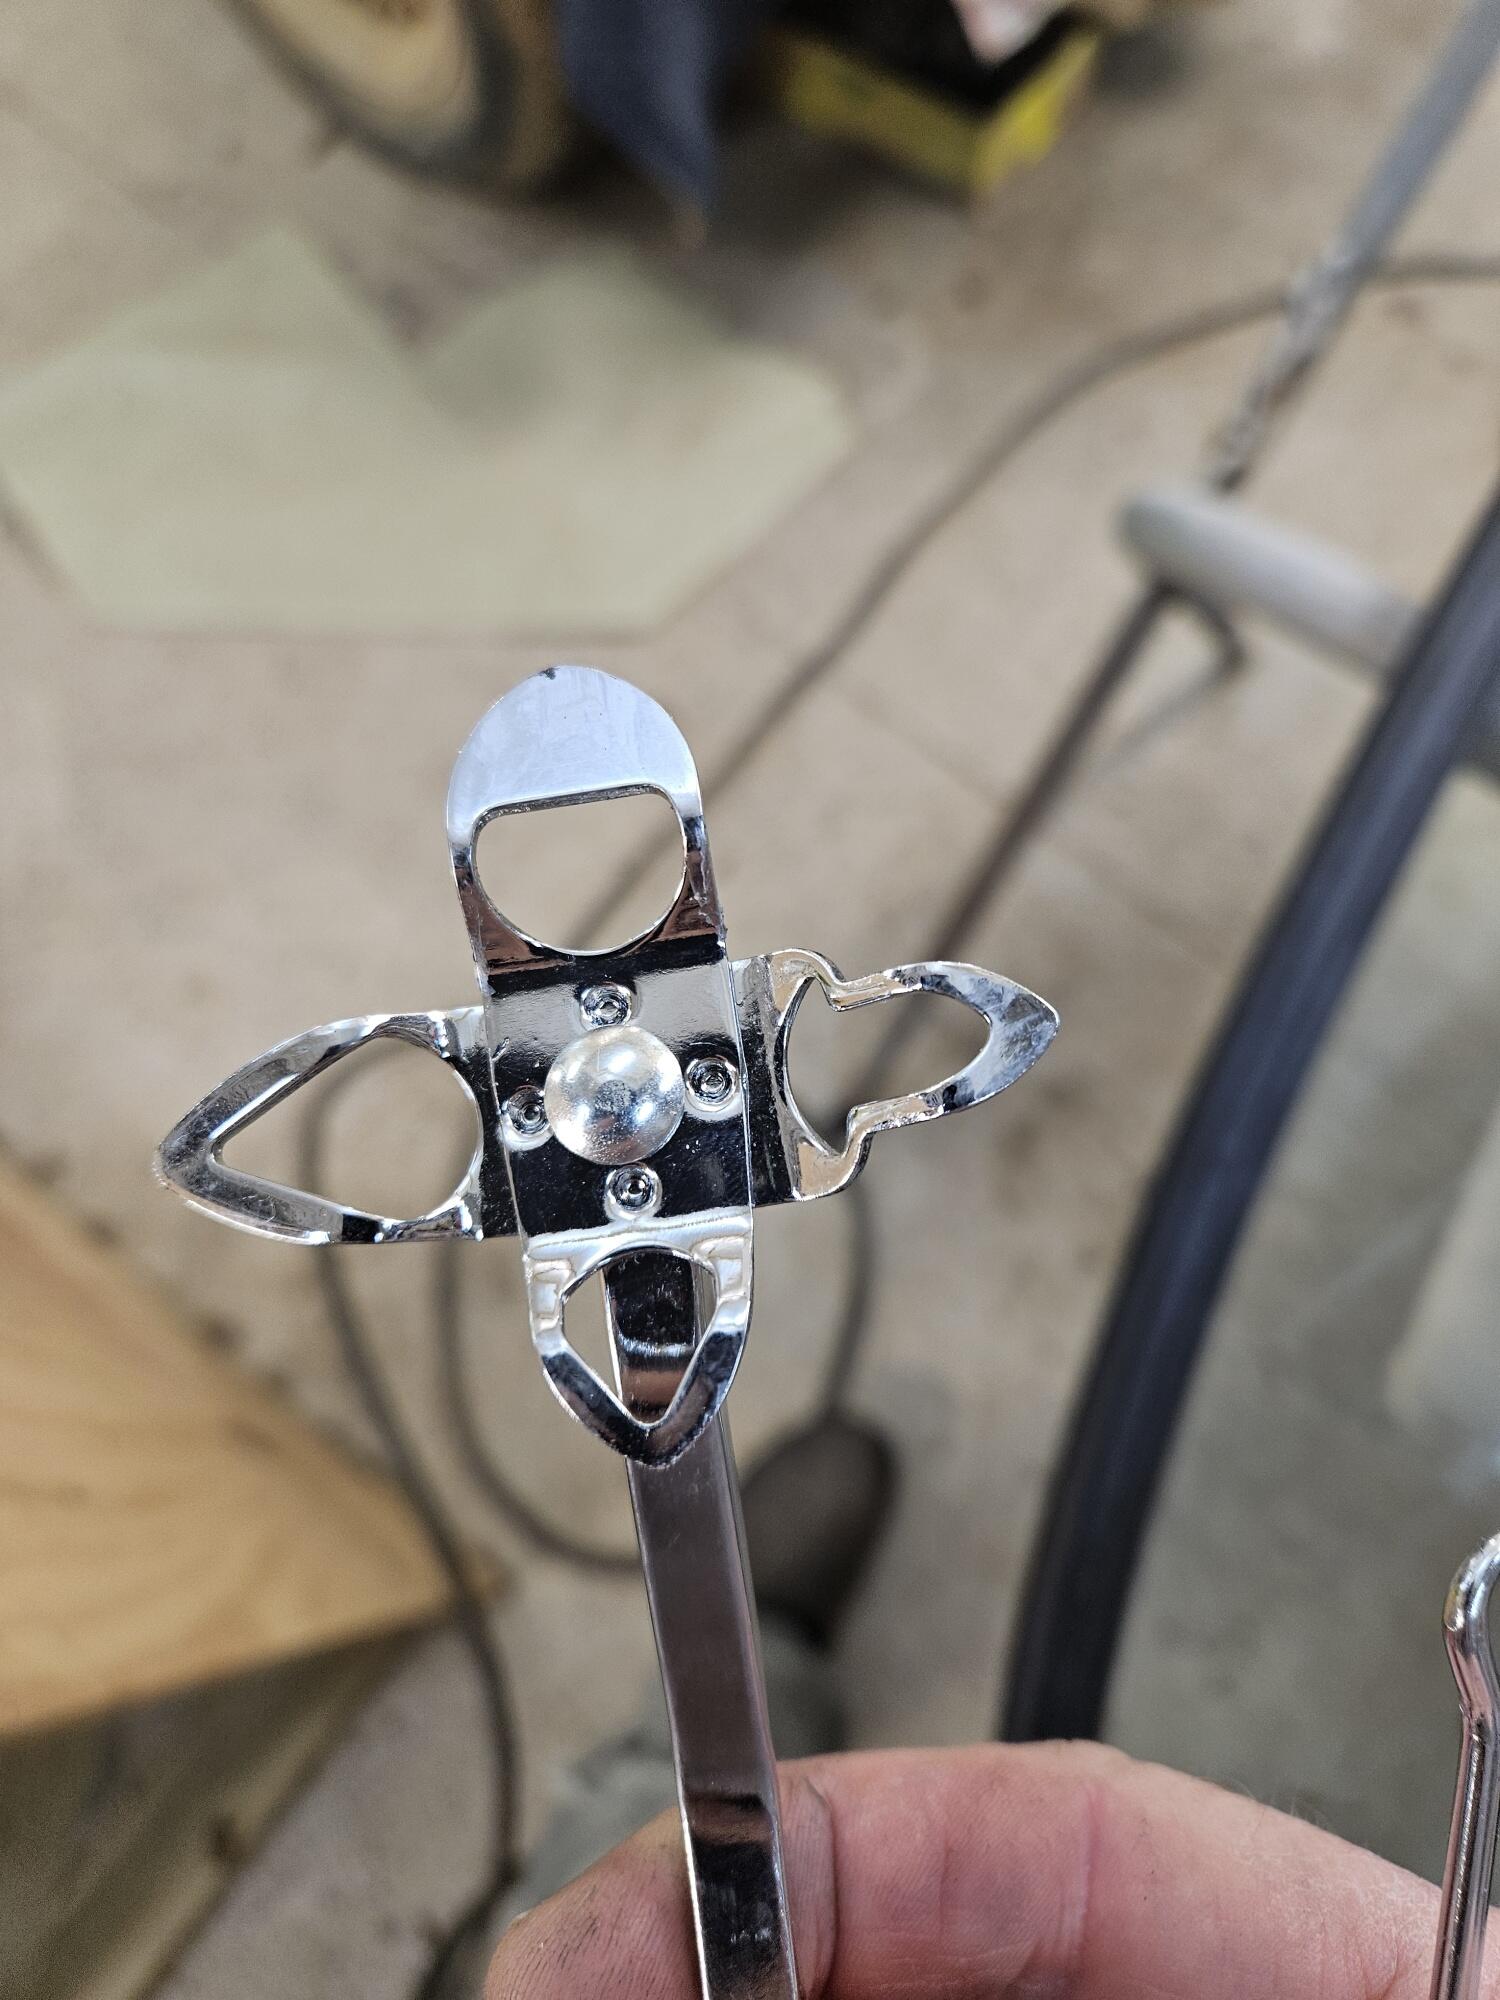
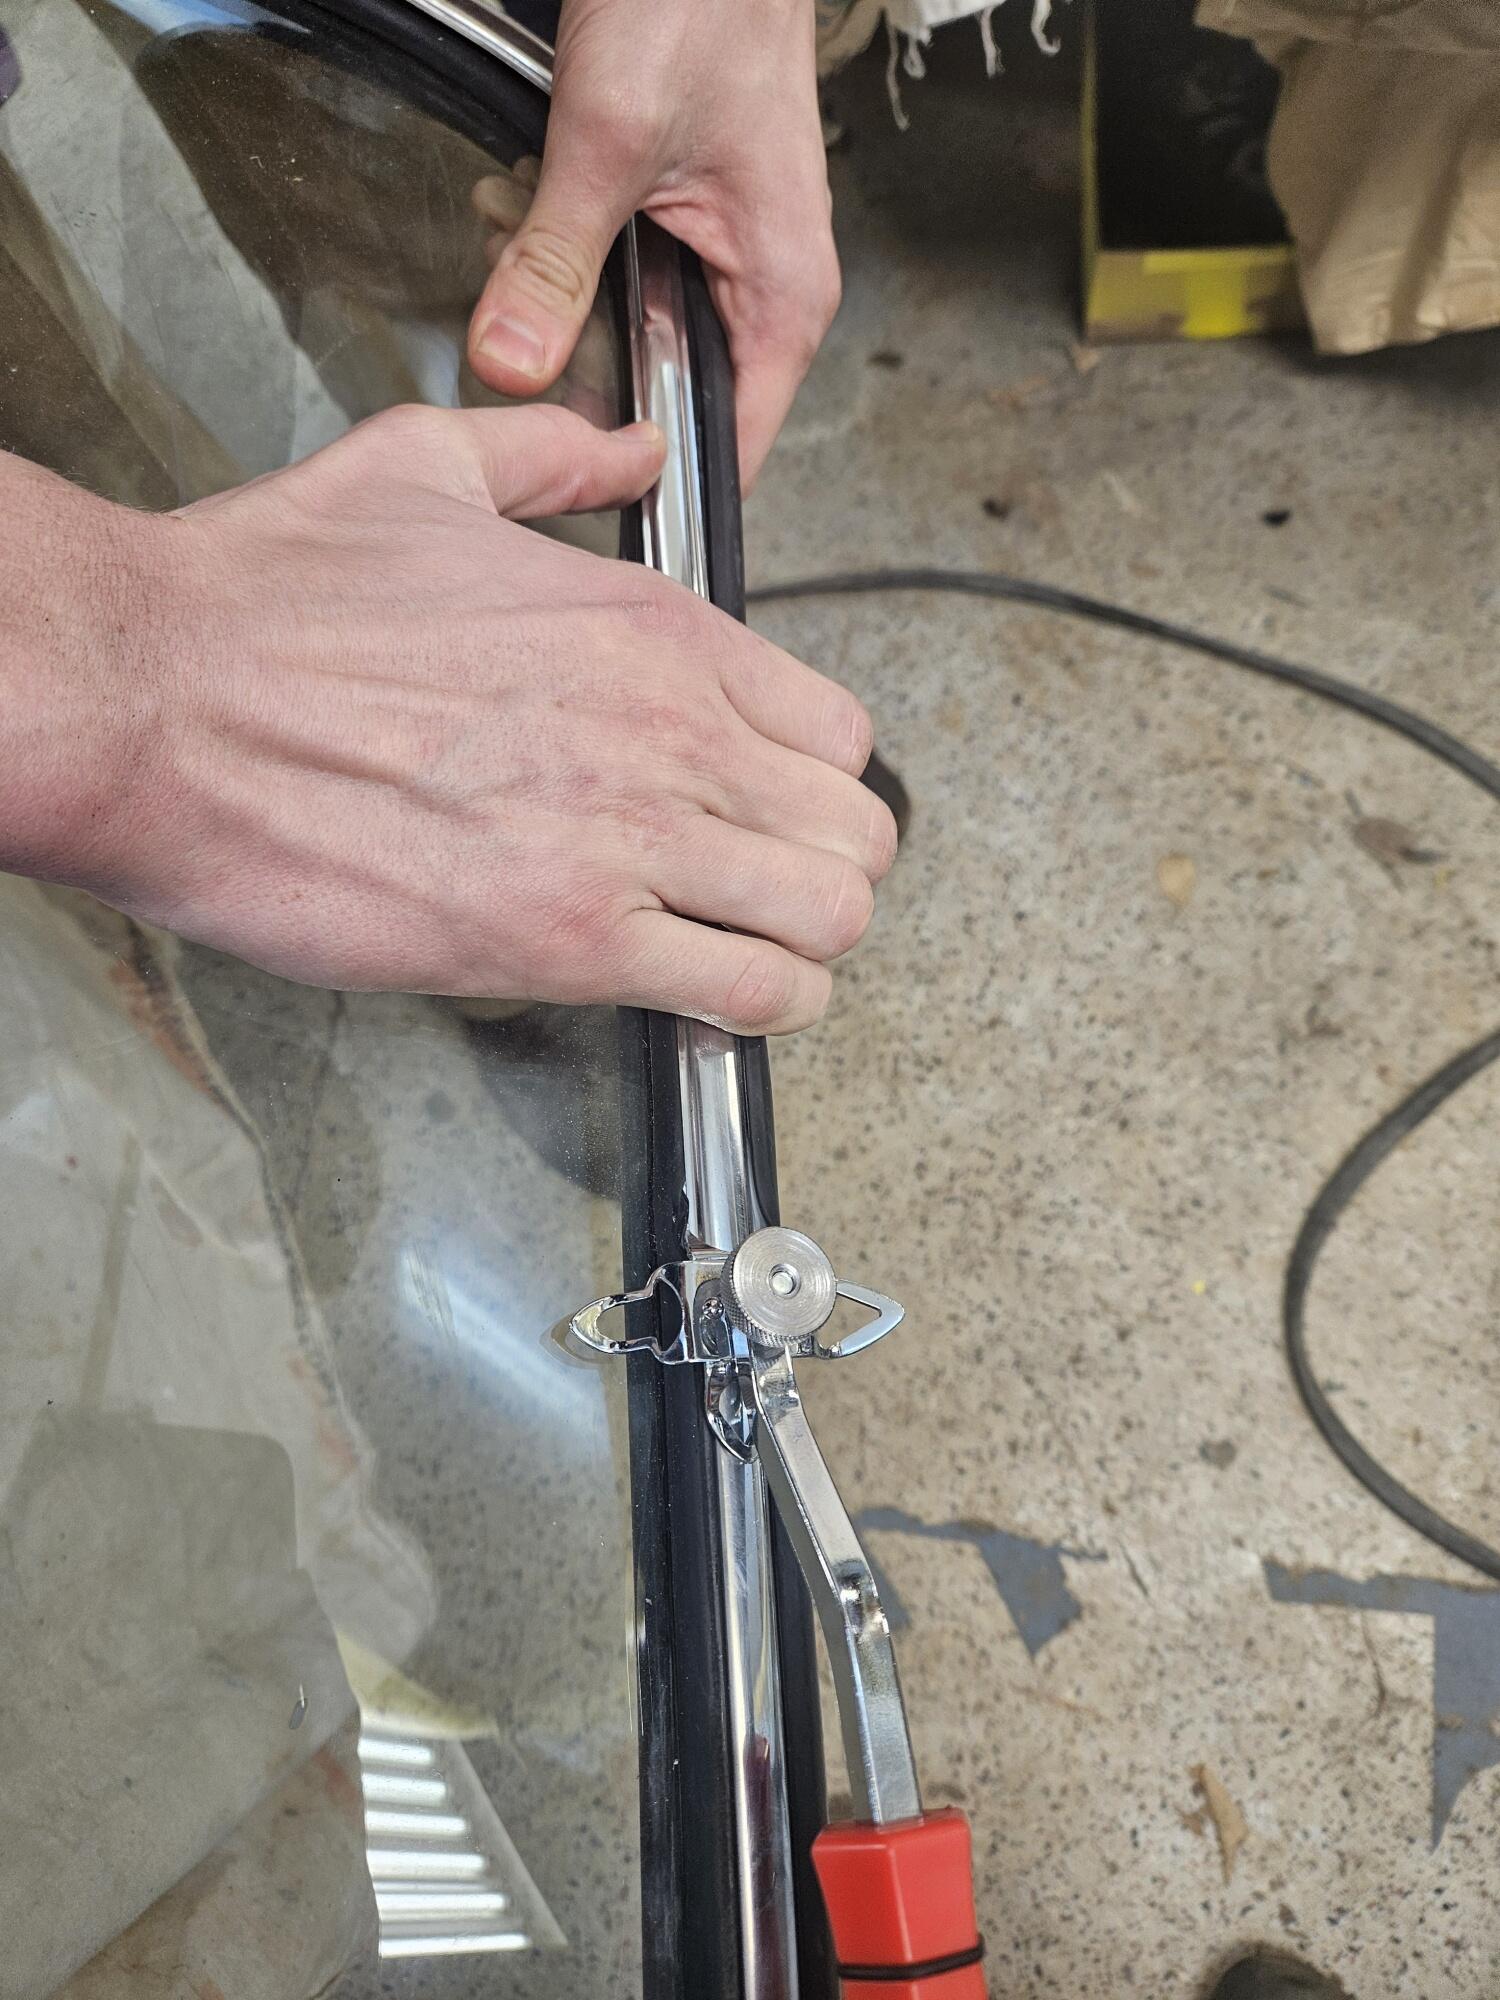
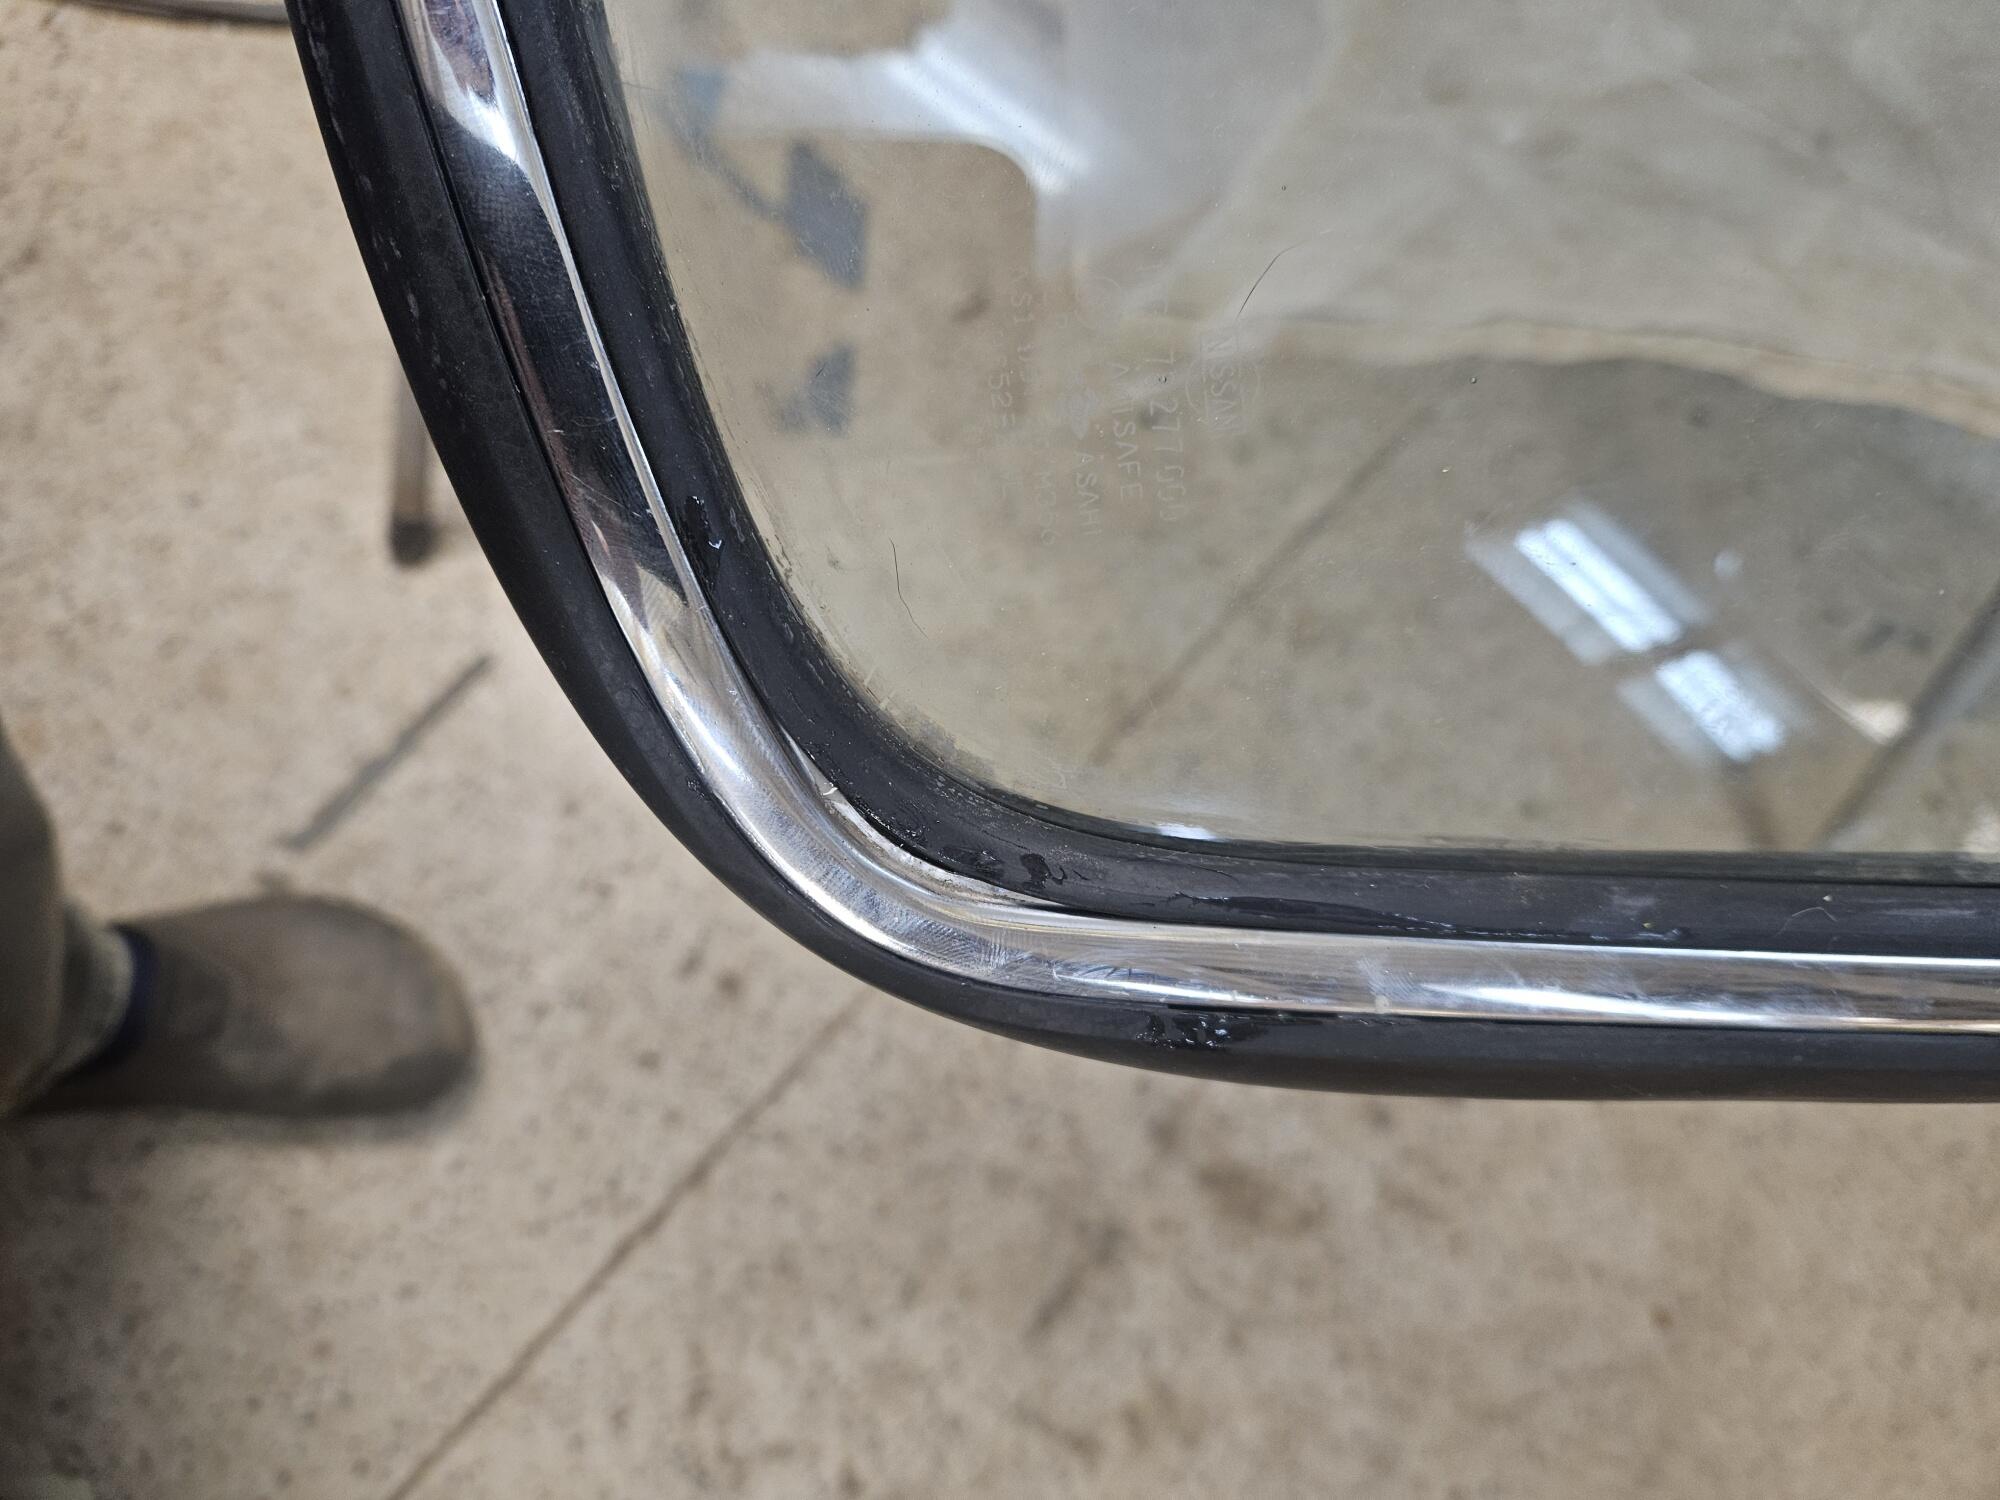
7 pointsSo I lied, I ordered a new windshield gasket from Zcardepot. It wasn't a lot of money and I could afford the little bit of lost time. The second one I got was not a "Precision" gasket. I actually like it better. It seems softer and possibly a little larger and the welded corners look really good. So I had a go at the stainless trim again. I bought some tools on Amazon, because who doesn't like new tools! 😉 So this is a windshield trim tool. There are some vintage windshield styles that use a rubber insert to log the glass in. I wasn't sure this tool would have a tip that was large enough for the stainless trim. Cody was helping me here hold the gasket to the glass and keep it in line with the trim I used the Precision gasket lube to make it easier for the edges of the rubber to move around the trim. The gasket isn't quite right in the lower corners yet, but I was thinking the car would force this corner into shape? We got the trim in with one really small nick. It's almost unnoticeable. So hopefully next weekend we will install the glass


 7 points
 -
3 pointsI hear ya, had the exact same thing happen with that little black wire. The square nut inside was so loose it almost fell to the bottom of the dizzy, would have been a disaster! Made sure it was tight this time. Probably should go to electronics, just hate getting away from the original design, don't know why, though.3 points
-
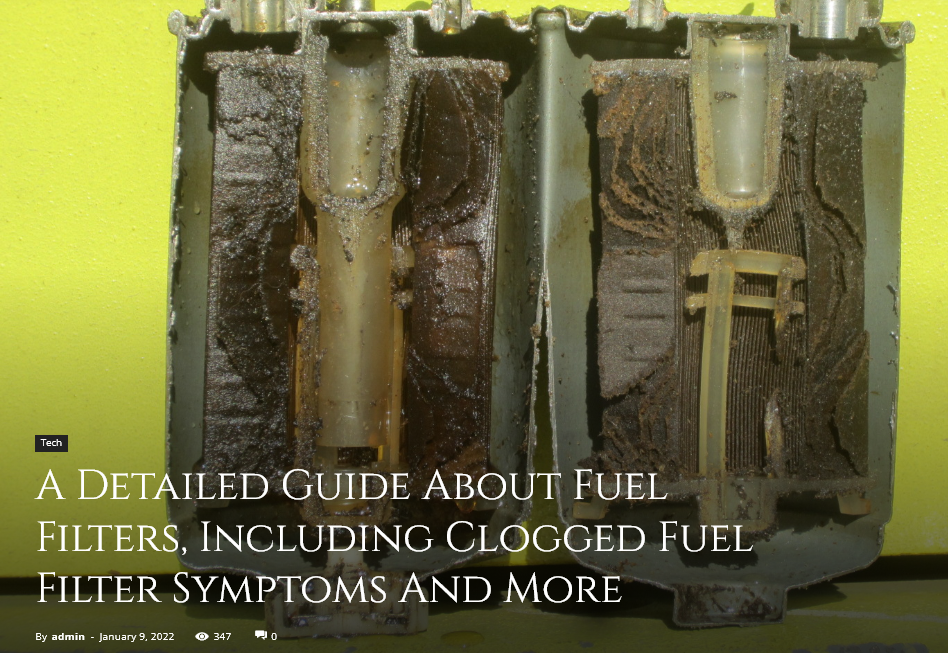
3 pointsOn the half-full filter issue - it might be that the exit point is not where people think it is. Has anyone taken one apart? https://writina.com/clogged-fuel-filters/
 3 points
 -
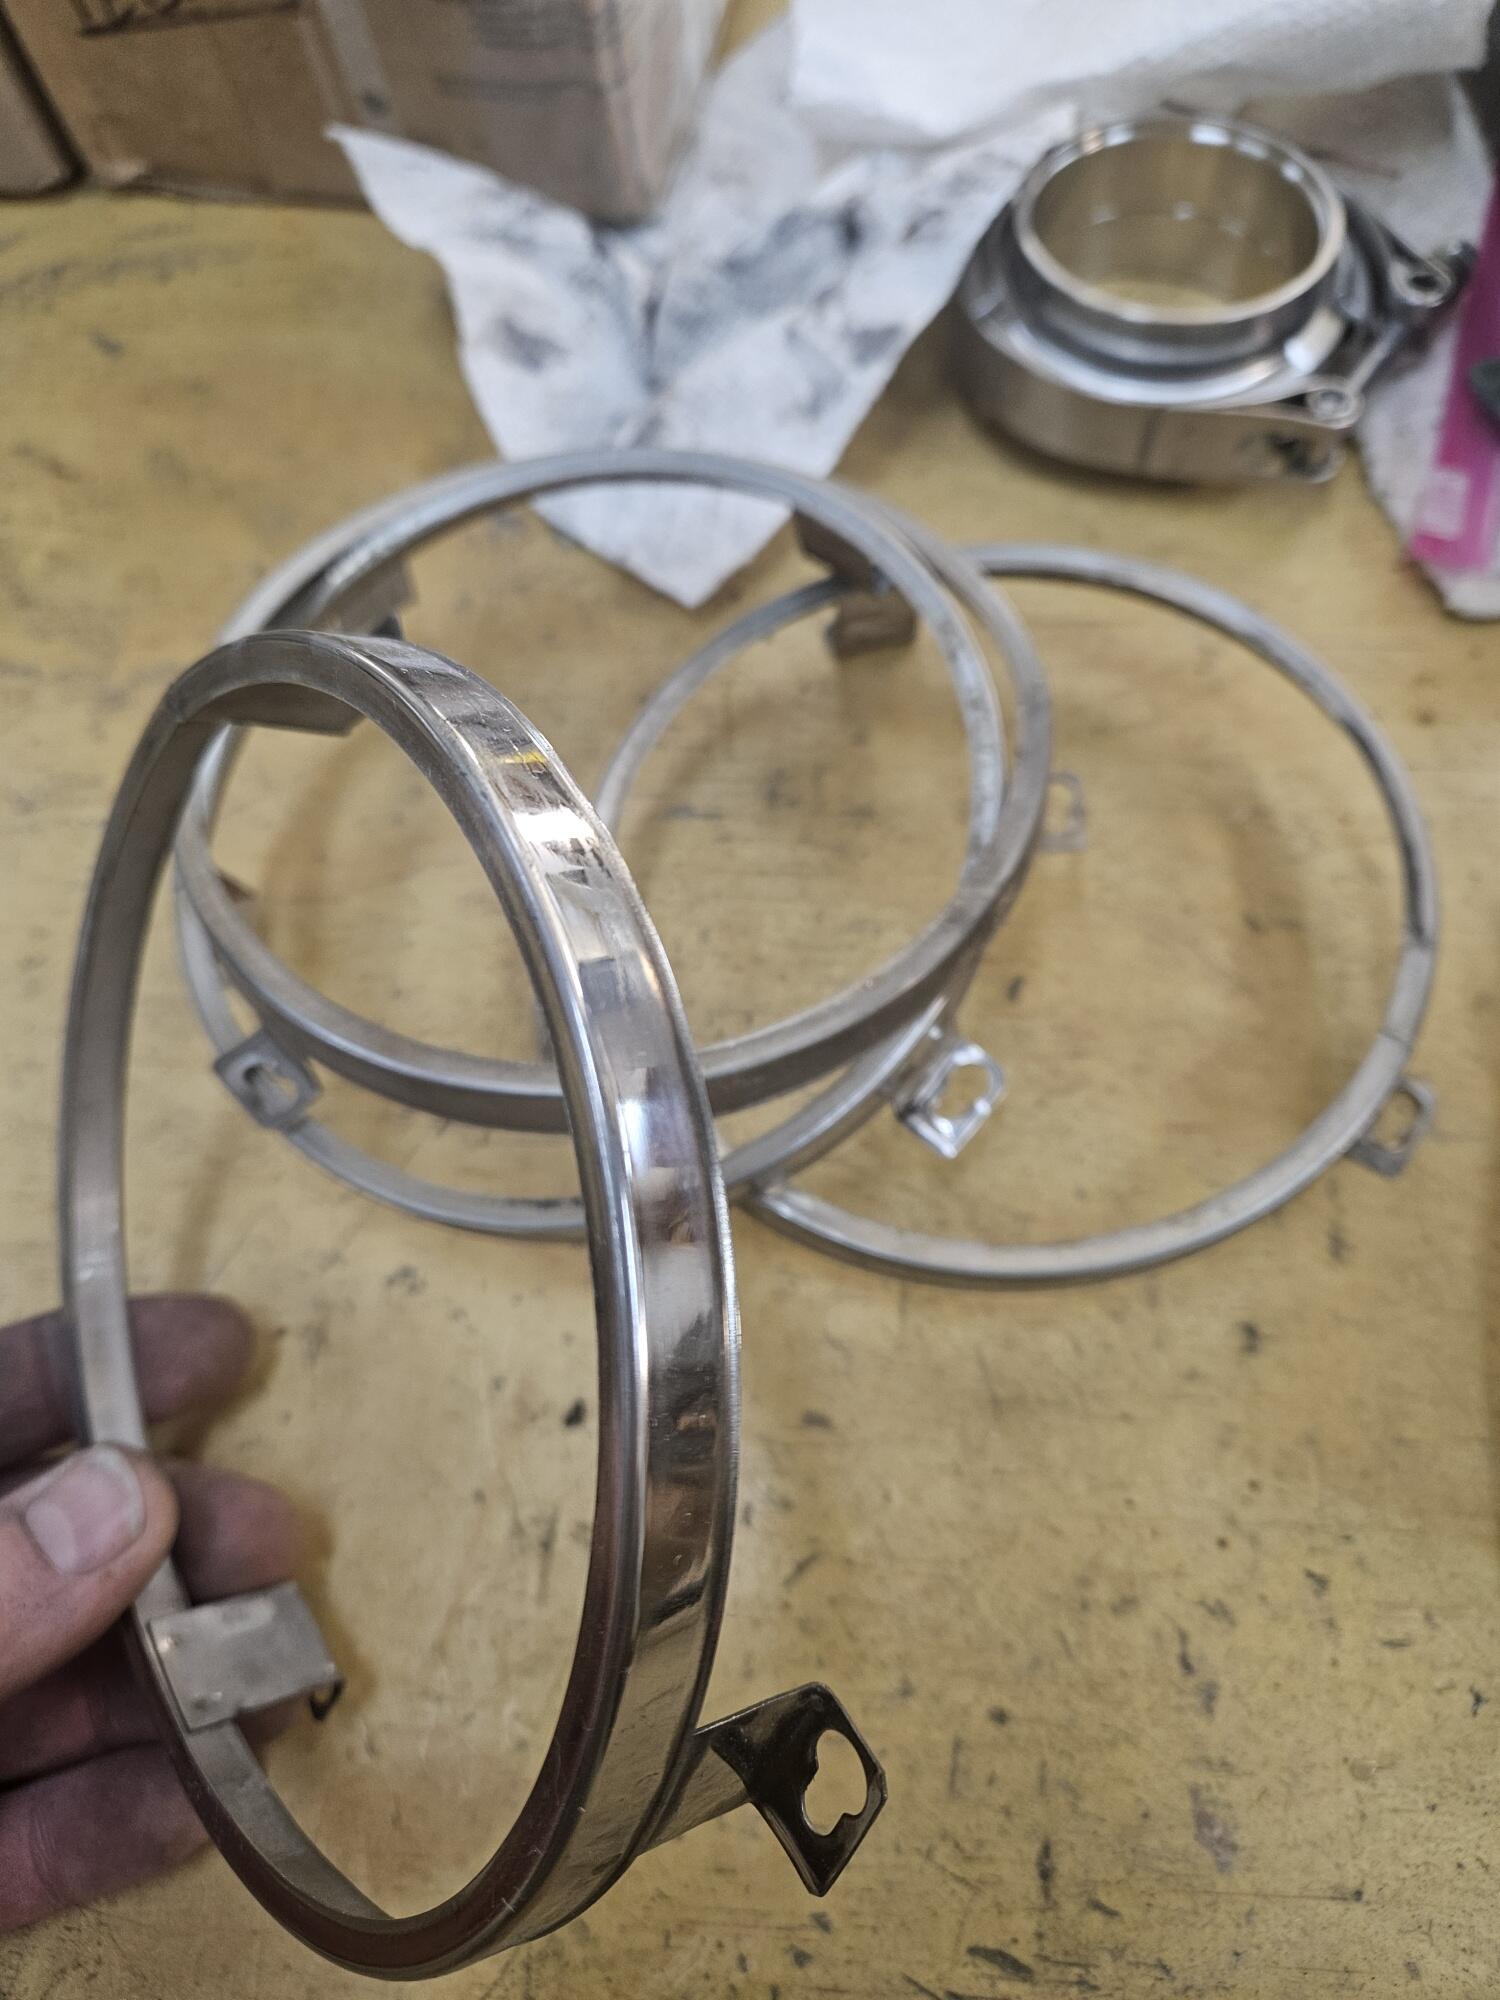
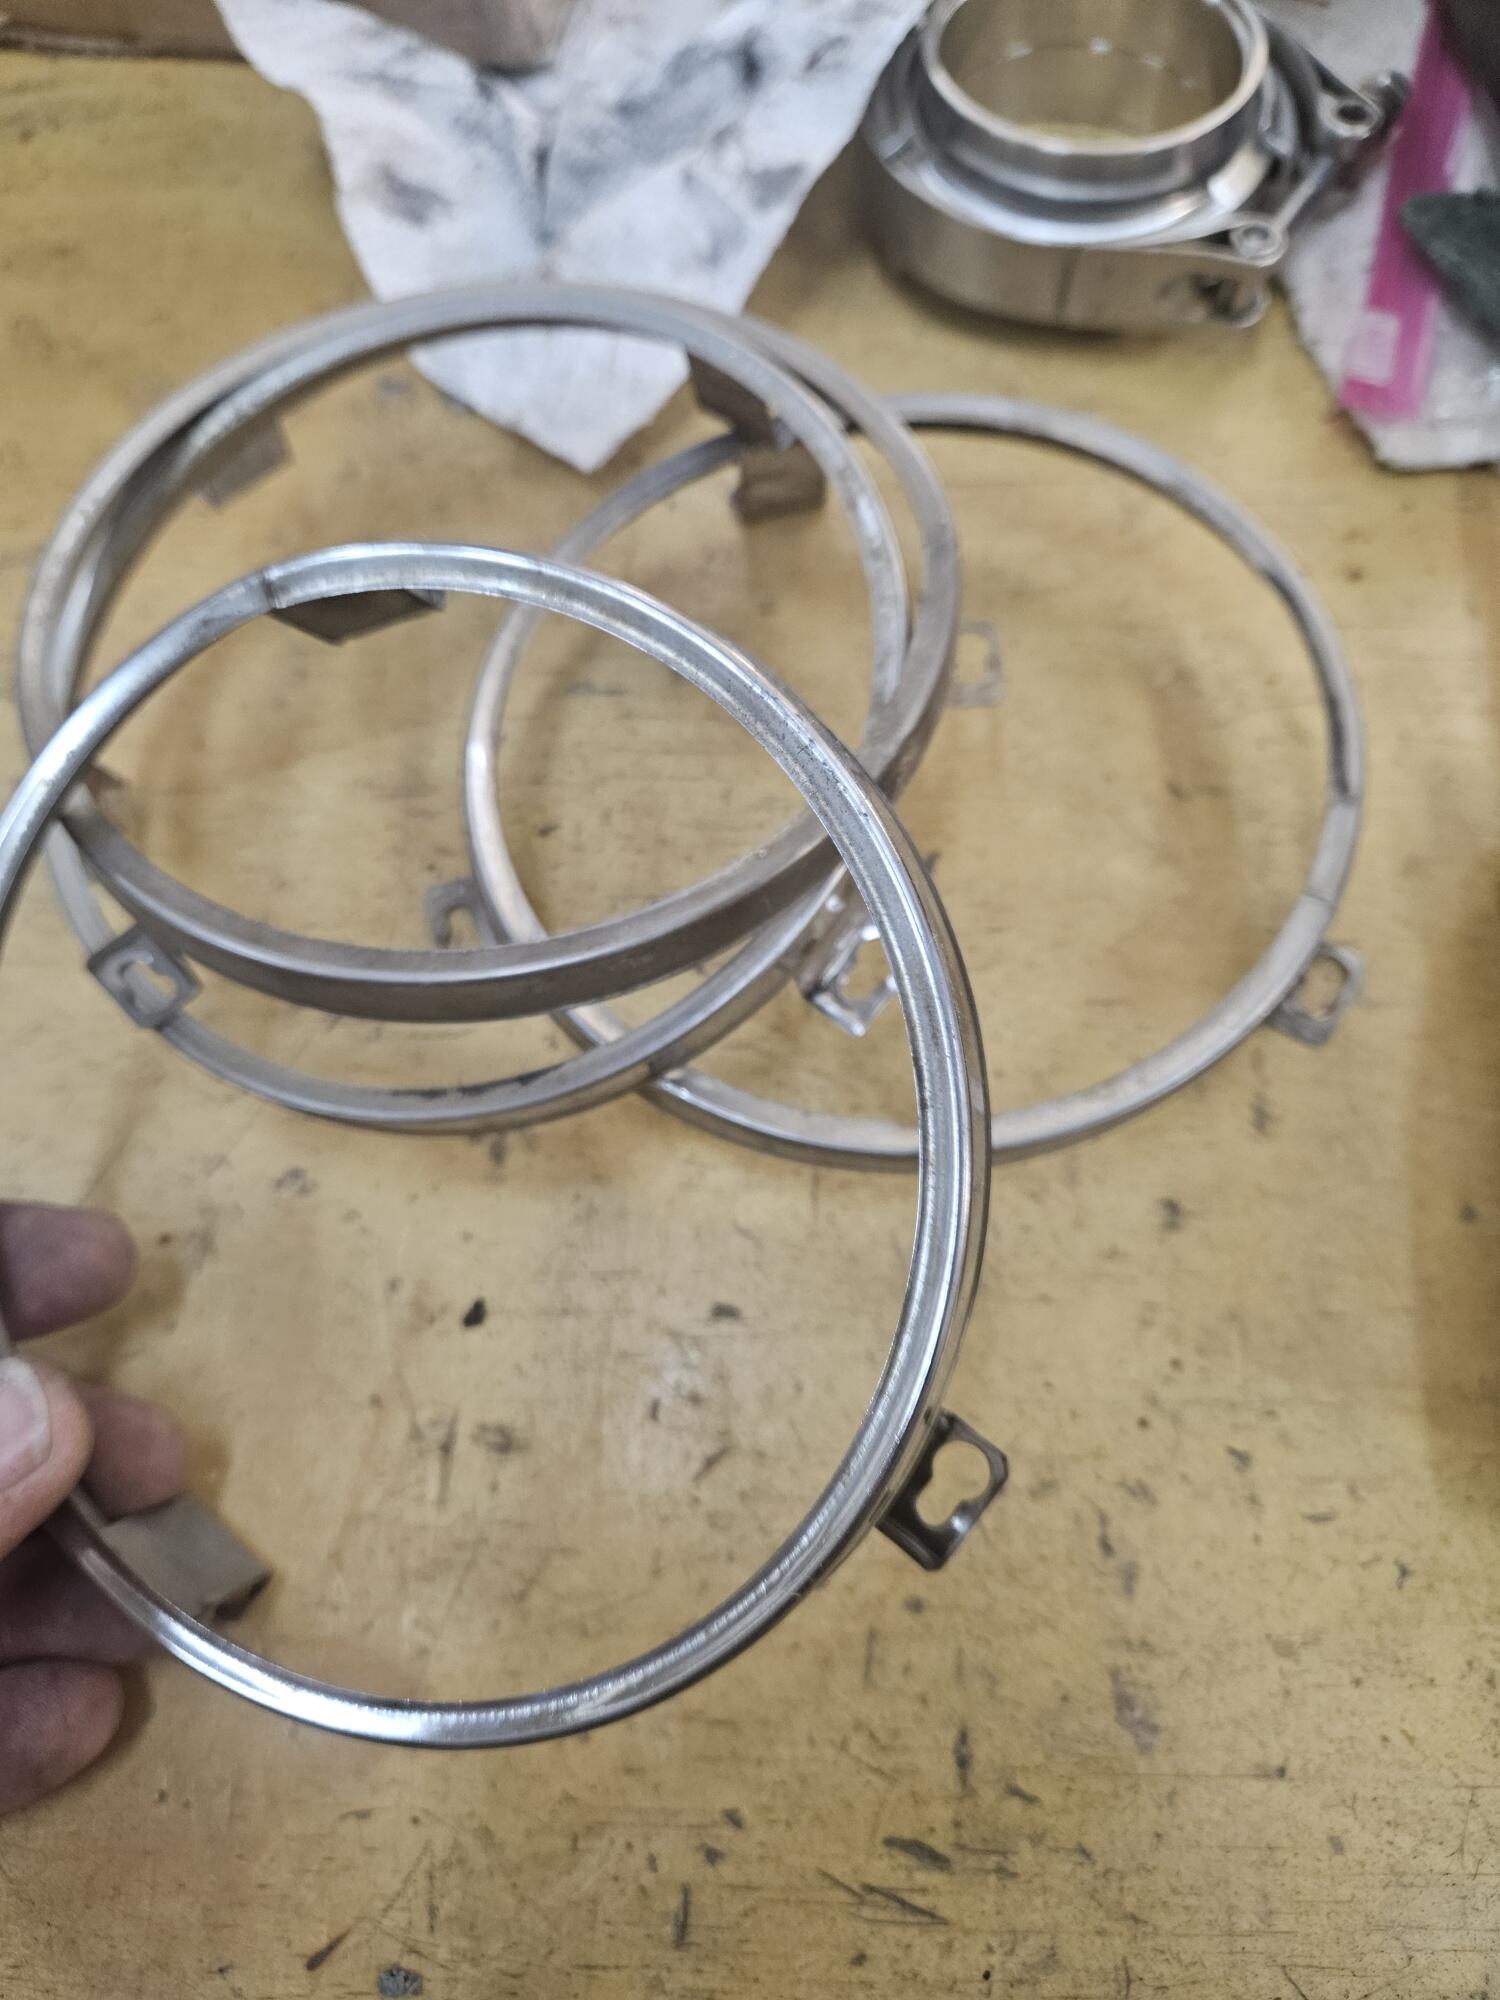
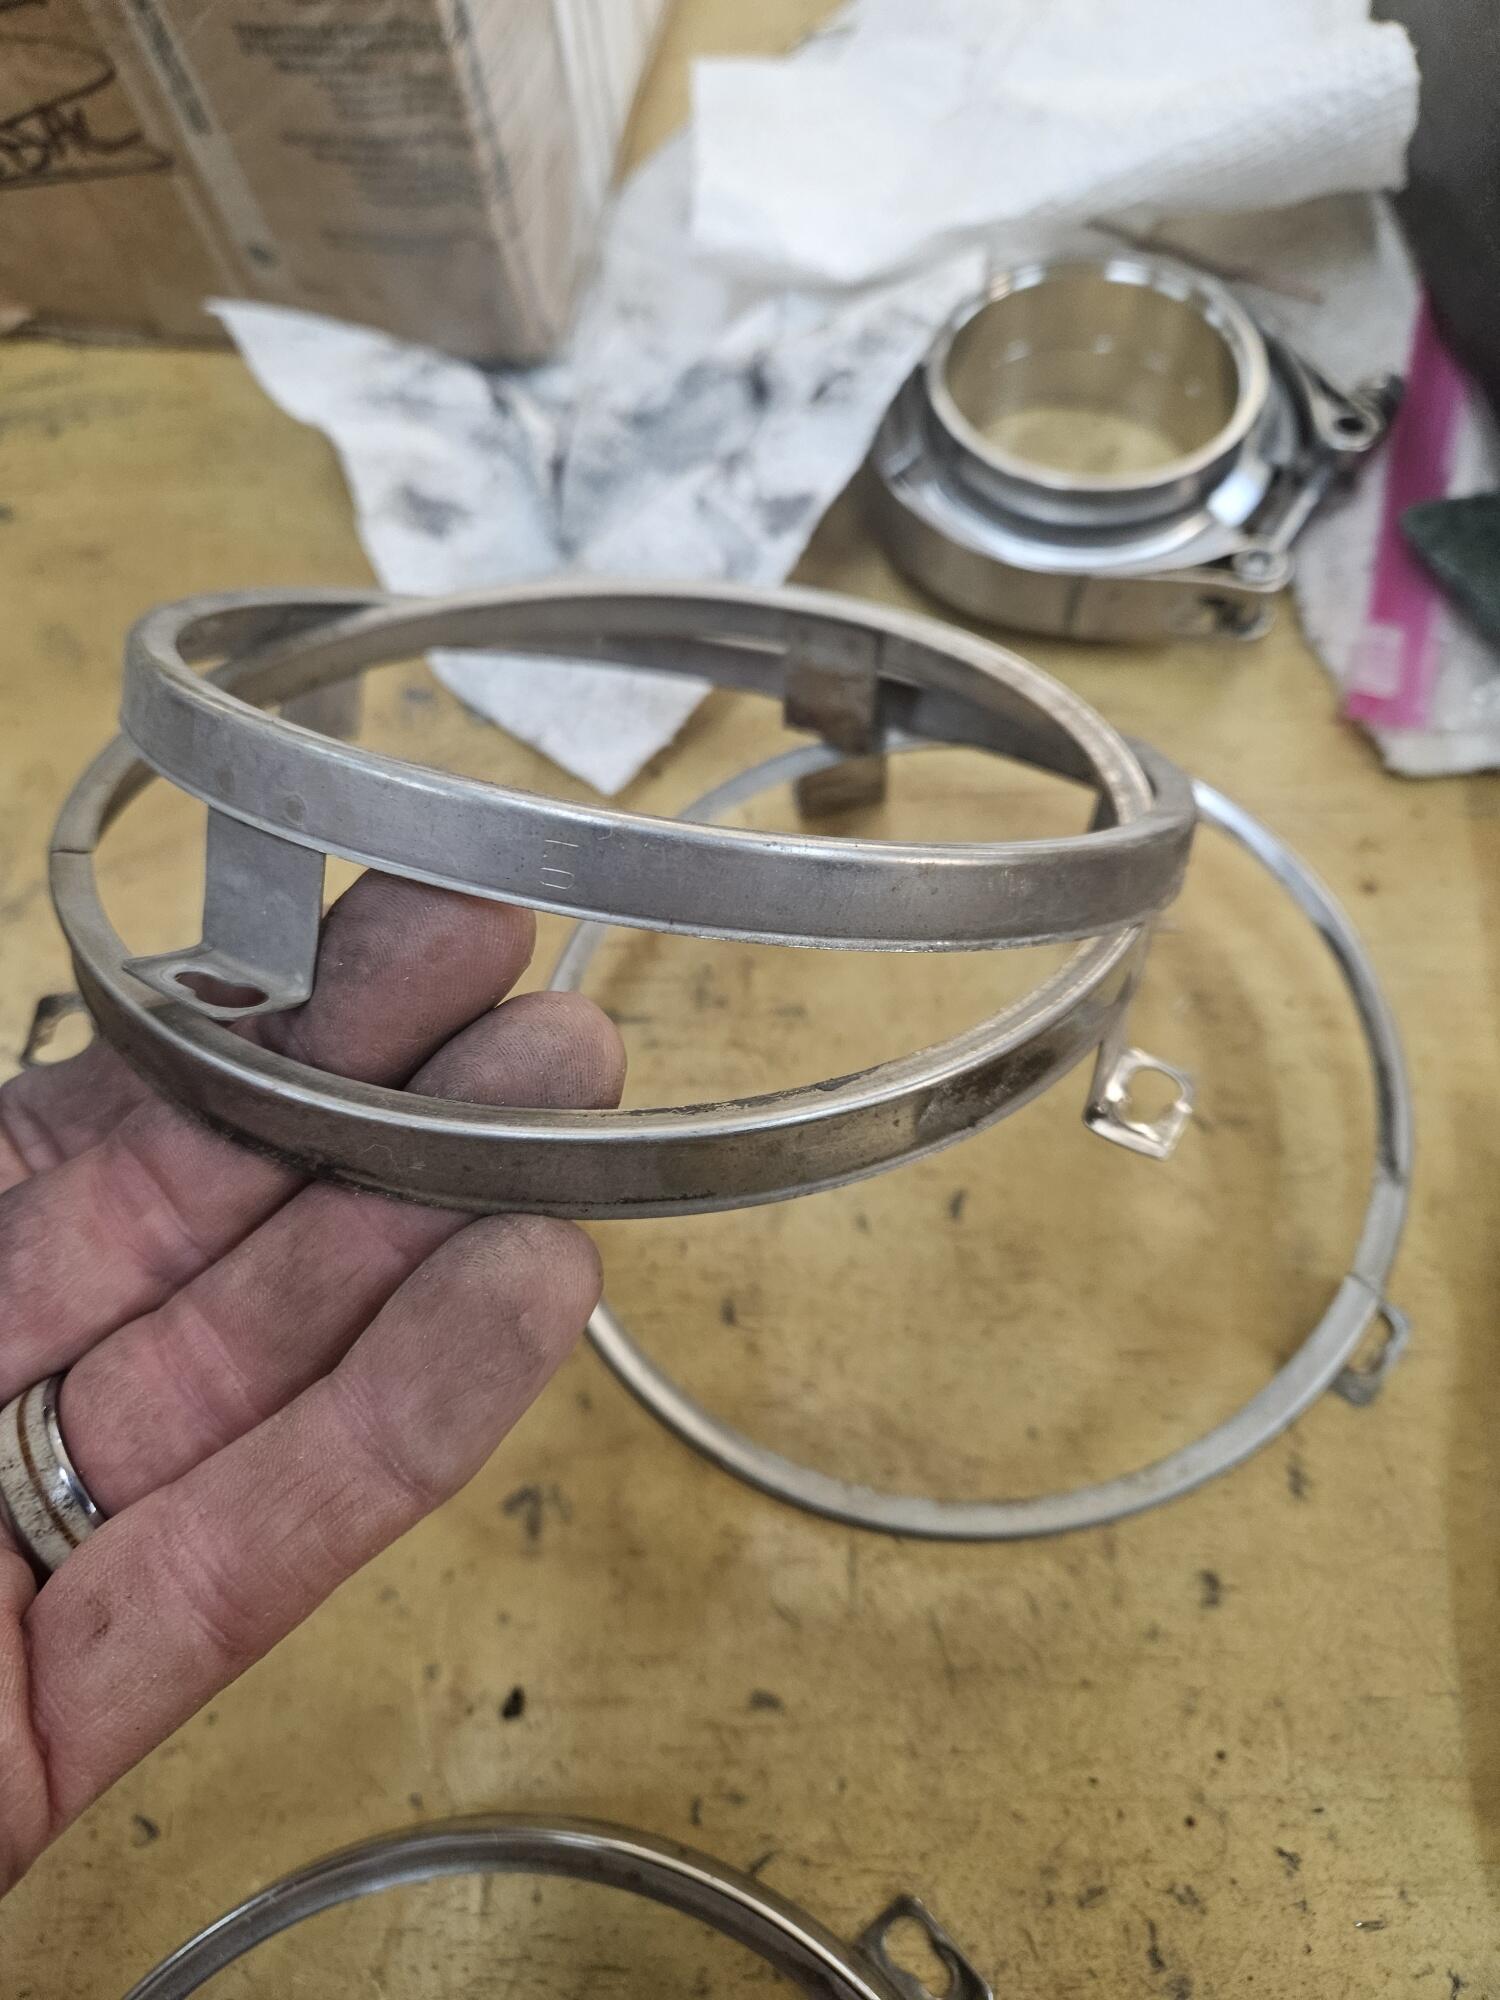
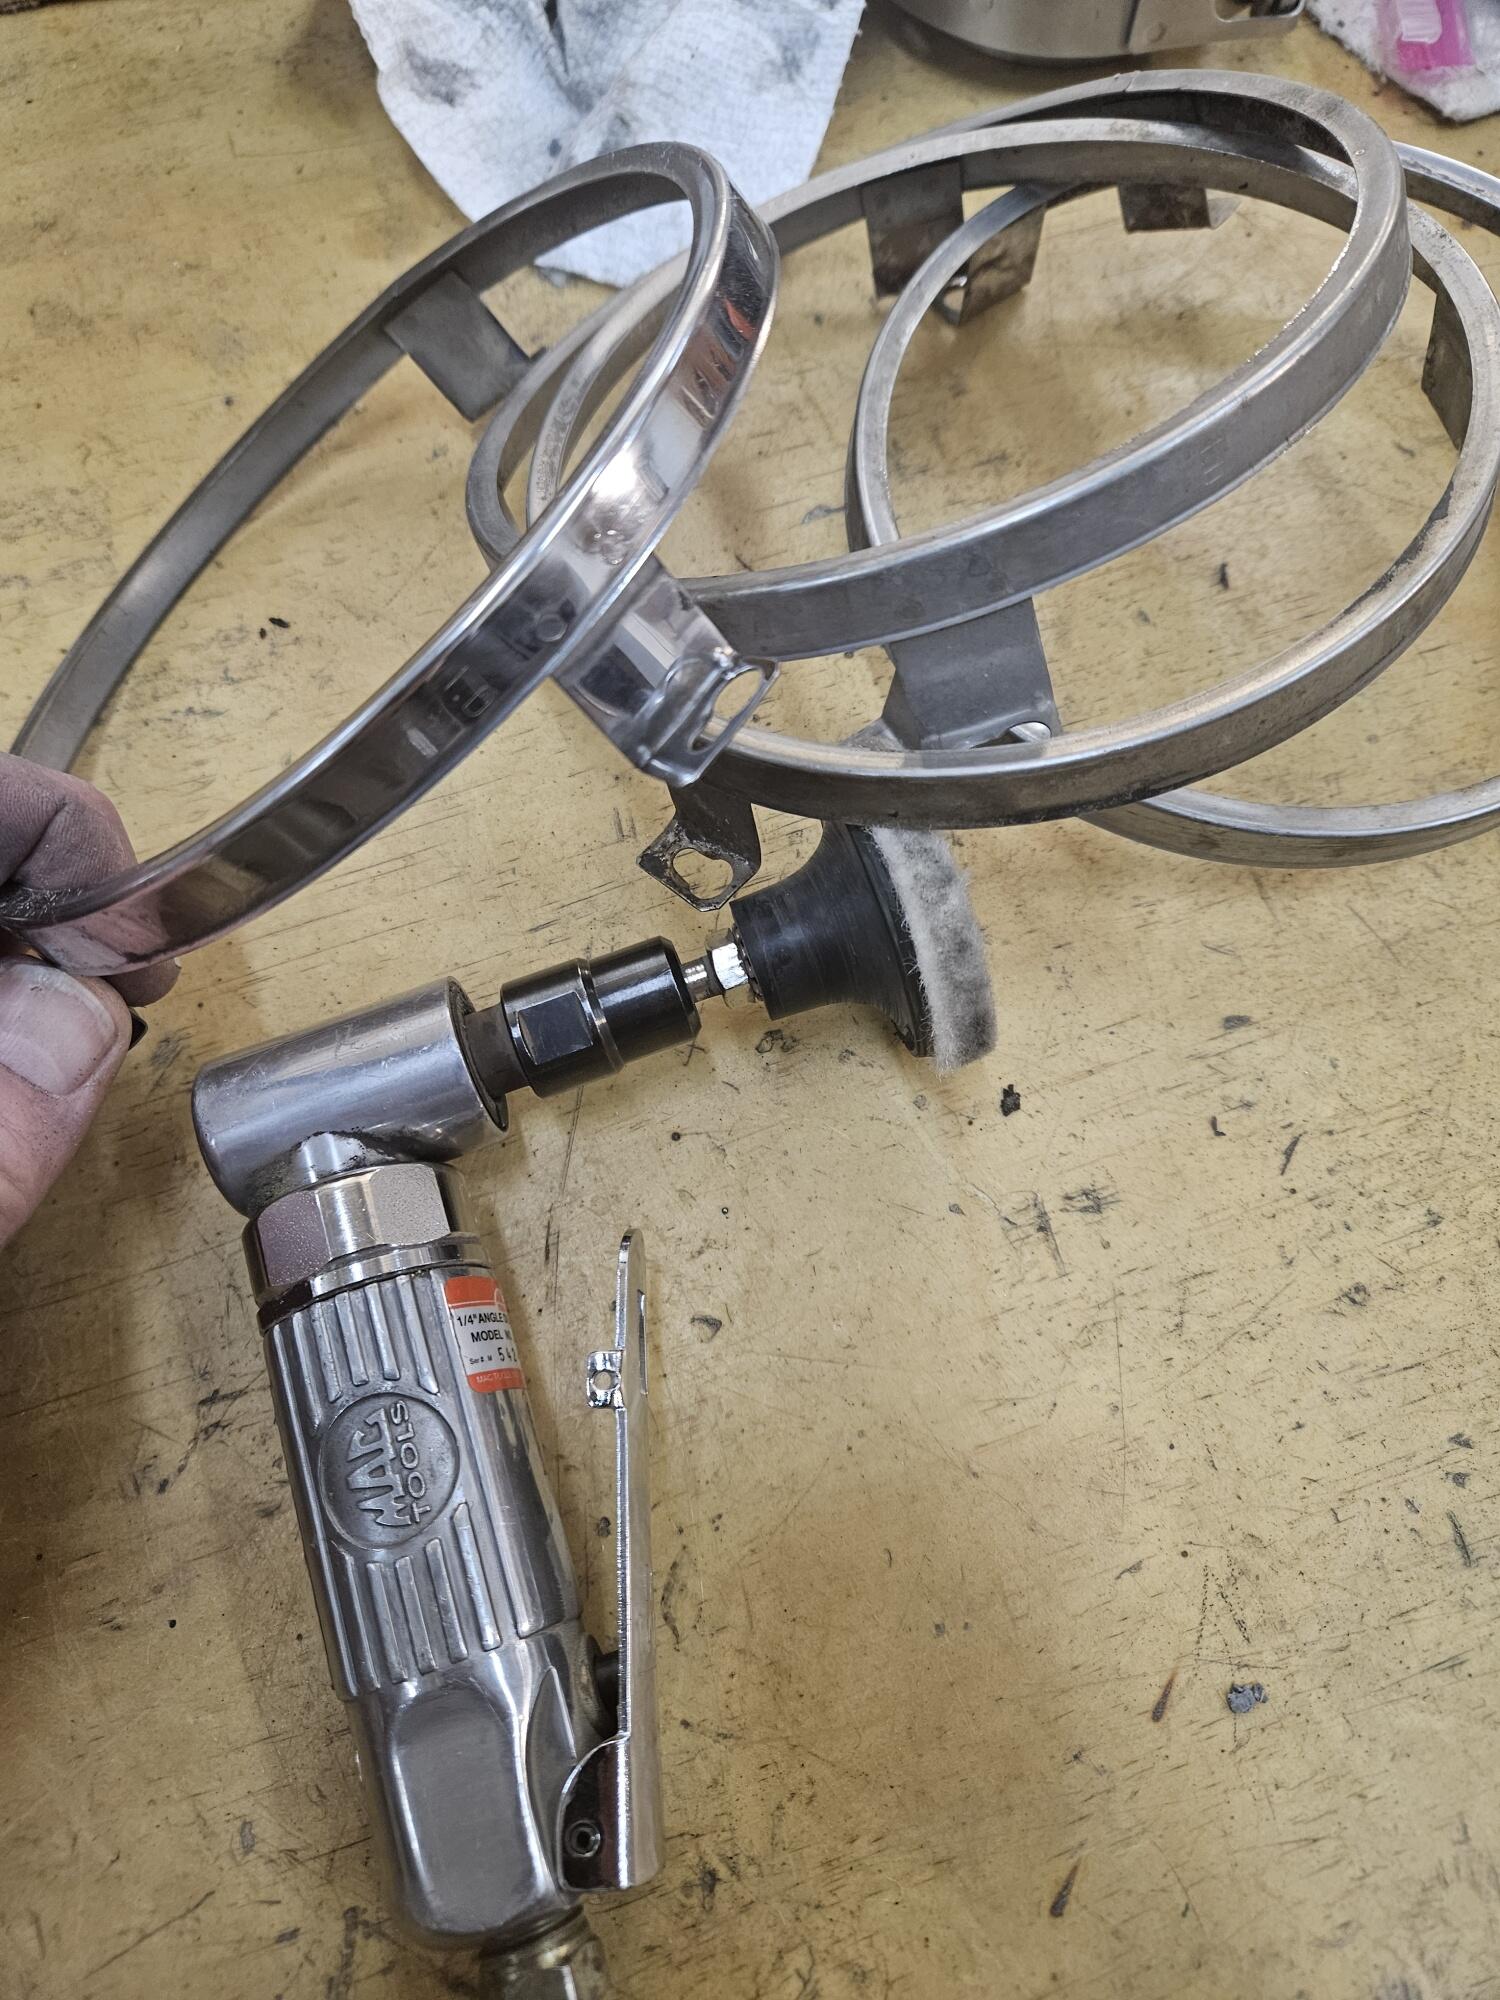
2 pointsI would put those rings on a old headlight! Much easy-er to work and the polish machine can't break the part so easy. 😉 (Something that often happens when polishing small parts..)2 points
-
thank you for passing on the nubbin knowledge.2 points
-
2 points
-
This is an aside for those installing an LSD in their R180. It came to my attention that R180 ring gears were provided in 110 and 115 mm IDs in the US. The KAAZ model DBN2020 LSD that I purchased was designed for the 115mm. I had to enlarge my 110 ring gear so it would fit on the KAAZ. It took me an hour to mount the ring gear perpendicular to the lathe axis and another hour to carve out about 5mm. The ring gear is incredibly hard steel. Lucky for me there was a knowledgeable machinist available to help me.2 points
-
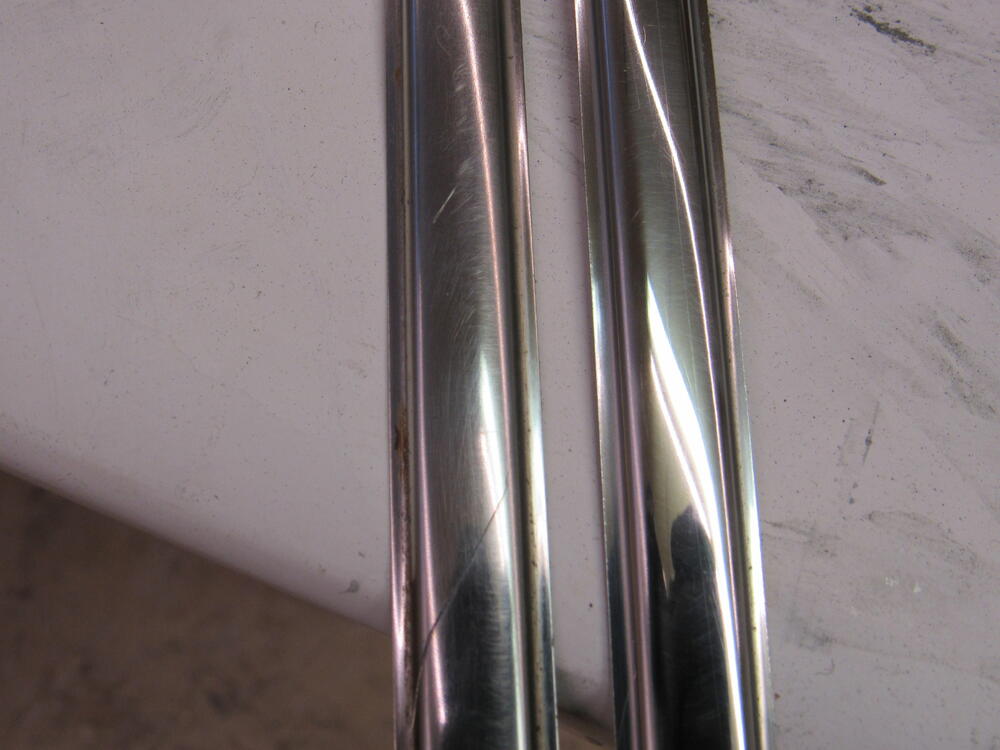
1 pointYeah, I liked the tool. You have to be careful not to force it or pinch the rubber. If the rubber edges don't want to flow around you can just stay still and swing the handle left and right to get the rubber lips to pop out. I'm sure there are some more tricks to it. It might be the trim needs to be lifted a little to reduce pinching. It took Cody and I about 10-15 minutes to get the two lower pieces of trim in. I did the top by myself in about 5 minutes1 point
-
1 pointWould you say the tool worked? An expert by the time you are done, sort of thing?1 point
-
1 point
-
Over the past few weeks, i collected random parts from various sellers, which were up for sale cheap or which i was looking for specifically for my build. Let's have a closer look. First of all, Some nice parts for the airbox restauration (Stickers and SU-carb insulators): Then also got a bunch of OEM Bulbs for the dome light: Had to test if my restored dome light works nicely with the new bulb, which it does. Excellent. Found a set of Print "Cliches"- Those are basically negatives used in a print-press back in the days: Will also work nicely as stamps, if you want so 🙂 Also got this OEM NOS Brake repair kit. It only list Skylines and the Laurel C130 on the mark, but i double checked th enumber and it should also fit the S30: Then i got two steelies, which were almost for free. I probably won't use them on my car, but since i already had two, i have a full set now, which makes it easier to sell them, and or use them. The Production date also fits, so that's a pro. You can see the on ein the picture is slightly dented, but easy to repair. Then: Got this super-wobbly OEM front spoiler. It was only 20 bucks and not sure if it is salvageble. But i think a pro might maybe fix it with some warm temperature and bending, but let's see. The reason why i bought it, is because it's probably the only one which i've ever seen where the mounts are not Corroded (yet) inside the rubber and has bloated it up. I'm not sure yet what i've going to do with this, but i thought i better secure it, as those original lips have become rare. Even if i don't need it, it makes a funky looking moustache at my garage wall 🙂 Oh and also got these books. The left one from ebay (which cought my interest because of the euro spec Z on the cover), and the right one from my Mate Florian. While flipping through the book on the left (which came from america), had this photo inside from the previous owner of the book. On the back it was noted that it was taken at Christmas 1998 🙂1 point
-
1 point
-
1 point
-
1 point
-
A couple of reassembly tips: Place a tiny dab of lube in each hole for the nubbin springs - that will keep them in place during the process. Position the switch in the Parking Light setting - this will place the nubbins in the middle of the rockers and avoid lateral pressure that might pop one loose. Place a tiny dab of lube on the middle of the rocker for the nubbin contact.1 point
-
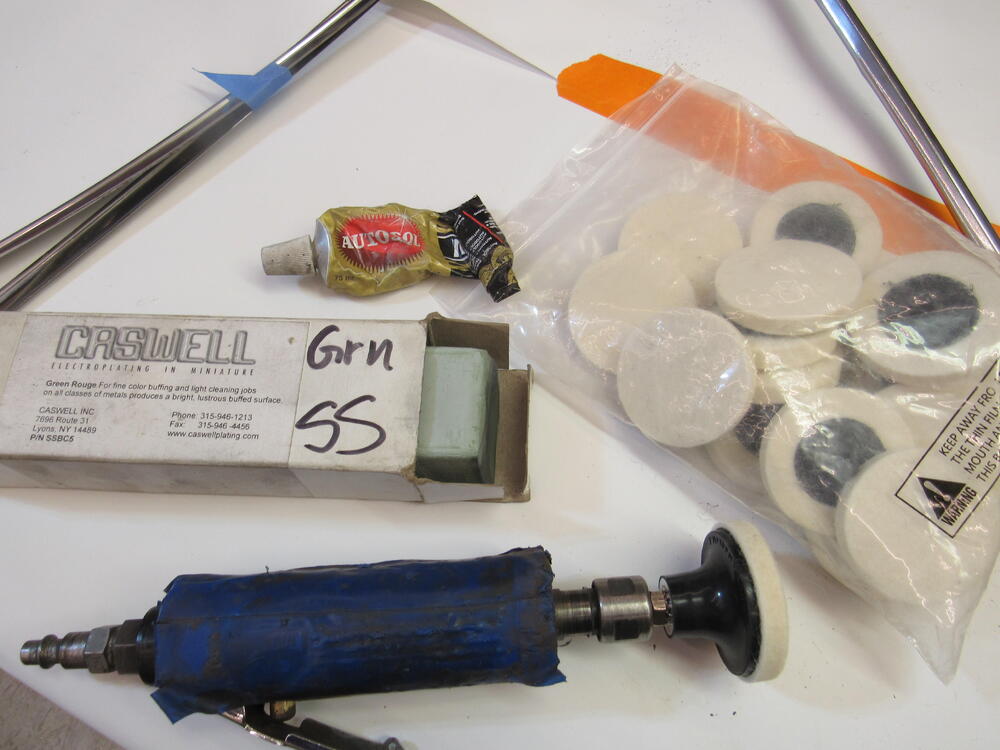
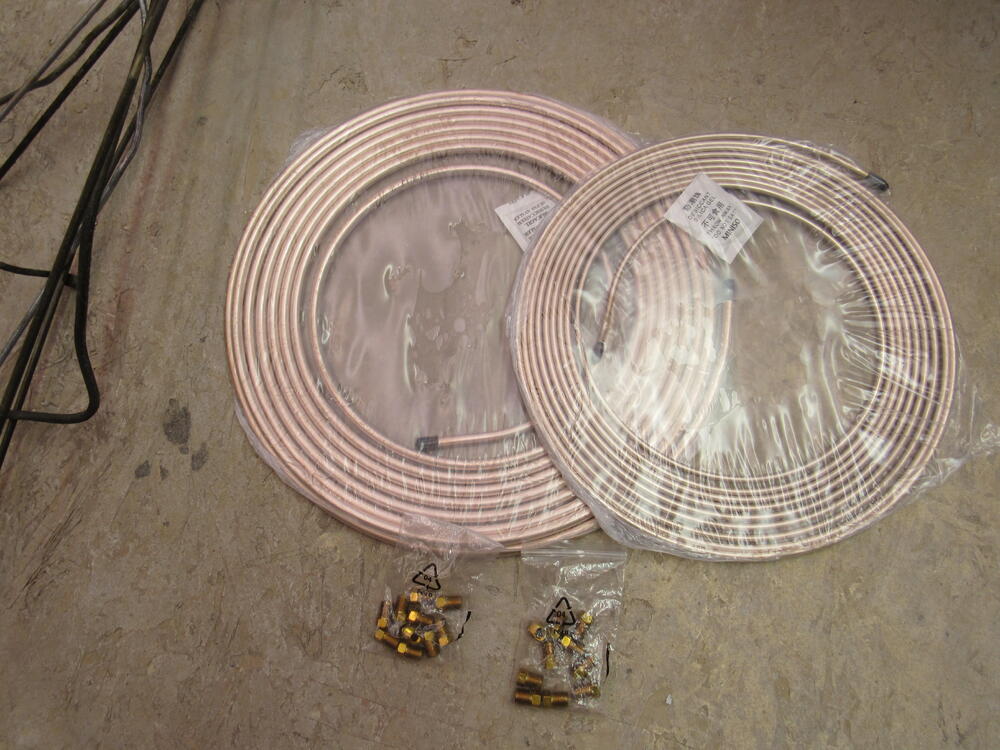
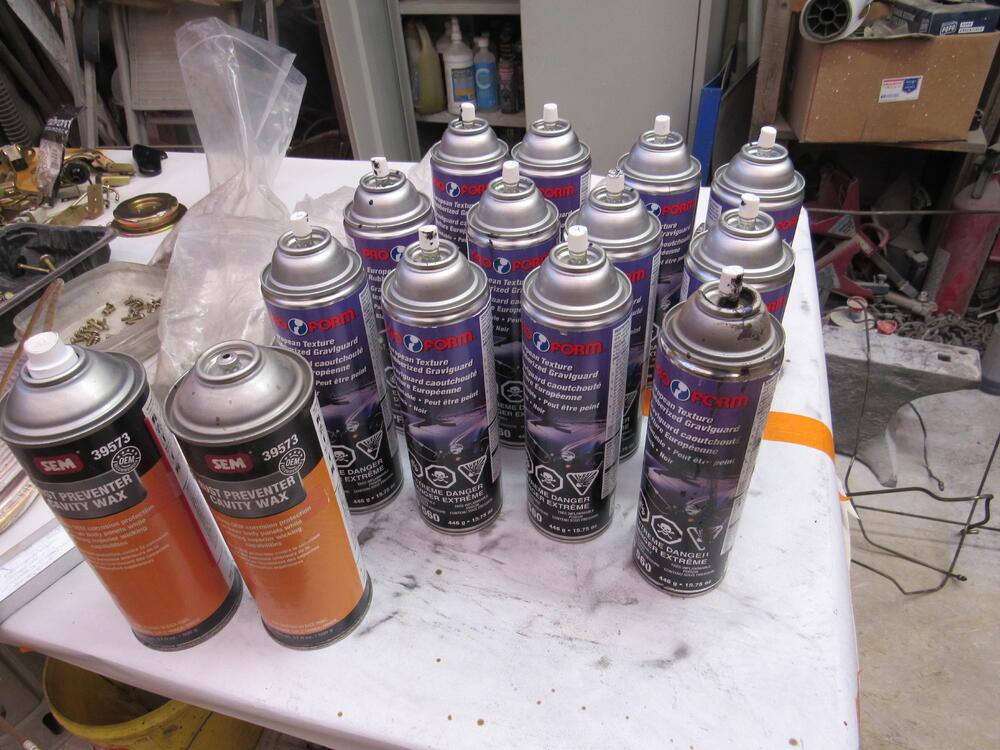
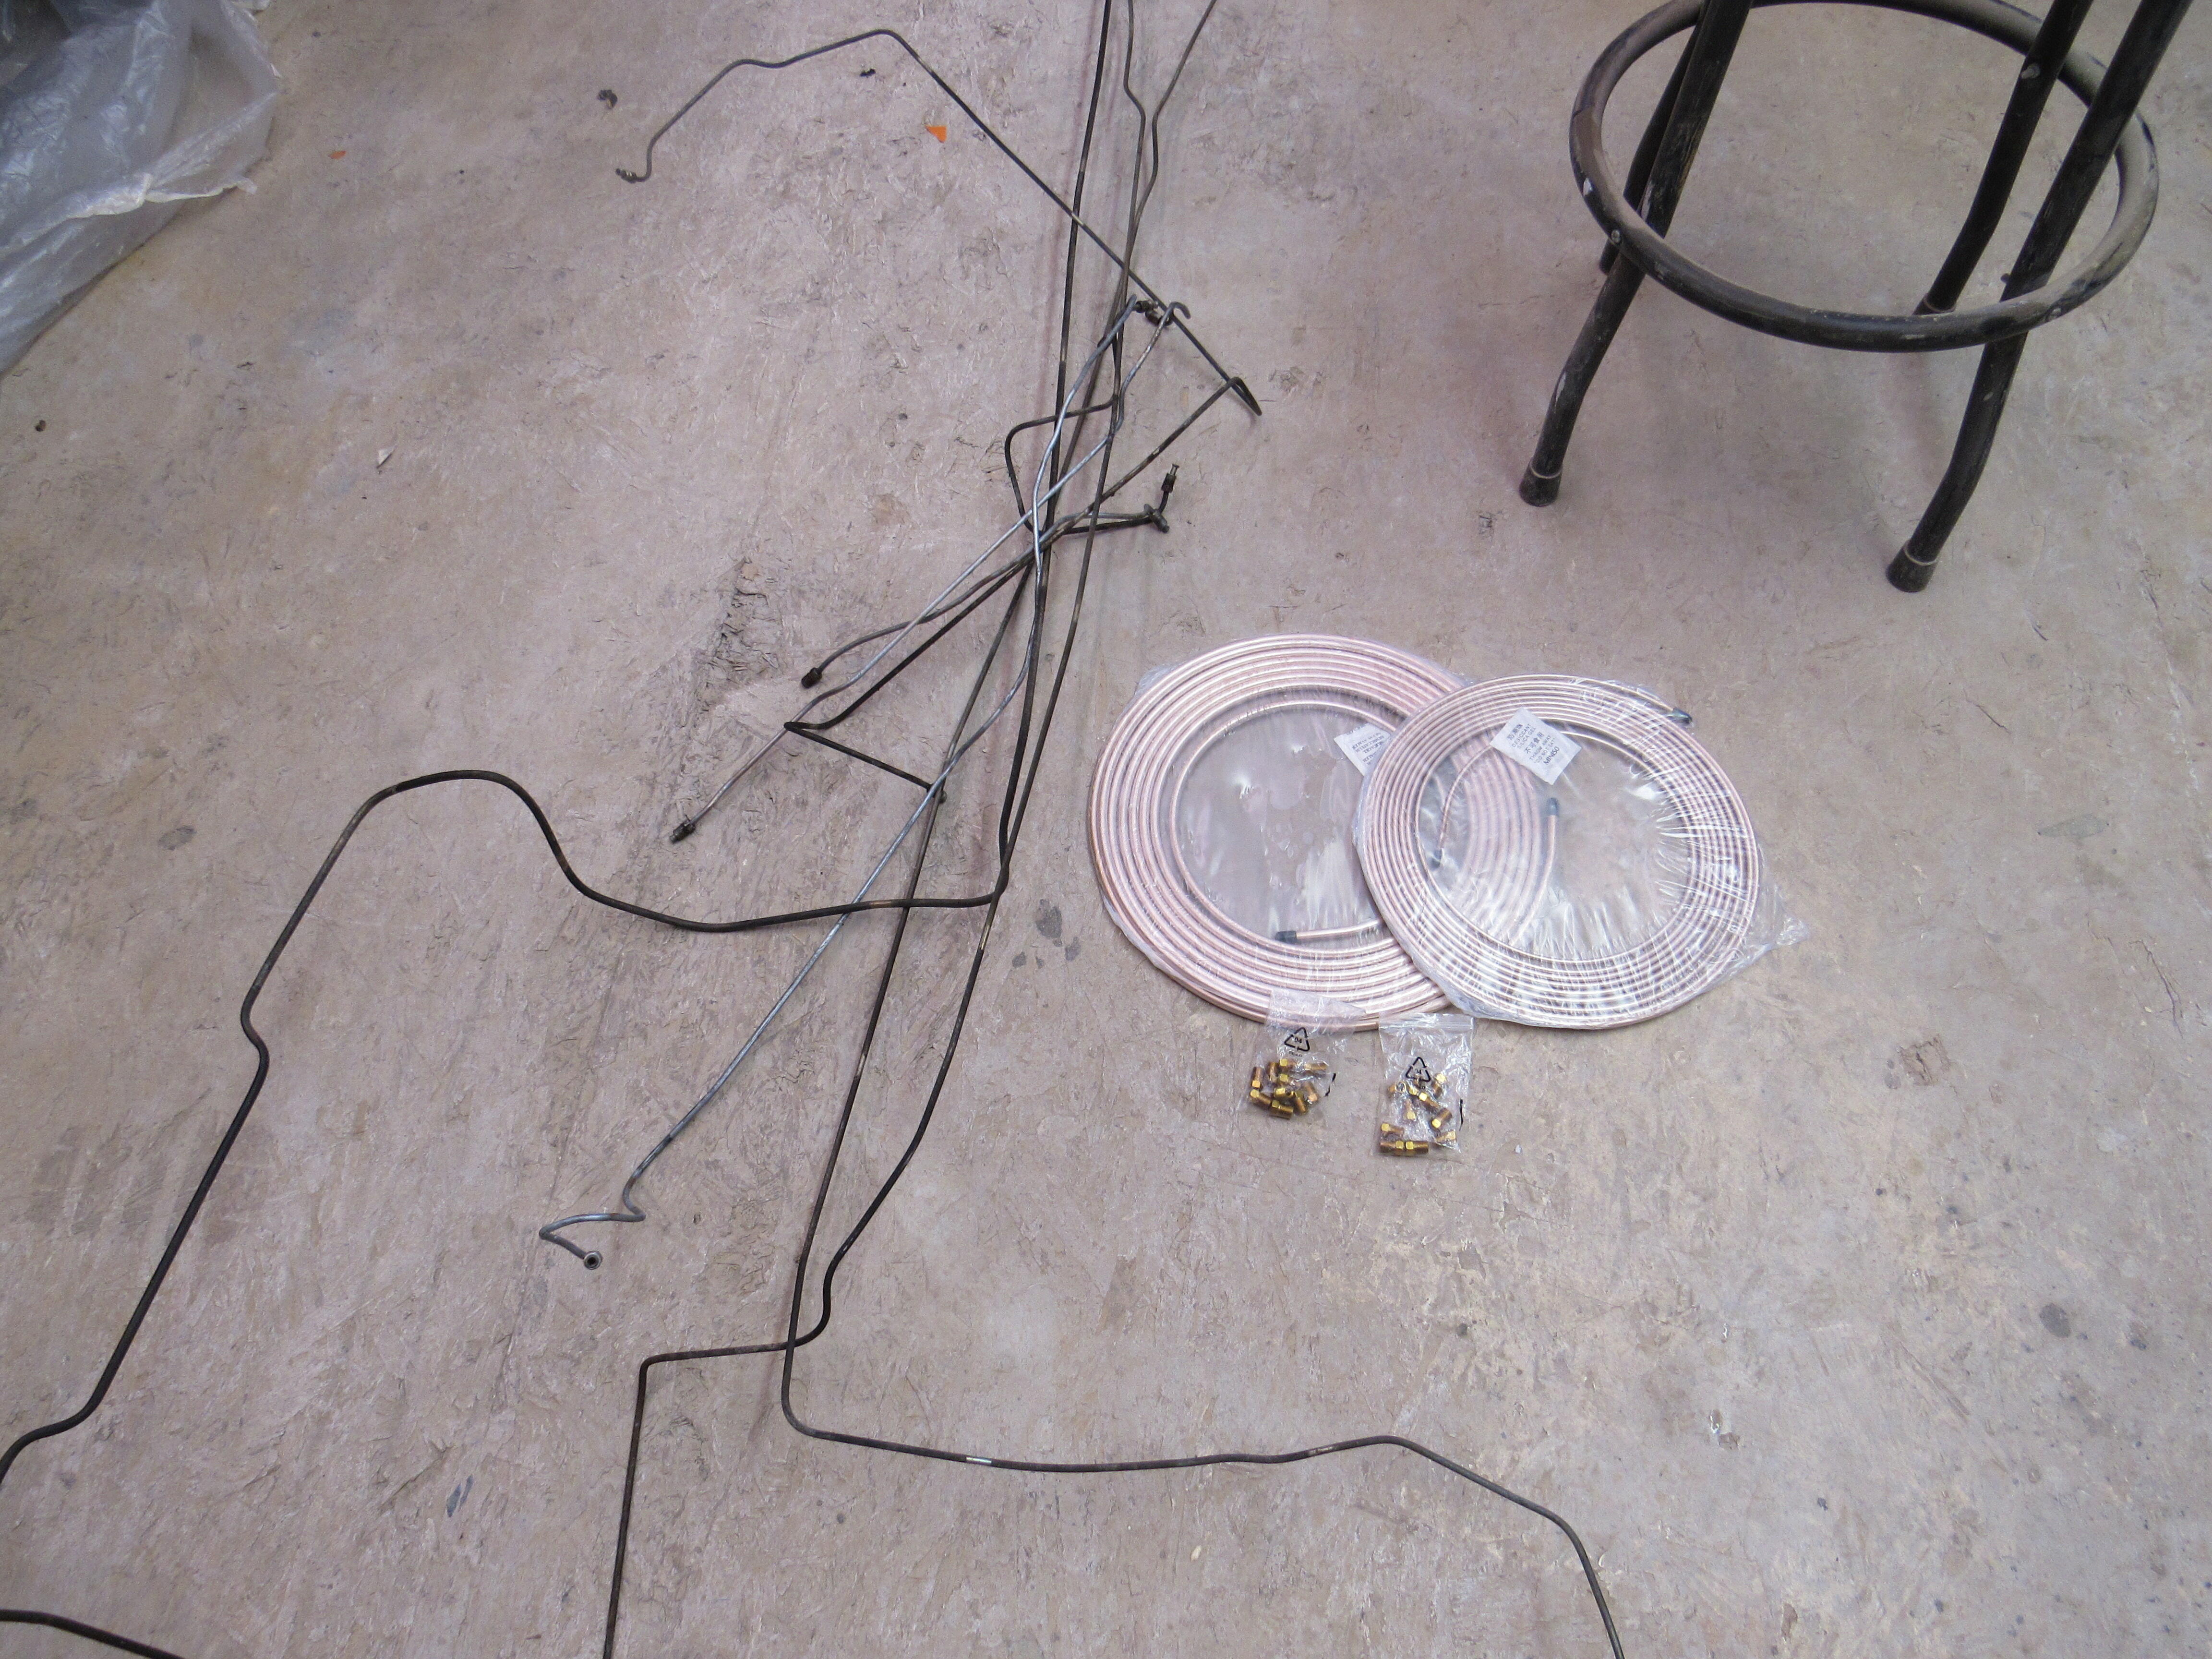
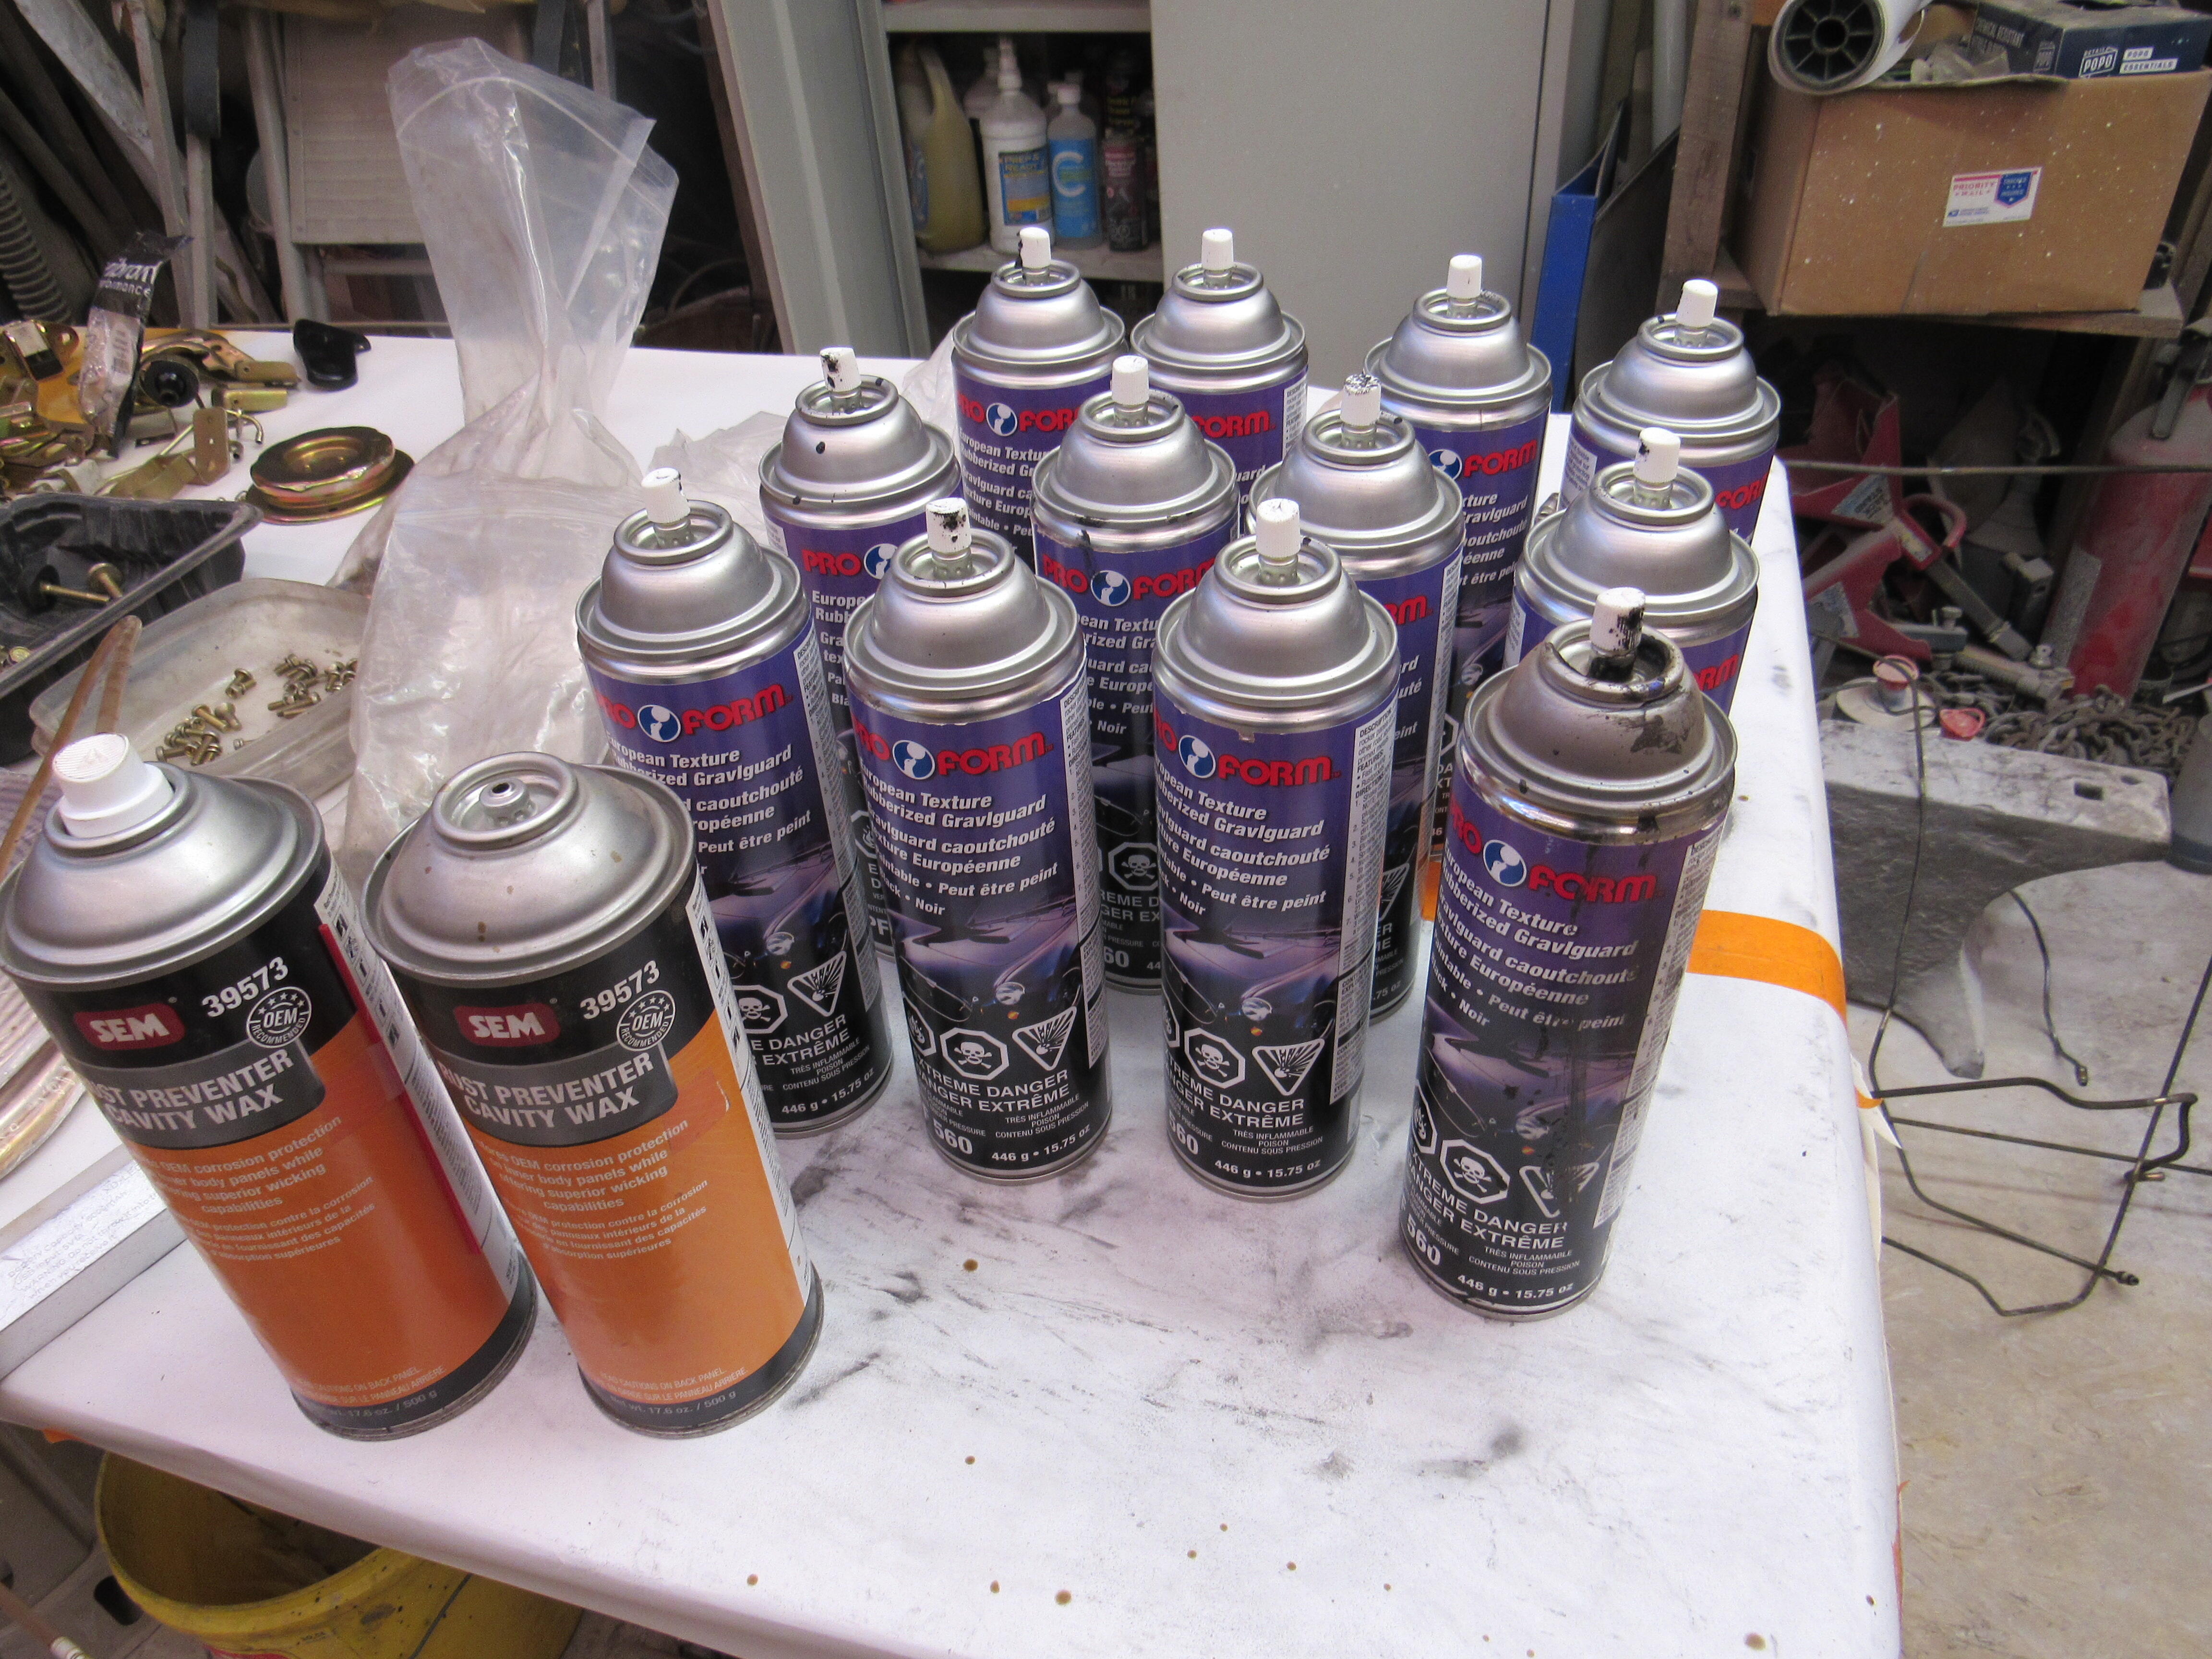
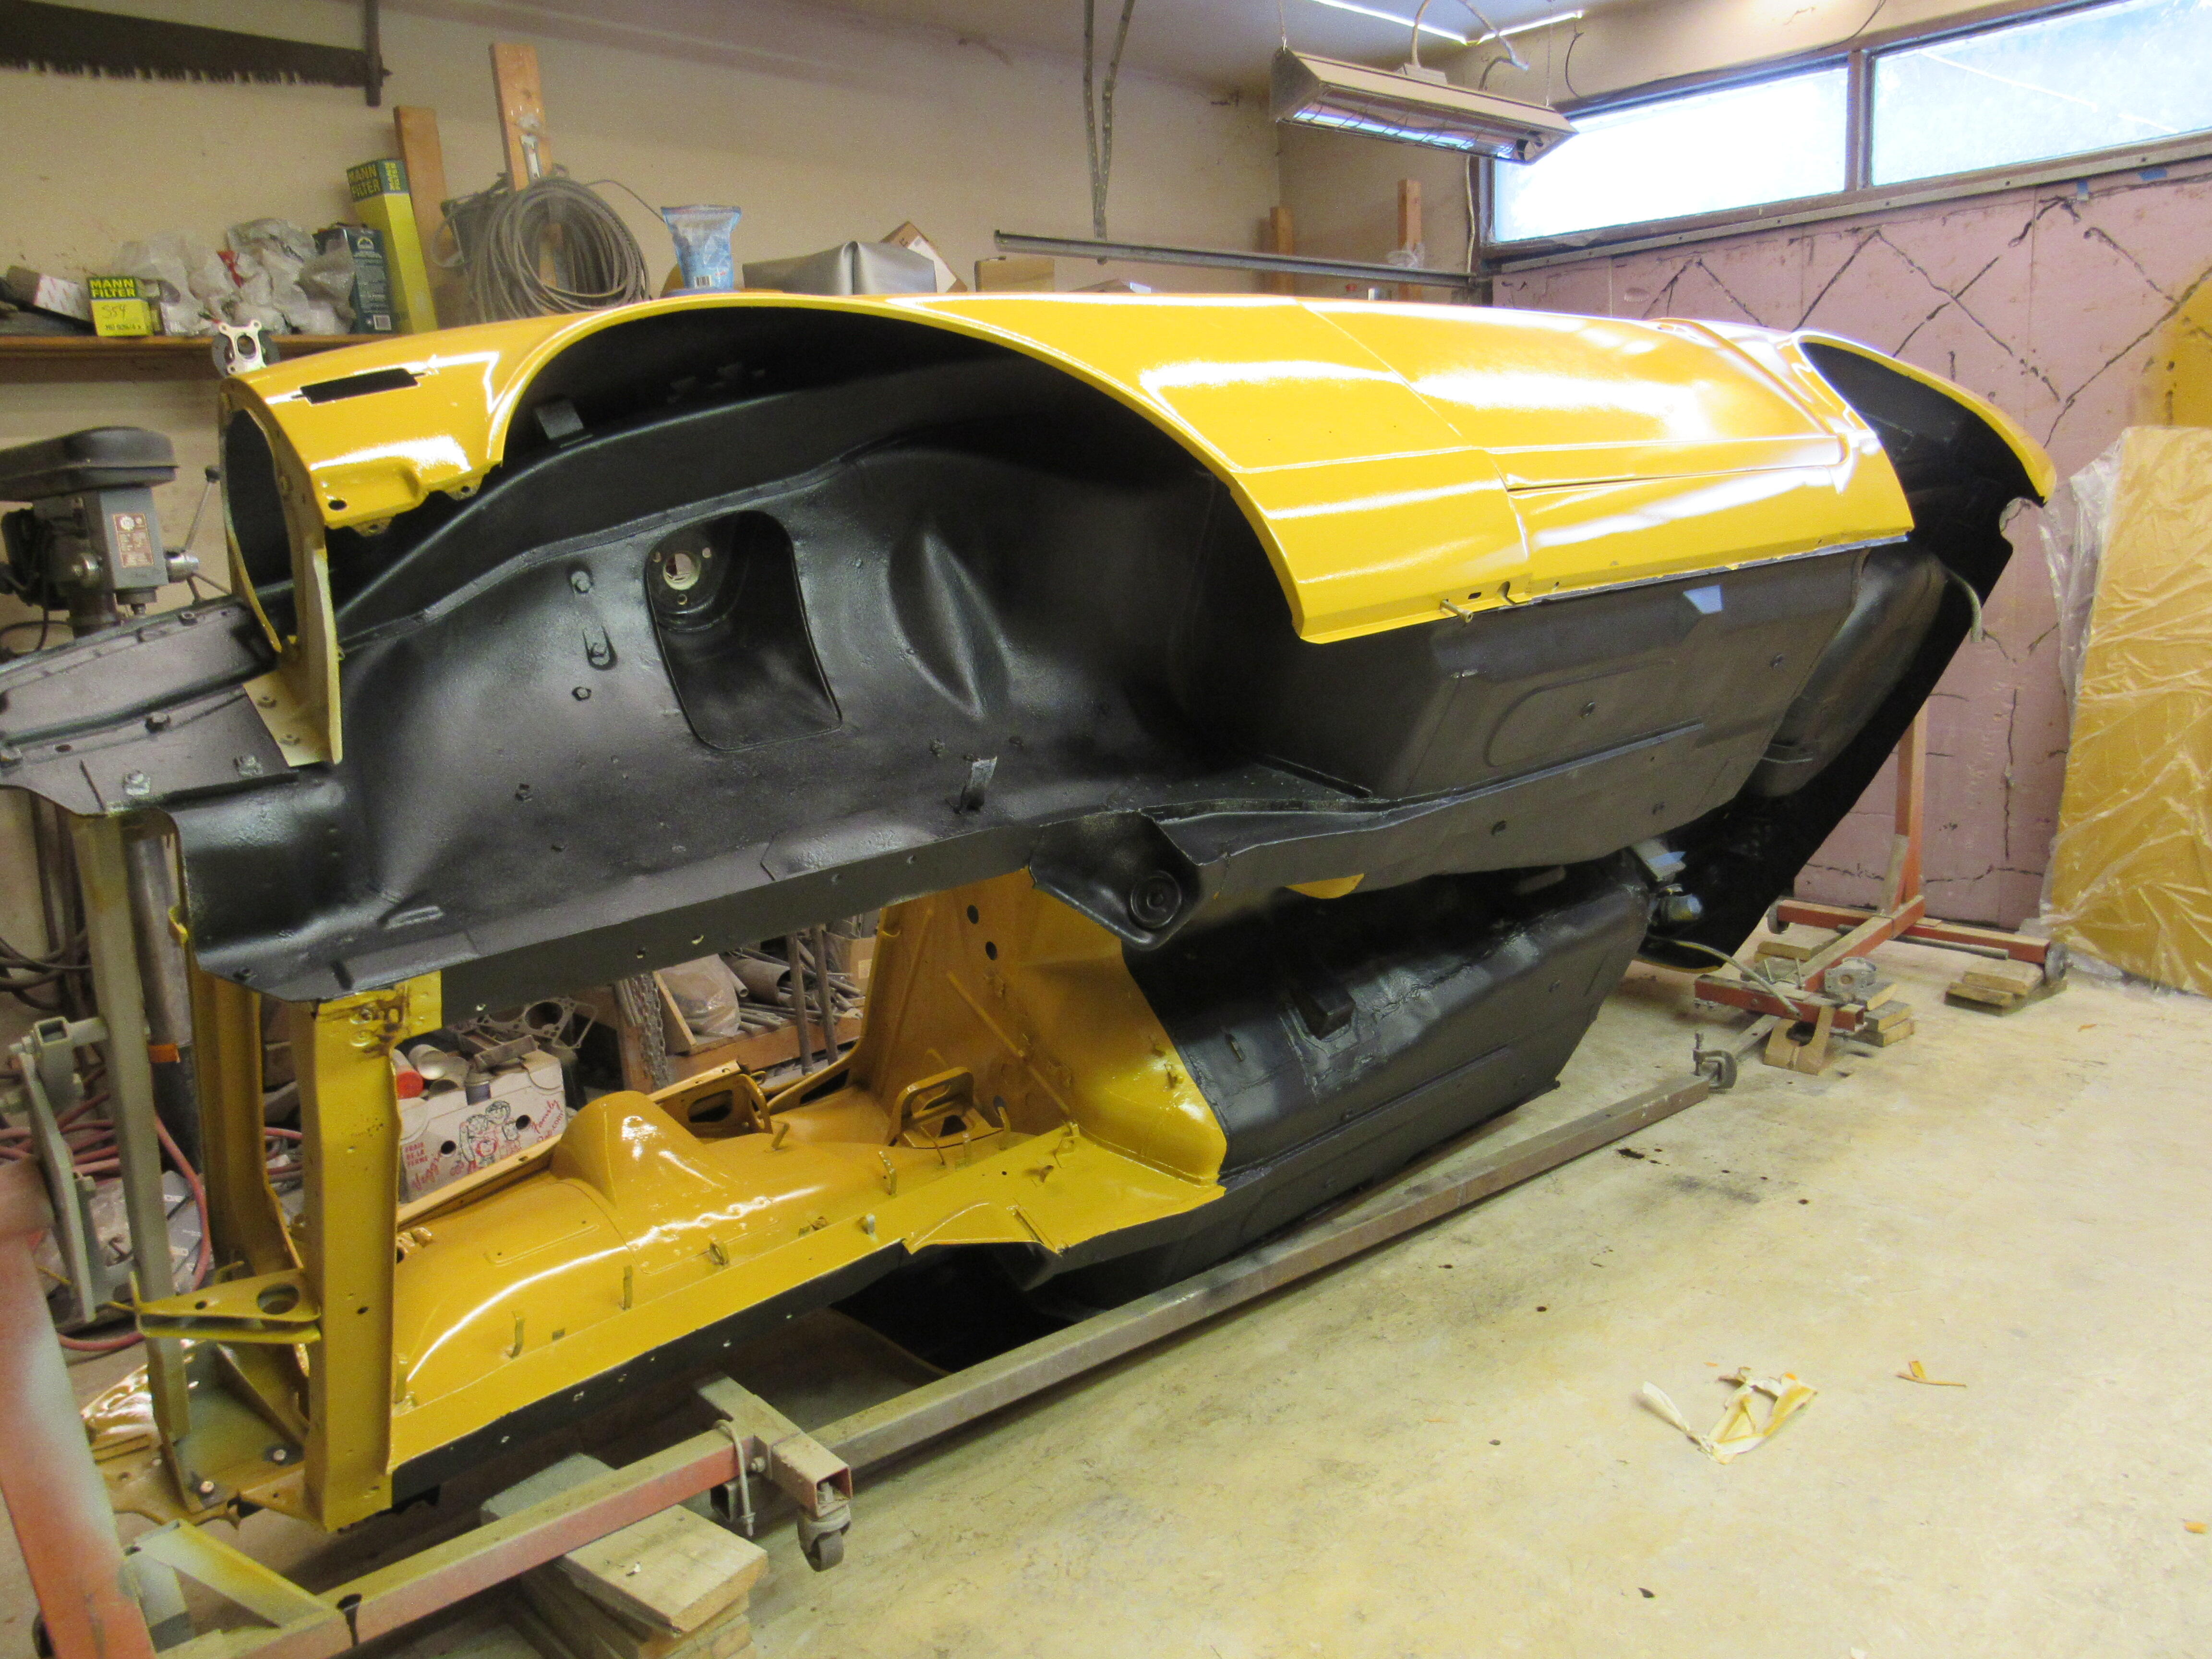
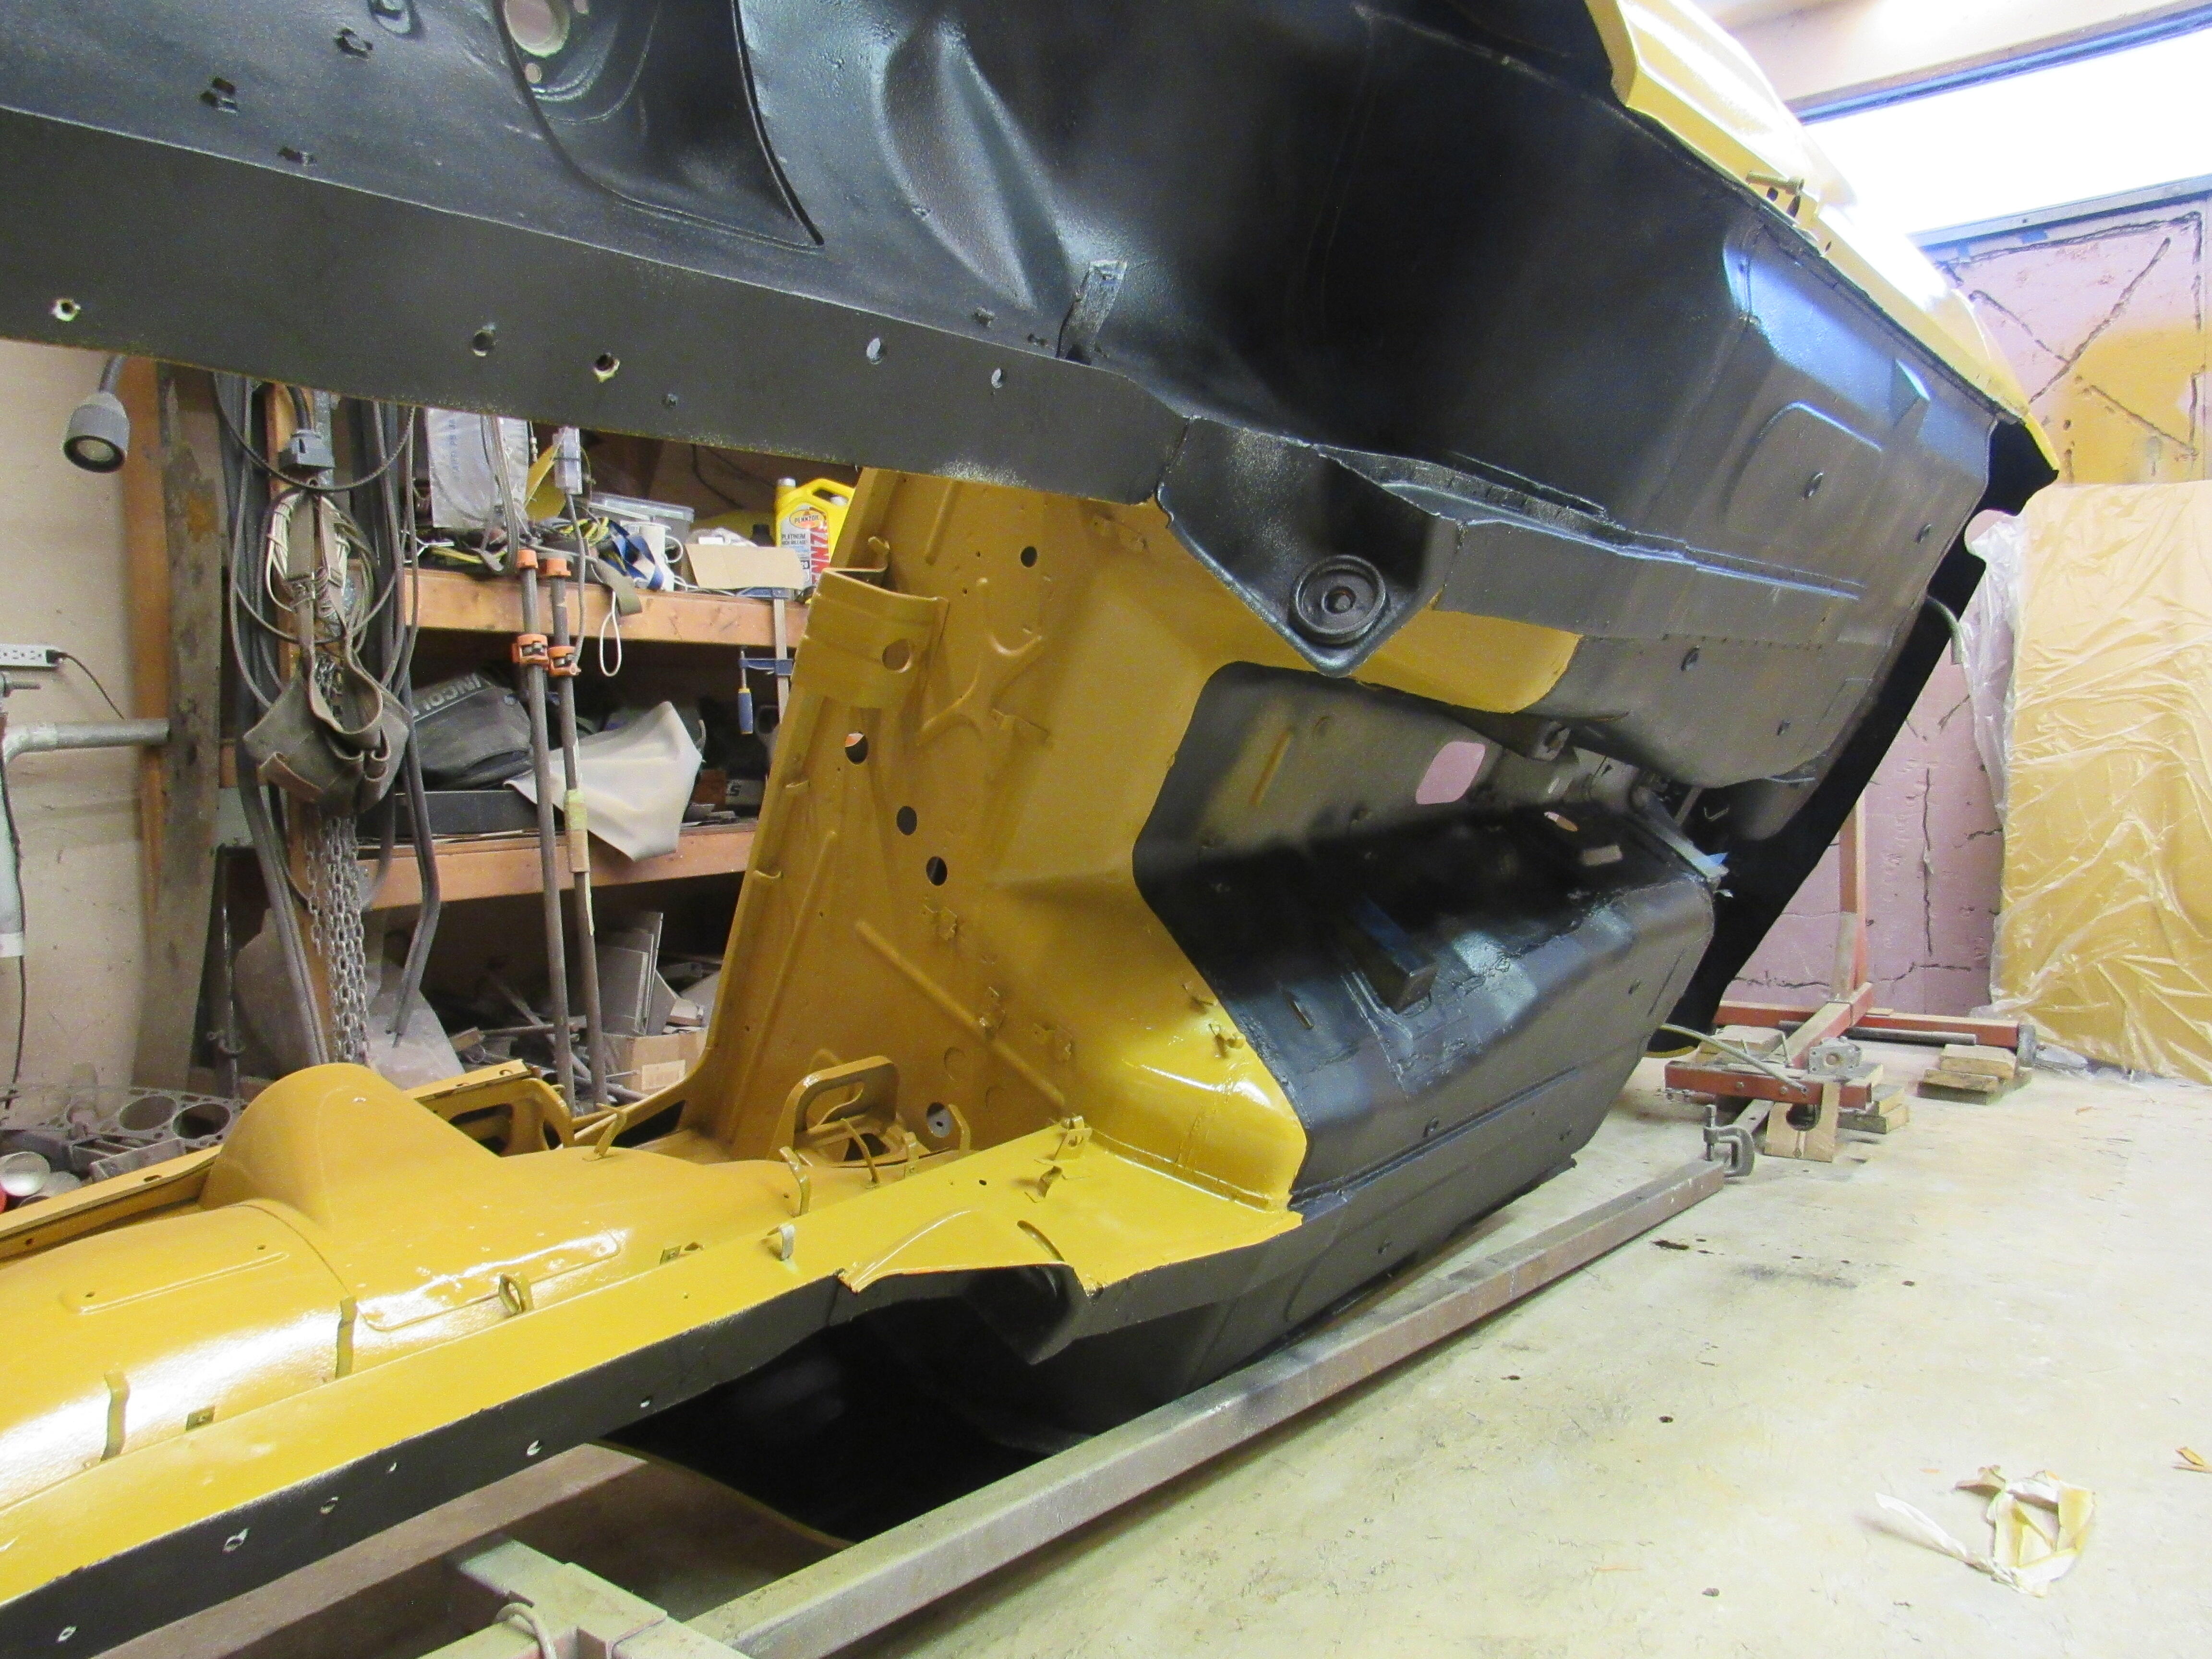
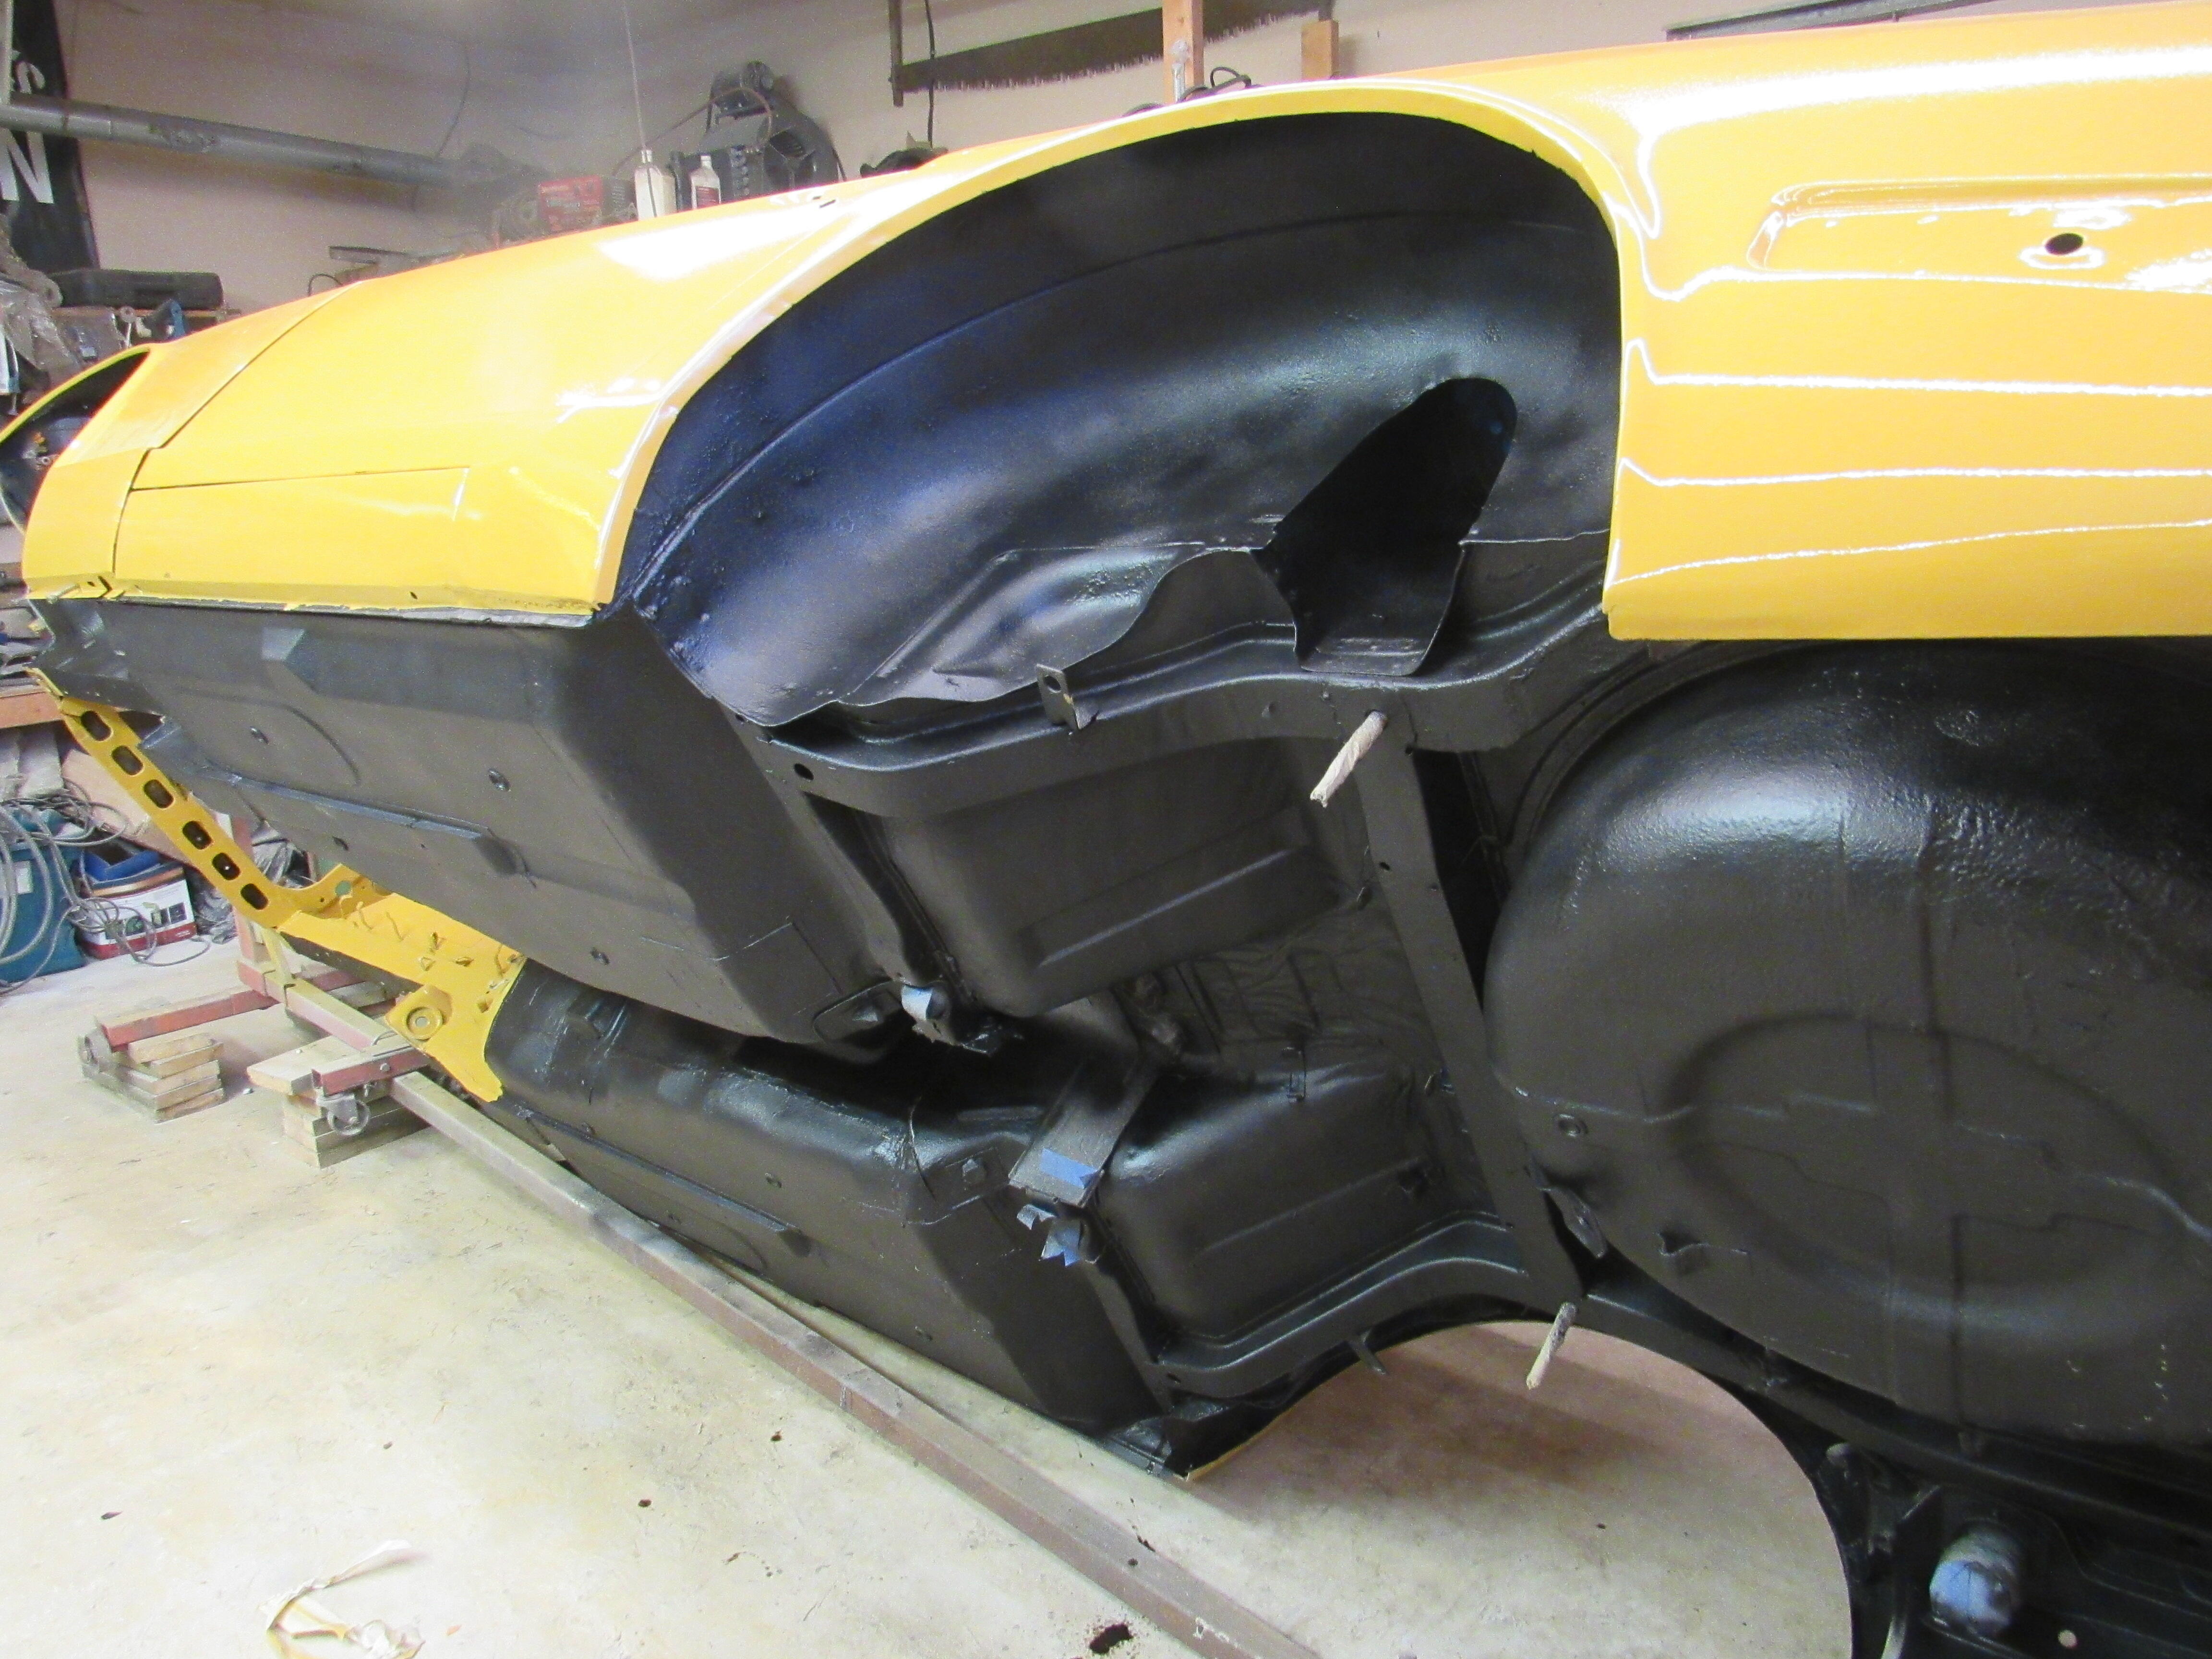
1 pointThis morning I followed @Patcon 's lead, pulled all the SS trim out of storage and got working on it. I p/u a bag of Roloc type felt pads, some 1500 grit wet sand paper, green SS polishing compound and a tube of Autosol. I used the 1500 grit paper for the first piece then realized the green compound was doing every thing the sand paper was doing and more, after the compound I took a second felt pad and loaded it with Autosol. Just a few minutes on each piece with great results, this a lot safer for the operator and the trim than trying buff these out a wheel buffer. I pulled all the brake and fuel lines out, will start making the new ones. Masked off the entire car and got all the undercoating done today, 12 cans, that was followed by 2 cans of SEM cavity wax, great stuff, thin enough to creep between the spot welds


 1 point
 -
update-- nubbins and springs on the way, checking my wire routes based on the guidance here. Will post pics when finished. Thanks everyone!1 point
-
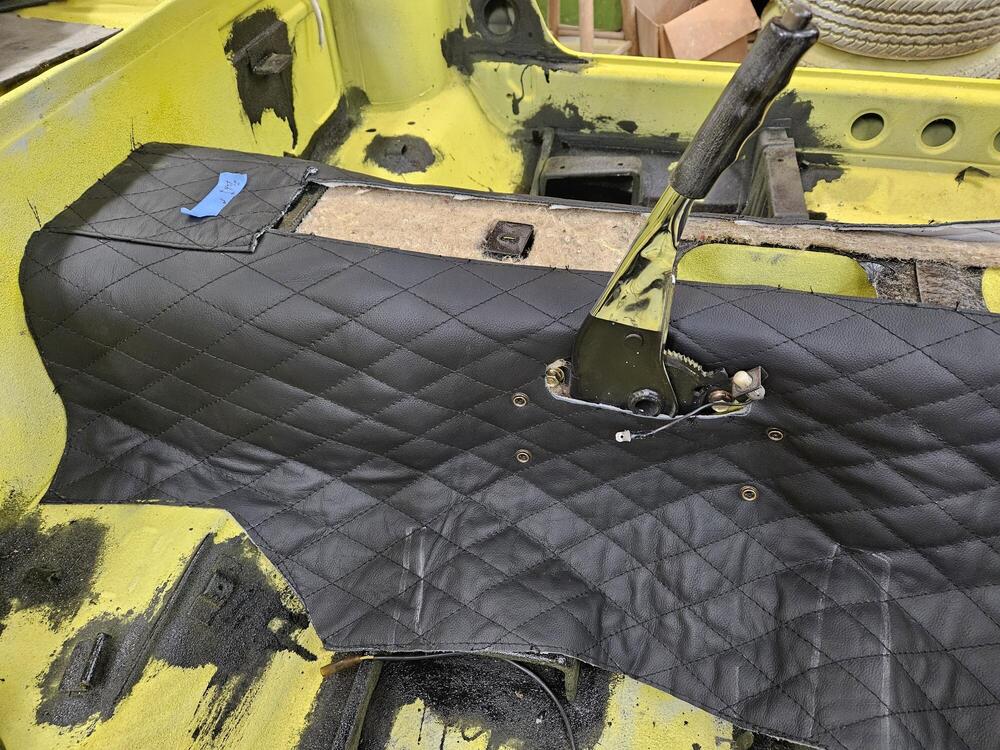
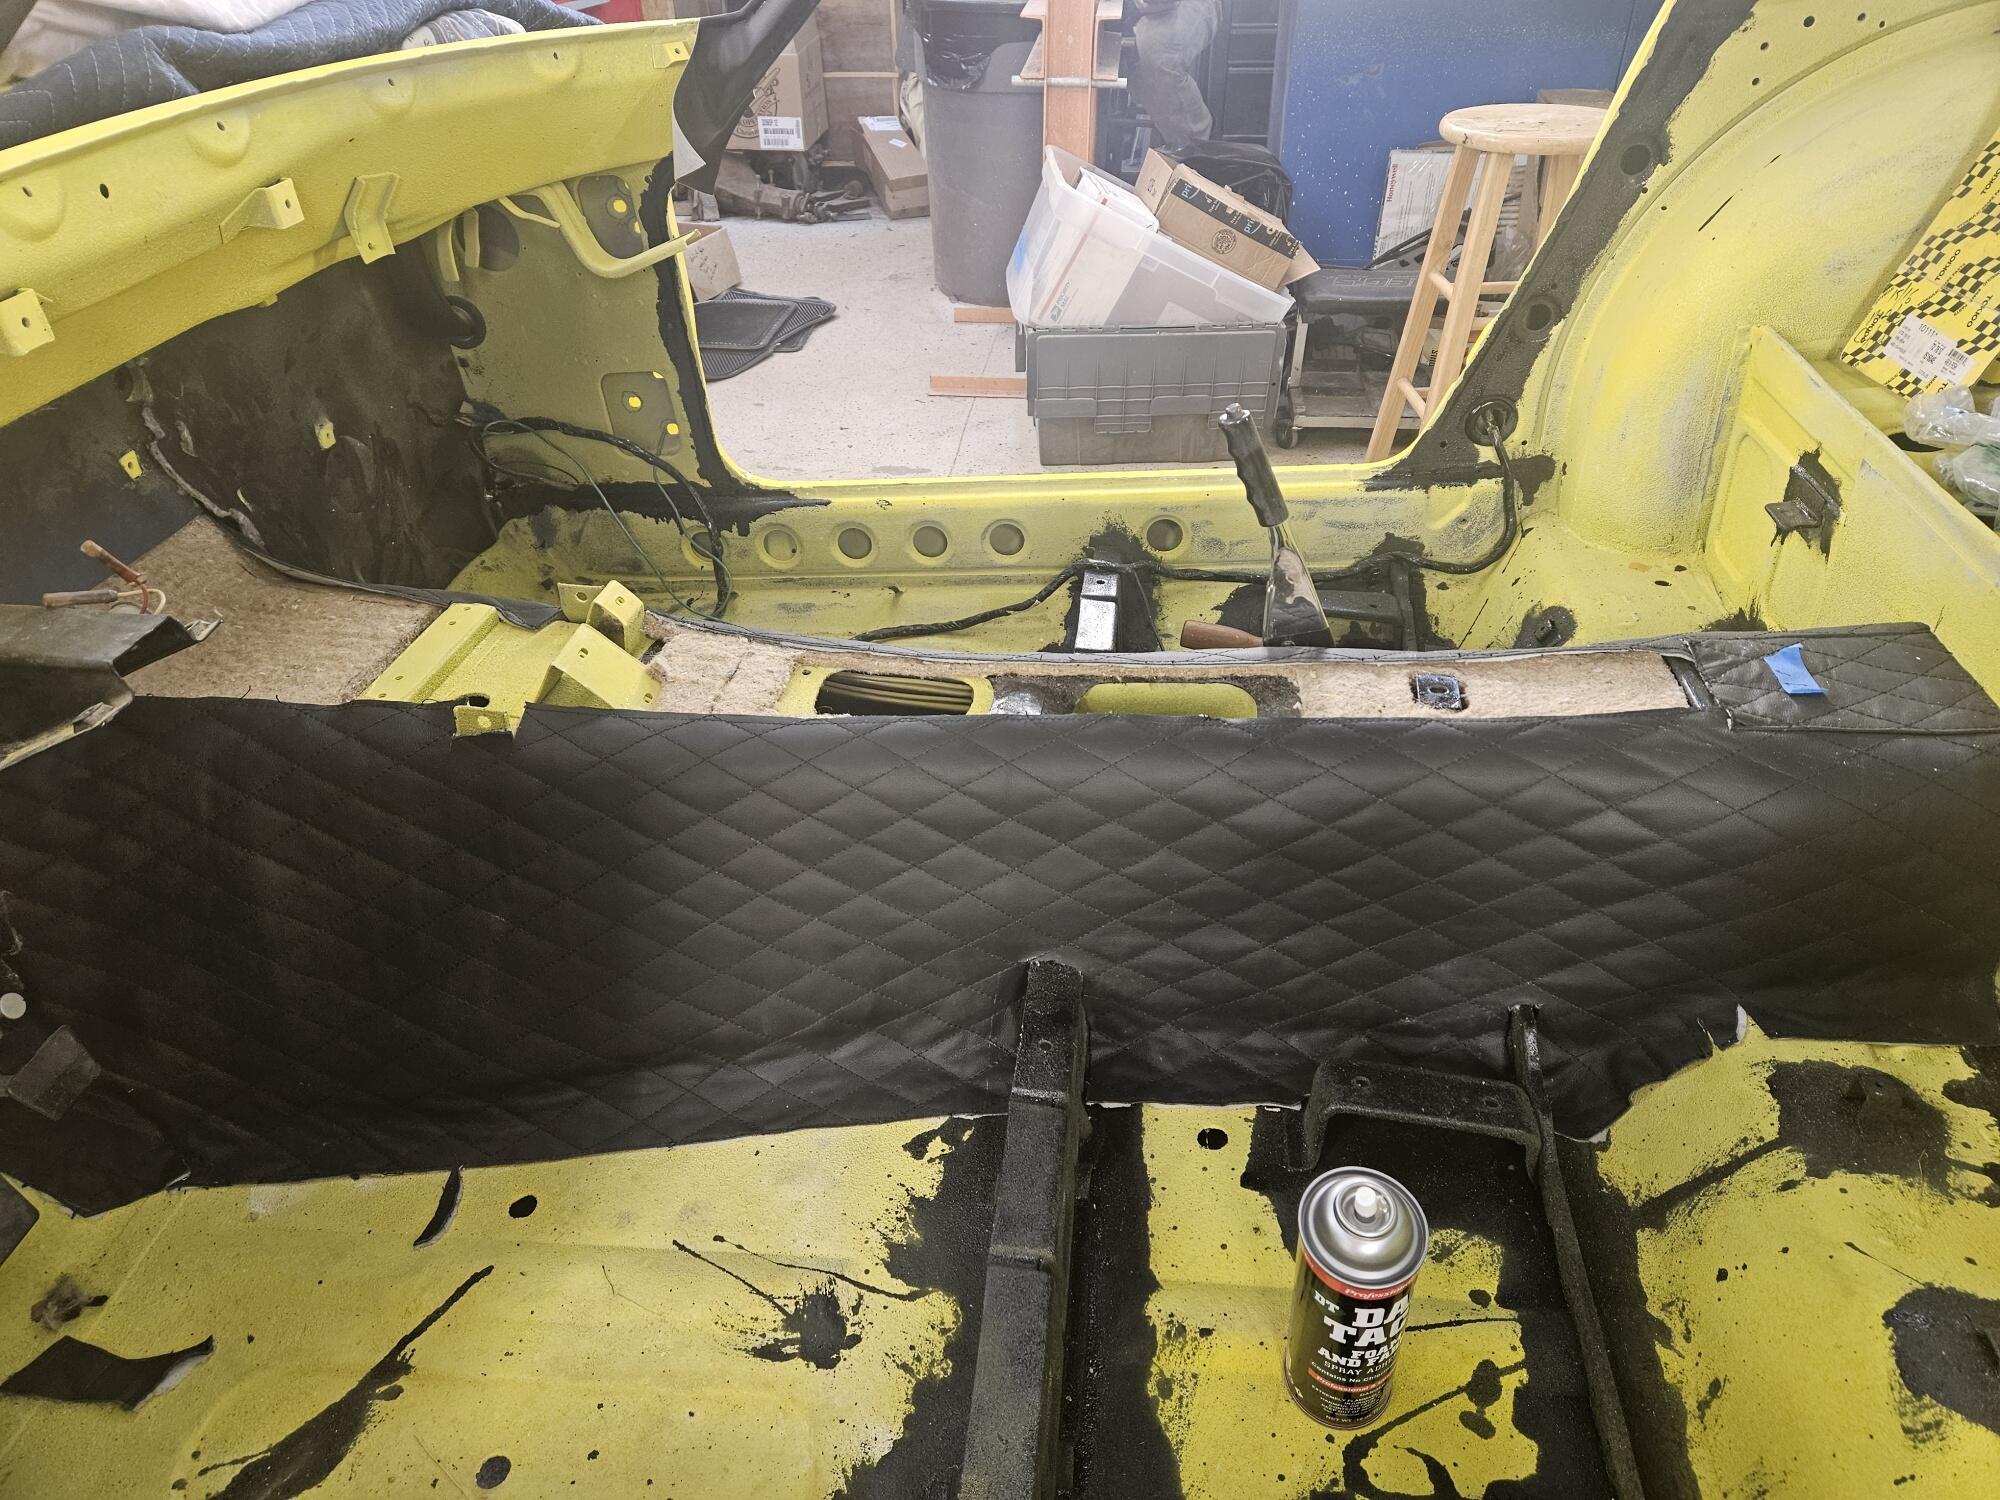
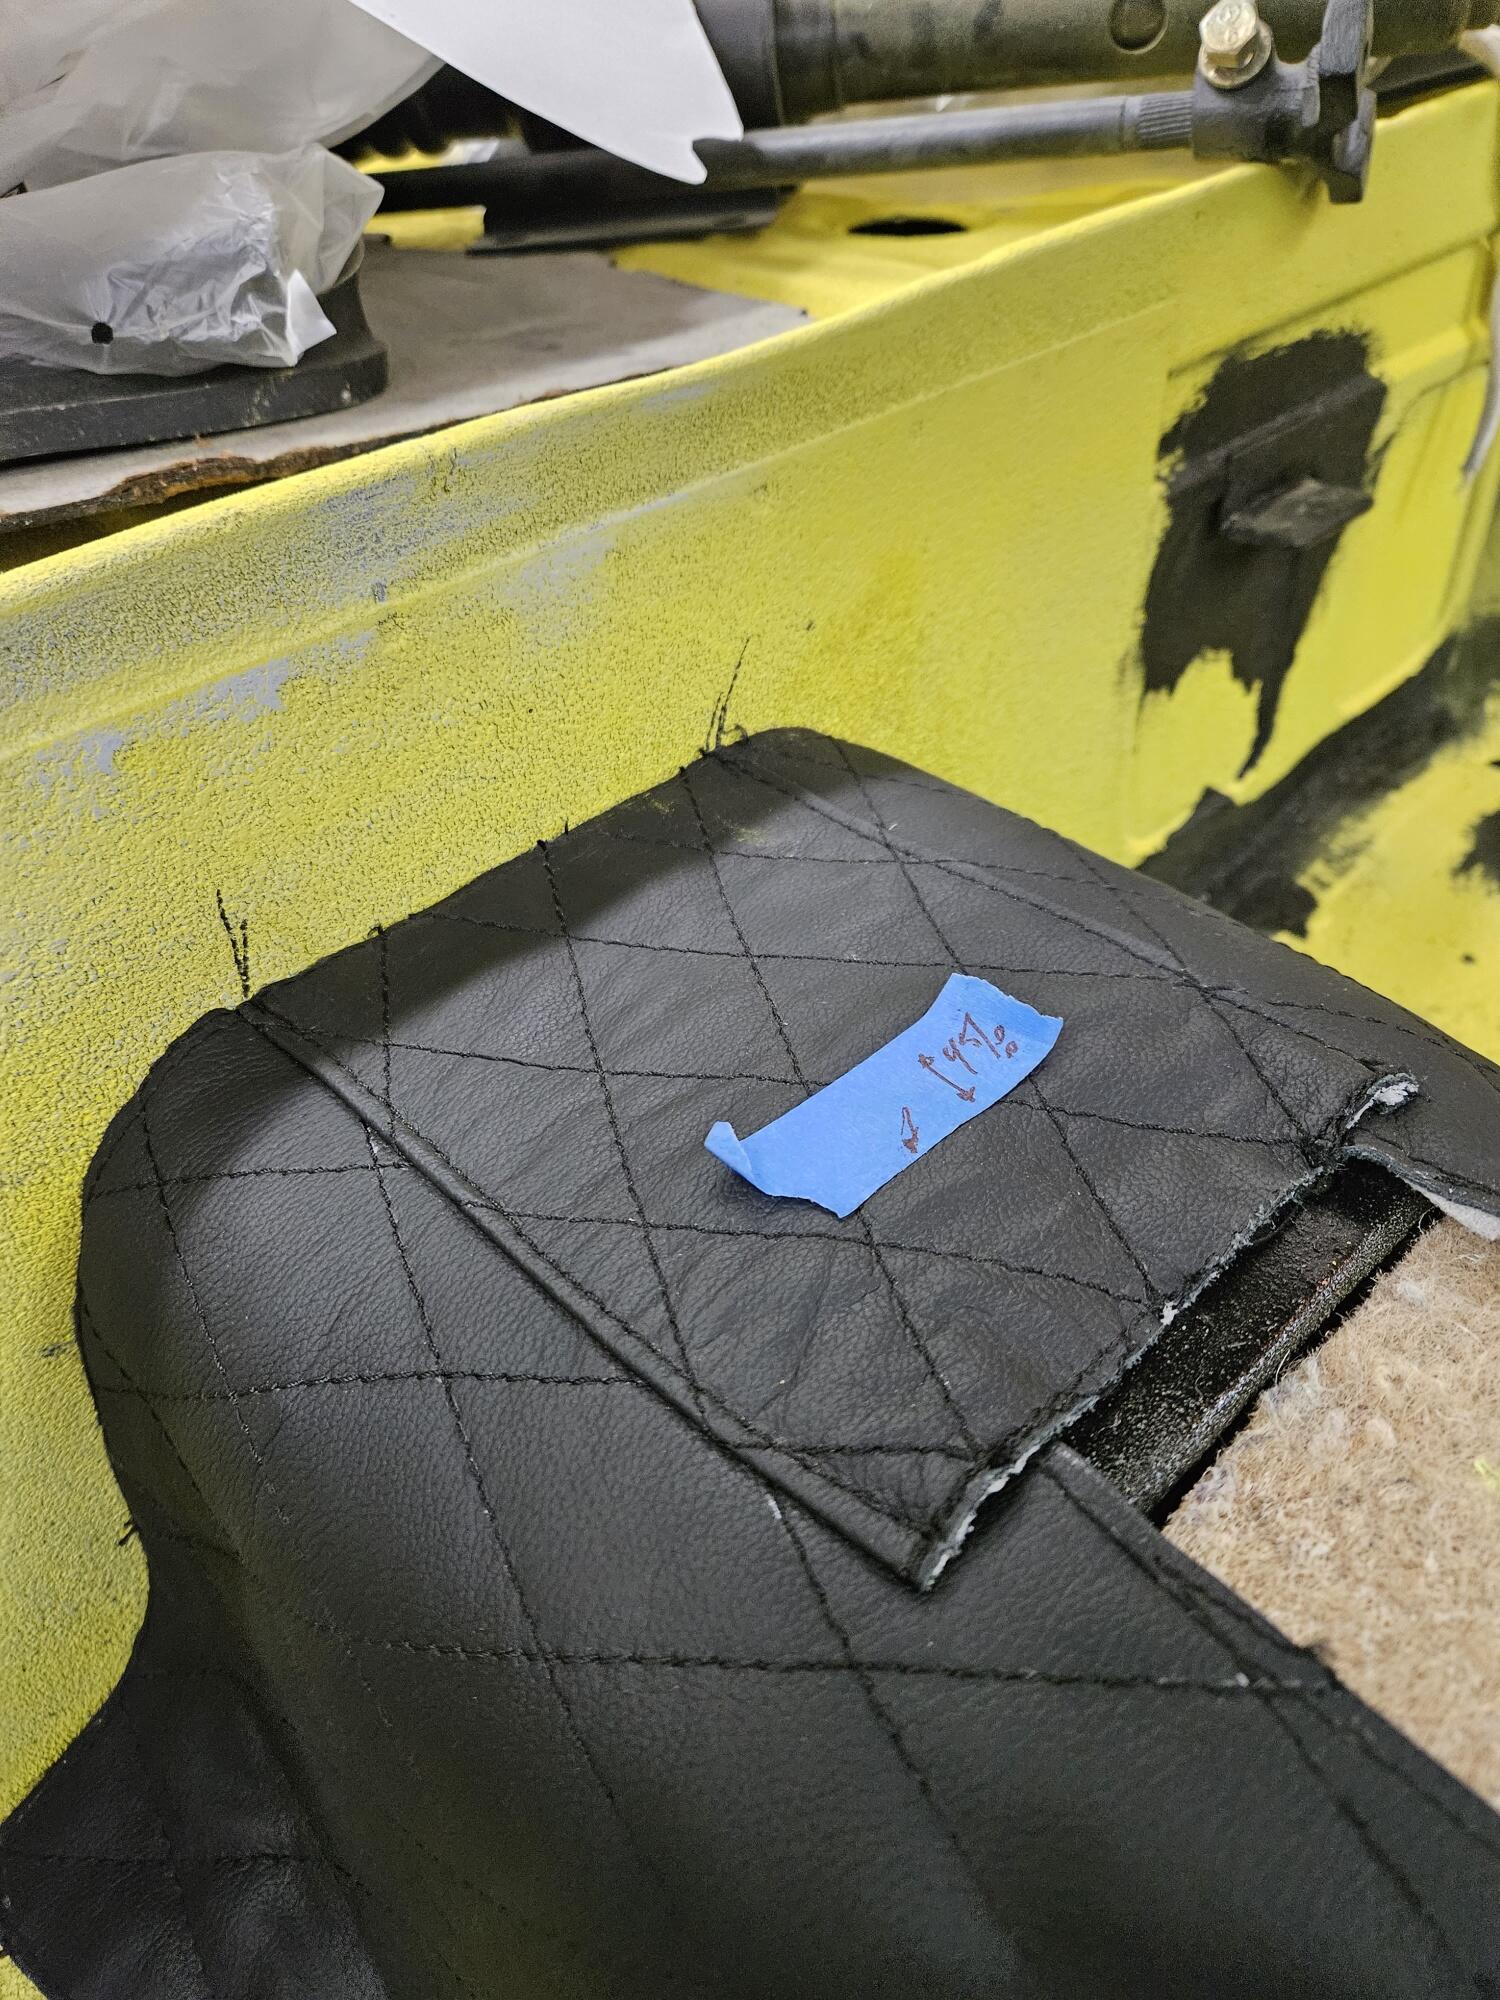
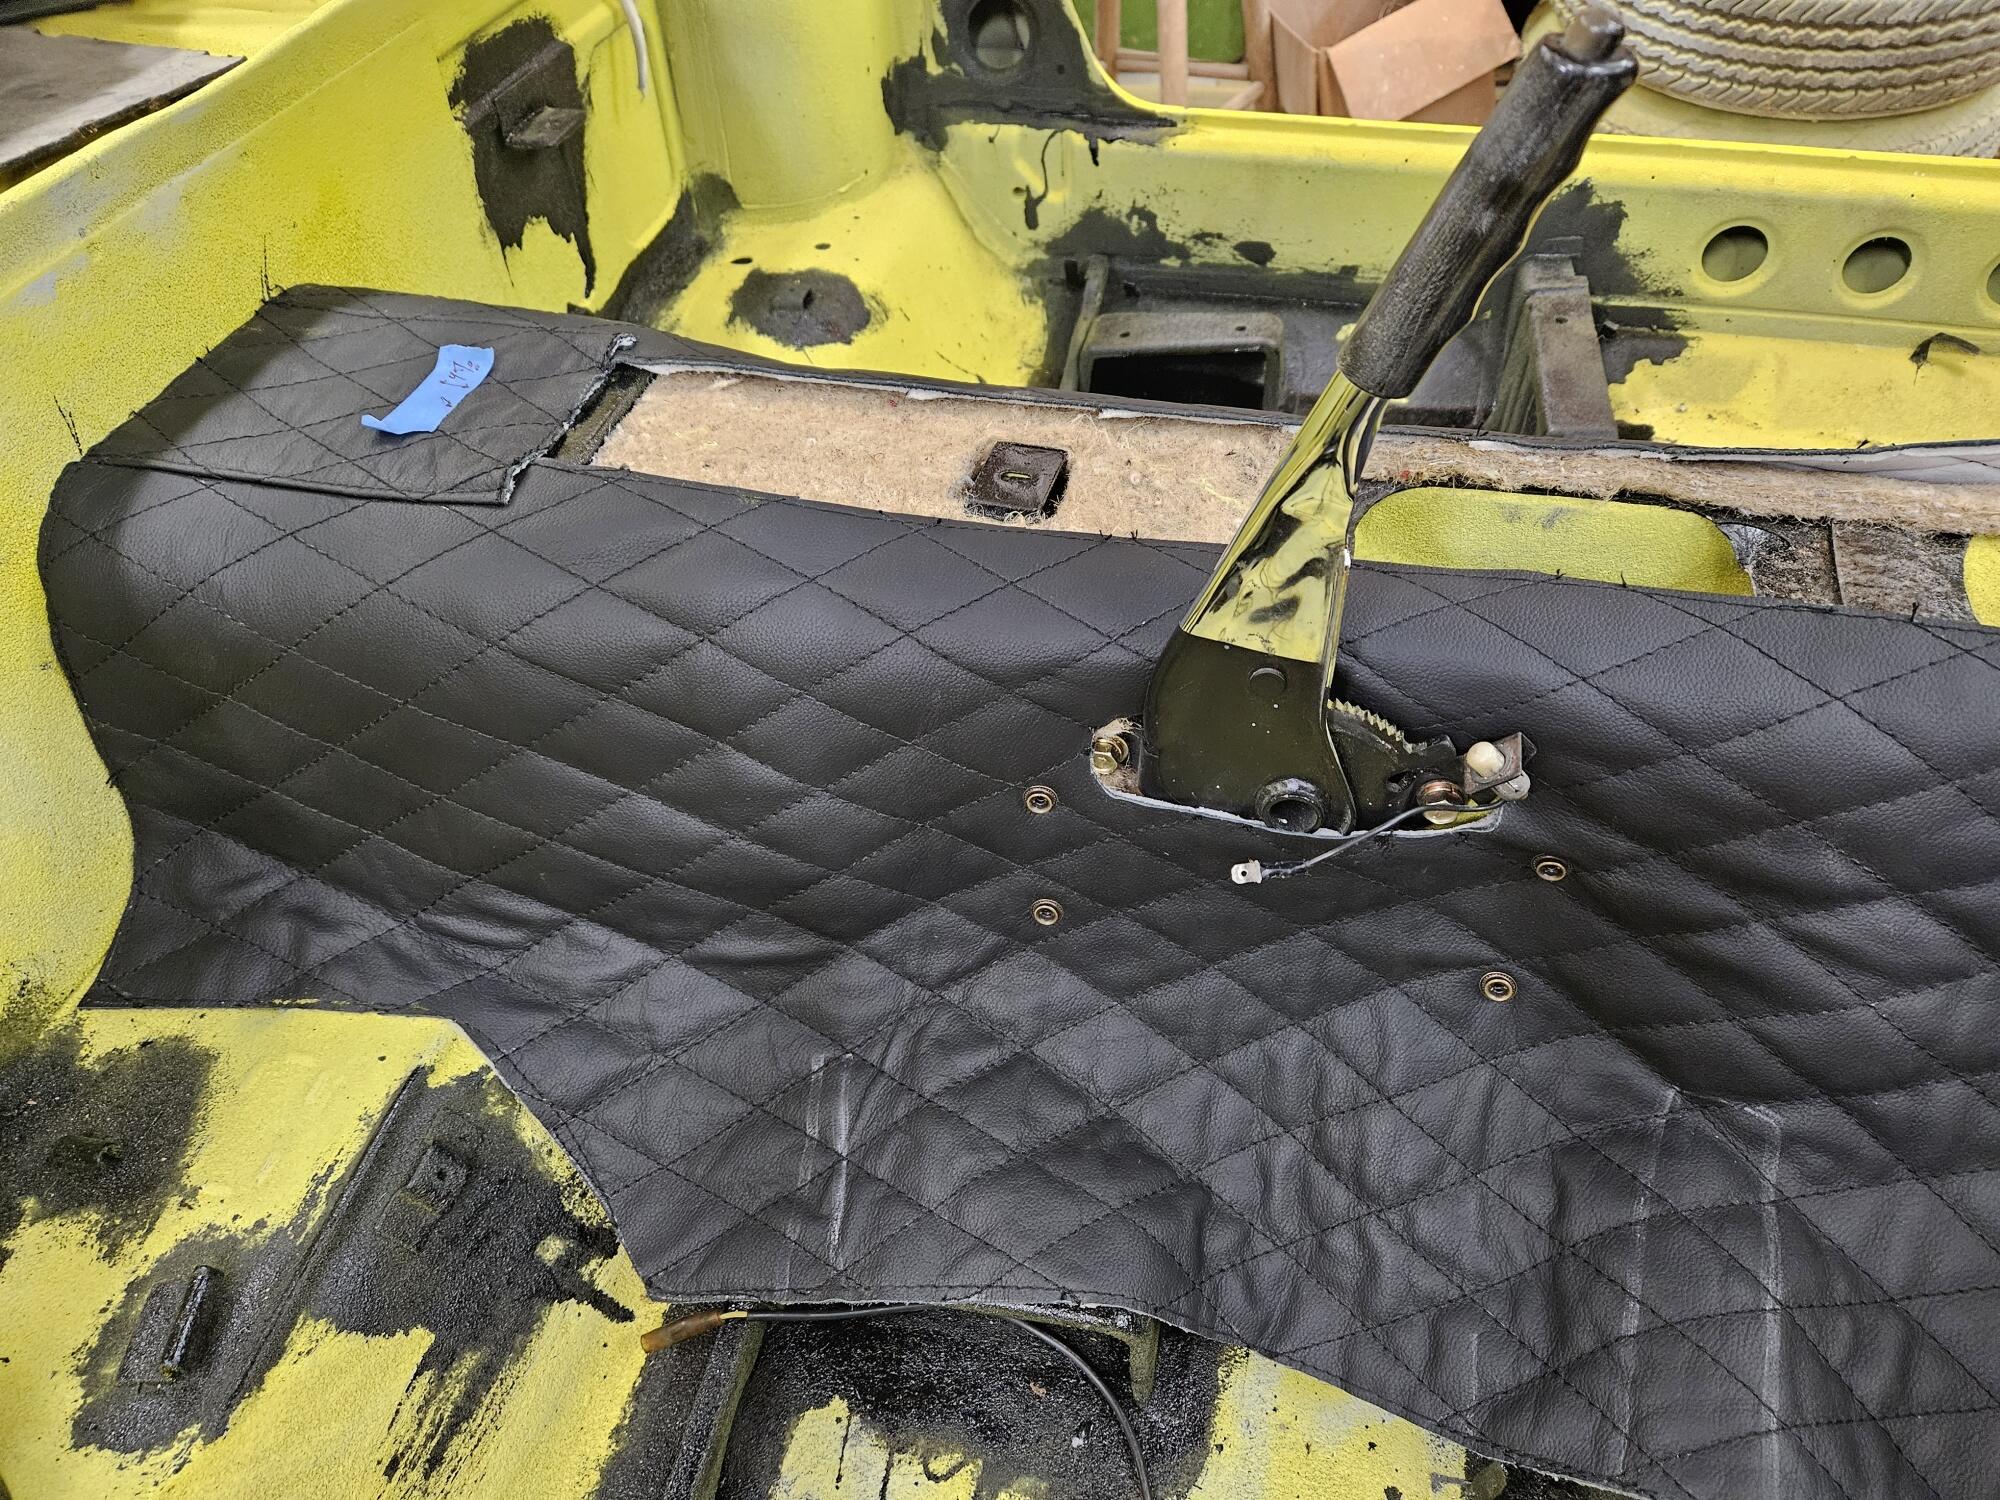
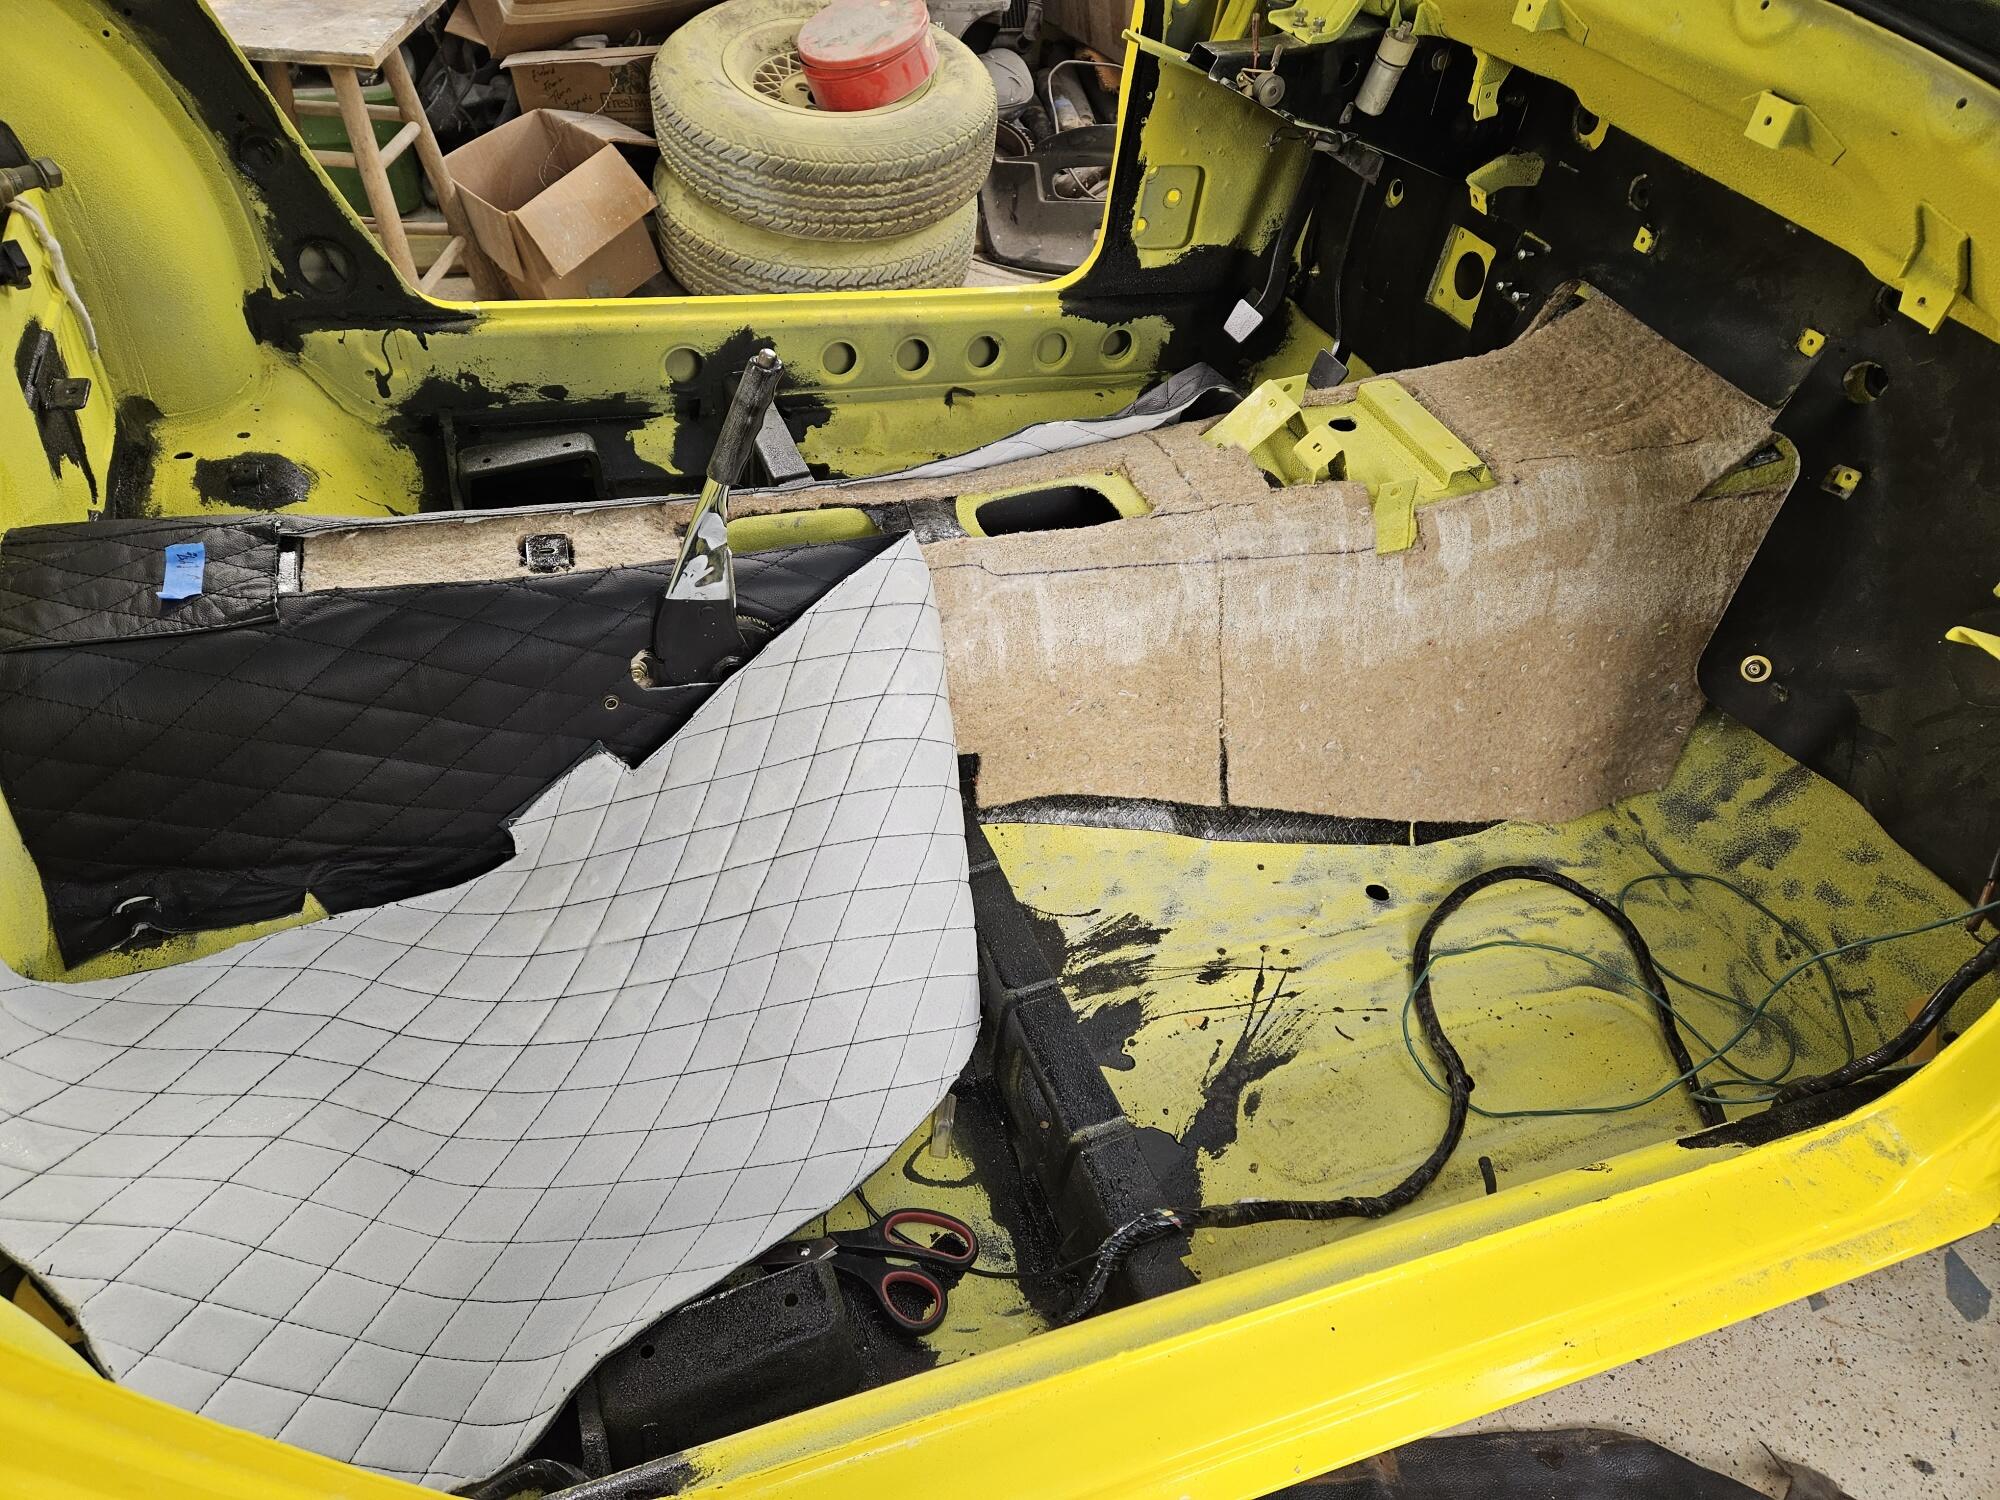
1 point1 pointI will work getting them posted. I probably didn't do them yet1 point1 point1 point1 pointSo I drew out some templates today for the cardboard pieces that go on the rear strut towers under the diamond pattern vinyl. I posted them in pdf and dwg. One of them is larger than 8 1/2 x 11 240z cardboard strut tower.dwg strut tower carboard1.pdf strut tower cardboard2.pdf1 pointSo before I started gluing, I made two sharpie marks for where the seams should meet the luggage panel Then I sprayed glue on the top edge about halfway down and put it in Today I worked on the front half. I sprayed both surfaces. I didn't let it tack too long so it was a little easier to position

 1 point0 pointsI agree "crap" I did remove it but I met a freak who's going totally original/ stock with his engine. I'm selling the tube, emission components are a must for the buyer. so need to return the component's the way I removed them. That's the challenge. My engine is EFI :). California is not requiring smog on exempted vehicles, the way they're going to get us is huge annual registration cost to drive the mass polluters, it's coming soon.0 points


Important Information
By using this site, you agree to our Privacy Policy and Guidelines. We have placed cookies on your device to help make this website better. You can adjust your cookie settings, otherwise we'll assume you're okay to continue.