Leaderboard
-
Richie G
Free Member7Points254Posts -
HusseinHolland
Free Member6Points1,031Posts -
26th-Z
Free Member3Points5,264Posts -

cgsheen1
Free Member2Points690Posts


Popular Content
Showing content with the highest reputation on 10/18/2023 in all areas
-
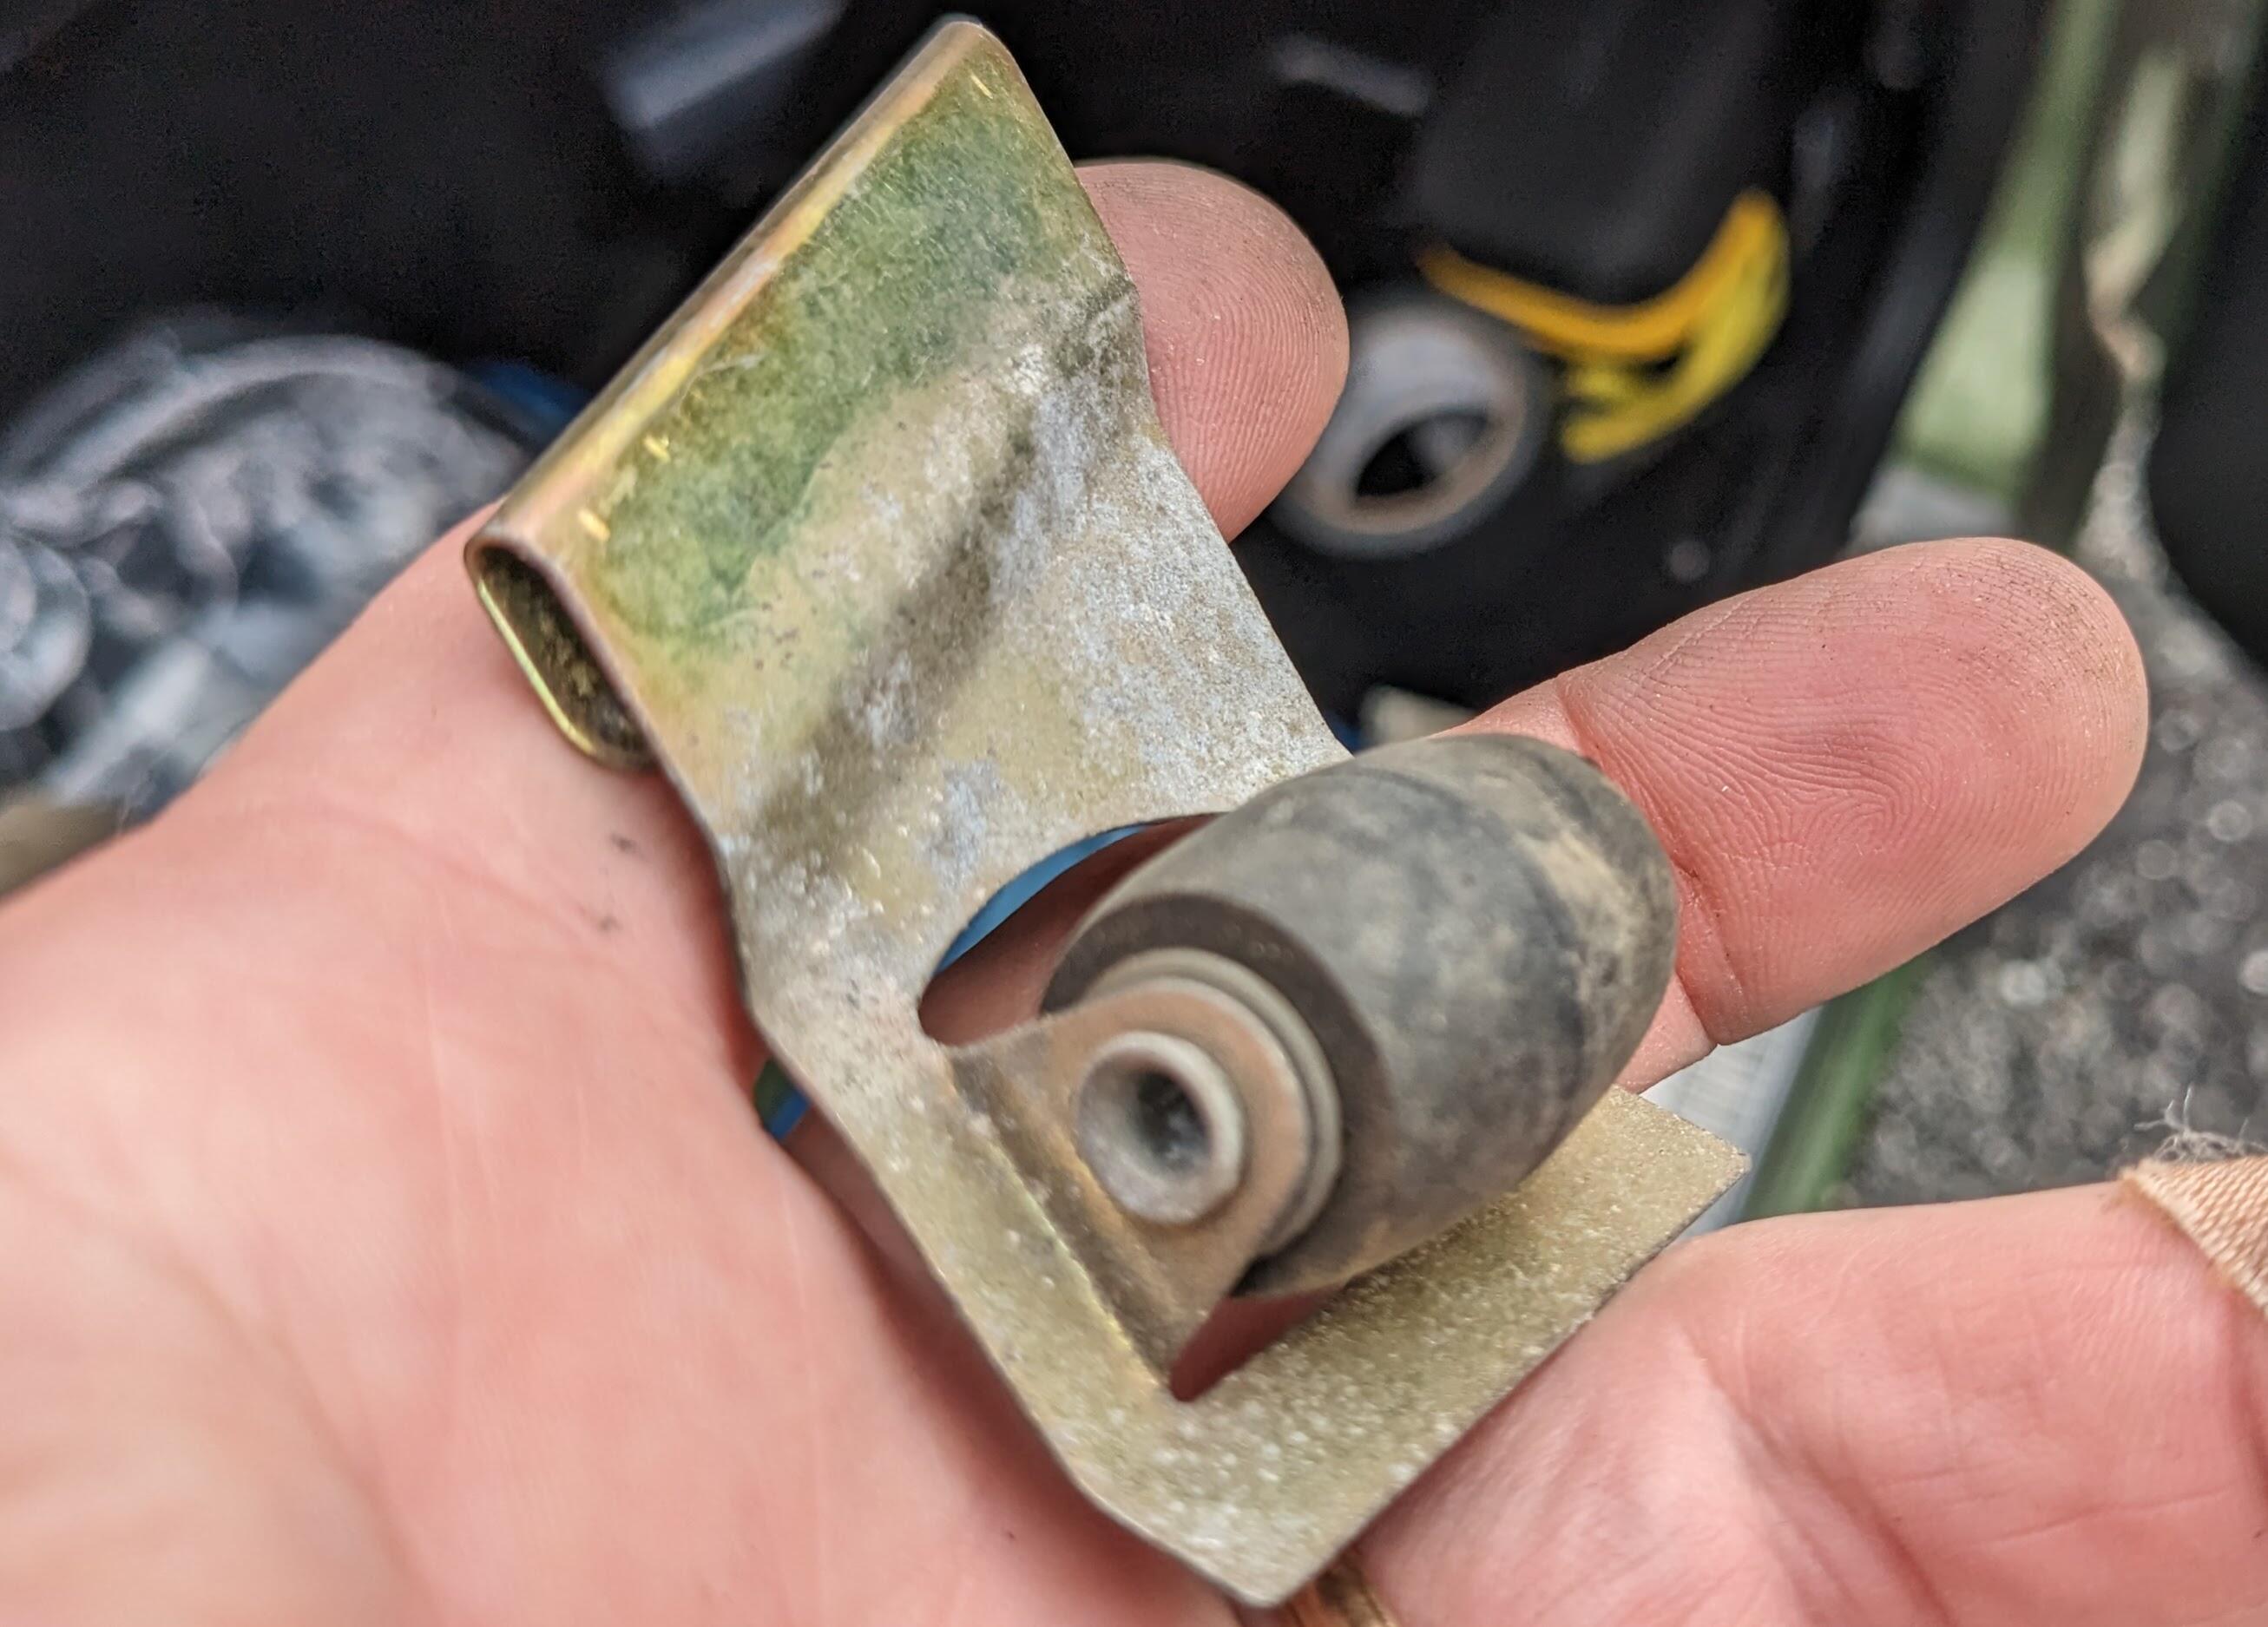
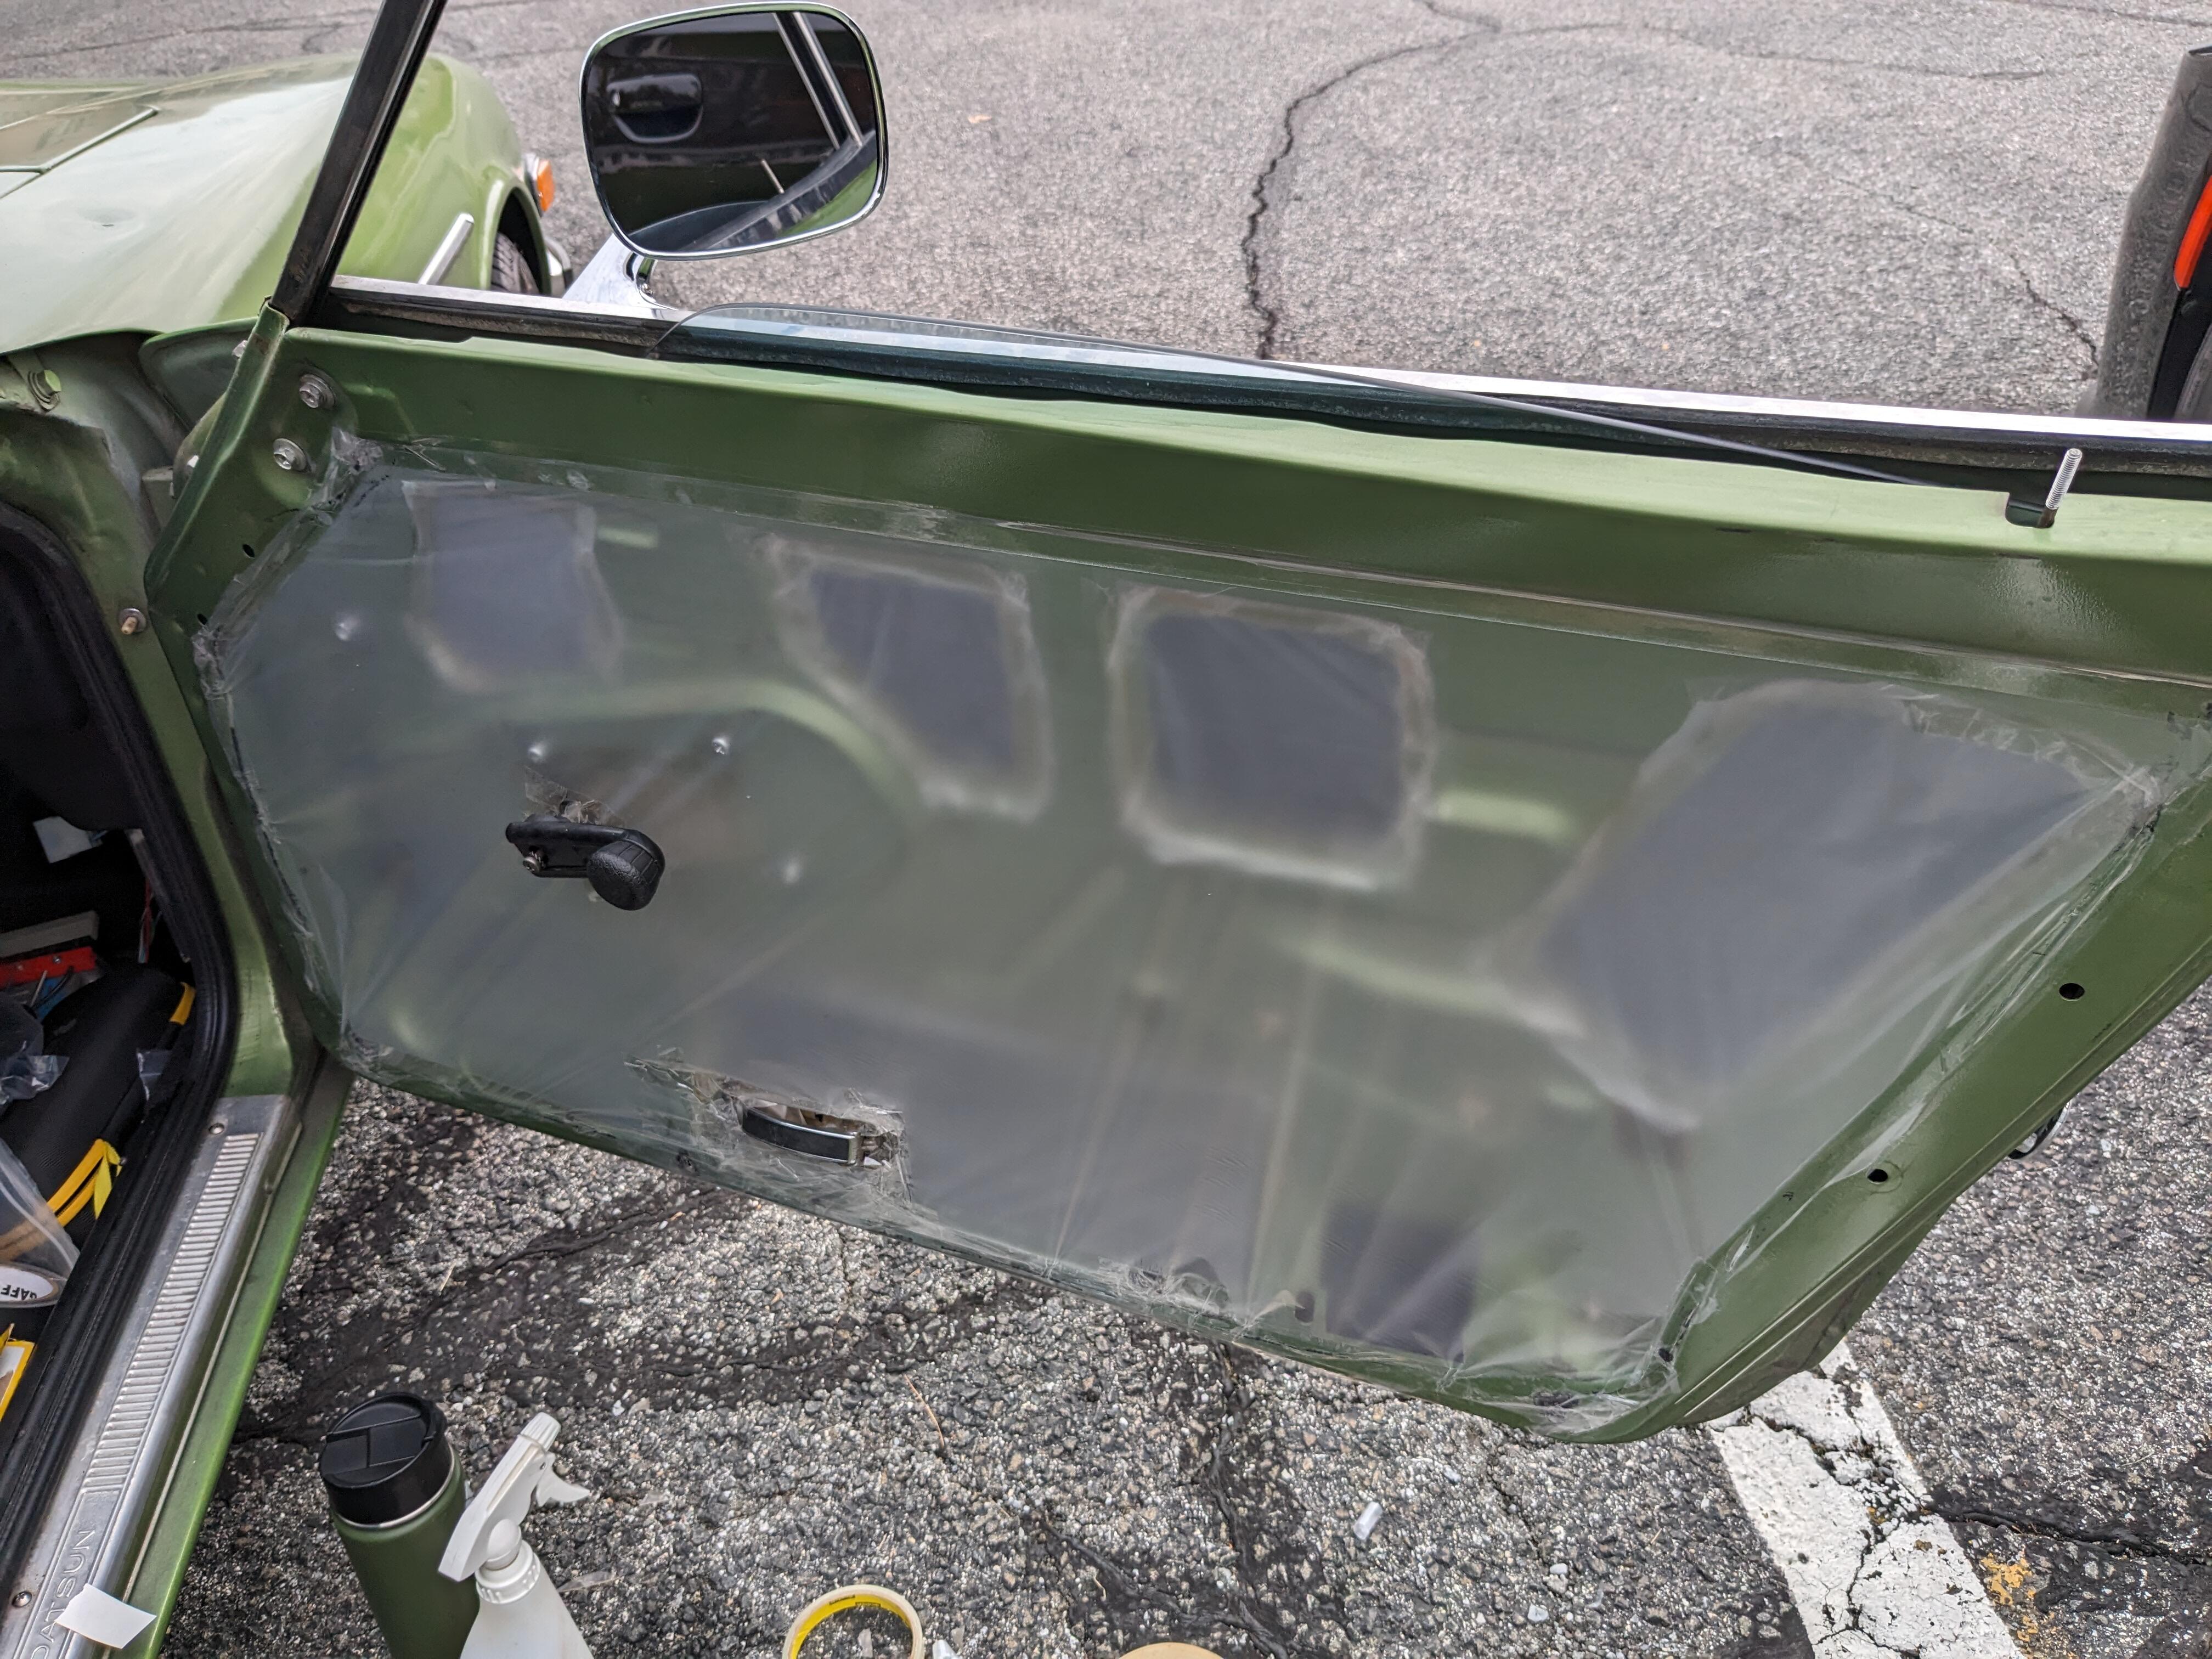
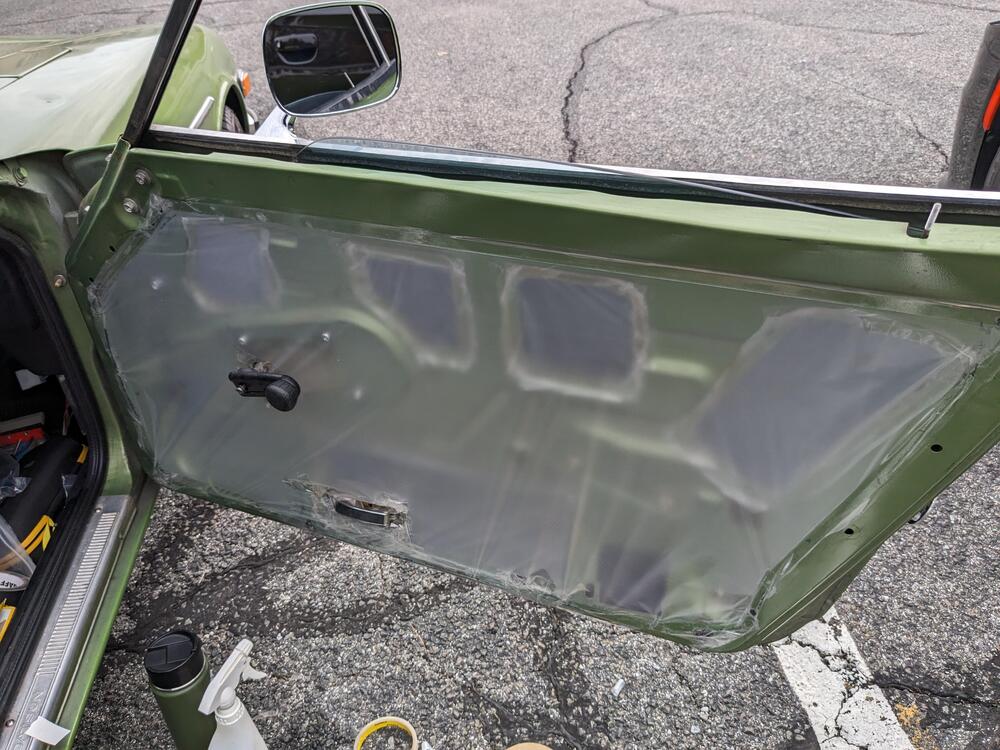
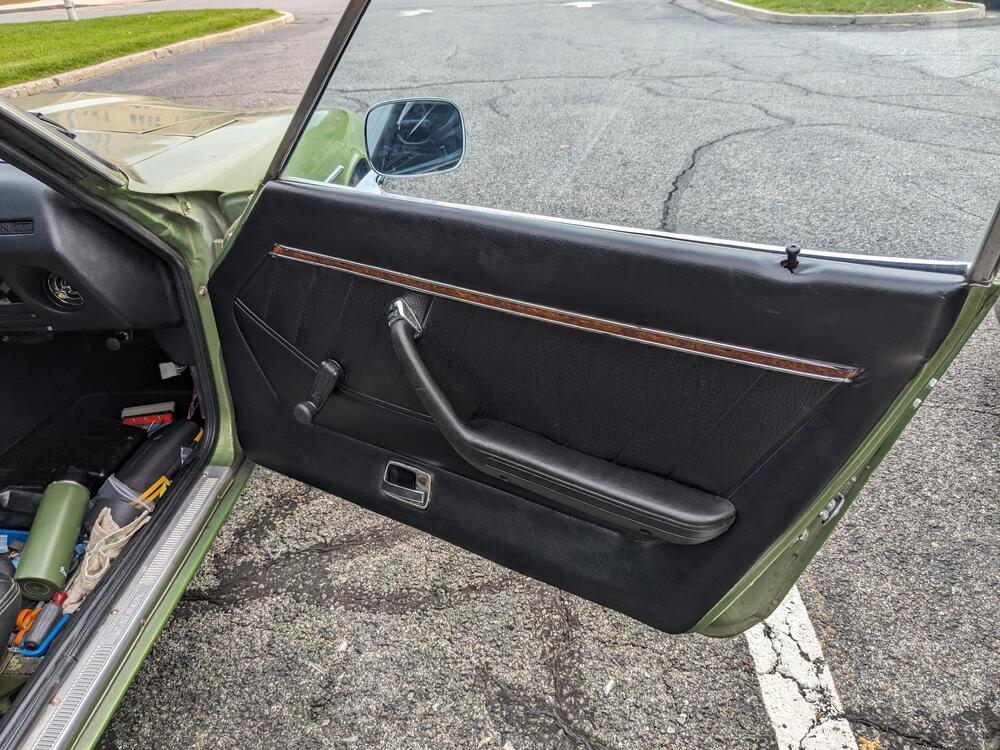
Thank you - the antenna drain I plugged sometime ago, the PO put in a manual antenna mast. I'll look at where the EVAP lines come through the floor, and the harness grommet. T/light gaskets are coming... Today I got the door sealed back up & put the door card back on. I need to find a grommet for the lock button Found this in the bottom of the door yesterday - the tab has no tension anymore, so just as well I bought complete new ones Before I put the door all back together I massaged the two dents as best possible, used a heat gun on the outside & a screwdriver handle to work the metal from the inside. Lower dent was between the visible dot & the belt molding Fitted the Volvo 240 crank handle, and a replacement armrest - this one I found in black, so I didn't have to paint it/


 4 points
 -
I literally just finished the driver side yesterday and here's some pics. The precision rubbers work great if you are patient and steady. You won't break the glass if you apply even pressure inward and towards the rear at the same time. i was able to do this by myself put using one hand to press on the glass and the other to set the screws by reaching around. The trick is as mentioned, set the glass about 1 inch or so forward of the screw holes and the trick is to get the corner peice set first. Only set enough screw to catch them move on to the bottom back then two front. Remember to only set the screw enough so it catches at first then move on to the remaining screws so you have wiggle room to move it until all 4 are caught then you can easily tighten down.

 3 points
 -
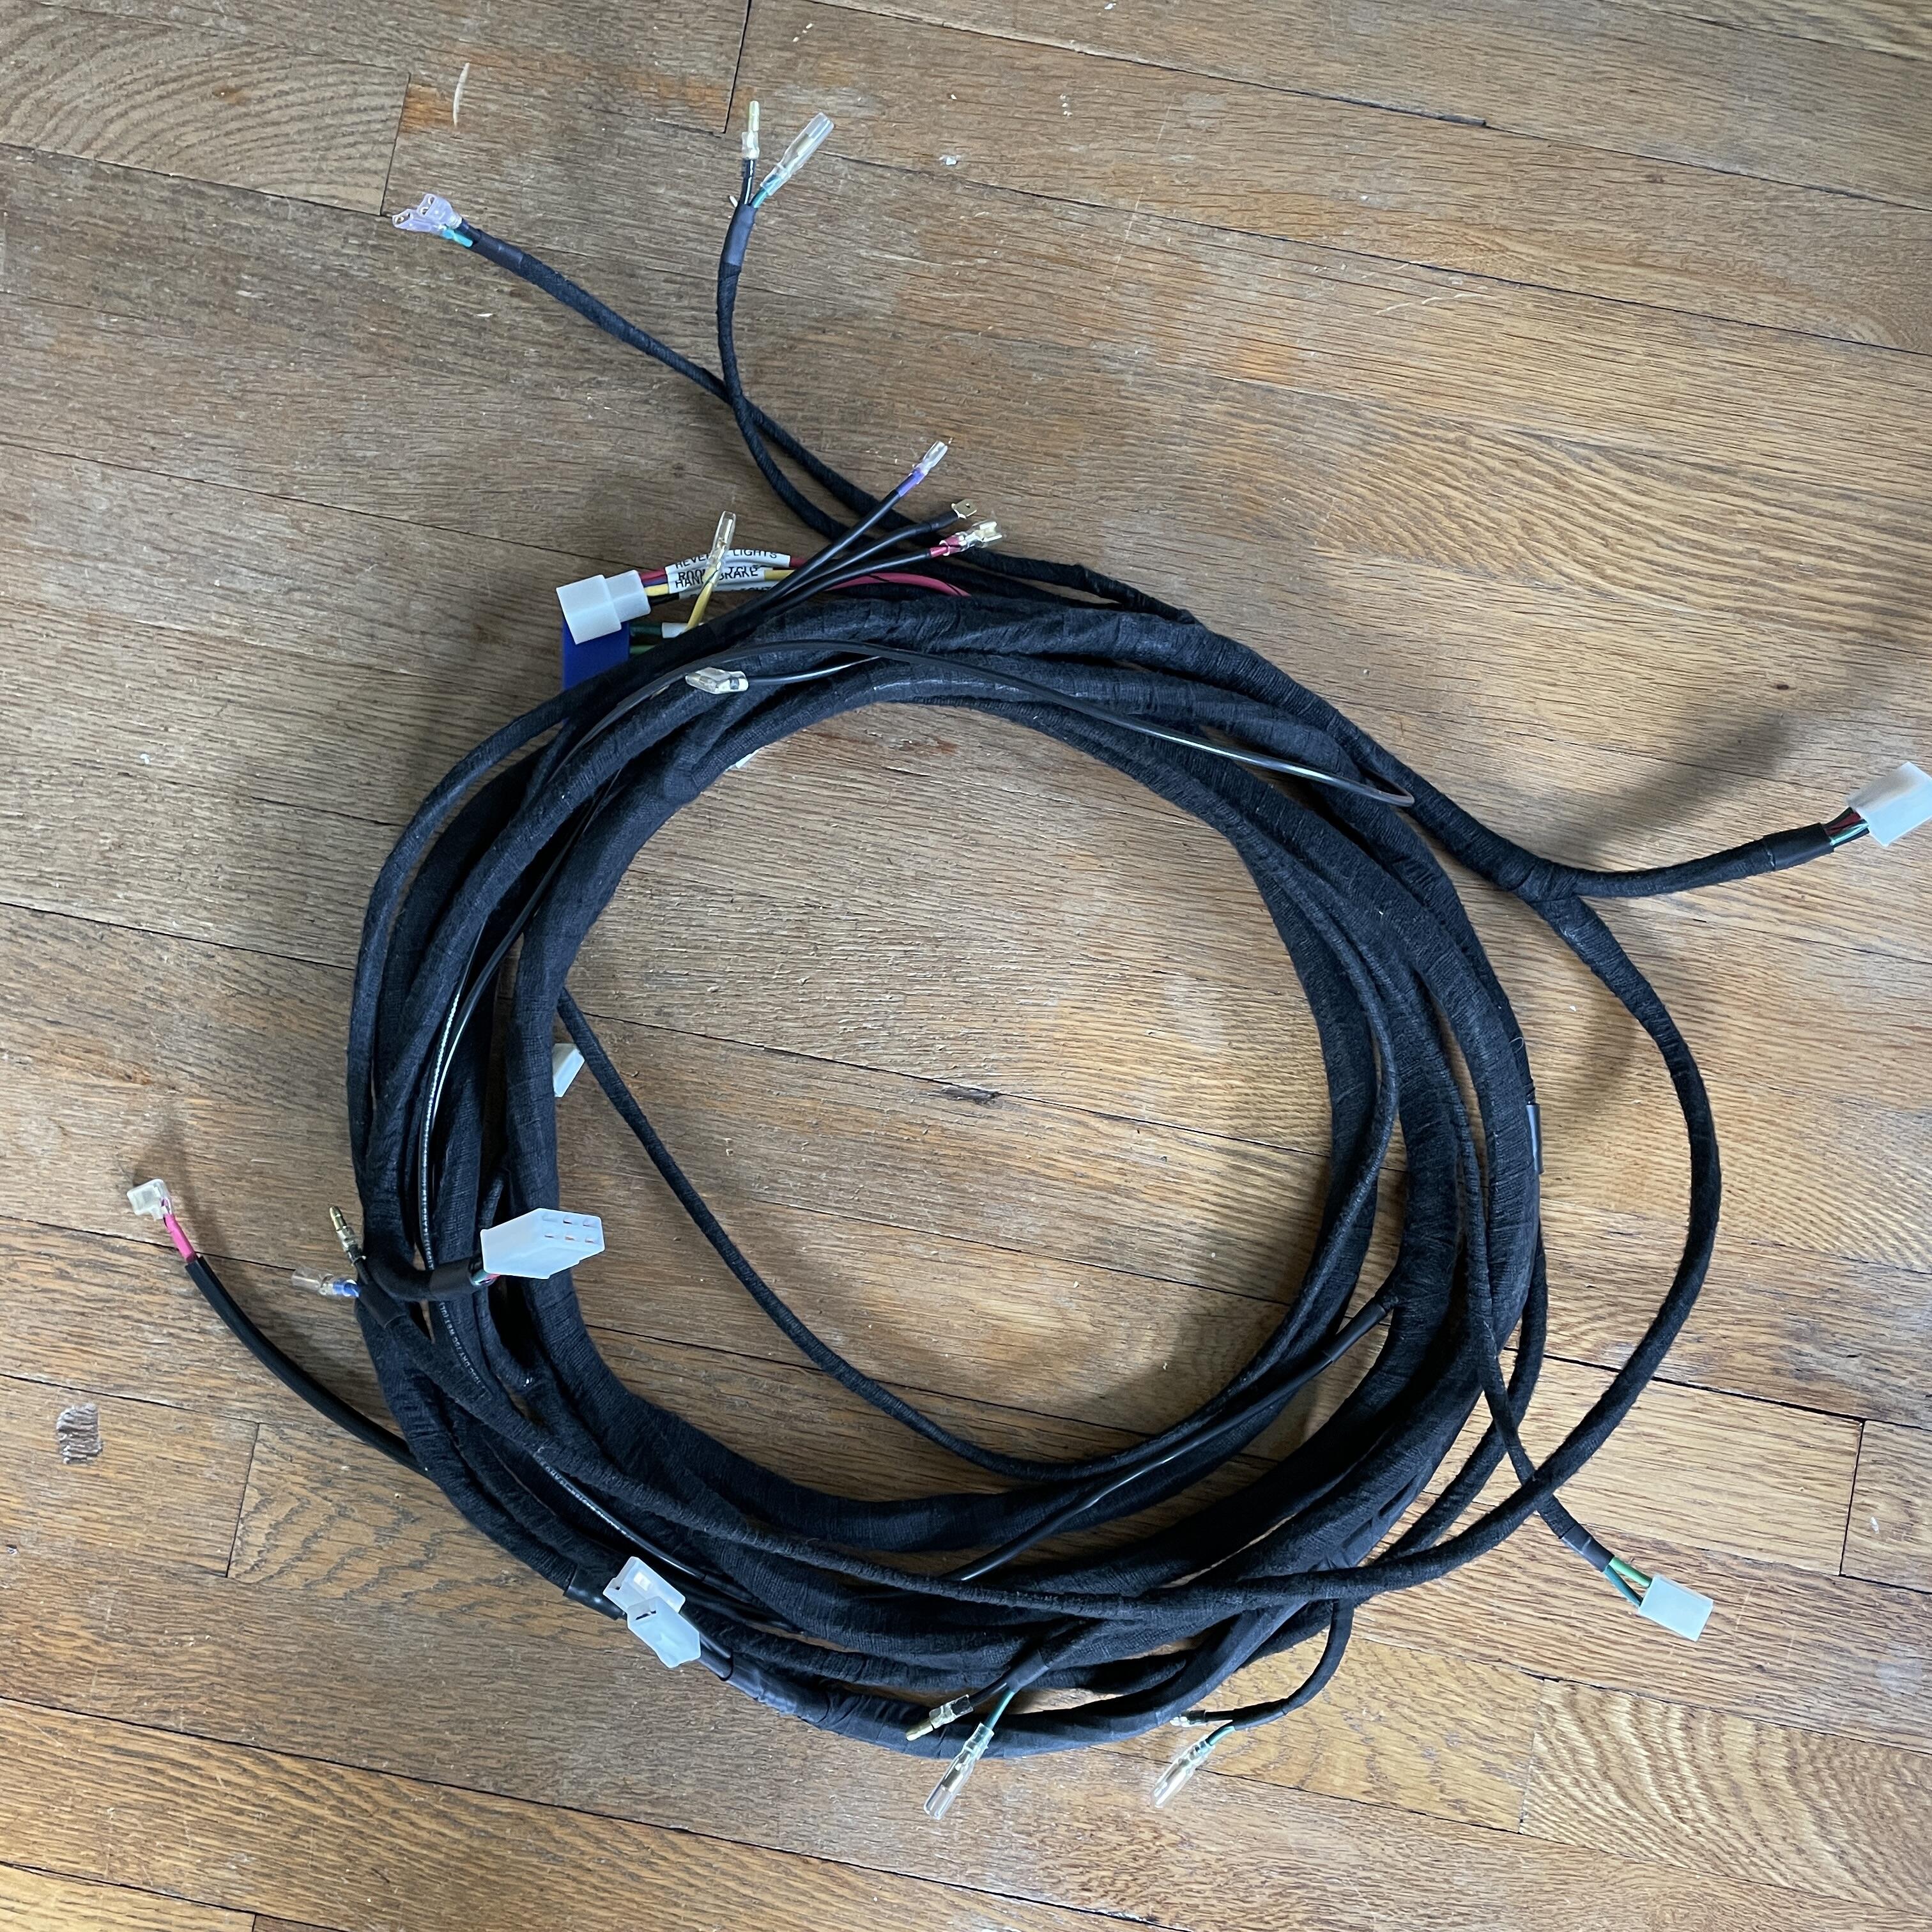
2 pointsFinally done with the body harness. In addition to deleting the wires for the speaker and antenna, added a provision for some kind of third/auxiliary brake light next to the license plate light wires, switched to a euro/JDM wiring configuration for the rear combination lights, and added wires for a 12V power supply. Also, I used fuzzy Tesa tape for most of it to reduce potential rattling and their chemical-proof tape near the fuel system, just in case.
 2 points
 -
@Patcon Thanks, those top corner seals were tough to find, had to go to Norm at Zeddsaver. He's got good stuff but a bit on the pricey side. Little by little im getting through the entire interior. Lots left to do but very enjoyable. Next big thing is tackling some poke throughs in the floor boards. The PO decided it was best to just lay a new soundproof over the original without taking care of the surface rust underneath. Well you can guess how that turned out lol. I don't think the holes will be large enough to require new pans but we'll see.2 points
-
2 pointsThey got the wheels, pillar emblems, and single side mirror right but missed the hatch vents. If this was Bring a Trailer that crowd would be trashing them LOL.2 points
-
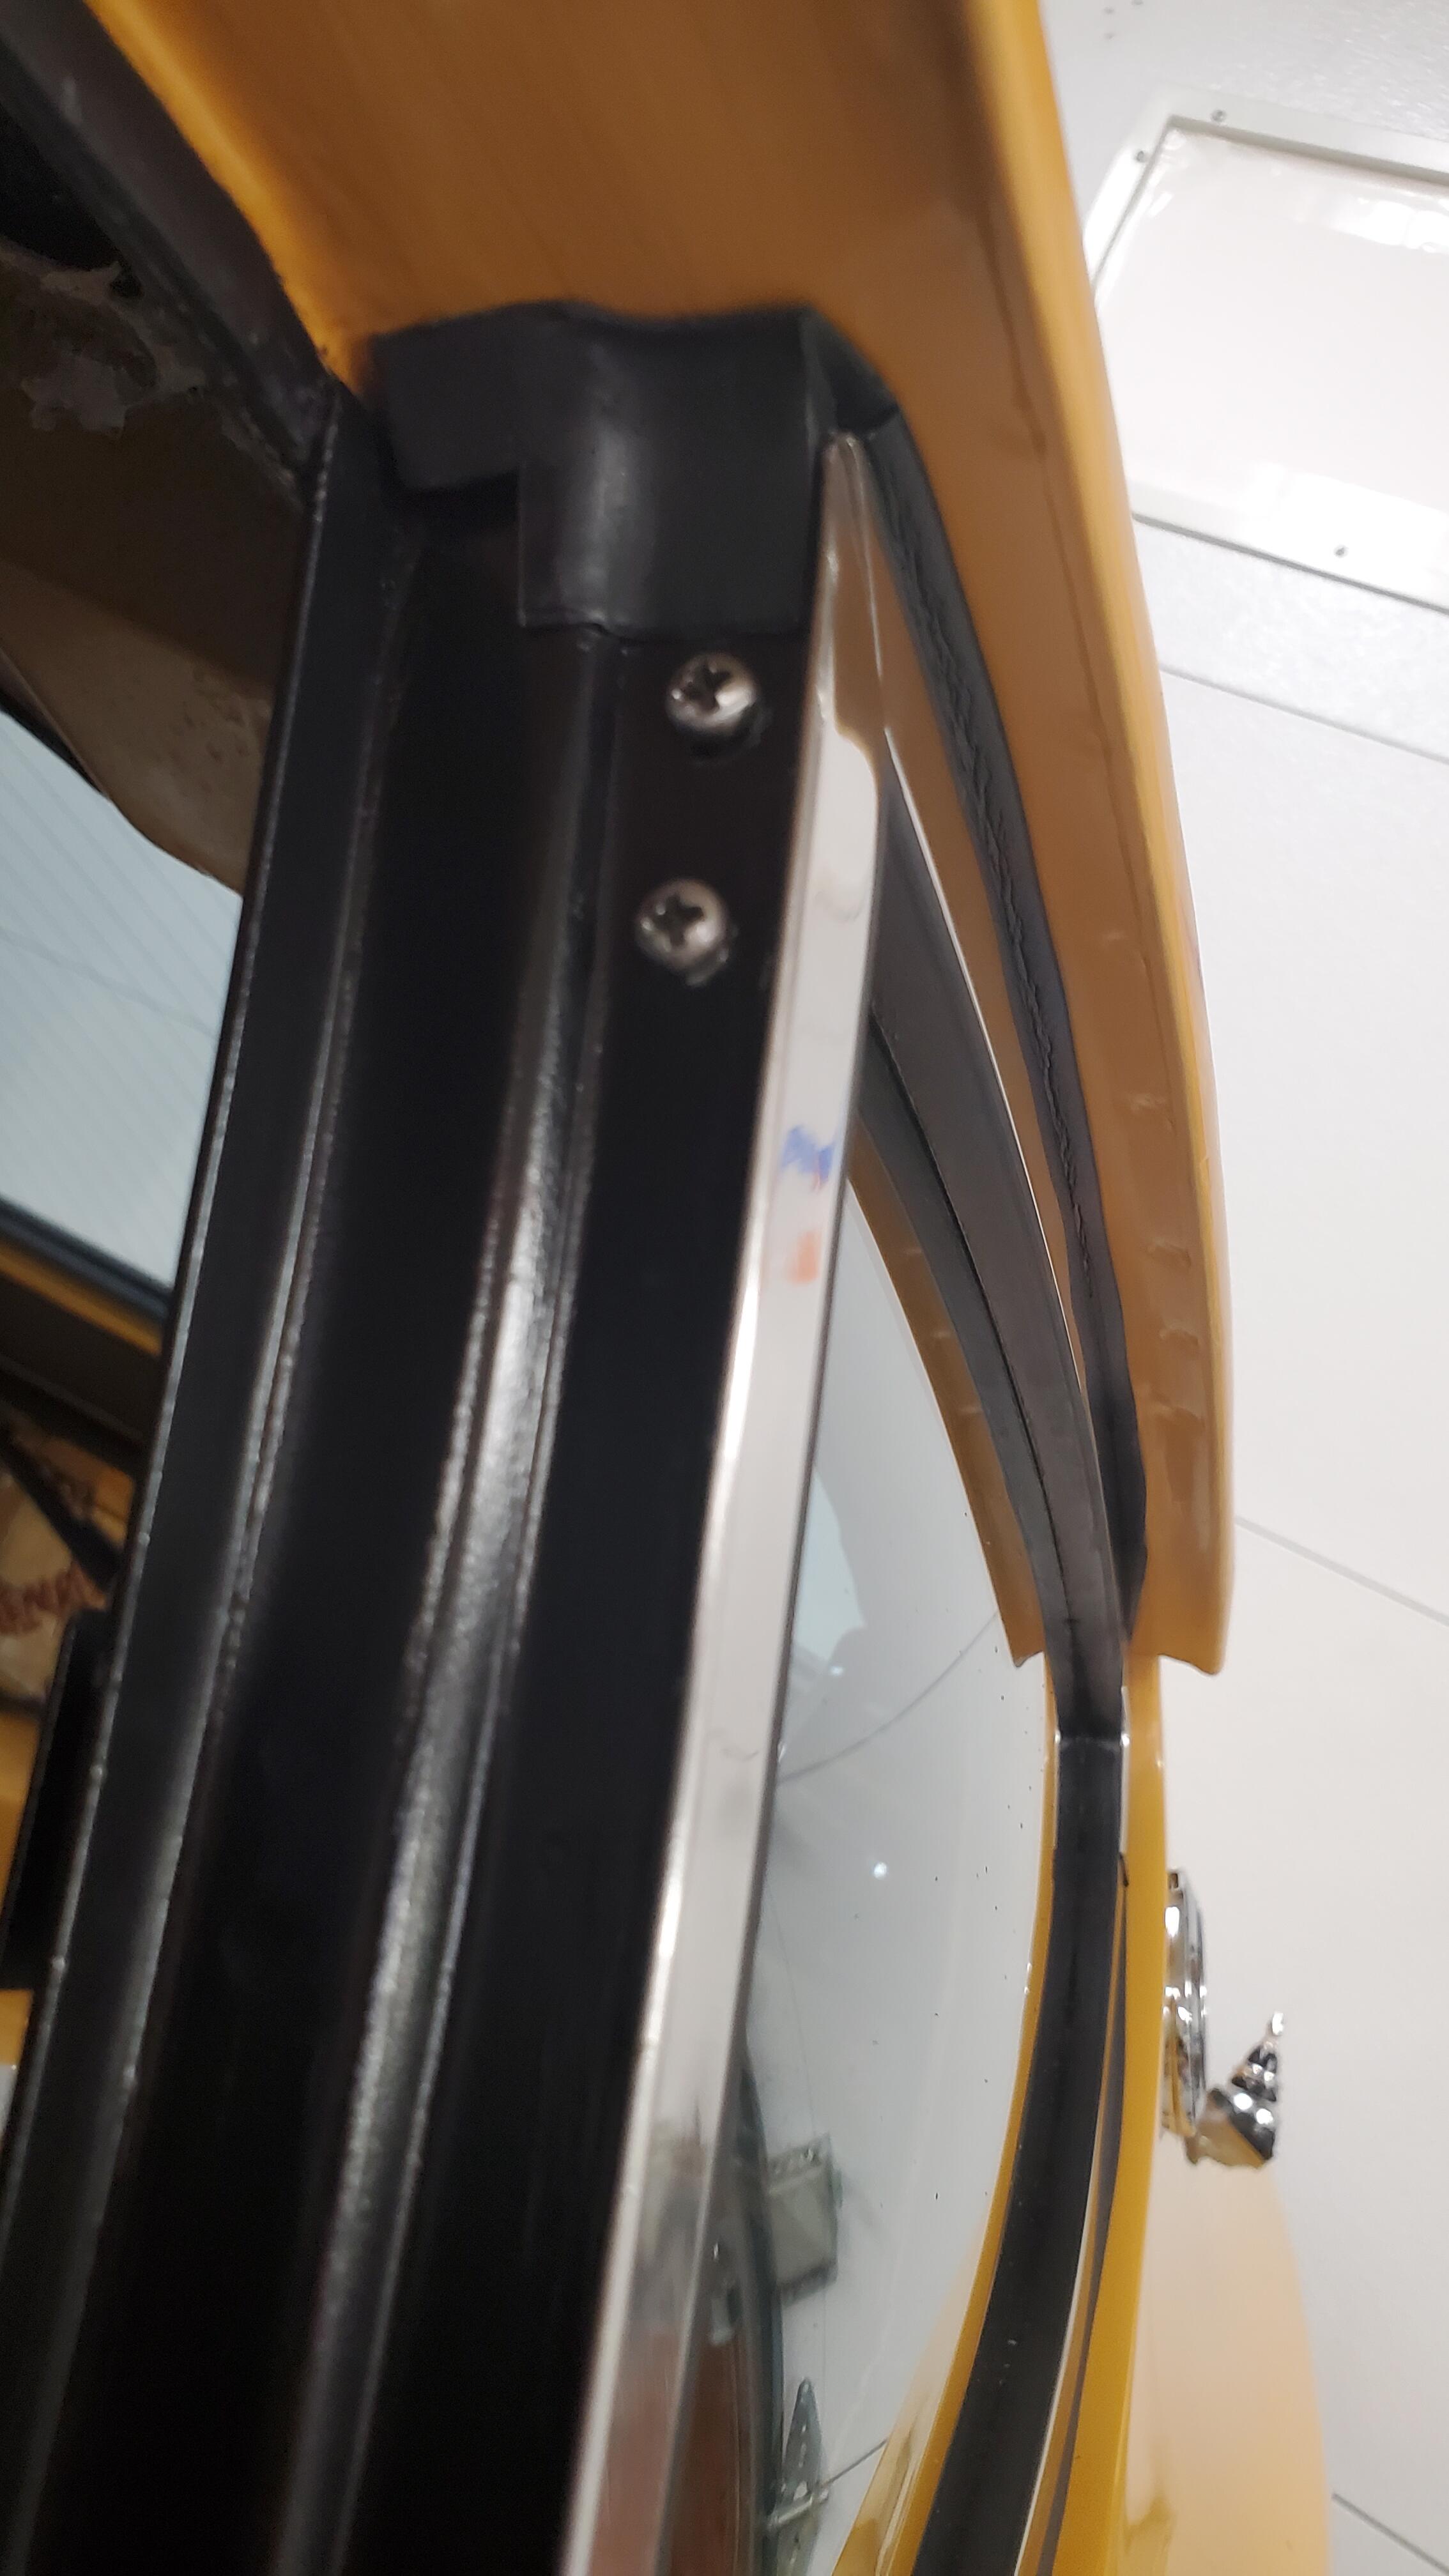
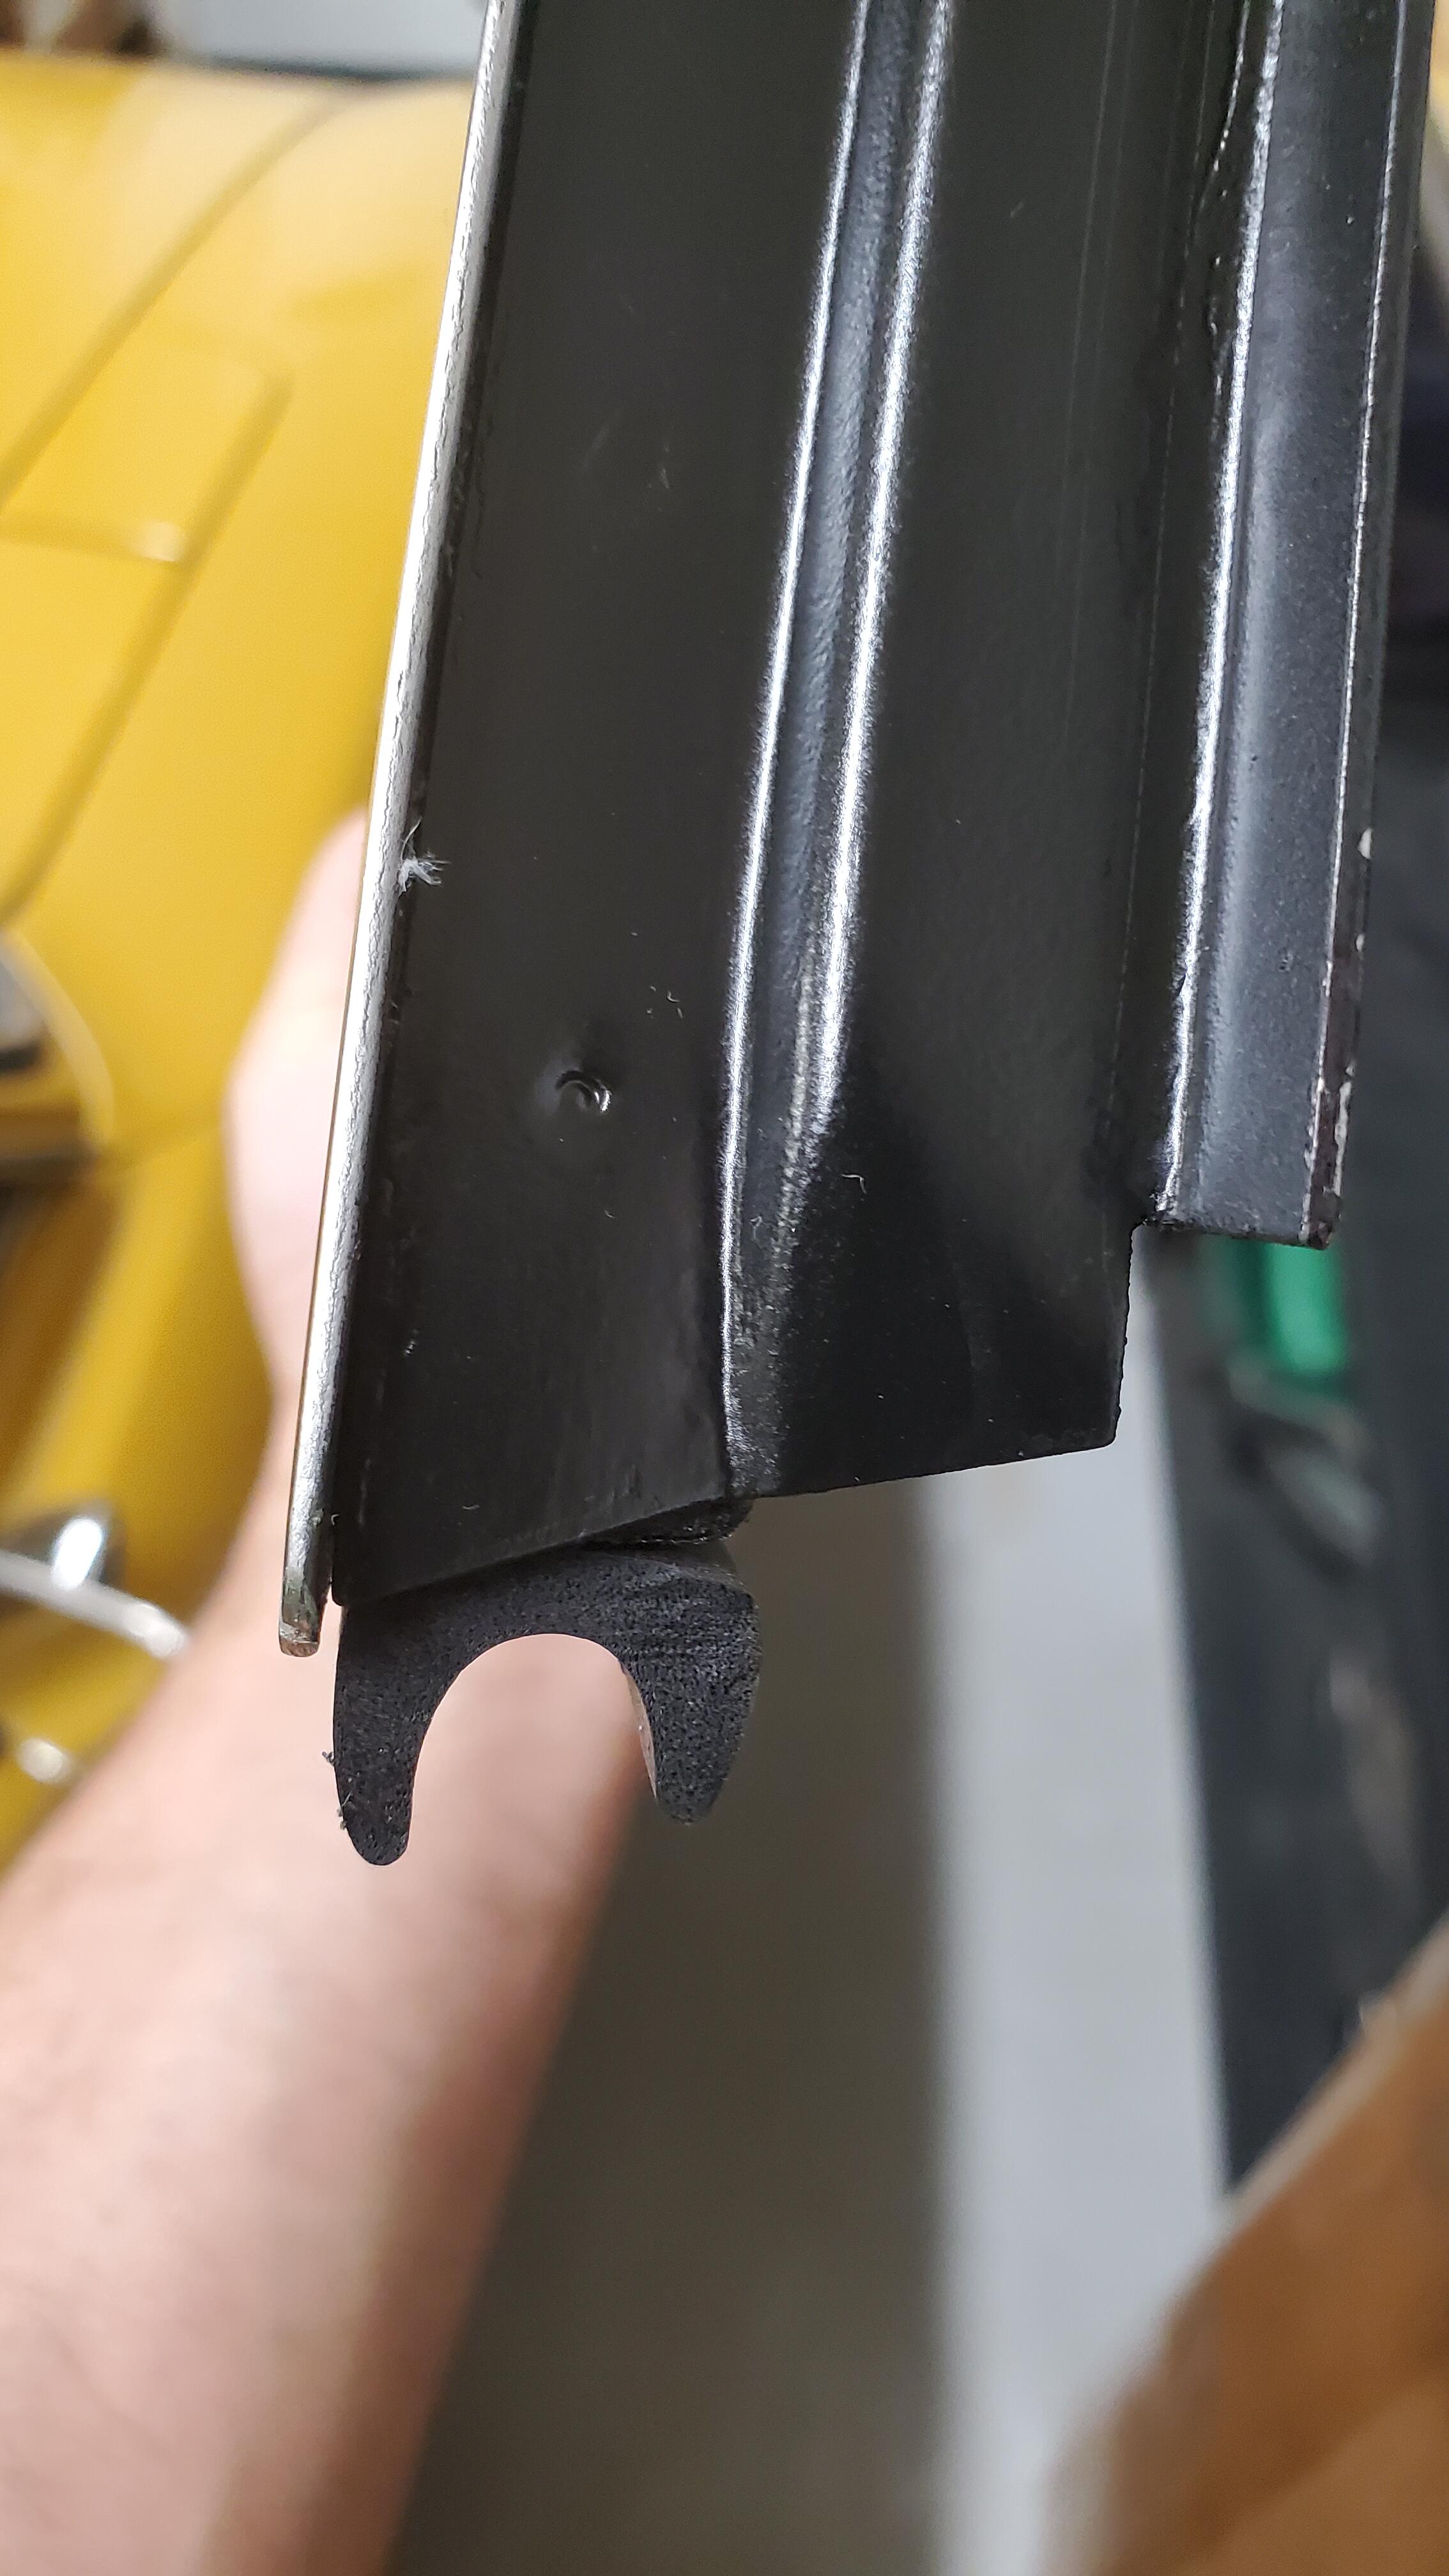
Nope, you have it correct - taller edge on the outside. The quarter window is meant to push BACK and IN to set the gasket properly and it's generally difficult (nope, near impossible) to do by yourself. BUT, it should never cause scratching paint... (the gasket should always keep the metal frame away from the body - so are you sure your frame is correct?) I usually start with the window set about 1/4" - 1/2" away from being flush with the mount tabs and forward, then push it AFT and INBOARD while someone else tries to get a screw started. Unfortunately the Precision weatherstrip is not the easiest to work with...2 points
-
2 points
-
1 point
-
Mine will hold more than 1.5bar pressure for a least 2 weeks. It took me a while to get it that far, but replacing the check valve on the fuel pump was my eureka moment.1 point
-
1 point@Reptoid Overlords is probably thinking there is a constriction somewhere, either in or out, that is limiting the engine speed. That is what I was angling for, too, but starting with fuel. The fouled plugs indicate rich conditions unless the rings are so bad on each piston that you're getting oil into all of them. Too much fuel would overwhelm the spark, but I would expect the engine to die at that point. What I was asking you to do in my previous post was to see if you could correlate fuel pressure to engine performance. Since you don't have the fuel pressure gauge installed, all of this can only be speculation. Data is more important. I was suggesting 500 RPM increments only because it would be easier to differentiate monitoring points. Ideally, you would make a video with a tachometer (from a timing light or multimeter) and fuel pressure gauge in the same shot, then we could correlate the engine sound, engine speed and fuel pressure. (A video done correctly can be very helpful for remote diagnostics. I knew I had an exhaust leak in my 240Z, and I sent a video slowly moving across the engine while the car idling to a friend. He said the leak was around #2, and he was right.) So could there be a restriction in the intake? That is worth examining. Is the flap moving cleanly and easily, or is it getting hung? Is there something in the airbox or between the airbox and AFM (think critter houses) that could be blocking air flow? Could the exhaust be blocked? Again, I would expect the engine to choke and die, but I could be wrong. I have seen several videos online of mechanics shaking a squirrel's stash out of a muffler. Lastly, as I said before, make sure all of the wires on the coil, distributor cap, and plugs are fully seated on the components, especially the coil to cap wire. A weak spark could account for poor performance. Since this thread is already 13 pages, would you please state again the age of the coil, cap, rotor, and wires? Are you on the stock ignition, or do you have a ZX distributor or other ignition?1 point
-
I was able to set the bottom front screw just like you mentioned. Let me try to do this with the rear one first as that requires more pressure first and then the front ones might align. Will report back...1 point
-
I’ll take some pics of mine when I get home so you can see. Yes, it really squeezes the seal tight and that outer lip will deform outward and should form a tight seal. As you’re pressing and installing each screw, just keep an eye on the seal and maybe using a soft plastic pick or hook of sorts, use it to gently pull that outer lip outwards if need be. That said, I don’t recall having to do this much at all. I’ll take pics in a bit… Sent from my iPhone using Tapatalk1 point
-
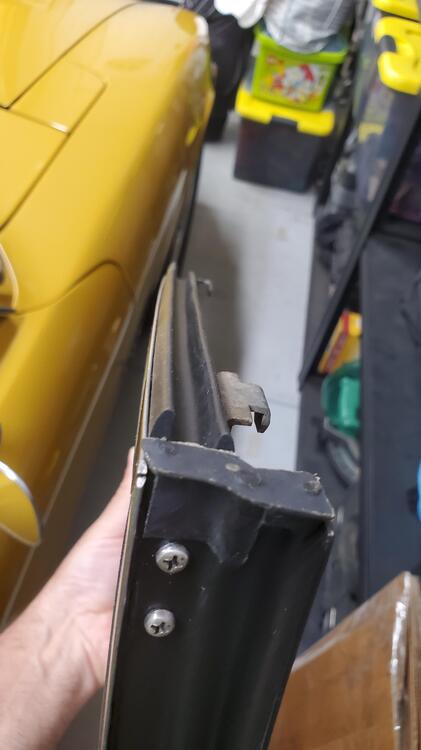
I used a long wide, padded ratchet strap though the hatch. Soapy water, patients, and a helper to pull it back and get some screws in. It worked well and no scratches. Still not a fun job. (I did clean off all the old glue and debris off the frame.)1 point
-
1 pointTrans is definitely whiny - but it does have 250K on it. I only have to deal with it for a year or so, after that I'm doing a 350Z drivetrain conversion with the 6 speed. Should be all good after that.
 1 point
 -
1 pointThe motor feels strong as it is. One reason I changed the TPS WOT setting was I could see the AFR's get really fat just revving the motor in the driveway. After driving around & coming to work today, about 20min local & highway- the enrichment values seem pretty good under load. I reduced the ECT resistance value a touch as the cruise AFR was a touch rich. Now I have the wideband I do see that the system goes kinda rich right off idle before it levels out, but my old Volvo does much the same. I think I should just put in the 250A breaker, as the first couple revolutions hot cranking with the 125A seemed slightly sluggish before it blew, and less so with the 175a, so perhaps the initial starter draw is high enough to strain the lower amp breaker, and actually induce the slow crank, I dunno. It just seems to crank better now than yesterday. (EDIT - excessive draw was due to faulty rebuilt starter, replaced) I do still need to redo the compression test, as the one I did back in the Spring prior to any valve adjustments had one cylinder well over 10% deviation - 140ish vs. 165 range on the others. Valves were very tight on that one. Overall engine feels pretty darn smooth now it doesn't have a lean condition, for sure.1 point
-
My car has no adhesive whatsoever. The OEM hardware works just fine.1 point
-
I've always had the best search results by typing simple keywords and ending with classiczcars.com. If it's something I remember reading from a member I put their name next to last then classiczcars.com. Most of the time I hit IMAGES and go from what I've seen in threads. Our forum is fantastic but searching within the database is lacking for sure. I'm about to start using duckduckgo.com. Google has gone to the dark side where the money is, assholes. Maybe I'll use Ask Jeeves on AOL. Sorry for the detour.1 point