Leaderboard
-

dutchzcarguy
Free Member5Points2,677Posts -
HusseinHolland
Free Member5Points1,031Posts -
Patcon
 Subscriber
 3Points11,142Posts
 -
EuroDat
Free Member3Points3,309Posts


Popular Content
Showing content with the highest reputation on 09/10/2023 in Posts
-
3 pointsHAHAHA... the best line in this whole topic!! 😂 (For us single guys!) Bart once cleaned car engine parts in his mother's dishwasher hahaha... Hahaha.. I need to know what she said when she came home!! 😅 Next time throw a sausage roll with it's plastic packaging still on in the oven.. then you have an excuse for the smell Hahaha..3 points
-
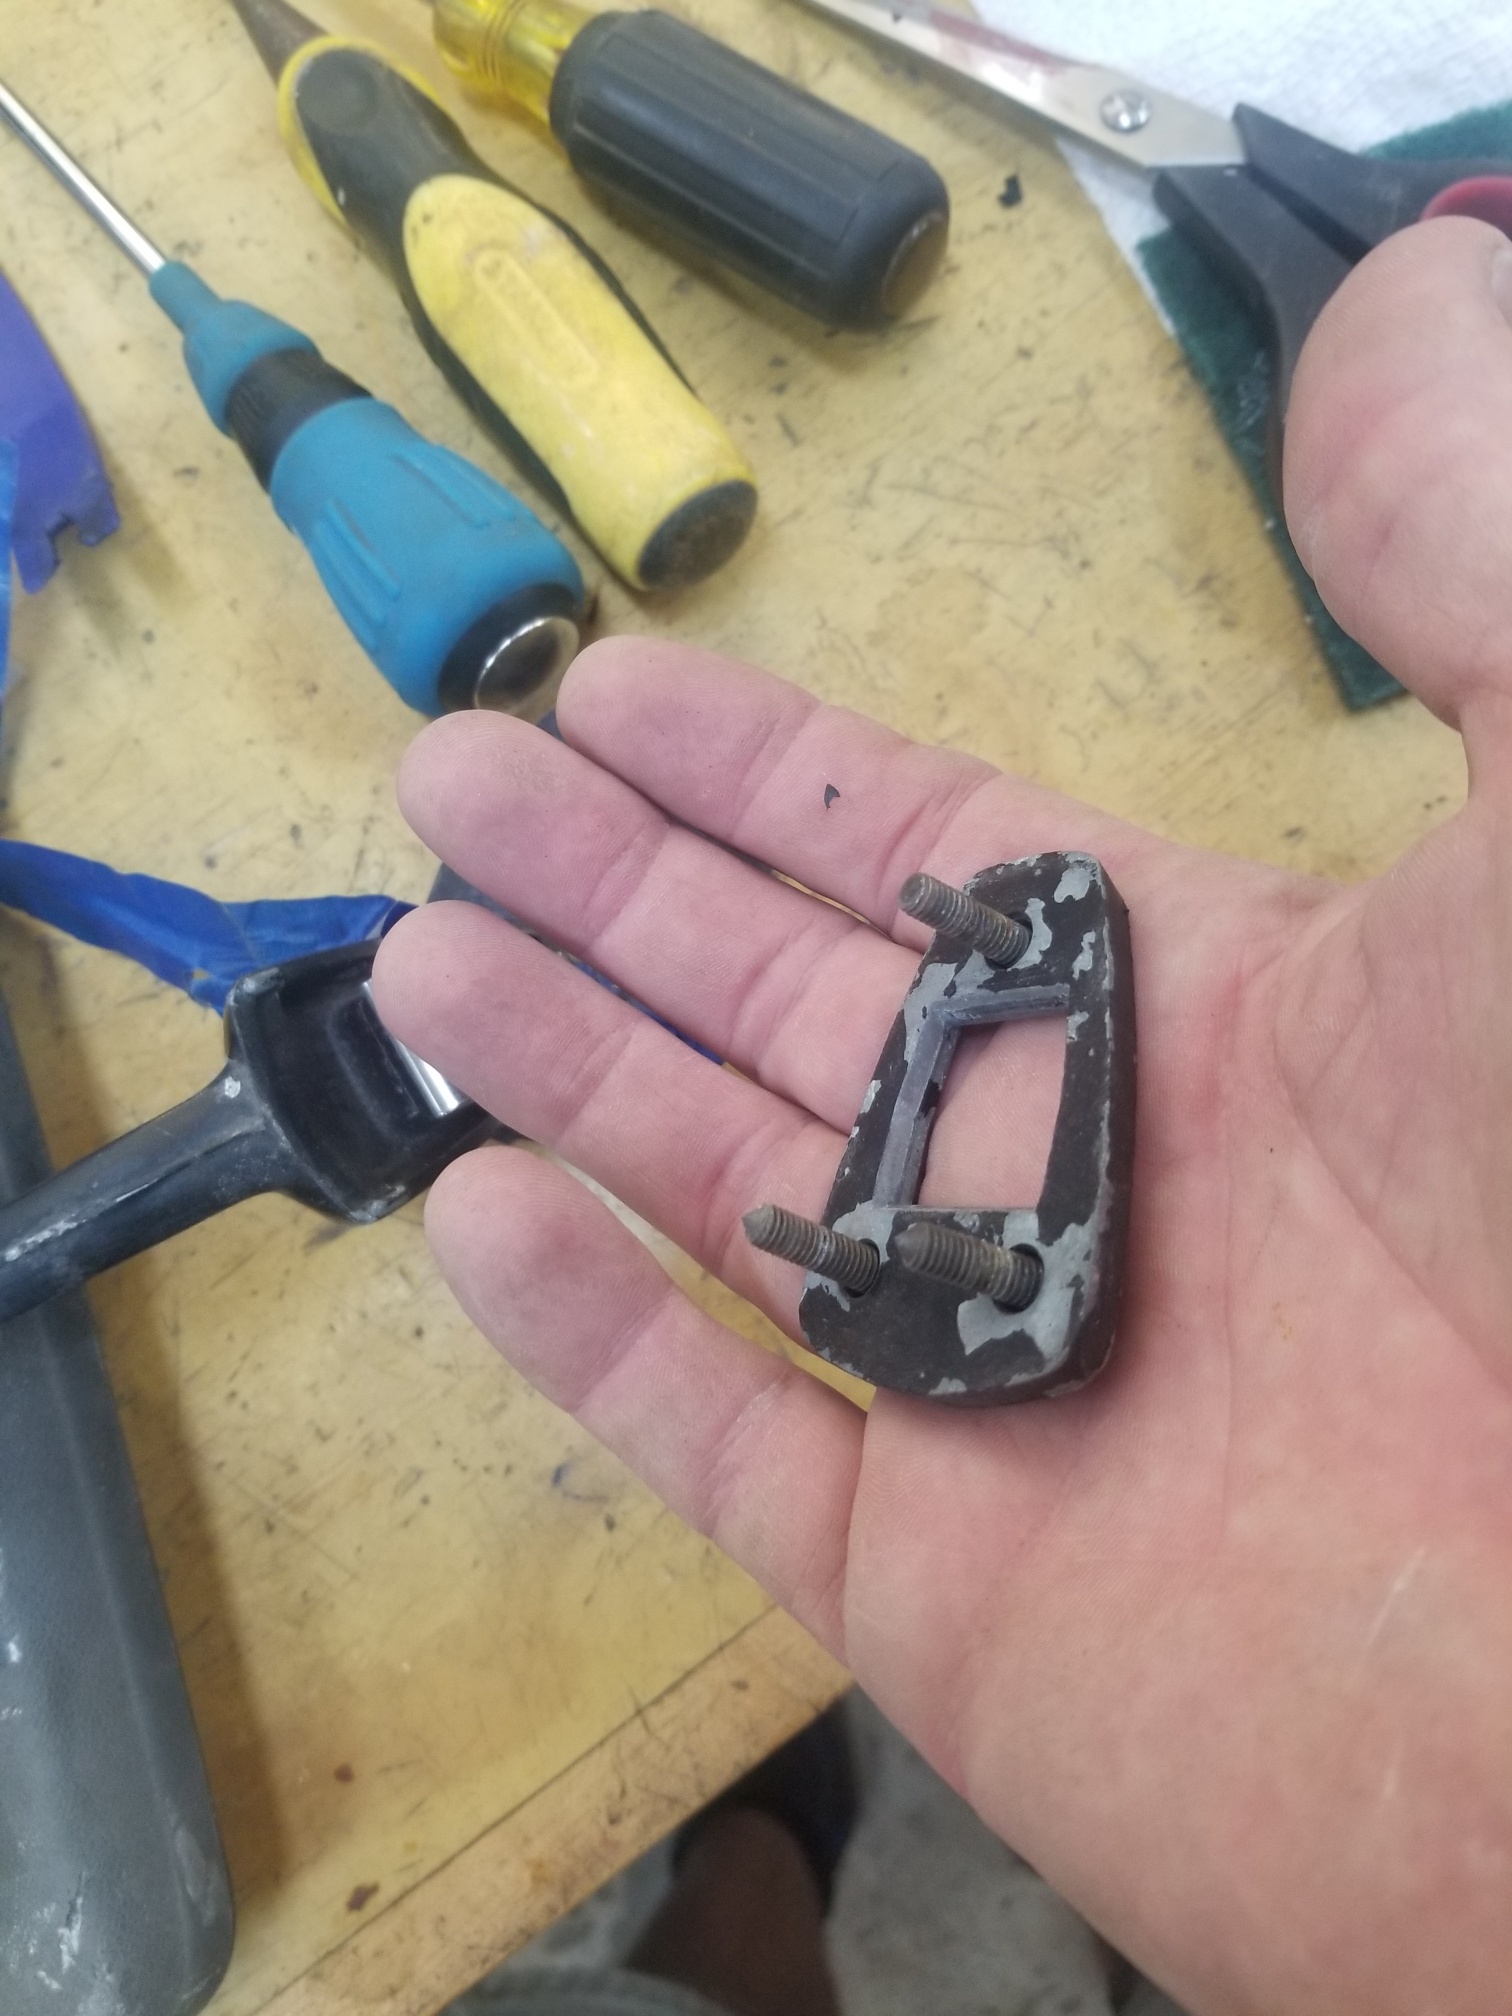
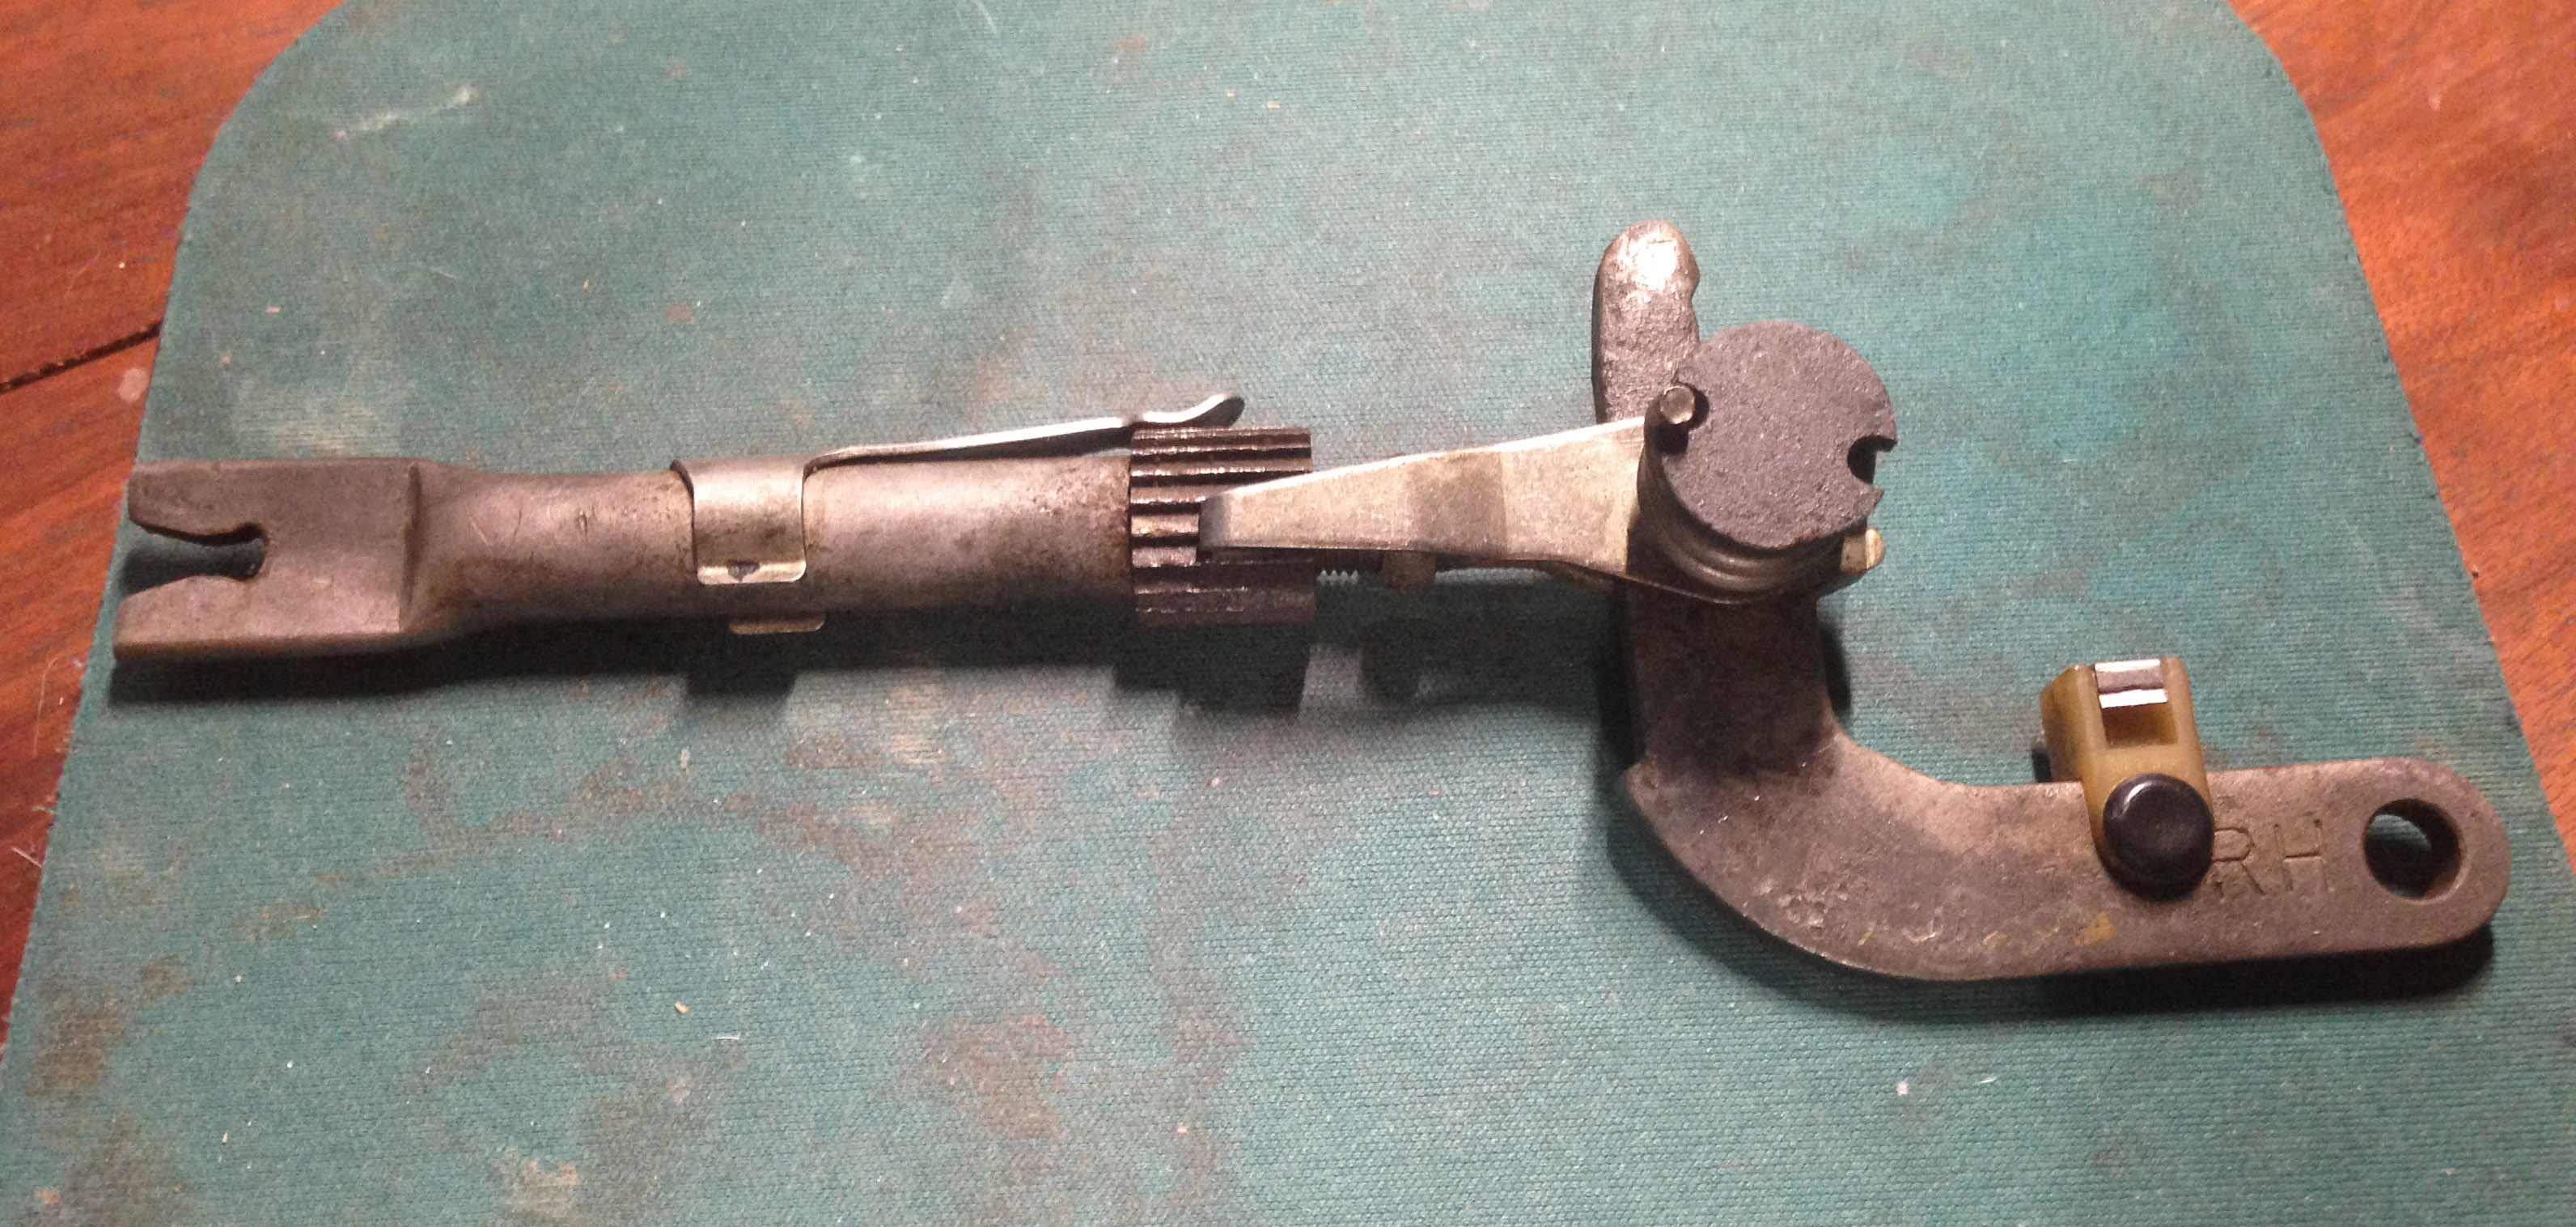
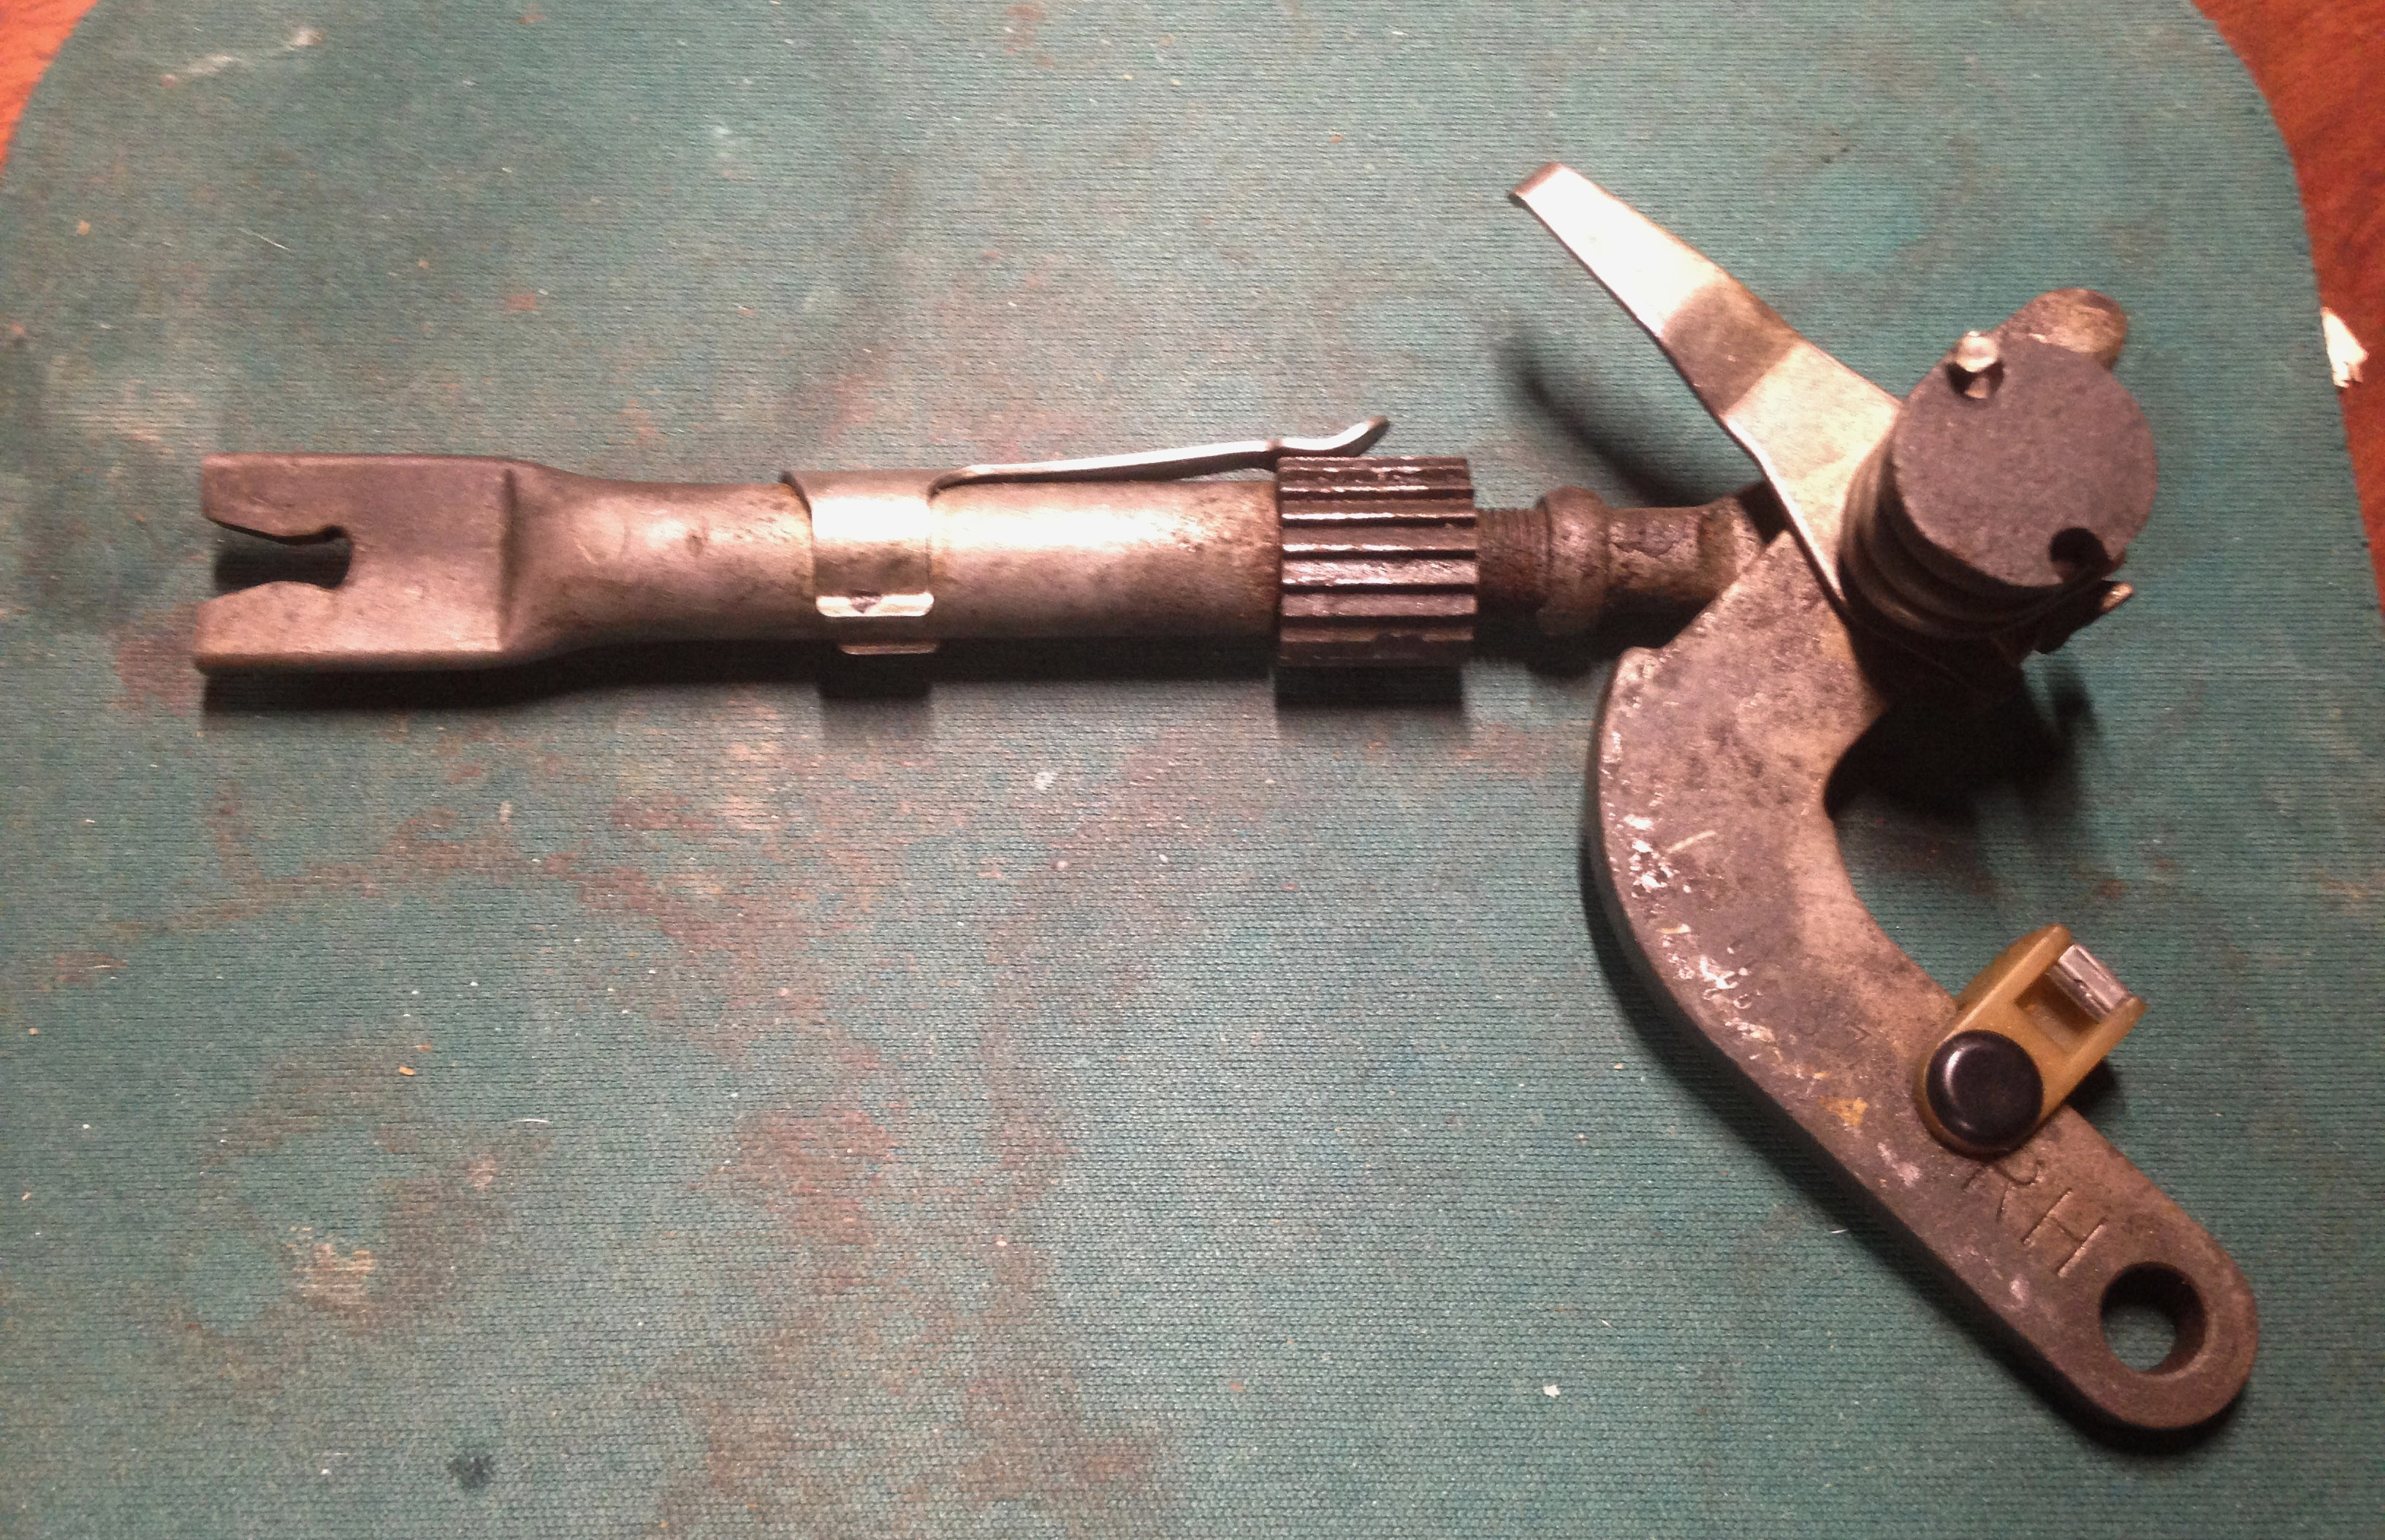
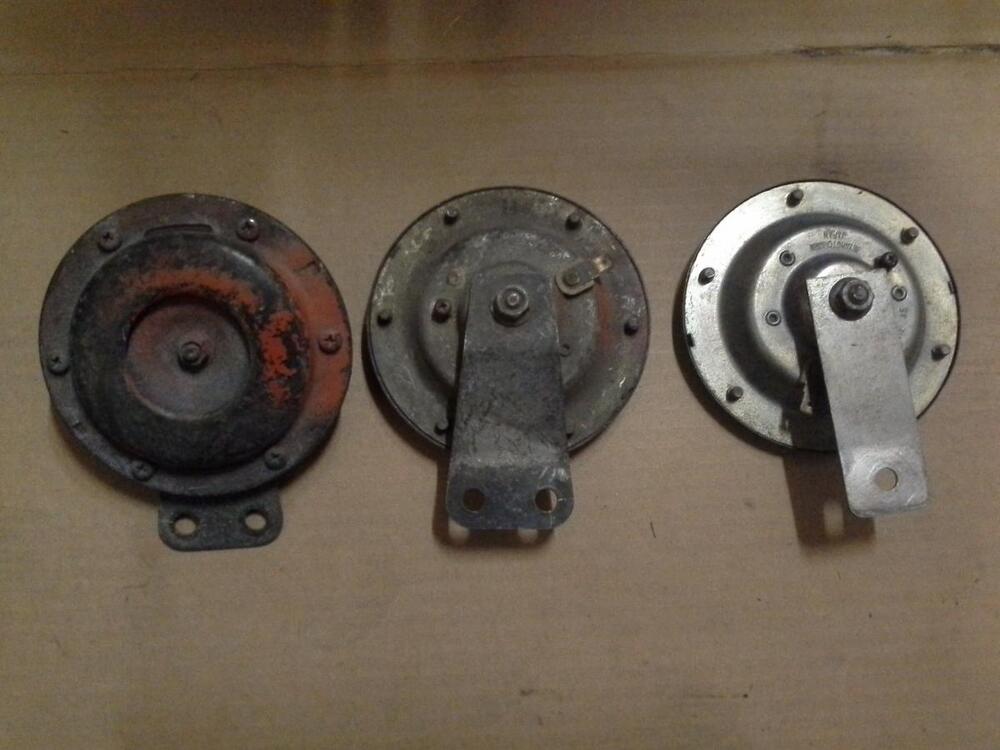
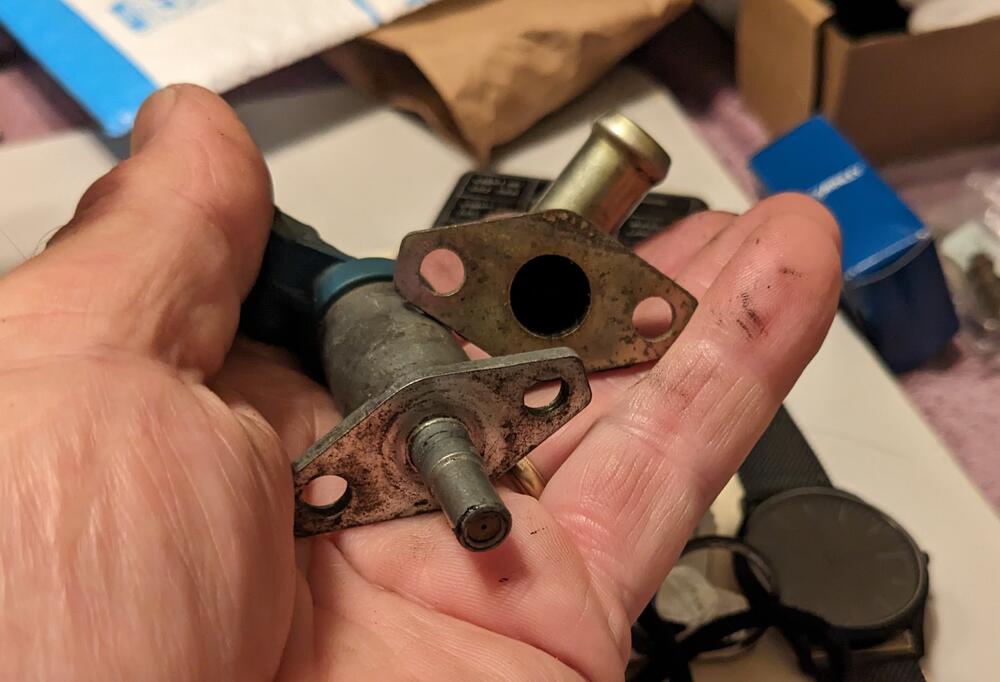
Yes the plated version is the 240Z version. The other one is a 280Z. I think there are 3 basic models of the S30 horns and probably more finer differences in the 3. The left horn in you photo is the later 280Z version. The single metal strip bolts to the bumper shock. The right horn is from the 240Z. There is also a variant on the 240Z version, I think it came in the 260Z and maybe the later 240Z. The have the same mounting bolt pattern as the 240Z, but the bracket connects to a single bolt on the back of the horn like the 280Z. See photo.
 2 points
 -
I know it will turn out great and you will be proud of it. That is the real reason we do it. Like a lot of other hobbies, you shouldn't do a cost analysis. I throw all my receipts in a box for the next guy to add up!2 points
-
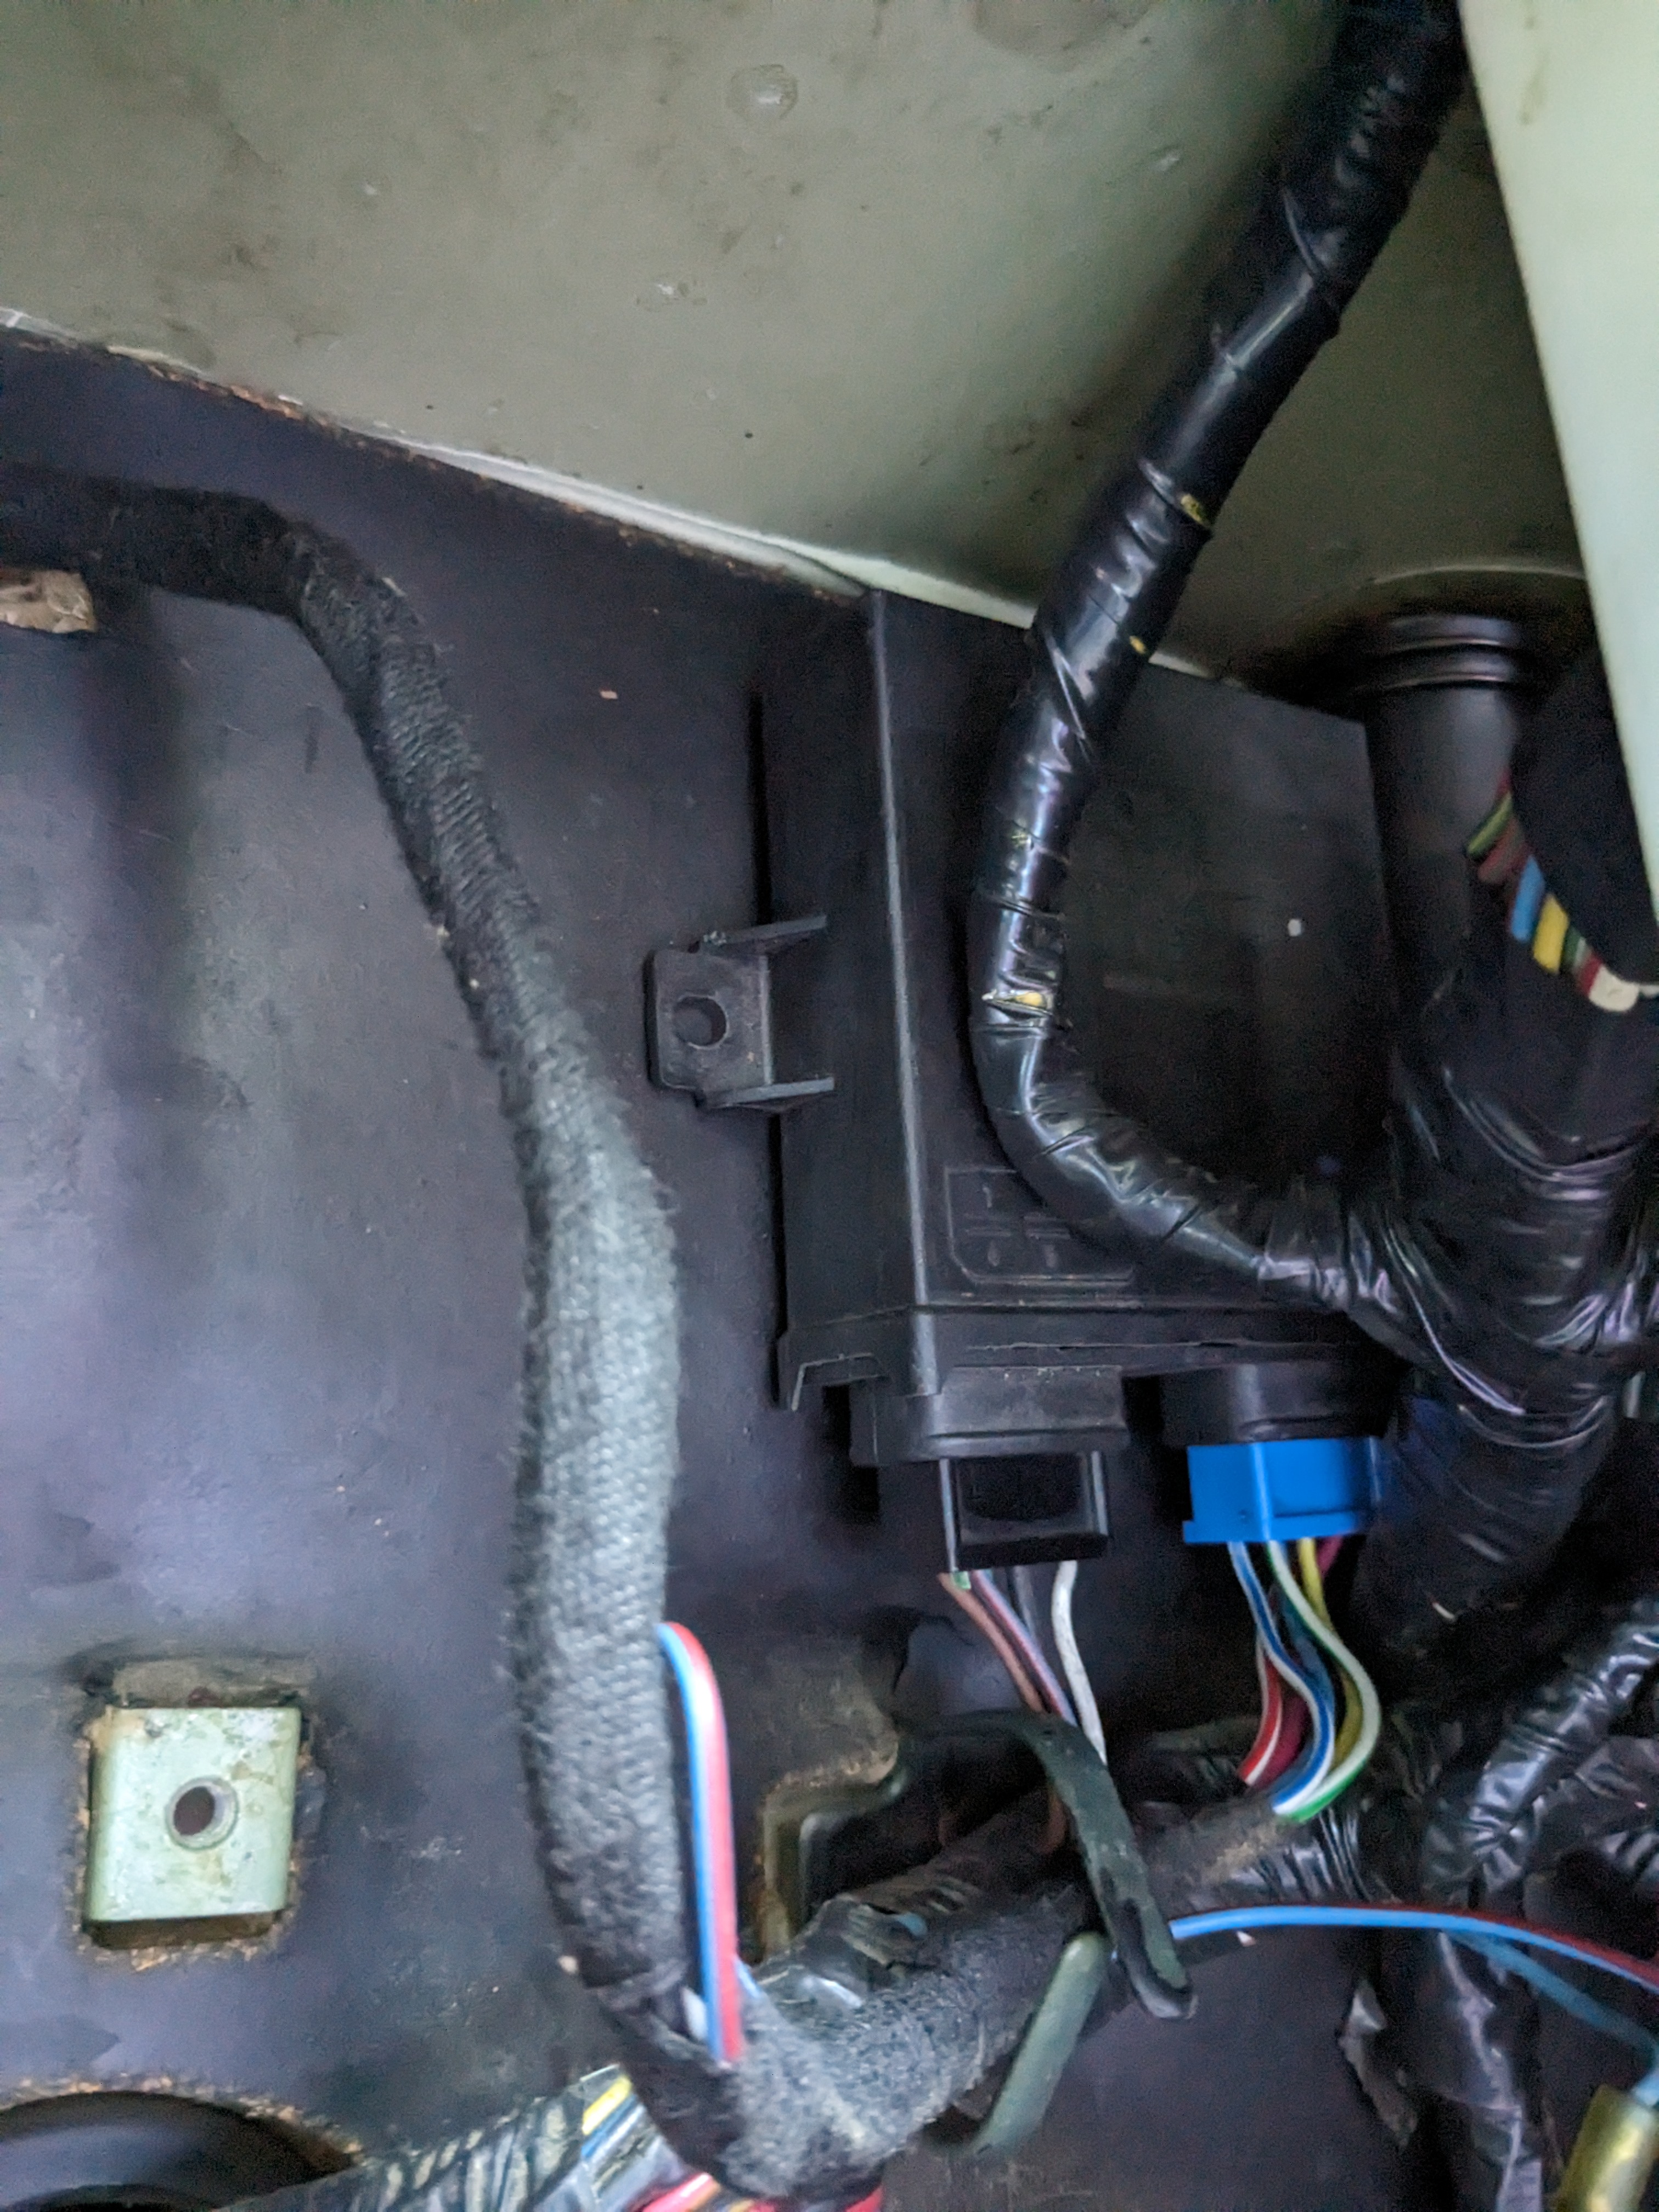
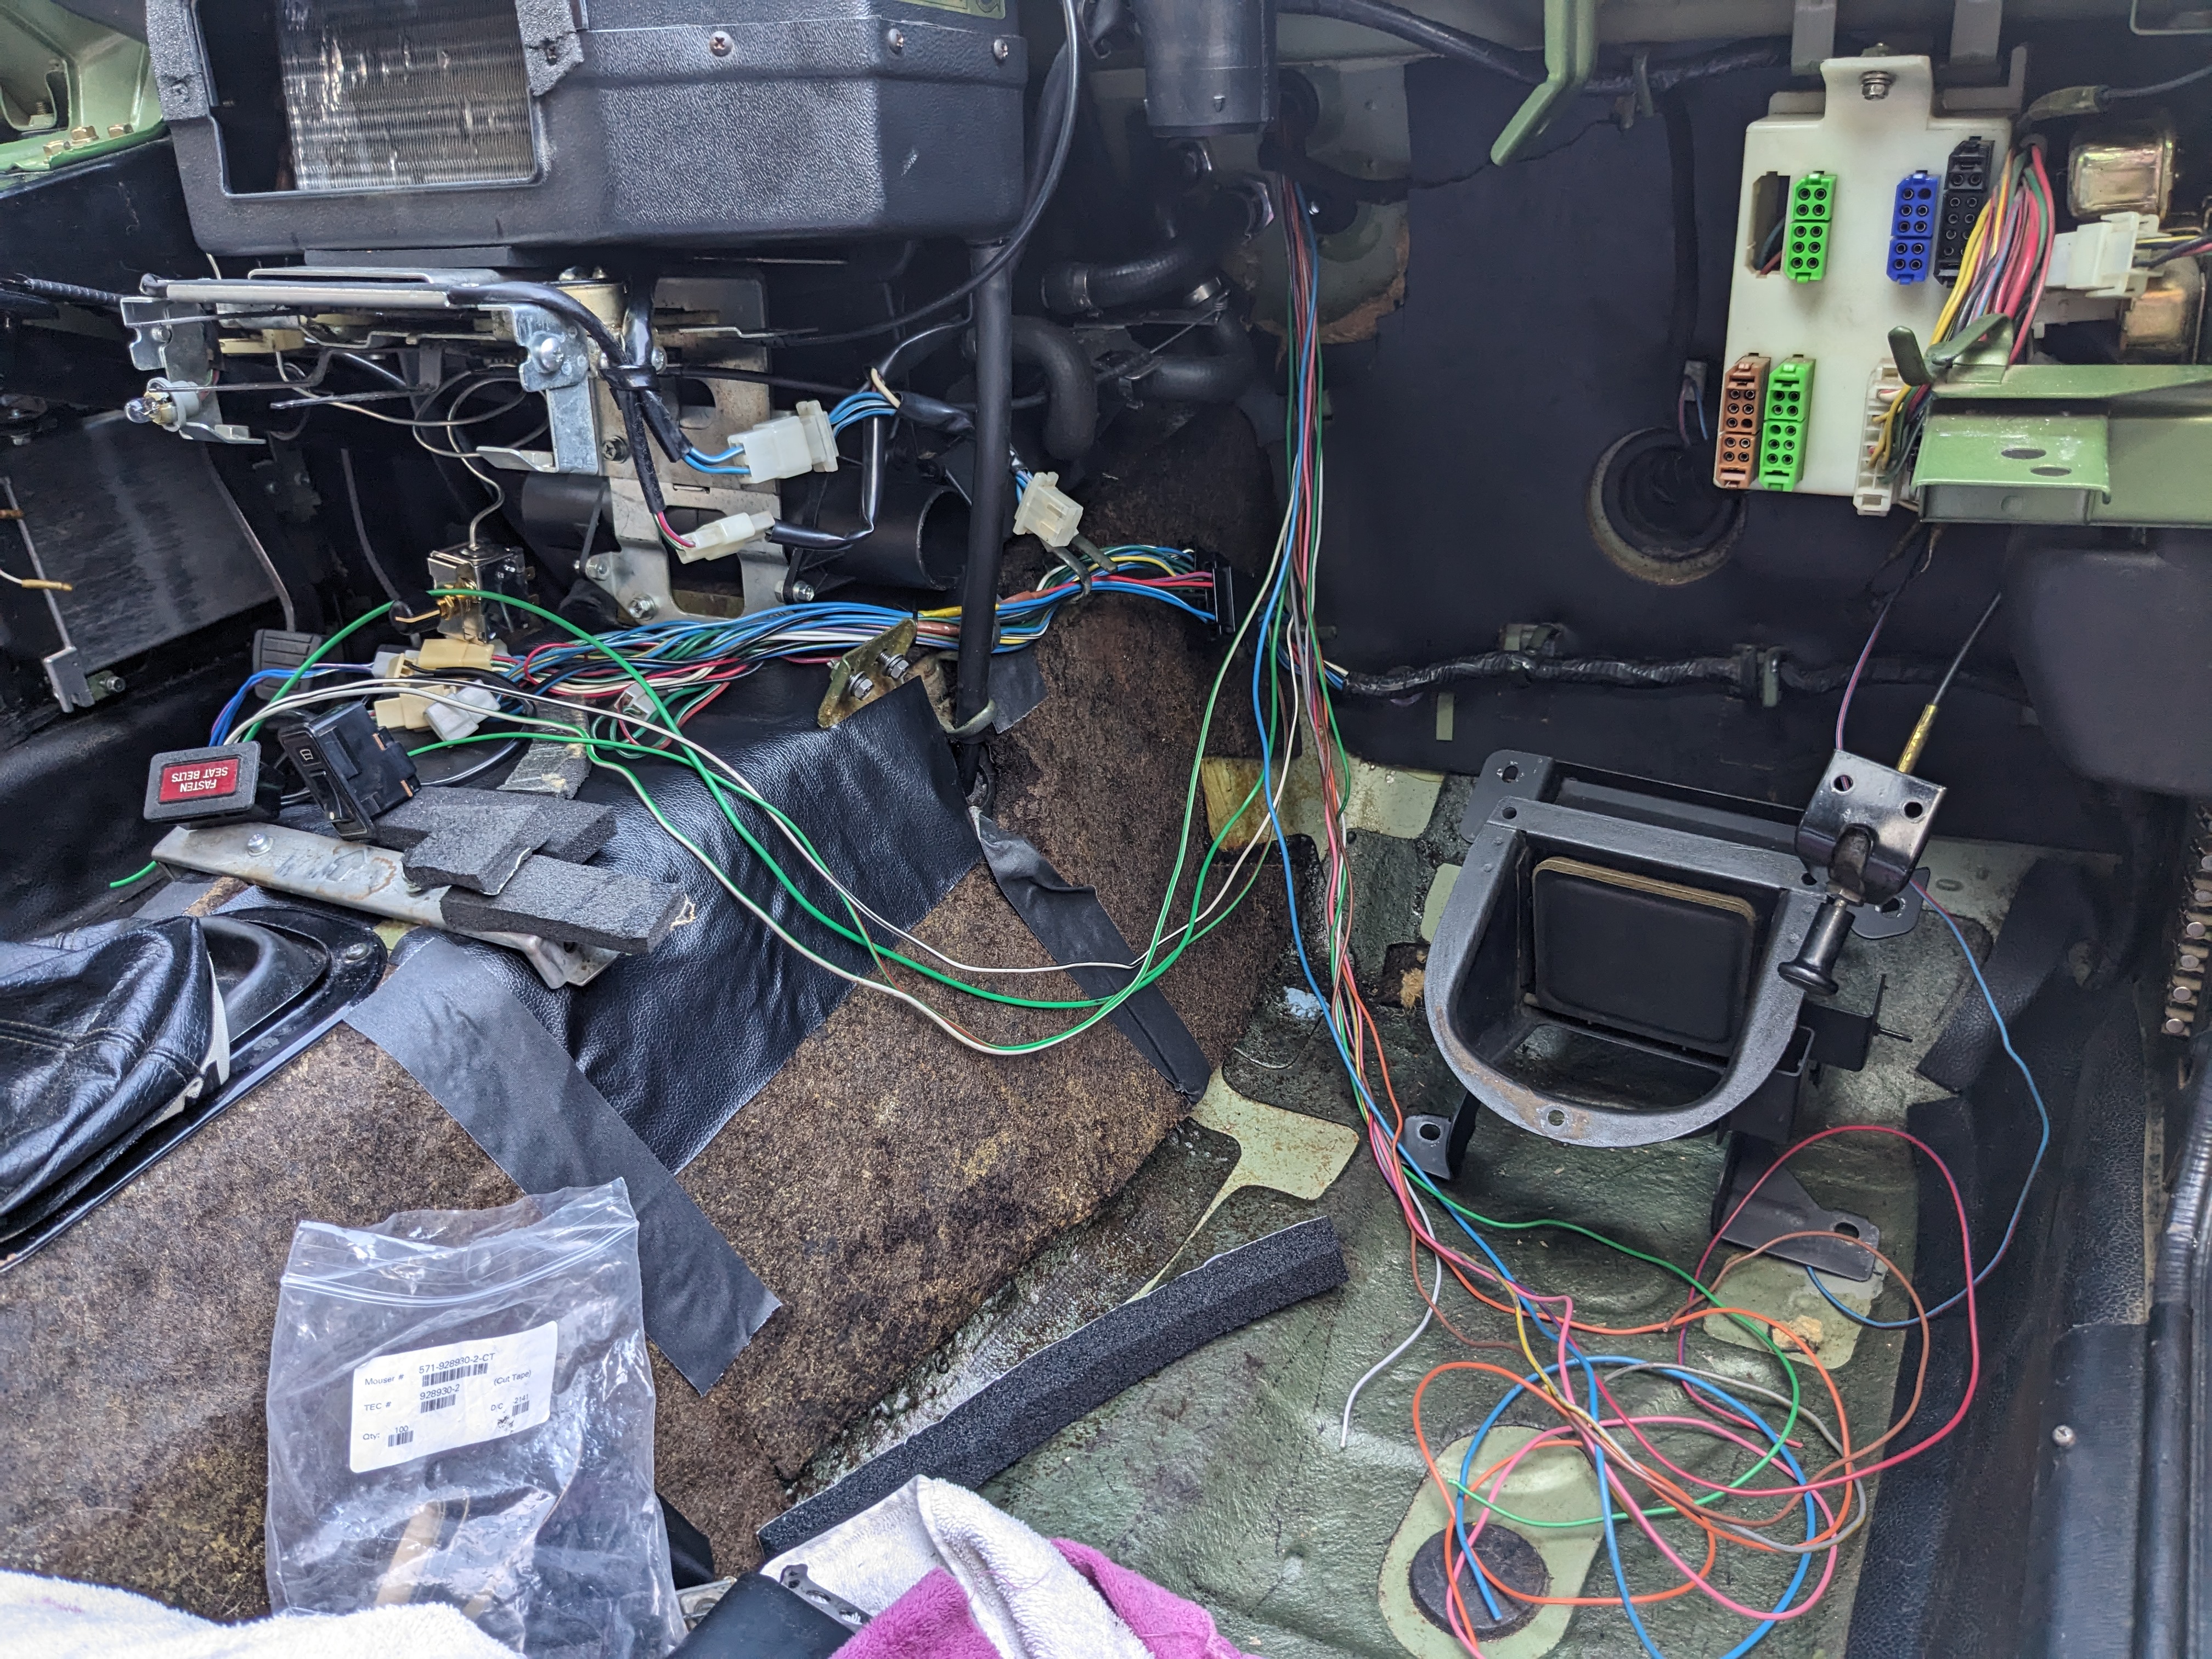
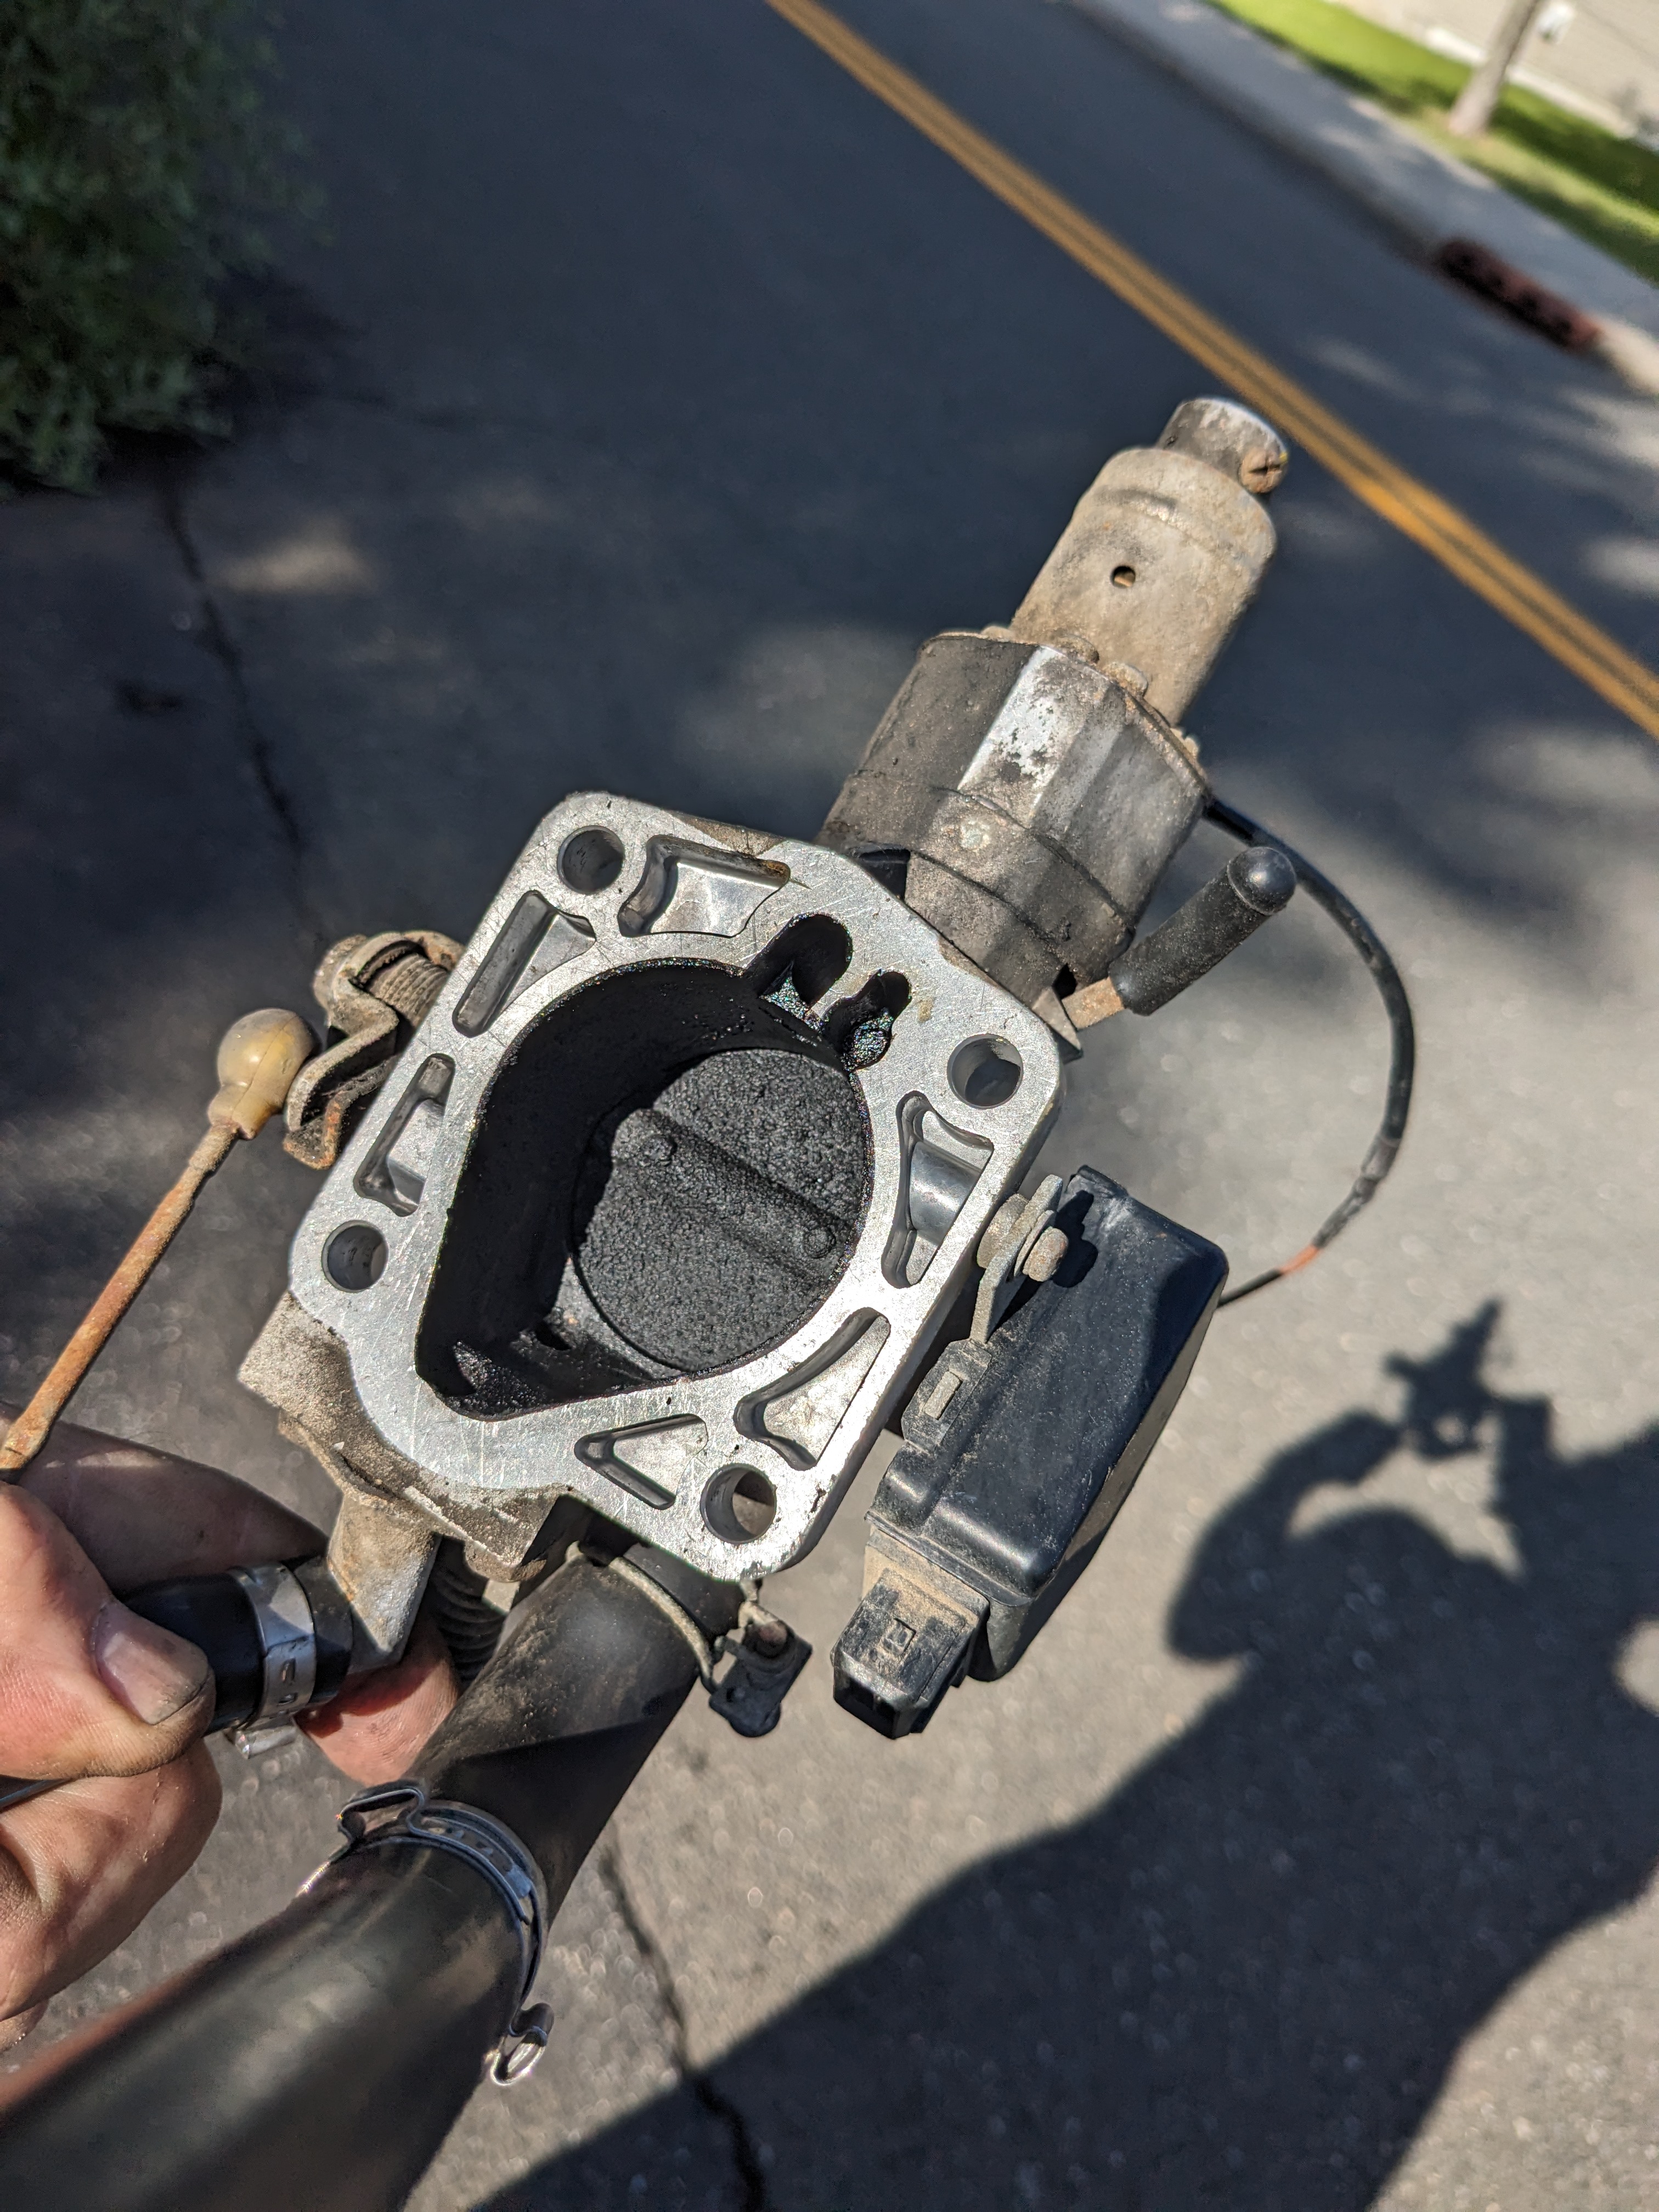
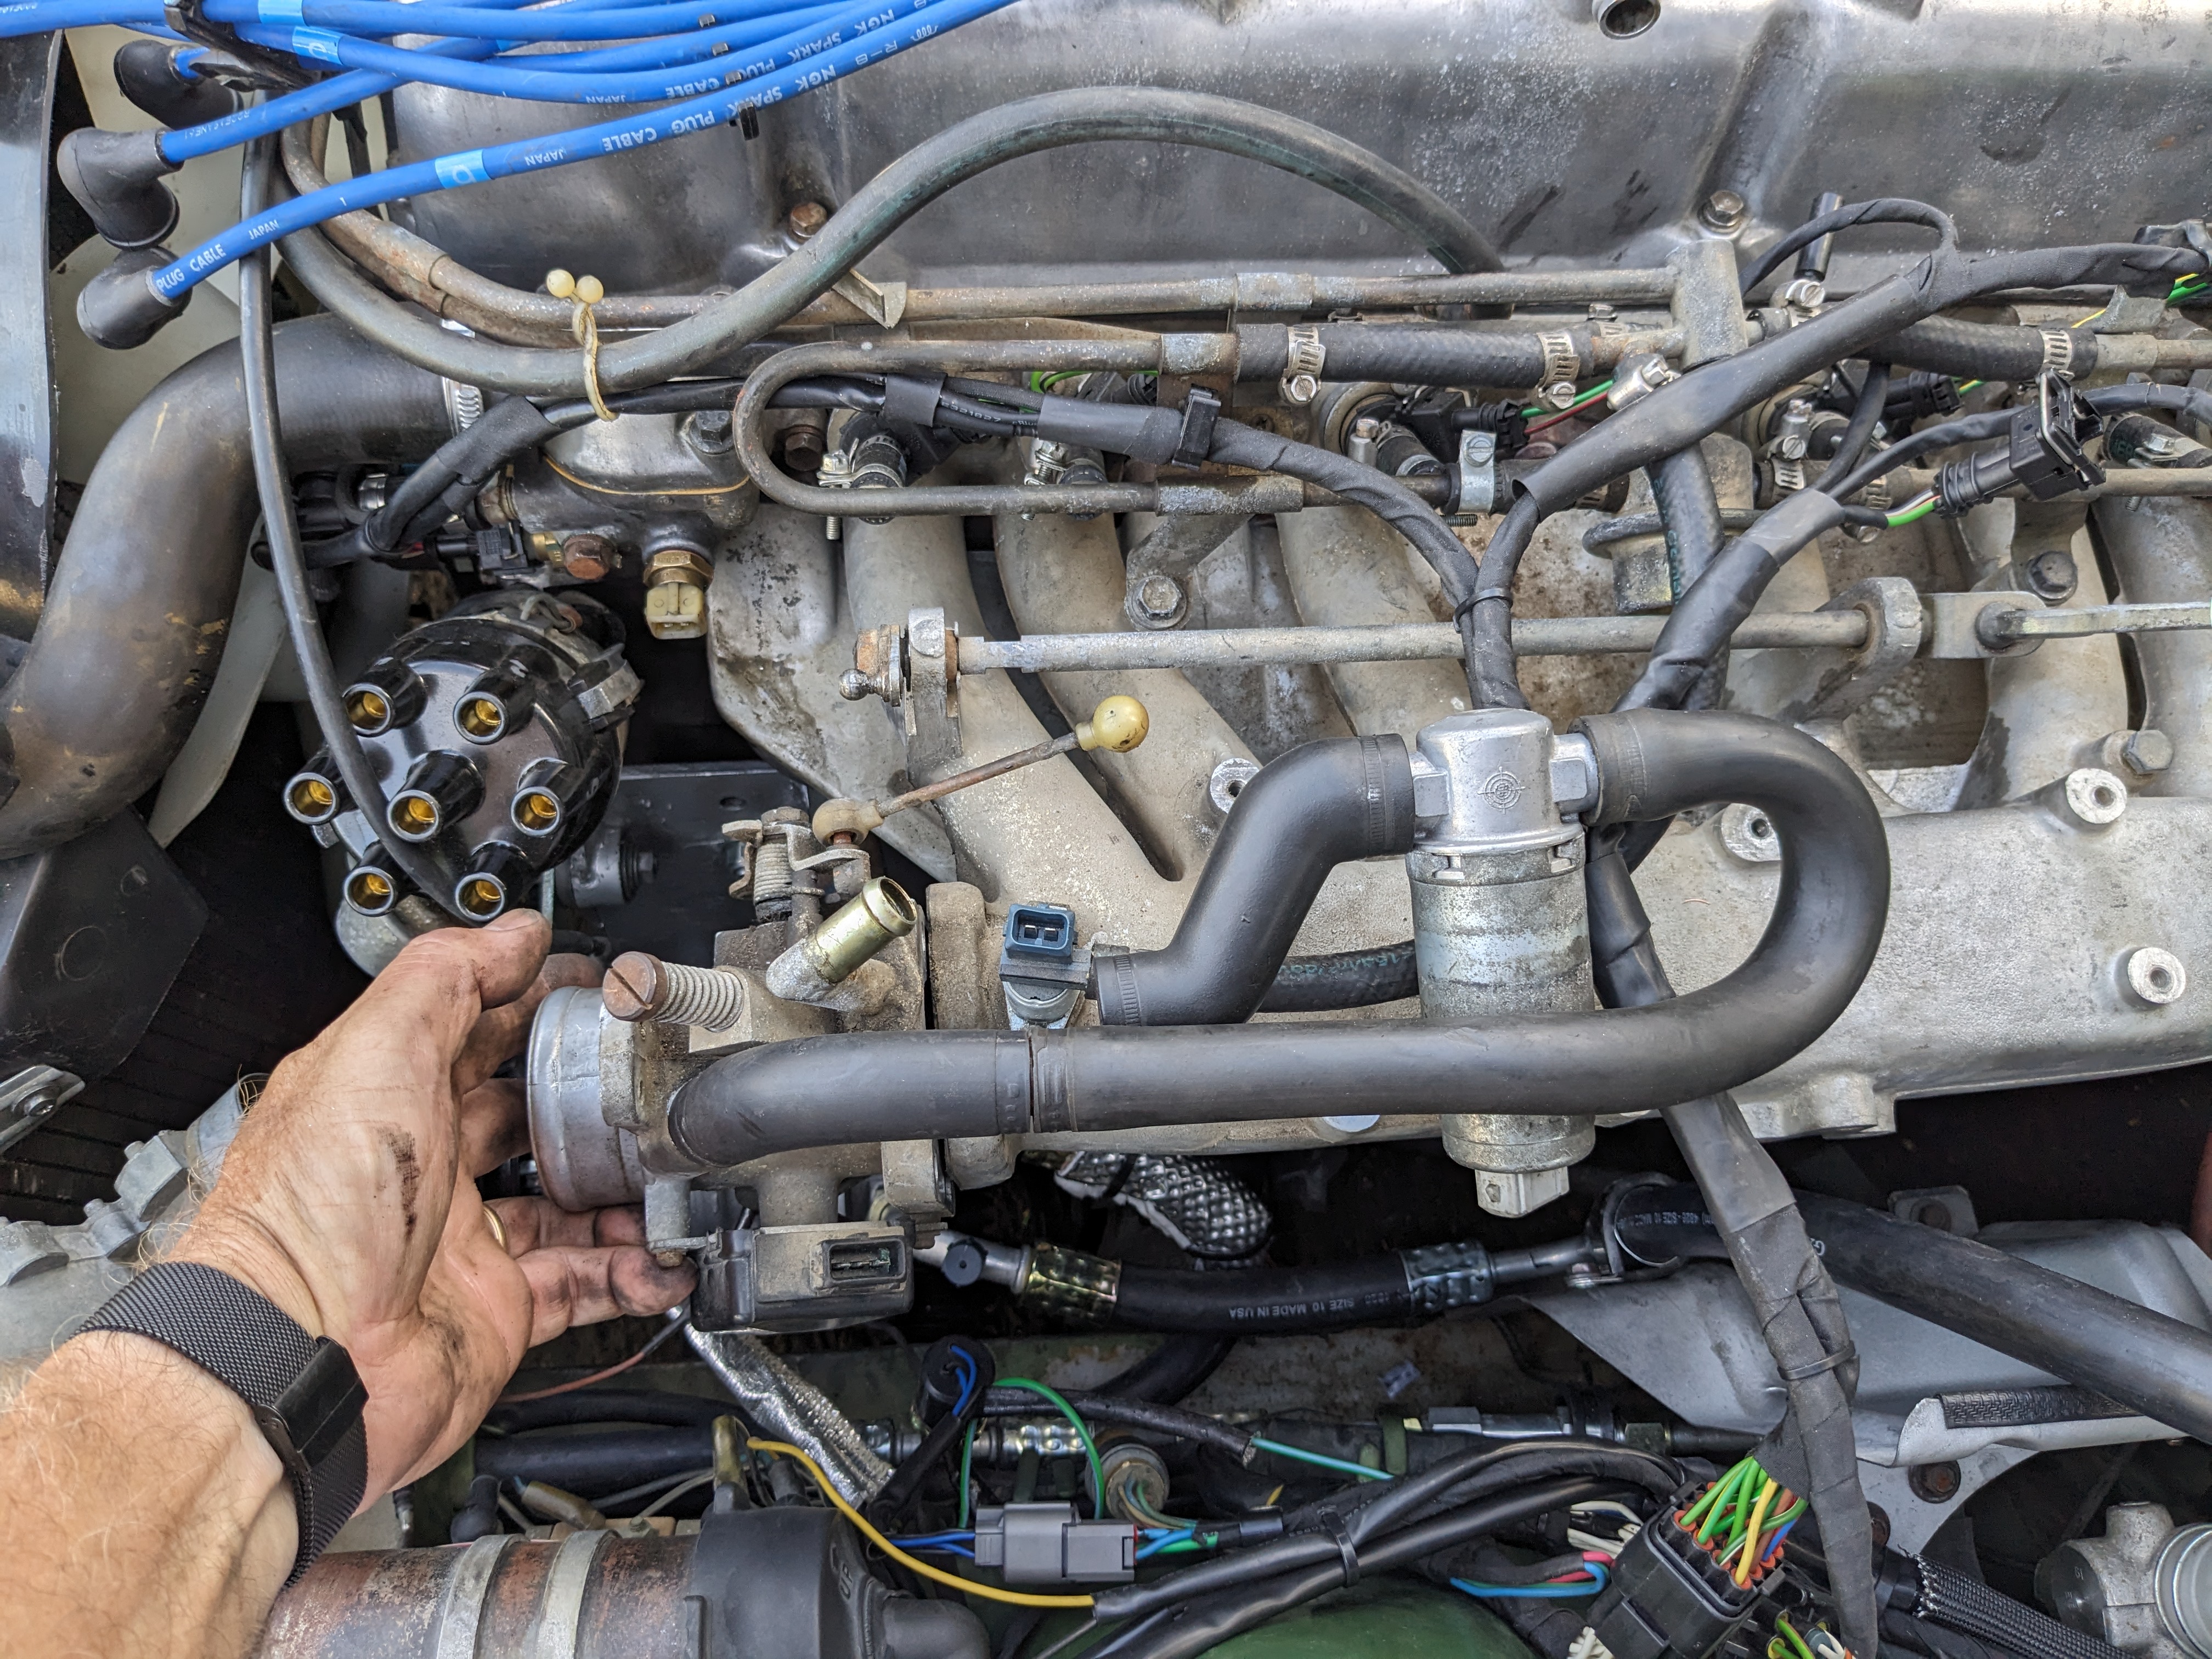
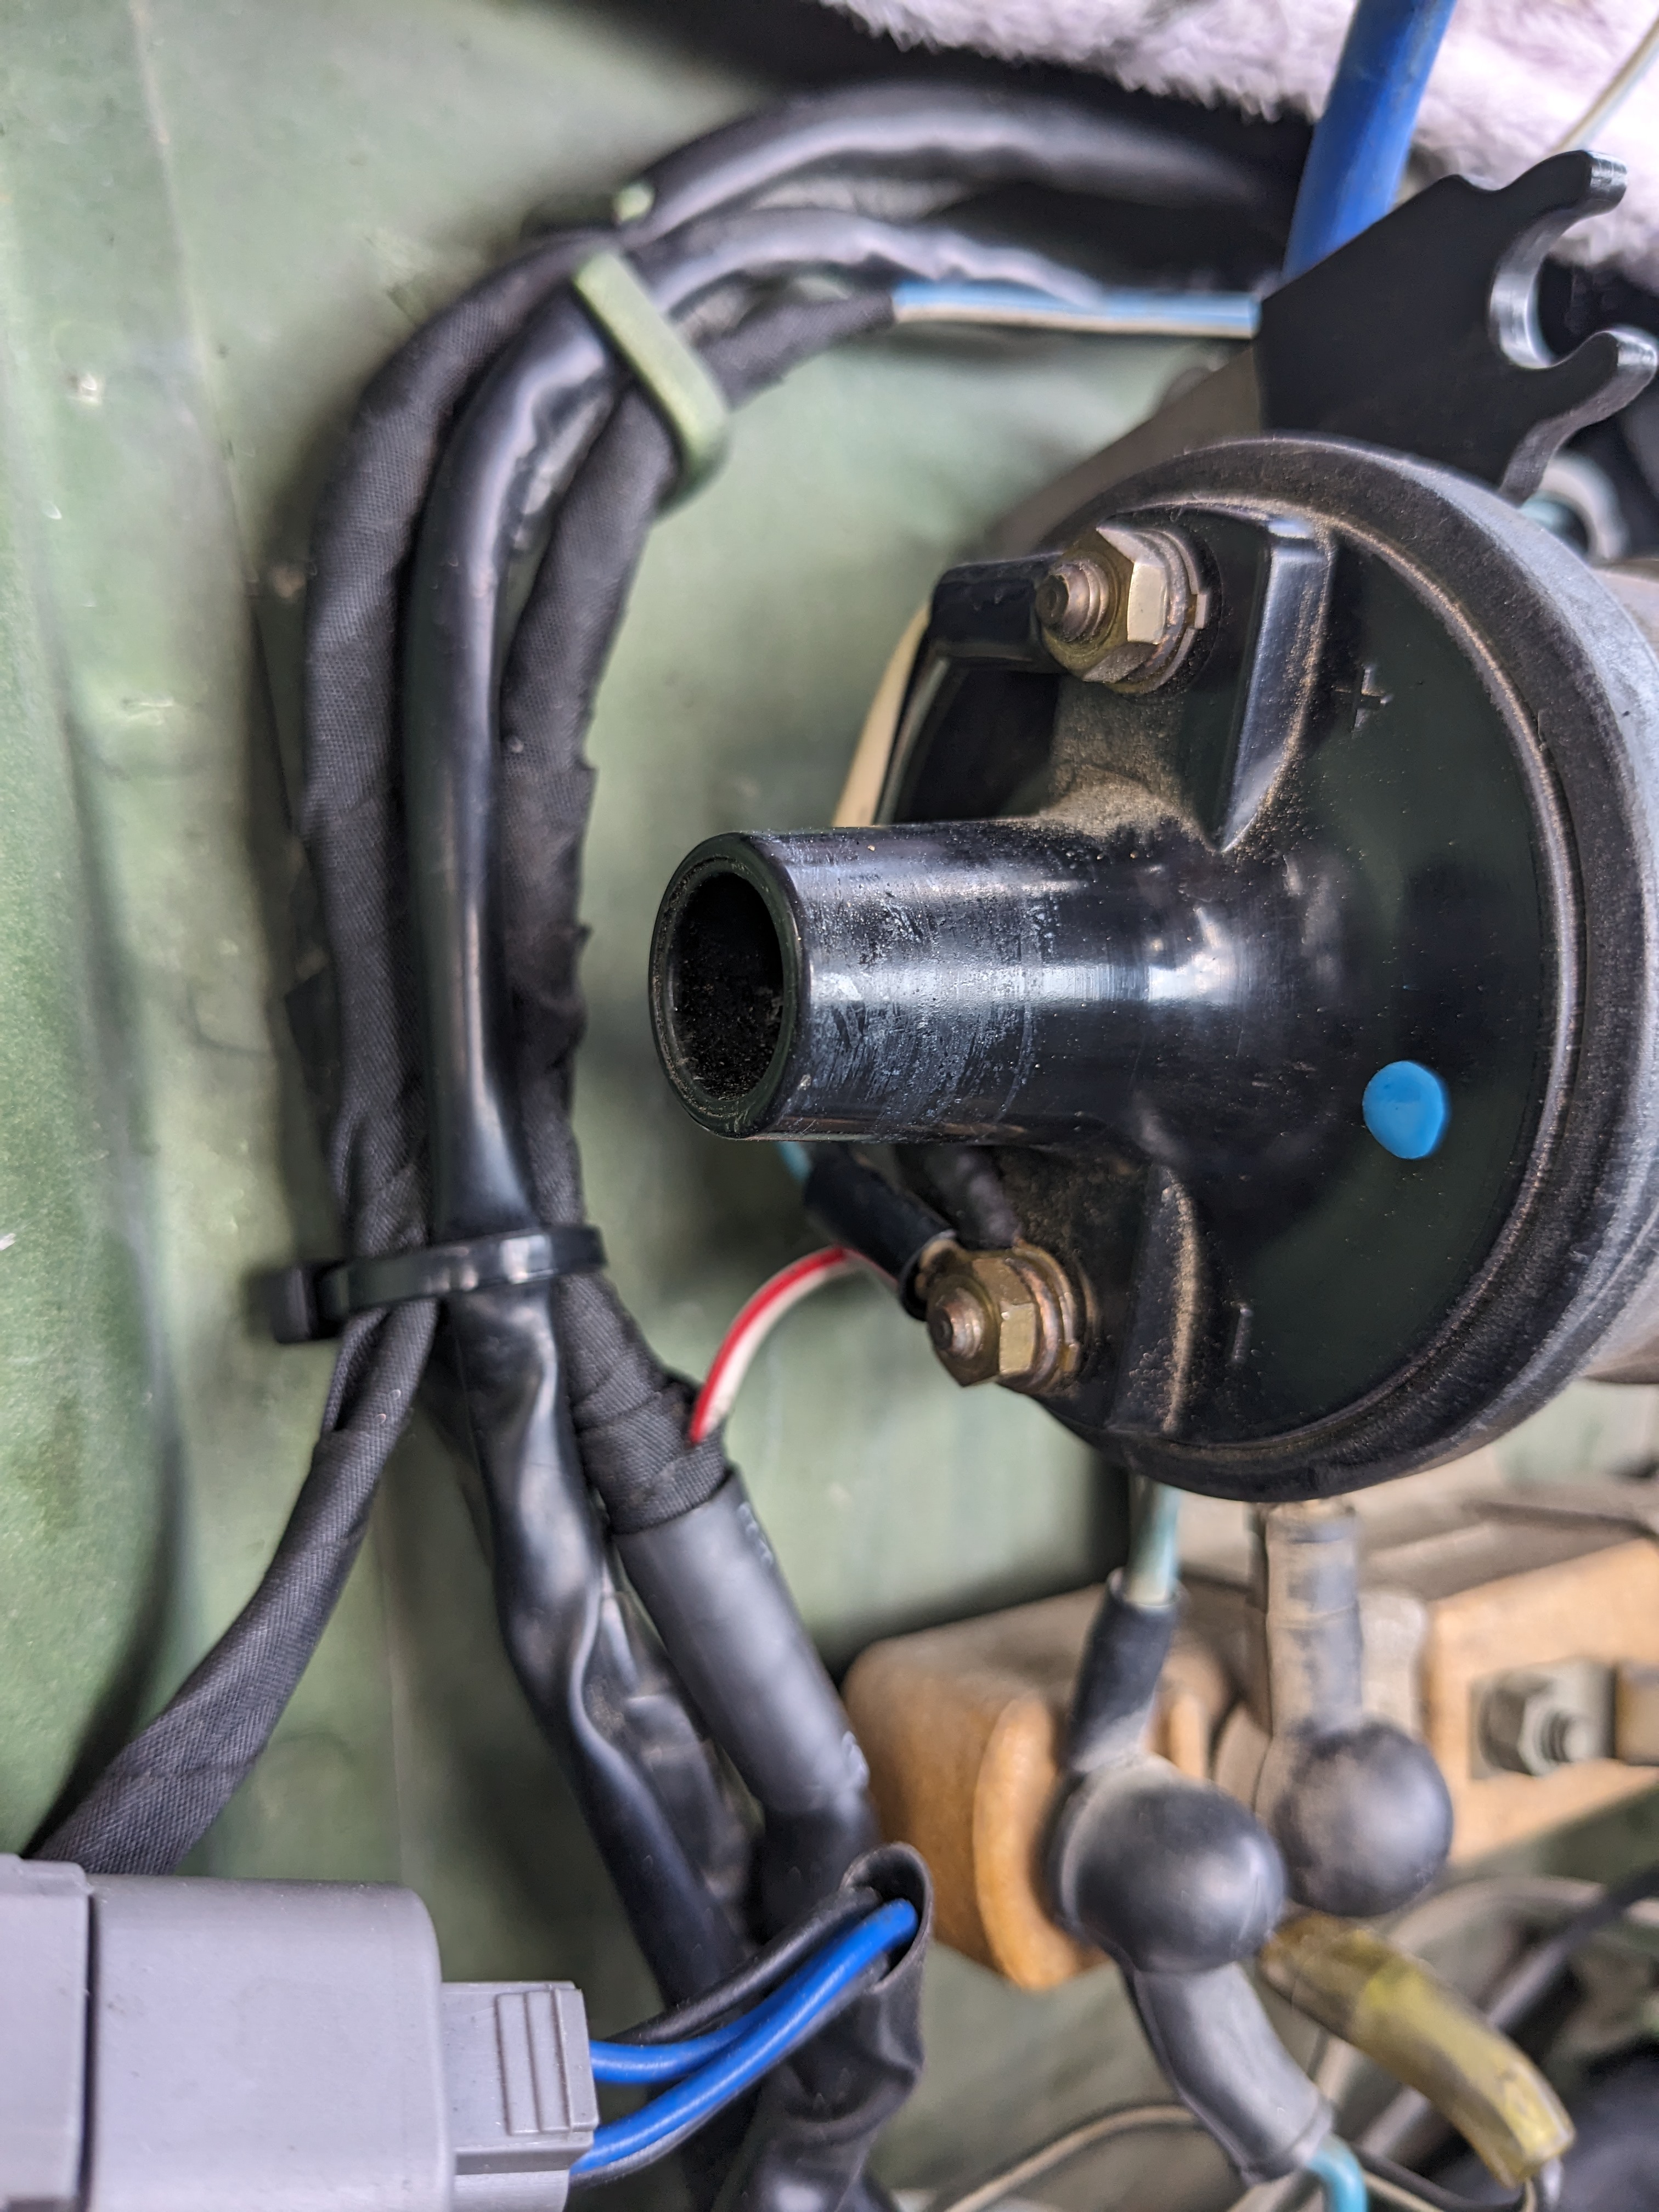
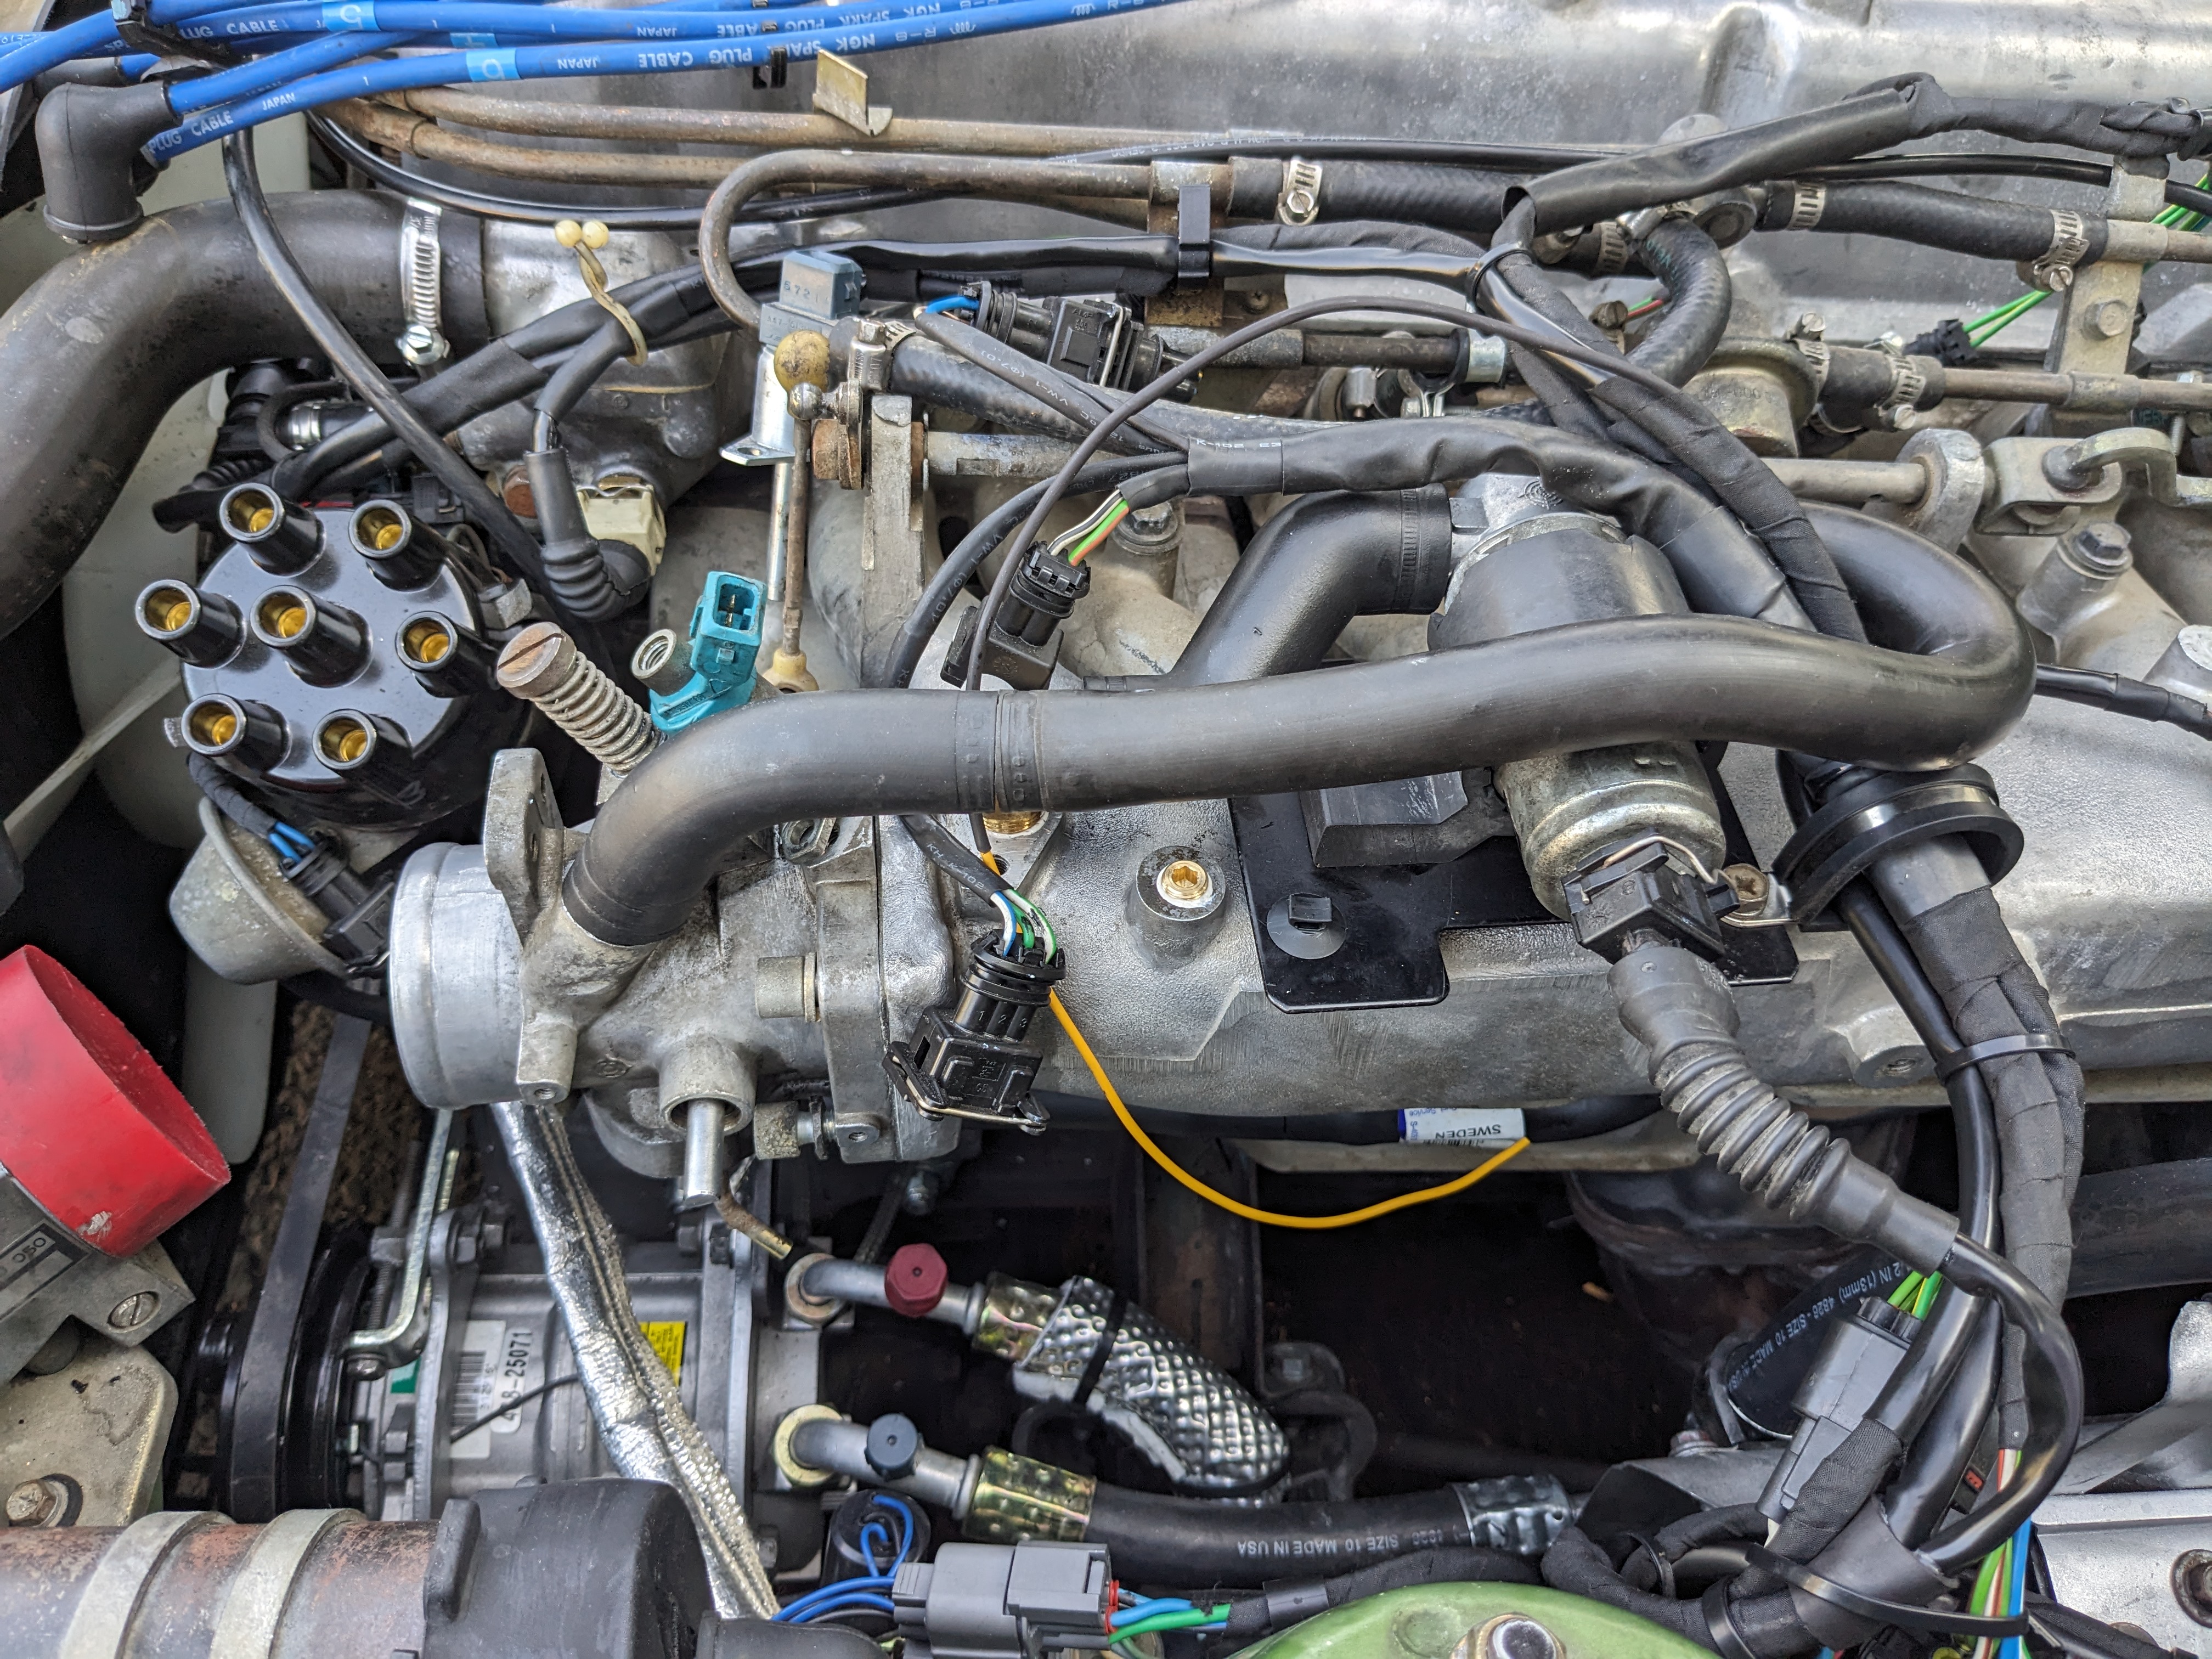
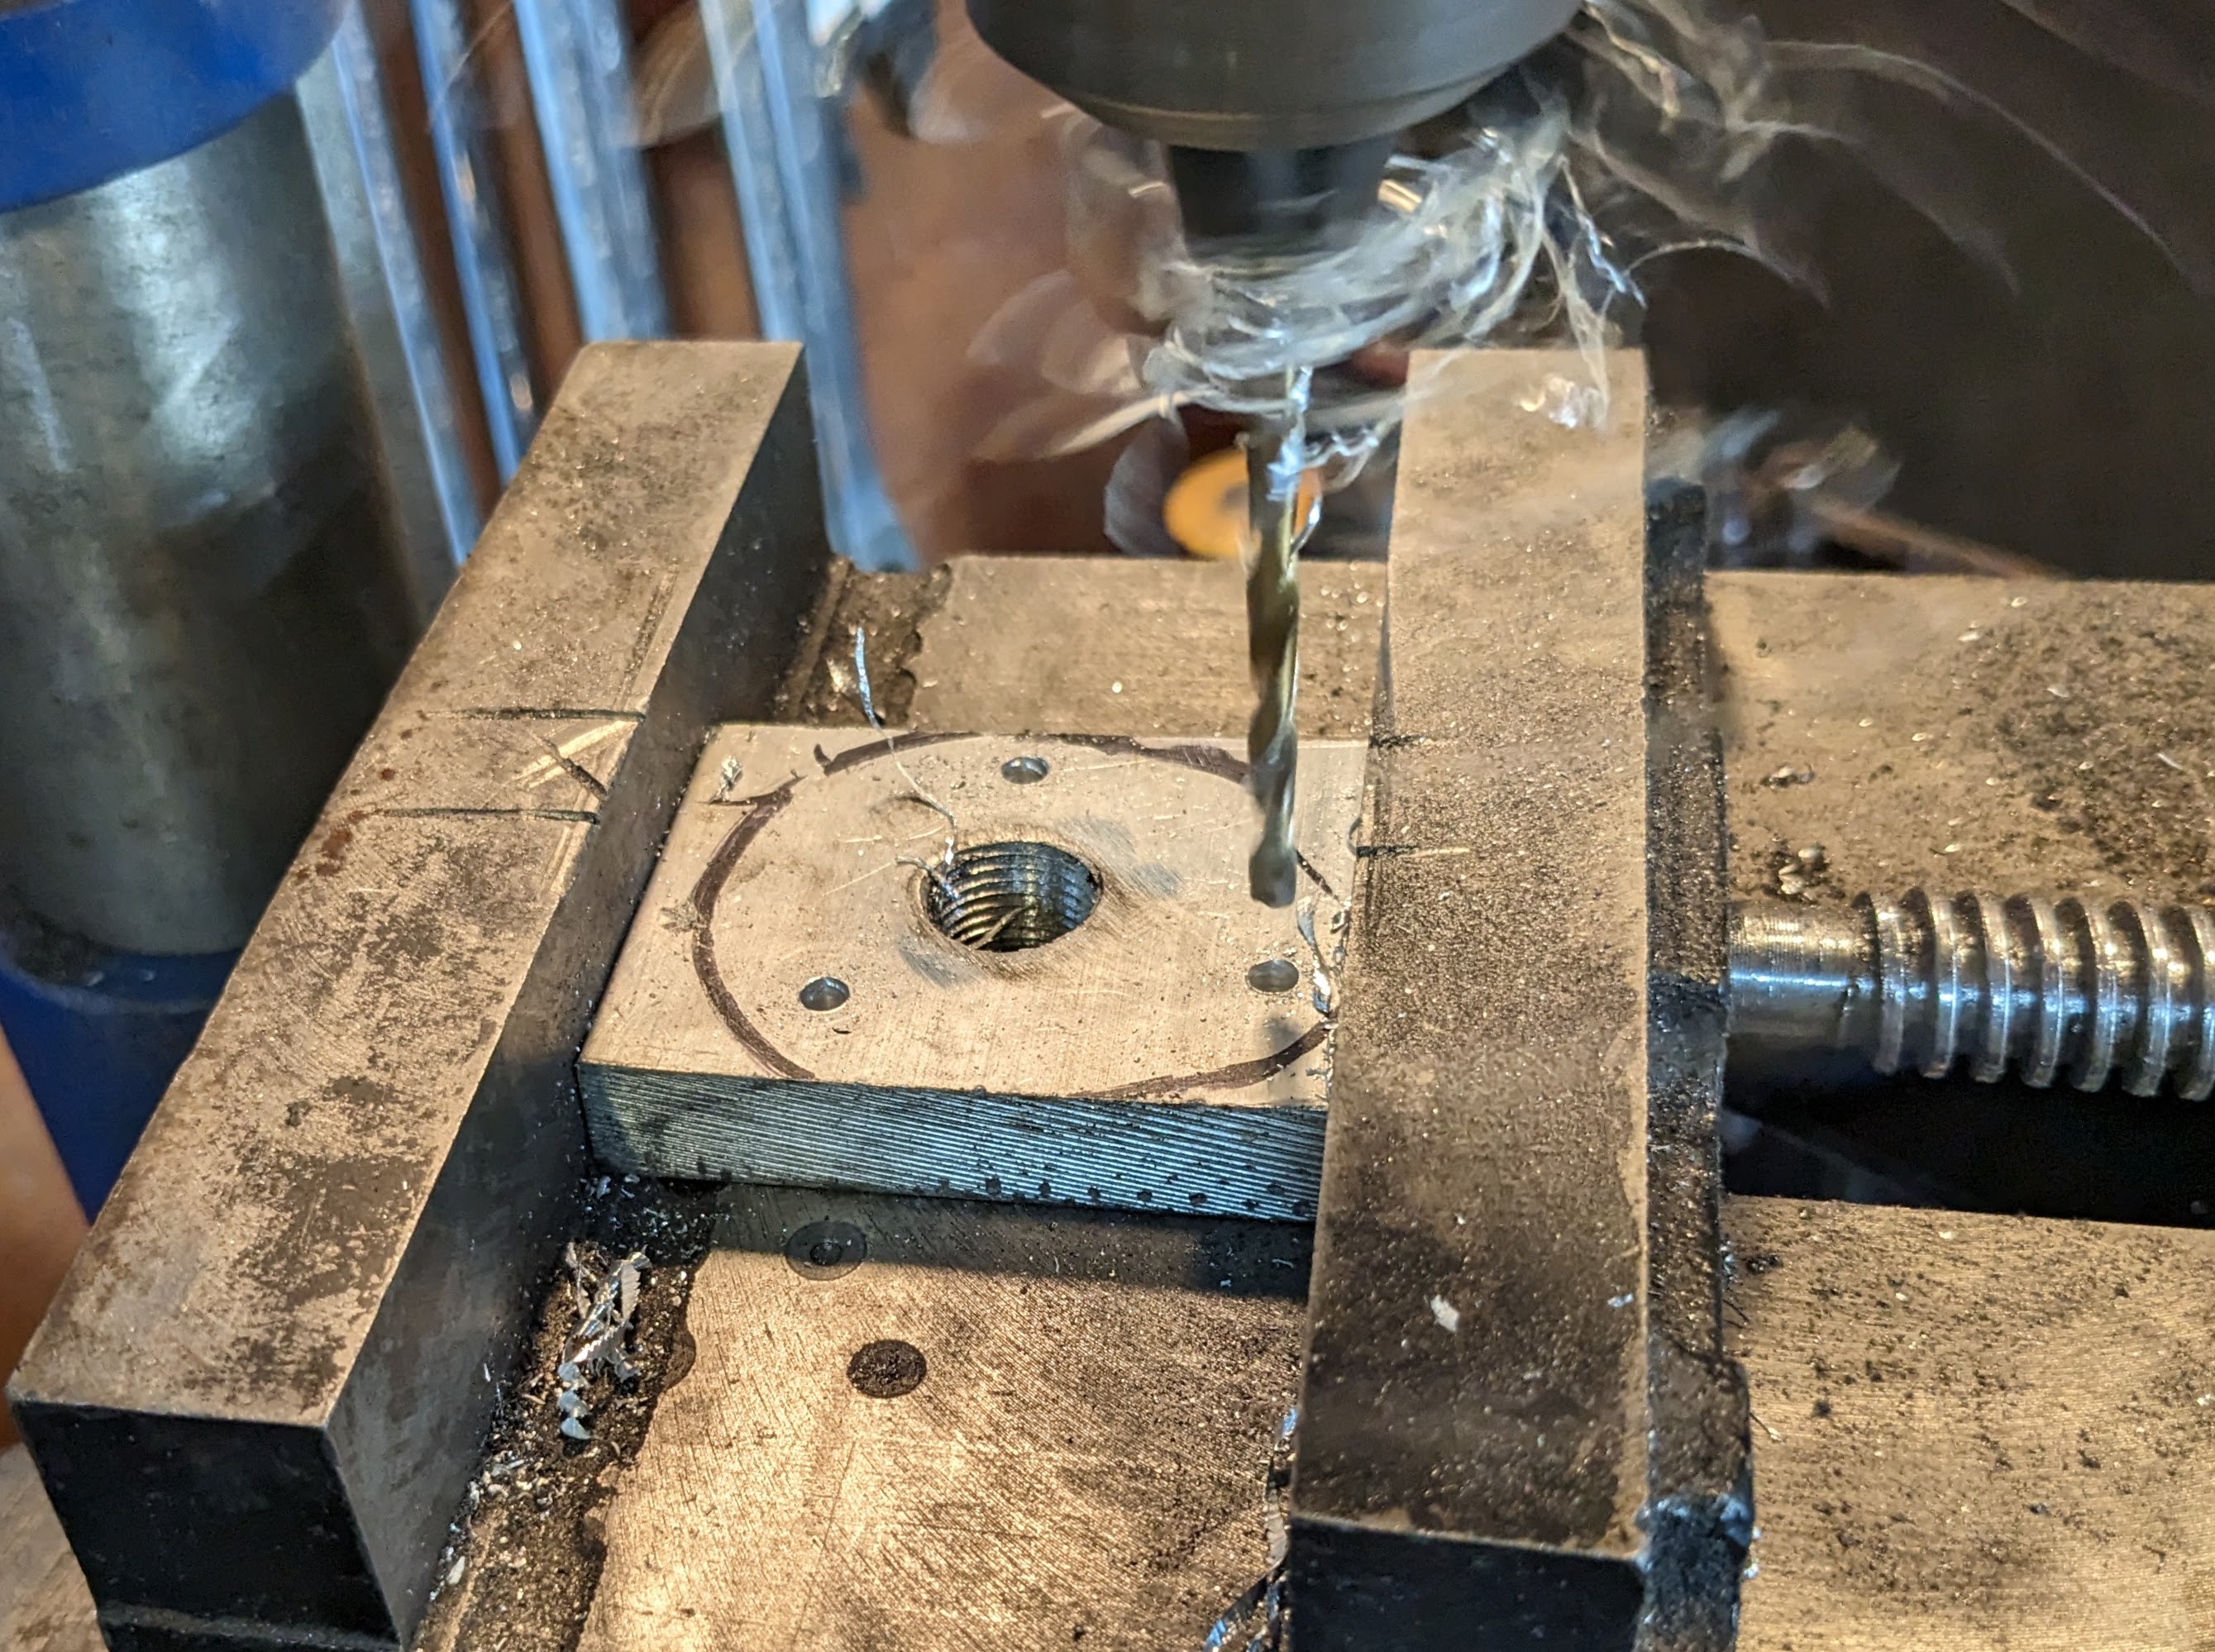
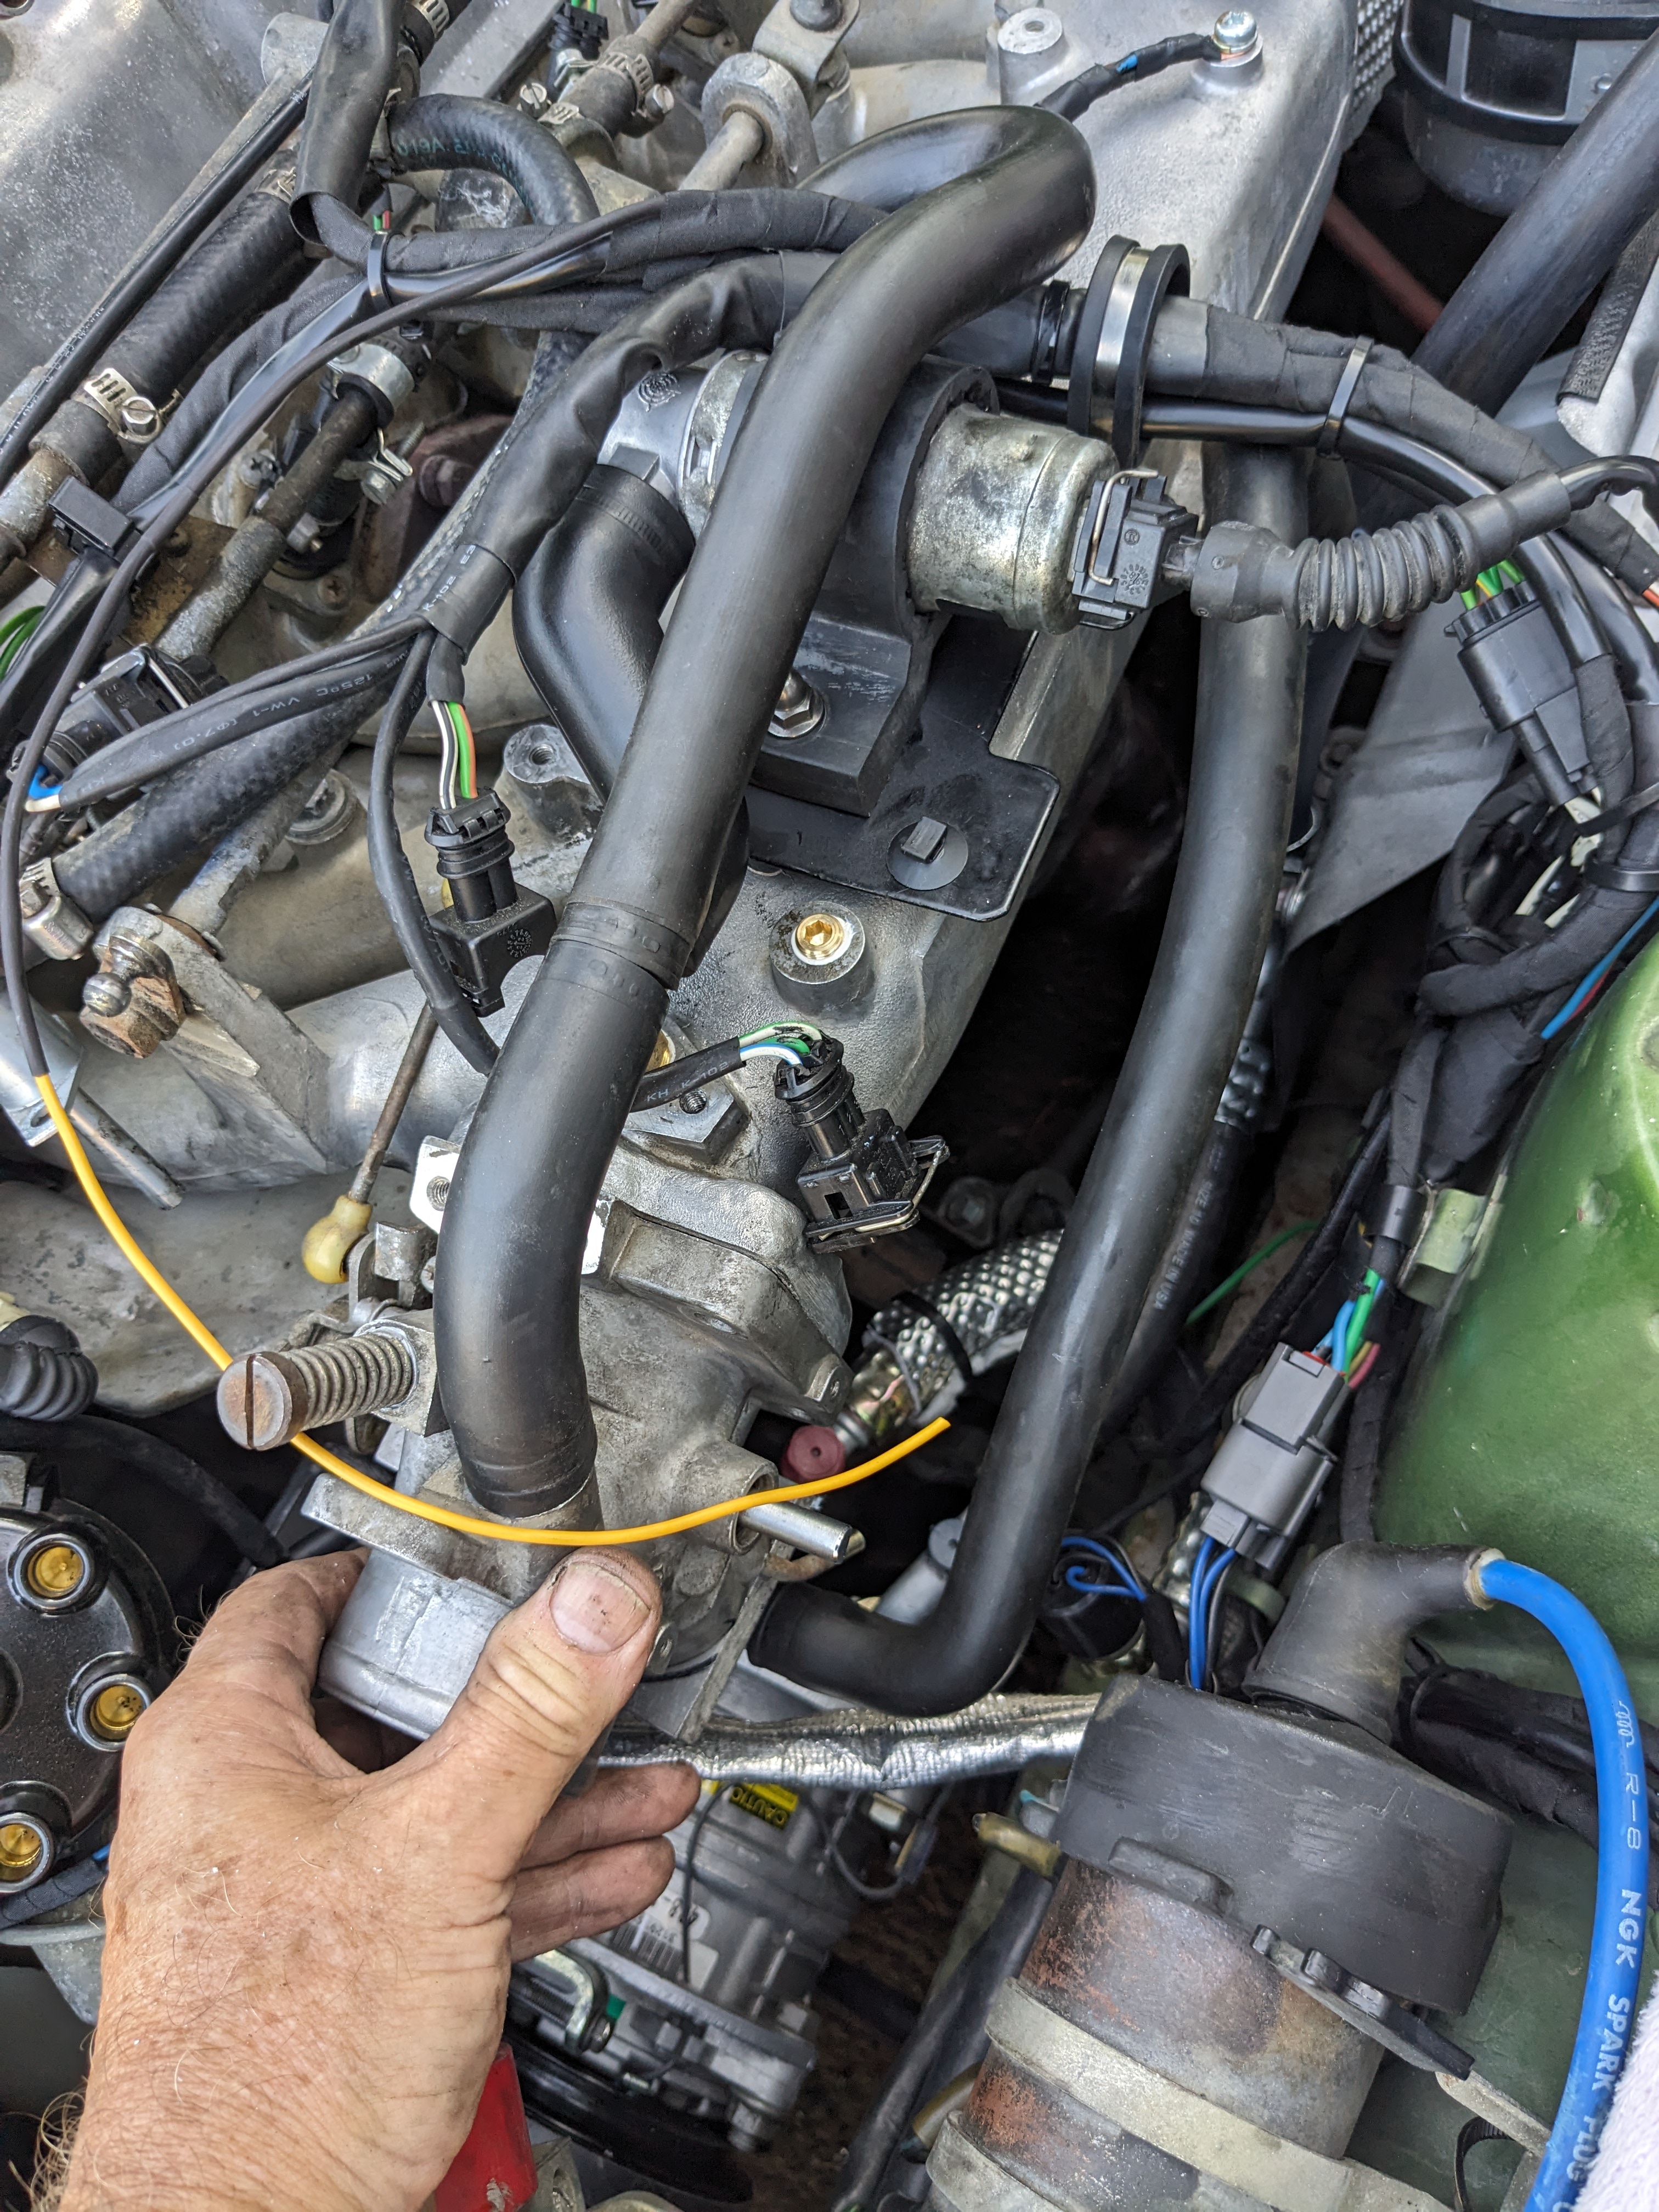
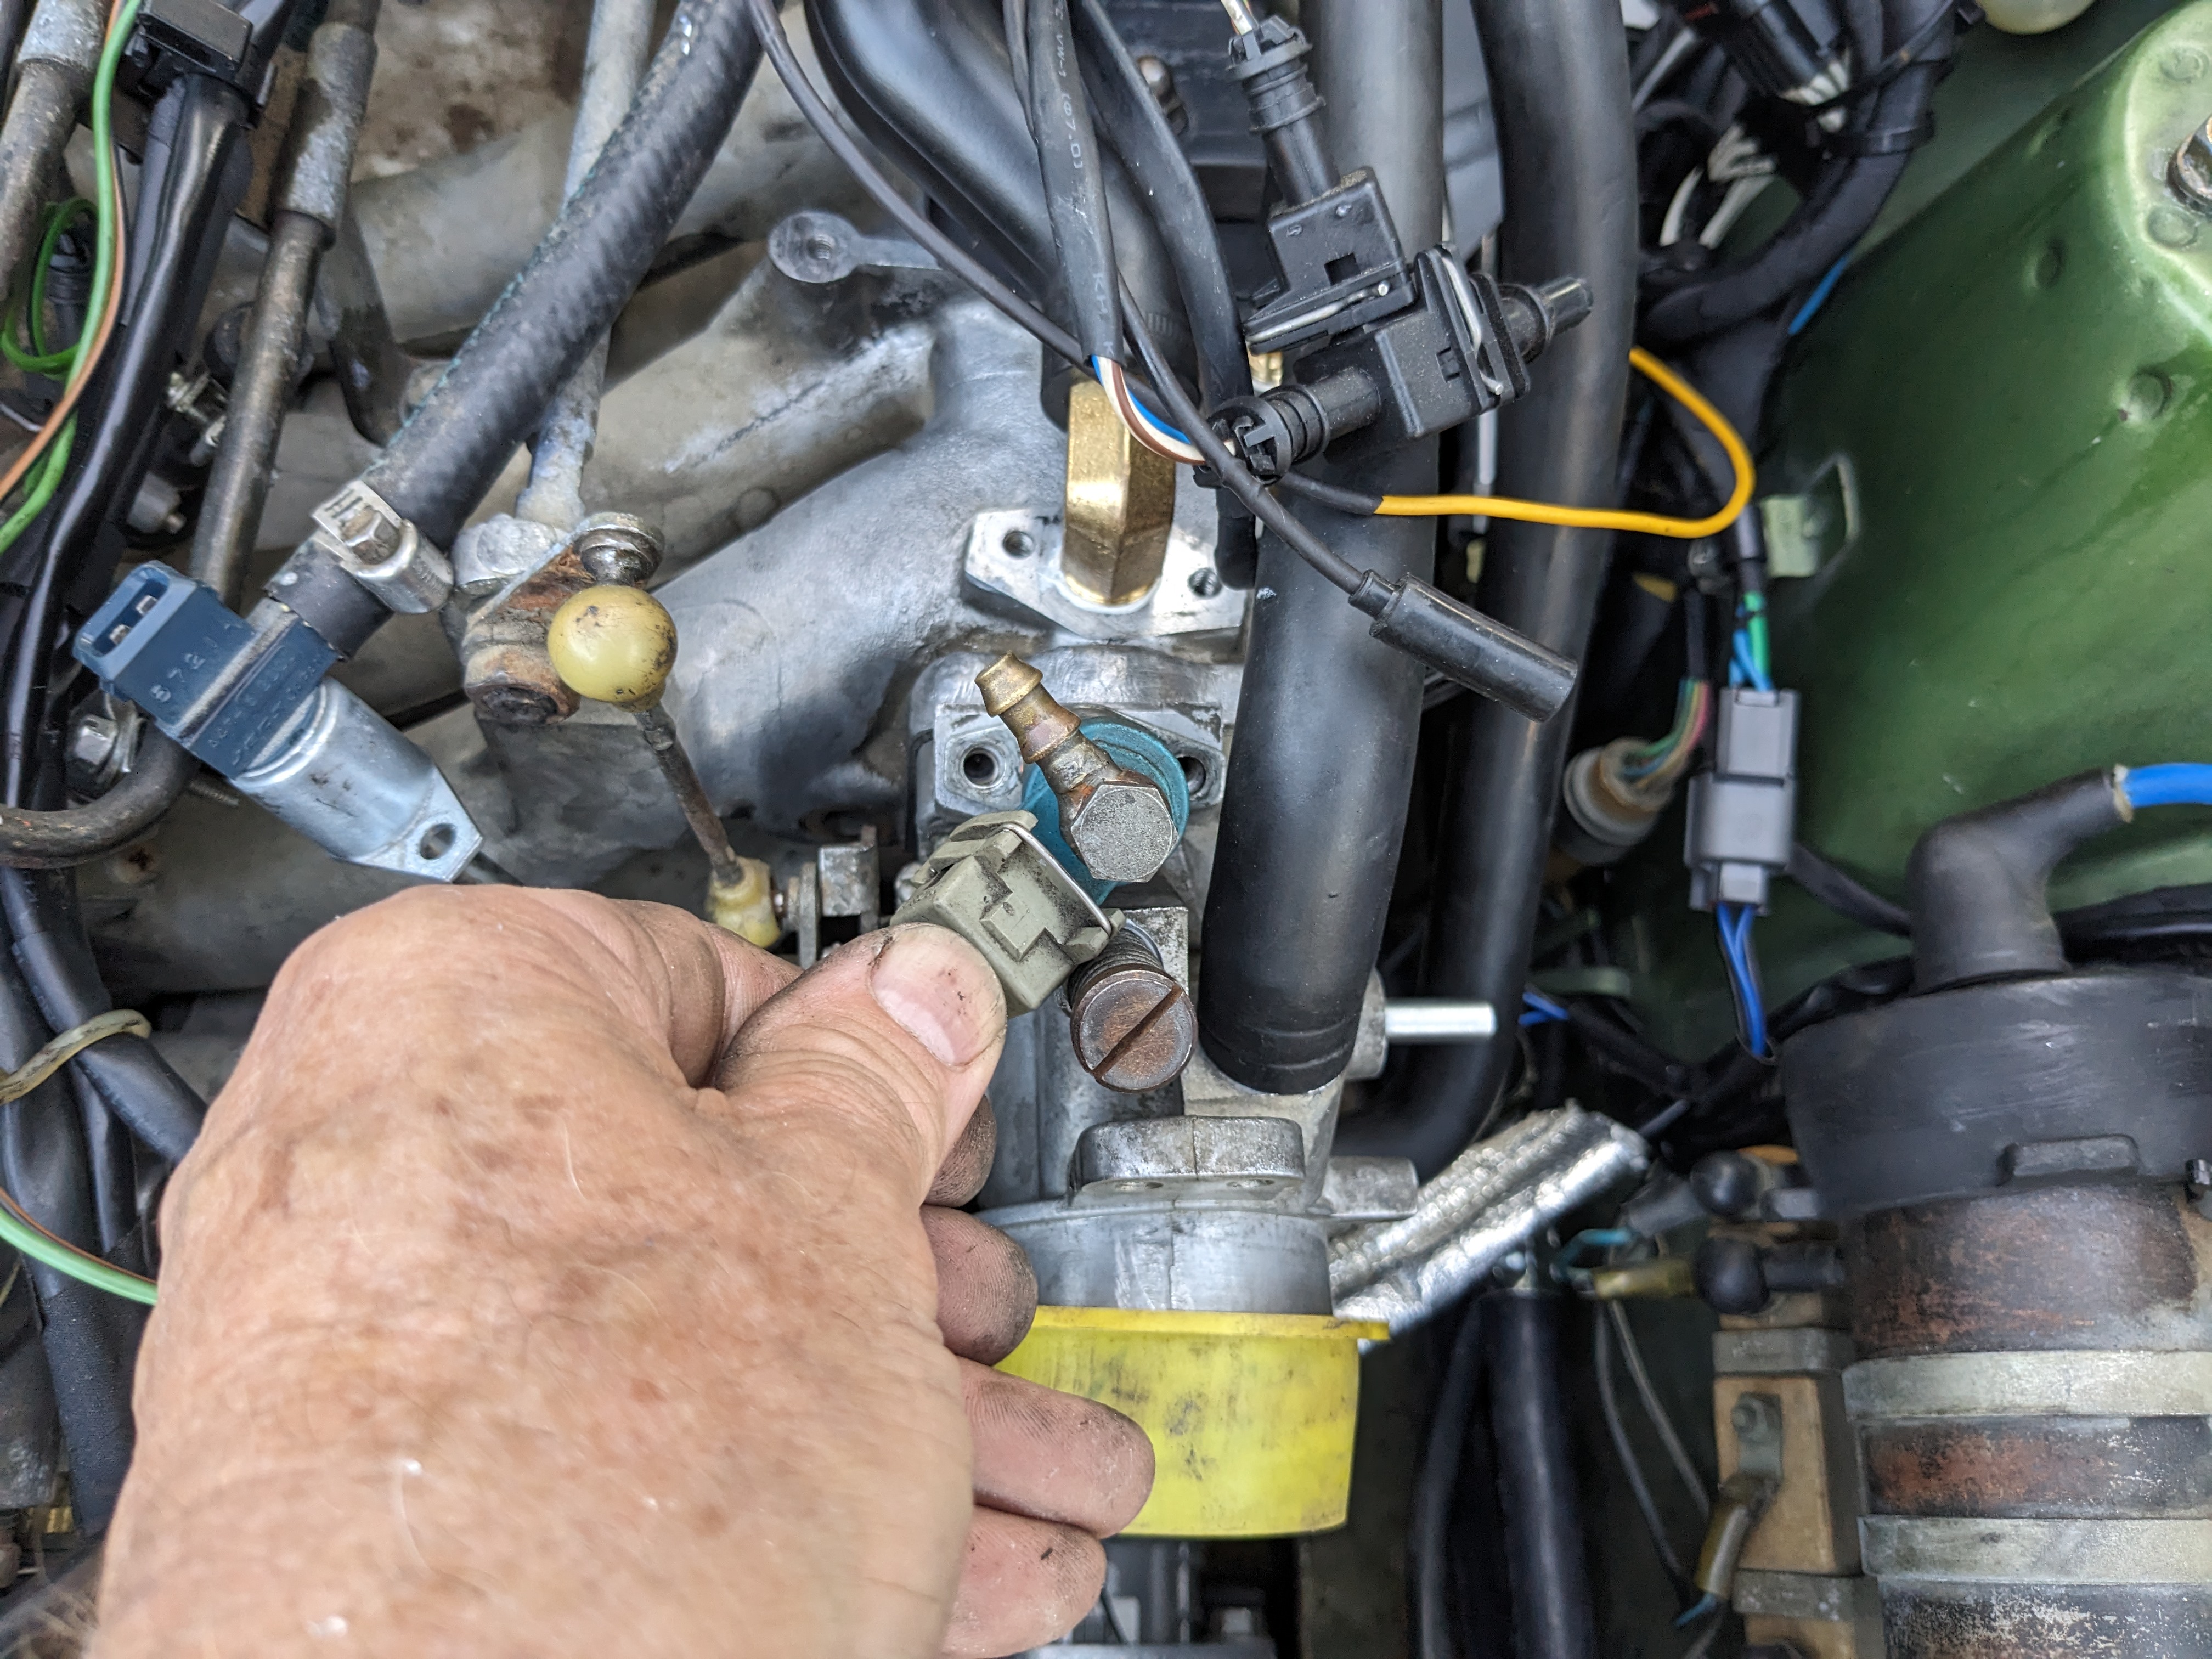
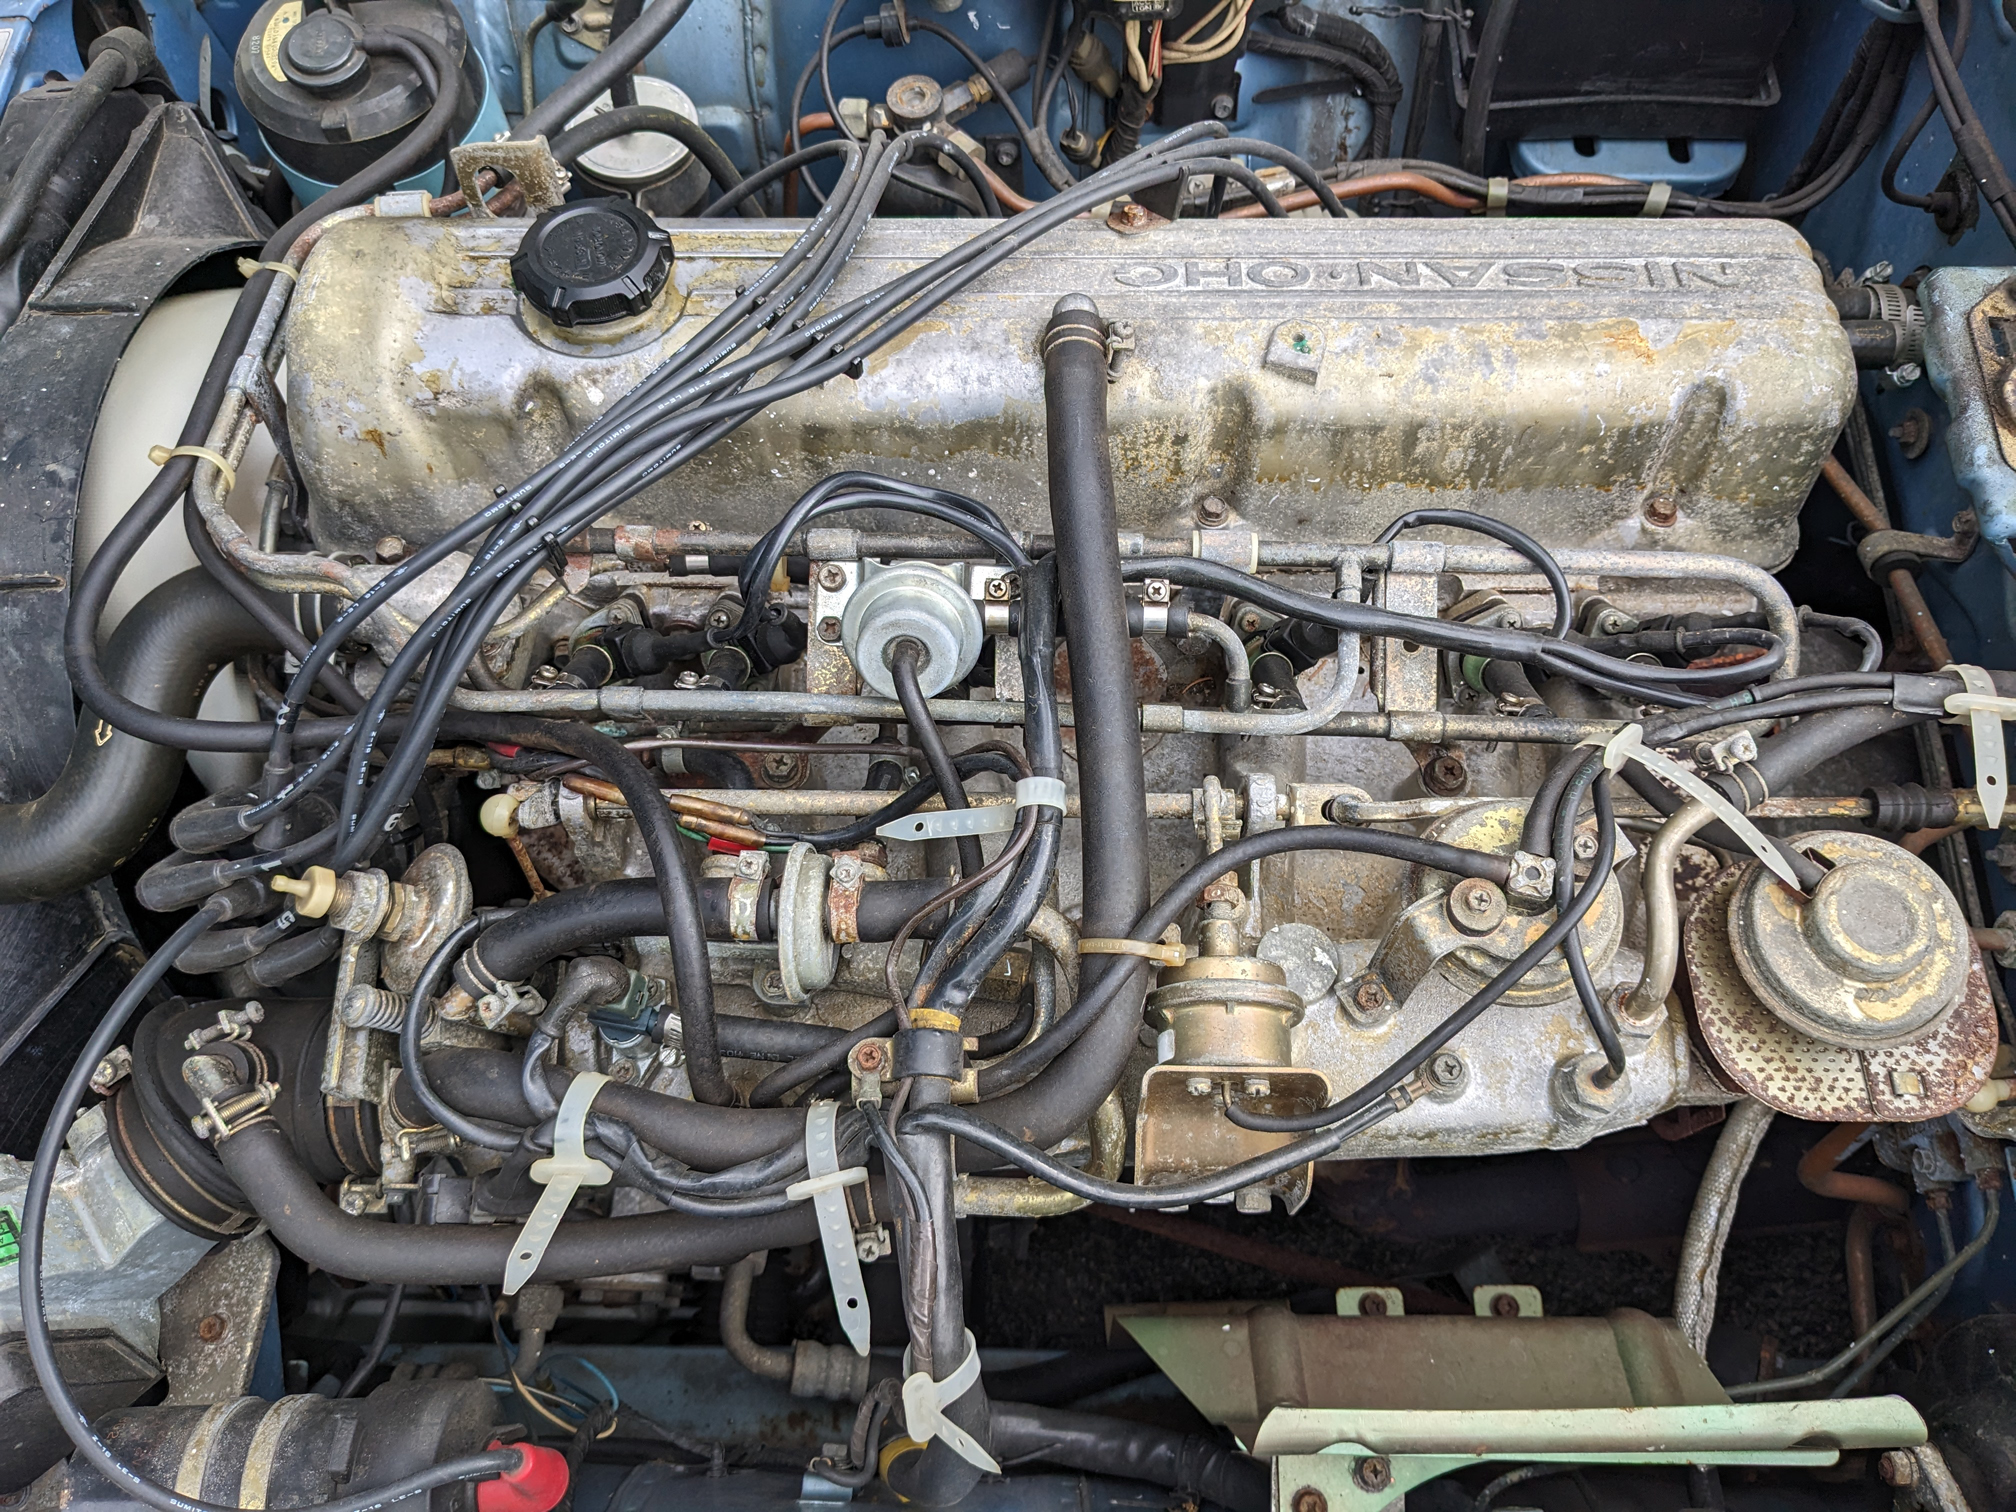
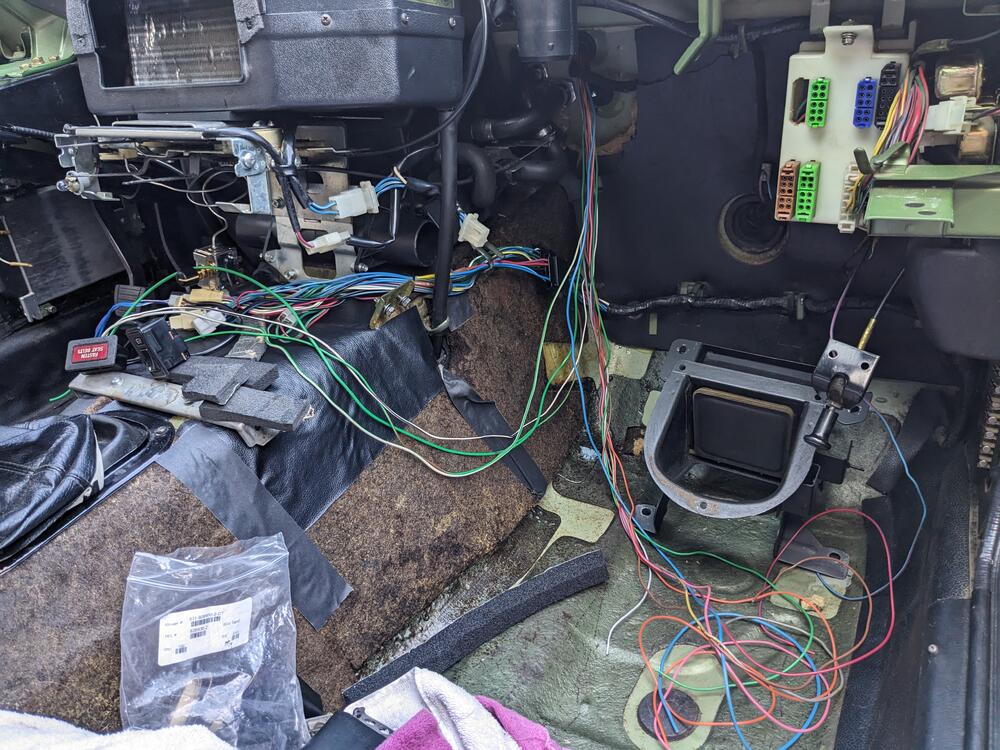
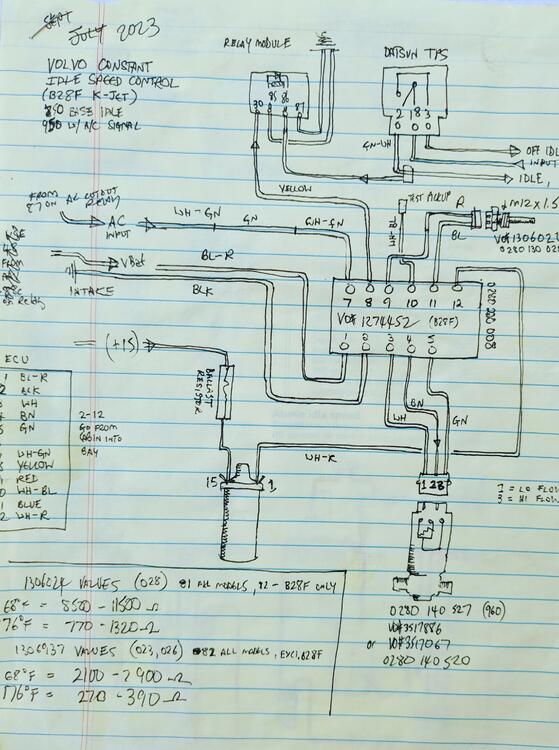
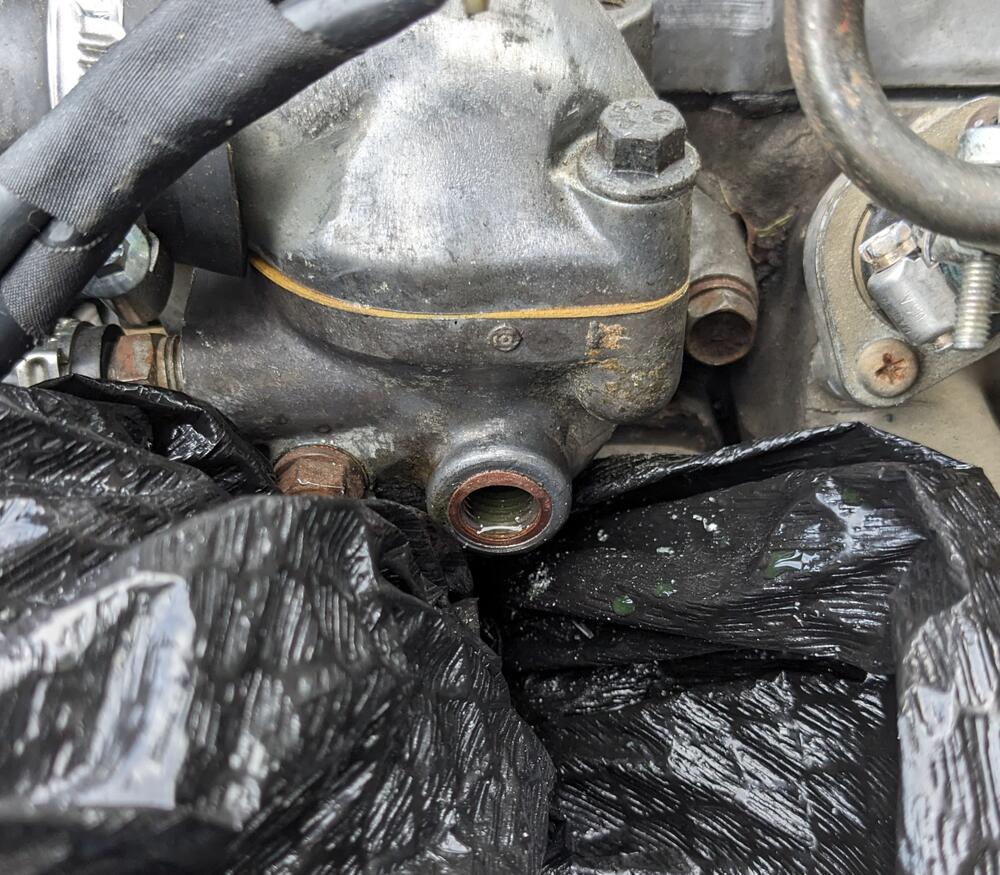
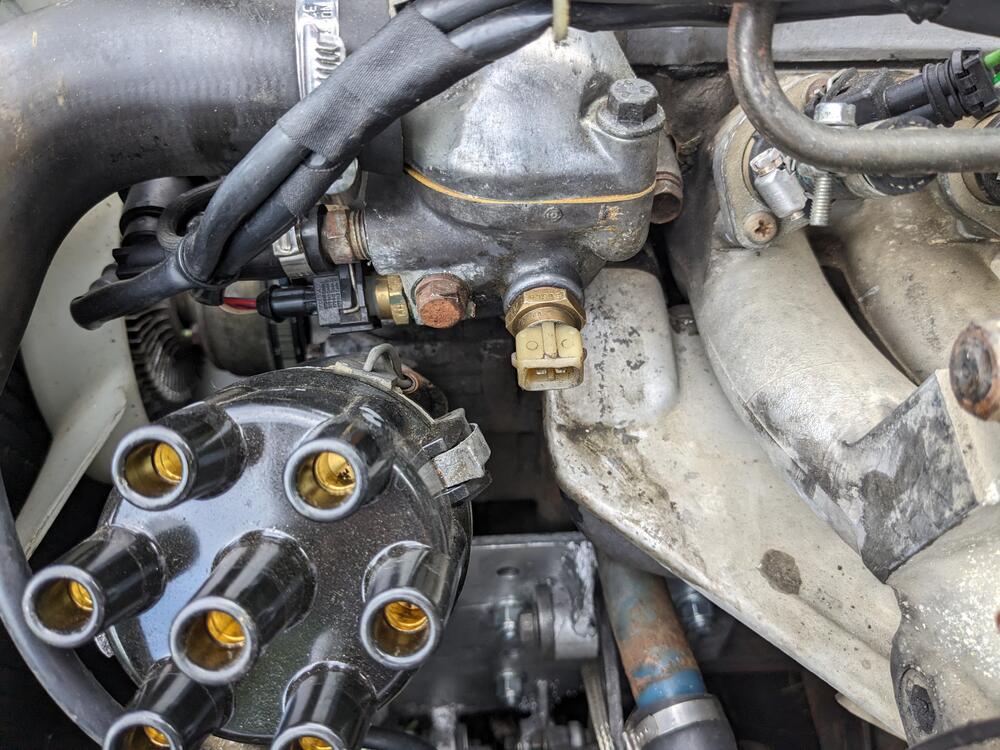
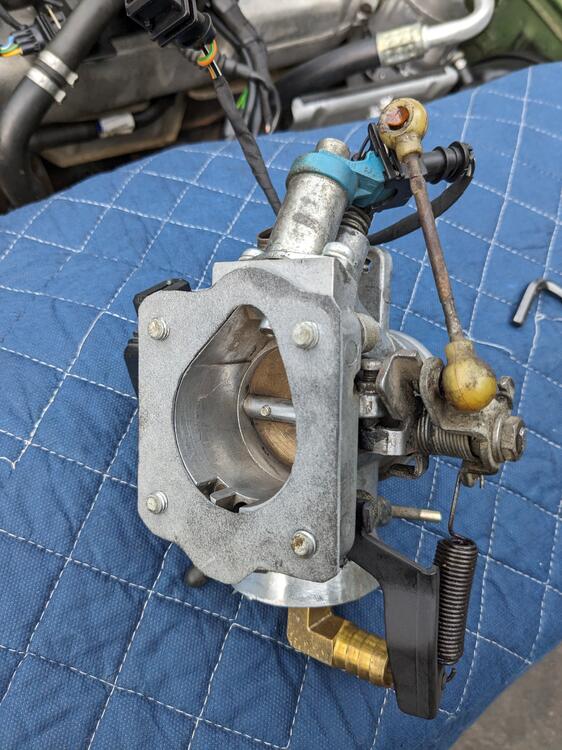
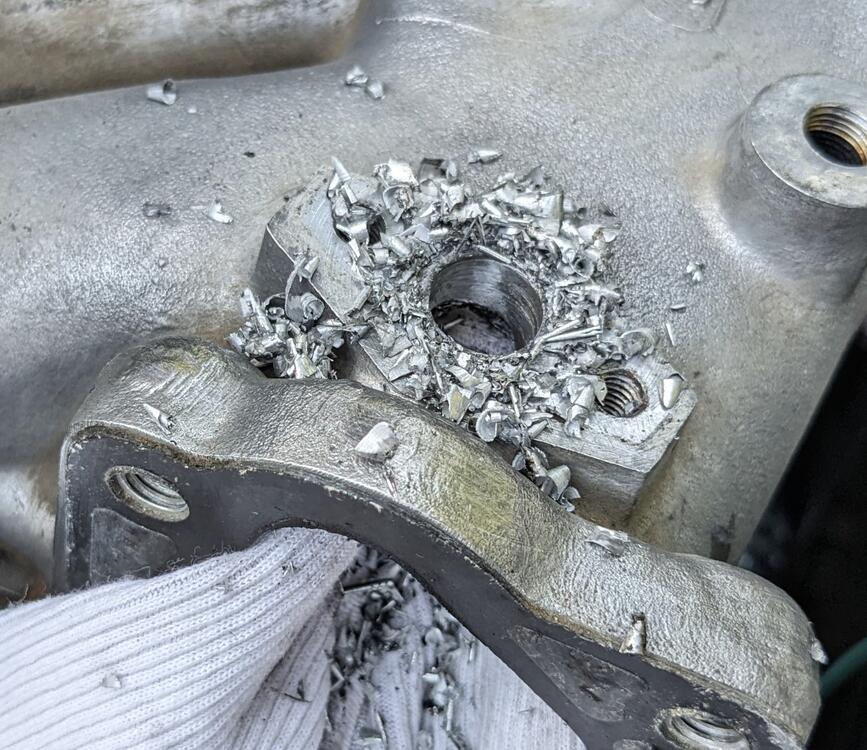
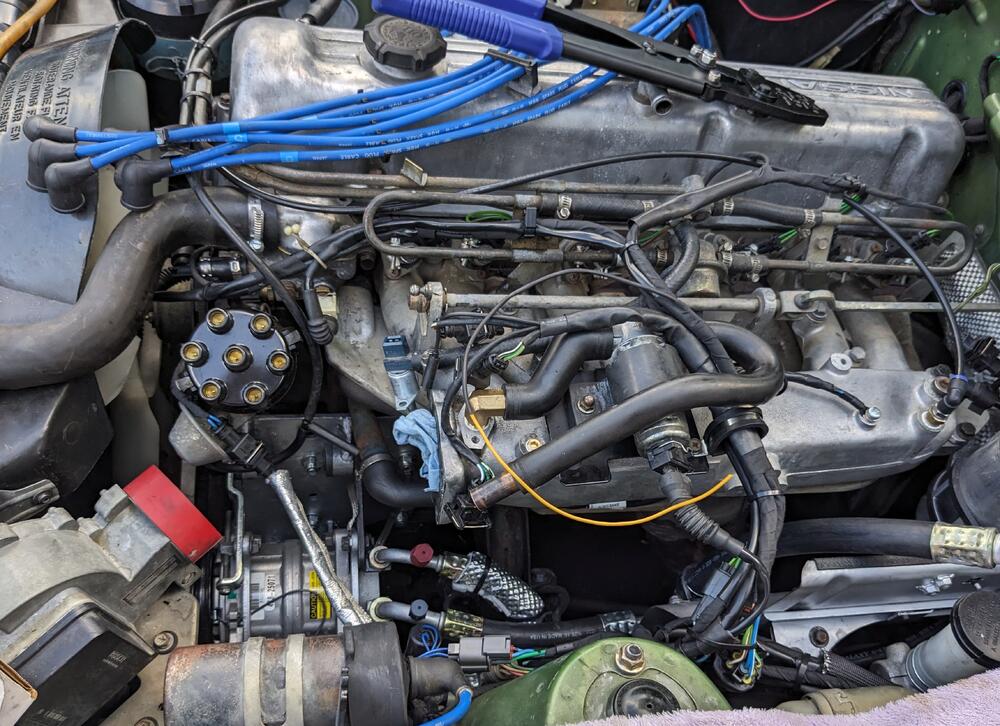
Whilst I've been adding wiring for my AC install, I've also been wiring the Bosch CIS. It was used on Volvos in the mid 80's with K-JET. V6 version - has correct ECU with 6 cyl ignition pulse. (B) Benzine 2.8l (F) Fuel Injection my wiring Bosch 0280 220 008 - Leerlaufregler = Idle Control combined wiring harnesses for AC & CIS module will be tucked up in right corner removed the throttle body. Made it easier to access the water housing to redrill & add a 12x1.5mm Timesert for the ECT Lots of grease on the drill & tap, picks up the shavings ECT 0280 130 028 (VO 1306024) installed IACV will go something like this. CSV will move to throttle body, where air port is now. CSV port will be used for the IACV return Flange offset/bolt spacing is identical. Edit - Volvo uses an o-ring for the CSV - have to check the port ID in the TB


 1 point
 -
I think the gold plated "ring" on the front is actually supposed to be kind of an olive green. That being said, mine are like yours. BTW SteveJ has mine "tooting"...! Awesome...!1 point
-
I havd been following this thread and a little suprised no one has commented yet. It is an interesting mod you're attempting and I hope it delivers the results you are looking for. Great detail and plenty of photos so others can follow. Slowly buy surely these parts (AAR for example) are getting harder to find and a possibld update to later more available parts is more than welcome.1 point
-
1 pointWell I think that leaves you in a not-too-bad spot. If it started all by itself sitting loose with a 9V, but then would NOT start all assembled off the car battery, then that would be more of a problem and mystery. If it never starts by itself but will run indefinitely if given a push, that's easier to deal with. My quick hit "from my armchair" would be to try a slightly lower value resistor in place of the 2 Meg. Maybe try 1.8 Meg instead. Just to test things, you could parallel another high value resistor (like a 2M or 1.8M) across the existing 2Meg resistor. Just clip it across to see if it will start by itself then. If that works, then you could desolder the 2M and replace it.1 point
-
Yeah, I wondered why mine seem to flap in the breeze when lowered part way, seemed unlike Nissan given the care taken with all aspects of design on this car. I ordered a pair as mine must have died years ago & been discarded - the bracket isn't there or I would have known to look further into it when I was working on the driver's door.1 point
-
1 point
-
1 pointMy wife is top notch! She didn't complain at all. I've even had to train my wife not to shop for Datsuns! 🤣1 point
-
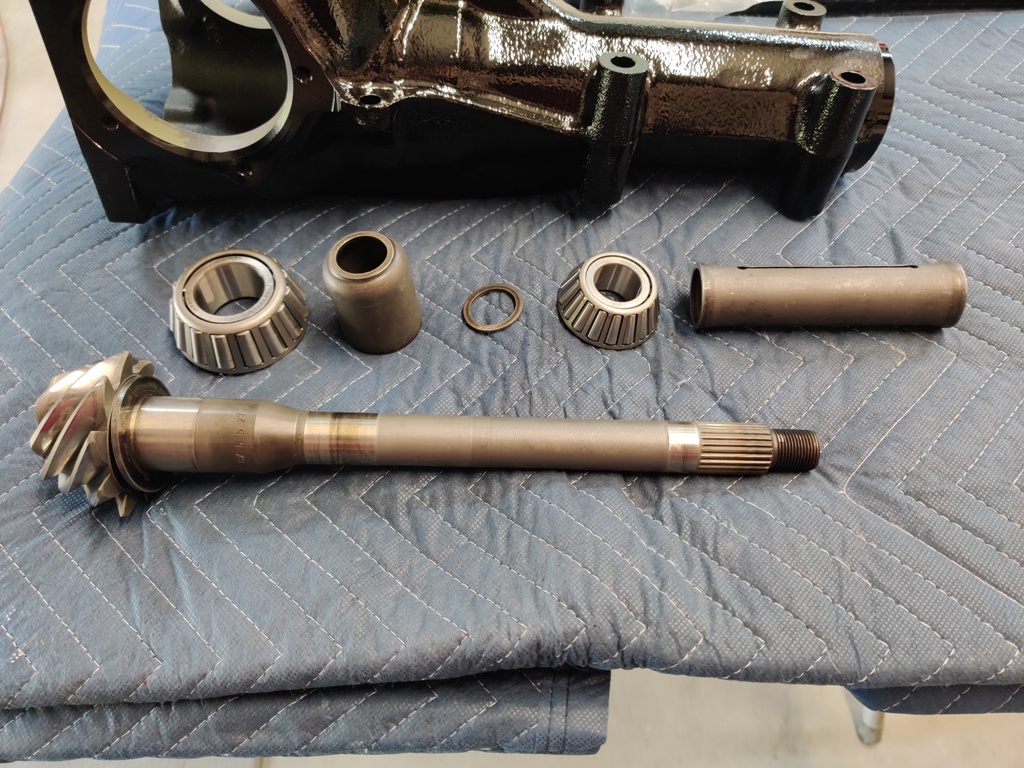
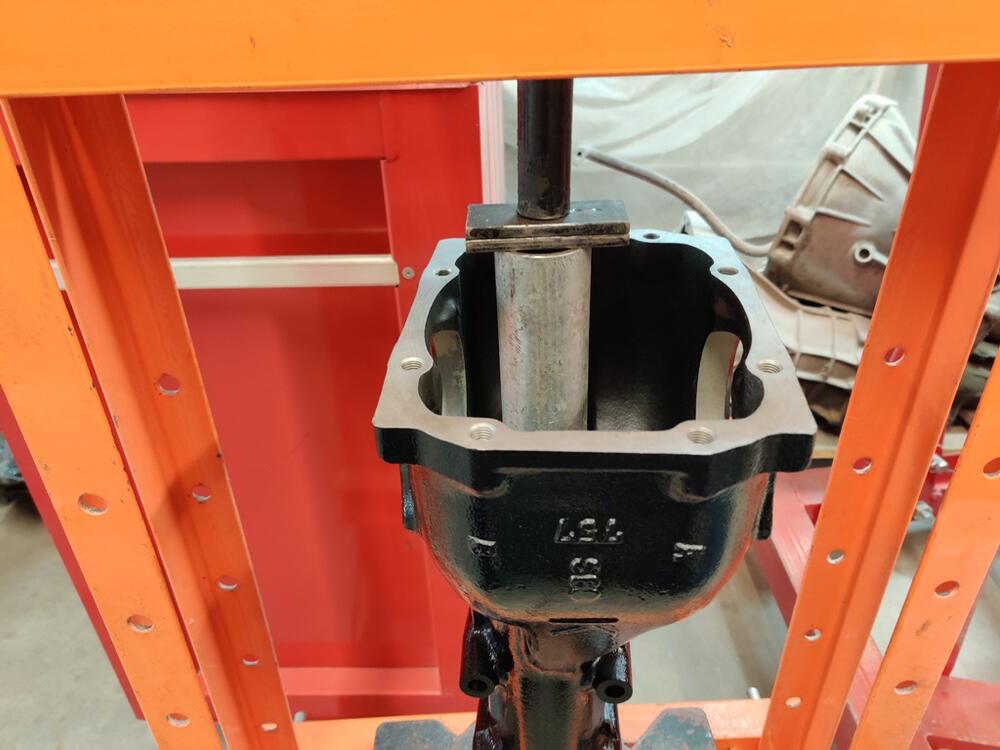
Do not forget to check the alignment of the gears.. see some youtube videos about that! Otherwise you might hear a BIG crash in your diff some day. very important that the gears come together on the right spot1 point
-
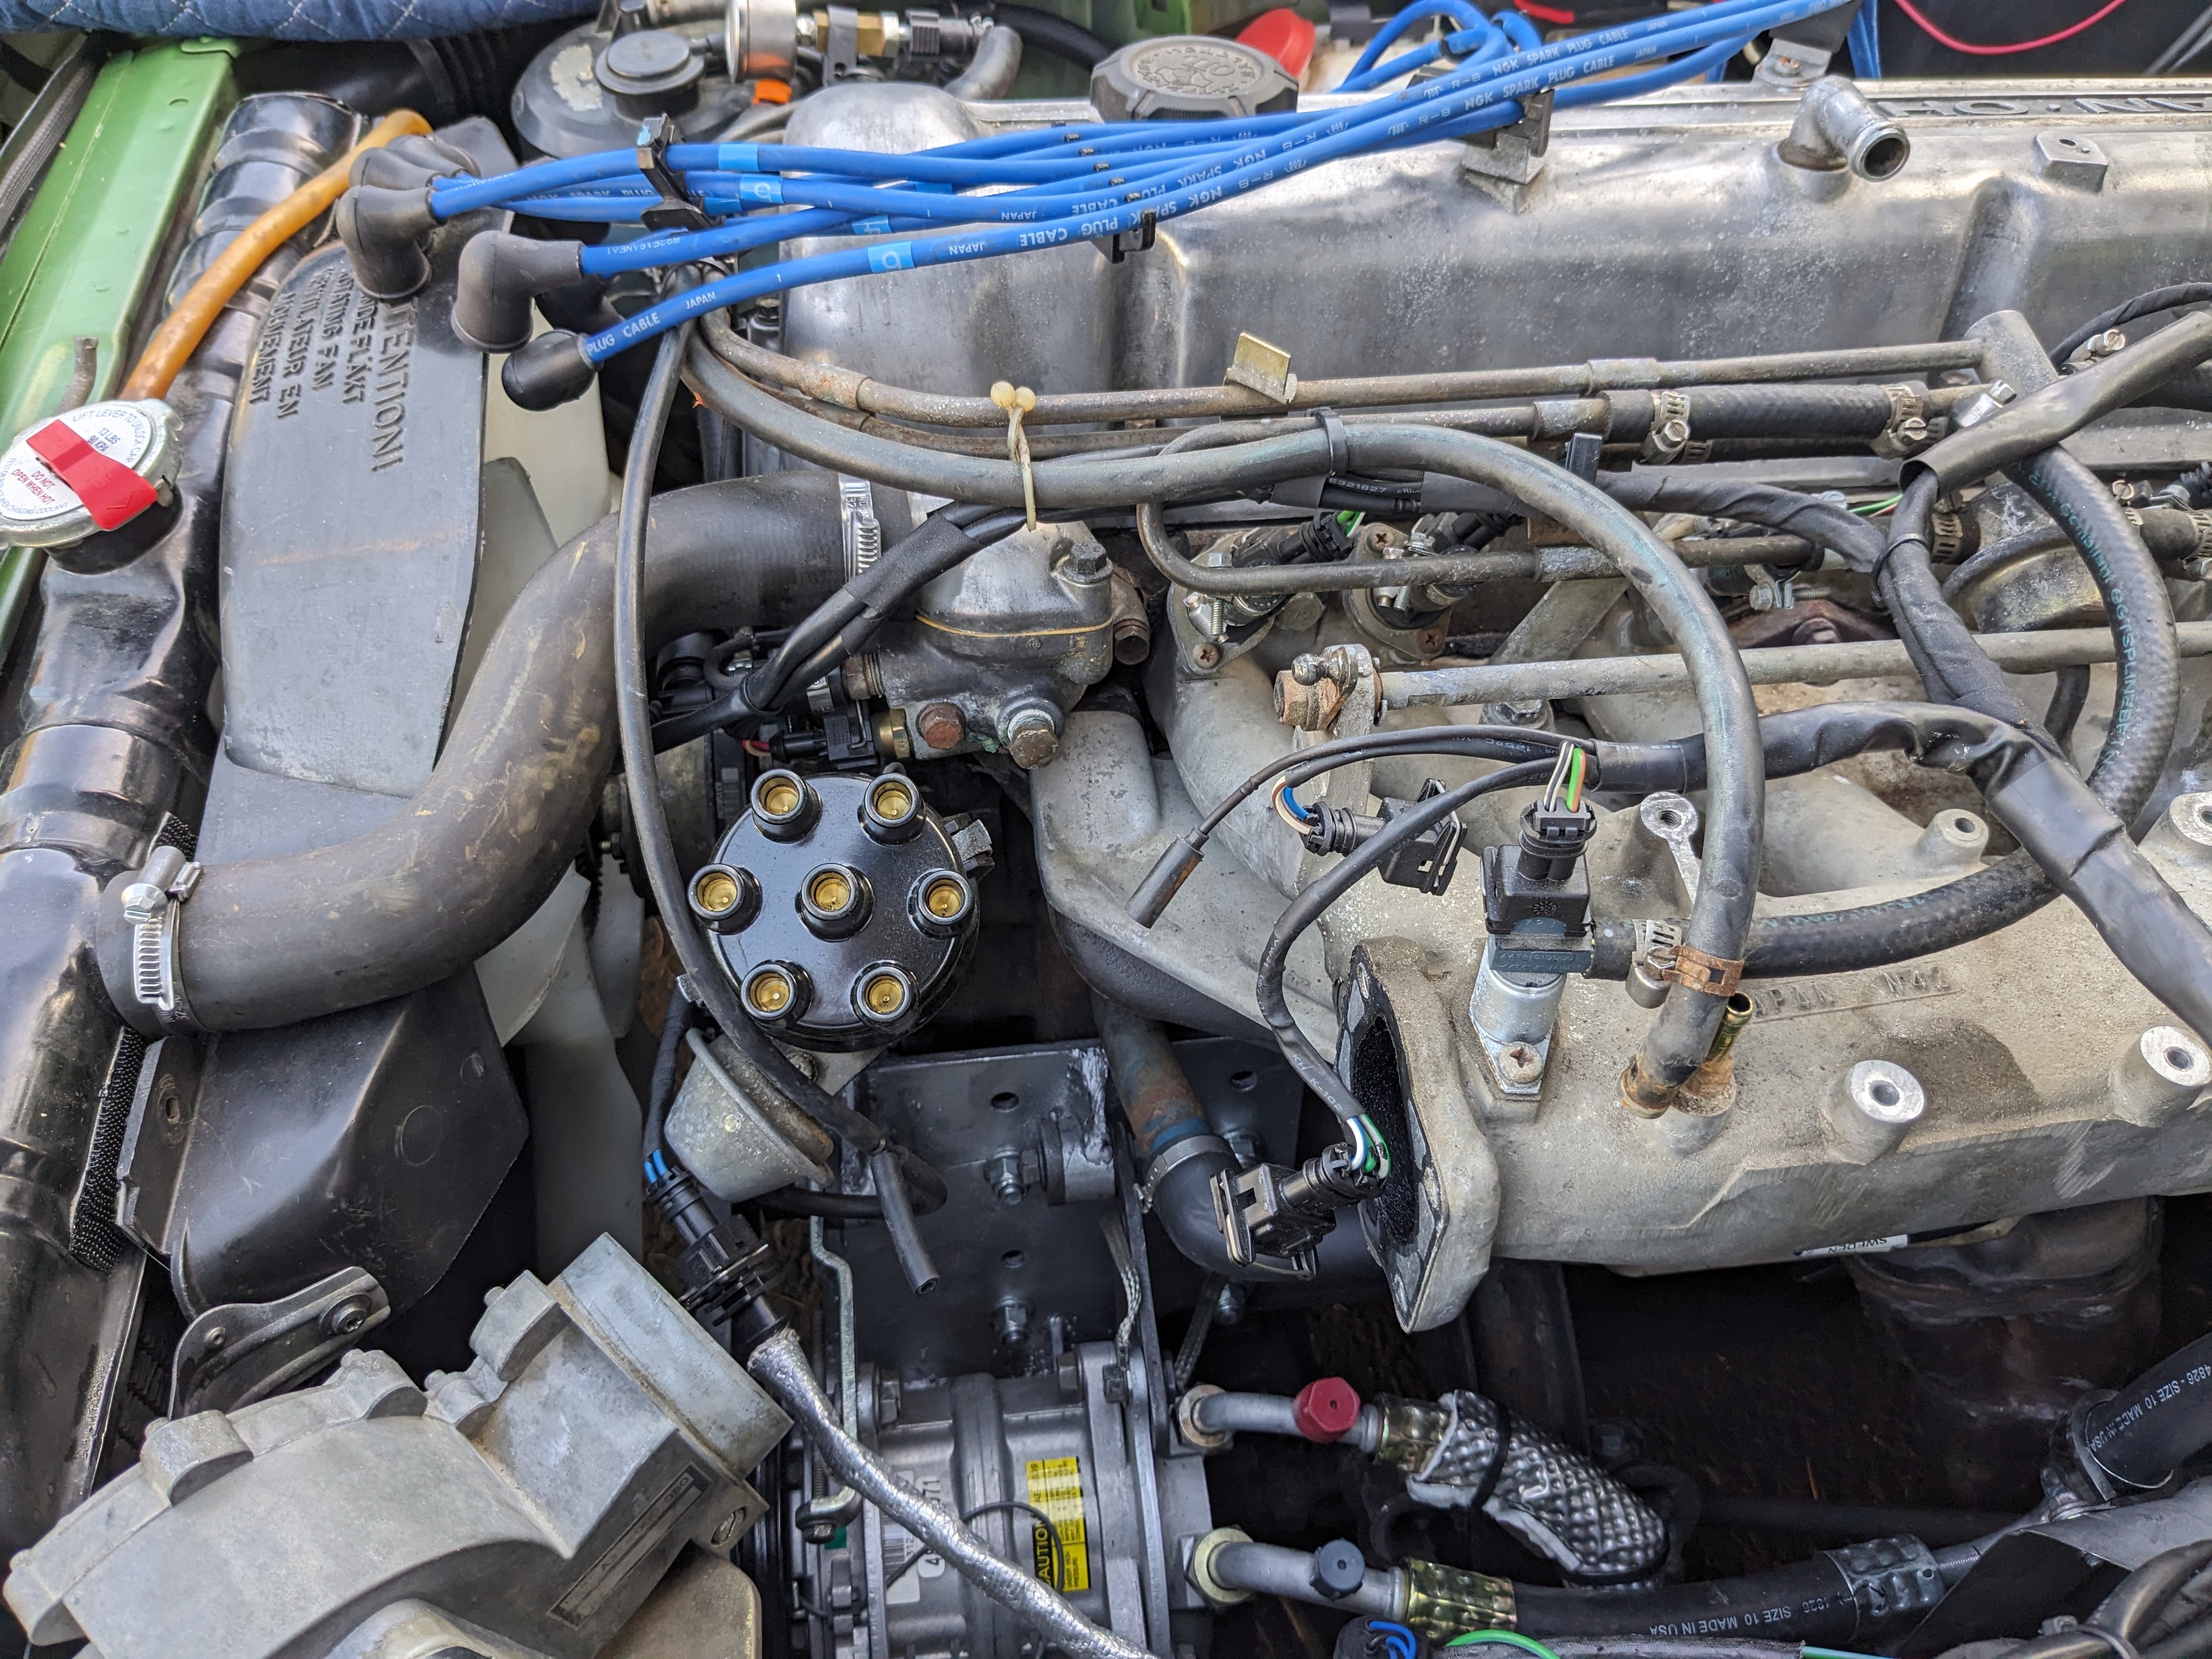
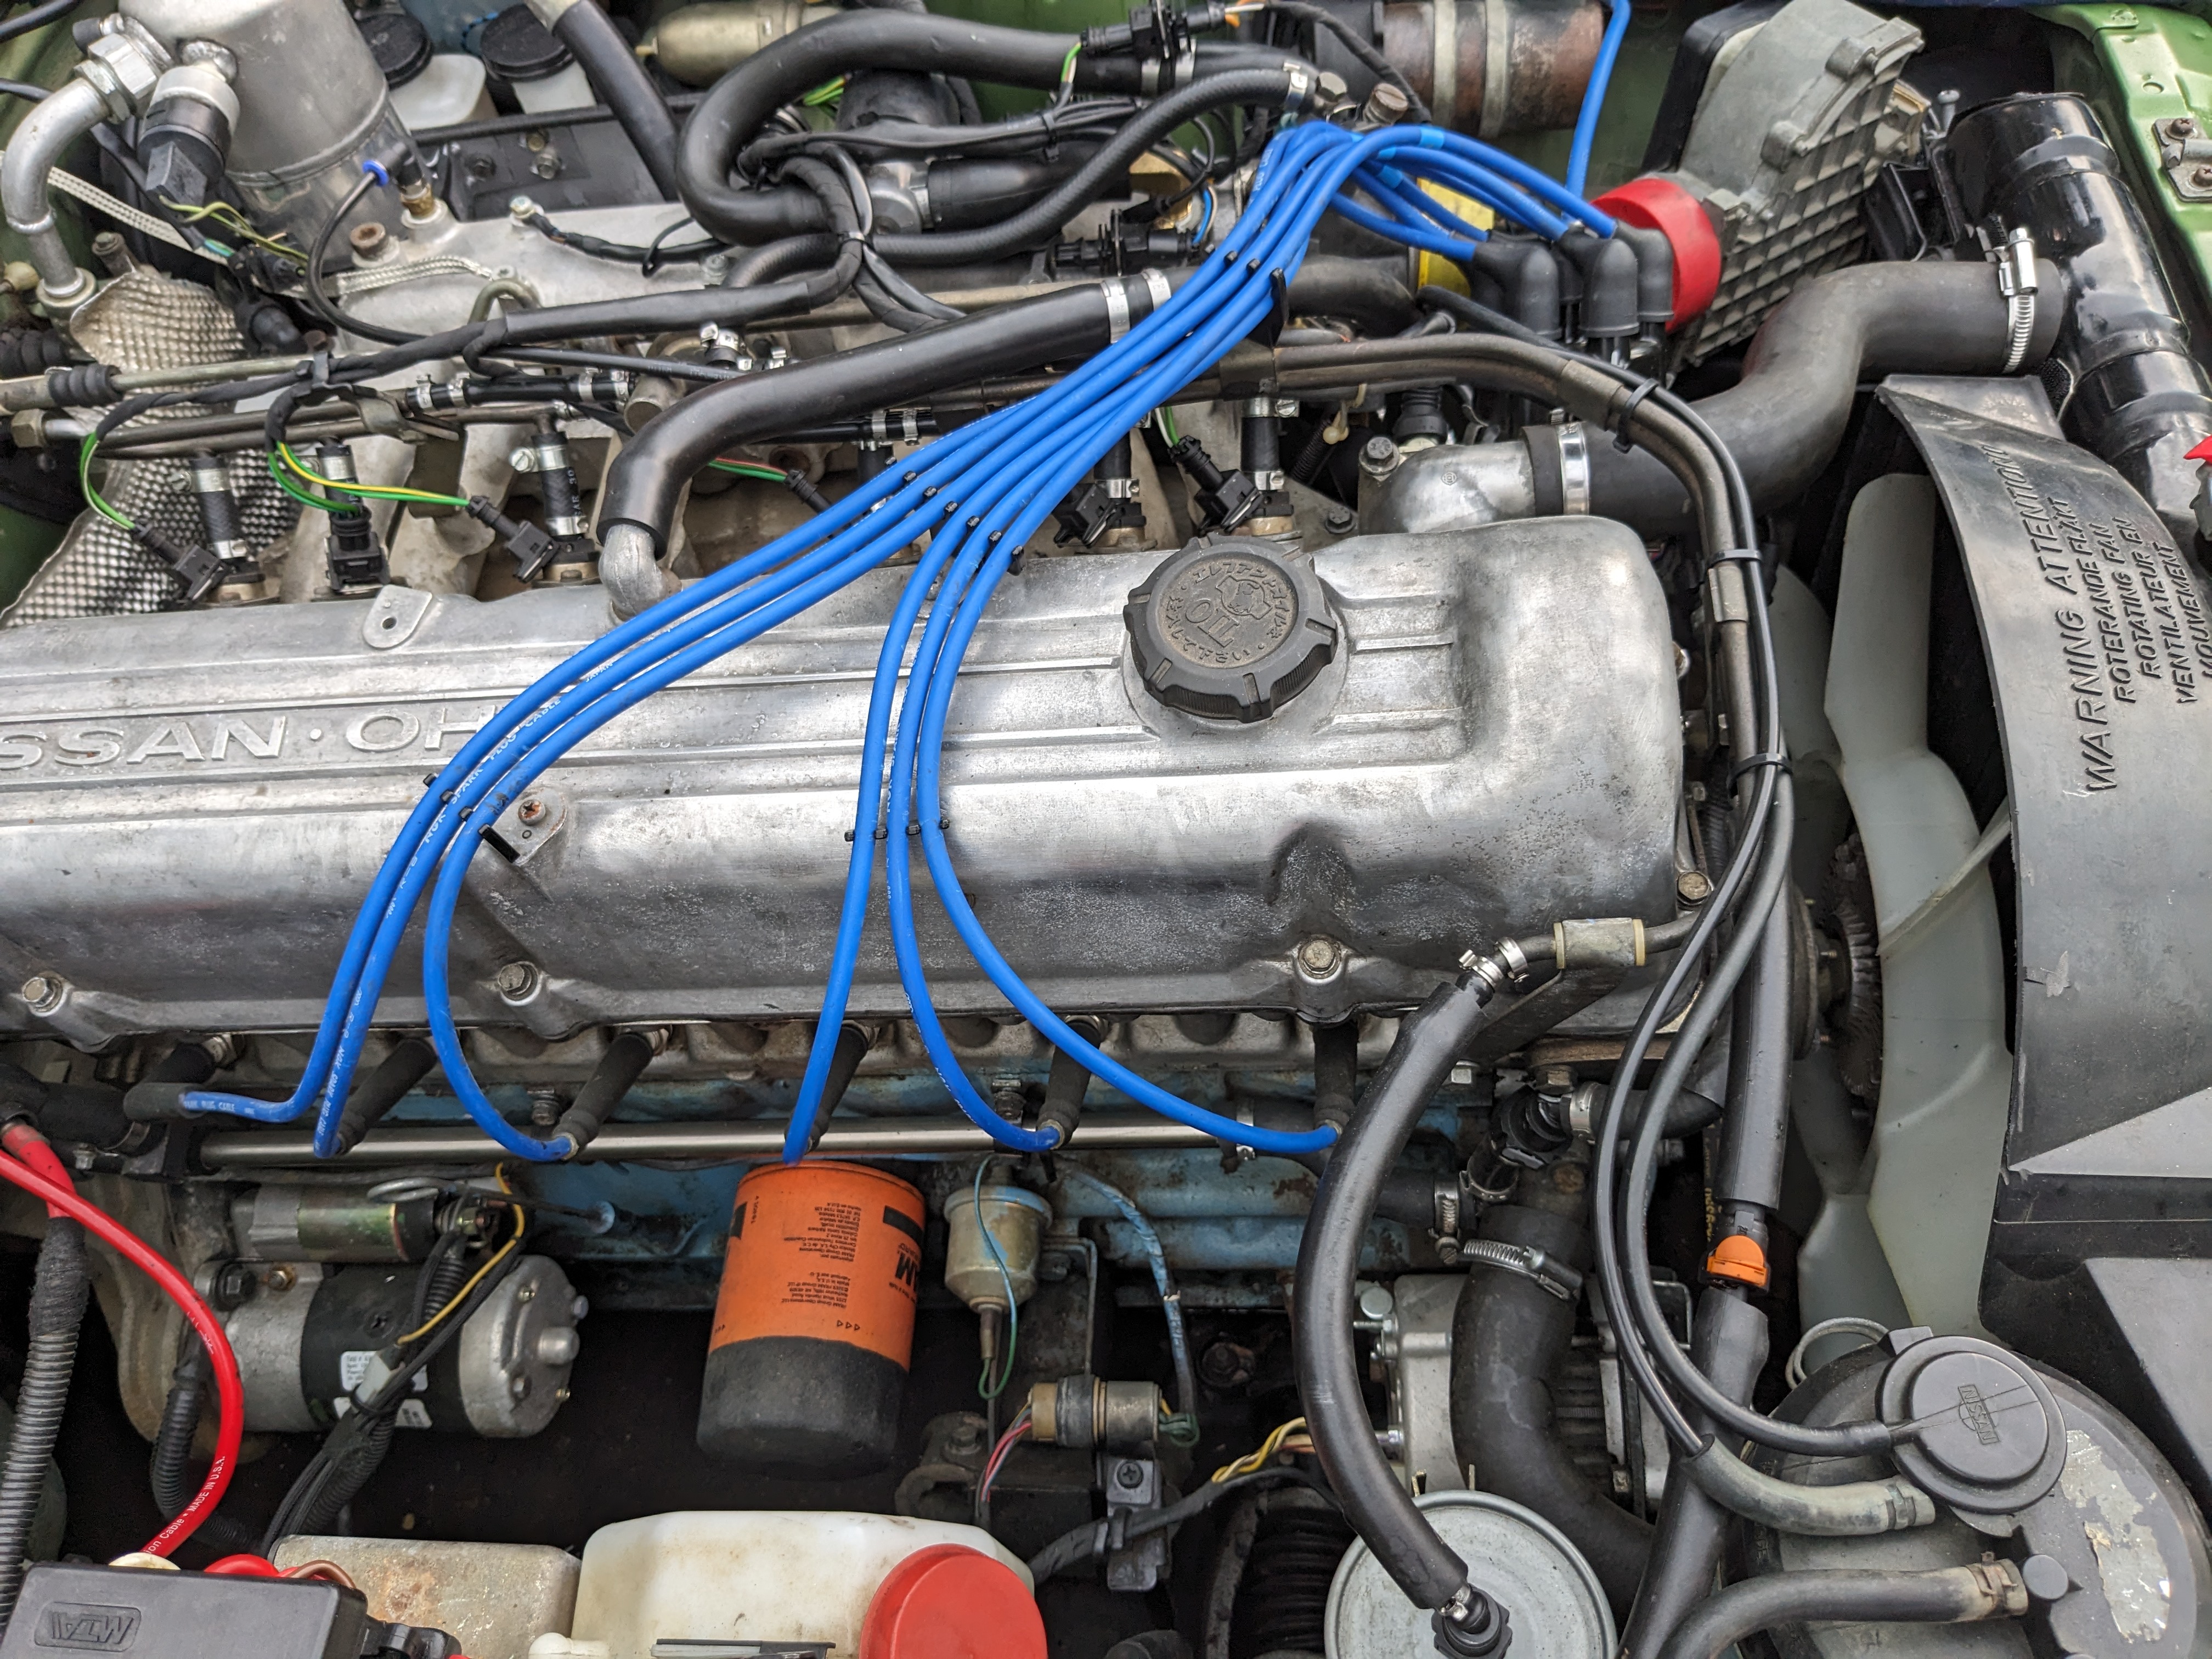
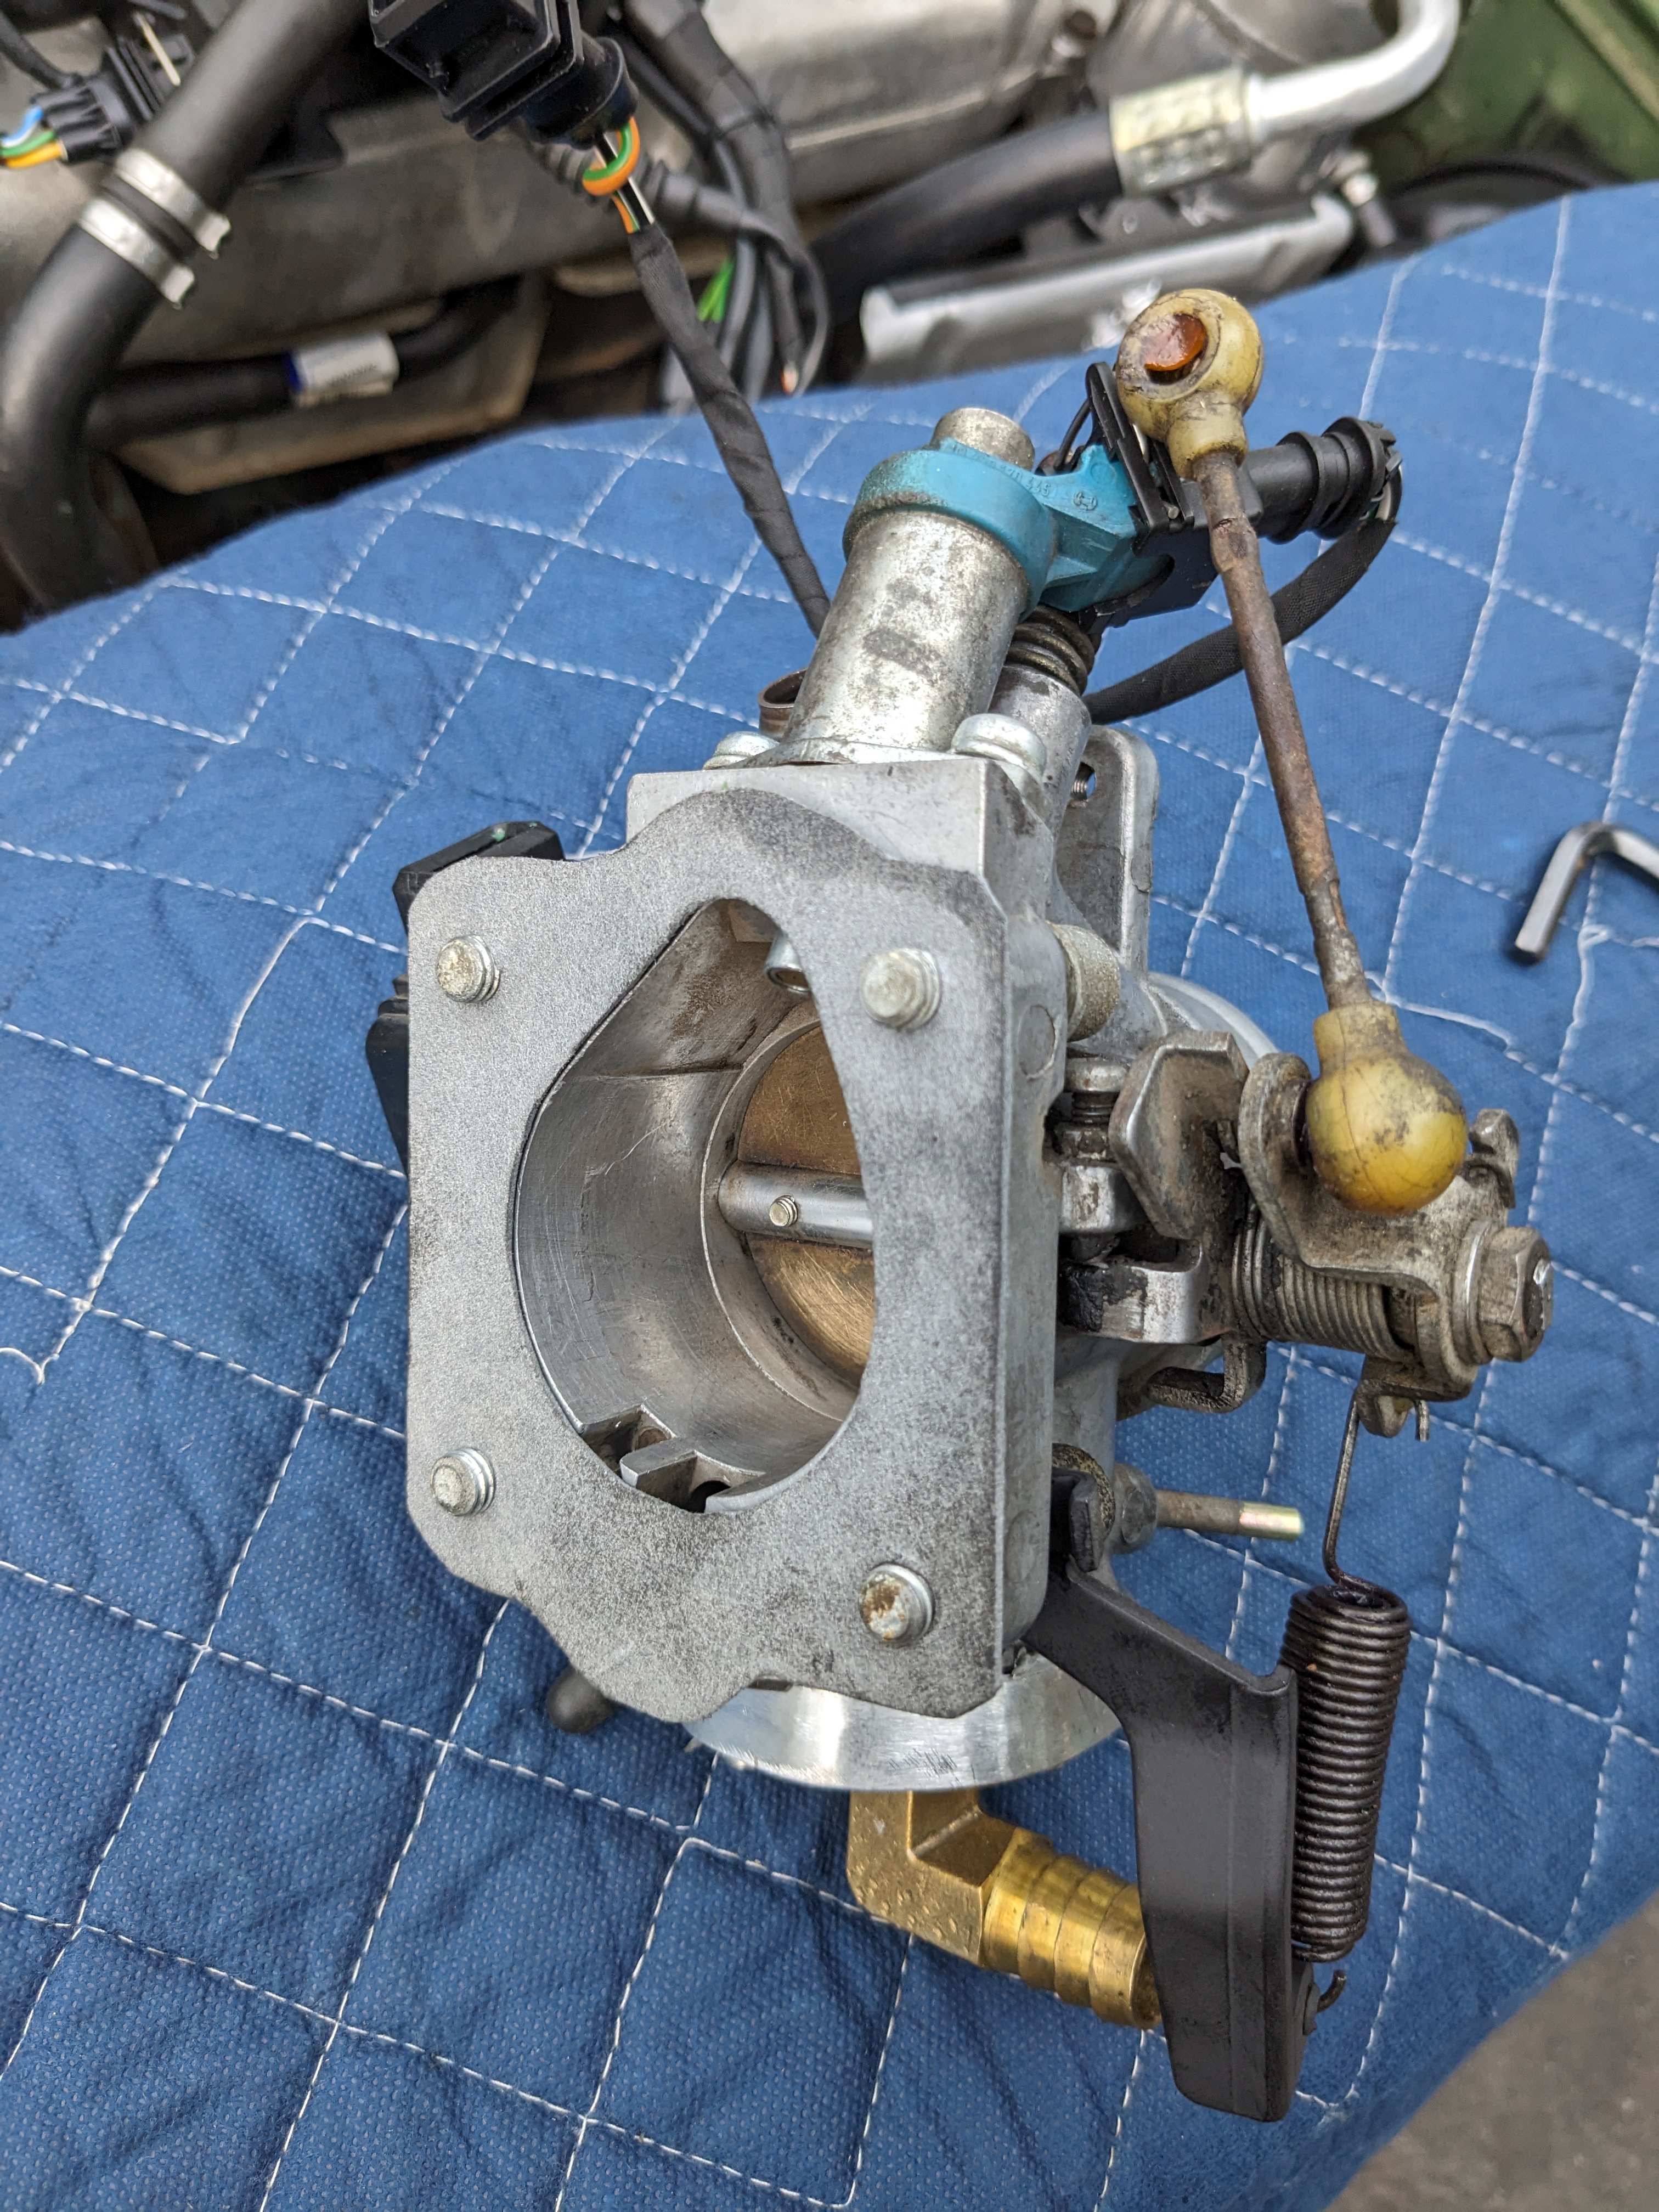
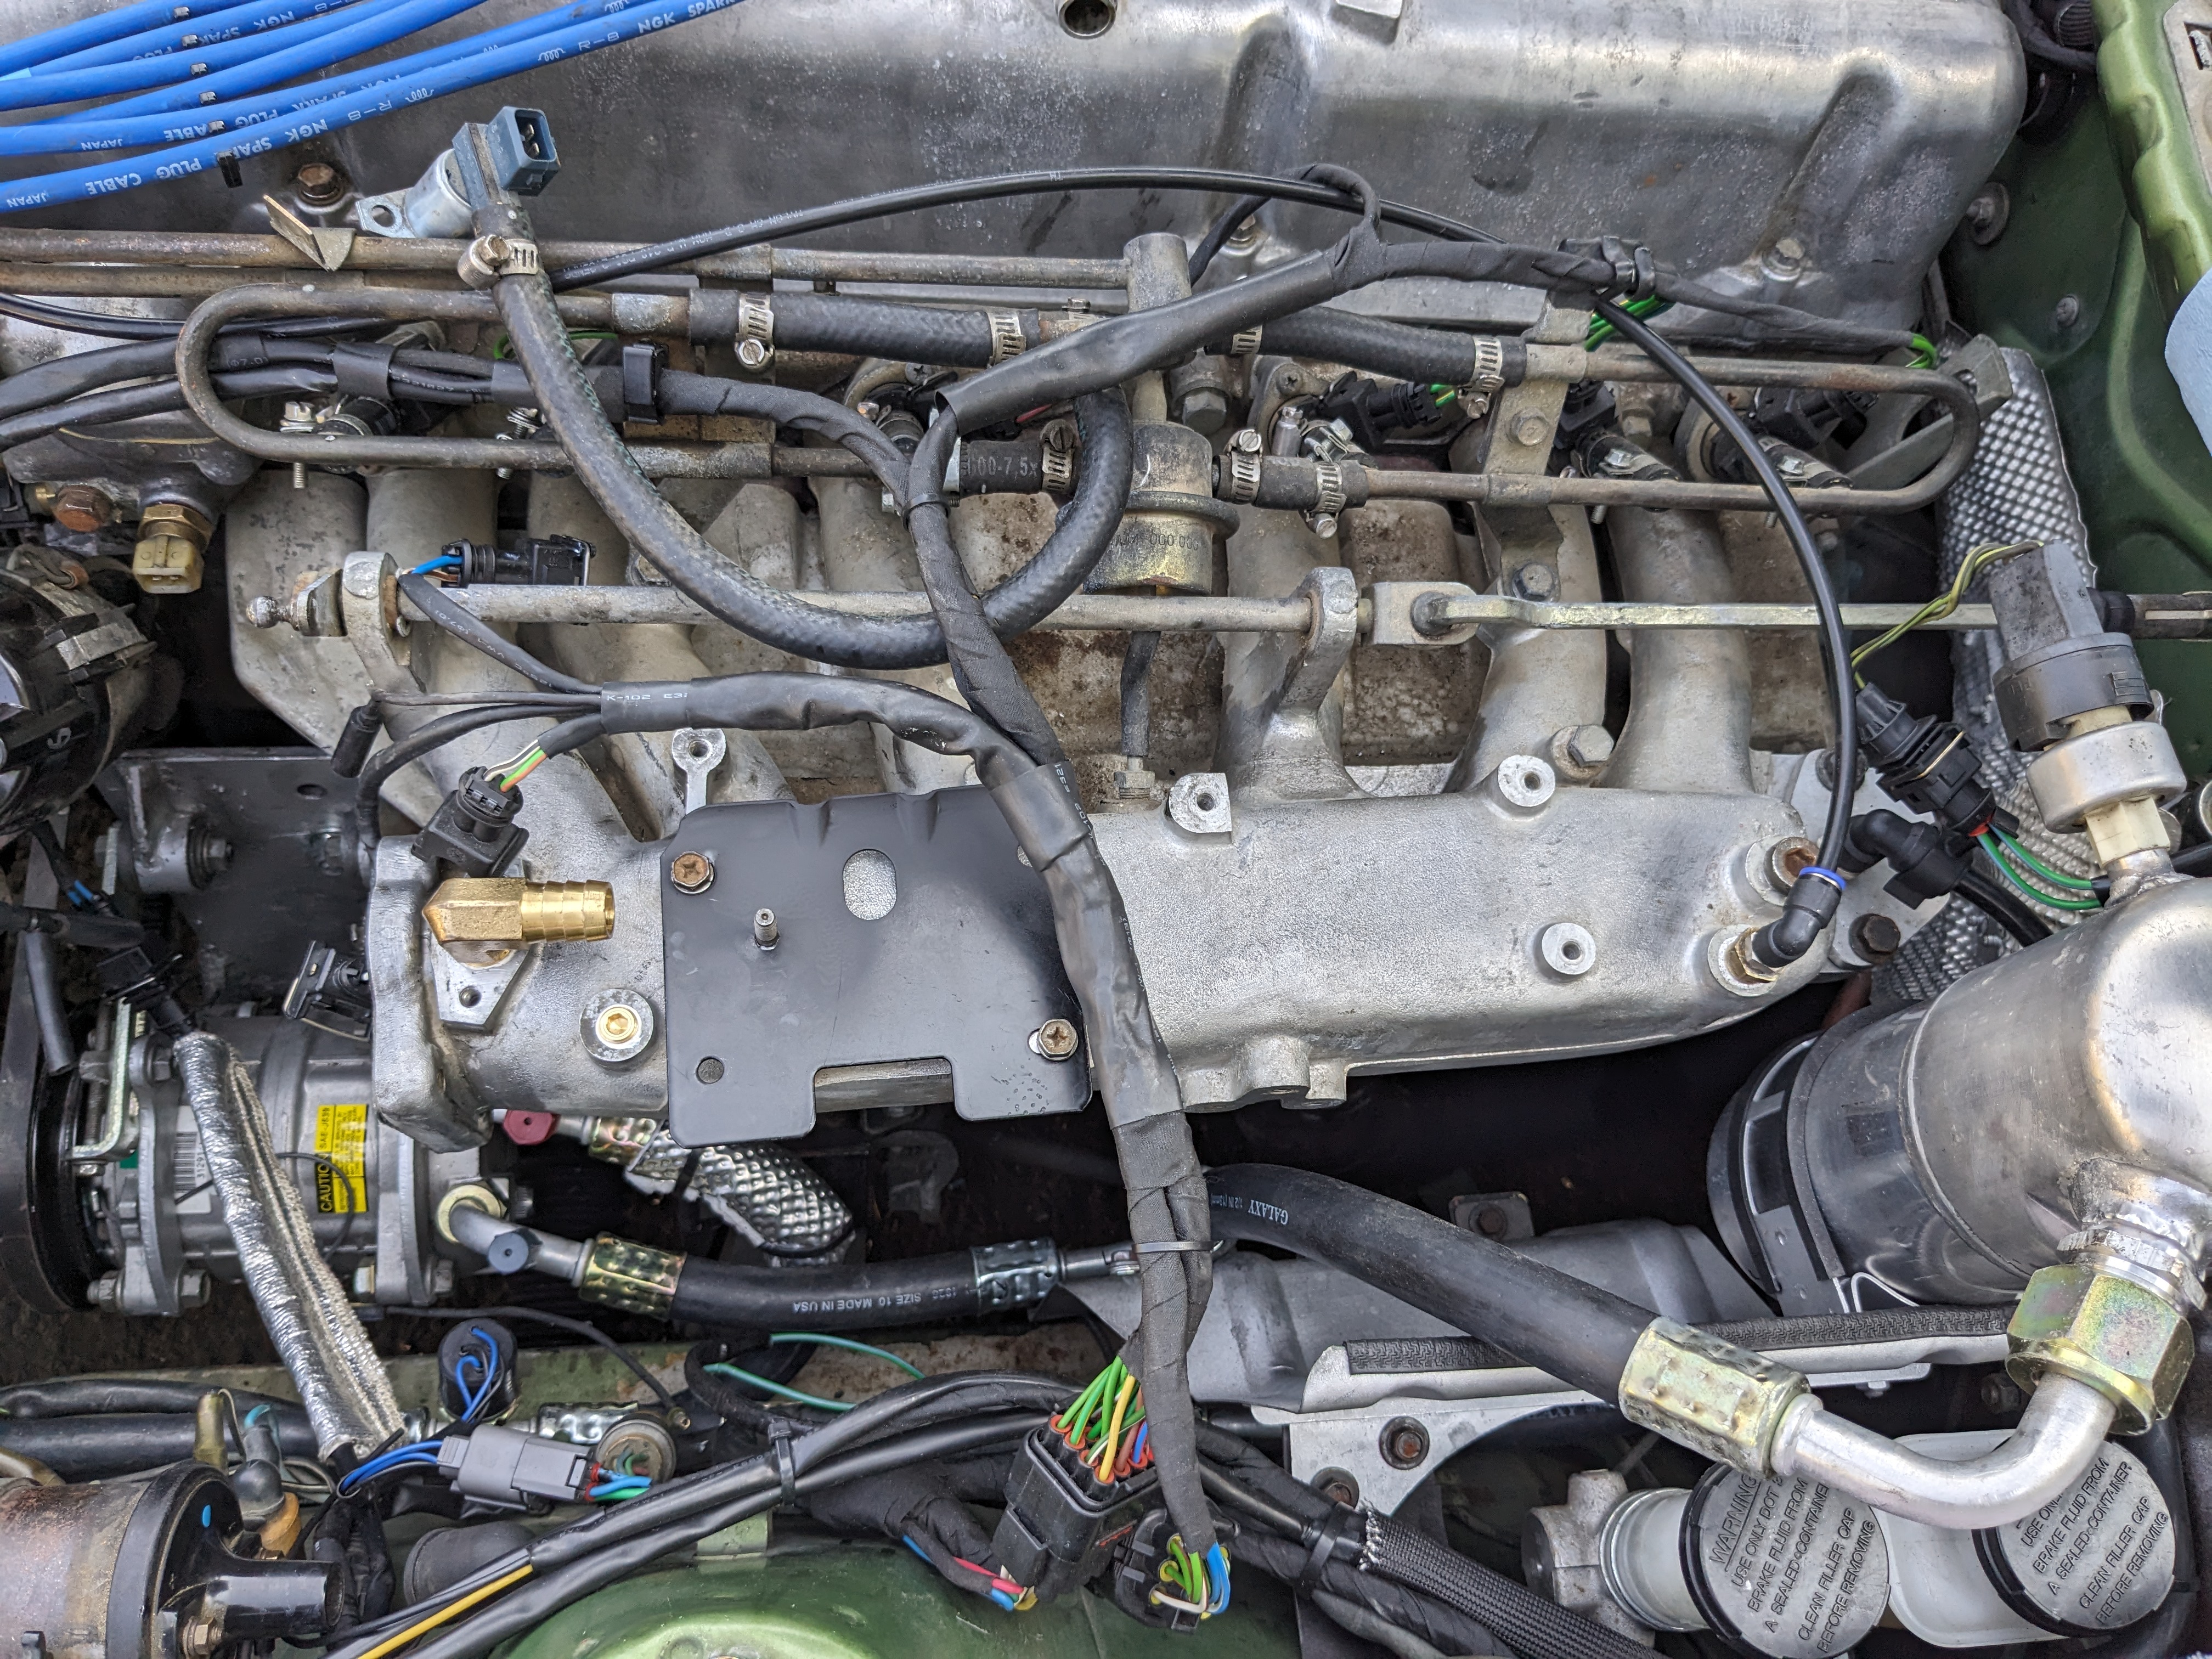
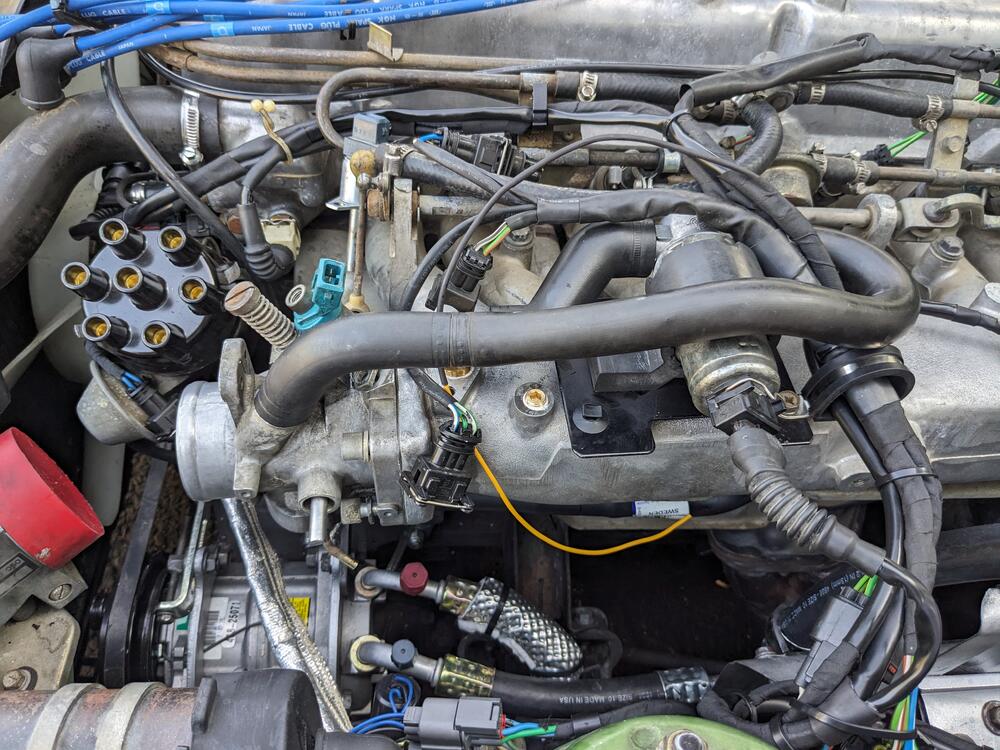
Looking back at the pic of the 78 bay I took, I realized the plug wires were not properly placed - it irked me that they were hanging out on the right side, so I took care of that & made the TB gasket EDIT - the external throttle return spring had a sleeve of some sort inside it - it was cooked, presumably from the manifold proximity, so I'm not sure of the intent. I removed the scraps & put a section of greased nylon (8mm OD) tubing inside the spring.


 1 point
 -
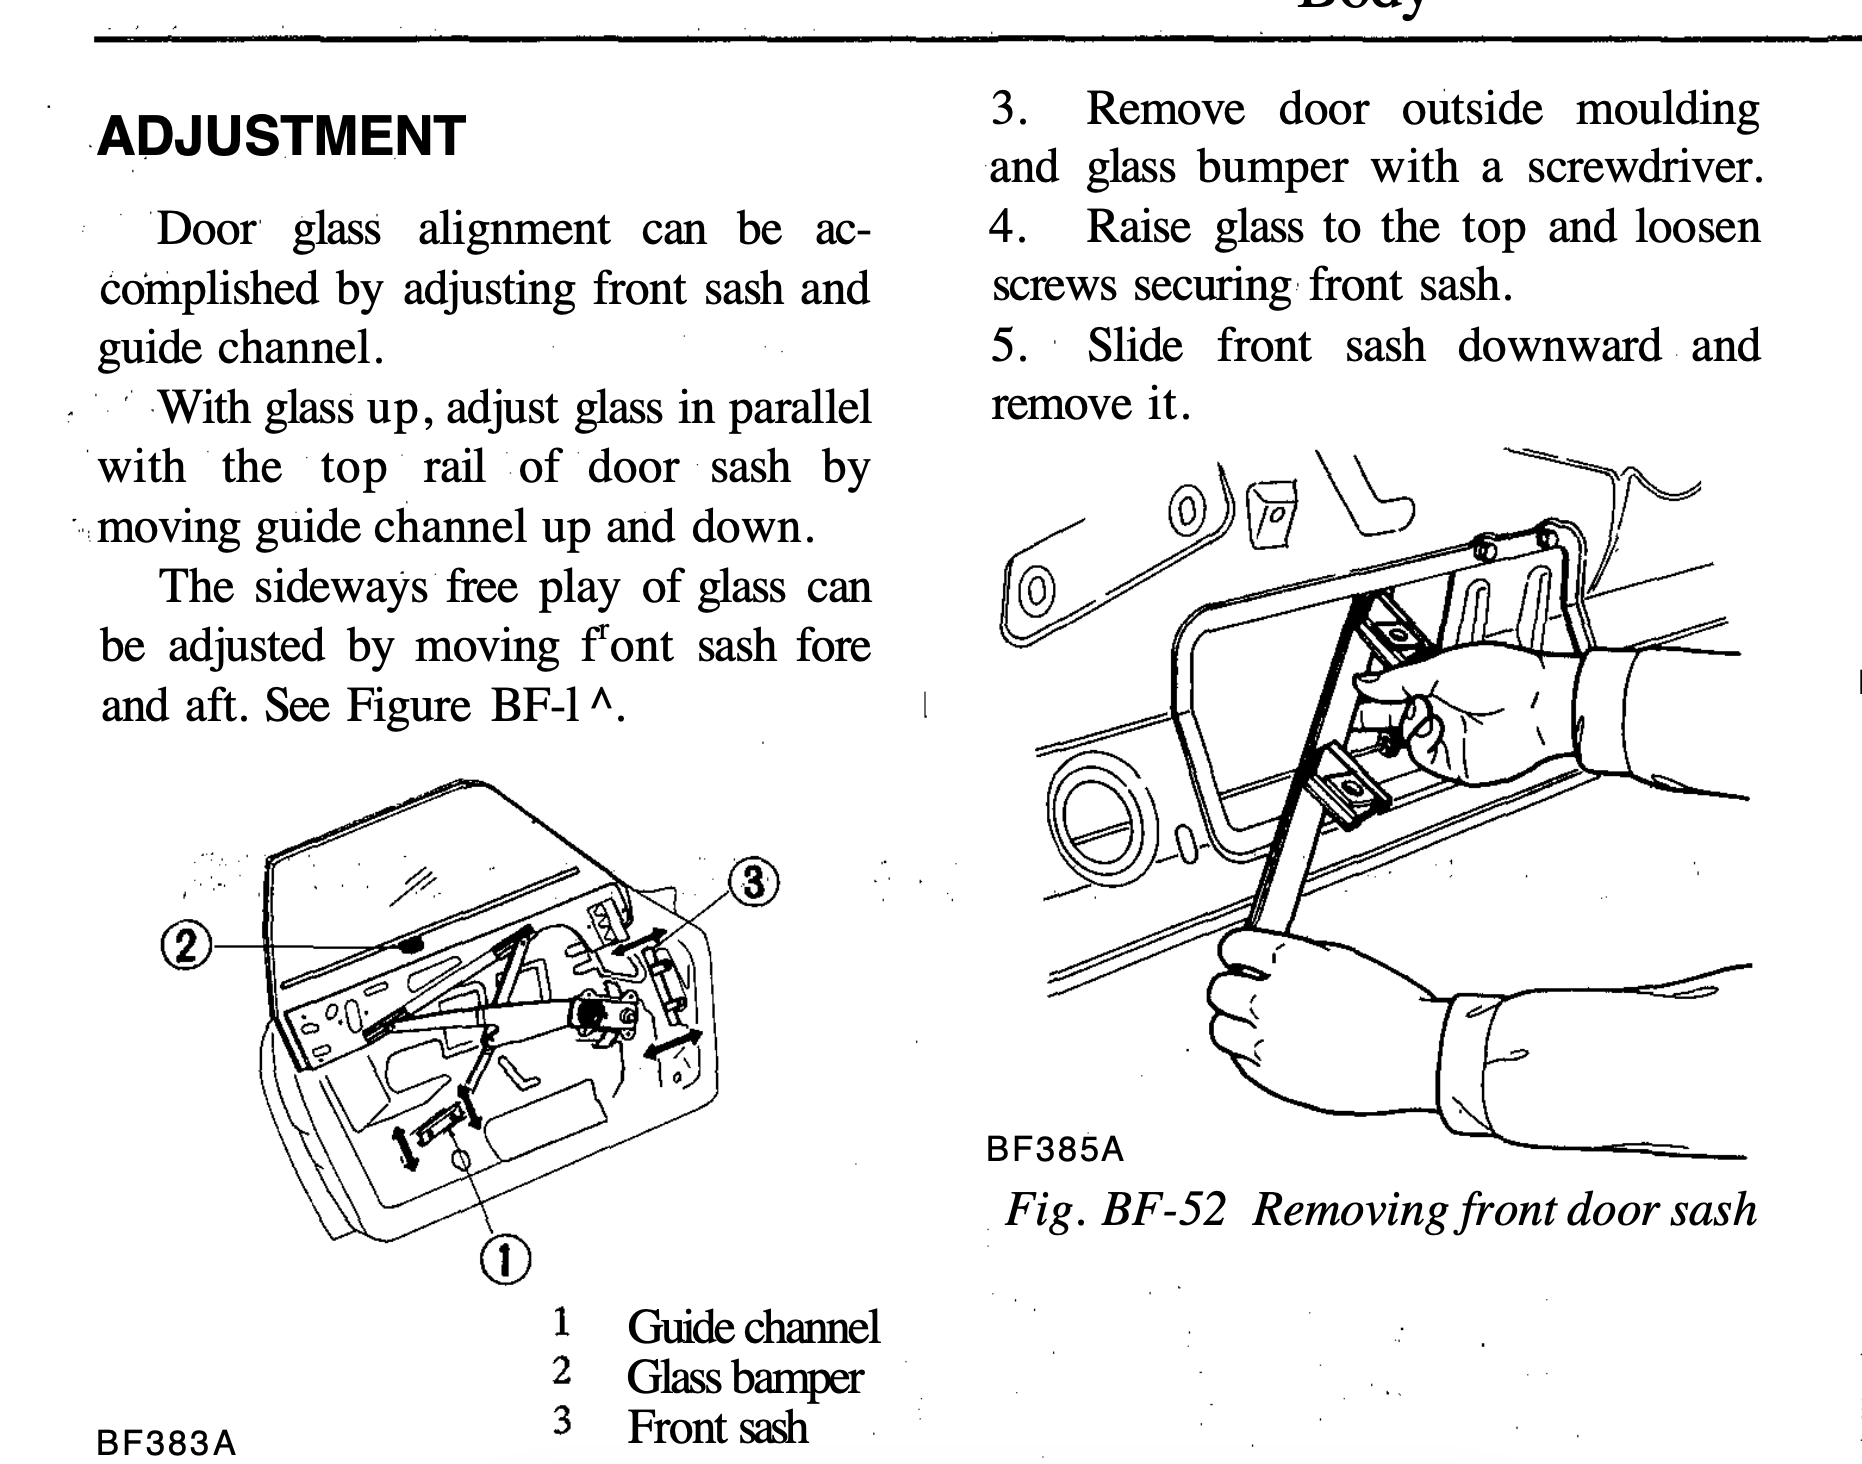
What year is yours? Mine had no extra parts attached - I'm not familiar with the extra pieces that are attached to yours at all. I see now in the manual there is what they refer to as a "Glass Bumper" looks like it's supposed to be somewhere in the middle of the door? That is MIA in my door. I had the whole thing apart when I fixed the door card. Do you have a bette picture of it? EDIT - never mind, found them on ZcarDepot - they also show where it needs to be installed

 1 point
 -
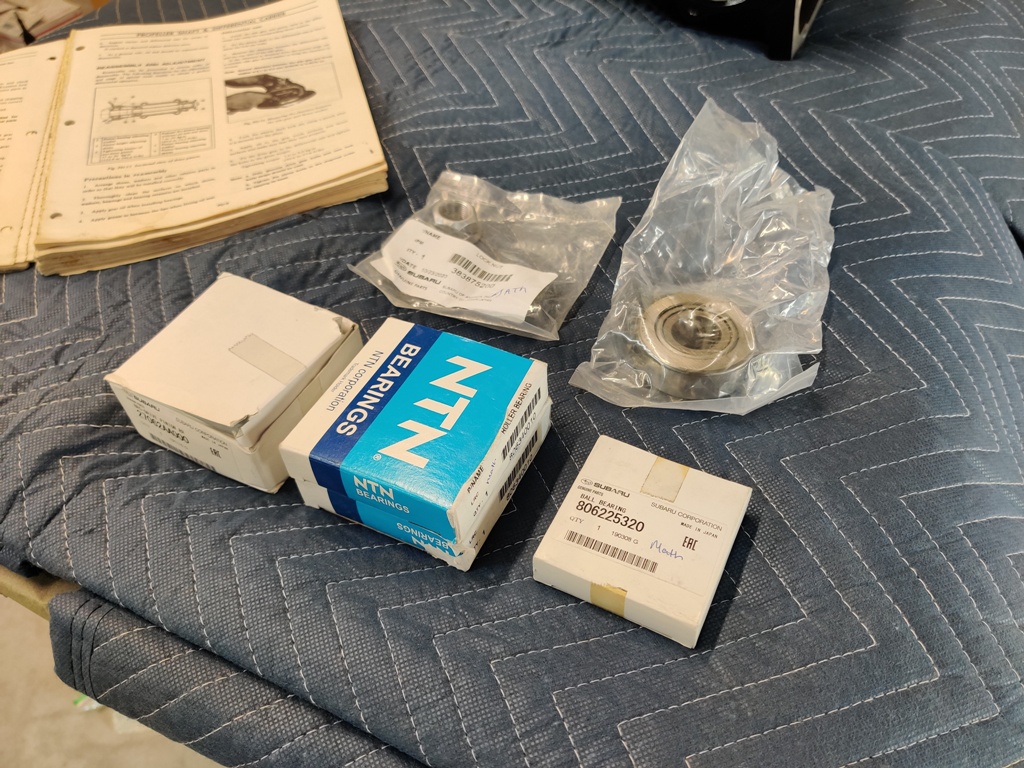
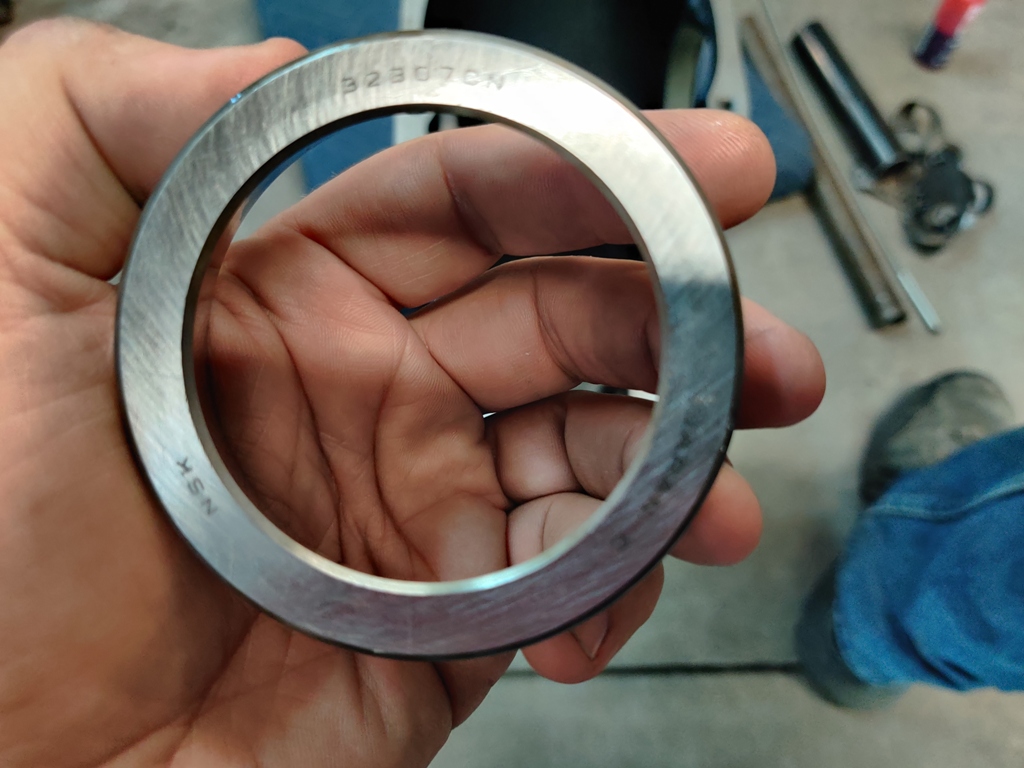
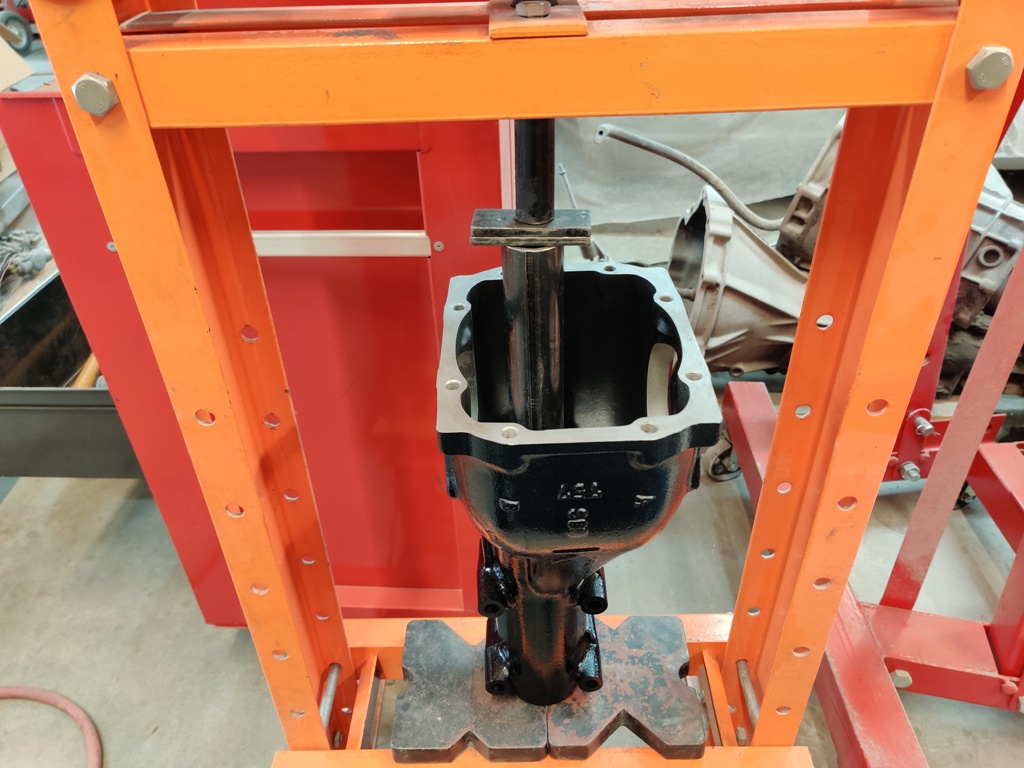
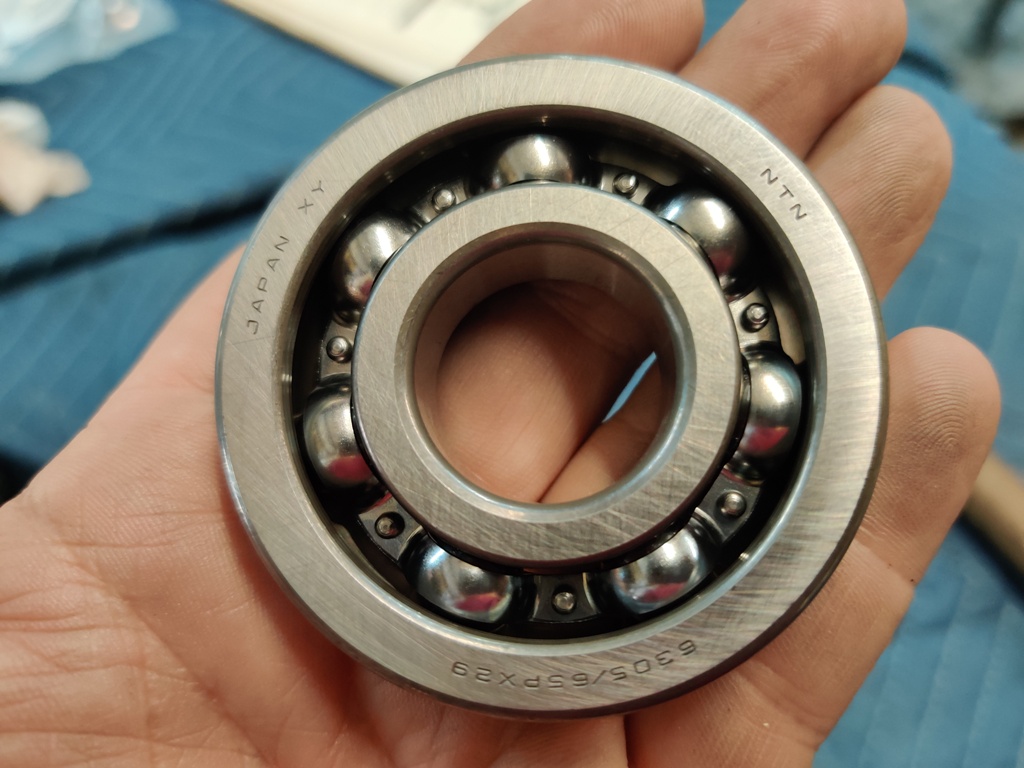
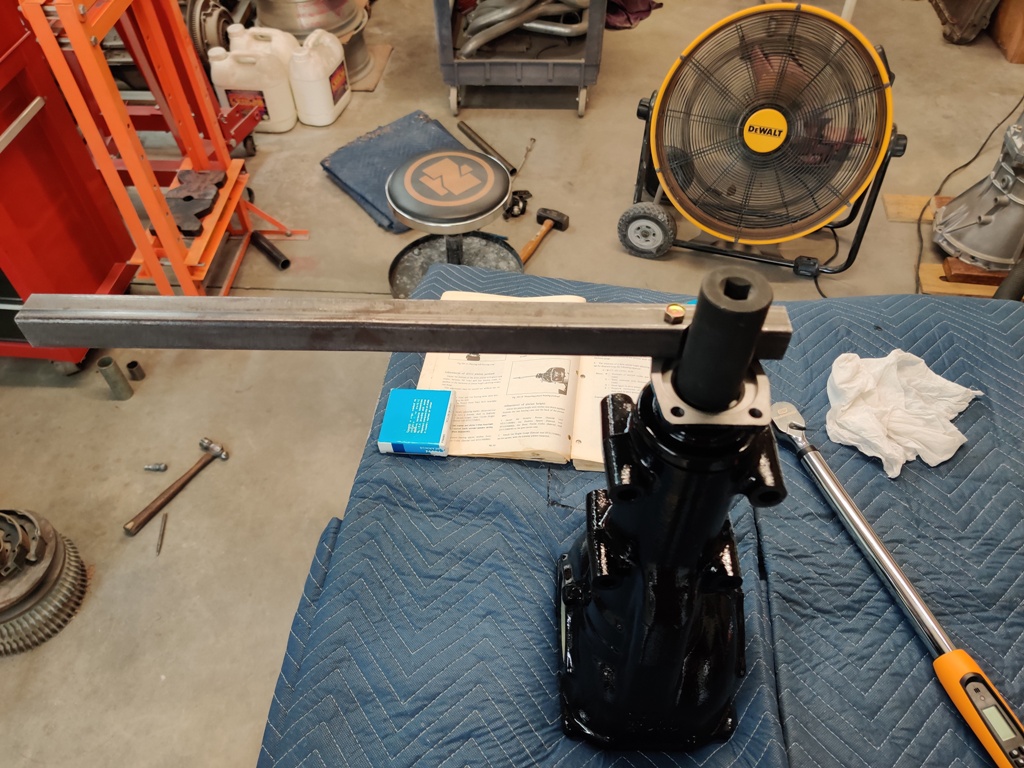
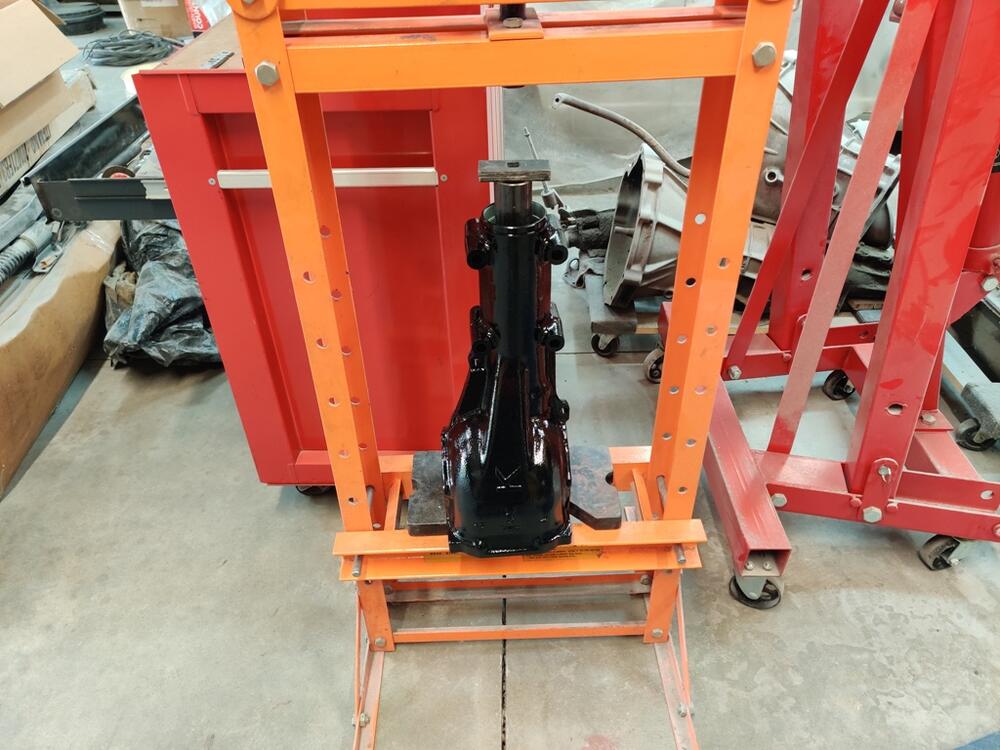
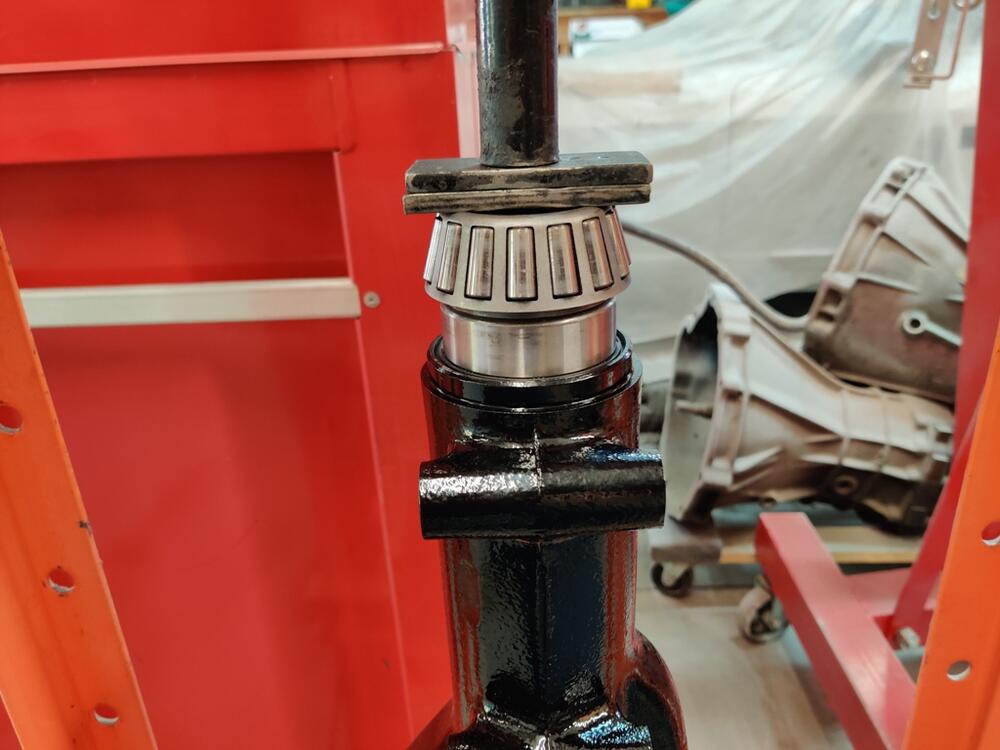
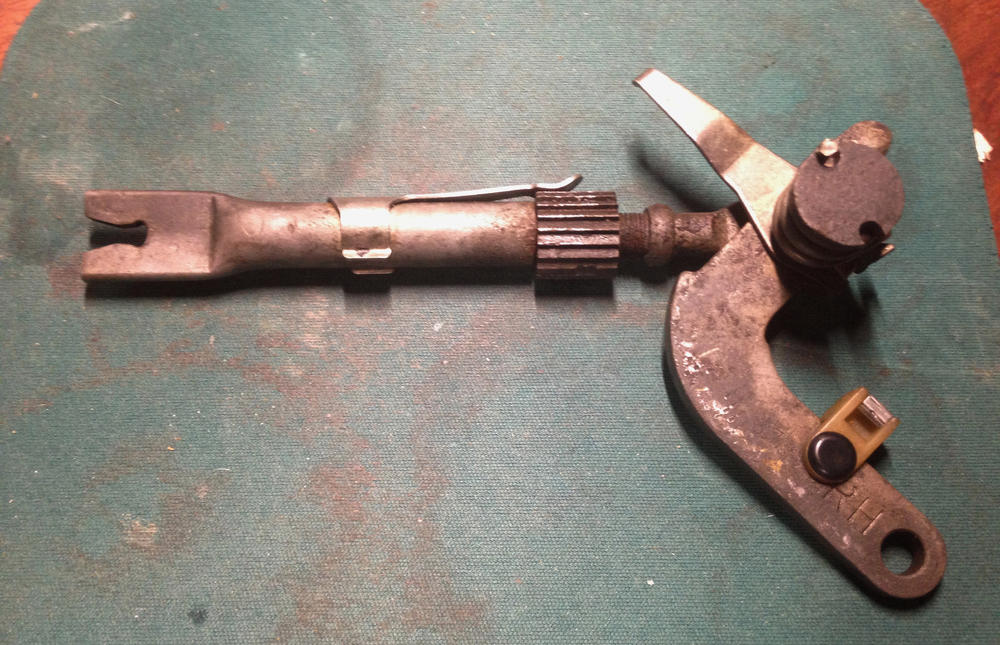
I worked on assembling the differential today. I bought this differential from a salvage yard probably two decades or more ago. It came from a Nissan 4X4 truck. The ratio is 4.11:1. I sourced new bearings, seals and a lock nut a while back from a Subaru dealer, as they had better pricing than the usual place I buy new OEM Nissan parts from. The old bearings were very useful for pressing in new bearing races and seals. I lightly cleaned my 12 ton press up, wiping all loose dust off of it, and put it into duty. I still haven't bought a 20 ton press just yet, something I put on my to do list when the 12 ton wasn't enough to press the control arm bushings out of the rear control arms. I made a lever arm to hold the pinion from turning so I could set the spec on the pinion nut. I set it to 132 ft-lbs using my new, digital torque wrench. Next, I will be installing the Quaife lsd unit.


 1 point
 -
Amen!!! I would not dare to go add mine up!!!1 point
-
Thank you for the kind words! My goal for this restoration has been to restore the car to "new", with perhaps a twist. I like how new cars today have very straight panels and very little of paint defects from the factory. My goal for the paint was to elevate the body finish to that level. Oh! Yep, at $50 an hour - $100k. My time log (very loosely approximated by estimating hours per day worked, sometimes very accurate, and sometimes I forget to note it, and have to go back and fill it in) is sitting at 3201 right now. This doesn't include most of the assembly, which has yet to happen. It also doesn't include any of the time I spent with restoration related work while on my laptop or internet research, or parts searching, buying, etc. For every 8 hours I actually have worked on this project, I probably have one to two hours, or more, of research, search, work on spreadsheets, etc. related to this restoration.1 point
-
1 pointyeah, but your 240z needs more than that mart, i wouldn't call it " vibration free " when i sat in it years ago. if you want to do it properly you need to invest big bucks in all the old rubber suspension parts etc1 point
-
1 point
-
1 pointI used the roadster belts in both of my Z cars. Yes, the retractor mounts near the quarter window. Here's what you're looking for: https://www.wescoperformance.com/noname.html1 point
-
Success! I made all the changes we talked about, bled the system (again) and now have good pedal feel and brakes. I'm pretty sure, as you all suggested, the caliper issue was the key problem. Thanks for all your help....You Guys Rock!1 point
-
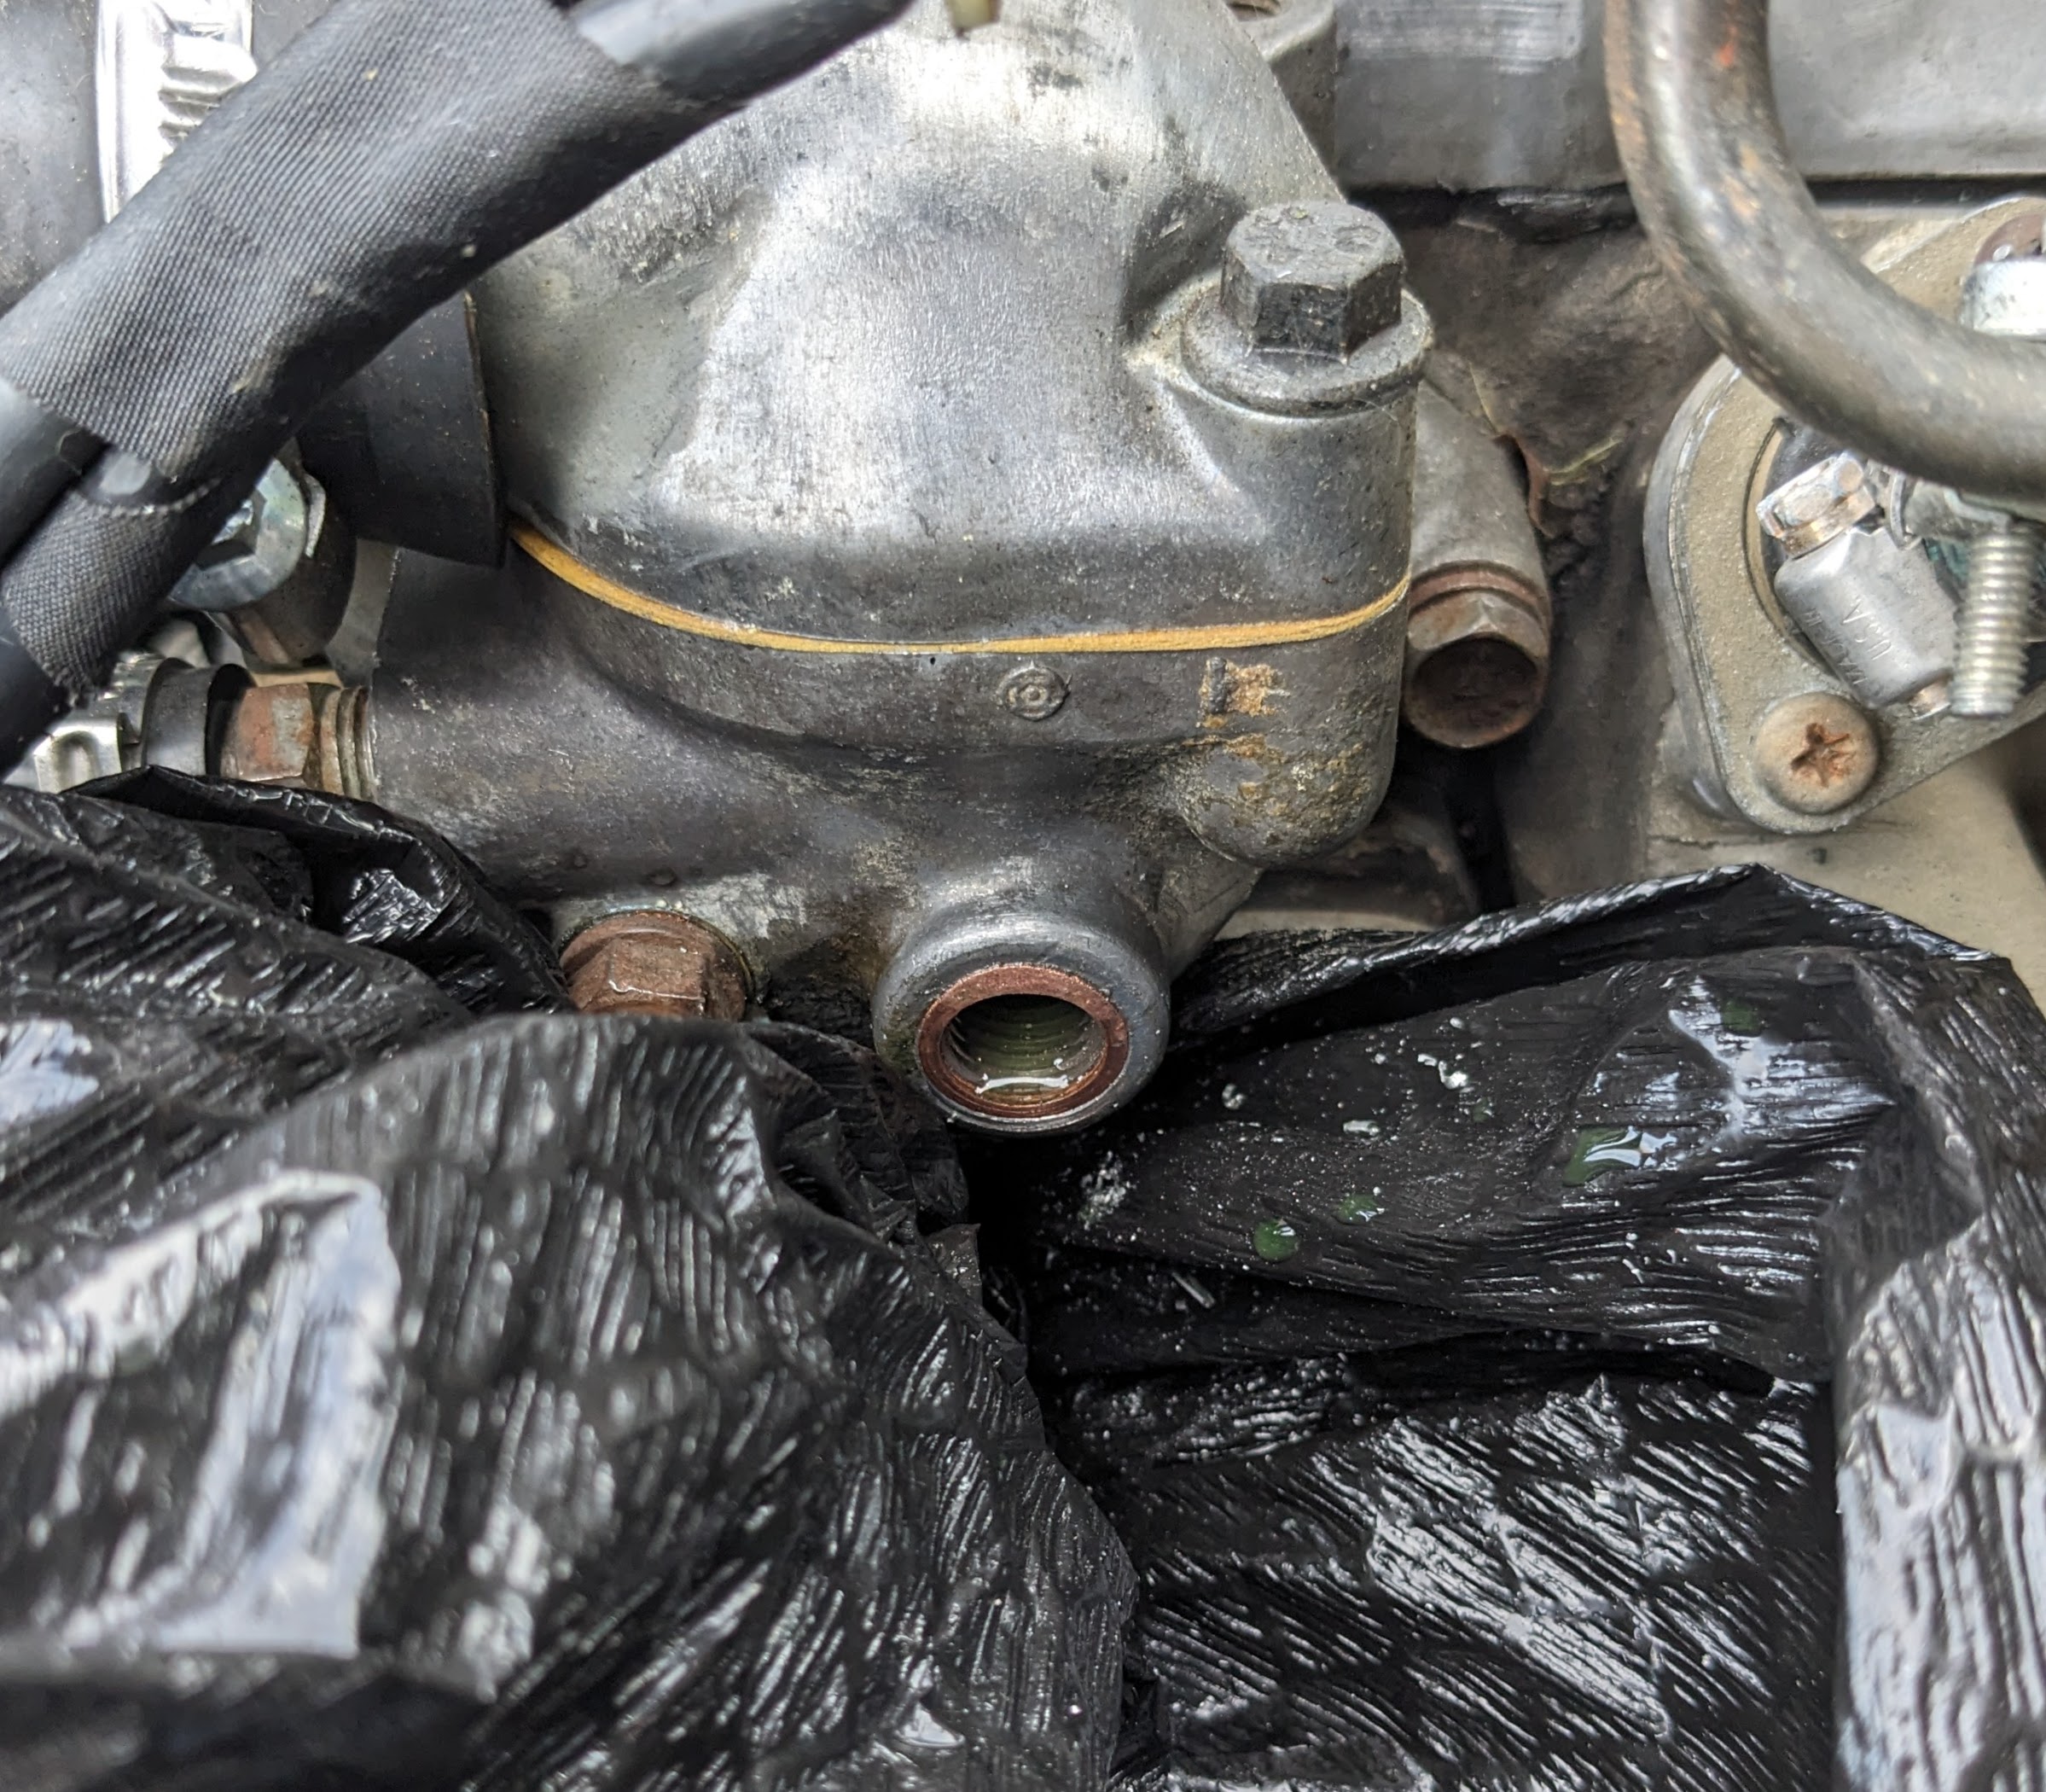
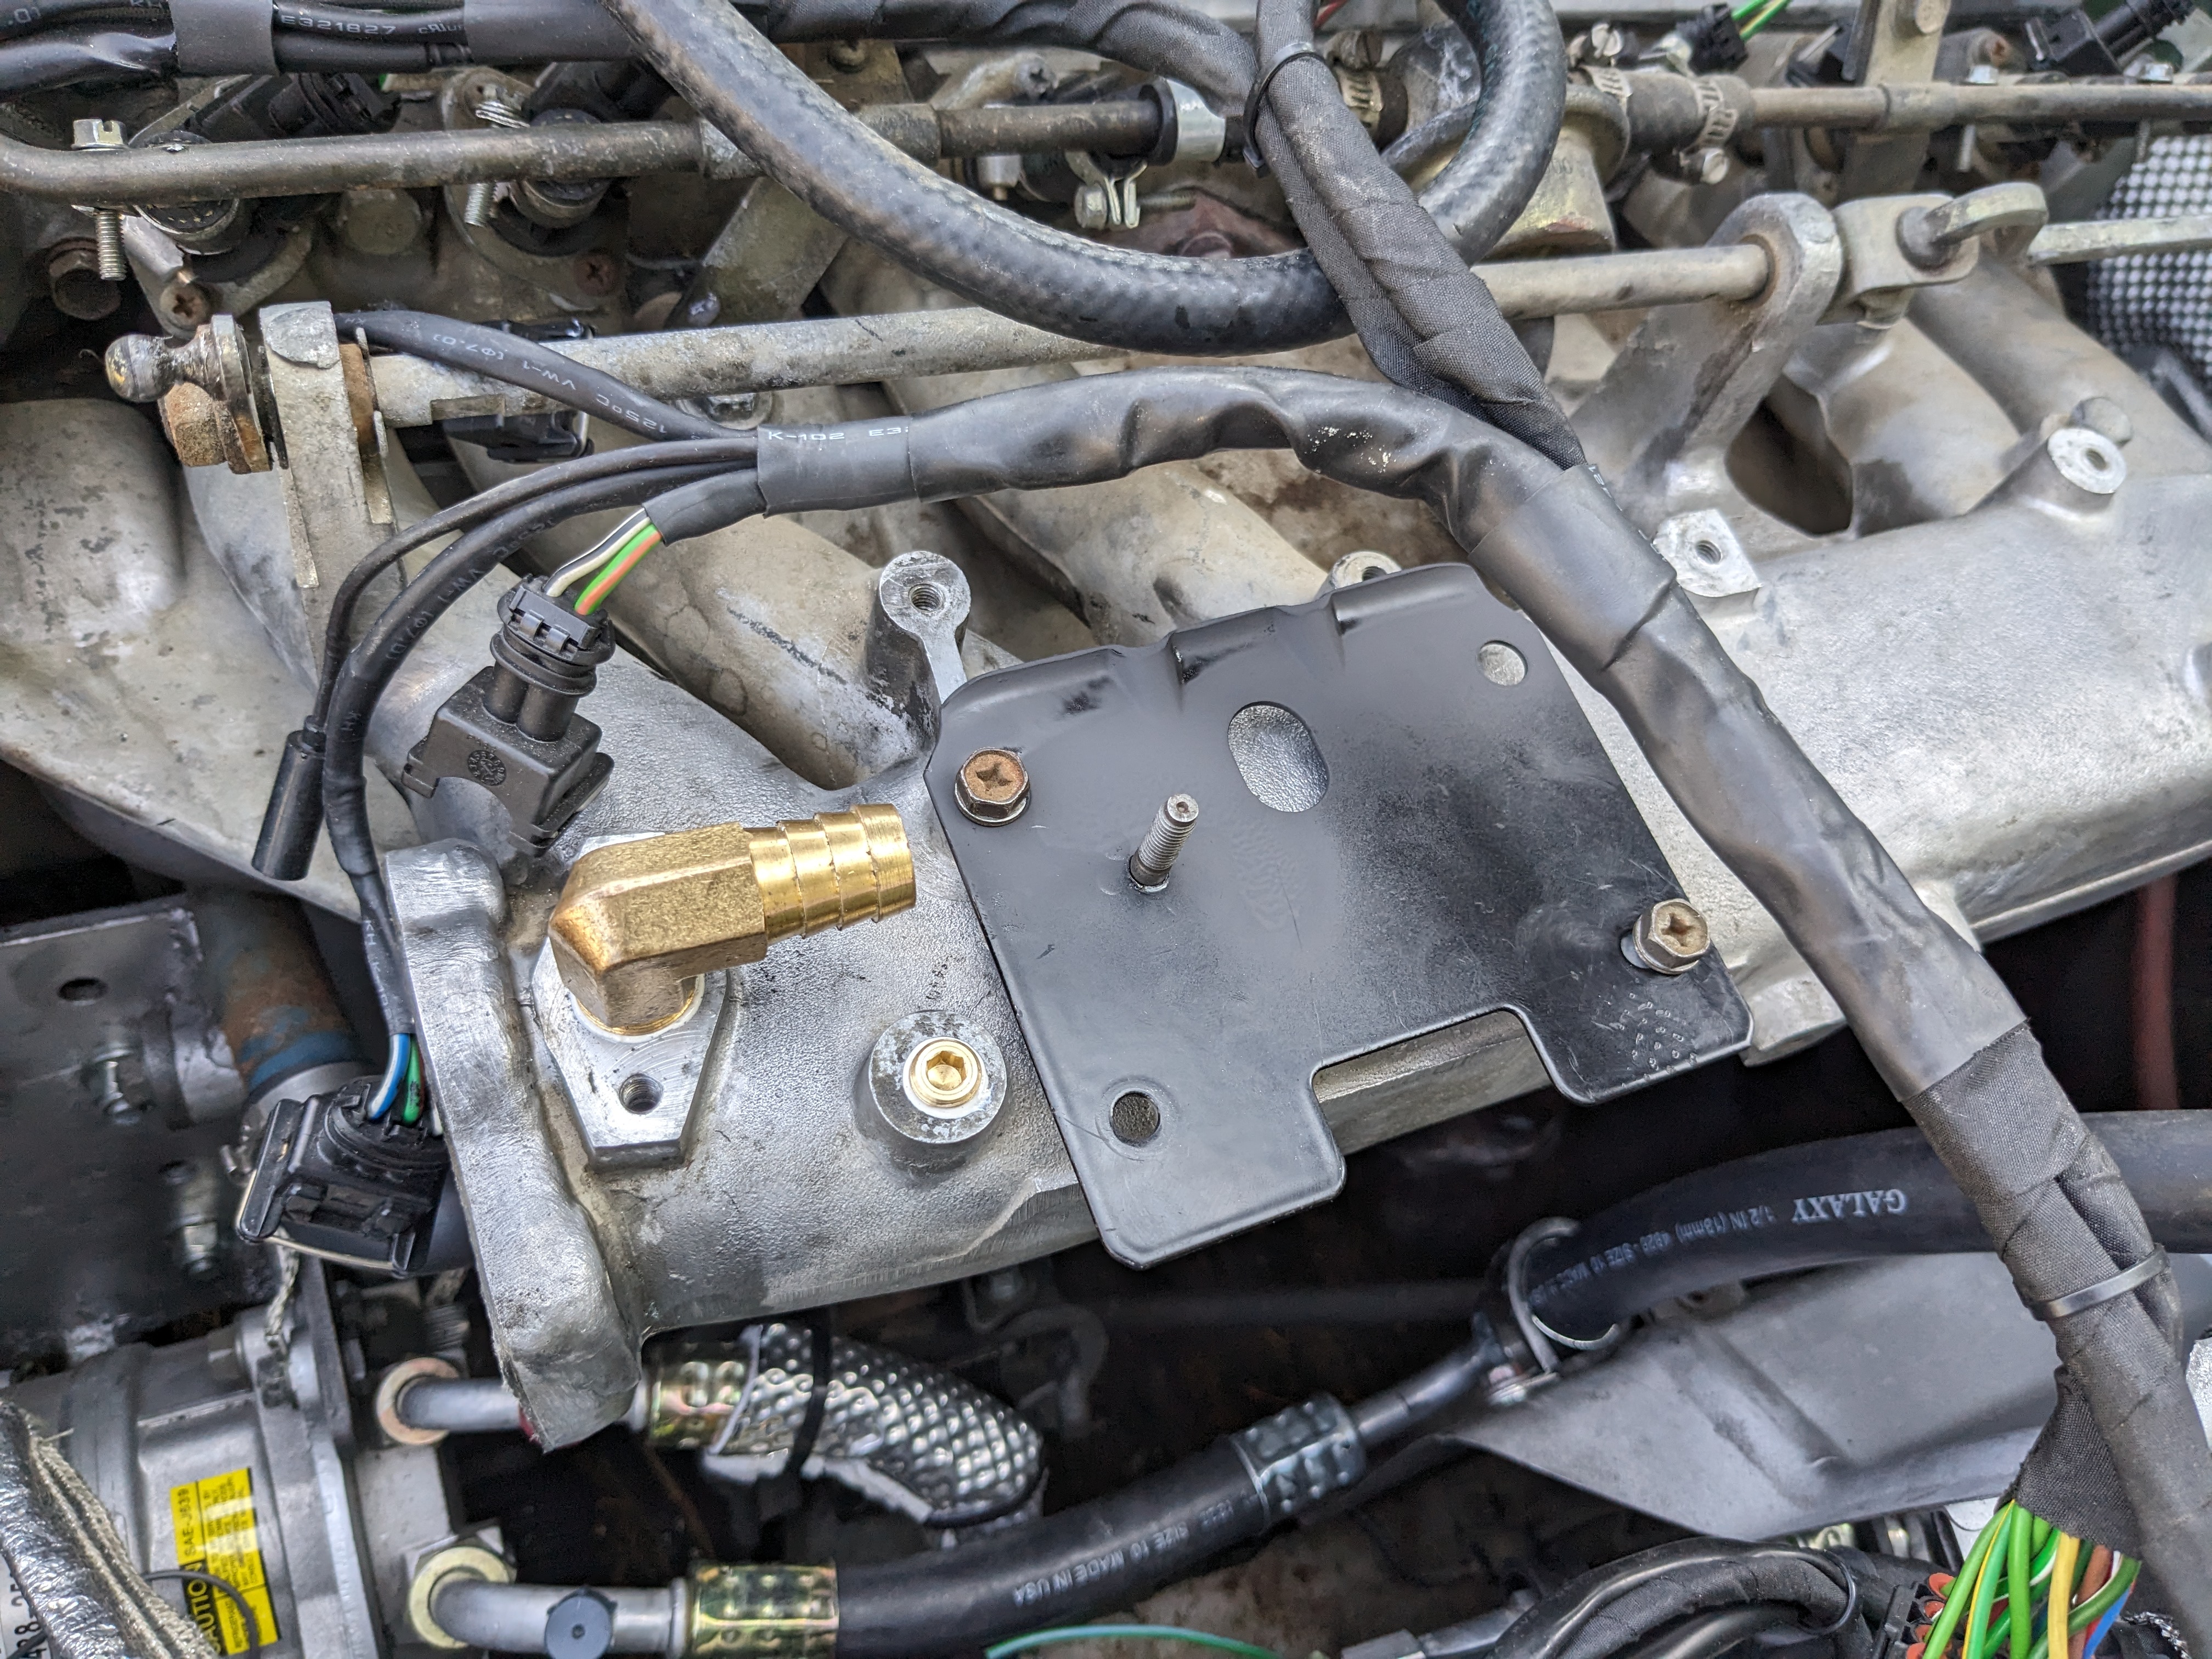
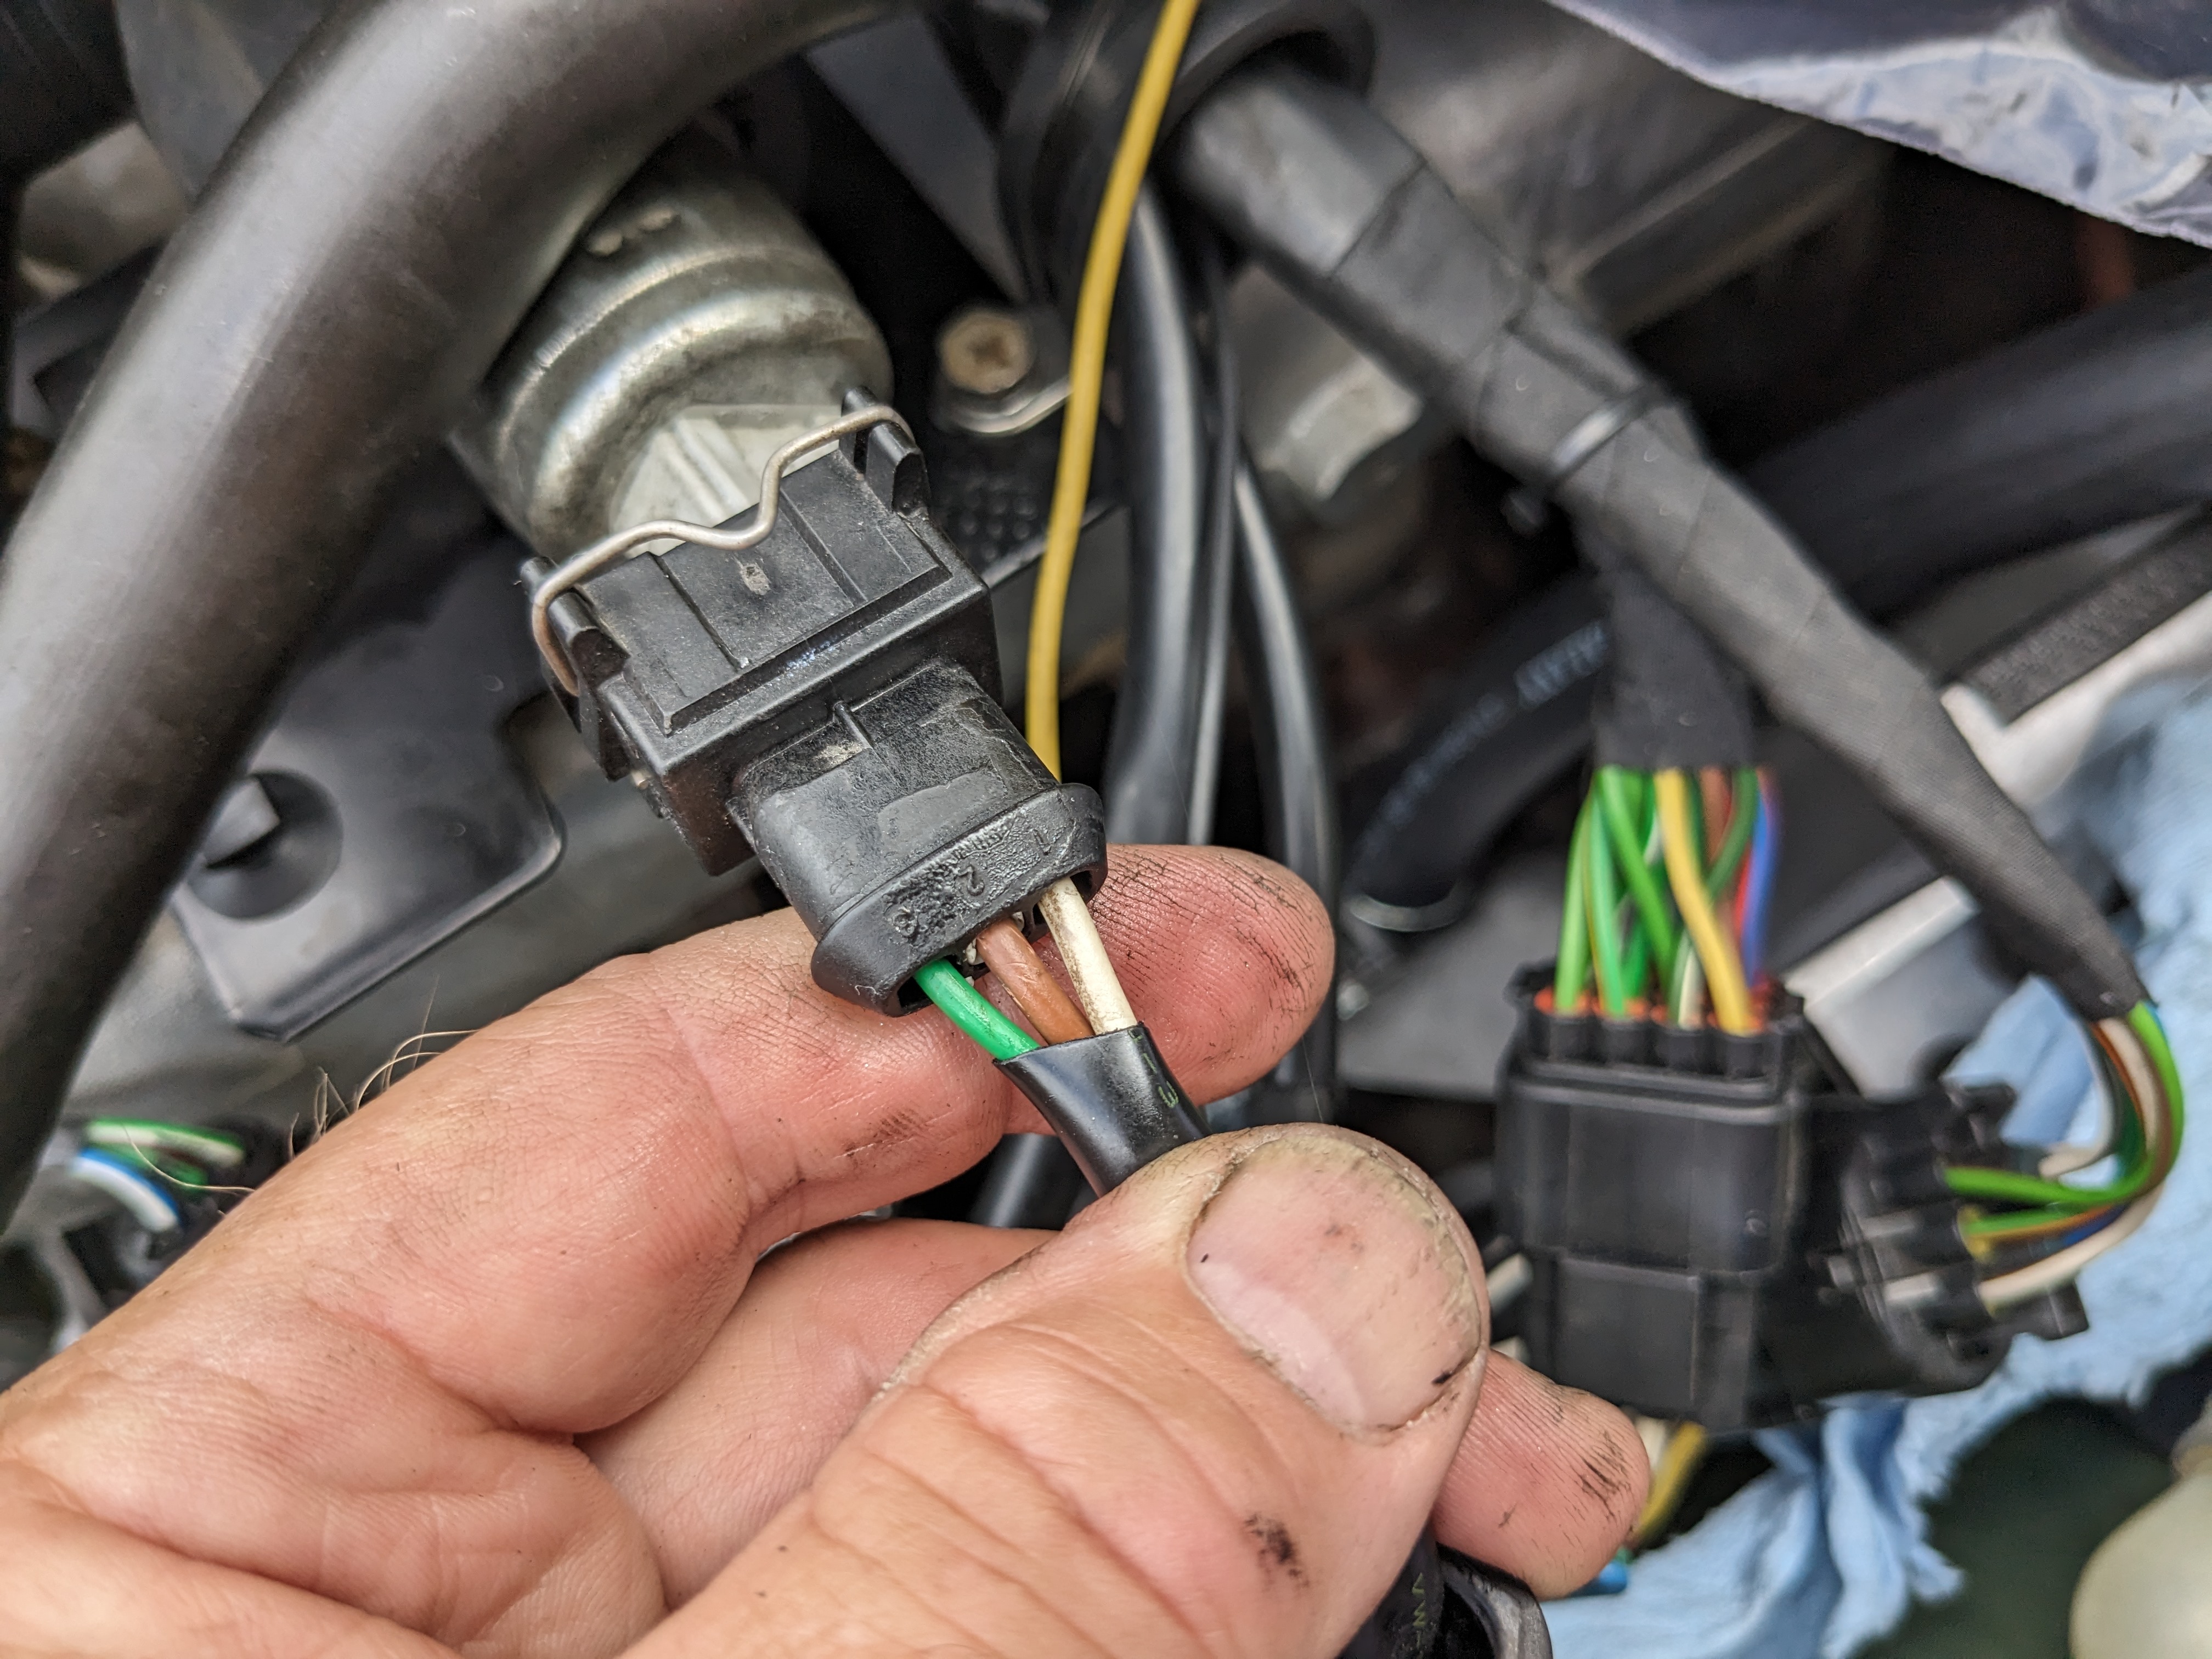
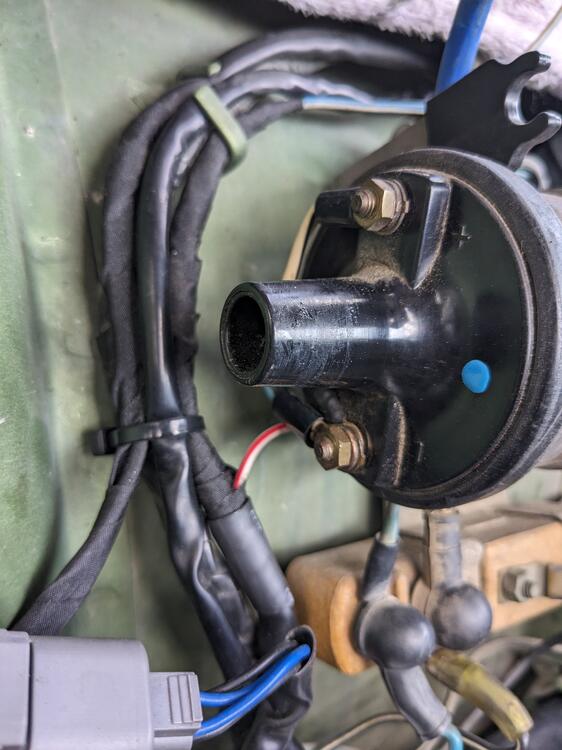
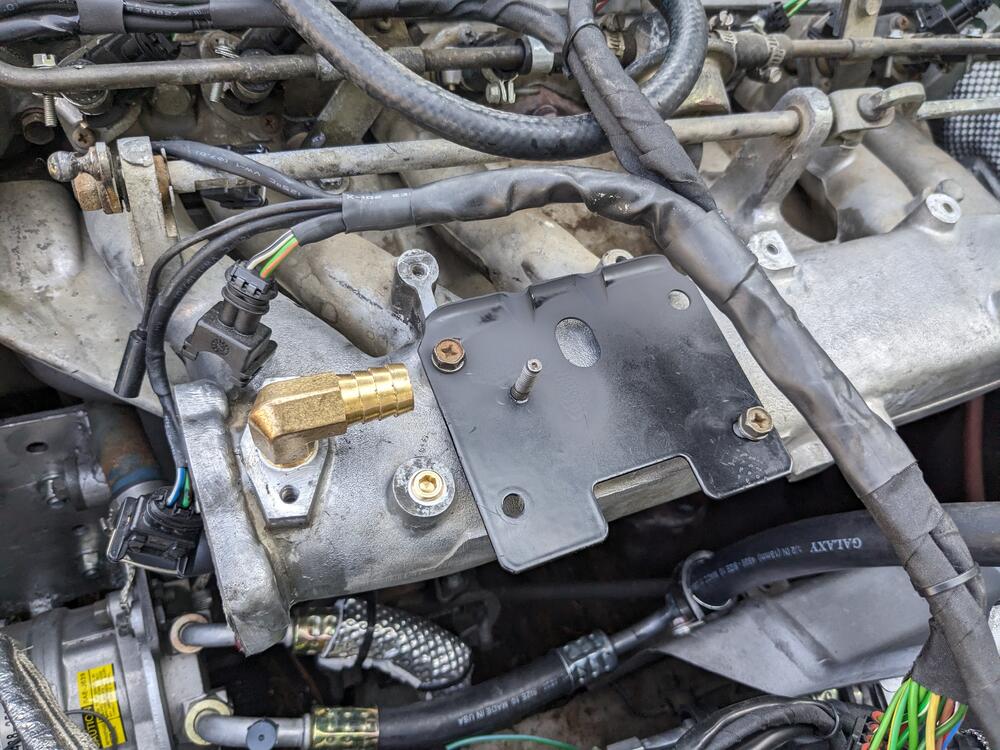
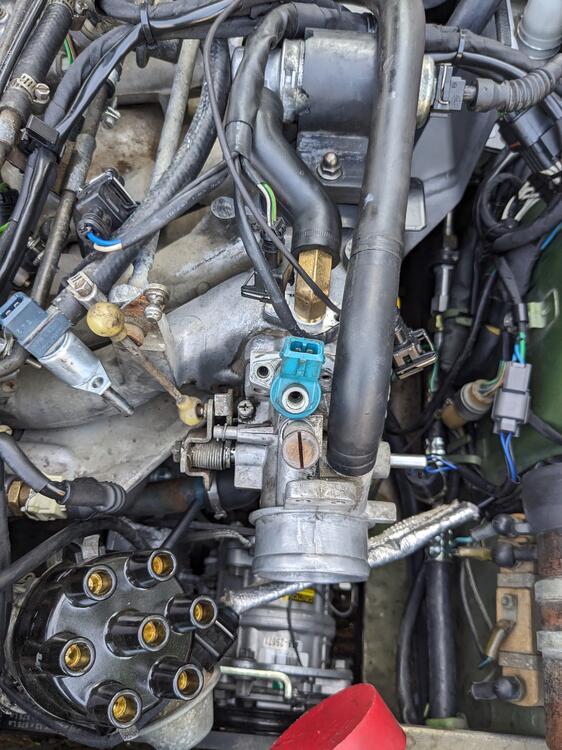
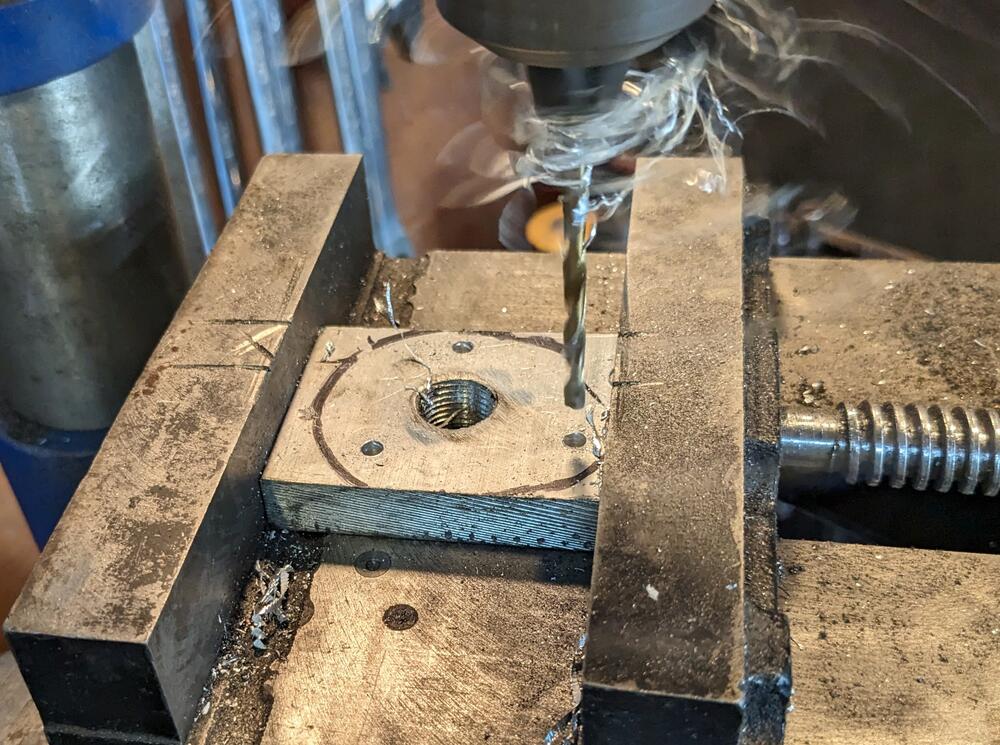
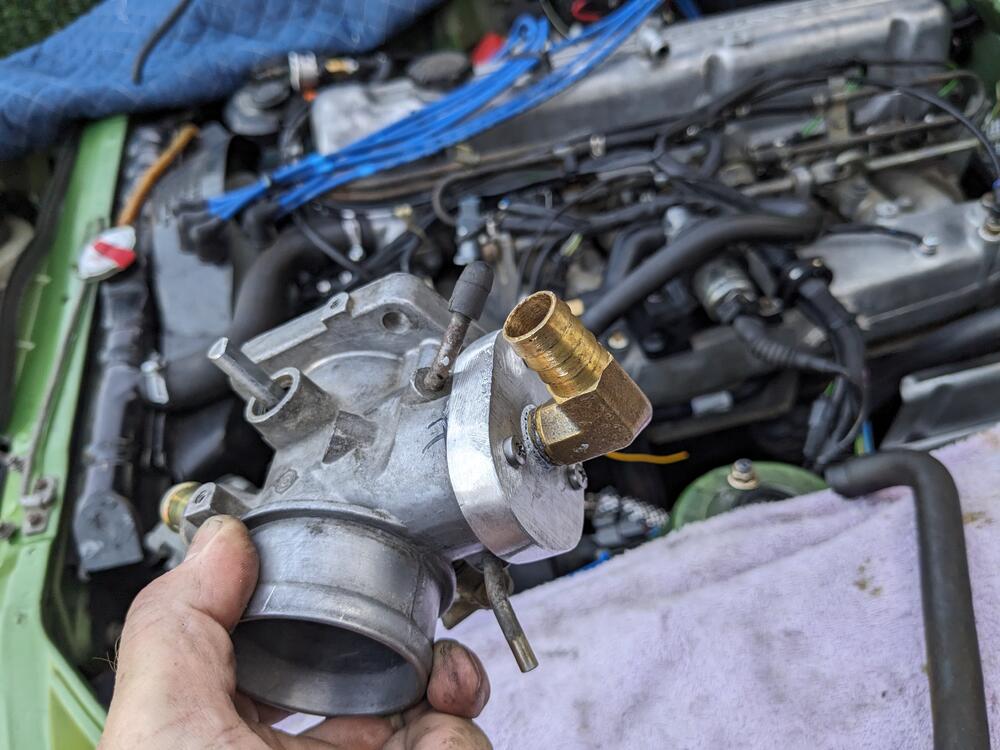
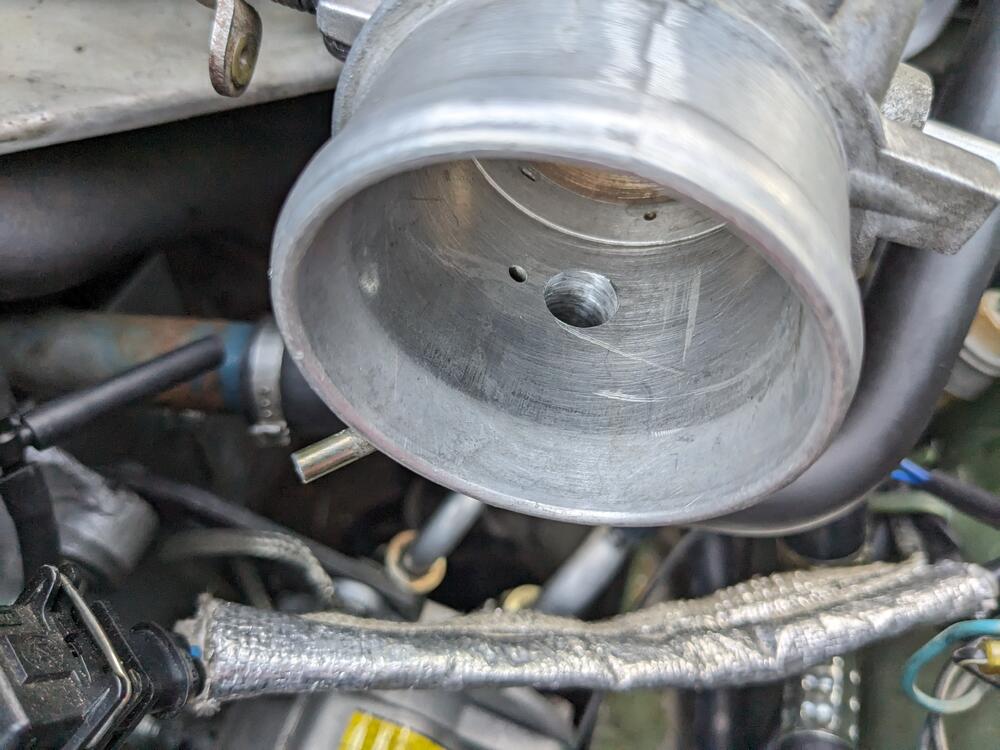
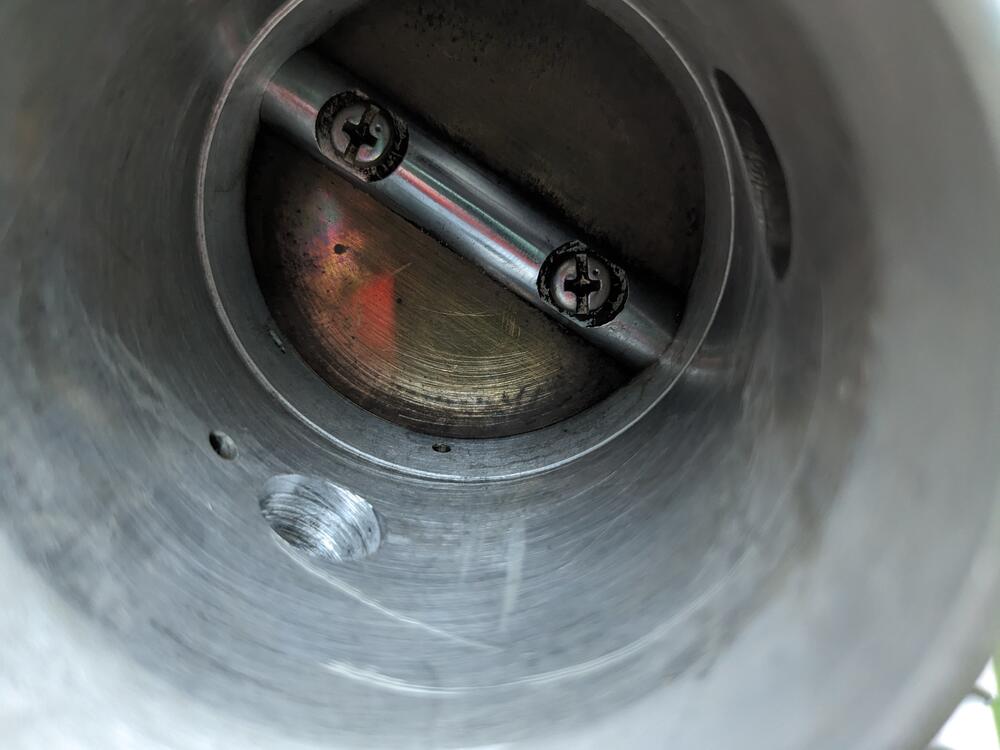
Coil (-) connection. Red-White, since that's what Volvo uses. Blue is usually (+), glad I checked what Nissan uses for (-) Drilled (9/16") & tapped the intake for 3/8" NPT elbow fitting Made a support plate for the 3517886 IACV. No room for a bolt to come through the plate from above, so I welded a nut on the backside & put in a short stud to retain the IACV bracket. Re-tapped the vacuum port for the charcoal canister to 1/8" NPT & plugged it. The IACV hose passes right over it Moved charcoal canister vacuum port to rear of plenum, using quick connect with nitrile line With the IACV placement sorted, I wired the 3 pole connection and the 2 pole for the ECT, and the ground connections at the intake CSV placement in TB to get a clean run on the CSV feed hose, I'm going to flip the CSV. Converting to barb fitting. Using a different CSVB than above, I have 3 (Volvo) variants with differing offset connectors Made the block off plate for the B.C.D.D, with 3/8" NPT port for the valve cover vent. Used the B.C.D.D base gasket as the template for the mount holes shaped somewhat, brass elbow fitted. Used HondaBond to seal the plate to TB. B.C.D.D port redrilled to match the greater breather vent ID above, since the above port is now dedicated to only idle control Breather vent elbow fitted below will clear the TPS once reinstalled. Have to figure out a clean way to unify the valve cover port hose with this 78 280Z AAV & Breather vent hose layout for ref.


 1 point
 -
https://www.classiczcars.com/forums/topic/34633-kia-sportage-weatherstip-rocks/#comments1 point
-
Agree, it's not a great seal, if you keep the hatch closed and let the car sit out in the sun it will start to relax over time. I used a Kia Sportage door seal on my the hatch for years and it worked well.1 point
-
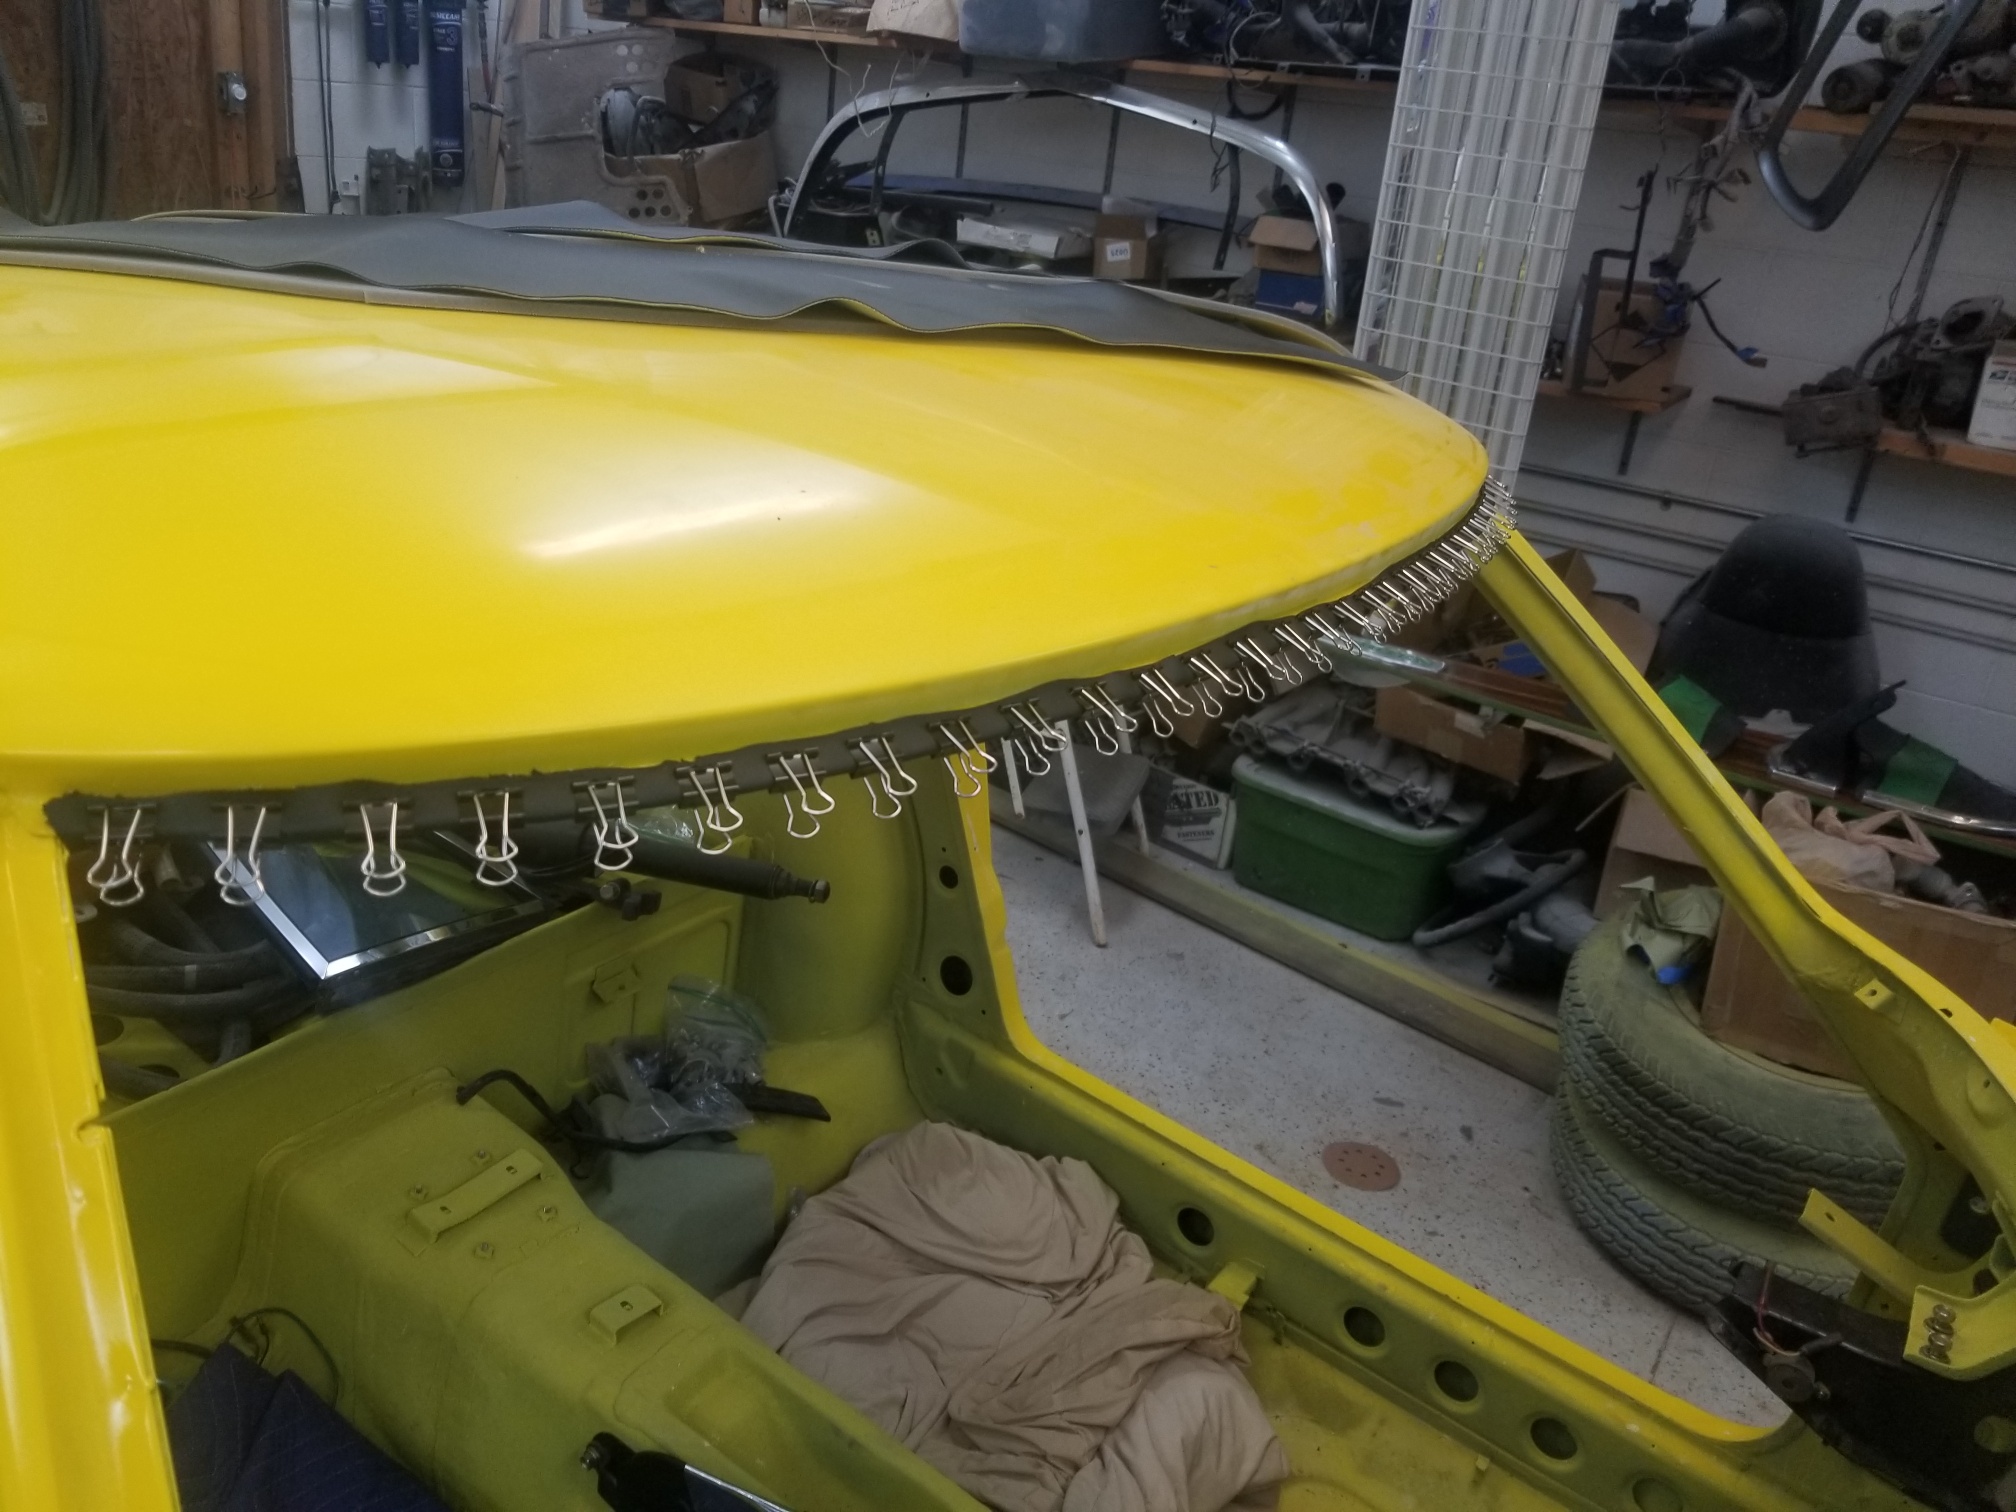
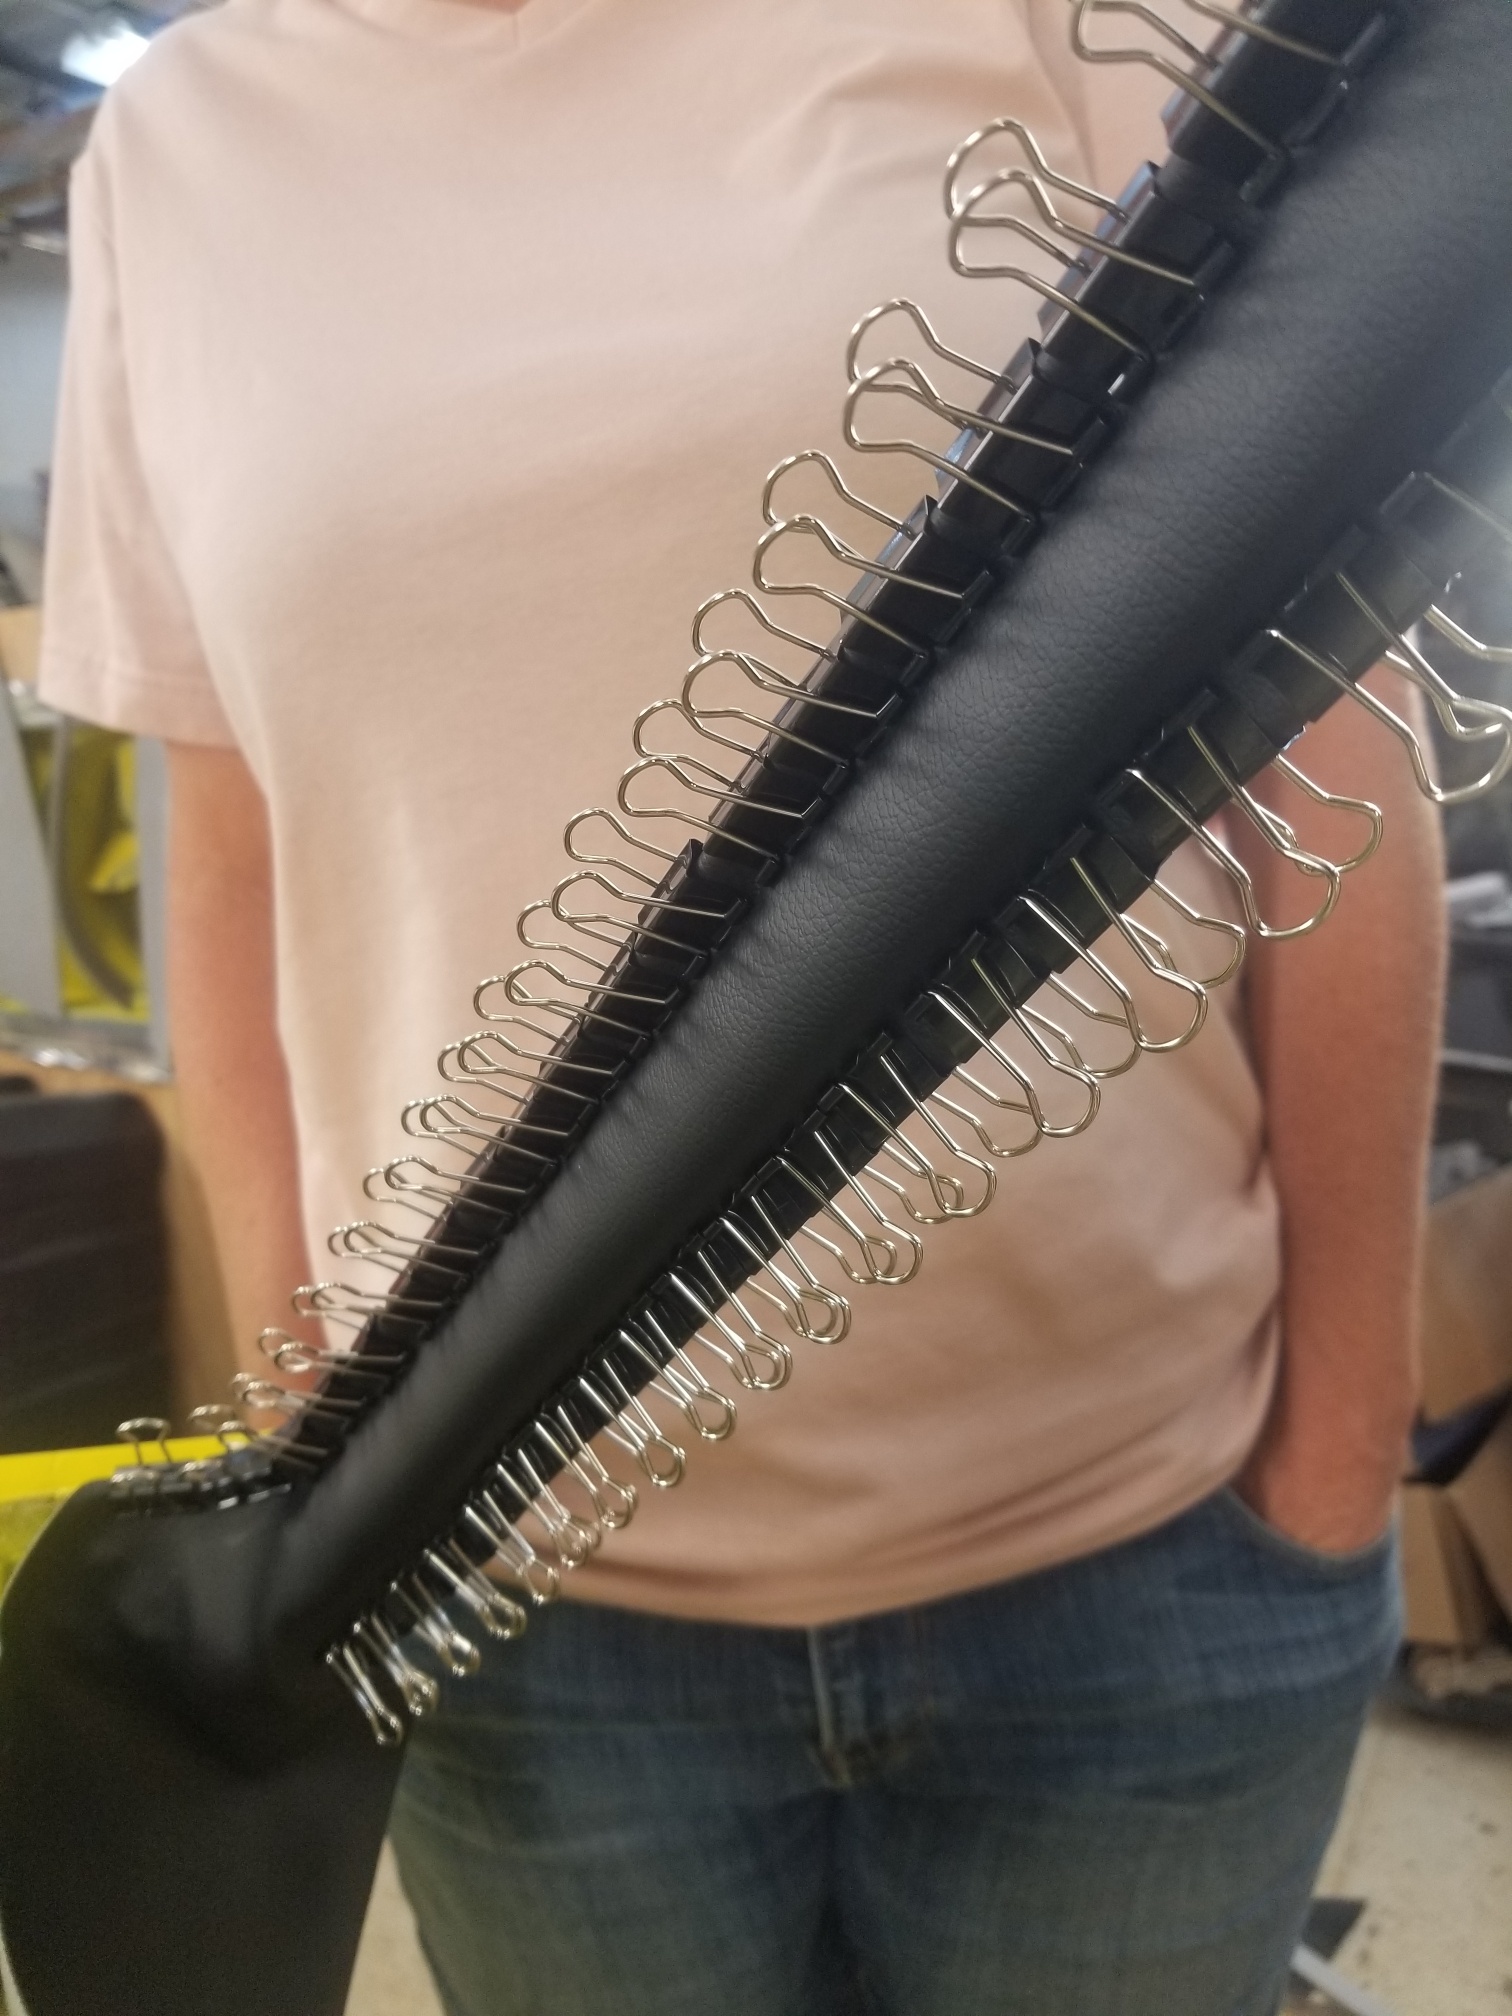
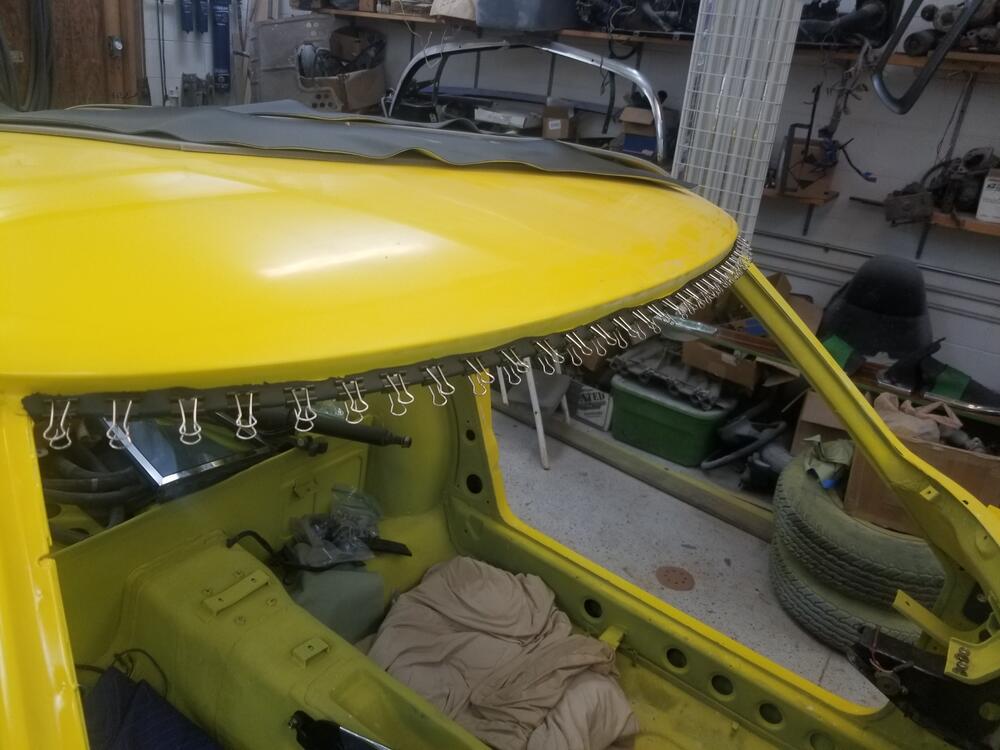
1 pointLooking so very good Charles! You are clearly the bulldog clip king of your neighborhood!!!1 point
-
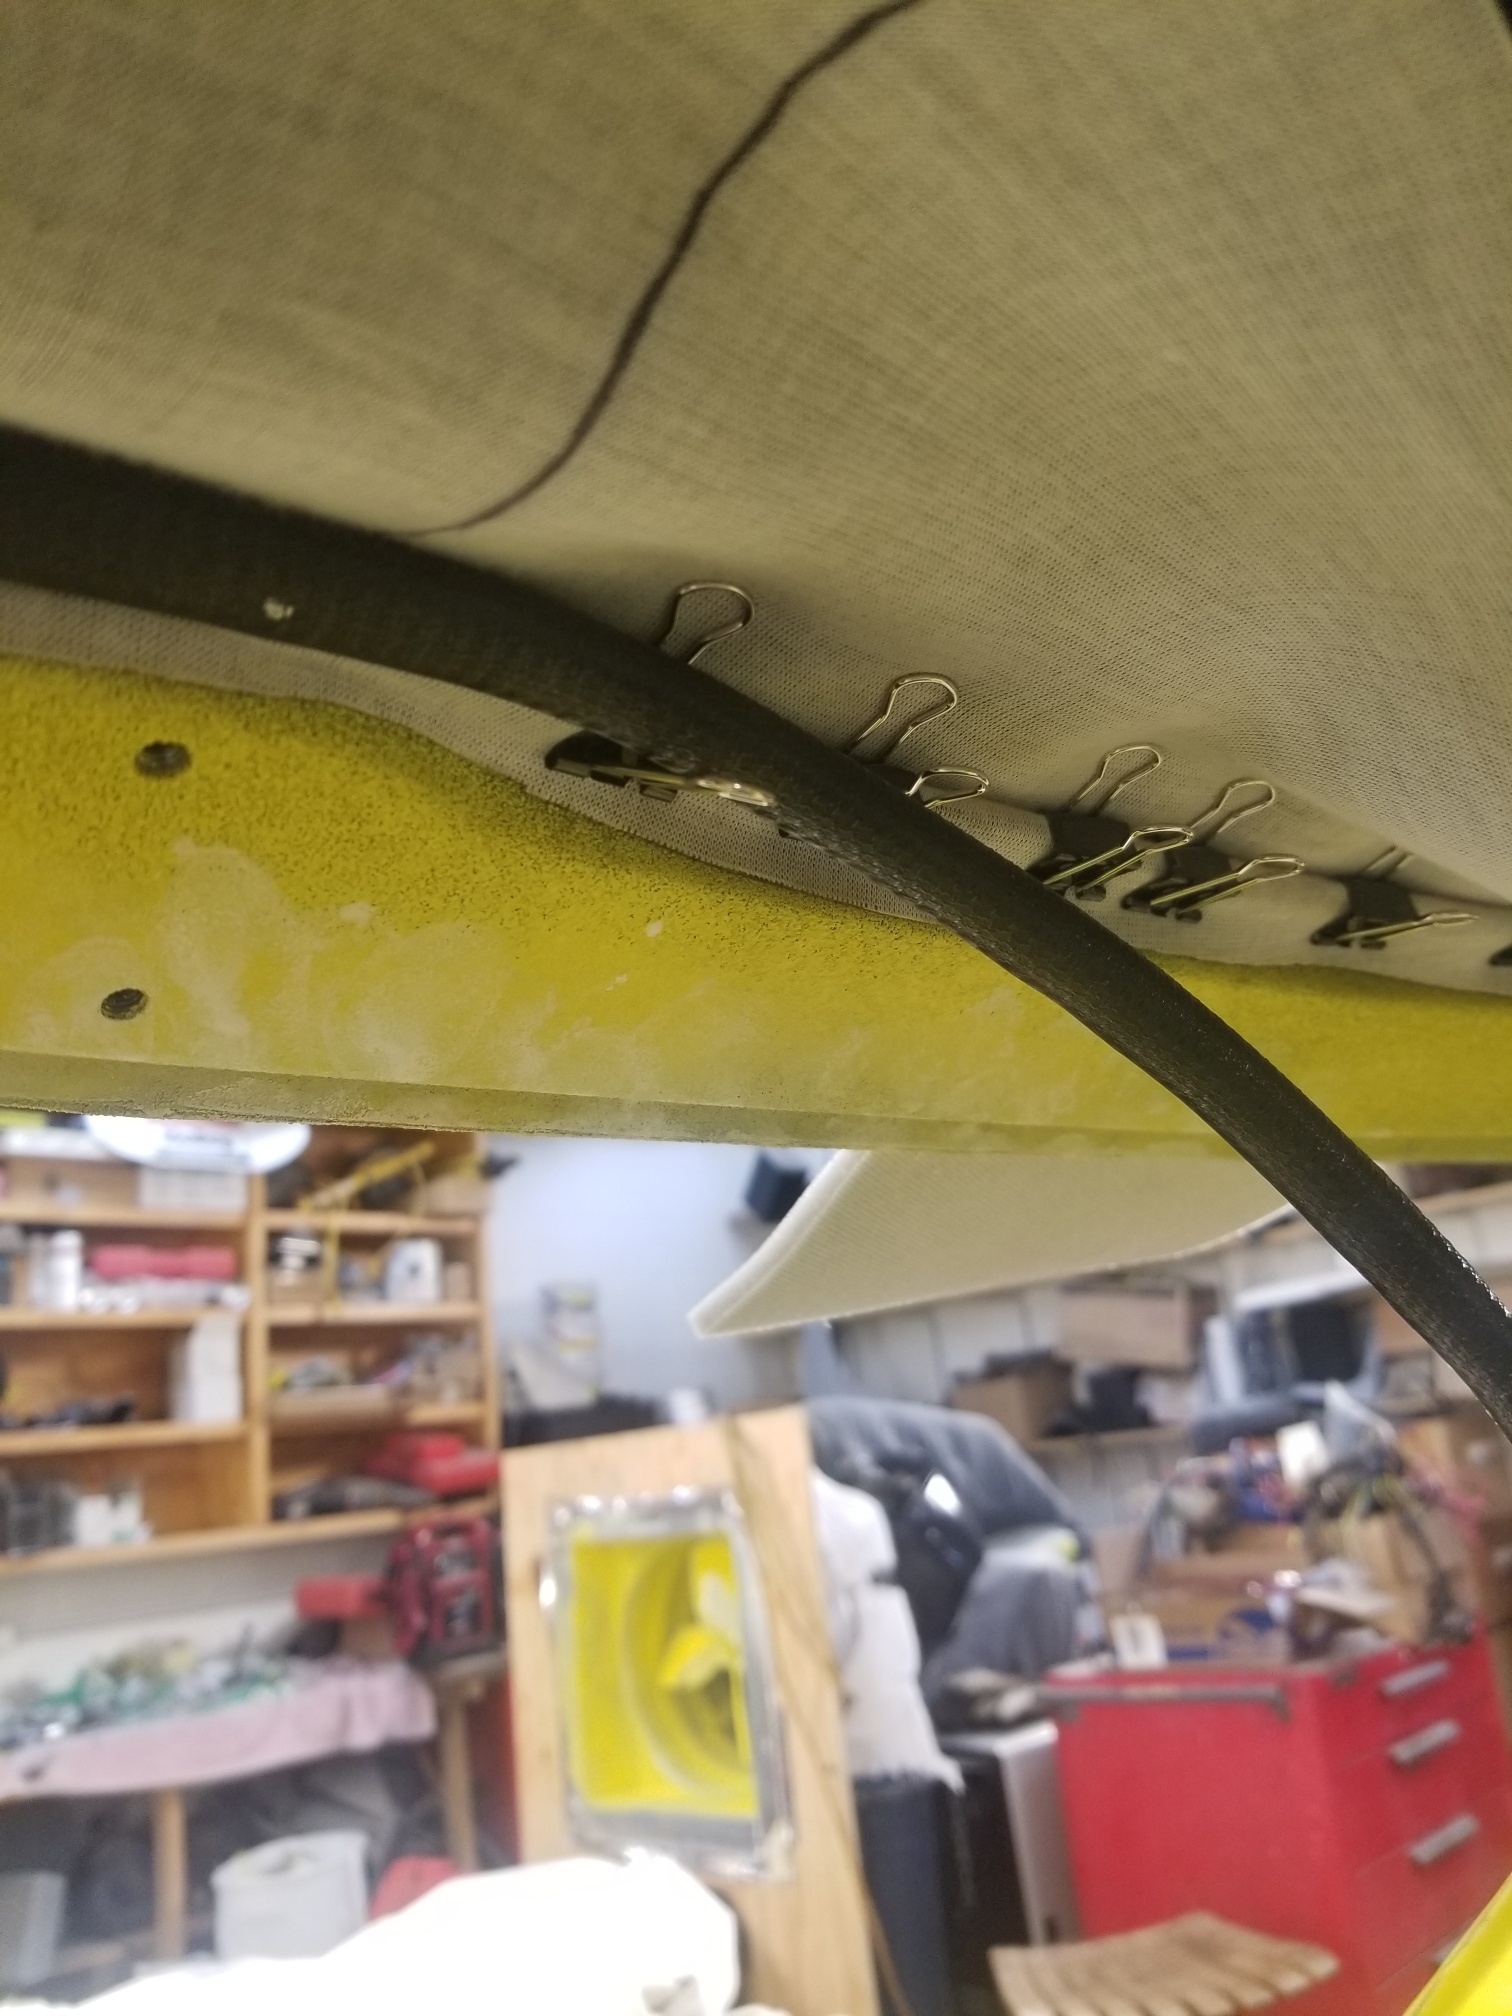
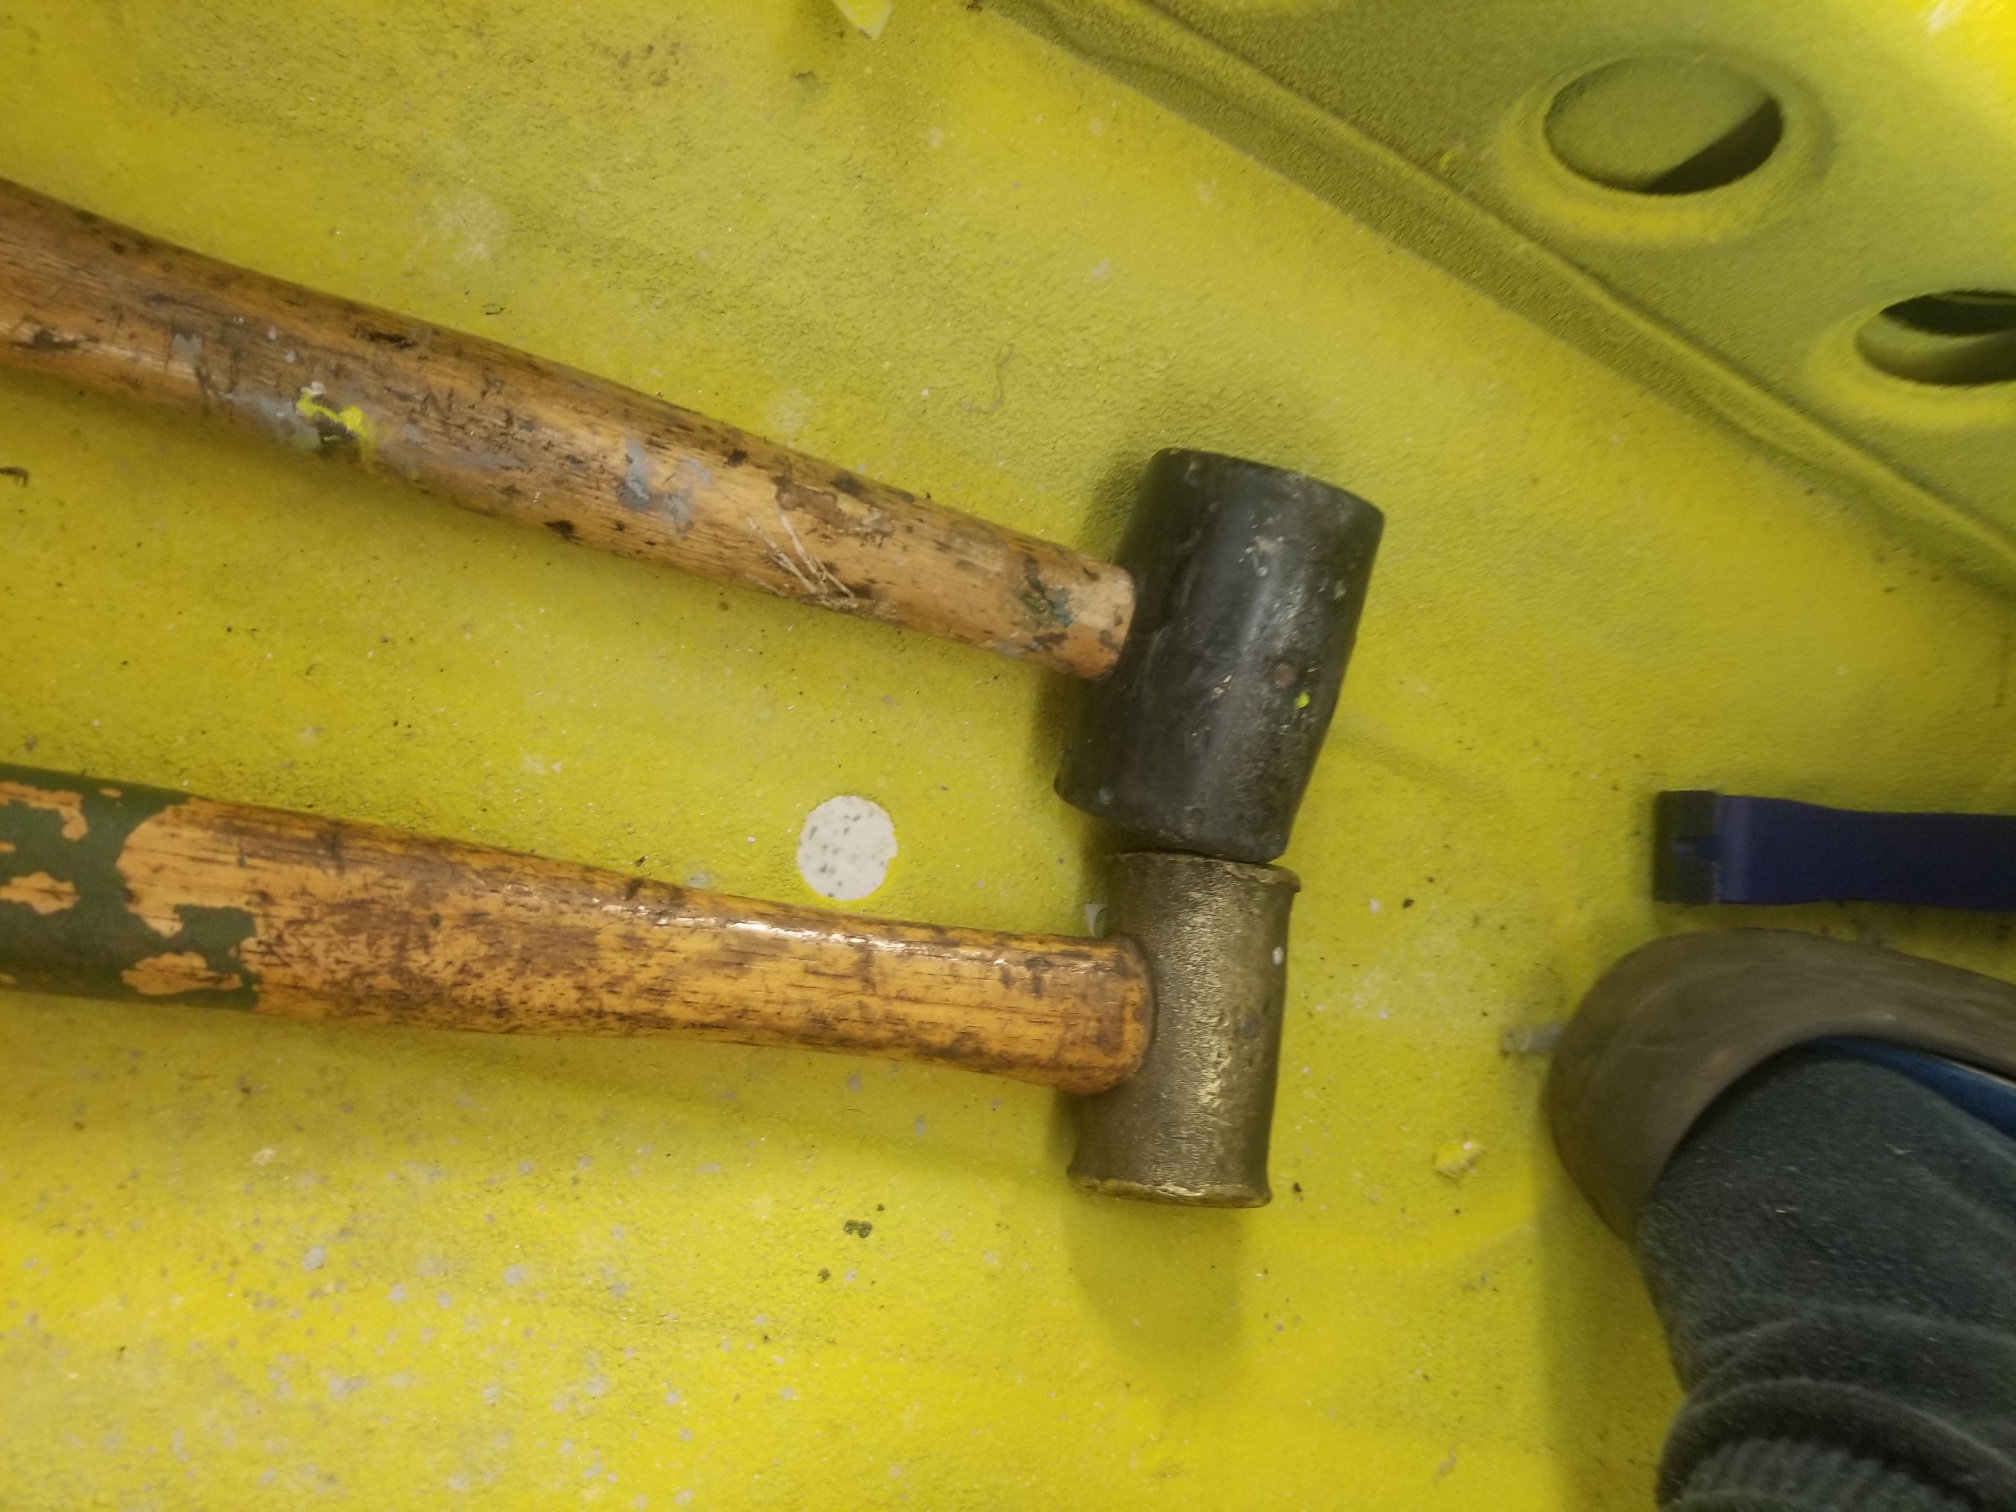
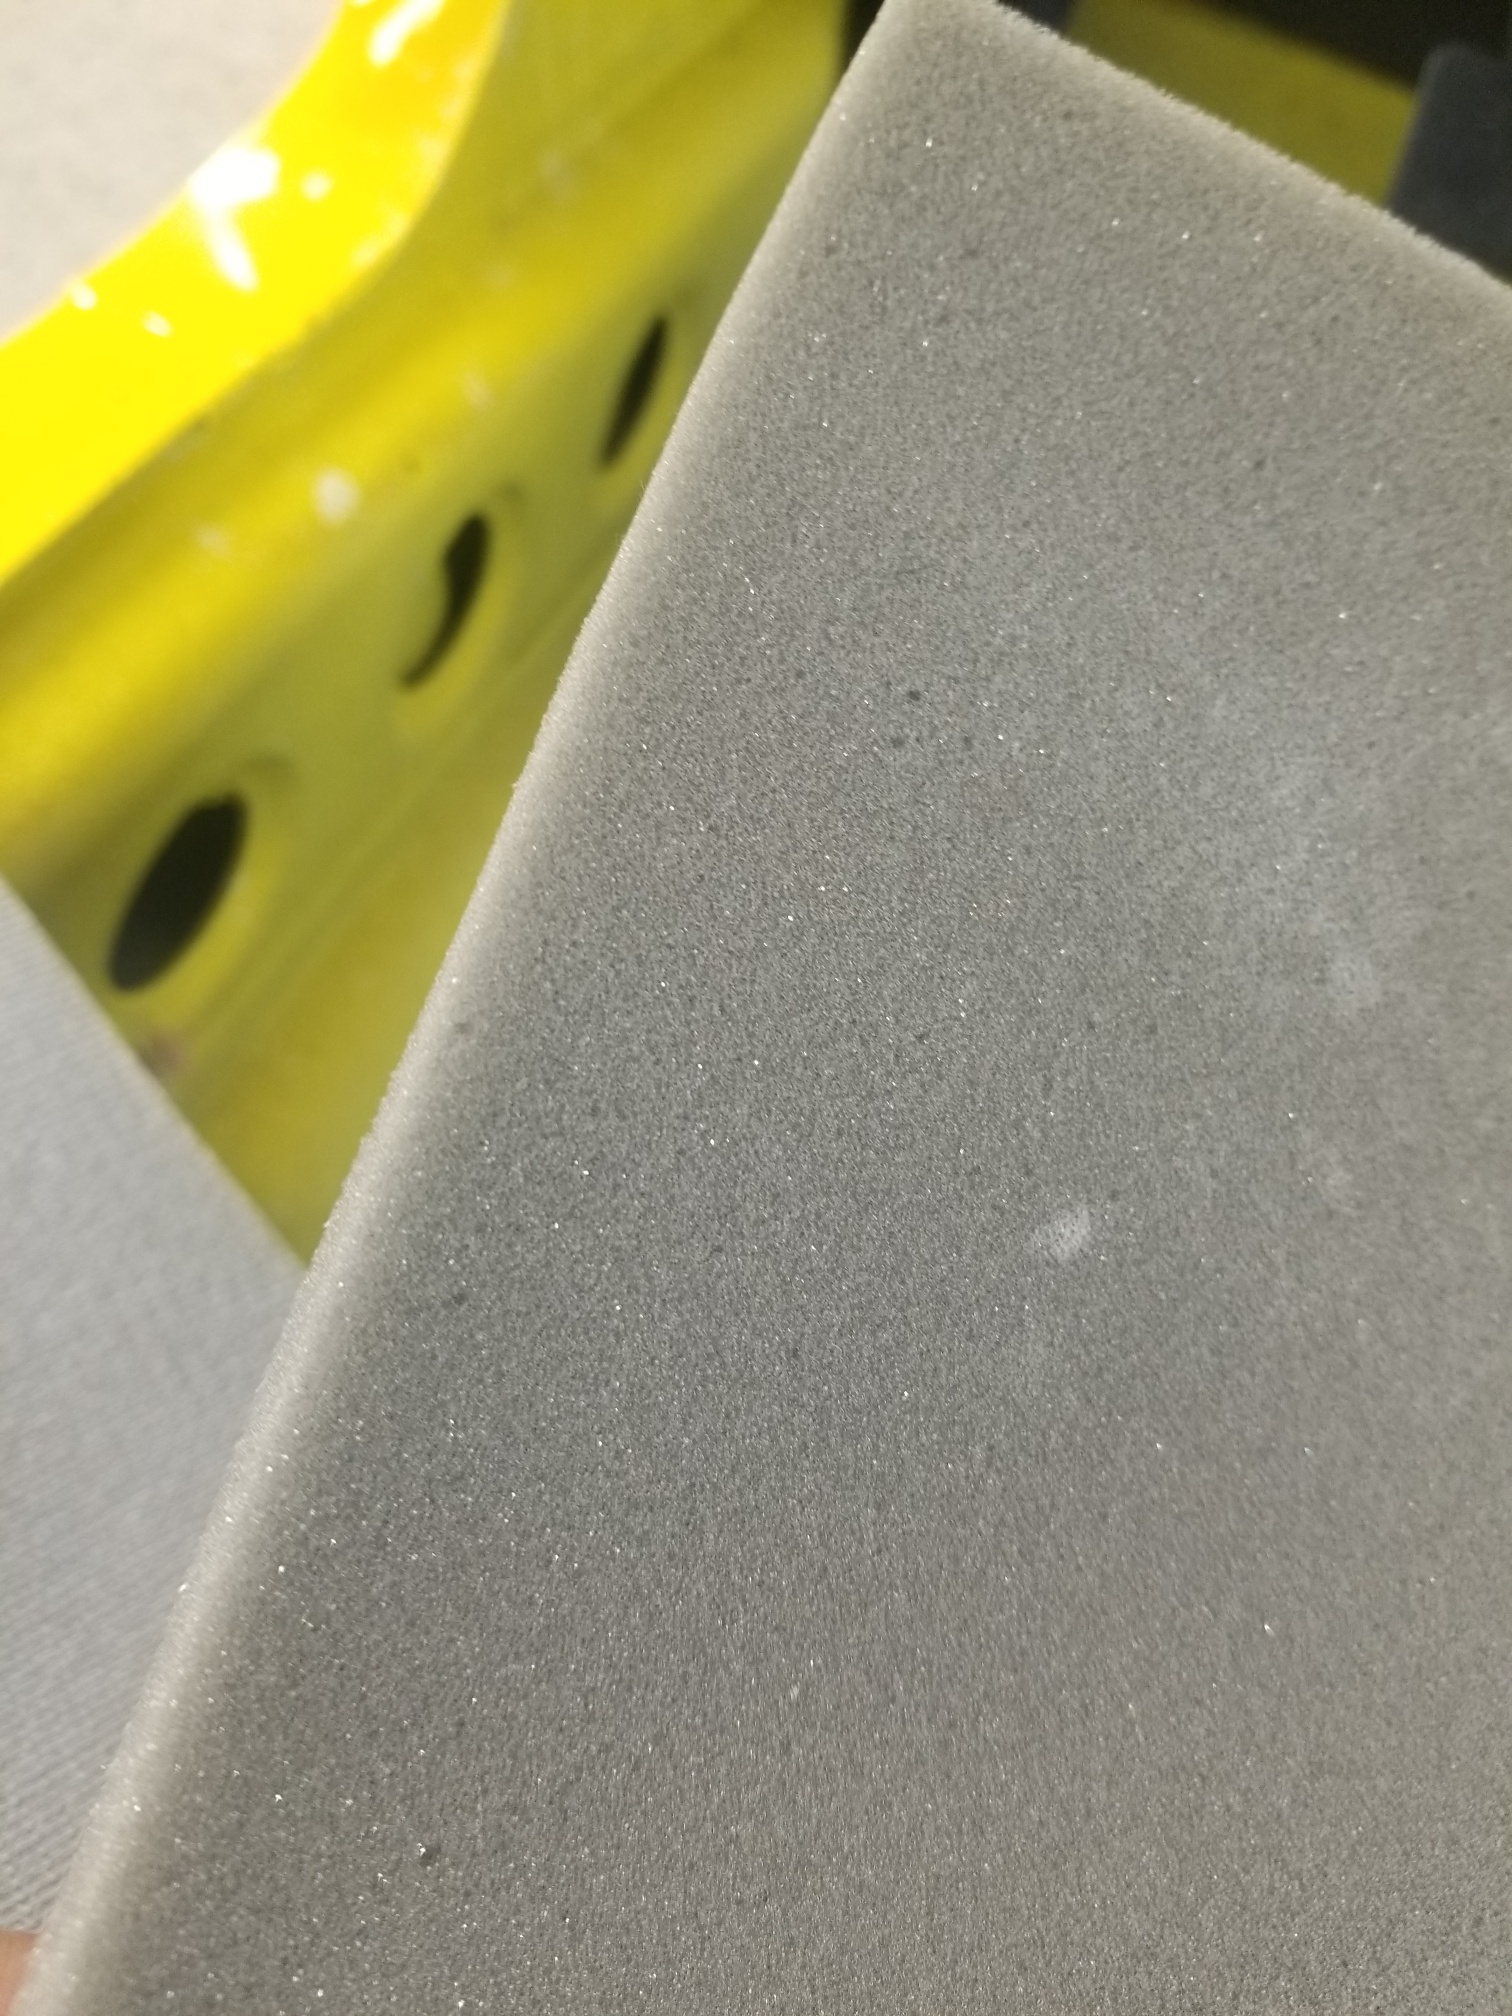
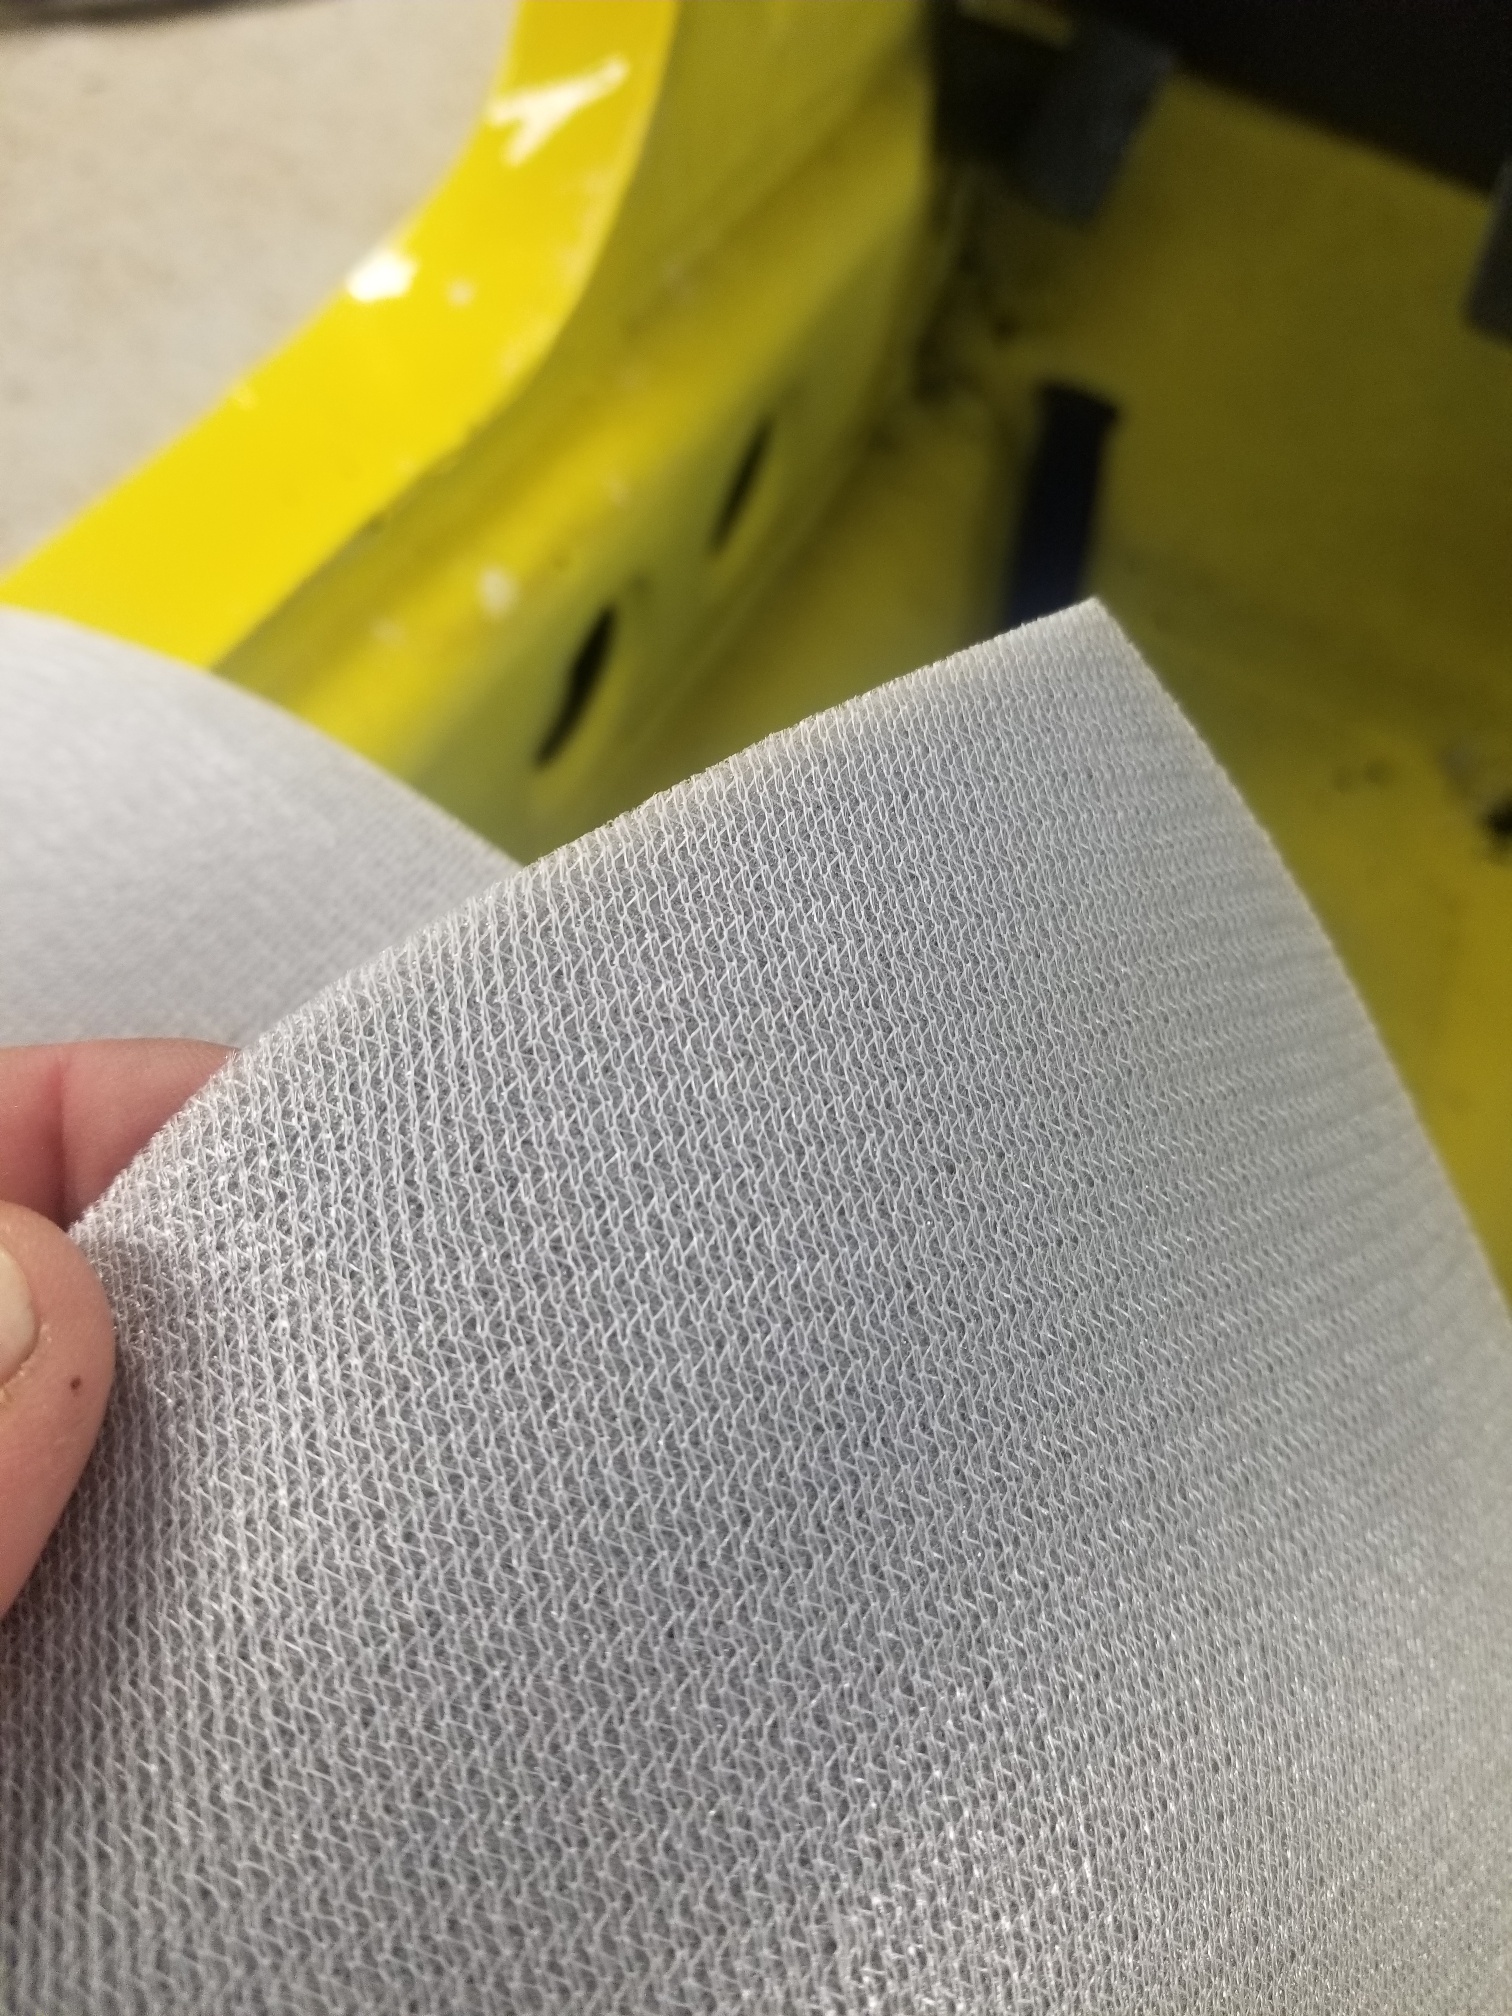
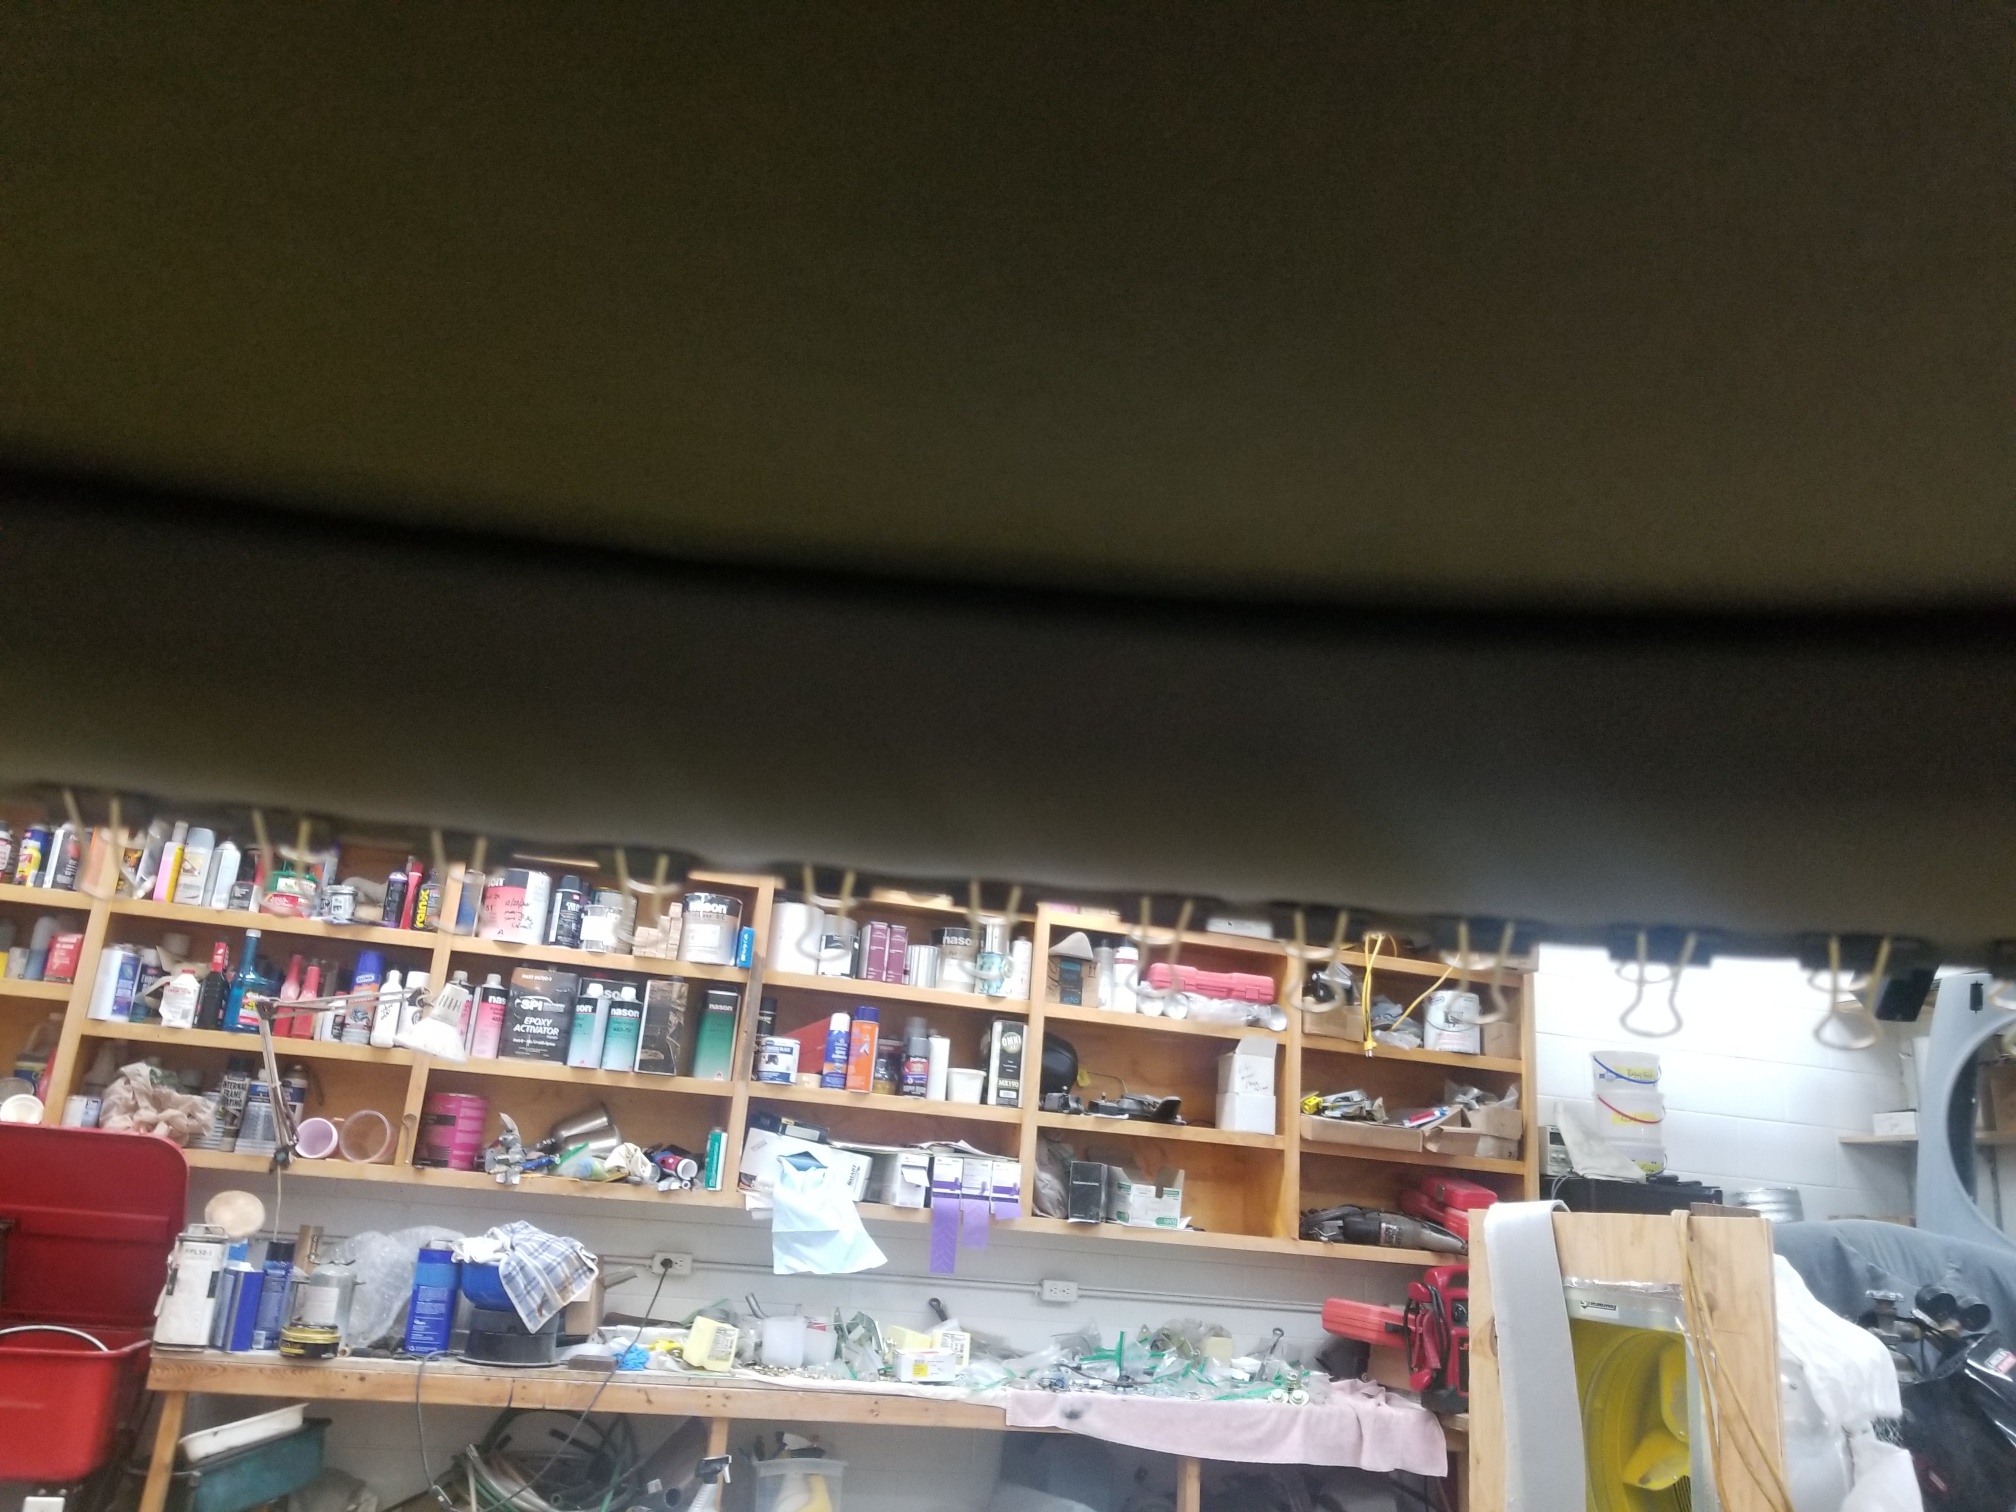
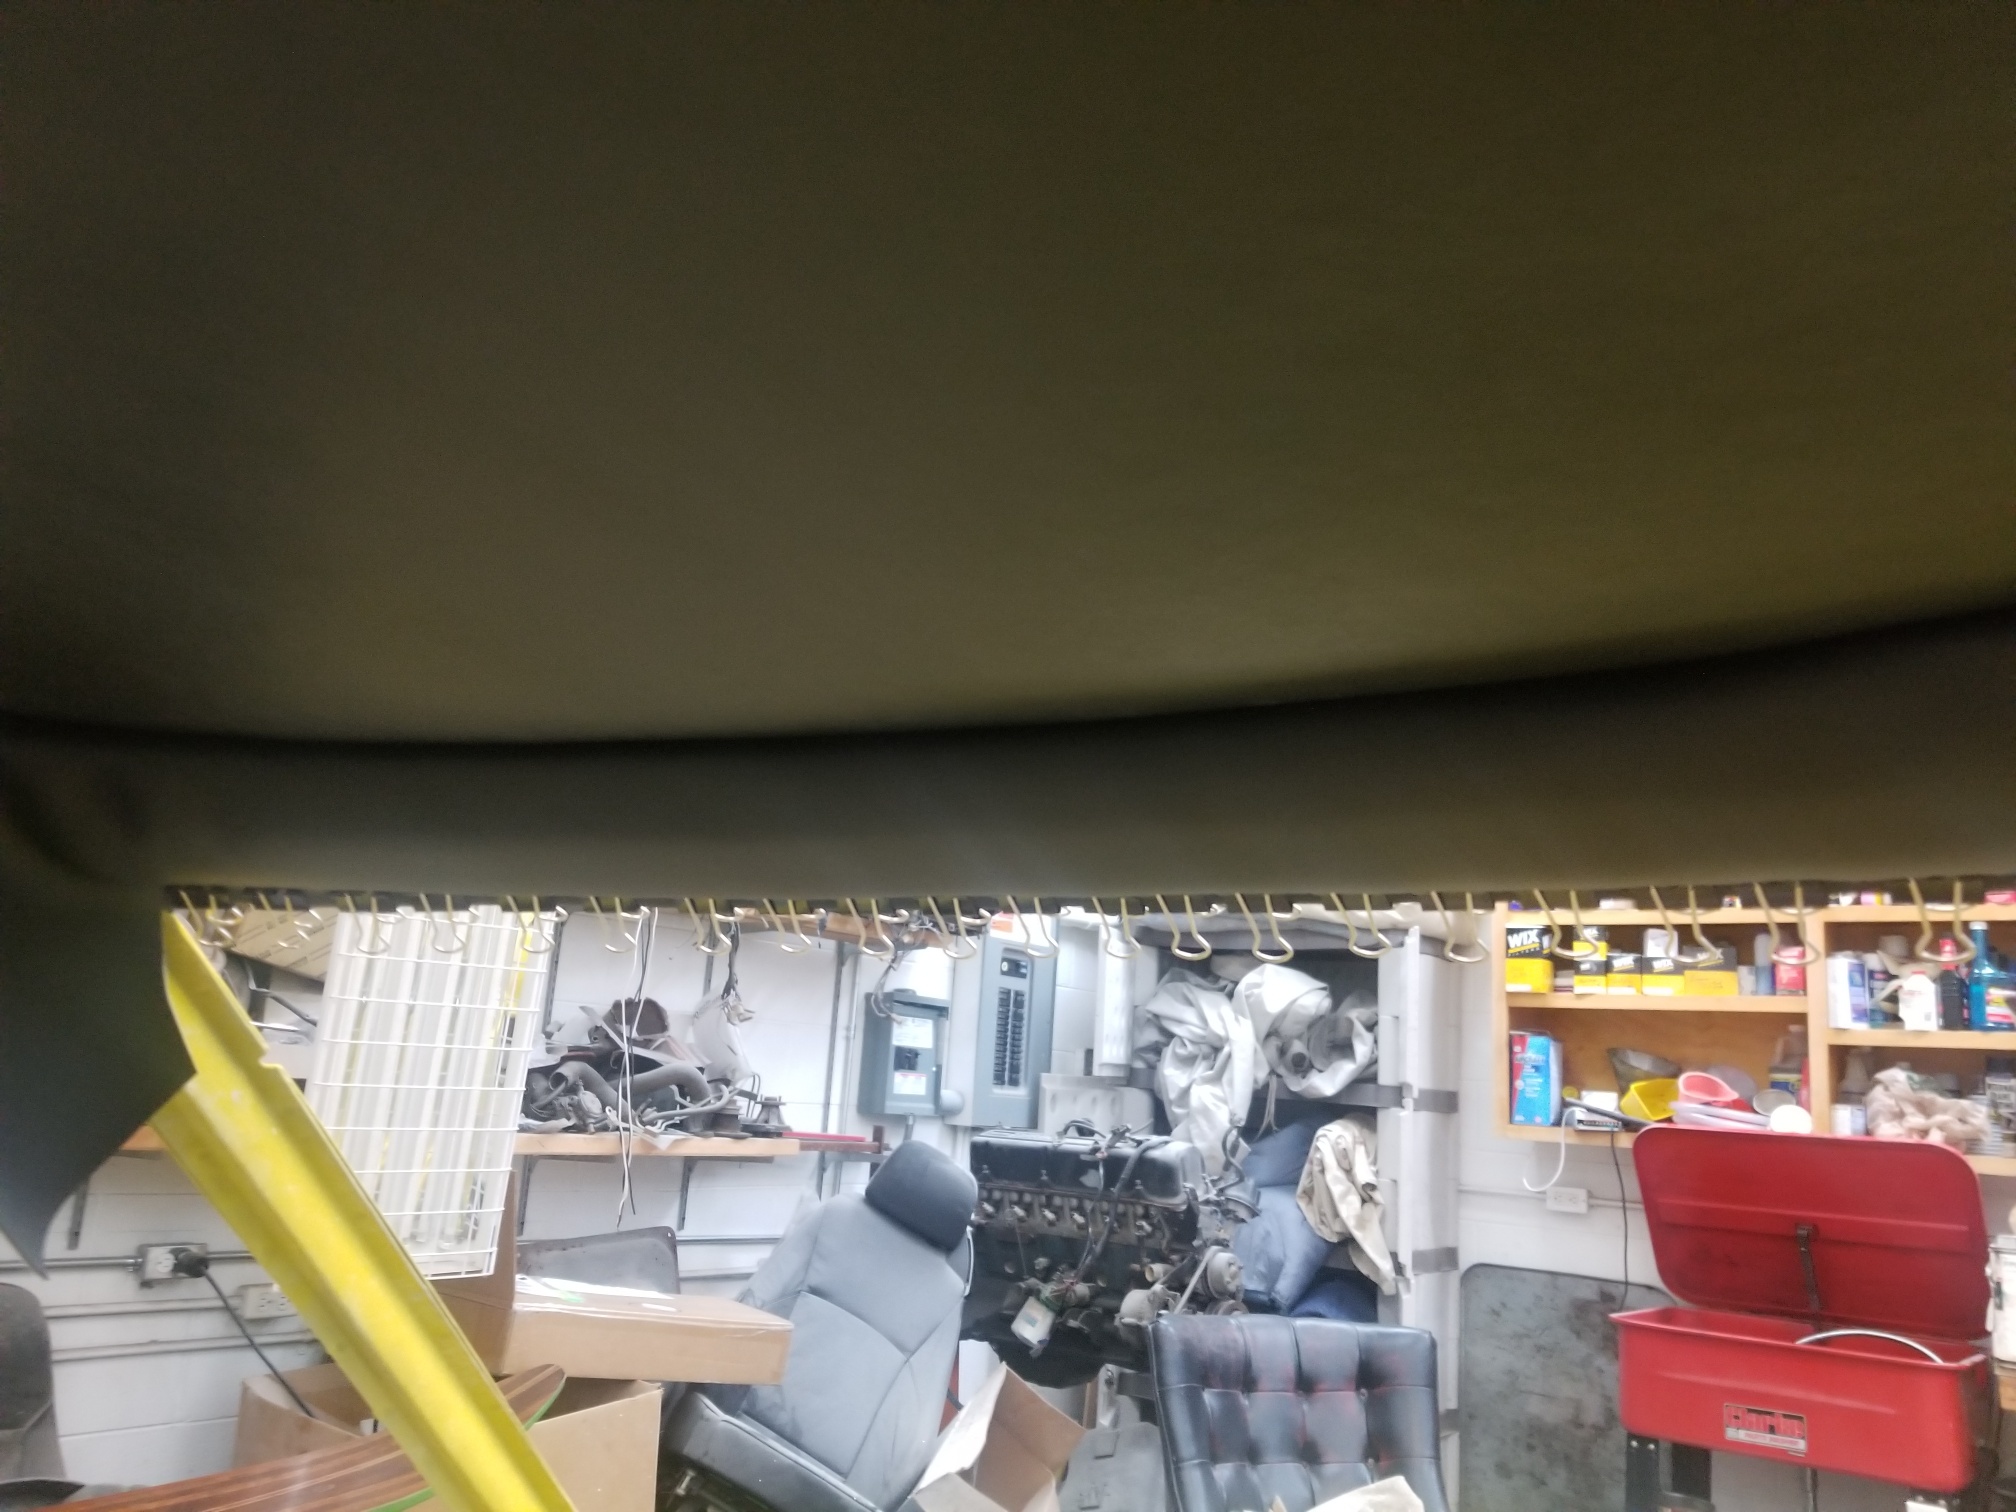
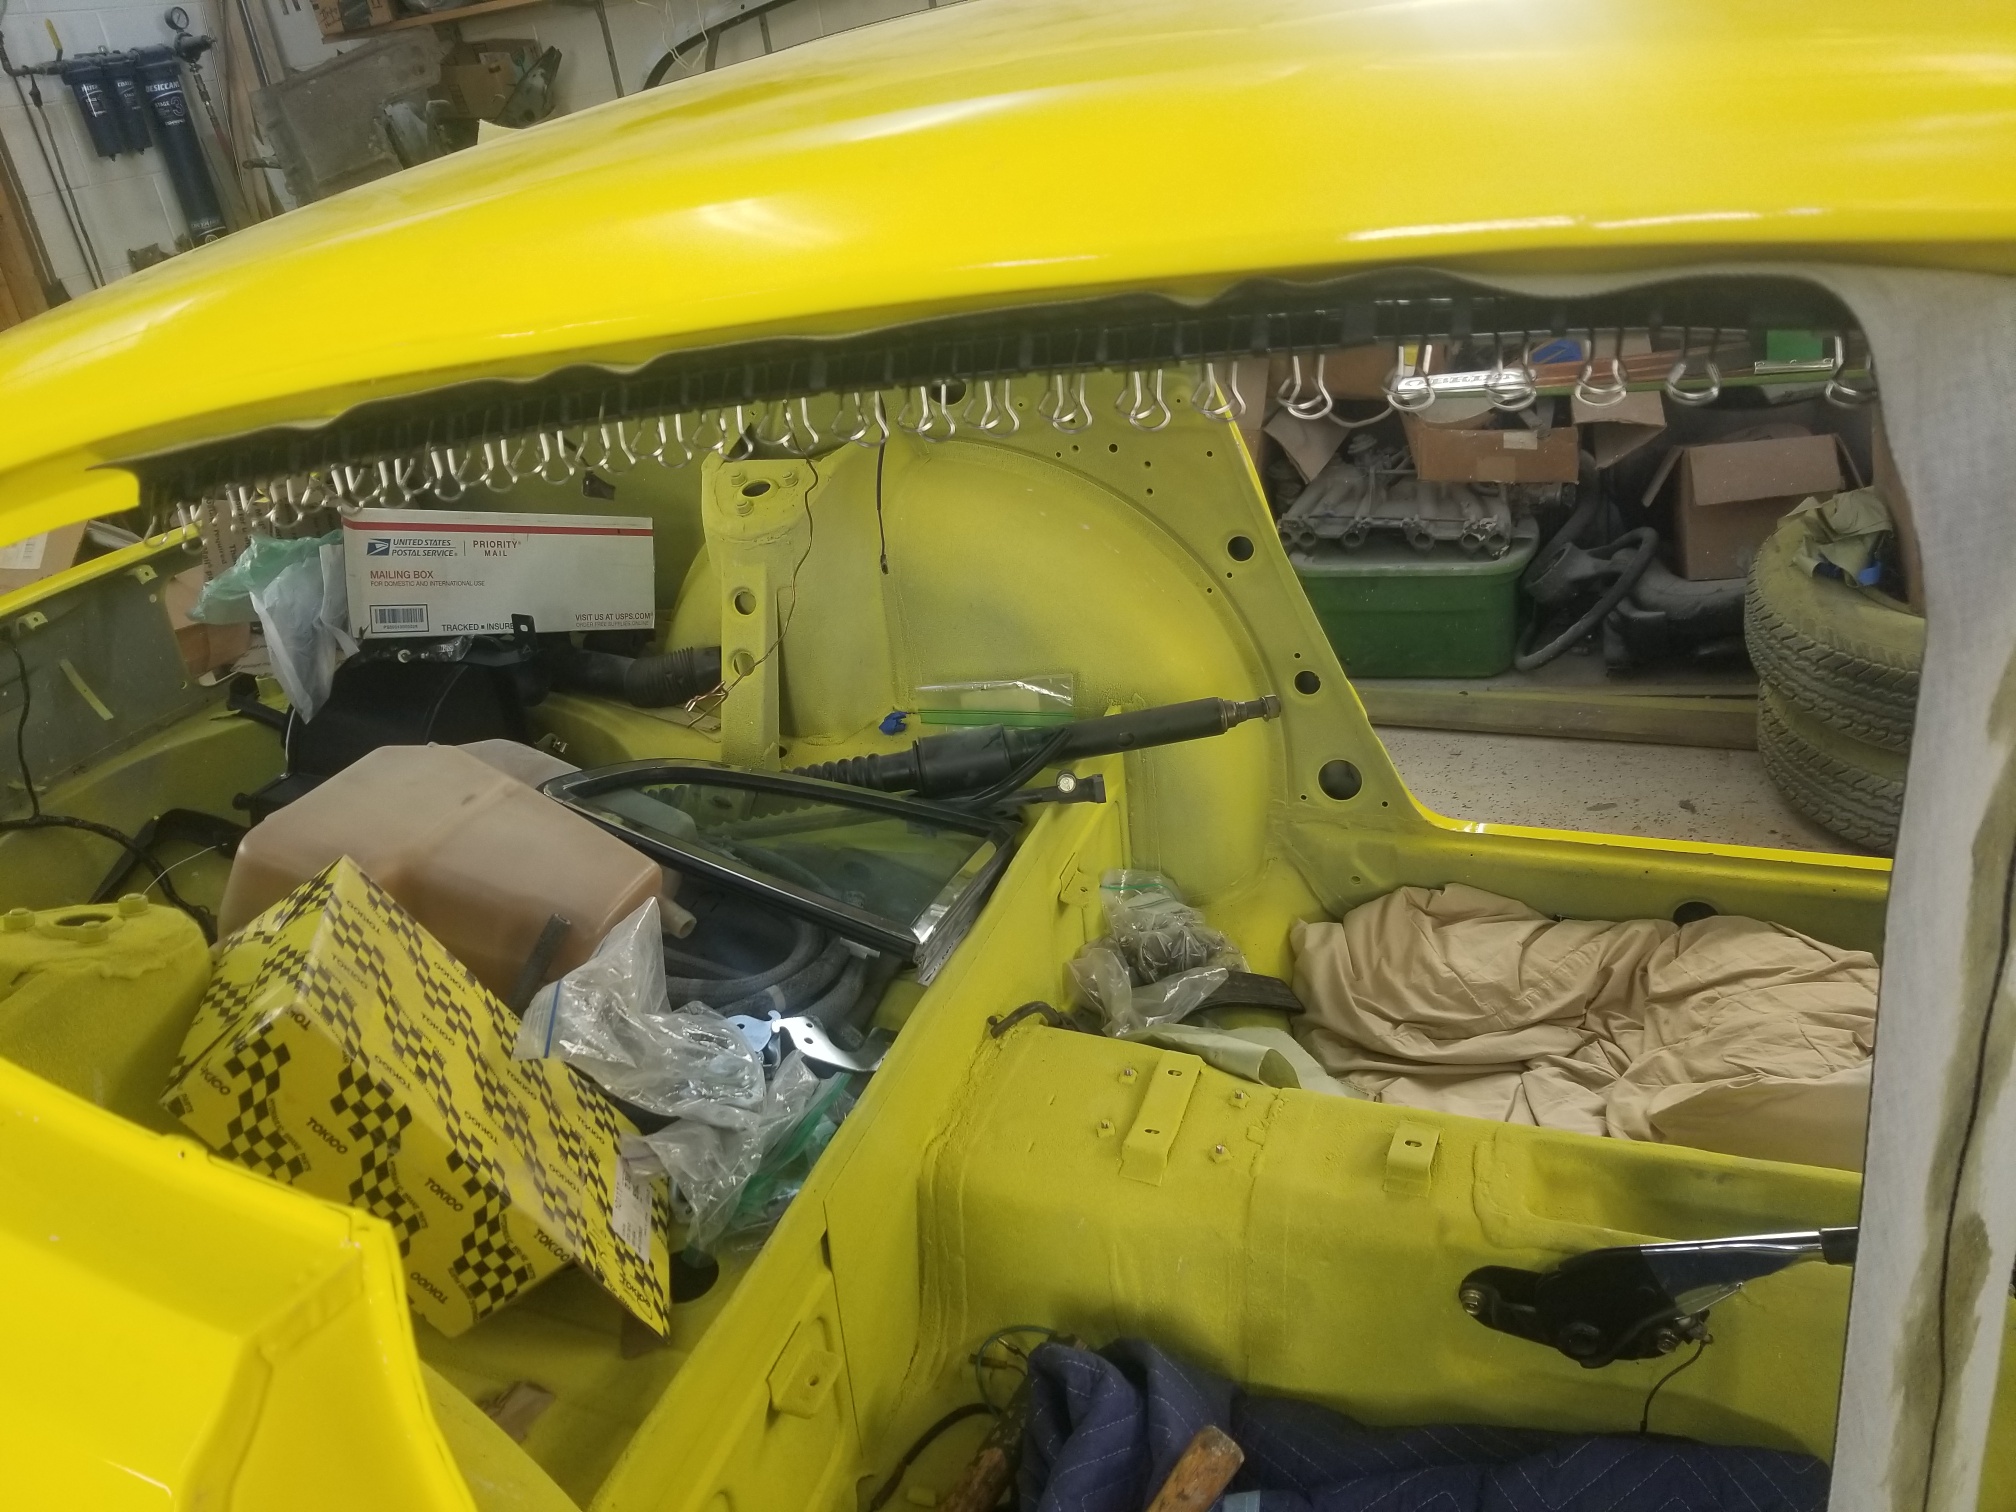
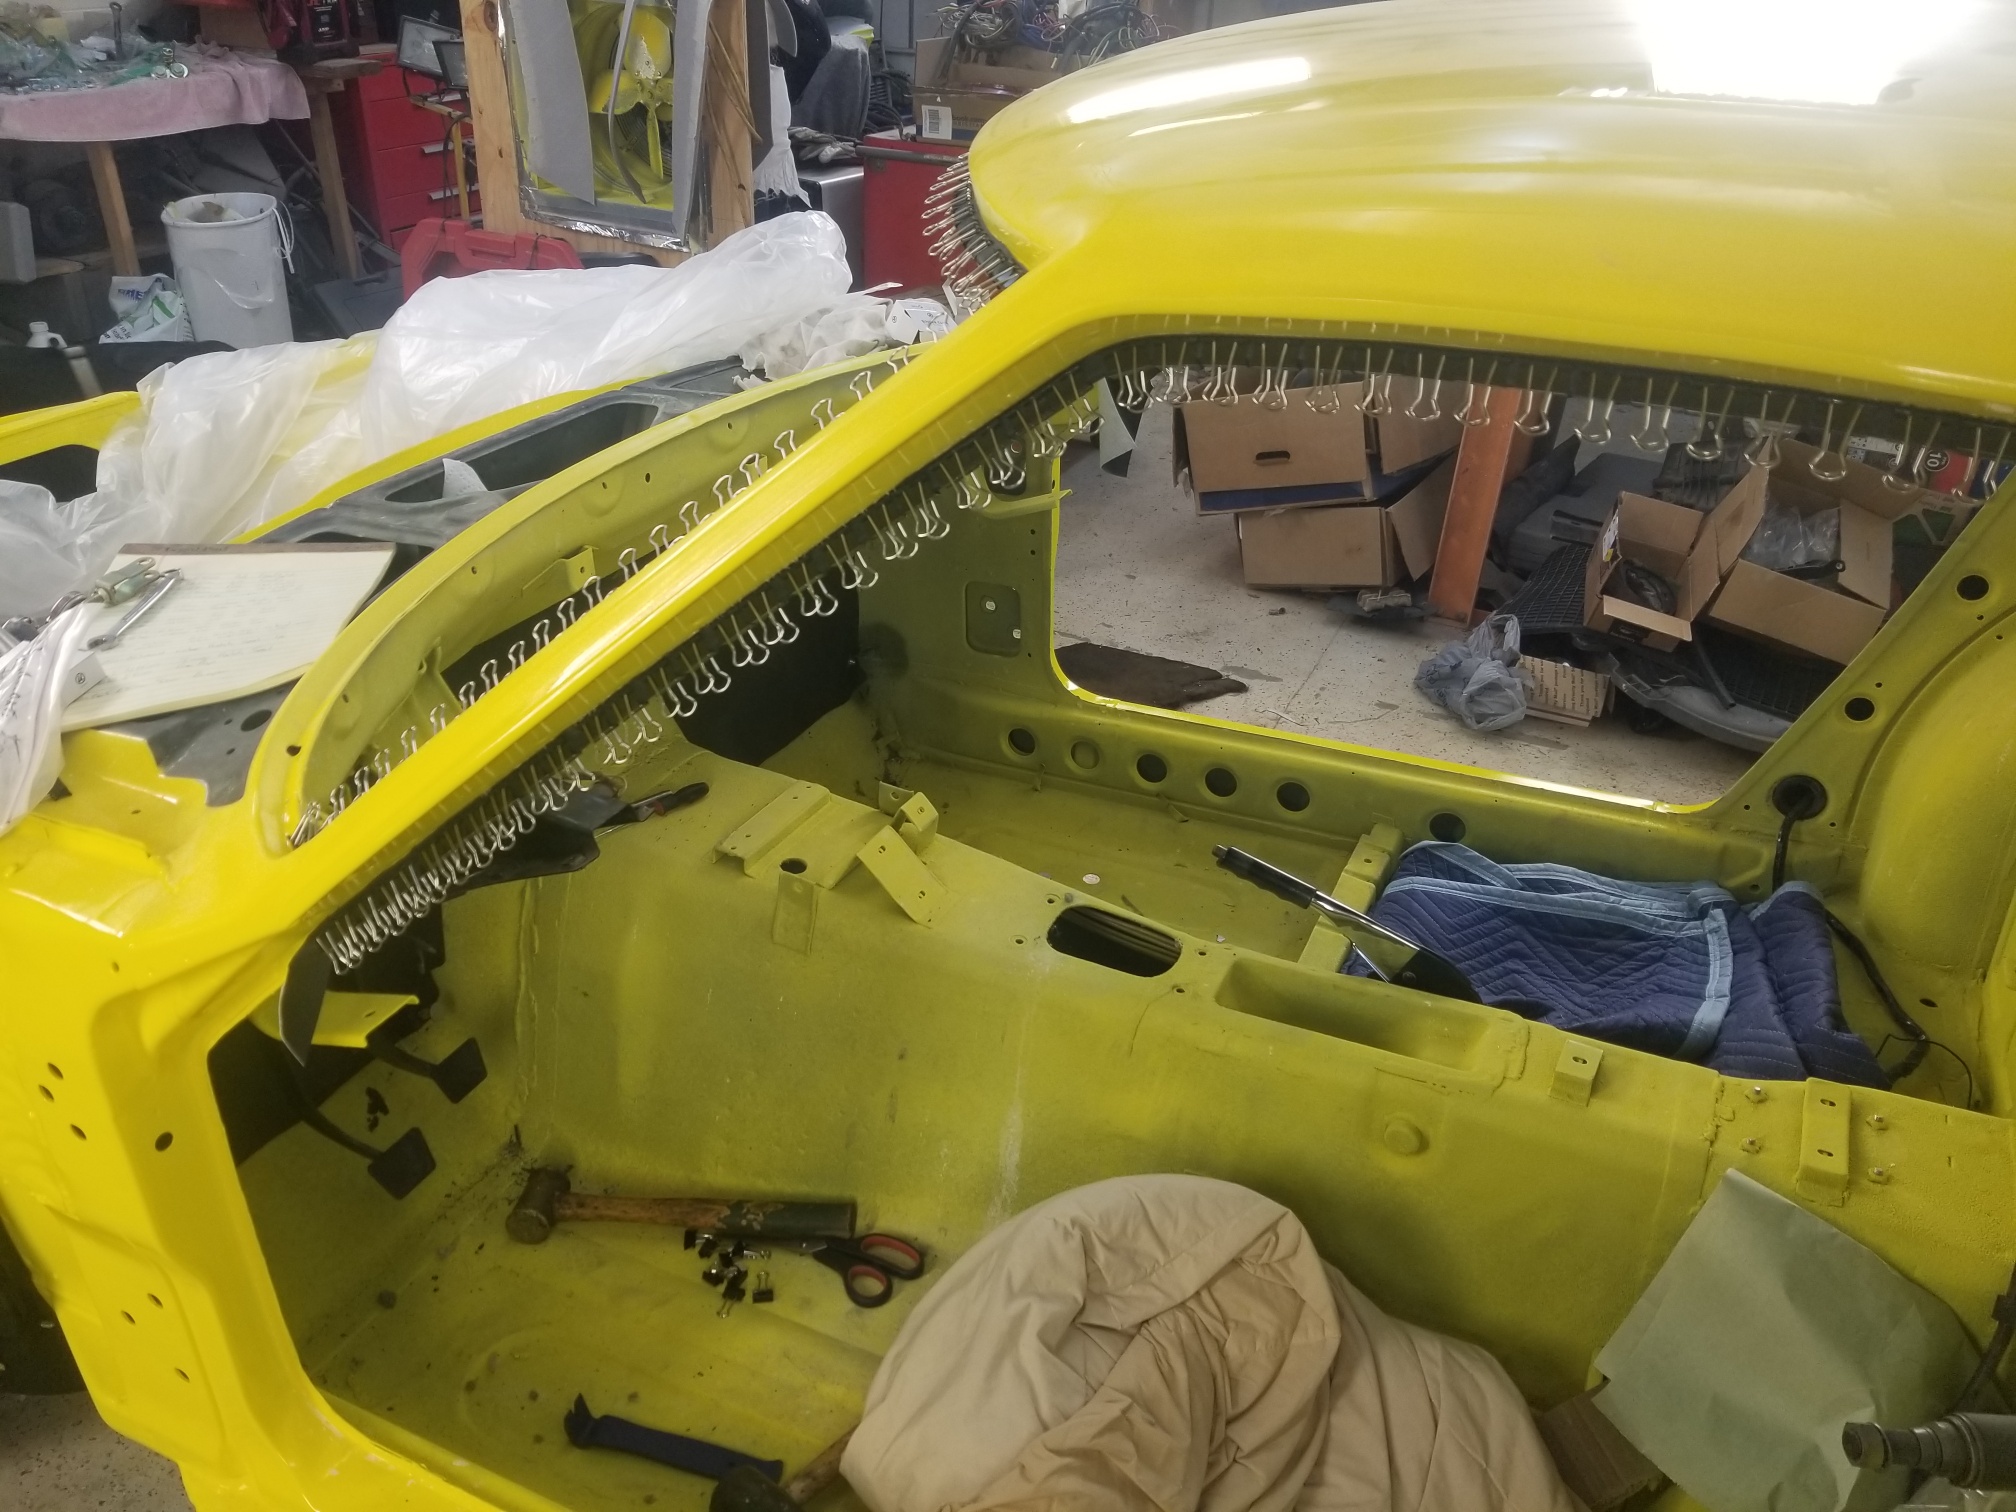
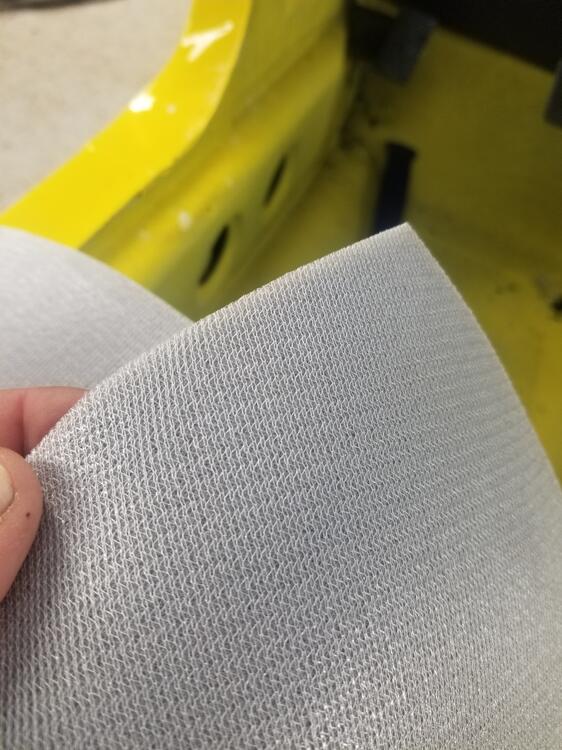
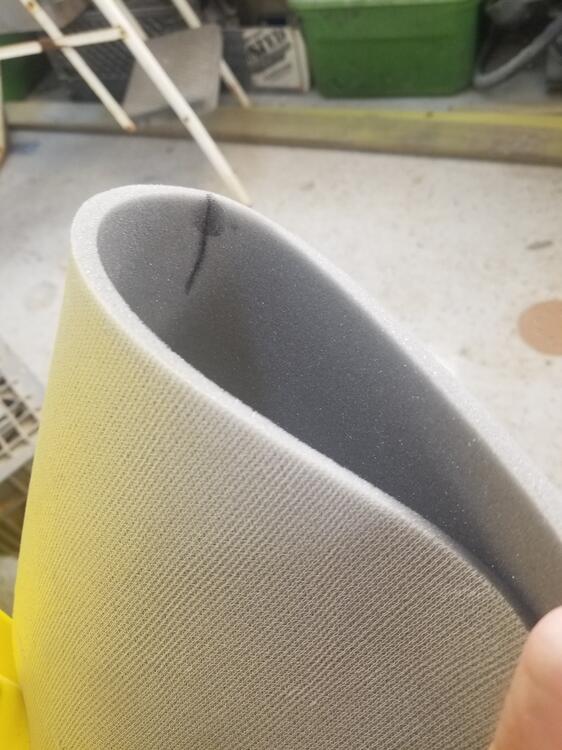
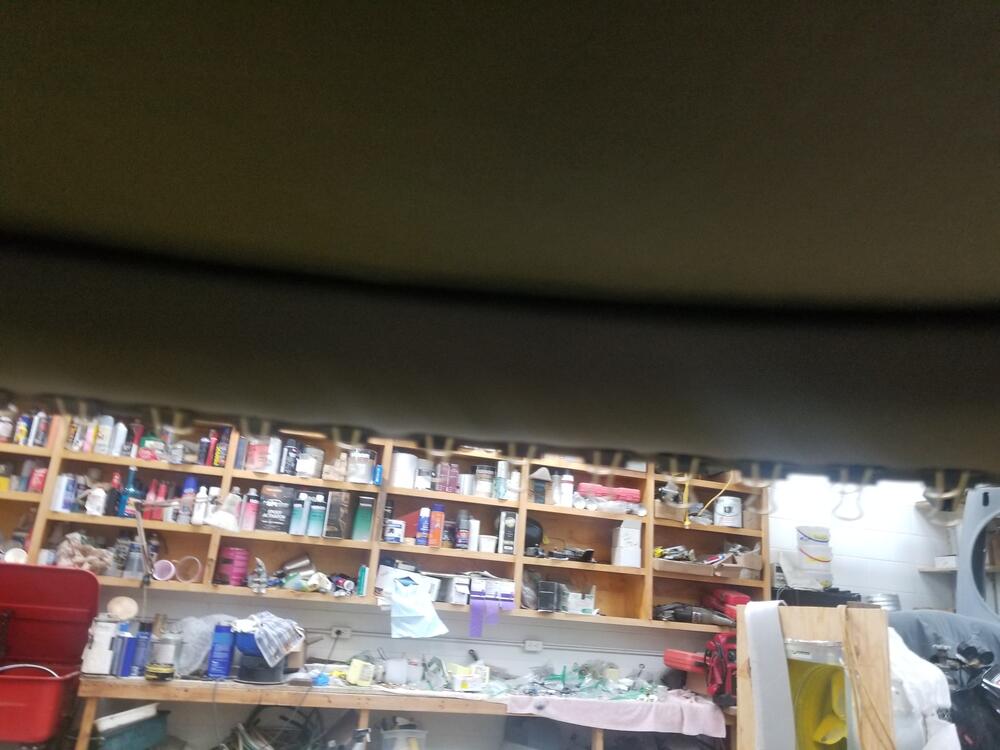
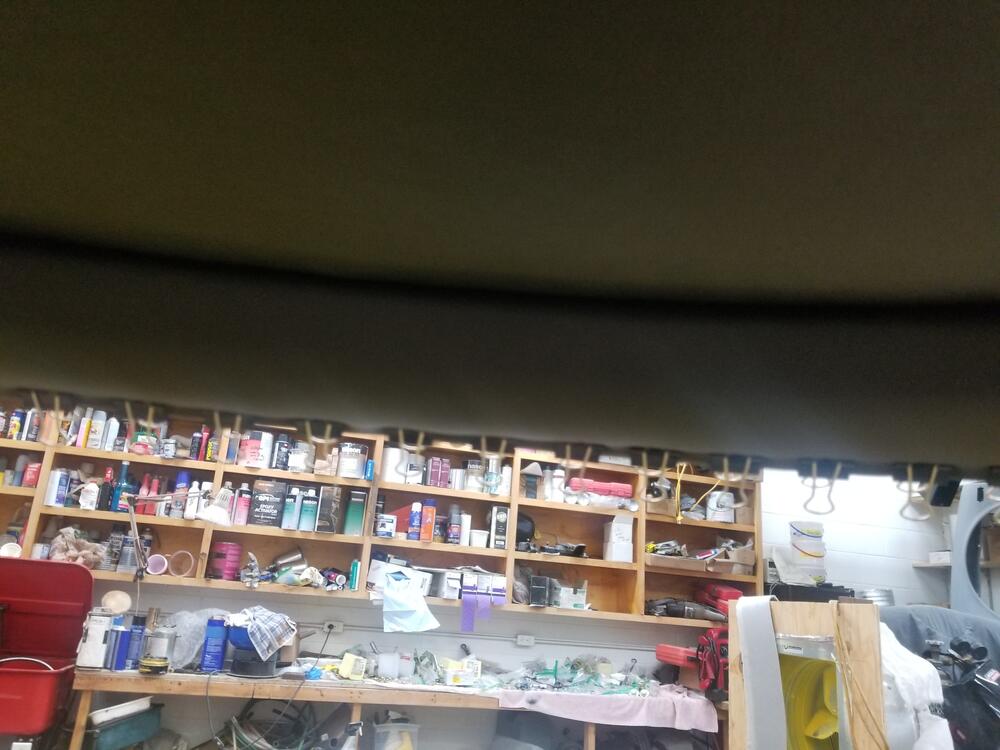
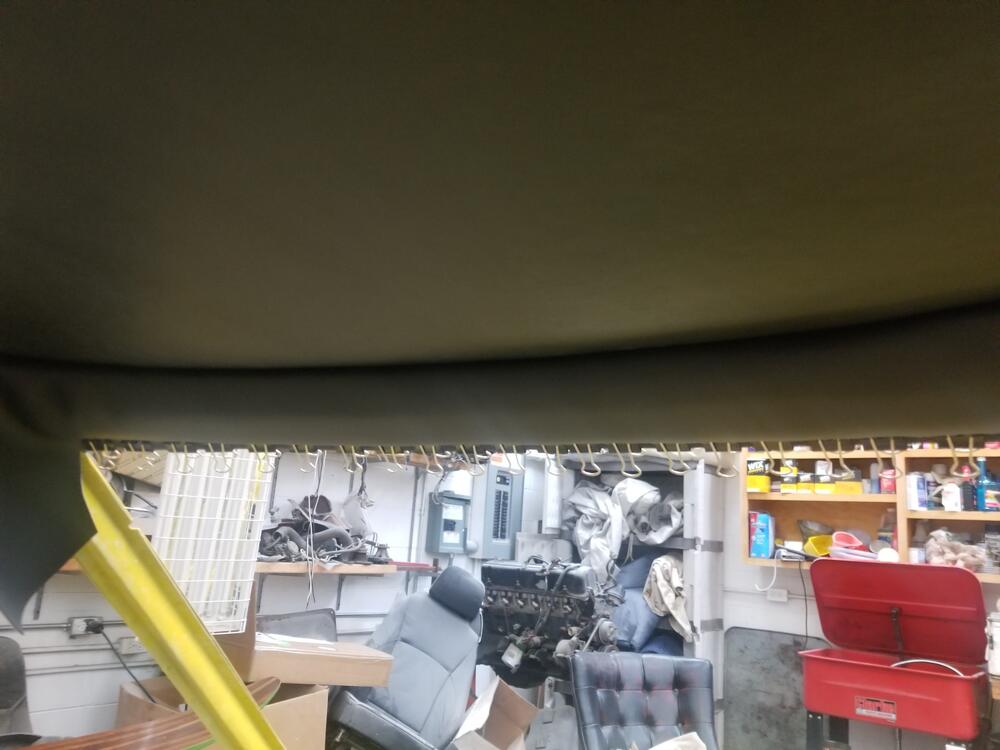
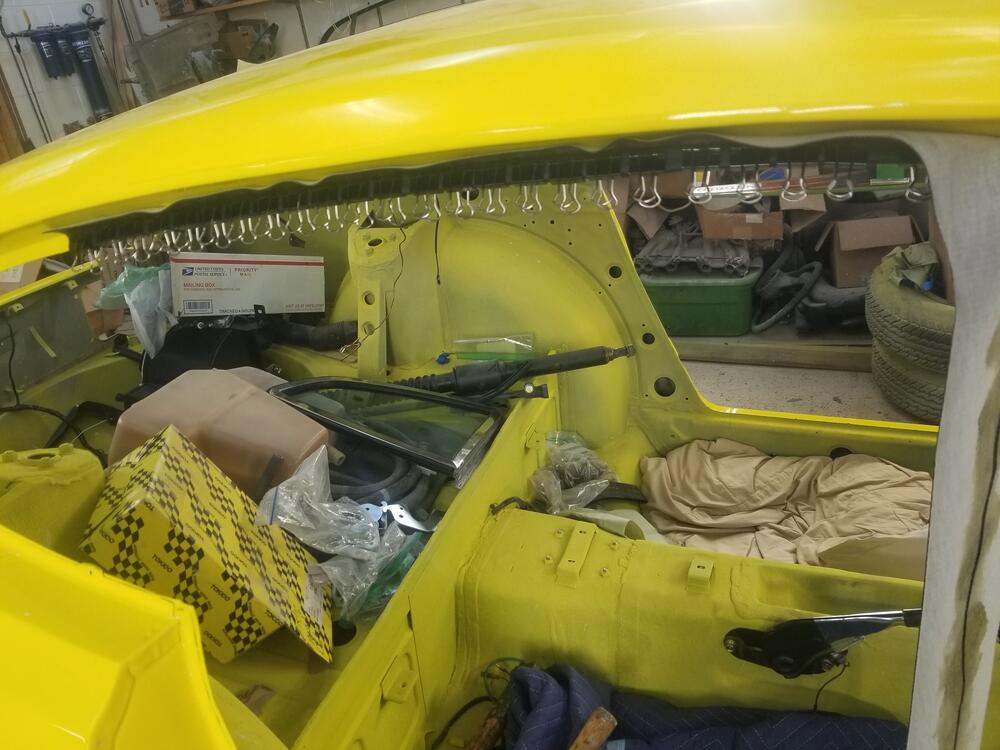
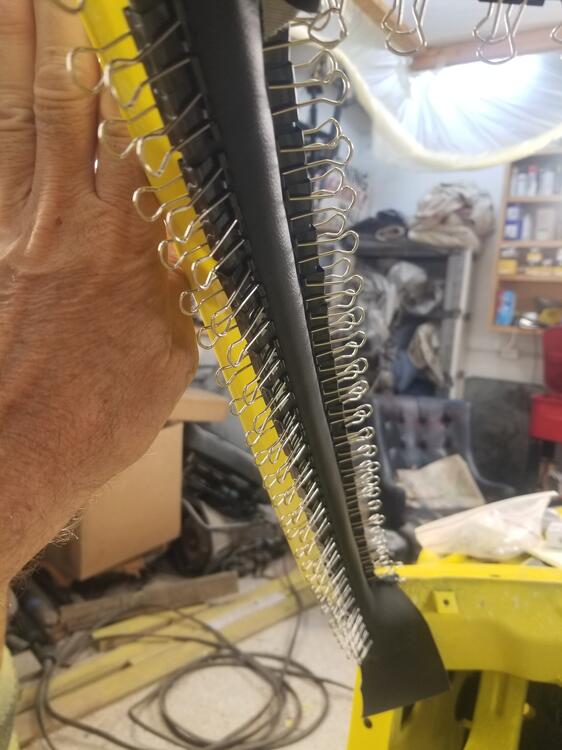
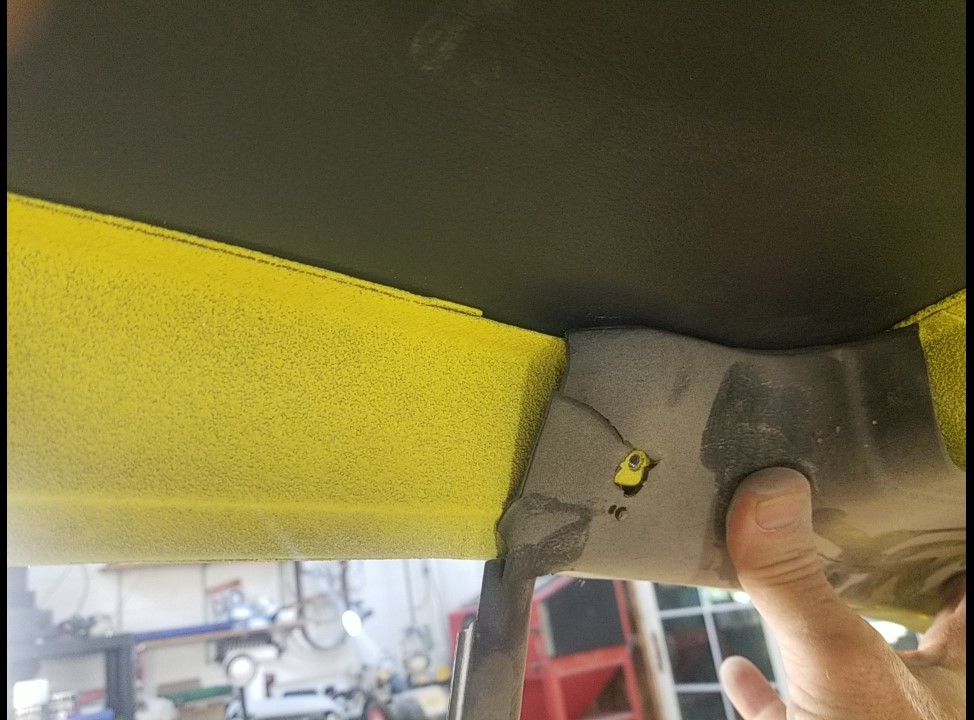
1 pointSo I started off the day tapping the holes for the visors, mirror and coat hook. They are all 5m x 0.8 I pulled the front windlace off and redid it a little bit. I tried to get it tucked to where the edge was pretty even across based on the RV mirror bump out. Then I clipped it off. Then I pulled off a few clips and ran the windlace from the middle out. My windlace had a small white dot on it near the middle. I don't know if that was a factory thing or not. I used a rubber mallet against the windlace and hit it with the brass hammer to seat it. Then I trimmed it back The kit I have is from MSA and the foam is grey open cell with some kind of backing on it I found the middle of the header piece and marked it. Then I used the spray adhesive from the kit. It works pretty good. I glued it up into place and then trimmed it and cut all the visor and mirror holes. Then I used weld wood contact cement and glued the header piece in. I didn't pull it very tight and after the clips are on it looks good. The sides are actually the harder portion. I had to slide the pieces from the kit backward and forward on the ceiling to find the right place where the A pillar material would hit right. Then I installed the windlace. Then I glued the upper edge of the roof trim above the door. I drew a line where it meets the seam so I knew where to run cement. Pull it a little and clip it off Then I figured out the fold technique and locations. Y'alls pictures were really helpful with this Then I glued the inside edge of the A pillar and clipped it. Then I did the outside edge I'm not really sure where to stop the bottom of the A pillar? This took about 225 19mm clips... This where the window trim fits. So the roof trim gets covered from here back That is good to have that about behind me. There is a little detail work I need to do at the folded seams to try to fasten them down and make them look good. I might use a little super glue for that. Would have been much easier on the rotisserie!! "Tuition"...


 1 point
 -
1 pointOverkill but it has what you want: http://www.classiczcars.com/topic/39668-77-280z-drum-brake-refresh/1 point
-
1 pointYou could buy some of the Eastwood rust removal solutions and soak it in that and it will come out as clean metal...1 point
-
1 pointSoaking in Penetrating oil, CLR, or Vinegar will all loosen the rust. It does require some force to pivot though. You could put one end in a vise and wiggle it to help it along.

 1 point