Leaderboard
-

Zed Head
Free Member6Points19,236Posts -

siteunseen
Free Member3Points15,115Posts -
Captain Obvious
Free Member3Points10,081Posts -
Mark Maras
Free Member2Points3,719Posts


Popular Content
Showing content with the highest reputation on 05/25/2023 in all areas
-
4 pointsZ engines are so easy to remove that this comment doesn't really have any weight. Looks more like a guy with a business trying to get some business. That's my first impression. Mechanics need to mechanic. As Mark M. says, inspect first, then decide. I've noticed that the high quality parts seem less available today. You could end up replacing good used parts with bad new parts. If it's not broke don't try to fix it.4 points
-
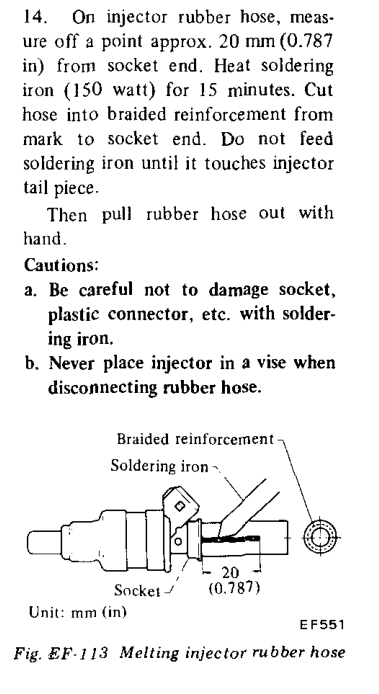
Found this - https://injector-rehab.com/product/ferrule/ Answer to question not asked - I had a vague memory and found its source. It's in the FSM Engine Fuel chapter. One of those old wood-burning tools would work too, I'd guess.
 2 points
 -
Haha!! You know me well my friend! I'm pretty sure I could make them, but I'm also pretty sure I would just rather buy them!2 points
-
2 pointsI'd pull the pan and check out the cylinders, and bearings. Then the head and change the valve seats. Other than that, at 40,000 miles, i'd expect to still see hone marks in the cylinder walls.2 points
-
2 pointsI've learned something very important about end of life. People need closure even it's just a minute or 2. My guy was abducted it feels like and it still bothers me. I can't imagine how his wife and kids feel. Thank you all for your kindness towards me. It has always been comforting to be accepted by smart, thoughtful people that make this forum special to me.2 points
-
So, i thought i'd pay the bodyshop another visit. i was a bit suprized to see the car looked tmore or less the same than last time on the first glance. But upon closer inspection i realized they have worked on a lot of details. They finished the welding of the front area. added some threads where they were missing on this version of the parts i had (some have minor differences to my original ones, since they might come from a different year version, despite being factory parts). Also the firewall area behind the bedals was completed. The floor pan and seat mounts were removed and the inner side was replaced with the KFV part. Including the additional einforcement plate: Luckily i brought my USB-stick this time so i could get the pictures which the panelbeater made while in progress. he also repaired the lower section of the inner-inner rear wheel arch As well as the tool storage area behind the driver seat: You can also see the lower "Dogleg" area behind the driver, which got replaced. Some small items had to be made by hand, like this rear inner wheel arch lower corner (behind the strut area). Meanwhile the whole section is closed again. On both sides the Mud / Dirt panels got test fitted to see if all bolt holes and stuff lines up. I agreed for a next visit in 1,5 weeks, and i'm hoping for the floor panel area to be done and maybe the outer side skirt (incl seat belt mounting reinforcement, etc..). So far i'm really satisfied with the work they do and also their attention to details which matter at the end. Oh and i need your input. Behind / Outside the LH floorpan, we found some kind of reinforcment plate, which extends to the seat mounts. It looks Very much like factory spot welds from the inside, but i couldn't find anything about this piece in my parts manuals, nor does it make any sense to mee. the area was heavily "repaired" in the past. but this particular piece looks to good to be a repair. No we wonder if we should fabricate something like that and weld it in on the replacement floorpans, or just leave the floor pan as it is? I have a shipment with very rare and cool parts ready to be s hipped out in japan, but since seafreight is quite expensive atm. I guess i'll wait a bit and collect additional stuff before i send it out.1 point
-
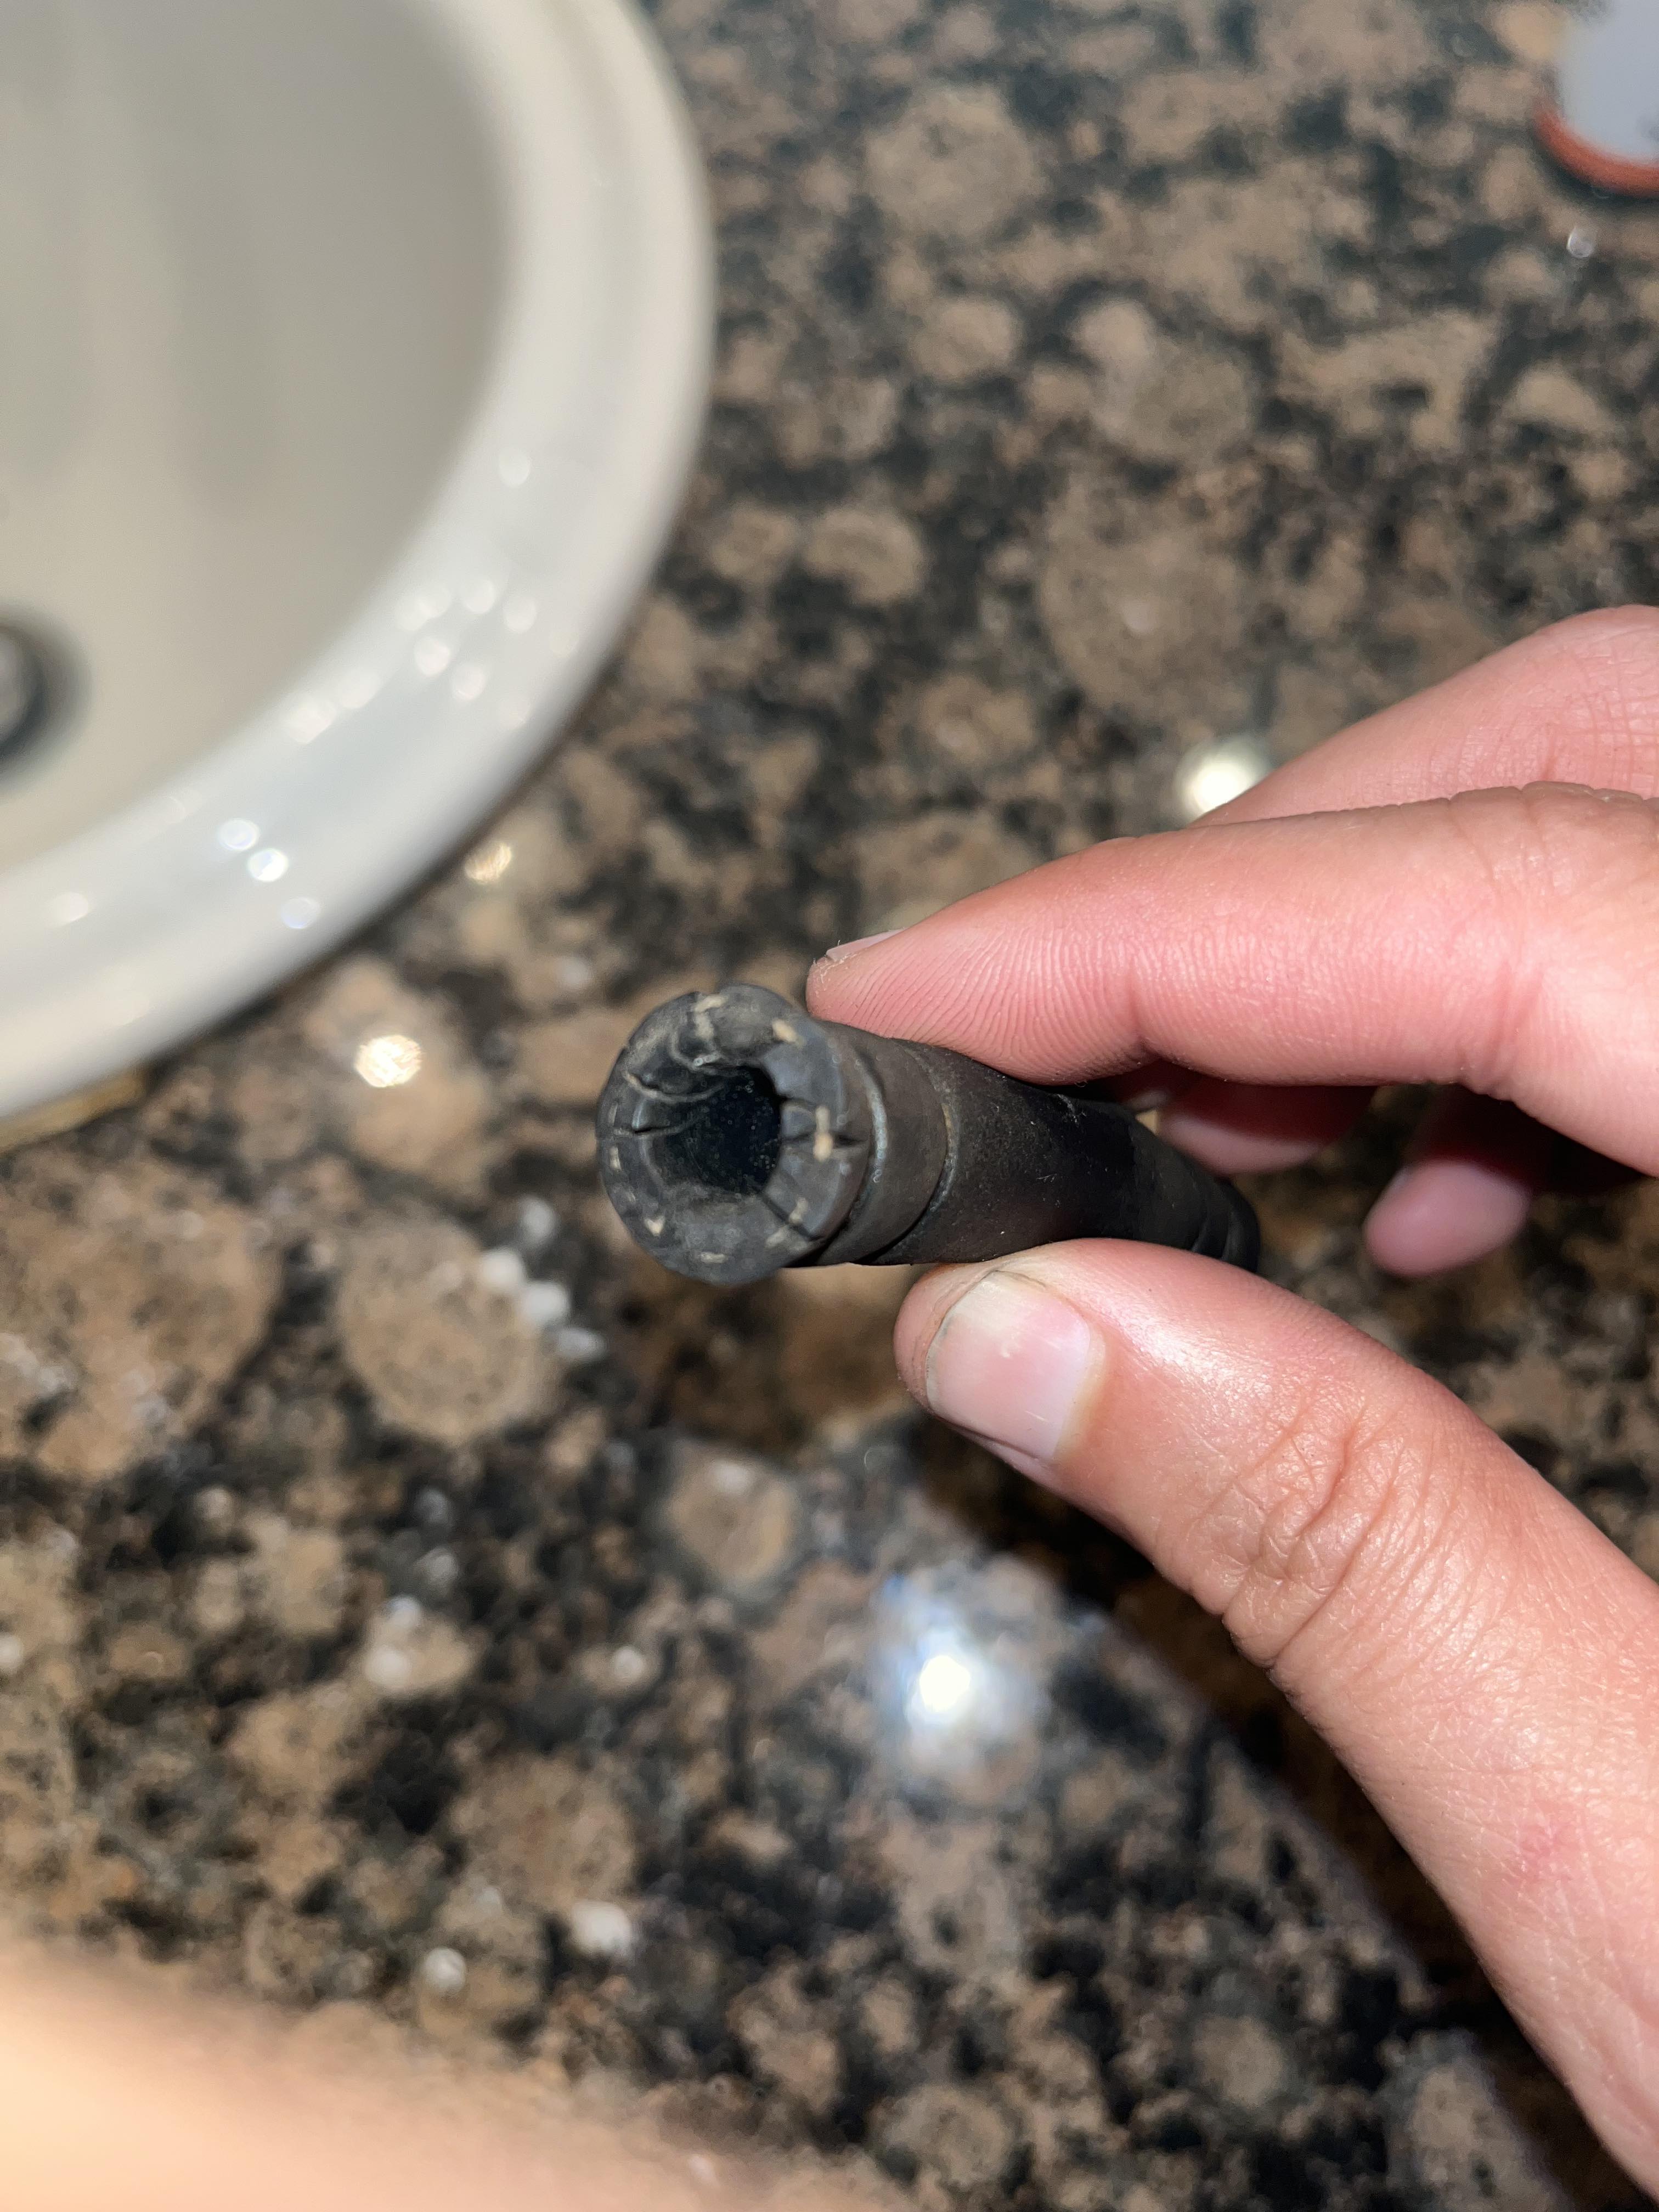
1 pointUpdate: So I just went under the car and looked around, tightened hose clamps, etc. All the hoses under the car looked newish with modern belt-style hose clamps except for one which I yanked off (image below) which will be replaced tomorrow along with belt clamps so I think we're in business here. I also found one screw hole that was missing a screw so I dug one up strictly to plug that leak hole.
 1 point
 -
1 pointI found the right size low pressure fuel rated hose for my vent lines at a local O'Reilly parts store. Seems like 5/8" was the larger size and they had it. Used two 90 degree brass 3/4" PEX for the 180 degree bend. Saved a lot of money and nobody knows but us.1 point
-
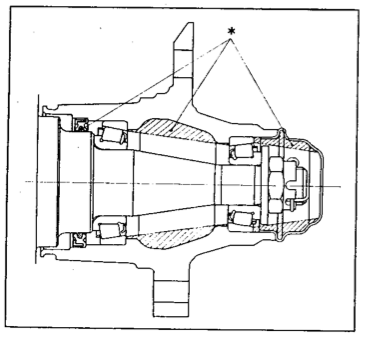
1 pointIt looks like that lip rides over the step on the spindle. The seal is farther in. I agree with Zed a debris shield. Functionally it keeps dirt off the seal, which could potentially fail and release grease on the brakes.
 1 point
 -
1 pointSounds like good progress! One other thing to check... The grommet around the antenna drain tube. It's back there in the same corner as the end of the exhaust pipe.1 point
-
1 pointSo here are some target areas: Missing grommets for the fuel tank vent lines Missing grommets from the wiring harness to the fuel pump/fuel sending unit Missing bolt that goes through the body (with a change to aftermarket seatbelts Bad/missing grommet for the throttle Bad/missing grommets around the heater hoses or wiring harness in the engine bay1 point
-
1 point
-
1 pointHi Richie, I completed this same project on my 1970 240Z (same color) in September 2020. You only want to drop the tank once, so do as much service to it as you can. It was a pain to reinstall, but otherwise a straight forward project. In addition to the hoses, I replaced or installed the following: 1. Fuel Neck (OEM) 2. Fuel Tank Lid Flap (ruined by PO using wrong fuel cap) 3. Fuel Tank Panel Shield (mine was missing) 4. Fuel Sender Connector Boots (old boots may be brittle) 5. Fuel Tank Rubber Strap Isolators You may want to get a new O-ring & locking tab for the fuel sender, in case you need them. If your fuel gauge is not working correctly, replace the fuel sender now. Consider replacing the associated Gas Tank Vent Hose Boots and Grommets. The are available from Banzai Motor Works (GF-17, 18, 19 and 20). Not sure how many of each you will need. Luckily, mine were still serviceable. Based on information at: https://woodworkerb.com/home/datsun-240z-rebuild/240z-fuel-tank/ I ordered five hoses from JBugs in CA. They are cloth braided and appear to be the same as the OEM hoses you are replacing. When you order, make sure all five are in stock. Otherwise, they will charge you for all five and send any out-of-stock hose later (when your project is already completed). In my case, I was sent four of five and I luckily sourced the missing hose (9 x 3MM) from a local, national auto parts store. I did not replace the simple, thin non-clamped vent hoses attached to vapor tank, so be careful removing them. I have no details on type or length. For the “funky” bend hose connection to work, I inserted spring coil (like on older screen doors) into the hose to make the connection work. JBugs Order: Note: Hoses are sold by minimum length requirements. In other words, longer than you need. 1. N203741 VW German Cloth Braided Breather Hose, 12X3.3mm, Length: 10 2. N203701 VW German Cloth Braided Breather Hose, 17X2mm, Length: 10 3. N203551 VW German Cloth Braided Fuel Hose, 5X2.5mm, Length: 3 4. N203571 VW German Cloth Braided Braided Fuel Hose, 7X2.5mm, Length: 3 5. N203761 VW German Cloth Braided Fuel Hose, 9X3mm, Length: 10 Total cost: $116, with free shipping in 2020 Tank Removal Process: 1. Disconnect battery 2. Loosen right rear wheel 3. Jack up car 4. Remove right rear tire remove rear interior panels (I think you have already completed this step) 5. Spray rusty strap nuts & bolts in advance 6. Drain the tank well; any remaining fuel can be drained by removing the fuel sender 7. Remove the wires for the sender 8. Carefully remove fuel hoses next to sender 9. Remove filler neck clamp at tank 10. Carefully remove hoses from expansion tank 11. Support the tank; use a floor jack or transmission jack & small piece of plywood 12. Take off the straps and lower the tank 13. Lower 4”-6” and disconnect remaining hoses 14. Pivot tank forward a bit due to the rear skirt 15. Detach all of the vent hoses, the filler hose & fuel lines 16. Remove the tank If you have no evidence that the tank was previously removed and cleaned or your fuel filter gets dirty quickly, have the tank cleaned. You will probably want to repaint the the exterior. Tank installation is is reverse order, but note: 1. You may have to raise the tank to connect some hoses. Some do not have much room for slack. 2. The tank drops out easier that it goes back in place. I have to fight with mine to clear the rear skirt. You may want to put good quality painters tape along the skirt to avoid skirt damage. Good luck with your project! Nate1 point