Leaderboard
-
26th-Z
Free Member14Points5,264Posts -
Jeff G 78
Free Member3Points3,007Posts -

CanTechZ
Free Member3Points1,311Posts -

dutchzcarguy
Free Member2Points2,677Posts


Popular Content
Showing content with the highest reputation on 06/10/2022 in all areas
-
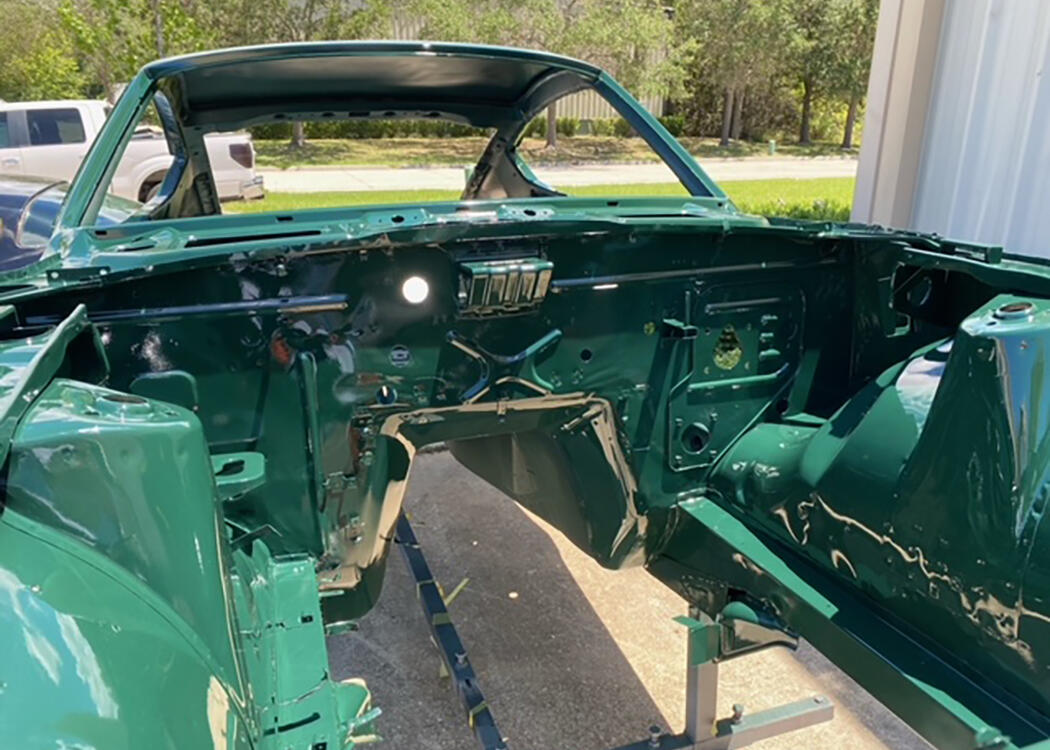
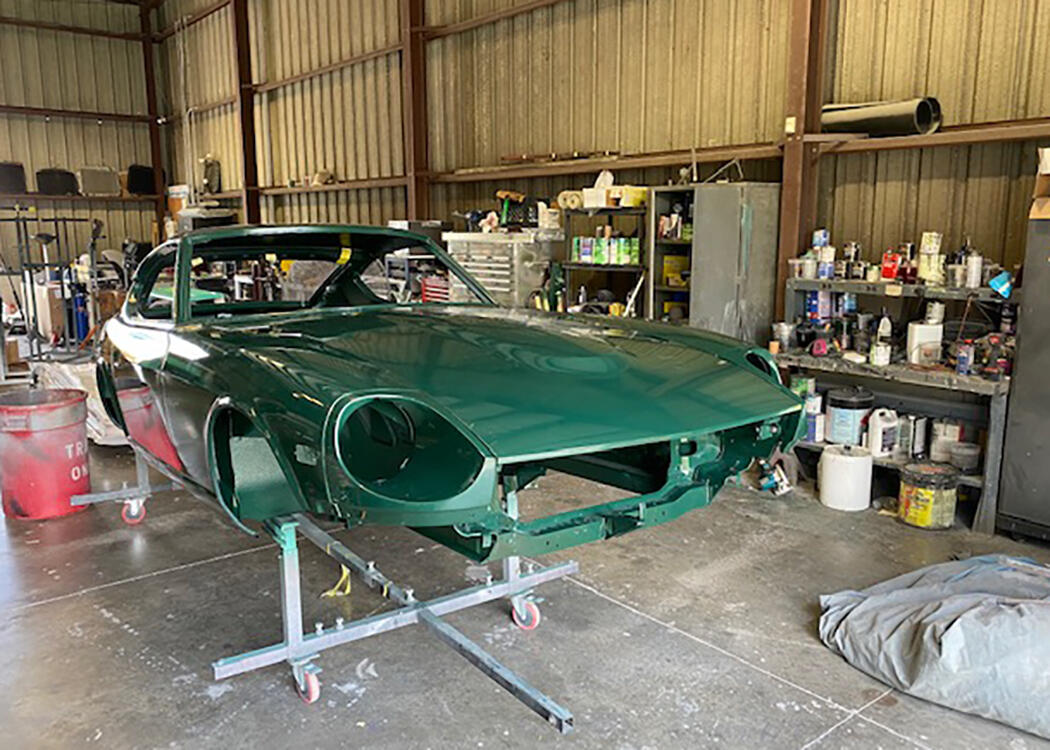
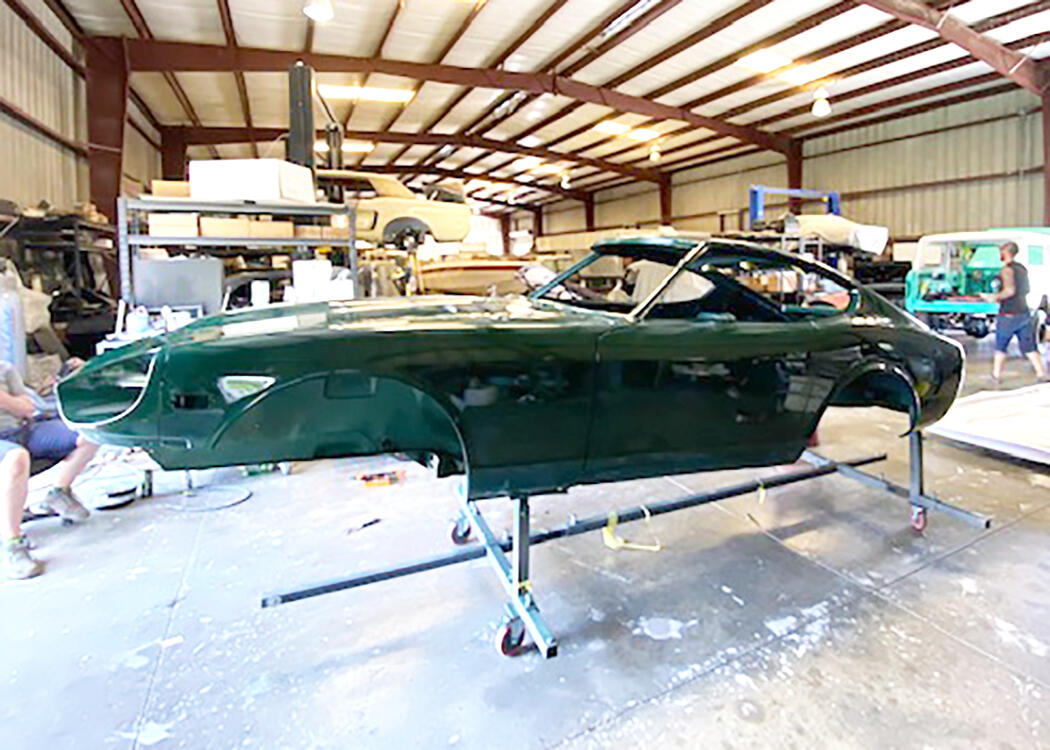
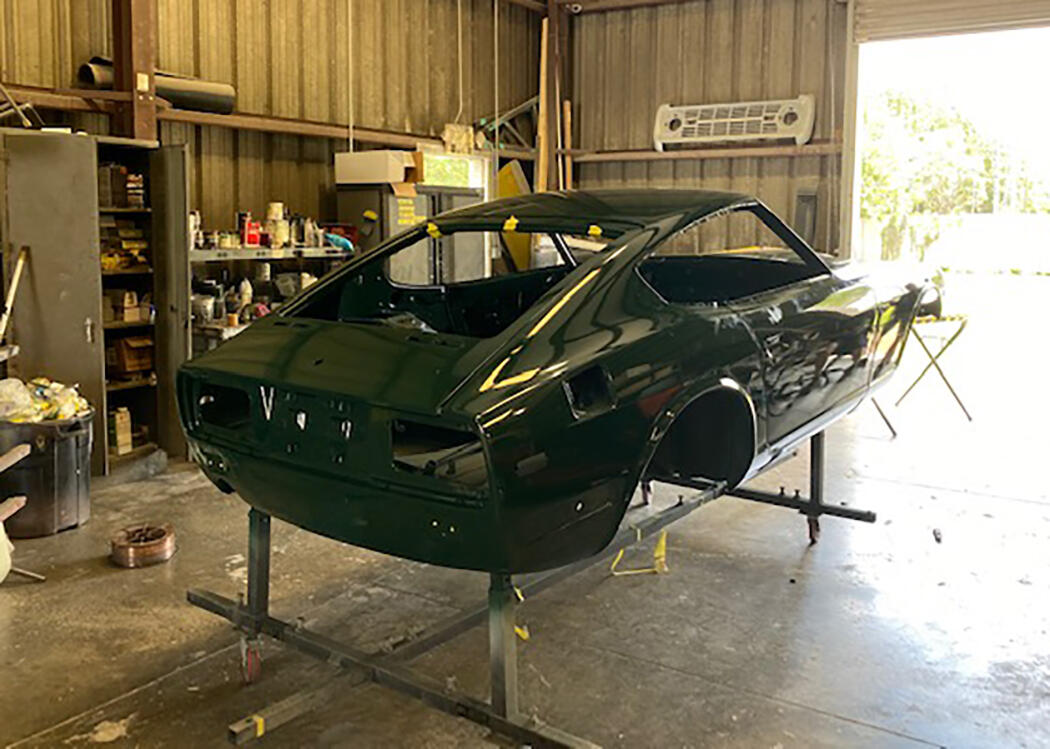
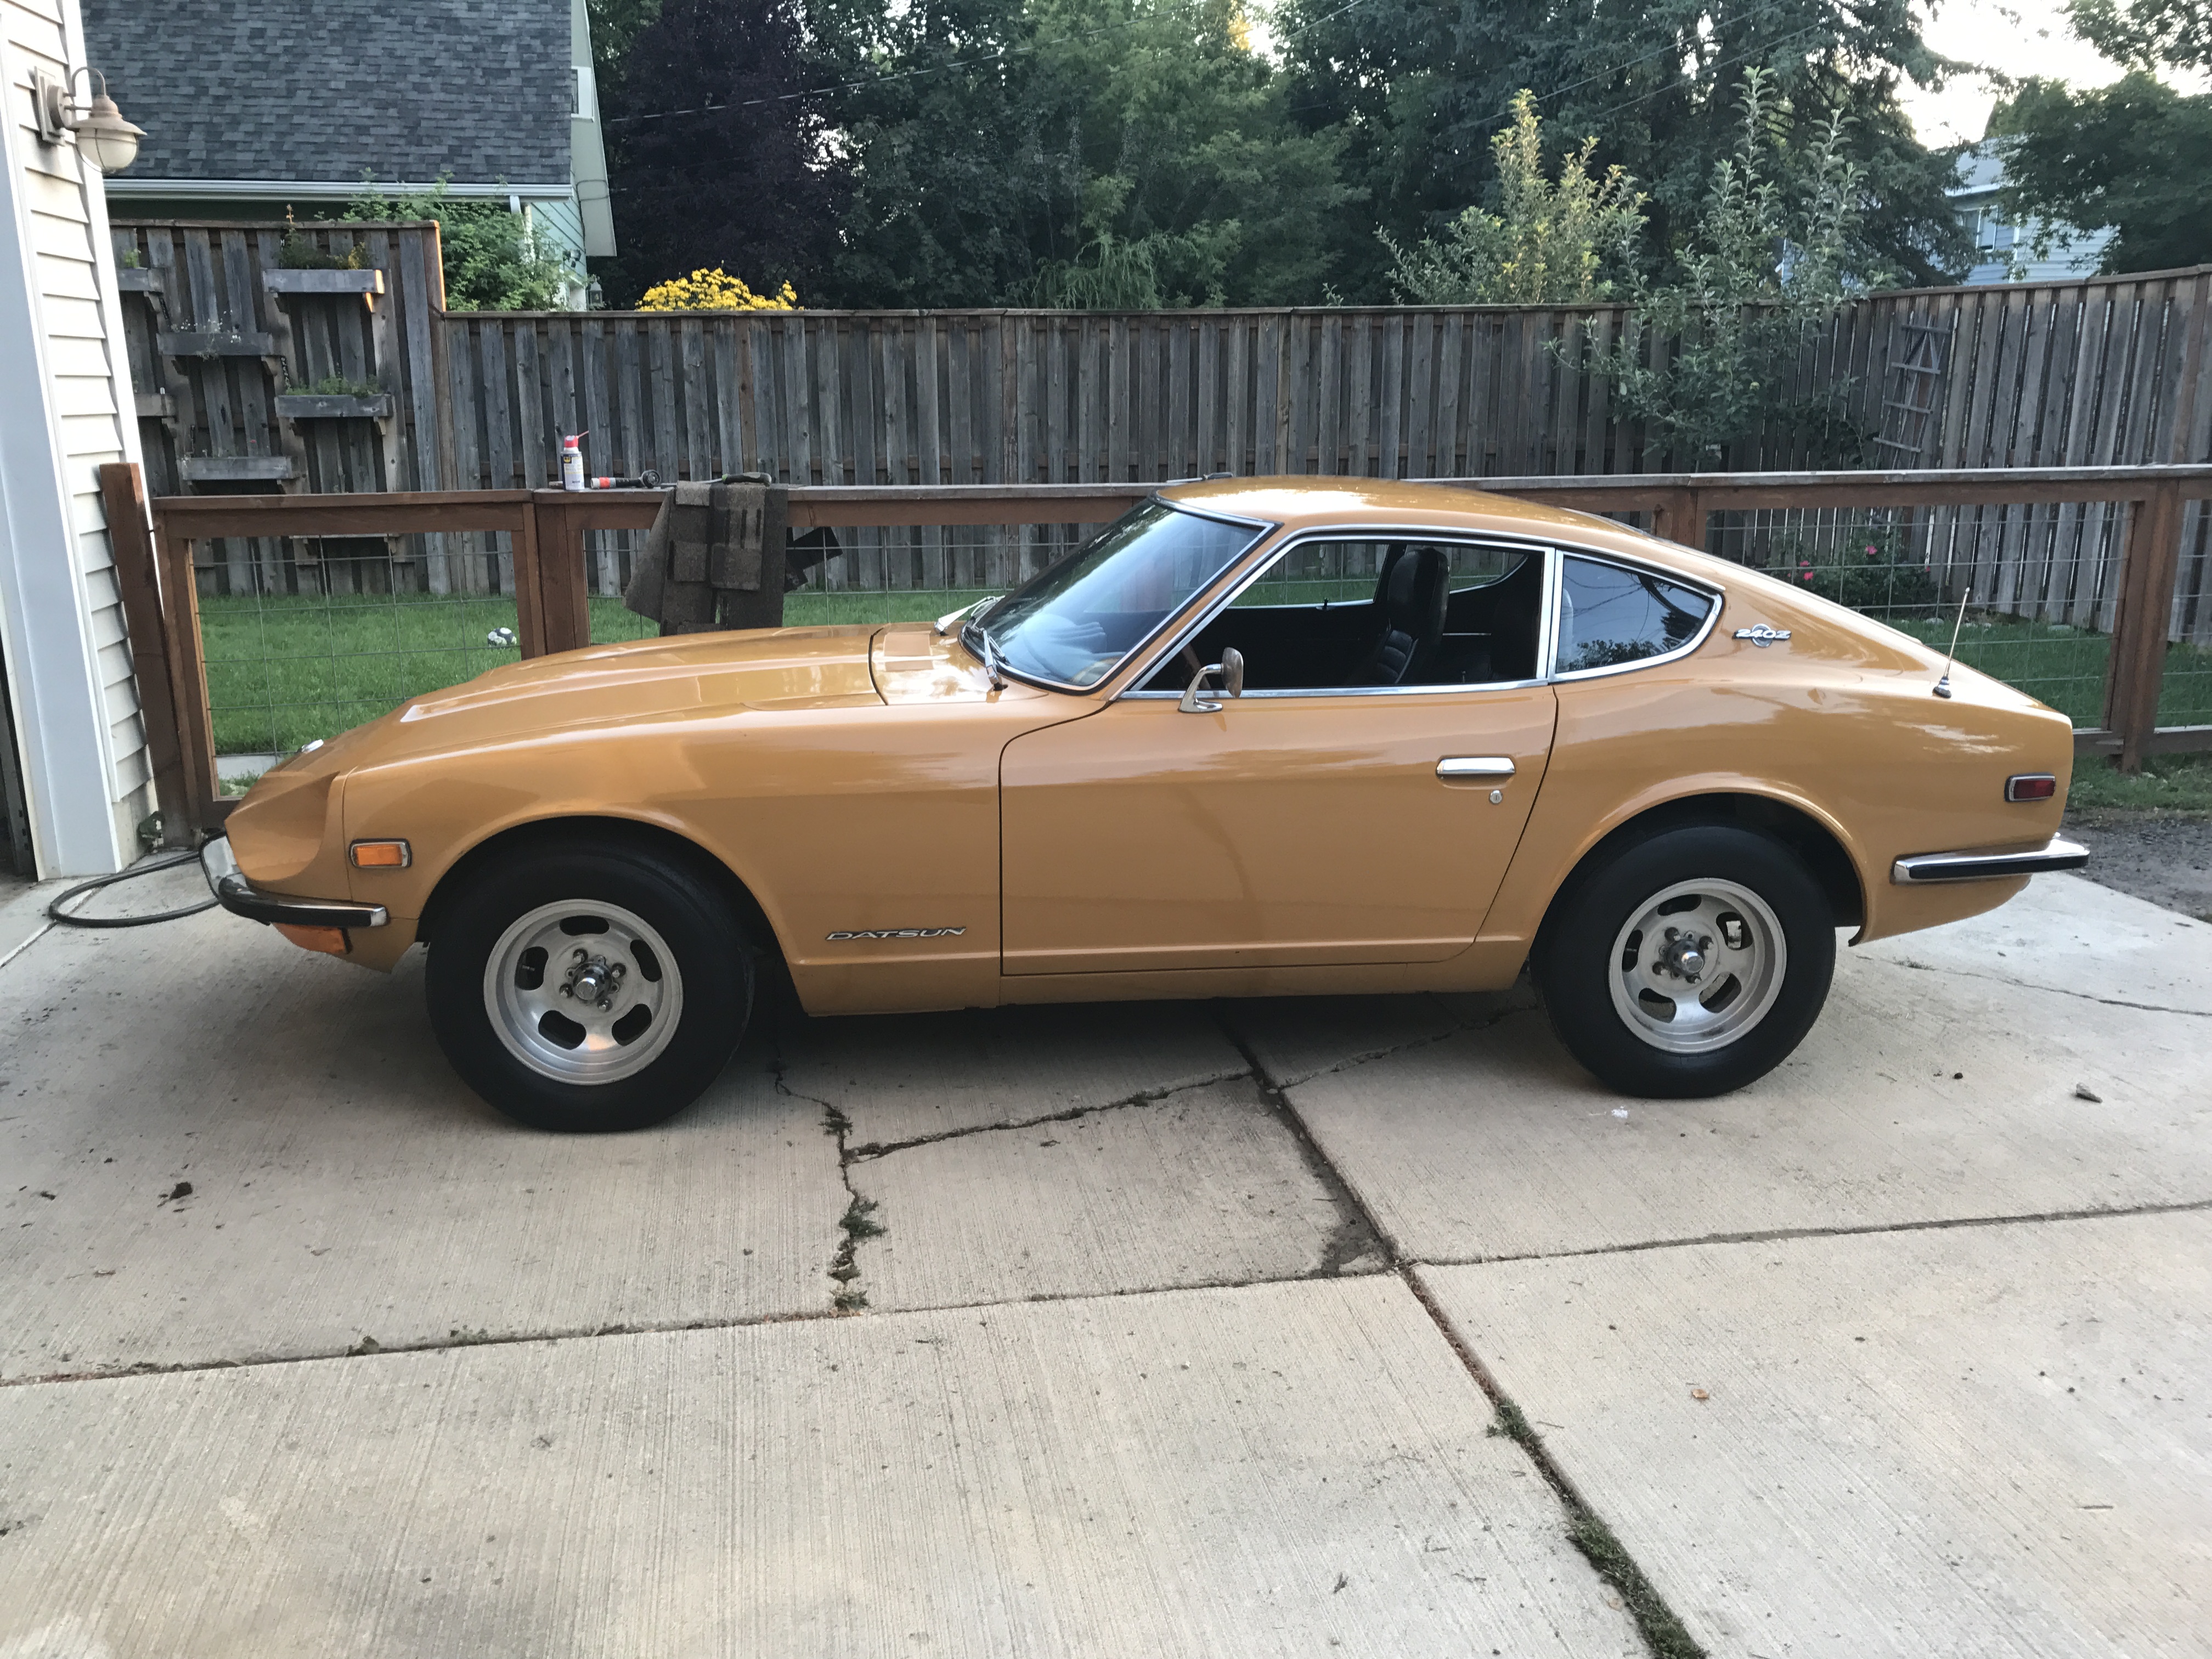
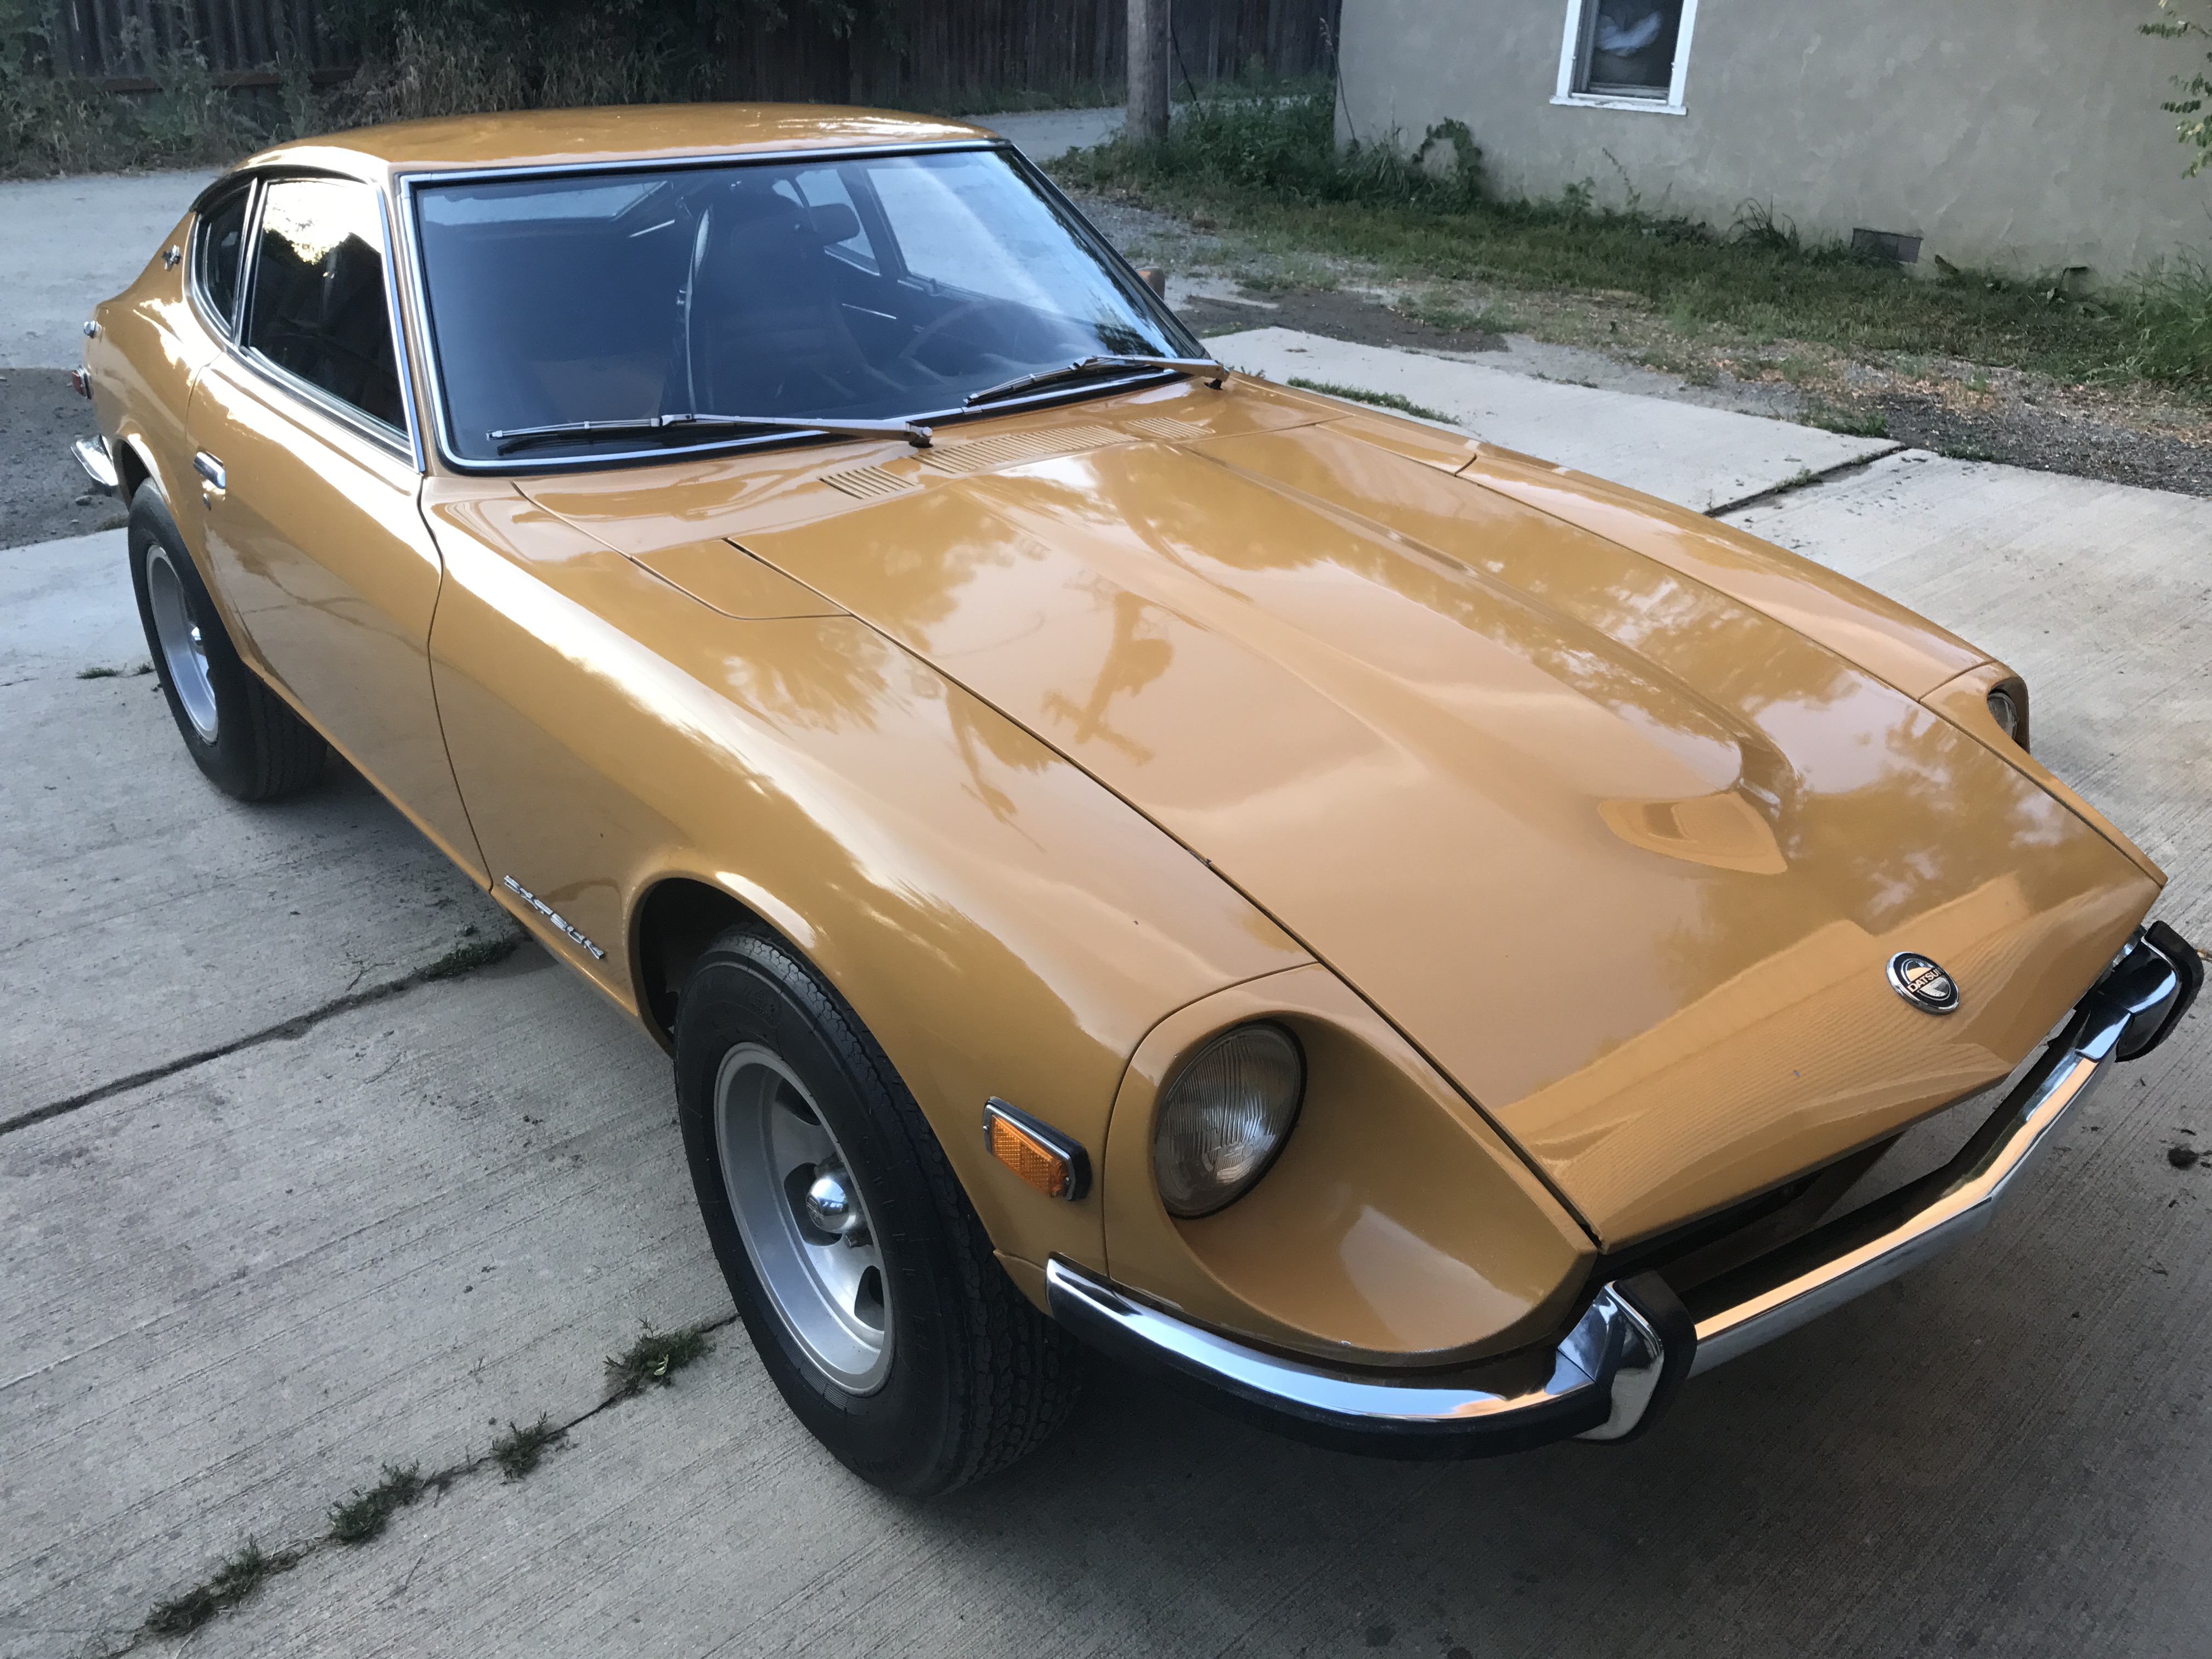
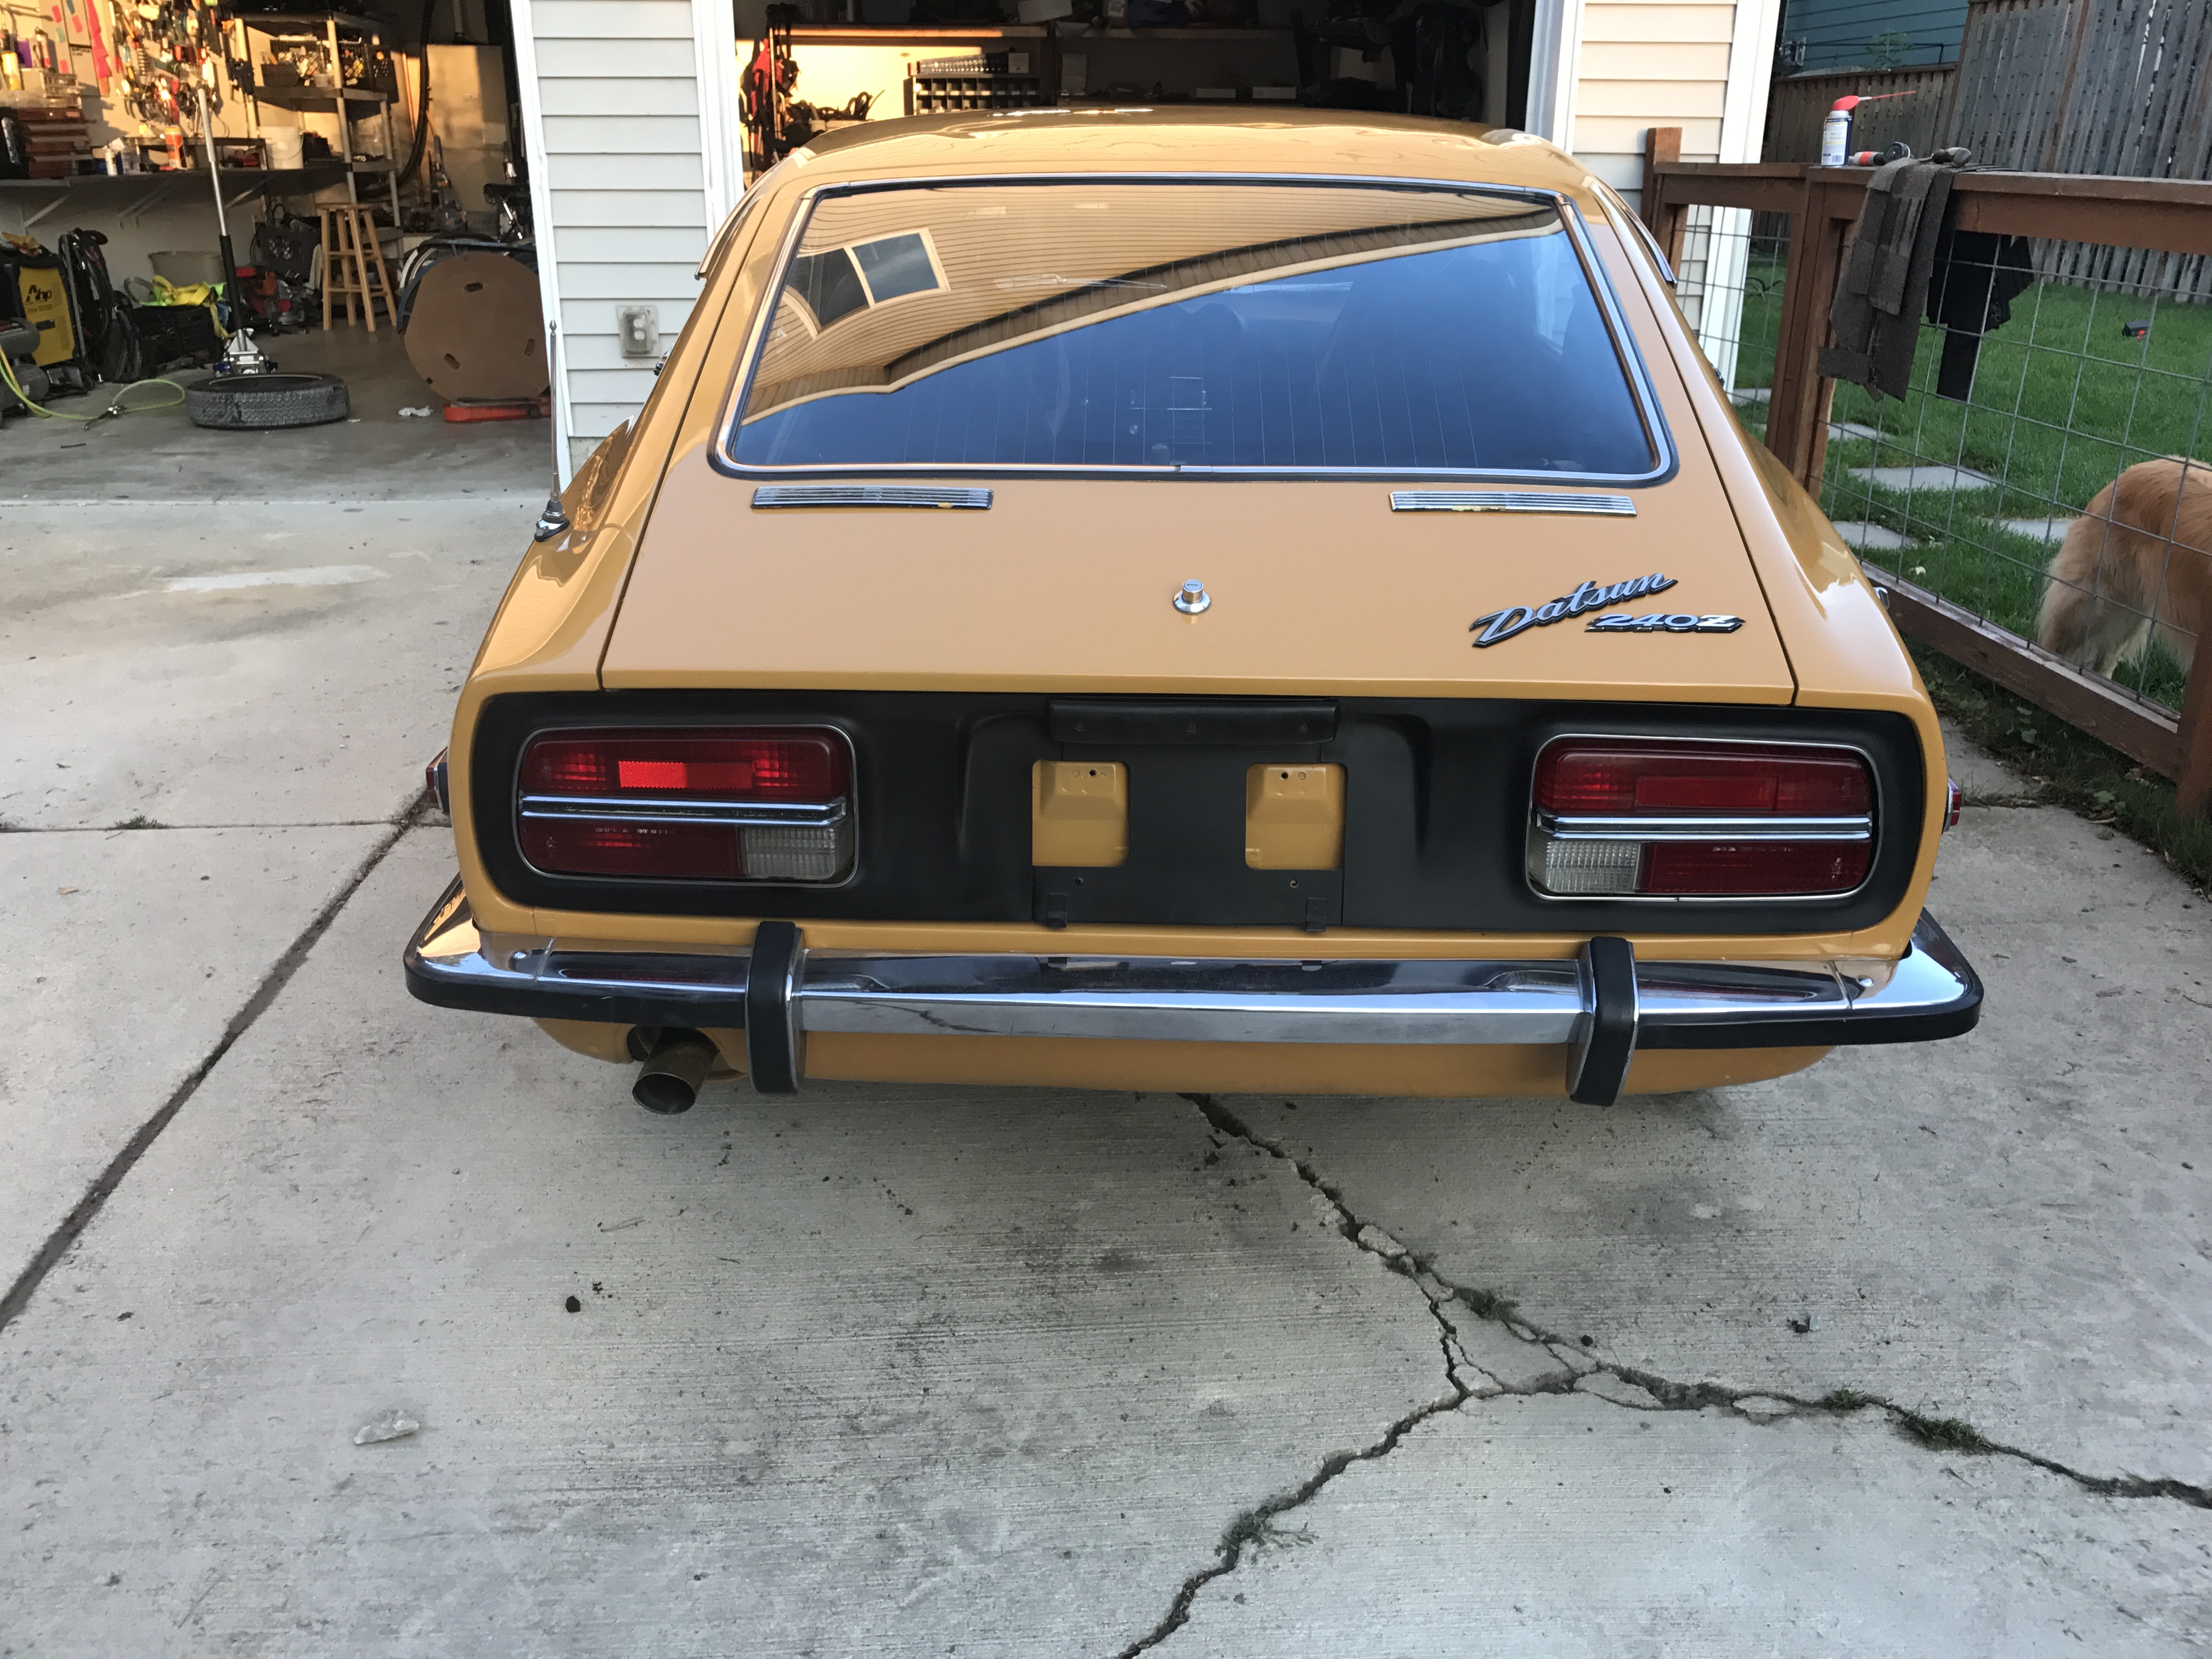
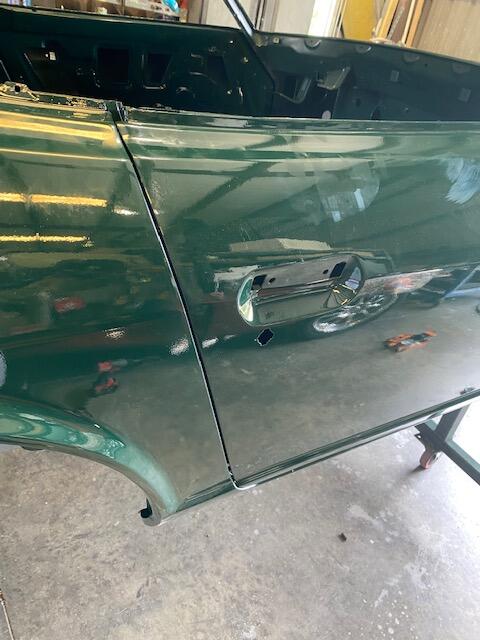
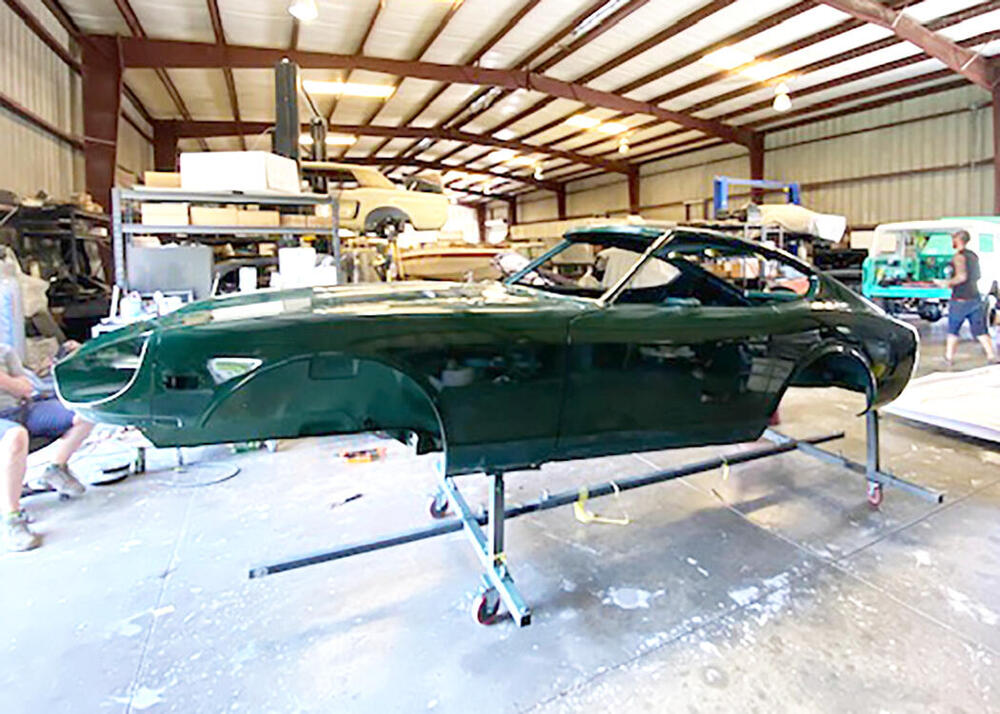
7 pointsThis restoration shop is a full service business. Classic Car Restorations in Bradenton, Florida. Complete services from paint and body work to interior work to full reassembly. Many thanks to Brian and his crew for excellent work and specific attention to detail. They fixed some poor welding work and fixed some other metal that had been covered over in Bondo. Once I get the car rolling and running, she will go back for the interior installation - butterscotch. For 26th, I chose a two stage acrylic with a clear coat. The underside is textured in a colorised product called Raptor. I decided to texture the wheel wells and inner fenders. The interior finish is just the base coat which is why it looks a little dull


 7 points
 -
4 pointsIt has been one long journey. Three different body shops, years of storage, but she will be coming home next week to begin the reassembly process. Finally!


 4 points
 -
2 points
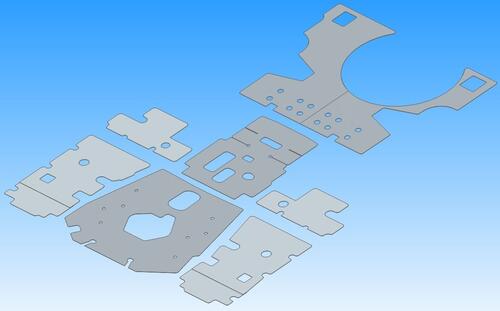 Templates for the tar mats (floor insulators) for the front floor and under seat areas of a 1970 240Z in PDF and DWG formats. The dimensions were taken from my July '70 car. I measured these as accurately as I could and printed verification templates on a wide format printer to check fit. Transmission tunnel and rear deck templates have now been added, this now a complete set.Free2 points
 -
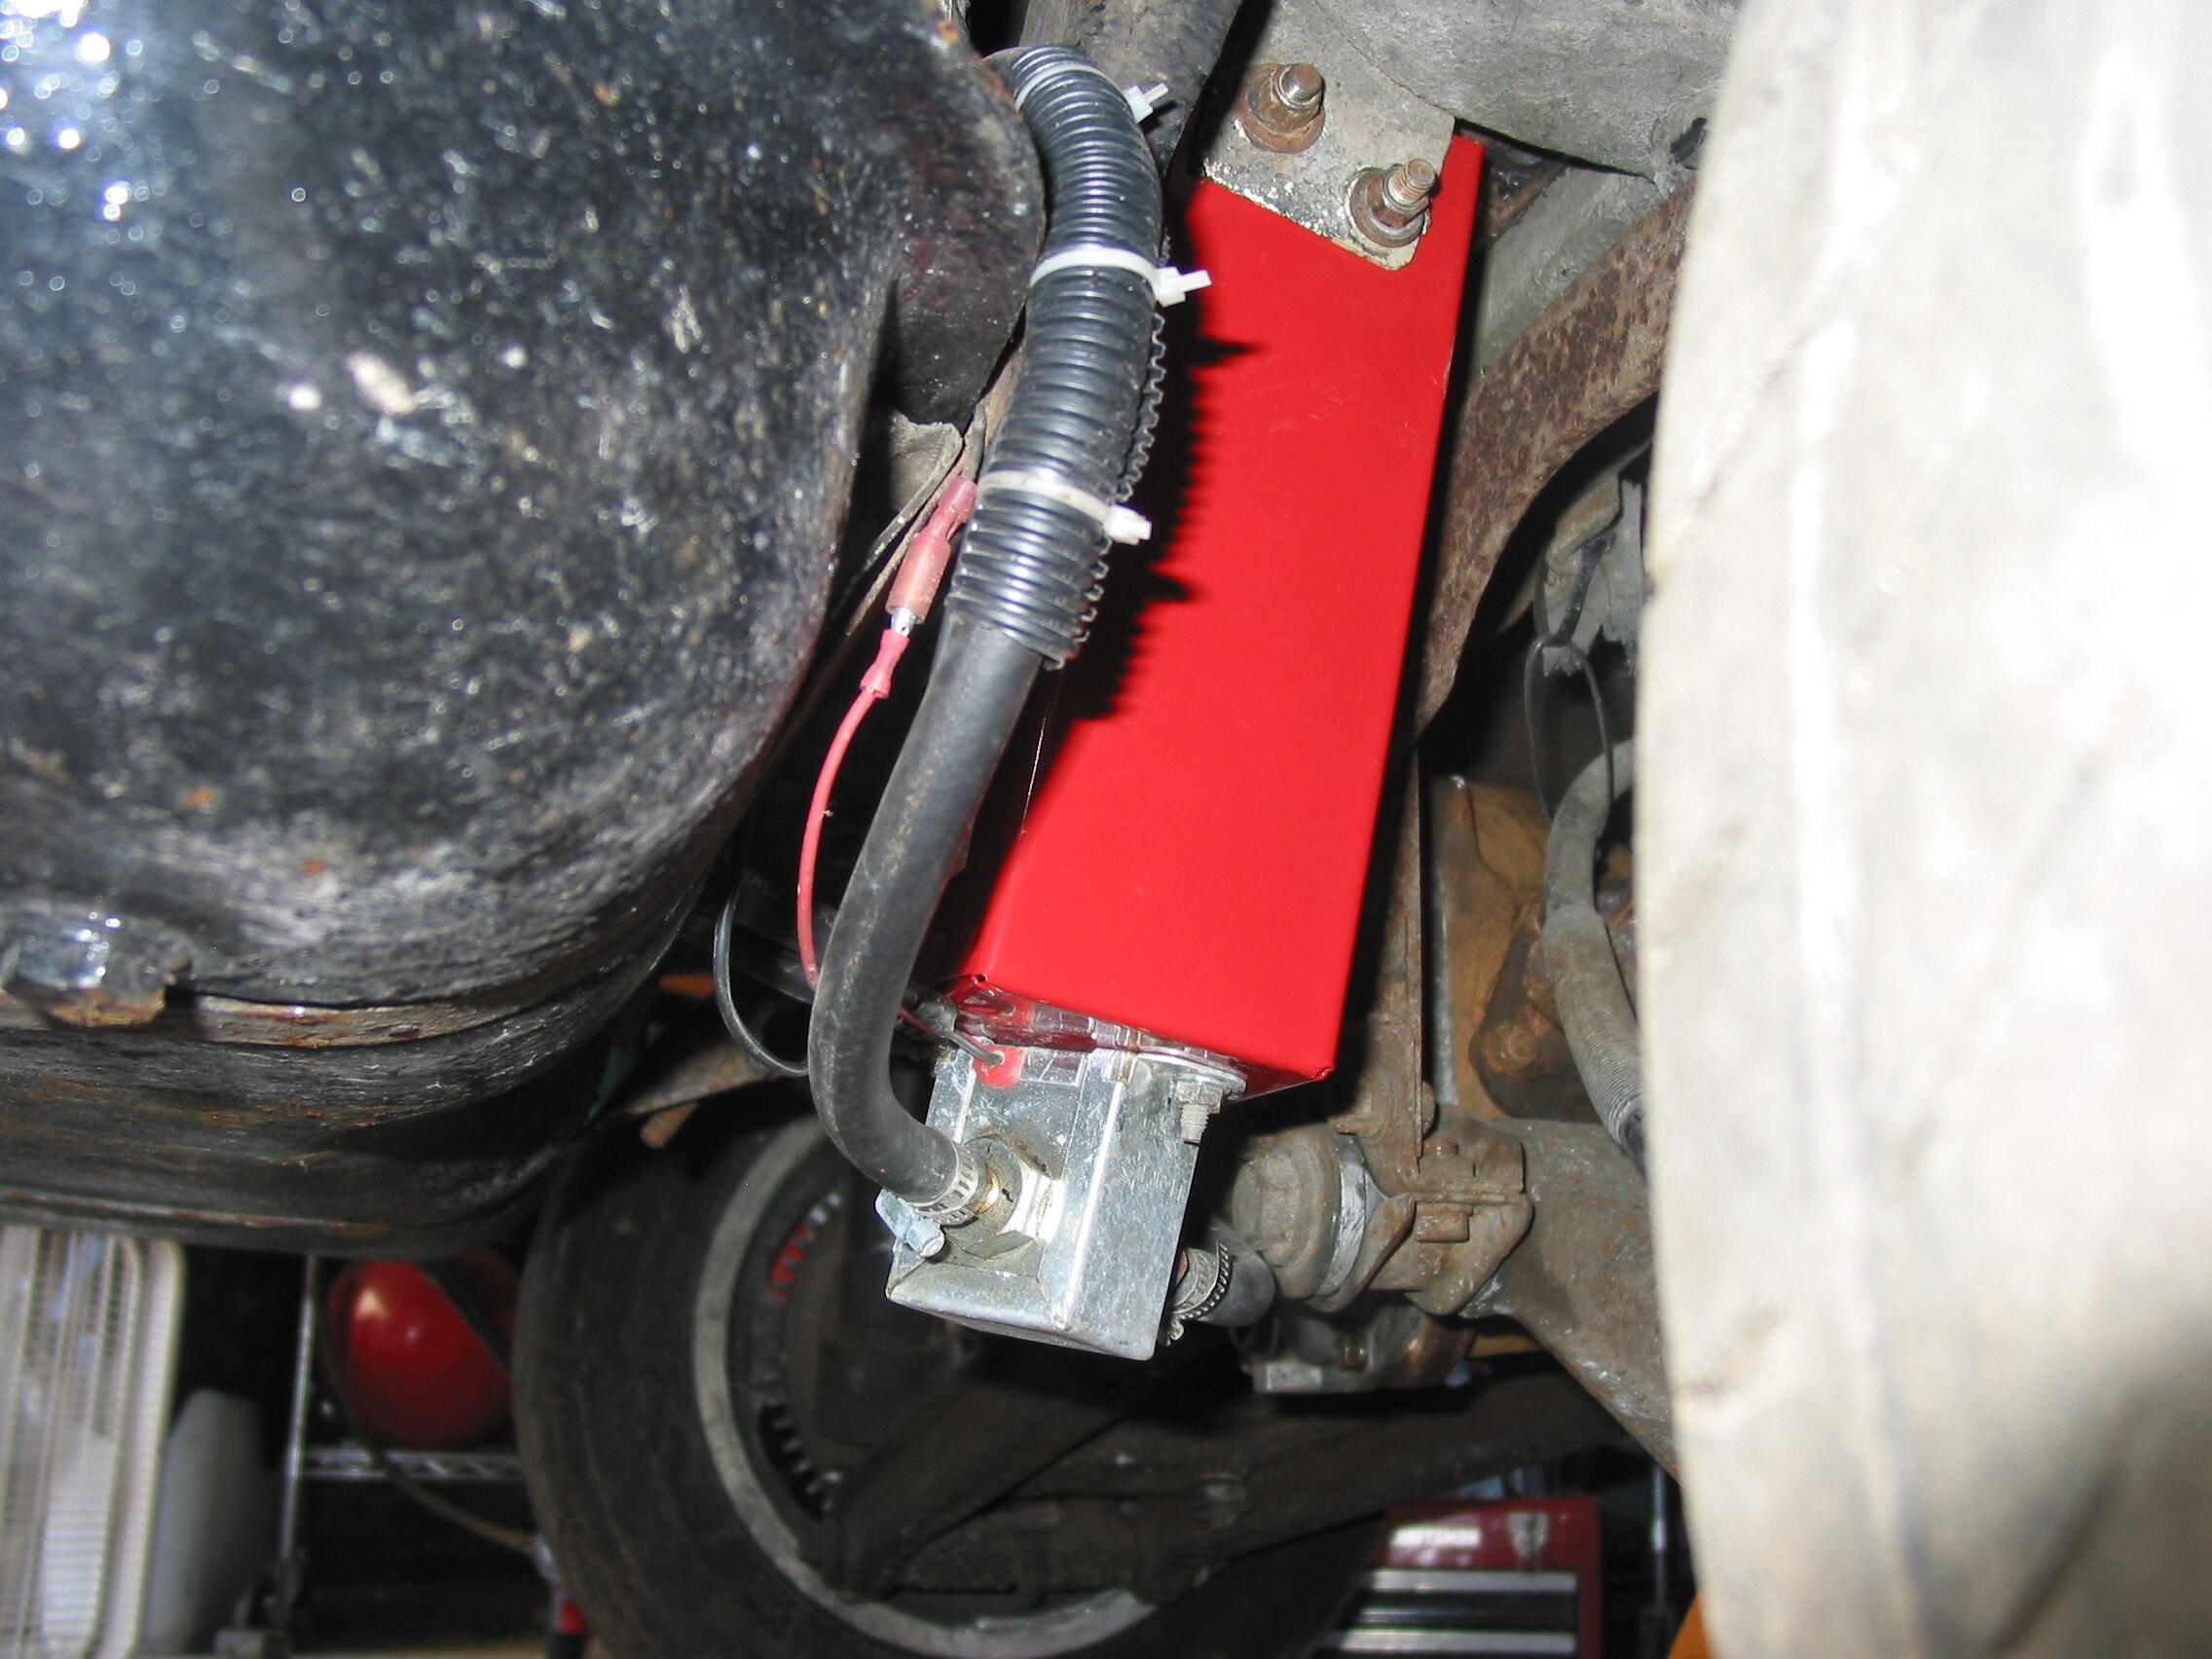
2 pointsIn my case, I tried every possible combination of things I could think of over a several year period. I deadheaded it first with the mechanical pump and then with an electric pump. Deadheading did improve it somewhat on my car, but not enough. Mine would run great for 30 minutes in a race and then start to fall on its face at high RPM and get progressively worse until it wouldn't pull at all aver about 4000 RPM. When I'd pit for fuel, it would refuse to restart and I killed several starters over a number of races. The electric pump didn't help until I dropped it down below the tank height as shown above. I also immediately opened the hood at pit-in to reduce the heat soak from the cherry red exhaust. Those two things would usually allow it to restart after refueling. When I clamped the return, it would run longer and better as long as the ambient temp wasn't really hot. In one 25 hour race, it ran like crap in the 85F daylight and then ran great from sunset until it got hot again around 10am. Lap times are normally much slower in the pitch black, but we turned our fastest laps around 3am when the temps were lowest. Ditching the fuel rail along with the other mods made my car run great even in 90+ temps in race conditions. I sold the car before I was able to do any A-B-A testing to see if I could undo any of the mods. I had a huge multi-layer heat shield plus additional bowl shields and the back of the hood was propped-up 2 inches.
 2 points
 -
2 pointsHi, I used 10w40 always in L28 in 3 cars.. over 30 years experience and never another.. i think you can use 20W50 also because of the warm weather, but still u will use a bit more fuel because of the viscosity of the thicker 20W.. for lubrication i think you can stick to 10W40, makes very little difference. As fuel is expensive i would stick to 10W... Racing oil is also not necessary, throwing away your money.. unless you have a very modified engine. You could use some oil special for high miles engines if you have a lot of miles on your engine.. say over 200 kmiles..2 points
-
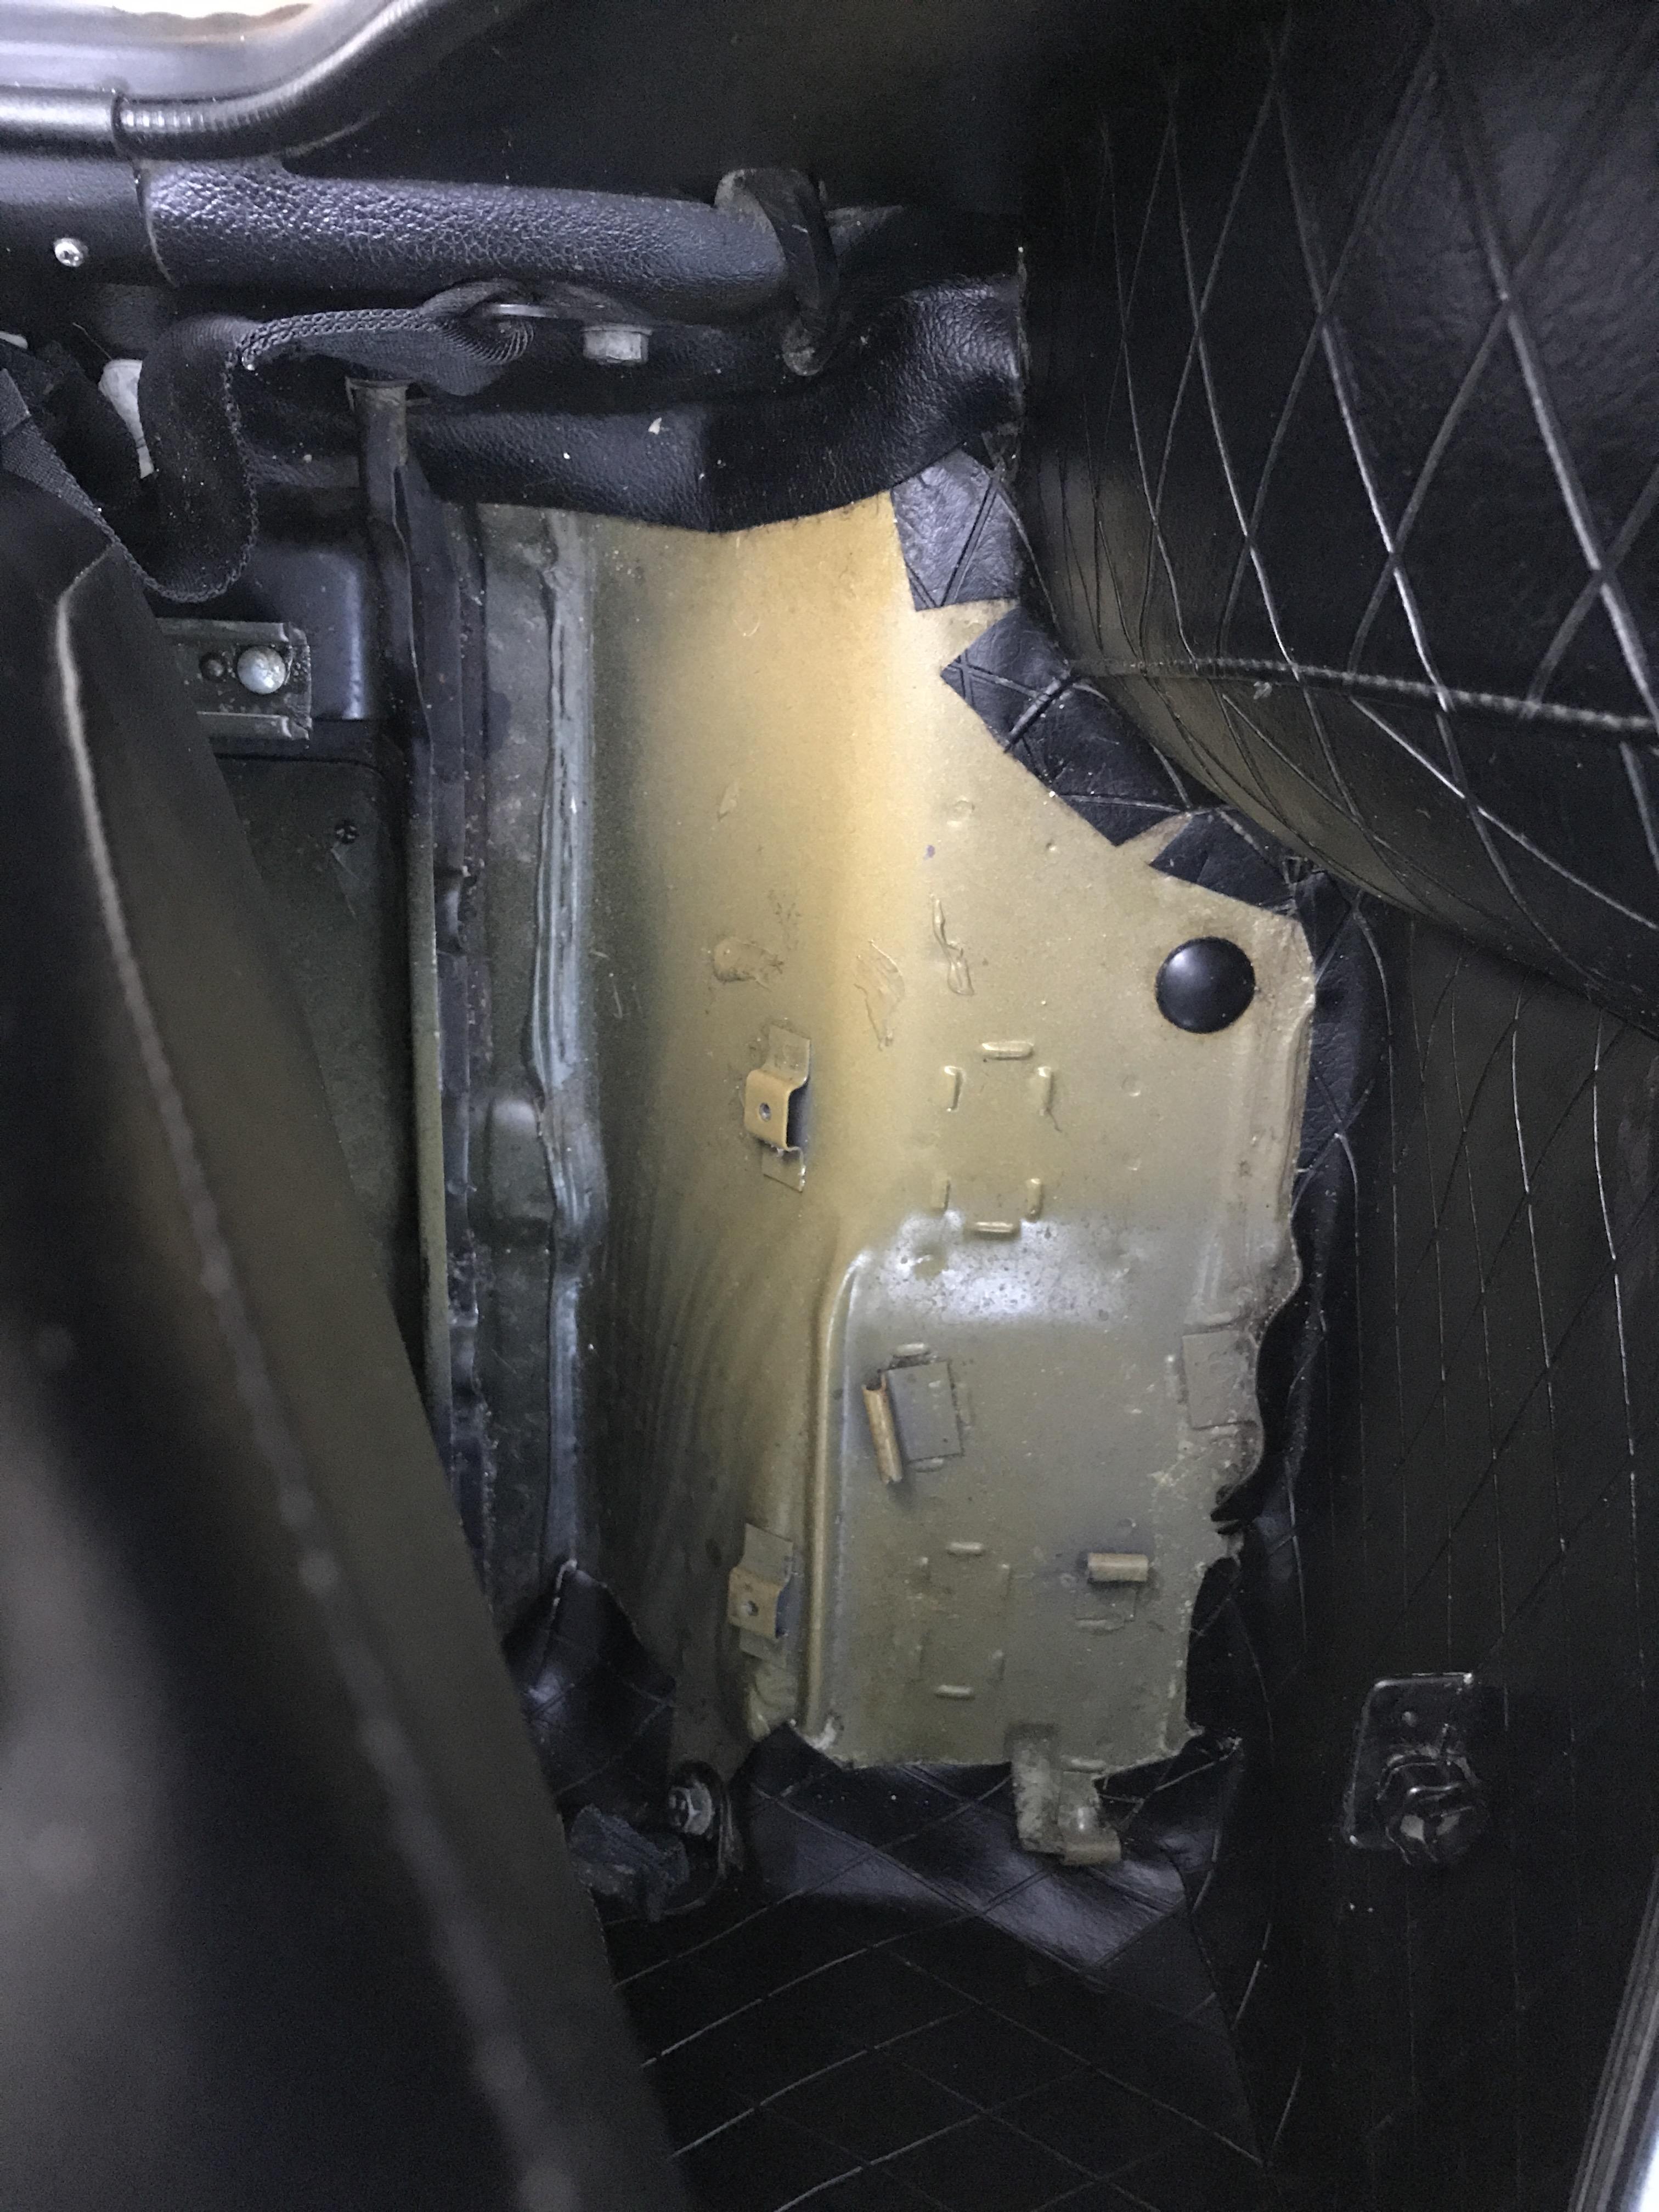
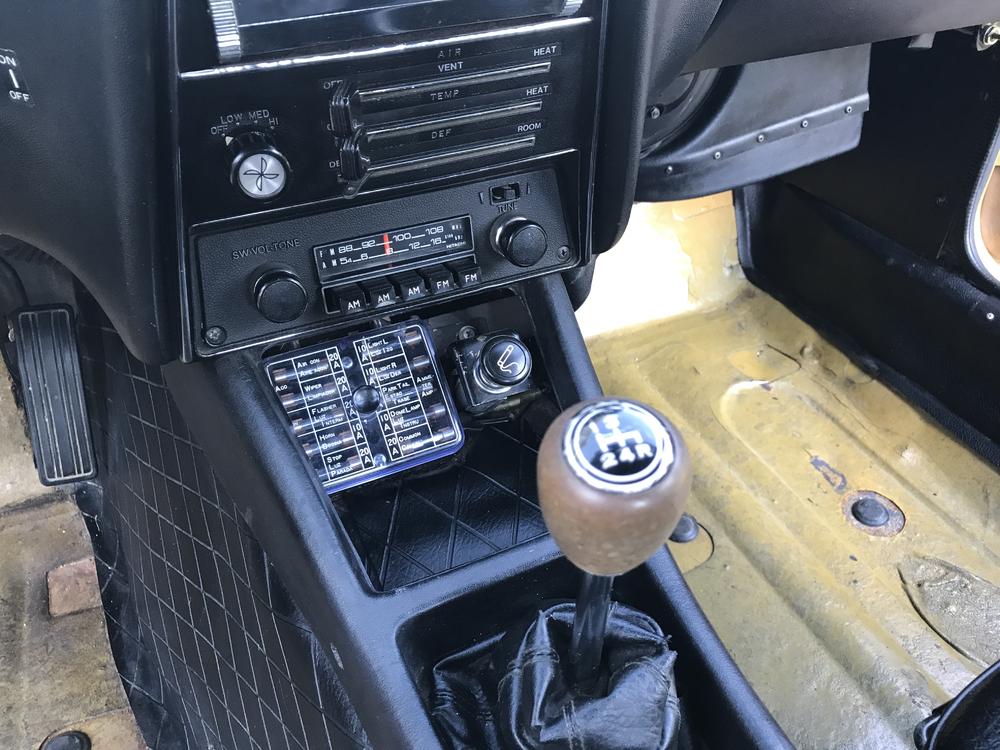
1 pointHello all, I am going to document my build. Basically I have a garage kept series 1 240z. That hasn't driven since 1986, it needed brakes which she couldn't afford so it has sat since. It was resprayed in the 80s as well. Some bad overspray but overall it's a very rust free car. I actually found it in my neighbors garage. My goal is to drive it and enjoy it, but it needs some TLC. First and foremost I got it running, and that is when I made the decision to keep it and I have fallen in love. I will keep it mostly original, minus some brakes upgrades, wheels and BC coilovers. Maybe someday have a built motor for it, but not for now. Everything I take off will be either professionally painted, re - zinc coated or powder coated when it goes back on. I am going to try and stay away from painting it. Everything I do will be reversible and I am keeping all parts I pull off/ upgrade. First thing I did was get it cleaned. Which took a long long time. I started this on Hybriz but I don't think it's the correct build for their site. So I am going to move it over here. I am new to Z's but have been building cars since high school. This is my 2nd major build.


 1 point
 -
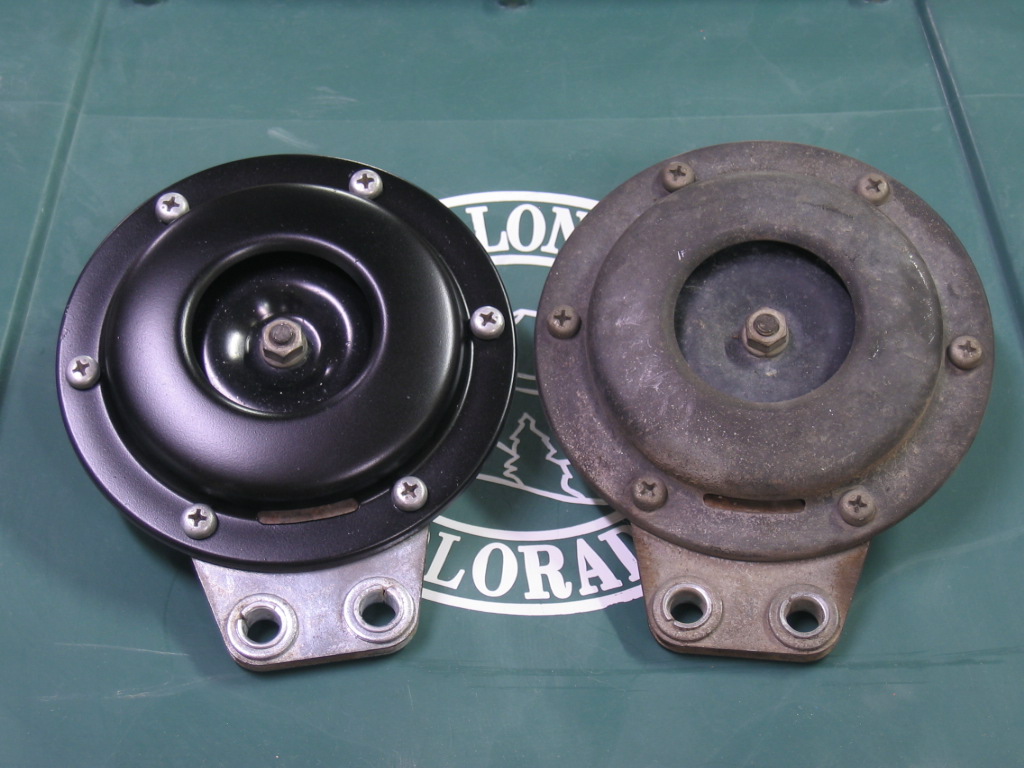
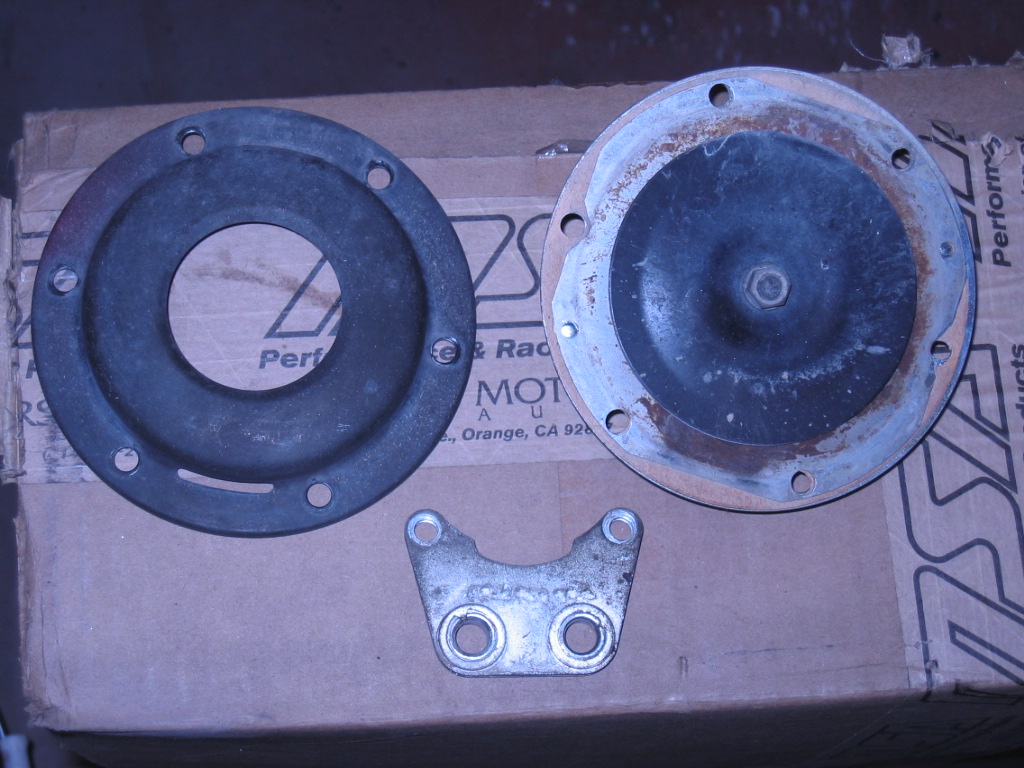
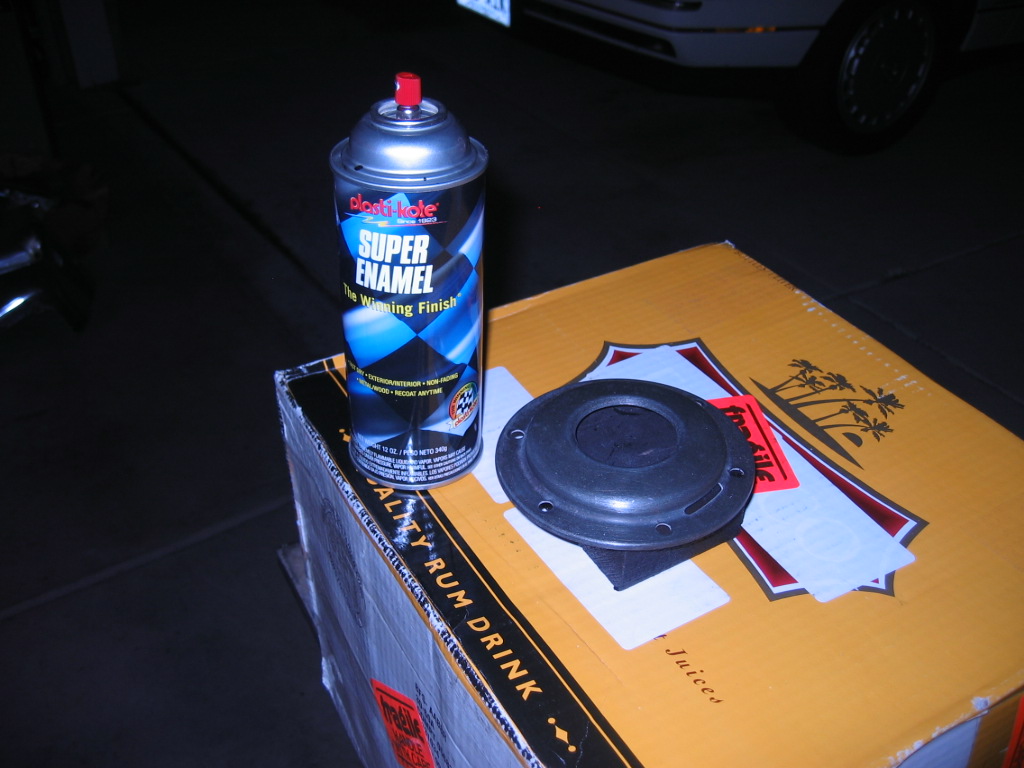
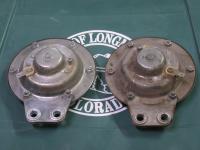
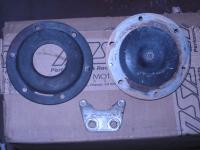
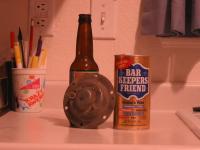
I have methodically been "refreshing" my '73 240Z a bit at a time. I've repainted the car, rebuilt the front & rear suspension, installed new carpets, a headliner and a dash cap, refinished the engine bay and just recently had the engine rebuilt. :knockedou One of the last detail items I had left to tackle was the horns. They were pretty cruddy looking after 30 plus years of service. :sick: First of all, here is a list of items that I used to refinish the horns: Phillips screw driver 5/16" nut driver 1 Scotchbrite pad #0000 Steel wool 3M rubbing compound PPG wax & grease remover Satin black enamel paint Wire brush Barkeepers friend an old tooth brush an few old socks Here are the steps I followed: 1. Use the screw driver and nut driver to remove the six screws that hold the horn together. Notice that the two screws that secure the mounting bracket to the horn are longer than the rest. Also, note that there is a lock washer sandwiched between the horn and the mounting bracket, as well as another lockwasher between the mounting bracket and the nut. Also, there are two little metal spacers that fit in the mounting bracket. Don't lose any of these small items! Once all six screws are removed the horn can be separated into the front cover, diaphragm, and rear cover. 2. Clean the screw heads with the Scotchbrite pad. Place the pad on a hard surface, such as a workbench, and grip a screw by the threads. Rub the screw over the Scotchbrite pad until it is nice and clean. Repeat this process with the remaining screws. Once all the screw heads are clean polish them up with the steel wool. It should make them fairly shiny. :knockedou 3. Use a wire brush to clean the nuts. I used a cup brush on an angle grinder. A bench grinder with a wire wheel could be used, or you could use a hand held wire brush. If you use a wire brush on a power tool, BE VERY CAREFUL! WEAR EYE PROTECTION! WEAR GLOVES! A wire brush on a power tool can easily launch the nut into space. If that happens, consider yourself lucky if it doesn't hit you :hurt: , hit & nick something around you (like your Z! ), or end up lost . 4. Clean and polish the black metal disc on the front of the diaphragm. Use an old sock, or other cotton cloth, damp it with water, and apply a bit of the rubbing compound to the sock. Use small, circular motions to polish the disc. Wipe clean with a clean, dry portion of the sock. 5. Clean the front cover with warm soap and water. Dry thoroughly. Clean the surface with a bit of wax & grease remover on another old (clean, please!) sock. Scuff the surface with the Scotchbrite pad (note - be sure all heavy dirt, oil & grime deposits are removed BEFORE scuffing the surface with the Scotchbrite pad!). Wipe the surface clean with a bit of wax & grease remover in preparation for painting. Allow the cover to dry thoroughly. 6. In a well ventilated area, spray a couple of light coats of the satin-black enamel on the front cover. I placed the cover on a block of wood, up on a box on top a small, portable work bench in my garage. Once the cover has been painted, hang it up with a bit of wire and let it dry. 7. Clean the back cover with Barkeepers friend, or similar cleaner. Be careful when cleaning the back cover, as it contains the coil & other electrical parts. DO NOT SUBMERGE IT IN WATER! I used another old sock, damped it with water, and then applied a bit of the cleaner to the sock. Then, I used it to clean the larger areas of the back cover. For the nooks & crannies I used the toothbrush. I damped the bristles with a little water, applied a small amount of the cleaner to the tooth brush, then cleaned the tight spots. I used a damp rag to wipe the surface clean. Don't tell my wife, I cleaned the back cover at the kitchen sink while she was away at work! :paranoid: 8. Clean the mounting bracket using the same method as for the back cover. 9. When the paint on the front cover has dried, reassemble the horn. Notice that there are 2 dimples on the perimeter of the back cover, located 180 degrees apart. Also notice that the diaphragm has 2 small holes (conveniently located 180 degrees apart, see the connection here?), in addition to the 6 mounting holes. These 2 small holes fit over the dimples, insuring that the diaphragm lines up correctly with the coil in the back cover. The front cover has 2 slots around the perimeter, located 180 degrees apart. Place the front cover over the diaphragm and align the bolt holes so that one slot is at the top of the horn, and the other is at the bottom. 10. Install the mounting bracket to the bottom 2 mounting holes using the 2 longer screws. Don't forget to install the lockwashers! Each of these screws should have a lockwasher between the rear cover and the mounting bracket, and another lockwasher between the bracket and the nut. Install the 4 short screws in the remaining holes, put a nut on the back of each screw and tighten them all down. Use the screw driver and nut driver to complete this step. 11. Reinstall your "new" horns back on your Z! They may not be show quality, they may not be totally authentic in appearance, but they sure as heck look a lot better that they used to! :classic: This post has been promoted to an article


 1 point
 -
1 pointSo just to provide a little clarity, you said that after several hours you were able to get the car to start and pull it back into the garage. How easily did it start? By that, I mean... After it sat for a couple hours, did it fire right up like normal and run fine again? Or did it take a bunch of cranking and sputtering, but then eventually after enough cranking and sputtering and rough weak idle, it finally came back to life and THEN ran normal again? Basically, I'm trying to figure out if there was fuel in your bowls when it sputtered and died. And about this part... Where in the timeline you laid out above did you try this? Is this after the 30 minute idling, but before the several hour wait?1 point
-
1 pointTry this simple test. Buy about 4 feet of fuel hose and a T fitting to bypass the fuel rail entirely. Run a hose from the fuel pump output to a T fitting at the front carb and then run hoses from the T to the two carb inlets. Finally, clamp off the return line with needle nose vice grips so it doesn't drip what's left in the rail. I had terrible vapor lock issues with my race car and this mod solved the problem after I tried every other possible fix. Prior to ditching the rail, I also ran an electric fuel pump at the tank mounted on a drop bracket so it was gravity fed from the tank. Ethanol fuel doesn't like being "pulled". By being gravity fed, the pump could "push" the fuel to the front of the car. This helped get the car started hot, but did nothing to fix the vapor lock while on the track. Different carbs did nothing, shielding the heck out of the exhaust did nothing, eliminating the return line helped a bit, but not enough.
 1 point
 -
Worked perfectly. Had the file printed full size, tediously cut the templates out, fit in the car, cut out the tar mat material (tediously again) and installed. I like the fit. Measurements seen good. Cutting out the template and material was the worst of it.1 point
-
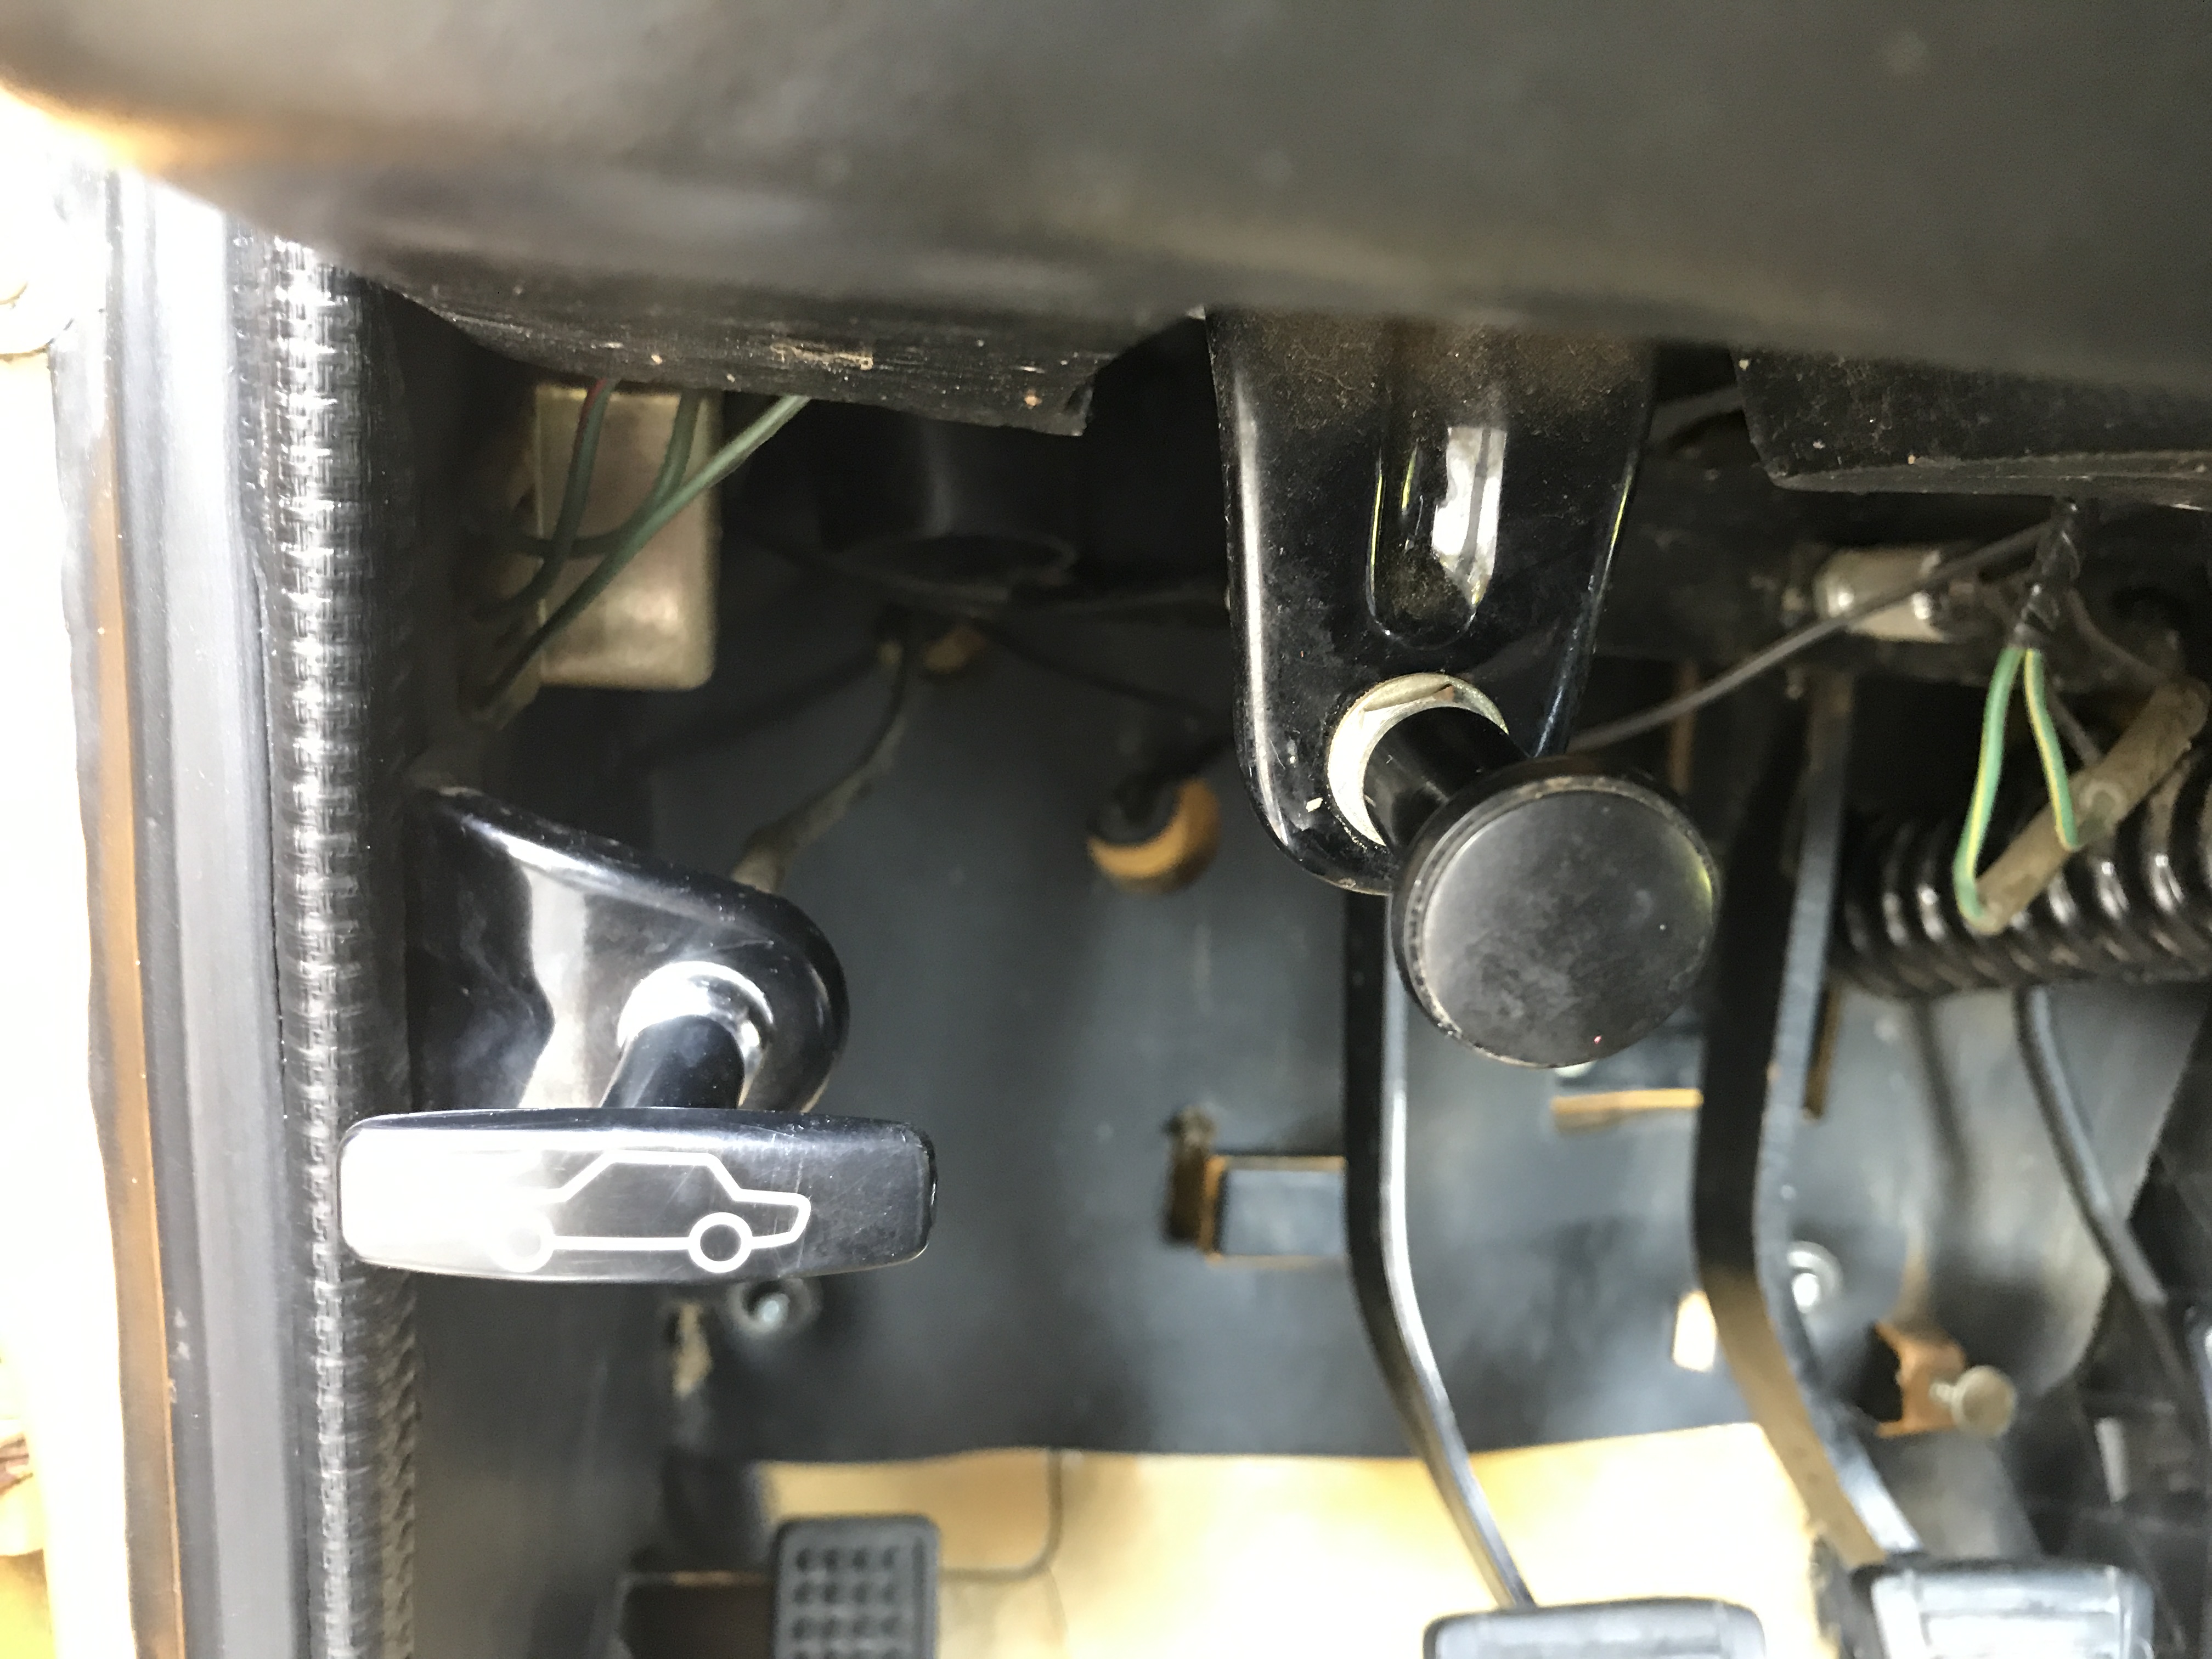
1 pointYea, I agree. I would think that the symbols would be worn, not the thickness of the knobs.1 point
-
1 pointI don't see much wear on the symbols that would indicate heavy usage. I think they were made that way.1 point
-
Ah...Here you go. 17251-E4101 is the original filler cap superseded without date by 17251-E4102 (with chain). The filler neck 17212-E4101 changed to E4102 with it, but again, no date listed in the parts book. The rubber flap, 78818-E4100 is the only listing. My cars have the flap. I still have a brand new one that I bought in 2013. It is labeled E4100.1 point
-
1 pointAlso, you will have better success with the hose clamps if you use an actual JIS screwdriver!1 point
-
I would try Z Car Doctor in Idaho https://zcardoctor.com/ The small s-slip that keeps the choke cables together went missing on my '72. He didn't have it, but connected me with another Z parts collector that had one 🙂1 point
-
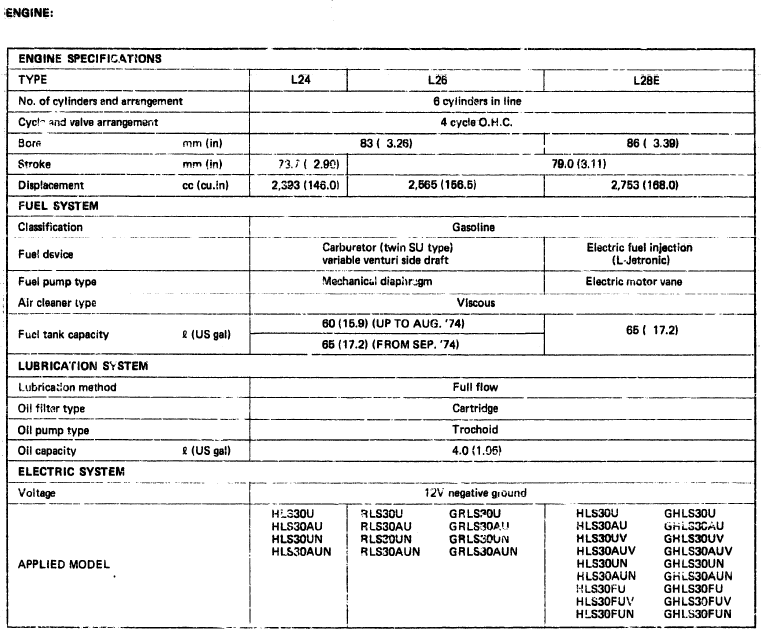
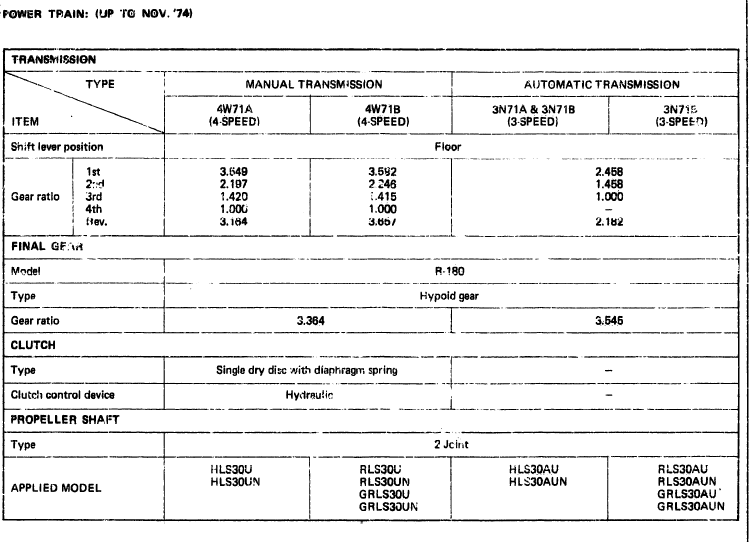
There is good info on the S30 range from 70 - 78 in the 1975 Nissan parts microfiche for North America, PUB. NO. C-0010U. For example this chart that shows the sub variants, with specs over this period,

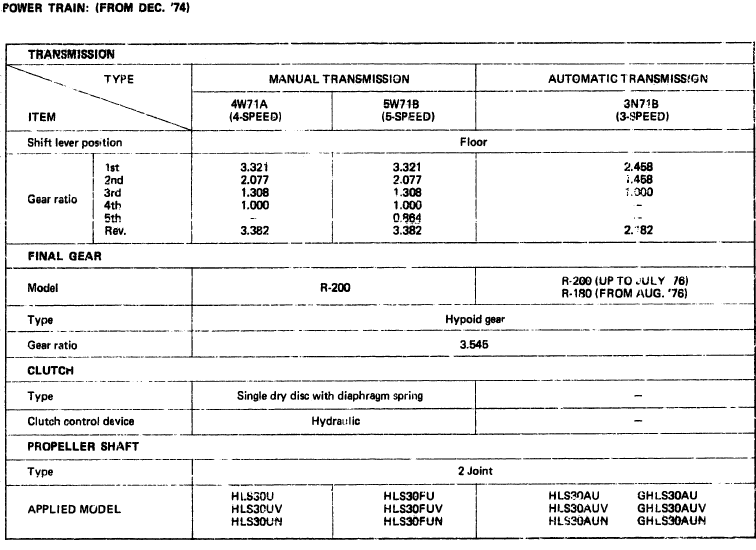
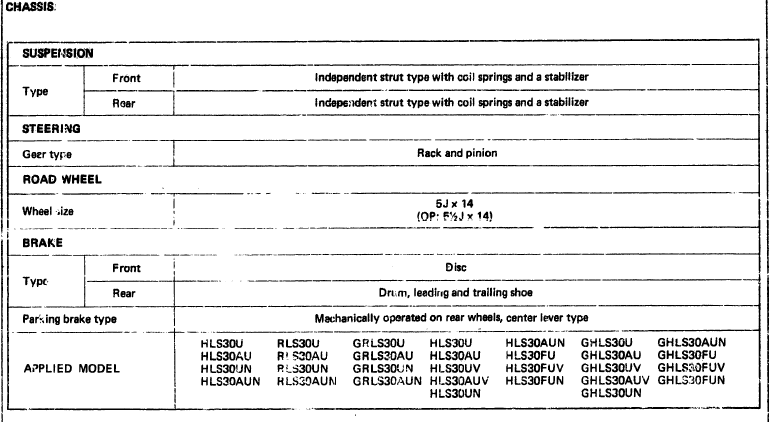 1 point
 -
1 pointMy favorite wire run grommet thingy from Spal. http://www.spal-usa.com/power_lock_kits/automated/accessories/33040080.html
 1 point