Leaderboard
-
.JPG.cfcada9cf1c1b502df3f5f2f2ca3ff36.JPG)
SteveJ
Free Member8Points9,646Posts -

siteunseen
Free Member6Points15,115Posts -
zspert
Free Member3Points384Posts -
grannyknot
Free Member3Points5,158Posts


Popular Content
Showing content with the highest reputation on 10/12/2021 in Posts
-
4 pointsIf you trust it enough for a 3 hour drive up this, I can help you with installing an electric fuel pump, Cliff. I have a lift and all of the tools to do the job right. Heck, you could bring the dog, too. The wife and I like 4 legged guests. Our old girl might ignore your dog, though. She's pretty much to the resting most of the day stage in her life.4 points
-
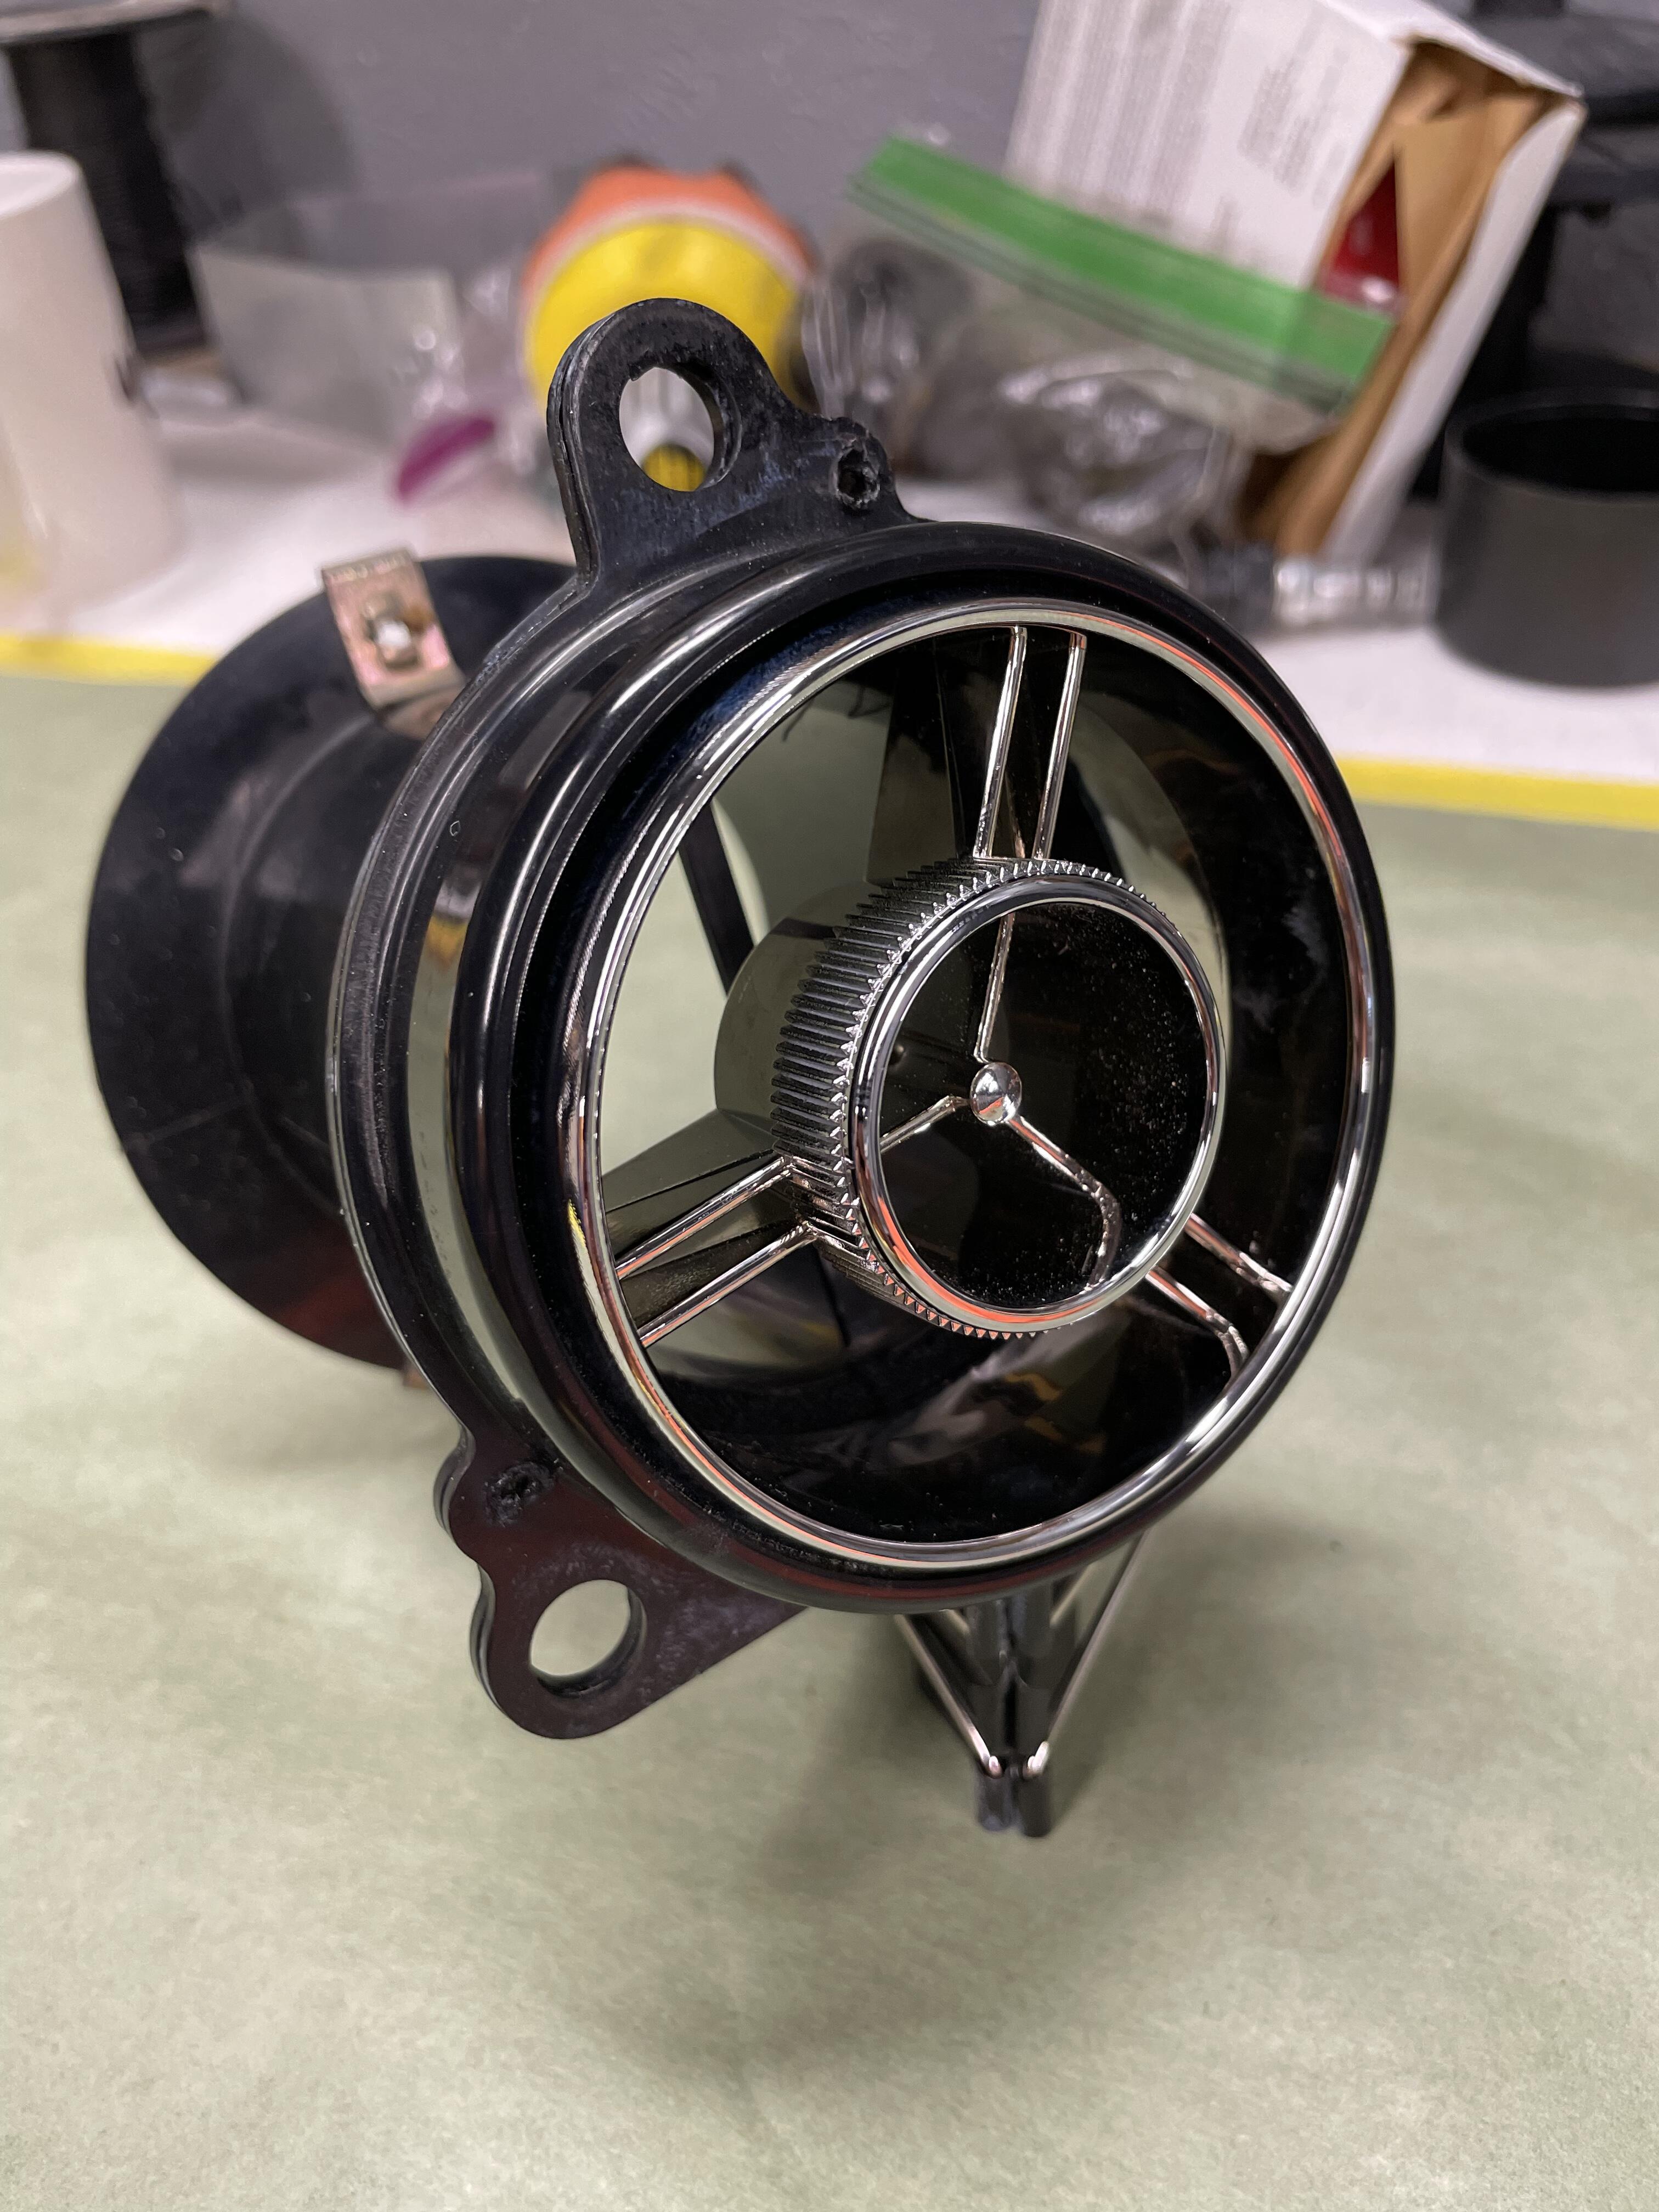
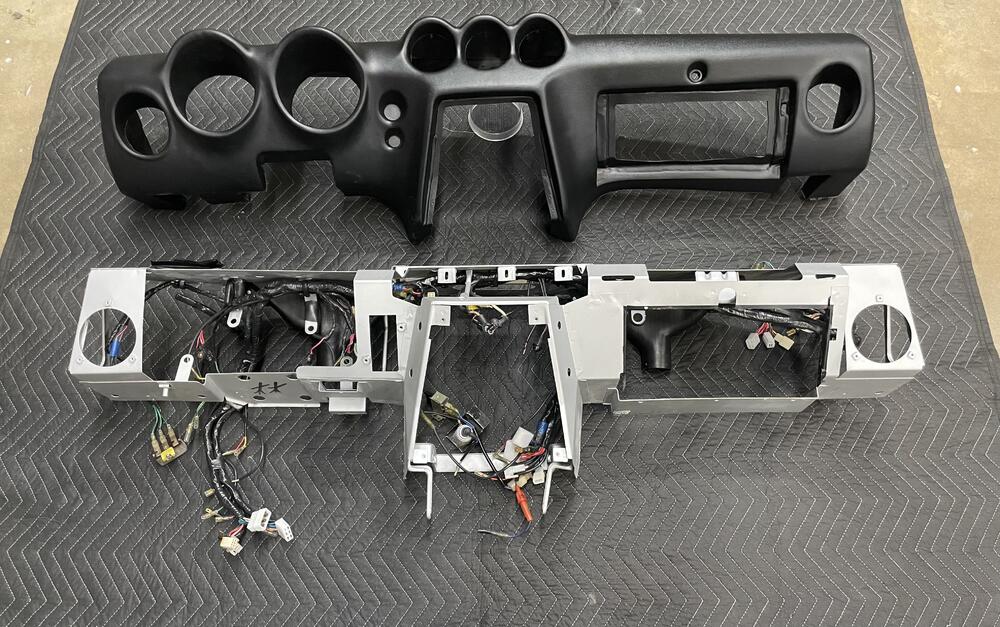
3 pointsStarted working on the dash again. Waiting on a few items to ship out and should have it in the Z very soon.
 3 points
 -
3 pointsI’m about to do the same set up with a big filter / regulator and a facet silver top in tandem with my mechanical pump. My internet research has found that most aftermarket inertia switches can trip too easily, especially on track days. But the modern Mini’s switch is very reliable and doesn’t trip with pot holes etc. Also placement is important. Vertically inside the car on the firewall appears to be ideal. https://www.hubauer-shop.de/en/fuel-pump-emergency-off-switch-07131068856.html Part no. 071310688563 points
-
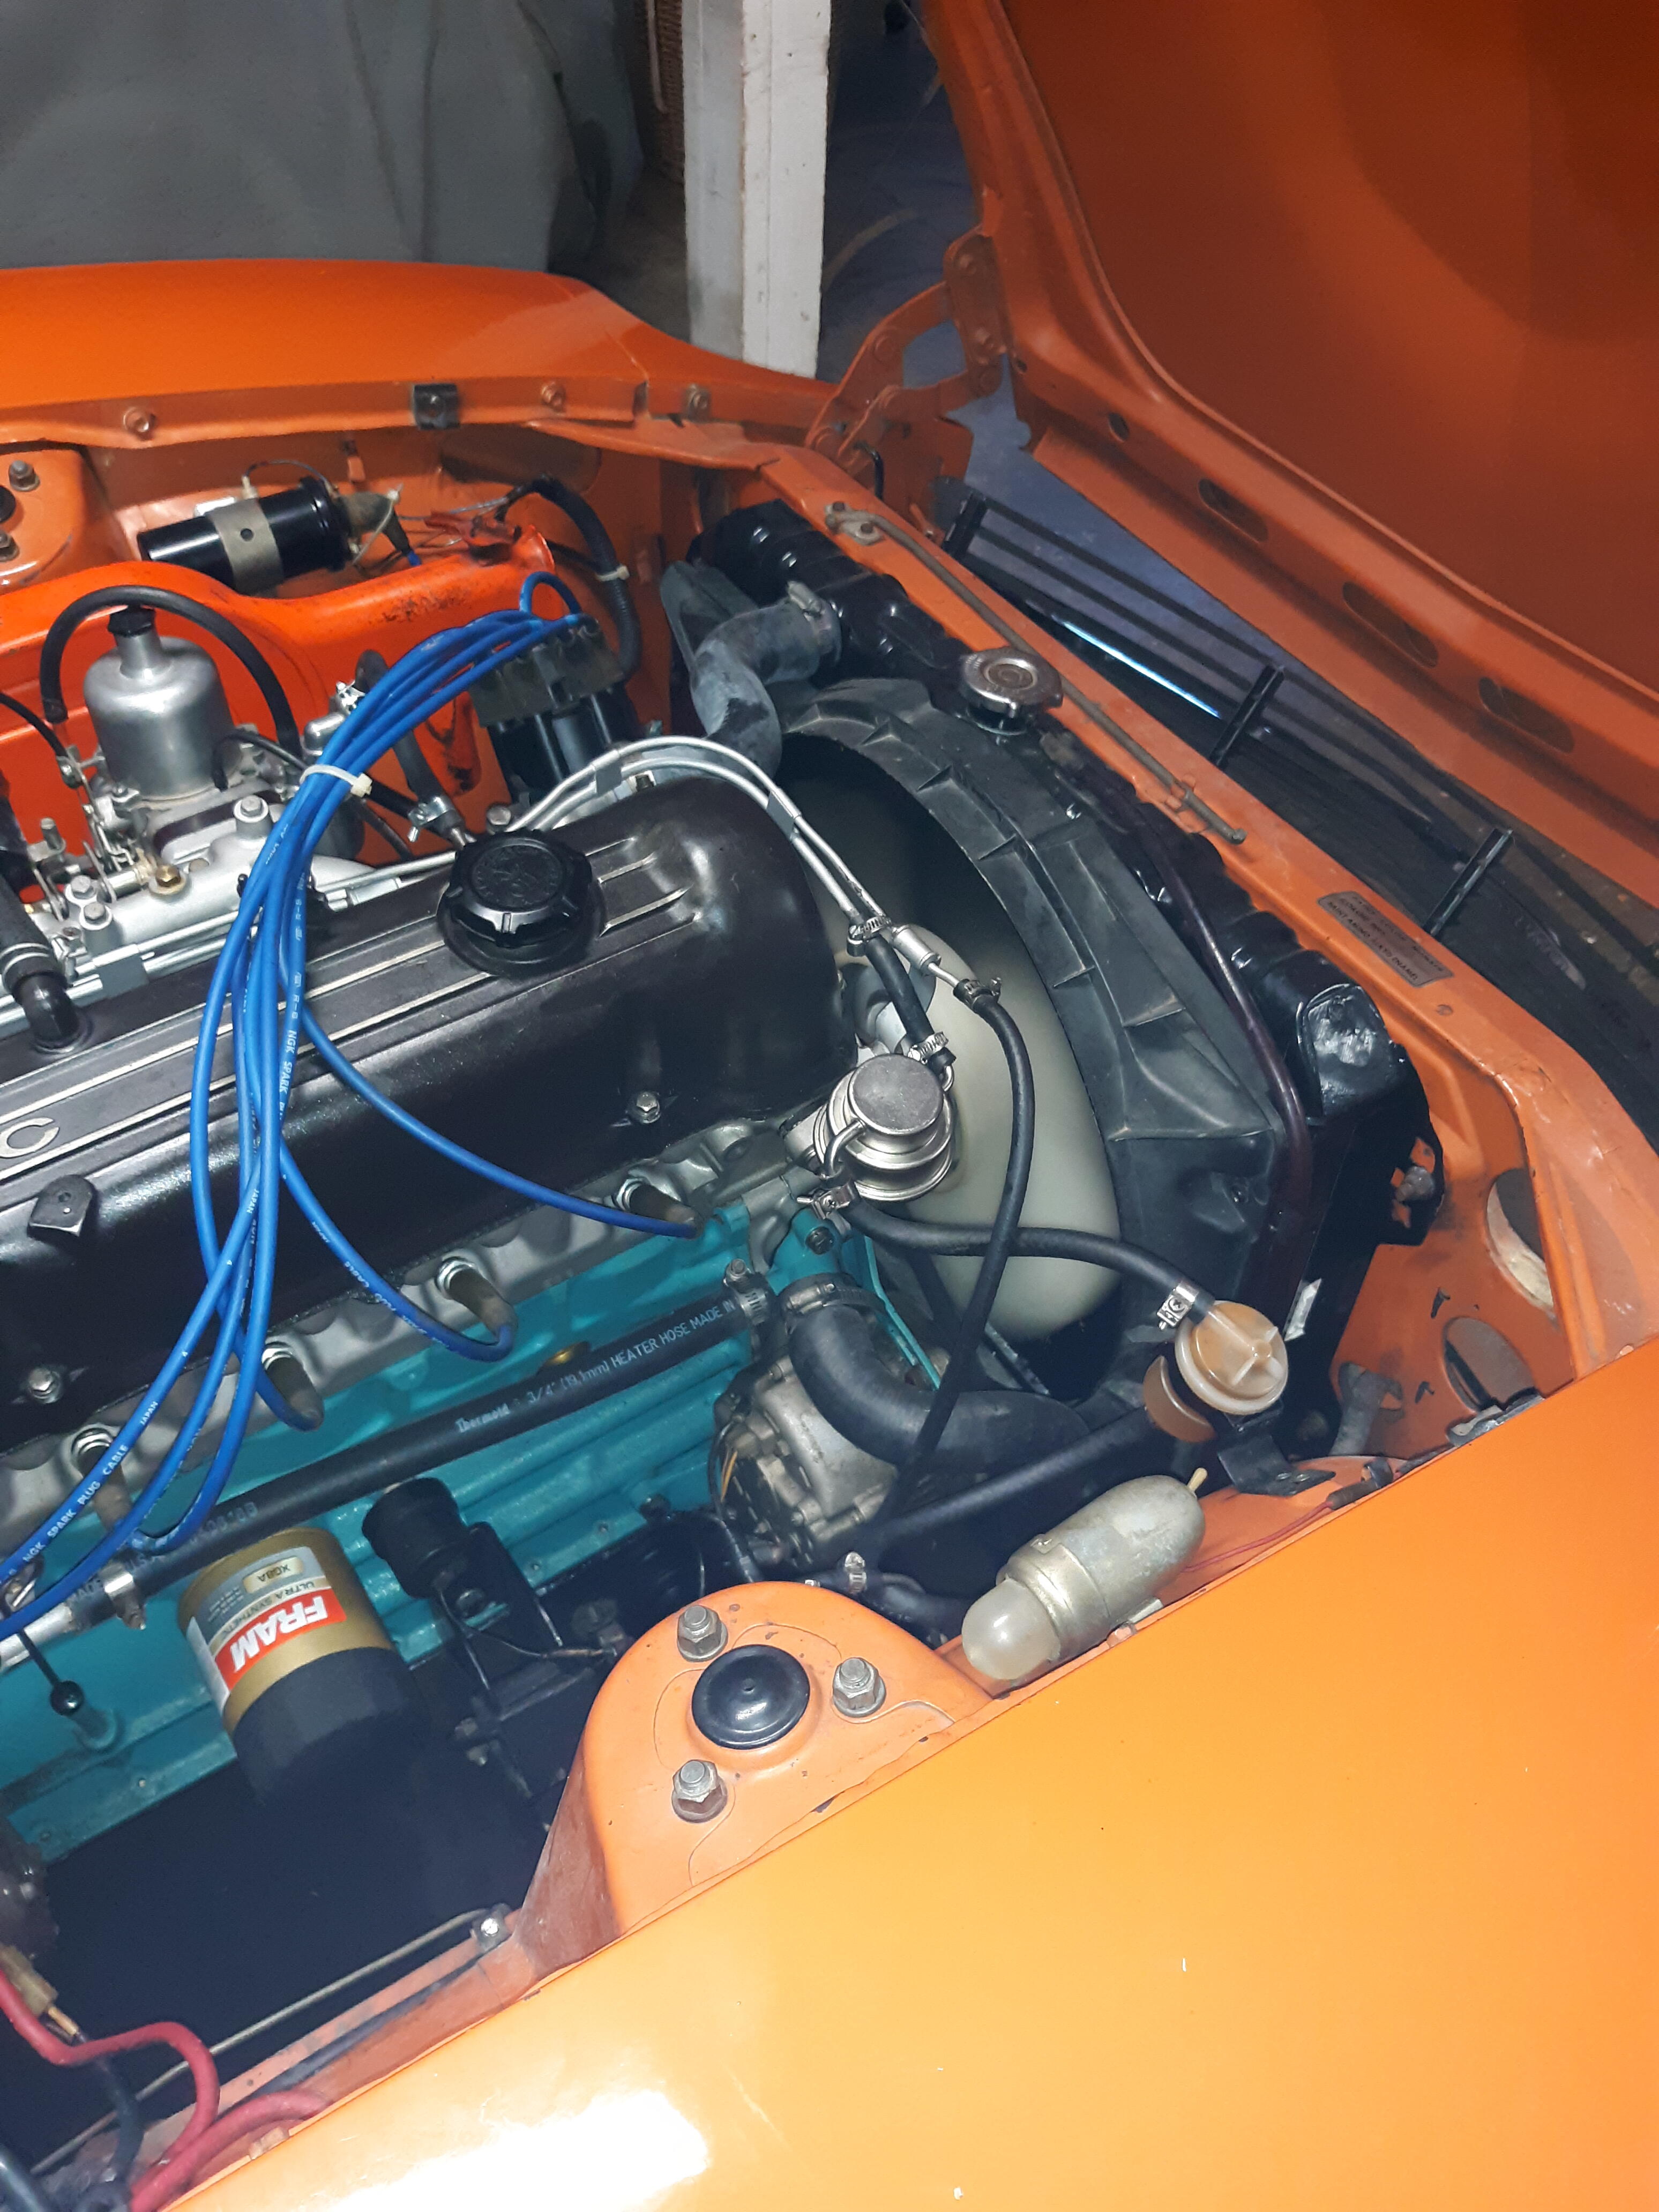
I took a look at the white 280 that was sold on BAT at the tail of last week. The owner had it in the car corral @ Hershey. Very nice car without rivet on side molding but with Zbart, the attendant plastic plugs and engine compartment treatment. Some nitwit in the past tossed the battery covers, firewall insulator and fastener when the battery went south. The car had spent some time in the sun as the luggage compartment carpet and straps were a bit faded. NEW OWNER - Banzai Motorworks has the correct reproduction insulator and fastener. A customer's 240 - sold on BAT in early Feb of this year - trophied in the preservation class. Congrats to Jim L. Threat of rain reduced the slow field by about 25%., ONLY 300 or so cars. Only found one chap in period threads.
 3 points
 -
3 pointsThank you Racer! It needs changing too. I'd forgotten how much that car means to me, all the time and money to get it where it's at now. Then I was scared to drive it with these idiots around here. So it sat under cover for 5 years, only driven about 1,000 miles. I can't stand it when something doesn't work so I took the chicken $^!# route and drove across town and bought another $35 mechanical pump. Started right up! I've got to my affairs in better shape before I do the switch to electricity. End of the year, property taxes, homeowners ins. then Christmas presents. I will drive it more now for sure. I've got a great Hagerty's policy on both of them. It's like a kid I guess, can't keep them inside forever. Thanks for the replies. I know what to do now. Cliff
 3 points
 -
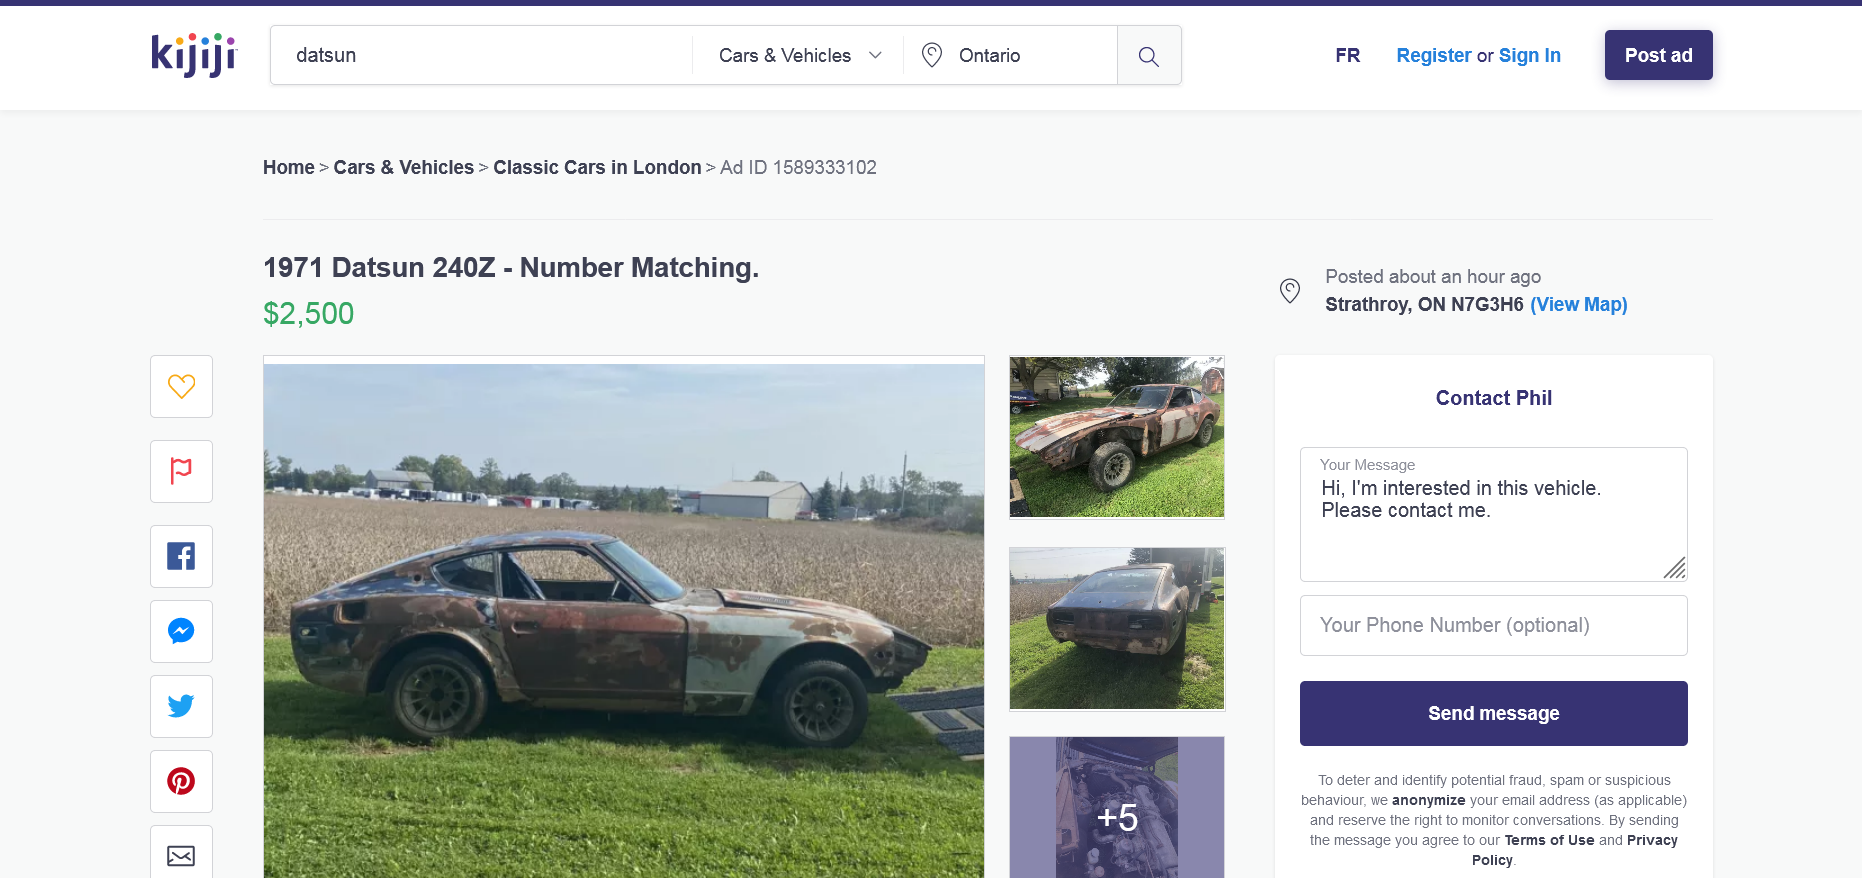
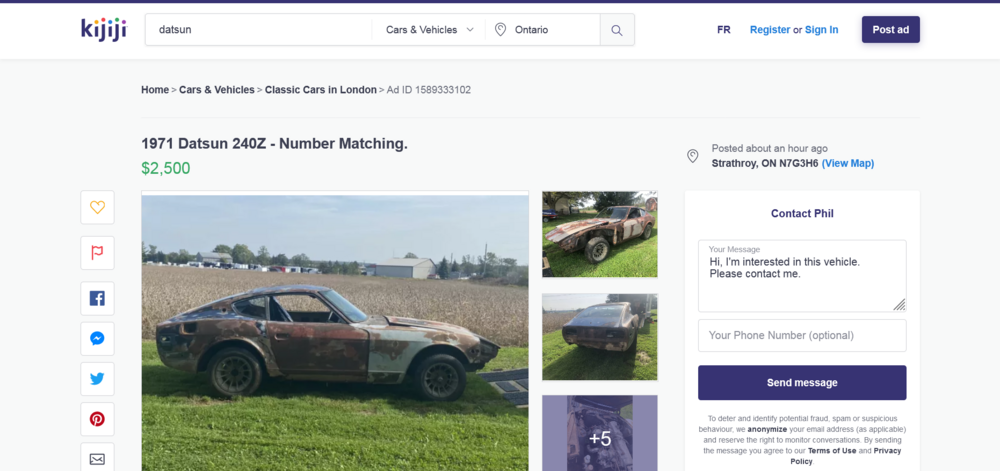
"Ran great when parked over 35 years ago." https://www.kijiji.ca/v-classic-cars/london/1971-datsun-240z-number-matching/1589333102
 3 points
 -
2 pointsCliff, you're welcome to come visit just to hang out. That goes for the doggo, too. Maybe we can convince Randy to spend a day at his shop, and we can have a Z overdose day.2 points
-
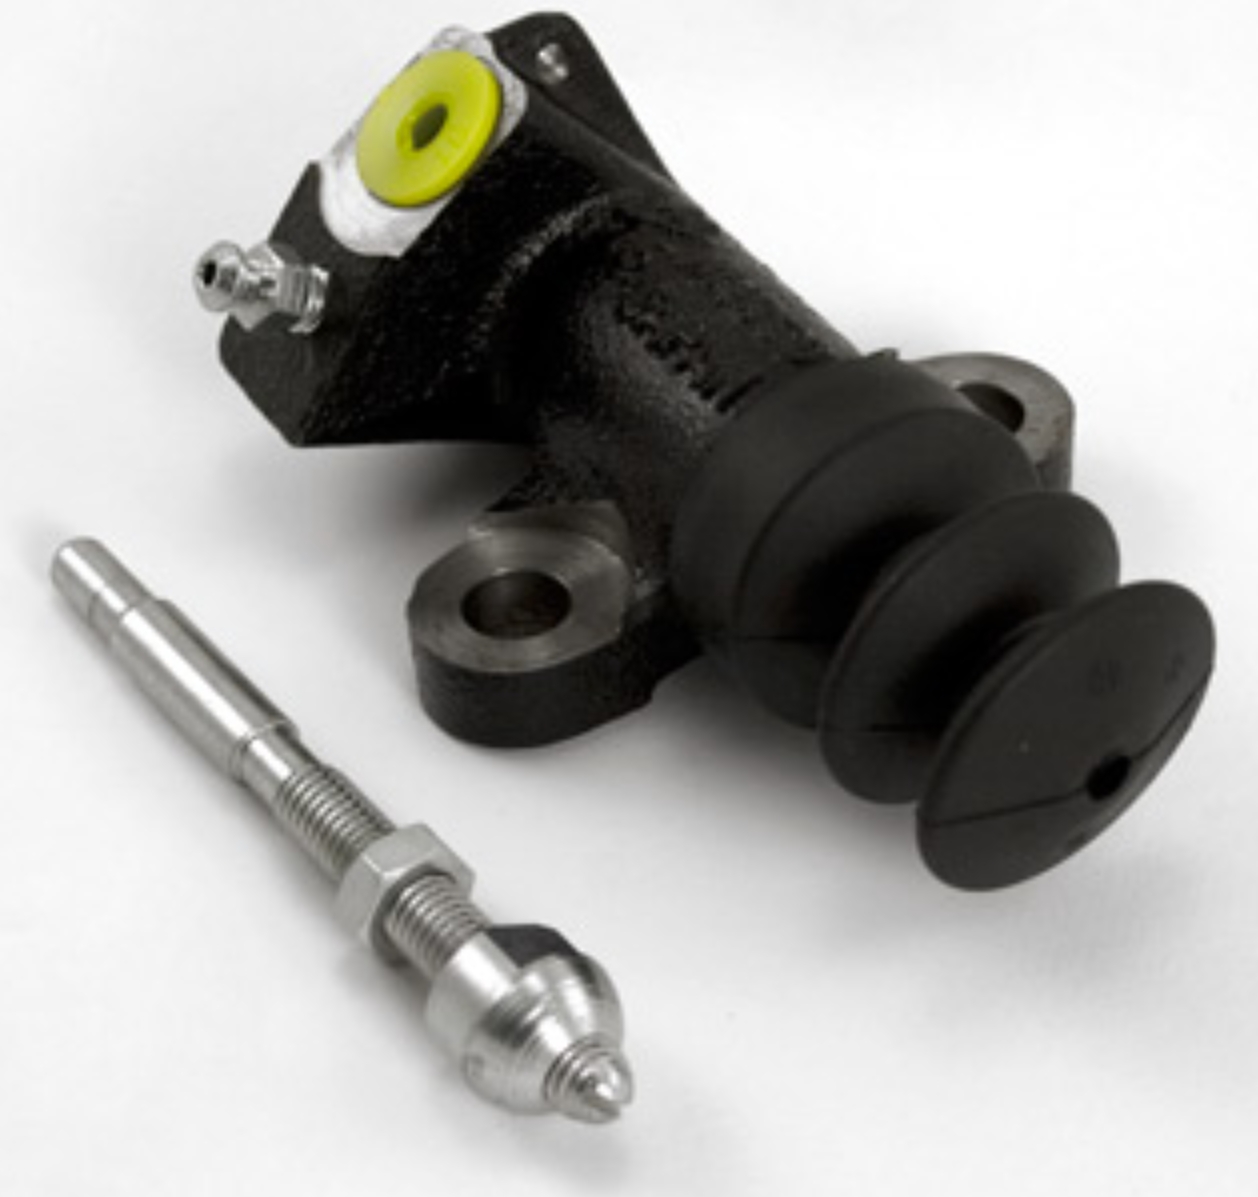
2 pointsGot the clutch working Sunday with a new master cylinder, slave cylinder and hose. Also discovered while laying under the car that the front fenders and 1/4's have been replaced with Nissan parts. Depot tag on the back side of the passenger fender was dated 7-86 so this must be the time frame my father in law had the car painted.2 points
-
2 pointsWow what a friend! I'm thinking I'll be able to spend the time and money in January, February? I'll keep in touch. Thanks again Steve.2 points
-
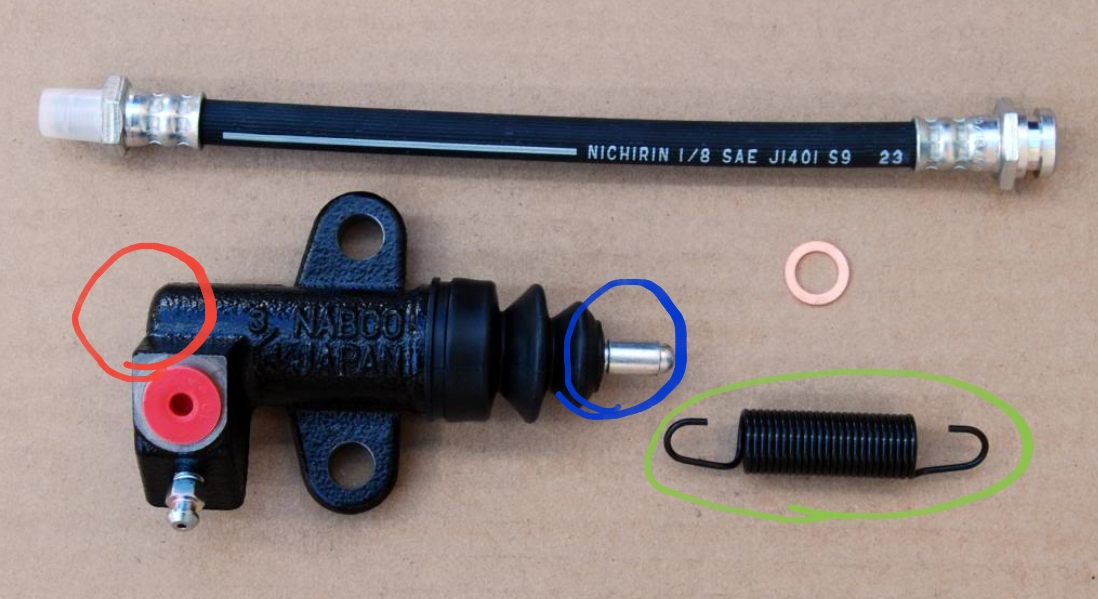
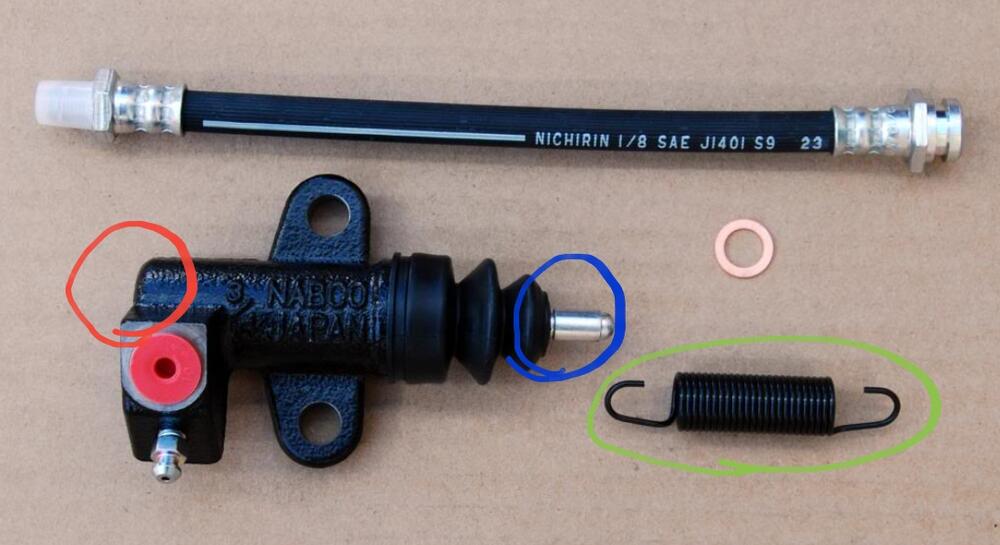
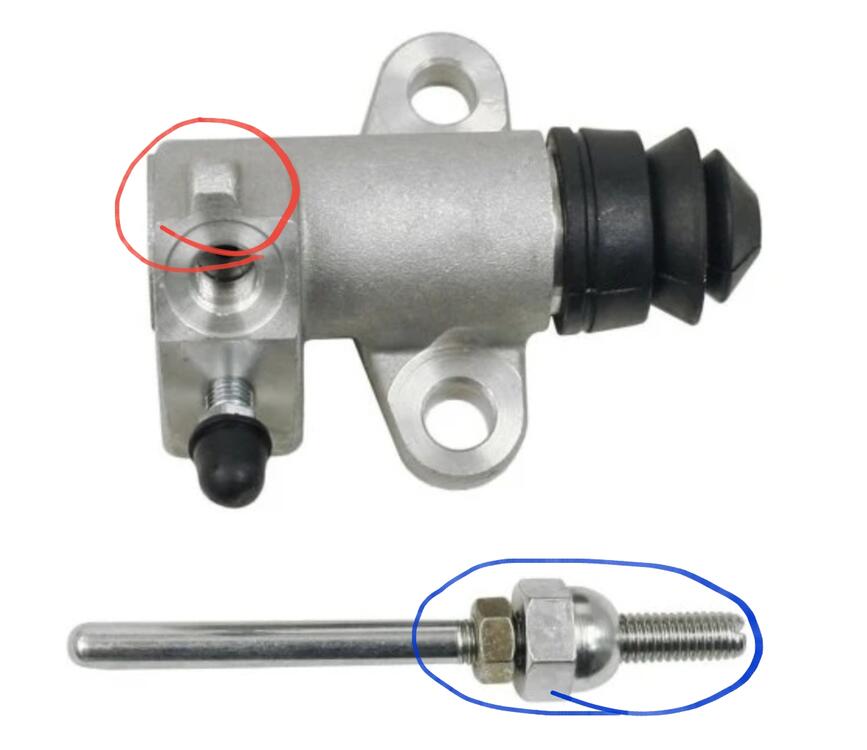
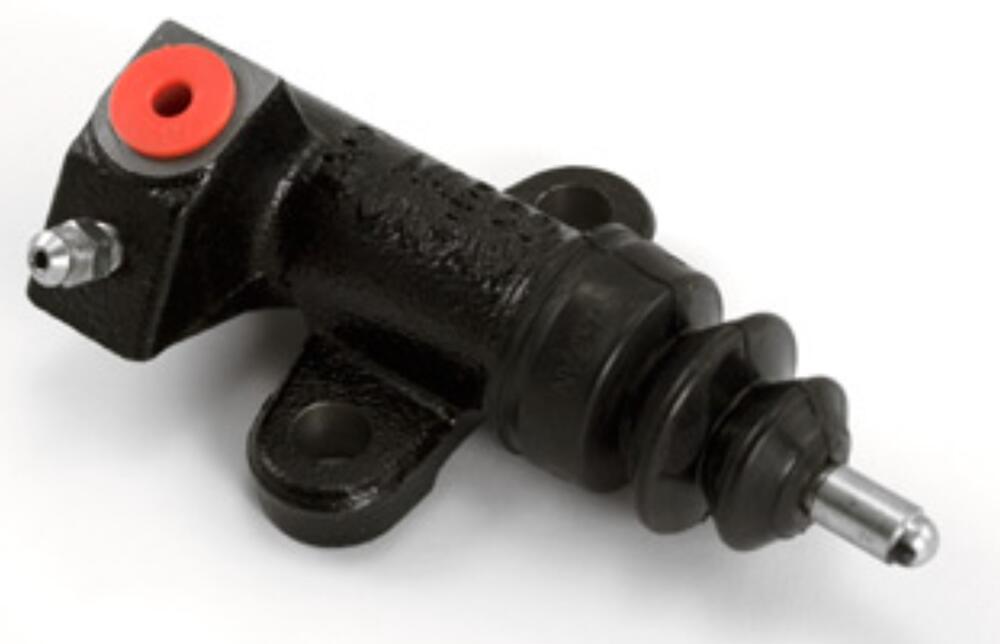
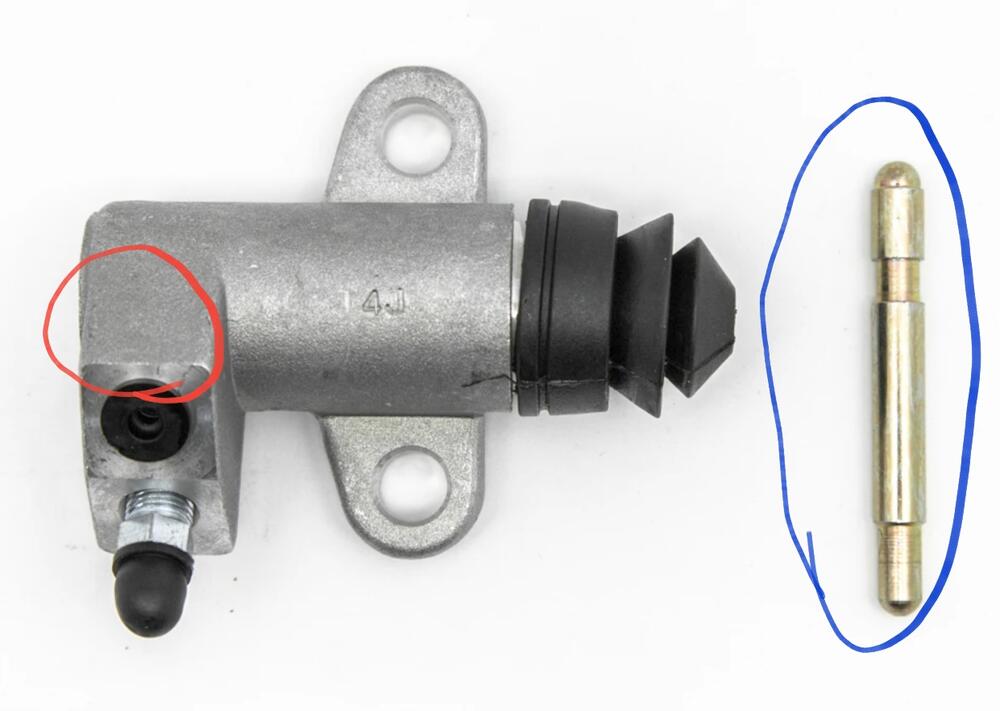
2 pointsI googled "datsun 240Z slave cylinder" to check what was availabe. The first hit was a shocker from a webshop for Z parts. The parts are a mix match of the early and later types. Here they show a later type slave cylinder without the spring anchor point (red circle) and the non adjustable push rod (blue circle). Then they simple supply a spring (green circle) and describe is as early OEM nos parts. Early looks like this: Later type looks like:

 2 points
 -
1 pointCame across this guy's youtube channel and he seems to know his stuff. There are other good videos but here's a general one that might be worth watching.1 point
-
Thank you for starting a new thread with a thorough description. Going to the diagram of the circuit: The white wire comes off the turn signal flasher and goes up to the steering column. I suggest trying your test light from that wire to ground. The test light should flash. While having 12VDC at the flasher indicates the hazard switch isn't broken, the contacts could be corroded/carboned up to the point where there is not enough current flowing. This can happen at connectors, too. Do your brake lights work well? Have you tried taking voltage readings (to ground) at the sockets for the turn signals? You can also check at the connectors pictured in the diagrams above. Look for the green/black wire for the right side and green/red wire on the left side.1 point
-
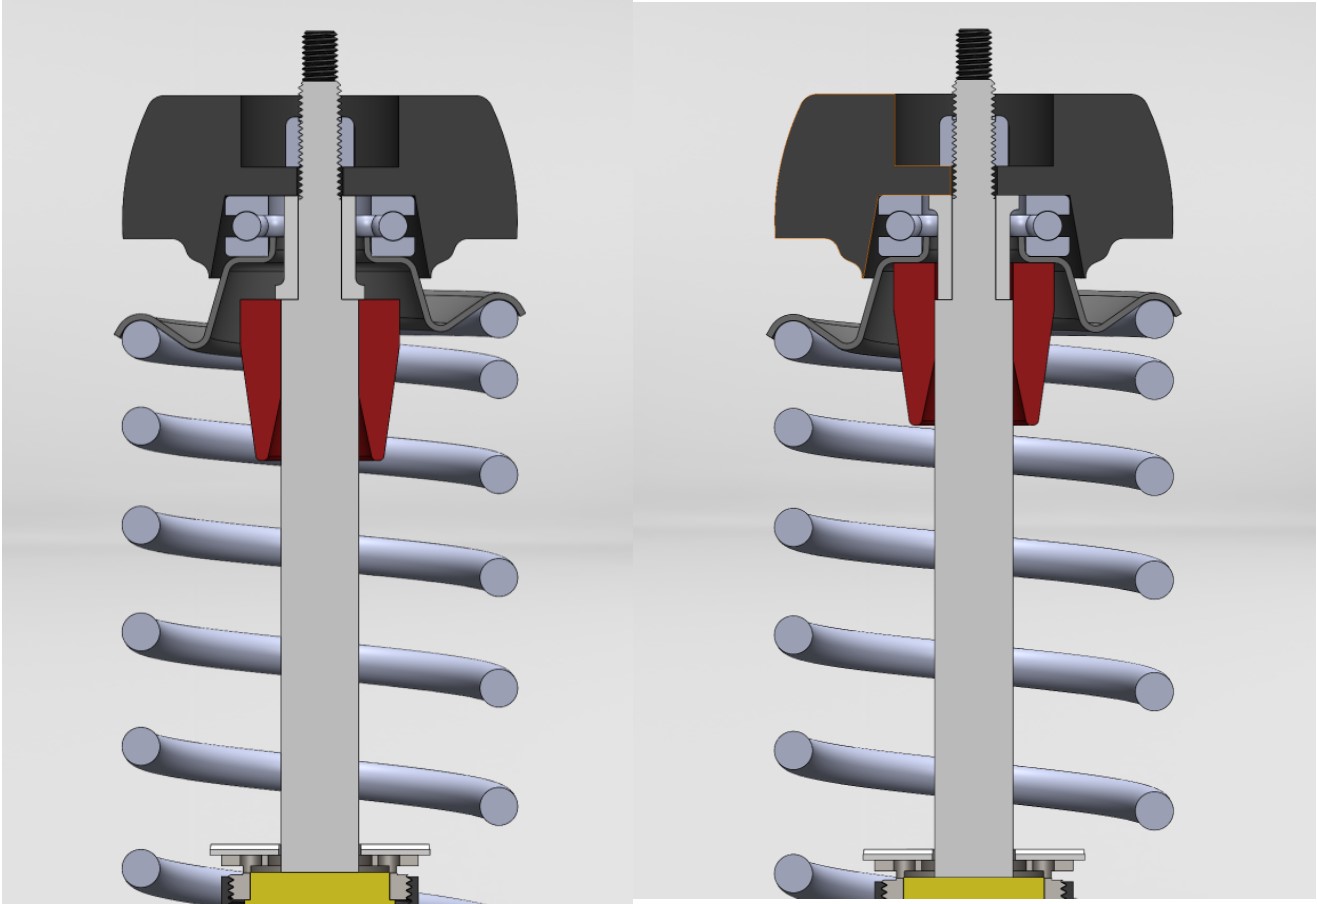
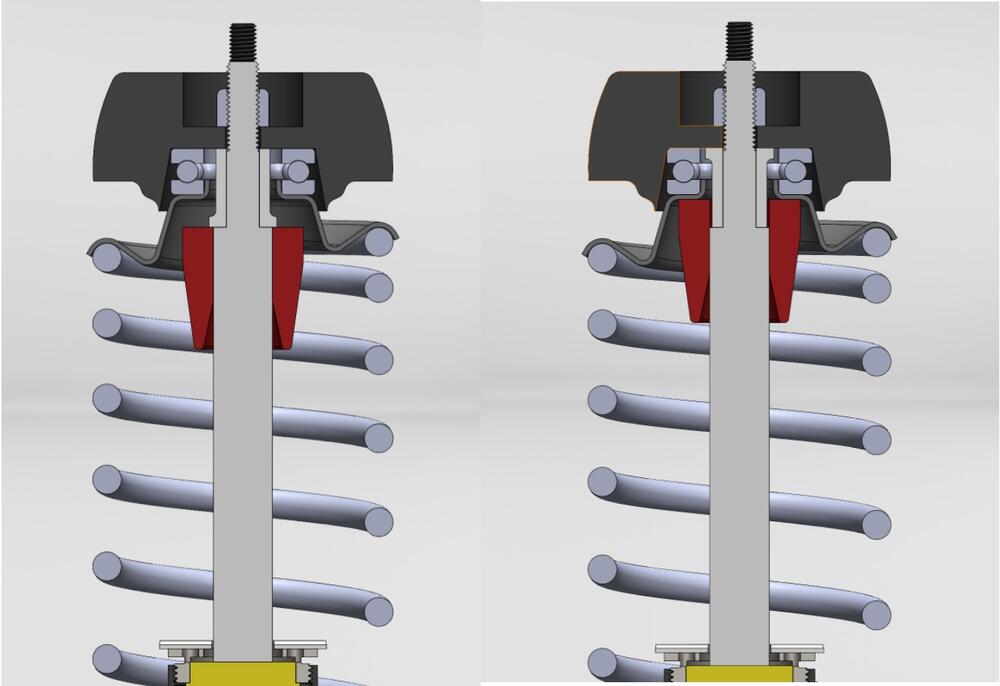
1 pointThe way I modeled this was based off my own interpretation and I chose to place the flange on top to give more surface area support for the insulator as well as to let the bump stop seat all the way into the spring perch as it does in the stock setup. Given that the stock struts do not have a flange and are fine with the contact area they have I can see why the koni engineers would say either way is fine. I chose mostly based off the way the bump stop seats but if you have a different bump stop the results may vary. I've had these installed for a few months now and have done a fair bit of driving and they have been wonderful!
 1 point
 -
I think @Wally is a newcomer to the forum who lives in your neck of the woods.1 point
-
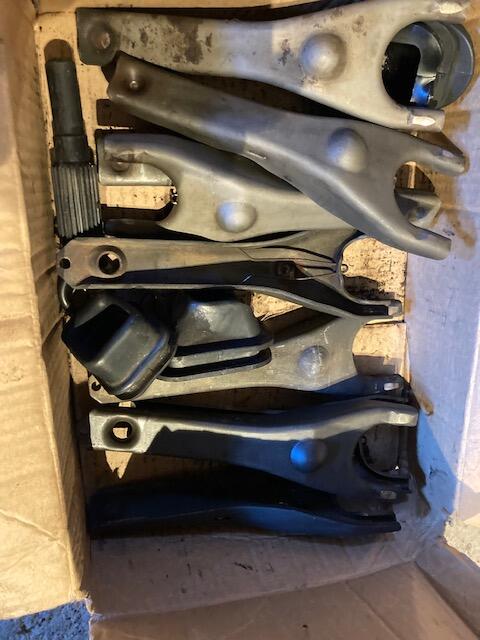
While not in Houston I am just up the road in Austin. Post pictures of what you have...I may see something in there I "must" have. 😉1 point
-
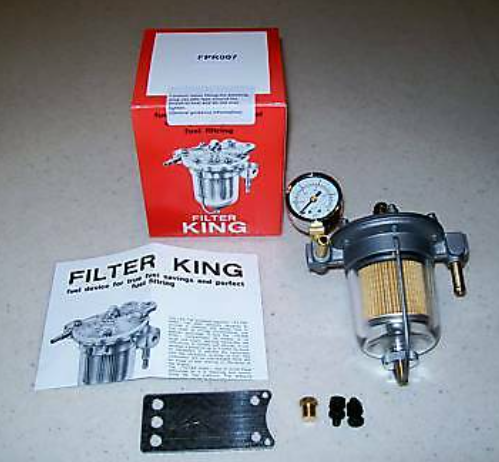
1 point@AK260, that looks a lot like the one I've been thinking about using. I'm looking at the Malpassi Filter King Fuel Pressure Regulator & Gauge Clear Glass Bowl.
 1 point
 -
Thanks Jim, I already found that source when I was browsing for that part. Knowing the part number really made a difference 😃 I’ll probably order some directly, but thanks for the generous offer 🙏 If I actually get to install them, I’ll let you know if there is anything worth knowing 👍1 point
-
I can send you two of the ones I got, or you can order your own from : megazip.net 48128-78500 is the part number. Took less than two weeks to get to me. $30 USD to get them via EMS shipping. Remember they are the long right side ones, so the left side will need to cut flush once its pressed into the housing. Haven't done any yet, so help tips about how to do it, but I would heat the housing to 300-400 F in the over to expand it and freeze the bushing to make insertion easy(er). They are bronze or similar, so not very hard.... Jim1 point
-
1 point
-
1 point
-
1 pointI think I understand the benefits and the desire to run either an electric fuel pump with or without a mechanical pump. In your original post you mention that you don't run your 240z frequently and that you thought the diaphragm may have dried up and caused the pump to fail or not perform as it should. Sorry if this is off topic. During the restore of our car there have been long periods where the car has not been started. I am running a mechanical pump without the benefit of an electric. I have a fuel filter before the pump. I too was having issues starting after the car sat for a while. After sitting for a period of time the fuel filter bowl was always empty. At first I did not think much of this, but that changed with time and effort. Since the car is in the process of being restored most of its parts are new or restored. New fuel pump, new hoses and clamps, restored fuel tank, restored SUs, restored plumbing from the pump to the SUs., ... etc. I read that many of the cardone fuel pumps had issues so I purchased another pump, but it too was not able to suck fuel from the tank. I got to be an expert at filling fuel bowls by hand, to get the car started. I was thinking that my fuel pump was not strong enough to pull the fuel the distance from the tank while it was cranking and that it was taking too long to crank the car to fill all the lines and the fuel bowls. A friend suggested that there was an air leak that was causing the system to lose its vacuum, and that the tell tale was the fuel filter bowl being empty after the car sat for a while. He talked me into checking to make sure that the right size (diameter) hoses were everywhere. Sure enough I did have some that were a bit larger than they were originally. While I never really proved that the diameter of the hoses and clamps was the issue, the fuel filter bowl now is able to stay full even after the car sits for months. I believe if I checked the fuel pump that there would be fuel in the pump keeping the diaphragm wet. Anyway, I was considering going to an electric pump but forgot about it after my issue was resolved. Don't get me wrong electric fuel pumps are great, a little noisy sometimes, but pushing fuel at a constant rate is beneficial. Really like Racer X's and Steve J's safety solution.1 point
-
1 pointThanks for the info. So, I just stacked all of the parts (strut insulator, spacer, spring seat, bump stop) together....and then installed everything over the koni strut rod sleeve...which is installed at the top of the strut rod. I experimented with both ways to orient the sleeve. The strut insulator gets bolted firmly against the top of the strut rod sleeve we are discussing. The strut rod sleeve slides through the middle of the spacer OR bearing. I So, I don't understand what you mean by your 2nd paragraph above. With everything stacked together, if the wide portion of the koni strut rod sleeve is oriented downward, then it protrudes about 1/4 inch below the bottom of the spring seat. Based on this, I doubt that the 1/4 protrusion would ever damage the bump stop. I do now wonder whether the wide portion of the sleeve, if installed downward, could get hung up in the hole of the spring seat when installed on lowering springs, the car is lifted up, and full droop causes the spring seat to drop below the wide portion of the sleeve. I also compared the parts with KYB and old Bilstein struts I have on hand. Both are the same diameter at the top where the threads end/start as the narrow portion of the Koni sleeve. And, both widen permanently at about the same spot where the wide portion of the Koni sleeve would rest if installed downward. The difference though is that if the wide portion of the koni sleeve is installed downward it kind of serves as something that the spring seat could get hung on as described above. So, for me, in balance, I think I will continue installing koni strut inserts with the wide portion of the sleeve on the top.1 point
-
1 pointMotorsports Auto Sales or MSA has the best selection of headers and exhaust to the rear in my opinion. I have their 6to1 ceramic coated header and 2.5" premium exhaust on both my Zs and couldn't be happier. Anything '77 and above will be diamond shaped exhaust ports. The ceramic headers really bring the under hood temp down compared to the stock cast iron manifold. My 280 needed a 20" resonator for a bad drone sound on the interstate, about 70mph. Cost me $20 at my local muffler shop I believe. That's cut into and welded on too. The 2.4 240 didn't have that annoying sound though. You'll get 10% discount with your classiczcars.com membership number too. Goggle "msa header classiczcars.com " for more info.1 point