Leaderboard
-

siteunseen
Free Member4Points15,115Posts -
Captain Obvious
Free Member2Points10,081Posts -
EuroDat
Free Member2Points3,309Posts -
Namerow
Free Member1Points1,551Posts


Popular Content
Showing content with the highest reputation on 01/21/2018 in all areas
-
I ended up running 3/8 stacks when I had the box on the 3.2L (364hp).1 point
-
Did I remember to say, 'Wear gloves, too?'1 point
-
1 pointNo, and no. I would absolutely NOT use red Loctite on any of that suspension hardware. The "correct" hardware is all supposed to be the vibration resistant style and should not need any sort of thread locking compound at all. However... If you are: 1) uncomfortable relying on just the original distorted thread design, or 2) reusing stock hardware that has been reused a mystery number of times in the past, or 3) using aftermarket hardware that does not have a locking feature built into it then I would suggest you use either the blue medium or maybe even the purple low strength thread lock. You most certainly do NOT want red as it will require a torch to take things apart again in the future. And as for the spindle pin, it should NOT require a press to get the pin into the hole at the bottom of the strut housing. It should slip in nice and easy. Spin in the bore with two fingers, and fall out with gravity if you tilt the assy to the side. If you need a press to get the pin into place, then you have a burr kicked up inside somewhere, or you've still got rusty crap built up in the are and have more cleaning to do. My money is on rusty crap as my past experience indicates that a wire brush is not aggressive enough to remove the hard thin layer of surface rust that builds up in that hole. Chemical means or a more aggressive mechanical means would be in order. Long (sacrificial) round file for example. The hard cast iron will probably ruin the file, but consider it a donation to the cause.1 point
-
Knowing what I know now, the only part of that particular issue is wether or not the hood lines up correctly. Everything can be repaired/replaced either now or later. From the pictures that car looks to be well on the way to being back on the road as is. It looks like the familiar story of someone starting a Z dream project and then realizing the amount of resources needed to finish. A "punt" project if you will.... and probably trying to minimize their losses. It's a good starting point IMO. Money now or Money and Time later.1 point
-
1 pointI agree with Cliff. IMO, If one likes screwing around with suspect electrical components, EFI is the answer. If, however, one is more mechanically inclined and wants to move on to other parts of the project, SU's are the answer. They are the most reliable, trouble free carbs I've ever dealt with. Fantastic for the street. I might add that RossiZ swapped to SU's after refurbishing the entire EFI system. He loves SU's on his 280 daily driver.1 point
-
1 point
-
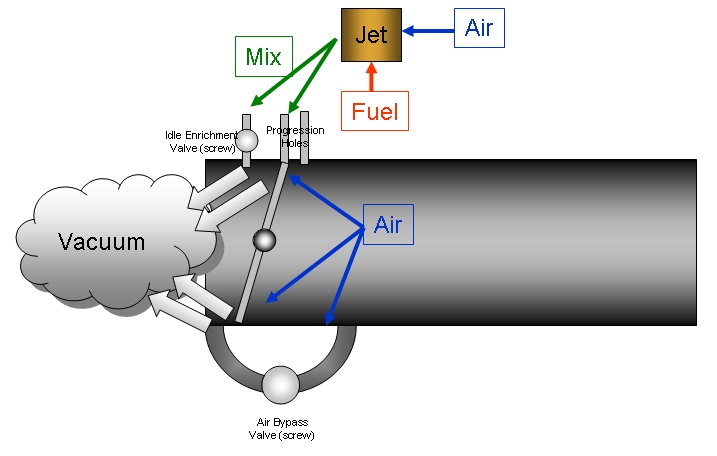
1 pointAt idle, the only places for air to pass to the cylinders are: On Carbs: 1. Idle enrichment screws. If these are open too much or if the idle jets are too large (have too much air and fuel passing through large drillings) 2. Throttle plate air bypass (built into 40DCOE 151 and 45DCOE152 carbs). Early carbs like your 40DCOE 18's may have holes drilled in throttle plates. 3. Twisted throttle shafts (one plate closed but the other is partially open...usually on early carbs with brass rods). On Intake: 1. Poor sealing between carb and manifold (loose hardware where softmount grommets/thackery washers are located). 2. Poor sealing between head and manifold. 3. Air leak from brake booster. 4. Other (such as you PCV fitting). What are your idle jet sizes? For a next step, I would recommend that you check for all of the manifold leaks then if no leak is found: Keep push rods off and, with engine running, start turning in idle enrichment screws in to full stop then back out to 1/2 turn (gentle pressure at full stop is fine). For early DCOE's like yours, the taper on the idle enrichment is rather abrupt so a small turn lets a lot of air and fuel pass. Most early carbs work between 1/2 to 3/4 turn out. Yours at 3/4 are way out there. Read this if you want your head to hurt: http://240260280.com/Tech/Carbs/Weber/DCOE Theory Operation and Tuning.html :)
 1 point
 -
1 pointOH.. i see what your problem is in the picture: it says: "Made in Italy" sorry couldn't help myself.. (I HATE italian junk!!) eh but seriously.. if the valves are closed in your carbs, there must be some other air intake.. also known as leaks... ;-)1 point
-
1 pointHave a hose pipe or fire extinguisher on the ready too. Don't get mad at me but swapping in SU carbs was very popular in the late 70s, early 80s. The "computer" on our Zs only ran the EFI, FYI. Once they're set you're good to go. 8^) $500 give or take. Like an old VW too.1 point
-
1 point
-
I was going to suggest that about the bulge on the inside. I was wondering if you were just creating a dent by pounding with the drift punch. Band saw! Band saw! Band saw!1 point
-
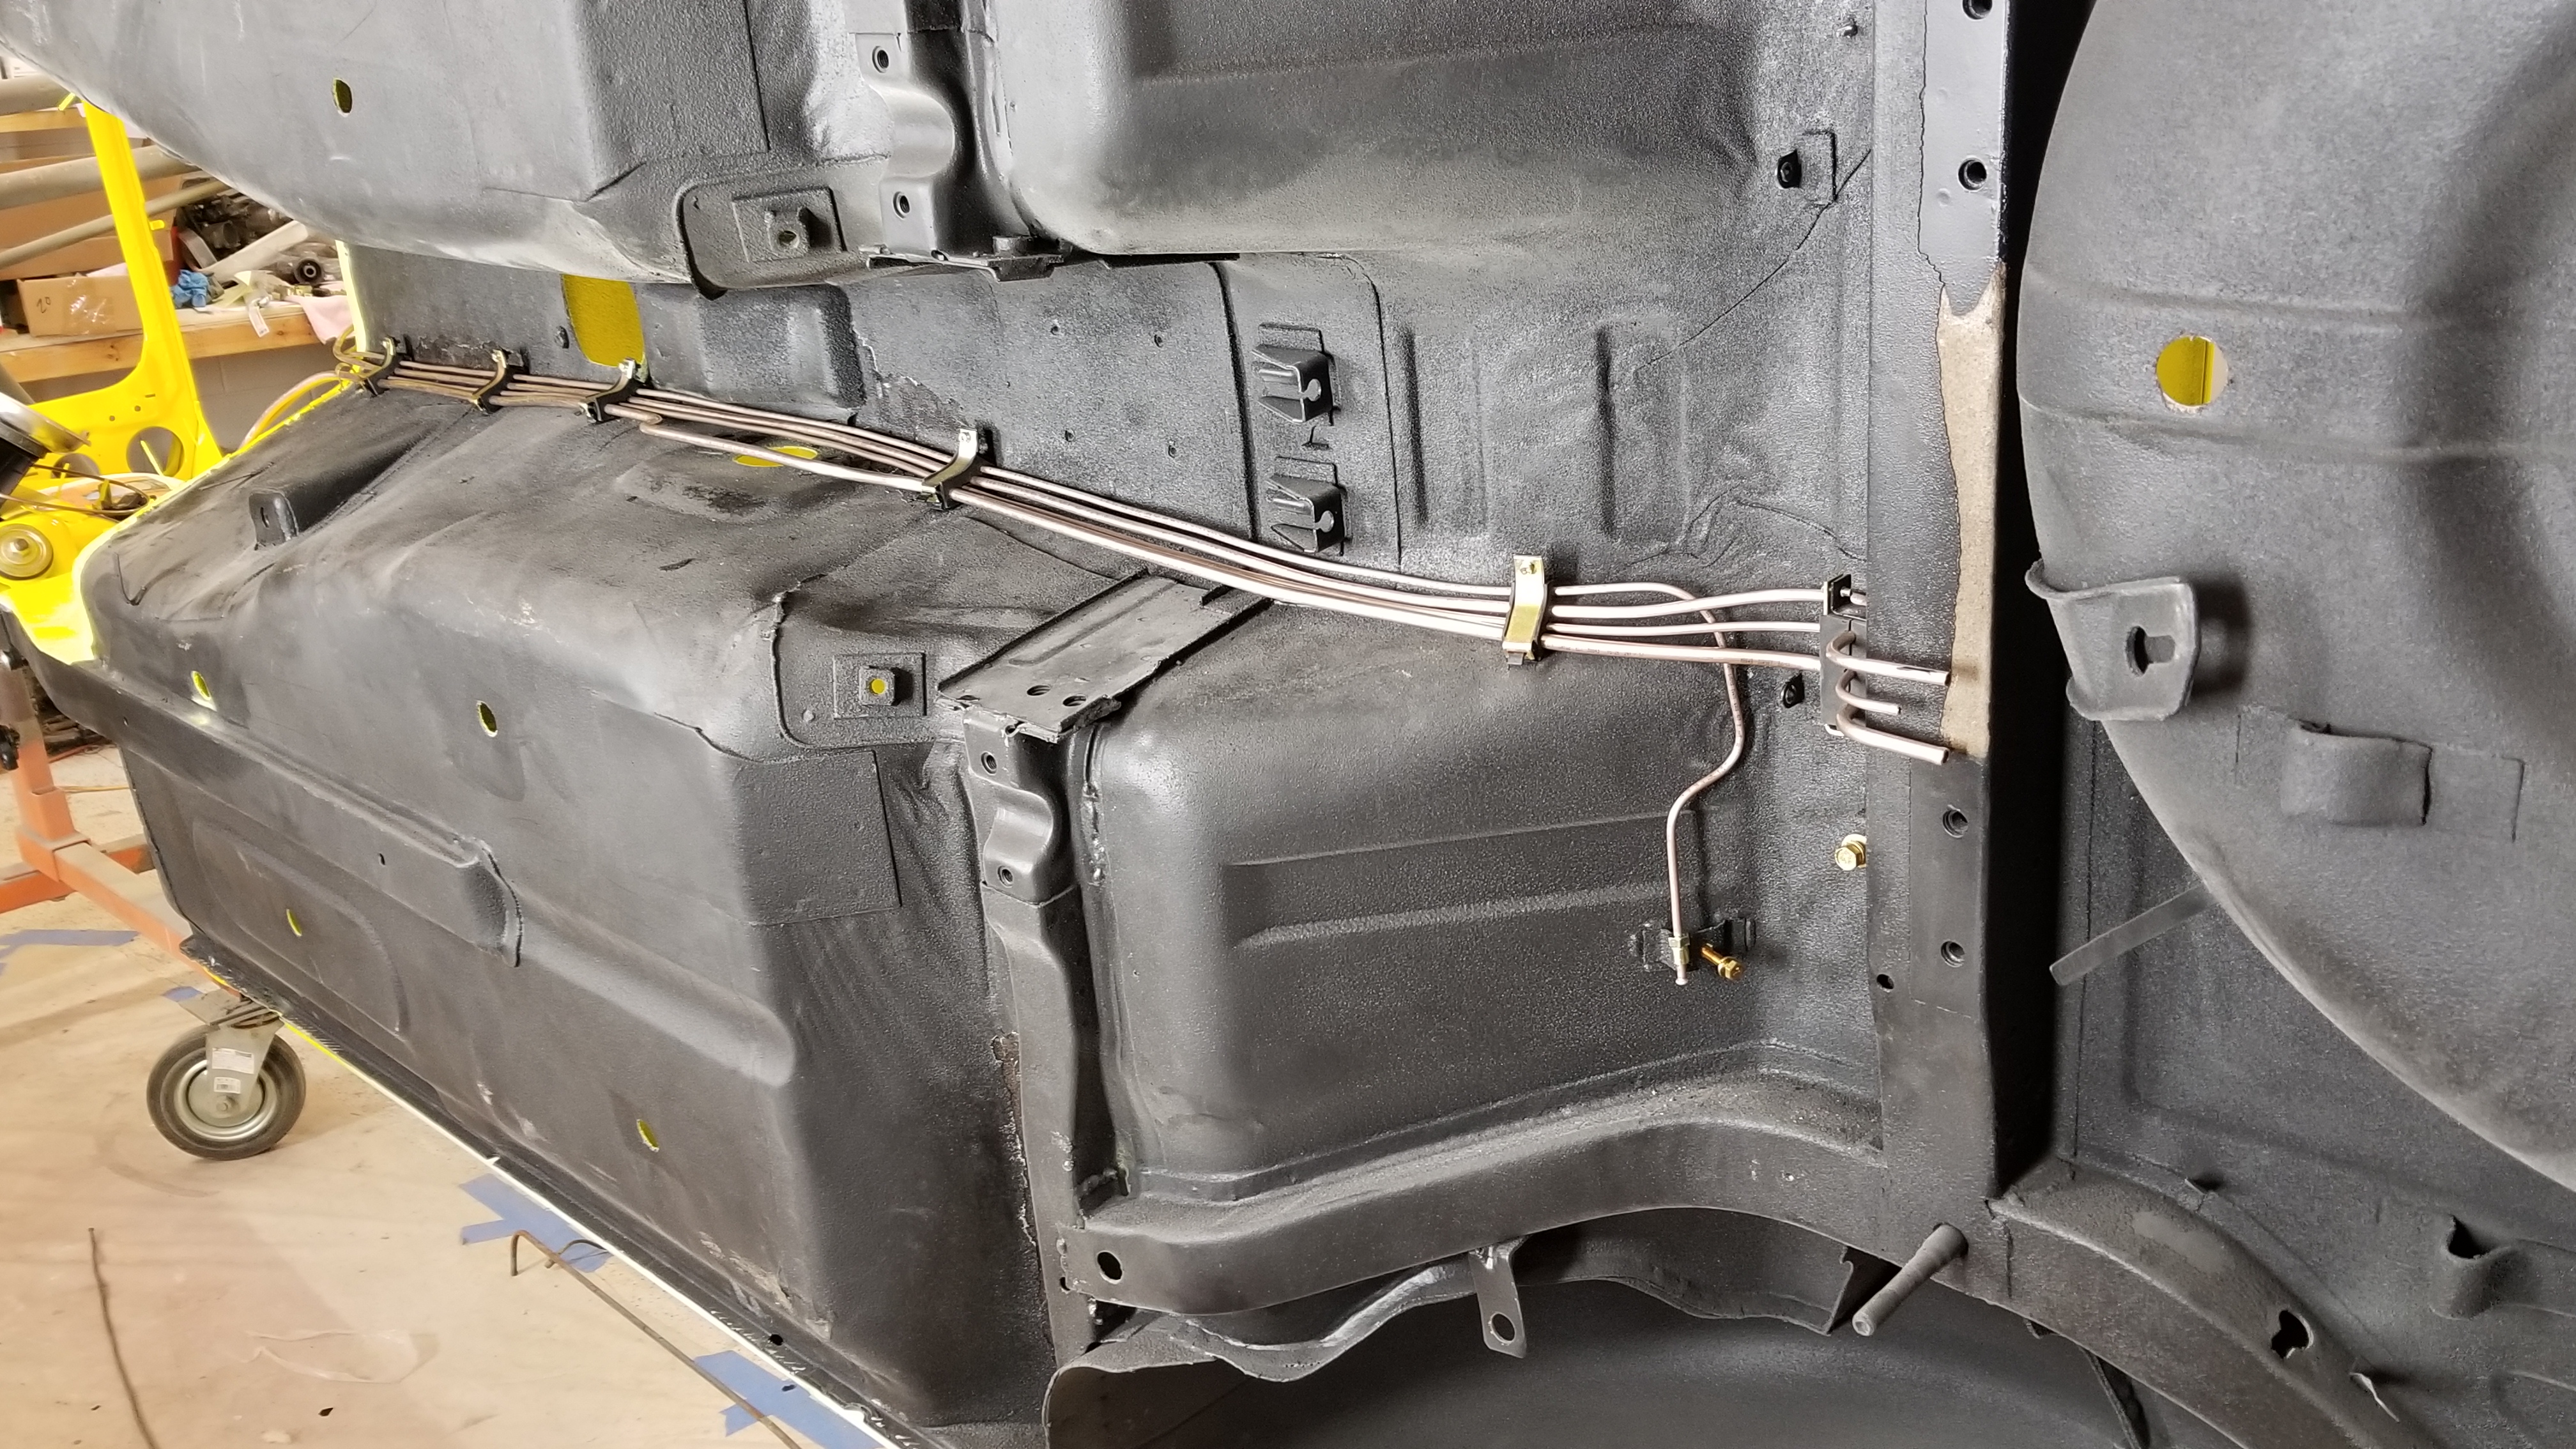
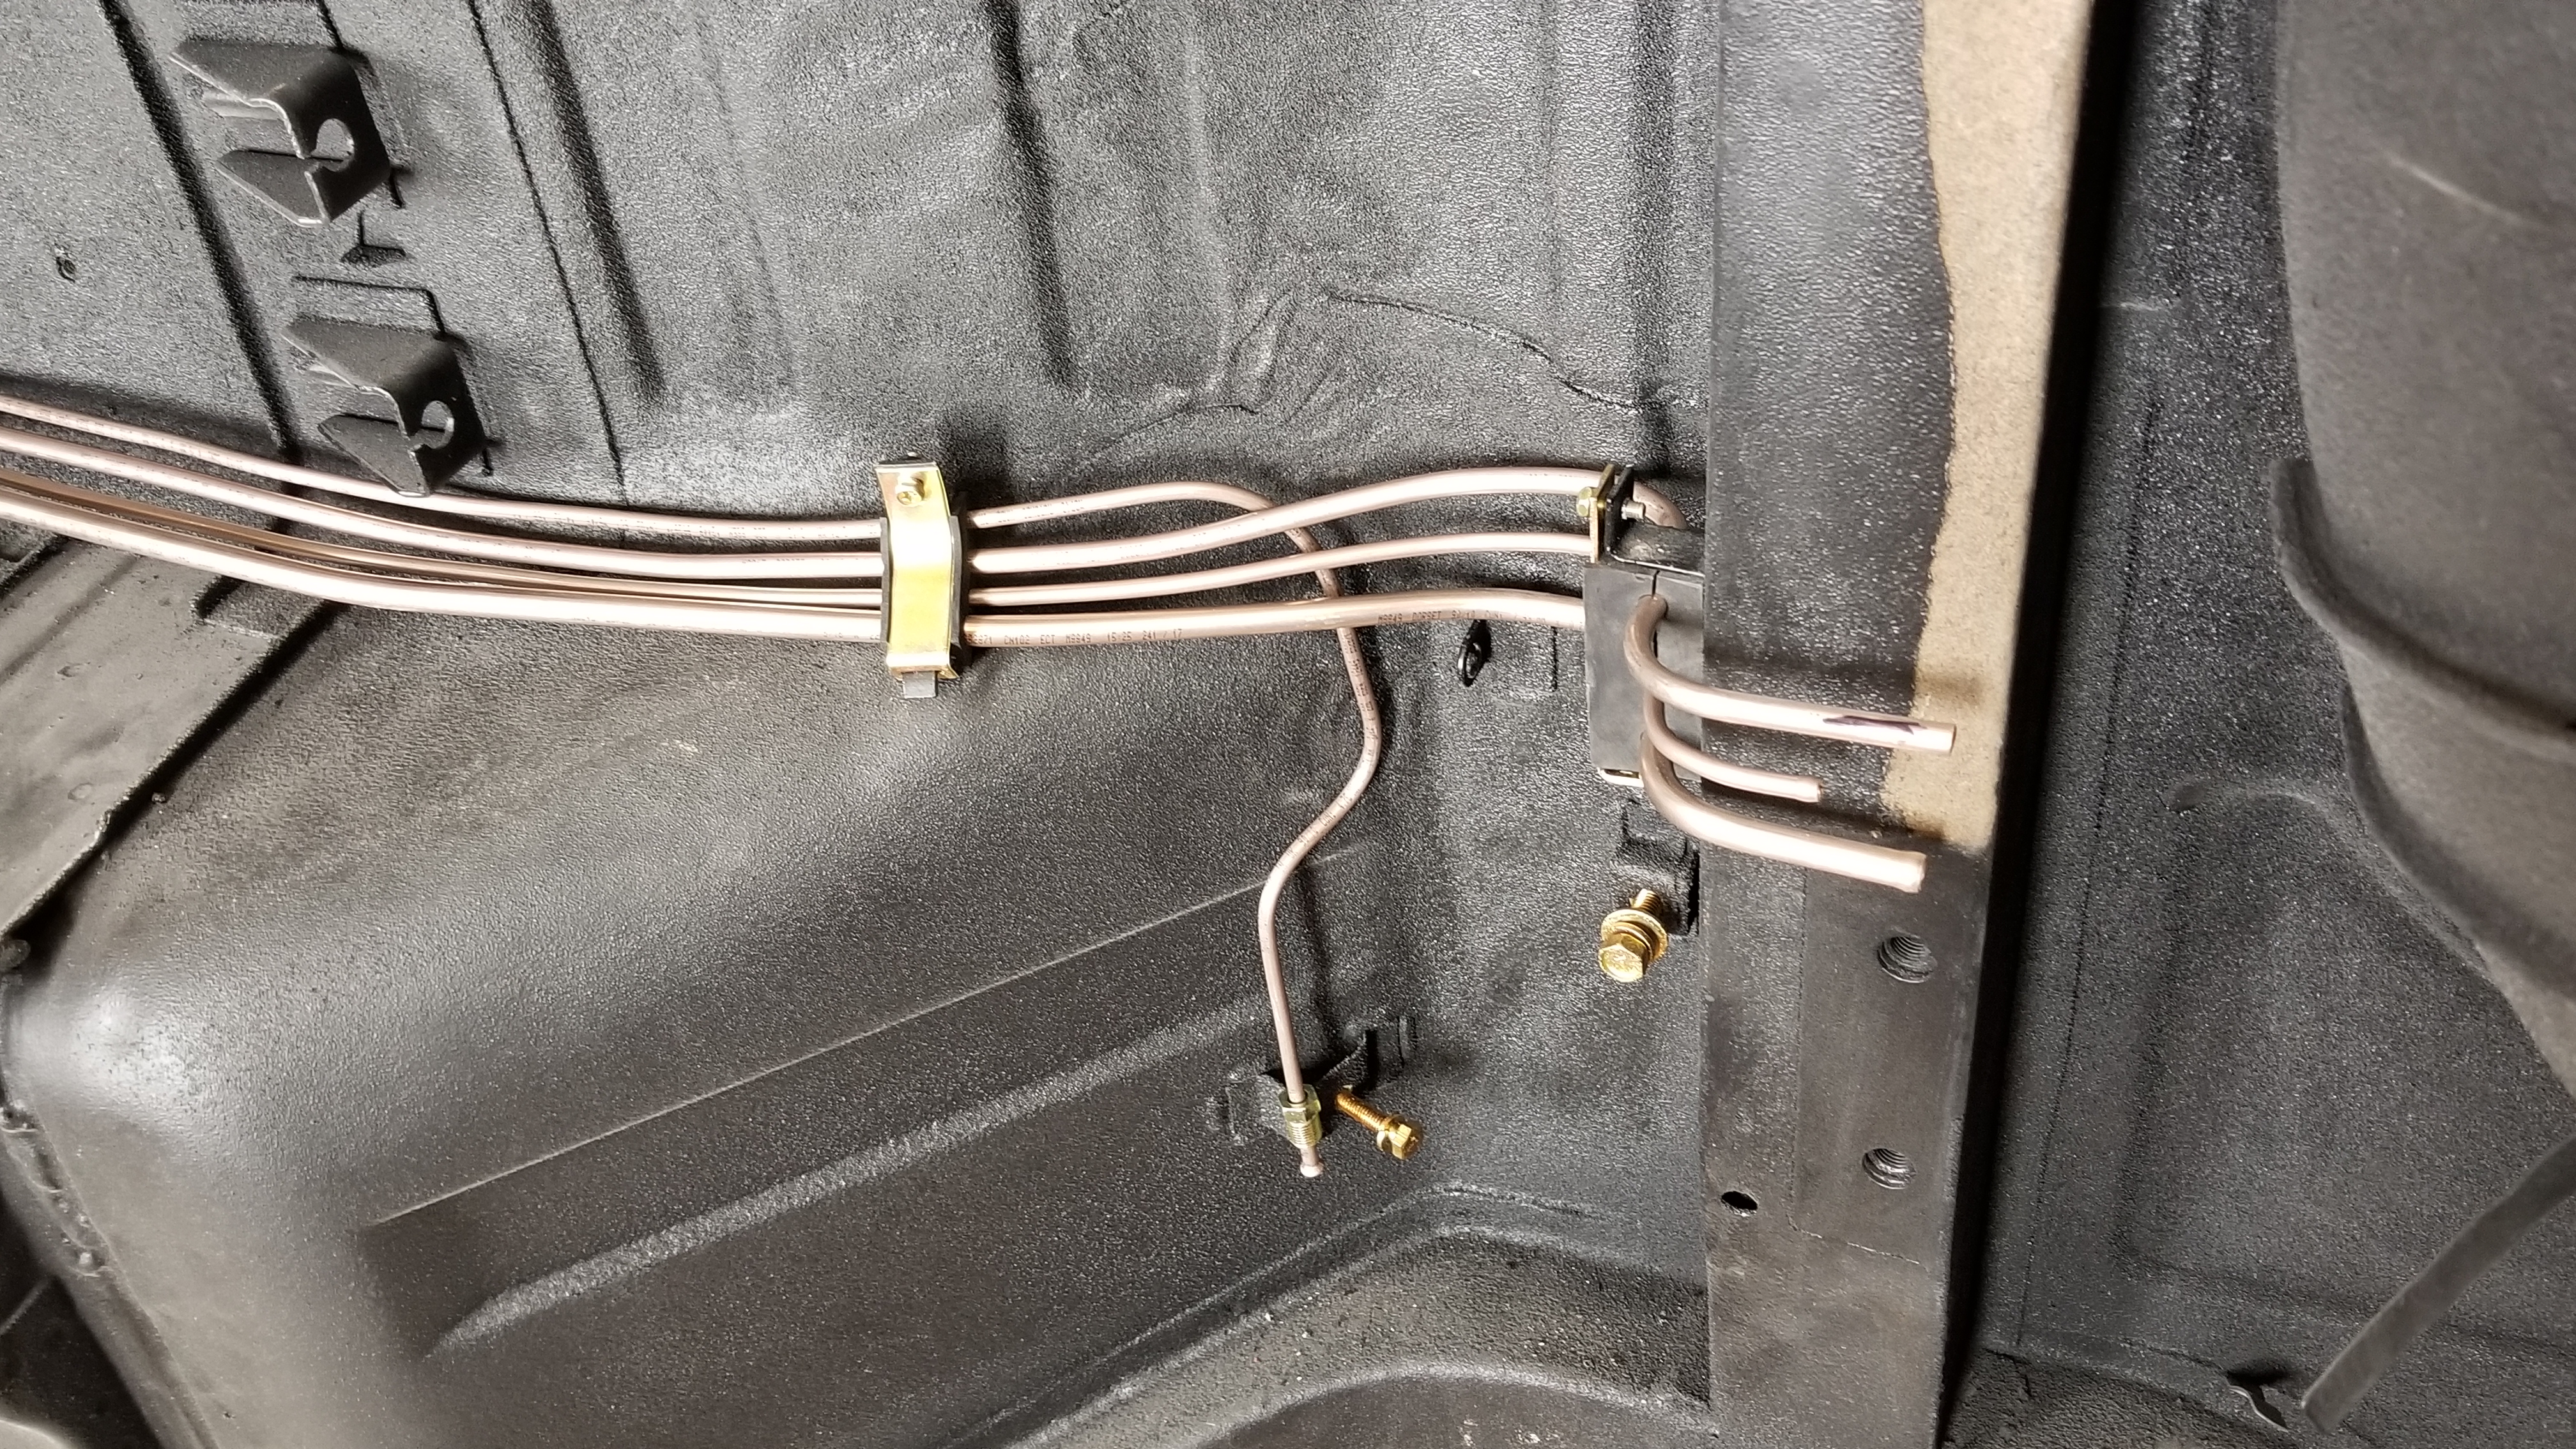
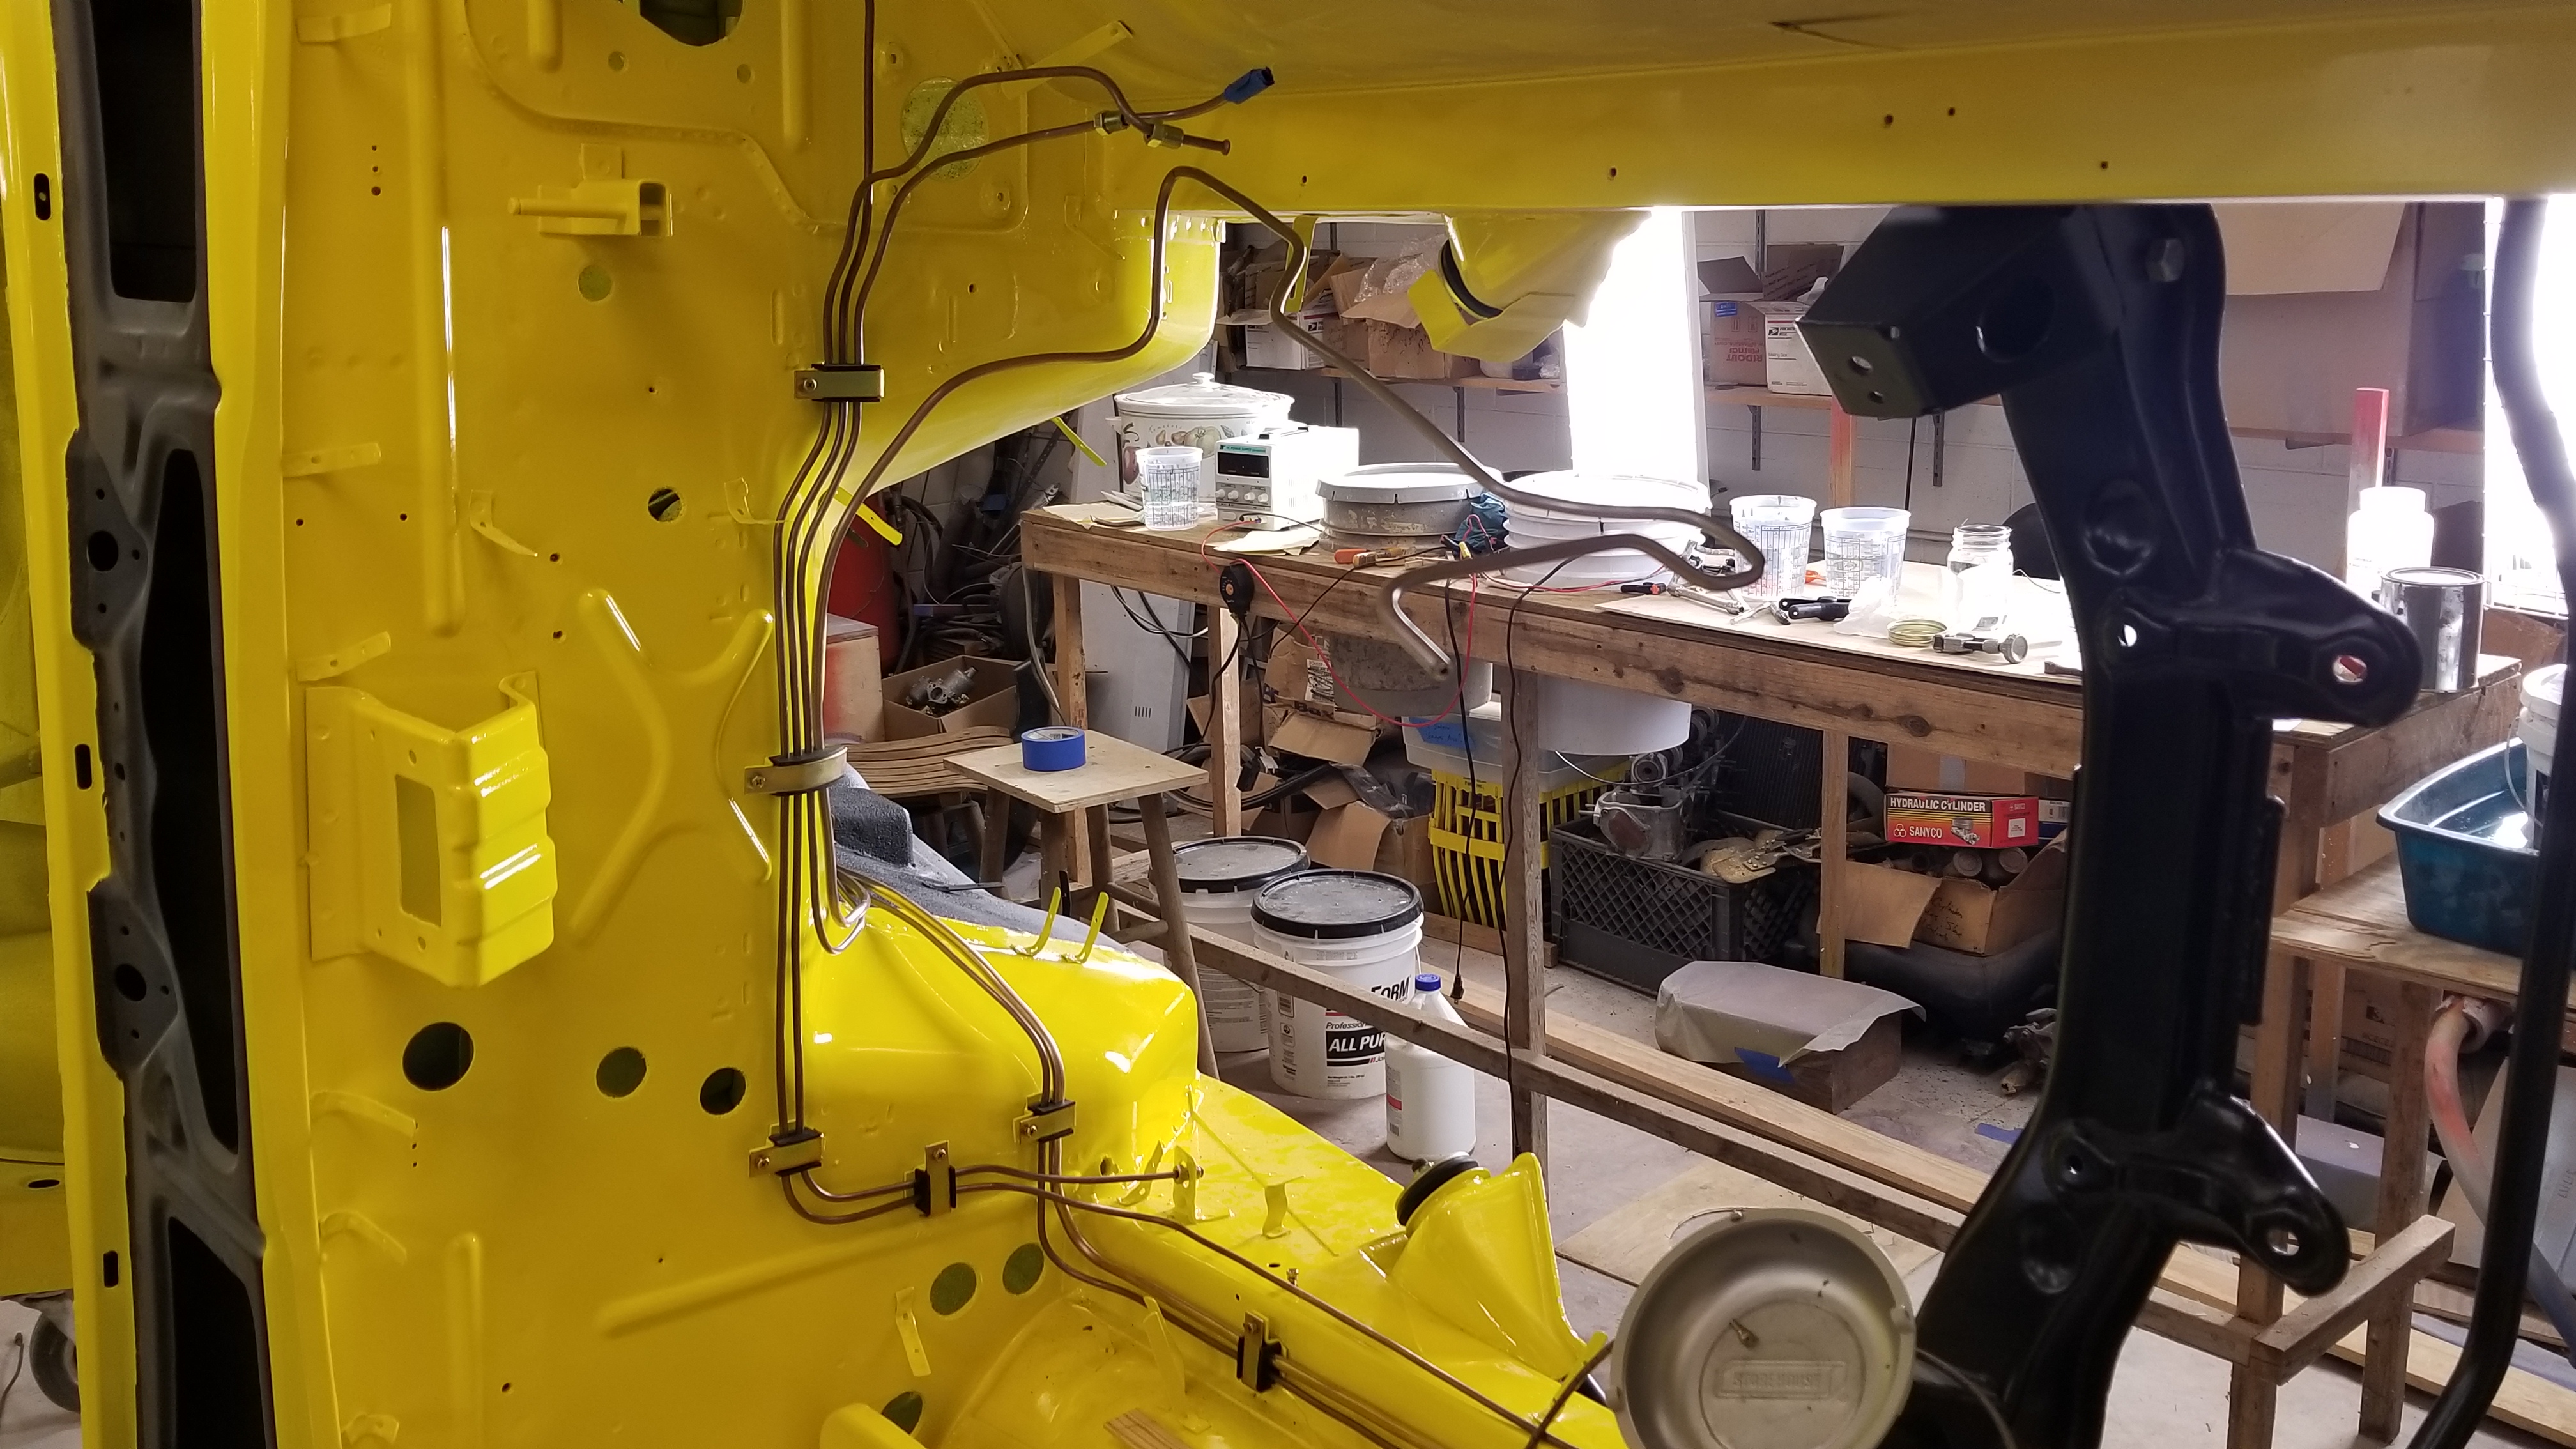
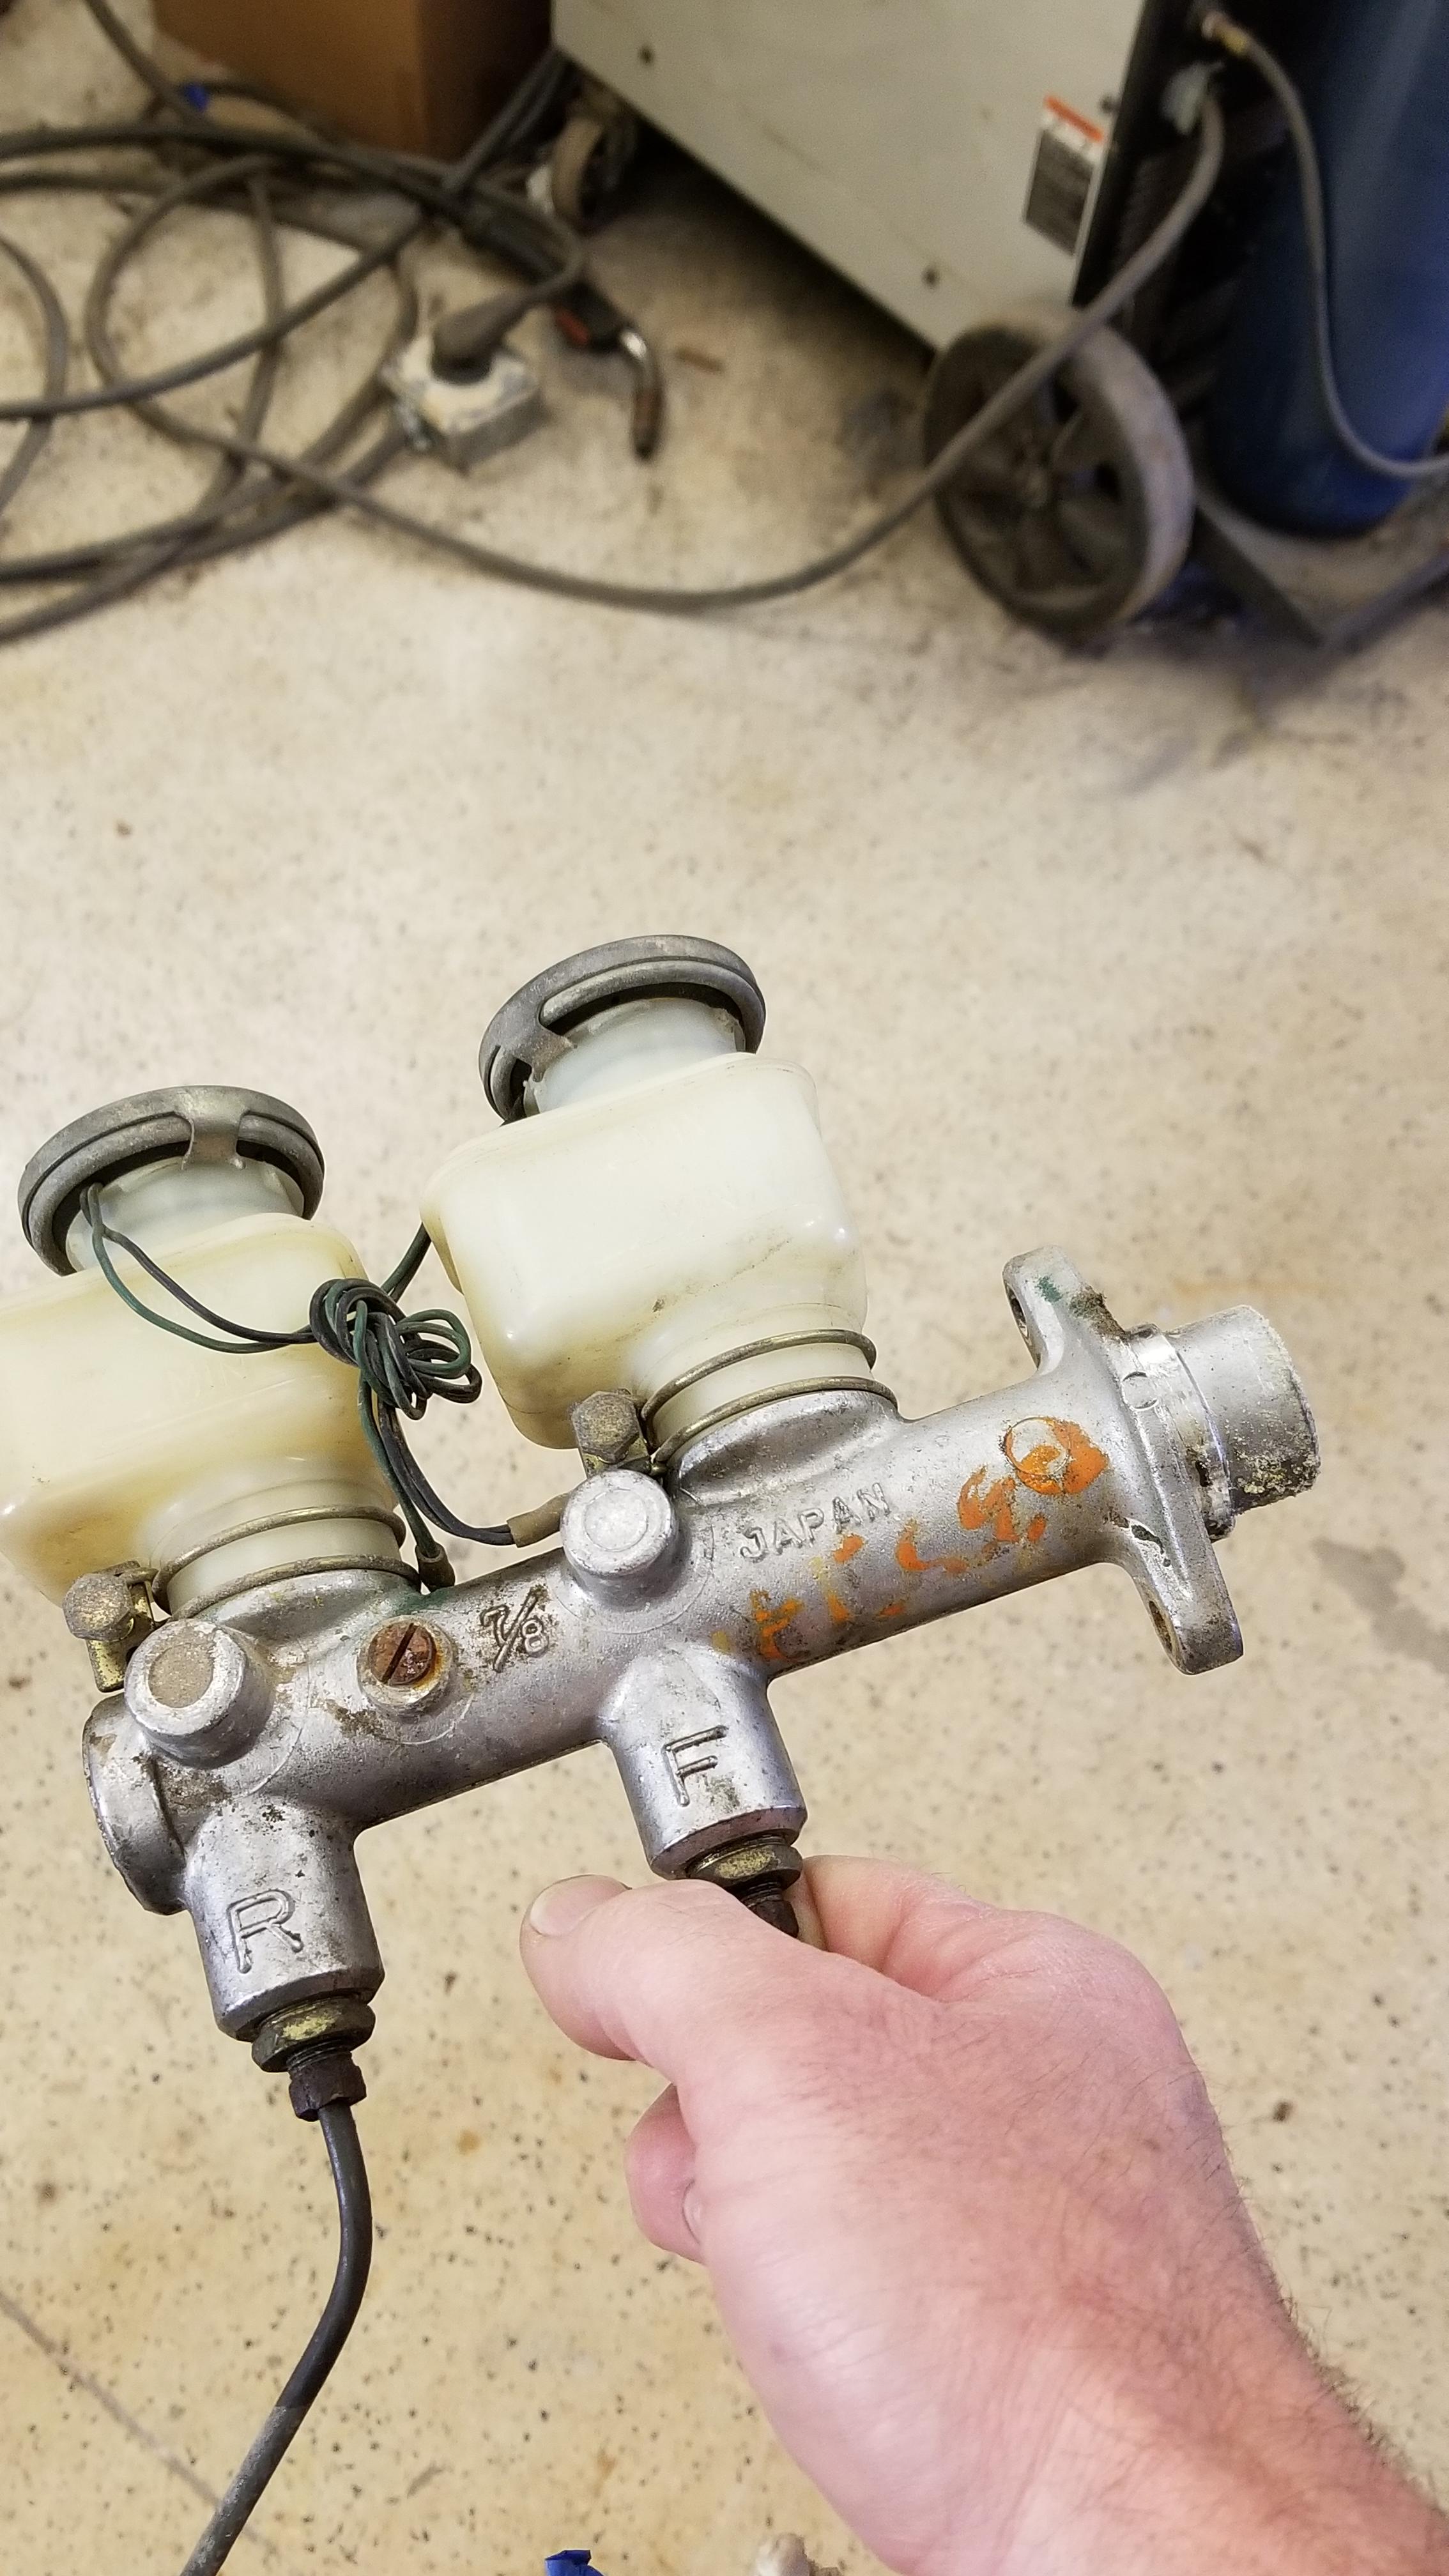
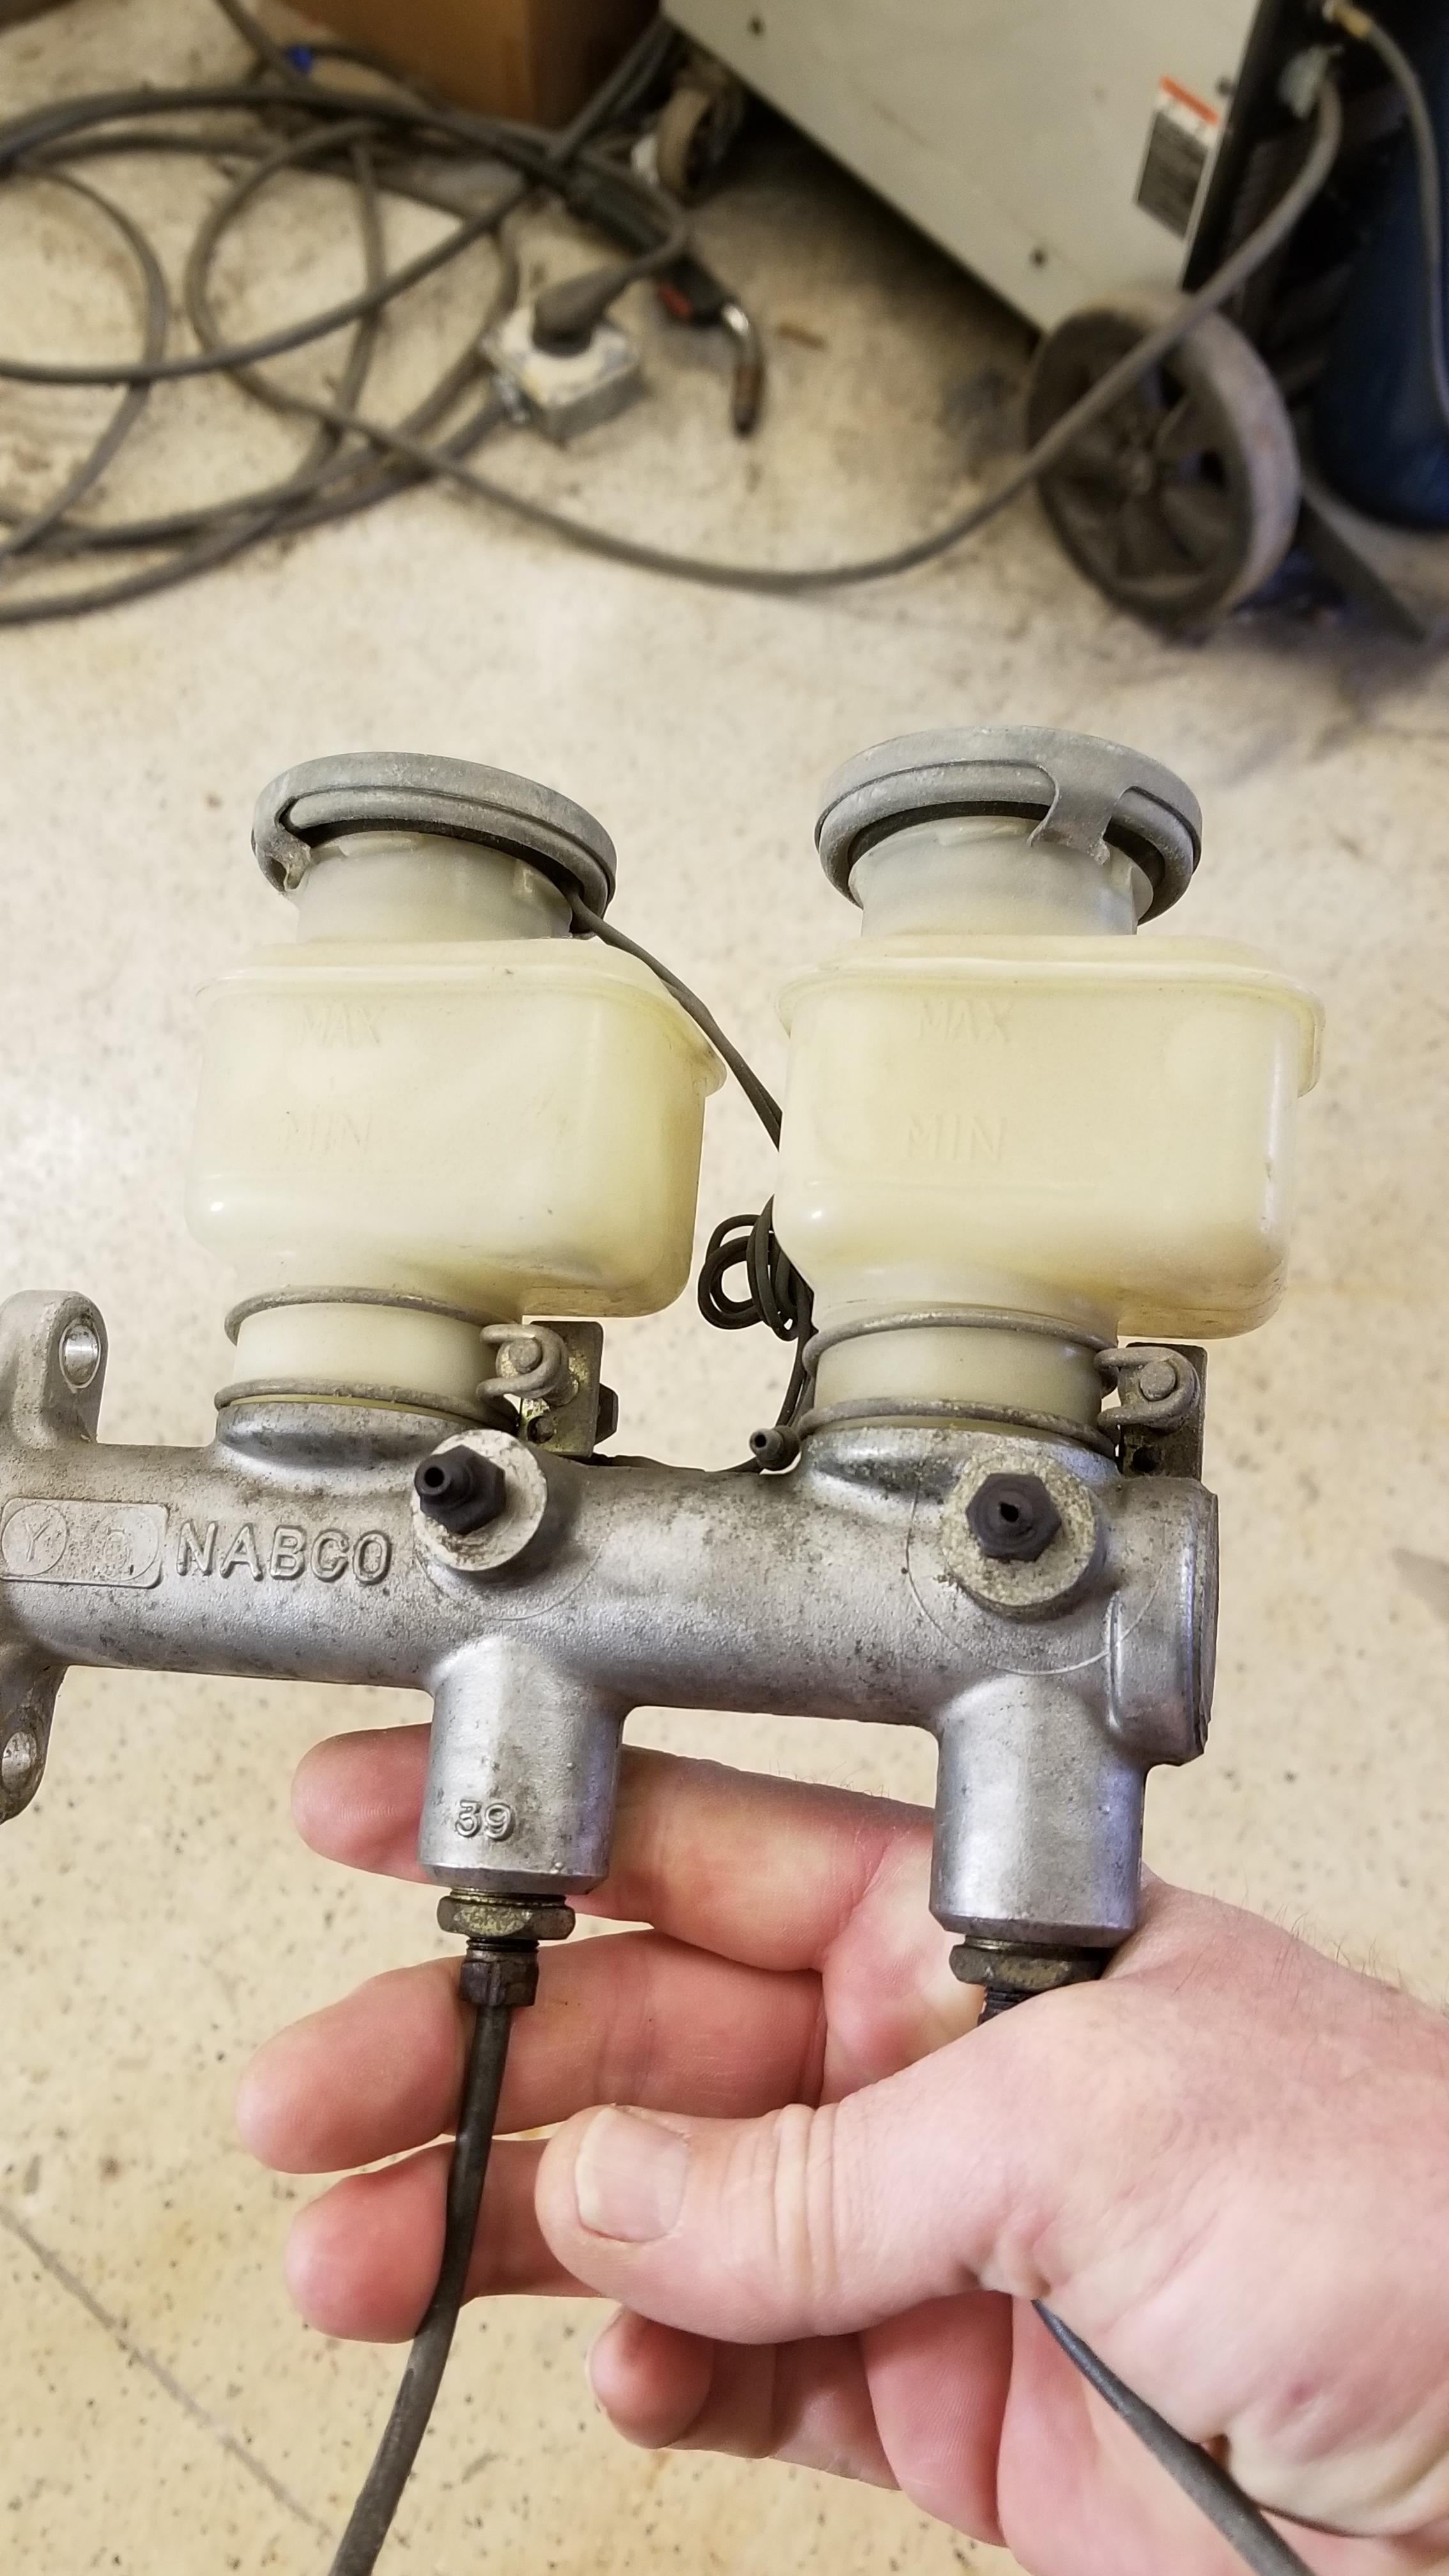
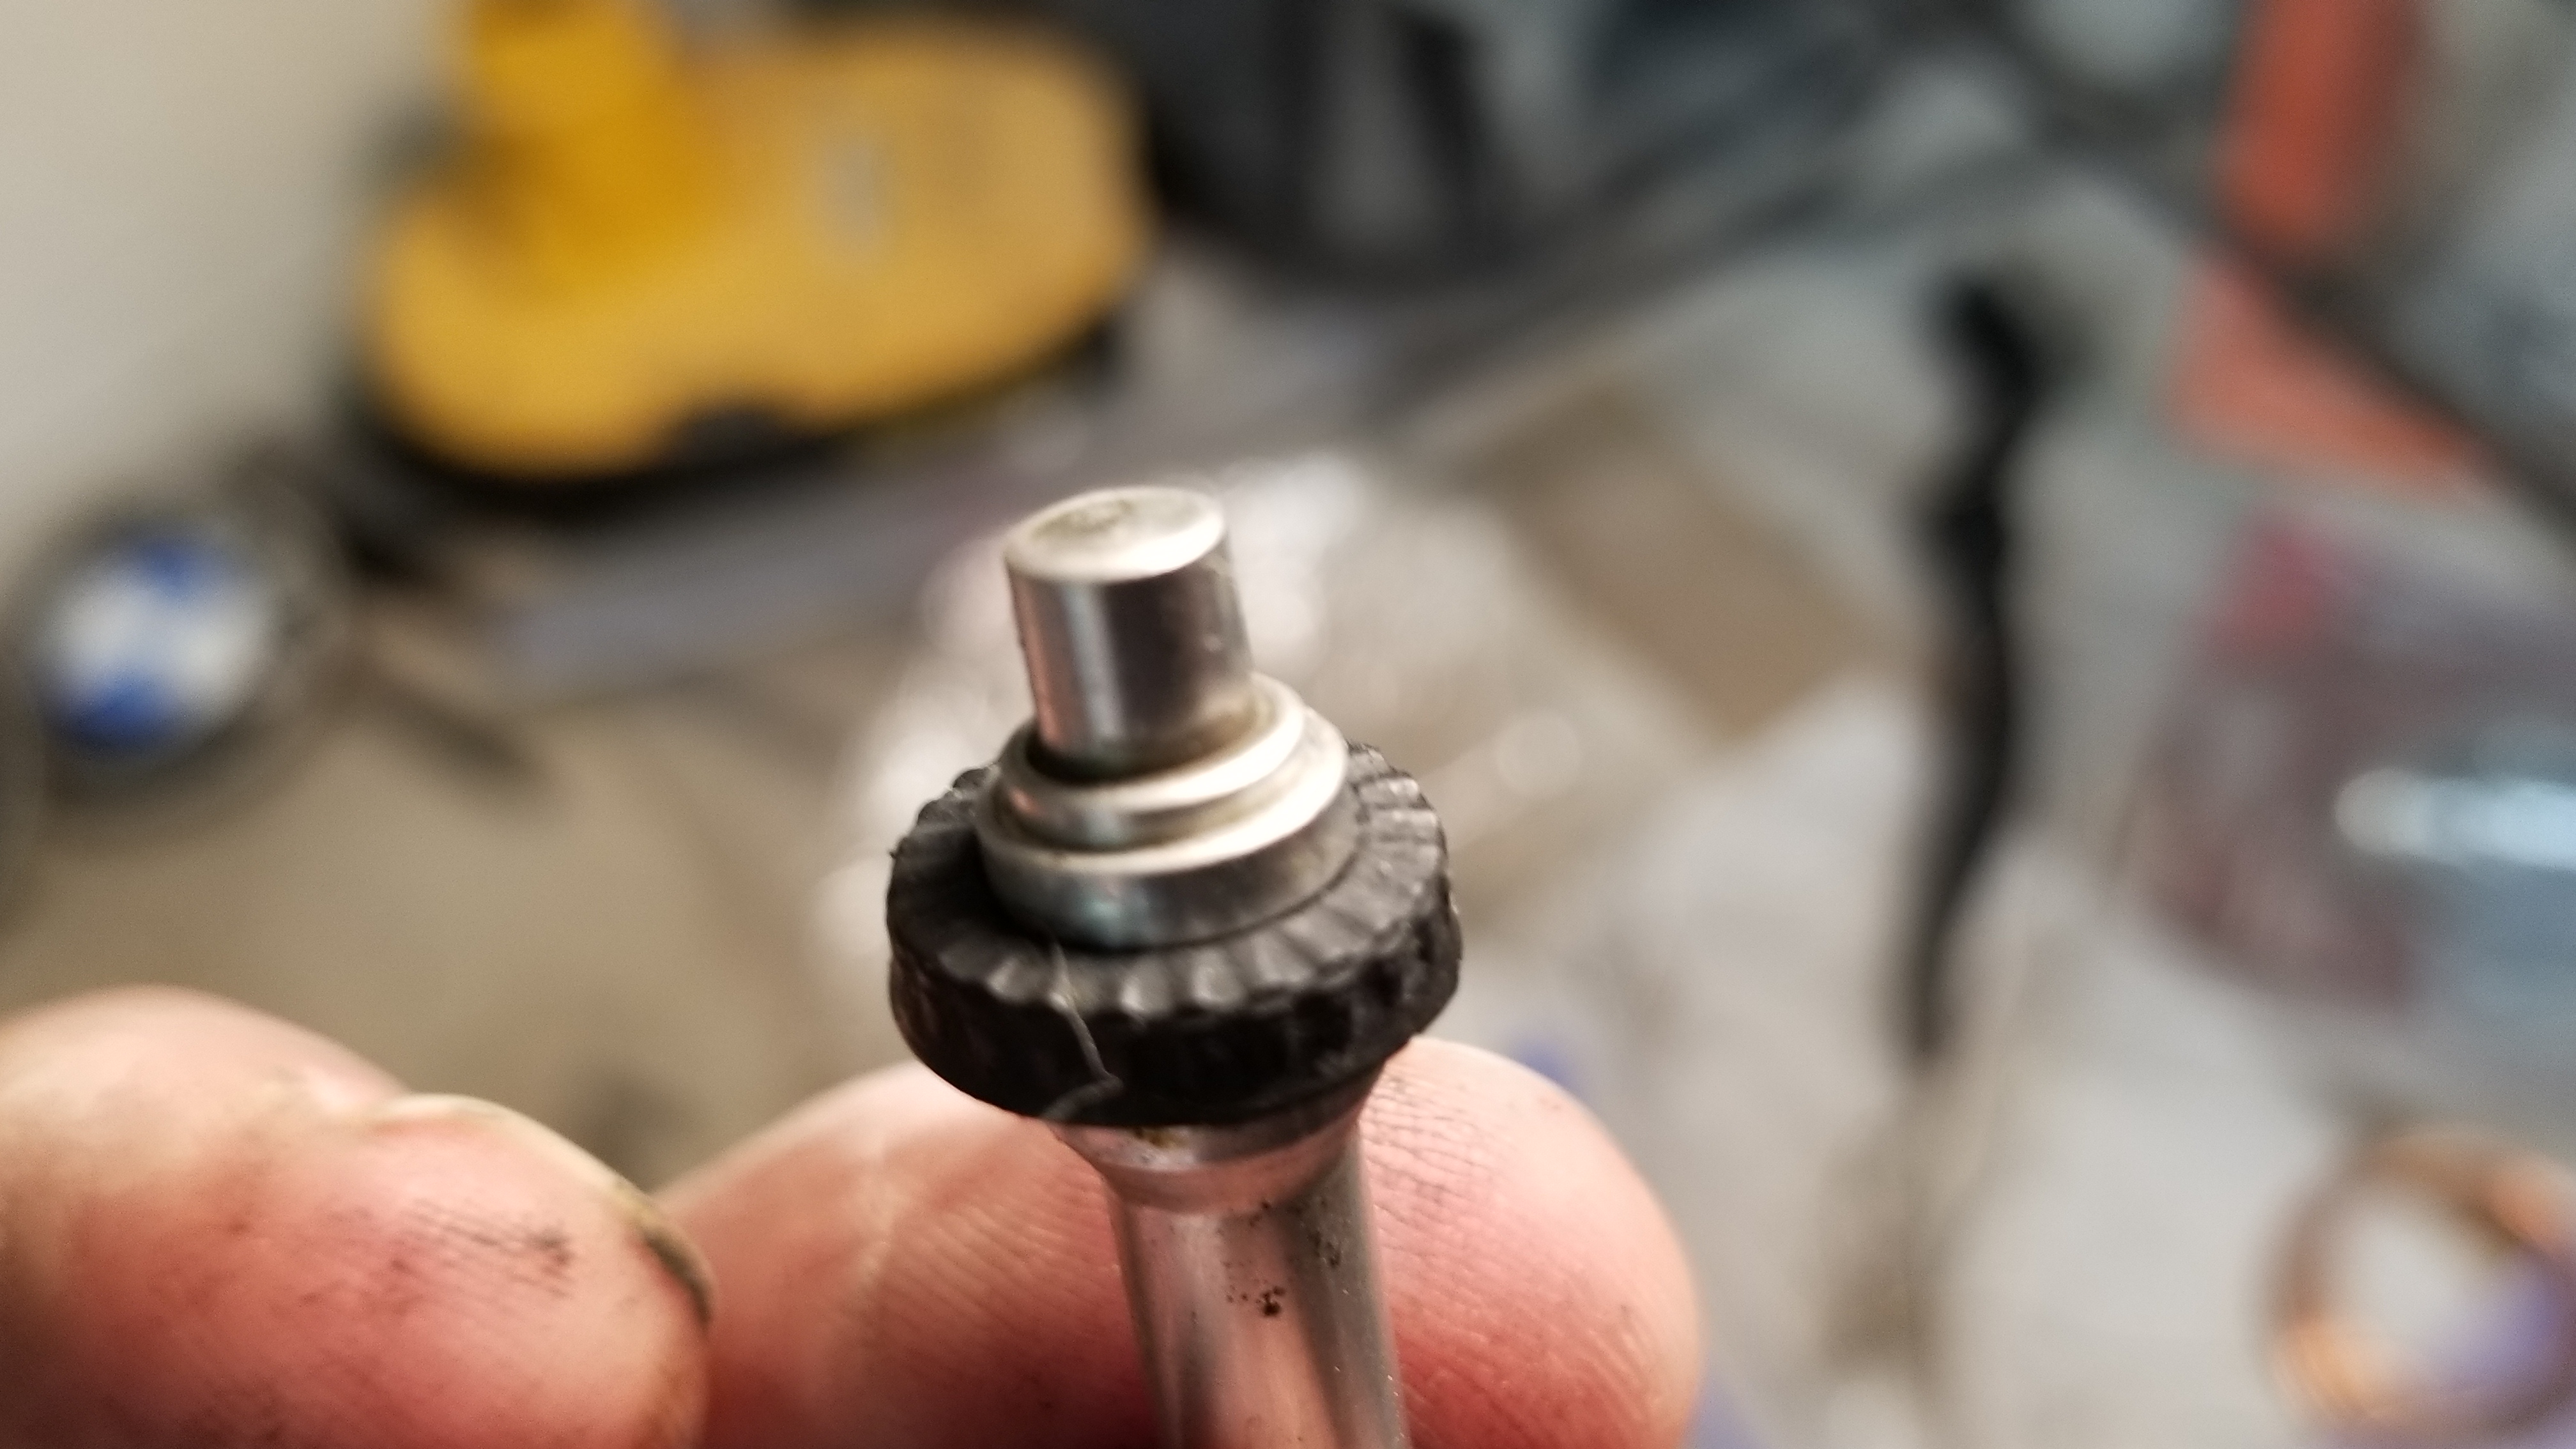
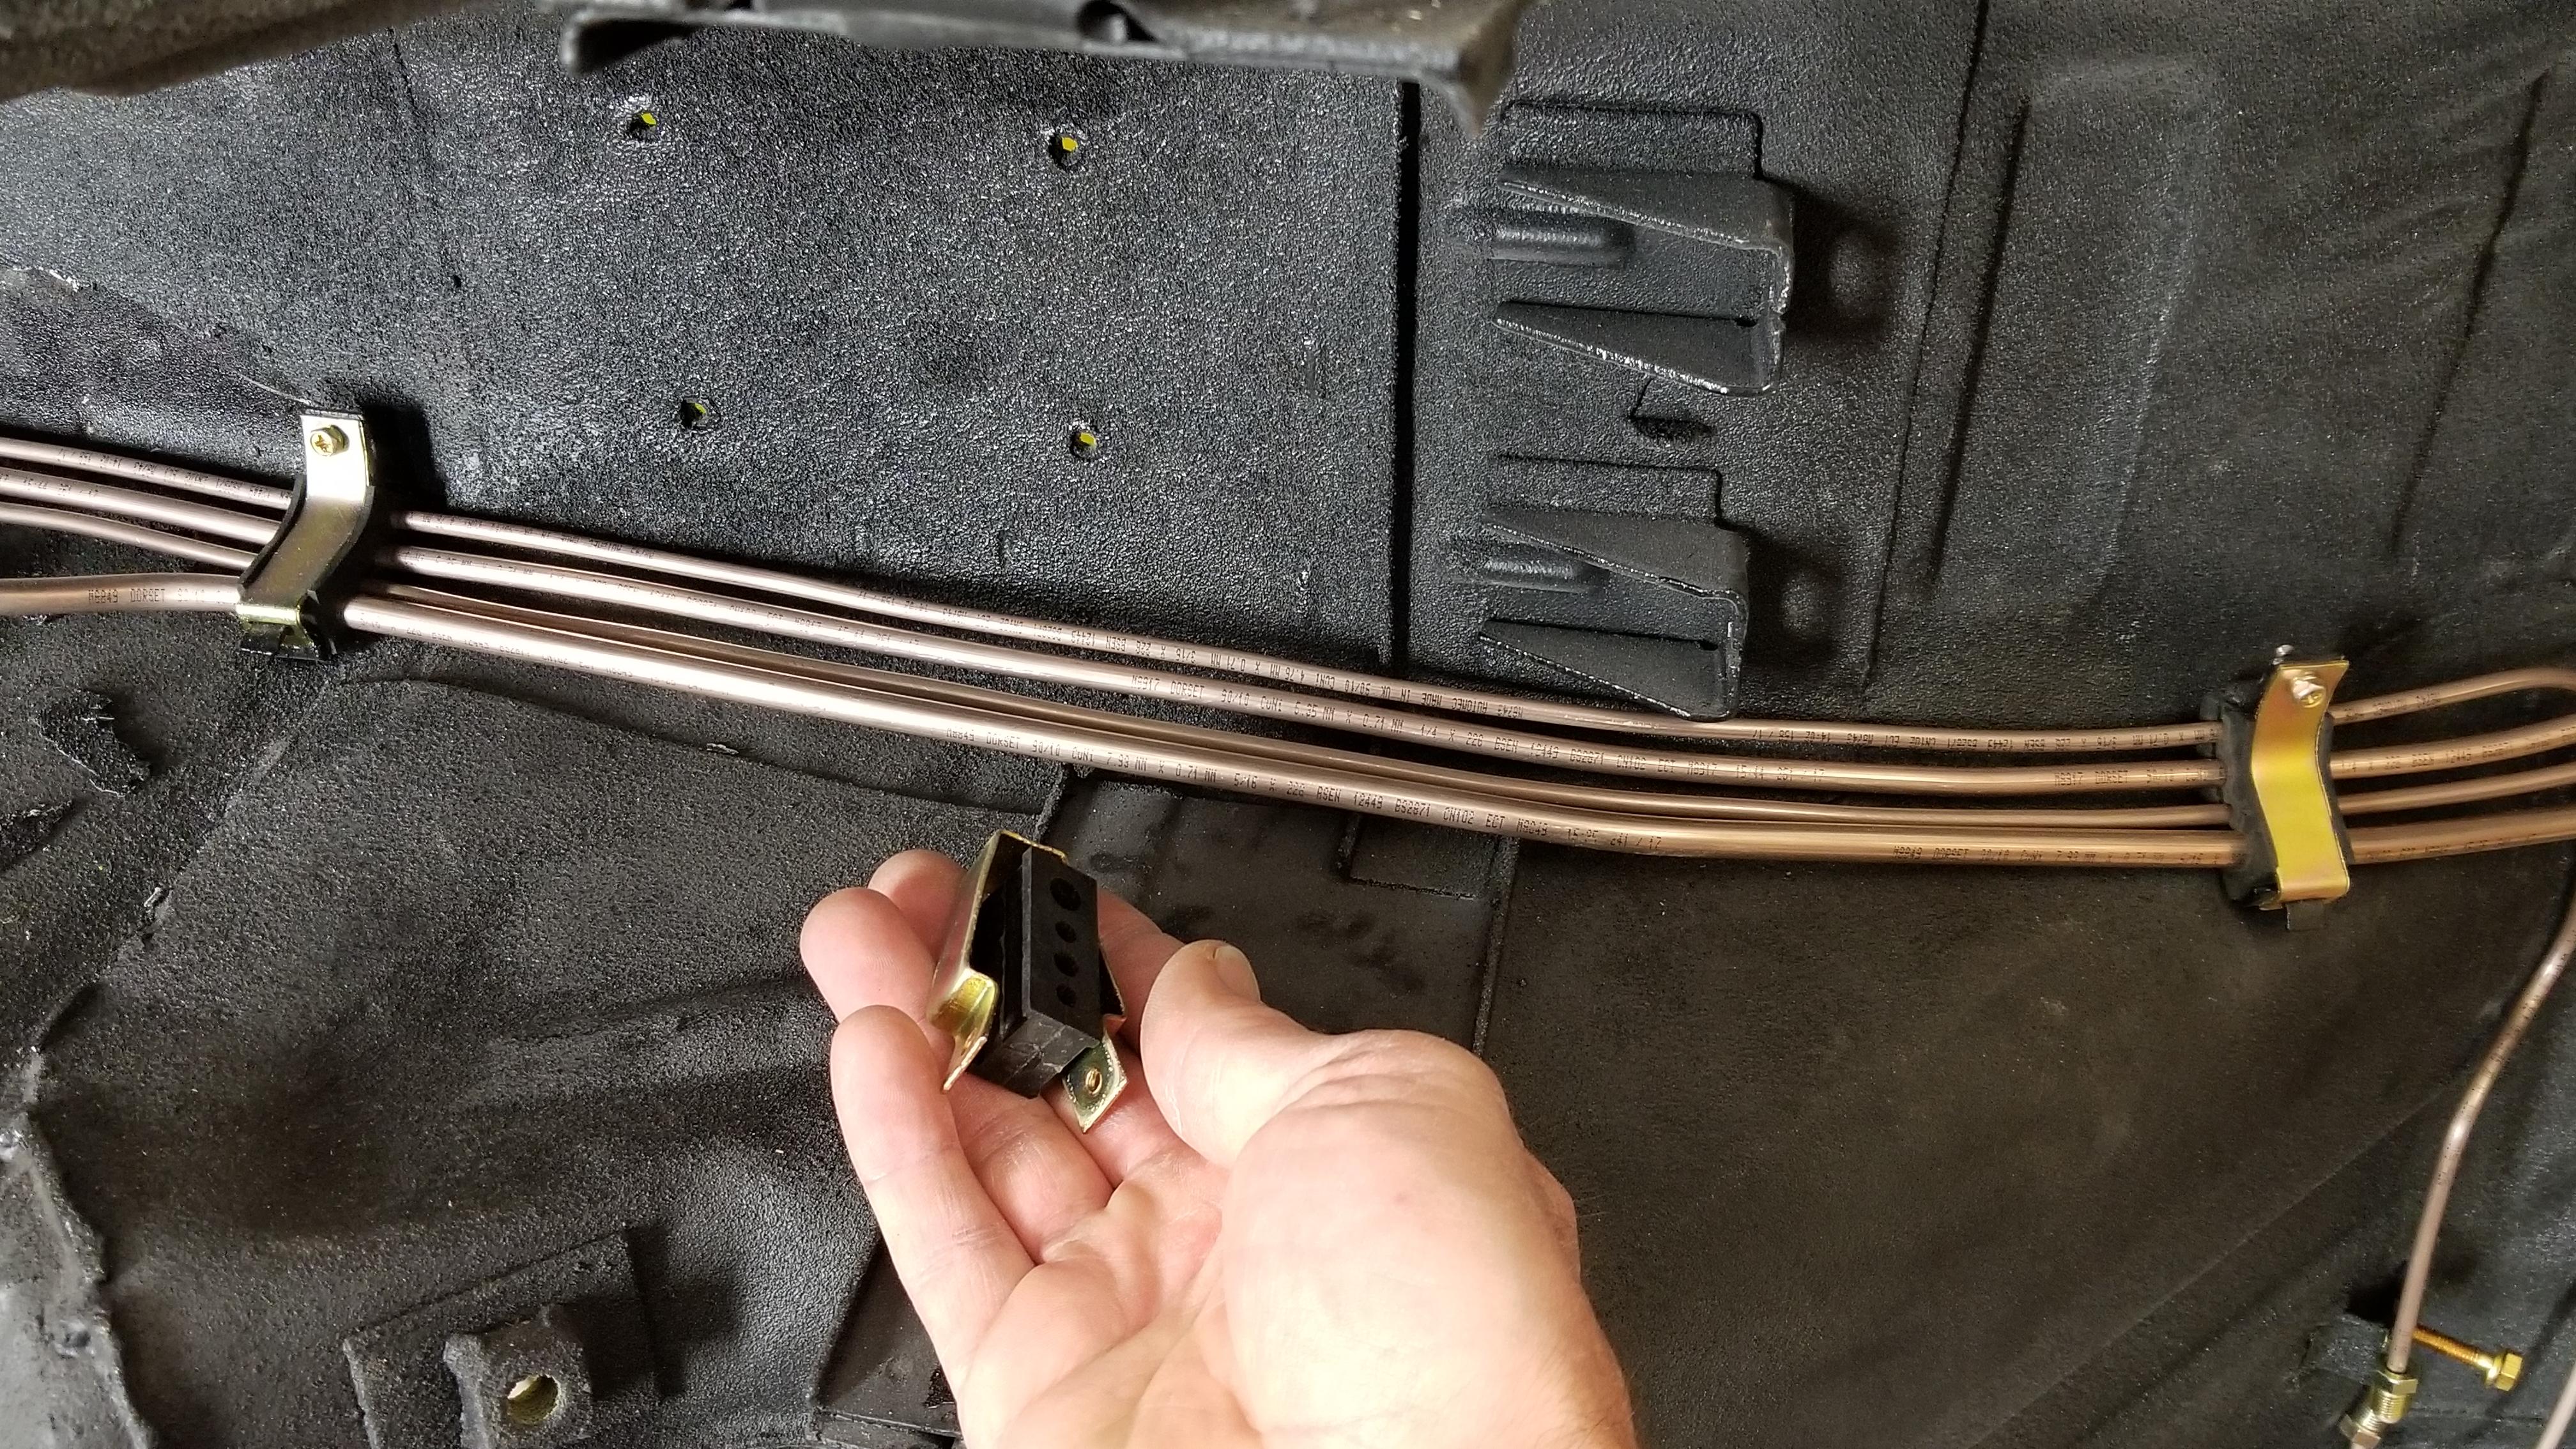
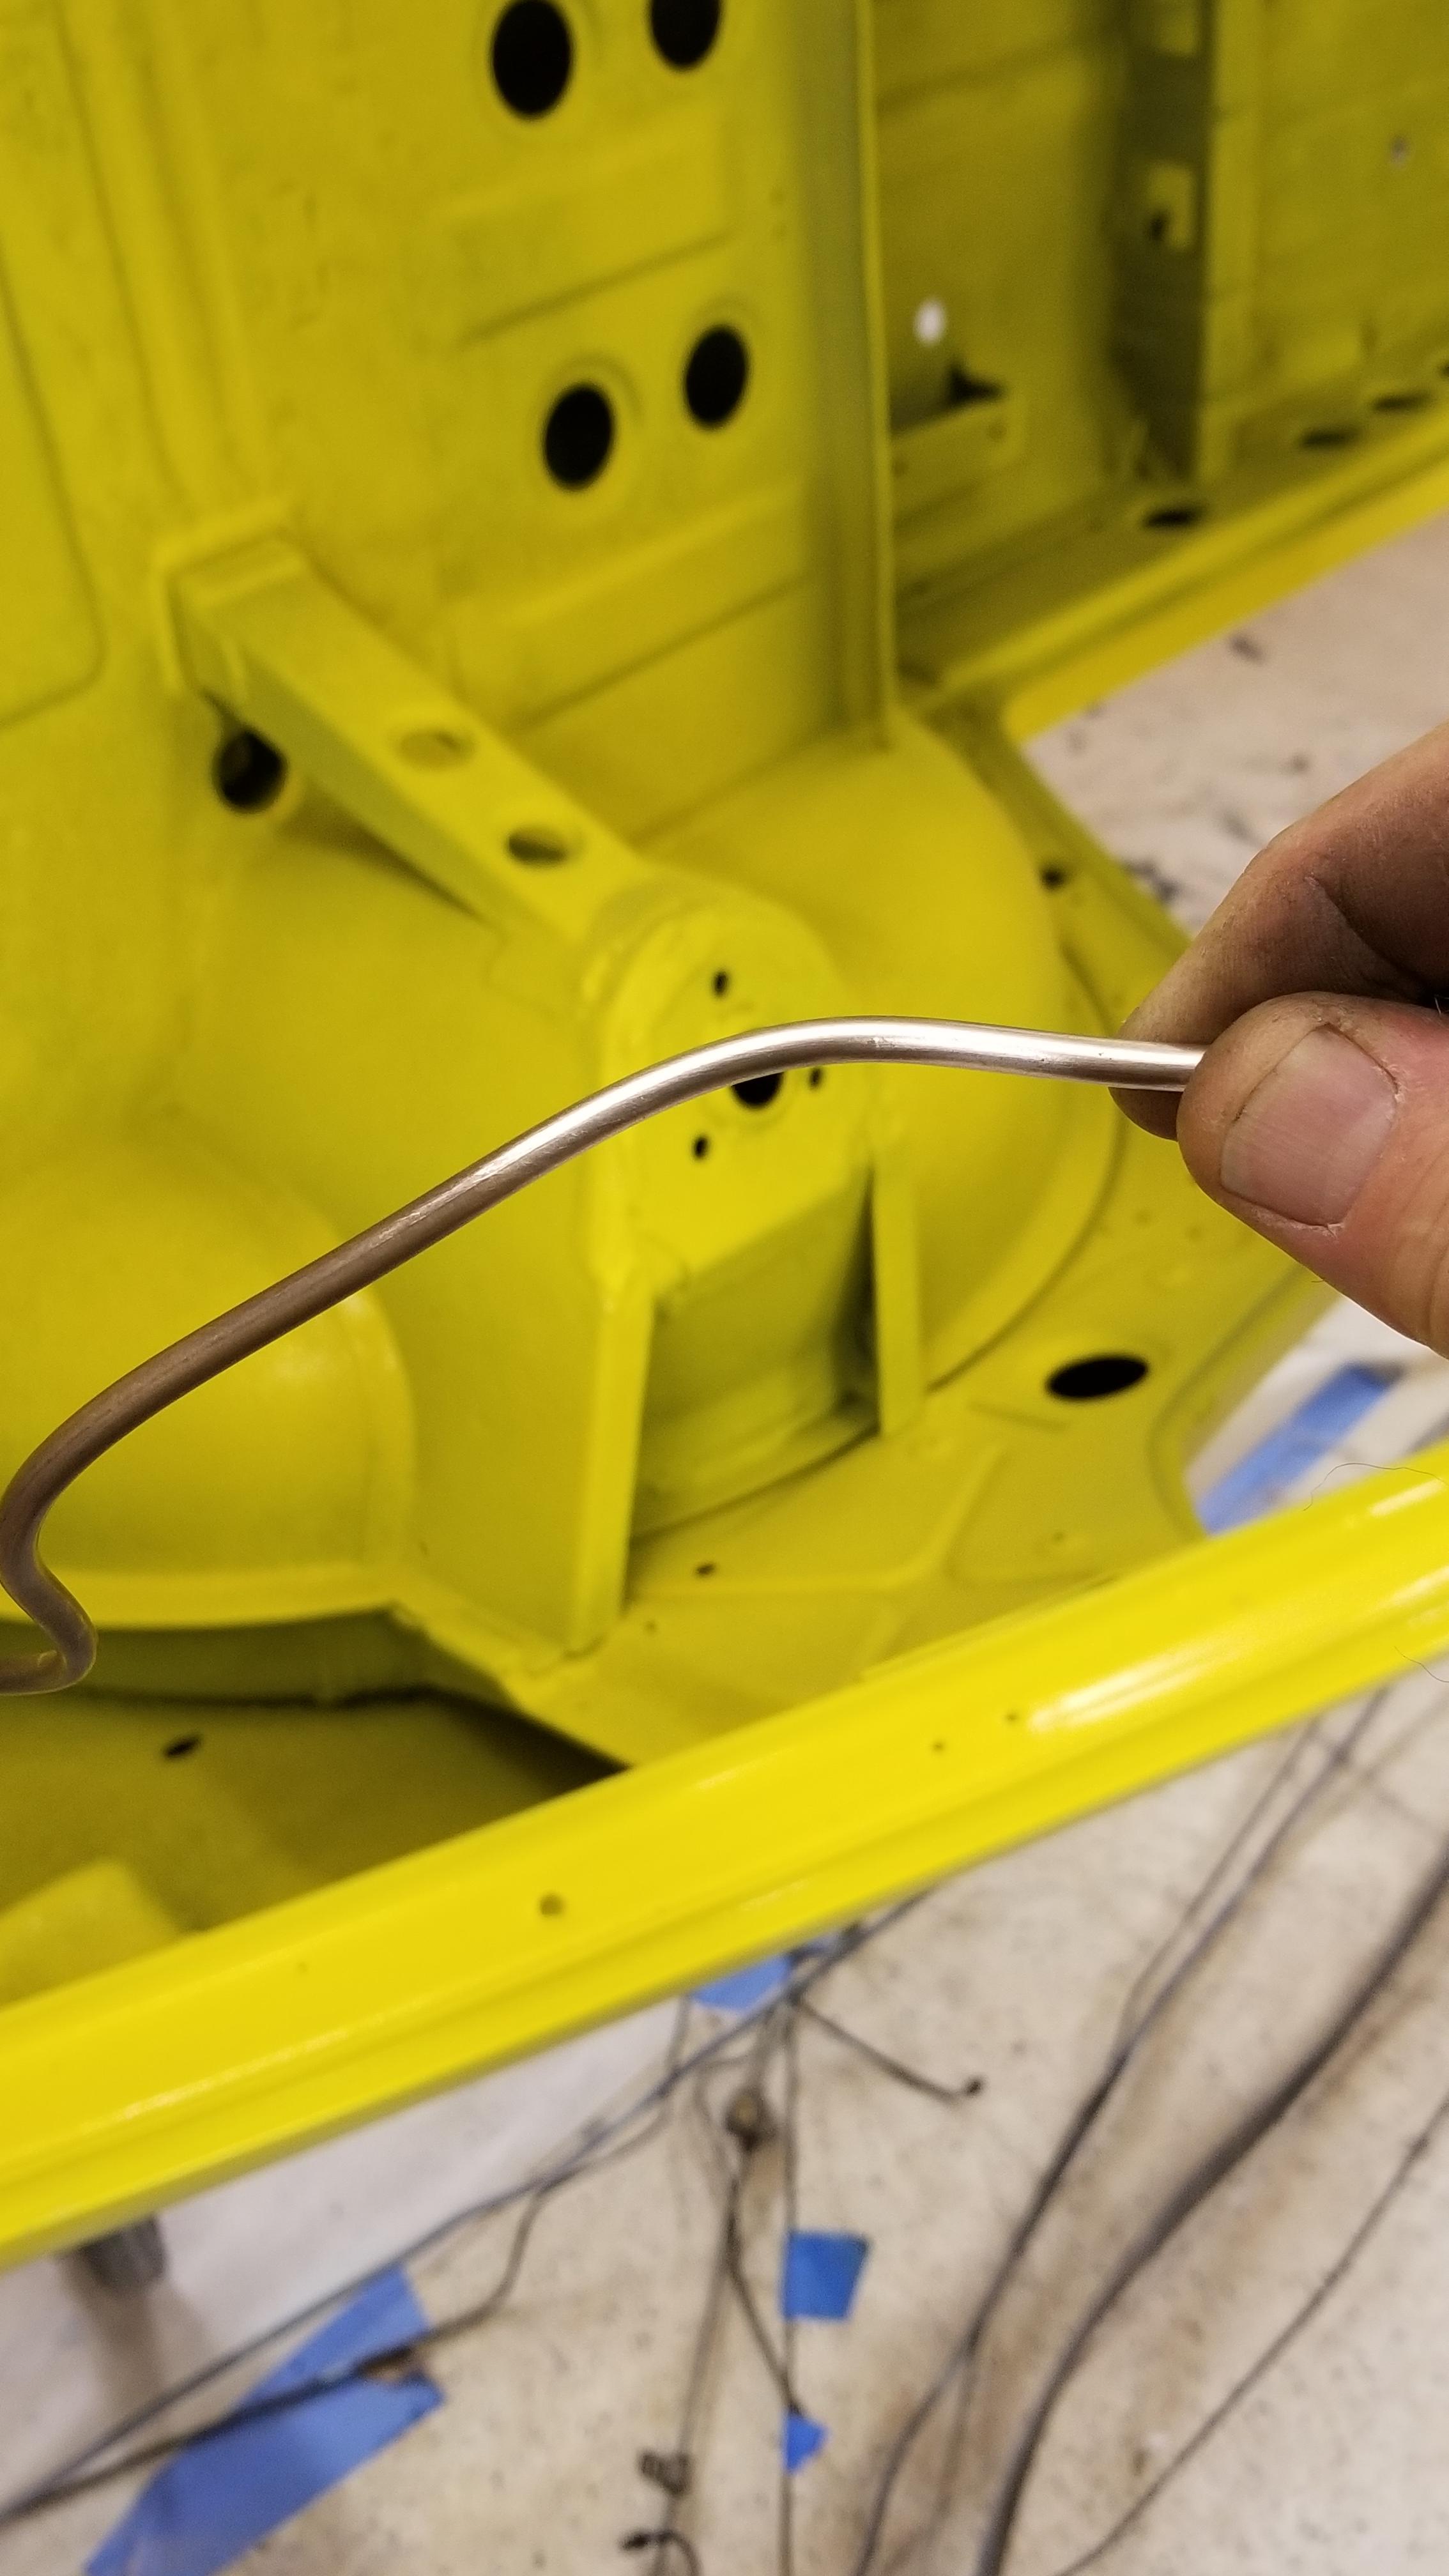
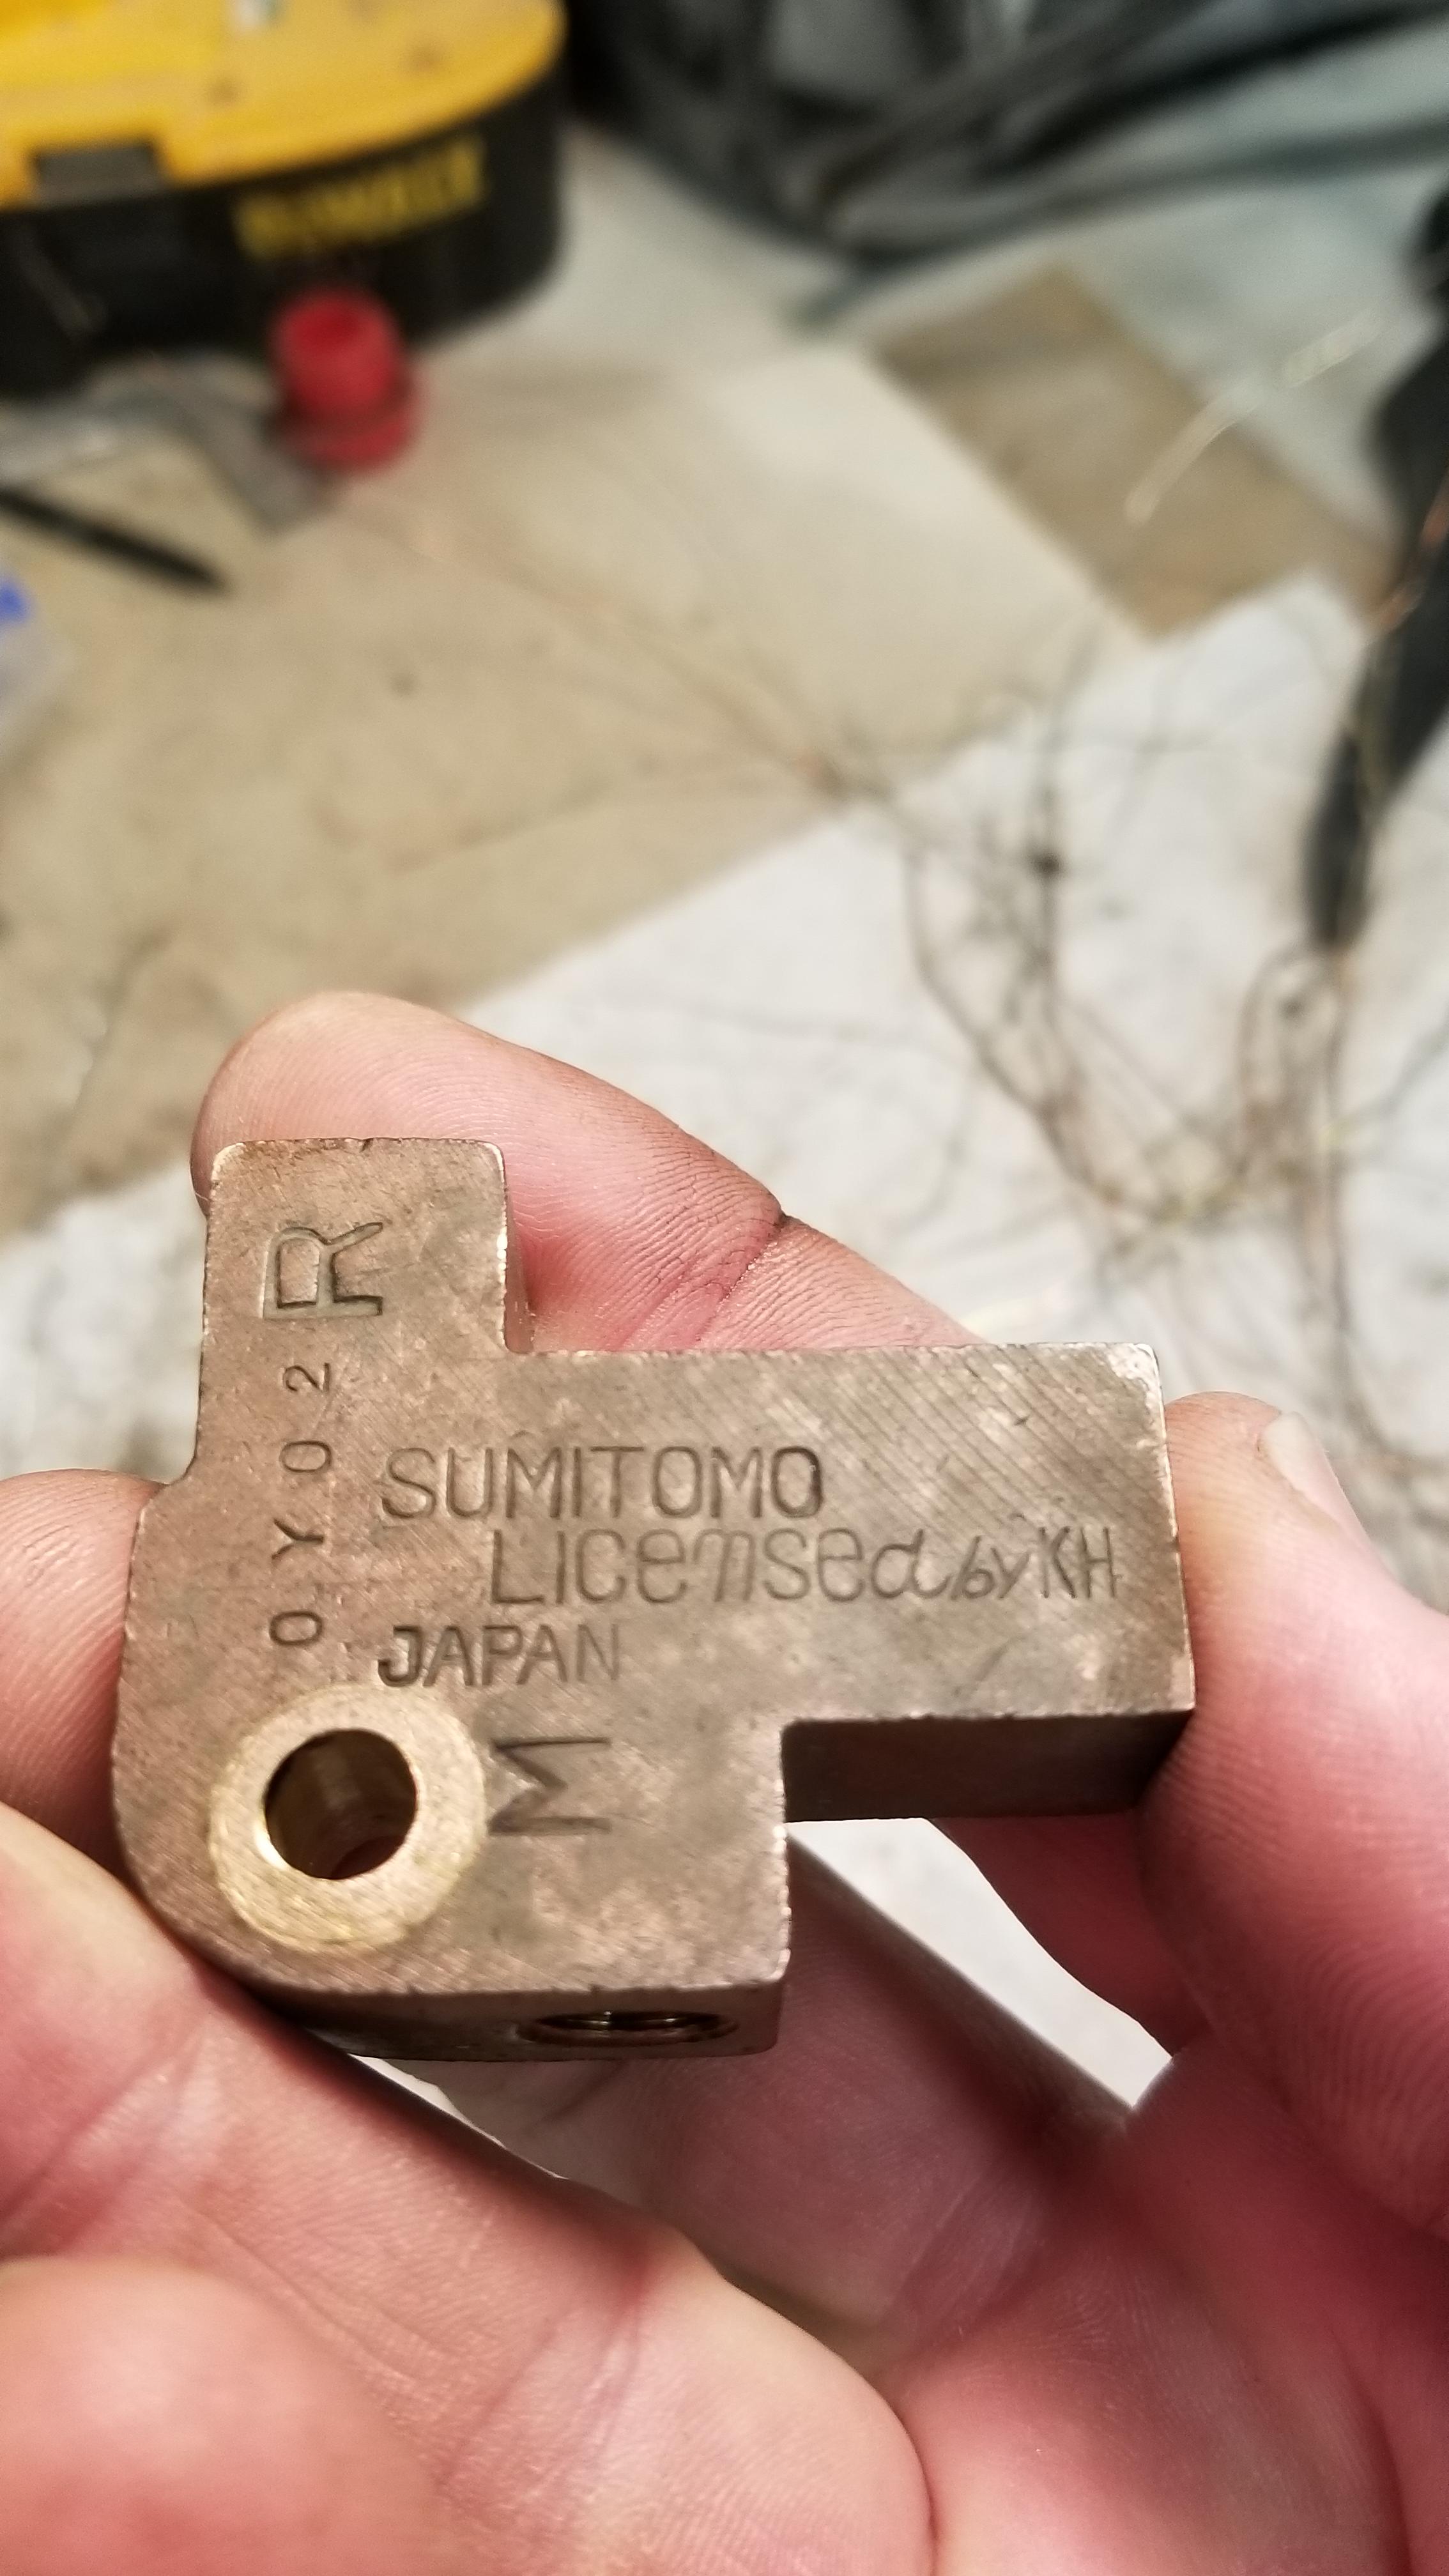
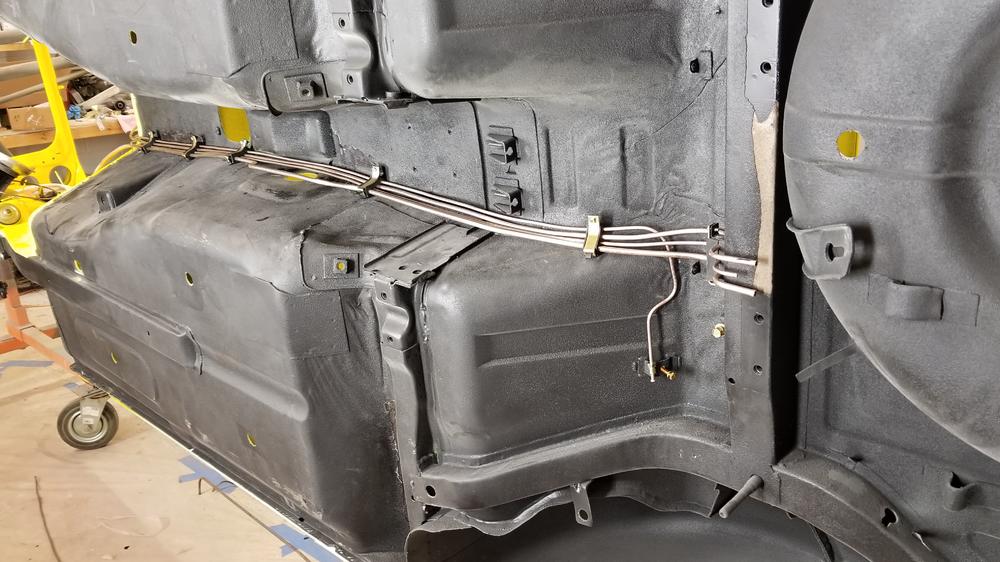
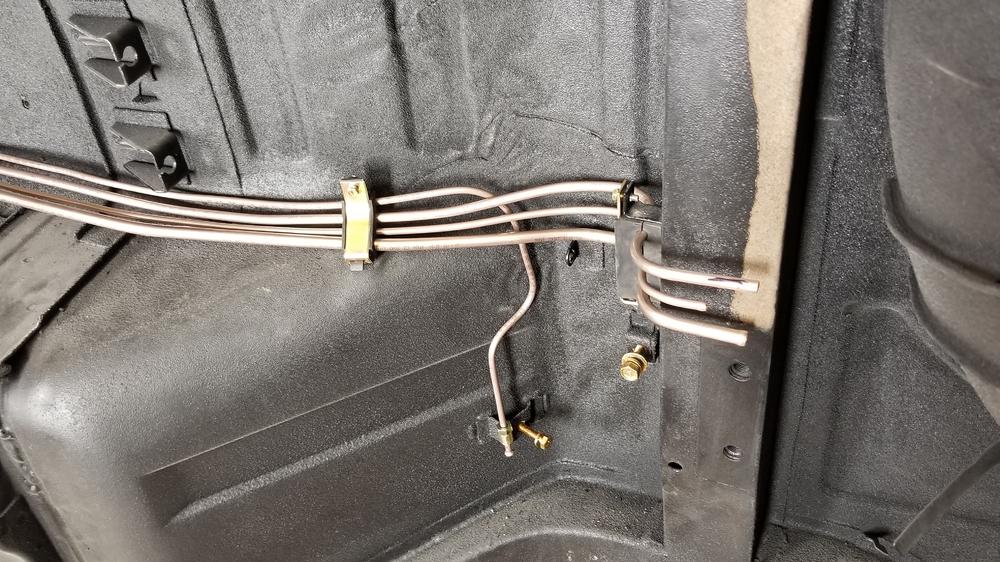
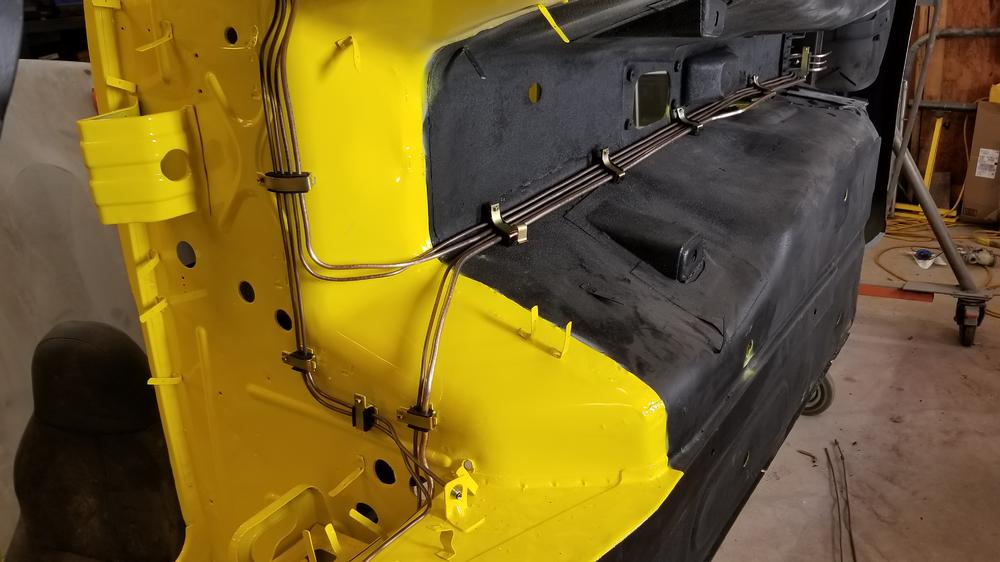
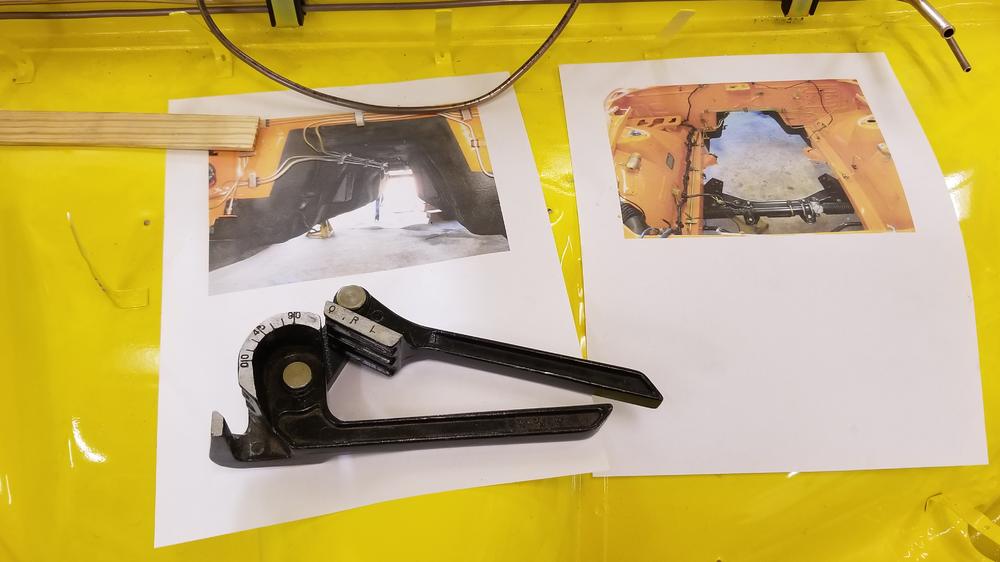
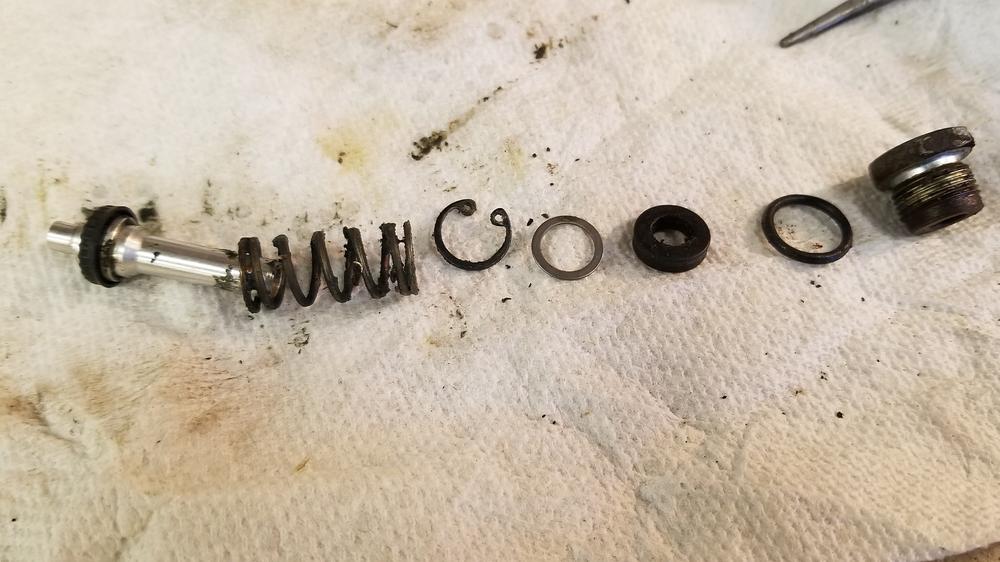
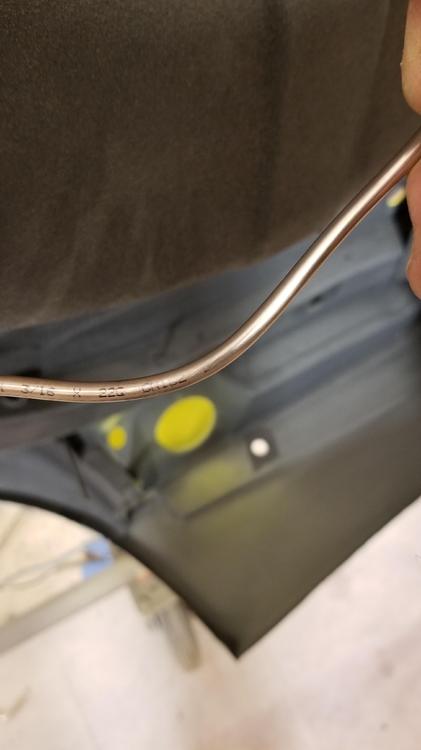
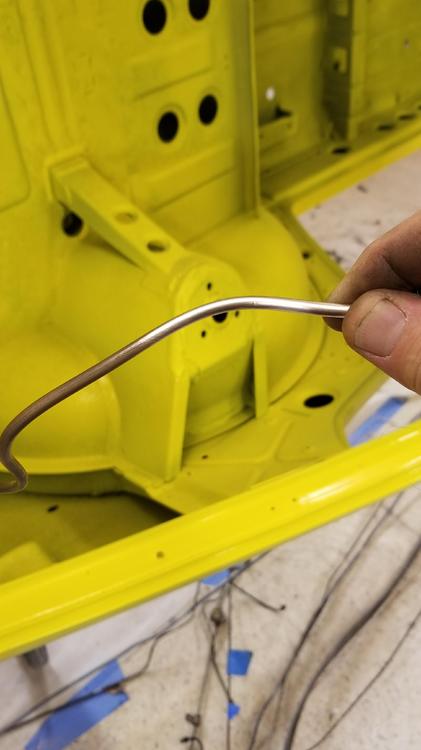
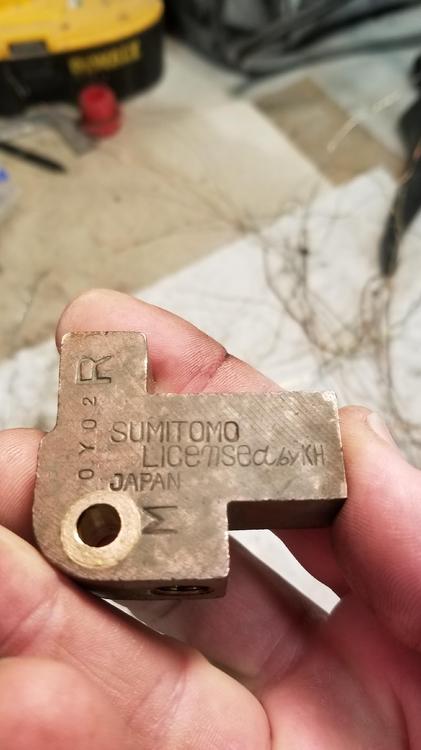
1 pointSo I made some more progress today. Worked on finalizing fuel and brake lines. Plated parts during this time. Disassembled the proportioning valve and the brake circuit switch These are Fedhill lines. I flared all of these with an Eastwood flaring tool that was loaned to me by a generous car guy! I bent this in a multiple of ways. Hands and thumbs, the handle from the flaring tool, a piece of 1 1/2" pipe and this flaring tool shown below Thanks Rich for the excellent photo documentation! @motorman7 Can some one ID this maser for me? Also where does this bracket go? I am guessing it goes on this section of line near the differential mount. The Fedhill material shines up very easily with #0 steel wool. I then ragged it with some Eastwood satin Diamond Clear. We'll see how it ages... Here is the proportioning valve broken down. I believe this is the original one but can't confirm it. It has an E4100 tag on it. Car parts manual says it should be E4101 so I am not positive. It also has the dimple seal at the top of it. There is some corrosion on the bottom of the push rod. Don't know if this is gonna cause a problem or not????


 1 point
 -
I googled "fastwoman yogurt cup test classiczcars.com" Works every time.1 point
-
1 pointThank you! Next on the list is rebuilding the rear end, since I've completely redone the front. After that is paint. I'll post pictures later, but the paint inside of the car is flawless and I'm gonna paint the outside to match. It's a real pain, isn't it? Haha. I've got 8 of them on my bench now.1 point
-
Godd work Siteunsen. I couldn't even find that one. I did find one where someone was asking about the yogut cup test. It might have something to do with the migrating from the old server to the new one.1 point
-
Hard to find the original thread like Eurodat says. Here's the best I could do with my phone. Hope you find something useful. http://www.classiczcars.com/forums/topic/49816-help-with-yogurt-cup-test-please/1 point
-
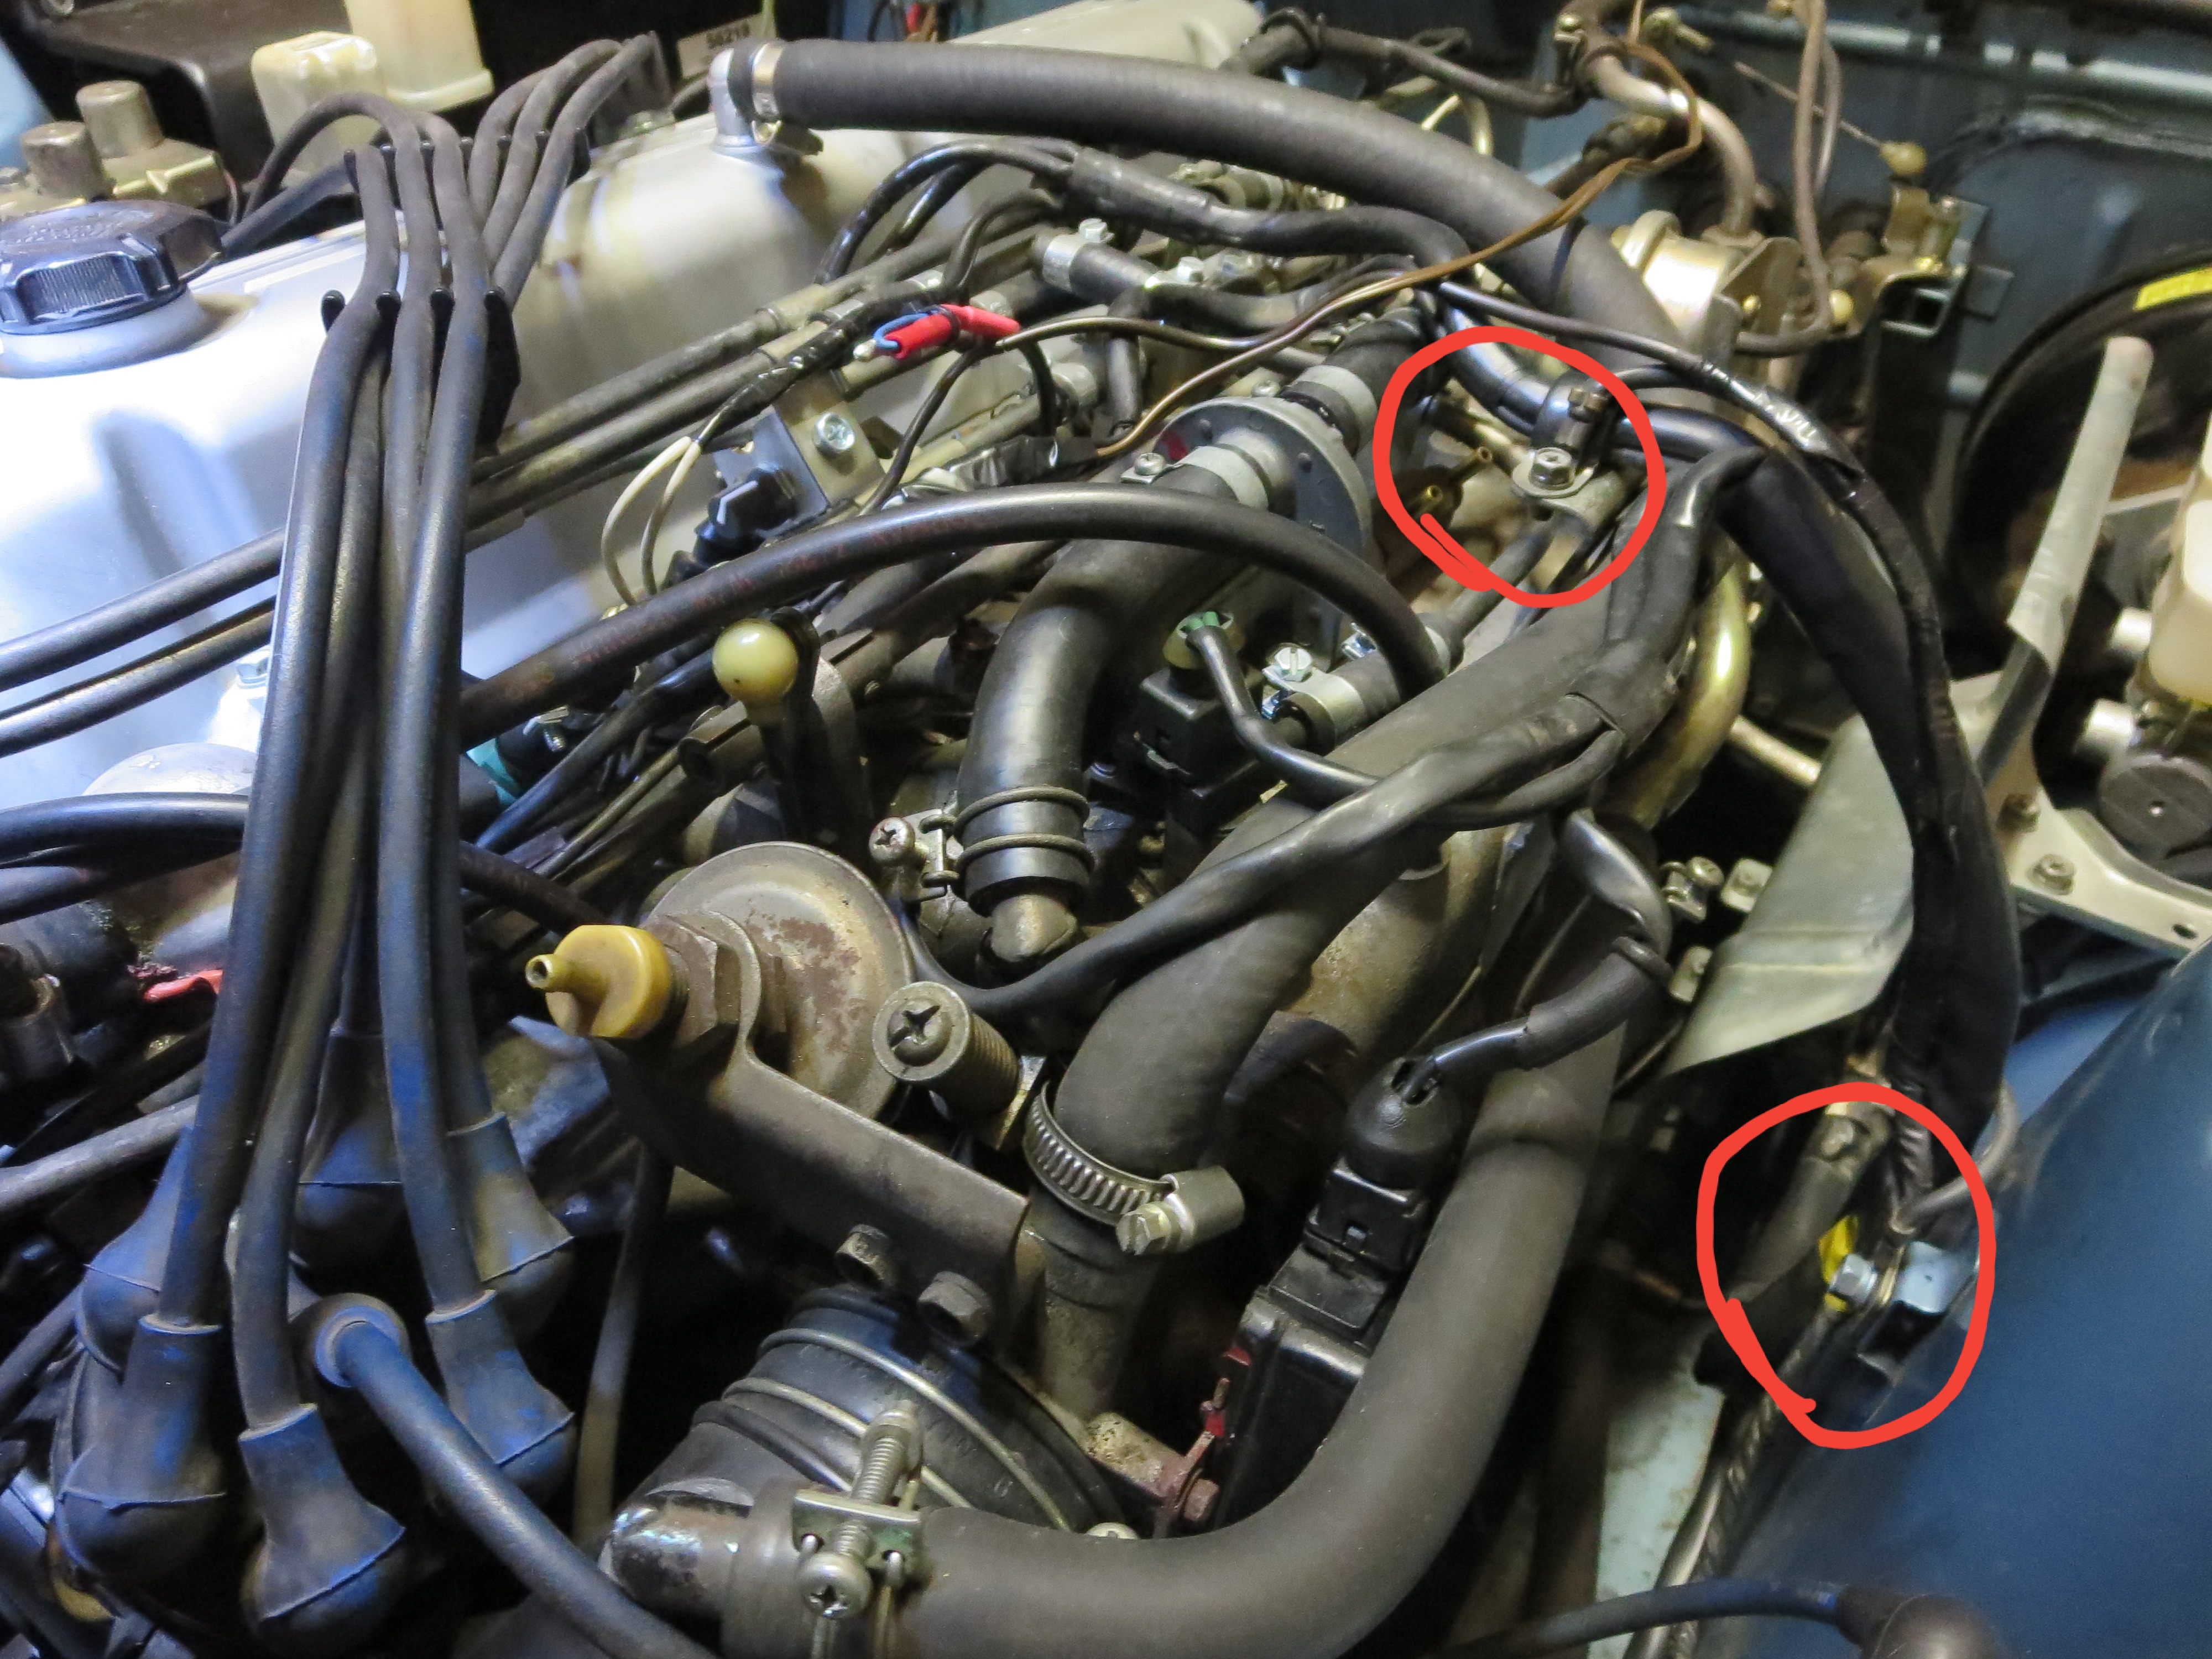
Hi Jesus, We have been PMing over your HEI module swap and I missed this thread altogether. Your problem could be caused by a number of issues or even a combination. The AFM switch is a common cause. The AFM has a cap with silicone kit. You can gently cut the kit and remove the cap to check the switch. Check the switch adjustment by reaching in from the air filter side and moving the vane or turning it by the counter weight by hand. Check for vacuum leaks. There was a thread on here called the Yoghurt cup test, but I can find it anymore. Basically its just removing the hose between the AFM and the throttle body and blocking the hole with a yoghurt cup. The removing a hose so you can blow air into the manifold with your mouth and searching for leaks with soapy water. Fuel pressure and pump capacity are also things that can cause your problem. Buy a simple gauge and you can do some symple test to check the pressure and flow. A blocked filter can be so bad, that the car will idle, but the pressure will drop right off when you open the throttle and need more fuel. The fuel system has infact two filters, one in the pump inlet and the filter at front right side of the engine. See the instruction in the pdf. It is for checking leak down, but the flow test and basic pressure check while running engine is what you need. Check the earth terminal on the top of the inlet manifold. It is very important for the EFI. And check where it connects to the body on the side of the strut tower. Cheers Instruction - Fuel Pressure Test 280Z RevA.pdf

 1 point