Leaderboard
-

Dave WM
Free Member3Points3,591Posts -

Mike
Administrator3Points23,065Posts -

siteunseen
Free Member3Points15,115Posts -
Redwing
Free Member2Points747Posts


Popular Content
Showing content with the highest reputation on 07/04/2016 in all areas
-
From all of us at Classic Zcar Club, we hope you have a safe and happy Independence Day! Light some fireworks and take that Z out for some fresh air! Freedom rocks...
 3 points
 -
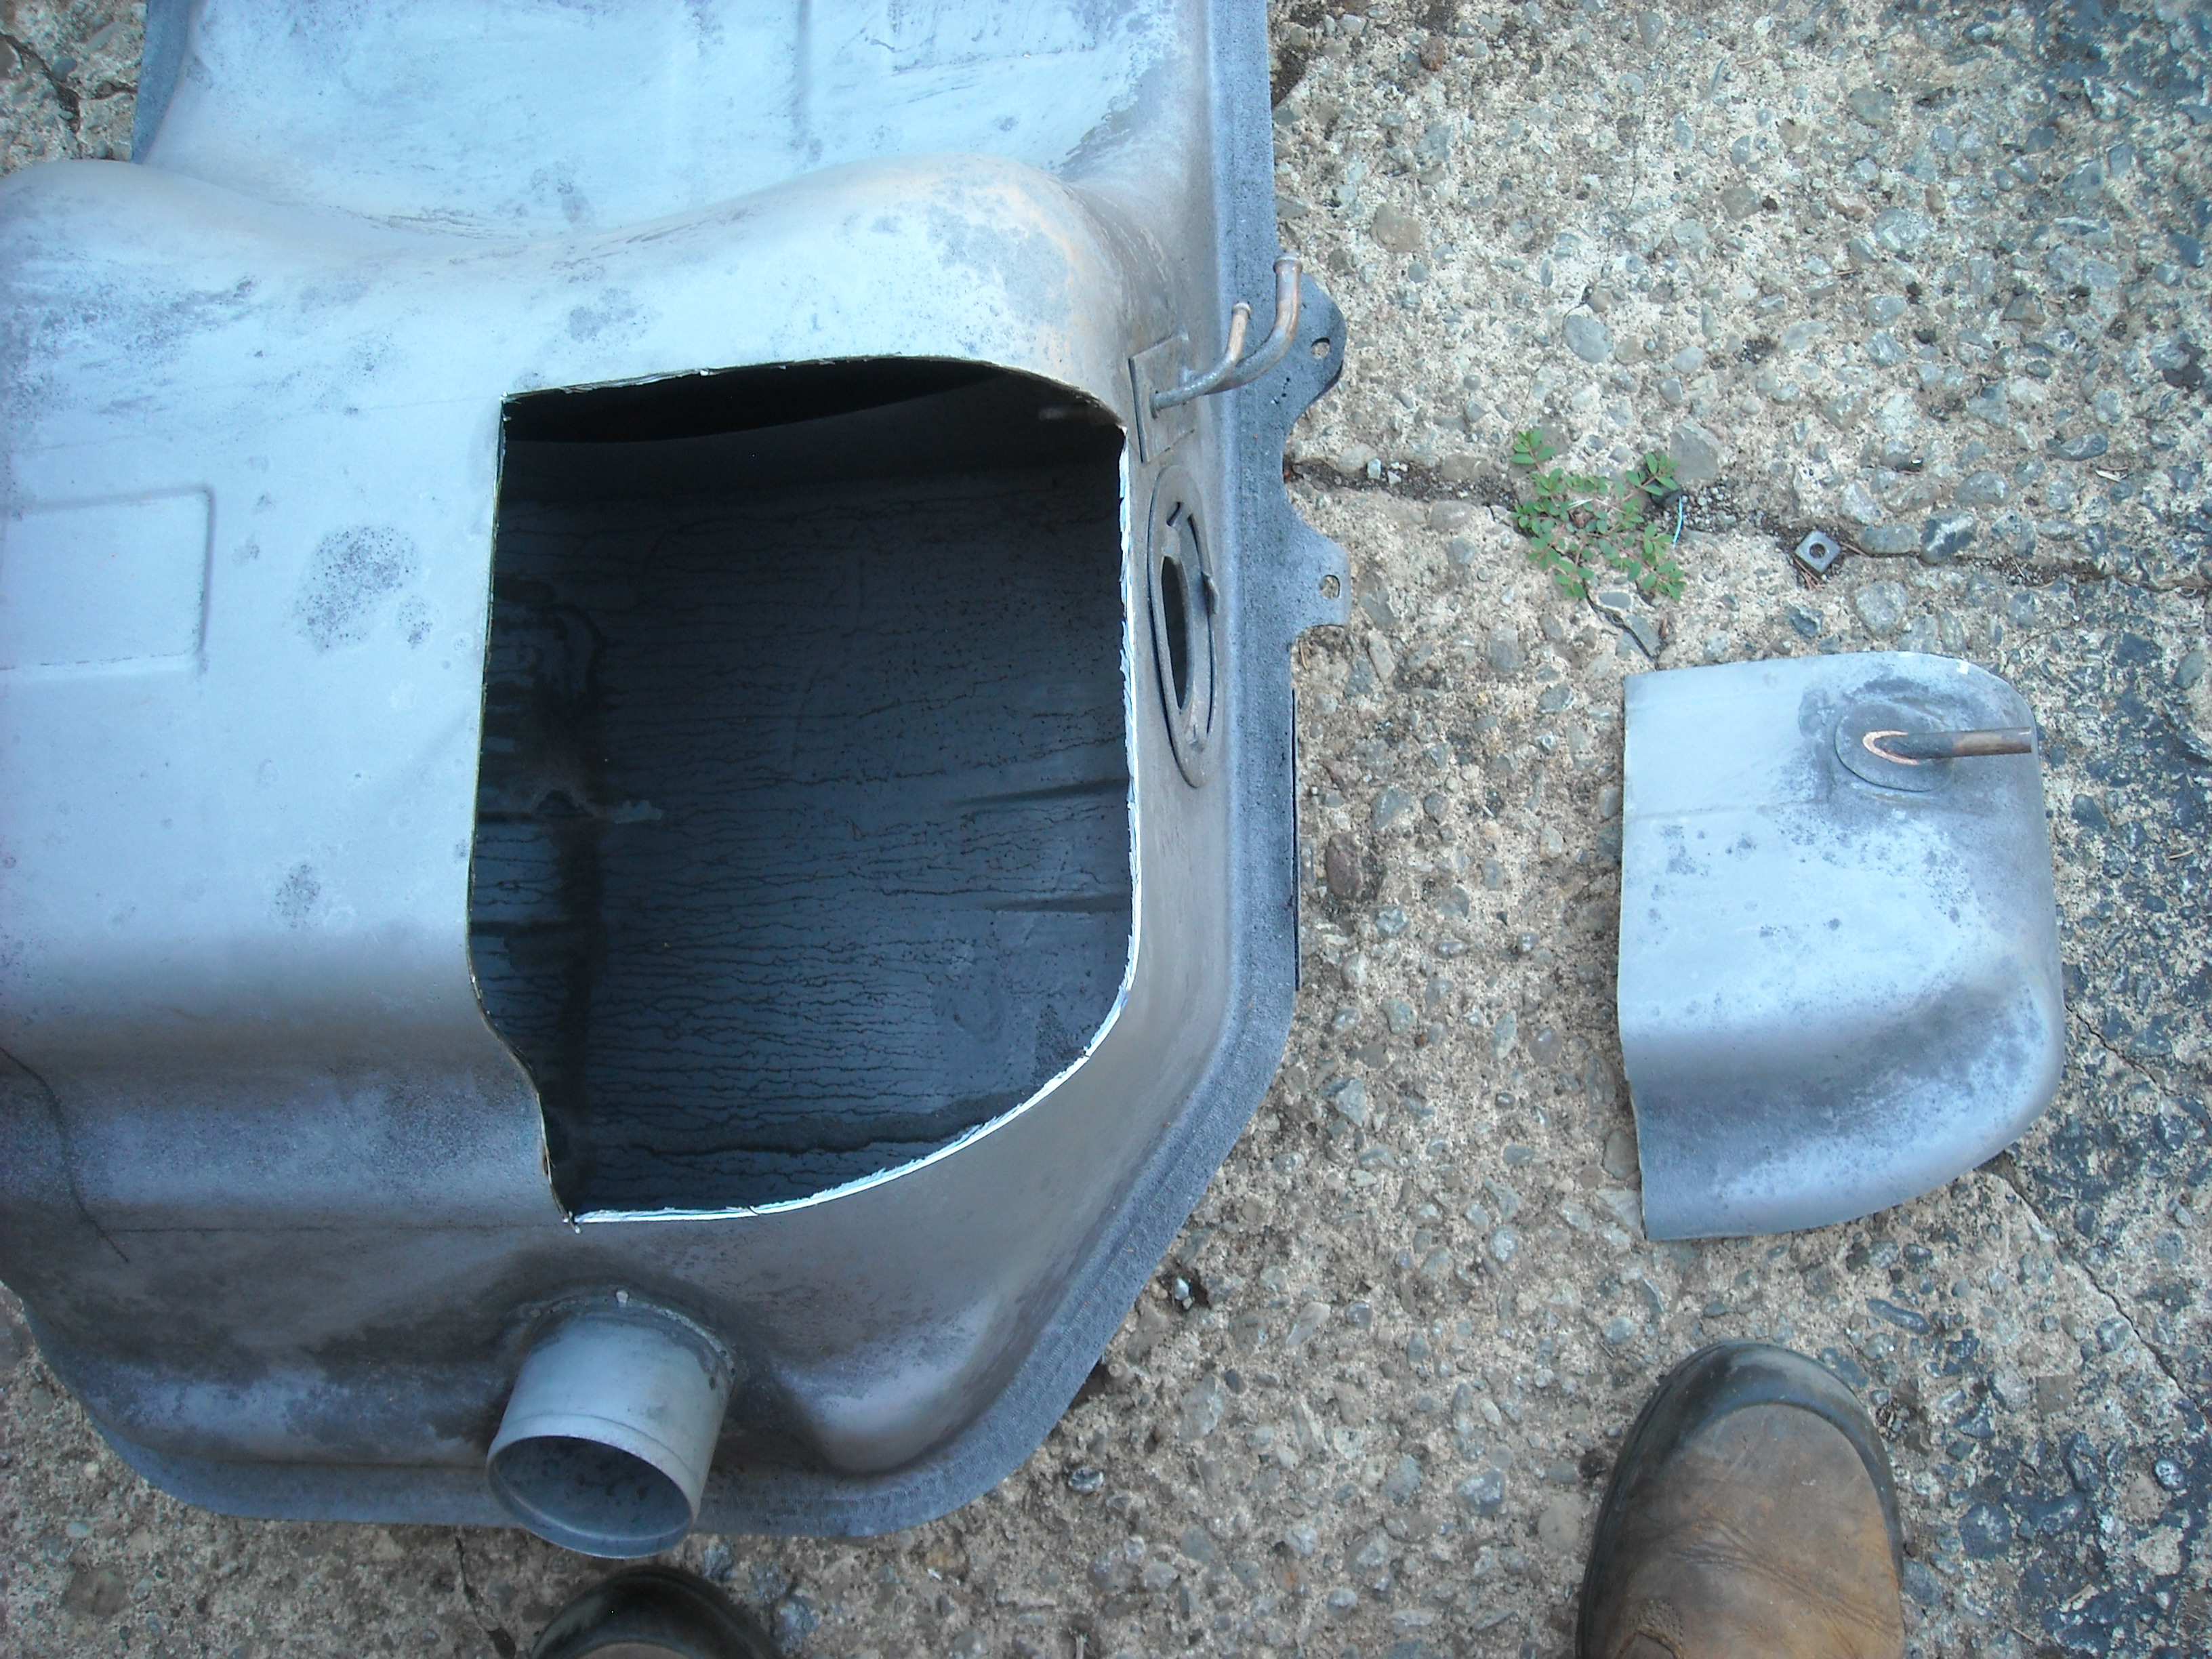
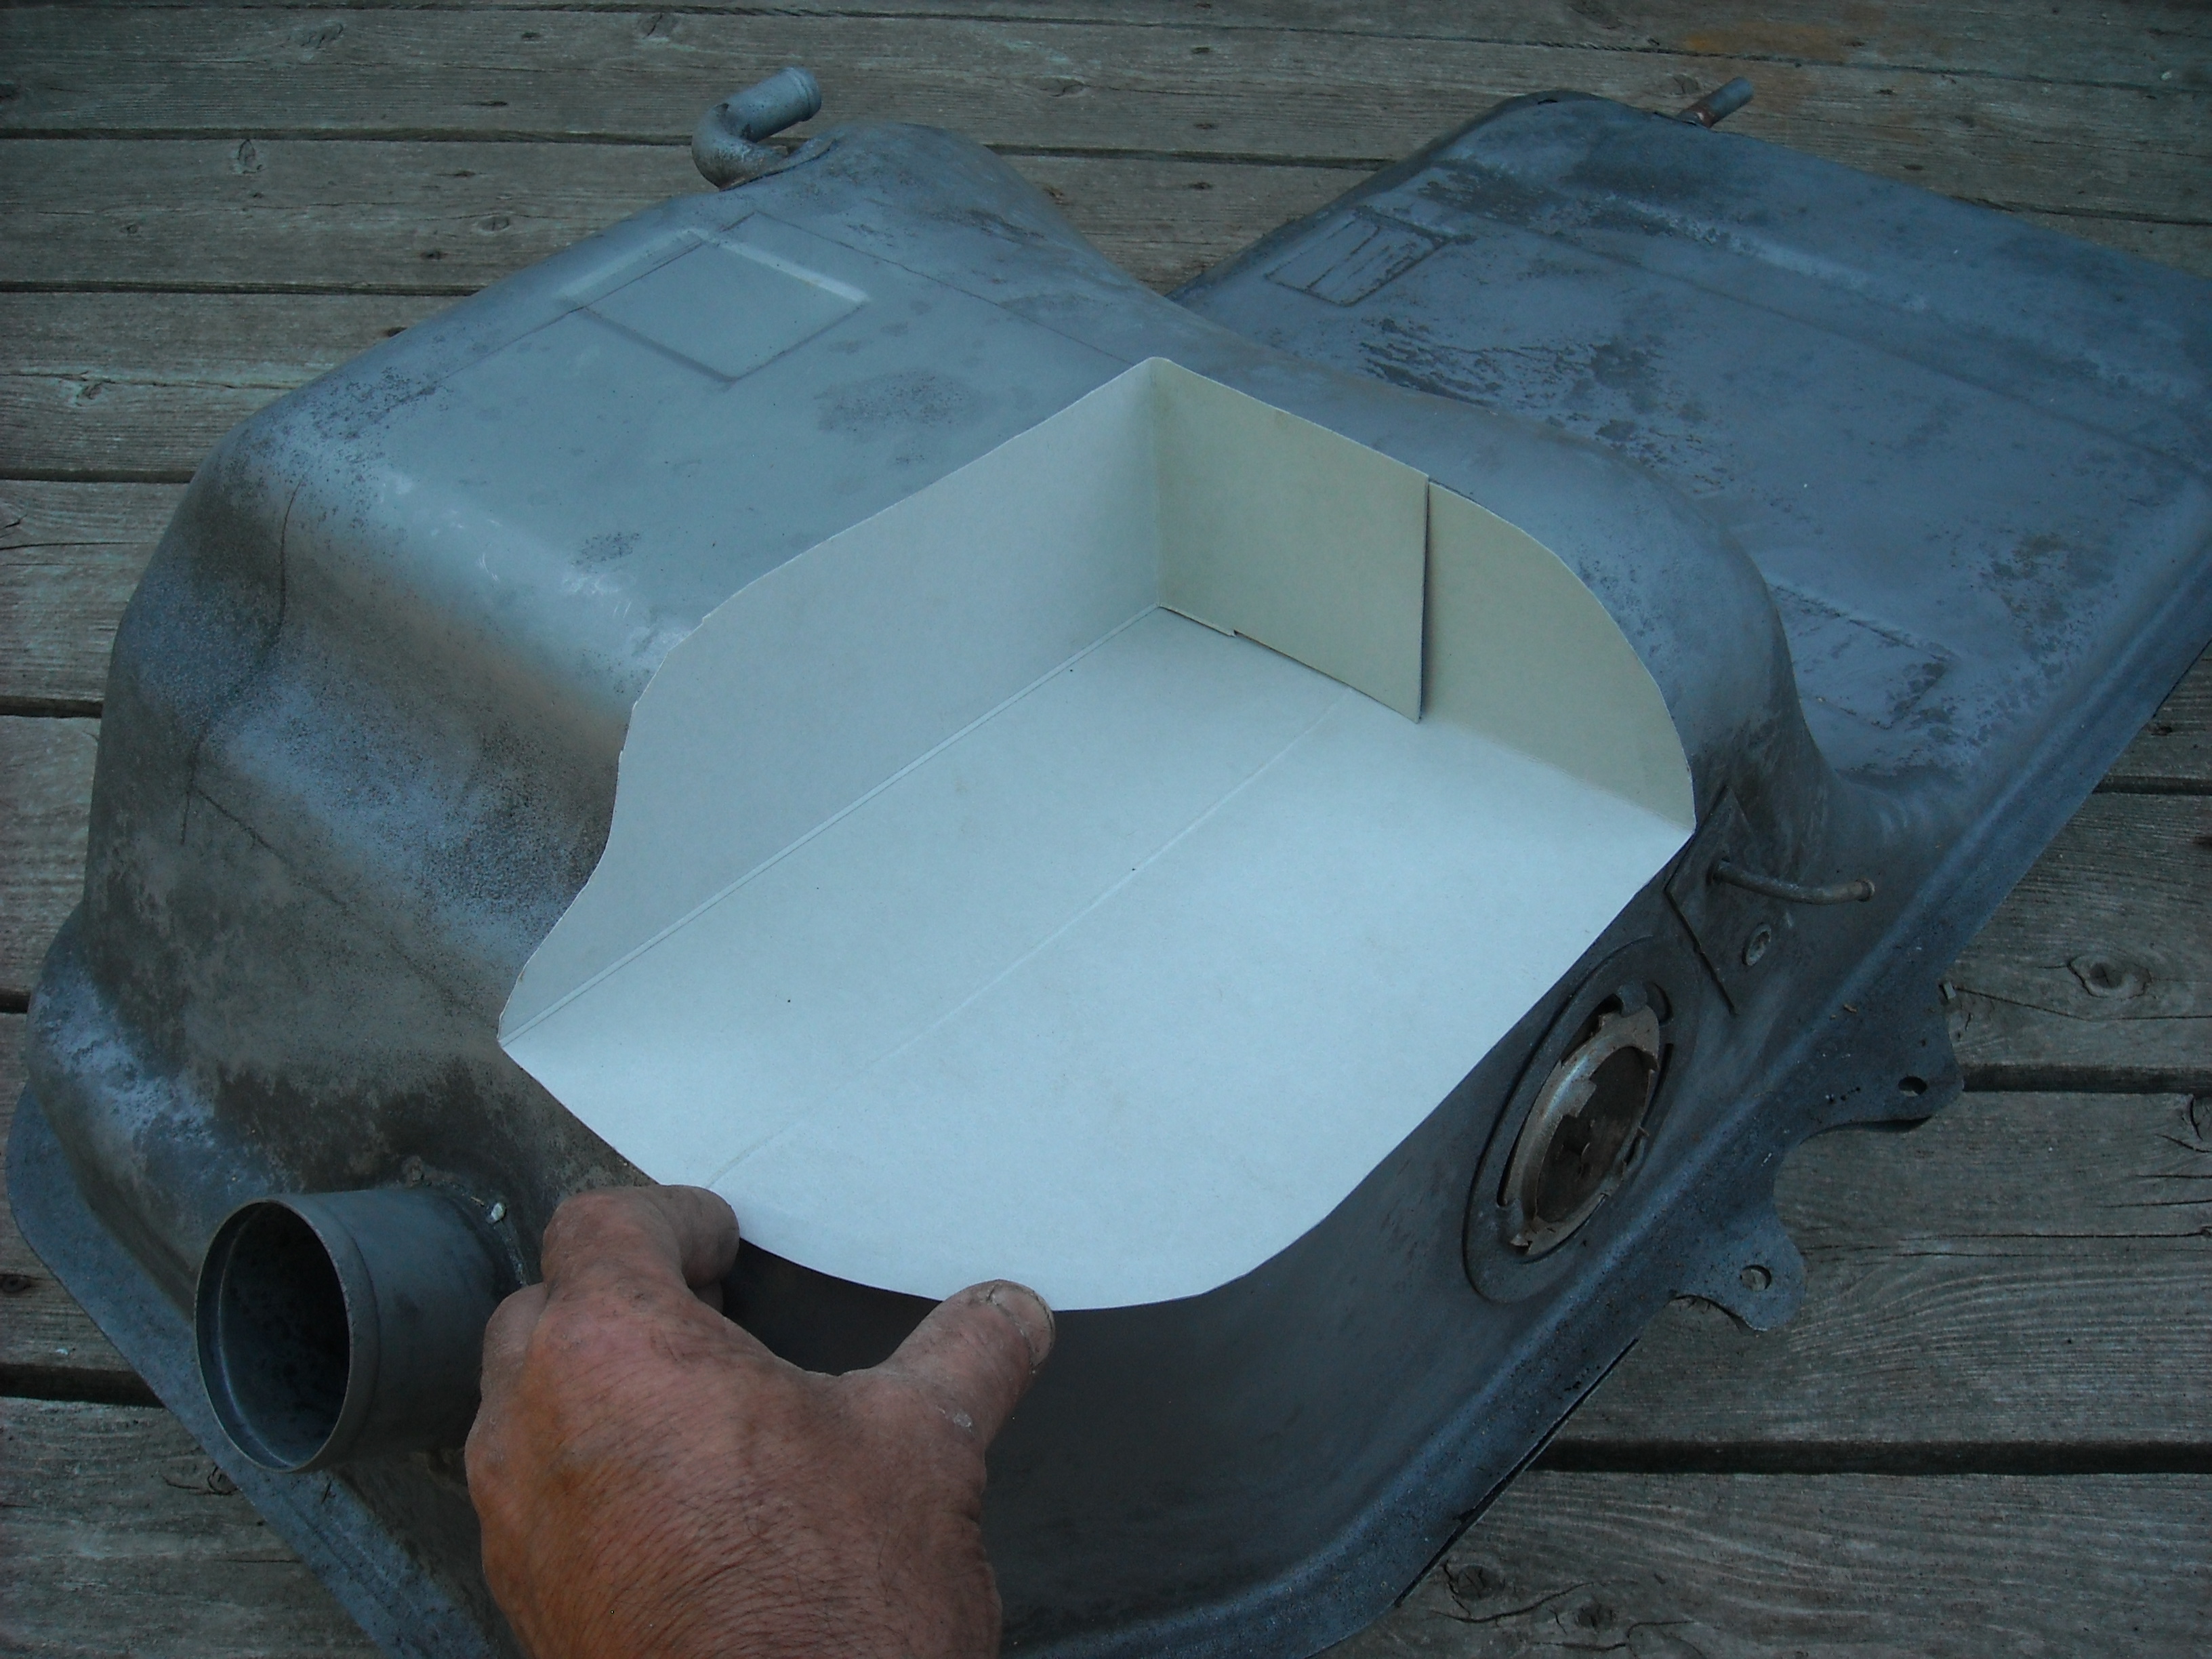
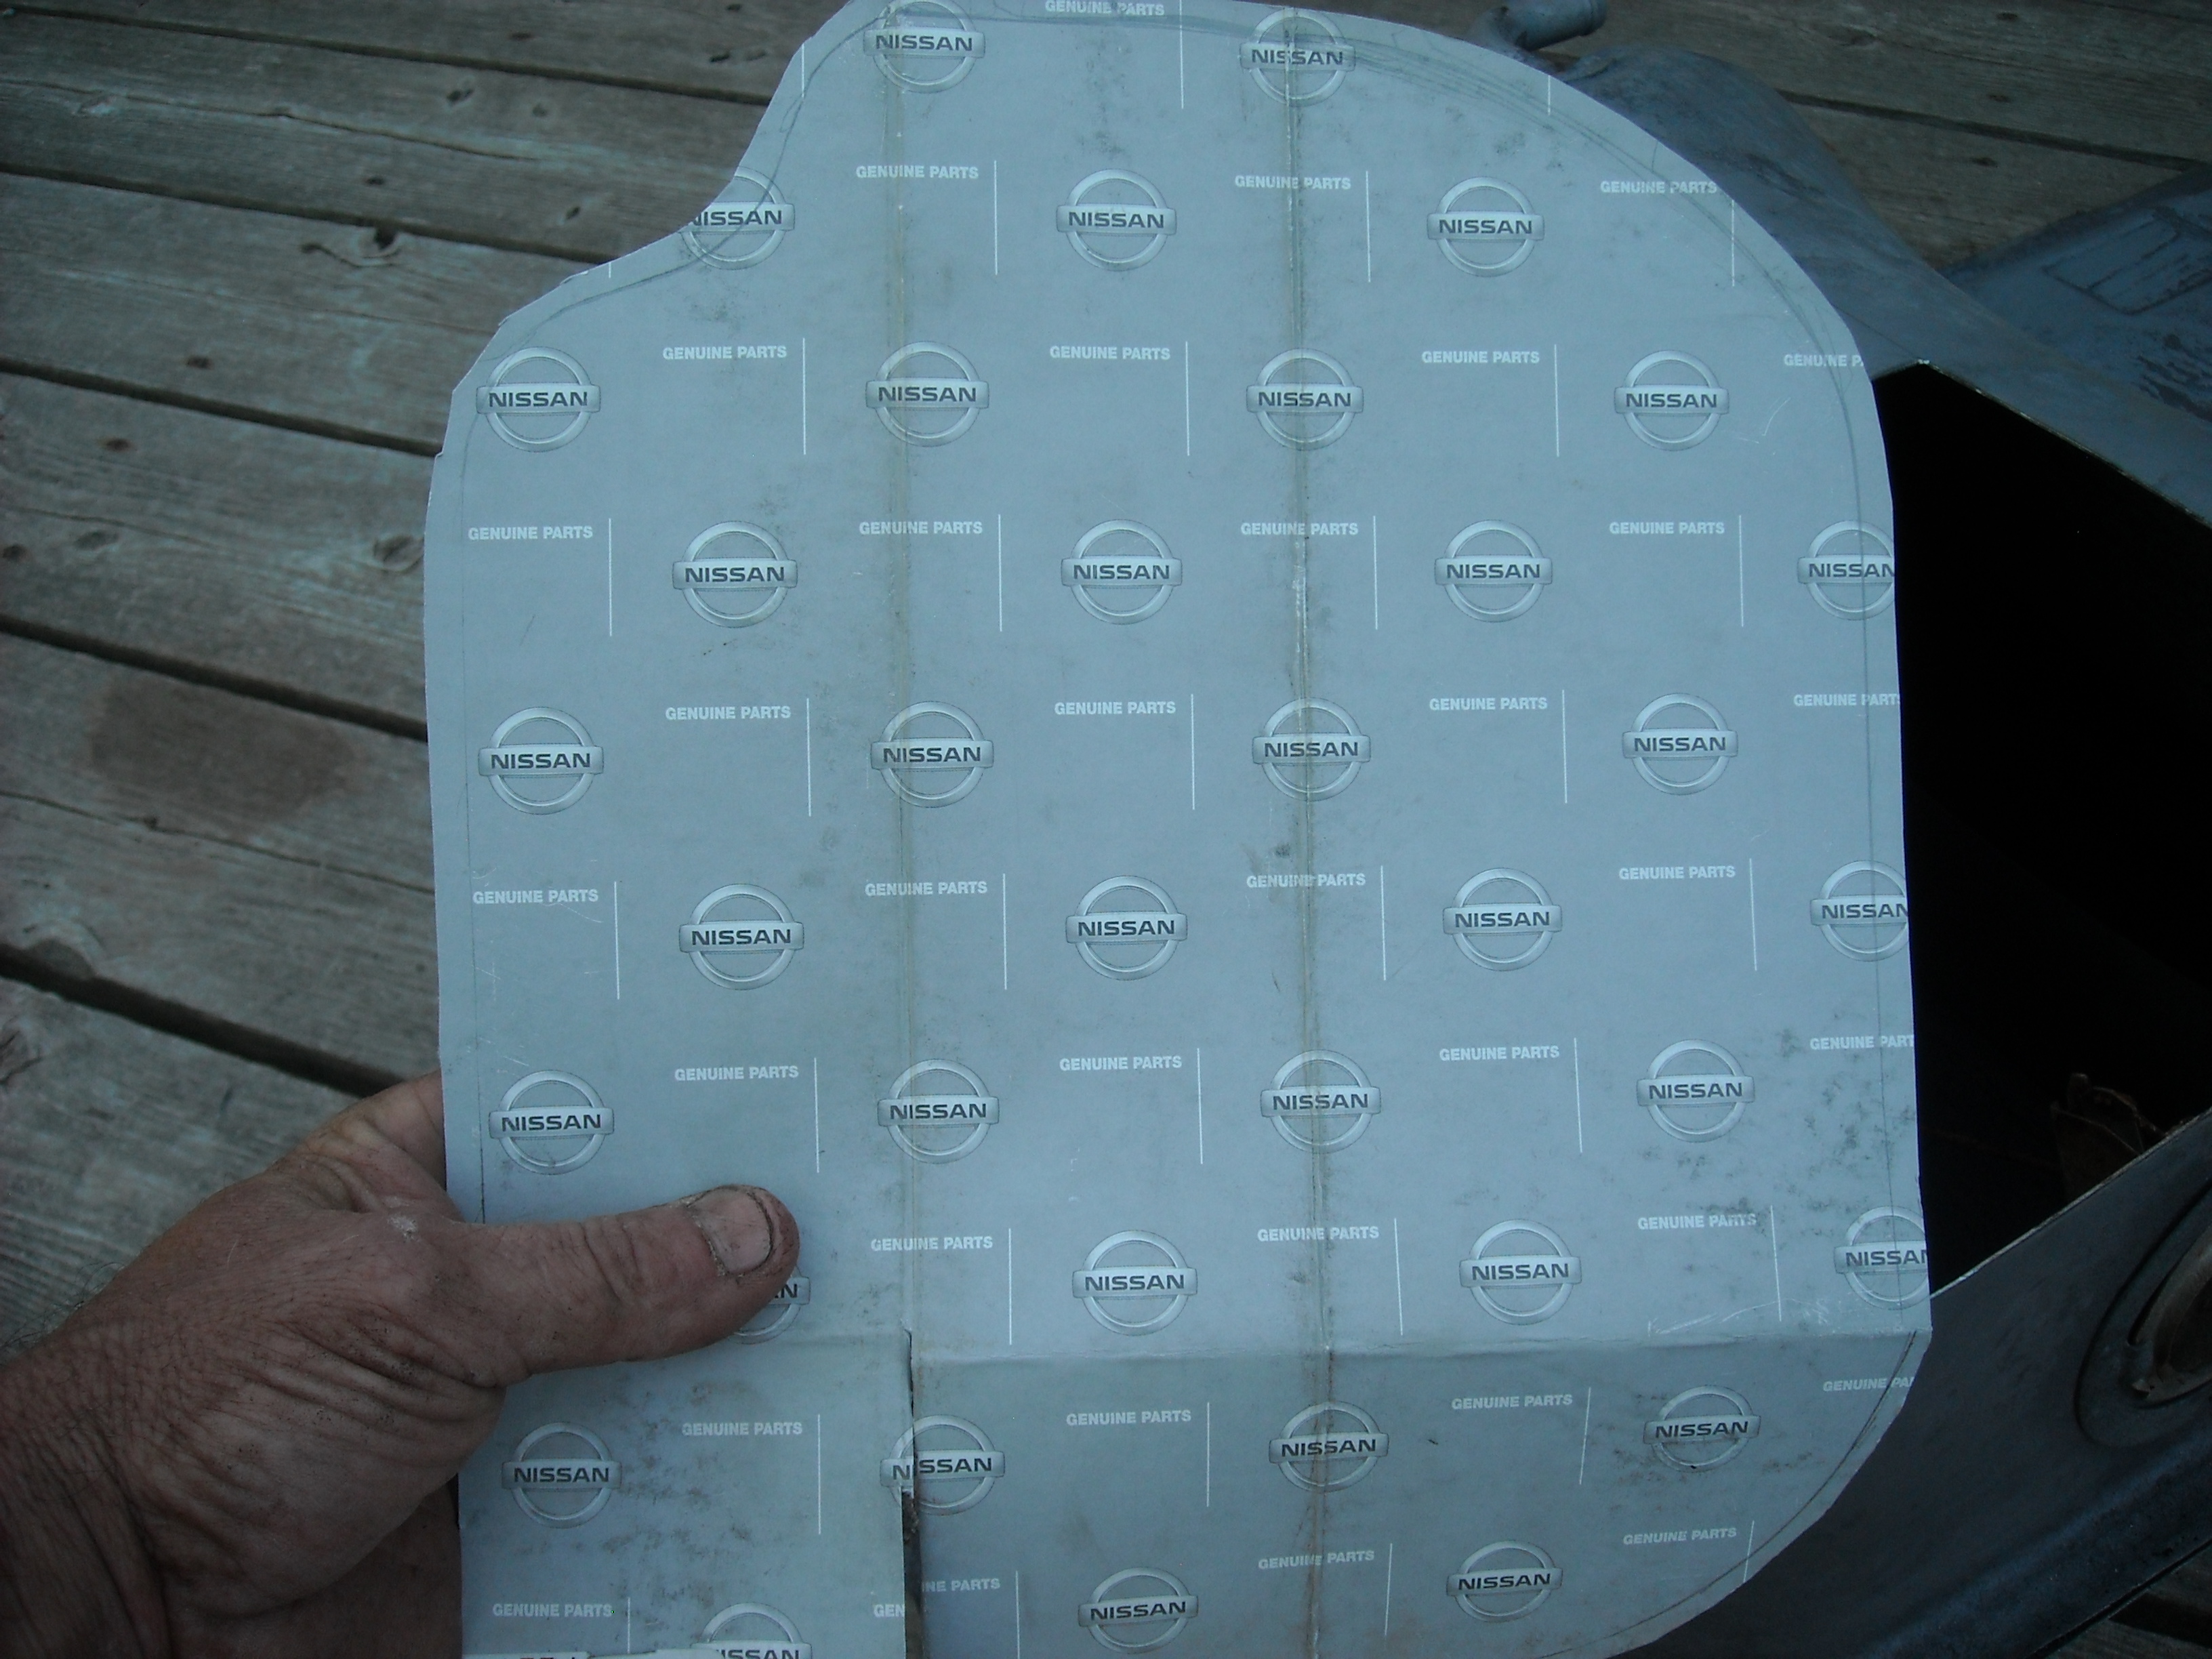
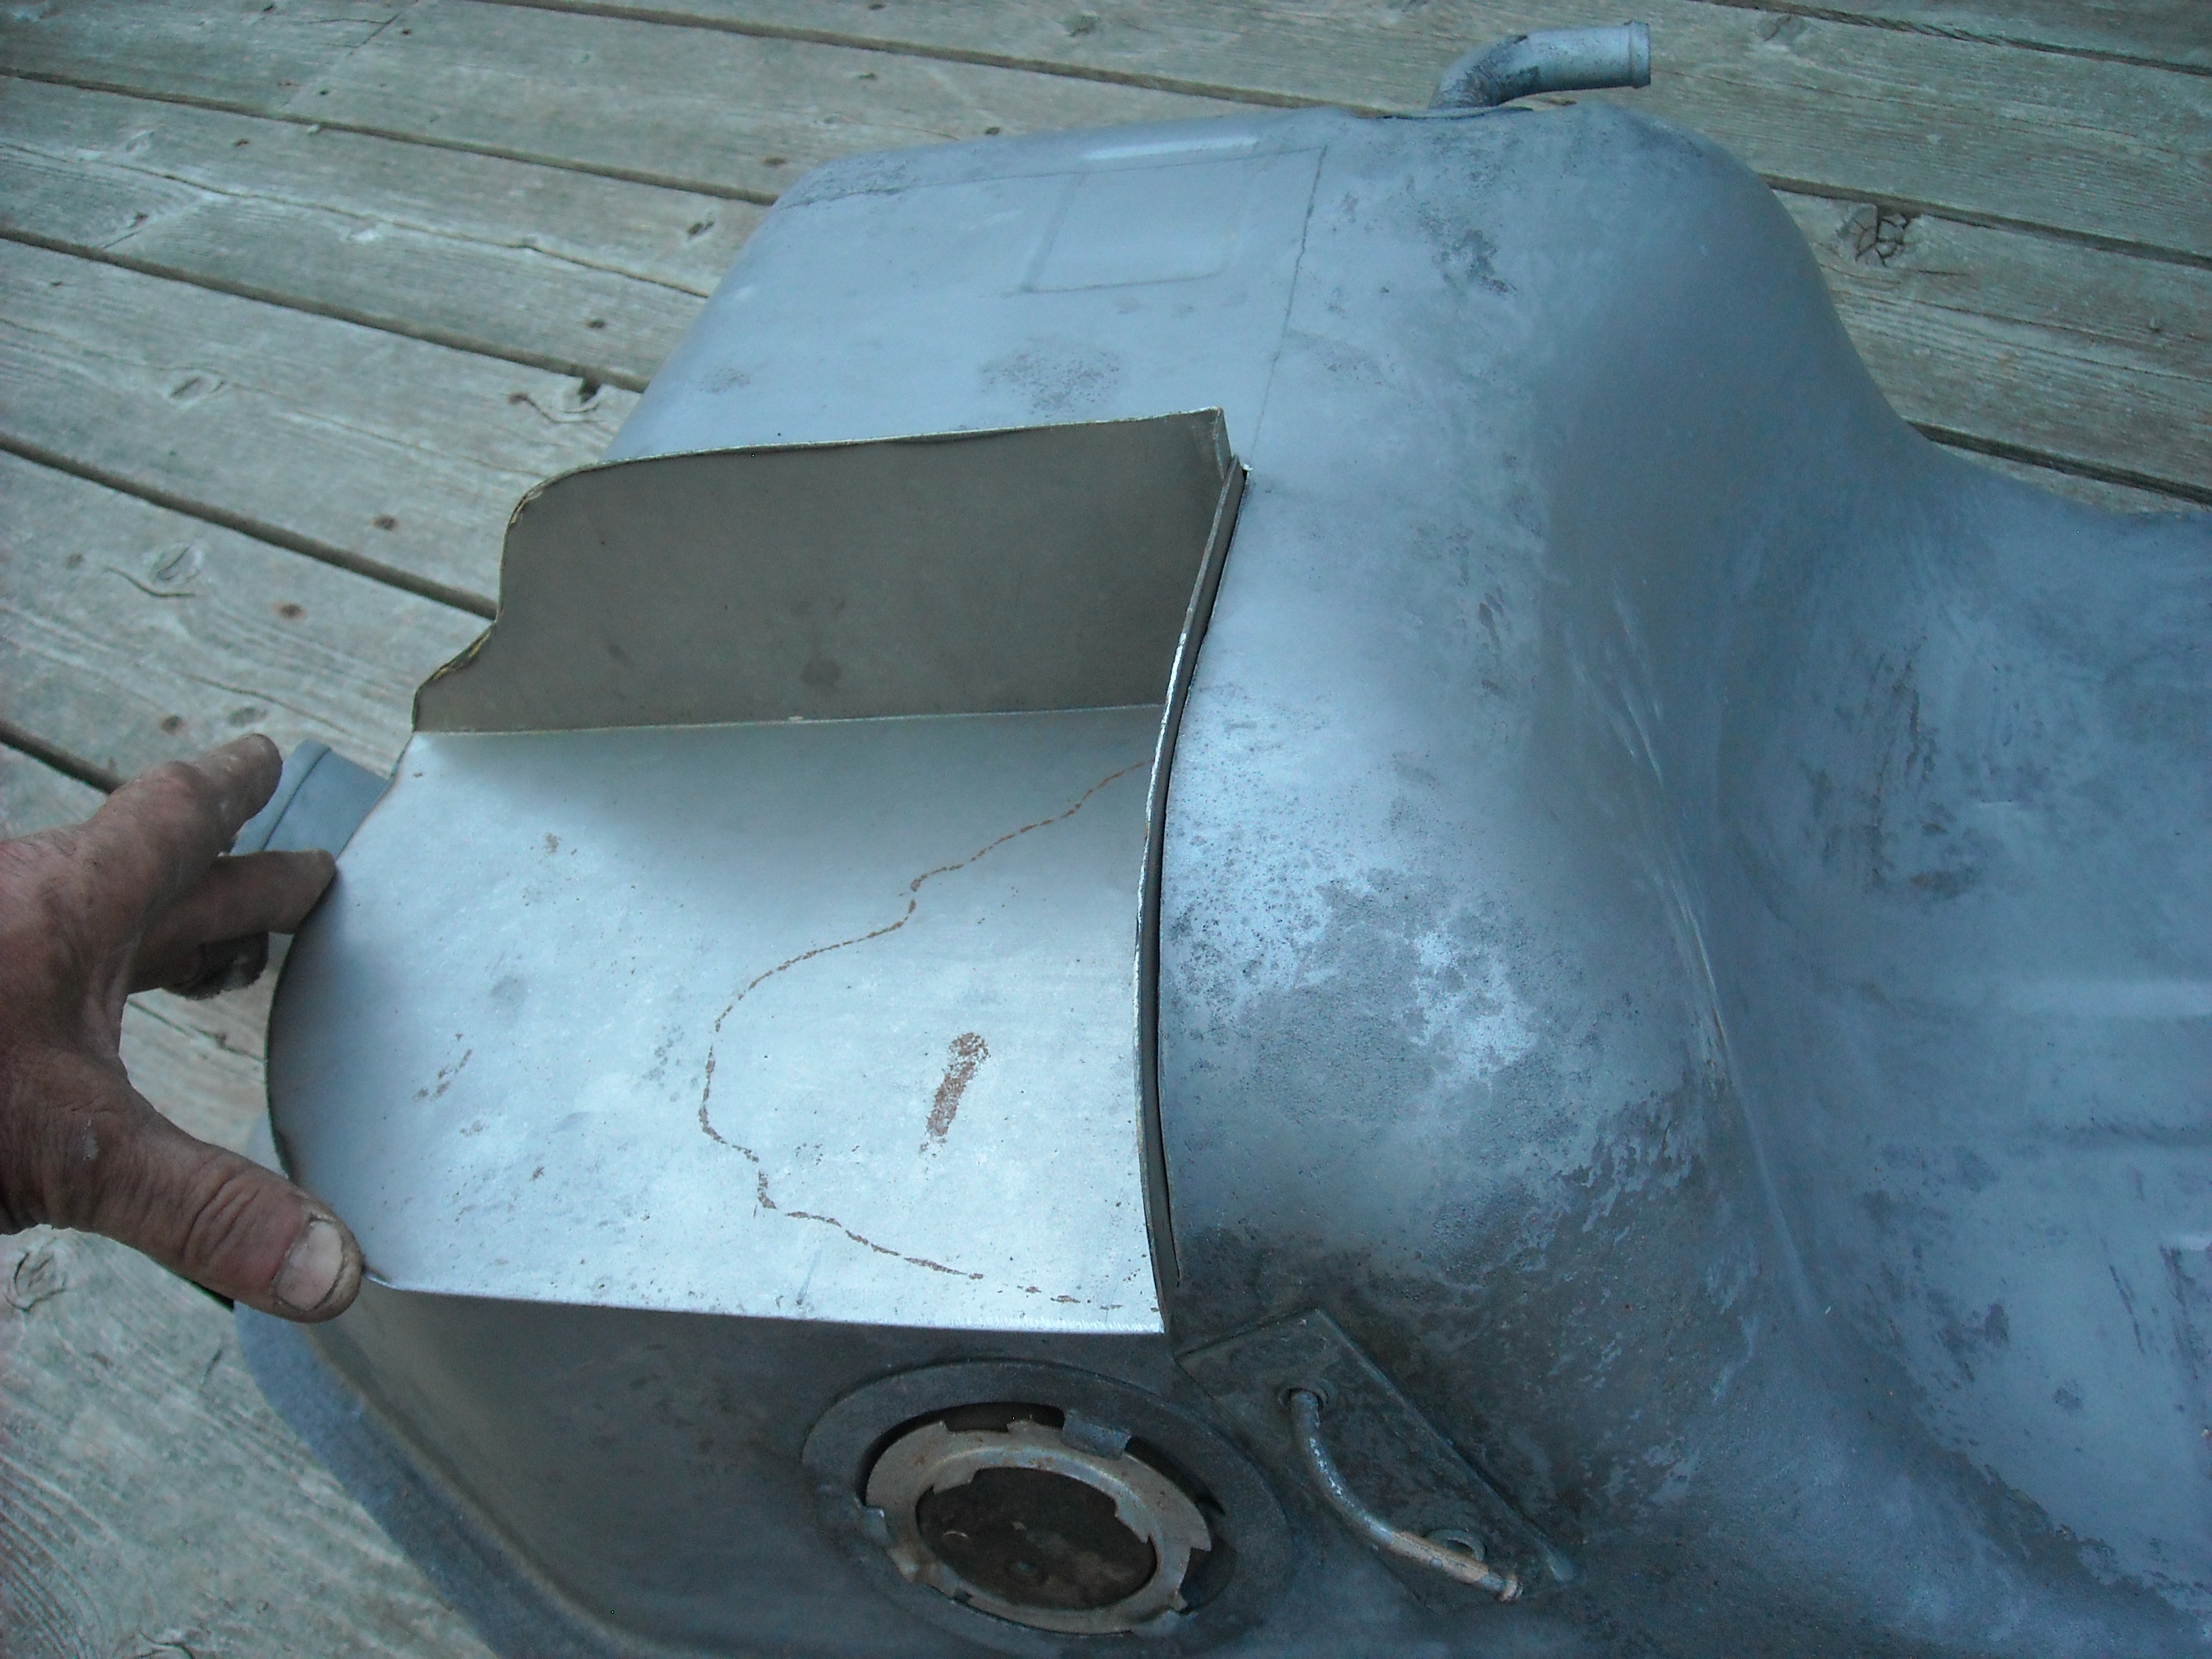
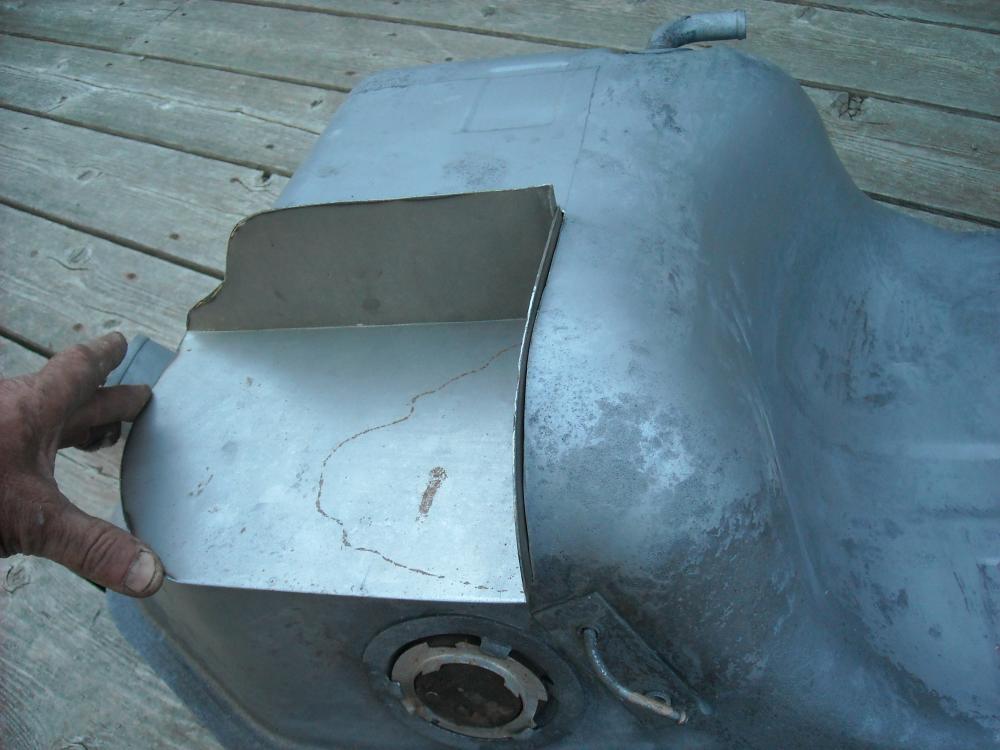
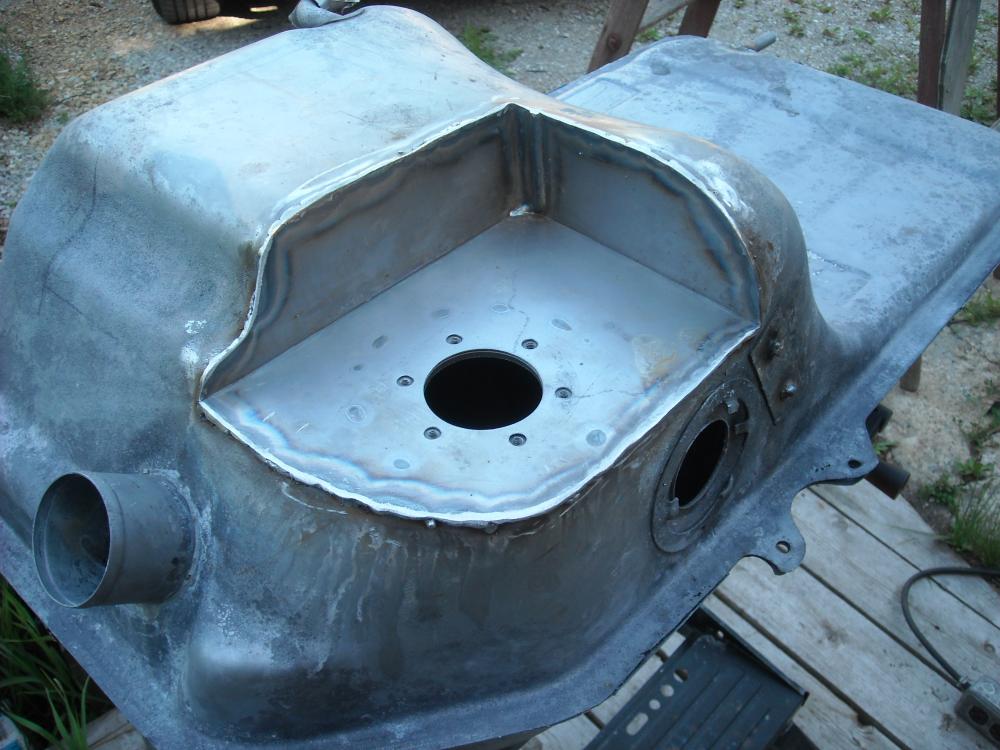
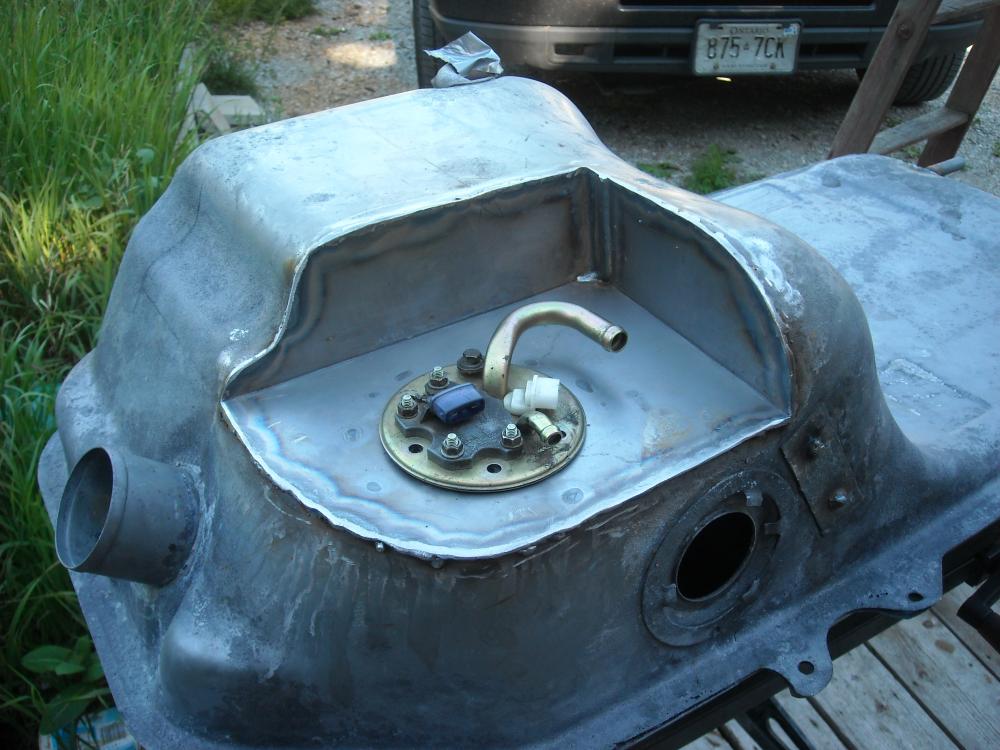
Charles, that reminds me of a thread a couple of years back where one of the members here cut out one of the storage bin lids from the rear deck of a wrecked 240z and welded it in right above the fuel pump he installed in the gas tank. Only another Z guy would know it wasn't a stock access door, I'll see if I can find it. Thanks for the idea!1 point
-
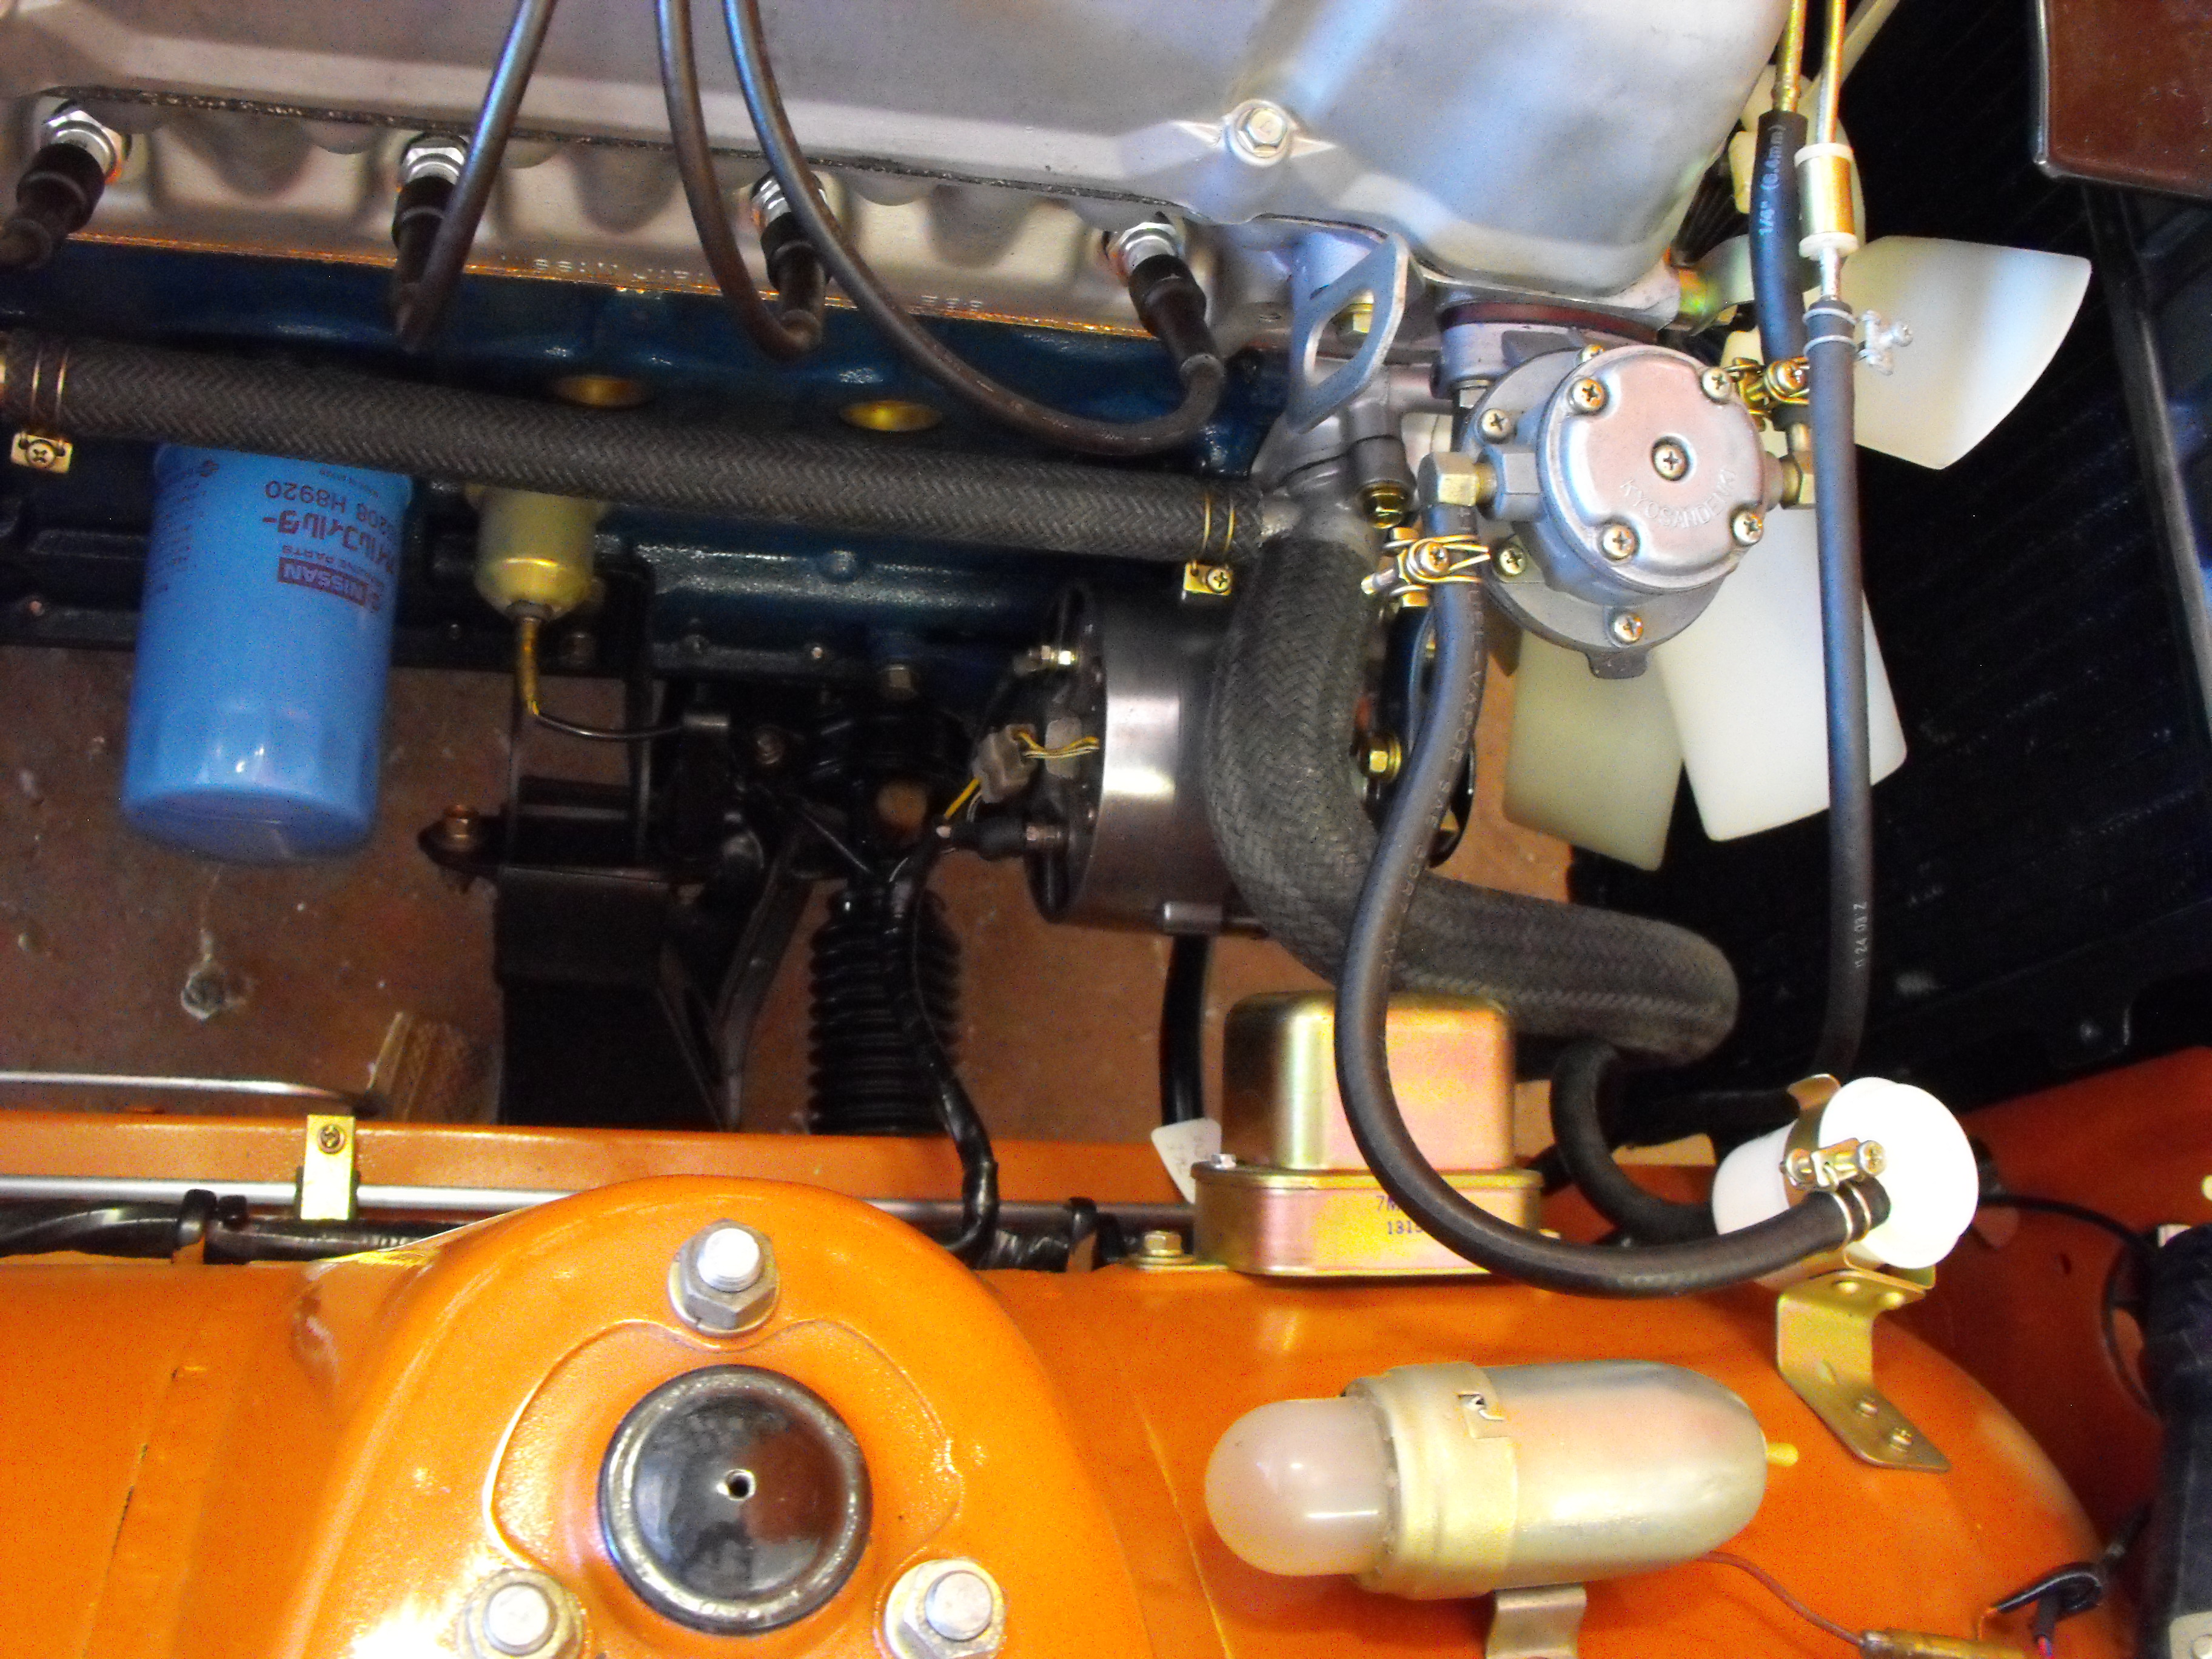
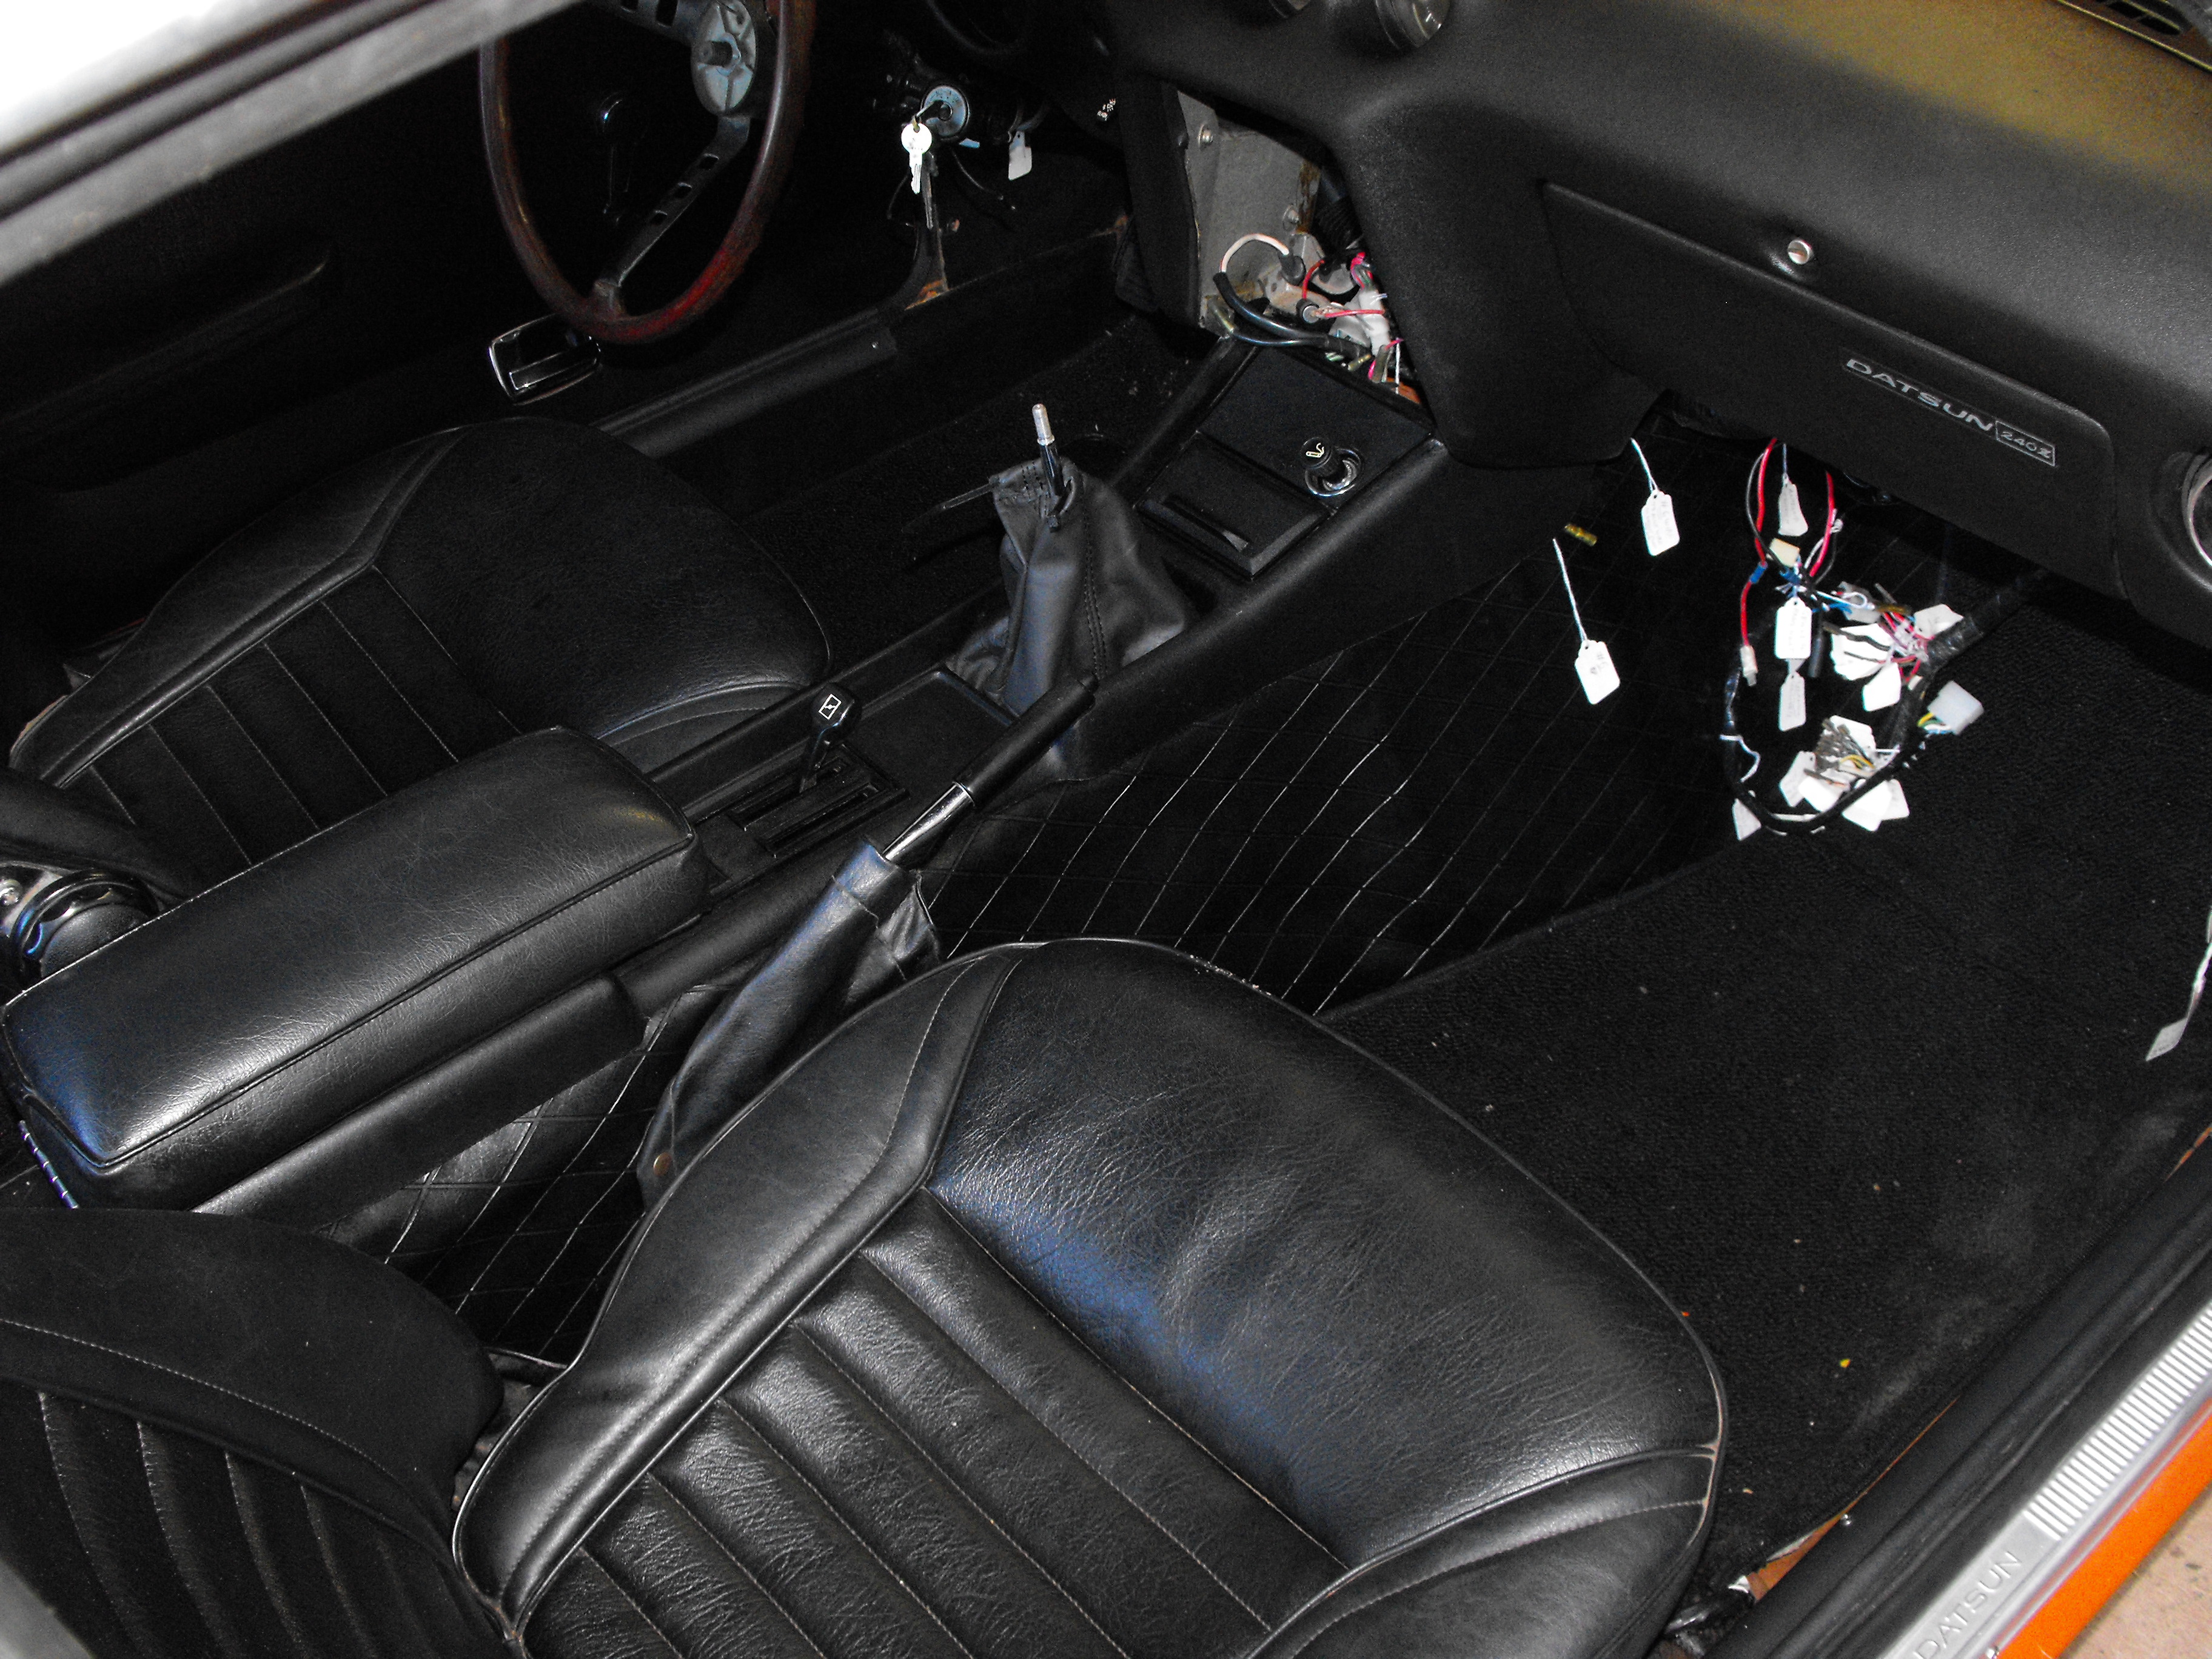
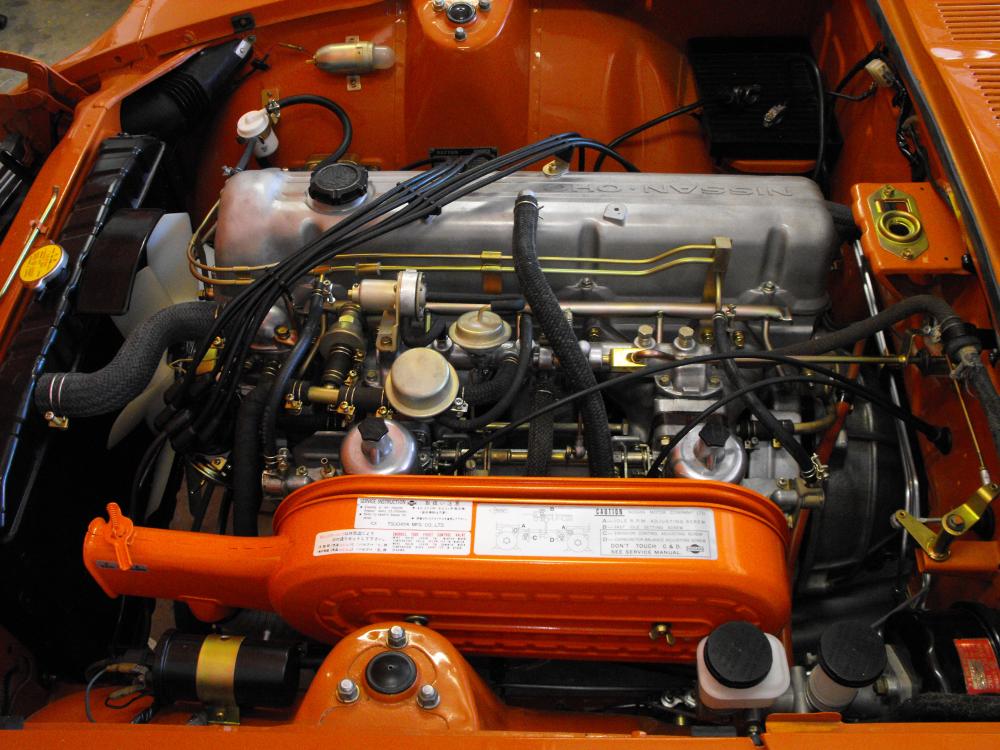
1 pointMore progress made over the long weekend. I got the new shift boot for the center console, so I installed the boot and the console. The console looks great, choke is hooked up, now it's time to start addressing the electrical. I did get the alternator cleaned up and installed. It is the original alternator, so hopefully it still works. I did opt for a new voltage regulator as those seem to be a bit more critical. I got the final fuel hoses attached to the fuel tank. Also got the fuel gauge sensor cleaned up, checked out and installed. The breather hose is from zcardepot. It was $16, way cheaper than Motorsports $75 tube and looks just the same. The braid is very similar to the radiator hose braid. Also attached the front bumper, but only temporarily. Still waiting for the bumperette rubber to come in. Here are the pics


 1 point
 -
1 pointSince its not factory anyway, the best thing would be to just replace EVERYTHING forward of the firewall and hope the evap is ok. Would be a good idea to remove the expansion valve (do not need to pull the evap to do that IF its a factory evaporator). Clean it, replace O rings check it for function. Button up the evap with cleaned expansion valve then all new stuff. I am saying this cause if you want a reliable AC that pretty much what you will need to do. I do things in stages but that's cause I can do the work myself, but that is not the best for all folks. edit on removal of the exp valve, SHOULD be able to remove with out pulling the evap BUT if its in there and stuck from lack of use, it could be a problem getting out of the housing. Based on what I have seen, its likely that you could have corrosion in there as well.1 point
-
1 point
-
1 pointOK. So that's an aftermarket setup. Not factory. The receiver dryer is a universal one and should be relatively easy to find. Those hoses with clamps are Mickey Mouse. Those all need to be remade. Fortunately it is relatively easy to get AC shops or Hydraulic shops to make the proper hoses with the correct AC couplers. Edit: Dave and I were typing at the same time.1 point
-
1 pointClearly after market AC, back off on the pic with the circle spot not sure what I am looking at. Good thing is you don't have the expensive drier.1 point
-
1 point
-
I learn more about our Country watching television on the 4th than 12 years in public schools. Don't blow your fingers off and let the dog inside tonight during the fireworks show.1 point
-
1 point
-
Regarding the poor reception of these AM radios, I just got hold of a TM-1081ZB and its sensitivity is zilch. I've noted that on other series 1 radios that the sensitivity was pretty poor also but my latest one is dead. So, I started by replacing one of the RF transistors and got to thinking this radio will need an alignment after replacing any of the RF transistors and I don't have a signal generator to align it. So, I found the guru of AM radio repair on youtube and just sent him my radio for repair. I asked him to please video the repair process because this is a pretty common problem on these old signal seekers. I will post a link to the video on here when he uploads it. So if any of you guys like to tinker on these radios, this may help you in troubleshooting what's wrong and you might be able to repair yours for the cost of a transistor. This should also apply to any first gen s30 hitachi am/fm. The only difference it appears is the location of the transistors on the boards. Stay tuned.1 point
-
1 point
-
1 point
-
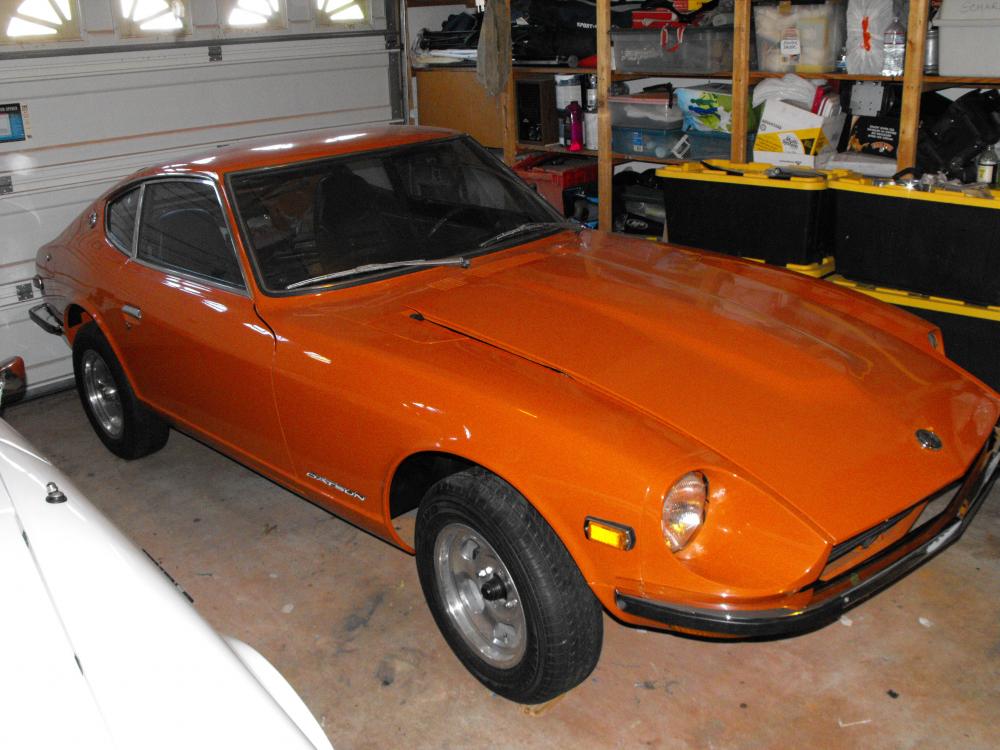
1 pointSo it happened!!! The car looked and ran great!!! No issues other than some minor fuel leaks at the gas tank when parked at an angle. Definitely watch the video! Worth the watch with a few cool shots of the Z!1 point
-
1 pointYour right Jai, love is blind. I've been down that road before and that's why I said what I did, experience. I had an '81 911 that I loved and worked on constantly spending a life's savings. Sold it and bought a Camry then I was able to buy the Zs from cutting my losses with the Porsche. I apologize for speaking my mind but as stated above you could spend $1,500 at least on a good a/c for Red Bird. Hopefully a $100 worth of R-12a Red Tek will get you through the summer. I just got a Nissan Sentra with cold air for $500. It's not pretty but runs good and gets 35 MPG plus bone chilling air. Cheap grocery getters are out there. I don't see how you do it, I'm 47 and can hardly get out of mine. Working on it myself saves me money but I turn around and spend that on pain pills and stay in bed the next day.1 point
-
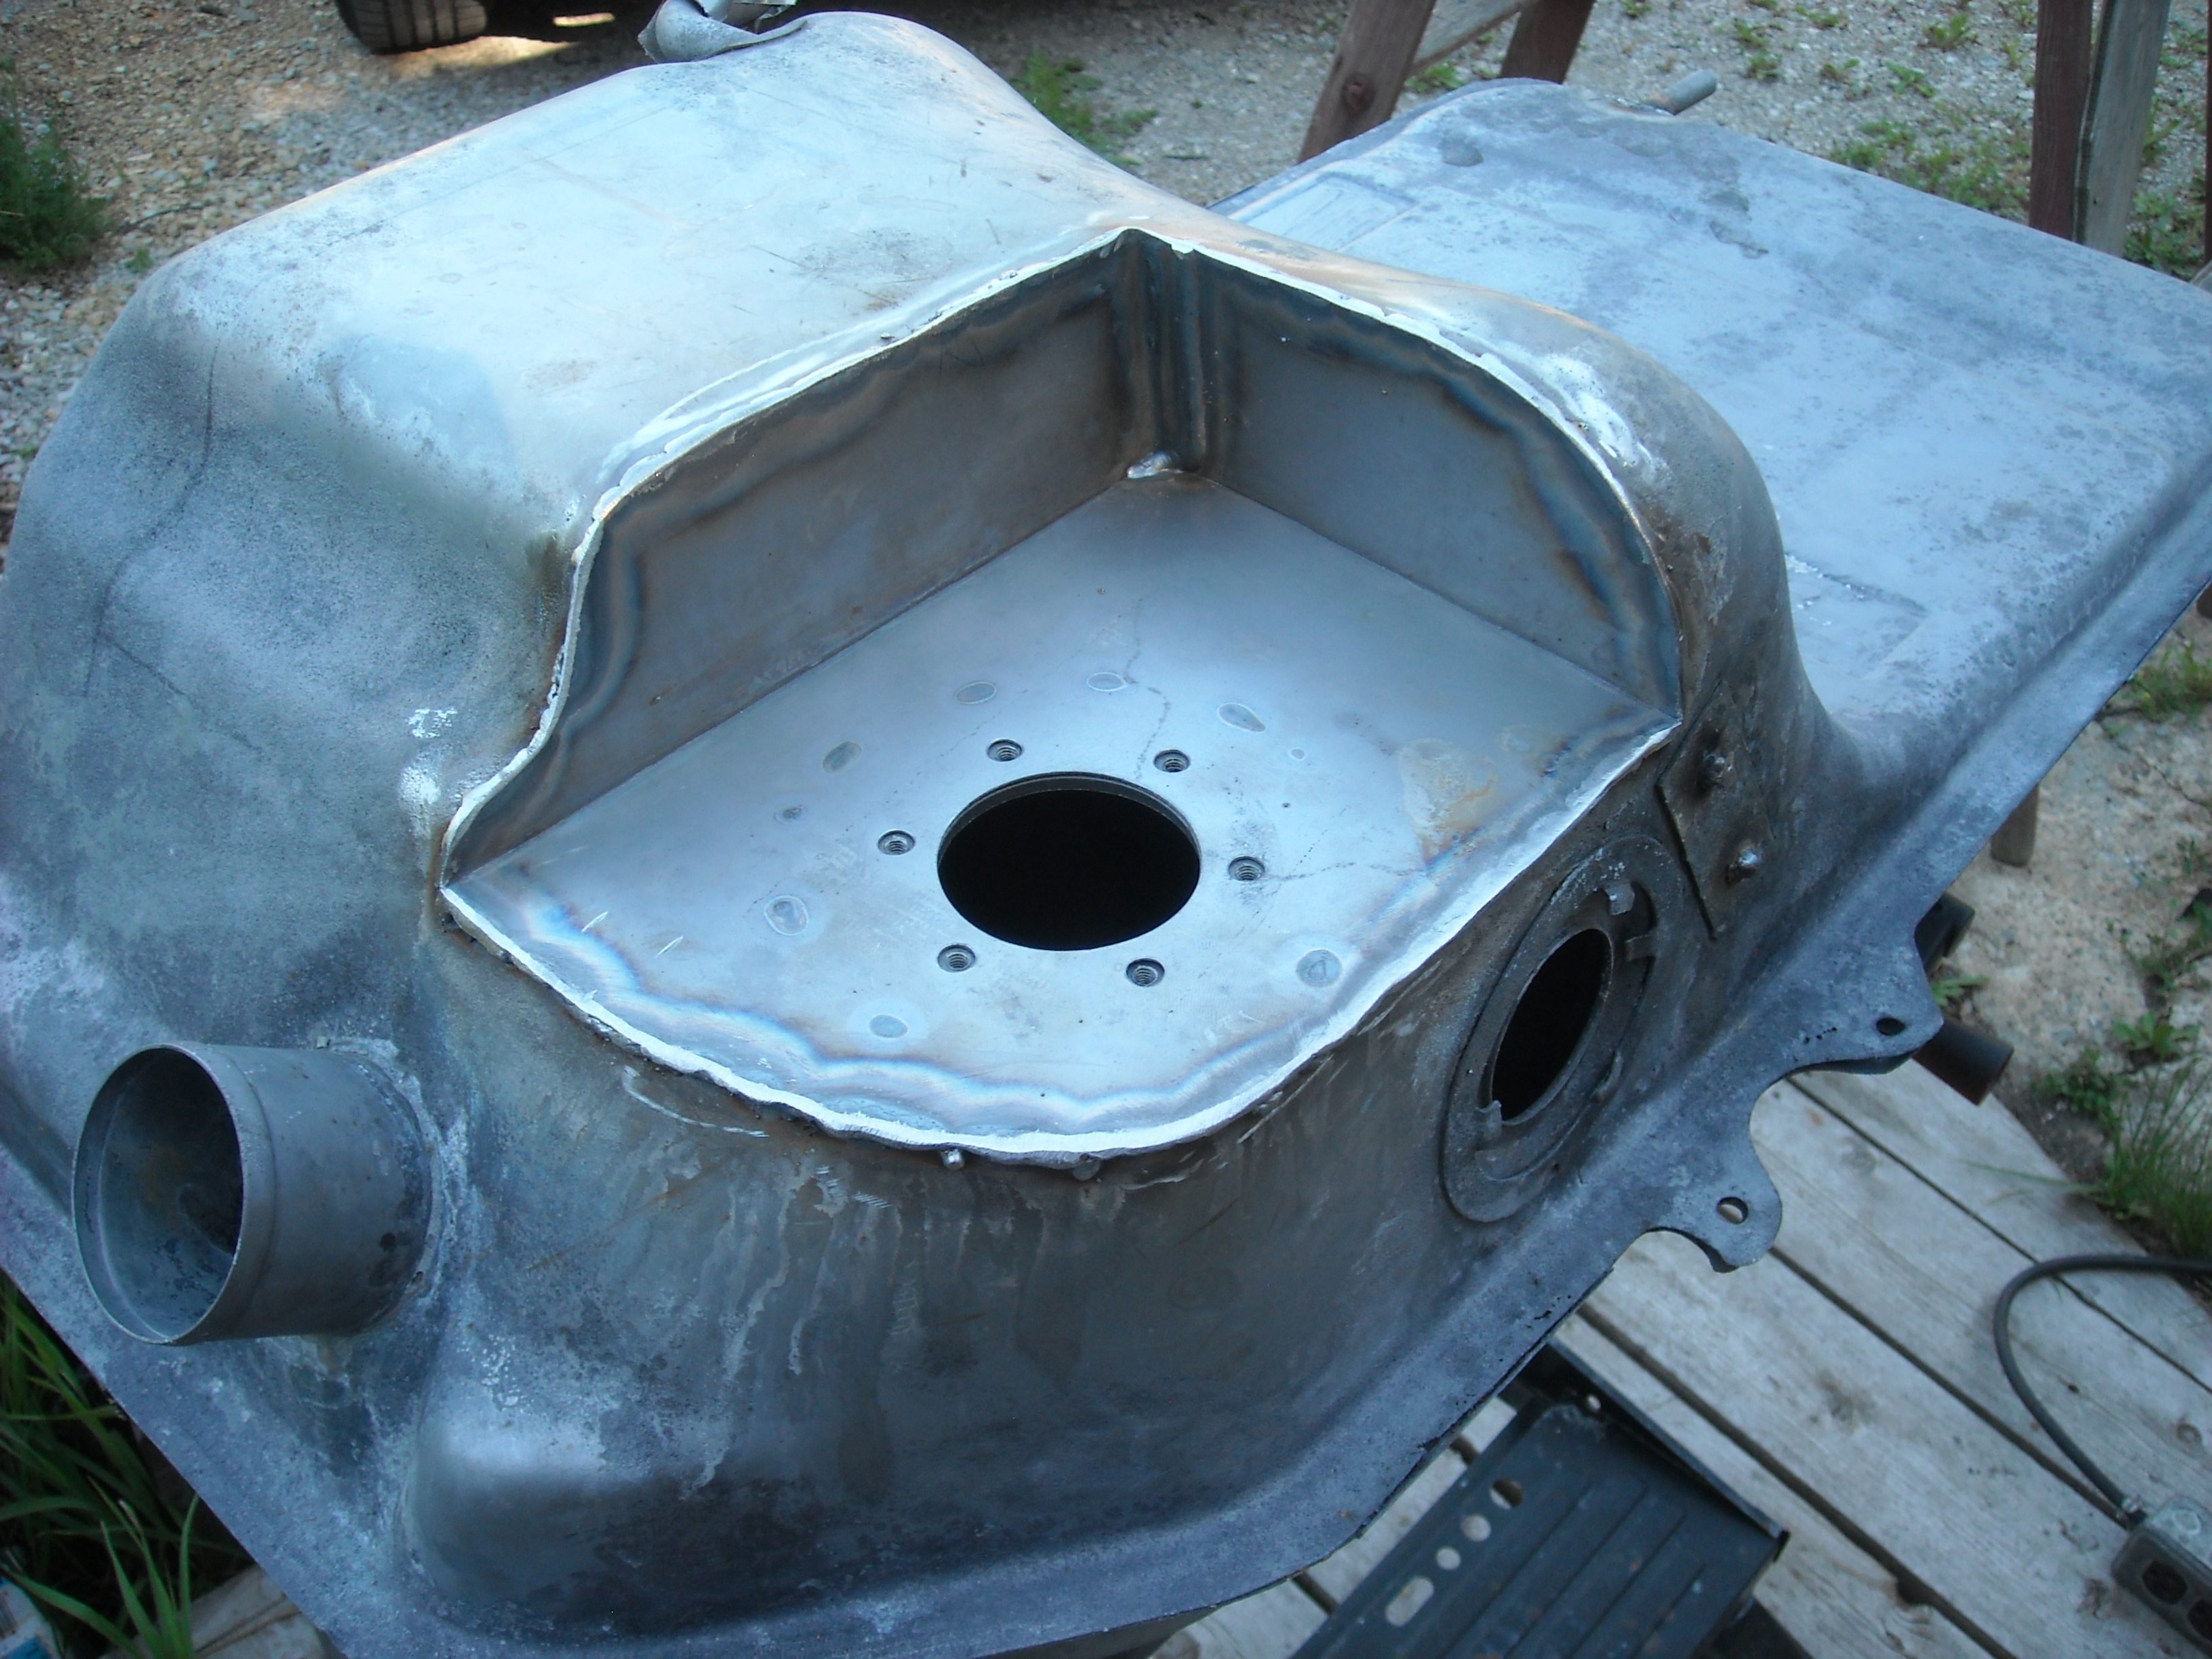
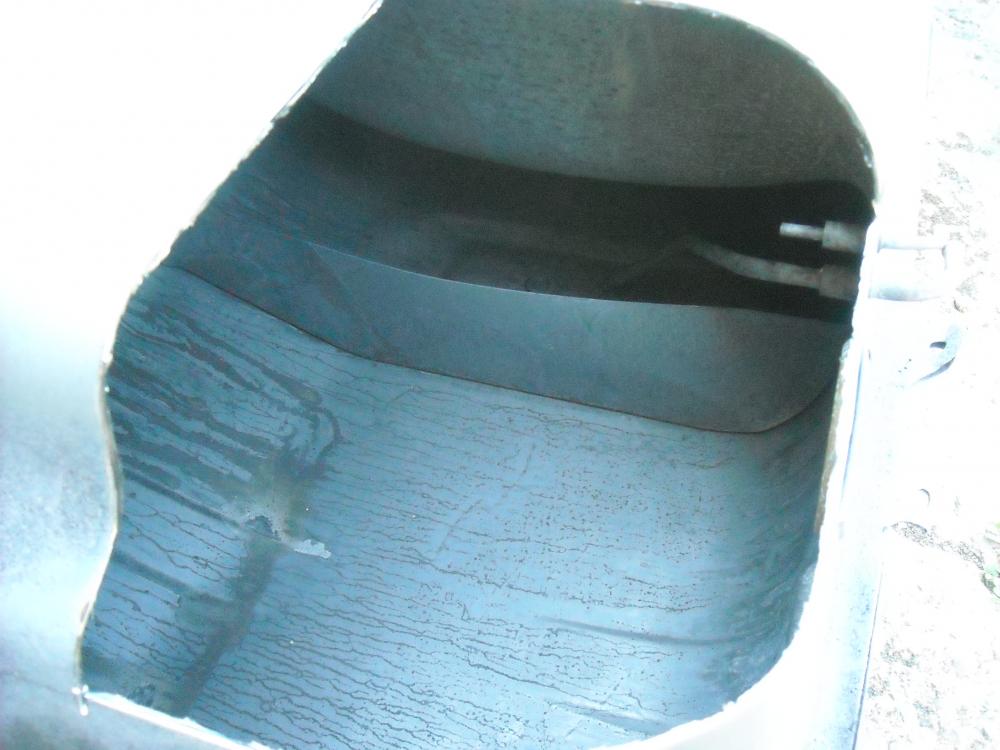
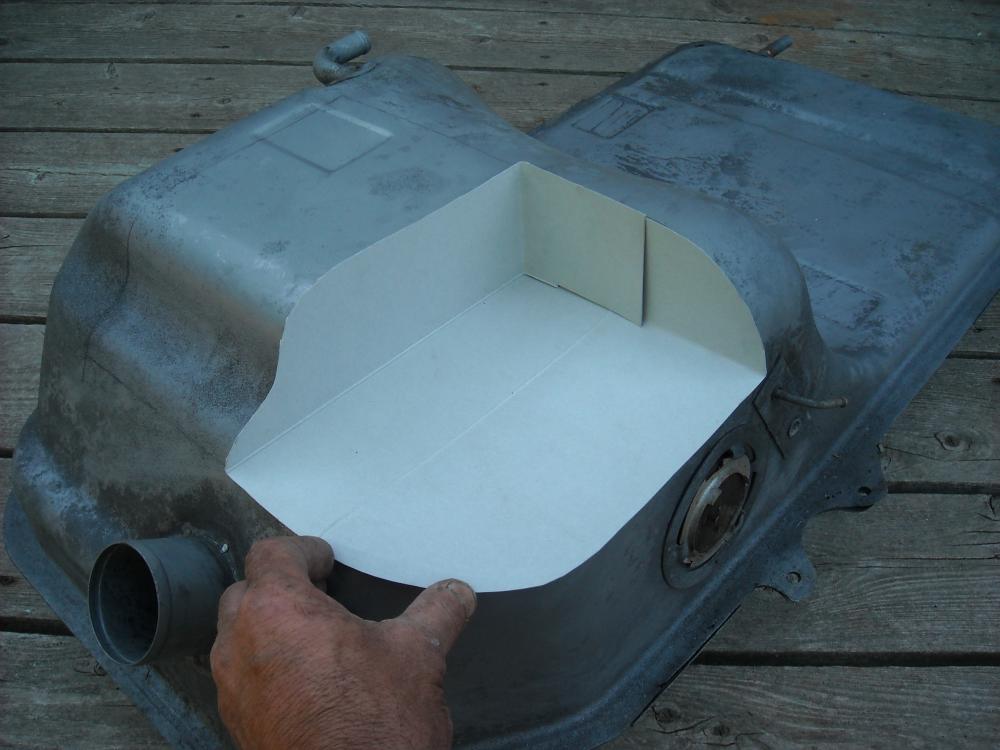
Started doing some fun stuff for a change, included this picture for the purists, just want them to know I take originality seriously.I forgot to take a pic of the baffle bowl that was welded inside for the fuel pump pick up to sit in so it doesn't suck air when the tank gets low. I have a POR15 gas tank sealer kit coming in the mail soon.


 1 point
 -
1 pointMinimum of 2500. Yes - disconnect vacuum and set dial back to 34 total . As far as figuring the vacuum on top of that - not sure , but I would say just add in the vacuum advance on top of the 34 at 3000 and see where it stands. In the end Cliff, your motor will tell you if the advance is too much. I bet you will have to either limit the vacuum portion of advance , or just reduce your timing- period1 point
-
1 pointJai. Take a picture of the original receiver dryer. That is one of the harder parts to find. My factory system came with a receiver dryer that has offset inlets and outlets. One is on top and one is lower down on the body of the cylinder. That is the hard one to find and I believe is the factory type on 1975 and 1976 280z. Some may have inlets and outlets that are on the same level as each other. Those are quite a bit easier to find. The R/D with offset fittings is a " Four Seasons #33286 ". Very hard to find anyone who has stock on these. ( I've been looking for a year via Google and E-Bay ). Vendors advertise them, but never have stock. However, a company in Canada seems to have them " In Stock ". I ordered one from these guys and it is the correct one with offset fittings. $63.29 CDN plus shipping. http://www.thewrenchmonkey.ca/products/auto-parts/four-seasons/33286/ The compressors are fairly robust. My 1976 still has the original 40 year old Hitachi. It had been overfilled and locked solid ( Hydraulic lock ) when I bought the car. After evacuating the system and refilling, it has held a charge for 2 years now. That surprised me. BTW, I found a good used 280Z AC compressor on E-Bay for $60. I bought it for spare parts. Re-manufactured compressors can be found for $300 as mentioned. The hardest part may be sorting out the " Mickey Mouse " AC Climate controls. The factory system uses Ruby Goldberg system of vacuum pots, hoses Vacuum-Magnetic switches and several electrical switches, thermostats and relays that can cause grief. Lots and lots of places for vacuum leaks. You need someone who knows these systems and can work in a methodical manner to get all of the factory Climate controls working. . I used a jumper wire hooked directly to 12v on the battery to test if the clutch operates. I made up a simple 4 foot long, 12 gauge jumper wire ( with ATO Fuse holder and a switch ) that I ran straight from the Battery to the compressor 12v lead. That way I could bypass ALL of the switches, relays, vacuum do-hickeys on the control side and just make sure the Compressor worked and it blew out fresh air. That saved me a Ton of grief. I knew the big stuff worked... it was just the small bits and bobs that needed fixing. The Climate control Vacuum selector valve often leaks. It has silicone sealing grease in it that dries out. Can easily be fixed, but you have to be careful how you reassemble it. It has to be " clocked " just right. Sarah ( FastWoman ) has an excellent " How to Fix " article on this simple, but finicky little switch. http://www.classiczcars.com/forums/topic/32856-refurbishing-the-hvac-vacuum-selector-valve-in-a-1978-280z-useful-info/ I used R12A by RedTek to re-fill the system. R12 is extremely hard to find in Canada ( not to mention expensive ) and I didn't want the hassle of switching to R134. R12A is compatible with both R12 and R134 and the oil is compatible as well. No hassles... just evacuate, vacuum down system and add correct amount of R12A and R12A oil. Another advantage of R12A is that it apparently blows " colder " than R134. R134 does not perform as well as R12 in older vehicle AC systems. http://www.redtek.com/English/product.asp?ID=181 point
-
1 pointNice cross flow. Yes the condenser is likely to have a rock strike. I see some new tube serpentine types that supposed to be a drop in replacement. If it was me I would do the least possible just to base line it, that would be pressure check to see if there is any R-12 in it now. If not pull a vacuum and put some R-12 in and see what happens. I really depends on how reliable you want it to be. Completely replacing everything and paying to do it will indeed cost a bundle just a rough break down in parts $400-600 for a new compressor $300 for a condensor $20 for a drier pray the evap and expansion valve are ok or $400 for new combo with modern expansion valve $60 for R12 so you can spend a $1000 in parts figure 400-500 labor and you are getting into the 1500-2000 for a professional job. OR pull a vacuum, recharge with R-12 and dye and see how long it goes $60 for the R-12 (get a can with dye) maybe 2 hours labor (mostly waiting for the vacuum to pull down) 150$. then see how it goes. On mine the only leak I have is a slow leak at the condenser, so that will be replaced in the future (I bought a used good one). My numbers are just ball park and I have no idea if my labor $ are even in the ball park, but I can tell you that I had a 92 ford explorer get all new stuff (stayed R-12) but for the evap and that was 1500$ at a AC shop. After that I decided I would learn more about it. Oh and HR369 is correct I would be all over it to help you get it going if you were close, but NW Ga is something close to 600 miles. Your best bet would be to take it to an AC shop that's been in bus for a while, and ask what would it cost just to check it out and try evacuate and recharge with R-12 if the compressor is not locked up. The biggest problem will be sourcing a OE drier, but they should be able to get an aftermarket to fit.1 point
-
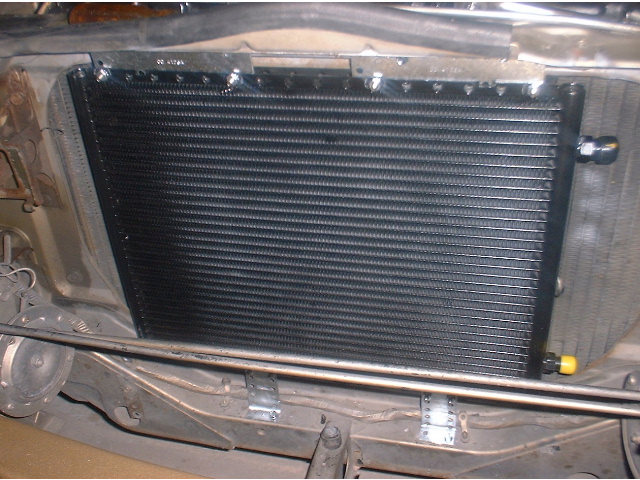
1 pointHow long ago did the a/c work? I really enjoy working on my 78 z a/c system because its so easy to get to every part. Thats including the expansion valve which is very easy to get to, unlike many other cars. If i were a a/c pro, i'de jump at the chance of working on something so easy to repair. Car a/c technology really hasn't changed much in the last 40 years so you don't need an old school tech to understand it. There are a couple ways you could do this. The patch and pray method. You could have a shop replace the obvious things first. Then charge with R12 and check for leaks with a leak detector. OR Go thru and fix all of the original system. Personally I like the quality of the factory a/c system. The only problem with using original equipment is the expansion valve is no longer available new. A used one has to be installed if yours is bad/stuck open or closed. I've got a couple used ones if you go that route. I installed a used expansion valve 10 years ago and its still working good and I use my a/c every time I drive it. Even in the winter here in hawaii. You could get a new aftermarket evap core that has a generic expansion valve. That's an additional 300$ part. Dash has to be pulled if you go this route. The a/c compressor is probably oily around the pulley. Thats where the hitachi's like to leak freon. Have a rebuilt one installed and replace the condenser with a new cross-flow condenser. New r134 type rubber hoses have to be fitted for the new condenser so that takes care of the old rubber hoses that needed to be replaced. The condenser is the second area i would suspect a leak from a rock hitting it. Then i'de convert it to r134 gas. The old r12 gas is very expensive. OR Install an all new Vintage Air system. They have to pull the dashboard to put in a new evap core and you're probably looking at about $2000 Too bad Dave WM doesn't live closer. Picture of new crossflow condenser I installed 10 years ago. You could probably fit one thats a little bigger than I got. And lastly, if what you've got for a/c now is aftermarket, remove and replace with Vintage Air.
 1 point
 -
1 pointThe truth hurts so here goes, trade Red-Bird for a Camry or Accord unless your husband left a little insurance policy so you can buy one. I paid $2,000 for my '00 eight years ago and have 279,000 on it now. I could get in it right now and drive to drink coffee with Zed Head on the west cost in a day or two. I love Zs but they're toys after 40 years.1 point
-
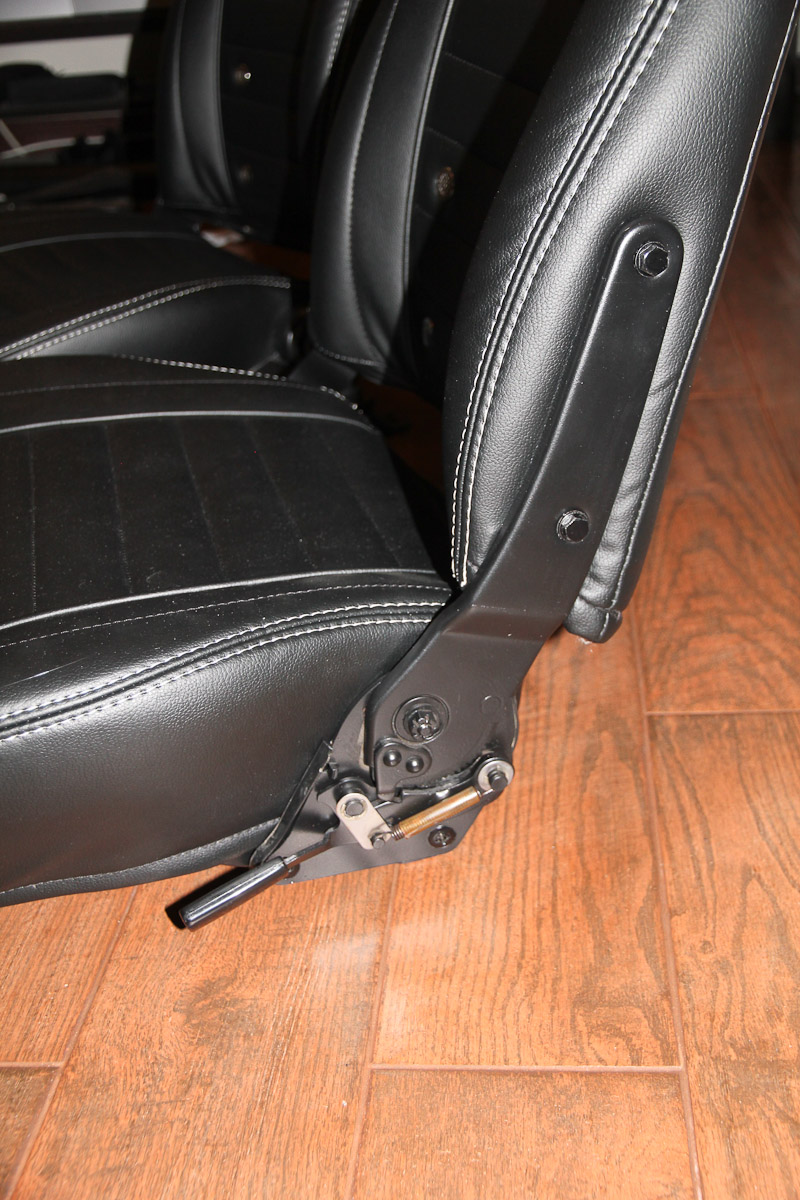
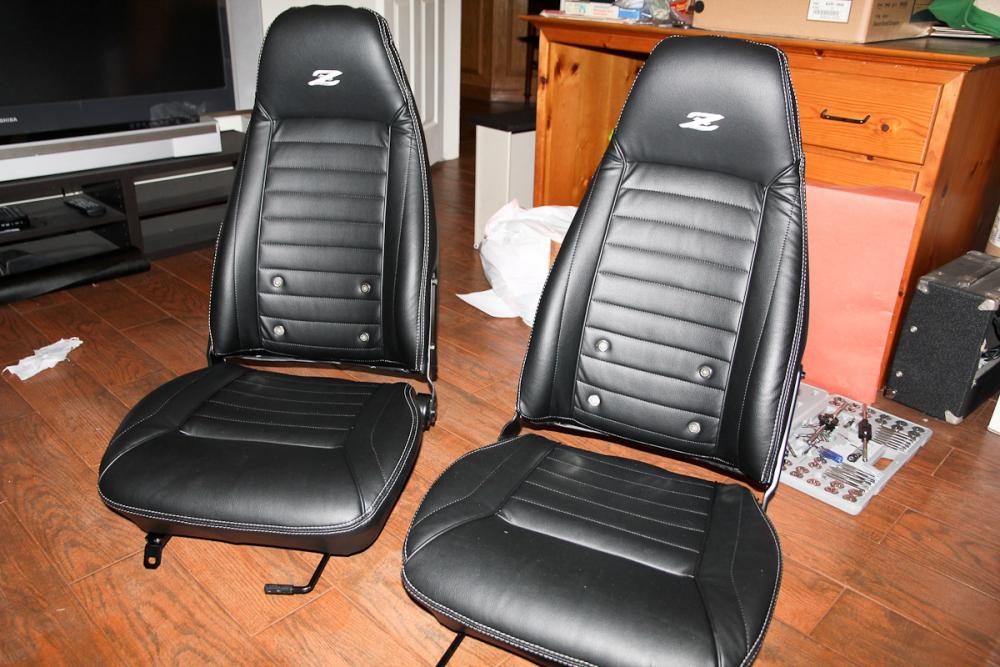
Knocked out the seats and the headliner over the last week! I'm really, really happy with the way the seats came out. I ended up not pulling the cover all the way down on the reclining mechanism side. That meant I didn't have to cut anything, and I figure if something comes loose, I can always go back and pull it down. Everything got a coat of black, including all the bolts, and the seats look better than new -- not bad for my first upholstery job. Only blemish is the missing mechanism cover. I may try to mold something at some point. And the headliner, for all I was dreading it, actually turned out to be not that bad. I made my own from perforated headliner fabric that I backed up with 1/4" foam. I was too busy running around to take pictures during installation. But what I did was masked off an 8" strip down the middle of the headliner from front to back and the matching strip on the roof, then sprayed with contact cement. The middle of the headliner was marked with tape, that I used to center it in the car. Applied the headliner from the middle out, stretching any wrinkles along the way. Then I just let the edges hang down, sprayed glue on the headliner and roof on the passenger side and continued working towards the edges. A panel removal tool tucked everything under the edges. Repeated the process on the driver side. Sweaty and uncomfortable work, sure, but nothing that's going on my Never Again List. Tomorrow, seats go back in!
 1 point