Leaderboard
-
jfa.series1
 Subscriber
 3Points2,739Posts
 -
JDMjunkies.ch
Free Member2Points641Posts -
Consigli
Free Member2Points115Posts -
Chickenman
Free Member2Points1,210Posts


Popular Content
Showing content with the highest reputation on 03/04/2016 in all areas
-
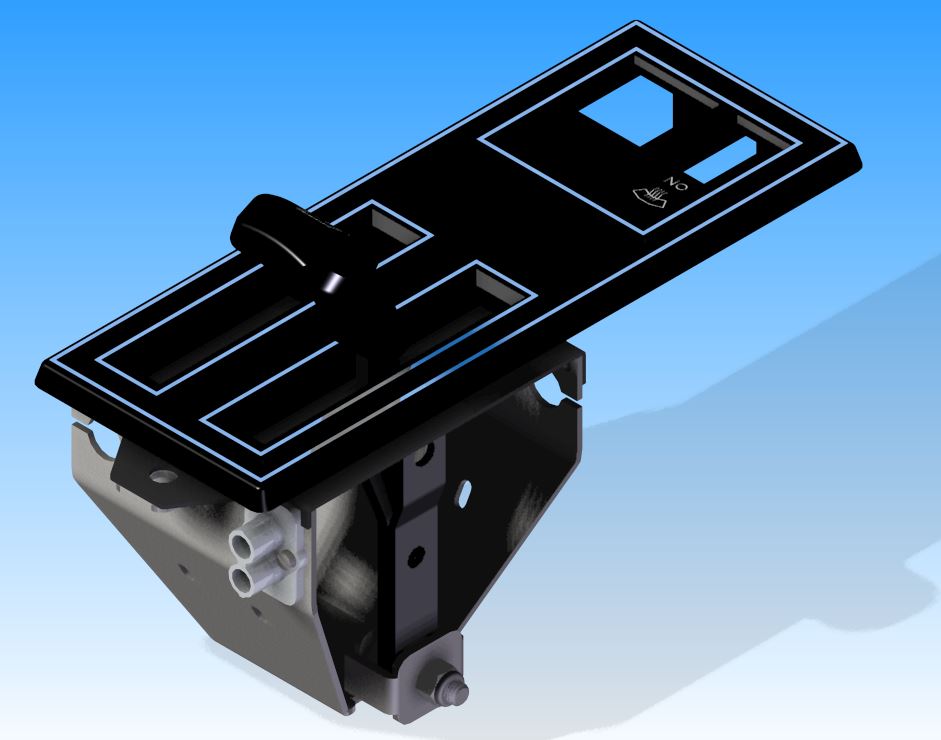
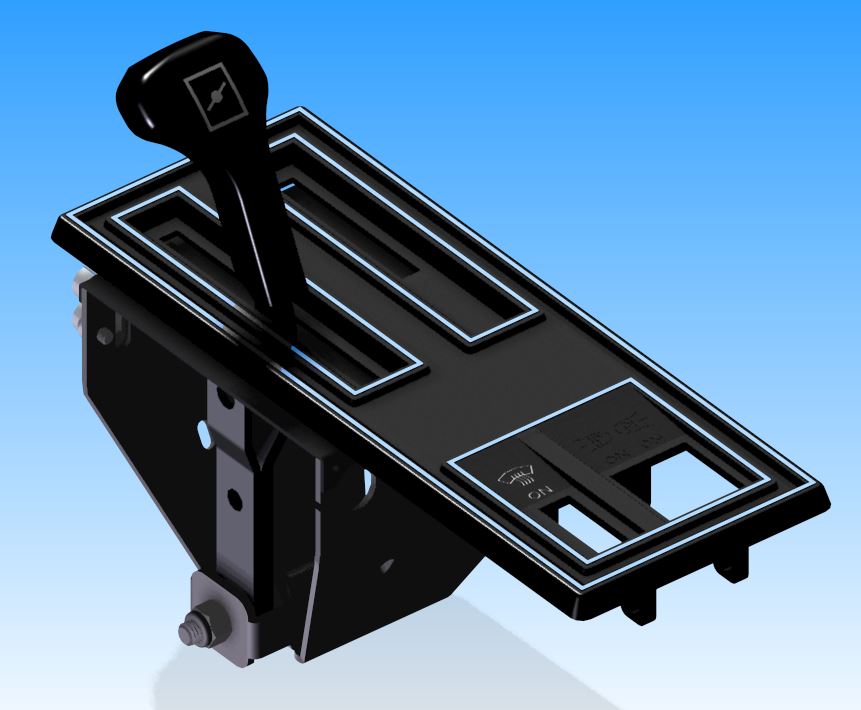
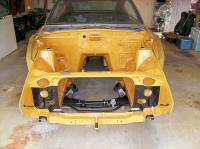
While I had the choke assembly disassembled from my 7'70 240z to deal with a sticky choke issue I started to measure and model the parts as an exercise while I had some free time. It got me thinking that others might be doing the same with other parts and might like to share stories and maybe a few cad files or just to show off what you are working on. I am a mechanical designer and use Solid Edge as my primary 3D solid modeling tool, I am also learning Solid Works and have a background with 2D AutoCAD. Here is a sample of the work I have done so far, comments welcomed from cad and non-cad users alike. If we get to the point of sharing cad files I'm wondering if @Mike would consider adding a 2D/3D cad section to our downloads area, if file size is an issue limits could be established. Cheers, Mike
 2 points
 -
2 pointsHow much to pay for a roach coach is really the wrong question to ponder. A needy project car is a three part equation. First part is how much to pay. Second part is how much will the restoration cost in time and money. Third part is can you afford the second part - if the answer is no then walk away.2 points
-
1 pointZ cars are fetching big $$$ in BC and Alberta right now. Mainly because we have no survivors from our salted winter roads. Buying has slowed down a lot with the exchange rate, but when it was near Par in 2014, I started seeiing Z cars being brought in on Car Transporters fairly often. Mainly from California and Arizona. My 280Z is an Arizona bought car that lived most of it's life in California.1 point
-
1 pointPlease stop with the "exactly" - its a bit irritating. I painted the same area as Nissan but its not "exact" because I used gloss paint for the reasons I explained. I don't know why other don't paint this area. It will take only an ounce or two to paint that bulkhead. Since Nissan never used POR-15, you should use it wherever you think its needed. As to more pictures, of course I do. Many of them are in this YouTube video I made up of my restoration project but don't expect me to clutter this forum with them: https://www.youtube.com/watch?v=7L1oxFQMfcU1 point
-
1 point
-
1 pointThe complete engine bay should be painted in the body color if you are planning to stick with the factory approach. The front of the radiator bulkhead was painted in a dull (not flat) black originally. I chose to use a gloss black to make it easier to keep clean. Satin black would be a good option that would be closer to the original factory look but still pretty easy to keep clean. Flat black will hold dirt and is not easy to clean. Check the picture closely - there are five mounting points for the grill that also get painted black.1 point
-
1 pointIn the states you guys.. (Or your parents.. ;-) ) bought a 240z for 3600 dollars ?? or so...? in the early seventies... We here, in the Netherlands, had to pay 21000 guilders for one 240z! !!!!!!!!!!!!!!! (a Dollar was about 2 guilders then..) For that money we could also buy 3 !!! midclass cars yes!! 3 !!!! only about 240 z's were sold in about 3 years!! Thats why we cán believe those early cars are worth it!1 point
-
***UPDATE*** For those looking for pictures and diagrams on the Headlight Upgrade Harness (HLH) -OR- the Parking Light upgrade Harness (PLH) I have good and bad news I've started making and selling the harnesses for the Headlights and parking lights shortly after I posted this thread just over 10 years ago. They are readily available at Motorsport Auto in the link below, and NO, I do not make the fuse box's on that Technology page... MSA Technology Upgrades Page I stopped advertising on Classic Z Car Club because it went against the rules of selling the same items as one of the Site supporters. And the links to that were and always have been part of my Signature (below) I won't be updating or adding pictures on how to build the upgrades as it is bad business practice to shoot myself in the foot by showing you how to build the product that I feed my family with. So with that being said, Please feel free to ask questions and support the supporters of this website. You can find more info on my products at ...... Datsun 240Z Upgrades And please remember to donate when you can, spread the word on this great website and enjoy keeping the classics alive. Dave1 point
-
1 pointJuts because I'm bored and suffering from insomnia again I decide to do a bit of searching of old pictures. Regarding use of Nyloc's on early Datsun vehicles. The only people it would be really important to ( IE: correct style nuts ) is collectors and Vintage restorers. The Nissan Nylocs were what are referred to as " Tall " Nyloc nuts. I've worked on many, many, Datsuns, Honda's Mazda and other Japanese cars back in the 70's. Rallied and Raced 510's, 1200's and Z's Nyloc nuts were quite common on suspension parts in those days. Not to say that there weren't " crimp " style nuts used on some big bolts as well. FWIW It's hard to find pictures of original 240Z suspensions.. but here's a restoration of a 1968 510 with original suspension. Look carefully and you can see OEM Nyloc's nuts on lower control arm pivot bolt, sway end link bolt and TC rod to lower control arm bolts. You'll have to take my word for it I guess... or not. It's up to you. Edit: I also found a picture of an OEM 510 in an old Datsun book ( circa 1971 ) showing the front suspension components. I'd have to scan it, but this picture also shows the OEM Nissan " Tall " Nyloc on the threaded end of the TC shaft as well as other places. Now, I honestly can't find any pictures of OEM 280Z front suspension, but by then Nissan may have superceded the nuts. But my 9/70 street 240Z that I purchased in 1975 came with Nyloc's on most of the suspension parts, including the big TC rod nut. Same with my 1971 240Z Race car, 1968 510, and 1971 Datsun 1200 . Just sayin' guys... I sold the actual OEM nuts and bolts for these cars... and although I'm now 61, my memory for OEM Parts hasn't faded that bad. All FWIW... peace.1 point
-
1 point
-
Made some progress again First i cleaned all the switches and buttons by hand so the white texture finally came back to life and is visibla again. worked surprisingly good with an old tooth brush and some dishwashing water Well and then assembled everything back together. not factory fresh but as nice as an 44 year old switch can get Then started with the turn signal switch on the other side. seems a bit more tricky... The contacts had massive burn marks So this is after cleaning Who needs puzzles when you have cars? I never realized how complicated these switches are until i took it apart Then got some updates from the bodyshop. Rear lower side cowls (before): And after: And that "triangle piece" inside the rear fender well... Tomorrow i will visit a shop to repair my wing and on friday i'll drop by the bodyshop again. hoping for some updates again1 point
-
Today i spent a wile rebuilding / refurbishing the headlight switches. The problem with the Original wiring design is that the full headlight current runs through the steering wheel multifunctional switches. This causes contacts tu burn, specially when upgraded to H4 headlights. I decided to refurbish them before putting it back on the steering column. In future i will run a relay, because the original design is not very long-lasting, nor is it very safe to have 20 amps in your hands when switching on the lights Started with choosing the best of all four switches i had (one beeing a later model or something different): Disassembled everything following This great manual: http://www.doyouevenhoon.com/datsun-240z-gtr/how-to-rebuild-datsun-240z-headlight-switch.html and ended up like this: Removed the old contacts and as you can see they're pretty urnt and carbonized: Used some "relay contacts cleaner" Fluid and after a bit of rubbing looked like this. Also but the switches back in reverse orders to make sure the "weak" part will be on the opposite side and last longer Will continue with the rest of the switch next week. need to buy smaller pliers first In the meanwhile i got an update from the bodyshop. Before: after: Now work on the passenger side floorpan and rear quarter as well as the small storage compartment started. More rust than expected. but yeah. t hat's how life is Also ordered ordered the rear lower valance and rear corner valance so basically i will have an almost new chassis at the end *lol*. more updates soon i hope1 point
-
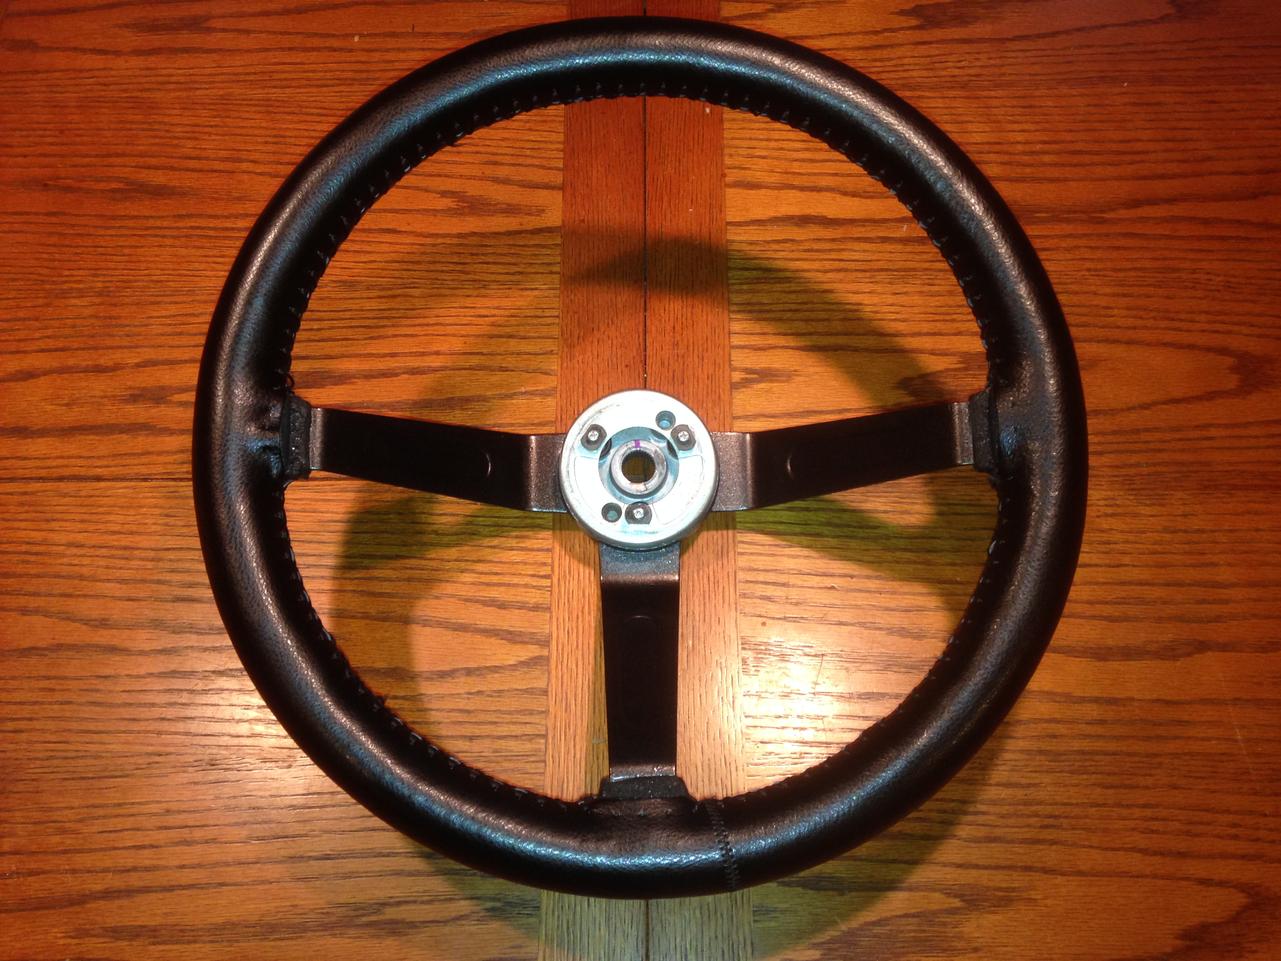
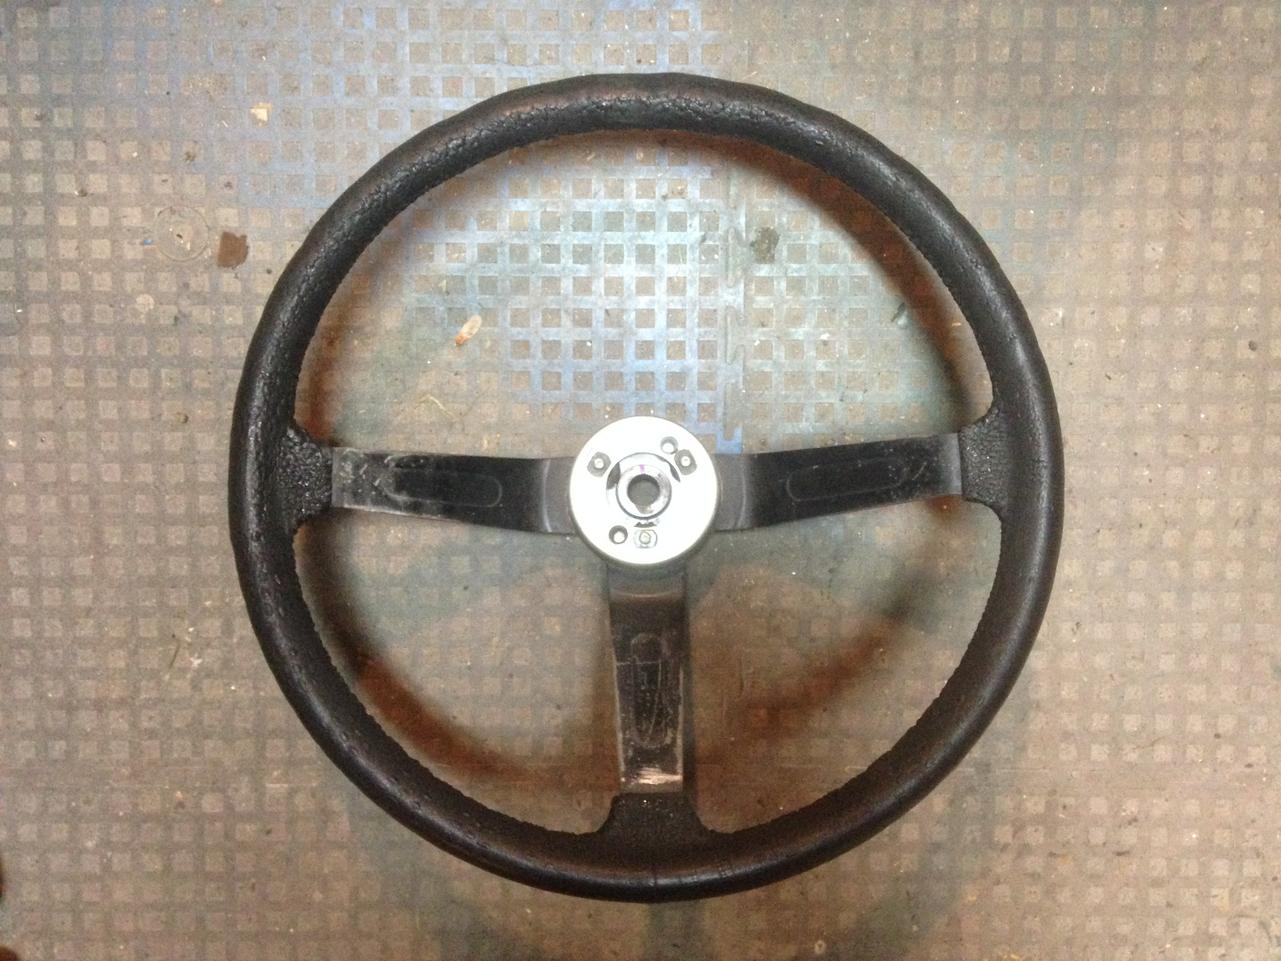
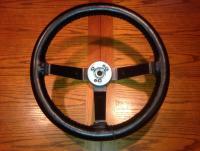
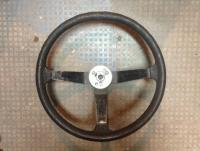
I re-did my 280 wheel last year, If you are on a budget, It was done for about $20. Before and after shots
 1 point
 -
1 pointThe previous posts with a black engine bay are really well done. Here's another vote for sticking with the factory approach.
 1 point