CanTechZ
Free Member
-
Joined
-
Last visited
Everything posted by CanTechZ
-
 Cold air for the vents comes from the front ahead of the rad support. Those rubber tubes are for the cowl drains, here is a good discussion on the subject. See post #6 by @Terrapin Z.
 -
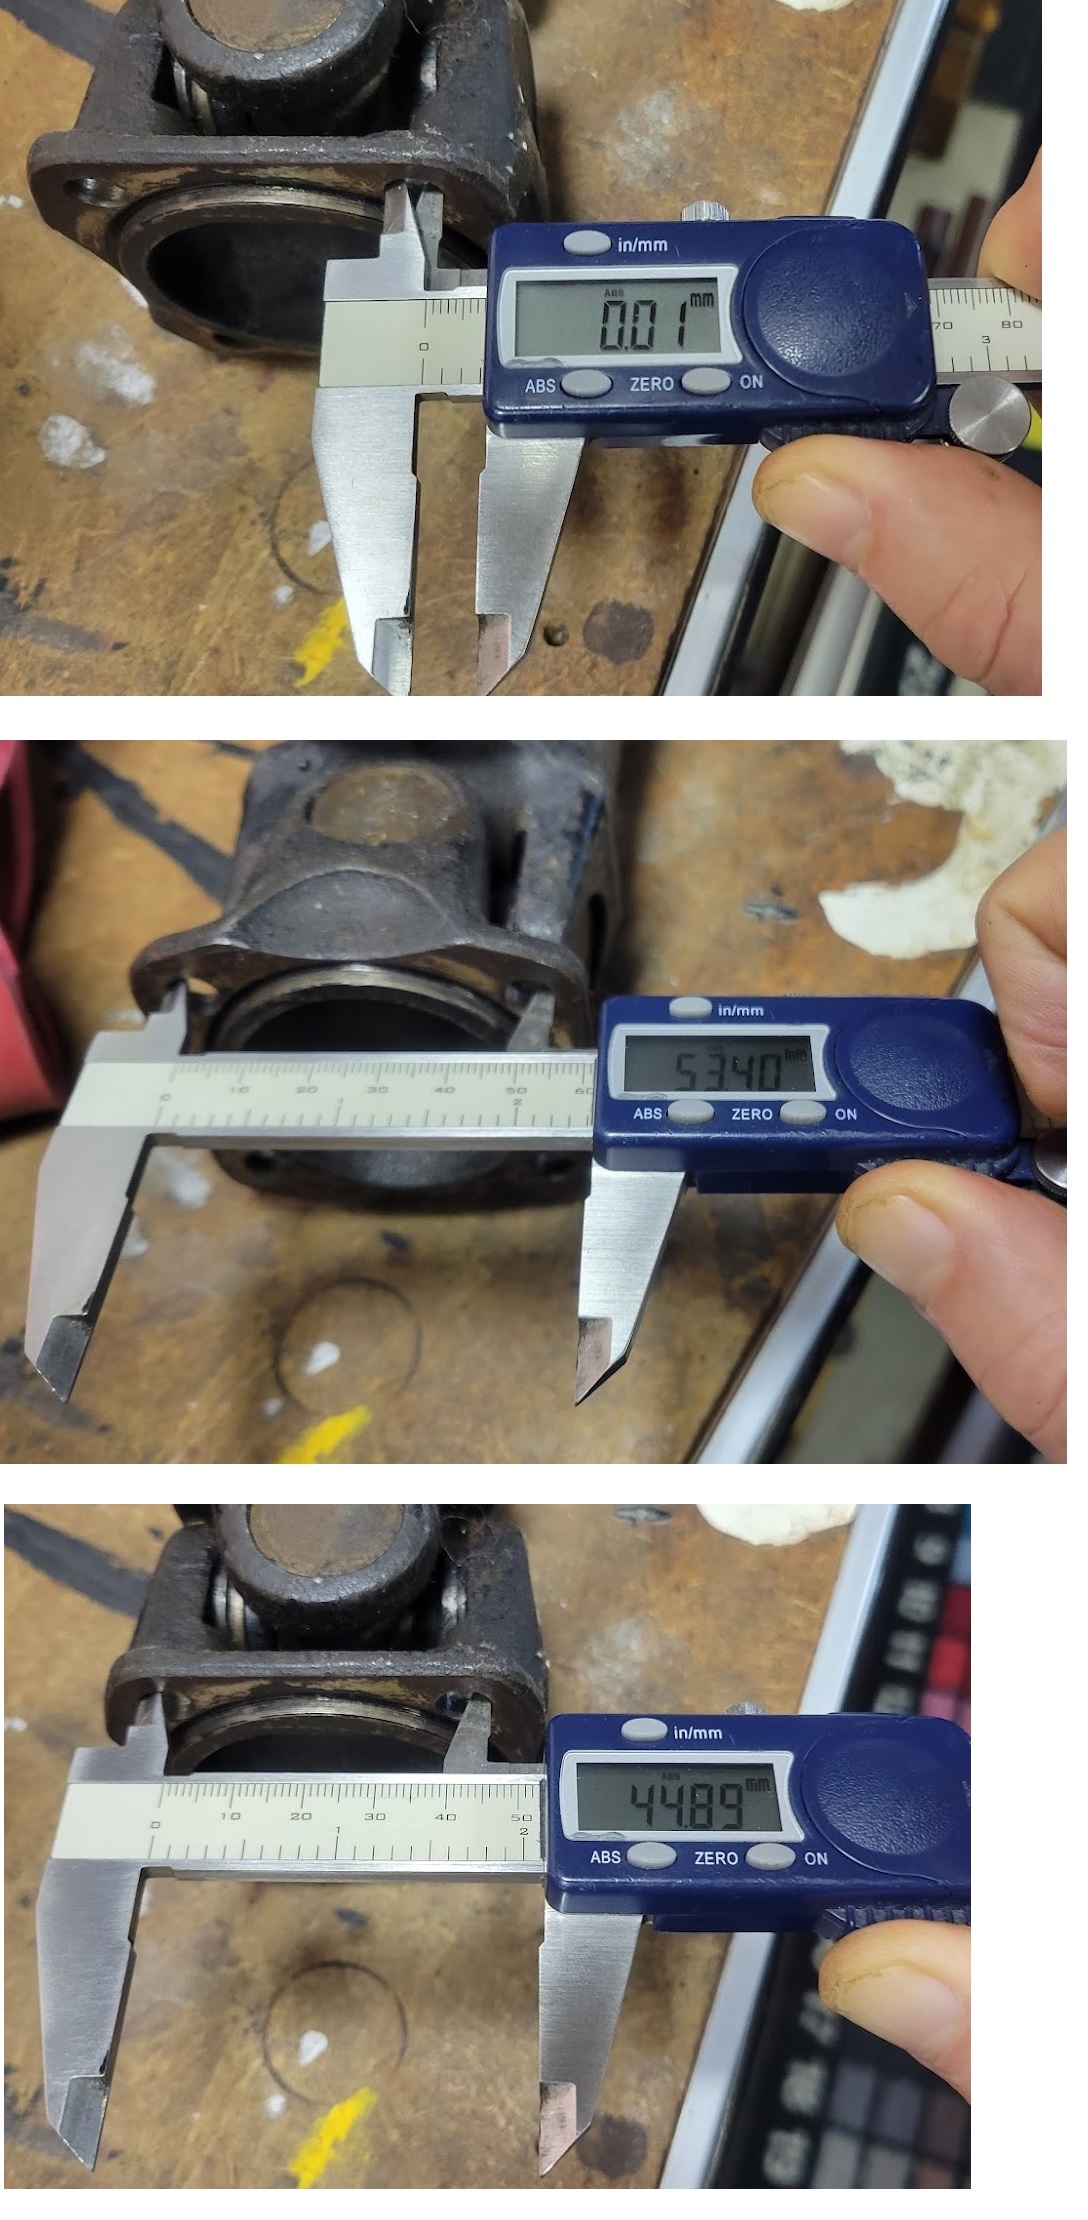
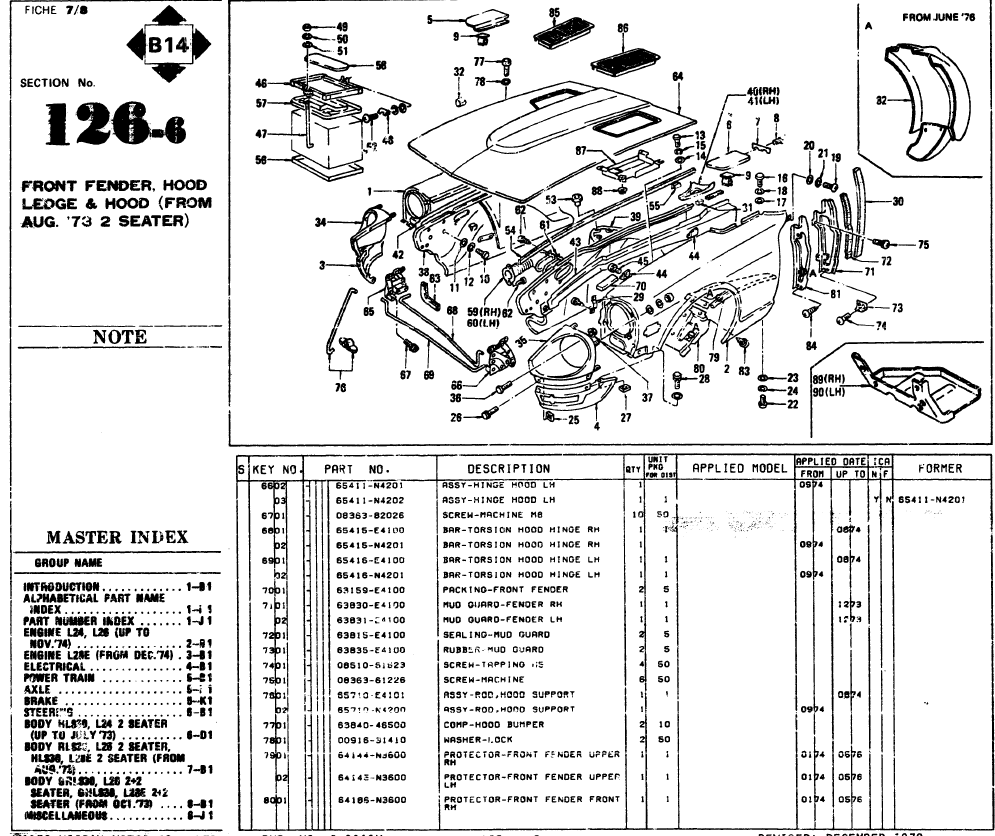
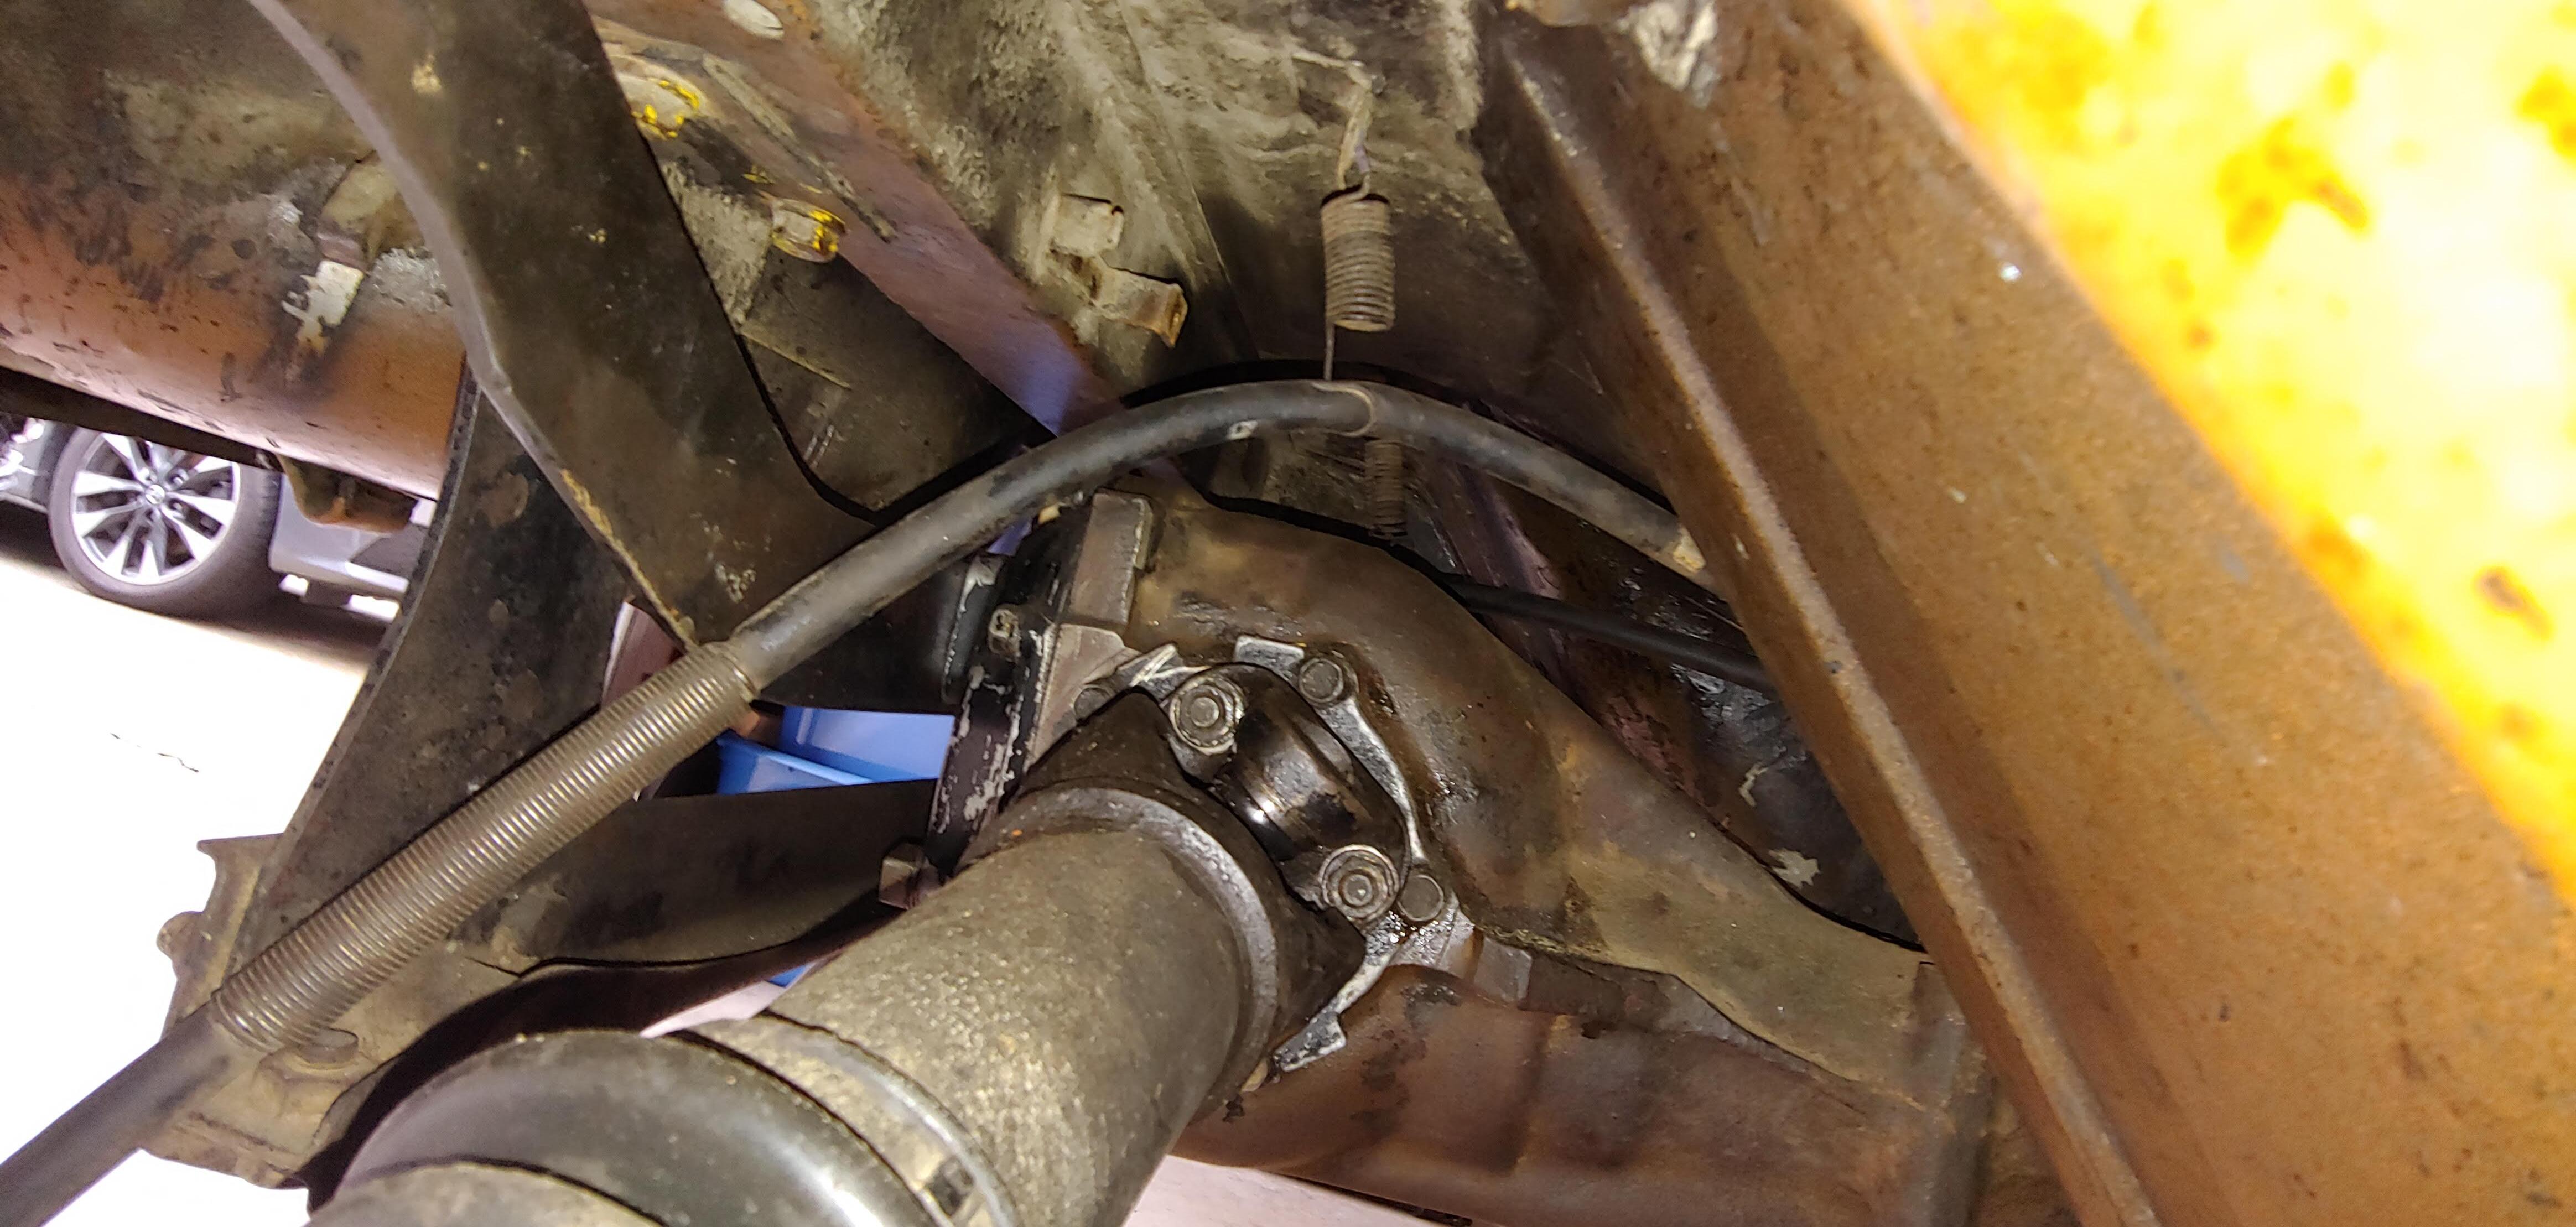
Good timing on your request, my 1970 propeller (drive) shaft is currently sitting on my workbench. I measured the "X" dim as 53.4mm and the "Y" dim as 44.9mm, using a digital caliper. To do direct center to center measurements I first zeroed the calipers on one of the holes, see pics below. The holes measured 8.10/8.15mm dimeter, clearance for an M8 bolt. Sorry I don't have a 260Z shaft.


-
I believe they are for inner fender liners, item 80 on this parts diagram. They were not on the 240Z's IIRC, so your fenders might have been replaced. I could be wrong, but I recall something about this on the forum previously.
-
Found this topic about windshields, @PrincePaulwhat is the source for the OEM windshield thickness of 6.76mm that you mention in the first post?
-
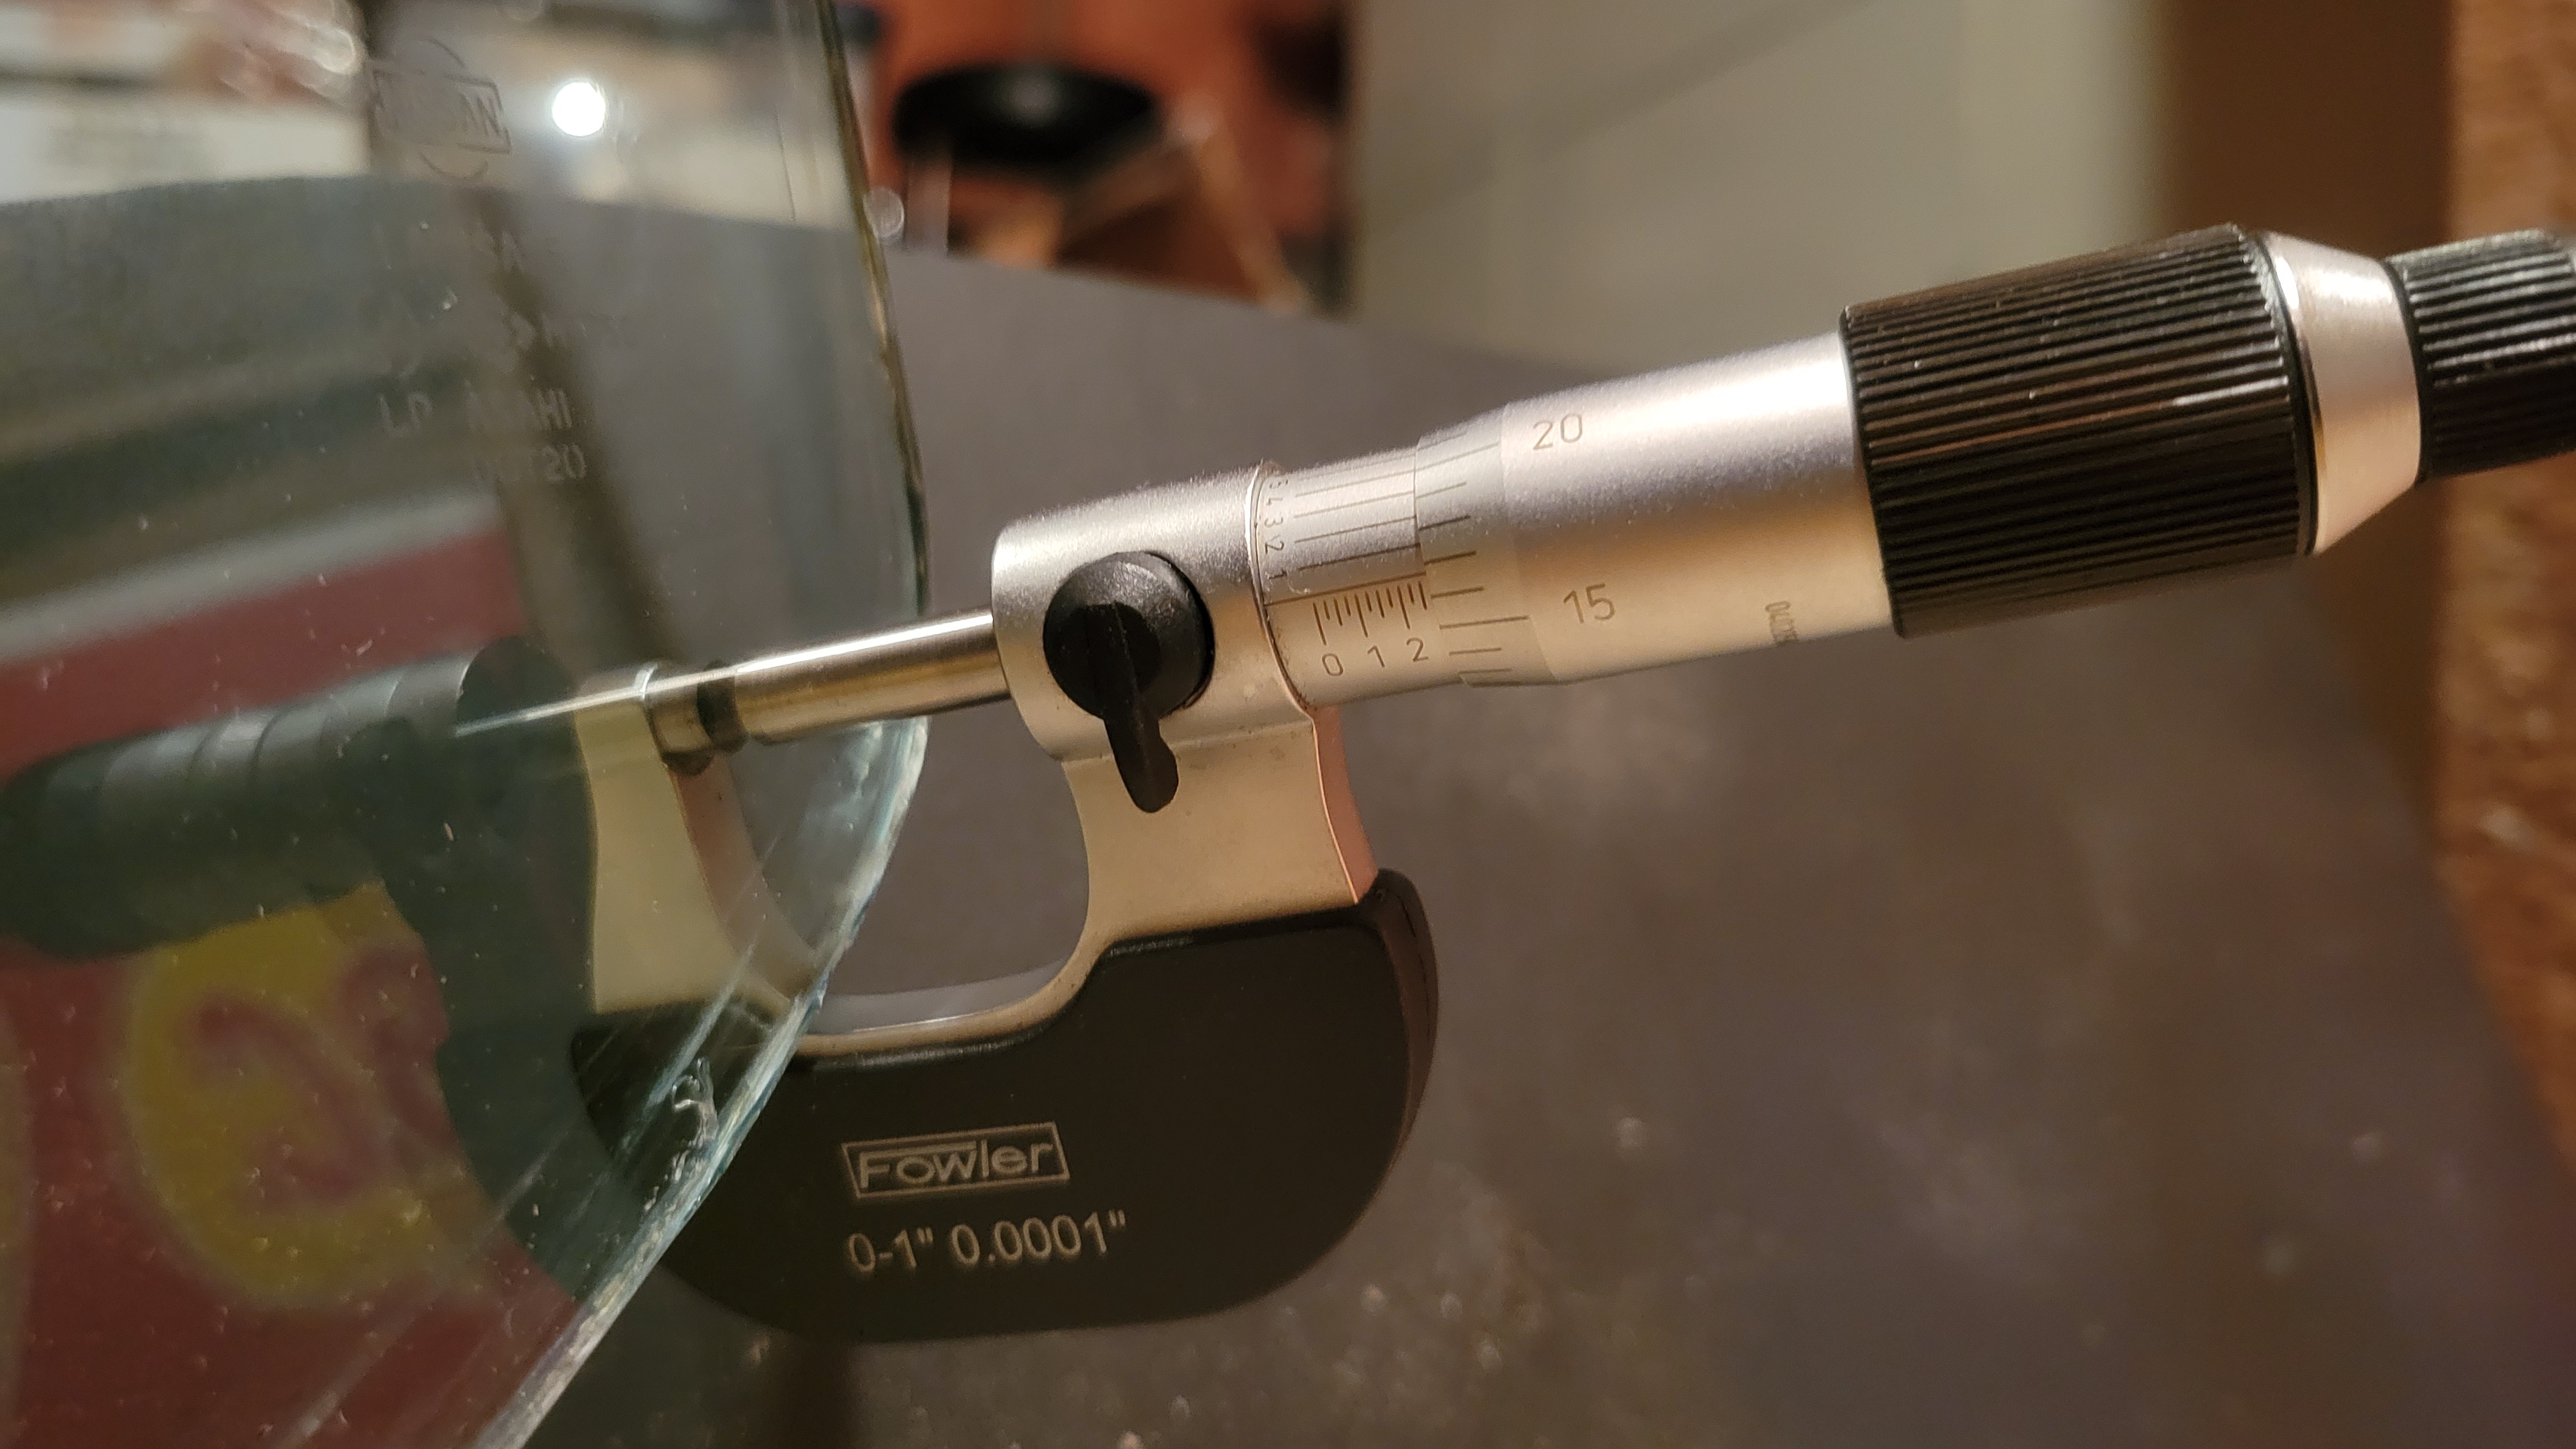
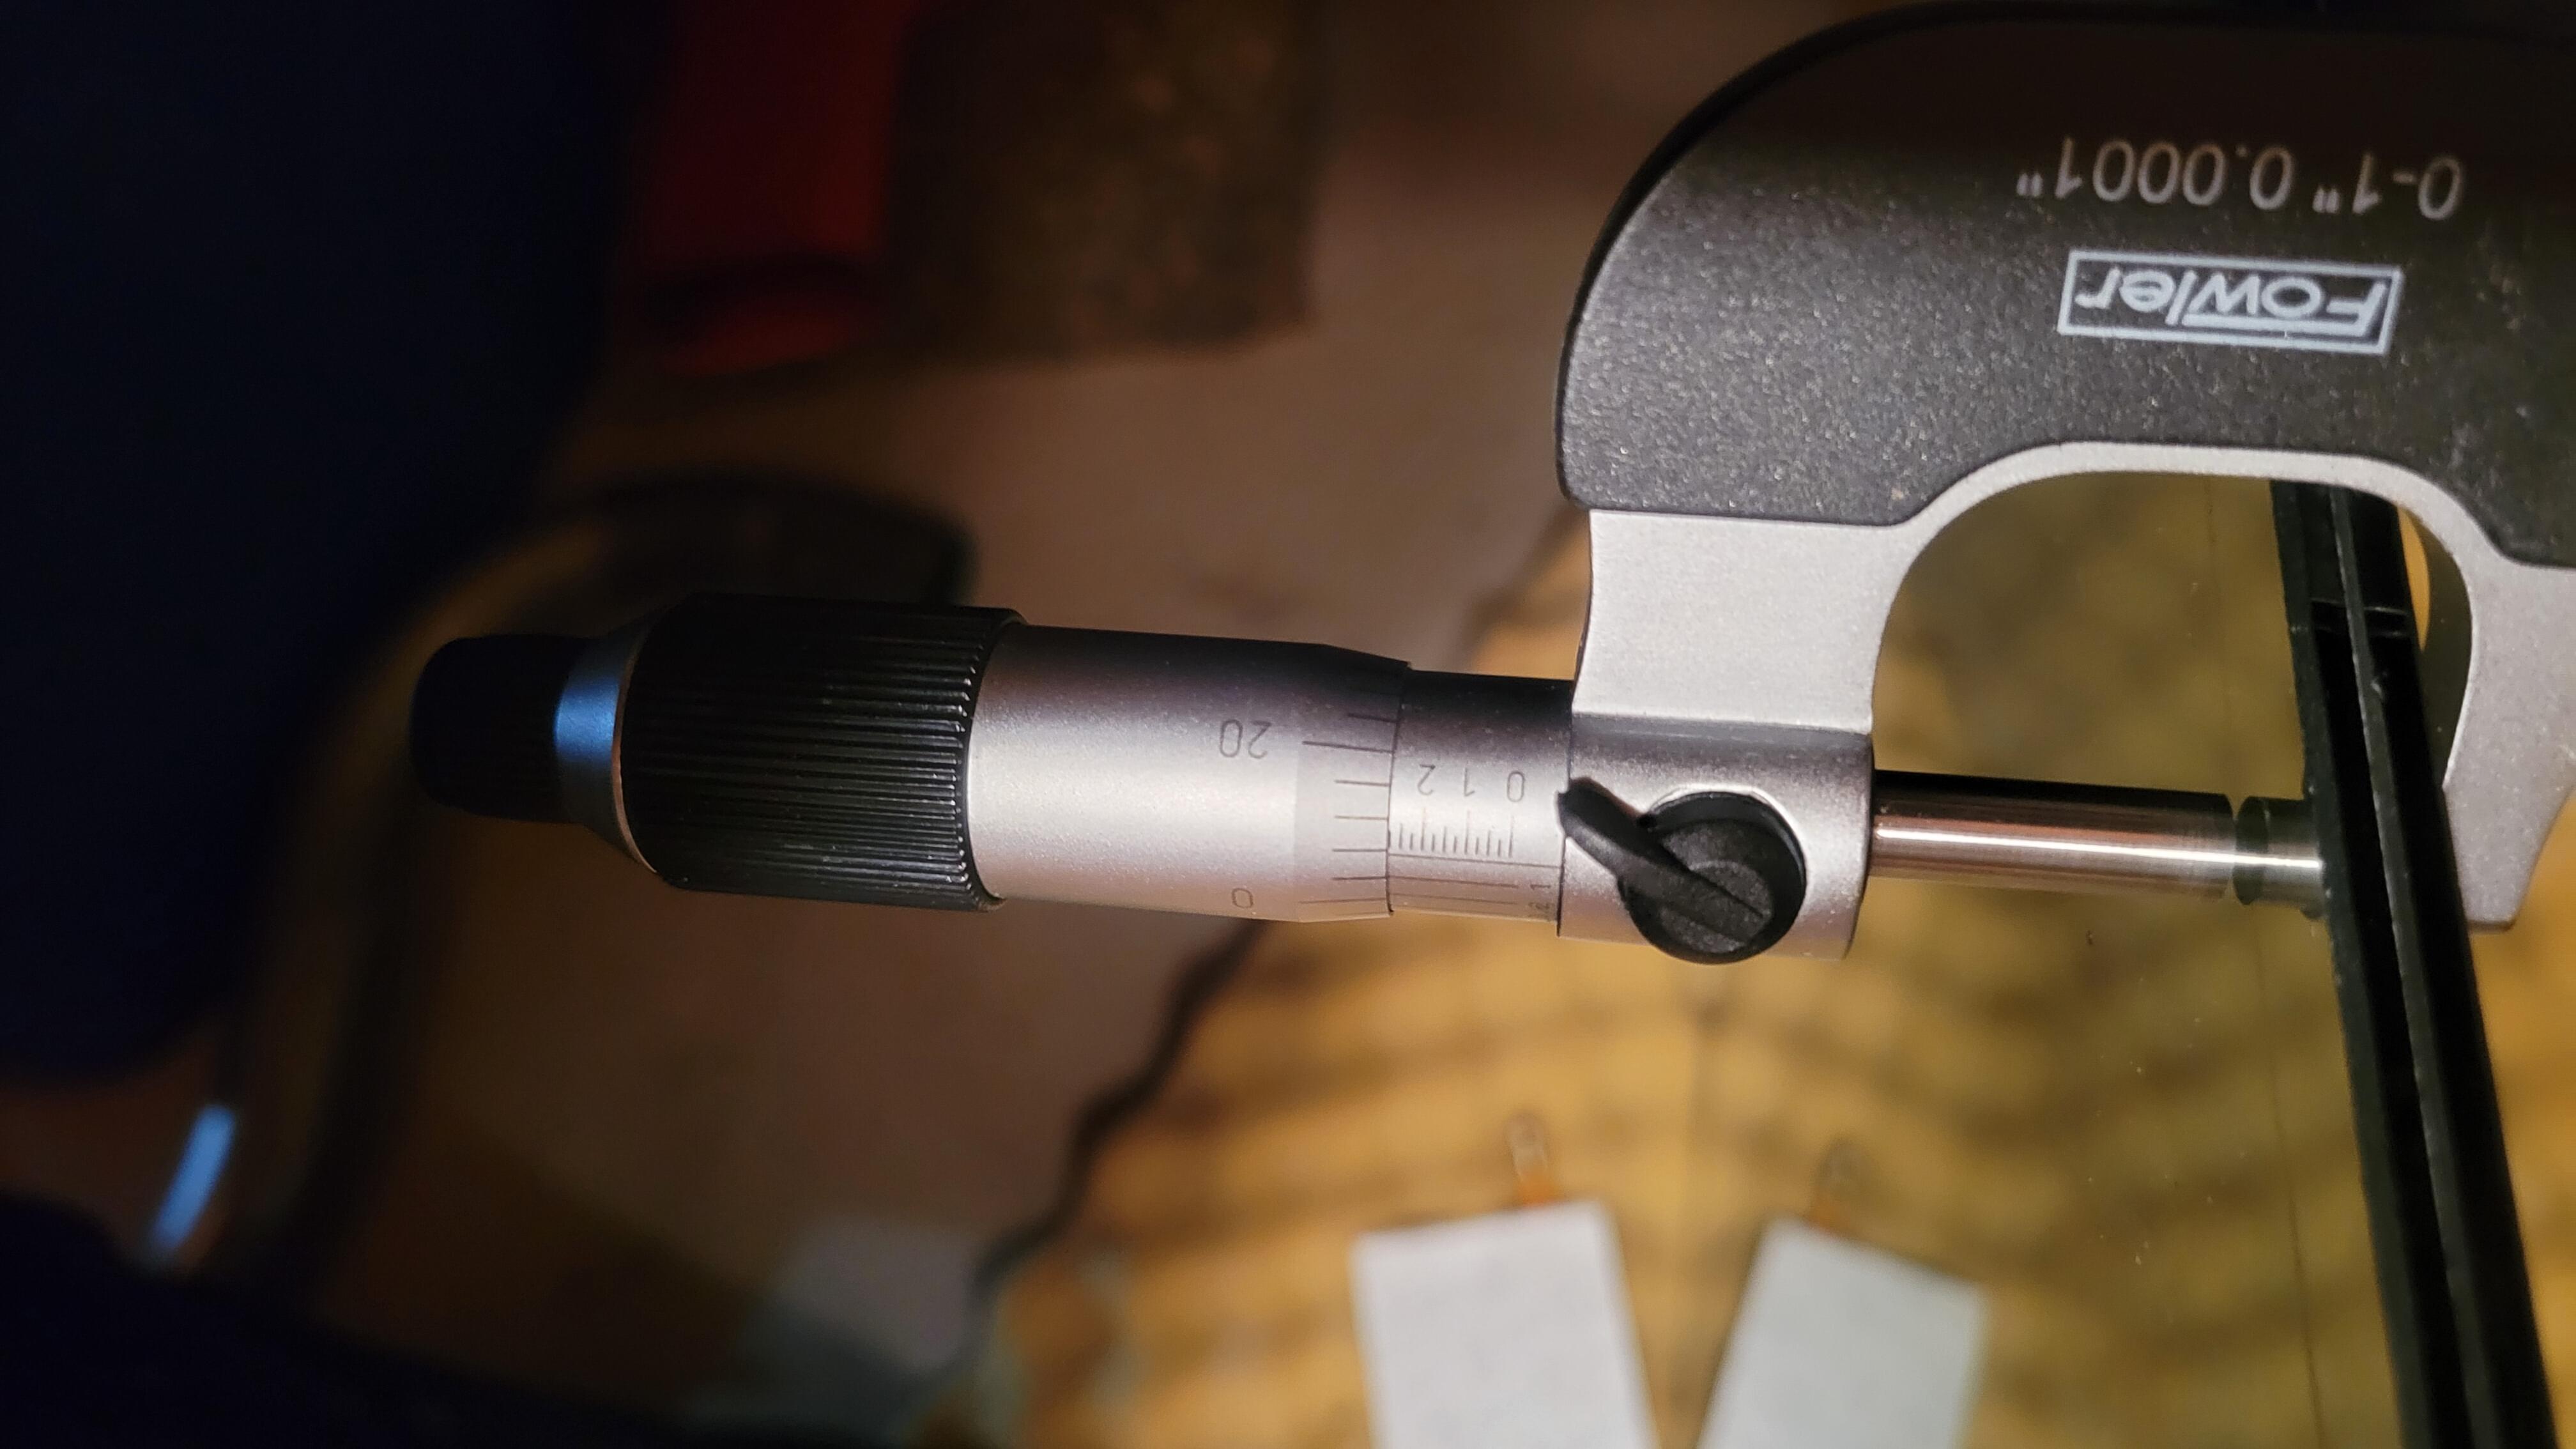
Interesting, mine is definitely closer to 7mm thick, and to the best of my knowledge is original, I've owned the car since 1978. Here are a couple of pics while measuring. First one is lower left corner, 0.267" (6.78mm), near the Nissan OEM marking. And the second is 0.273" (6.93mm) at the upper edge near center. Possibly 6mm is a minimum tolerance?
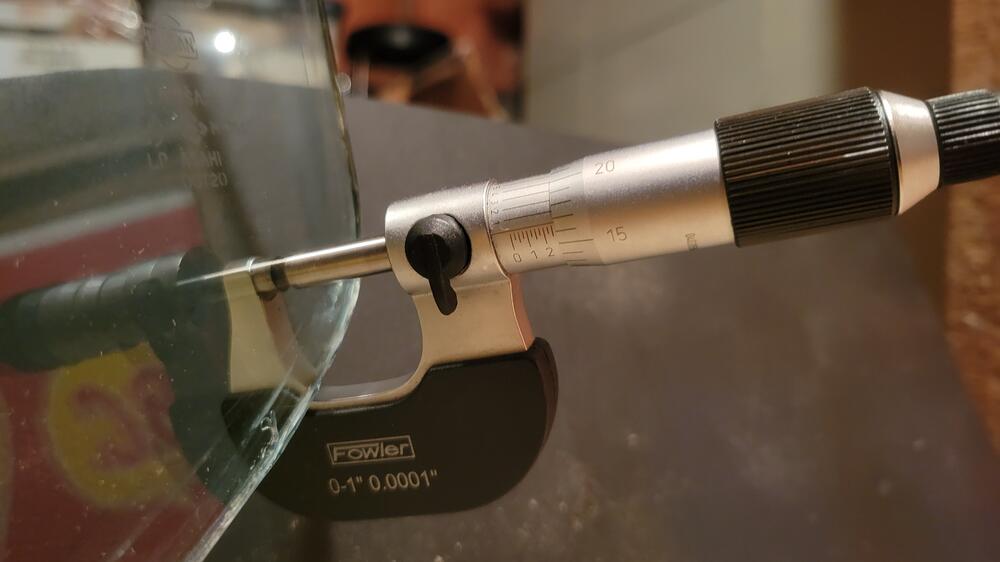

-
Just checked the original windshield removed from my 7/70, and it measures 7mm (.275") thick.
-
The parts microfiche shows this very clearly with the hex head of the bolts on the propeller shaft flange side. This is how my 1970 is assembled.

-
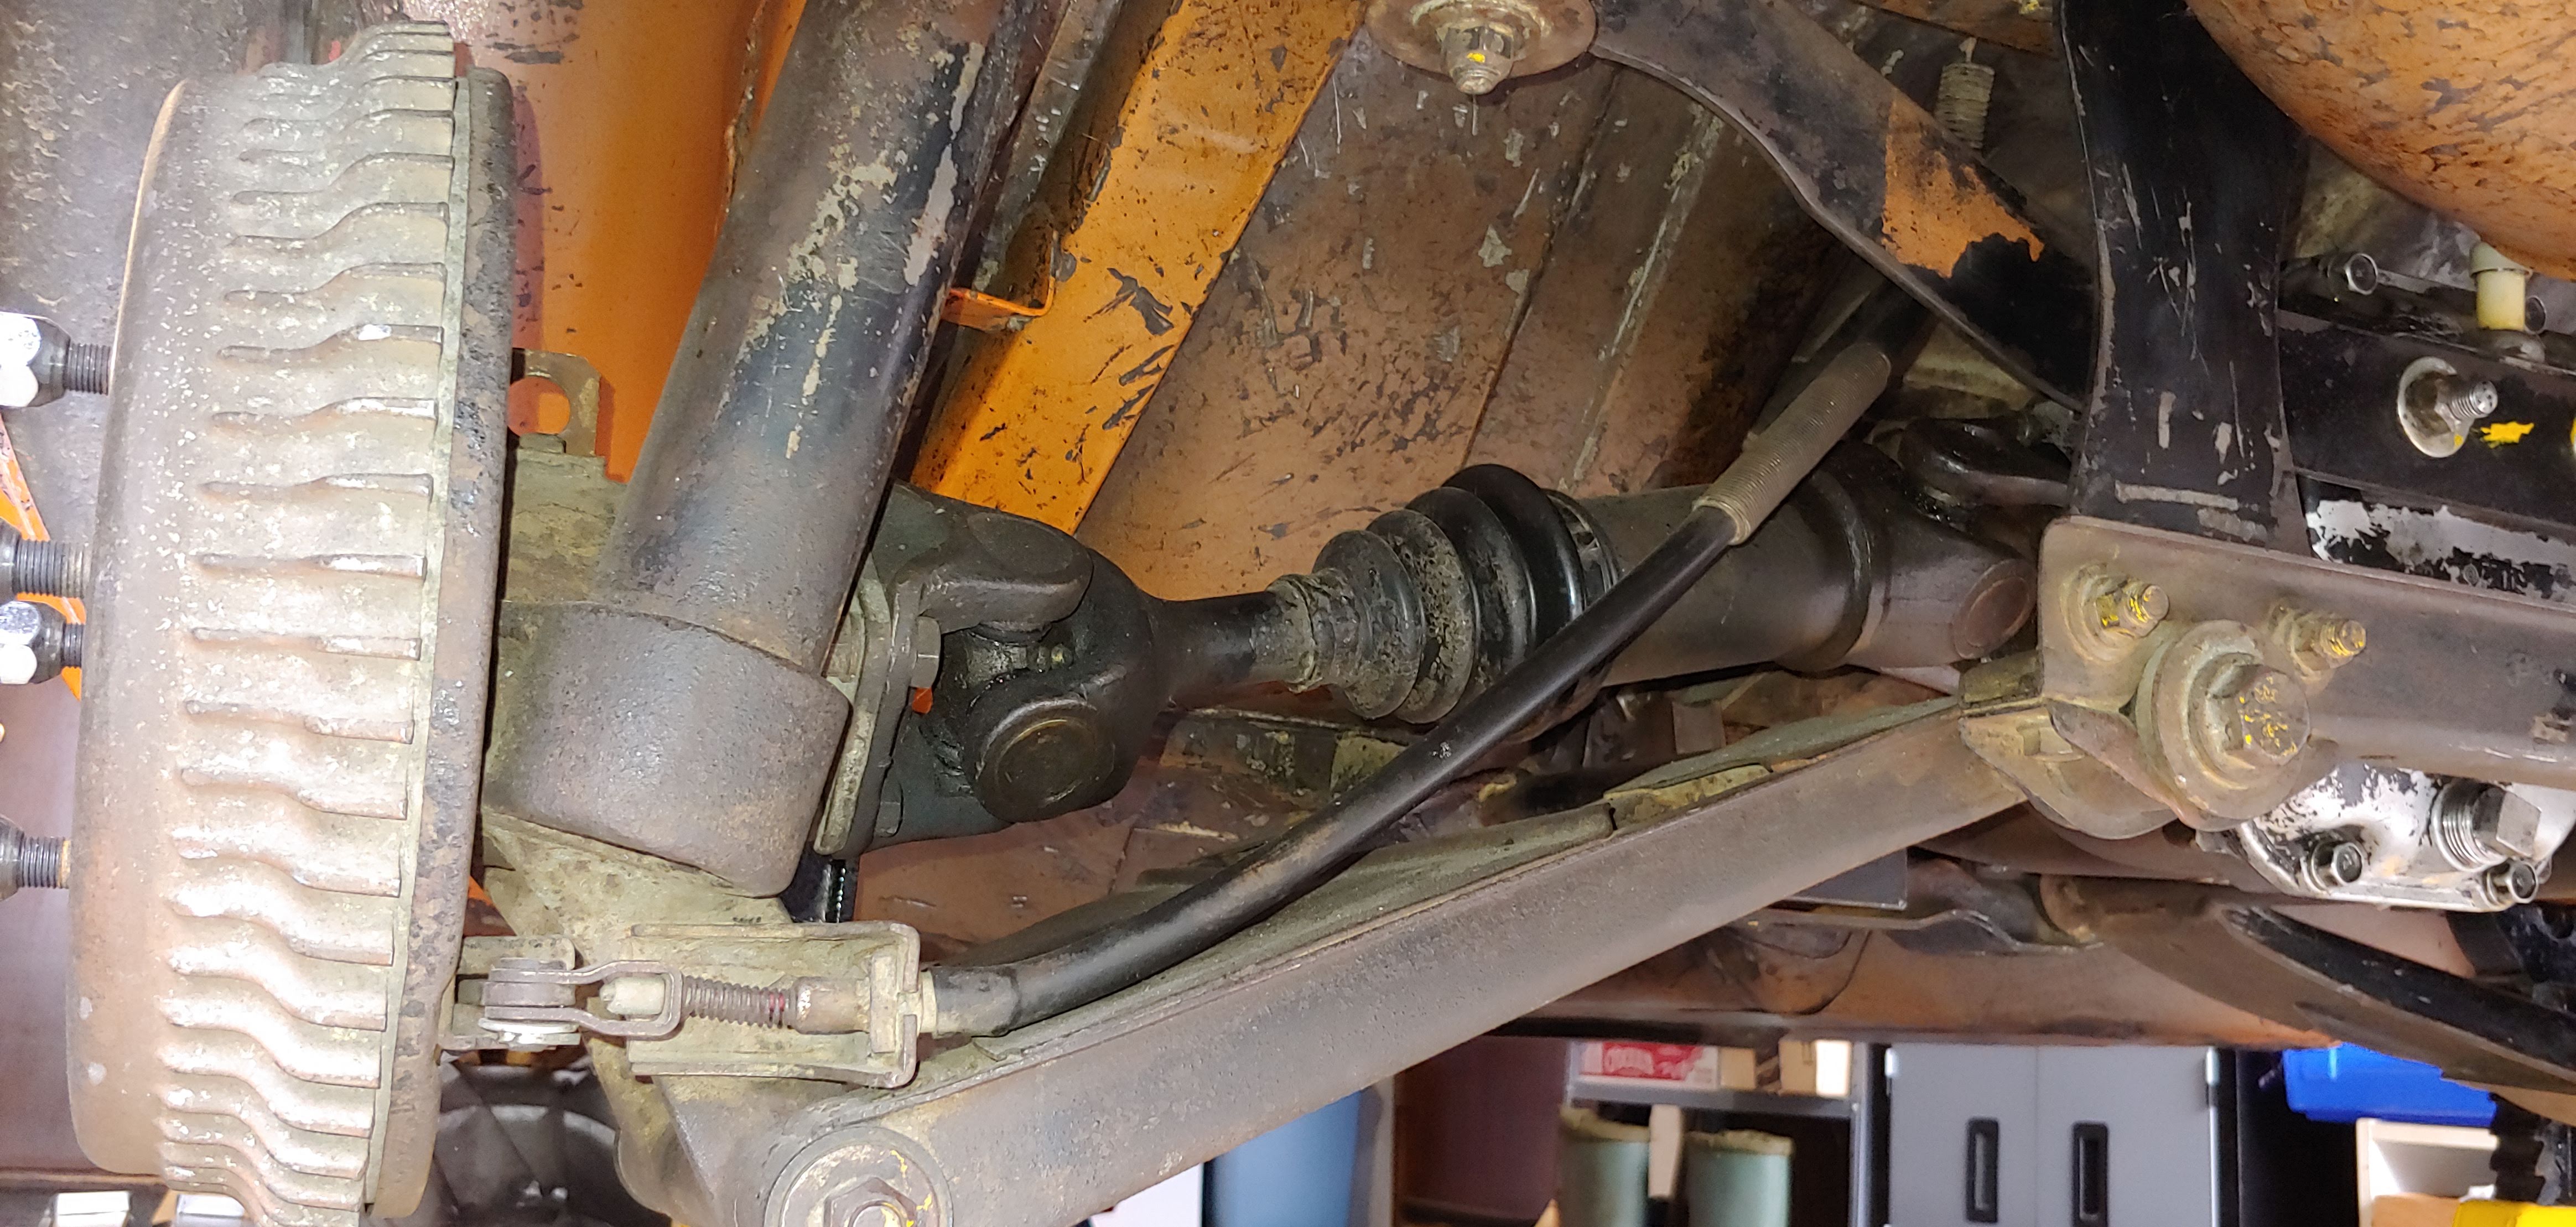
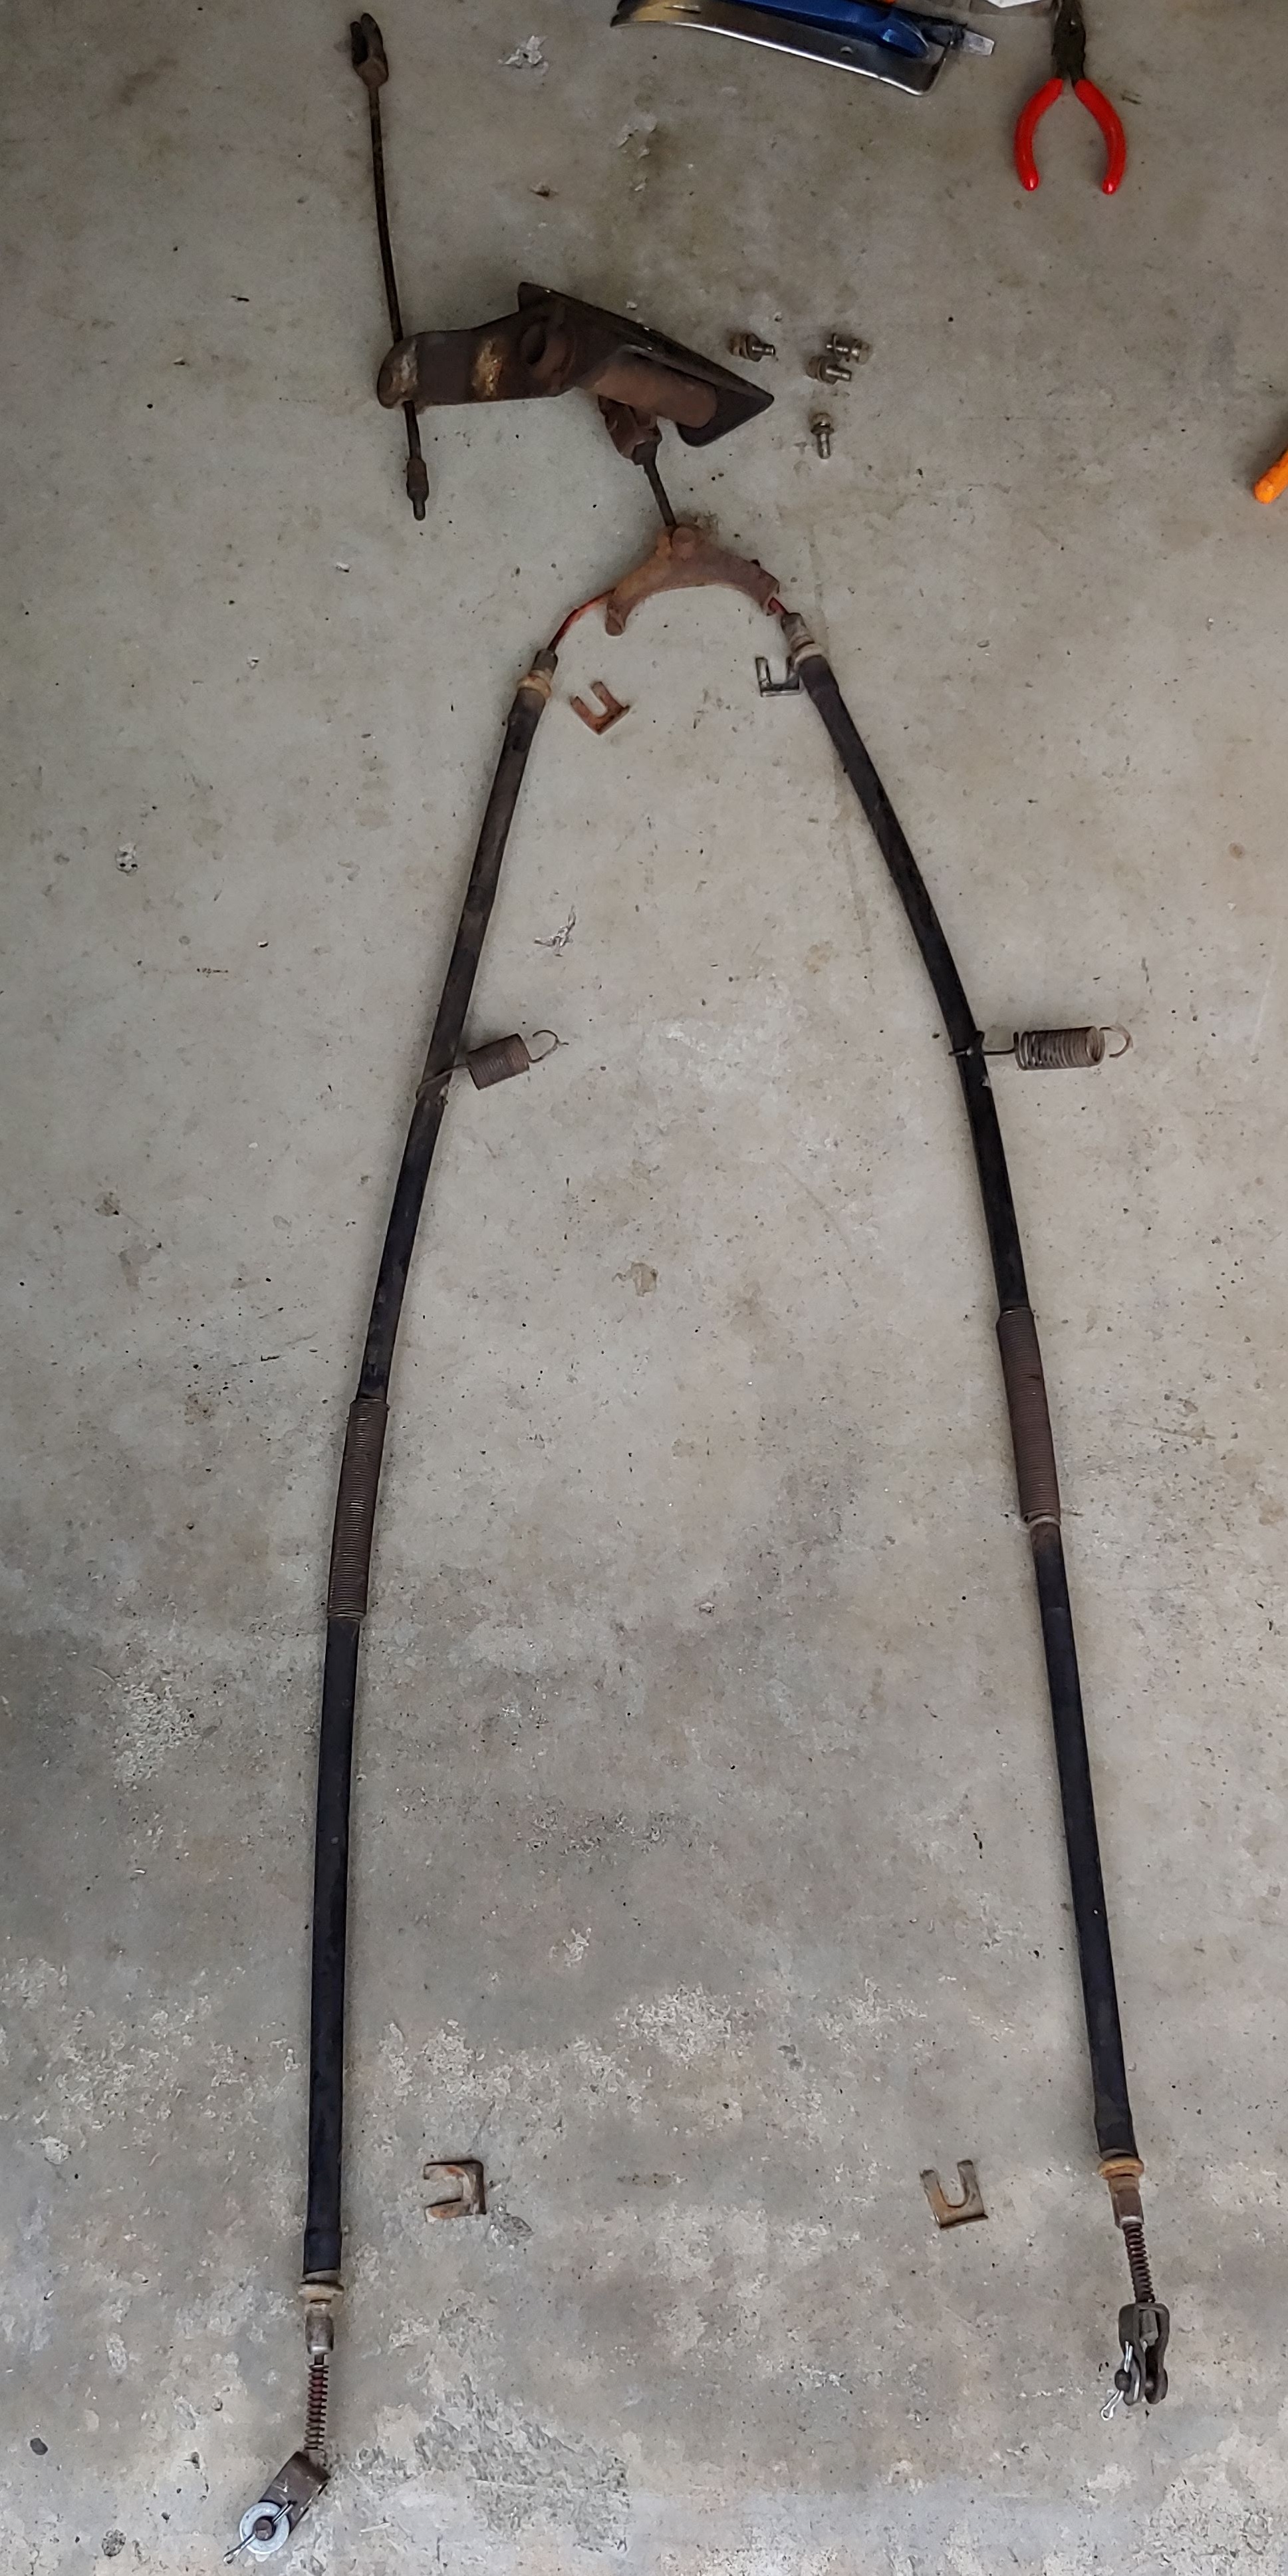
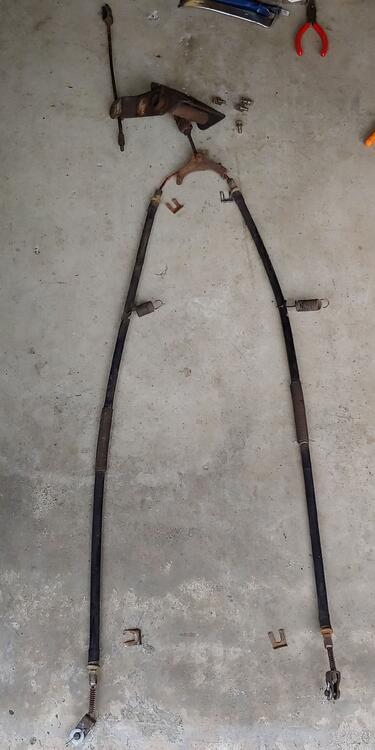
Hi John, FWIW here are a few pictures from my 240 showing the springs and how they attach. I'm not sure if the 280 was done the same.

-
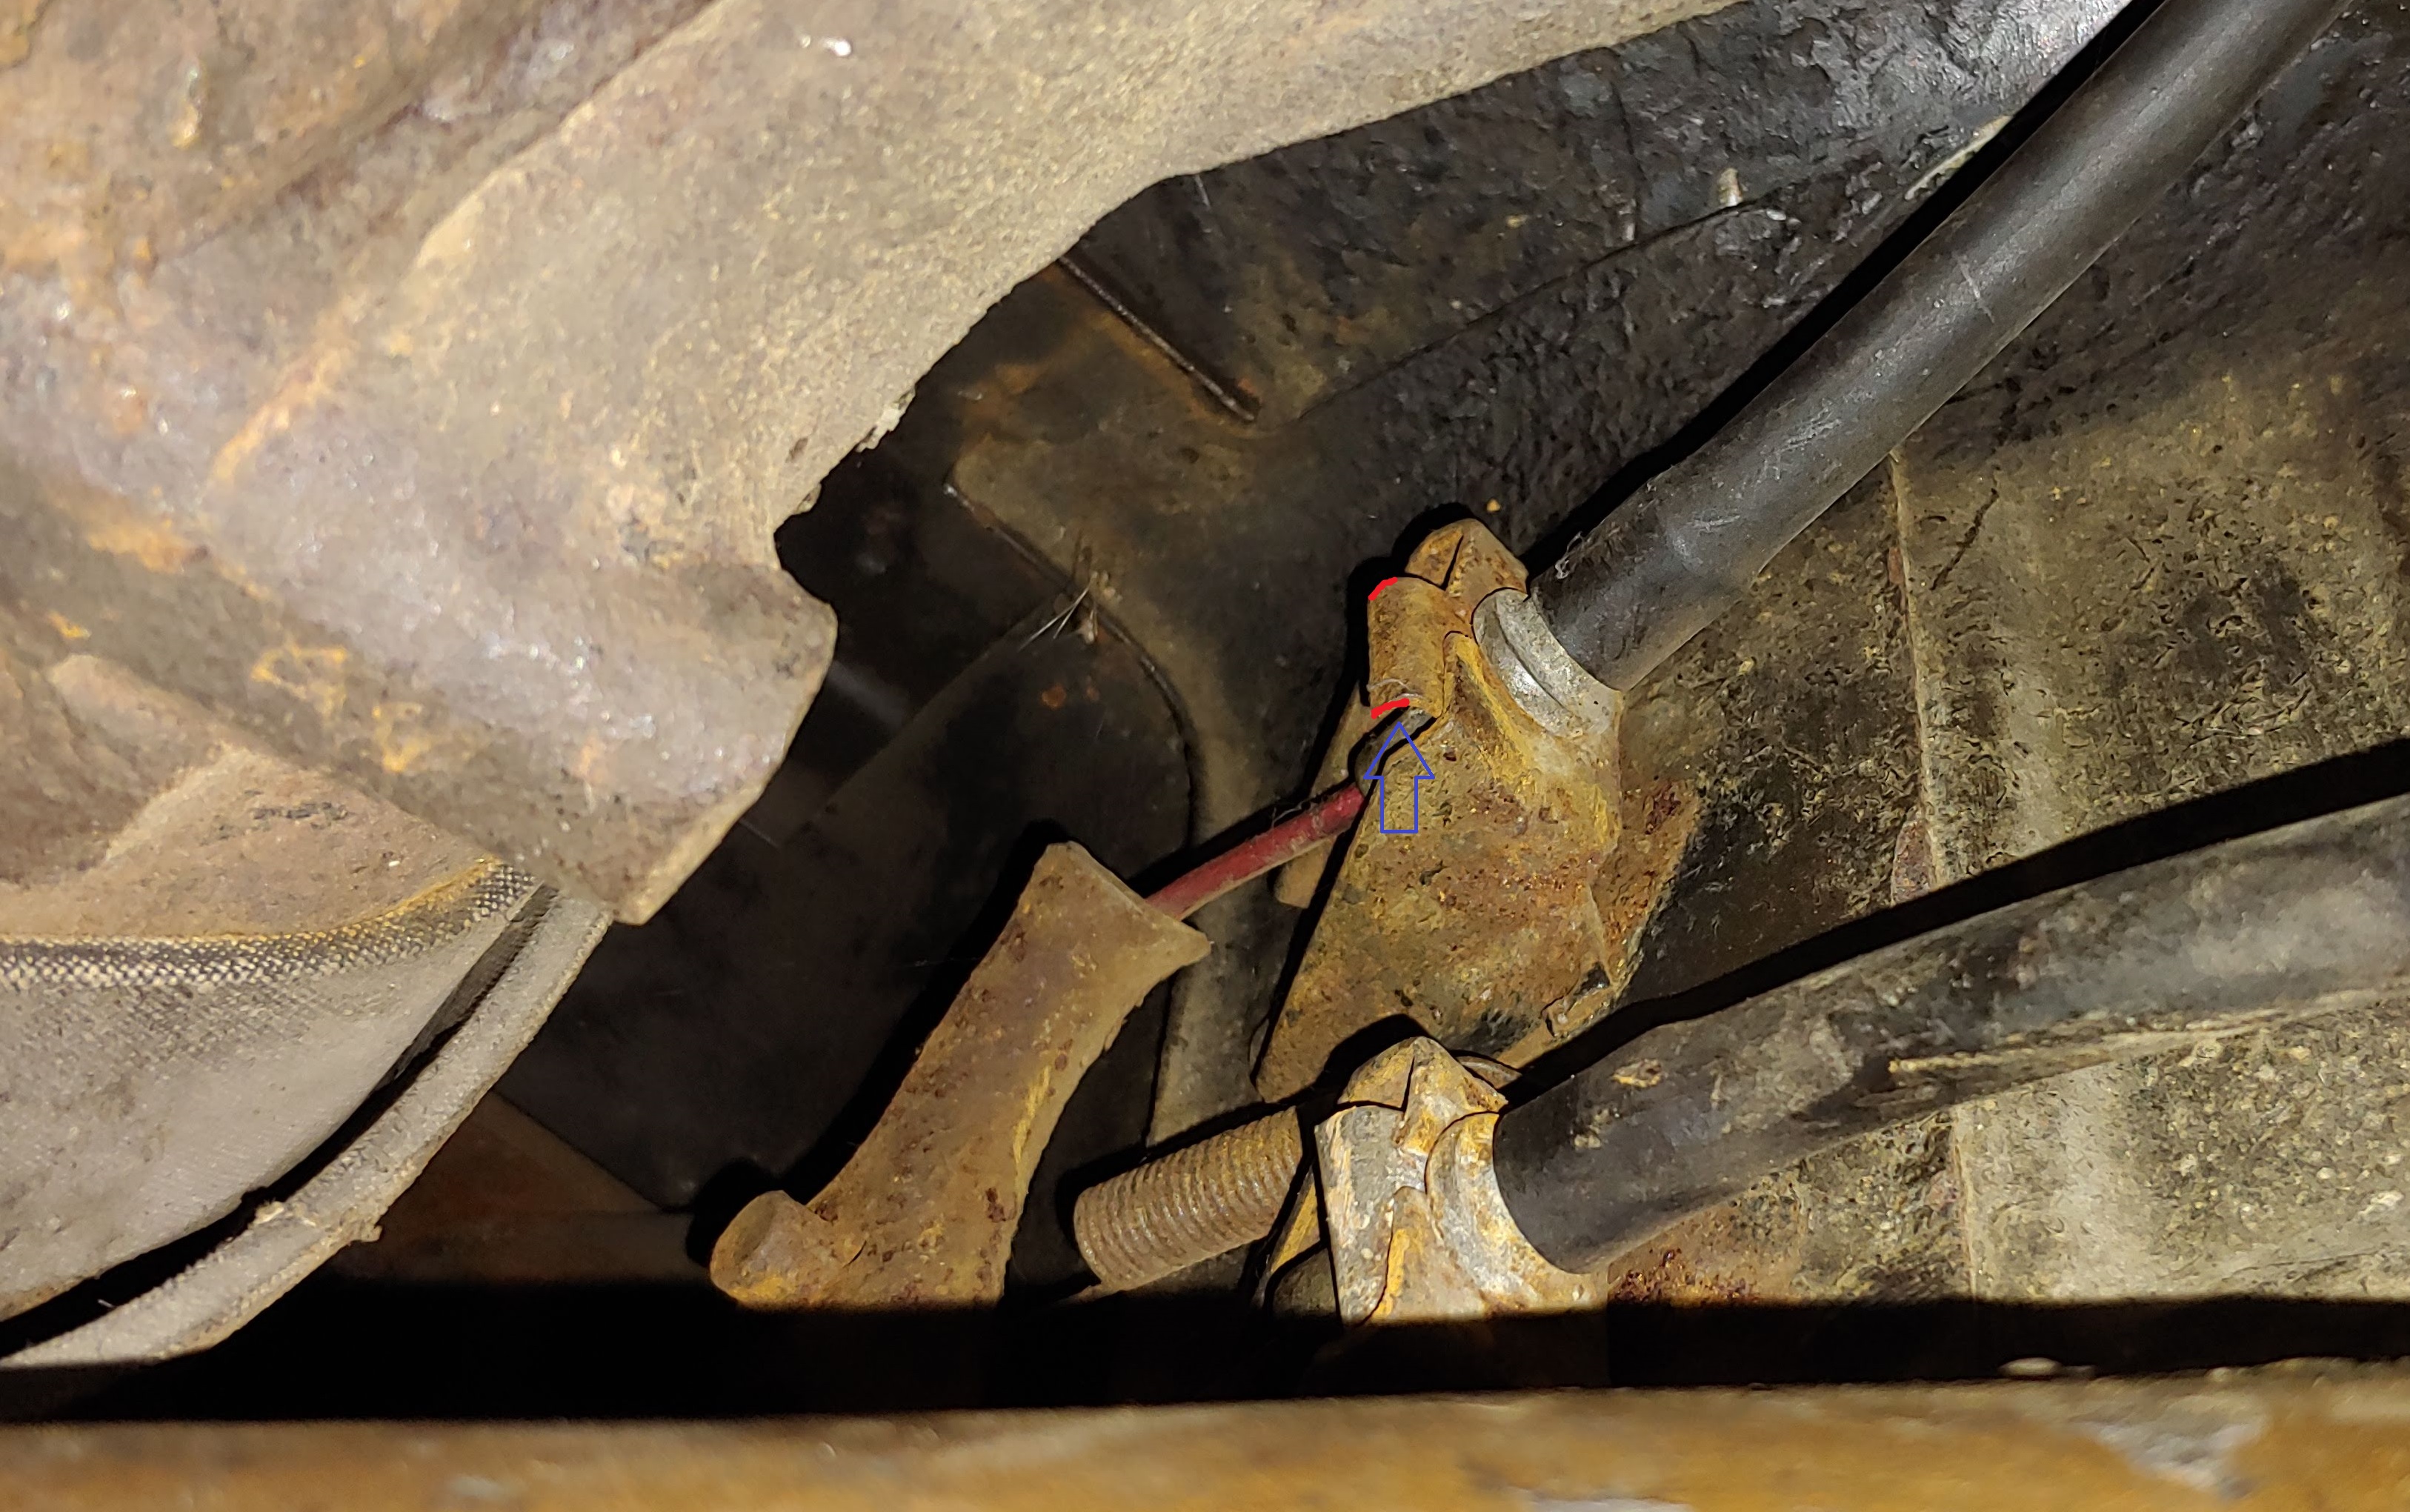
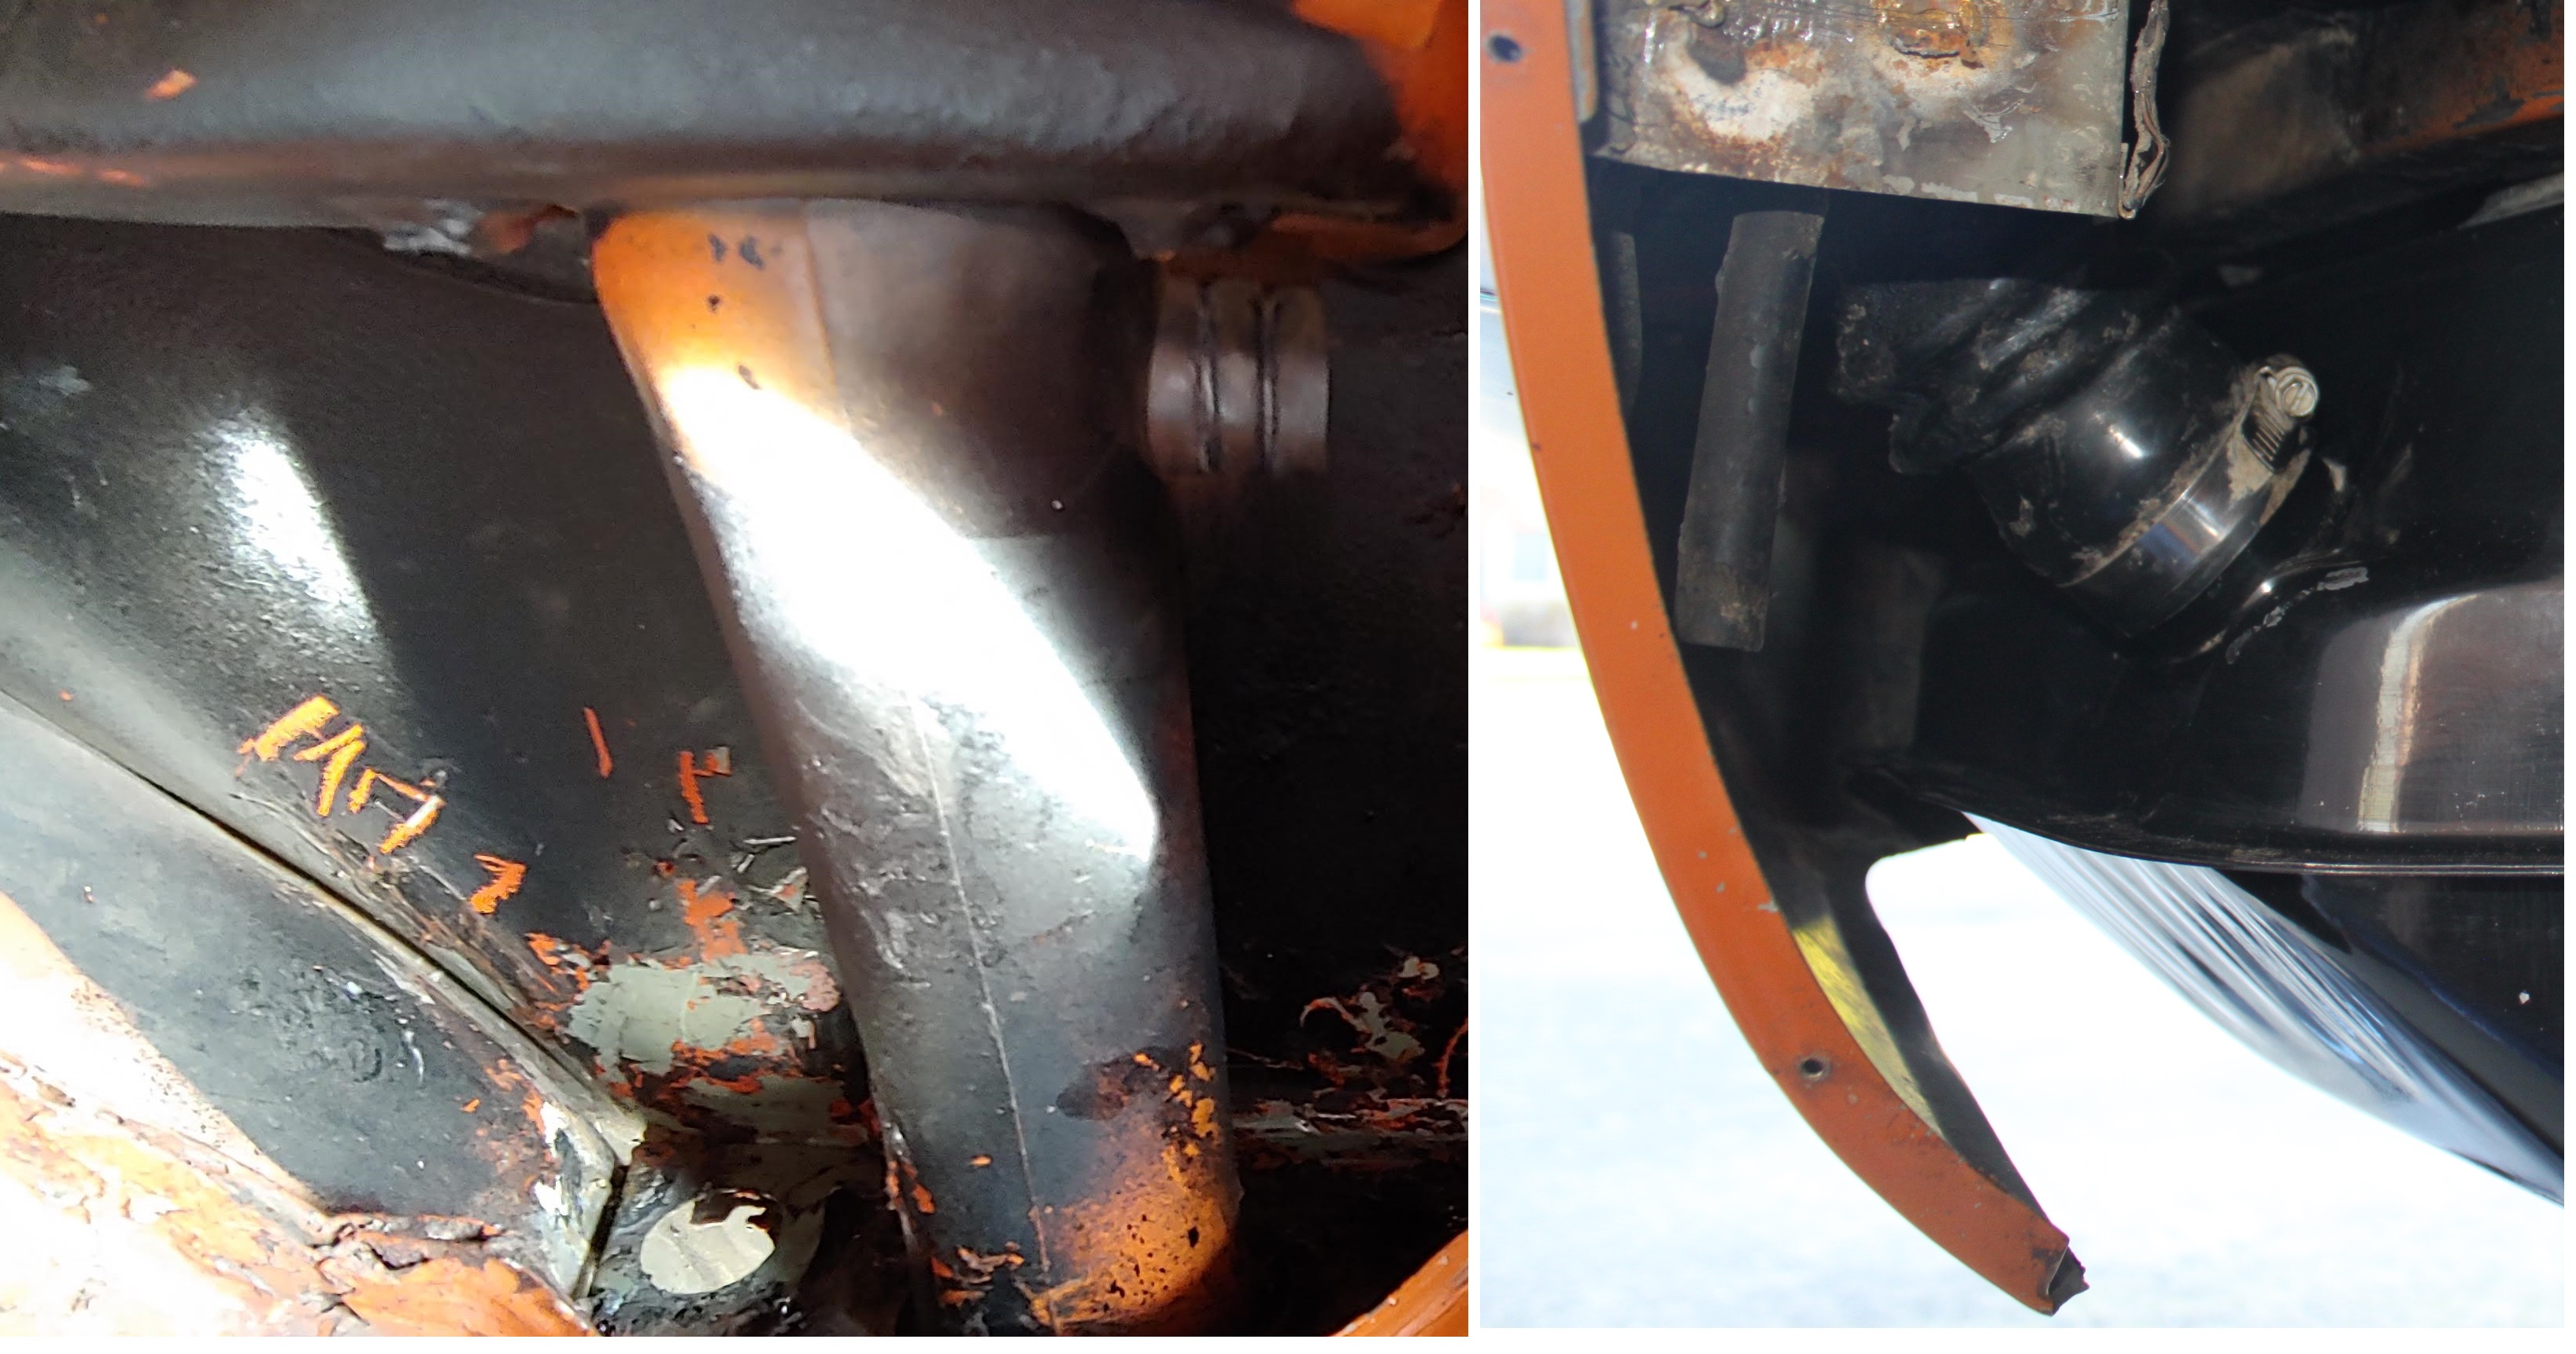
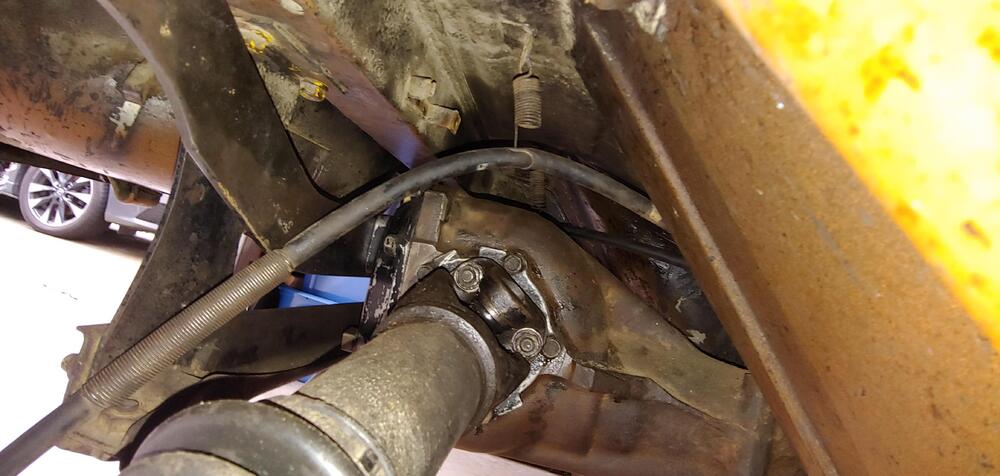
I was able to get those clips out, with the diff in (drive shaft was out) on my 1970 using vise grips and a pry bar, with the car on jack stands. The pry bar was actually an old heavy flat bladed screw driver. Like yours they had never been out and were very difficult to remove. Here is a picture marked up showing what I did. I held the edges of the clips (marked red) with vise grips and used the pry bar under the clip flange (where the blue arrow is) and applied force against the top of the mounting bracket. While applying force with the pry bar I was attempting to rock the clip back and forth in the direction of the arrow and eventually I was able to get it to move and pull out. The rust on the surfaces causes a lot of resistance but if you can break past that and the clip starts to move it will come out. Good luck

-
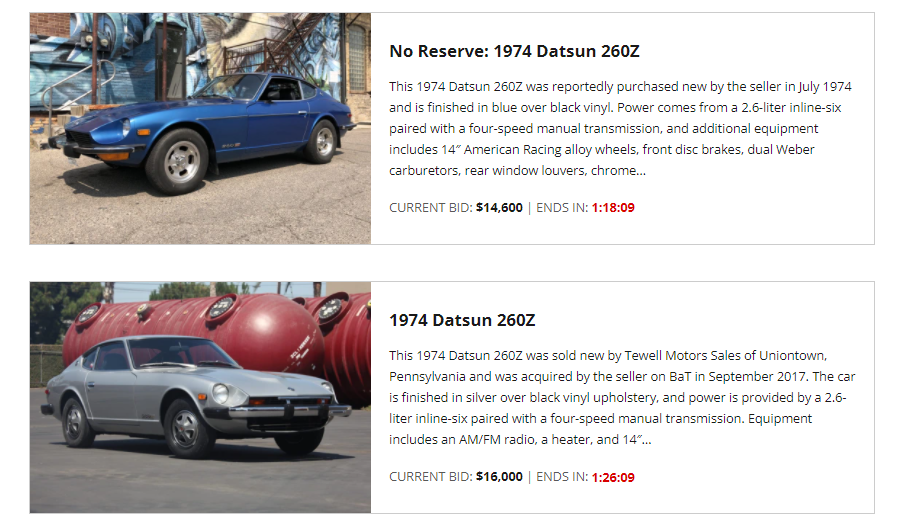
Two BaT 260Z auctions ending in less than 90 minutes, one with no reserve. Both look to be pretty nice and they are still well under 20K. The silver one sold for 46K on BaT in 2017. Interesting that neither one had many comments or communication from the sellers. https://bringatrailer.com/listing/1974-datsun-260z-50/ https://bringatrailer.com/listing/1974-datsun-260z-51/
-
This is very cool technology, here is a link to a post from @Mike a couple of years ago when it was first announced. The video shows the process in a little more detail.
-
Did you even bother to click on the link that @siteunseen politely posted? When you do a google search that includes classiczcars.com, the result are primarily focused on this forum. A lot of times you get more focused results than by using the search button on this site. In Site's example you get the following, and if you click more results, you get 3 plus pages of relevant results from our forum. I will also mention that if you search from our forum with quotation marks, ie: "engine removal". you will get results for the phrase in quotations. Which also gives a good list of results. I suspect you already know this, but by reading your blunt requests for help it doesn't appear that you have the time to search for yourself. Maybe you should think about that for a while, oh and yes I do have better things to do.

-
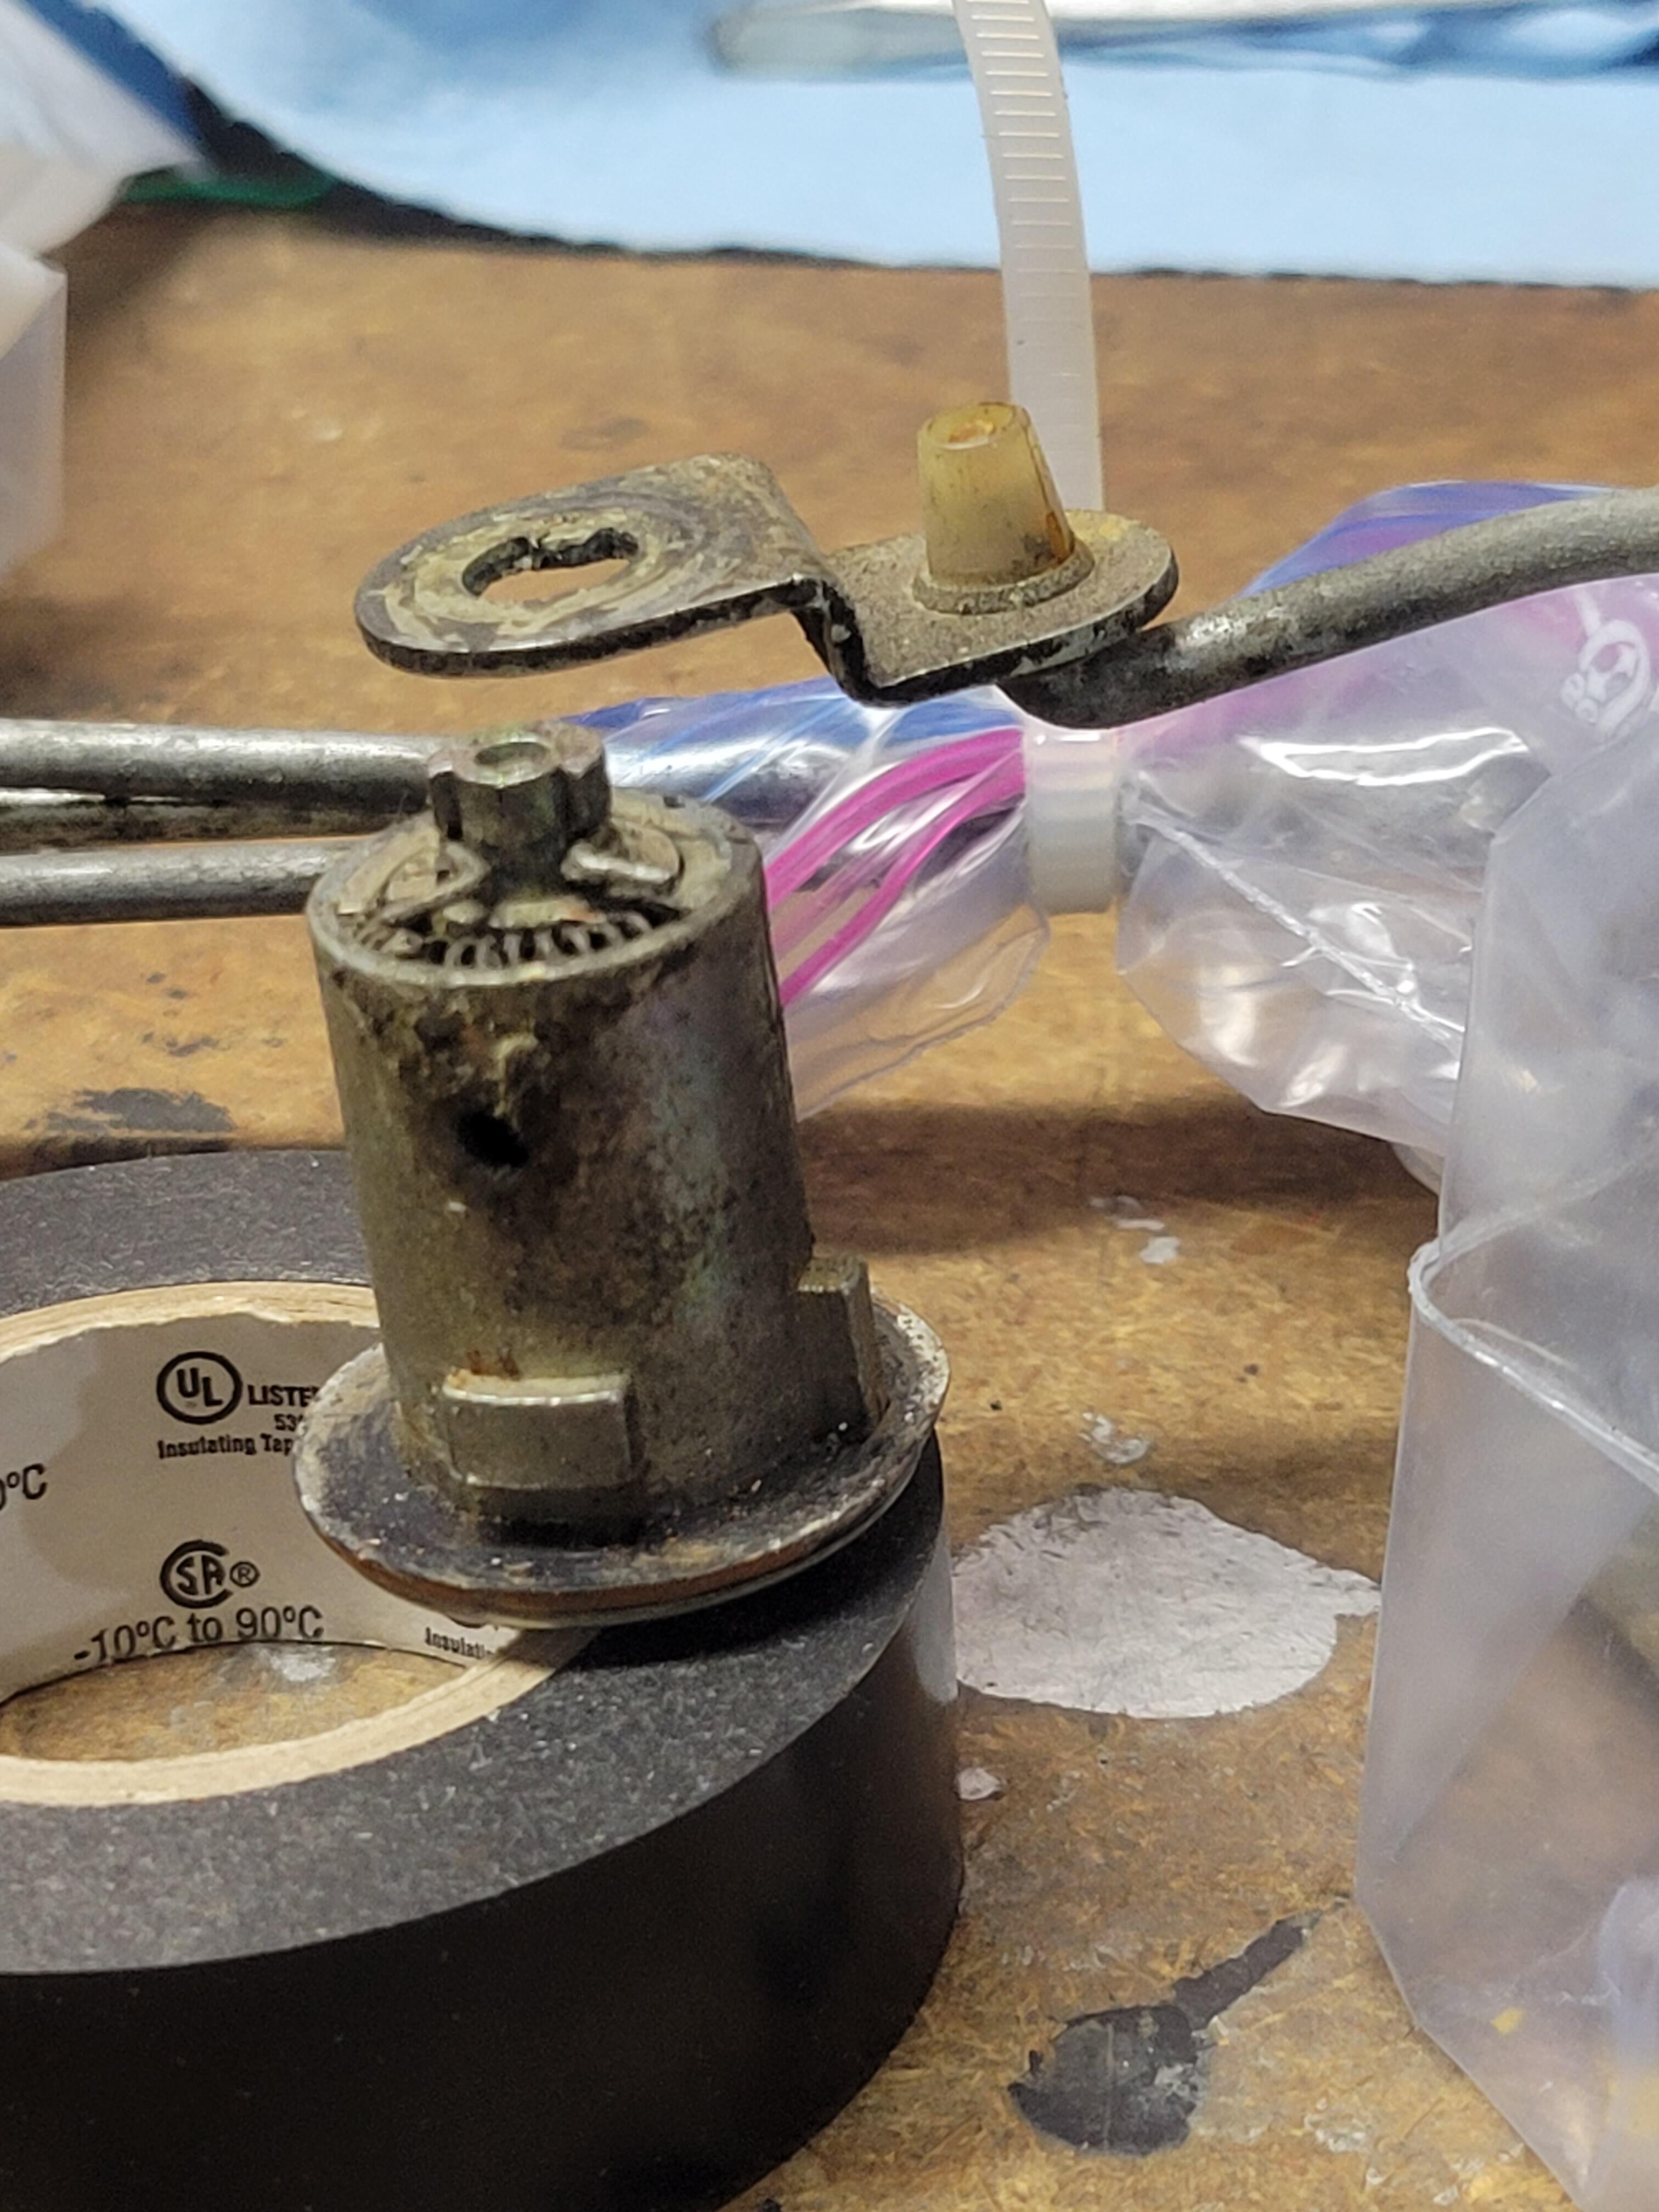
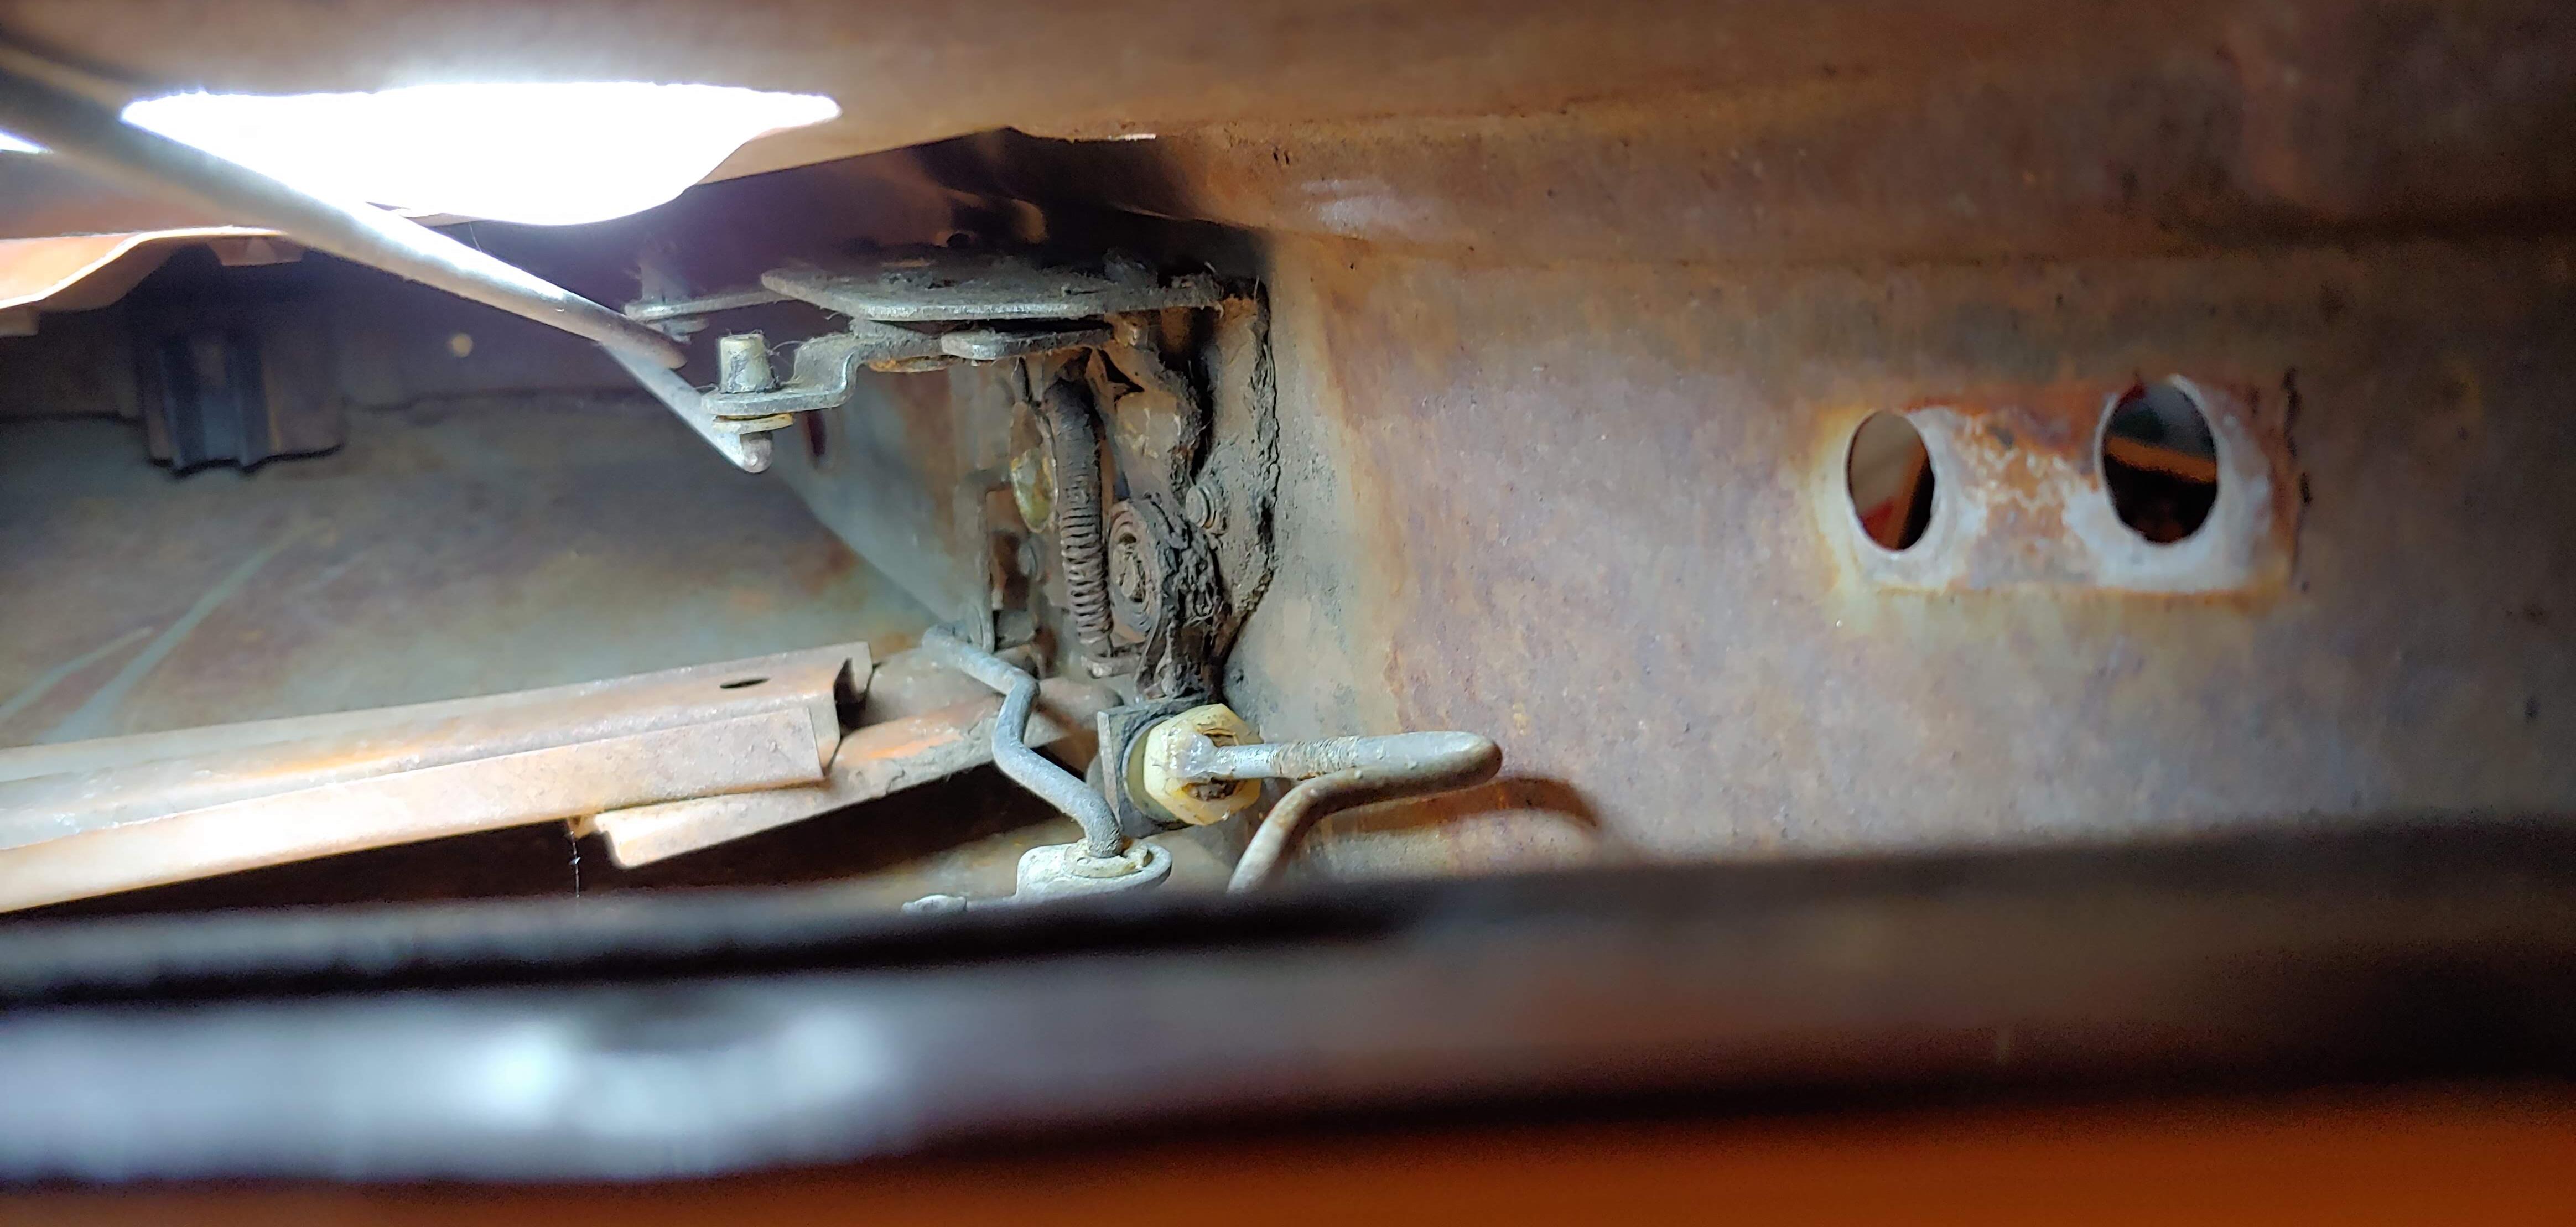
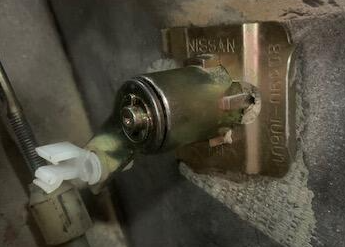
For those with early cars who may find this discussion later, here is a close up picture of the connection from the actuator on the key cylinder to the rod on the door lock mechanism. It shows the split plastic bushing that is used, instead of a clip type connection as shown above.

-
They might be different for "series 2". My car has the two key system with the short single sided key for the doors.
-
Just checked the lock assemblies on the doors from my 1971 parts car (12/70), they don't have the plastic clip on the the lock cylinder actuator either.
-
Is that the correct key cylinder? Mine doesn't have the white plastic clip that is in your picture.
-
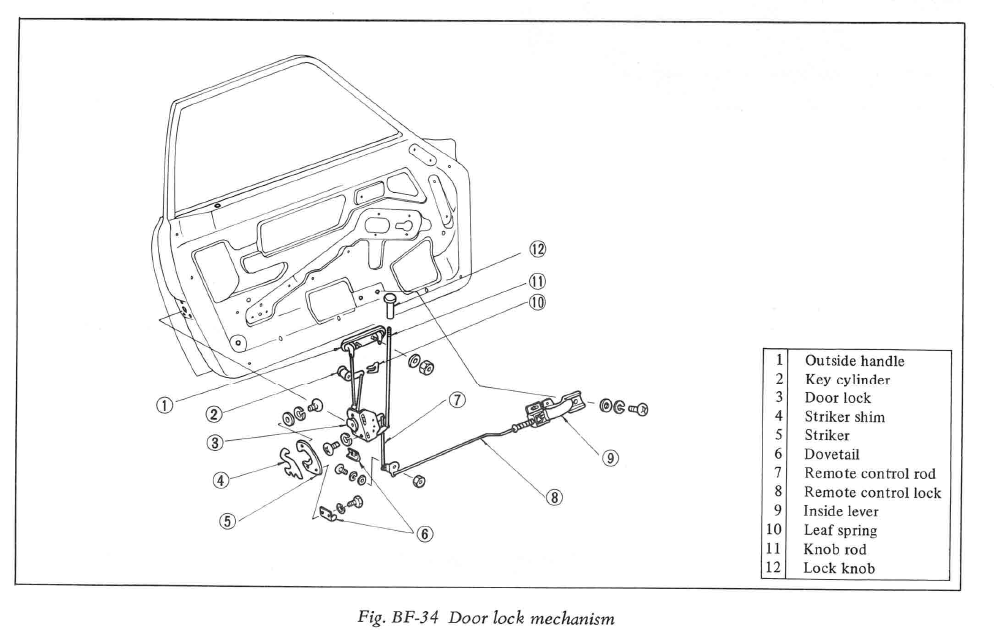
Also here is an image from the body section of the FSM.
-
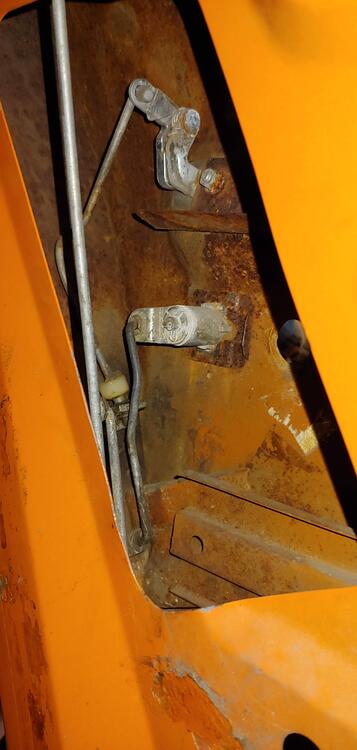
Here are a couple of pictures from my 7/70 that I took so that I could re-assemble in the future. Don't like relying on my memory, Hope this helps.

-
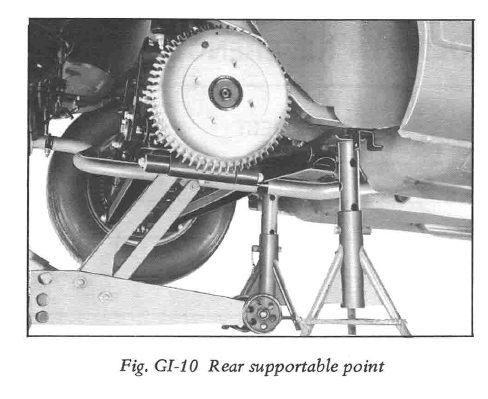
The FSM is a good source of info for this question. Check the general information section.
-
The company name should be, lol
-
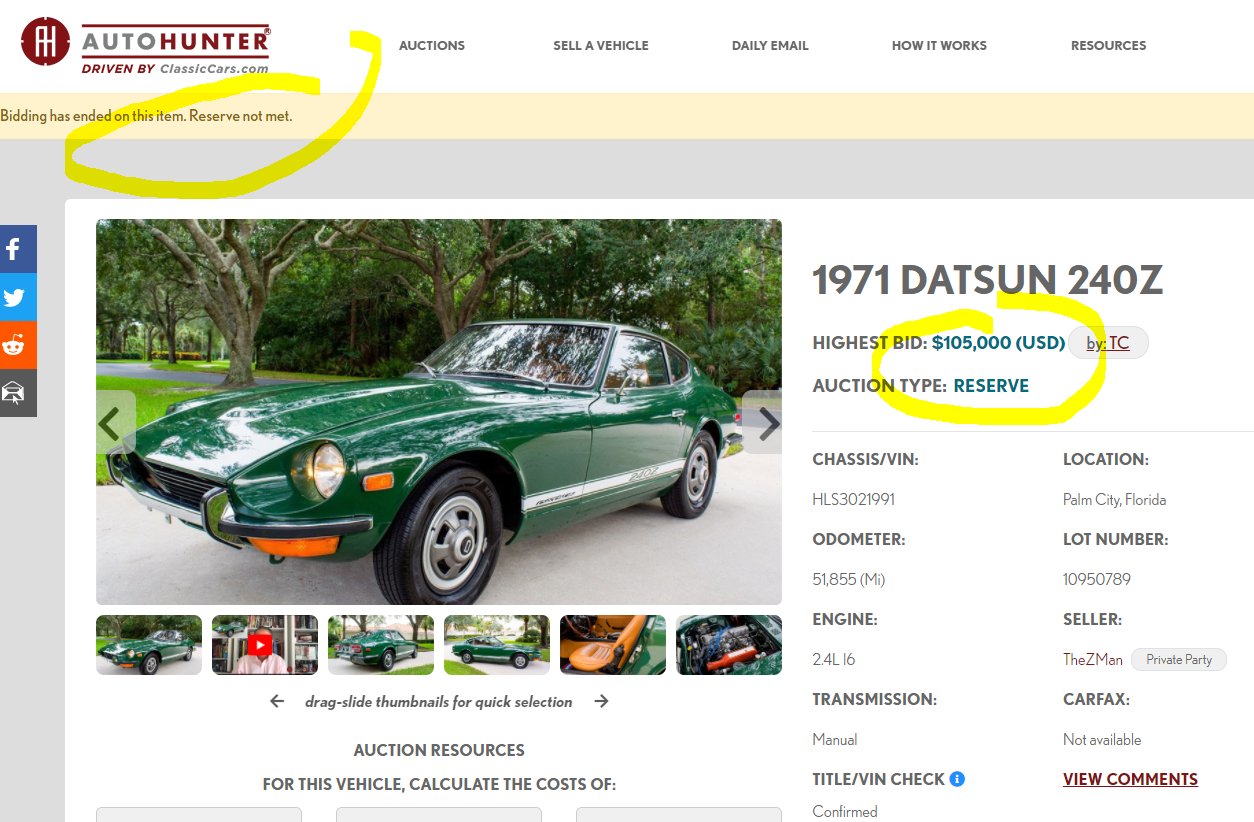
I was wondering the same. The comments indicates that the seller was not very cooperative. Maybe not the right word, but he definitely was not making much of an effort.
-
Reserve not met at USD 105,000

-
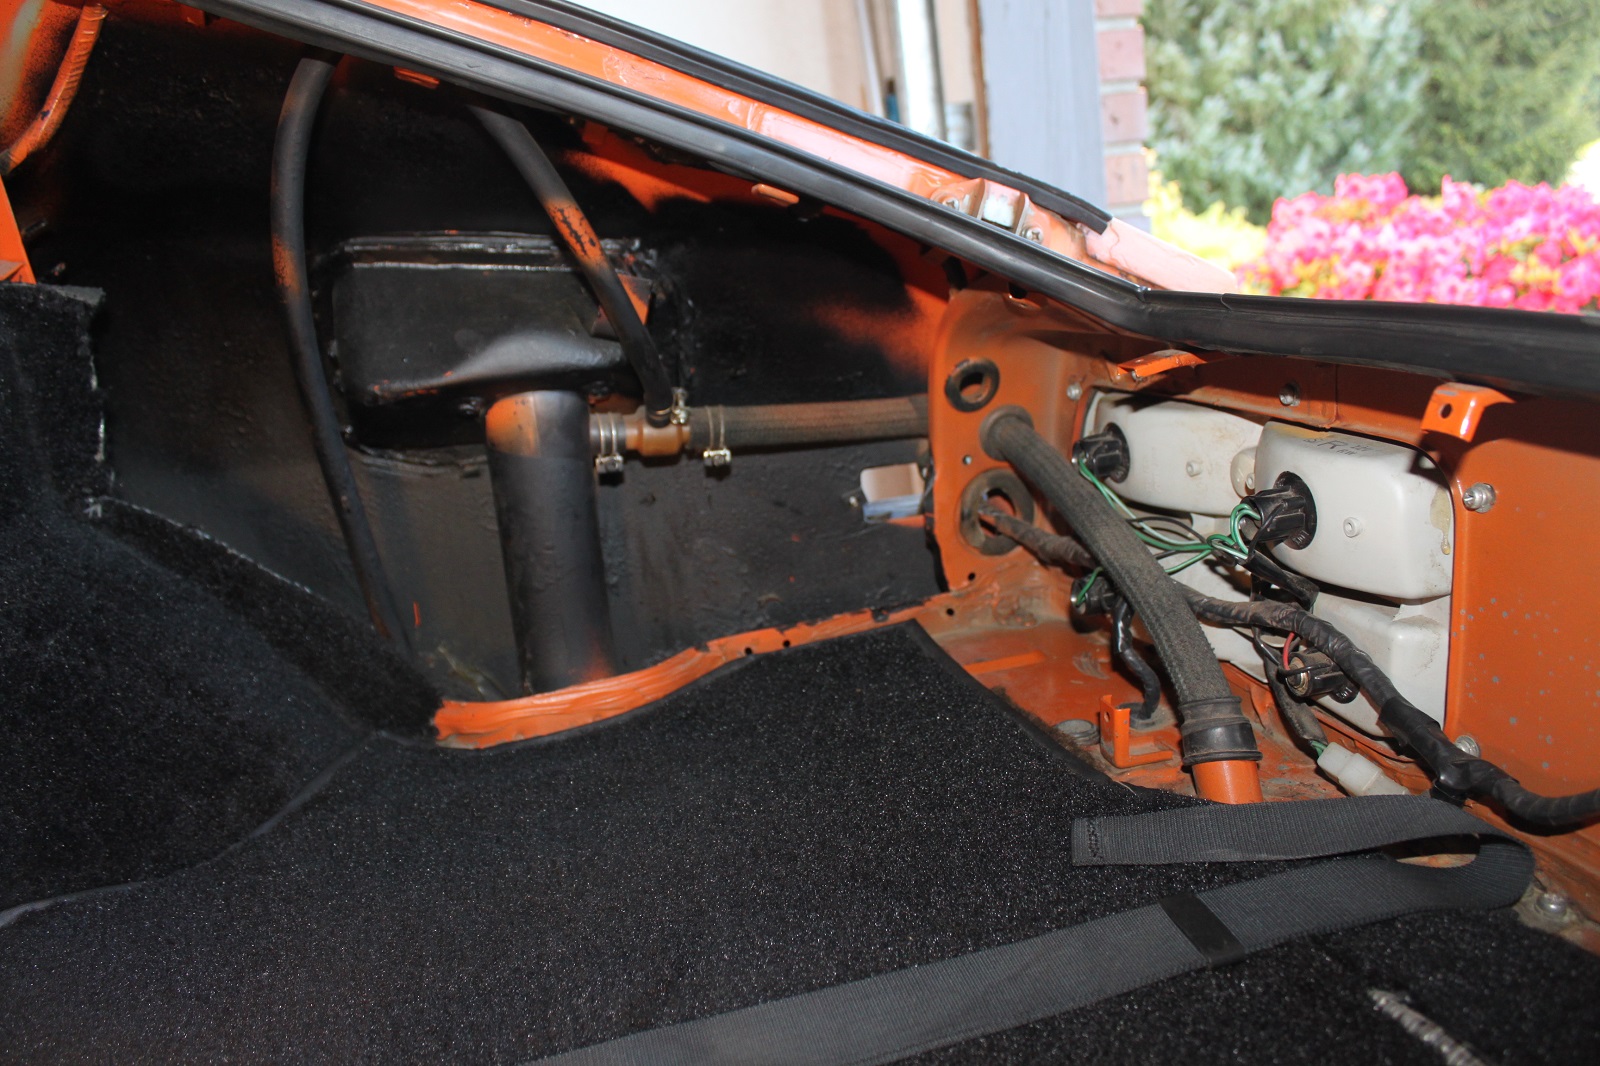
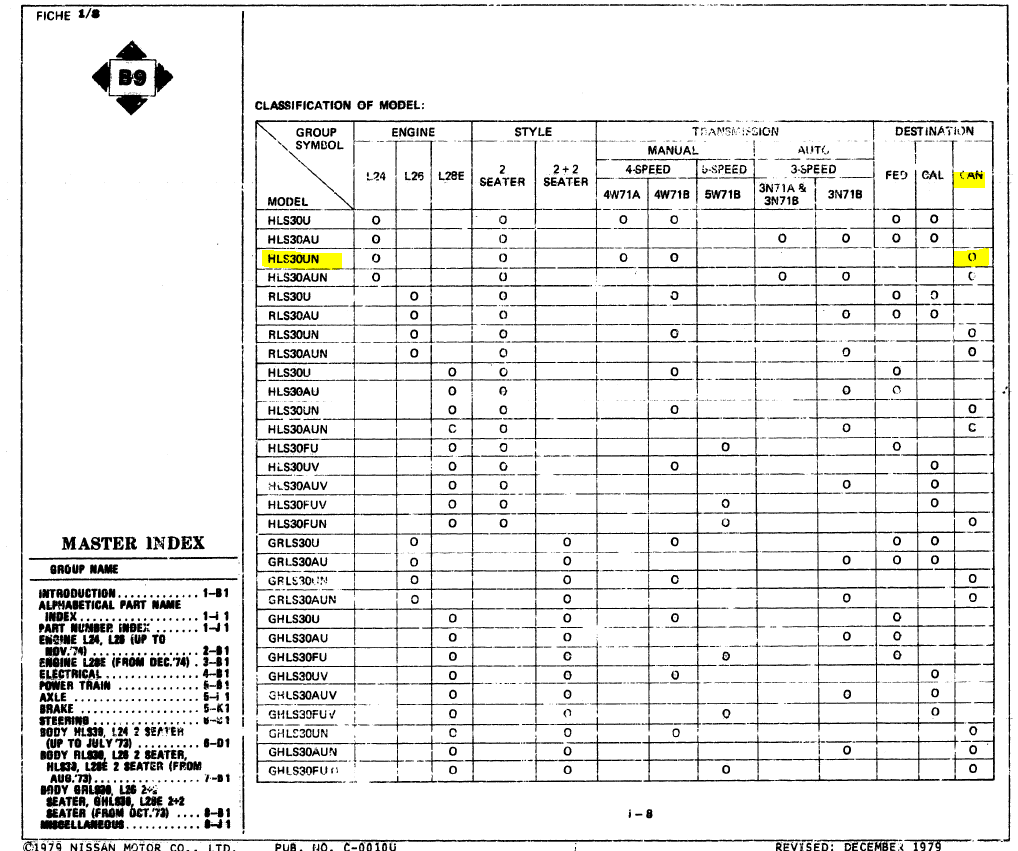
Early Canadian market 240Z's had no vapor tank either, until about 9/70 I believe. They were known as non-emissions models, HLS30UN. Here are a couple of pictures of my 7/70 Canadian car showing the original vent hose routing without a vapor tank. The hose tee's off the tank vent hose going straight up and then loops back down going through a hole in the floor behind the plastic trim panel.


-
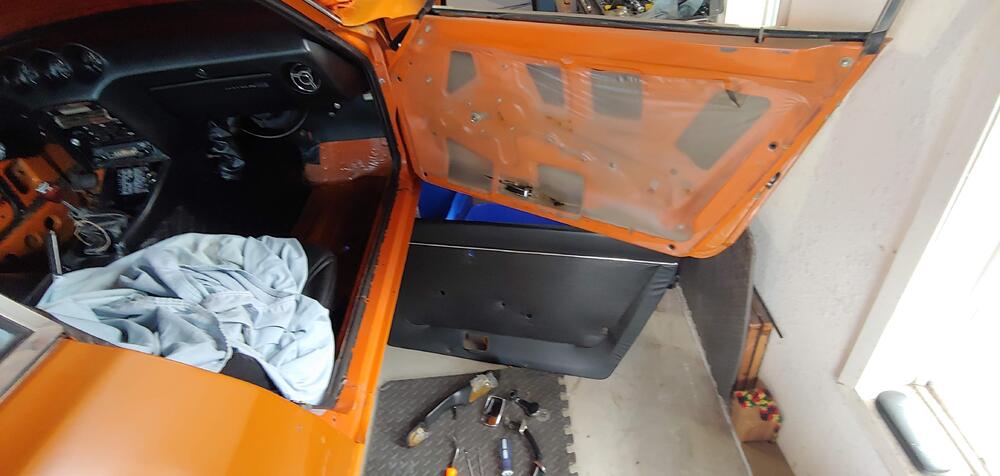
Here's a picture of the original vapor barrier on my 7/70 240Z, before I disassembled the door. It was held on with adhesive all the way around the perimeter. I assume 280's were similar.
-
You're welcome. Funny thing is when I was doing a quick search for these, that was the first link I found and almost posted it as well.