CanTechZ
Free Member
-
Joined
-
Last visited
Everything posted by CanTechZ
-
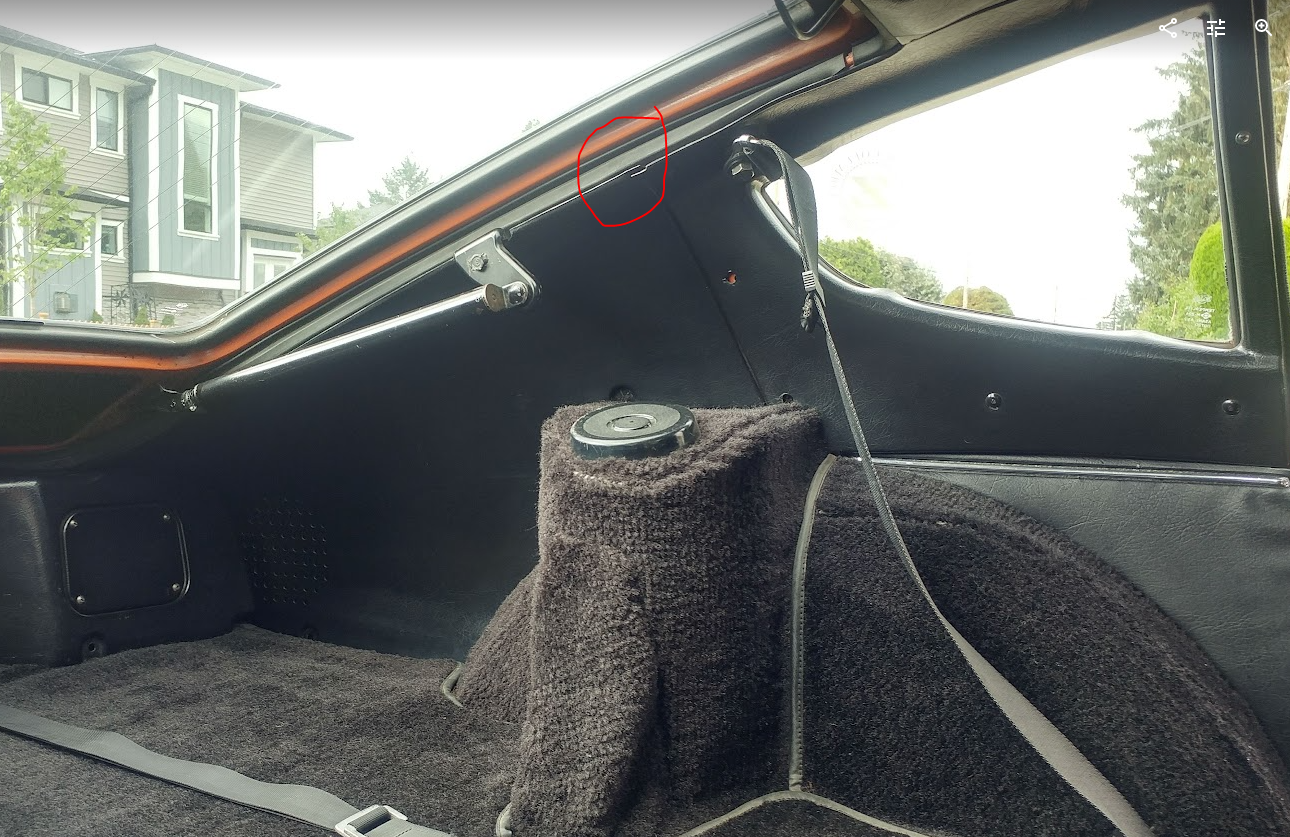
 In addition to what @jfa.series1mentioned, I have found that it helps to have the panel around the quarter window out before installing the rear, due to the overlap of the two panels. In your picture I can't tell if the quarter window panel is installed.
-
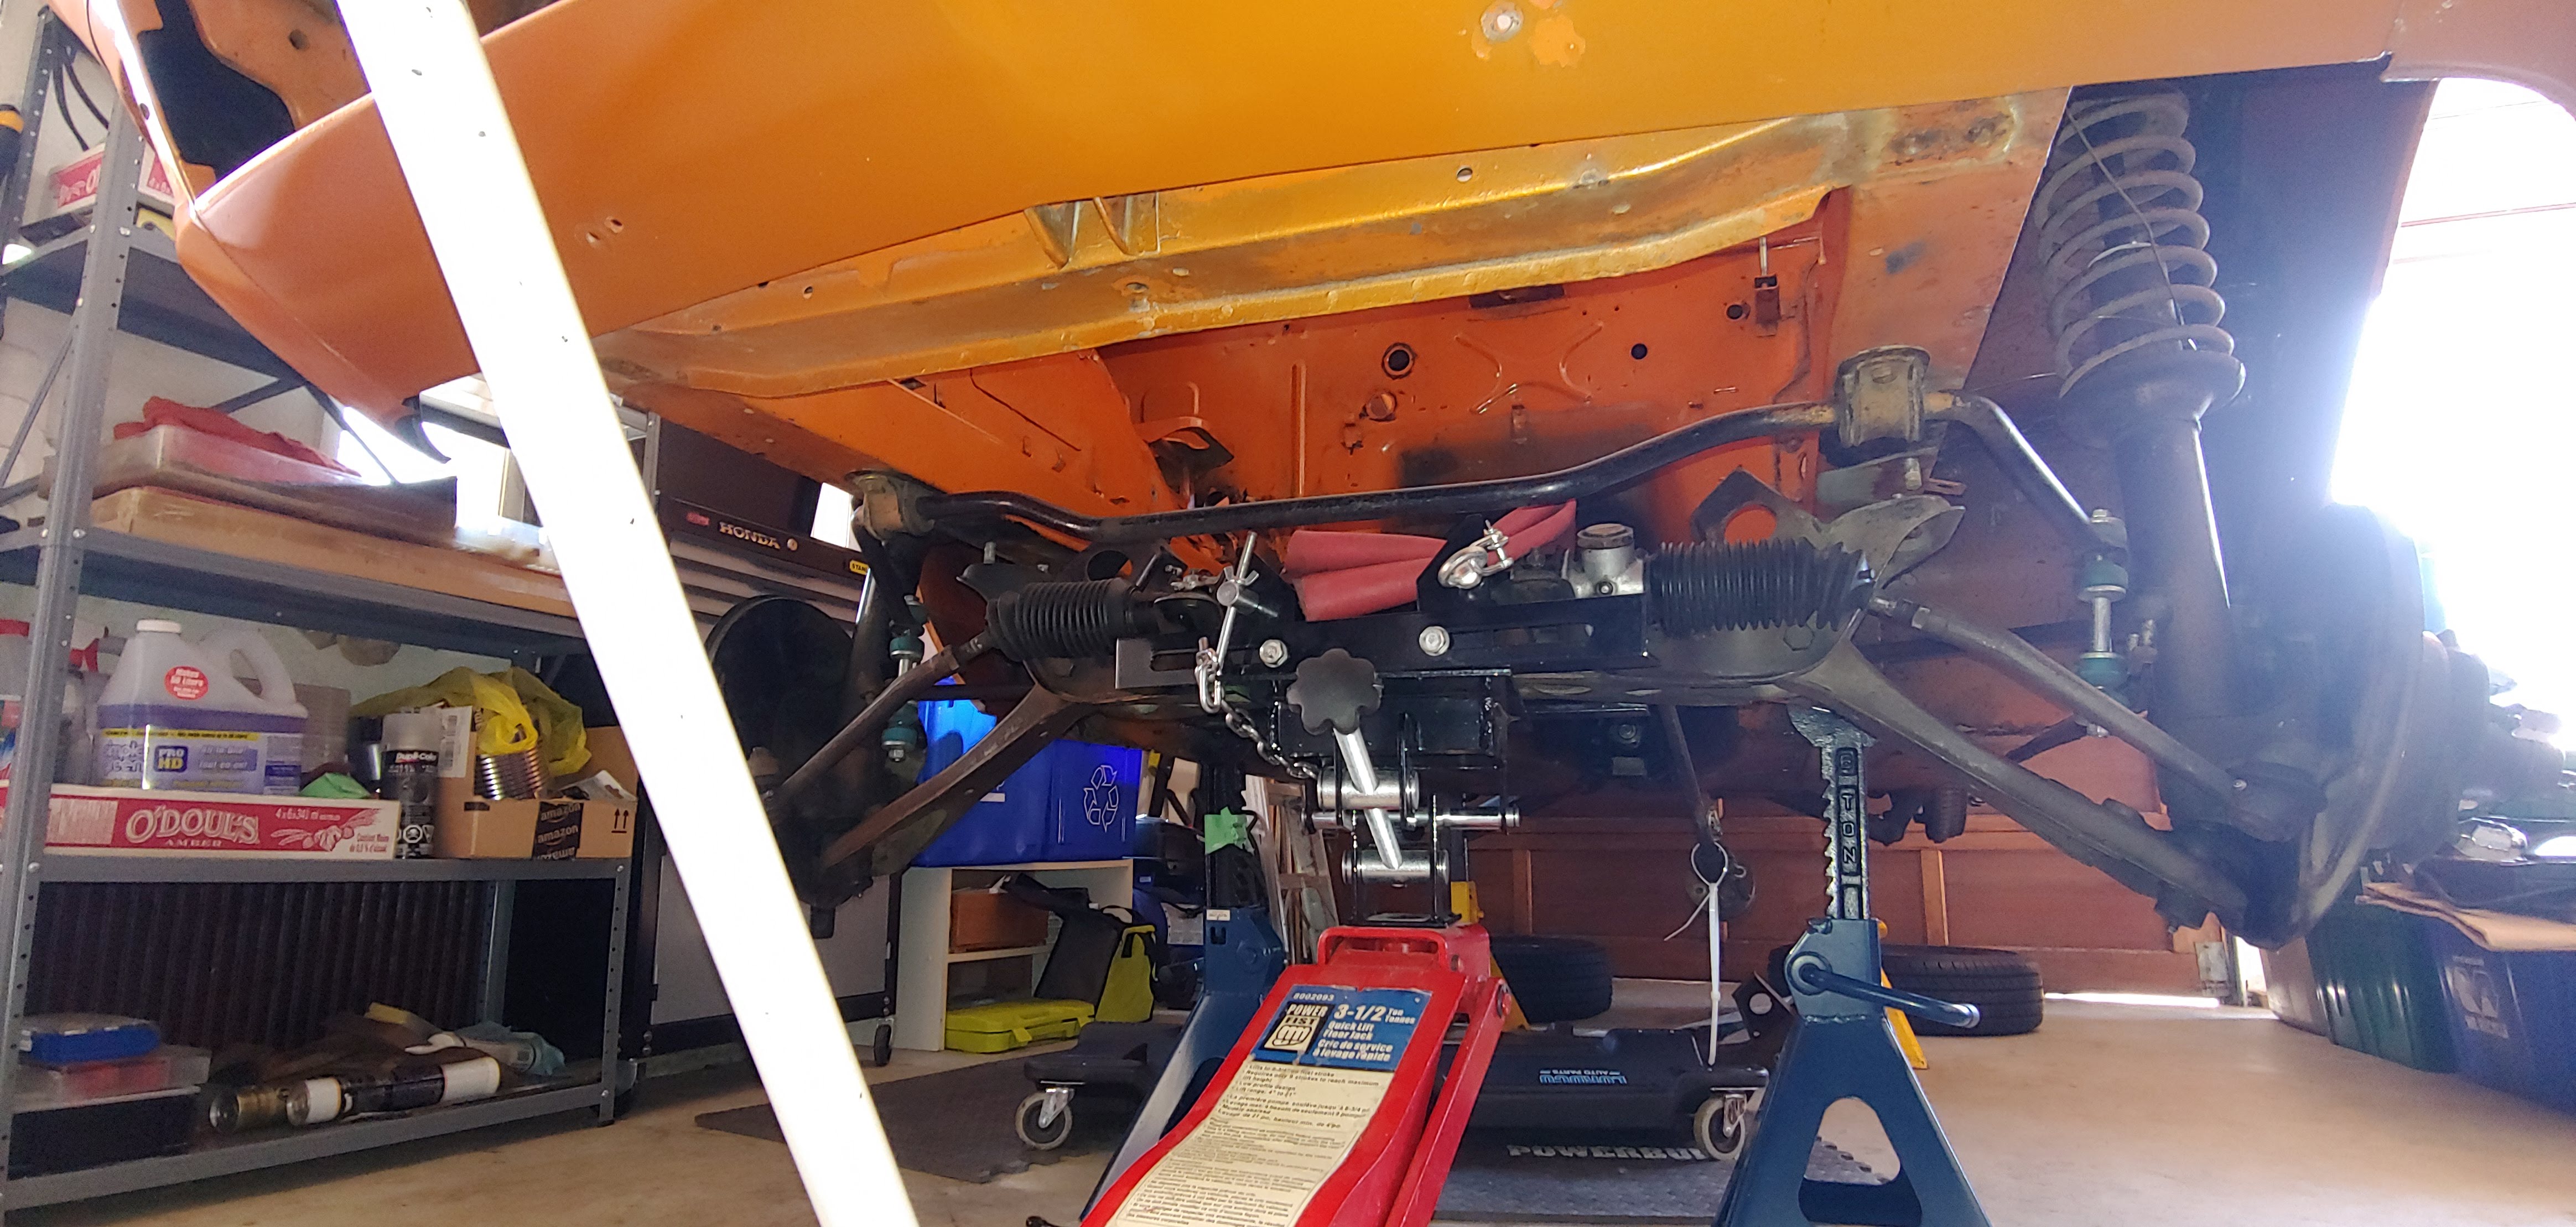
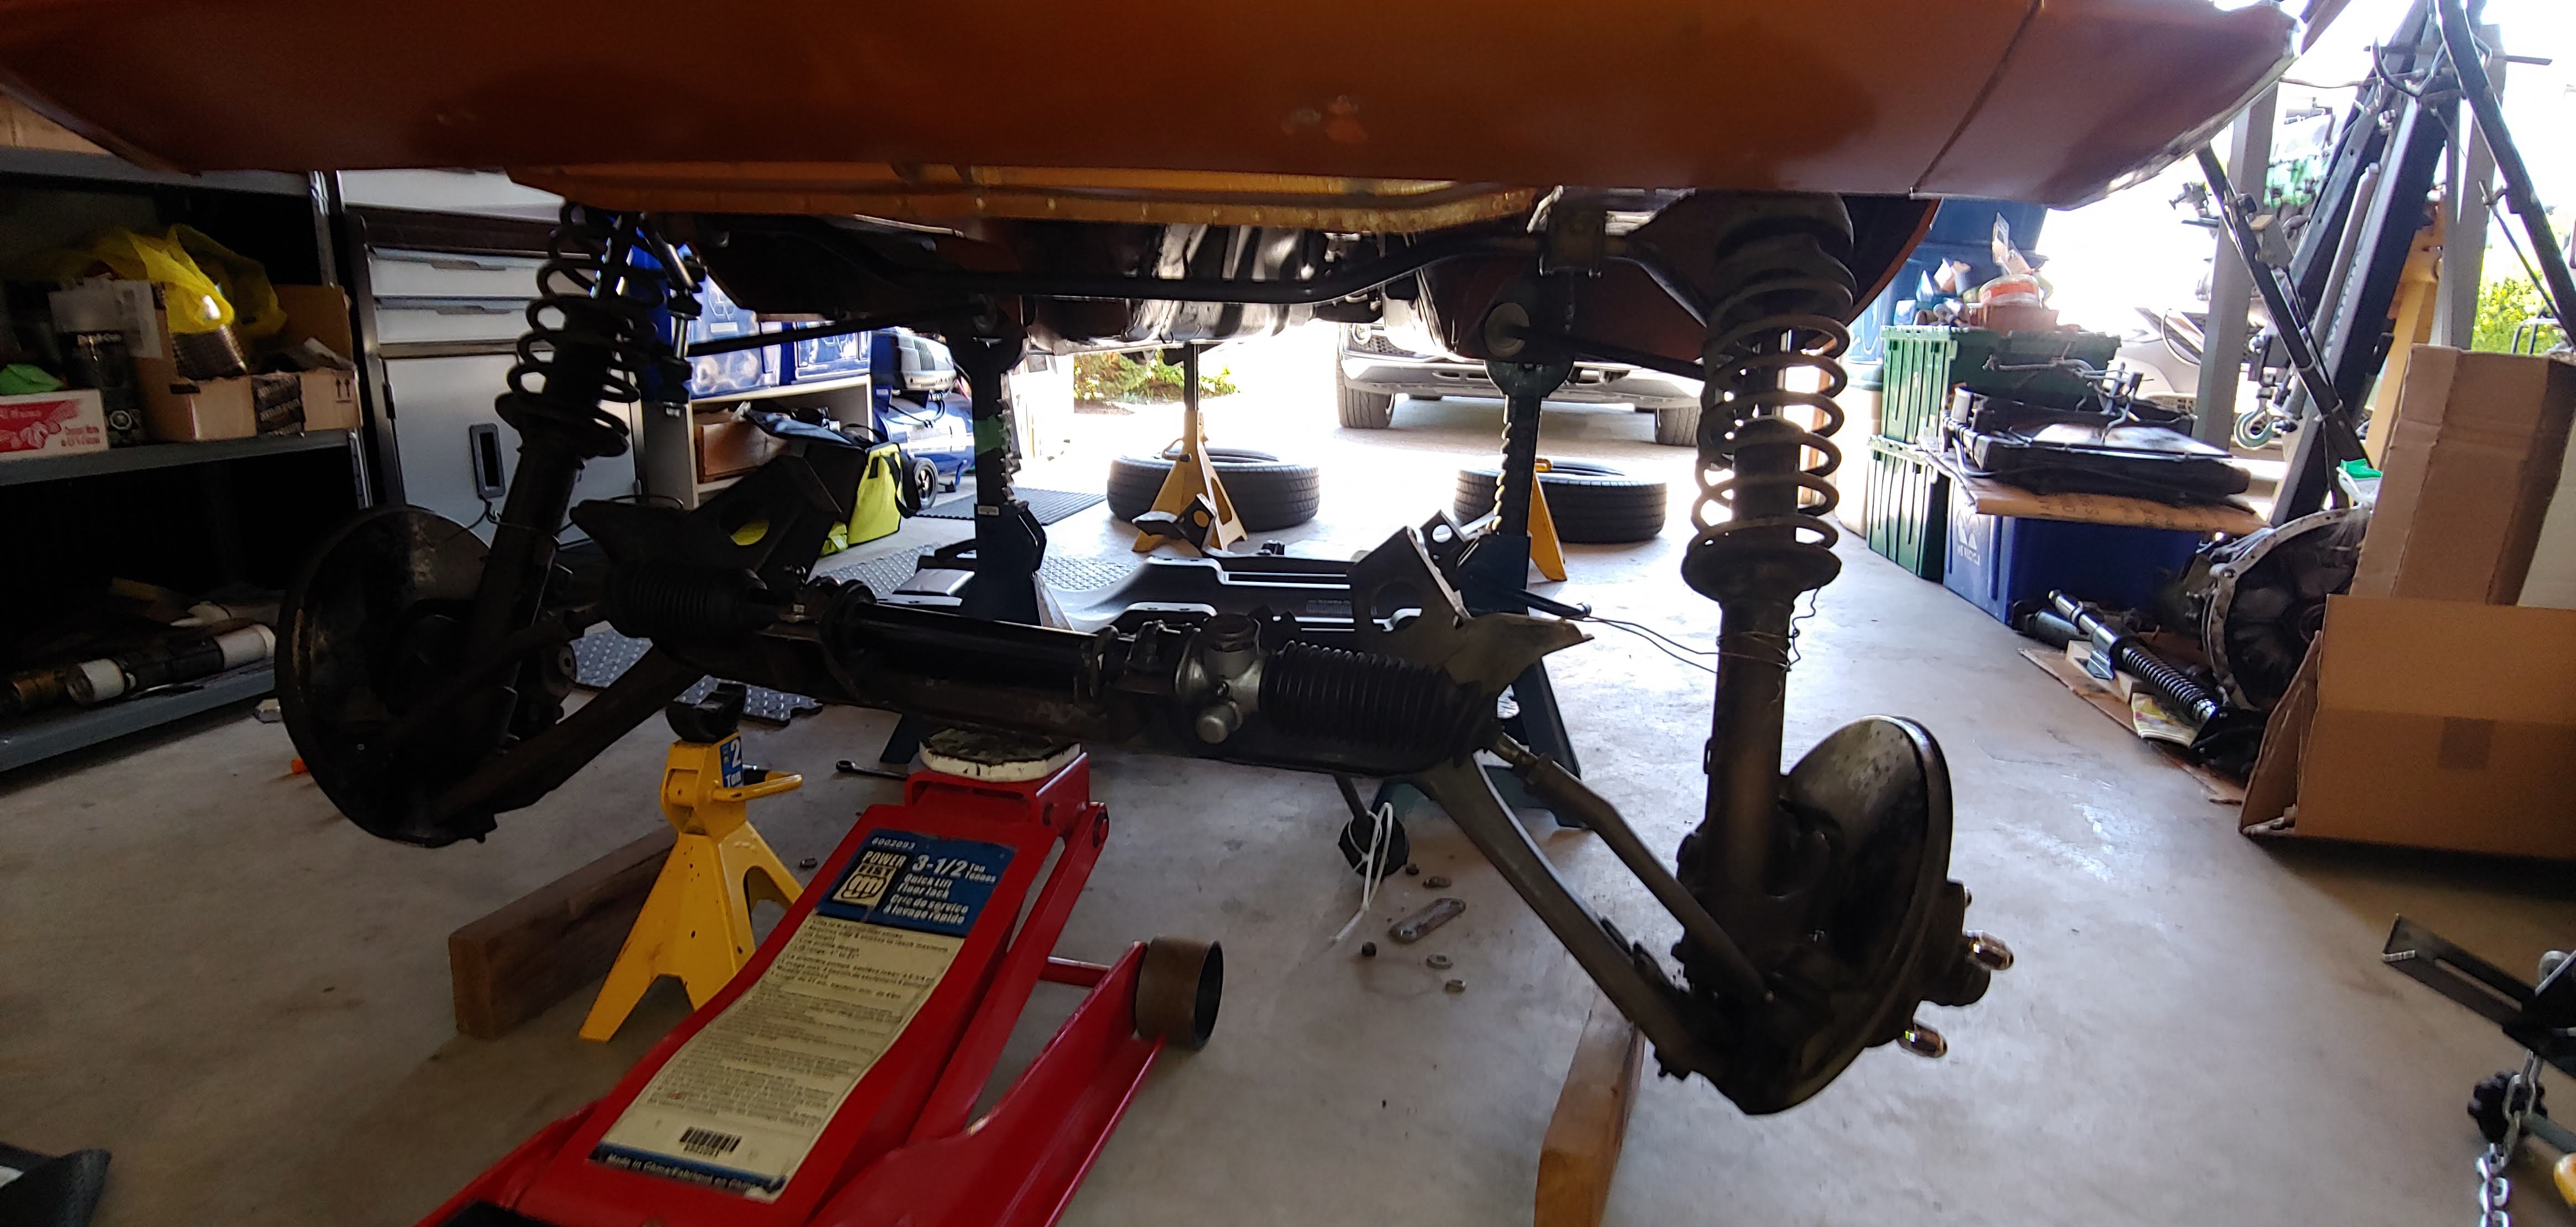
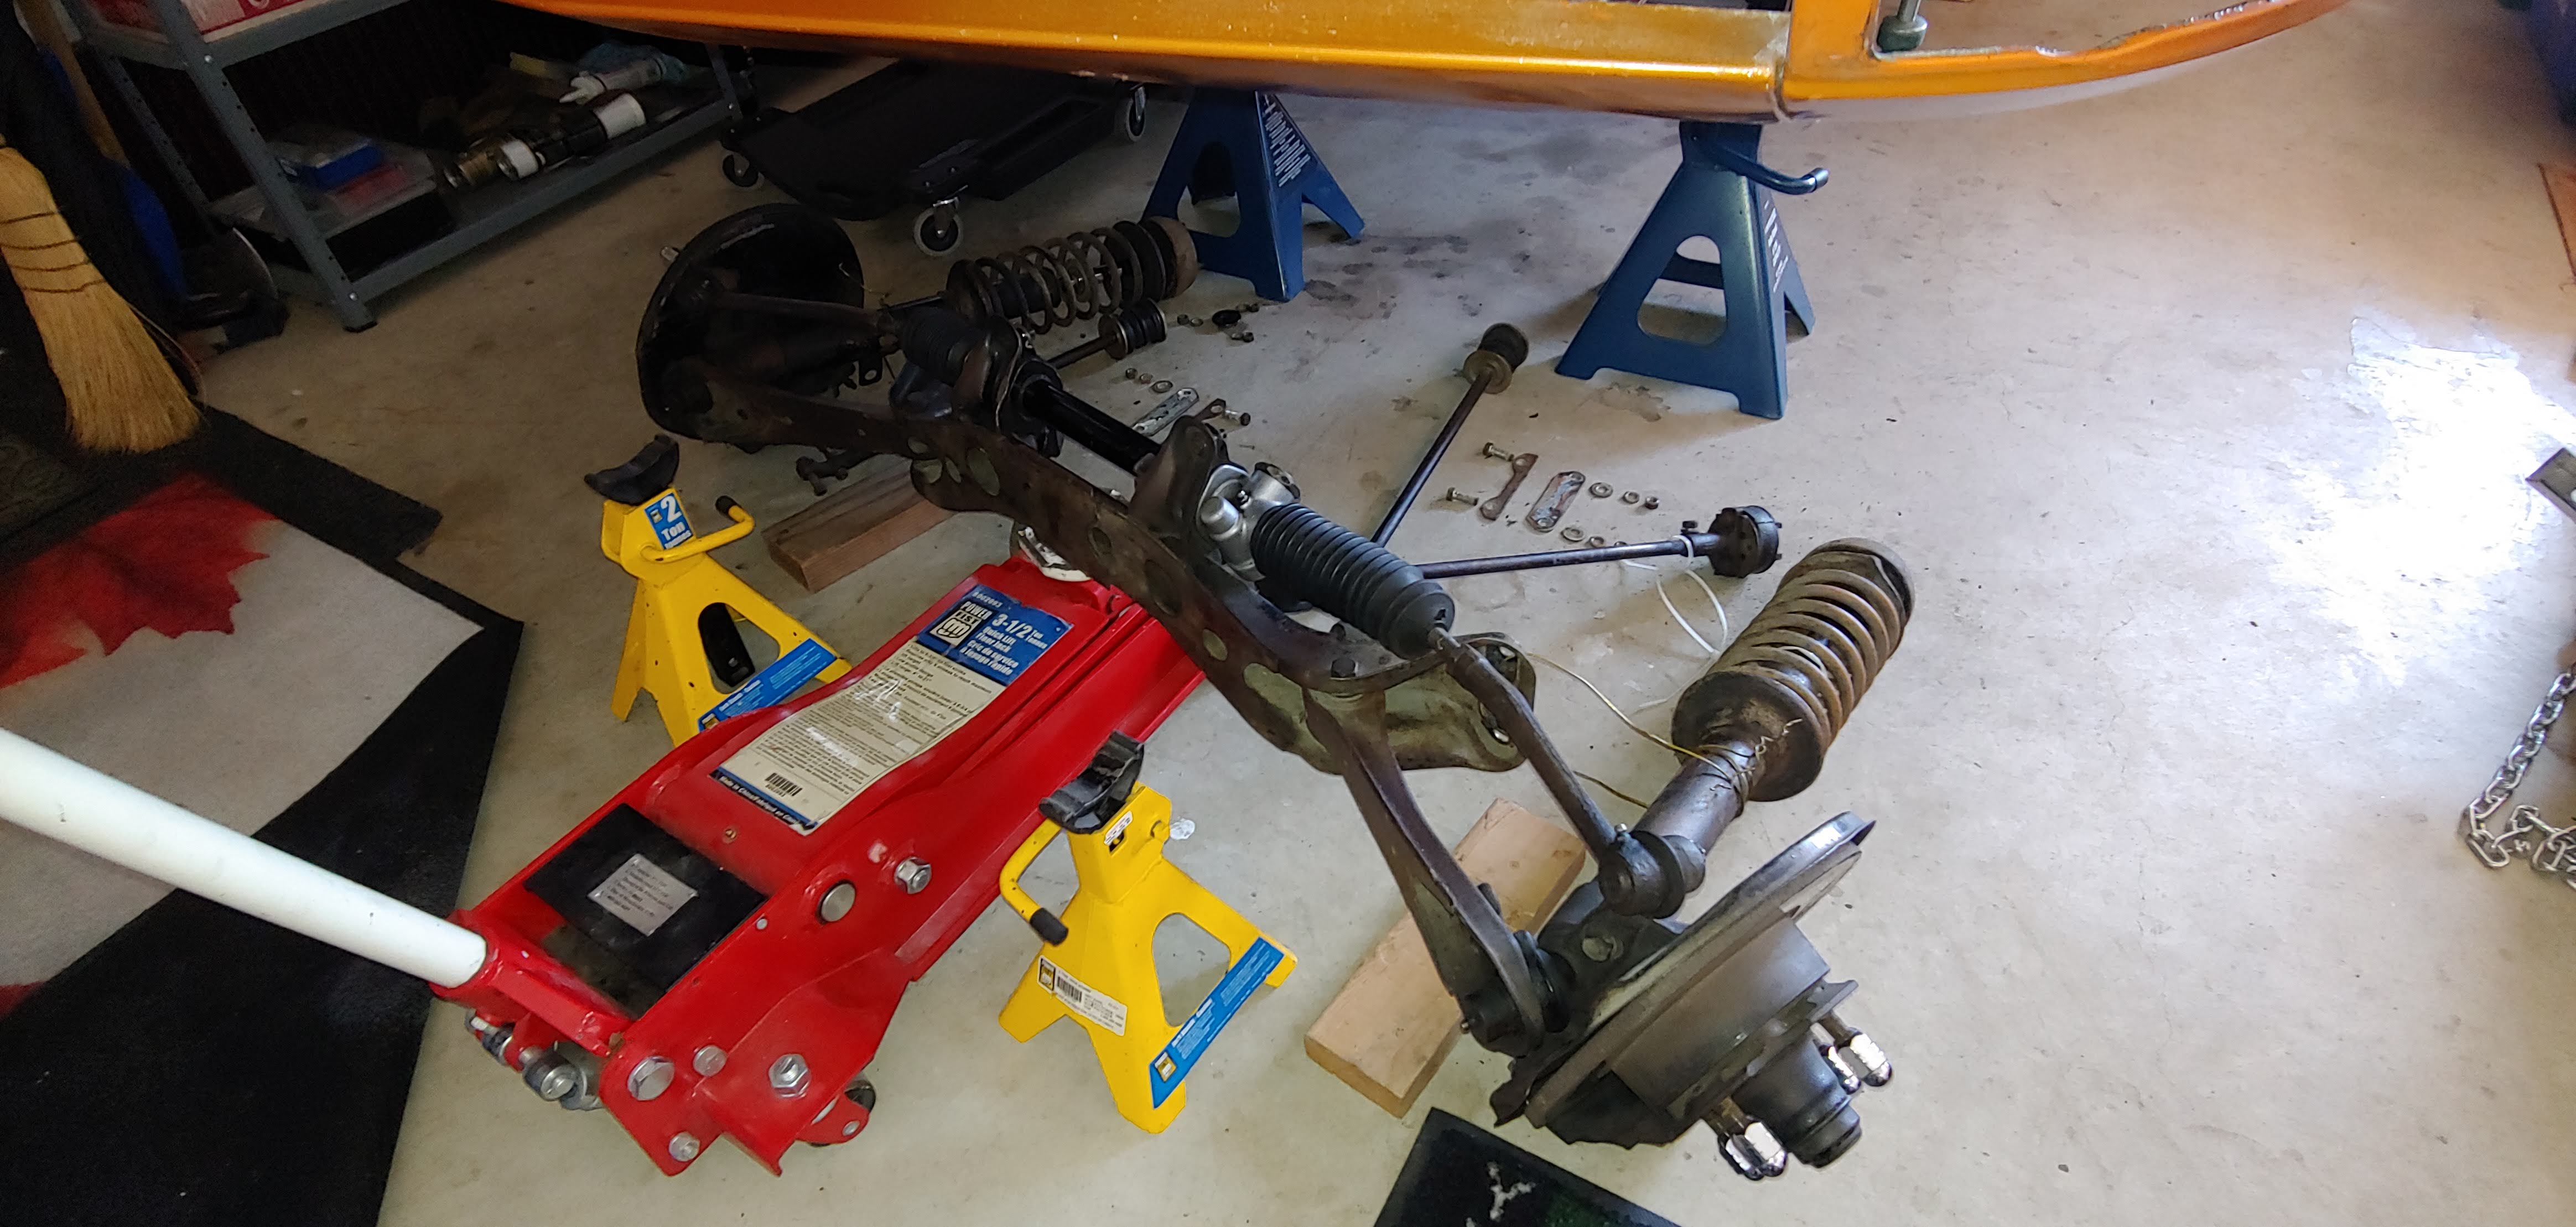
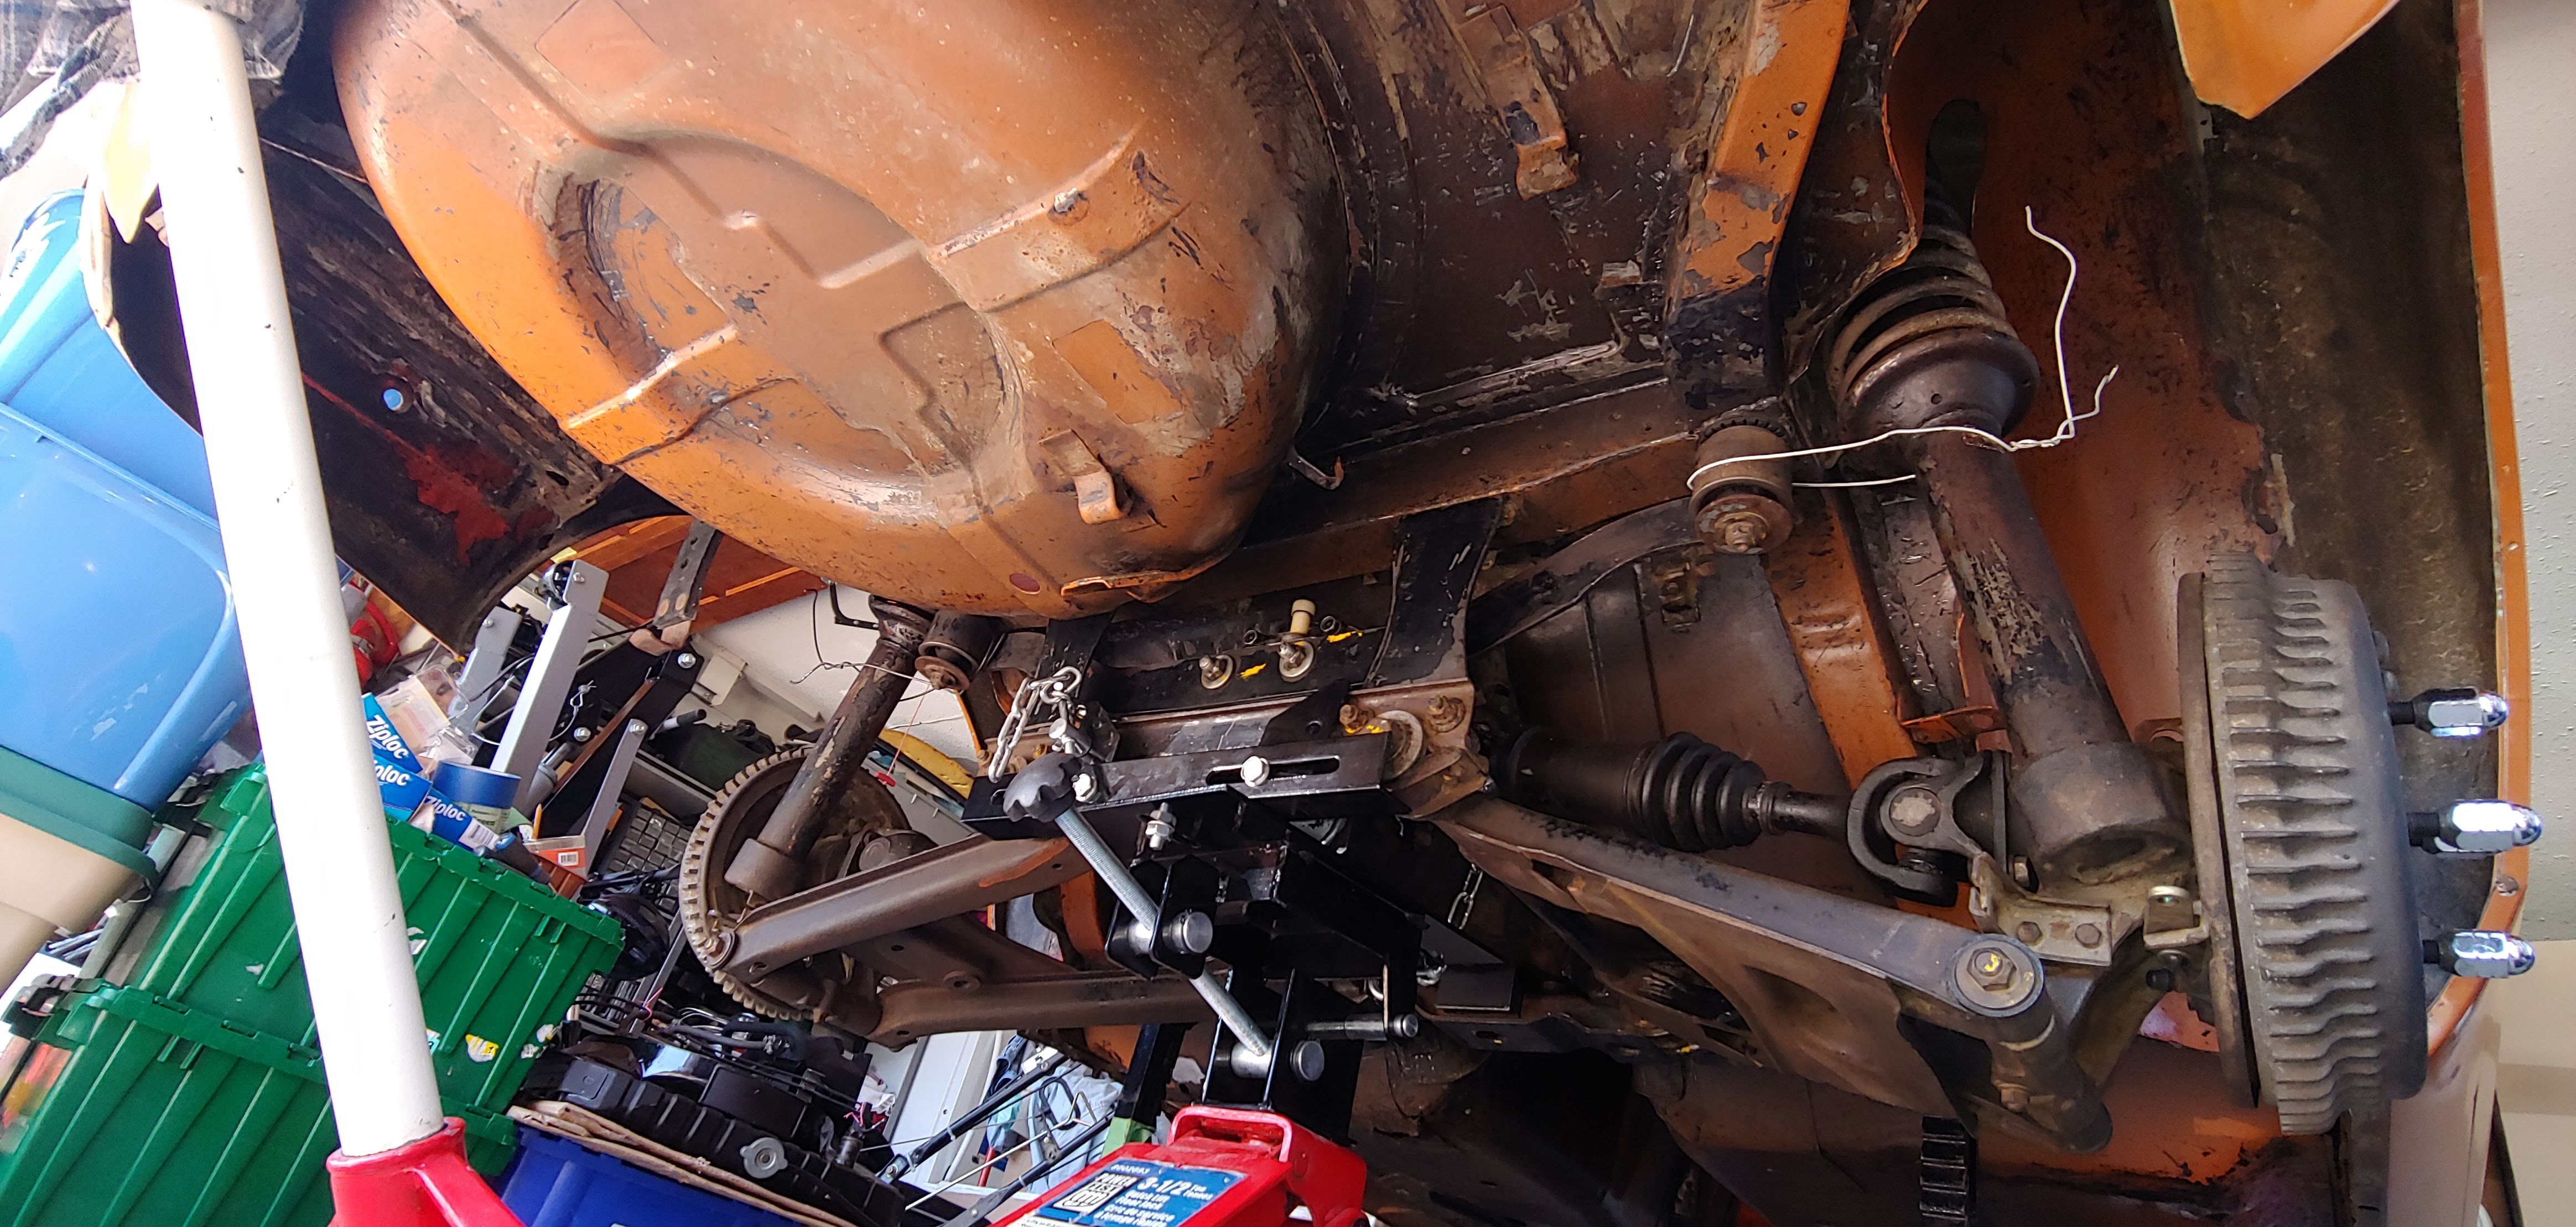
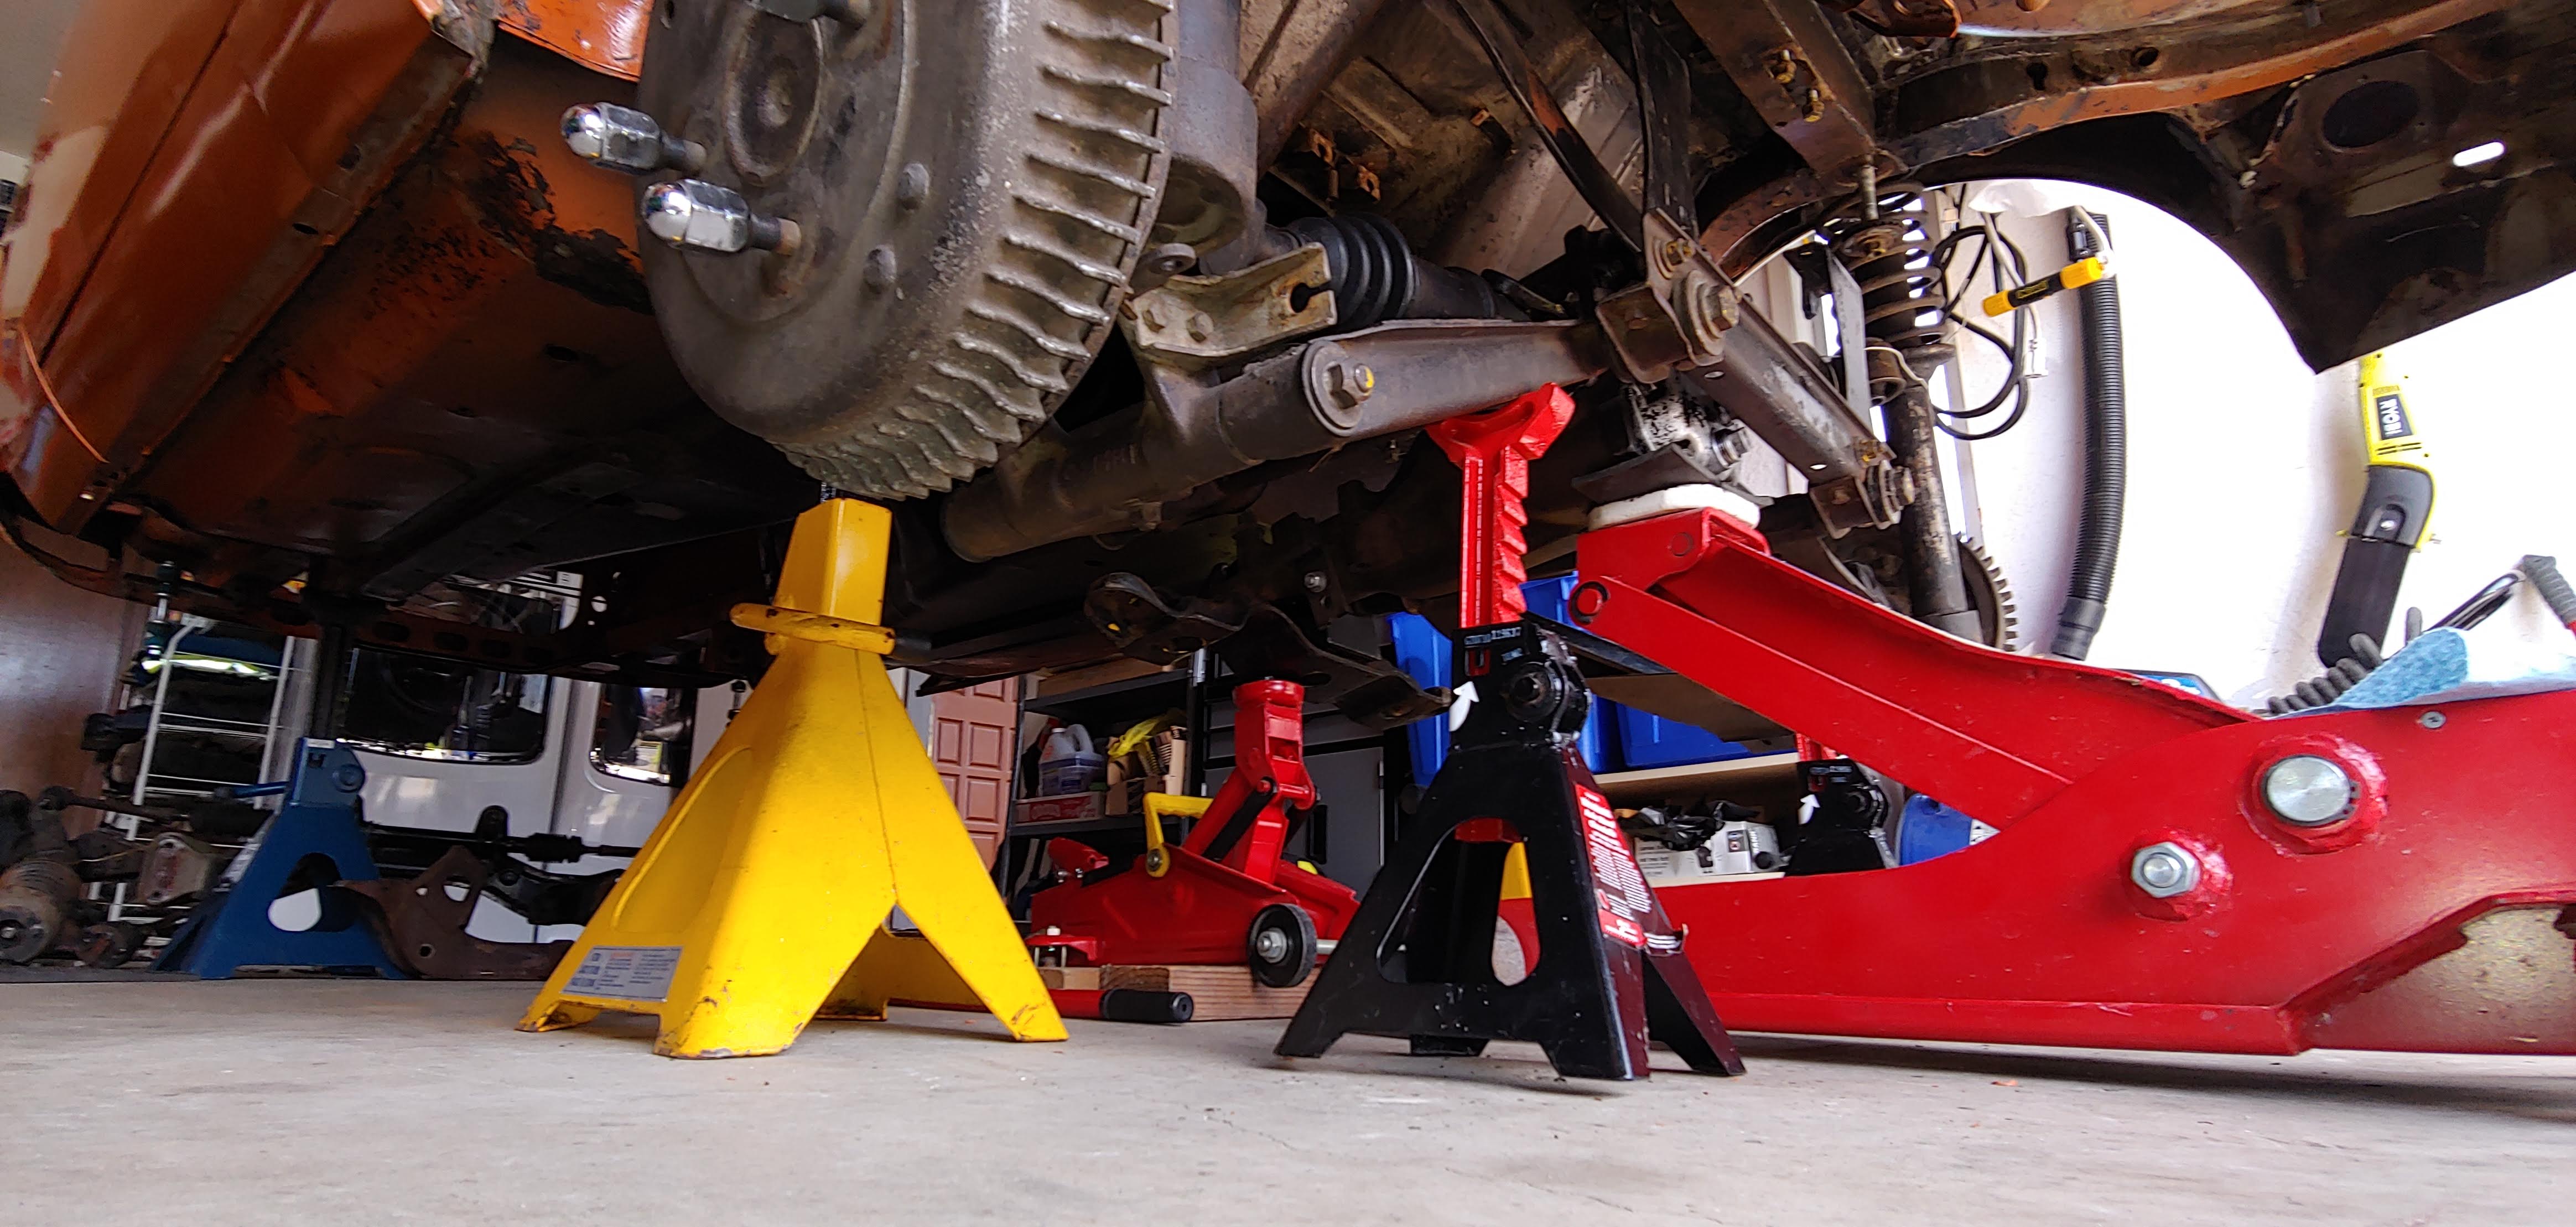
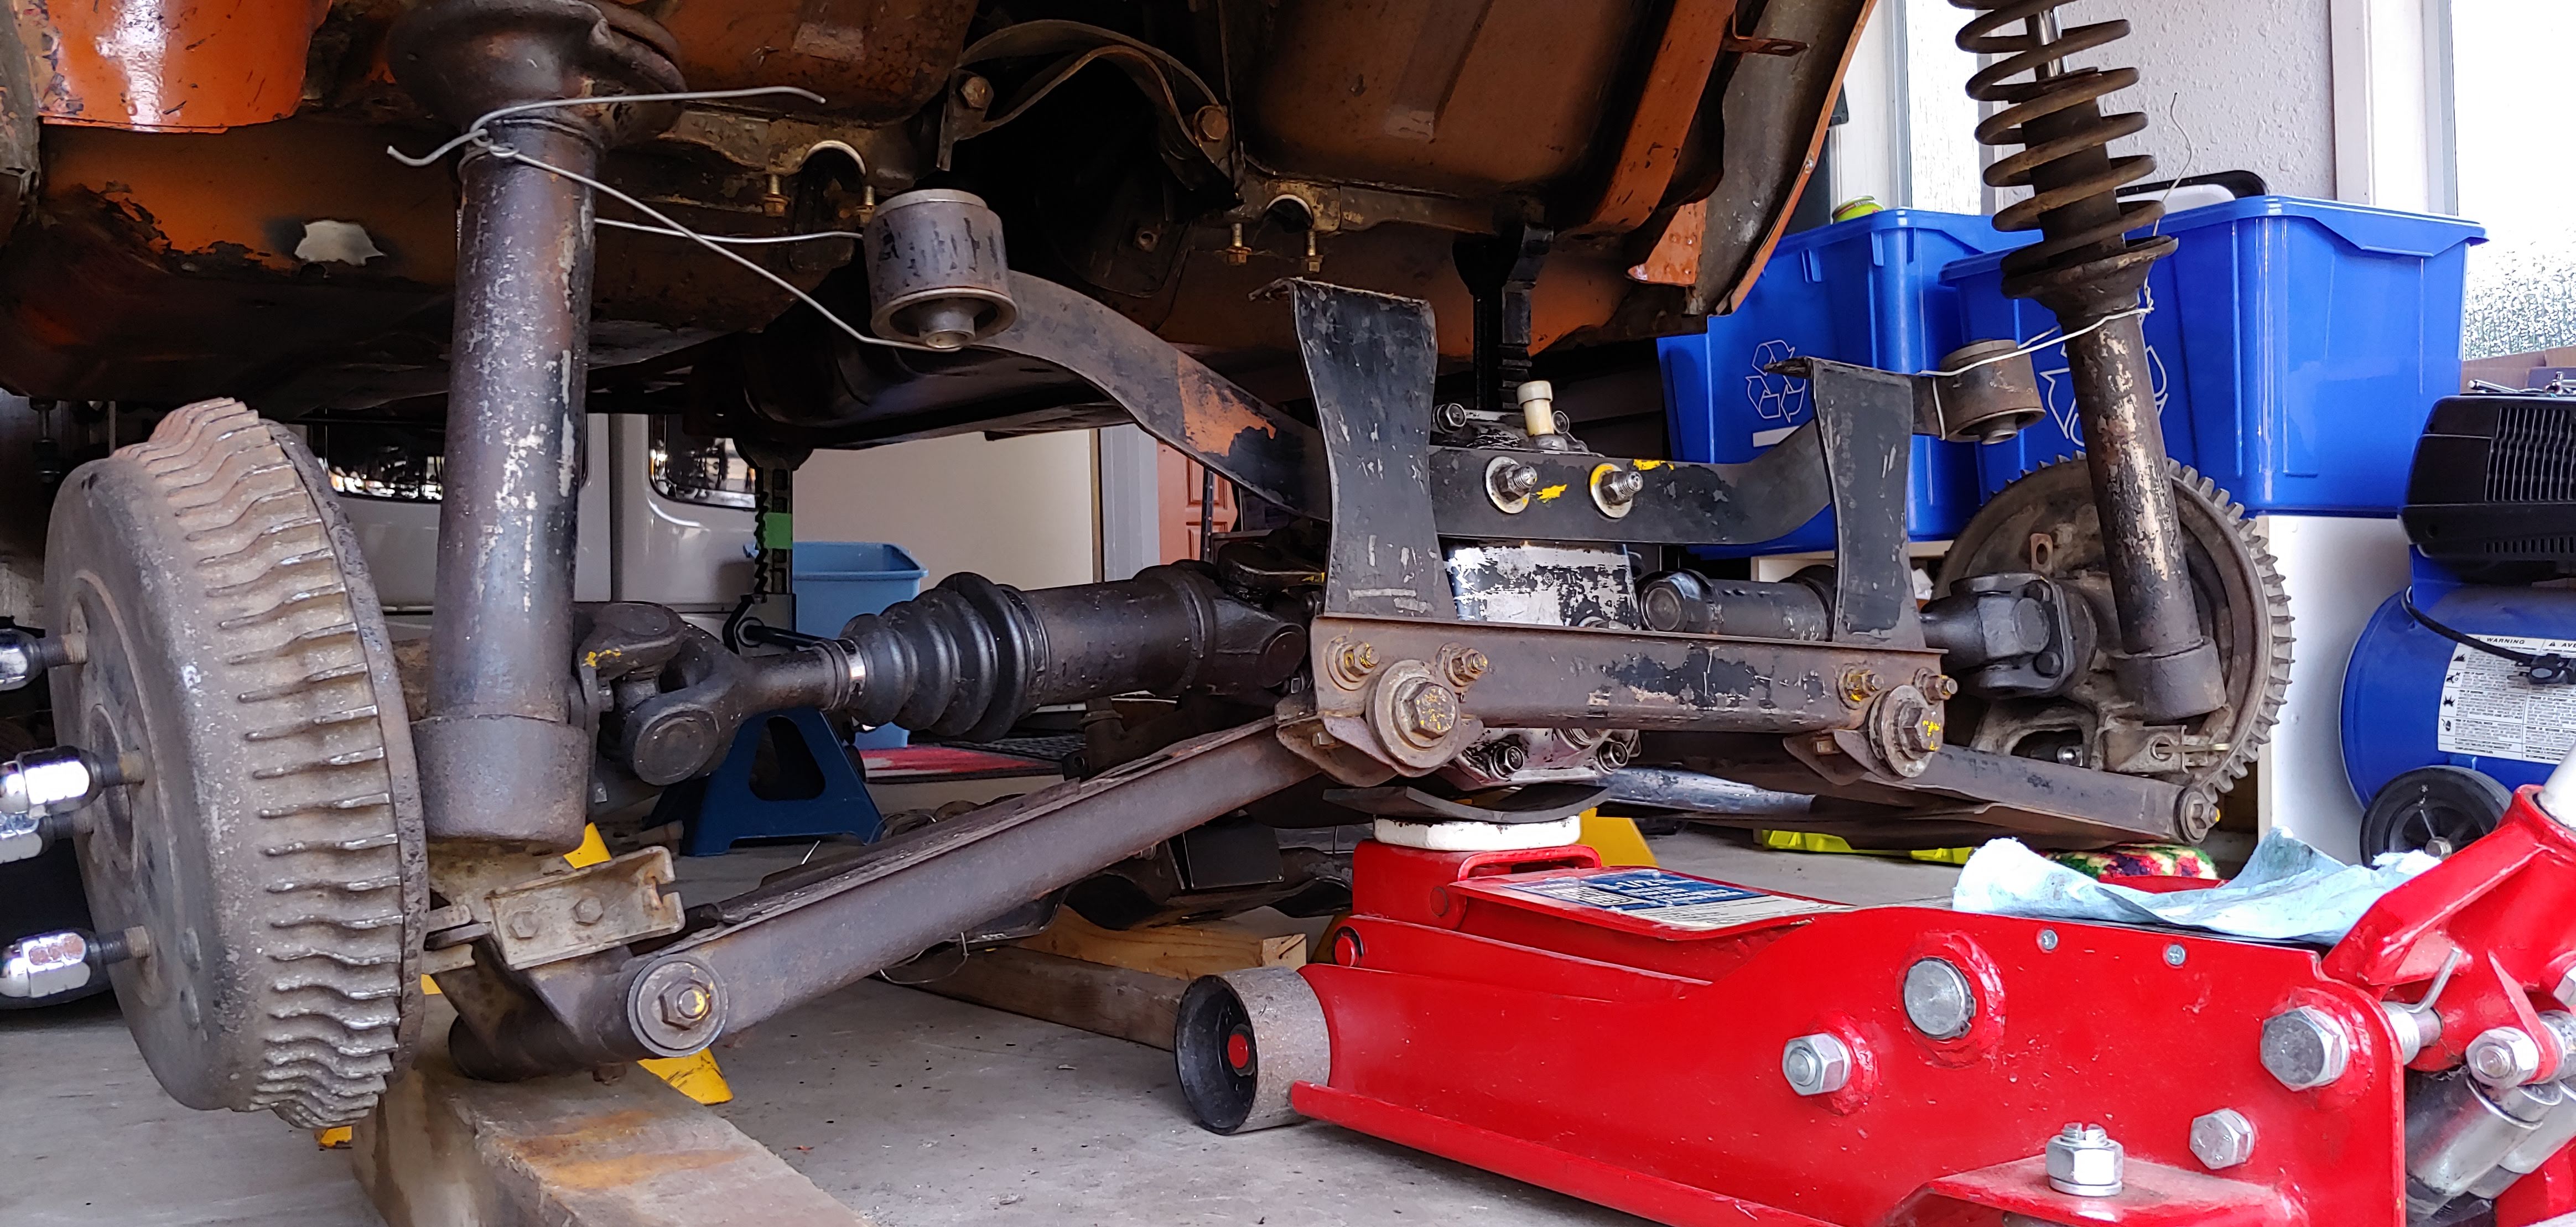
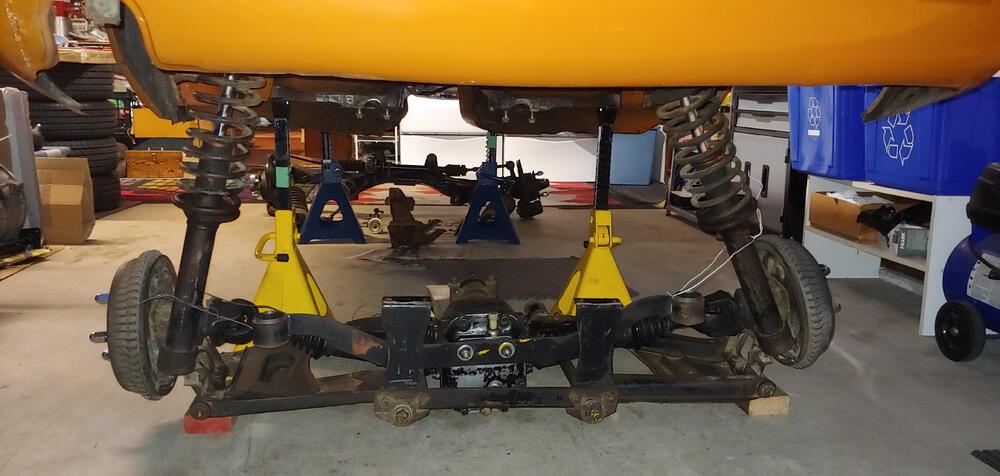
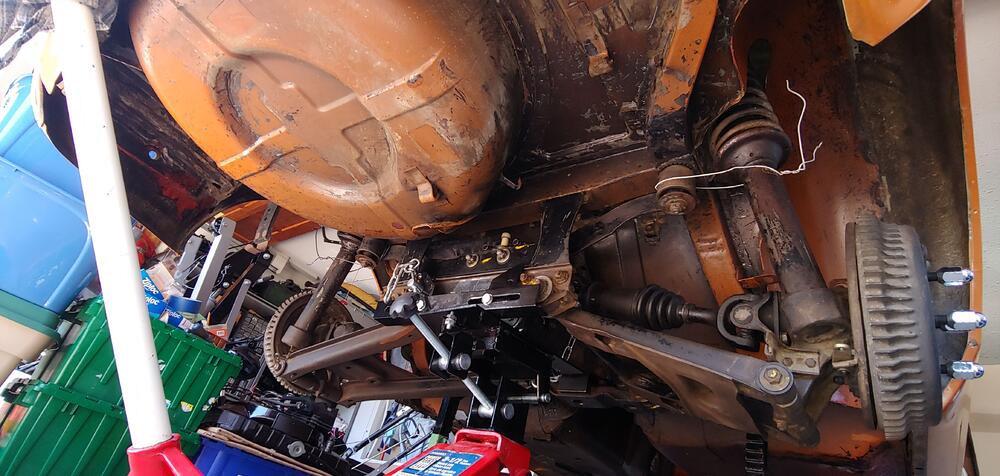
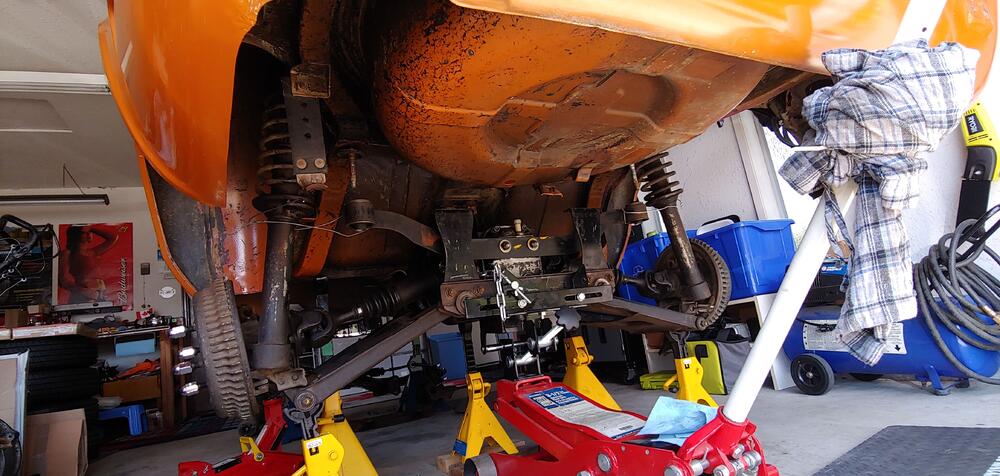
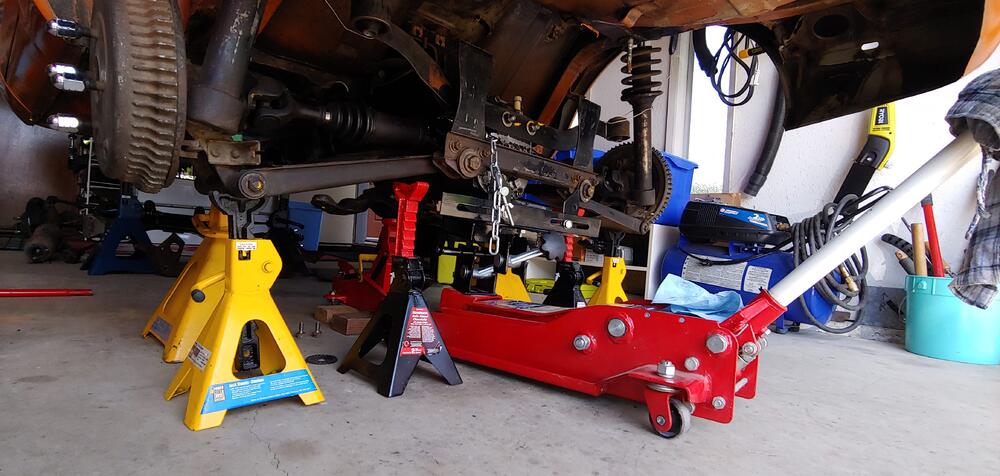
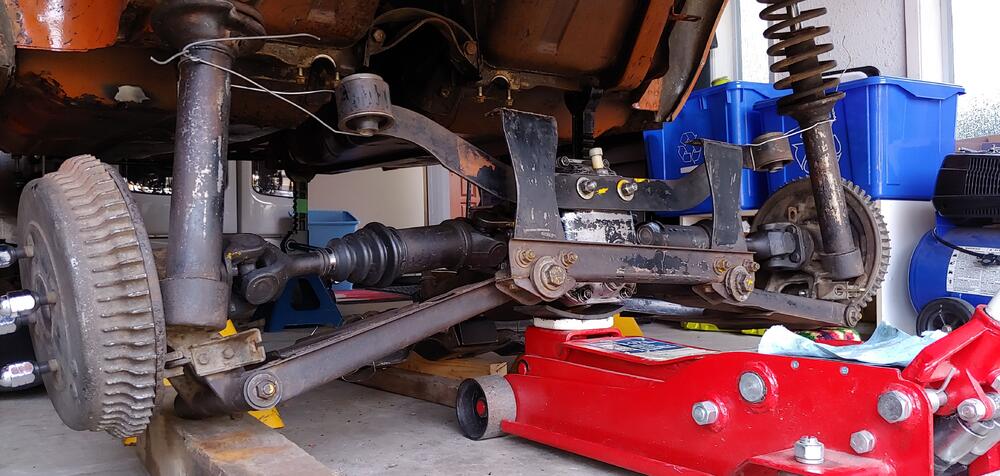
This past Sunday I removed the front and rear suspension, officially my car is no longer a roller. All went without issue thanks to the detailed instructions in Wick Humbles book and the video posted by @240ZBUILTBYME on his build thread. https://www.classiczcars.com/forums/topic/64416-240zbuiltbyme-1971-240z-hs-001063-project-sheena/?do=findComment&comment=607208&_rid=7818 Also it has very useful to have lots of spare jack stands and a small extra floor jack. Here are a few pics of the setup and process for removing the front crossmember and suspension as a unit. The transmission adapter on my floor jack added extra stability in the absence of a helper. Rear setup and process, Resetting for the final drop without the transmission adapter, Only a few more things to do, before it's off to my body guy's shop.


-
-
-
-
Thanks for posting, I had not heard of them either. Any idea where they are based, I noticed that they don't ship outside of the US. Not really a big deal for me as I'm close to the border, unless it doesn't reopen soon.
-
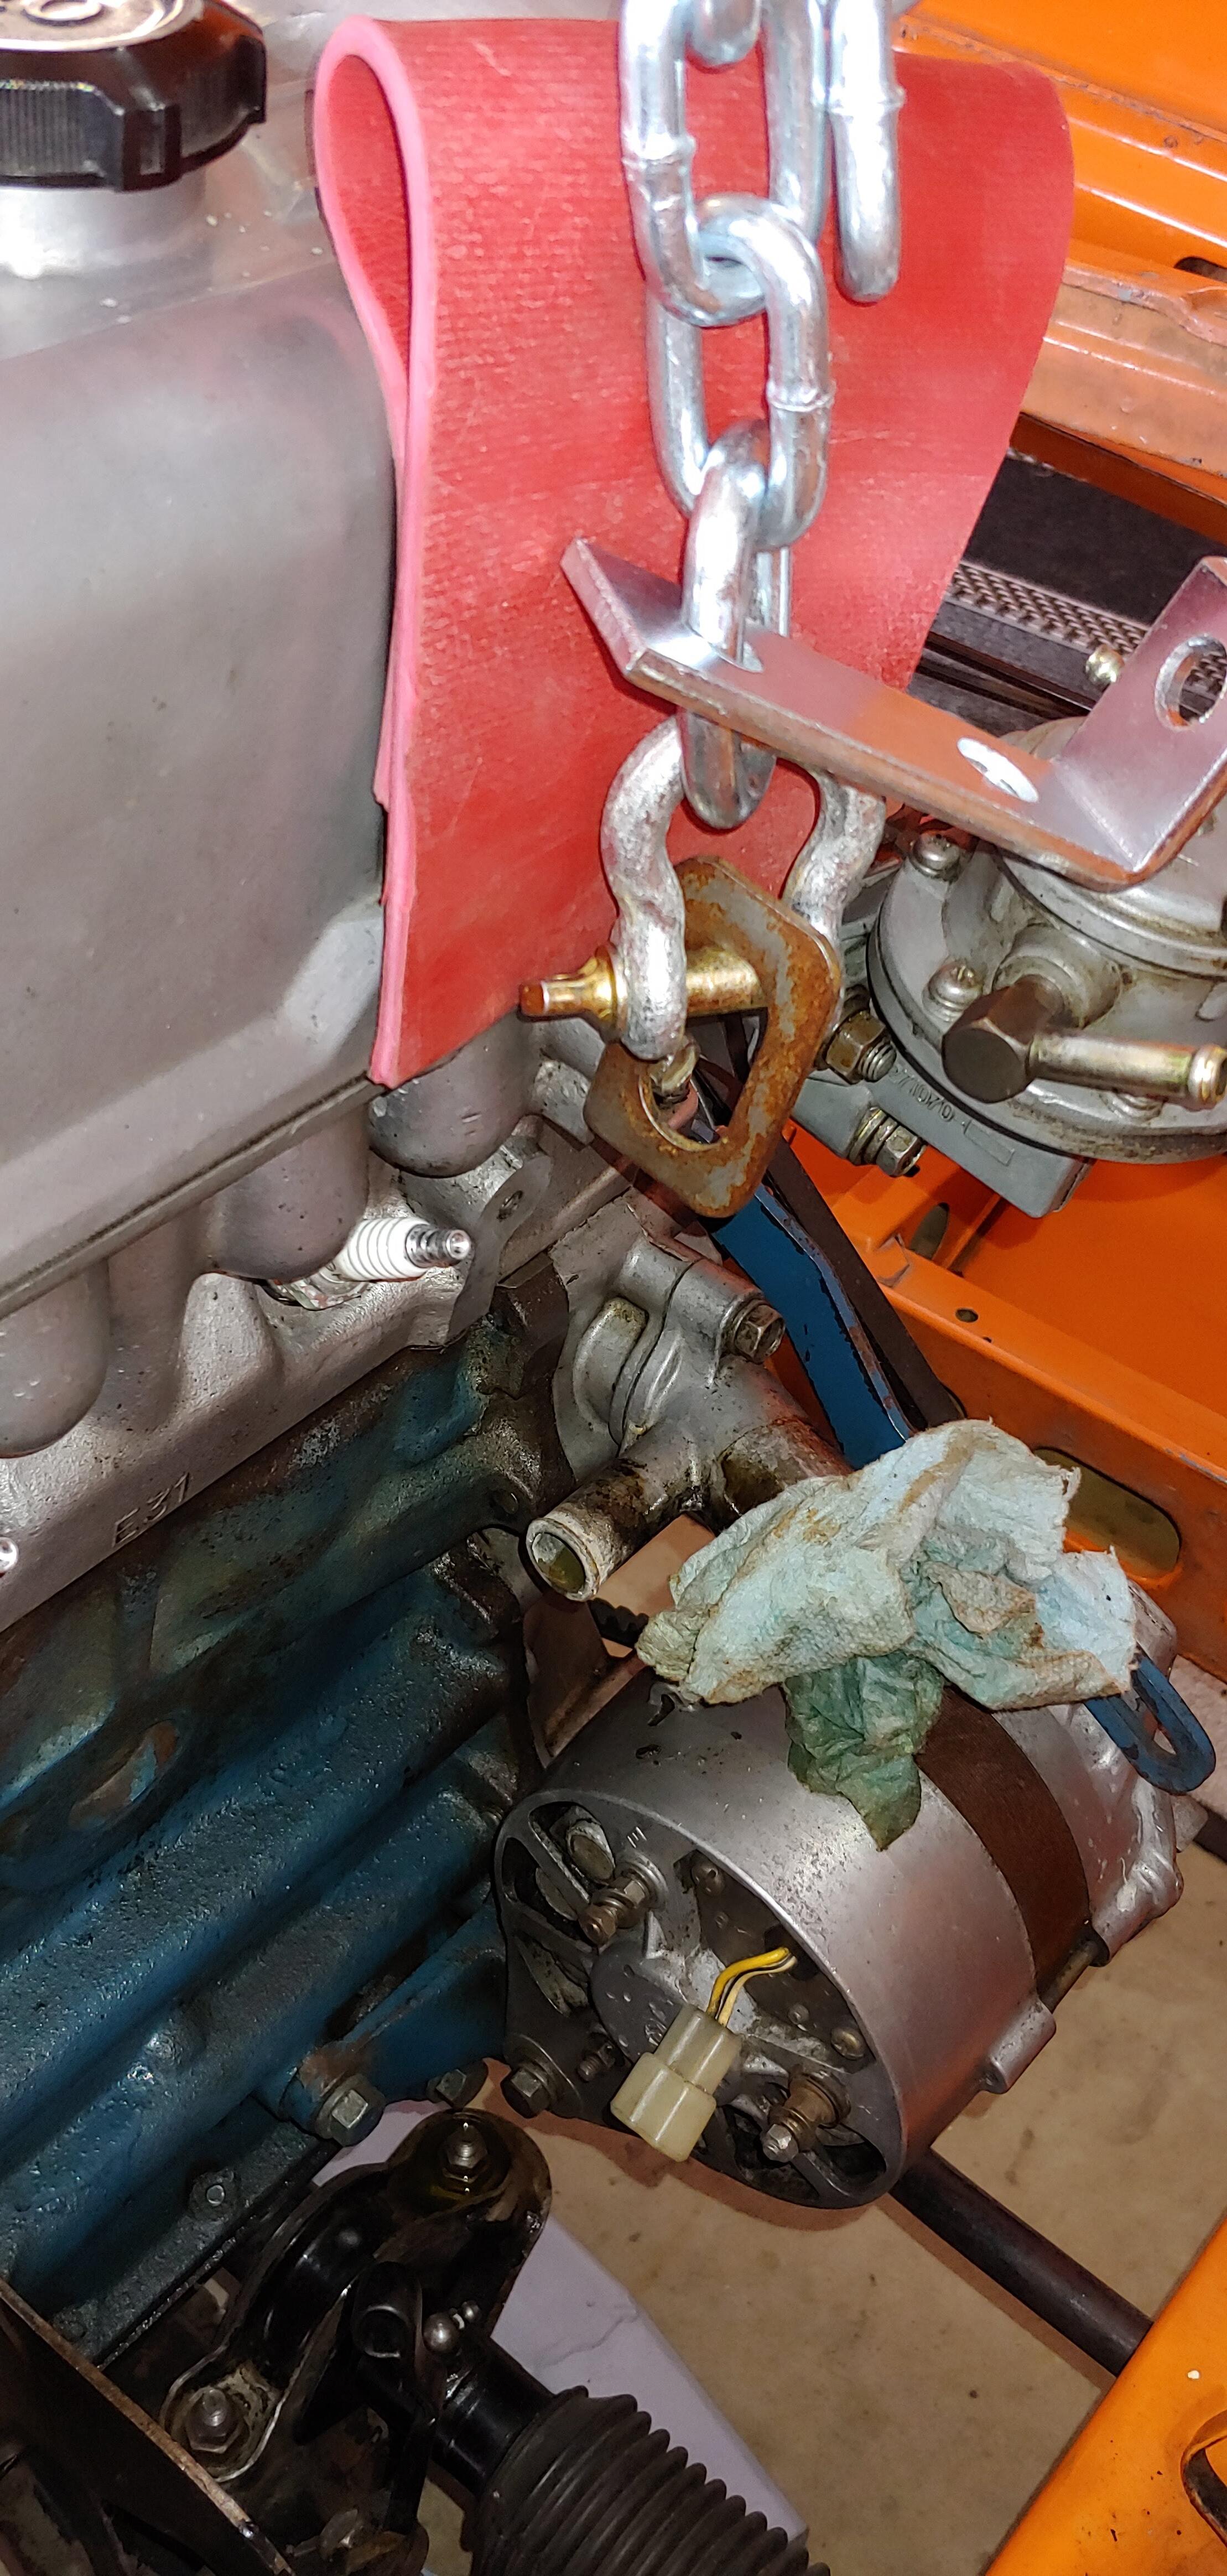
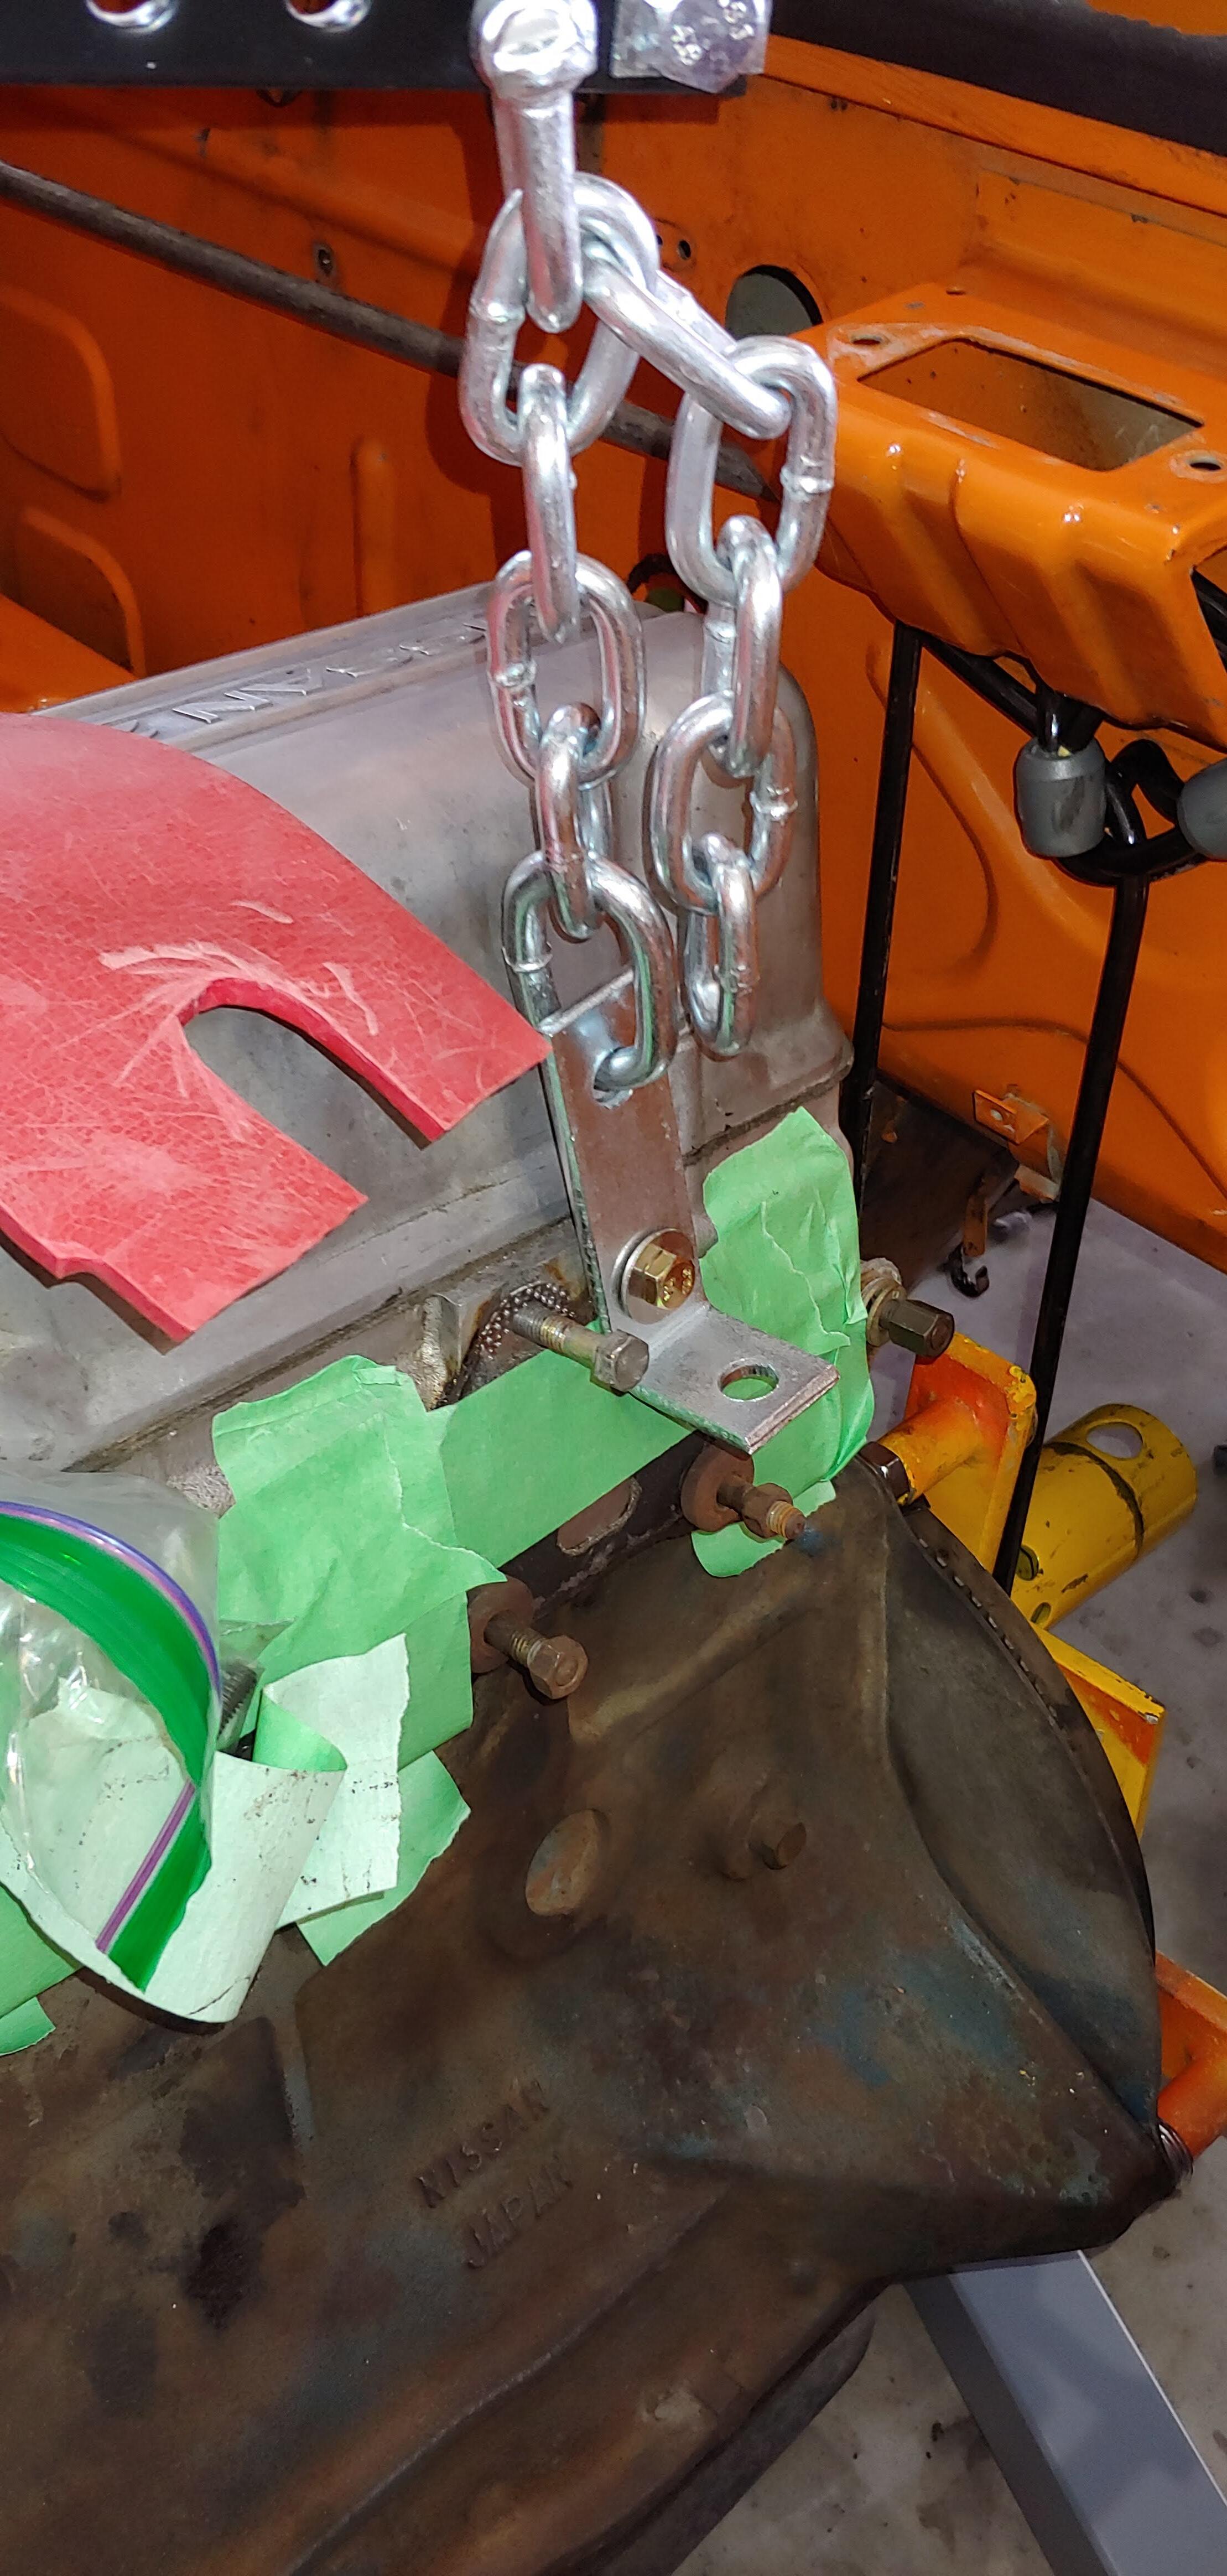
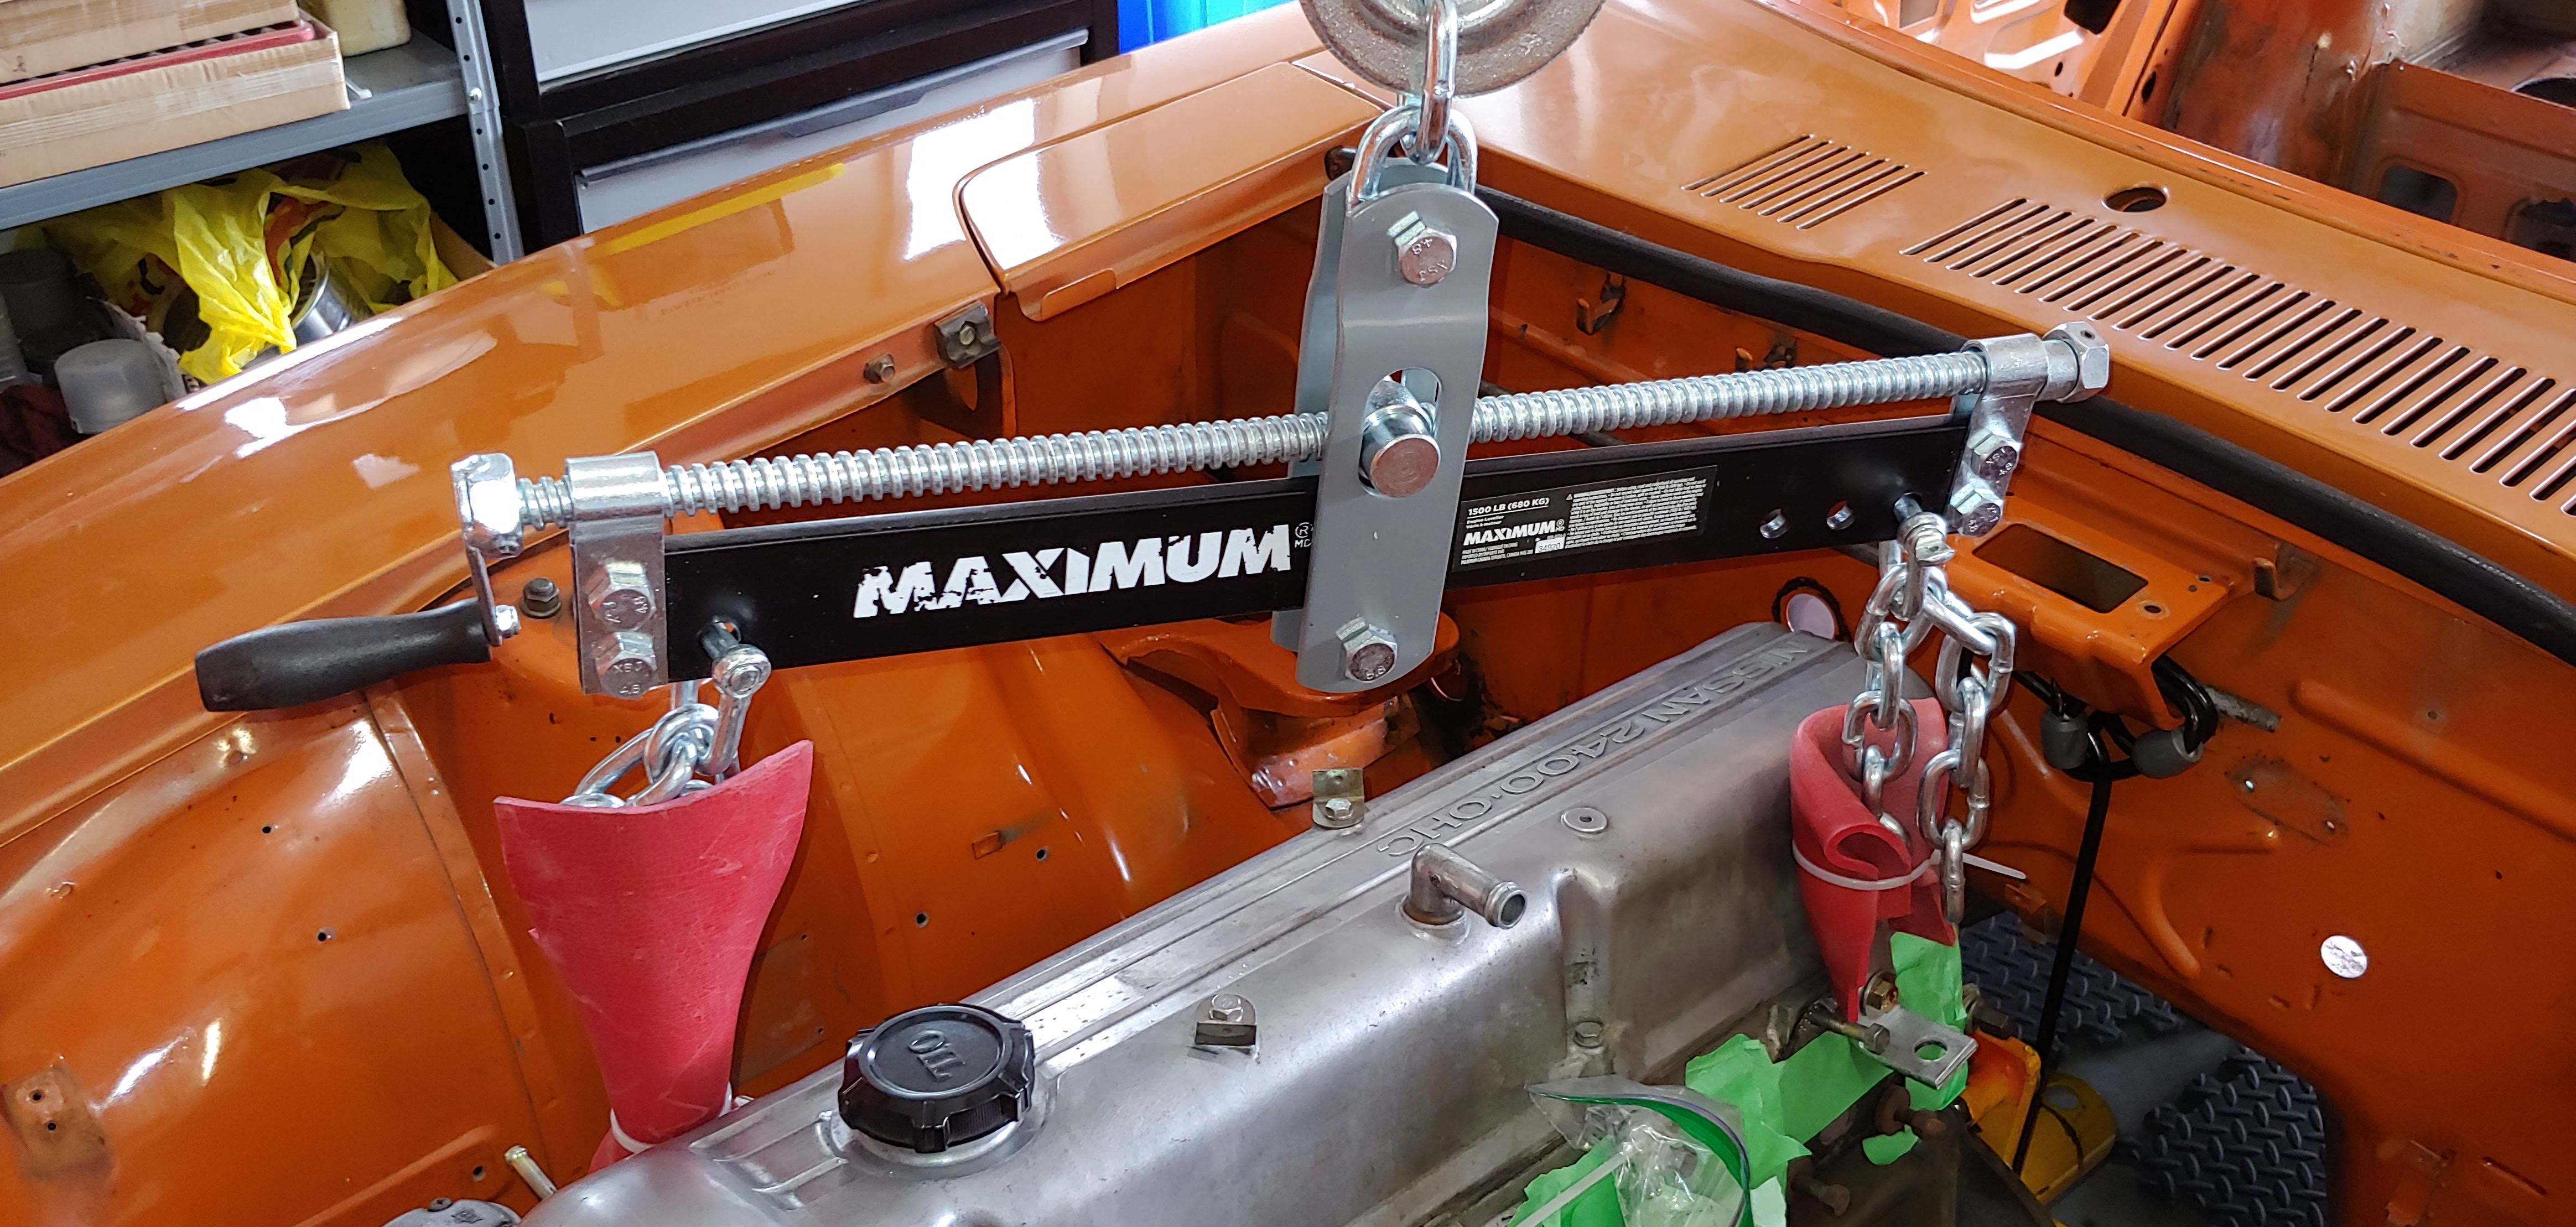
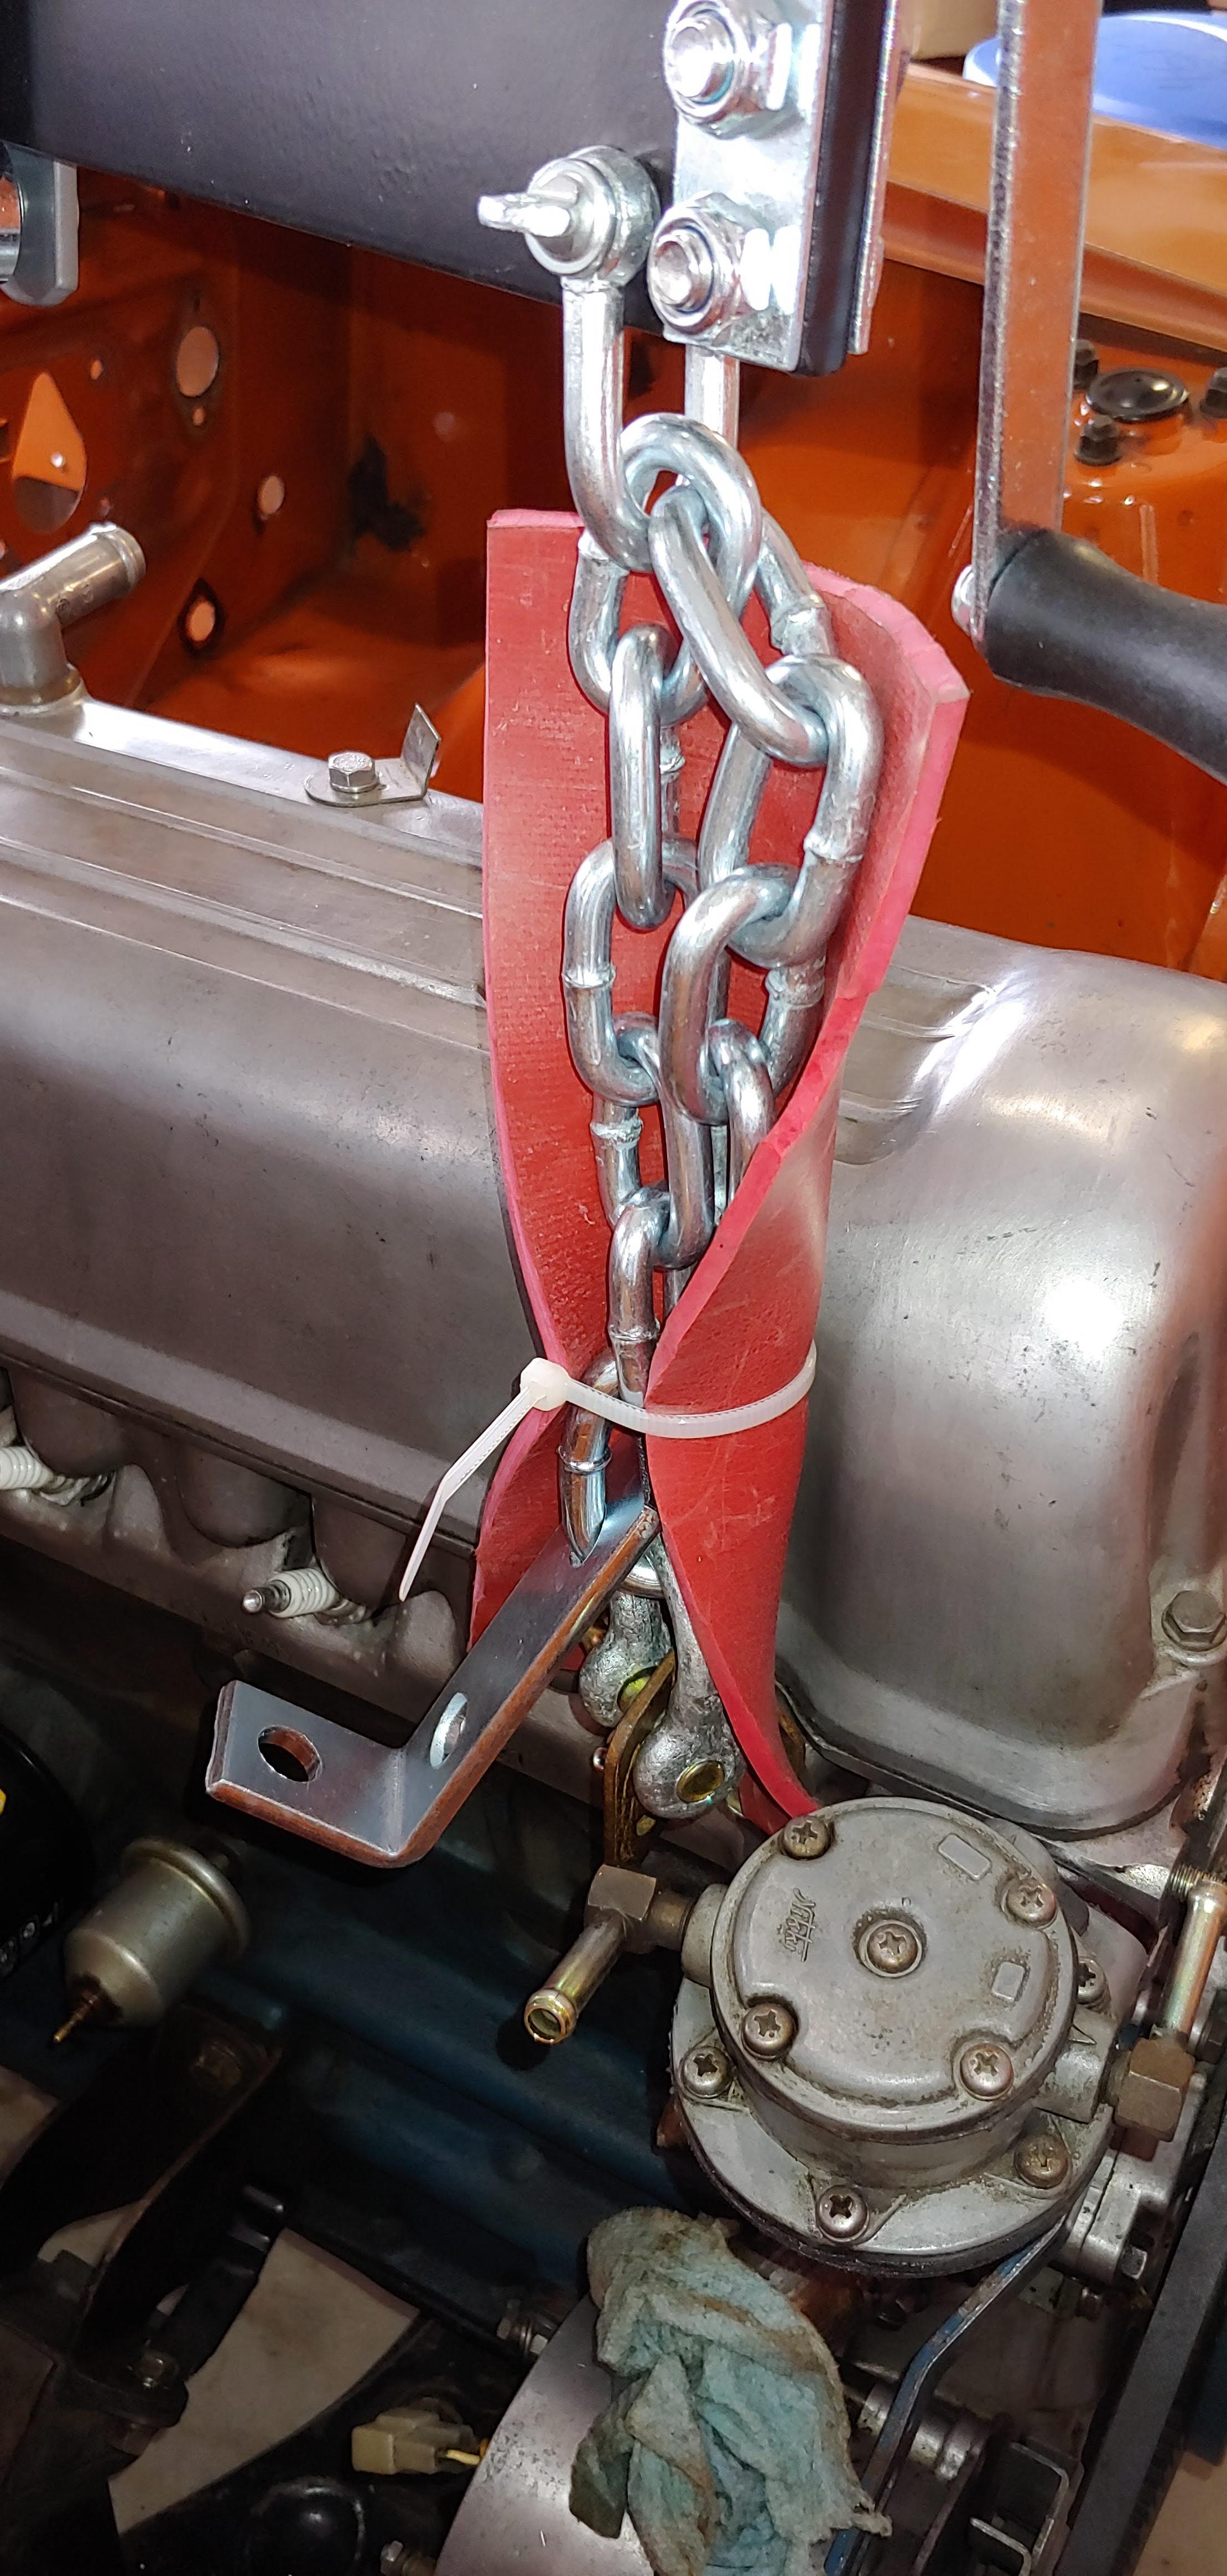
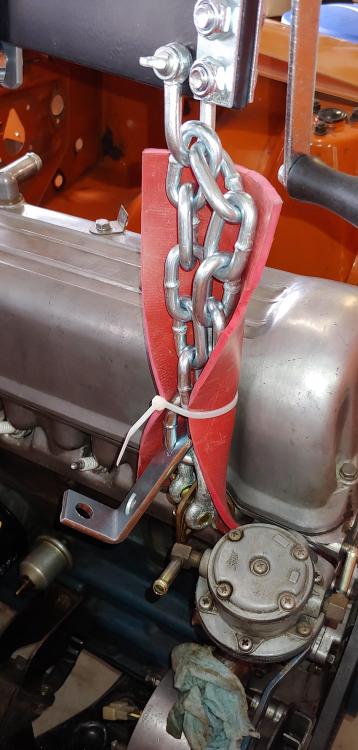
The clevis was purchased separately, as I used a factory lifting bracket the clevis worked better than the L bracket on the leveler. Funny thing, I checked first I checked Canadian Tire and they only had Chinese non rated clevis's, the one I selected is from a local industrial supply store, it is a 3/8" VGD "gold pin" anchor shackle with a 1 ton WLL and it was cheaper than the CDN Tire import. At the rear I actually used the rear intake mounting hole that uses an M8 capscrew. I used a shorter screw plus, a 14mm OD x 8.5mm ID sleeve in the hole of the lifting bracket on the leveler.


-
-
-
-
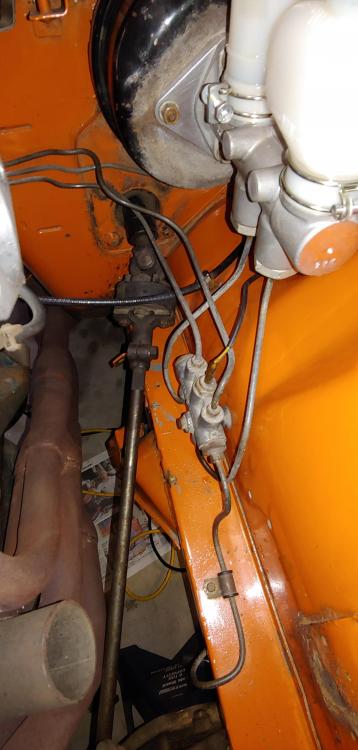
Not sure if this helps but here are a couple of pictures of my early M/C with the original tubes connected. Hopefully you can compare these to your setup with the later M/C. I replaced mine about ten years ago, probably just before they went NLA.
-
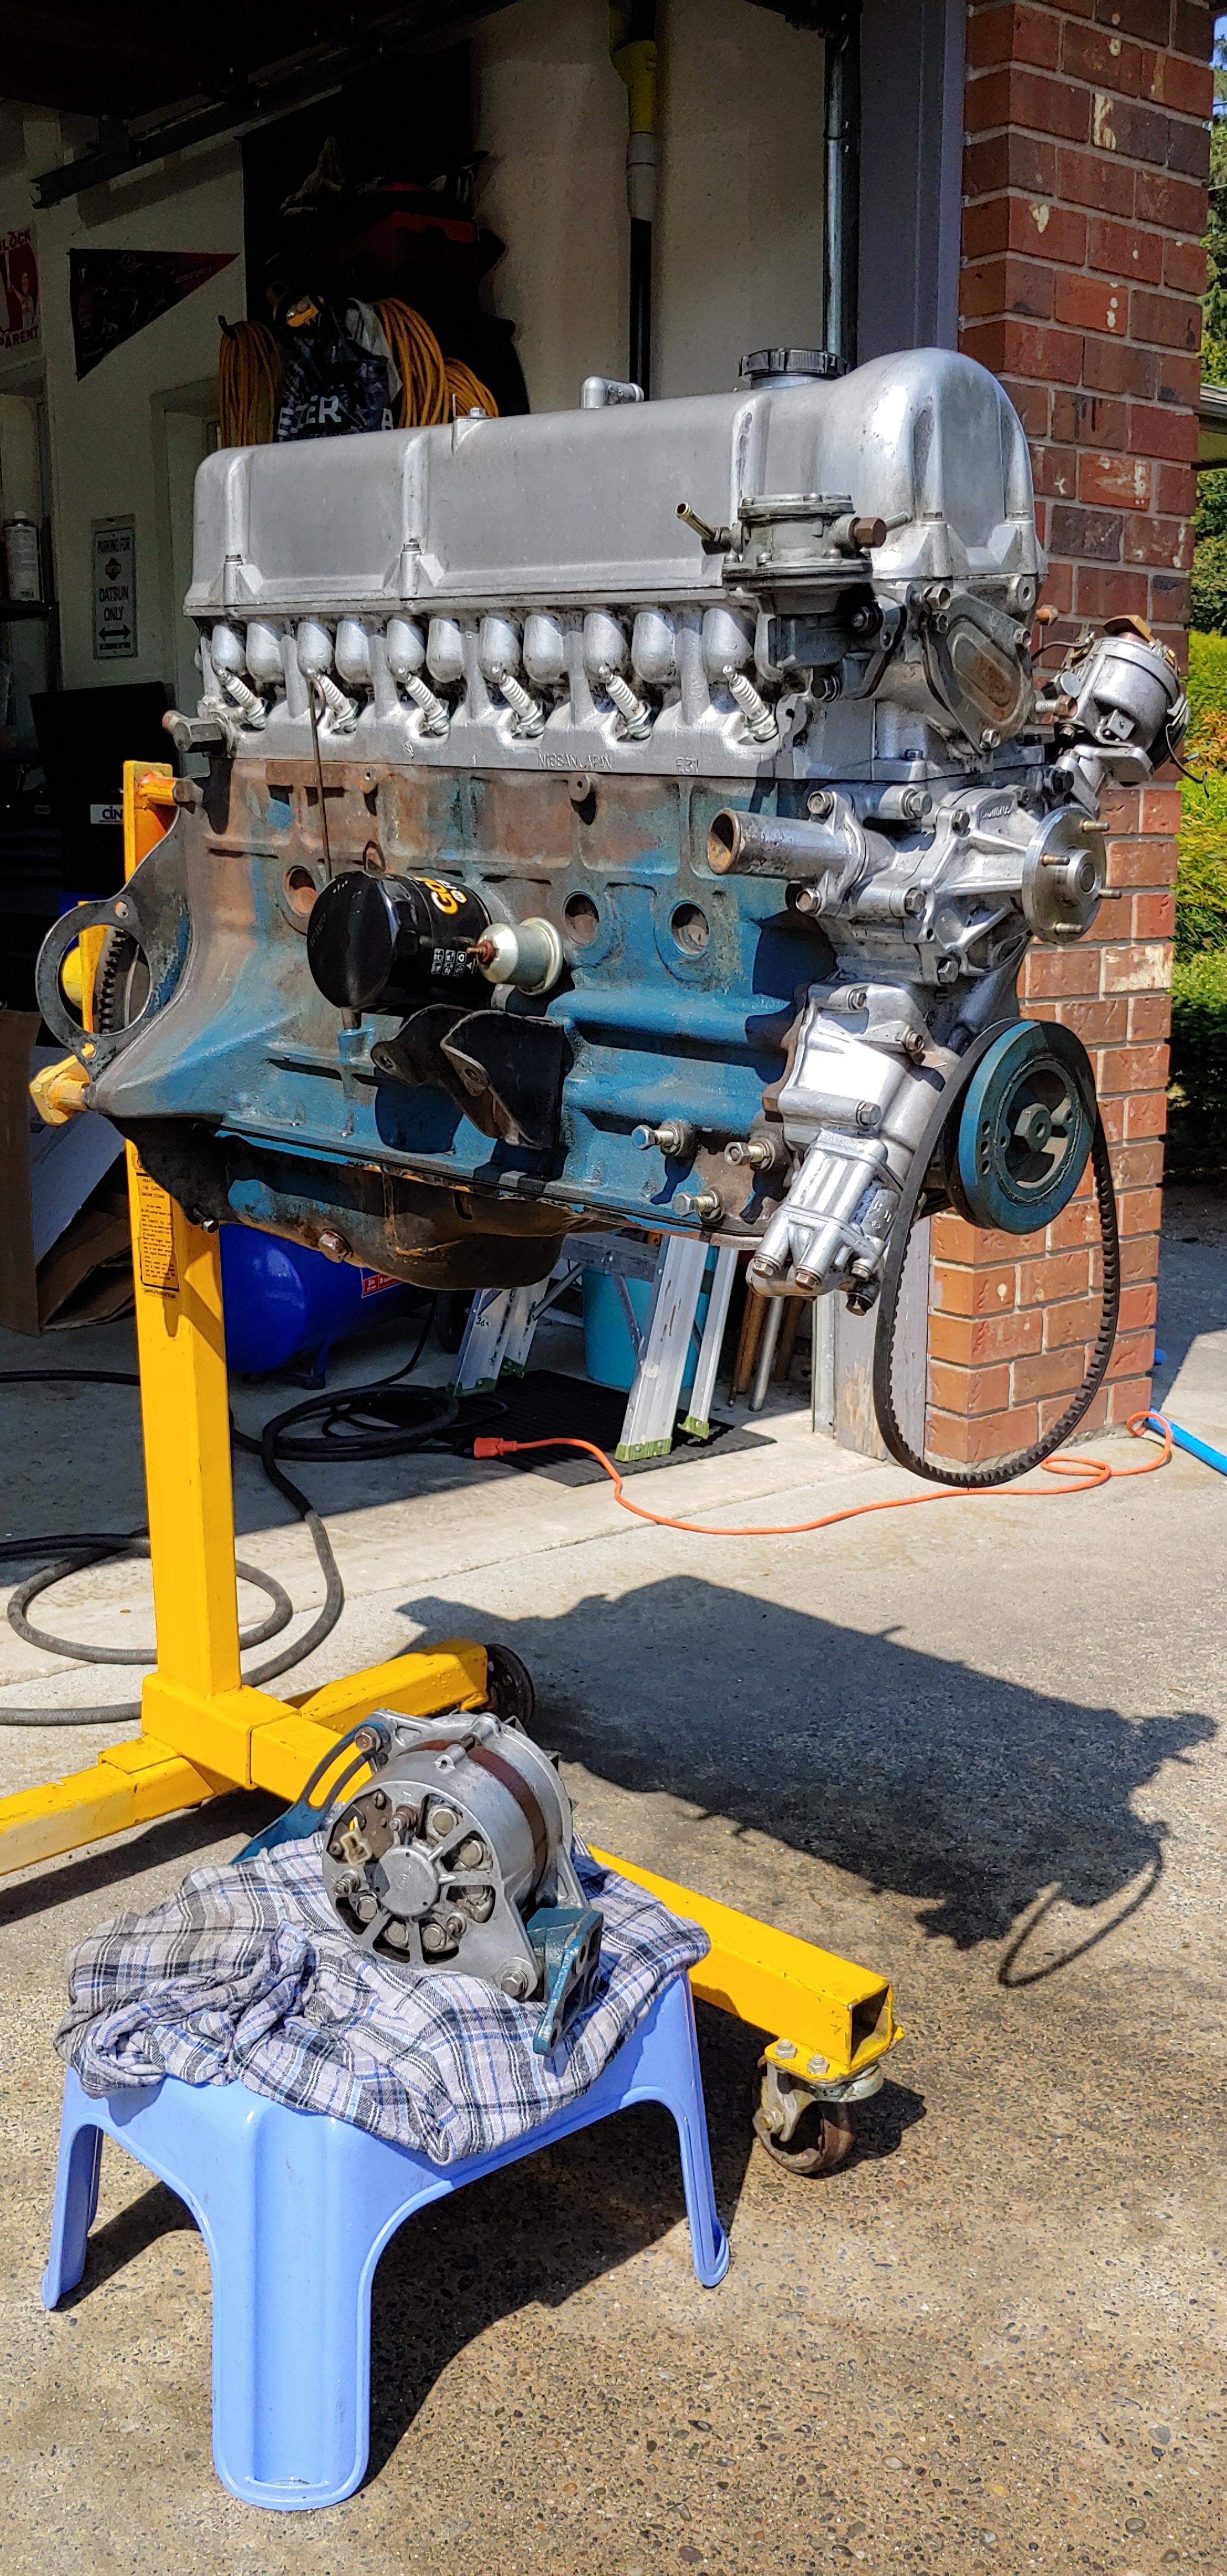
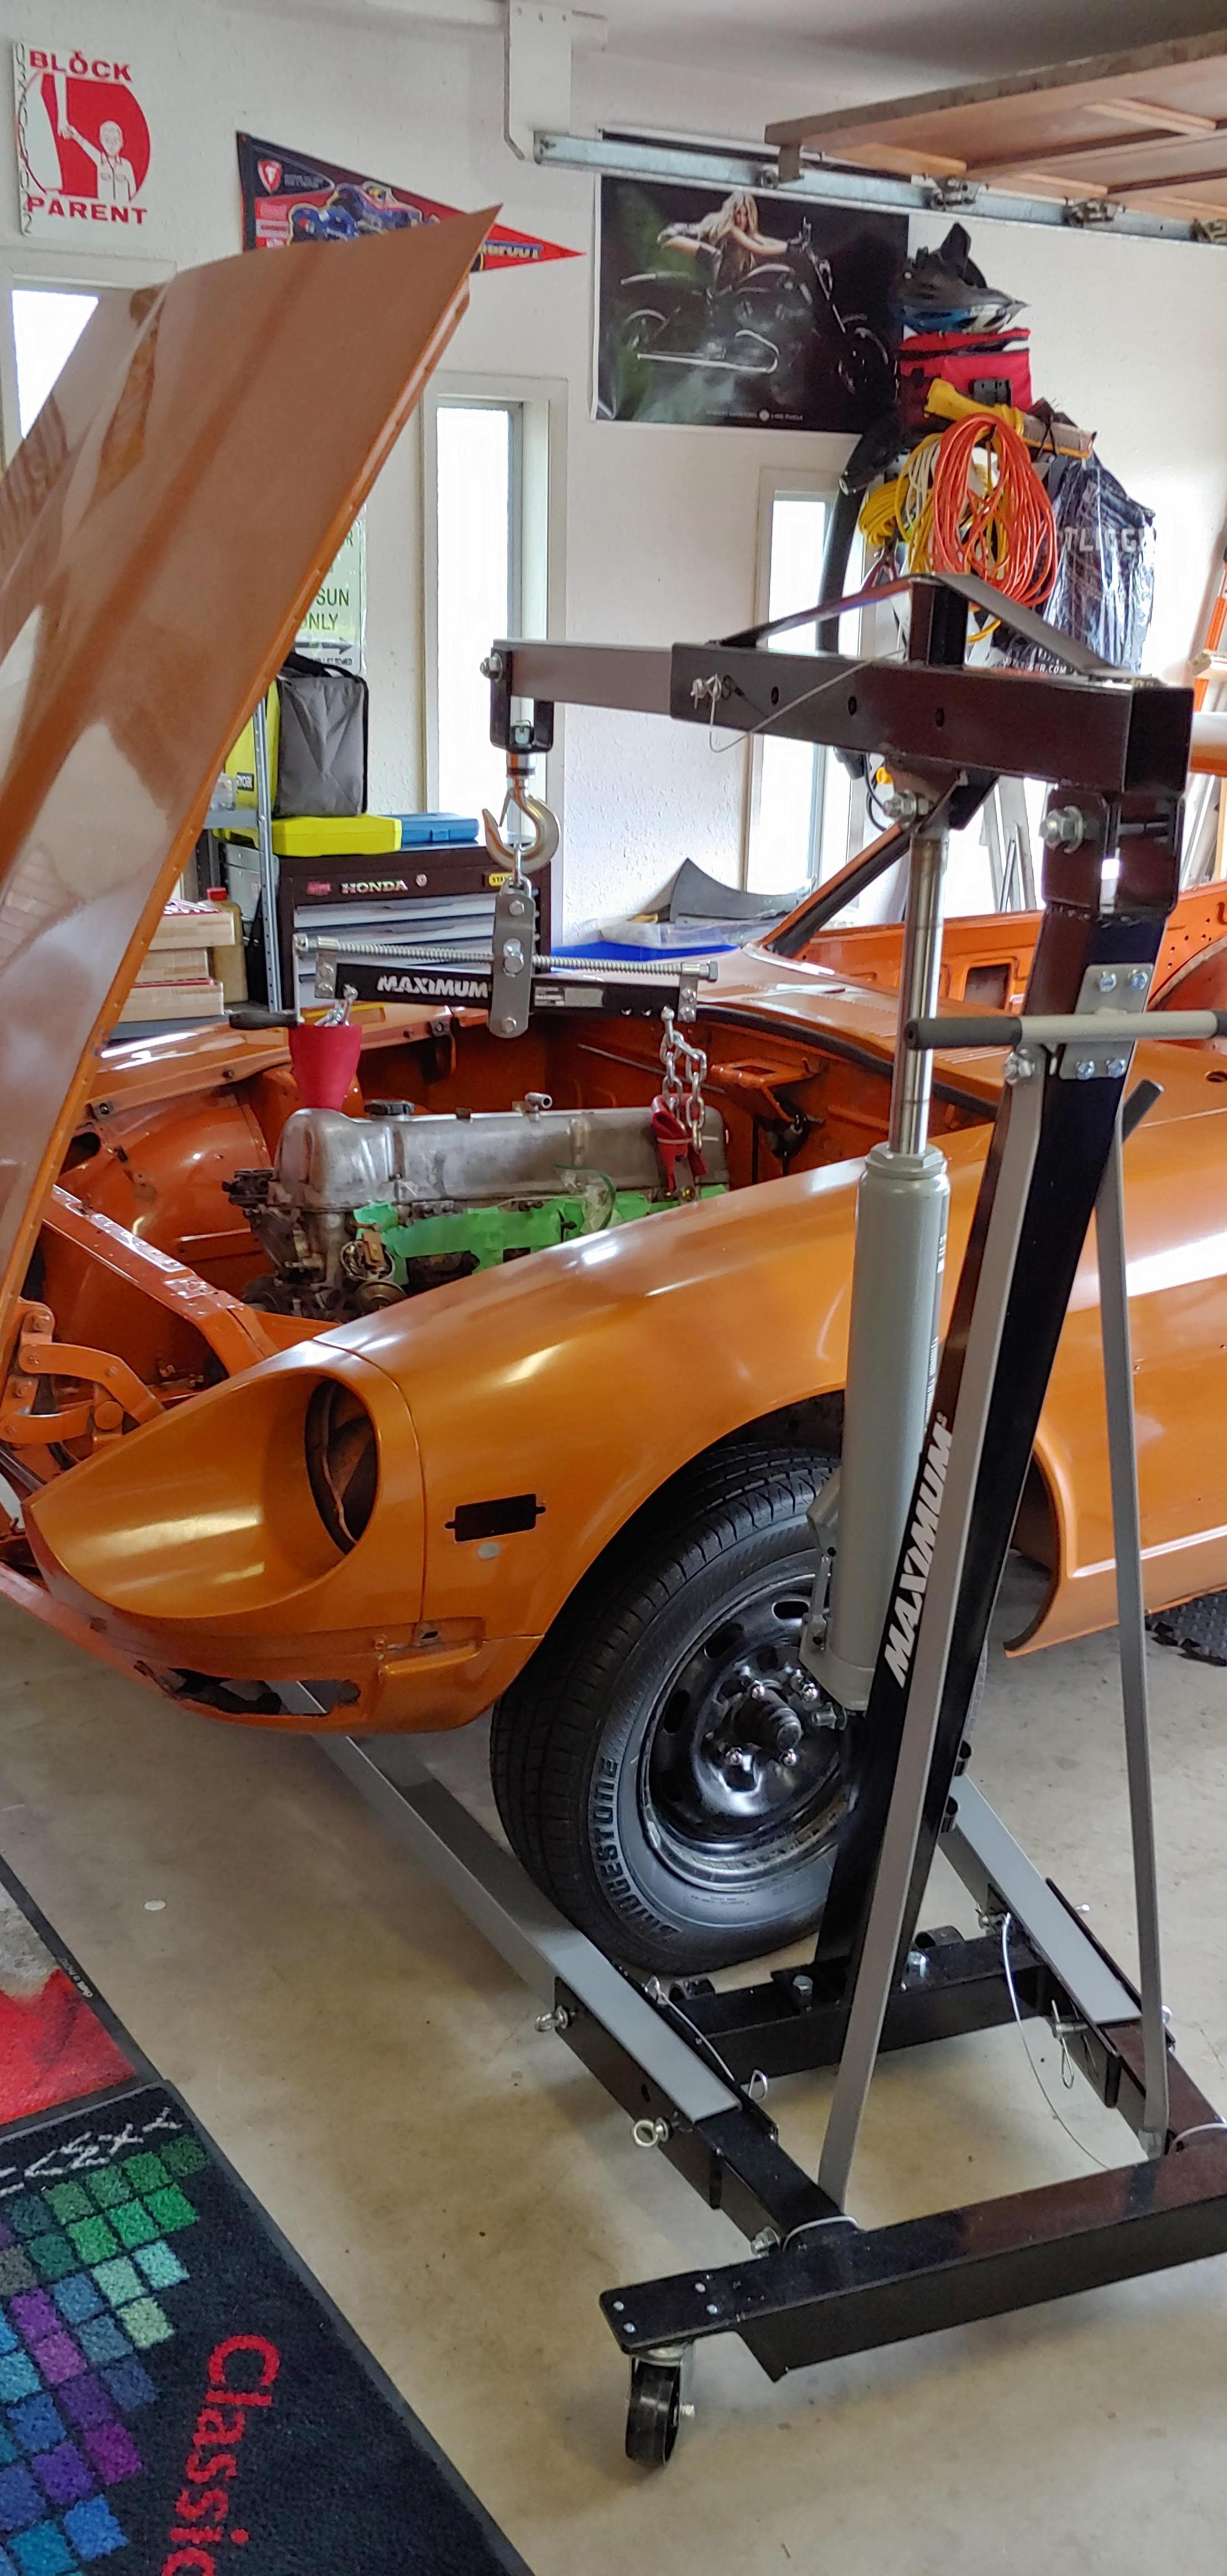
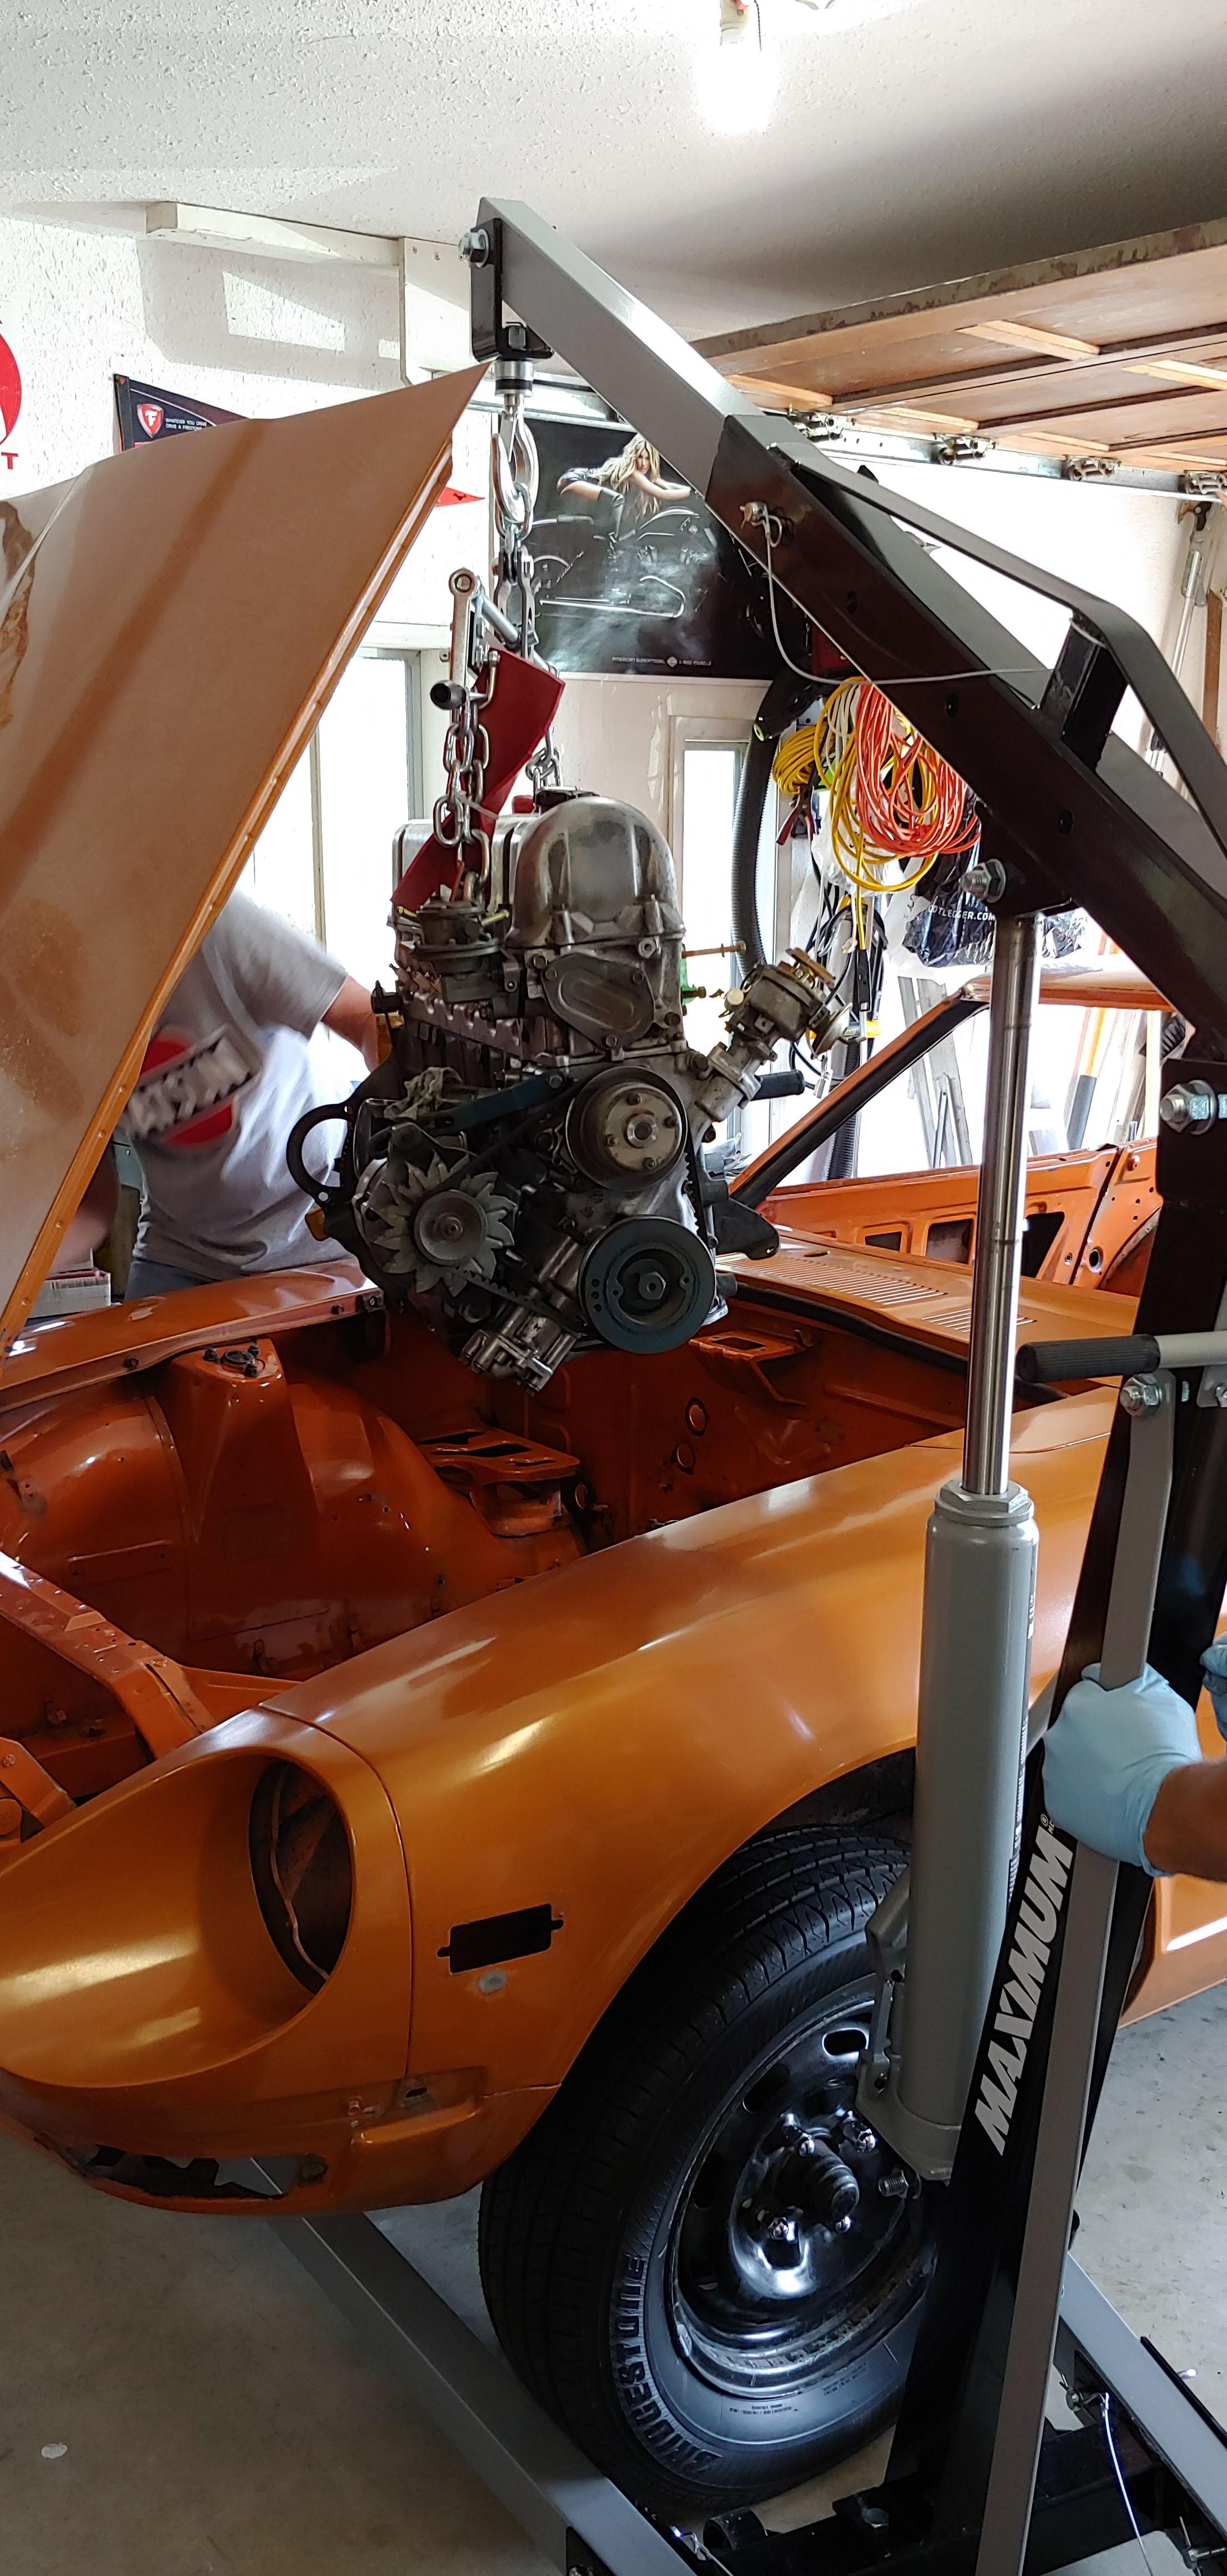
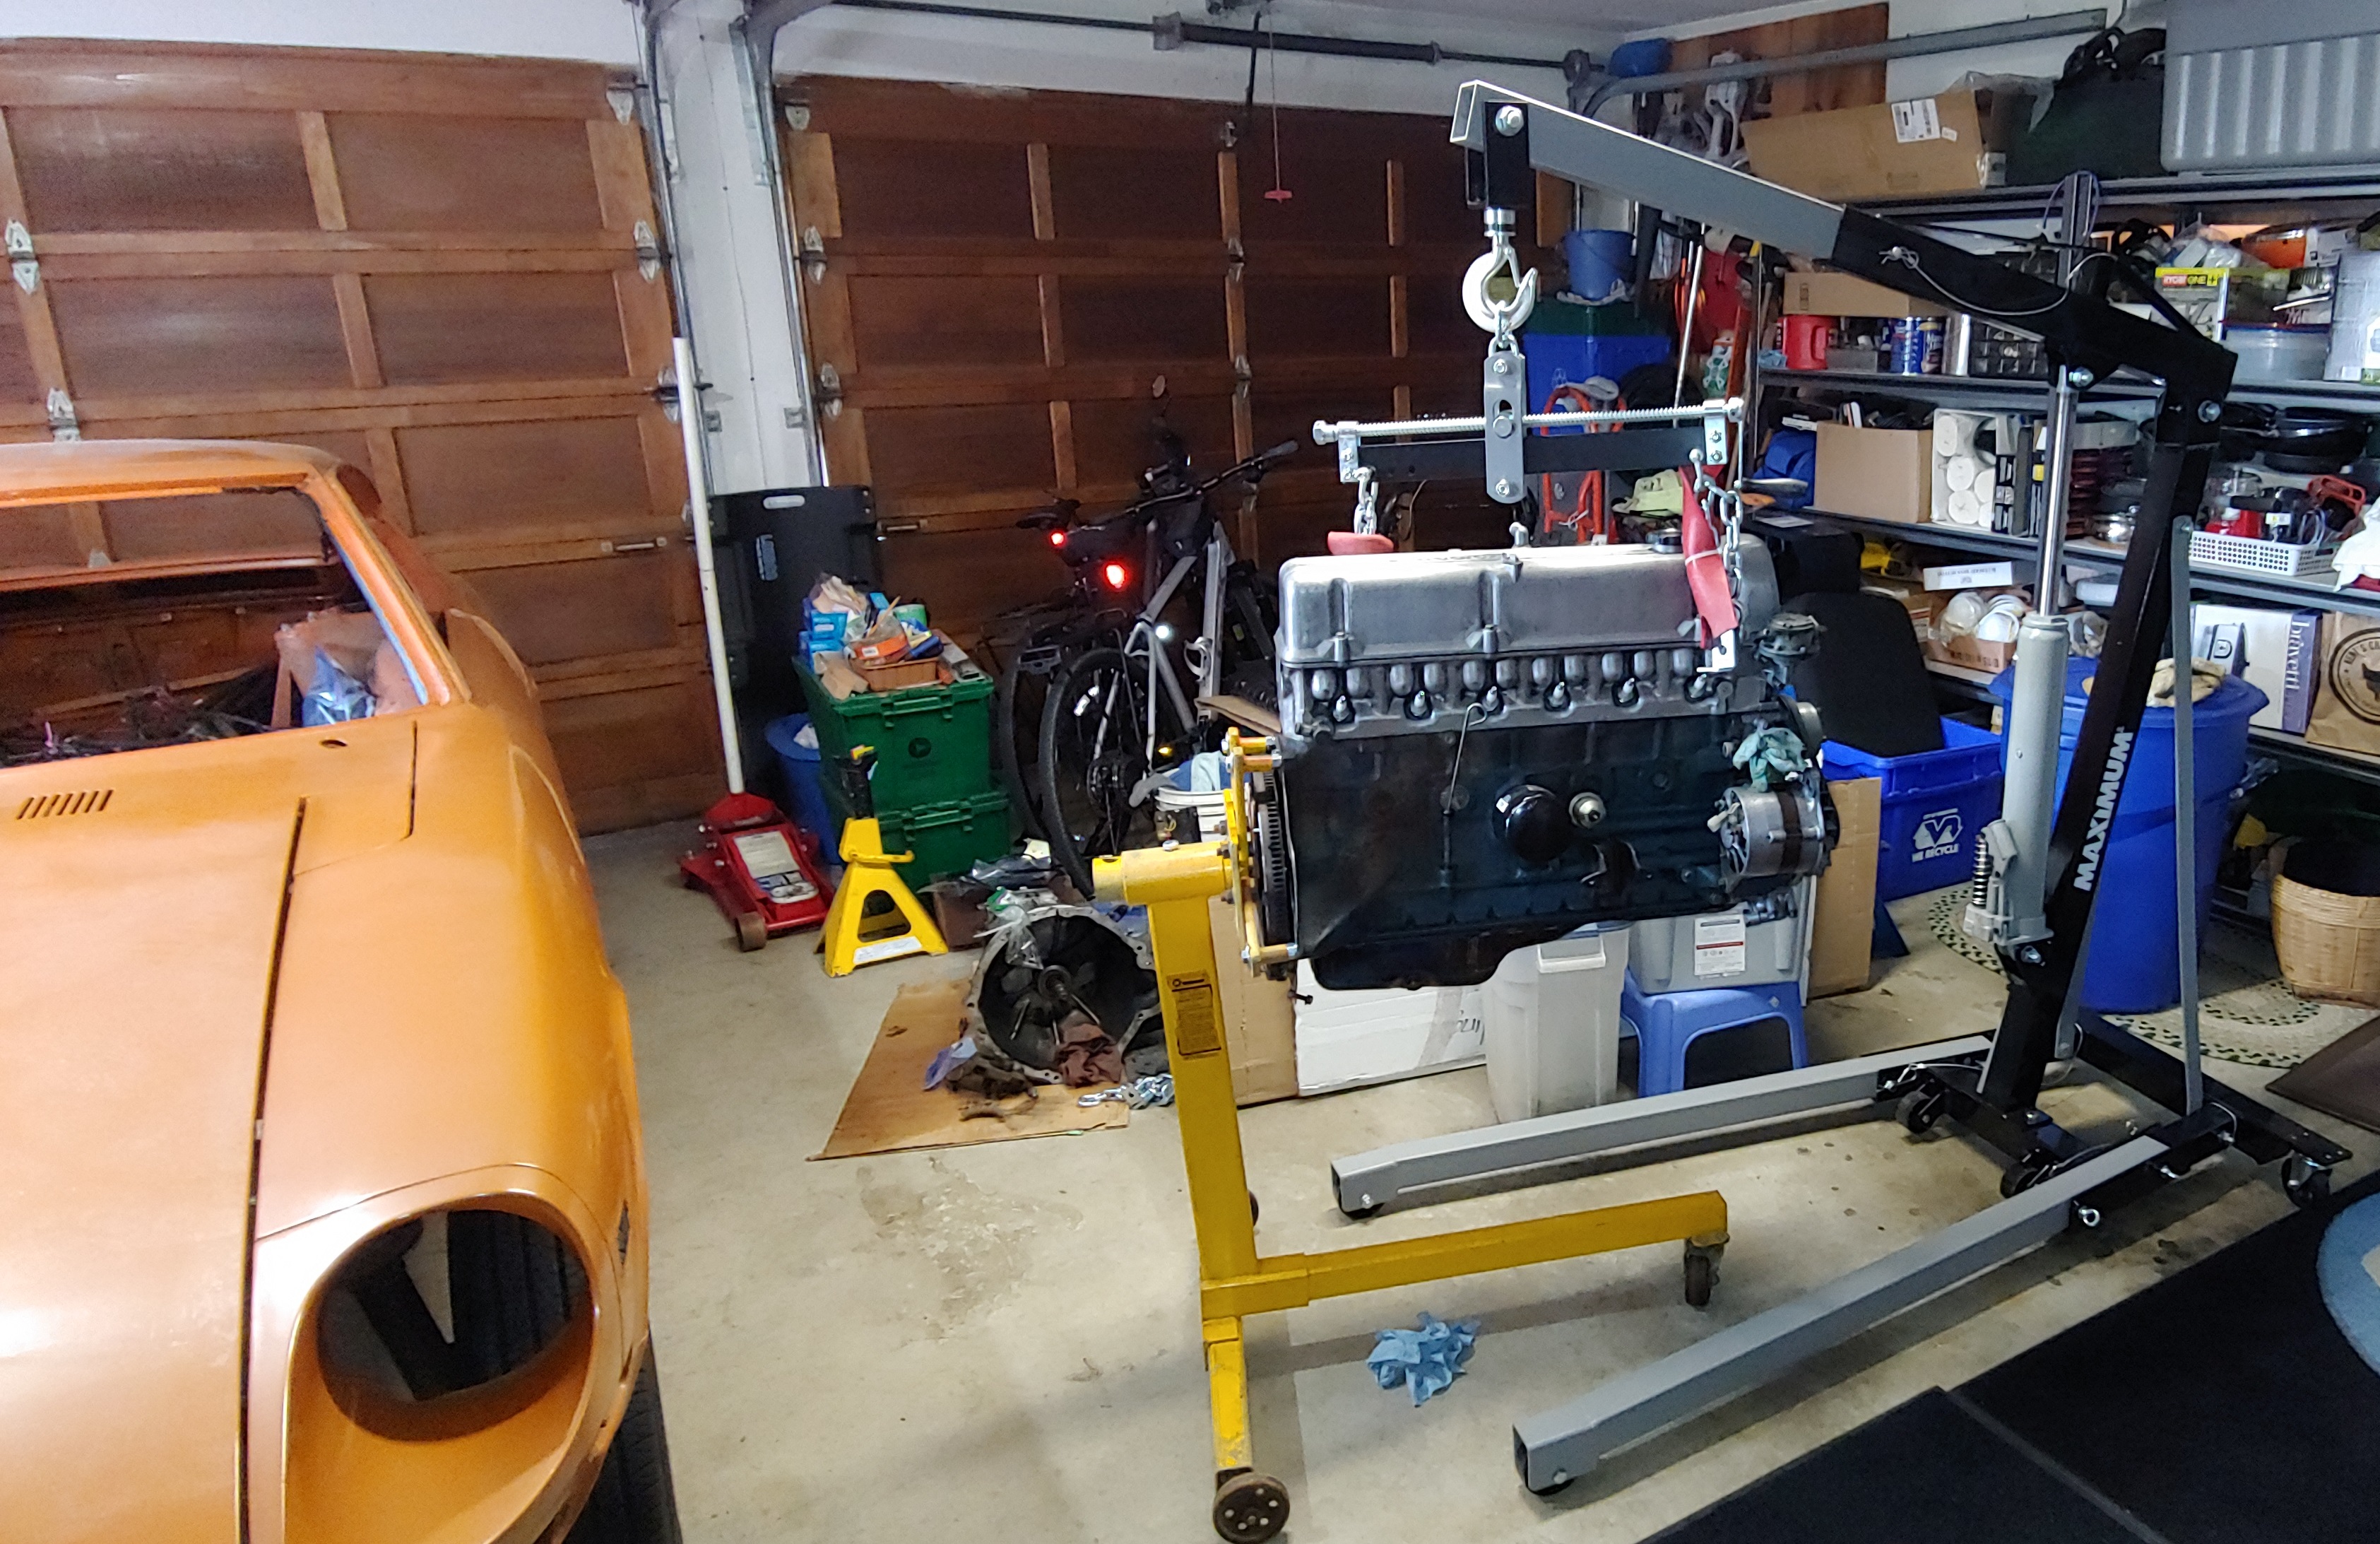
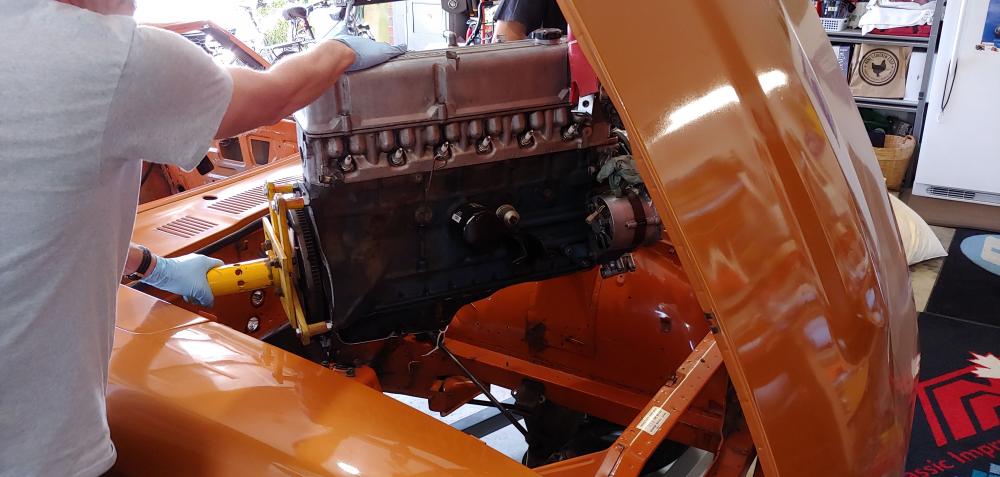
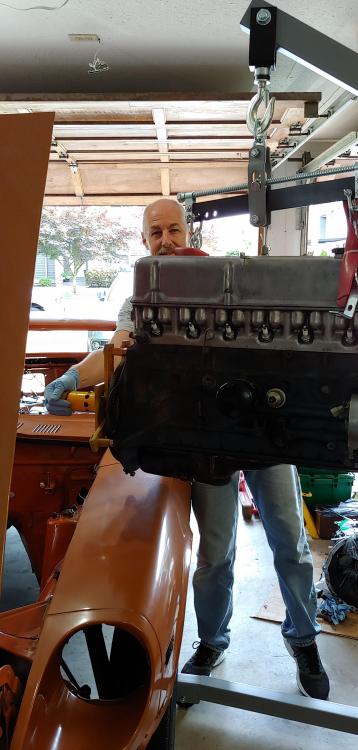
Successful event yesterday pulling the engine, without removing the hood. It only took about 15 minutes to lift it out and mount on my engine stand. Thanks to my friend, Dave. I did spend a good part of the day before doing the rigging and taking measurements to make sure I wouldn't need to remove the hood. Getting very close to sending the shell to my body guy Jody.


-
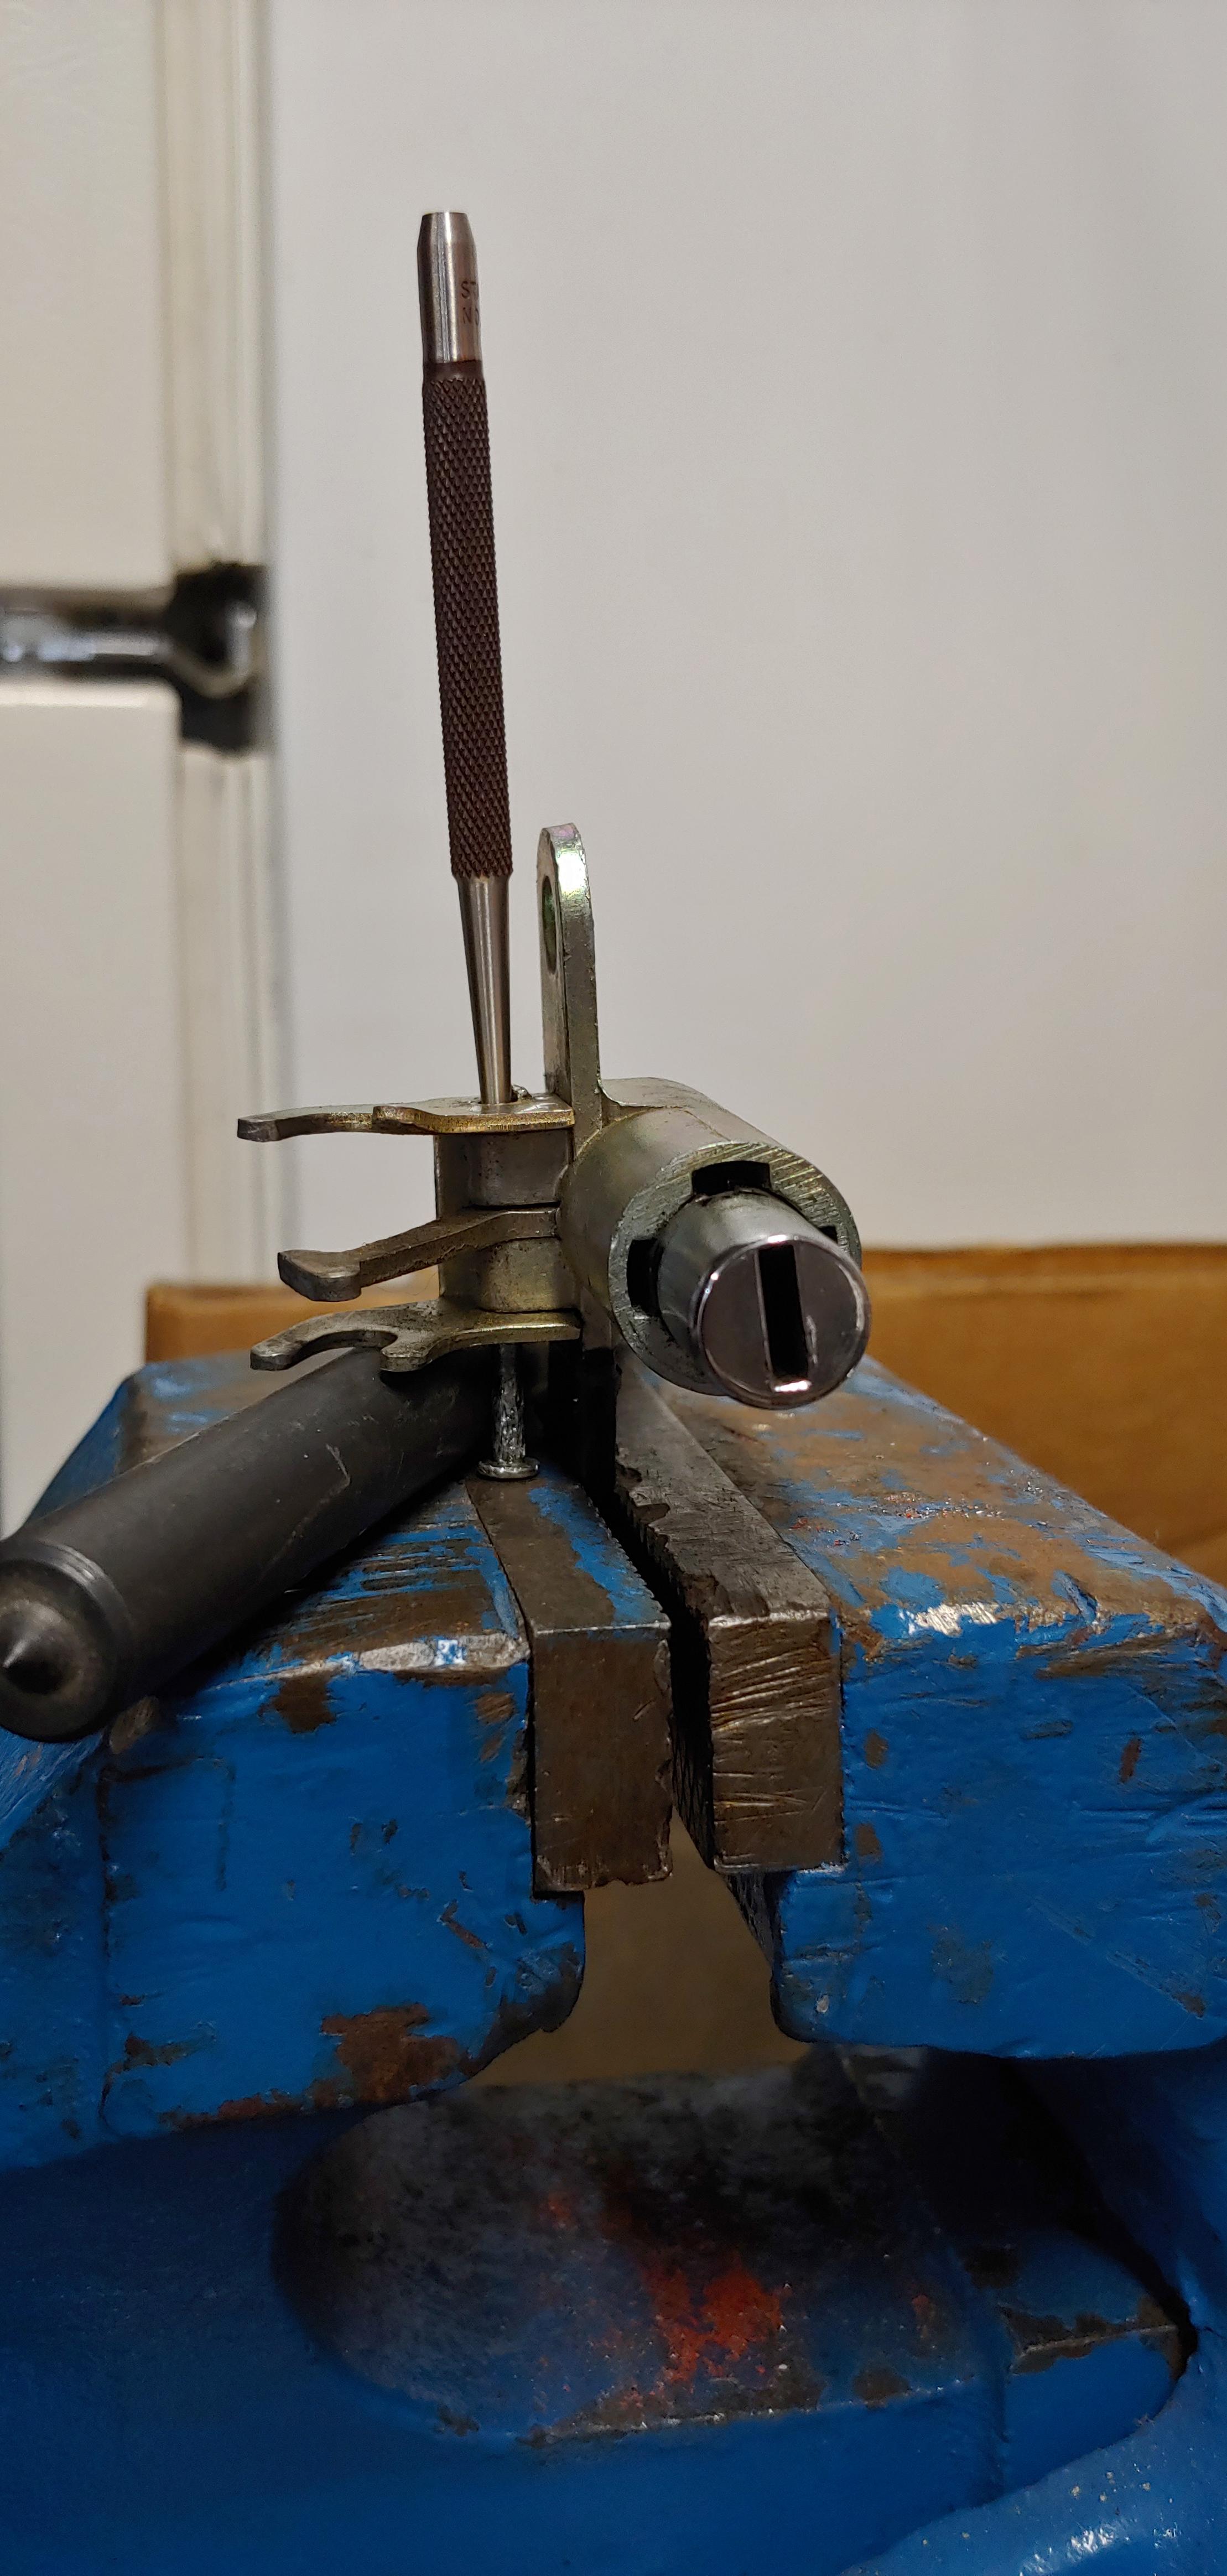
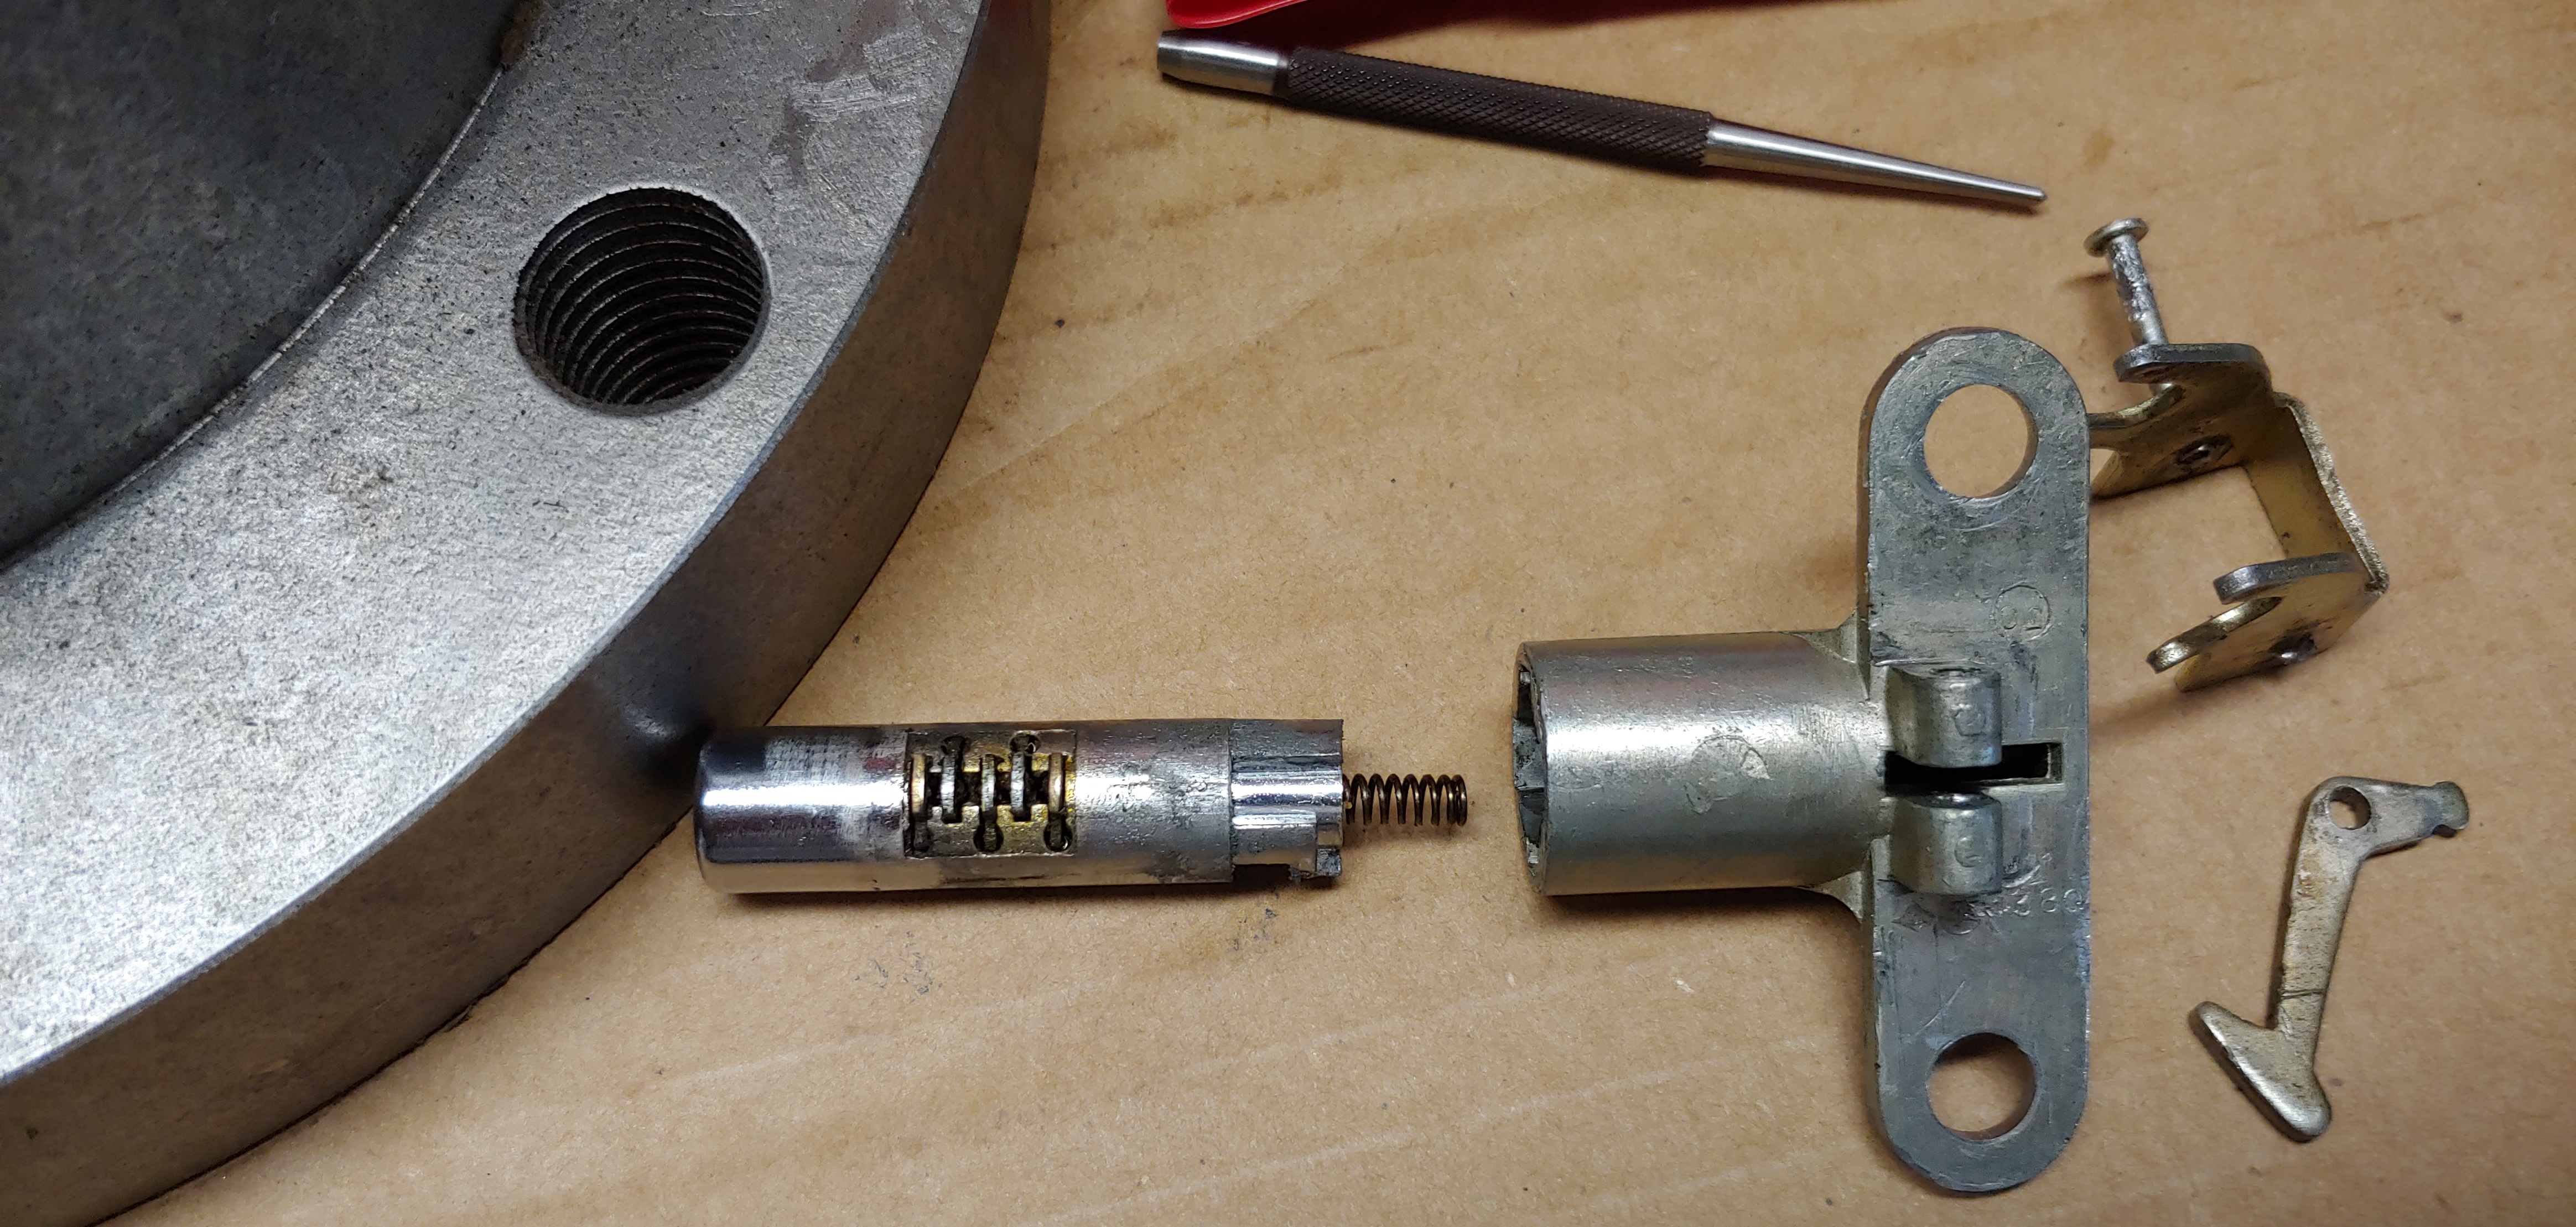
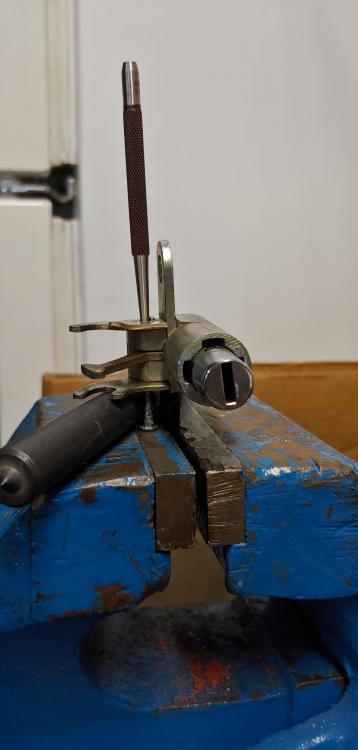
I have no key for the lock, so no big deal to take it apart. The mistake I made was trying to remove only the peened part of the pin with a chisel and then driving it out. Due to burrs it got stuck part way through and bent slightly. One thing to watch out for when driving the pin out is that the mounting flanges bend quite easily. I held it in my vice by one flange and blocked the side for support, while driving the pin out.
-
Working from home today, so I took a break and took my spare apart. I did mangle the pin a little, but it might still be reusable.

-
Totally different design on the 240, here's one from my parts 1970 car. I wonder if you could grind off the peened over end of the pin, so that it and the latching lever could be removed, to let the lock cylinder slide out? To re-assemble hopefully a center punch or two to the edge of the pin would be enough to retain it. Or change to a spring pin.

-
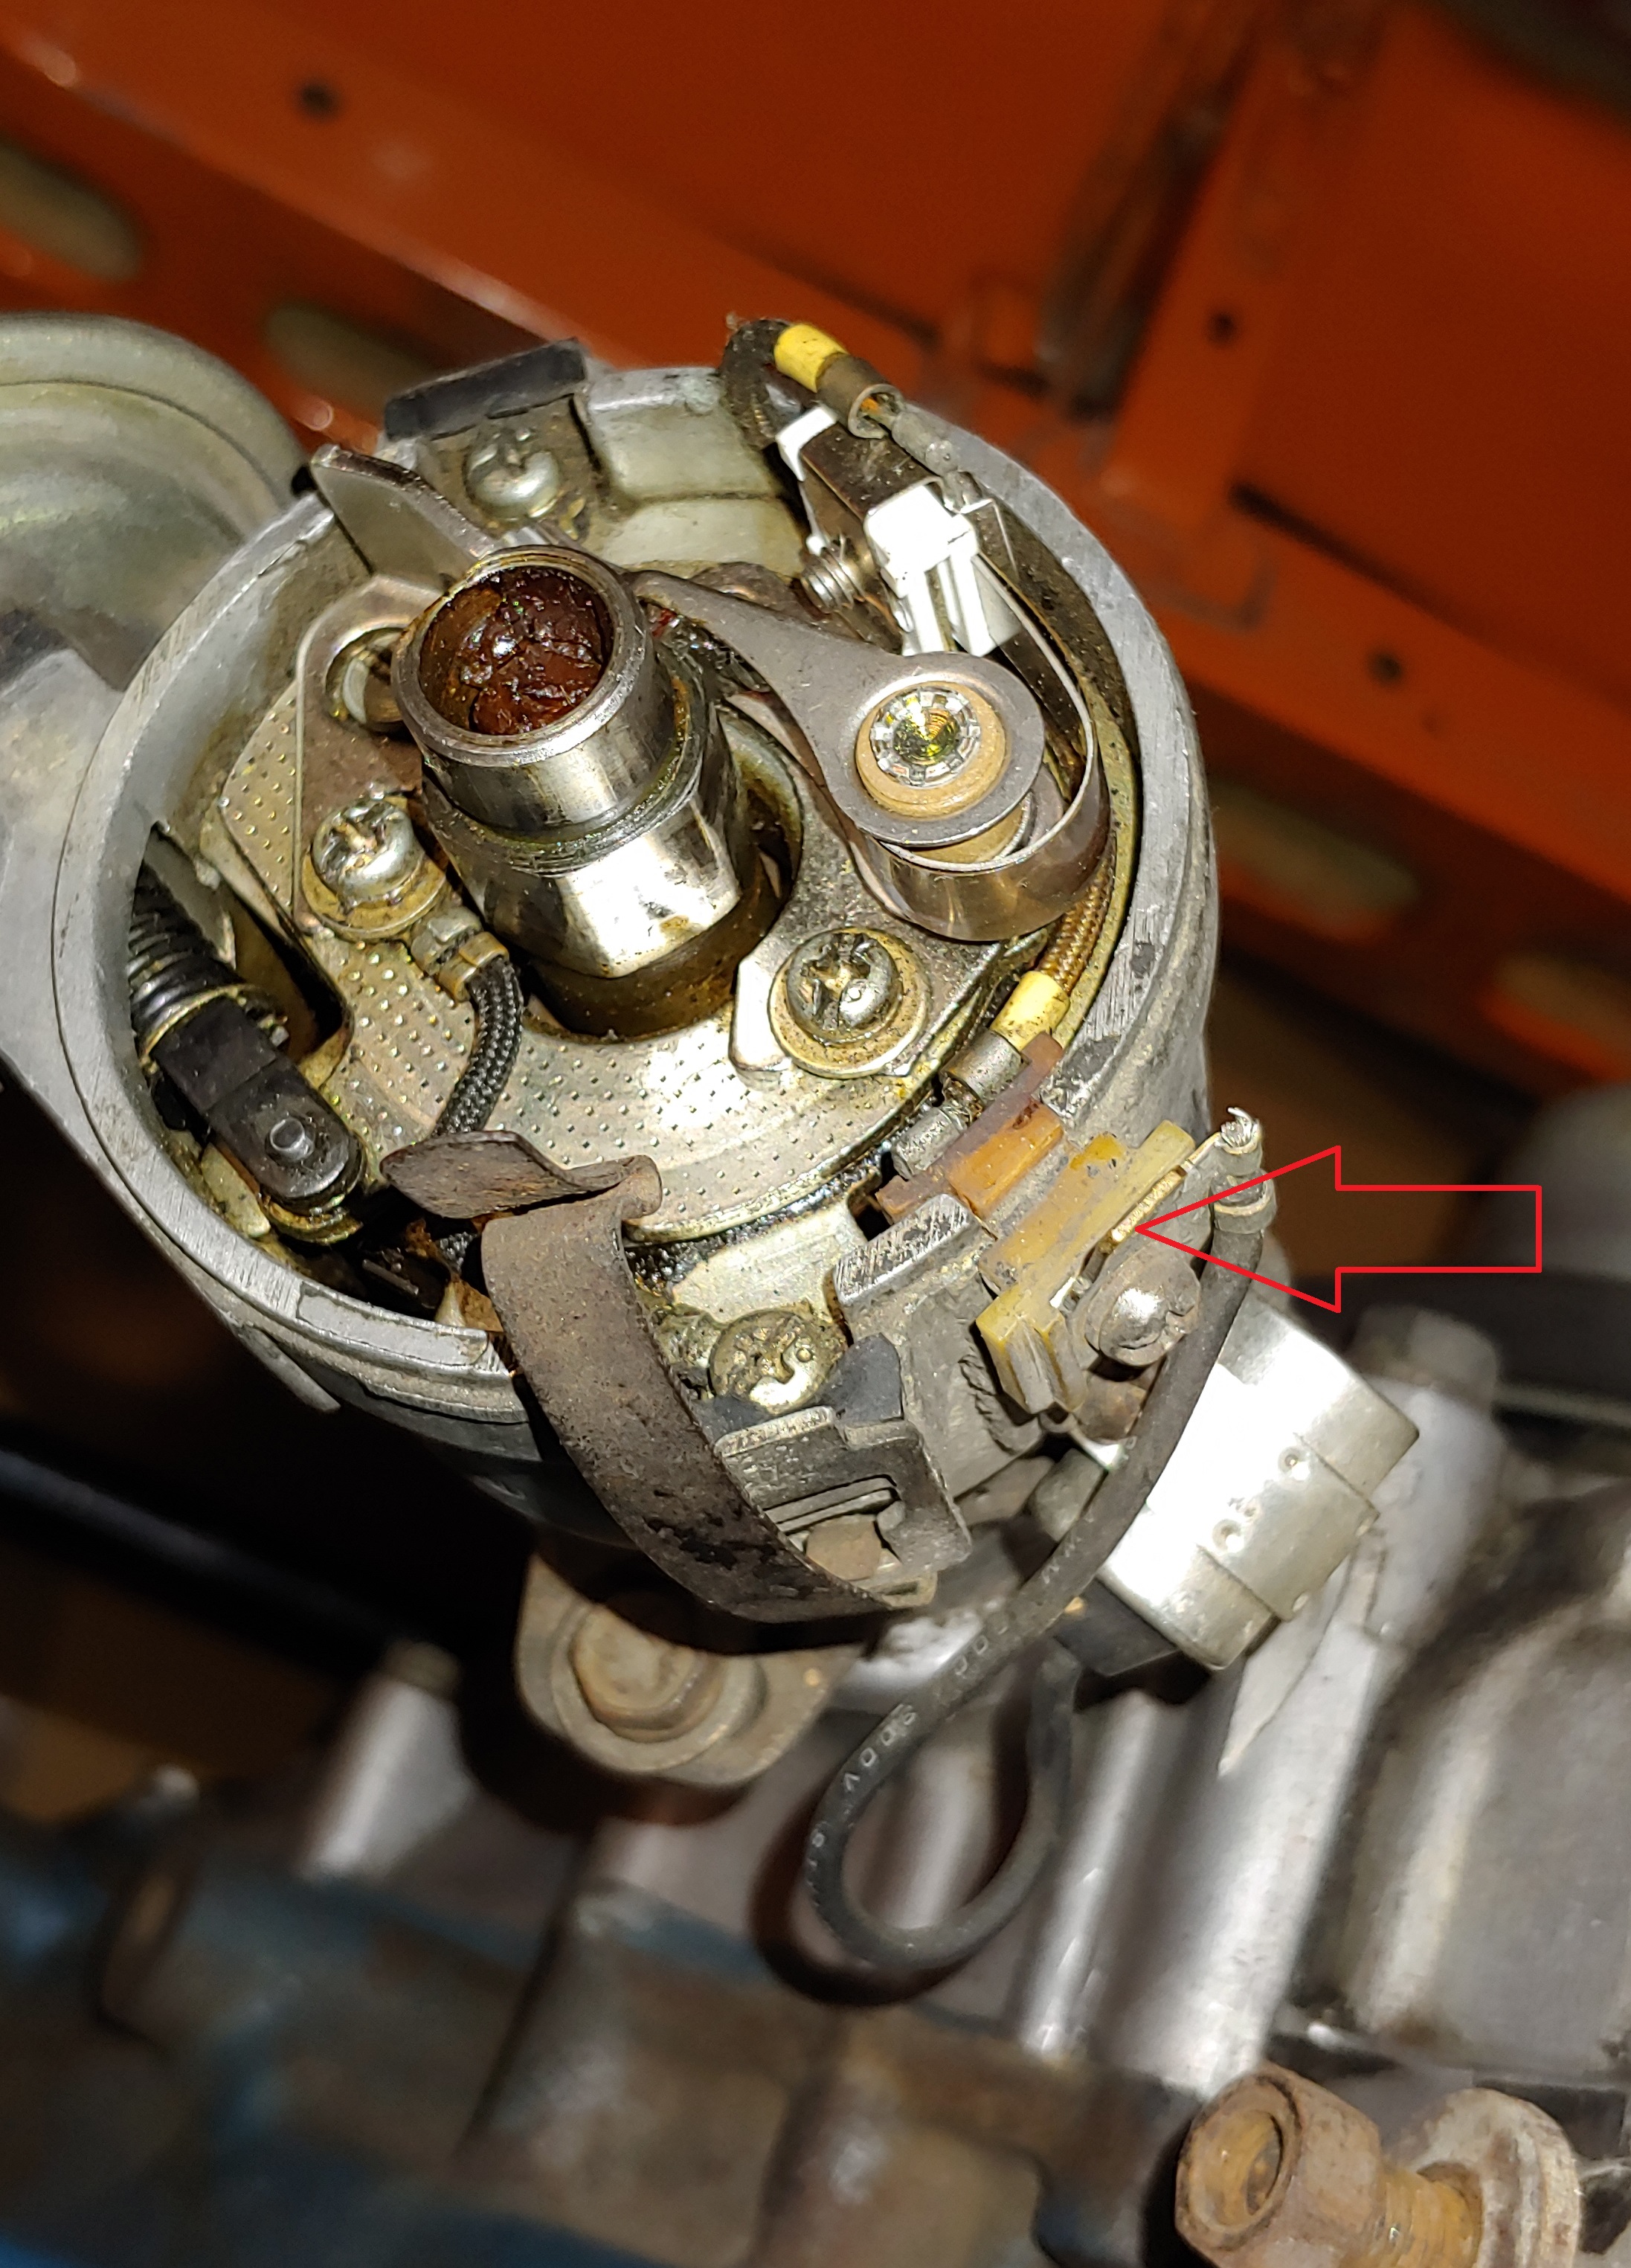
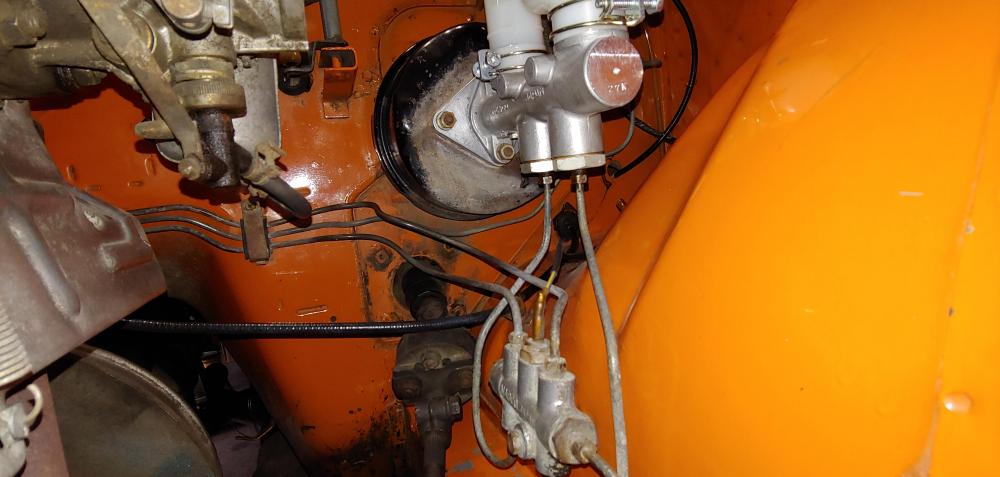
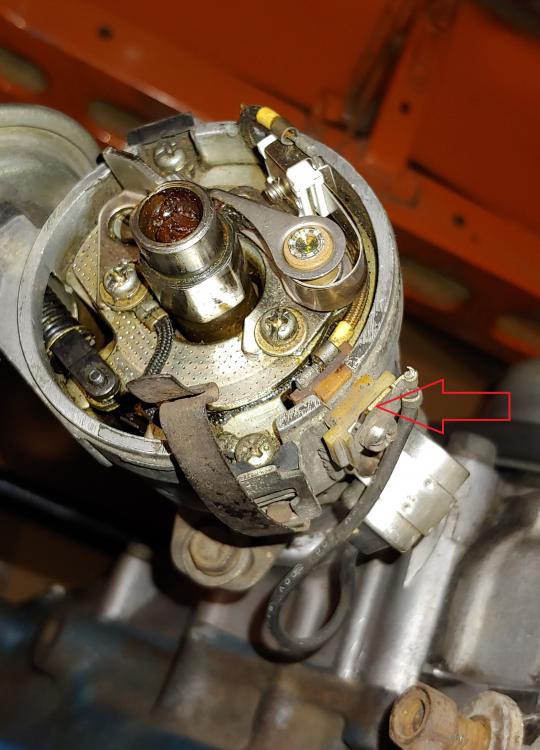
You mentioned that your car has been changed to electronic ignition, likely changes were made and that black wire is not used. Normally there are two condensers, one at the coil and one at the dizzy for the points circuit, at least that is how my 1970 is. Here is a picture of mine with the dist. cap removed. showing the connector spade (red arrow) where the black wire goes. FYI it's the yellow wire that is connected to the temperature switch on the thermostat housing. In your picture I see red and black wires in the same area where mine has the condenser. Do these connect to the electronic ignition module? This would explain why there is no place to connect the original black wire.
-
Vapor blasting gives a very nice original look finish. Here's an example of vapor blasting by a company near me, that provides this service:
-
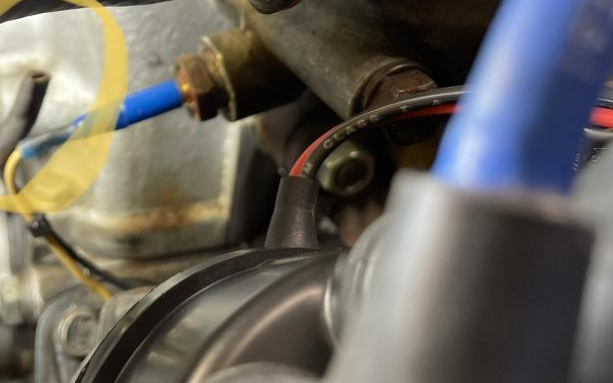
I think it goes to the small condenser on the side of the distributor.
-
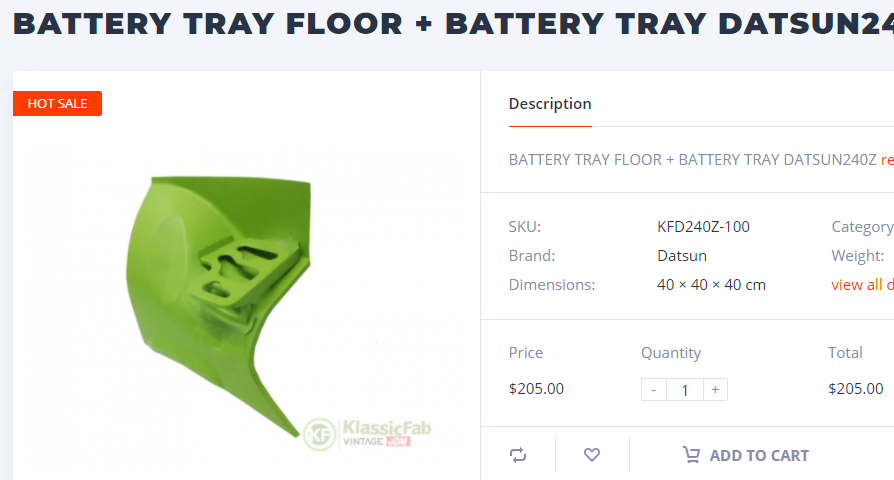
FYI, KlassicFab has a great deal on now, for the battery shelf and surrounding metal, https://kfvintagejdm.com/shop/datsun/battery-tray-floor-battery-tray-datsun240z/
-
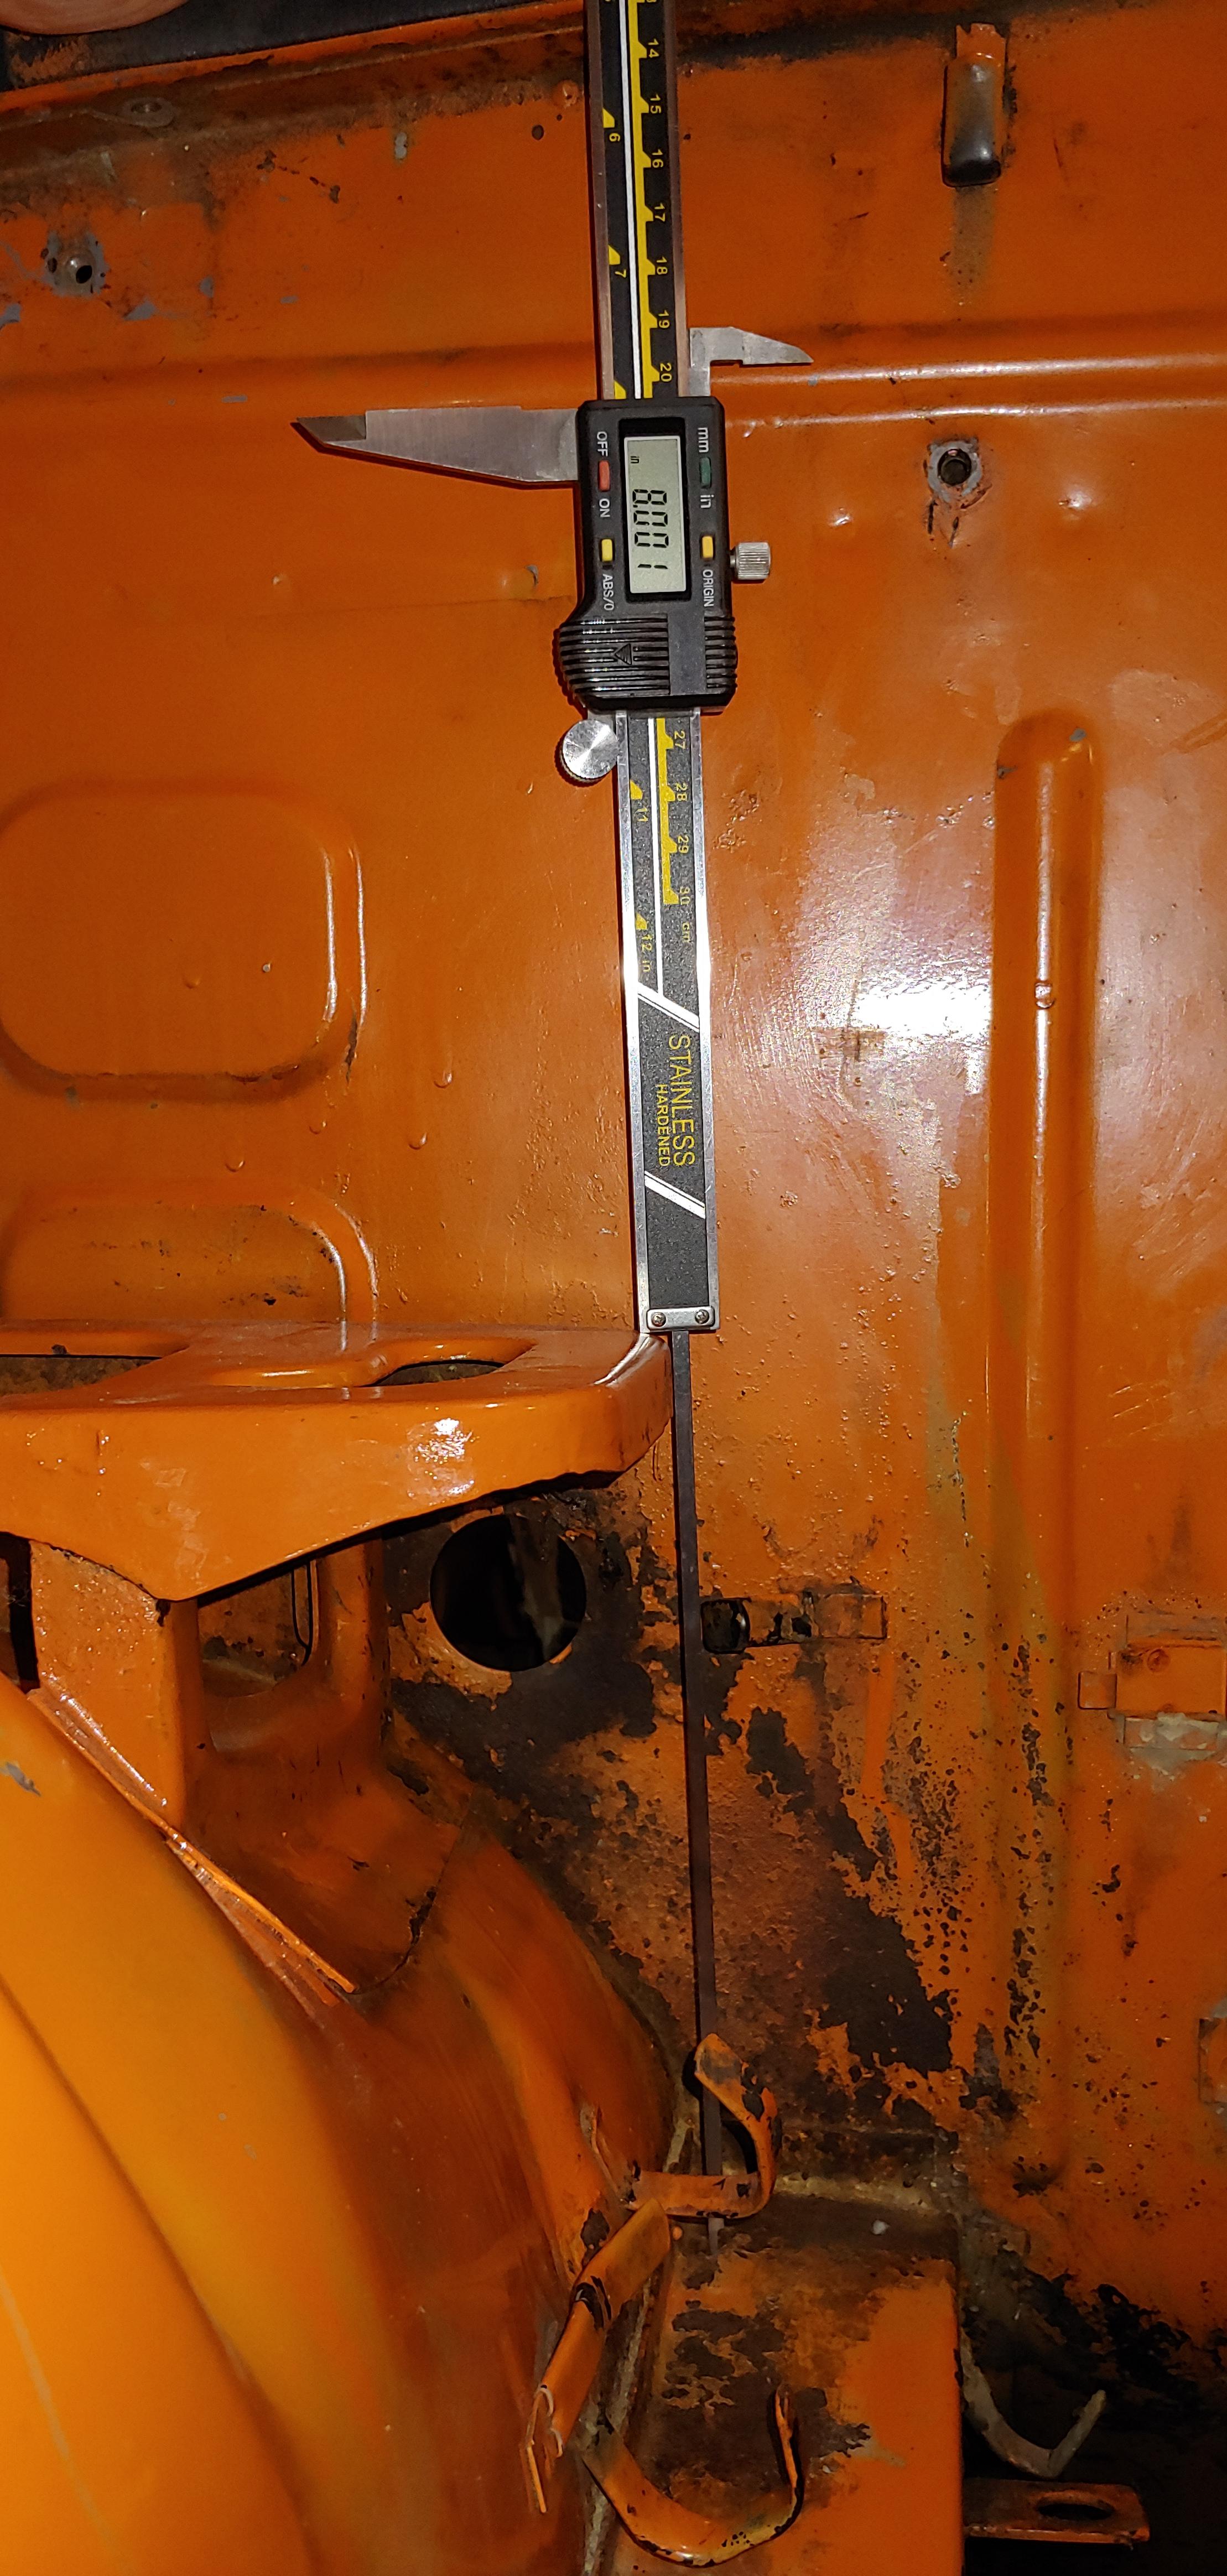
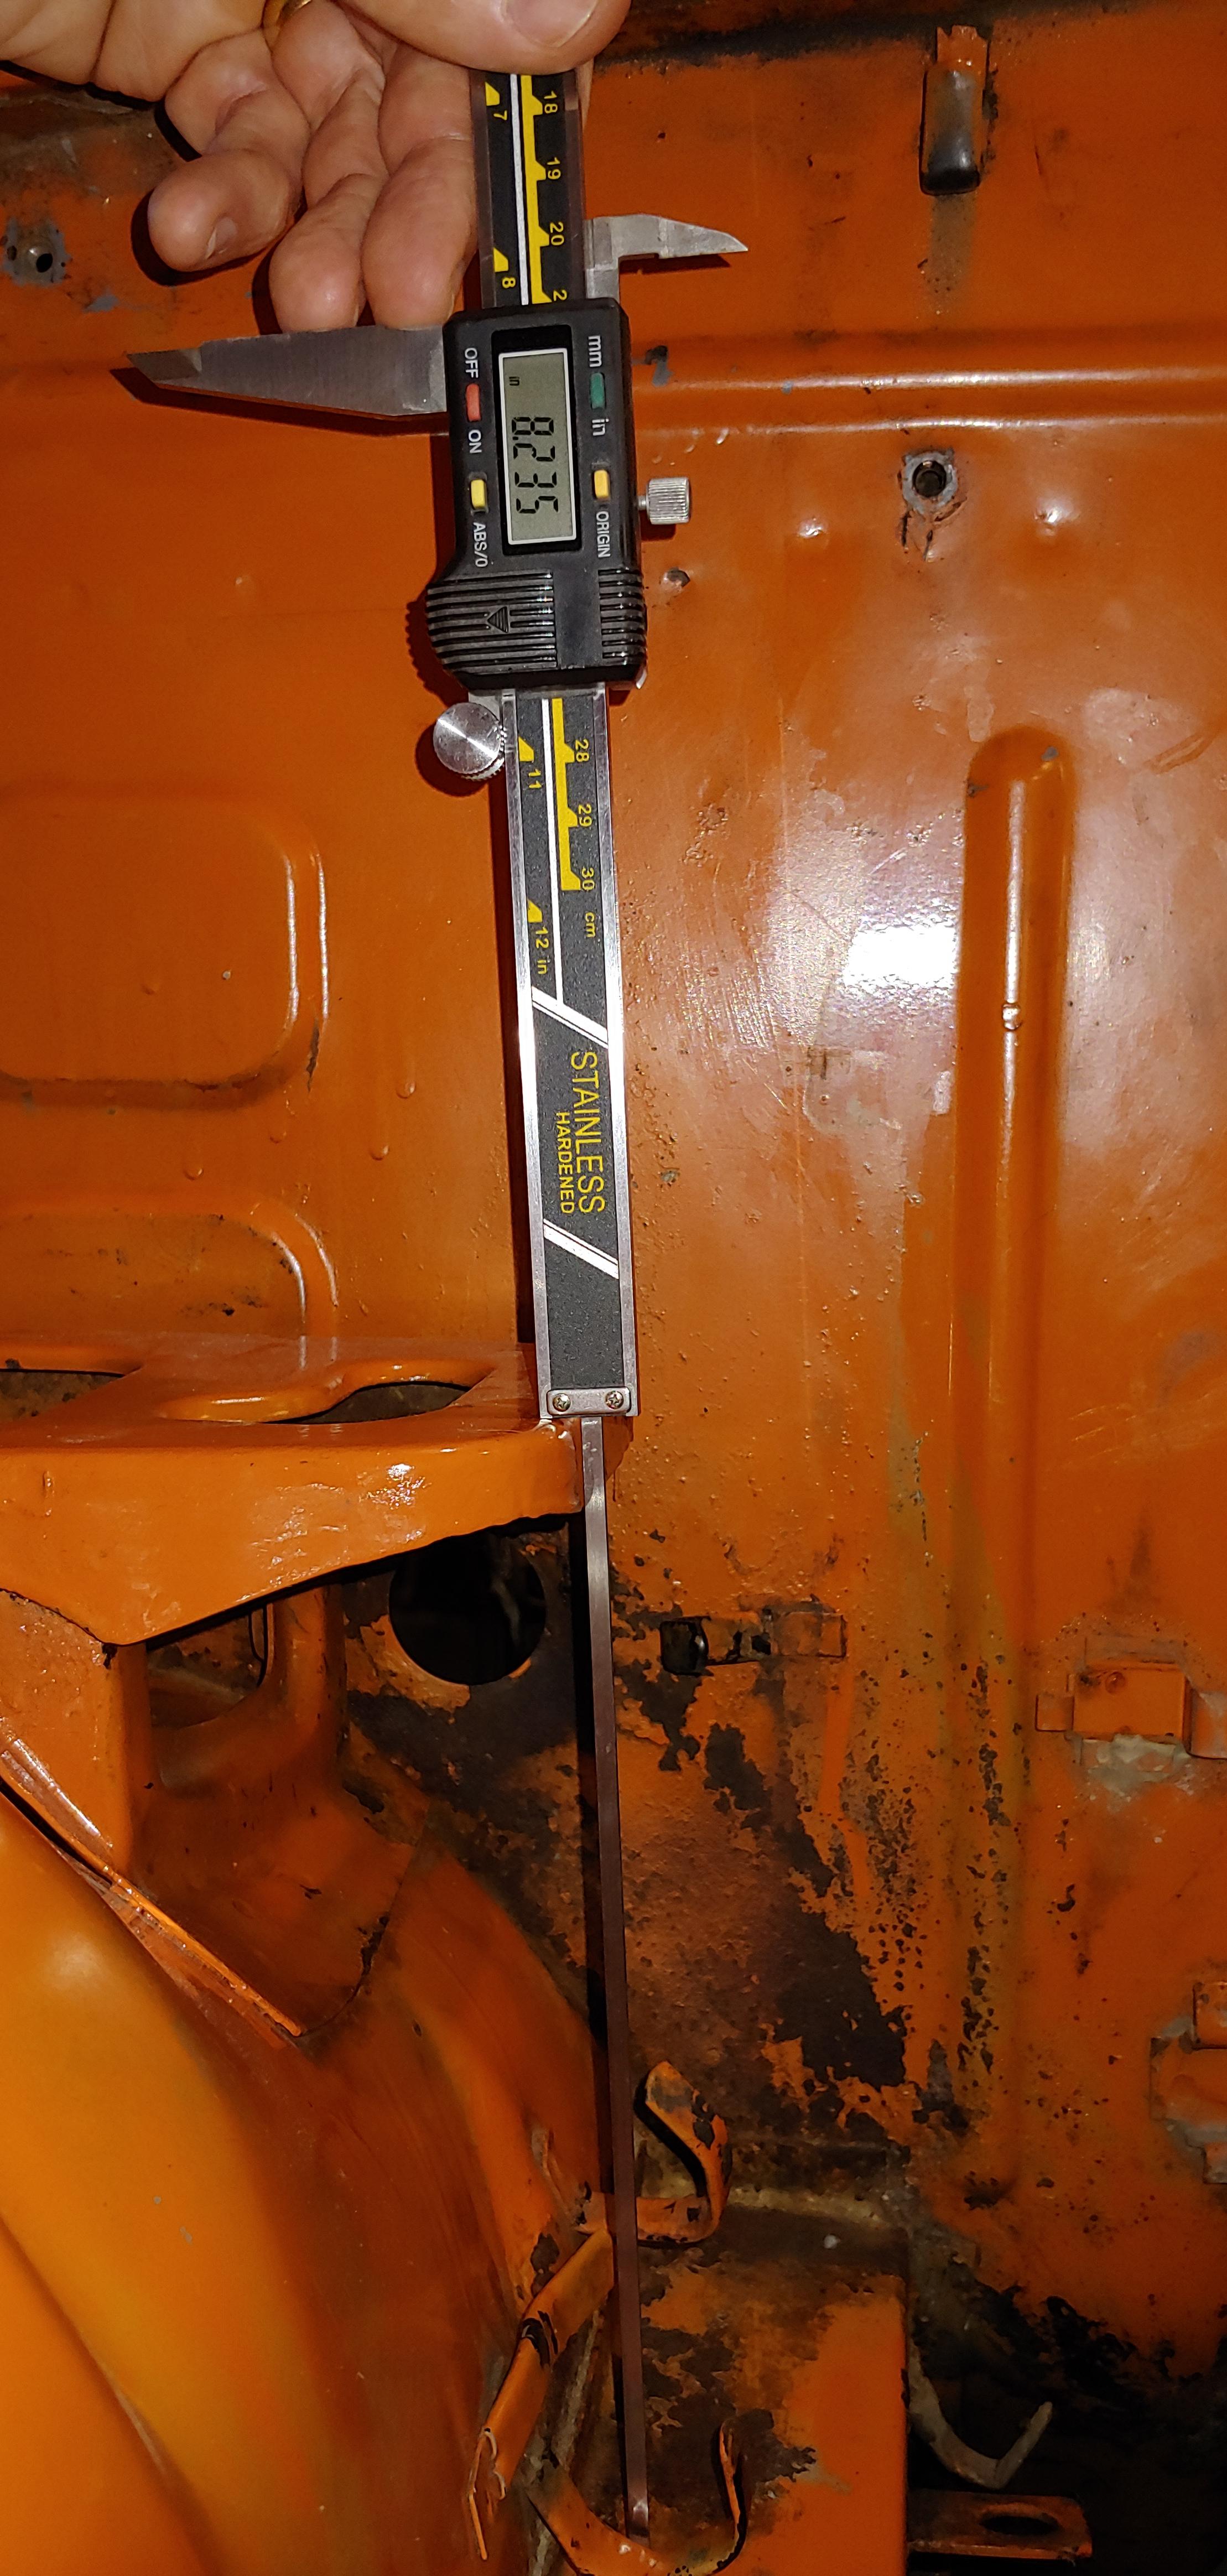
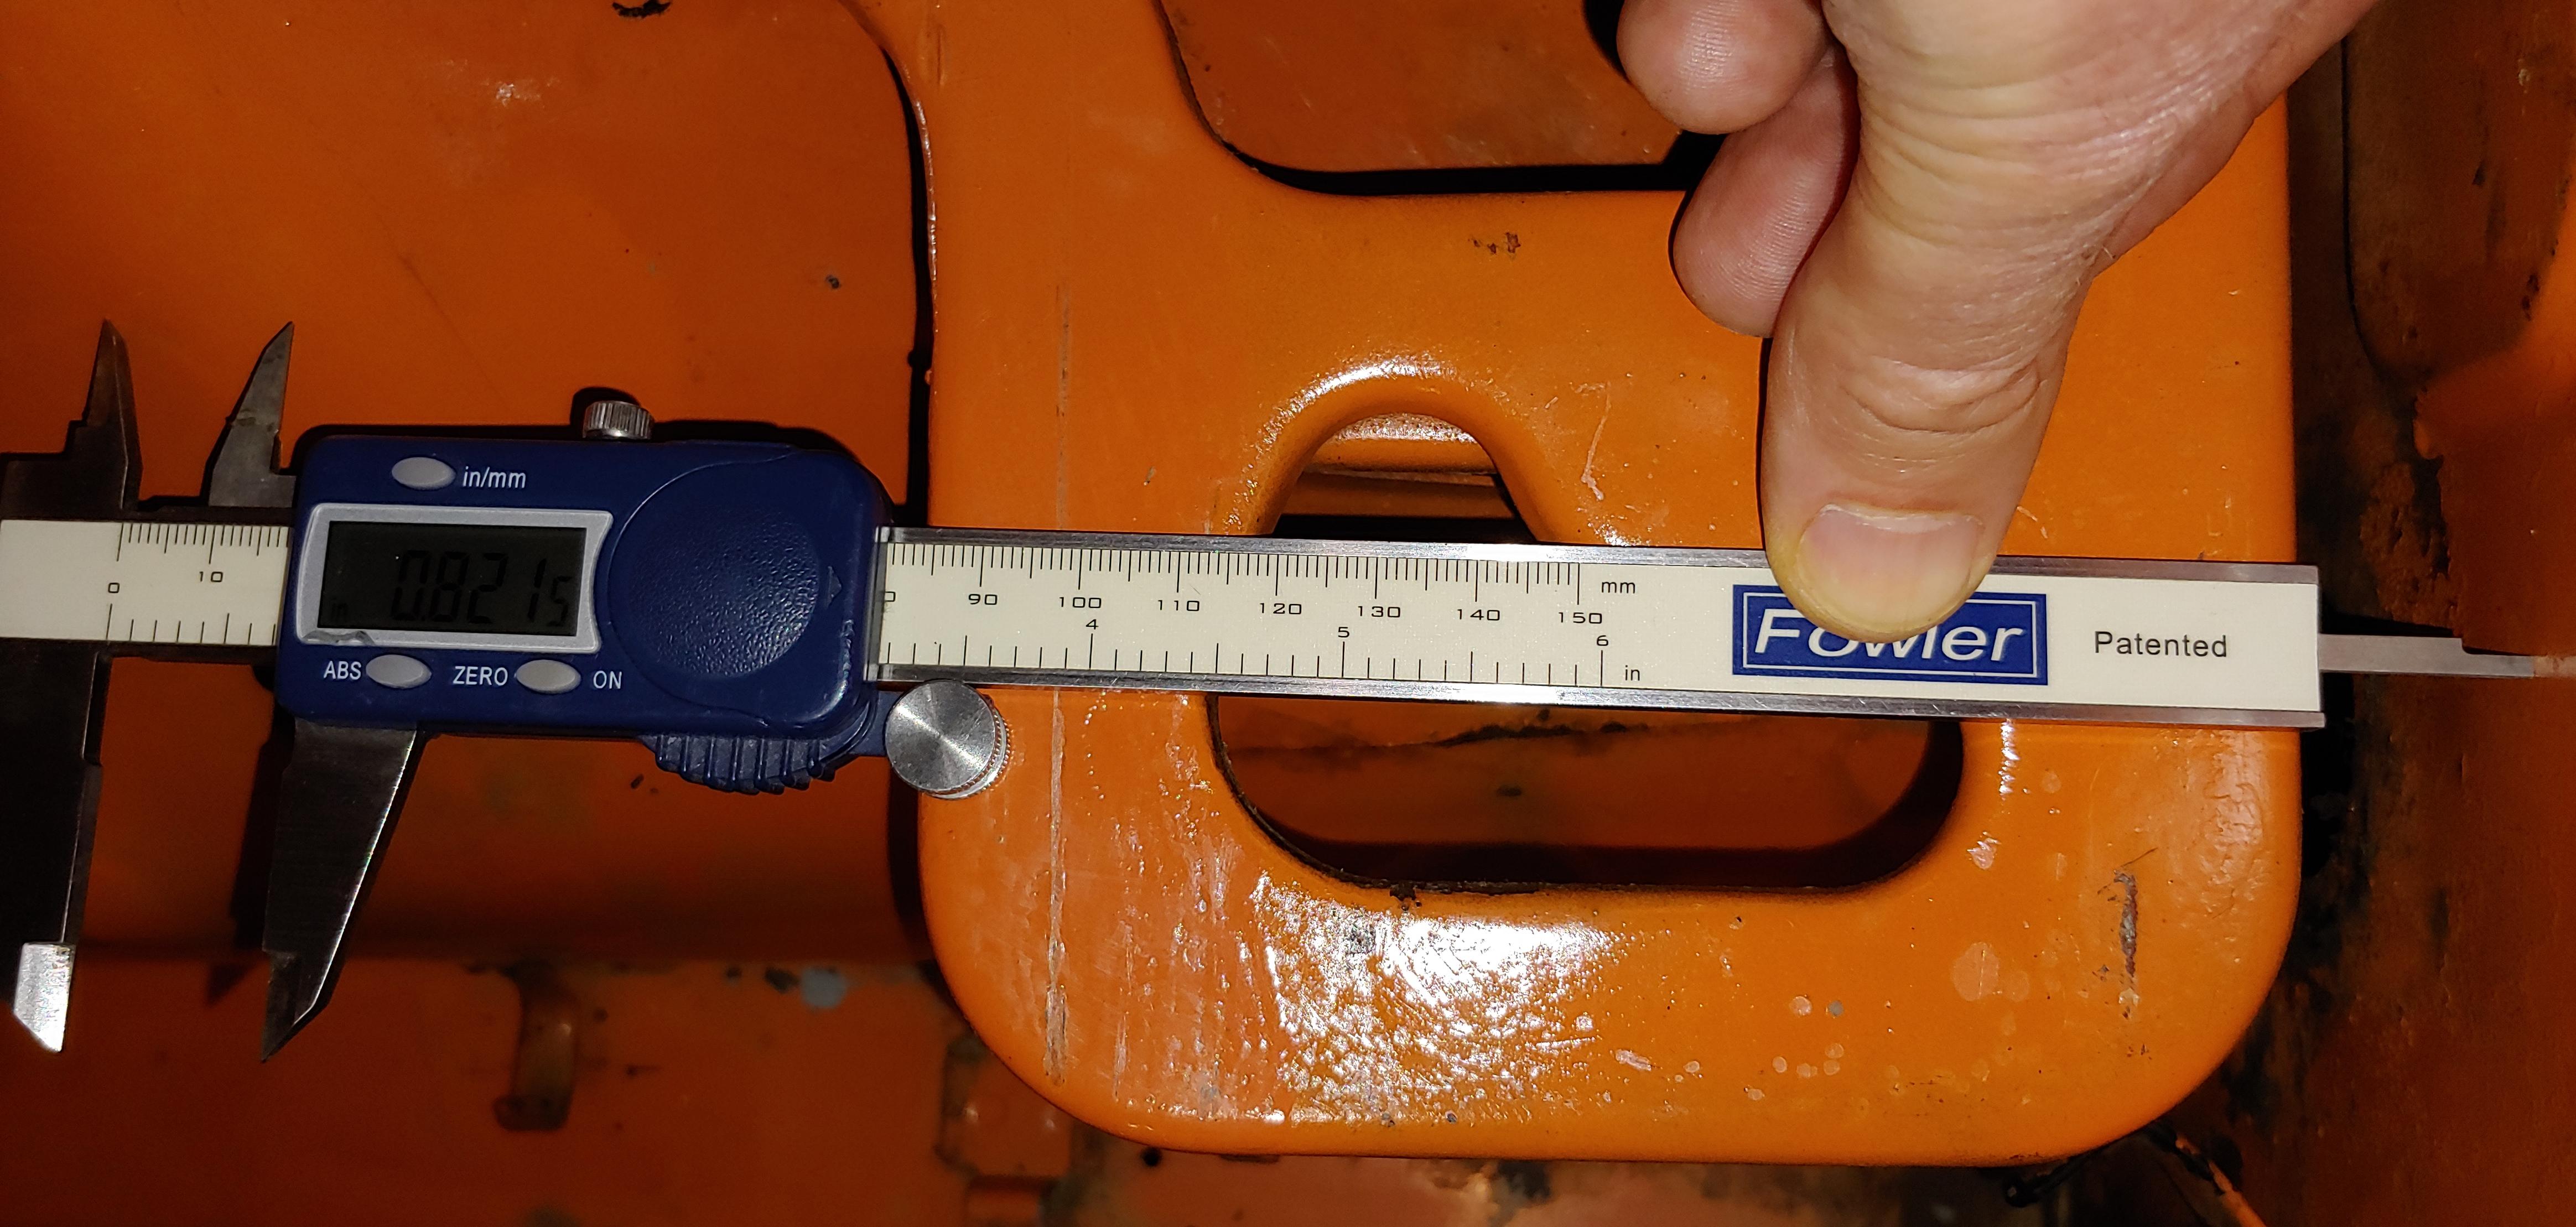
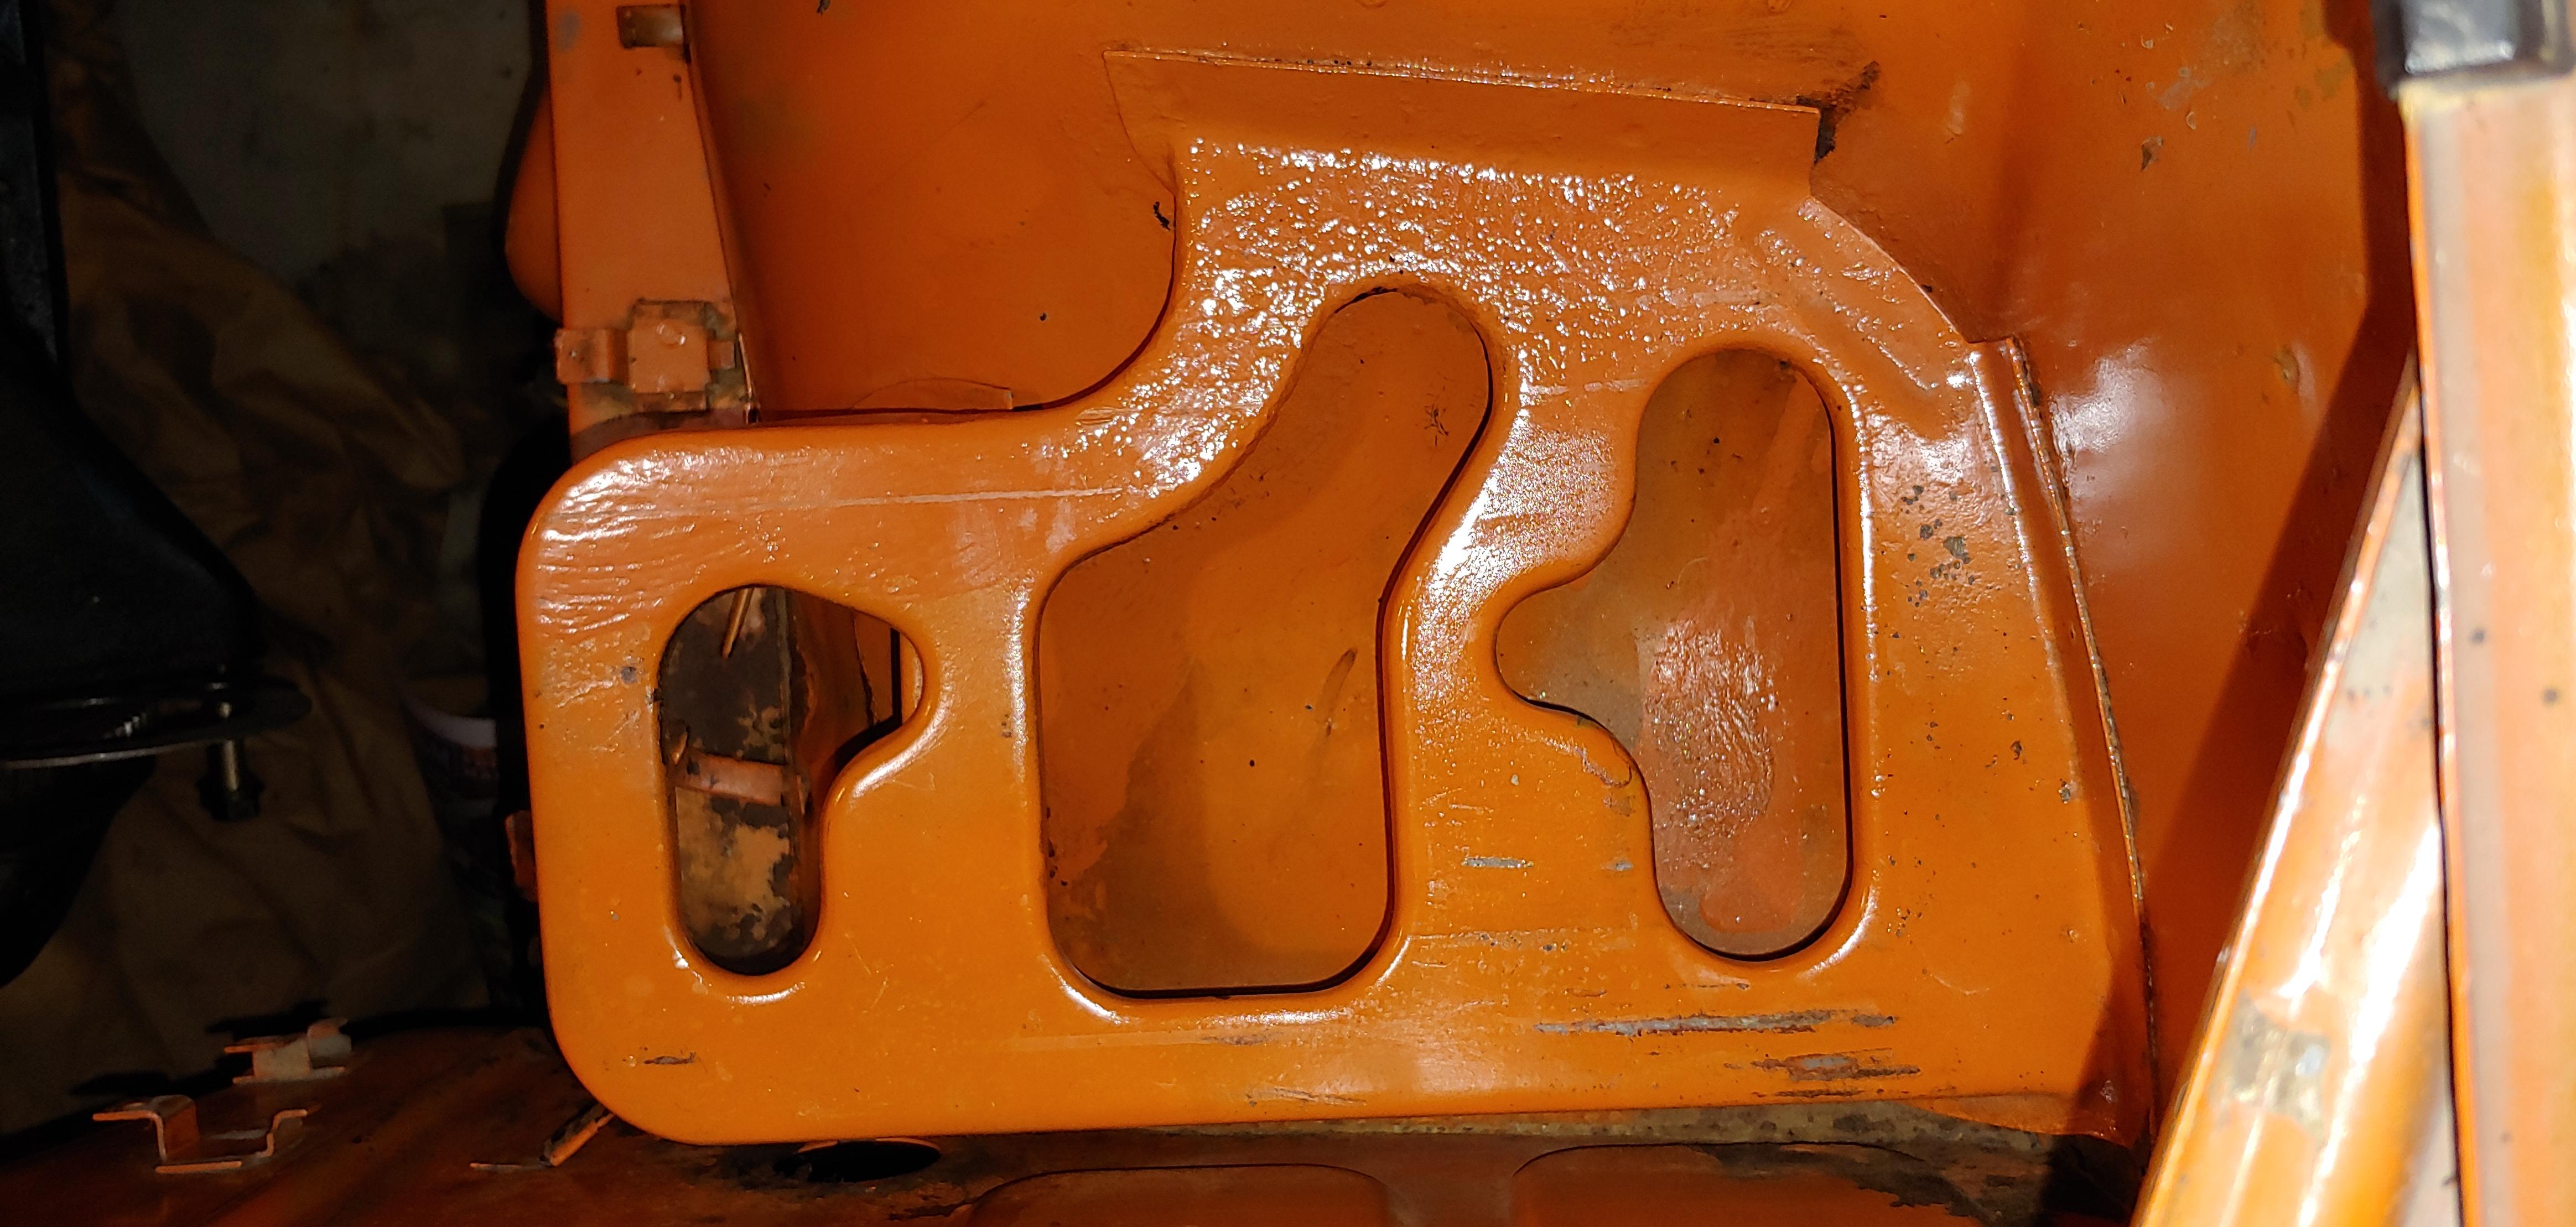
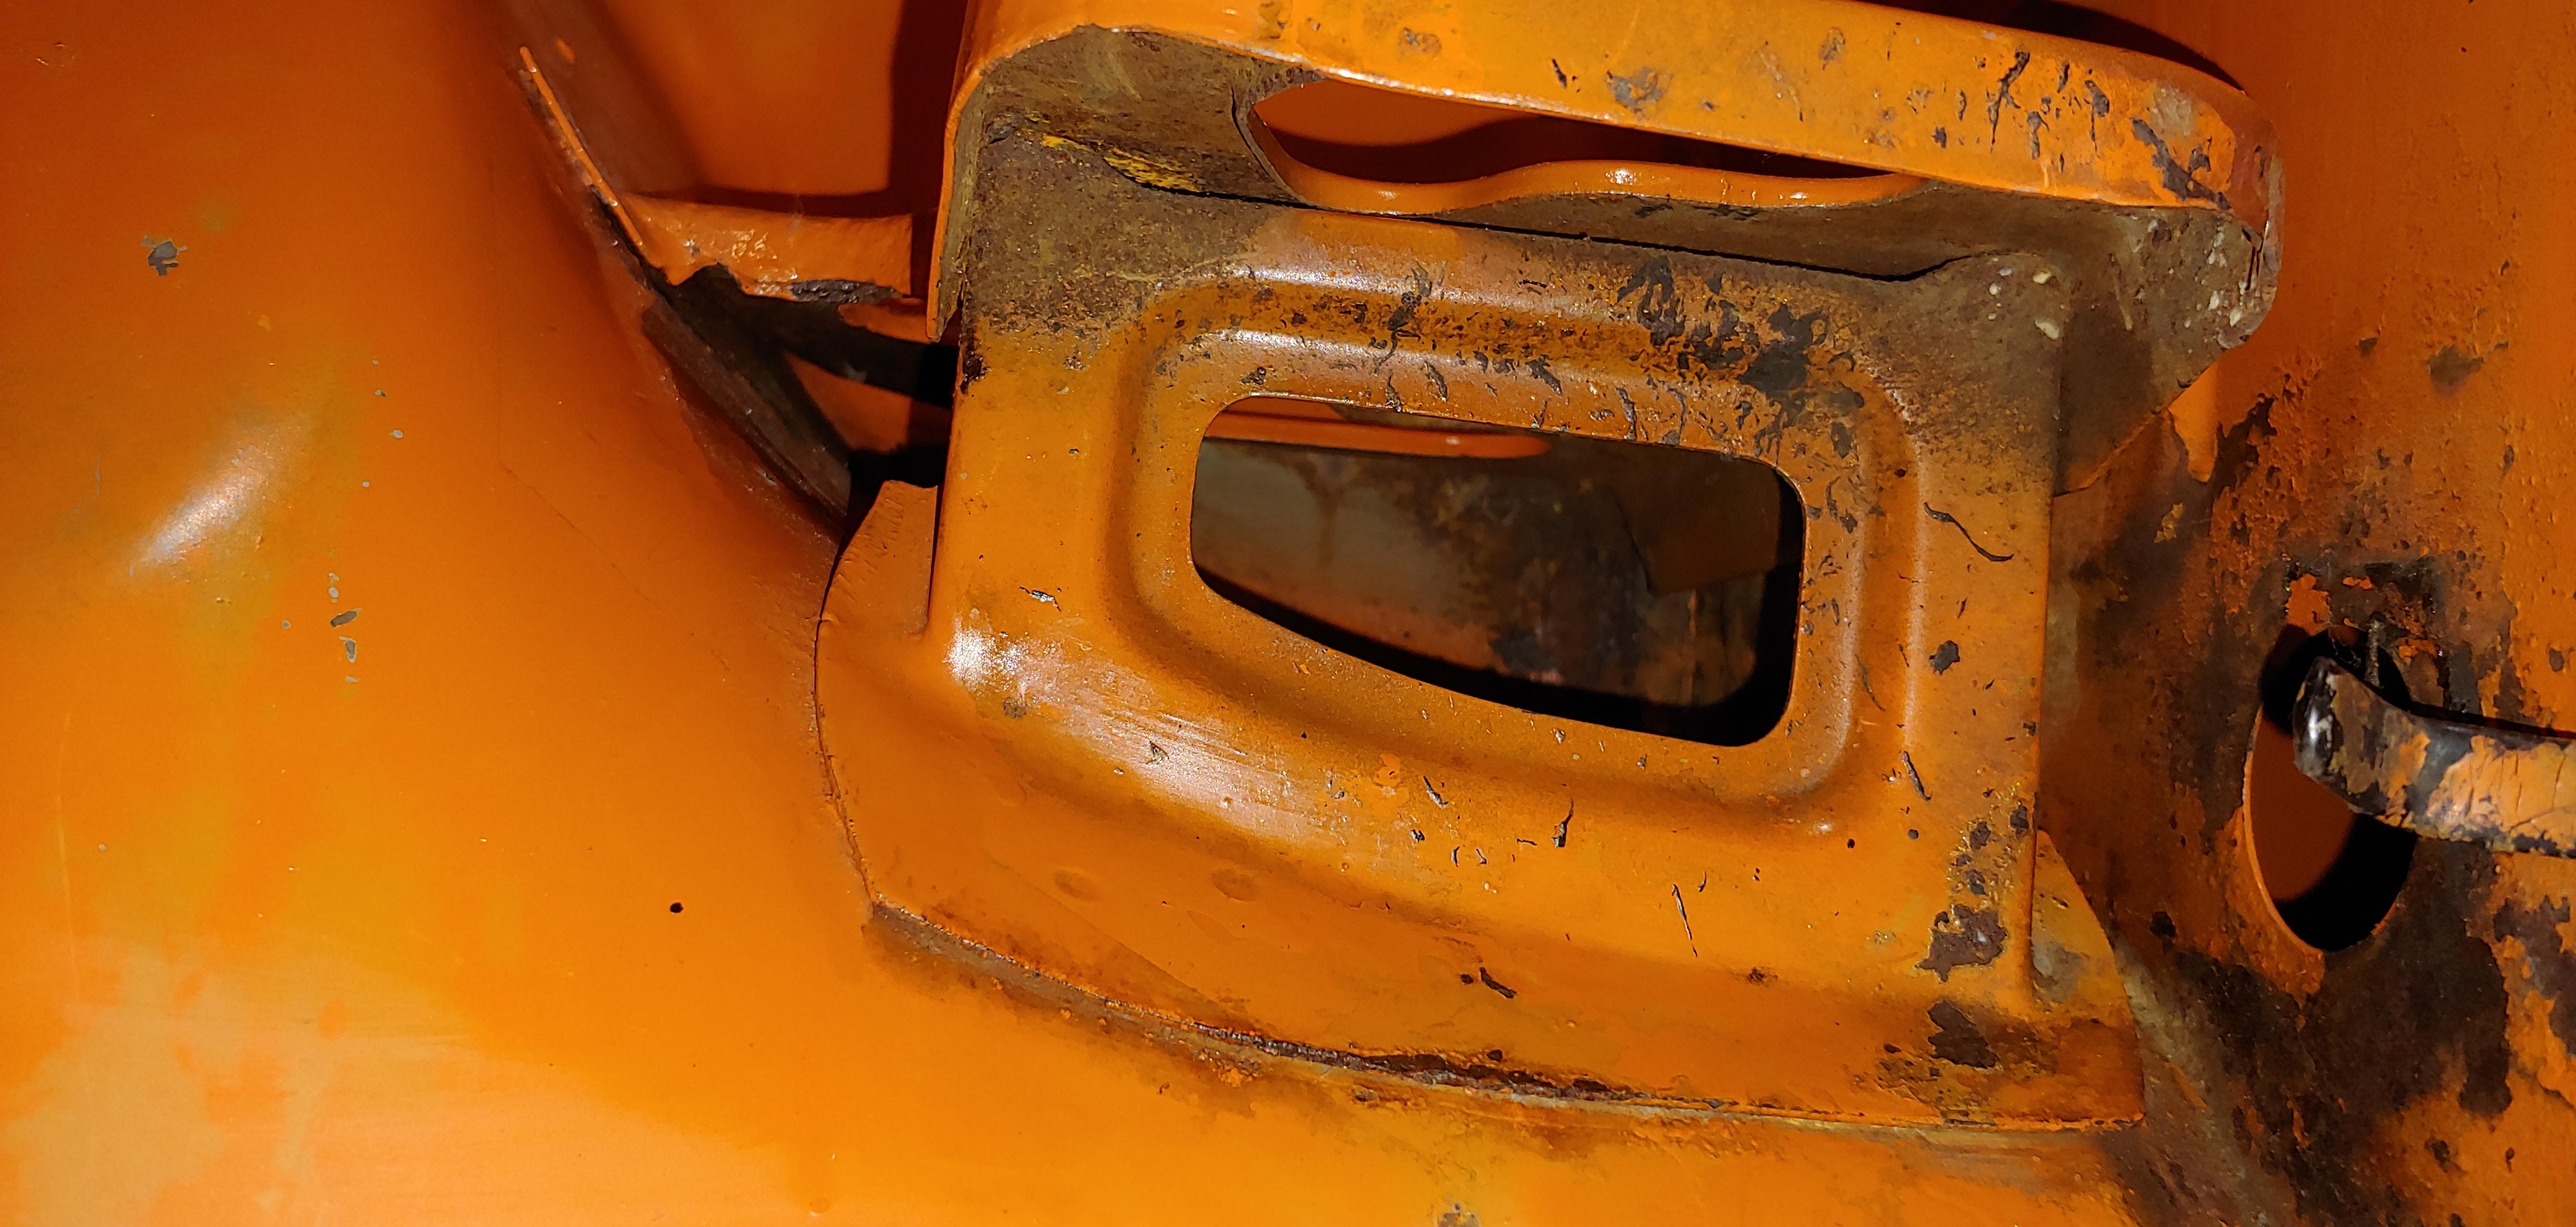
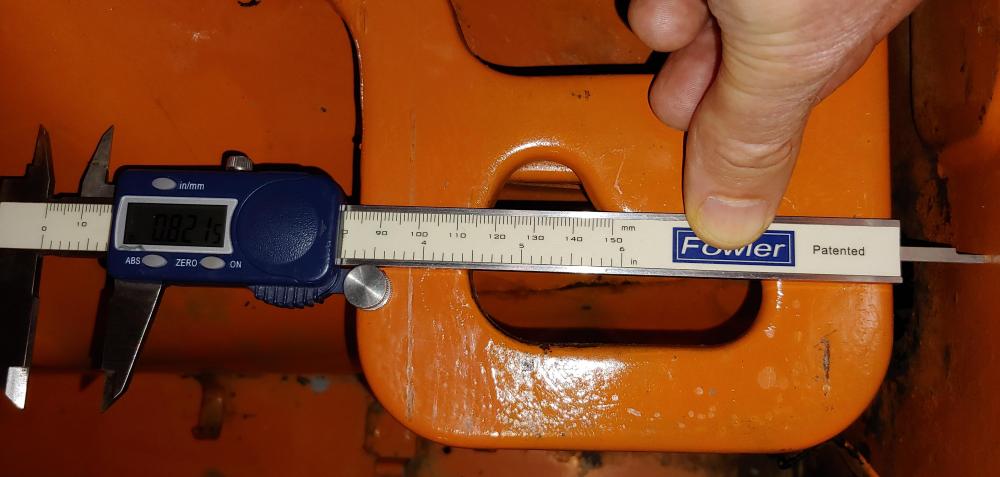
@Bonzi Lonmakes a very good point, if my shelf was any higher I would have real problems getting a group 24C battery in. It is difficult now, I have to assemble the battery, plastic tray and cover and hold down frame and attach the positive cable, then slide this group of parts in as a unit. Even doing this it is difficult, as the plastic tray drain tube connector sticks out below the shelf. A kind of tip and then slide effort, is required to get it into the final position, without snapping off the drain hose connector. Don't ask me why I know. I did a little more checking this morning and noticed that for the most part my battery shelf is actually quite level and square with the firewall at the 8" above the top of frame rail. There is a twist in the narrow part of the shelf that goes up about to about 8.2" above the frame rail at the end. I seems I had my calipers at an angle when I took the picture above with the 8.235" reading, I would say 8" is the absolute max, and Bonzi's measurement of 7-7/8" would be better.
-
Here are pictures of the measurements from my '70 plus a couple to show the fitment. The shelf on mine is definitely on a slope front to rear but is quite level left to right. Mine measured 8" above frame rail close to the firewall and 8-1/4" at the forward edge. Dist from the firewall about 13/16". It has touchup paint work but no body work in this area.


-
If no one posts sooner, I will get this measurement for you when I get home from today. My Car is disassembled so it will be easy to get.
-
That was quick, thanks for posting the pics. Looks like a very close match. I think I will order one soon.
-
-