CanTechZ
Free Member
-
Joined
-
Last visited
-
Currently
Viewing Topic: Z's on BAT and other places collection
Everything posted by CanTechZ
-
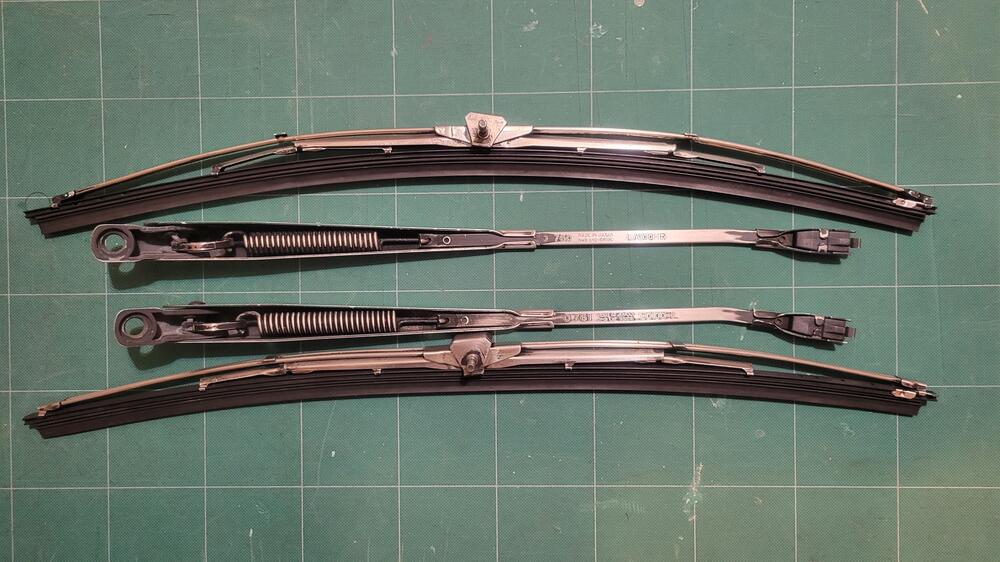
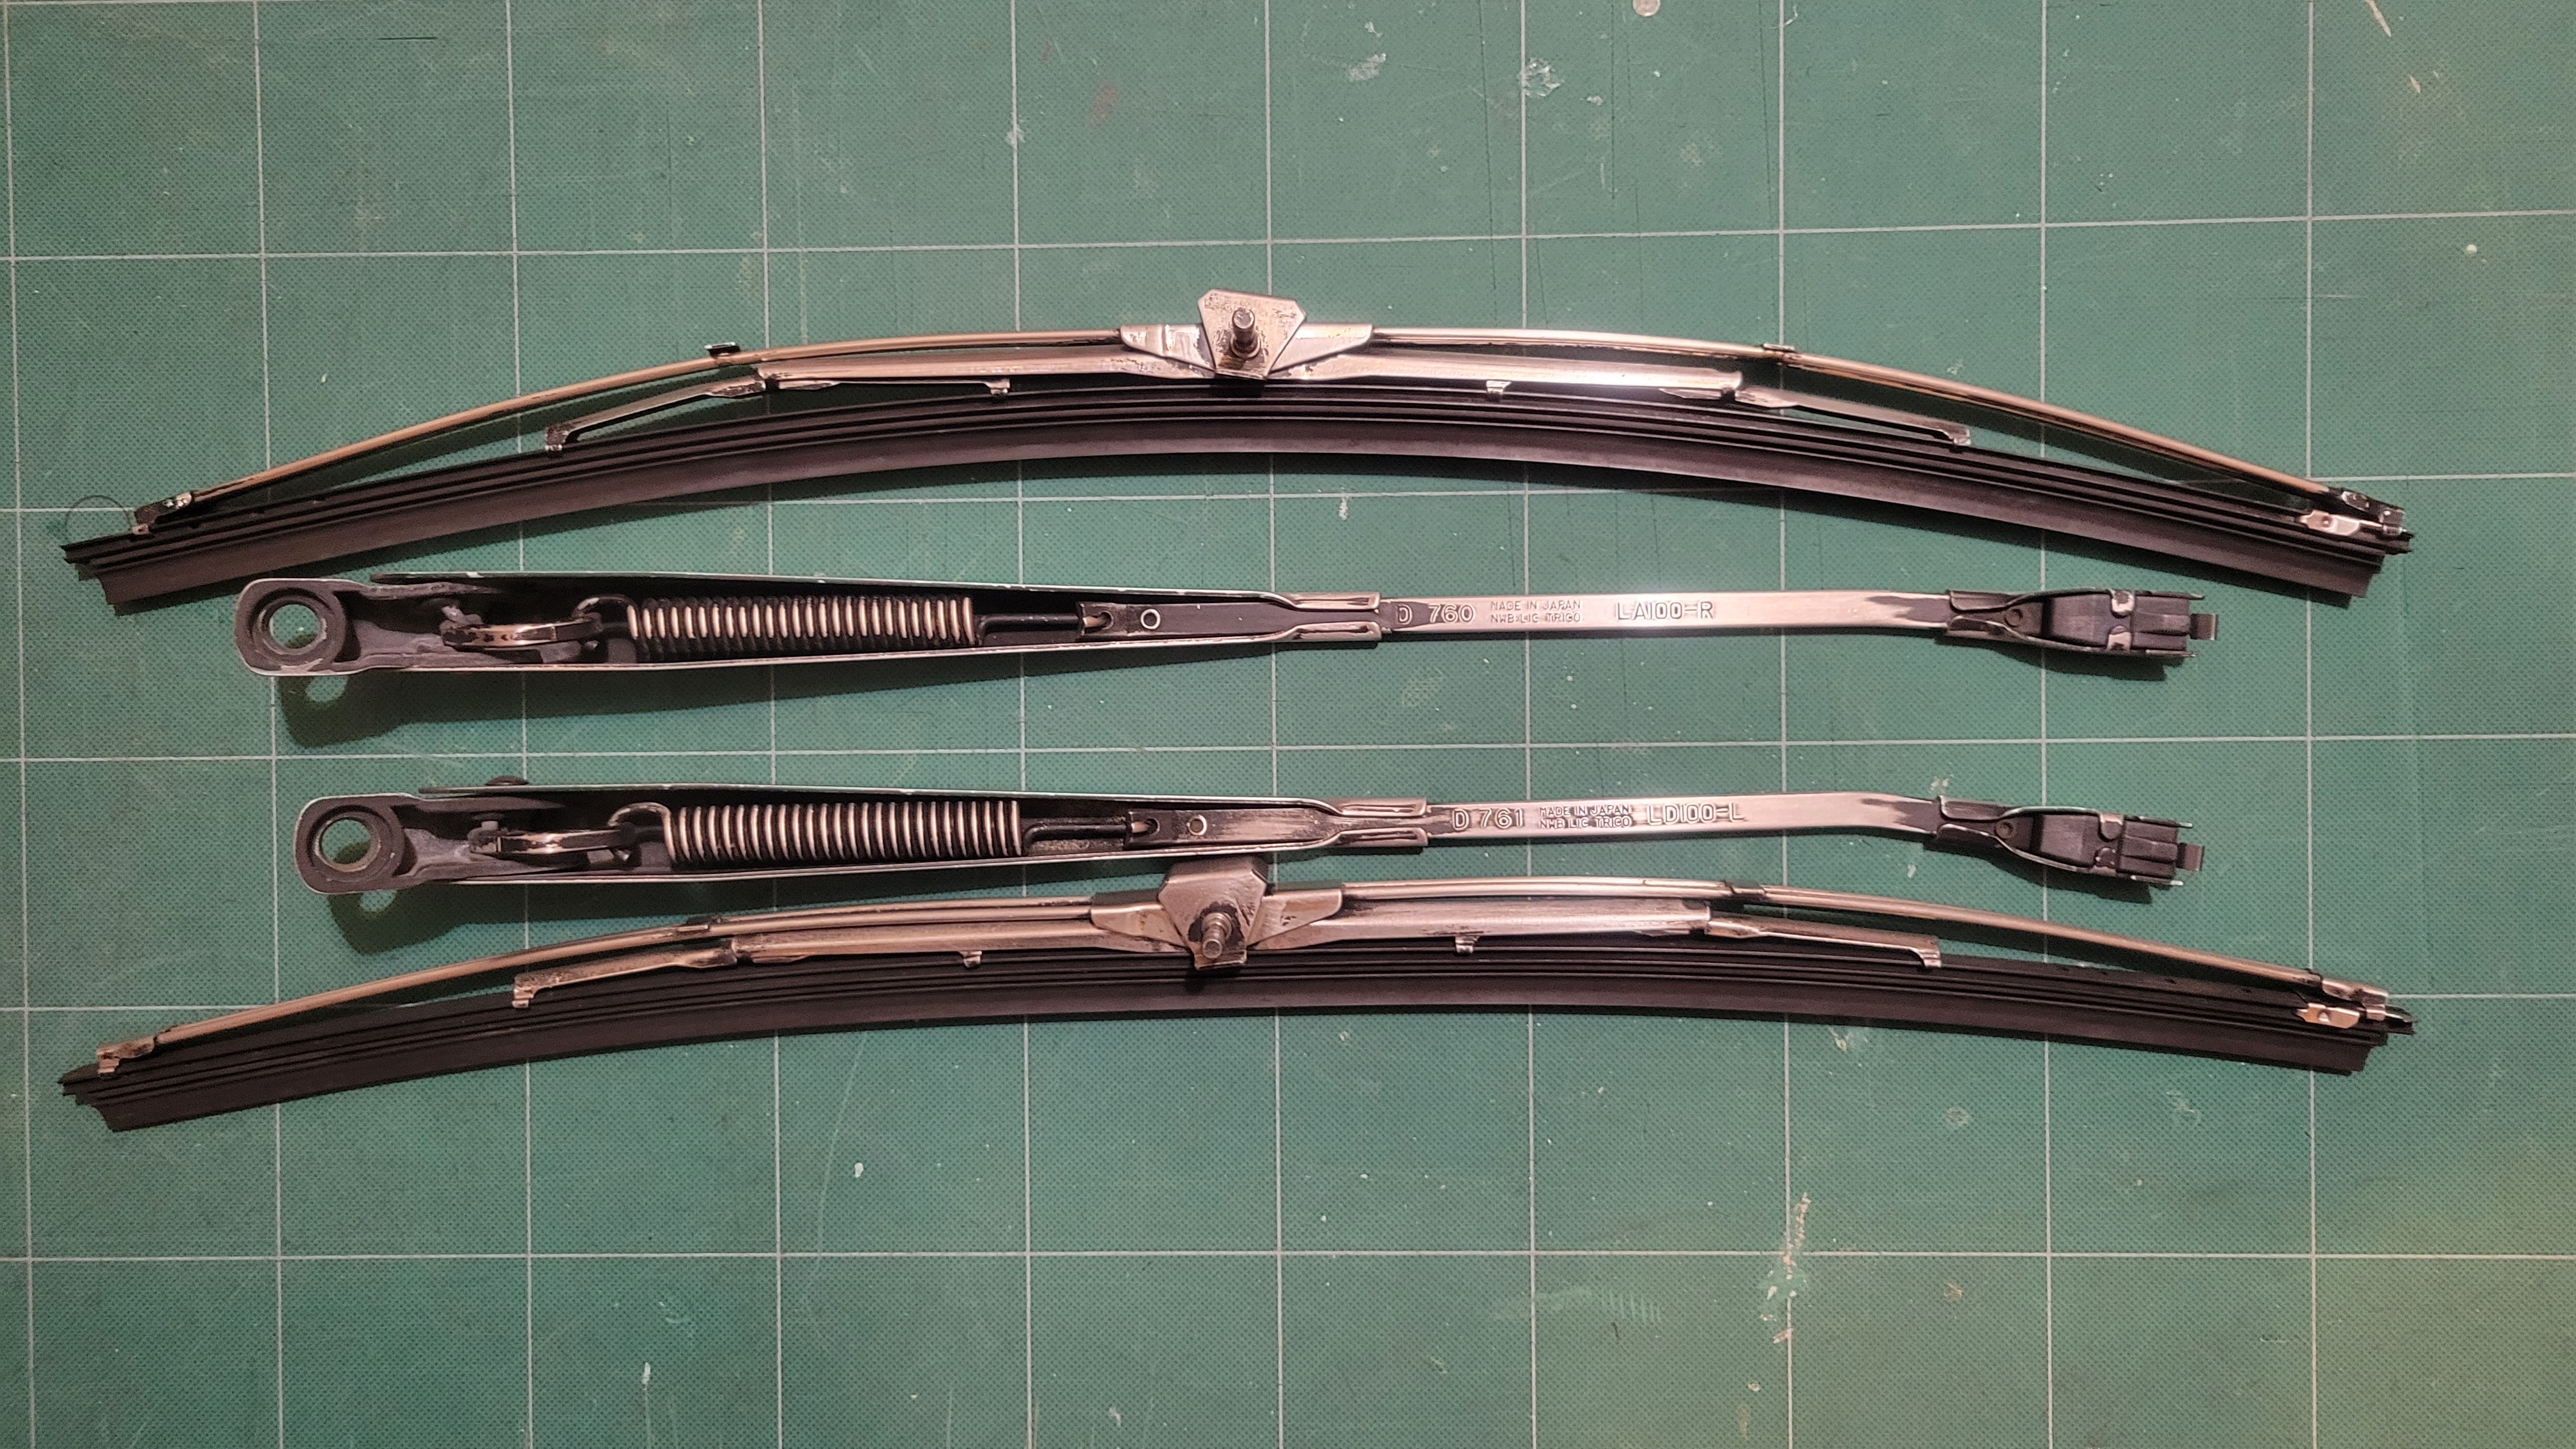
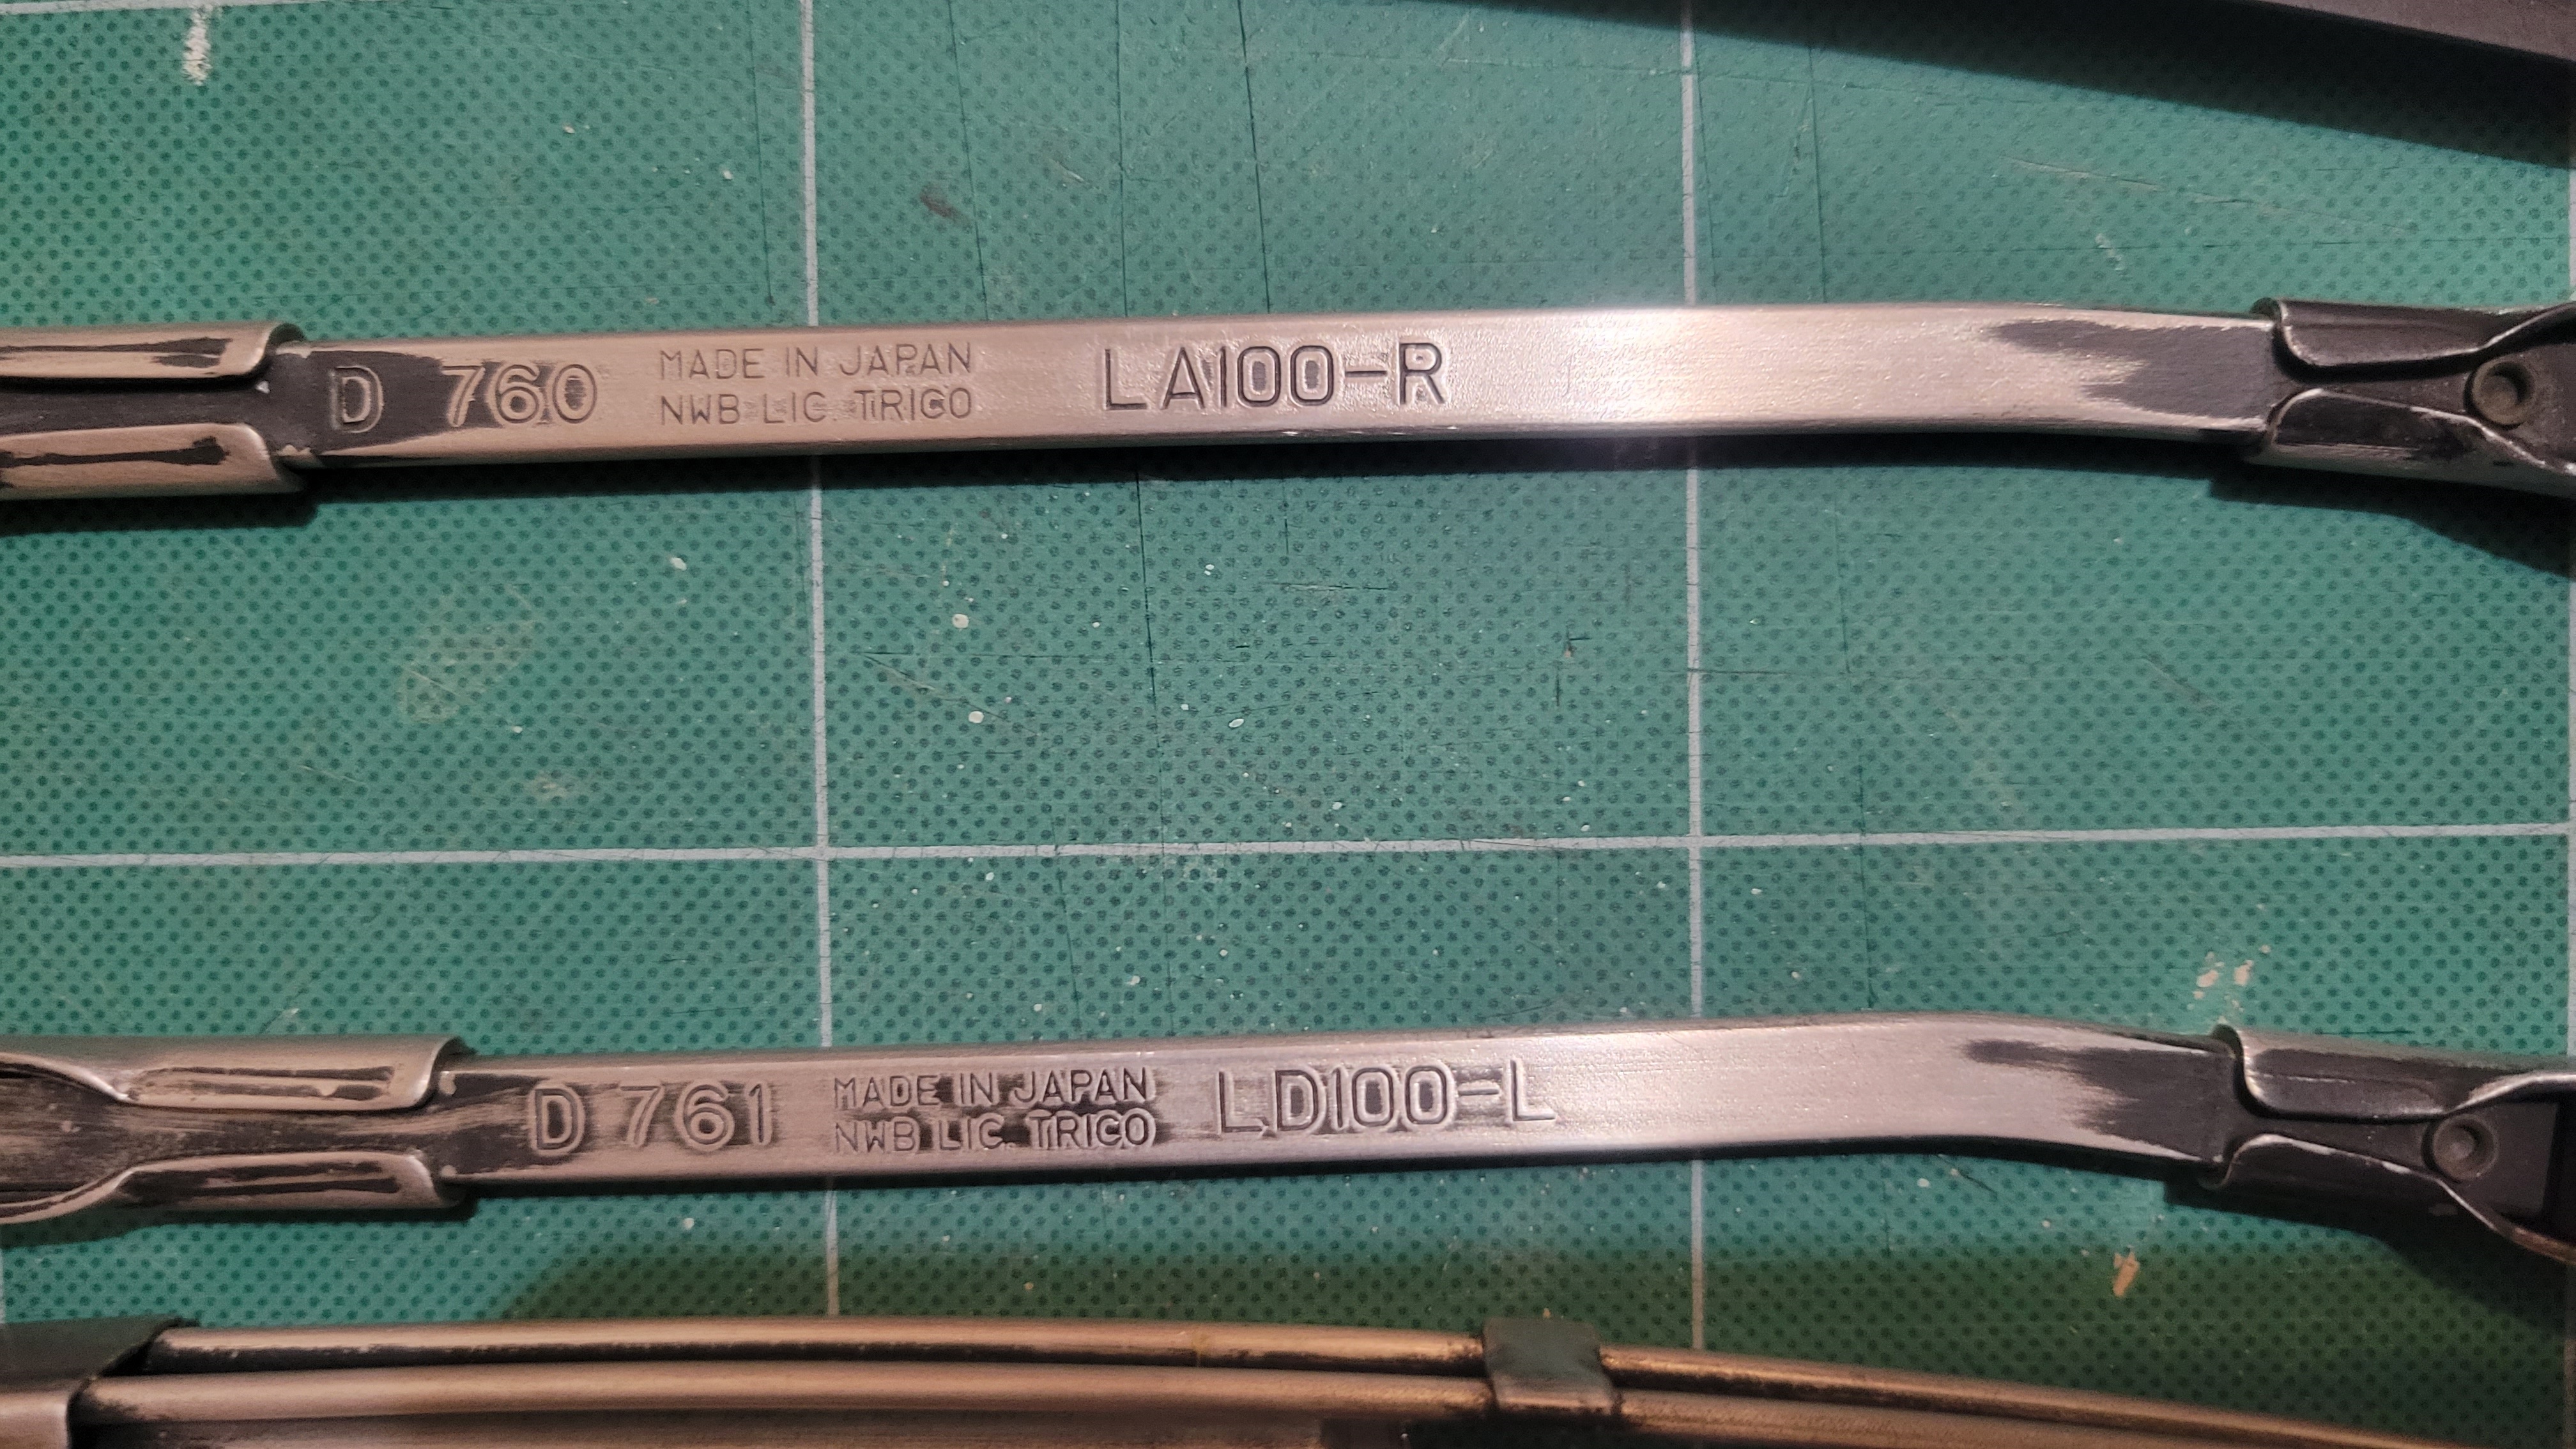
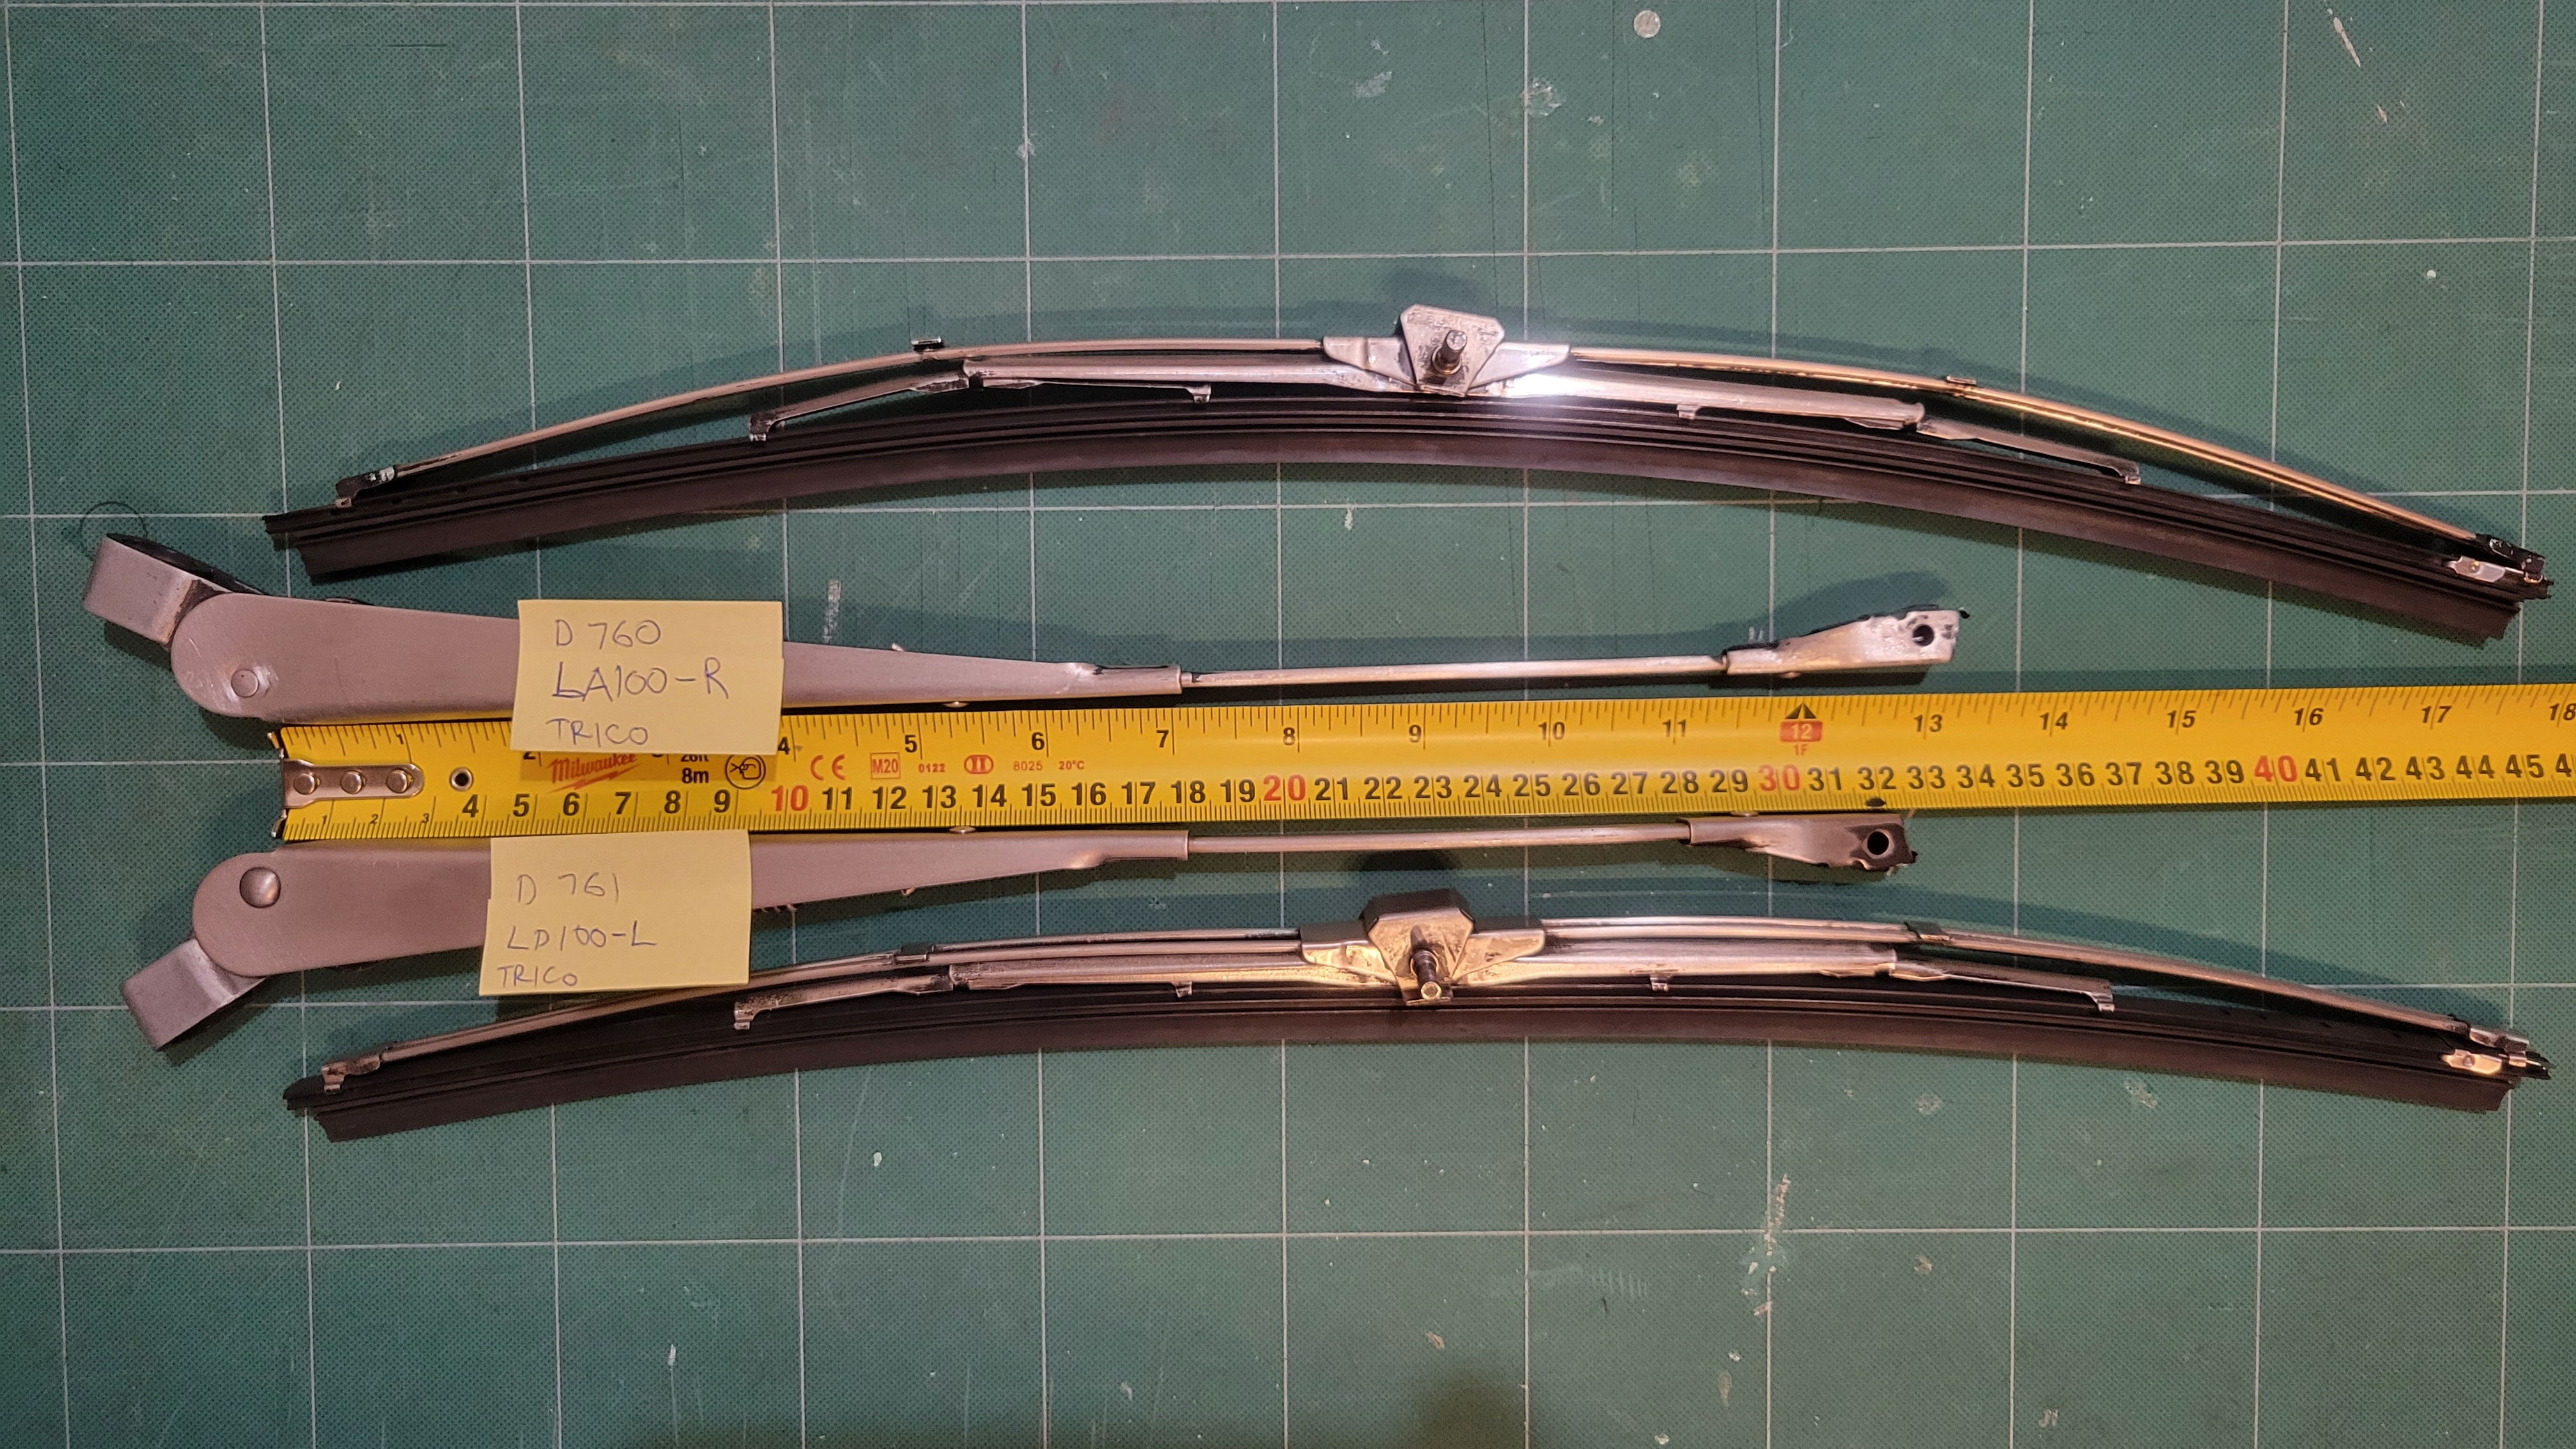
 Here is a pair of 280Z arms and blades that I got in trade from @240260280a few years ago. They are not actually correct for my 7/70 240Z but after I removed the black paint they looked good to me. The arms seem to identified left and right by the markings as these in these pic of mine. The right arm is longer, but only by half an inch. (The zero on the tape is in line with the center of the rivet, the photo distorts the view.) Hope this helps, Mike


-
The upper knob is what I have on my 7/70, used up to 6/72. The more rounded one is used after that for 240's. There are other versions used on 260's and 280's. If I'm not mistaken the later ones used on 280's (maybe 260's) are just push on and don't require a screw. The push on ones also work on the 240Z controls, I have a heater control set from a 12/70 parts car that has them. Must have been installed by the previous owner. The pic above is from @hls30.com in this old post:
-
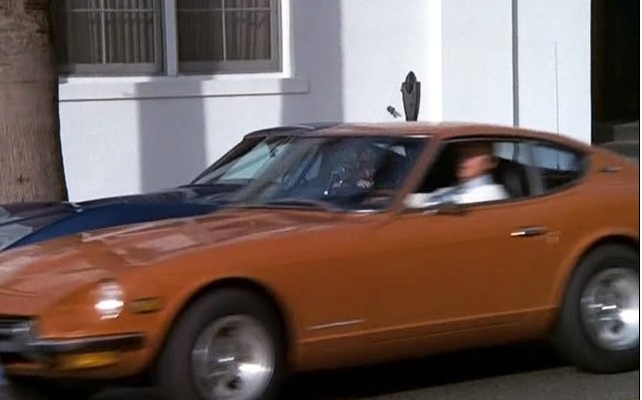
Good eye, a lot of interesting cars can be seen in these late sixties, early seventies TV shows. Later in the same Cannon episode a very nice gold colored E-type Jag can be seen. The same era show, Mannix, has a lot of cool cars as well, including the collection of convertibles that Joe Mannix drove. Like this '68 Dodge Dart GTS. From season 4 (1970), on Mannix, a '70 240Z is seen as a background vehicle. (source IMCDB,org)
-
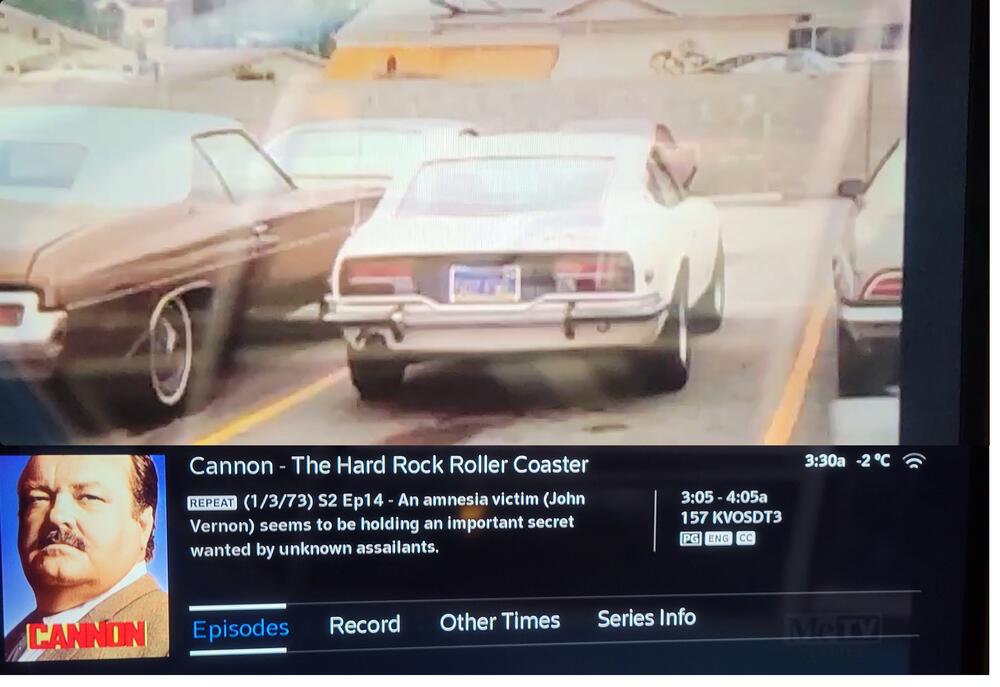
Looks like a '72 240Z shown for a spilt second on this episode of the TV Series Cannon from 1973. Here's the clip, don't blink. It's about 5 seconds in. 20230222_032712.mp4
-
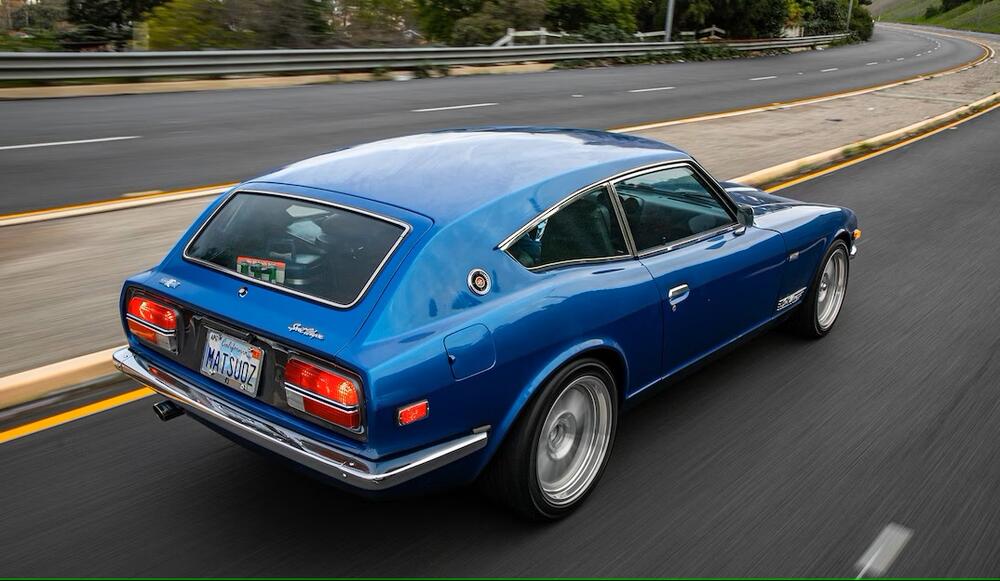
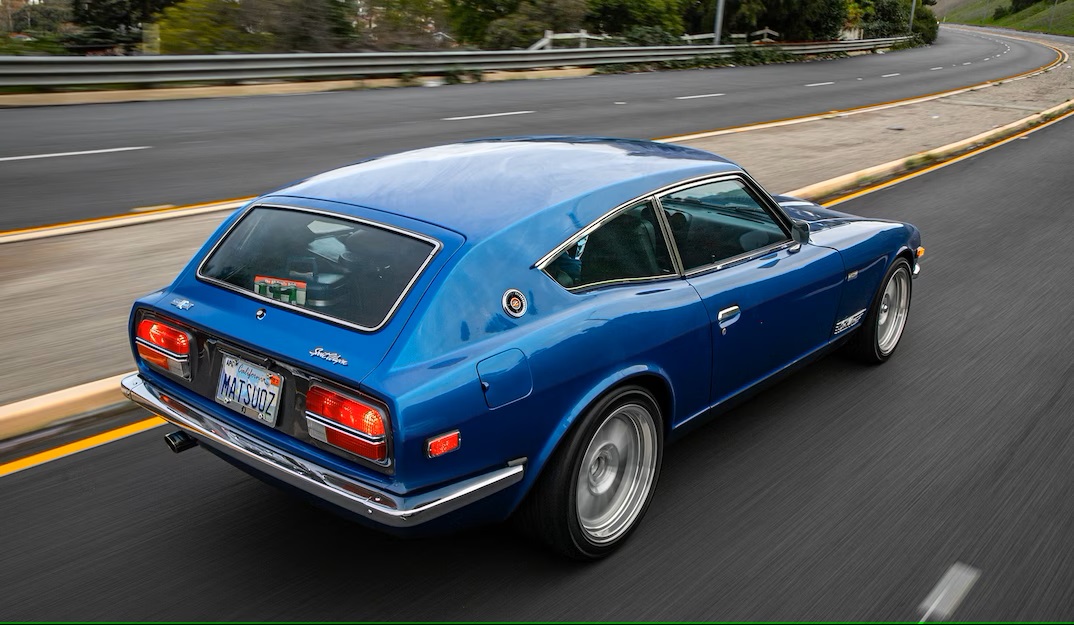
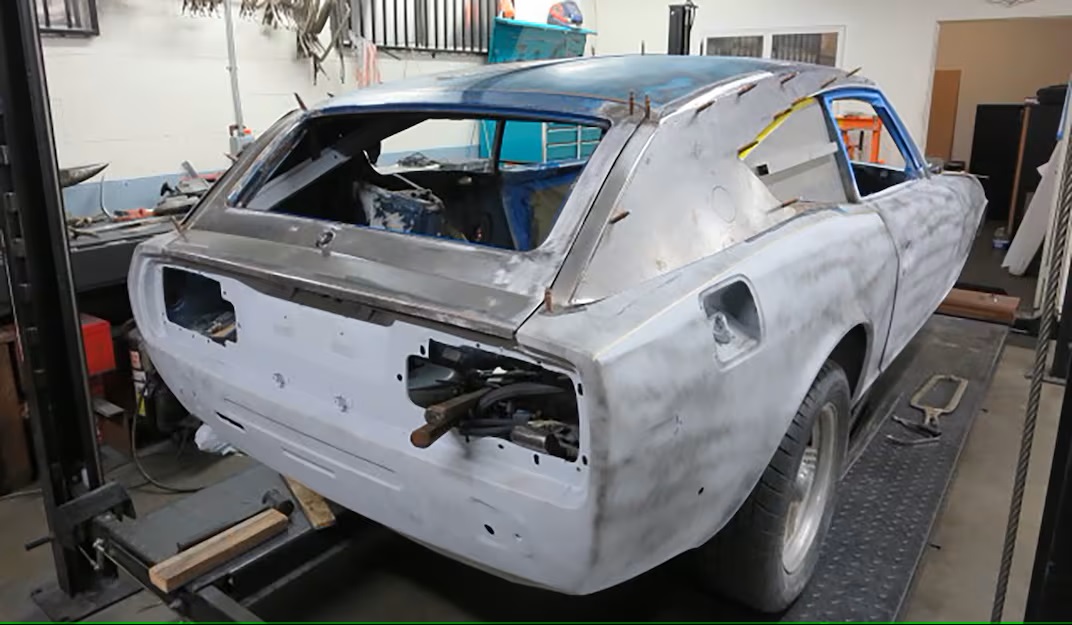
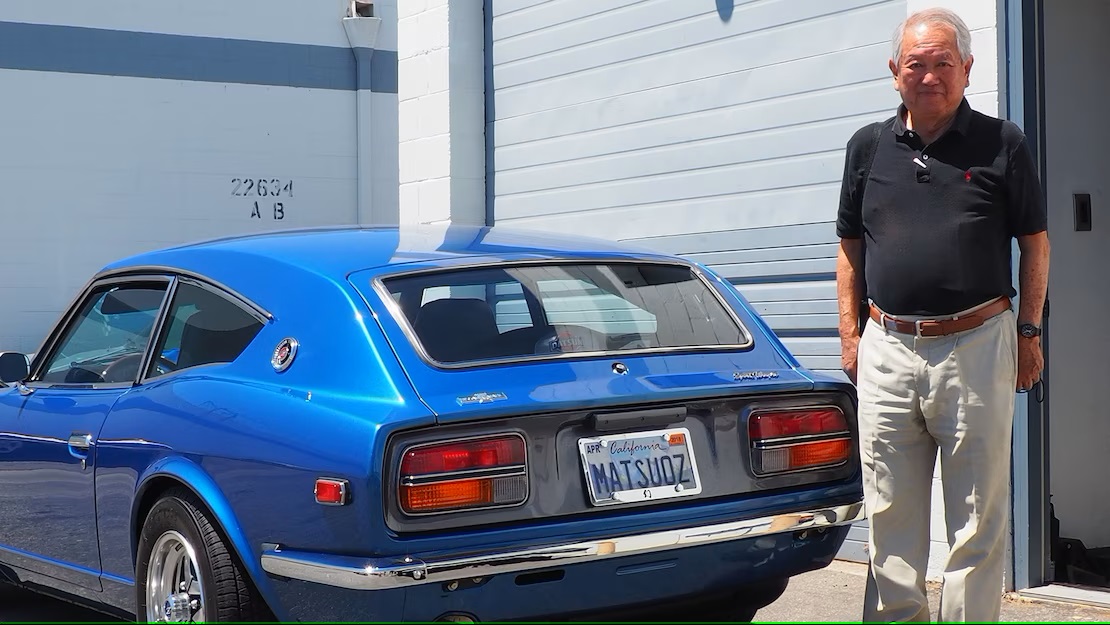
Just noticed that Motor Trend recently posted an article with some good pics of this Phantom Z Wagon. Love it or hate it, I think it's kind of cool. https://www.motortrend.com/features/nissan-datsun-240z-sport-wagon-shooting-brake-custom-build/ Not complete without Mr. Matsuo. 🙂


-
You're welcome.
-
Also here is a link to where I shared a Hi-res pdf scan from my 72 FSM,
-
Here is a hi-res tiff file I created a few years back. 240Z Chassis Dimensions - Source 1970 FSM Dated 15AUG70.tif
-
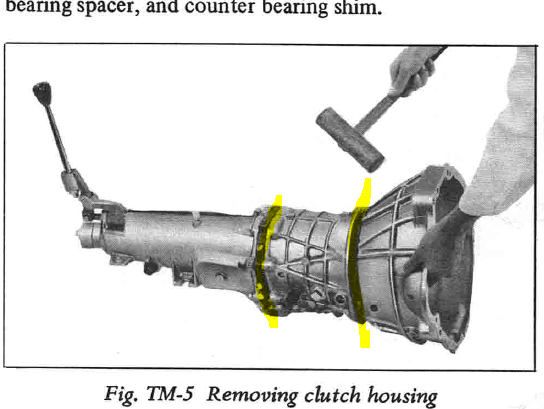
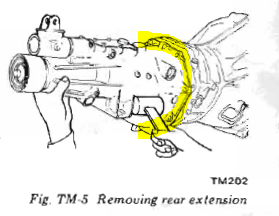
The type A is a three piece case design like this: Type B is a two piece case design,
-
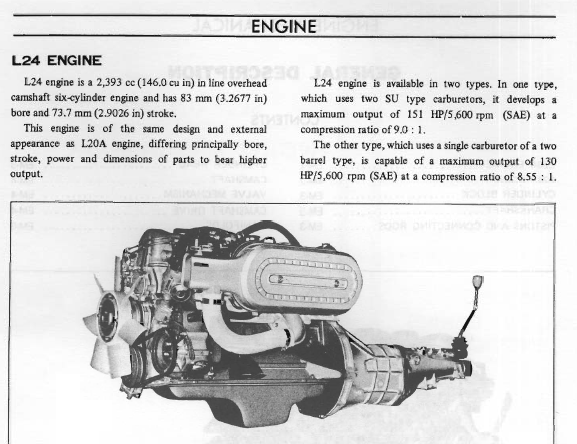
Here is a picture from the engine mechanical section of the 1972 FSM.
-
Yup, sometimes a picture is worth a thousand words, give or take. Lol
-
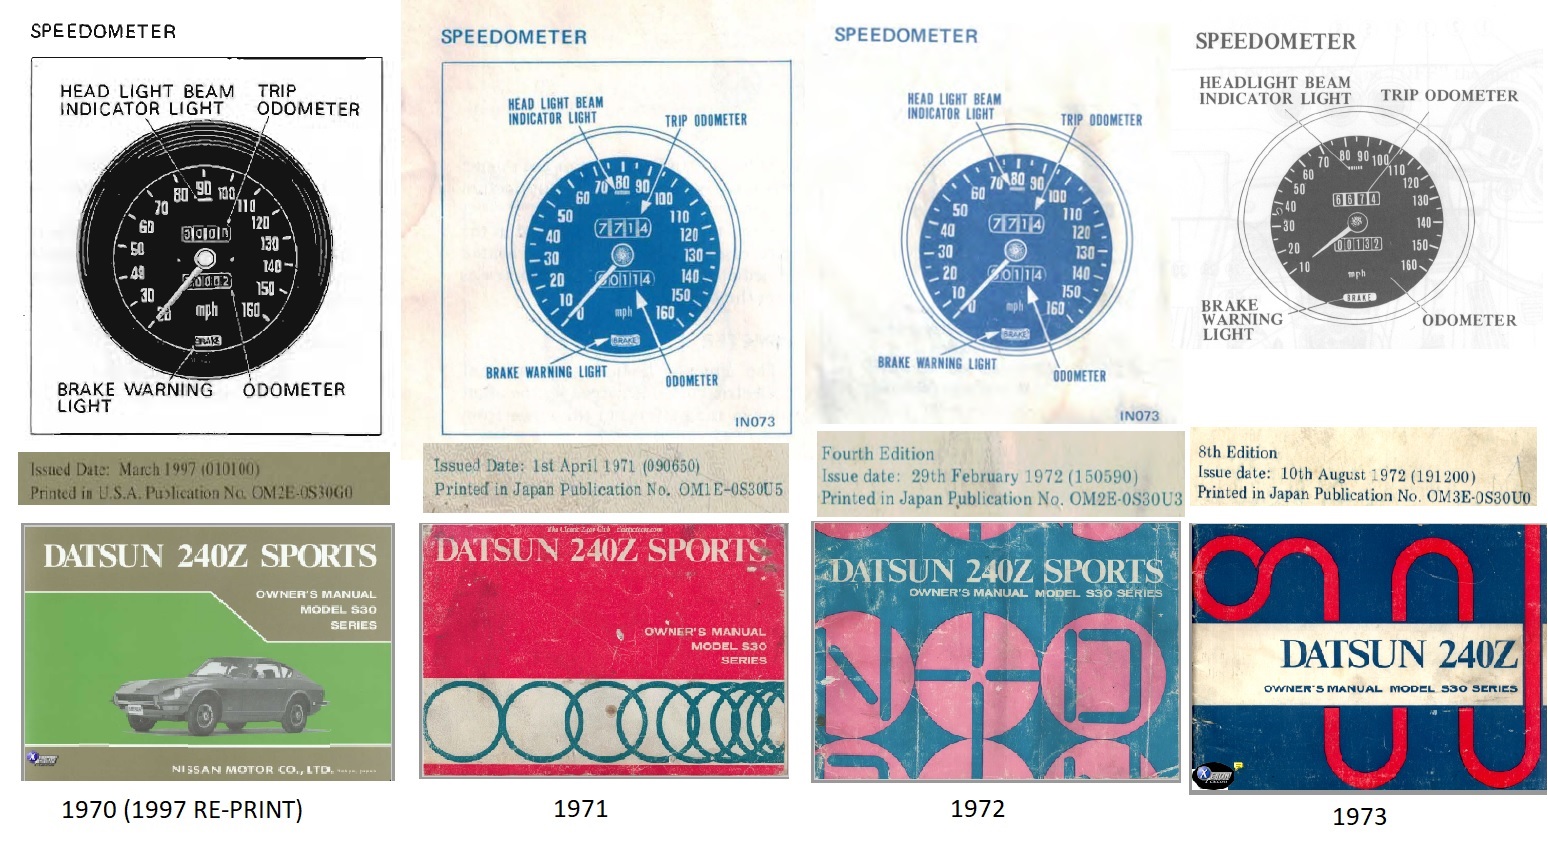
FWIW, here is a comparison of 240Z speedometers as shown in the 1970 thru 1973 Owners Manual pdf scans I have collected.

-
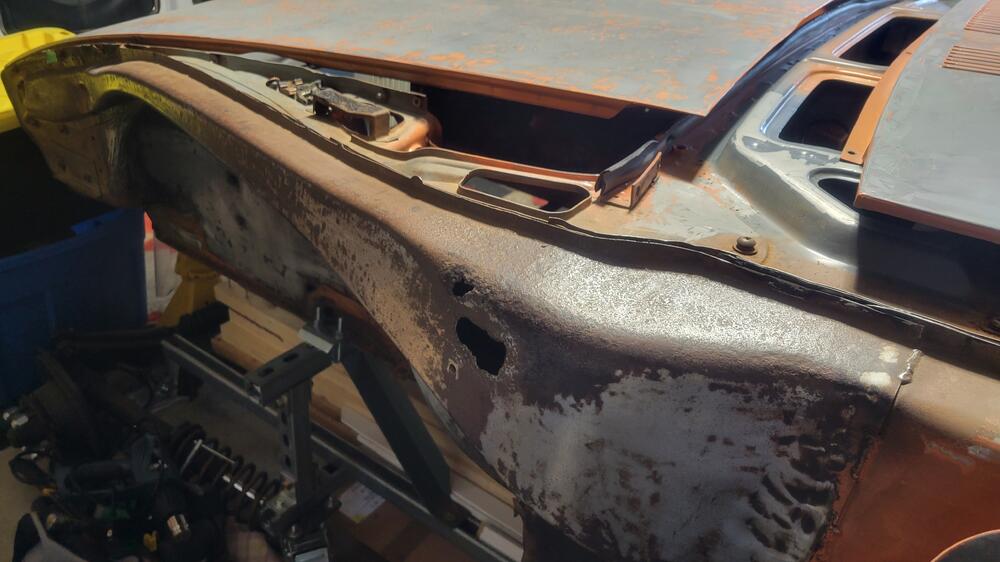
Here are a couple of pics I took while I was dis-assembling for my resto.
.thumb.jpg.c1a8ea6c0e8927441fad45ba731faf68.jpg)
.thumb.jpg.7941795196fc92cf8ef4e905b28f8500.jpg)
-
Thanks and no rush. I definitely understand about keeping these as a pair and that shipping will not be insignificant. Feel free to PM me. I am going check mine a little closer with a borescope plus do some poking with an awl to see if it's worth repairing them instead of replacing.
-
All I can say is "Wow". You don't see those every day. The left one would be a good add to my car. Are you serious about possibly parting with them?
-
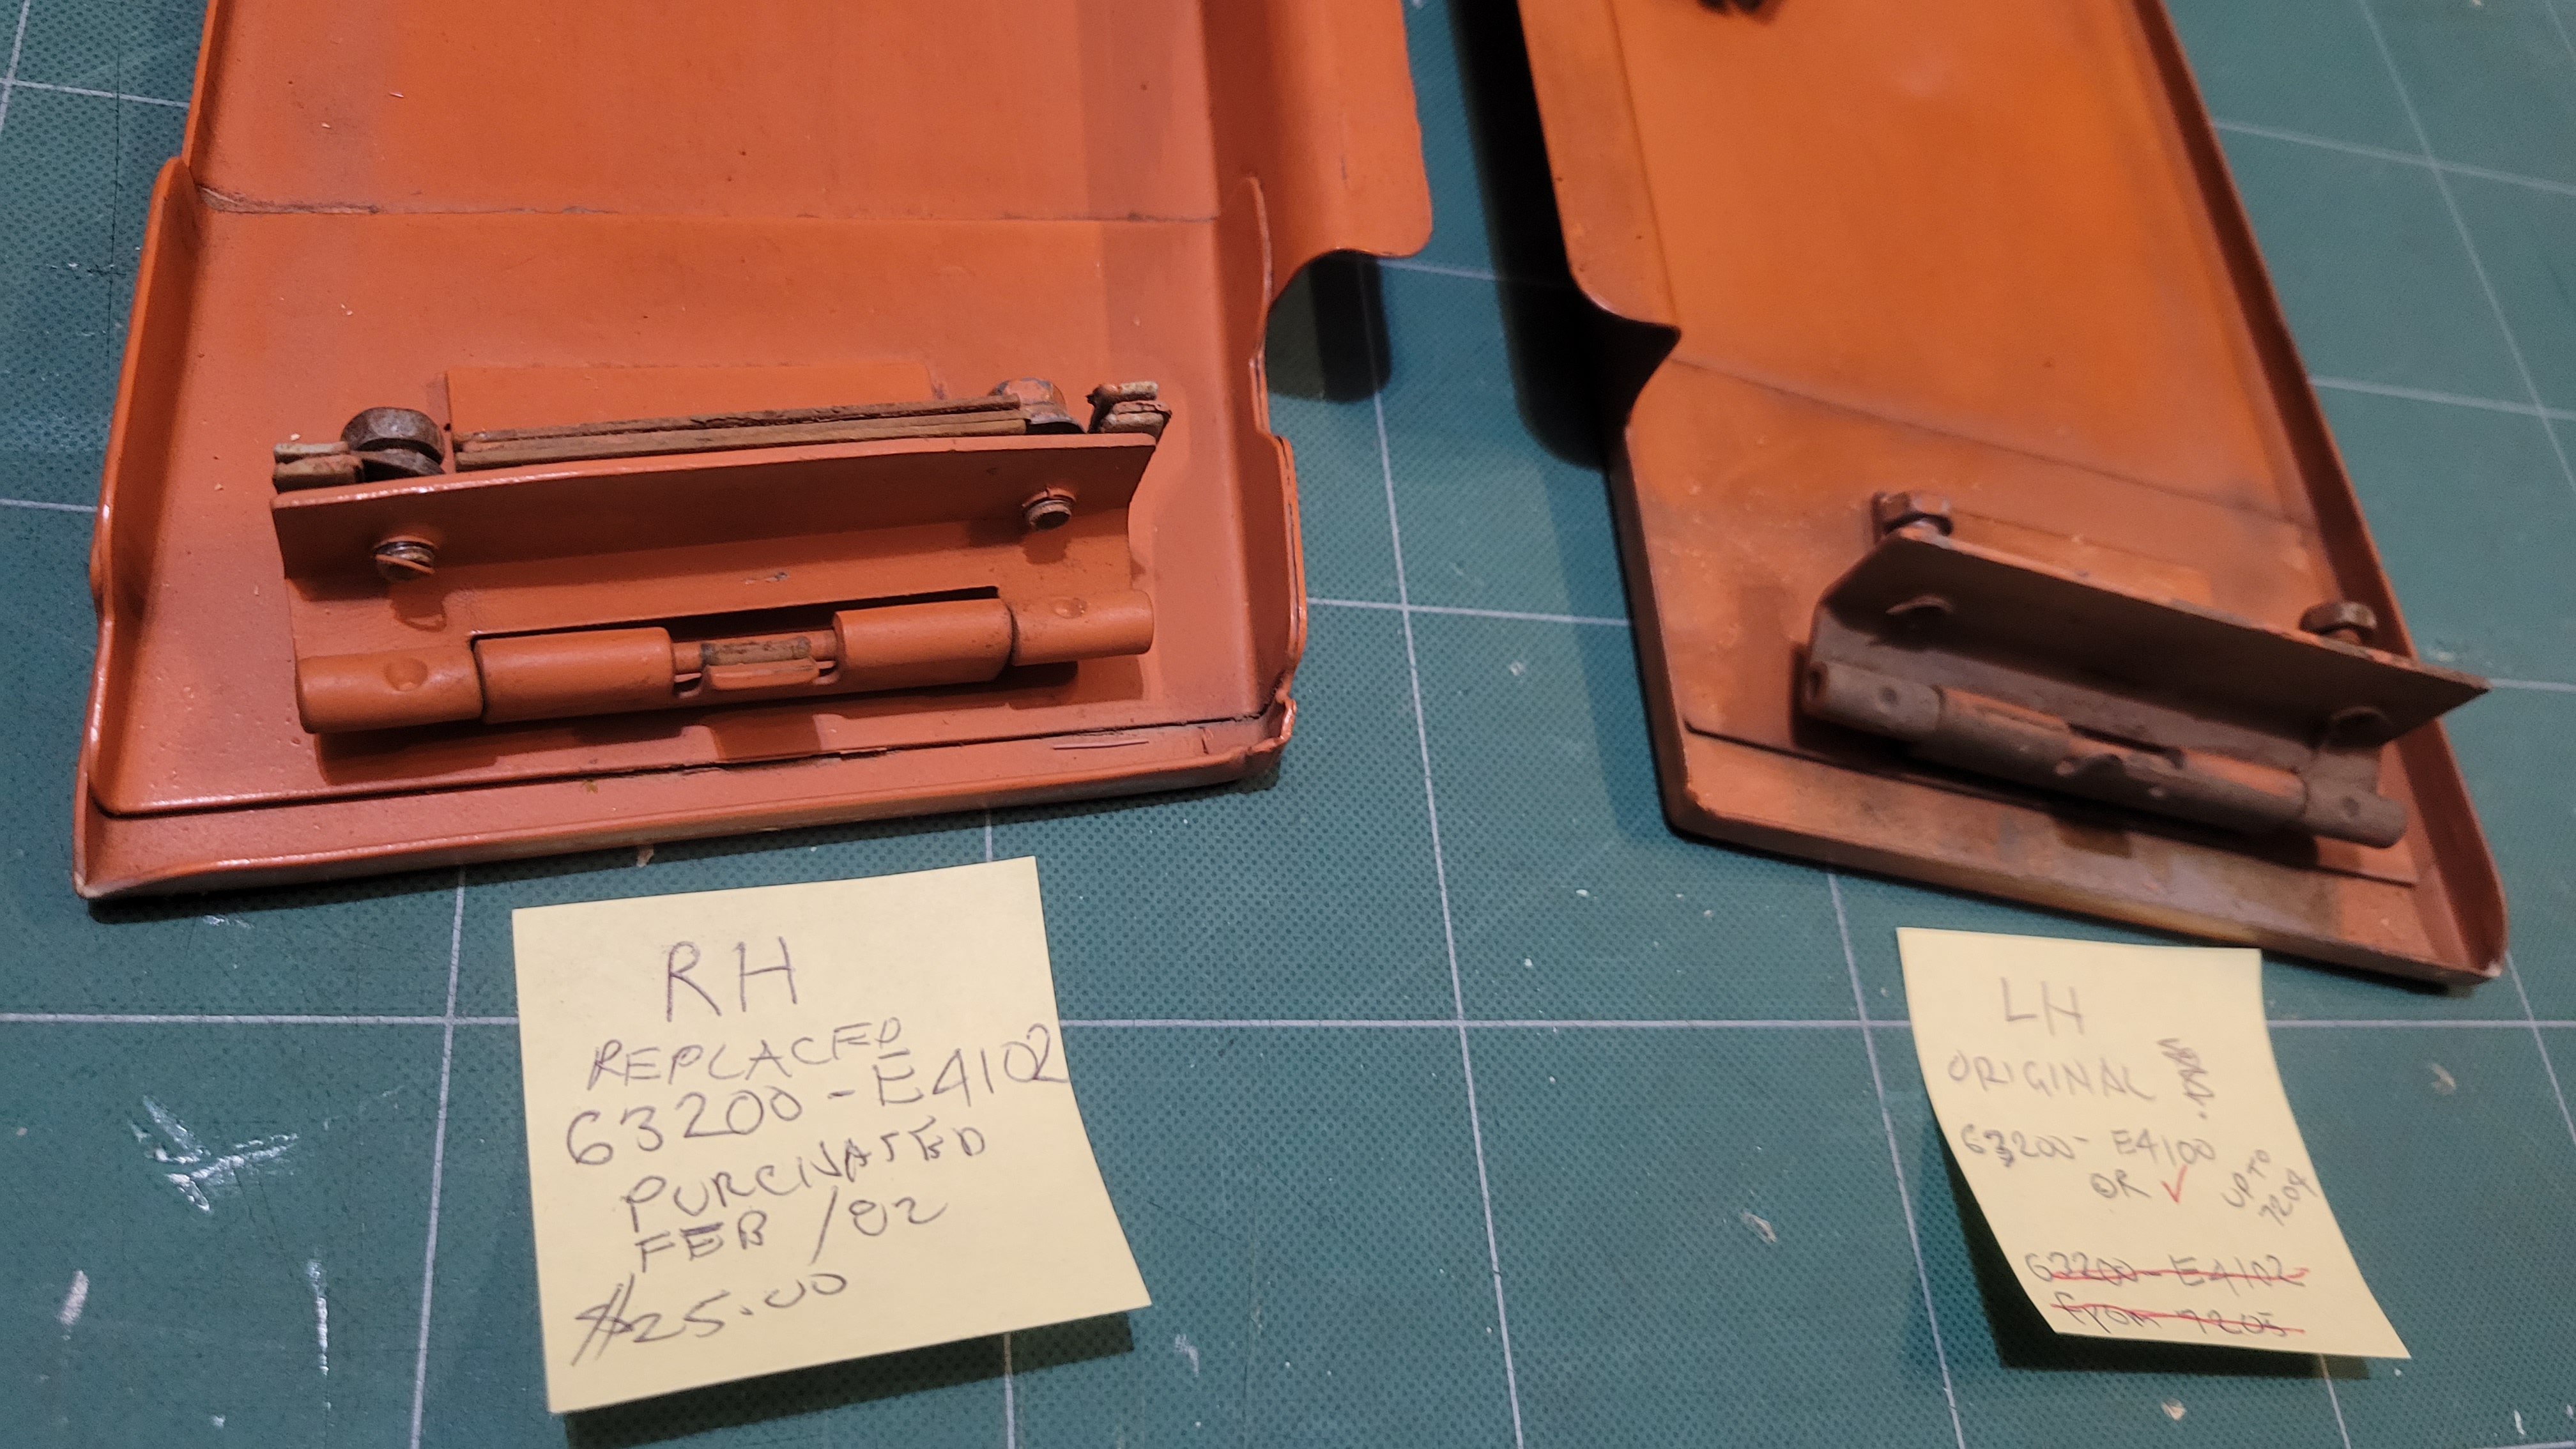
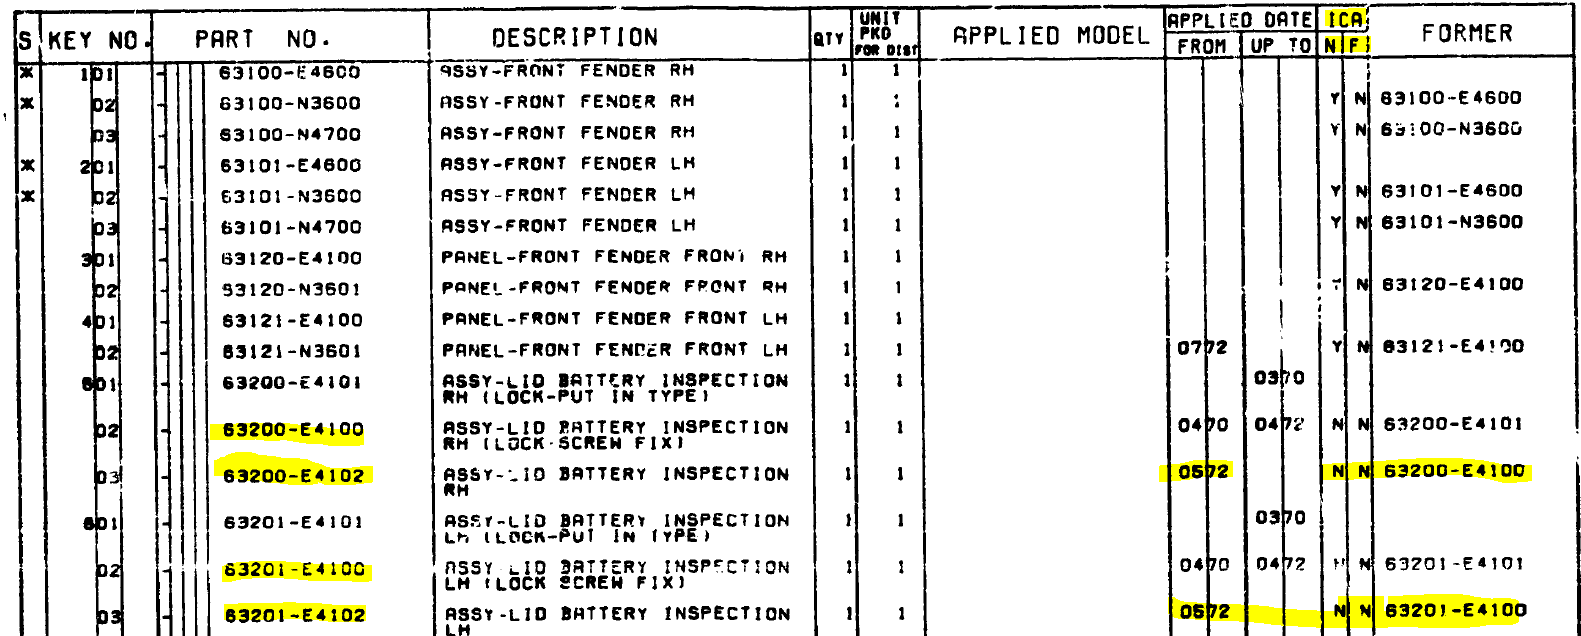
Nice to see parts like this. When I saw the 5'72 from date on your post it got me thinking about my 7/70 HLS30 that I am currently restoring for the second time. During the first resto back in 1982 my body man suggested I replace the original on the RH side as it was warped. He said it would be cheaper to replace that fix, at $25 for the part he was right. So I had a look at my covers and sure enough the RH is the one from 5/72 on, p/n 63201-E4102, and my LH one is still the earlier used from 4/70 to 4/72, p/n 63201-E4100. For those interested here is a picture showing the difference, The reinforcing doubler is much more robust on the later one. I find it strange that the North American parts book shows these as not interchangeable. Seems like they are.


-
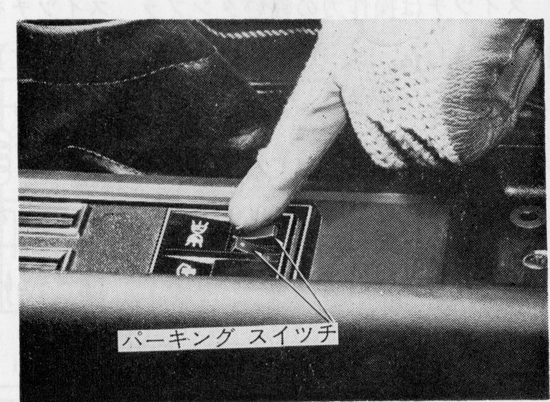
Covers space for left and right parking light switches on JDM cars. Picture courtesy of @HS30-H
-
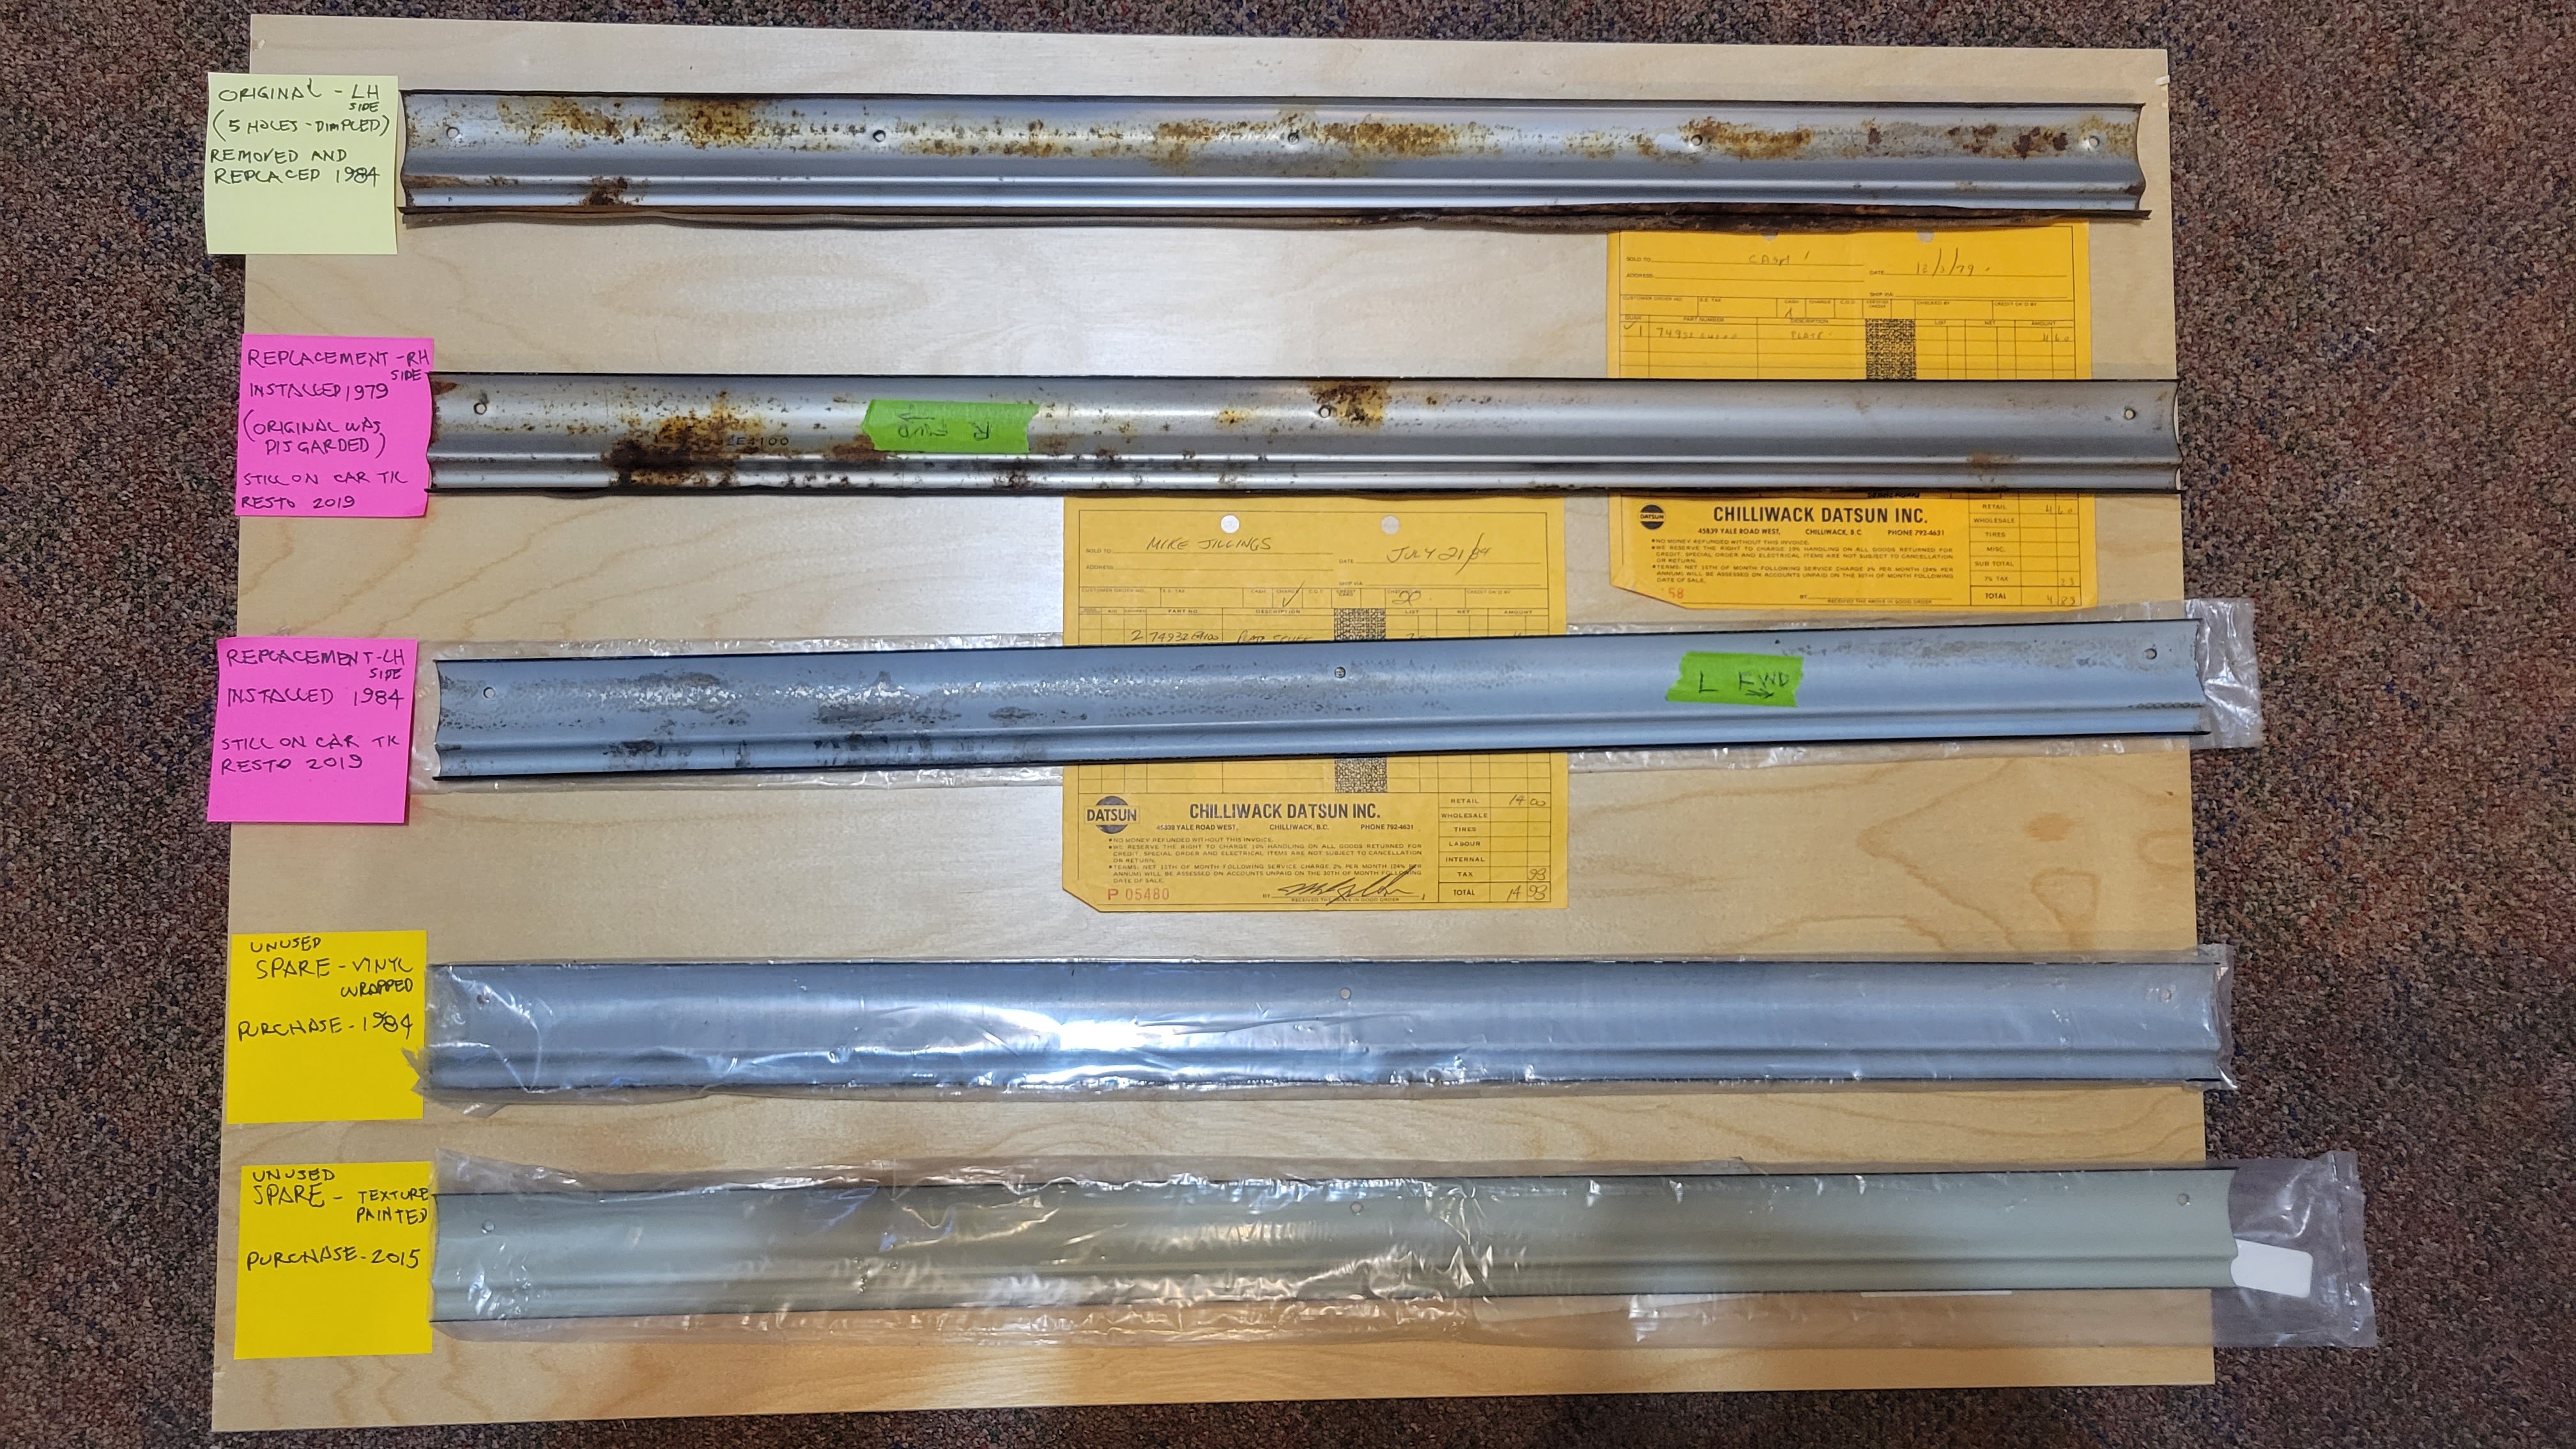
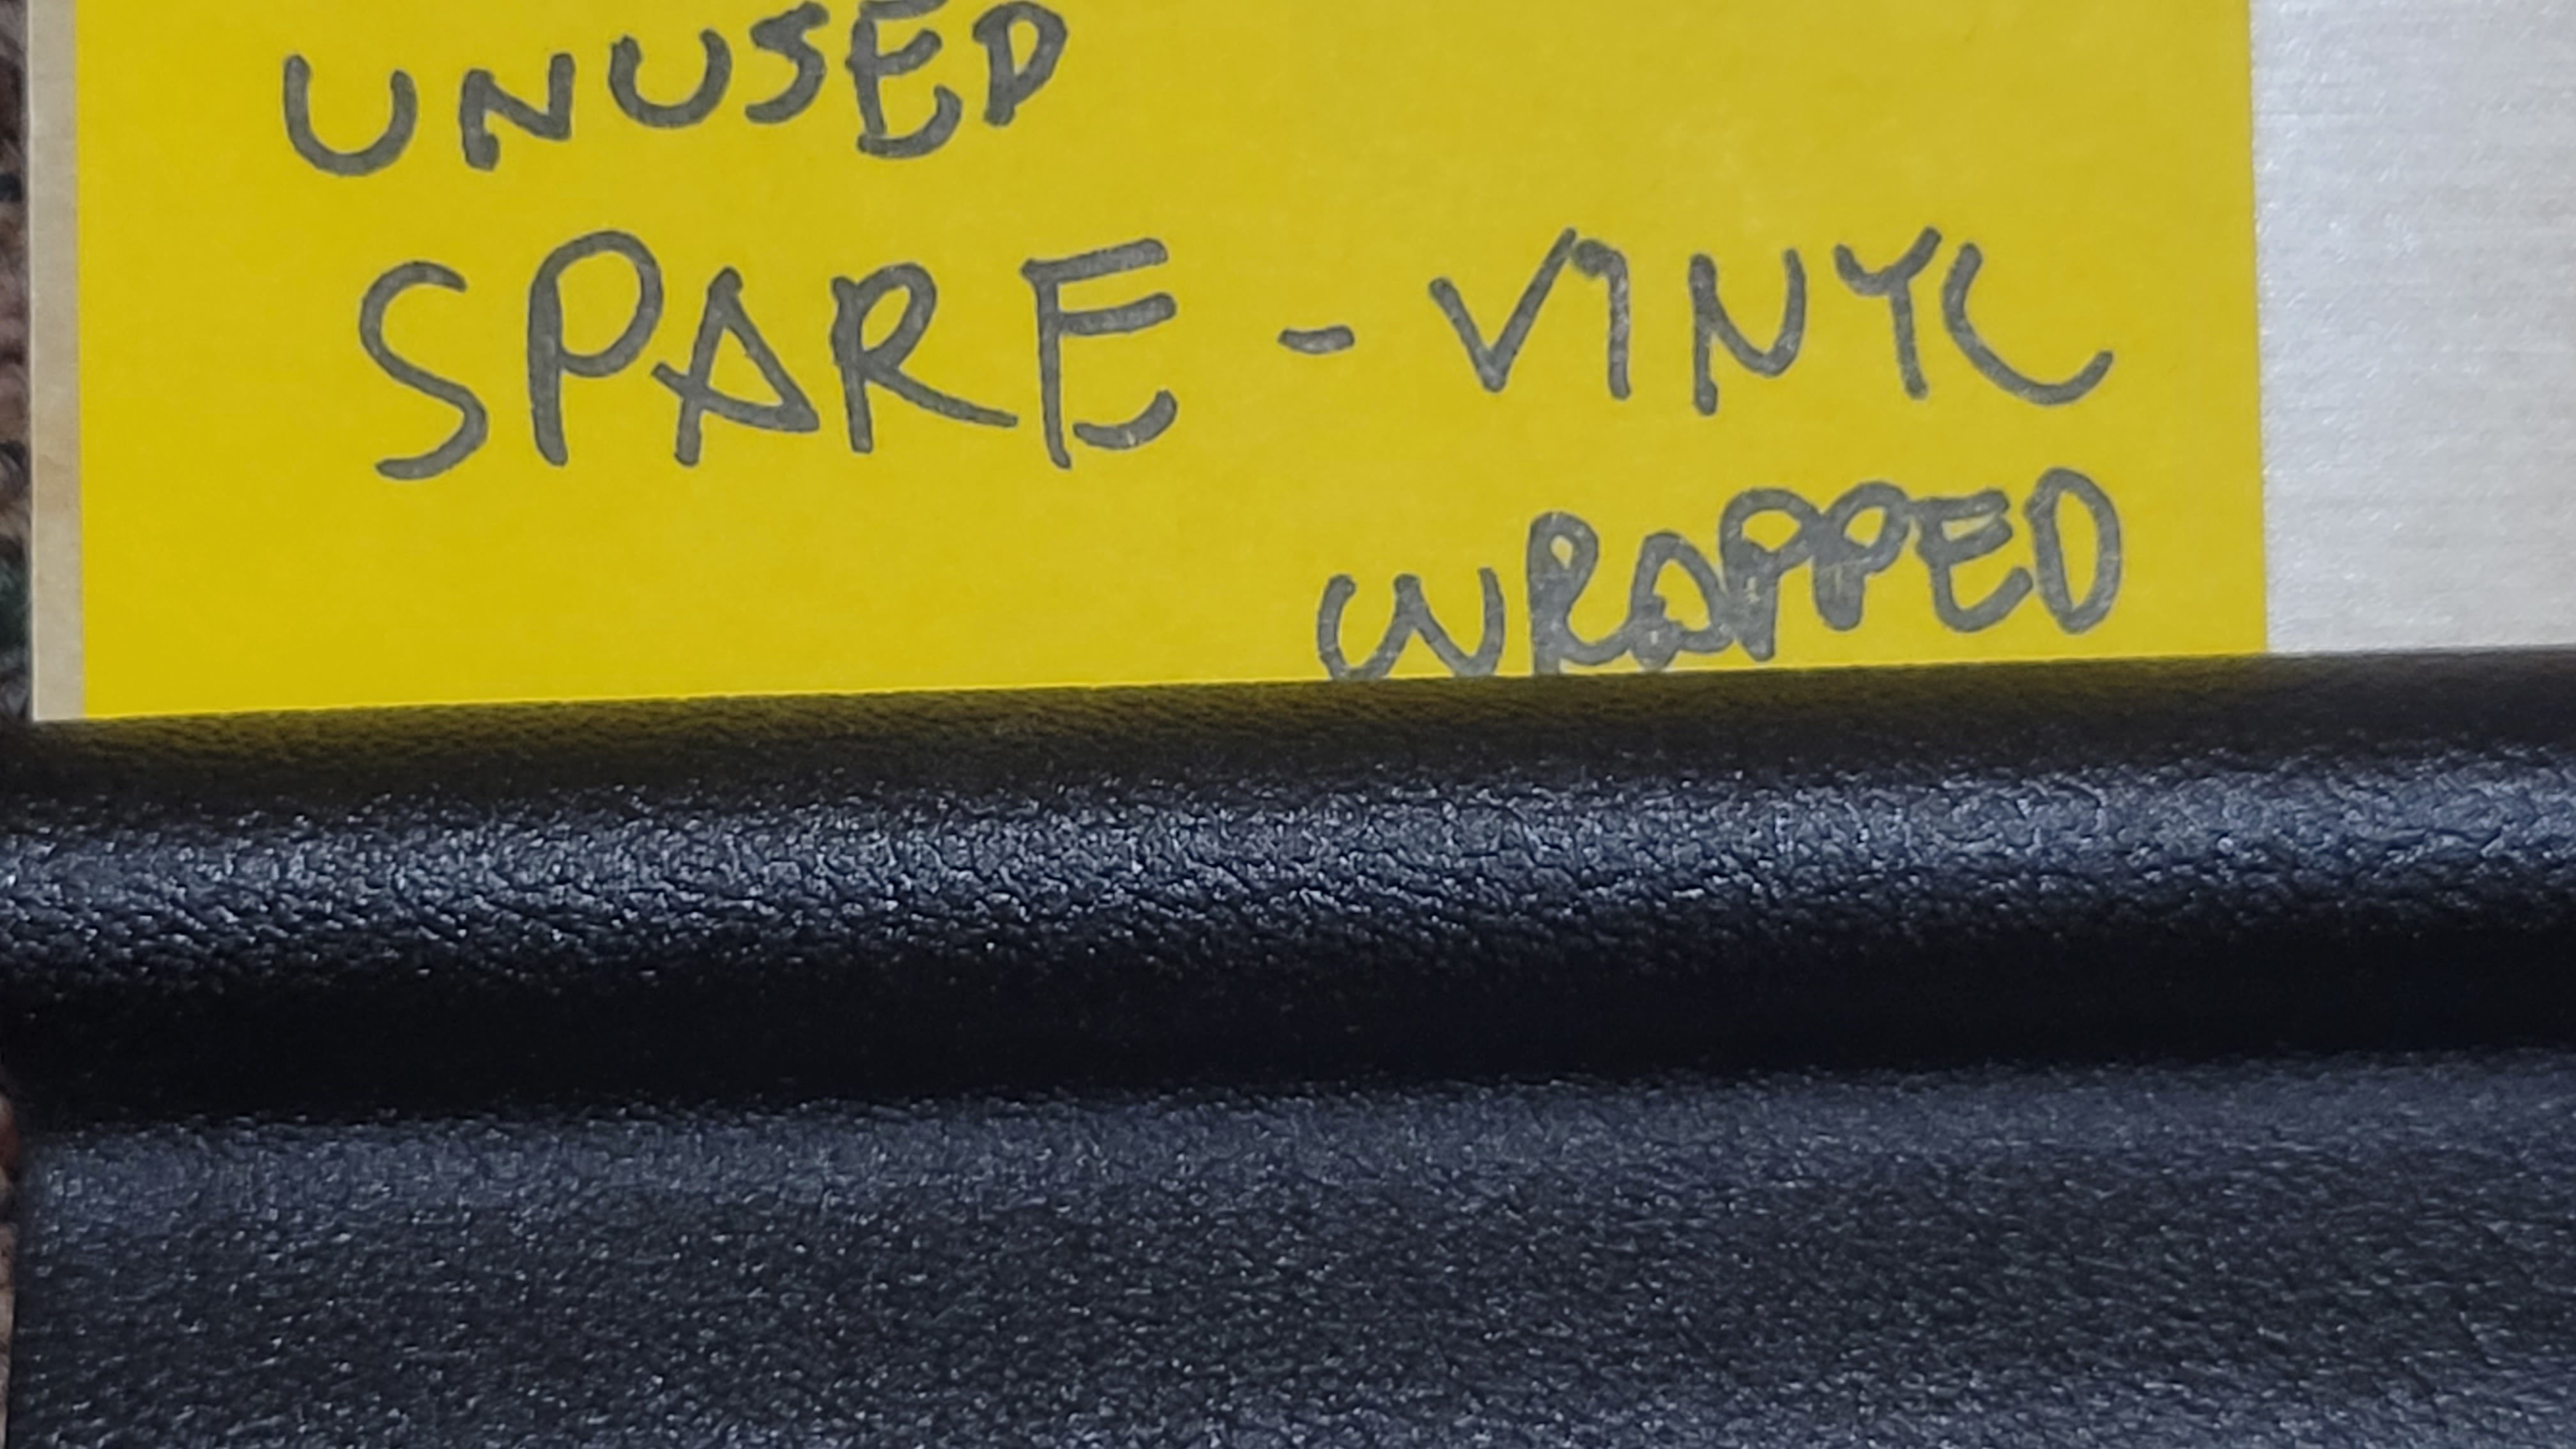
Here is my "hoard" of part number 74932 E4100 scuff plates, that cover the rocker panel vinyl and hold down the weather stripping. There is an interesting evolution of this part. The early version had 5 holes. and later versions have 3 holes. My 7/70 car originally had the 5 holes ones but when I bought my first replacement in 1979 it was the three hole type, as were the two I purchased in 1984. Also it seems that sometime after 1984 Nissan changed to a texture painted finish instead of the original texture vinyl wrapping. I have one of the new painted ones that I purchased in 2015. Below I have included closeup pictures of both to show the difference in finish and texture. Top side: Bottom side: Close up of finish/texture of the early vinyl wrapped design: Close up of finish/texture of the later texture painted design:


-
You probably saw this info from @kats during your search, but I just wanted to post the link for others that might find it useful. It does include most of the OEM part numbers for the early and later designs and has a lot of great pictures.
-
-
It might be @Patcon, but I believe he is looking for the roof head liner welting. I just checked and the head liner welting is about 3mm (1/8") shorter than the door seal welting. Door seal welting is 14mm channel height and the head liner welting is 11mm channel height.
-
You are correct that in some of the replacement weather stripping this is included with the door weather strip as a one piece design. What you have would be useful if someone wanted to stay with original two part design. This material is generally referred to as welting. Here is a discussion with some more info.
-
The seller just posted his picture of how the car has been stored for the last 15 years. It's still only at 12K with two days to go. https://bringatrailer.com/listing/1971-datsun-240z-247/
-
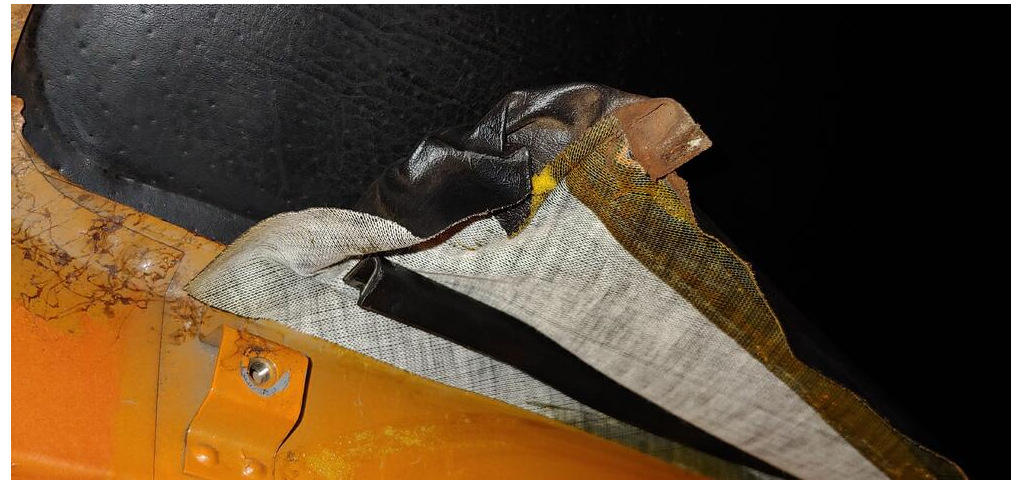
@jwtaylorIs the welting in this picture what you mean by clamp strips?

-
Here is a link to the post I made on my build thread about removal of these items. I plan to use it remind me about how to reinstall this trim, ie steps in reverse. I was lucky that mine reusable. Hopefully it might help.


.jpg.7675014ee9df9b51e9ab963401bc683e.jpg)
.jpg.b8d9fa1dda069836fcc2da040ef18565.jpg)