


AZ-240z
Supporting Member
-
Joined
-
Last visited
Everything posted by AZ-240z
-
I would be surprised if there isn't some form of compatible reducer for this paint which would work and allow the use of a touchup sprayer.
-
Randy, My suggestion would be to look up your local auto paint supplier, have them match the original in single stage paint and buy paint and hardener. Mix these in correct proportions and put it into one of these inexpensive little paint sprayers that has a screw on propellant cartridge (Propell, or something close in name) and touch it up. The advantage of this is the paint is much more durable than a rattle can which does not have the hardener. If the car is painted in single stage paint, I don't think you will be satisfied with trying to do a touchup in two stage system paint. Just my thoughts, and good luck. Dan
-
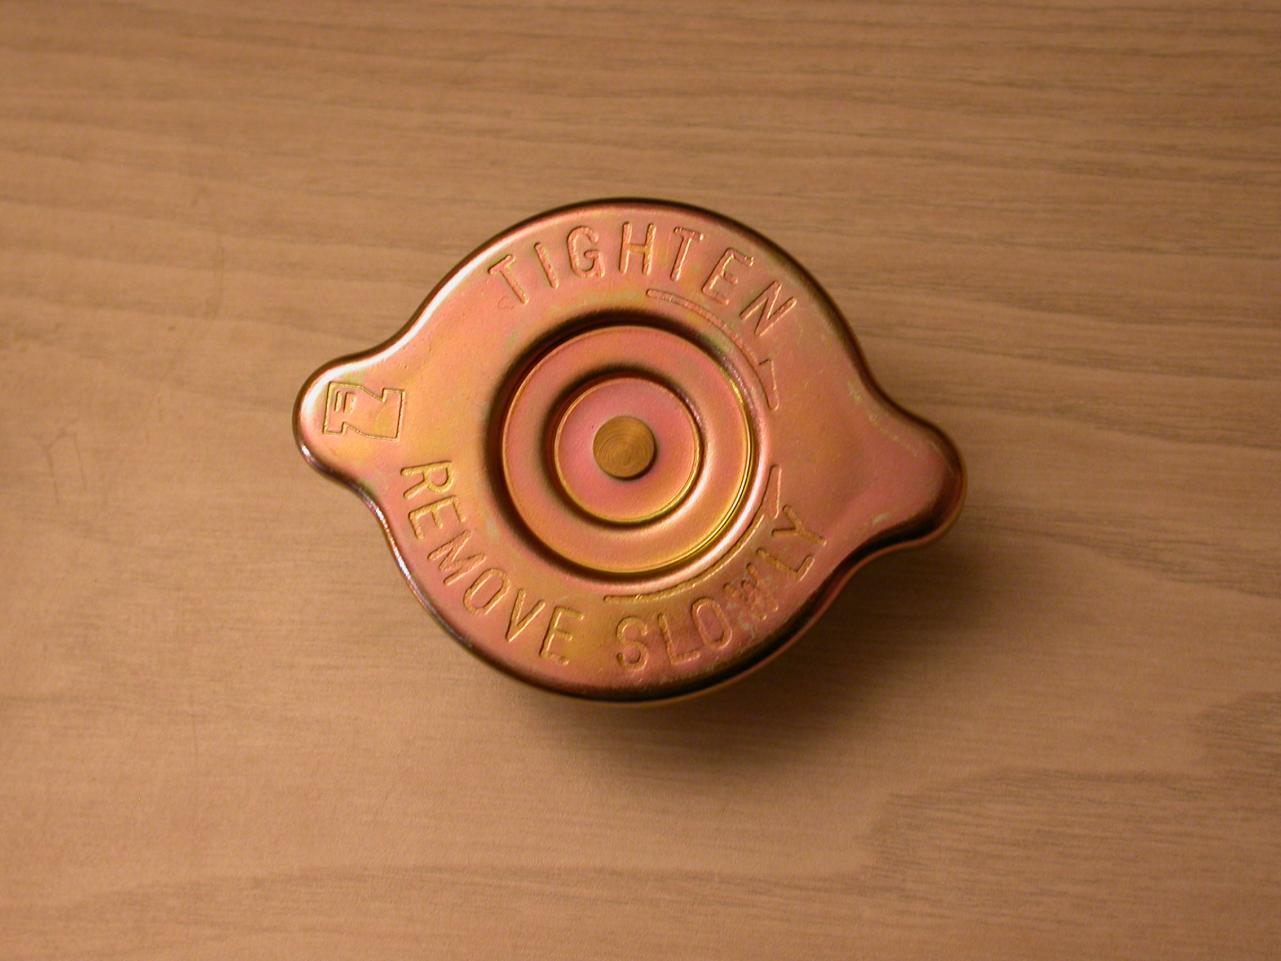
Both of Chris caps appear to be yellow zinc with different degrees of fading. It appears there is more than one supplier of these stock caps for early cars, one JDM and another possibly North American, or at least that is a reasonable assumption. I am satisfied that my cap matches up with the original part number, though, and I have a high degree of confidence in my source from past purchases. Dan
-
Chris, I just got confirmation from the source of my radiator cap purchase that it is the North American part: 21430-10600. It has since been removed from his web site as it is NLA. I have always been very happy with this person, and his ability to come up with hard to find NOS parts. His web site is www.New-Datsun-Parts.com I have no interest in, or association with this site other than as a resource for my parts. Dan
-
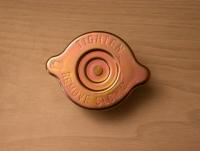
Chris, I bought a radiator cap for my car which is supposed to be for the series 1 cars. Practicng my picture attachment upload skills, (real novice here). It is gold cad and all early caps I have seen were the same gold finish. Do you think these were available in both silver or gold finishes from difference suppliers? Let me know what you think as there seem to be some subtle differences in the scripts engraved in these caps. Kats 432z also has the gold cap. Dan
-
Chris, that has been a quandry for me, also. I have always thought that the pulley was painted a semigloss black with the fan done in yellow cad or zinc. I bought a factory remanuf. grapefruit alternator on ebay, factory stickers and all, that had that finish. I also have a second reconditioned grapefruit alternator I purchased locally from an auto electric shop. It, too, had a black painted pulley and am assuming the shop just redid the original finishes. I, also, have a picture of a white '72 z with 16M original miles on it showing a yellow plated fan and pulley. I am leaning toward the black pulley finish right now. Dan
-
The cars' looking real good, Clive. Thanks for asking. It is basically done except for making a set of carpets to original quality and appearance, mounting the NOS exhaust system I have collected, and putting all the braided hoses on under the hood. My goal is extreme originality which is a very slow process when it comes to finding all the correct parts. Its all about the process for me, though, so it may be a bit of a let-down when completed. Dan
-
Thanks, Mike. I won't be home for a few days, but when I return I will try to upload a couple of pics of my alternators with the inscriptions for comparison. The engraved parts numbers may be on a part of the housing closer to the mounting pin. Dan
-
Clive, I think someone on this site has reproduced those early plastic inspection lid clips. Not sure who, but someone should chime in with that info. Dan
-
Thanks, Mike. That is my point of confusion. I have two alternators with the following engraved in the housing. # 1. LT140-53 104 (Not LT145-35 as Kats references) 23100 A4800 # 2. LT145-35B105 23100-E5200 But my FSM engine book on page EE-20 says the Hitachi LT145-35 is for an L24 engine with an output of 12V-45A, and the Hitchi LT 140-53 is for an L20A engine with an output of 12V-40A. Both of these grapefruit alternators appear to be identical in appearance, otherwise. Our parts CD shows the original alternator is 23100 A4800 with an output of 12V-40A. When the weather warms and you get into cleaning under the hood, you may hold the definitive answer as to what is correct. Thanks, Mike. Dan
-
Congratulations, Clive. I can only imagine how excited you have been getting this time capsule home. I second Mike's request for more pictures to include under-hood shots of any blackout paint forward of the radiator support such as the grill mounting brackets. Pictures of any surviving decals, of all sorts of original fasteners from hood hinges, fender ledges, door hinges, etc., would all be a terrific resource for future restorations. Detail pictures of all parts of a very unmolested early 240z are invaluable. Dan
-
Hey Mike, Does the alternator you pictured have a part number engraved into the housing? There were actually two grapefruit alternators, one for the L20 and one for the L24 with different part numbers. I think that #210 could be a gold mine of originality info. Standby for being pestered by me. In your picture, you show that little oil press. sending unit wiring minder which is bolted to front engine mount. Would you, or anyone, happen to have an extra one of these little minder hooks available for sale? Sorry for the hi-jack, but I couldn't resist with such a good picture and opportunity. I'm going to go Stand In The Corner for a while, now! Dan
-
Mike, I agree that there are a log of incorrect things going on here, but the later series 1 cars do have the summer/winter flap. I'm guessing this was added around the model year change between 1970 and 1971 series 1 cars. Sorry, don't mean to be picky. DanLook inside the filler cap and count the rows. DanJohn, Do you happen to have a copy of Wick Humble's "How To Restore Your Datsun Z Car". On pages 97 and 158 Wick explains the relationship of those number, which he calls ISO, to Datsun Bolt-Torque Specs. Basically he says these ISO numbers bear no direct relationships to SAE numbers as they relate to torque value, but indicate a lower torque value than the SAE numbers. I need to find out how to copy and paste and will try later if you don't have this book. DanAnother place to try is www.zparts.com DanChris, this is probably what you meant, but the air pump pulley is painted blue engine color and fastened to cad plated pump drive wheel with cad plated fasteners, all yellow cad, I believe. DanSteve, nice job, looks perrrrfect. A place to find those little rubber front bumper end bracket insulators is www.zzxdatsun.com. Your rubber washer spacers look good, but this is a good place to find other neat "Stuff". Just go to the catalogue/ rubber/ BO-52 to find this item. DanSteve, I agree with Jim. I would not cut the bumper as this probably would change the correct fit and geometry with the bumper brackets and body mounting holes at the ends. Perhaps someone could give you the correct measurements of a good bumper from one tip to the other and some other cross-referencing measurement to confirm which way you need to correct the bends. I would think that a bumper and re-chrome shop would be able to, with the correct tools, and these measurements, true up your bumper without cutting. Either way, the chrome is probably going to suffer some abuse. Just my thoughts, and good luck. DanArne, is your support strut stock, or aftermarket? I just had a look at mine, and, with the hatch down, not latched, and just sitting on the latching mechanism, there is absolutely no tension pushing up from the support strut as it is lying almost parallel, now, with the hatch. unless the support strut is too long, ie., not designed for your z, I can't see how it could be pushing up on that corner of the hatch. I don't question what is going on with your cars, I'm just trying to envision what geometry is creating this kind of push. Could it be that, with your hatch closed, the piston rod had reached the end of its travel length before being fully retracted into the strut housing? Does that make any sense? DanWhat am I missing, here? The hatch hinges are adjustable four ways where they bolt to the body. There is no adjustment where the hinge bolts to the hatch, itself. I would just remove the support strut from the hatch, loosen the hinge bolts at the body, and see what you can do to realign the fit of the hatch. You will need another pair of hands to support the hatch while you make these adjustments. Hope this helps, but let us know. Dan P.S. Wick Humble's book, "How To Restore Your DATSUN Z-CAR", is invaluable when doing anything to your car, as well as the search function of this site. Good Luck!Take a look at www.new-datsun-parts.com, page 2 of exterior parts. Not sure if those are what you are looking for, but worth a look. DanI agree with Ron. I would not be surprised if someone on this site has a nice spare, or, I frequently see examples surfacing on ebay, depending on your time horizon. Another thought is used parts suppliers out here in the southwest where rust in not as large an issue as compared to the southeast. Although pricey, www.zcarsource.com shows some available. I would much rather find the correct part, if at all possible, rather than hassle with re-engineering a newer part. Best of success Dan

Important Information
By using this site, you agree to our Privacy Policy and Guidelines. We have placed cookies on your device to help make this website better. You can adjust your cookie settings, otherwise we'll assume you're okay to continue.