zKars
Supporting Member
-
Joined
-
Last visited
Everything posted by zKars
-
Thanks for all the feedback. I agree that getting the mounting bracket right is the key to the whole situation. Clearly I find the one wire (really two if you count the ground lug) very handy as it totally simplifies the wiring. True you loose the ability to have the charge light, but with an ammeter or voltmeter, which we all have, there should be no mystery if the thing is charging or not. I meant it when I said I'd make up mounting brackets for who ever needs one. Got the alignment jig built to mill them flat and straight and to drill the 3/8 hole straight through. I have nothing but good things to say about the good citizens of Kansas. The place looks exactly like home (Saskatchewan). No mountains or trees to block the view.
-
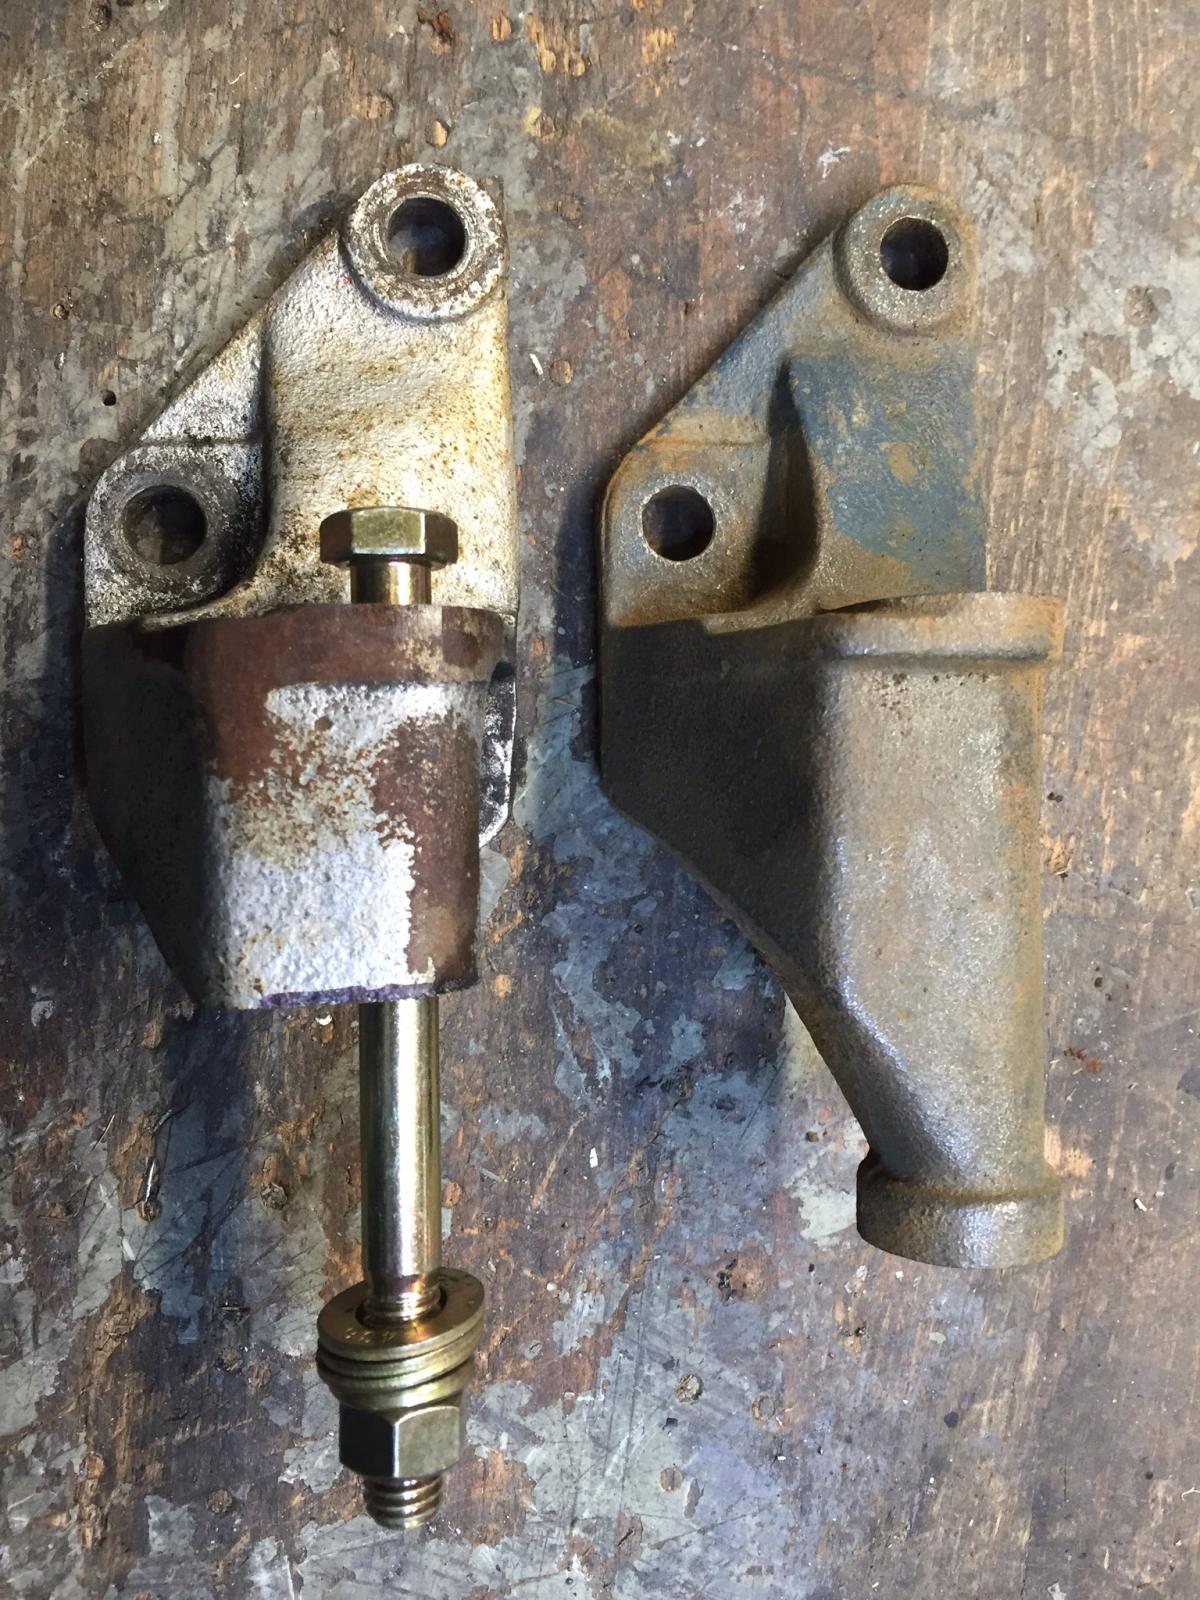
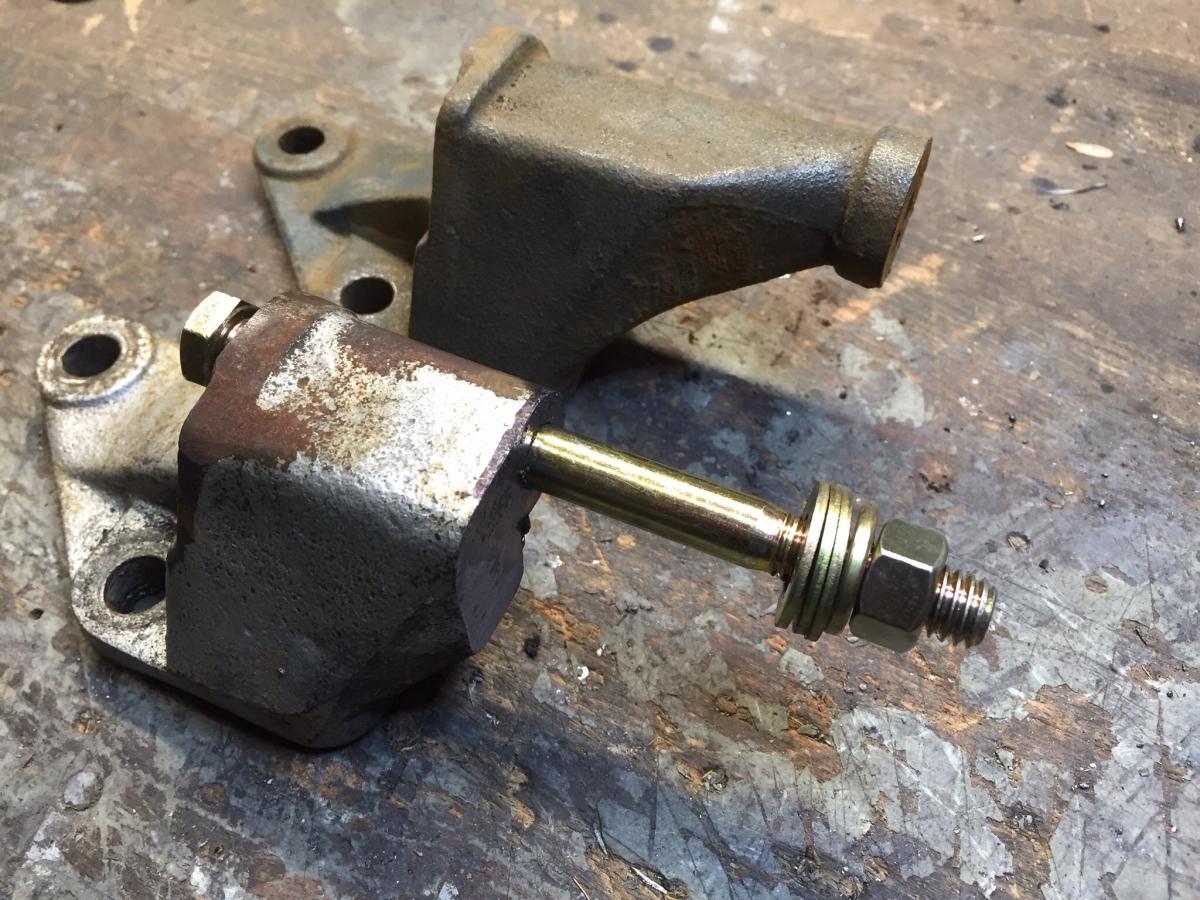
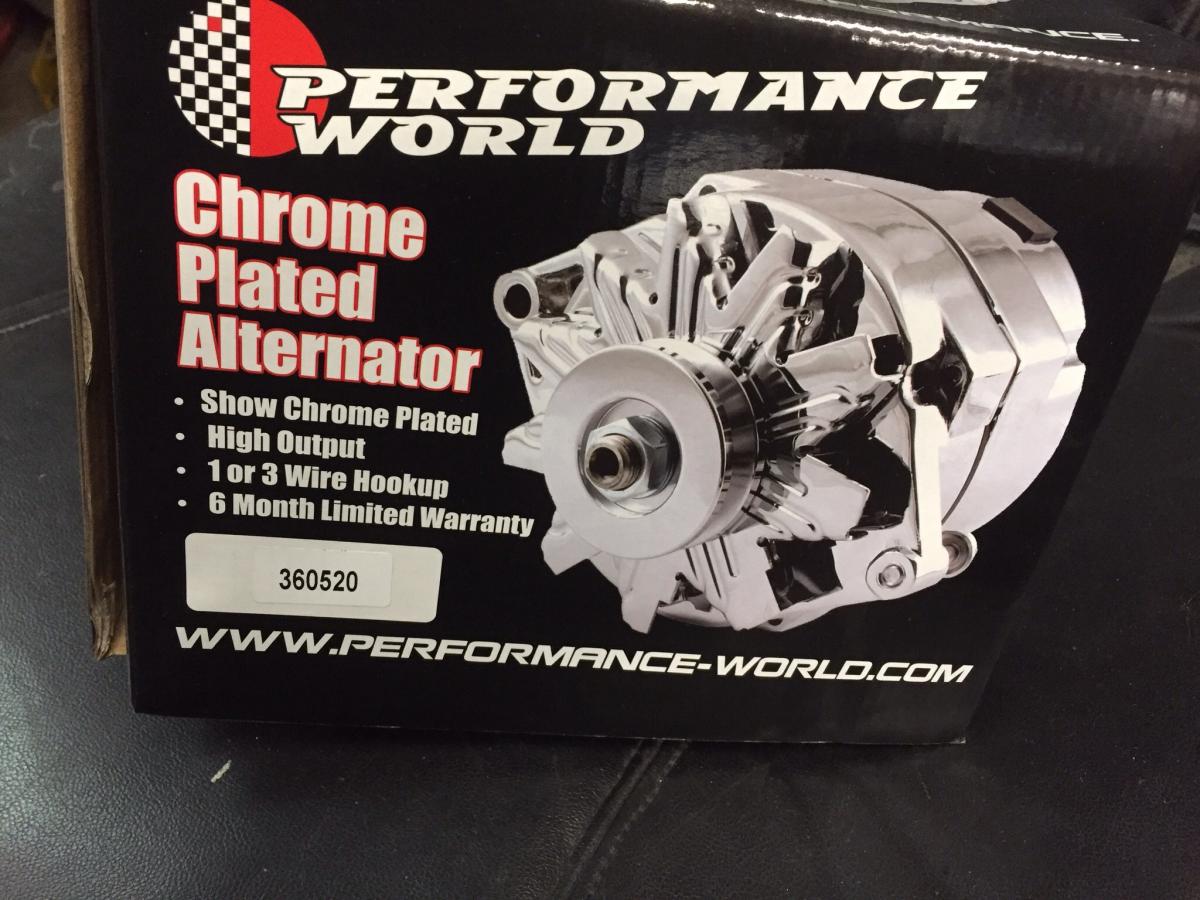
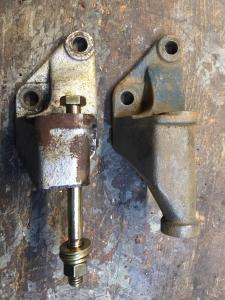
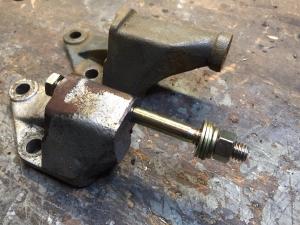
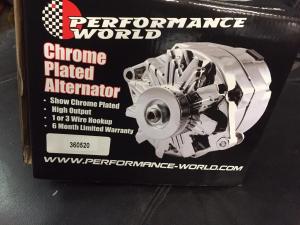
So you're on the road at night cruisin' in your Z. Slowly you notice that your headlights are getting dimmer and dimmer. You check your ammeter or voltmeter and see that your system is in discharge mode. Oh crap. Belt fall off? I hope so. Nope, still there and tight. oh oh oreo... Well you got that "big" 60 AMP internally reg'ed ZX alternator just a few month's ago, but I guess it gave up the ghost. Trouble is you're in Podunk Kansas and the local AutoZone doesn't have one in stock and can't get one for four days. Now what? Me, I'd rather have a common alternator, one I can get anywhere. And I mean anywhere. About the only sane choice is the GM 10SI body alternator. I know I know, you're thinking, "this GM alternator thing has been discussed to death", well, yes, but if you go looking you will find a variety of GM alternators discussed and the mounting of them is a bit of a mess. Advantage 1: Available anywhere, Advantage 2: Cheap Advantage 3: Internally regulated, one wire. Advantage 4: Available from 100-140 amp. Electric fans, big lights, big stereo, no problem. Advantage 5: Available anywhere. Yeah, again. Mounting is pretty easy after you get past the first issue, ie that the lower alternator mount has to be modified. It has to be cut and drilled. Here is where to get one. I picked mine up from Mopac in Calgary for $134 CAD all taxes in It fits the stock space well, even uses a 8x1.25 bolt at the upper mount point. You need to cut the mount off to leave 1.75-1.8 inches remaining. The cut face must be flat and flush and square the mounting surface. The alternator position is determined by this face, it has to be decent. The drill out the 8x1.25 threaded hole to 3/8" through the whole thing. You'll need a 4.5 x 3/8 grade 8 bolt, washers to space it just perfect to match the plane of the water pump pulley, and a nut/lock. I used a 4L350 drive belt. 35 inches long. PS, I have one of these in my Z and 510. Don't leave home without. Here is where to get one if you're the on-line type: https://www.performance-world.com/ProductDetails.asp?ProductCode=360520 I got mine at Mopac in Calgary for $135 CAD all taxes in. Show Chrome polish was $10 more. Yes really. Cutting, facing and drilling those brackets properly is a bit tricky without a mill. I have a couple of spares if you want one. I can wip them up in 15 min. Or send me yours. All I'm missing here i year/make\model spec to tell the young'en behind the counter when you need to find one in Podunk Kansas. (I've been there, its not so bad...)
-
That Clifford stuff is not for us, it only fits Datsons......
-
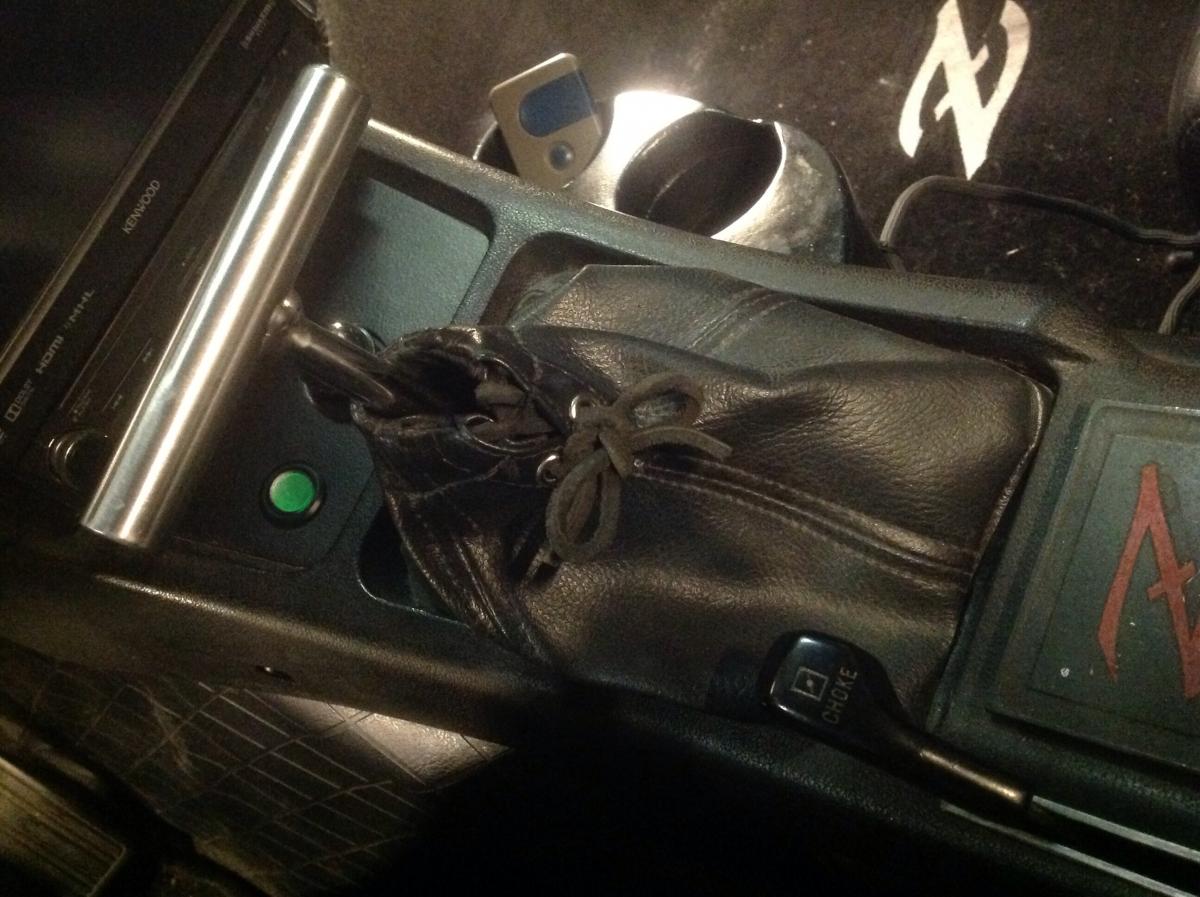
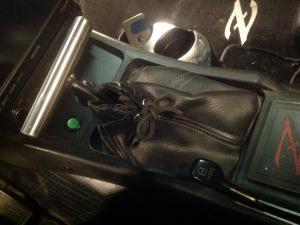
Alrighty then, its settled. Who would like a big icy cold shiny piece of stainless steel welded to the top of their gear shift lever? Only trick is mounting it to the tranny and getting it through the three shift boots.... It can be done. I have all sorts of internal transmission shafts that can easily be turned in serious shift T knobs..... This one is 5/8 diameter and 4.5 long.
-
That does help explain why 3/5 is noisier than 4. My new T shifter is easily twice as heavy as the original shifter now that it has a fat solid SS bar welded on top of what's left of the old shifter shaft, so your increased mass = reduced noise observation makes sense and partly explains why Rob's noise is still there. I really like the ability to solidly push and pull that T-shifter. And all that cold steel under my hand feels really good. Bit chilly now that mornings are at the freezing point around here. Make me some delrin bushings' wood'ja?
-
Velly Intellesting.... Same 3/5 noise, but not solved with bushing replacement. Hmmmm. Apparently you need a T shifter too! How about the bushings in the rear trans mount? Did you install the poly ones from the Energy suspension kit? Back to stock rubber!
-
Over the past two-three years my 82-83 ZX trans in my 73, rebuilt about 10 years ago with new bearings and syncros, has been making more and more gear whine noise. Not all the time, but specifically in 3rd and 5th. Most noticable on the highway. In forth it's mostly not there, but move to 3rd or 5th and it got noticably louder. During the last trip to the coast, a rising, whining noise when downshifting started to get worse too. Specifically as you pushed the gearshift into the next lower gear prior to letting the clutch out. Going into 3rd was the worst, but other gears were starting this racket too.. oh well, I'm thinking, time for some work again. Couple weekend's ago, I had the console out (unrelated project), and somehow I decided it was time to try yet another "improvement" of changing my gearshift knob style. I've always wanted to try a "T" type handle, so out came the shift lever from the tranny. Well guess what I found. A damaged plastic pin bushing, on the right side.kinda crushed. Still there, but not in good shape. I did notice my shifter was SLIGHTLY sloppier than before, but not enough to make me go looking. Well, I proceed with my T shifter mod, (fodder for yet another post), replace that bad pin bushing and put it all back together. Natch, I had to take it for a drive to try out the shifter feel. Off I go merrily banging gears with a big grin on my face. It wasn't until I was bombing down the local freeway did a lightbulb finally go off and I says to myself, "Hey! where the hell did that gear whine go? The trans is totally silent!!!! So what changed? Well two things. The bushing of course, but also the length, shape and mass of the shifter rod. Apparently the noises that the trans makes ALL THE TIME was getting transmitted to the shifter rod with that bad bushing. Now with a good set of plastic bushings and a different rod shape and reasonant frequency, the thing is now quiet. Who'da thunk it? Anybody change their pin bushings to some solid metal ones notice any increase in tranny noise after doing that?
-
No stock ballast required. The 0.6 ohm coil and Pertronix Ignitor II are a matched set.
-
Those eyeballs are 280z dash end vents. They are great for a couple of reasons. 1. Fit the gauge holes. They are smaller than the 240 eyeballs. 2. They are aimable and CLOSEABLE unlike the 240 eyeballs. They are just siliconed against the back of the opening. If you had the dash out you could use the three little mounting tabs to put in some screws to secure it from the back. You have to remove all of the extra plastic from the eyeball housings but that's easy with the almighty dremel. They look good in chrome, but if you can't find a decent set (peeling chrome), just paint them black. As to where to find some, ebay, put a WTB ad up here, or maybe one of my storage bins?
-
This is a little extreme, but its the only way to get a significant amount of cold A/C air flow directed at your face. I recently completed this mod and am extremely happy with the air flow performance. http://www.classiczcars.com/topic/52309-location-and-installation-of-vintage-air-gen-ii-mini-controls-on-1972-240z/ Go to post #12
-
The four cables all have to be attached to the front control level panel before putting that panel into/onto the dash. The cables are routed into place as you put the panel in, then later, attached to the four points (hot water valve, vent flap and two on the right side) under the dash. Each connection point requires a slightly different acrobat stance to get its retention clip in place, but perservere, you can do it. I cannot imagine trying to do it the other way.
-
Nothing worse than getting up the morning that you will put that cover on the Z for another 6 month rest. Nothing better than dreaming up the list of things to add to and improve on the Z over the next 6 months. And waiting for the post man to bring those boxes of goodies... Oh, yeah, please (insert preferred deity identifier here), let the USD/CAD exchange rate improve over the next 6 months....
-
-
ChickenDude, it does not surprise me in the least that you made that apparently obsure connection. AND I'm coming to your place to play, I mean, RACE, slot cars next time I get over to the coast.
-
I completed the next stage in my return to a more rational ride quality. Changed out the 6K and 5K coil over springs on my McKinney Motor sport coil-overs (that 470 and 390 in-lb in case you were wondering... 70-100 is stock! sheesh!) springs for a nice set of 150/175 in-lb Eibachs... Much better! Not spongy or floaty or caddie like, actually quite nice.
-
Getting the mixture correct has a huge impact on running smoothness and noise. Spend time on the getting the basics right and not adding new parts. It is quite suspicious that only 4 and 5 are black, 6 should be the same as they are all fed by the carb mixture.
-
John, you mean the porsche threaded plug connectors (and the Rajay ones in your link) actually "thread" onto the threaded end of the plug (with the cap removed)? If this is the case, that would solve this loose cap issue. Nothing like a threaded connection to prevent loosening. Learn something every day! Thanks. I find it so hard to believe that something like this that is decades old has this type of design flaw that has never been addressed. Or are we making a mountain out of a mole hill (that's never happened before, has it?)
-
Measured the resistance end to end of the MSD button. ~2 ohms. Not that different from the carbon tip in the new Bosch cap, which is ~5 ohm. I think the difference is heat tolerance more than conductivity.
-
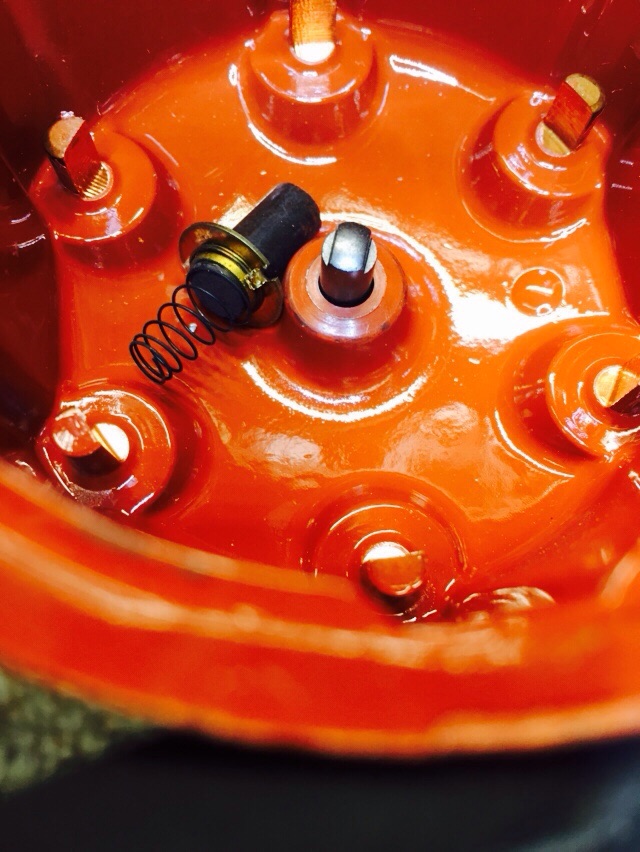
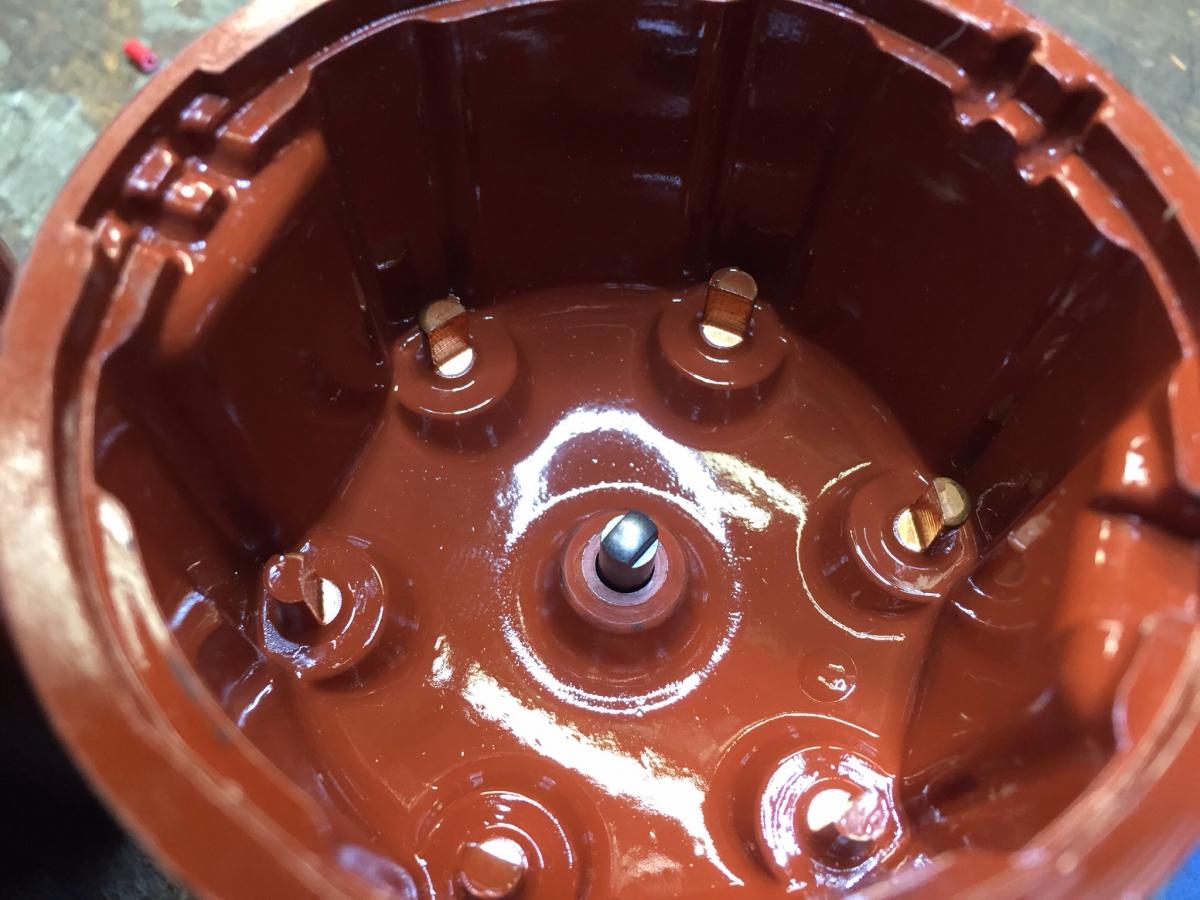
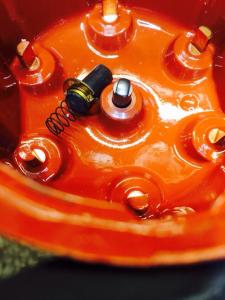
Well I got the MSD 8214 center contact. $15 canuck bucks. Nice piece, but about 2x larger diameter than the mini center in the Bosch cap. Its not clear, but it appears to be not solid, so its not going to be practical to machine it down to size. Pretty tiny, my lathe is not.... So now its a balance of how much $$ and time to design/make verses buying a few stock caps. The one we found in Port Alberni came with a $50 price tag. Ouch. Rockauto are $25ish, but with shipping for me...
-
You betcha. On the way over this afternoon. Thanks
-
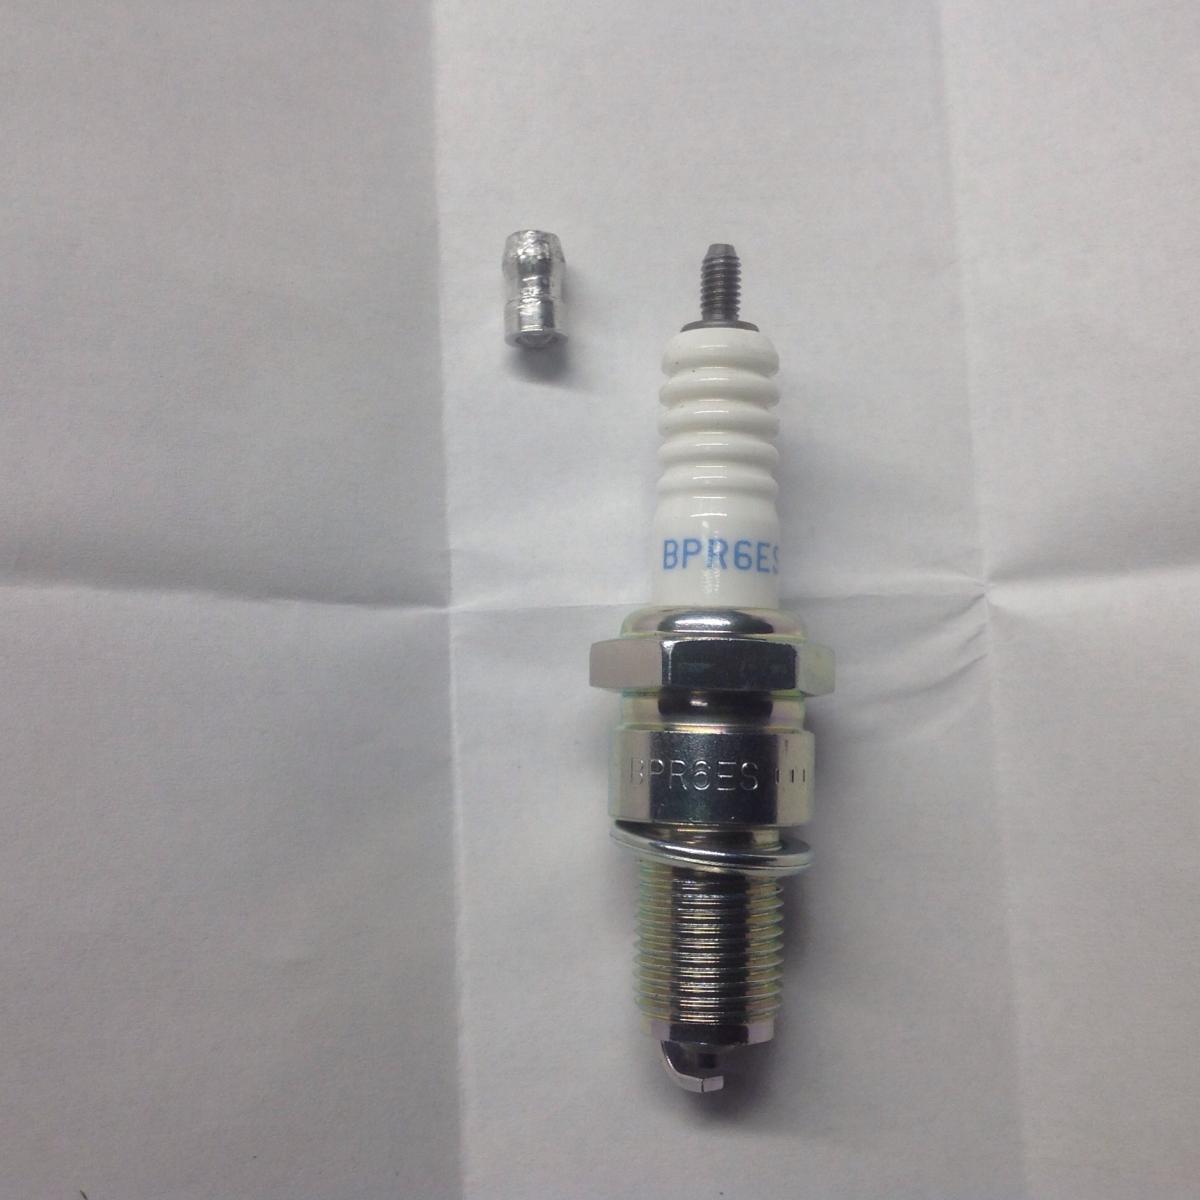
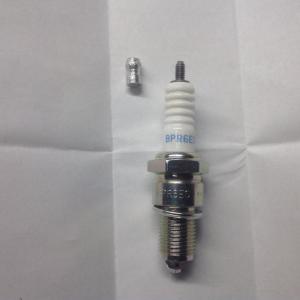
So I've been chasing ignition problems lately (see my post re 123IgnitionUSA dizzy and melted cap center button), so I've been going over my total spark system looking for problems. I (re)-discovered one issue with the plugs. Years ago I had a persistent misfire and finally started swapping out plugs one at a time until I found the culprit. You may not be aware that the tip of these plugs is threaded on. That tip screws right off. There was one plug with a VERY loose cap. Threaded it back on tight, misfire went away. Magic. I remembered this last night, so I checked my 6 last night, EVERY ONE was loose from just a little to 1/2 to 3/4 of a turn! Every time you take the plug wires off (something some of use do more than others...), you give that tip a bit of torque I guess, and eventually.... I tightened up the tips, fired it up, and guess what. The smoothest idle I've had in a LONG TIME... The car ran 'ok' prior to this. Tons of power, just that nagging feeling that it wasn't as smooth as it could be. My AFR gauge used to jump around more than I thought was normal. Under static cruise, you'd swear there was a transient misfire going on. No more. Touch key, car starts, idles nice. Funny how a healthy ignition system makes you car run better. Big surprise... Go check your plug caps. Tighten down with a vise grip. Don't bust the insulator, just snug it up. No don't use locktight. Non-conductive.
-
You were in Tofino?!?!?! We were there 14-17th, Stayed at Middle Beach. Been going there for years. Love the drive, but the place is getting too popular, too much traffic! We had 4 Z's of various years out and one sad guy in a STI.... Could be worse.... Very good info on the button fagility with higher voltage systems. At one point I was using a brass crimp bullet connector to attempt a reconstruction of the button. Was working for a while, but the contact with the top of the rotor wasn't smooth, and it was digging in.... I'll see if we can adapt that MSD button to the Bosch coil. Wish we had Lordco in Alberta.
-
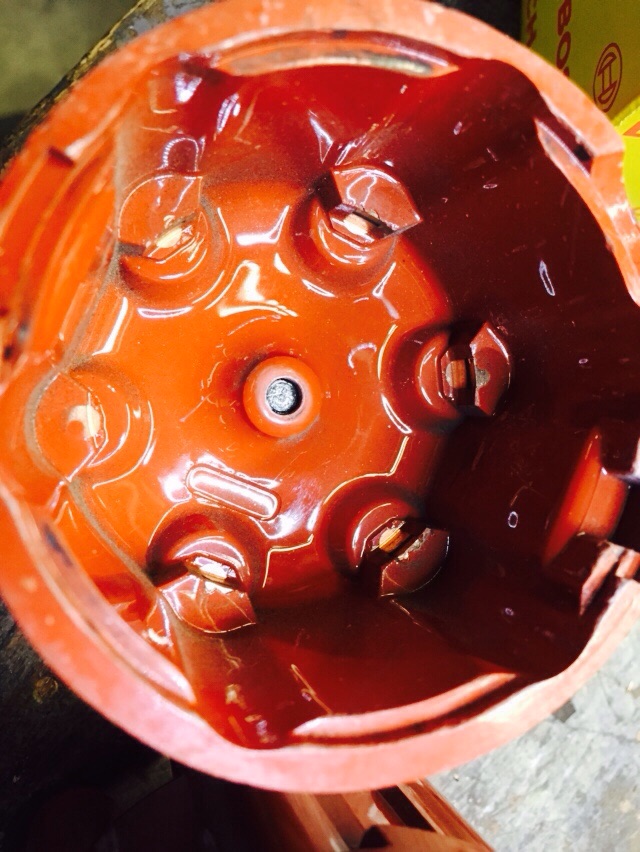
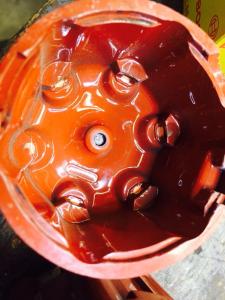
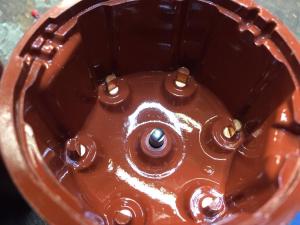
Have some feedback after another road trip with a BIG problem. We are at something like 20,000 km now, and had a problem with the distributor cap. The center carbon contact inside the cap is gone/worn right off. Old in first, replacement cap next. Contact tip is nearly 1/4 inch long The problem manifested itself as worsening and then very hard hot hard start. Discovered the coil spark was weak and initially replaced the coil as likely culprit. Eventually as things went from bad to worse, discovered the worn out cap center contact. No blame here, no idea why this cap should be worn out at 20K km, but I didn't expect that at this early age. Everyone check your caps! Replacement is any 6 cylinder late 60/early 70 german like Porsche, BMW or Mercedes. Bosch 03014 is one option. They also list parts here: http://www.123ignitionusa.com/four-4-and-six-6-cylinder.html More details about what transpired as trouble shooting progressed. As we were on a road trip, I had a spare coil, but it was only a 0.8 ohm primary type, 123 clearly specs a nothing less then a 1 ohm coil with clear warmings about reduced life if not, but that's what we had so used it. Started better, but after 400 km, found a MSD coil with a ballast resistor and installed that. Started ok, so carried on. After 1500 km (away from home in remote location, Tofino BC), and three days of rest, went to restart and it did initially then died after 5 min warm up. No restart. No spark. This is when the bad cap was discovered. A new cap was miraculouly found in Port Alberni (thanks Ed for parts ID by helping my friend Pat who went on a parts hunt). Unfortunately the new cap did not fix the problem. The car started but after warmup, ignition went to intermittent on/off status rendering the car undrivable. This indicated a problem with the dizzy internals. Not good. Forntunately I travel with spare parts and had an old E12-80 ZX dizzy to swap in. That got me home without further incident. Seems my short term low ohm coil use, bad cap, and eventual maybe not quite enough ohm total ballast resistor, and the related "temporary" wiring did in the 123 dizzy. Beware all yee who dare run non-3 ohm coils. I'll report back after the dizzy issue is fully diagnosed by putting it back in at home with proper wiring and doing some hot testing to see if it will fail now. If so, then back to 123 for service I guess. I'm sure Ed will take care of it and let us know what the problem was and how to prevent it in future.
-
If you are not going to use the heater part of the GenII system then you can just use the heater hose holes to pass the AC hoses. Well, maybe and maybe not. A great deal depends on the routing of the hoses on the INSIDE and how they have to get from the firewall to the connections on the evaporator box. The stock heater hose holes are right behind the evap unit fan after its mounted, so you would have to run pre-bent hard lines to make an immediate 90 deg down. Each of the various plumbing options that Vintage Air has (rubber hose, hard lines, SS braided and others) will require different routing based on the how tight the hoses can be bent and how you need to get each connection from place to place. Cost also factors in, the SS lines are twice as expensive as the basic rubber stuff for example. The "correct" way to do this is to mount all the components, THEN route the hoses between them. Unfortunately the stock heater hose holes are not in the best location....
-
There is a way to scan and create a PDF document that is not expensive for an everyday Joe. Most multifunction printers that scan/print/fax can scan pages and make PDF files of them. Once you have your ~1500 individual pdf files, they can be pretty easily assembled in a single PDF. I can help with that if anyone needs such a tool. The tough and tedious part is separating the book, then feeding the pages one at a time to do the scan. Not much fun, but doable.