Leaderboard
-
conedodger
Free Member22Points12,639Posts -
Patcon
 Subscriber
 15Points11,181Posts
 -

Zed Head
Free Member10Points19,314Posts -
Yarb
Subscriber10Points1,973Posts


Popular Content
Showing content with the highest reputation since 12/05/2025 in all areas
-
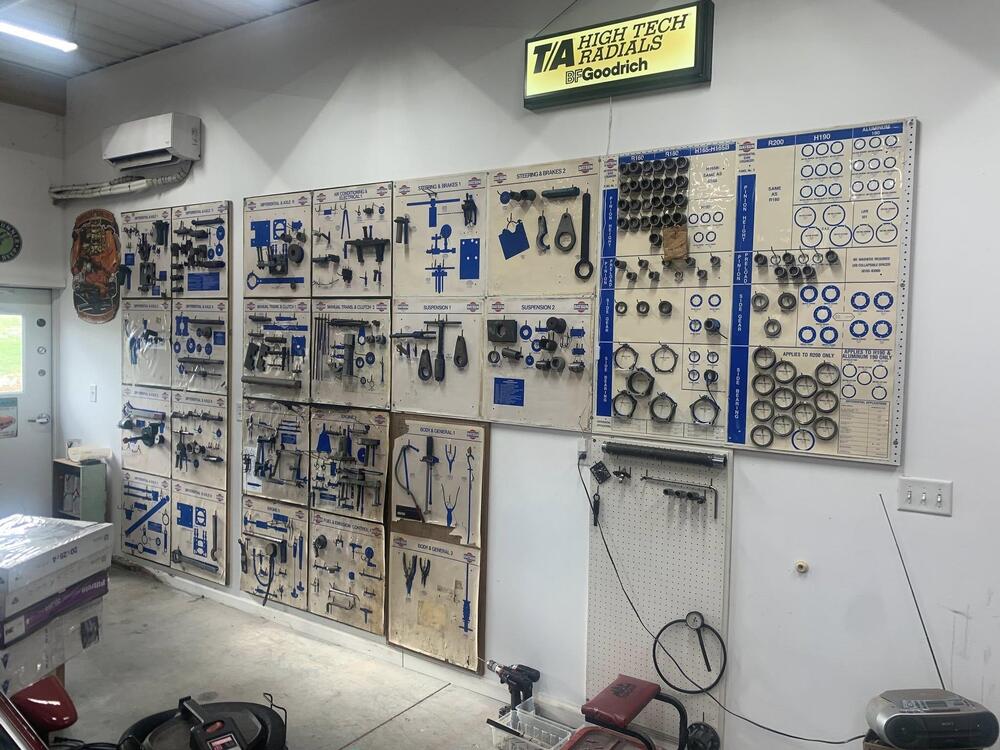
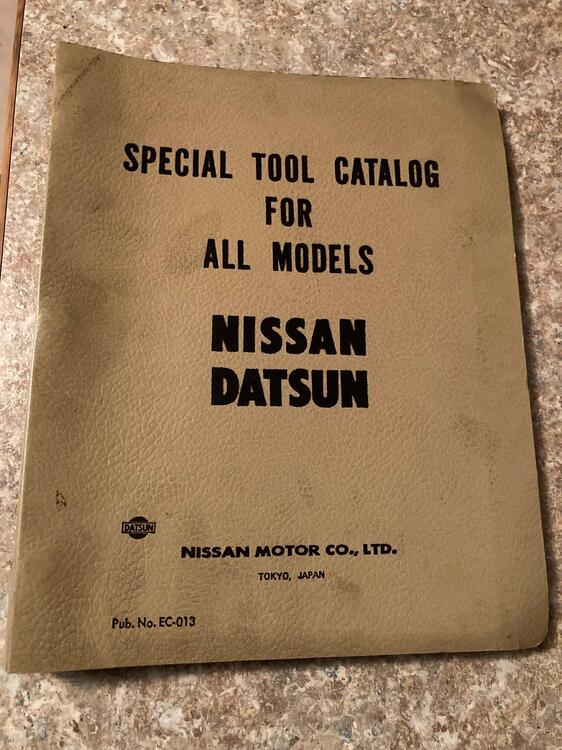
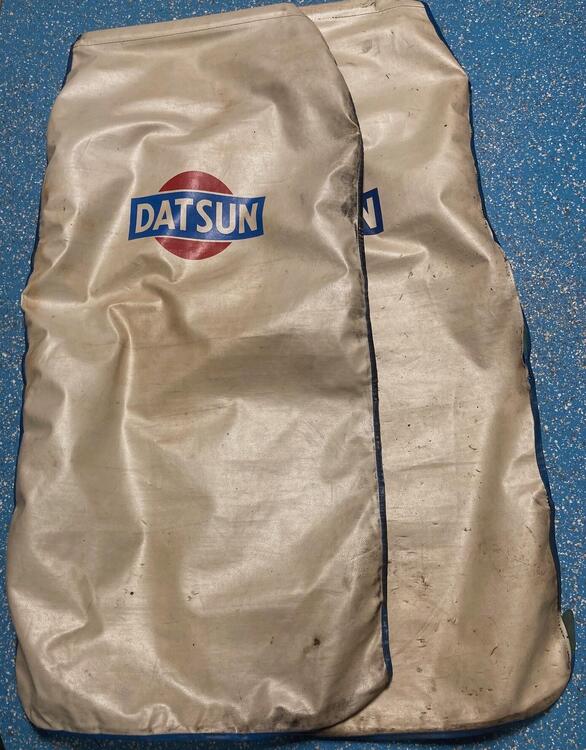
5 pointsRecently a guy on FB posted he had bought a bunch of Datsun tools and tool boards. He has them all cleaned up and mounted on the garage wall. Makes a nice display. I have the Special tools manual from 9/69 and a couple of mechanic seat covers that I really have never seen before. Do any of you have any info on the seat covers?
 5 points
 -
4 points
-
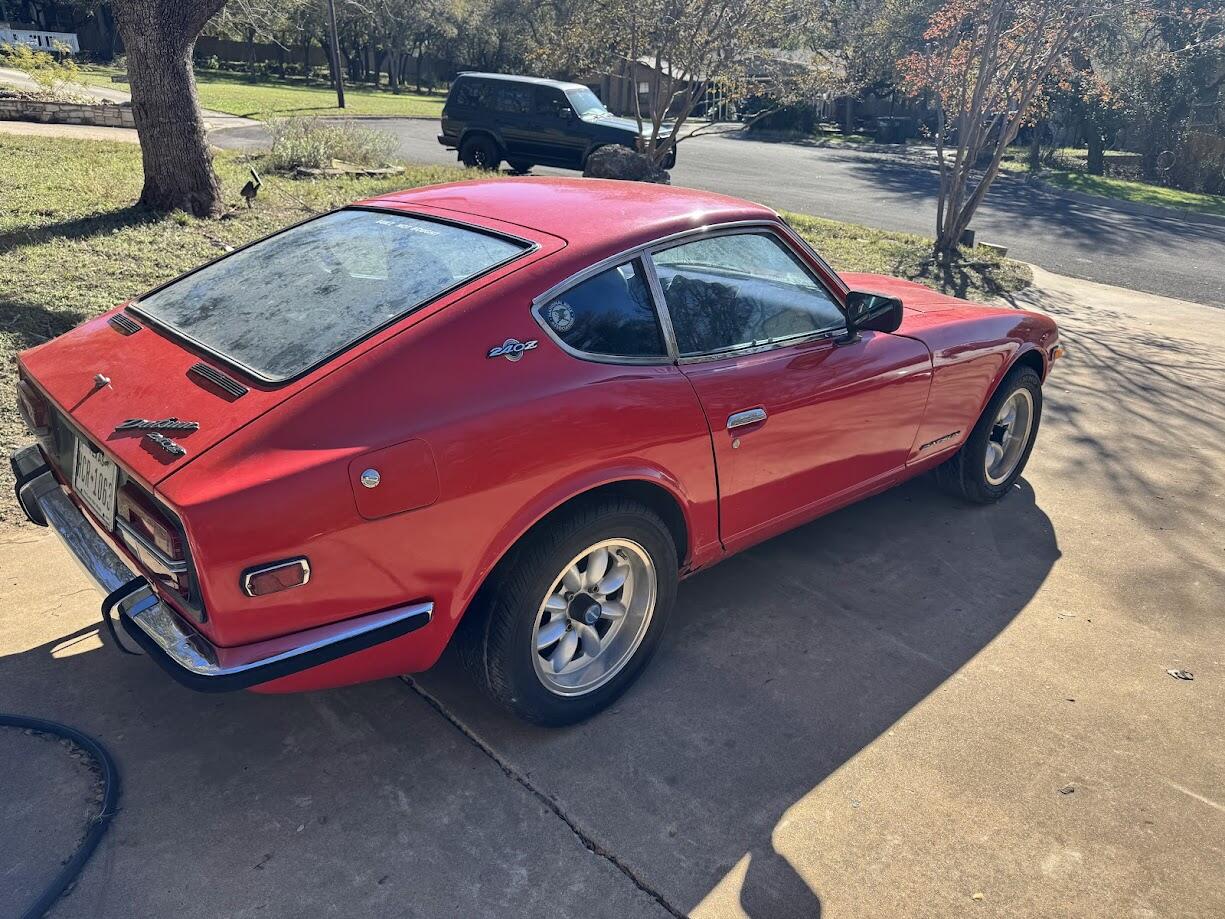
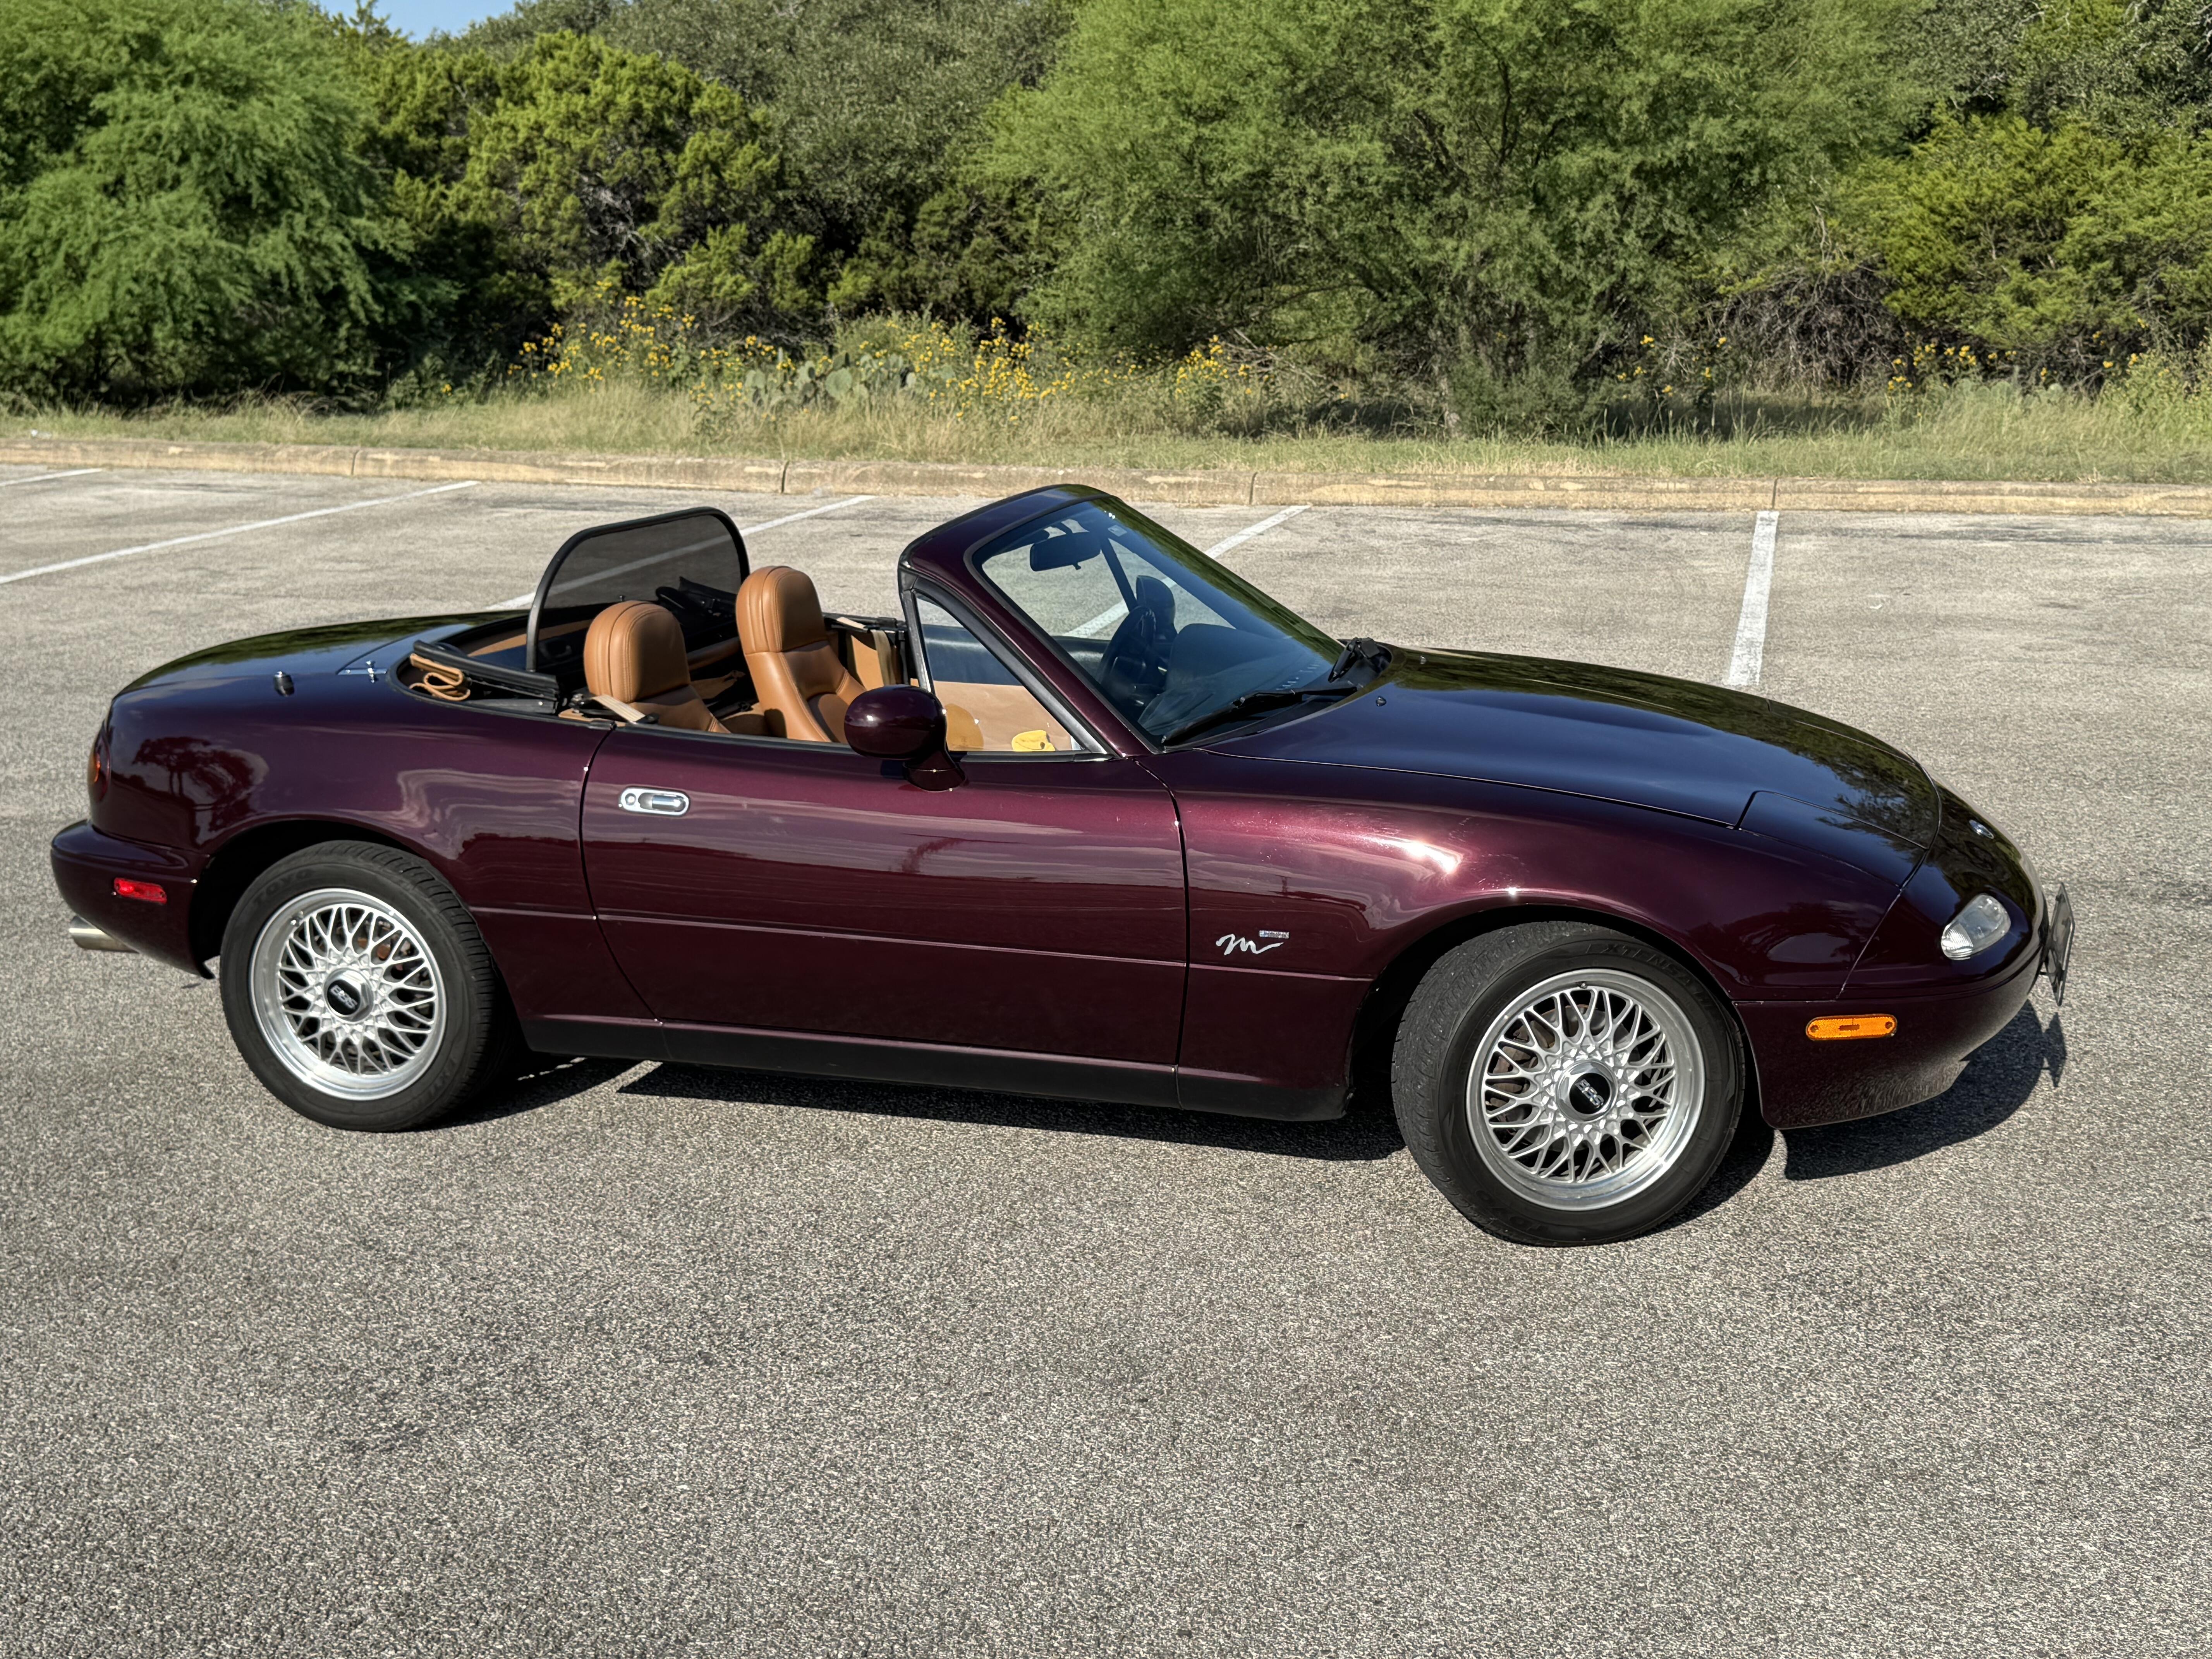
3 pointsPoppin' back in for a bit, although @conedodger and @Yarb see me quite a bit in The Rusted Zed Pub section. 😎 🍻 It's been a few years since I've spoken with Gary Moisant but I'm pretty sure he's still around up in Oregon. Can't get him away from the race cars! The last time I spoke with Keith @2ManyZs (many, many years ago) he was having some health issues. I reached out once by email a few years ago but never heard back. Edit: I reached out again to Keith yesterday and he is still around, still has his Z but it is still unfinished. So, I popped back in here because I ran across something the other day that made me think of this thread. I saw my old Z for sale on Marketplace!!! She's about an hour's drive away and actually less than a mile from my mother-in-law's place! Paint still looks good (which I'm pretty proud of!) but that four-letter "R" word has started coming back with a vengeance! The guy who is currently selling, bought her not too long ago from the guy I sold her to. I stopped by yesterday on my way home from Austin, TX to see her, talk to her, and wish her well in the next part of her life. Still has good bones, but the level of repair is far more than I'm willing to tackle at this age and stage of my life. It was cool to see her again and I can't say I didn't shed a tear or two... We did go down the roadster route for a few years but not anything from Datsun. We did the Miata thing. Cool, fun little car that was a blast to drive. Helped that it was already set up for autocross which made street driving an absolute blast! Top down every single drive, even if we got caught in the rain (as long as you stay moving...)! But alas, as the wife and I both start looking toward retirement all of the toys have been traded up for a large center console boat for fishing down on the TX Coast! Grandkids are on the way and life's focus has just changed. The Z will always be a part of my life and I will die loving the sleek lines of the S30s, but I don't think there will ever be another one in our garage. Add it to the list of cars that "We should have never sold!" 😉 Y'all keep the rubber down and the RPMs up!


 3 points
 -
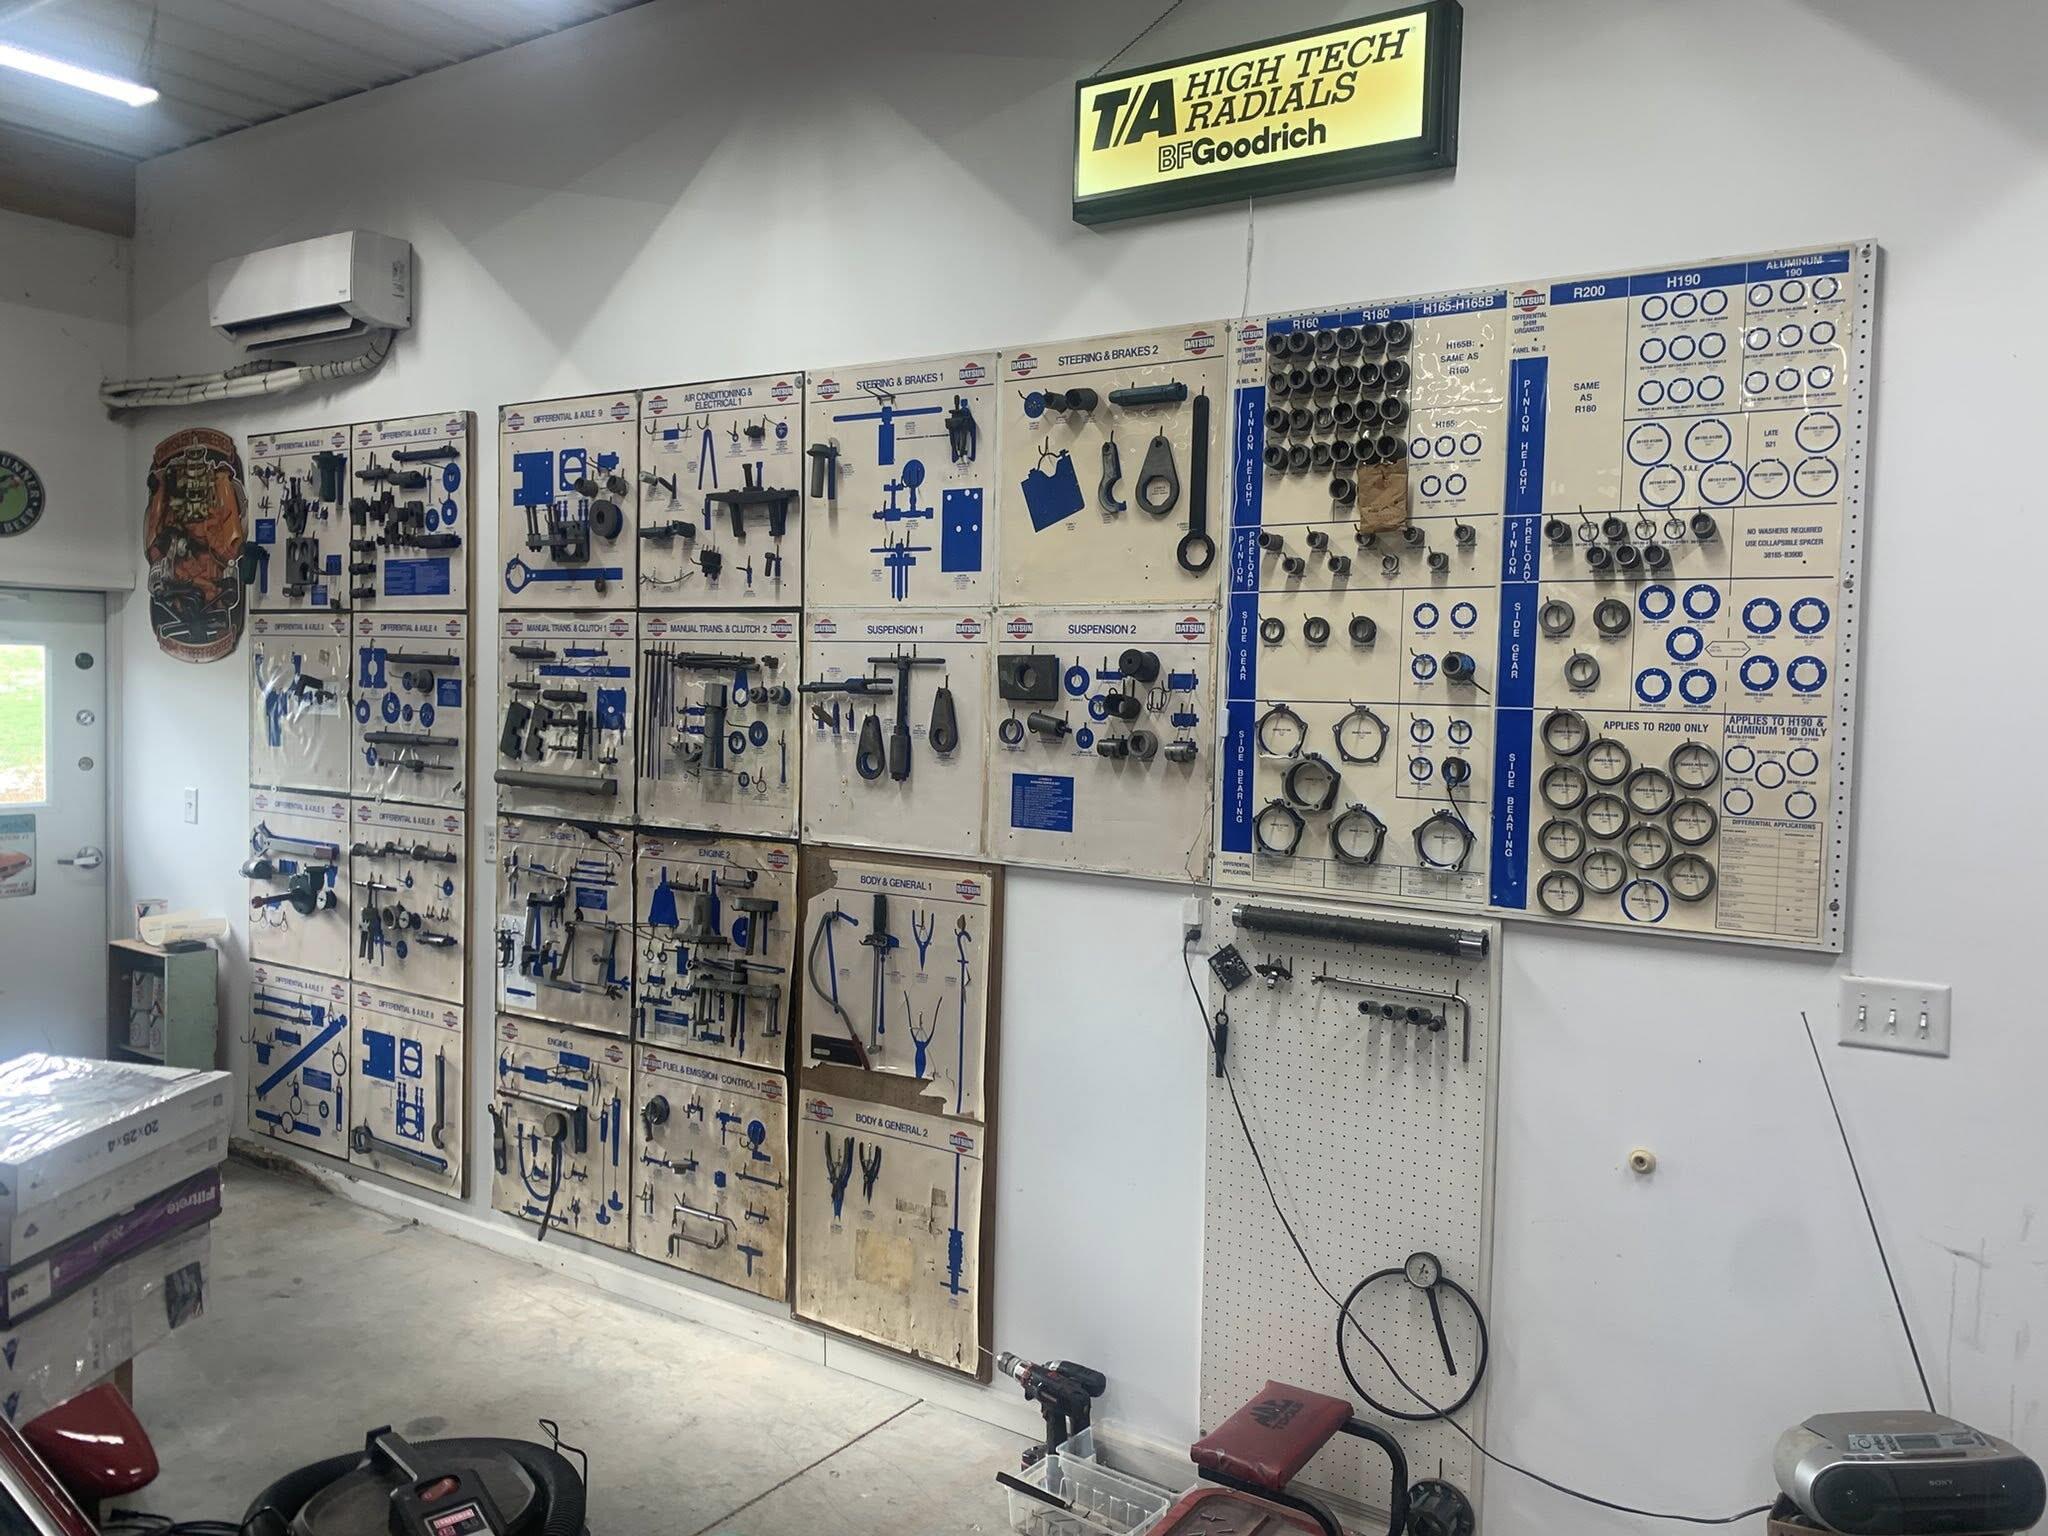
I've been traveling a lot recently, and been dealing with life, but I still managed to collect some cool stuff: I got hands on this cool vintage NISMO enamel sign from Japan: And this cool Poster, which shows a works GTS-II race car. The seller says he got it from a racing shop called Iwashita racing in Shizuoka, many years ago. According to Alan, it shows SCCN works car from the first round of 1972 Fuji Grand champion series on the 20th of March, with driver Kazuyoshi Hoshino. I also found this Dutch 1971 Datsun Advertising magazine. Usually I don't collect documents from other countries (there's just too many), but this one is special, because it shows an EU-spec prototype car. If you look closely, you will see the Fender-top mounted blinker / turn signals and the Rob Janssen homemade front spoiler, which led to the development of the OEM front spoiler for European cars by Nissan. Then I got a reproduction of the MK-1520 ZC car radio manual and a correct Swiss 1972 service / Warranty booklet for my car. After a bit of a search, I also managed to get this cool Nissan Oil Can: With the Elephant oil logo from the 240Z oil filler cap: I also got gifted a Center cap from a friend. Not the correct one for my car, but who am I to turn down freebies? I also found a set of NOS OEM FS5C71A transmission "monkey motion" shifter bushings. The original ones of mine were worn out, and I had them replaced with some red aftermarket ones, but these will definitely look better. Then I'm constantly on the hunt for the missing tools of the Datsun / Nissan tool boards, which I acquired recently. Luckily they pop up sometimes, and recently I got a bunch of missing ones: There are still quite a few missing, but 2/5 tool boards are complete now, and the remaining ones are filling up quickly. I'm currently awaiting more deliveries, so expect another update soon. Oh, You may have noticed that I've also reorganized my workshop and garage a bit for better usage of space.3 points
-
Well... it started life at Pierre's Z... saw it in 2001 at the Motorsports Auto Show. The best looking Z Convt. conversion I had seen. The body lines were beautiful..
 3 points
 -
3 points
-
3 points
-
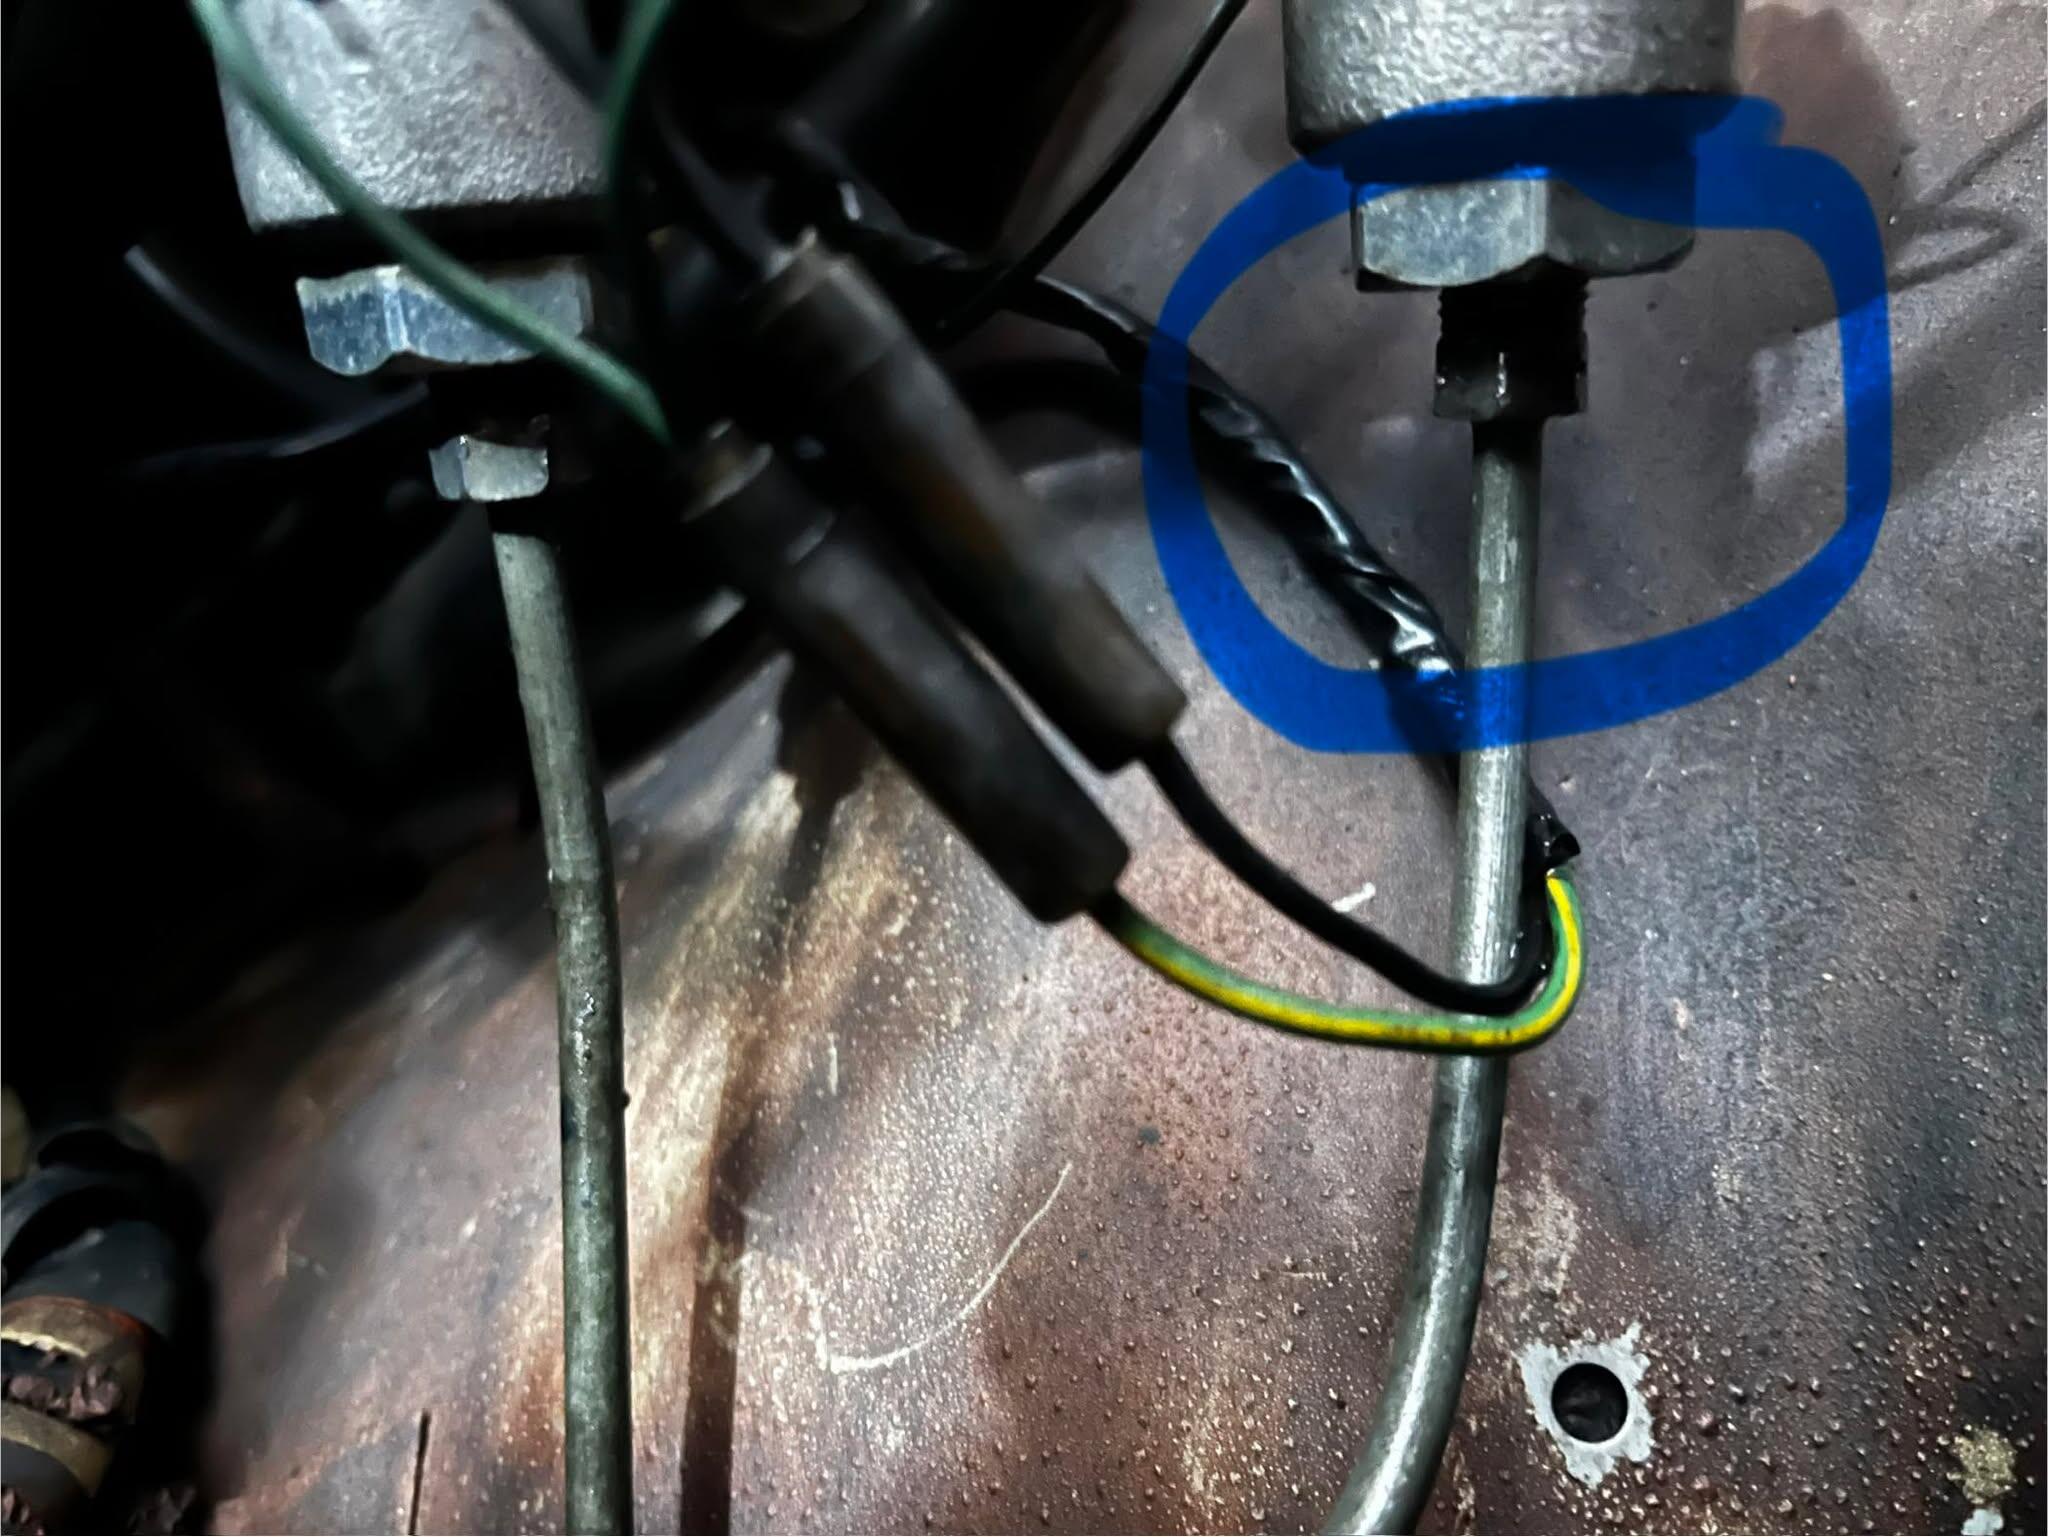
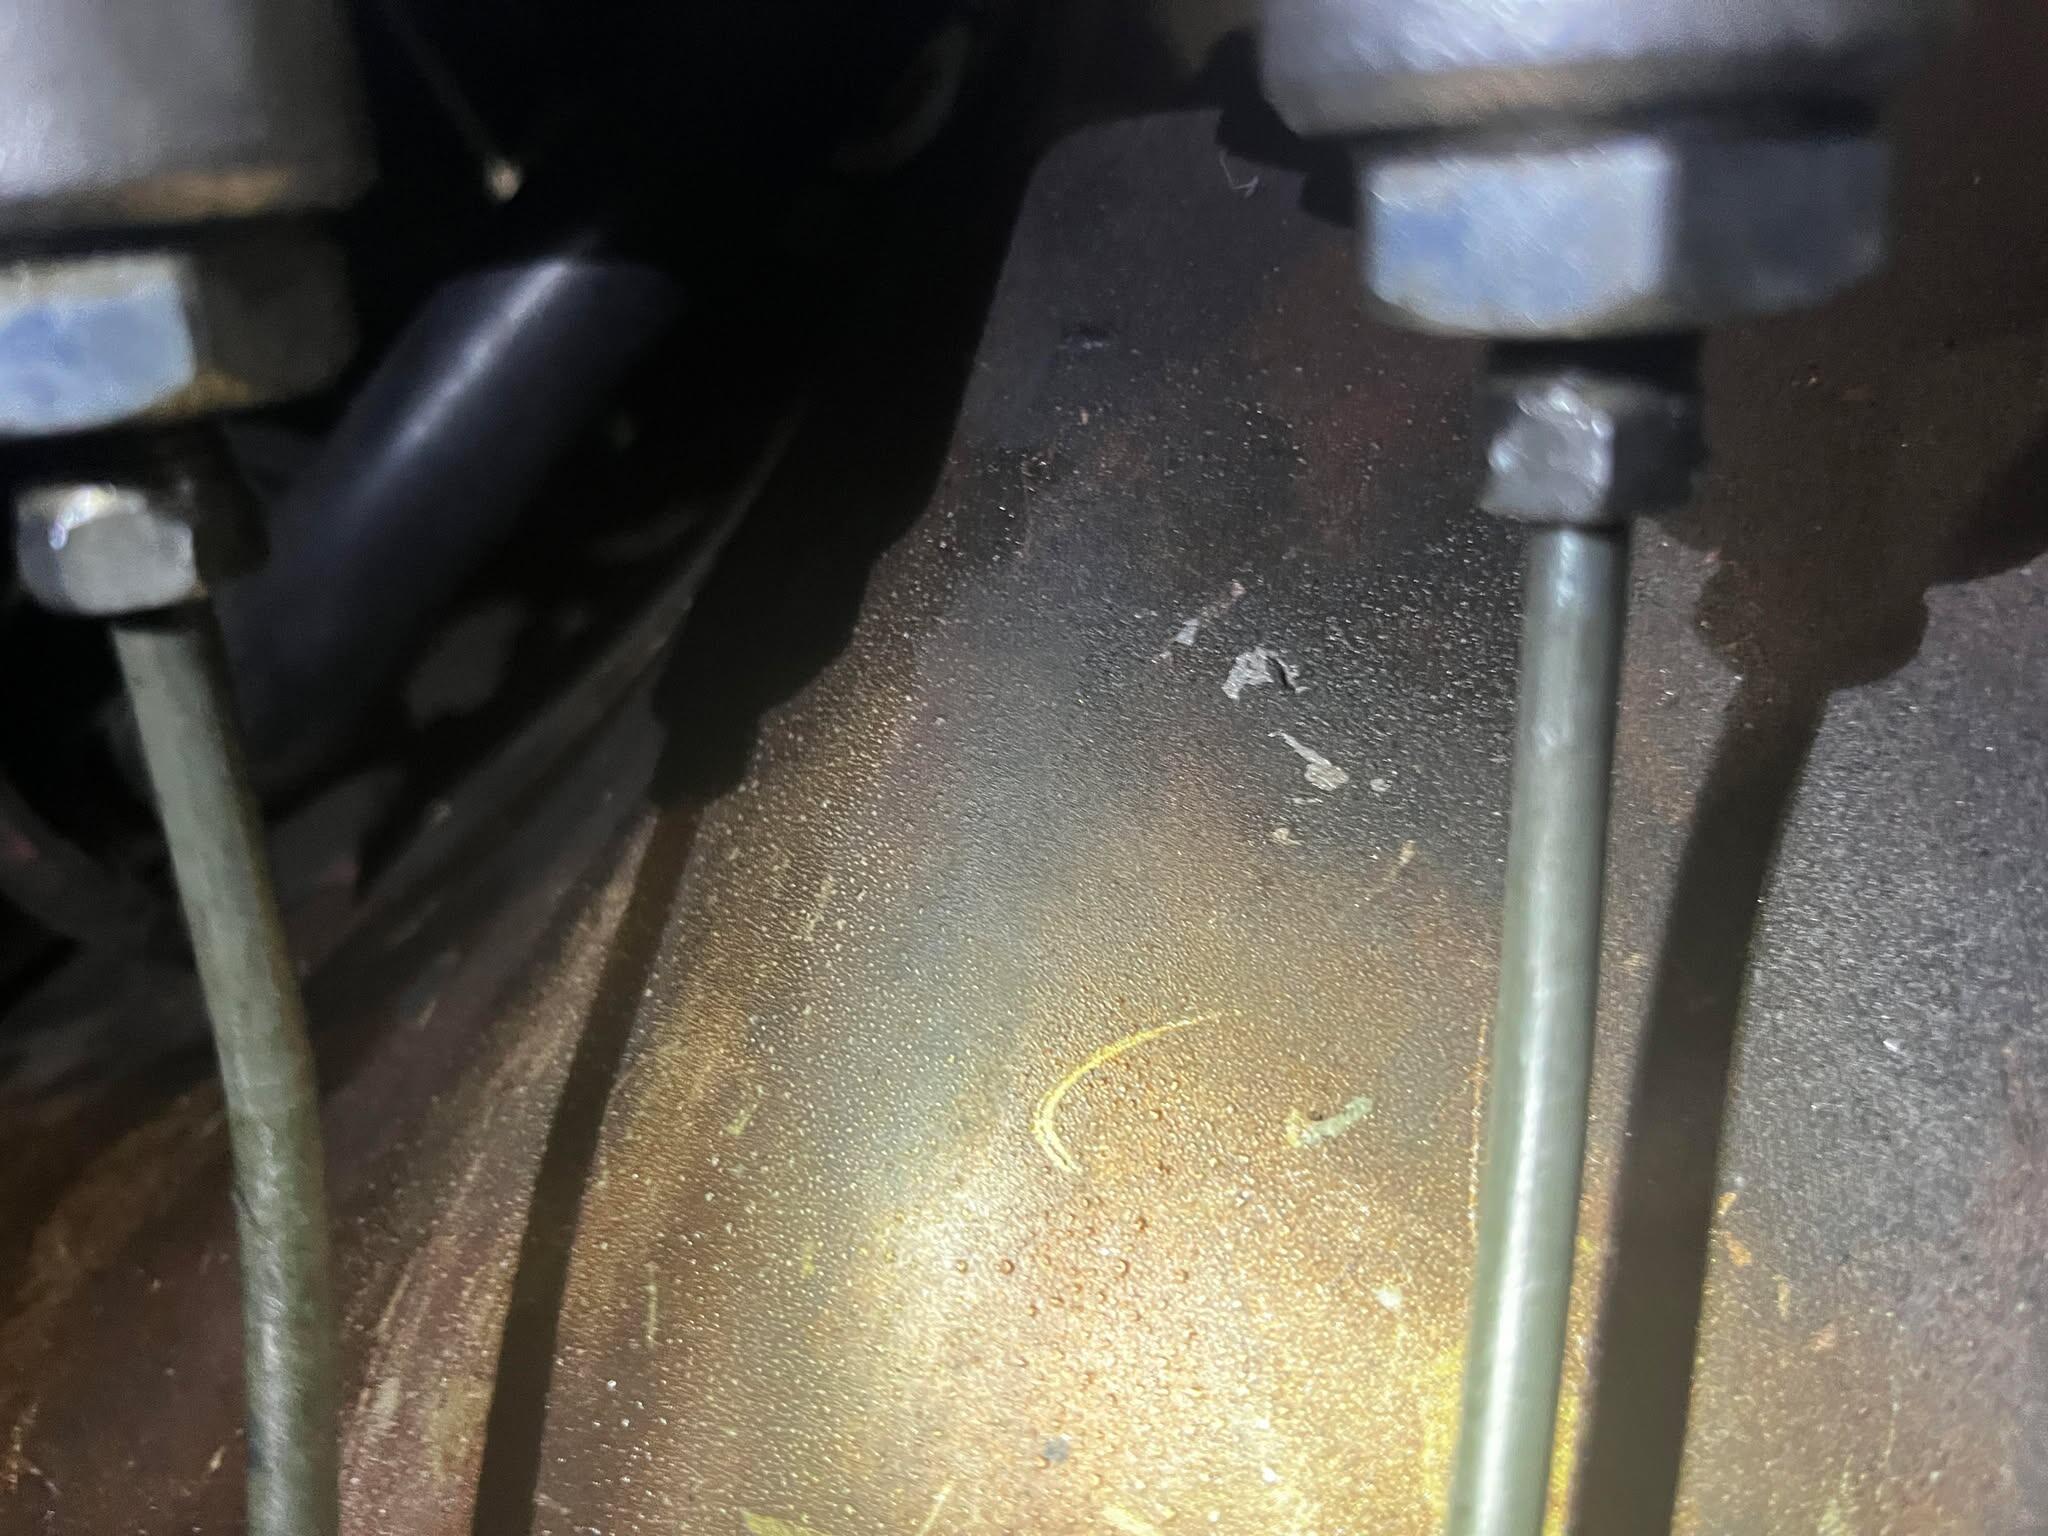
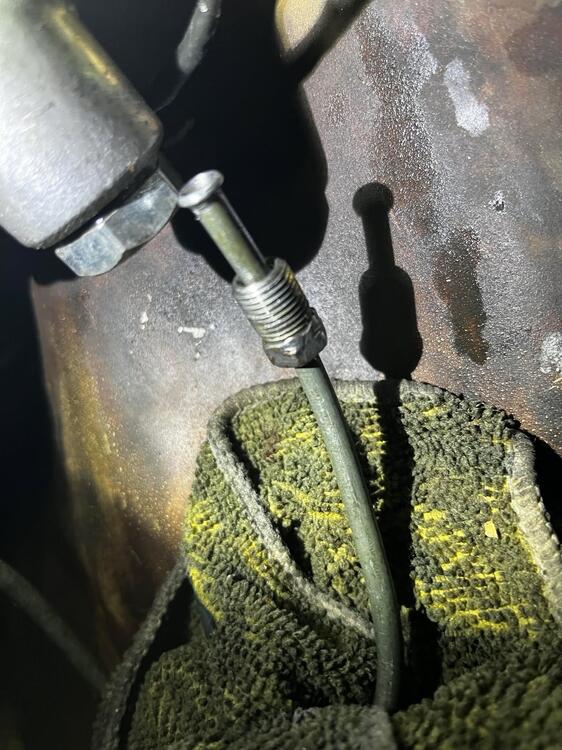
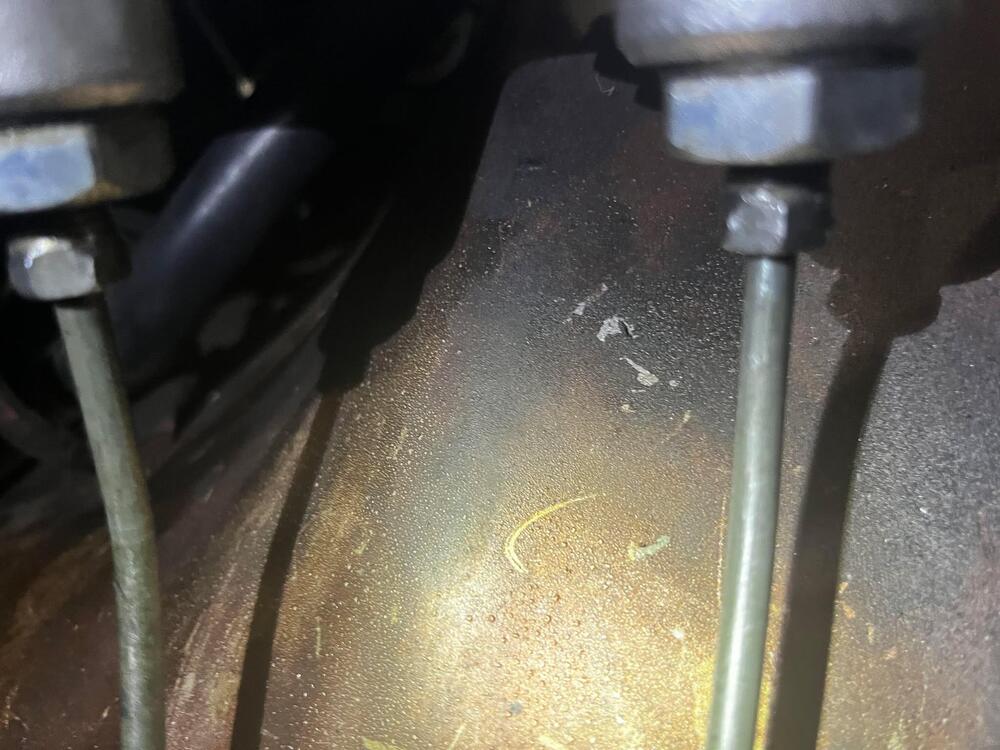
3 pointsUpdate for all of you. We very may be in business here and you were all right - the hydraulic line was crooked/not fully seated and once I took it out and reseated it, the leak was gone. Again, I still don't understand how it didn't leak over the course of 6 years and thousands of miles, but I guess that was a good thing. I am going to bleed the brakes tomorrow just to be safe but I did bleed the master after all of this and the pedal feels good. Here are pictures of the line screwed in before, the flange/nut's condition when I took it out this evening, and how the cylinder looks now with the line in straight.

 3 points
 -
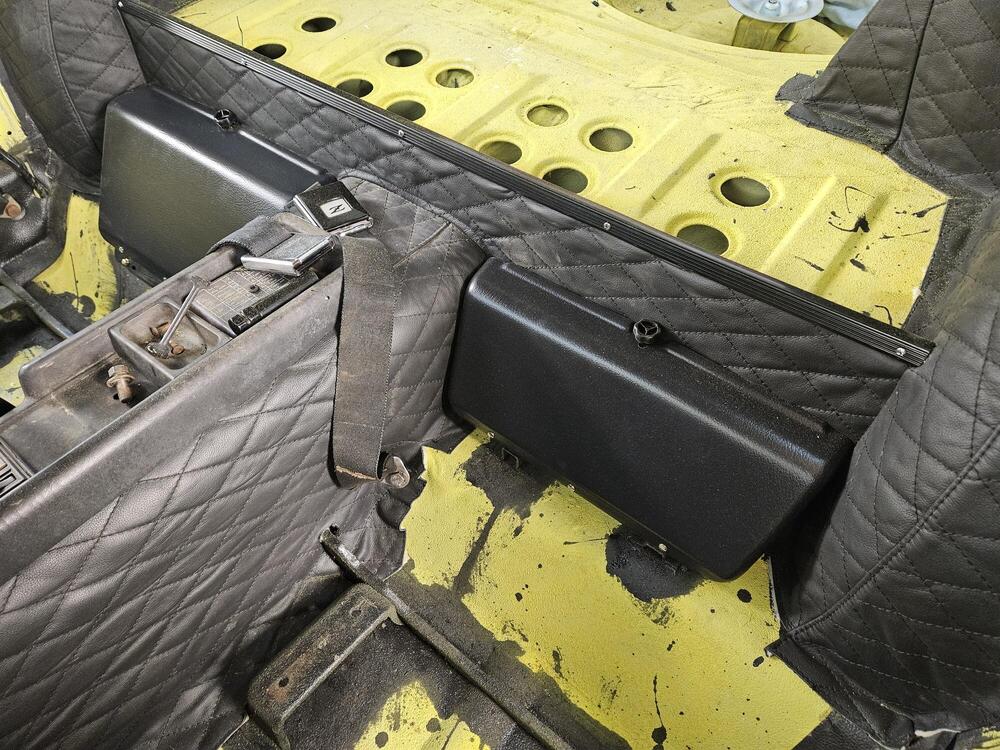
3 pointsI also got the tool covers from resurrected classics and got them installed A little nerve racking to bend the plastic hinges to mount them

 3 points
 -
3 pointsS30 parts are rare and expensive. Not enough competition or volume of sales to keep the price down.3 points
-
It's unfortunate so many cool looking concept cars don't get built or the coolness gets lost in the transition to production line2 points
-
That's what we did with boats, river racing. Put spray paint marks on the inside of the highway guardrails along the river. 13 hundred and 20 feet, run what you brung was like a Bible verse I'll never forget.2 points
-
Wonderful stuff you have obtained, I envy you! In addition I have never seen tools boards, wall mounted tools are so cool. Thank you for your gift “tools manual” which is replicated nicely, I think I have the lost pages in digital format when one of my friend on facebook kindly gave me. So we can share it. Kats2 points
-
From the looks of it, it will break $46k but I doubt they will recoup the investment2 points
-
If you follow me on social Media, you might have noticed that I spent the last 10 days in Japan with my fellow S30.world friends for a very special once-in-a-lifetime experience. I'll post multiple detailed stories on this website soon, but I still need to process it all in my brain and go through thousands of photos. What I can show you already is what I brought home from Japan, aside from all the business-cars and fresh S30.world clothing (not pictured): First, a set of Papers with the "Nissan logo": Those are the ones that Nissan dealers usually put in new cars to protect the carpets. We had them at our Car show in Japan to protect the floor from tire-marks. As we had a lot of them leftover in the end, I thought i stuff two in my suitcase :-) I also got various stickers. From the old NISMO logo stickers, which I bought in the Nissan HQ Gallery in Yokohama, to a handwritten Kanji-version of my name, to various stickers of the event, and a sticker that me a local Honda dealer gave when we checked out their cars. Some went of course directly onto my new "Hall of Fame": I was also very fortunately to buy one of the very last RS-Mach "Ura Mach" steering wheel from the maker himself. I have planned a detailed story on this blog about the Mach steering wheels, so stay tuned, if you want to know more. He sold all the remaining ones he had on this very day and doesn't plan to make new ones. I also came home with a lot of Magazines and catalogues. From the Protec catalogue to the Nostalgic hero (showcasing the new NISMO DOHC head, which we would be able to check out the next day), to the nice Motorfan Fairlady special edition which I was gifted by Endo-San, To the new Motor magazine 70th anniversary edition by Editor Morita-san, which joined us during the first days of our trip. At RS-Watanabe we got gifted with a nice bag that also included a lovely box with their iconic Watanabe 8-spoke wheel as a miniature keychain version. Lovely! From Morita-san i was gifted the lovely pin in exchange for a document I gave him and from Jeff we got gifted some ZCon keychains and a group Z sports car club Bolt tray. The bolt-tray went directly on my car lift: Then we also got gifted a set of reproduction rubber plugs for the drum brake drums from a good friend and Endo-san handed out NOS spare bulbs in original packing, which will be excellent to put in the glovebox :-) In a local toy-store we found a box full of mini 240Z's for 90 cents a piece, so I got a bunch of them as a gift for customers :-) From one of the Japanese participants of the show, we got gifted these lovely 70ties scanned magazine covers from two Japanese 1971 "Autosport Young" magazines, which assemble to a nice poster when you put them together. Aside from the naked lady, you see all the Nissan Fairlady Z Works race drivers in front of one oft their racing cars. I framed it and hung it in a nice place in the garage: We also got gifted some copies of hand made sketches by Tamura-san, one of the original designers of the S30 car, plus a nice photo from a LHD prototype car: Then I also got this. I understood that this is some kind of rating chart and something very special, somehow linked to Sumo battling, but still have to find out what exactly it means. Another cool thing was this S30.world Japan expedition Lego kit: Which, when you assemble it, turns into an S30 under a Japanese Torii gate with the S30.world logo on it: I was lucky my suitcase didn't burst. I would have loved to buy more stuff, there was definitely no more room for that, and that's fine for my wallet too :-) Expect more updates from our Japan trip soon!2 points
-
Grab a torch - propane will do - and melt the body lead out of that section. That'll give you a better idea of how that sheet metal is shaped and spot welded together. There will be body lead in various places all up and down that pillar. The lead will probably have saved the sheet metal up near the window flange - and may give you a good clean section to weld to at that end.2 points
-
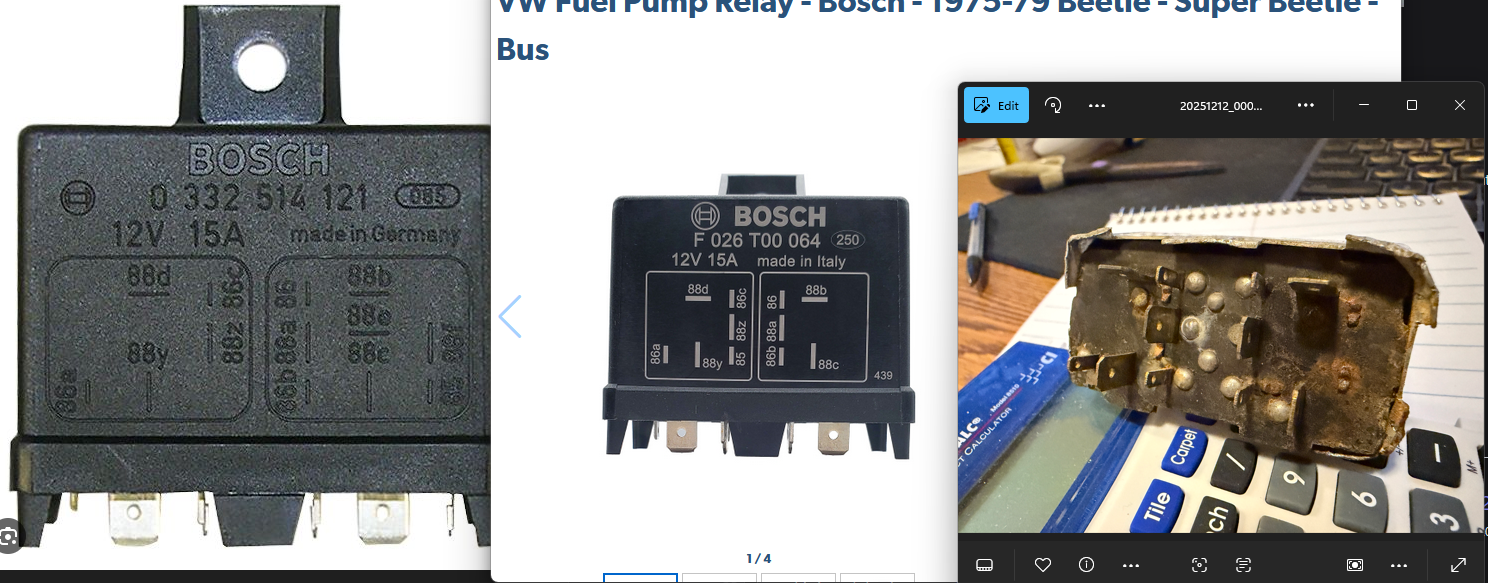
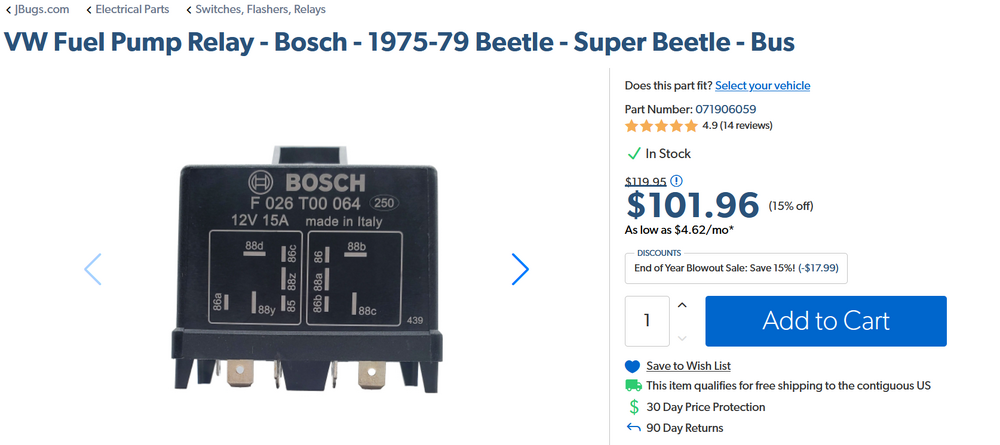
2 pointsFYI, I diagnosed a bad EFI relay on a 77 and told the owner to get the relay that @EuroDat said to buy. He got that relay, slapped it in, and the car ran just fine.2 points
-
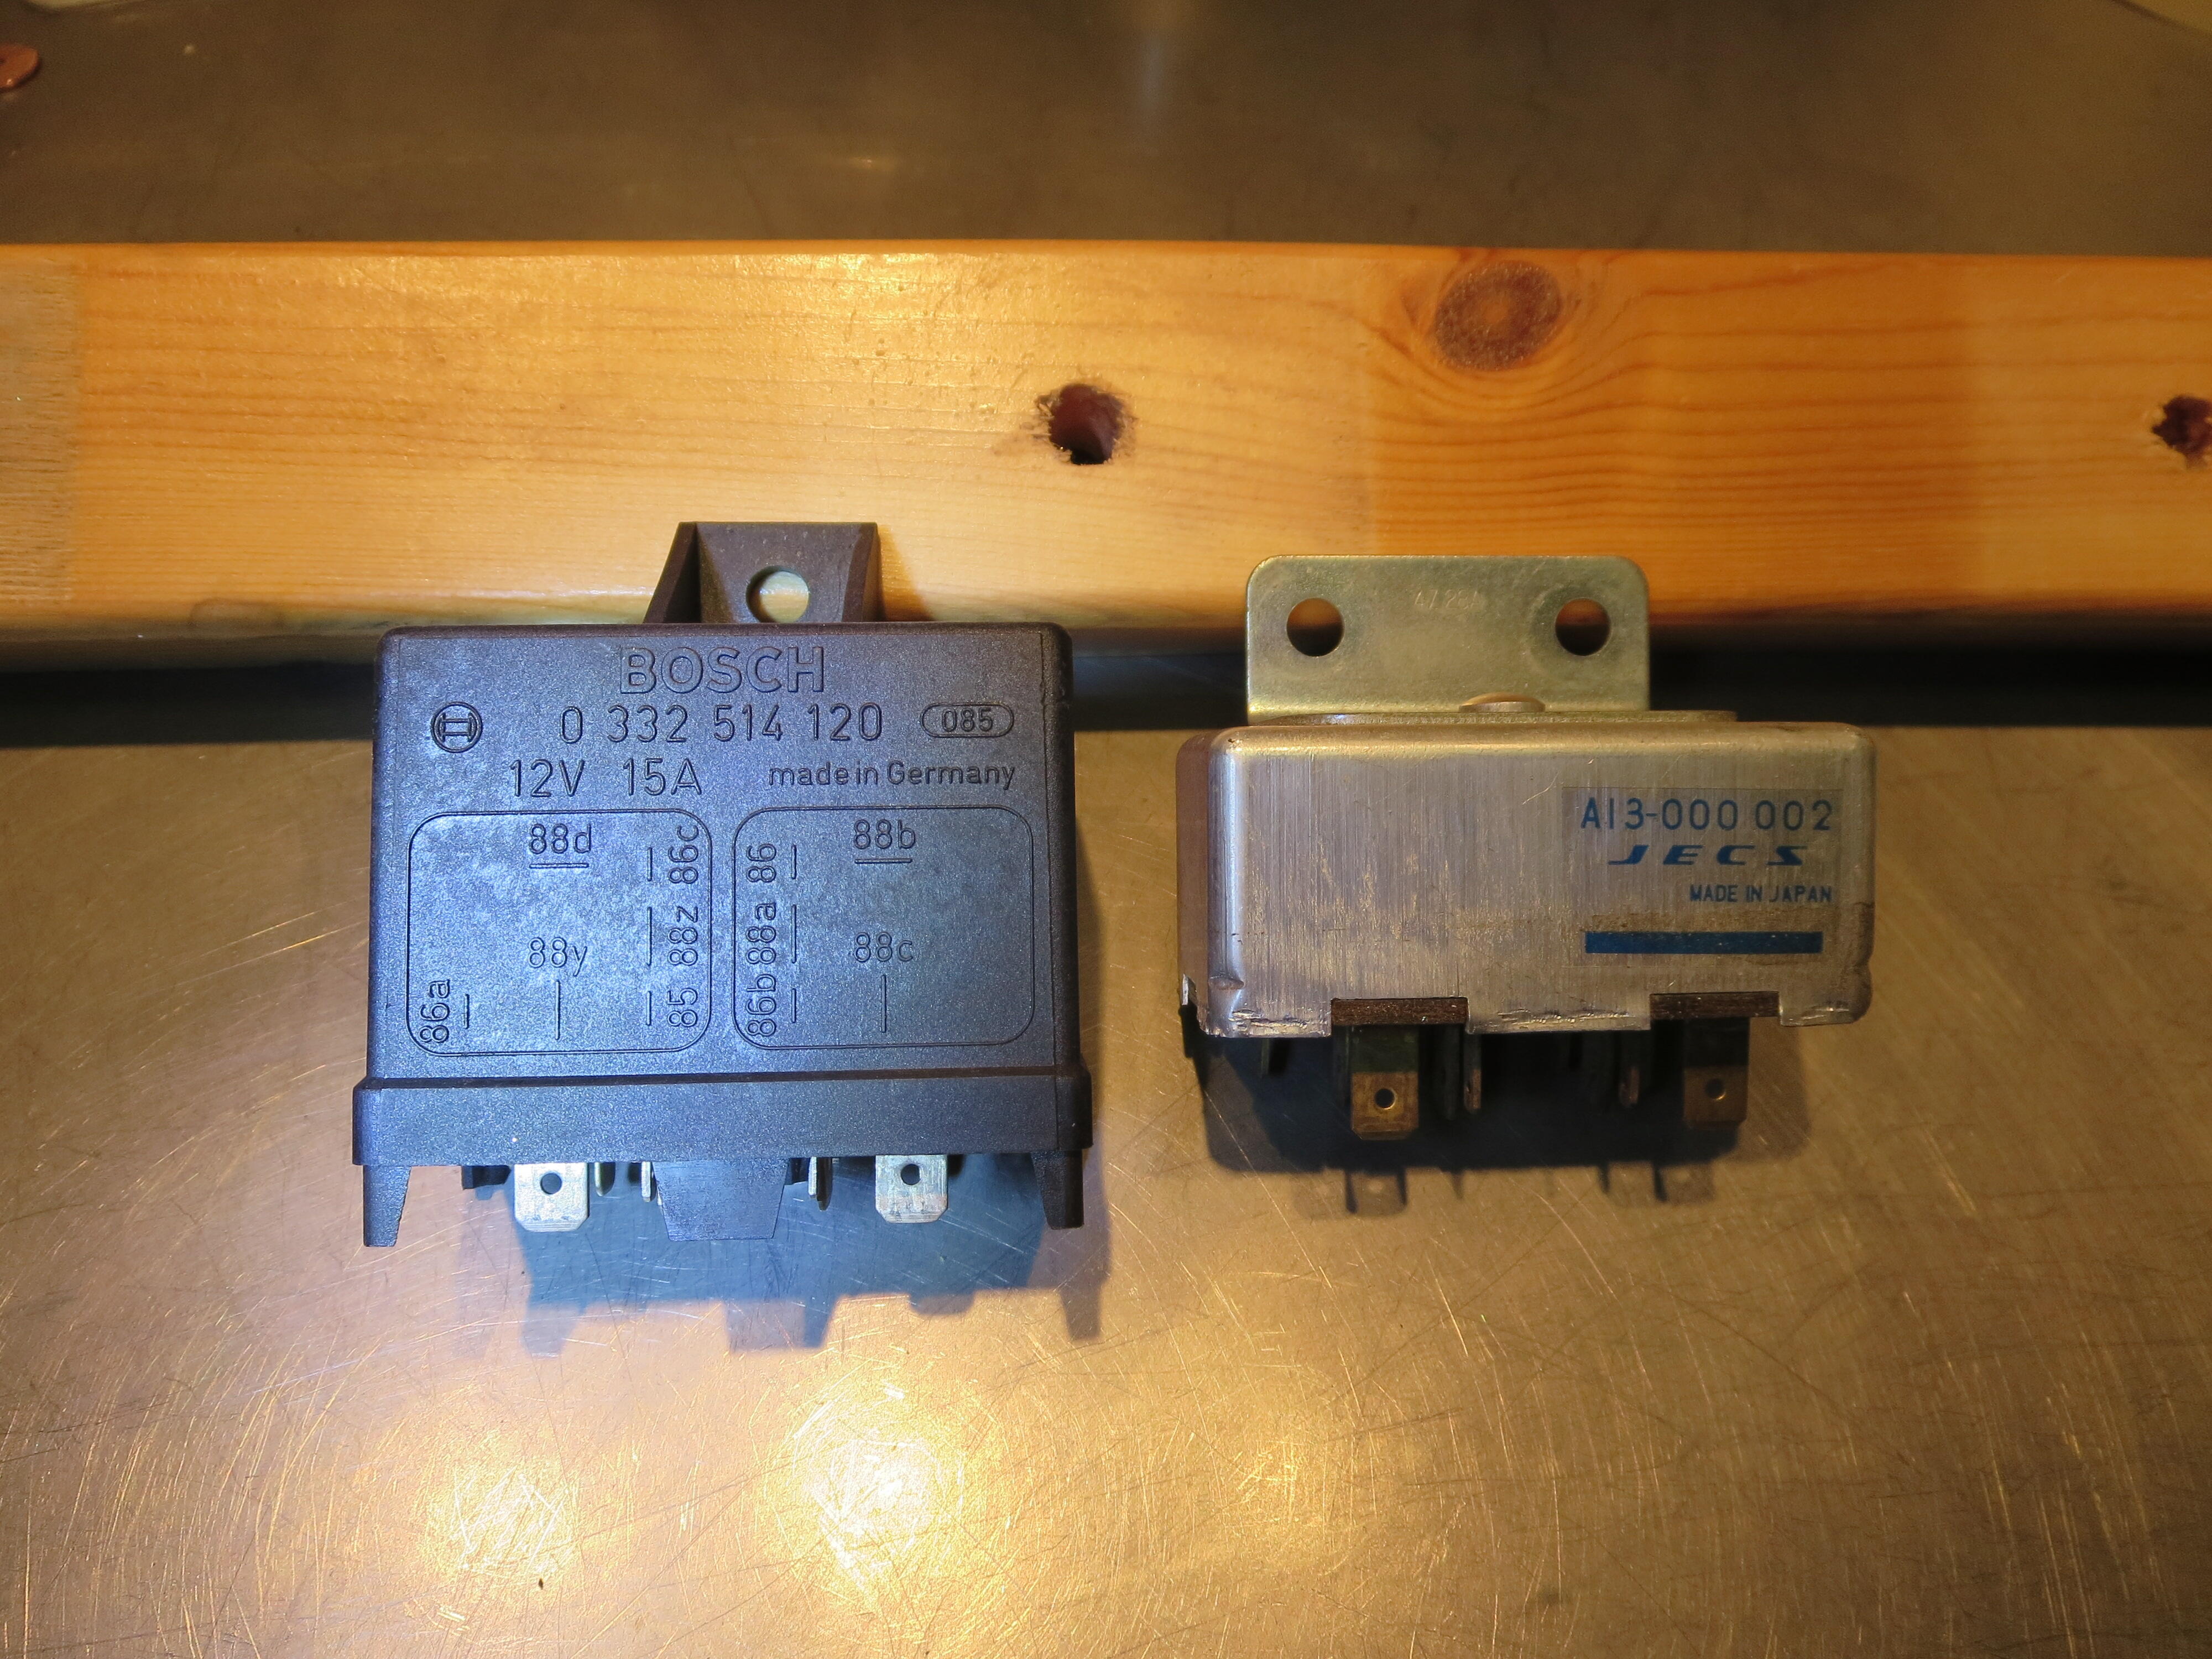
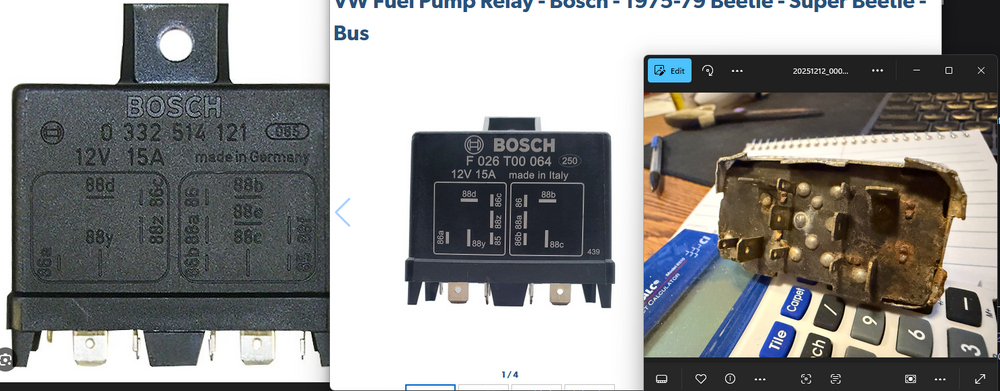
2 pointsNot sure that relay has the same function. It might need some wiring changes to get it to work. The correct bosch relay is 0332 514 120. Bosch have several variants for the VW's

 2 points
 -
I should have something in a donor part if you decide to go that route.2 points
-
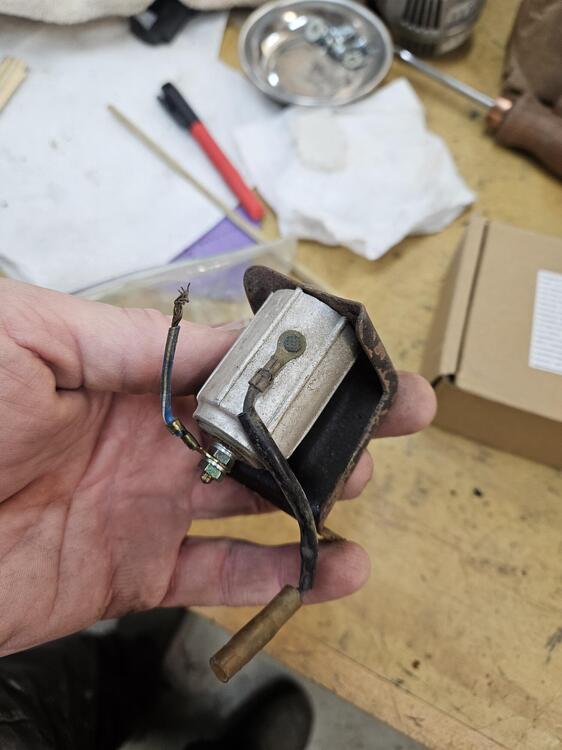
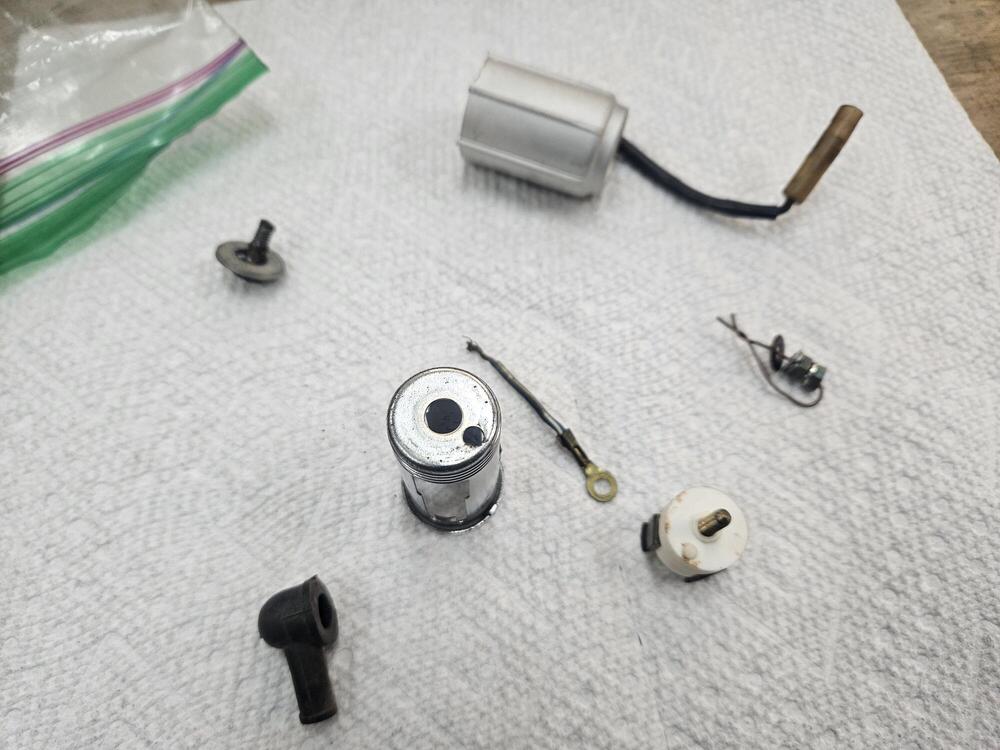
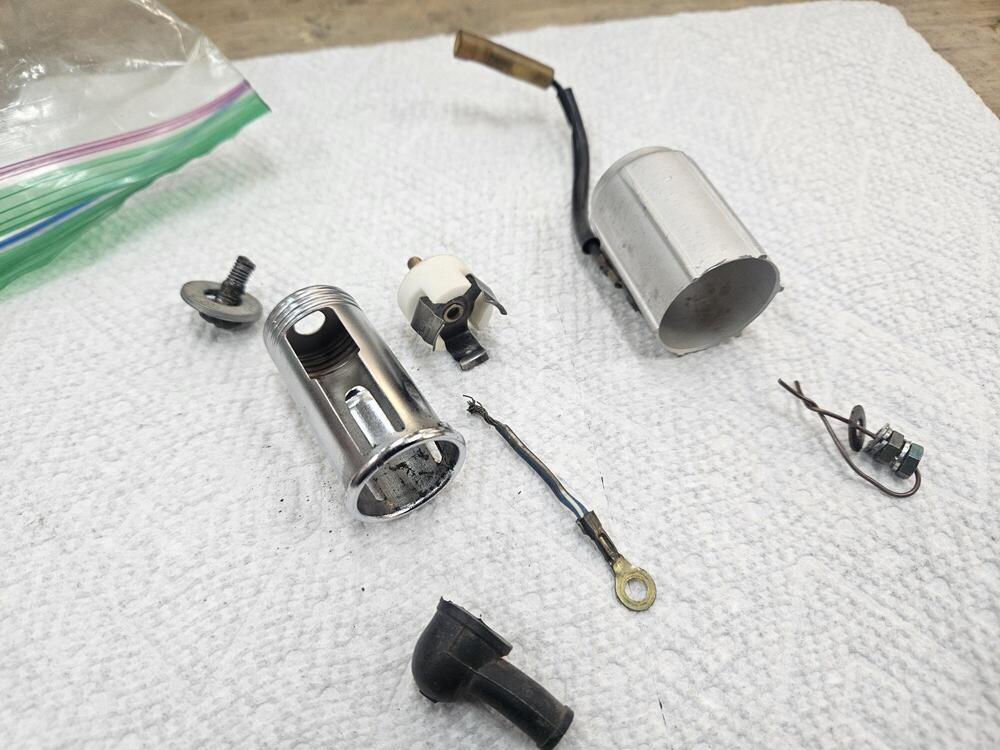
2 pointsMy '72 had the same type, it's a York a/c. You have to pull just about all of that off to replace the fuel pump. The smaller round thing above your circle is the fuel pump.2 points
-
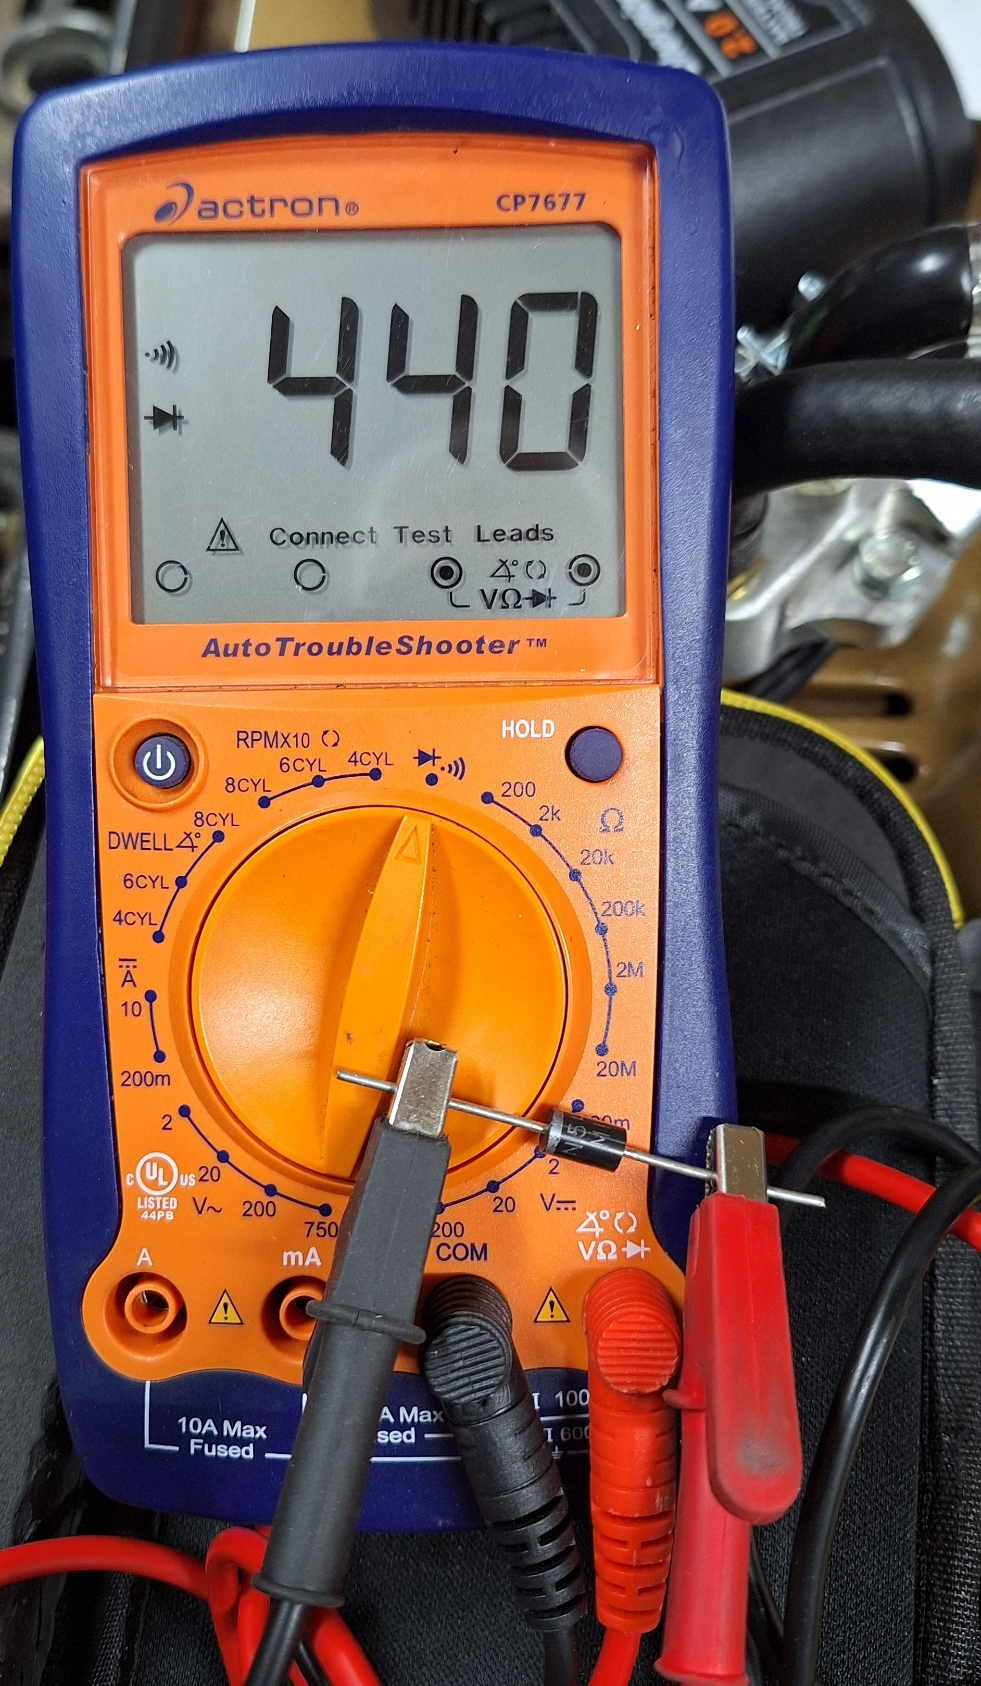
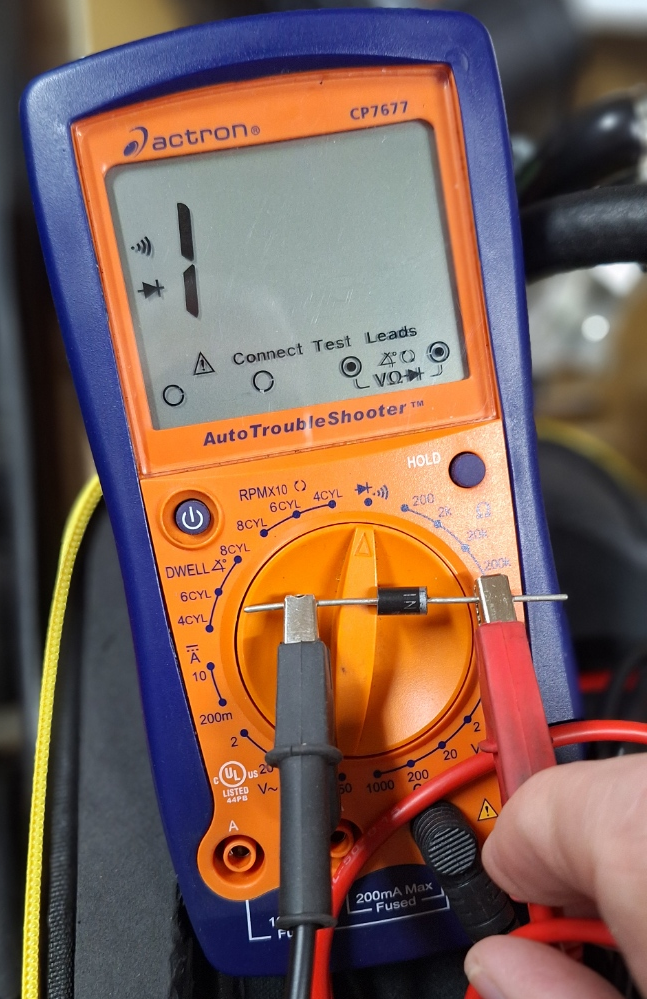
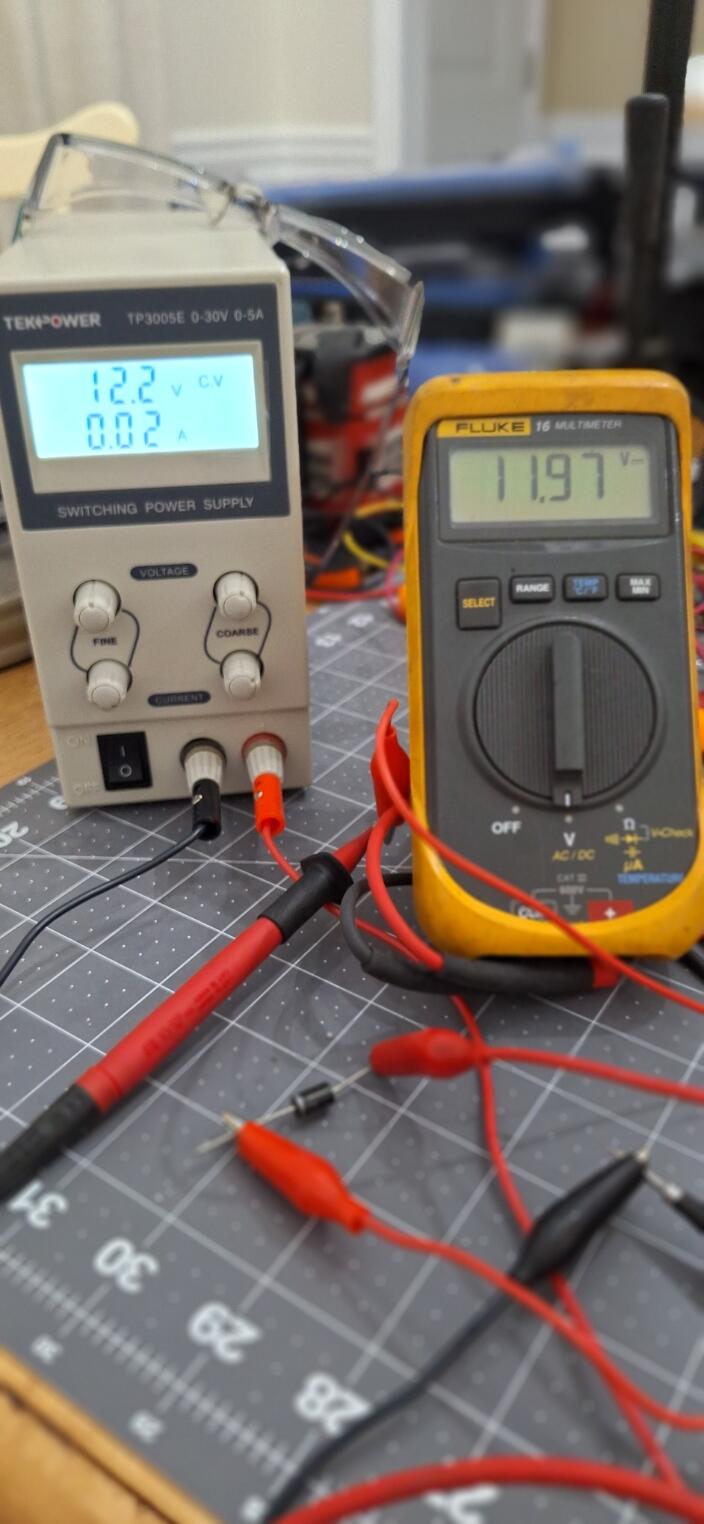
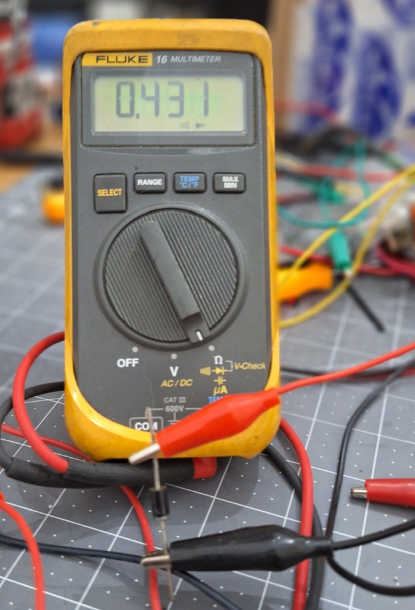
Of course, there is one other possibility. I could have designed the test wrong. I dug out a diode that should be the same spec as the ones used in the plug and tested myself. I found my instructions were lacking. You should re-test with the meter in diode testing mode. You can leave the key in OFF, too. If you test from the ballast resistor to the white/black wire, you should get a result similar to this: With the leads swapped, you should see this: If you do the voltage test, you should see a little less than battery voltage as the diode causes a slight voltage drop.


 2 points
 -
2 pointsNever seen the last type. Suspect it is a retro fit that someone did from some other car. The first one is 240, second is 280, though can’t nail down the change over date. Could be as early as the north american 260 in 74. The fiche might provide the date info2 points
-
(this is for anyone else interested in a little information about some specifics that you raise:) 1. NONE of the above are "Coil - ". (Stock config = Coil "-" is connected to the points output of the distributor. So, new wire from the Coil "-" to your new gauge...(it will be a 2nd wire connection as the Coil "-" needs a "signal to fire" from points or an electronic ignition unit as well - your new gauge is just tapping into that signal)) 2. You don't necessarily need to jumper any of the wires in that connector, but you need to understand the coil wiring to decide whether to JUMP or just ABANDON the G/W and B/W in the connector pictured above. The stock circuit goes like this: IGN SWITCH -> B/W -> Ballast Resistor -> G/W -> Tach connector -> Loop on back of Tach -> Tach connector -> B/W -> Coil "+". The coil gets power at IGN ON through this and the Tach "senses" the flow of electricity to the coil. If you're replacing the stock Tach, the re-route of the B/W back to the Tach is not necessary - the B/W and G/W to that connector can simply be ignored (abandoned). SO - the B/W that goes to the Ballast can be connected to the Coil "+" - either through the Ballast (by removing the G/W and running a short wire from there to the Coil "+") OR bypassing the Ballast and connecting the "ballast's" B/W directly to the Coil "+" instead - IF you no longer need a Ballast Resistor in the circuit. note: I think it's better to abandon and get all that extra wire (and added resistance) OUT of the power circuit to the coil... BTW, the other two wires in that connector: Black - is a Battery Ground. R/L is gauge lighting - it's listed in the wiring schematic as "IL". So Black is the power ground for the Tach - the Tach gets power (battery voltage) from a Green in another connector.2 points
-
2 points
-
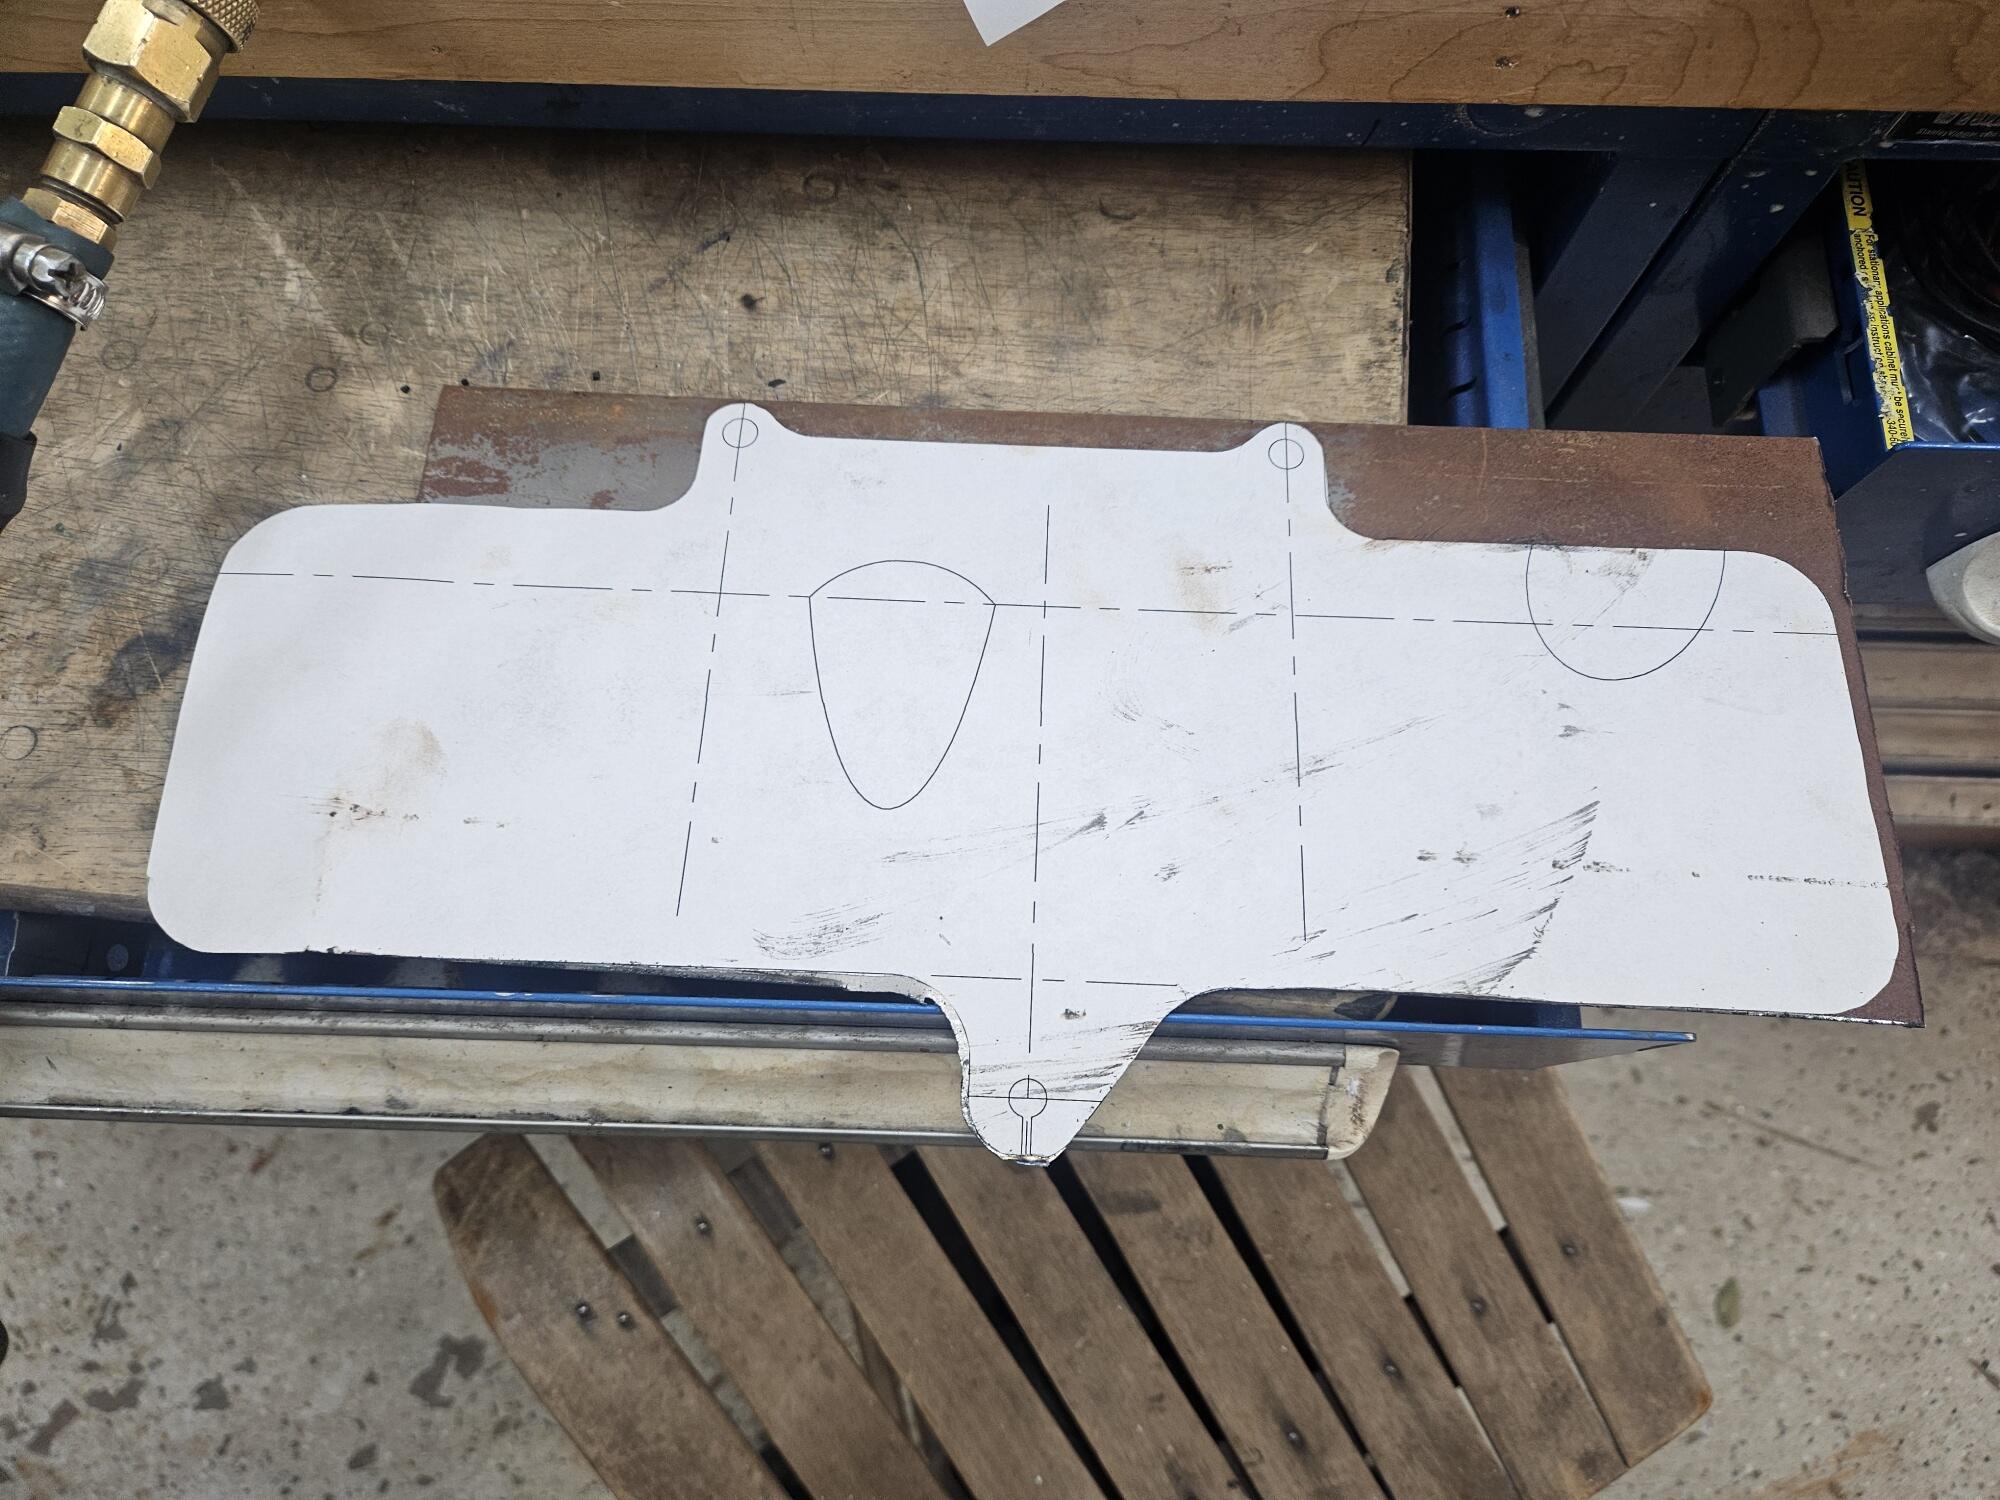
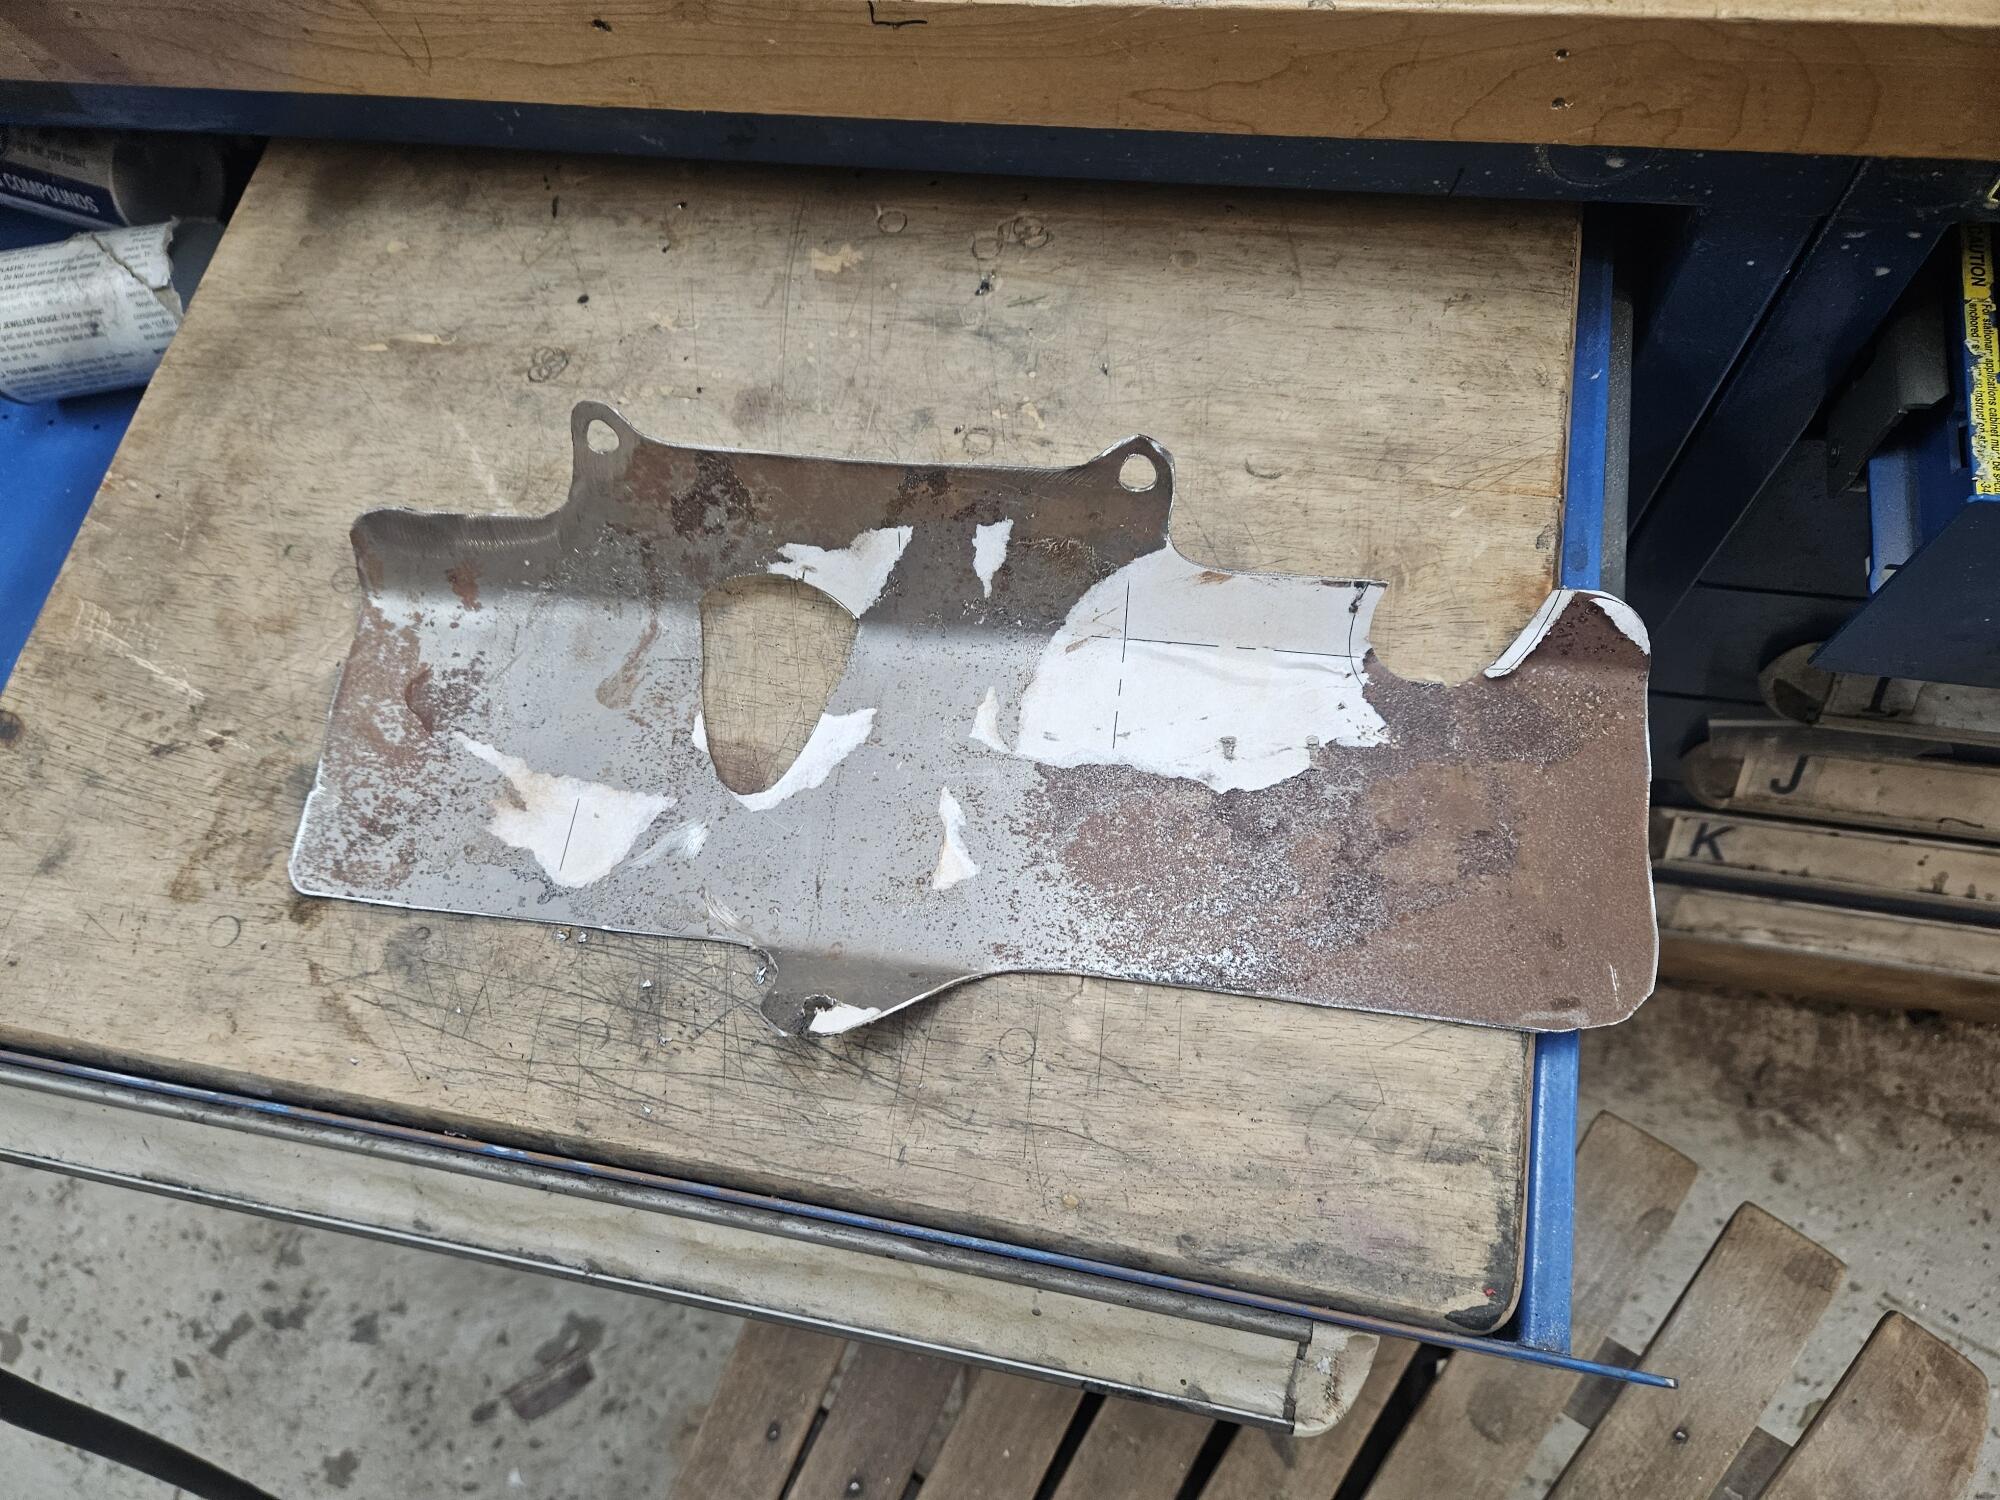
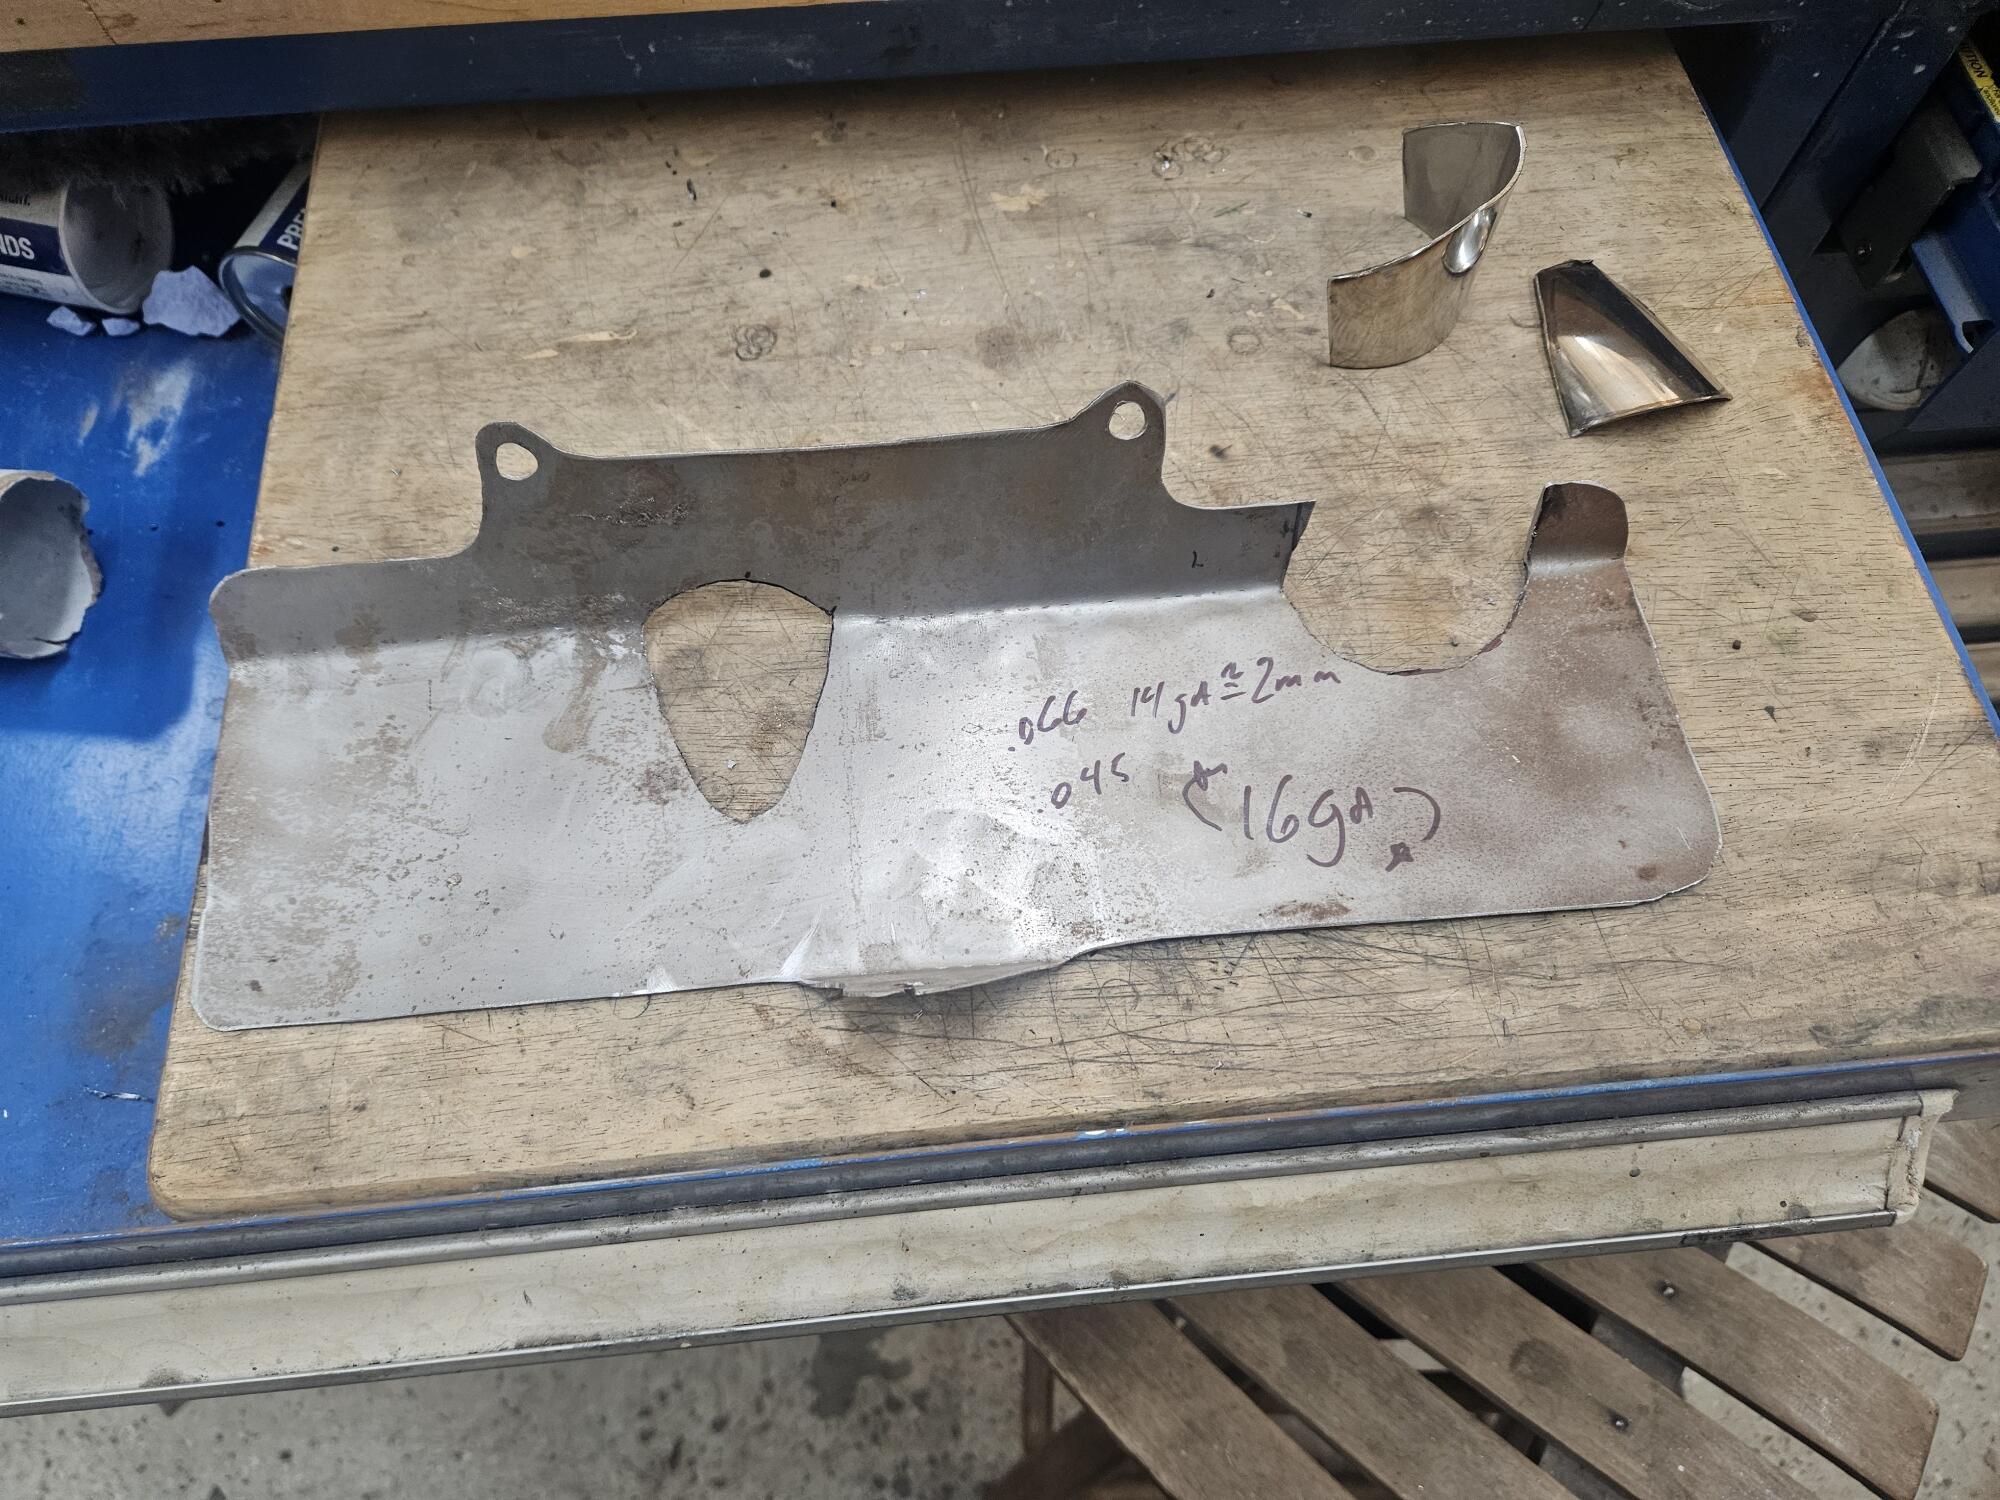
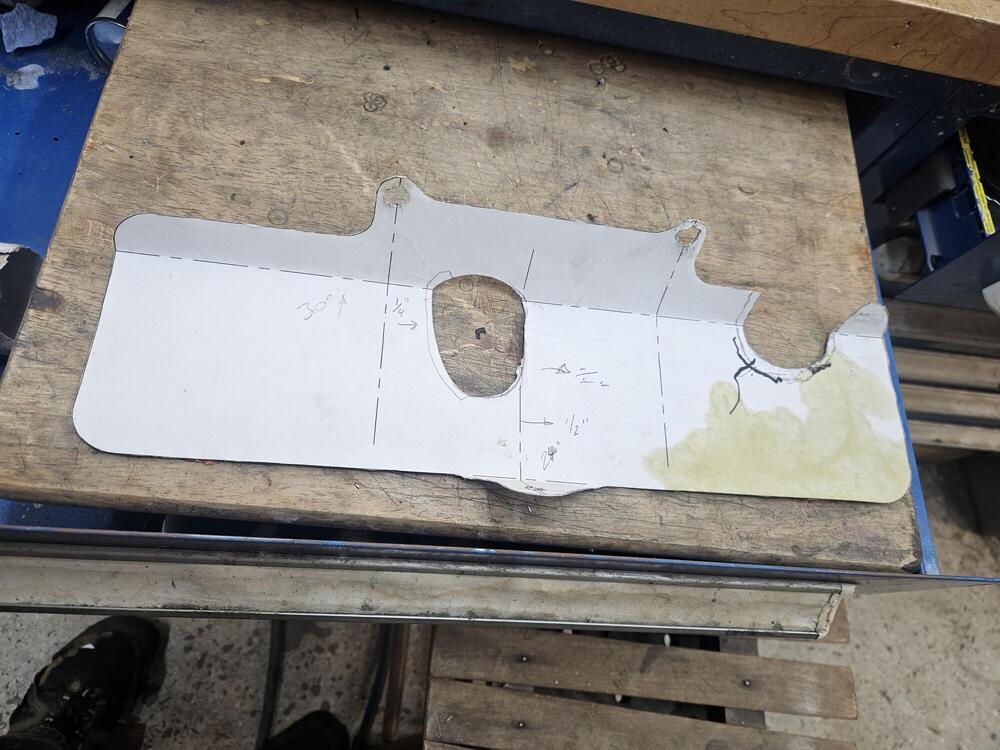
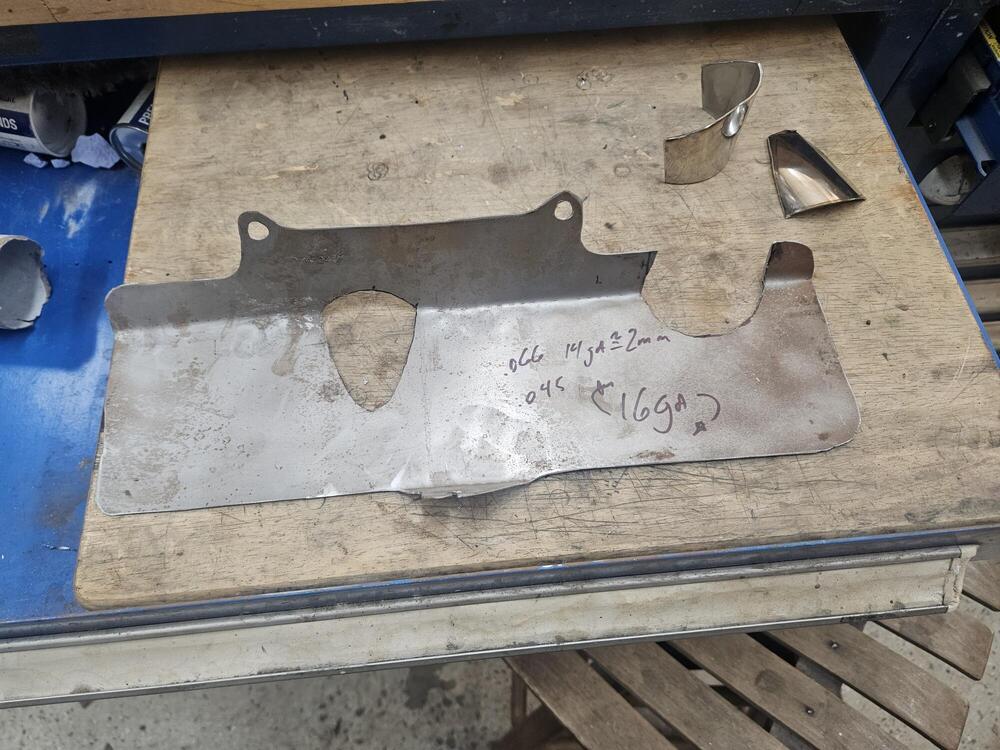
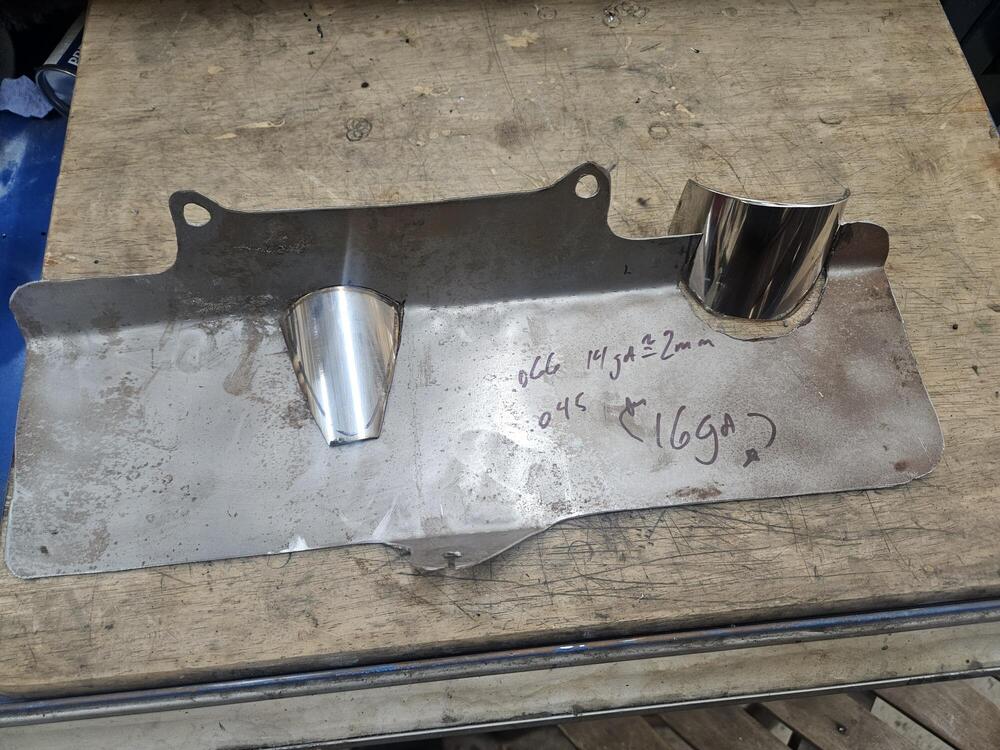
2 pointsI worked on the heat shield/ cable bracket some more today. Here is the current pattern An earlier template on a piece of coil metal I glued it to piece of 16ga I had laying around A little cutting We will have to clearance it around some of the header pipes. Since it's an equal length header, they intrude on the carb area more than some We will use some stainless exhaust tube to deal with the clearanced areas. Once I finalize a design I will have sendcutsend fabricate it for me


 2 points
 -
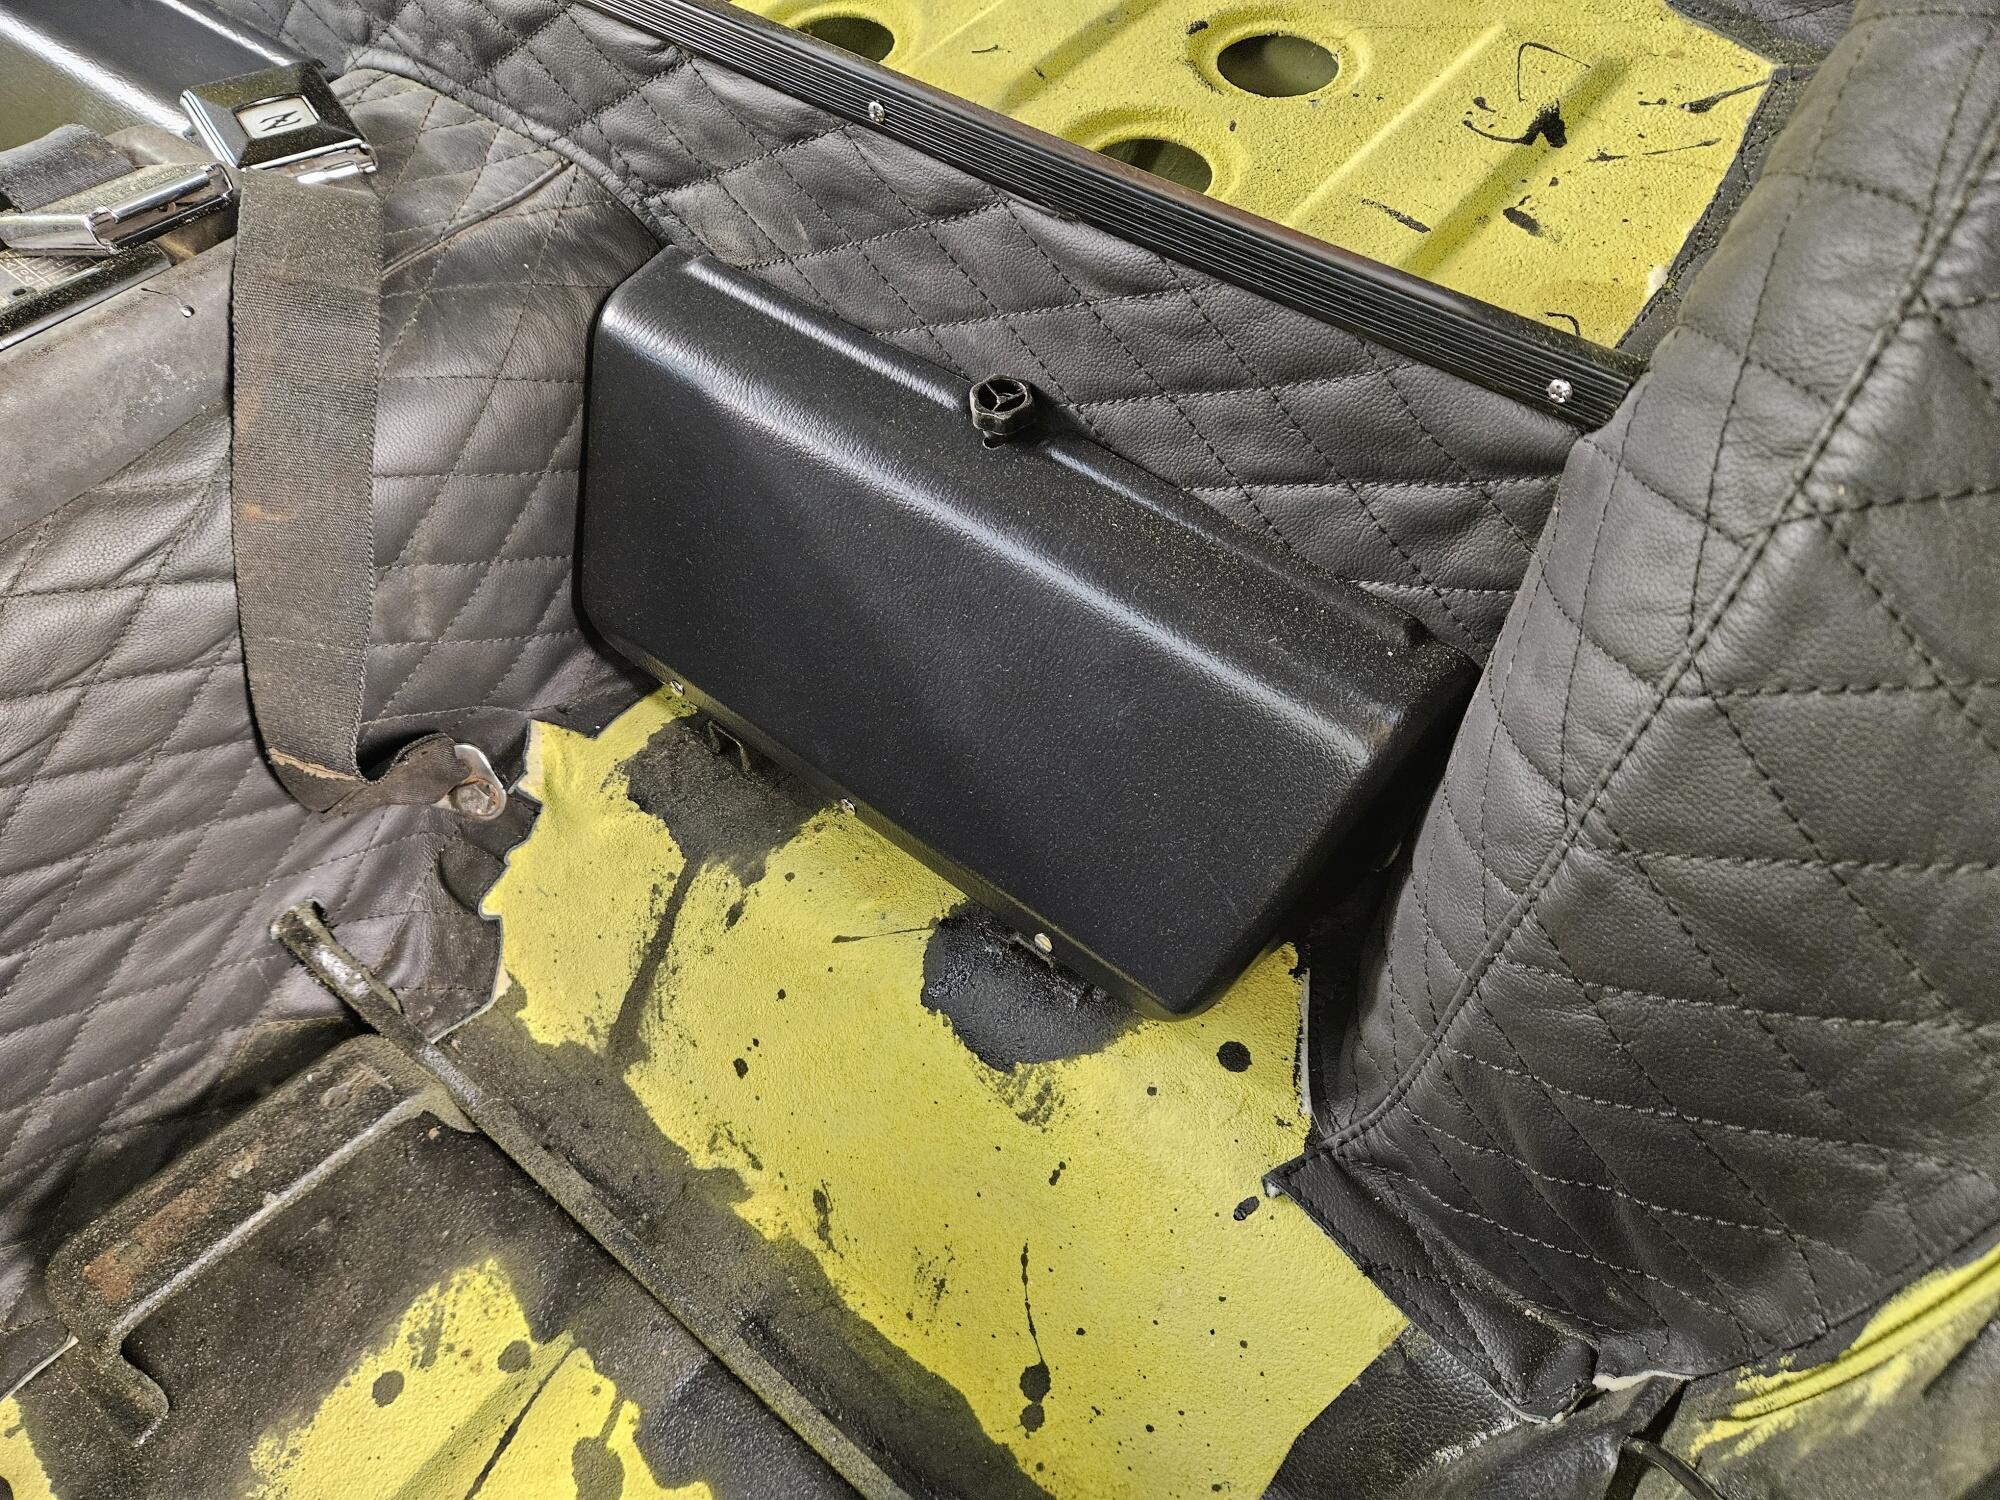
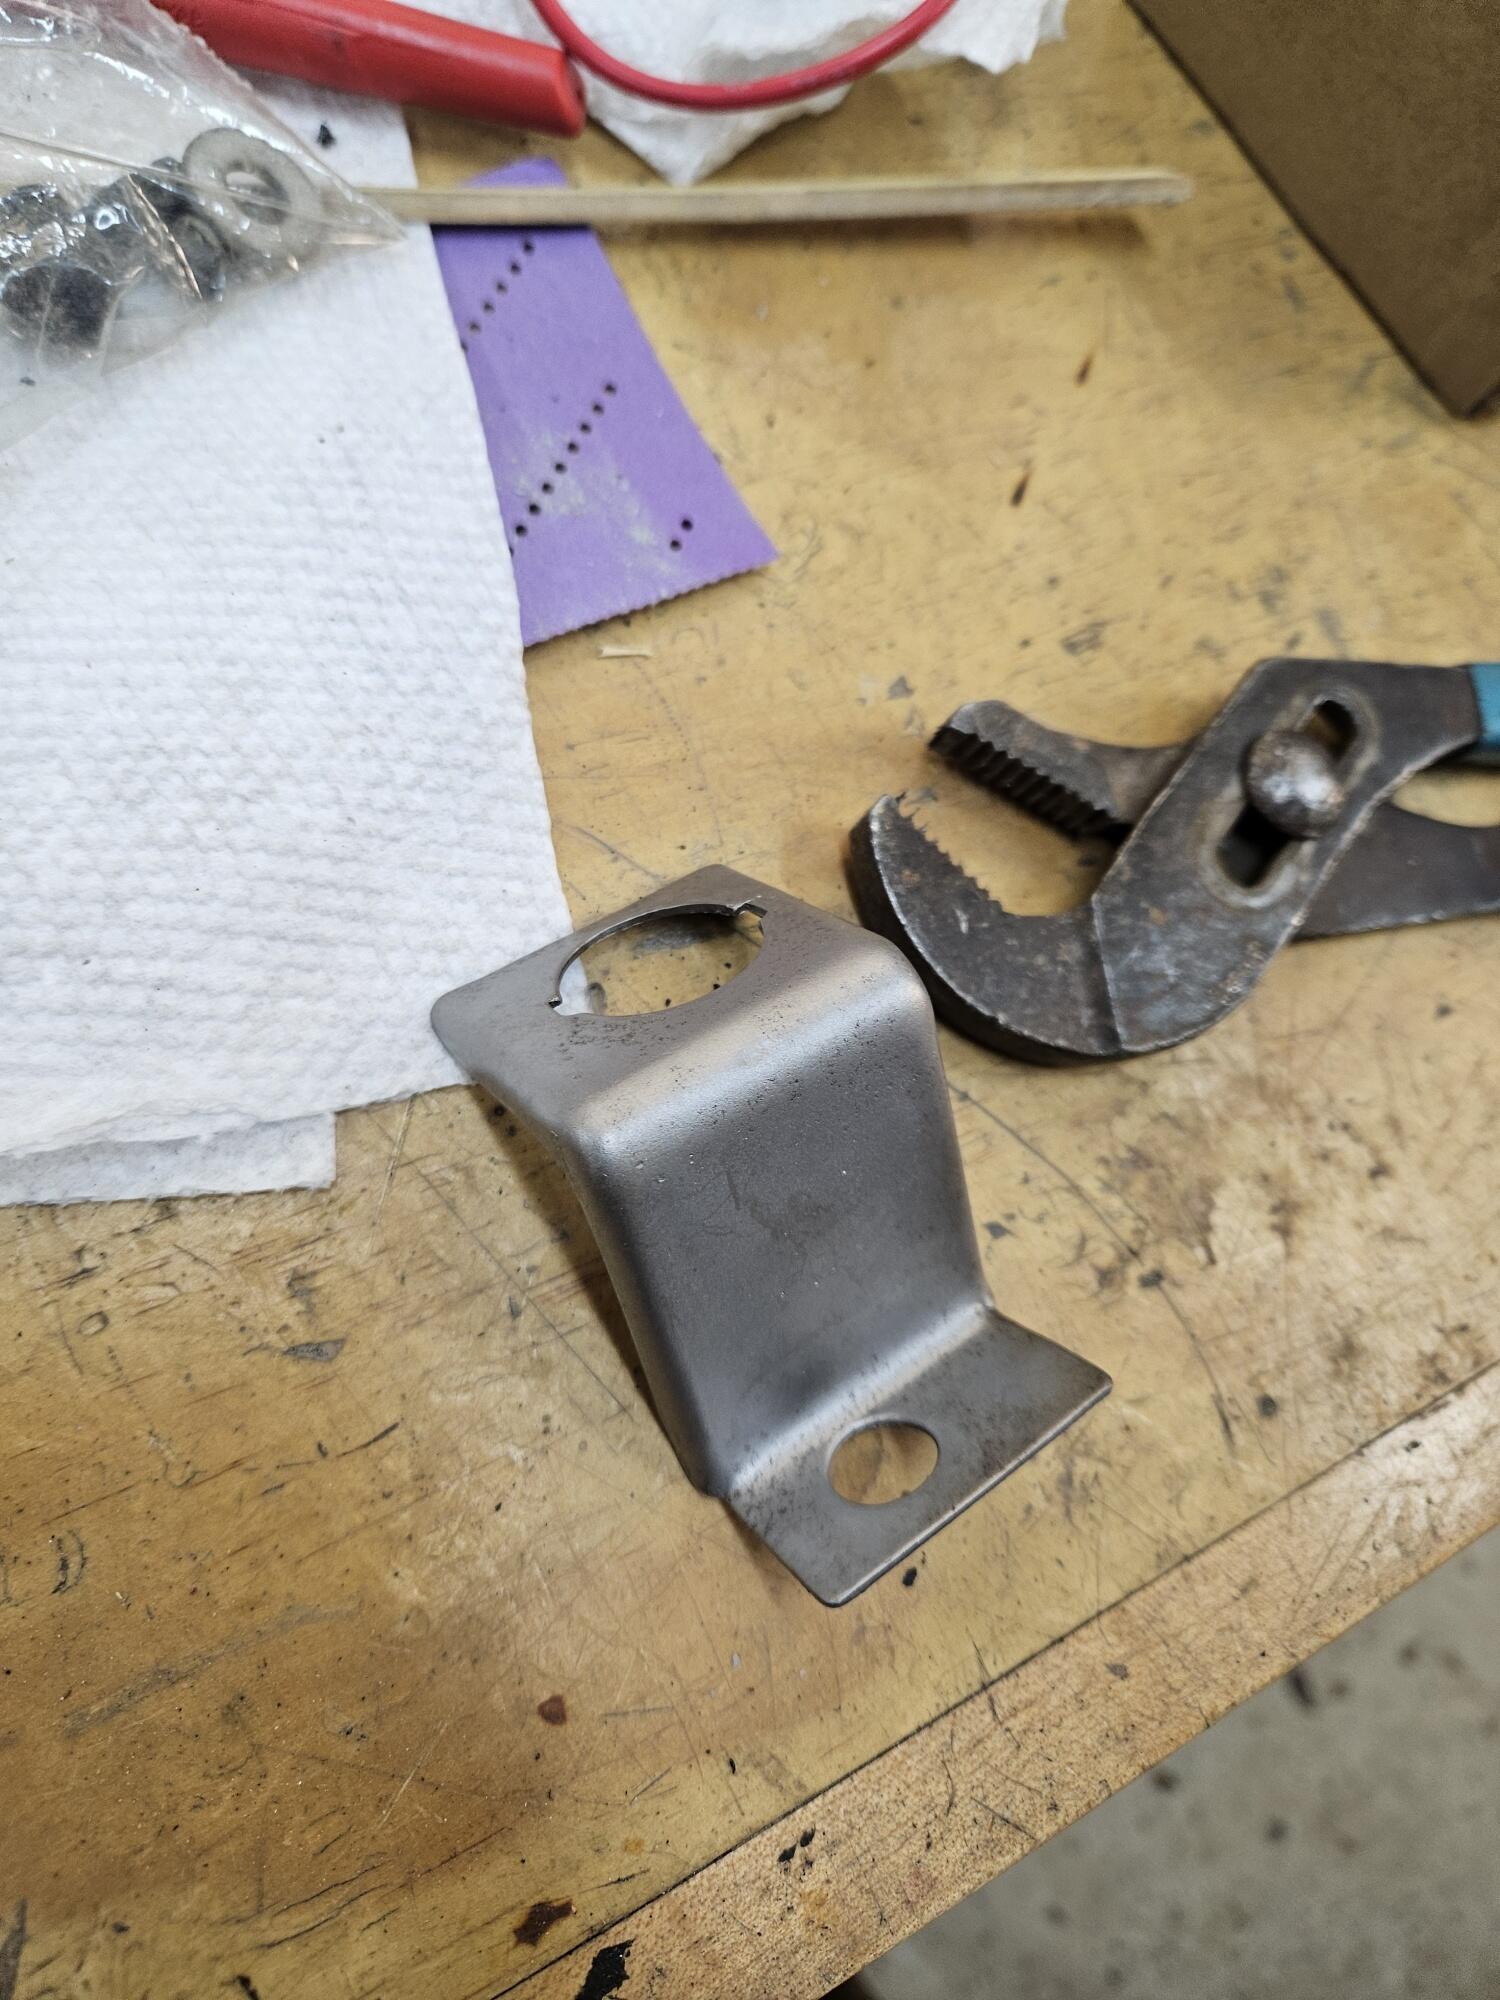
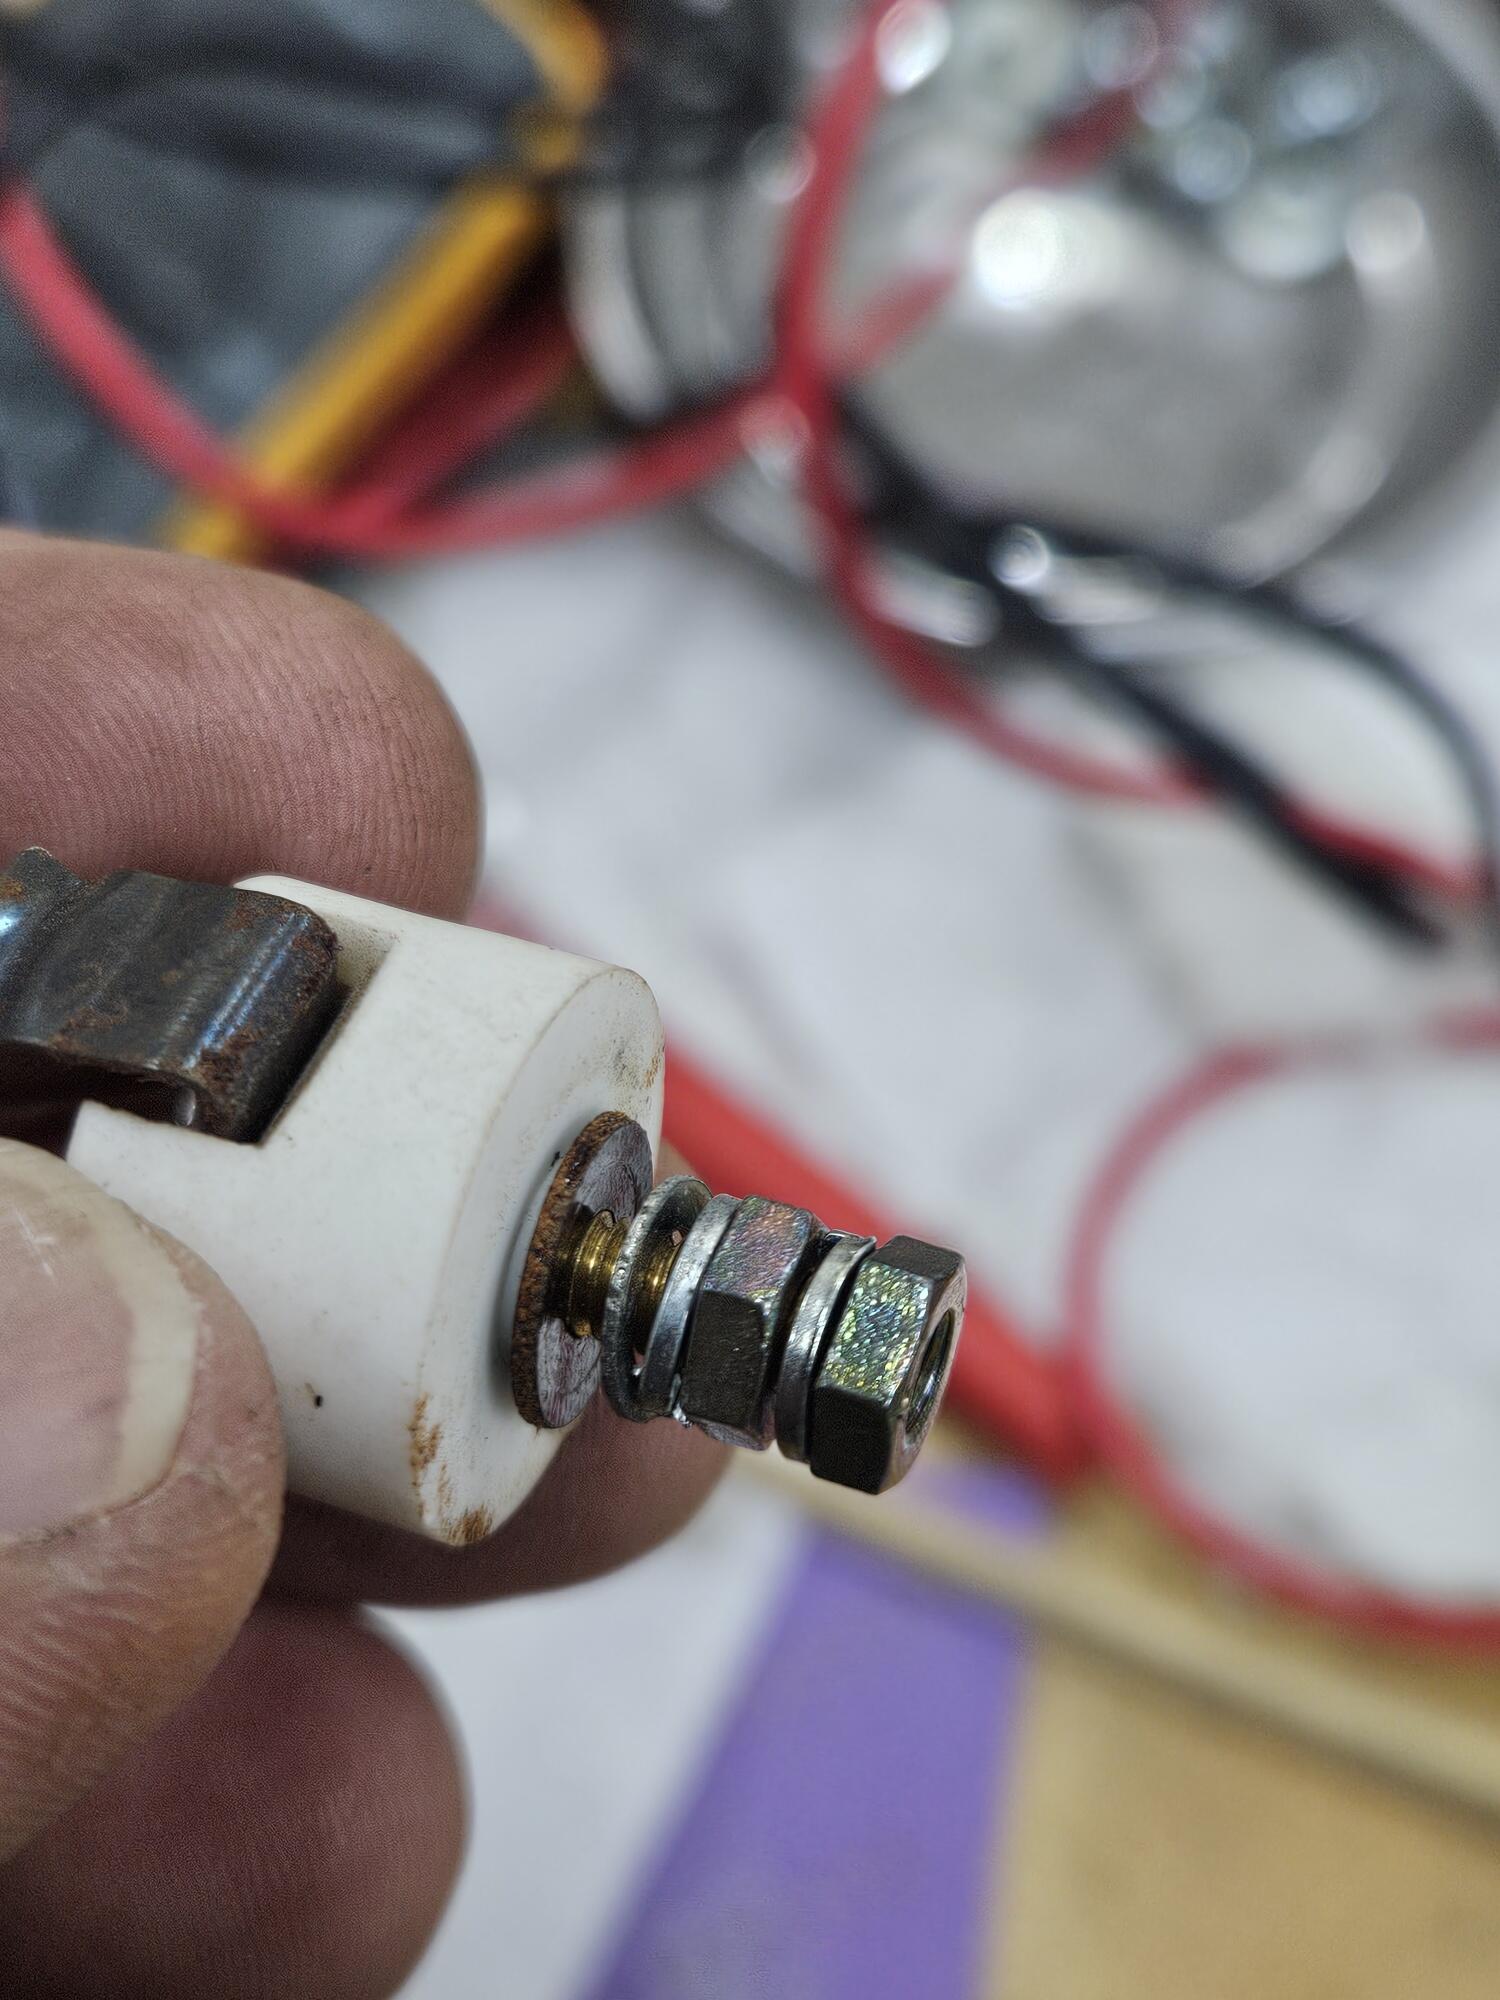
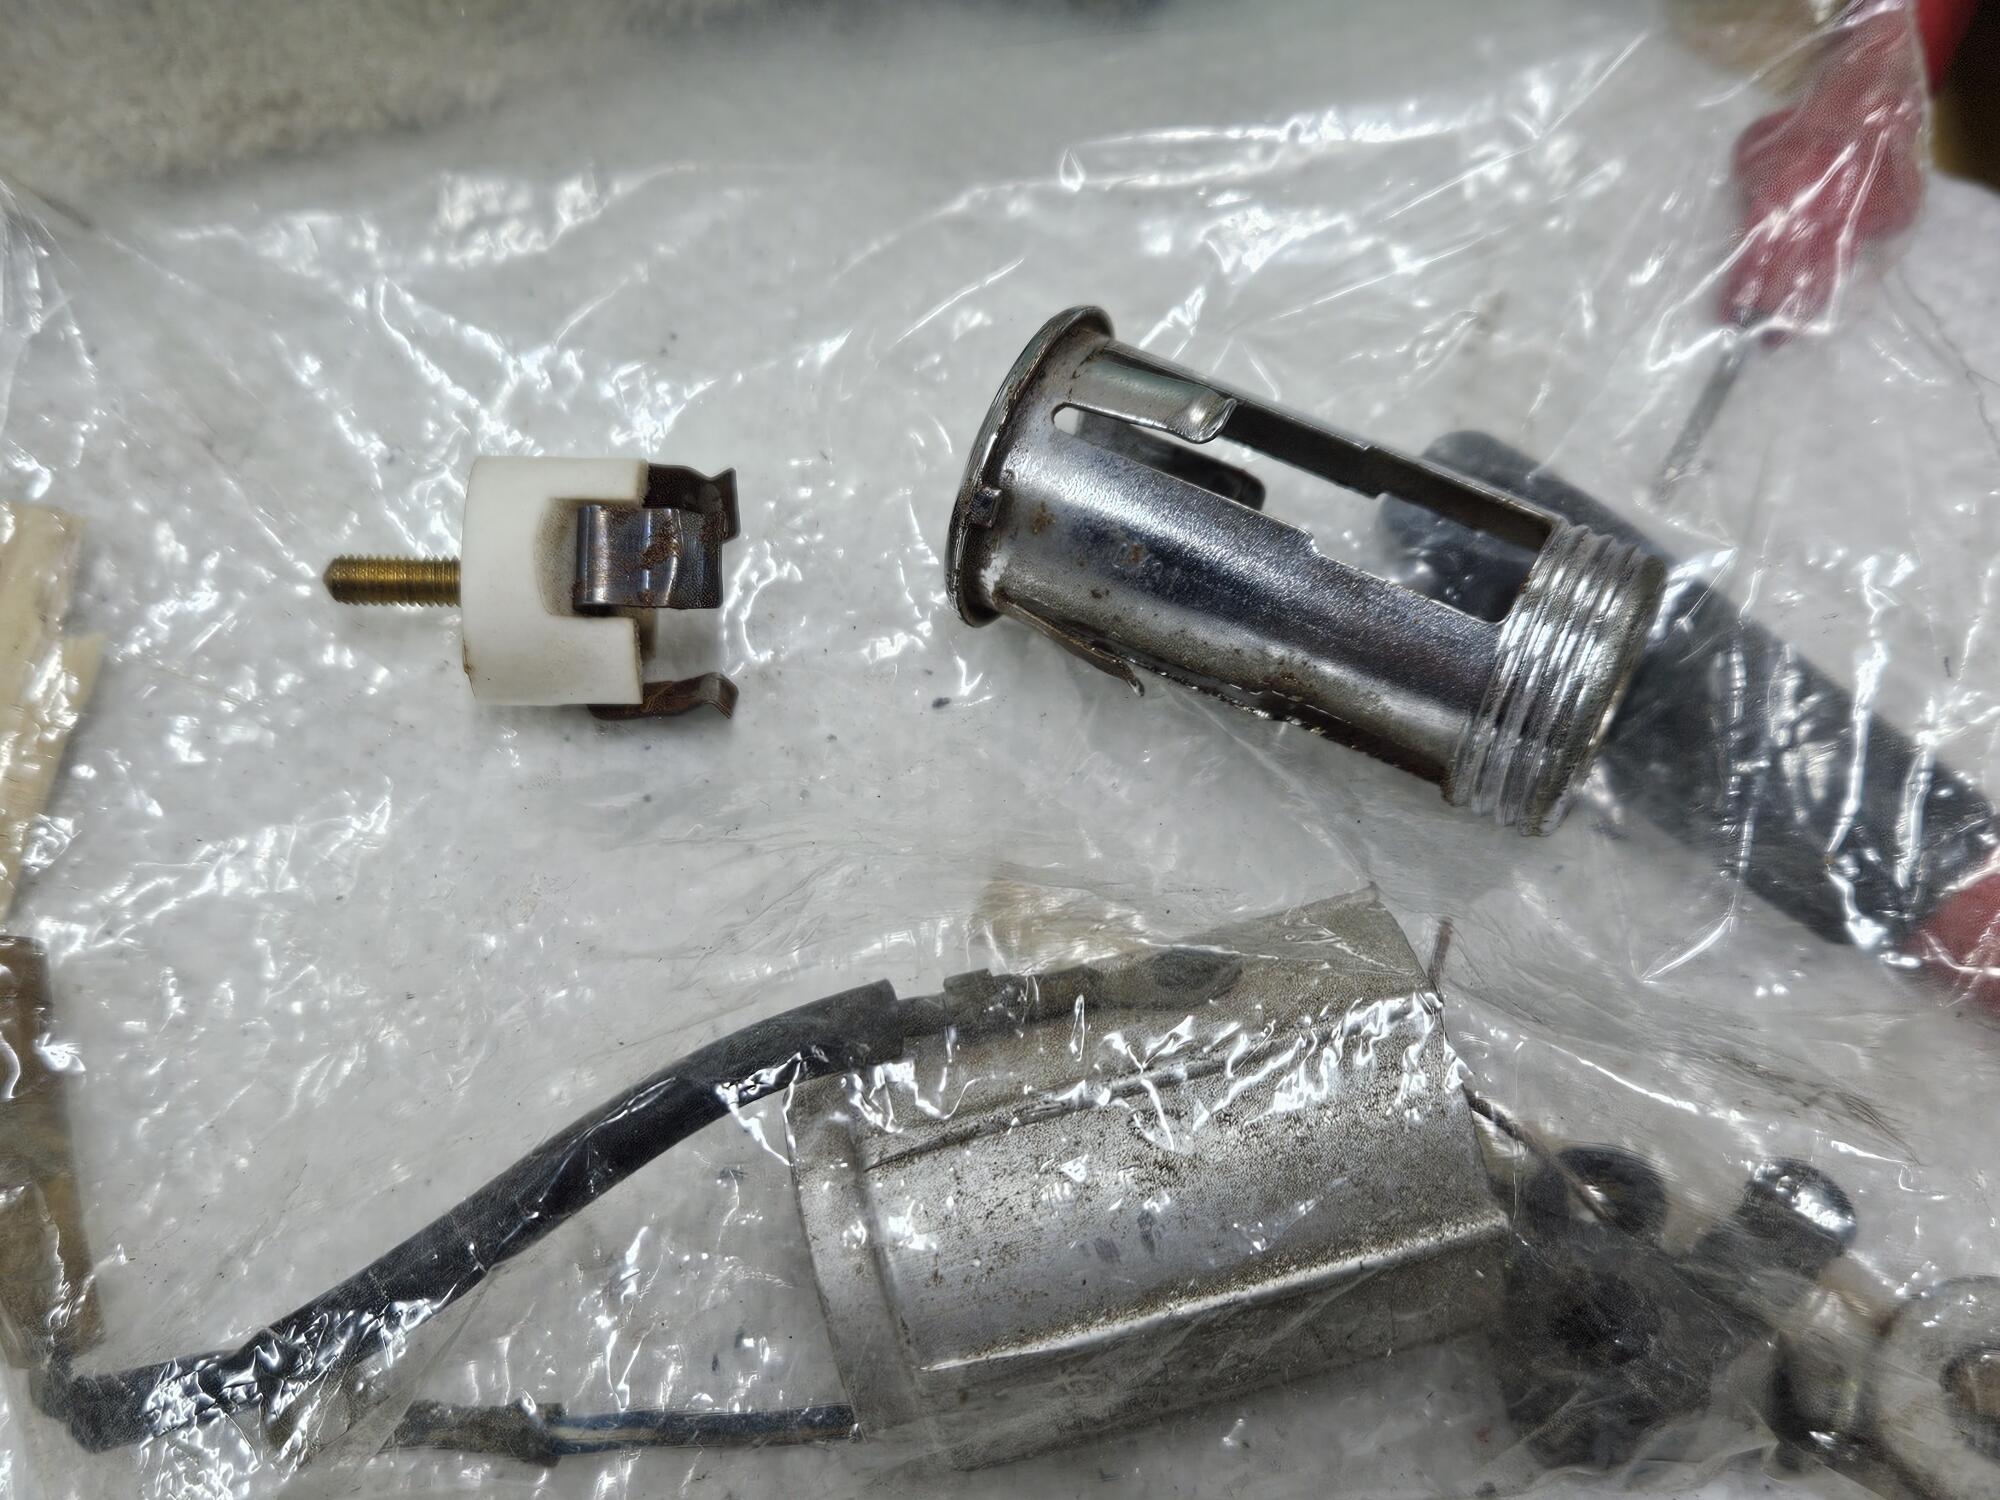
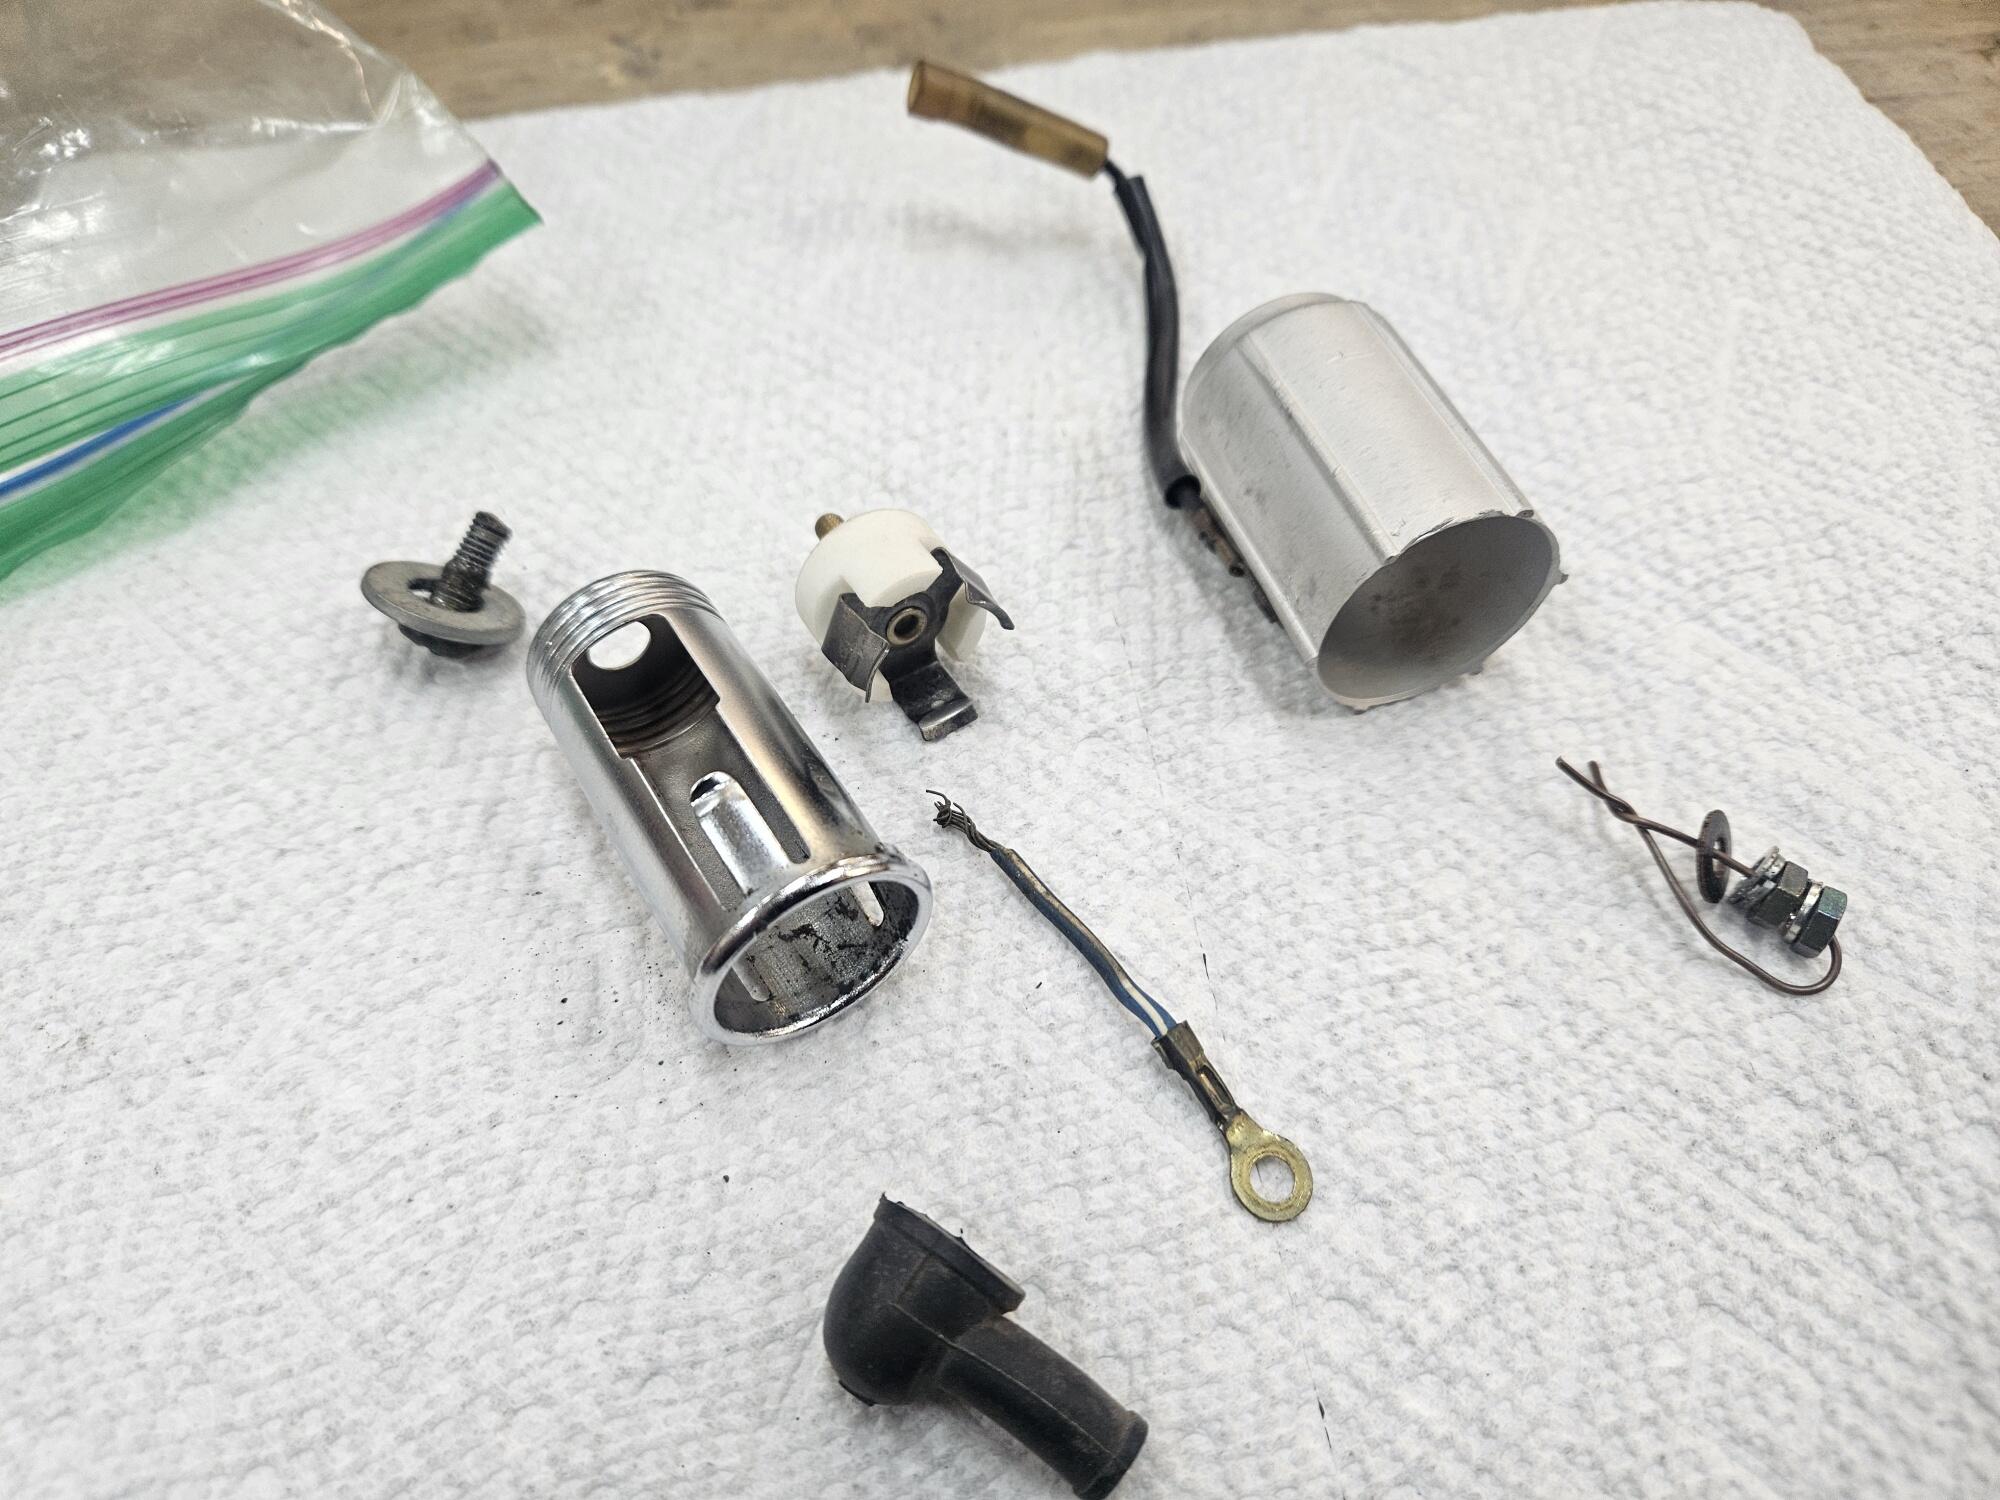
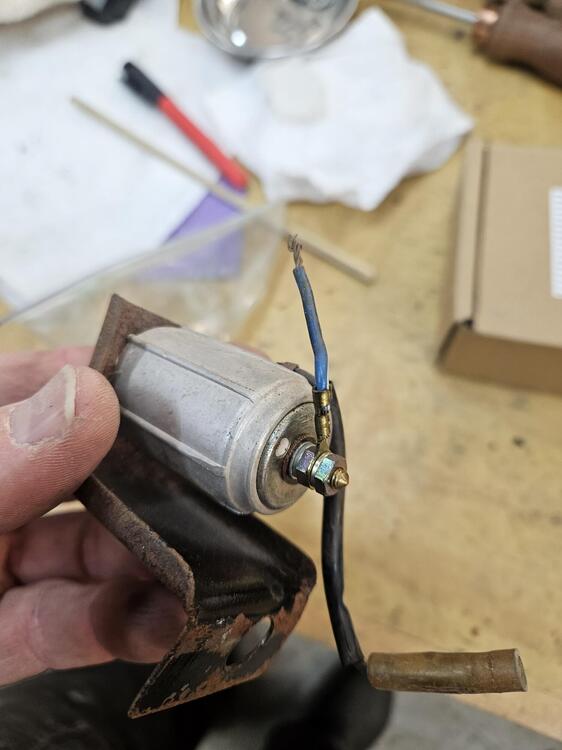
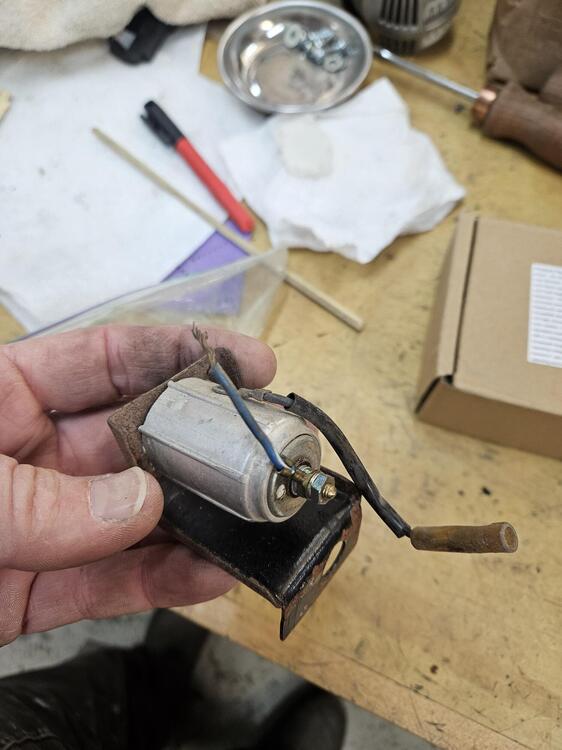
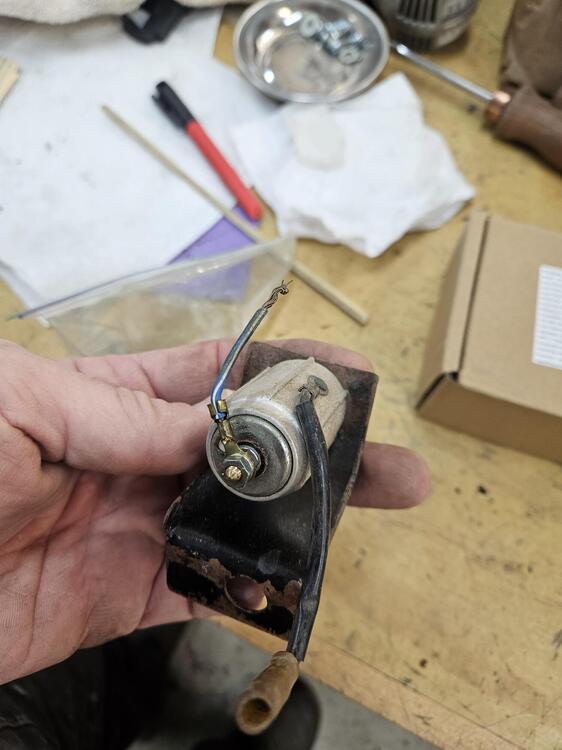
2 pointsI finished cleaning the cigarette lighter up today Straightened up the bracket and blasted it. Blasted the bottom ceramic with the prongs and polished the chrome rim


 2 points
 -
Agree with Yarb on rebuilt alternators. I make the store test them before I buy one. Been burnt before with a bad one, literally. Popped all my fuses as soon as I cranked the car. If you have a volt meter or can borrow one, check the fully charged battery without the trickle charger. Mine usually reads about 12.5 volts. Then crank the car and see what the alternator is adding, should go up to 13.5-ish. Check the alternator belt to make sure it's good and tight. I always use a broom stick or similar as a pry bar to get mine tight.2 points
-
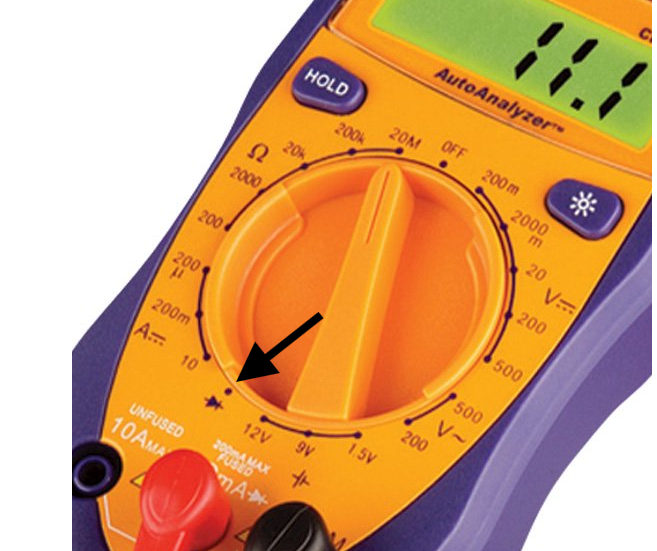
Good opportunity to learn how to use a multimeter. Check voltage at idle and while raising RPM. Some of the conversion plugs from MSA have been known to melt and fail. You can get a cheap meter for cheap at a place like Harbor Freight. https://www.harborfreight.com/7-Function-Digital-Multimeter-59434.html2 points
-
Everyone on this forum I believe has had issues with rebuilt alternators and starters. Take it to the parts store and have it checked out.2 points
-
2 pointsThe Kiwi girlfriend has lived with me for the last 10 years. She's great I'm lucky2 points
-
2 pointsLooks cross threaded to me, and seems it should be threaded farther in if it weren't.2 points
-
Thats not vapor lock. Different issue entirely Depends how high it climbs on whether its an issue or not. Lots of things can contribute to not being able to shed heat.1 point
-
1 point
-
1 pointIt wasn't meant to be a link, just an abbreviation. Something in the browser or forum software does that automatically, I think. ithink.com link.com thislinkwontwork.com
 1 point
 -
1 pointThis (F 026 T00 064) was the one I ordered, I got impulsive and this was the first part number I came across from this post here from @SteveJ . I couldnt find any other posts on here with the other part number at the time. The 0 332 514 121 relay has extra pins, this is because the extra pins are for the california vehicles, at least according to Jbugs. I suspect that using that relay is just fine since the car doesnt need those pins. This is the description for bosch relay 0332 514 121 accordinng to Jbugs BTW @Zed Head That CZCC link doesnt work
 1 point
 -
1 pointEFI/pump relay. Which one did you order? You didn't say. Don't overlook that the pump relay is controlled by the switch in the AFM. And that there is no "prime" like on today's vehicles. The pump relay is energized by the AFM switch or when the key is at Start.1 point
-
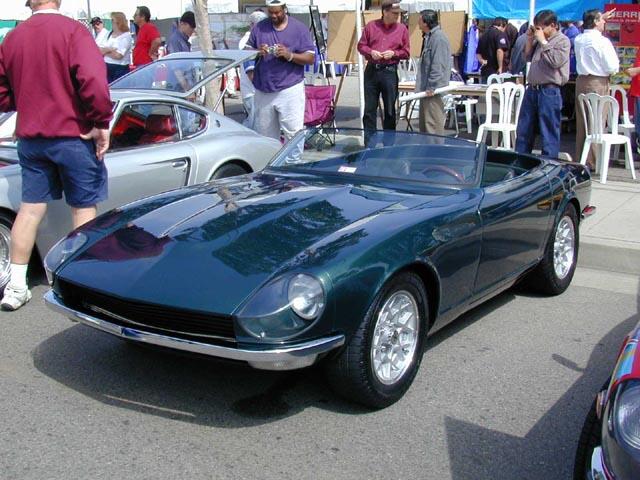
Lots of effort, time and money invested to create a 1971 Corvette LS6 convertible tribute clad in Japanese sheet metal and copious amounts of fiberglass . To each their own.1 point
-
So, having solved the problem of a bridge between the Bosch DBW throttle body and the native 280Z intake, I need to make gaskets for the bridge. I tried successfully to hand cut gaskets with an exacto knife and a cutting mat using gasket material. It would work, but it isn’t as pretty as the project deserves. So I bought a new in box Cricut Maker 3. This willl cut leather, so gasket material is cake. I need to draw it up and convert it to an SVG file but I will post picks of finished gaskets.1 point
-
I am glad that you enjoyed the trip in Japan. I didn’t know you took the Nissan paper to your home! I could give you 10 more papers. Every time I bring my cars to Nissan they put the paper on the driver seat floor. The paper is durable and good for oil drops, water etc. I visited your own website, the articles of the trip is so nice! It brings back so many good memories of our S30.world Japan Expedition. Kats1 point
-
1 pointProbably need to put some thought into replacing the short lines. You need to do an evaluation of what condition of the parts you’re working with.1 point
-
1 pointI have been using that bosch relay in the photo since 2012 and no issues. Plugged in a go. The bosch relay was used in the first 280Z in 1974. Datsun used a Bosch L-Jetronic system for the first 6 months of the 280Z production And Hitachi copied it. That is why a lot of Bosch parts will work on these efi systems. I think @Mike had a bosch system in his attic once. I posted an ebay link back in 2018 and it still works😄 https://www.ebay.com/p/77006951
 1 point
 -
What changes did he make to get all the plugs firing evenly?1 point
-
Okay, I'm going to assume the battery is disconnected. Put the key in ON. Put your meter on resistance. If there is more than one setting, put it on the lowest setting. Put the positive lead on the black/white wire at the ballast resistor. Put the negative lead on the white/black wire at the T connector. (Yes, you'll probably need some help. Record the reading and report back. Swap the leads and remeasure. Record the reading and report back.1 point
-
1 pointOK so my girlfriend who has a New Zealand accent can get 50%. :) On another note, it's starting to look like there's a scammer in the community. bww 5325 who's only posted twice and joined November 15th Told me about Suly38B@gmail.com who claimed to have a gas tank and long story shorter I sent him $300 December 1st and he's gone radio silent on me.1 point
-
1 pointSounds like you don't agree 100%. We're just offering possibilities. It's actually more interesting to some of us that the fitting was 3/4 turn loose and did not leak sooner. If it was mine I'd pull that line and make sure I didn't need more parts before starting the MC replacement. Might find out that you don't need a new MC, you actually need a new hard line.1 point
-
1 pointYeah, you're right, it does look crooked...I wonder how it didn't leak for 6 years if it was like this. I'll install the new master this weekend anyhow since I already bought it and report back on the state of the threads, etc.1 point
-
1 pointThe angle of the brake line tubing itself should be straight going in. You need to manipulate that line where its dead center going in. You mentioned it didn’t leak before but I think you may have had luck on your side.1 point
-
1 pointThe rear reservoir would be for the front brakes. Unless you mean the reservoir for the rear brakes when you say rear reservoir. Neither reservoir should be pressurized. The pressure should only be created by the pistons in the MC bore. If you had moisture in the brake fluid it wouldn't be a surprise to have corrosion in the bore after 6 years. Then when you pushed the pedal to the floor you might have damaged the rubber seal inside. So, loose fitting allows reservoir ro leak dry, pedal goes to floor because of it, damaging MC seals, new MC leak looks like old fitting leak. Should have got that fitting tight the first time. Seems like it was very loose. Oh well.1 point
-
Recently, I was able to obtain something rare, which I've been searching for five years, or so now. But let's start in the beginning. In 1937, Nissan registered a daughter-company called "Nissan Auto Sales Co. Ltd." as a sales division spin-off. In 1957, the same company registered the "NISSALCO" trademark, with the aim to develop and produce service tools for Nissan factories and workshops. They produced all kind of mechanical and electronic testers but also accessory parts for Nissan Car owners. Here is a picture from the Nissan Cherry assembly line, with a NISSALCO sign above every test bench: Today, the company is still existing, but under the "ALTIA" Name. In the early 70ies, they developed a Special service tool box for the Datsun 240Z sports. ST0929-0000. And yesterday, I finally got one, after many years of searching for it. The toolbox comes with a selection of Special tools for the 240Z. And this box came with a lot of extra tools inside. You can lift out the upper case, and then you have access to the lower level. Mine included also the Booklet that comes with it. So first, I had to get all the parts out and go through them. Luckily, i collected some of the Datsun / Nissan / Kent-Moore Special tools books over the years. And the box (even though without any part number or information) and some of the tools are also listed in the US-service manual: Sadly, I quickly realized that my purchase came with a lot of additional tools which do not exactly belong to the S30, but random Datsun's, and some original tools from the box are missing. It seems that the previous owner also recreated some missing tools. Overall, it's still a good starting point. After cleaning the box out, hammering the metal straight and fixing the locks. it started to look good. I wanted to keep the patina, but still clean up all the parts. so i gave them a quick wash in the parts cleaner: And then put the original parts back in: Assembled (some tools are not correct): And closed: The set also included this nice Nissan wooden tool box, with the lovely lock: I still have to figure out yet what this is used for, but i just love the looks of it: I'm also working on to restore the original manual that came with it: But it appears that the last few pages are missing and the back cover. But still better than nothing. It also has a very strange format, where each page is only printed on one side and then folded to have a print on both sides, which is a bit weird. That's it for now. I will try to keep finding the missing tools and pages. If you know something, I'm happy to hear from you. Expect some more tools related stuff in the coming days, but i also hope to work on the car itself again, in the next days. Stay tuned!1 point
-
I have a picture of a girl called Flower and it's NOT because of her sweet smell. The complete opposite actually. Happy birthday!1 point