Leaderboard
-
conedodger
Community Member8Points13,006Posts -
Parman
Supporting Member2Points102Posts -

Zed Head
Community Member2Points19,556Posts -
26th-Z
Community Member1Points5,267Posts


Popular Content
Showing content with the highest reputation on 08/07/2025 in all areas
-
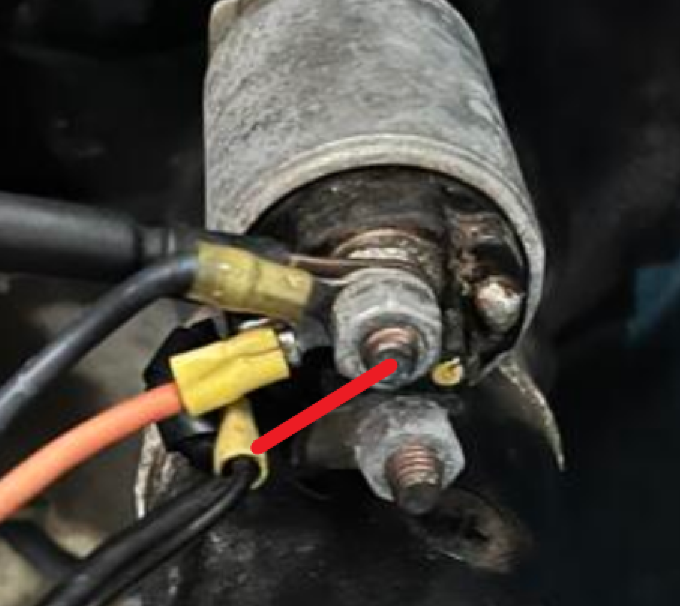
1 pointBig thanks for the info! I hit the solenoid with a hammer then used the screwdriver method and the starter turned.1 point
-
1 pointEats, shoots, and leaves? Eats shoots and leaves. Runs, but rough. Runs butt rough. Just kidding. Are there any glue blob marks on the AFM adjustment screws? Match them up if you can find them. Nissan placed a blob of silicone on the wheel after it was set at the factory. What do you mean by "rough"? At idle, during cruising, during acceleration? It's fairly common for the 280Z's to run lean. There's a modification that can be done, described by Blue on his atlanticz pages. He also has an AFM "reset" procedure for AFM's that have been messed with. https://www.atlanticz.ca/zclub/techtips/EFI&fuel.htm1 point
-
1 pointas @Zed Head said, pull the spayed ign. Off the terminal and measure the voltage. Black to Gand and red on the spade turn the key to start. I think that he's just answering Yarb's question directly. Seems like you're getting voltage/current to the starter solenoid. Leave the wire off of the spade terminal on the starter and use a jumper wire or a tool like a screwdriver to connect the main battery connection to the spade on the solenoid. You can also run a longer wire directly from the battery positive for convenience. The starter should actuate. If it doesn't then the solenoid contact has probably crapped out. There will be some small sparks and the starter will work correctly otherwise. Make sure the car is in neutral and nobody has their fingers or other things by the fan belt. If you hear a solid click from the solenoid but the starter motor does not spin that's a sign that the starter motor has failed. Yout starter looks pretty crusty. If you try this jumper wire method and everything works then you have a problem with the wire from the ignition switch.
 1 point
 -
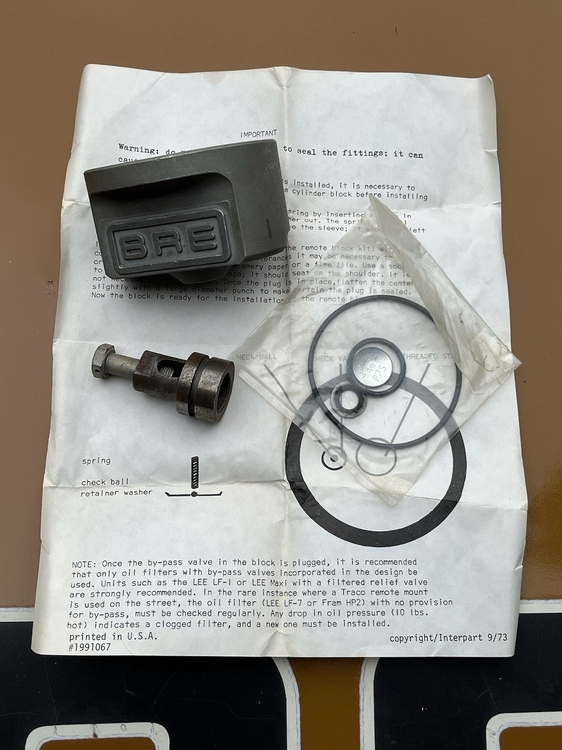
1 pointManaged to find a couple of the BRE cast aluminum adapters recently. https://www.ebay.com/itm/317146279997?_skw=Datsun&itmmeta=01K22V8ZHVKDFD1YZ2R67FYVVG&hash=item49d764303d:g:5ZgAAeSwYvNokRsm&itmprp=enc%3AAQAKAAAA4MHg7L1Zz0LA5DYYmRTS30kCoKfIwvB5xxhwqLfQsN2nCxk2lPQjX3YKVMYwrxYpvqUj44P448Su9W0IOyv9xeIAWjVrCeP8Fr2QU1TY9e7pNLlaT0BG9tj5zLexgY7byGGuH2yDK0OiyU3vR5fkXWKKN3IQdcSYmXNnnPXjRhXS2So%2FSPgQZXBaYiIZLQCVX3X7Vna%2FqJOosiRjsA69htfeltceq2Cf7k2gmZCY6J8H8hKNyQdK0sBnsetXbfjln%2FMlmTzAAStHKN2erVuANzBT9%2FZ1nAhivjZ33R04f%2B9W%7Ctkp%3ABk9SR4z5o9uQZg

 1 point
 -
1 pointThe recommended prices on the website range from $1235 to $2665 to $3380 in US dollars. I have always owned Seikos and really like them but I don't wear a watch like I used to. As much as I would like to get one, they're too pricey for me. I can't see spending more than $500 for a watch / chronograph (old school) like that. Hell, I could get a Heuer for $3400.1 point
-
1 pointHave you started to identify which contacts they used inside the shell? There are lots of different members within the family, and I'm not sure which ones they used. They are the split finger version and are not gold plated... Those two things you can tell from just looking into the connector. But beyond that, I haven't looked into it. And also within the family... There is JT (Junior Timer), and JPT (Junior POWER Timer), I believe the major difference is the inclusion of a spring (on the power version) to clamp the female contacts closed tighter. So if you're concerned with contact force, maybe you could "upgrade" a couple contacts to a JPT version instead of the original JT? Not sure it's even possible, but just a thought.1 point
-
1 pointAh, step on out you have gone this far! Educational purposes of course for the rest of us!!!1 point
-
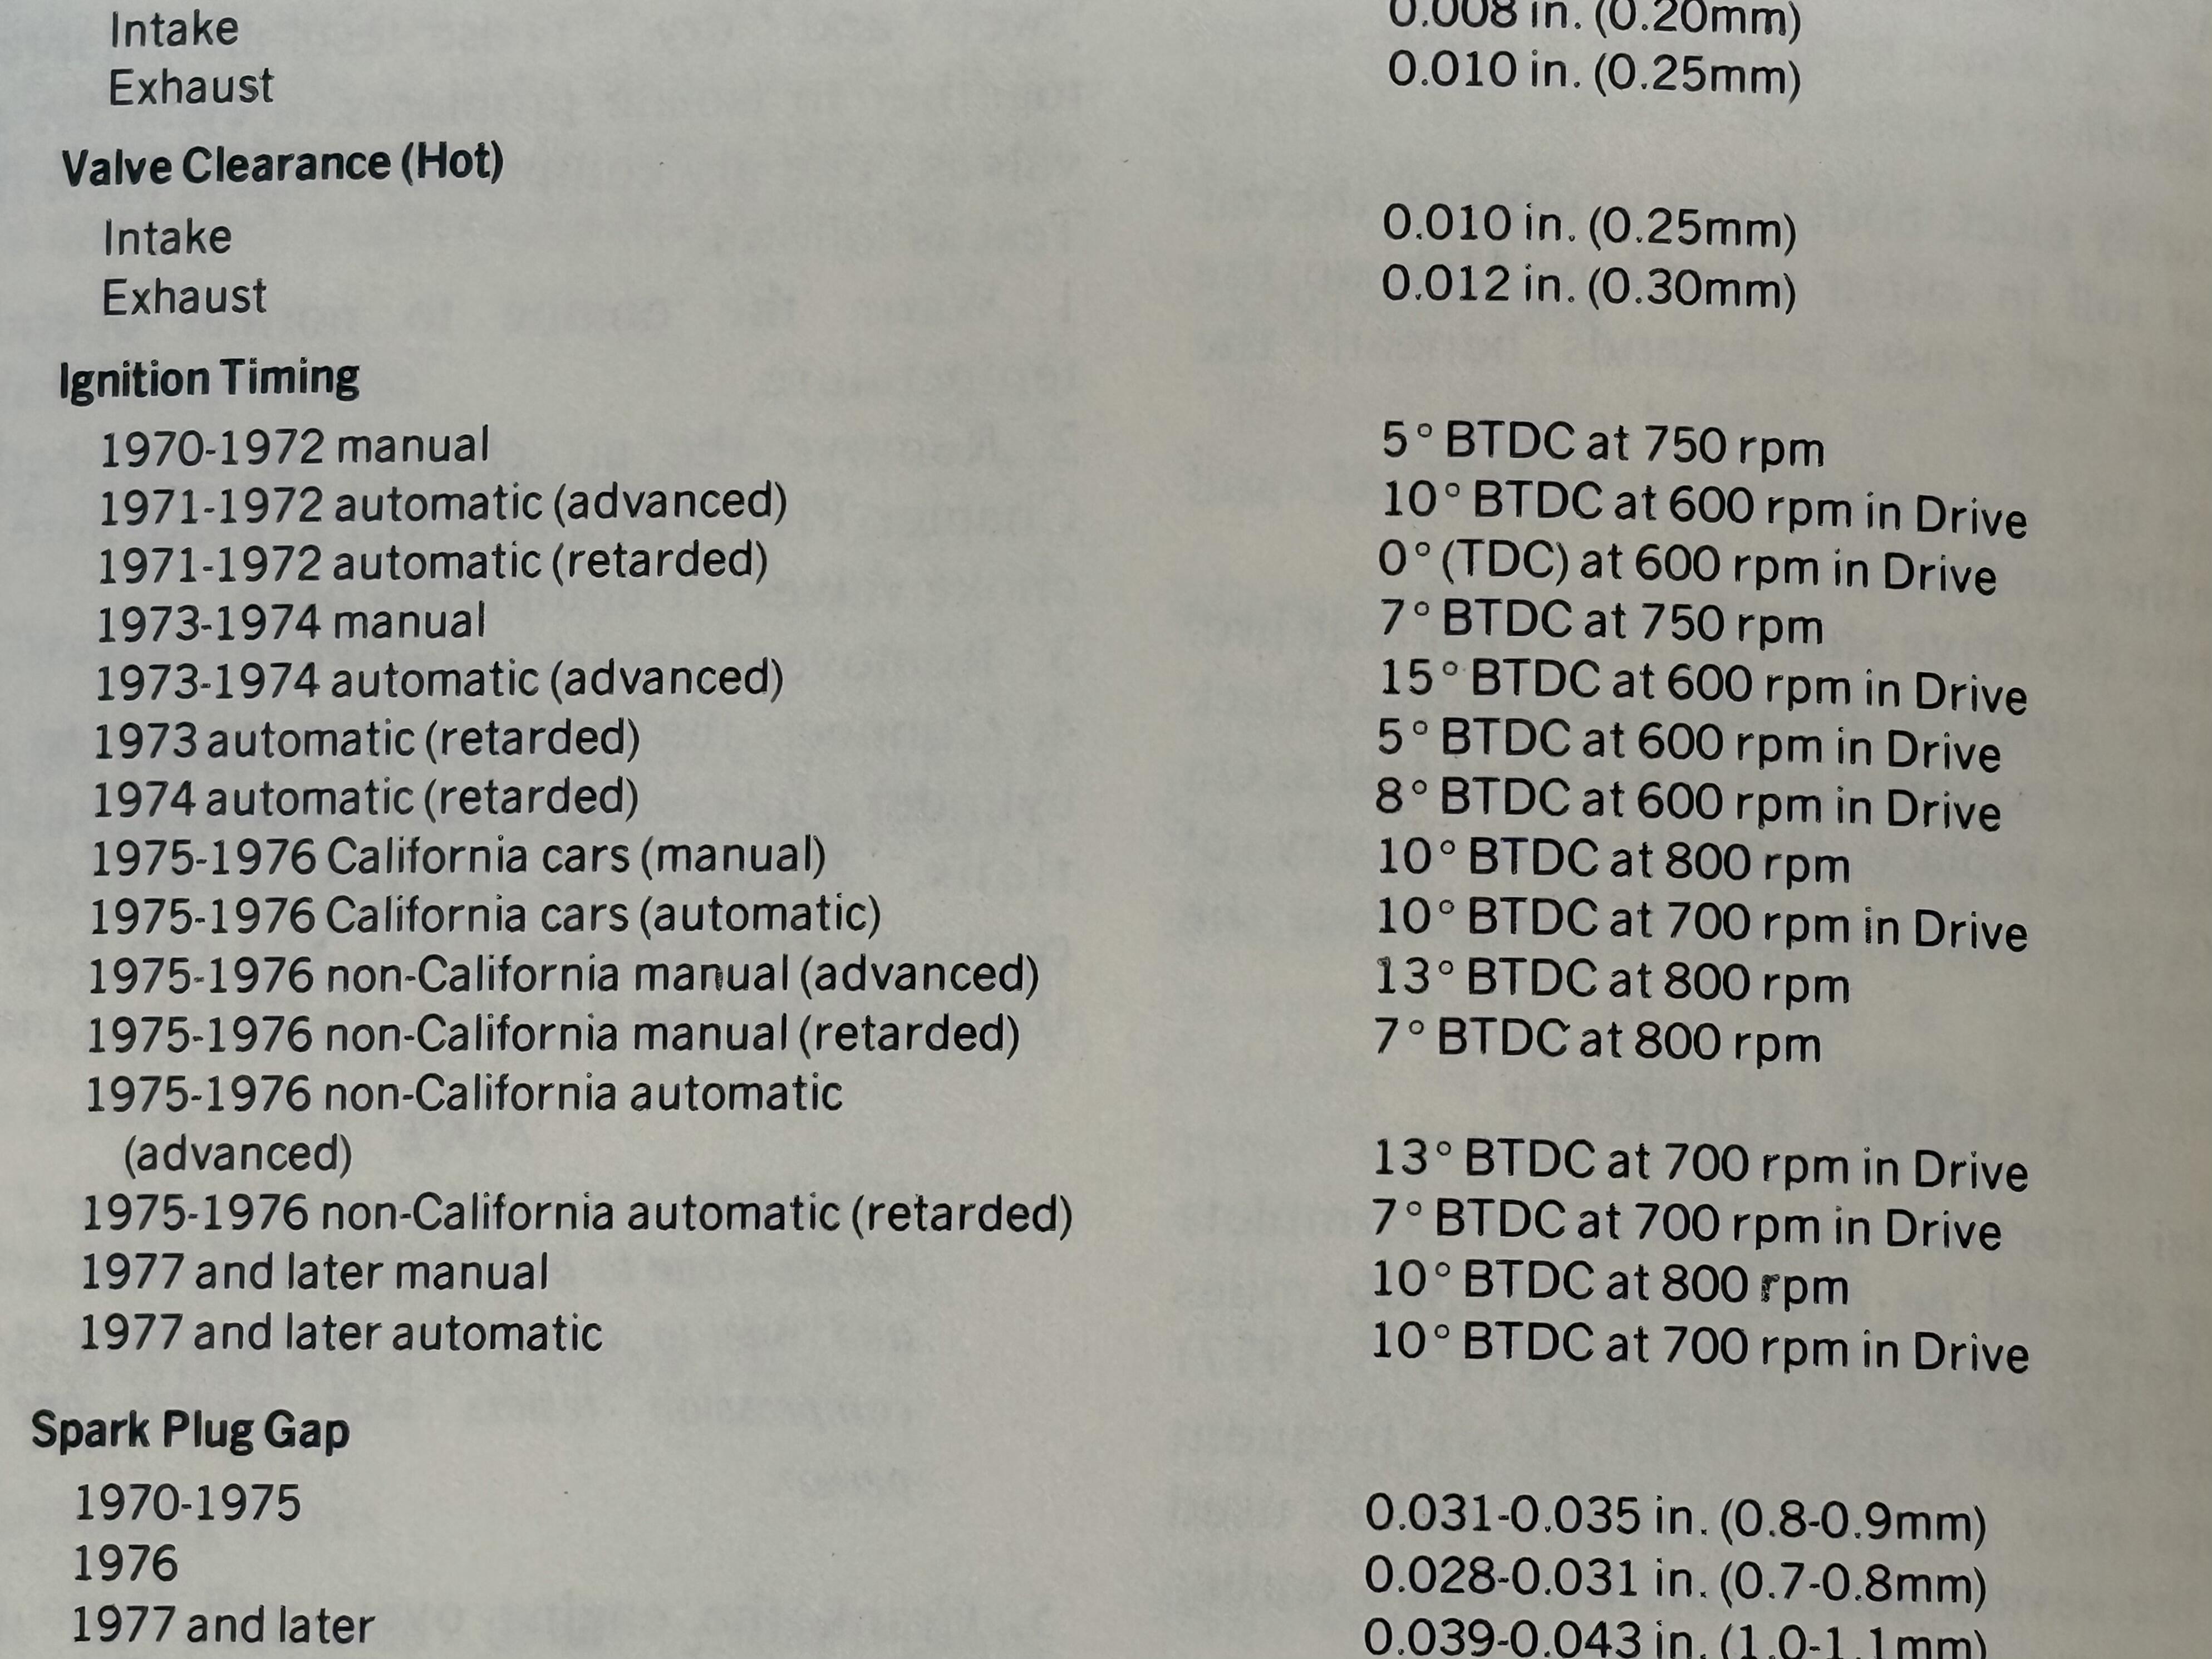
1 pointI’ve never had much respect for the Chilton or Climer (sp?) service manuals, once I realized they were nothing more than stolen excerpts from the real service manuals and how they claim to handle all Datsun Z models from 1899-2050 in one book. Talk about cherry picking and massive omissions I thought Now that the real manuals are available online, I rarely look at them. However, the other day, I got a Climer manual with a parts horde and happen to flip through it just to see if I was missing anything. I might have to eat my critical words, when I found a compilation listing of what seems to be ALL the possible timing options 70-78. “Maybe” they did a bit more than just decide which pages of the FSM’s to include. This was sparked (see what I did there?) by a Z friend with limited Datsun knowledge who was asking me about timing specs for his 71, telling me he looked on line and found really wildly varying numbers and couldn’t decide which one was right. Well, there you go. the list shows a large variation depending. PS. It also has a pretty high quality set of schematics for the various years and transmissions all in one place. I read most of the text! .
 1 point
 -
1 pointSorry to hear about you and Janet's health problems but like everything else, if there's one person that always figures out a way it's you. So glad to hear from you! Cliff1 point
-
1 pointGreat to have you back on board, Phil. Your how-to articles, posted both here and on the Atlantic Z site, have remained an important resource for all of us Z owners.1 point
-
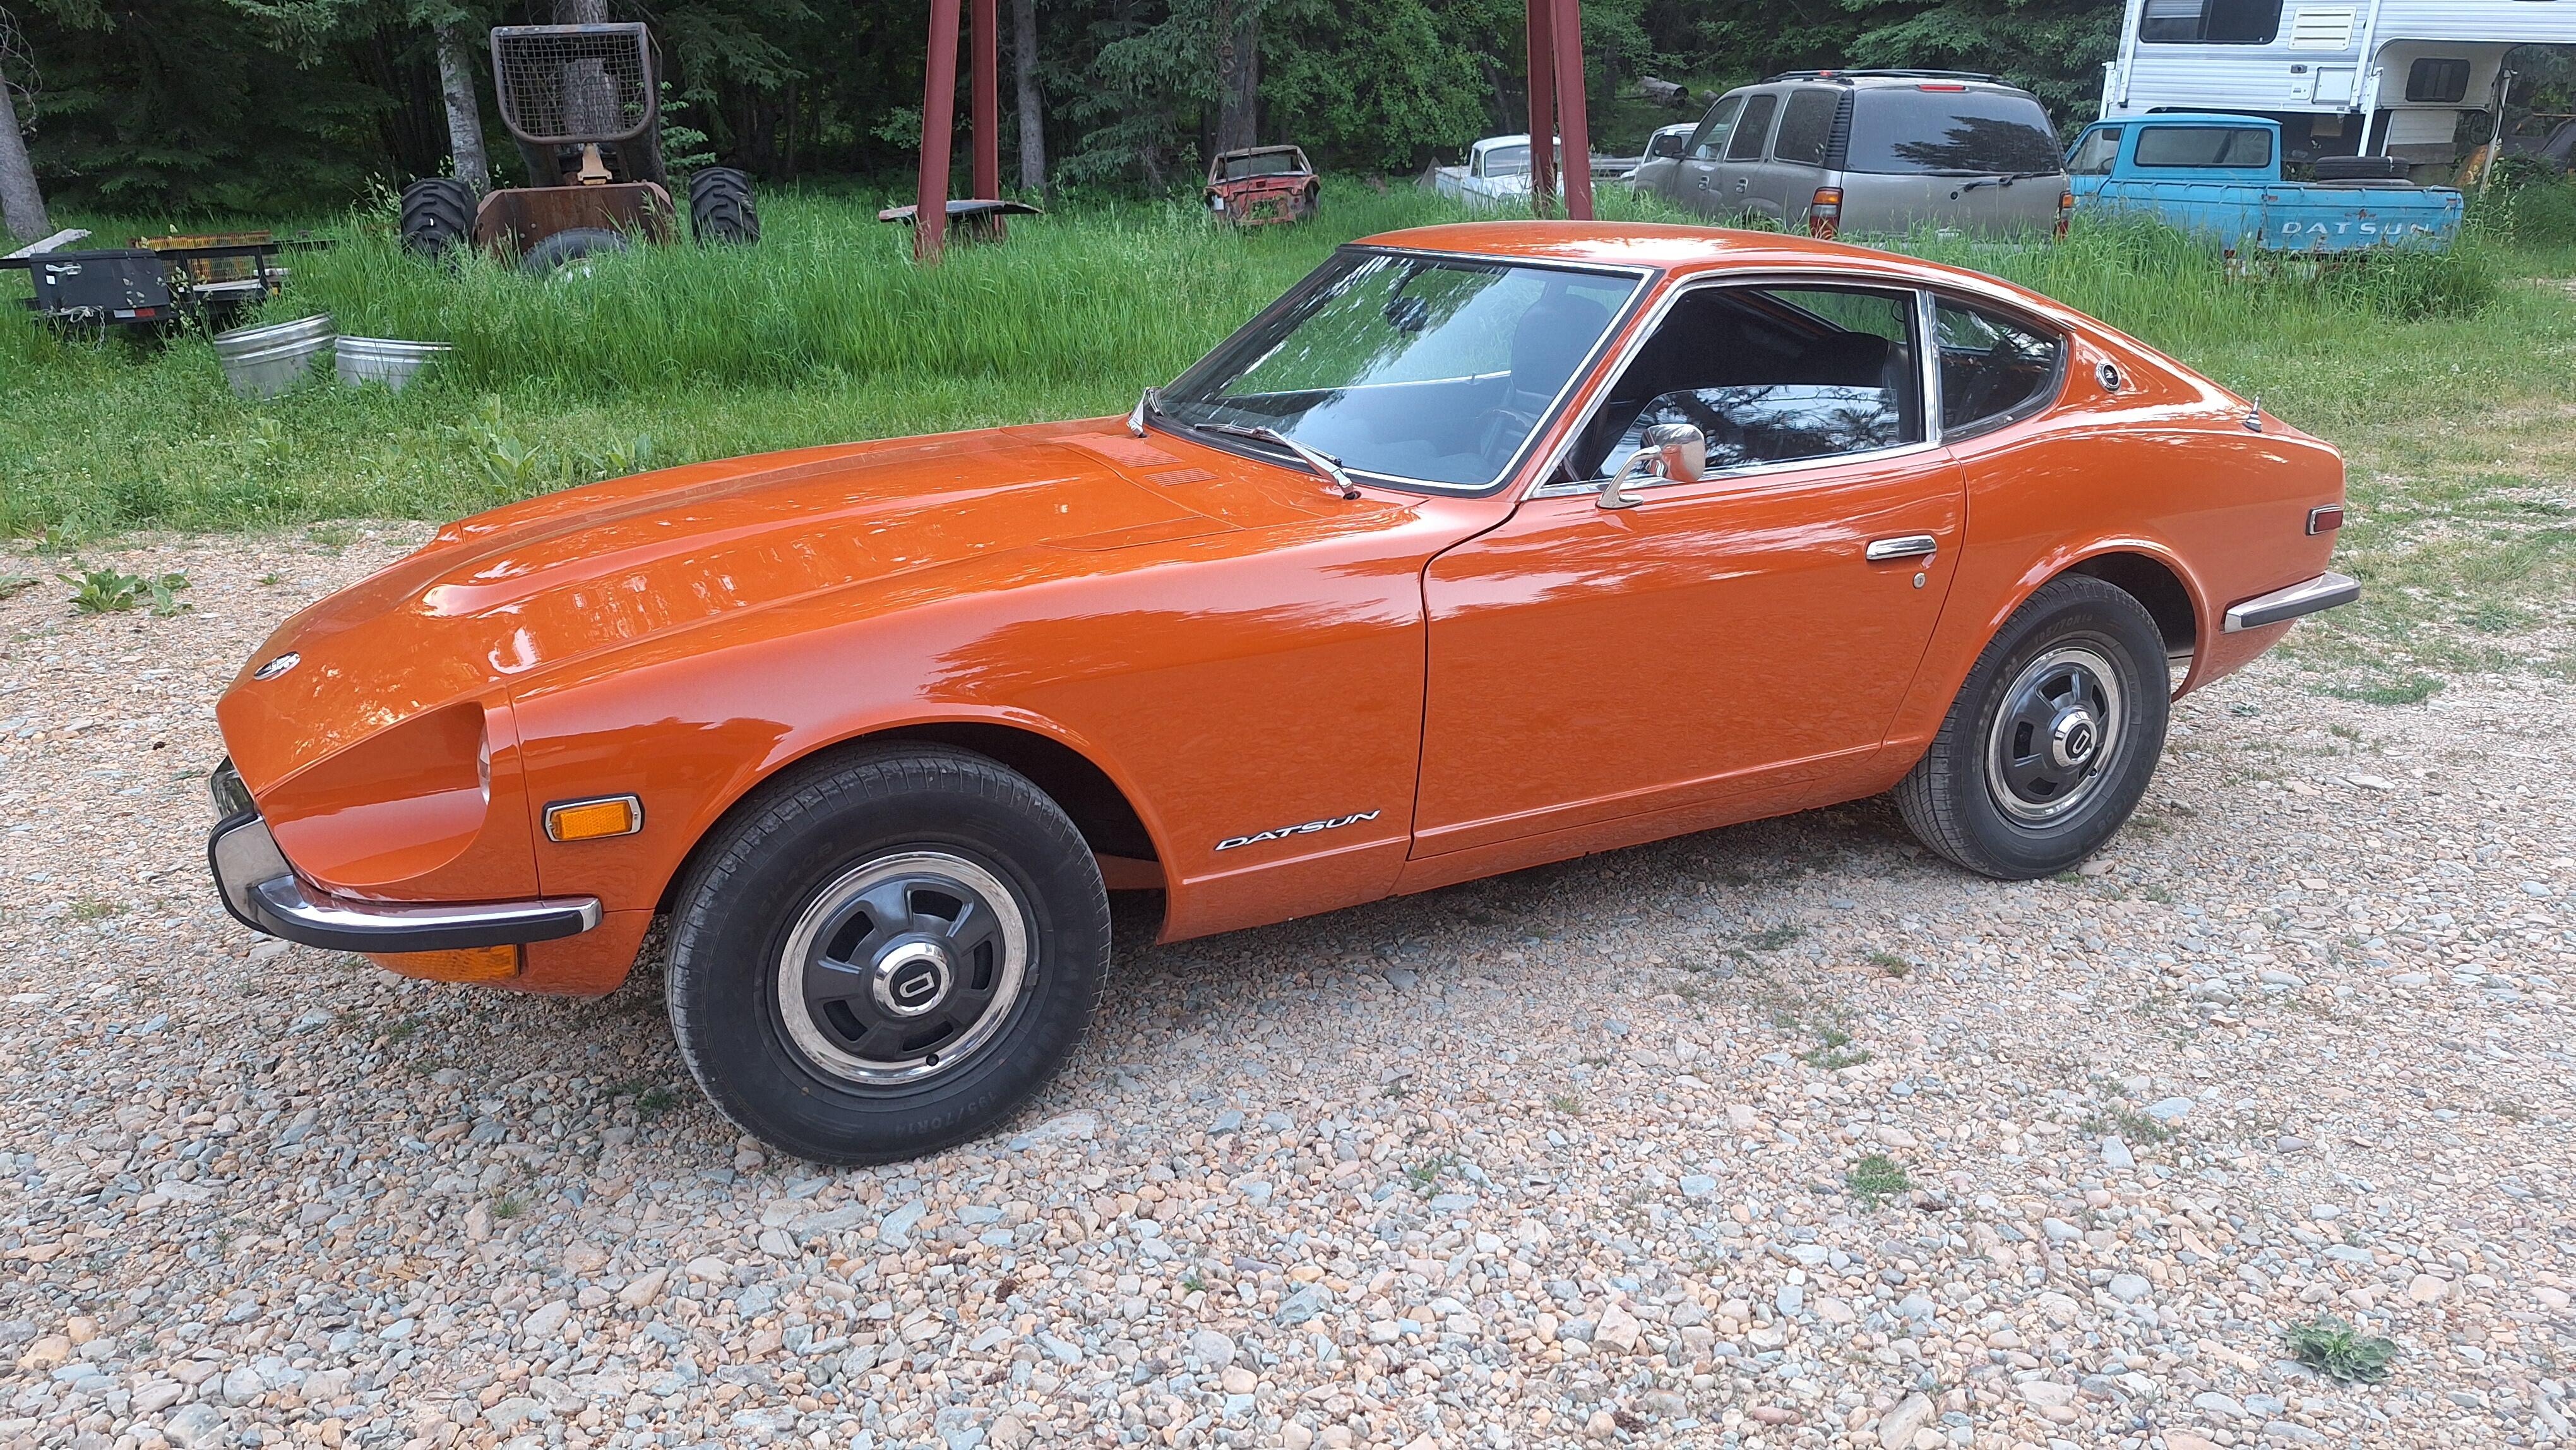
1 pointOh sorry, I finished it up, drove it a few miles, had a very small oil leak I fixed, timing cover bolt(s). The front brakes or hubs were getting hot, resolved that issue quickly. I've probably put 600 miles on the car since. It rides unbelievably smooth and quiet. There's nothing left to work on. I'm at a loss now, it's kind of a strange feeling. What a battle it was though, I really enjoyed the challenge for the most part, and I miss it.
 1 point
 -
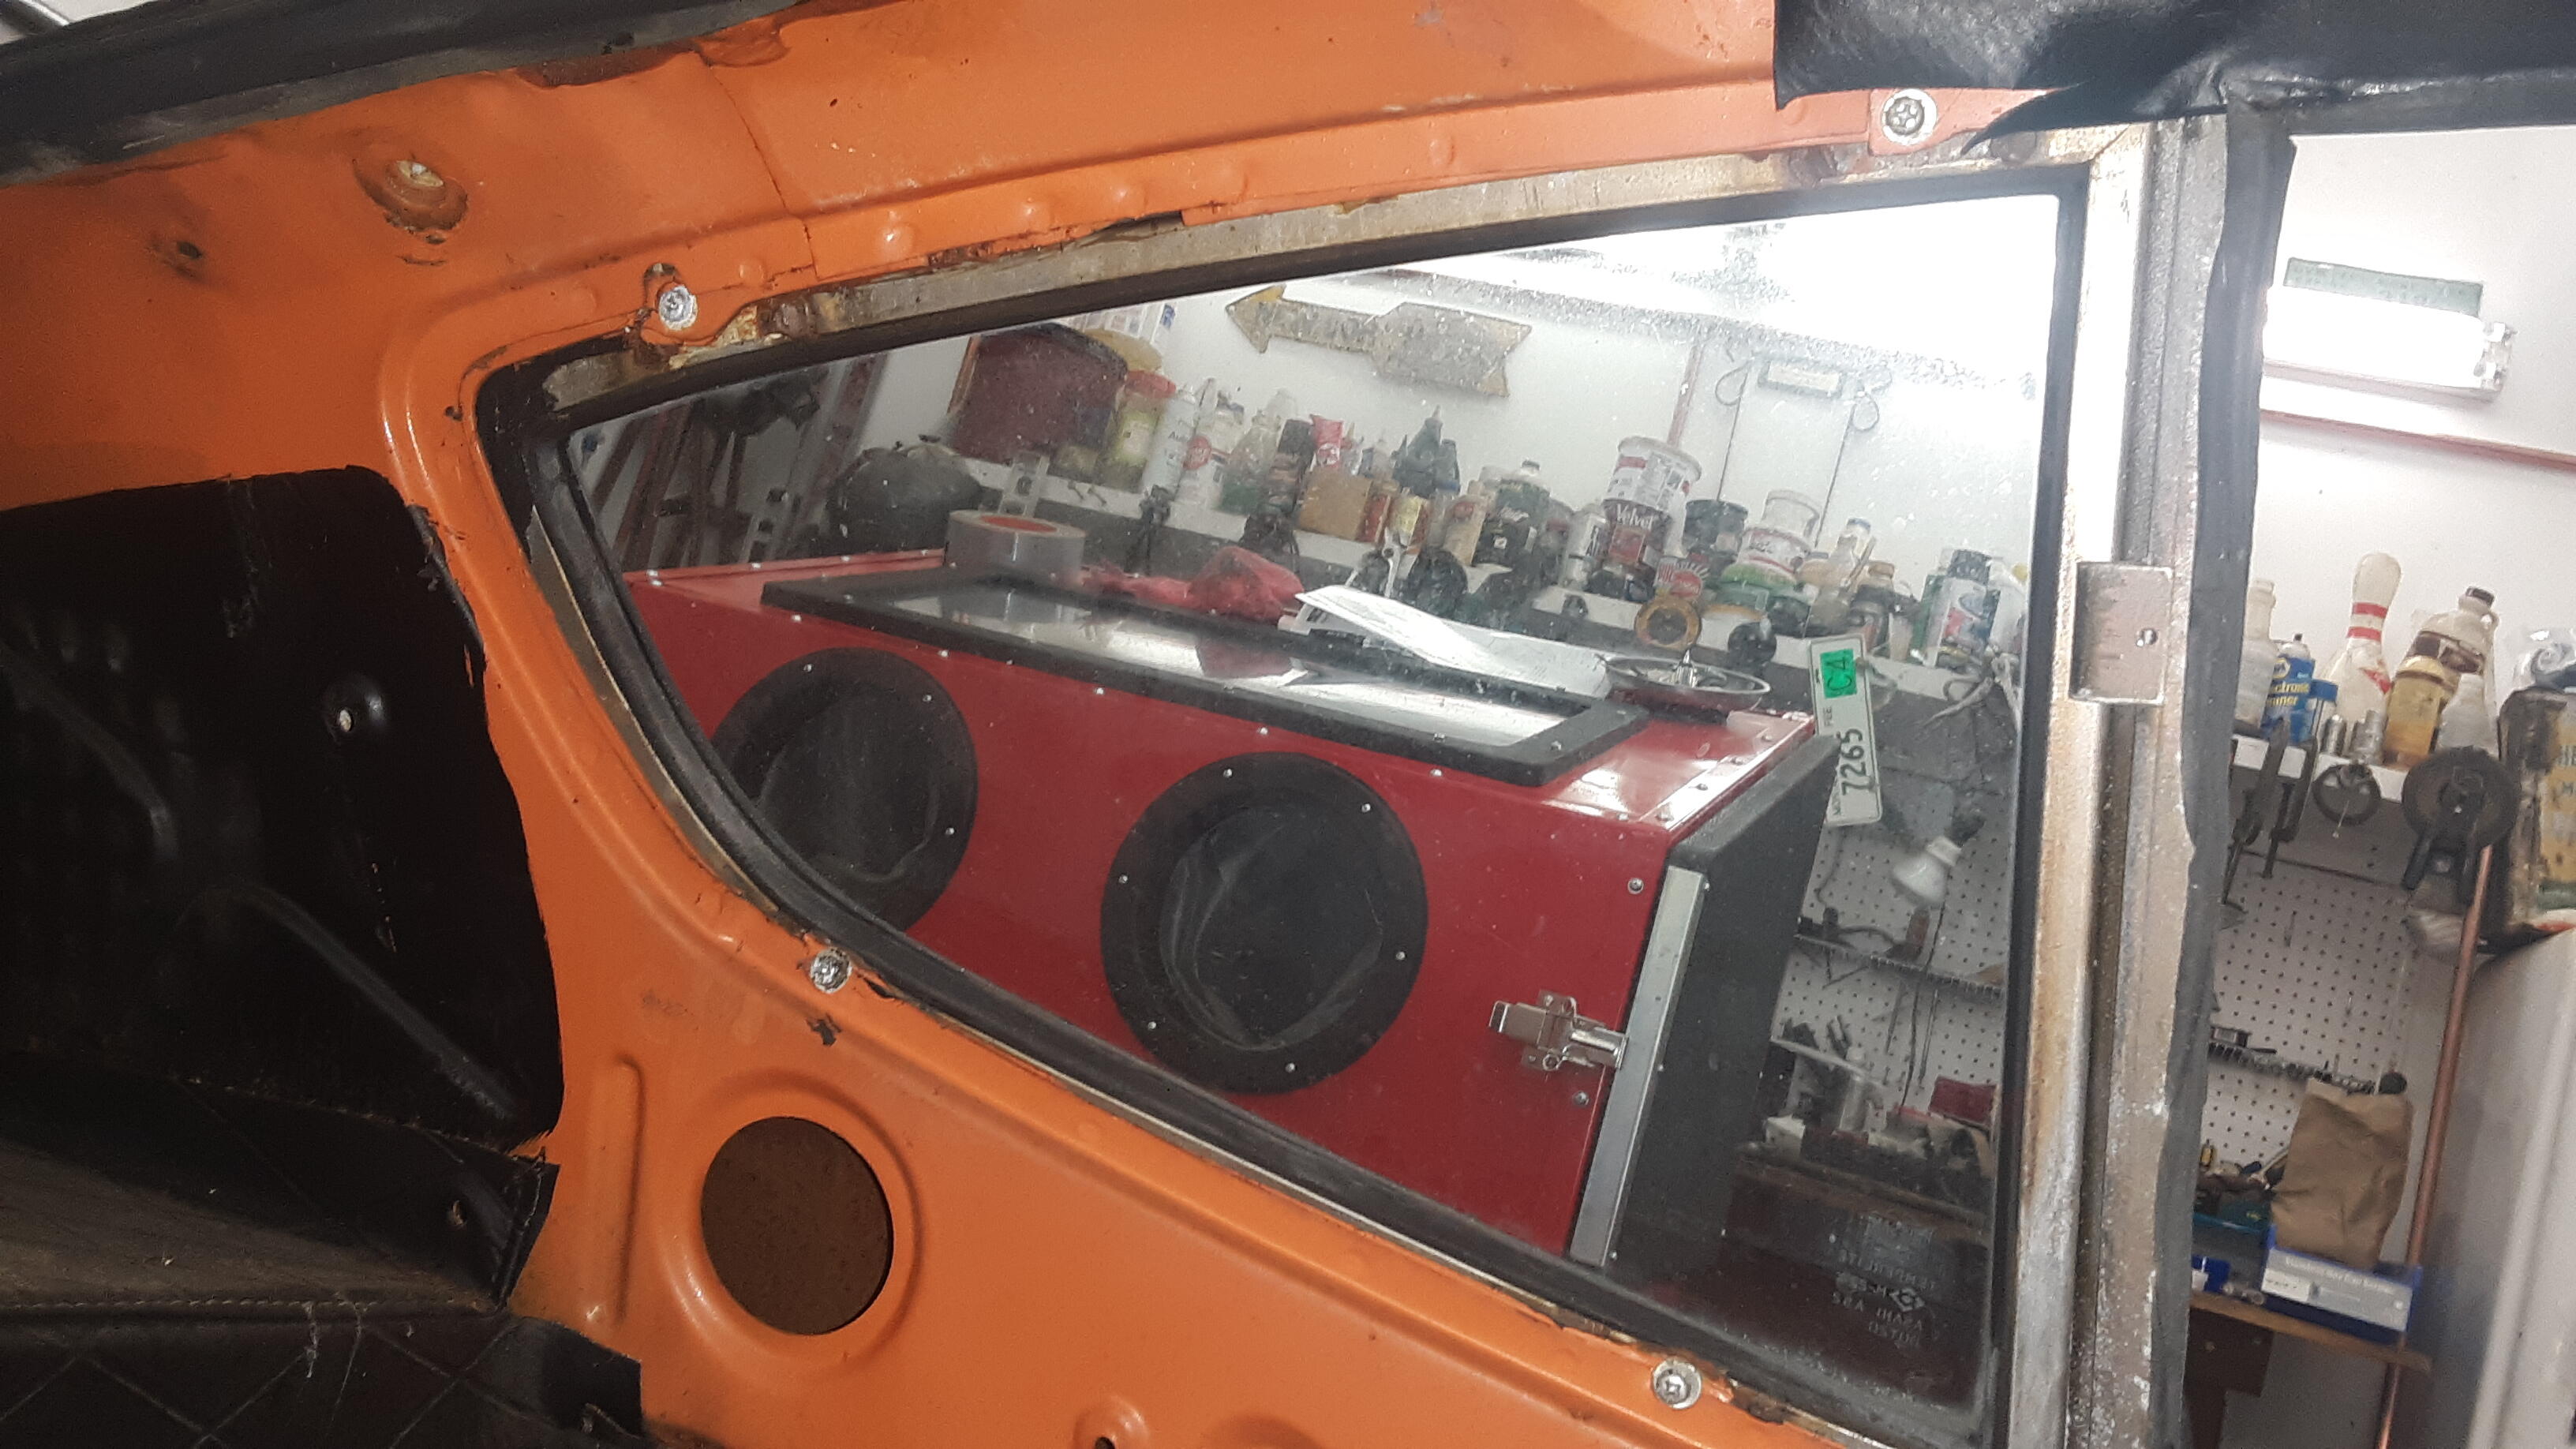
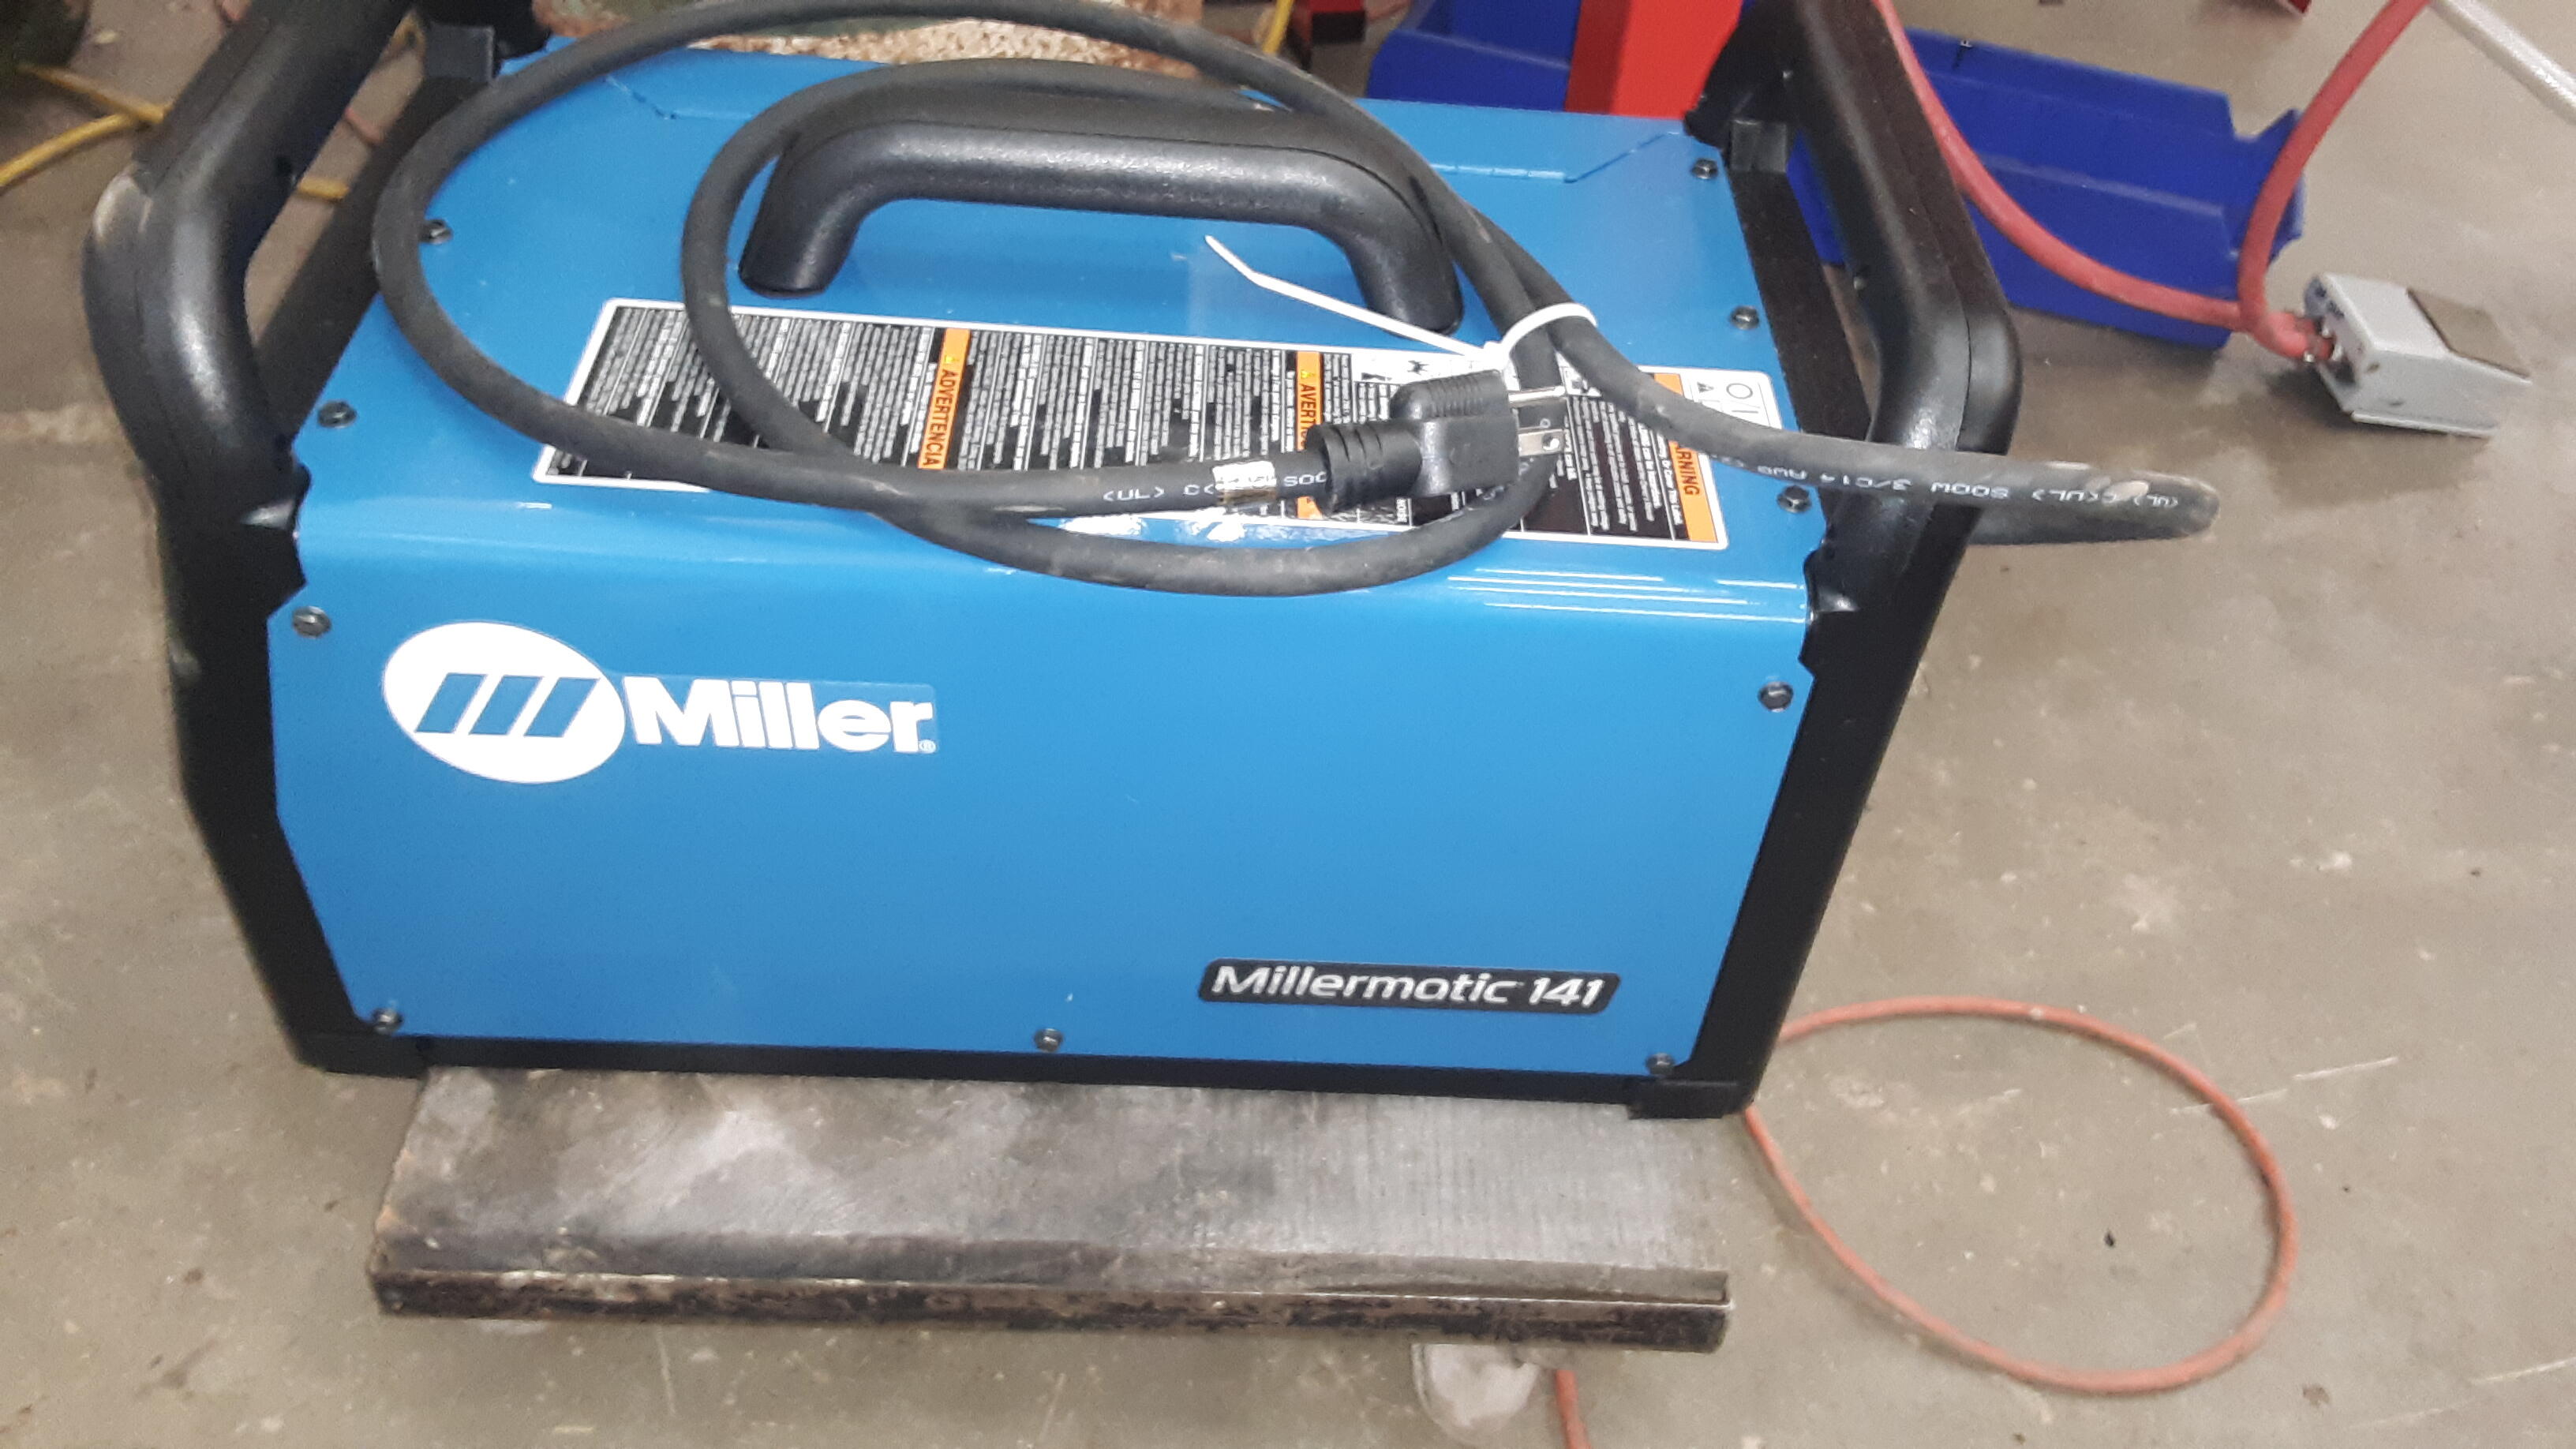
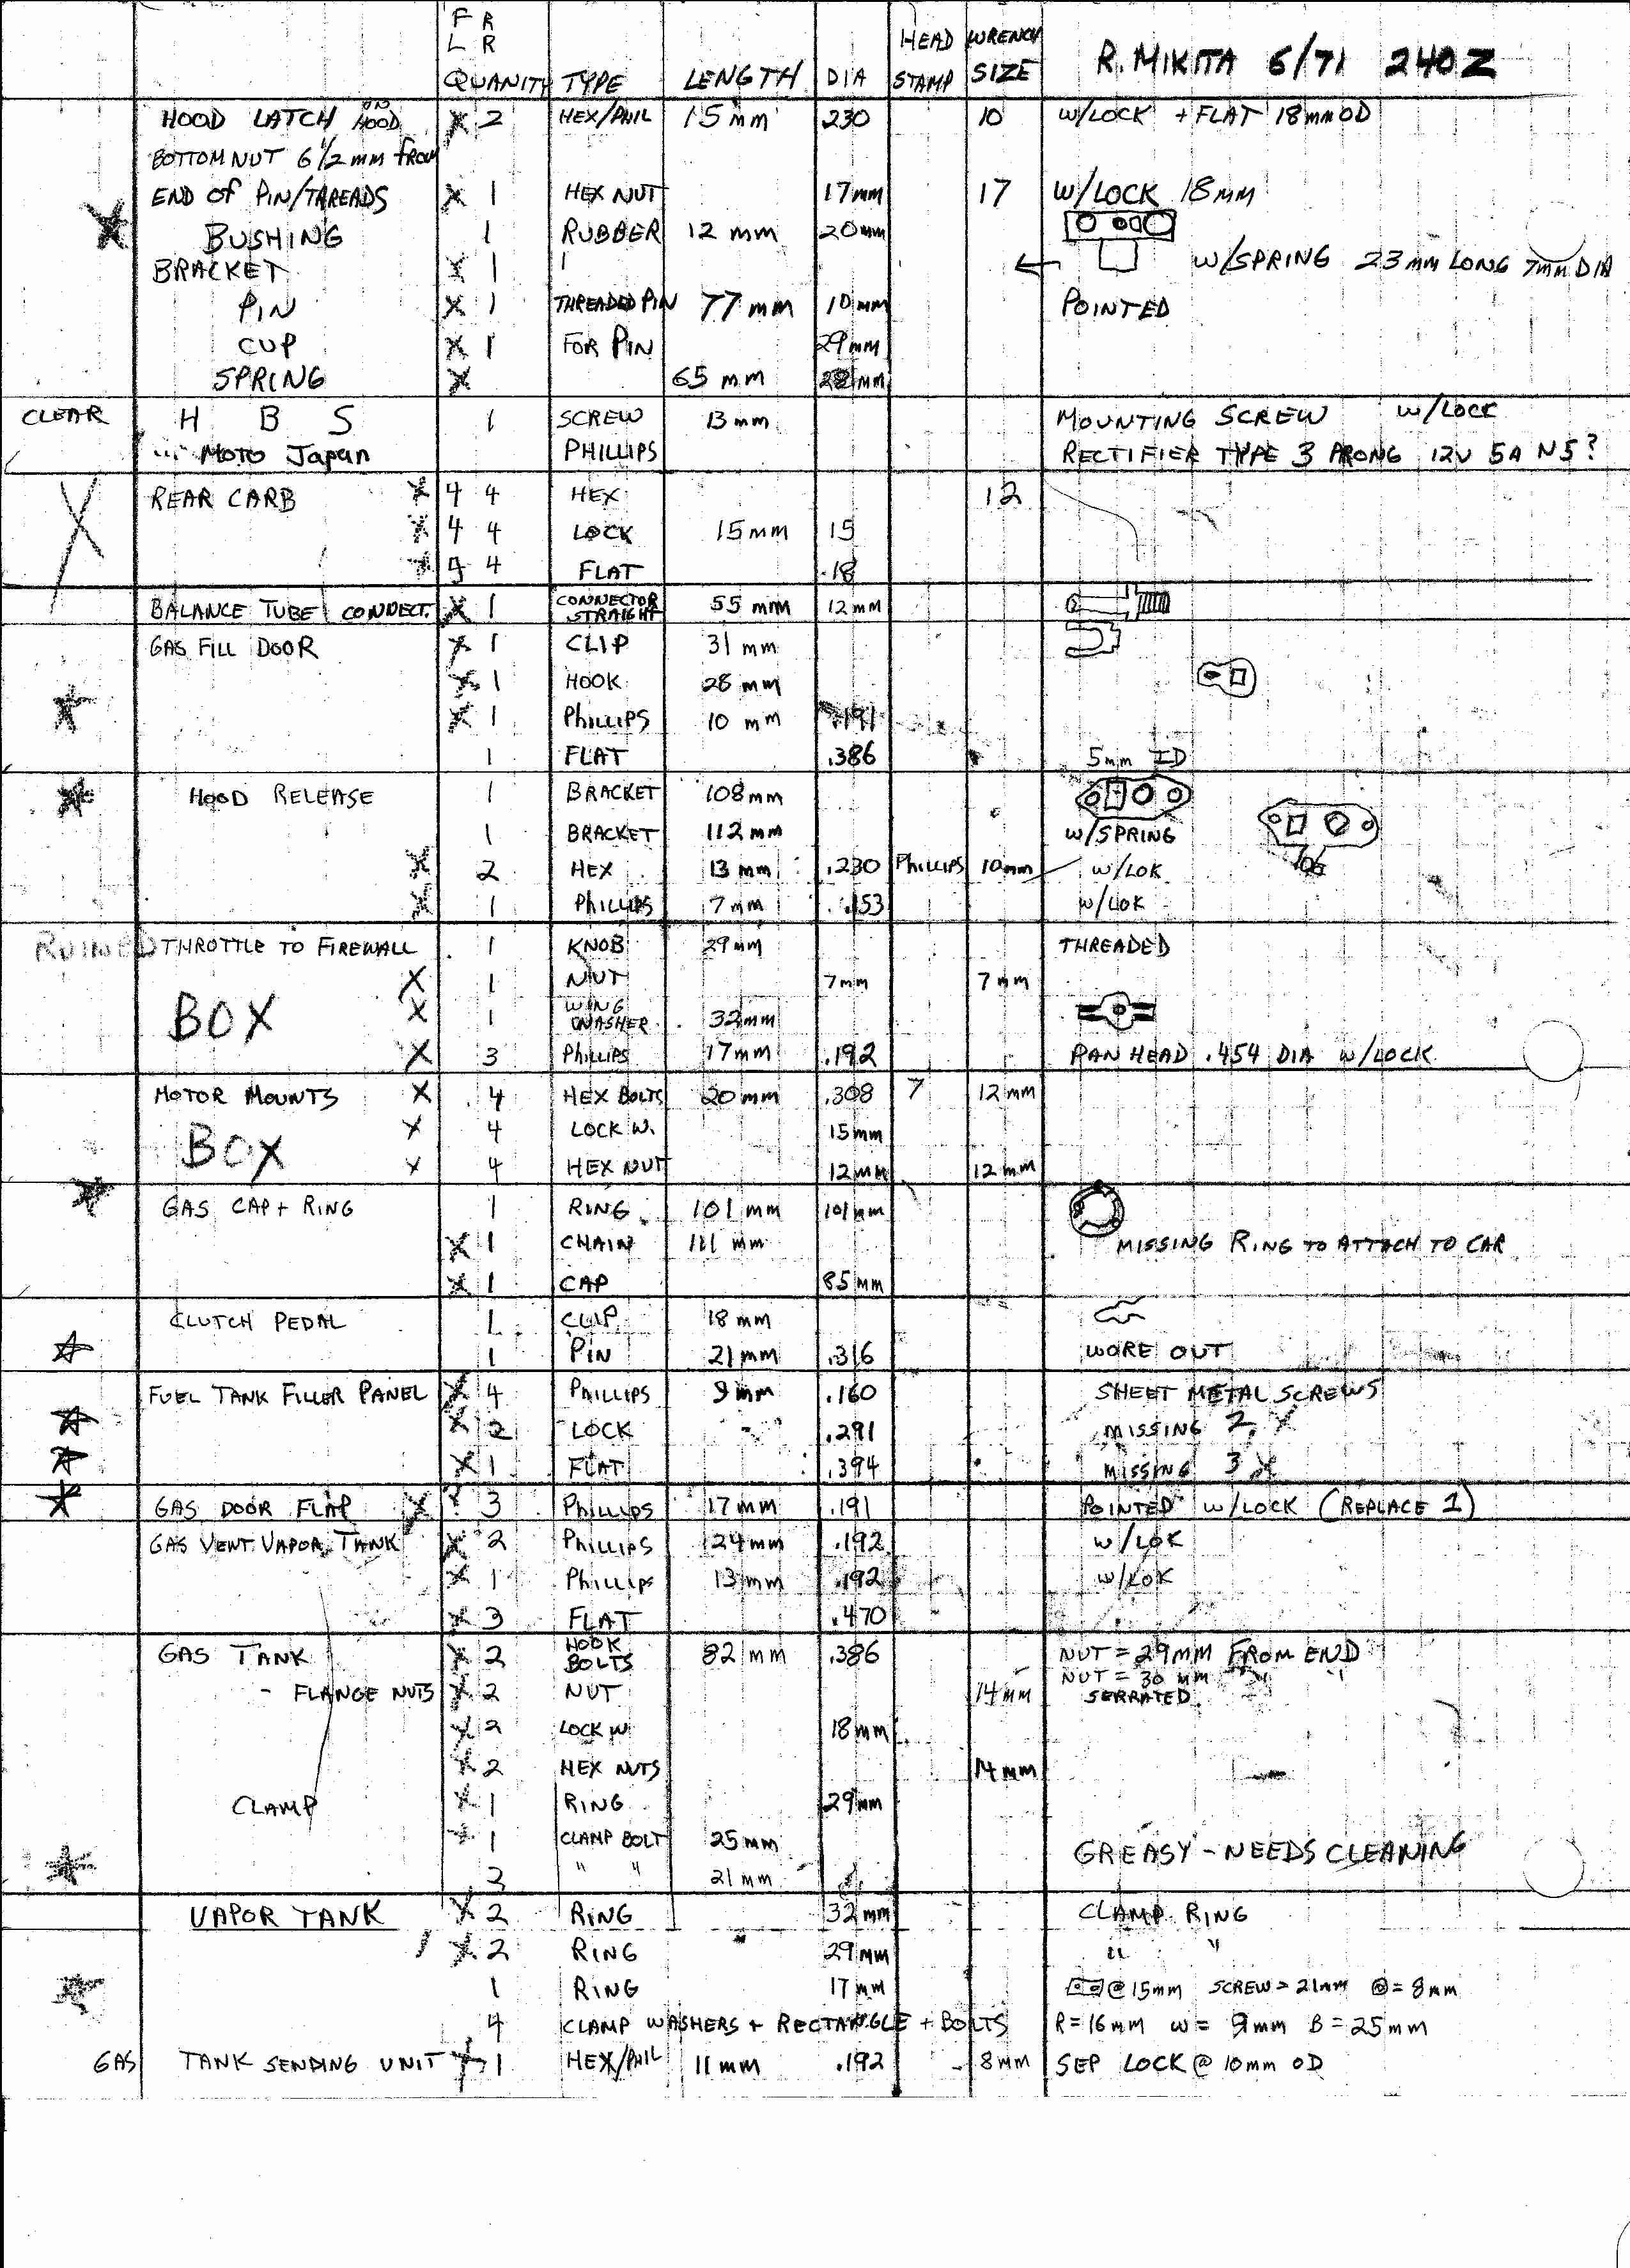
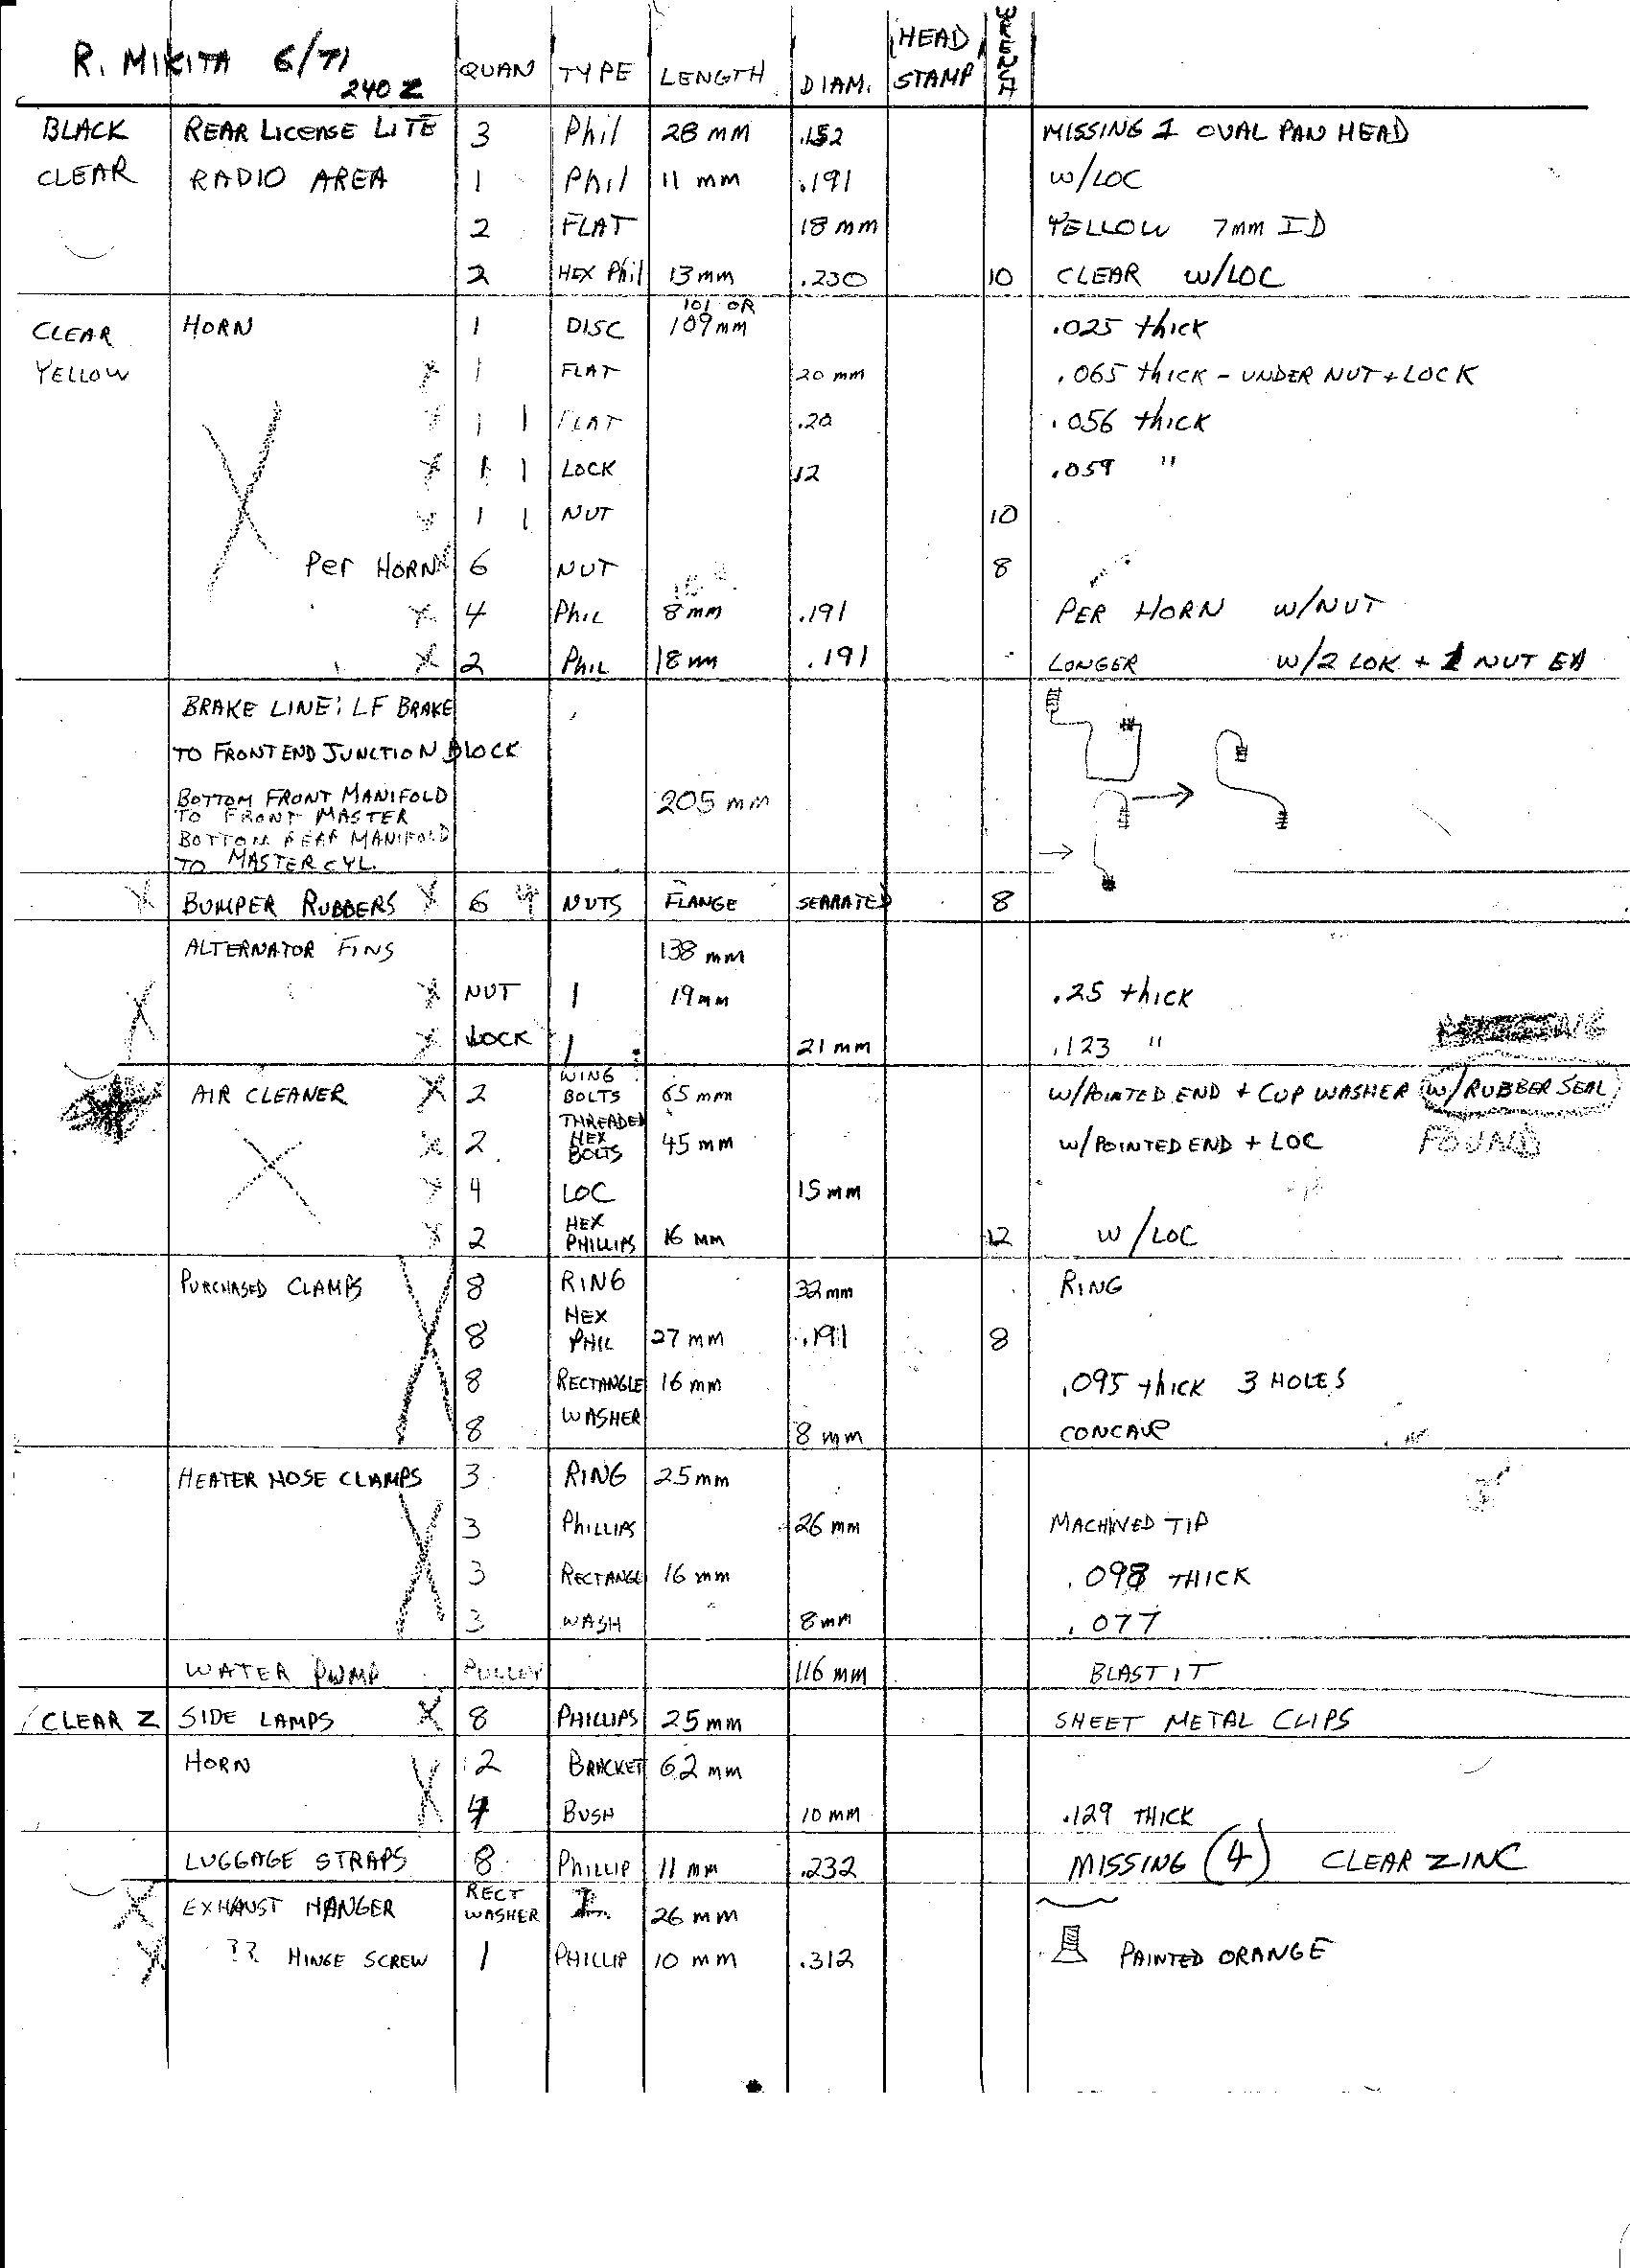
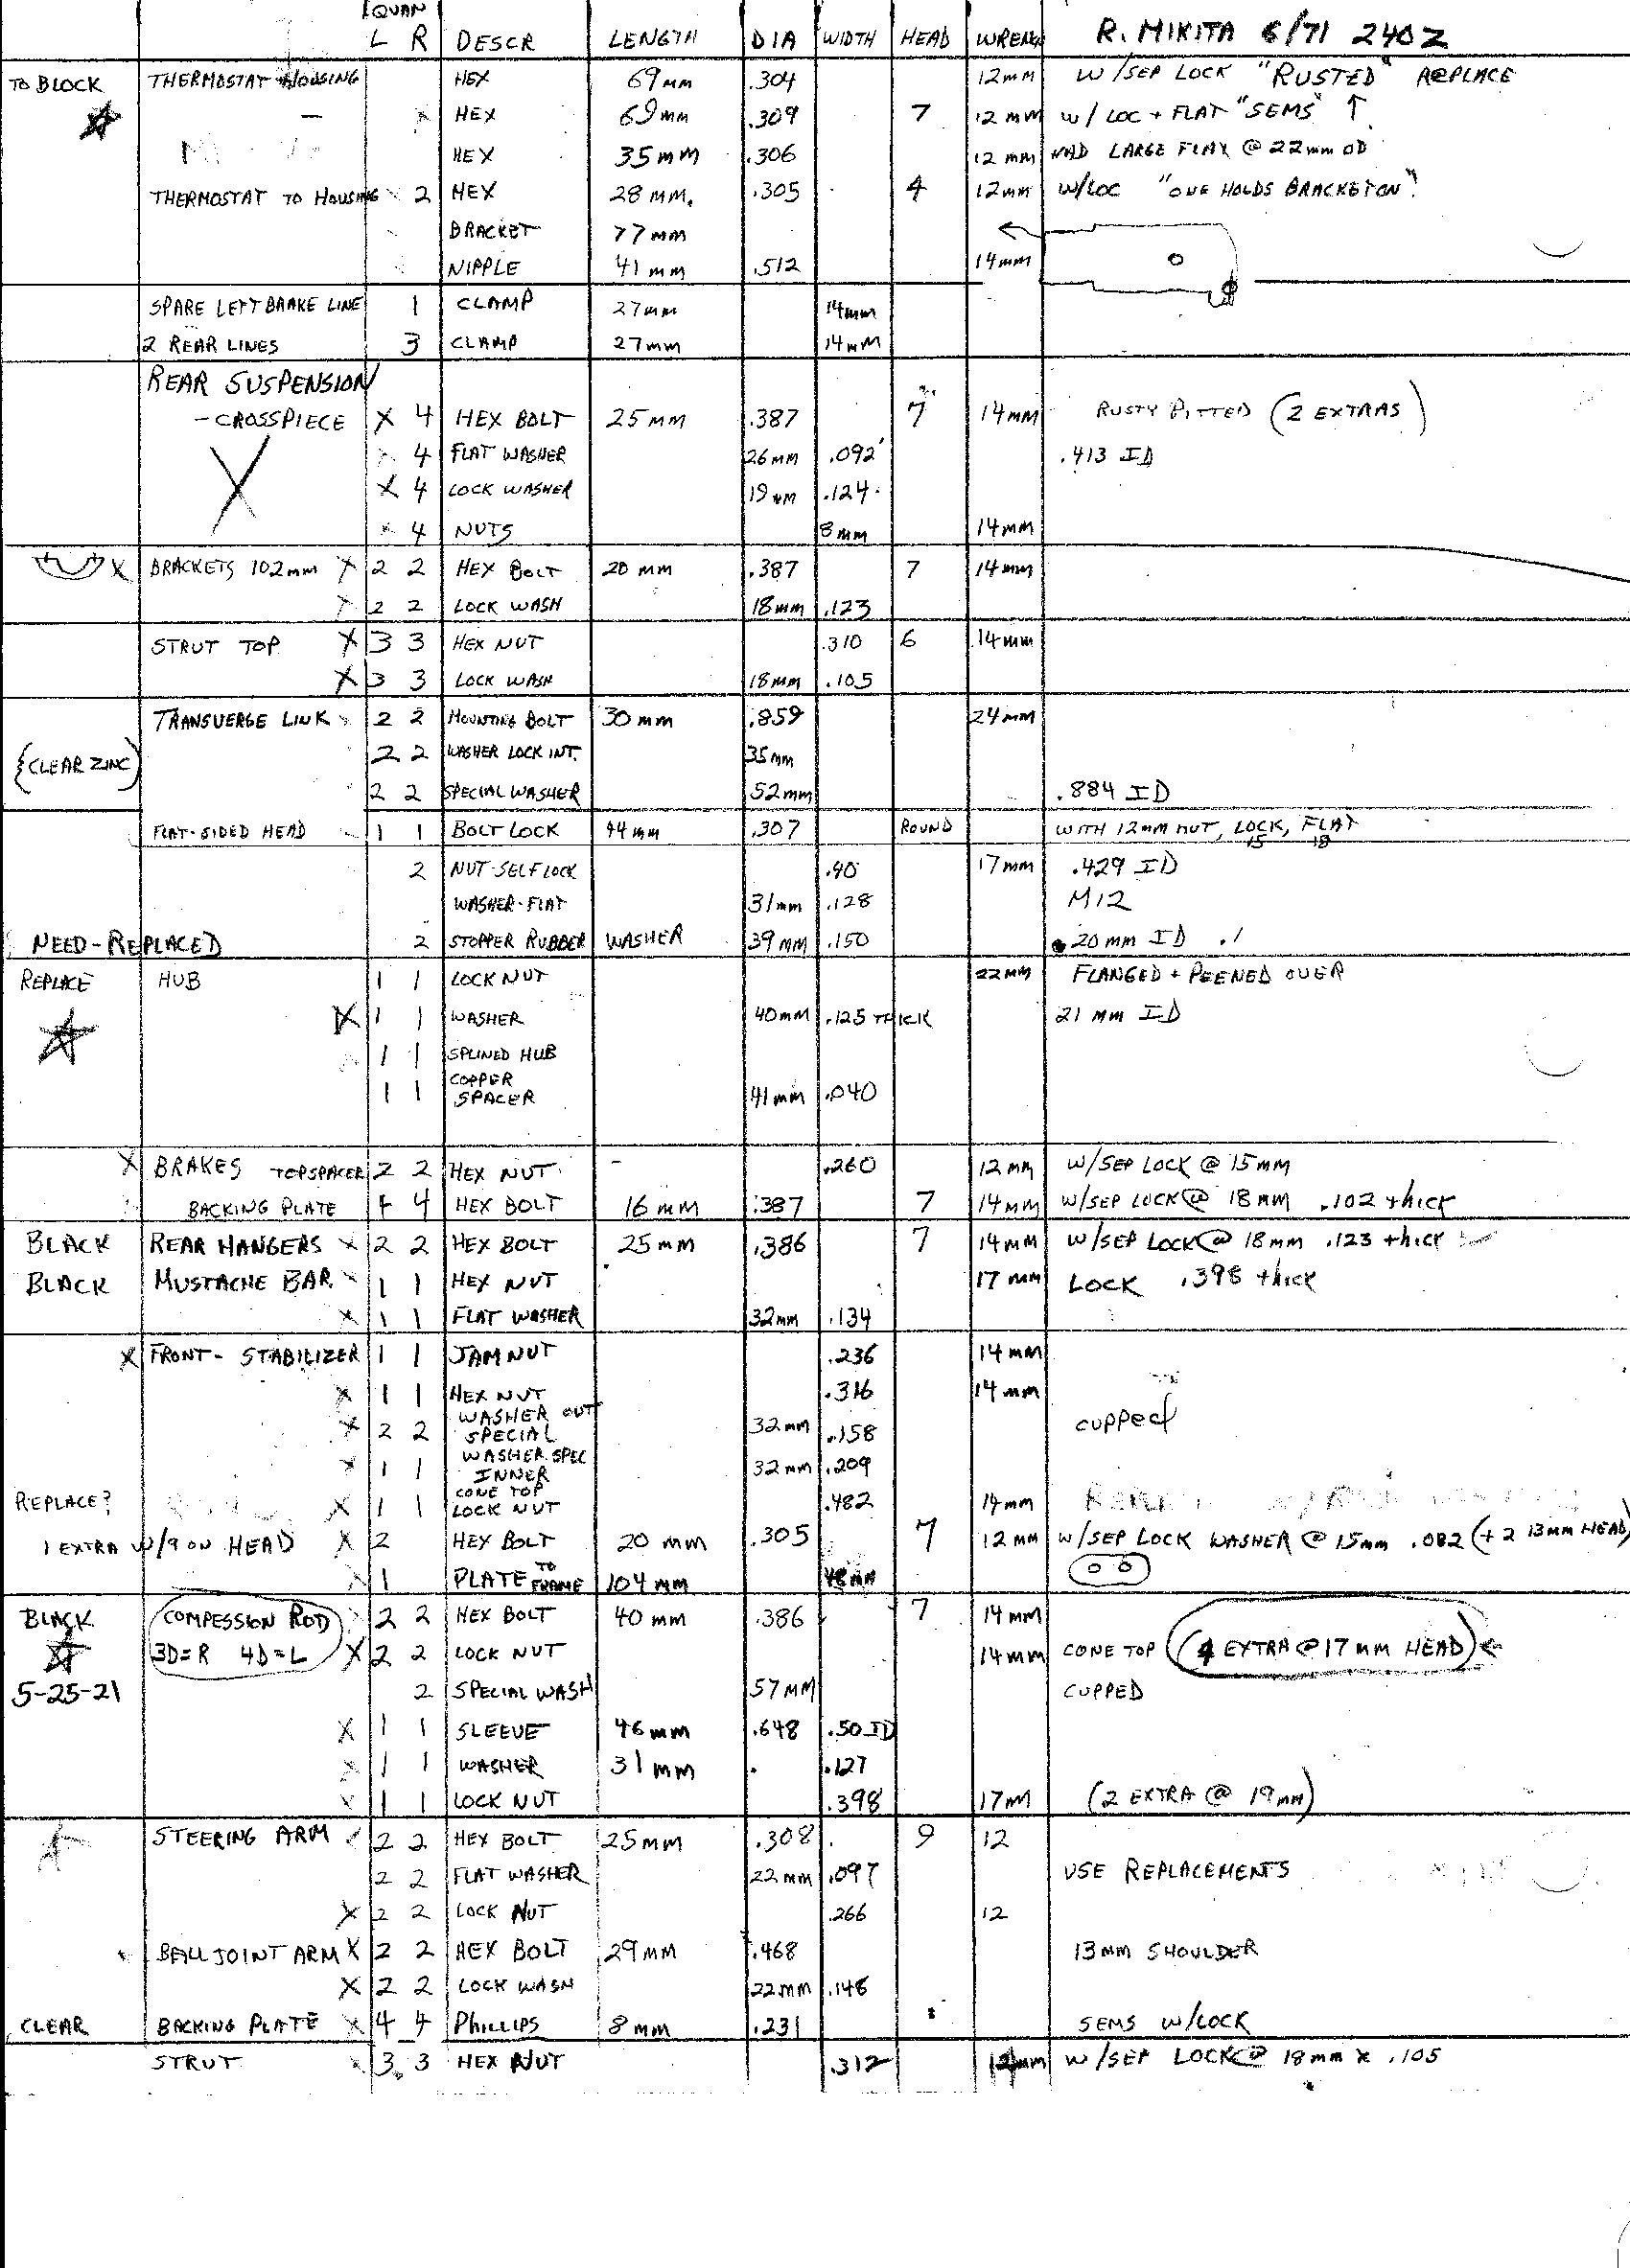
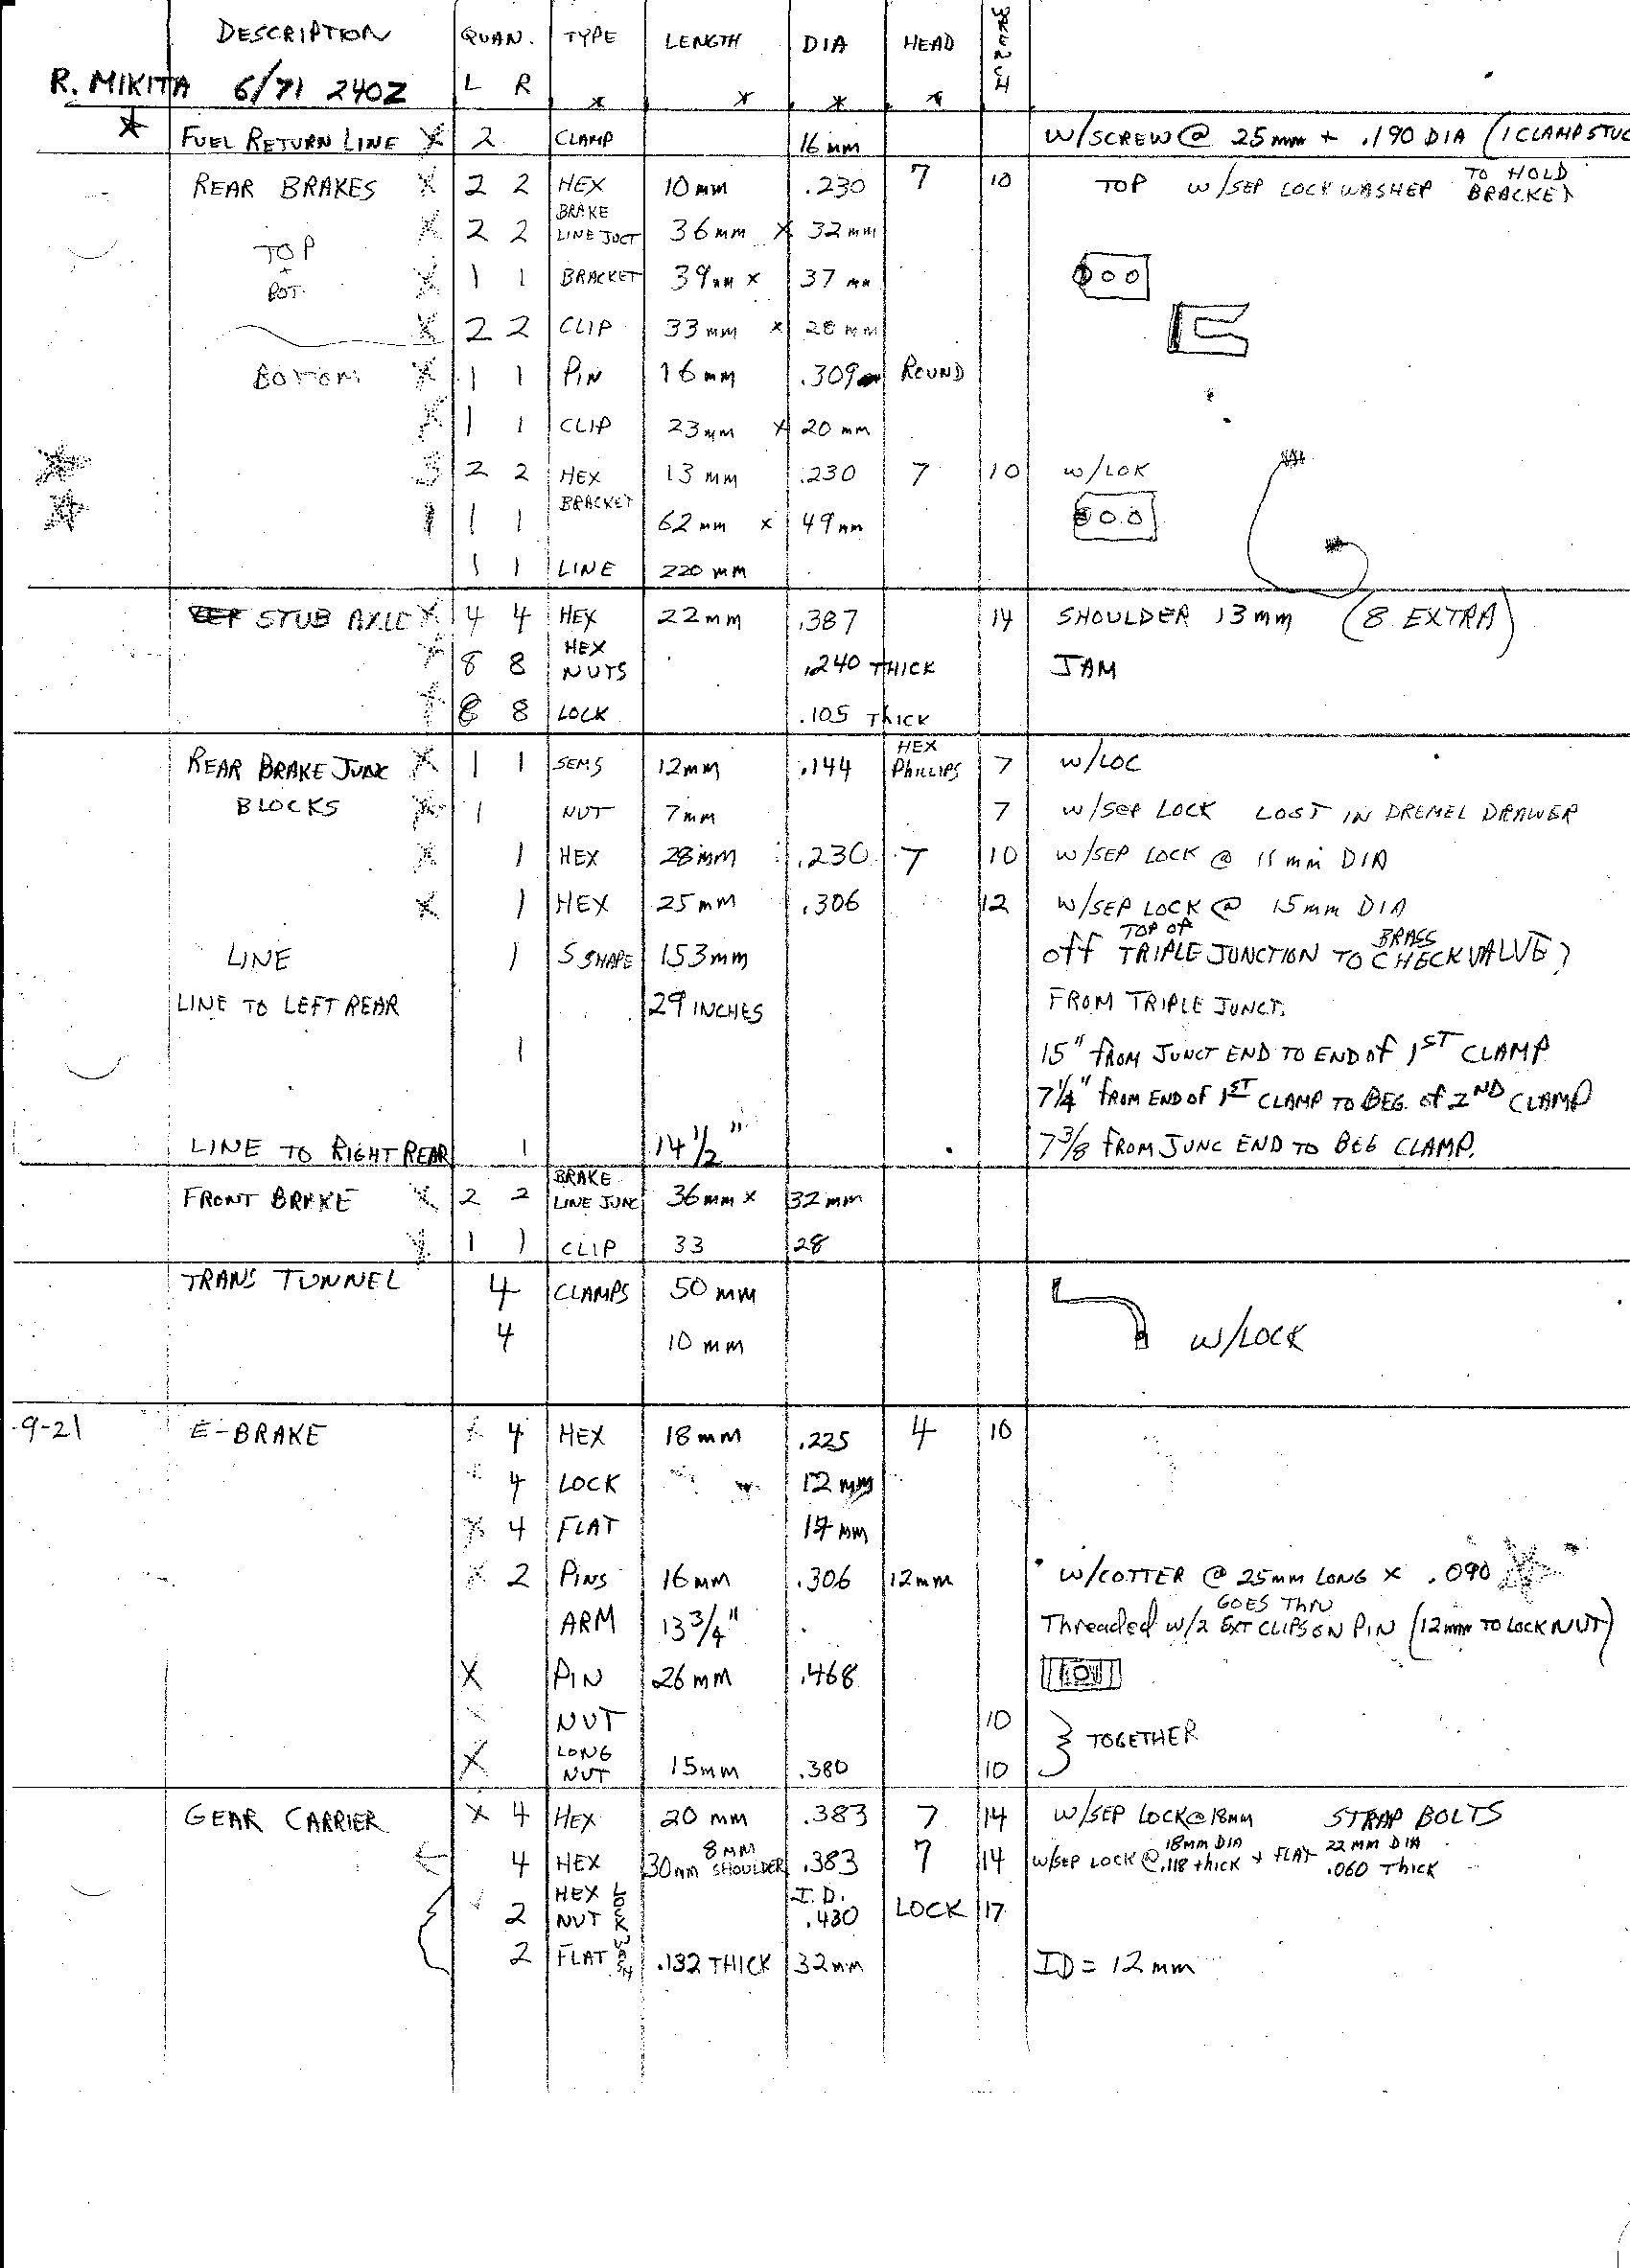
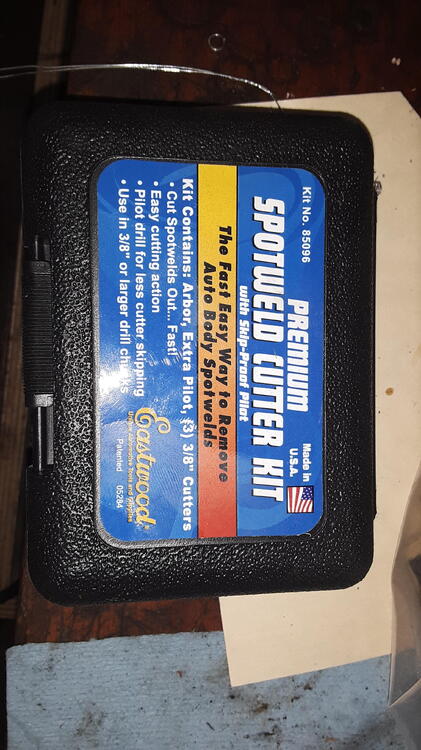
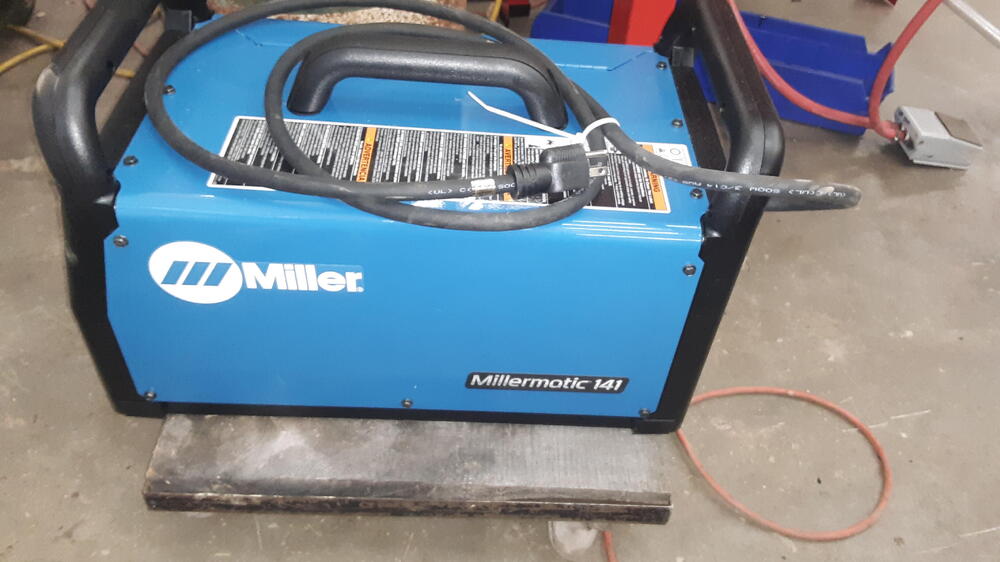
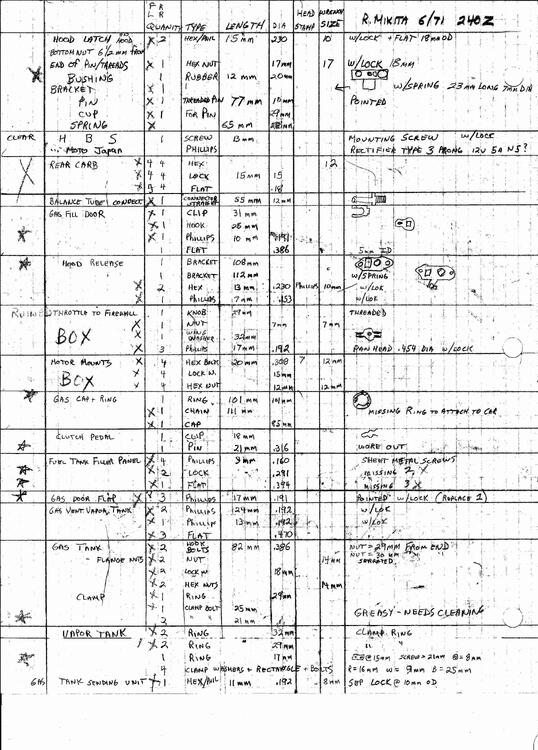
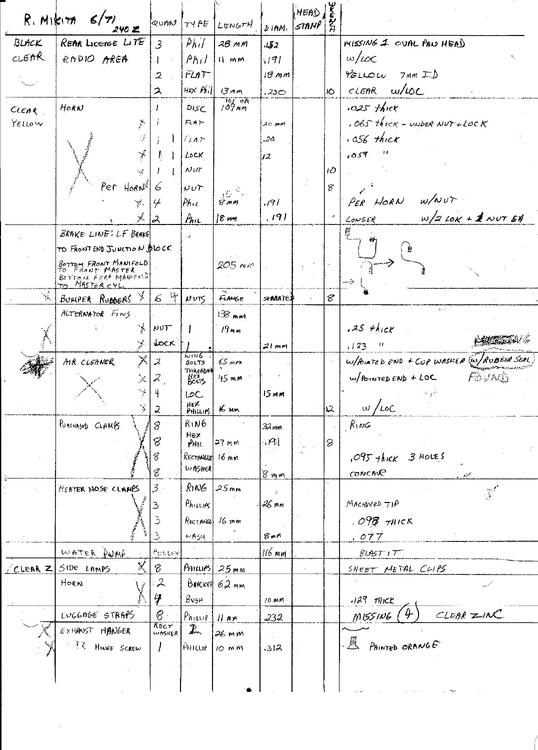
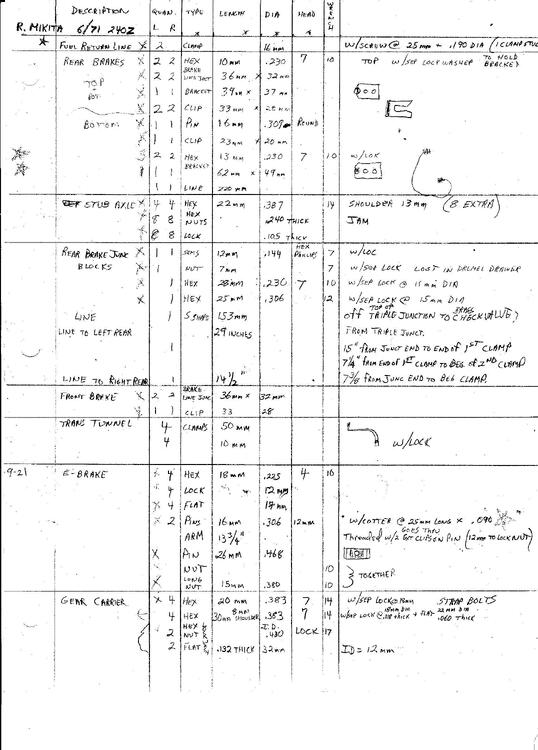
1 pointThis car had some moisture, condensation from sitting in the weather all these years. Hot summers, cold winters, all kinds of weather. It was at this time I got one of my favorite tools, a harbor freight blast cabinet which I upgraded to a foot pedal etc. More tools included a spot weld cutter bit, a welded for welding thin metal. I have welders, but they're for heavy logging equipment, not this. As I took the car apart, I carefully bagged up the parts in separate labeled bags. About this time, I started reading Motorman's "the Orange" and "Deja vu" threads. It really inspired me to think "hey, I can do that!" But then realized to get parts plated, I needed to throw everything into a box together. Now my memory isn't that good, and getting worse every year, so, I decided to measure and record everything. It took days. The thickness and diameters I measured with a micrometer, lengths in millimeters. I wasn't to familiar with metric....so if these can help anyone, here they are. I had a couple shipments to Sav-On plating and parts of another car in these. As far as clear zinc or yellow, in some cases I may have gotten it wrong as these things were powdery/rusty color. I think this car was pretty much unmolested. datsun invent 6 001.bmp


 1 point