Leaderboard
-
Patcon
 Subscriber
 9Points11,140Posts
 -
inline6
Subscriber4Points1,281Posts -
Captain Obvious
Free Member4Points10,081Posts -
Matthew Abate
Free Member3Points1,204Posts


Popular Content
Showing content with the highest reputation on 01/26/2025 in all areas
-
3 pointsChanging your name on this topic/site isn't gonna help "Johnny" .. time after time people helped you and said the engine needs to come apart and then you ask questions in a different way but essentually the same questions.. the engine isn't gonna fix itself.. I don't want to gravel/irritate you.. but you need to listen to the advice! I'm not going to waste more time on this..3 points
-
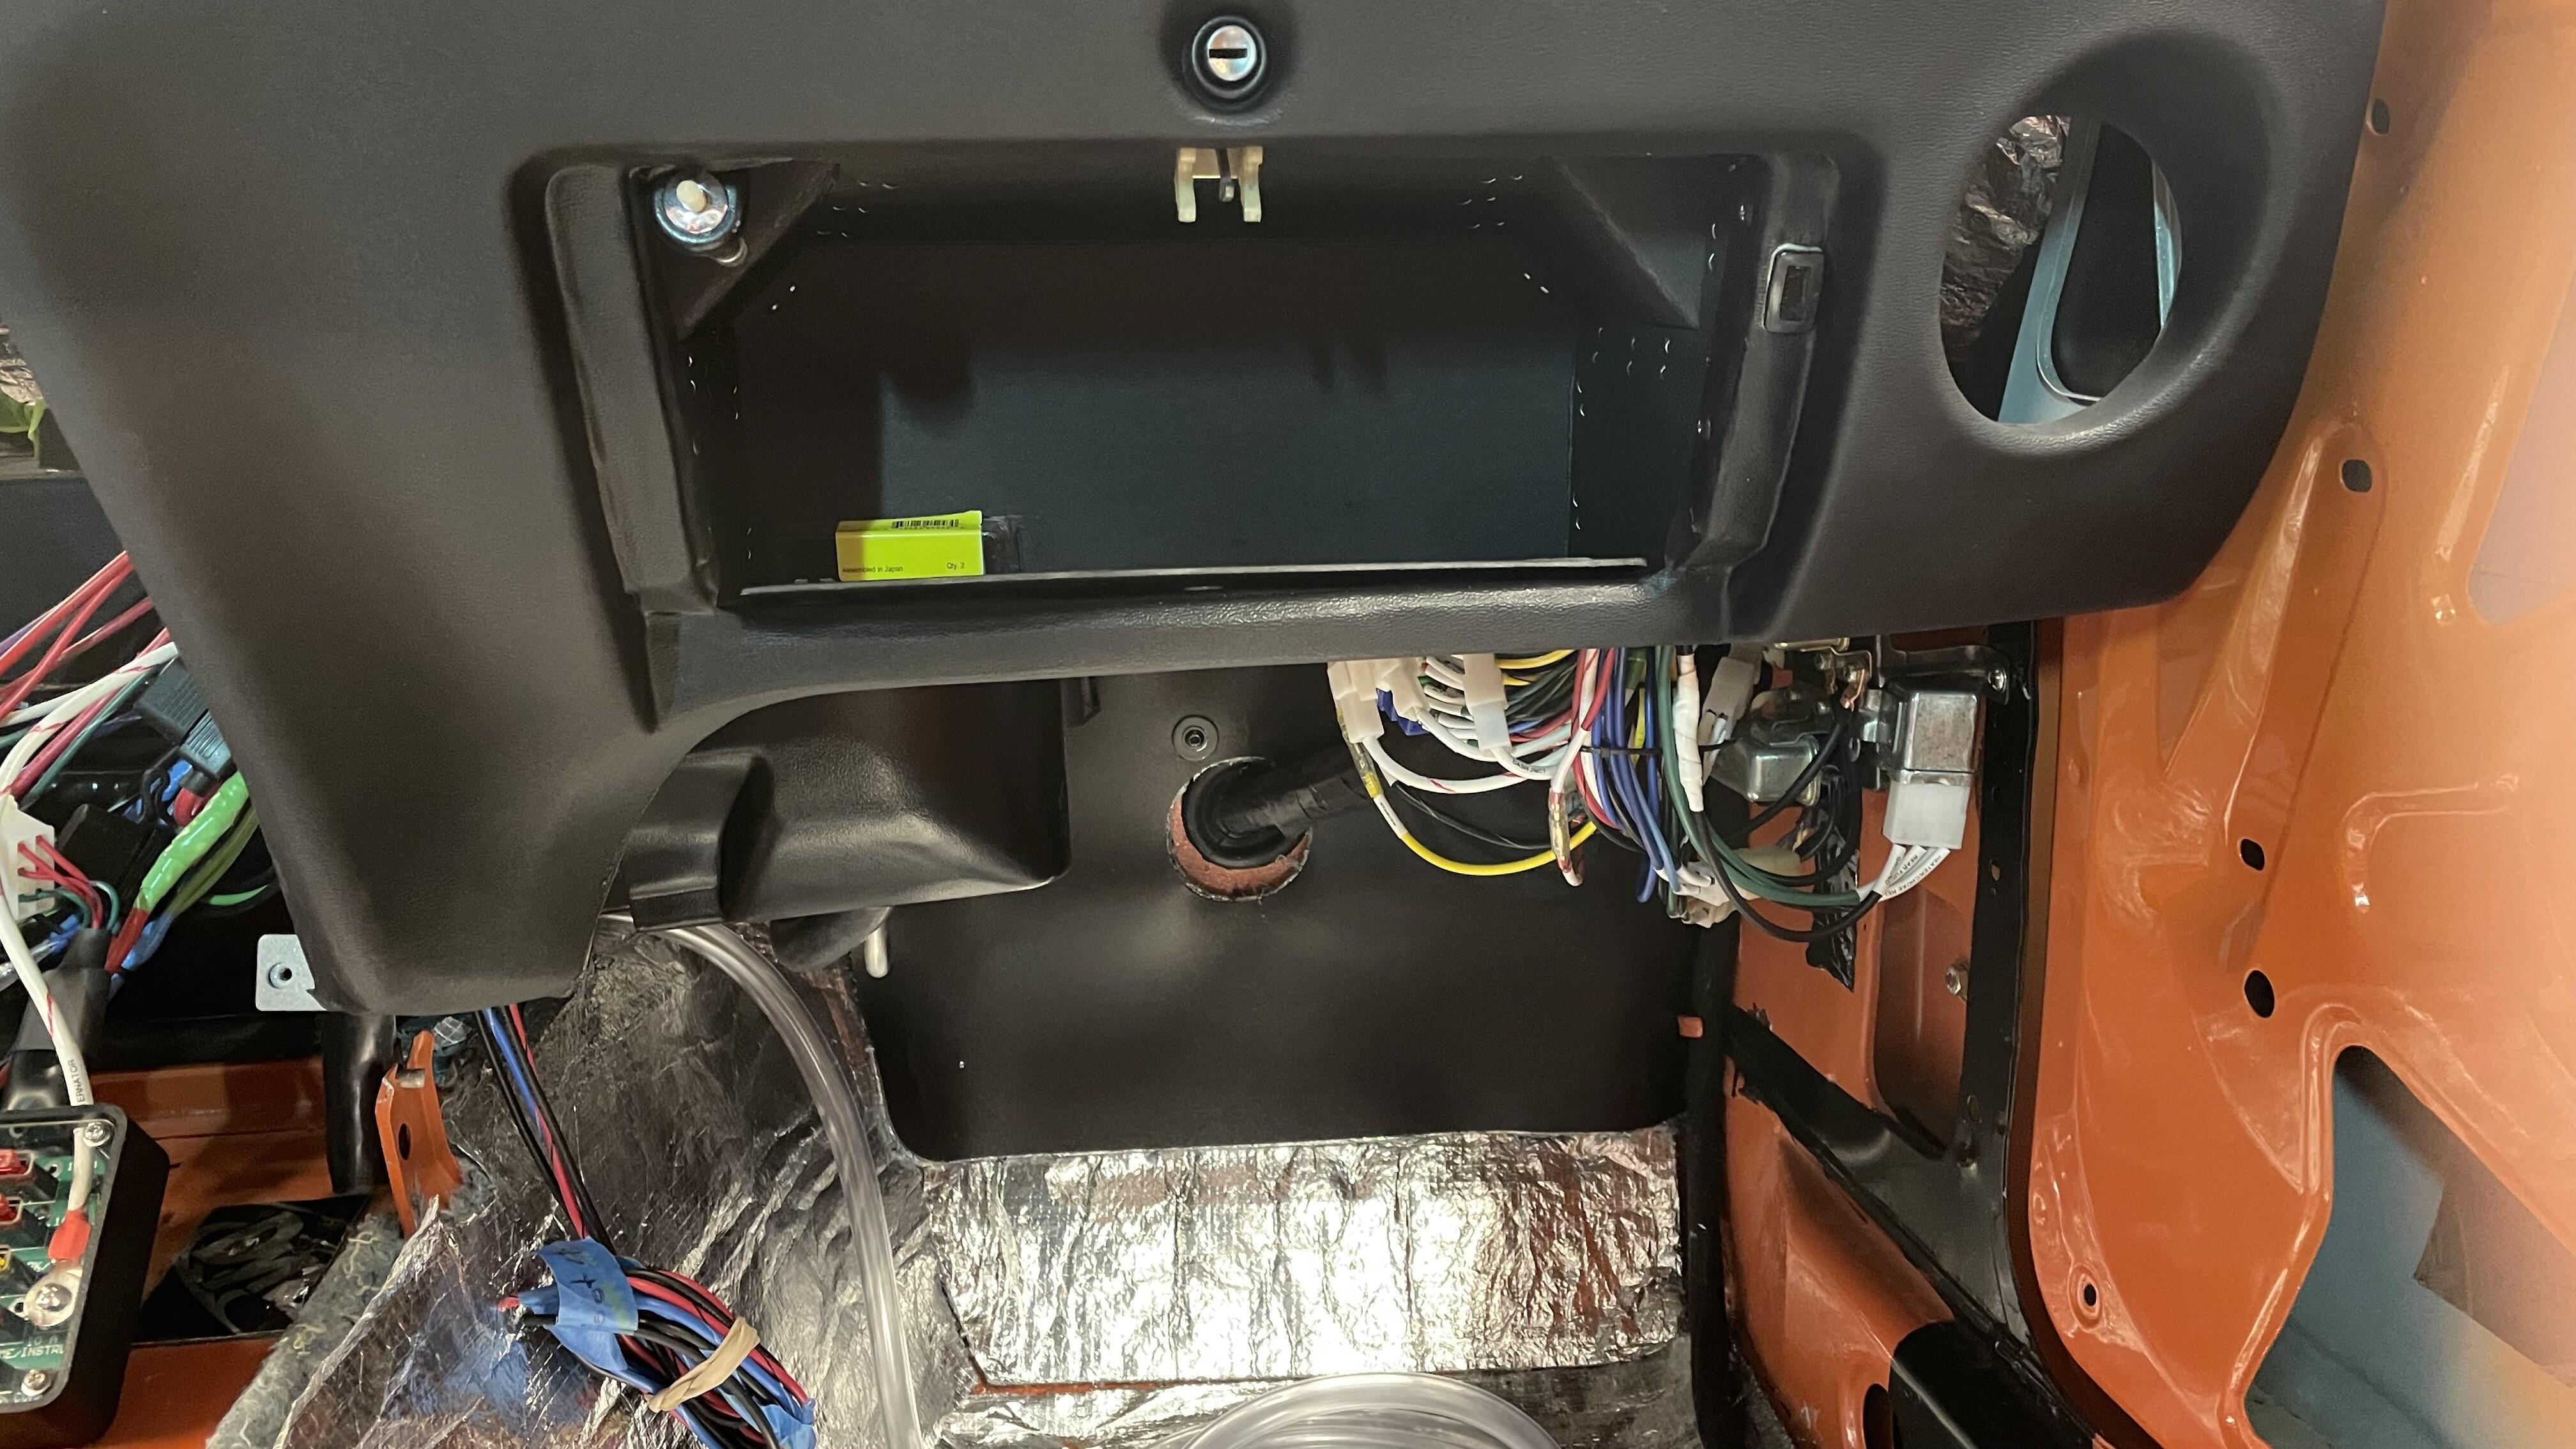
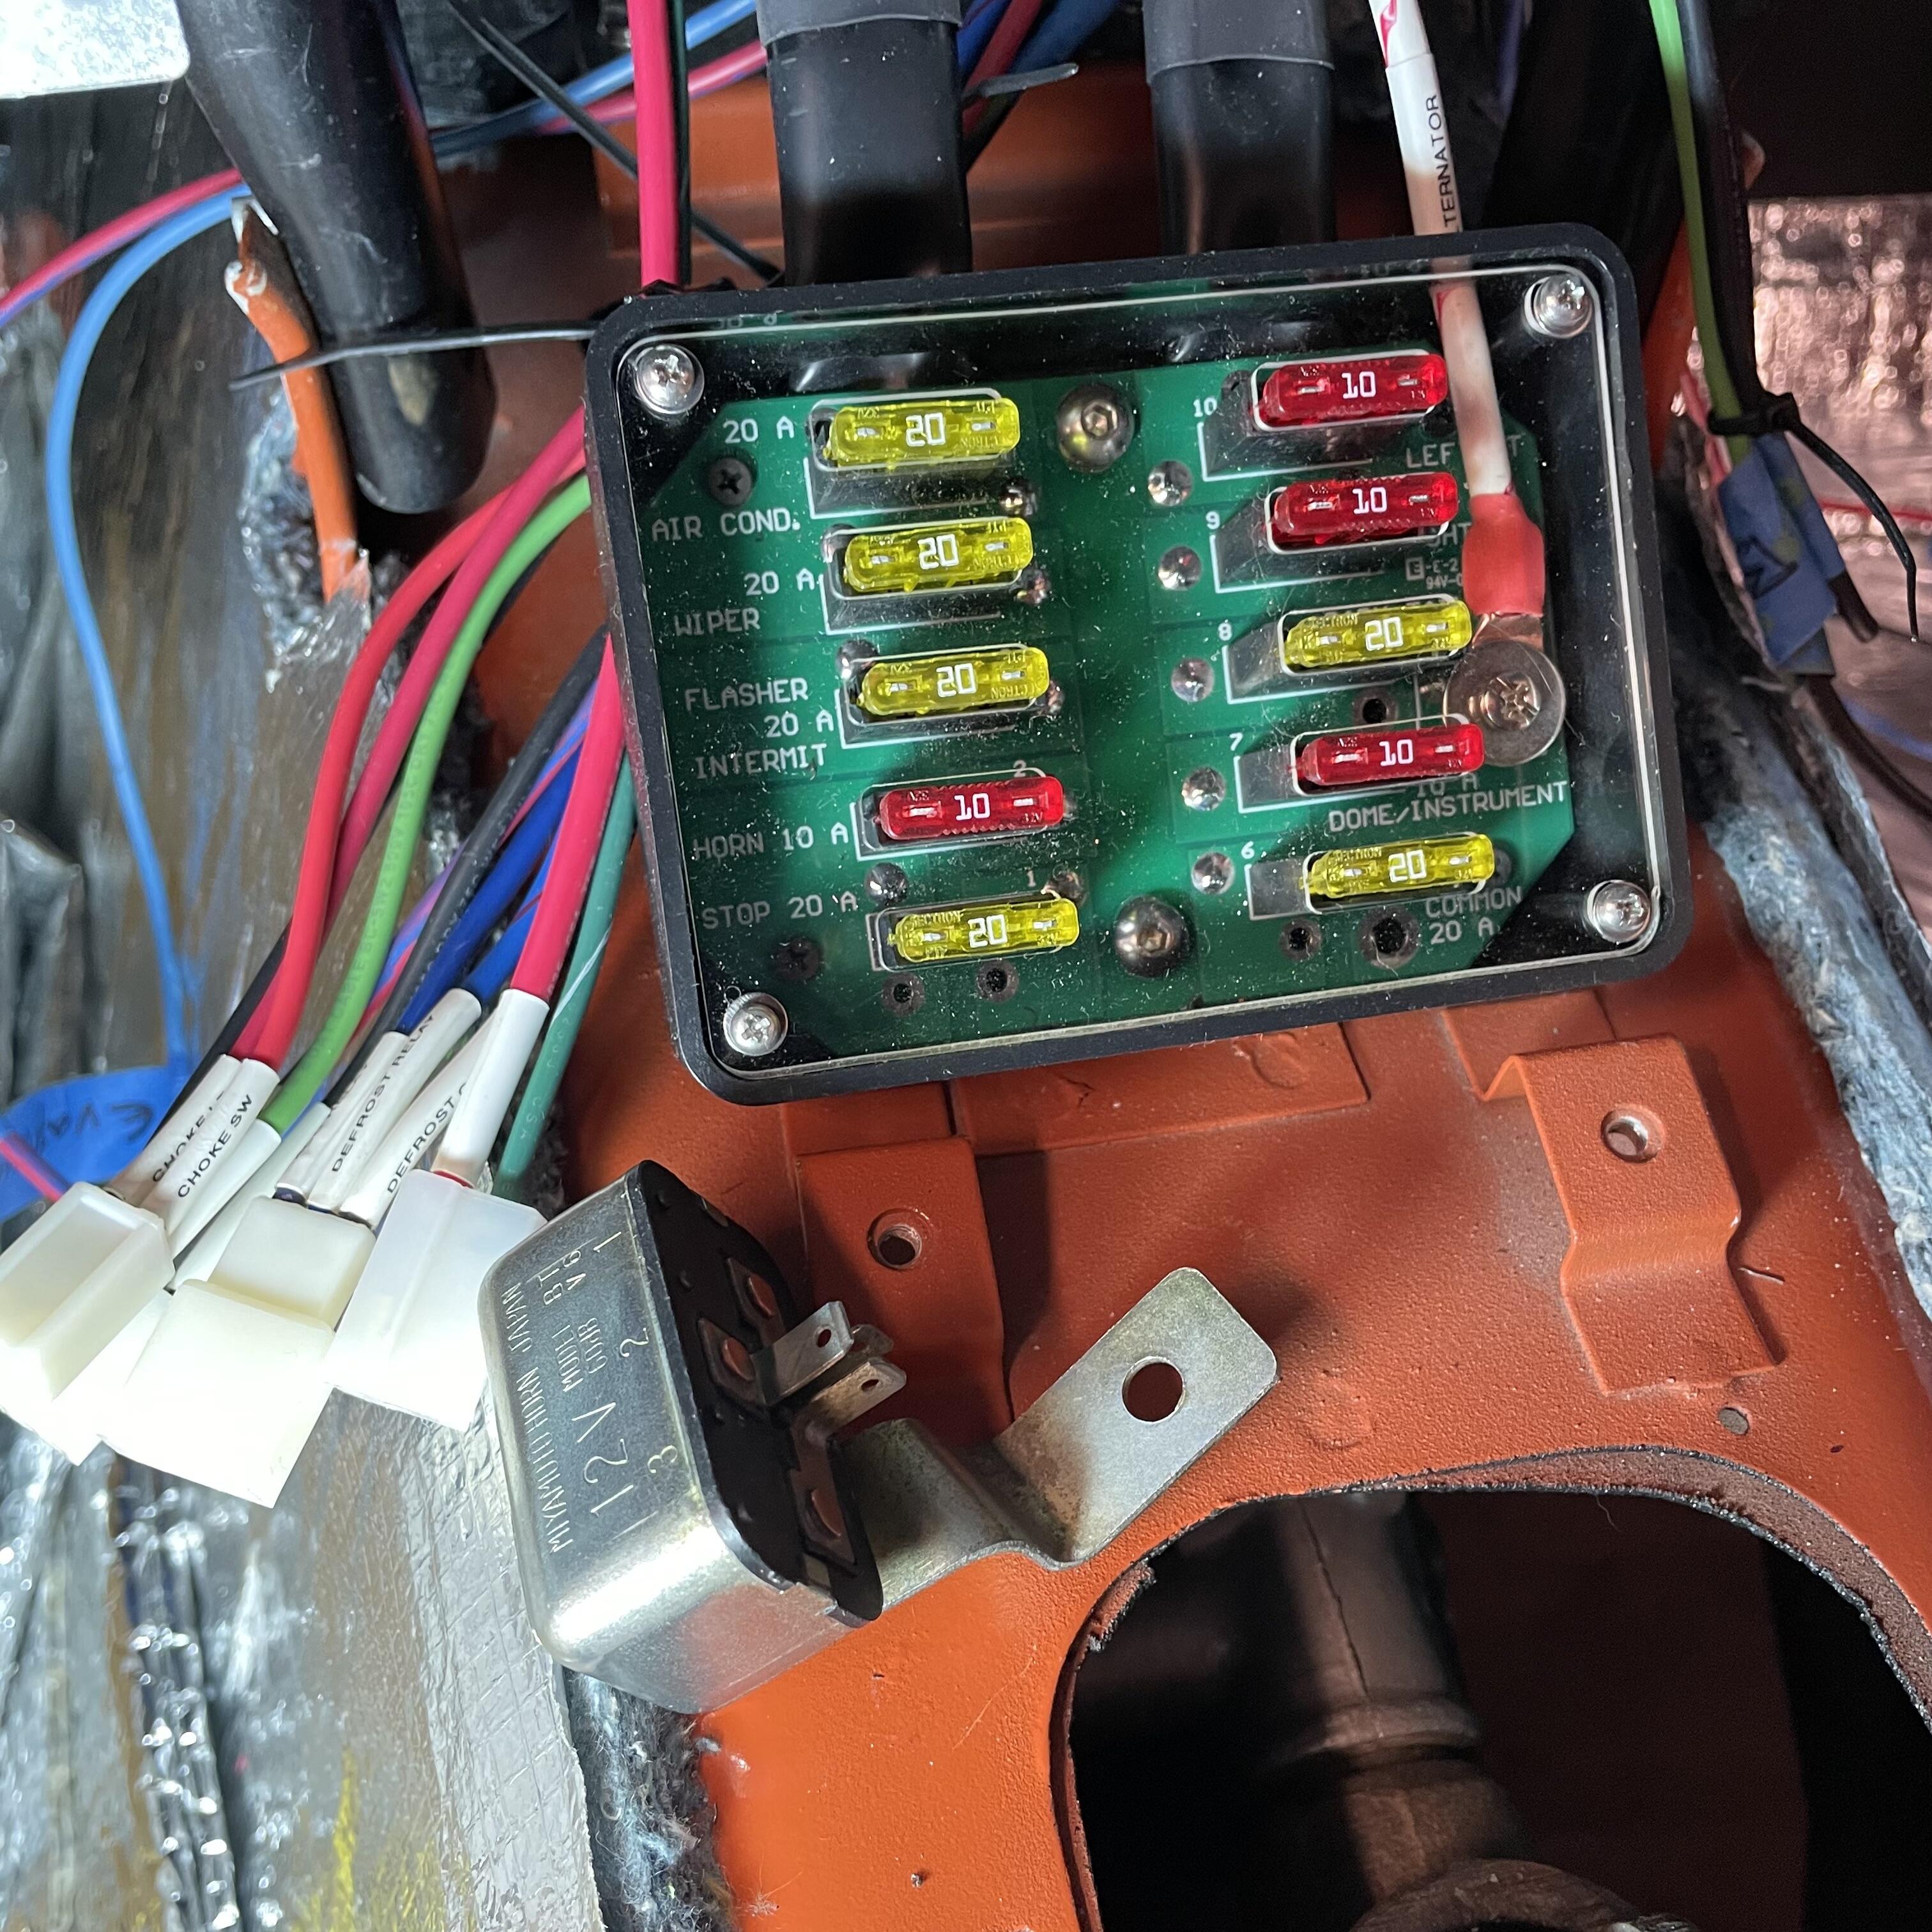
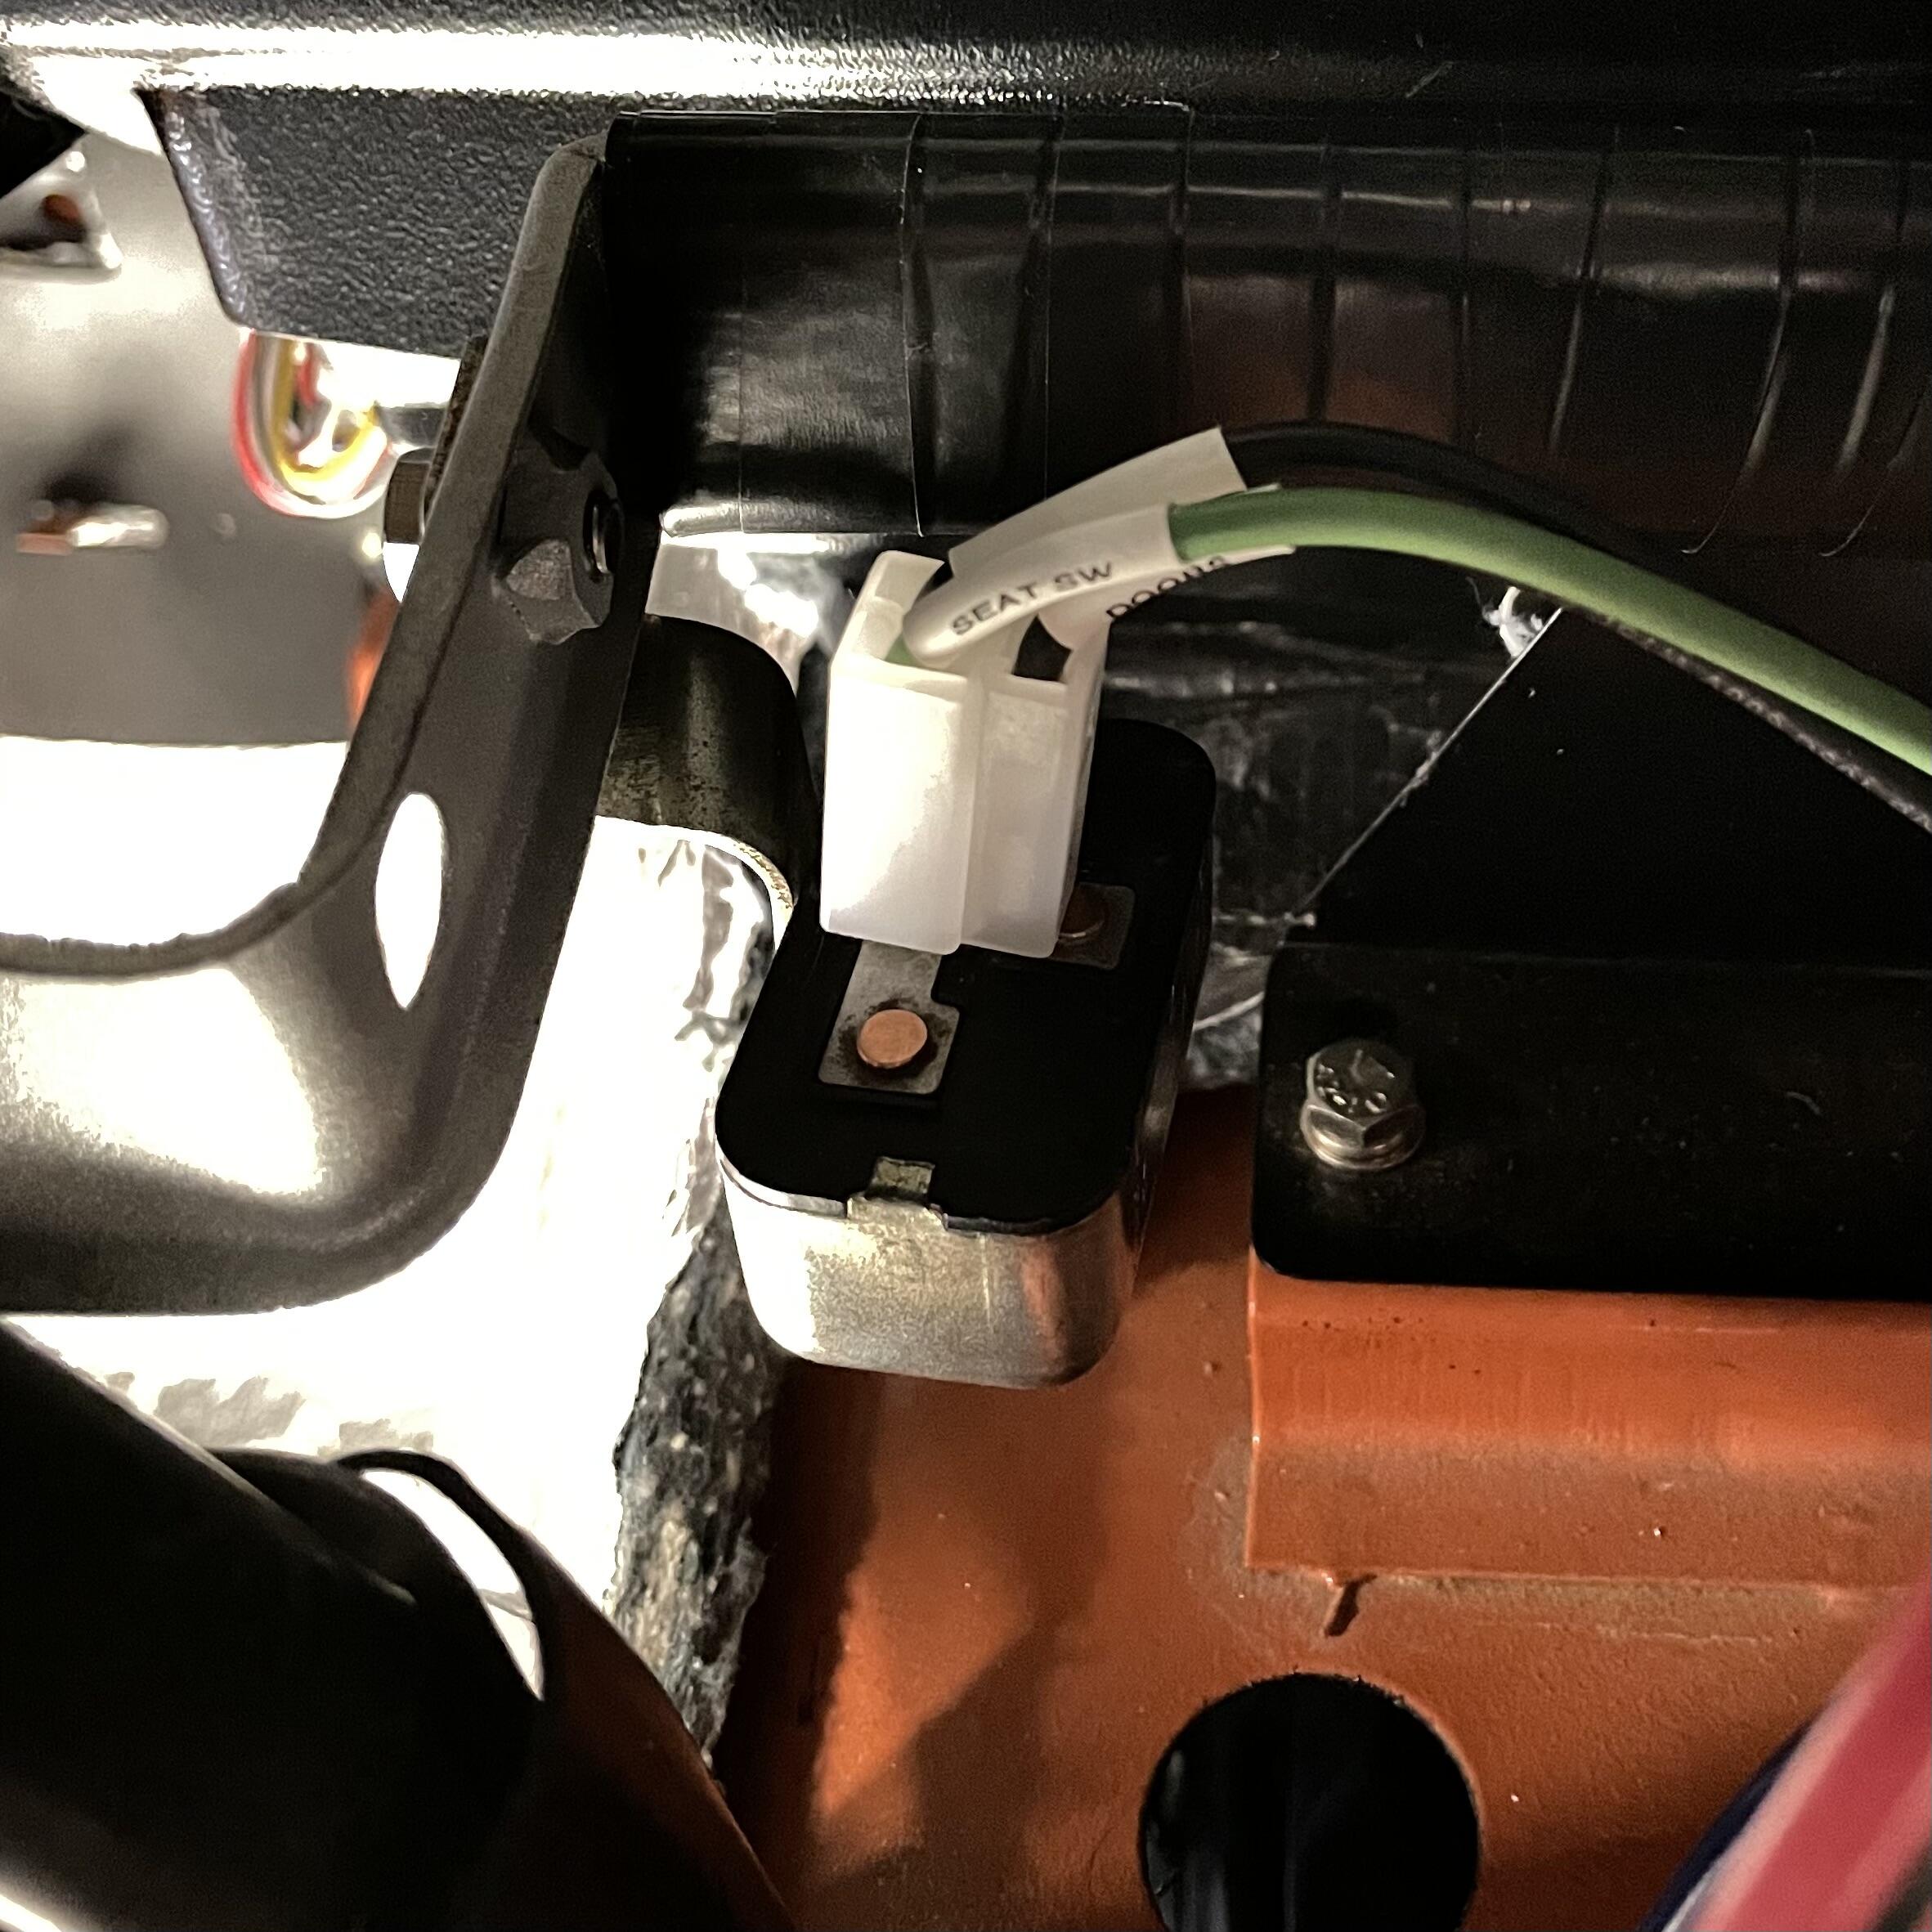
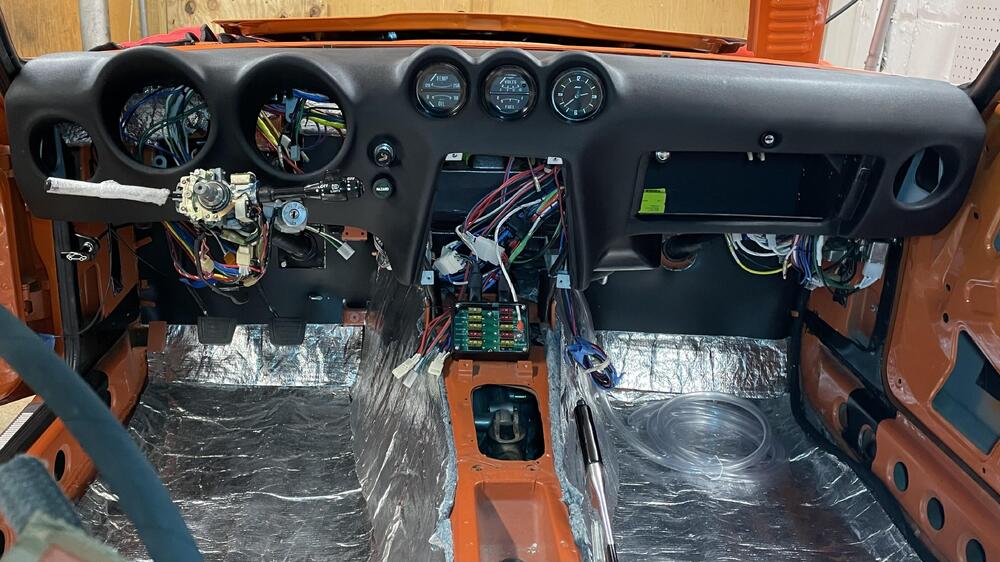
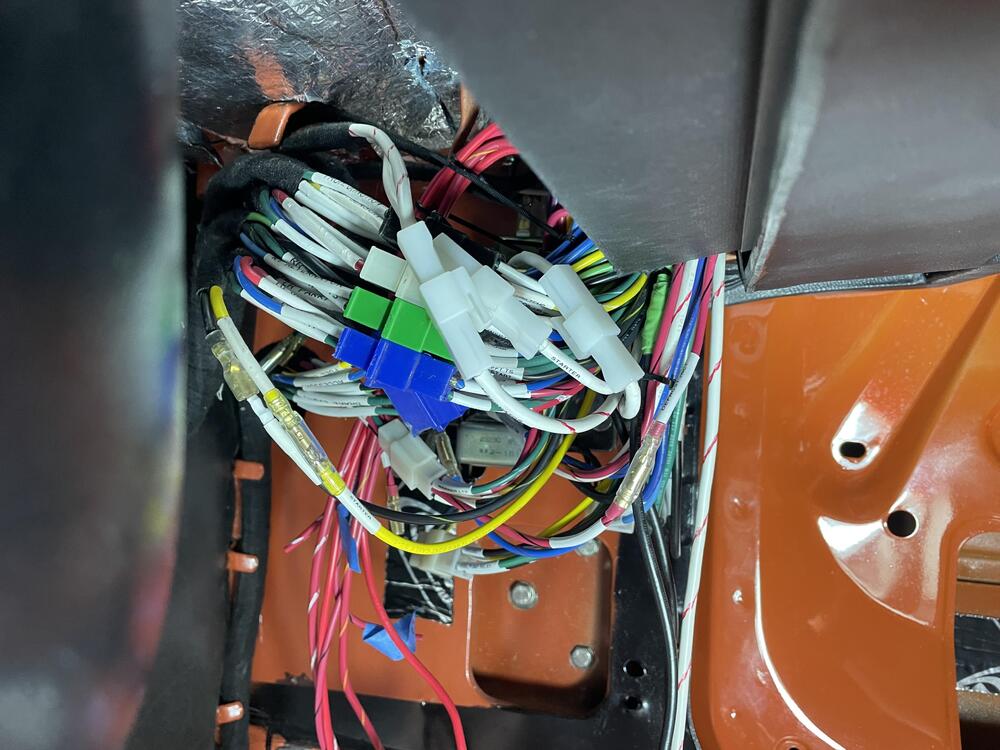
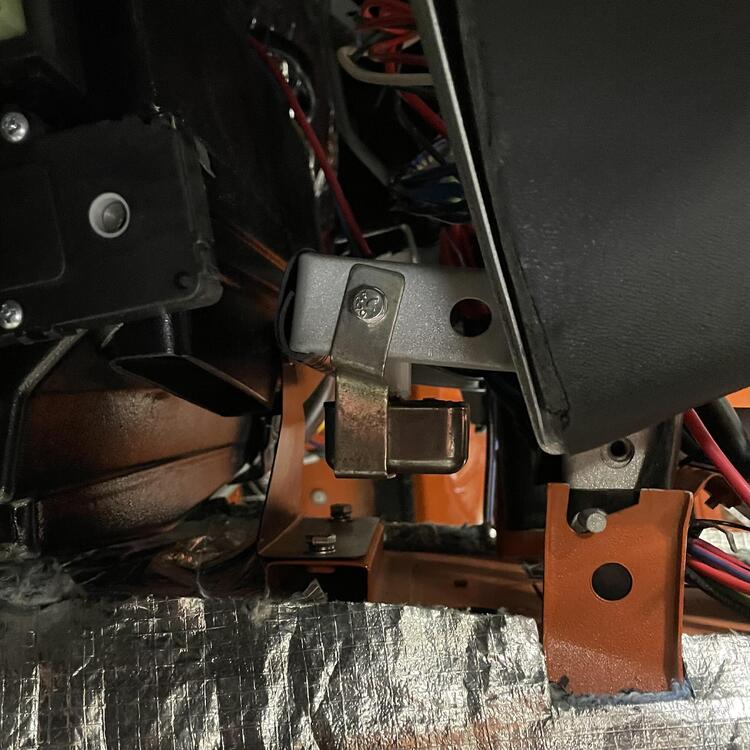
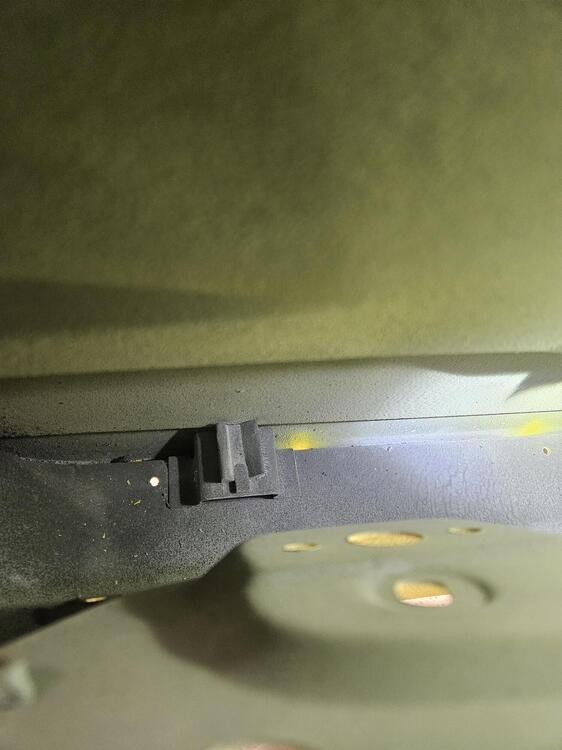
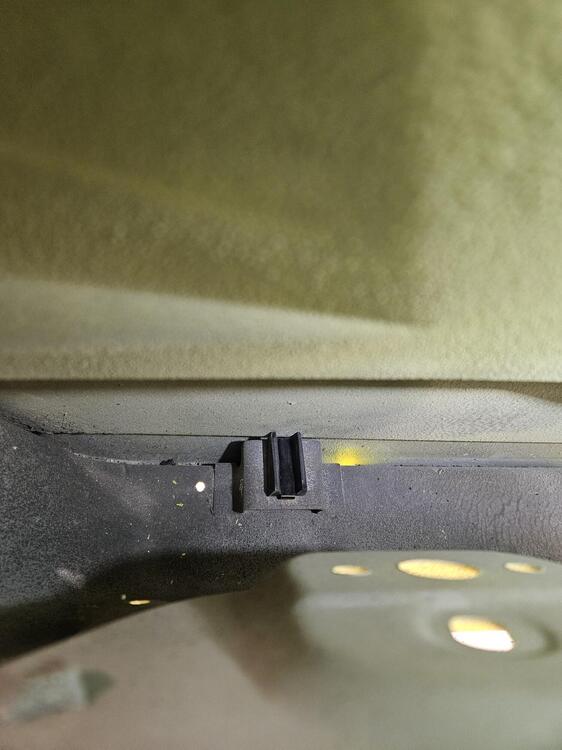
3 pointsSo close! I have three steps left before I can wrap these dash harnesses and put them into the dashboard for real: installing and wiring my NLR-132 headlight relay, installing and wiring the AILD-1 PWM, and testing everything. I can test everything except the dash lights and headlights now, so I’ll probably wait on the relay and PWM because I’m not certain where I want to put them yet. This was not crazy hard, but it did take four or five times as long as I estimated, plus my body is killing me from laying on the seat rail braces. These cars are not spacious. I kept up my system of labeling the terminals with what’s on the opposite end of the wire, so if I do discover any issues they should be fairly easy to diagnose. I checked all of these wires so many times I can’t imagine I have any errors, but who knows. ¯\_(ツ)_/¯ I’m having some trouble with terminals staying in the colored connectors I scavenged from the old harness. I guess I mangled them too much getting them apart. I’ll see if I can fix that when I pull the harnesses to wrap them. For a minute I couldn’t figure out where to mount the buzzer. I ended up using a threaded hole on the left side of the dashboard frame. The buzzer looks like it’s supposed to be there, based on the way the bracket is bent, but I have no idea if it’s correct. I think those holes were fire the heater or stereo originally. Whatever. It works.


 3 points
 -
2 pointsHate to hear that. I tried to get in touch with them a week or two ago. No luck. I sent a few things off to Rochester Overnight plating. They arent overnight, but I should get my stuff back this week. I will post up how they turned out.2 points
-
2 pointsDon't cut the choke cables. Loosen both cable attachment screws at the carbs. Push and pull the choke lever a few times. Is it easy or difficult to operate? If it's difficult, lube the cable and lever mechanism with oil. I pulled the carb end of the cables up, and sprayed WD 40 or CRC lube into the cable sheath ends and let gravity pull the lube down along the length of the cables. Then I looked to see if both nozzles were all the way up, pushed the choke knob forward and connected the cables to the carbs. Good luck and tell your Dad not to worry about the Canal.2 points
-
2 pointsSteve will make you one when you order. Even if it's listed as out of stock2 points
-
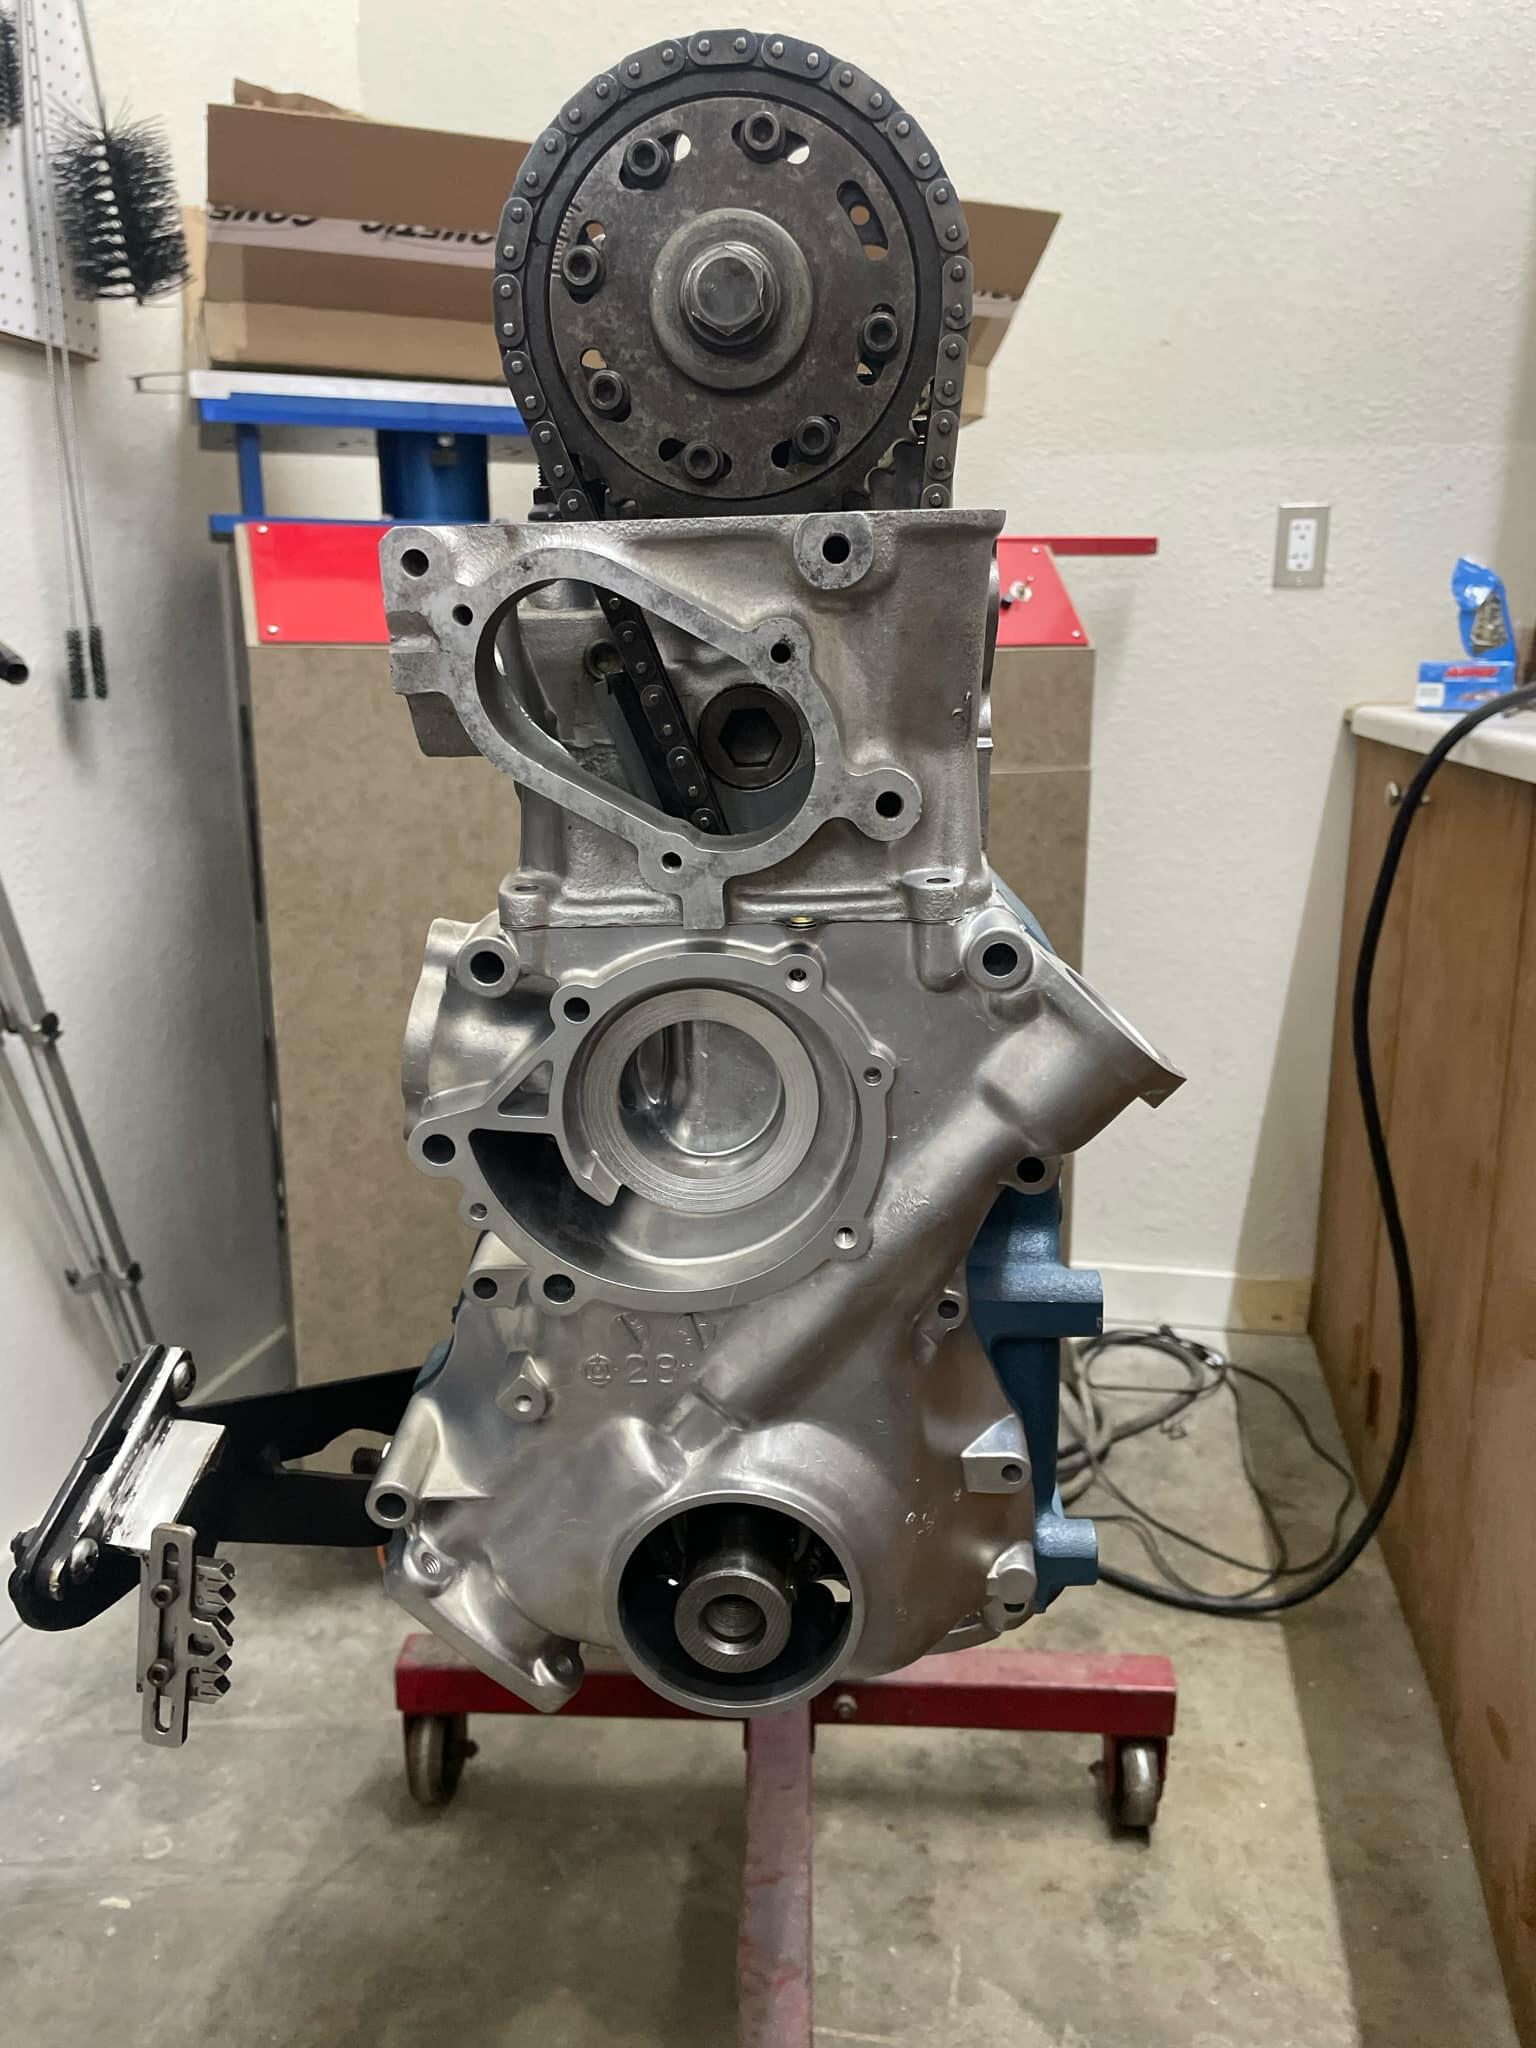
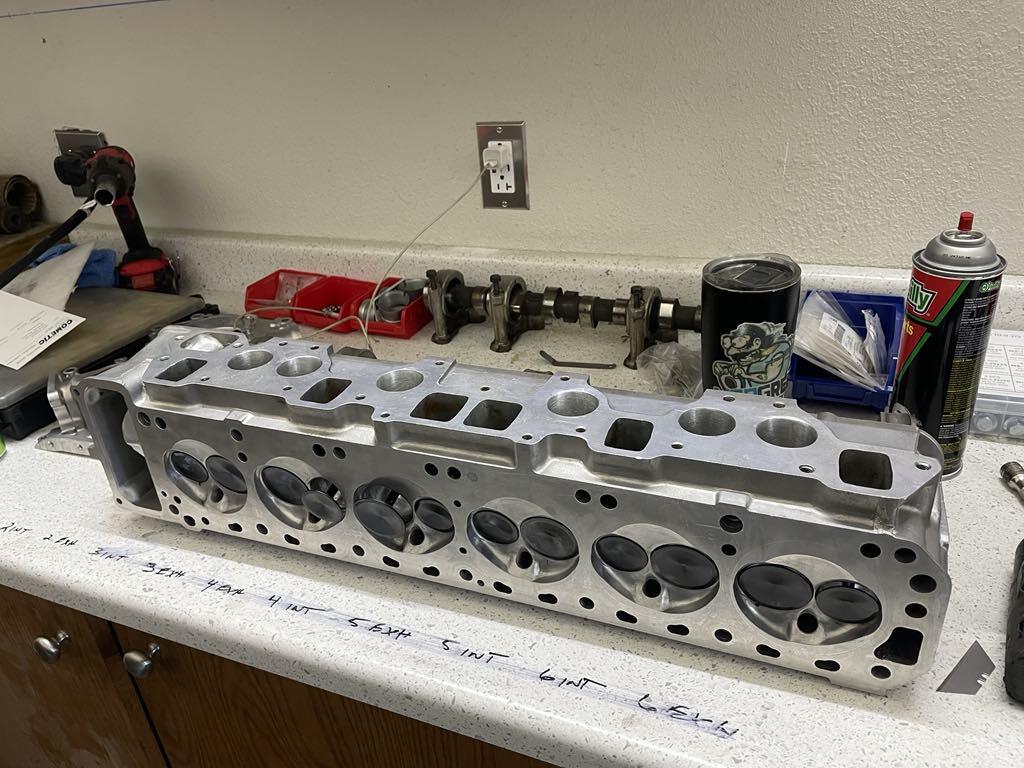
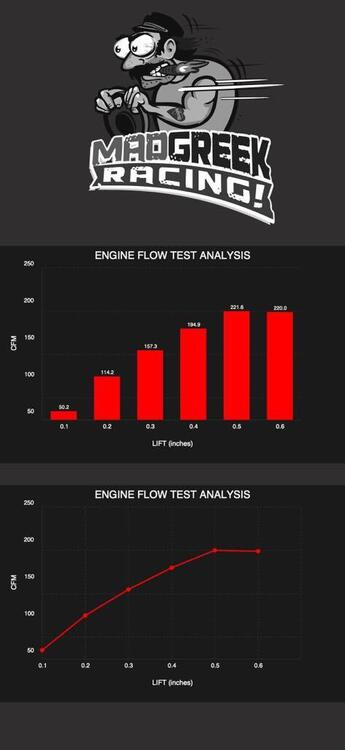
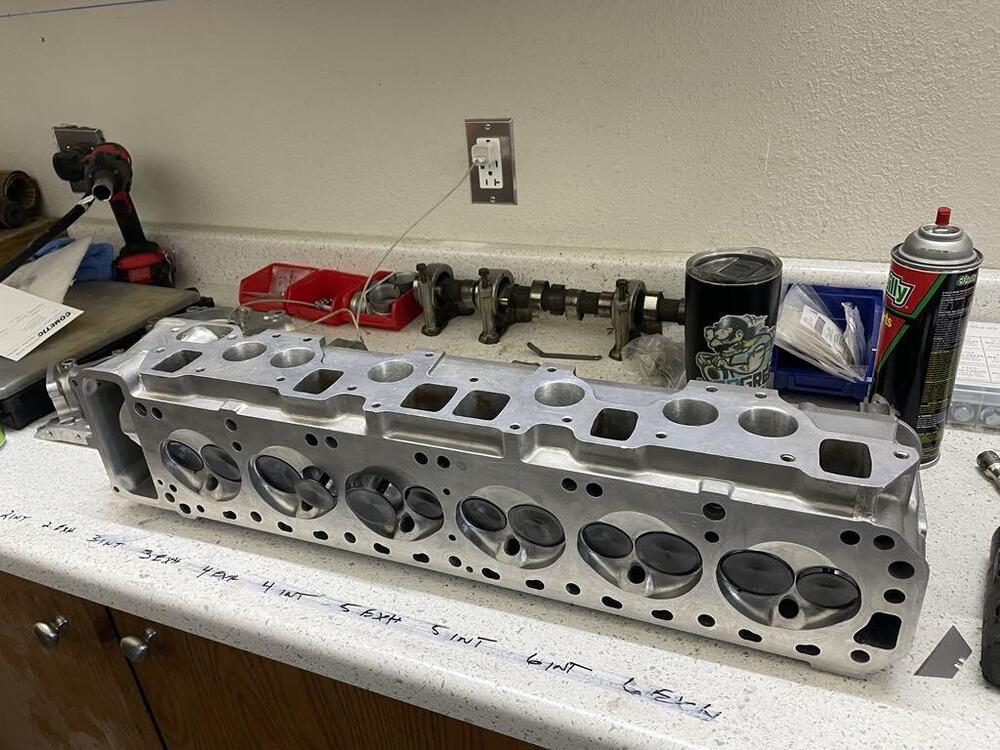
2 pointsA little update on my 3.1L! This motor was actually finished 3 years ago, but was tragically in a shop fire. Luckily the engine wasn’t too close to the flames and it was spared. It’s getting close to finished and then going into my 1971 240z! My 3.1L 10.2:1 compression ratio 88.5mm bore. N42 block. Sonic tested. LD crank by marine crankshaft. Crank Off-set grind to 84.6 stroke. Finish rod journals @ 1.8889" Thrust Finish 1.27”R & R plugs with threaded plugs Dynamic Balance Ion-Plasma nitride, straighten & micro-Micro polish all journals E31 head. Port work by Andrew Kazanis Dsi valves, titanium retainers. Isky springs. Bonk cam. I got it in NOS or near new condition prior to porting. Rebello JE Eagle pistons and toyota rods 221 CFM flow at .45-.5 lift. With rougAndrew Kazanis sizes. Mine is 88.5x88.5x.25x3.14159x 84.6x6 /1000 = 3122cc Thank you Andrew Kazanis for all the help and your magically porting work.


 2 points
 -
2 pointsOh wait... Sorry, I missed that detail. The brake light is on when the key is in the OFF position!!! So all that stuff I wrote... Forget all that. It's more complicated than just a brake warning switch. So I'll shut up here and wait while @SteveJ provides some REAL help instead of the knee-jerk blather I posted above. I mean, your brake warning switch may still be screwed up, but there are some electrical gremlins at work here too.2 points
-
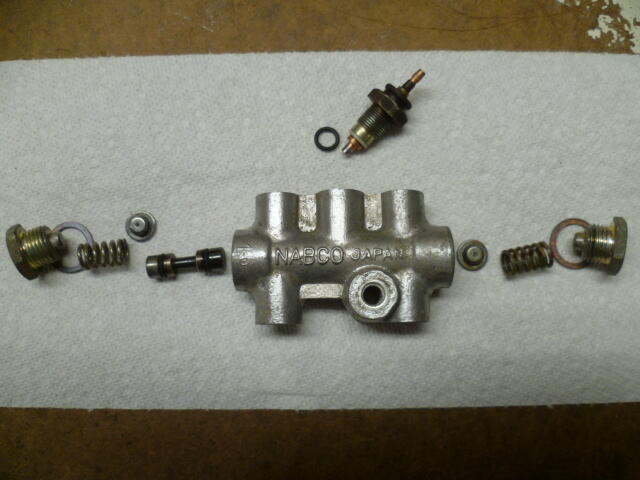
2 pointsShort answer? Because your brake failure switch is indicating a brake failure. In other words, the switch is closed. Long answer? I'll let @SteveJ work you through it! But I suspect the problem in inside the brake switch. Something like your little slidey piston is all gummed up and stuck on the "fail" position: Or maybe one of your tiny metering orifice holes is gummed shut with 50 years of gelatinized brake fluid and deteriorated rubber:

 2 points
 -
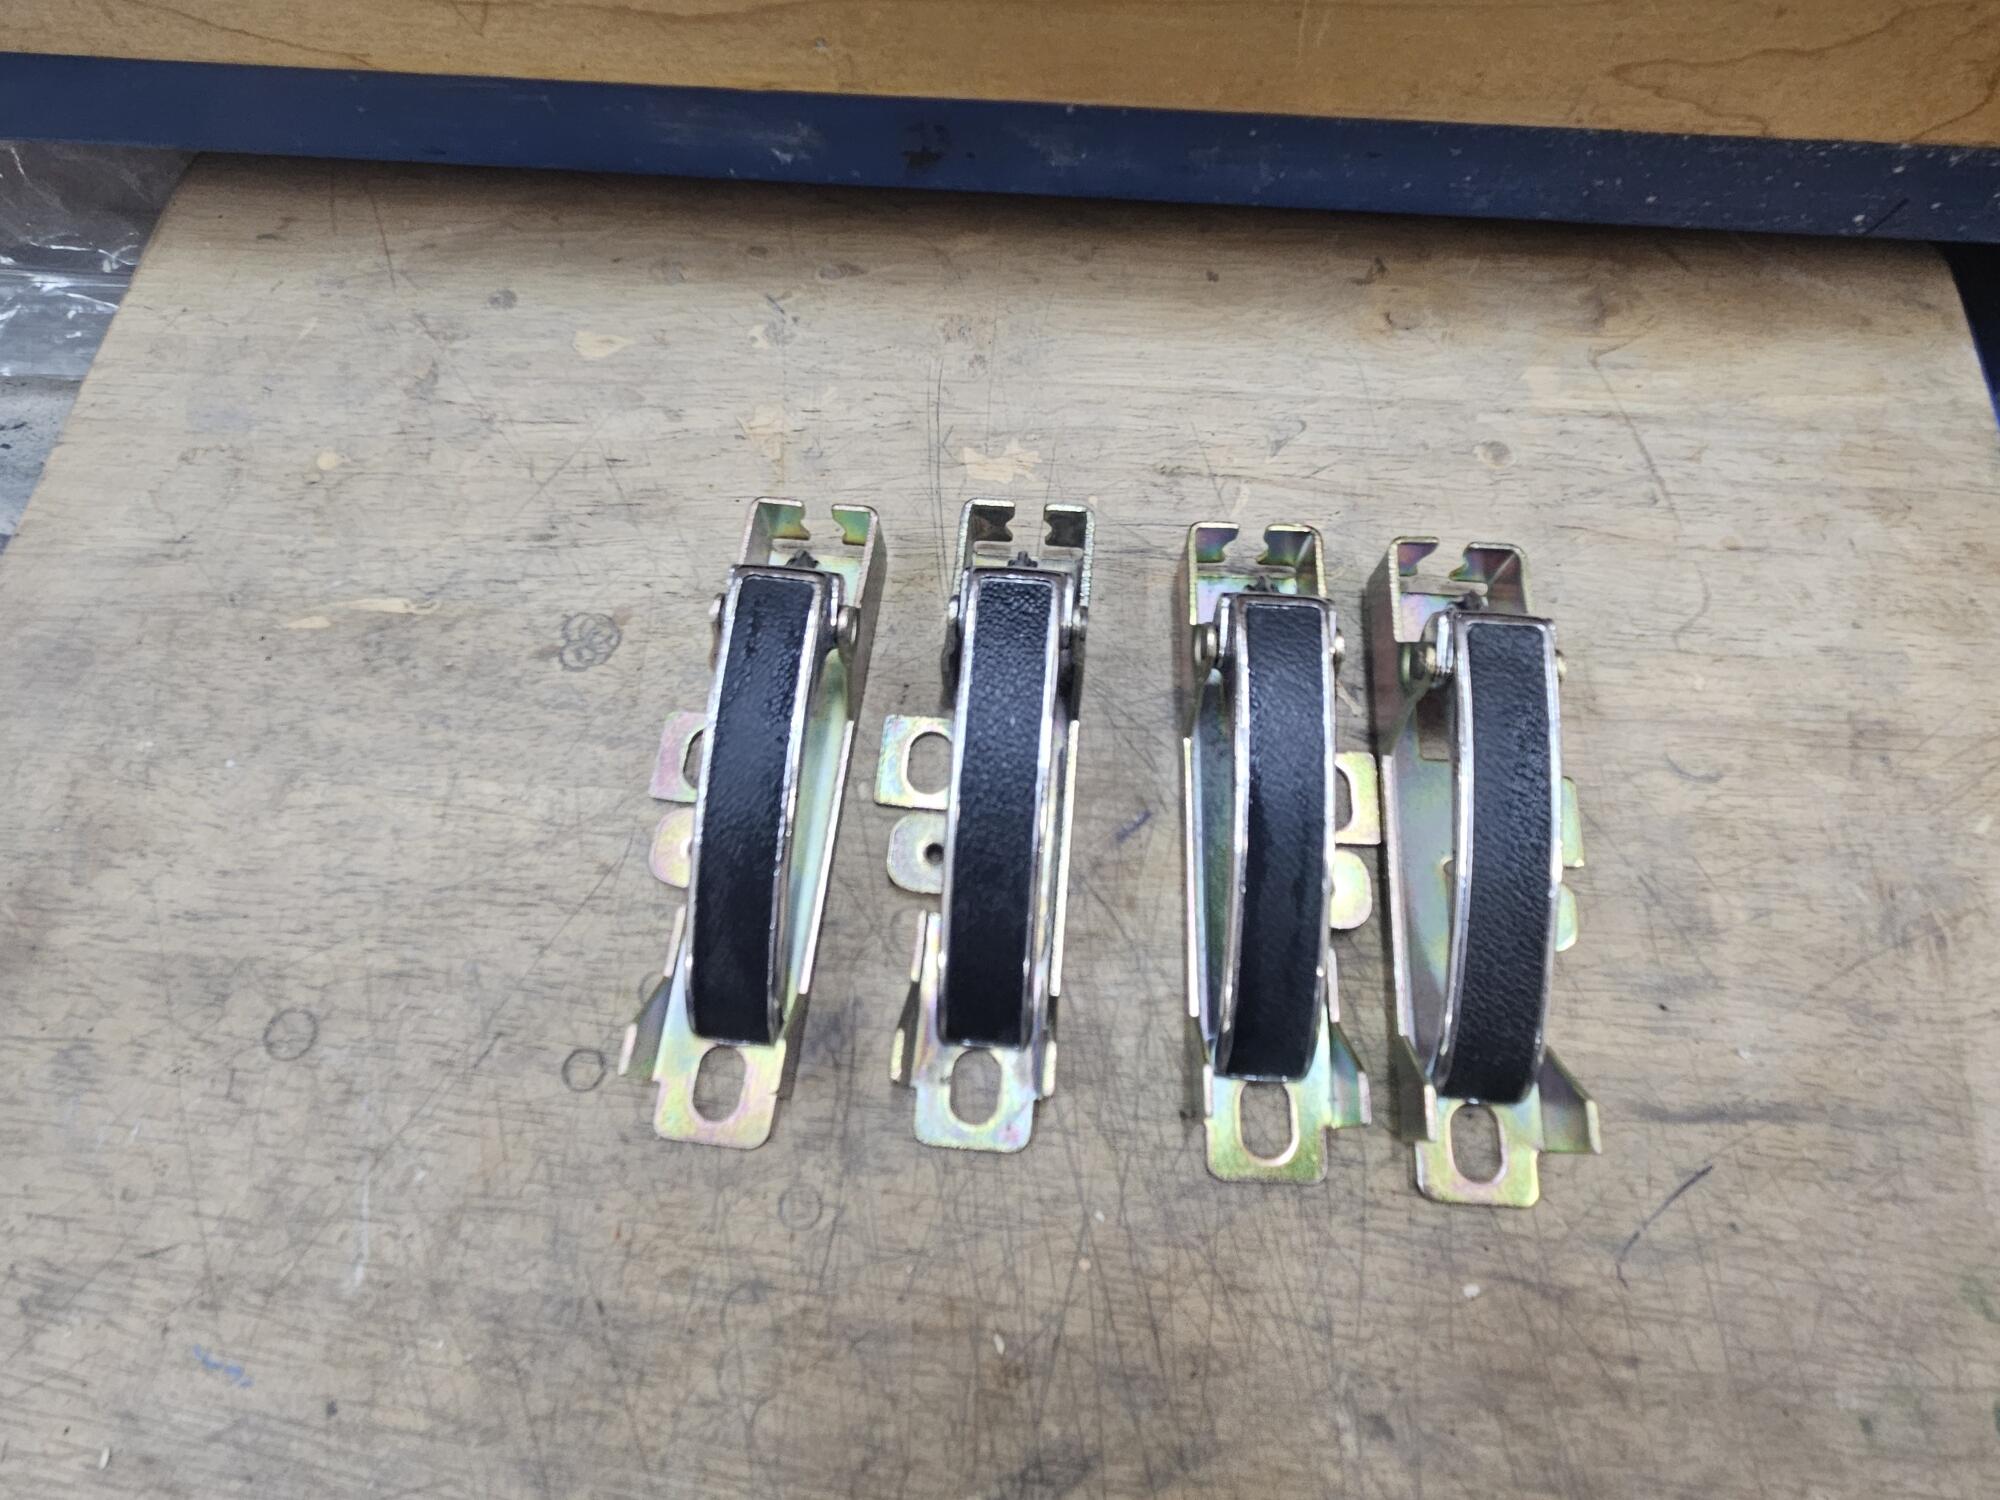
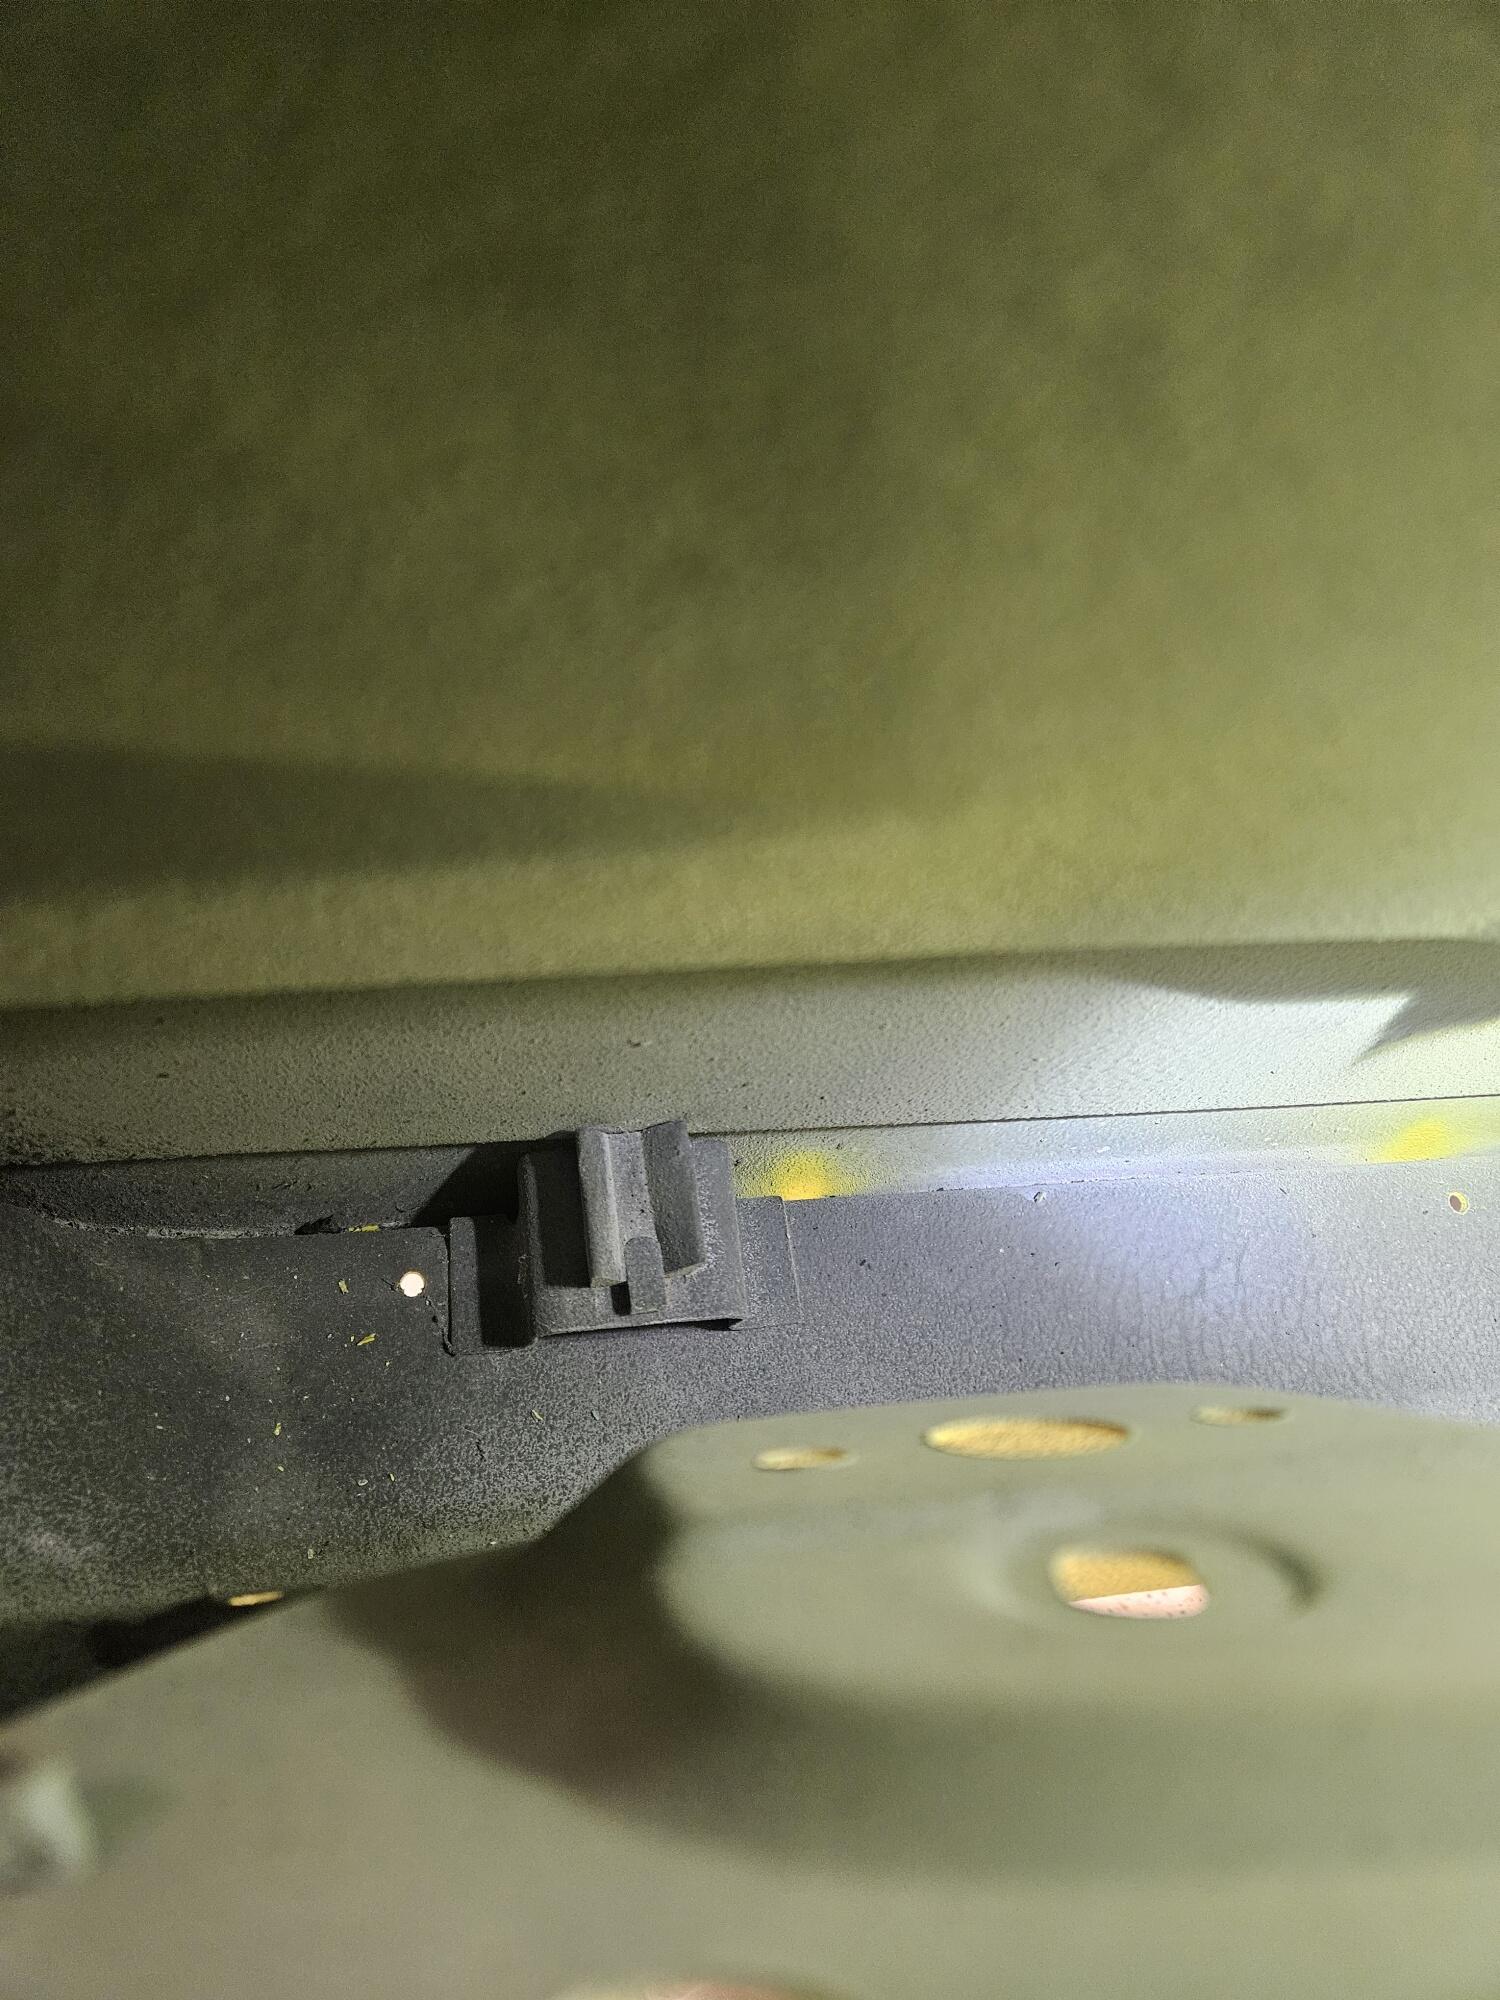
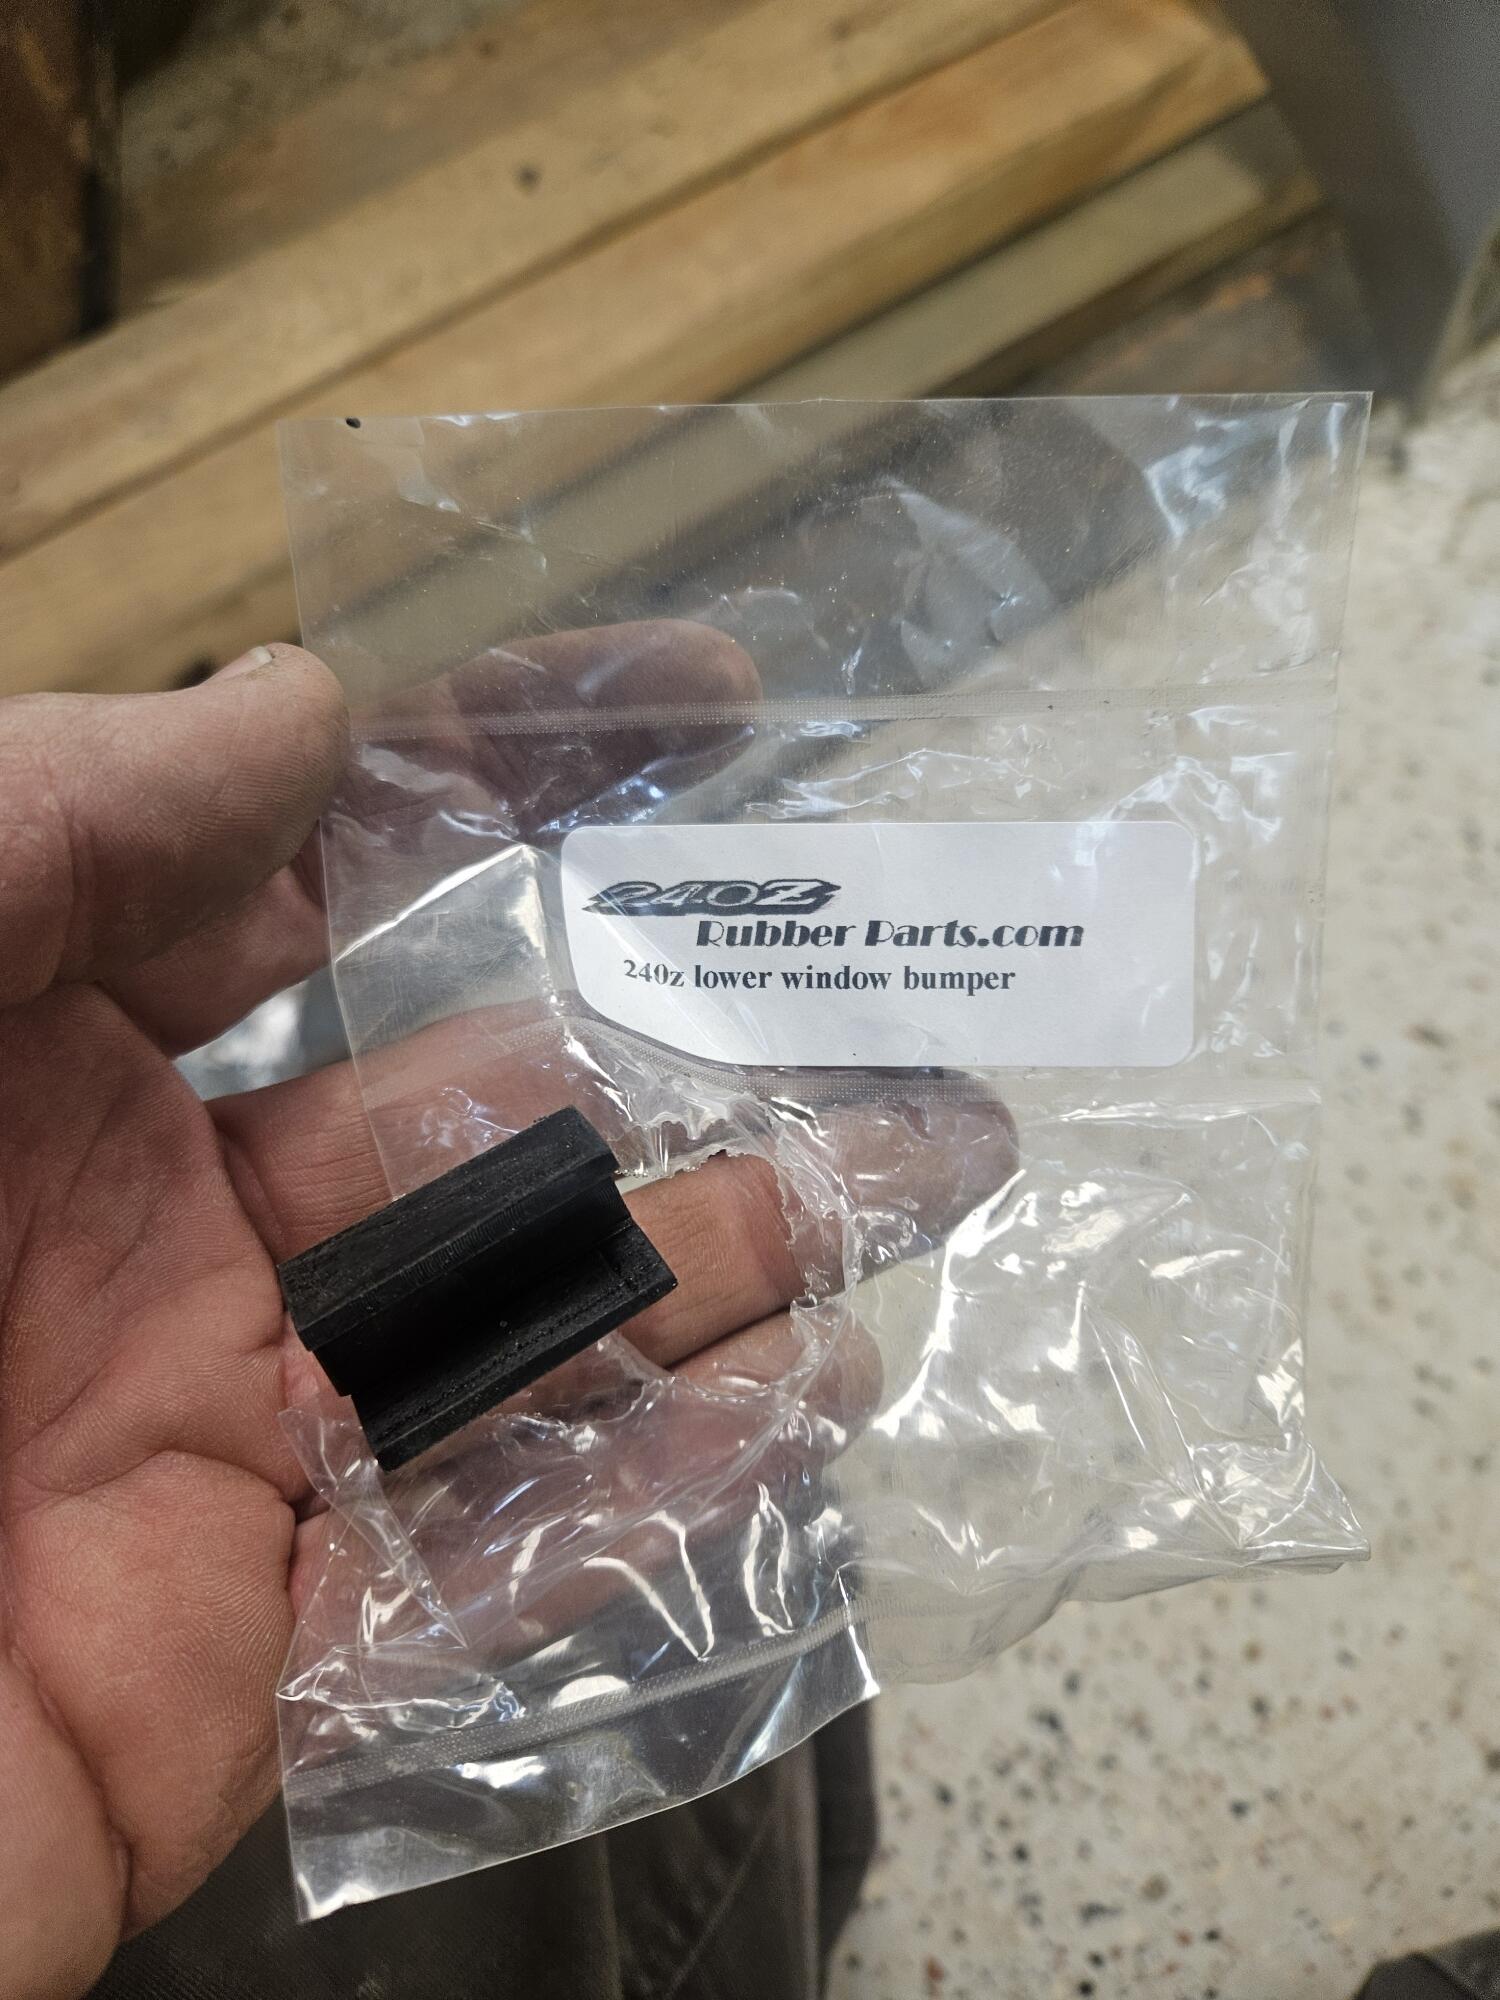
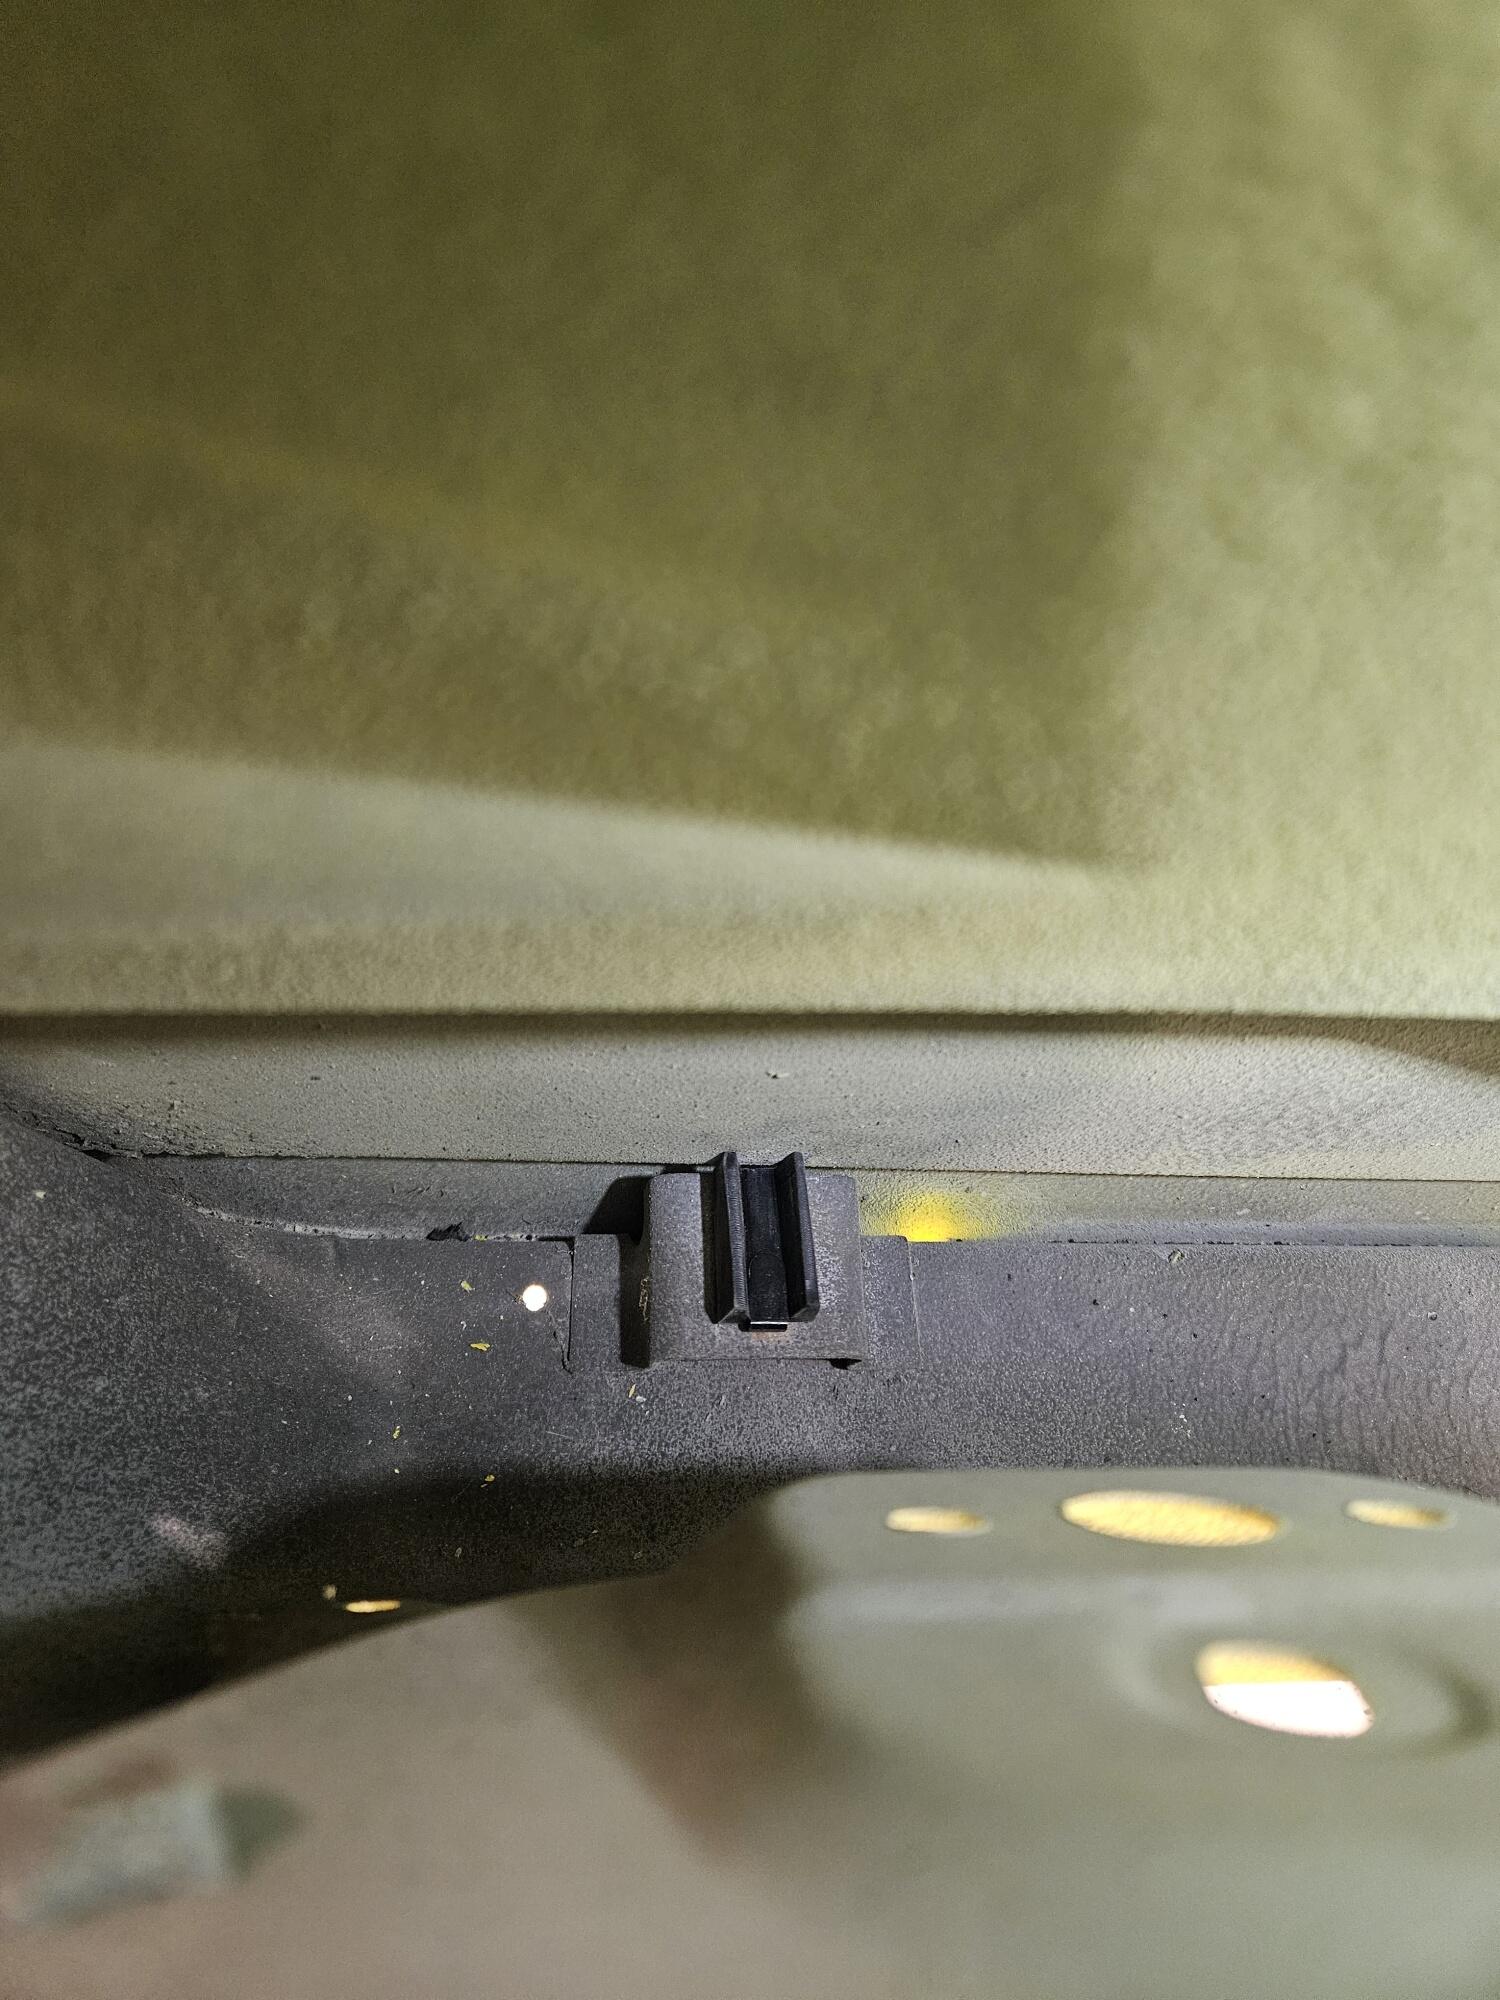
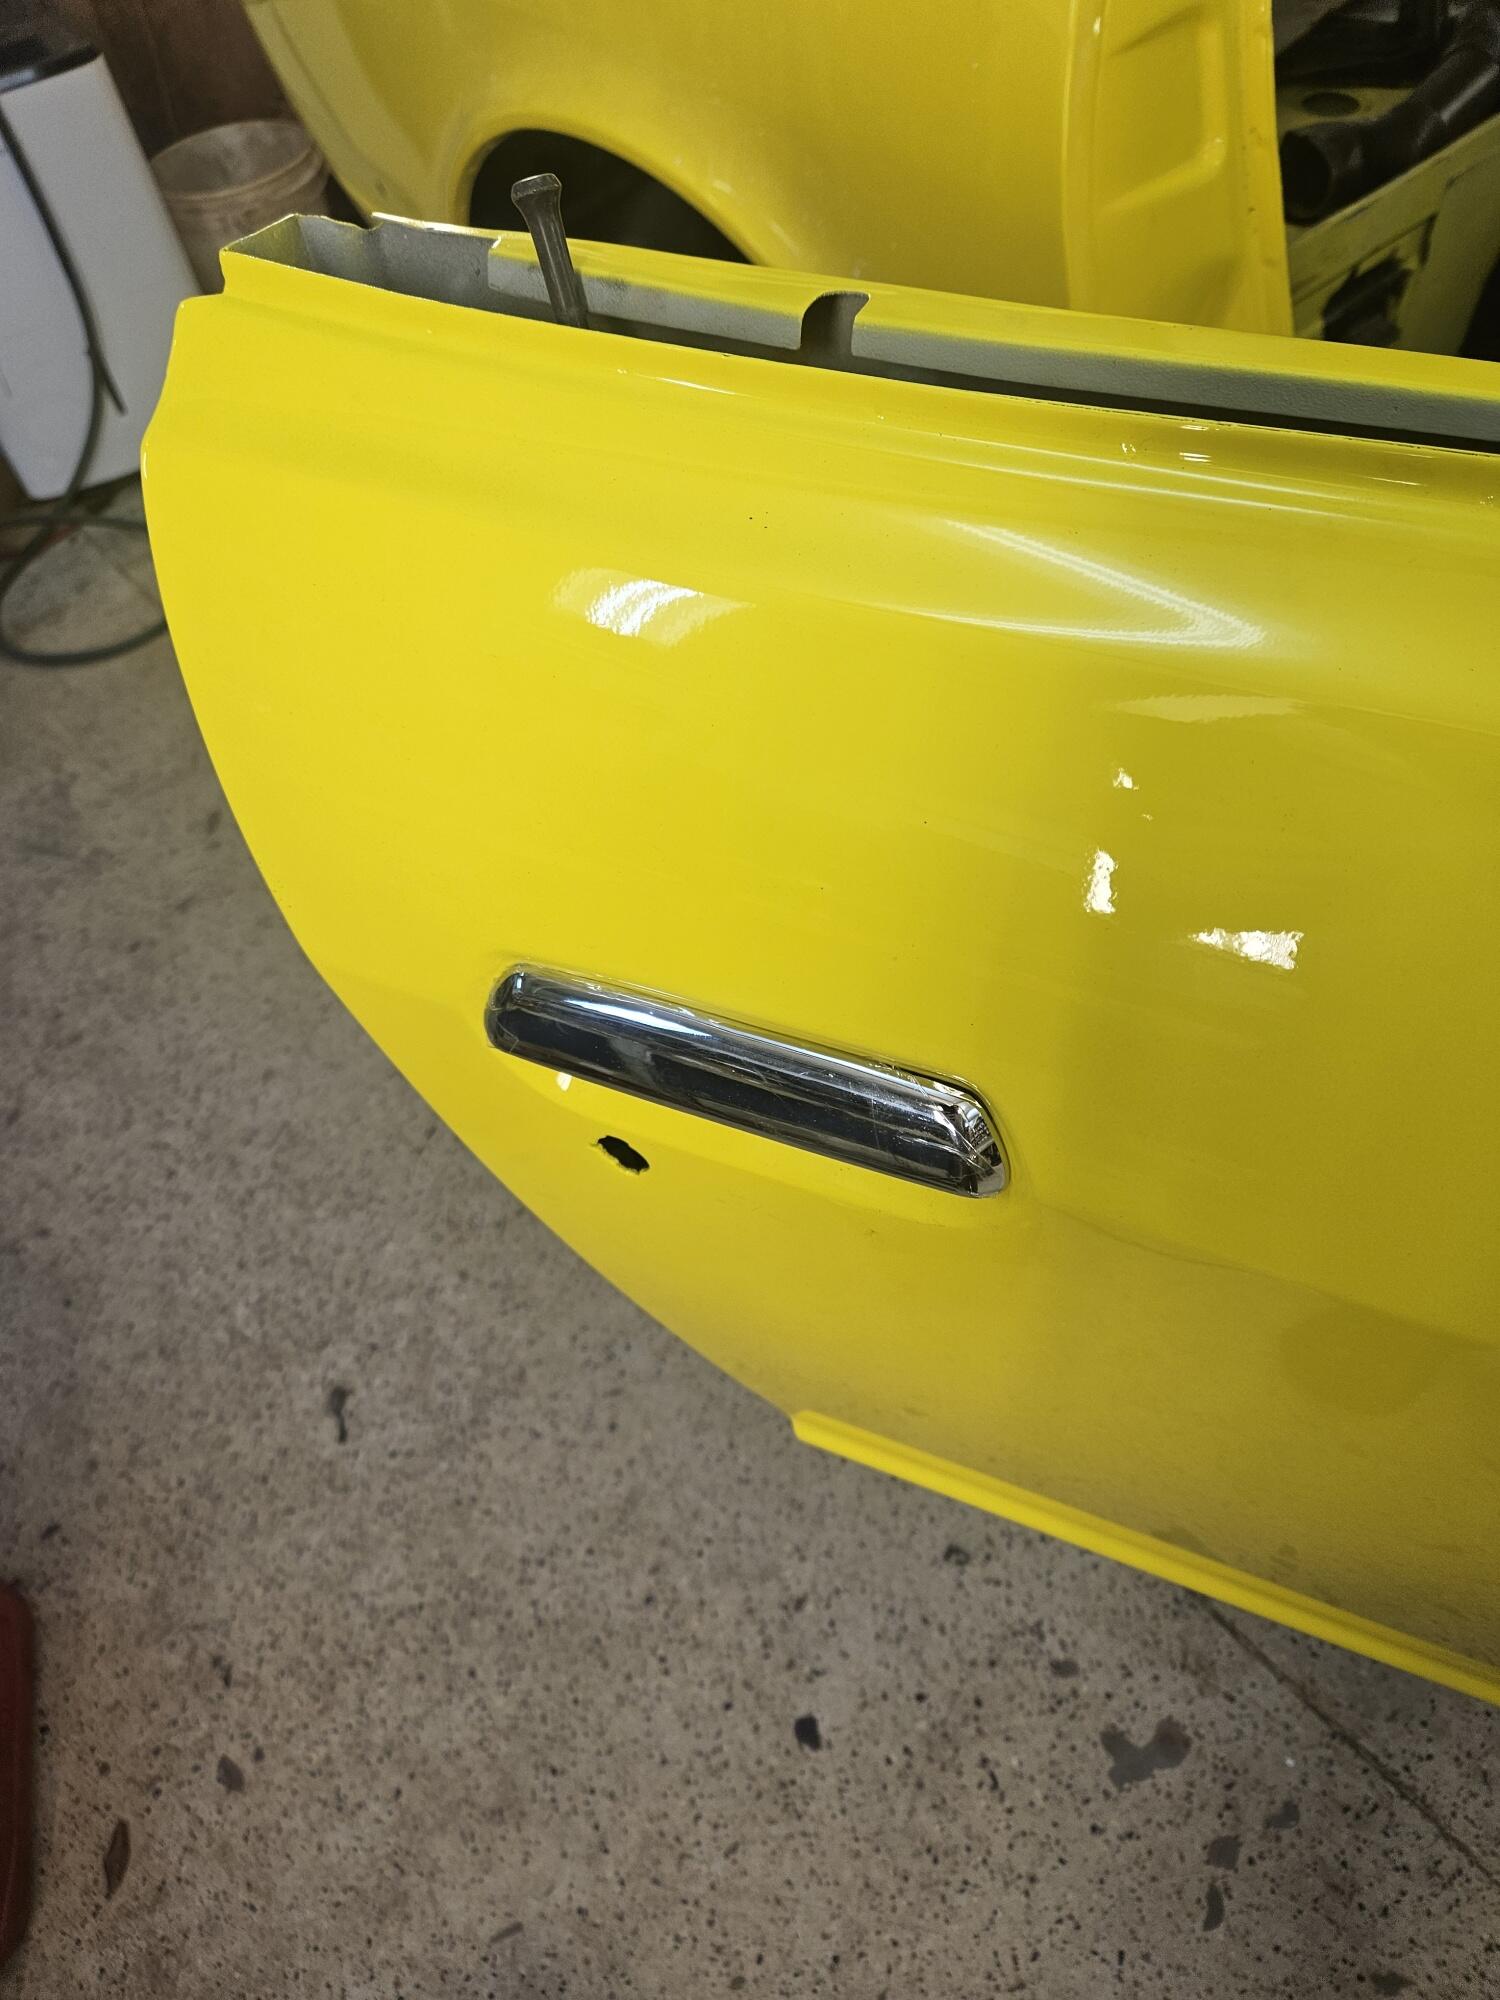
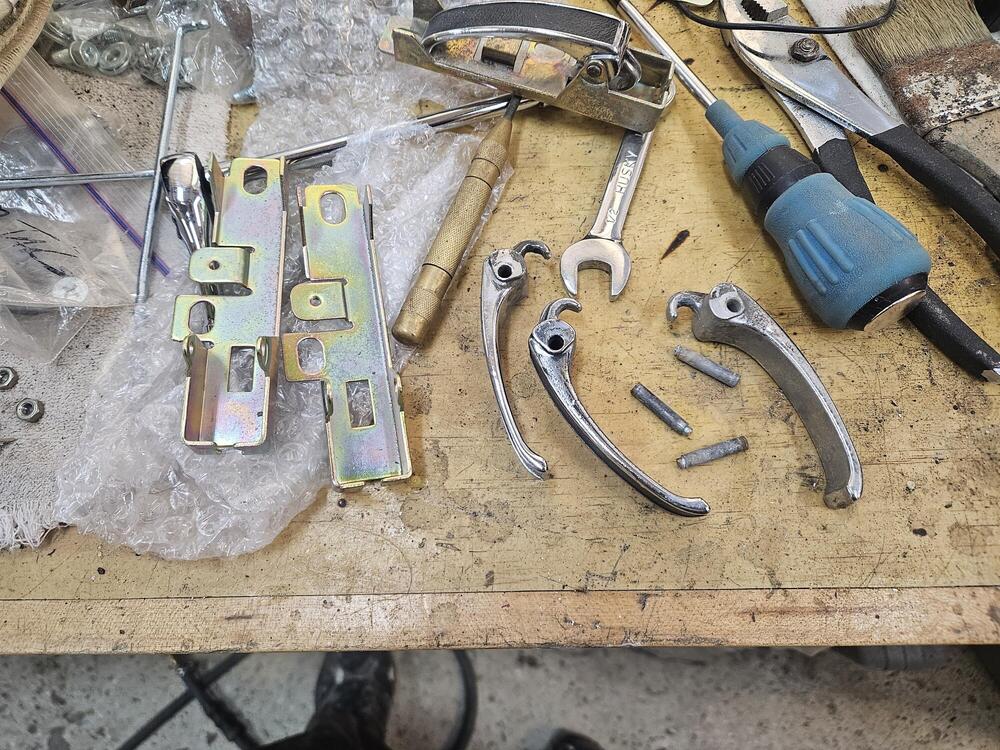
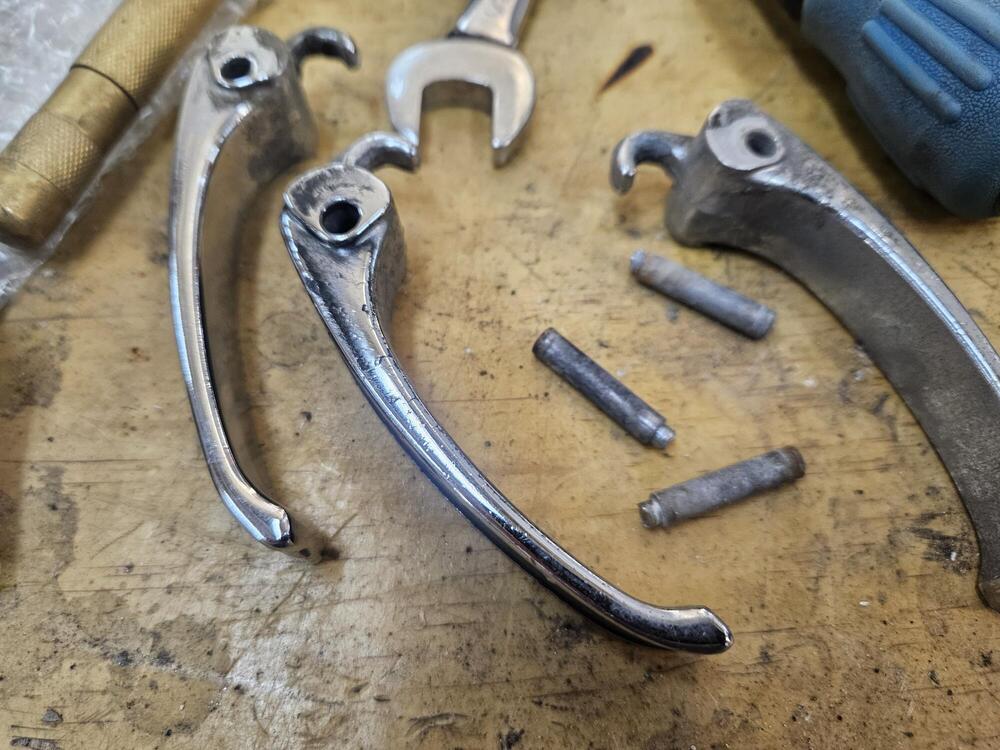
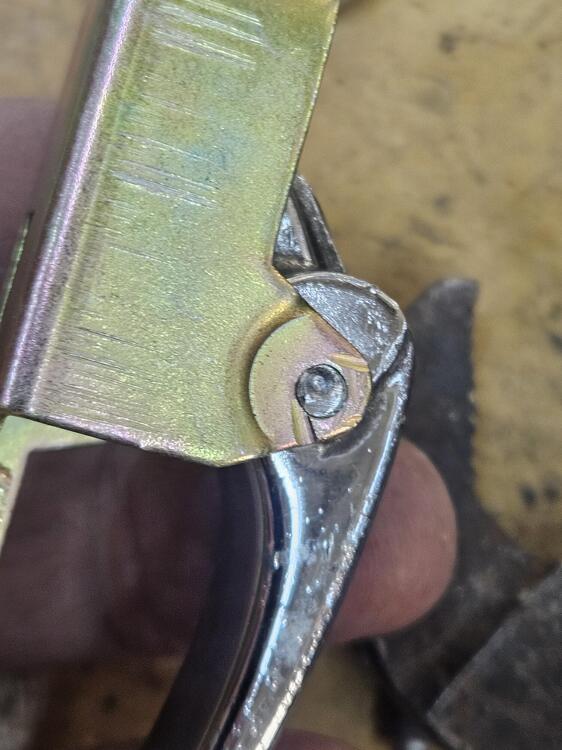
2 pointsI tinkered some today I disassembled the door handles so I could plate the brackets. Today, I polished the handles and reassembled them Peened the pins. If that doesn't hold, I will weld a small tack there I had two sets so I picked the best looking ones I also replaced these window stops in the bottom of the doors. They are surprisingly hard to get to and R&R Also put these seals on the doors. I will probably add some sealant under portions of them after the glass frames go in Mounted door handles I bought off Amazon. The main issue with these is the holes in the door aren't really big enough. I had to do some grinding on the door handles pins and they were still a tight fit! But they look nice and they have all the rubber seals on them


 2 points
 -
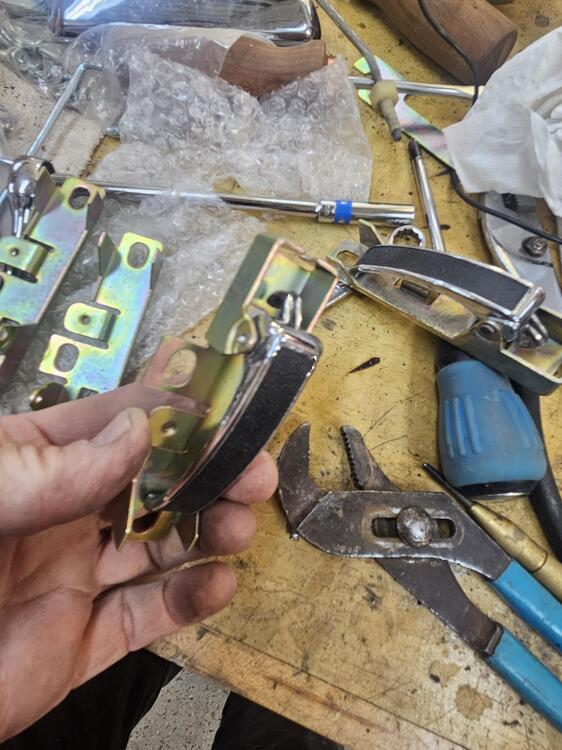
This is the place: Decorative Metal Coatings 2613 Temple Heights Dr. Ste. C Oceanside, CA 92056 Tel: (760) 746-3378 Fax: (760) 940-8781 Email: Accounting@DecoMetalFinishing.com Those plates are part of the ash tray parts. The plates seems to be something you can grab onto to lift the front of the ash tray out of the console. I had two sets of ash tray parts done.
 2 points
 -
2 pointsOr maybe this? https://www.240zrubberparts.com/product-page/240z-u-bolt-steering-rack-rubber-bumper2 points
-
Thanks, I read like $250 for the few parts you did. I will easily be four times that...1 point
-
1 pointIf the light is still coming on with the car off and the wire plugged into the switch, no, you don't need the combo switch in.1 point
-
Regarding the fuse cover, mine was slightly melted. I found one on Ebay a while back that was decent. Do not use any kind of thinner on them to clean them up. The white lettering on them is painted on and will rub away easily. I am pretty sure that the place in Marietta is the same company. When I contacted them, they responded from CA. They said that during Co-vid, the had to shut down the GA location, but that they were the same people. It was expensive.1 point
-
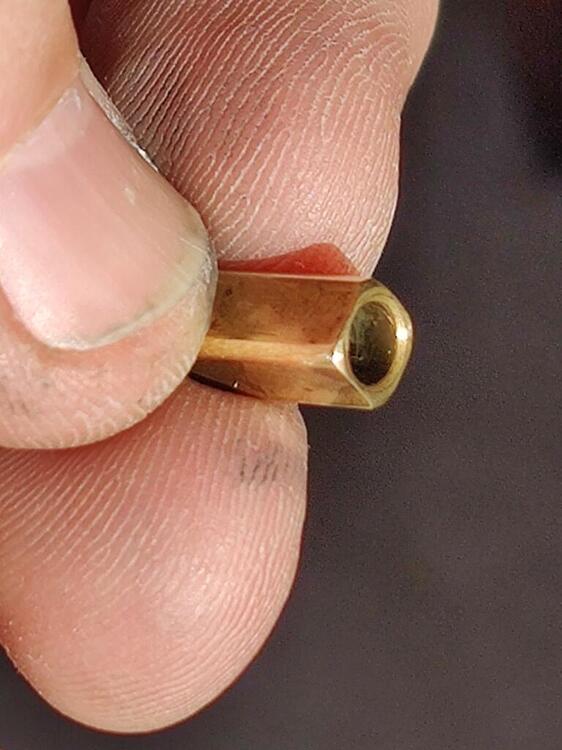
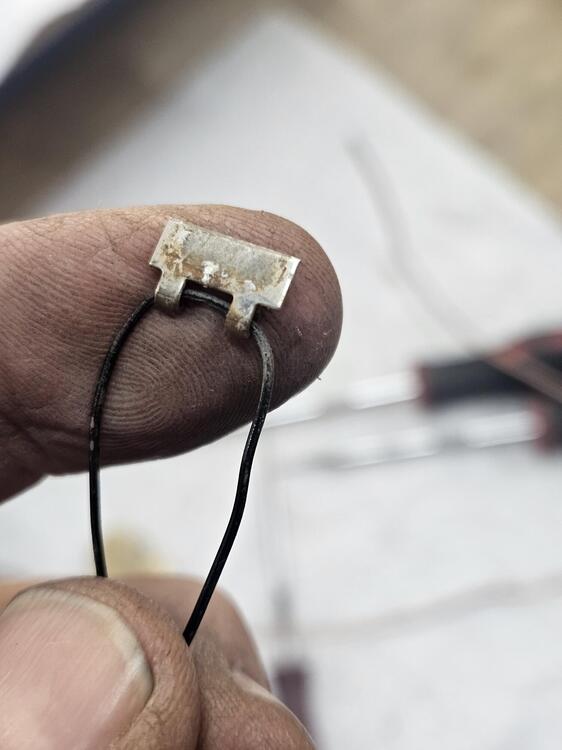
The replacement connecting rod for the carburetor showed up in the mail today from ZTherapy. Thanks @Patcon for suggesting I contact them. Unfortunately, the replacement needles and seats did not show up in the mail today. So, I found myself removing the rear carburetor needle and seat... just to have little look see at it for issues. Well, one thing led to another, and I found myself on Youtube watching a video someone made about their needle and seat not working properly and causing fuel to gush everywhere. That person used a Q tip in a drill and some metal polish to polish the inside barrel of the seat. I decided to have a close look at mine. I wasn't able to take a good picture, but you can kind of see from the above one that the inside of the seat bore where the needle sits is not exactly smooth. So, I grabbed a small section of 1500 grit sandpaper and rolled it around a drill bit which I inserted into this bore. Using the drill, I smoothed out the ridges on the inside of the seat. Then I used a Q tip and some metal polish and a drill to polish the inside of the barrel. I then sanded the corners of the needle with some 2500 grit sand paper and polished the corners of it as well with the Q tip and metal polish: I After cleaning them, I put the needle and seat back together in the carburetor. Because I had to take the linkage apart to install the new connector rod, I synchronized the carburetors again. Here is something interesting: While I did the standard balancing procedure which included setting each carburetor's set screw so that each carburetor had the same flow at idle, and then screwing in the auxiliary shaft screw (to activate the linkage against both carburetors) and setting the balance screw to have the same flow during throttle application, I also did something similar for the choke. This is not something I saw in the factory workshop manual. For proper choke function, the factory workshop manual provides instruction to set a specified gap between the throttle plate and the body of the carburetor when the choke lever is pulled. This is to be done for each carburetor. After this is done, in theory, when you pull the choke lever, the choke mechanism will open the throttle plates on the front and the rear carburetor the same amount. I did as instructed in the factory workshop manual. However, I then started the car with the choke lever slightly activated. This raised the speed of the engine above normal idle speed. And then, I checked the flow of air through each carburetor using the Uni-Syn. Well, the flow was not the same. Similar to the procedure to balance the front and rear carbs when the linkage is activated, I used the Uni-syn flow meter to set the flow between the two carburetors to the same amount with the choke lever in operation (slightly). To adjust flow I had to shorten/lengthen the connecting rod for the choke. After completing this adjustment, when I pull my choke cables to start the carburetors, both throttle plates are opened to a position where both carburetors are flowing the same! I never was able to get the chokes working well on my track Z (when it had SU's), but I think this will be the ticket to getting the chokes to operate well on this car. I will be able to test that tomorrow when the engine is cold. I did take the the car for brief drive after messing with the needle and seat. So far, so good! I hope I have solved the issue with the rear carburetor puking fuel.

 1 point
 -
1 pointNo he's never met you but he has seen your posts for a number of years now and can infer some things from the questions you ask. If you're going to get your feelings hurt by his comment and lash out I am quite confident the remaining help you have here will dry up. Also, always remember there is always someone bigger, meaner and badder than you! Best not to go around challenging people to fights. The man you underestimate might pummel you!1 point
-
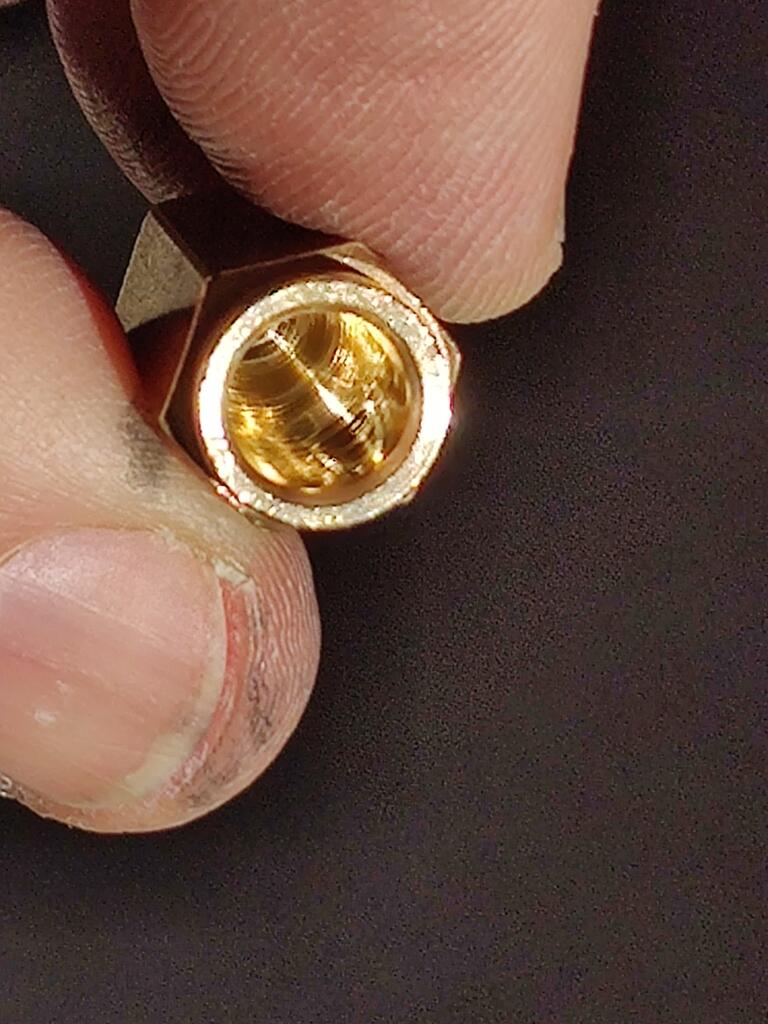
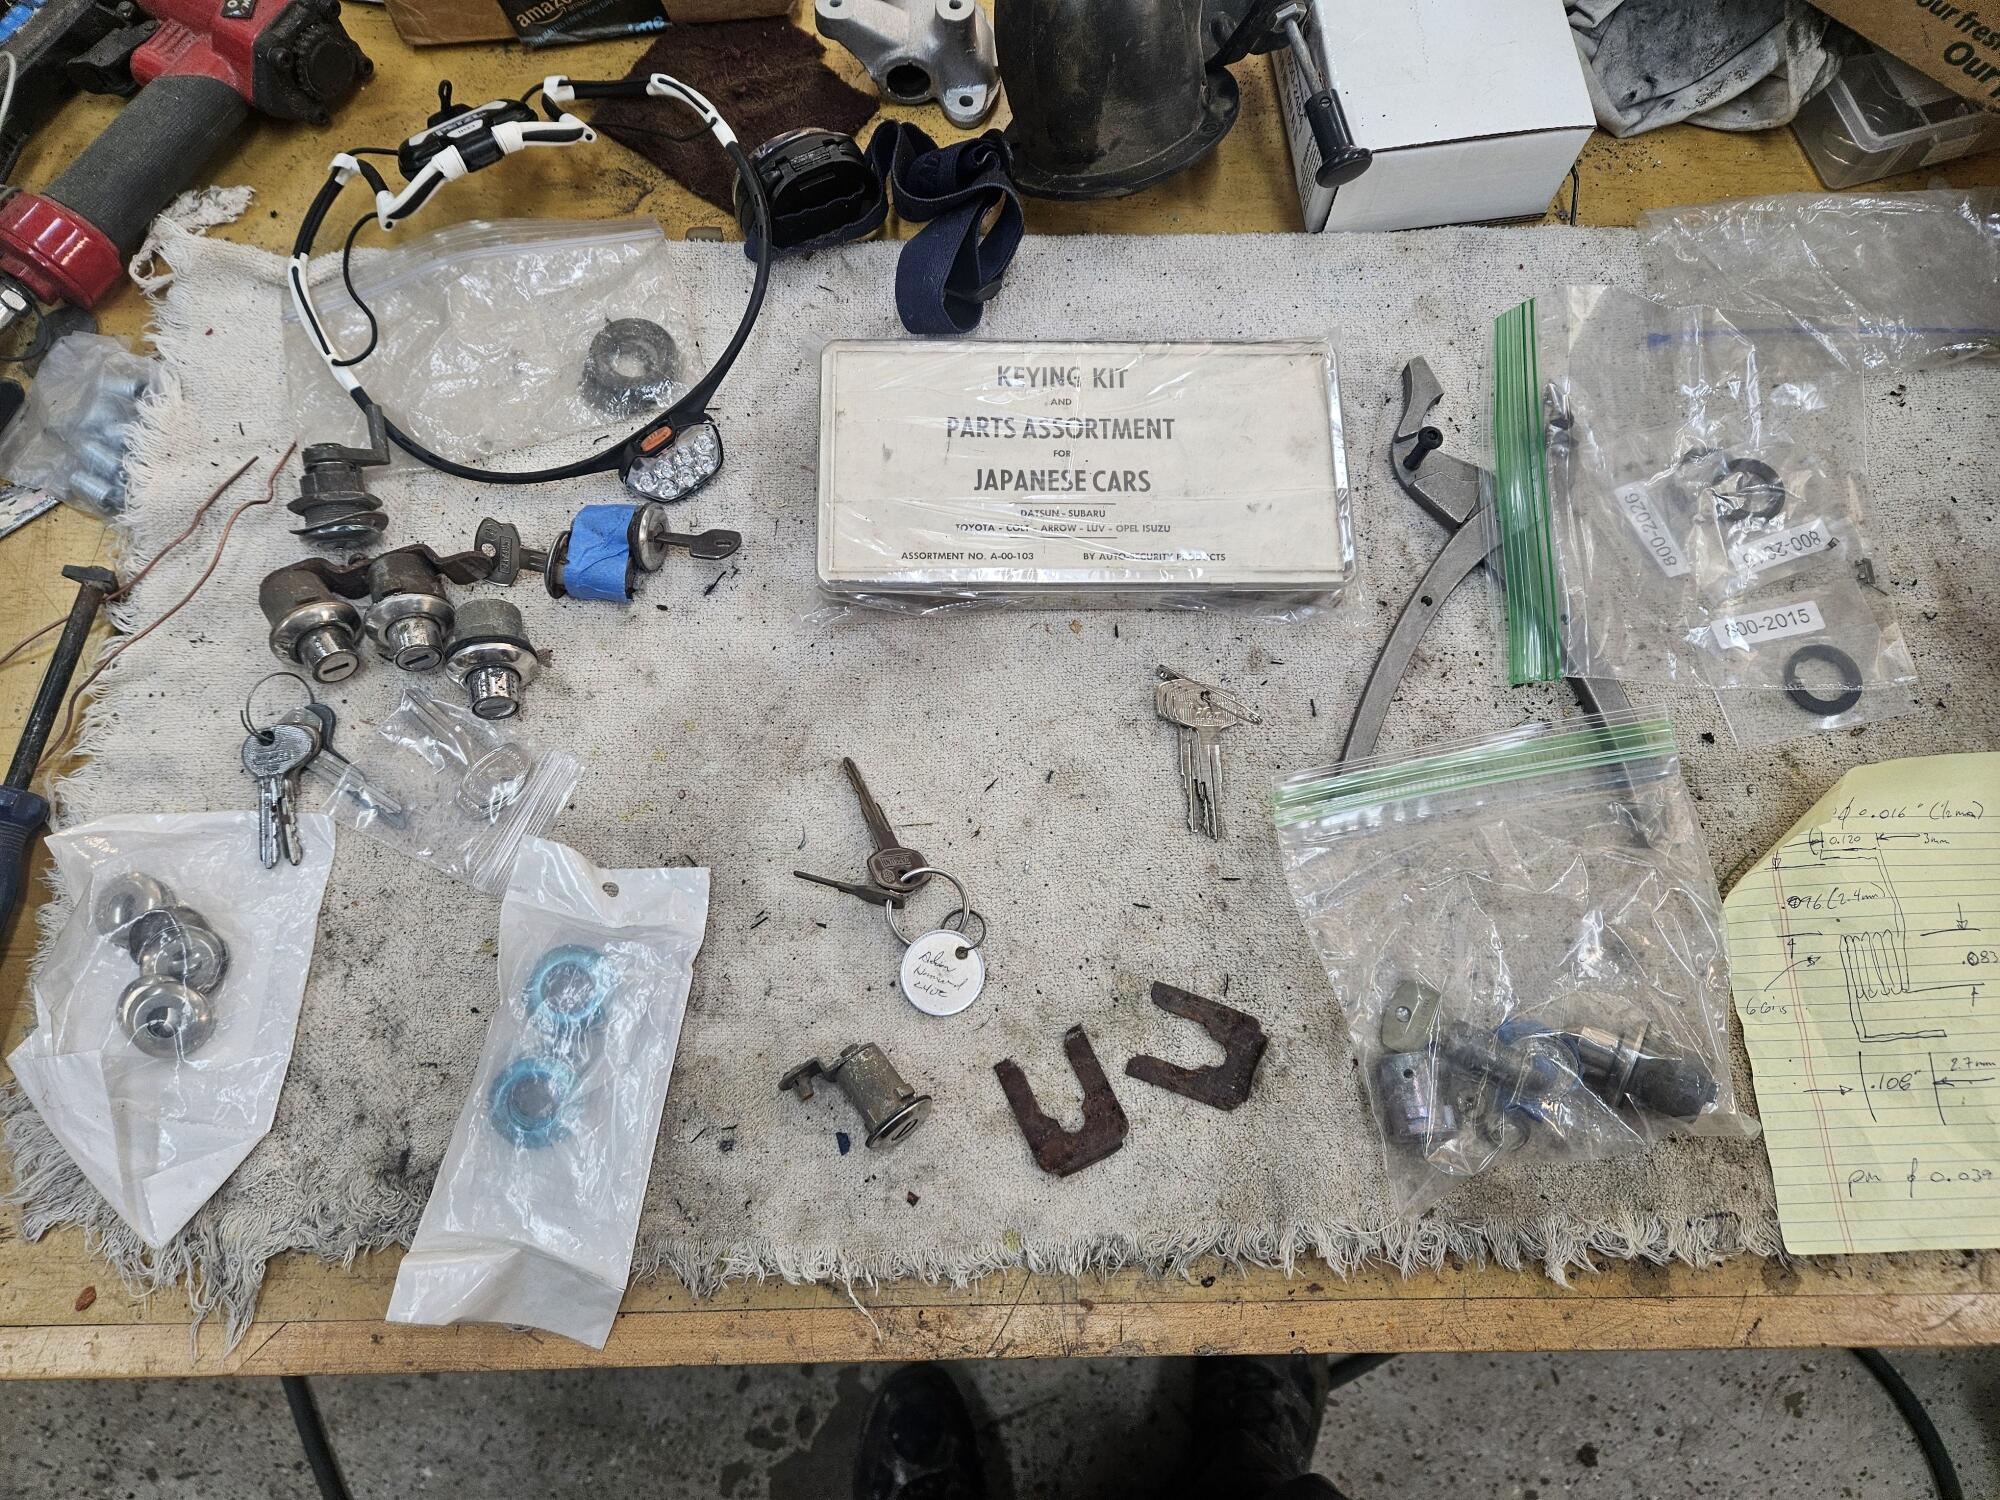
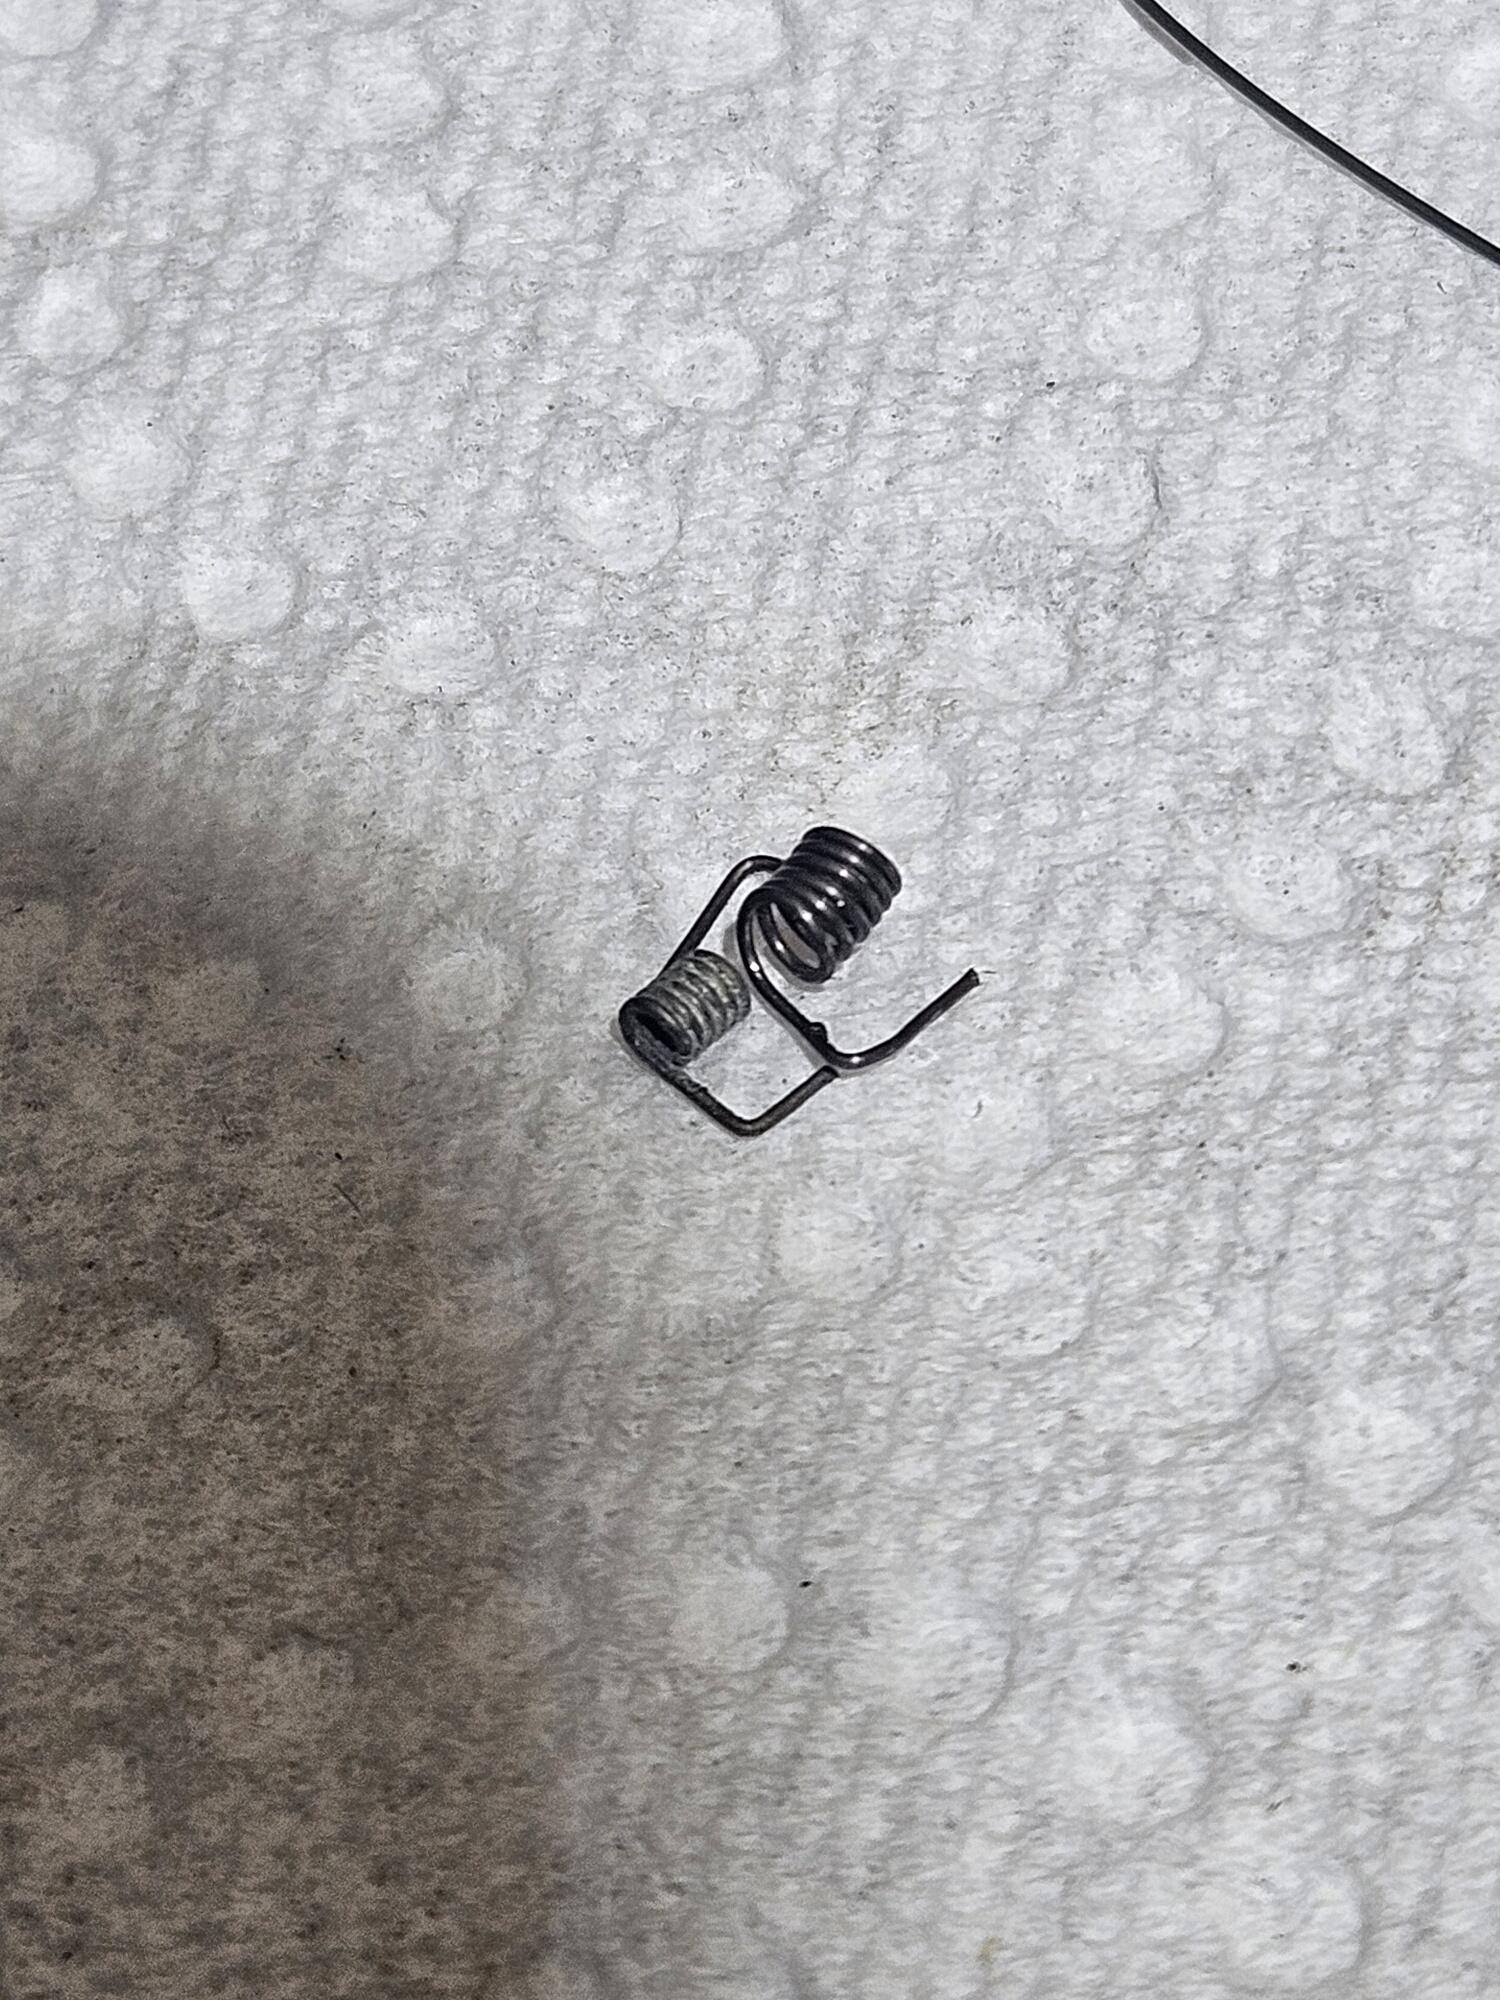
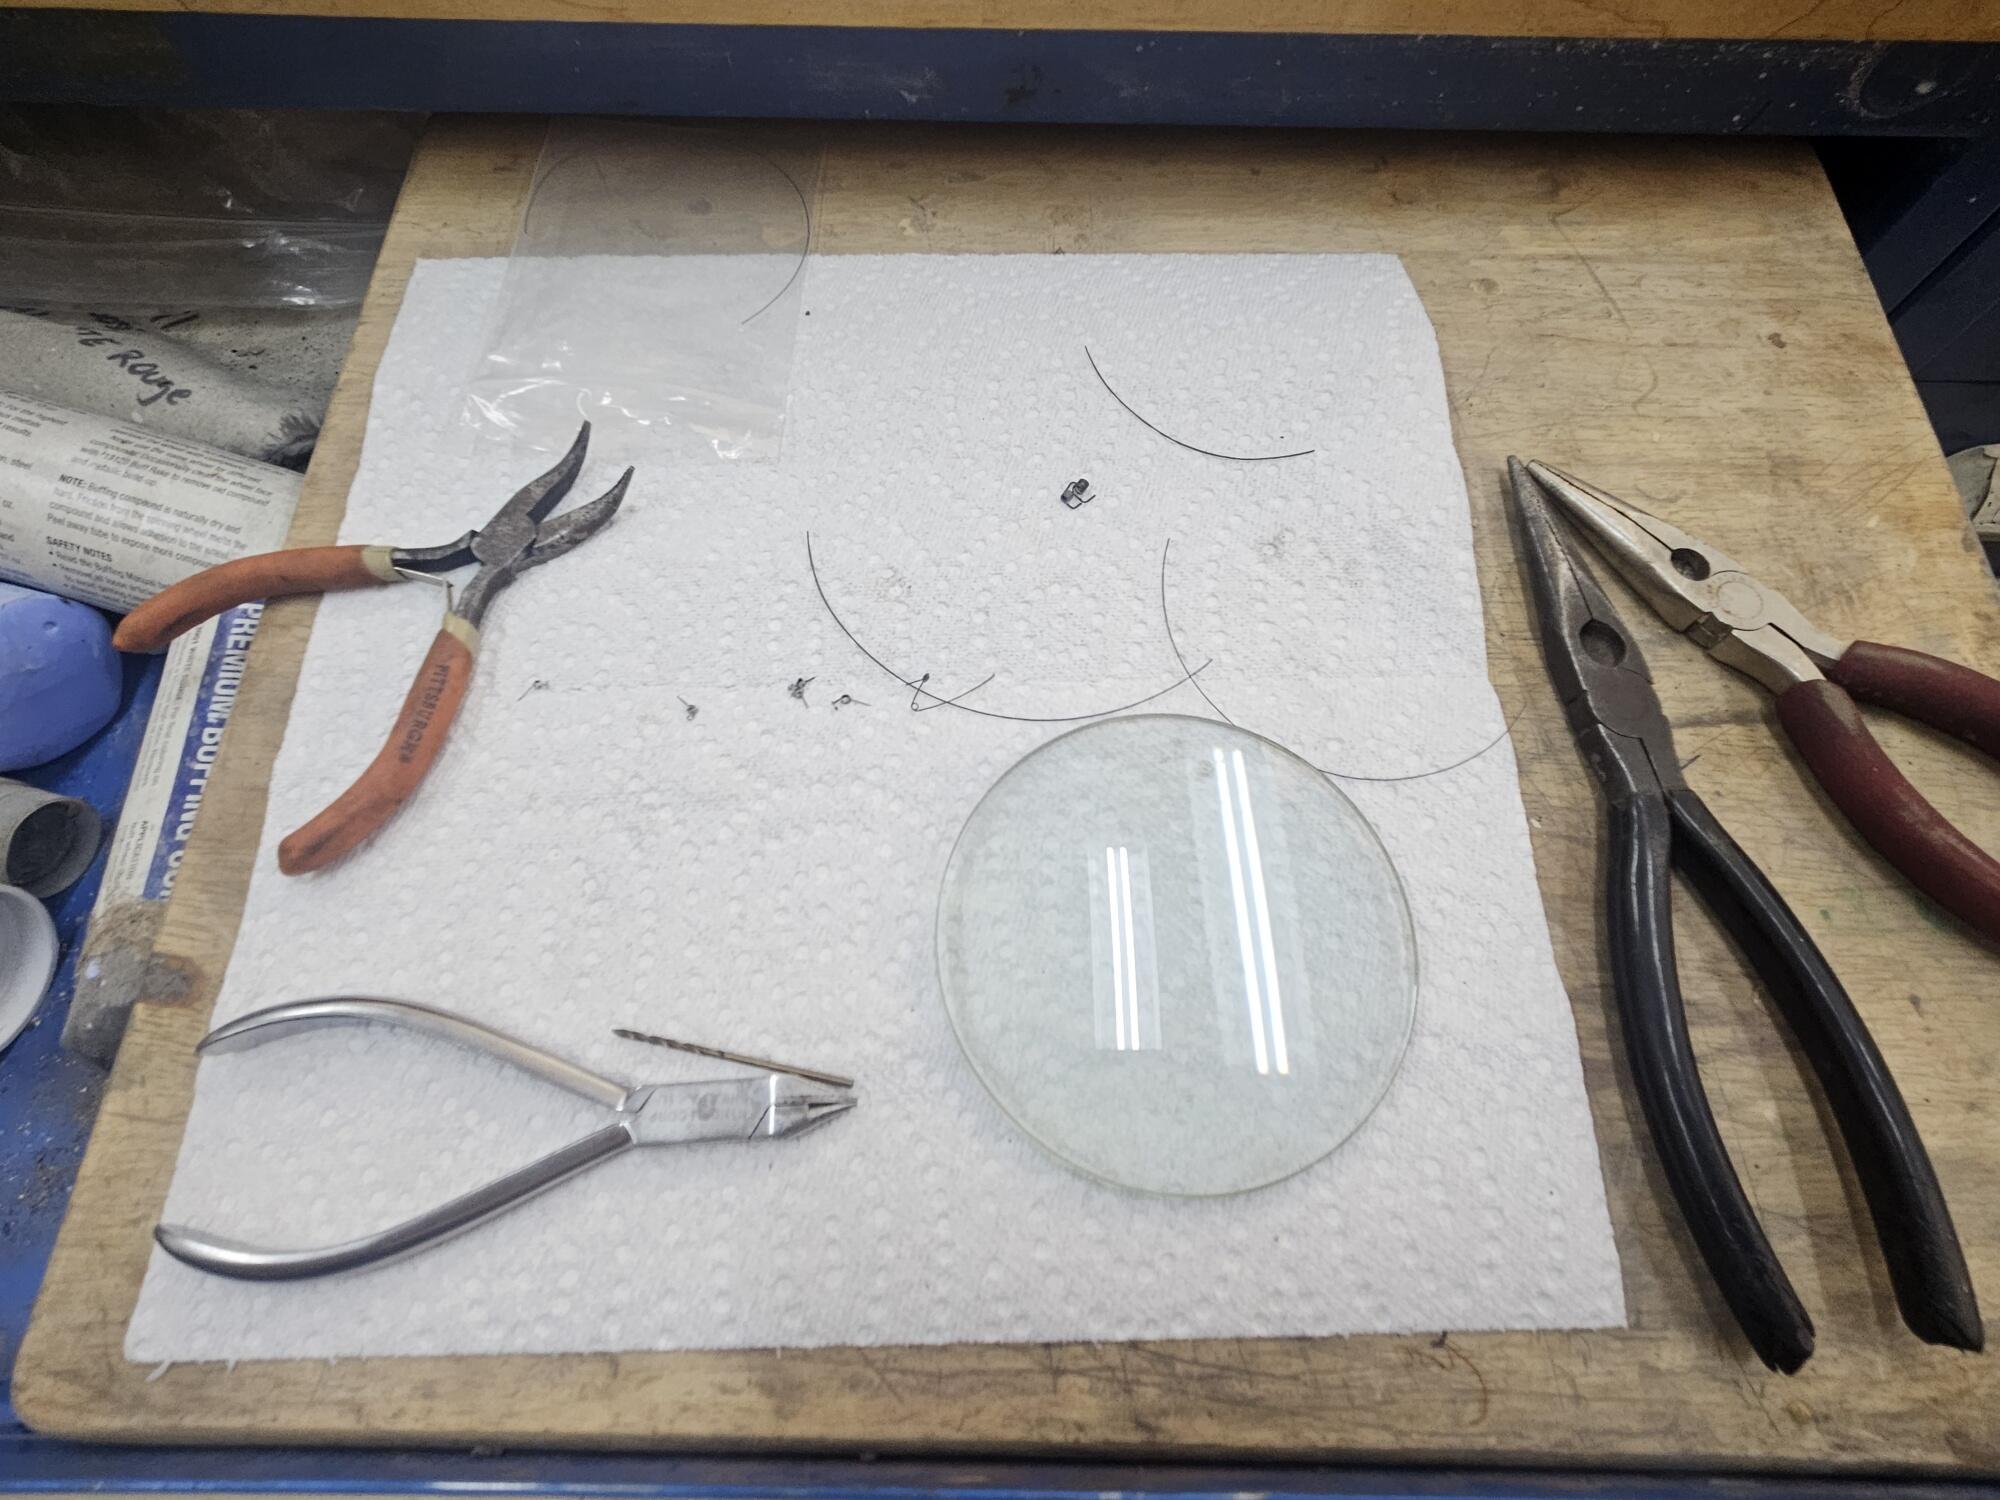
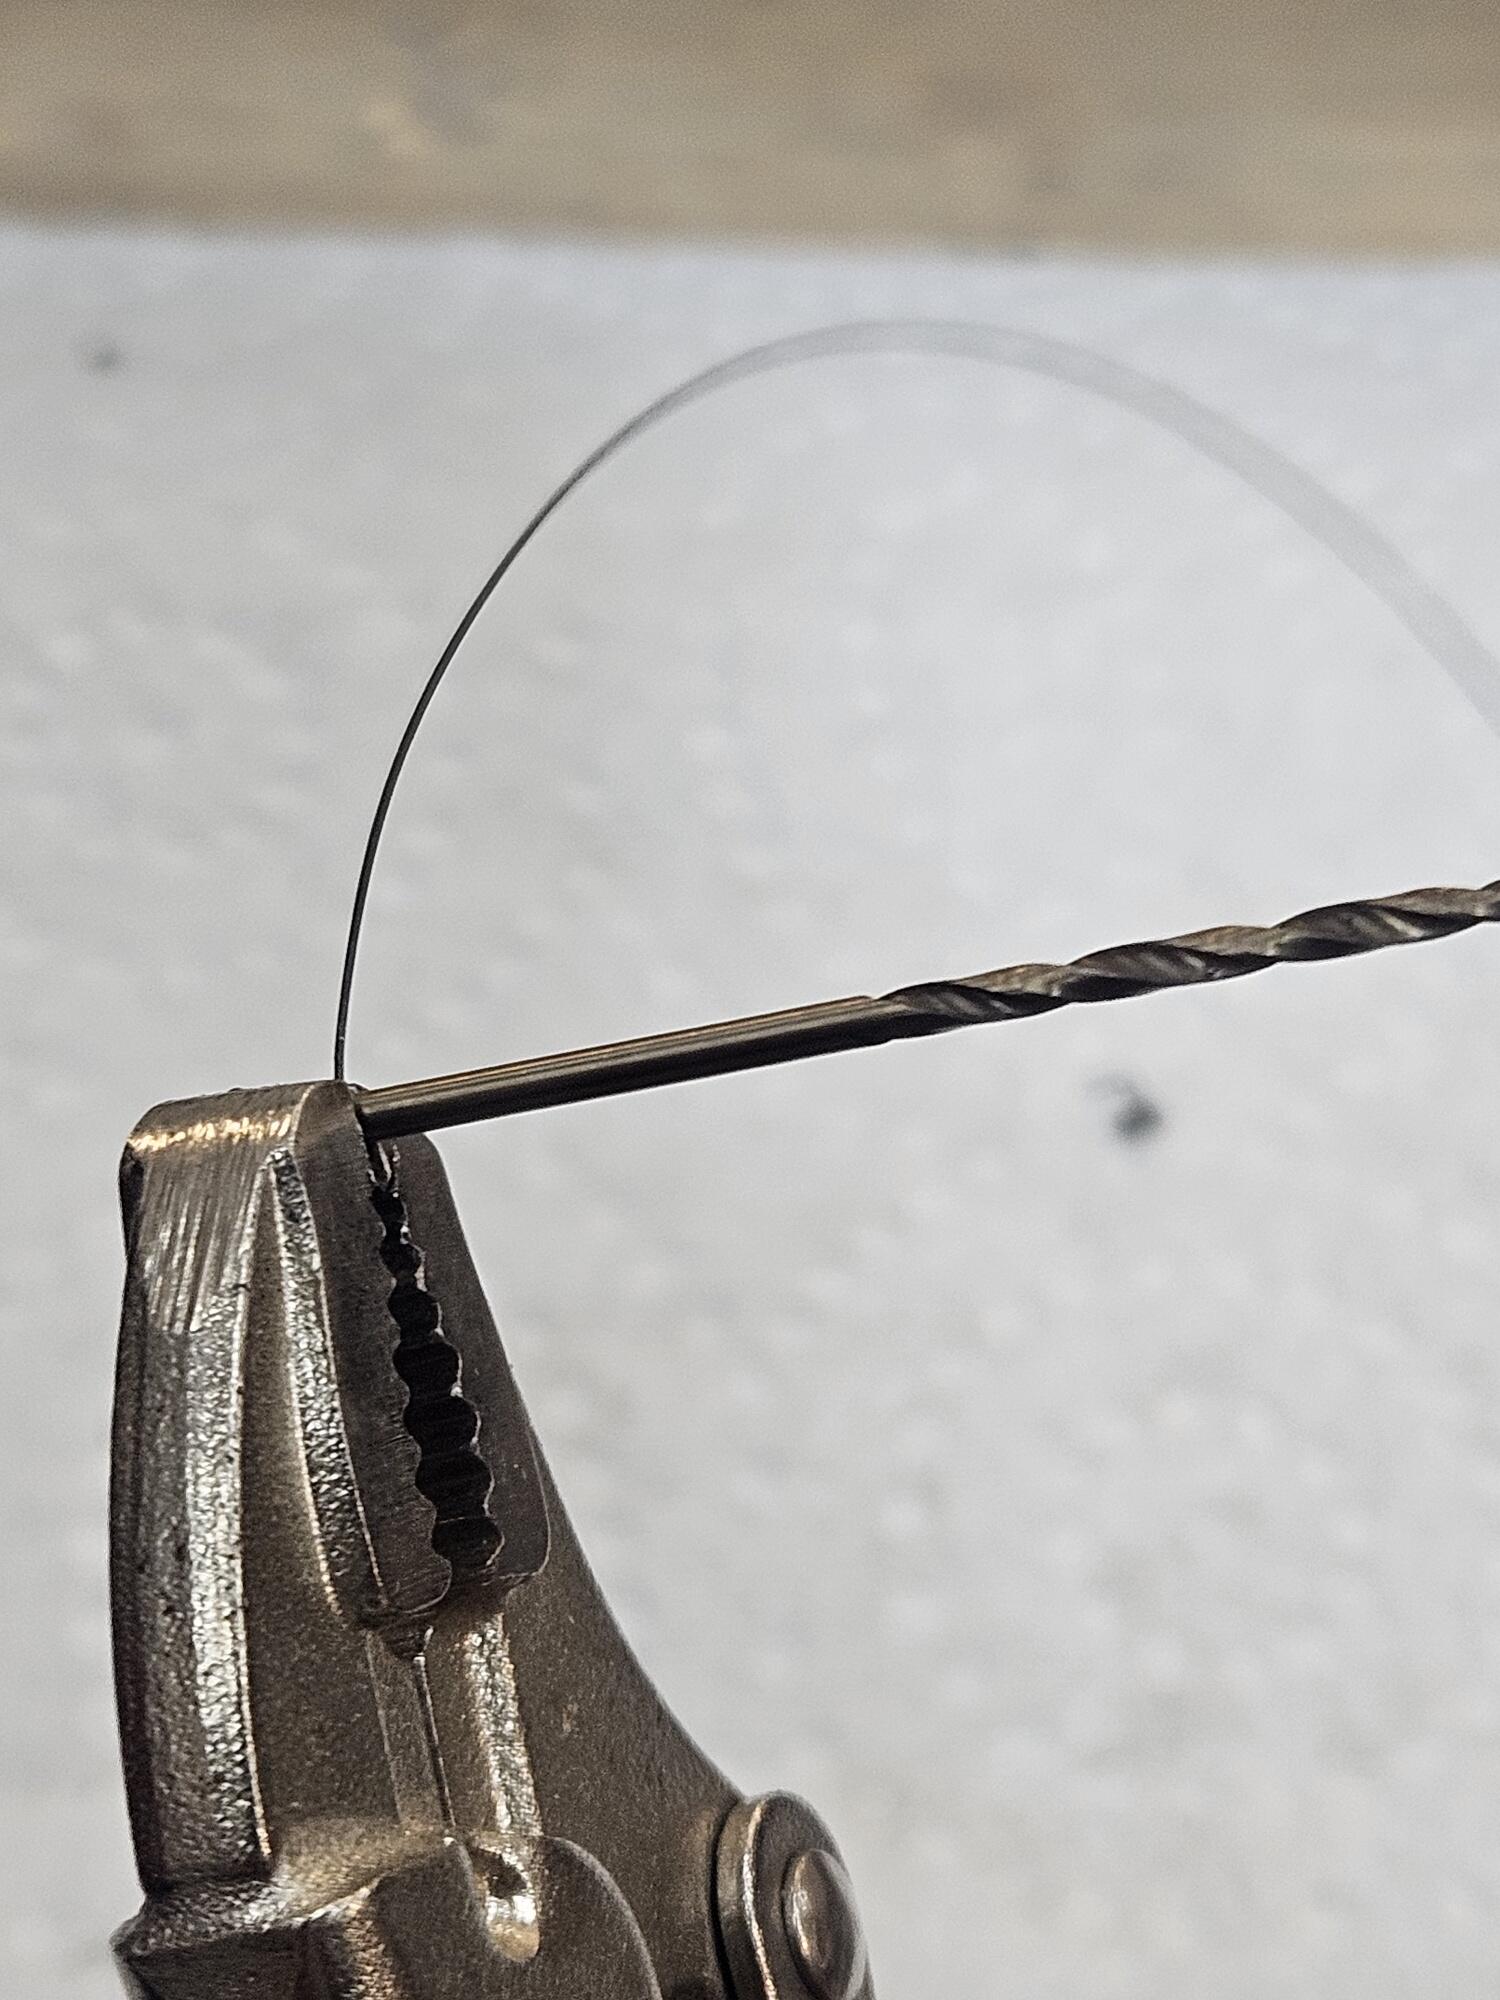
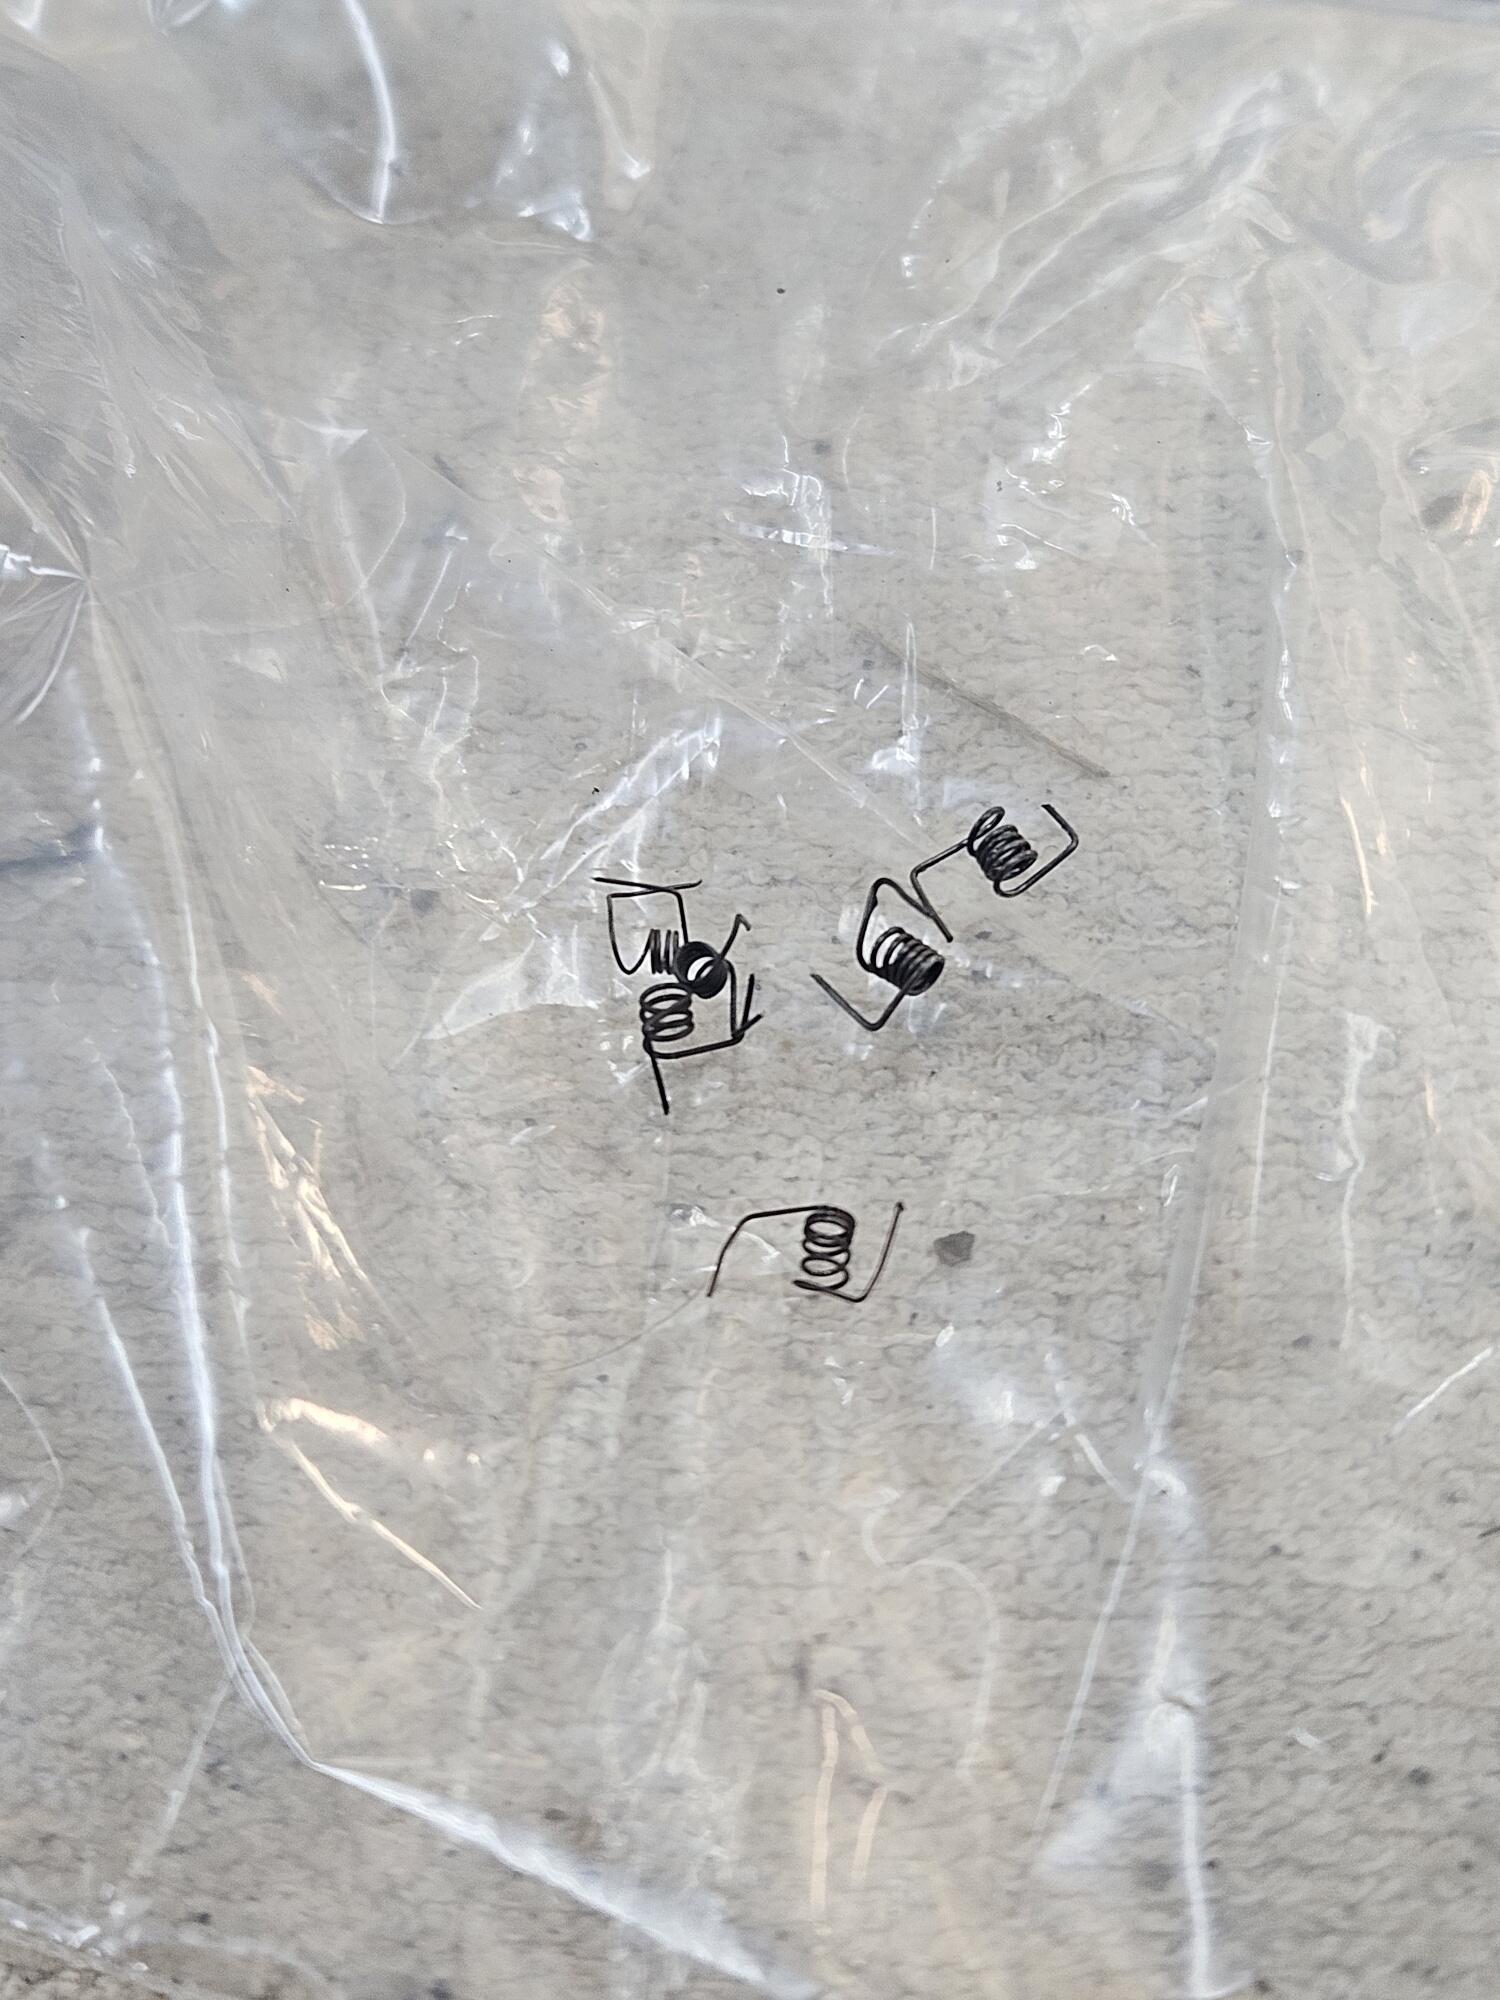
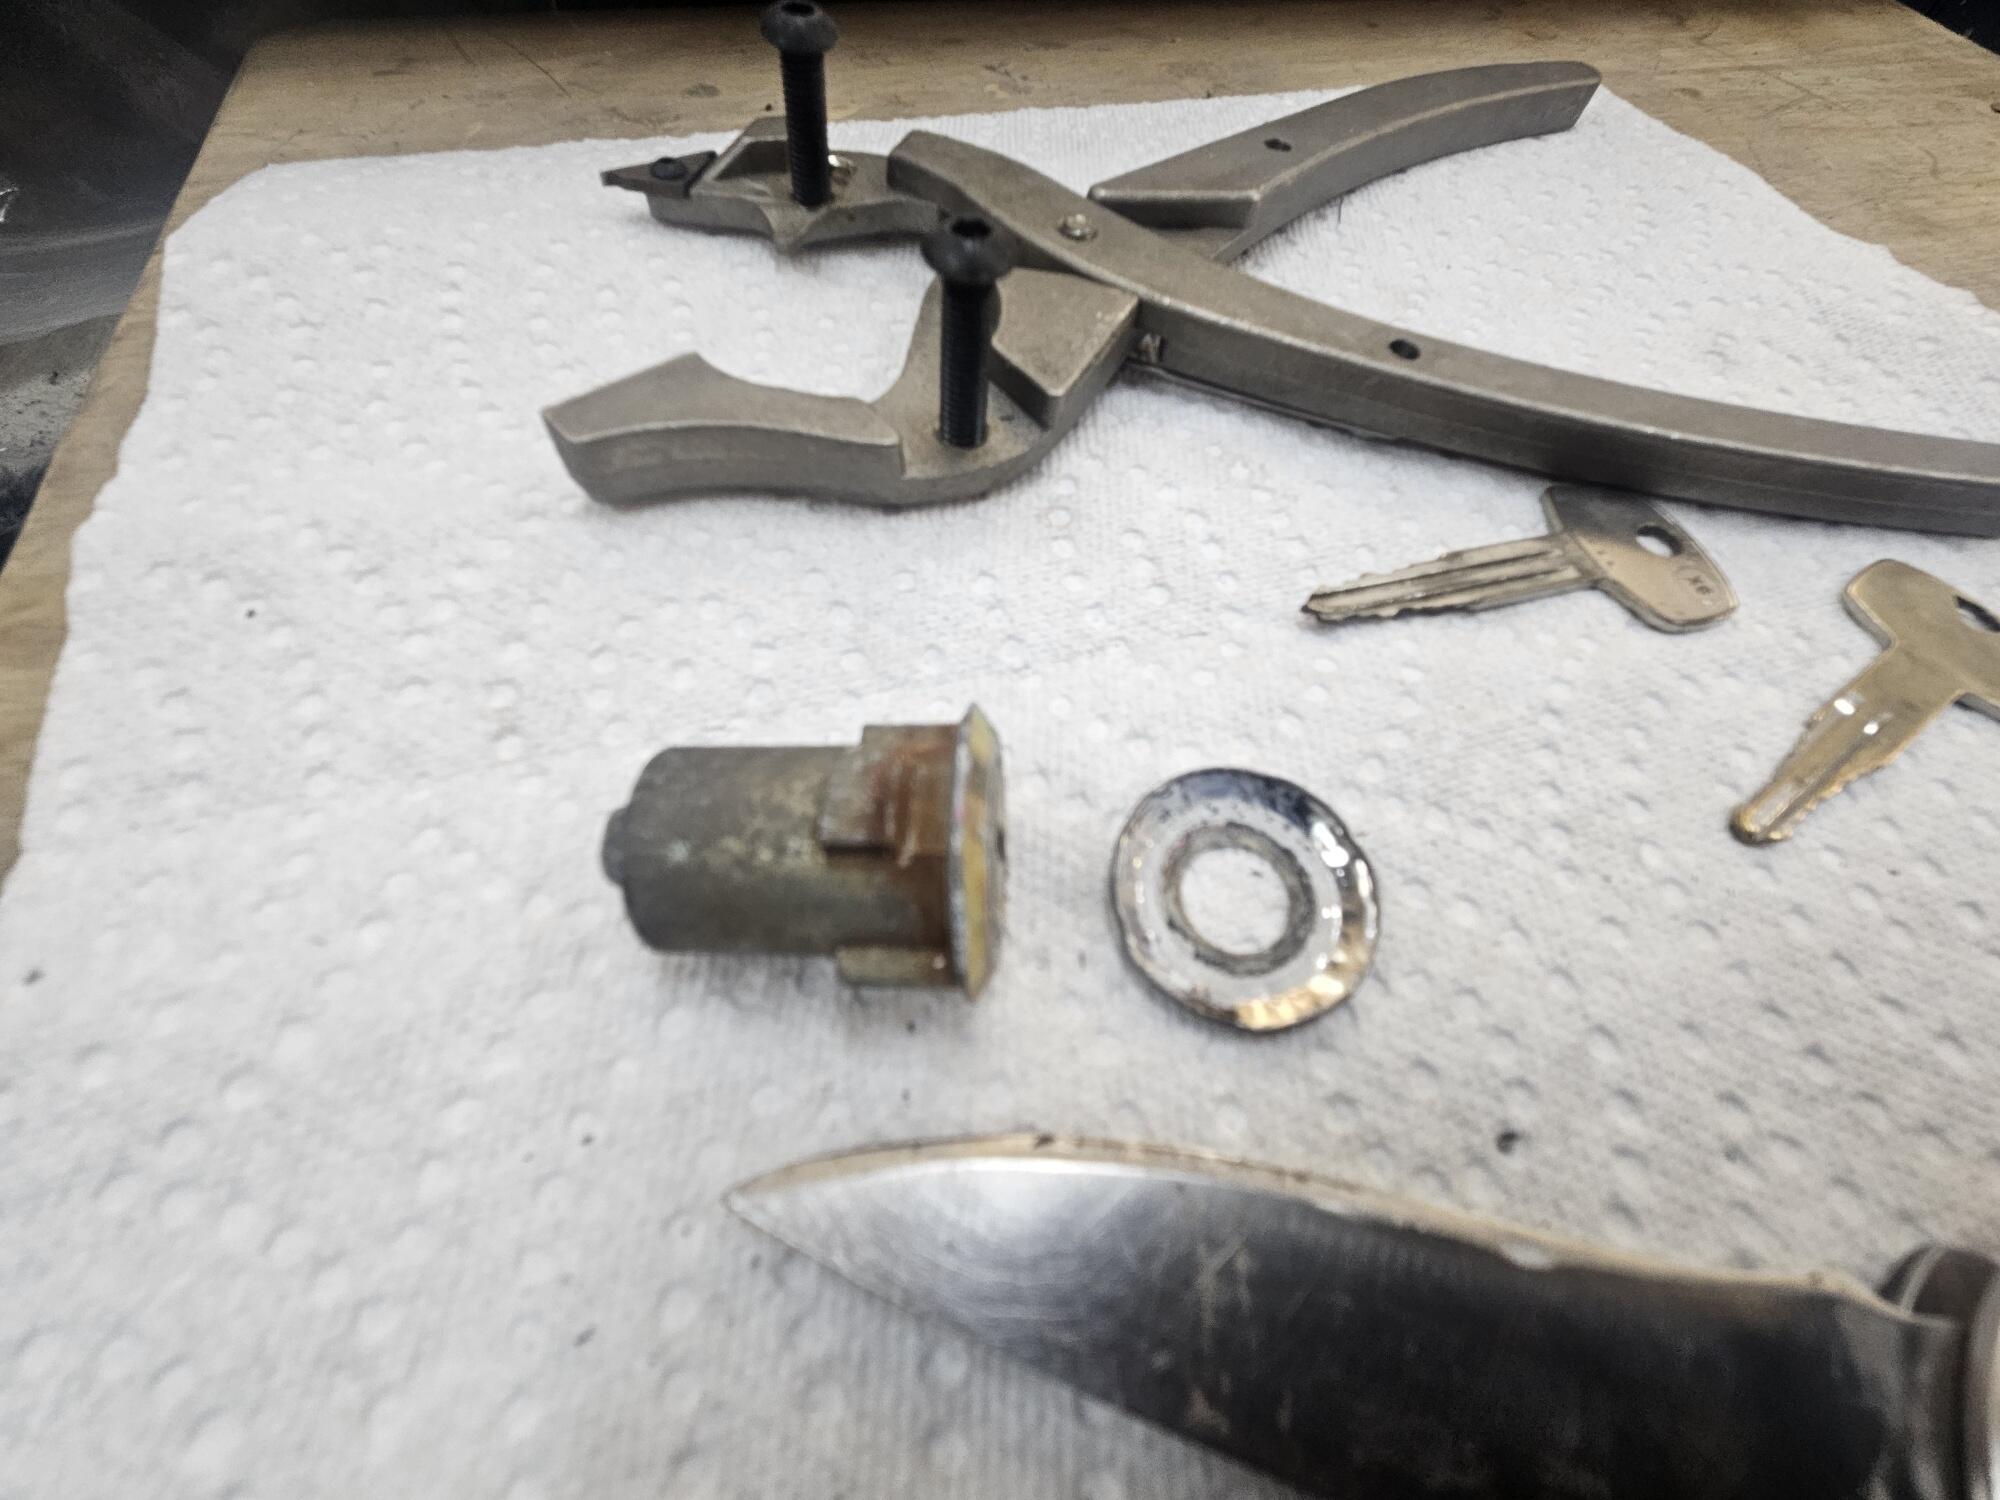
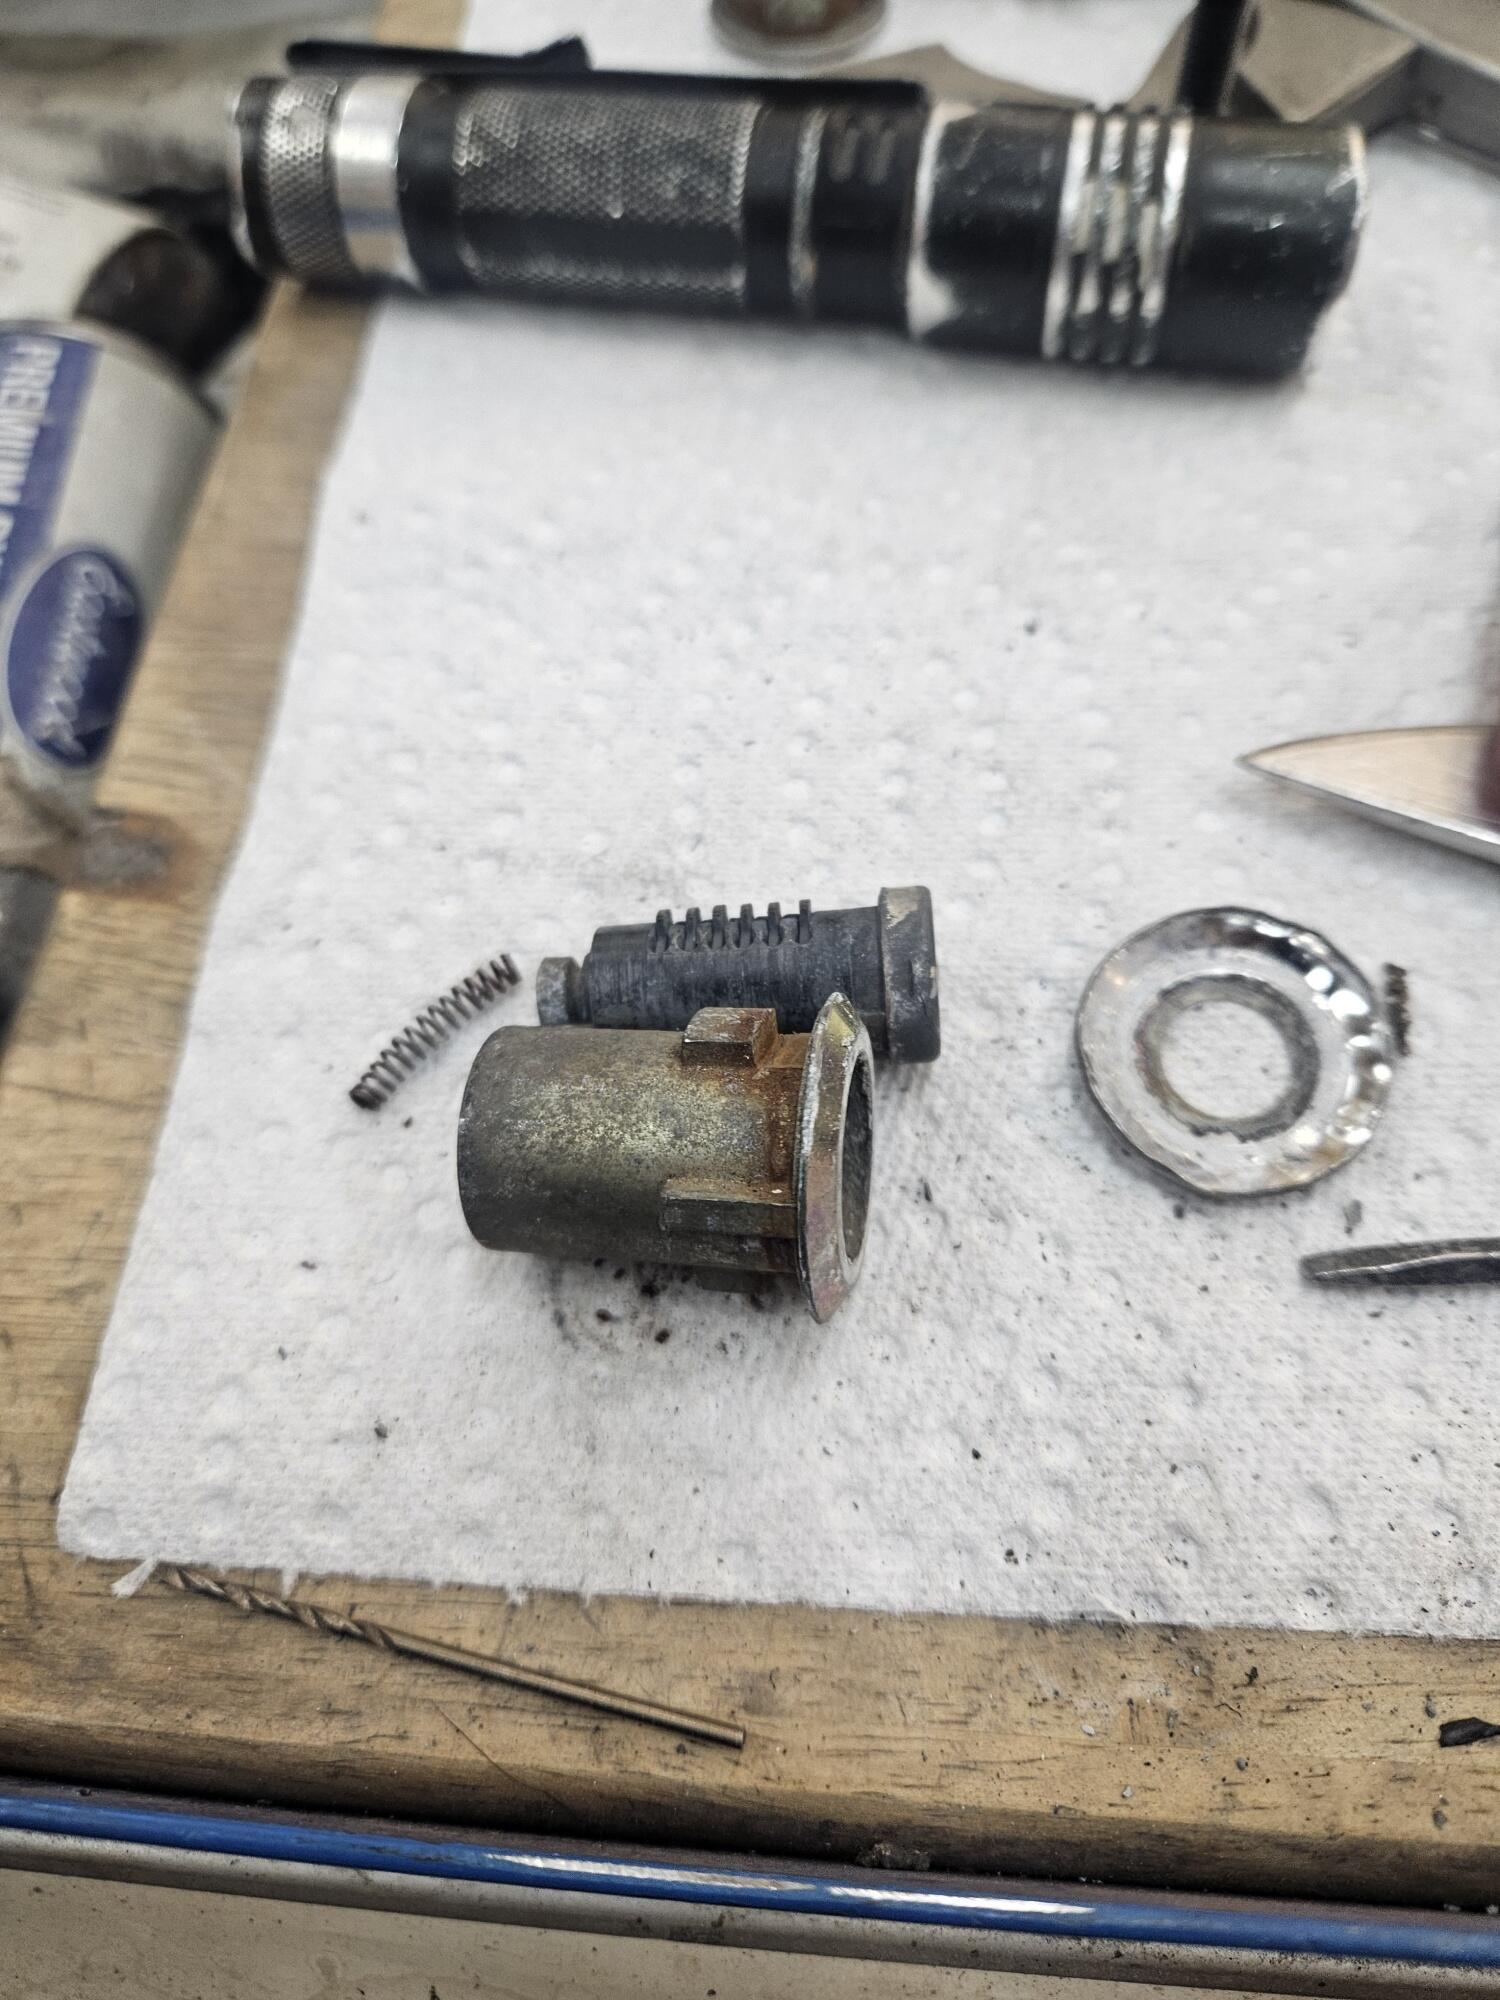
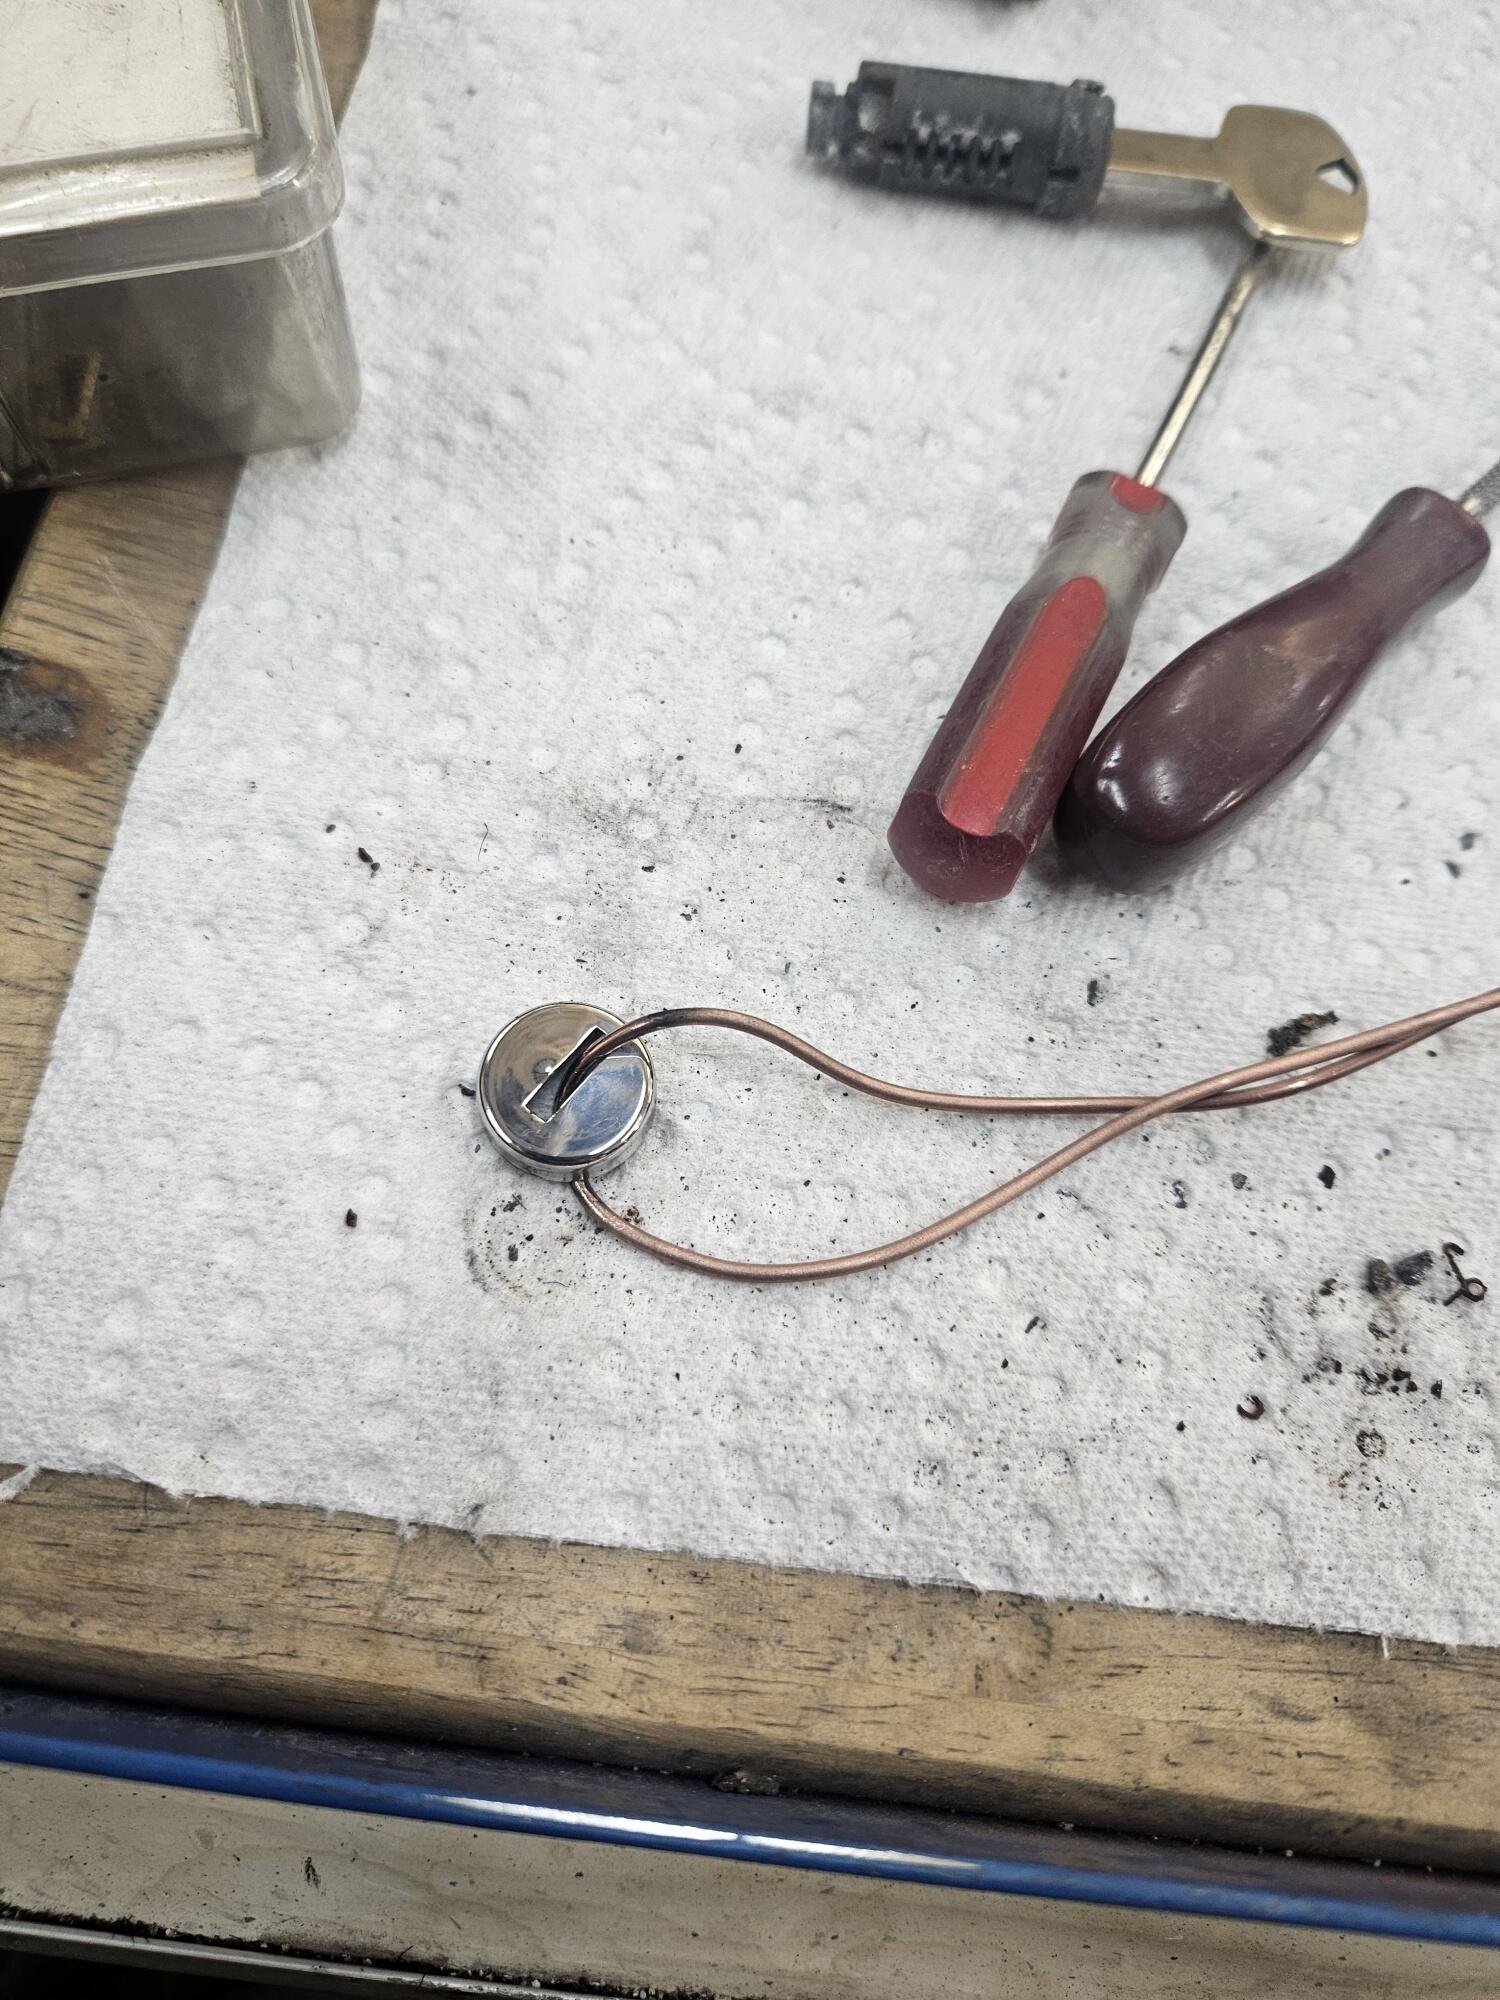
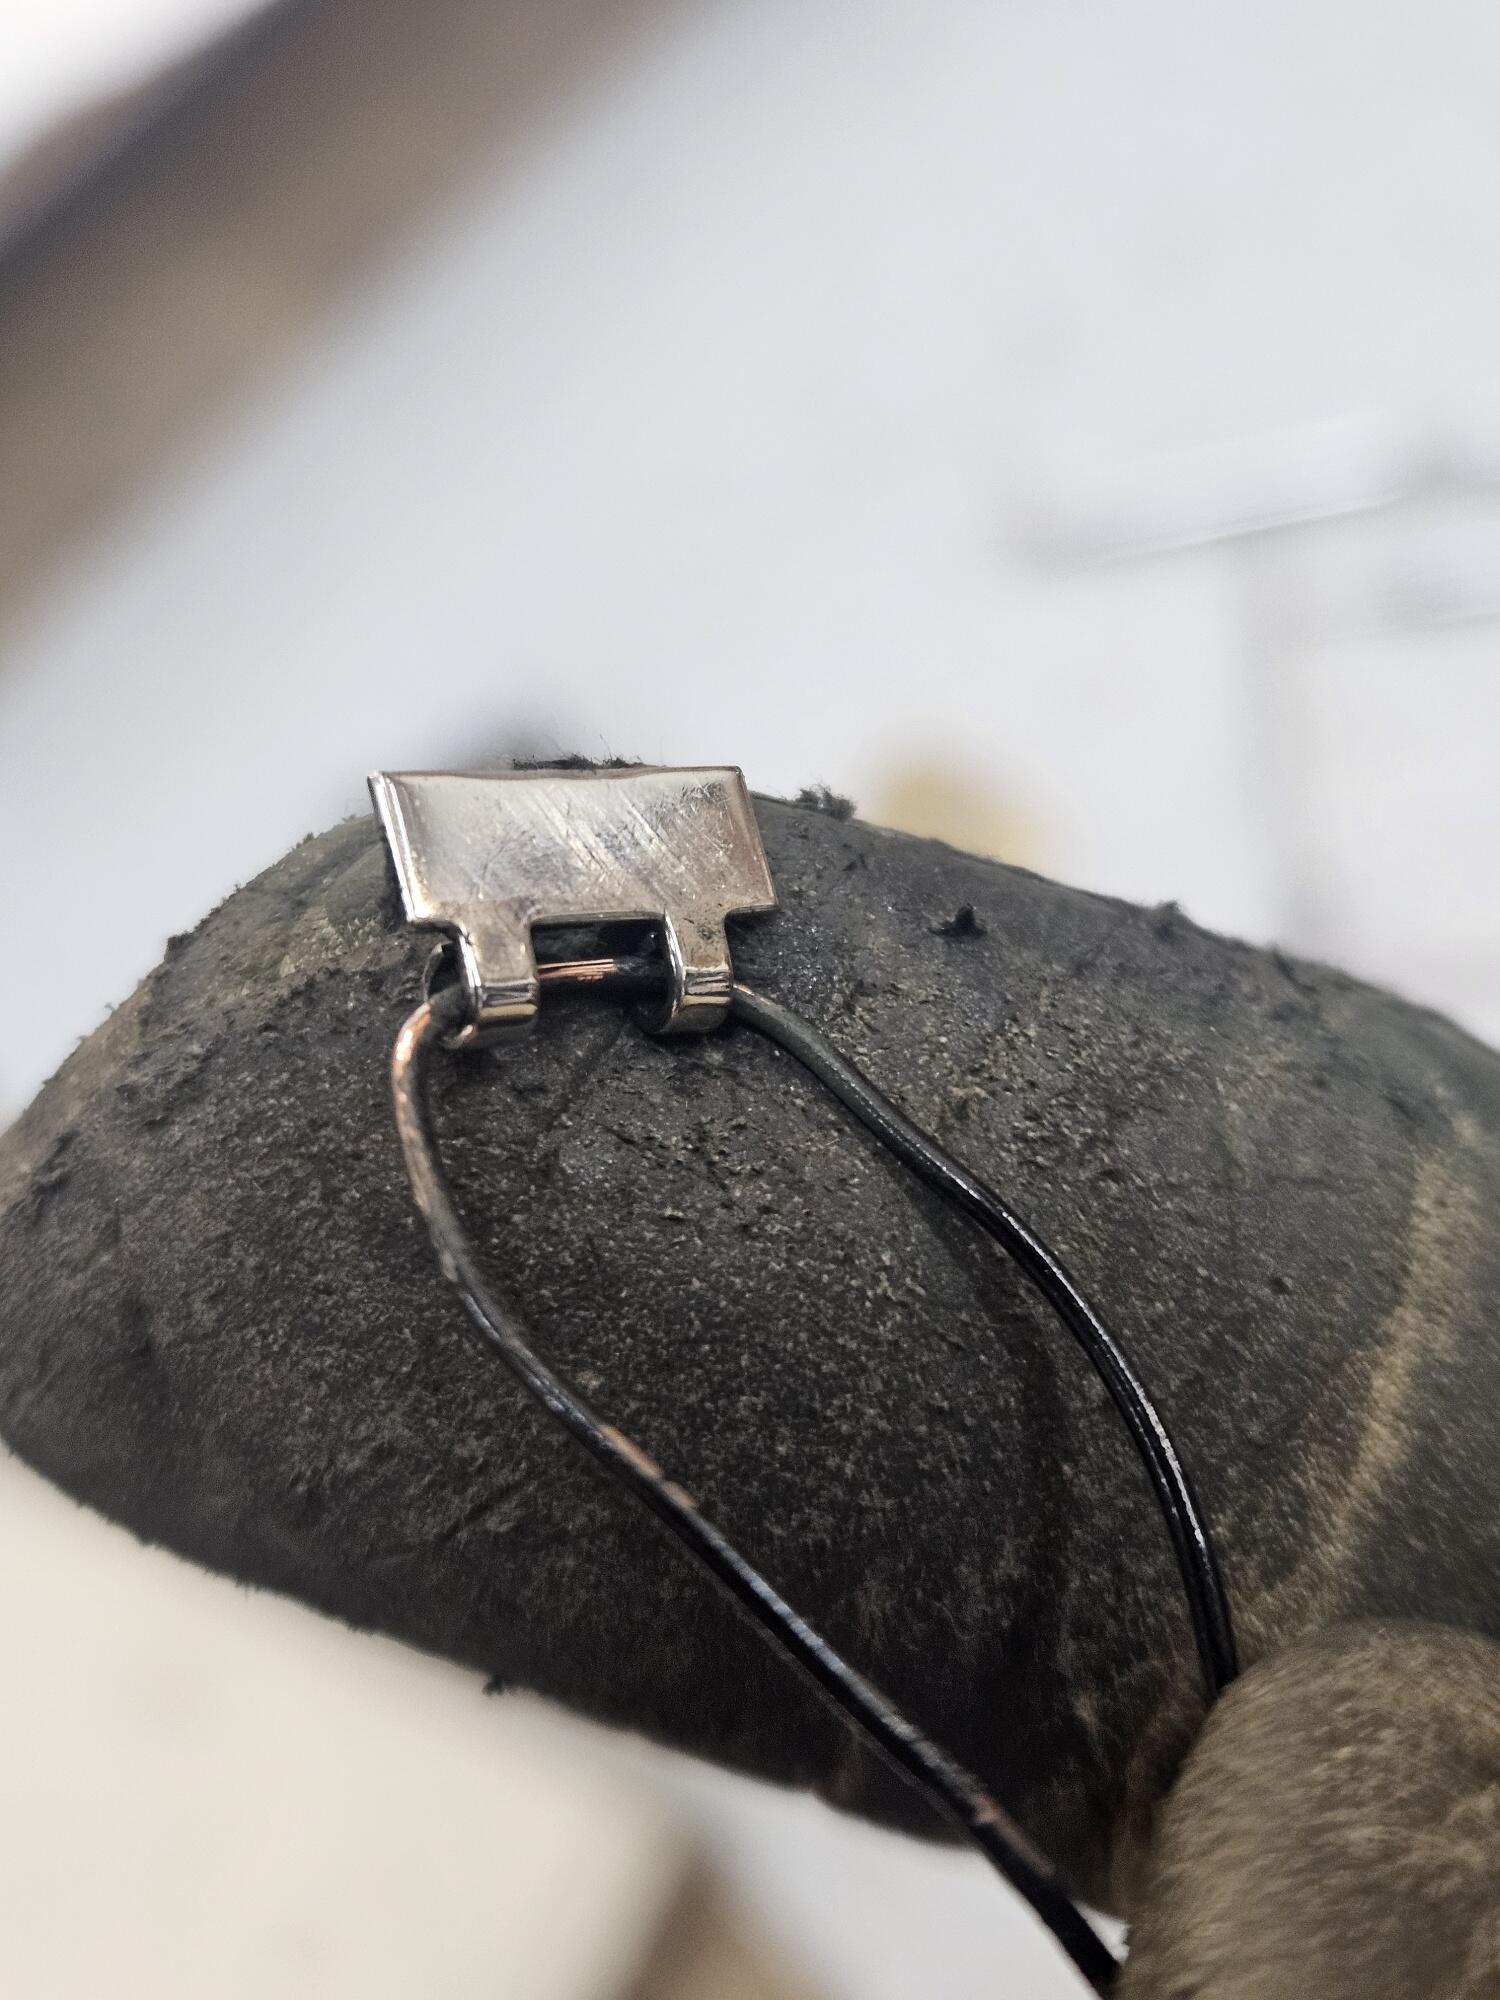
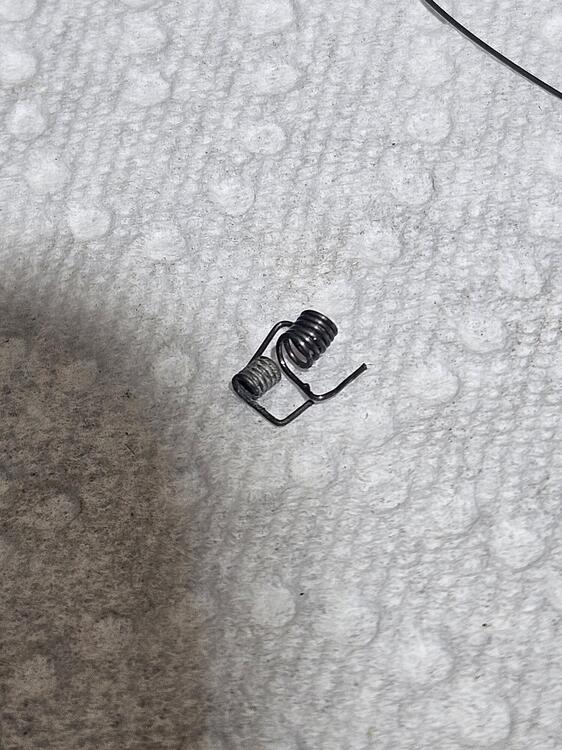
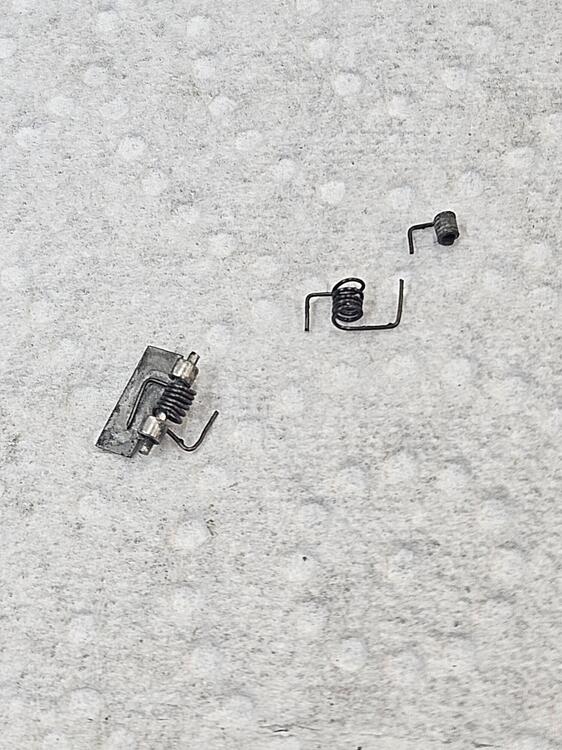
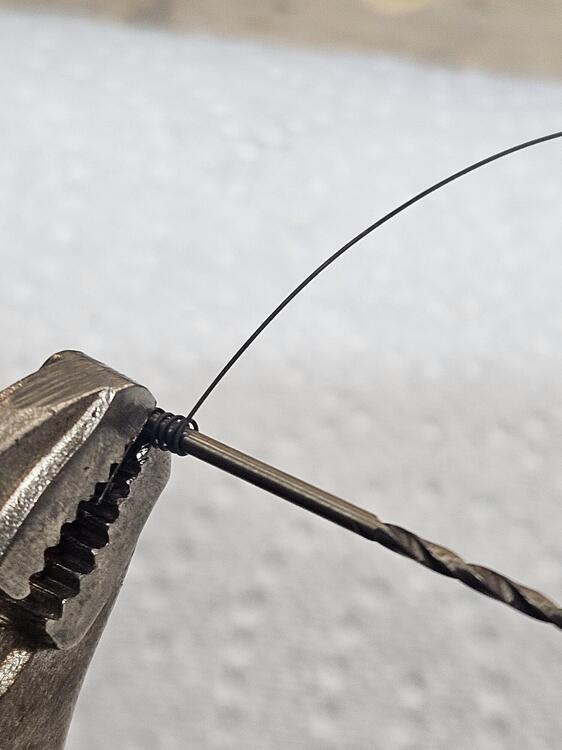
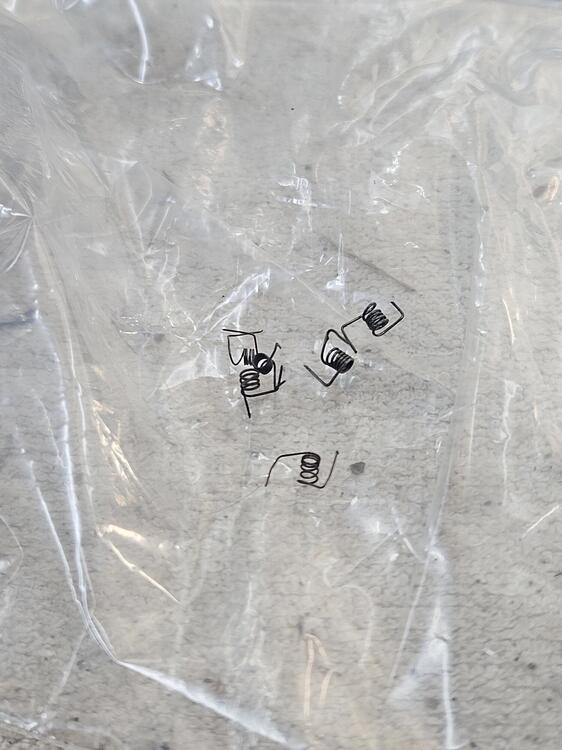
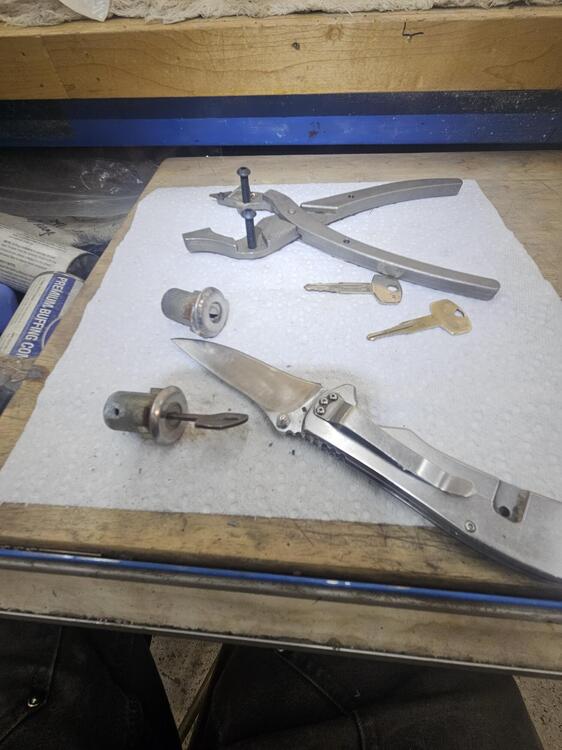
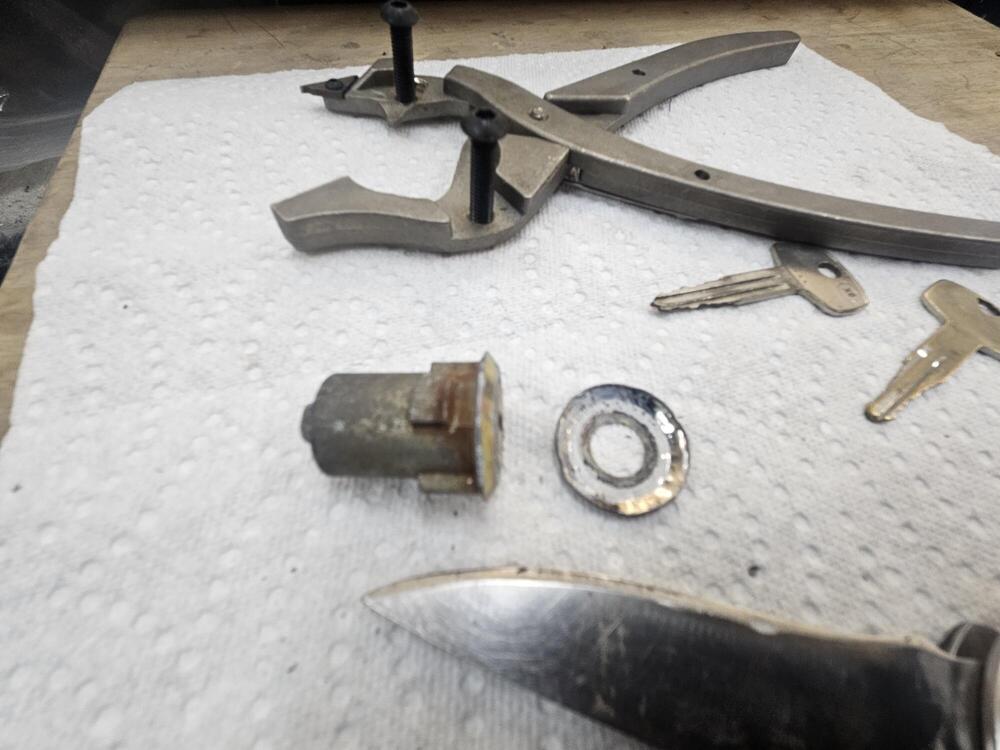
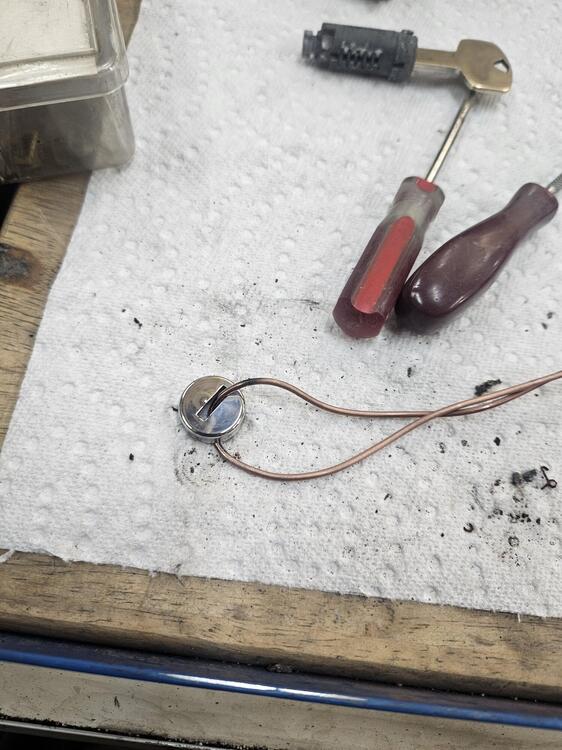
1 pointI also worked on rekeying some door locks today. I have an ignition key I like and I want one key for the whole car So I played at making tiny springs!! @emccallum He are the assorted's. Spare locks, replacement parts, lockset pliers, seals, etc Here is a first attempt. It was actually one of the best attempts I am using some orthodontic wire. There was some that was about 0.015" dia and some that was more like 0.010" dia.. It's difficult to get the coils to wrap close to each other. I used a small drill bit as an arbor, like 0.063" dia I found that the thicker wire was a little too heavy for the key door. It installs ok but the door has too much resistance. The thinner wire worked better was more difficult to make neat looking springs Disassembled the lock Lightly blasted the lock case and the inside of the cap. Polished the cap with the buffing wheel. A piece of wire helps keep it from getting away from you Repinned the lockset. I only have 4 different wafers and it seemed like I needed another size. I reworked one with a buffing wheel to make it work for now. Also my replacement wafers don't have the little tab on the side that lock them into the tumbler like the factory ones do. So reassemble is a little trickier. One finished lockset


 1 point
 -
1 pointThe switch is connected to ground. However, the positive side on the light, should be connected to the ignition circuit. Unplug the wire from the brake switch. Put the positive lead from your voltmeter on the wire, and touch the negative lead to ground. See if you have voltage. Let us know how much. Then we know where we need to go from there.1 point
-
1 point
-
1 pointHey man you dont know me! Im just asking a simple question and you come here with your arrogant bs comments! If you are not gonna help get a hike! Never offended no one in this forum. Wanna tell me something ill meet you at the park!1 point
-
0 pointsWell im just seeking for advice on how to grease the original 72 choke cable and adjust it correctly. Im doing this tomorrow hencr i need your advice and not some guy thinking he is smarter than Einstein!0 points