Leaderboard
-

CanTechZ
Free Member8Points1,311Posts -
conedodger
Free Member6Points12,513Posts -

siteunseen
Free Member3Points15,115Posts -

Zed Head
Free Member2Points19,233Posts


Popular Content
Showing content with the highest reputation on 10/03/2024 in all areas
-
3 points
-
Not on BAT -but related to current market pricing... 2004 M/B SL500 with 14K miles. Was asking $26,500.00... now down to $18,500. https://www.hemmings.com/auction/2004-mercedes-benz-sl500-westport-ct-919098?utm_medium=email&utm_source=EDaily&utm_campaign=2024-10-01&uemlid=a9a67d1ba1d99fc8f383120b6c9aa055922883ecc7fd9867ed60273a116fd5e4 If that car was anywhere in Florida - I'd rush over and buy it.1 point
-
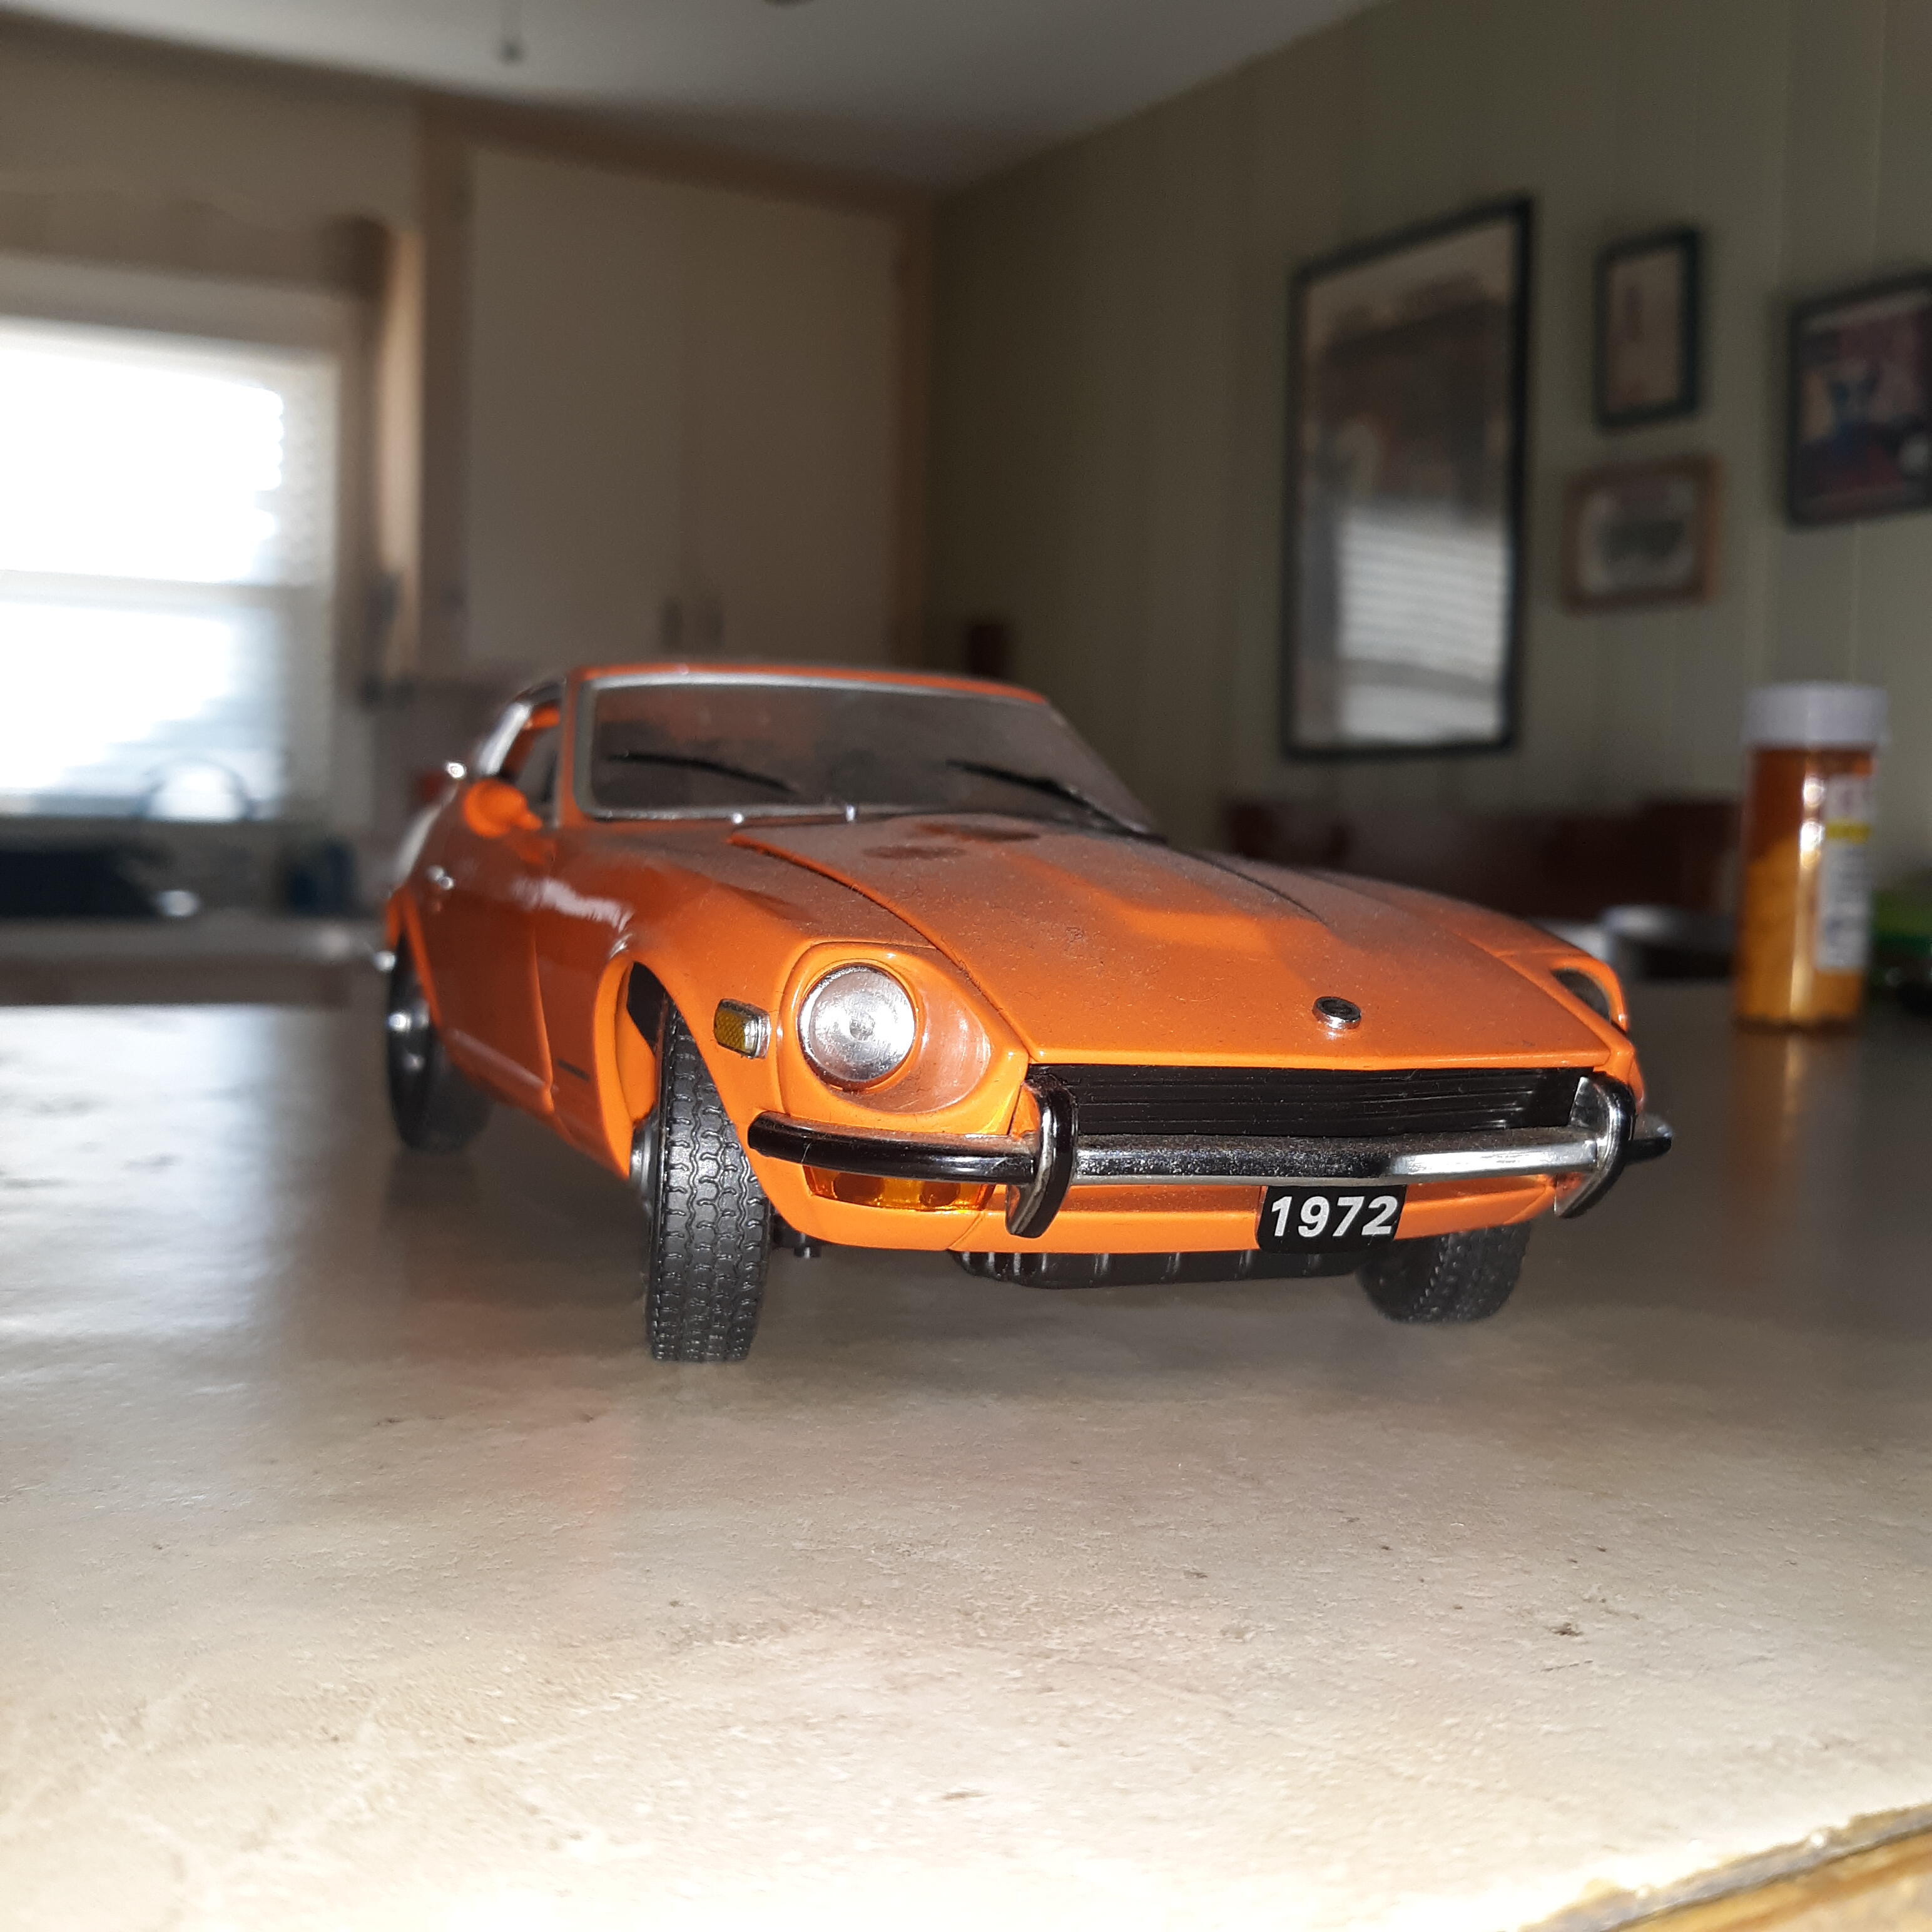
The Mint car is really getting the adulation. People coming out of the woodwork to talk about it. The story seems bigger than the car itself. 17+ hours to go!!!! https://bringatrailer.com/listing/1970-datsun-240z-128/#comments1 point
-
My attitude as a business man and human being is this - If you've been convicted of fraud I won't believe a SINGLE WORD you say! I'm just surprised that more don't have the same attitude. However, I'm certain that a sucker is indeed born every minute.
.thumb.JPG.5f17401c7475eb1dcc15fbba3d97d140.JPG) 1 point
1 point -
That's what TheGuild implied. He also said that Spyder-Man displayed cars at the Nissan dealership. Looks like he paid a "display fee" of about $23,500 for about four years. $5.875 per year. Seems really odd that a businessman, a car dealer, would take such a big loss. Maybe he thinks he's avoiding an even greater loss. Who knows, but interesting to watch. If he's taking a loss here, a person would guess he'll take a loss on the Mint car. Of course, it's only a loss if the previous sales actually occurred, money changing hands. More stuff to make you wonder. Maybe BaT is just a facade. chigger1717 won the auction. Looks like they bid on a few Z's in the past.
 1 point
 -
Yeah I had my FD RX7 repainted 10 years ago in Ireland when I was living in Europe and it cost me around 4,000 euro at the time. That was considered expensive to some, but I wanted a quality finish. Replating parts is getting pricey too. But just shop / labour rates have increased a lot, as you say, it pays to do a lot of the work yourself if you can to cut down on costs. I was quoted $15k AUD to restore a 240z in the late 90s.. that's how much things have changed in 25 years.1 point
-
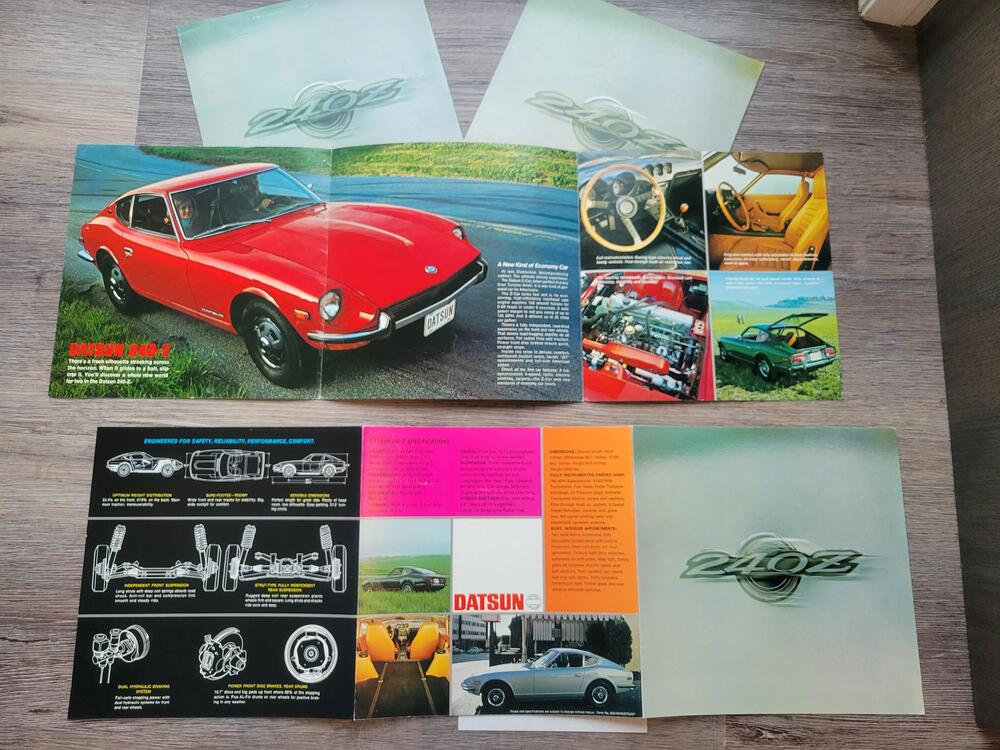
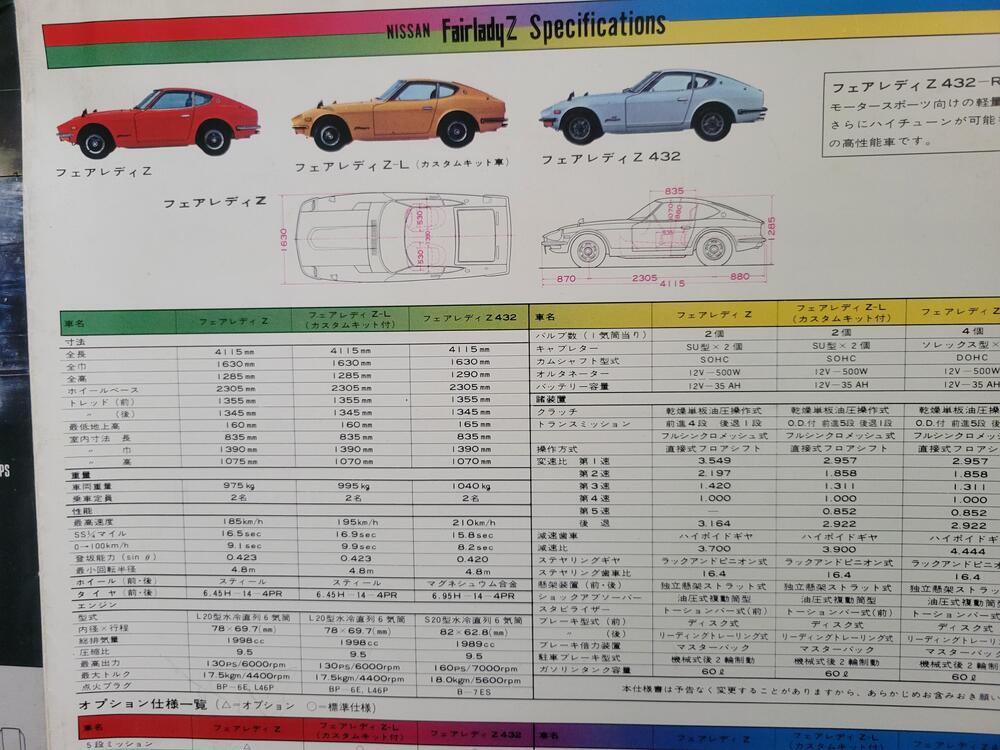
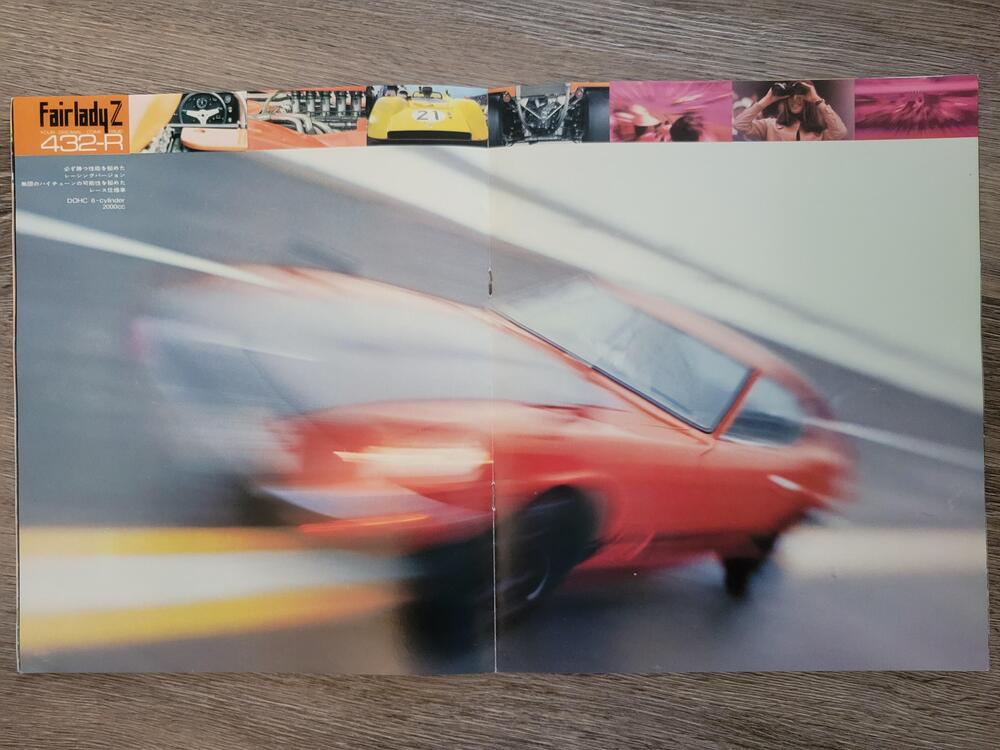
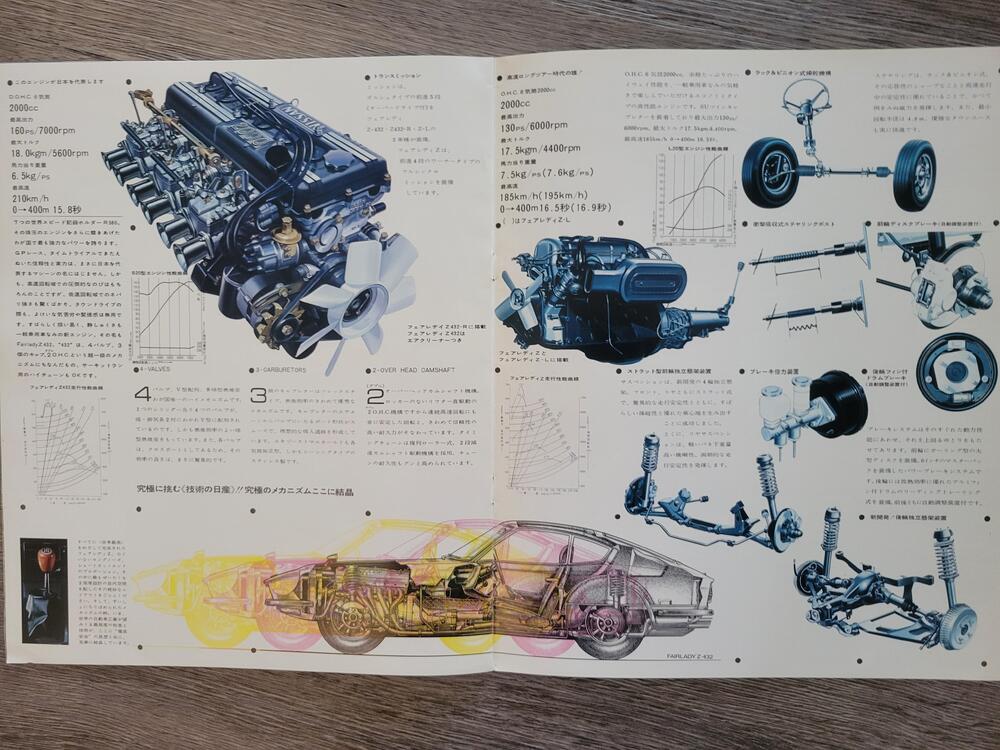
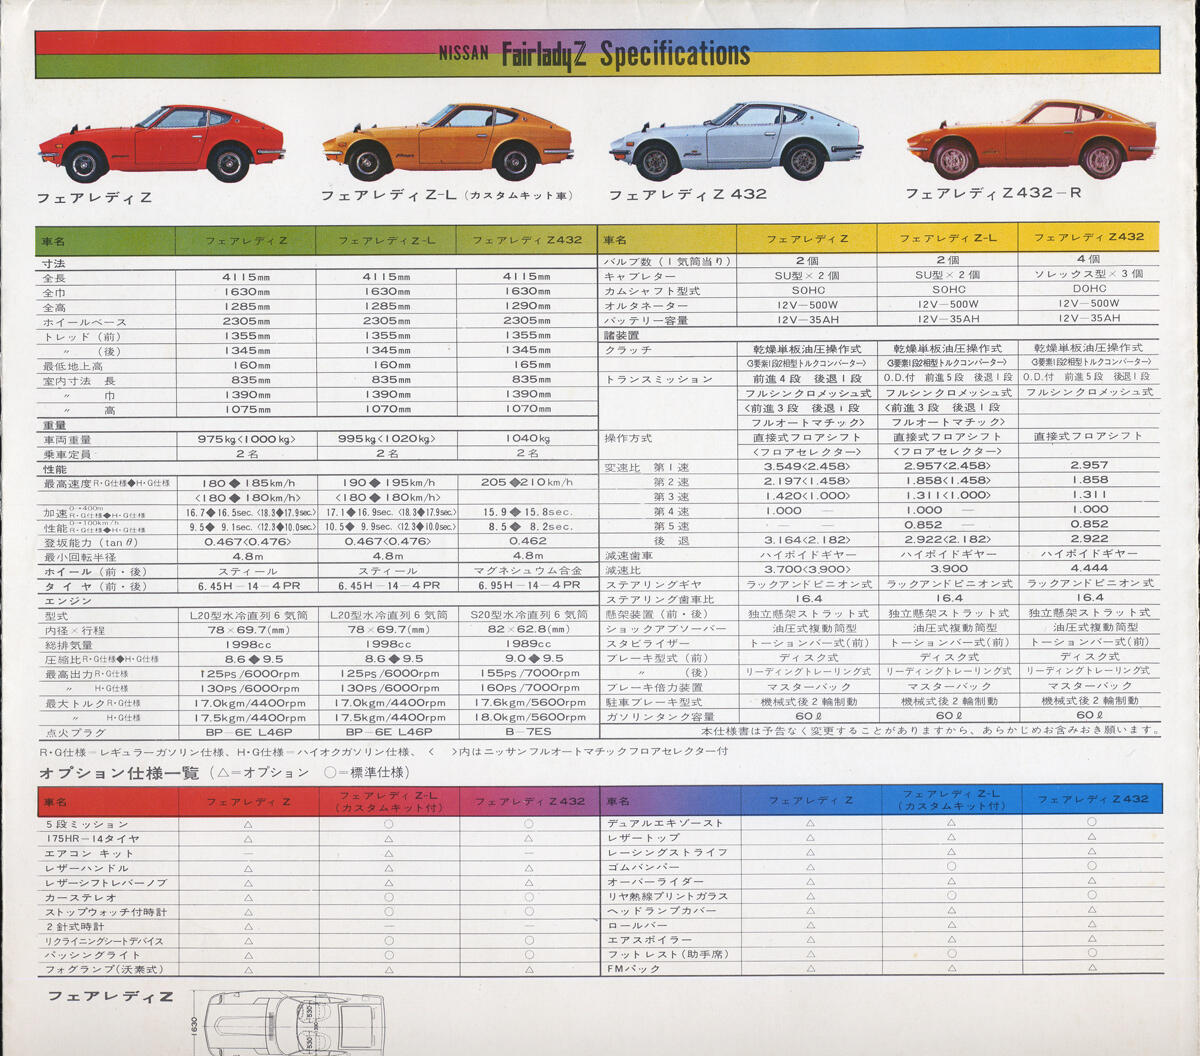
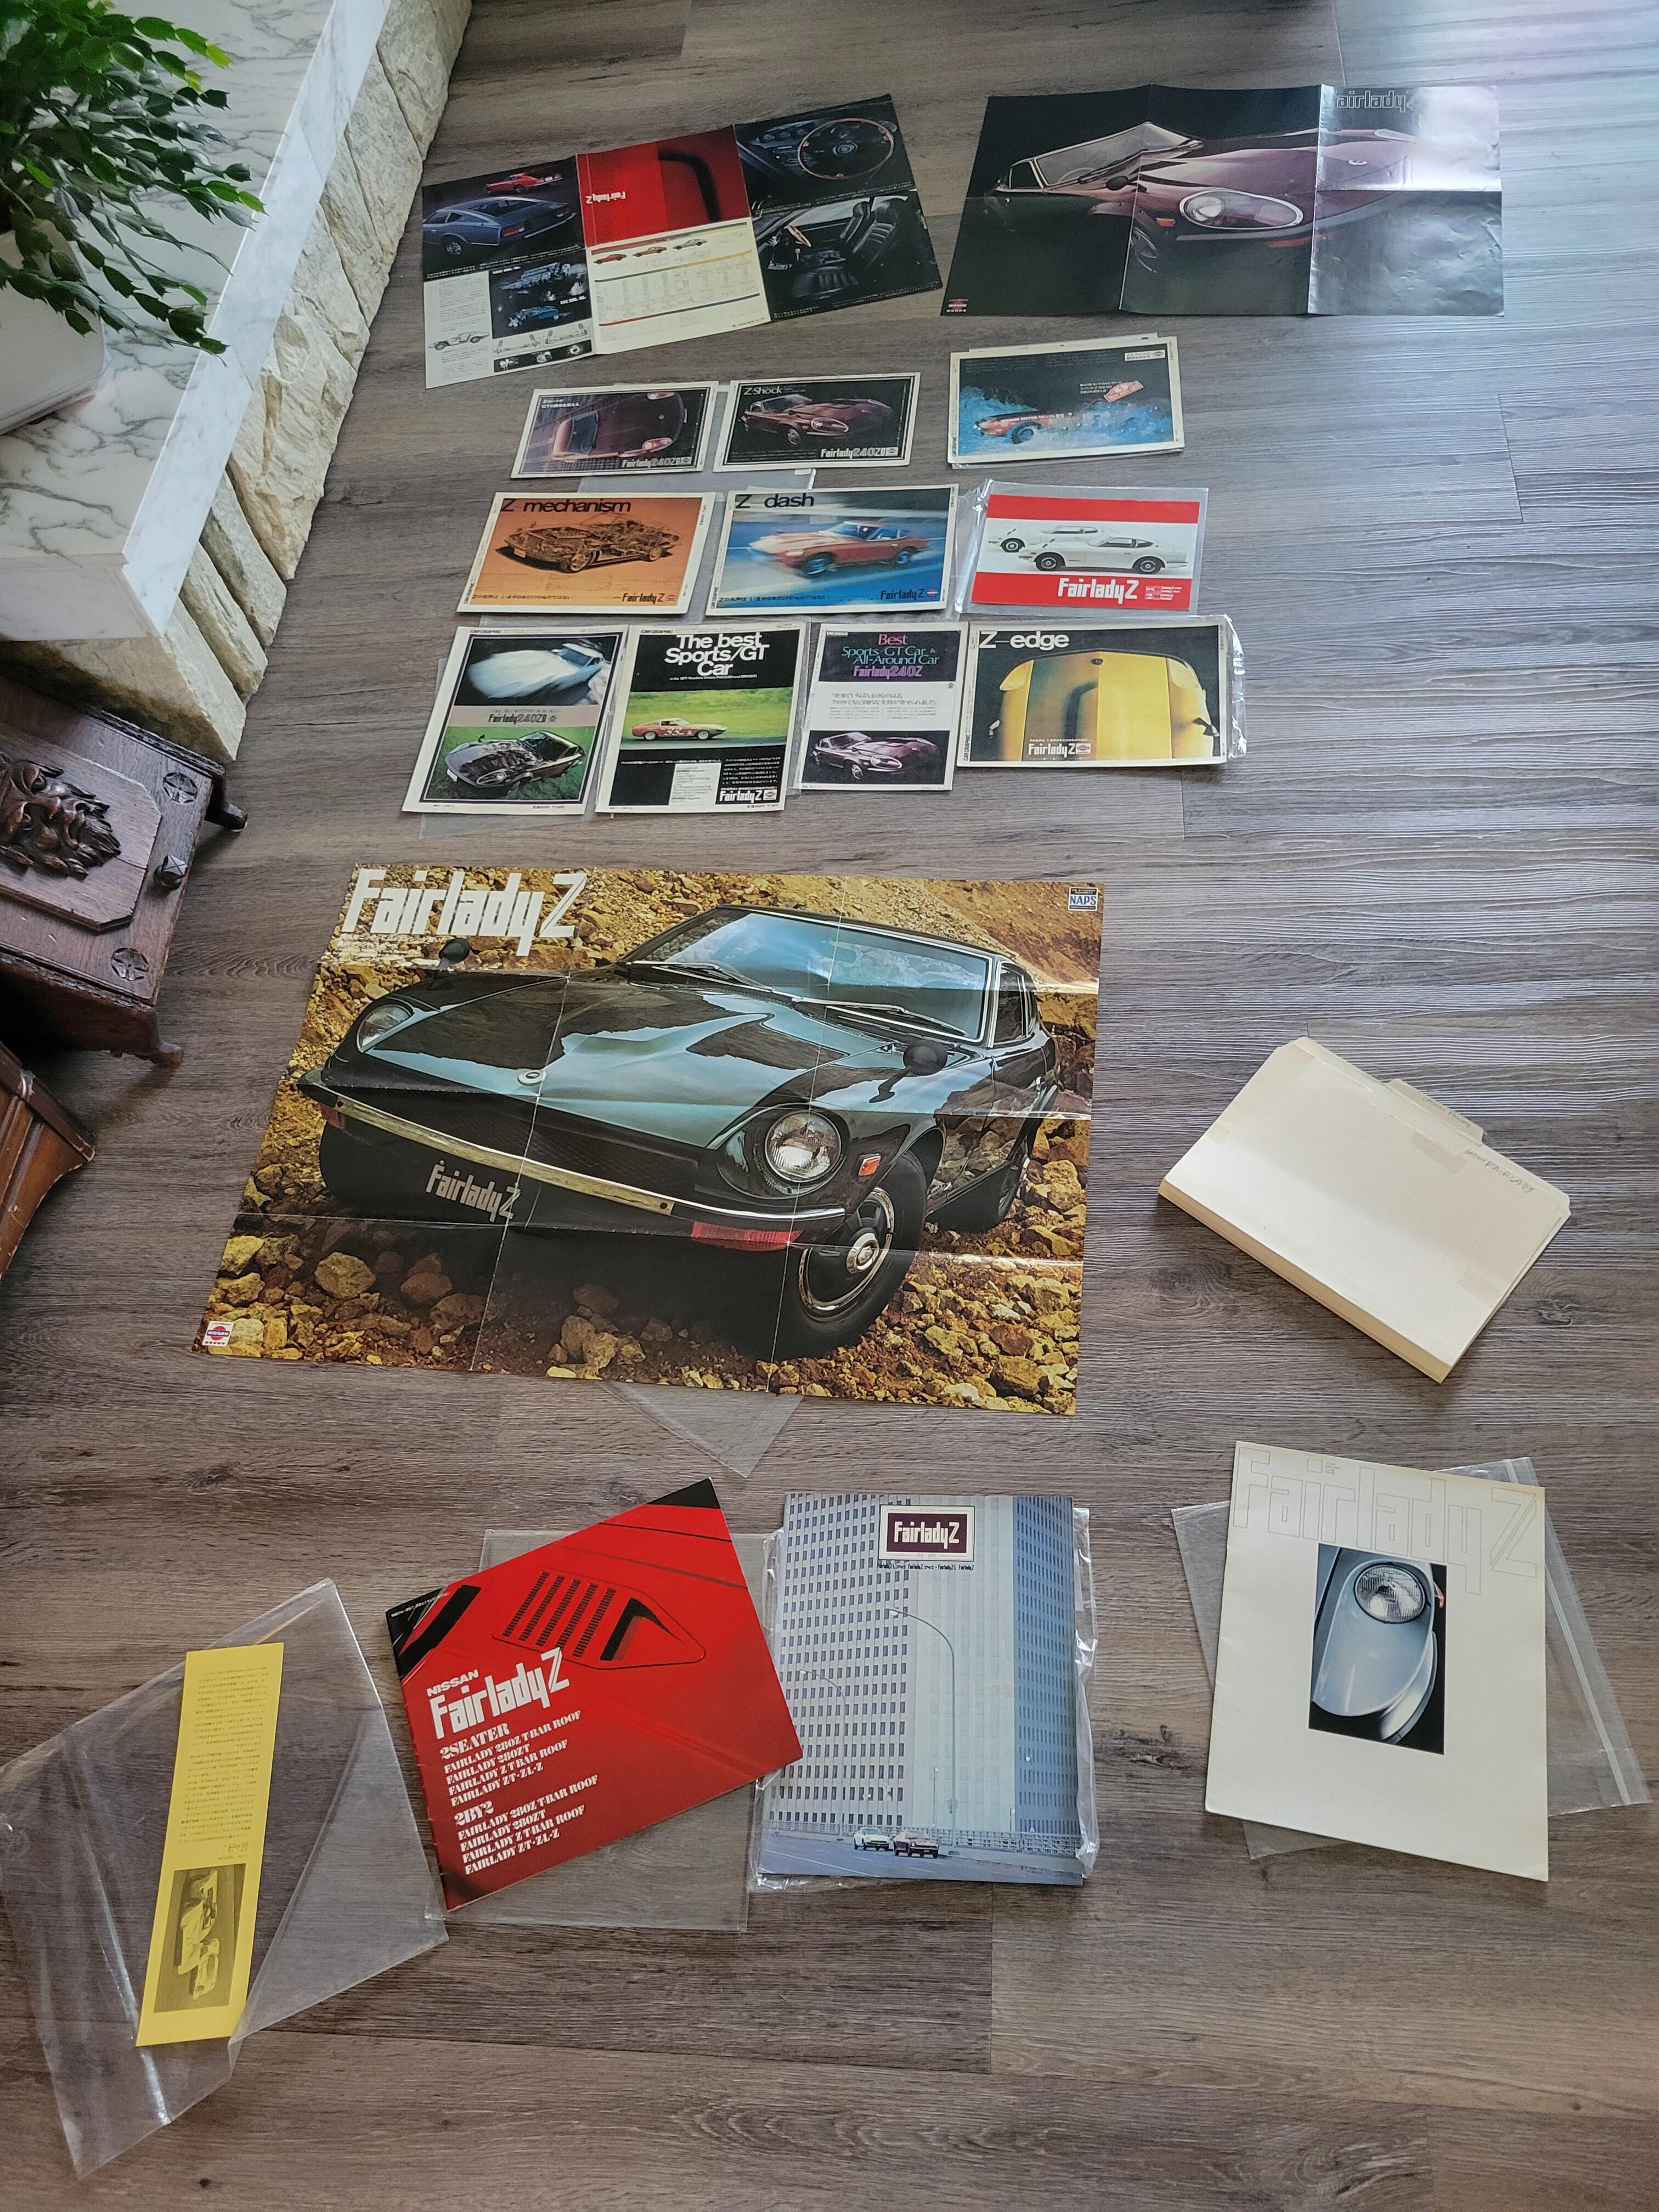
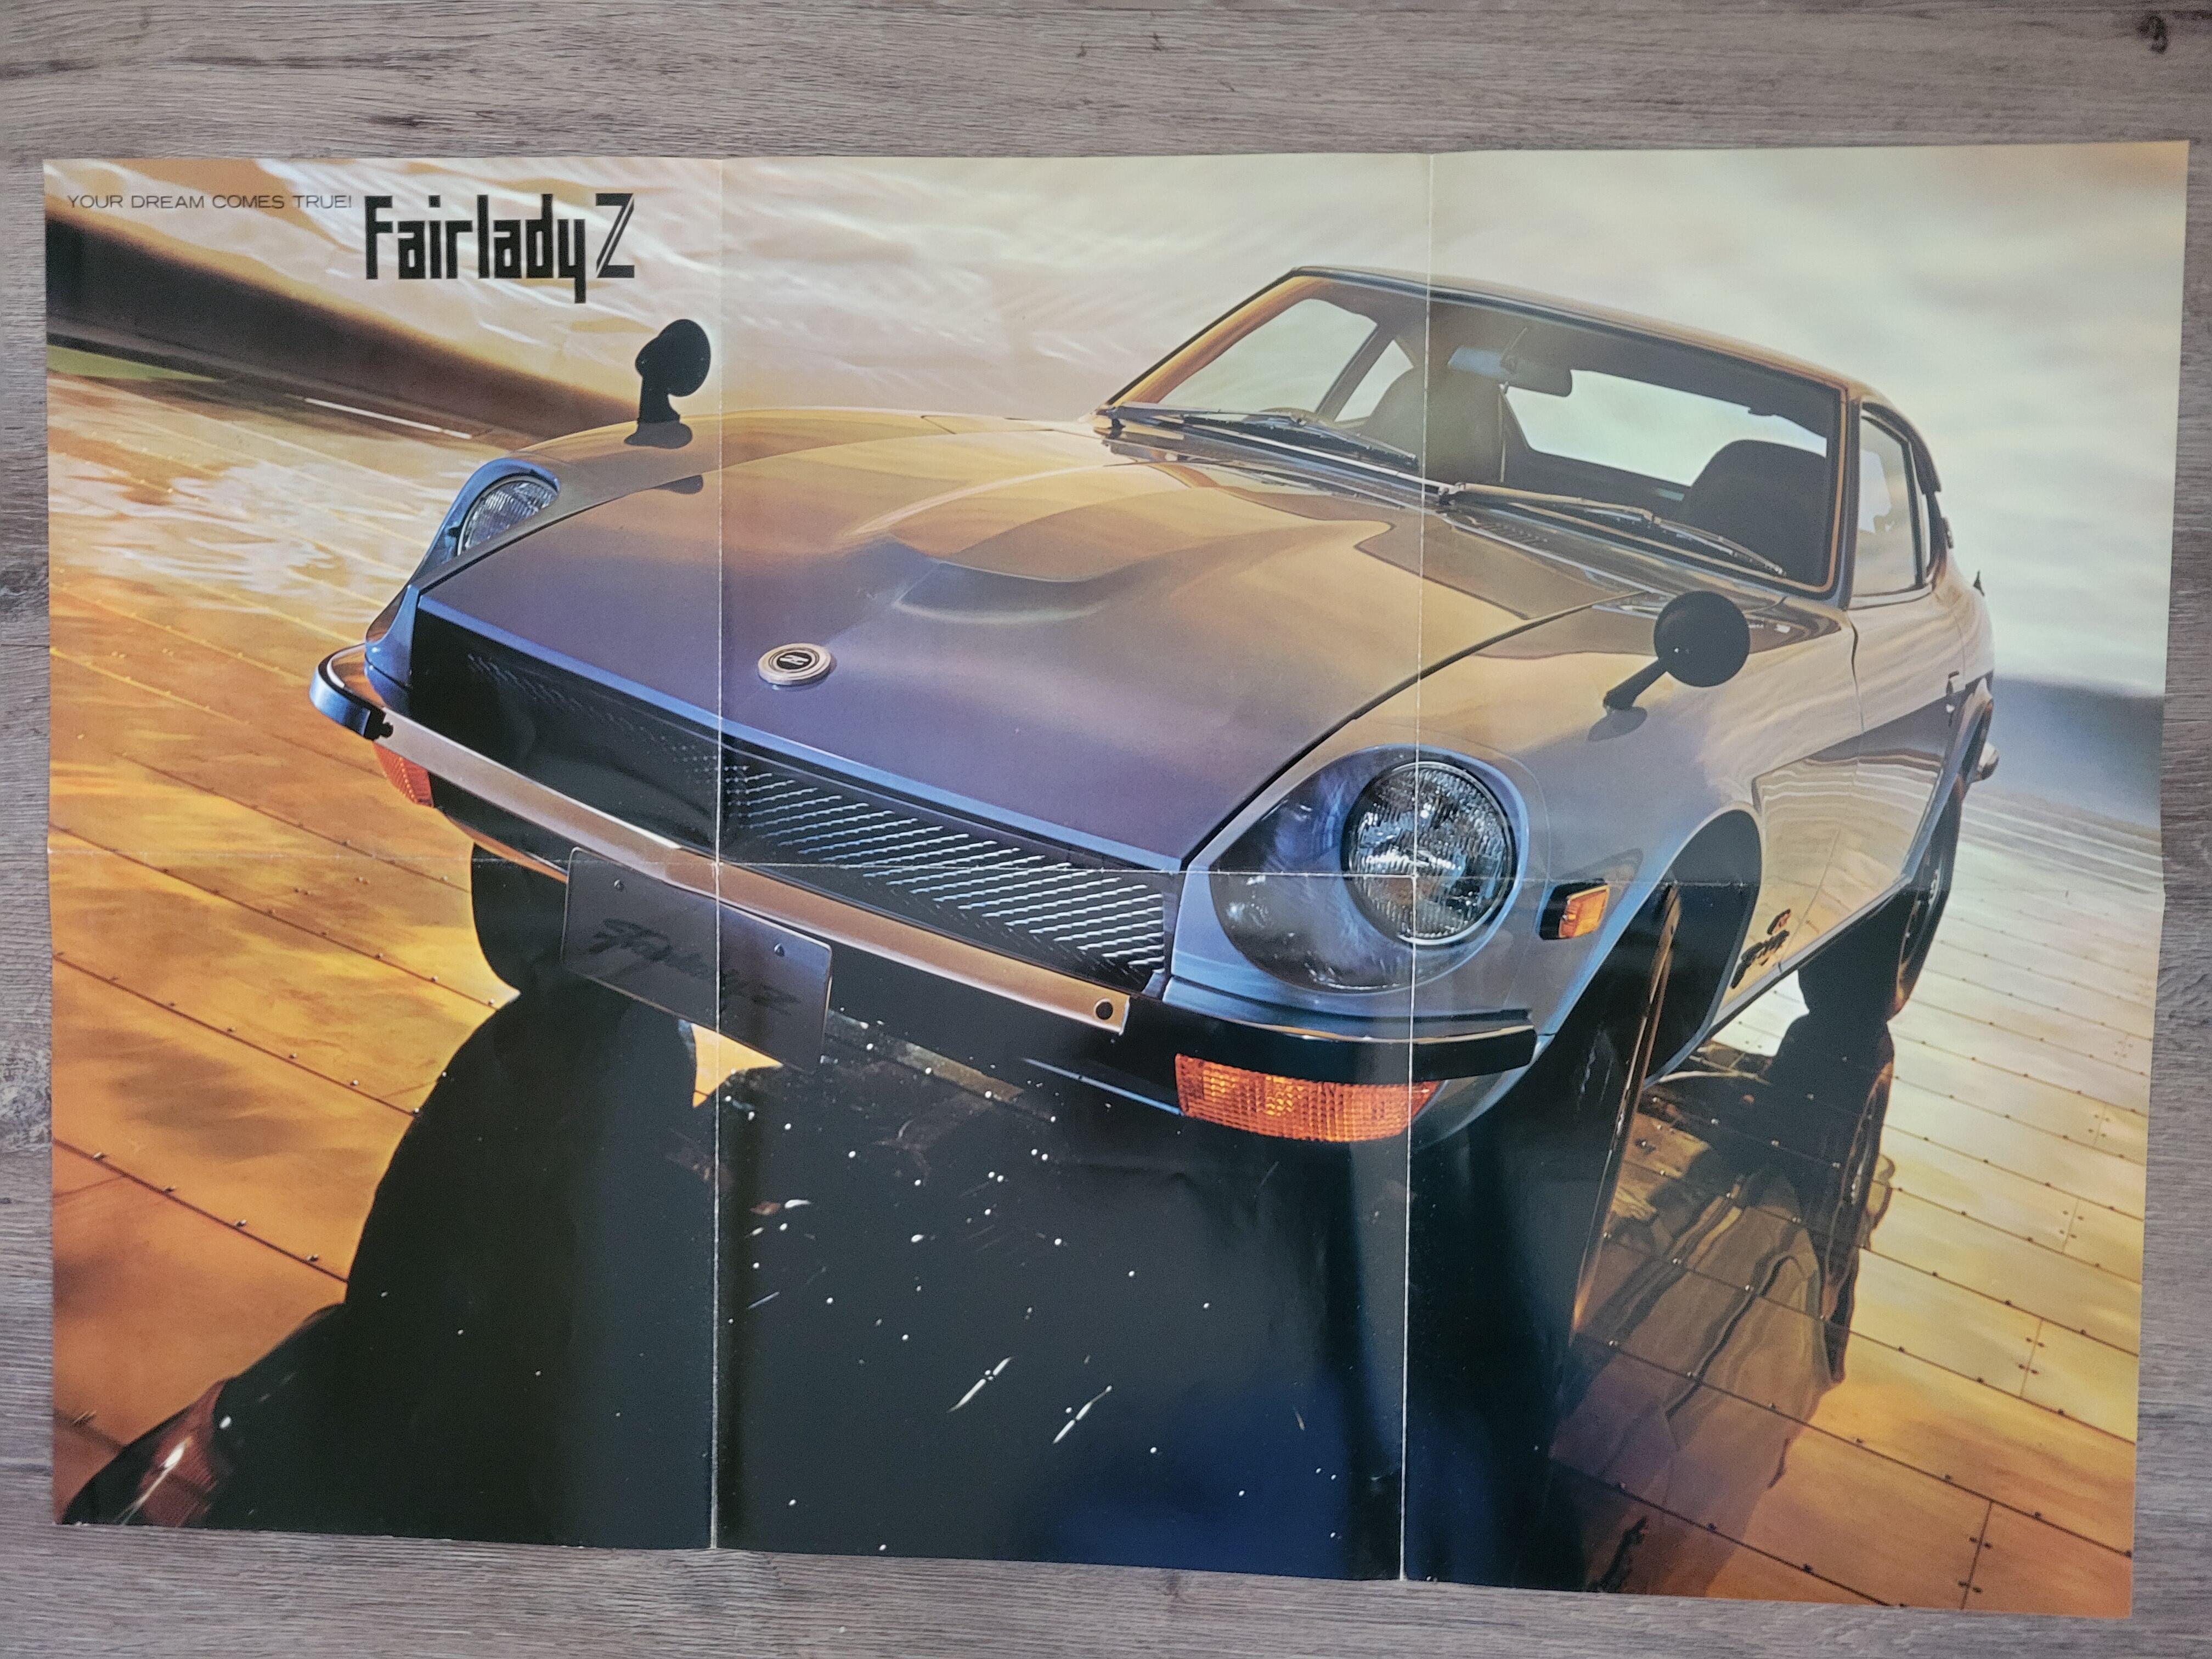
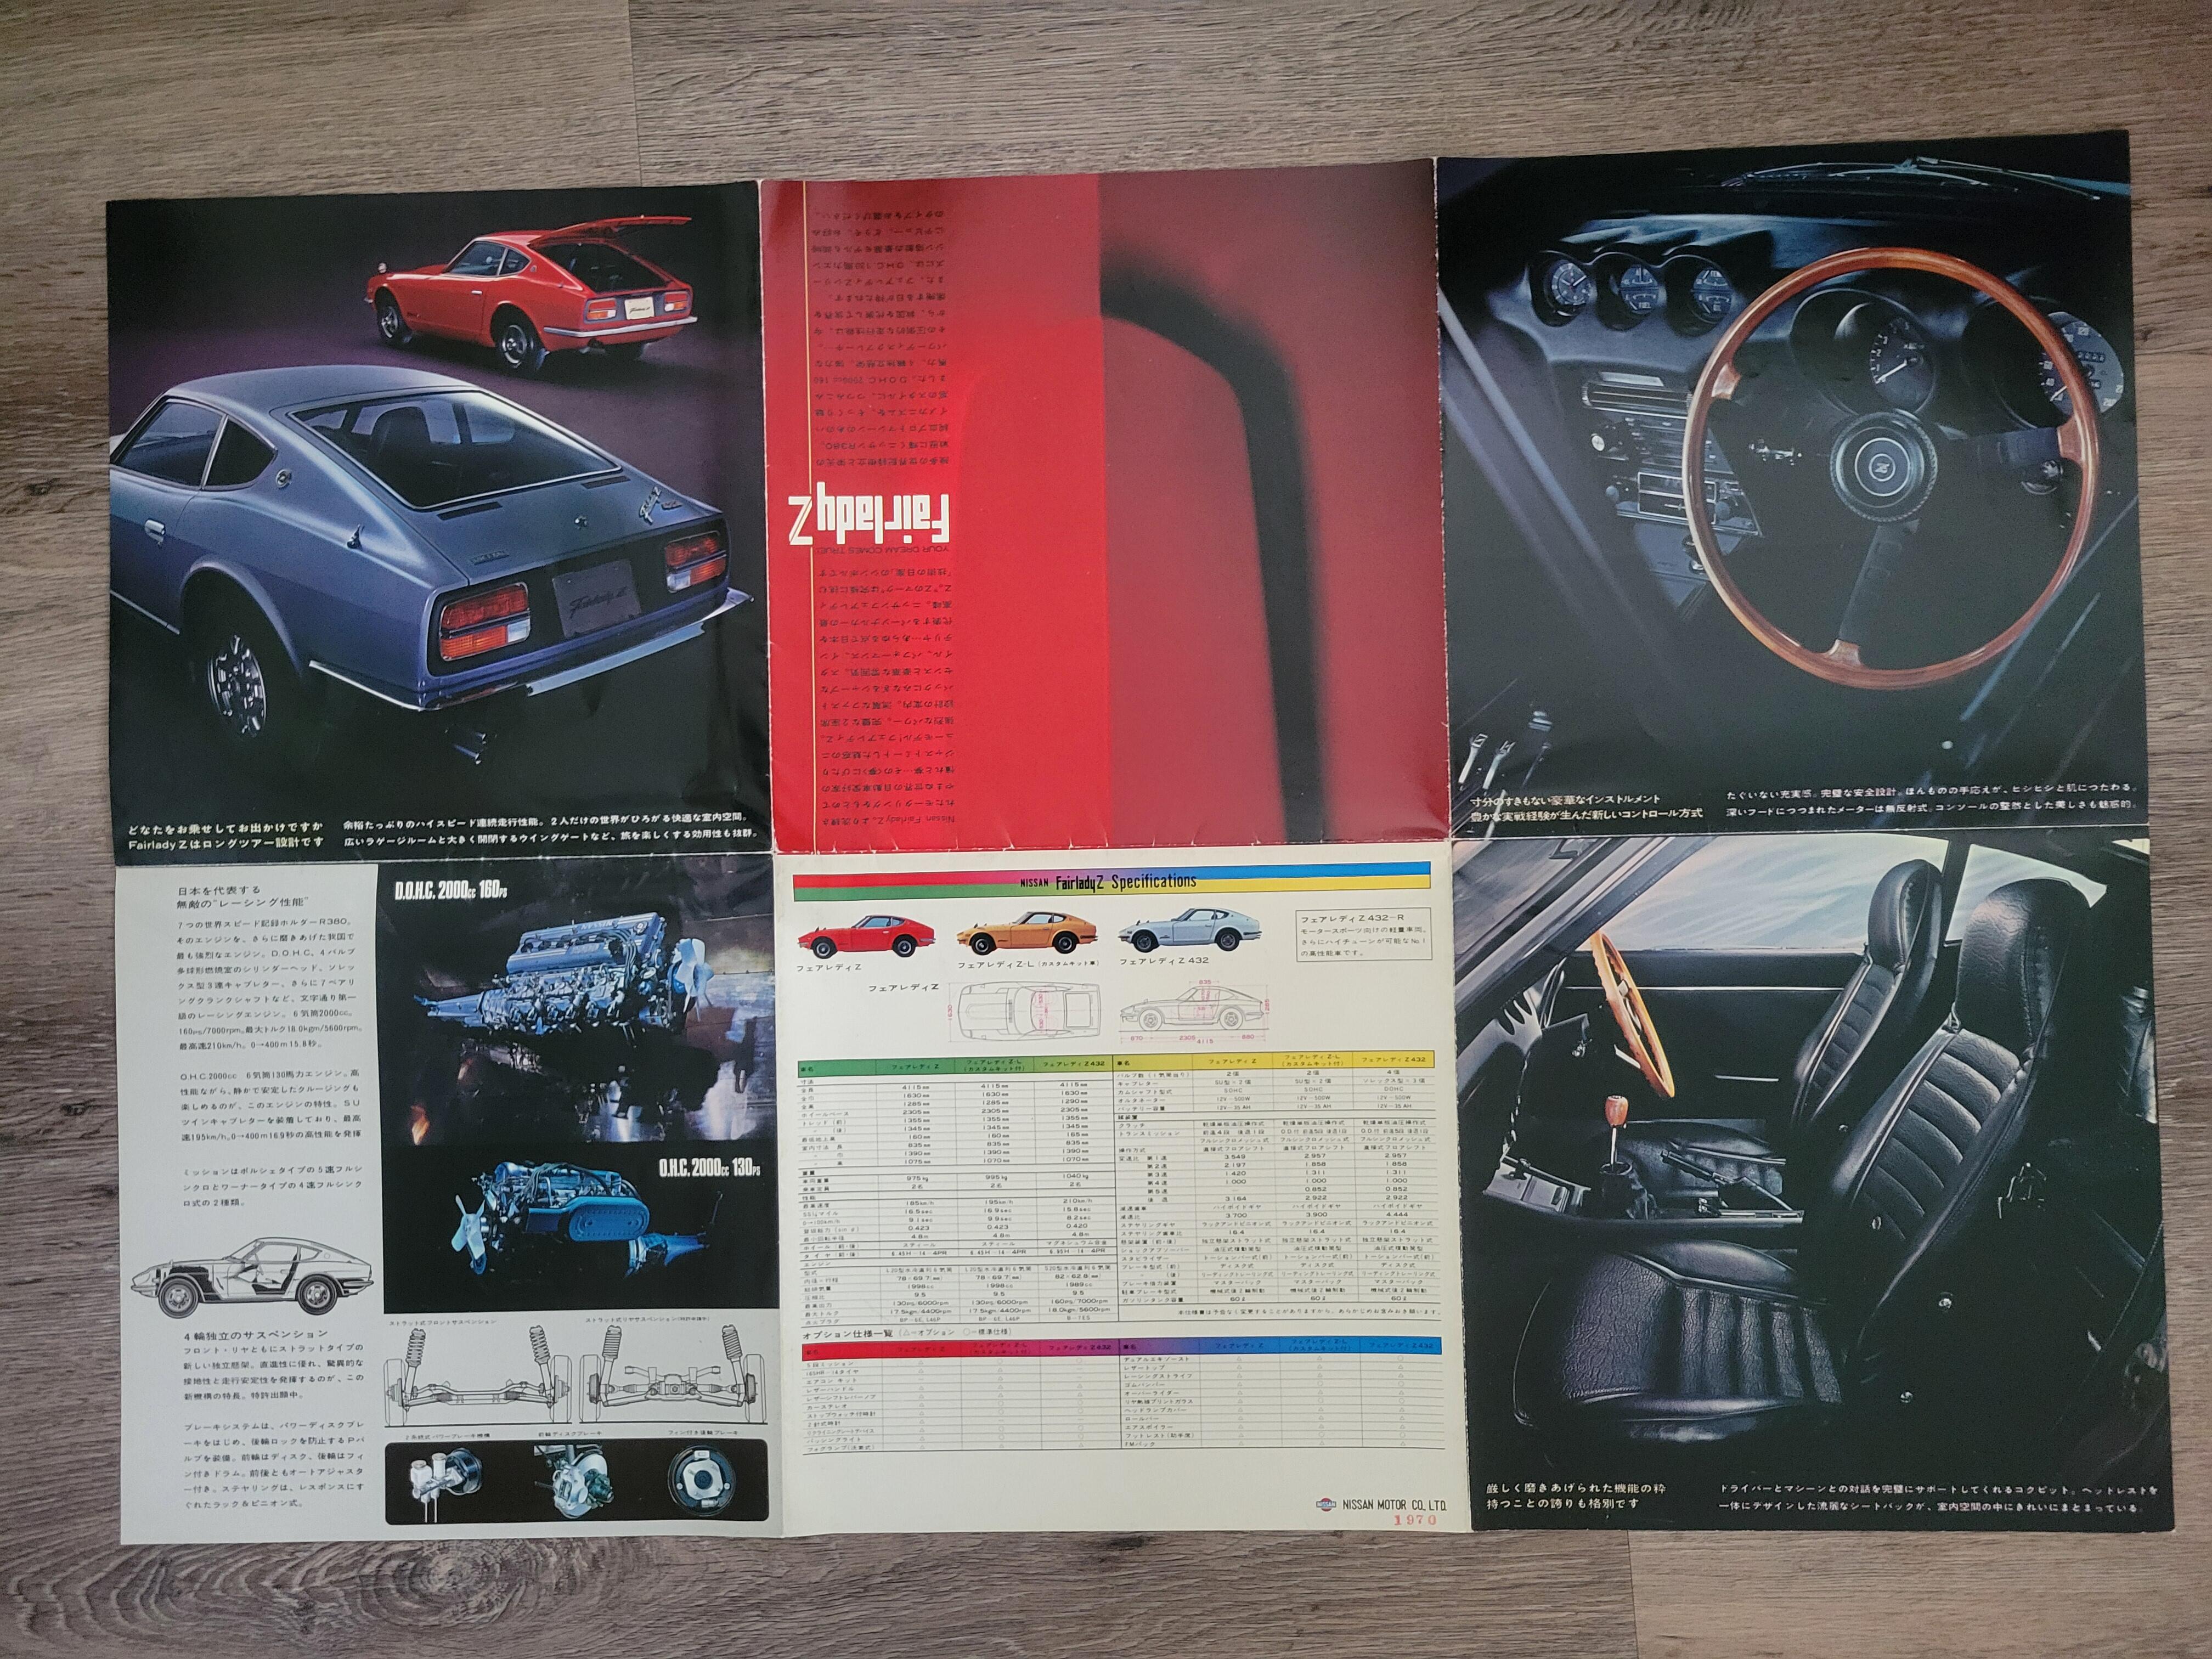
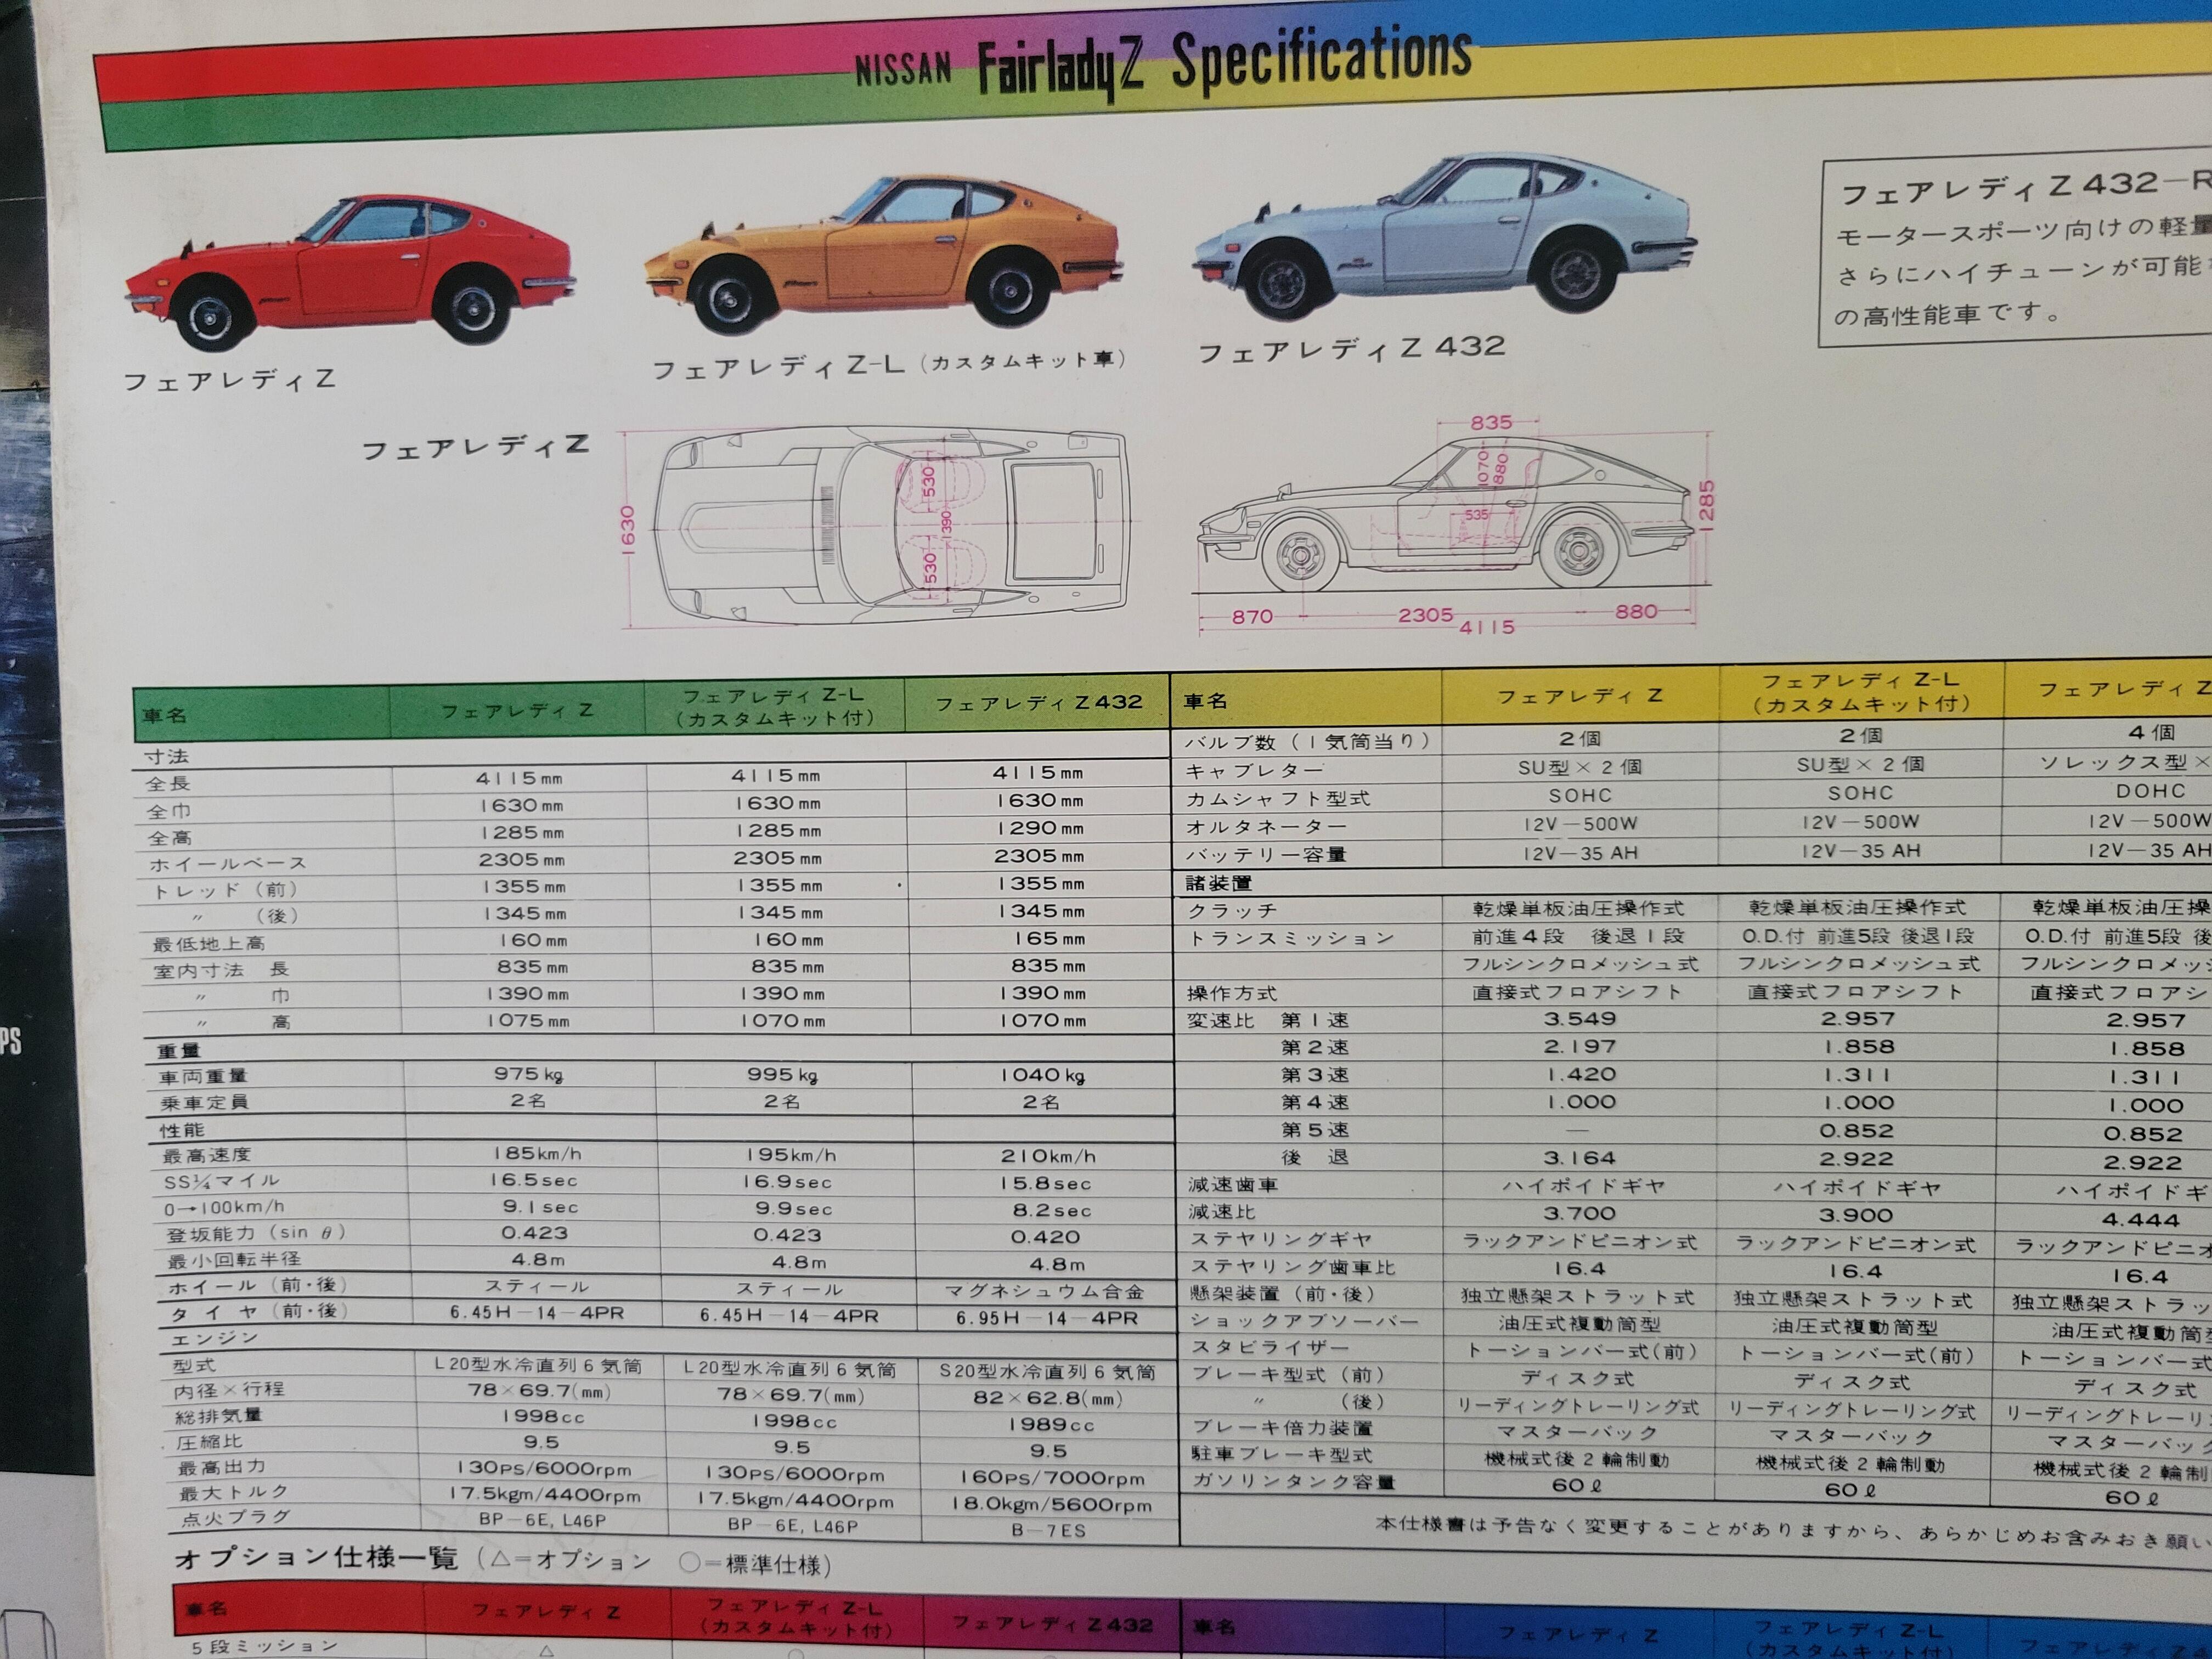
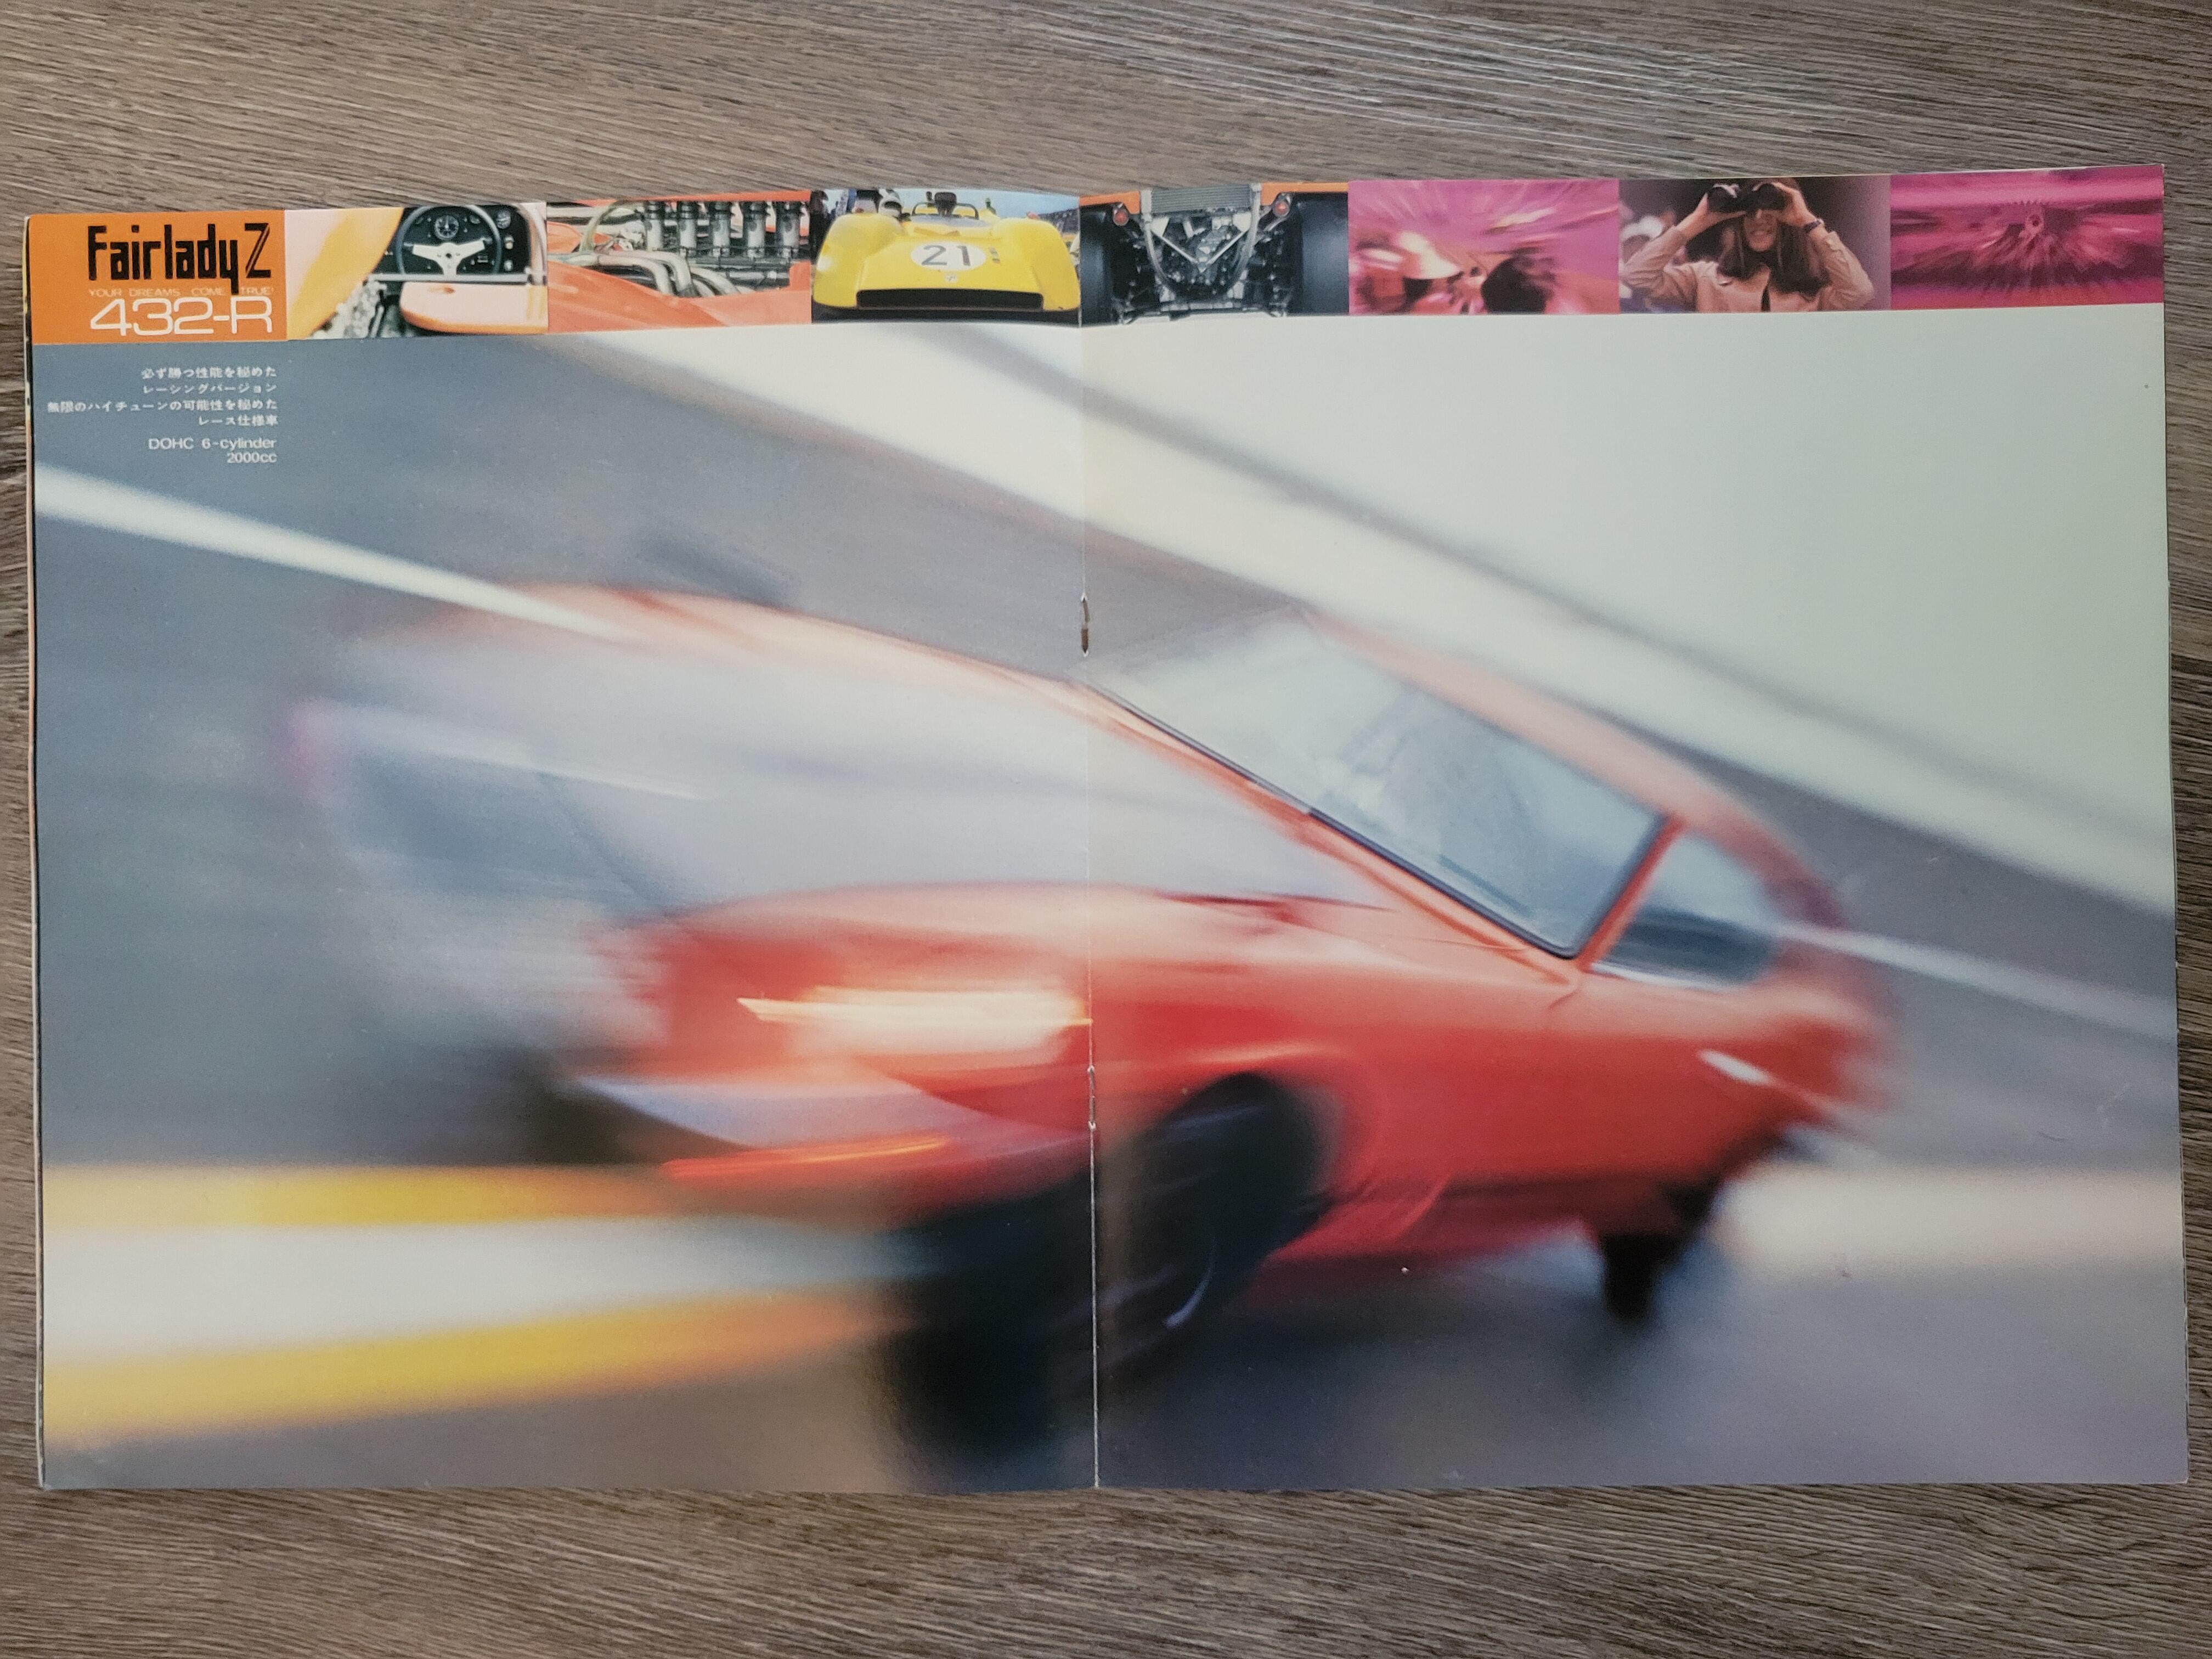
1 pointGreat collection! Some of them are frighteningly valuable these days. The white-bordered 'Fairlady Z' booklet brochure was the first full Japanese market brochure (as opposed to a fold-out/flyer) and there was a reduced-size reprint in the 1990s. You appear to have the original yellow paper insert with Nissan Works racing team driver Tatsu Yokoyama's notes on driving the Fairlady Z intact. Good! The red bonnet/hood fronted 'Your Dreams Come True' campaign flyer with the fold-out poster was handed out at the 1969 Tokyo Motor Show. There's more than one version and the differences are in the rear cover (Fairlady Z432-R photo vs Fairlady Z432-R text box) and one of the interior photos. I believe you have the earlier version with the text box and that is the more sought-after version. Here's the other one:
 1 point
 -
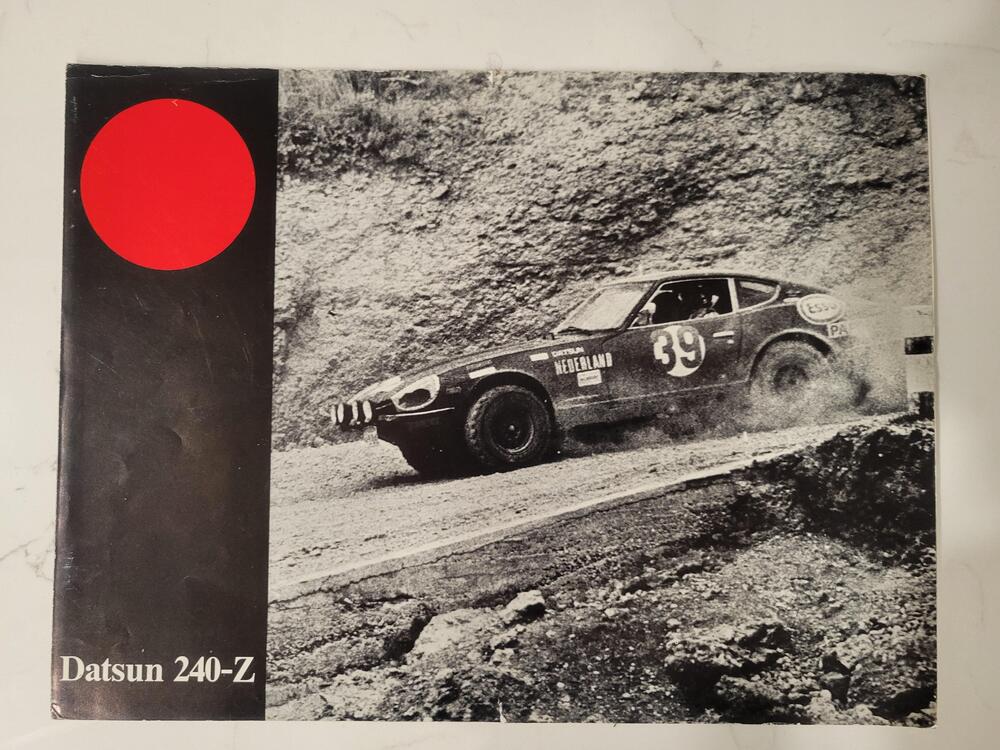
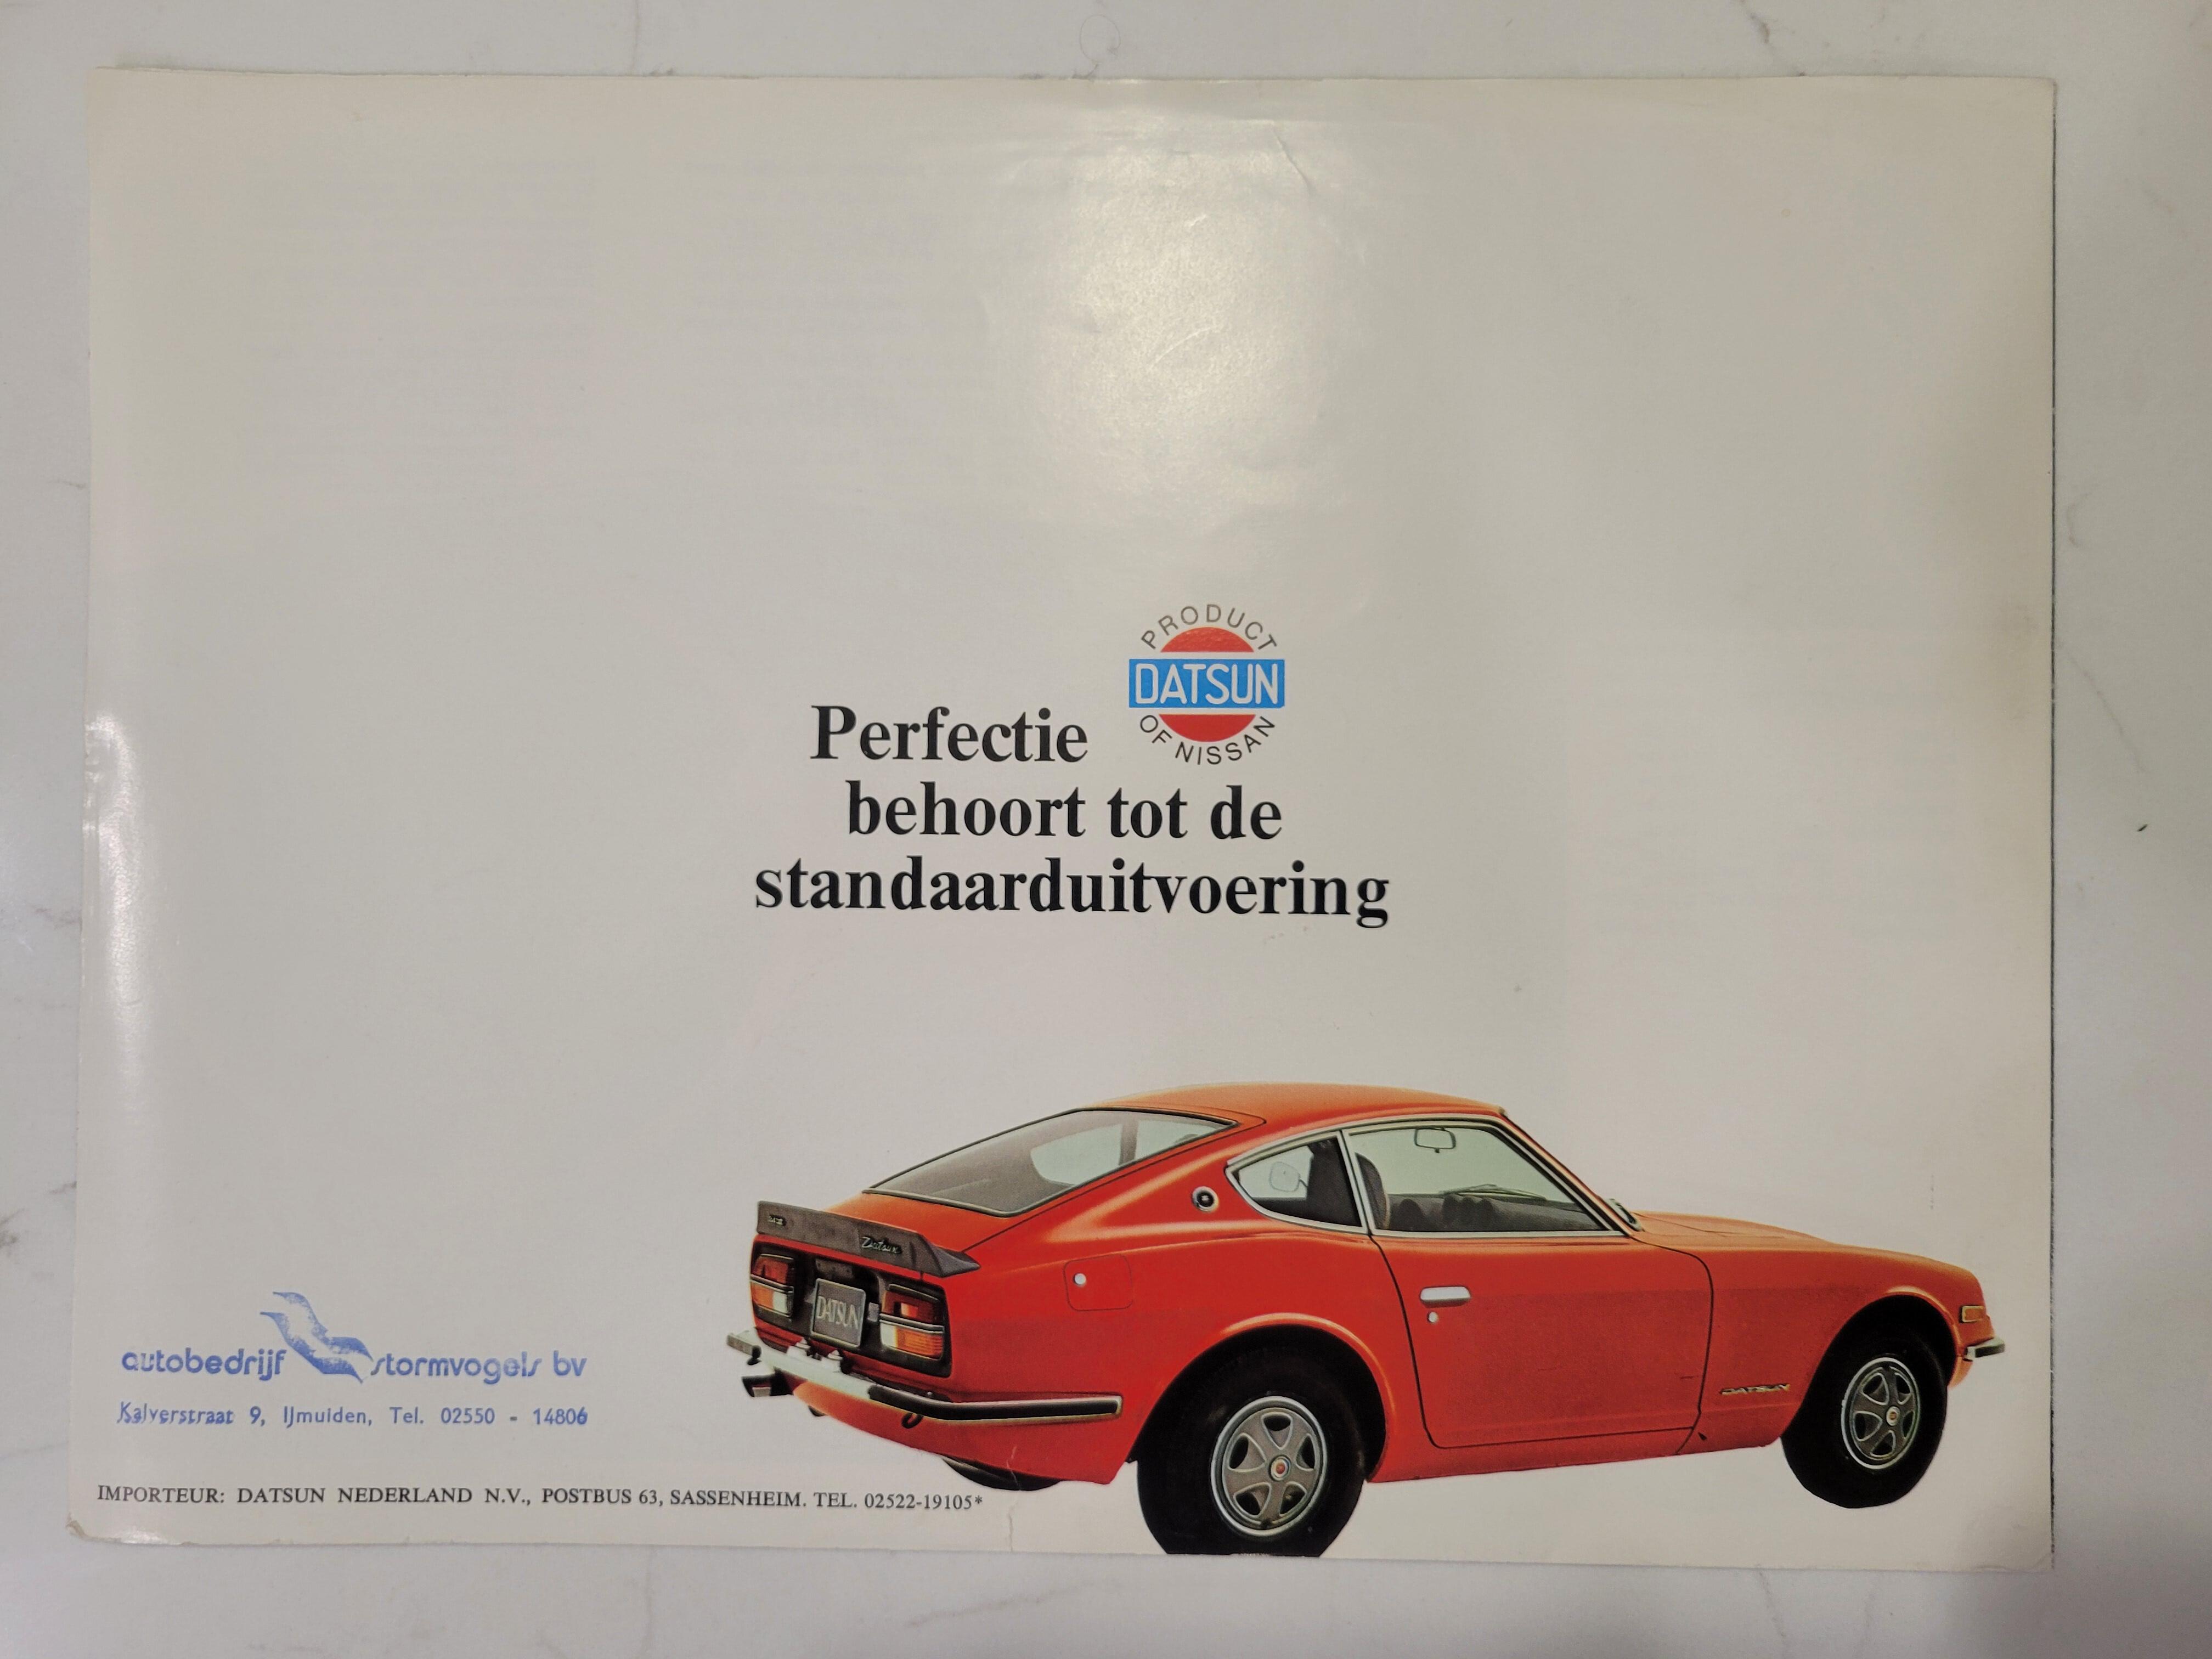
1 pointI think this one is likely an original. It has a Dutch dealer stamp and the condition is very good but not pristine. You are right that it is nice to have, either way. Here are pics of both sides.

 1 point
 -
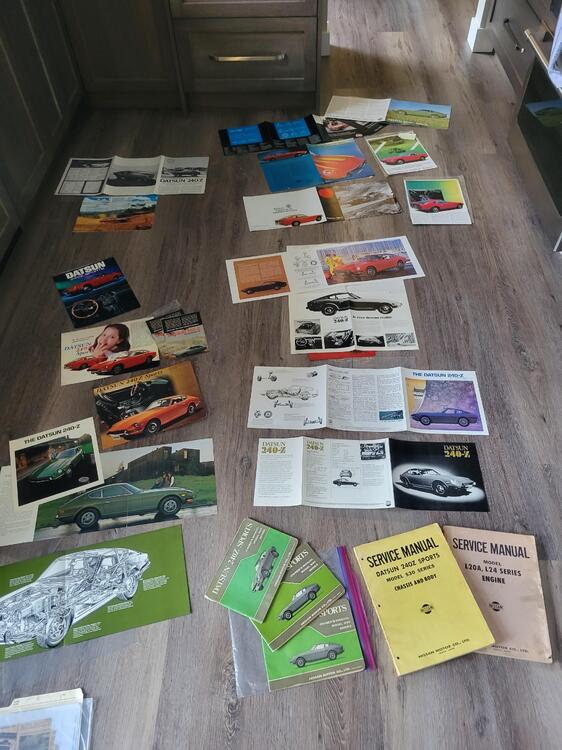
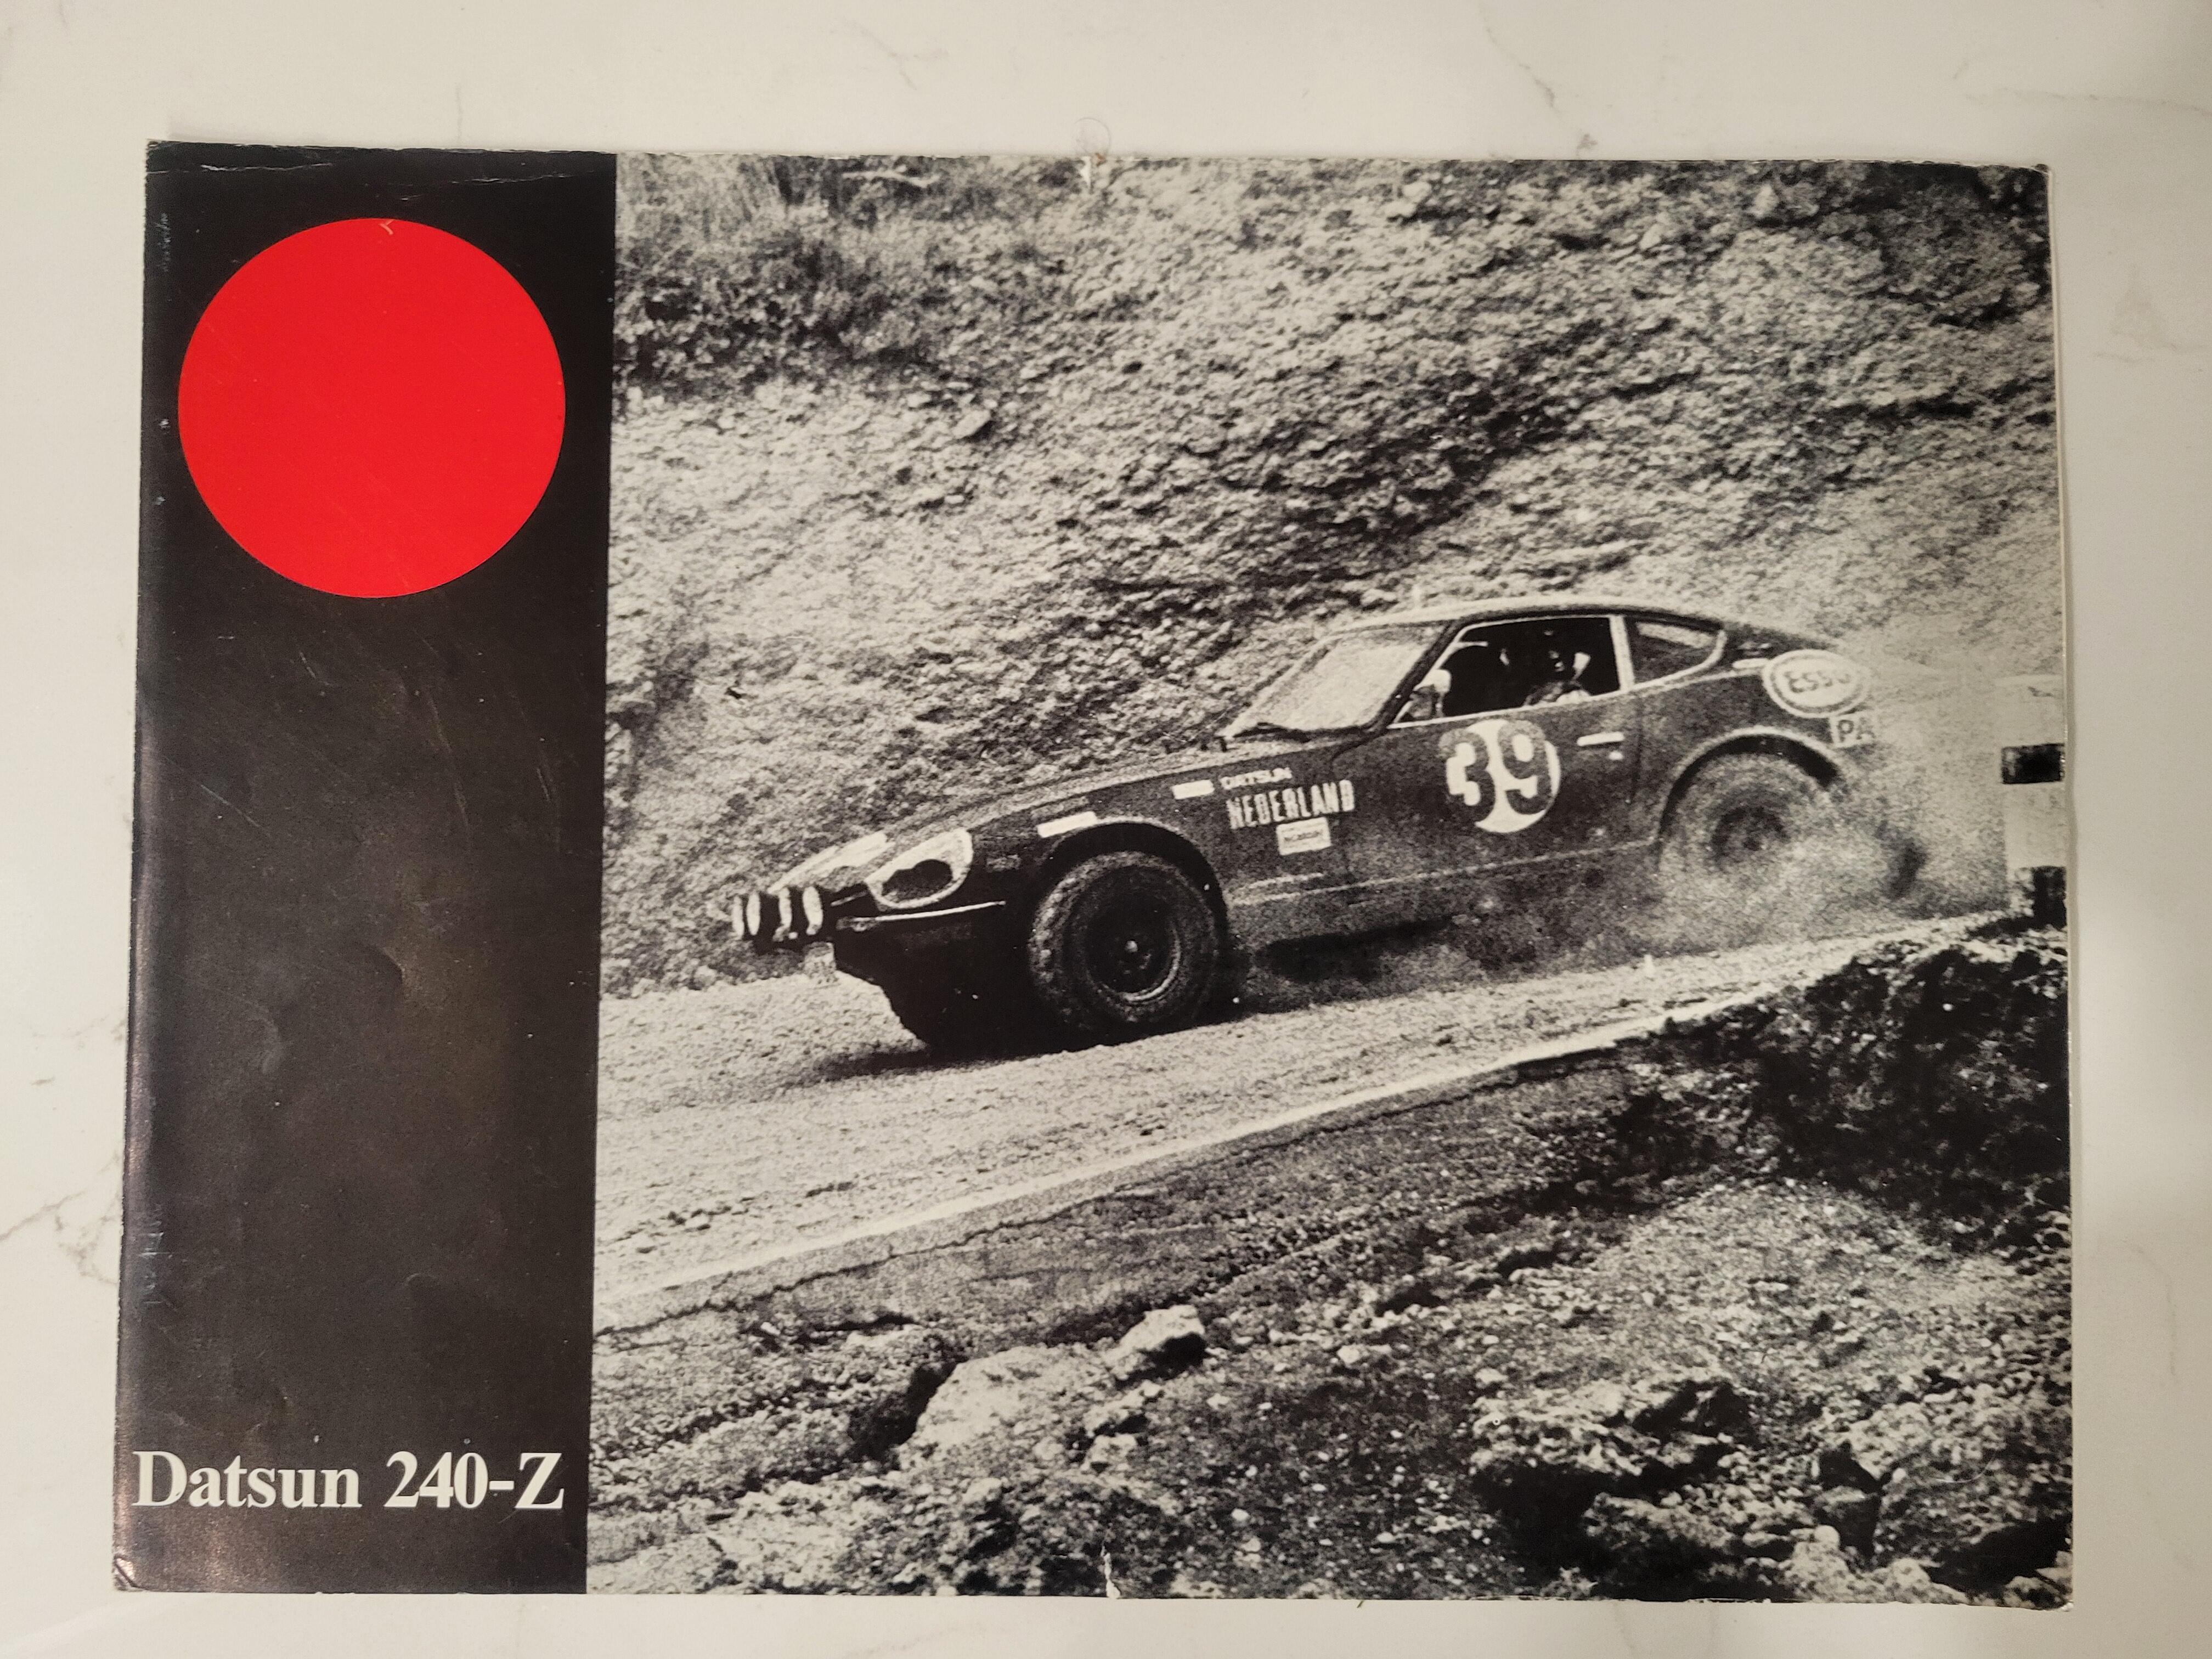
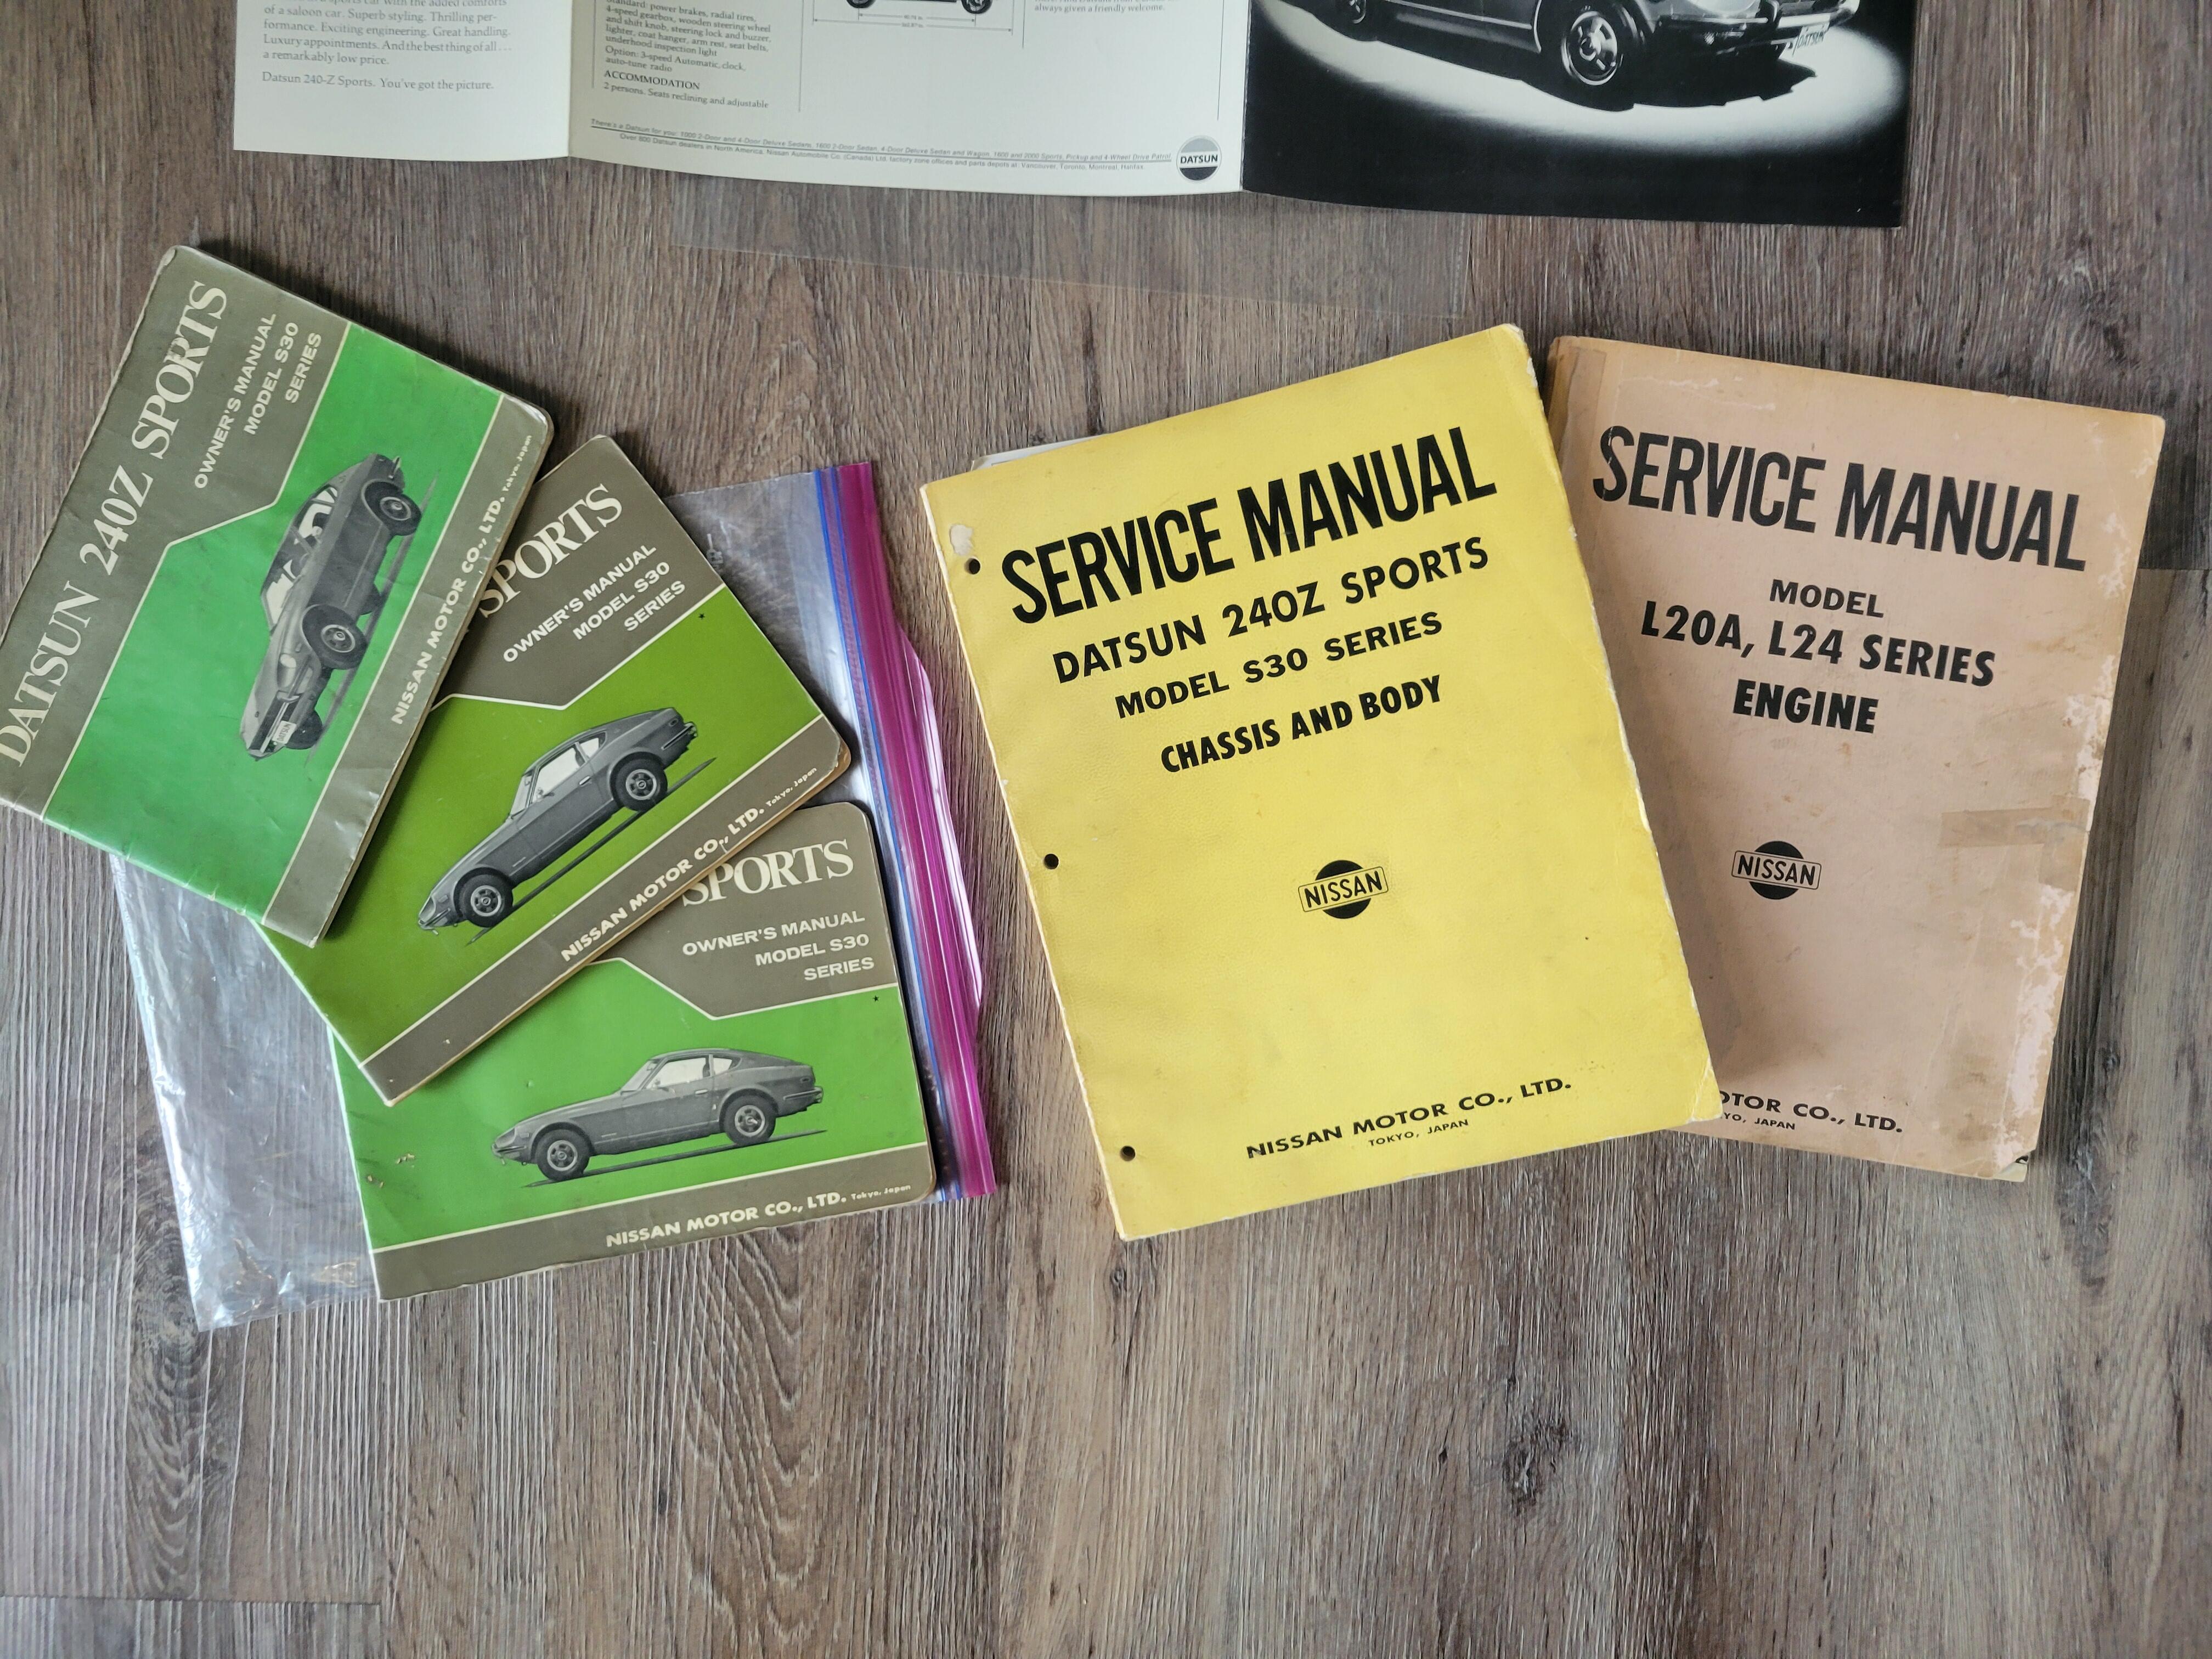
1 pointI forgot to mention that the previous owner, Pete, was a prolific collector of automotive literature and a huge amount of Datsun/Nissan literature was included with HLS30-00957 when I went to pick it up from his son. I will show a sampling here. Later I will search for a more appropriate thread to do a more thorough post. 1970 Owners Manuals from 12/69, 3/70 and 7/70 plus a factory service manual set from November 1, 1969. Many brochures from Canada, US, UK, Belgium, Finland, Netherlands, and Australia. Plus four copies on this 1970 brochure you will recognize. Also a large selection from the Japanese domestic market, some of which are poster on one side and specs on the back, very cool. One multi page booklet even includes the Z432 and Z432-R


 1 point
 -
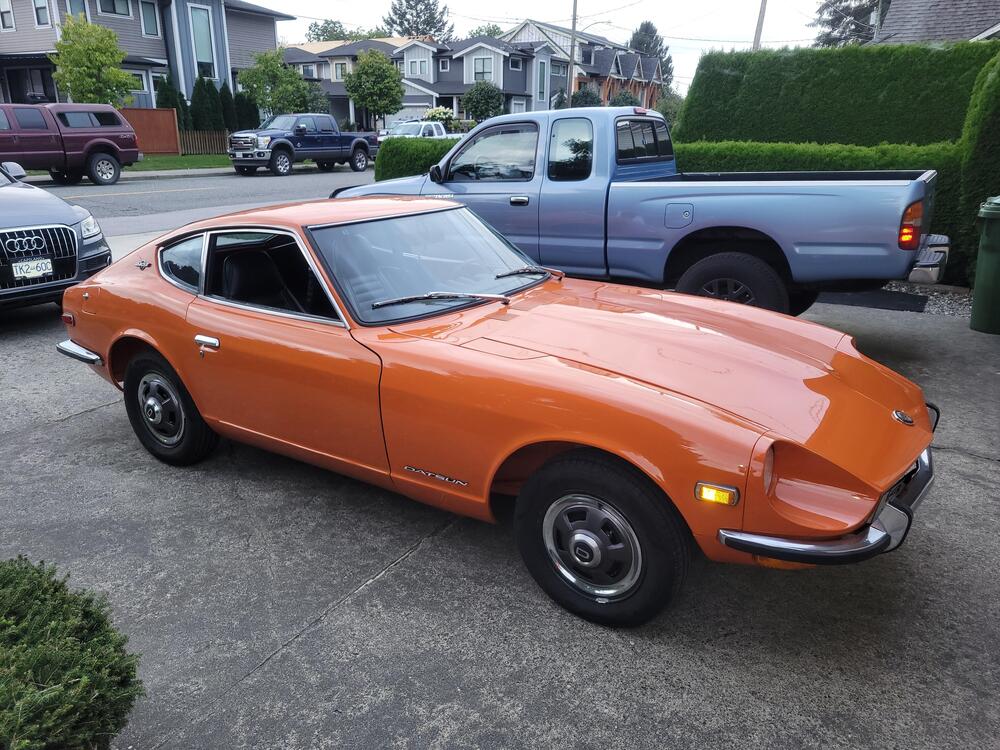
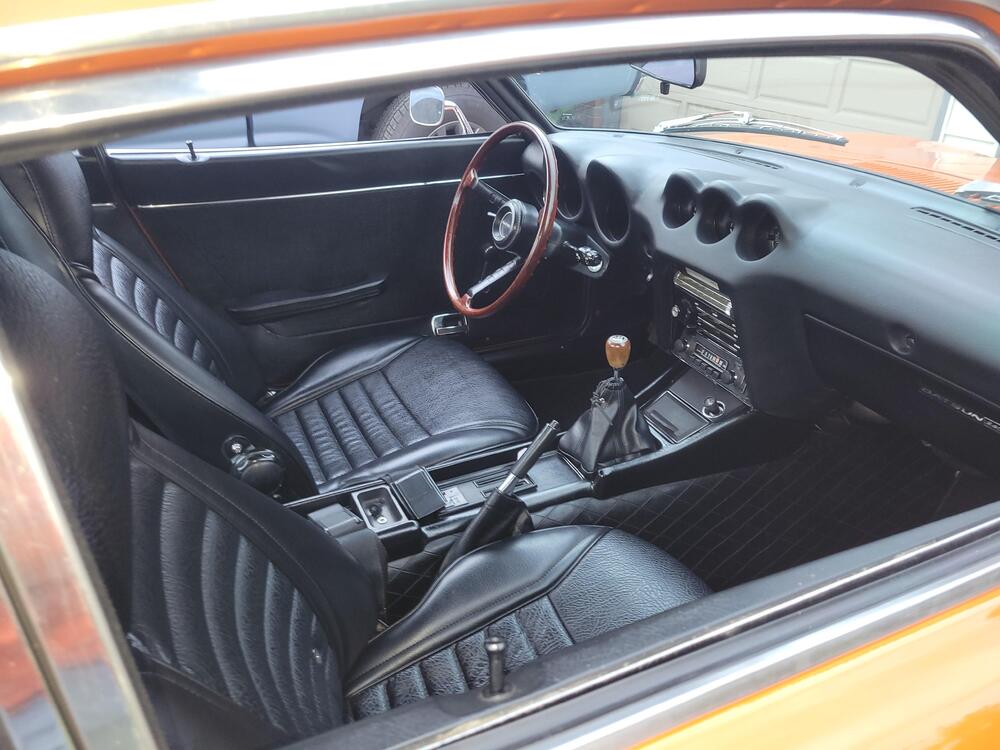
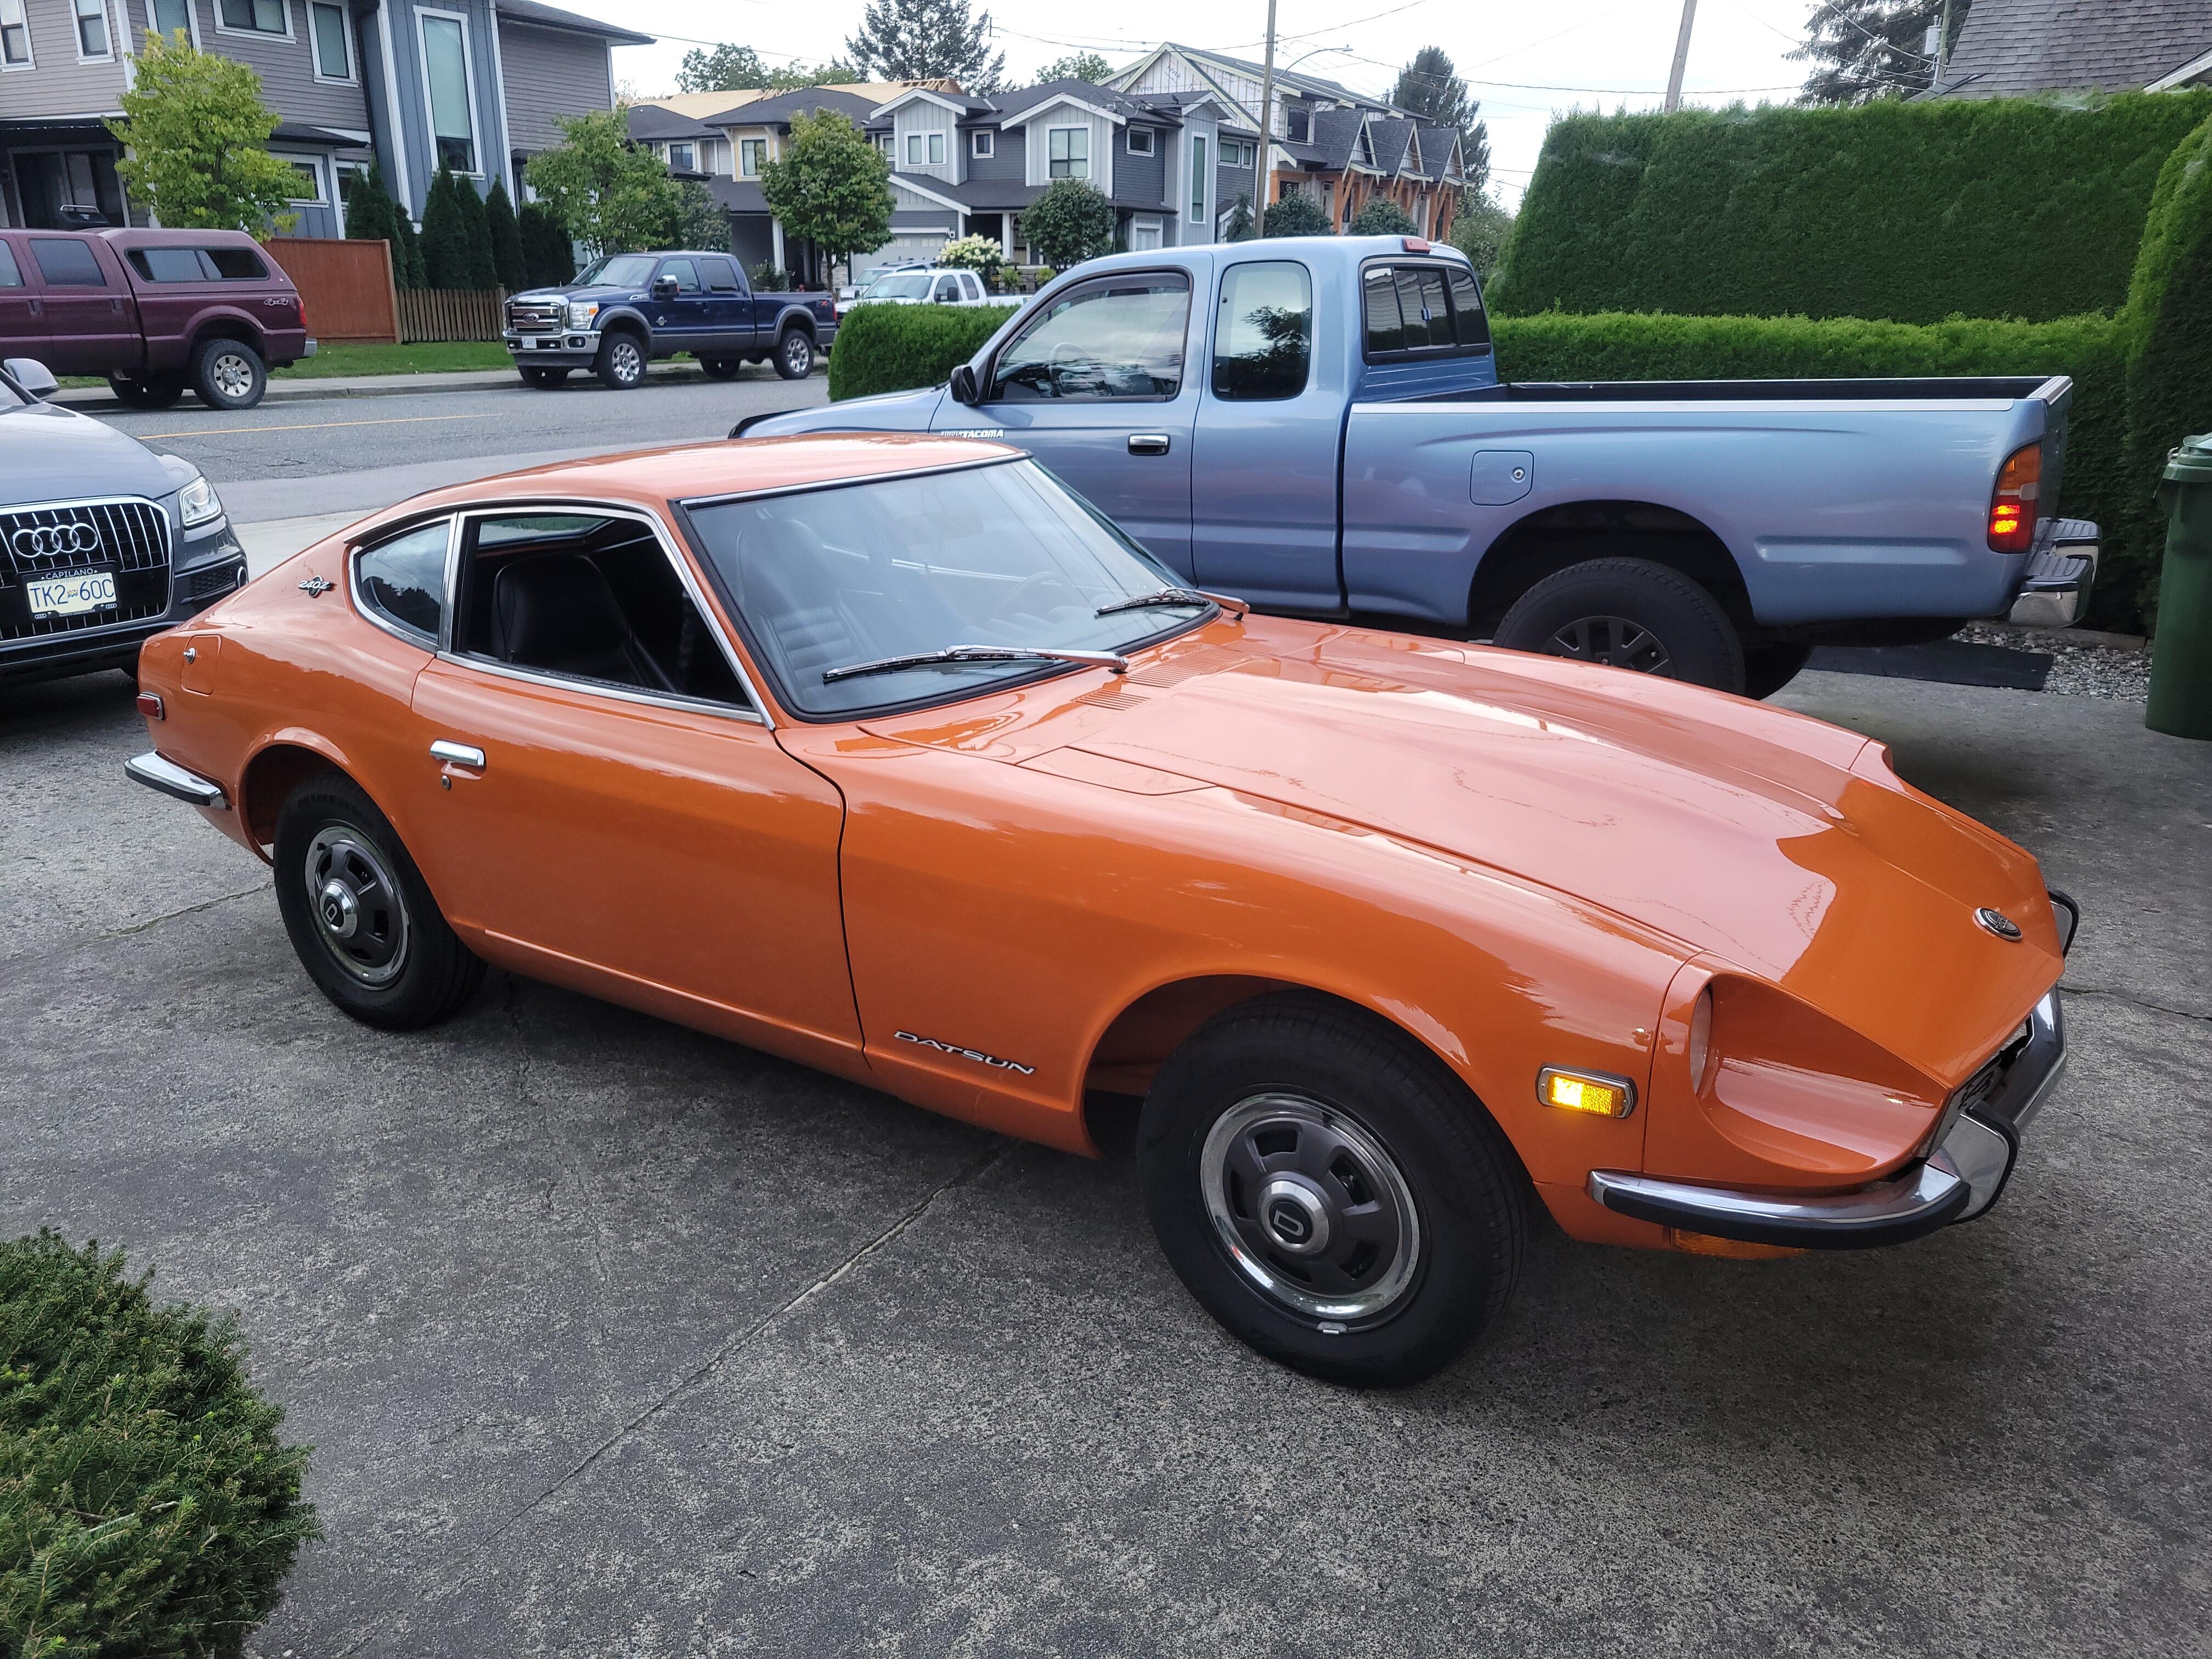
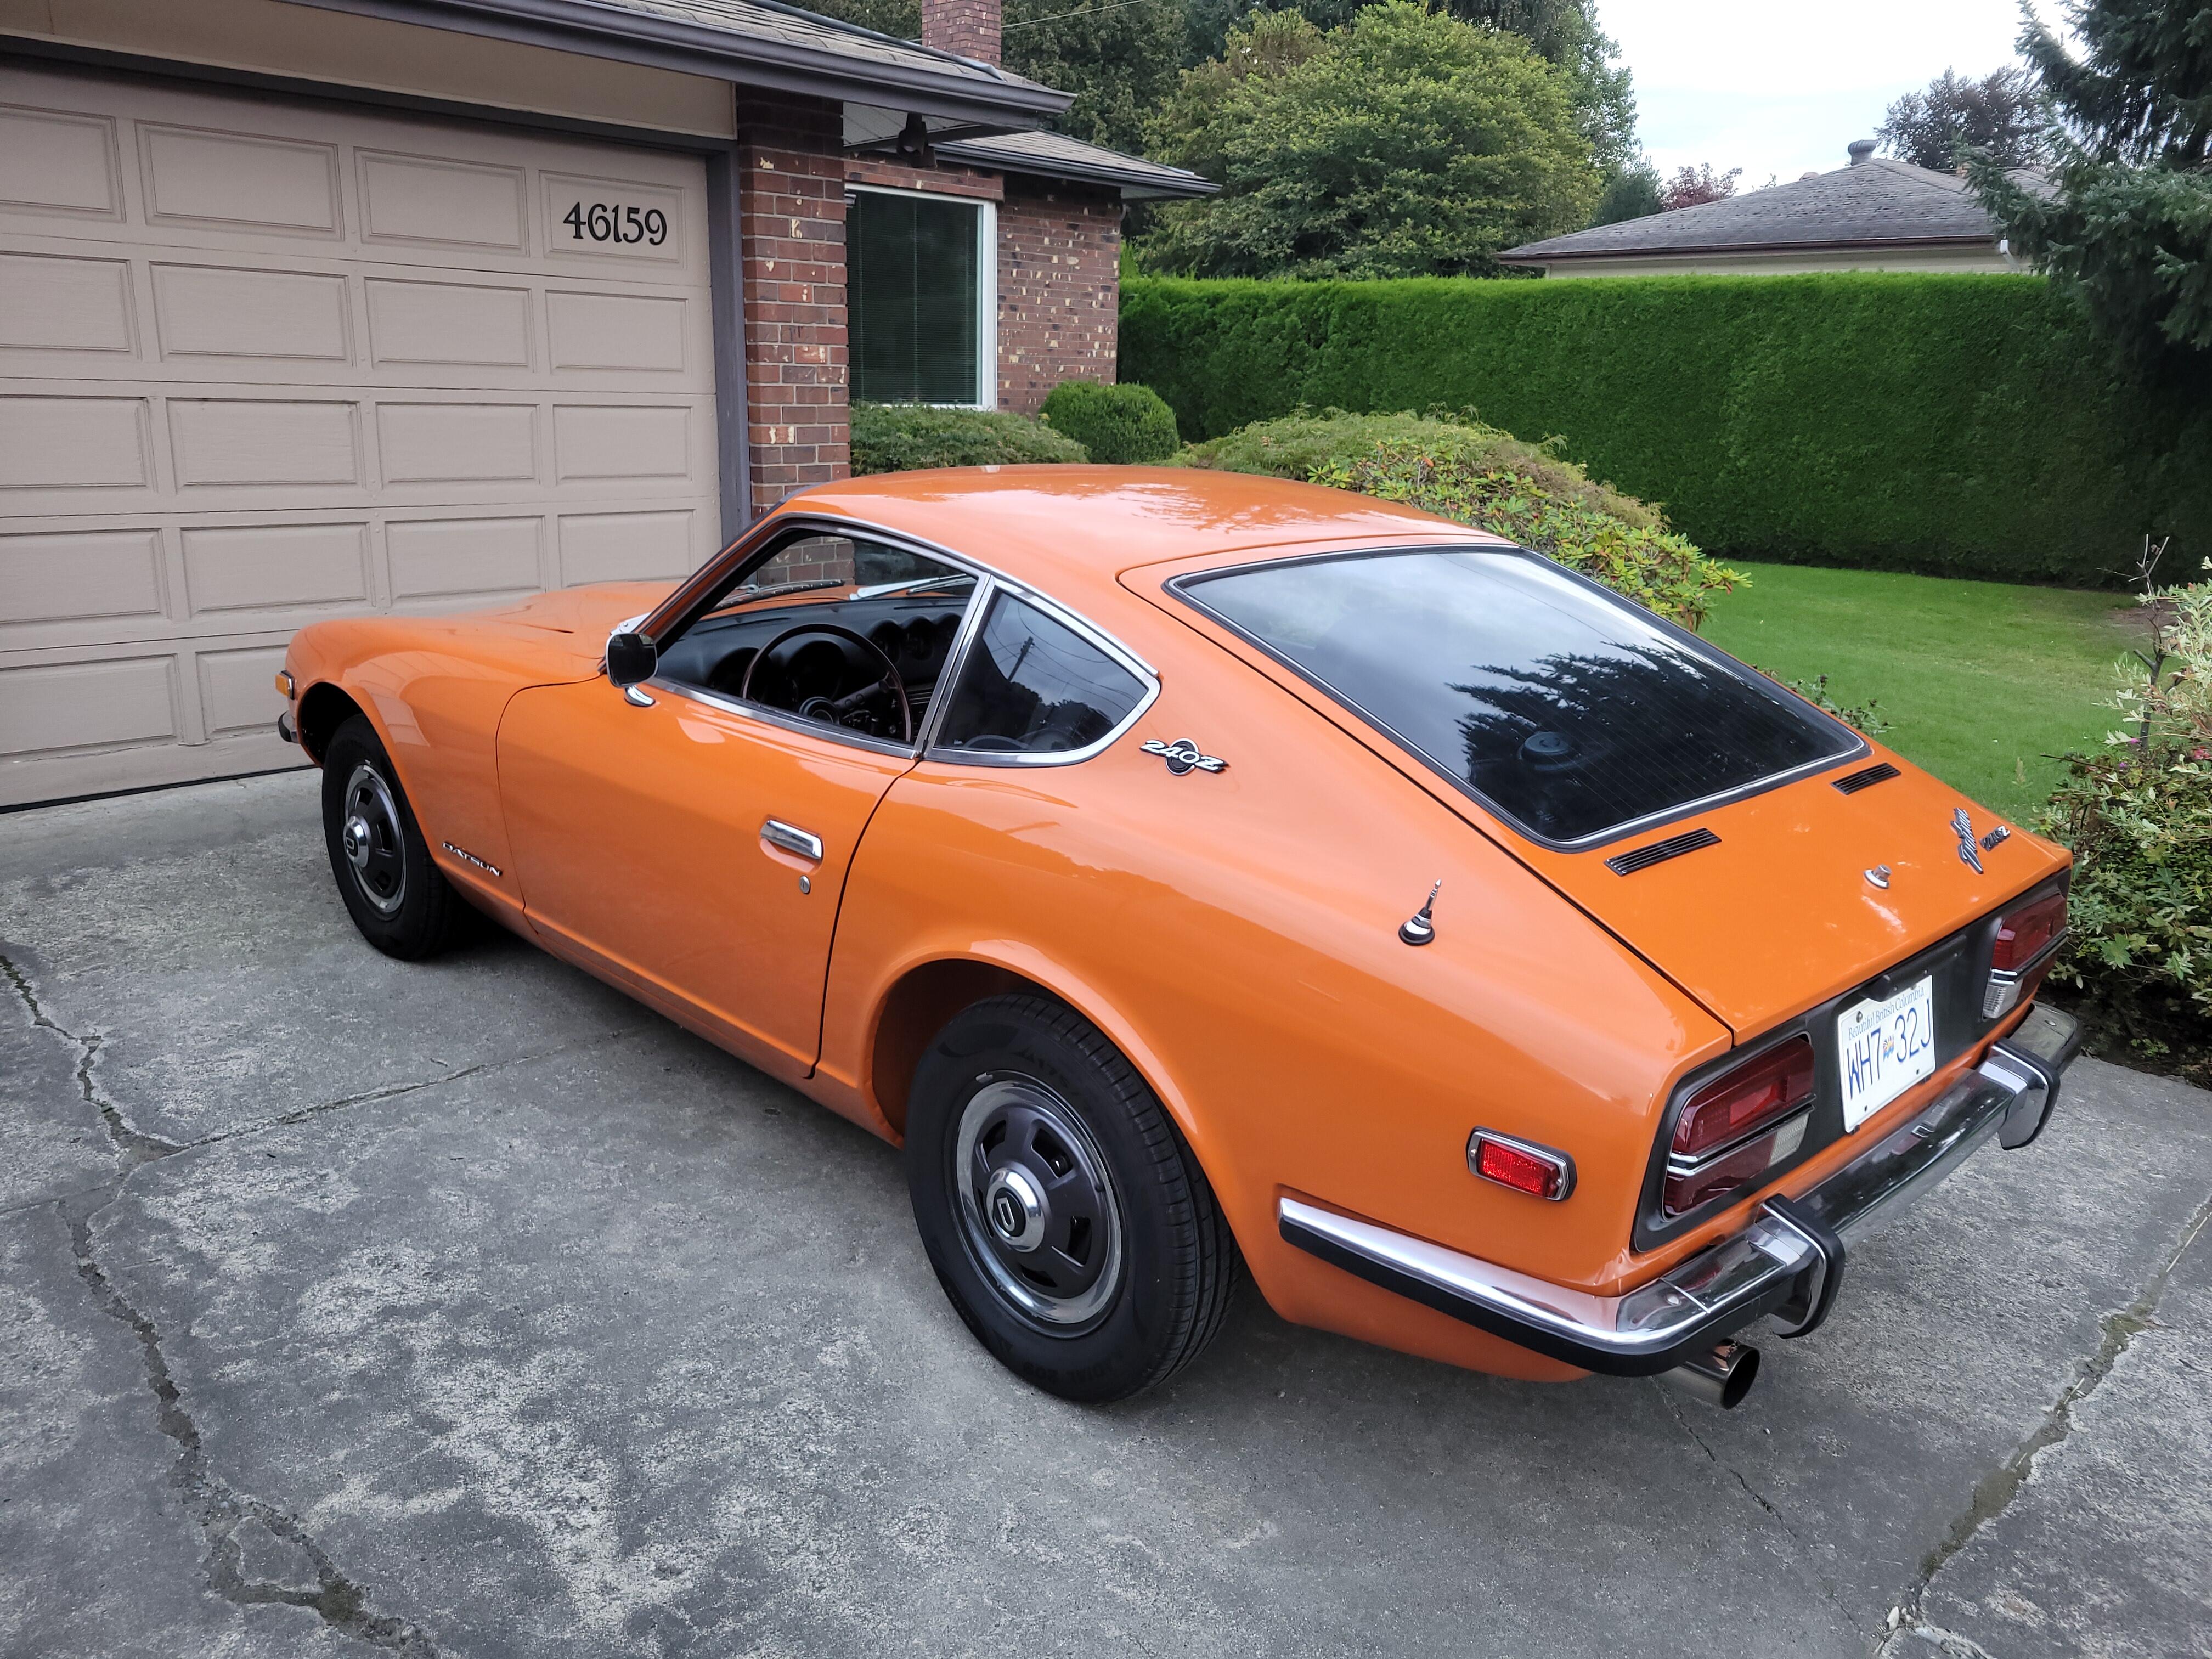
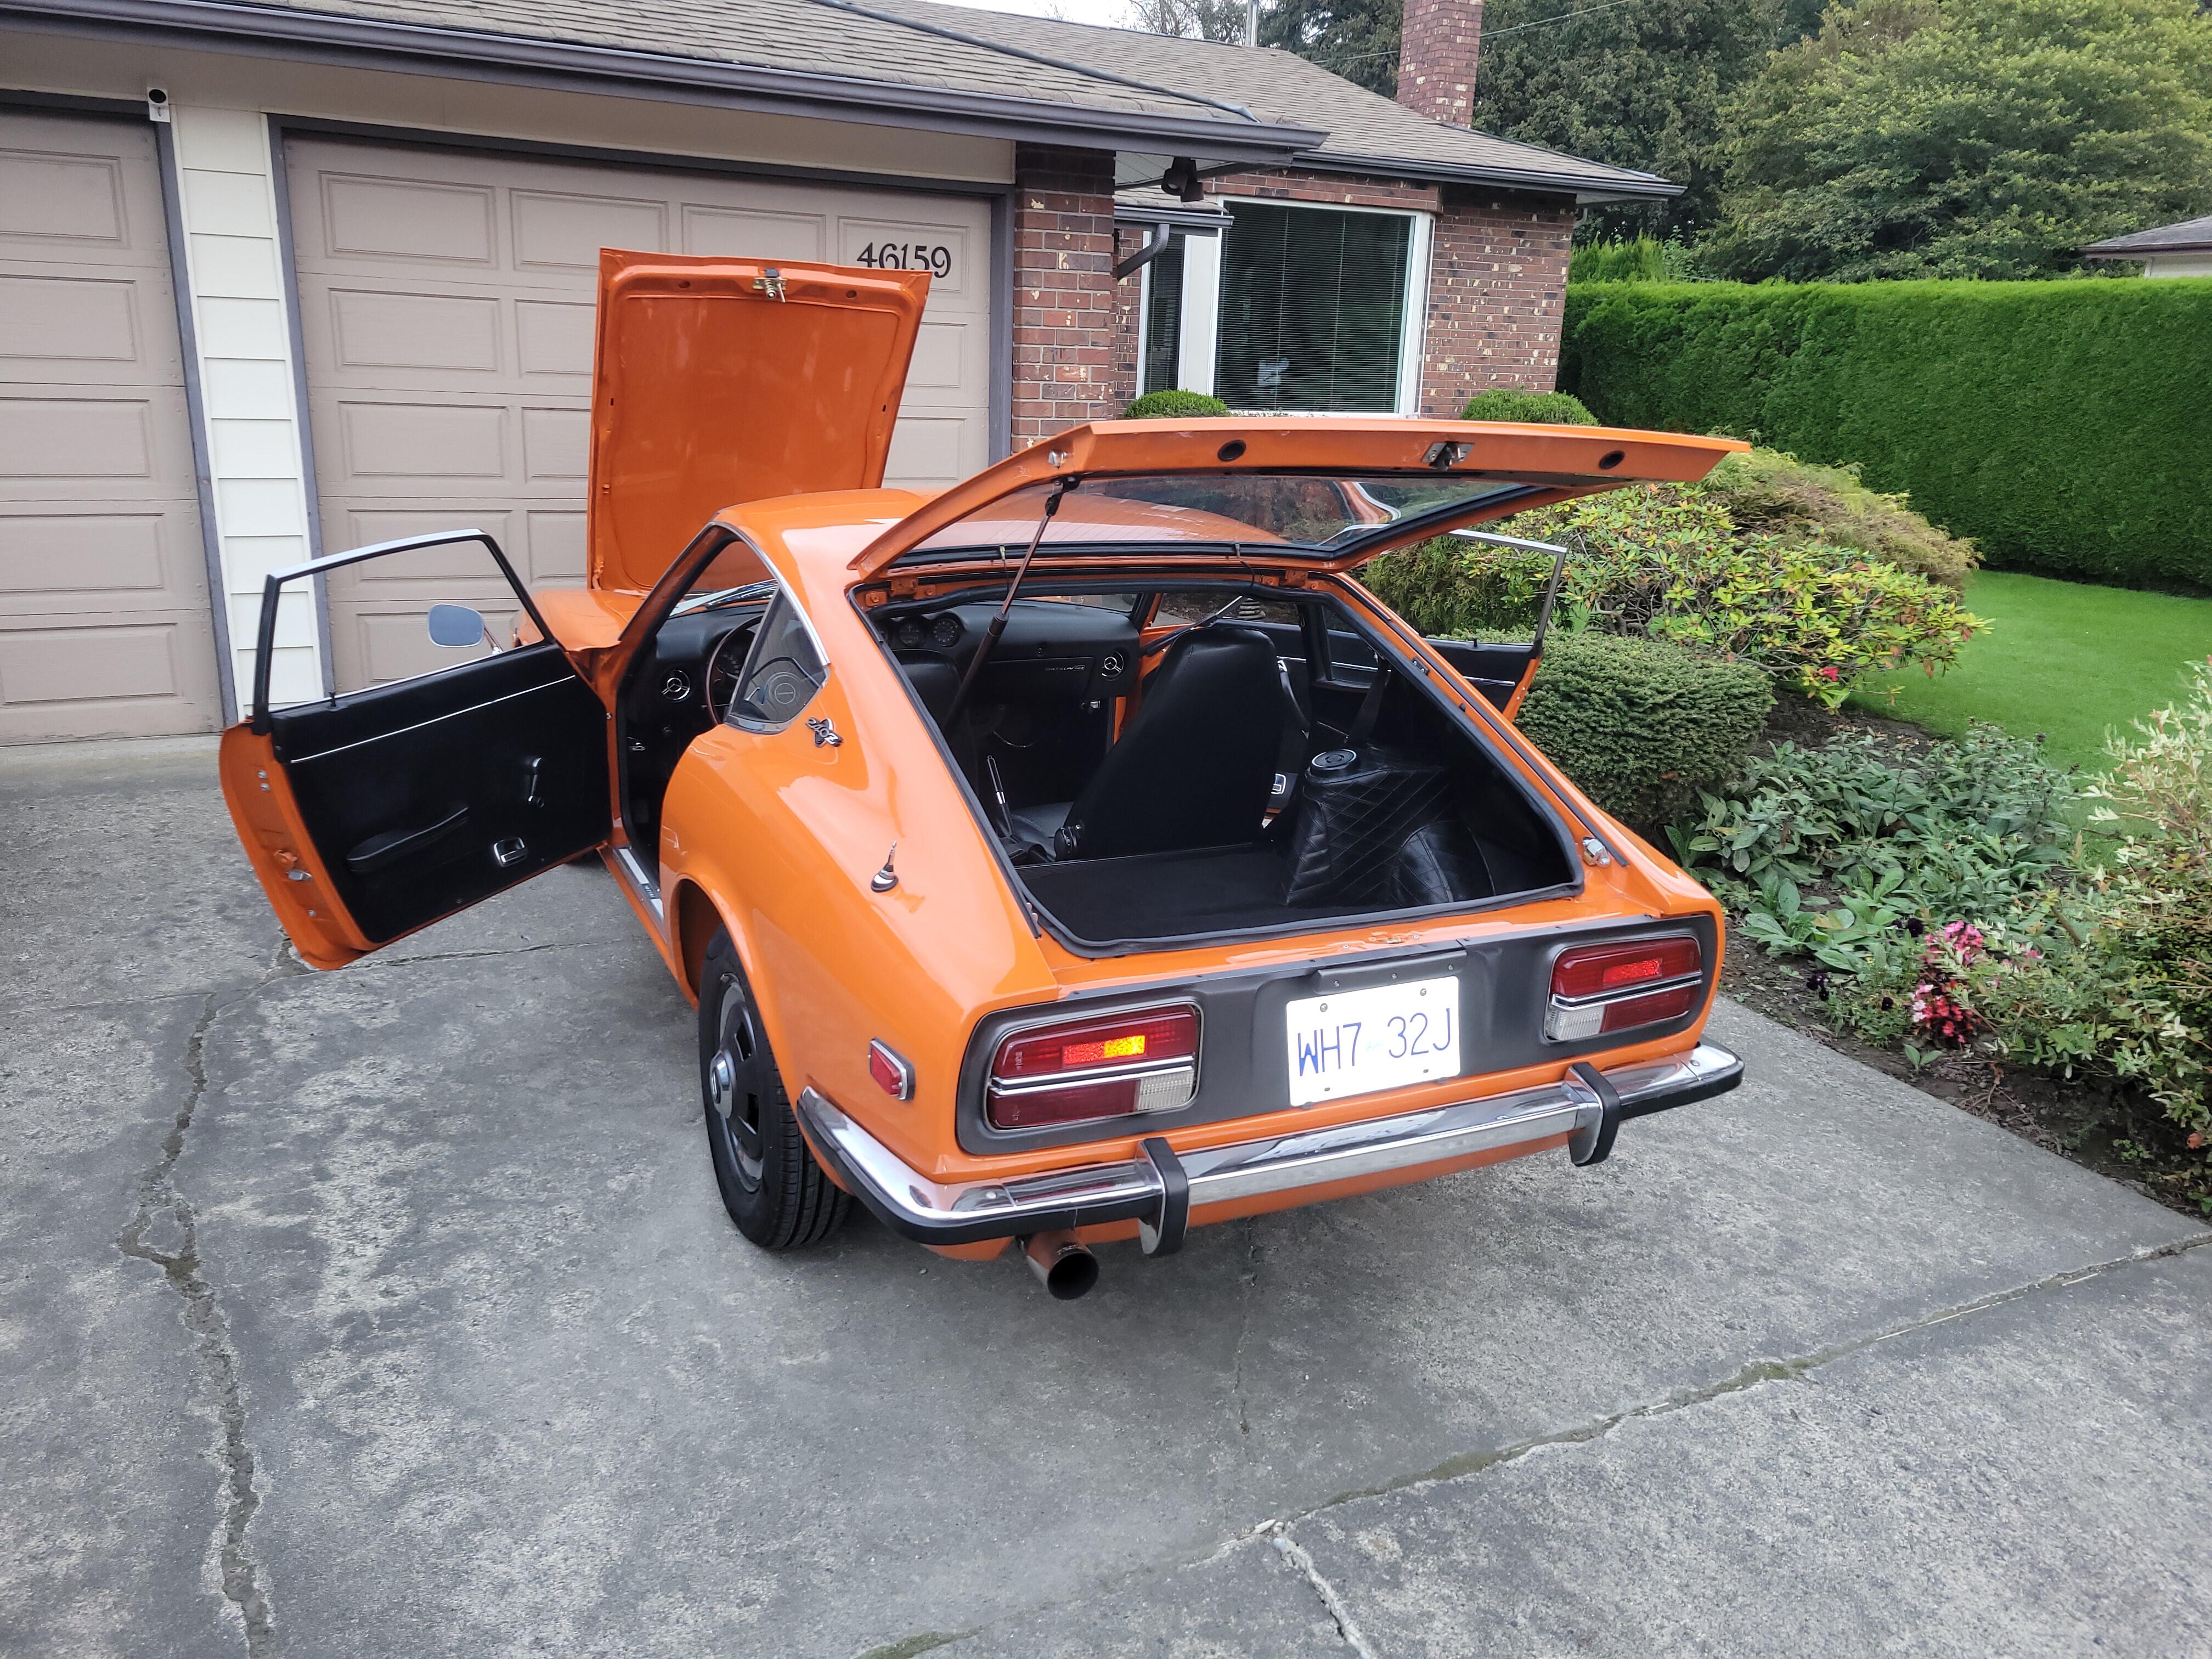
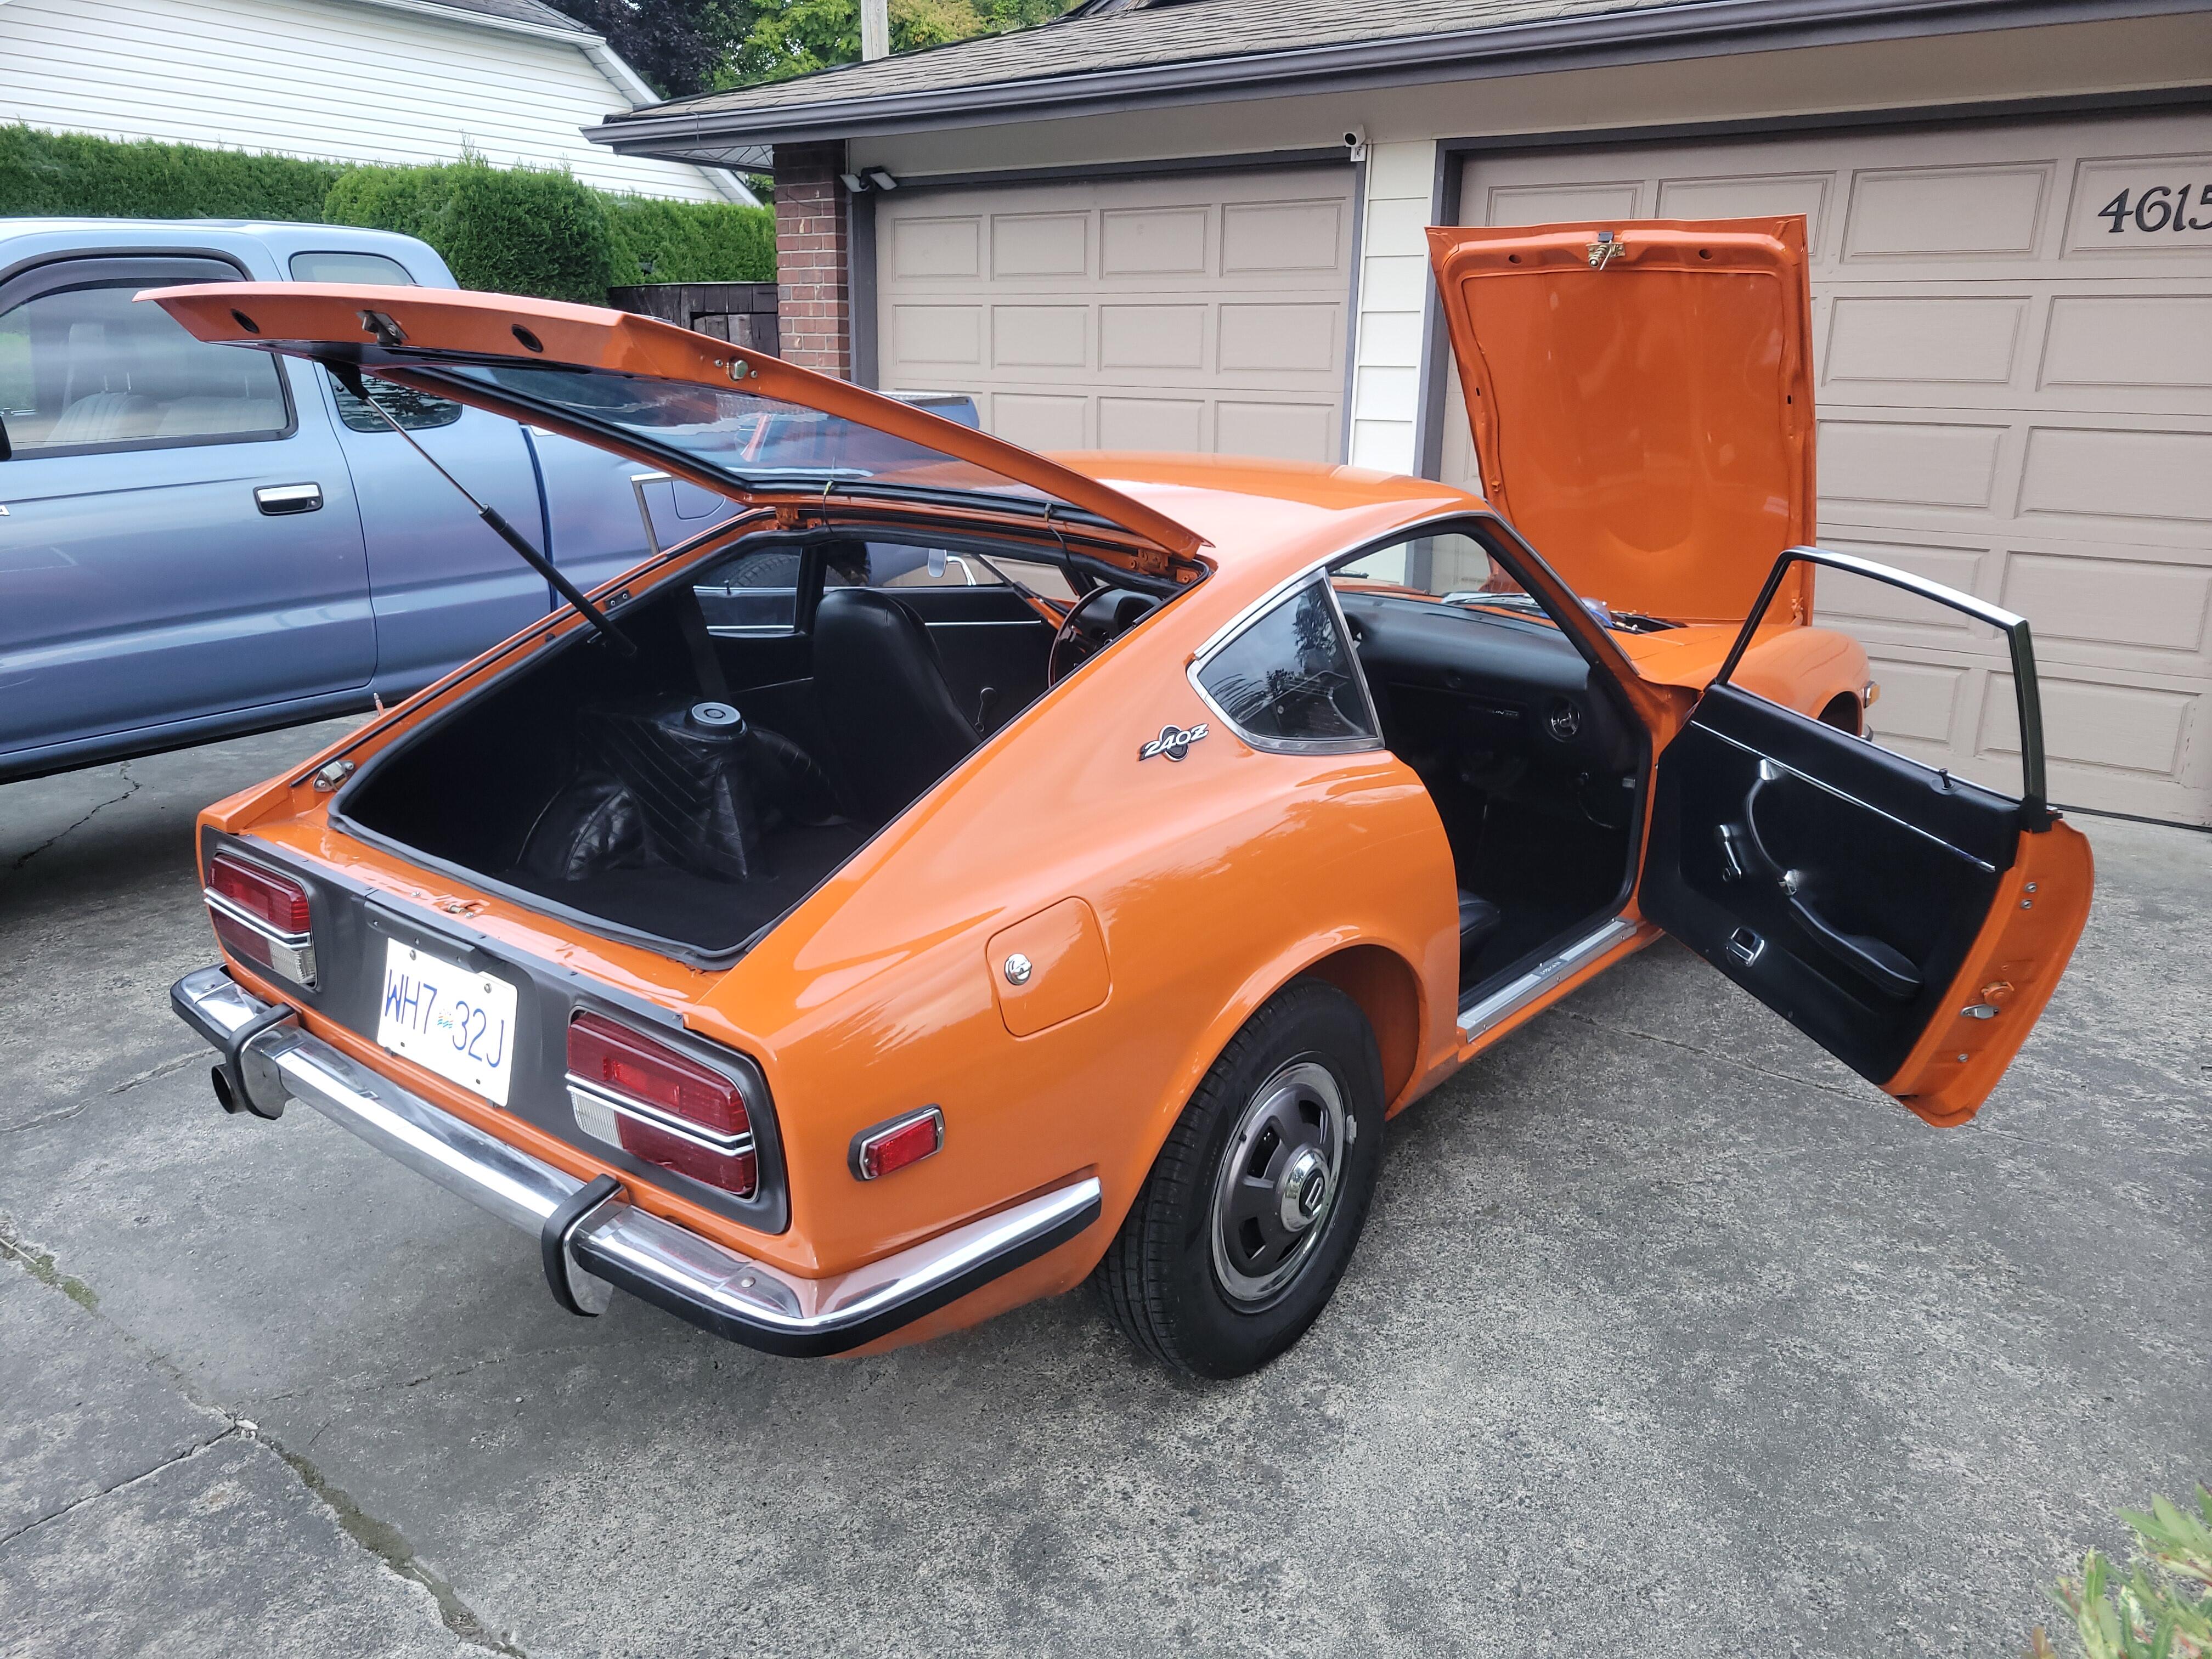
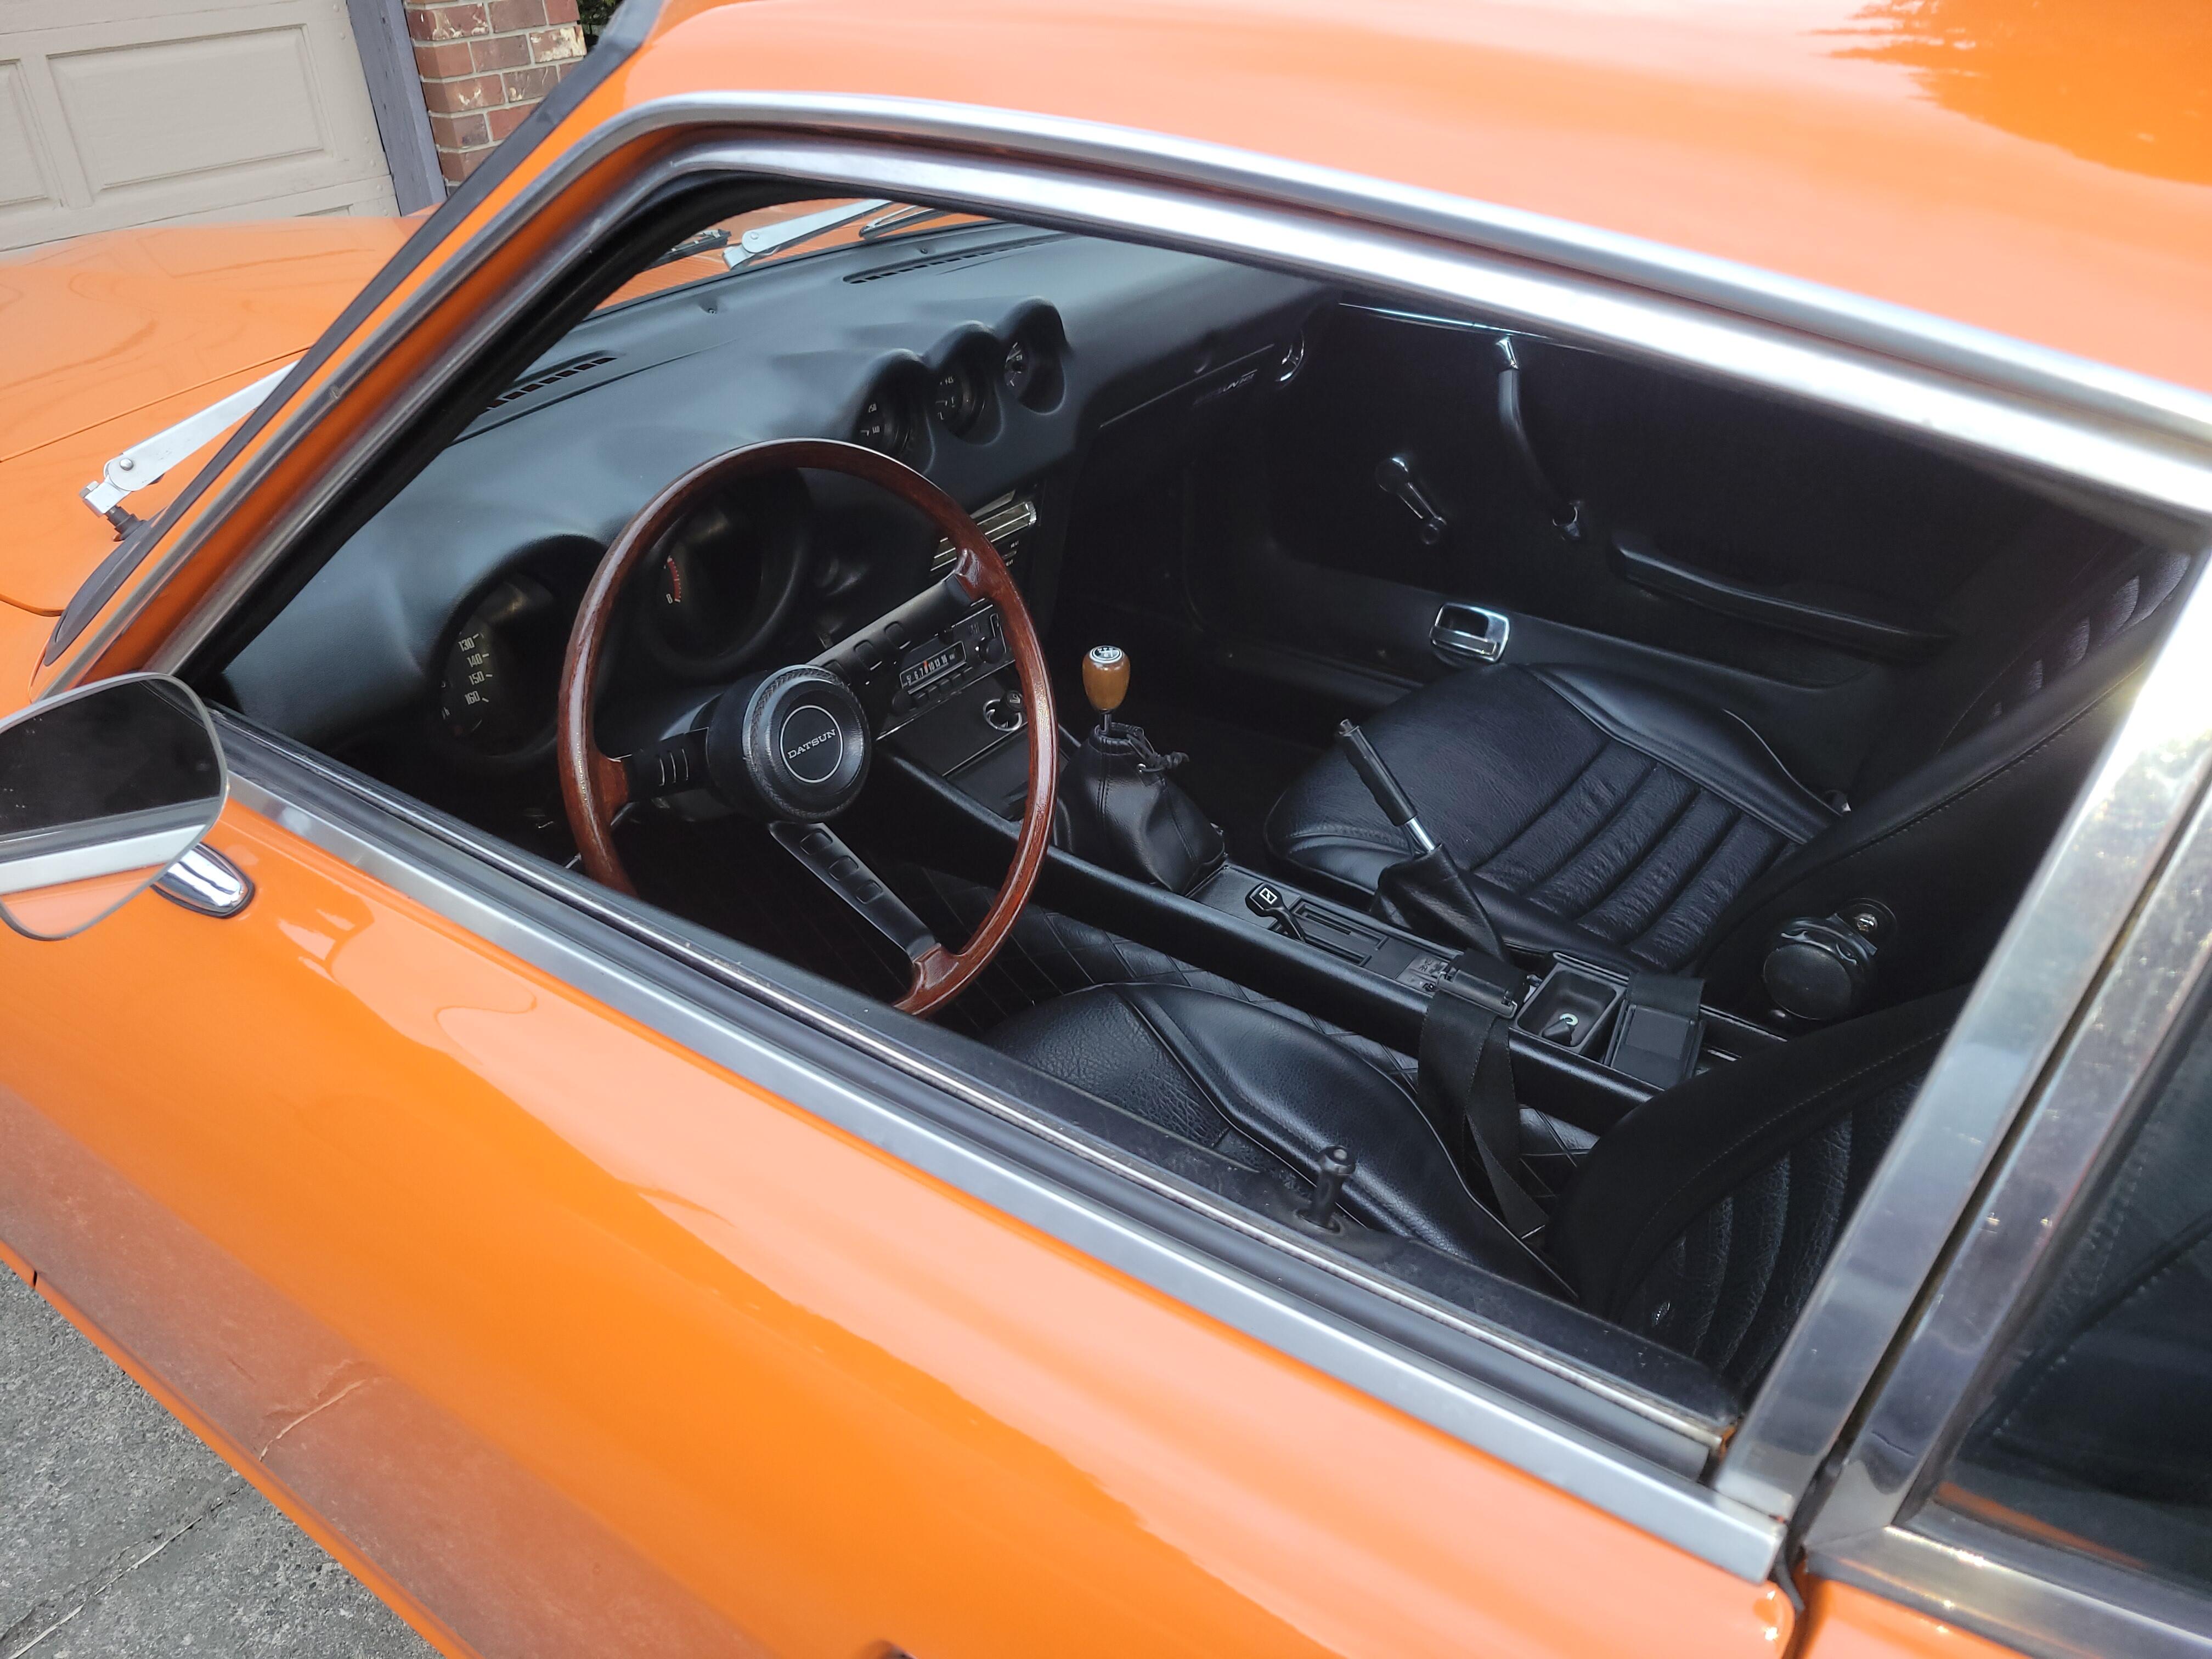
1 pointIt's been way too long since my last update, I've been very busy. I thought I should at least share some pics.


 1 point
 -
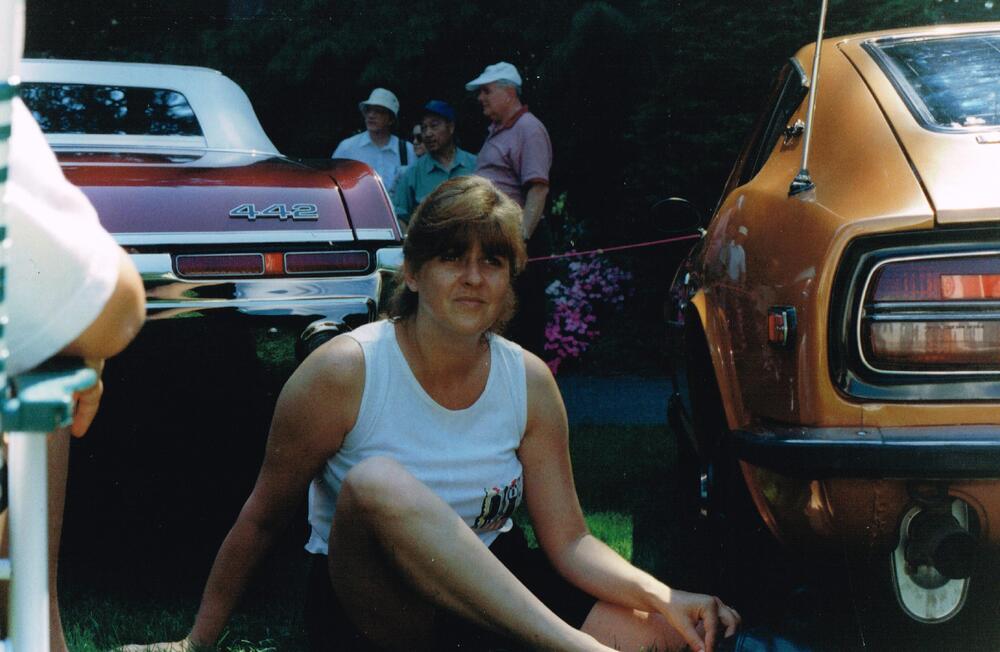
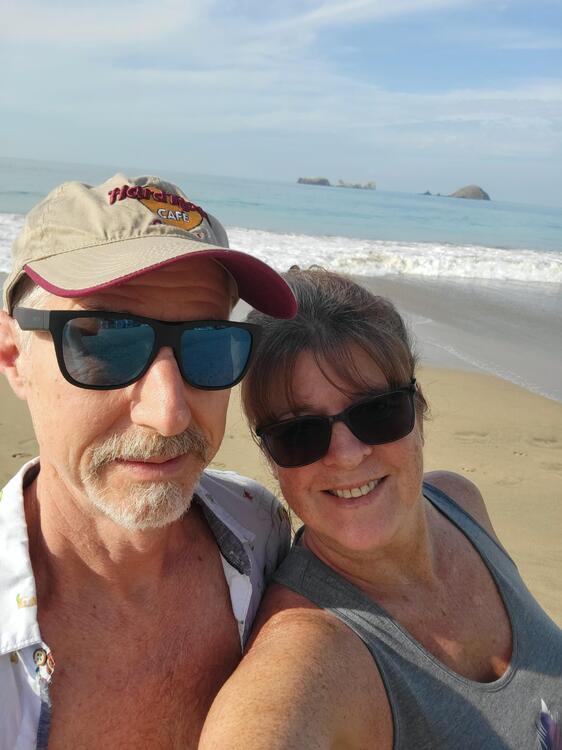
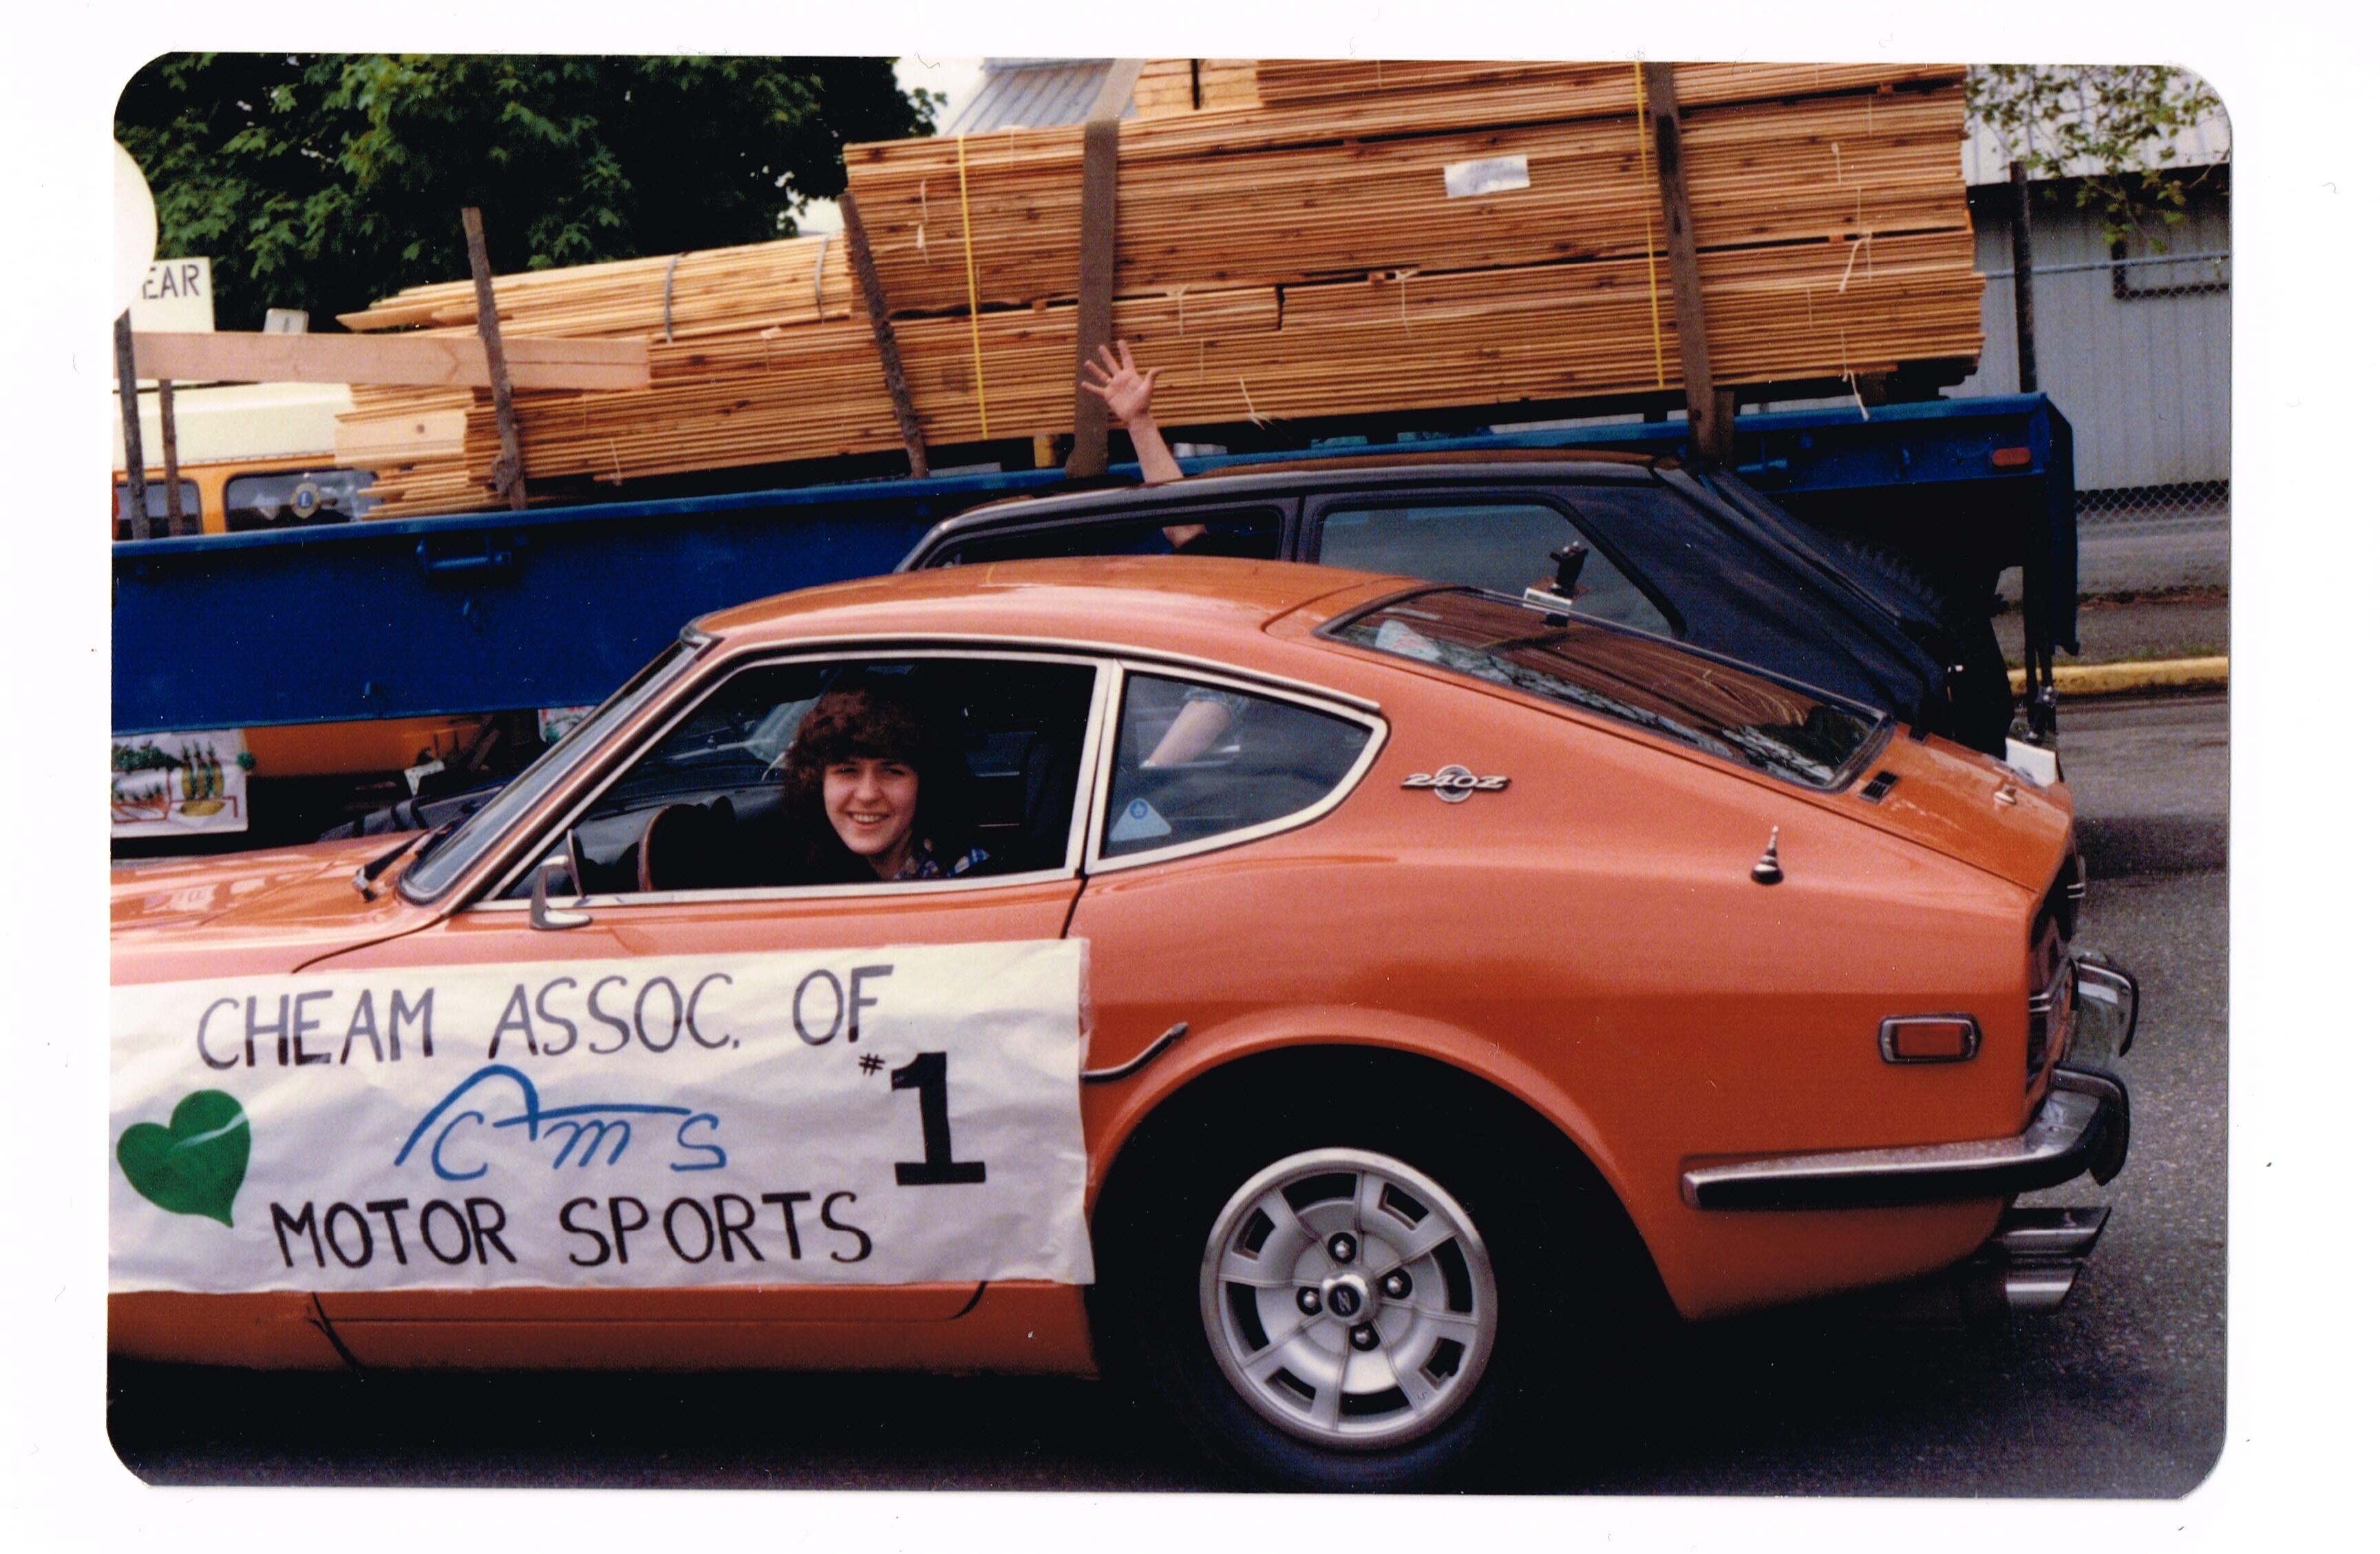
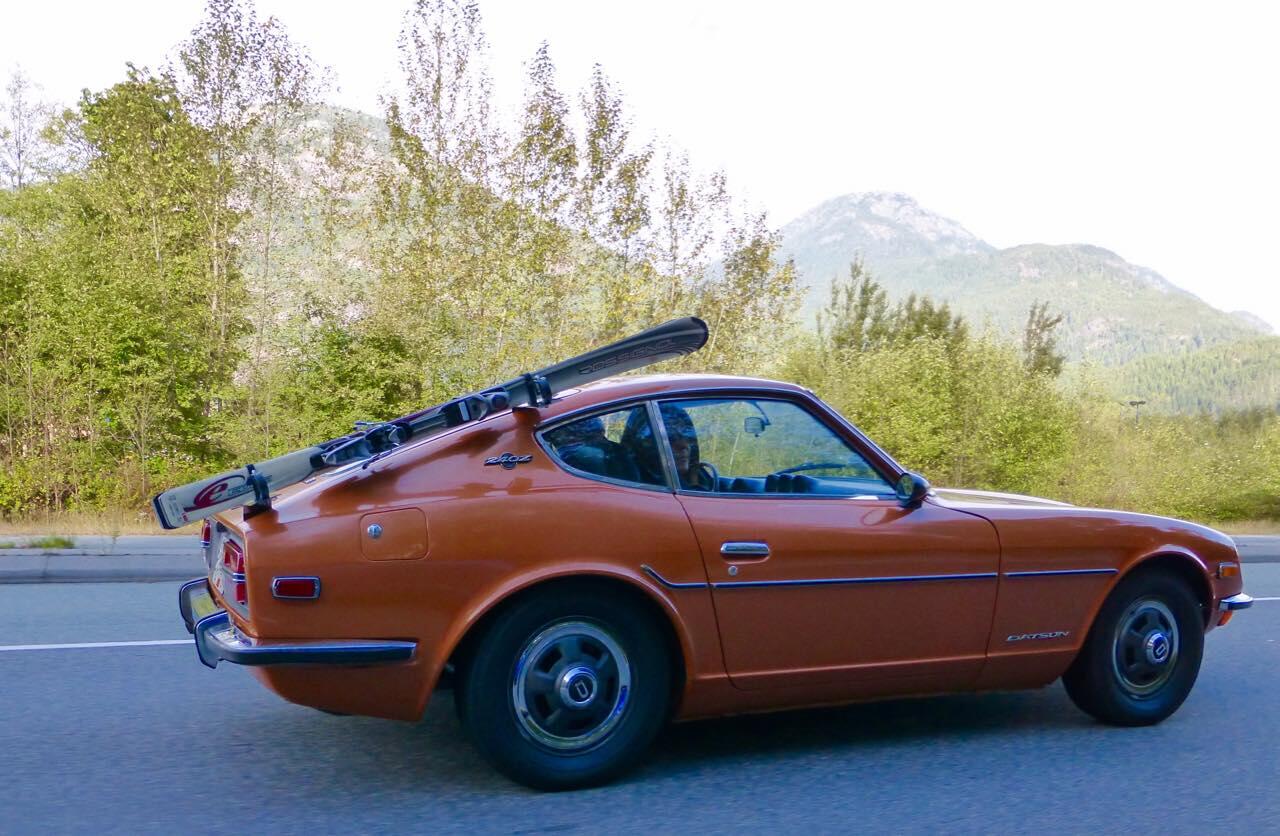
1 pointIt's been a while since my last update, but it's been a very emotional start to the year for me and my family. The love of my life Debbie, passed away on February 11th after a very short struggle with an aggressive type of lung cancer, and this will be a memorial post to her. I met and started dating Deb in 1980, barely two years after I first purchased the 1970 240Z I'm documenting here. Deb has always been a huge supporter of our Datsun we even took it on a honeymoon road trip when we married in 1983. Sadly I only have a few pictures with Deb and our 240 but I will share them here. First one is from 1981 with Deb driving our Zed in a local parade, representing the club we were members of, Cheam Association of Motorsports (CAMS). We hosted various slalom events and such locally thru the 1980's. Next from 1996, Deb at a Concours car show, at Minter Gardens where we displayed the Zed. Deb drove the 442 on the left to the show and we displayed that as well. The 442 belonged to the owner of the local body shop where Deb worked as a collision repair estimator. We both detailed both cars together on the days before the event. Lastly, from September 2017, you can just see this her in this pic of us driving to Whistler on the Sea to Sky Highway, There were about 30 members from our local club driving to whistler for a club show in our Zed's as a convoy. As Deb was the person responsible or pushing me to embark on this restoration in 2018, I would be remiss not to share a few more pics so that you can get a small sense of who she was. In addition to being my soulmate, Deb was a loving mother to our son, Chris. She was a passionate traveler, a real car person and enjoyed volunteering for various events like crew hosting at the Abbotsford International Airshow. This last pic, is us on a beach in Zihuatanejo, Mexico on our last vacation together, December last year. In Deb's memory I will be completing this resto over the next few years, just as she would have wanted. Rest in peace Deb, you are forever in my thoughts. Feb 6th 1964 to Feb 11th 2024


 1 point
 -
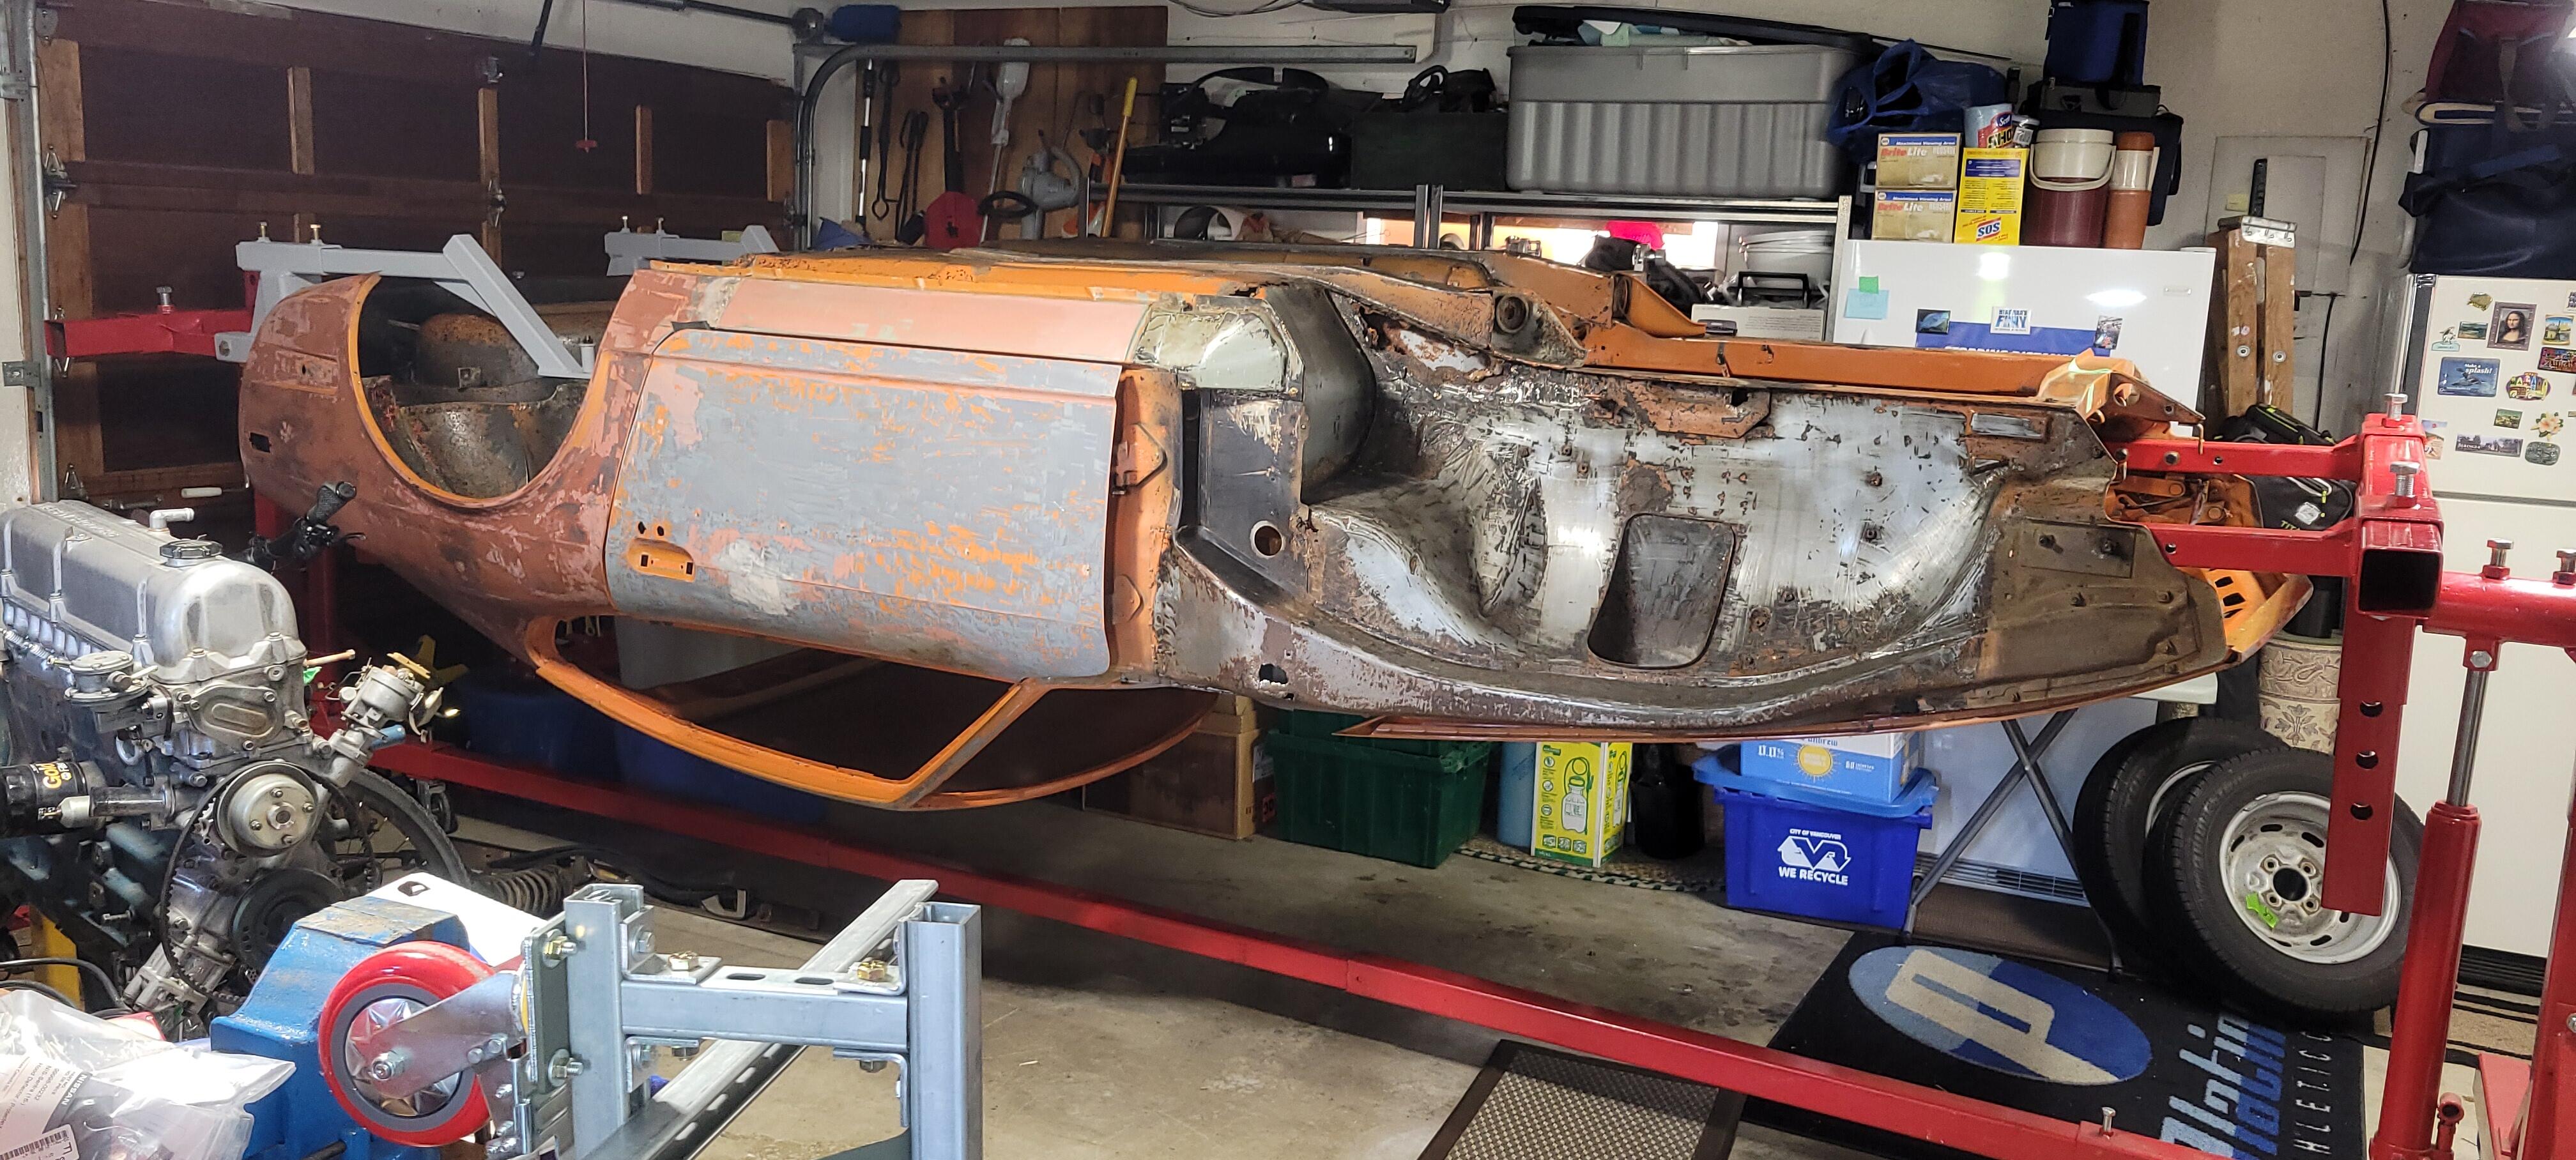
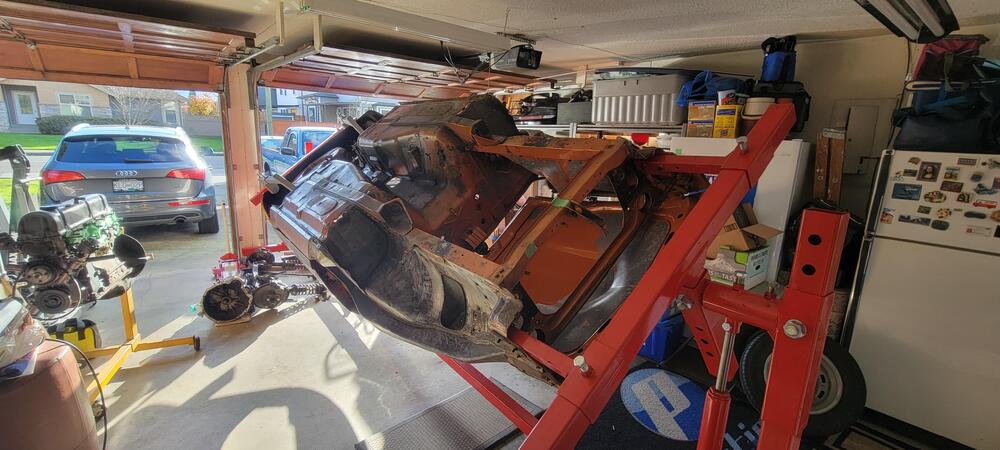
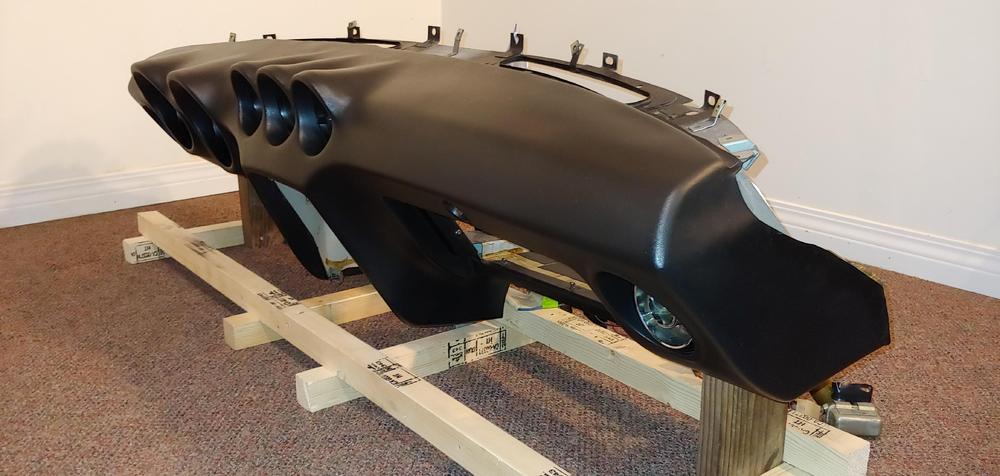
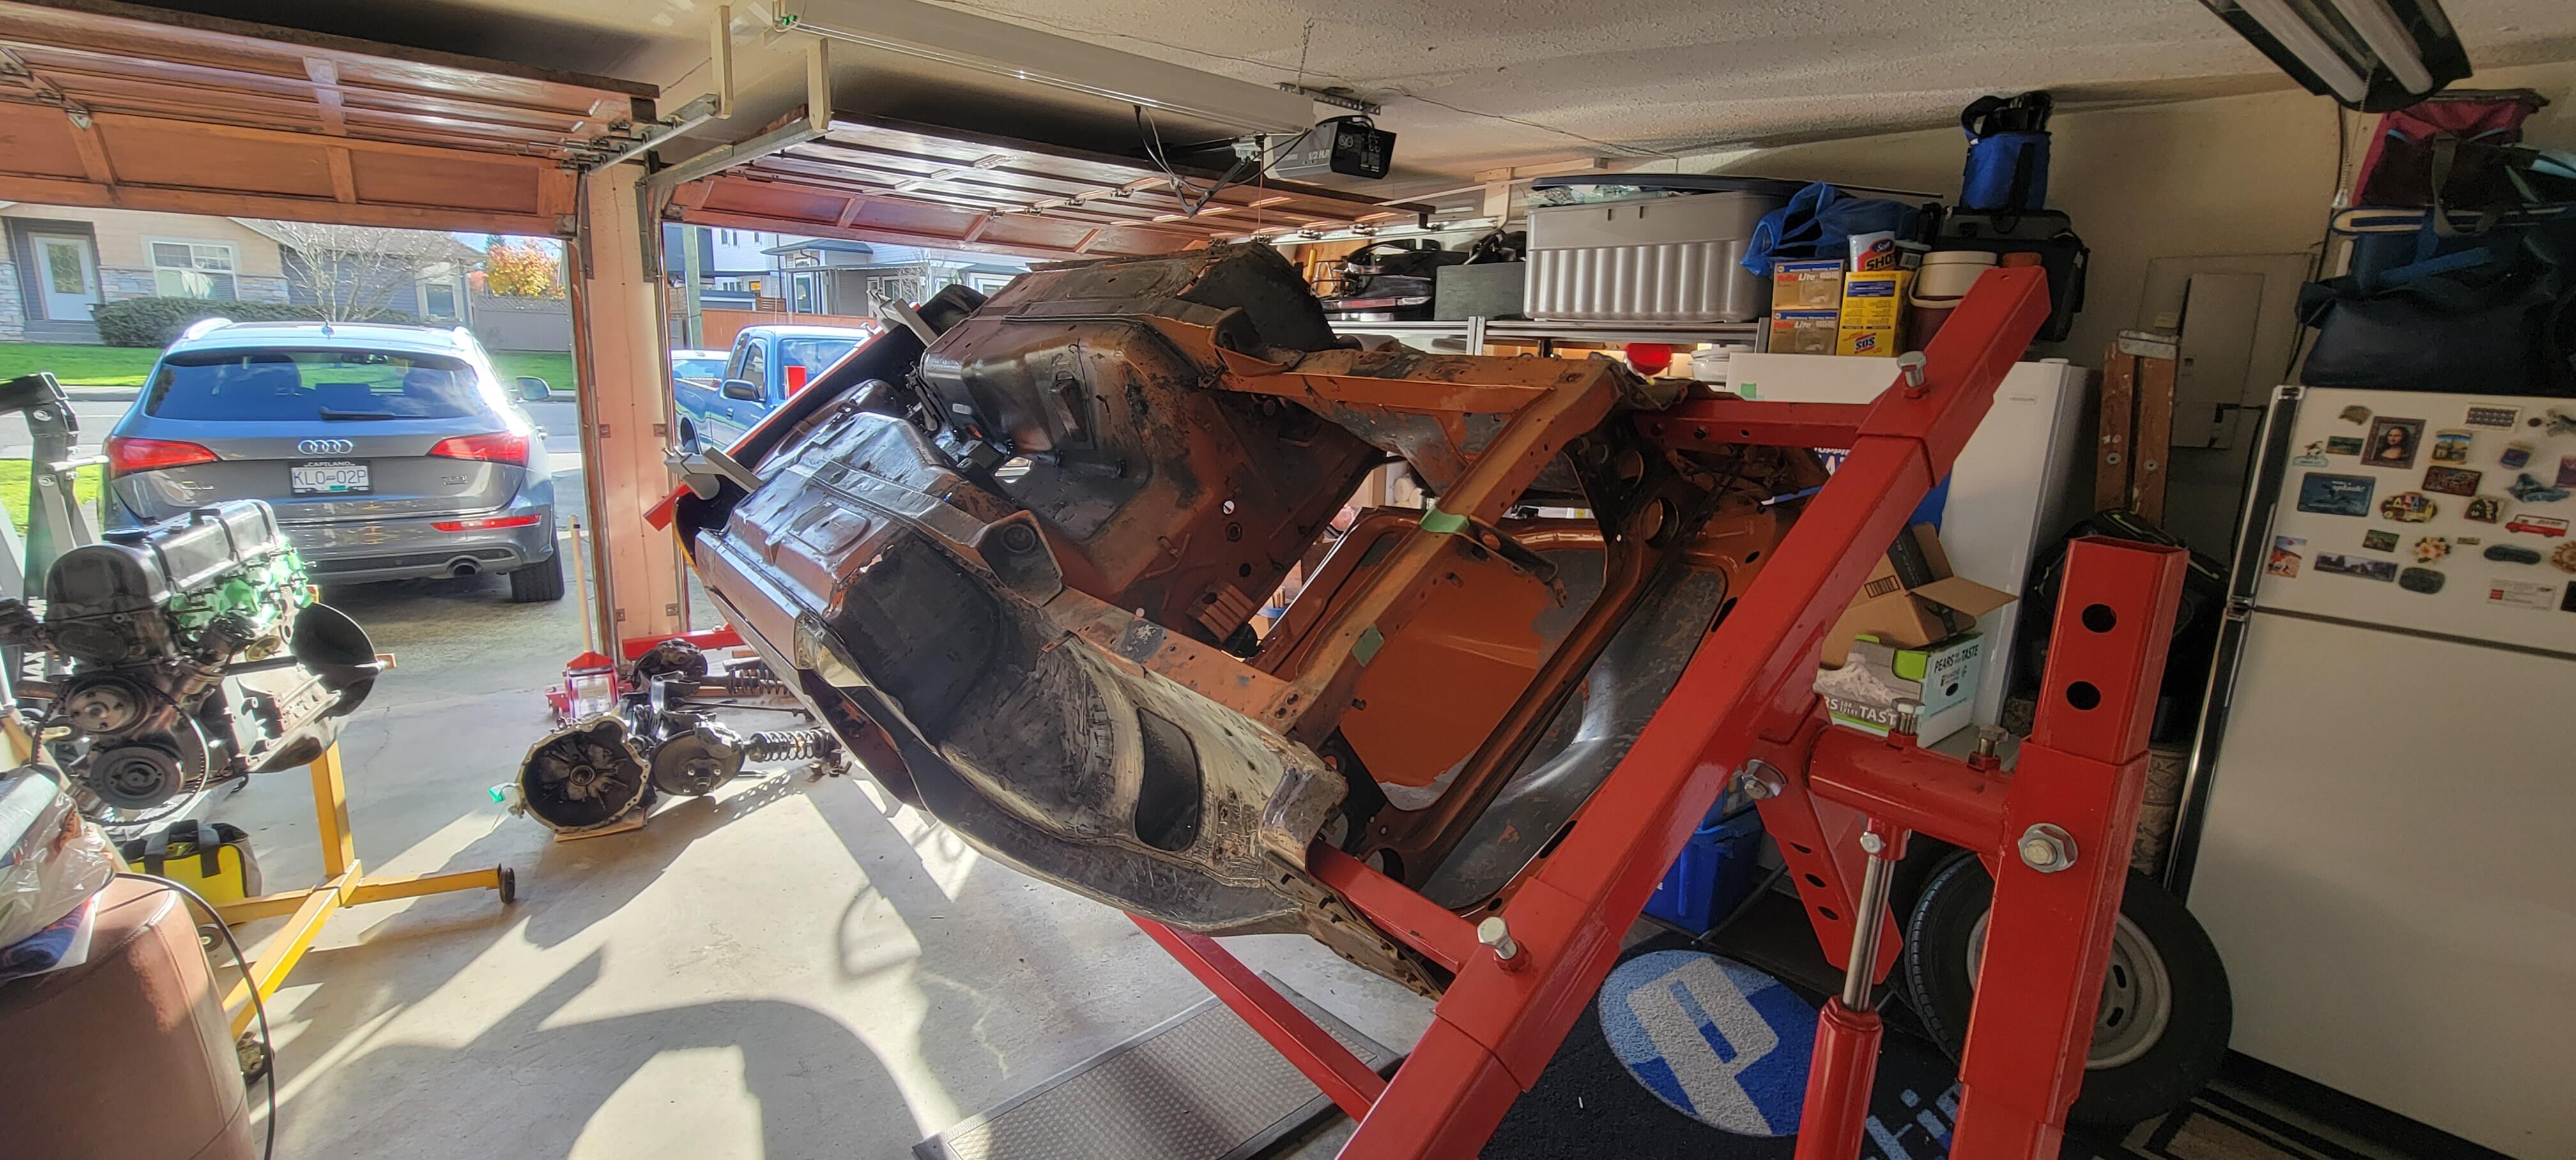
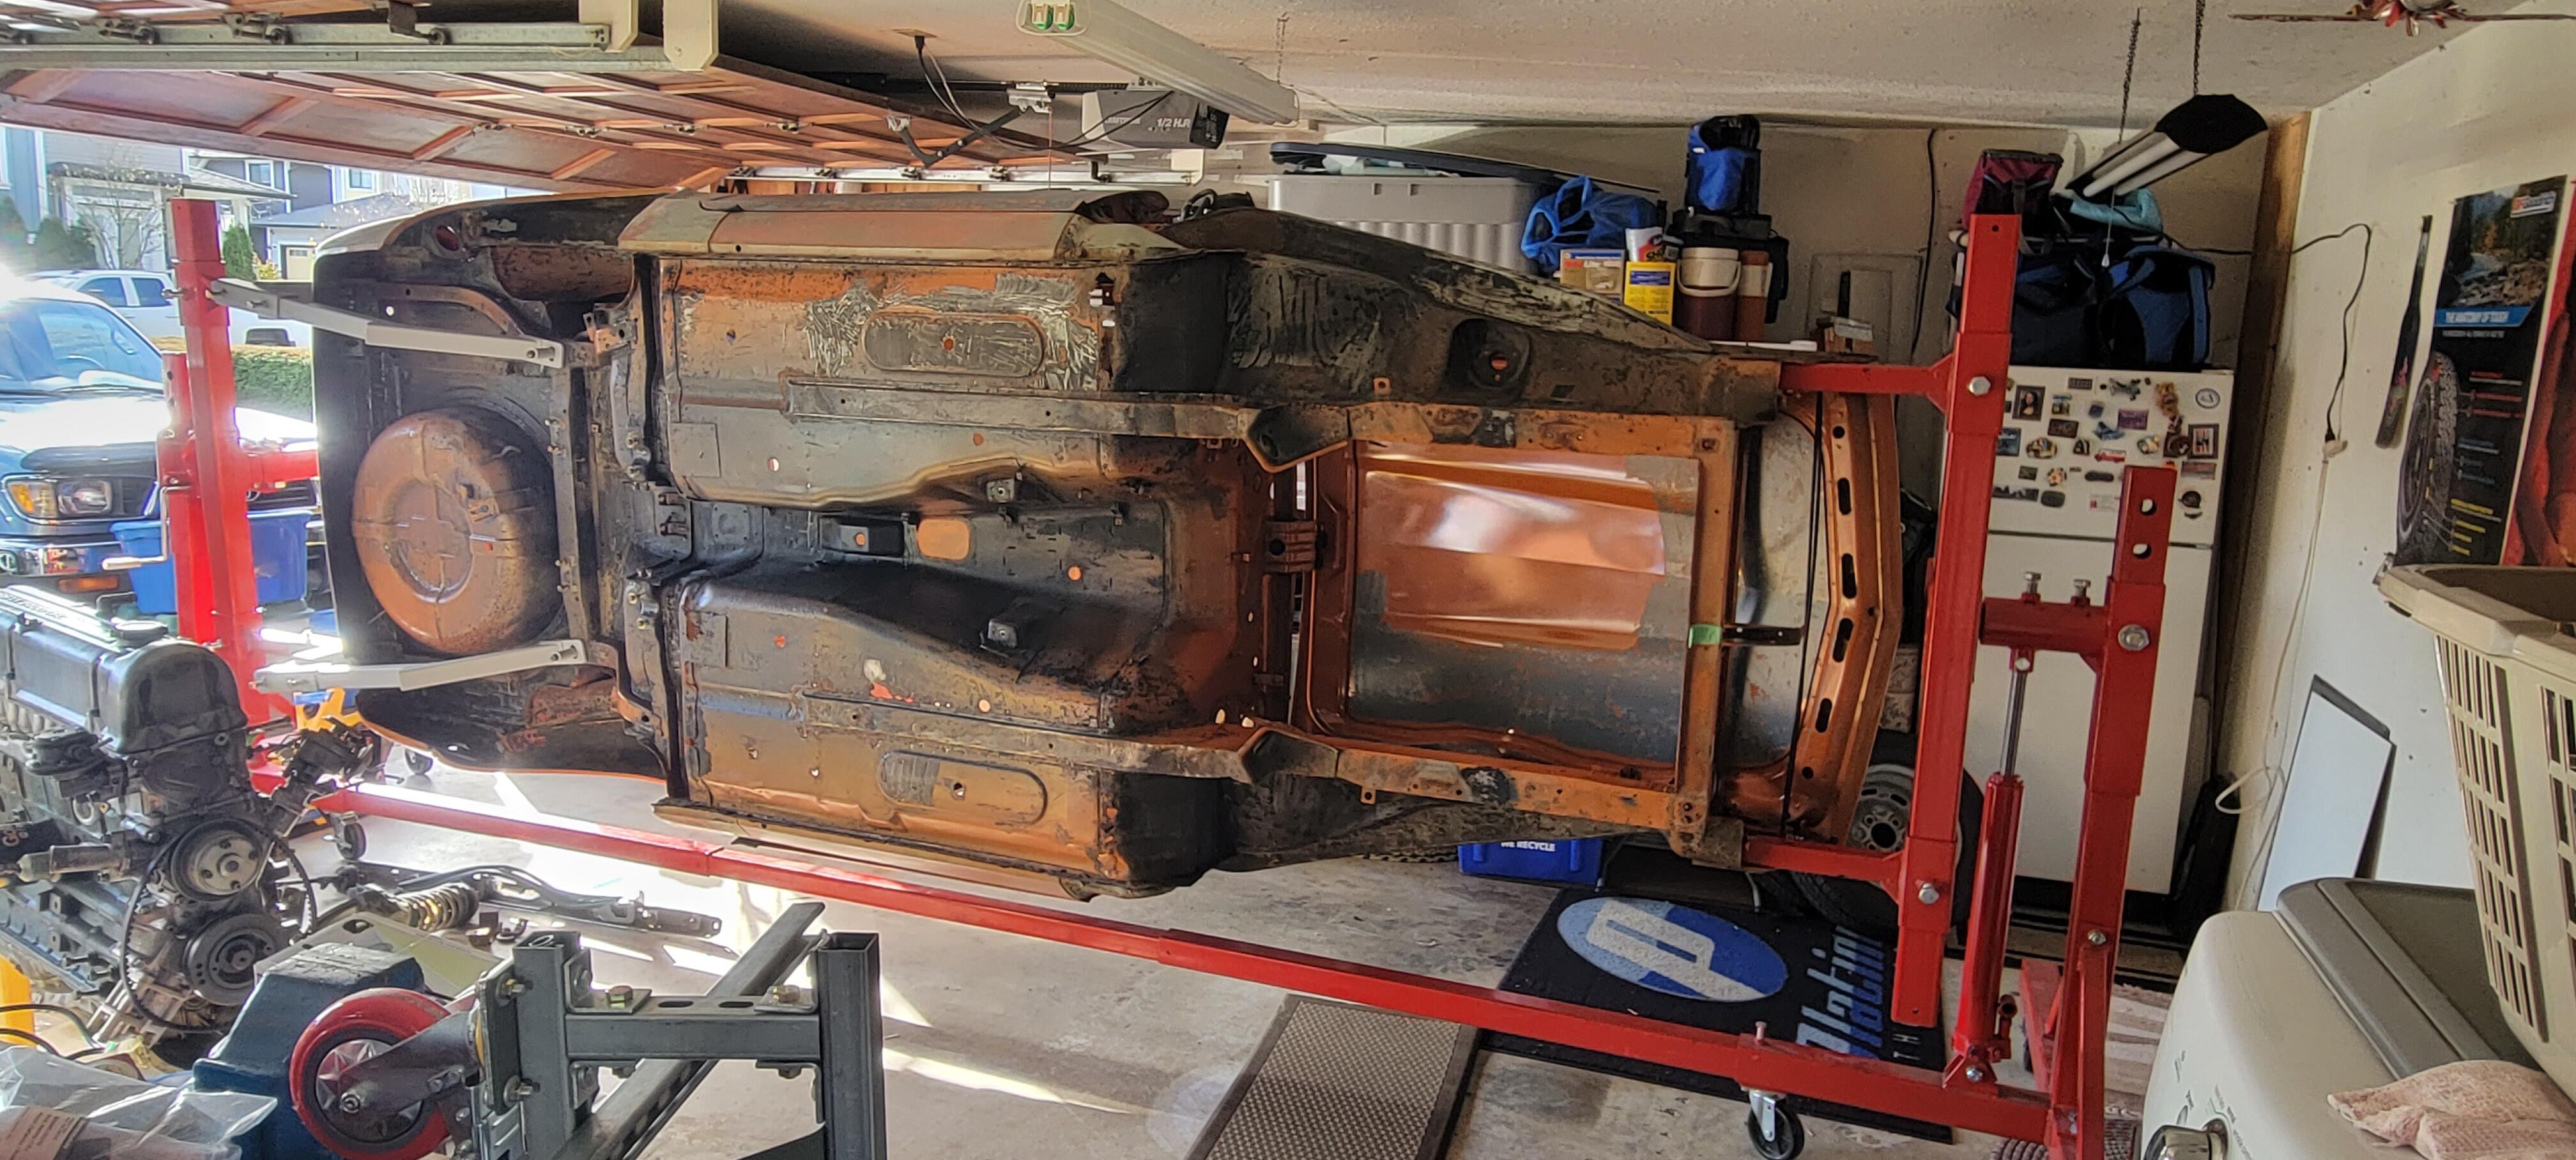
1 pointI took a break today from work and emptied out the shell and made some room around it to do a test flip. The rotisserie has a worm gear reducer to do the turn, I counted 15 turns of the crank handle to rotate 180. The balance point appears to be quite good with the 5-1/2" drop from the rotation axis to the bumper mounts suggested by @grannyknot, thanks for that info. Although this is a bit subjective, as the 30:1 reducer makes it a little hard to judge. Here are a few pics and a short video.

.thumb.jpg.6520c60373fa3e79005e531752cb35fe.jpg)
 1 point
 -
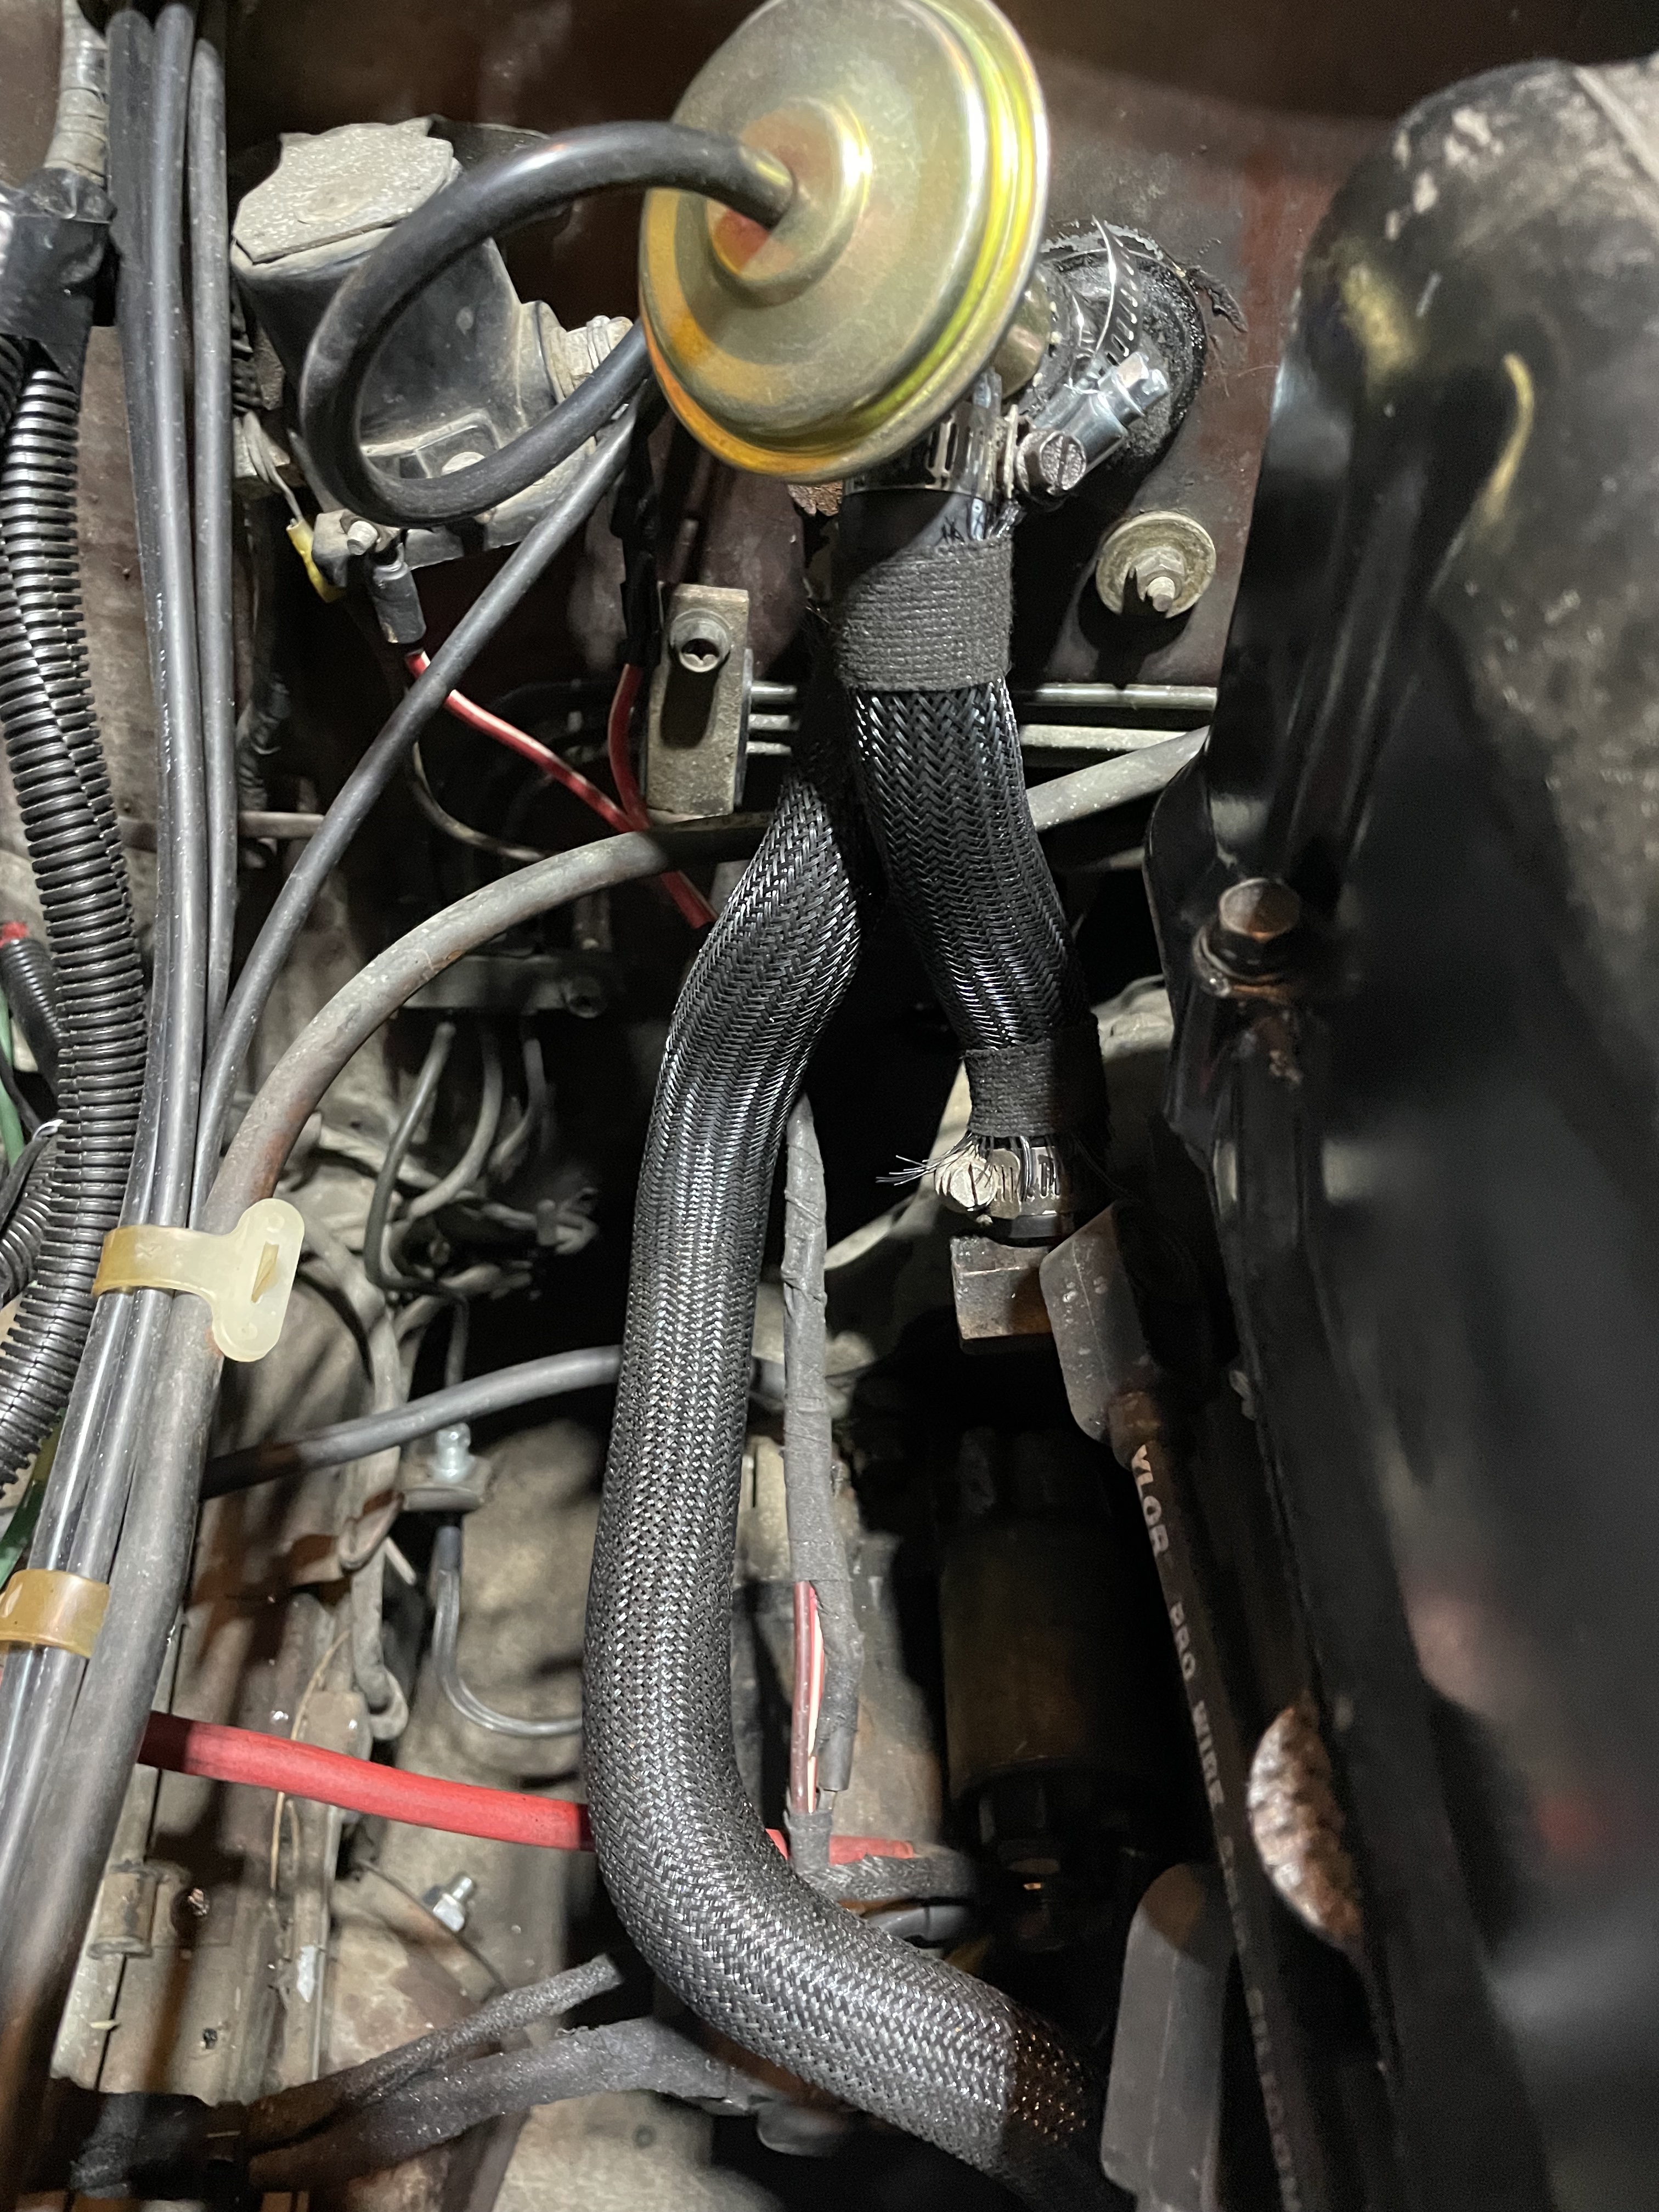
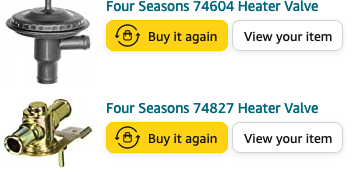
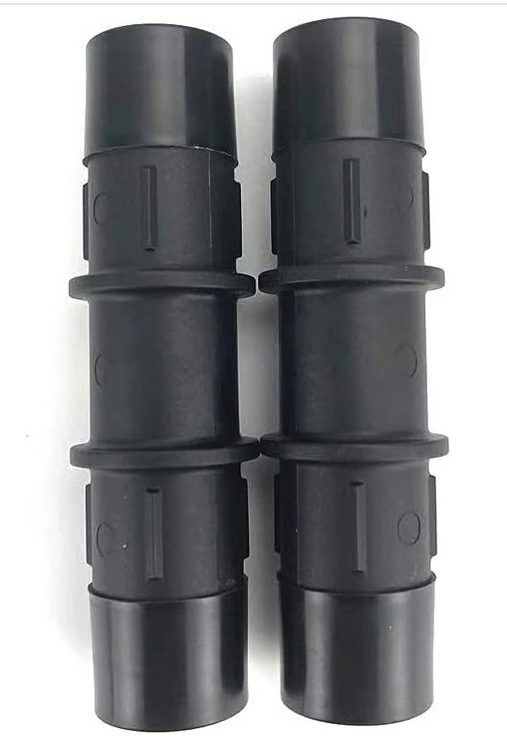
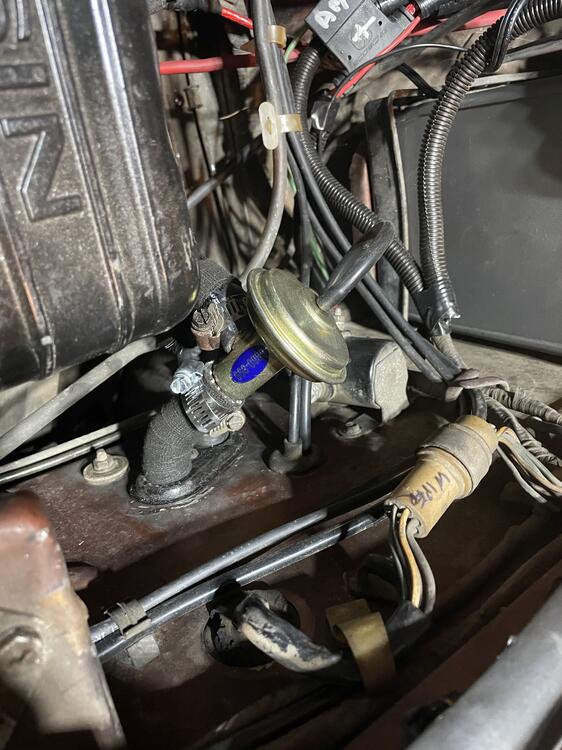
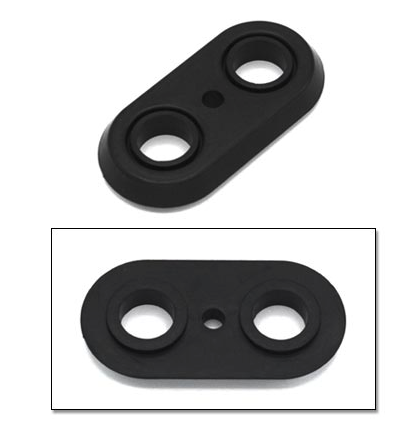
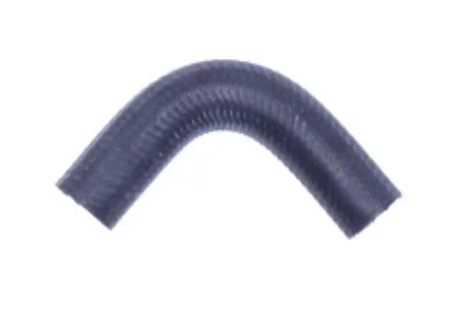
1 pointI wanted to add to this topic for reference. I recently tried to rebuild the OEM units without success. I learned the first time that I never wanted to do this job again, yet here I was. This is a factory AC car, so it is slightly different at the heater core than @mikev88 has setup. These are the parts I ordered: 4 seasons vacuum heater valve 74604 (1) 4seasons heater valve 74827 (1) Heater Hose Connector 5/8"X 5/8" Hose Barb Glass Filled Nylon PA66-GF33 Straight Fittings (1) Gates Hose 19402 (1) hose clamps vacuum hose barb , M-M (1) Vacuum hose I wanted to make this simple unlike the stock installation. First off was the 74604, I mounted that in the engine bay. For the vacuum line - you will have to make a new hole in the firewall grommet and push the vacuum hose through there. Then connect up with the hose barb to the stock line location under the dash (W for my 1977). For the plumbing into the valve, I was able to use the OEM hose off the block that went to the firewall. just rotated about 90 degrees to mount up the 74604 to it: Why this wasnt done at the factory, well thats a mystery! much cleaner and easier outside of the engine bay. For the factory grommet that seals the lines going through the firewall, you will have to enlarge 1 hole to fit the hose through it. I just cut where the lines were on it and it fit perfect: From the 74604, the Gates hose (19402) has a lot of bends. You just need a long J bend to go from the heater valve through the grommet and through the firewall. The other side will connect to the 74827 (under the dash): This is my installation before I rotated clockwise another 20-30 degrees : For the heater control wire, you will need to use some pliers and make a loop at the end of it. the new valve doesnt travel as far as the OEM one, so adjust where you want the lever to be on the dash. I lined everything up on full cold and tightened the wire holder down. Finish it off with a internal star washer to keep it from popping off. You will use the rest of the gates 19402 hose with the S bend to clear the outlet from the heater core to the new valve. For the outlet from the heater core, I used a stock hose: from the outlet, it went to that OEM hose, then to the 5.8" barb, through the firewall and through the grommet on the uncut side. Make sure to get the grommet pulled through to the middle of the barb. From there, connect to the stock hose. Everything fits and there is more room under the dash to work with. Reuse some of the OEM screws that came off the stock mounts to keep the side plastic onto the heater box. No issues with the setup and if there are future issues, it will be much easier to deal with. Hope this helps someone out there


 1 point
 -
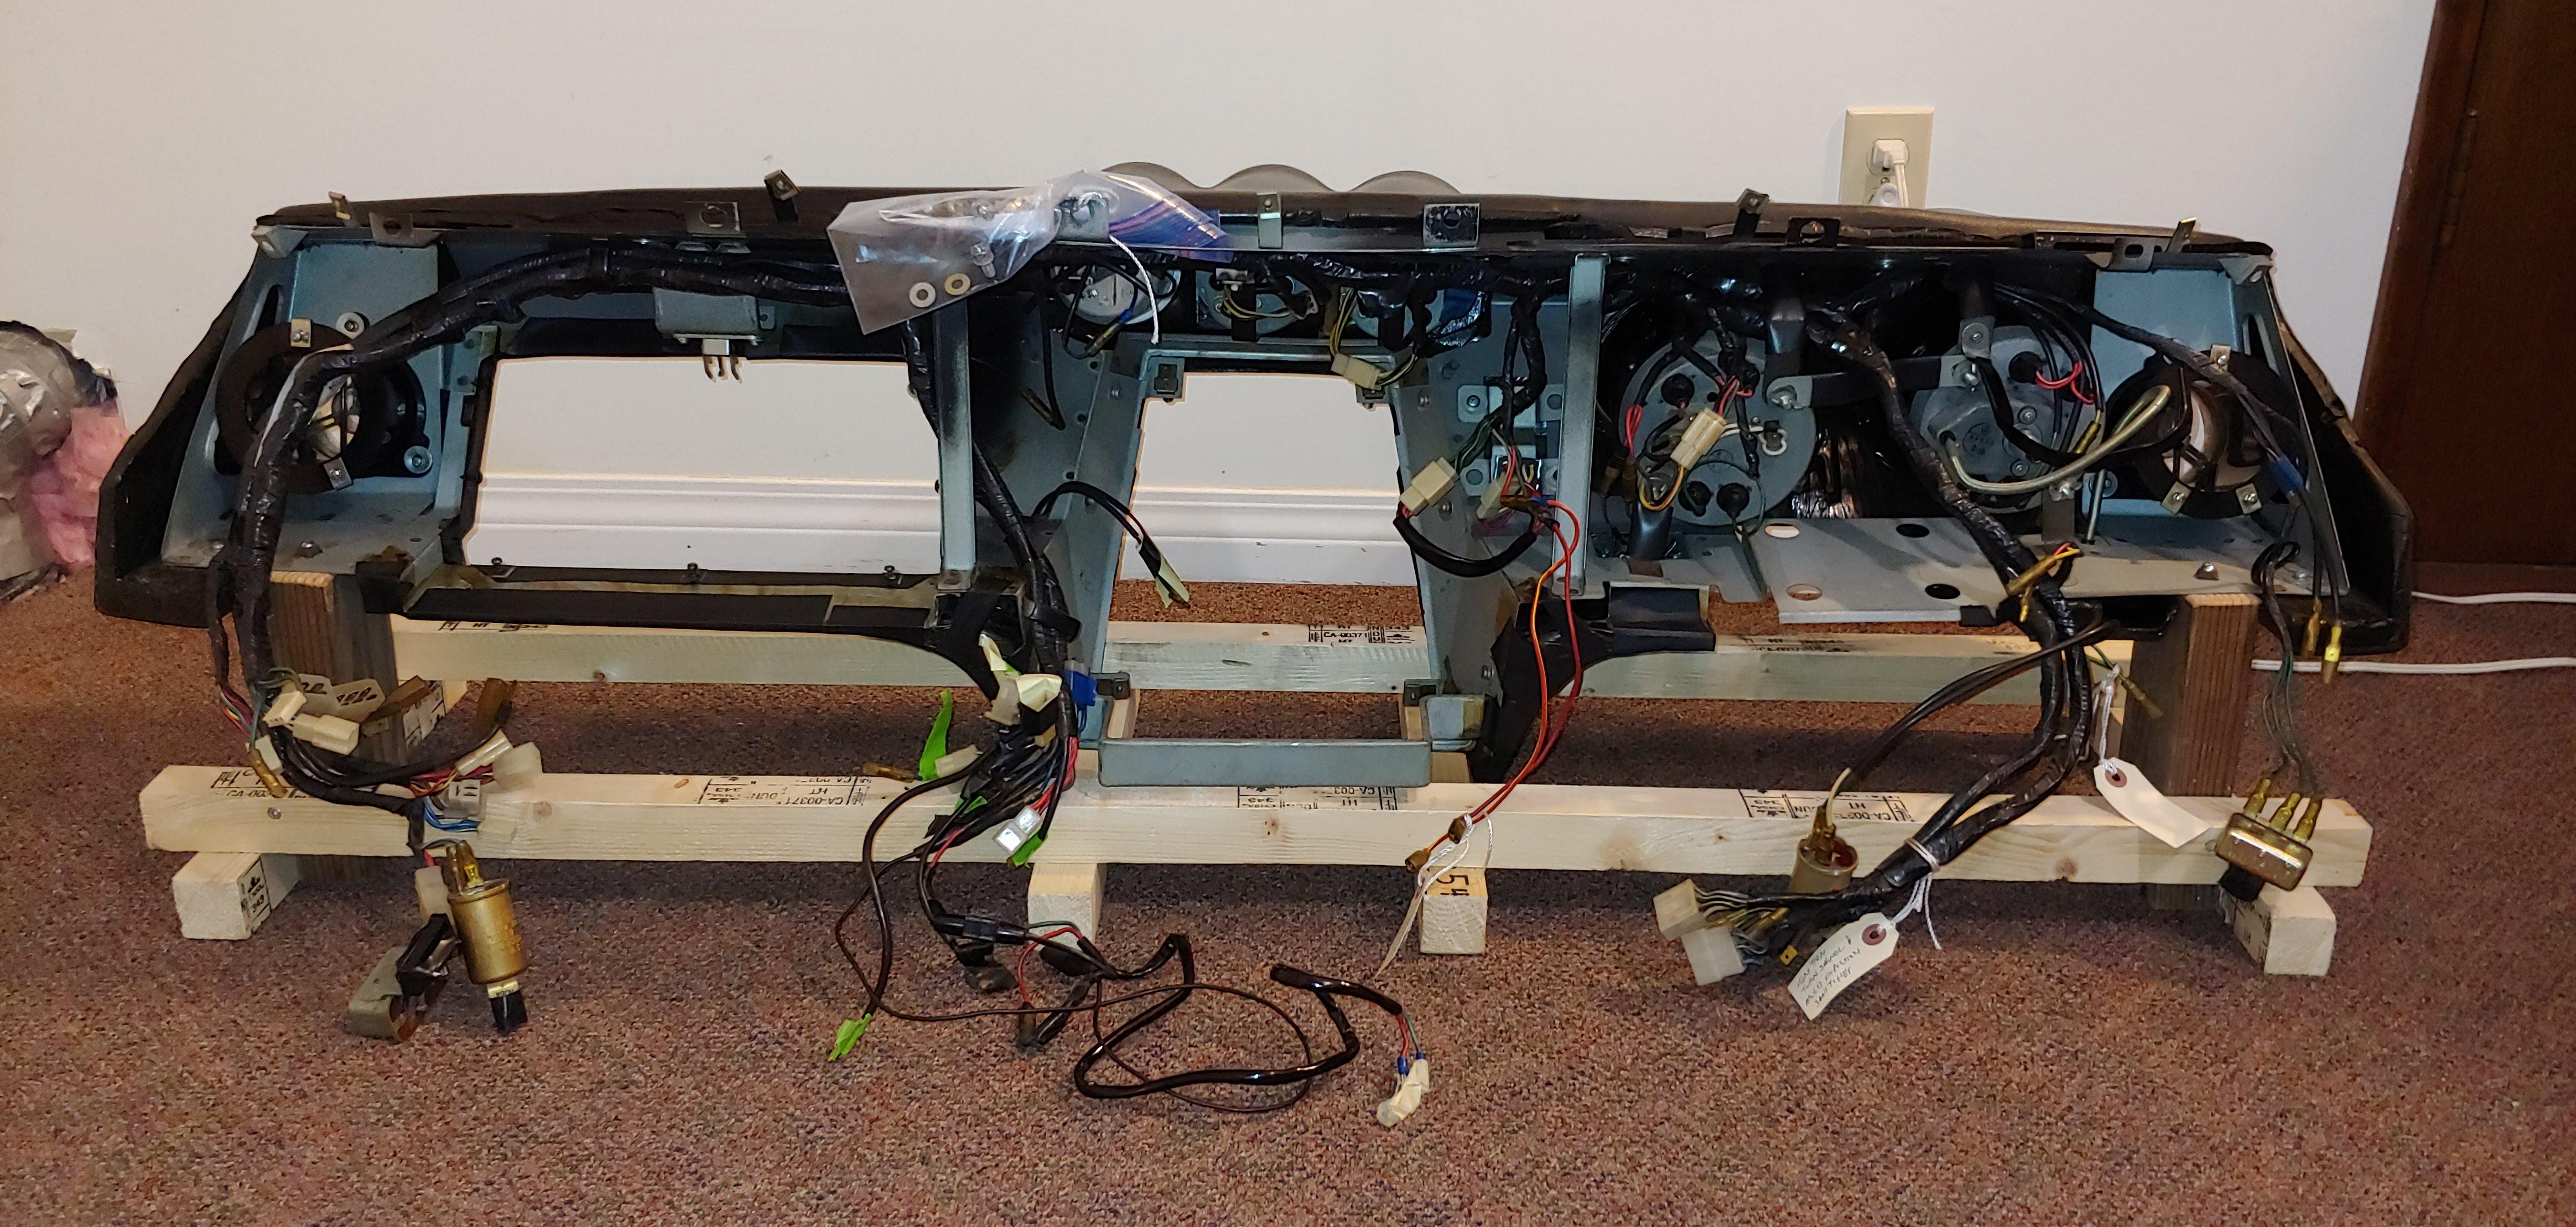
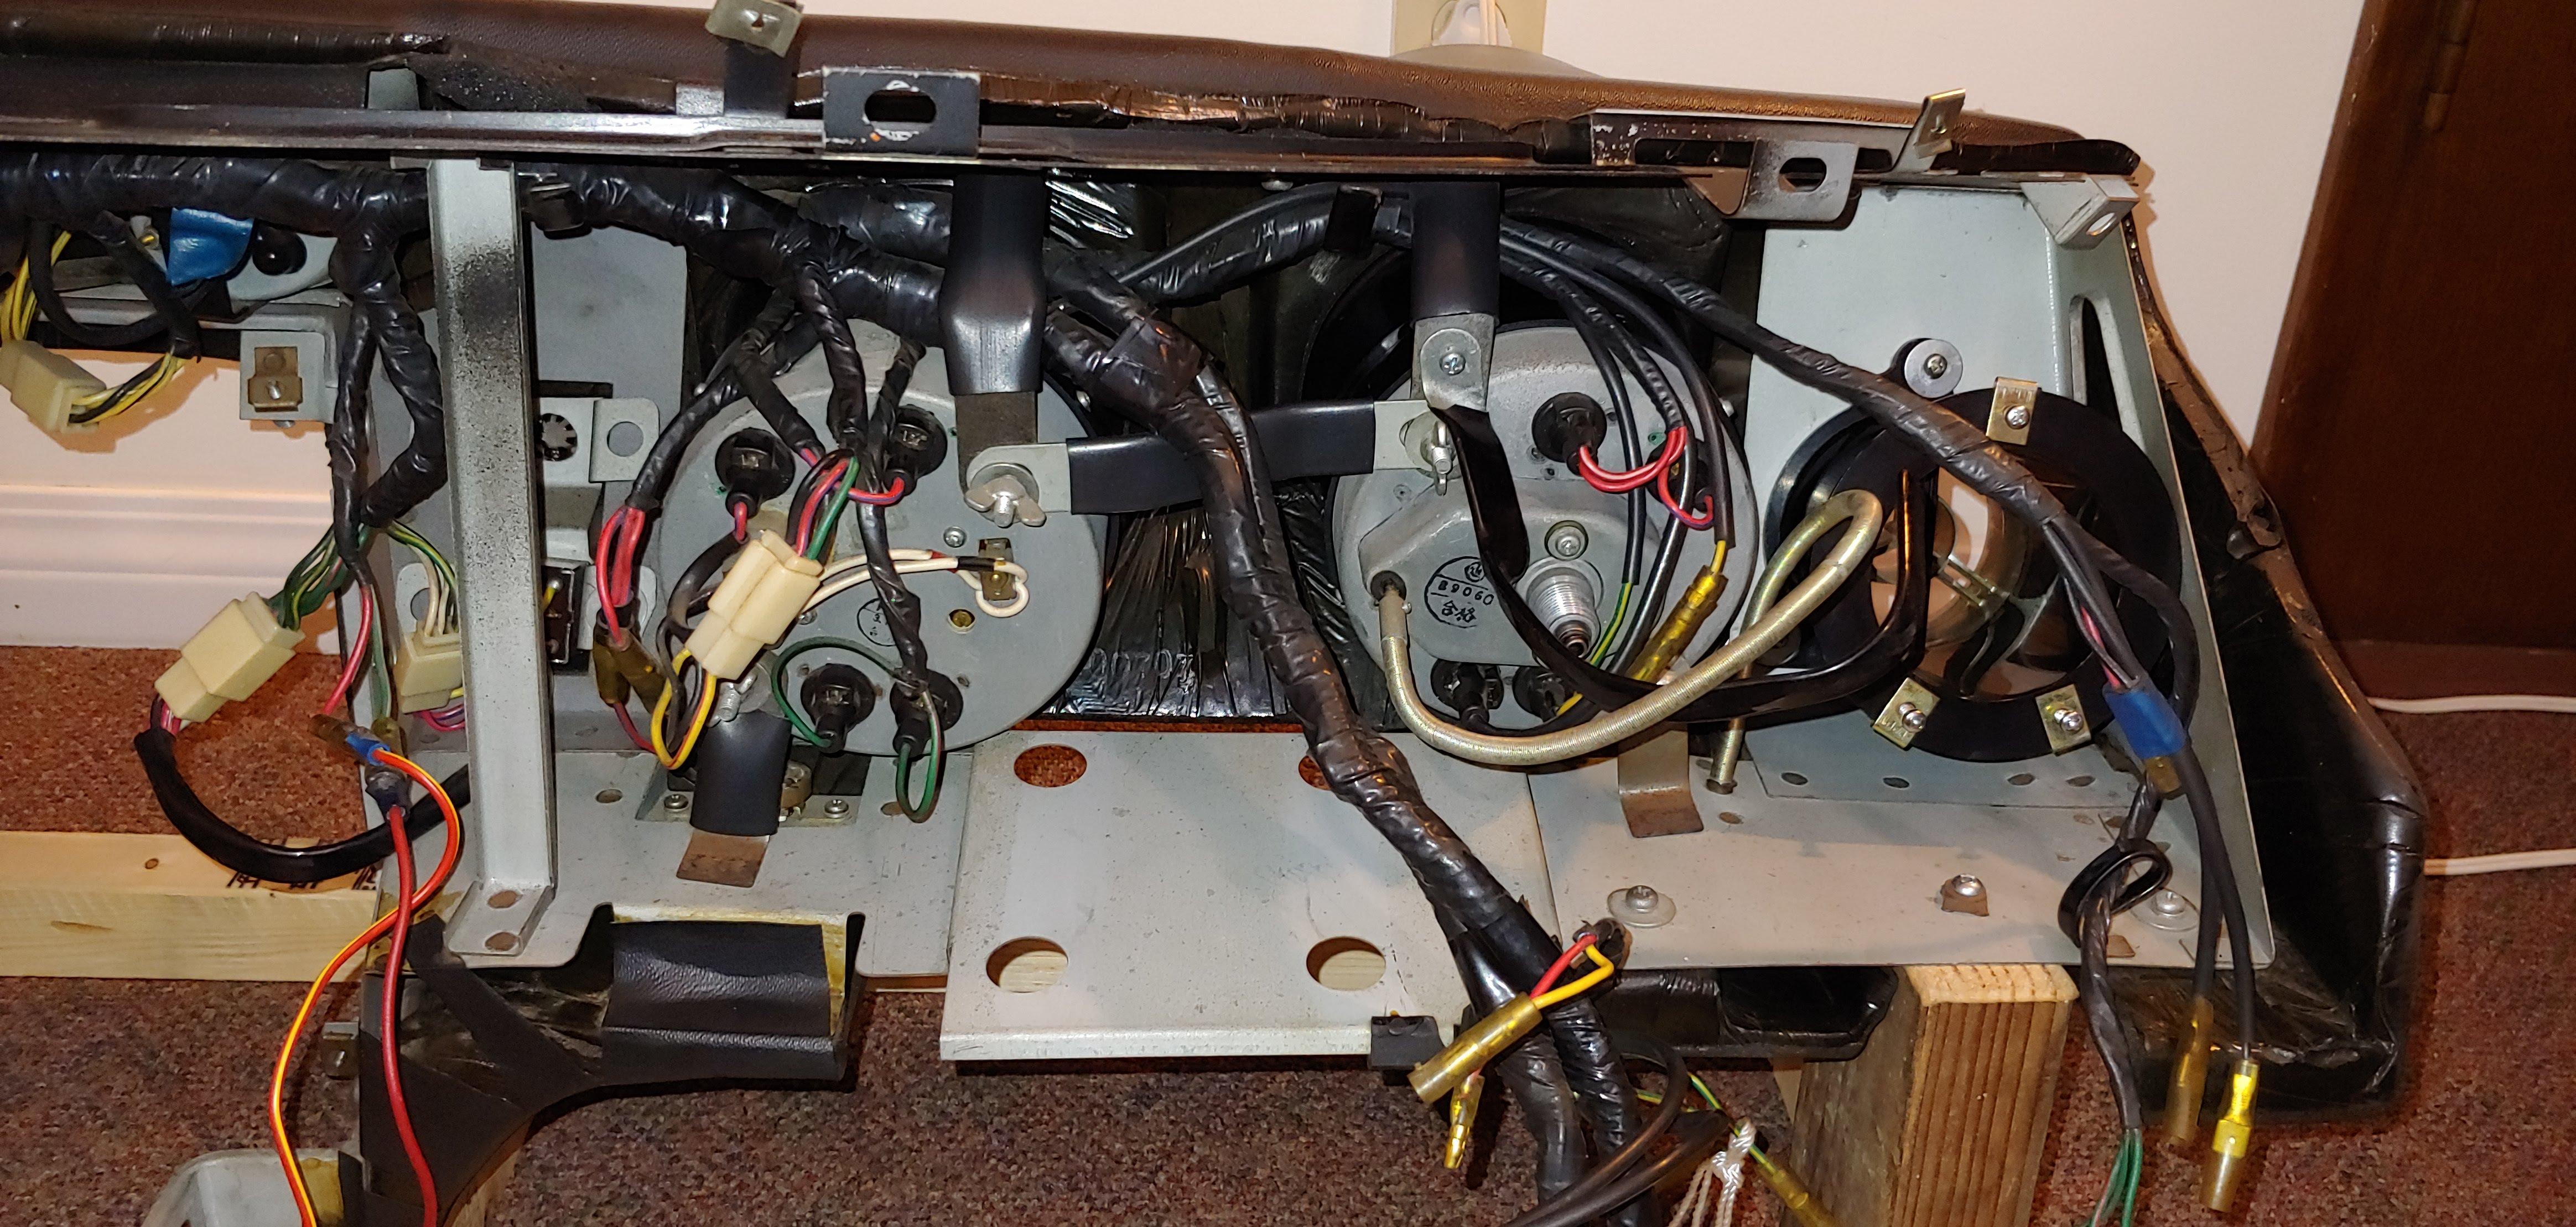
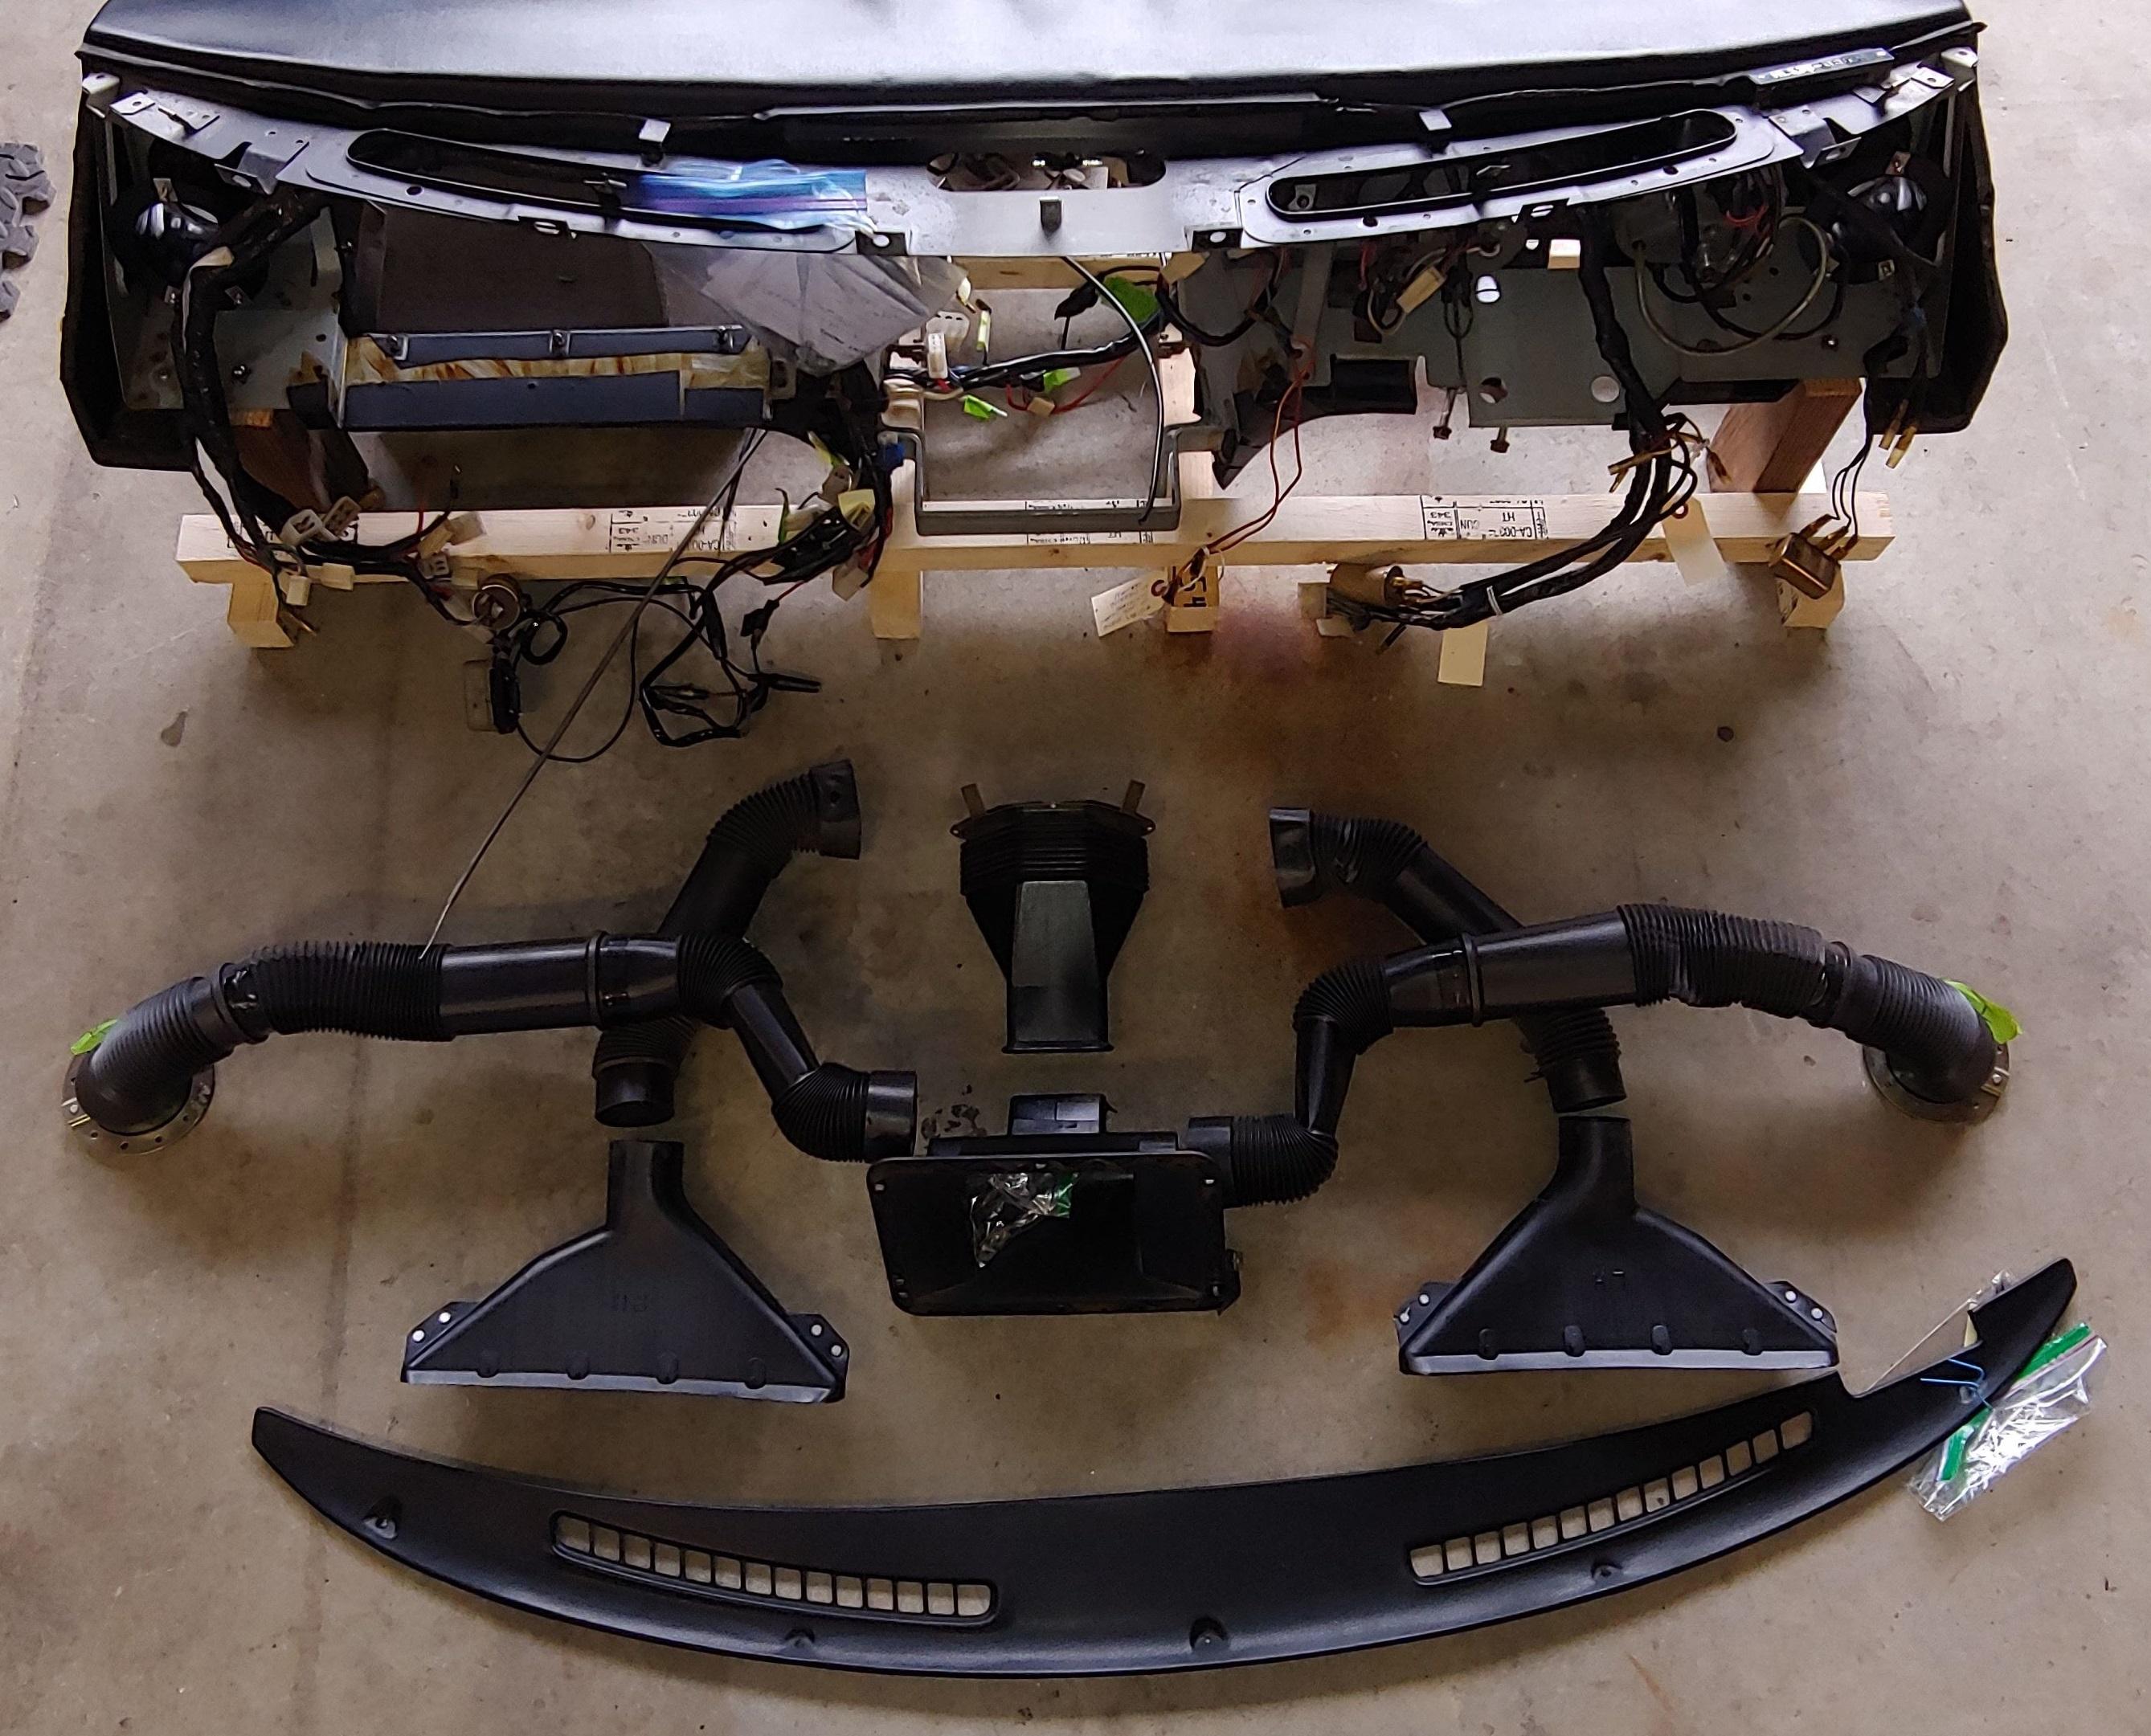
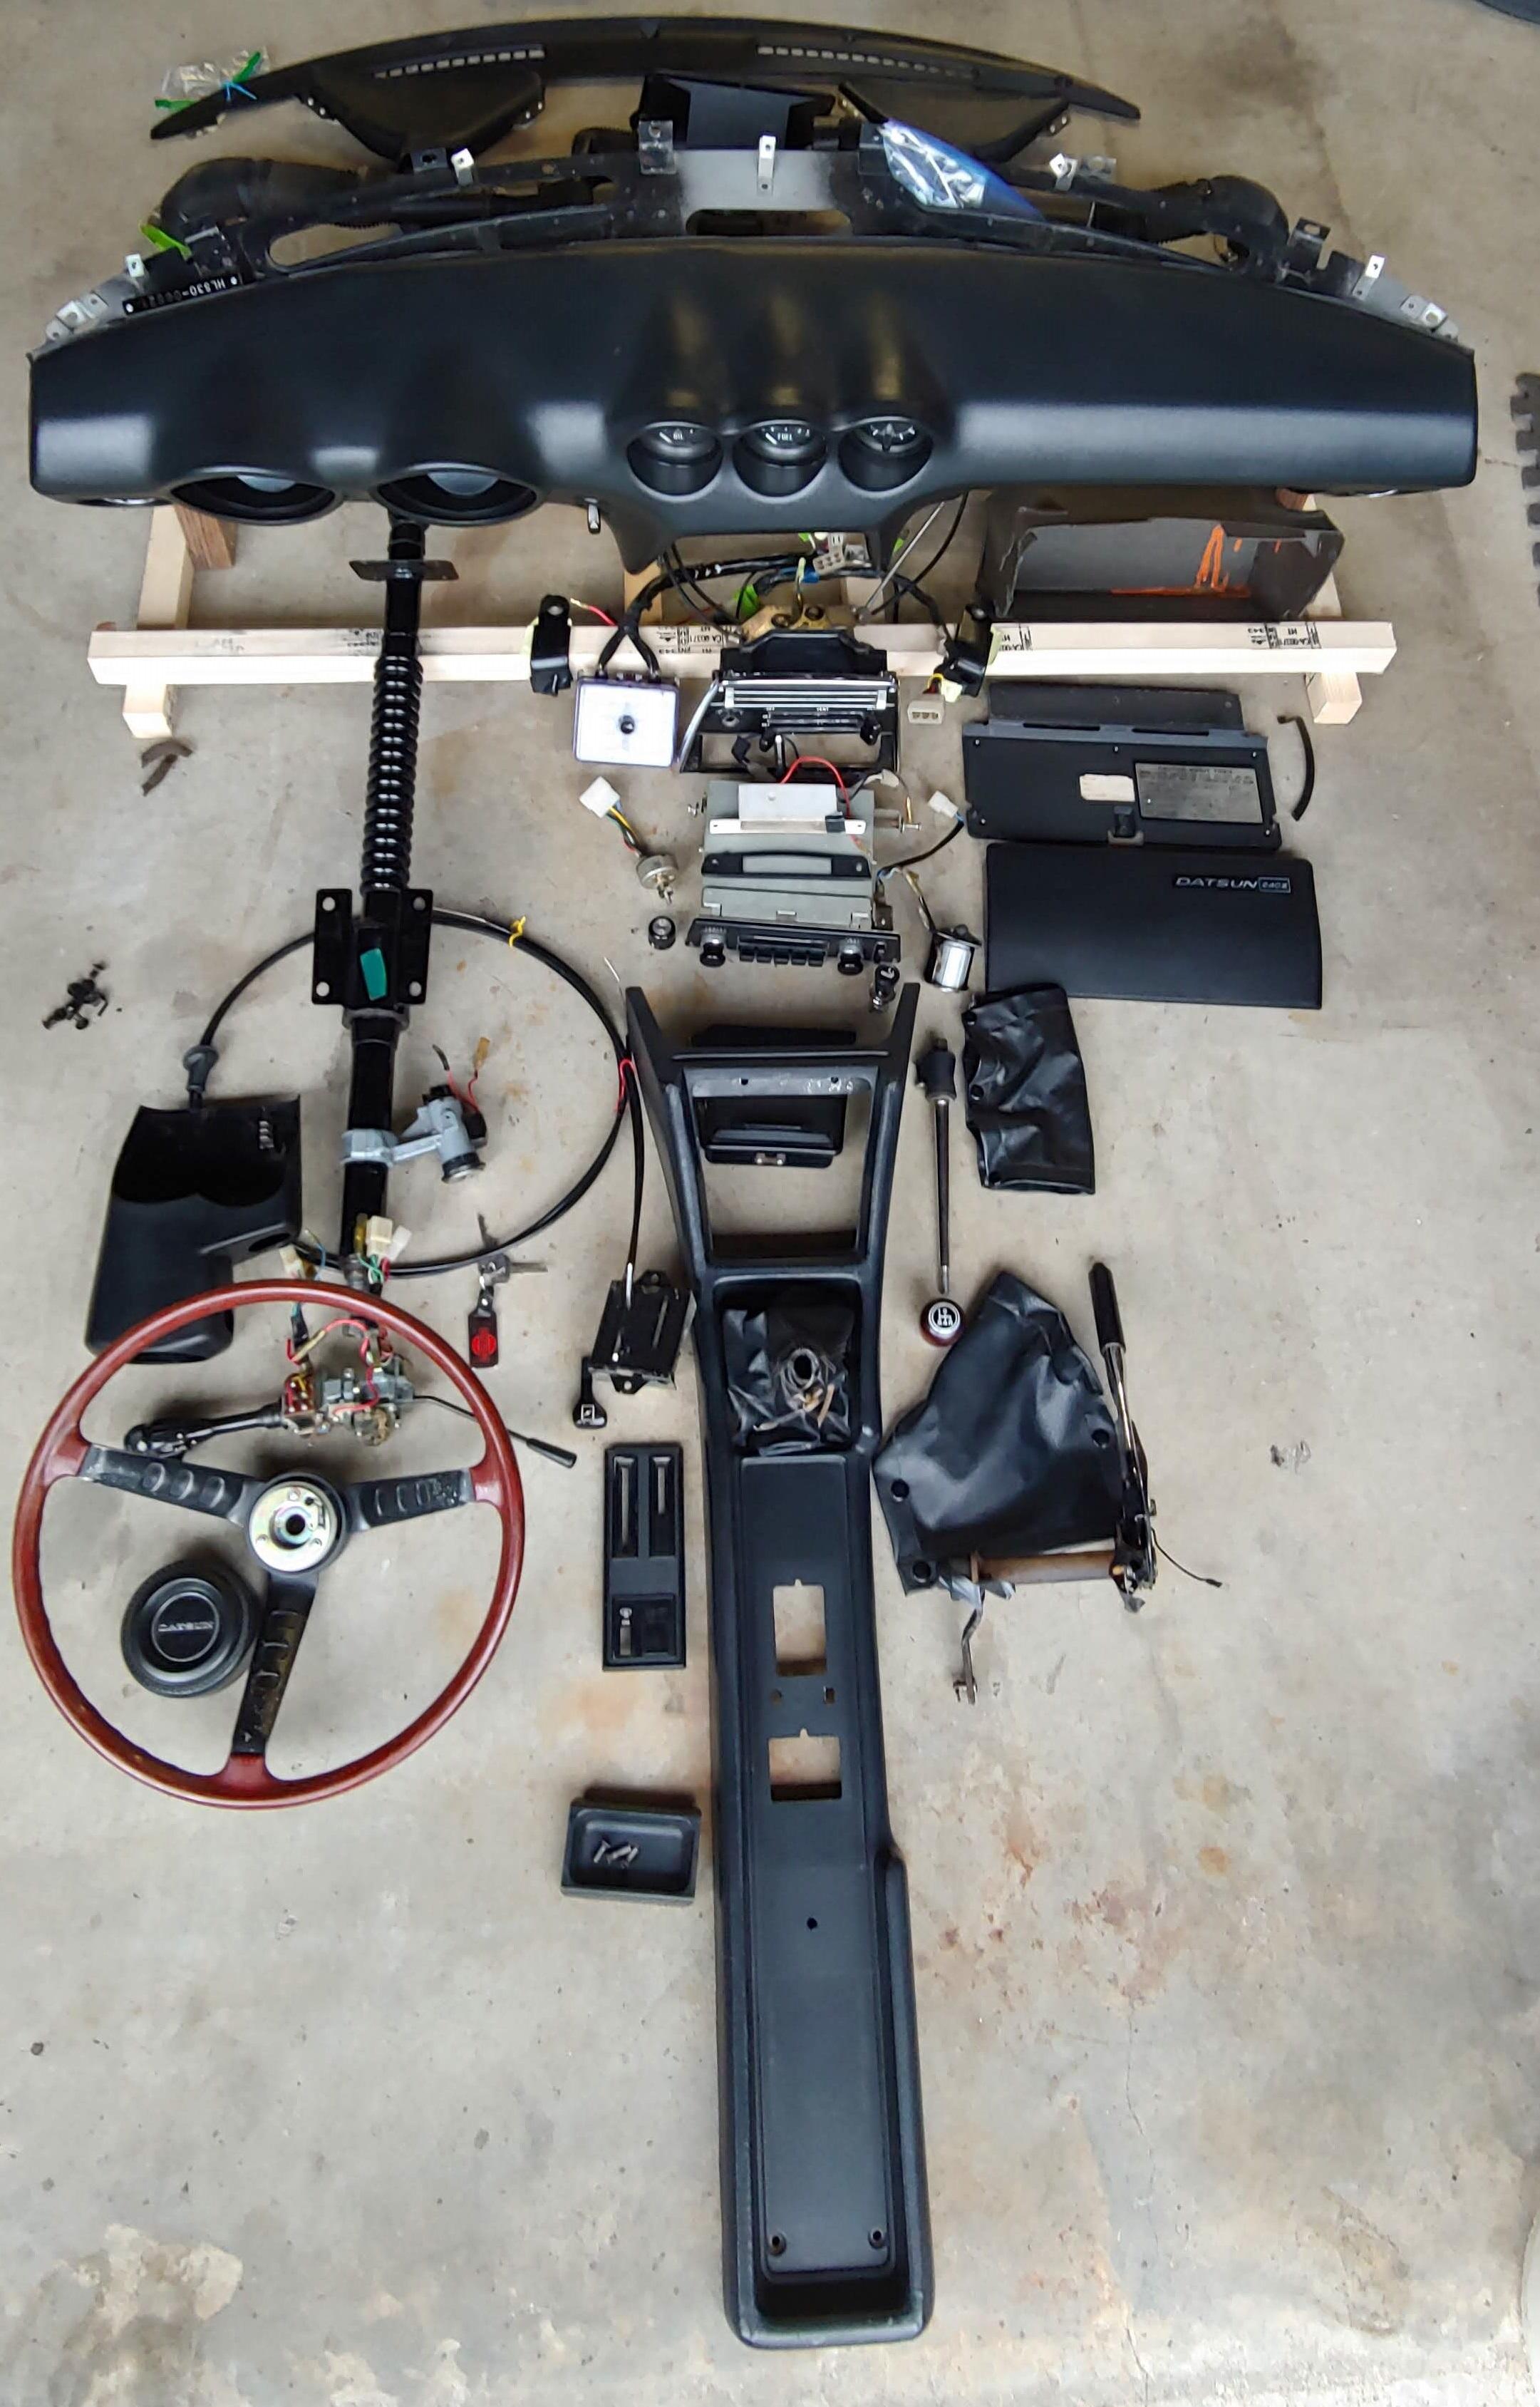
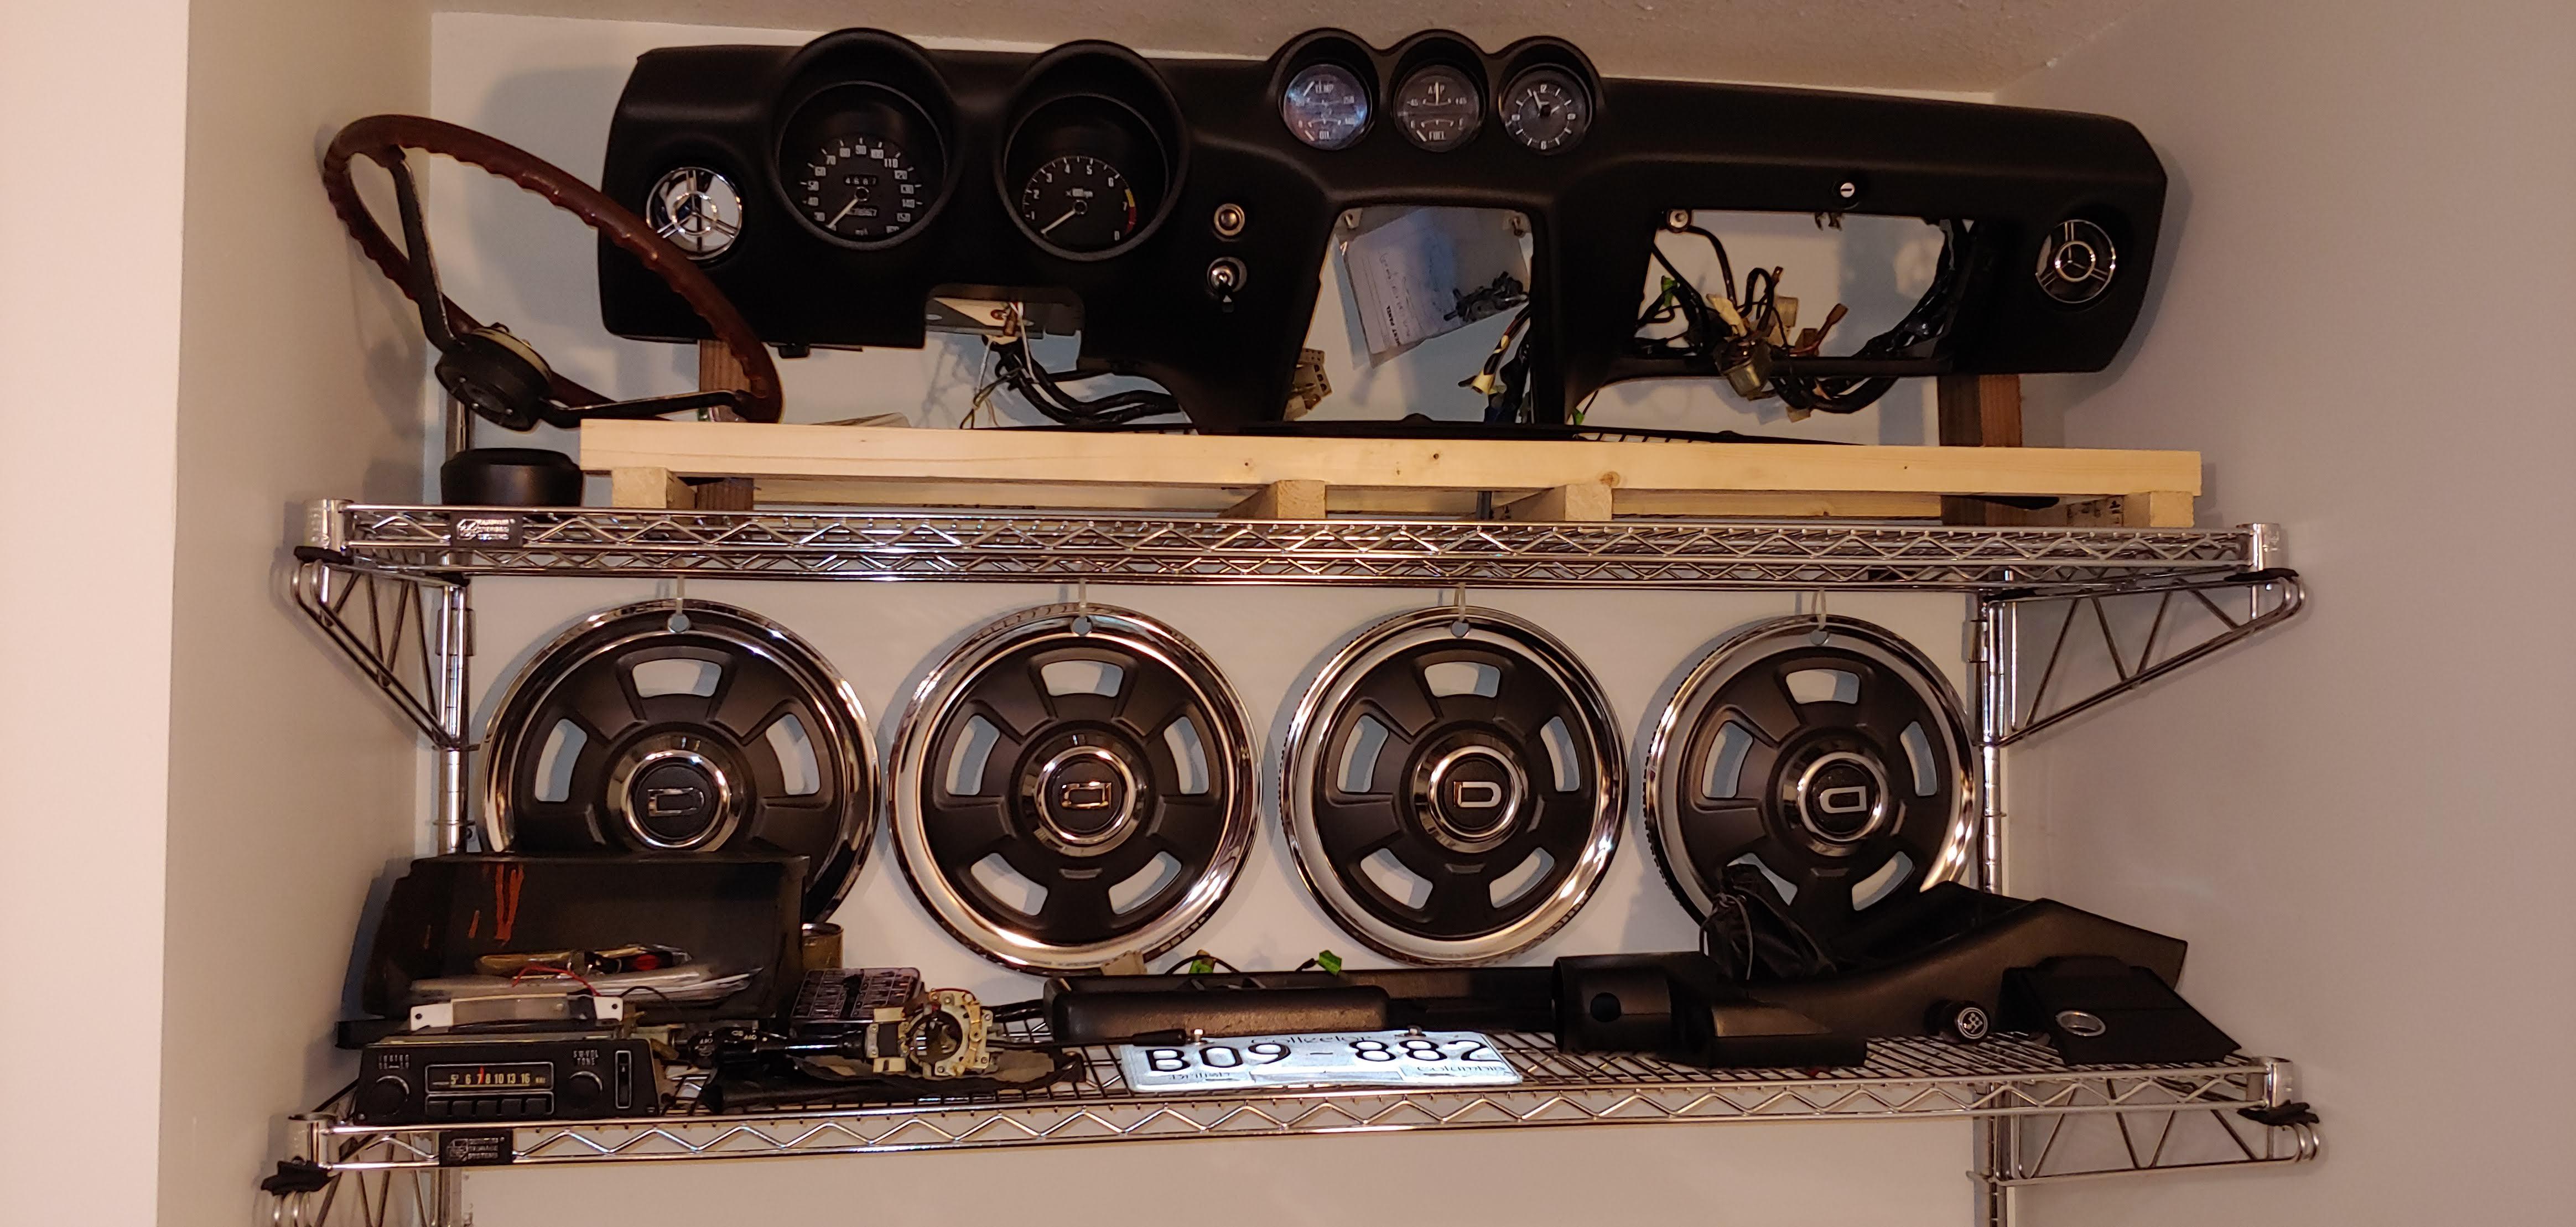
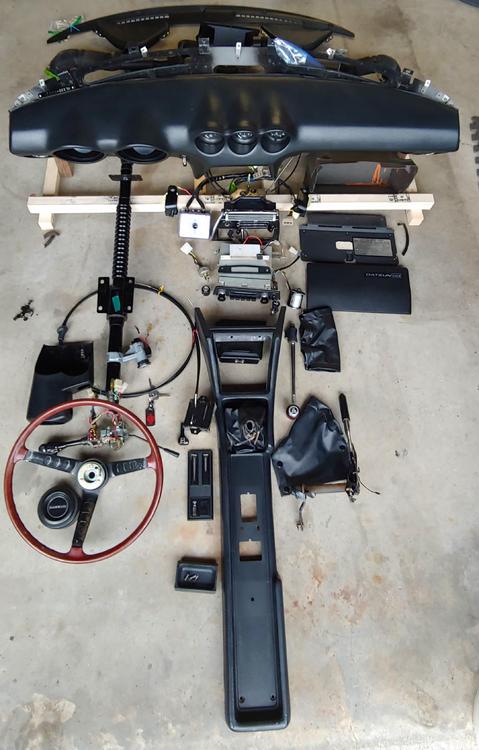
1 pointSpent some time yesterday cleaning the dash and some of the ventilation system parts to ready for storage. I am storing select parts on shelves in my office the rest will in my crawl space and organized on shelves and bins in my garage. I under estimated the space required but I'm doing my best to be organized so that I won't have to rely to much on my memory when I eventually get on to re-assembly.


 1 point
 -
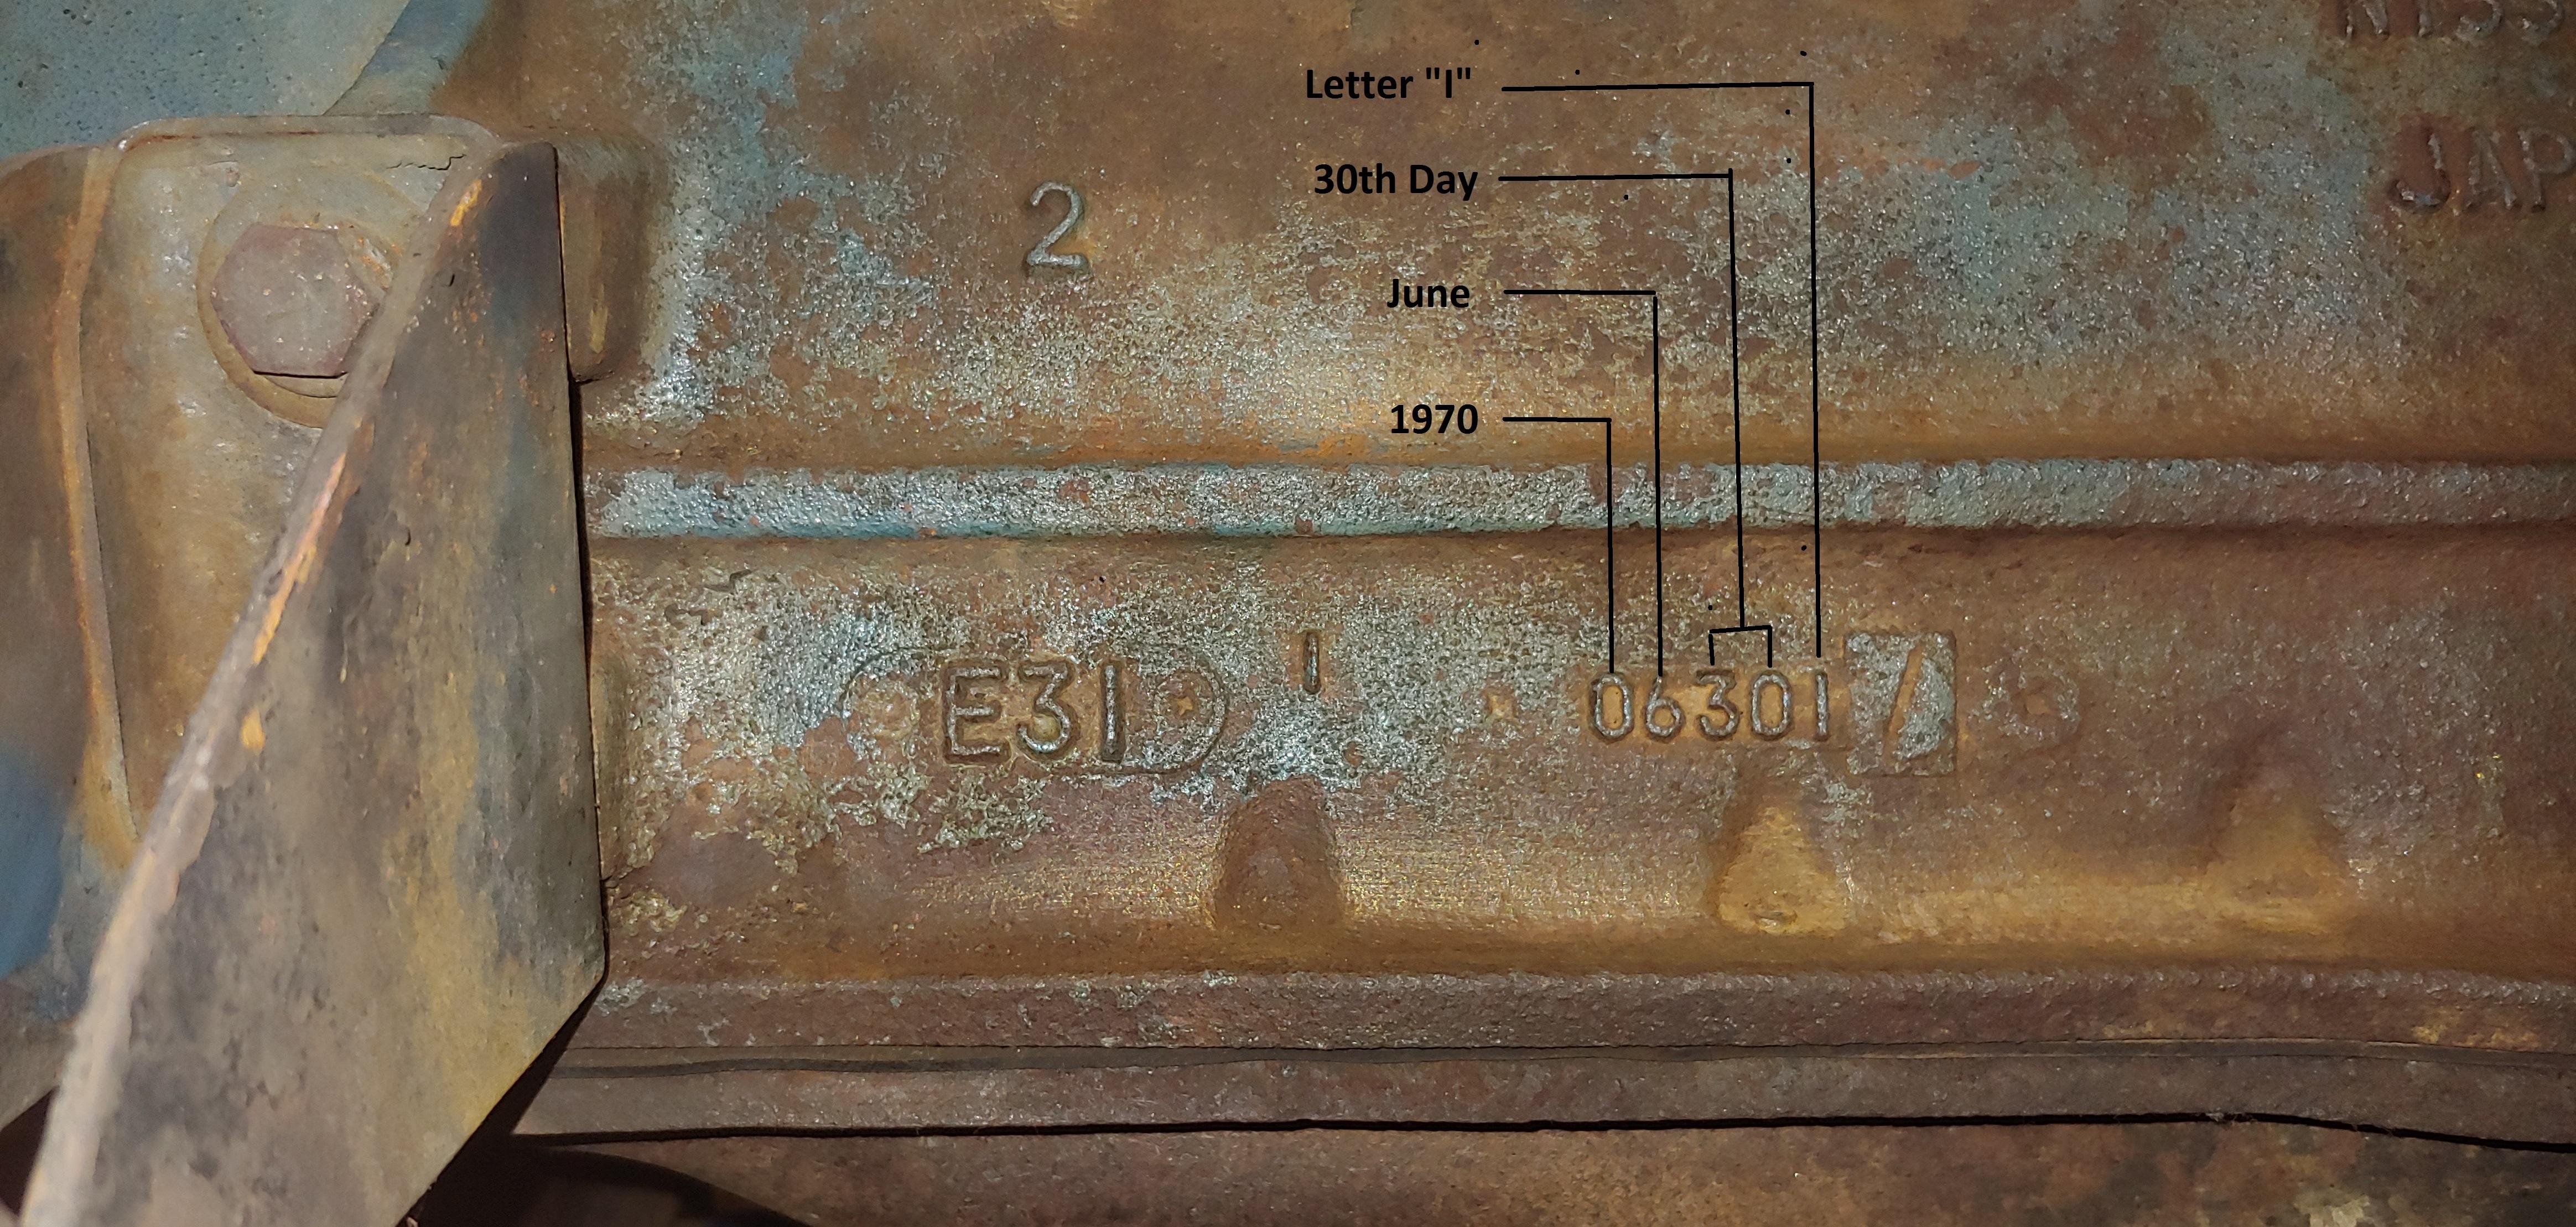
1 pointAfter recently removing my exhaust header I was able read the casting number on my E31 block, The casting number is located low on the left side, just back from center and in raised characters reads "0630I". Using the decoding method suggested by @katsthat would make it 50 years old today. Here is the old topic from back in 2004, where this was discussed:
 1 point
 -
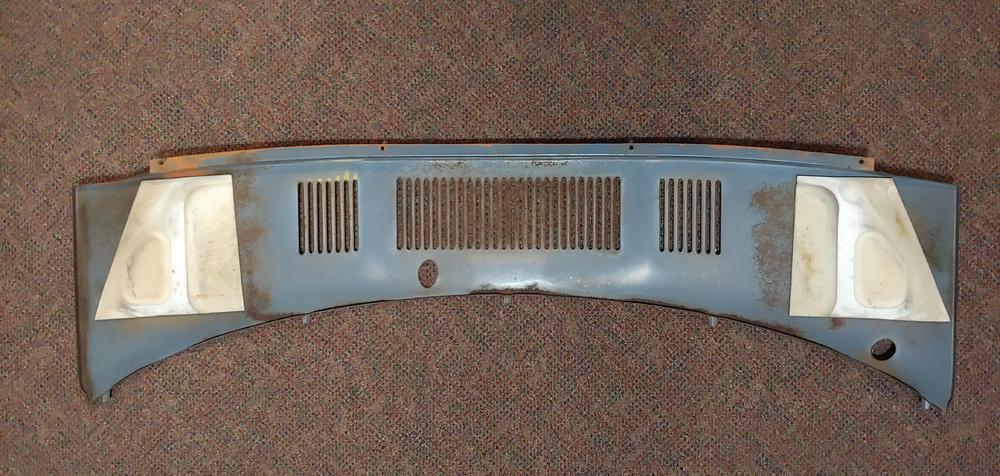
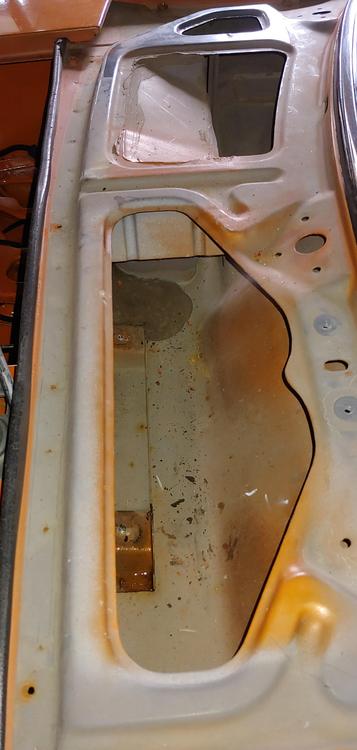
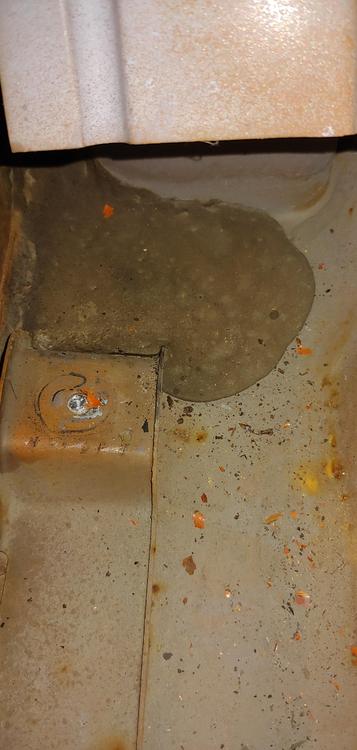
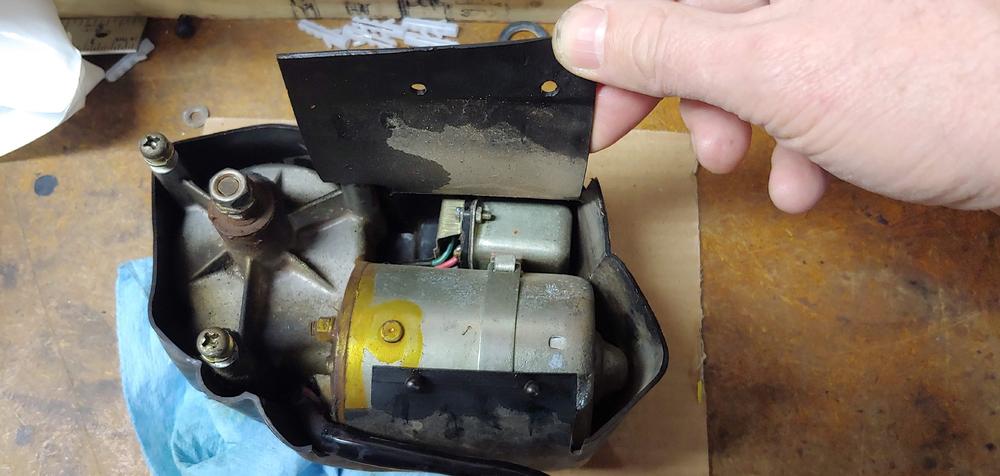
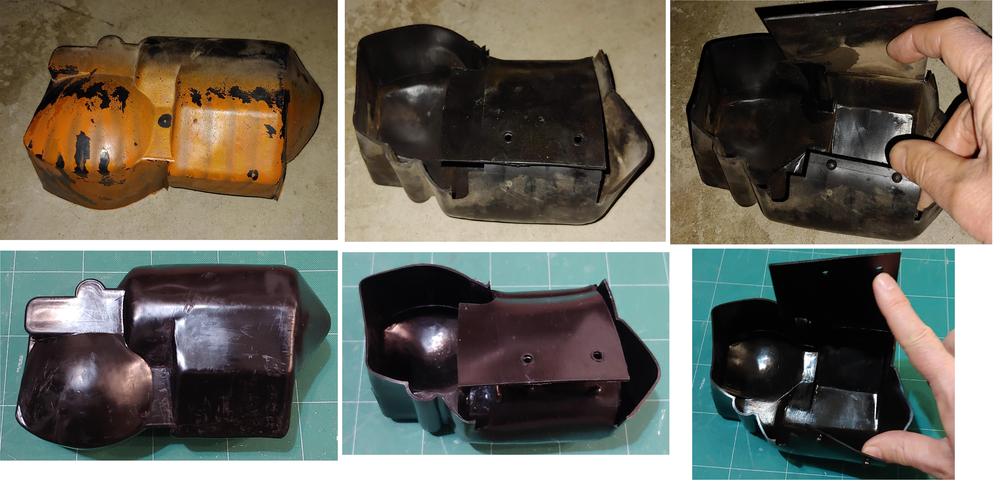
1 pointThis weekend I also pulled off the cowl cover to remove the wiper motor assembly and inspect heater fan intake duct and surrounding sheet metal. I'm happy to report that I don't have a rust issue in this area. Here is a good discussion, with fixes, on this subject: Here are some pictures of what I found, I was surprised to see that, except for over spray, the wiper motor cover was fully intact and that the grommet was also in very good condition. I also took some time and cleaned up the wiper motor cover. Before and after pictures attached. Anyone know when the change to a bag for the cover happened?

 1 point
 -
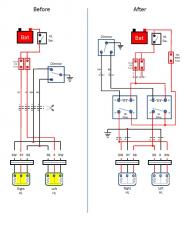
1 pointHere is another way to look at it. Gives you the before and after picture so you can visualize the changes. Headlight_relay.pdf
 1 point


.JPG.4d62ea35548b2fda4931b4399ebd20d8.JPG)


.jpg.45c57f9704118f985a3d3aa9fca56e71.jpg)