Leaderboard
-
Namerow
Free Member5Points1,551Posts -
conedodger
Free Member4Points12,513Posts -
dspillman
 Subscriber
 4Points445Posts
 -
MH77280Z
Free Member4Points469Posts


Popular Content
Showing content with the highest reputation on 04/26/2024 in all areas
-
Nice job. I used Distinctive Industries' covers when re-doing the seats for my 70 Z. I did not purchase new foam b/c the OE foam still seemed in good shape. Long story short, I found the fit of the new covers to be a bit baggy. Things improved a lot with the addition of 1/2" and 1/4" foam sheet in strategic locations (esp. the front and side bolsters), along with pushed-into-place 'basting' material (bought at a dressmaker's shop) that helped to remove/reduce wrinkles in certain locations. I was pretty happy with the end result, esp. considering the fact that this was my first-ever venture into the world of automotive upholstery. FWIW, hot rod and boat shops can provide a lot of guidance for this type of work.
 4 points
 -
4 pointsCalling it a day. Seam sealer was good enough for some cosmetic adjustments. Felt is attached with double sided tape.
 4 points
 -
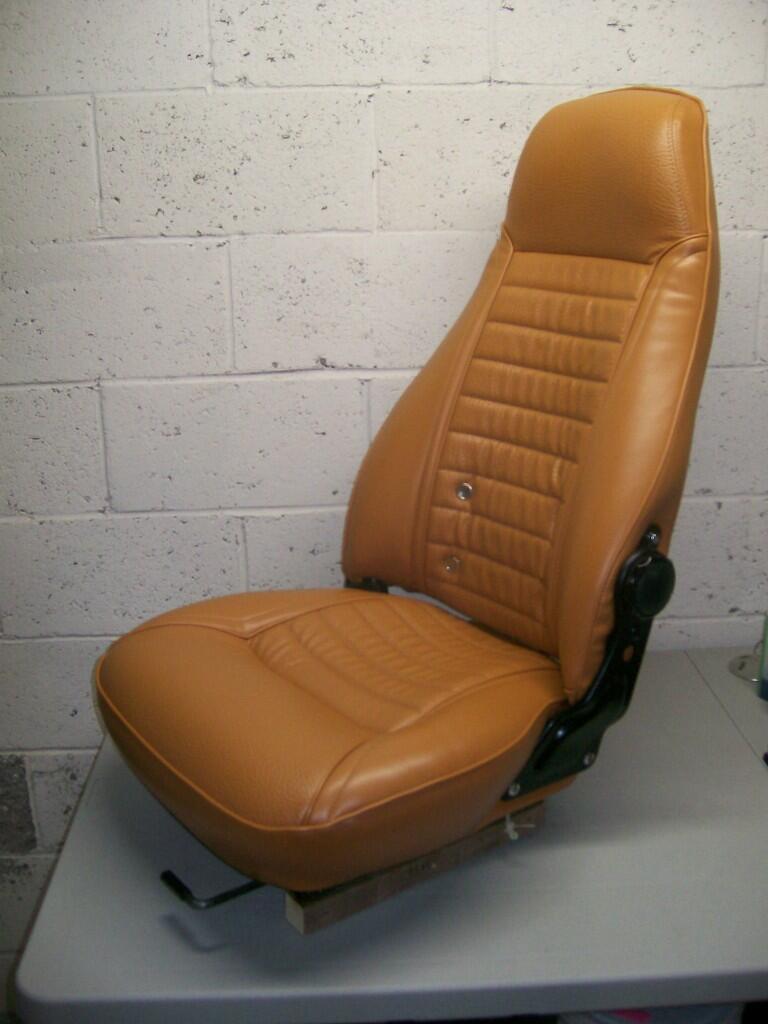
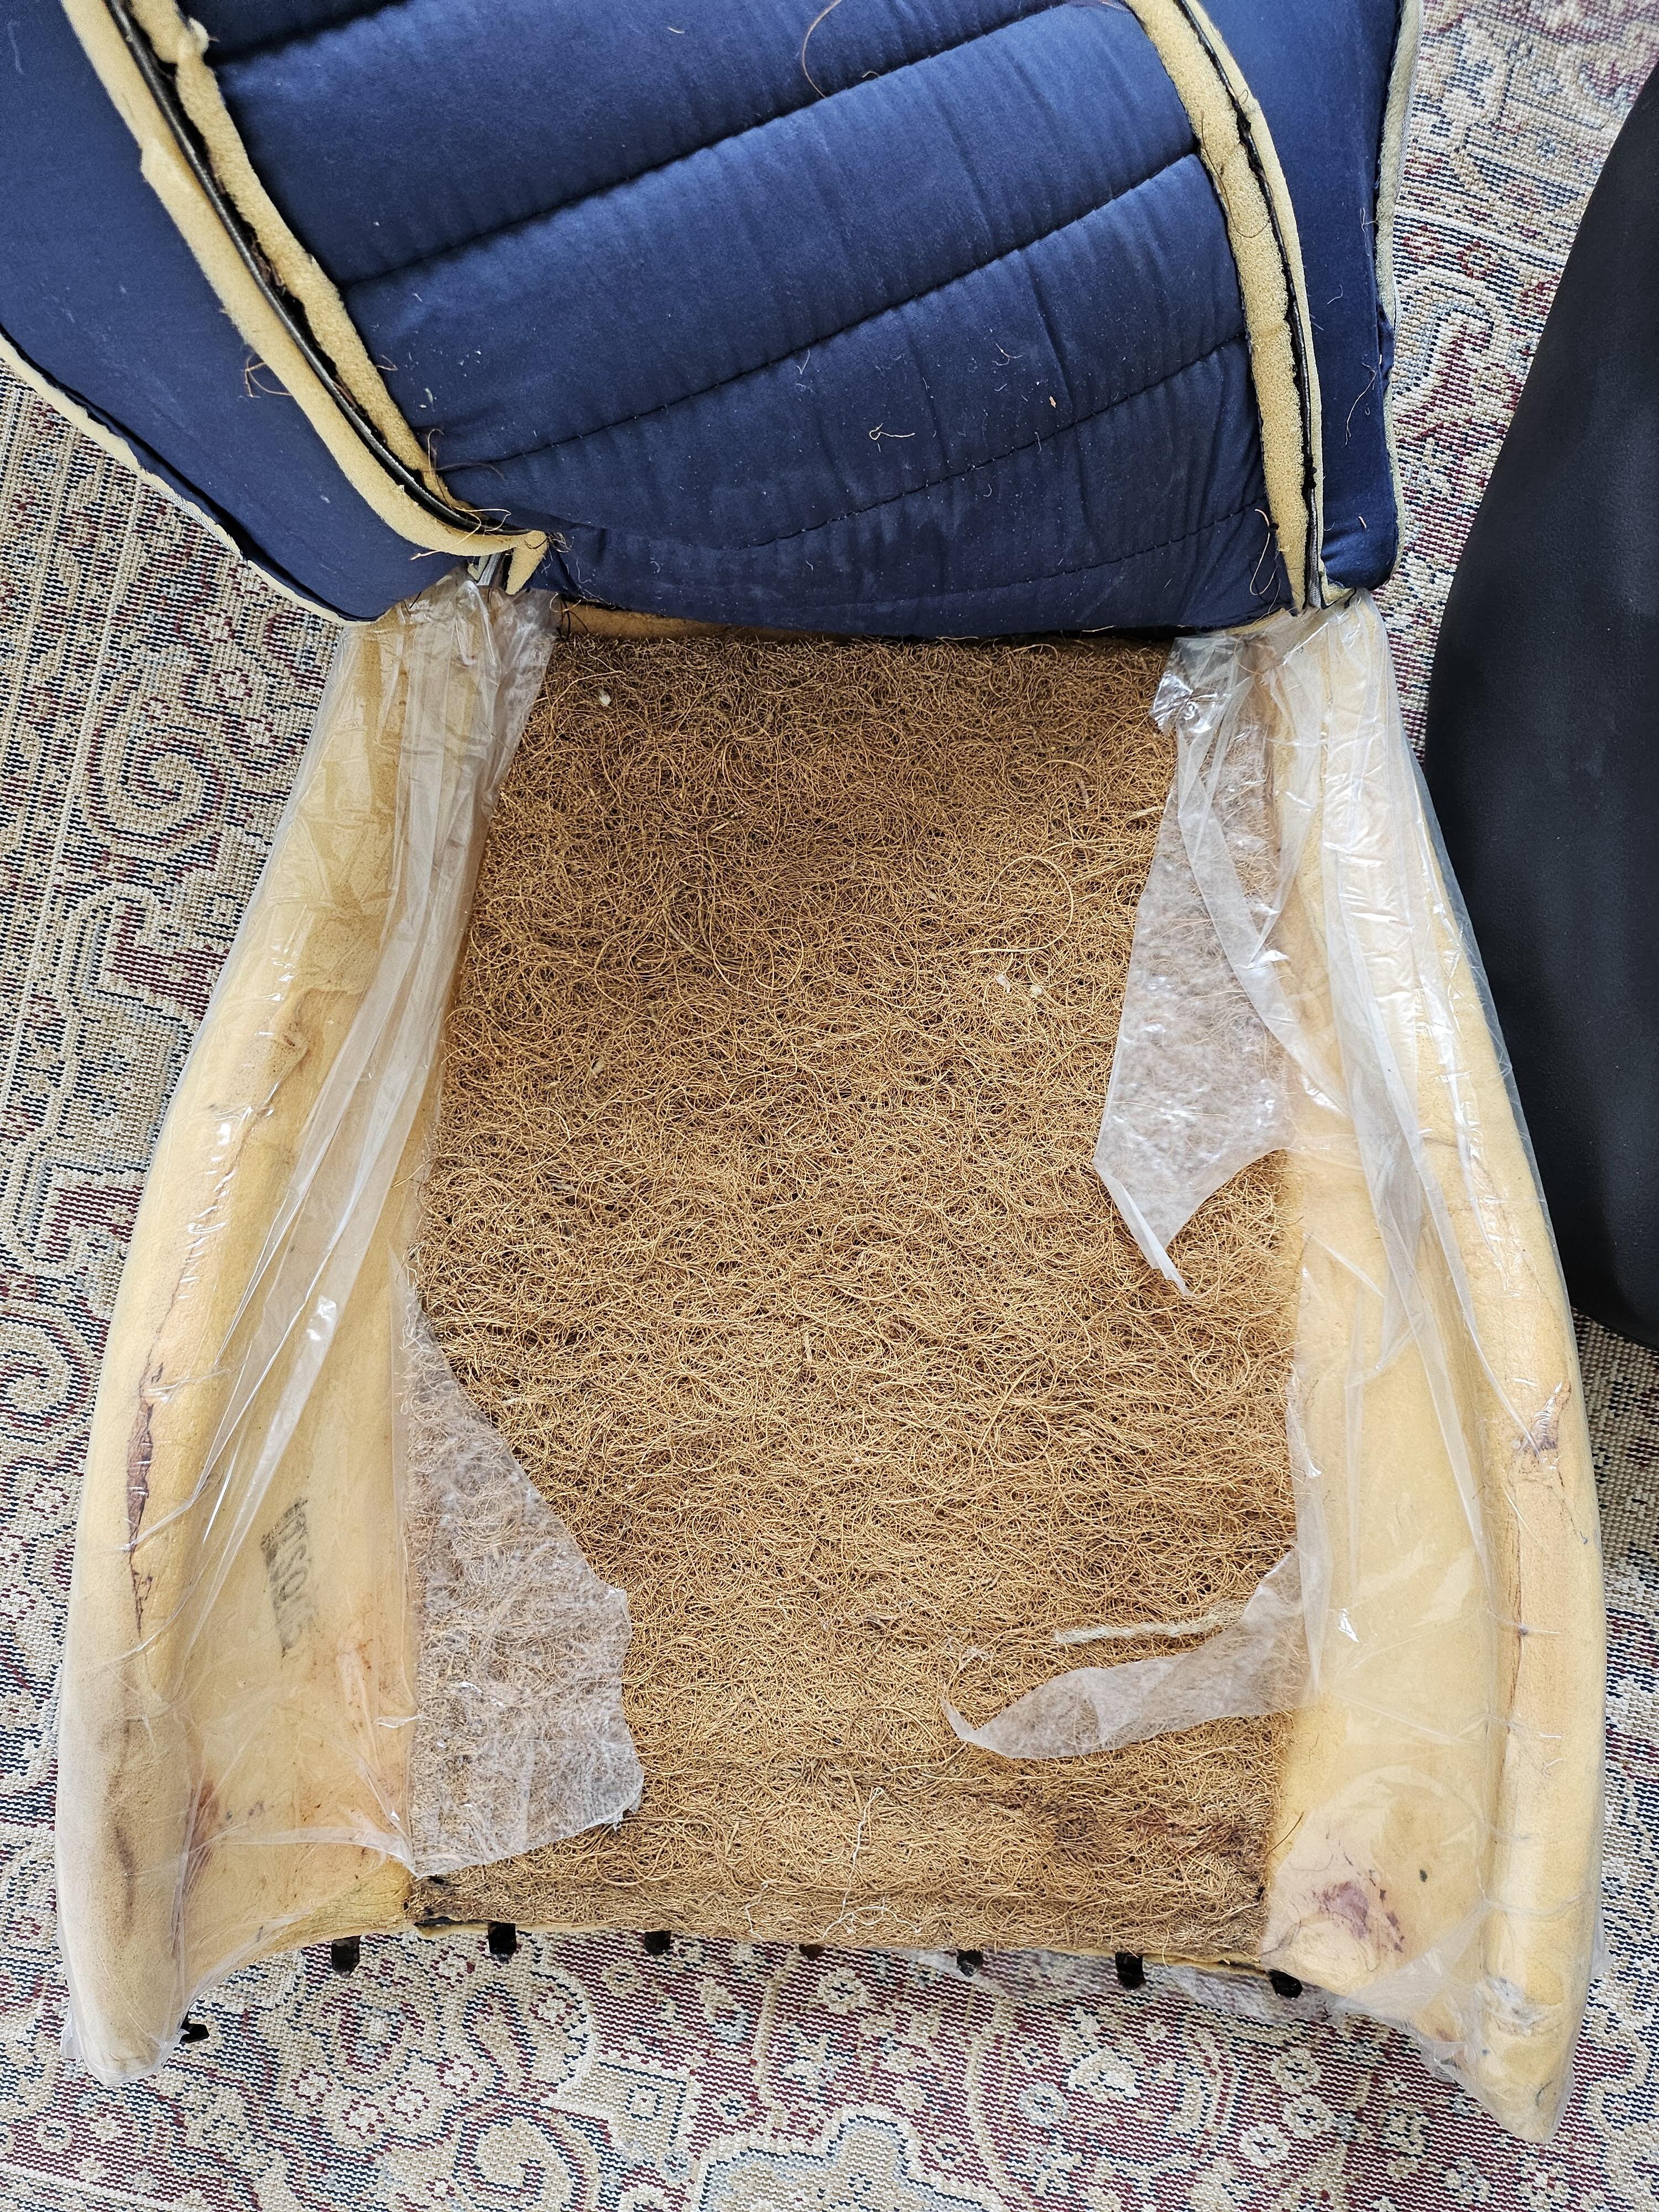
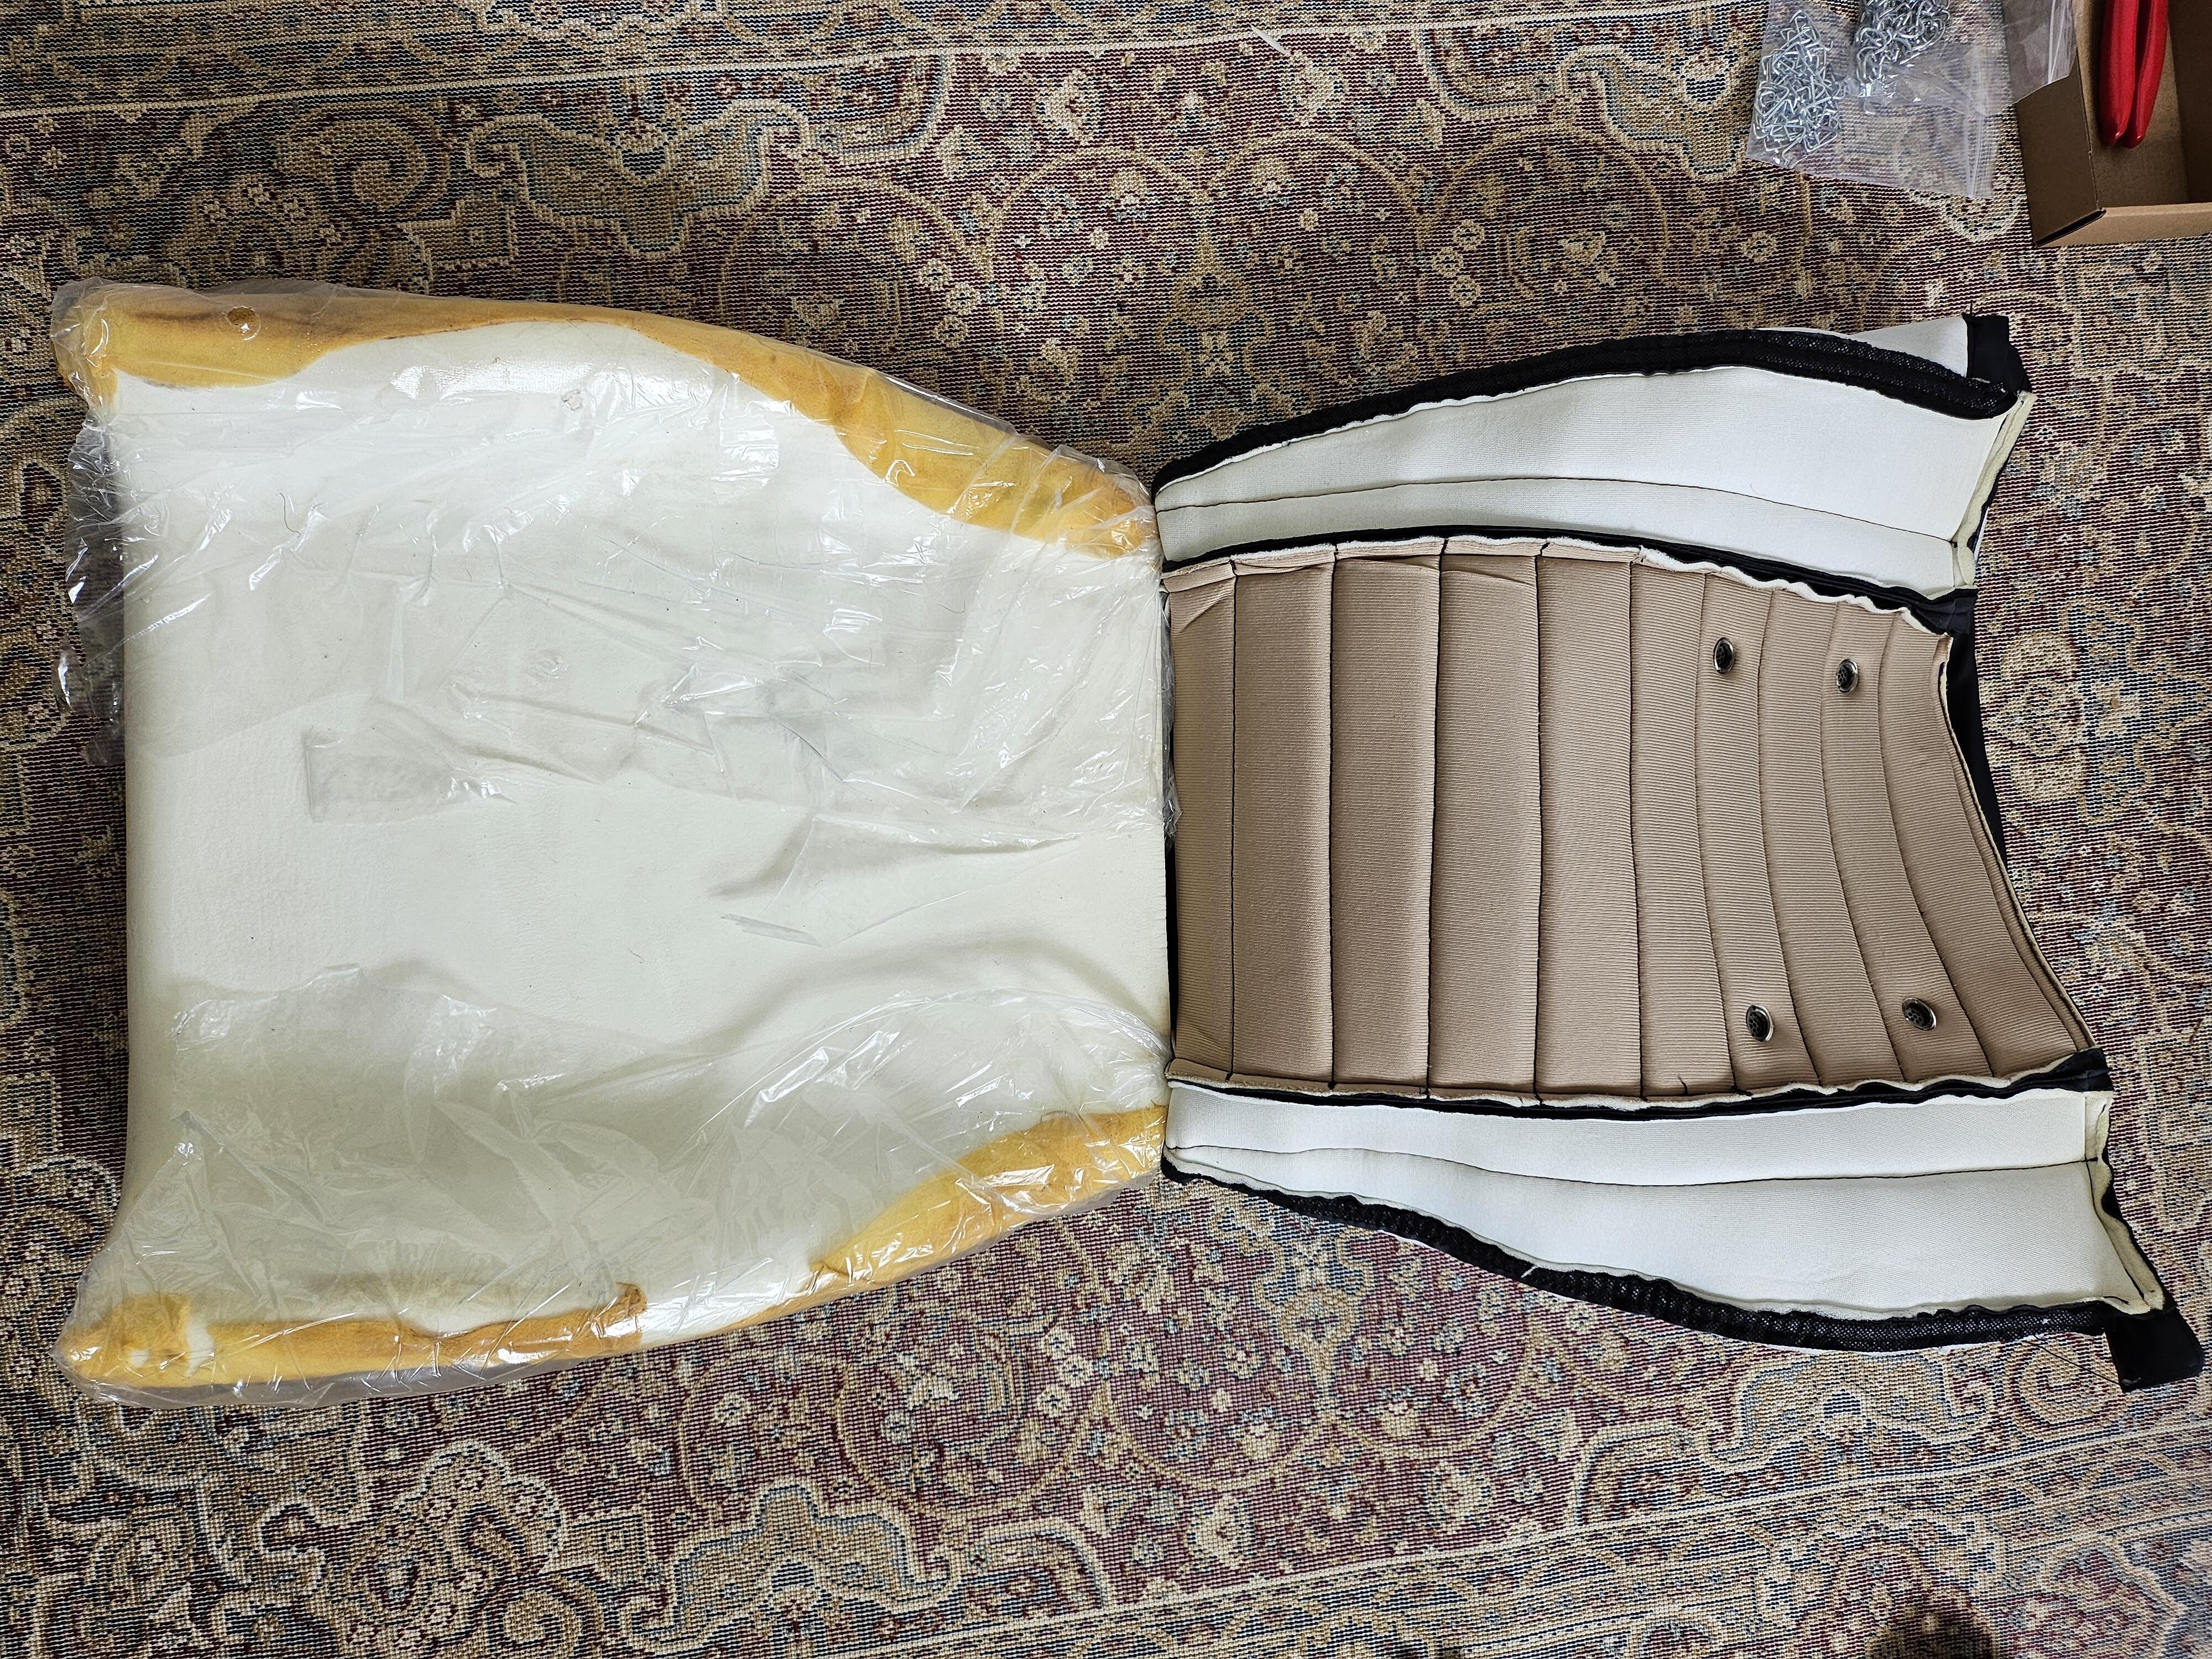
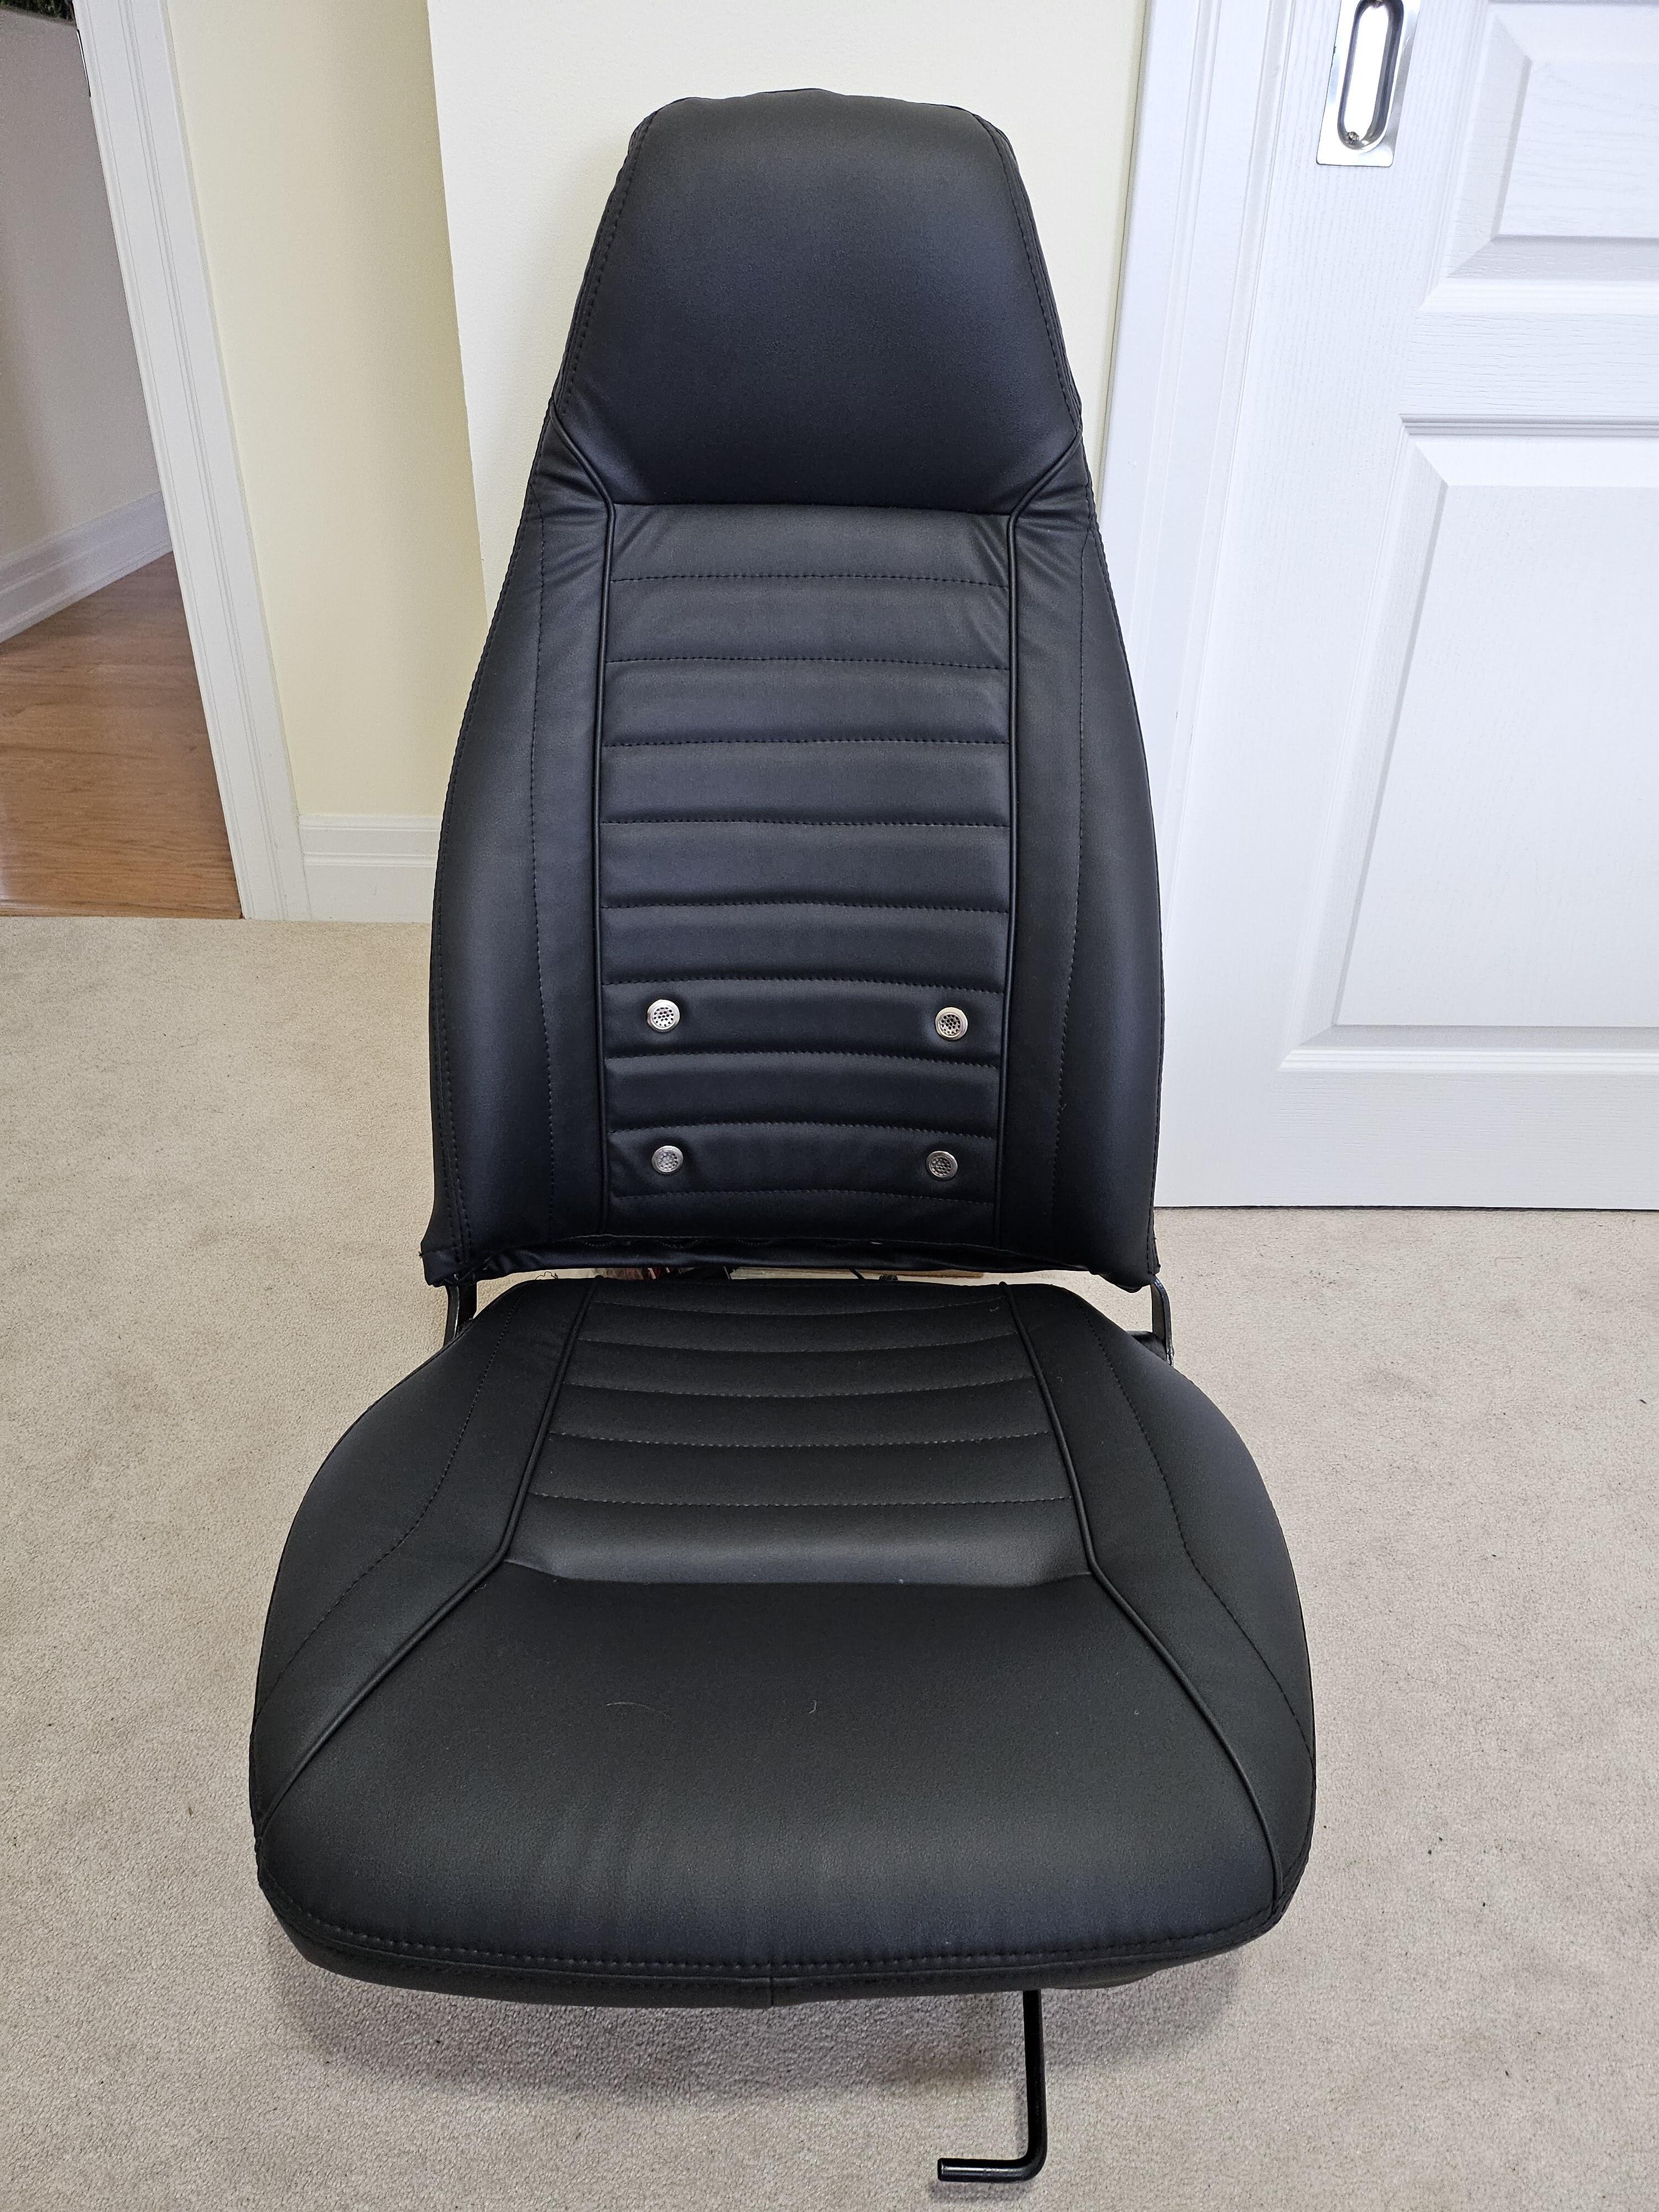
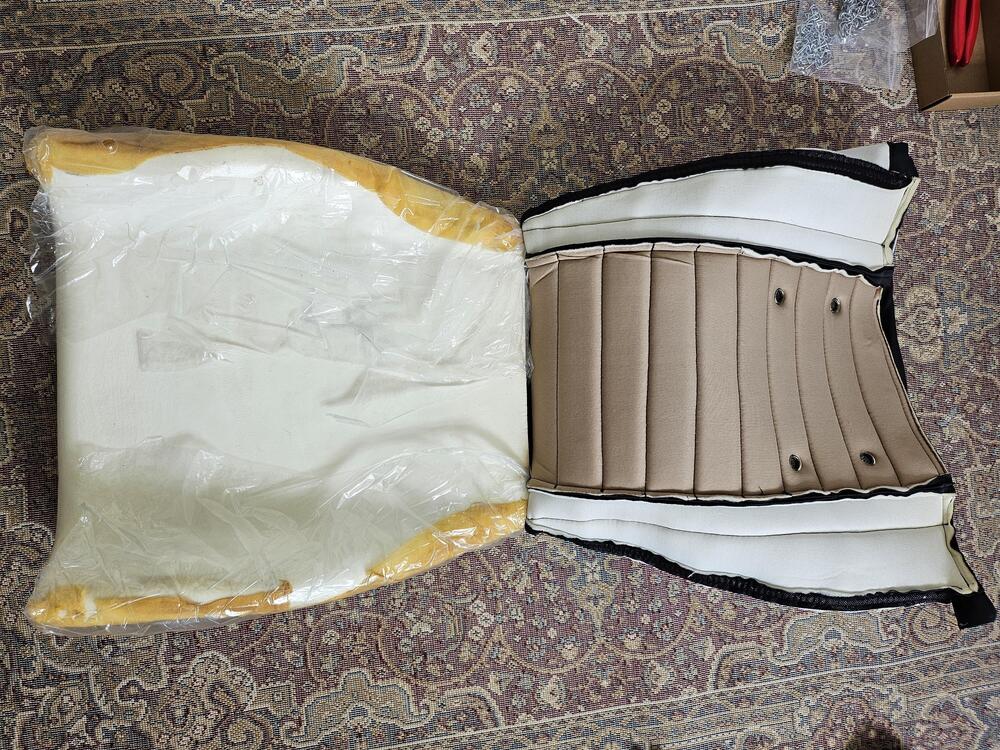
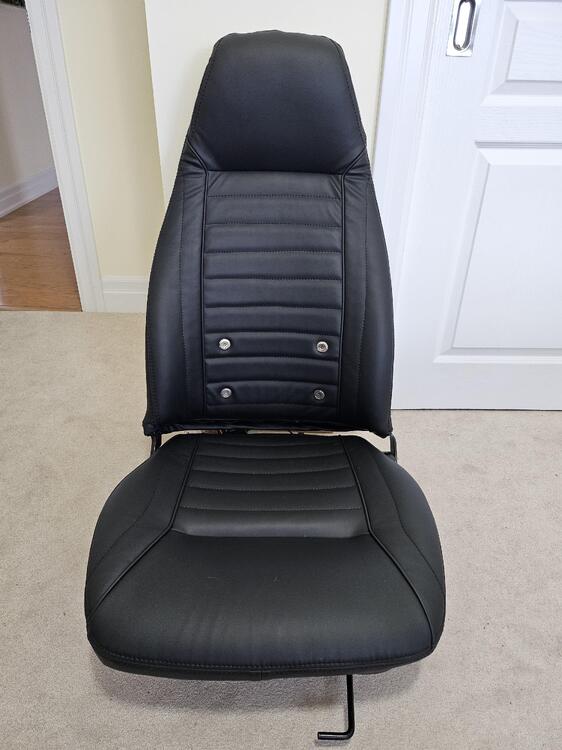
I just re-covered my passenger seat with the Interior Innovations cover that I bought from @KenFirch a while back. I purchased the replacement foam from Interior Innovations as well. I wasn't really looking forward to the job. It sounded like it was a bit of a pain, but it went very well and didn't take me more than a couple of hours. I thought I'd add a couple of things to this thread that might help people doing it in the future. My car is a 1971 240 (the one @grannyknot has been working on in a current build thread), but the seats seem to be from a 280Z. They have the metal "springs" in the seat bottom rather than the webbing. They've been recovered previously (the covers were obviously not original), but the foams seemed to be original. A couple of things made the job easier, as described here. There was a thin sheet of plastic covering the foam of the seat back. It seemed to be professionally made to fit the seat, but I don't know whether it was something that came from the factory. It was a little worse for wear, but I was able to reuse it. I was also able to leave the very thin layer of foam on the metal seat back. It was wrapped around and over the edges of the foam on the front of the seat back, but I was able to peel it off. I first glued the edges of the new foam to the metal seat back. I used Lepage Multi-Purpose Spray Adhesive and it held very well through the rest of the work. The plastic on the top of the seat back made it easy to slip the top of the new cover over the seat back down to the point where I needed to hog ring it to the metal back. Once I'd done that (more on that in a minute), I was able to very easily roll the rest of the cover down over the rest of the back. When using the tangs to secure the front and back of the cover to the bottom of the seat back, it was easy to pull the material down far enough. This was probably because it could slide easily on the plastic sheet. I was able to hog ring the cover to the metal back through the slot without too much trouble. I first used plastic cable ties to pull the wire on the metal seat back and the wire in the seat cover insert together, then used the hog ring pliers I bought to add the hog rings. I was going to cut the cable ties off afterwards, but decided to simply trim them instead. I can't see them doing any harm, and they're providing extra holding power. When I did the seat bottom, I first used the tangs to pull the cover down tight on the foam and metal seat base. Once I'd done that, it made the job of attaching the hog rings much easier because the foam was quite compressed. I used the cable ties again, which made it very easy to attach the hog rings. I do kind of wonder whether you could do this job with the cable ties and not bother with hog rings at all. Maybe they'd wear through over time. So I would suggest using a plastic wrap over the seat back, attaching the seat bottom cover using the tangs before doing the hog rings, and using cable ties to pull parts together when installing the hog rings. I'll be doing the driver's seat over the next few days, so I'll get a chance to do this again. Hopefully it will go as well as this one did.

 3 points
 -
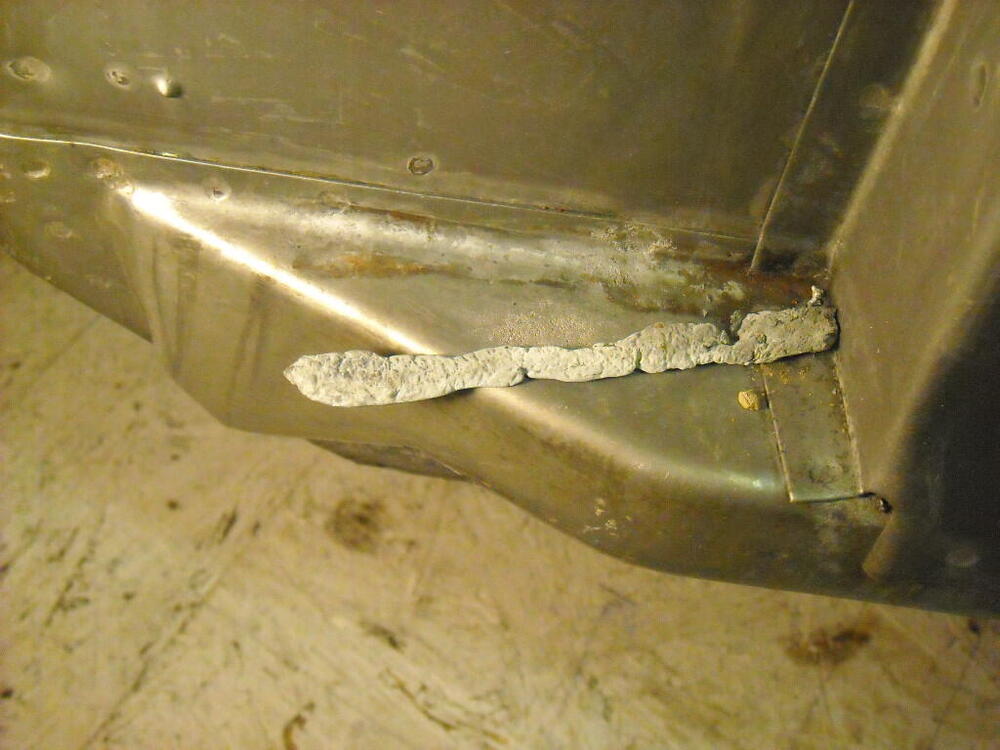
I was taught how to do lead work many years ago from a very skilled body man. You would never take a grinder to any lead, it is all done with a torch, wooden paddles for shaping and a body file for final smoothing. Shooting bits of lead all over your shop would be a nasty thing to do. Always remove it using a torch and good ventilation or a proper respirator.2 points
-
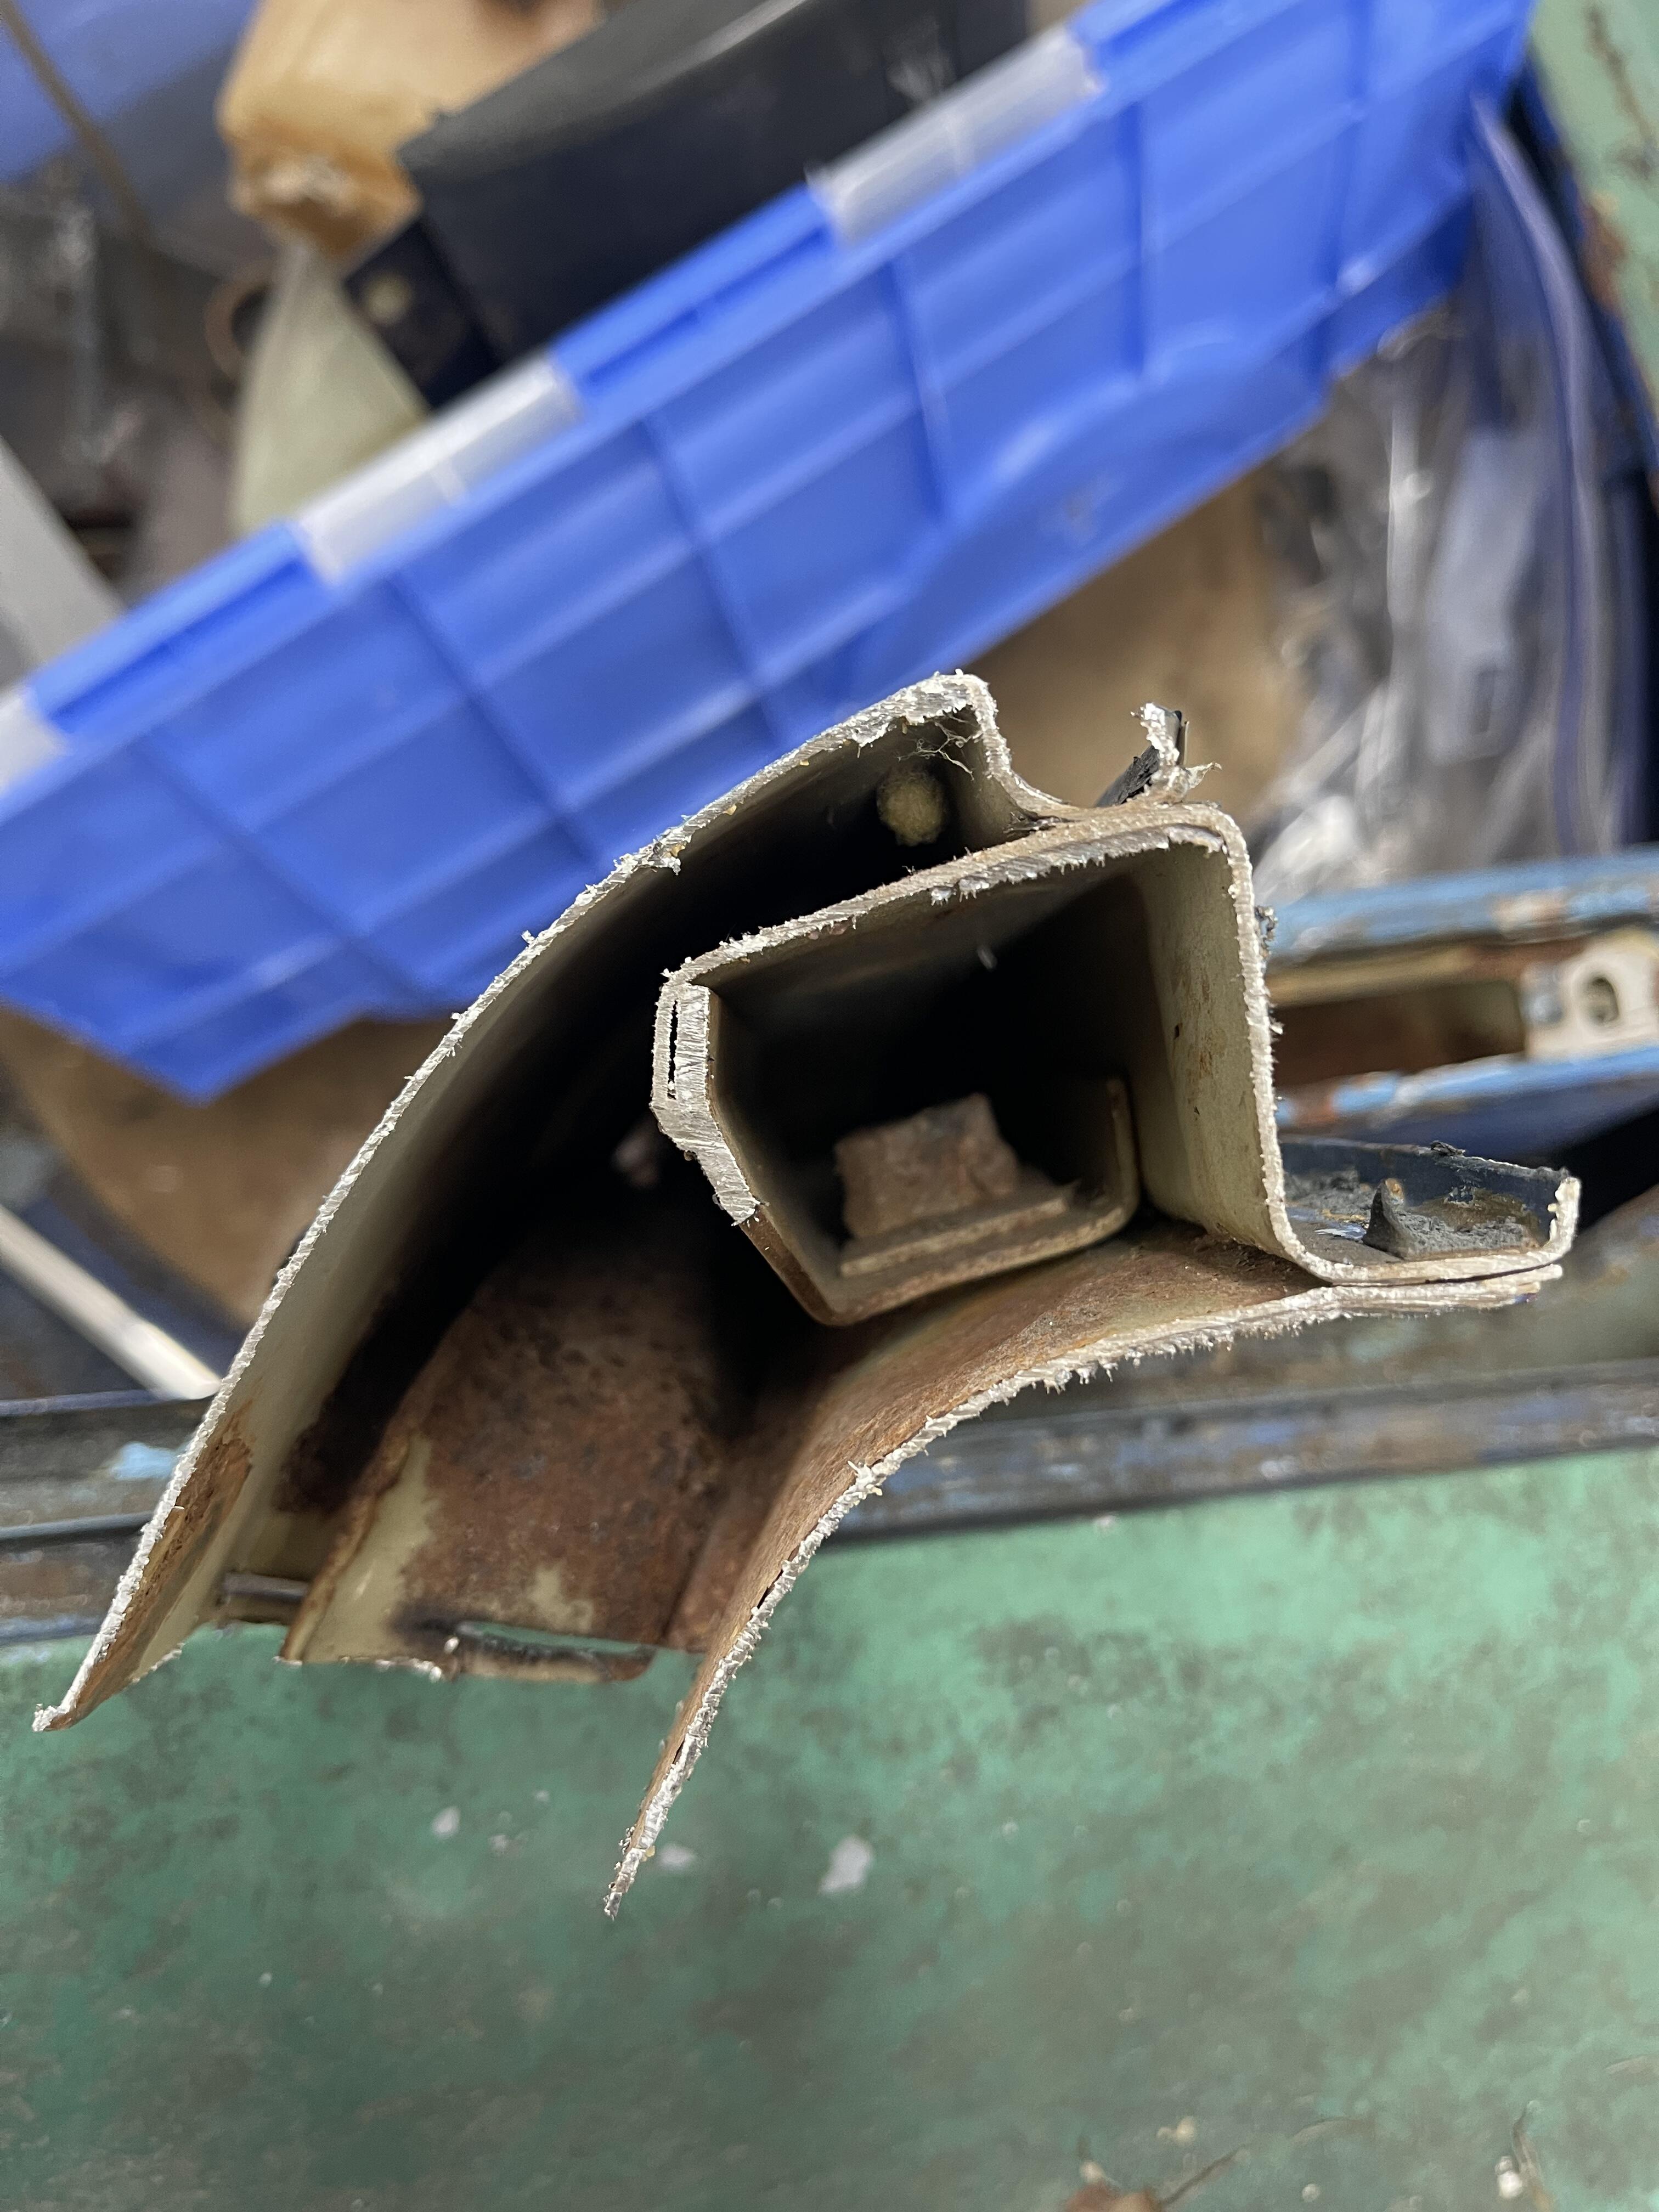
Found them, not sure these are going to help much, seems like only some of the lead melted off. 1st pic is melted lead that had pooled,

 2 points
 -
1 pointView Advert 240Z hubcaps Free! Save them from the recycler! I believe these to be the original hubcaps from my '71 240Z. I will never use them so I thought I'd see if someone here wants them. Pick up in Seattle or ship at recipient's expense. Advertiser woof Date 04/26/2024 Price $0.01 Category Parts for Sale1 point
-
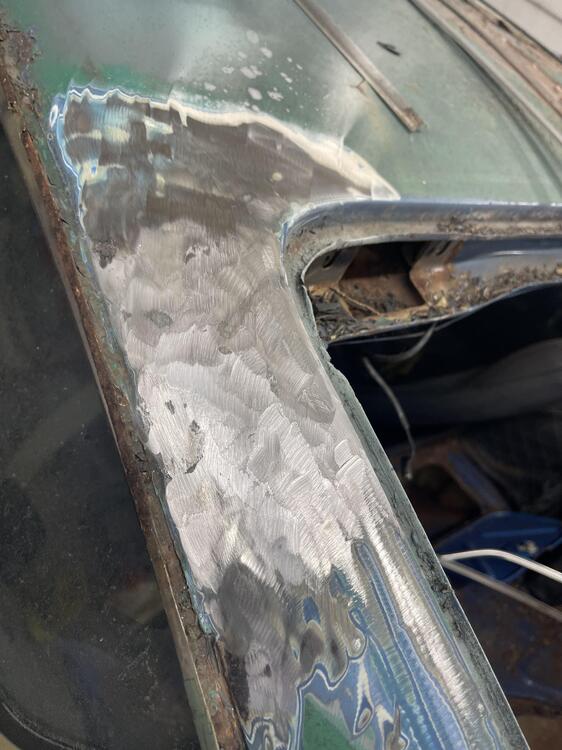
Gonna clean this peice up a little. Should be I interesting….dissection.
 1 point
 -
Captured nut in picture is shoulder belt attachment. 2nd picture back towards the taillights…3rd accross the top of hatch.

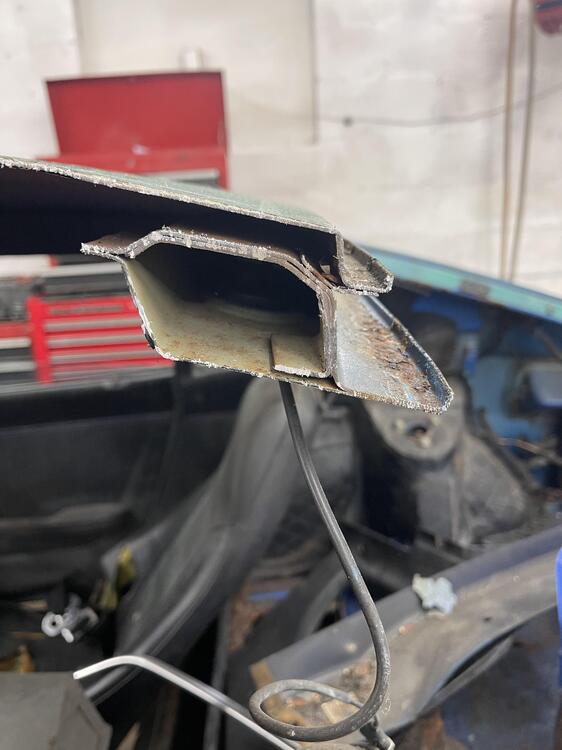 1 point
 -
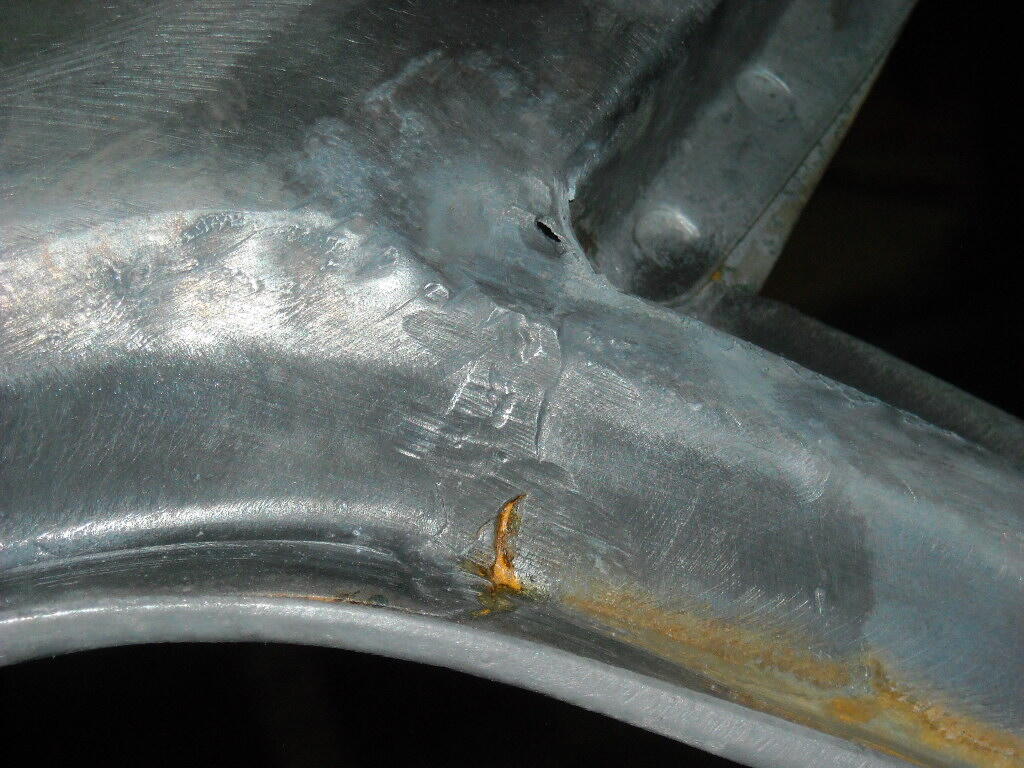
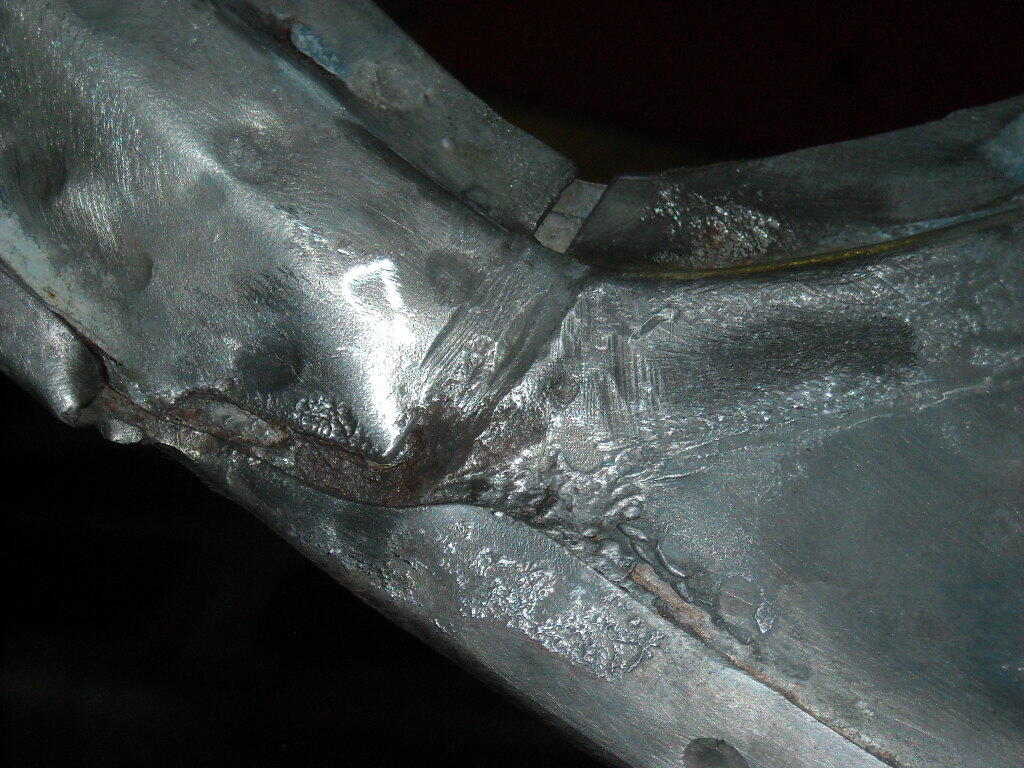
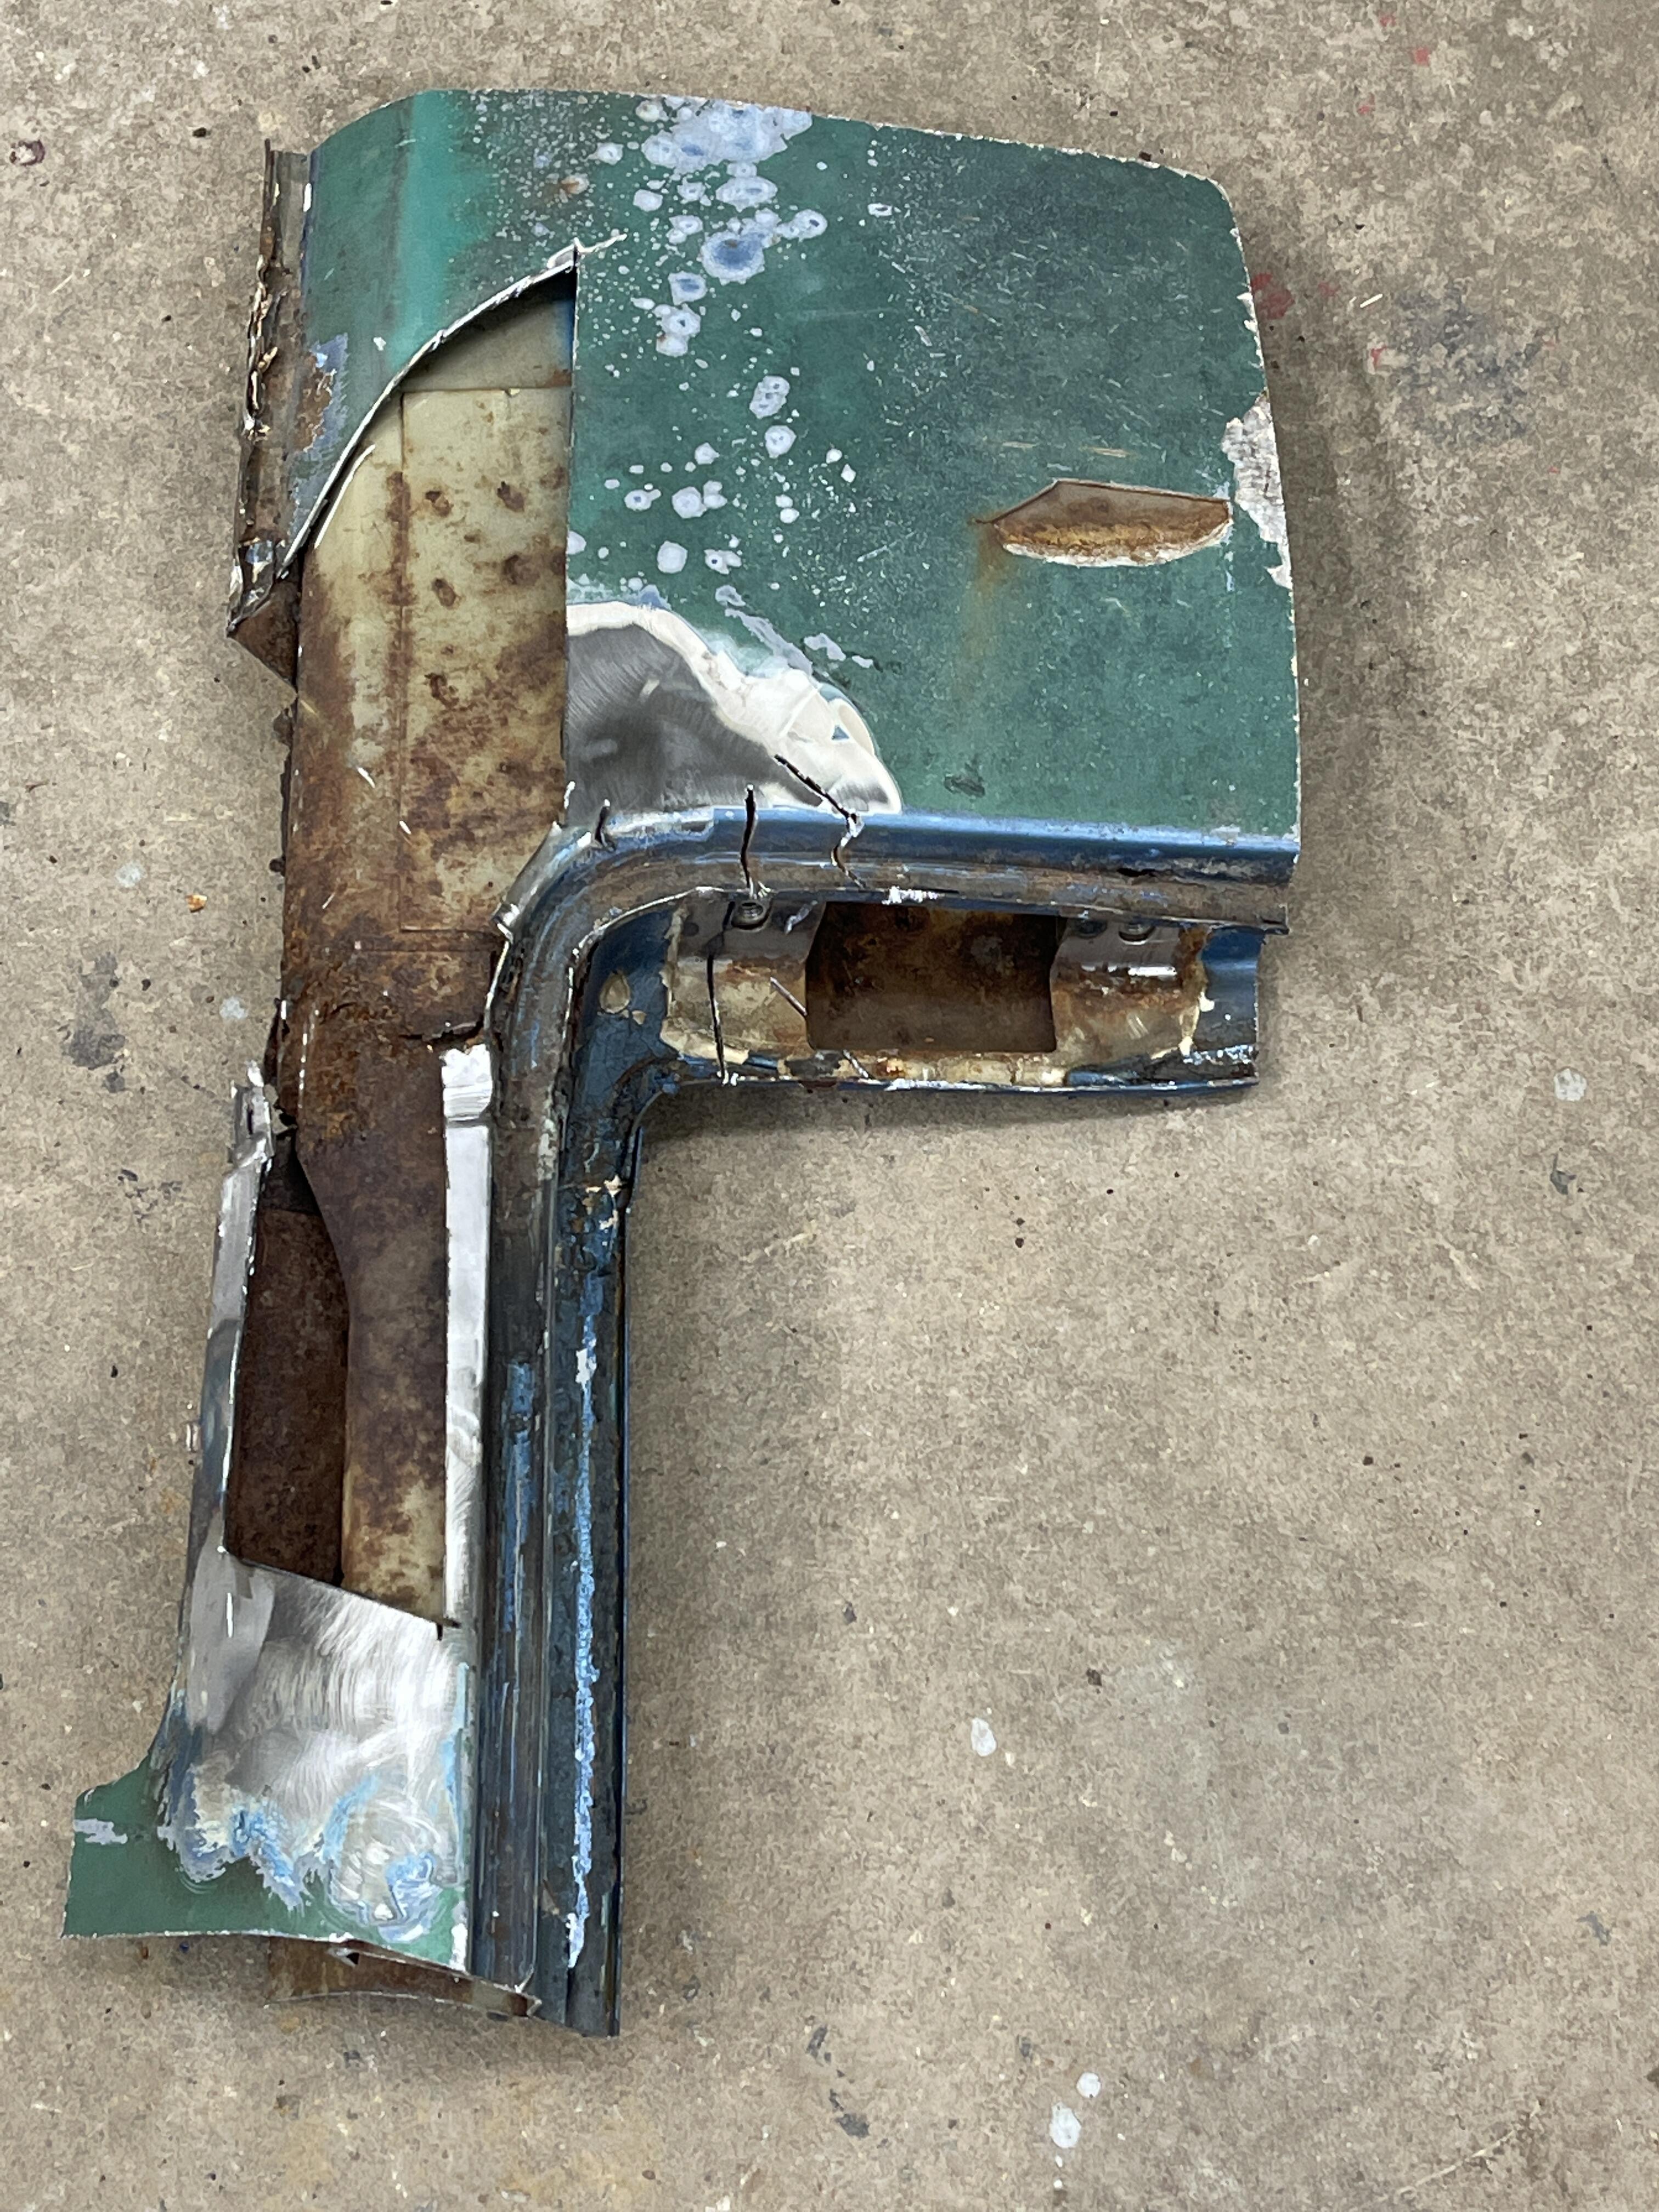
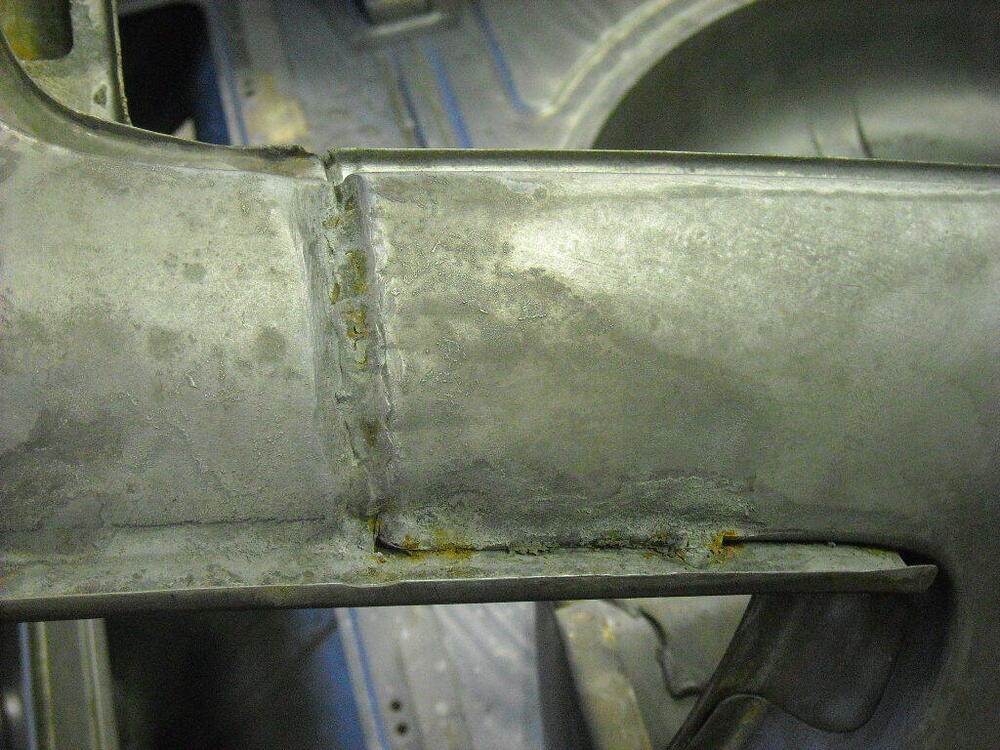
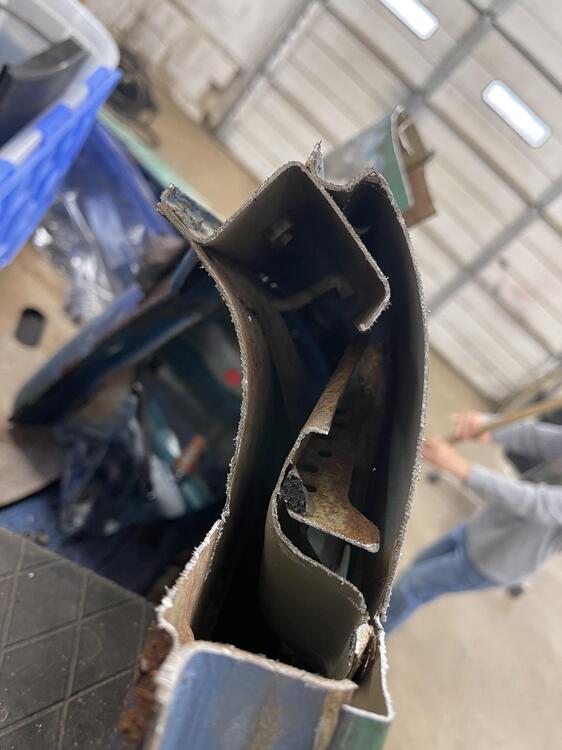
Alrighty, this is a interesting video just taken of the weld joint and just how much lead is in the c-pillar “cosmetic application” I just don’t see any strength in this lead being applied in this area. This is a rusted out 73 Fairlady I purchased for parts car. I ground off paint and bondo down to “metal”. IMG_7401.MOV IMG_7402.MOV
 1 point
 -
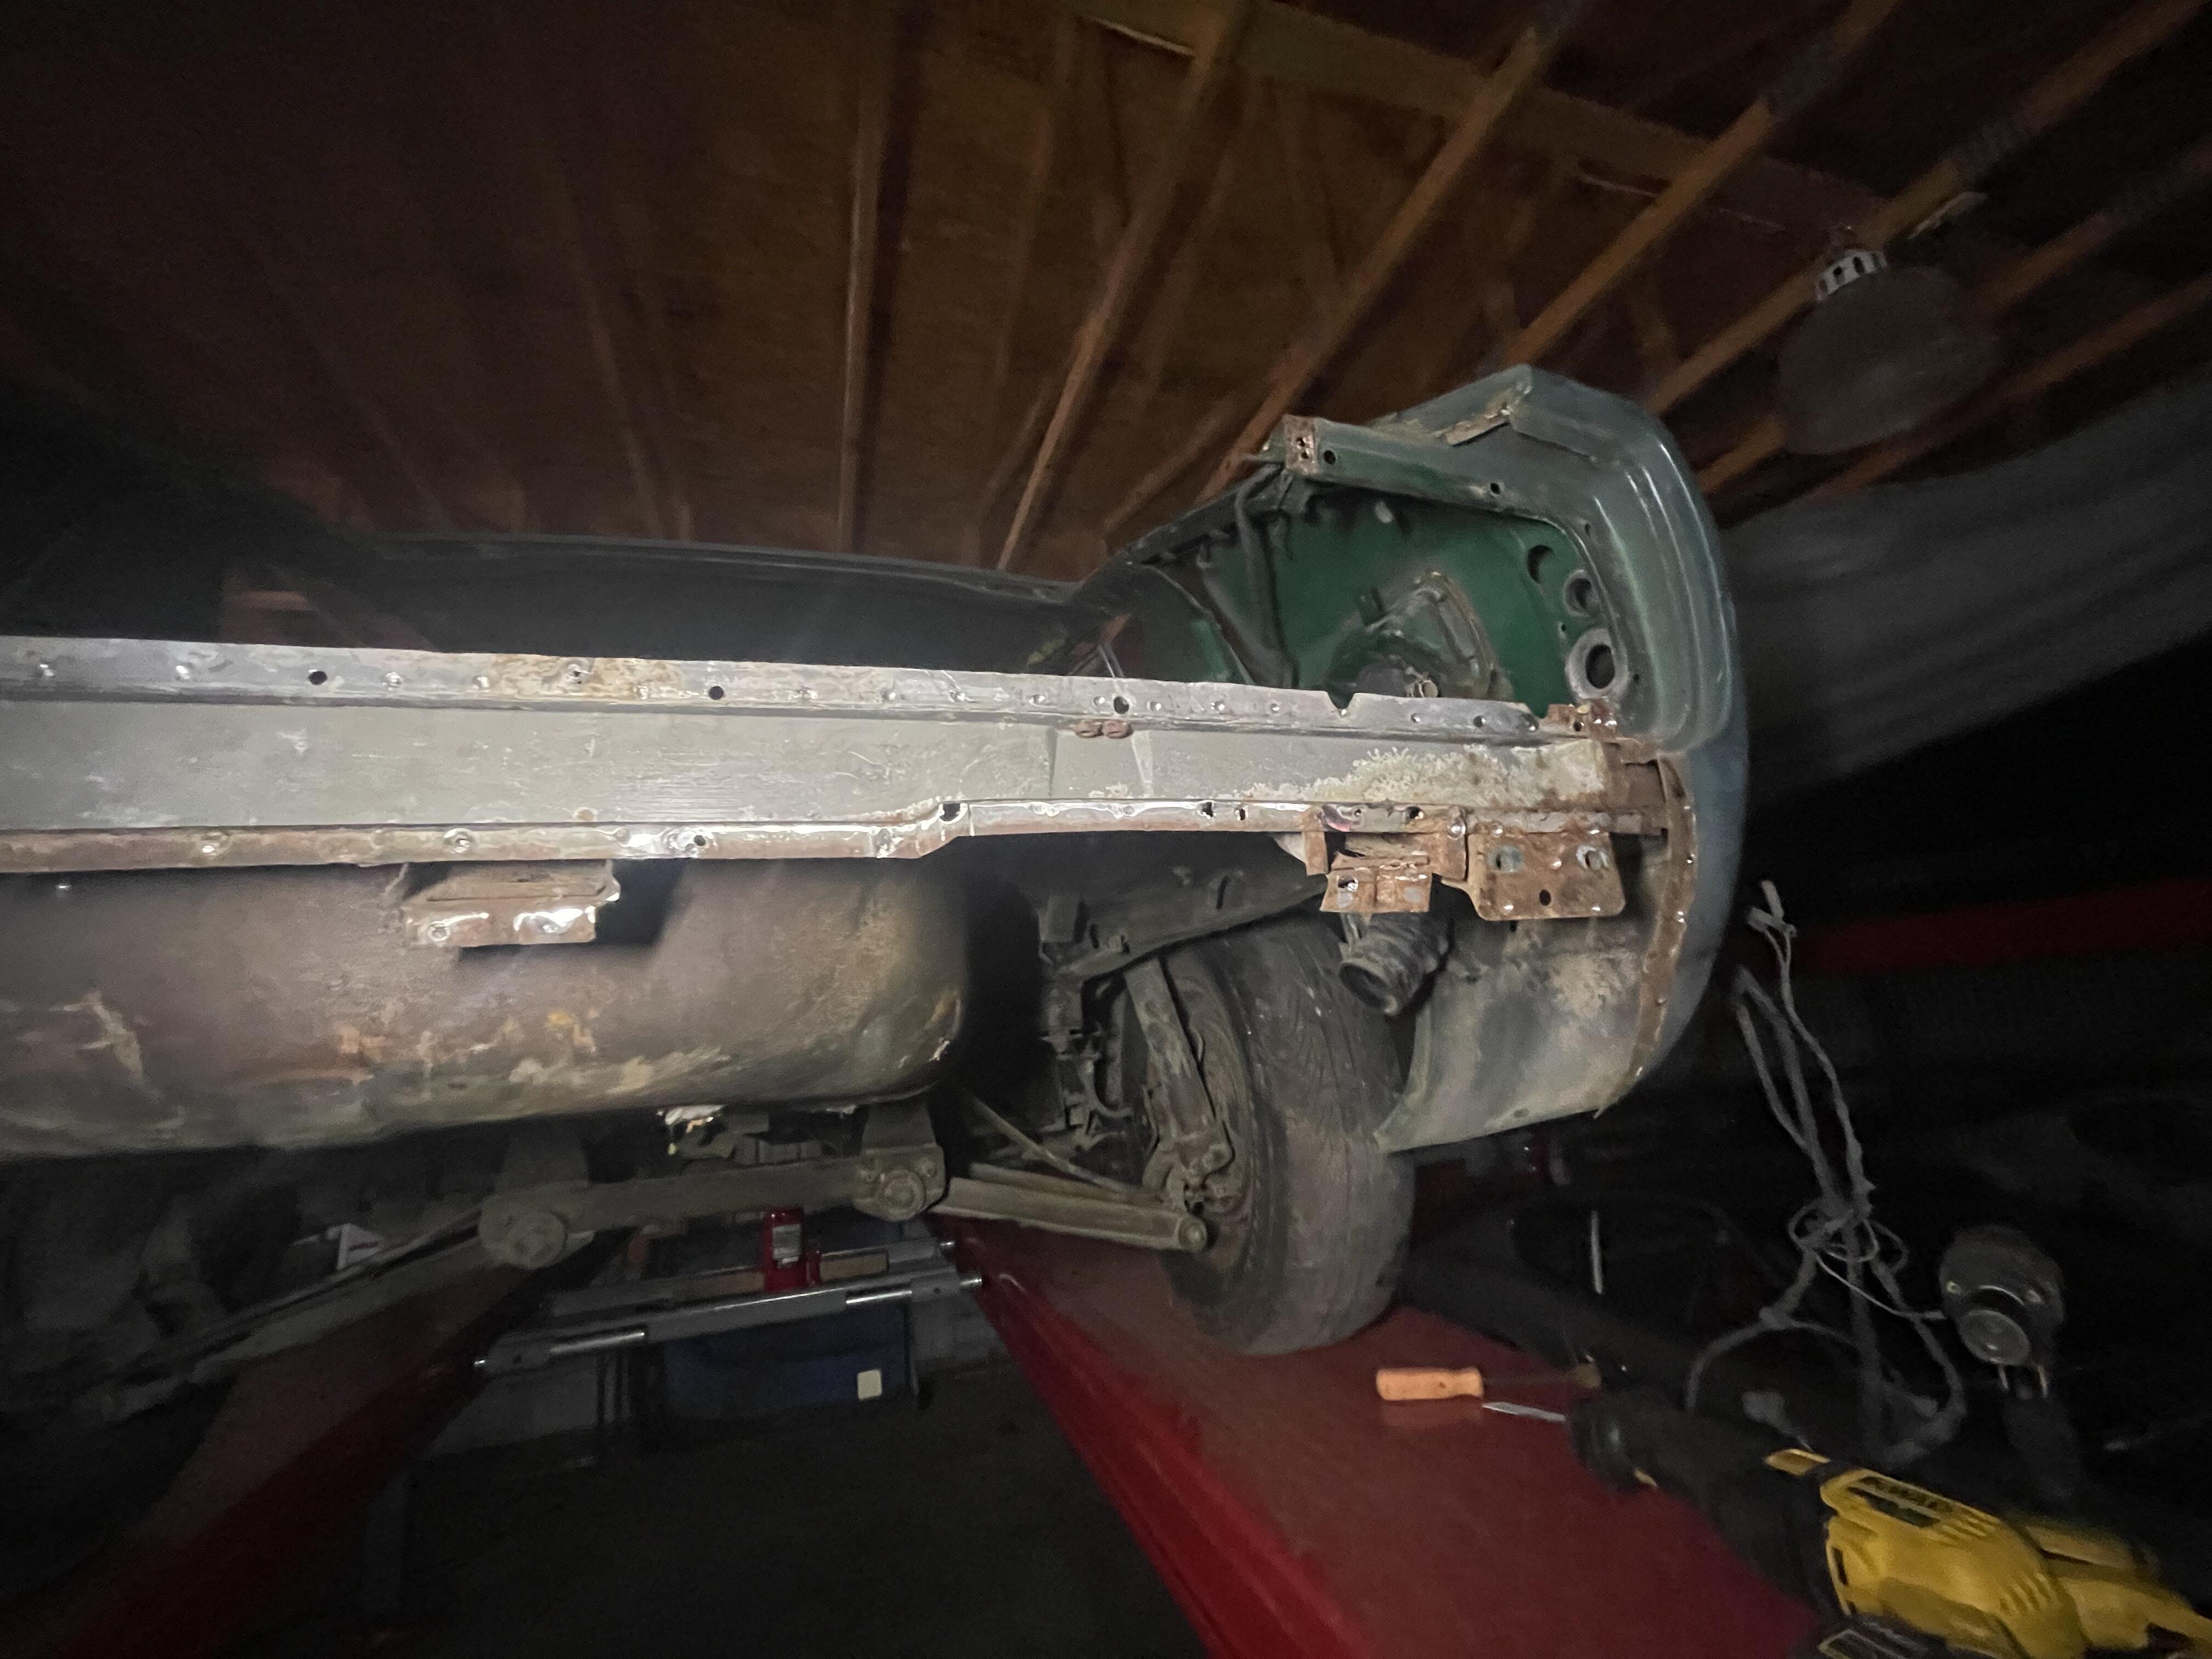
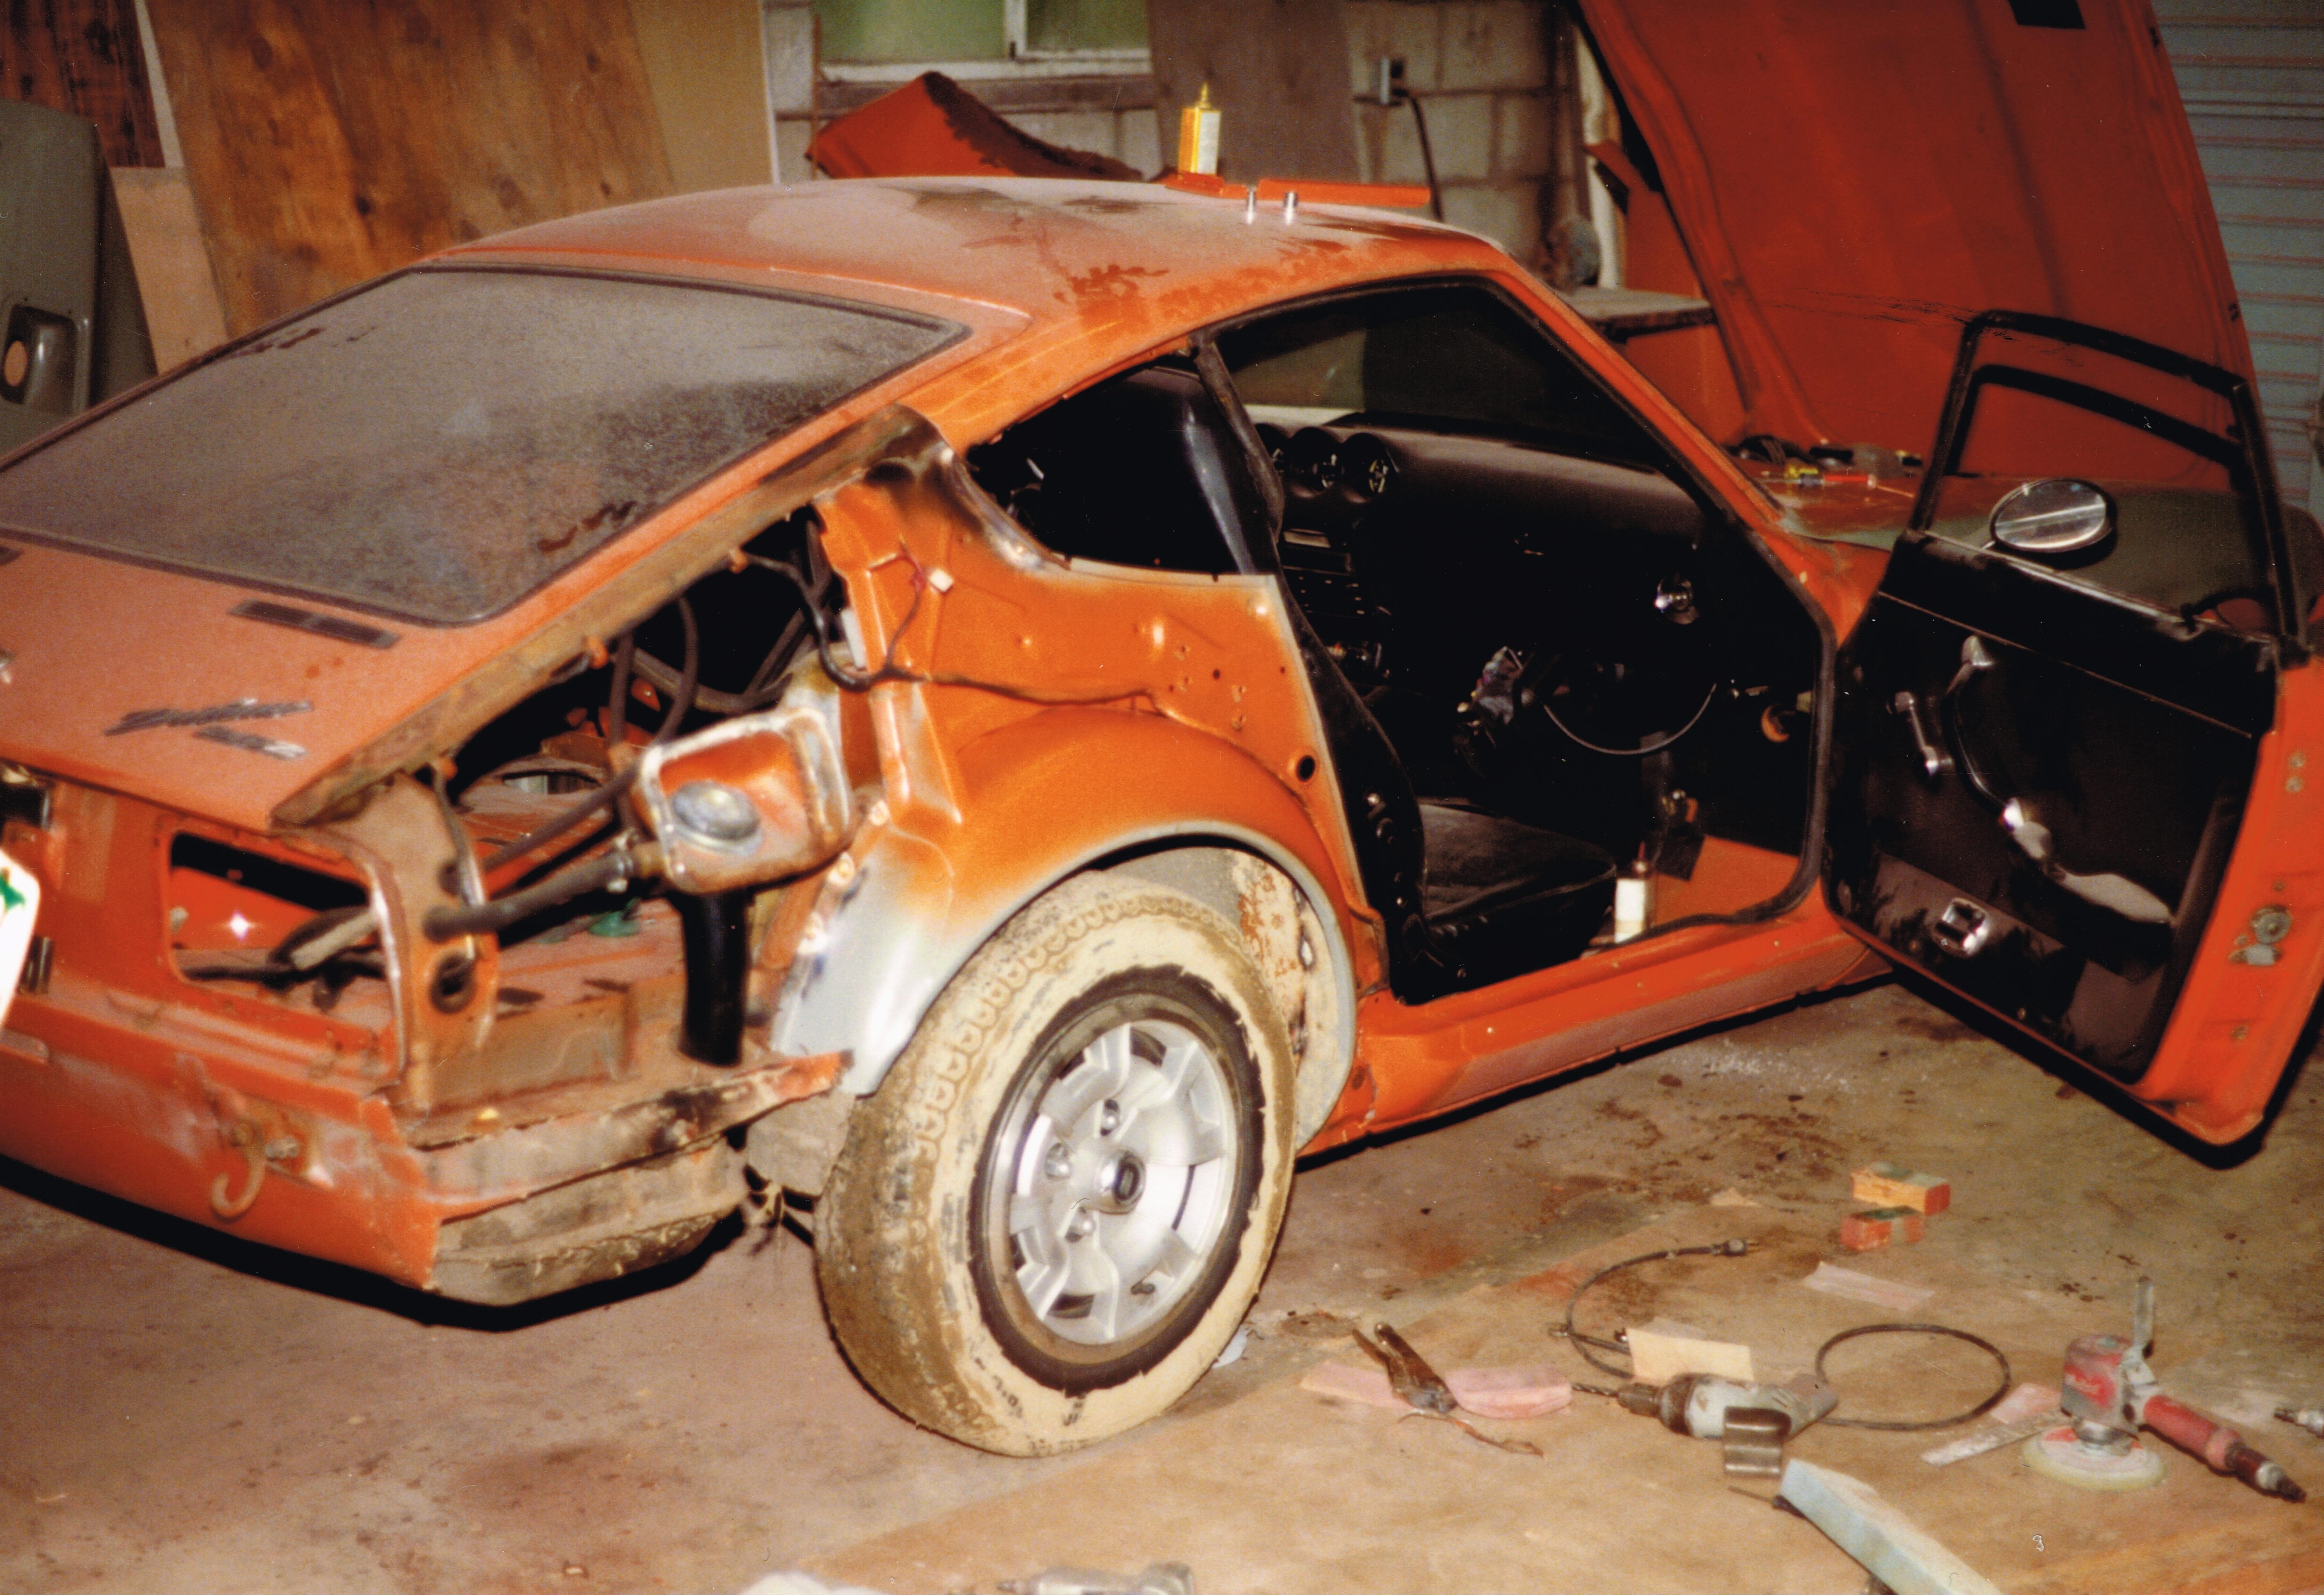
Couple quick pictures with rear valance and slam panel removed. I’ve got decent material here, mainly surface rust. Repairs/replacement will need to be made to left side bumper mount.
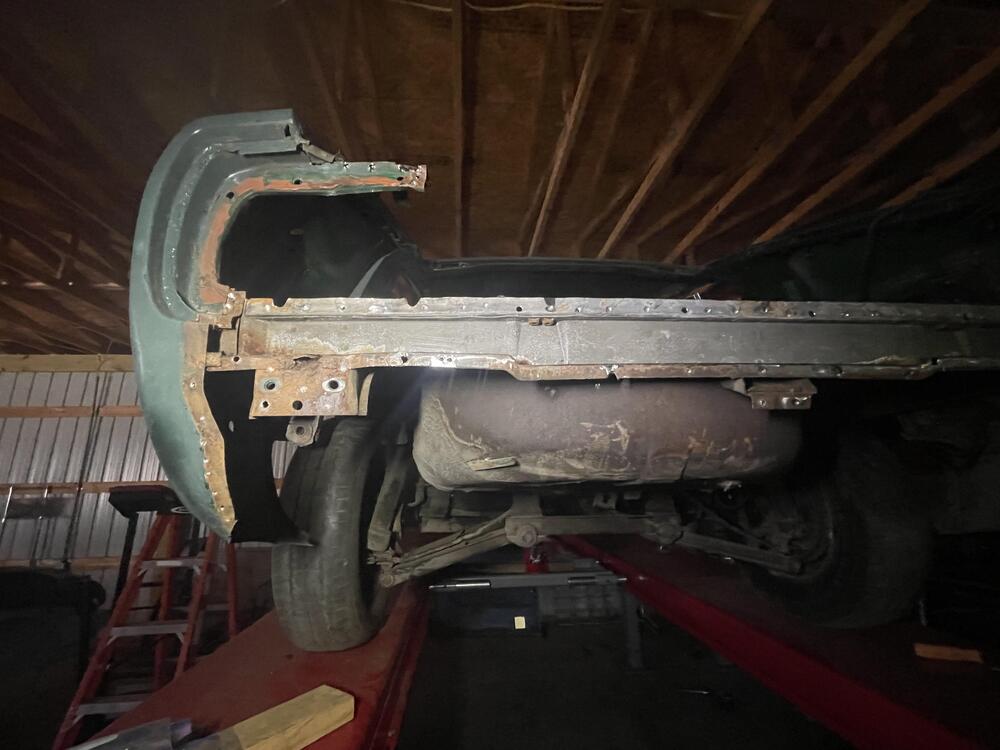
 1 point
 -
Excellent photos. Thanks for posting. It is, indeed, a complicated joint. I'm always impressed by the skills of the manufacturing engineers and designers who (with little credit) develop such schemes and make them ready for mass-production. I've often wished for 'exploded view' explanations of how the contributing panels come together at complex joints such as this one (another good example is the 'dogleg' behind the lower-rear door area). Unfortunately, it would require either: a) an informed industrial artist (similar to the person who created the drawings in the parts manual), or; b) a photographer in possession of all of the individual panels/stampings. Alas, the chances of either happening is remote.1 point
-
Watered Rodger, the 240. He has a new friend, Archie. Can't wait to shake brakes with one another.
 1 point
 -
Wait... I know. You're HOT, right??!1 point
-
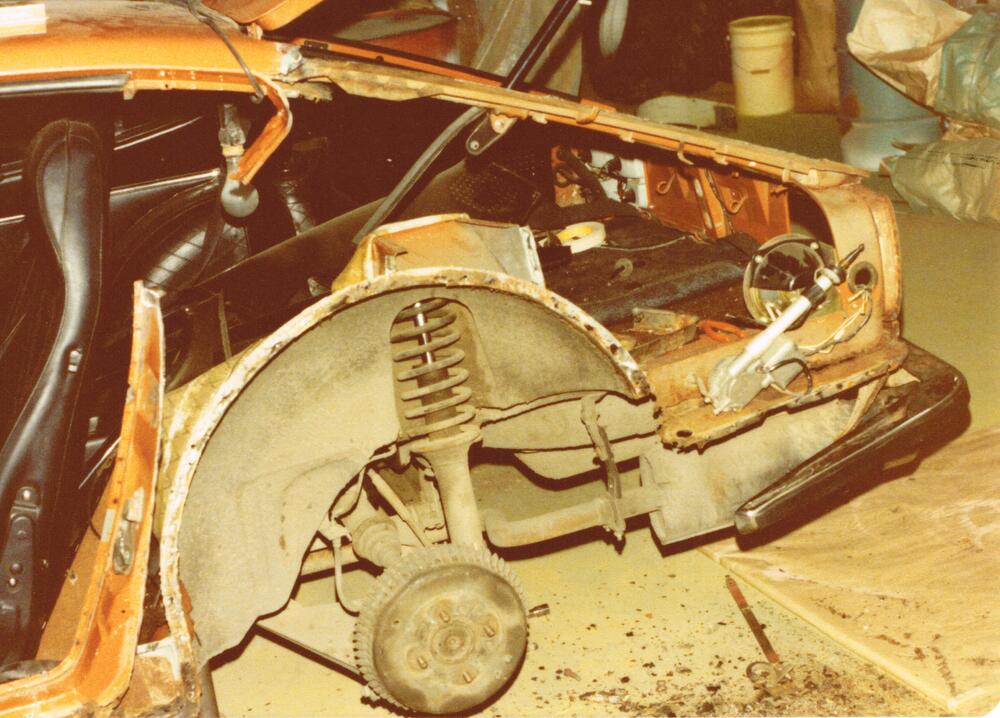
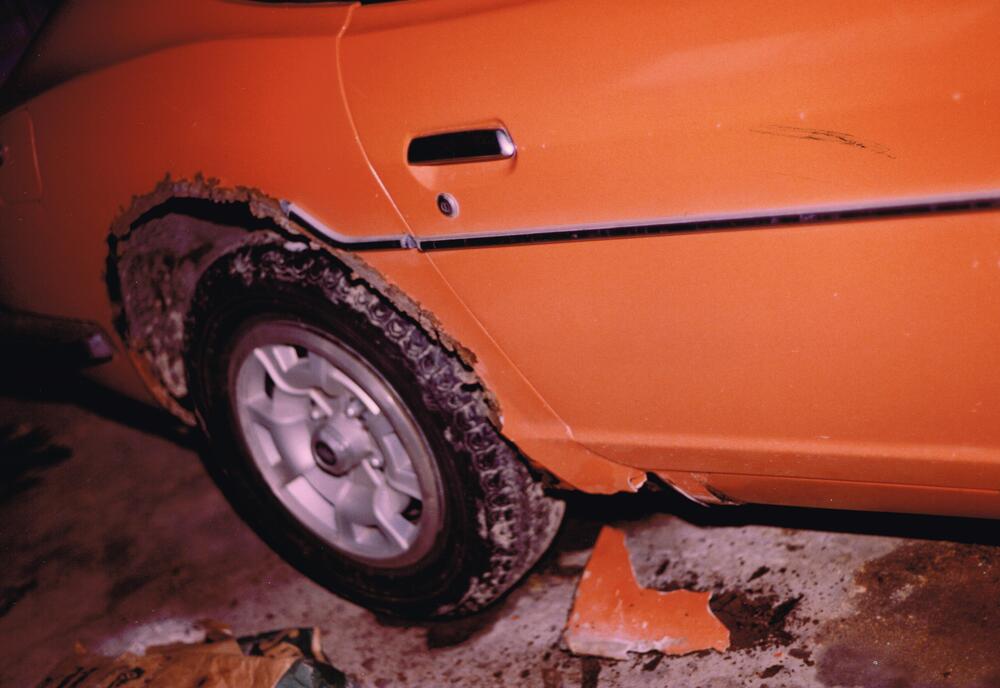
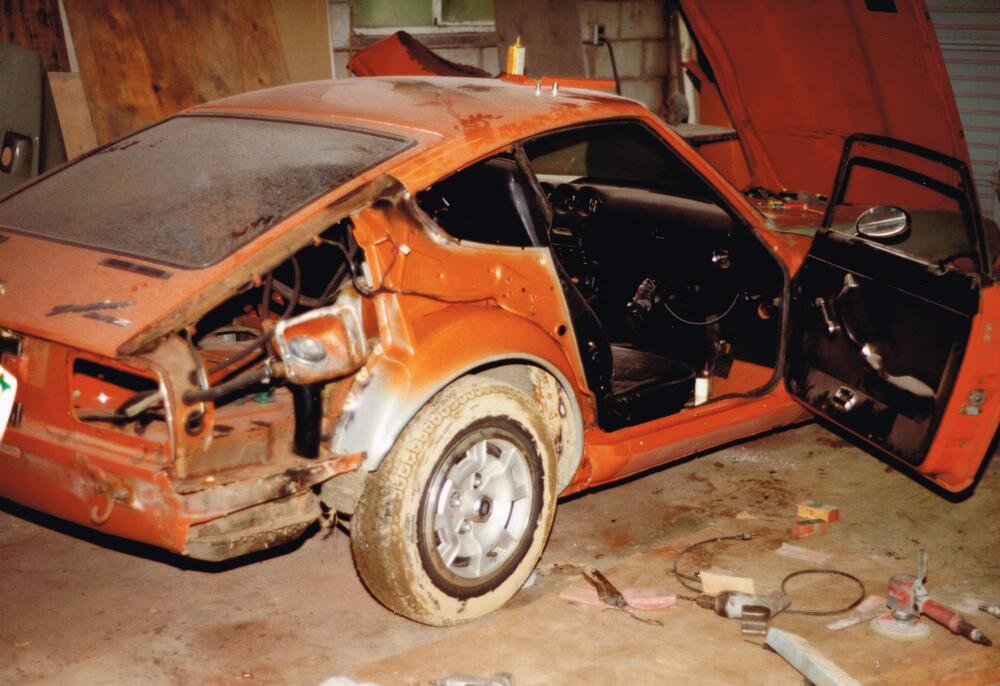
Here are a few pics from the early eighties when I had my rear quarters replaced. Sorry that they don't show more detail. The left side was actually done about a year before the right, as someone lightly backed into me and due to the existing shoddy bondo repair, a pile of rusty bits was left on the ground similar to the second pic, during the more complete resto. At the time of the incident I didn't have the funds to do the full resto. The left side was cut back to the factory joint but on the right side it is cut further down, I'm not sure why? Or if it was cut more later in the repair process? Anyways you can see a little of the detail. I wish I had taken more closeup pictures back then.
 1 point
 -
Use this link: https://www.thezstore.com/page/TZS/CTGY/classic08f If you plan to totally rebuild the seats, you'll need new foam, new upholstery, maybe seat webbing depending on year of your Z, spray paint for side rails and seat frame & back. MSA is the source I used recently and I'm pleased with materials and results.1 point