


Leaderboard
-
conedodger
Free Member10Points12,513Posts -
zKars
 Subscriber
 6Points3,770Posts
 -

CanTechZ
Free Member5Points1,311Posts -
inline6
Subscriber3Points1,282Posts


Popular Content
Showing content with the highest reputation on 04/14/2024 in all areas
-
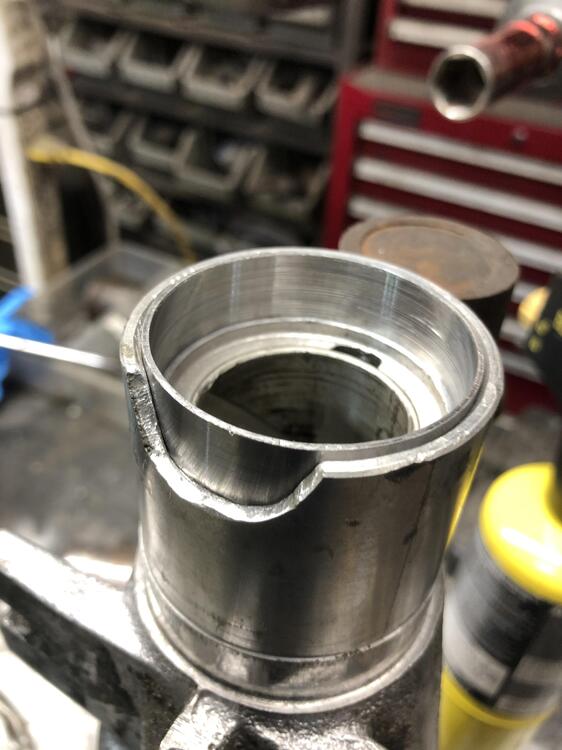
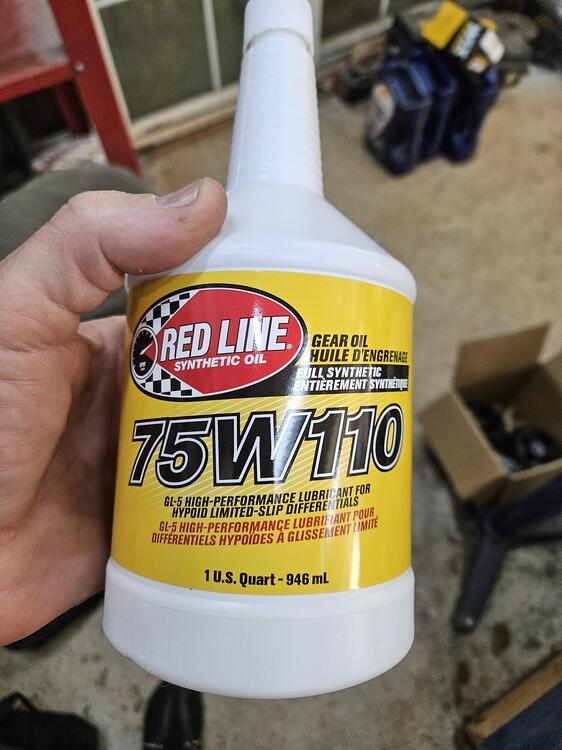
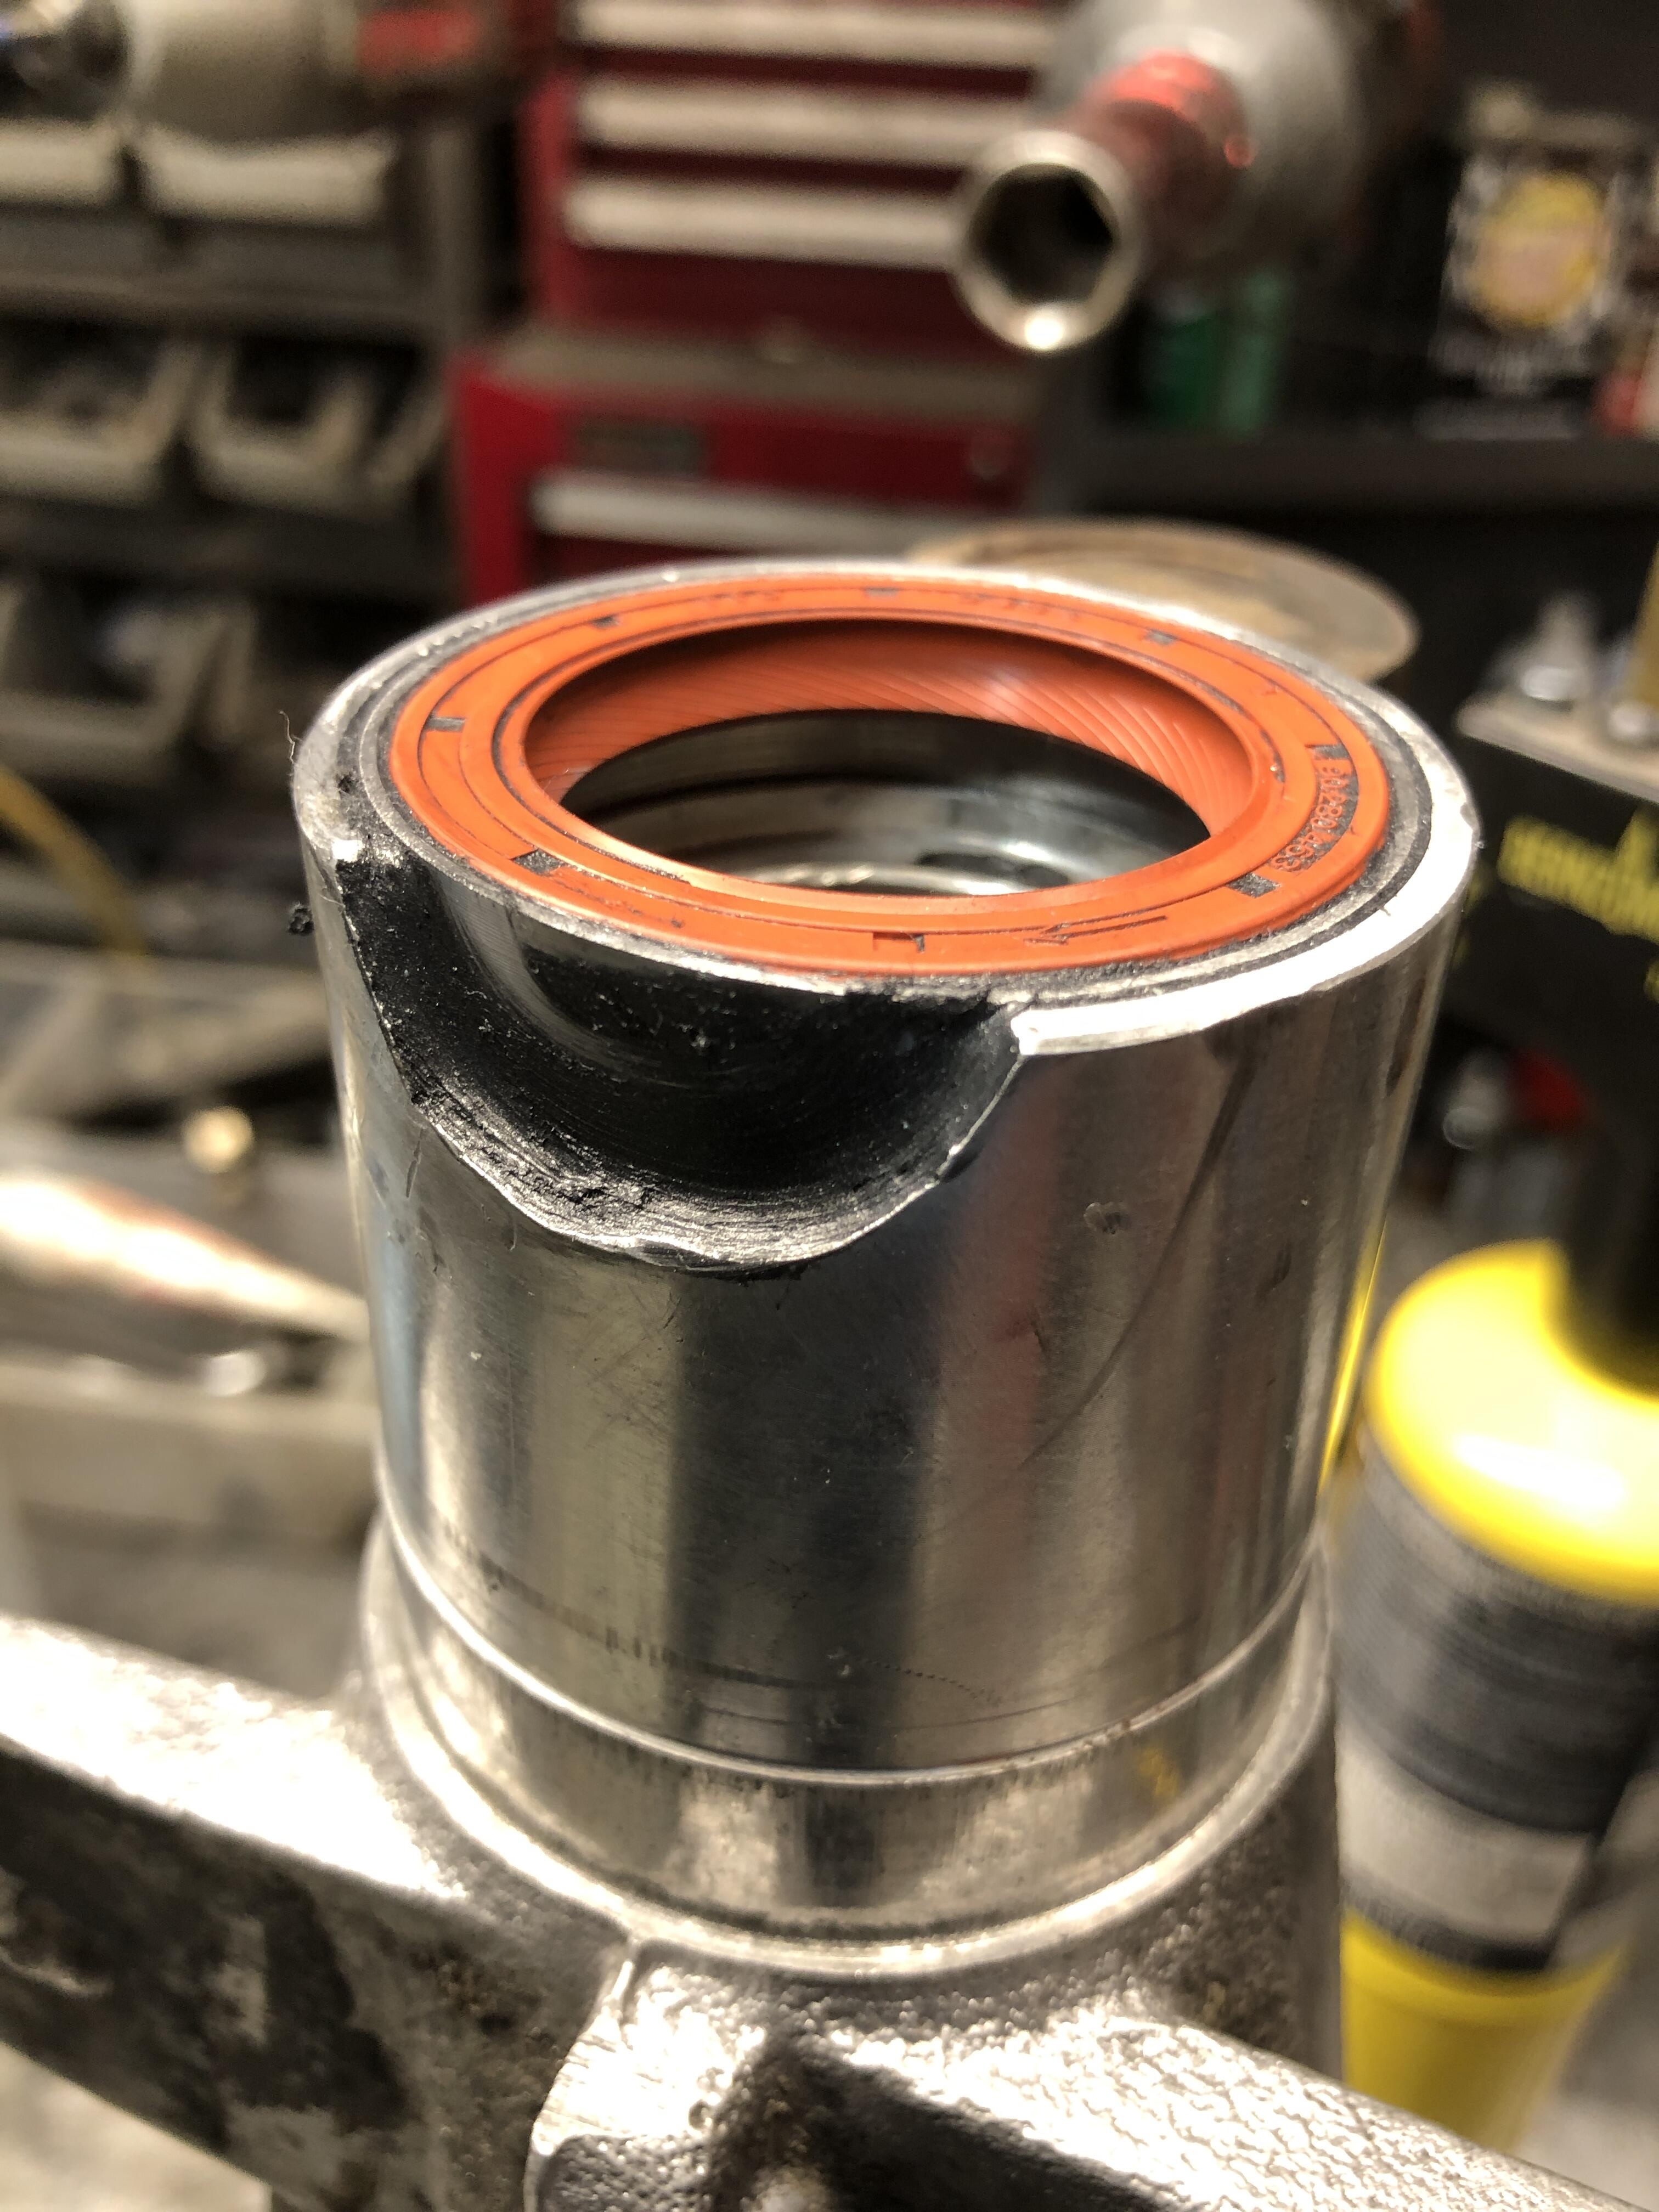
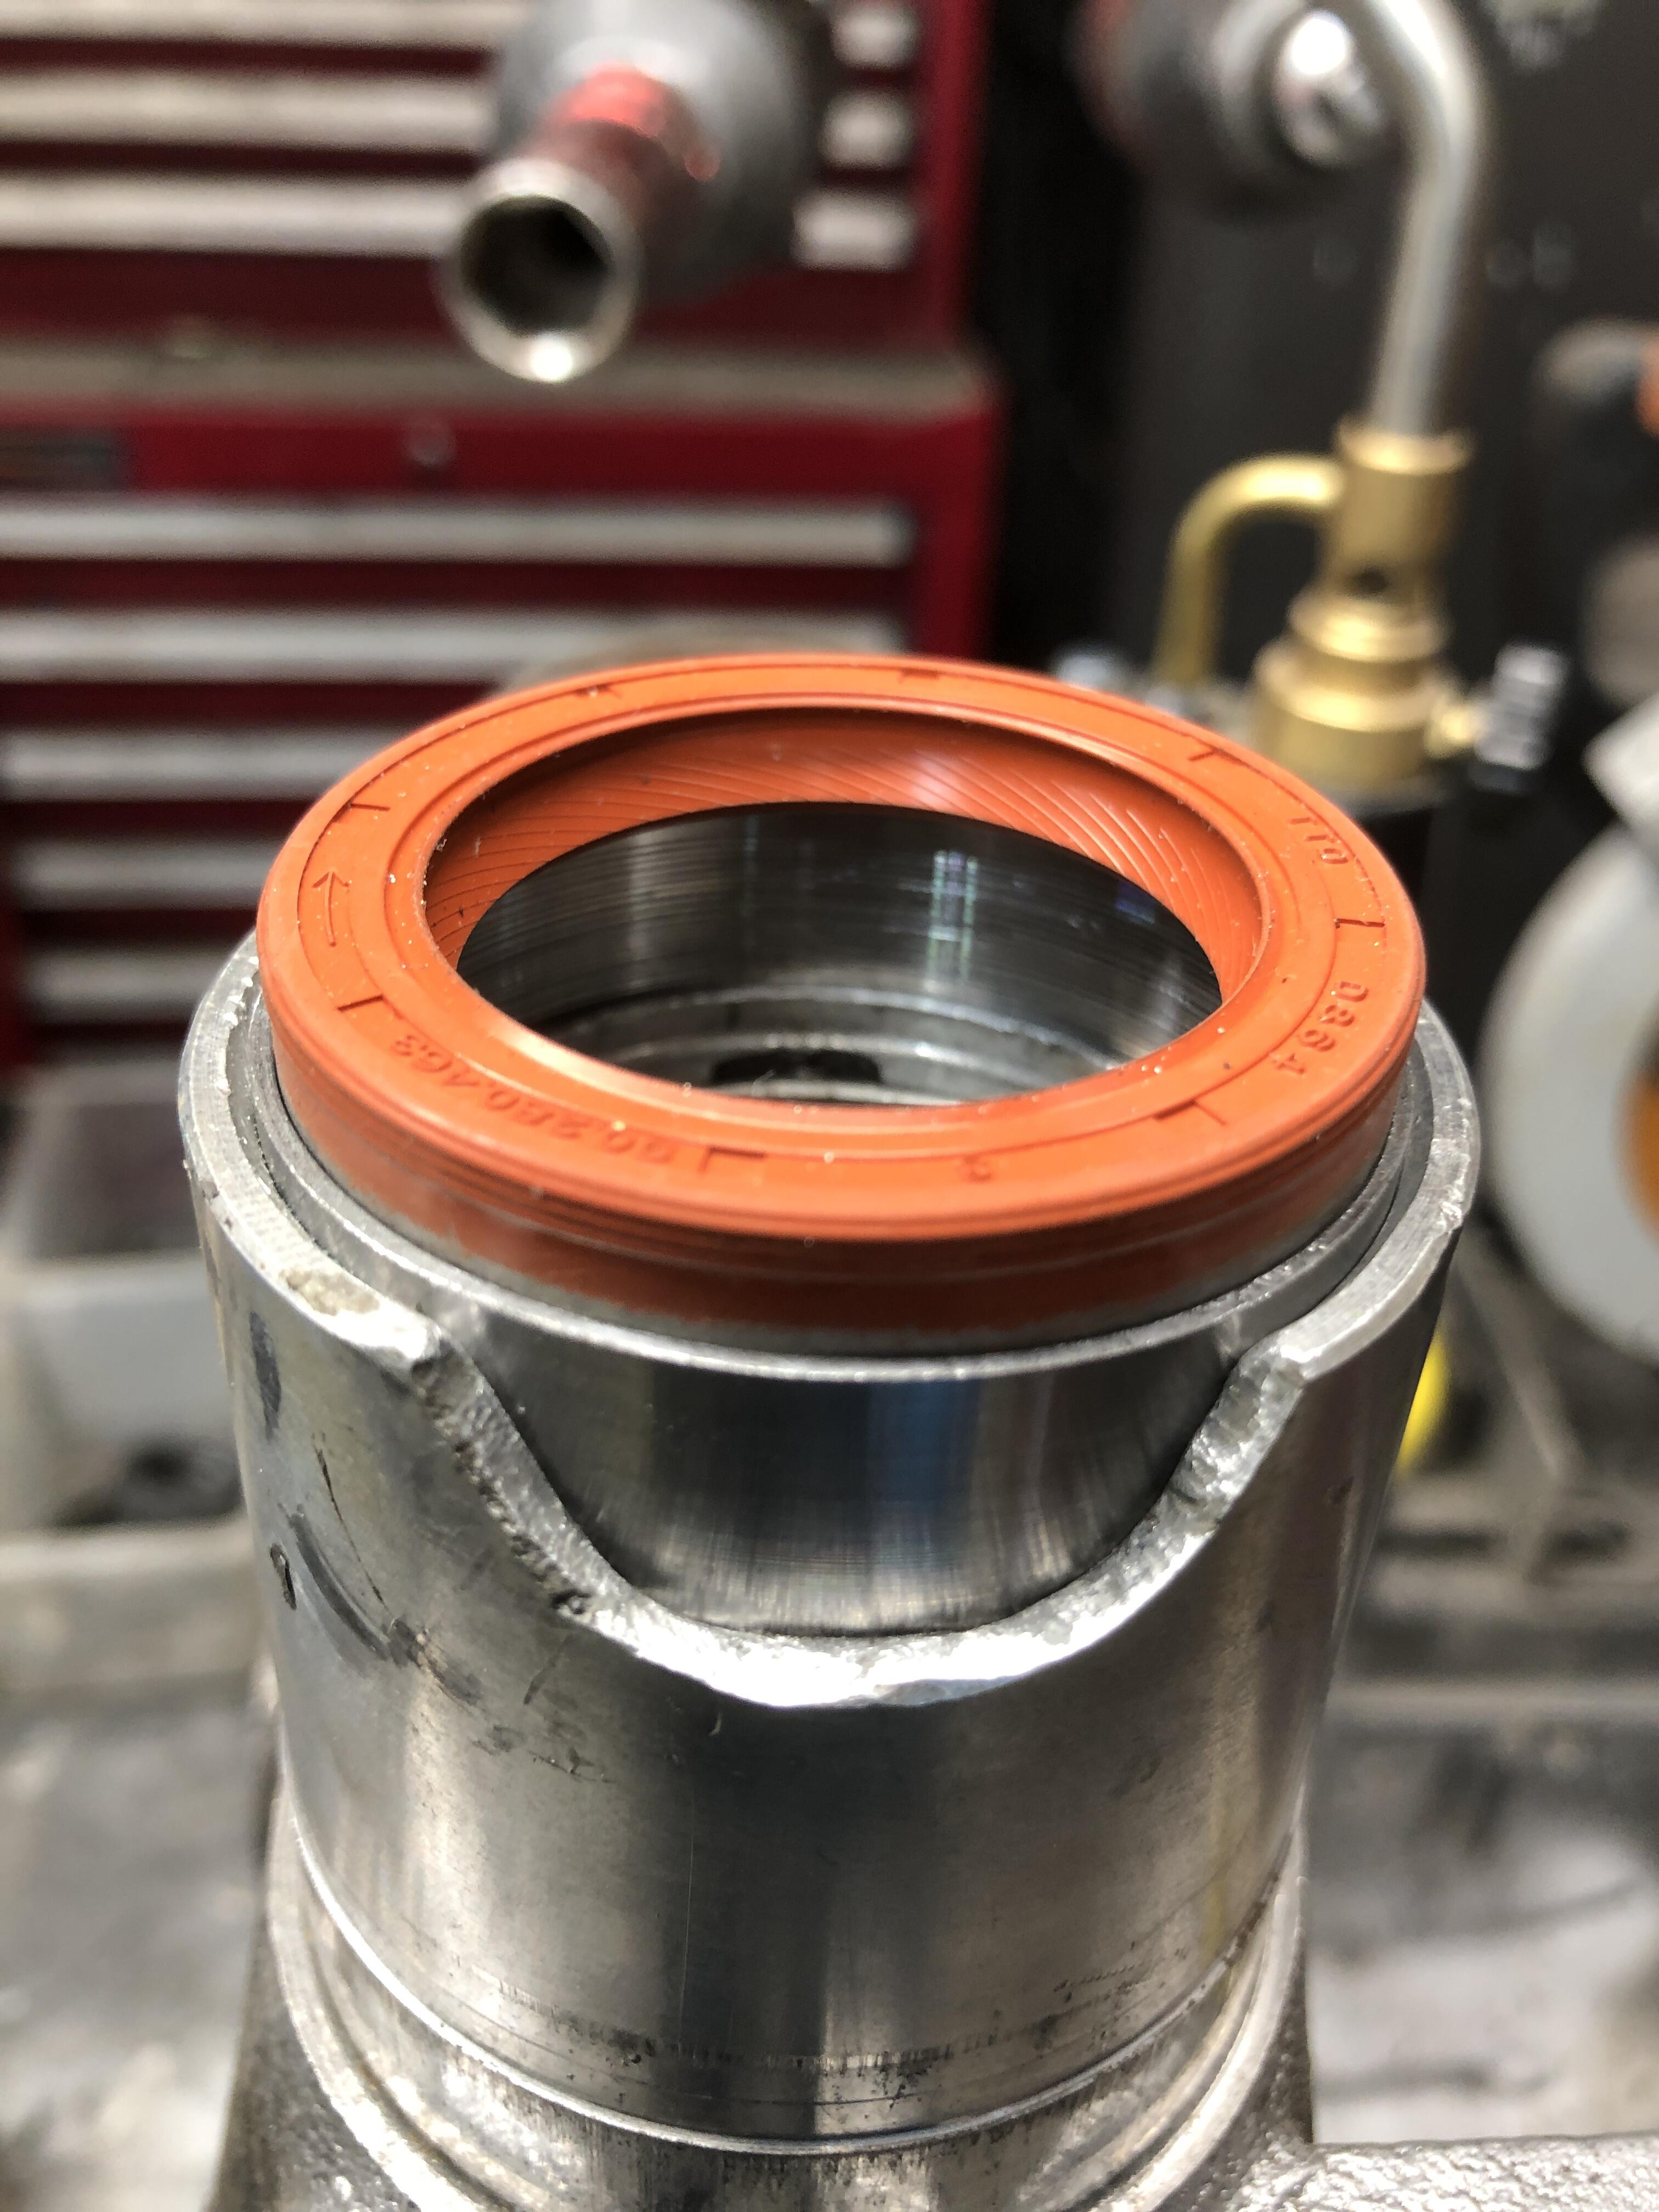
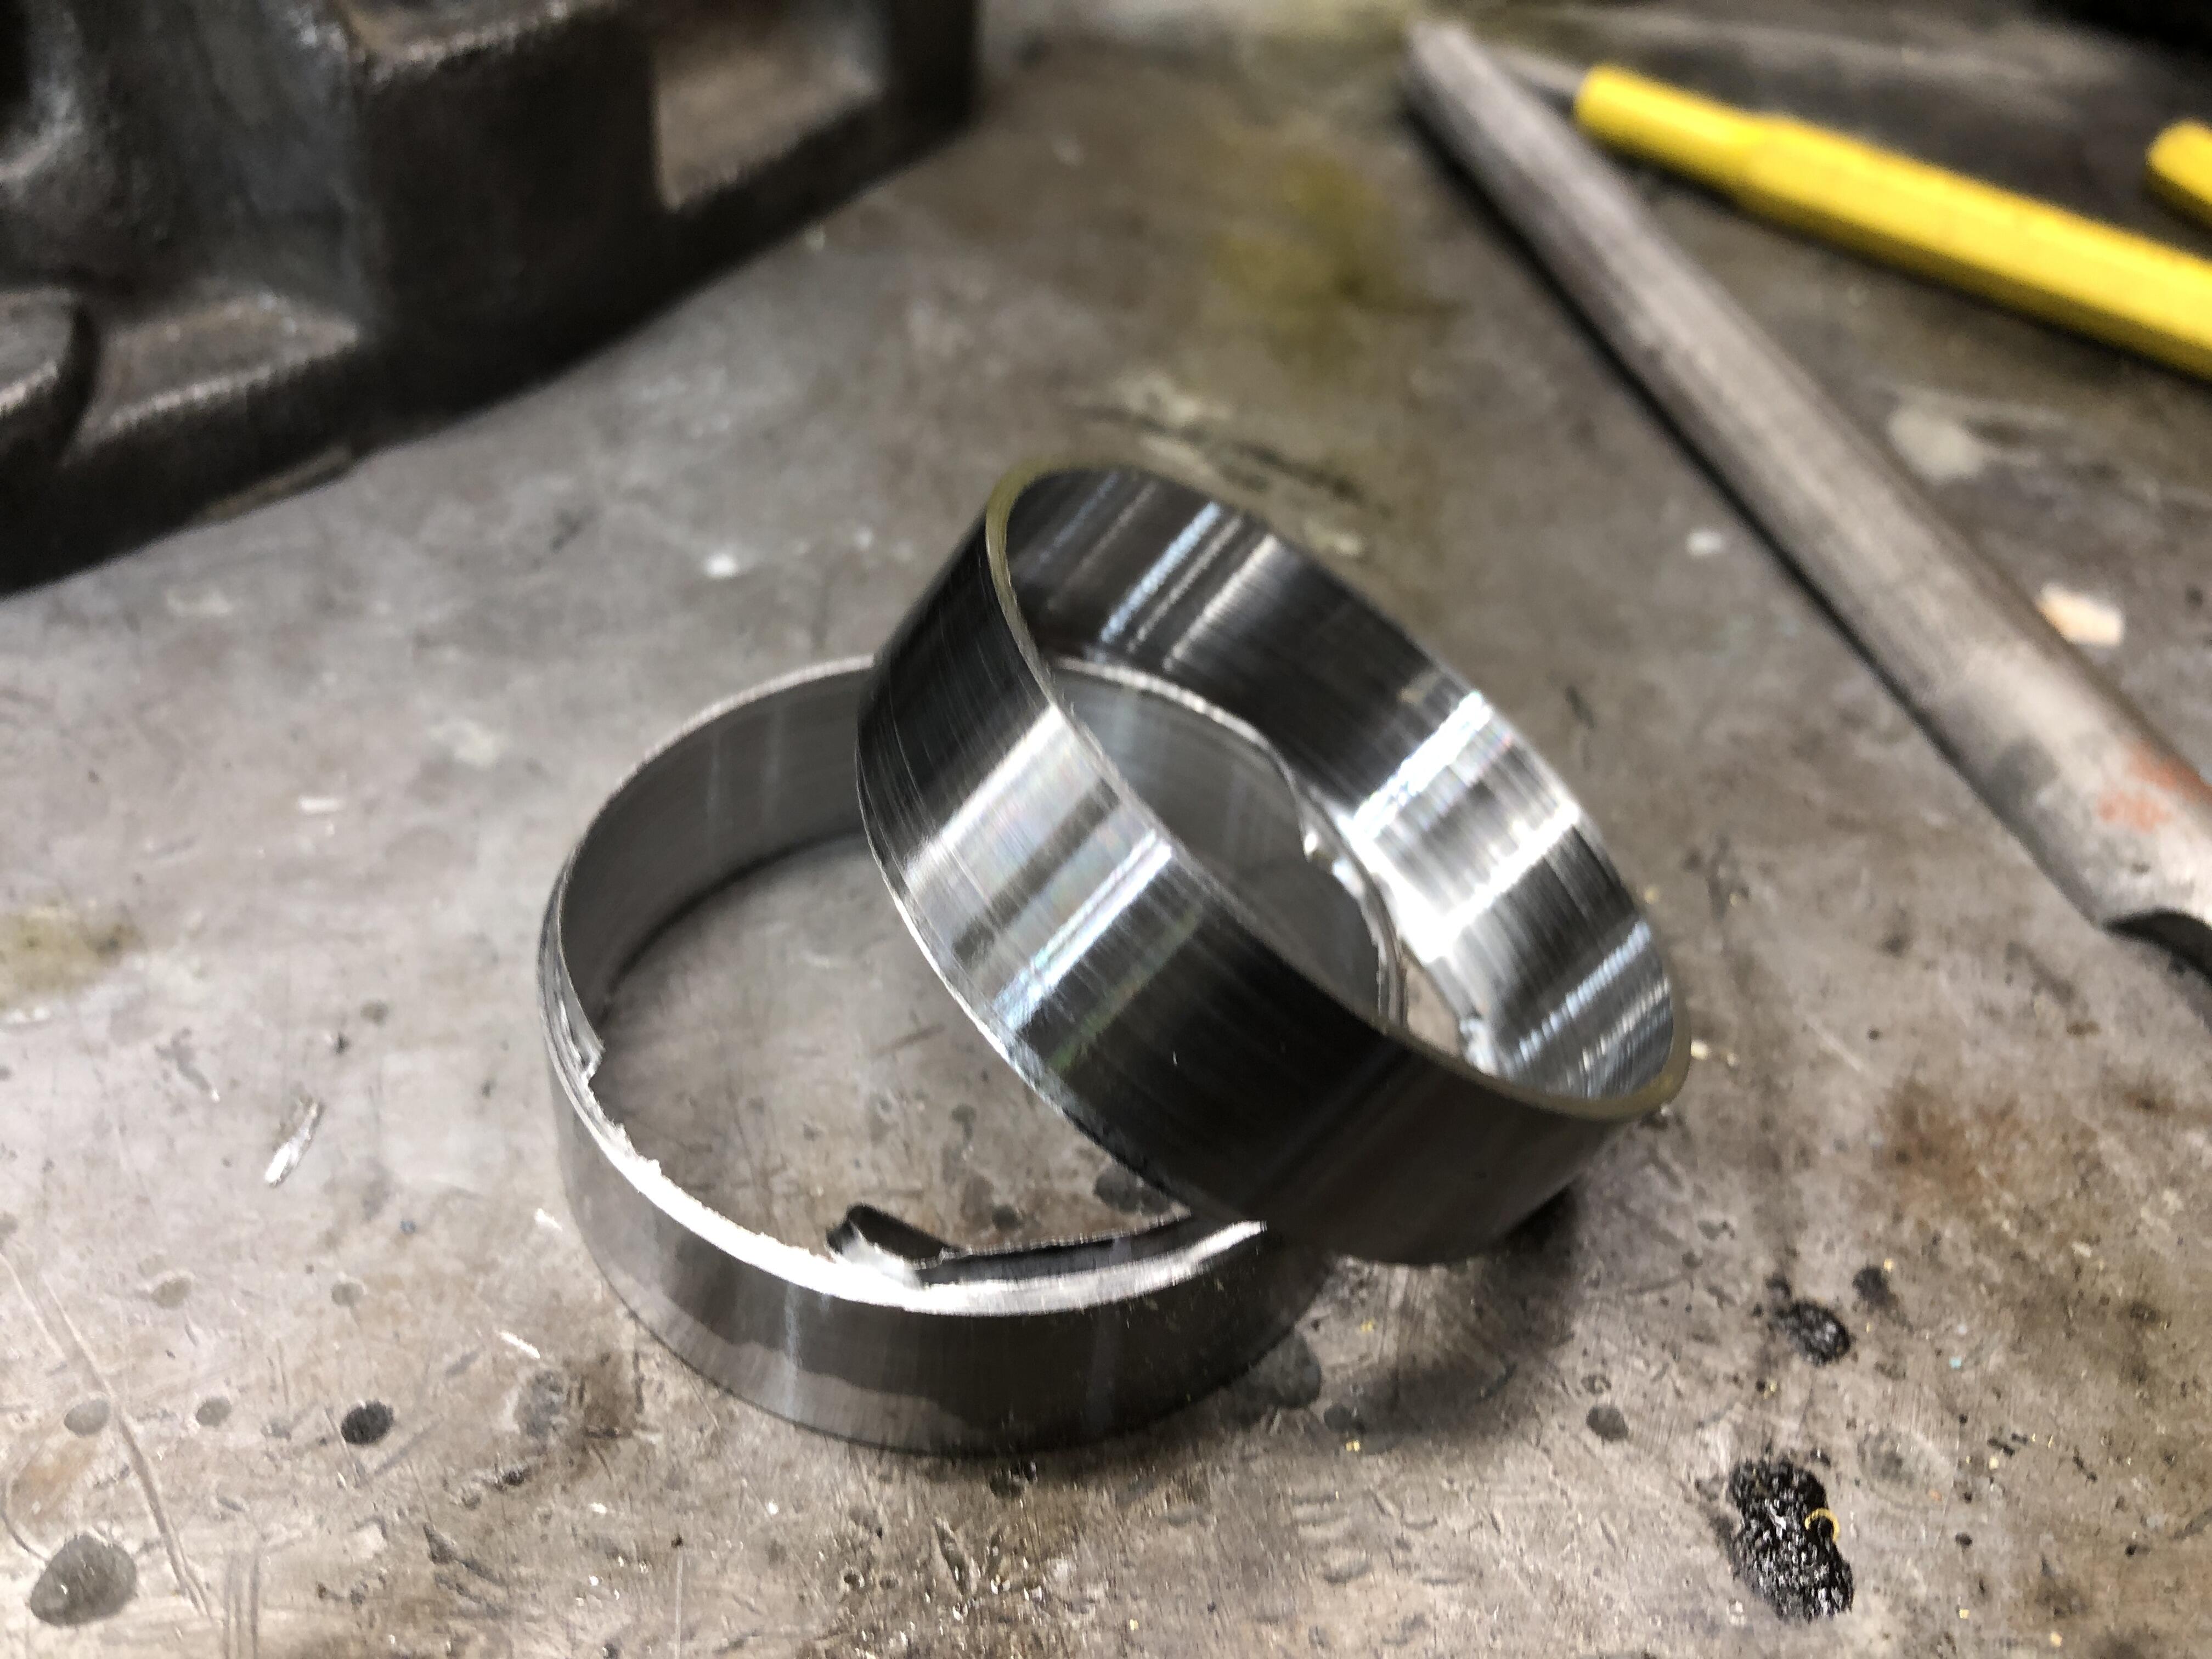
So, the repair is done. Made a filler spacer ring sleeve thingy, 50.1mm OD, 48 mm ID. 12.4mm high. Used convenient and most importantly cheap 2” (50.8mm) OD exhaust pipe as source material. Plenty of wall thickness. It’s about 46mm ID. Had that laying around. Bought the SKF equivalent seal to the Timkin quoted above. Warmed up the alloy housing a bit with the MAP torch. Tapped the sleeve home. Tad high, buzzed it flat to the housing. Sealant used (Right Stuff) to seal the area where the missing alloy sits next to the new sleeve. Also placed between the sleeve alloy housing.


 6 points
 -
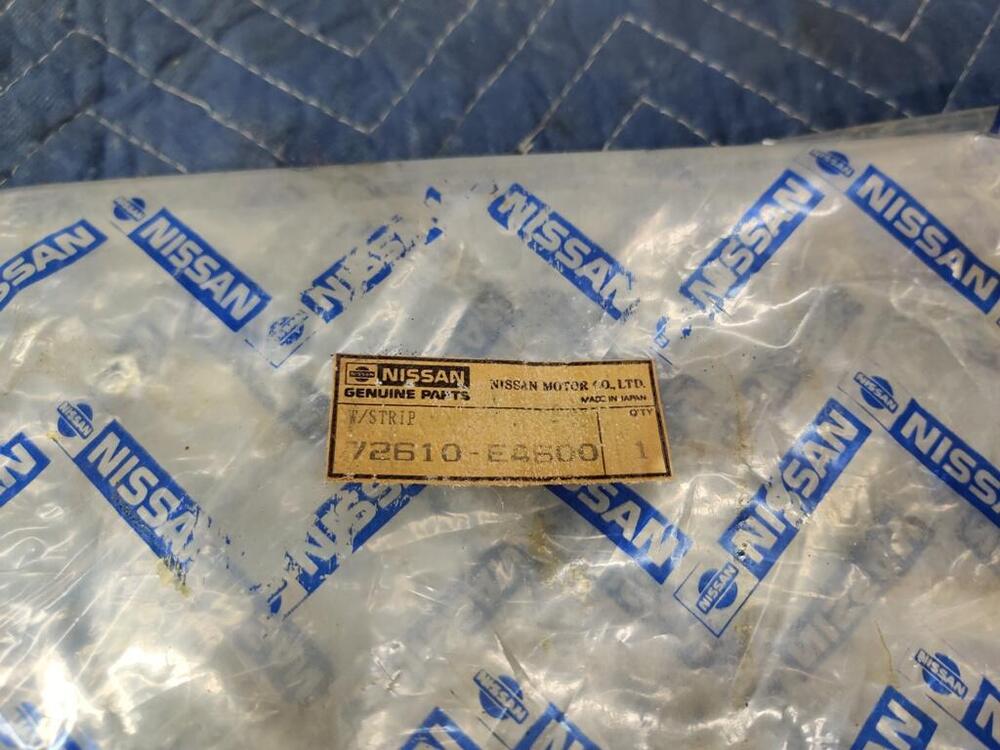
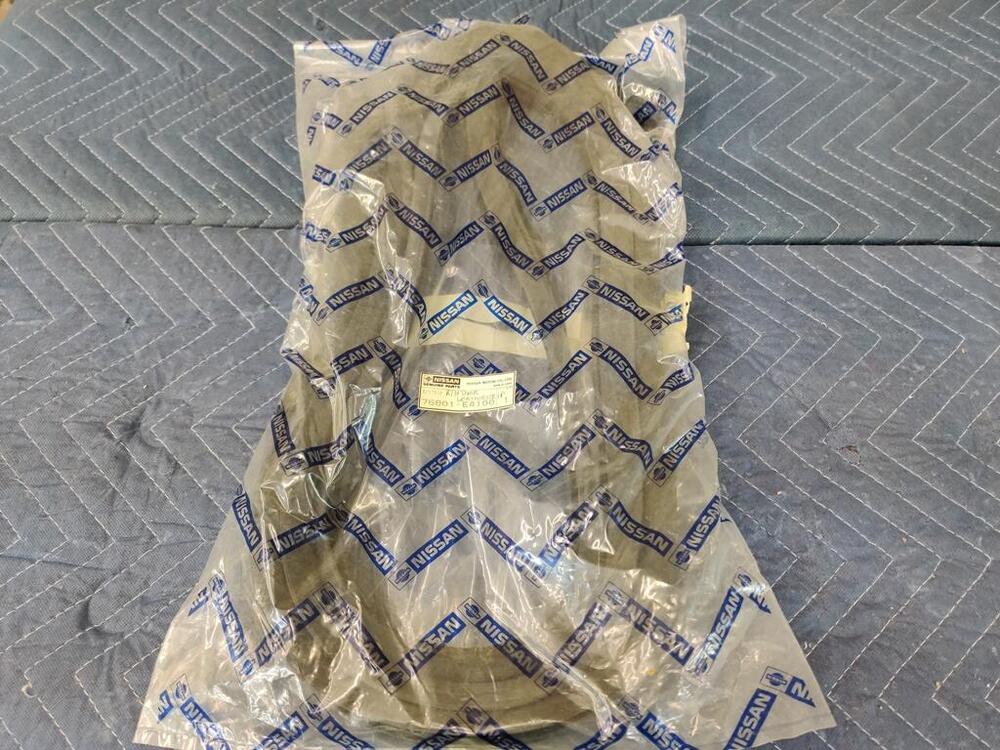
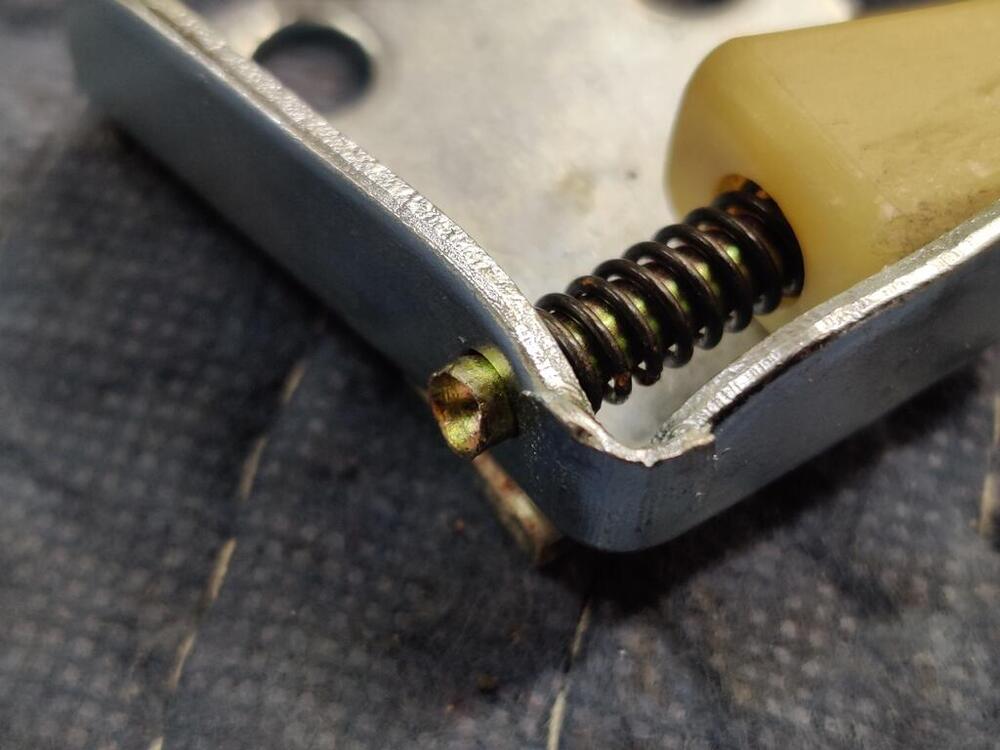
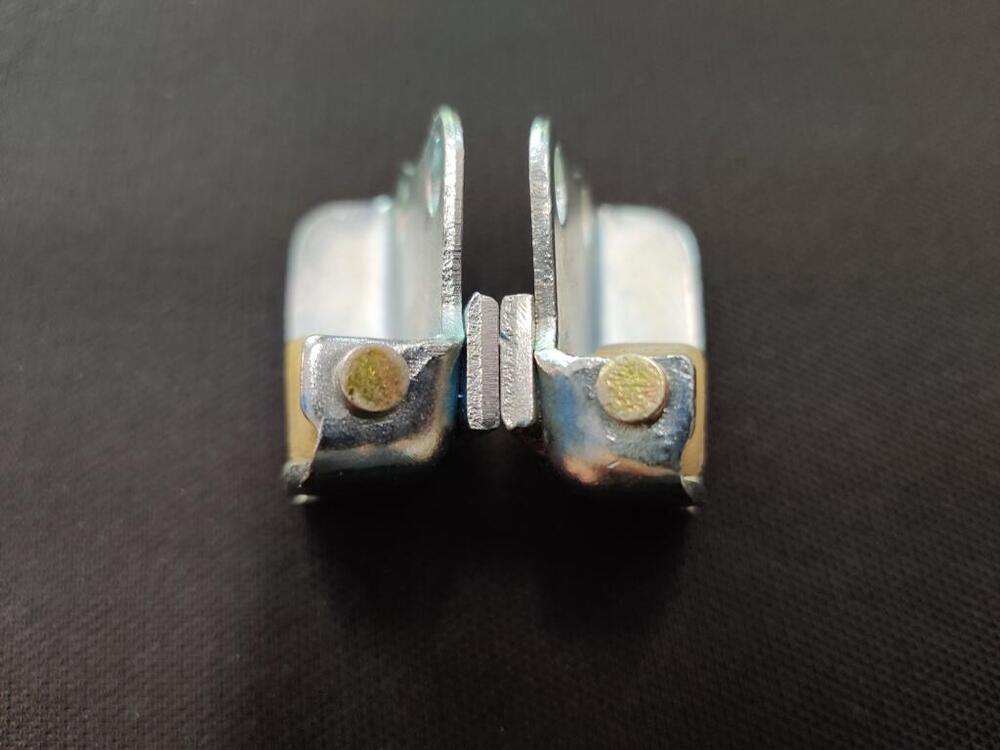
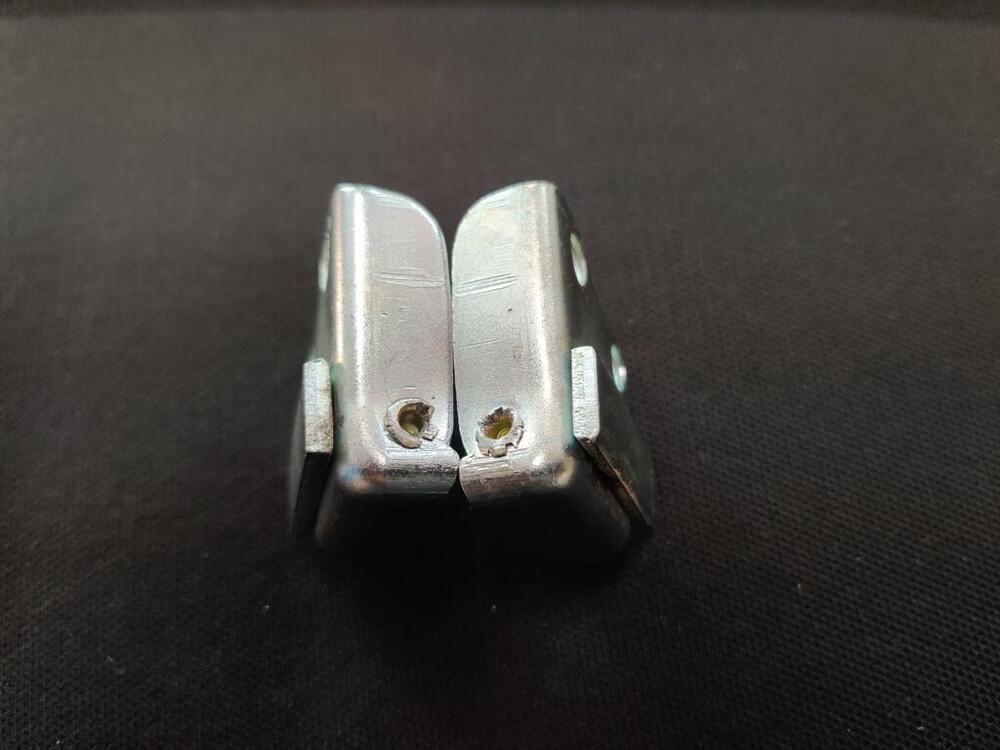
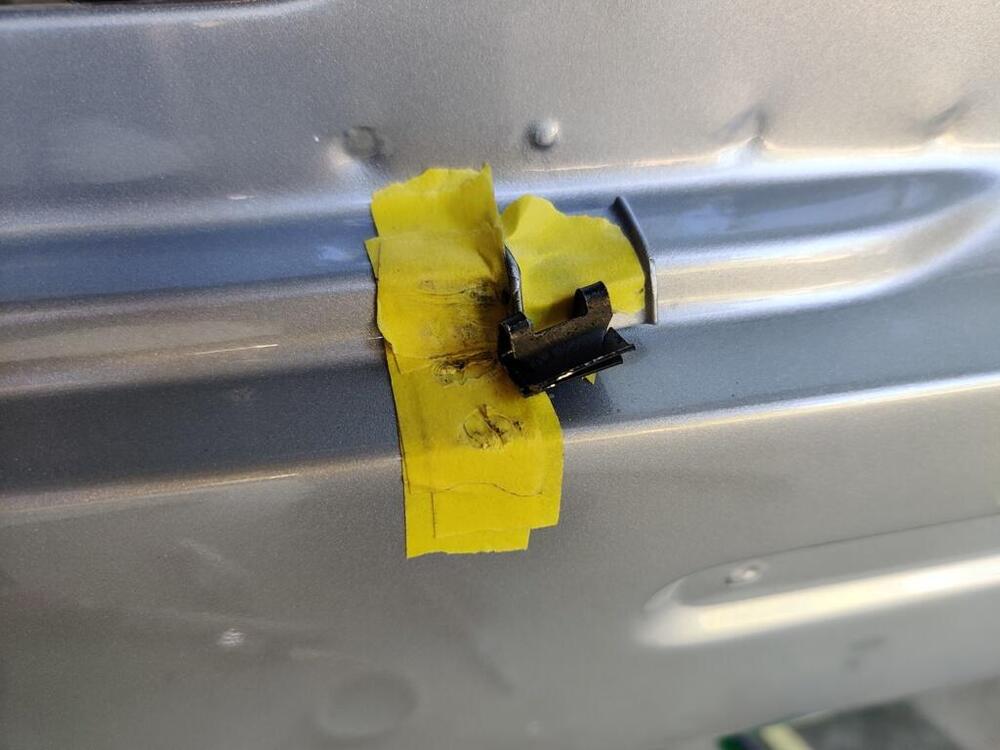
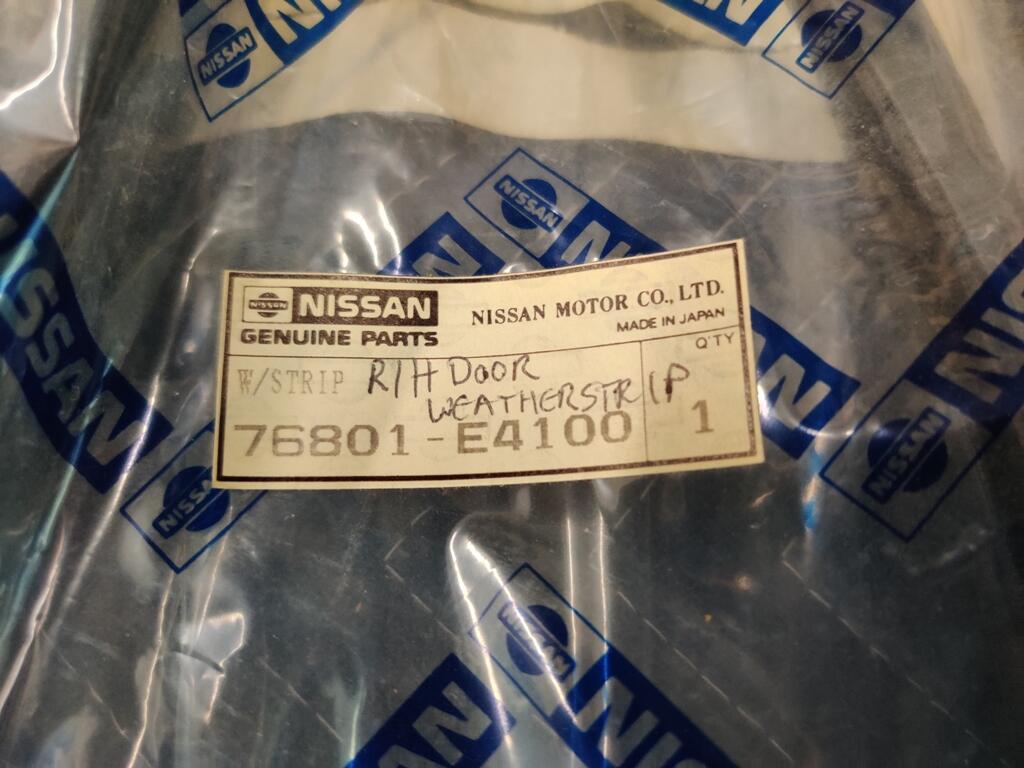
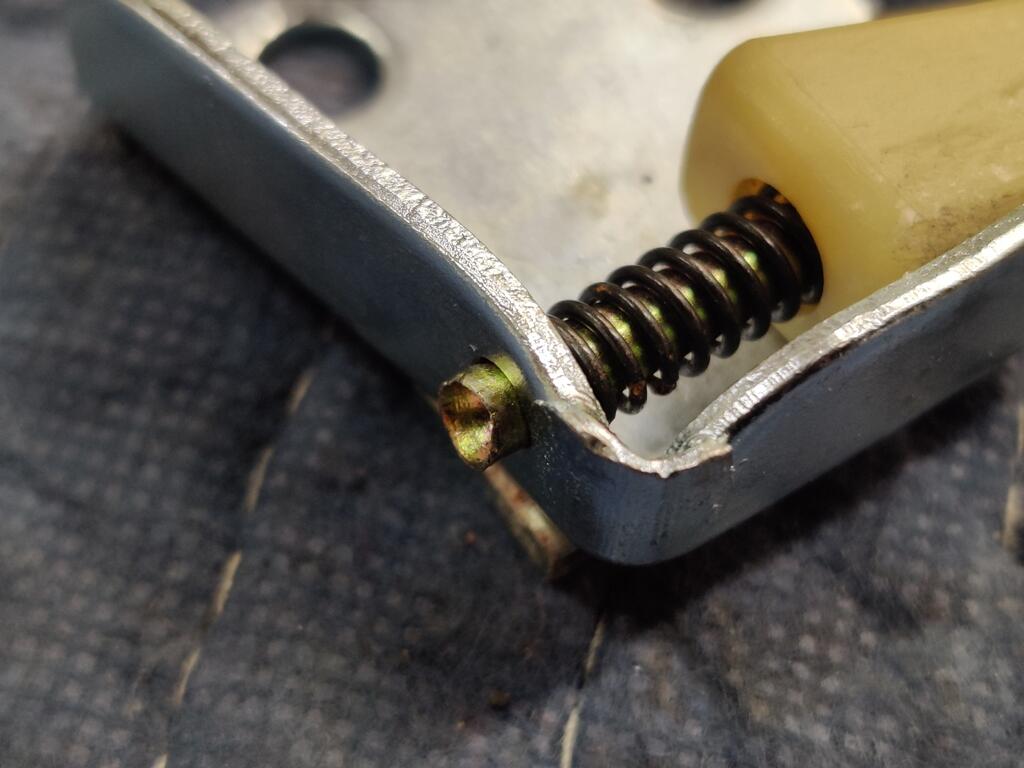
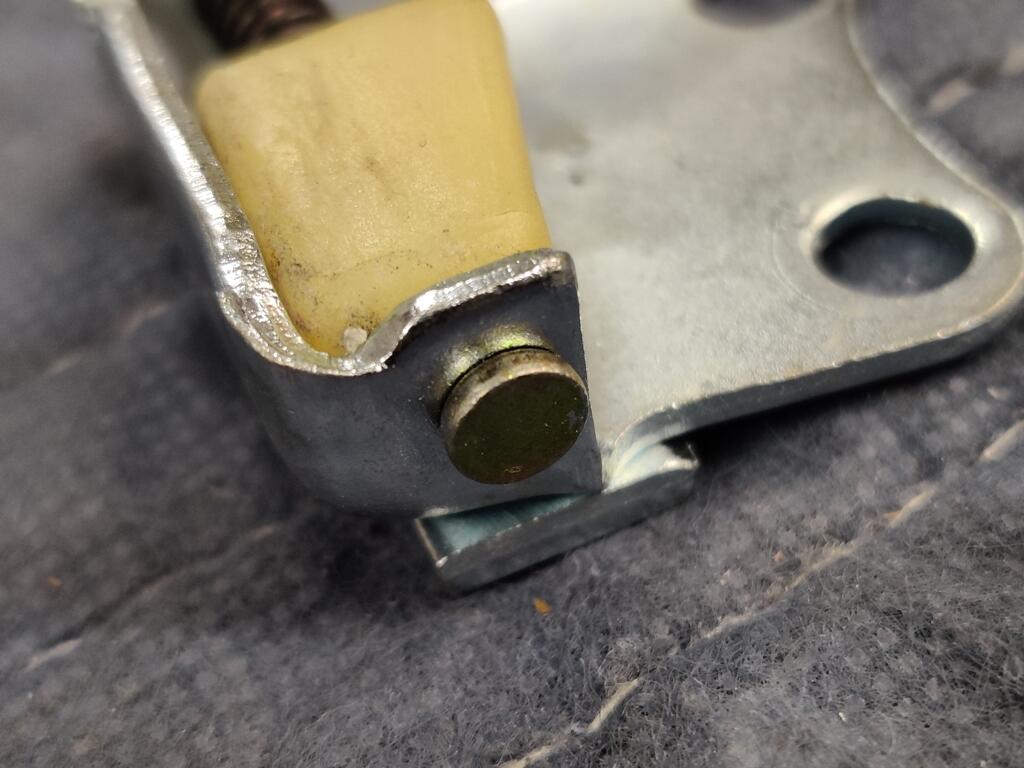
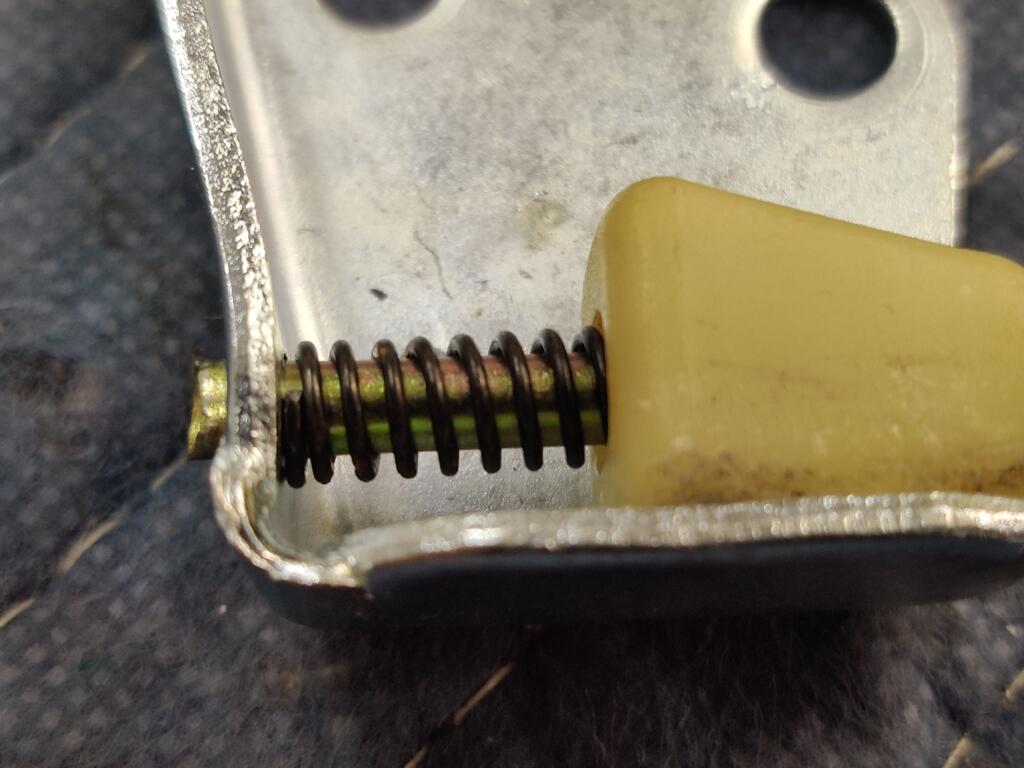
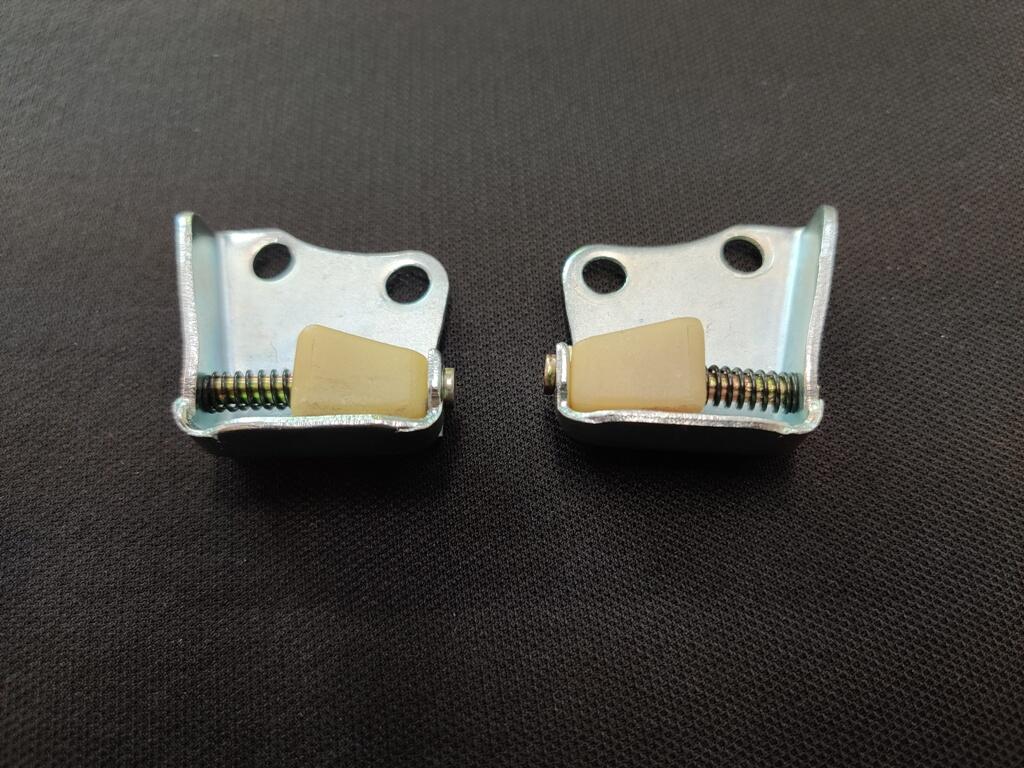
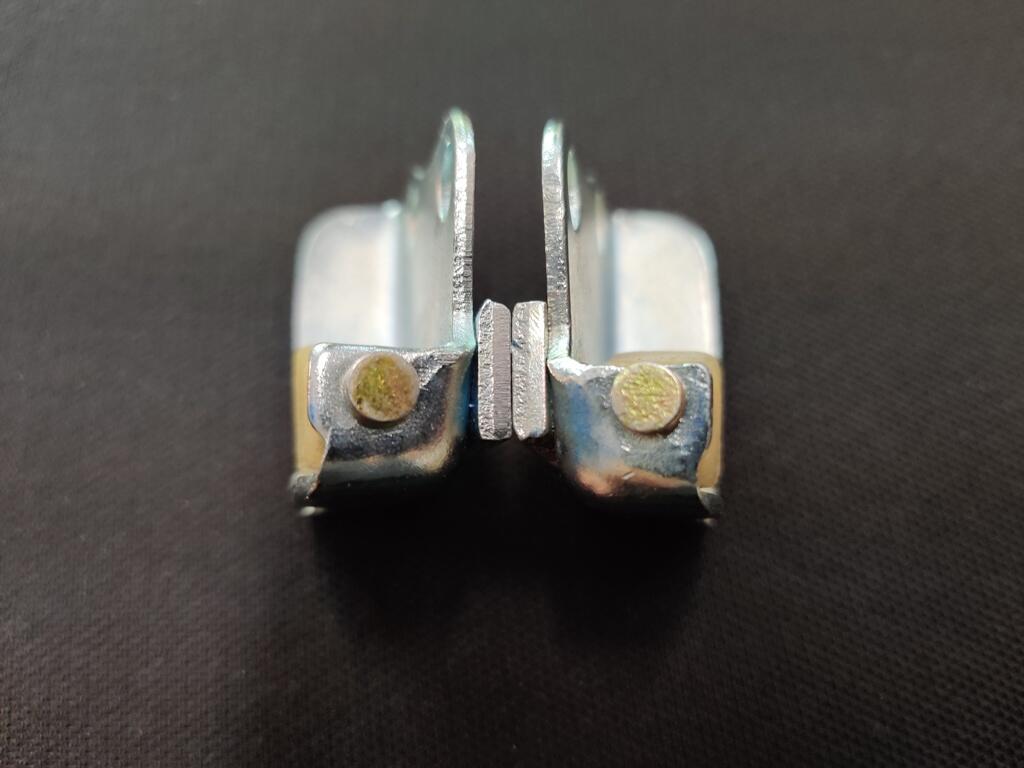
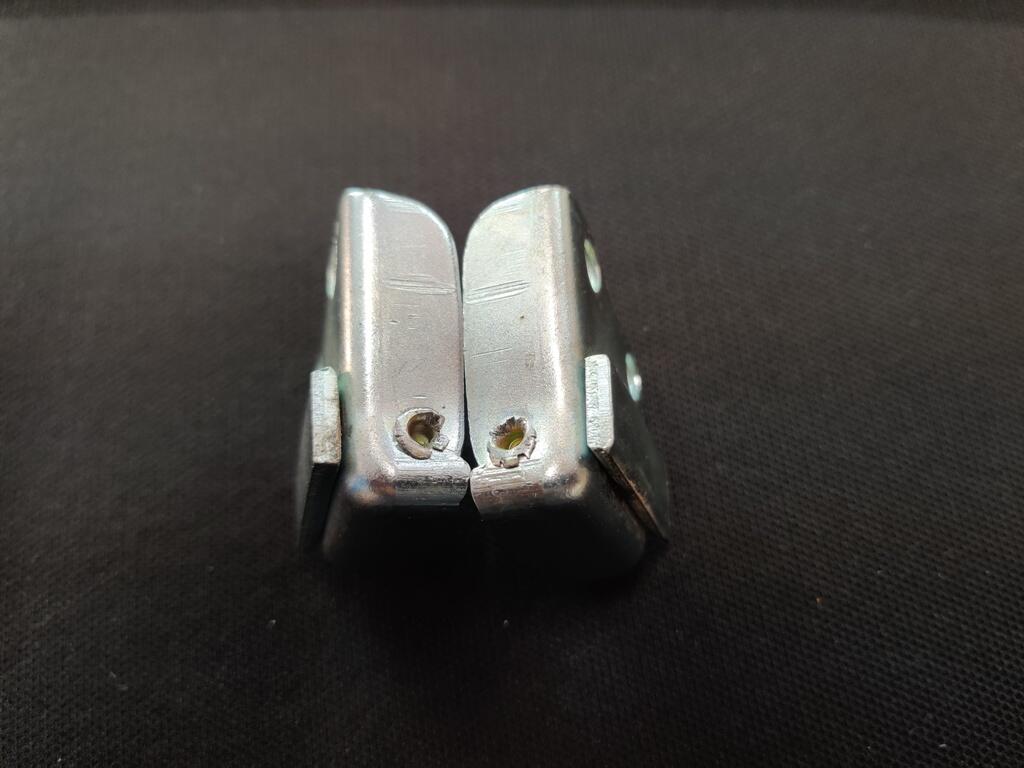
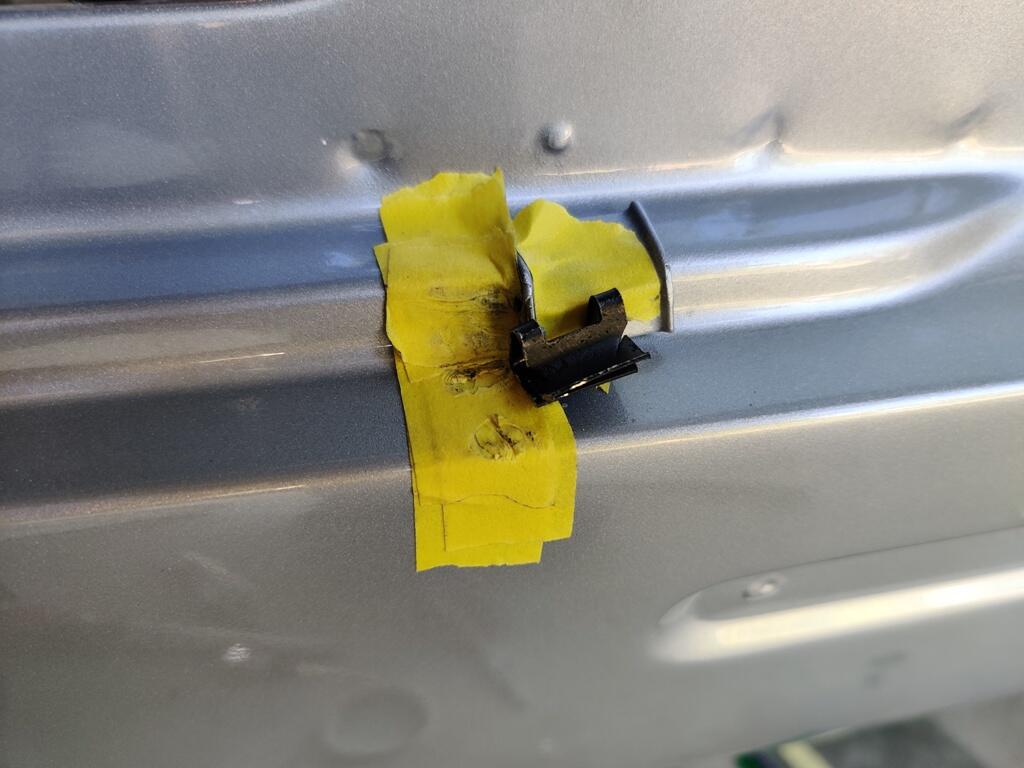
Recent progress included spraying the inside of the rocker panels and the upper front area of the quarter panels with Eastwood internal frame coating, routing and fishing the rear wiring harness through, an installing both door weather strips. These NOS weather strips were purchased by the previous owner of the car, so they have been sitting in these bags for a very long time. They are in great condition though, and it is nice to have original parts like this. One thing I have learned is that adjusting position of strikers and latches until confirming the door shuts properly and aligns properly with the body is best done without the weather strip installed. I did this before installing the weather strips. And I added the "dove tails" afterwards as well. I took out the rivets in these and had the plates, springs, and rivets re-plated separately. I also swapped in a plastic piece from a passenger side to replace the worn one that was on the driver side. I wasn't sure I would be able to reuse the rivets, but it seemed to go well. What didn't go well was trying to install these high strength steel clips for the tail light finishers on the body. This is how far I got one of them after about 45 minutes. I knew it wouldn't be easy to put these back on because it wasn't easy to take them off. The lips on the sides of the tabs which are welded onto the body make it very difficult to slide the clips in place. They can't be slid on from the underside. Looking closely, I was able to see some of the side lips are shorter than others. So, for the clip above, I switched installation to be from the right side instead. My recommendation is to either not remove these, or if you do, modify the lips on the tabs. They don't need to be tall to keep the clip from sliding off the tab. With short side lips, installation of these clips (from the side) is not that difficult.


 3 points
 -
2 pointsShe was, and thank you so much, your kind words mean a lot to me. I've never really been a guy to give names to cars, but I've decided to name my Zed Dallas, in memory of the nickname that Deb always has called herself. So from now on Dallas it is. 🙂 Mike2 points
-
2 pointsI am so sorry to hear of your loss. Debbie seemed like a wonderful partner to spend your life with. Although cars are only objects, they do hold a special place as a touchstone of great memories of happier times. May the restoration bring you purpose, peace and solace in a cathartic way.2 points
-
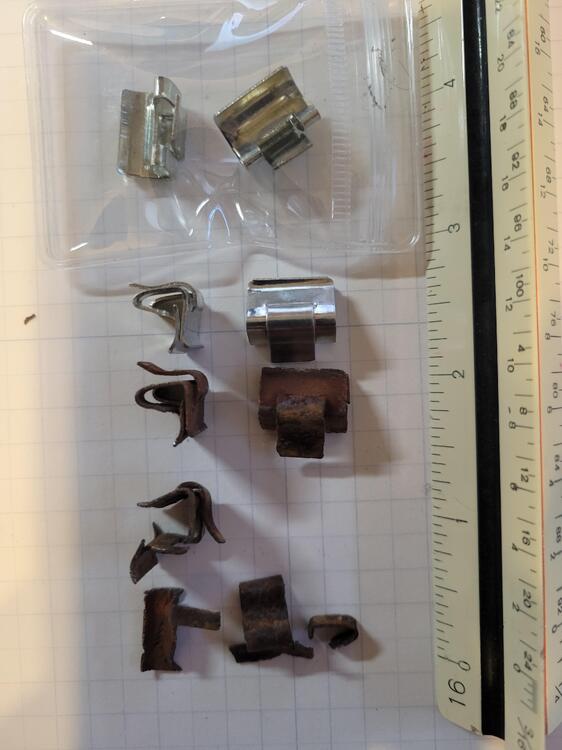
I got a set of those clips from @Resurrected Classics https://resurrectedclassics.com/en-ca/collections/1970-1973-240z/products/datsun-240z-1970-1973-taillight-panel-clips But unfortunately he is currently sold out. Here's a pic showing them compared to my rusty crunchy ones. I have not tried them yet, but they appear to be very accurate.
 2 points
 -
Nicely done. We should all have milling machines and lathes in our workshops!2 points
-
1 pointI posted a short video of the use of a magnetic finger. I bought some a few years back, and sometimes I remember I have them. They can be handy for getting washers and fasteners into tight spaces.1 point
-
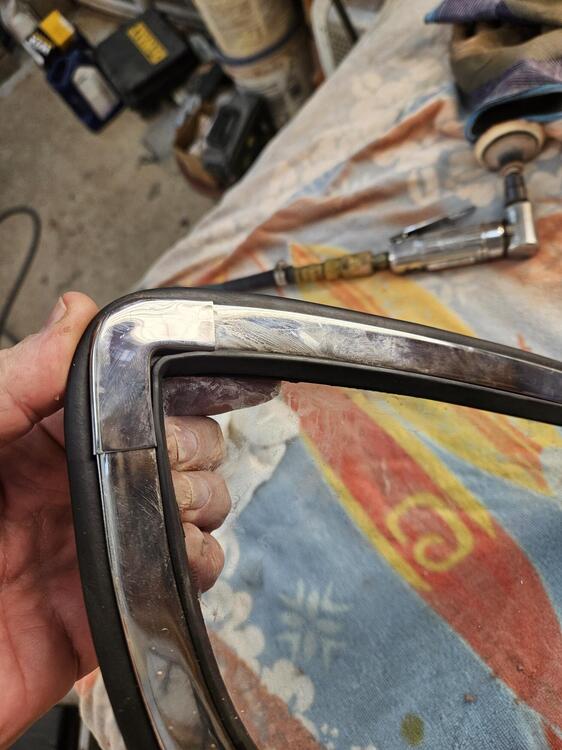
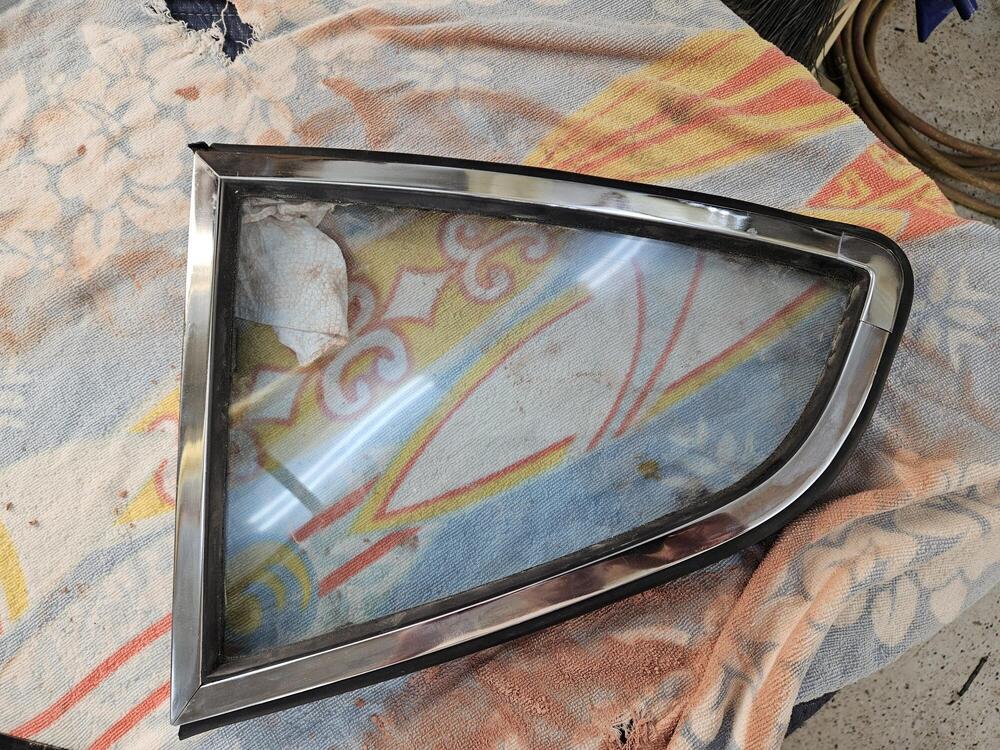
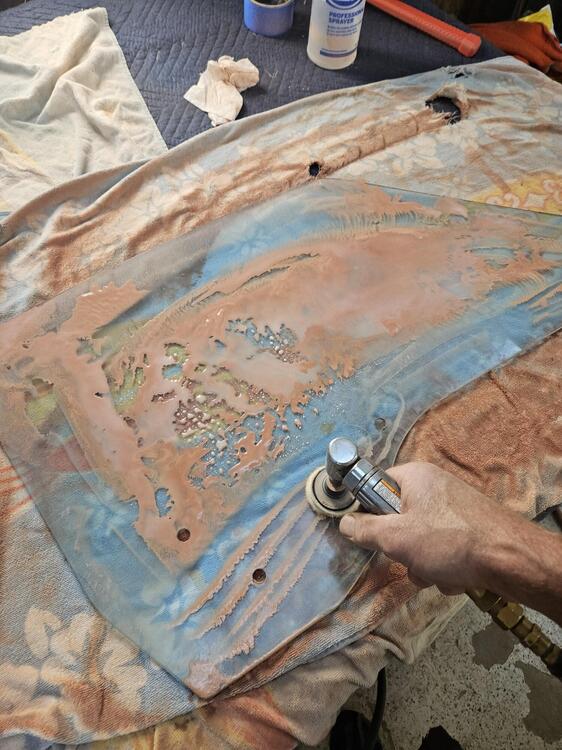
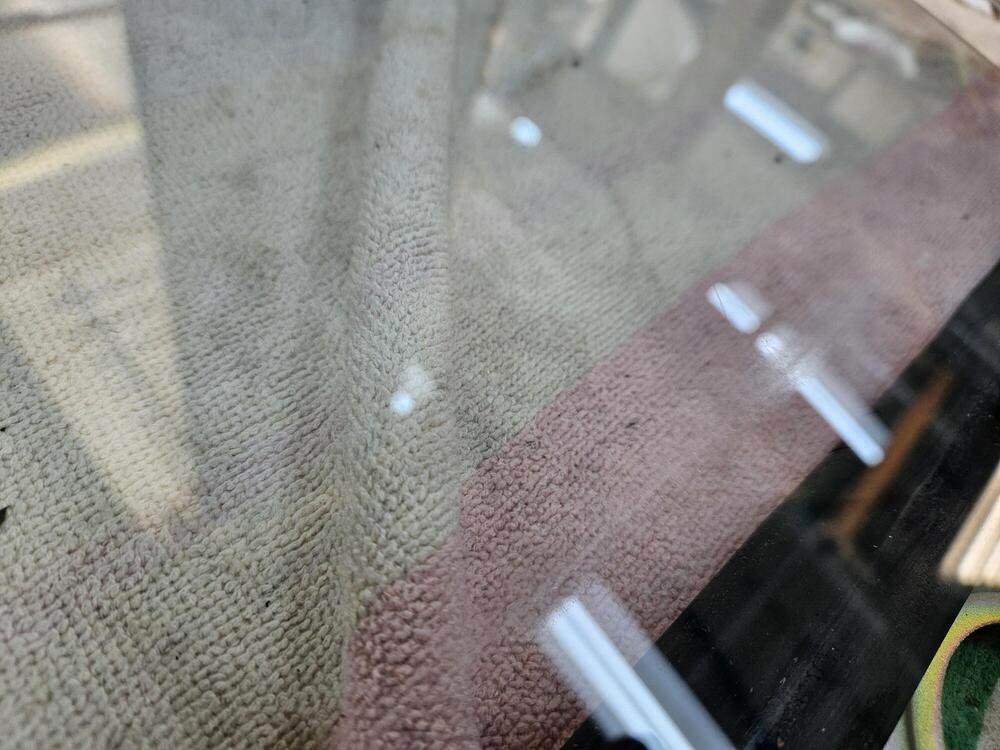
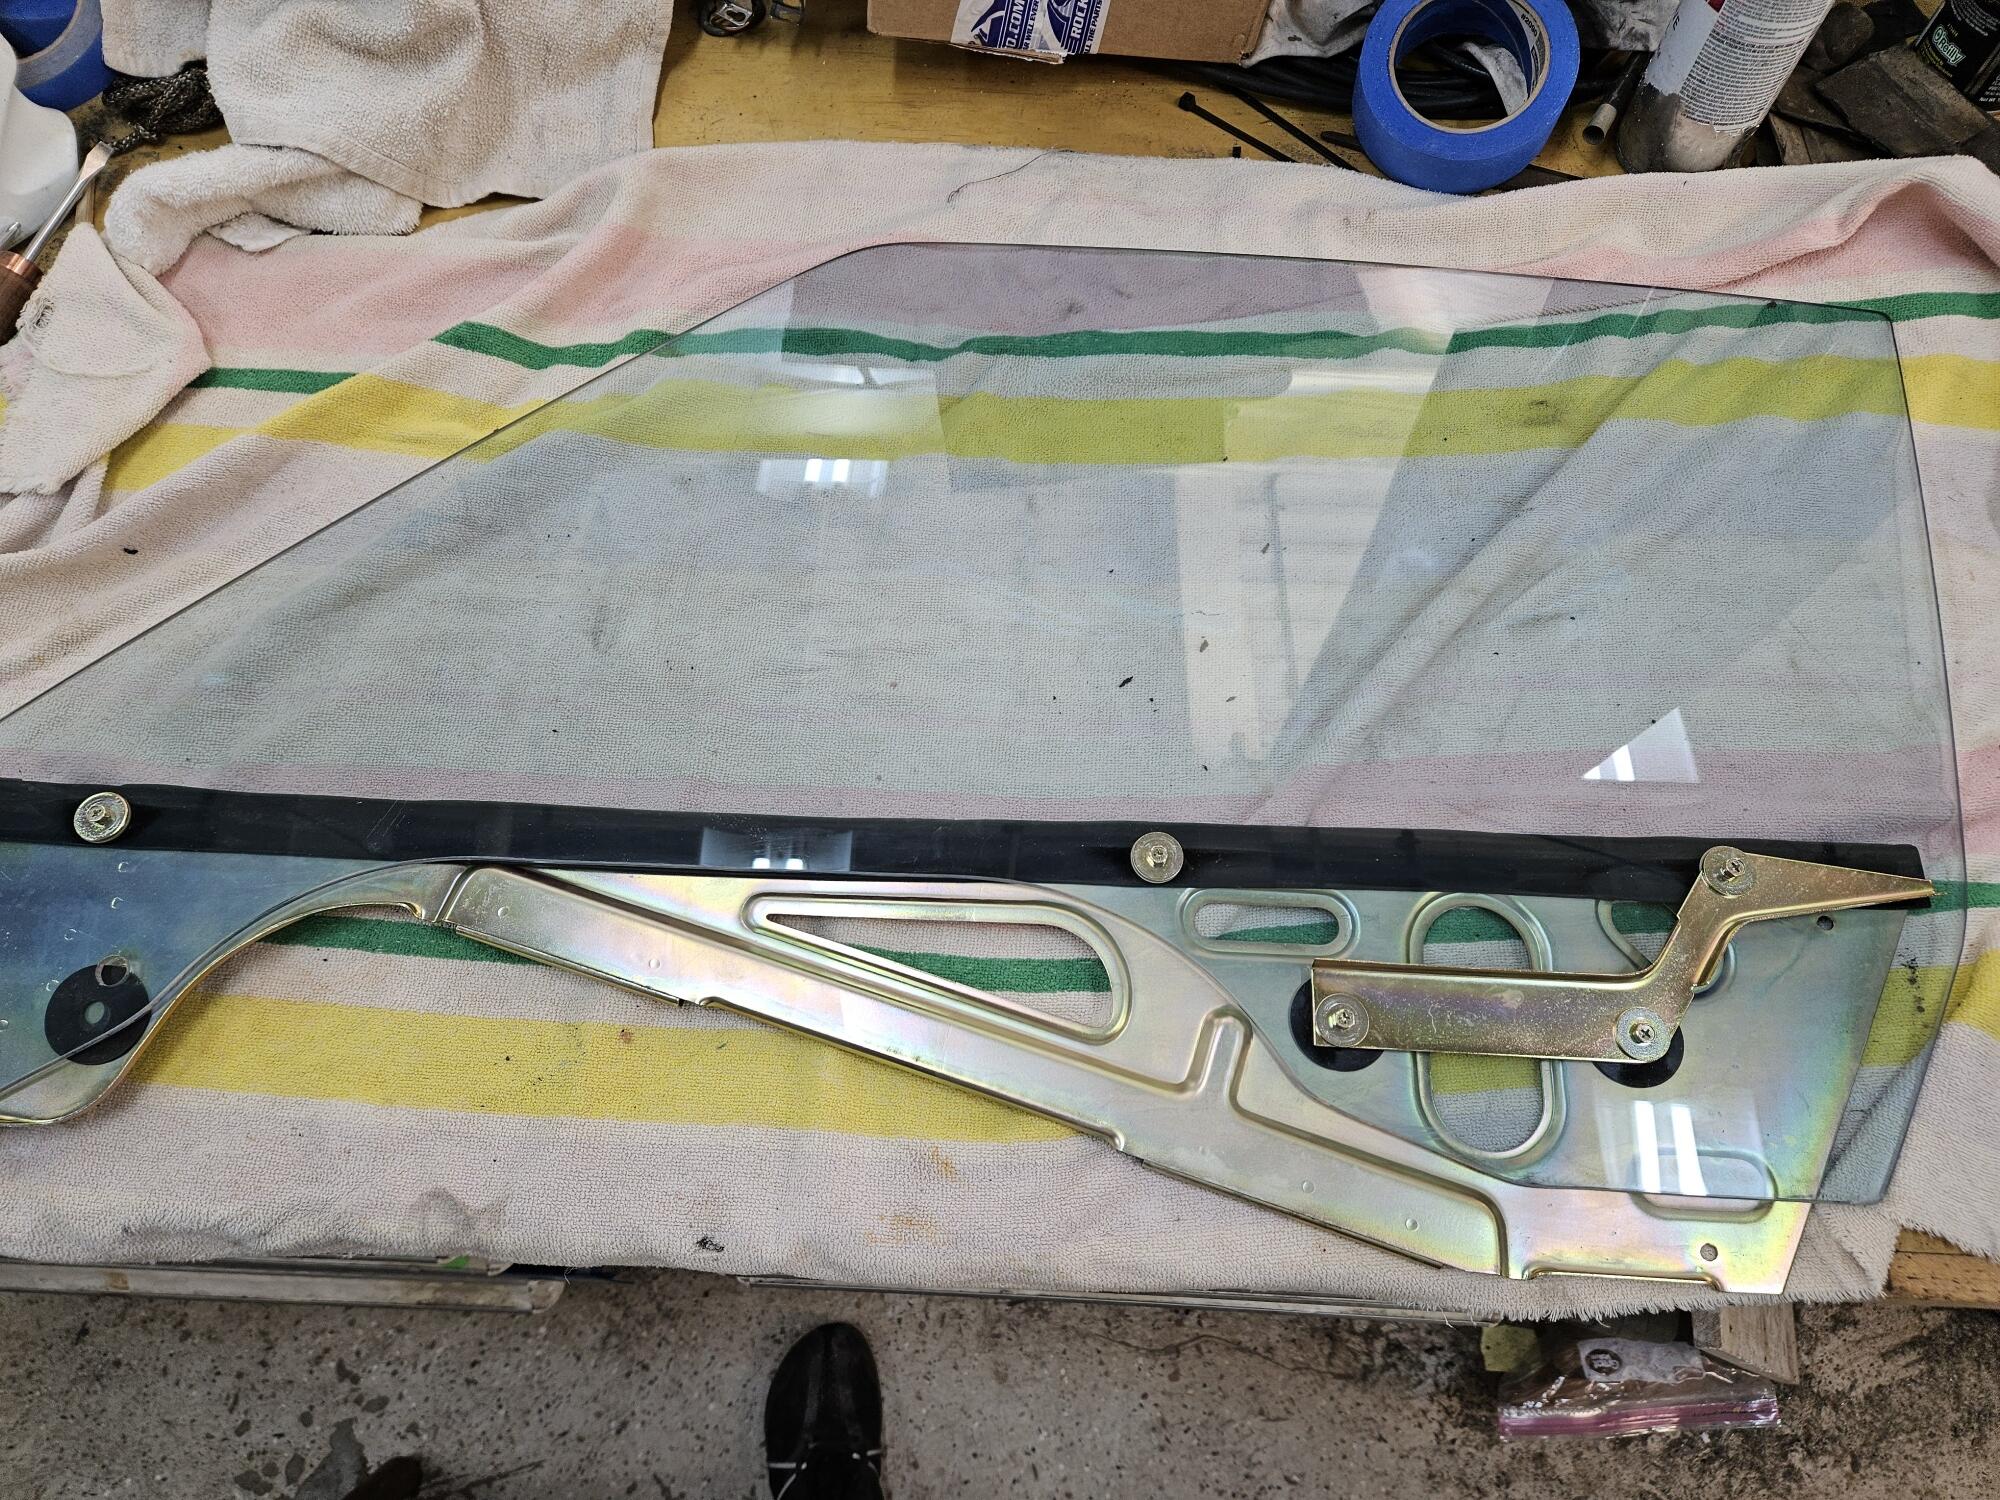
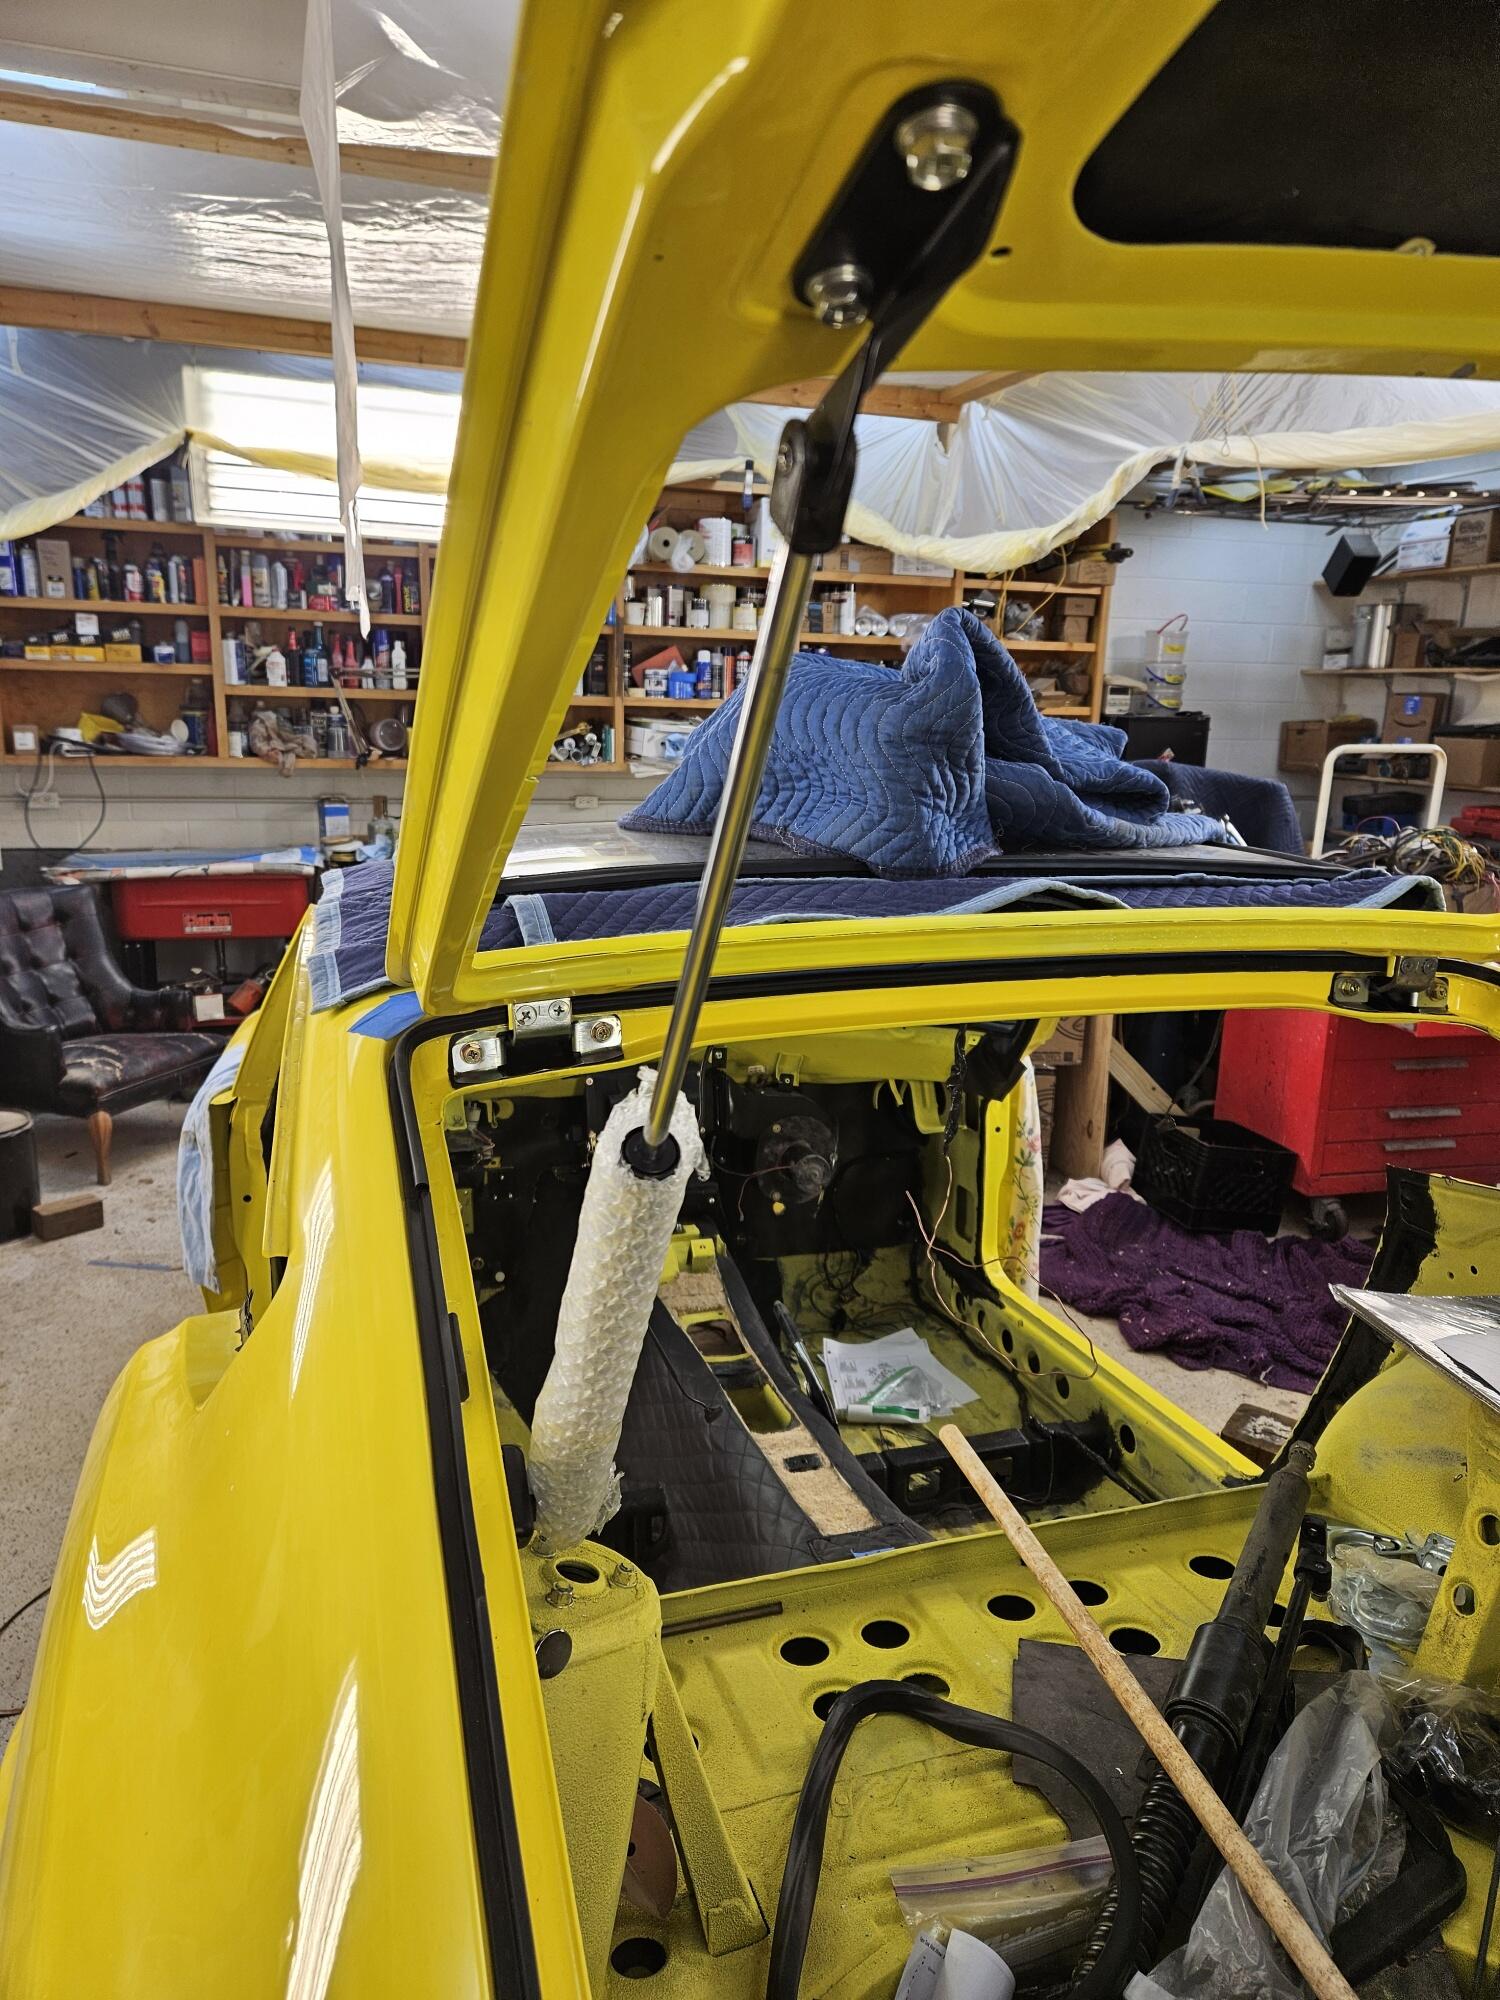
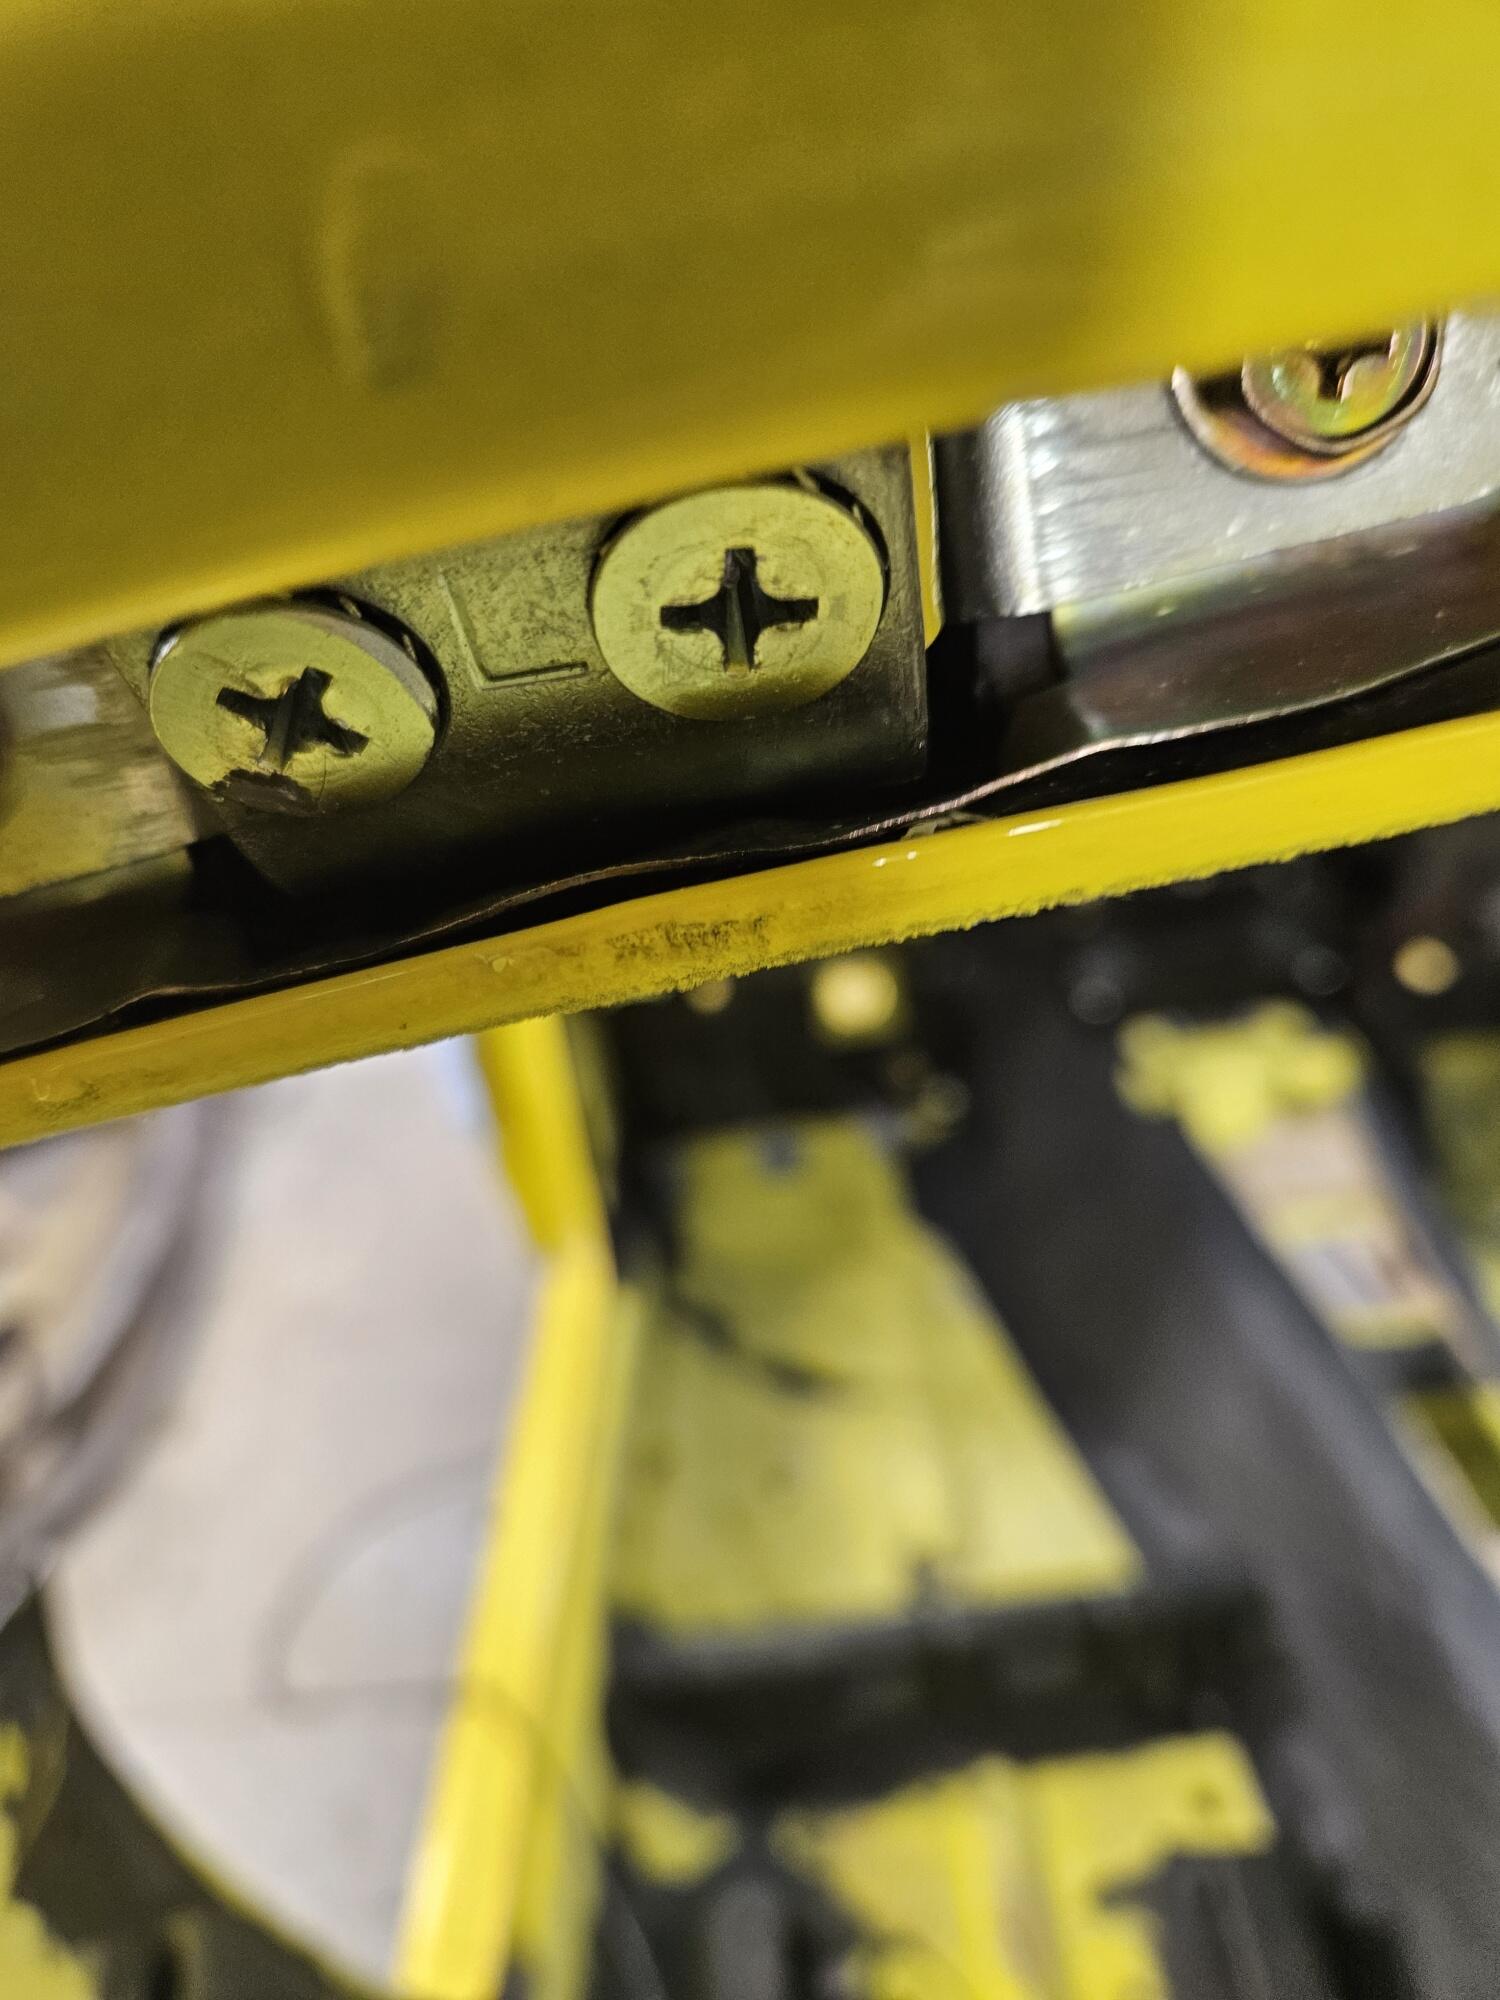
1 pointHere are the quarter windows This one looks pretty good. This is the main flaw in the other one Hopefully this corner will settle in eventually. The good news is I can't see it from the drivers seat! I polished the other door glass yesterday. The is Cerium Oxide. You have to make a slurry. It cleans it up pretty good but donesn't really remove big flaws. You can see the line of scratching right at the belt weatherstrip. I filled the differential. The hand pump blew an end off at one point and blew that stinky stuff all over me!! I got the hatch strut on yesterday too. It looks really nice @jfa.series1! I have a problem with the hatch hinges though. When I lower the hatch the hinge hits the ruber hinge cups. I am thinking there is too much sealant under them. I can force the hatch down the last few inches but you can tell the hinges don't move nay more. Can some body vouch for the hinges being supposed to clear all the way closed. When I lower the hinges down I can't get the hatch to flush up with the roof because of this interference.


 1 point
 -
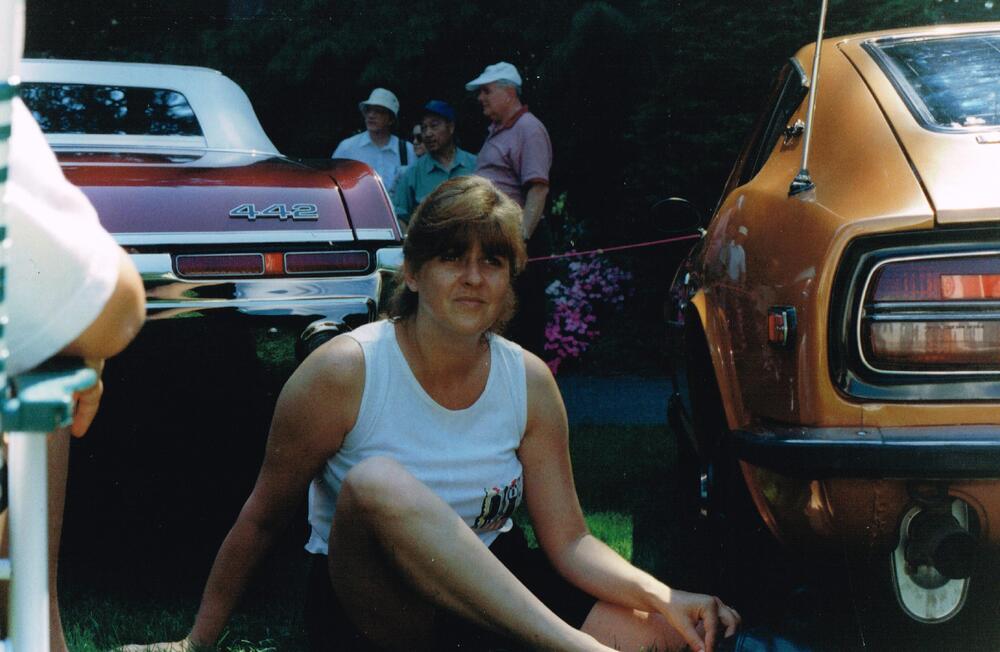
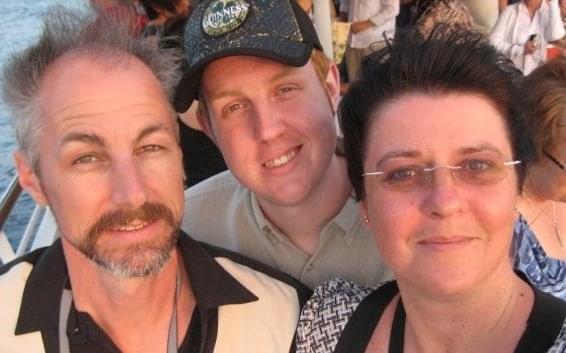
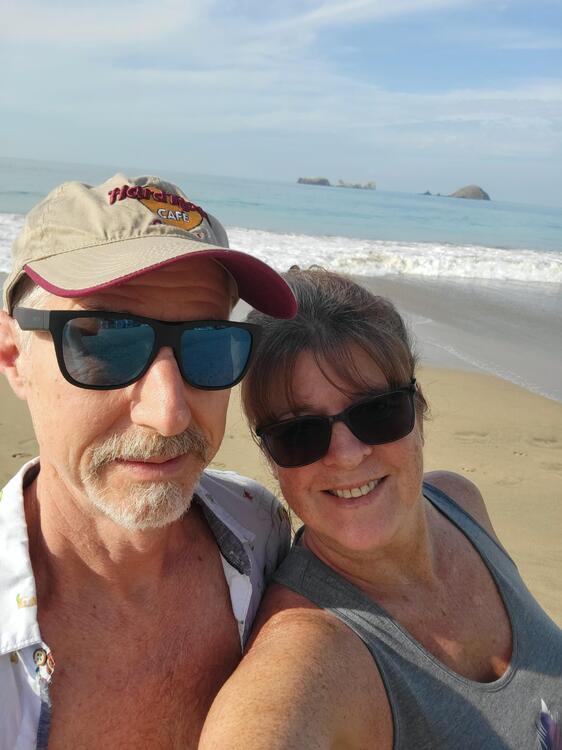
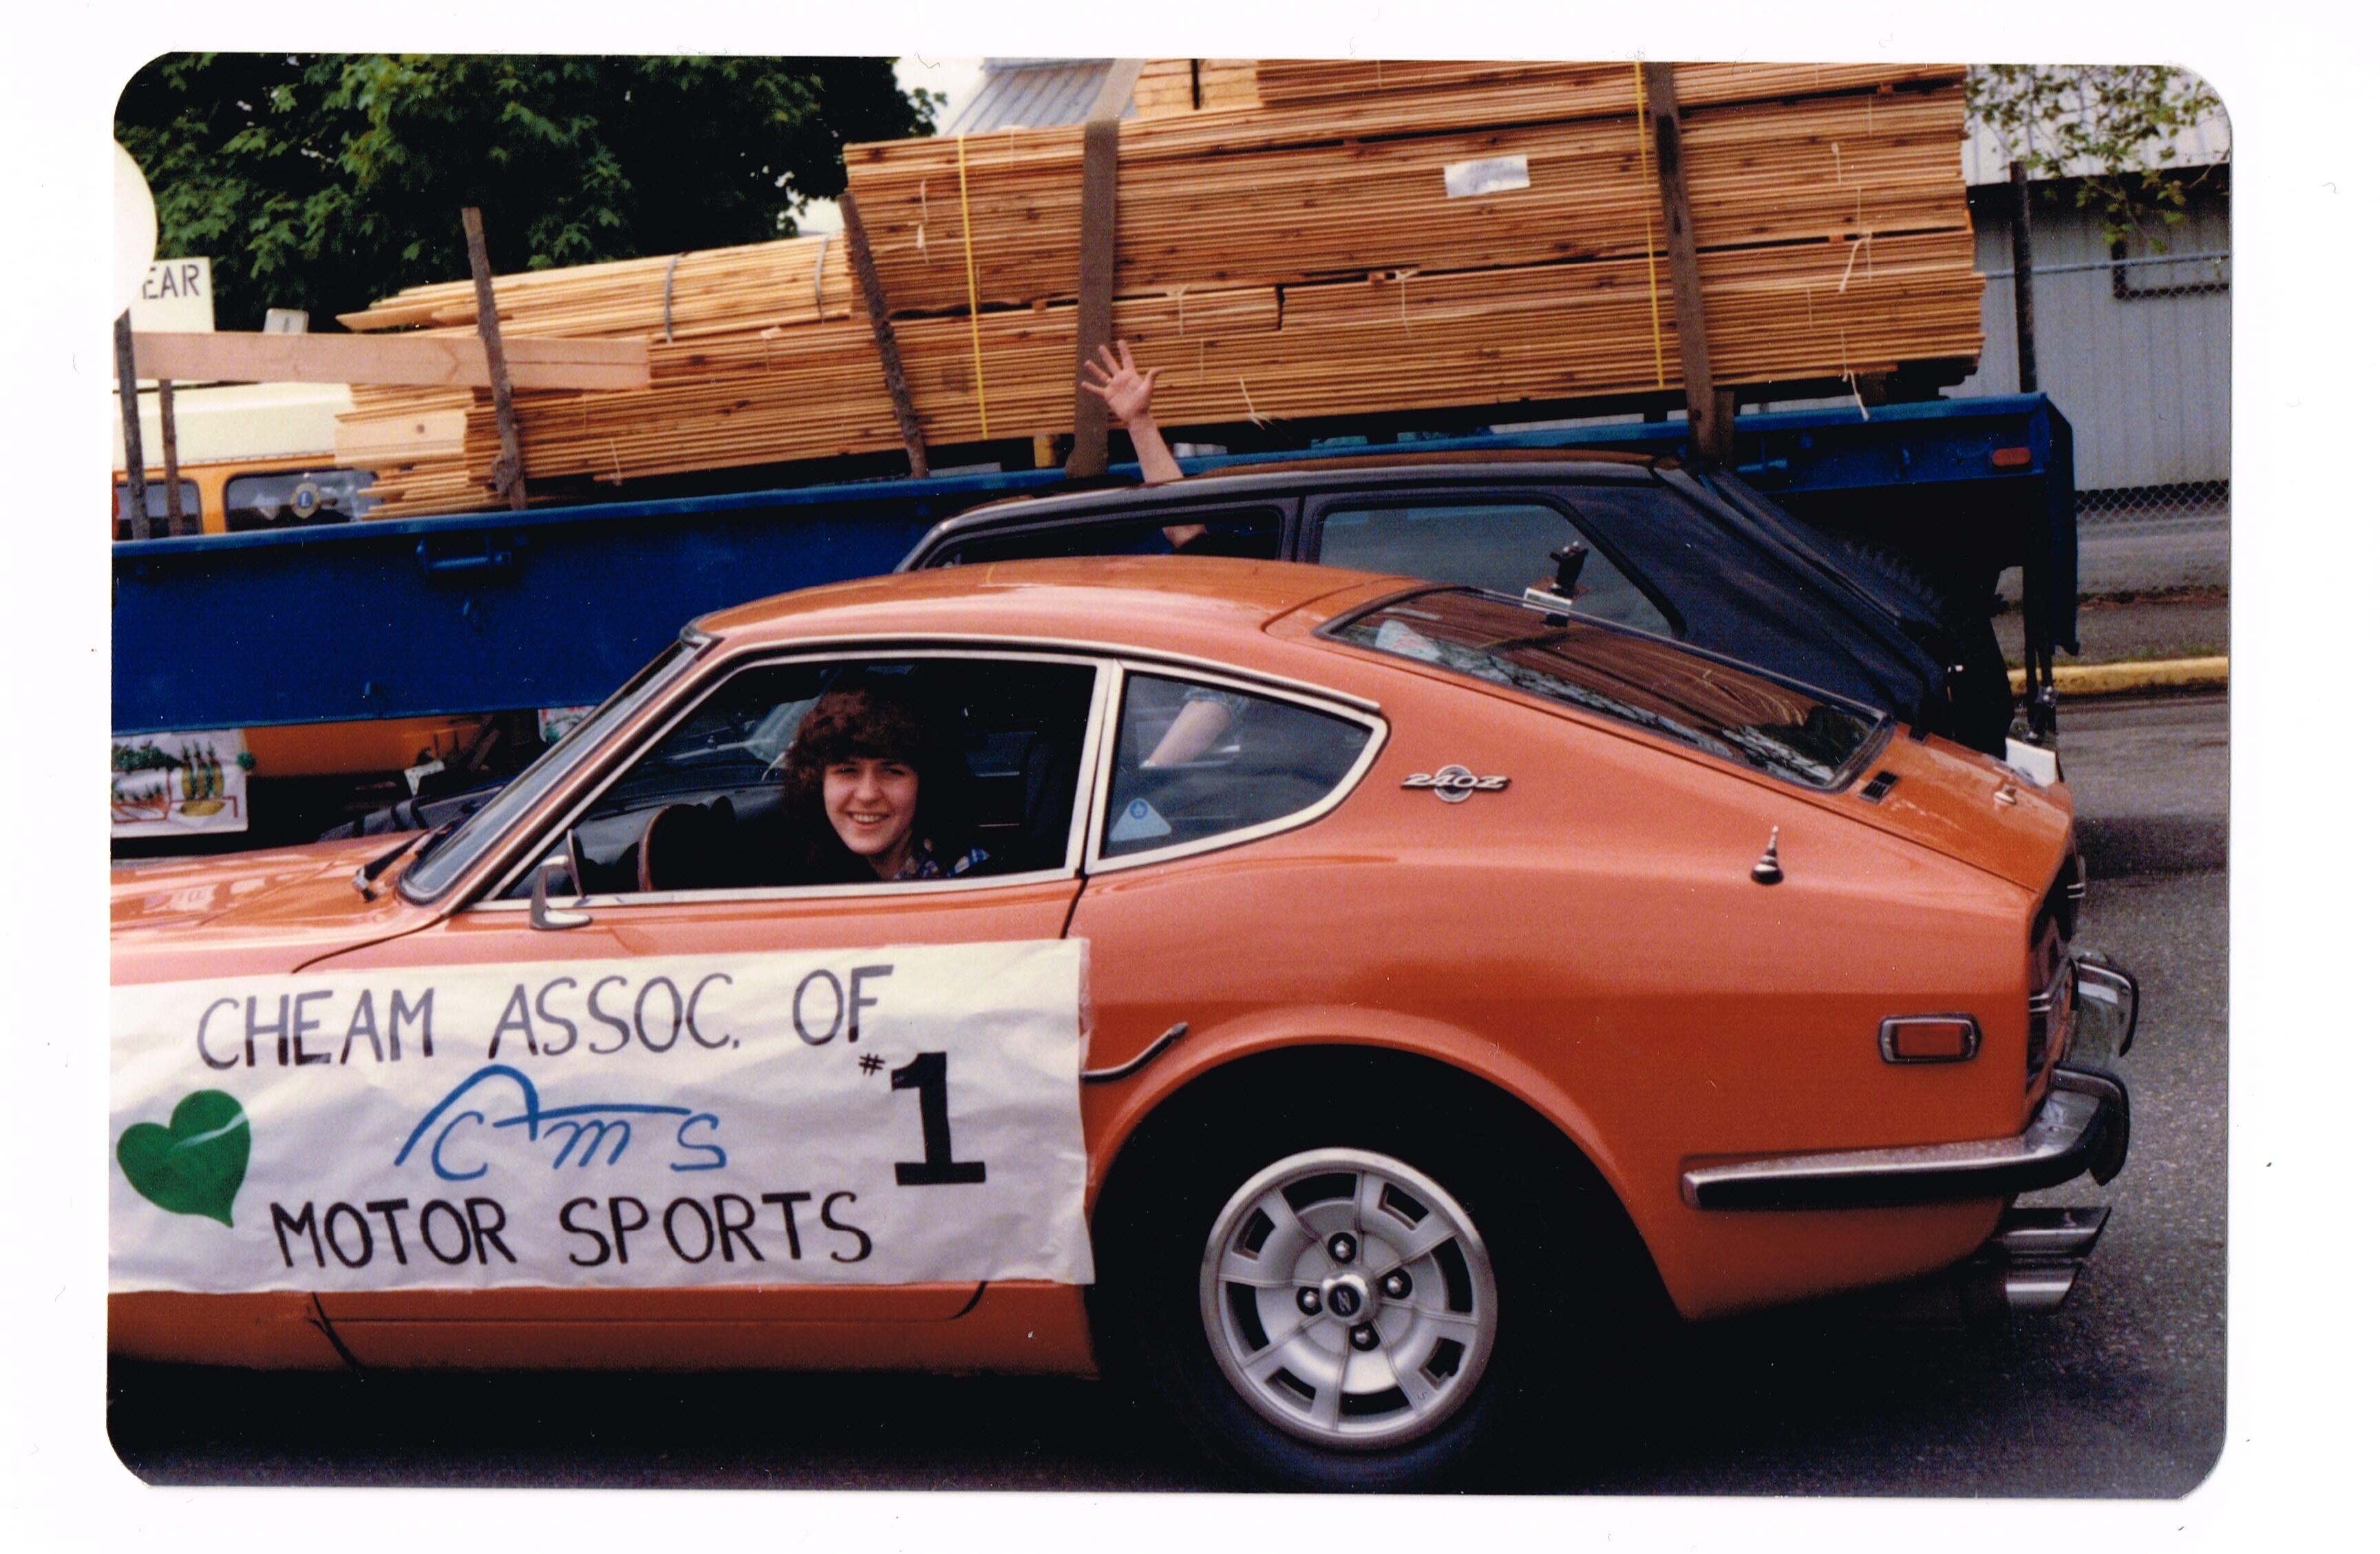
1 pointIt's been a while since my last update, but it's been a very emotional start to the year for me and my family. The love of my life Debbie, passed away on February 11th after a very short struggle with an aggressive type of lung cancer, and this will be a memorial post to her. I met and started dating Deb in 1980, barely two years after I first purchased the 1970 240Z I'm documenting here. Deb has always been a huge supporter of our Datsun we even took it on a honeymoon road trip when we married in 1983. Sadly I only have a few pictures with Deb and our 240 but I will share them here. First one is from 1981 with Deb driving our Zed in a local parade, representing the club we were members of, Cheam Association of Motorsports (CAMS). We hosted various slalom events and such locally thru the 1980's. Next from 1996, Deb at a Concours car show, at Minter Gardens where we displayed the Zed. Deb drove the 442 on the left to the show and we displayed that as well. The 442 belonged to the owner of the local body shop where Deb worked as a collision repair estimator. We both detailed both cars together on the days before the event. Lastly, from September 2017, you can just see this her in this pic of us driving to Whistler on the Sea to Sky Highway, There were about 30 members from our local club driving to whistler for a club show in our Zed's as a convoy. As Deb was the person responsible or pushing me to embark on this restoration in 2018, I would be remiss not to share a few more pics so that you can get a small sense of who she was. In addition to being my soulmate, Deb was a loving mother to our son, Chris. She was a passionate traveler, a real car person and enjoyed volunteering for various events like crew hosting at the Abbotsford International Airshow. This last pic, is us on a beach in Zihuatanejo, Mexico on our last vacation together, December last year. In Deb's memory I will be completing this resto over the next few years, just as she would have wanted. Rest in peace Deb, you are forever in my thoughts. Feb 6th 1964 to Feb 11th 2024


 1 point
 -
1 point
-
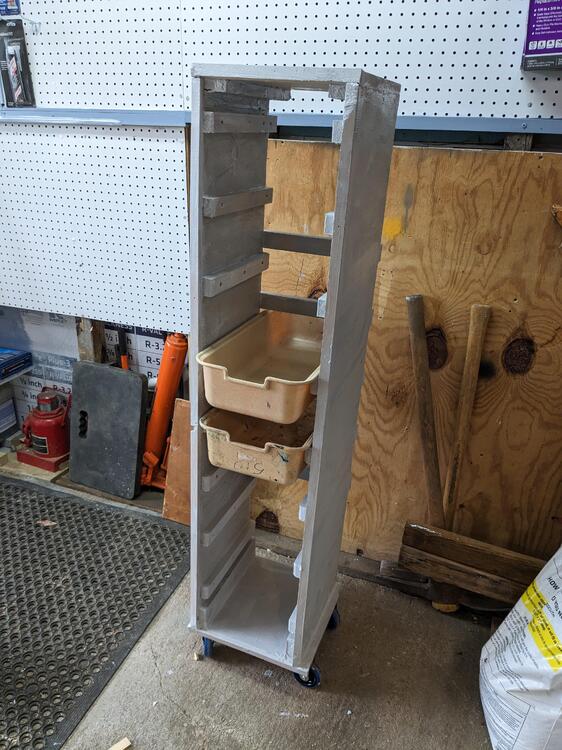
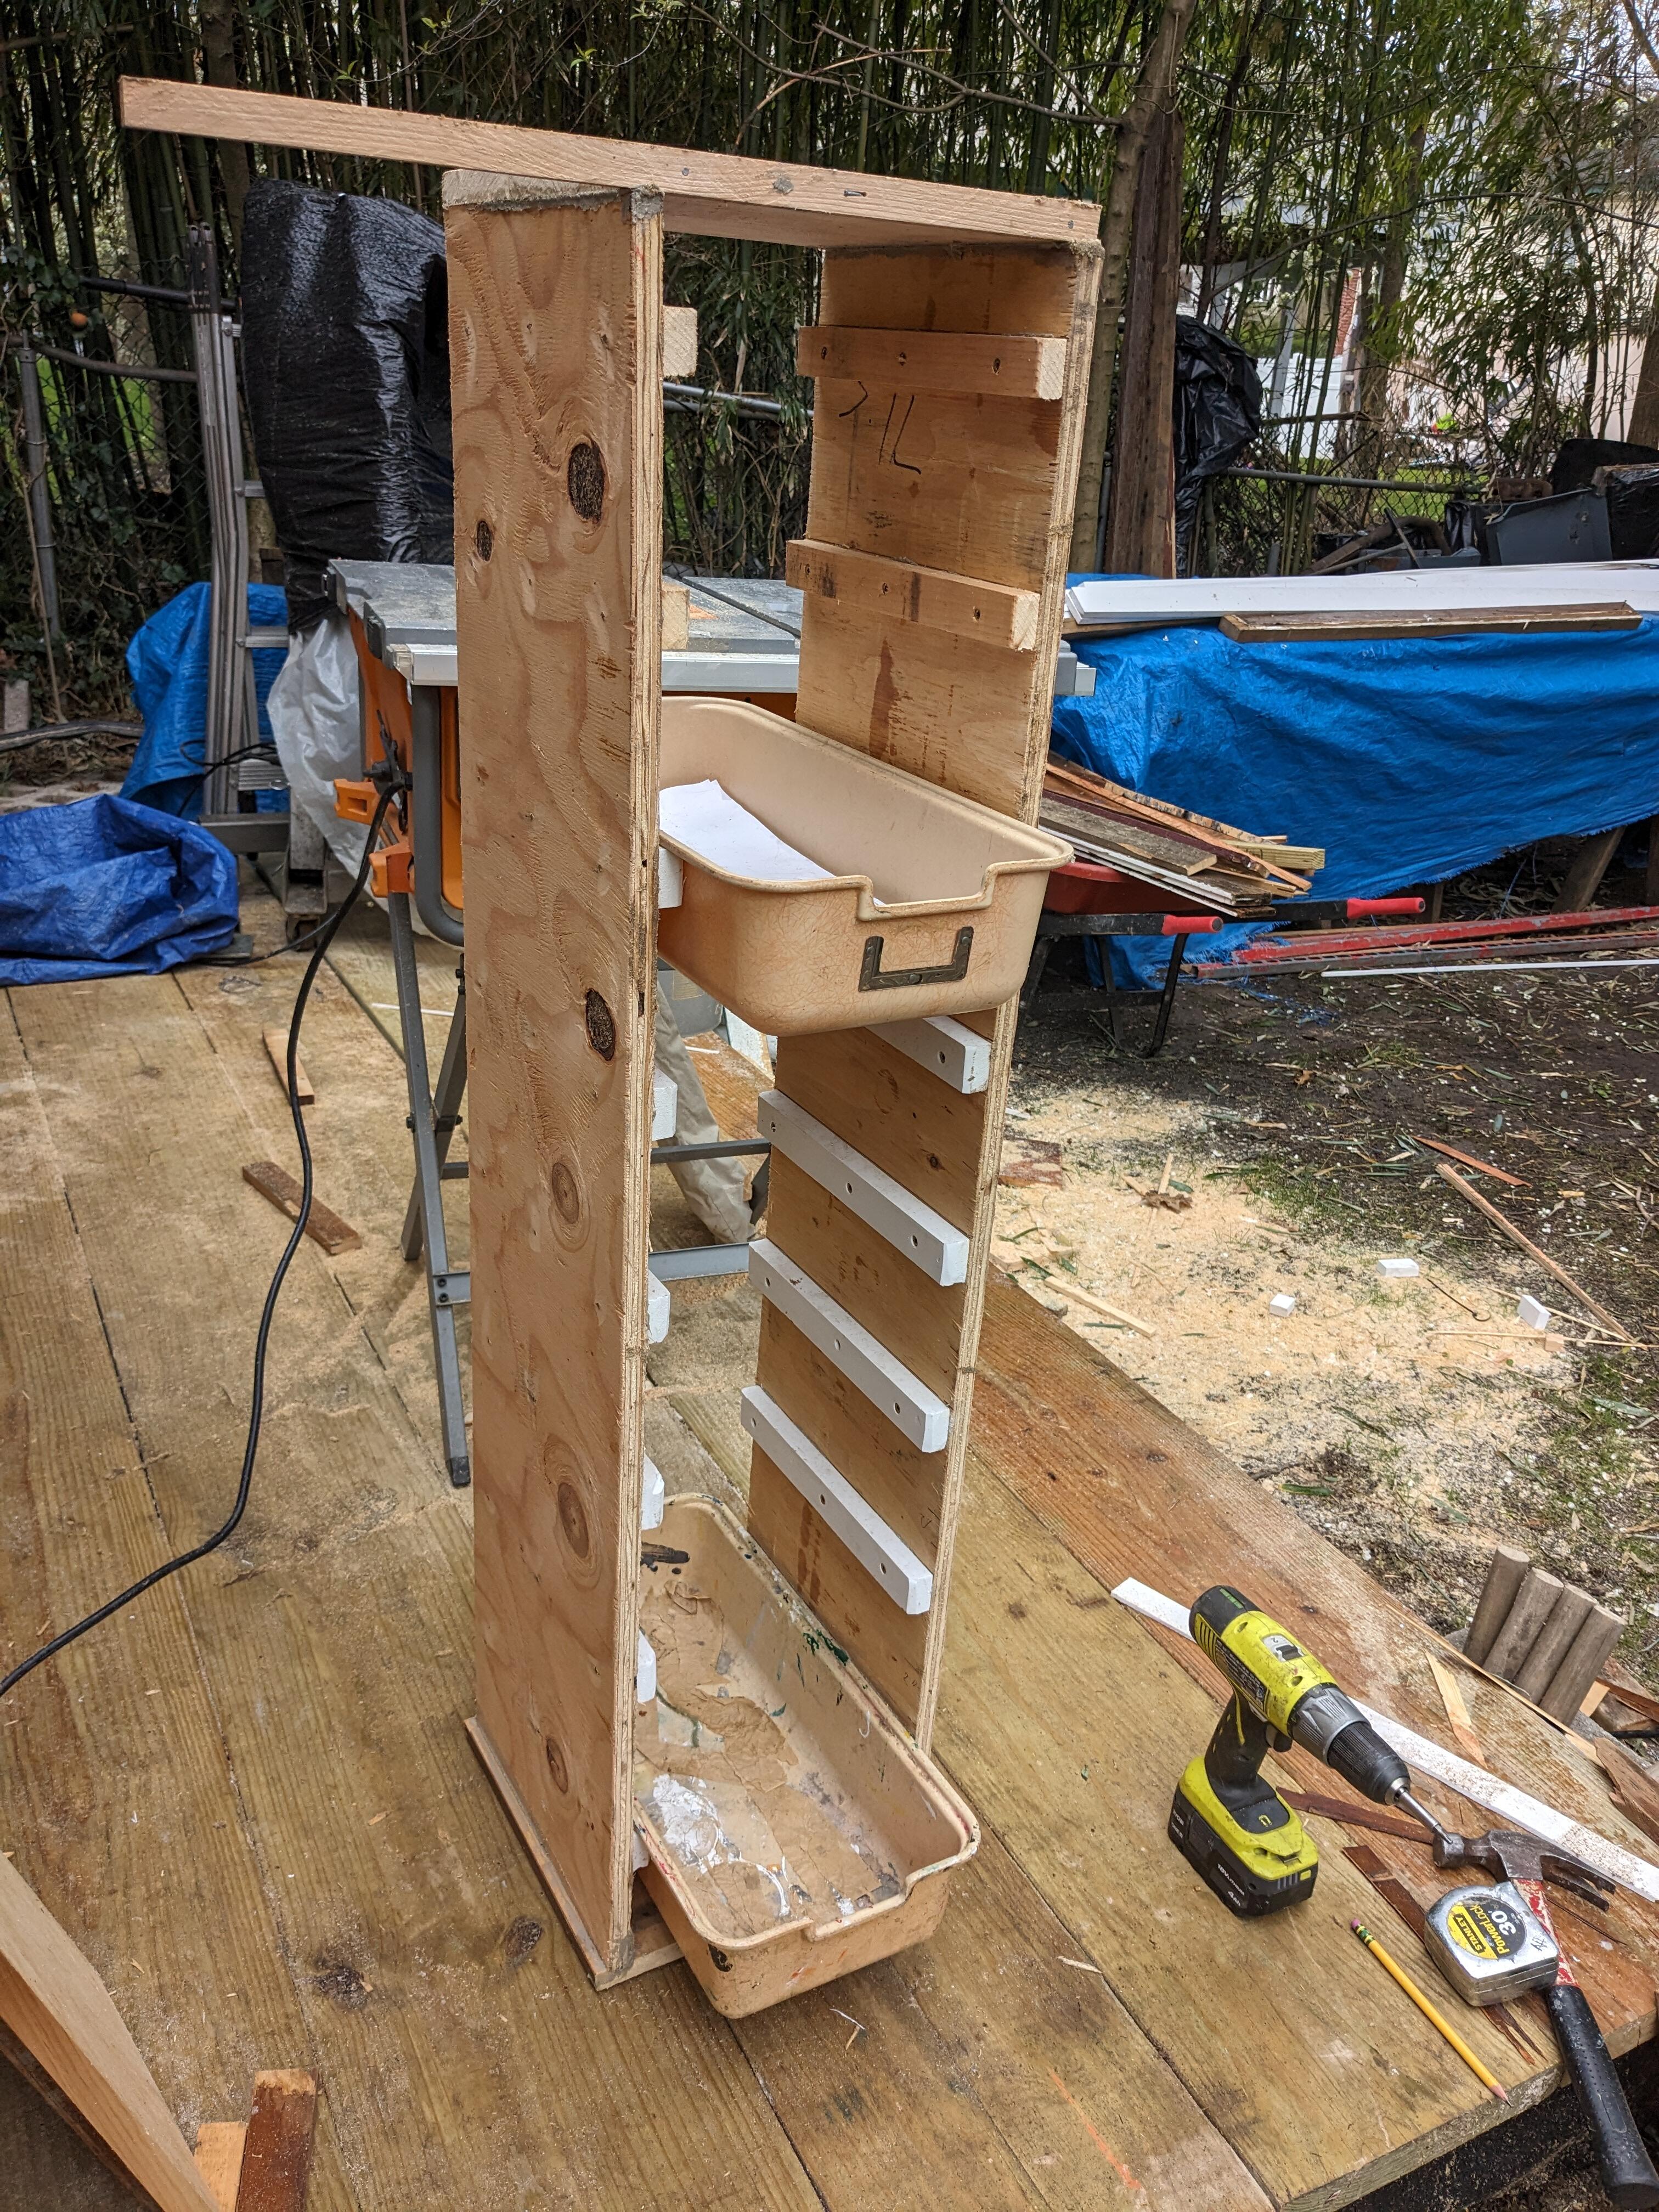
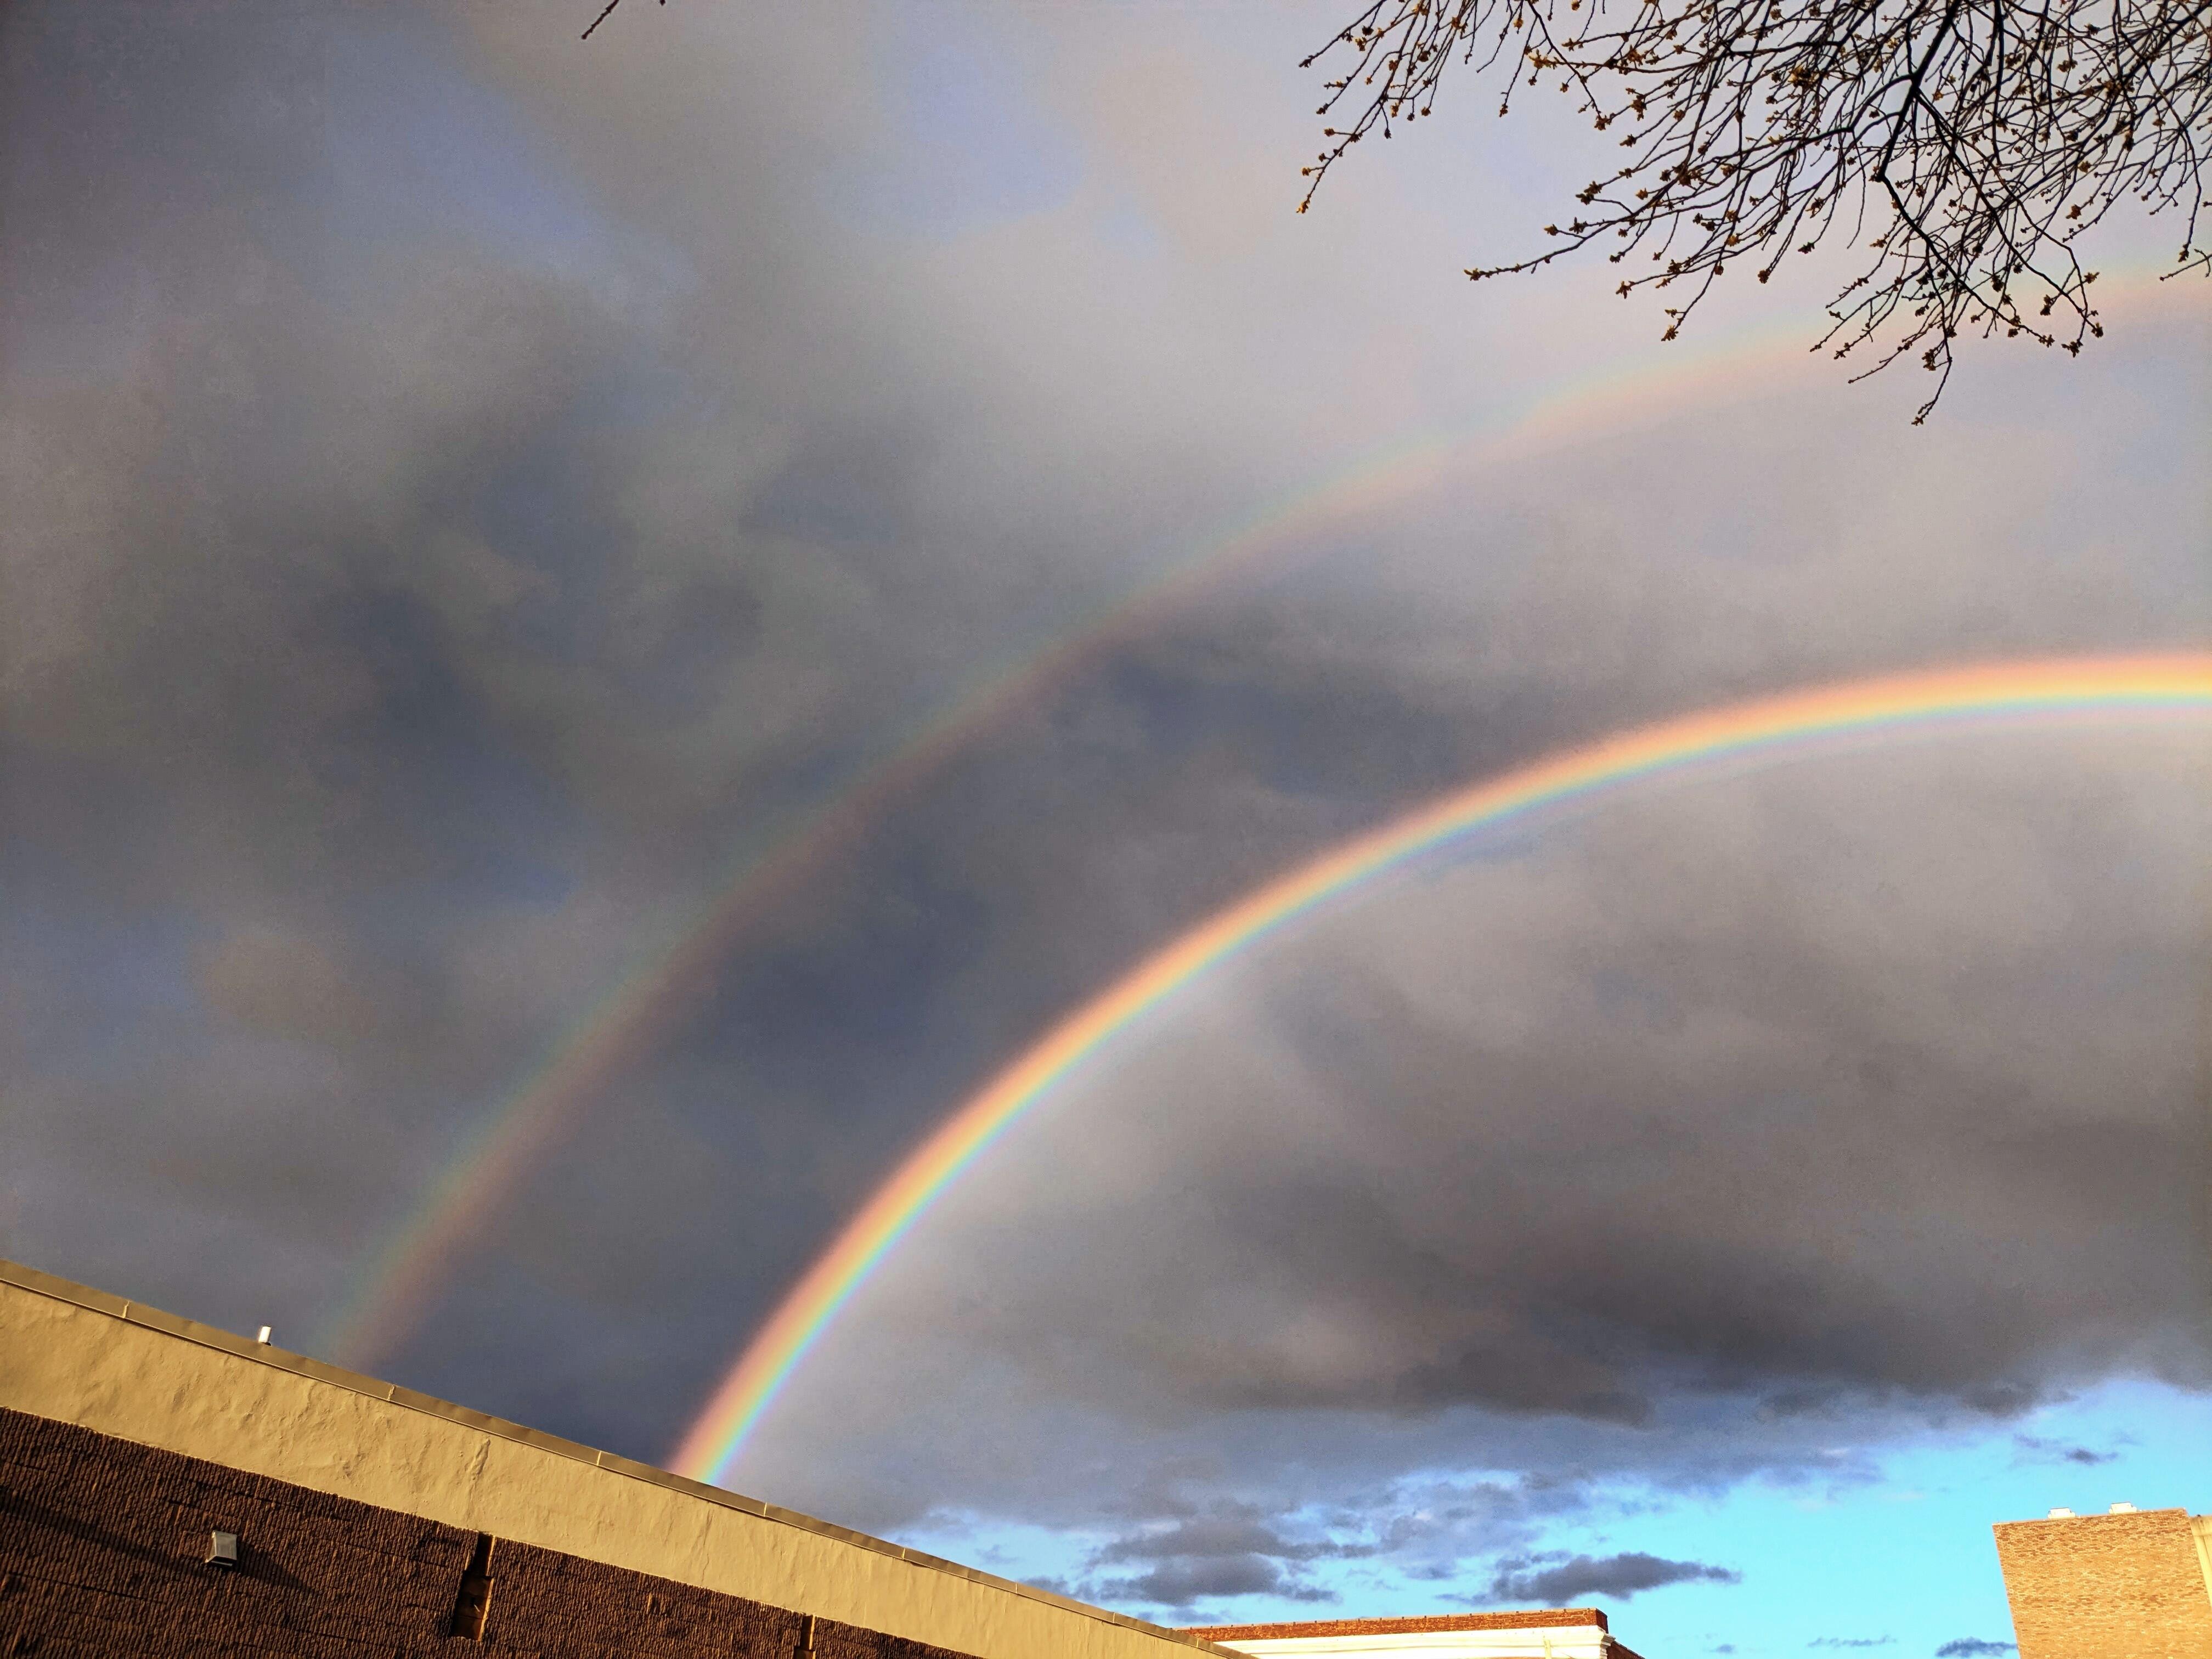
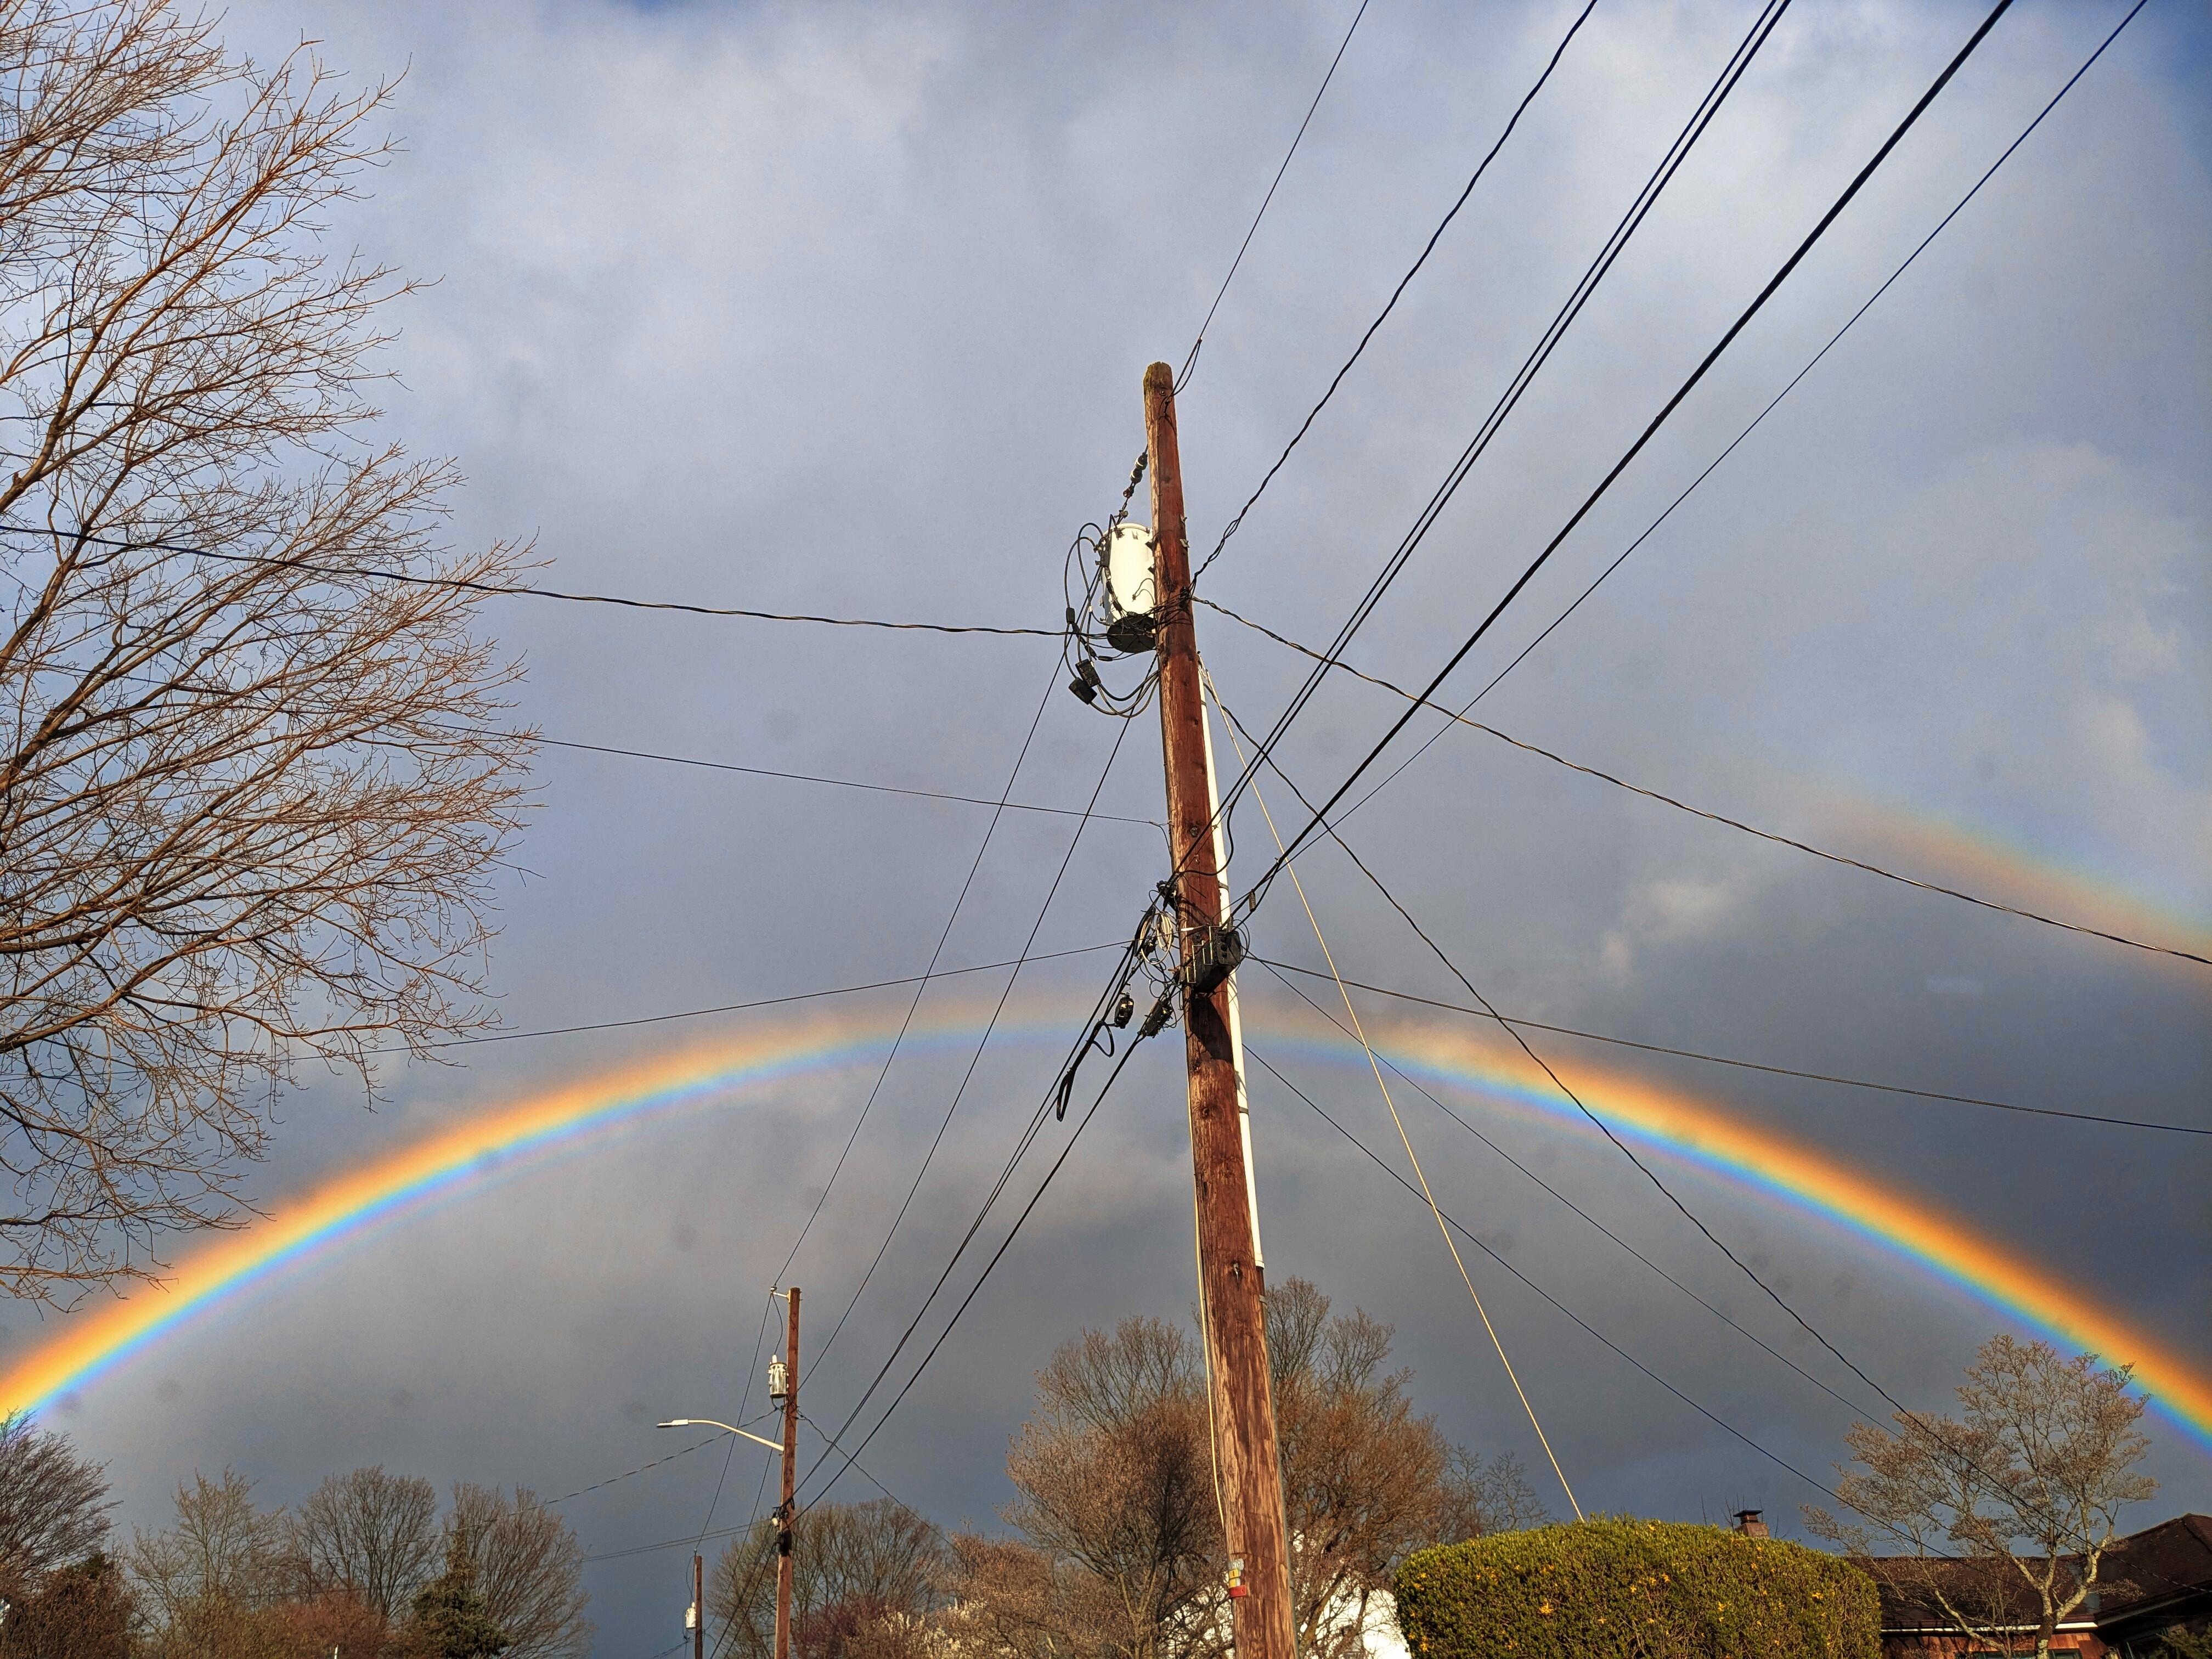
1 point1 pointHey Yarb - I didn't actually put a locking caster on it, I wasn't planning on using that small vice for anything industrial. I was thinking more just as a holding device for something that I might have to tack weid etc. I actually used it today to hold the ballnut from my chop saw, the thread strip and I had to put it insert in it. The vice was perfect for that . There is now a harbor freight, within about 5 minutes of my home, so I can easily get a locking caster if it should become a requirement. Fabricated the other wheelie cart for the narrow trays this one will hold eight, it is on the toll side, however they are all essentially lightweight as I use them to contain rubber bushings/grommets, body clips, various sealants, and so forth. Rained on and off all day today - so not much else accomplished. I did get this primed, and also I did get the caulking on the other side of the eave in the front of the garage. Really cool display yesterday evening - it's rained again after this one, and by the time we got to town, there was a clear double rainbow. Hard to photograph. It was also in the first one, but less obvious, to me anyway


 1 point


Important Information
By using this site, you agree to our Privacy Policy and Guidelines. We have placed cookies on your device to help make this website better. You can adjust your cookie settings, otherwise we'll assume you're okay to continue.