Leaderboard
-
HS30-H
Free Member5Points5,509Posts -
Captain Obvious
Free Member5Points10,081Posts -
KenFirch
 Subscriber
 4Points271Posts
 -

CanTechZ
Free Member3Points1,311Posts


Popular Content
Showing content with the highest reputation on 07/04/2023 in all areas
-
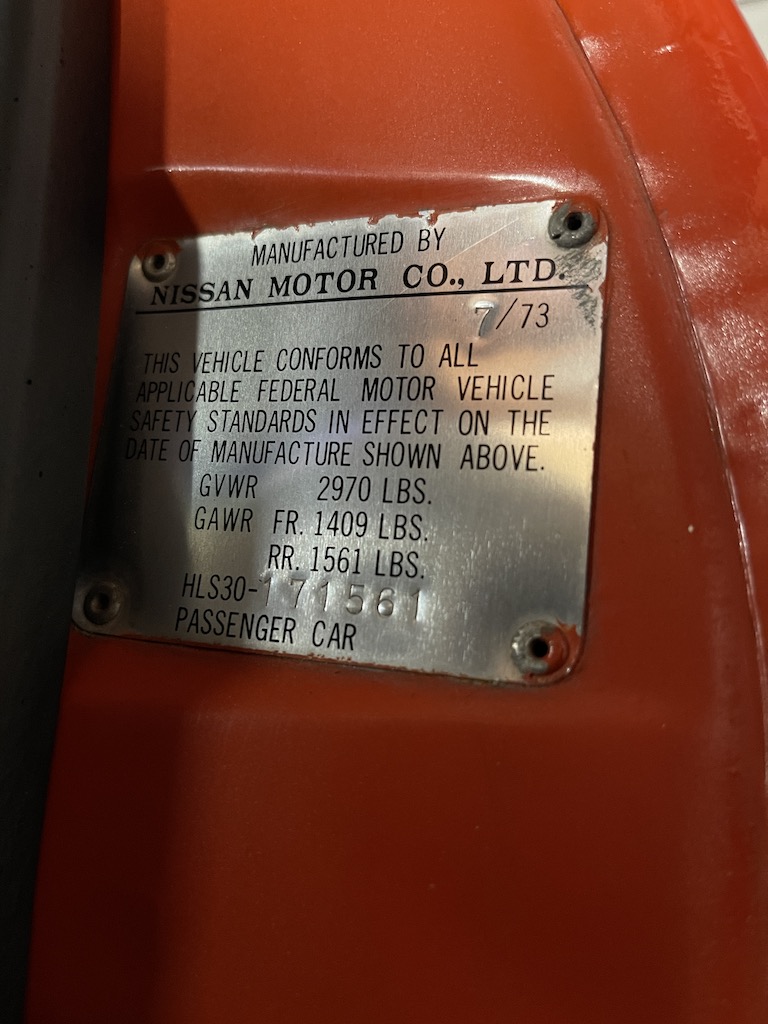
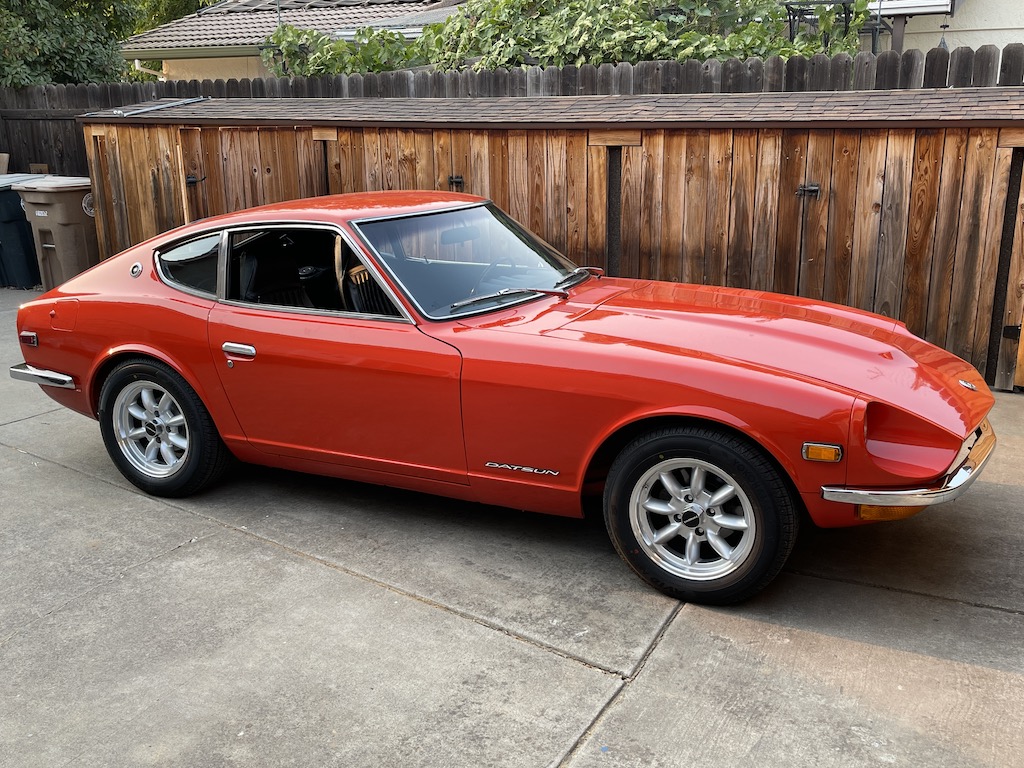
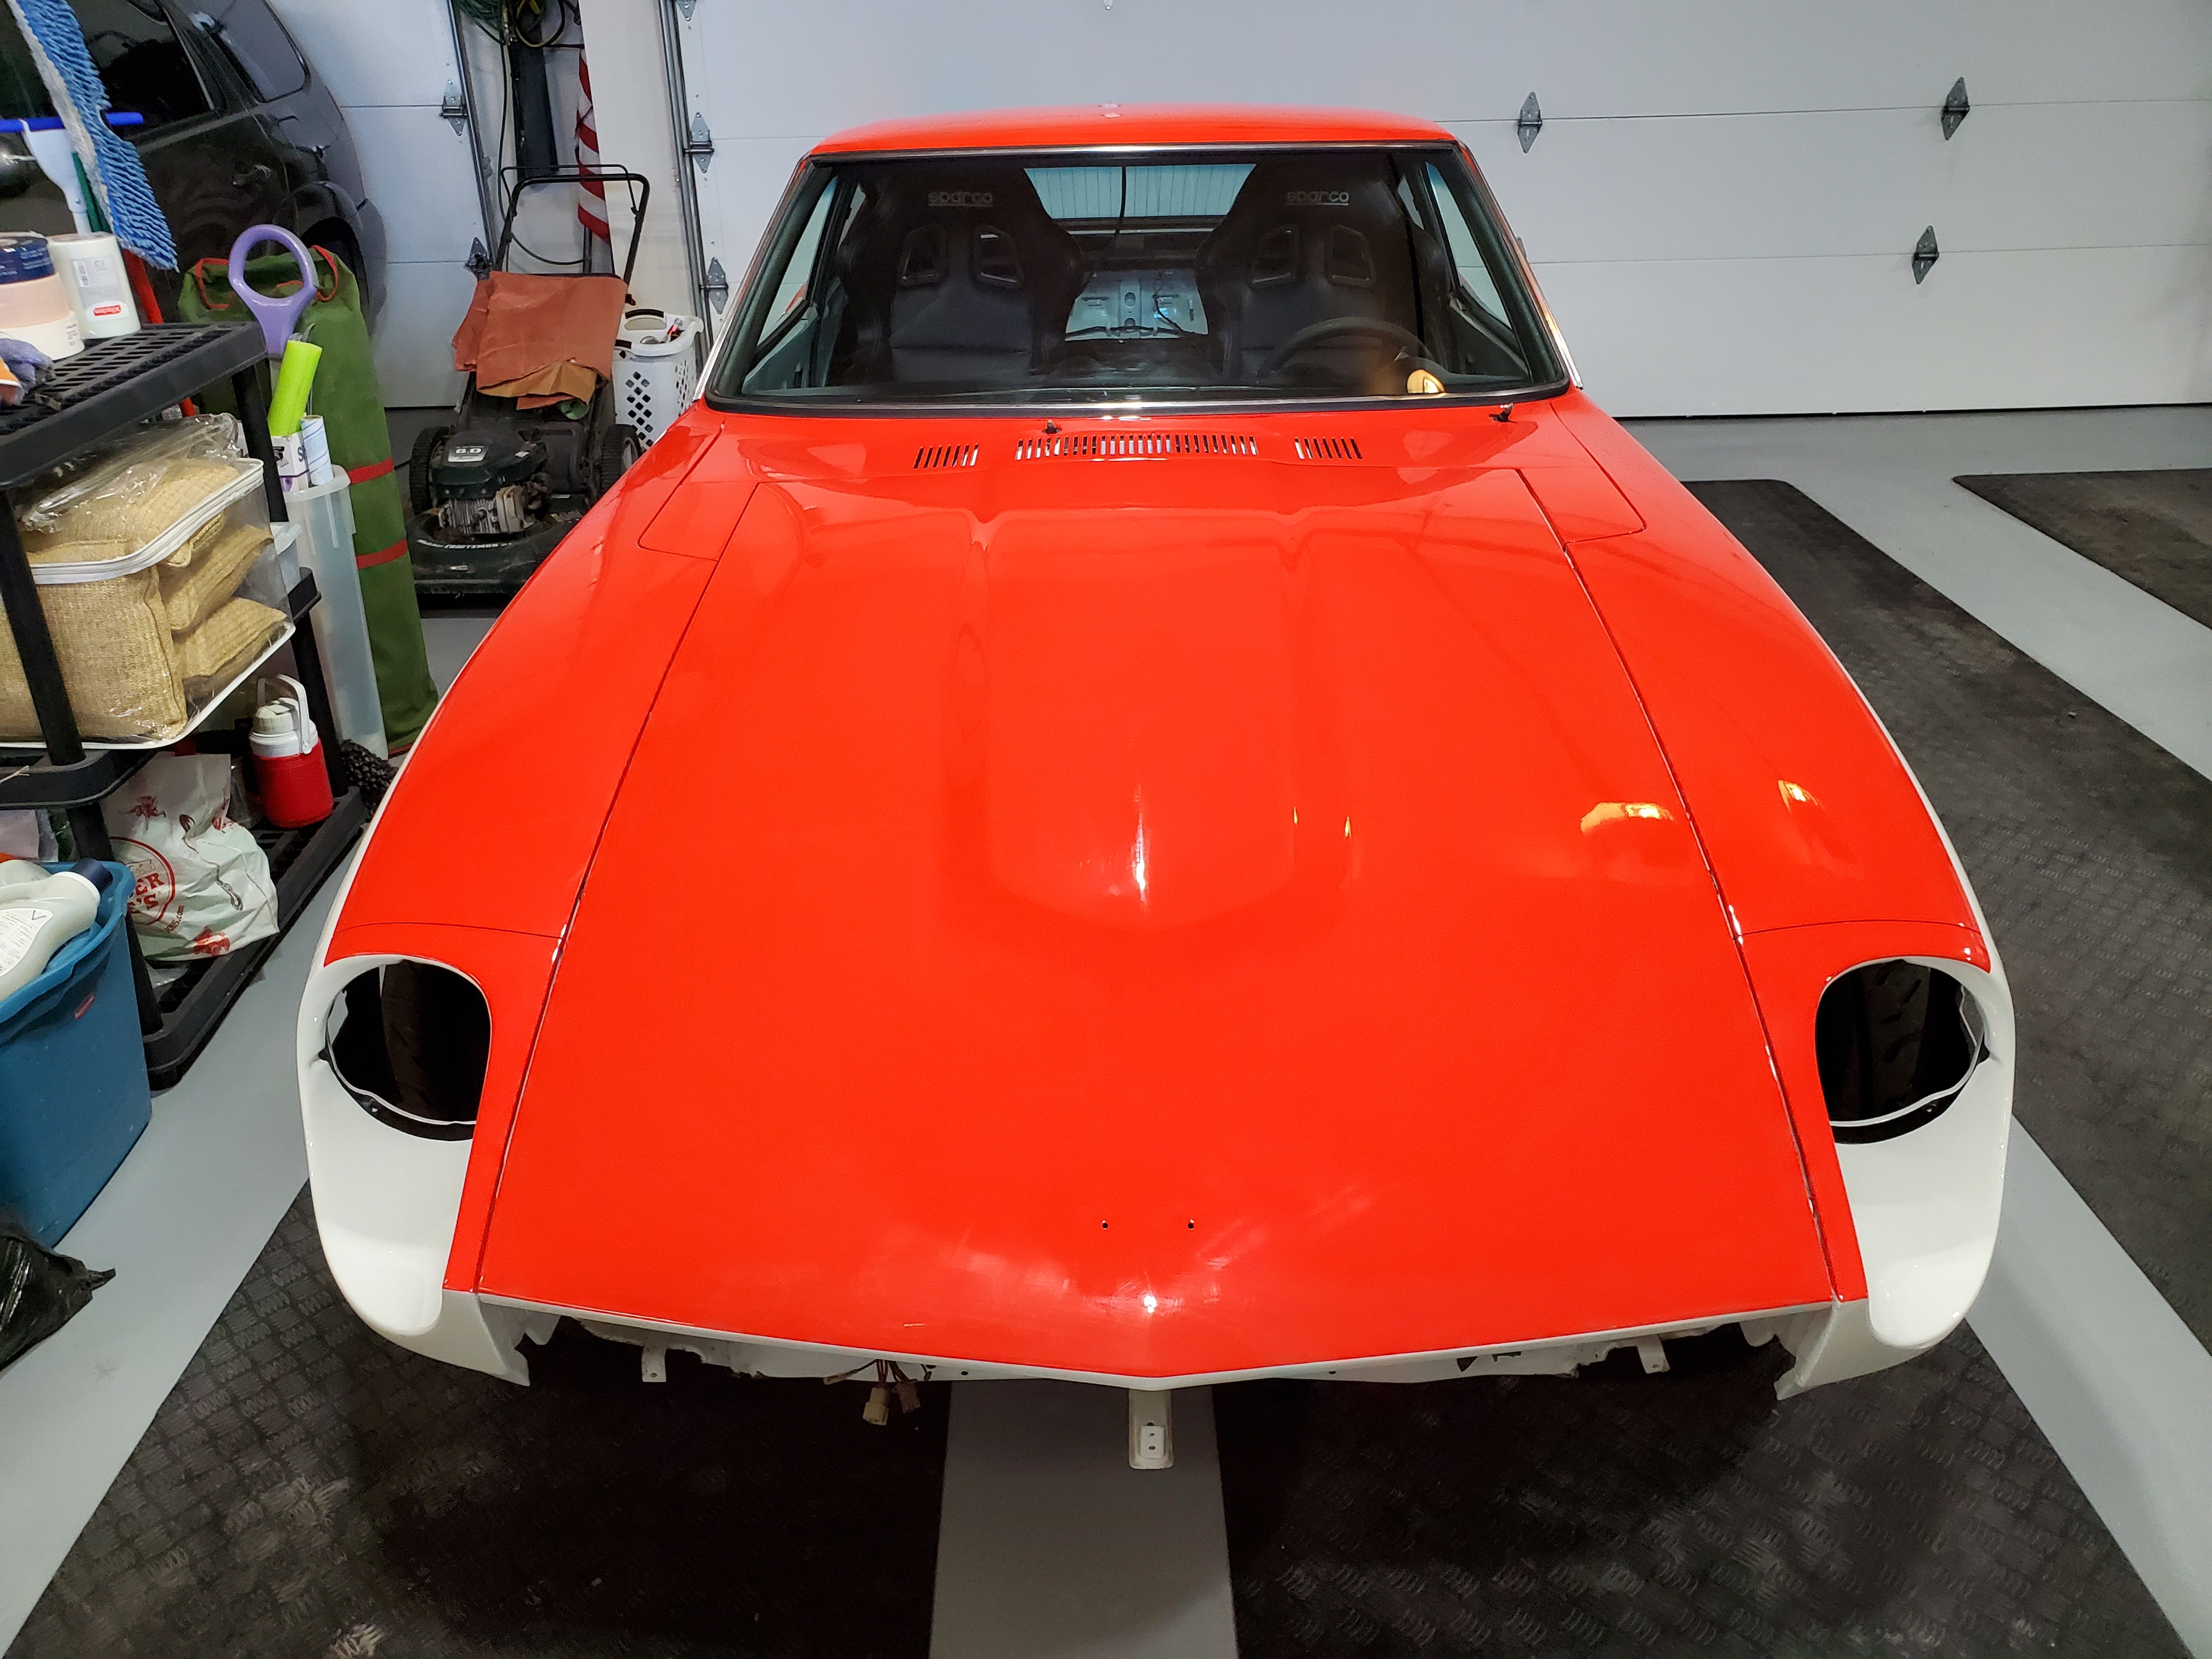
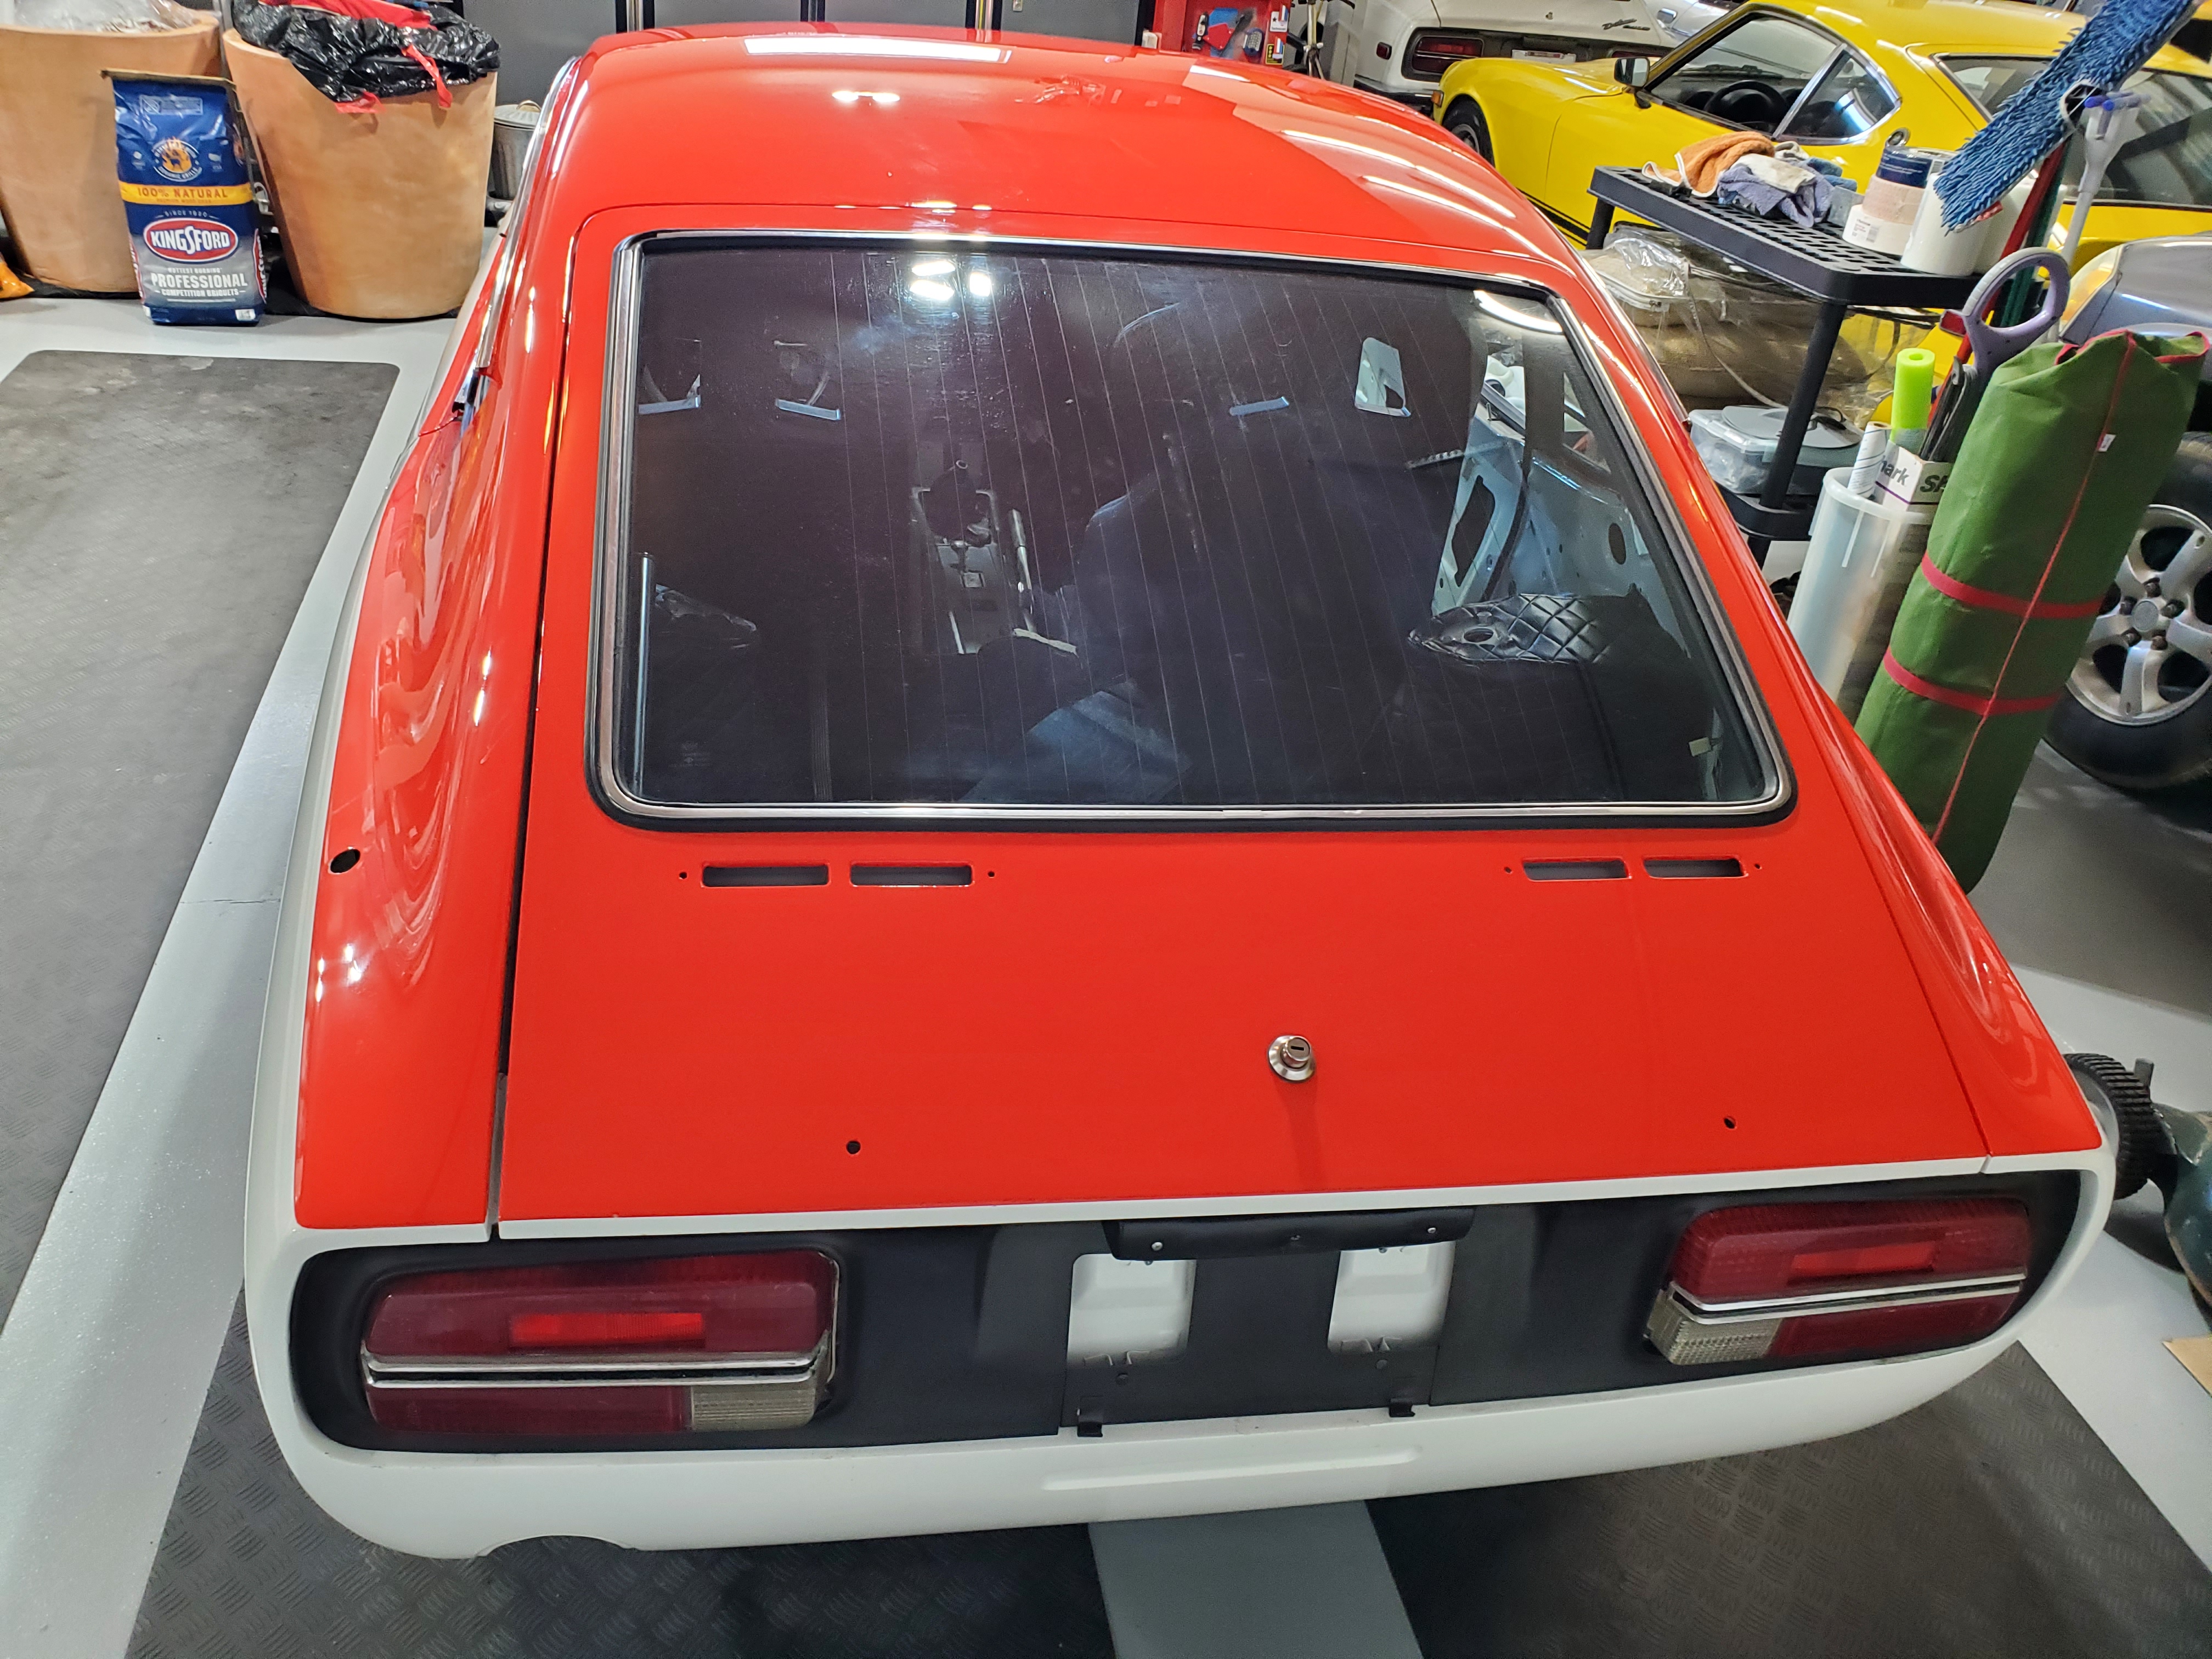
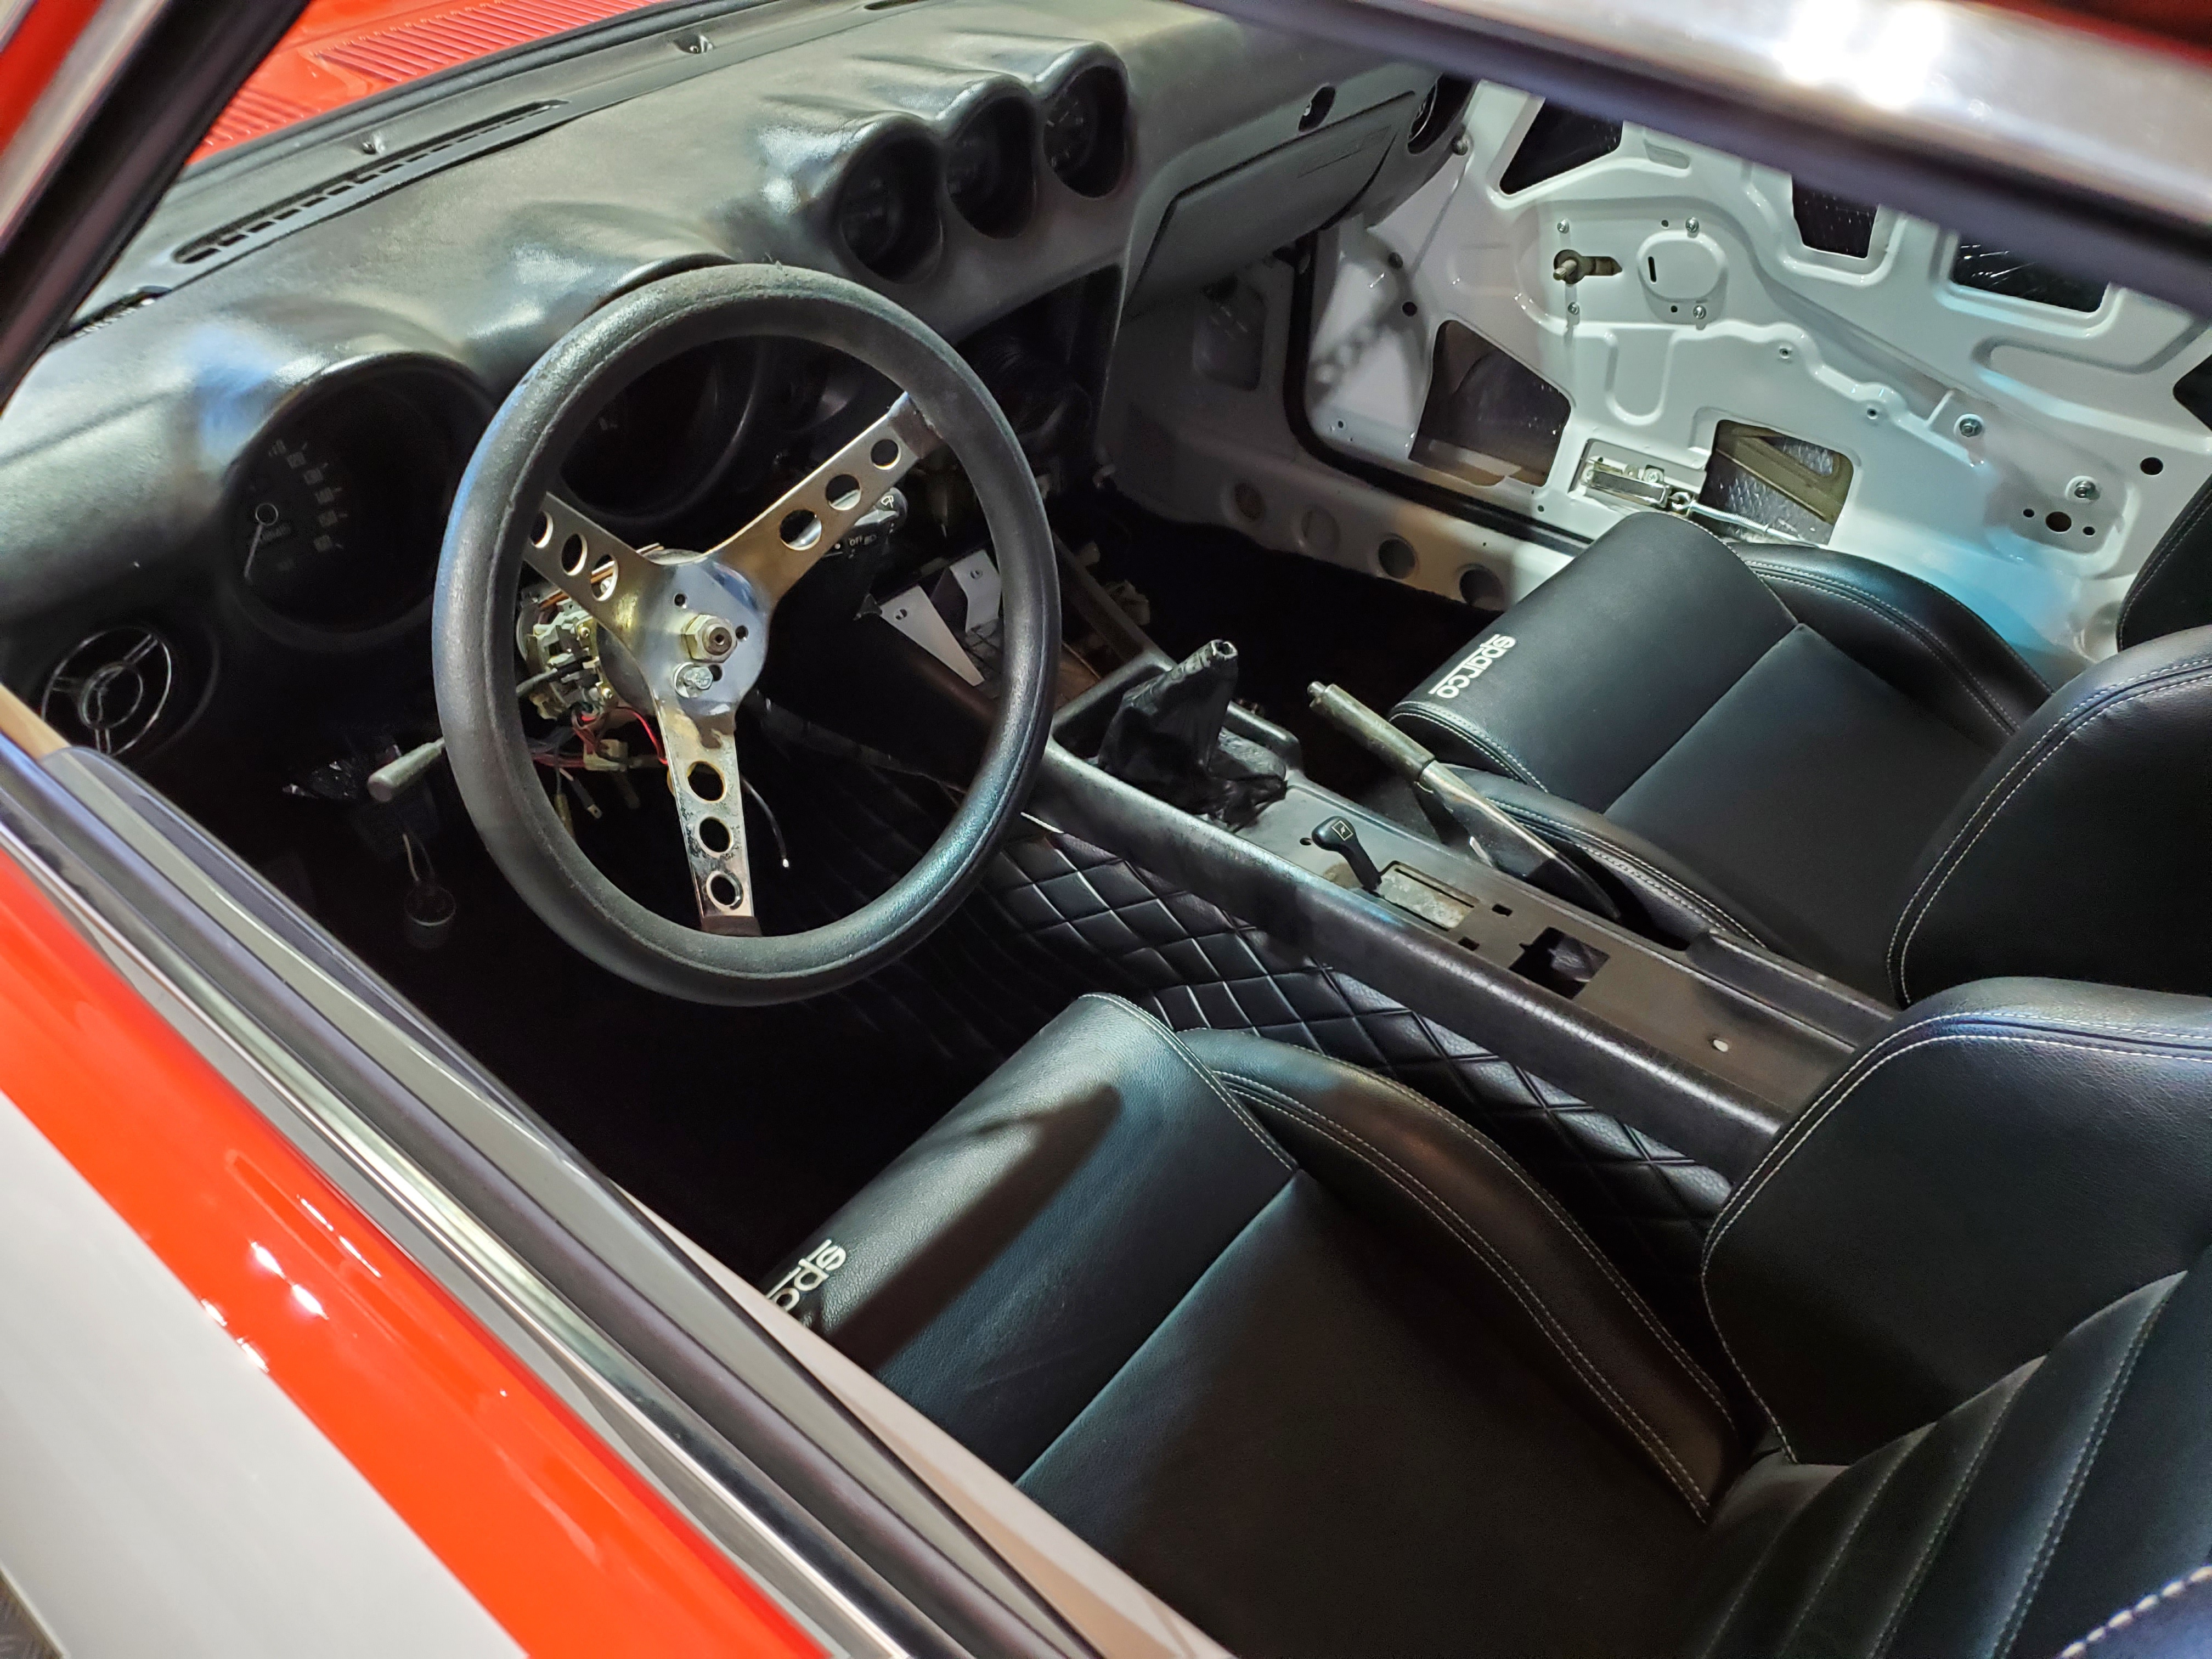
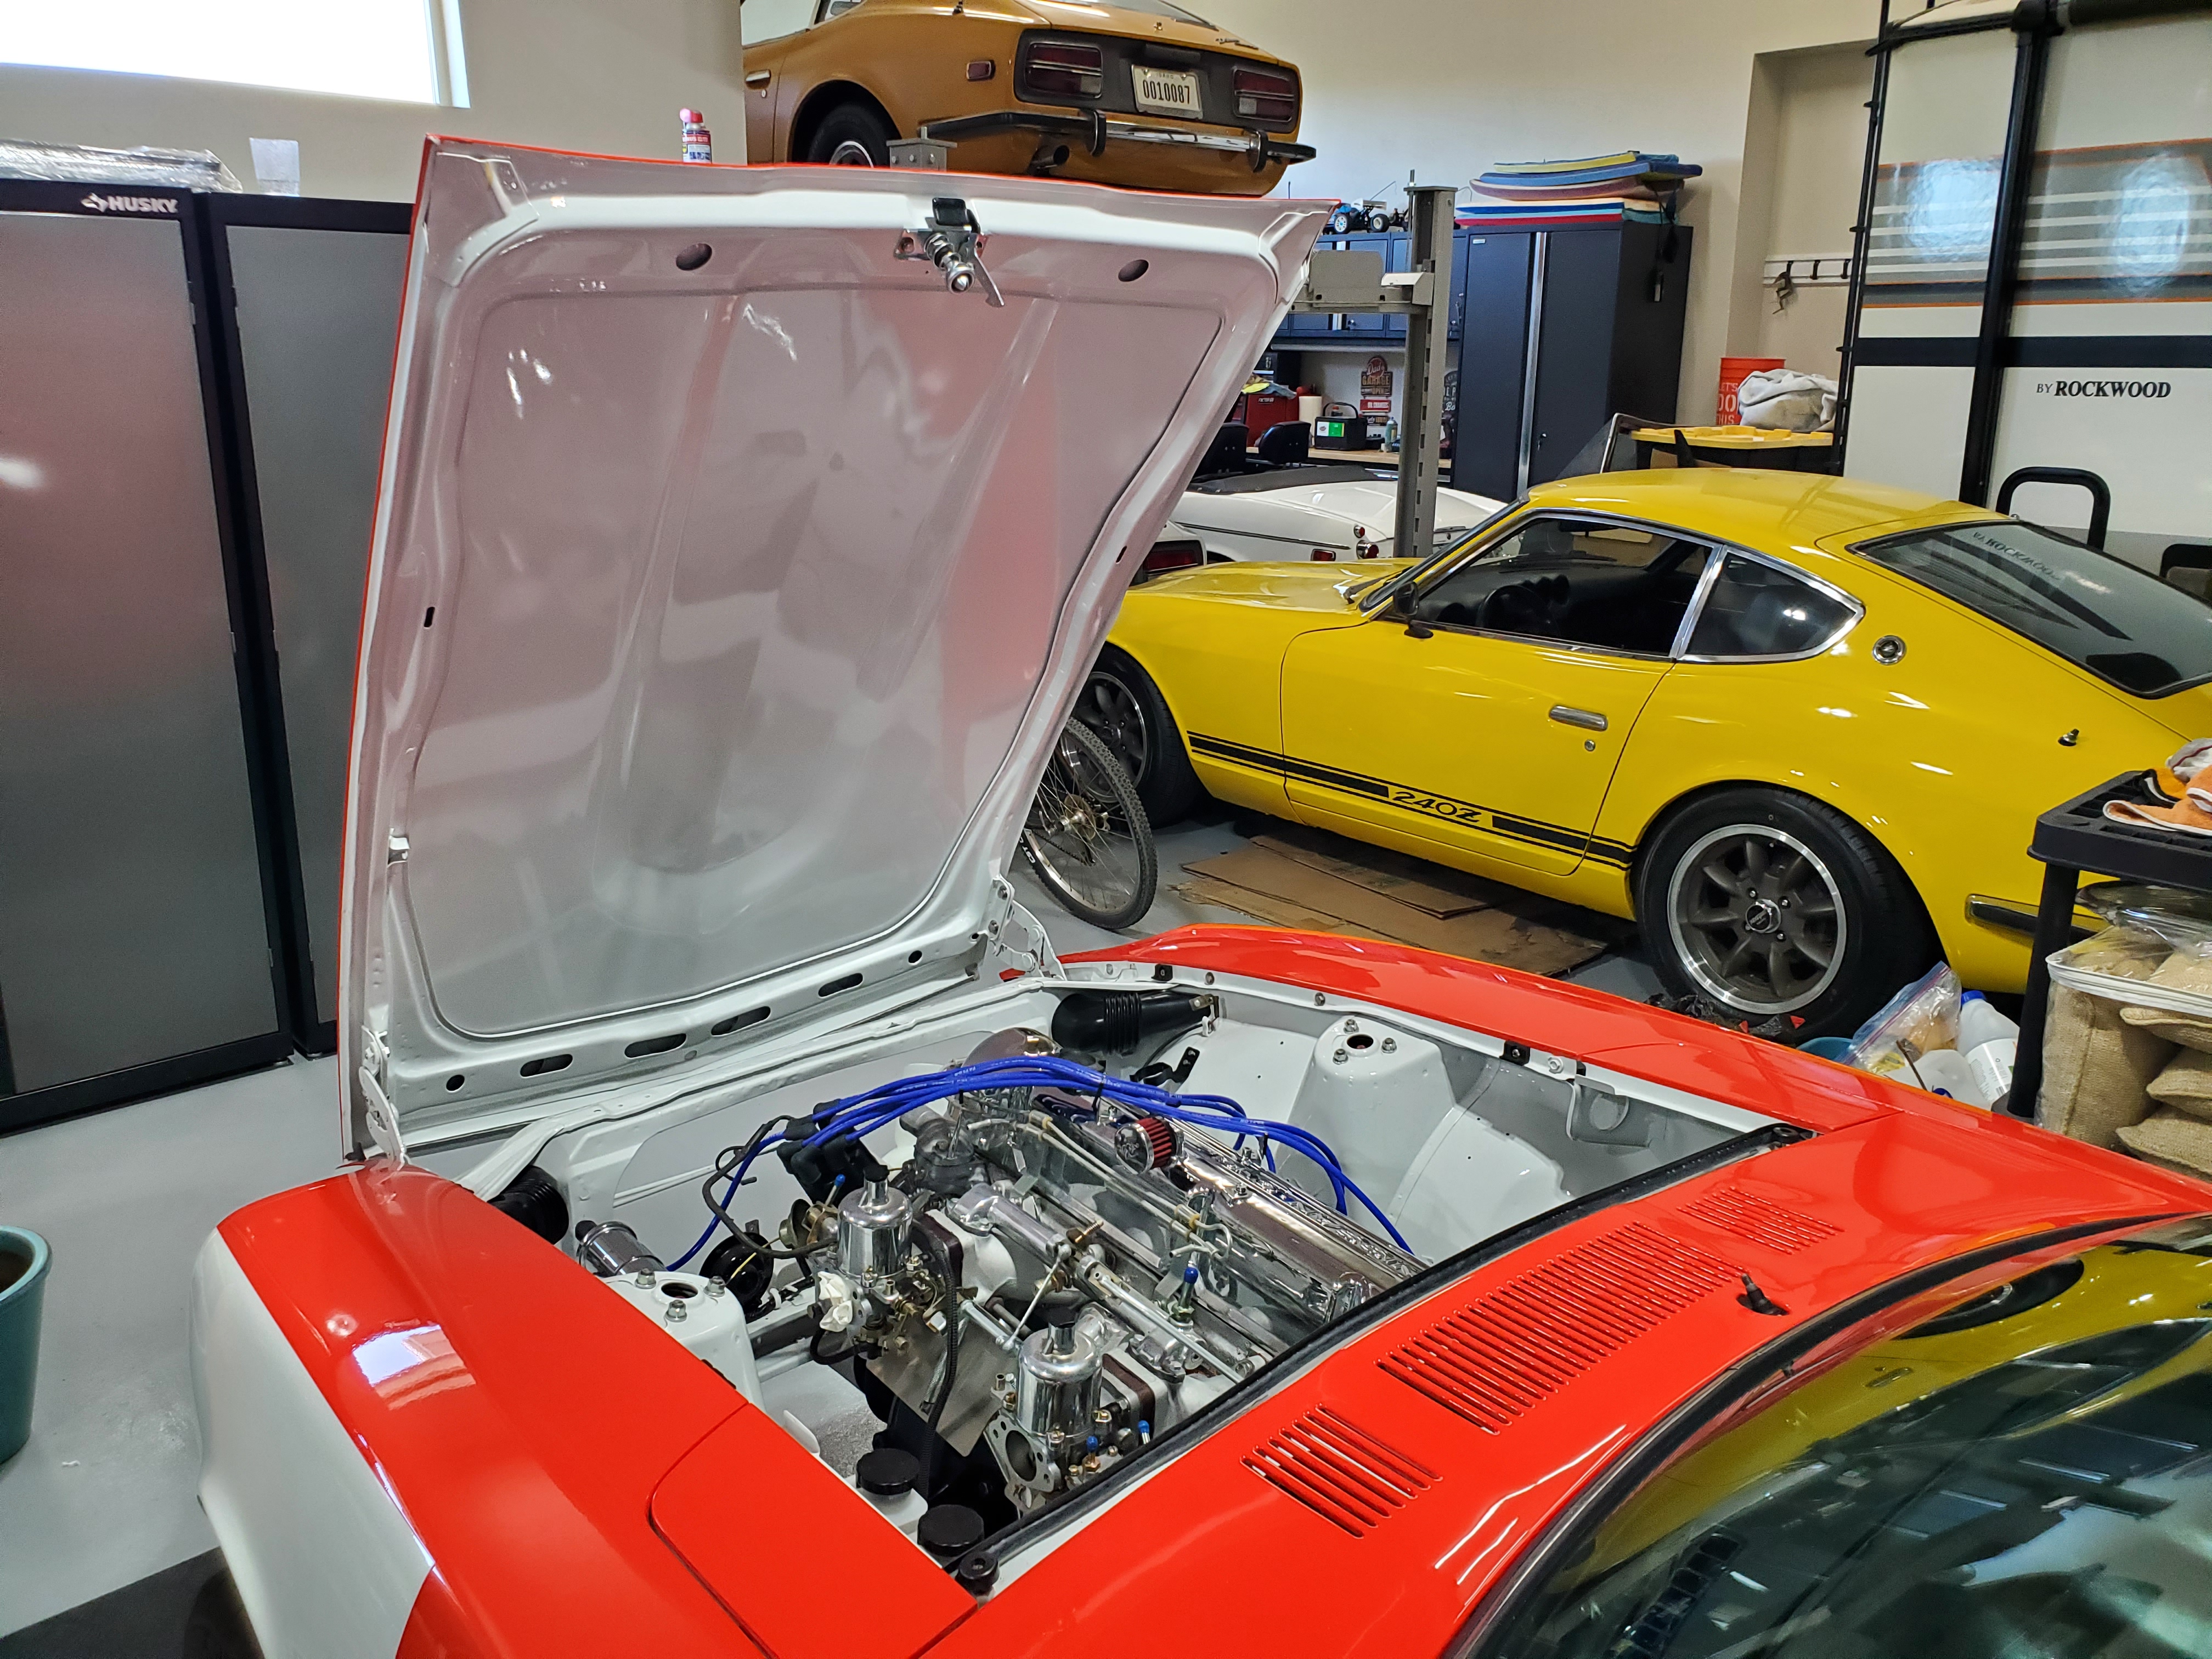
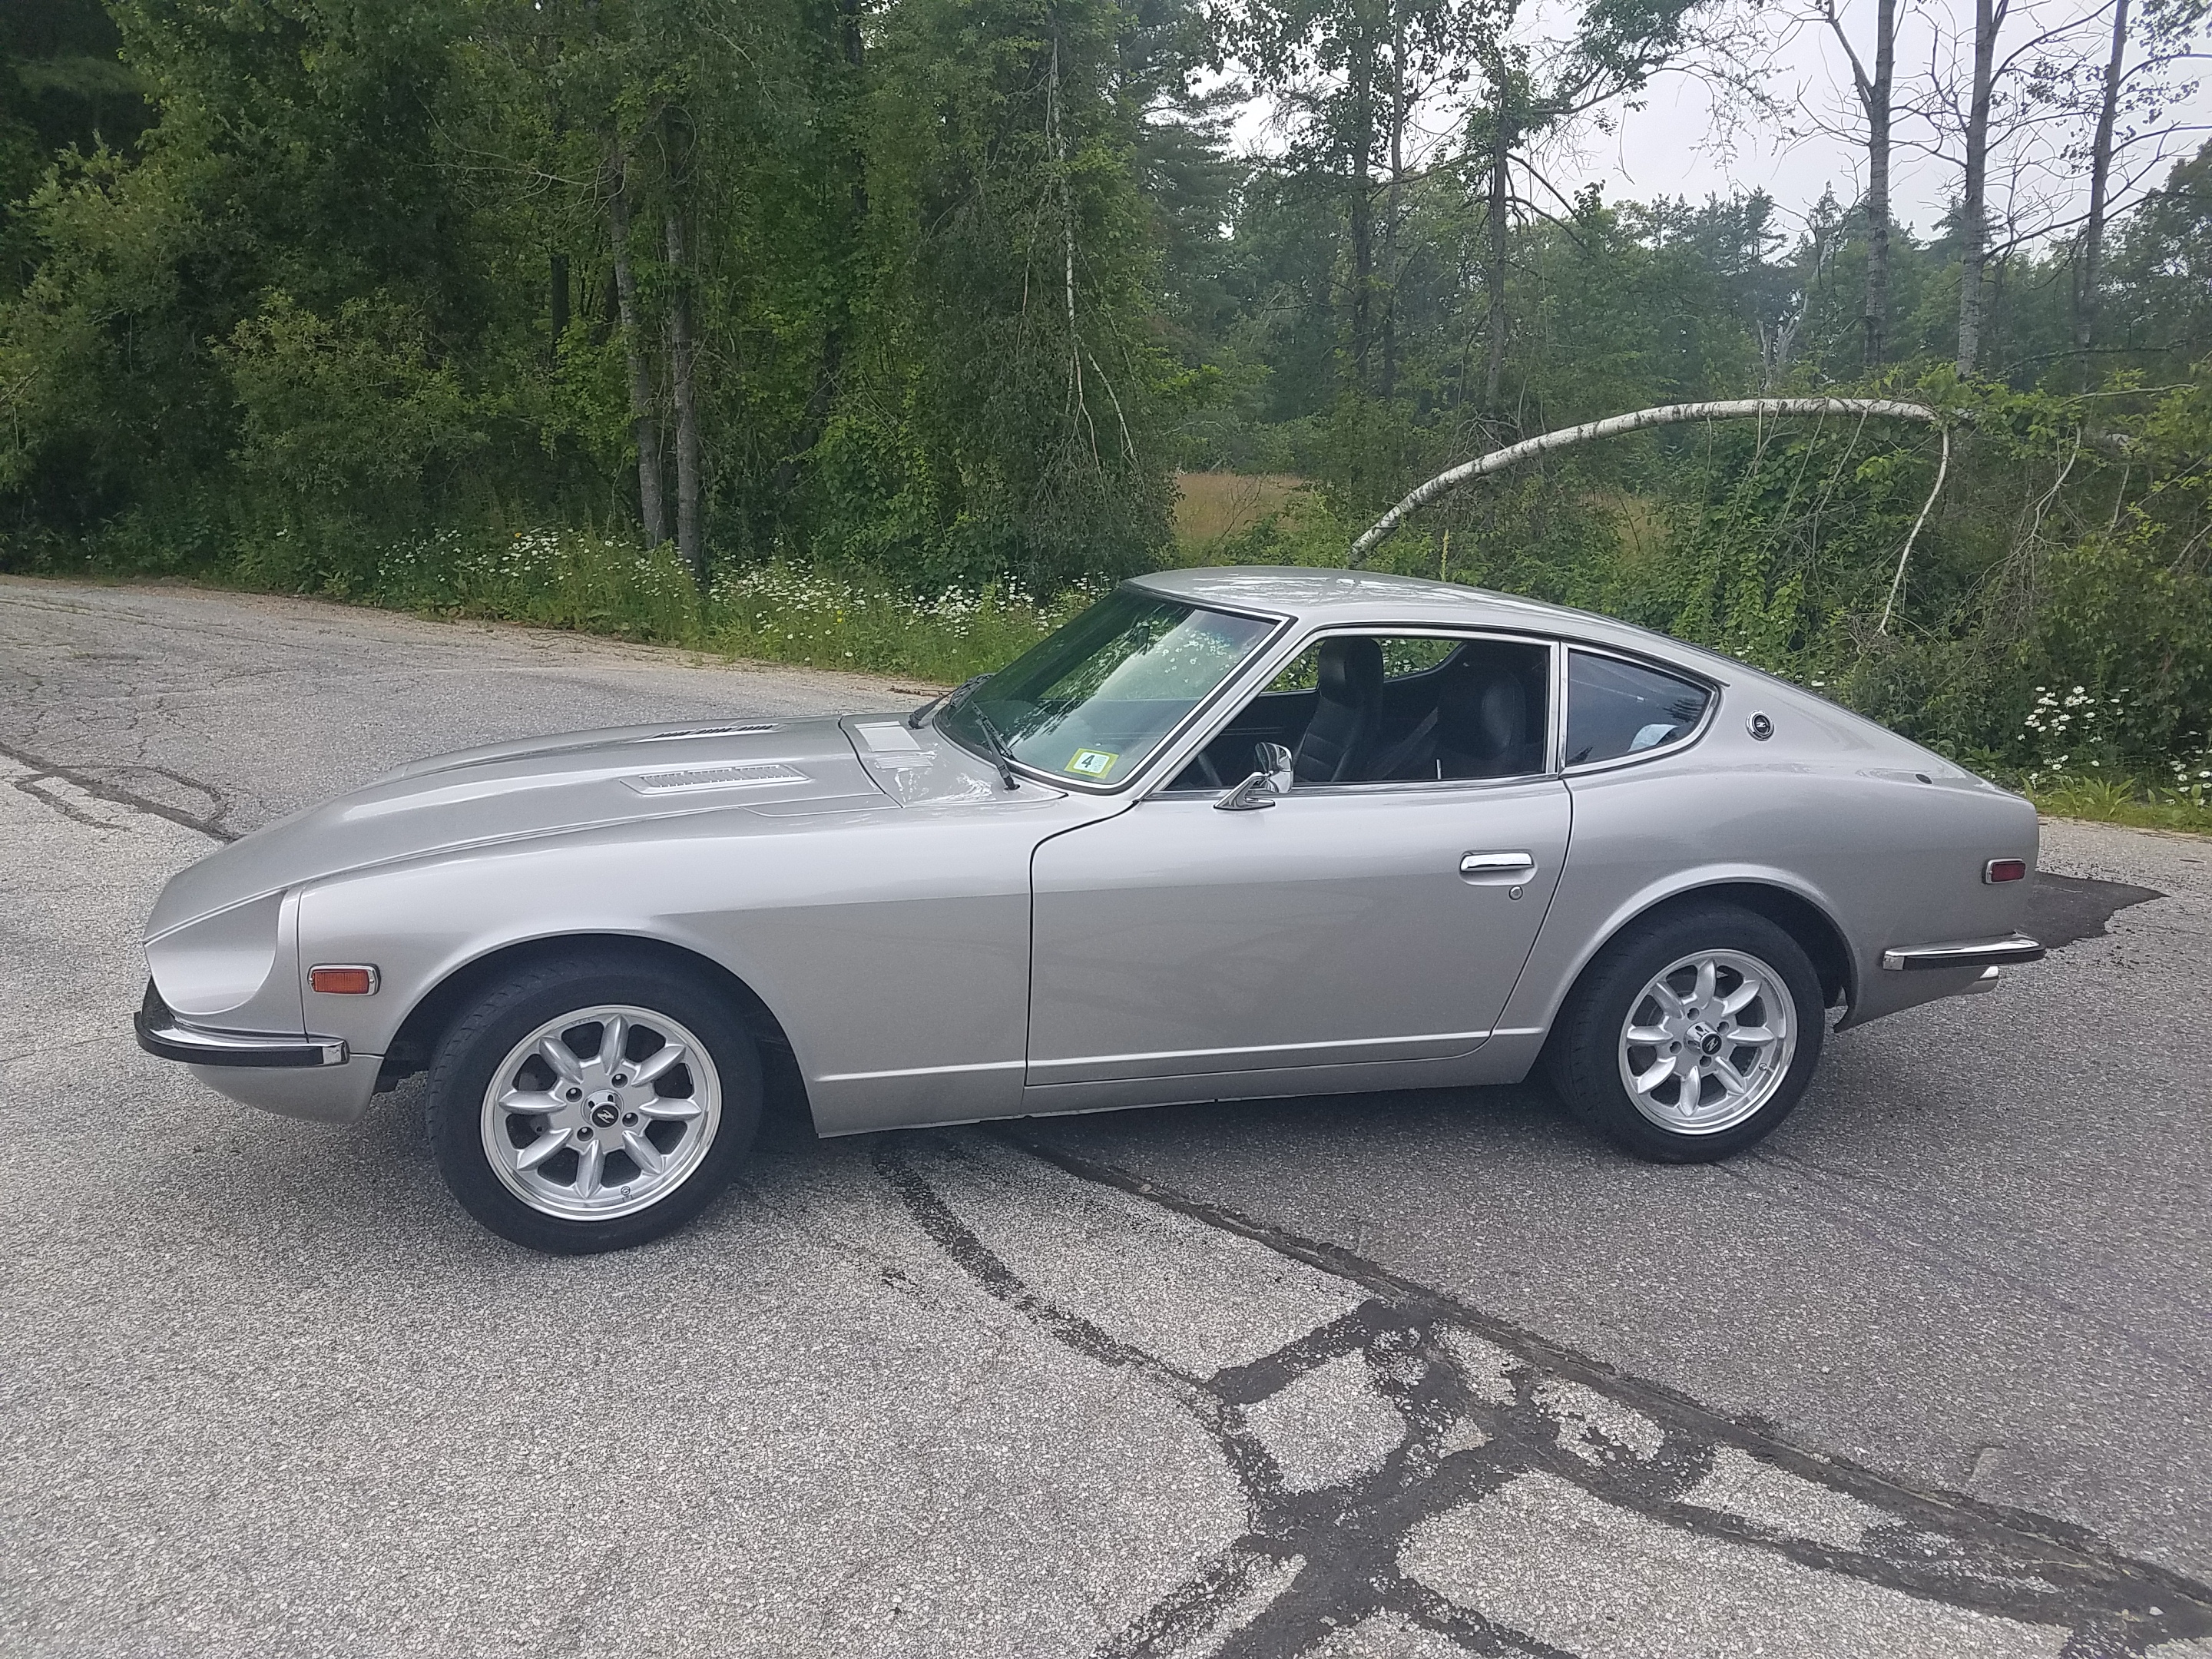
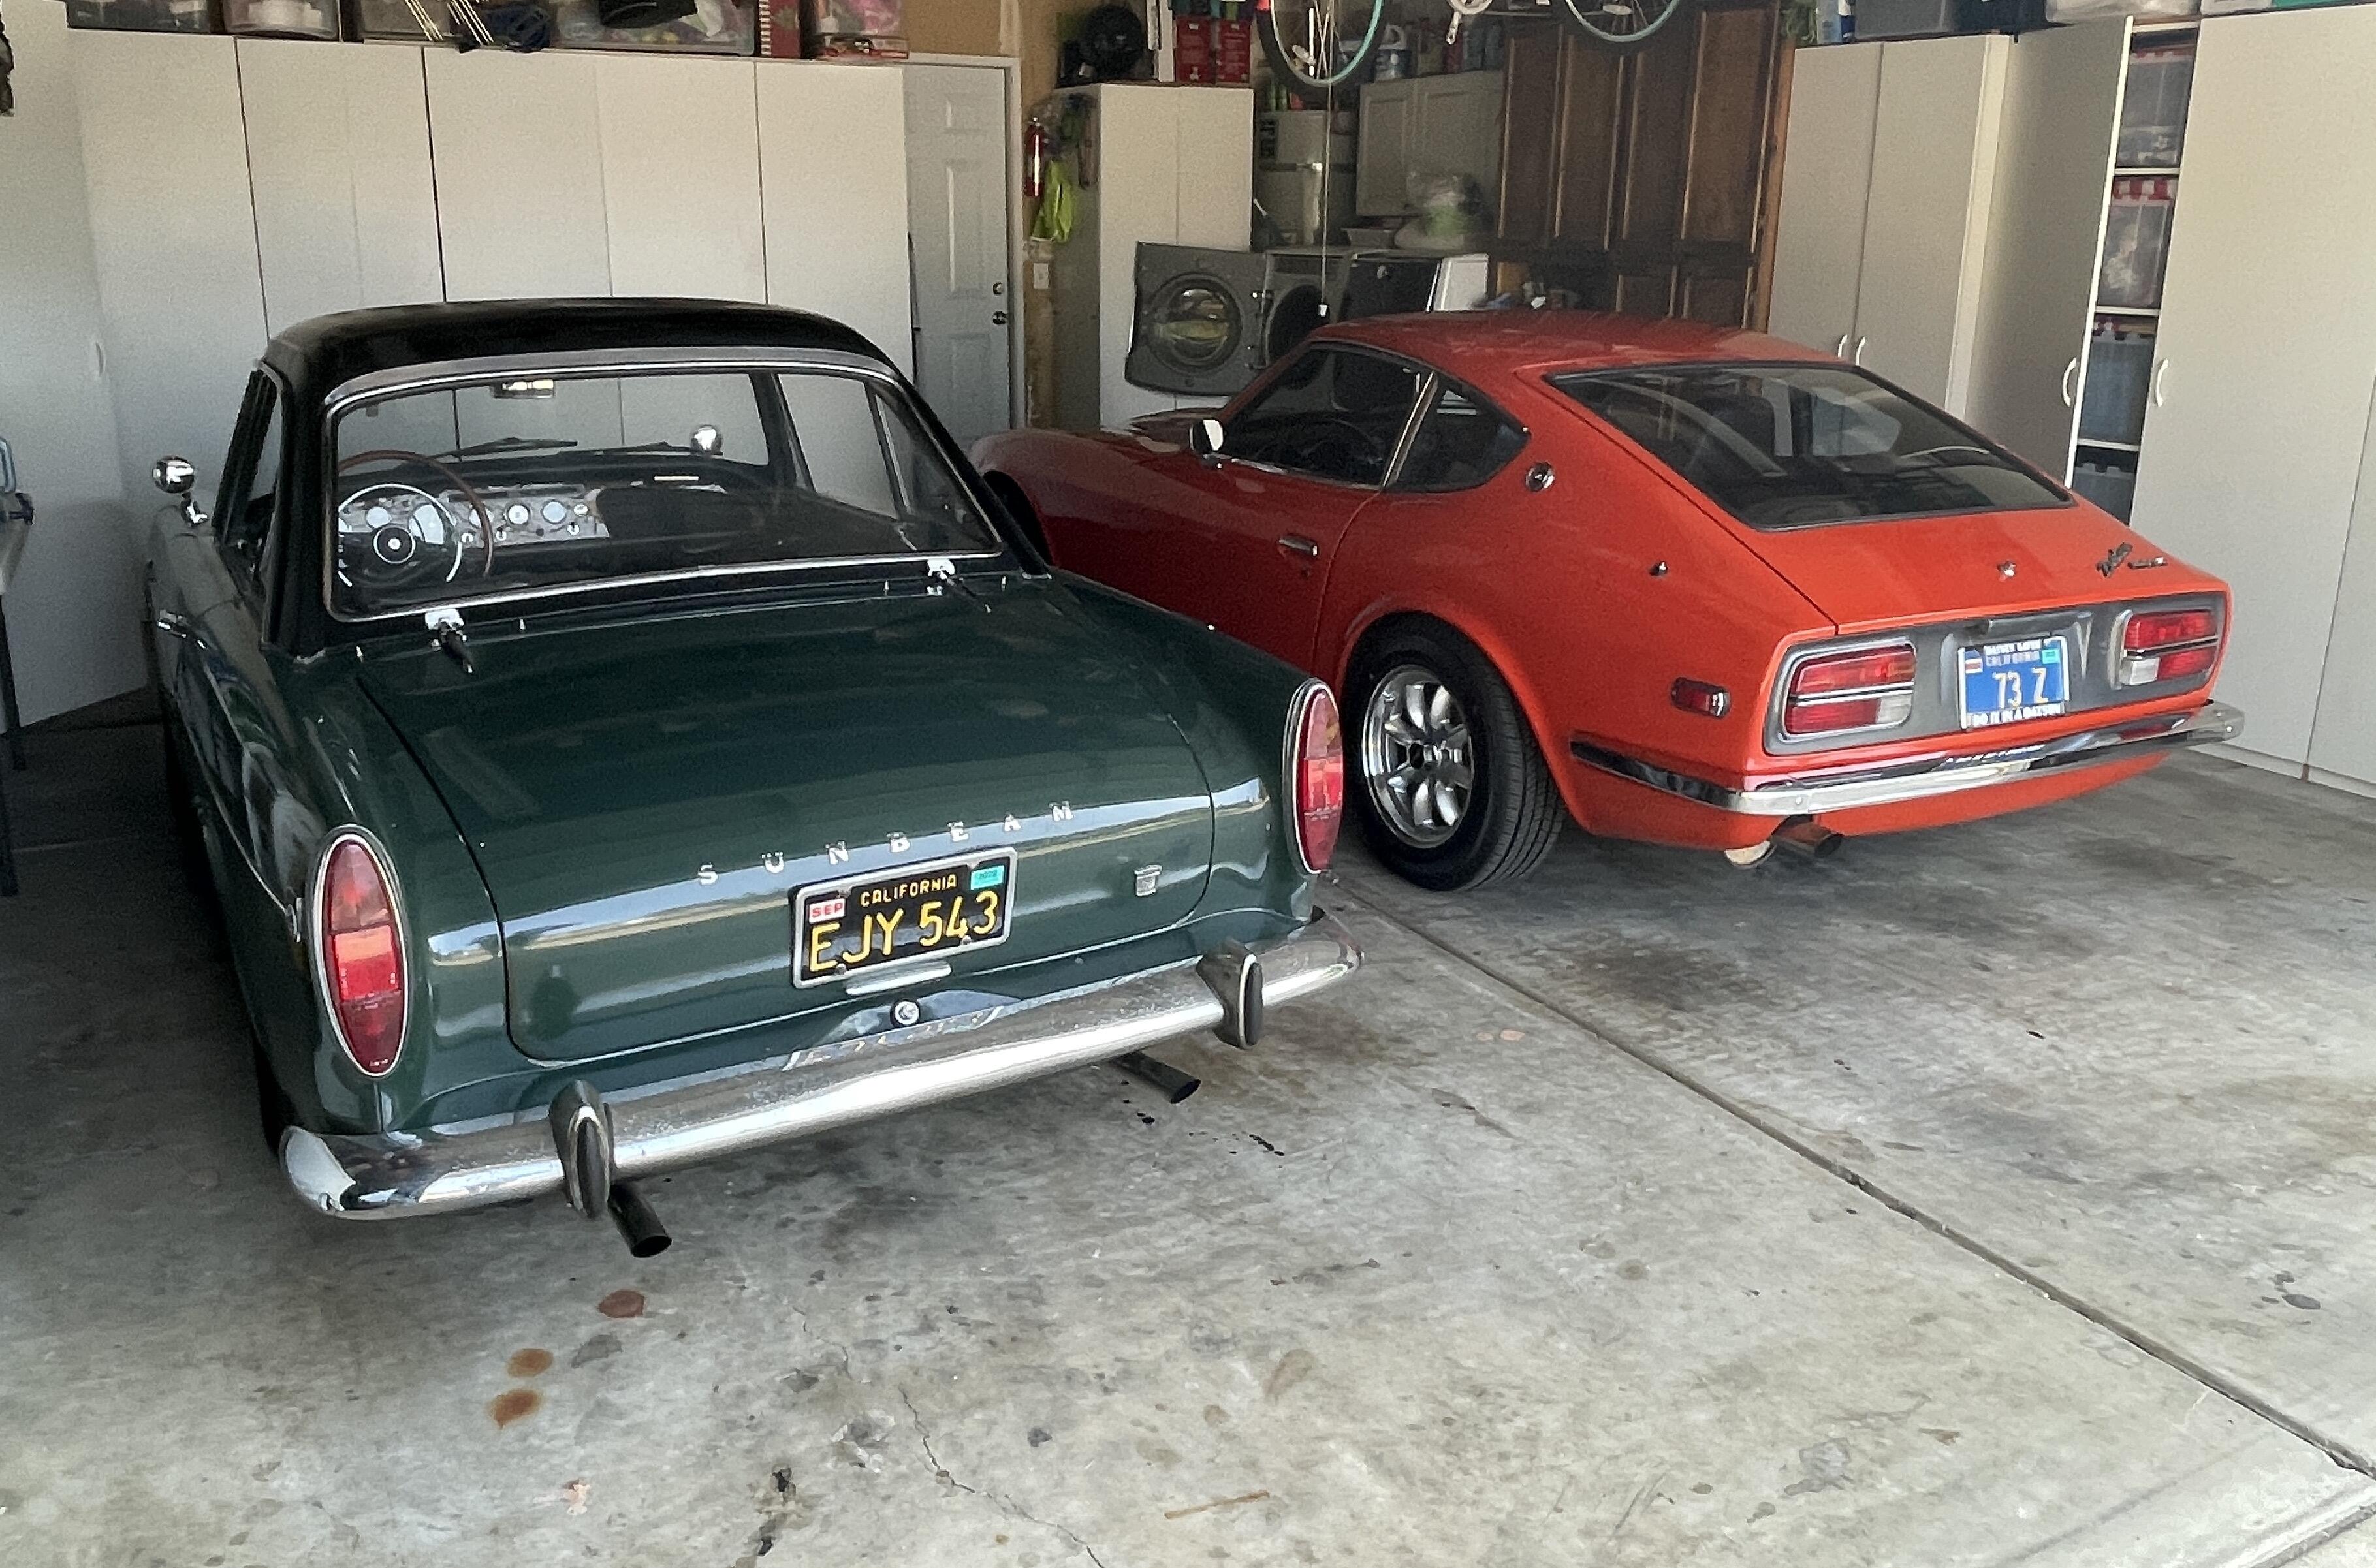
4 pointsHappy 4th everyone! 🇺🇸 And happy 50th birthday to our Z. Not sure how many 240Z's were built after ours, but I'm guessing 260Z production was starting to ramp up. Cheers! 🍻

 4 points
 -
3 pointsThe main point I was making was with regard to Cadmium. People still talk about 'Cad' plating, but there were no Cadmium-plated parts on these cars. The majority of the 'clear/'blue'/'yellow'/'gold' finish plated parts are Zinc.3 points
-
3 pointsI agree. There are no mis-statements anywhere, but kinda deception through omission. There were a couple feedbacks that highlighted that situation. Some people were surprised and disappointed that the parts they got were 3-D printed. The seller is very responsive to problems and does his best to make it right, but I think some of those misunderstandings could have been prevented at the get-go if it was more clear what the parts are.3 points
-
2 pointsHappy 50th also to the "Renowned Mr. Brown"...6/73 HLS30 163874. Cheers, Mike2 points
-
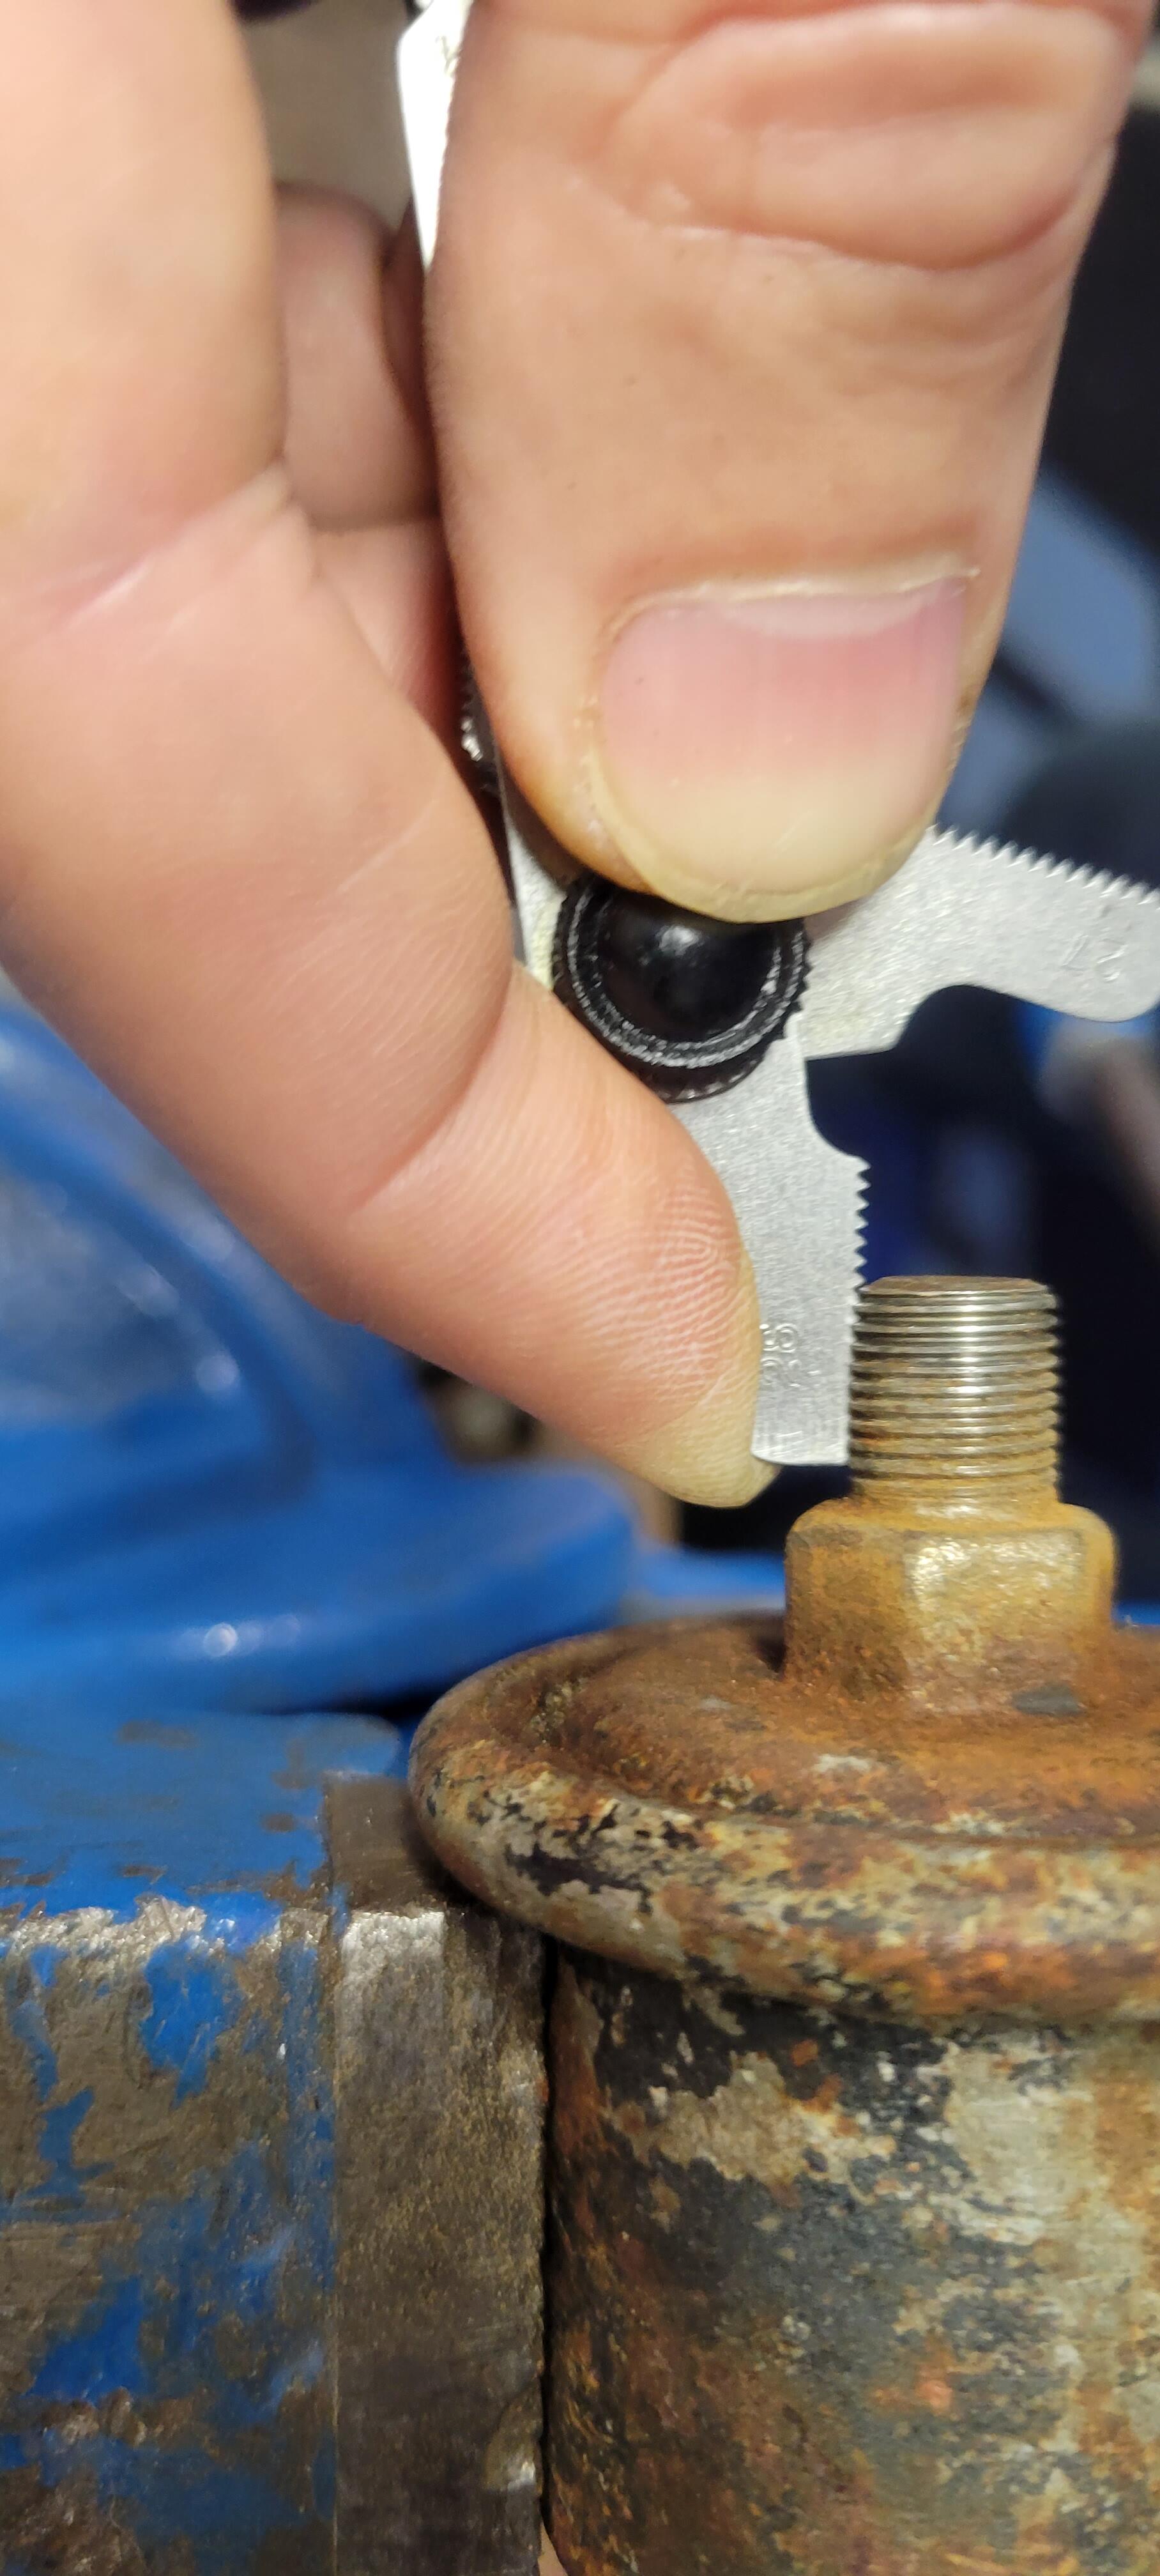
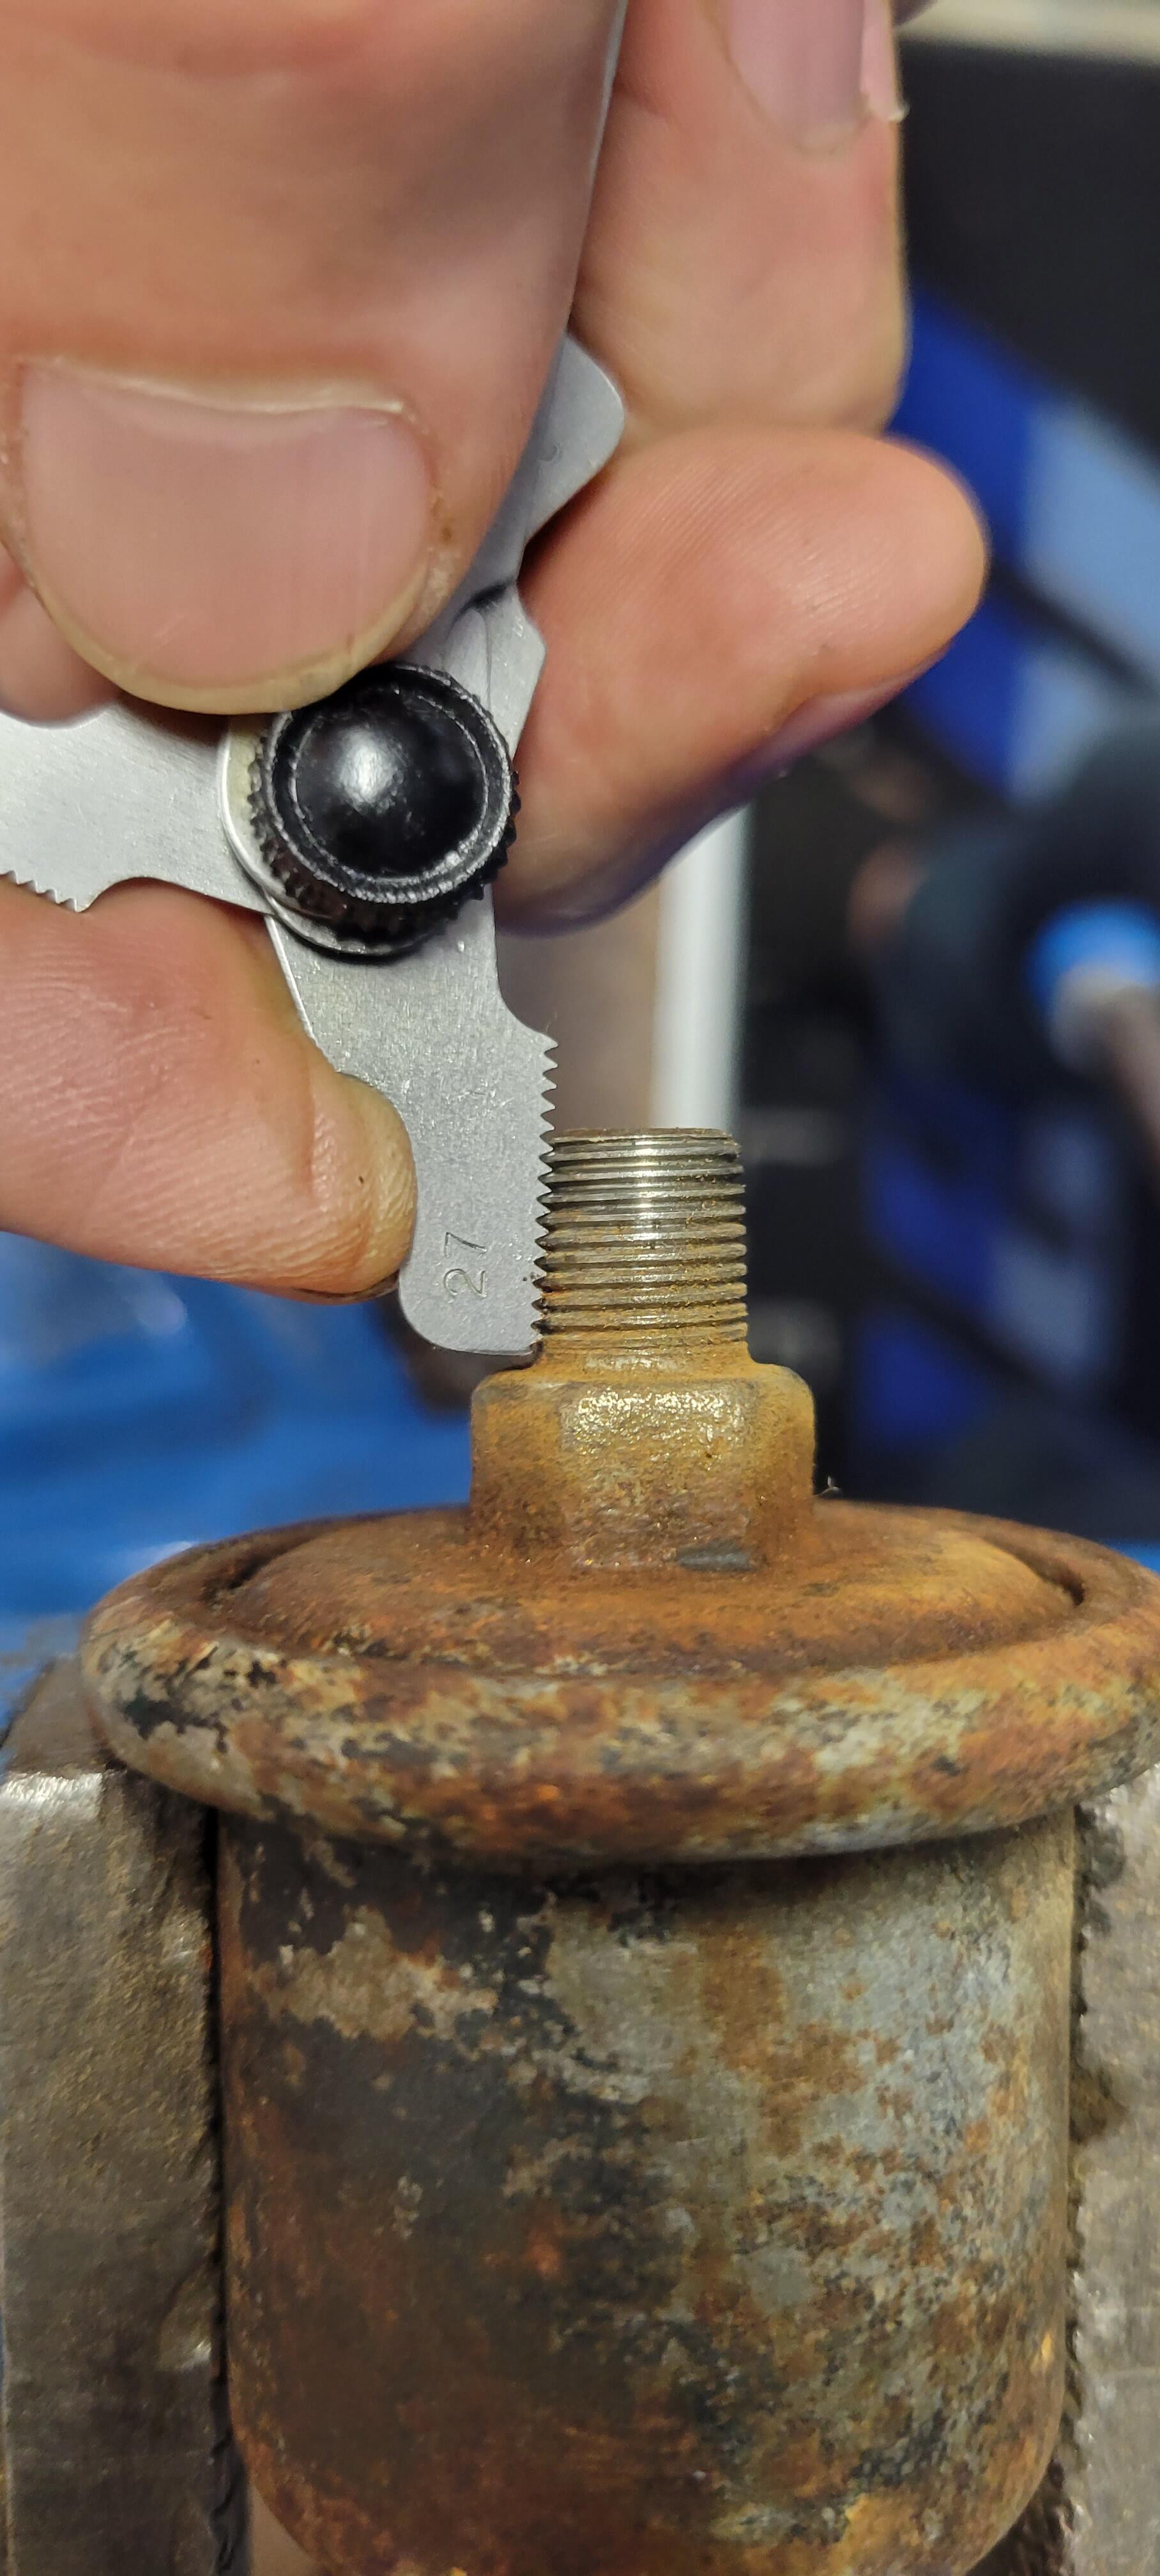
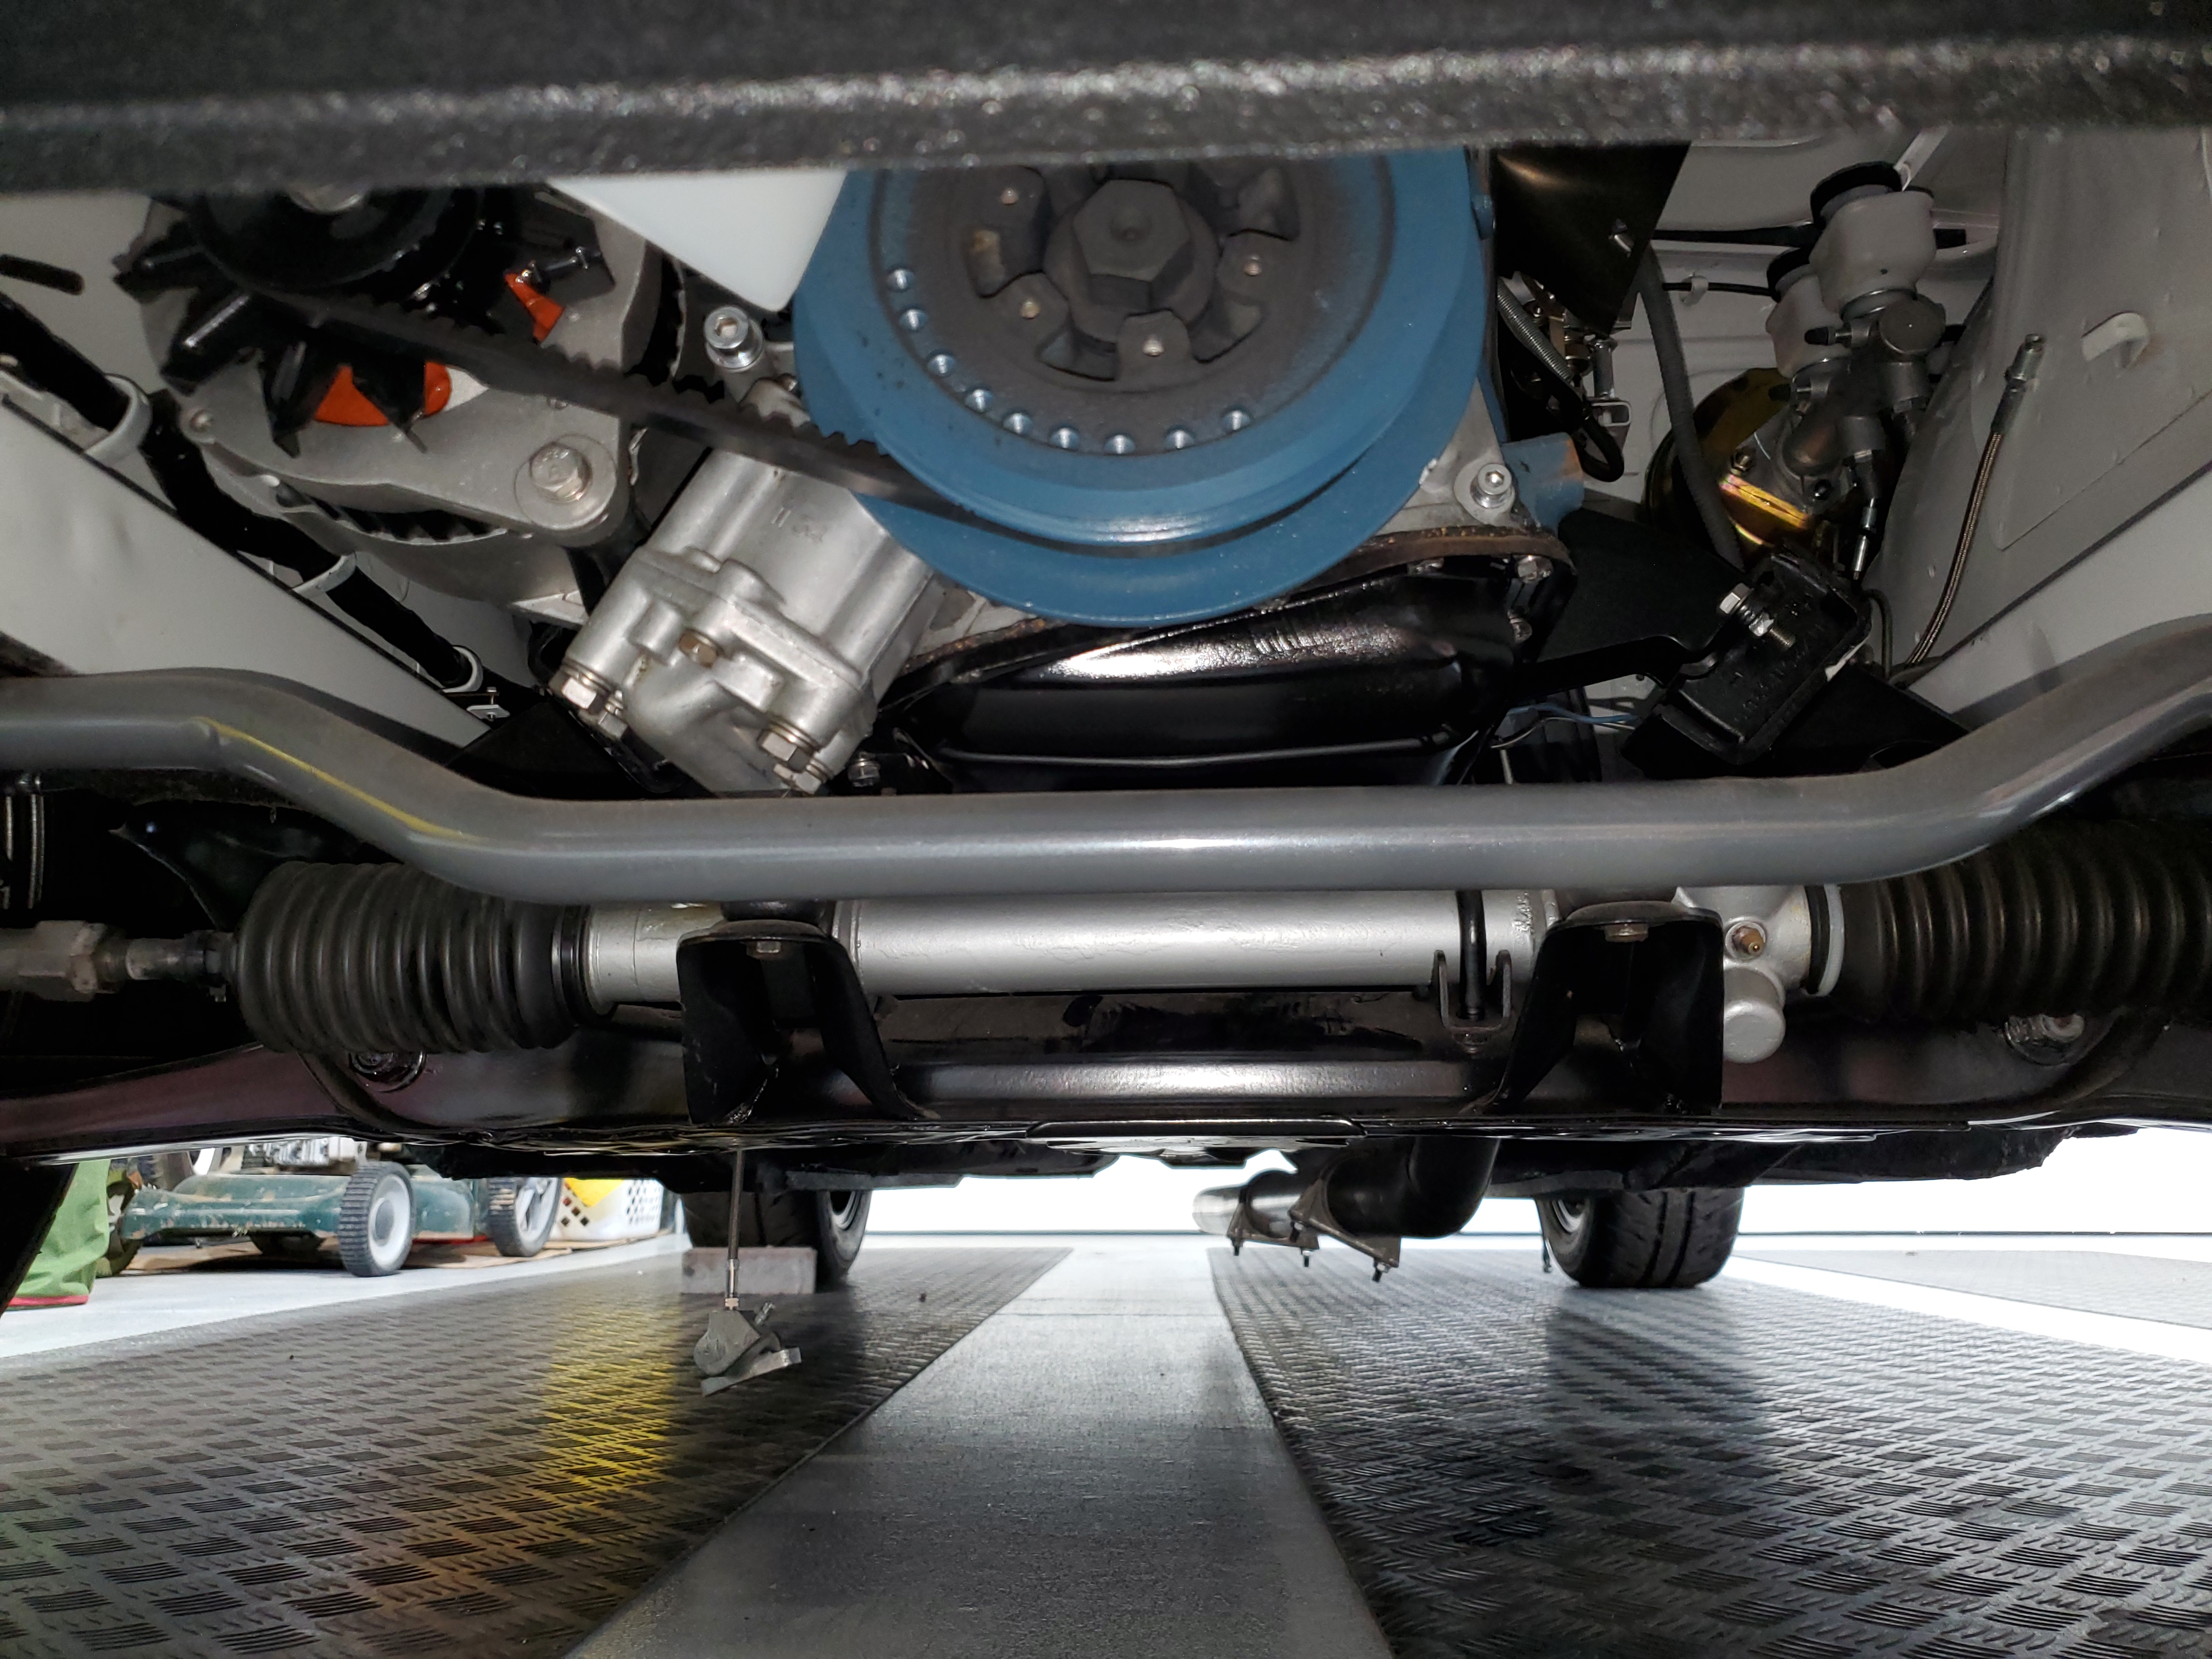
2 pointsActually the OEM oil pressure sending units used by Nissan are 1/8"-28 BSPT, not 1/8"-27 NPT. If your Beck-Arnley was 1/8"-27 NPT that would explain why it would not screw in easily. Here are pictures fitting my thread pitch gage into an old OE sending unit I have, The 28 threads per inch gage fits well (first pic) and the 27 did not. In addition to thread pitch differences, the NPT thread also has a slightly larger nominal male thread diameter. the chart below is from Swagelok, BSPT is also known as ISO 7/1

 2 points
 -
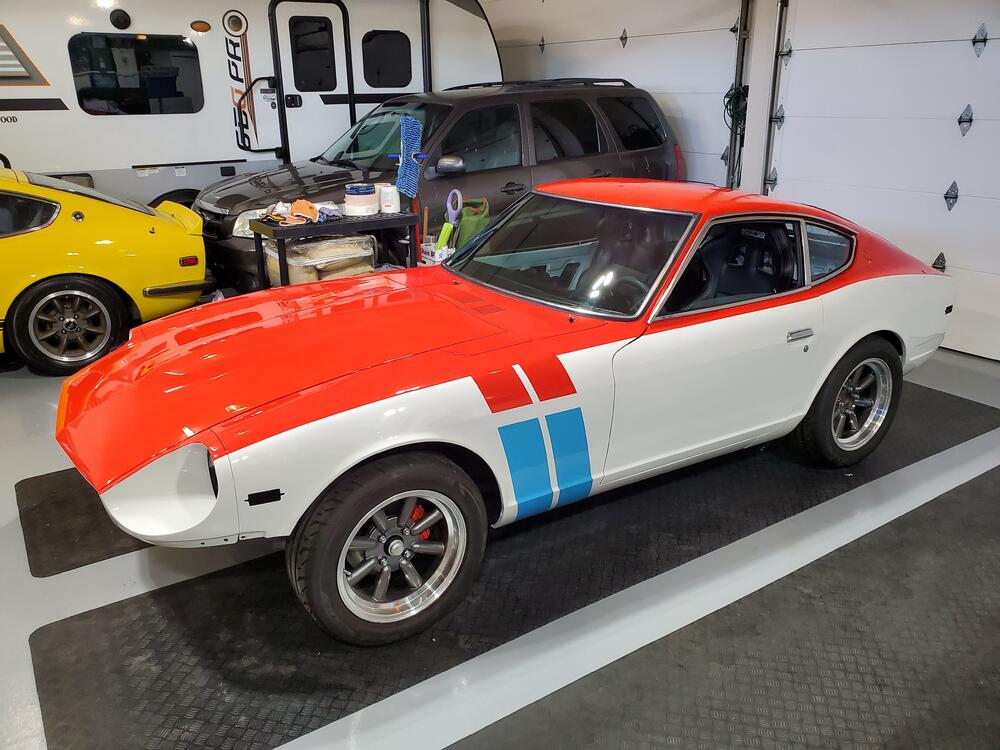
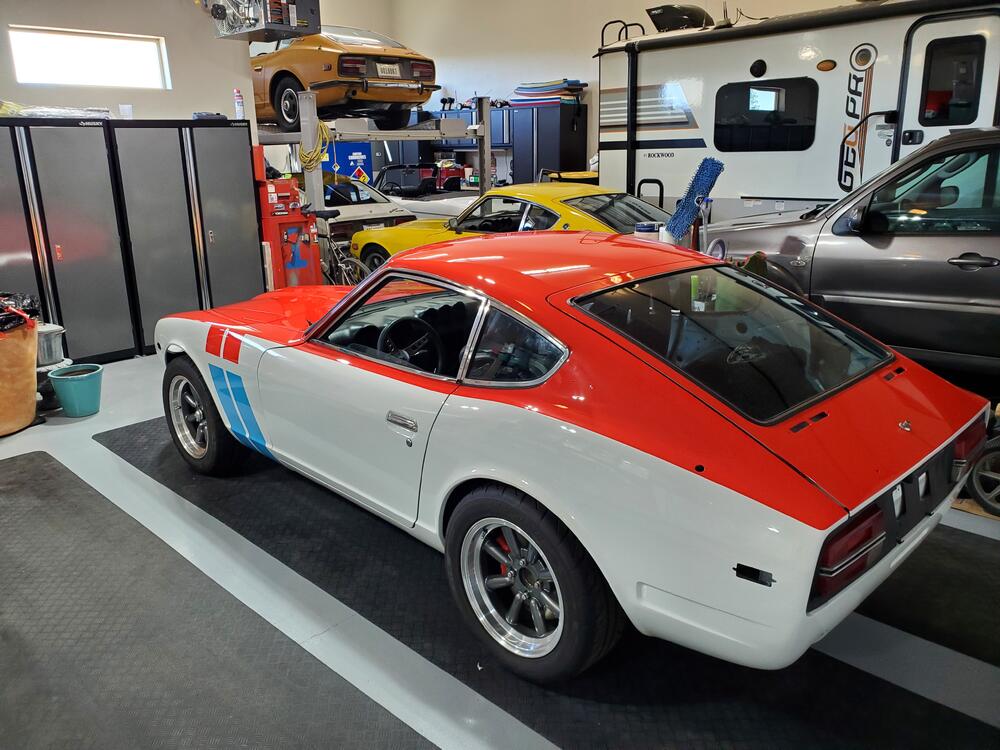
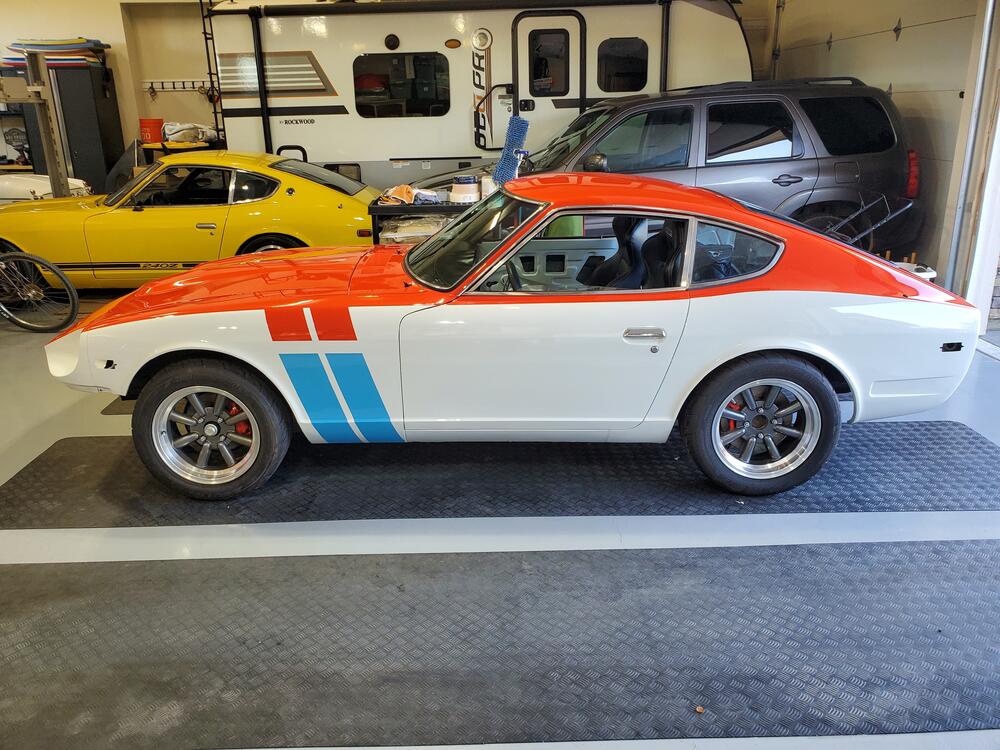
1 pointThe paint job on this car is gorgeous! I love seeing this in my garage even though it is not mine. It looks right at home with my other cars. After a two year break, I am back restoring Z cars....in my retirement. I love it. I did some of the work on this Z back in San Diego for a good friend of mine (the owner). I helped install the motor and transmission, all of the glass, most of the interior as well as the electrical harness refurb and wiper motor refurb. To make a long story short, I moved to Idaho, the owner is moving to Texas and not much has been done on the car since I left San Diego. I was asked to complete the build by the owner which I am more than happy to do. So, I will blog my progress on the site here for both the owner and others to see. Some of the plans are to remove the current brake set-up and install the Z car garage set-up. Also, I will add air conditioning. I have done neither of these on my previous builds, but hope to get input from the group and installation videos as needed. So, car arrived yesterday evening. We unloaded the car and pushed it into the garage where I will do the work. Today, I just wiped down the car with detailer and microfiber cloth to clean off the dust on the car and the engine bay, also cleaned the windows. I aligned the hood and latch mechanism so that everything operates smoothly. Tomorrow, I will begin to tackle the electrical wiring. Most of the remaining parts are still in San Diego, but will arrive here in two weeks. Until then, I will clean up some of the items that are currently on the car. Here are a few pics


 1 point
 -
I installed the inline ball valve on the In hose mostly because without it heat would transfer through the coolant by convection and after an hour of driving the heater core is radiating heat, on a summer's day that was too much for me.1 point
-
1 pointLove the BRE paint scheme, must have looked fantastic when it first appeared in 1970. Look forward to your build on this one @motorman7 , always enjoyed all your other restorations over the years. They have been an invaluable resource in helping me try and get things right on my cars.1 point
-
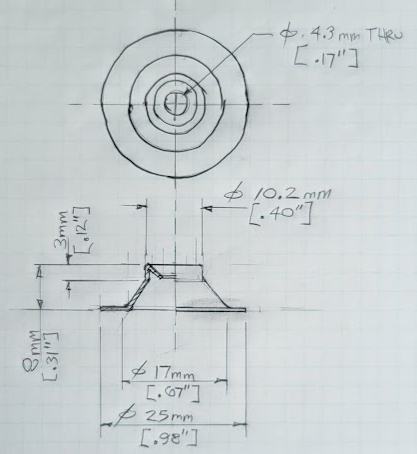
Here is a quick sketch of the OE snap. It's 10.2mm [.40"] diameter at the top.
 1 point
 -
Great work on the heater core stuff. Excellent camera work. I like the AN bulkhead feedhrough.1 point
-
1 pointGood. Those colors match the 78 wiring diagram I'm working from. That page EE-15 from the 78 manual is all kinds of messed up. Bottom line is you should have the same voltage on both the W/R wires at all times. So if you're taking voltage readings, it would be good to get one with the car off, and another one when the problem is occurring. One lead to the alternator body, and other lead to the W/R wires. And the idea that Zedhead suggested would be a good test... When the problem is occurring, if you jumper between the two W/R wires, does the problem go away? You don't have to run a fresh wire all the way from the battery to run the test, just run a wire between the two W/R right on the back of the alternator and see what happens.1 point
-
1 point
-
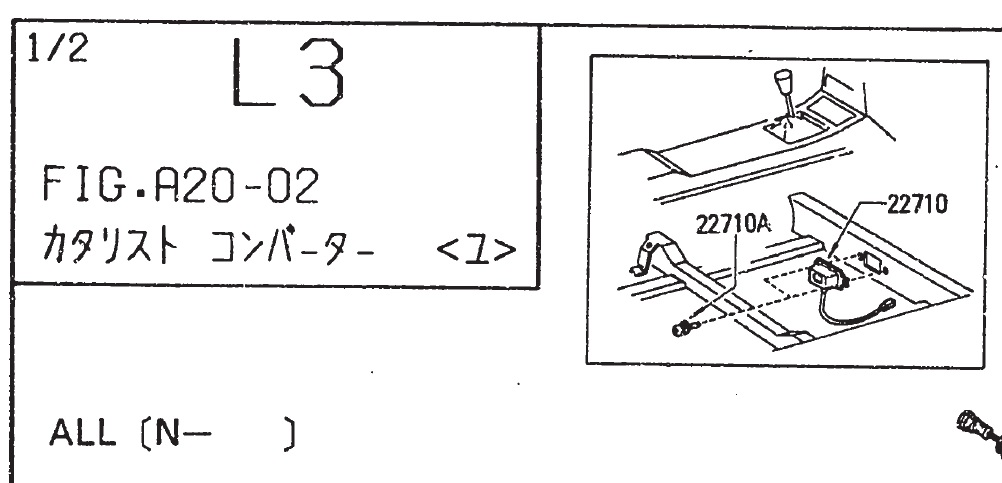
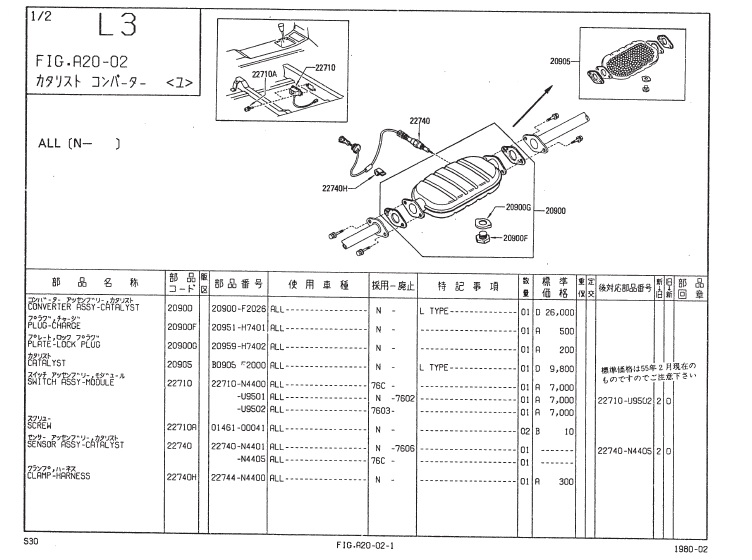
1 point22710-N4400 is part of the catalytic converter operating system on later production NAPS (Nissan Anti Pollution System-equipped) Japanese market models:
 1 point
 -
So, setting the compression rod washers properly positioned, and the rod nuts properly torqued ended the front end vibration.1 point
-
When I posted the post above I had only read the last short post of yours. What you wrote here is a very good description of a failing ignition module. It's how mine acted as it was crapping out. Search "HEI ignition module" on the site for a cheap and pretty easy swap to a more modern, by just a little, cheap ignition module. You can also find them around the internet, but a used one is going to be on its way to failure also.1 point
-
Are you absolutely sure the problem is fuel delivery, and not ignition? Using a fuel pressure gauge you should be able to confirm or eliminate fuel delivery as the culprit. Using a timing light, and a tach/dwell meter you should be able to confirm if the ignition system is performing as it should. When the mechanic had the tank out to replace the fuel gauge sending unit, did he not clean the tank and asses its condition? Also, there should be a nylon sock on the fuel pickup in the tank, sometimes they get clogged with debris and rust. Also, an observation. Are the short rubber hose bits from the fuel rail to the injectors original to the car? If so, they should be replaced. Many fuel injected Z cars have caught fire when these fail and fuel is dumped onto a hot exhaust manifold.1 point
-
Pretty much all 'gold'/'yellow' finish plated parts on Nissan cars.1 point
-
1 pointI often use some soft copper plates that protect any part that i put in my vice, i got it from a plumber, also the slater has some left overs that you could use. 🙂1 point
-
1 pointThe paint job on this car is gorgeous! I love seeing this in my garage even though it is not mine. It looks right at home with my other cars. After a two year break, I am back restoring Z cars....in my retirement. I love it. I did some of the work on this Z back in San Diego for a good friend of mine (the owner). I helped install the motor and transmission, all of the glass, most of the interior as well as the electrical harness refurb and wiper motor refurb. To make a long story short, I moved to Idaho, the owner is moving to Texas and not much has been done on the car since I left San Diego. I was asked to complete the build by the owner which I am more than happy to do. So, I will blog my progress on the site here for both the owner and others to see. Some of the plans are to remove the current brake set-up and install the Z car garage set-up. Also, I will add air conditioning. I have done neither of these on my previous builds, but hope to get input from the group and installation videos as needed. So, car arrived yesterday evening. We unloaded the car and pushed it into the garage where I will do the work. Today, I just wiped down the car with detailer and microfiber cloth to clean off the dust on the car and the engine bay, also cleaned the windows. I aligned the hood and latch mechanism so that everything operates smoothly. Tomorrow, I will begin to tackle the electrical wiring. Most of the remaining parts are still in San Diego, but will arrive here in two weeks. Until then, I will clean up some of the items that are currently on the car. Here are a few pics
1 point
-
1 pointI wanted to add to this topic for reference. I recently tried to rebuild the OEM units without success. I learned the first time that I never wanted to do this job again, yet here I was. This is a factory AC car, so it is slightly different at the heater core than @mikev88 has setup. These are the parts I ordered: 4 seasons vacuum heater valve 74604 (1) 4seasons heater valve 74827 (1) Heater Hose Connector 5/8"X 5/8" Hose Barb Glass Filled Nylon PA66-GF33 Straight Fittings (1) Gates Hose 19402 (1) hose clamps vacuum hose barb , M-M (1) Vacuum hose I wanted to make this simple unlike the stock installation. First off was the 74604, I mounted that in the engine bay. For the vacuum line - you will have to make a new hole in the firewall grommet and push the vacuum hose through there. Then connect up with the hose barb to the stock line location under the dash (W for my 1977). For the plumbing into the valve, I was able to use the OEM hose off the block that went to the firewall. just rotated about 90 degrees to mount up the 74604 to it: Why this wasnt done at the factory, well thats a mystery! much cleaner and easier outside of the engine bay. For the factory grommet that seals the lines going through the firewall, you will have to enlarge 1 hole to fit the hose through it. I just cut where the lines were on it and it fit perfect: From the 74604, the Gates hose (19402) has a lot of bends. You just need a long J bend to go from the heater valve through the grommet and through the firewall. The other side will connect to the 74827 (under the dash): This is my installation before I rotated clockwise another 20-30 degrees : For the heater control wire, you will need to use some pliers and make a loop at the end of it. the new valve doesnt travel as far as the OEM one, so adjust where you want the lever to be on the dash. I lined everything up on full cold and tightened the wire holder down. Finish it off with a internal star washer to keep it from popping off. You will use the rest of the gates 19402 hose with the S bend to clear the outlet from the heater core to the new valve. For the outlet from the heater core, I used a stock hose: from the outlet, it went to that OEM hose, then to the 5.8" barb, through the firewall and through the grommet on the uncut side. Make sure to get the grommet pulled through to the middle of the barb. From there, connect to the stock hose. Everything fits and there is more room under the dash to work with. Reuse some of the OEM screws that came off the stock mounts to keep the side plastic onto the heater box. No issues with the setup and if there are future issues, it will be much easier to deal with. Hope this helps someone out there


 1 point