Leaderboard
.JPG.cfcada9cf1c1b502df3f5f2f2ca3ff36.JPG)


 Subscriber


Popular Content
Showing content with the highest reputation on 05/14/2023 in all areas
-
5 pointsWhen I was younger I was naive on the nature of humans and have changed my view over the years. The world while full of great and generous people there are a lot of bad actors out there. It’s really really part of the nature of humanity, we are a competitive species with many bad traits that come out when our basket of goods is threatened. I’m reading the book The Peloponnesian War right now. The war occurred before Alexander The Great about 2500 years ago. You realize we cannot change our species, we have the same antics, same back stabbing, same ruthlessness today as we did then. We’ve progressed far technologically but we haven’t really changed who we are as a species. The goal for me is to fight these tendencies and always be the best human I can. The trolls like you saw in your post should be ignored and shunned, that’s all you can do…..pay it forward and do good!!5 points
-
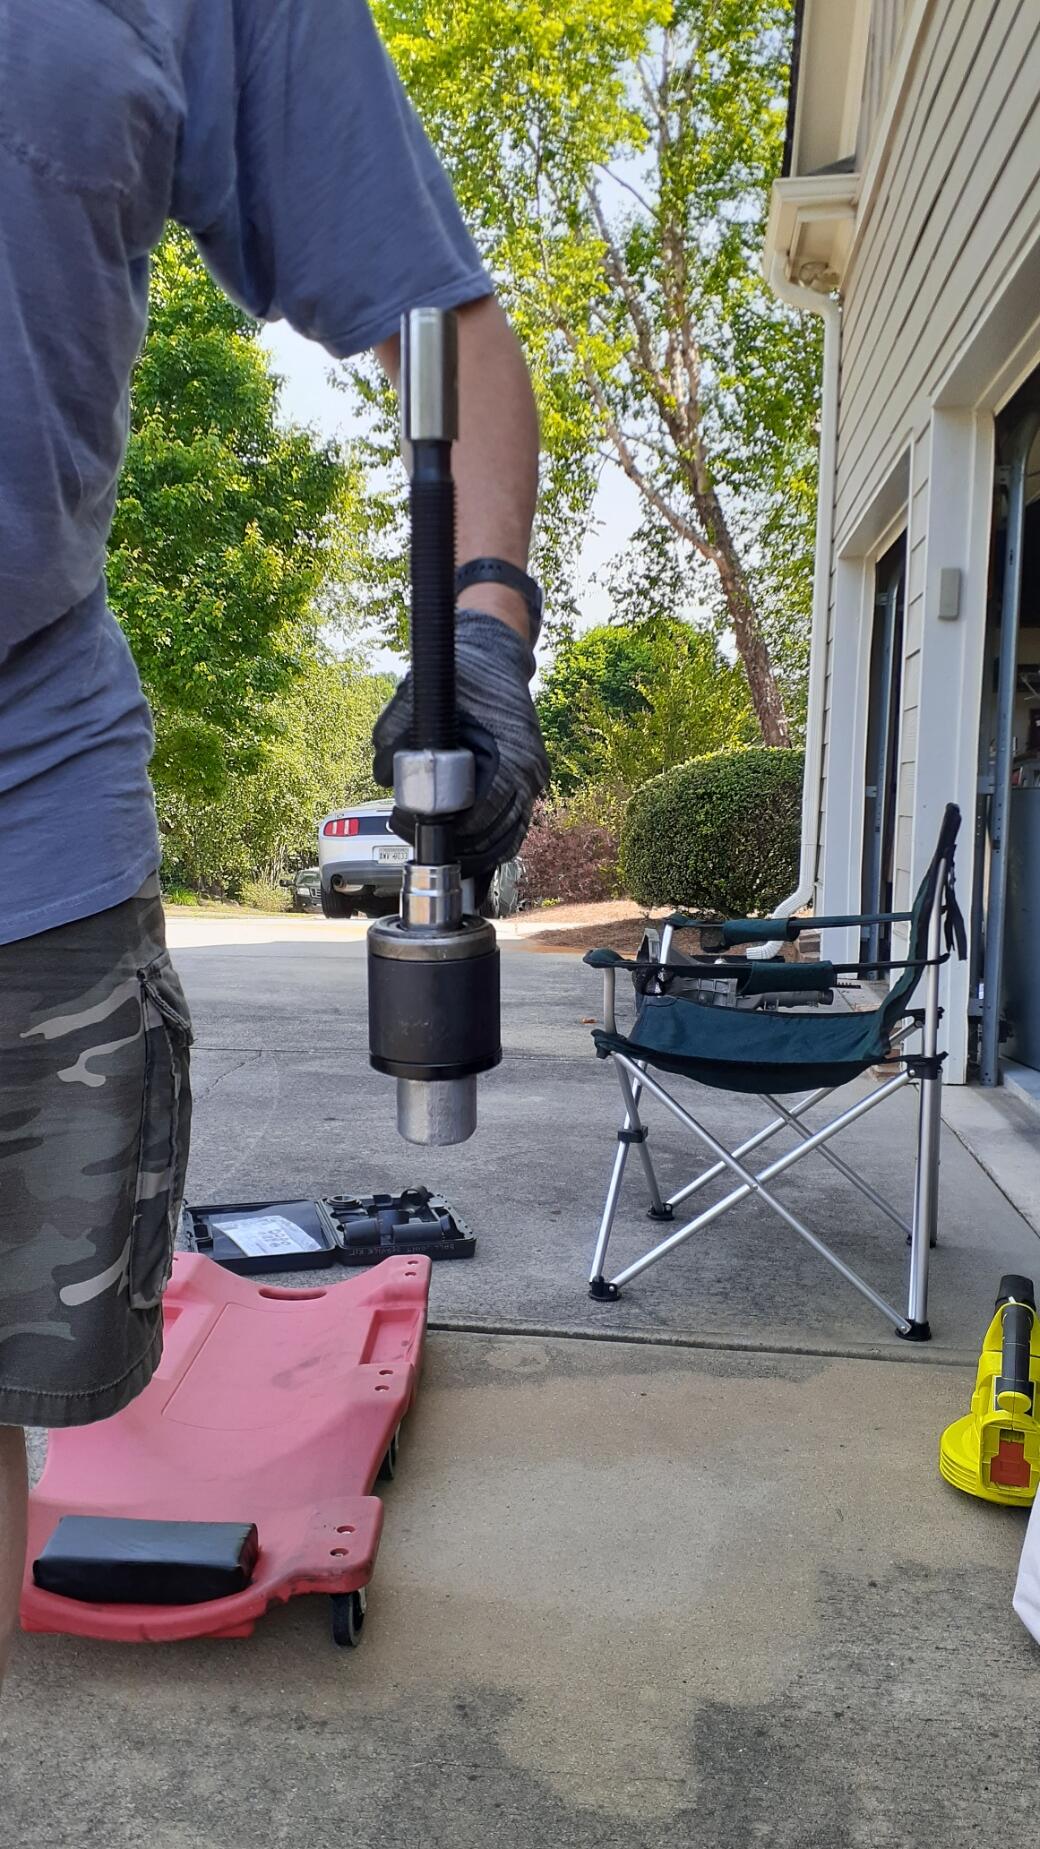
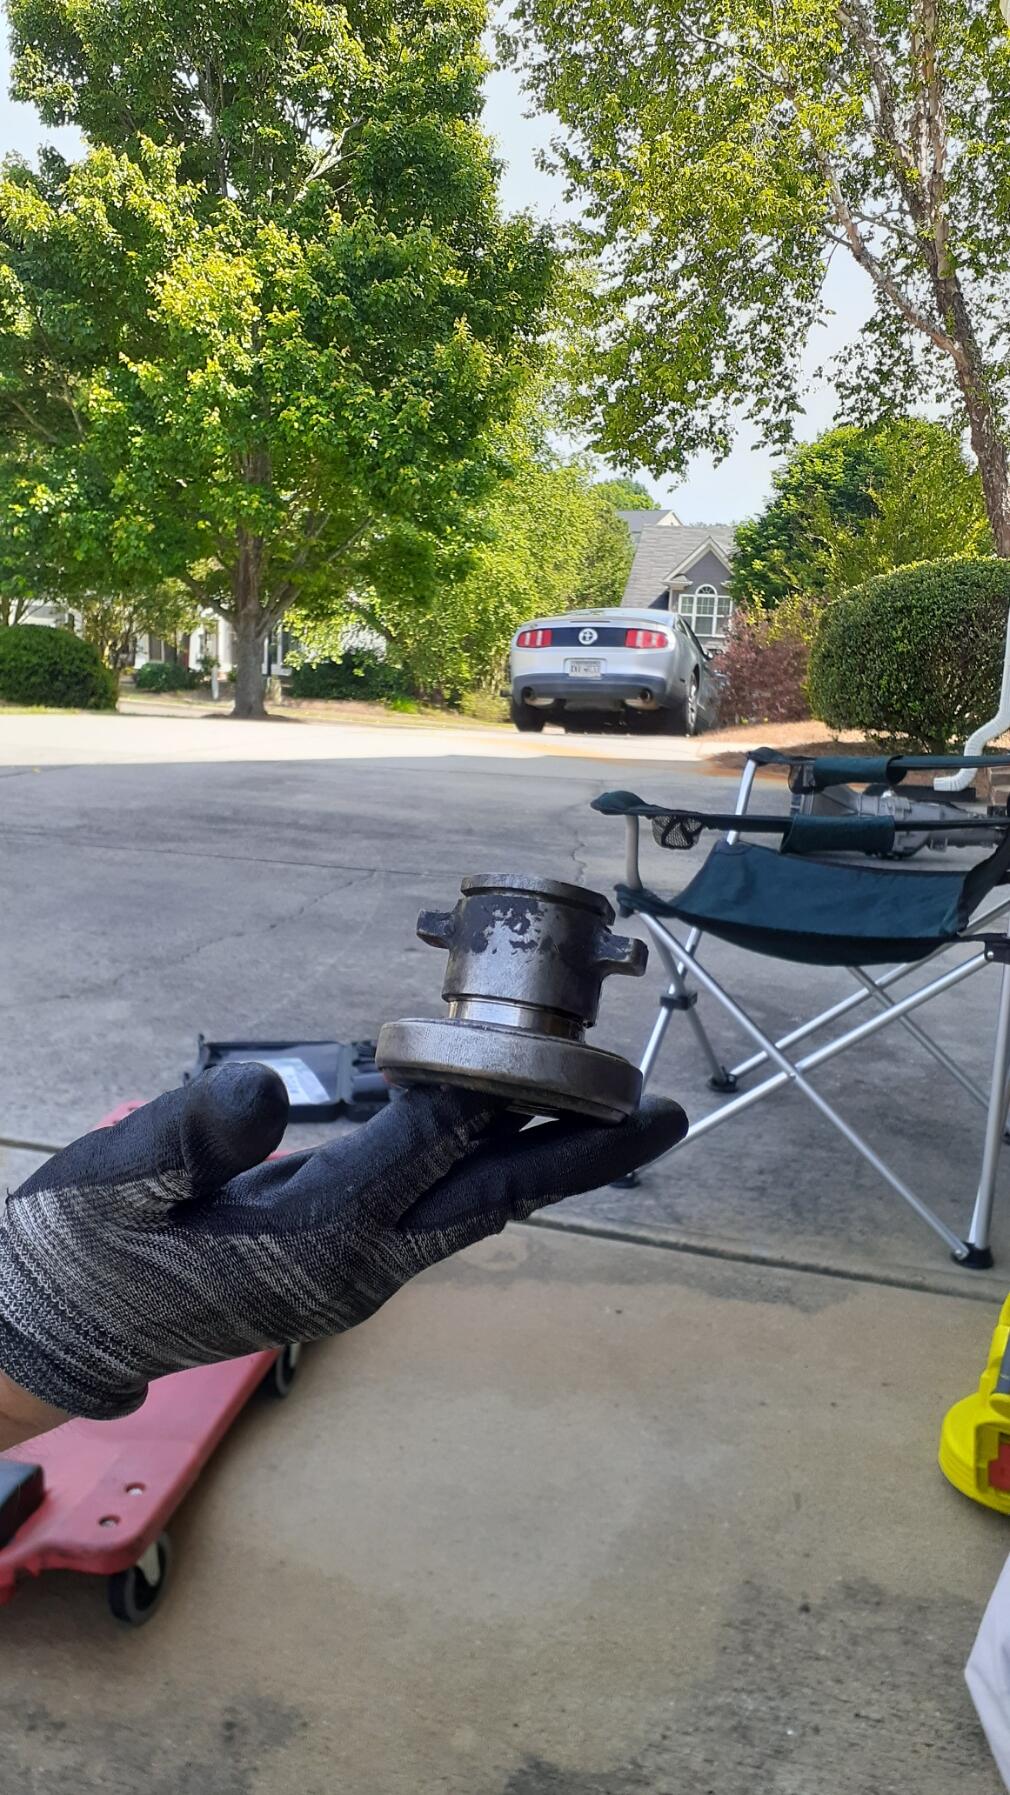
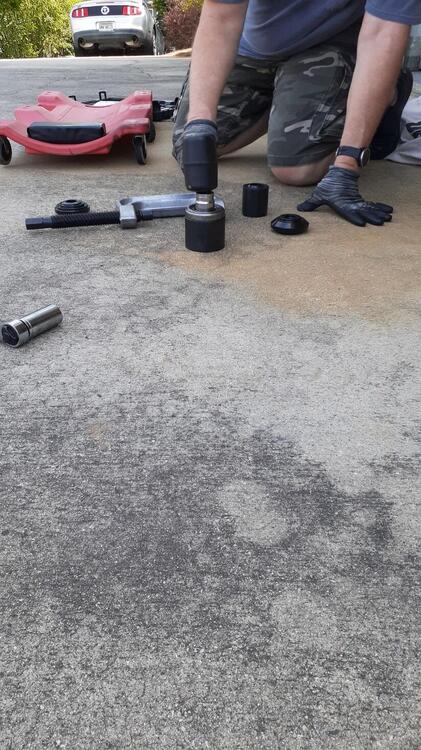
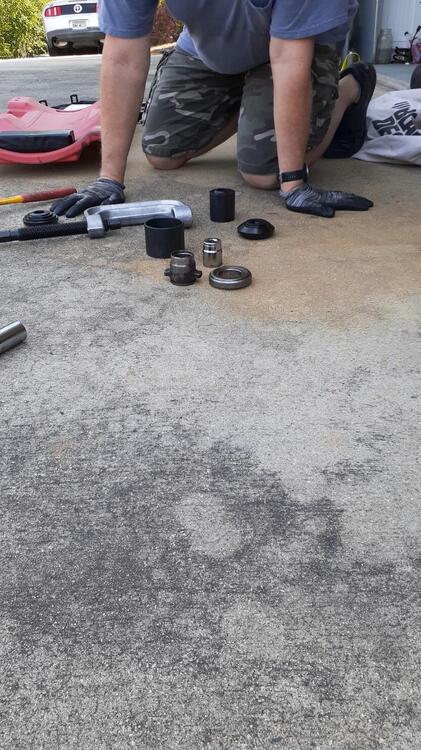
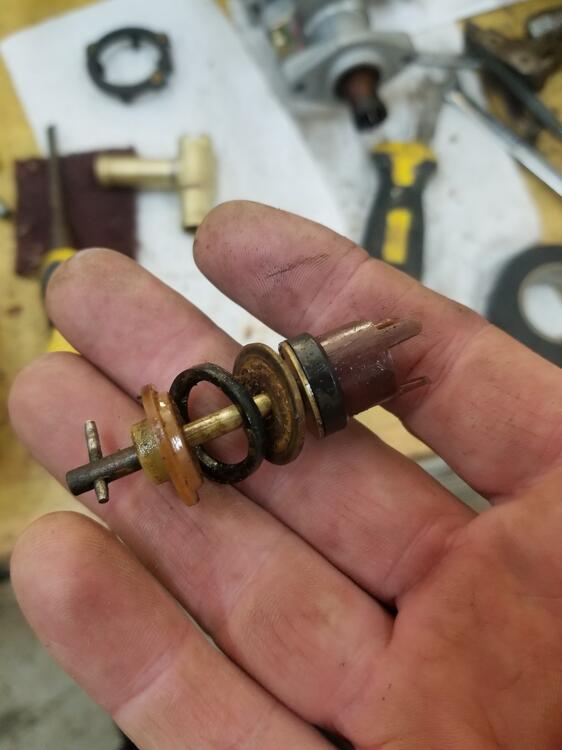
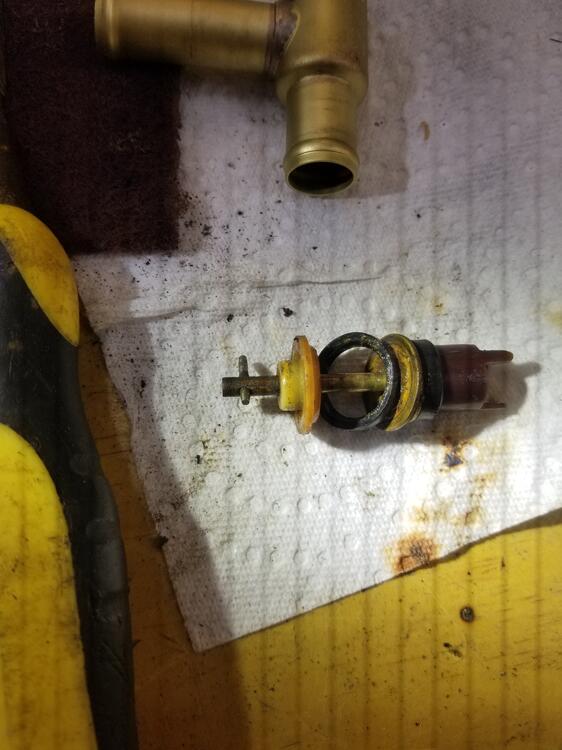
As I'm a complete novice to most of the transmission topics, this was a neat learning opportunity for me. I needed to separate the TO bearing and collar for installation of the new transmission. After consulting with a couple of friends, I decided to try the Maddox Ball Joint Service Kit I bought from HF. I found it had the right size collar for the TO bearing, and then I found a 27mm socket would drive out the collar. Here's the assembly ready for pressing. It worked for the most part, but the bottom plate kept the assembly from driving the collar all of the way out. I could try using my vice to finish the job, or I could get medieval. It worked.


 3 points
 -
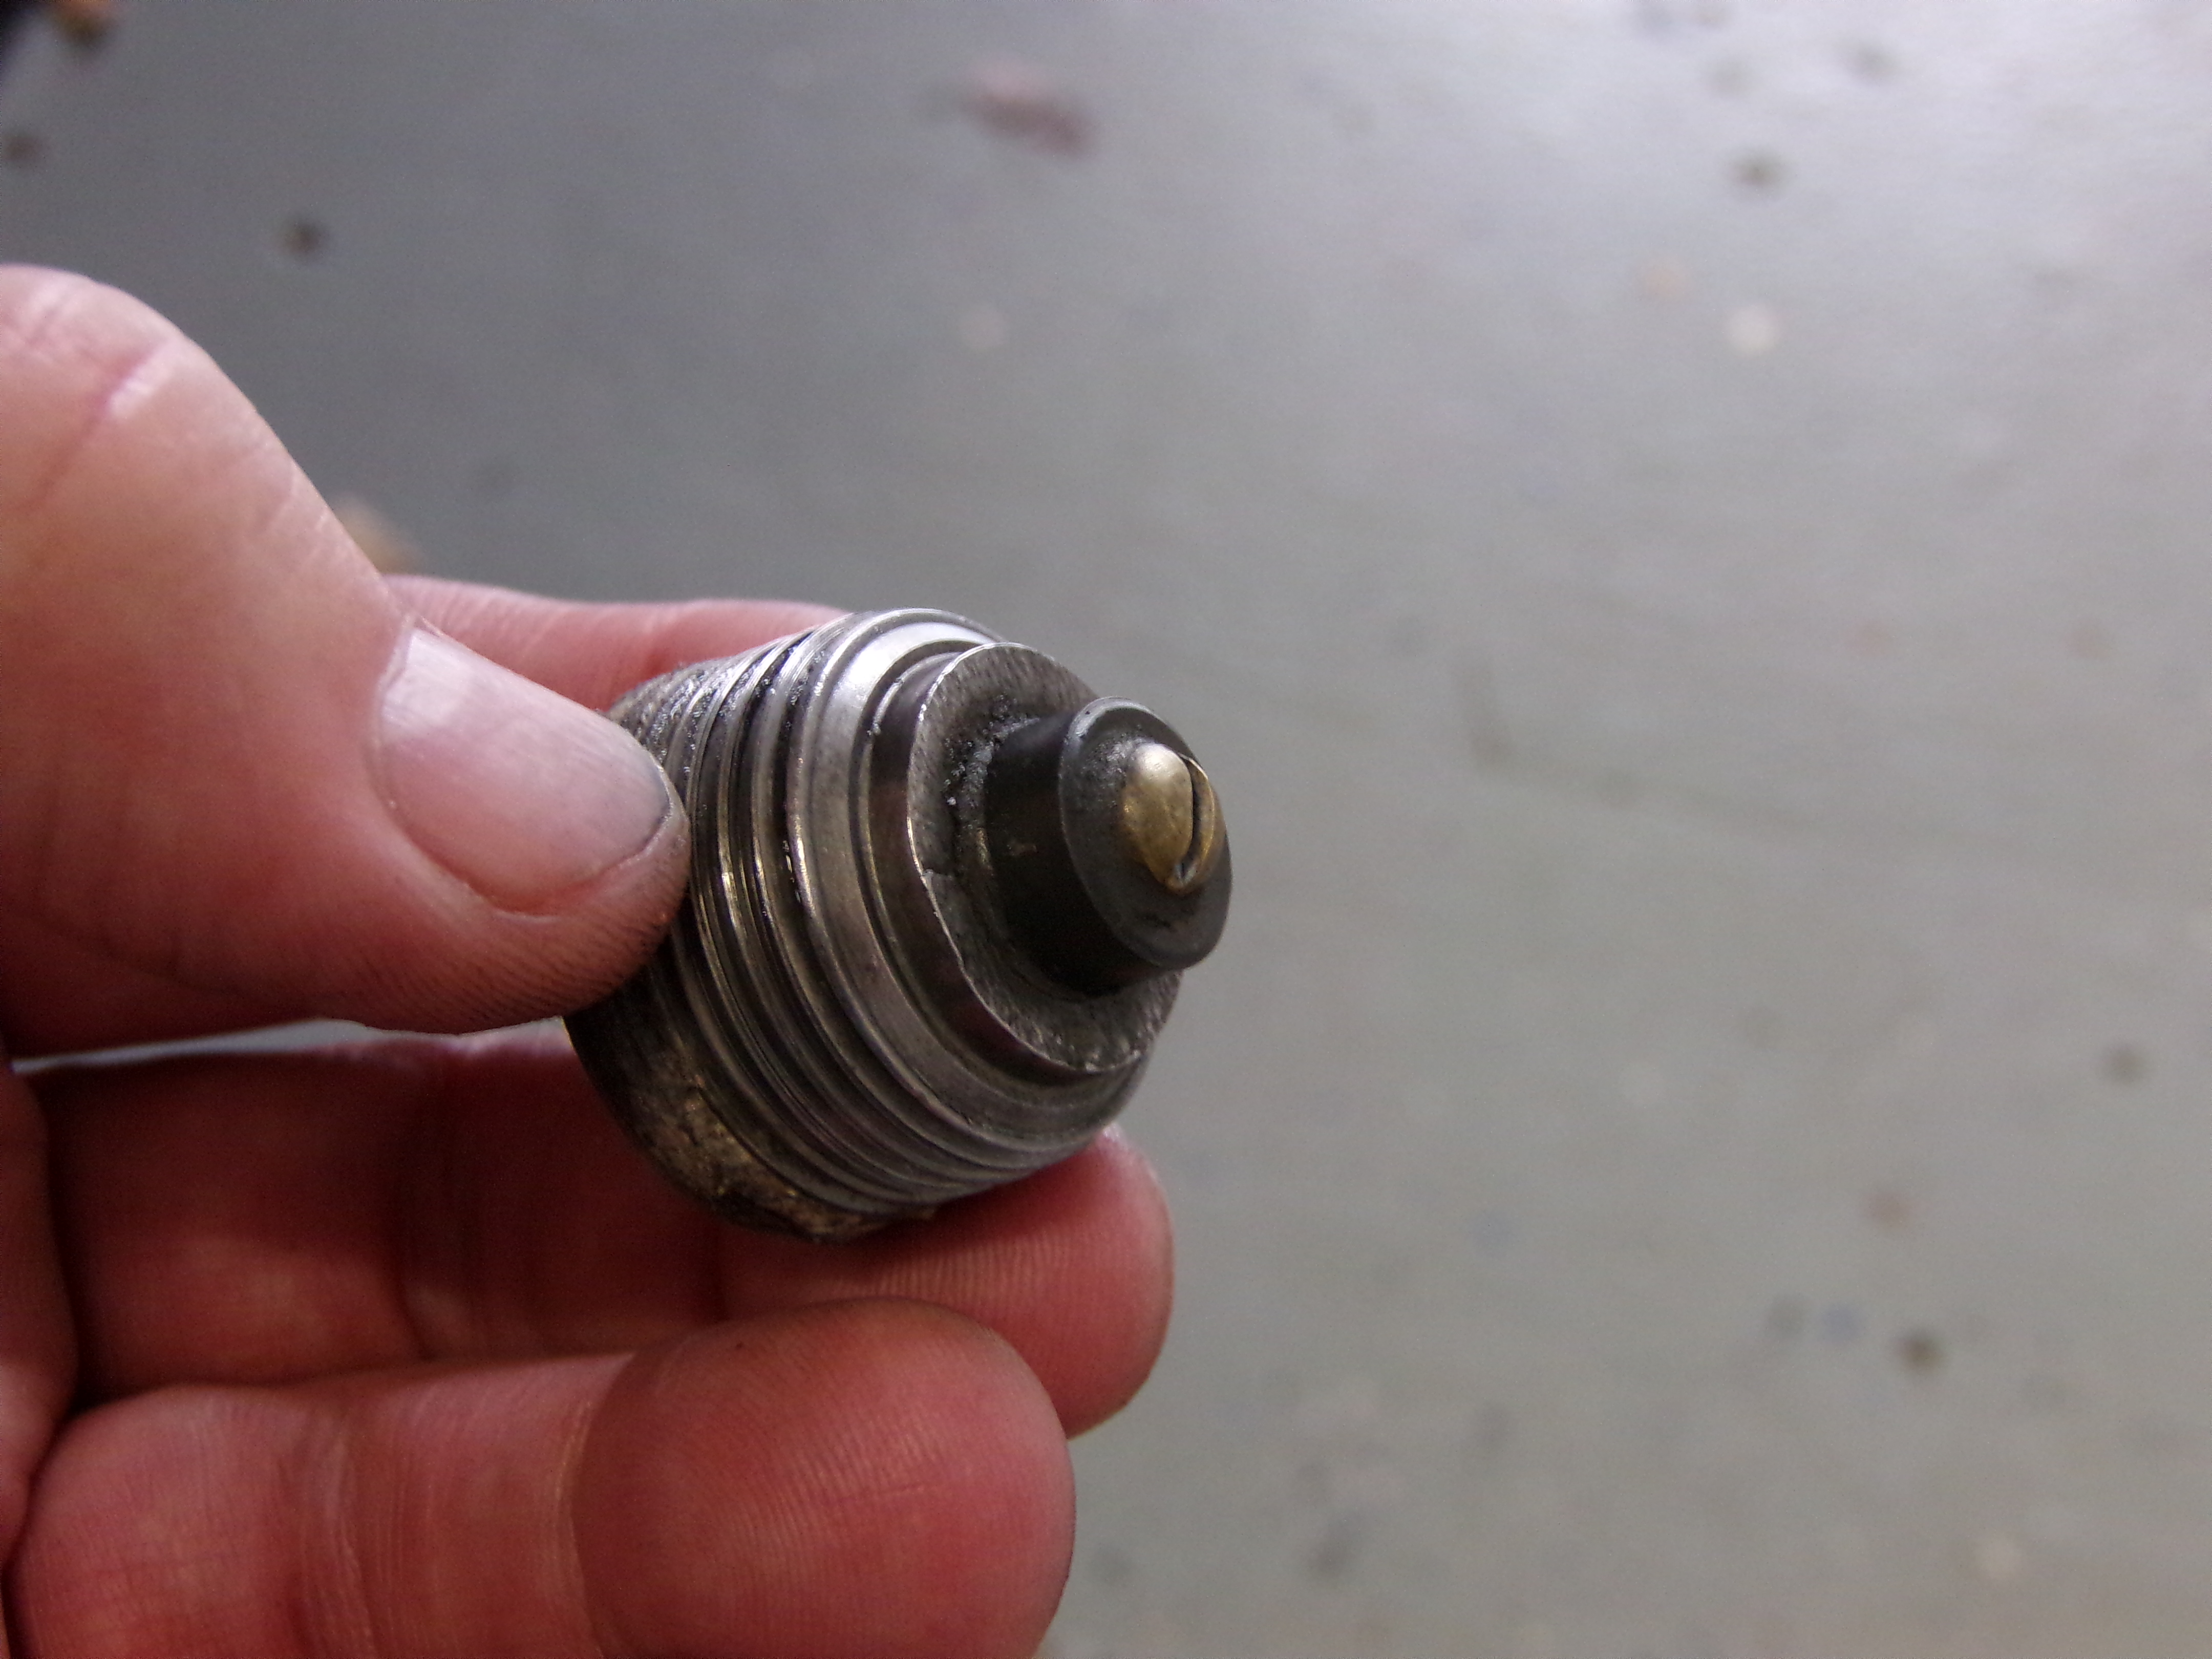
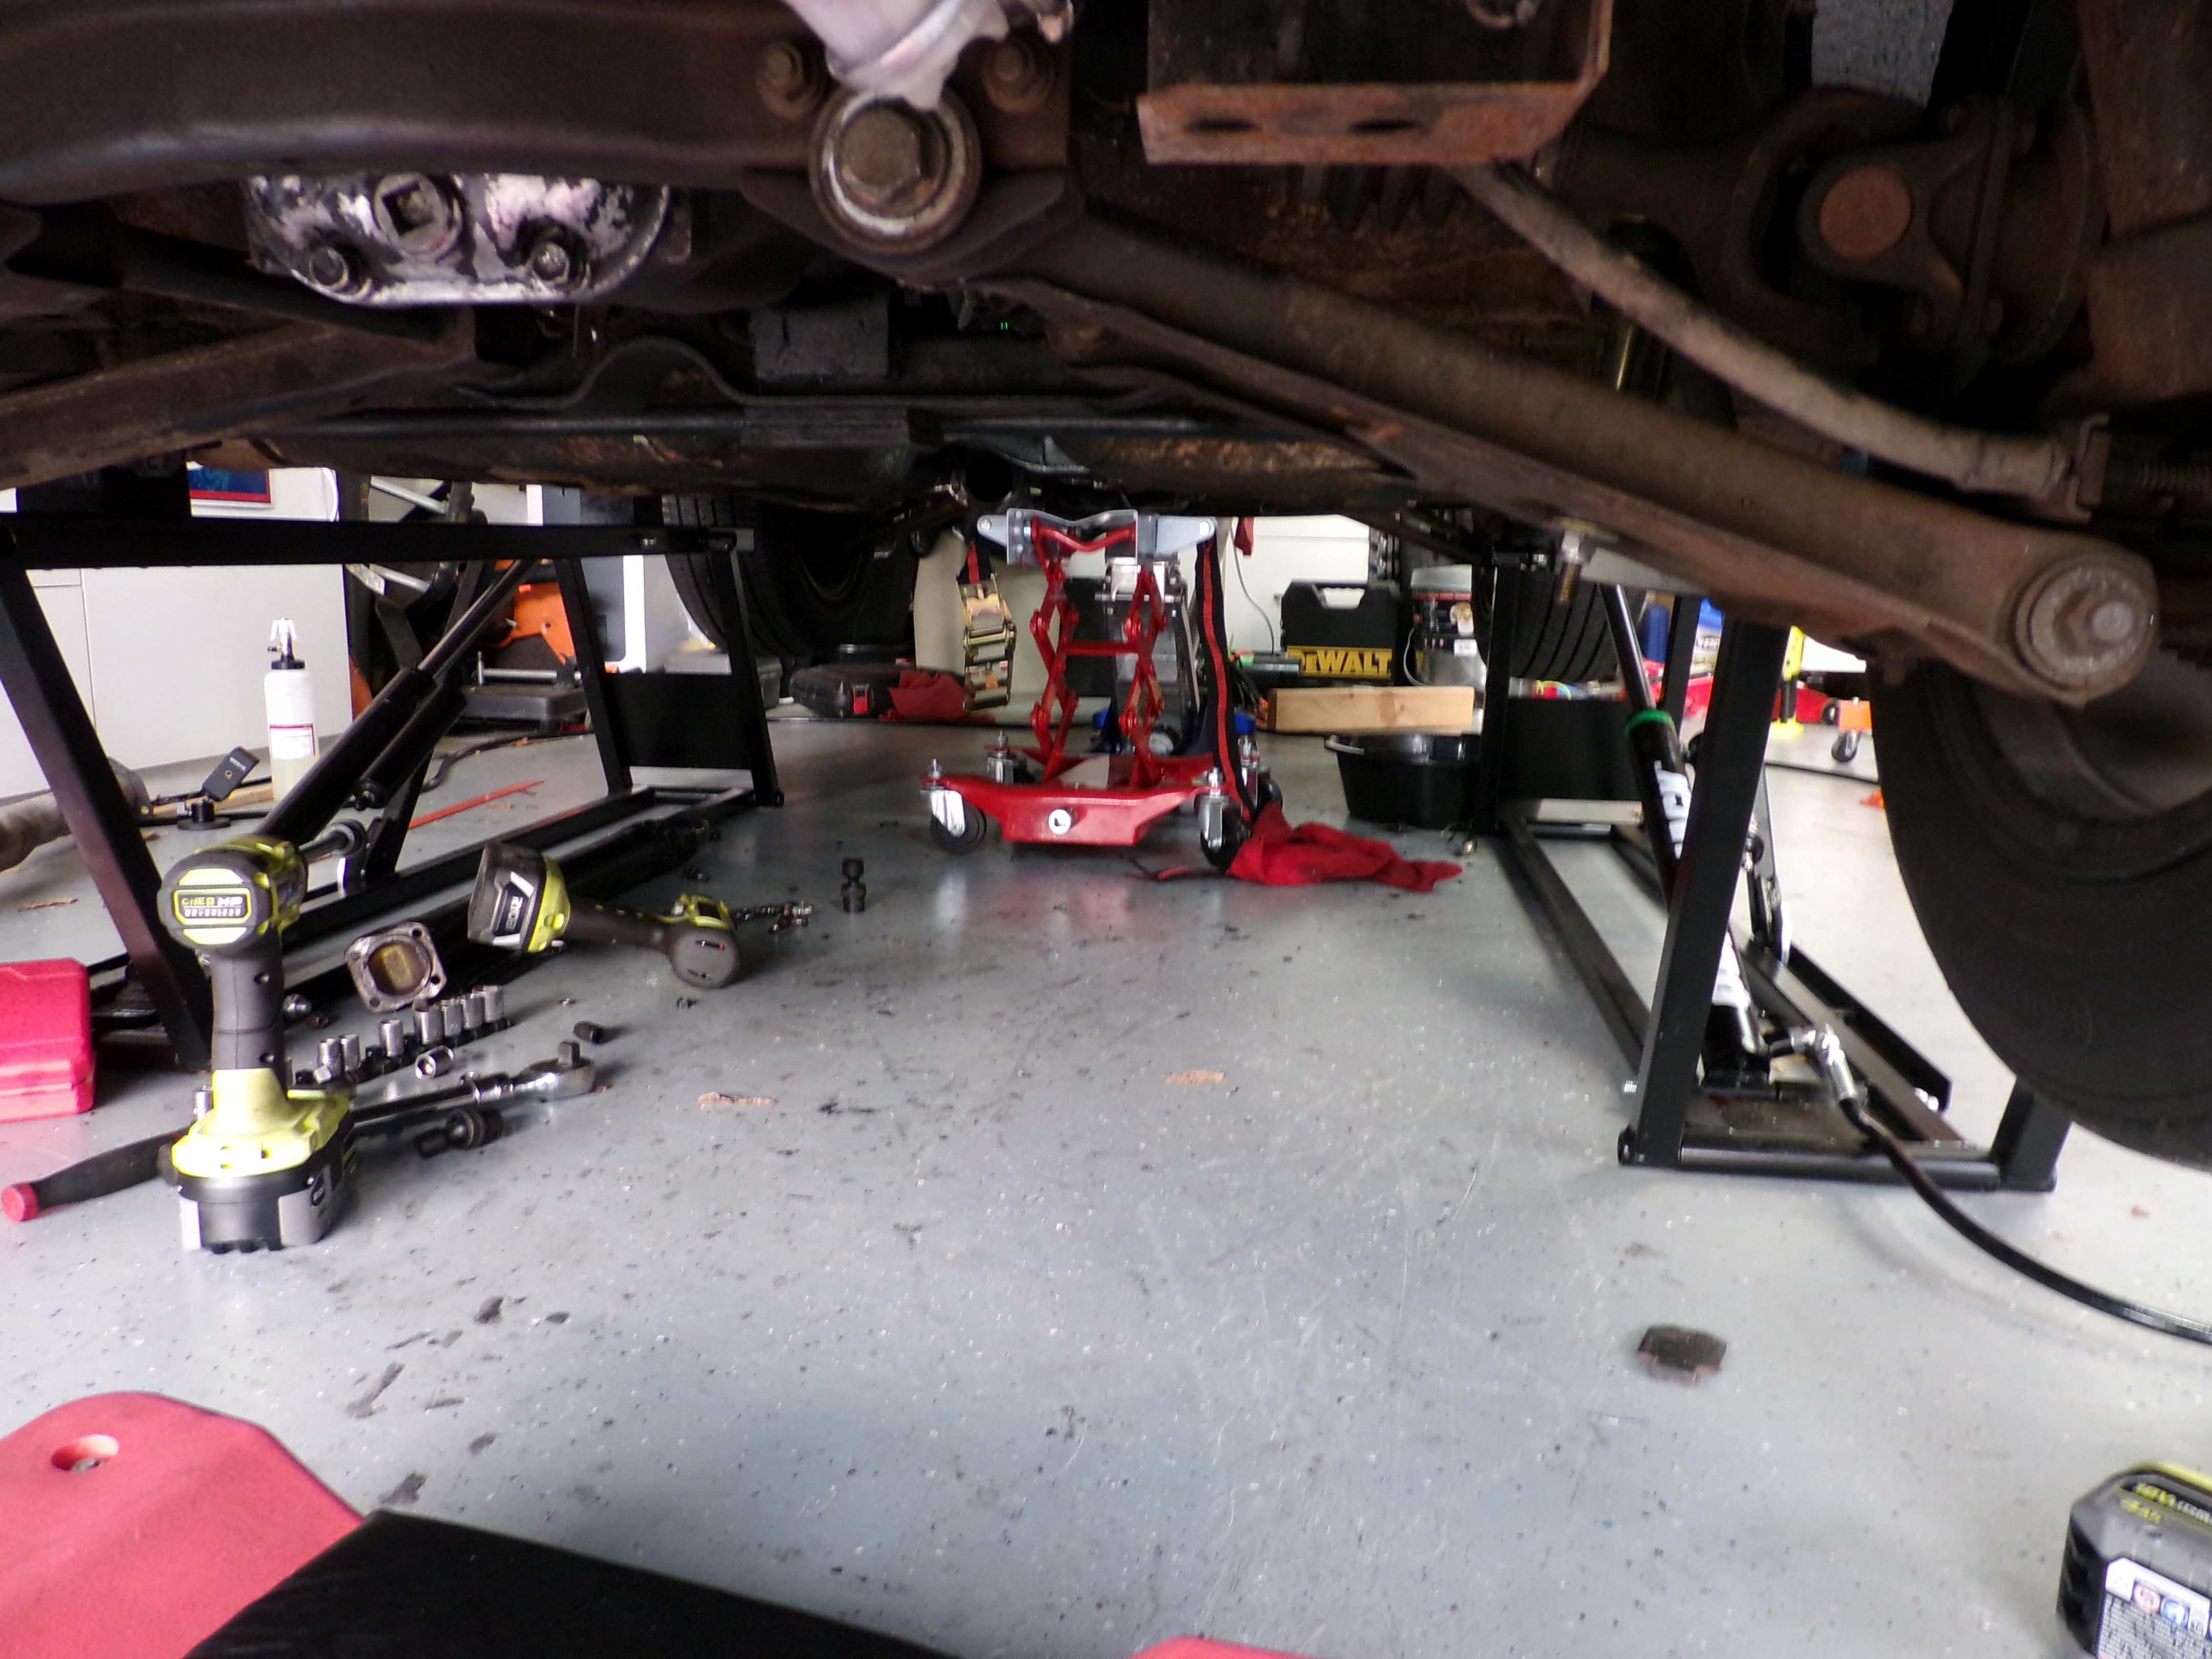
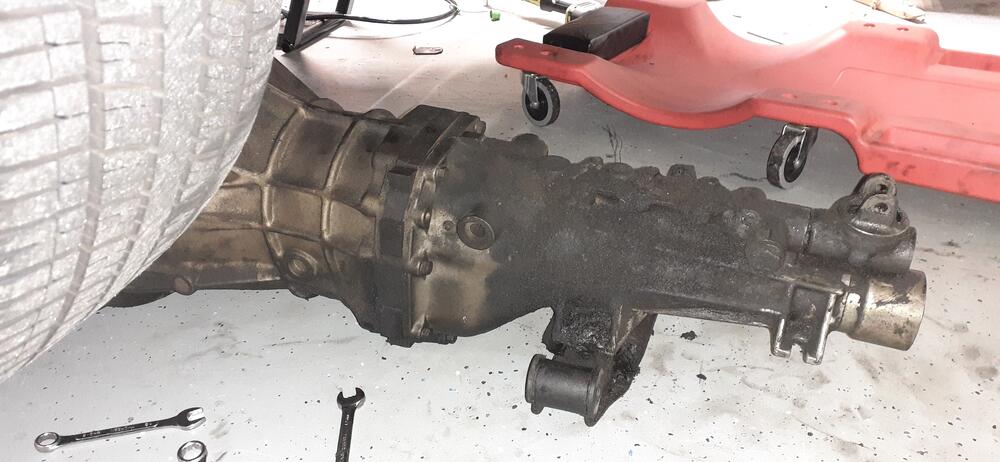
I pulled the 260Z transmission today. Here's the drain plug. That piece of metal lying on the floor was also attached. I also took a picture after I cleaned it. The oil coming out of the transmission was very pretty, all full of glitter. 😲 Soon I had everything else clear, so I was ready to drop the transmission. All I had to do was pull one bell housing and two transmission bolts. After I finally got the transmission clear of the engine and header, I lowered the transmission jack, and the transmission promptly rolled off the jack. I dragged it out to prepare to install the replacement.


 3 points
 -
3 pointsUpdate: took the Z for the safety inspection. It passed and I’ll get it registered Monday. I started the process back in July 2018 and finally met my goal. There are still things to fix, preventative maintainence, and such, but the car is driveable. I’ve learned a lot. I want to thank @Patcon @SteveJ @siteunseen @Av8ferg @Racer X and many others for mentorship getting this build complete. I’ve learned a lot from you folks. I really could not have done this without your wisdom.3 points
-
2 points
-
2 pointsInteresting.. i got a few myself and yup.. there is one that's leaking when i put the hose in a sertain wrong position.. What the brand is, i don't know, came long ago with the compressor.. I like to hear which are the better ones.. I hear them leak in pretty much every garage i come.. very annoying!!! 🙉 pssssss.... psssssss.... 😠2 points
-
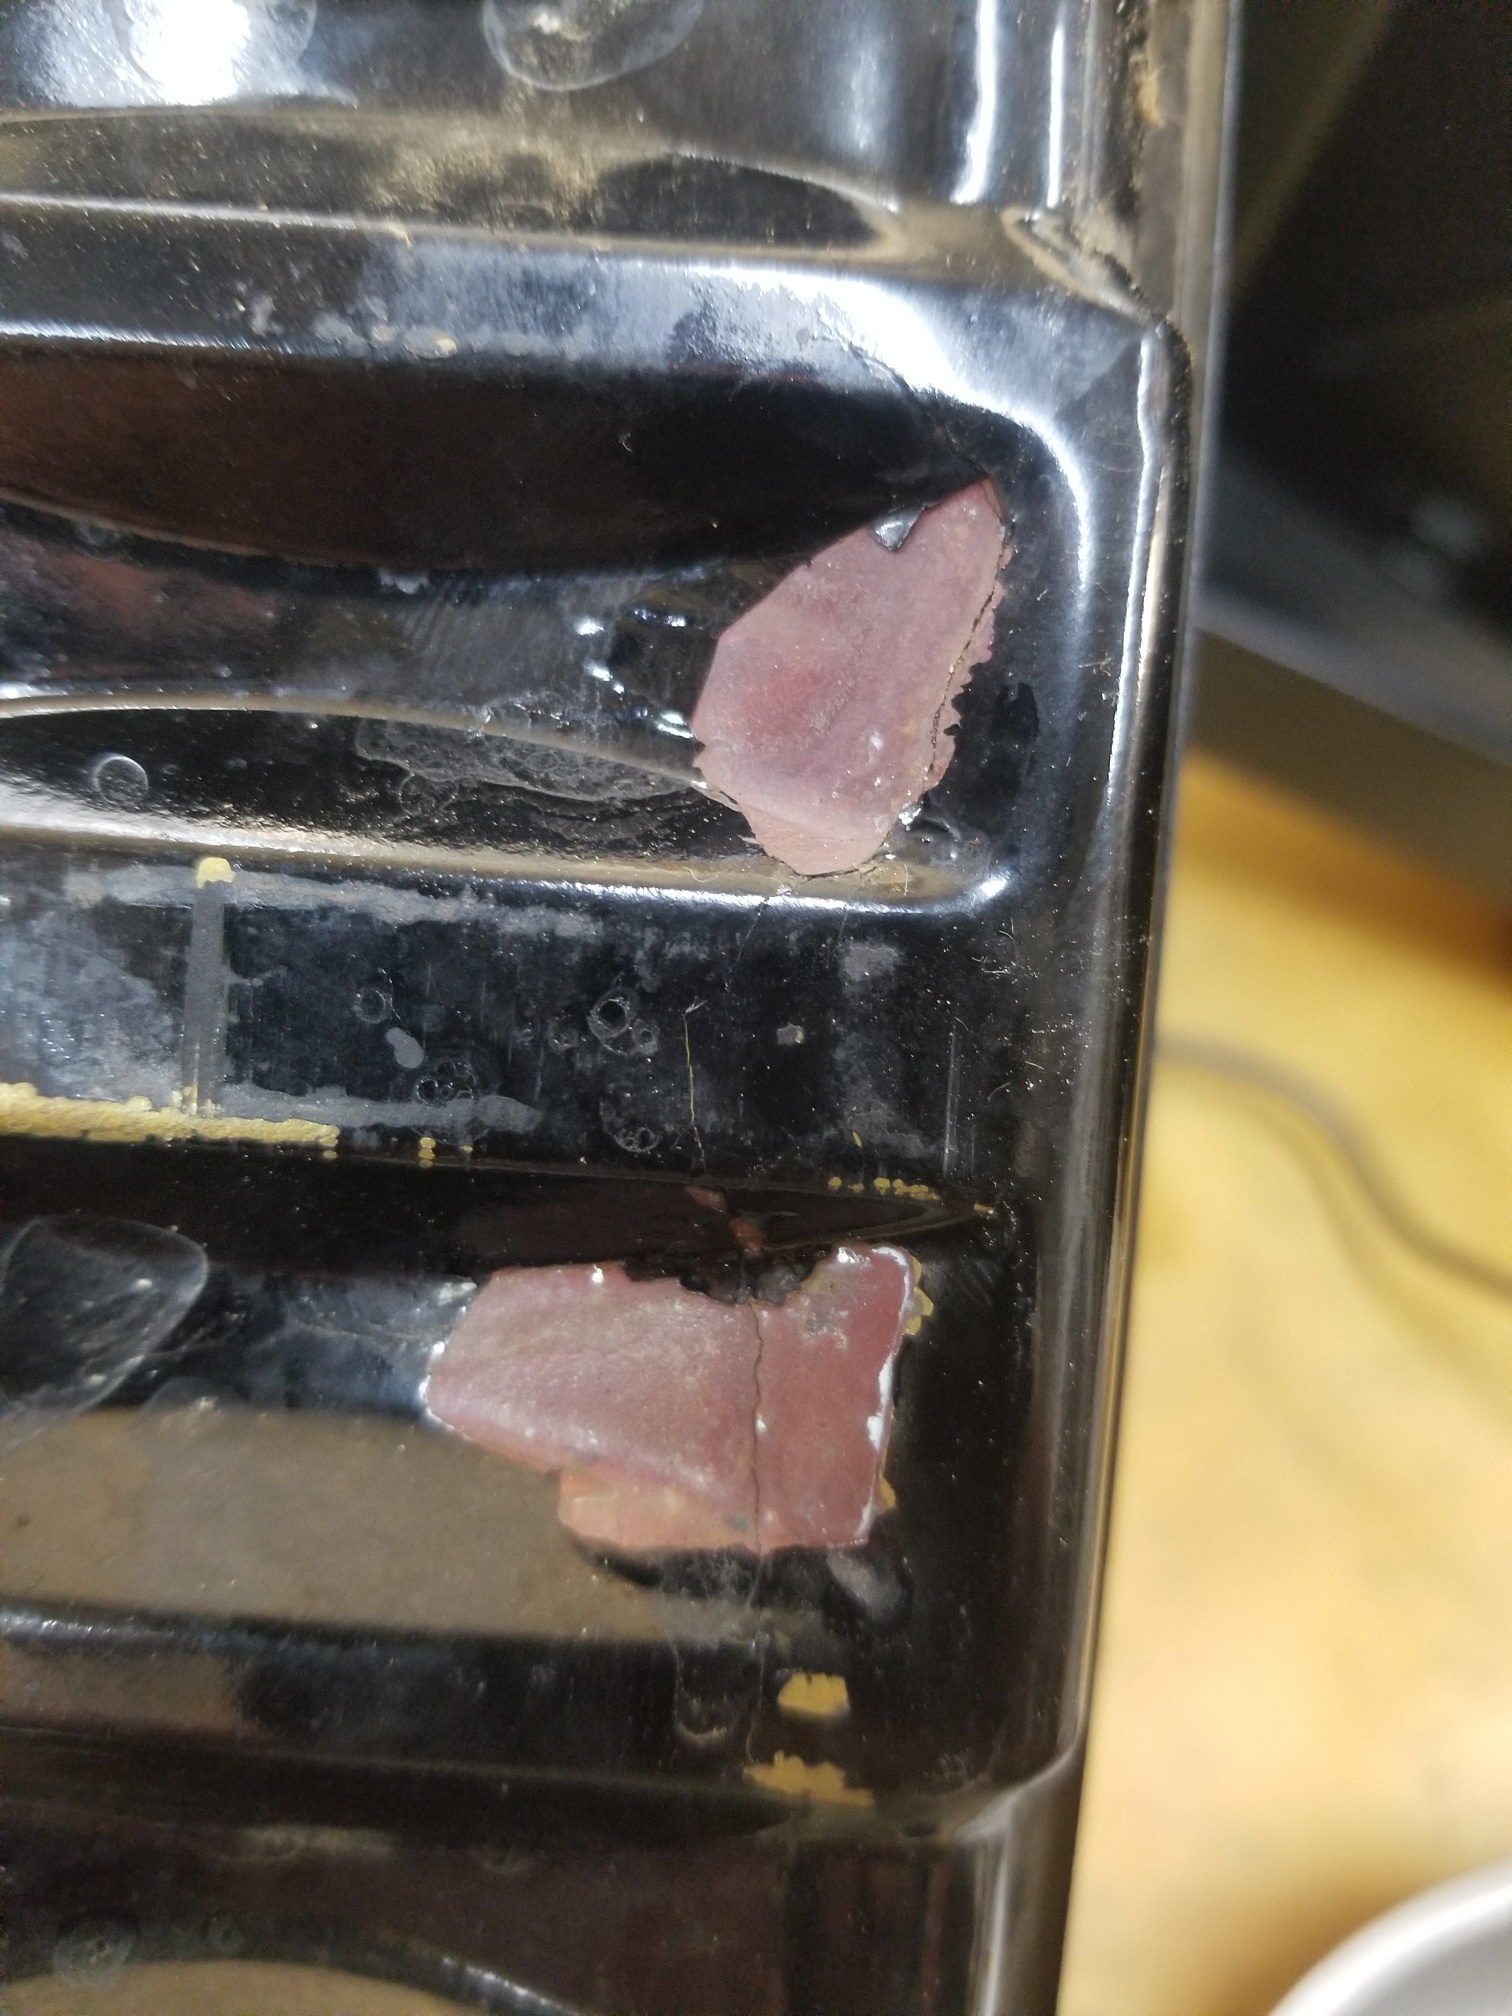
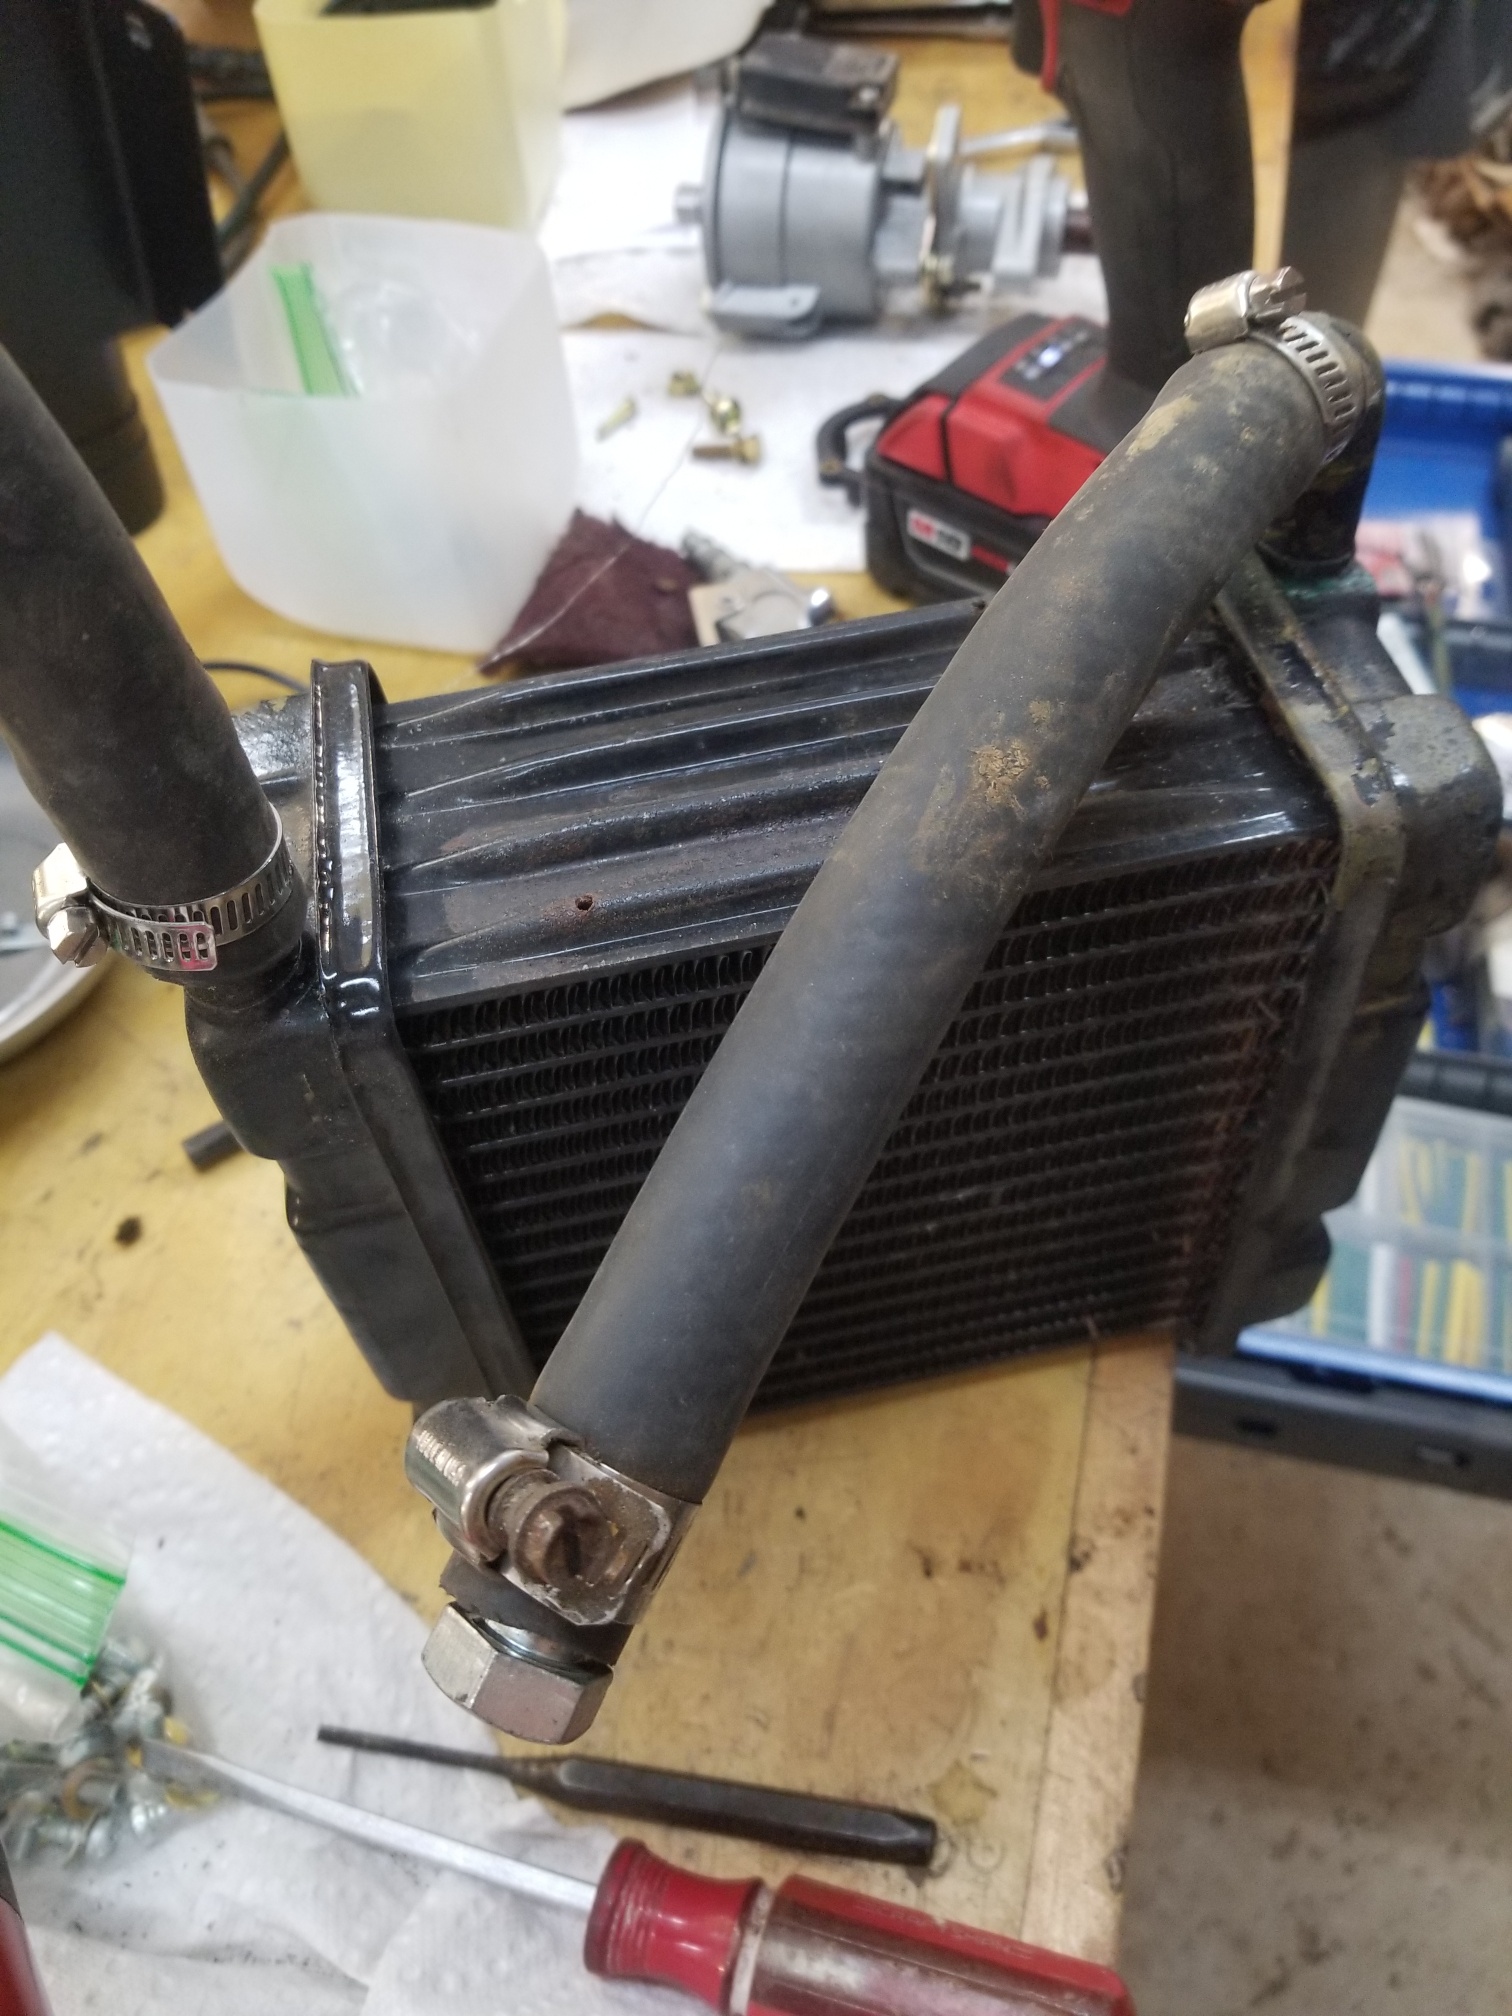
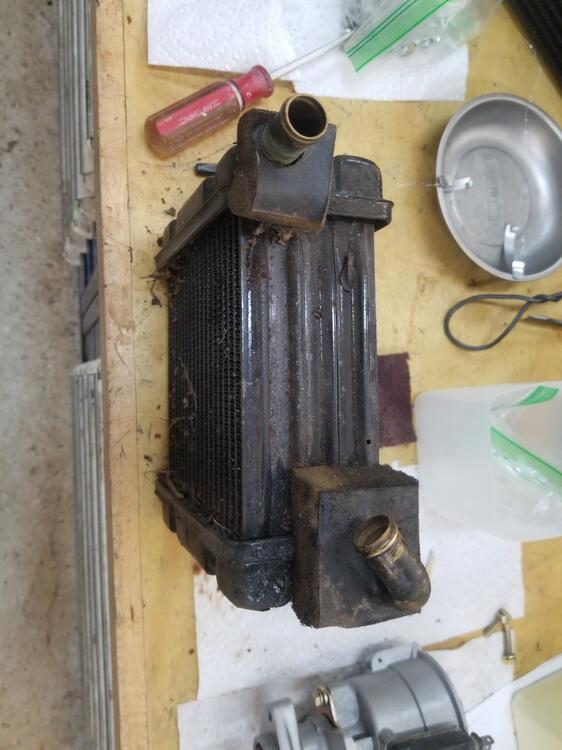
2 pointsI was working on the heater box some today. Tested the heater core that came in Lily, it's cracked! 😞 They are evidently, not readily available. "Brassworks" will custom make you one for $425! So I dug around in the shop and found another one. It tested good. They both appear to be factory units.


 2 points
 -
2 pointsFunny side note: I gave a shout out on FB to the garage who installed the exhaust. Another garage went into attack mode against the guys who did my install. Bottom line, if you say you could have done it better, then advertise your garage or speak up when potential customers are soliciting a service. Why attack a build done by a business competitor when you had an opportunity to advertise and didn’t?2 points
-
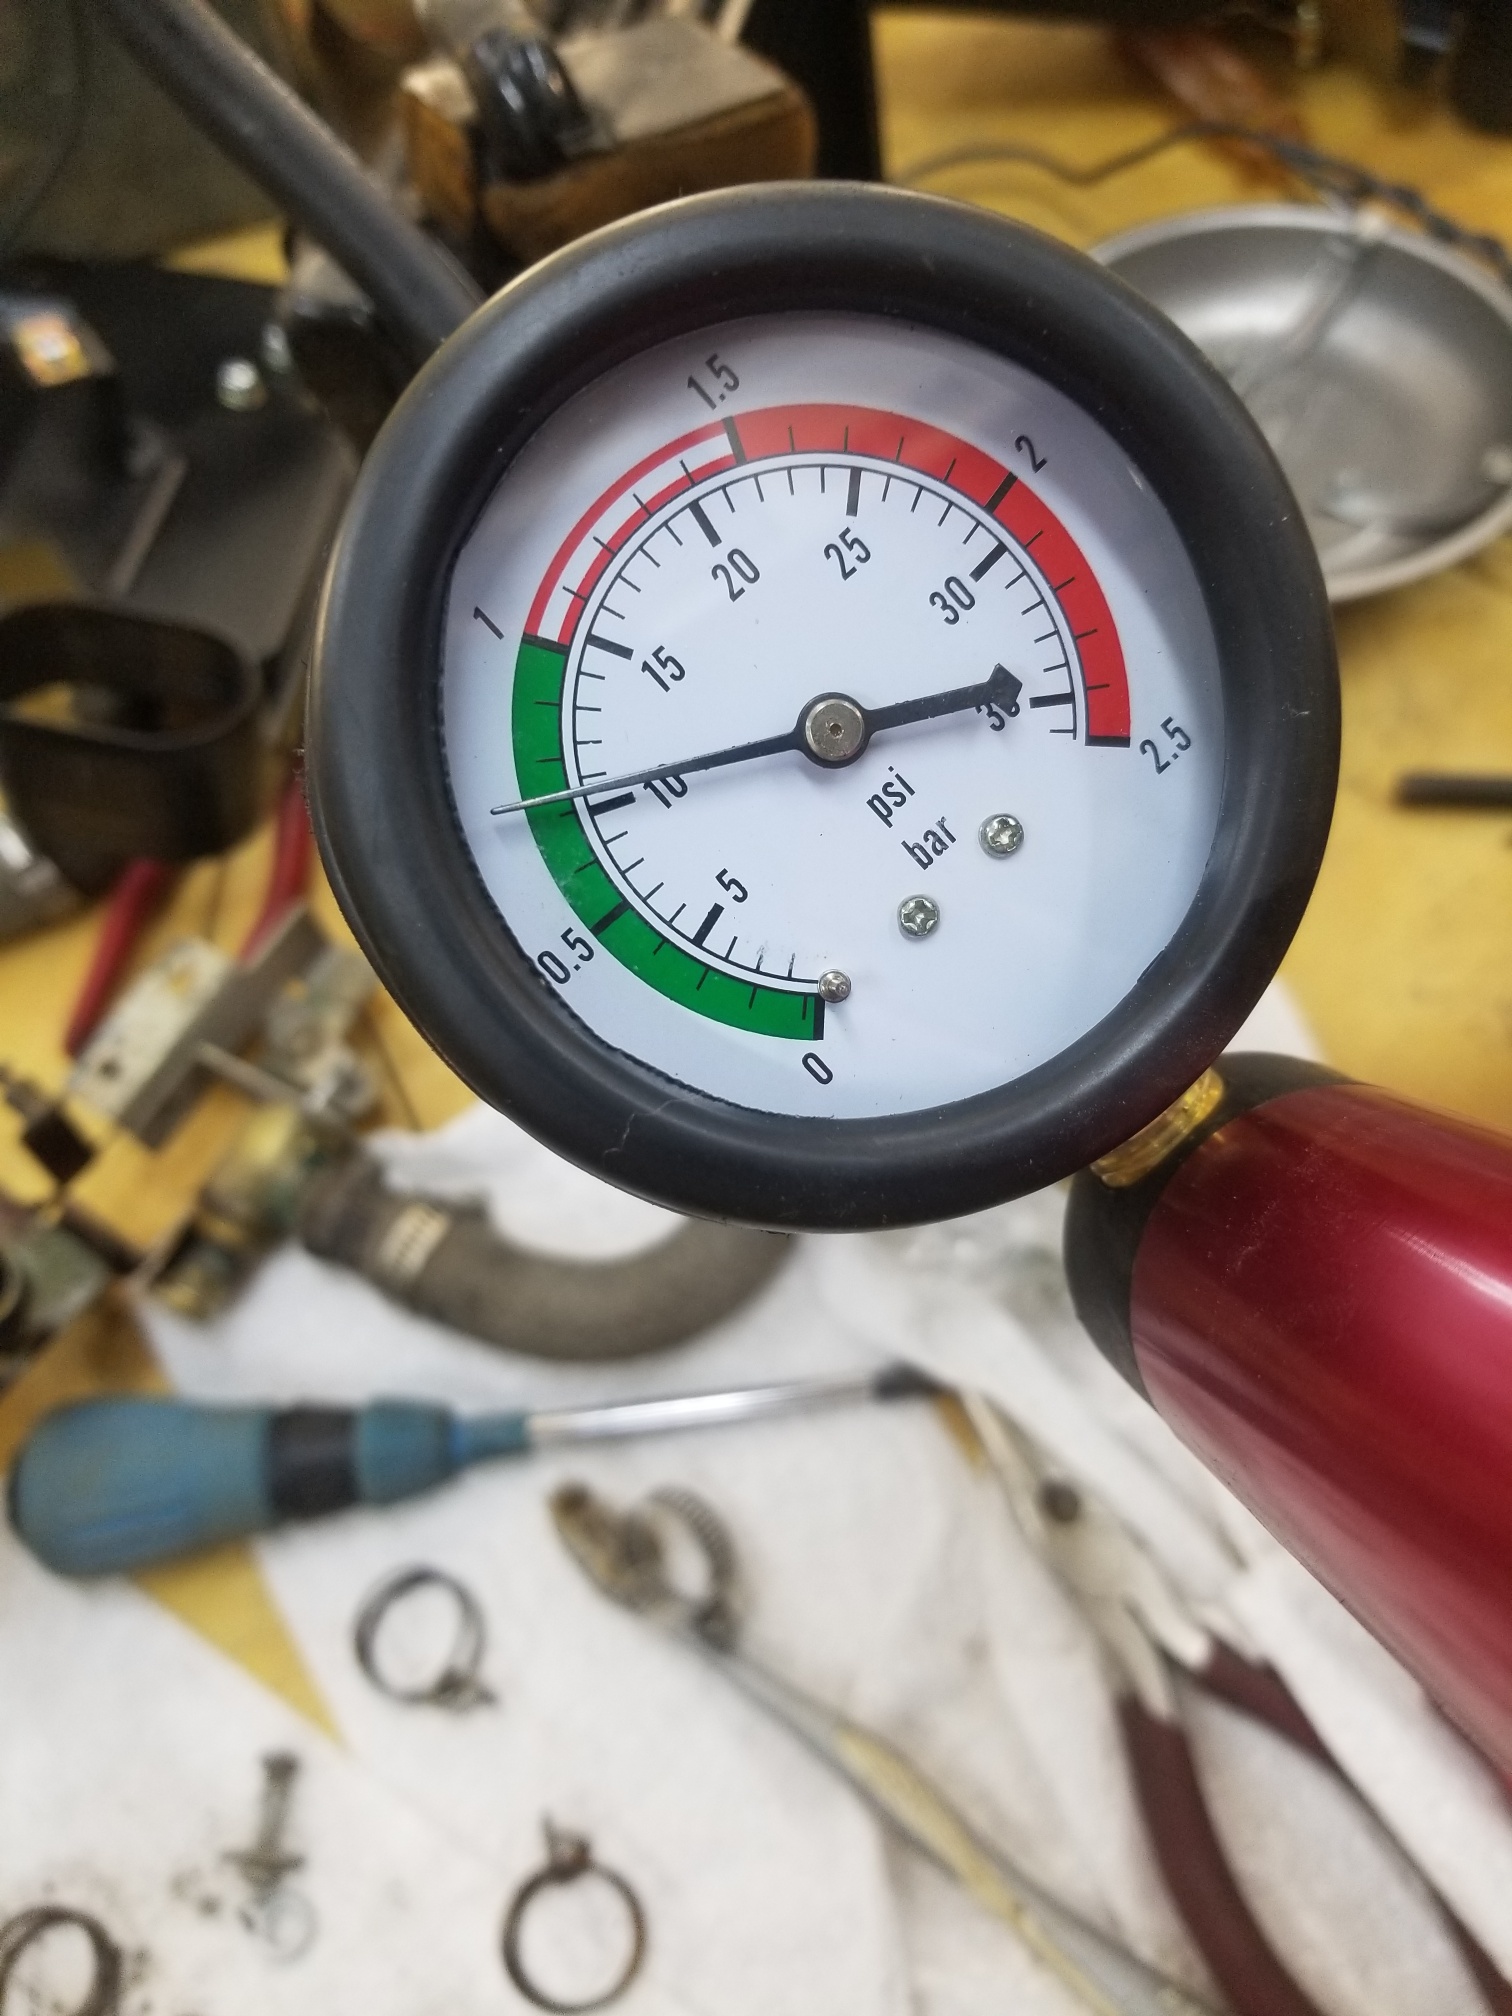
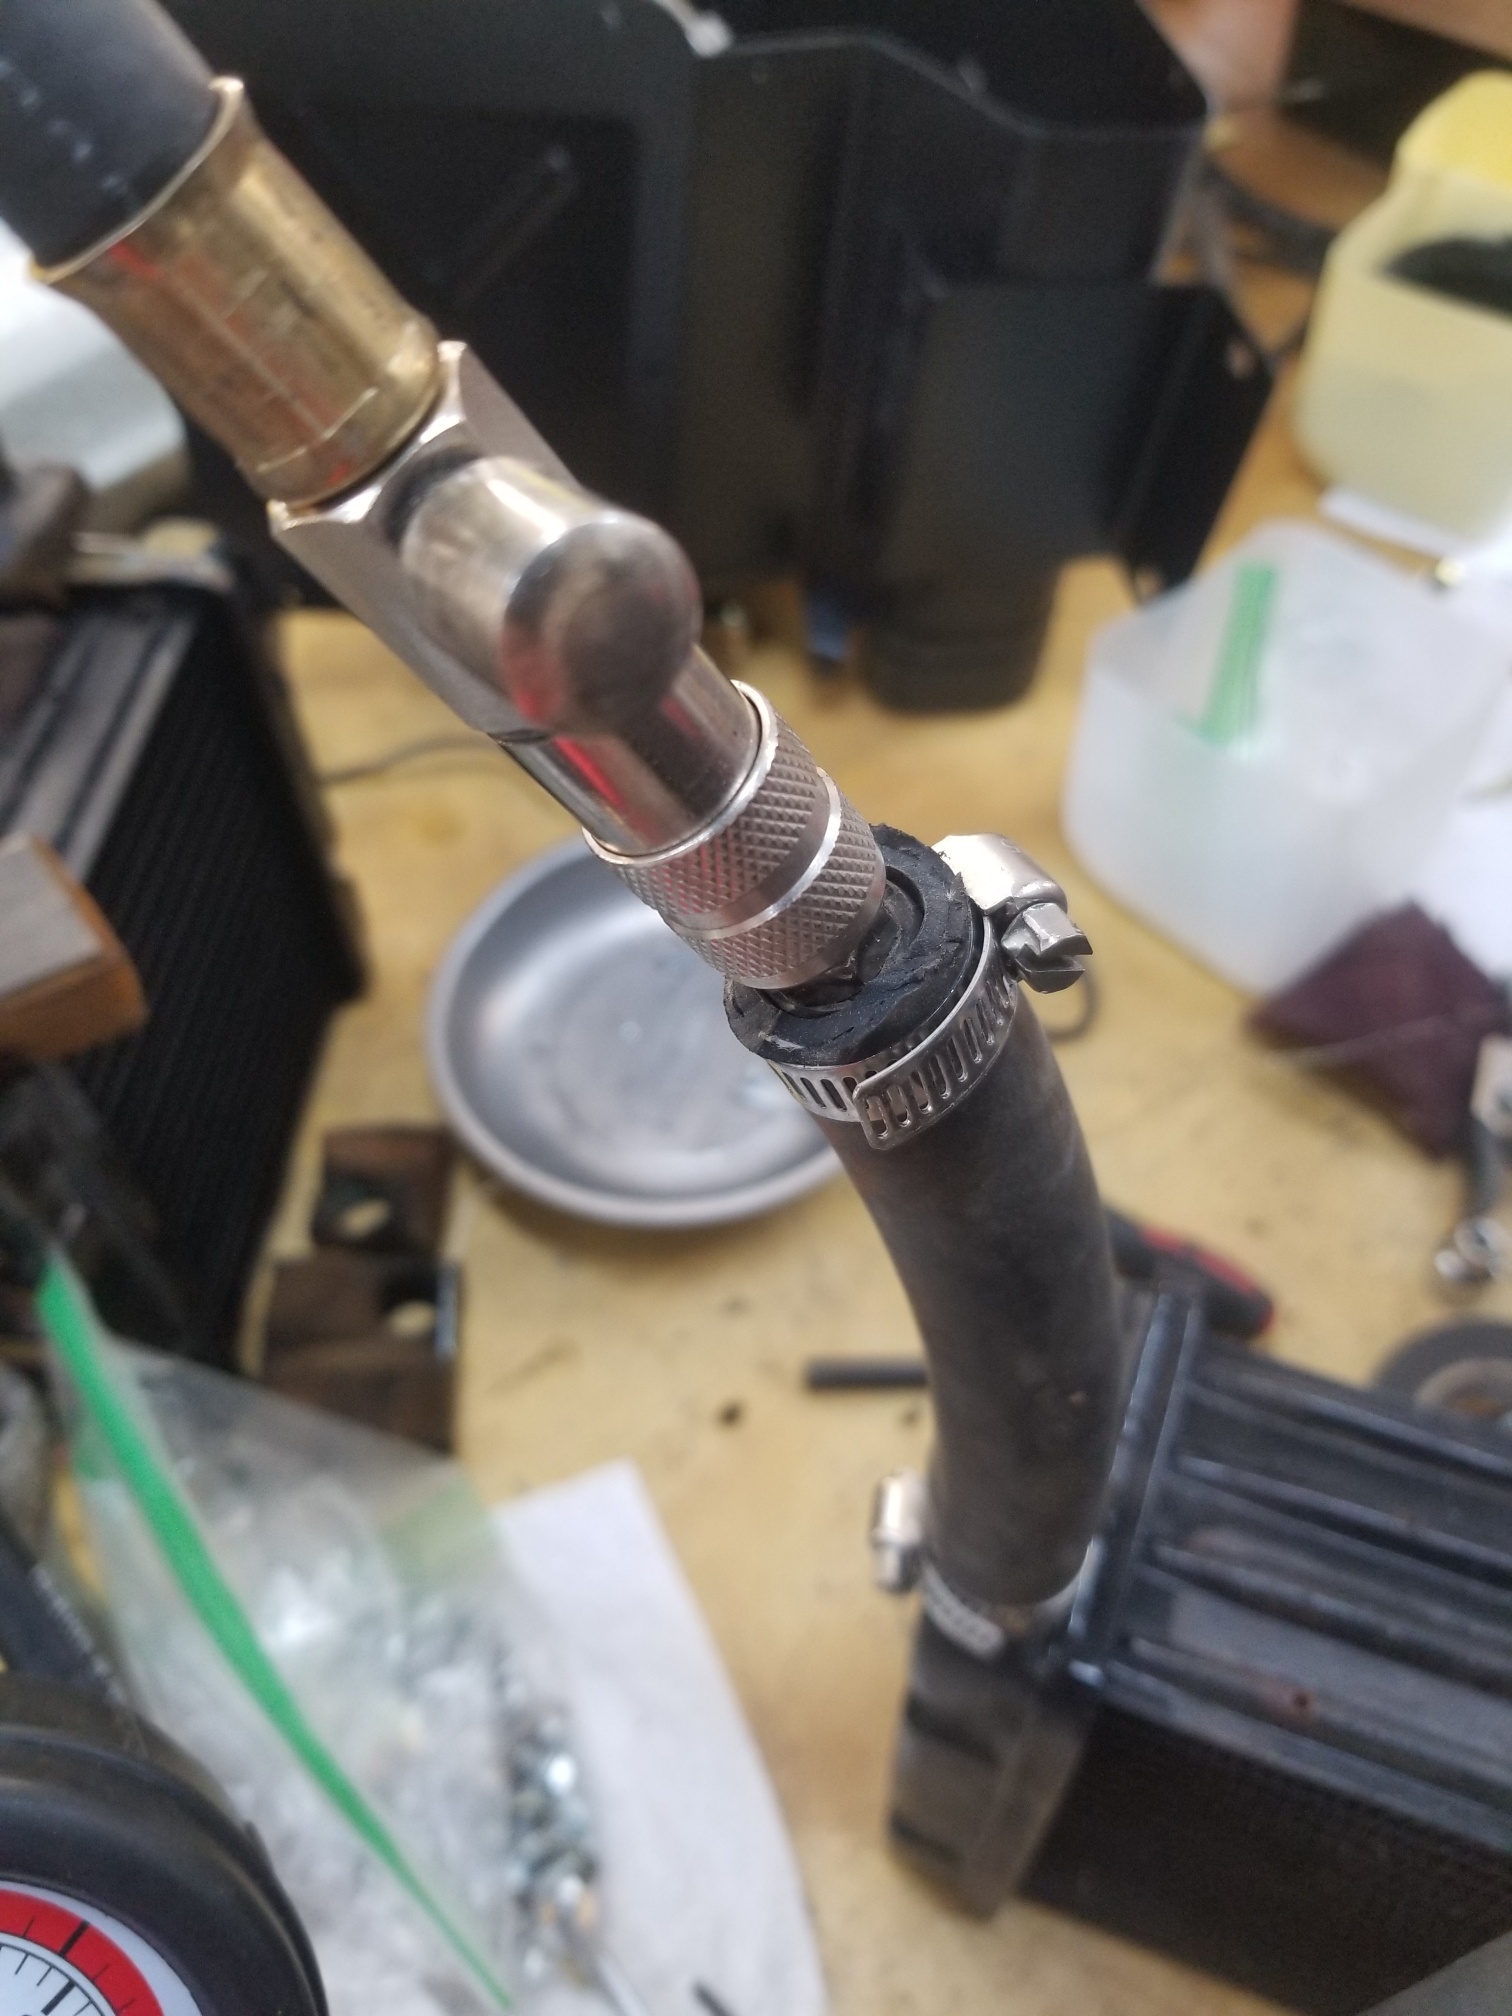
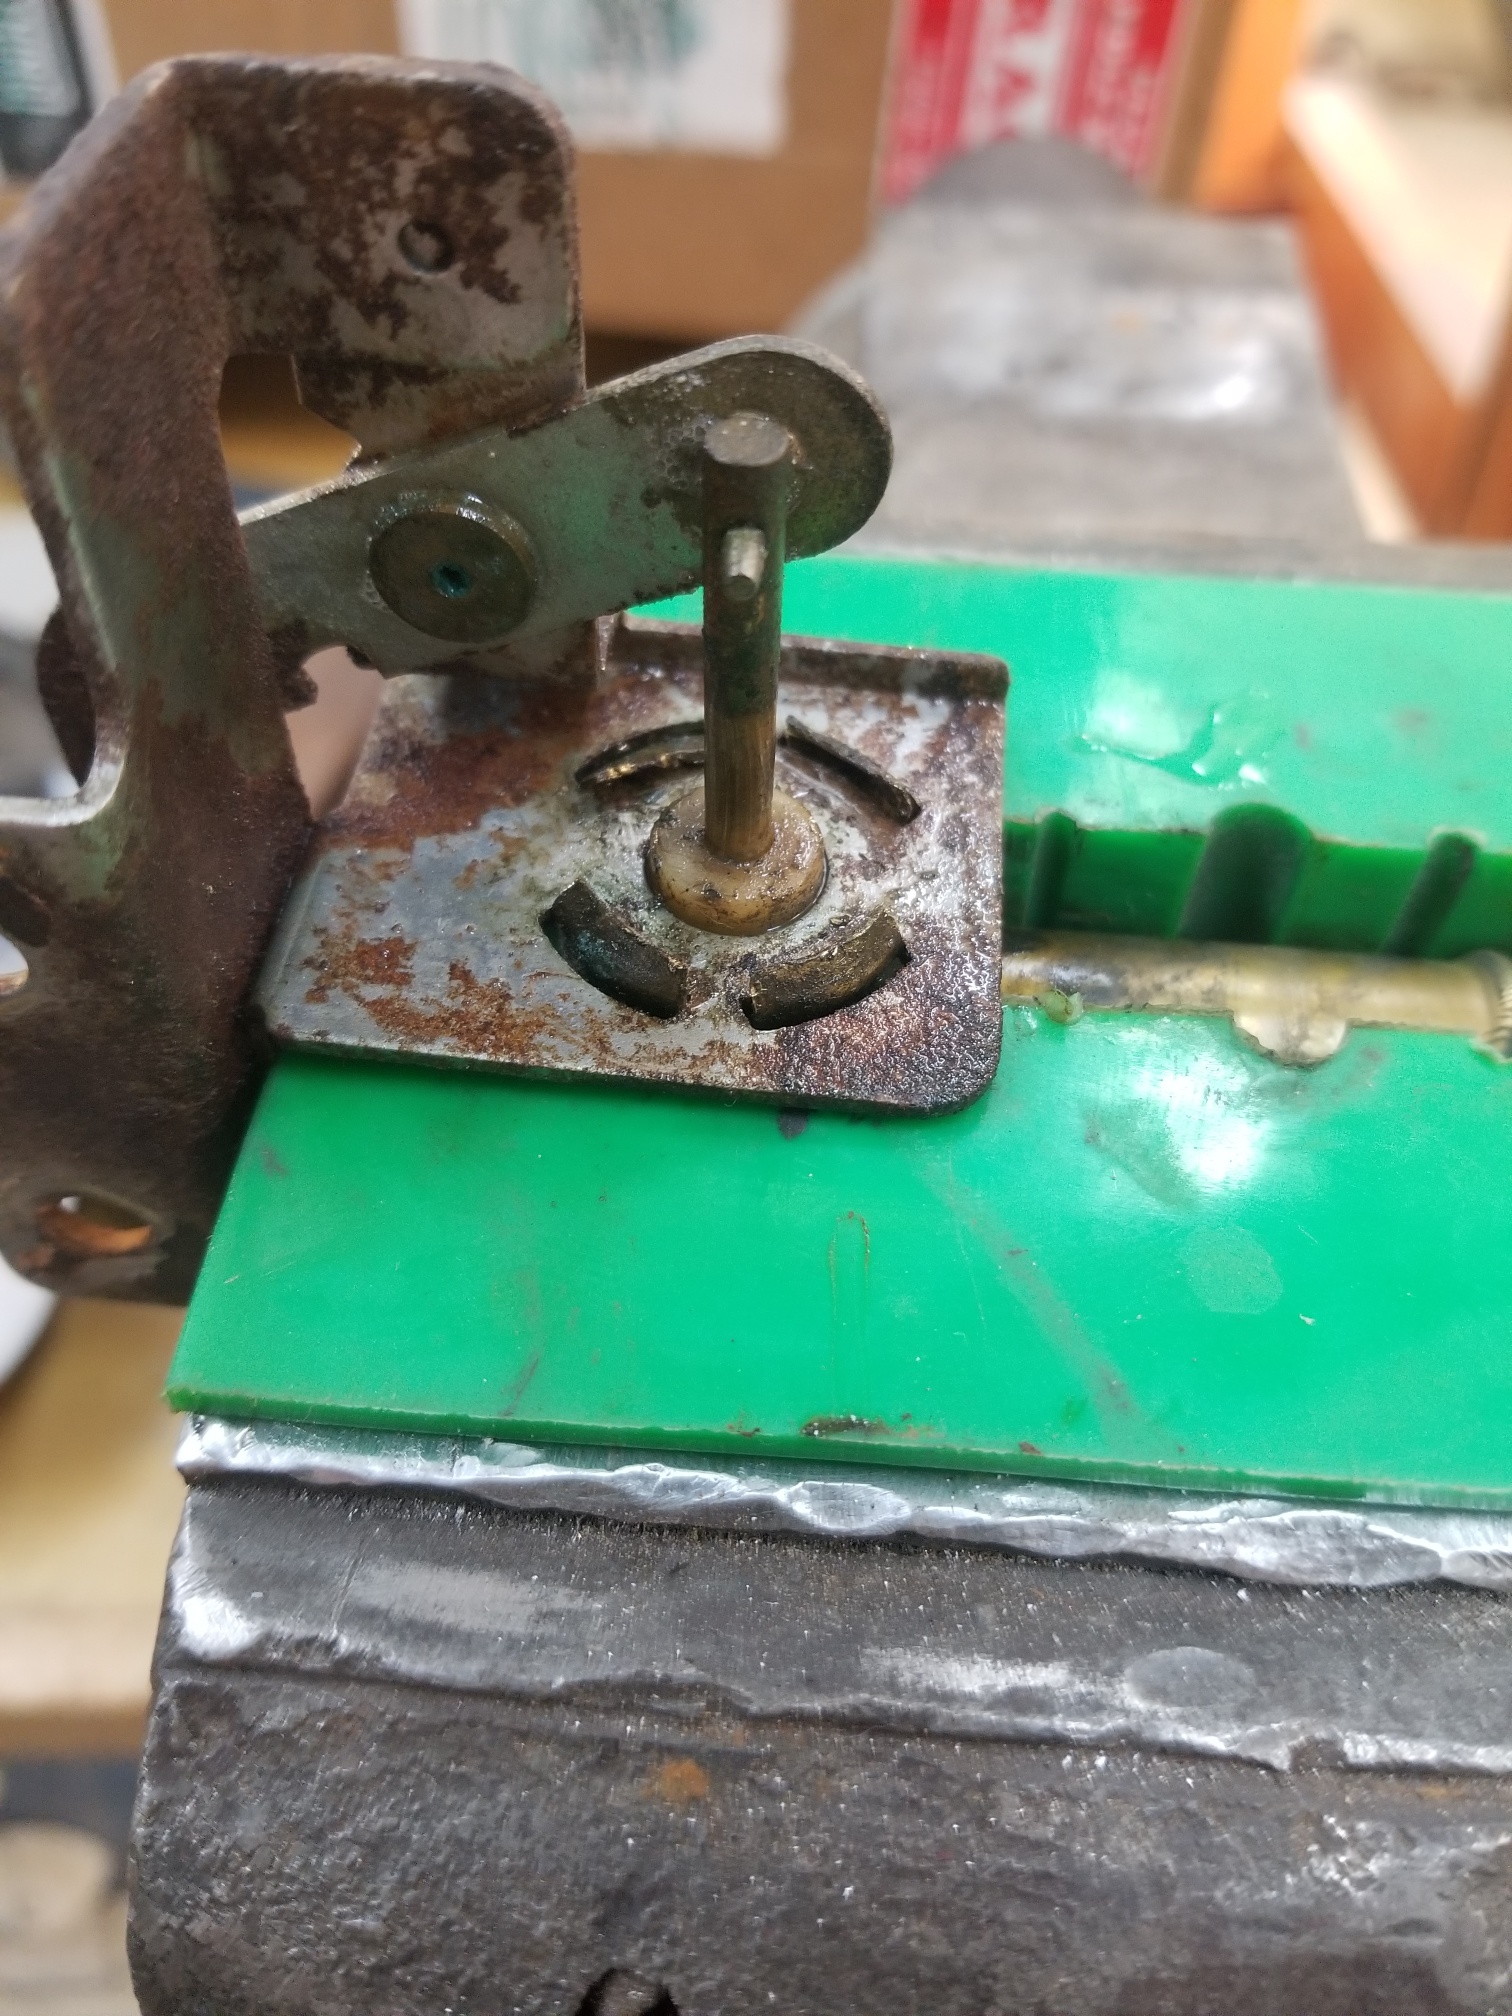
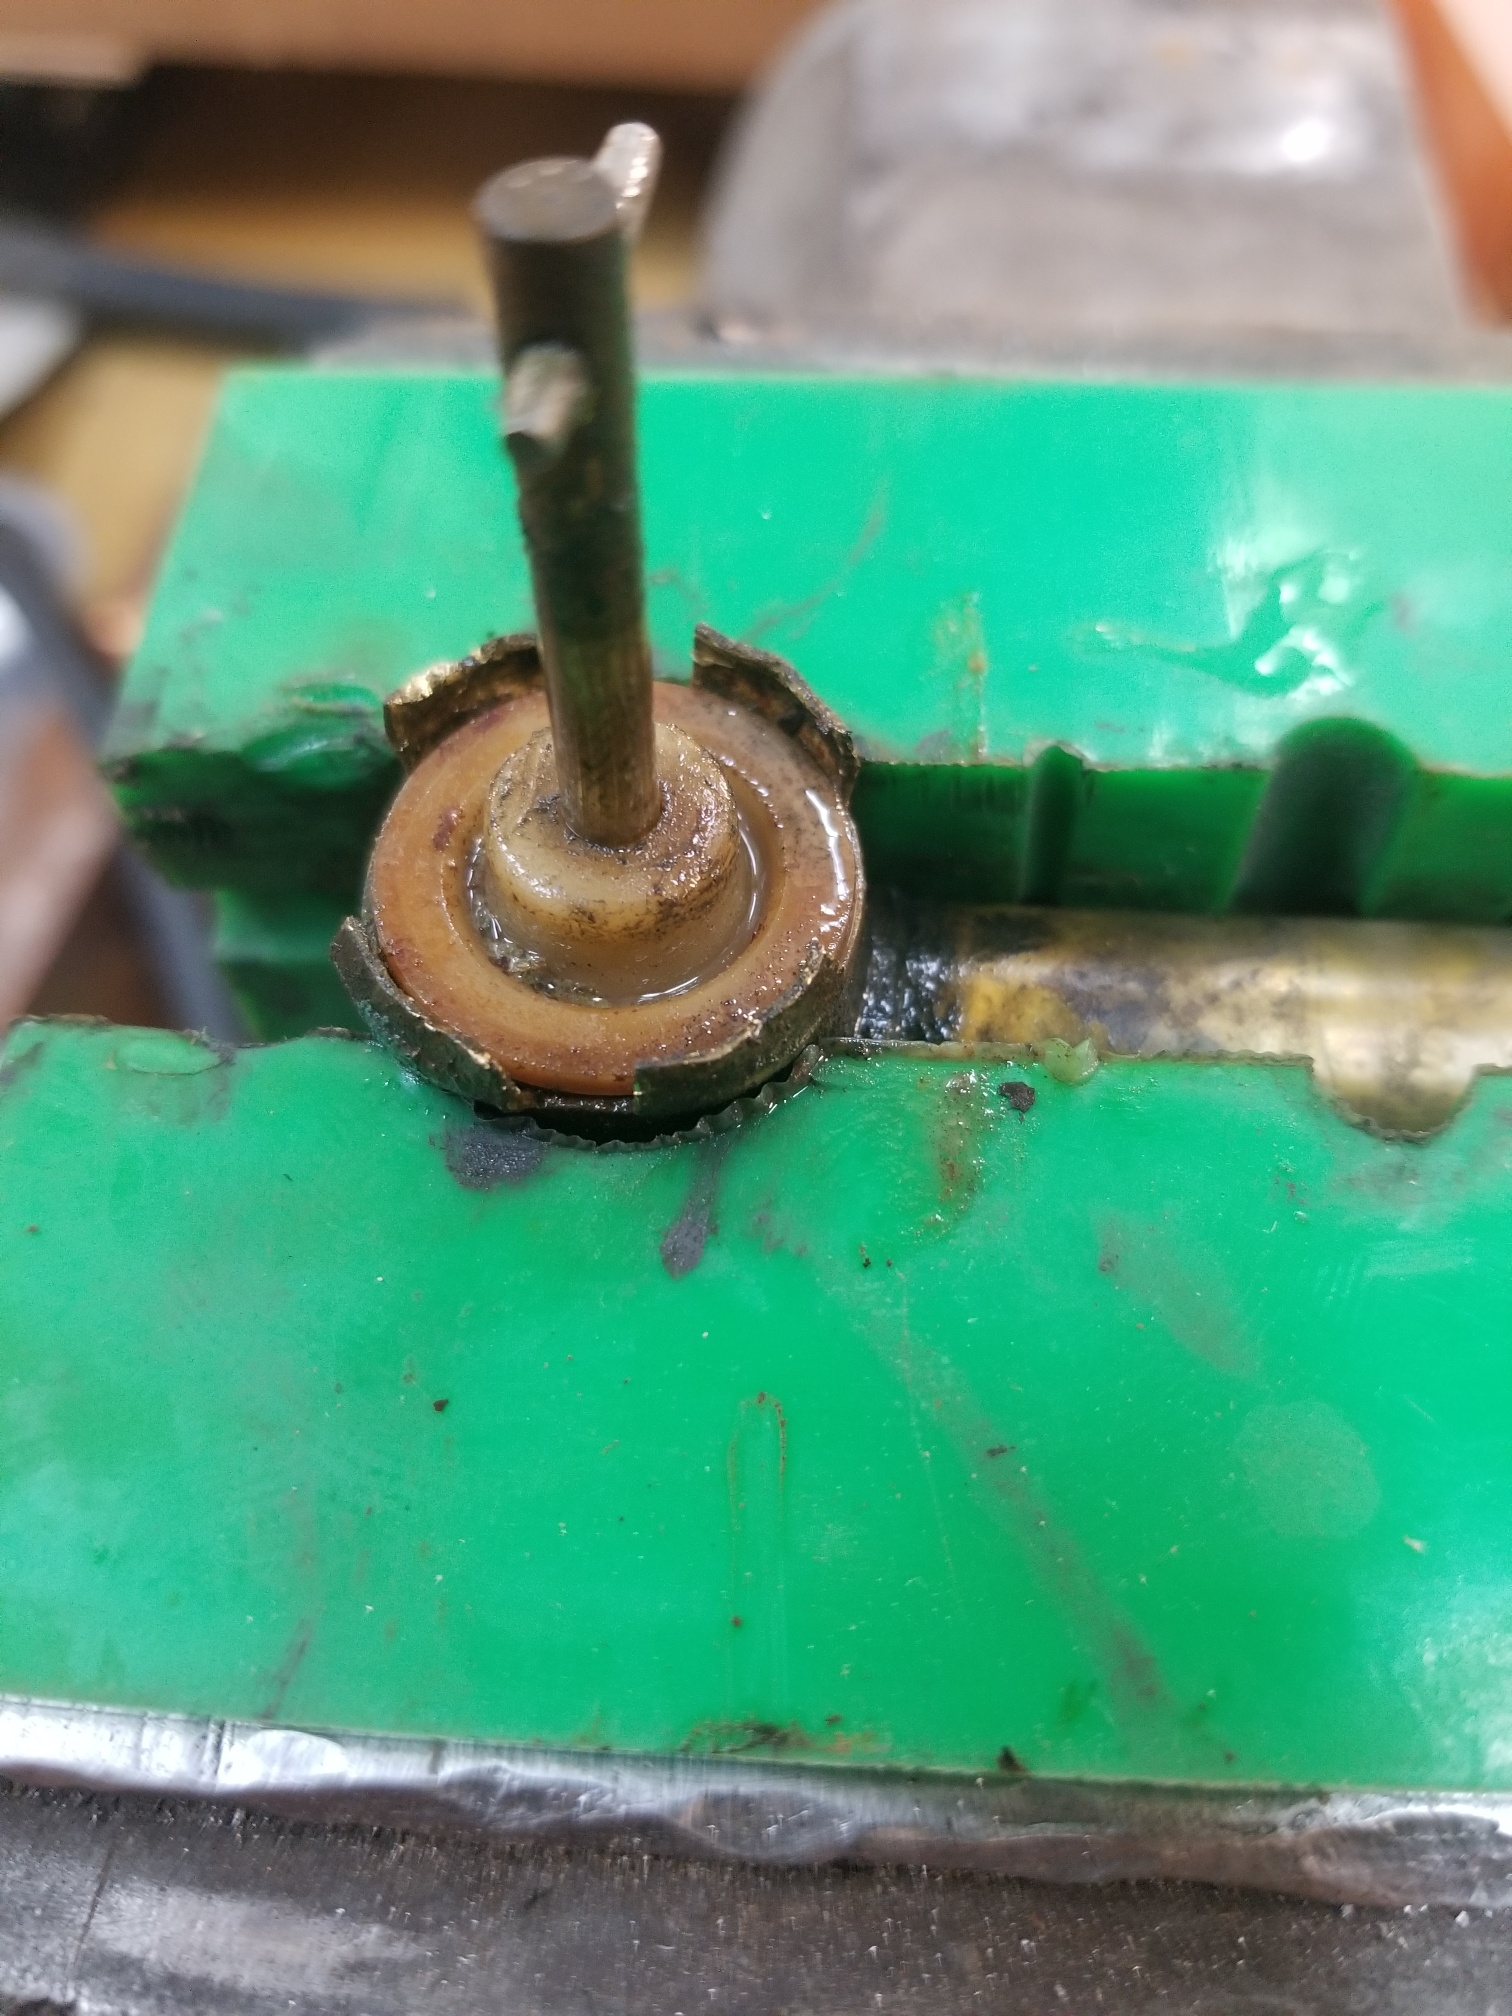
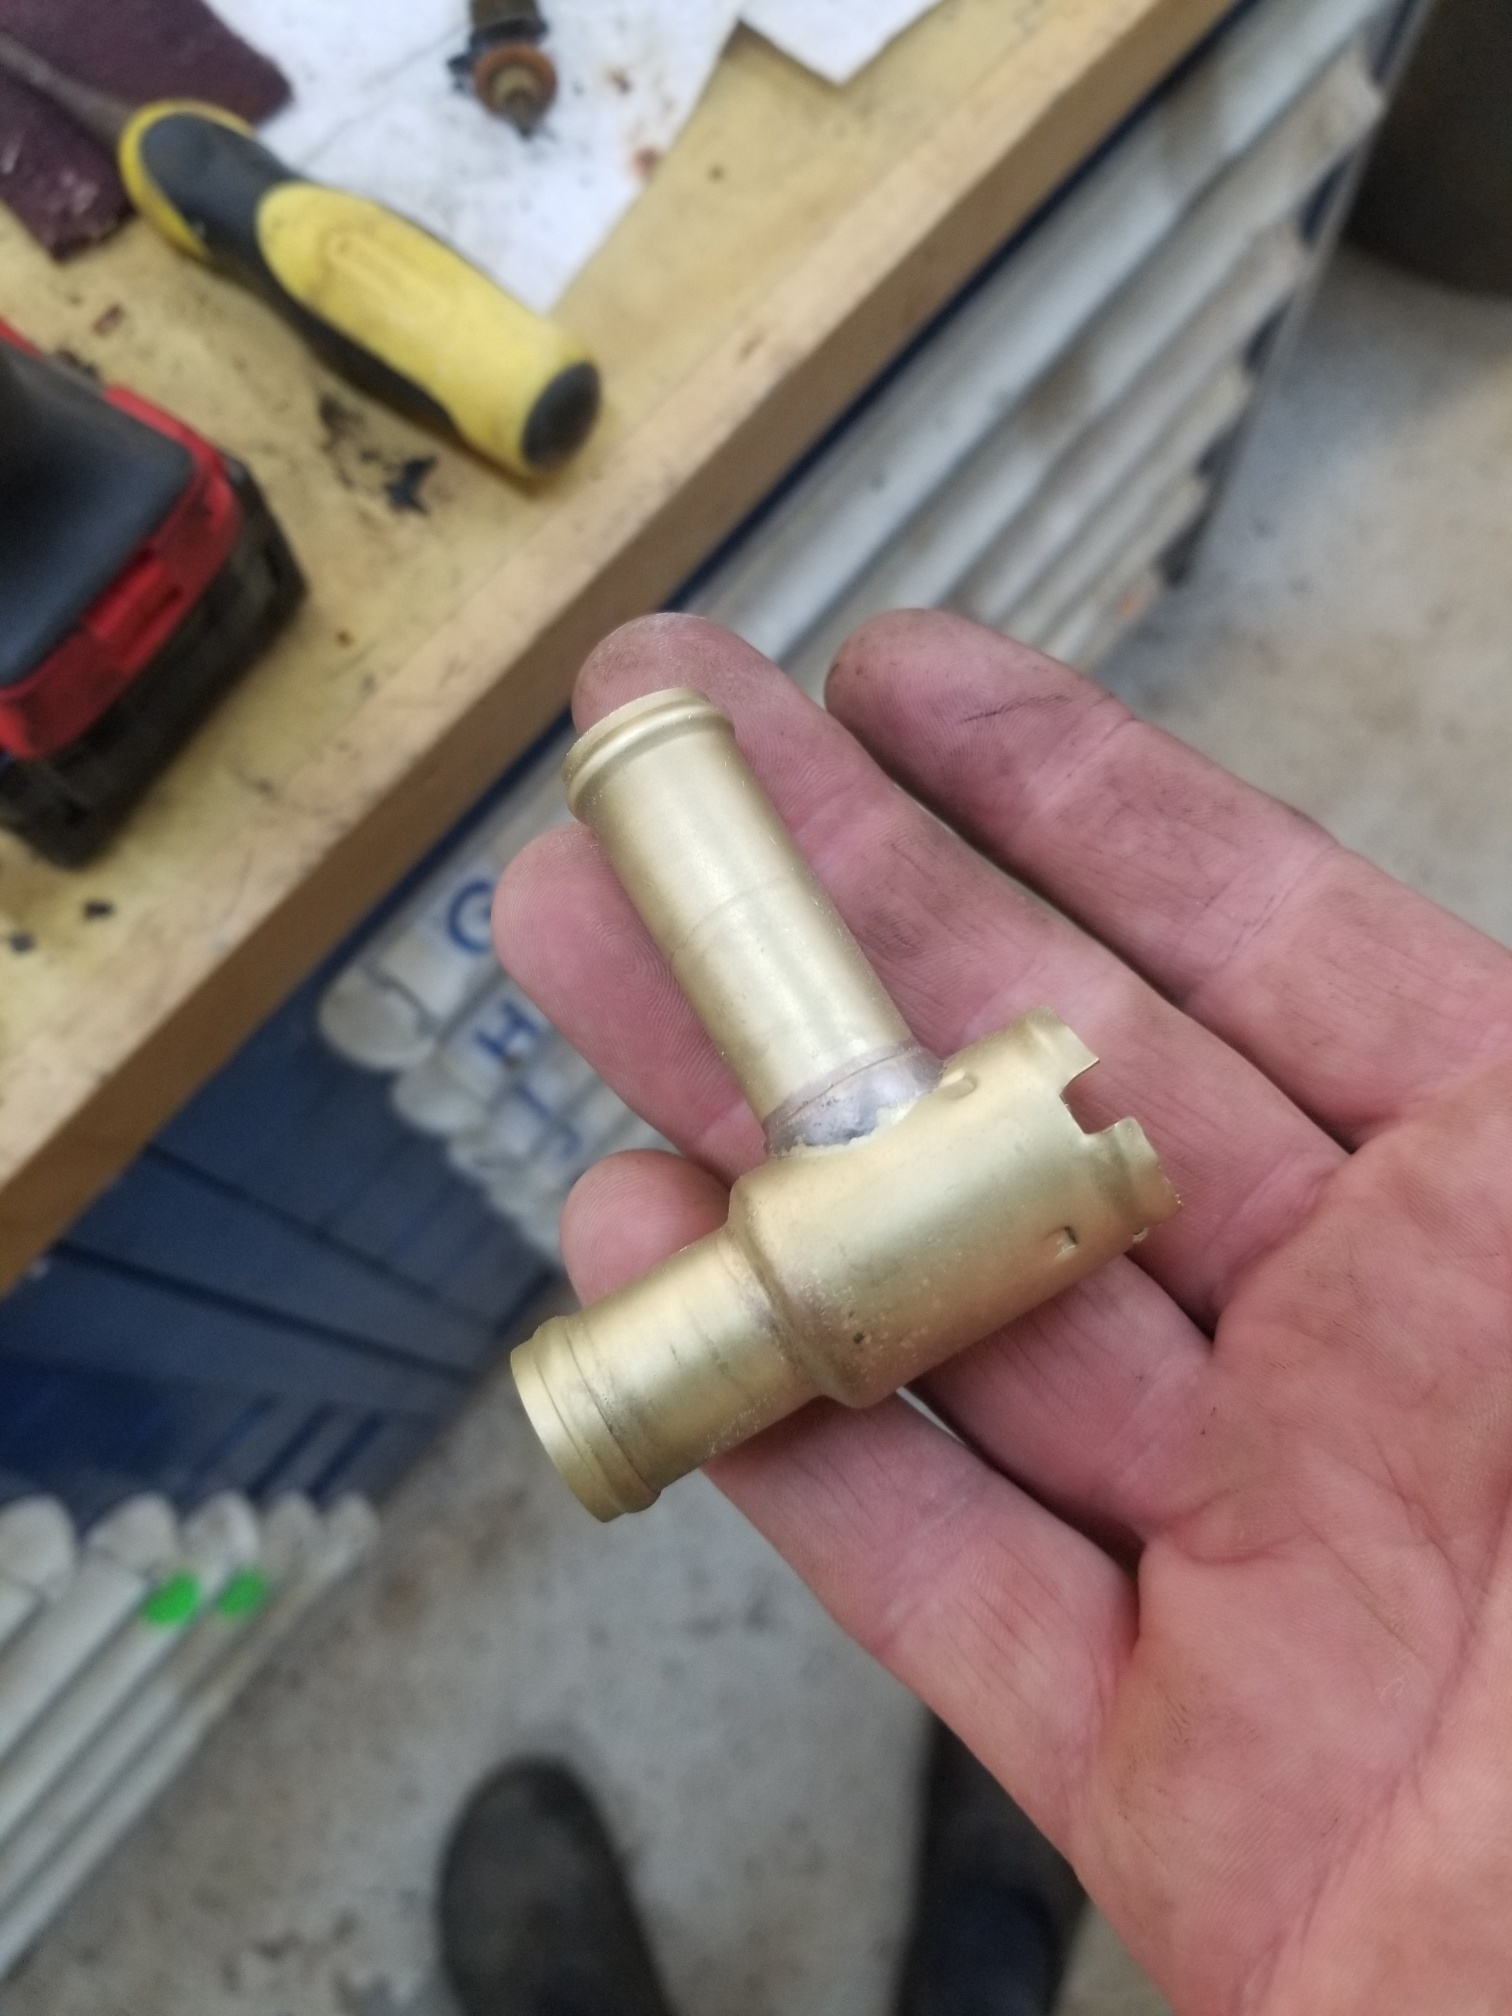
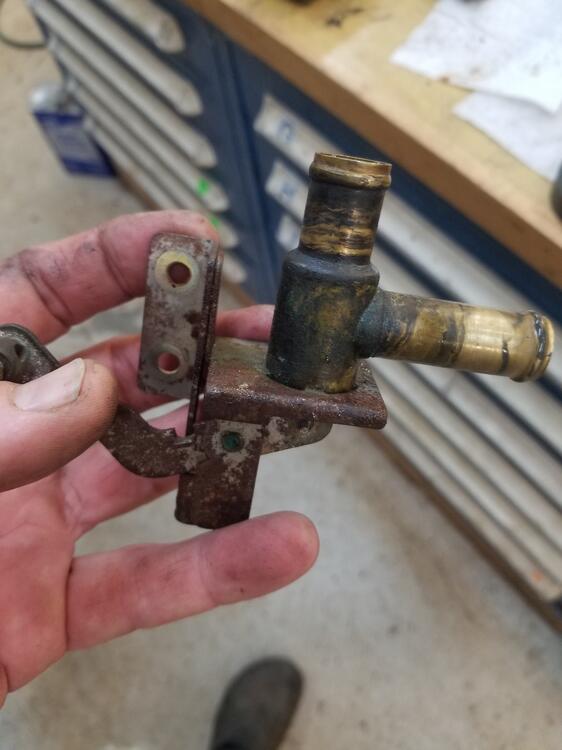
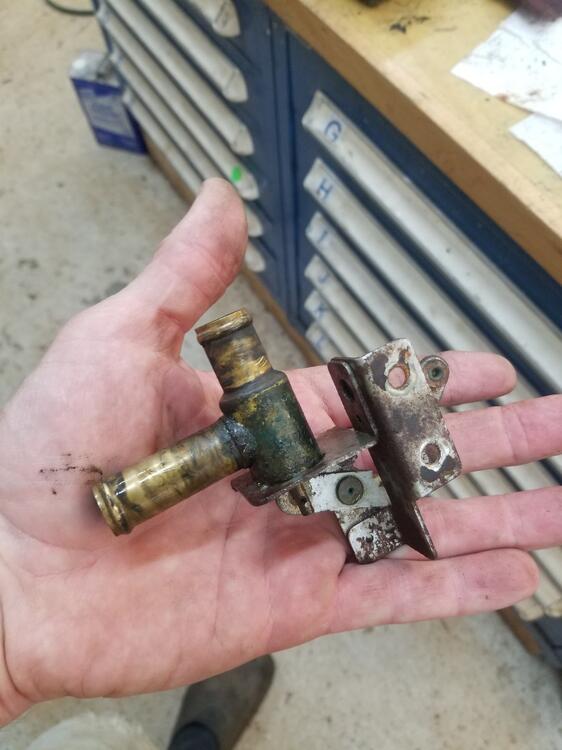
1 pointSo I am messing around with heater boxes right now and I was pressure testing two heater valves I had. I cobbled together some hoses to attach my coolant tester to. One valve did ok, although it leaks slightly around the push rod when it's being actuated. The other leaks badly as the junction of the brass body to the steel bracketry. So in the best Captain Obvious manner, I decided to take it apart! Folded the ears back and removed the bracketry The internals just pull out after that There is a square O ring seal between the hard plastic end and an inner washer. I think if it were replaced the valve would seal up. I've started looking for suitable O rings without having to buy a 100qty. Bead blasted the valve body just for fun


 1 point
 -
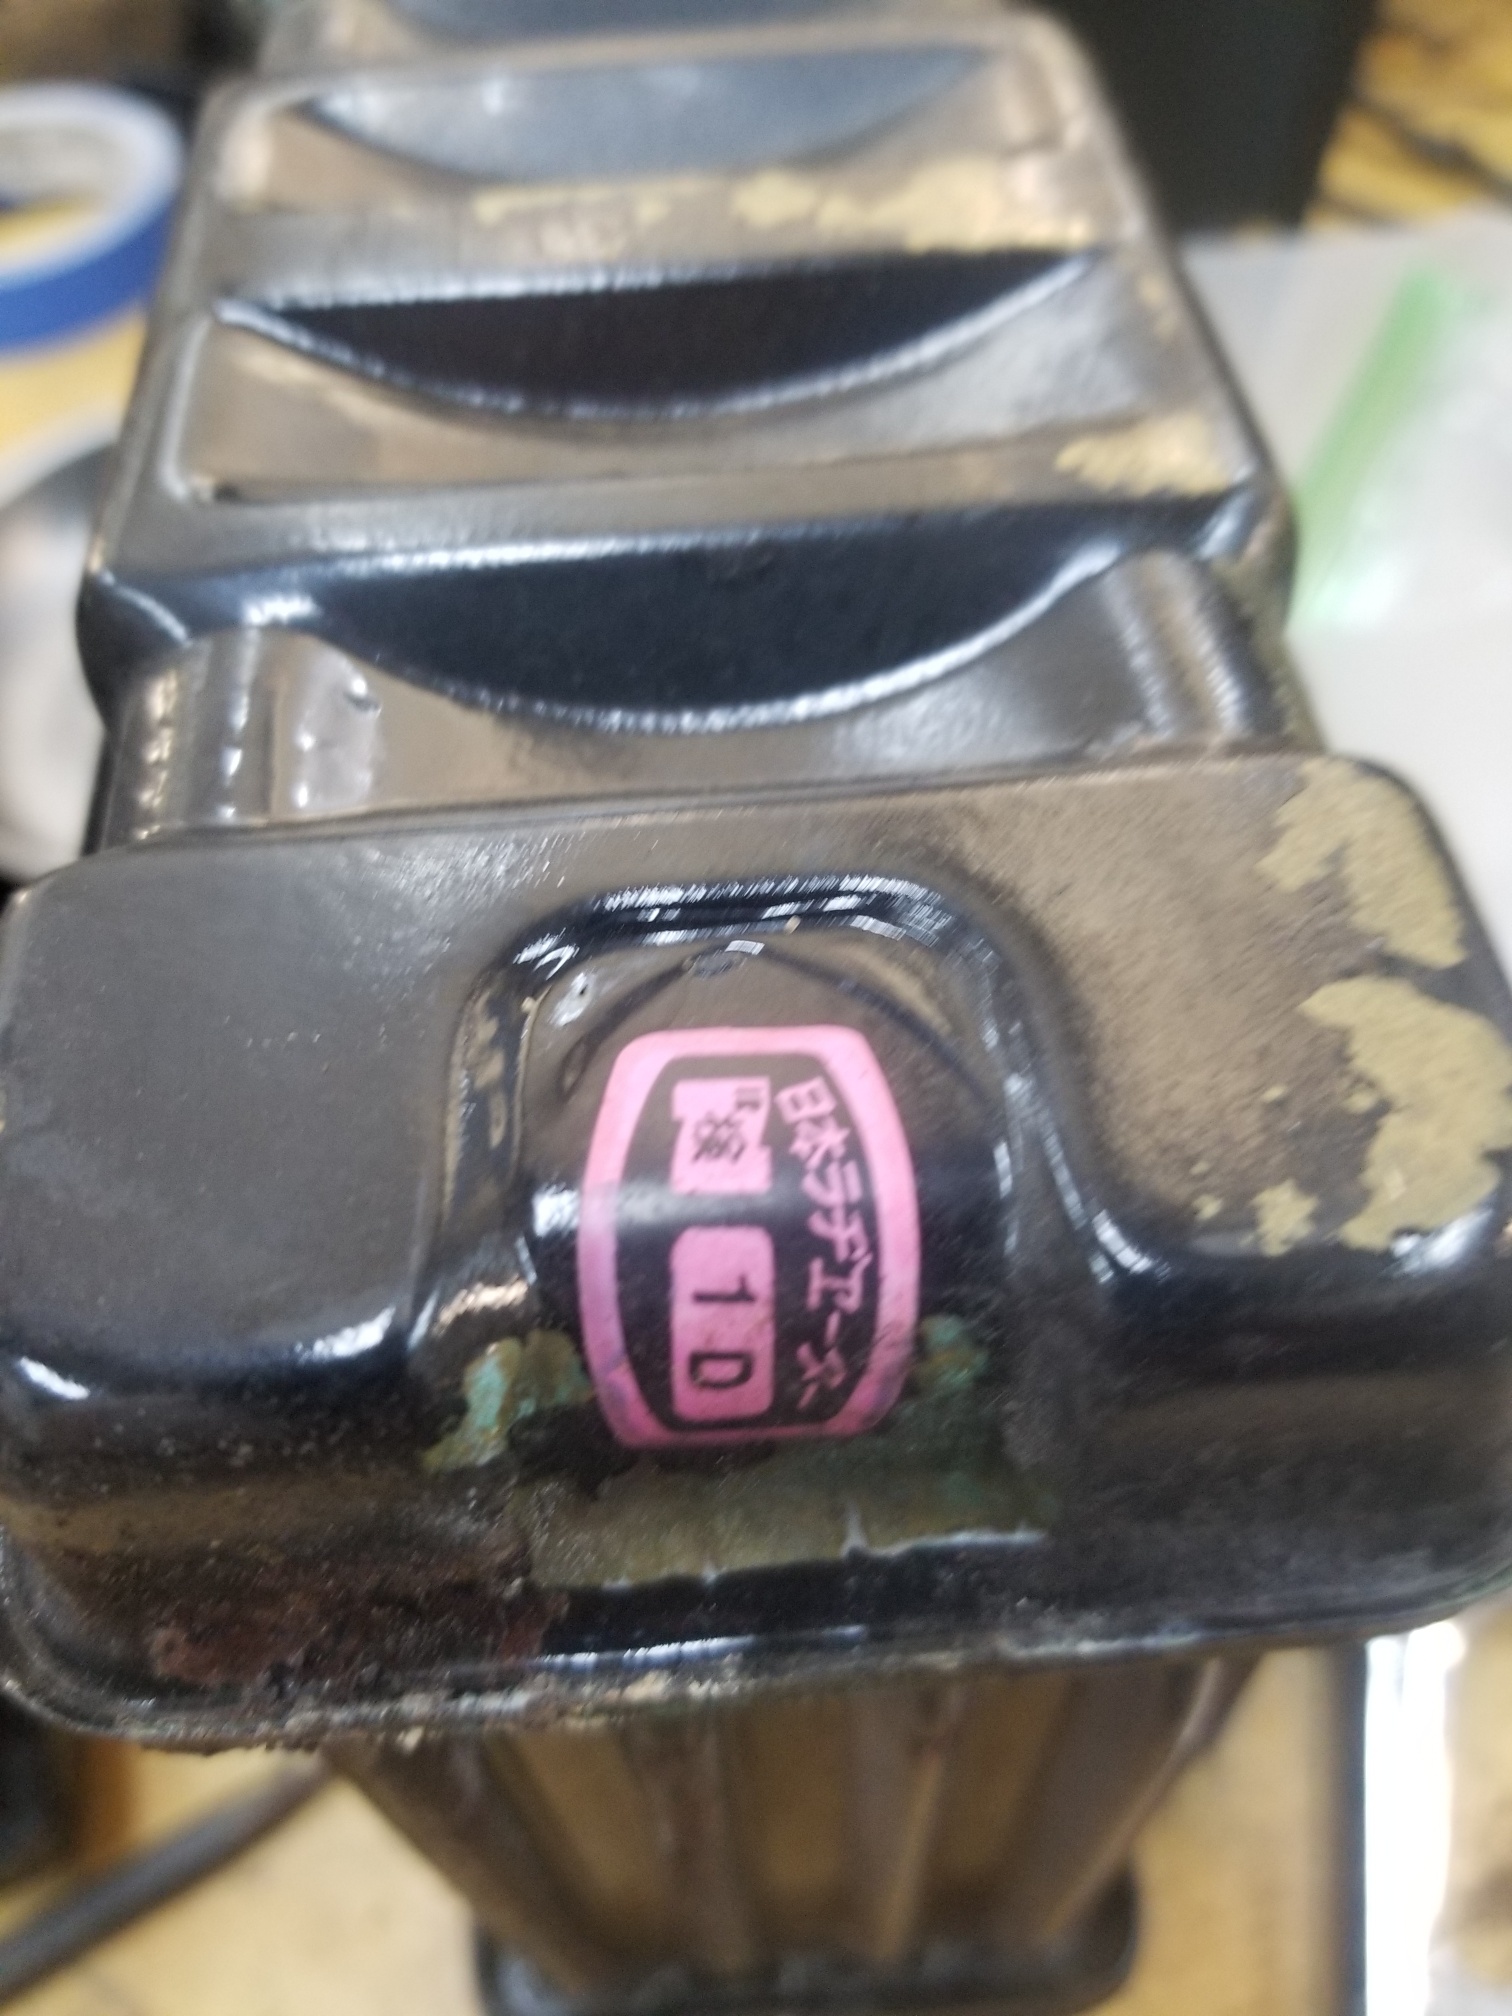
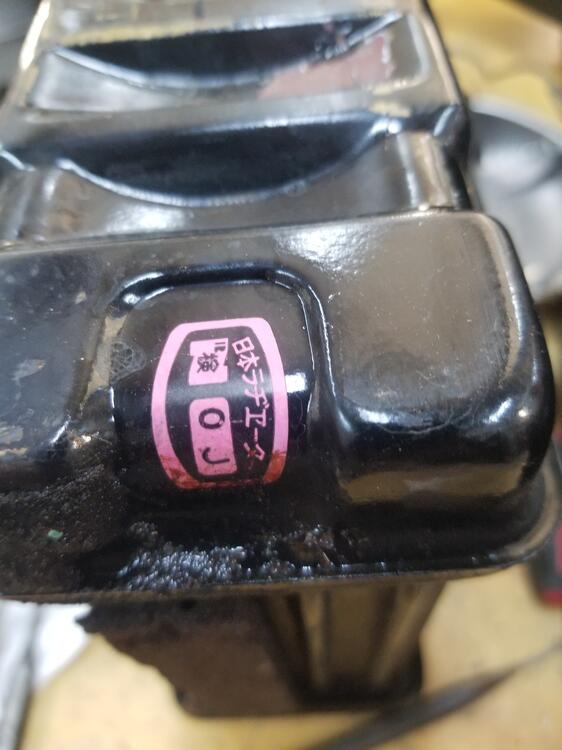
1 pointI try to tape off all those decals before I bead blast them and paint them. That would be great if you can use these pictures later!1 point
-
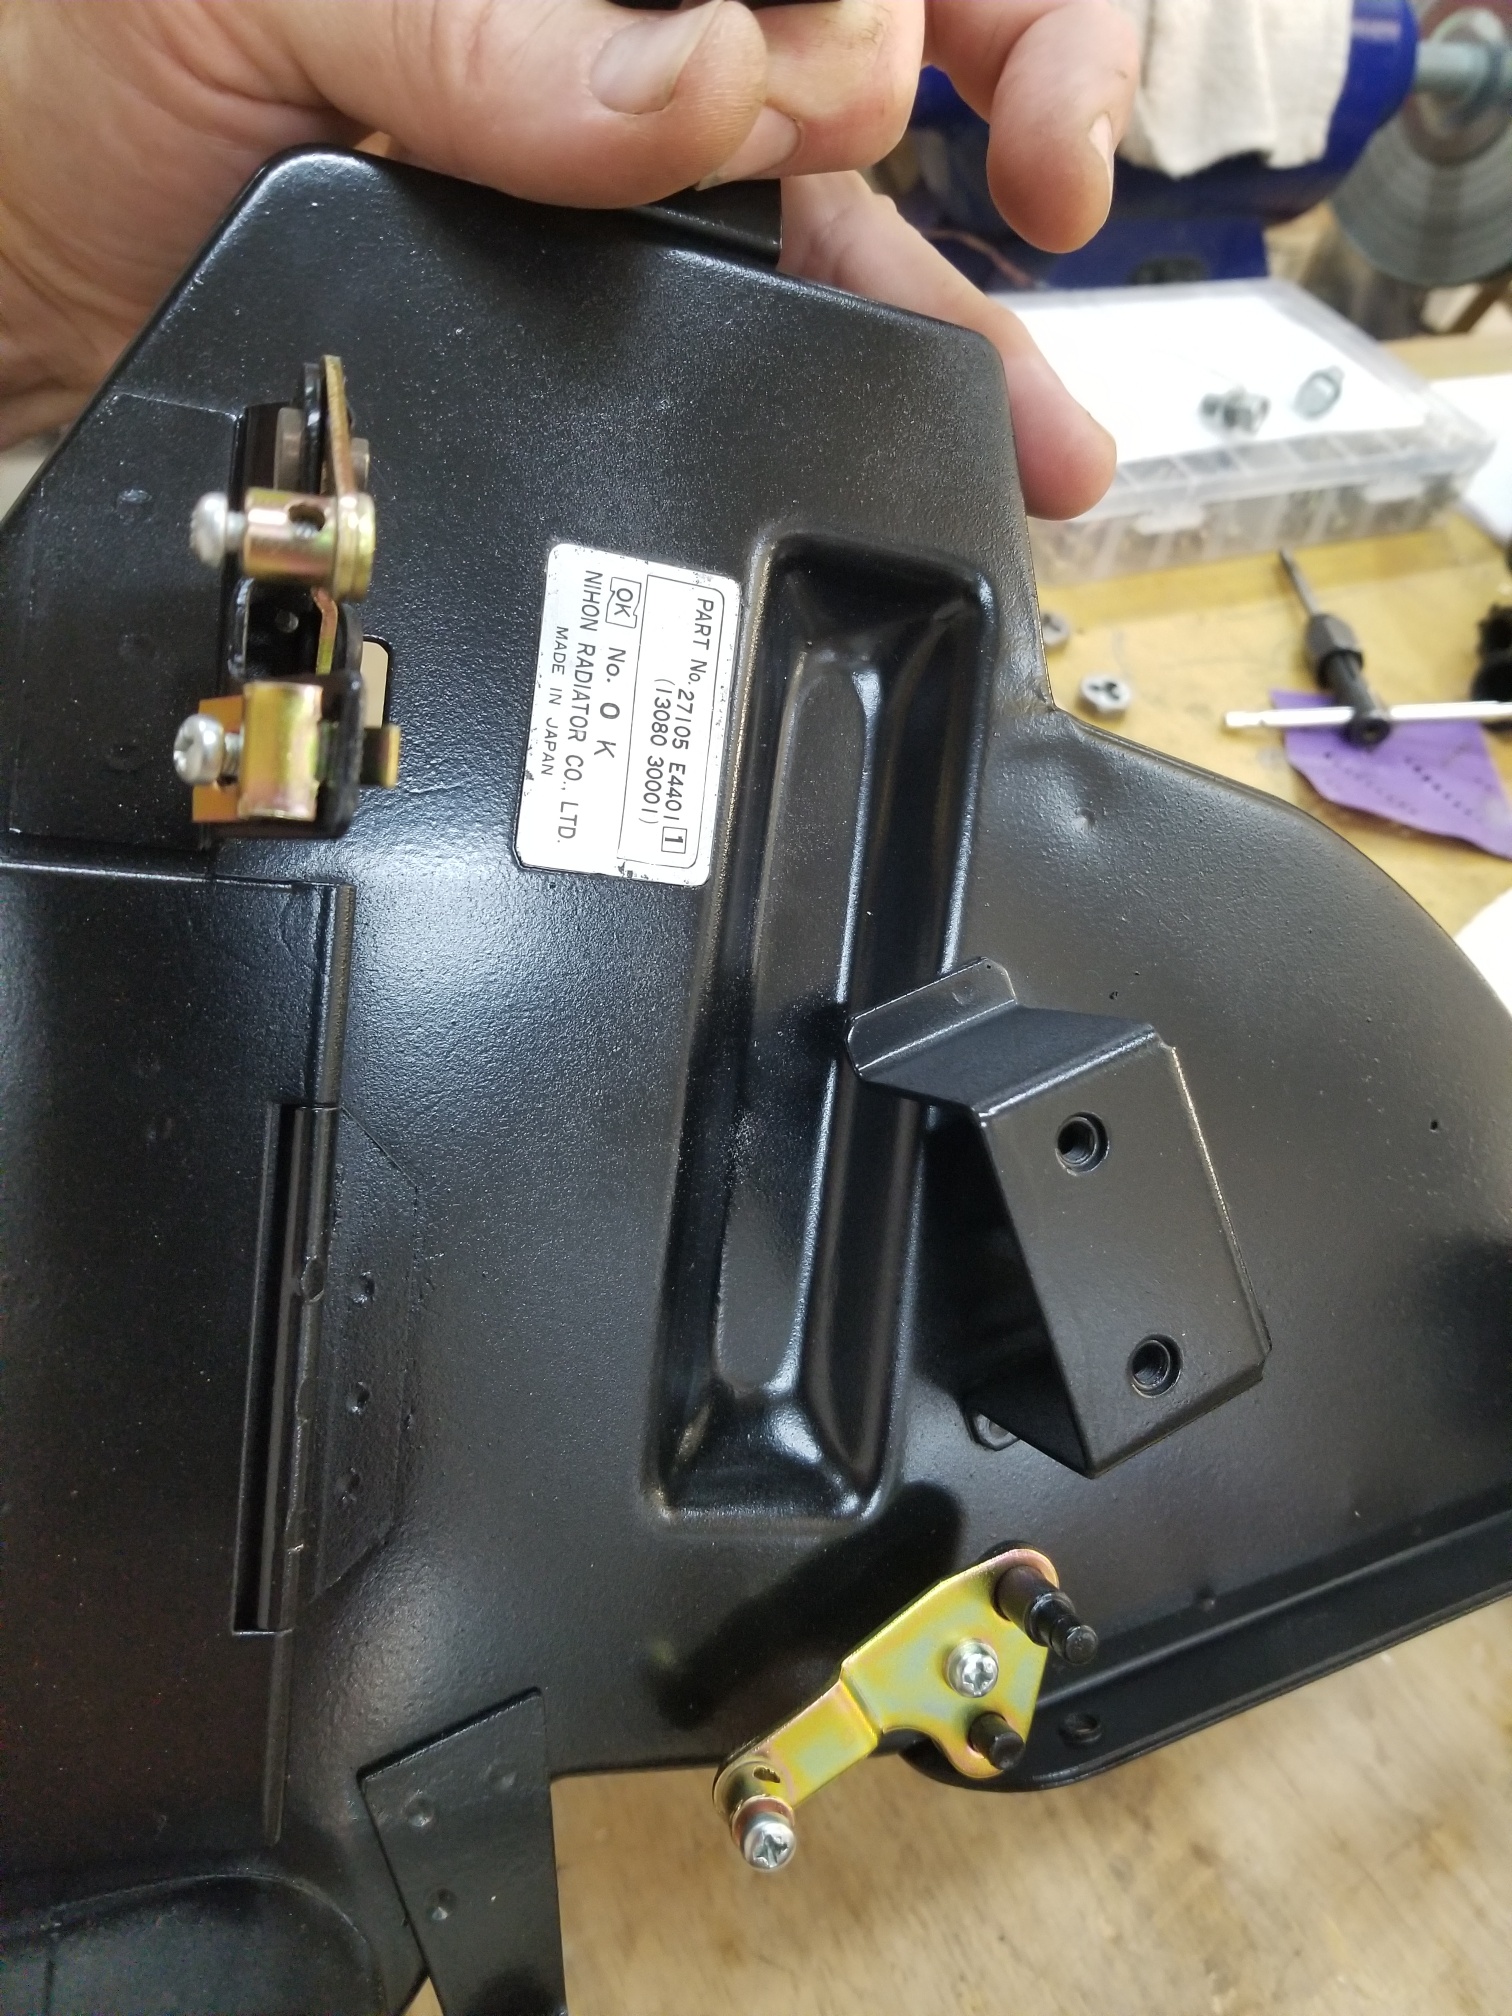
1 pointGreat work, I am going to do the same thing for my 240Z. This will be very helpful for me as a guide book. The decal caught my eyes, I didn’t know it is there! 「日本ラヂエーター」Nihon radiator Co.,ltd. (NICHIRA) I will check my blue 240Z if it still has the decal on it. Kats1 point
-
He also lifted the new transmission (a 720 box, not a 280Z box) into place, and we worked well together to get it bolted in. We verified the clutch engages and will disengage. Next Saturday, I'll put all of the parts back in...and fill the transmission.
 1 point
 -
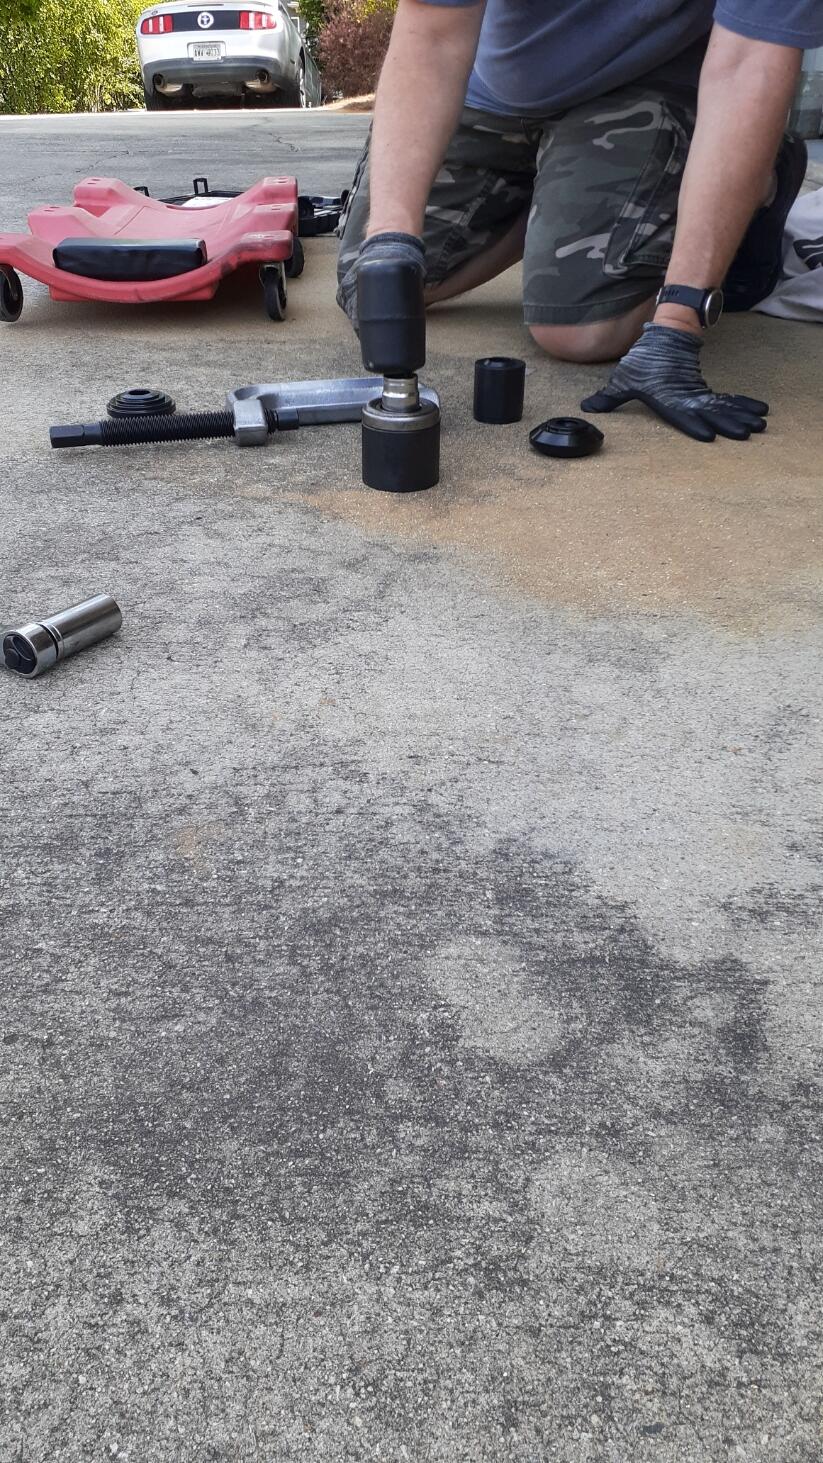
I didn't take any photos of pressing it in, but the Maddox kit had the right adapter for me to set it up and tap it a couple of times with a mallet to drive the collar into the TO bearing. It was nice having someone with experience come over and supervise.1 point
-
1 point
-
1 pointWe'll know the answer to that question after you've located the NAPA kit.😄 I suspect that the internals didn't change over the design history of that valve. Base plate, levers, mounting holes, yes. But cylinder, cap, plunger, rod and seal --- less likely.1 point
-
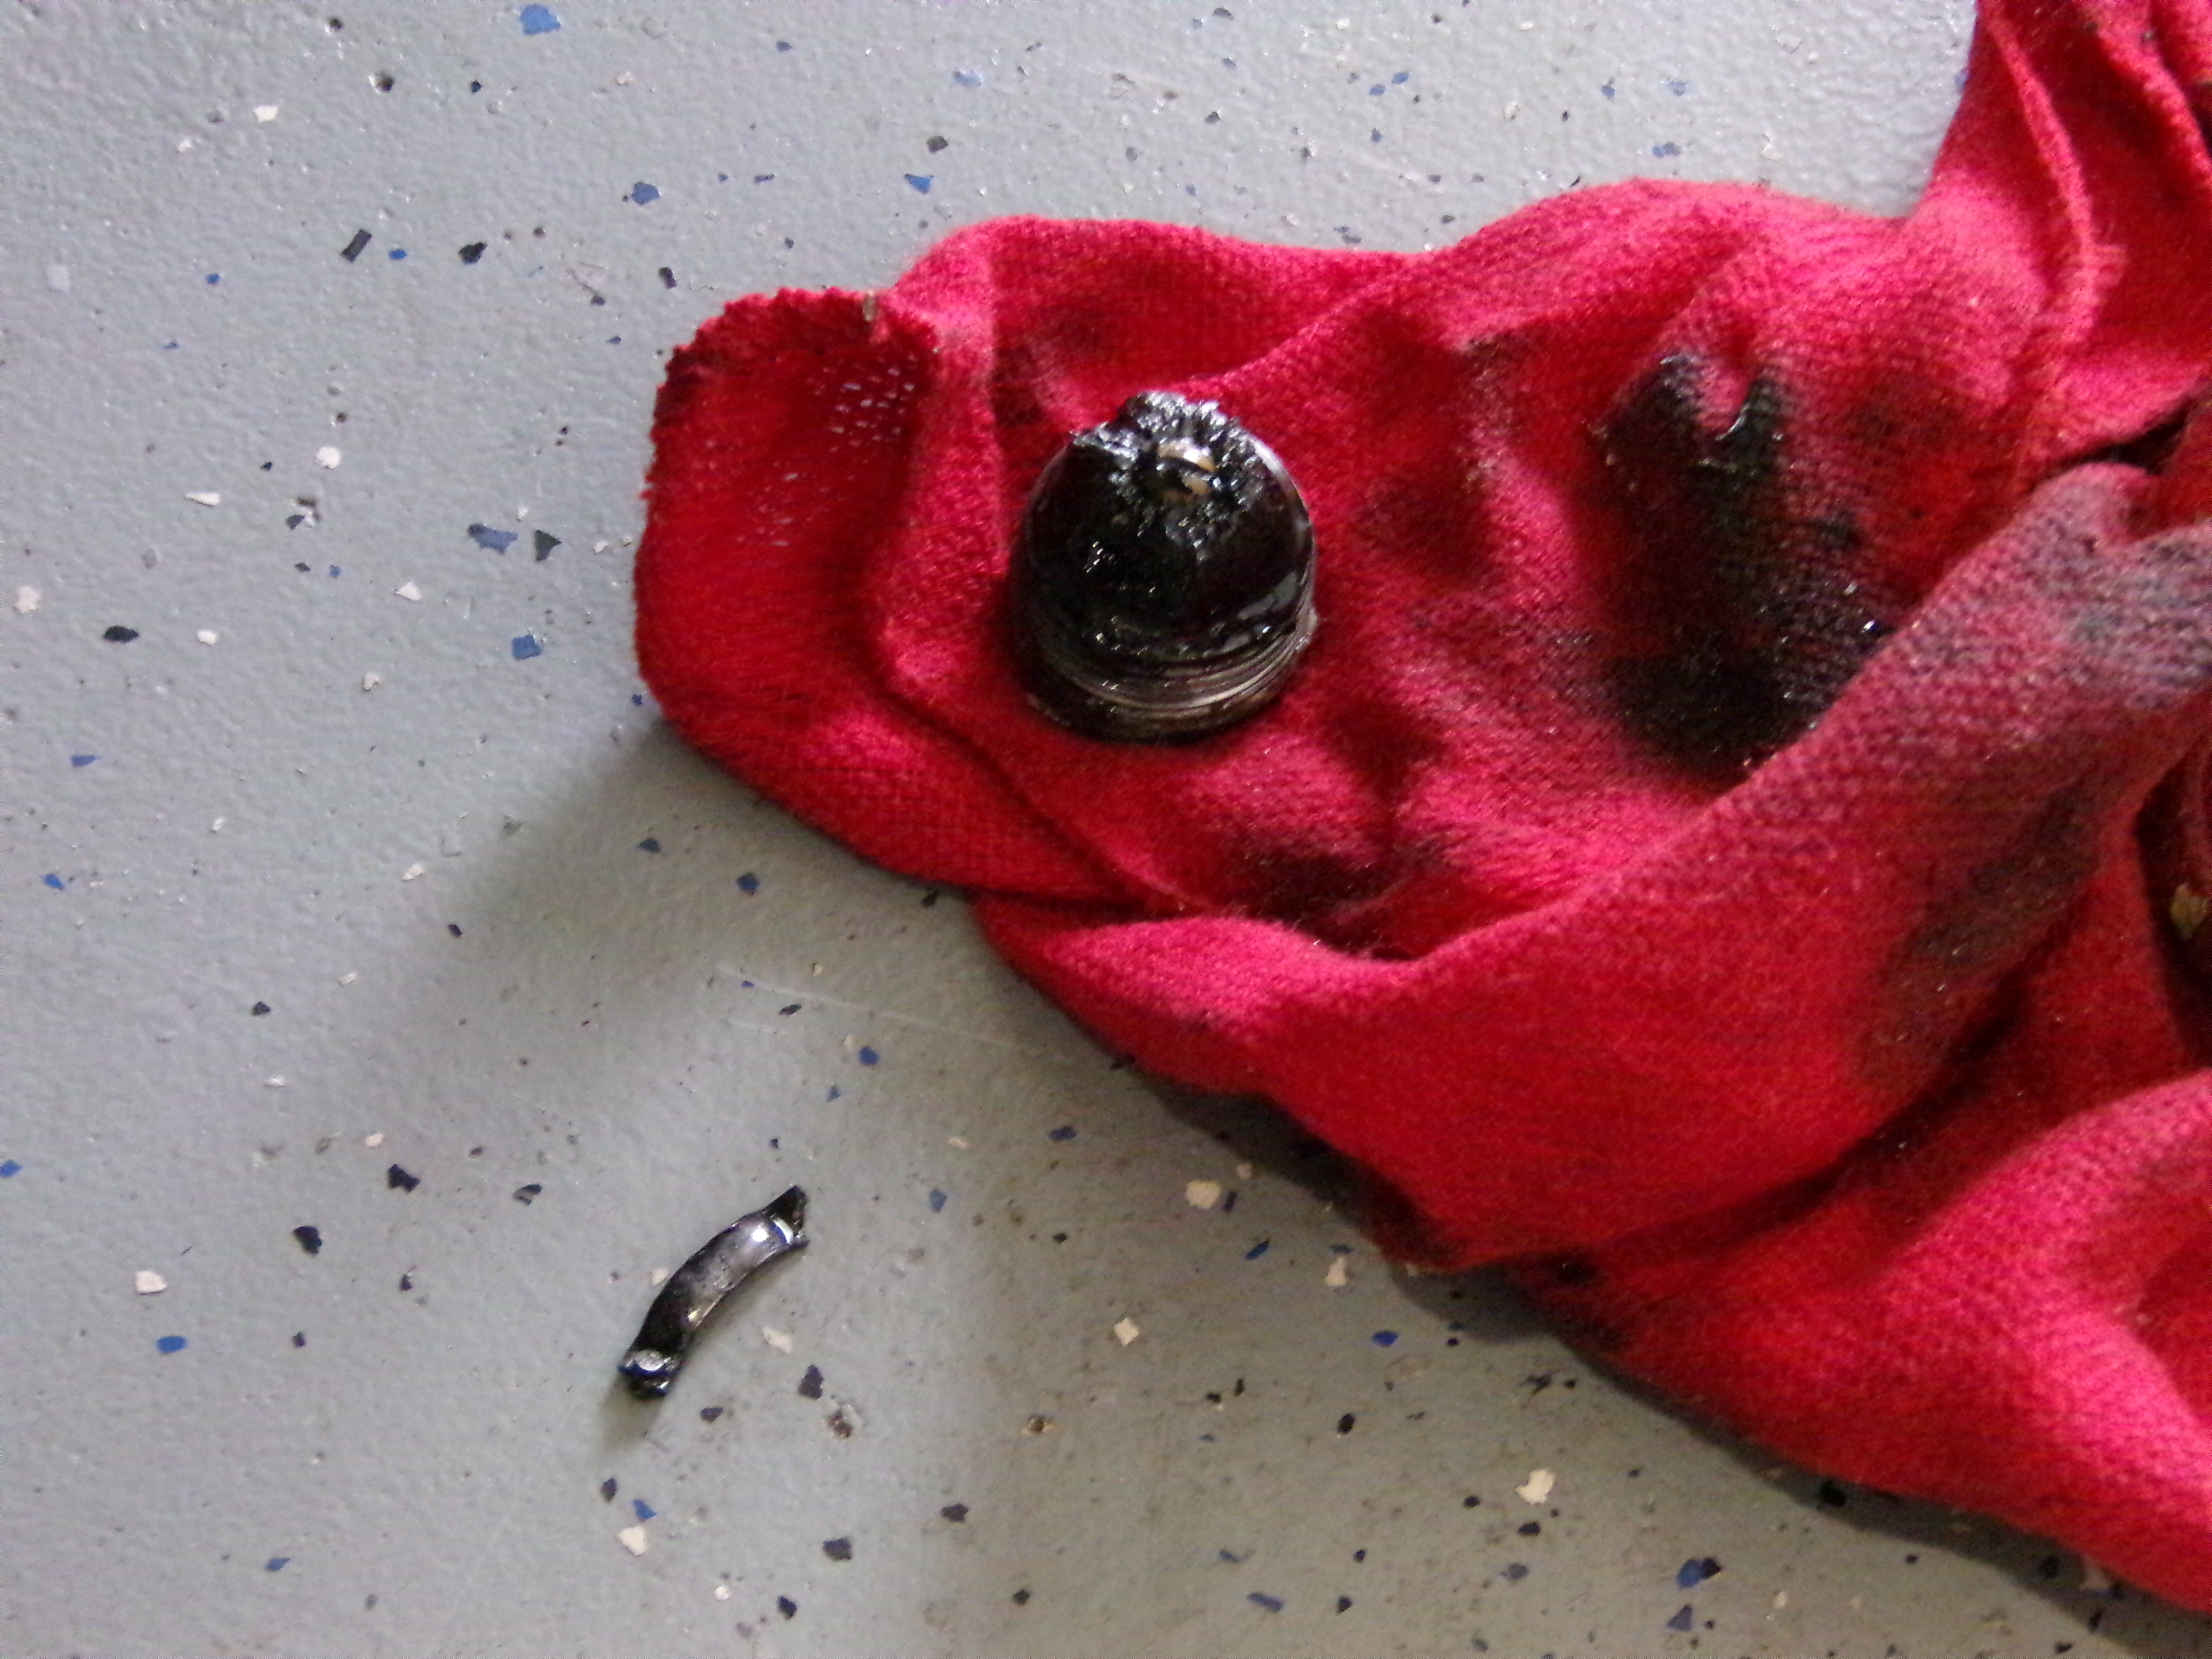
A tip: Use a block of wood (I prefer a hardwood like oak) to support the part rather than placing it on the concrete. It will protect the concrete from chipping, and, more importantly, protect the part from damage by the concrete.1 point
-
1 point
-
1 pointHere's an informative, UK-based website that explains the process of rubber hardening and offers some procedures for restoration. https://www.martins-rubber.co.uk/blog/restoring-damaged-or-weathered-rubber-seals-a-guide/ In line with dutchzcarguy's comments, they say: "For smaller, lightly weathered rubber seals, a simpler method is sometimes just as effective; boil some water in the saucepan, add a small amount of soap, and submerge the seal. Every 5 minutes or so, remove the seal using tongs and test its flexibility and condition. The time taken for the rubber to be restored will vary from case to case, but it can be just as effective, and less labour intensive than the previous method! Scrubbing smaller, lightly soiled rubber seals with almond oil is also an effective, simple option, restoring lost flexibility and cleaning away dirt and grime."1 point
-
1 pointI think we would say in detergent in American English. In the U.K. and in other post Empire English speaking countries they say Washing Powder. An example is Tide powder detergent.1 point
-
1 point
-
1 pointEh.. I have had very good results with symply putting the rubber parts in a lot of washing powder and hot water.. after a few days, the water gets very black and i repeat it ones or even twice.. THEY STAY very plyable! I got a old inlet pipe of a 280zx fueltank and it was very hard. I put it in a mix of water and some extra strong washingpowder and after years still soft. works also on window rubber on the botttom of your doorwindows! And MAN they where VERY hard! (It took a few weeks but it went a lot softer.)1 point
-
1 pointIf you clean the crack really well (with a small grinder) than you can simply solder the crack and it will be good to use again.1 point
-
1 pointOnce upon a time (fifteen years ago), there was a generic rebuild kit available from NAPA that provided the necessary seals. When I checked circa 2015, it was NLA. Napa part #660-1000 Good hunting.1 point
-
1 pointI'm happy I could help. I love keeping these cars on the road (or track) where they belong.1 point
-
1 pointYes, it's a 280Z 5 speed. No, there isn't a new diff at this time. I'll be using the 3.364 rear end. It'll only drop about 500 RPM or so in 5th, but I'll be happy with that improvement.1 point
-
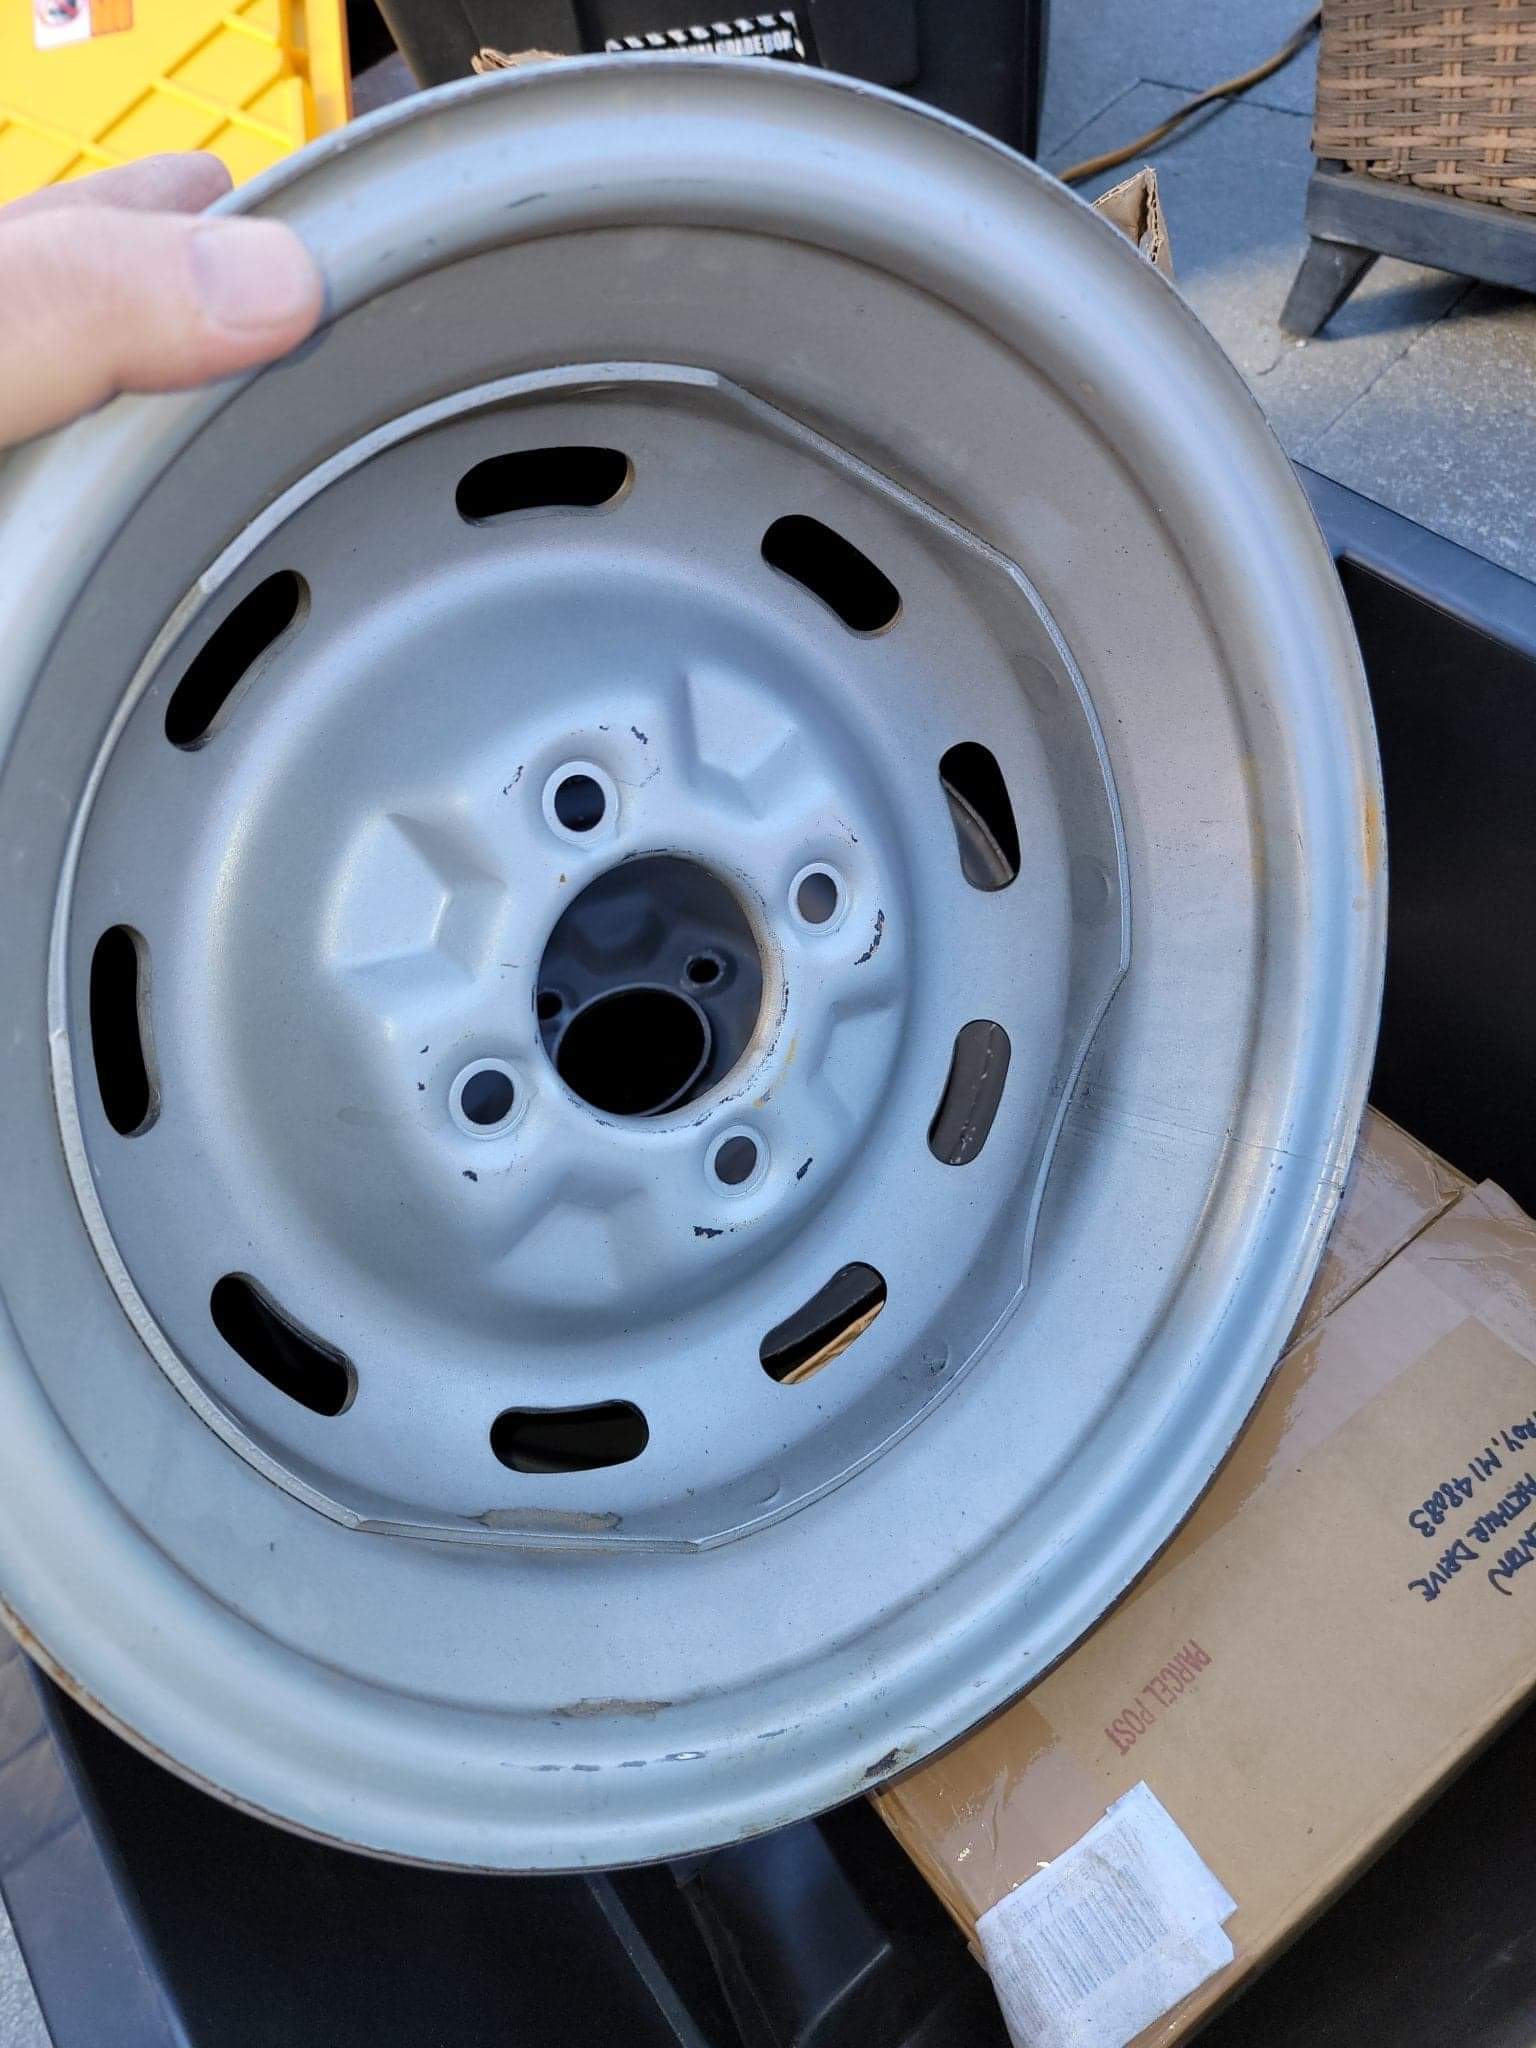
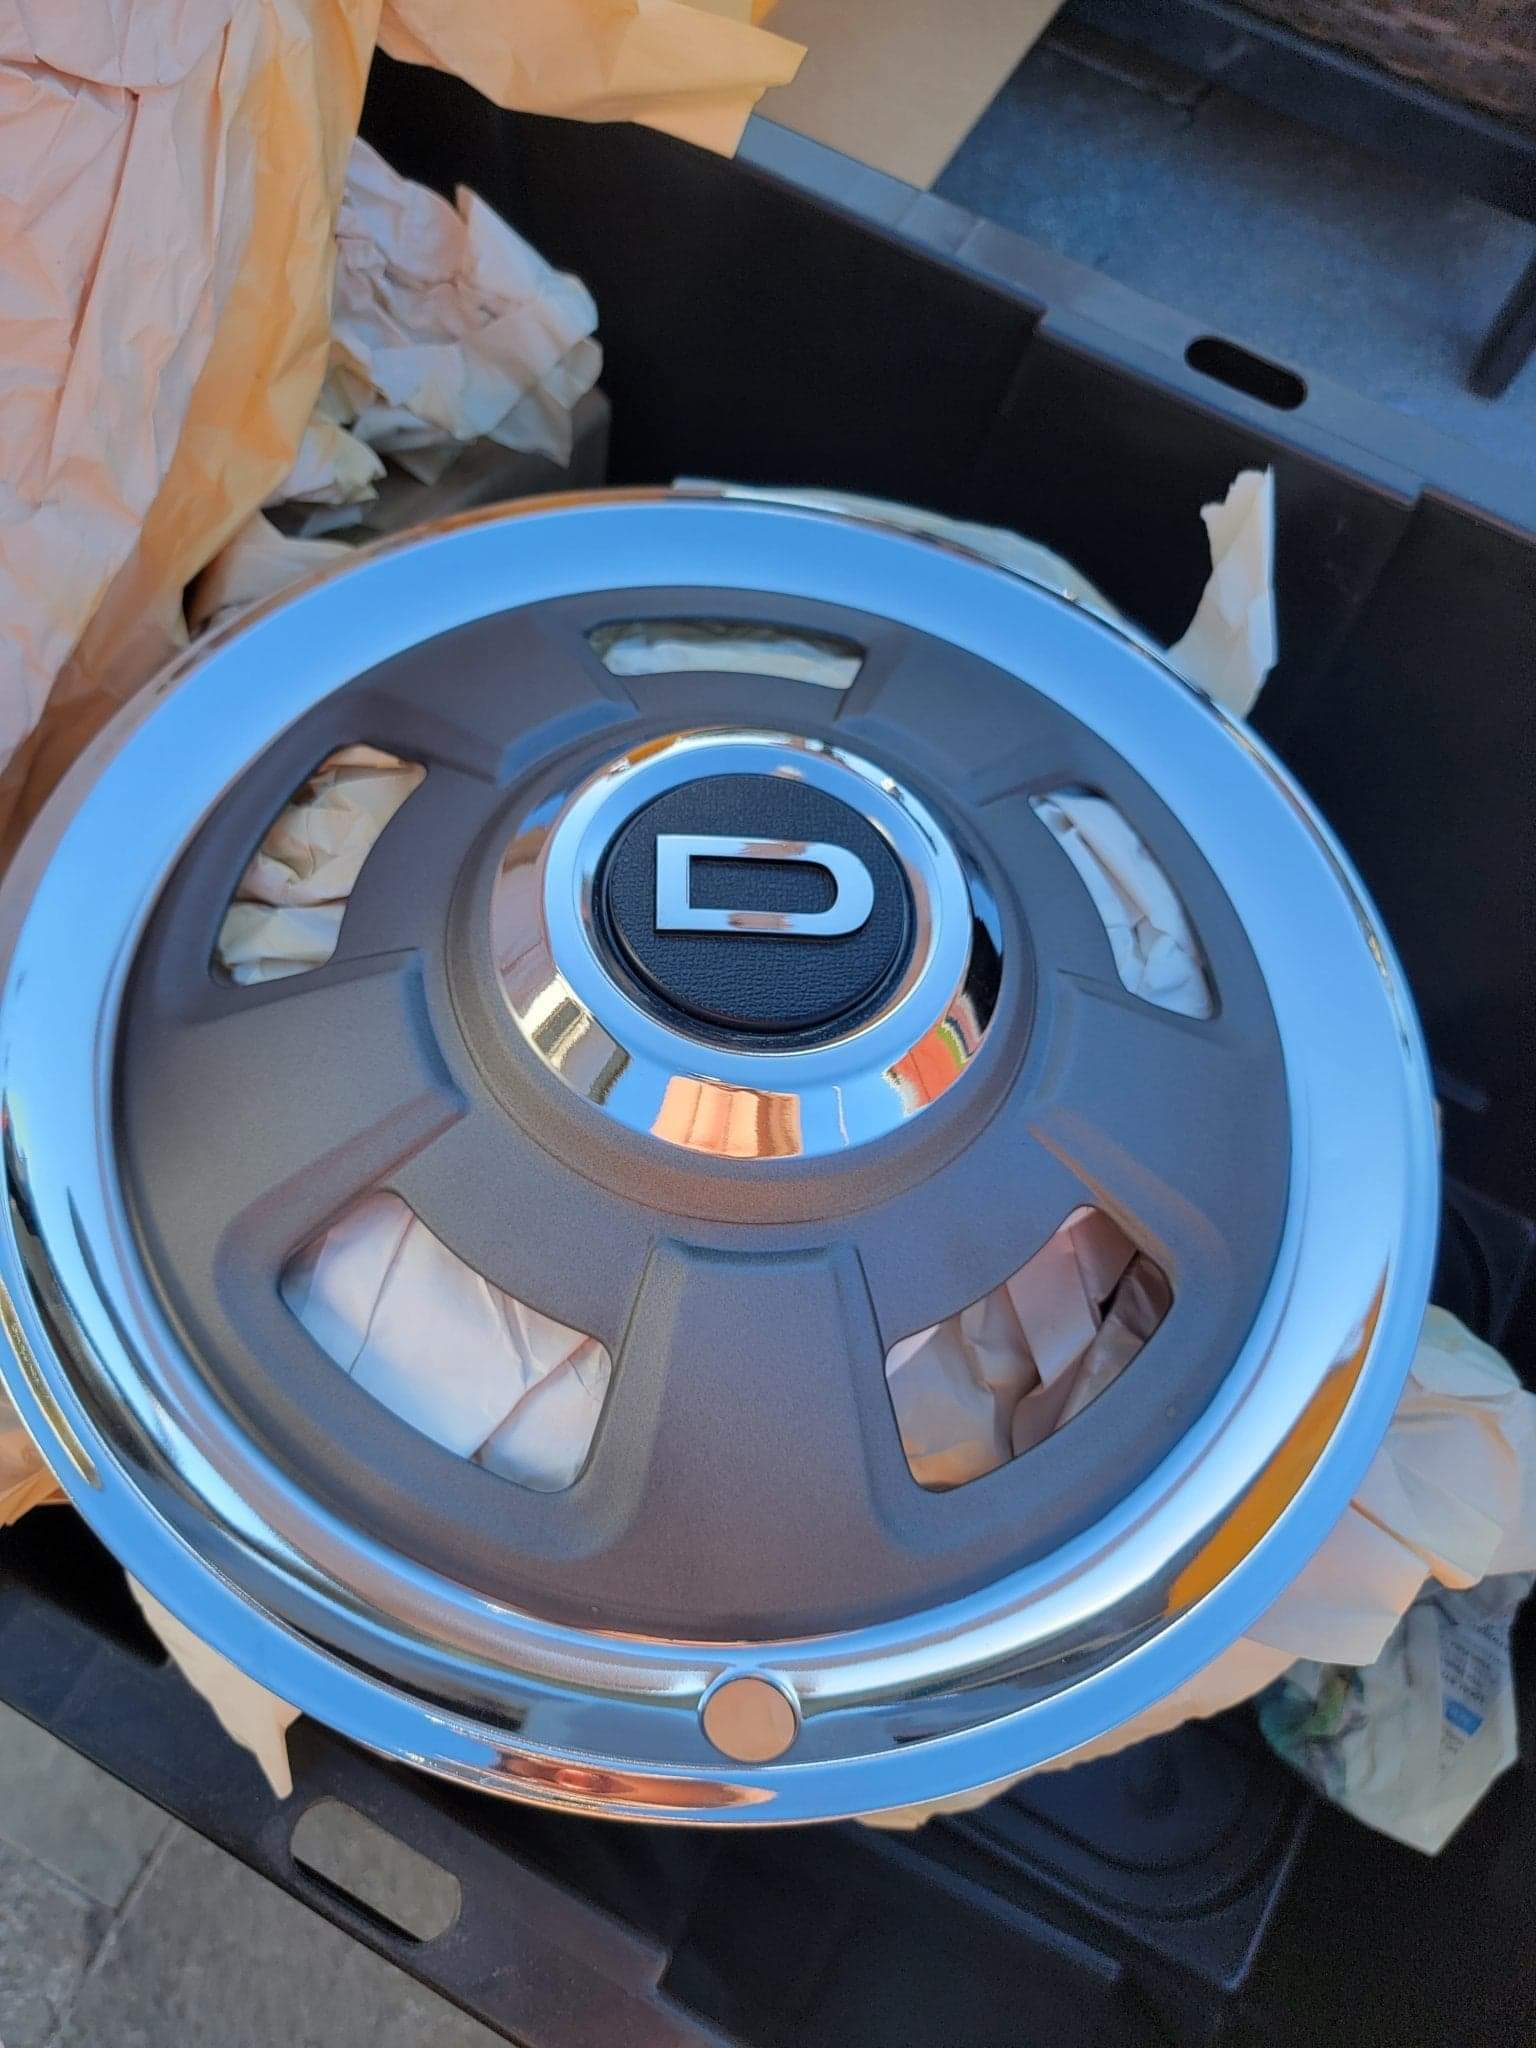
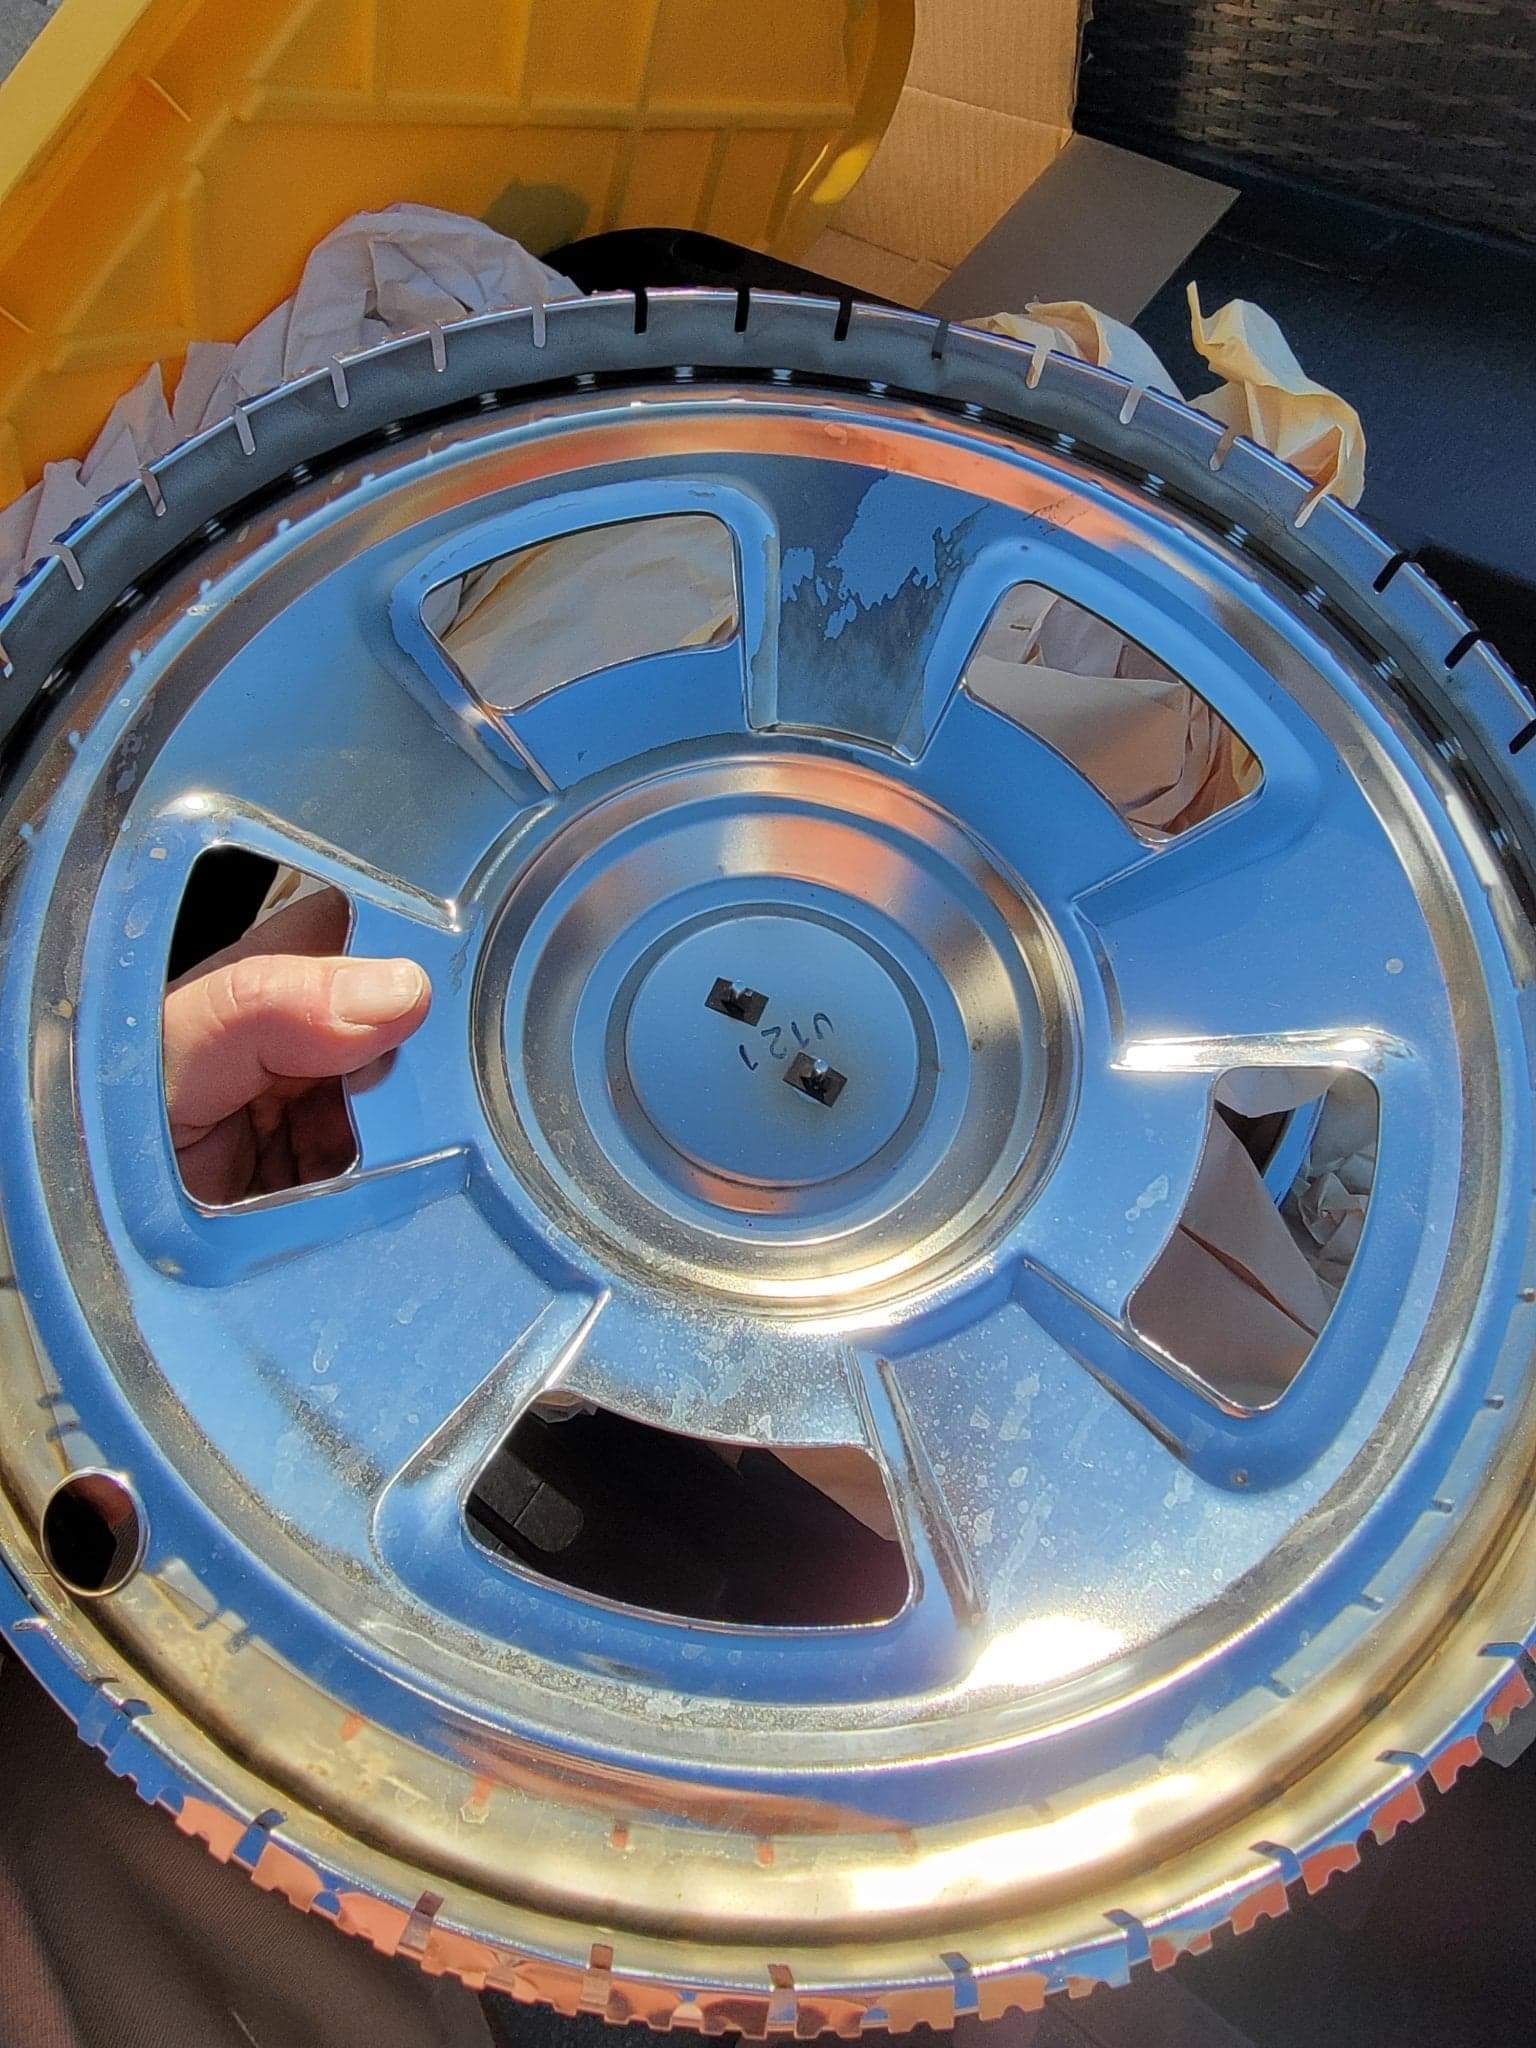
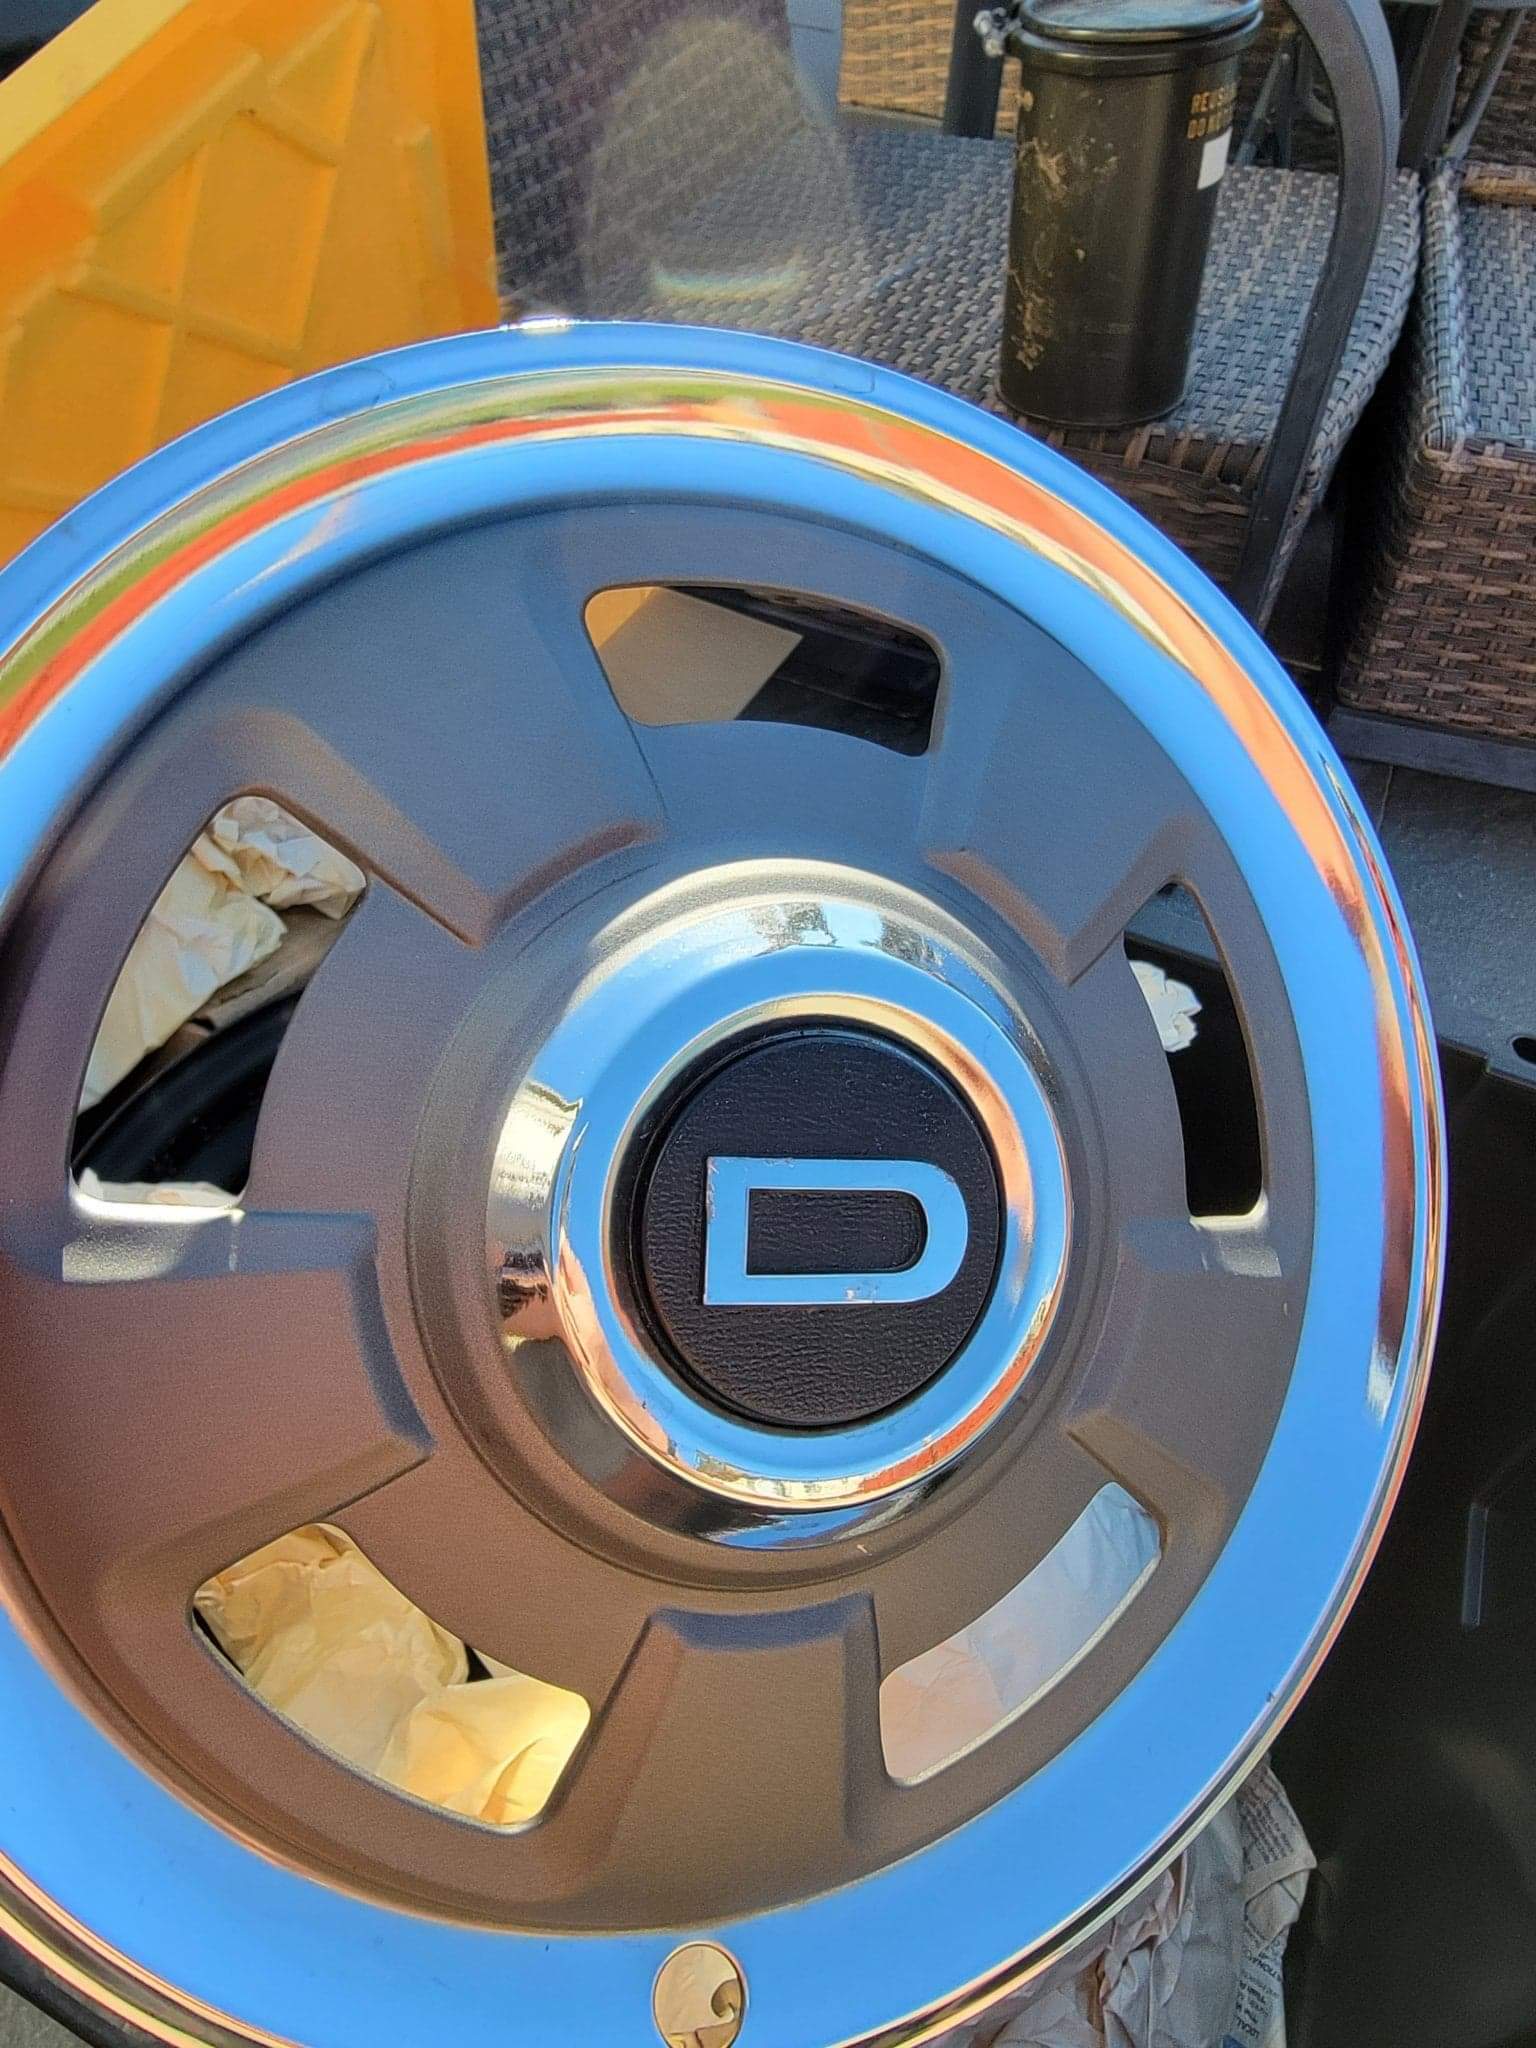
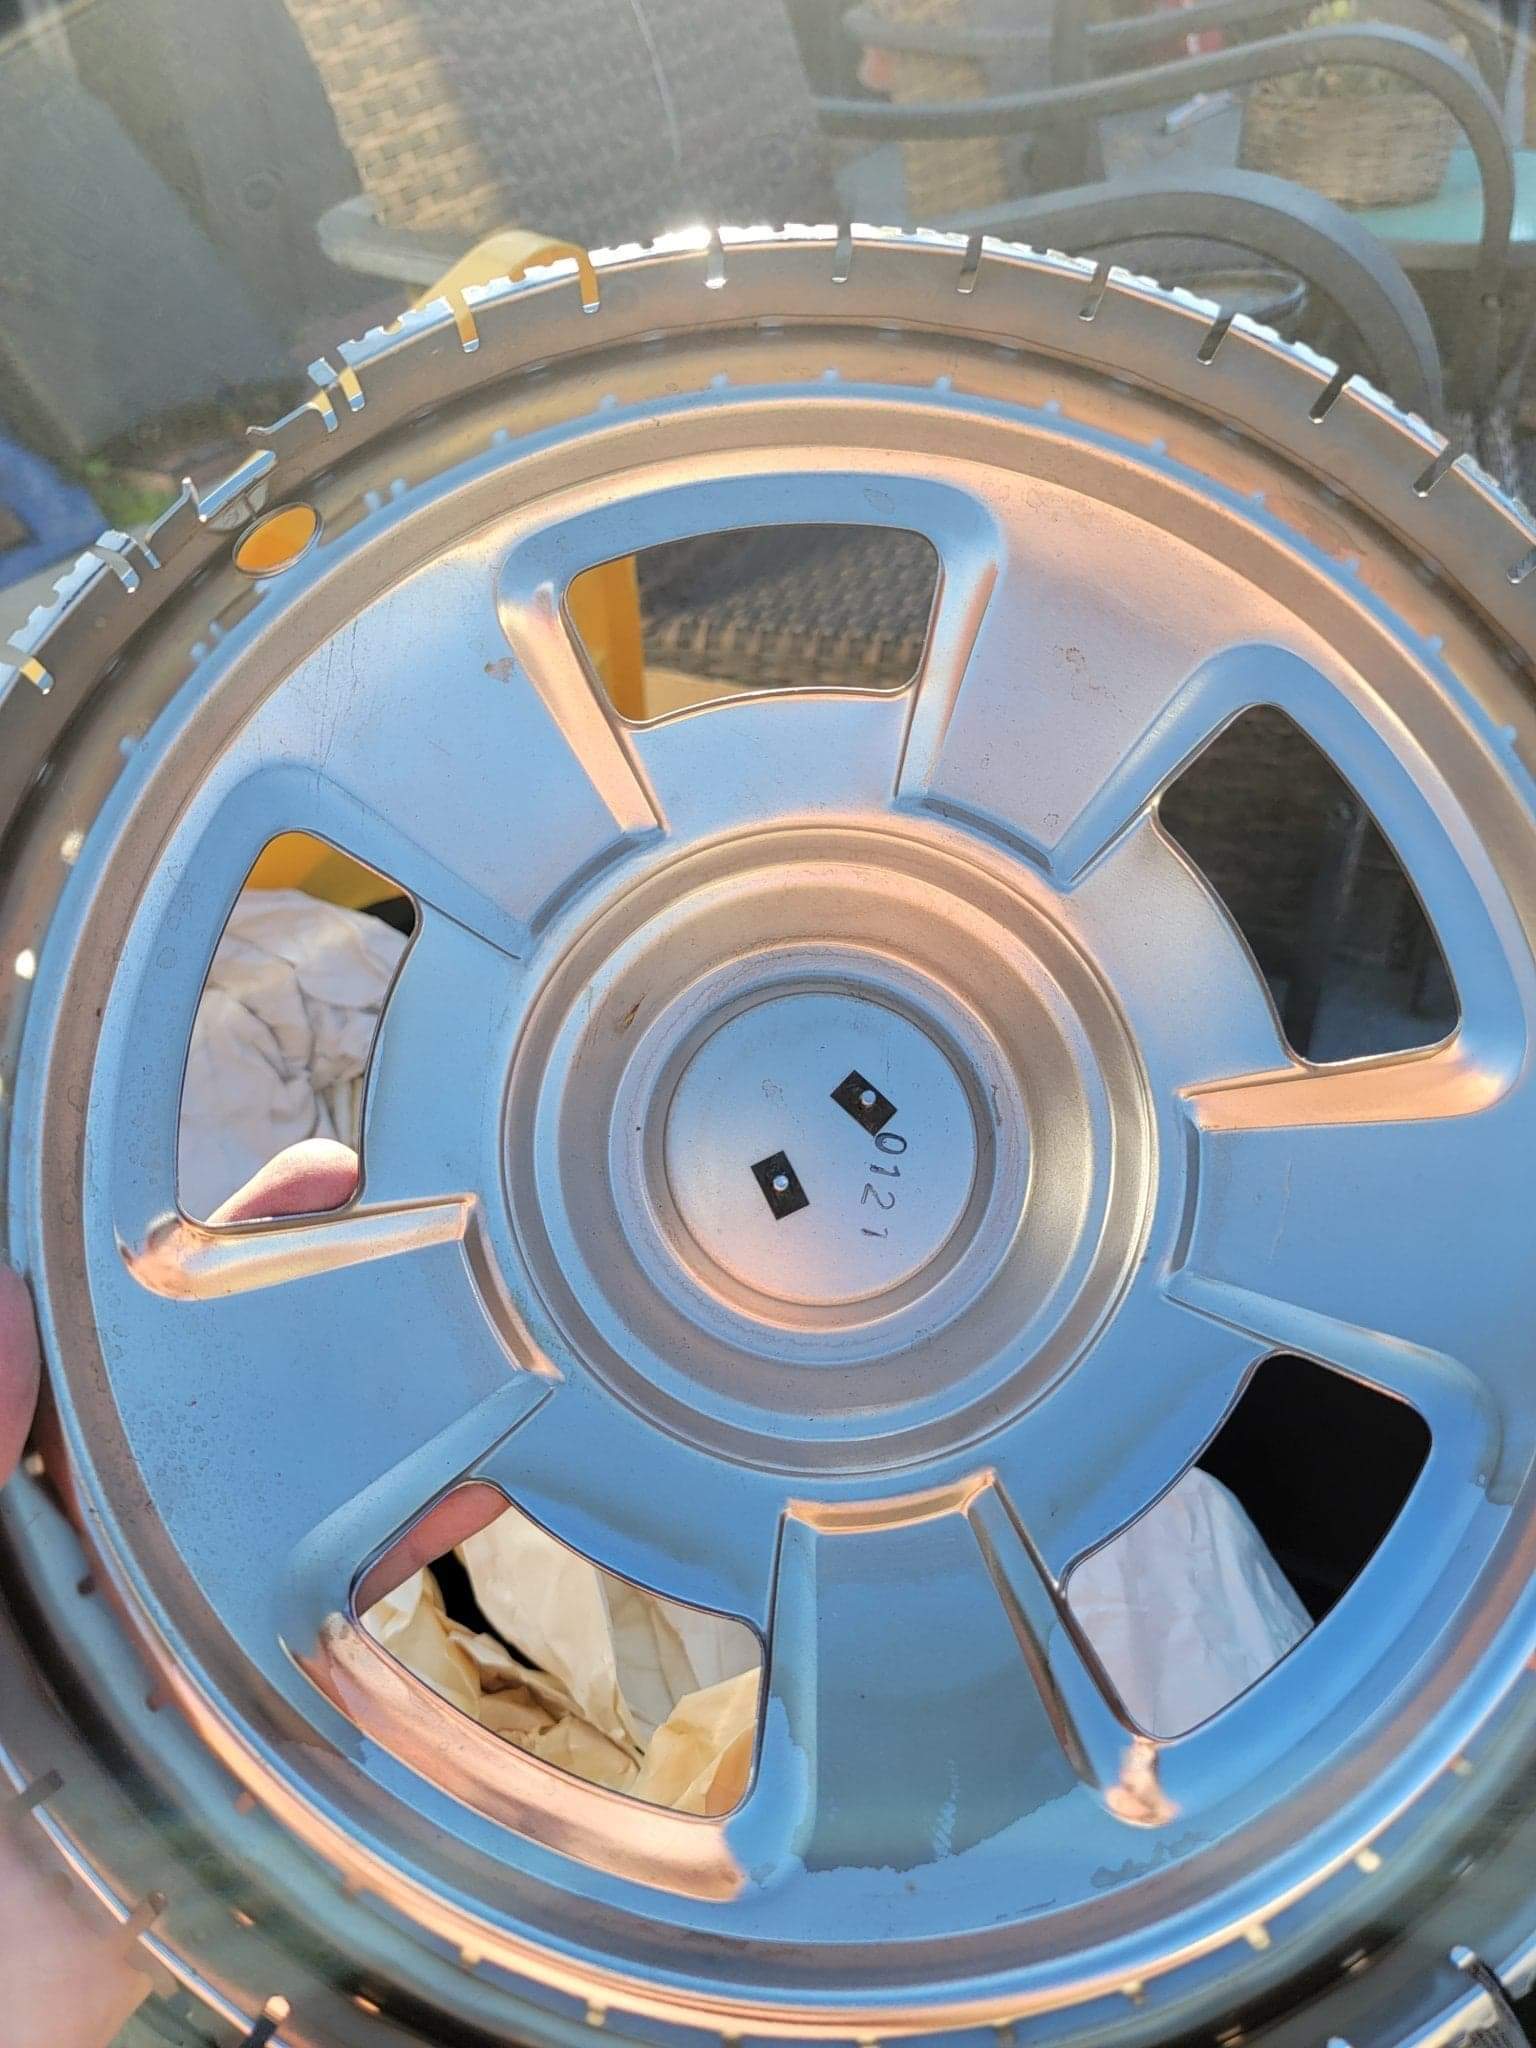
1 pointI got a set taken off at the dealership in 1971, date coded 12/70. The hubcaps are perfect. Will be sold with the wheels. I have pictures.


 1 point
 -
0 pointsAlso all the rubber parts I softened with wintergreen oil have since re-solidified, which is disappointing!!0 points