Leaderboard
-

Zed Head
Free Member7Points19,236Posts -
conedodger
Free Member4Points12,513Posts -

CW240Z72
Free Member4Points229Posts -
.JPG.cfcada9cf1c1b502df3f5f2f2ca3ff36.JPG)
SteveJ
Free Member2Points9,646Posts


Popular Content
Showing content with the highest reputation on 04/21/2023 in Posts
-
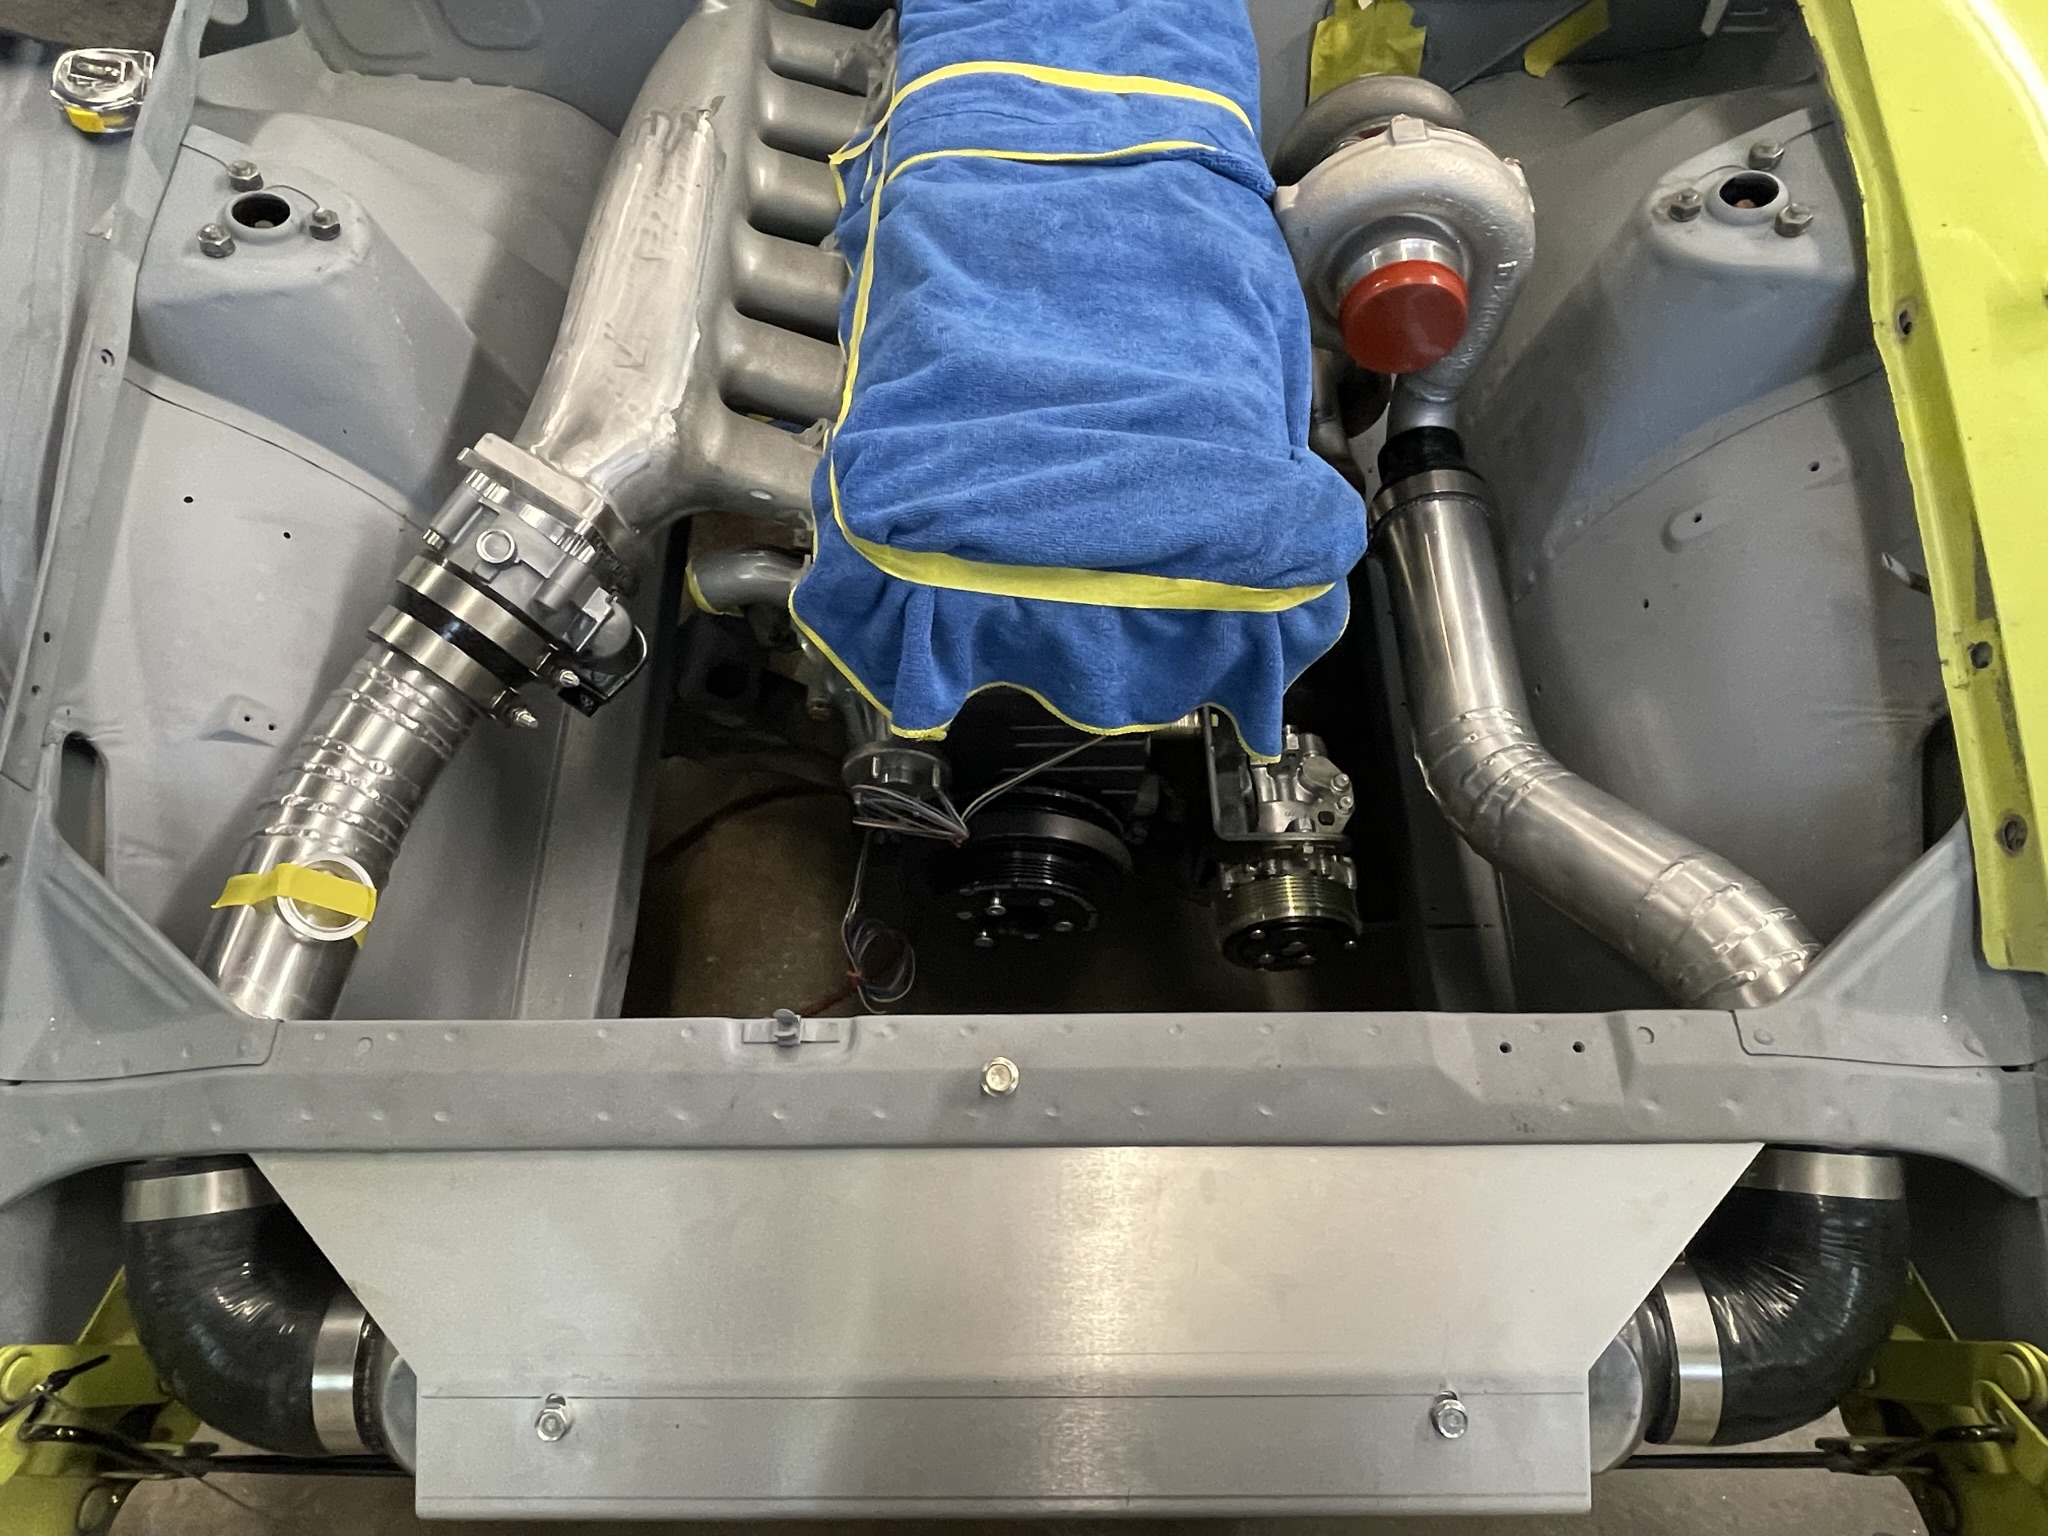
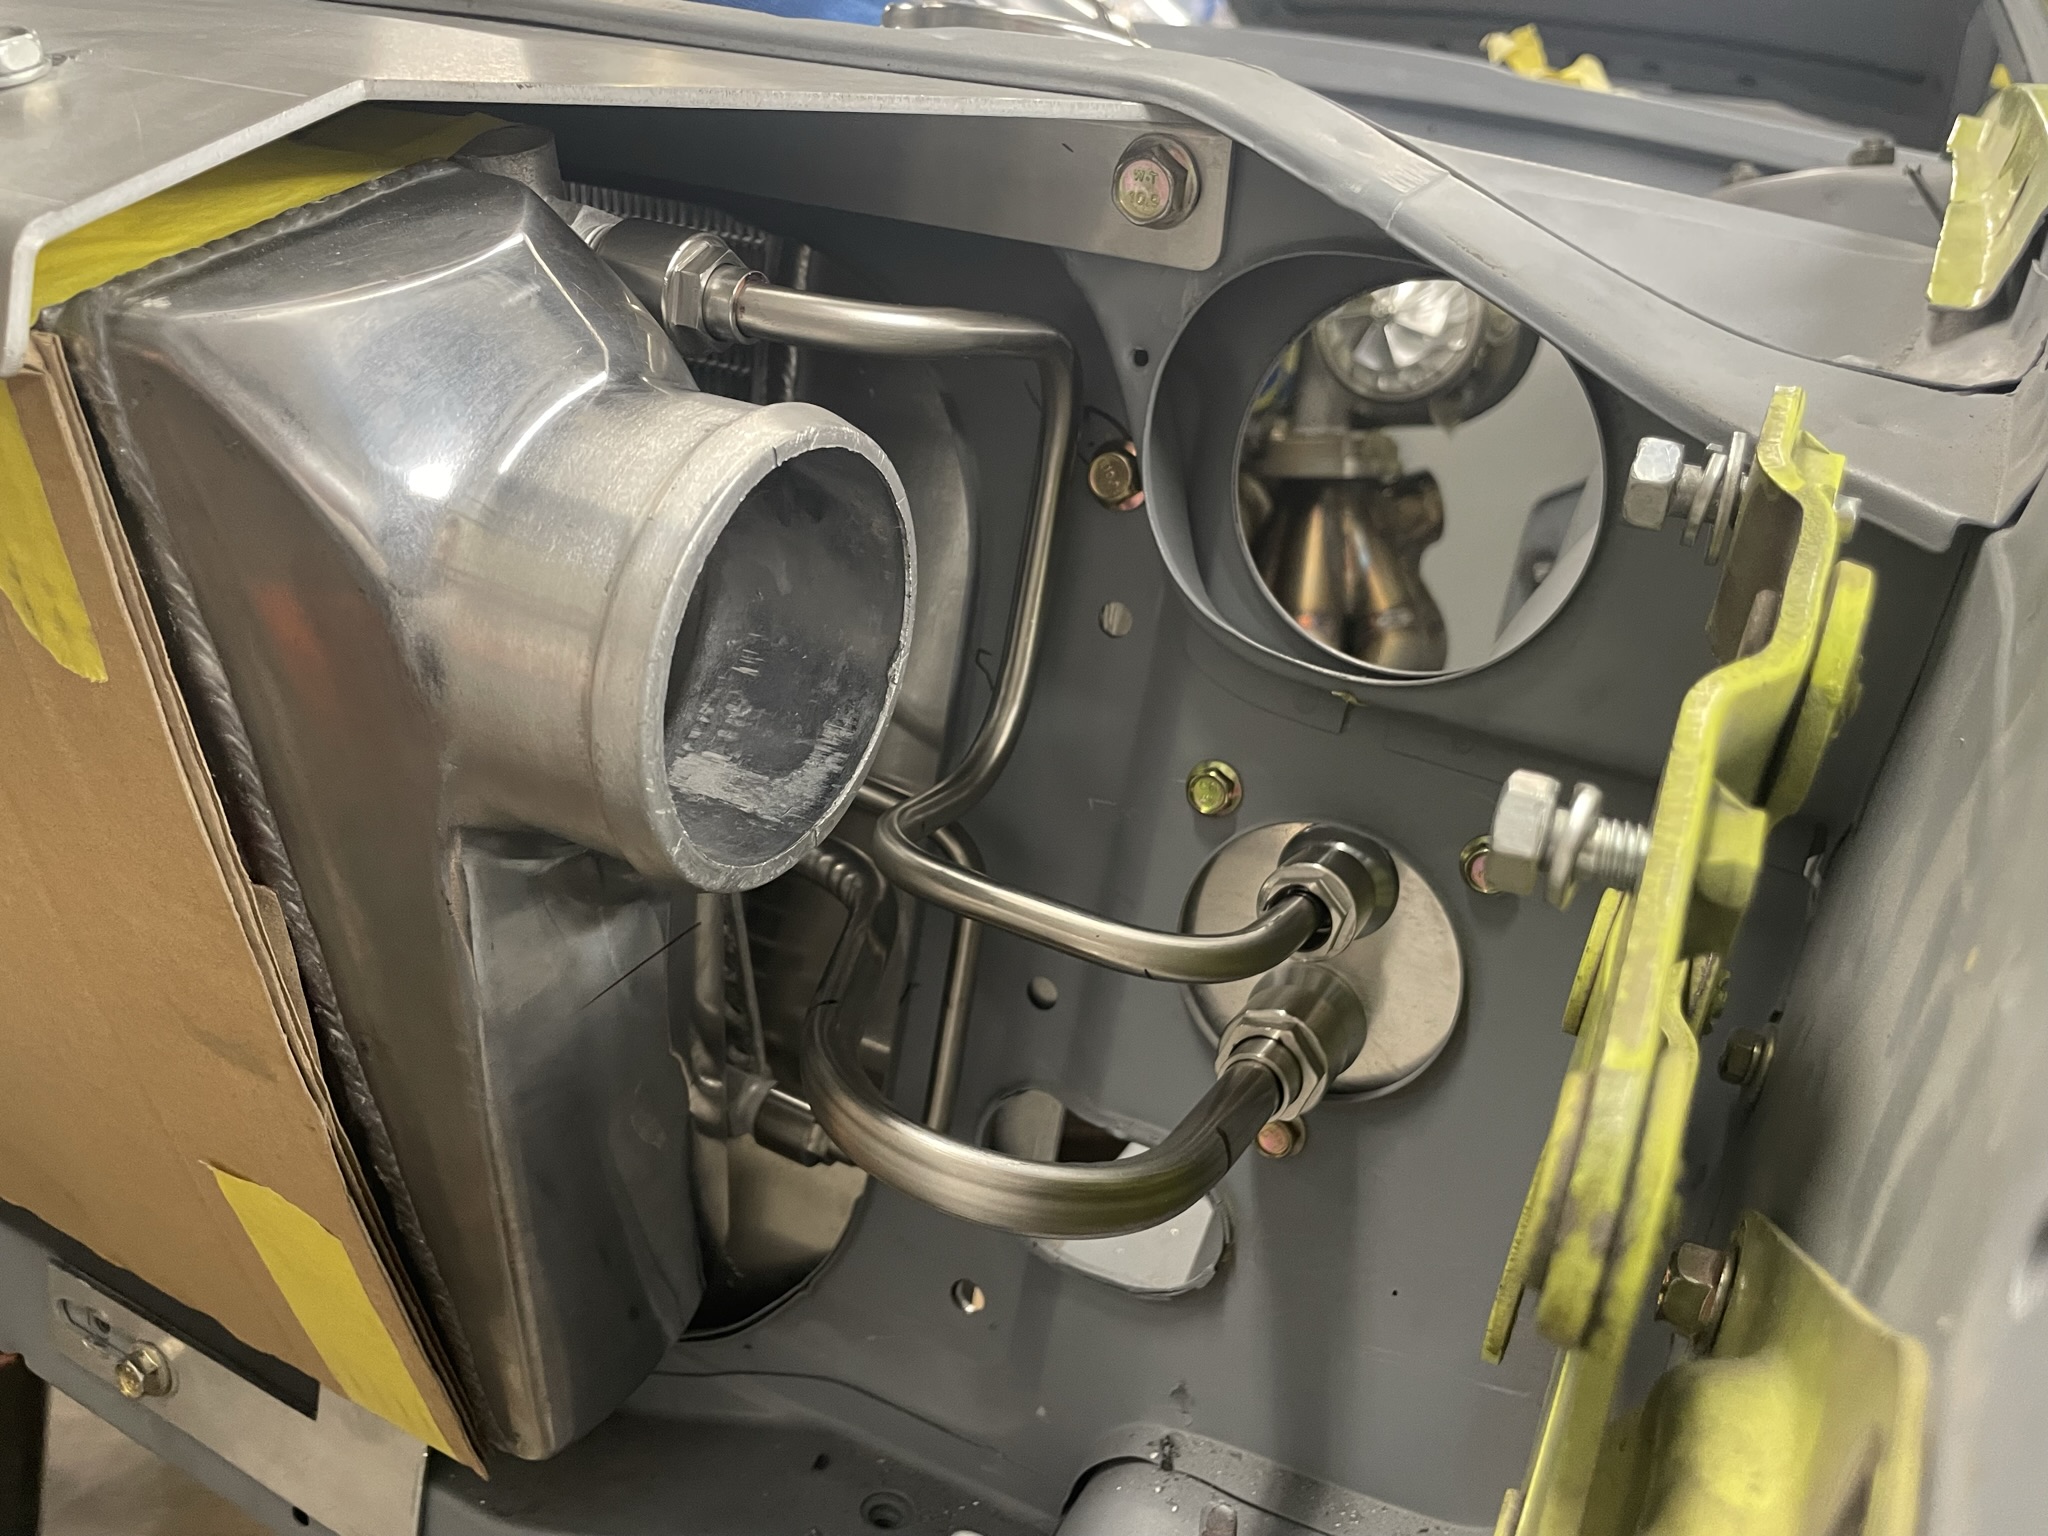
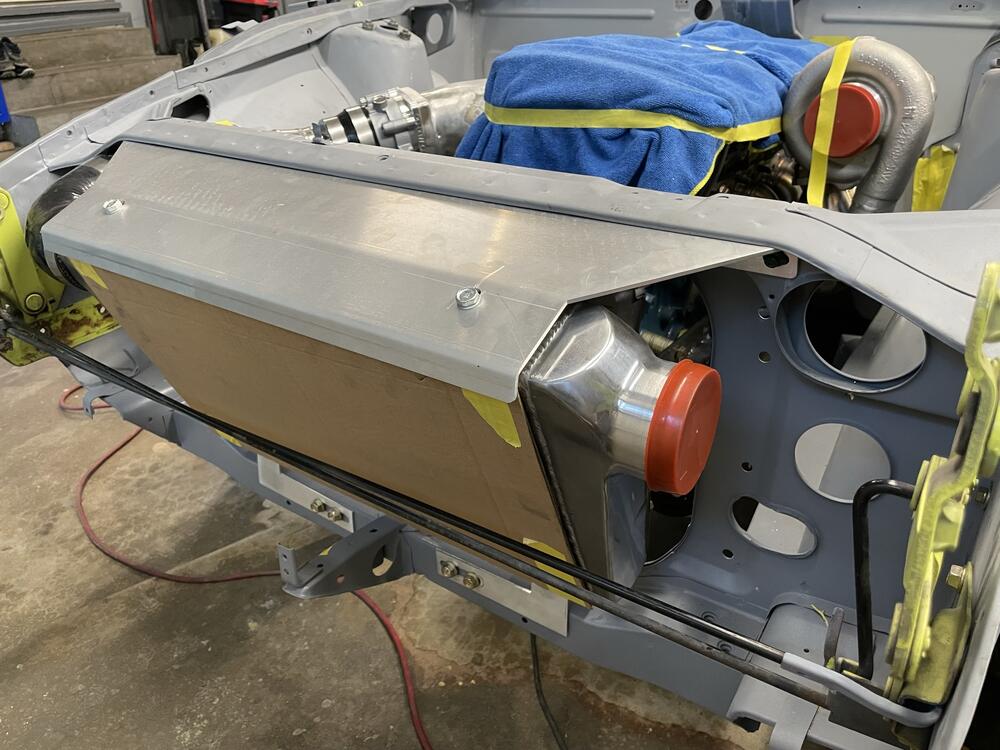
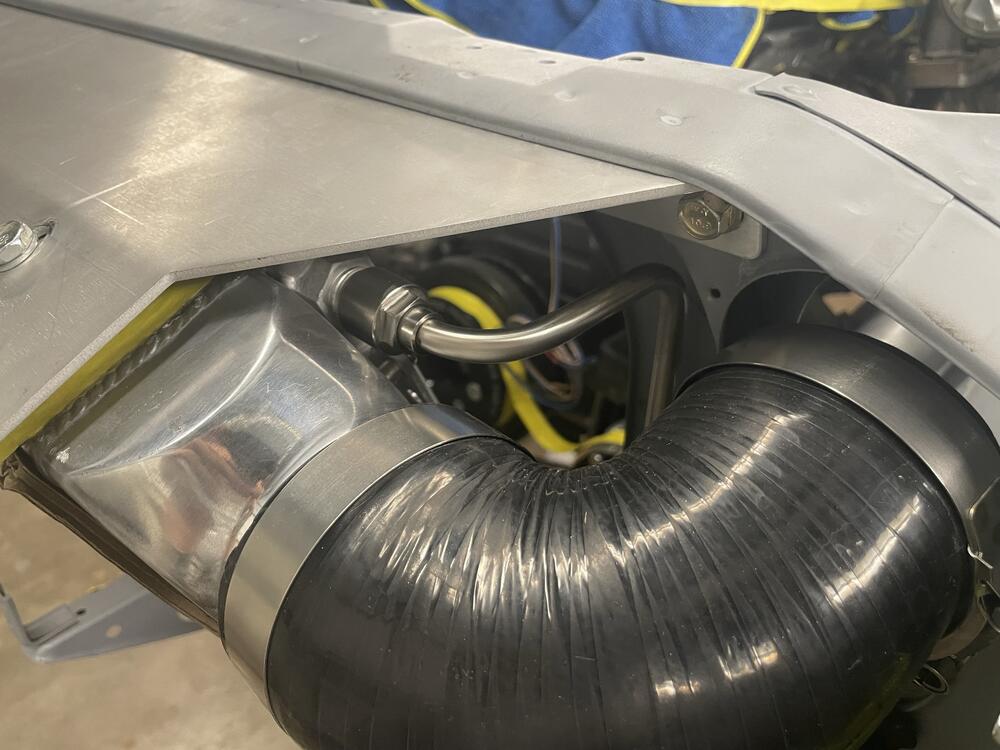
4 pointsFront end plumbing is just about complete. Intercooler installed, piping from turbo to intake laid out, and giving a go at making stainless hardlines for the AC system that will package around the 3" intercooler piping.

 4 points
 -
2 pointsFuzzy visors mean only one thing; you're screwed if you can't find the screw. And even if you can, you'll need a fuzzy screw driver or you'll screw the fuzz while you're screwing. I would say screw U to the fuzzy visors.2 points
-
2 points
-
2 points
-
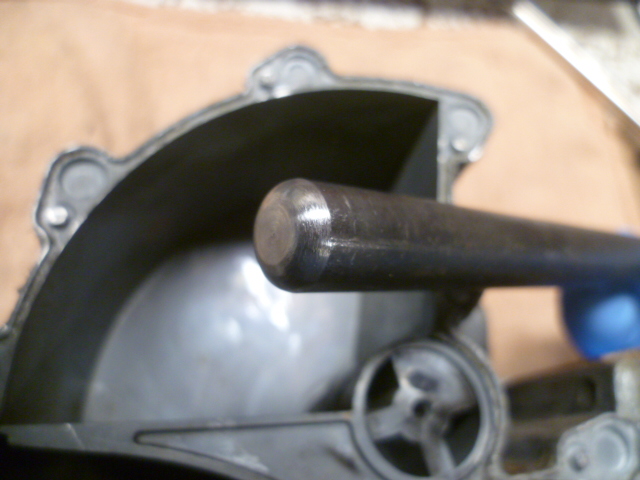
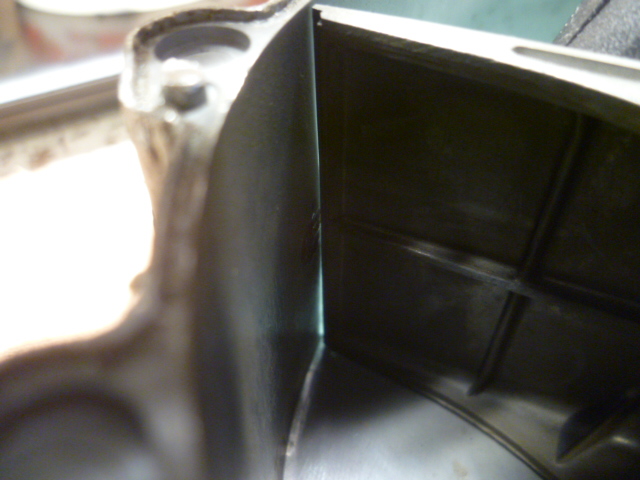
2 pointsSo I used a red Sharpie and marked the inside of the AFM where the interference was occurring. This is my target for bashing. Here's my target to push the case back out a little bit: And here's my drift tool. I rounded the end to try to minimize digging in and gouging the aluminum: In position and ready for an adjustment whack: And the clearance after a couple percussive maintenance adjustments It'still pushed in a little, but it clears the AFM vane: So now the AFM moves smooth for the entire sweep. Next, I'm going to work on how to put the side cover back into place. The plan is to drill and tap at least one of the rivet locations along the top side. The bottom already has two screws, so I figure if I add a third along the top and silicone it into place, it should be good enough. Certainly better than the broken paperweight I started with.


 2 points
 -
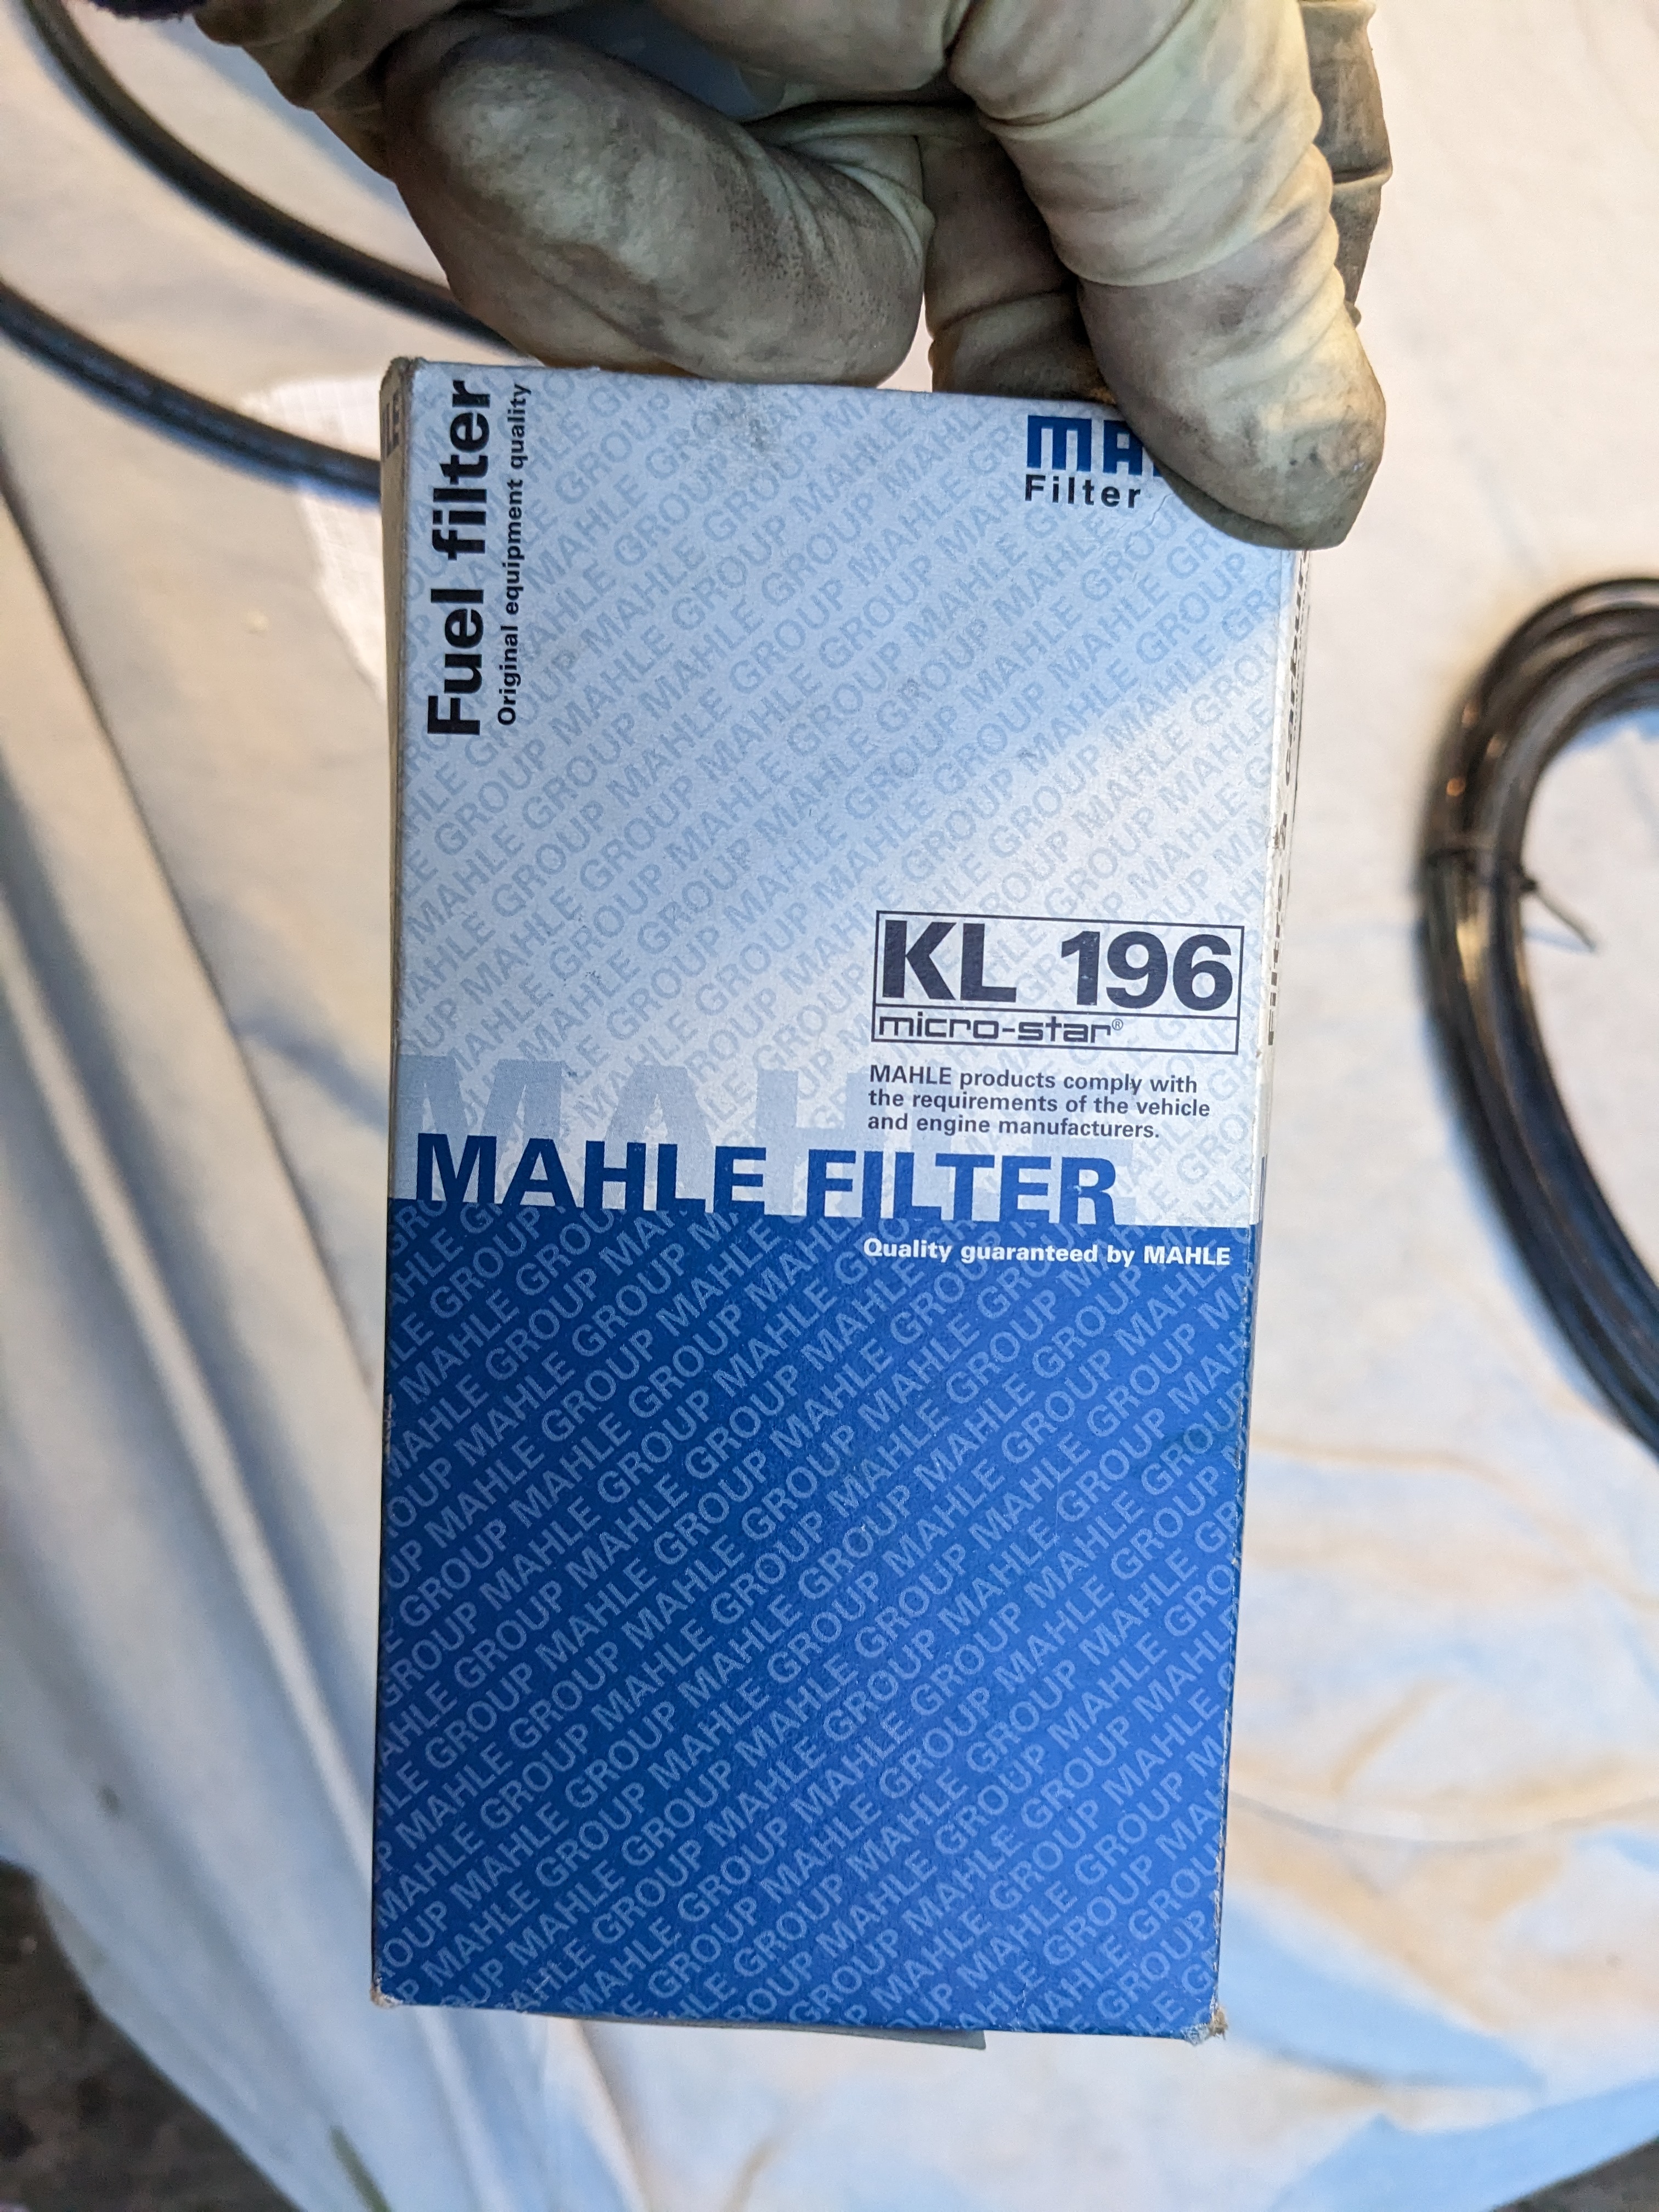
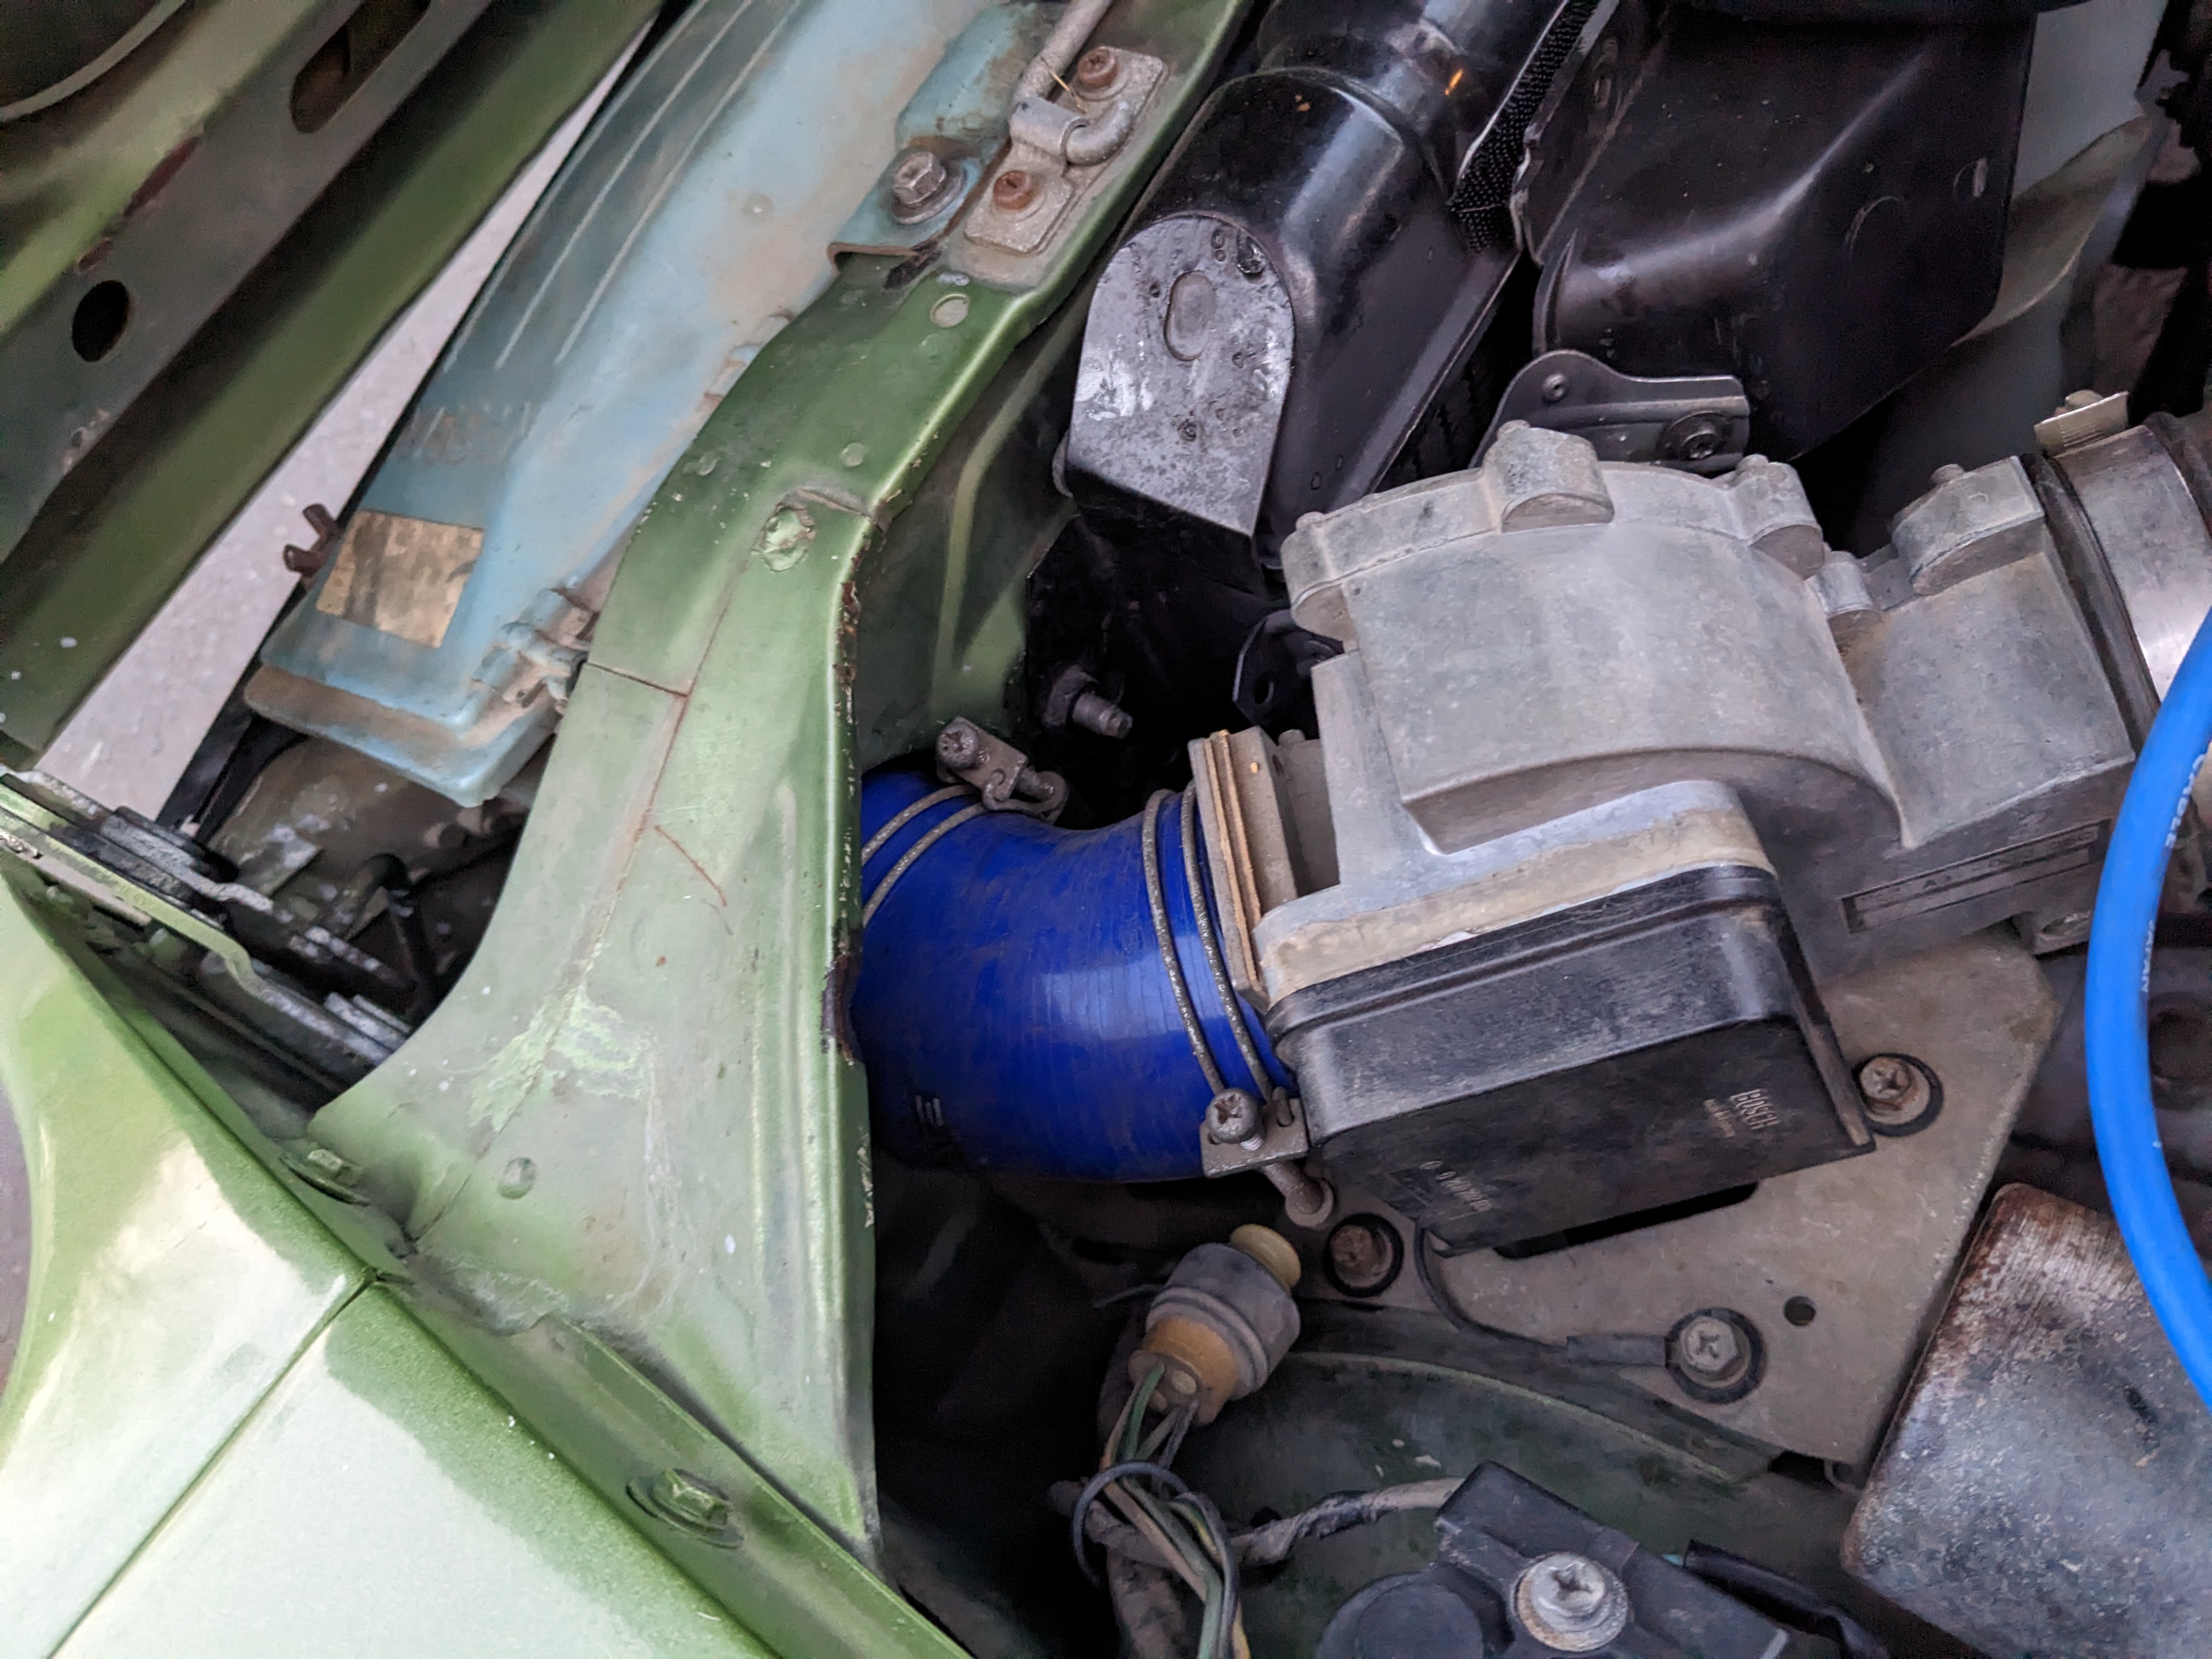
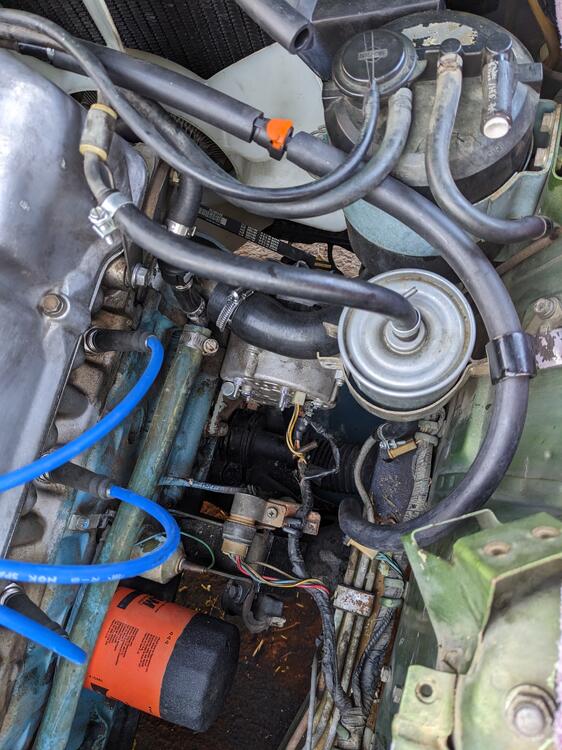
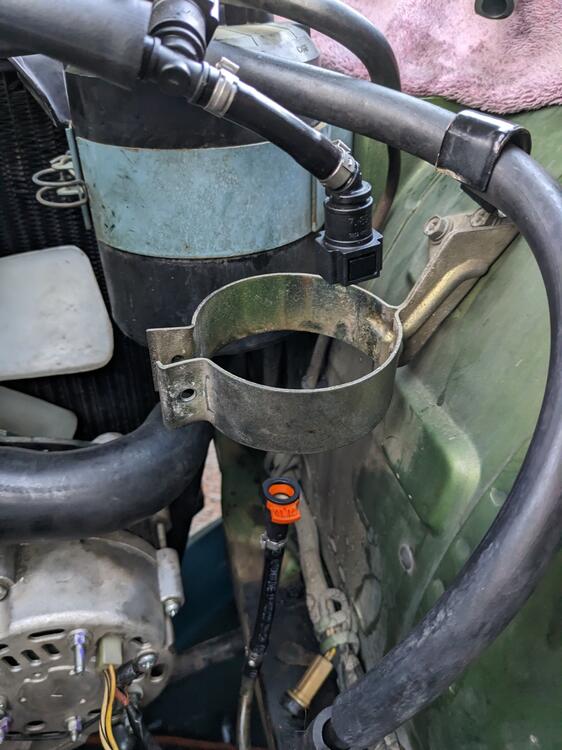
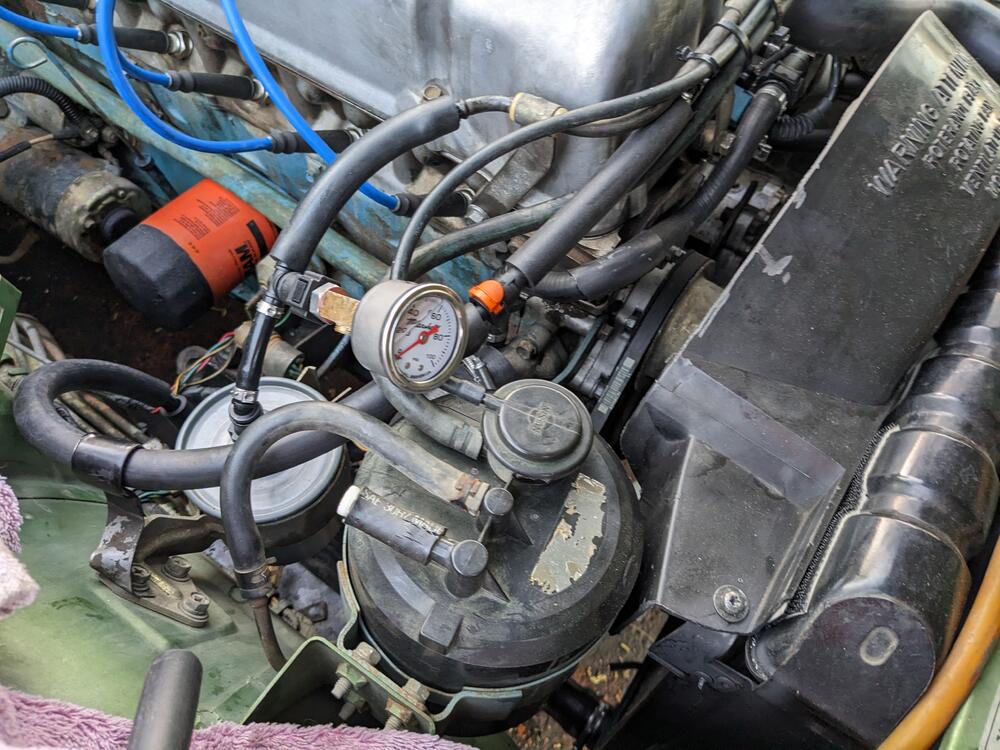
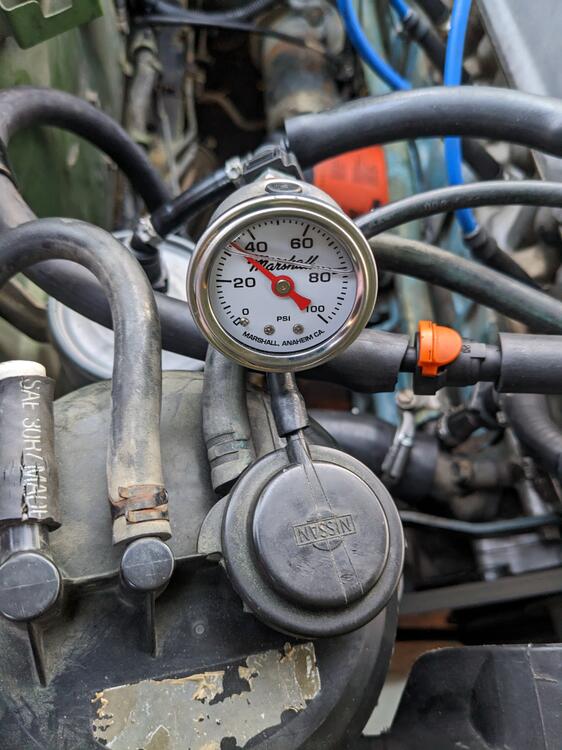
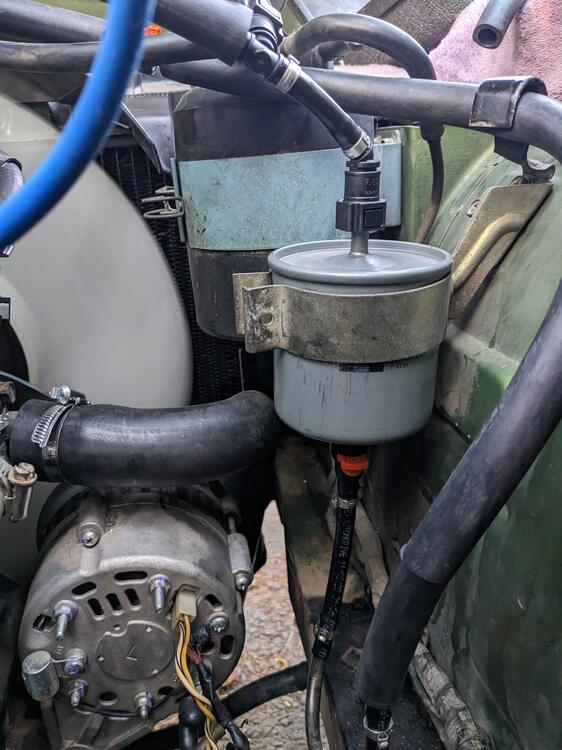
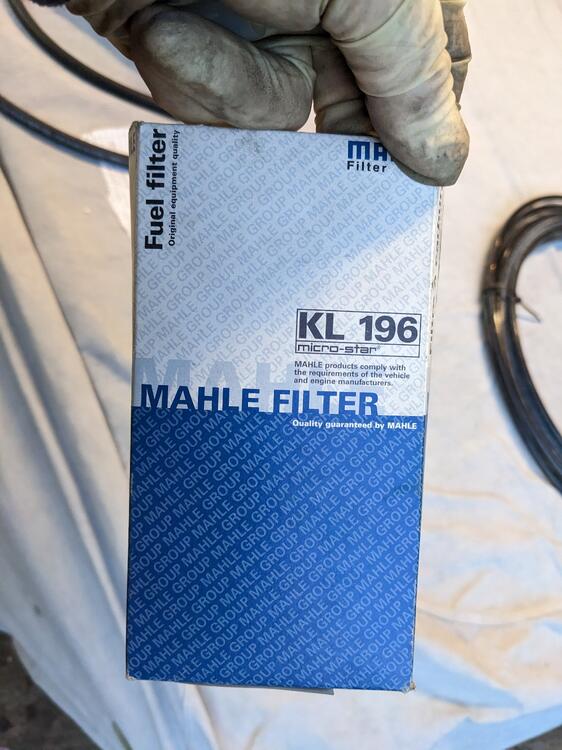
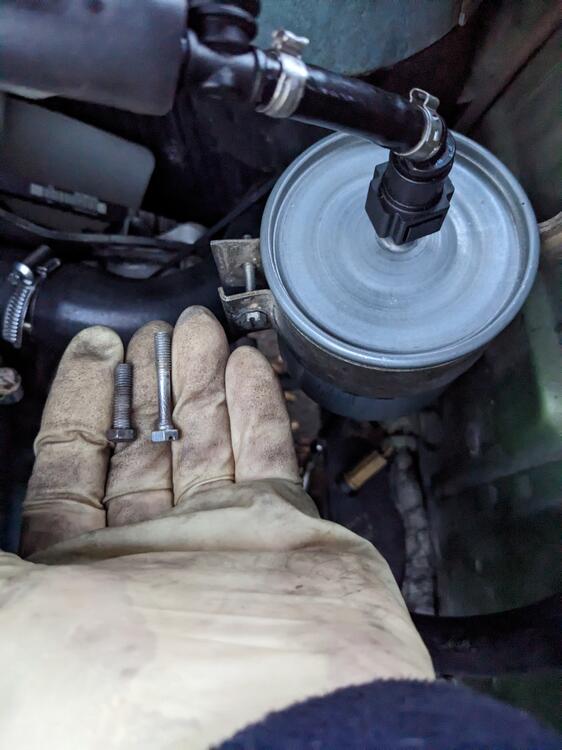
I made a start on redoing the fuel lines. I used sleeved 10mm nitrile line with quick-connect fittings. The ends are clamped to the hard lines, and are not intended to be removed moving forward. The quick connect fittings allow you to disconnect the rail from the feed & return. Did the return first. Rerouted behind the filter to get it away from the motor. Support bracket previously attached to the filter clamp is now secured it at the inner fender QC fittings for the (Volvo application, Mahle KL 196) filter needed a longer M5 bolt while I was there I added a branch to allow me to add the fuel pressure gauge (M10x1 w/QC, 1/8" NPT) Used a left over silicone elbow from my C30 turbo upgrade, perfect fit for the torn filter-AFM elbow
 1 point
 -
1 pointYou could have a bent hub flange or axle. It happens. Setting up a crude runout measuring device would tell you. Jack up a wheel, place a block some kind next to, put a stick on top and place the end close to the tire and/or the rim. Spin the tire and watch the gap between the stick and the wheel. Do the sides and the tread.1 point
-
1 pointIf I pop off the hose from the TB and suck on it, when I let go you hear the click of it snapping back in place. You also can't blow through the hose so the vacuum diaphragm is still holding air. I also put the timing light on it and pushed the throttle and you can see the timing advance immediately so they dist should be good.1 point
-
1 pointI don't know anything about your car's history. I'm just pretty pretty pretty sure that Nissan did not use fuzzy fabric on the visor. I could be wrong. You can probably feel the screw under the fabric if you squeeze in the right spot. Cut a tiny hole and stick a screwdriver in. Looks like somebody just sewed new fabric over the old vinyl. Probably made it heavier, so more droop-prone.1 point
-
Soo. today i have some big news. but let's start with the usual deliveries: 1) Something i've been searching for a while now. Well Actually i'm looking for the LHD L-Drive but this is the closest i found so far: an UK R-Drive manual: For those who don't know the L-Drive / R-drive is a Parts manual folder, but due to it's size it has the most detailed drawings and some additional informatino which is difficult to see or not existent in the microfiches, parts booklets etc. So my experience is that these are the most detailed parts books availabe (outside of NMC of course): Looks like your usual parts manual. This one is specific for the 240Z / 26oZ RHD Export specificatino booklets. so mainly UK and AUS, i guess. but i still have to see. I got it from the UK. 2) I also got this LH Inner wheel tub from KFVintageJDM in Bogota: Some may remember that i already got t his part from Tabco (USA). but i was never satisfied with the quality. Just look at the details like the little "humps" which are basically nonexistant in the Tabco item: Or the way they're cut at the edges, etc. And they came just in time, because i just got a coll from my Bodyshop that they will finally work on my car starting on Monday. Full-time with three men! Expecting big news soon. Early next week i'm going to visit them and bring an entire truckload of bodypanels for them to exchang :-)Stay tuned for more soon. hopefully. Oh and forgot to post this stuff which i got a while ago. 3) M-speed Nismo Competition racing mirror replica: Ventilation Intake pieces: And a nice print from Etsy: Which now found a nice place next to my signed Starroad Print in my garage. Let's see what the next weeks will bring. I also have a NOS parts lot find on it's way here and i'm just placing an order vor a cool Piece in Japan... Stay tuned for more1 point
-
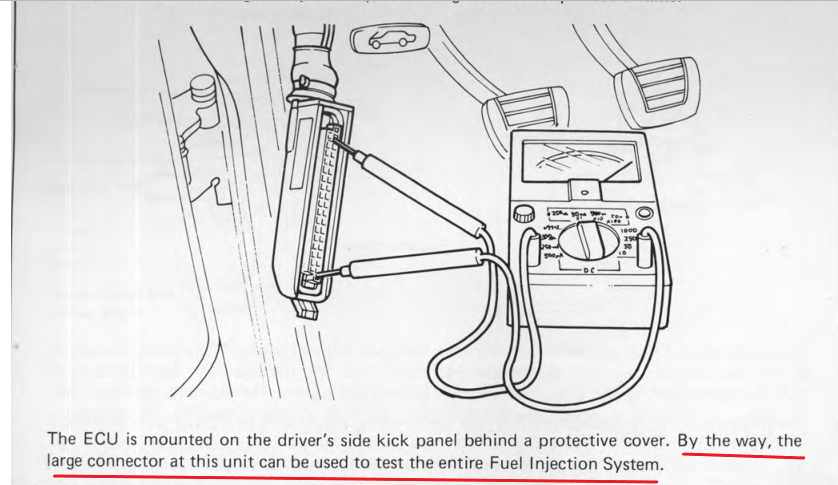
When you check the wires at the ECU you're checking exactly what the ECU sees. If it's not right then you move down the wires to find the source of the wrong numbers.
 1 point
 -
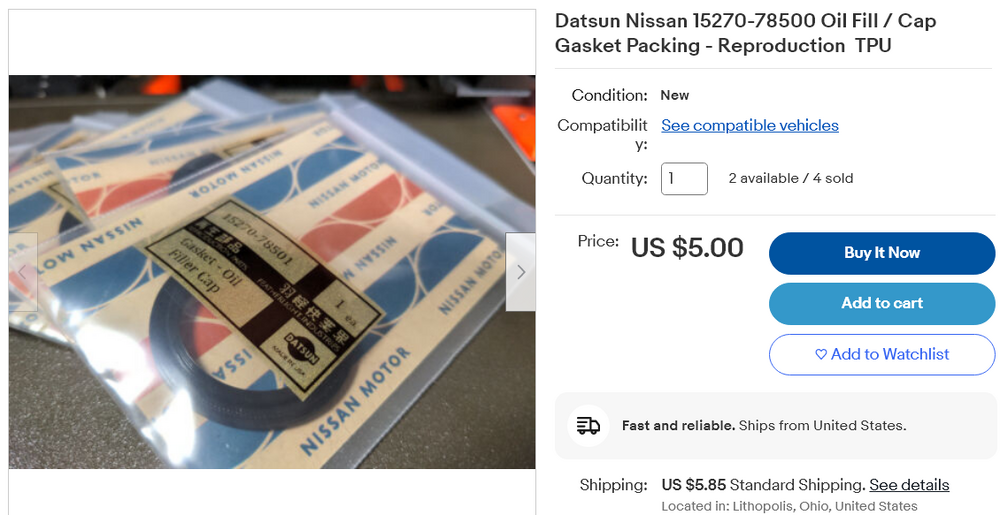
1 pointI looked but did not see anything. Tried all of the words - seal, gasket, filler, oil... Got nothing. Edit - I tried again, working my way through their new website sub-menus and finally got to the secret link. Wrongness and unavailable. Gaskets and seals > Oil cap > o-ring https://www.thezstore.com/category/552/gaskets-amp-seals https://www.thezstore.com/category/789/oil-cap
 1 point
 -
1 pointLooked a lot of reviews and this product Rust Kutter came up on top above OSPHO. Both are Phorphoric Acid based. https://www.amazon.com/dp/B001U1GW82?psc=1&ref=ppx_yo2ov_dt_b_product_details This thing works!!! my rust was pretty serious. Scrapped with a big wire brush and this is after first pass sitting for about 30 hours. Good thing is it creates a flaky black surface which I believe is the reaction residue which can be scrapped off with a wire brush. I think results are pretty good so far. I am planning to give it 3 rounds. Using the same treatment in the battery area which luckily dont have any pitting. Wanted to share the results and the product I used. Probably will also use that wet rag combination as well in harder areas. Slow and steady!!!

 1 point
 -
I have a truck with hub centric wheels that uses flat faced nuts to hold the wheels on. Torque spec is 150 ft-lbs. It's an interesting topic. One of the first of my many cars had a set of mag wheels with replaceable adapters for different patterns that fit in a recess in the wheel surface. Very sketchy. Most of my cars back then had numerous vibration problems so I never noticed if the wheels were one of them. Found a picture of a similar wheel. https://inthegaragemedia.com/rolling-stock/ Here's a Ford hub centric lug nut. The hub centers and helps out but the nut and lugs do most of the work. This is aftermarket, the Ford nuts have a spinning seat with some grip texture on the face. Still flat.
 1 point
 -
I don't think so. If the wheel is properly designed for a lug centric application it should have the same likelihood of misbalance as a hub centric wheel. I think that the problems come out when people use a hub-centric wheel on a lug-centric hub or vice-versa. Which looks like what you're thinking about doing. If Rota designed the wheel as a lug-centric wheel then they most likely would have balanced/centered it around the lugs. The hub hole would be low tolerance. Plus, the lug holes will be tight tolerance and if your adapter is not centered between the lugs you could find a tolerance mismatch. You might even end up putting a bending load on the lugs when you force the lug nuts in to the holes or down on their tapered seats. And, you'll need to match the center of the wheel to the center of the hub in your adapter/spacer since it's not just a gap filler. It is a spacer that has to fit two centers. Neither the hub or the wheel was designed to be the centering mechanism. It's more complex than it seems if you want the actual mass to be centered and supported. Apparently, hub centric can be stronger than lug centric. But, it still comes back to the engineering group that designed the system. Here's a simple review. The guy covers some of what you're considering. Things to be aware of. https://www.machinedesign.com/fastening-joining/article/21832042/whats-the-difference-between-lugcentric-and-hubcentric-wheels1 point
-
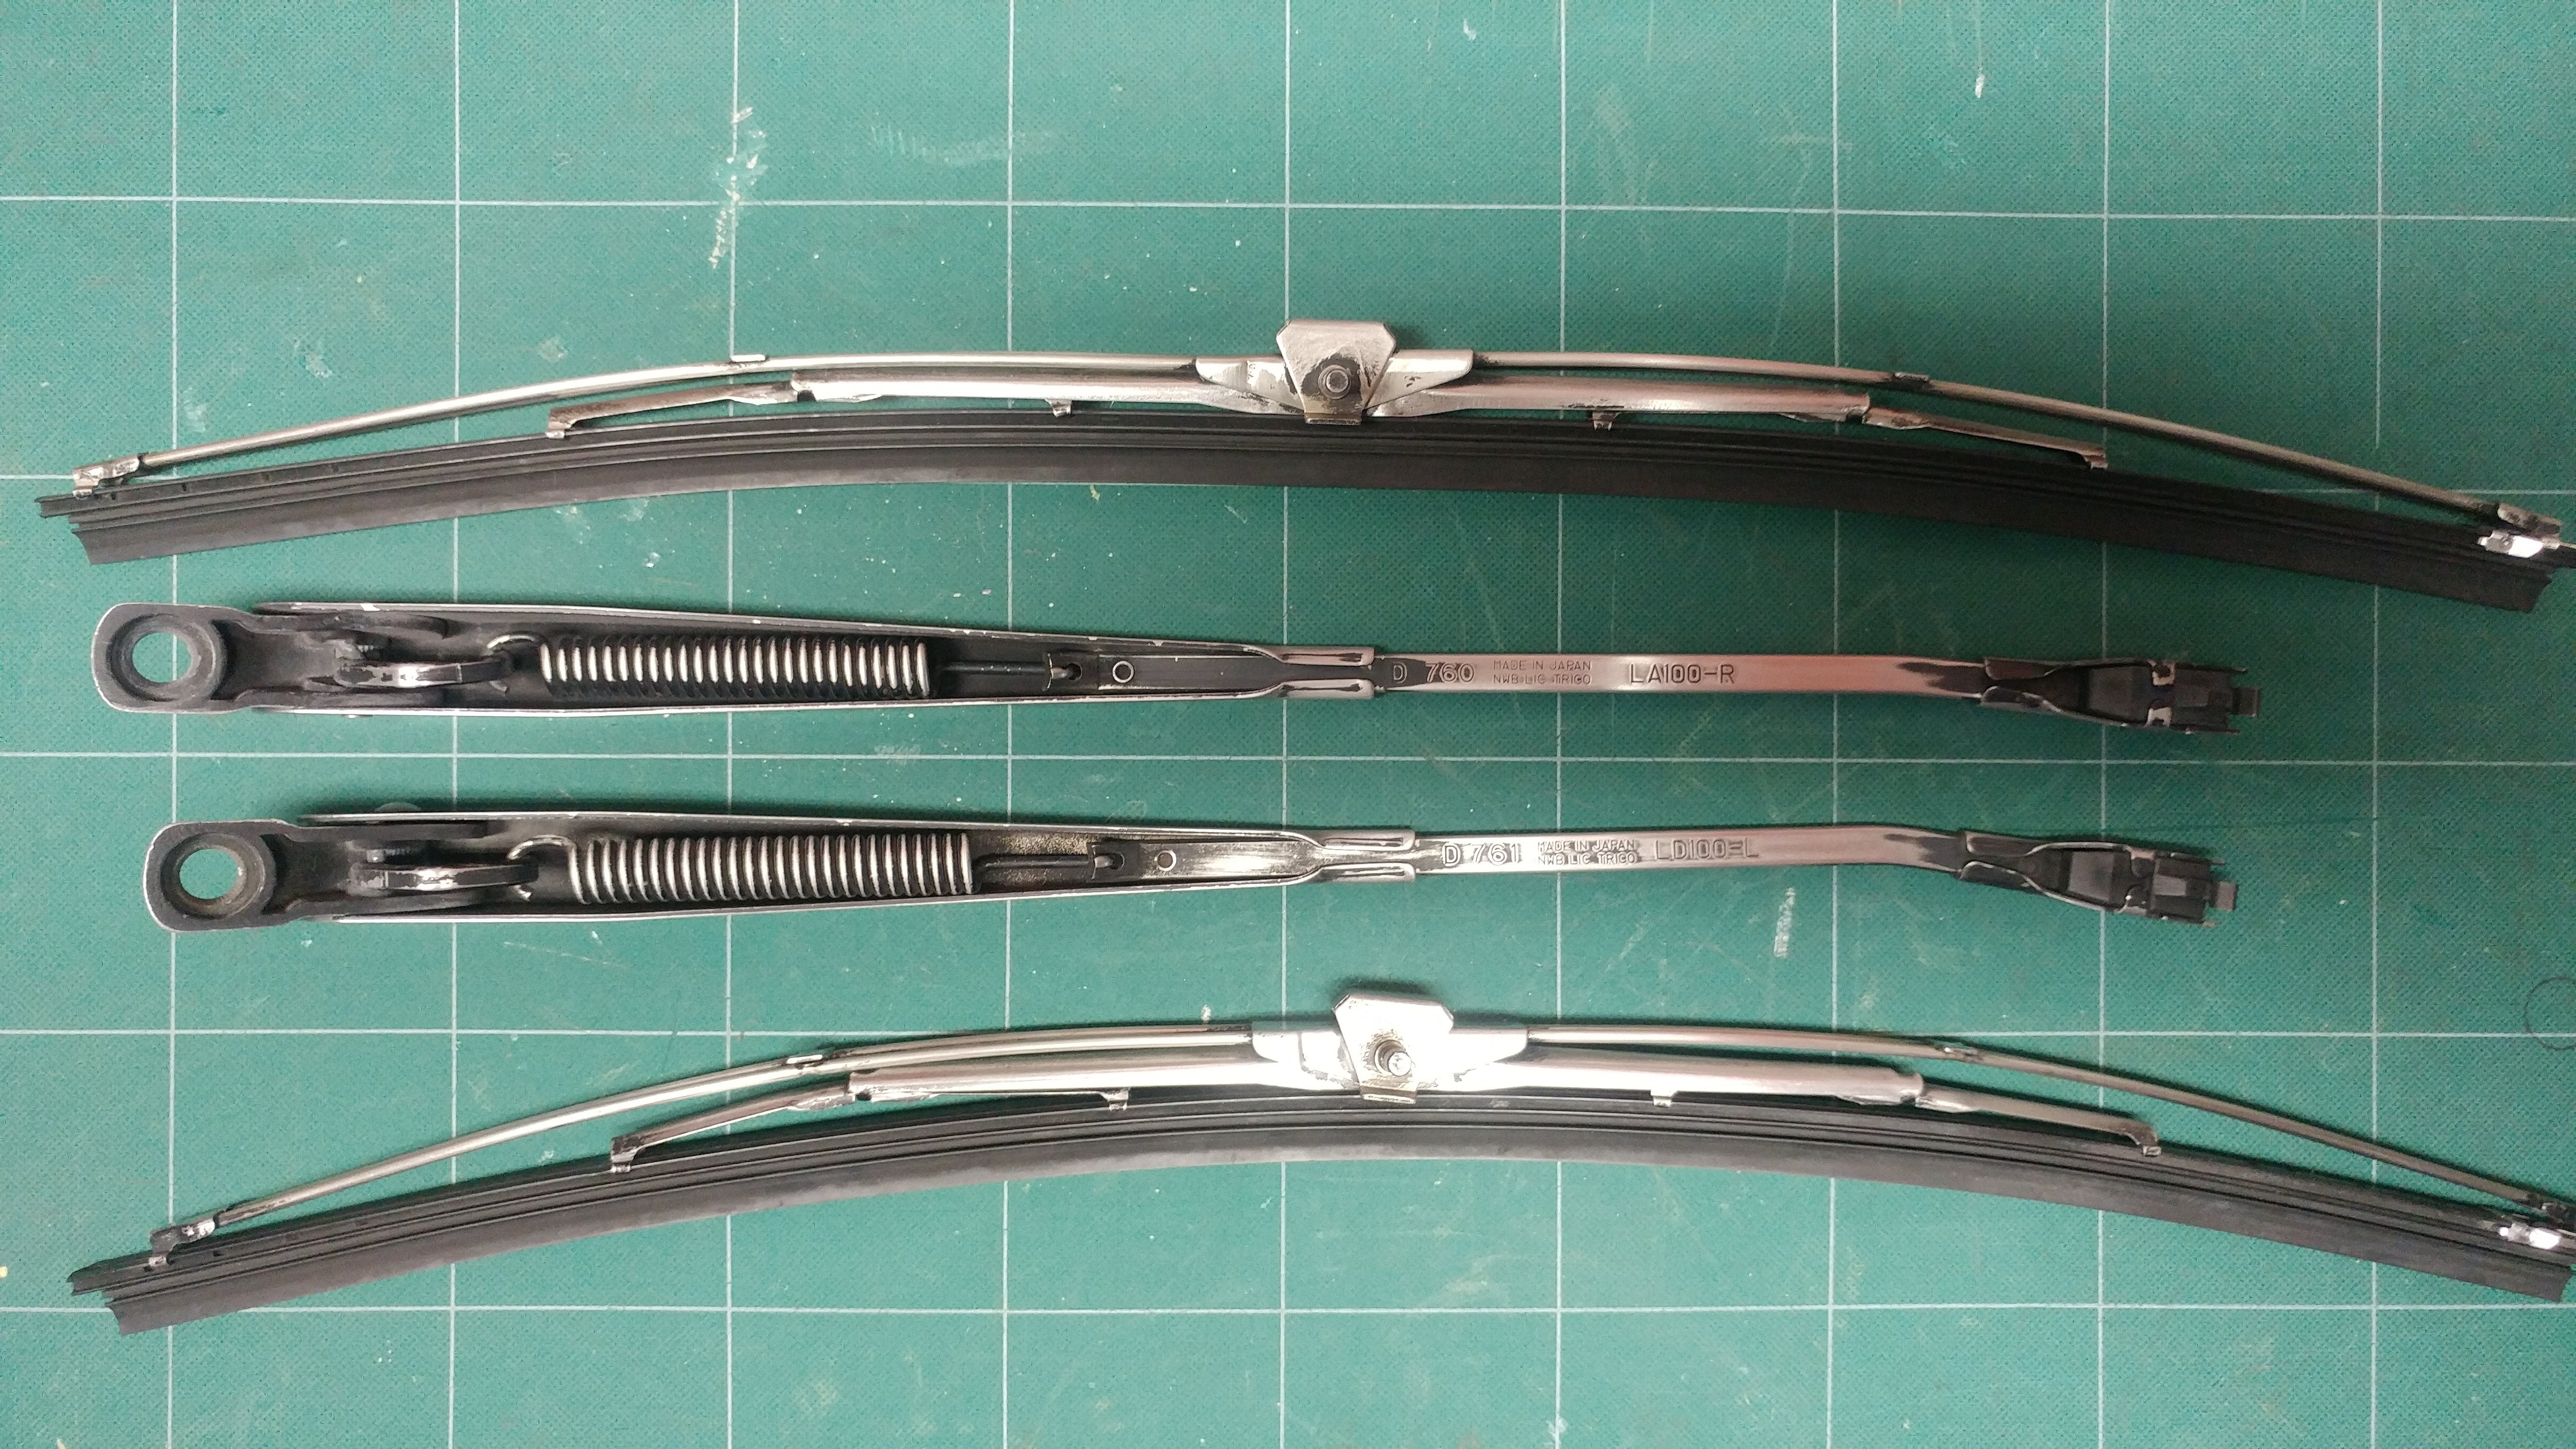
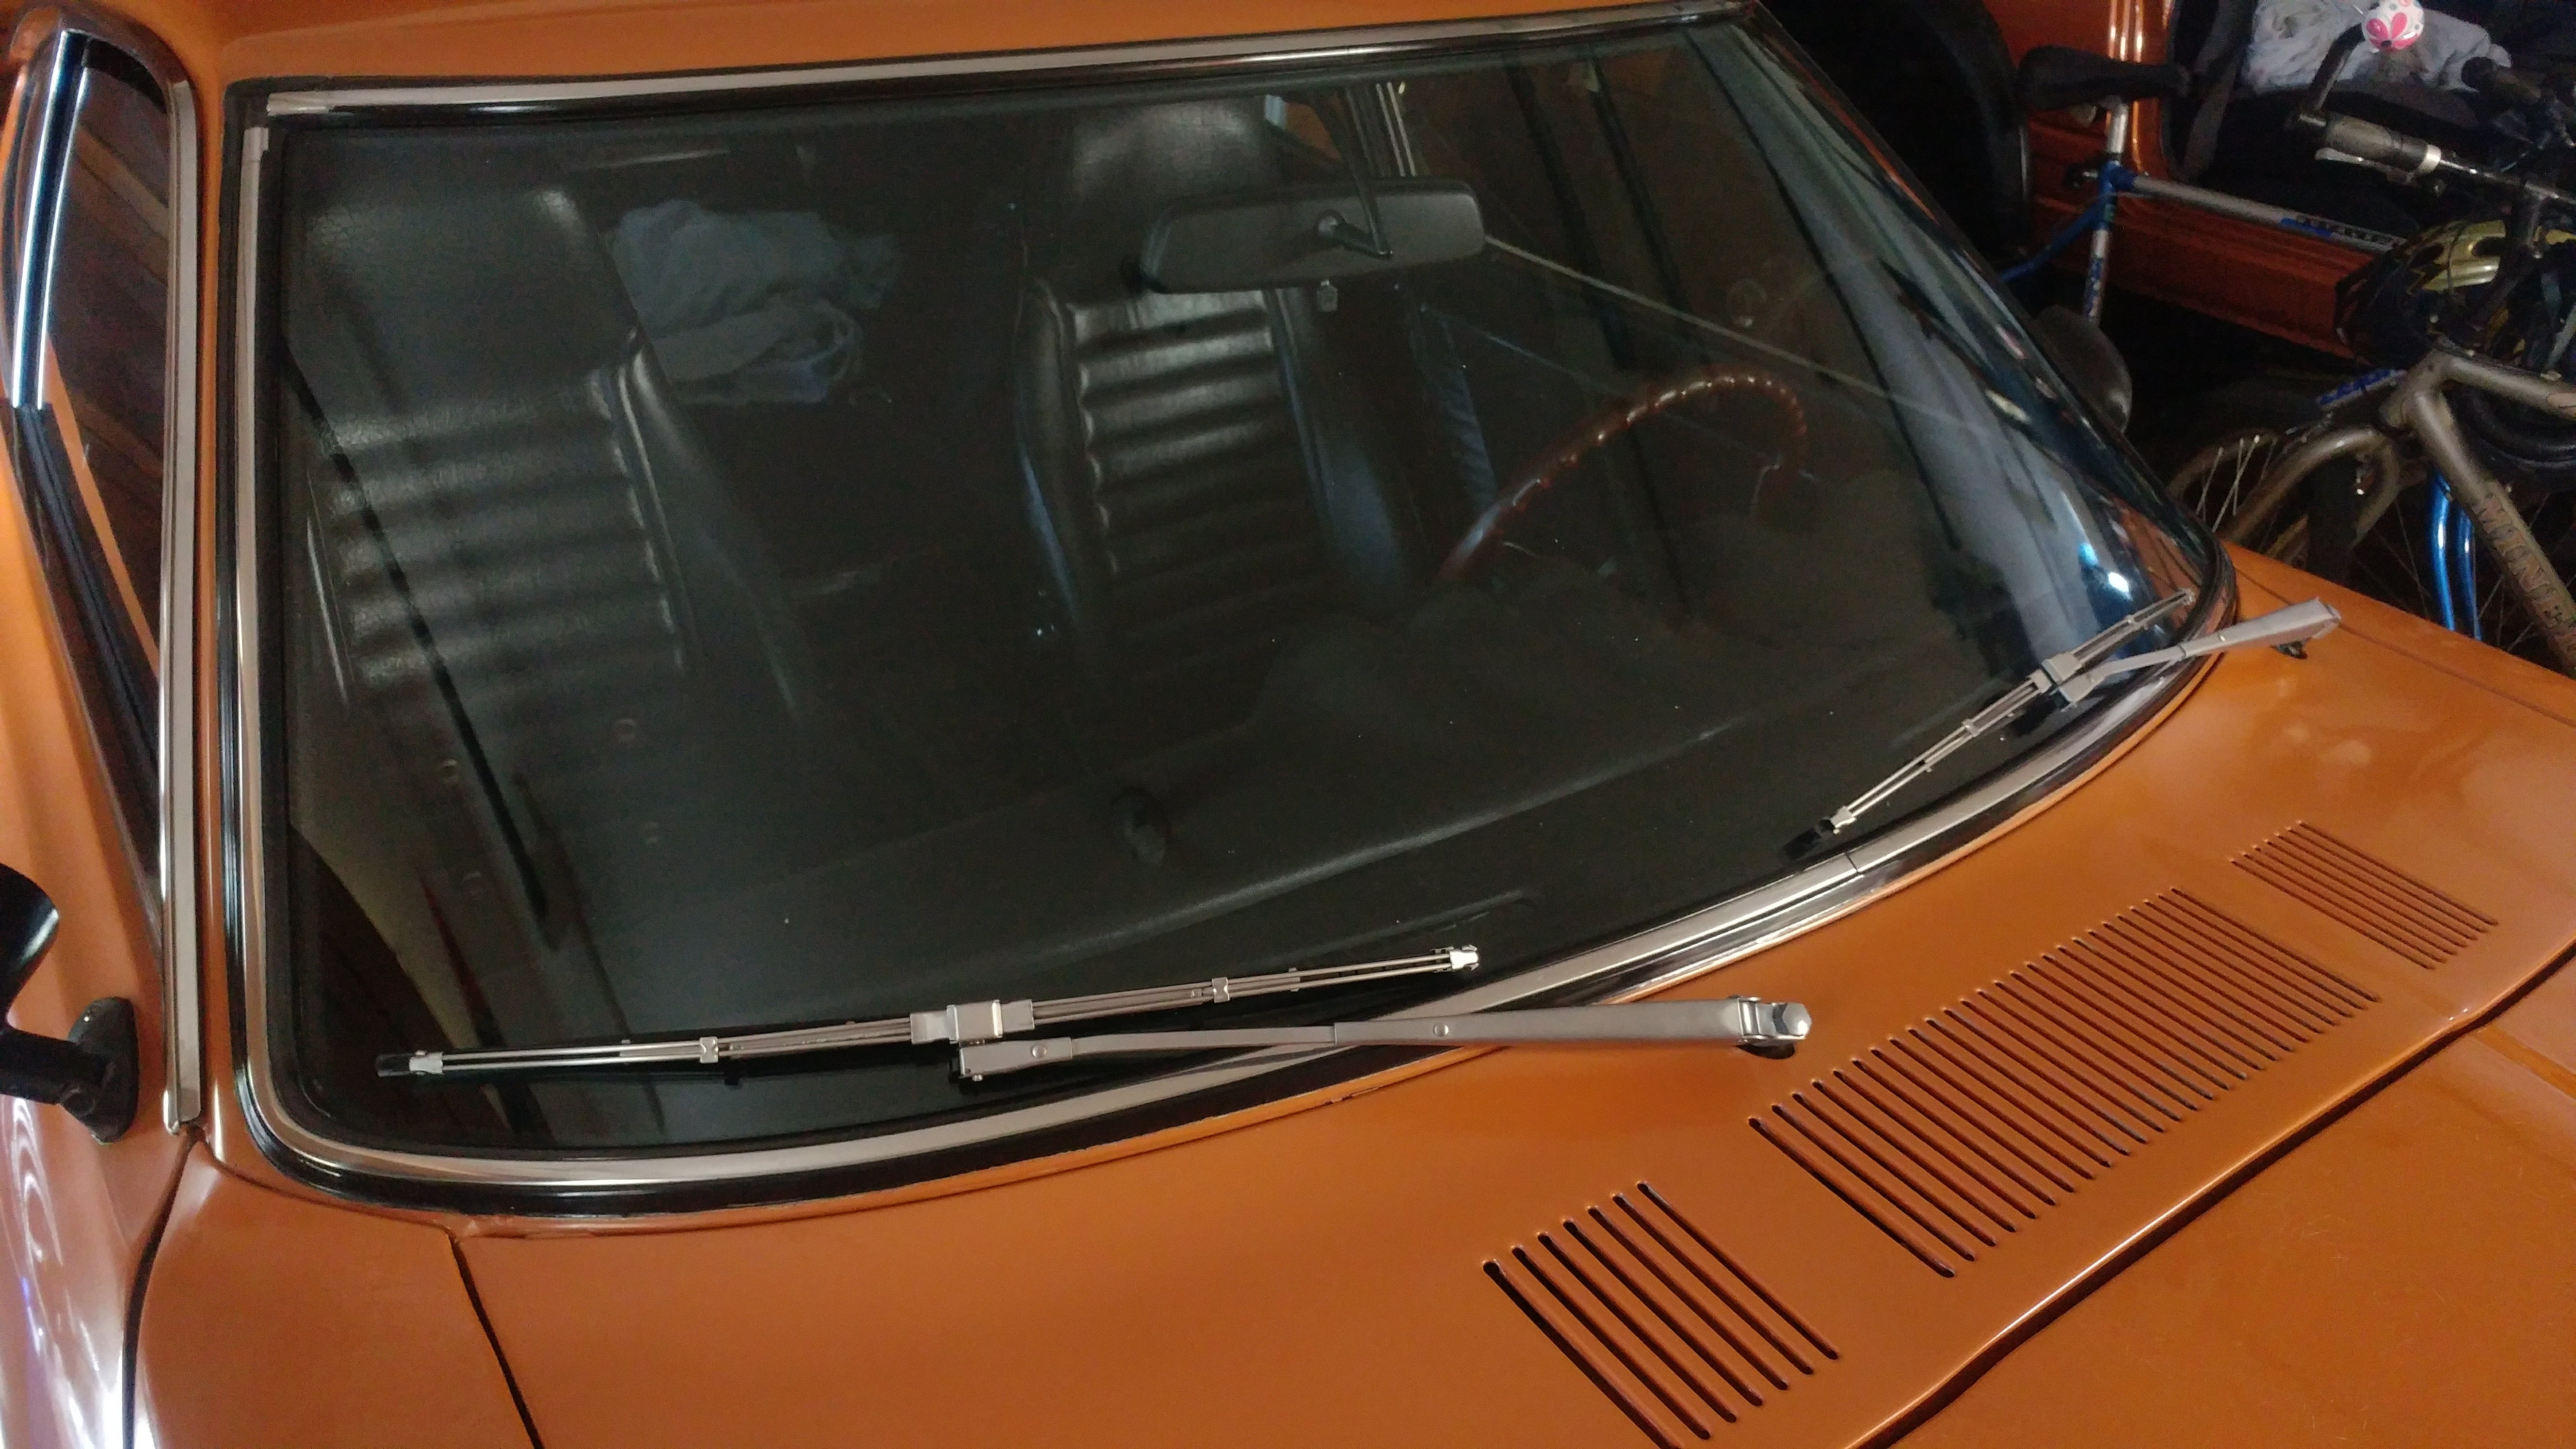
1 pointNot a 78 owner but I know a little about this. 77 and 78 280Z's had side mount blades instead of the top mount used on 70 thru 76, all had the twin wire blade design. Also in 1977 it was mandated in the US that wiper arms and blades be black. Here are a couple of images from 1976 and 1977 280Z sales brochures. 1976 280Z with early style, unpainted SS twin wire blades and top mount arms, 1977 280Z with later style, black painted SS twin wire blades and side mount arms, When I was on the search a few years back for replacements (I had aftermarket plastic blades) I got a set of the later style blades and arms that I decided to use on my 1970, When I got them they has quite a bit of the original black paint that I had to remove. Turned out pretty good, most people wouldn't know that they are not correct for my car. Here's a couple of pics of mine for a better look at the difference of the 77/78 style.


 1 point
 -
1 pointPaint store and 88 two bedroom apartments in 11 buildings I'm stuck with "managing". Paint mixing, rental property, cylinder head repair, manicures and income taxes done here. Taxidermy work is seasonal.
 1 point
 -
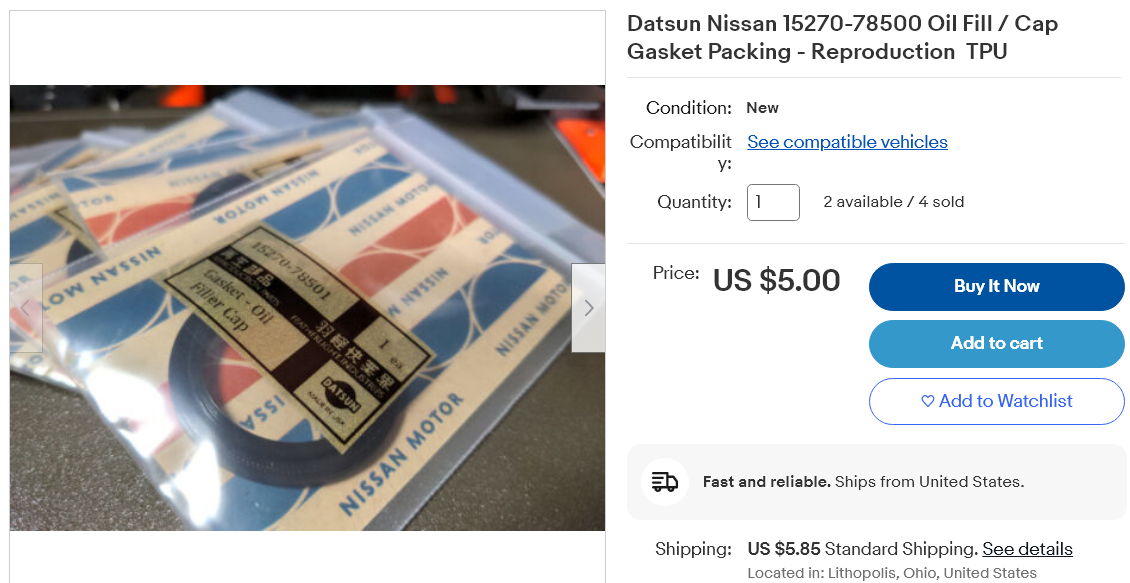
1 pointDon't know why I didn't go here last time, it's usually my go-to place to go to. https://www.carpartsmanual.com/datsun/Z-1969-1978/engine-280z/cylinder-head https://www.carpartsmanual.com/datsun/Z-1969-1978/engine-280z/cylinder-head/39 https://www.carpartsmanual.com/datsun/Z-1969-1978/engine-280z/cylinder-head/40 Not really sure what these guys mean by "reproduction TPU". Probably better than rock hard though. https://www.ebay.com/itm/275346381999
 1 point
 -
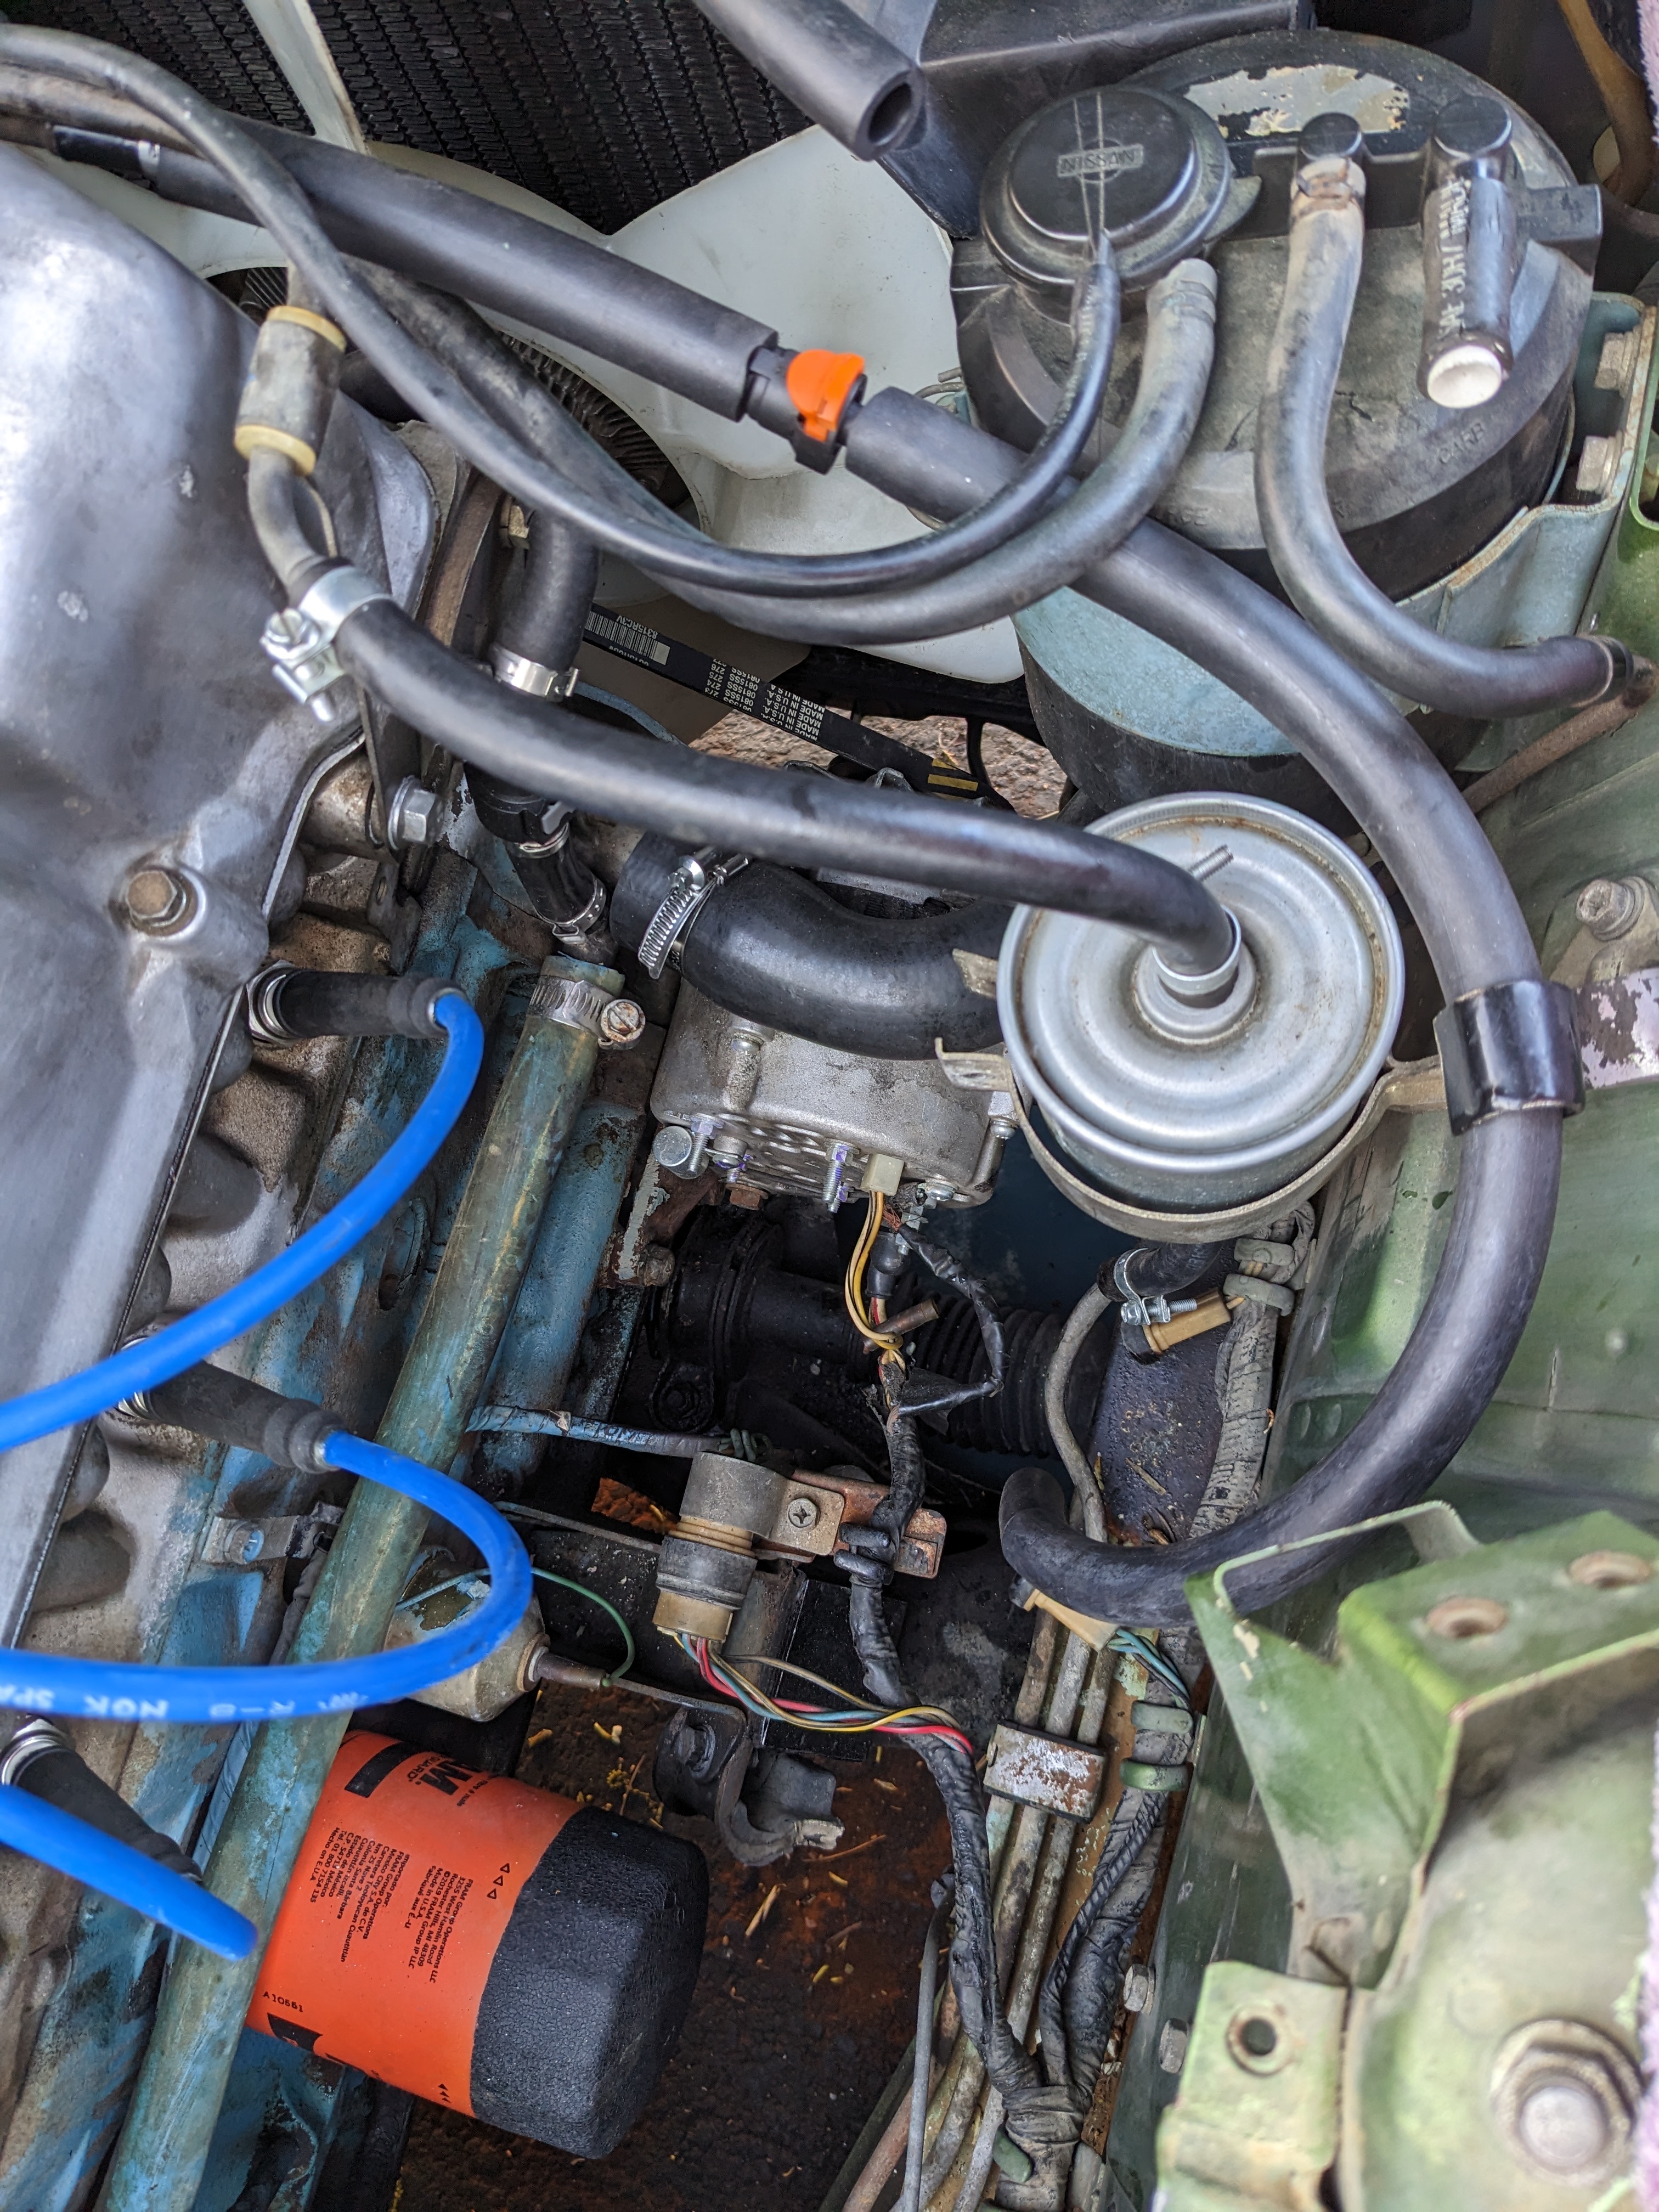
1 pointI have run out of easy stuff to check. PCV and carbs seem ok. I ordered some valve seals and I am going to check and replace them as a first step. If that doesnt do it, then I guess my only option is to pull the head and bring it to a different machine shop for evaluation. I will keep you guys posted. Thanks.1 point
-
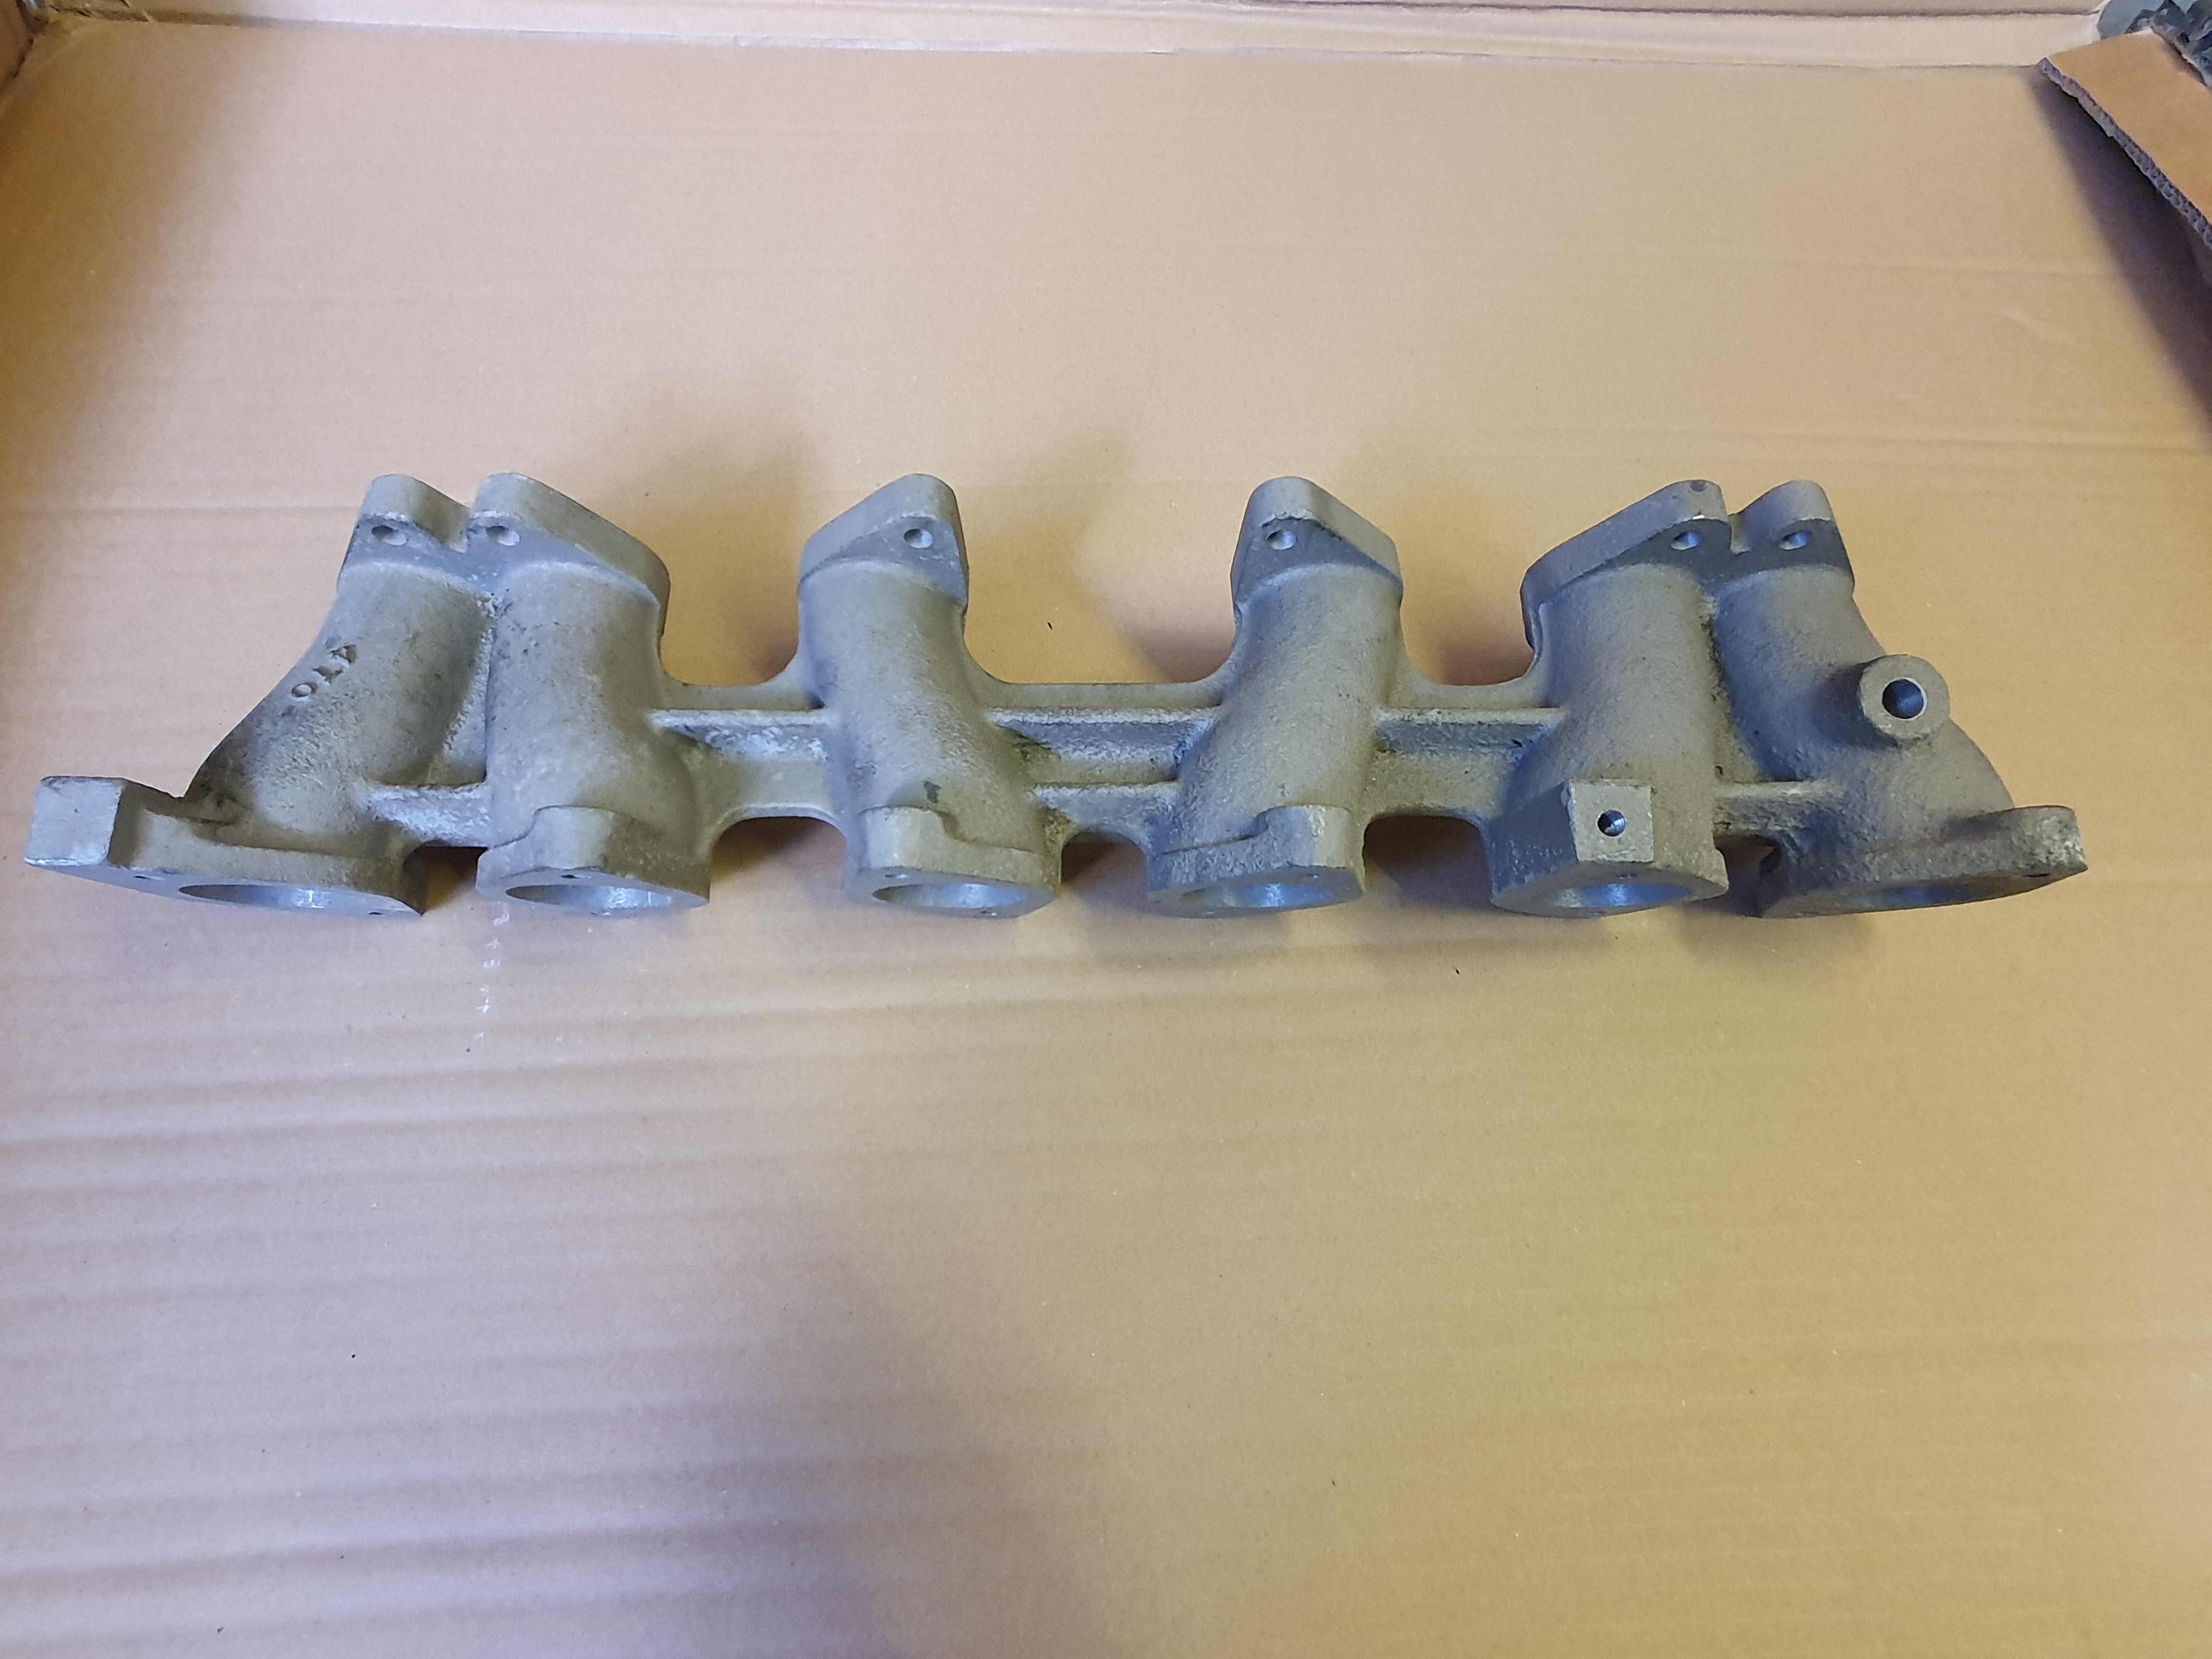
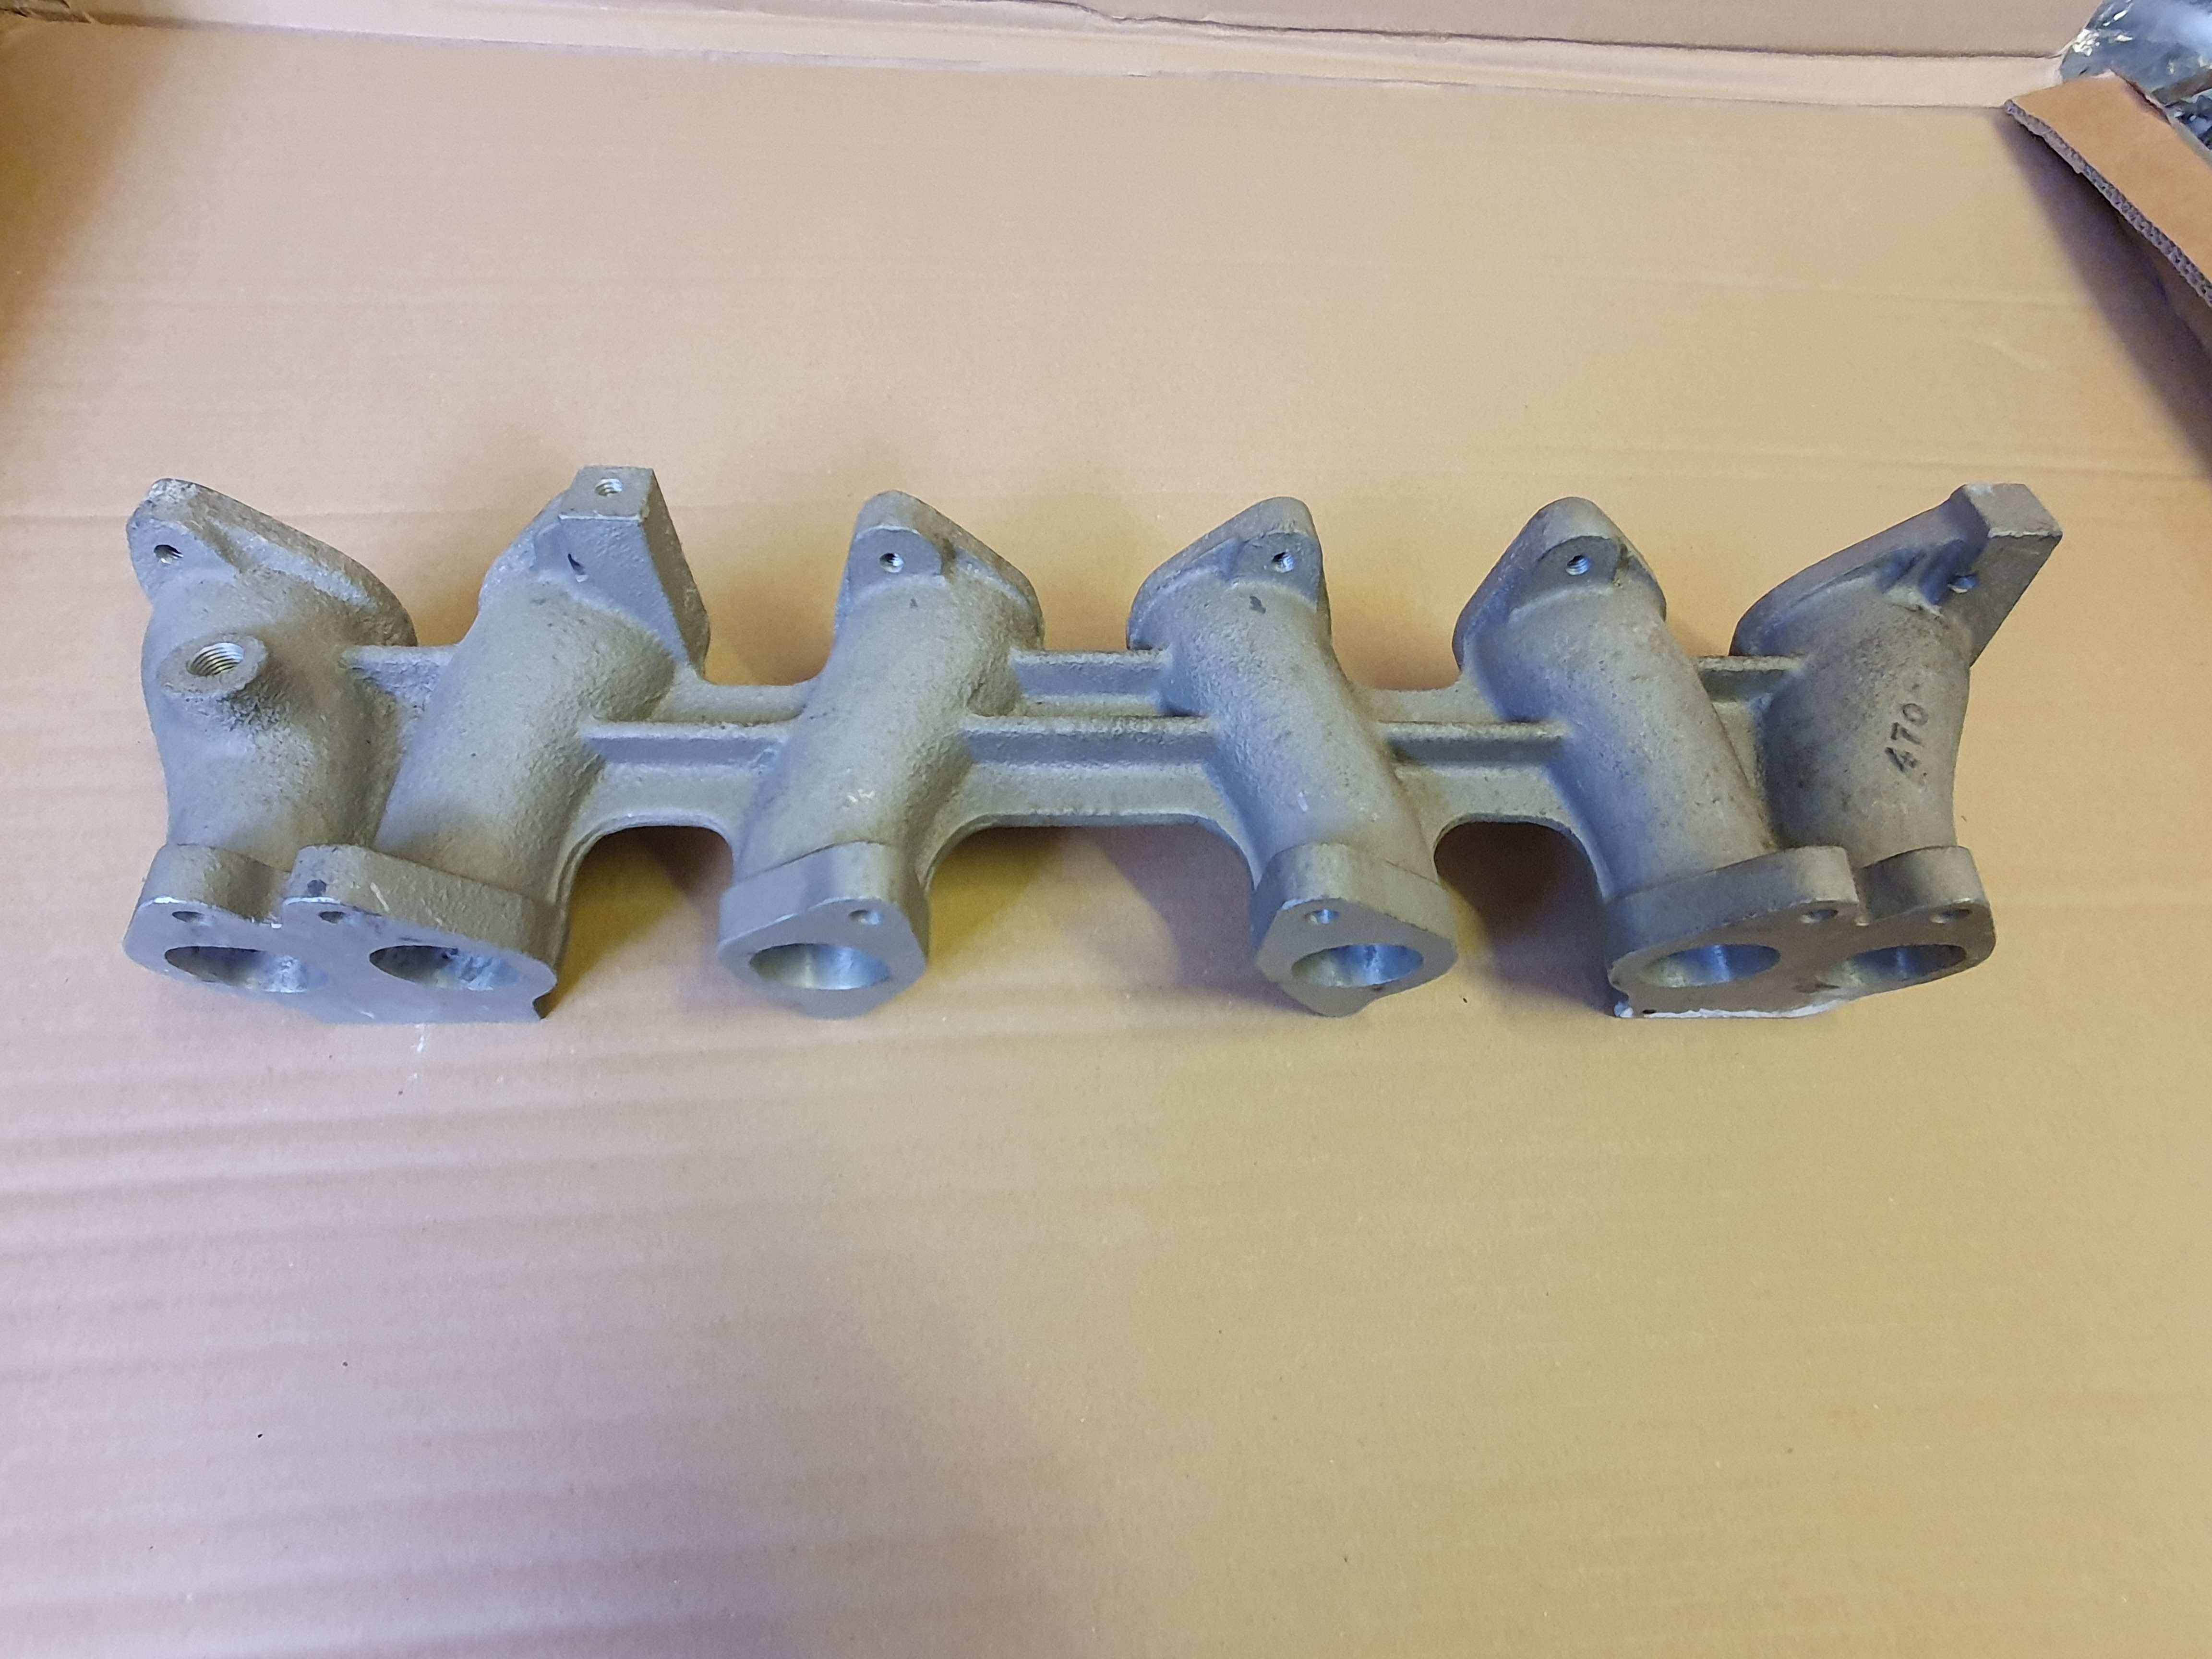
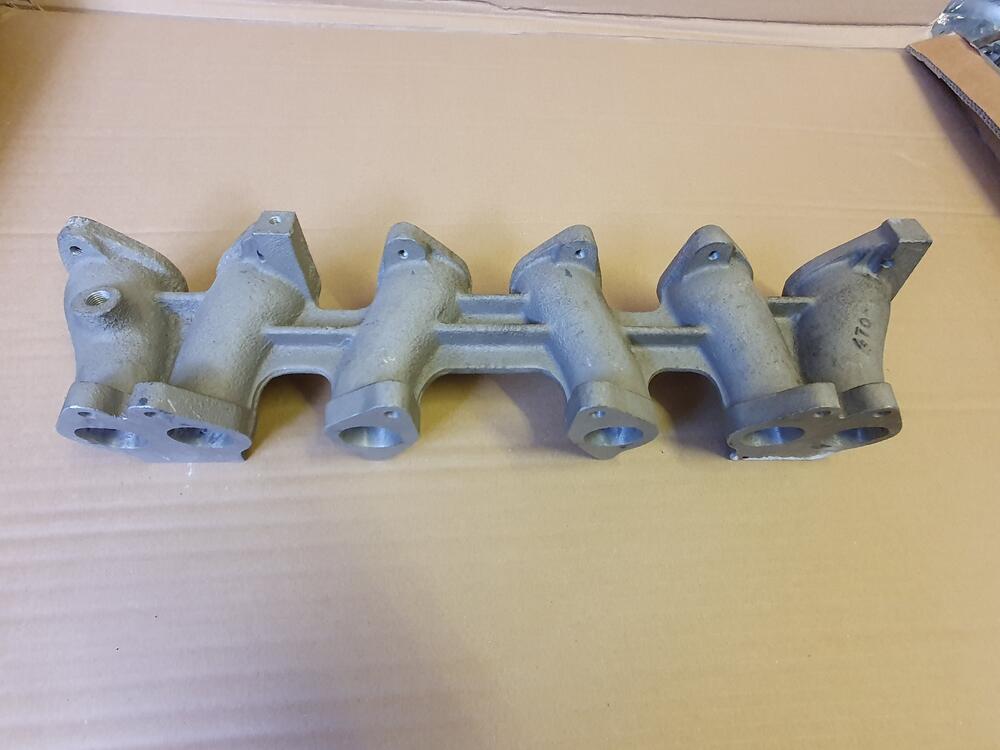
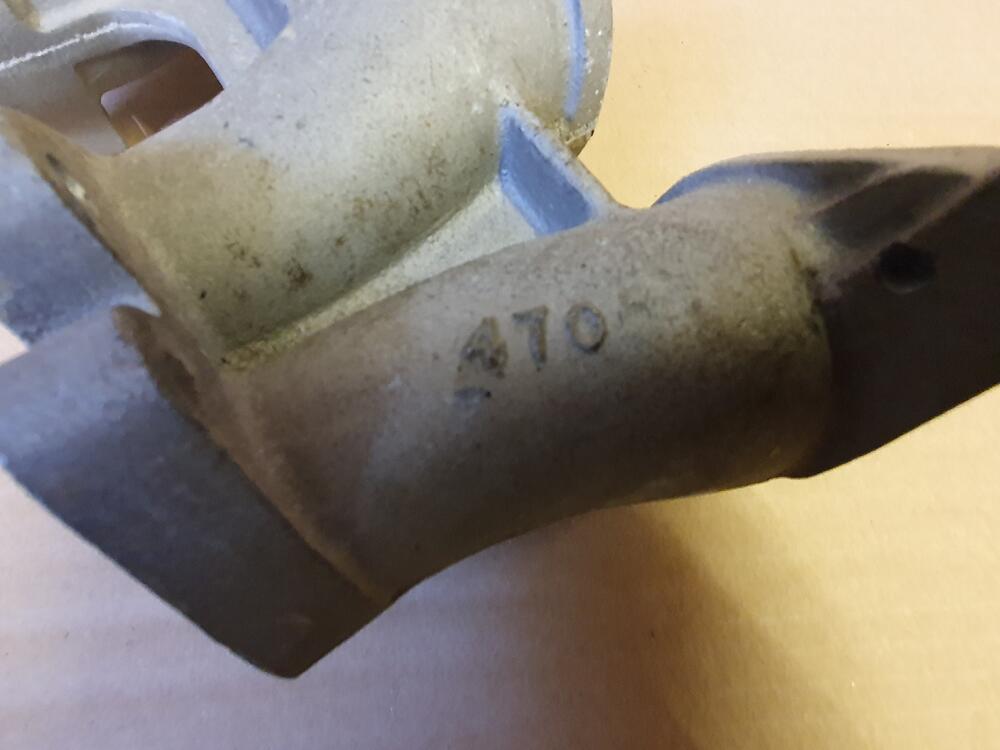
A cool part of DSSA history. Thank you for showing it to us. Intriguing! I'm surprised that they chose to use 40DCOE-24 series carbs. Weber's own recommendation as a conversion 'road' kit for the L24 engine was three 40DCOE-18 series and the 24 series was actually only offered as stock (factory) equipment on the 1600cc ALFA Giulia Super. The 24 series had 27mm chokes and 0.35 pump jets, whereas the 18 series had 30mm chokes and 0.45 pump jets. The 18 series also had an accelerator pump stroke more suited to the L24 than the 24 series did. My best guess (take that for what its worth) is that they sourced the 24 series carbs from ALFAs and/or already had them available. The manifold is a new one on me. I can't ever remember - even as a Londoner - seeing the name 'LONDON' cast into a manifold. Your illustration from the Janspeed catalogue shows the '470' casting that - I have always been told - was cast and supplied by Mangoletsi. Janspeed, and others, often supplied the Mangoletsi manifold with their conversion kits. I wonder if the 'LONDON' manifold was also something cast by Mangoletsi for a specific customer? However, I can't think of any L6 specialists in the London area or using the London name. Curious. Here's a Mangoletsi '470' casting manifold that I have in my loft, for comparison. Casting quality is - I have to say - fairly rough:

 1 point
 -
1 point