


Leaderboard
-
HS30-H
Free Member8Points5,509Posts -
xs10shl
Free Member5Points339Posts -

siteunseen
Free Member4Points15,115Posts -
conedodger
Free Member4Points12,513Posts


Popular Content
Showing content with the highest reputation on 03/11/2023 in all areas
-
5 points
-
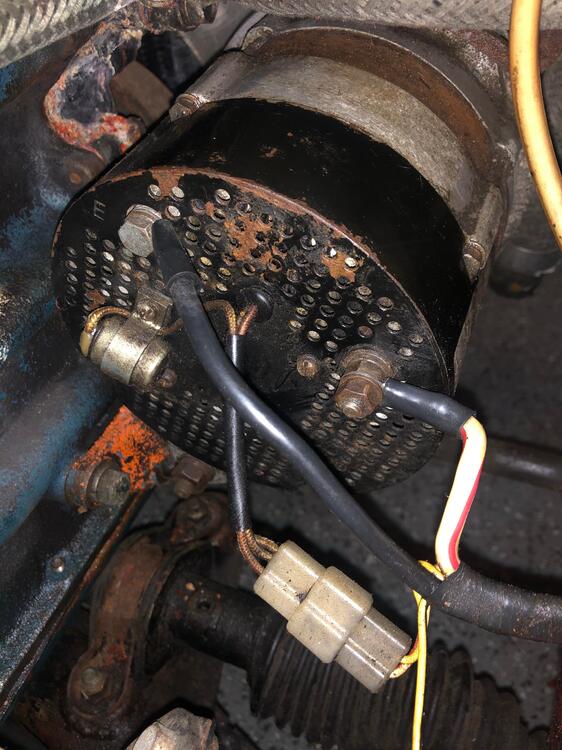
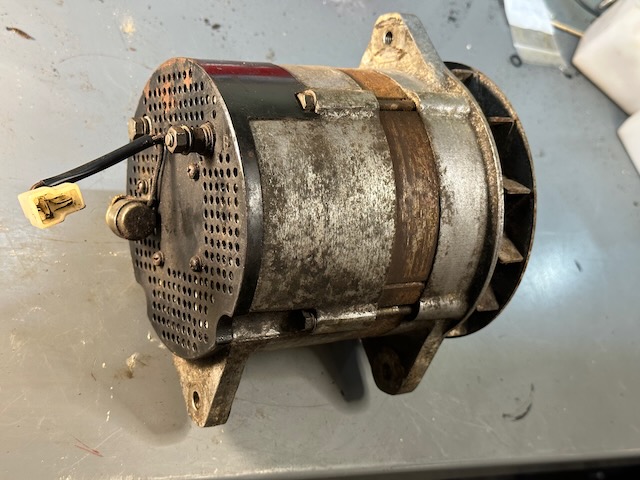
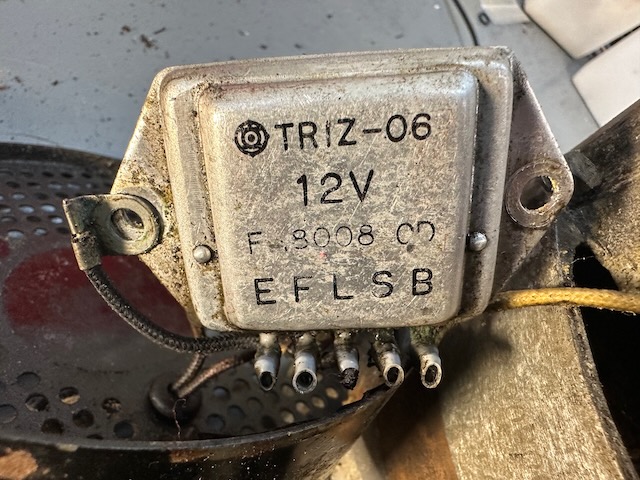
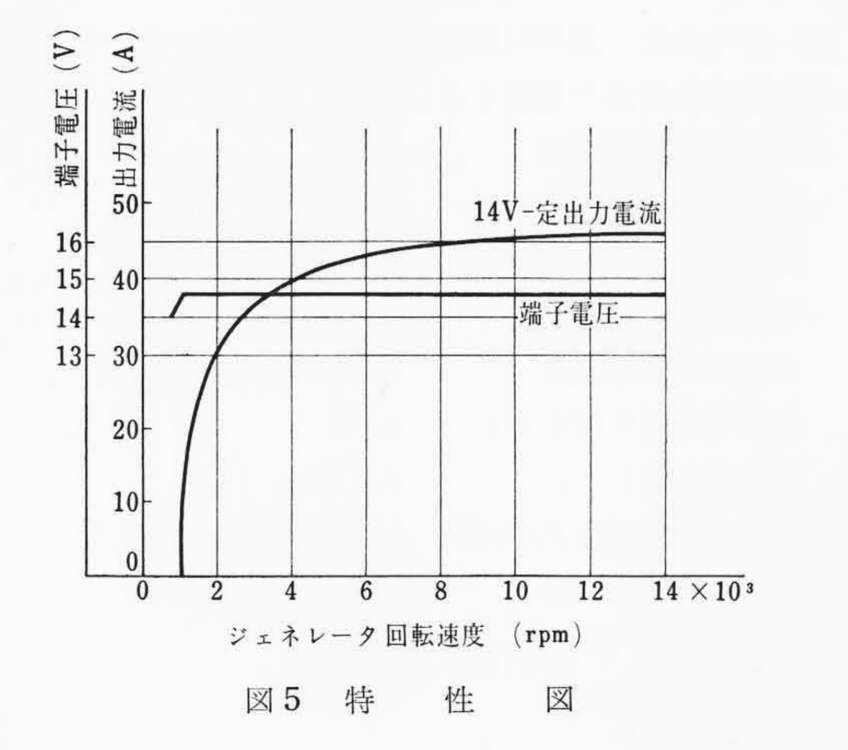
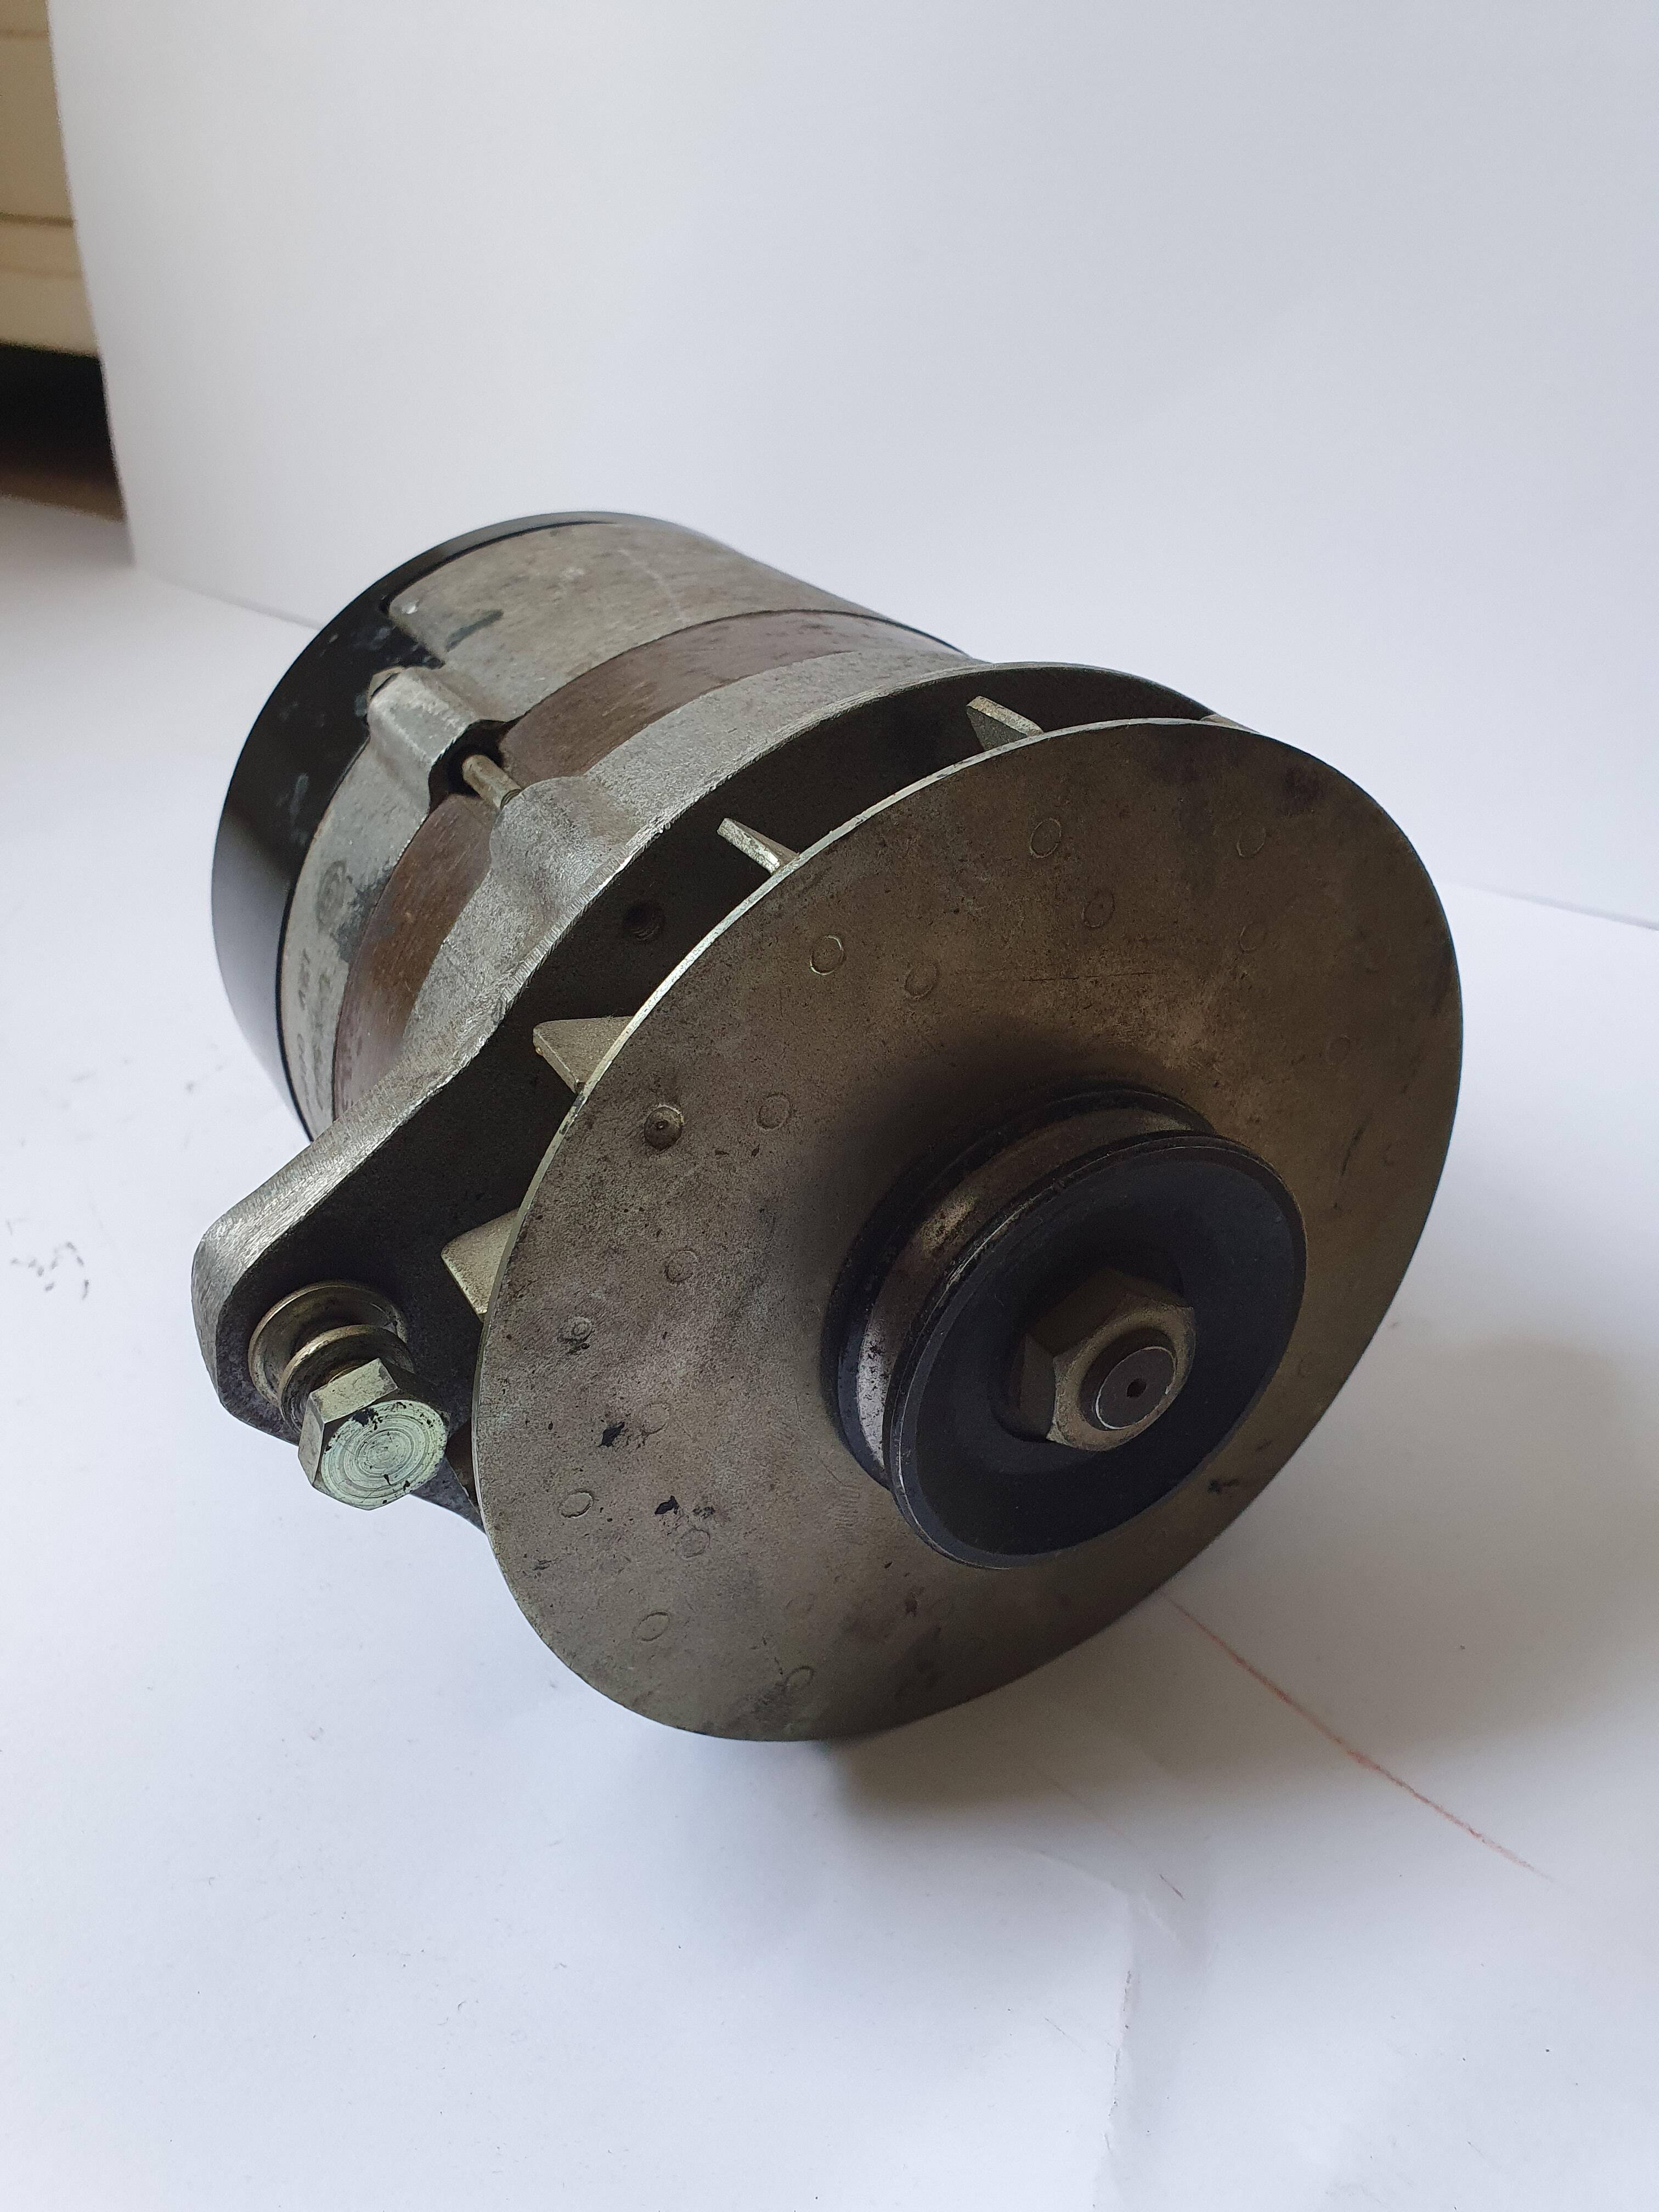
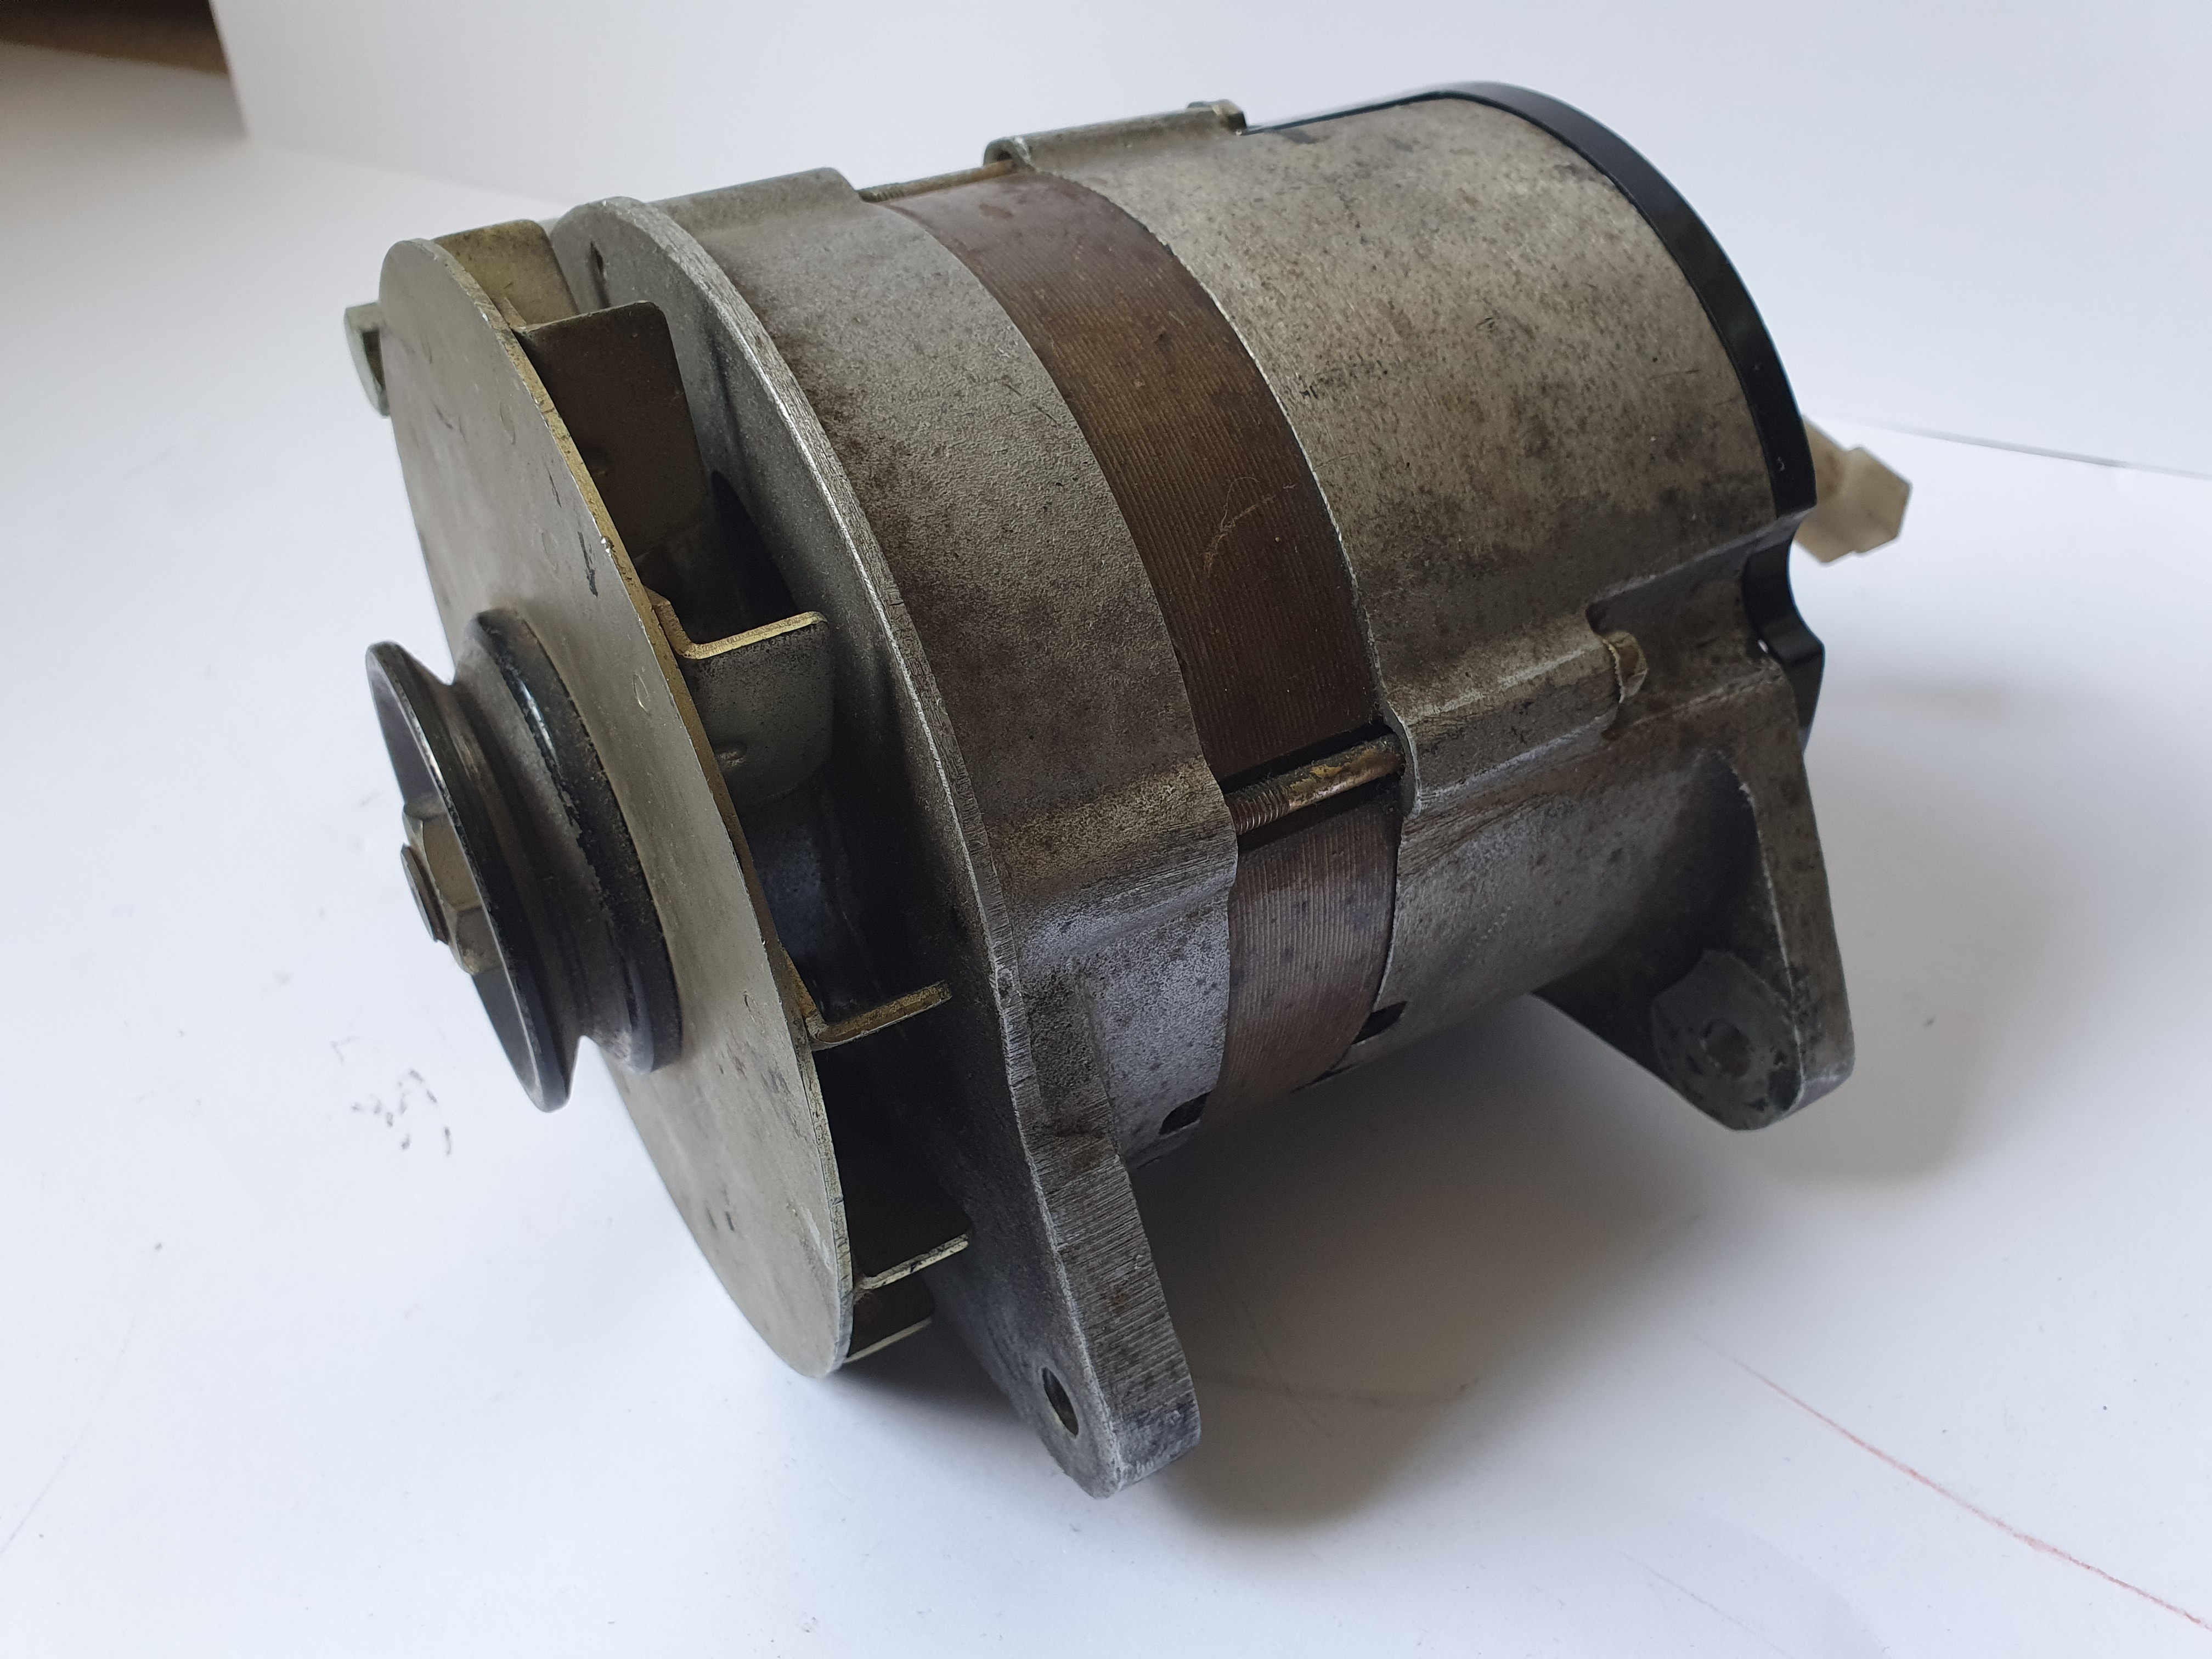
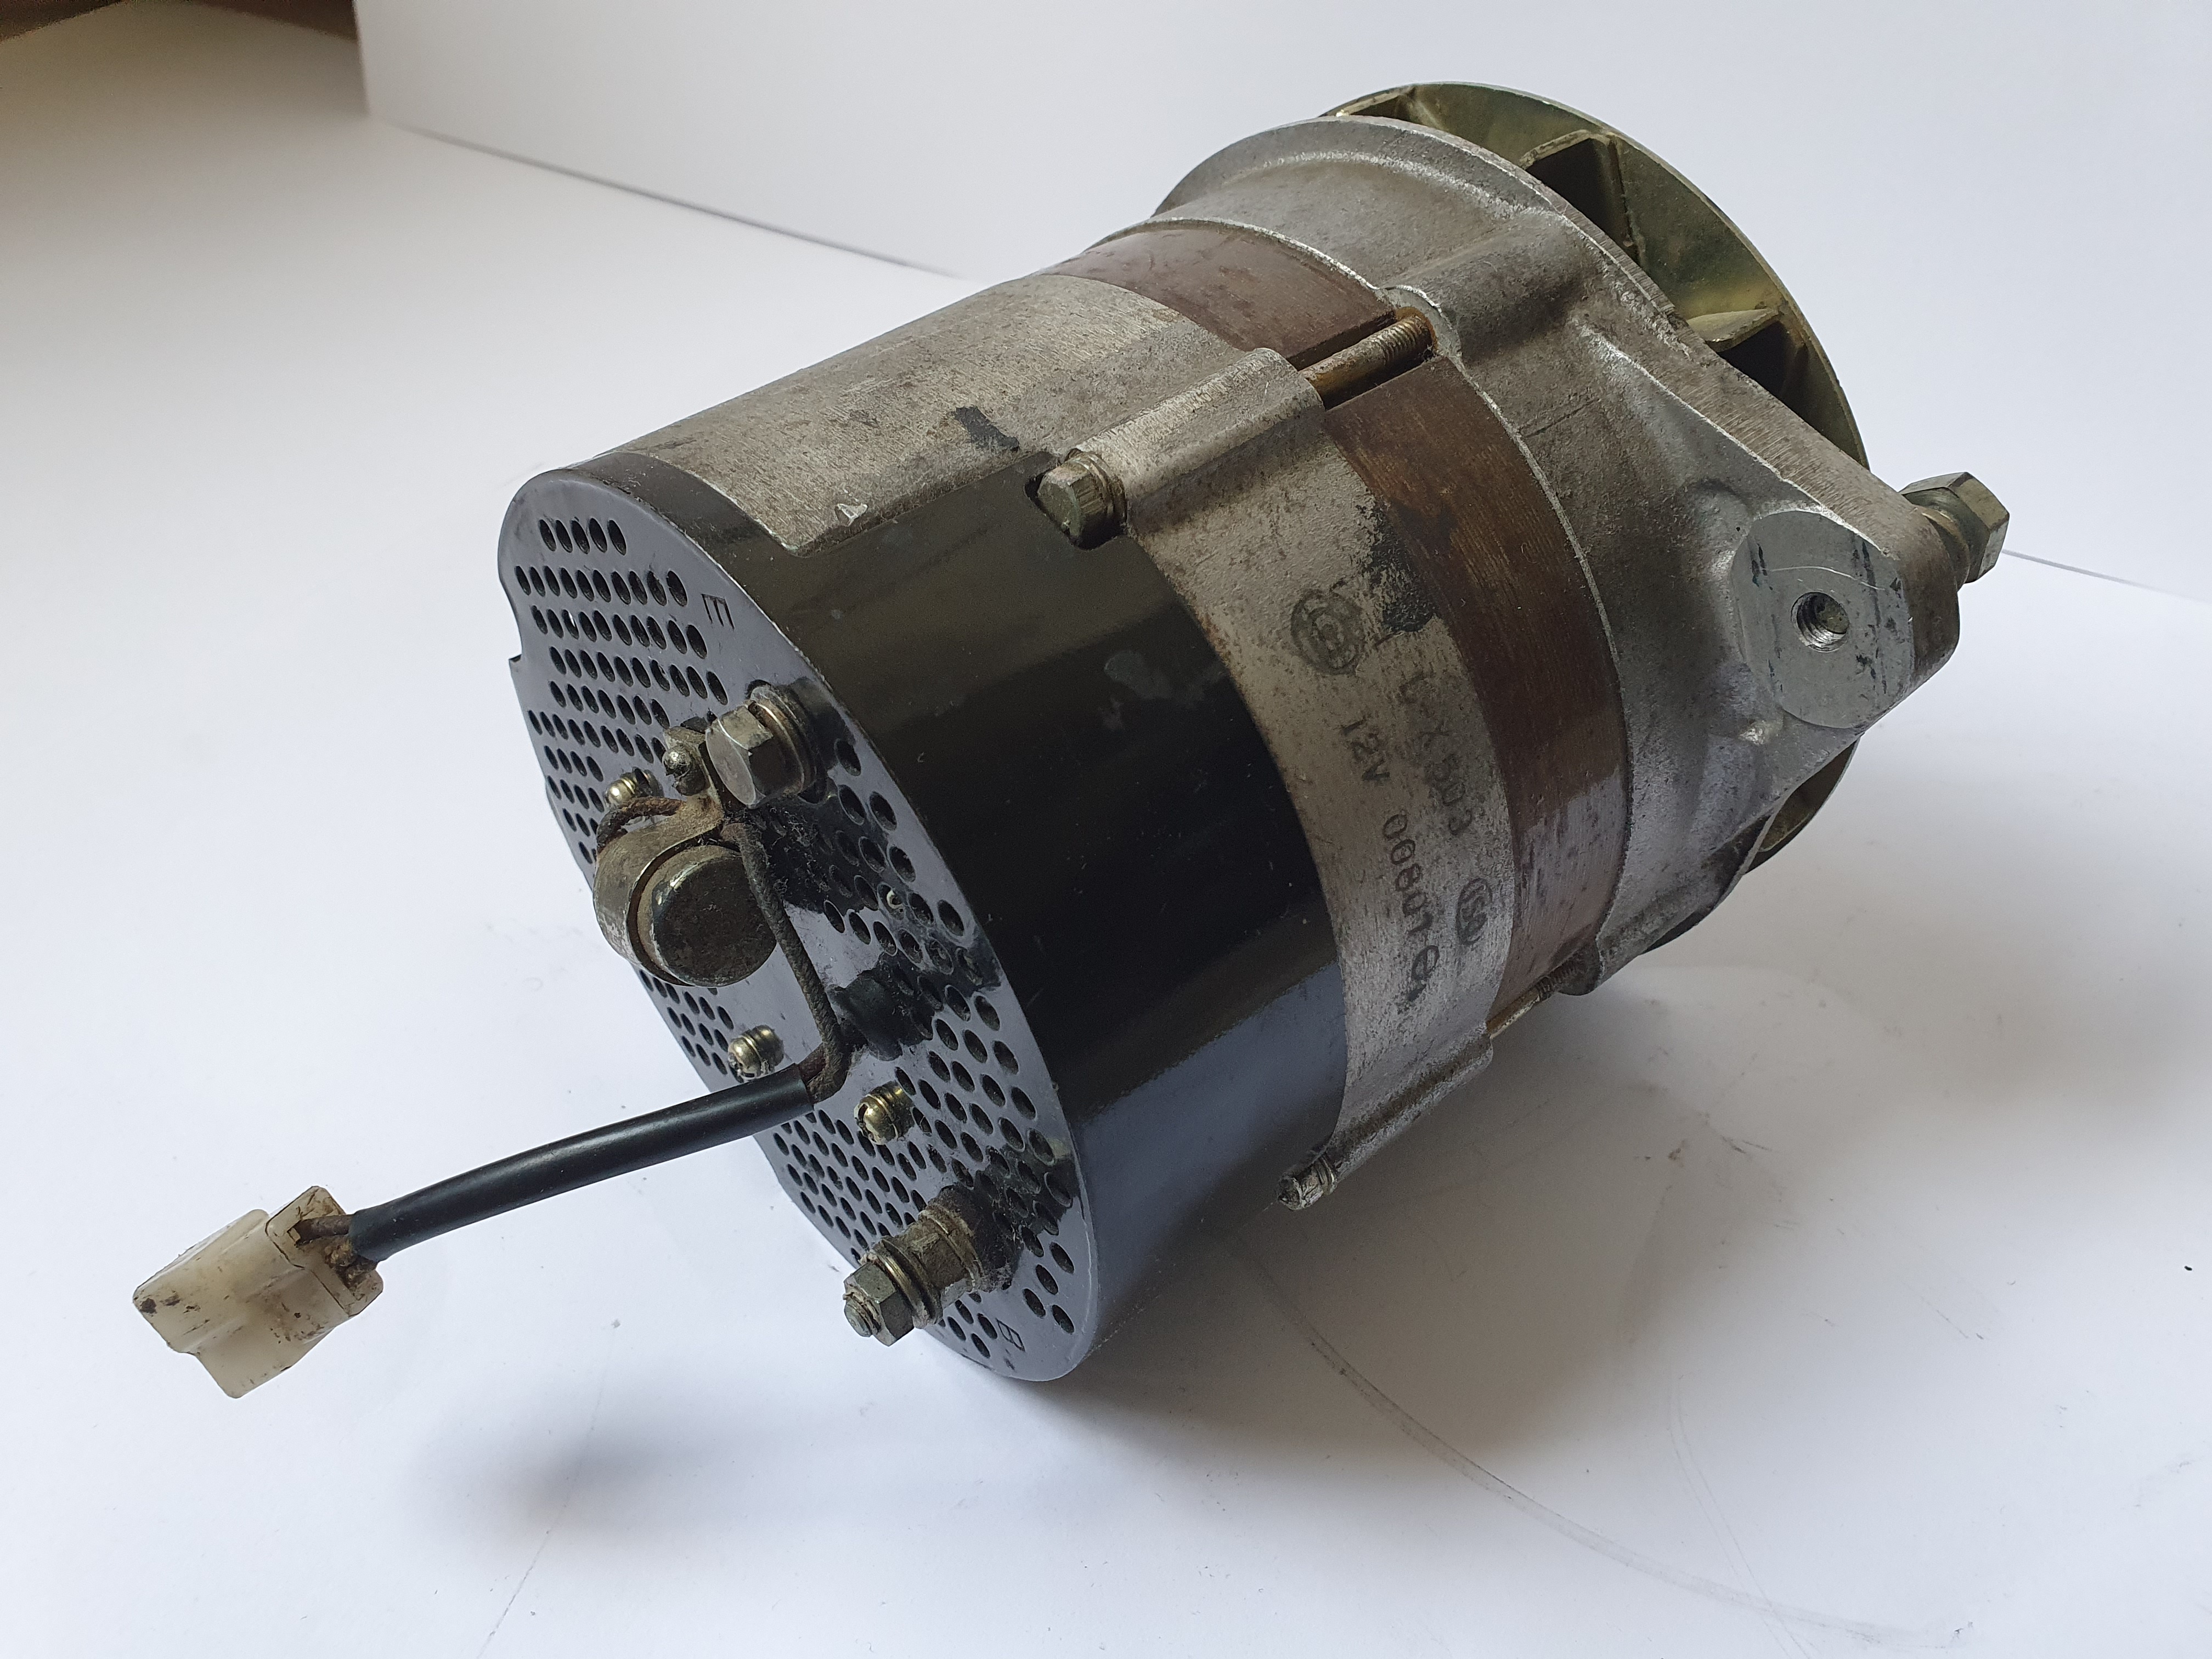
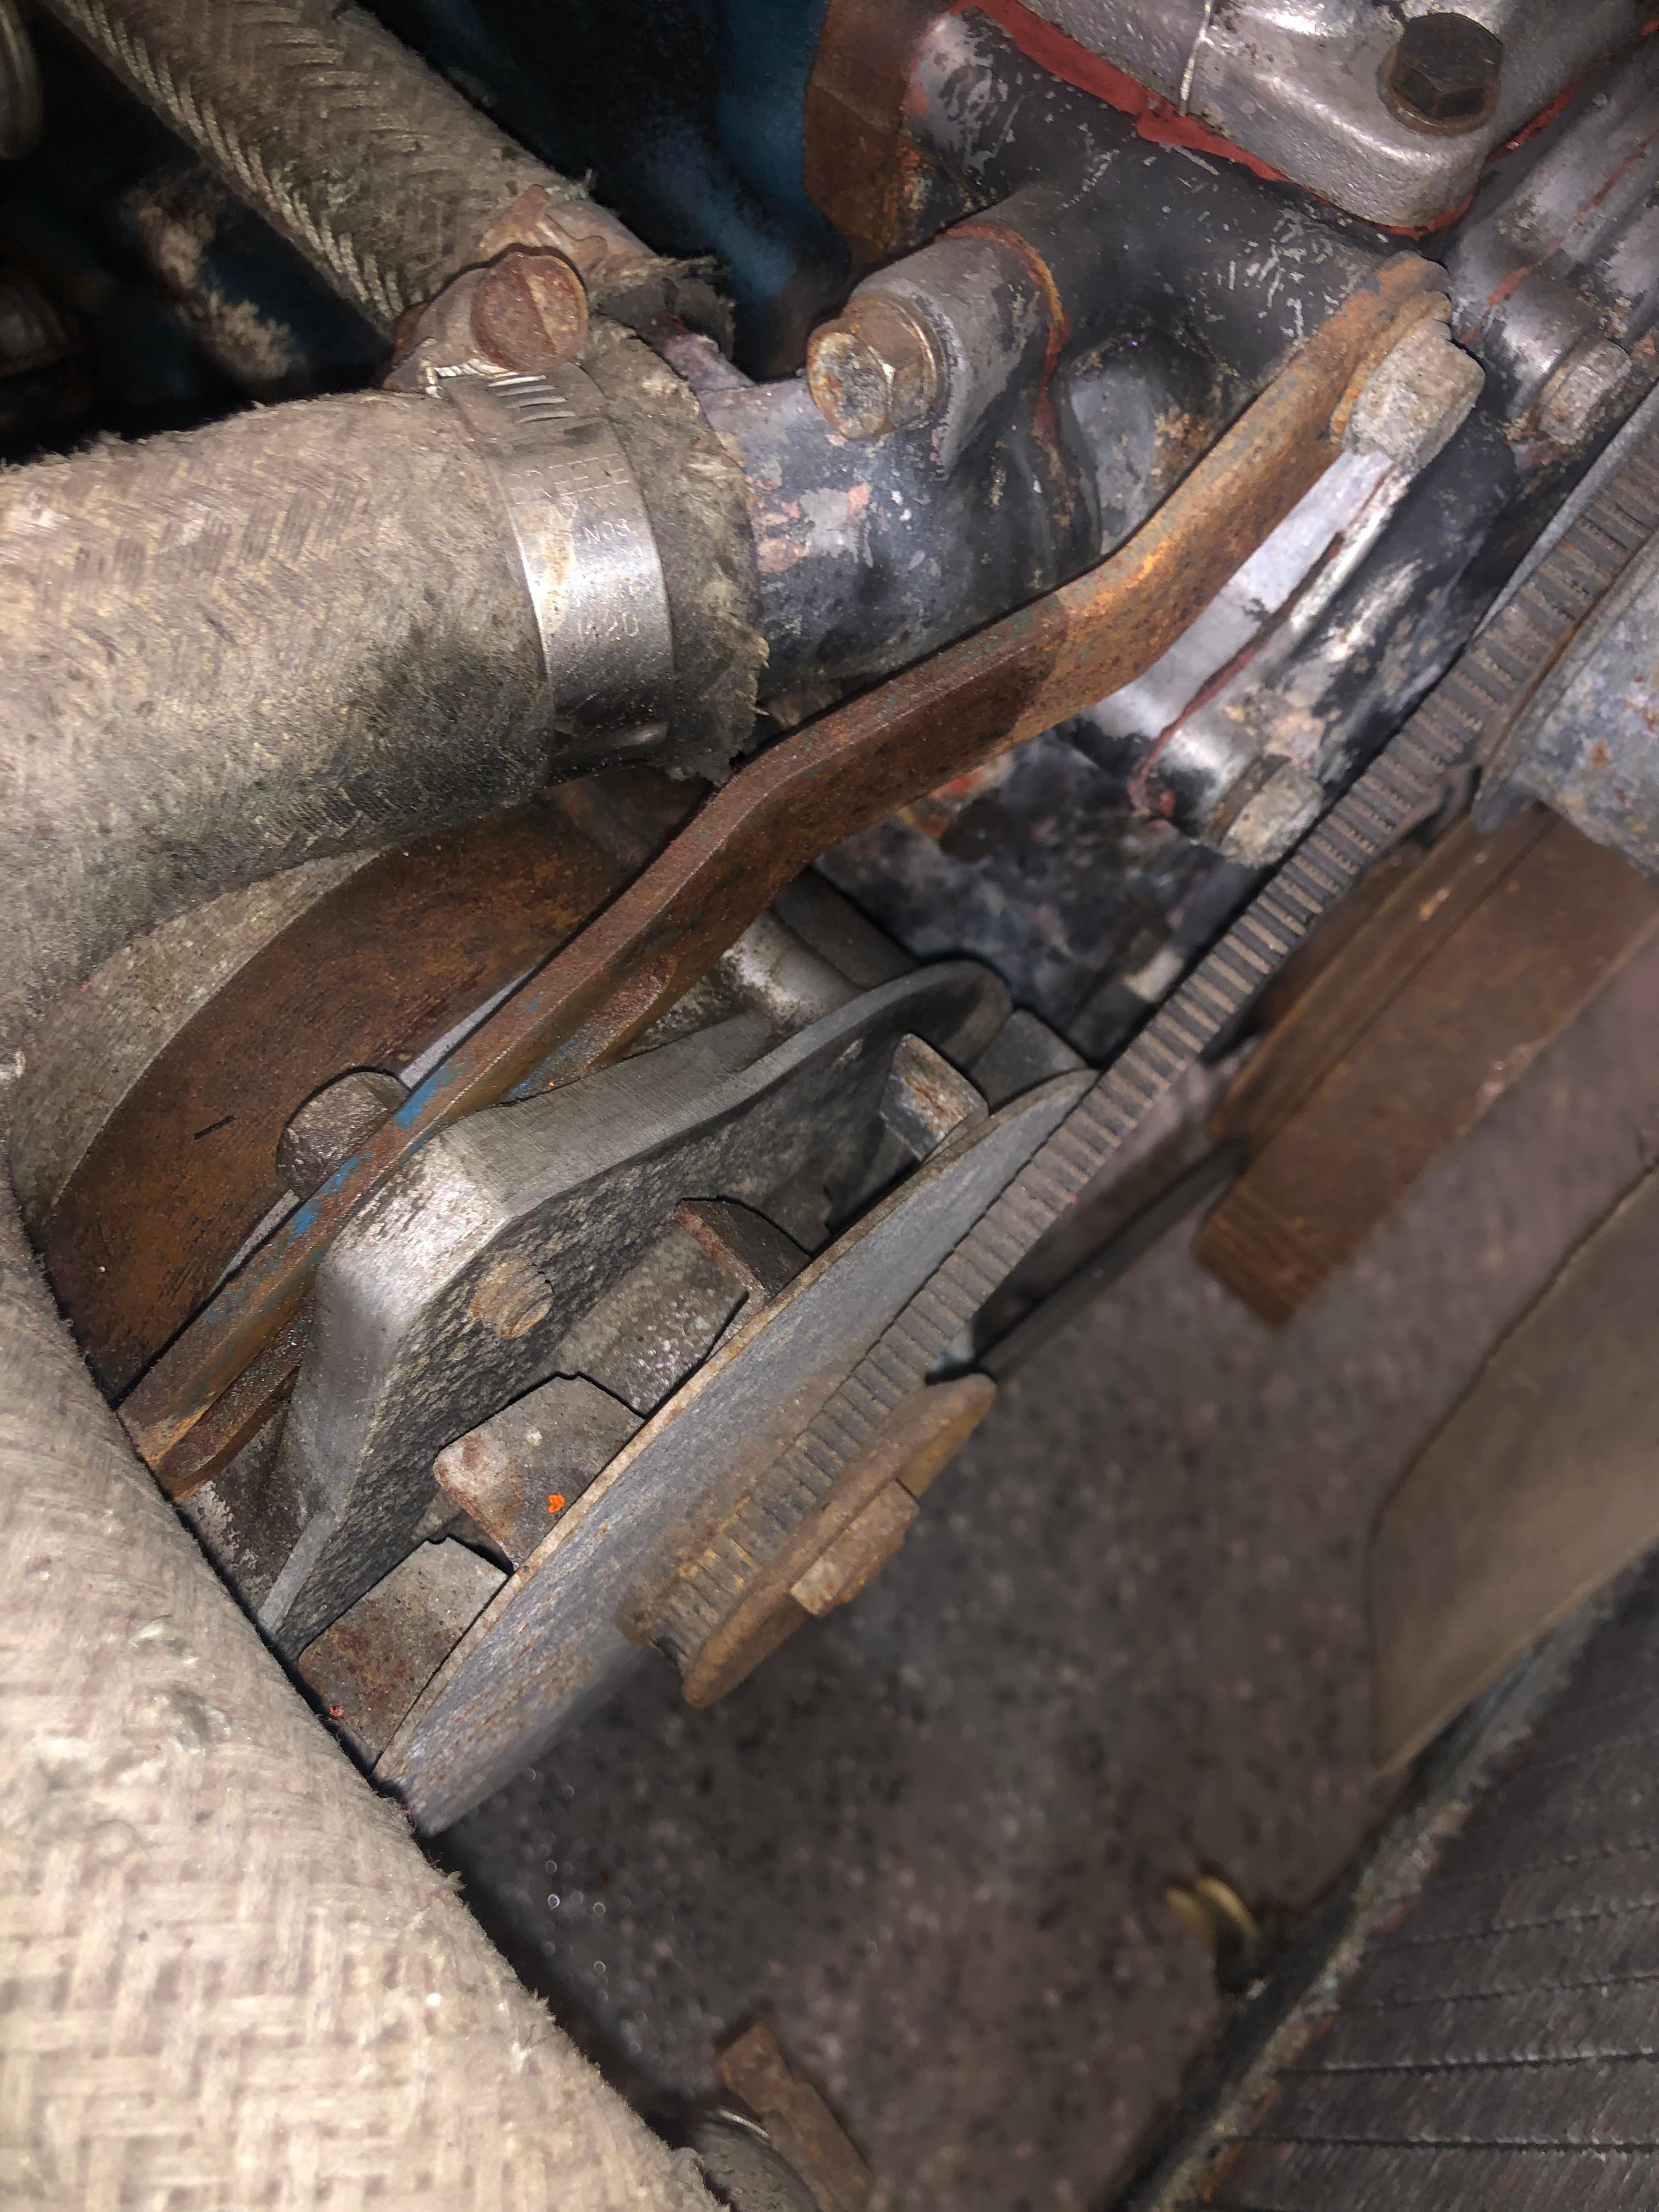
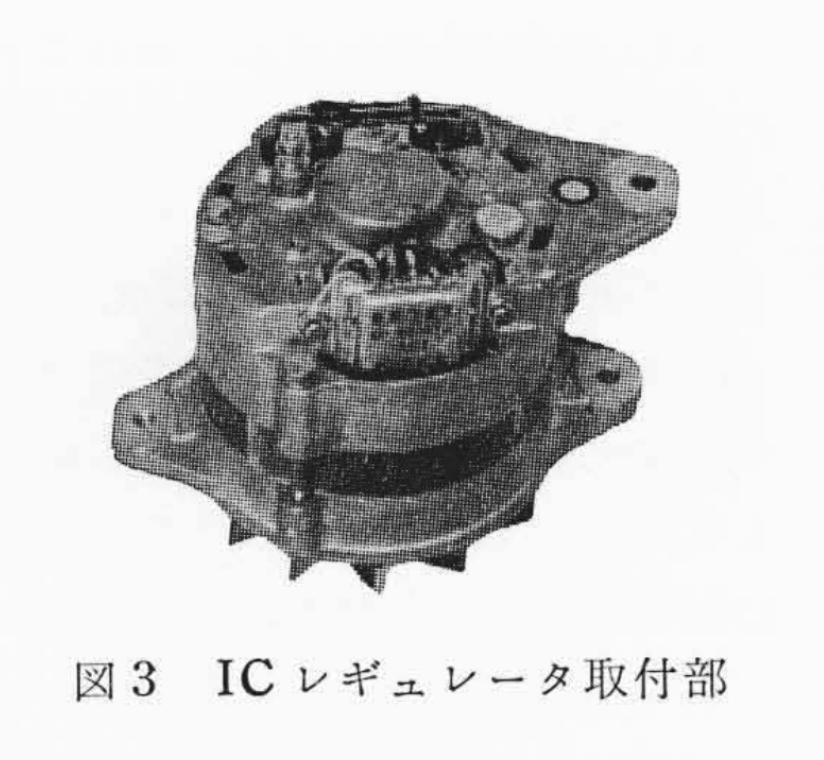
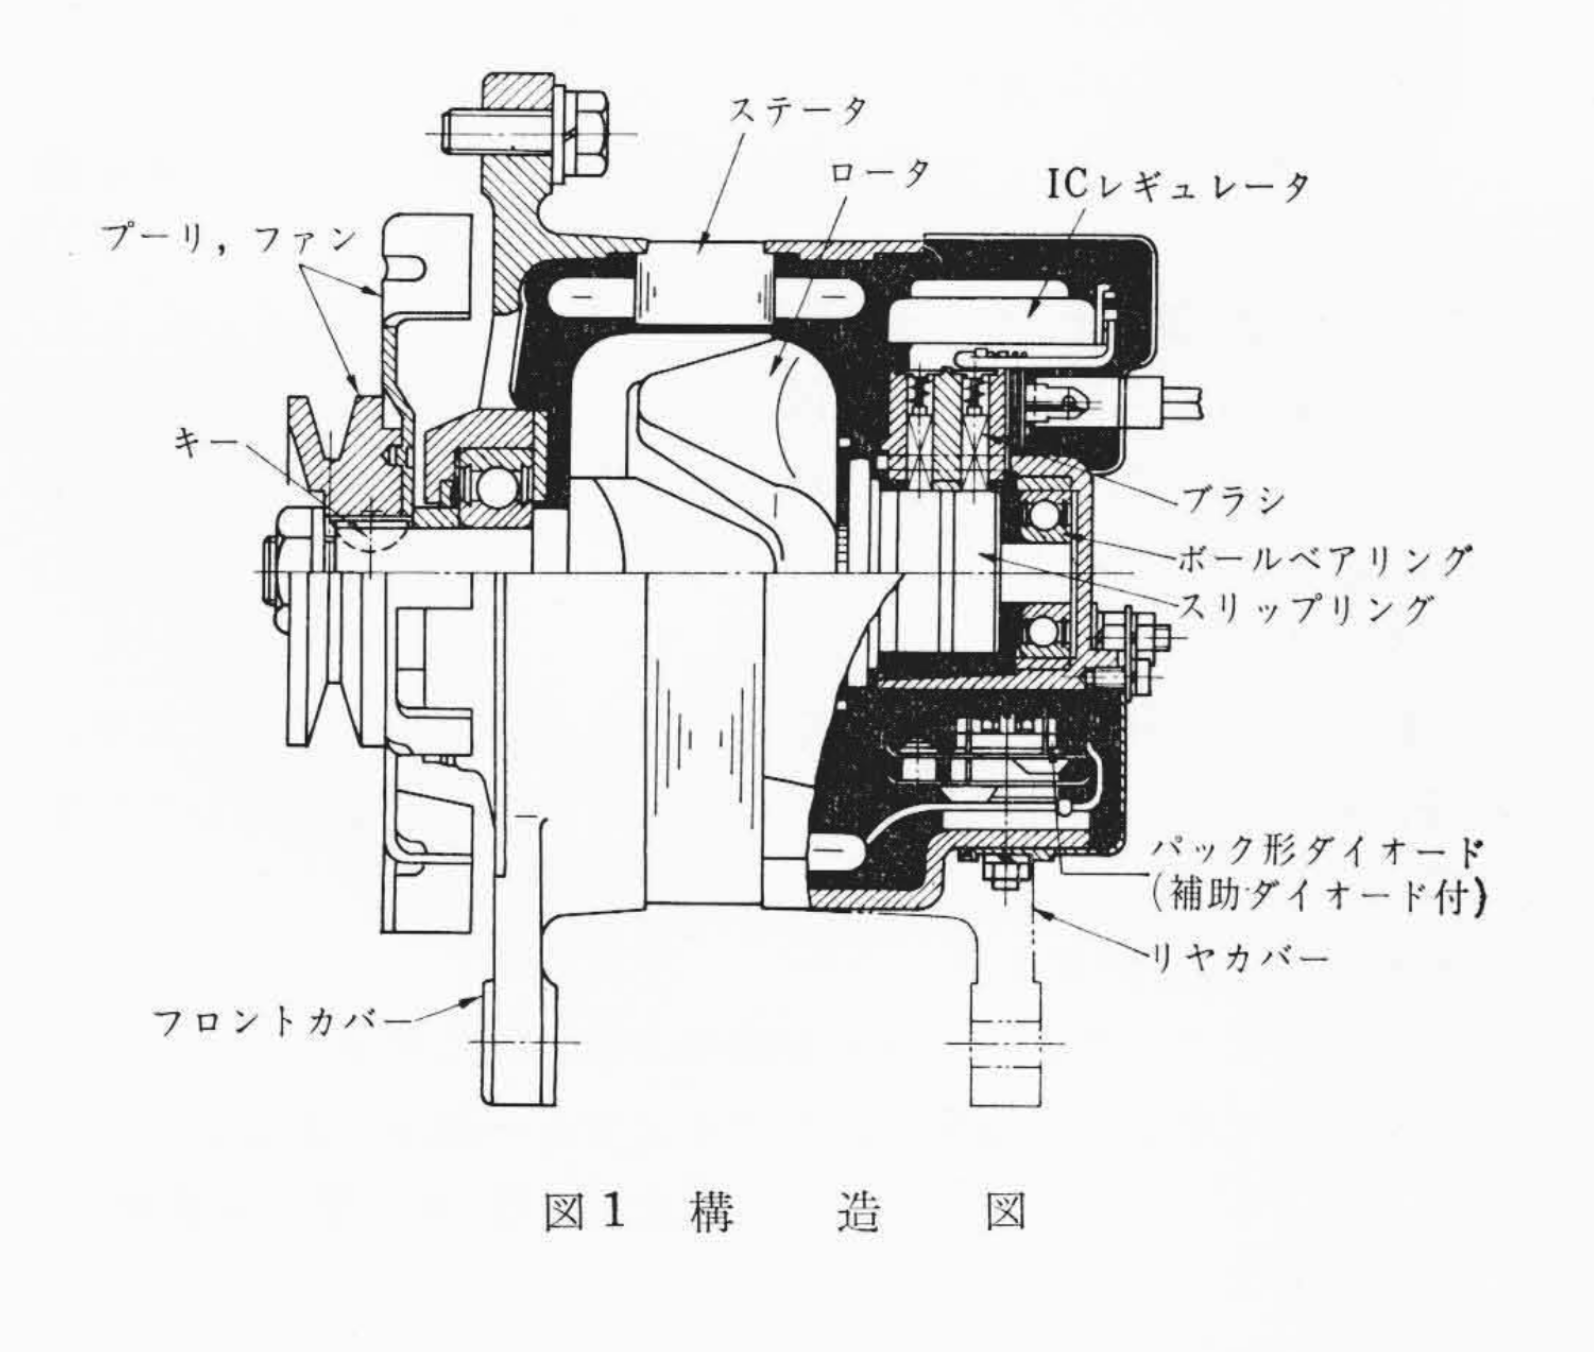
Today I turned my attention to the alternator, to see what I could learn about it, and share some of my early findings. Works cars had up-rated alternators with on-board voltage regulators, which was a departure from the S30 production cars. I've attached a few close-up photos to show how it looks in the car, and from the bench. I've also included a photo of the alternator used in the 1971 Monte Carlo - to my eye, they look similar enough to be considered equivalent, although I don't see any part numbers on the alternator, so there is no real way to be 100% certain. Without having any markings on it that I could see, I elected to disassemble it in anticipation of getting it rebuilt and ready for use. I didn't get very far before I had to quit for the day, but at least I was able to disassemble enough of it to get a picture of the markings on the voltage regulator - it's a Hitachi TR1Z-06. Based on a 1971 document I've downloaded from Hitachi's site, a version of this IC-based alternator was used in the Nissan President and Cedric, and it came in 40, 50, and 60A models. I'll need to bench test this one to determine its actual output. It appears that stock units did not have the protective black rear cover (see picture of a stock example). It was likely added by the Works team to provide additional protection to the voltage regulator.


 3 points
 -
3 pointsHe could make his own out of really really thick cereal box cardboard. 😀3 points
-
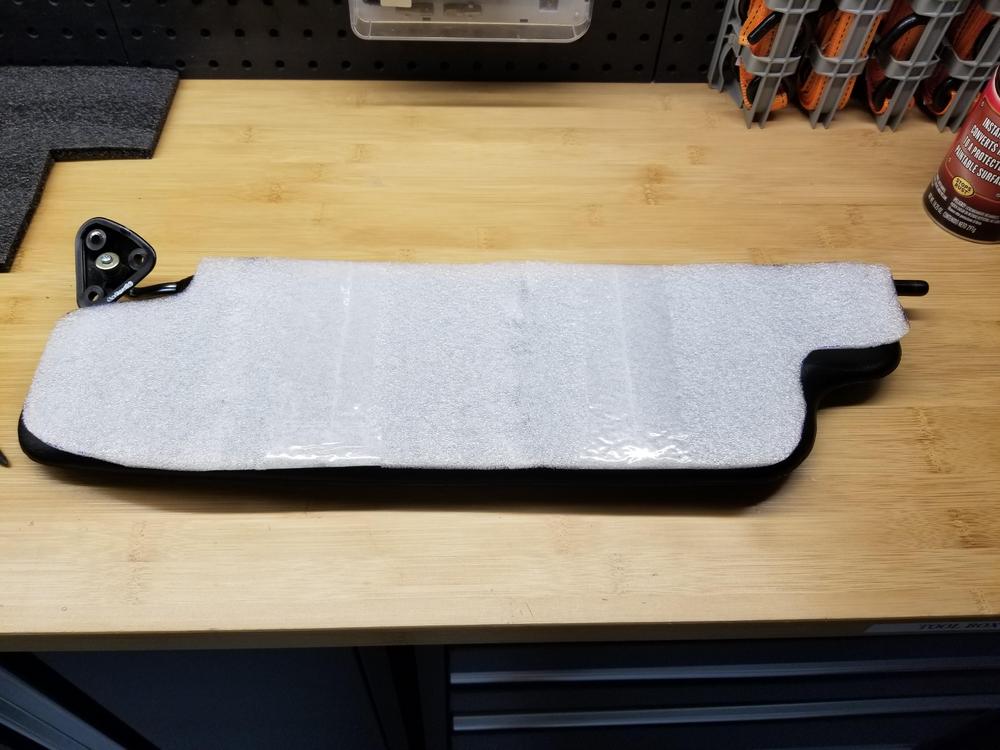
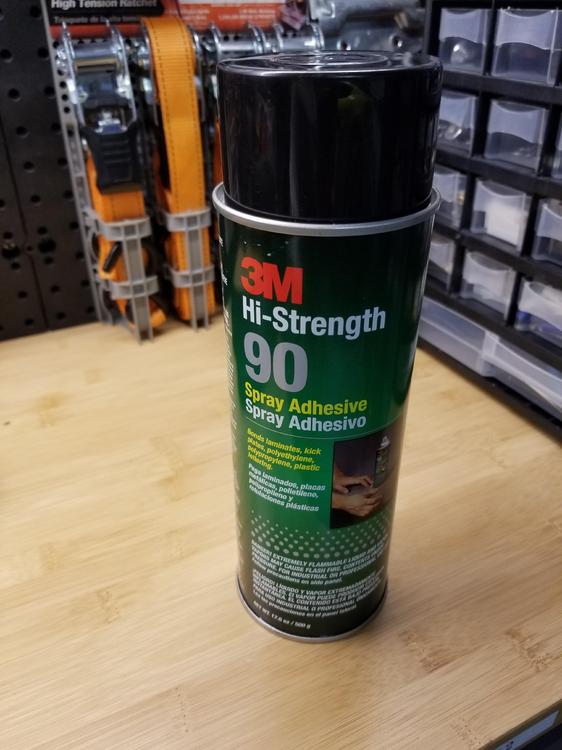
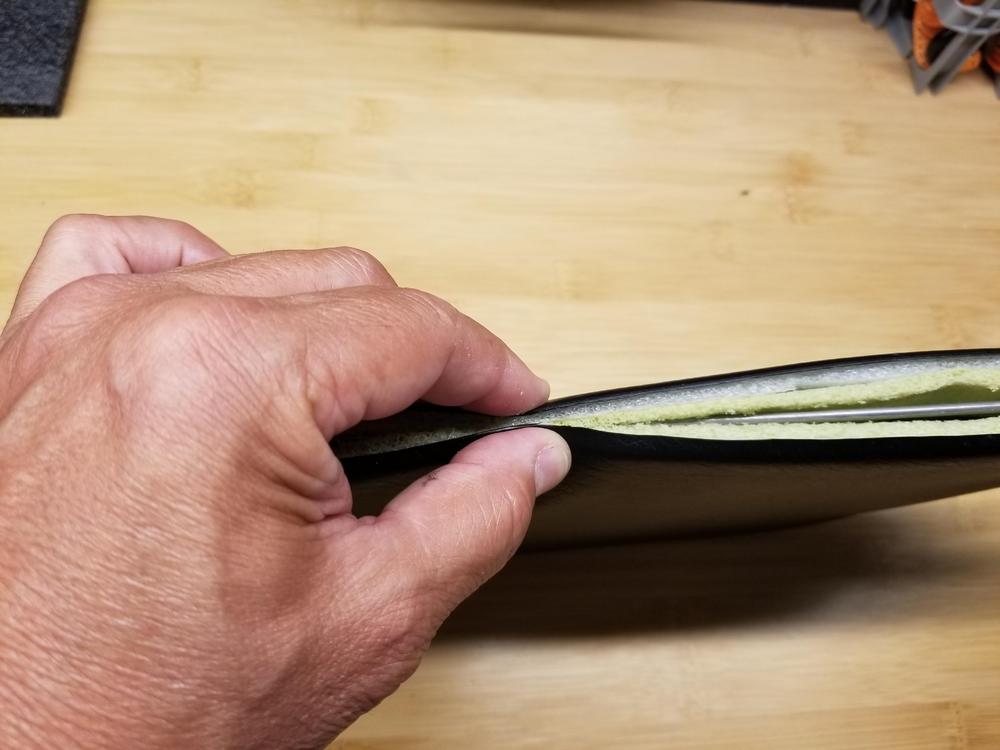
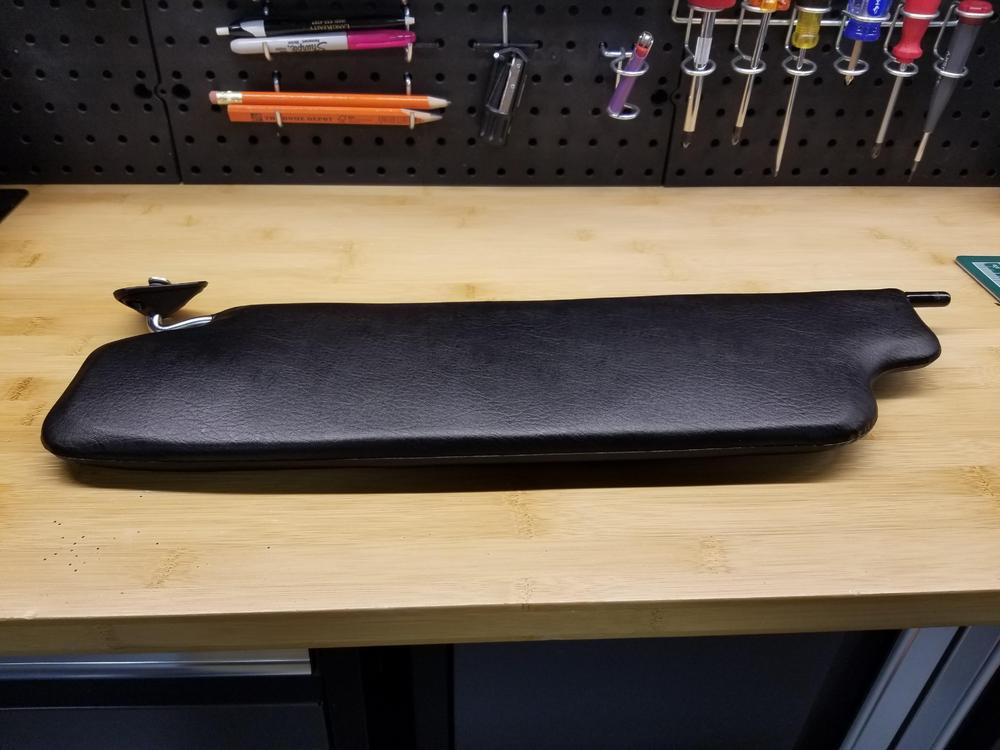
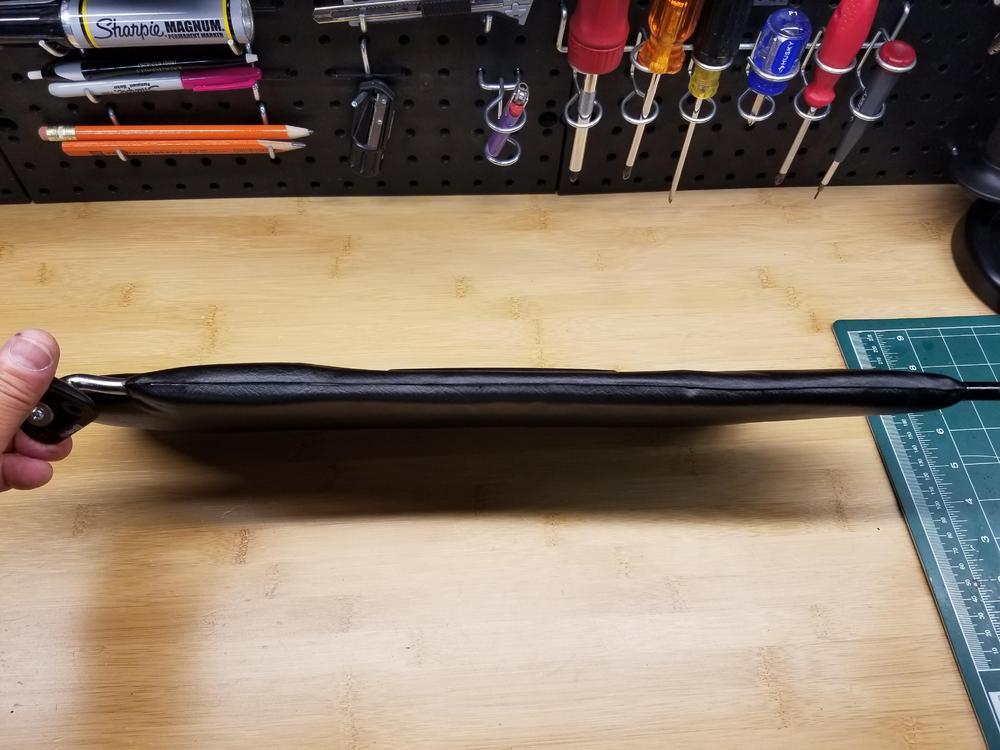
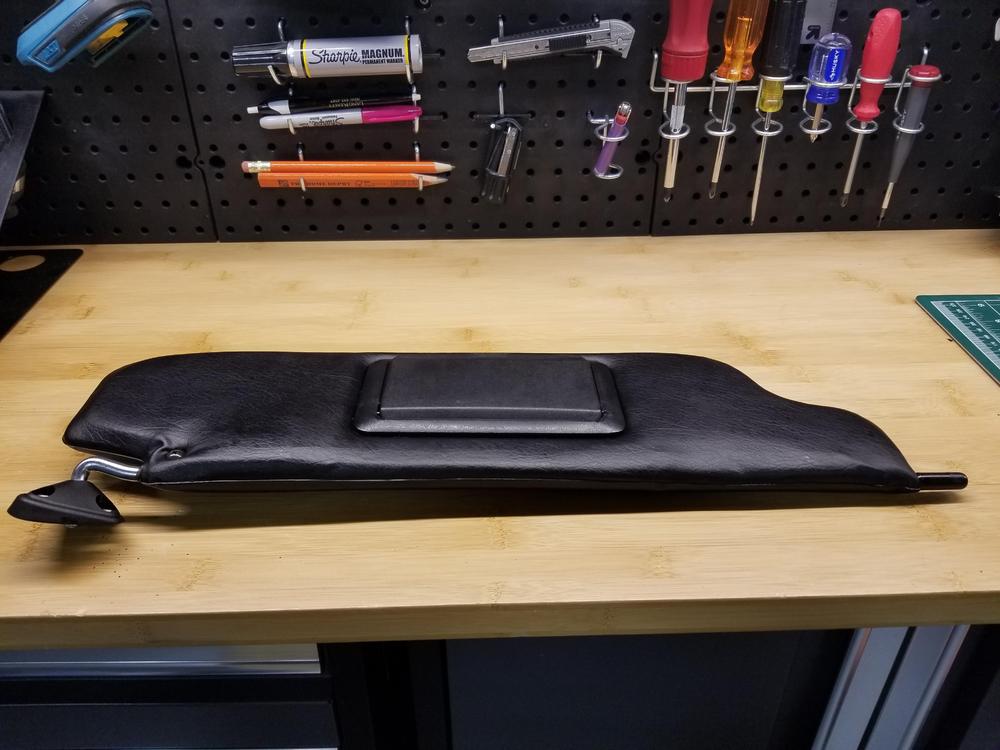
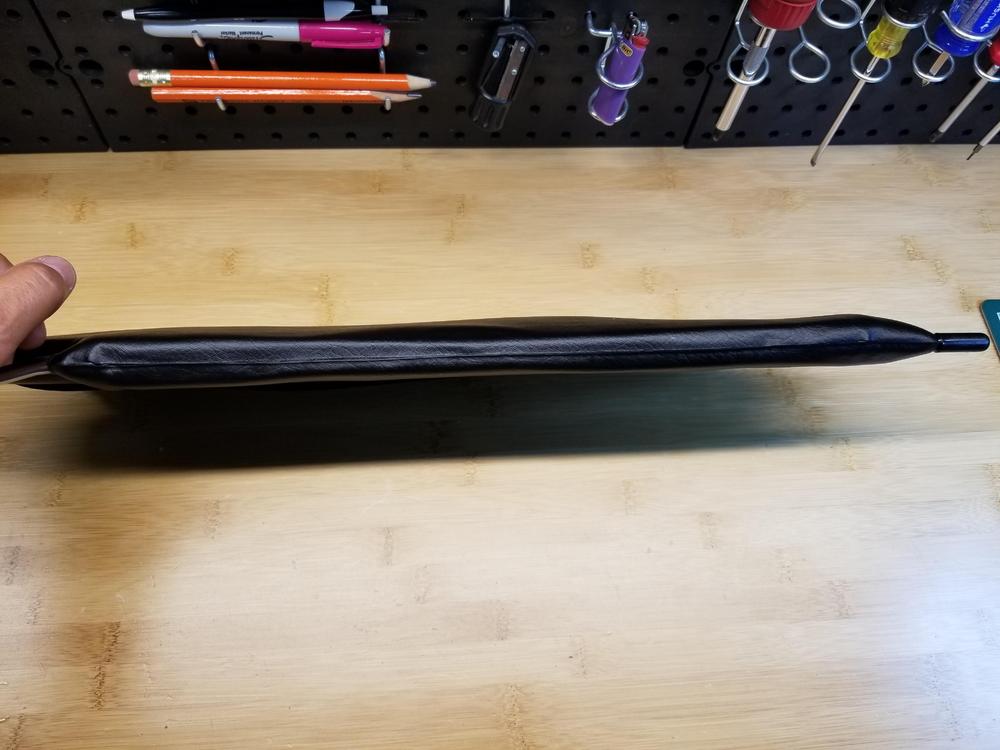
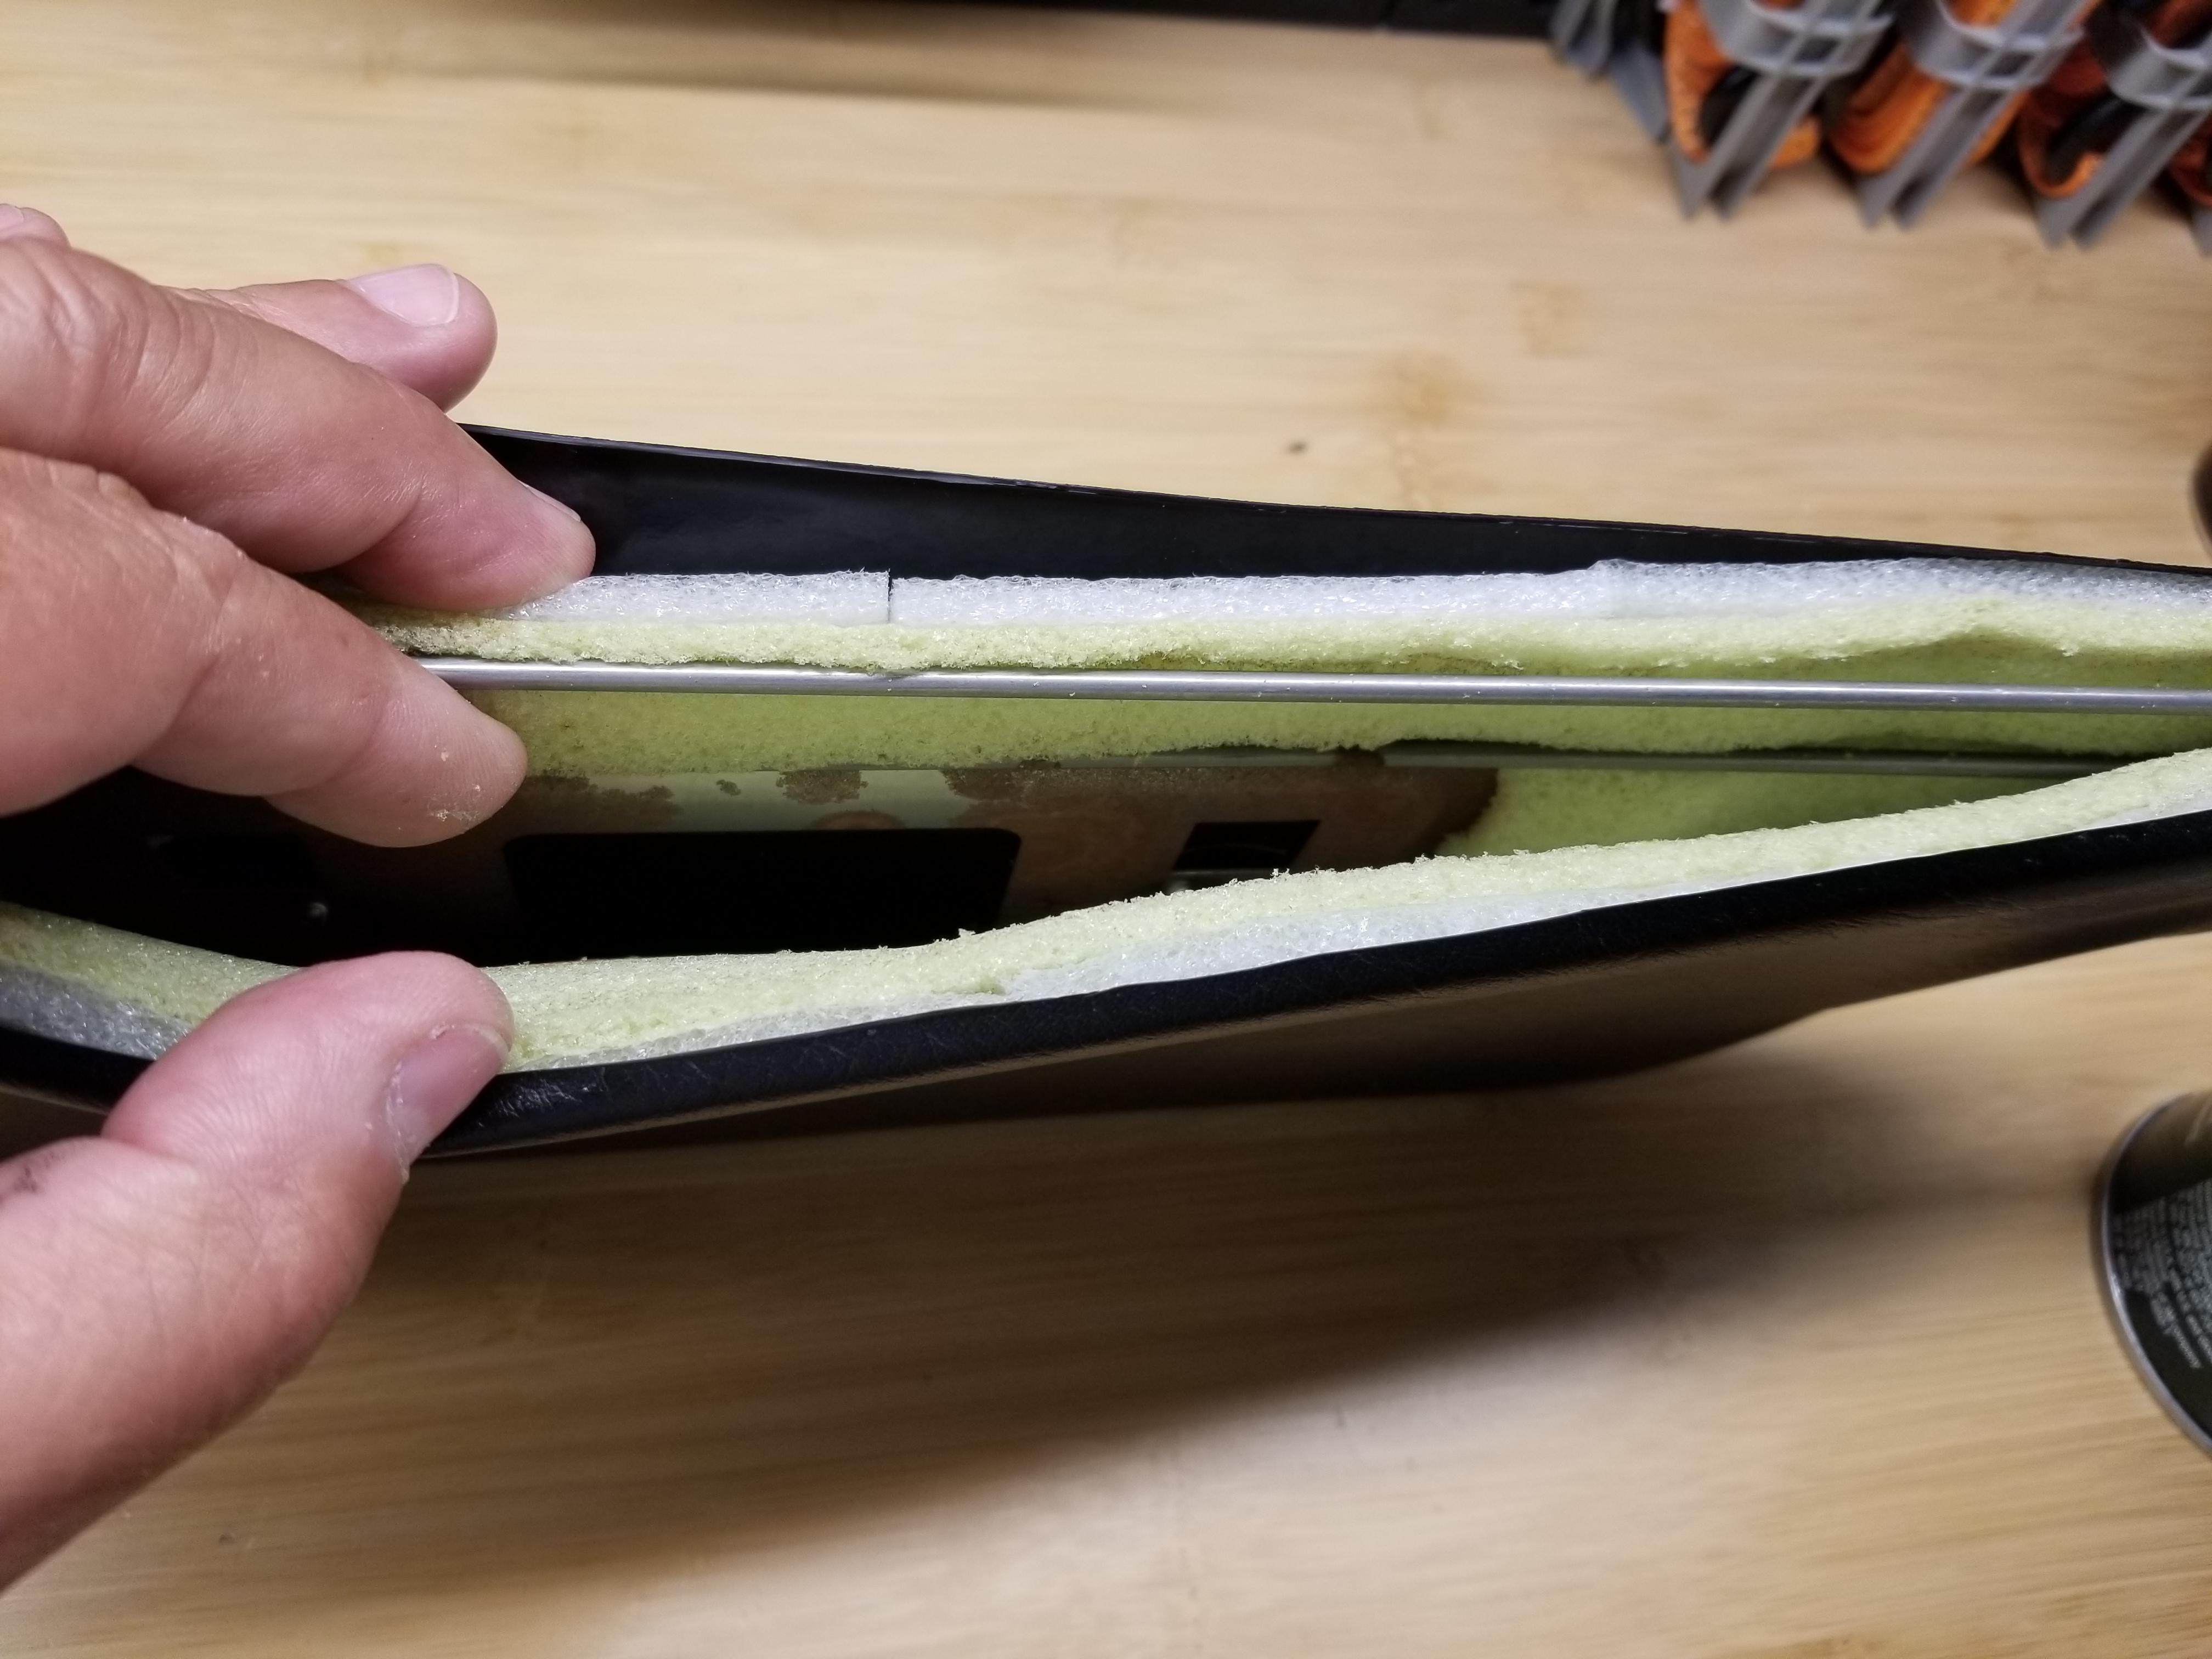
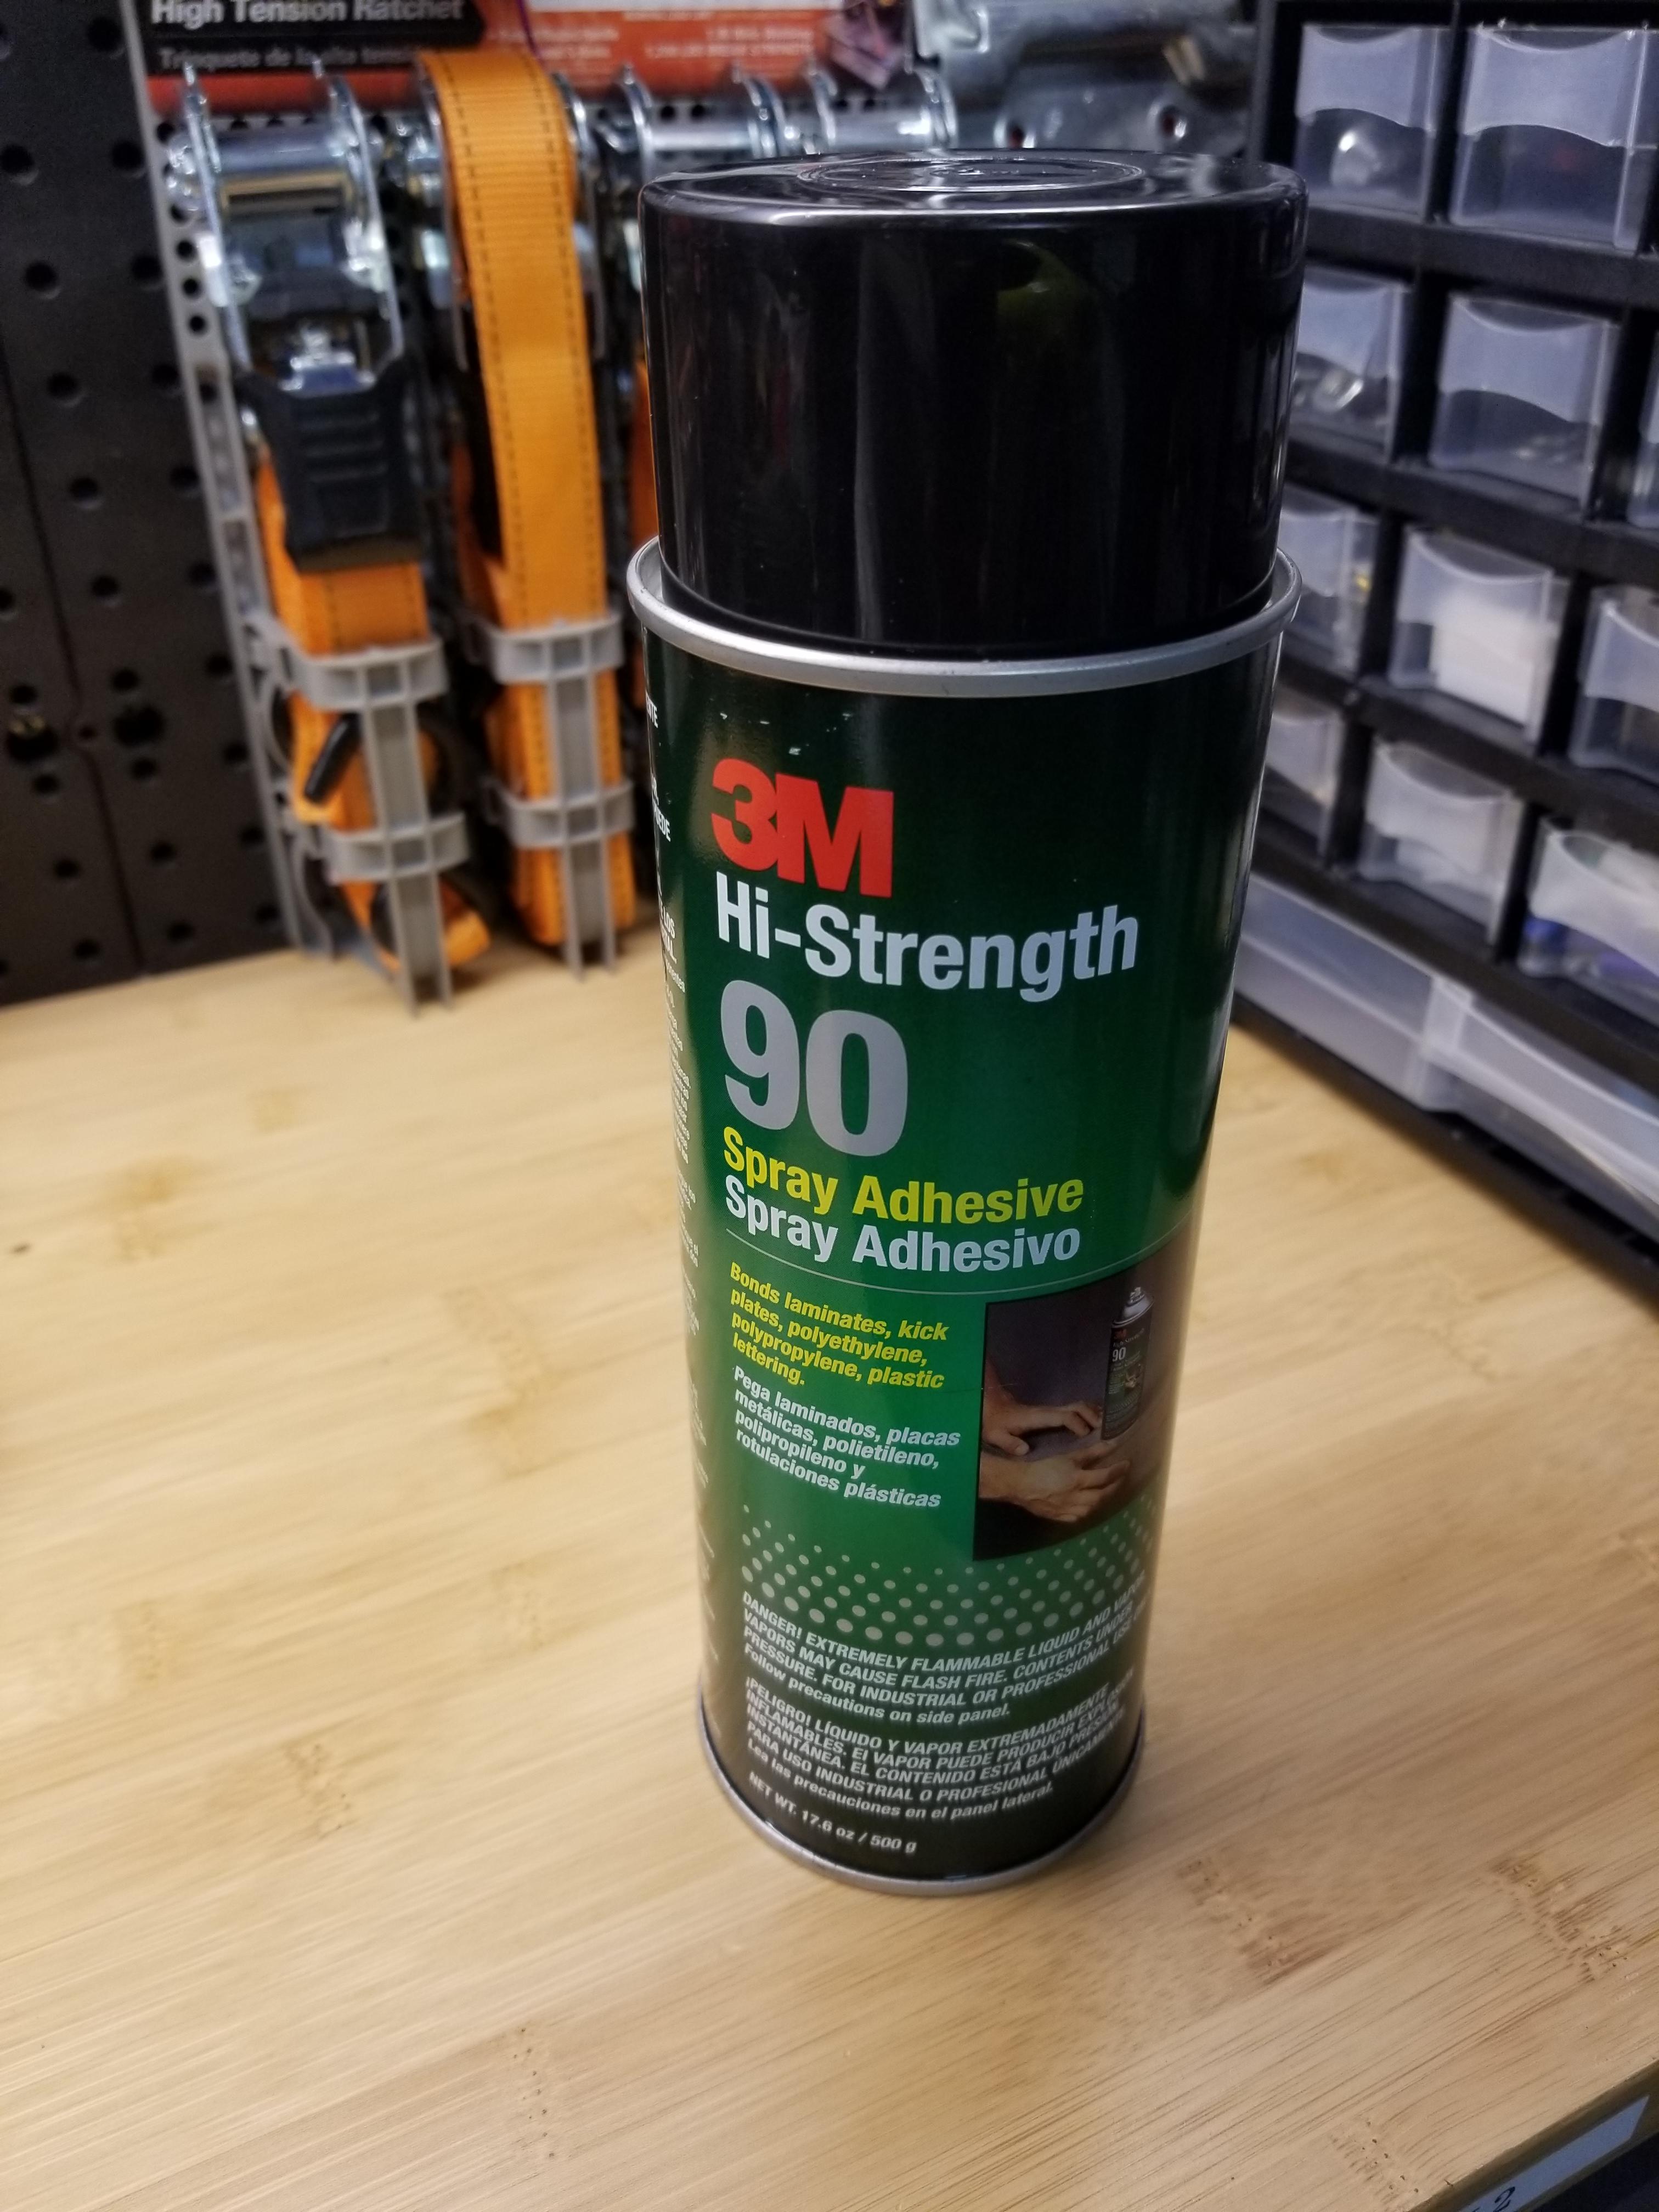
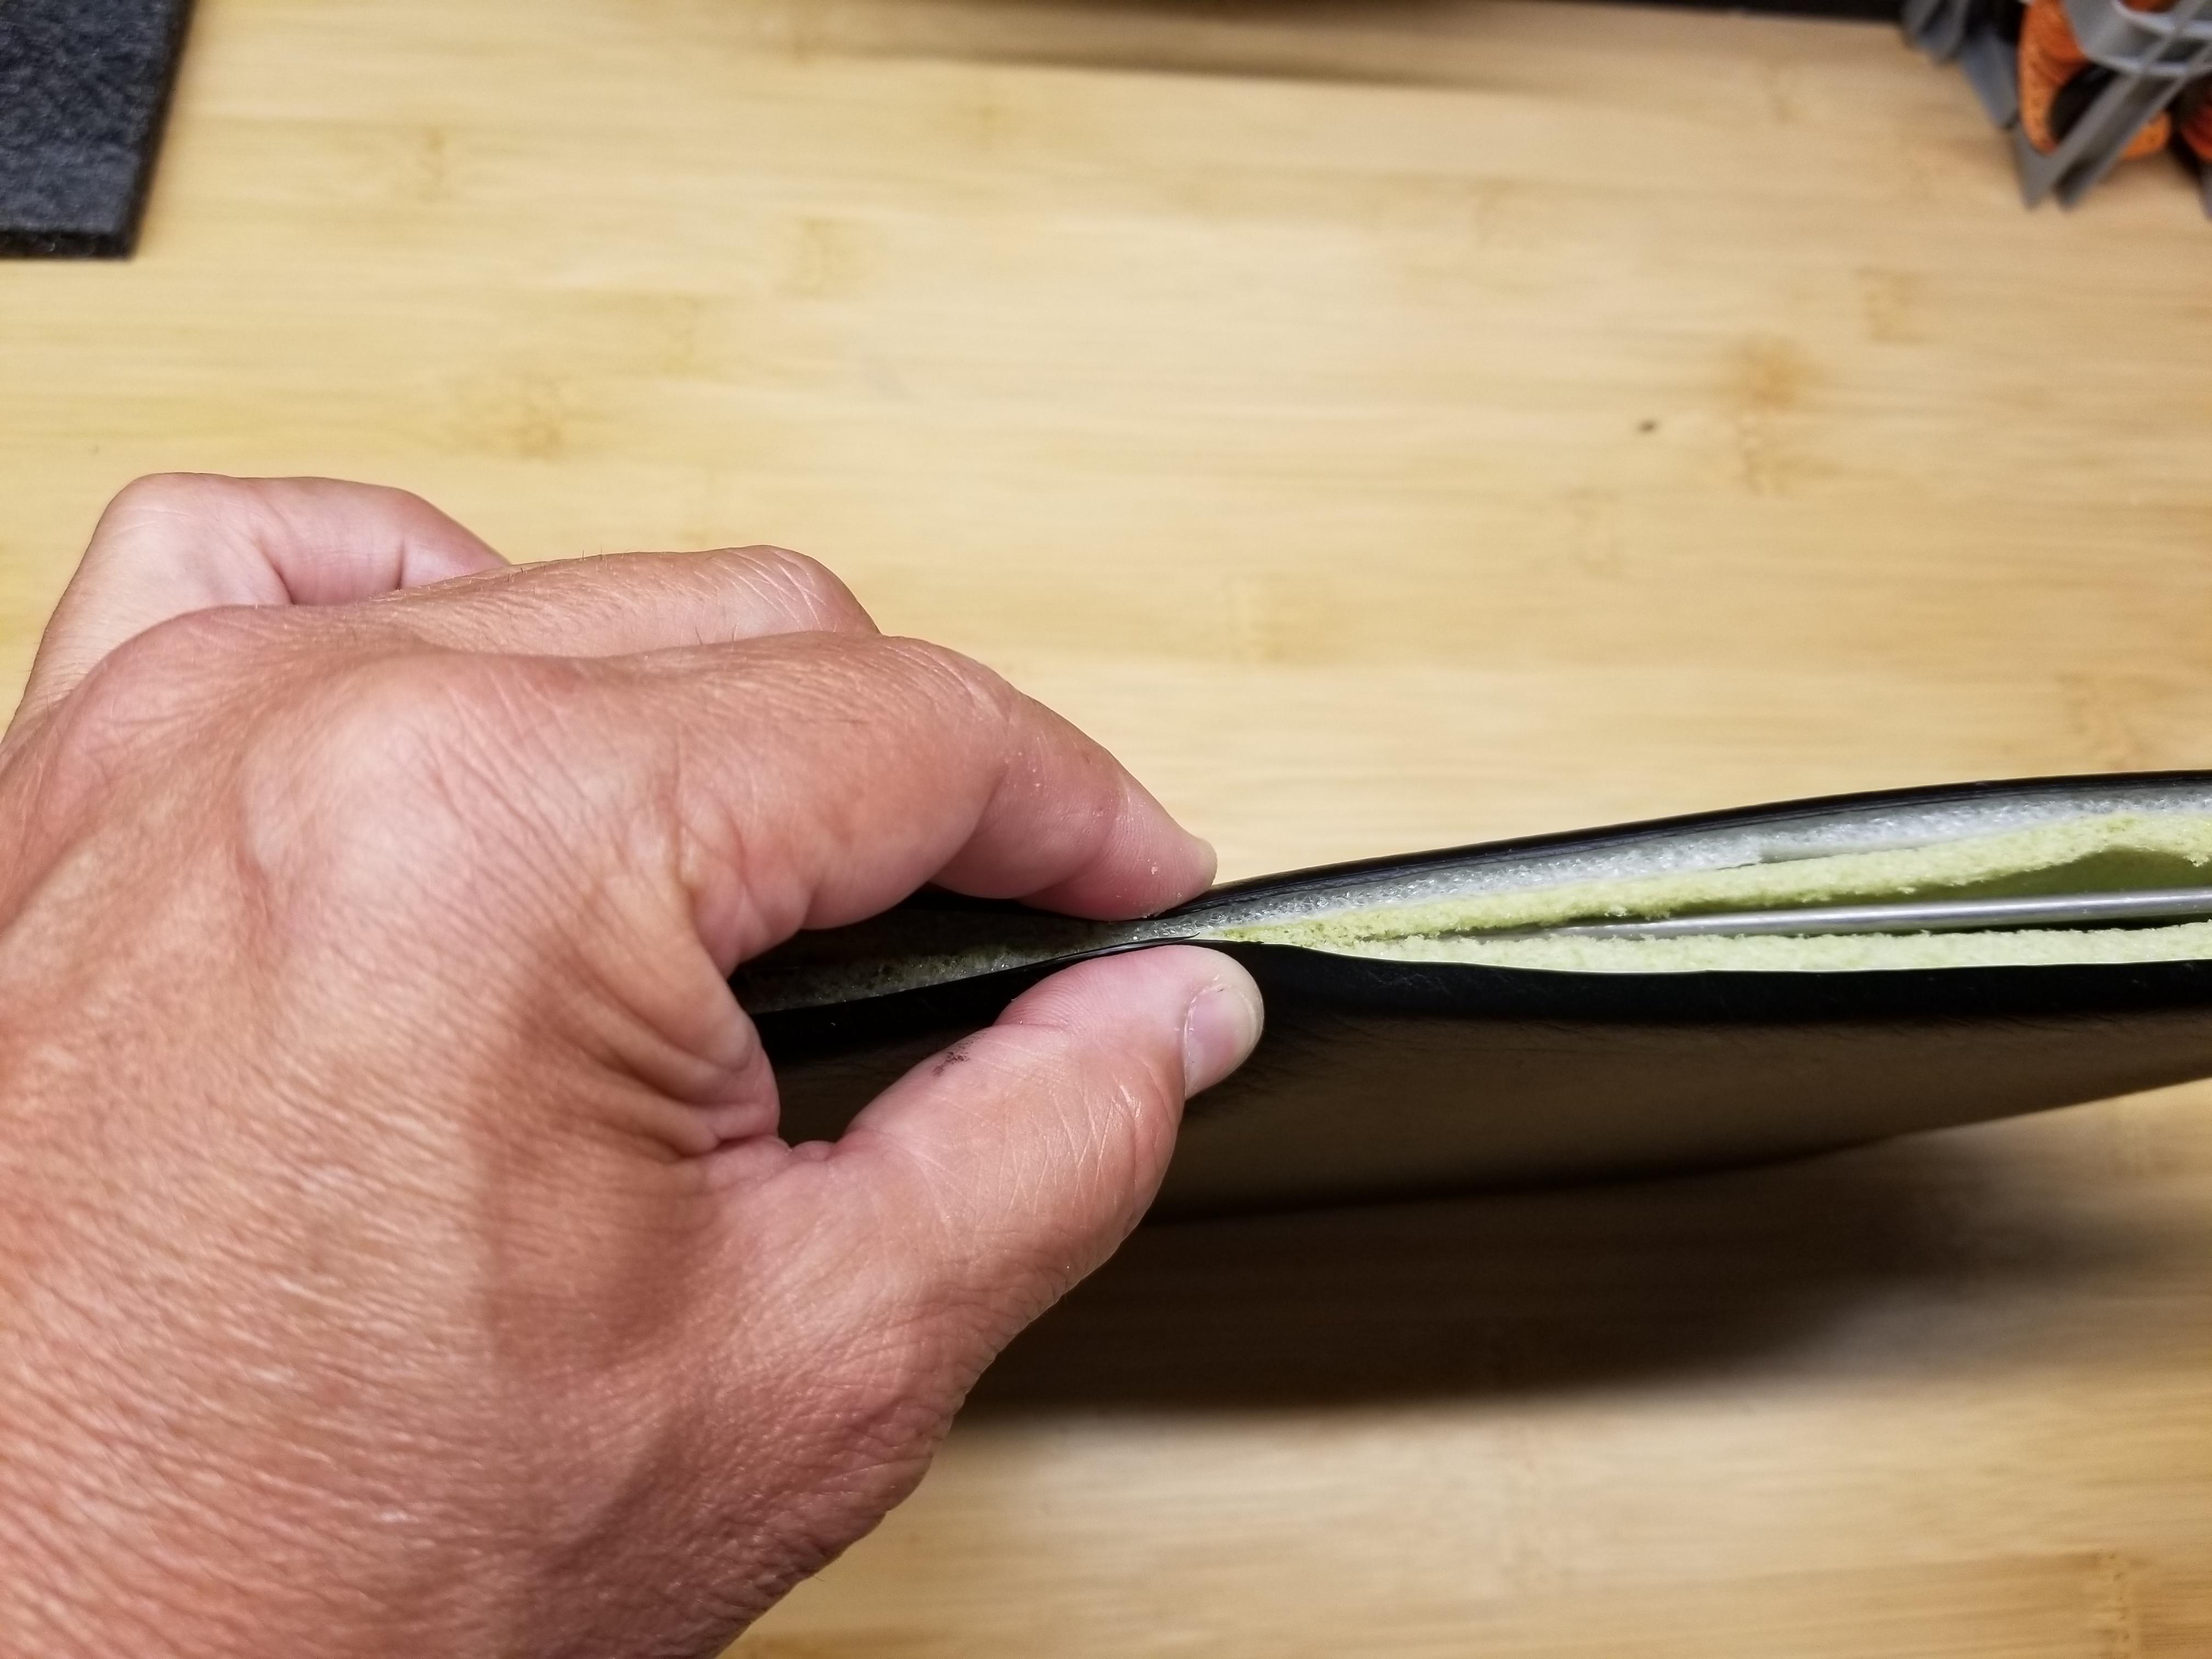
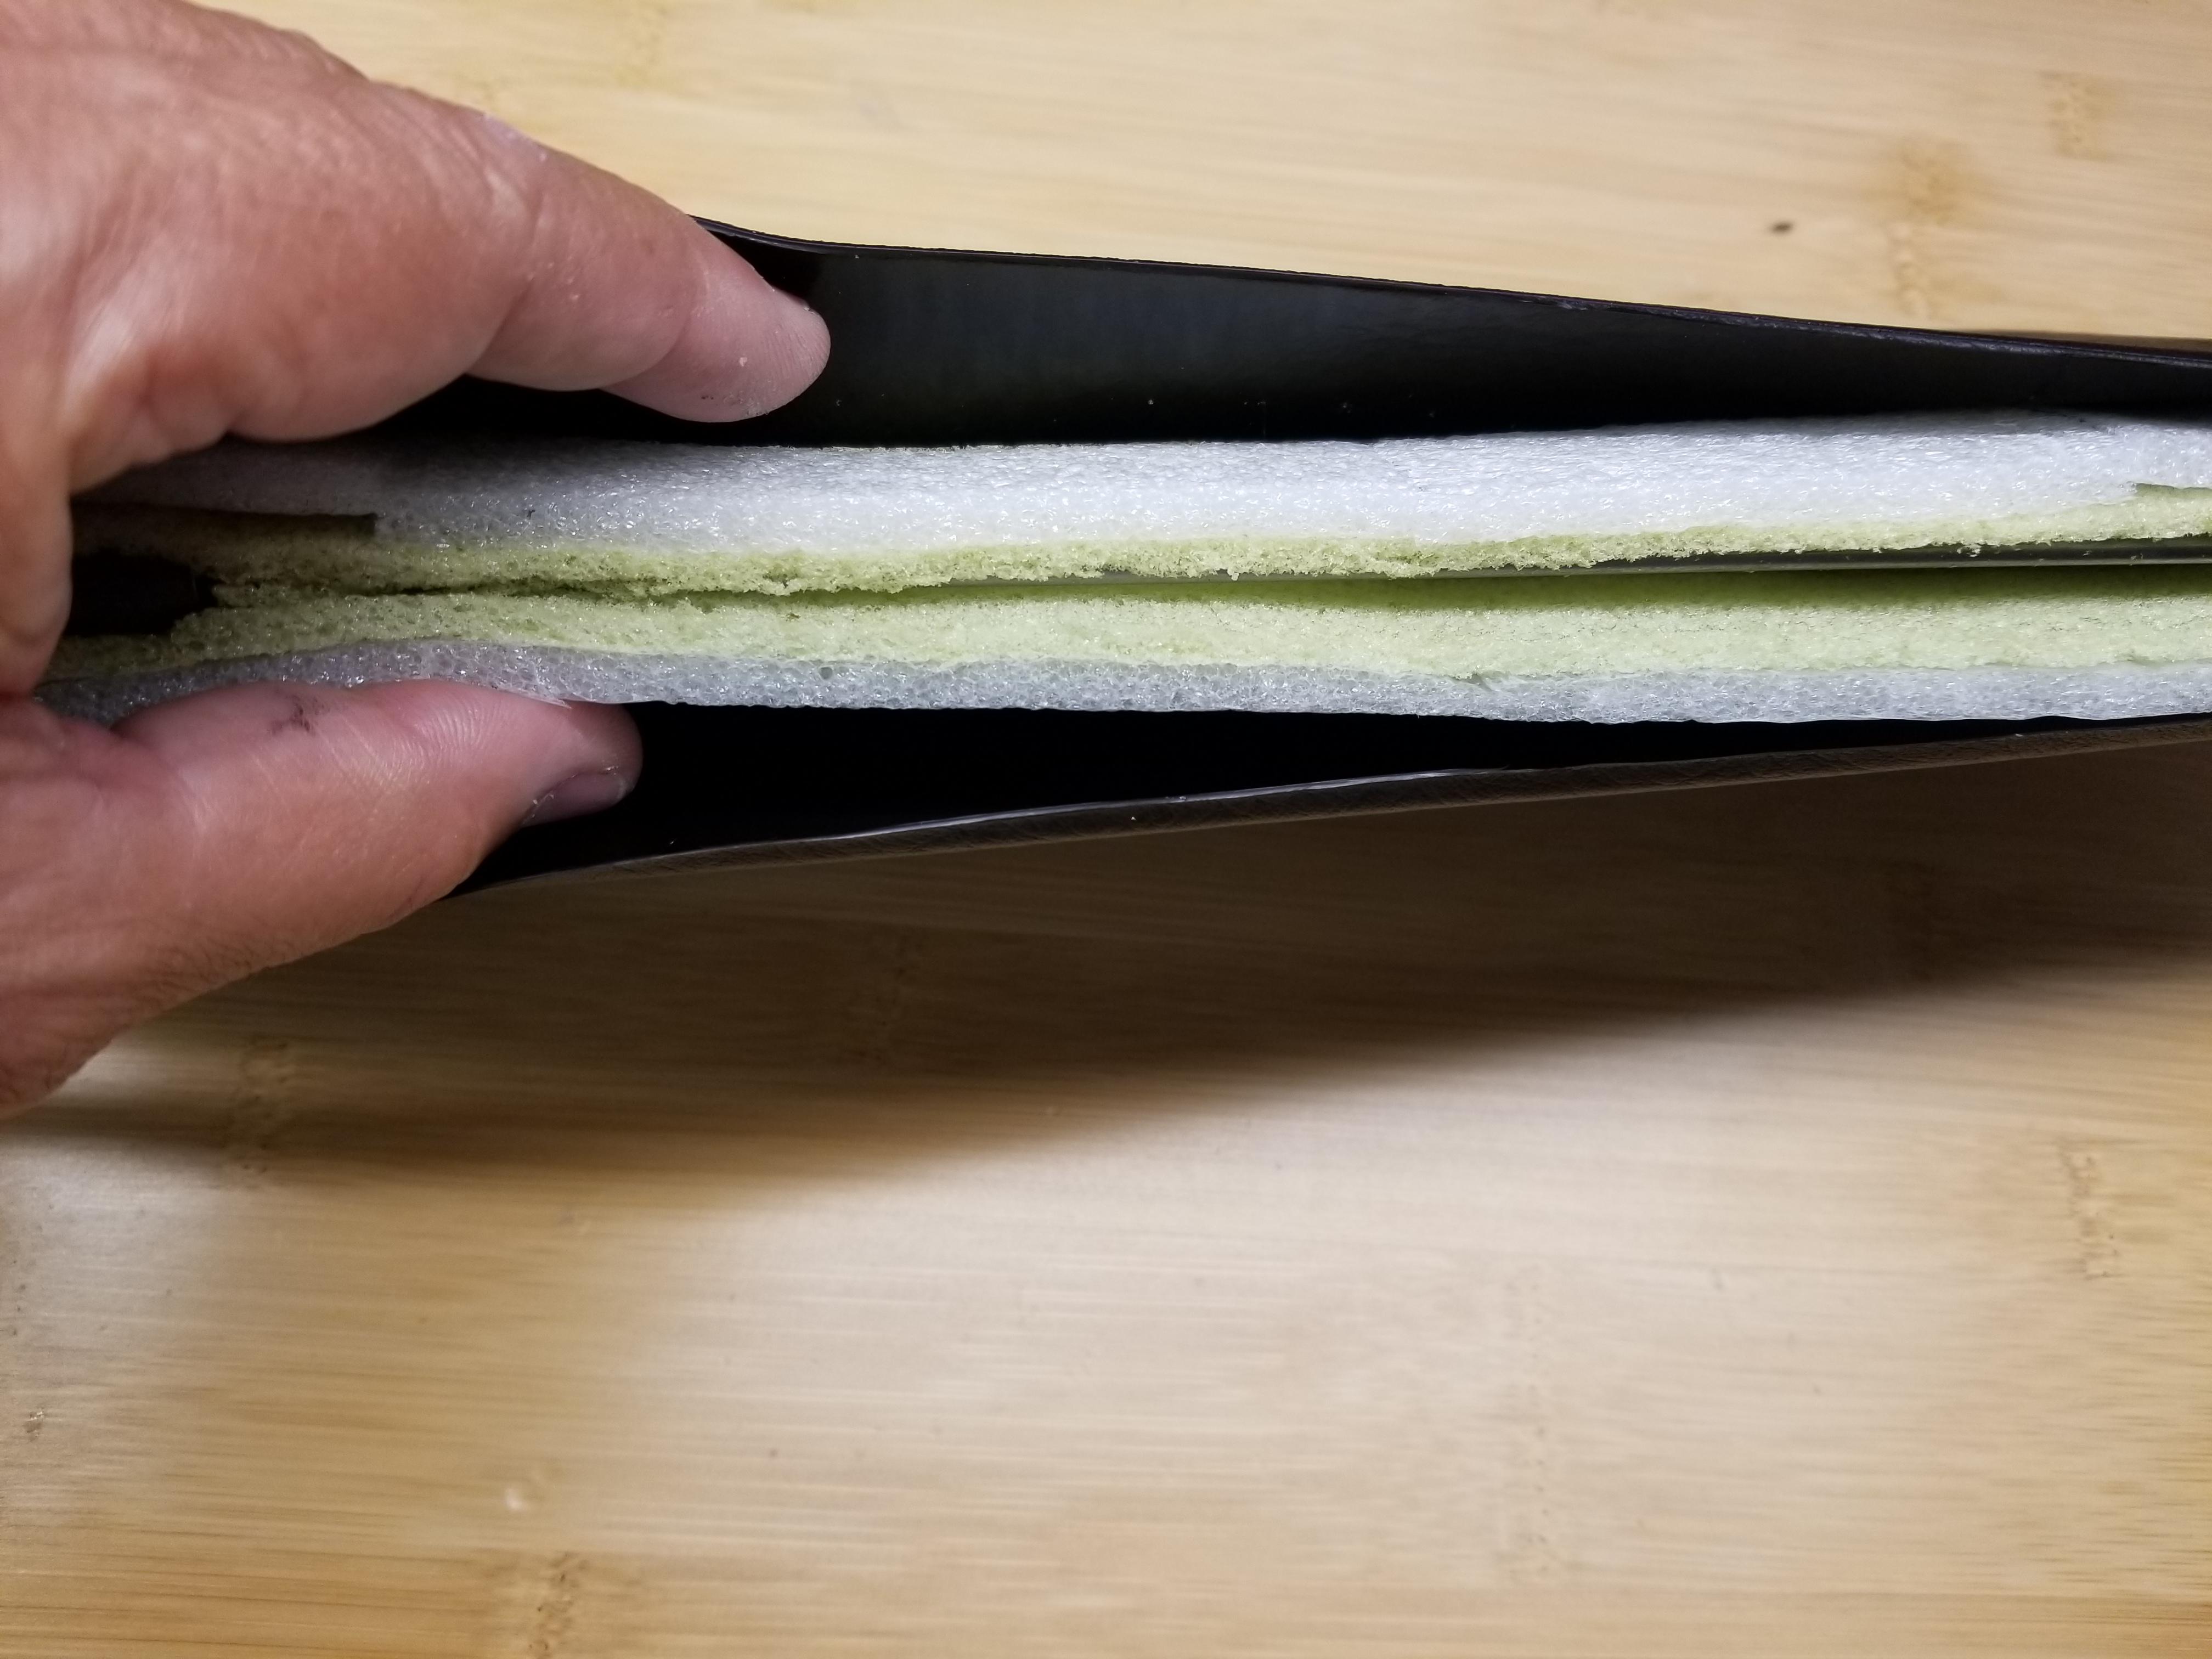
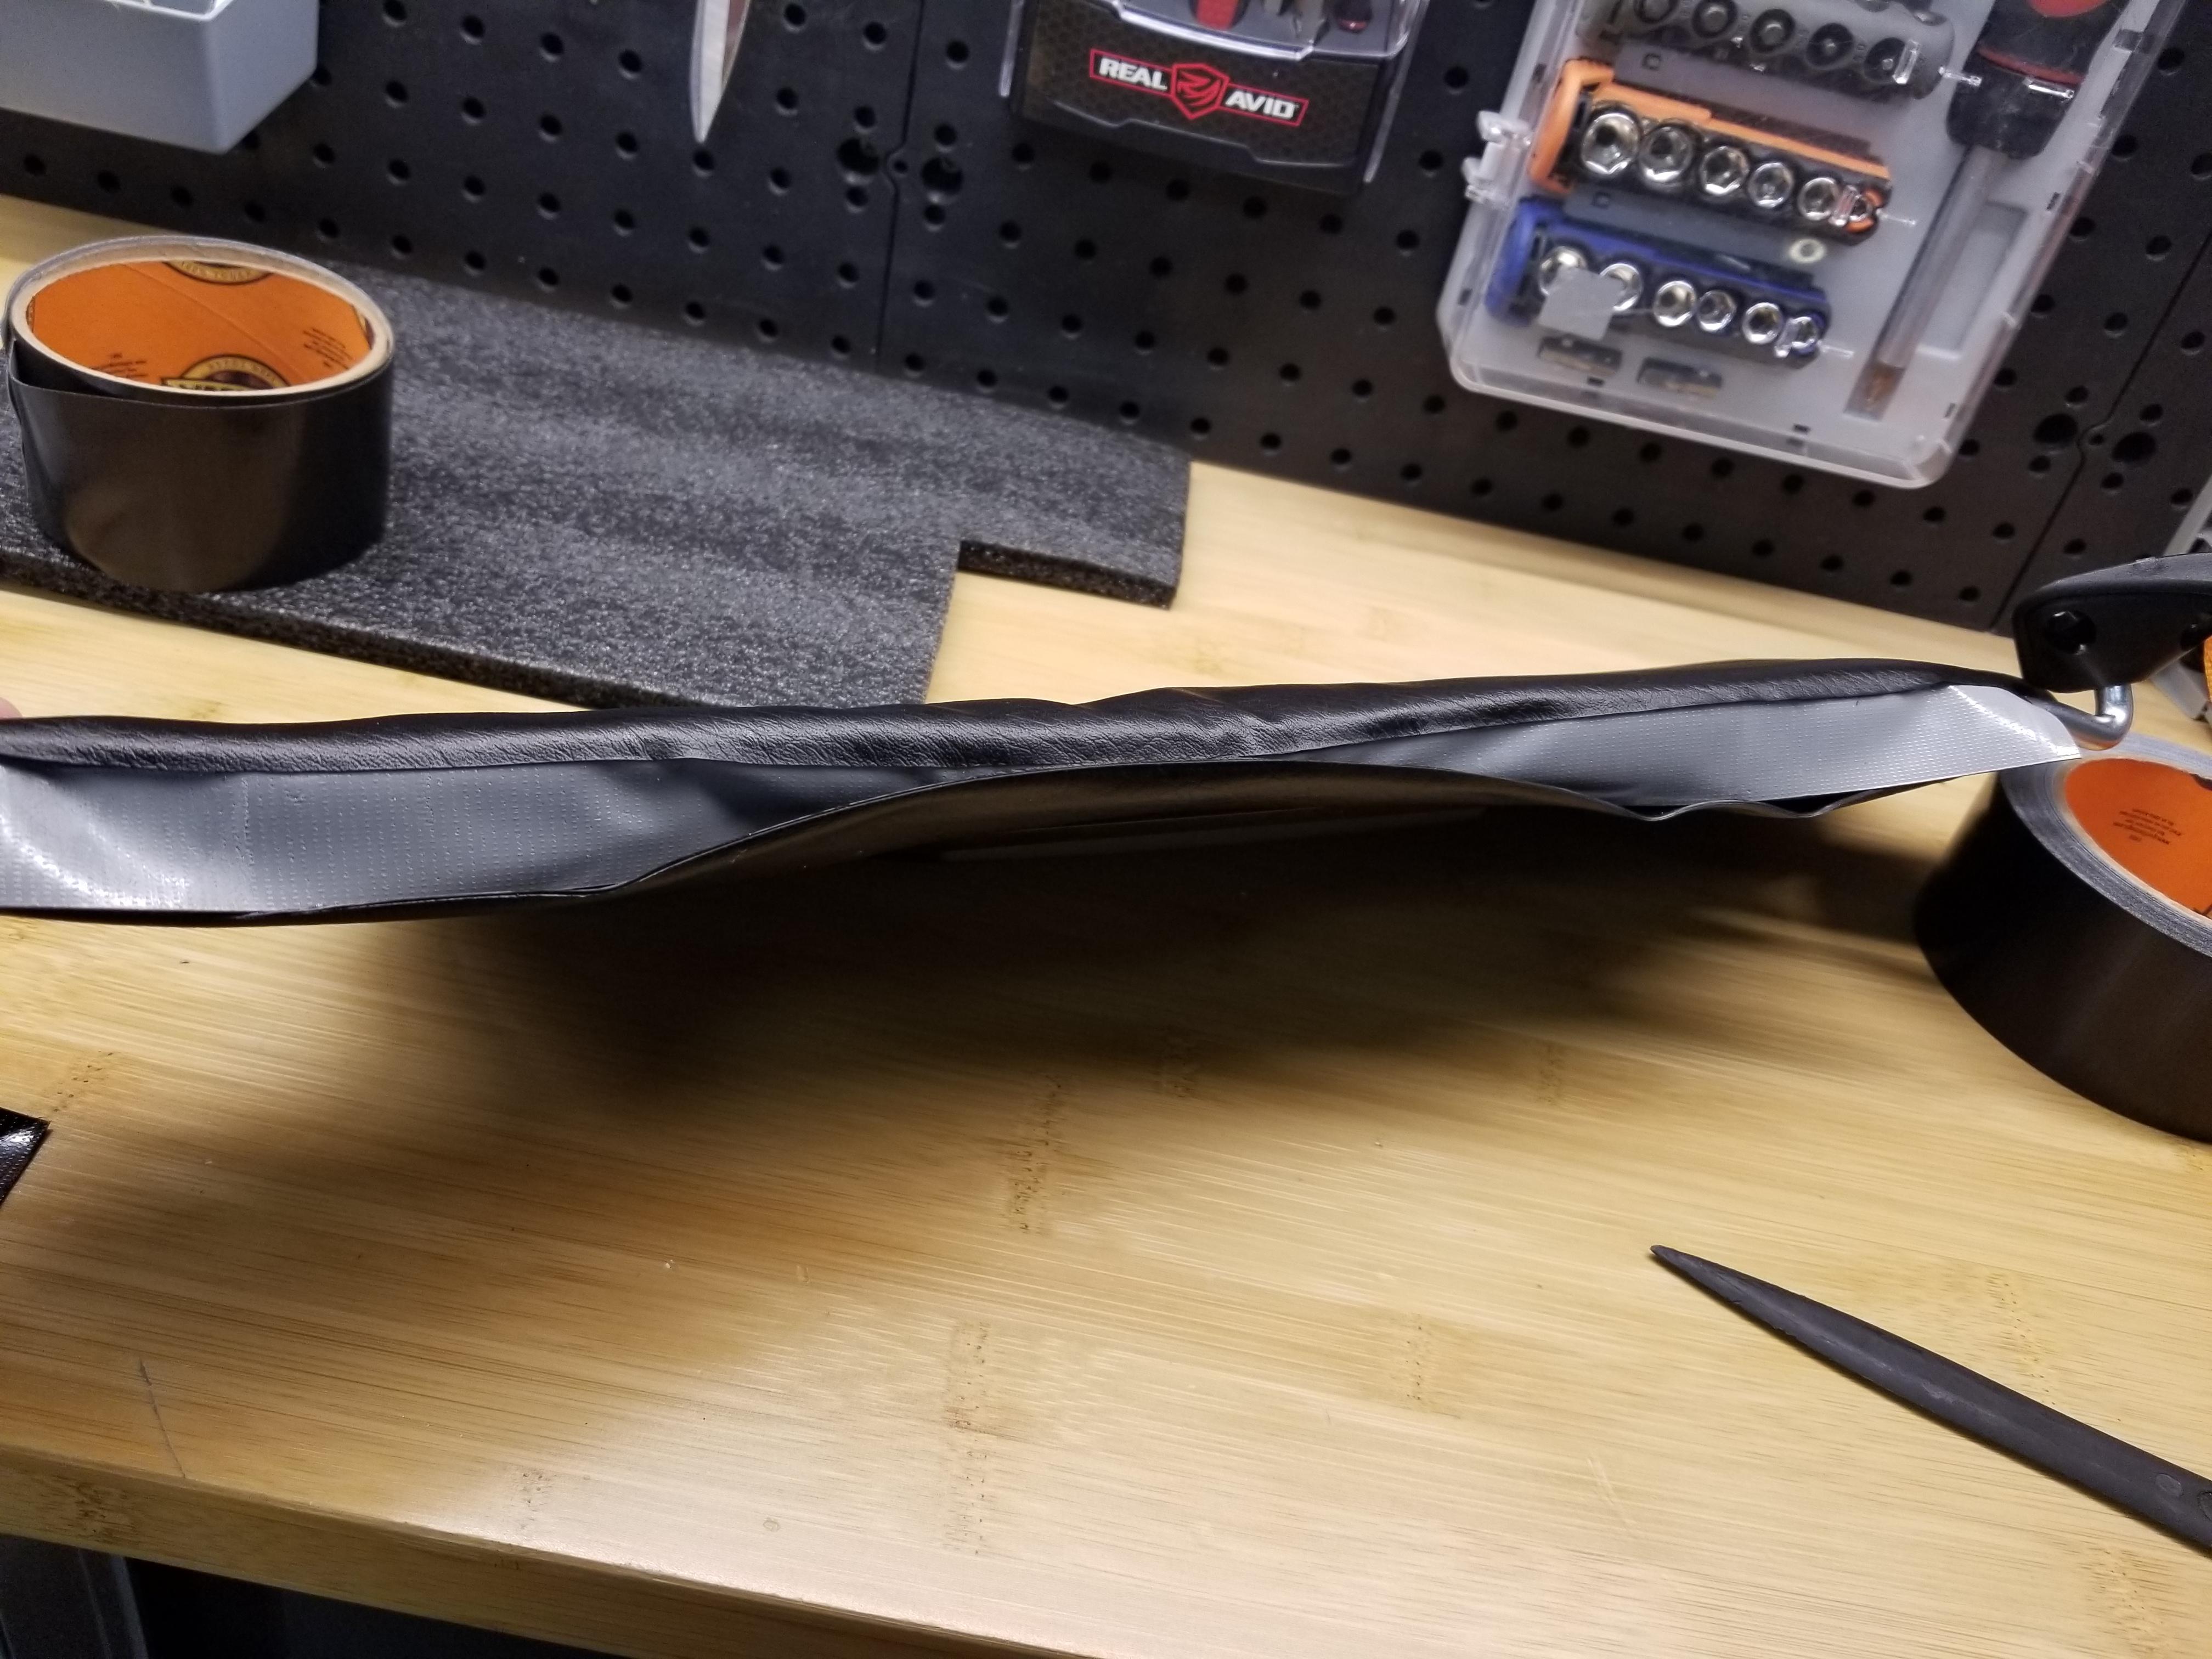
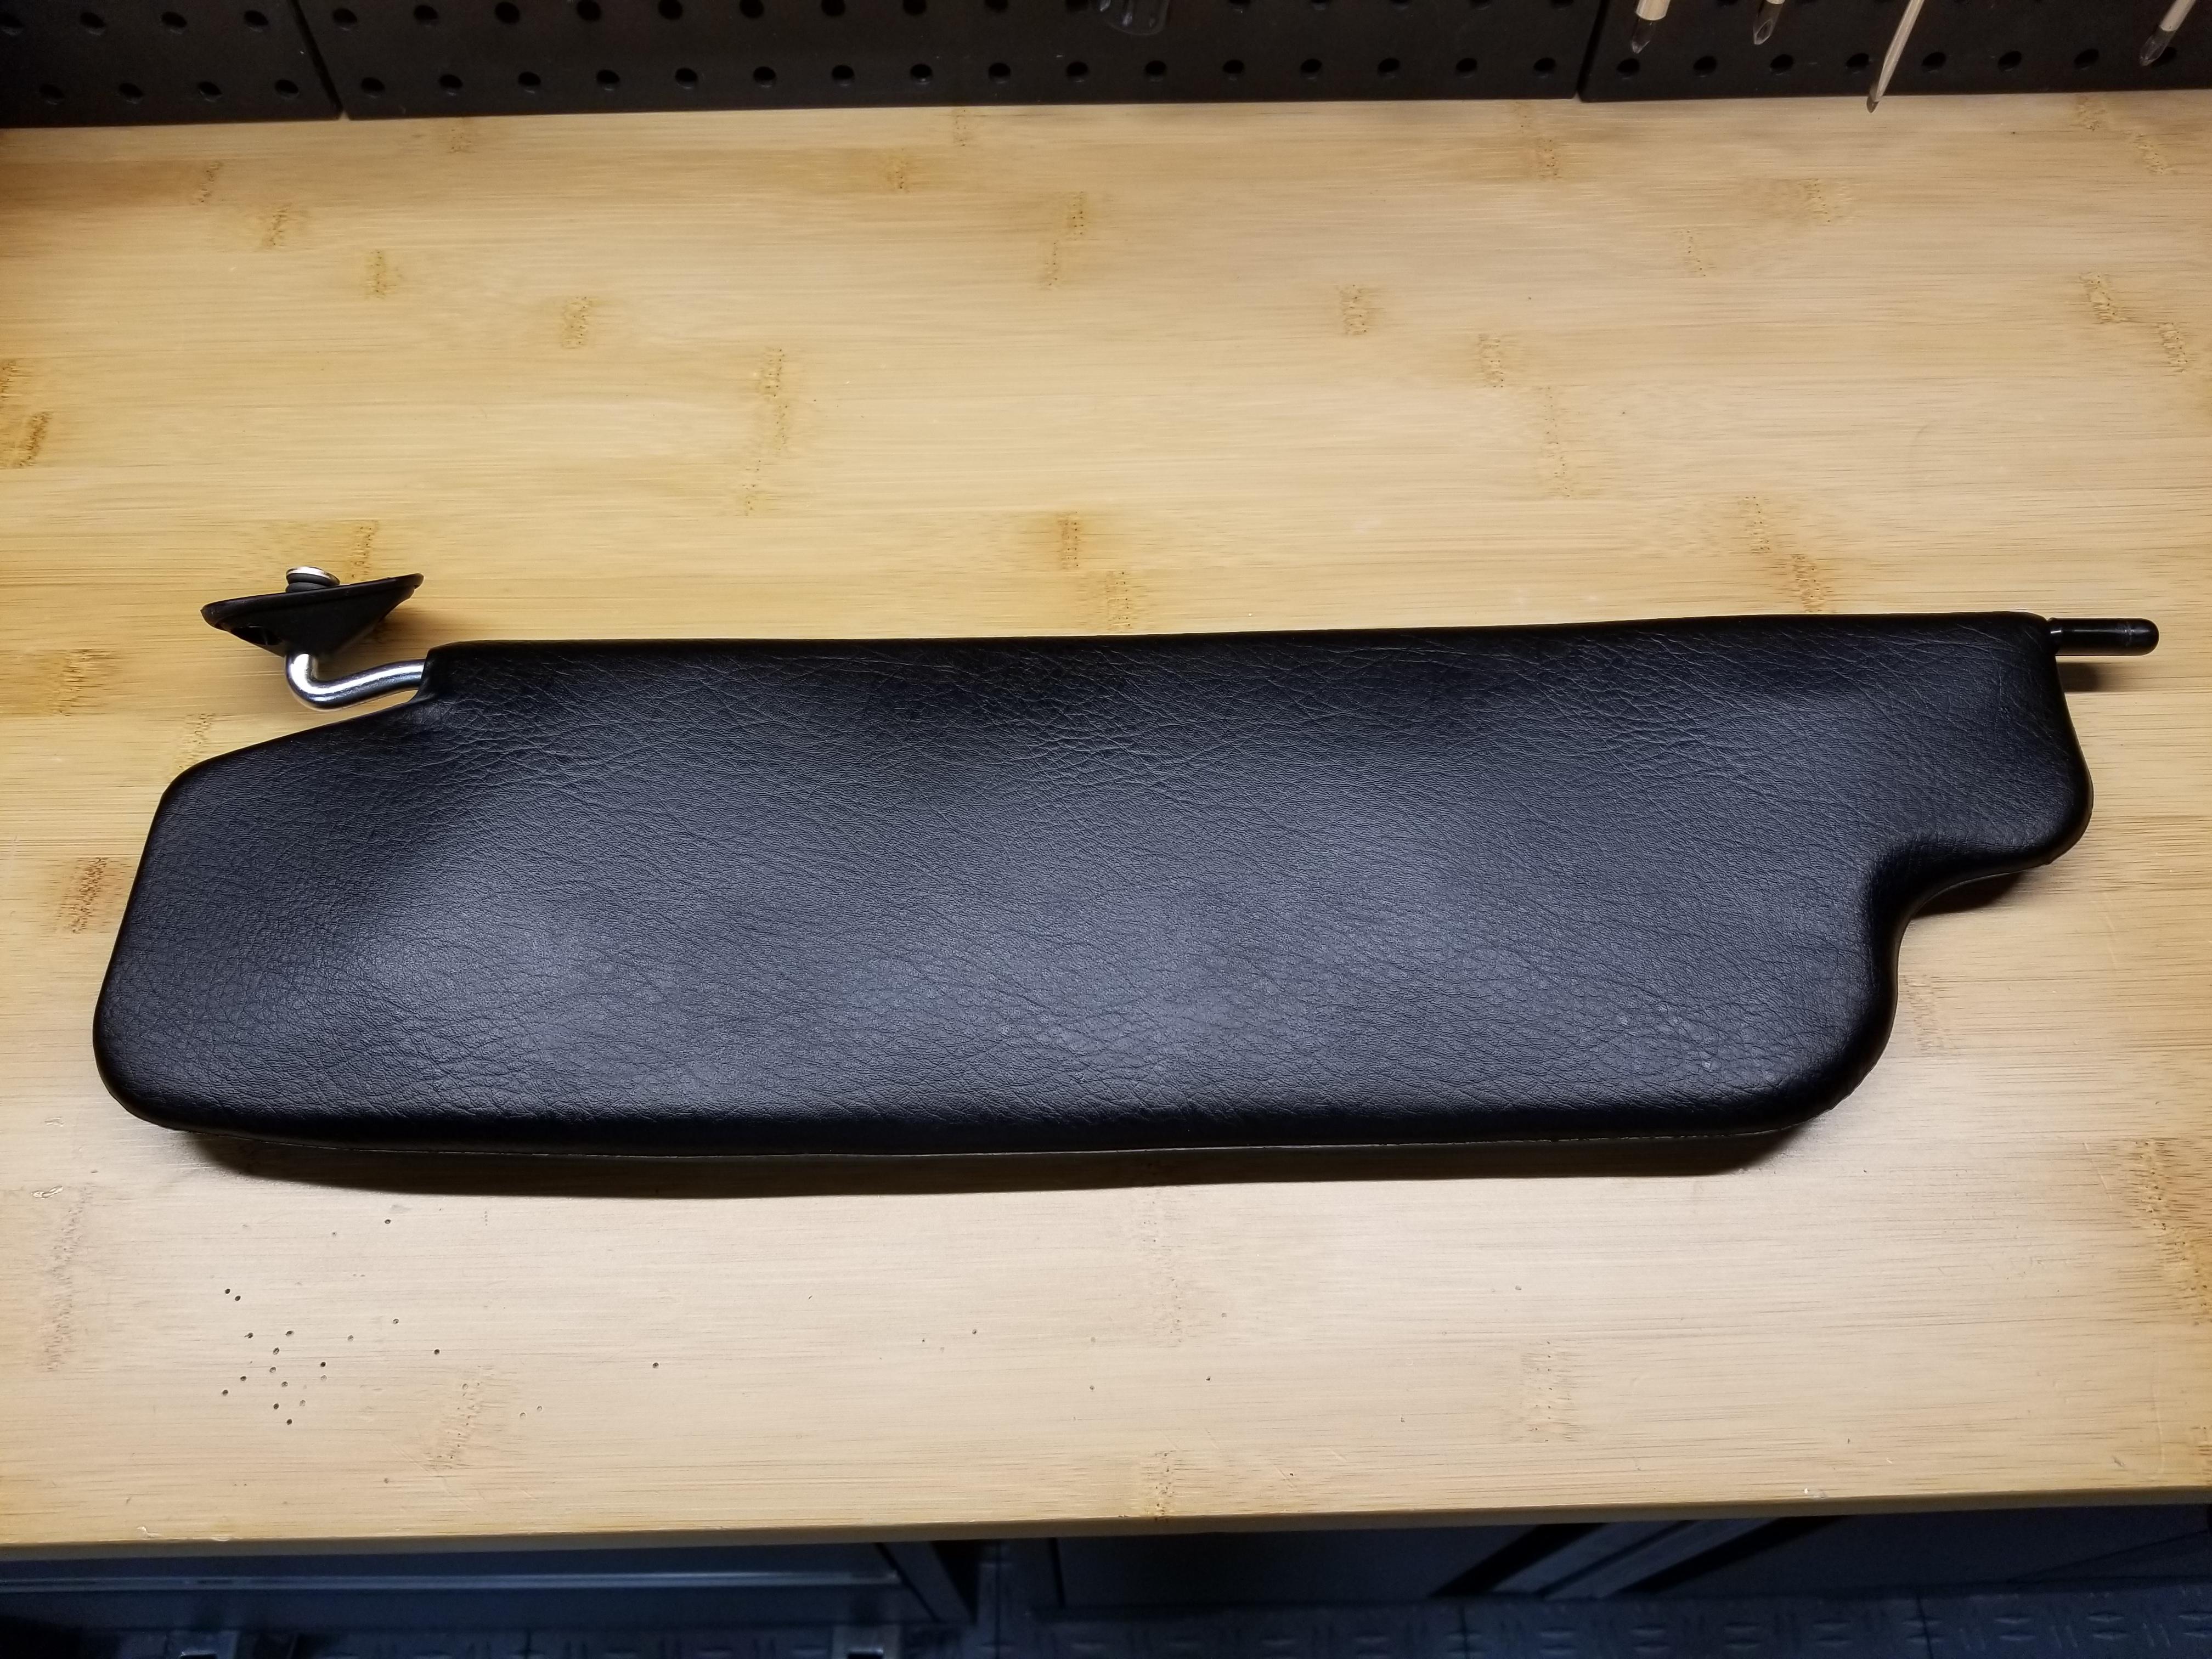
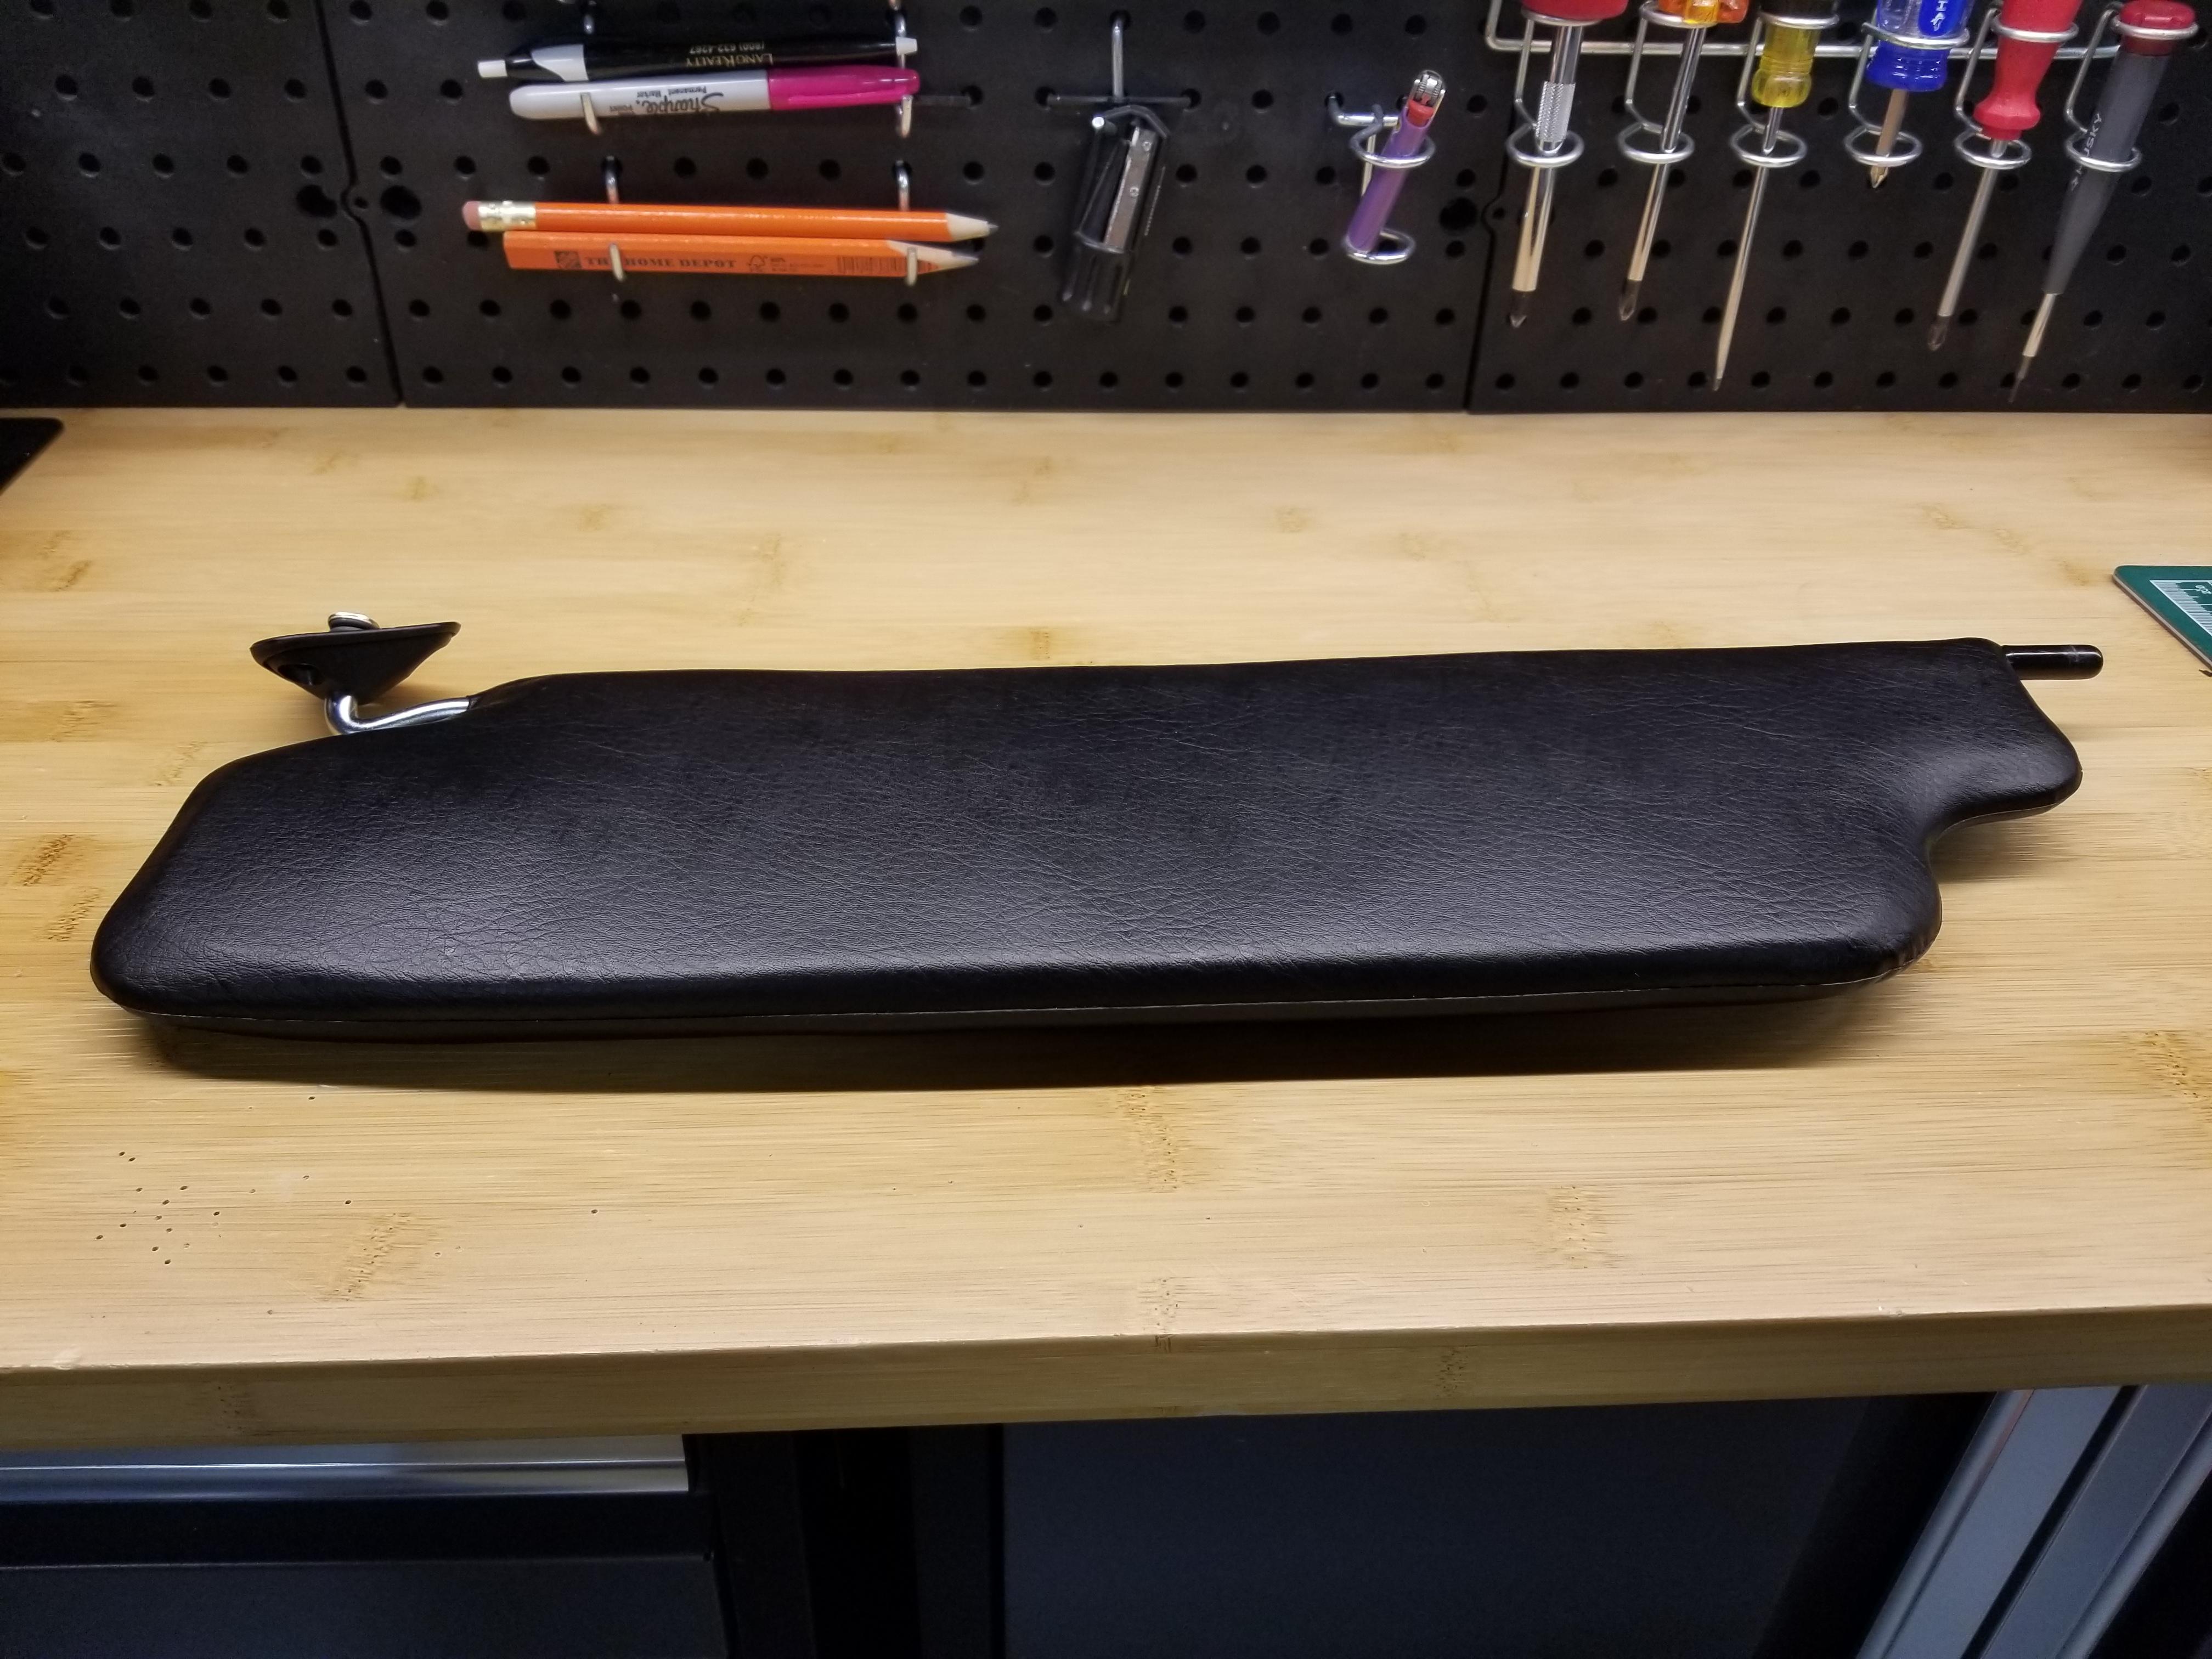
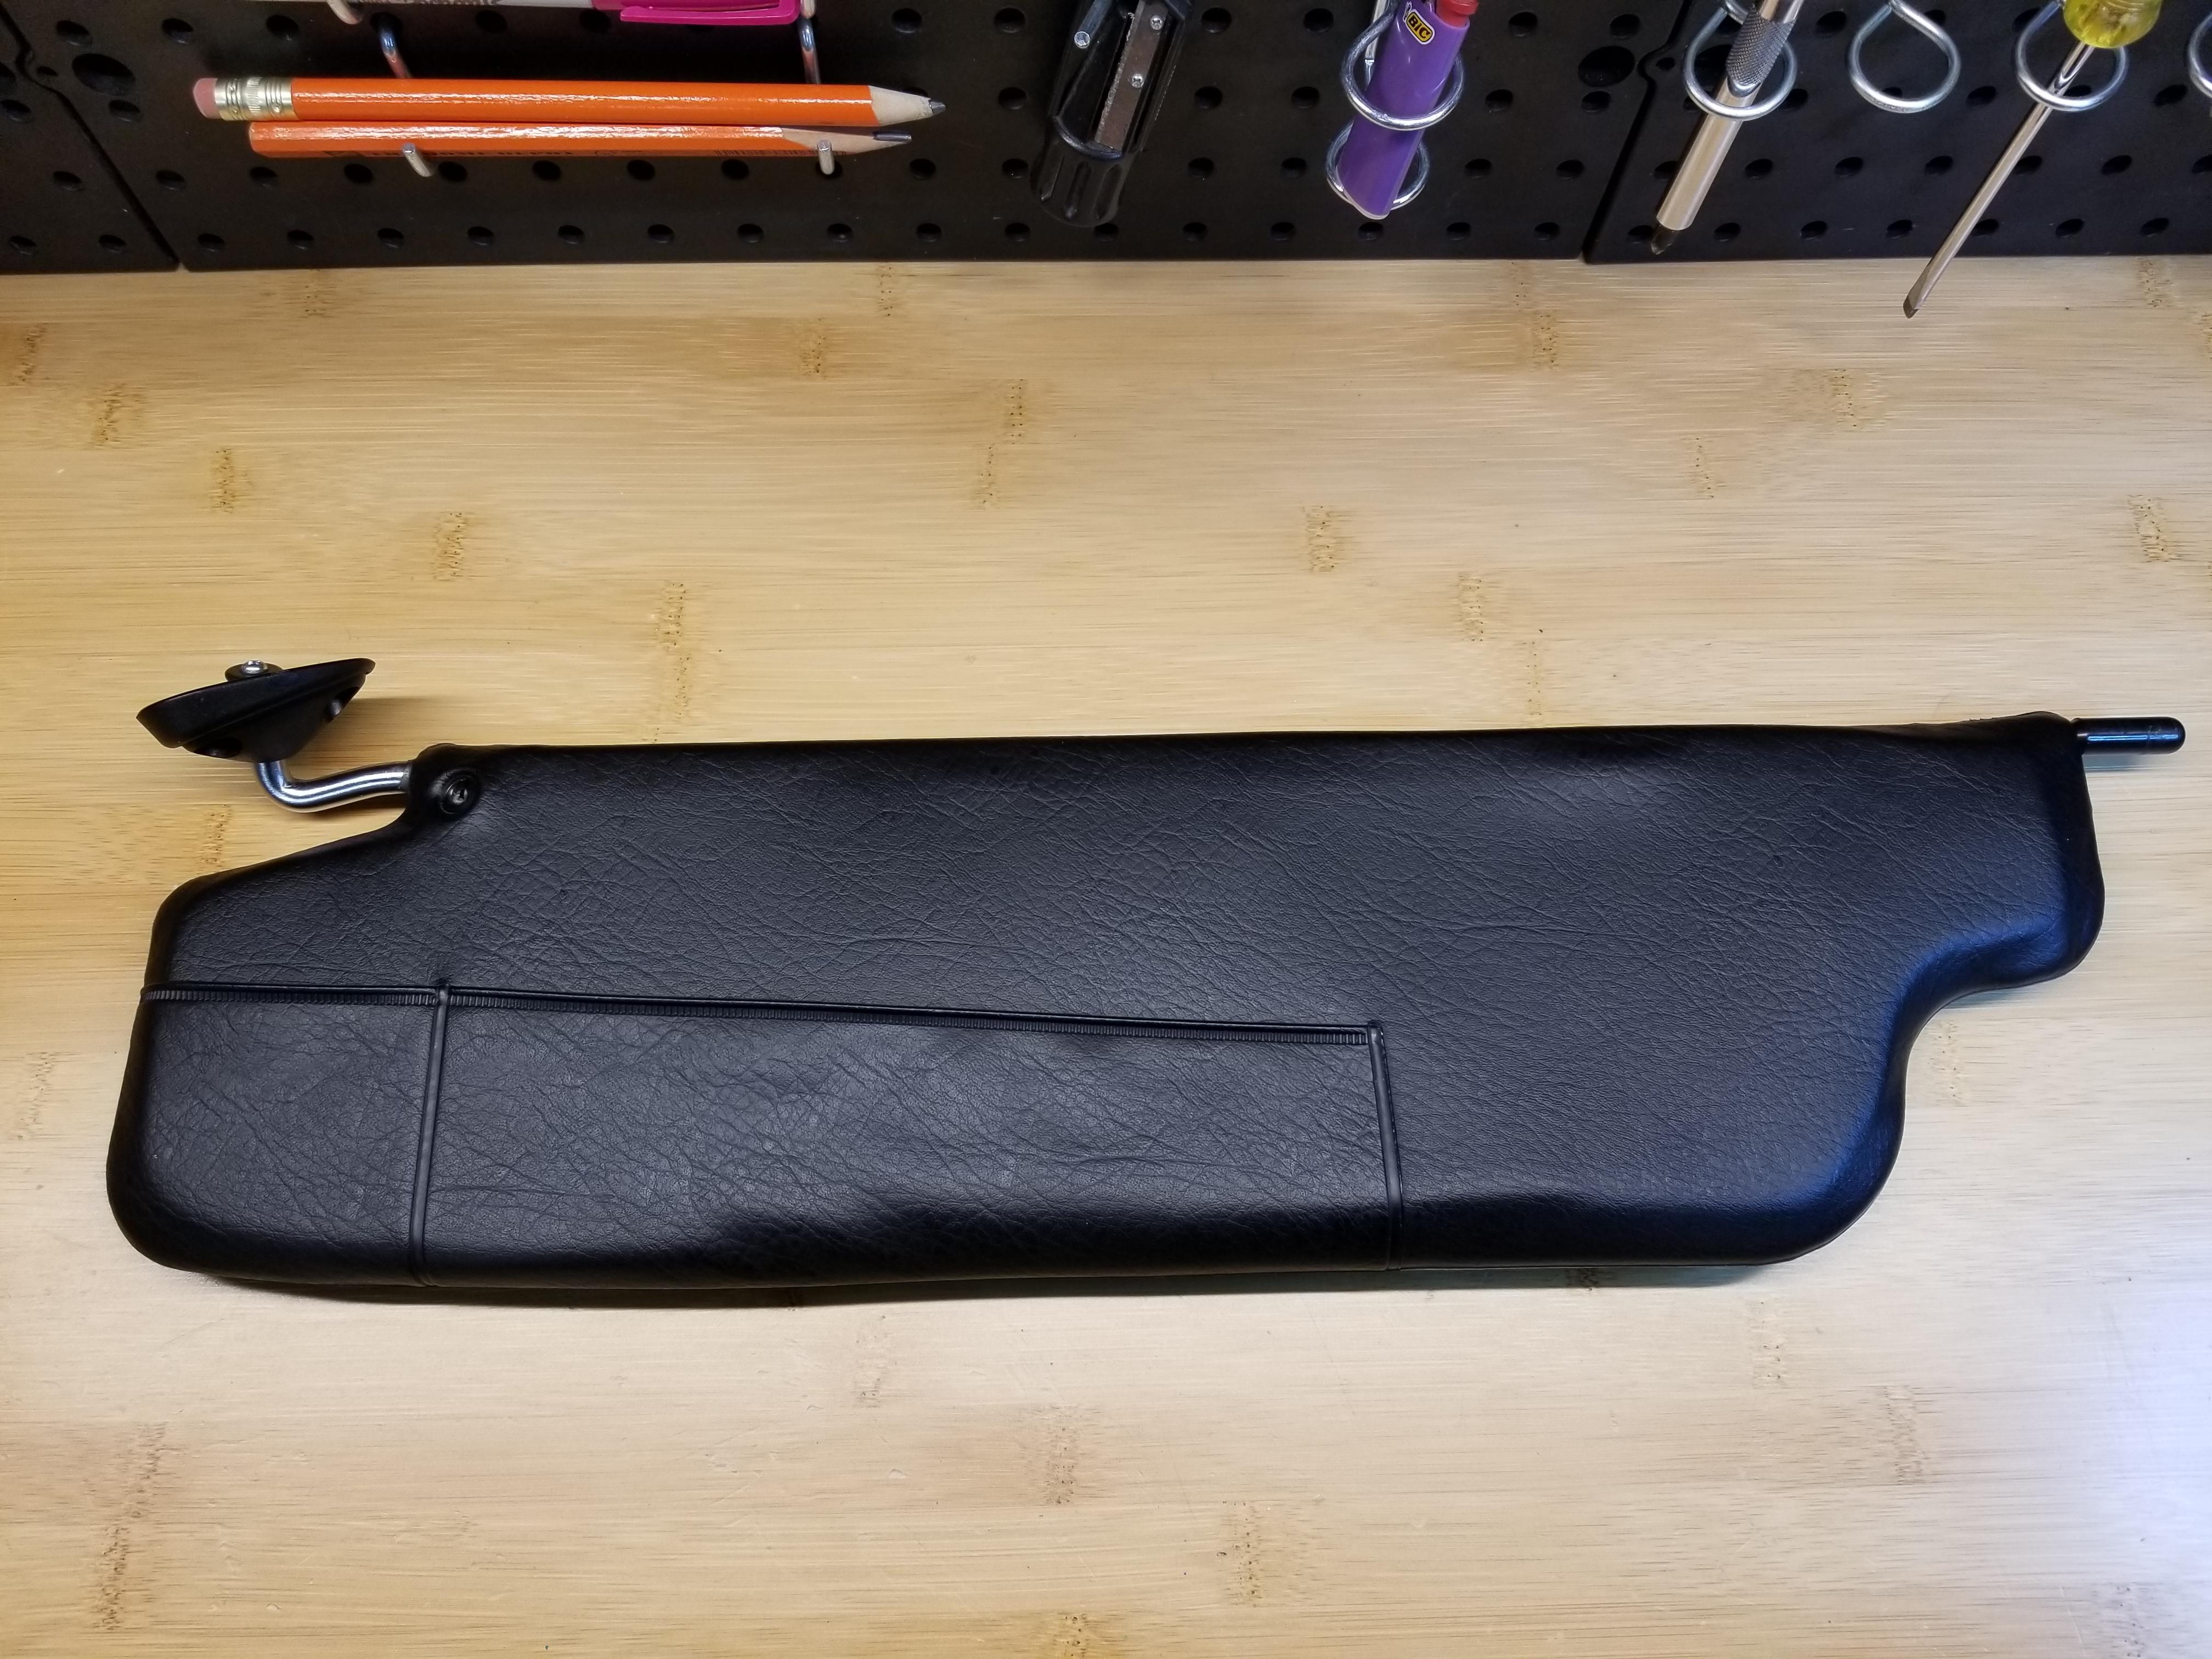
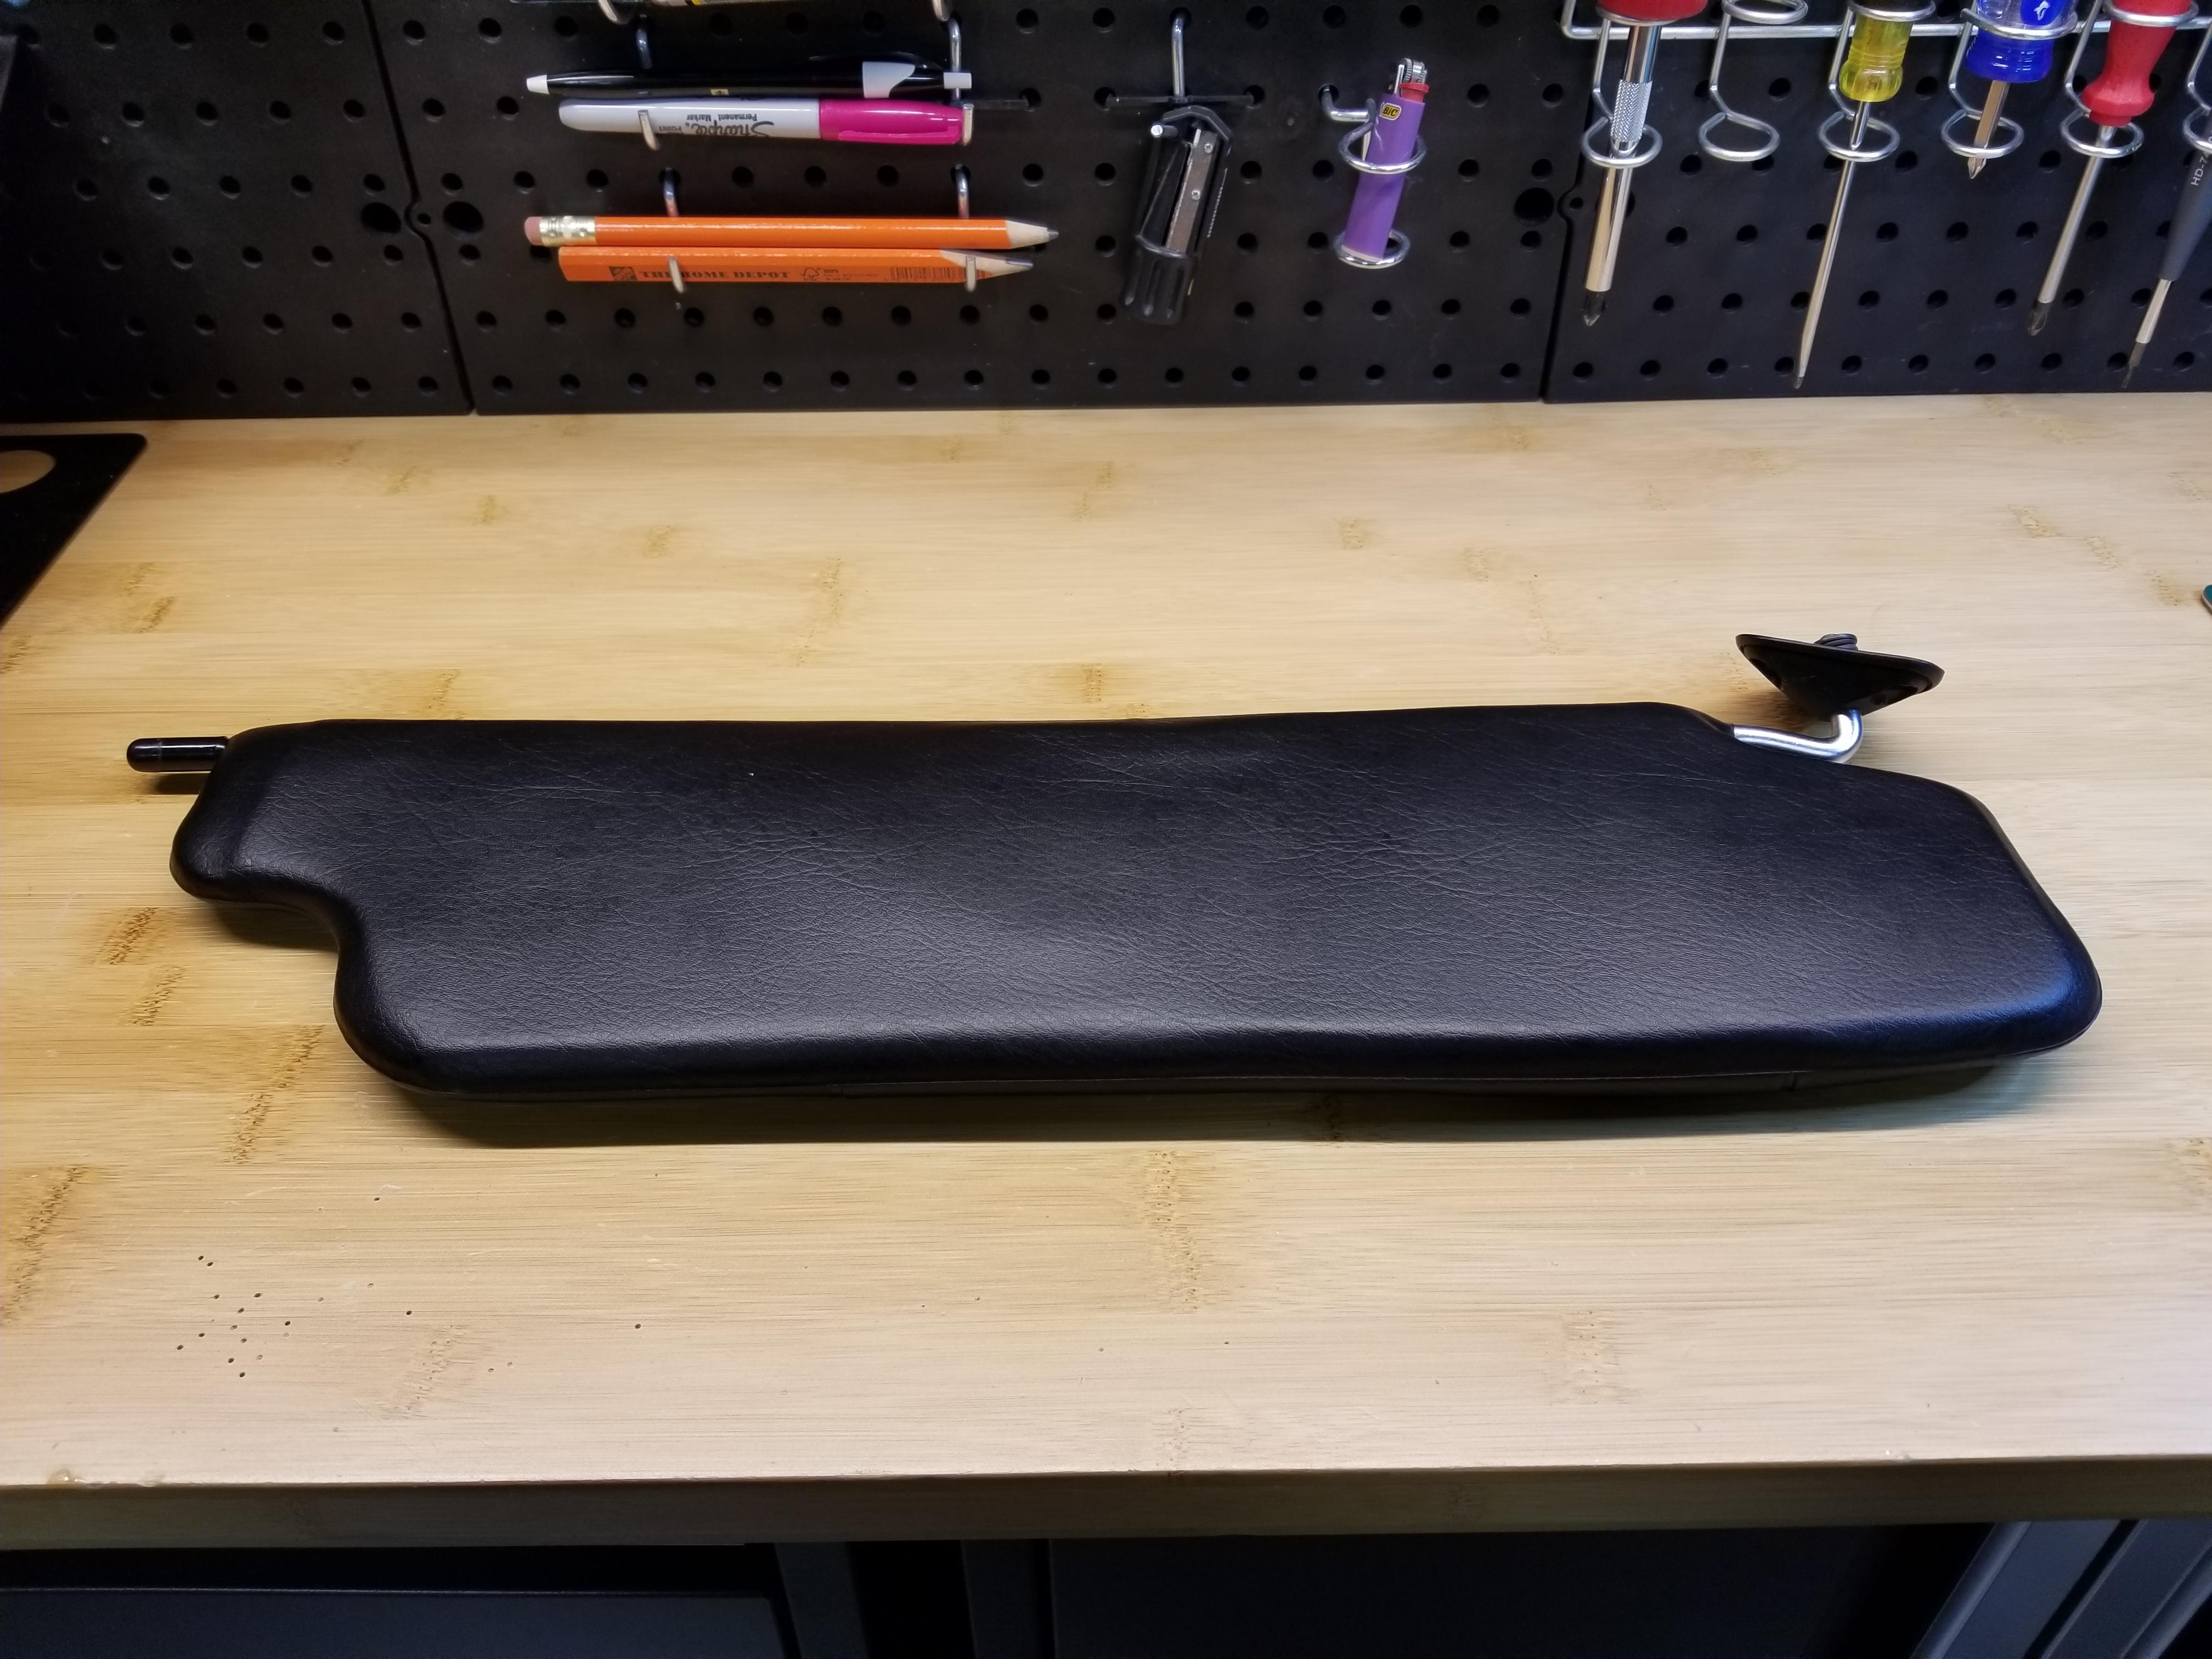
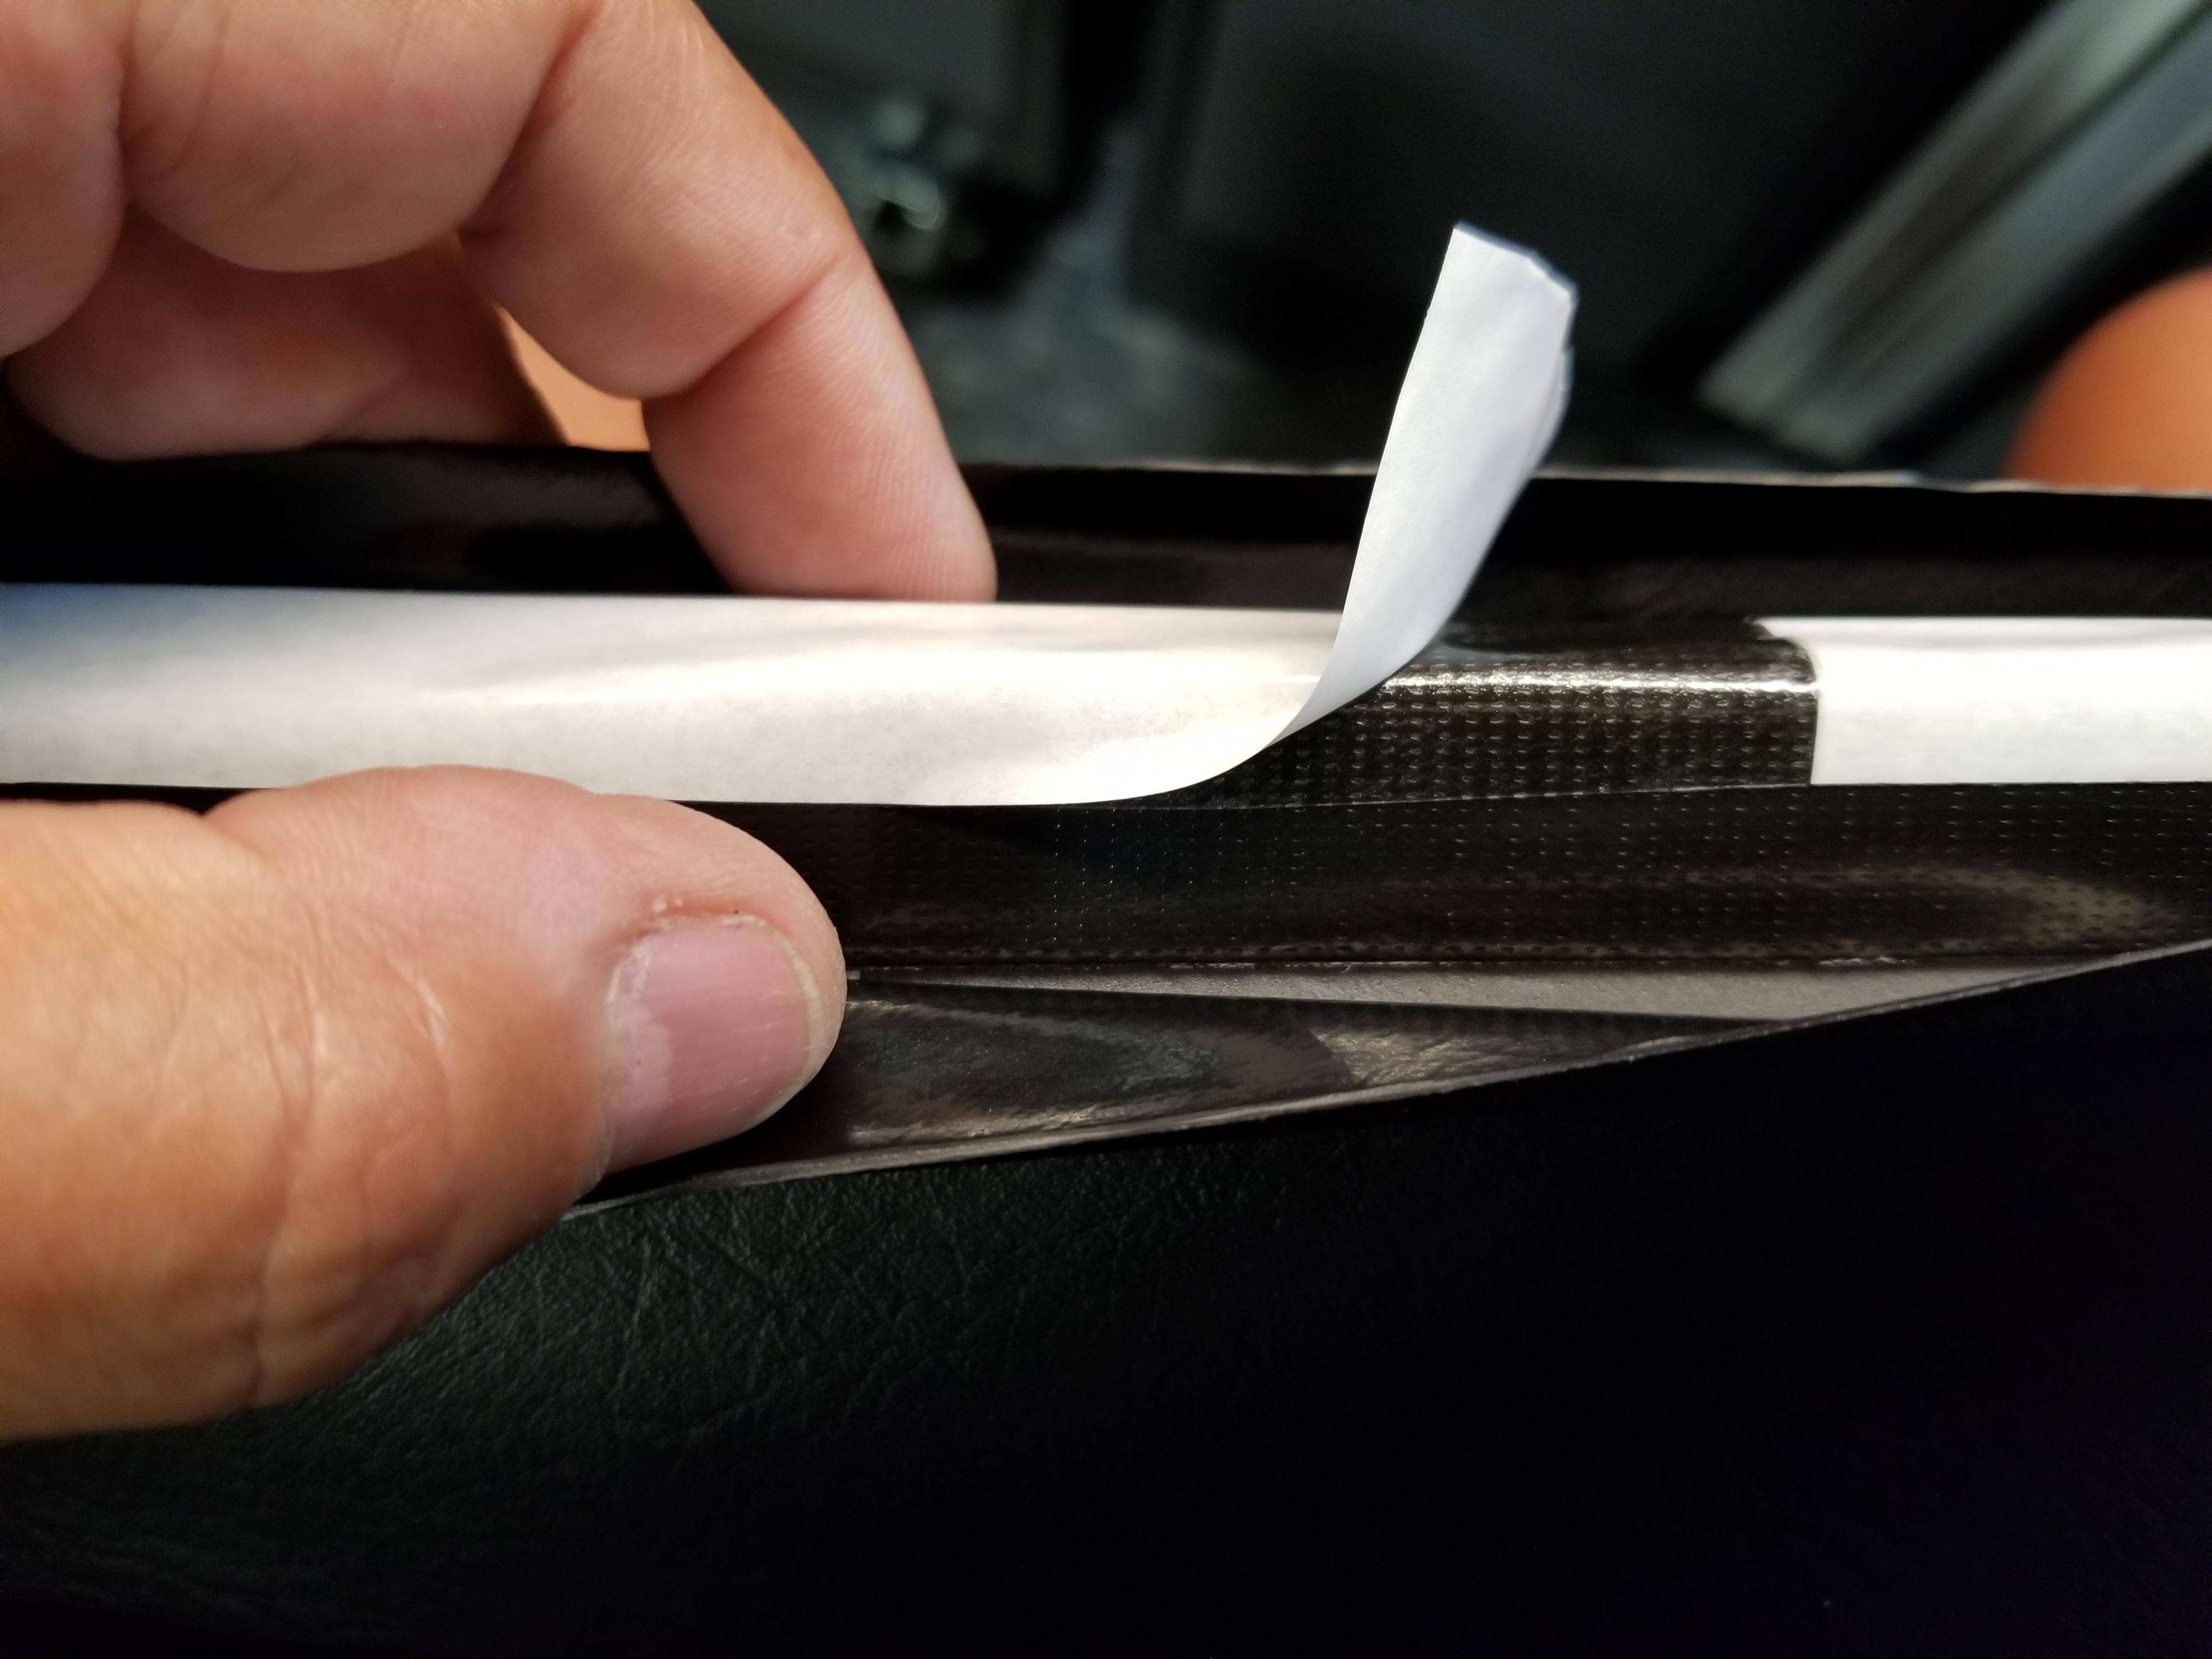
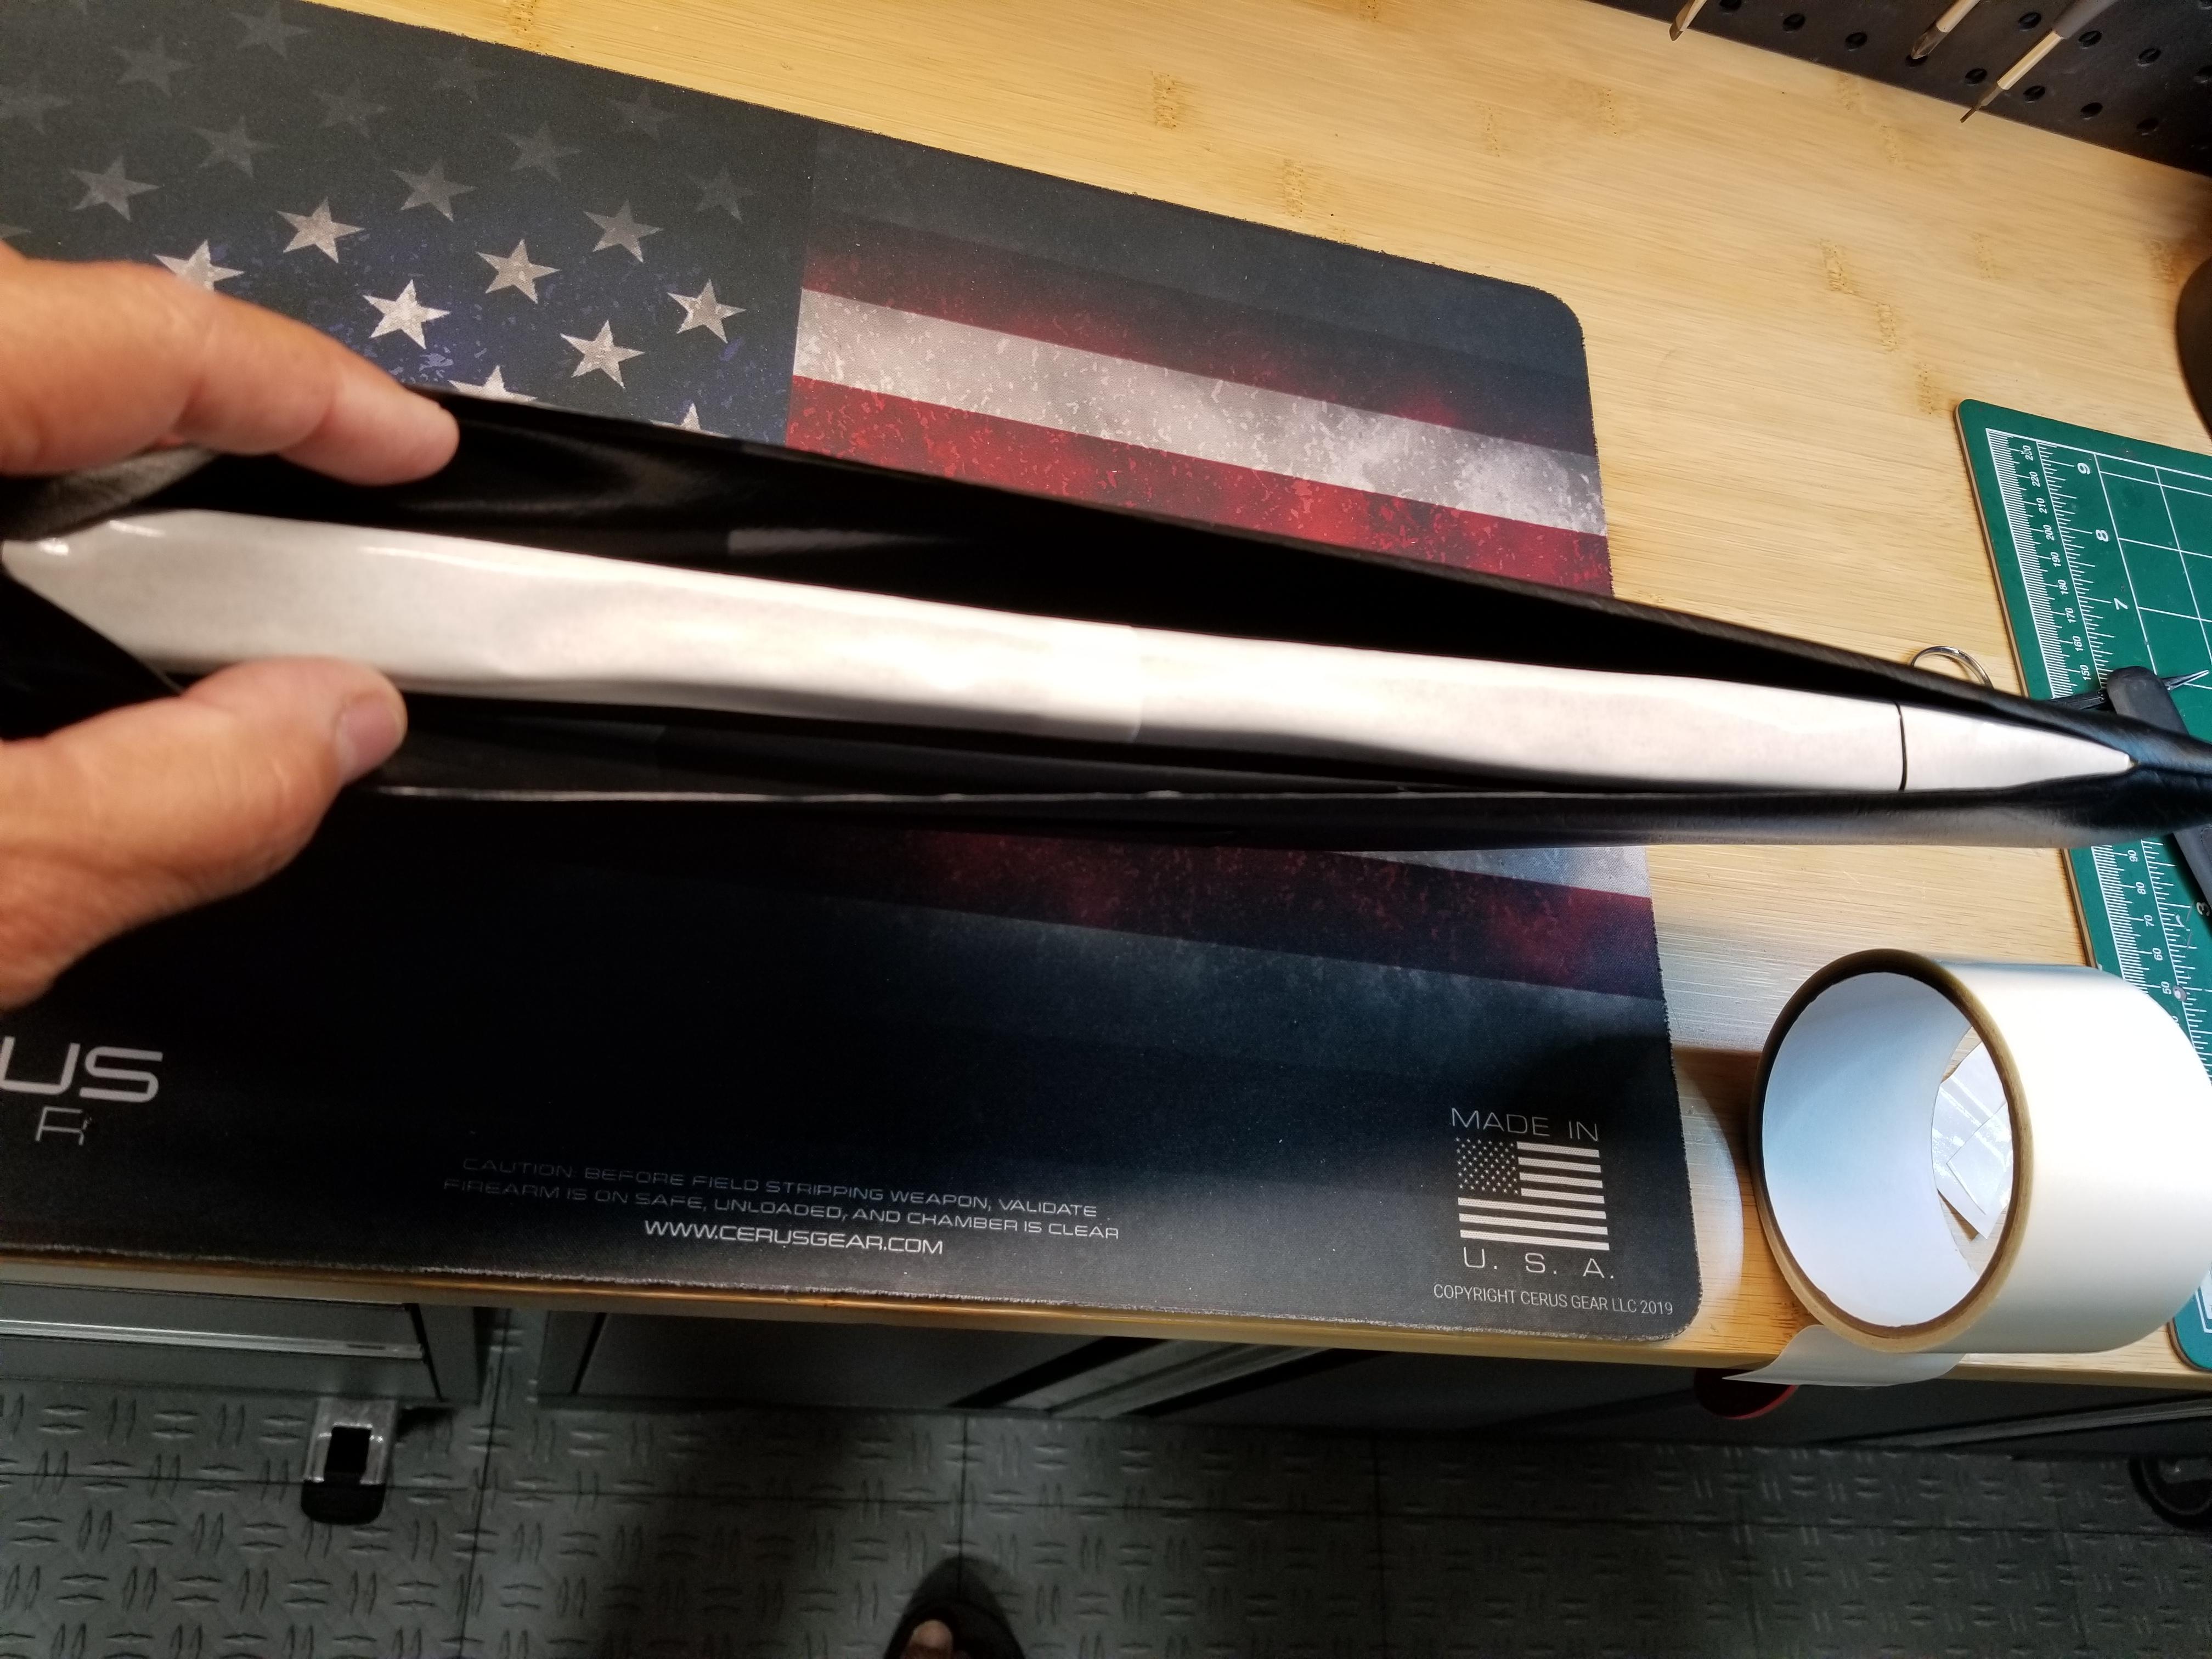
2 points2 pointsYeah, I've still got that gut feeling that the problem lies between the rotor and the sparkplugs. We know all the components are quality products but the connections are what I'd like to confirm. That cheap inline spark tester in post #152 would be a definitive test.2 points2 pointsDatsun Competition in the USA used to supply a 'kit' to convert an FS5C71-A 'Roadster 5-speed' for use in the Z. The transmission you ask about may be an example of this. Datsun Competition supplied various close ratio gear kits for them too. However, the FS5C71-A Servo Synchro 5-speed overdrive transmission was fitted as standard equipment for the S30-series Z range everywhere except the North American market. They were also used on Skyline, Cedric and Gloria models in the Japanese market. Parts (especially the steel Servo-patent synchros) are now hard to find and therefore they can be expensive to refurbish. I have the FS5C71-A on three of my cars and I personally like them, but they have a somewhat undeserved bad reputation which mostly comes from worn out examples.2 points1 pointAfter looking at my original "saggy" sunvisors for a few years (and with lots of "sheltering at home" time) I decided to try a "fix". The vynil skins themselves are in great shape but it seemed as if the internal stuffing had deteriorated over 40 odd years and there were wrinkles here and there on the visors. I didn't want to change the original vynil for leather (visor repair kits on the market) so I decided to cut them open along the forwardmost seam with a fine scalpel blade, staying on one side of the seam so I could later close the seam almost invisibly. To my surprise the foam layer inside was pretty intact and the cause of the wrinkles on the outside was just loose, saggy vynil. I cut out a filler panel for each side out of closed cell foam, 2.5mm thick and carefully fitted and glued it to the existing foam with 3M spray glue. Closing the seam again was tricky but all I could come up with was using a strip of Gorilla tape (that stuff really sticks). I placed half the strip along the inside of the top half of the vynil and slowly pulled the bottom half over the exposed tape until a precise closure was achieved. The result is a nice firm visor with an almost invisible seam. See pics below. PS: I've only done the passenger side (which has the vanity mirror and is a little trickier) because I ran out of the foam. I will do the driver side once I get the foam and will post any details that I might change for improvement. Original "saggy" visors (I know, they're way better than most!!) New foam filler (white) fitted and glued to each side of the original green foam: Trim the foam edges so approximating the vinyl edges can be achieved with just a little stretch: Gorilla tape on the inside of the top half and then bringing the bottom half of the vynil over the bottom half of the tape until the edges are precisely closed (start in the middle): Final result:


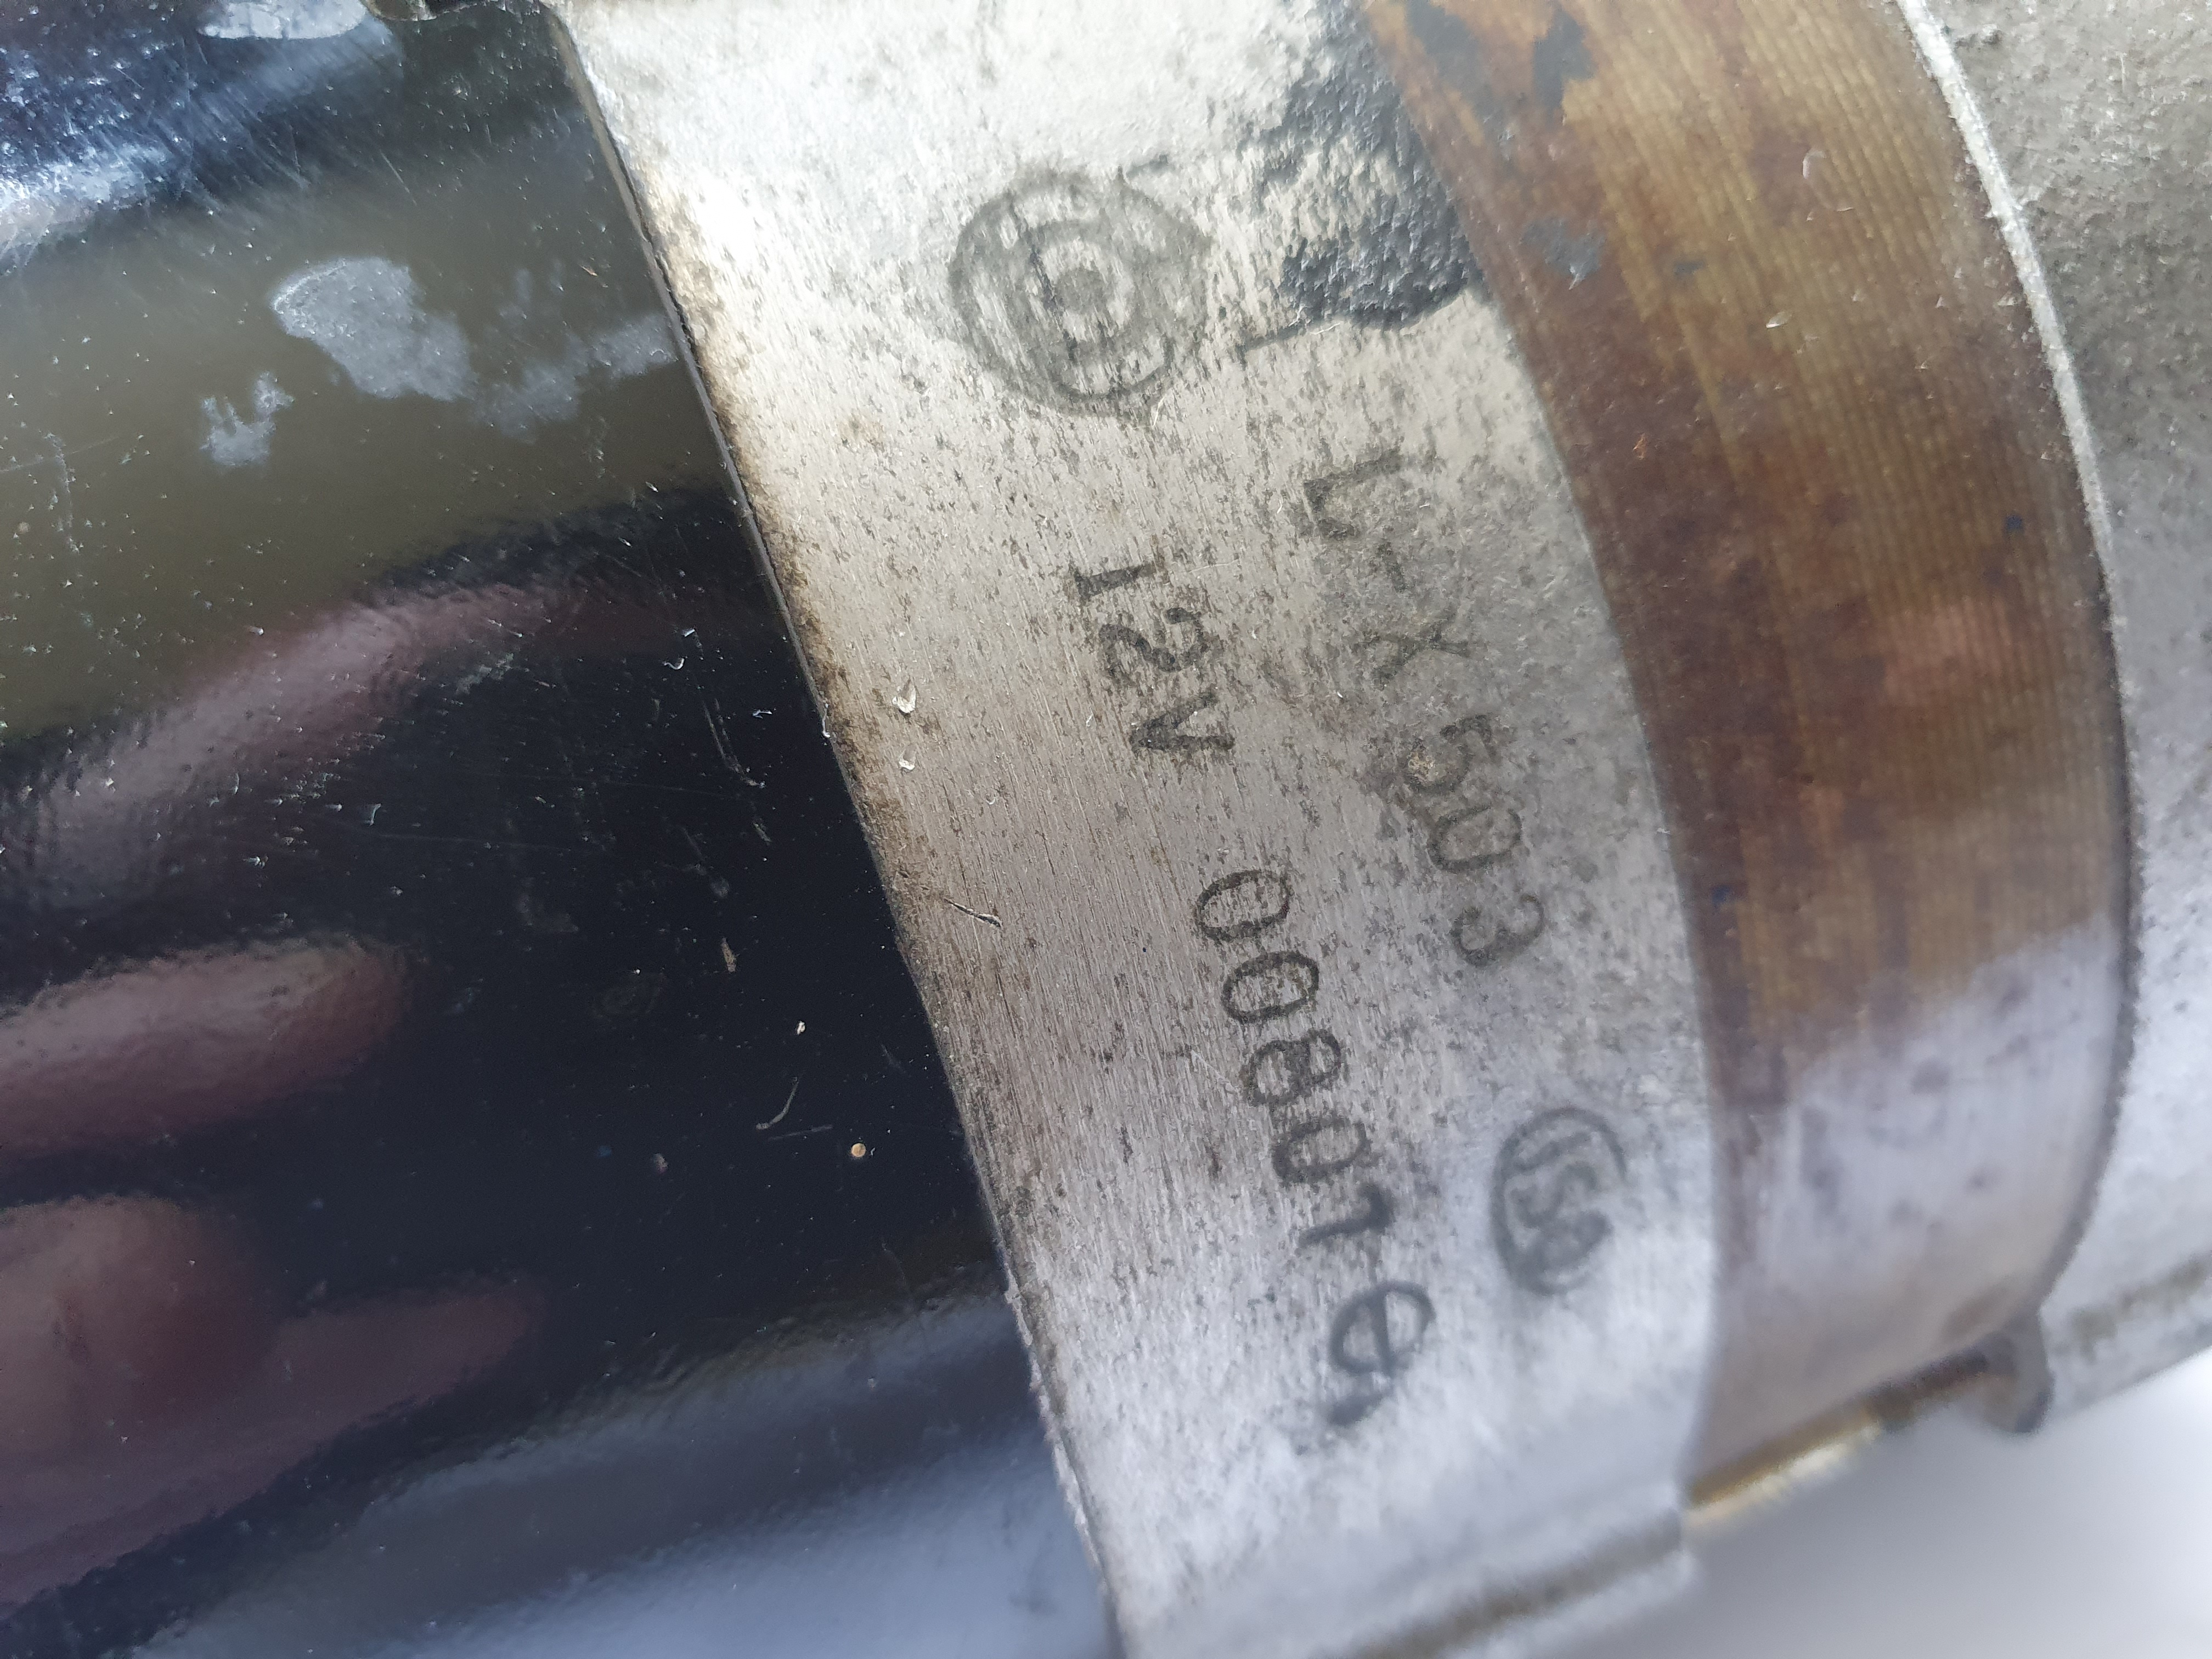
 1 pointThank you @HS30-H - I used your pictures to locate some incredibly faint imprints of the Alternator: L-X503 12V 00806. I'm supposing the difference in the last number indicates that these are a run of numbered units?
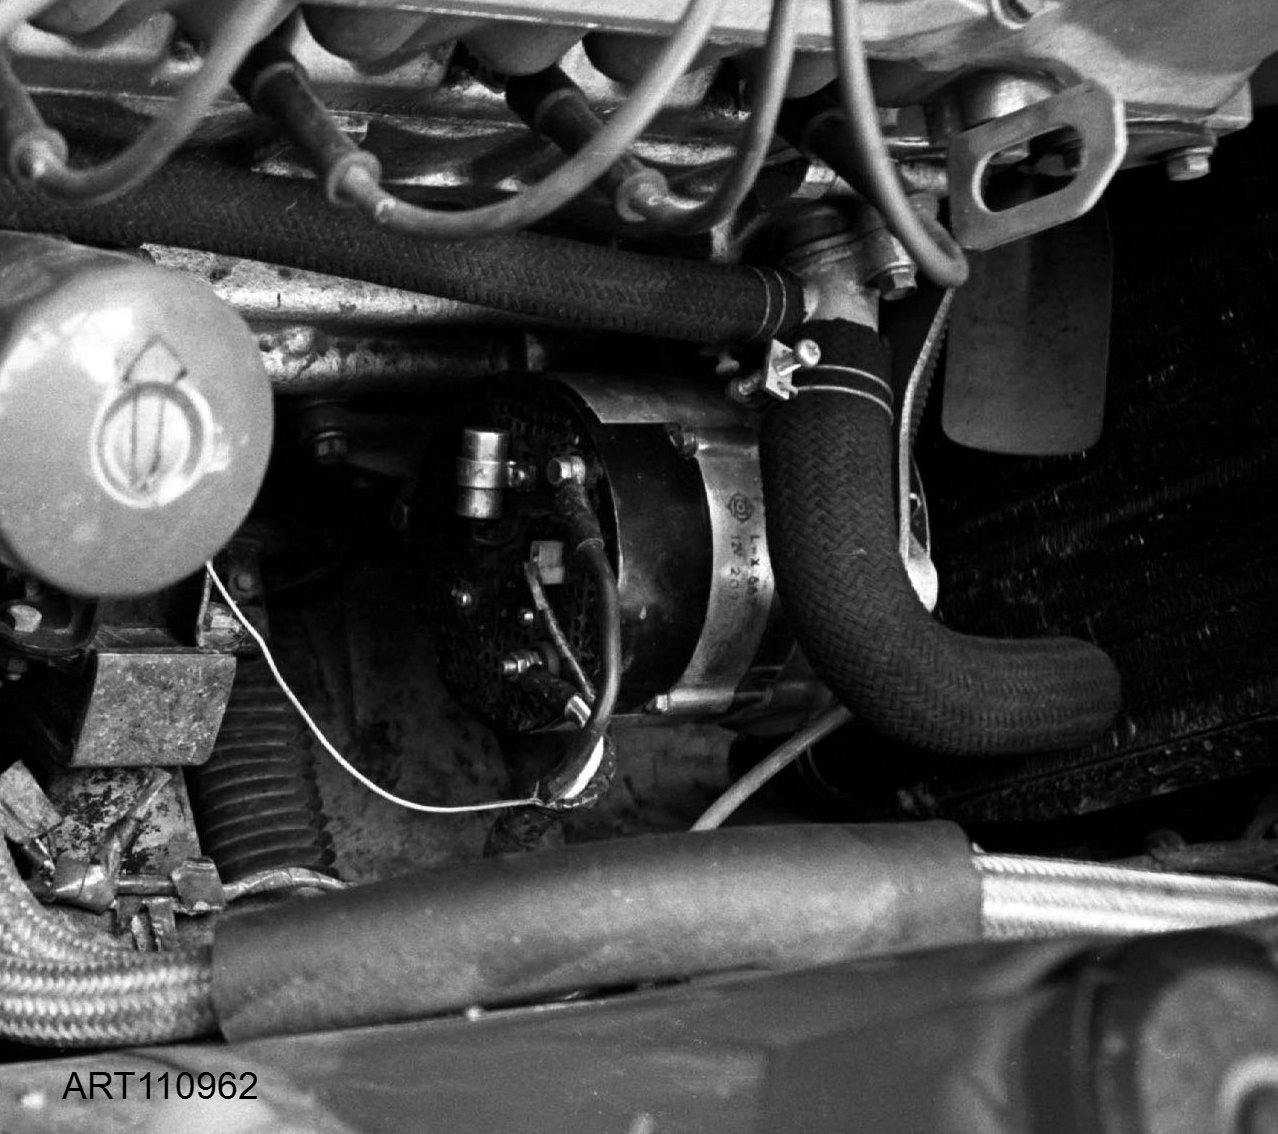
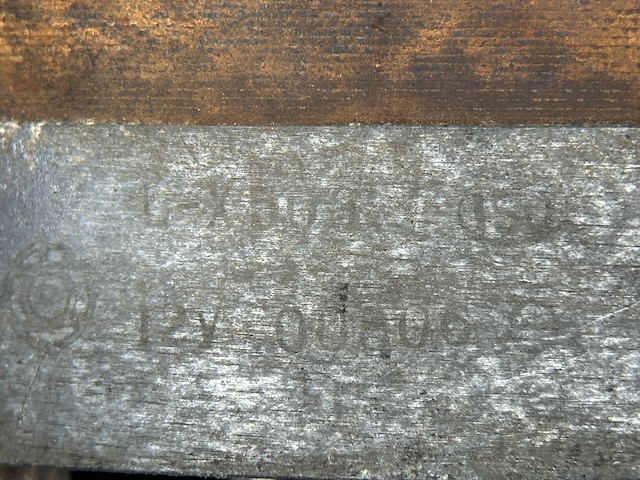 1 point1 pointDoesn't answer your first question but here is a good contribution by @dmorales-bello on doing it yourself. Sorry if you have already seen it.1 pointI have a Works 240Z rally car alternator. It is a Hitachi L-X503. I was told by several people in Japan that this was a heavy duty type usually fitted to various trucks of the period. Works rally modification included adding a splash shield to protect it from ingesting road debris. This was spotwelded to the fan blades. Here's a period photo of a Works car engine bay where the same or similar Hitachi part number is visible:
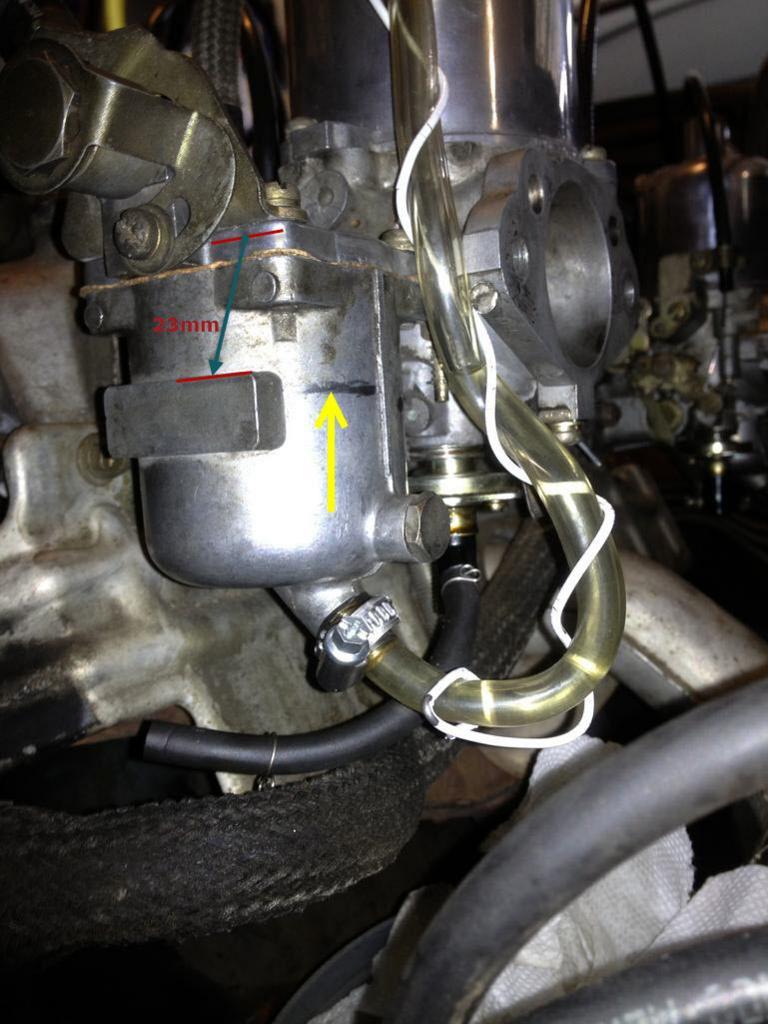
 1 point1 pointSeems like ZCD might not understand thermal conductivity. Strange. DescriptionNew fuel pump insulator spacer for Datsun 240Z and 260Z cars with mechanical fuel pumps. This spacer has two functions, one is to get the correct spacing for the fuel pump arm to the eccentric on the camshaft and the 2nd purpose is to insulate the fuel pump from heat. One gasket is required on each side of the spacer. Choose from phenolic plastic or billet aluminum.1 point1 pointZCarDepot has the spacer, too. https://zcardepot.com/products/fuel-pump-spacer-plate-240z-260z1 point1 pointI wanted to say if you did what that dvd shows, turn the lids upside down, you'll never get close. You can by lids right side up, blow through the fuel in bung and measure until you get it to shut off at .55". You'll need to do it in front of a mirror and it's still hard to do. The new needle valves we get today aren't able to hold the floats weight upside down like the Grose valves did when they made that video. I got halfway up Cheaha mountain when my front bowl ran out of fuel. It was running on 4 5 and 6 cylinders. I rolled it backwards perpendicular to the road and spun it until the bowl filled back up. Had to do that 3 times maybe until I got to the top of the mountain. I was so mad when I got home, finally, I figured out a way to mimic the carb float bowls and got them dead on. I try to get it to run bad but no way. Carbs that are right are unbeatable. This is what I read that gave the right ideas...1 pointI would replace it all for expediency. Dizzy to plugs. Once you know it's ignition related you can locate the exact cause by using sections of the substituted system1 pointI agree it doesn't seem to be oil fouled. I still think it's ignition related. I would replace the whole ignition. Even if just to diagnose. A leakdown test would be good too, because it would tend to rule out a compression or valve sealing issue1 pointI don't know of any way to definitively determine the health of the oil rings without disassembly1 pointGoogle "appliance wheel center caps".1 point1 pointI couldn't get the .55 dvd on SUs to work. I took the lids off and put them on top of a small glass with the floats moving up and down free. They are finally doing as when new. Here's the measurement I used from @zKars if I remember right.
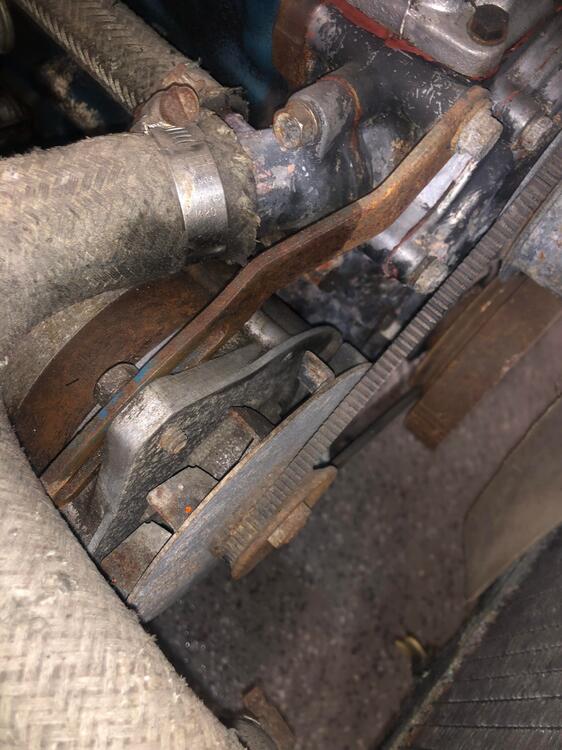
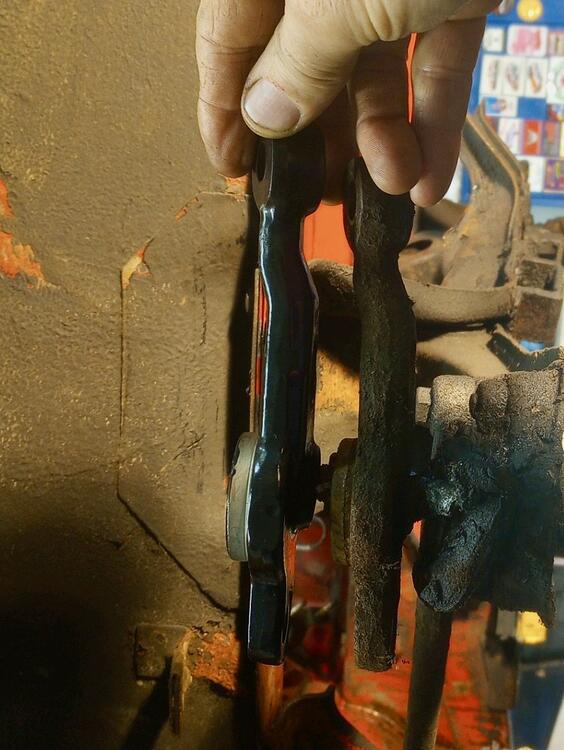
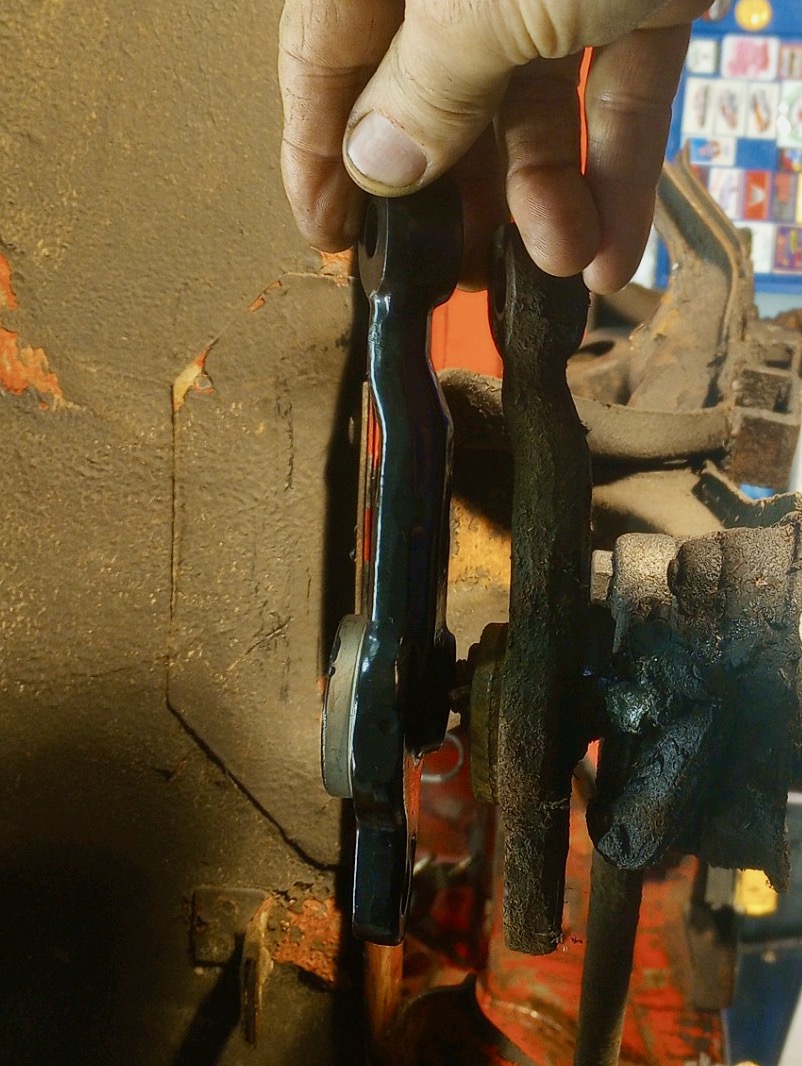
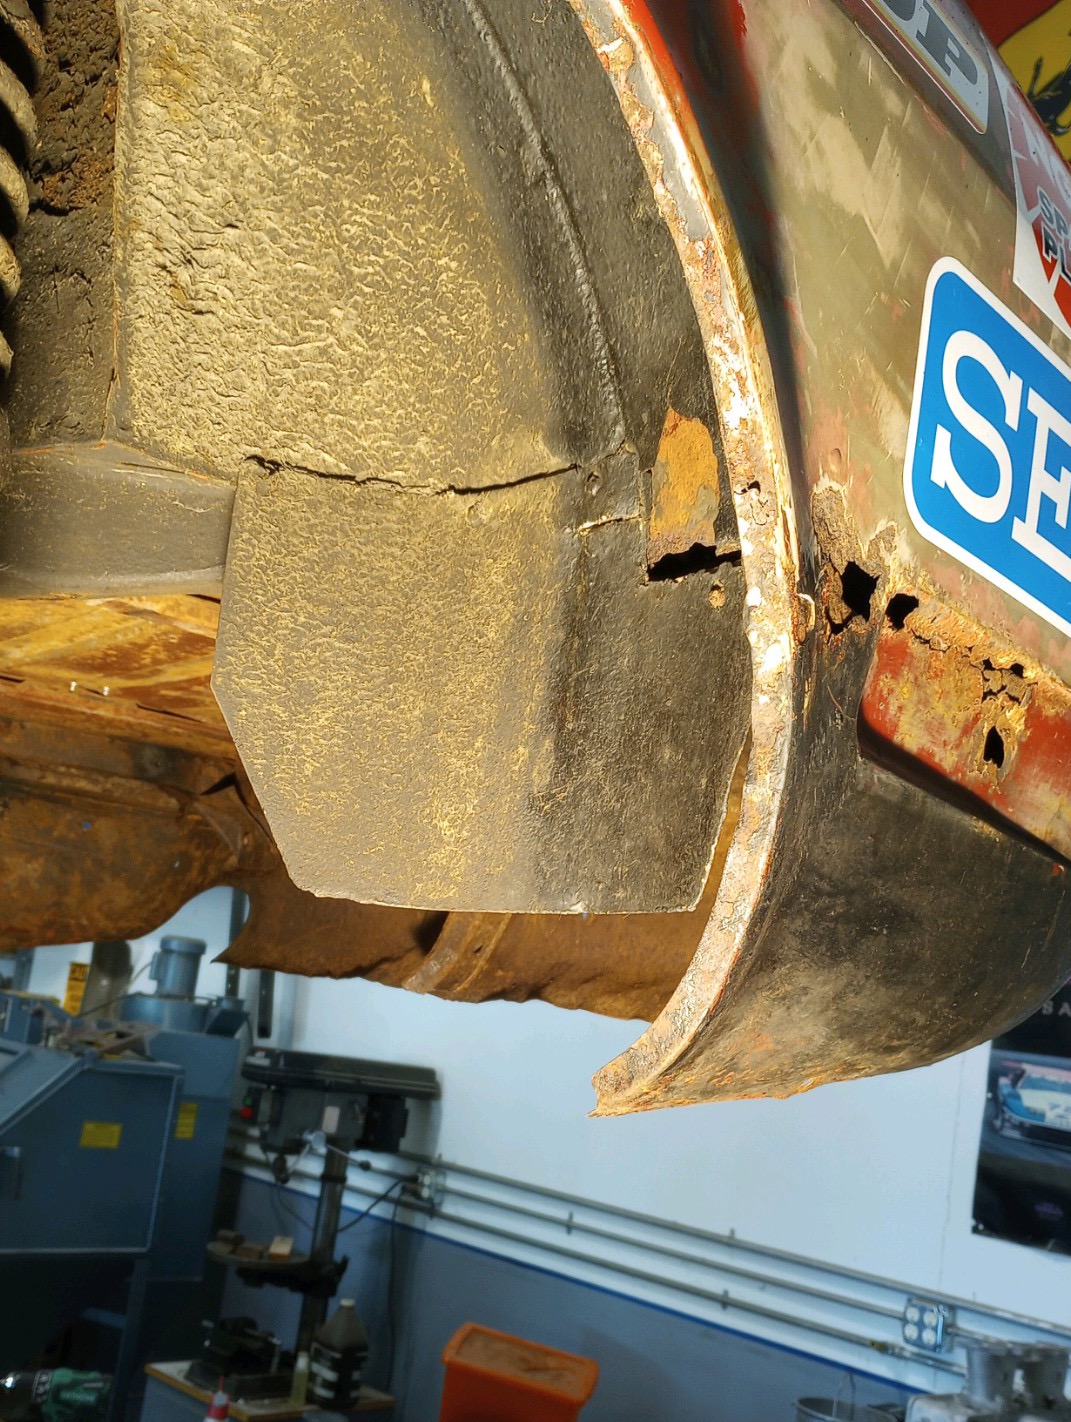
 1 pointA few of the discoveries during disassembly- strengthened gearshift mount (with stock mount for comparison), shortened steering arms (longer arm on left is stock), and rear left-side splash panel - just some of the little details which escaped us earlier that we're now noticing. These are perhaps easily overlooked features, but for me, its just interesting to see the attention to detail. All these mods serve a specific purpose.
.thumb.jpeg.c9499c5e52601d778622258a0854128e.jpeg)
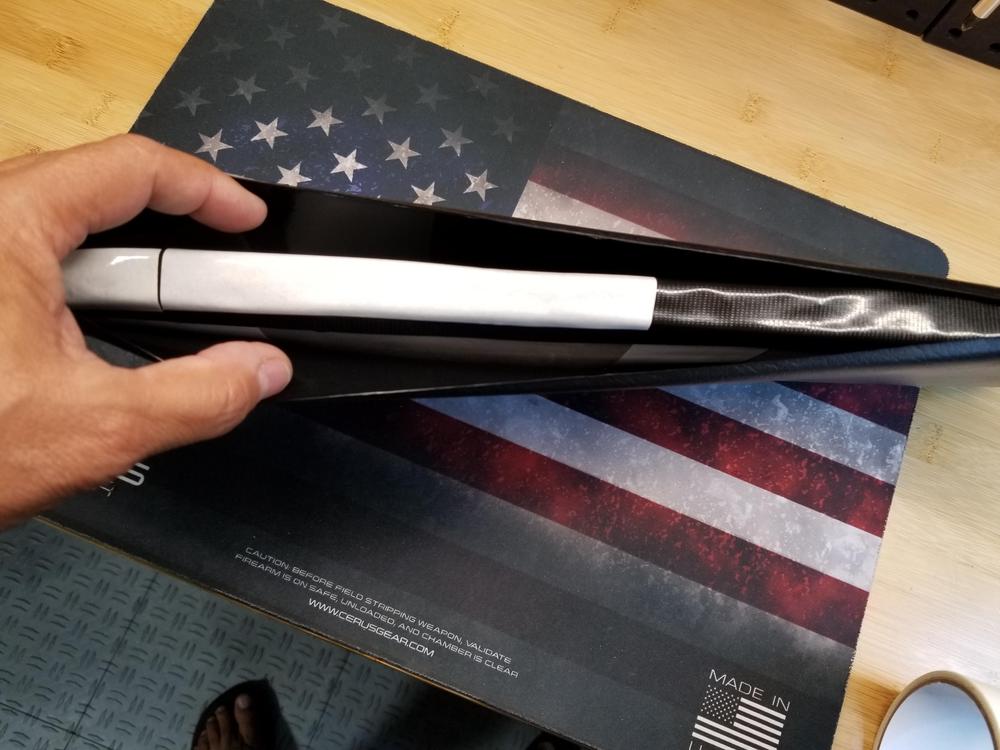
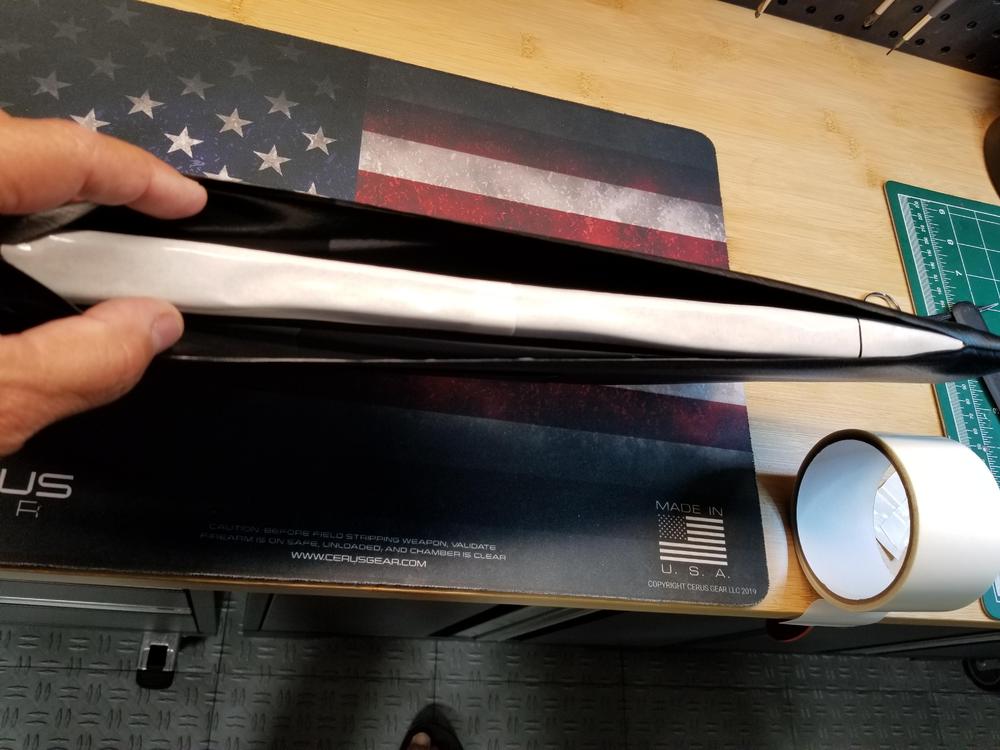
 1 point1 pointGreat questions @Namerow I just finished doing the driver side visor with a denser (dark grey) foam, same 2.5mm thickness. The denser foam gives you a result that's a bit flatter, less plump. I also revised a few technical details as I went along which made things easier and I will discuss those as I answer your questions. 1.- I decided to glue the new foam because it makes the visor a bit stiffer. It doesn't flex as much when you handle it and feels much more like the visors in other cars. It would have stayed in place without the glue anyways but the visor was more flexible. 2 & 3.- Because it was difficult to align the edges perfectly with the inverted strip of Gorilla tape due to the width of it (which made difficult putting it in place without wrinkling the vinyl) and the very strong hold, I used a 1 inch wide strip of double sided tape (used for carpeting) along the joined top edges of the filler material. It's also very strong but not quite as much as the gorilla tape. I did however use a strip of Gorilla tape to join the top edges of the foam before applying the double sided carpeting tape (see pics below) so as to narrow the edge a bit and take all tension out of the vinyl edges when closing them. I think it's really important that when approximating the vinyl edges they do so with very little tension, start in the middle with about a two inch section and then work your way from the two extremes toward the middle distributing the vinyl appropriately so you don't end up with wrinkles. Both tapes (Gorilla and carpet) initially allow you to separate and reattach the material with moderate effort so you can fiddle with the edges until they line up properly. It's not as difficult as it seems. 4.- I did use a medical #11 blade on a scalpel handle but Exacto makes similar #11 blades that can fit their handles. I would not use a utility knife for that cut. I liked the second approach (carpeting tape over the Gorilla taped edge) so much better that I took the passenger side visor apart again and changed it accordingly. It took a lot of effort and care to unglue the vinyl from the Gorilla tape after it had set! That stuff will not loosen with summer heat, believe me. I don't think the carpeting tape will loose its adherence easily either as long as there's very little tension when you close the vinyl edges. All things considered I'm quite satisfied with the results and I don't have to stare at my saggy visors anymore. I hope I've described the procedure clearly but keep the questions coming if needed. In this first pic you can see the Gorilla tape covering the foam edges (on the right) and the double sided carpeting tape with it's white paper backing on the left side: Place a 1" strip of carpeting tape along the whole edge over the Gorilla tape: Remove the backing paper from the carpeting tape and you're ready to start approximating the vinyl edges which can actually overlap a tiny bit as long as you left the "seam" on only one side of the cut (step 1 in the original post). Final results: There's still a bit of waviness on the vinyl skins but it's almost invisible once the visors are mounted on the car. Filling them with more foam would stretch out the wrinkles but the visor will start to look like a pillow.


 1 point1 point


.jpeg.08ac945f60af8c179aa5dd50a566c0a4.jpeg)


Important Information
By using this site, you agree to our Privacy Policy and Guidelines. We have placed cookies on your device to help make this website better. You can adjust your cookie settings, otherwise we'll assume you're okay to continue.