Leaderboard
-
conedodger
Free Member12Points12,513Posts -
Reptoid Overlords
Free Member3Points805Posts -
inline6
 Subscriber
 3Points1,282Posts
 -
26th-Z
Free Member2Points5,264Posts


Popular Content
Showing content with the highest reputation on 02/07/2023 in all areas
-
3 pointsTime to go Bozo! I replaced all my fuel lines at the tank because I discovered a leak only when the fuel pump would turn on after sitting more than 2 days. It helped the smell quite a bit. I have no carpet in the rear hatch. Just noise.3 points
-
Getting so close to handing the car over for painting - I am very excited to finish this phase of the restoration. I've written up painting instructions for the place that will be painting the car. Many reference pictures included, but even so, it is 21 pages long!!!!! Link included there if any of you would like to check it out. My punch list is going to be challenging to get through by bedtime on the 12th. Hoping I don't run into any unforeseen issues. A quick walk around video: Sometime this week, or this weekend, I plan to bolt on the custom wheeled sub assemblies I made and take it off the rotisserie. I'll post some videos going around the car with some silicone and wax remover sprayed on to have a final look at the quality of the body work.2 points
-
The screw finish is clear zinc. You need to measure the diameter of the shank. Should be 3mm. Just slightly smaller than 1/8".2 points
-
1 pointHere are a couple of pics I took while I was dis-assembling for my resto.
.thumb.jpg.c1a8ea6c0e8927441fad45ba731faf68.jpg)
.thumb.jpg.7941795196fc92cf8ef4e905b28f8500.jpg) 1 point
1 point -
Coil = Ignition Coil The coil condenser should be attached to the positive terminal of the coil. The condensers for the charging circuit are not documented in the 240Z wiring diagrams. The 260Z is the first that shows them. There is one on the WR (main) wire and another on the BW wire before the VR.1 point
-
Well - the long version is in the 21 page document - LOL. The short version is that I want them to spray silver on top of the undercoat, but not to full coverage. I want to replicate how the factory did it. So, lots of direct spray on rear fender wells and some on the front fender wells, and some on the floor and spare tire well.1 point
-
Nothing quite as good as something brand new! You also gain immense knowledge of your wiring circuits. Countless times I have ran into an electrical mishap (be it my fault or a faulty part) and I can still think back to when I did my wiring harness to diagnose the issue without the need for diagrams.1 point
-
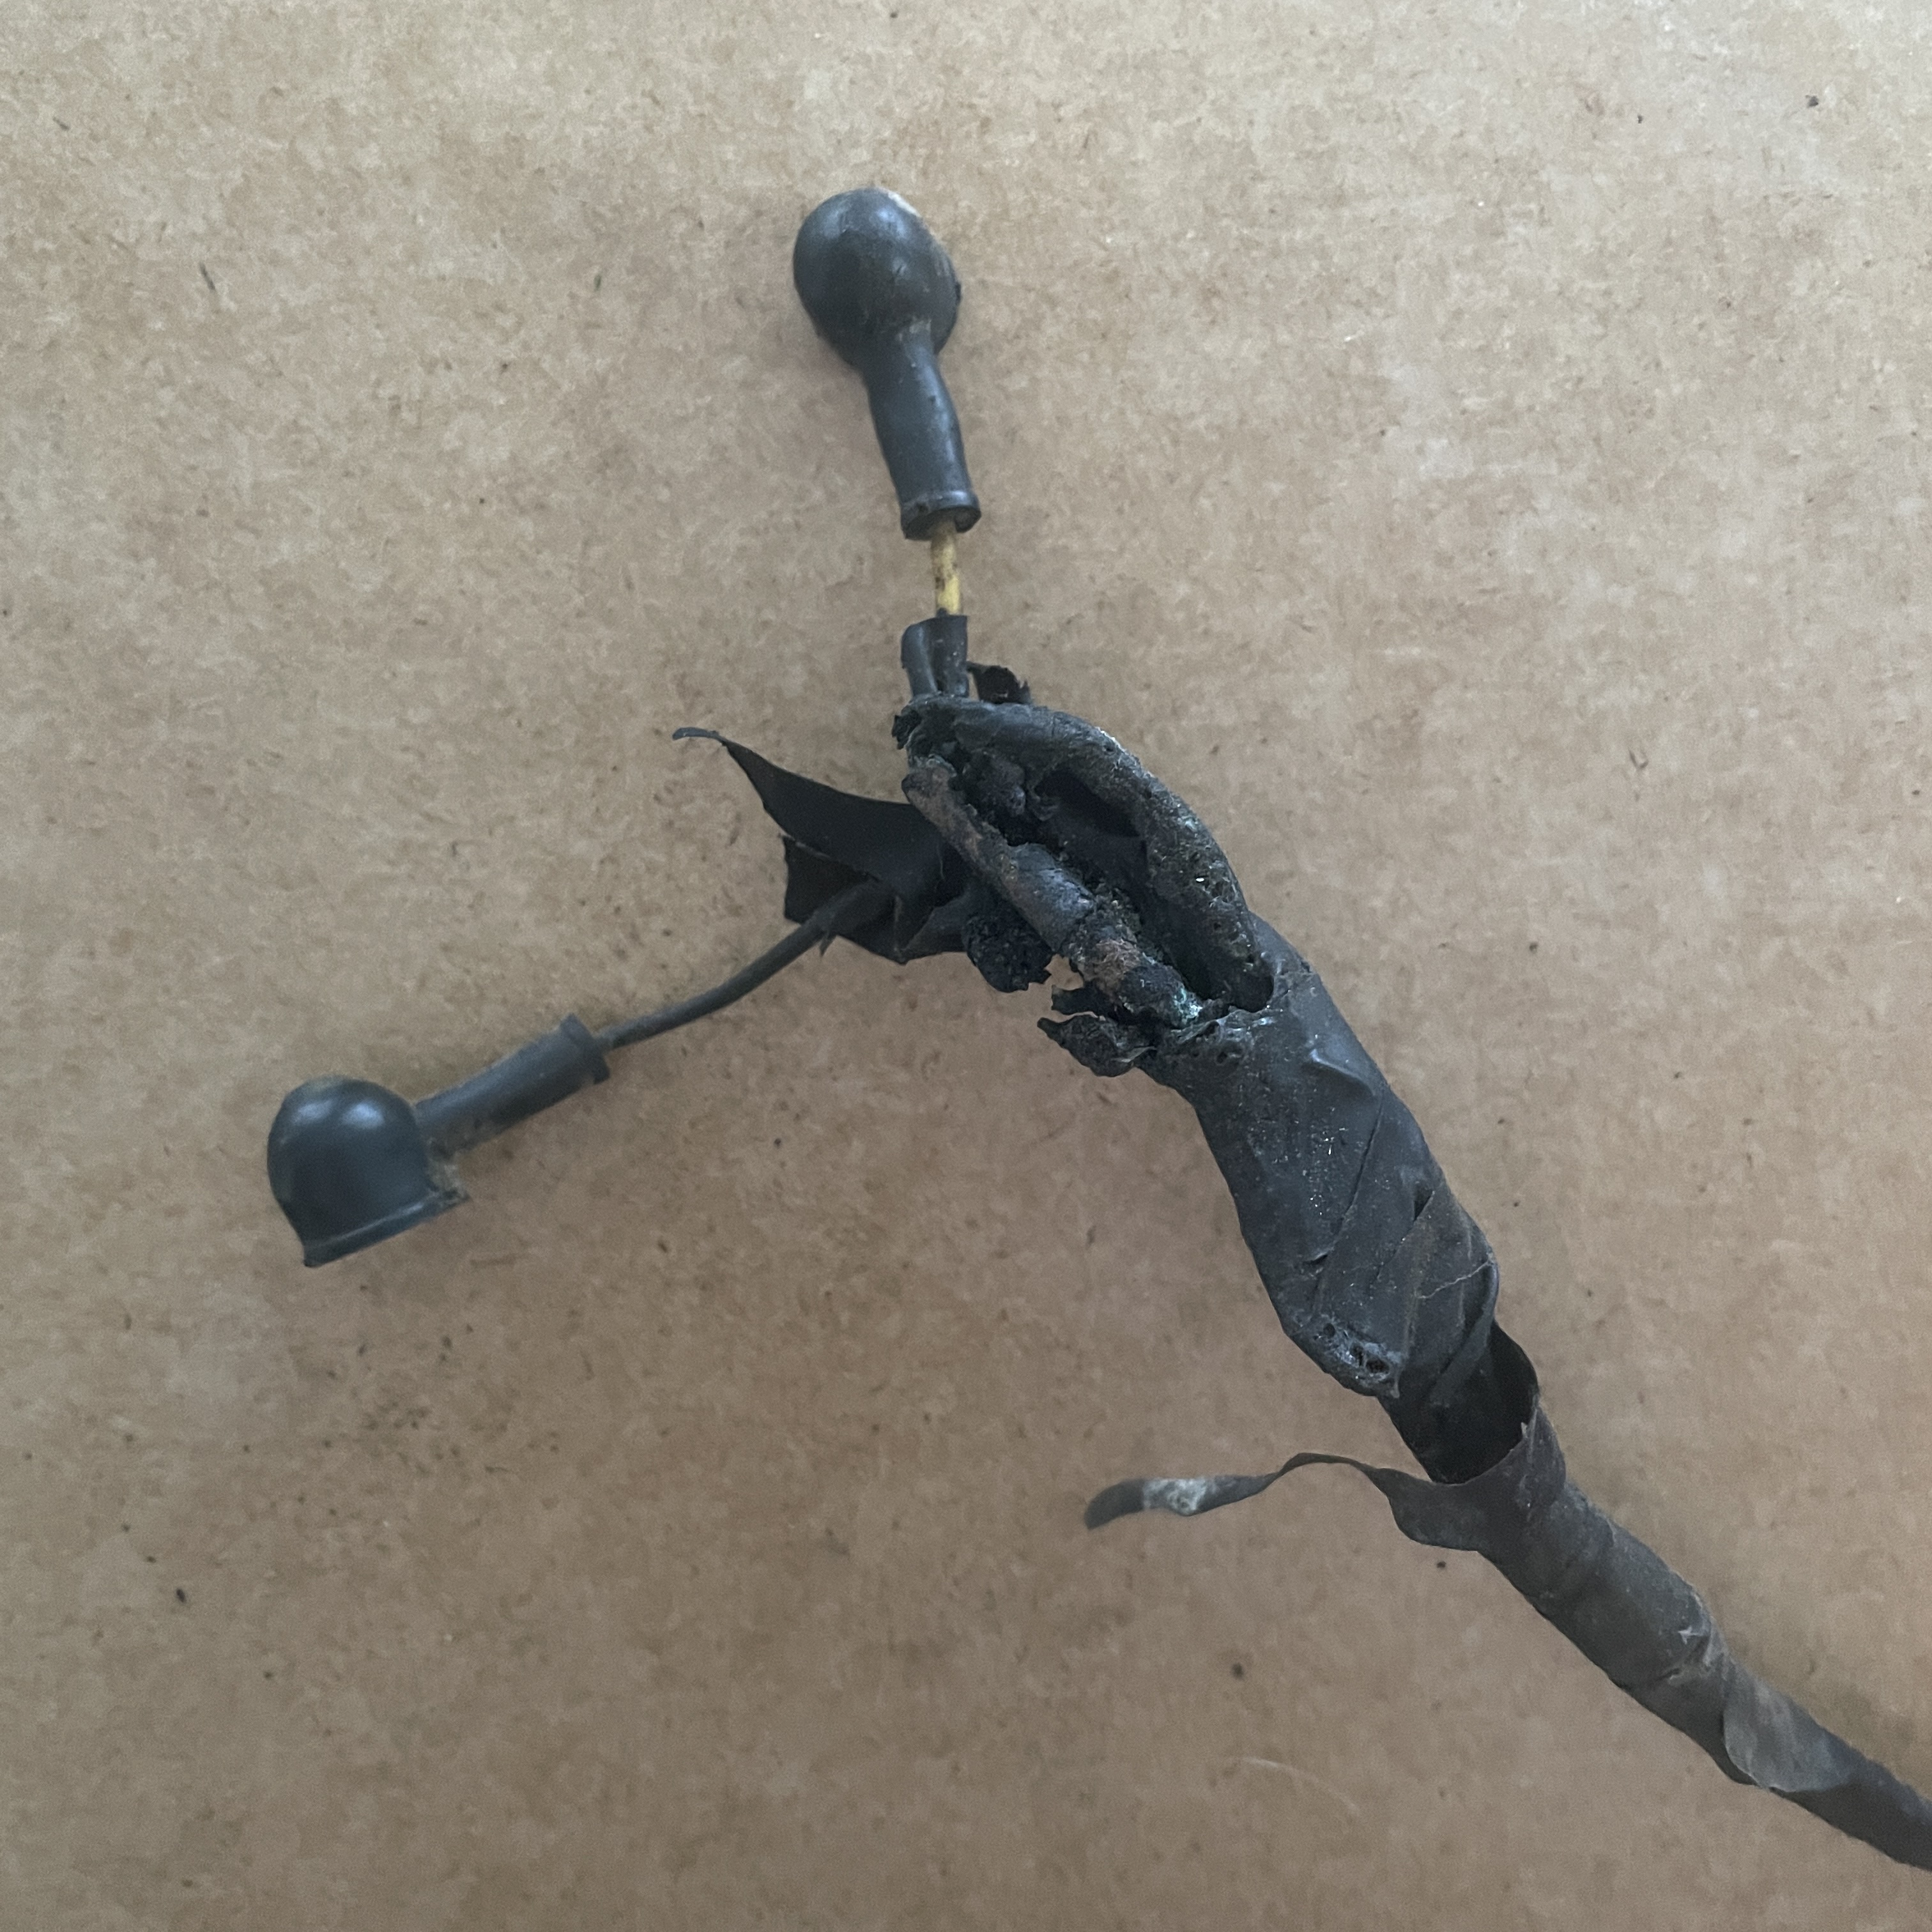
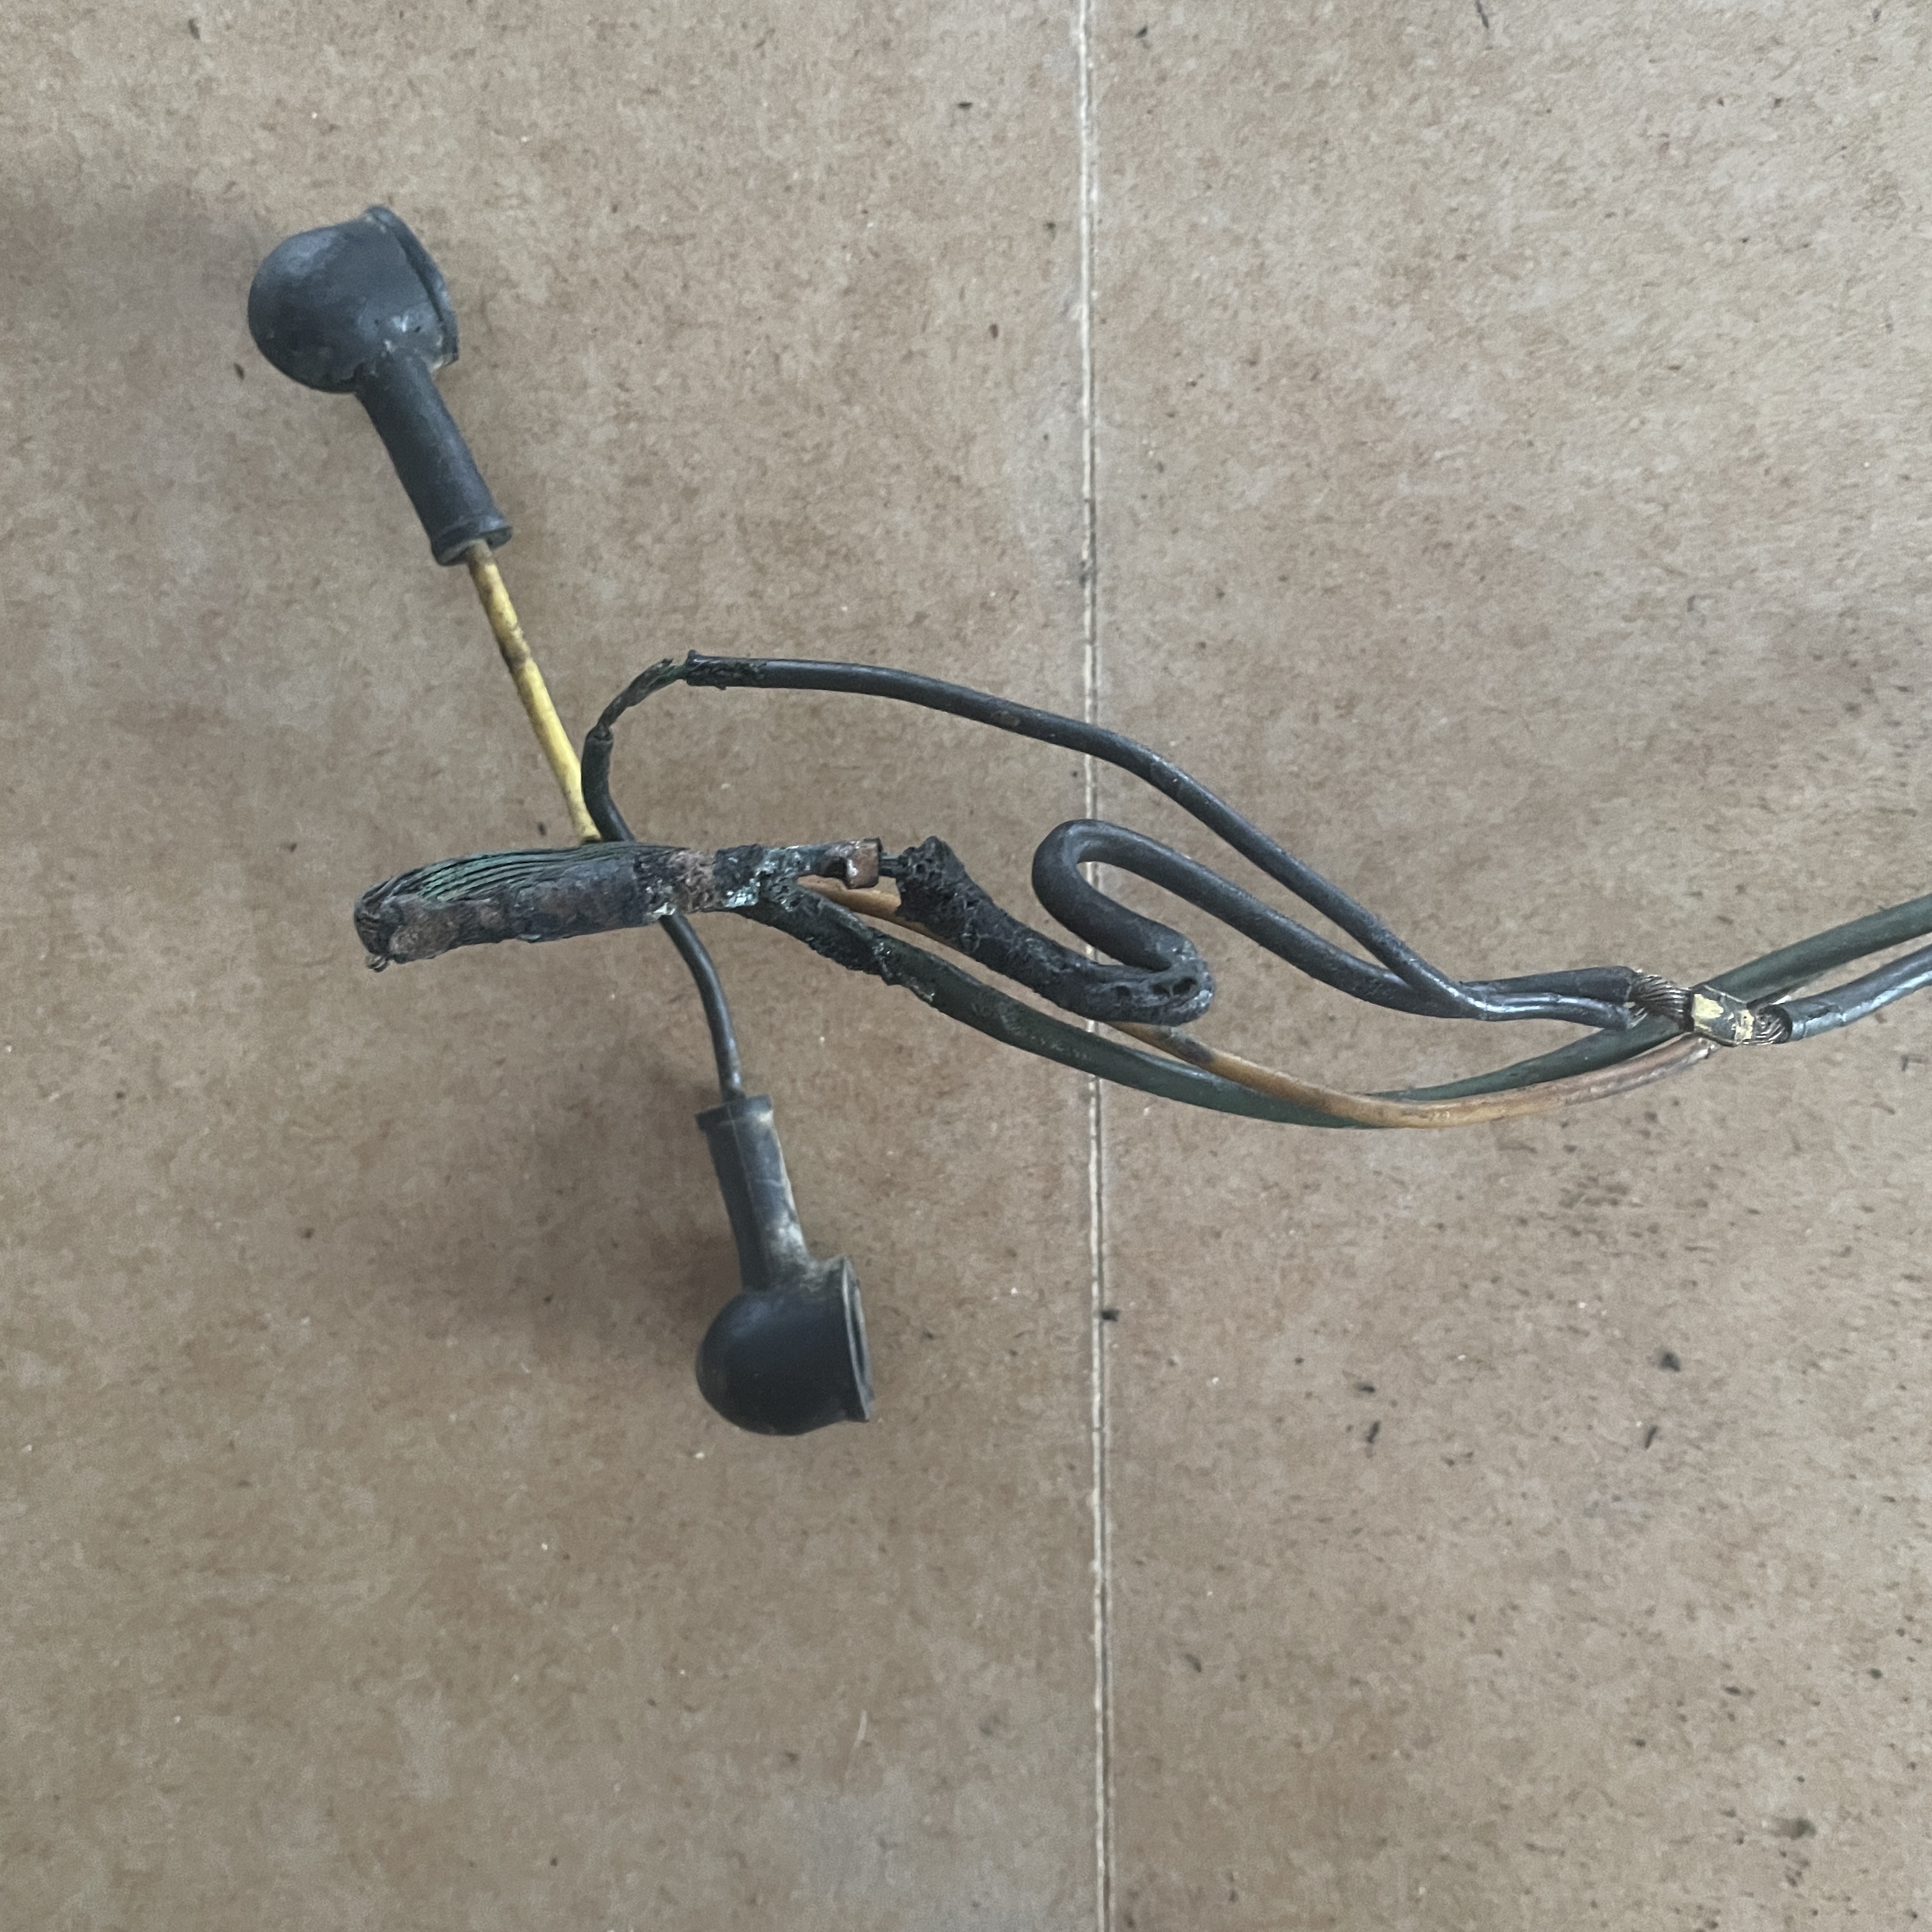
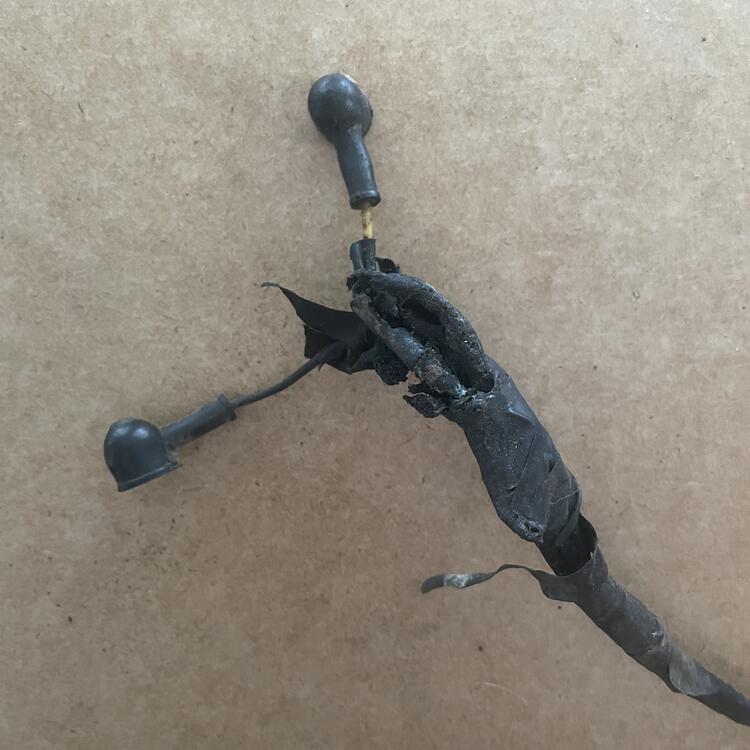
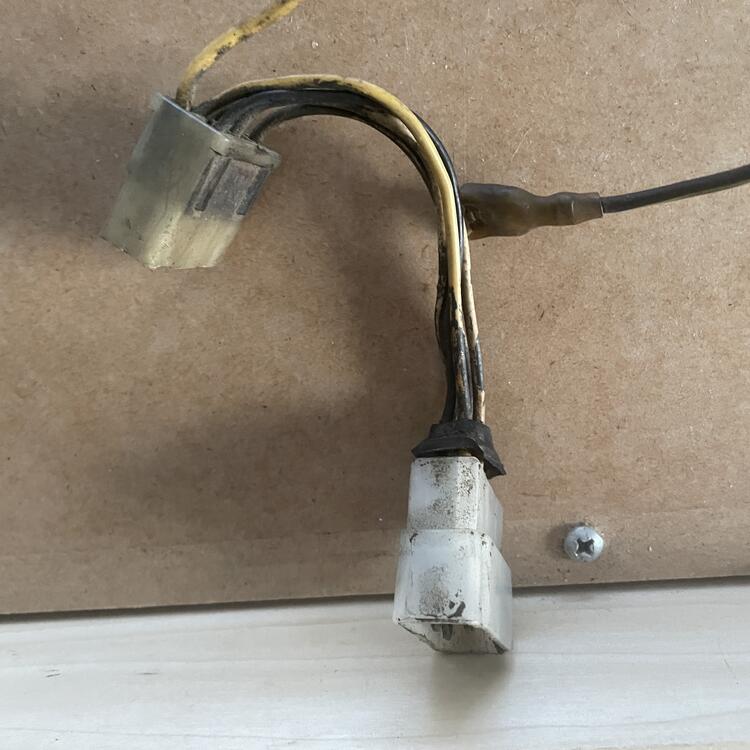
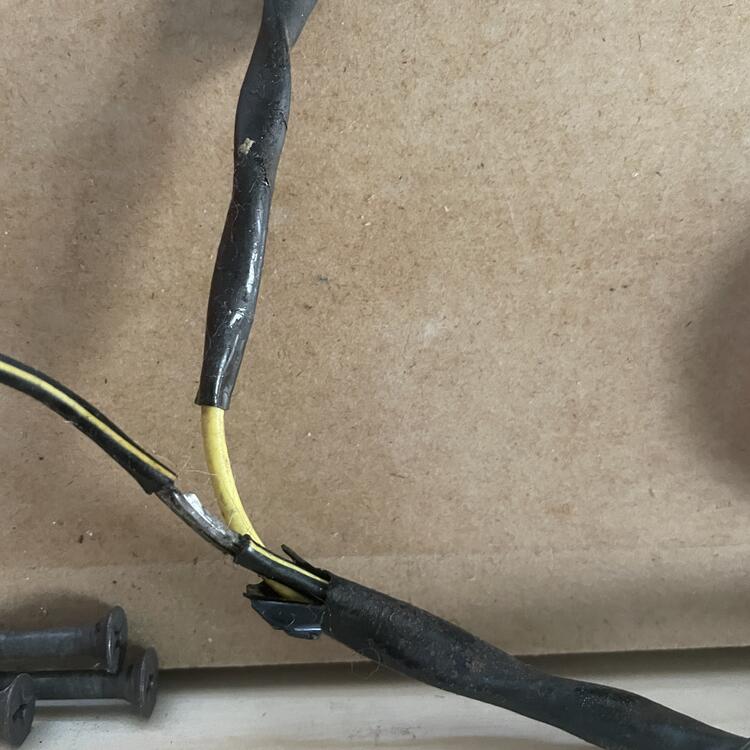
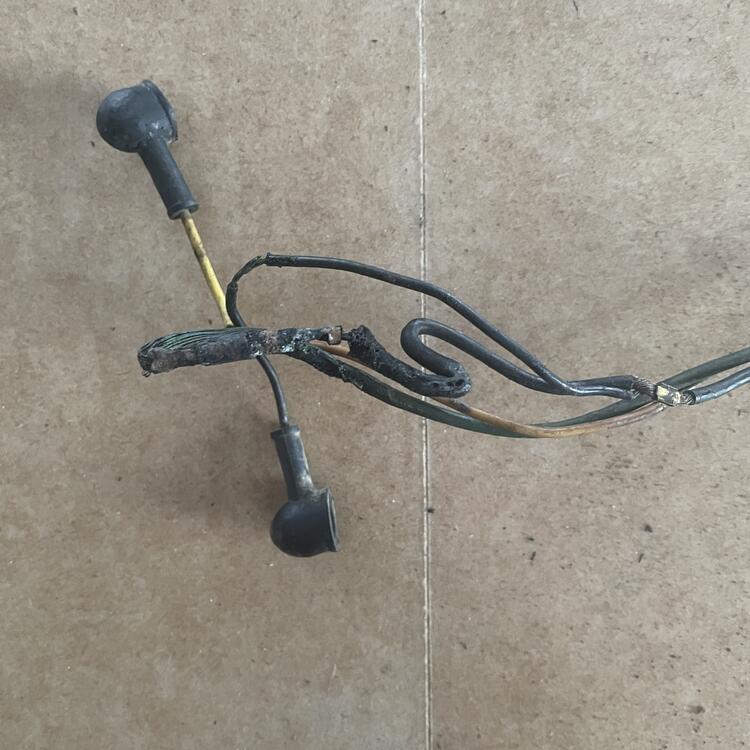
Someone asked me why I’m making all new harnesses from scratch rather than rebuilding what I have, and I think these photos answer that question. I have problems like these throughout all of my wiring across the entire car:
 1 point
 -
1 pointFor a stock wet sump engine, the dipstick is for checking the static oil level in the pan, relative to the oil pickup, and isn’t checked with the engine running. The oil level needs to be adequate so when the engine is running the level stays above the pickup, even while the vehicle is in motion. The design needs to allow that the oil level doesn’t interfere significantly with the rotating mass. The size and capacity of the sump need to allow for enough oil so the supply of oil is sufficient for proper lubrication during engine operation. Keep in mind the oil also acts as a coolant, absorbing heat as it passes through the engine, and dissipating some of that heat through the water jacket, and some to the atmosphere through the oil pan and exterior of the engine block and cylinder head. Some cars even have an oil cooler in addition to a radiator. When using a larger sump, the other items, baffles, trap doors, windage tray are part of the package. A larger oil capacity is added for extra absorption of excess waste heat generated when the engine is built and tuned to make more power than originally configured. Again, as in the stock setup, the oil level must be sufficient to keep the pickup submerged in a readily available supply of oil. A dry sump lubrication system doesn’t have a dipstick on the cylinder block, as the oil isn’t stored in the oil pan, but in a tank, separate from the engine. Usually the oil level is checked by opening the tank fill cap and looking inside.1 point
-
Thanks @Patcon - I'm thinking of using aluminum rivets and stainless screws per your measurements.1 point

.jpg.7675014ee9df9b51e9ab963401bc683e.jpg)
.jpg.b8d9fa1dda069836fcc2da040ef18565.jpg)